Displaying items by tag: Backpacking
Completing the Centennials - ending a decade-long goal on Thunder Pyramid
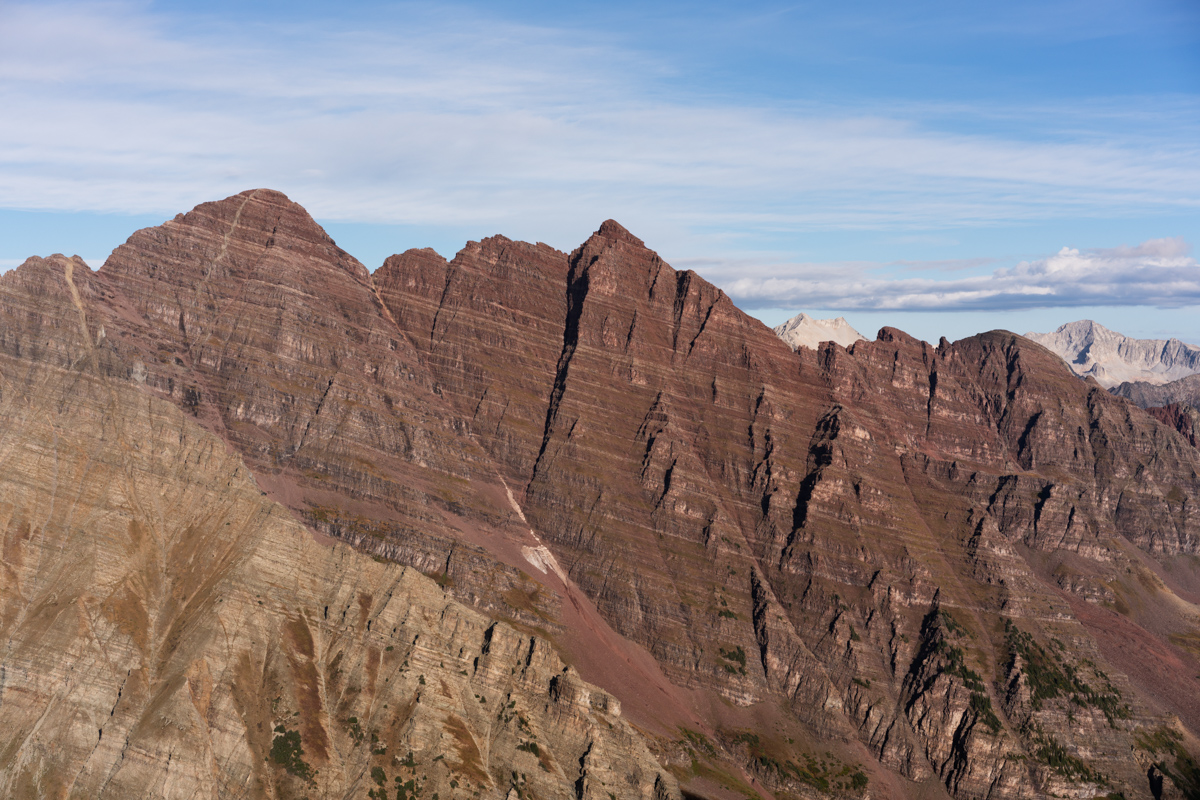
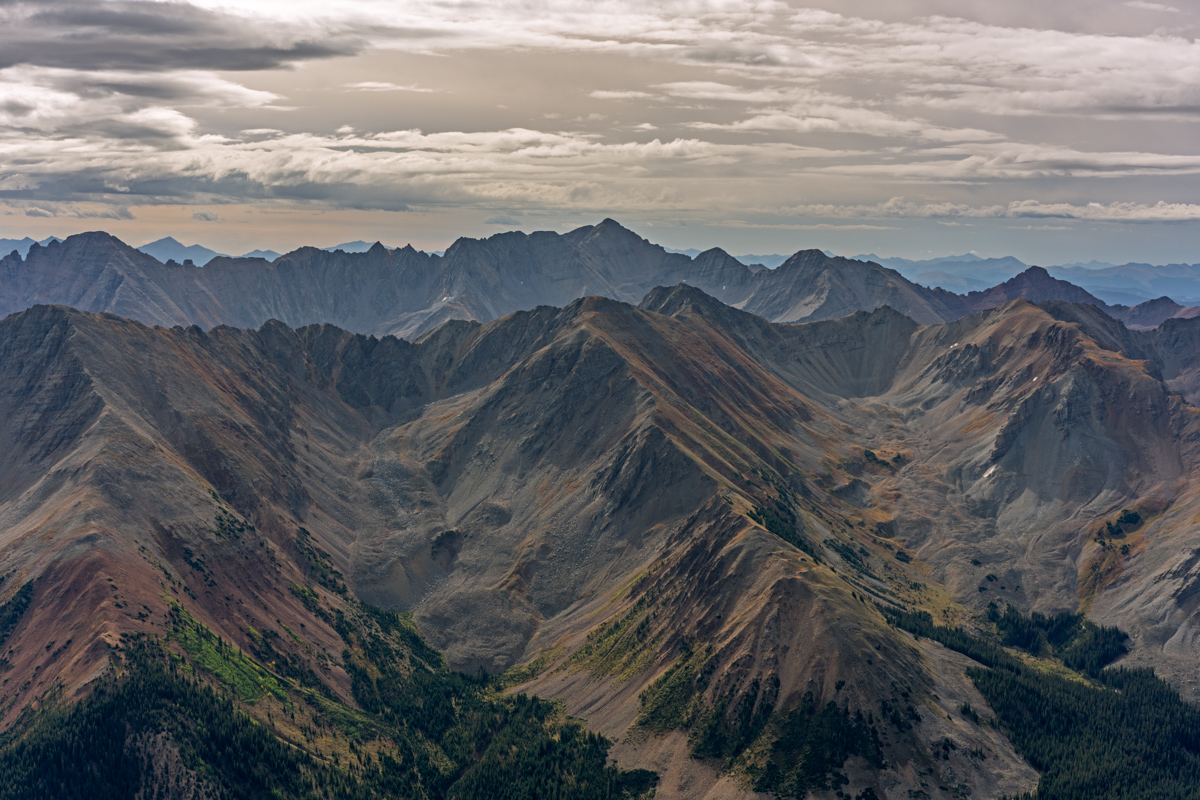
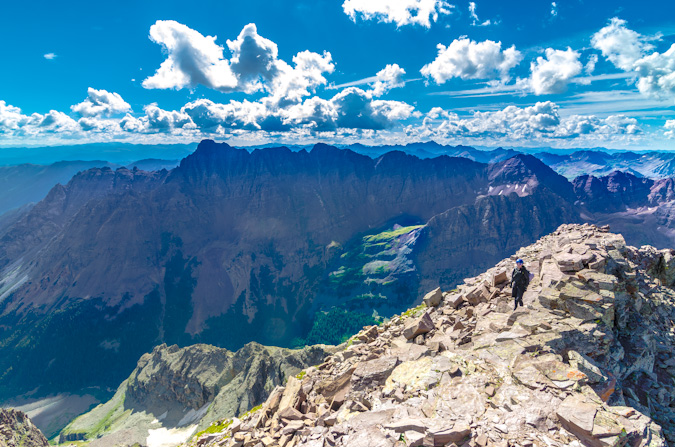 Pyramid Peak and Thunder Pyramid as seen from Maroon Peak in 2012
At the start of 2018, I told myself that this would be the year that I would complete the Centennials (the highest 100 mountains in Colorado). For no great reason, I wanted to finish my goal before I turned 40 (I'm 39). It was a somewhat lofty goal considering I had lost my job in January, started a new job in February, and was not in the best physical shape of my life. I started this goal officially in 2009 and game out of the gates in a hurry. I had a headstart, having started climbing peaks when I was 4-years-old (1982). I had completed 22 / 100 by the end of 1998 when I was in college, but took a very long hiatus after that. I only completed 5 more peaks from 1998 to 2008. That means that between 2009 and the end of 2018, I completed 73 of the highest 100 mountains. That feels substantial. In January 2009, I built this website and began documenting my journey. This trip report may be boring in some ways so bear with me. It is my way of reflecting back on this journey and reminiscing on a goal completed. The following summaries don't include repeat peaks or other peaks not in the highest 100 that were climbed those years.
- In 2009, I completed 20 summits on the list.
- In 2010, I completed 12 summits on the list.
- In 2011, I completed 14 summits on the list.
- In 2012, I completed 5 summits on the list and finished the 14ers.
- In 2013, I completed 5 more summits and then moved to Oregon.
- In 2014, I completed 1 more summit (how sad).
- In 2015, I completed 2 more summits (still very sad), but moved back to Colorado at the end of the year.
- In 2016, I completed 3 more summits.
- In 2017, I completed 3 more summits.
- Finally, in 2018, I completed 8 more summits and my goal. My average per year that I was actively seeking the goal was 7.3 - not bad!
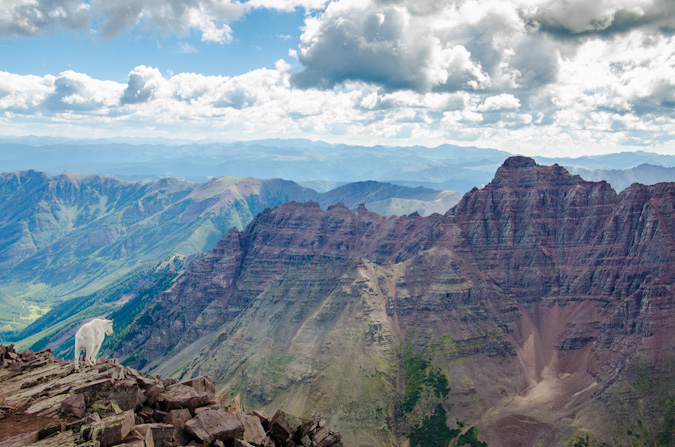
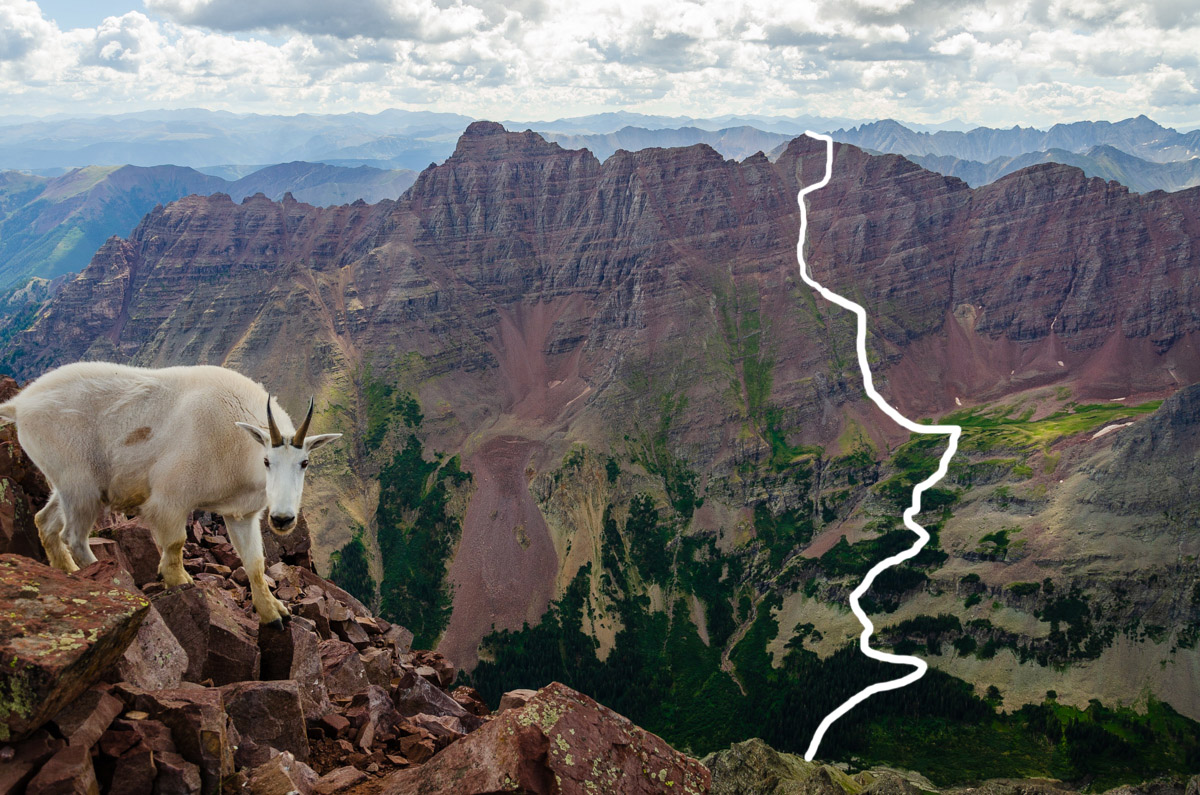
A mountain goat gazes upon Pyramid and Thunder Pyramid from the summit of Maroon Peak
Regarding the subject at hand: I have been dreading Thunder Pyramid ever since gazing upon it in 2012 from the summit of Maroon Peak. The vantage from that position makes Thunder Pyramid unclimbable, the White Gully leading to the summit a straight-up nightmare. I had heard horror stories (all greatly exaggerated) of the looseness of the rock on Thunder Pyramid and many very exceptional climbers, including David Morano and Steve Gladbach, have perished on her slopes. The mountain was ultra-hyped in my mind and I was completely prepared for anything I found due to that hype. Anxiety is a powerful driver for some of us and I'm no exception.
As always, you can see and download my full route and GPS tracks over on the incredible app, Gaia GPS, which I use on my iPhone to plan, track, and follow my routes on these trips. It is absolutely invaluable and worth every cent. I personally love that you have full access to all USGS topo maps and National Geographic Trails Illustrated maps as well. You can use the app while in airplane mode and even save maps for offline use. To get a nice discount on the application, follow this link and you'll also support my efforts to keep this site running.
For this trip, I decided to pack quite a lot of camera gear (by the way, these are affiliate links and using them helps me pay for this site and to bring you better content):
- Sony A7R2 Camera
- Laowa 15mm f/2 lensaowa 15mm f/2 lens
- Zeiss Loxia 21mm f/2.8 lens
- Sony 55mm f/1.8 lens
- Sony 70-300 FE telephoto lens
- Feisol Tournament 3442 tripod
As usual, I used the beta from Gerry Roach's High Thirteener Guidebook. I was still using the 1st edition of the book; however, his new edition is available on Amazon after many years of waiting - rejoice! Also, huge shout-out to my good friend Kane Englebert who called me to give me some excellent tips on climbing this peak safely - thanks man!

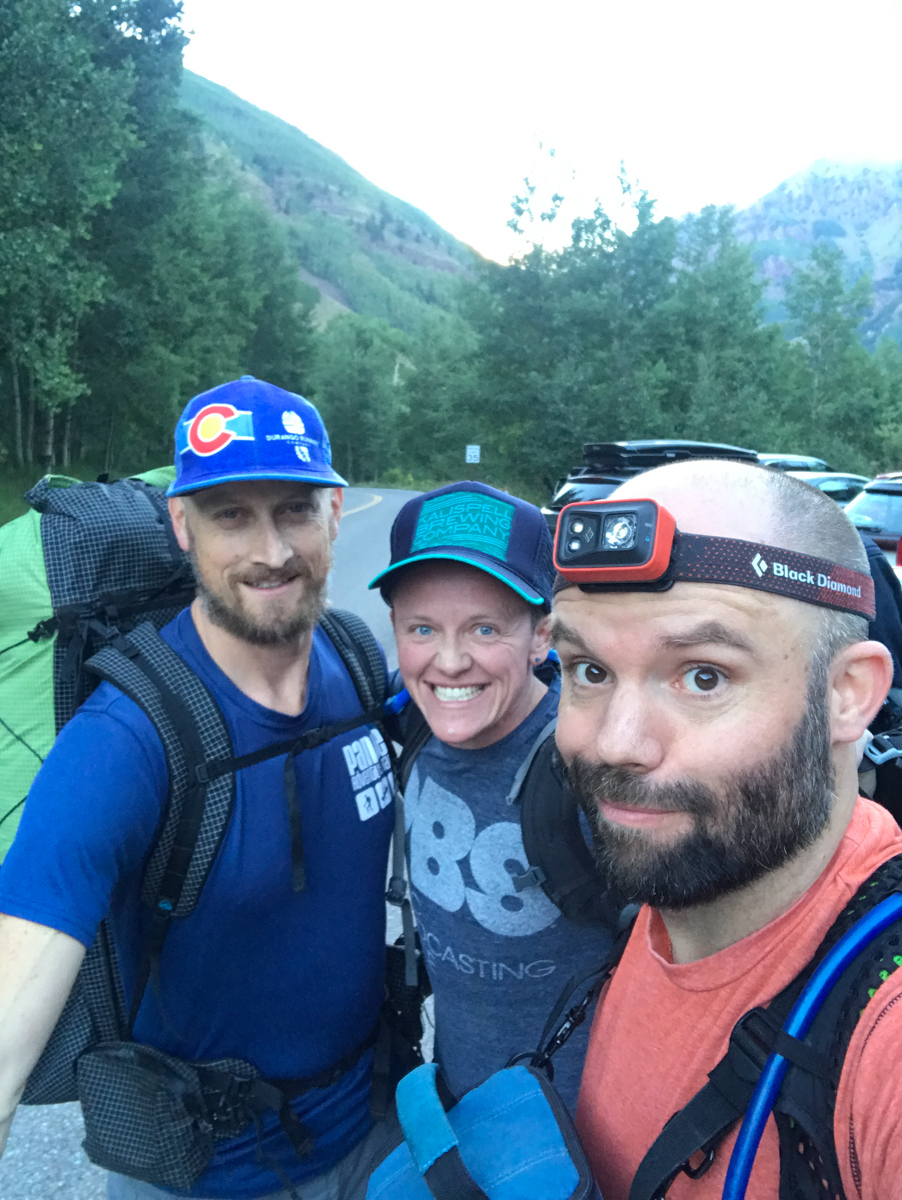
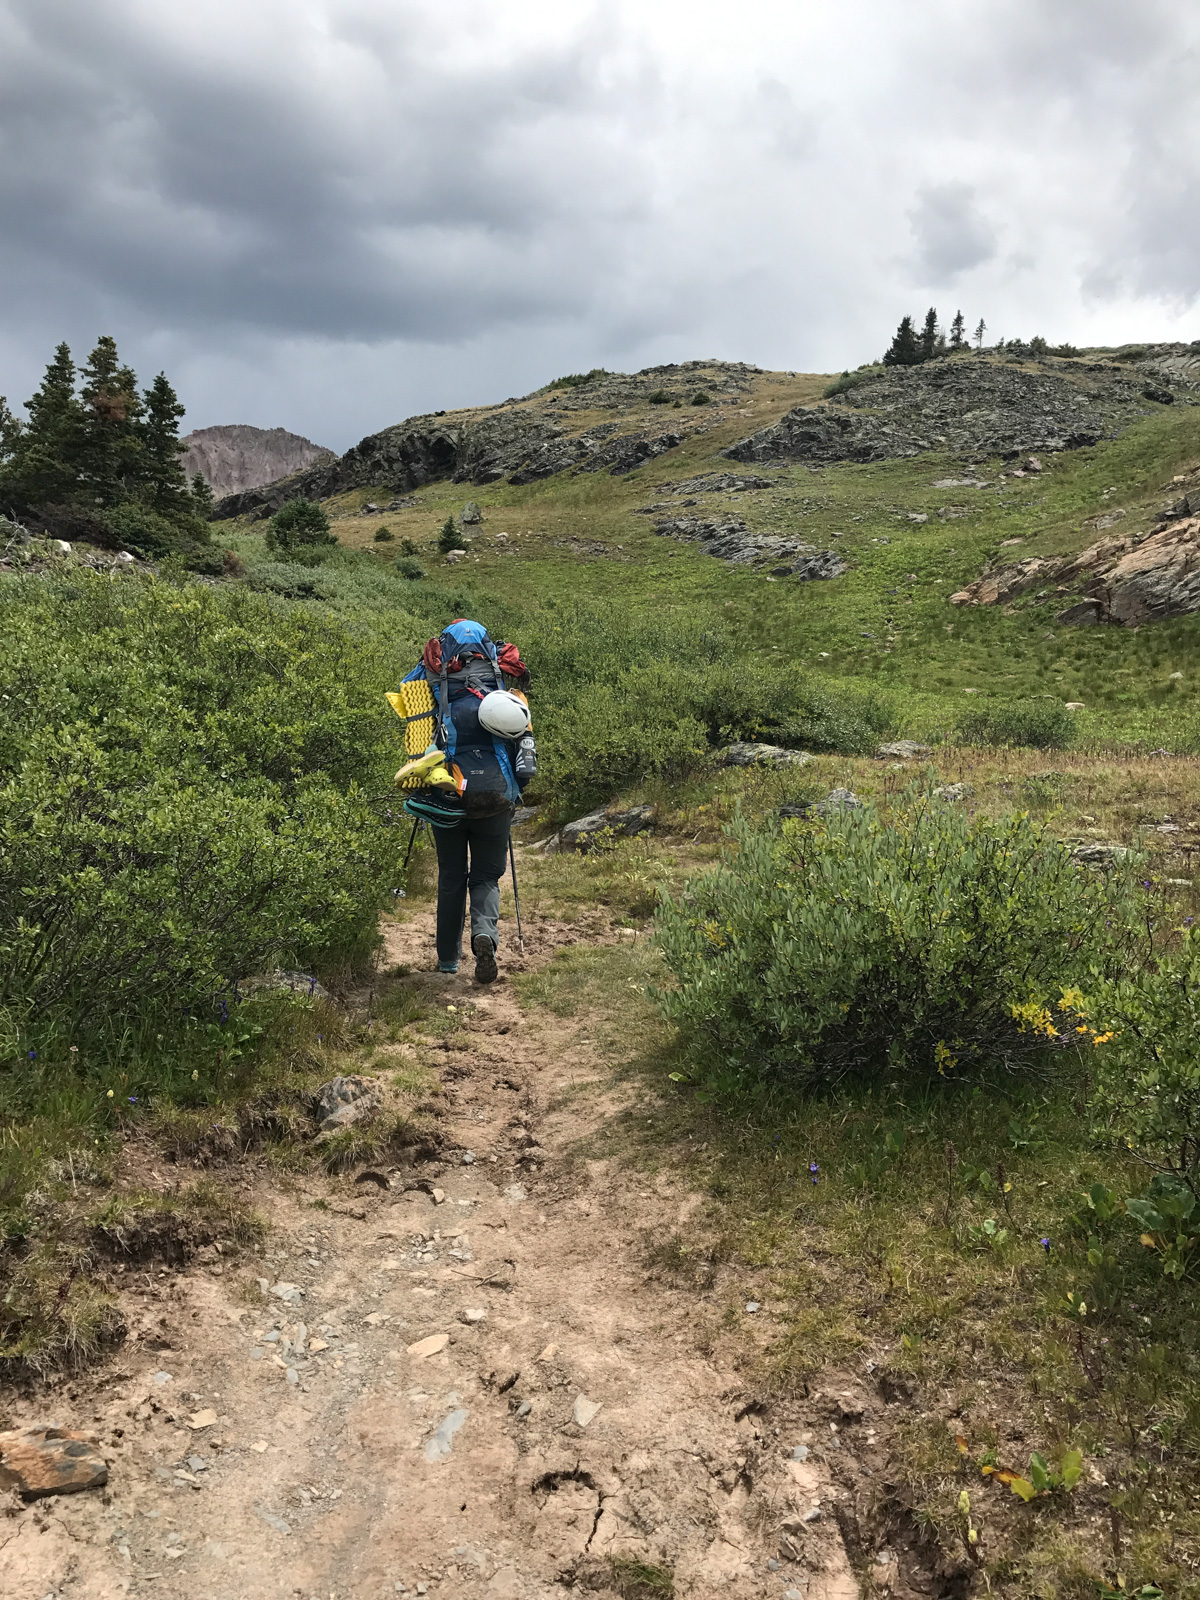
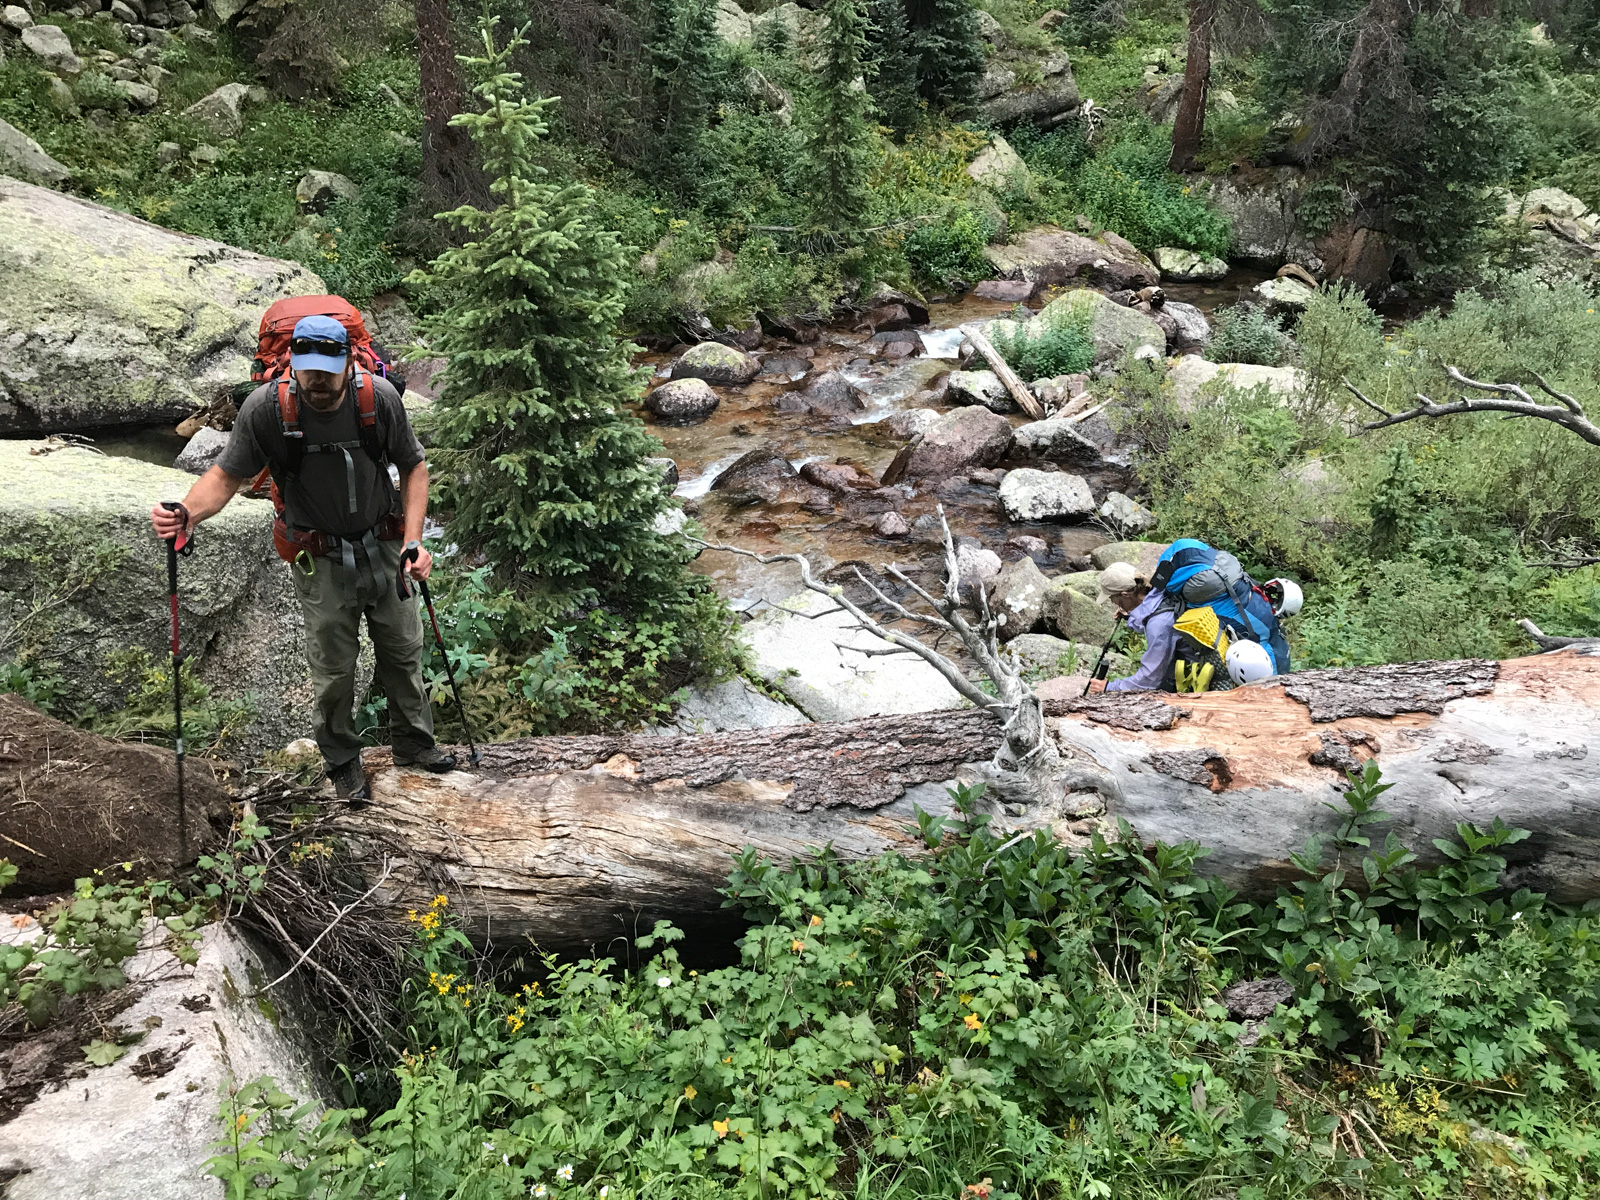
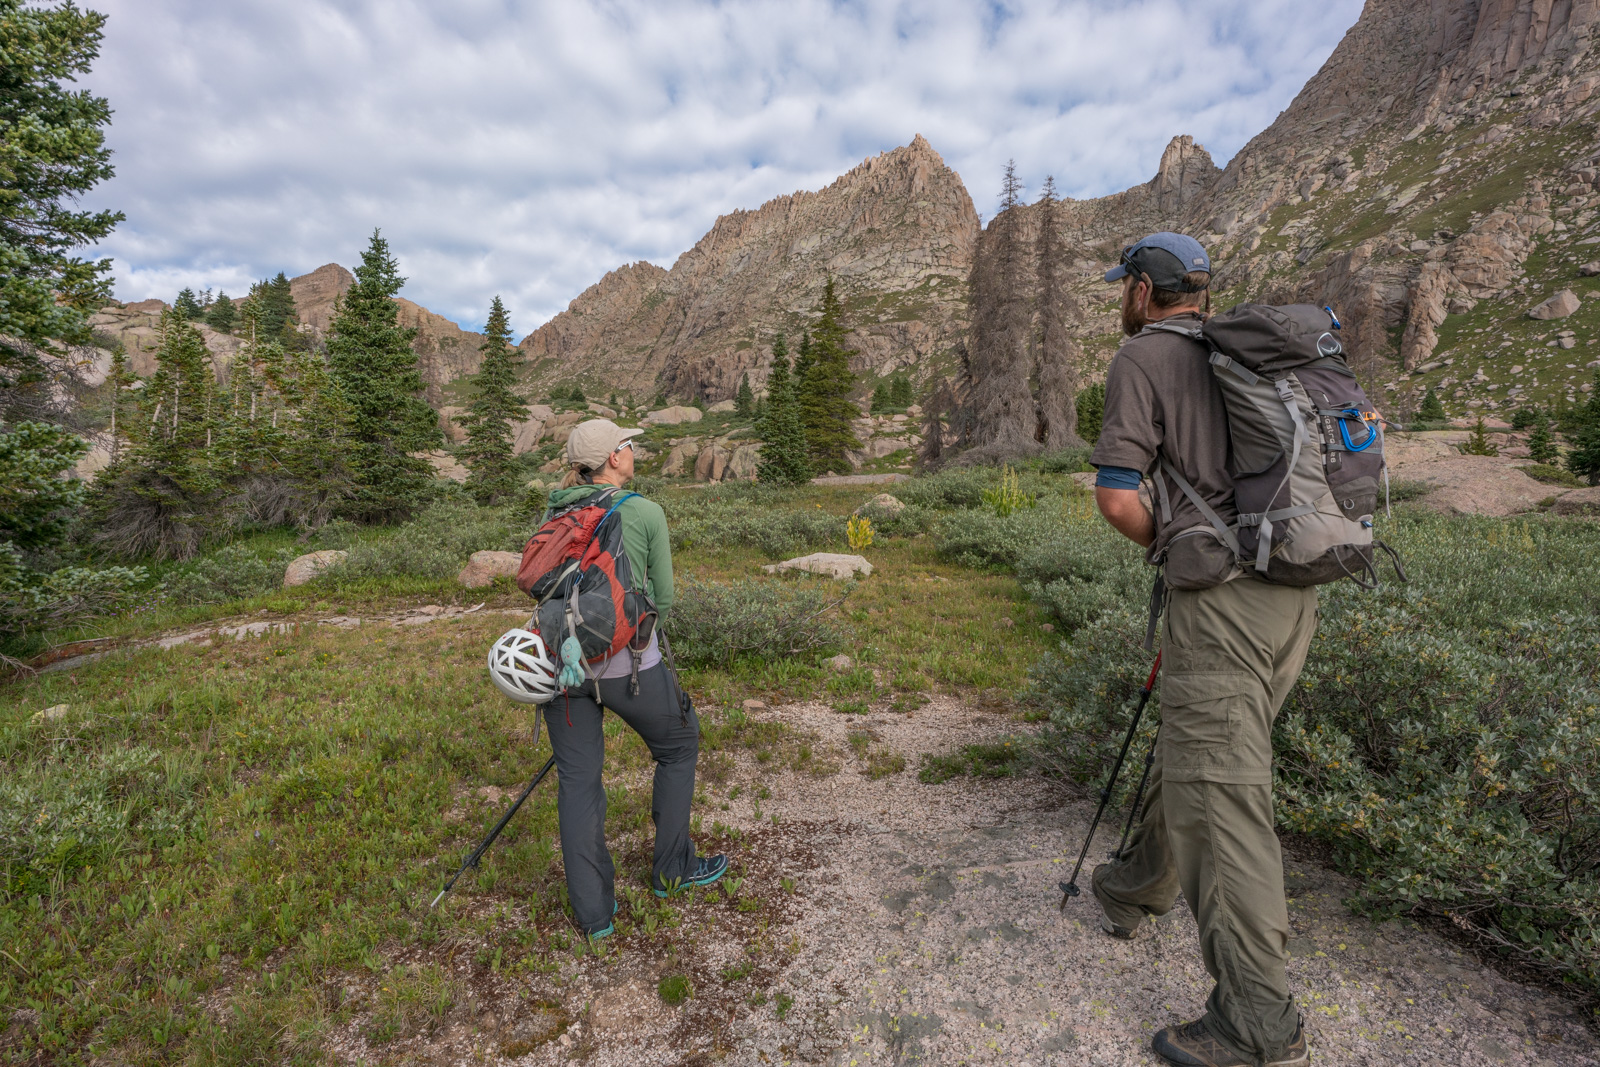
I decided to invite my two best friends for this final climb: Silas Musick, who has joined me on 16 of the highest 100 peaks; and, my friend Todd Myers. Since Todd was training for the Imogene Mountain Run in a week, he opted to just join us for the backpacking and stay in camp during the climb. The plan was for Todd and I to meet Silas in Aspen and then drive to the Maroon Bells parking lot together. Todd and I left Durango at noon on Friday. We met Silas at 6 PM in Aspen and we were all at the trailhead and ready to hike at 7:30 PM. We were planning to backpack to Crater Lake, set-up camp, and then get up really early for our attempt on Thunder Pyramid. Silas also had North Maroon on his radar and so we knew we would be in the area for a few days. The three amigos began our trip up from the lake in high spirits.
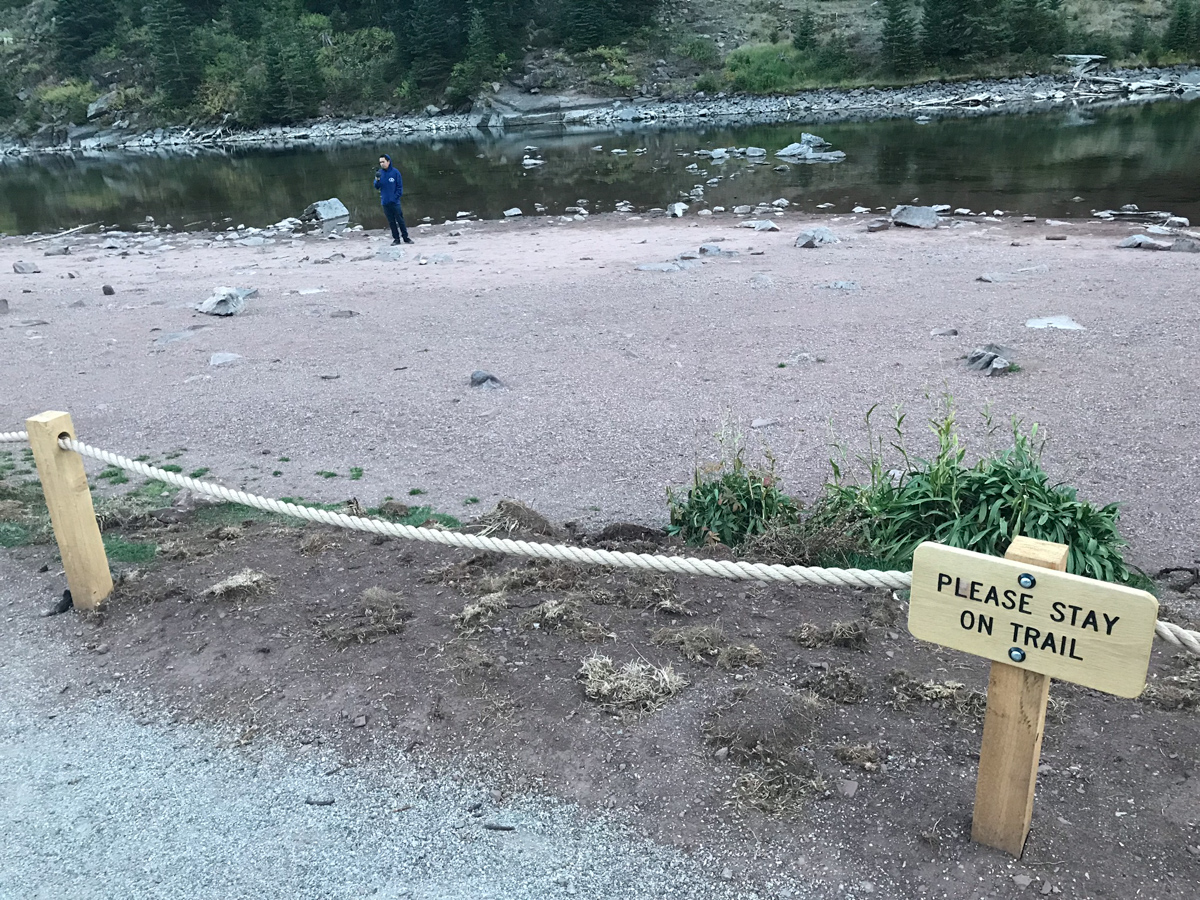
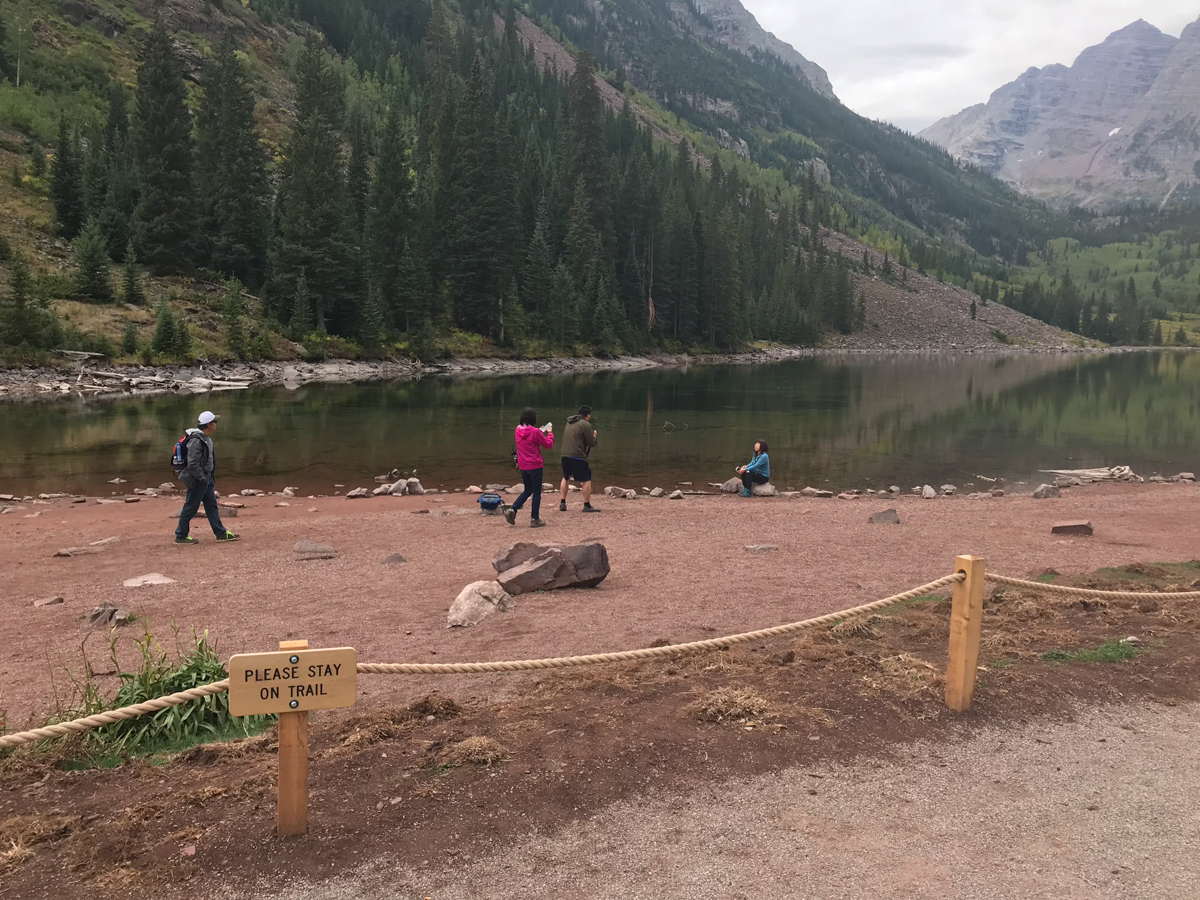
I was surprised to find that Maroon Lake had a rope surrounding it - which will not bode well for those looking to photograph it during autumn colors. Already, we found lots of people that simply disregarded the signage to stay on the trail, despite a sign being visible on the rope every 20 feet or so. Seriously, how hard is it for us as humans to simply obey rules? Do folks feel like they are above them? Anything for Instagram? What's going on here? You may not agree with the rope, but if you're going to enjoy public lands, you need to follow the rules. While they may sometimes be poorly implemented, we should still follow them. For more on the Forest Service's decision to rope it off, see this link.
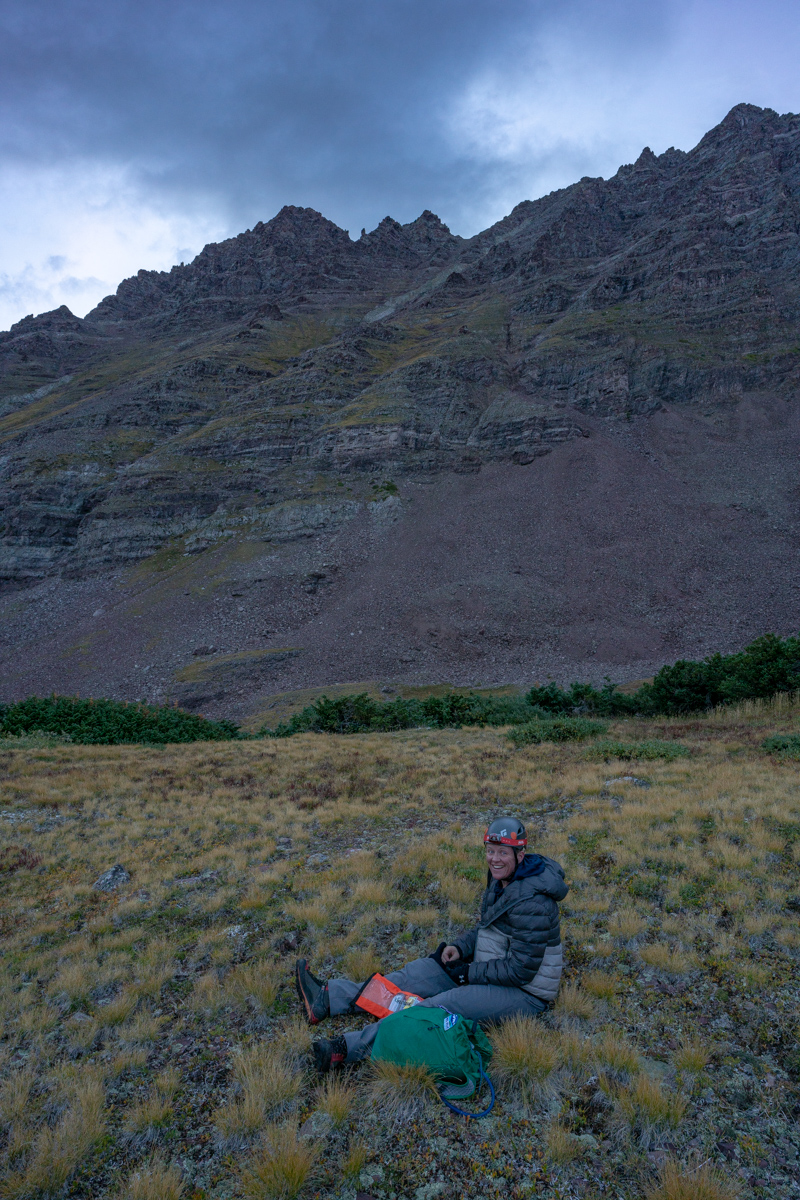
We arrived pretty late at our campsite and set-up in the dark. There was an abandoned tent at our site - one of those cheap Walmart tents. I sure don't envy the job of the Forest Service to keep these places looking halfway decent. The total disregard of Leave No Trace principles is quite astounding. OK, off my soap box! Silas and I set our alarms for 3:45 AM and hit the sack.
We woke up at 3:45 and left camp at 4:00 AM. The forecast for the day was not great; however, it was also looking like the best weather window for the weekend. We anticipated early storms and lots of clouds in our future and wanted as early of a start as possible. While this meant hiking up the first section of Thunder in the dark, we felt it was a good choice.
After hiking about 10 minutes, a young man by the name of Austin stopped us on his way down from above asking if we had cell phone reception. We of course did not and explained that you would have to go all the way into town to get cell reception. He explained that his father, Brad, had altitude sickness and asked him to go down to get help. We explained that the most important thing was for his dad to get down and for someone to help him do that. We urged him to go back up and get him. He reluctantly agreed and hiked with us to the Thunder Pyramid turn off. We wished him luck, made sure he had food and water, and went our separate ways. More on that story later!
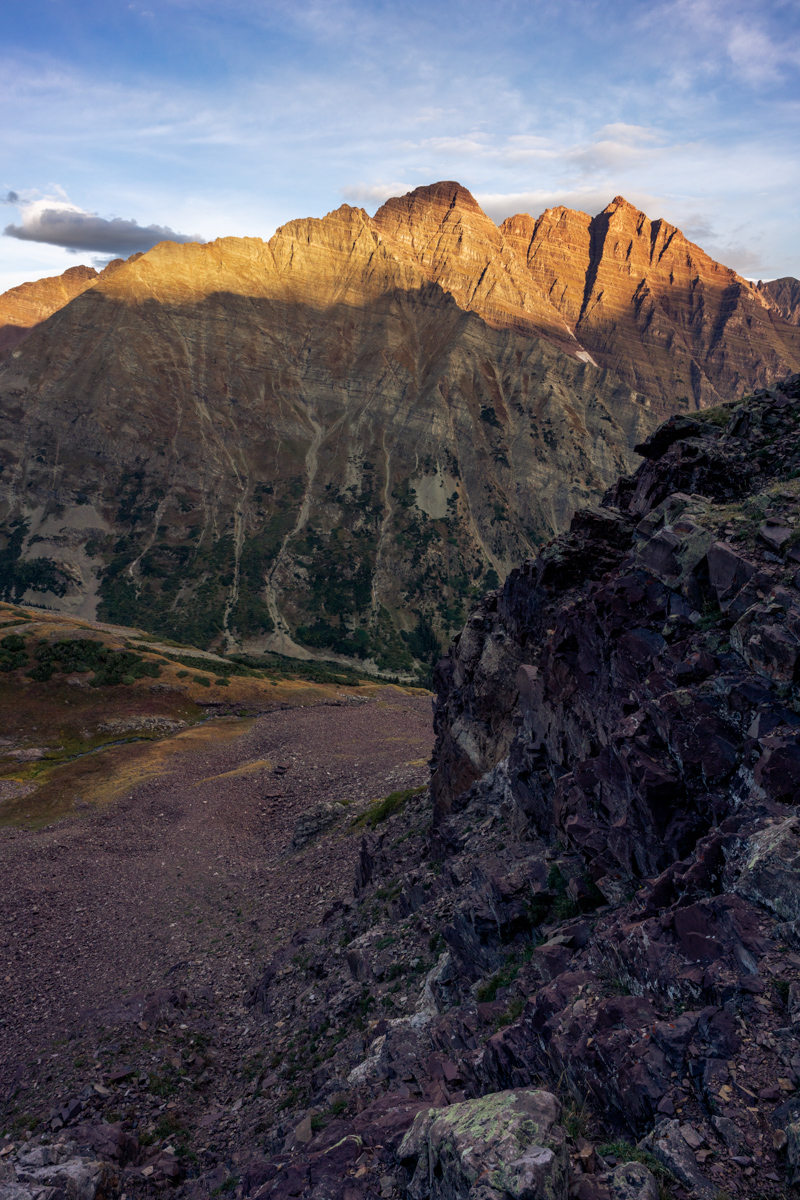
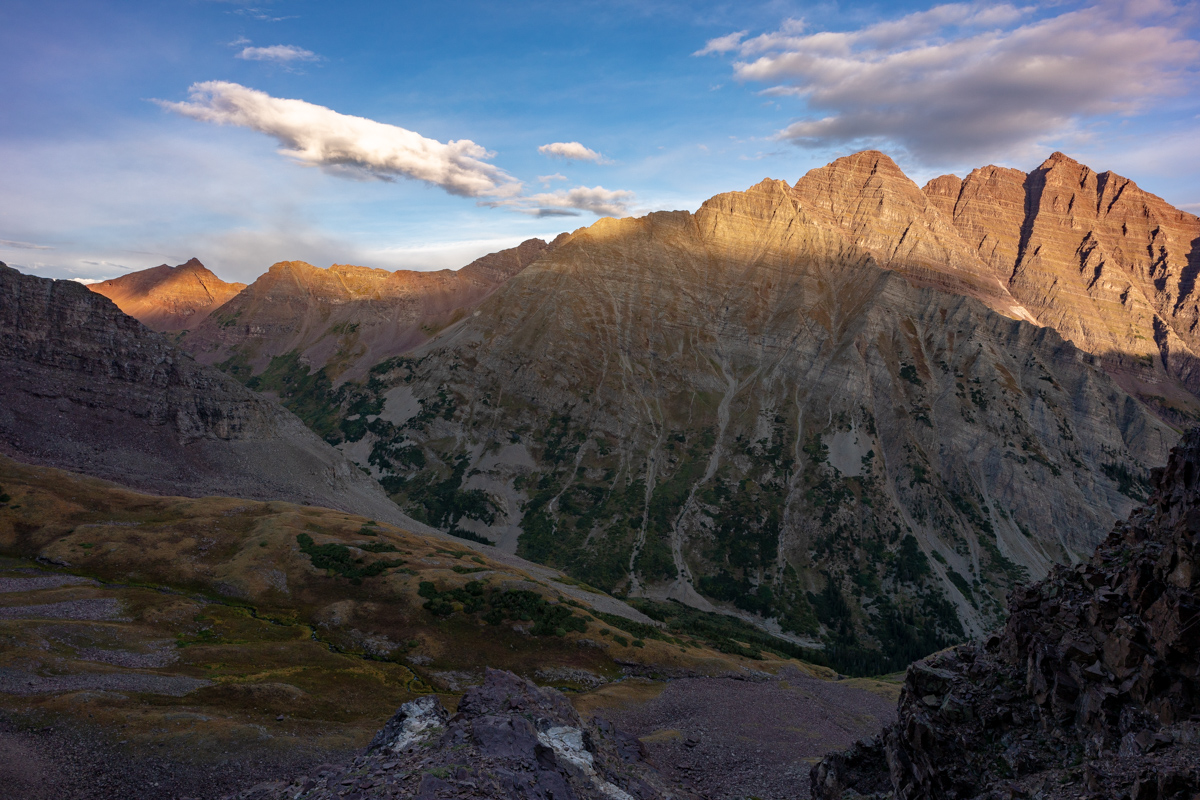
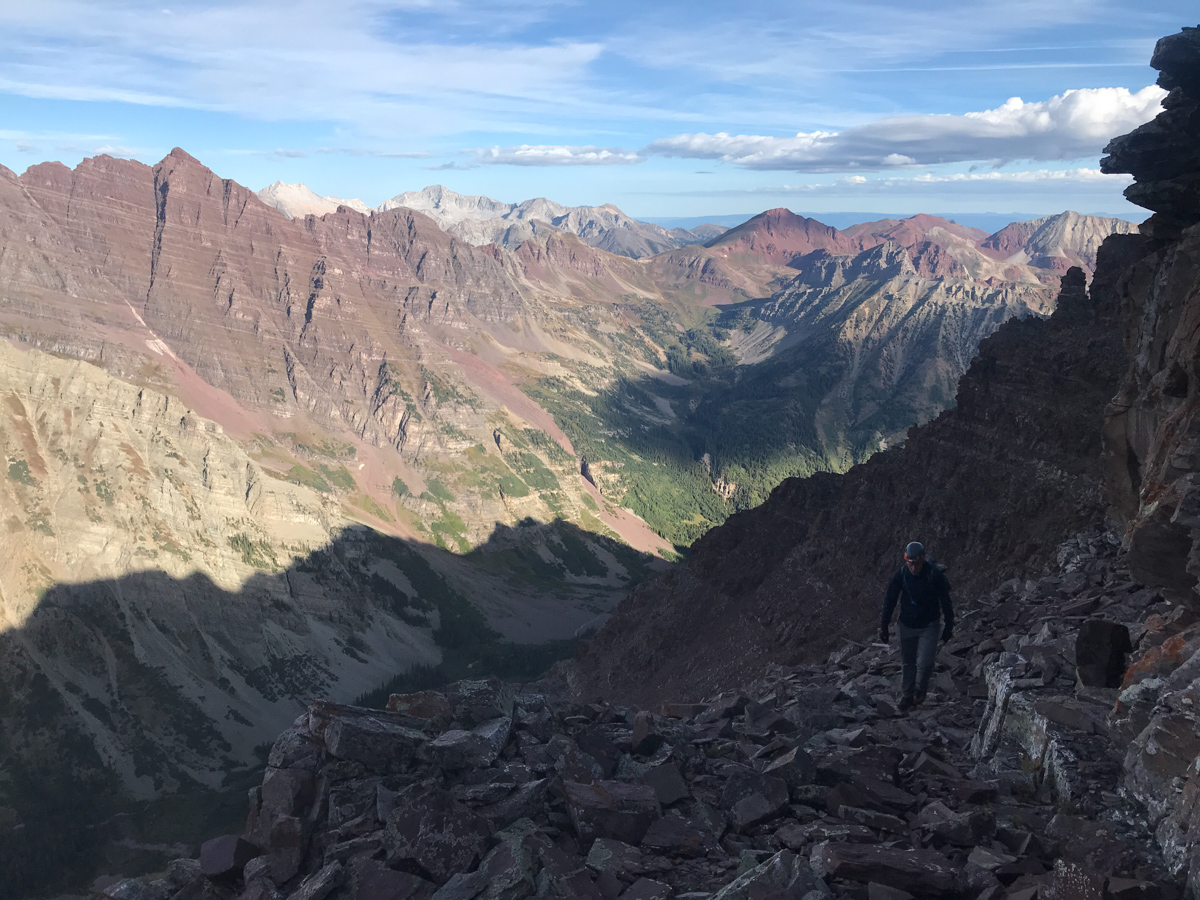
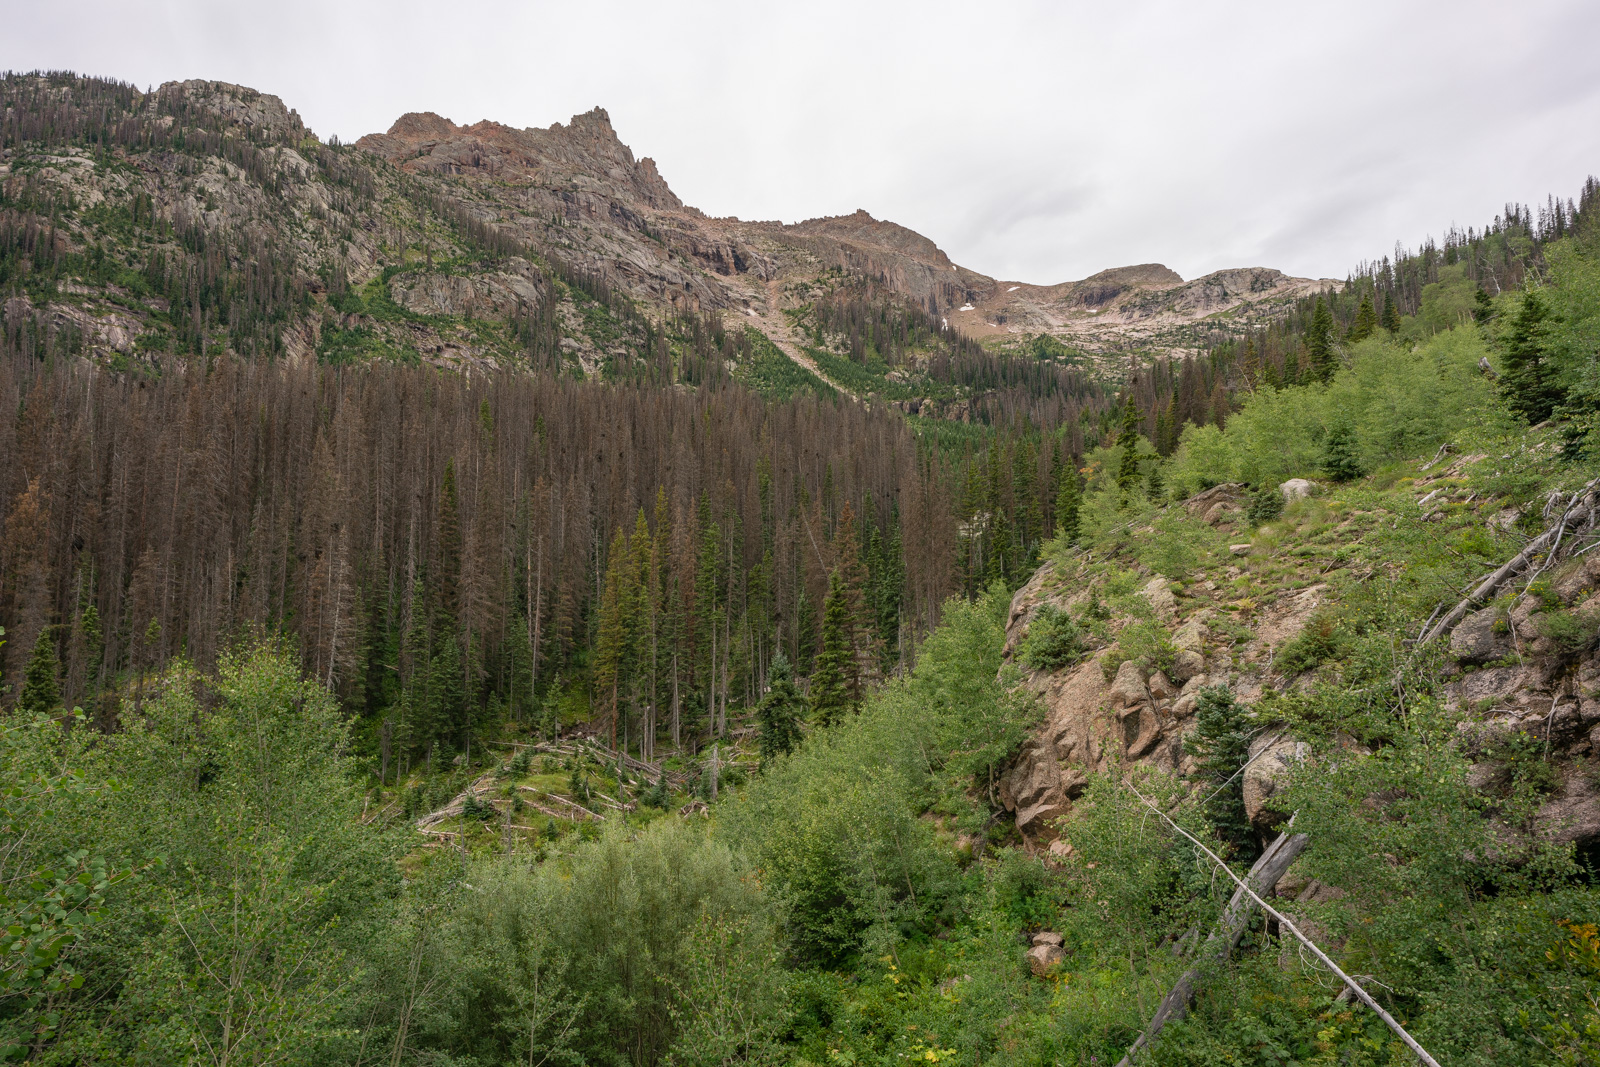
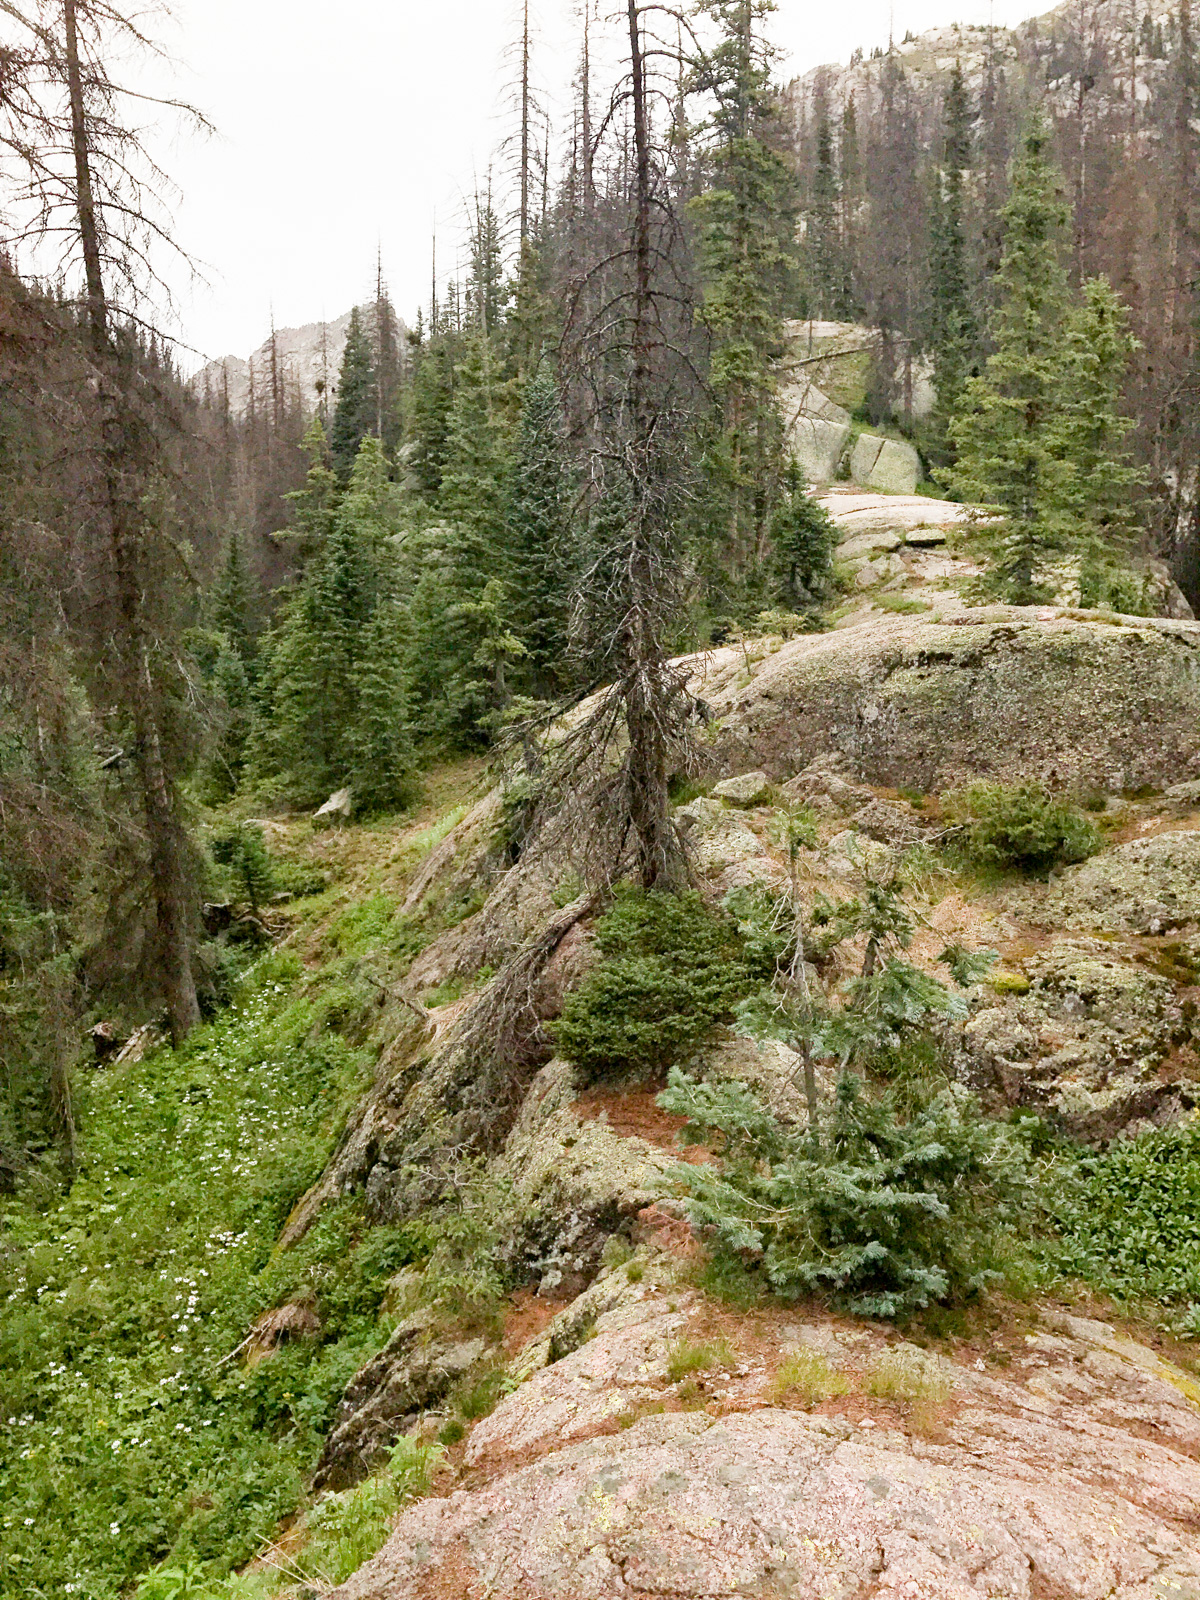
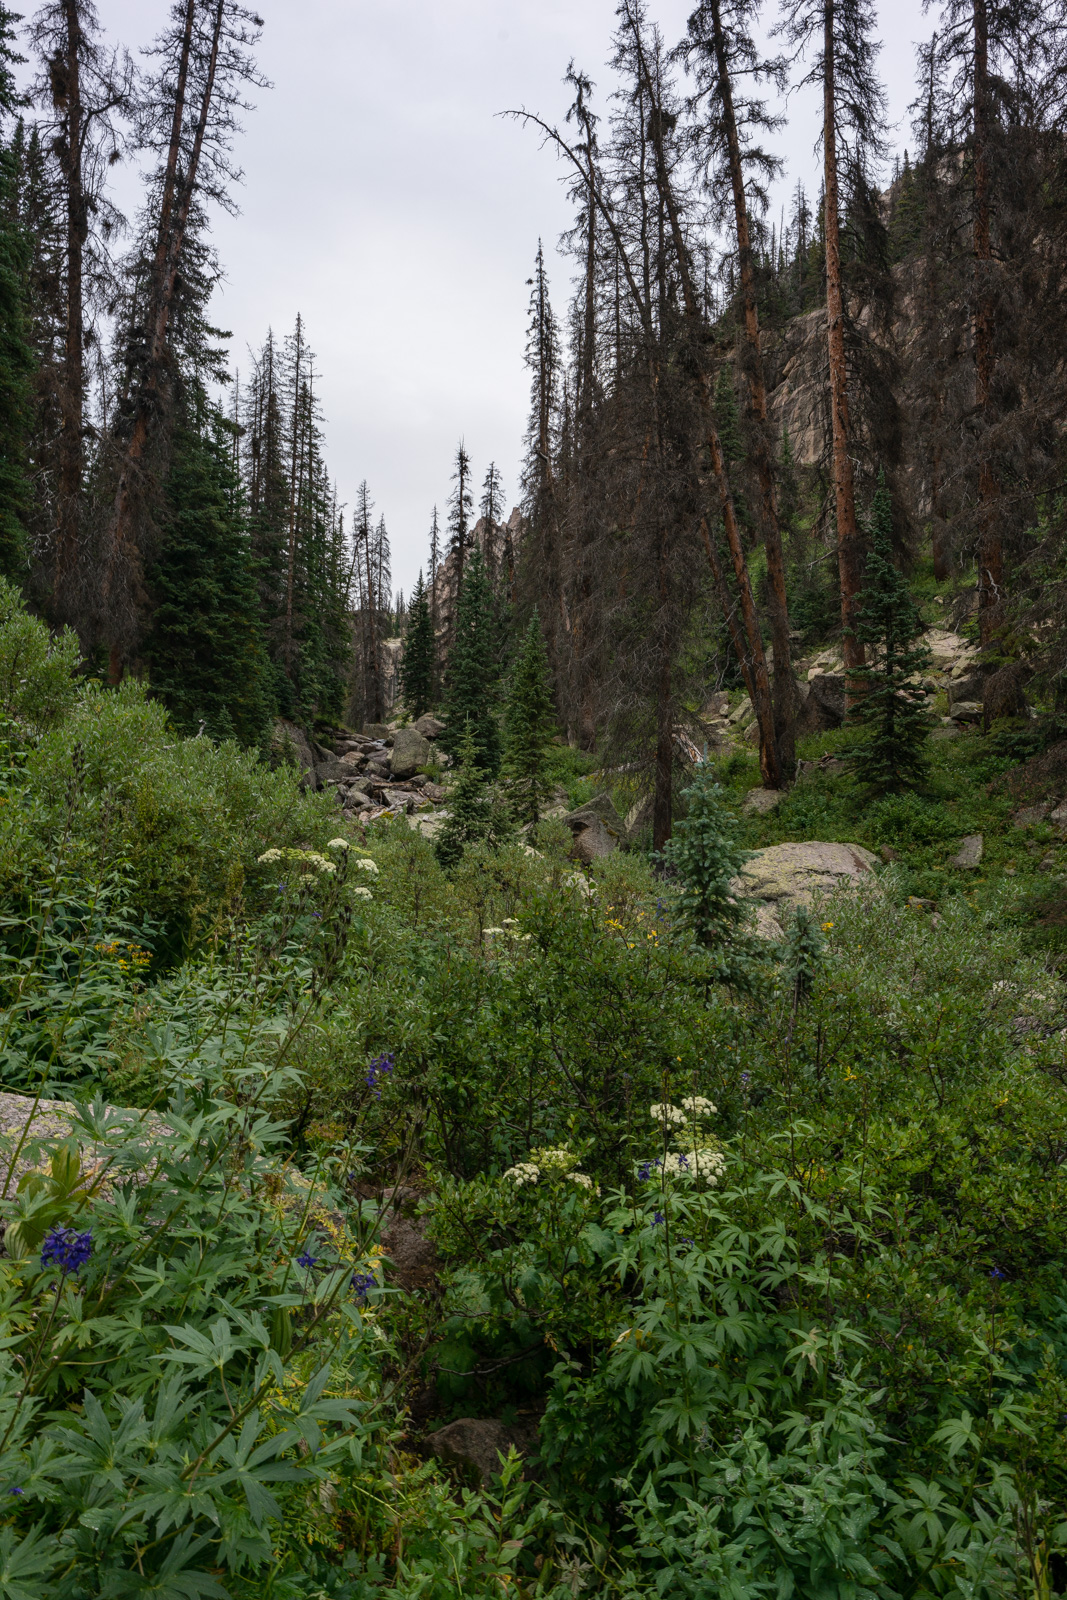
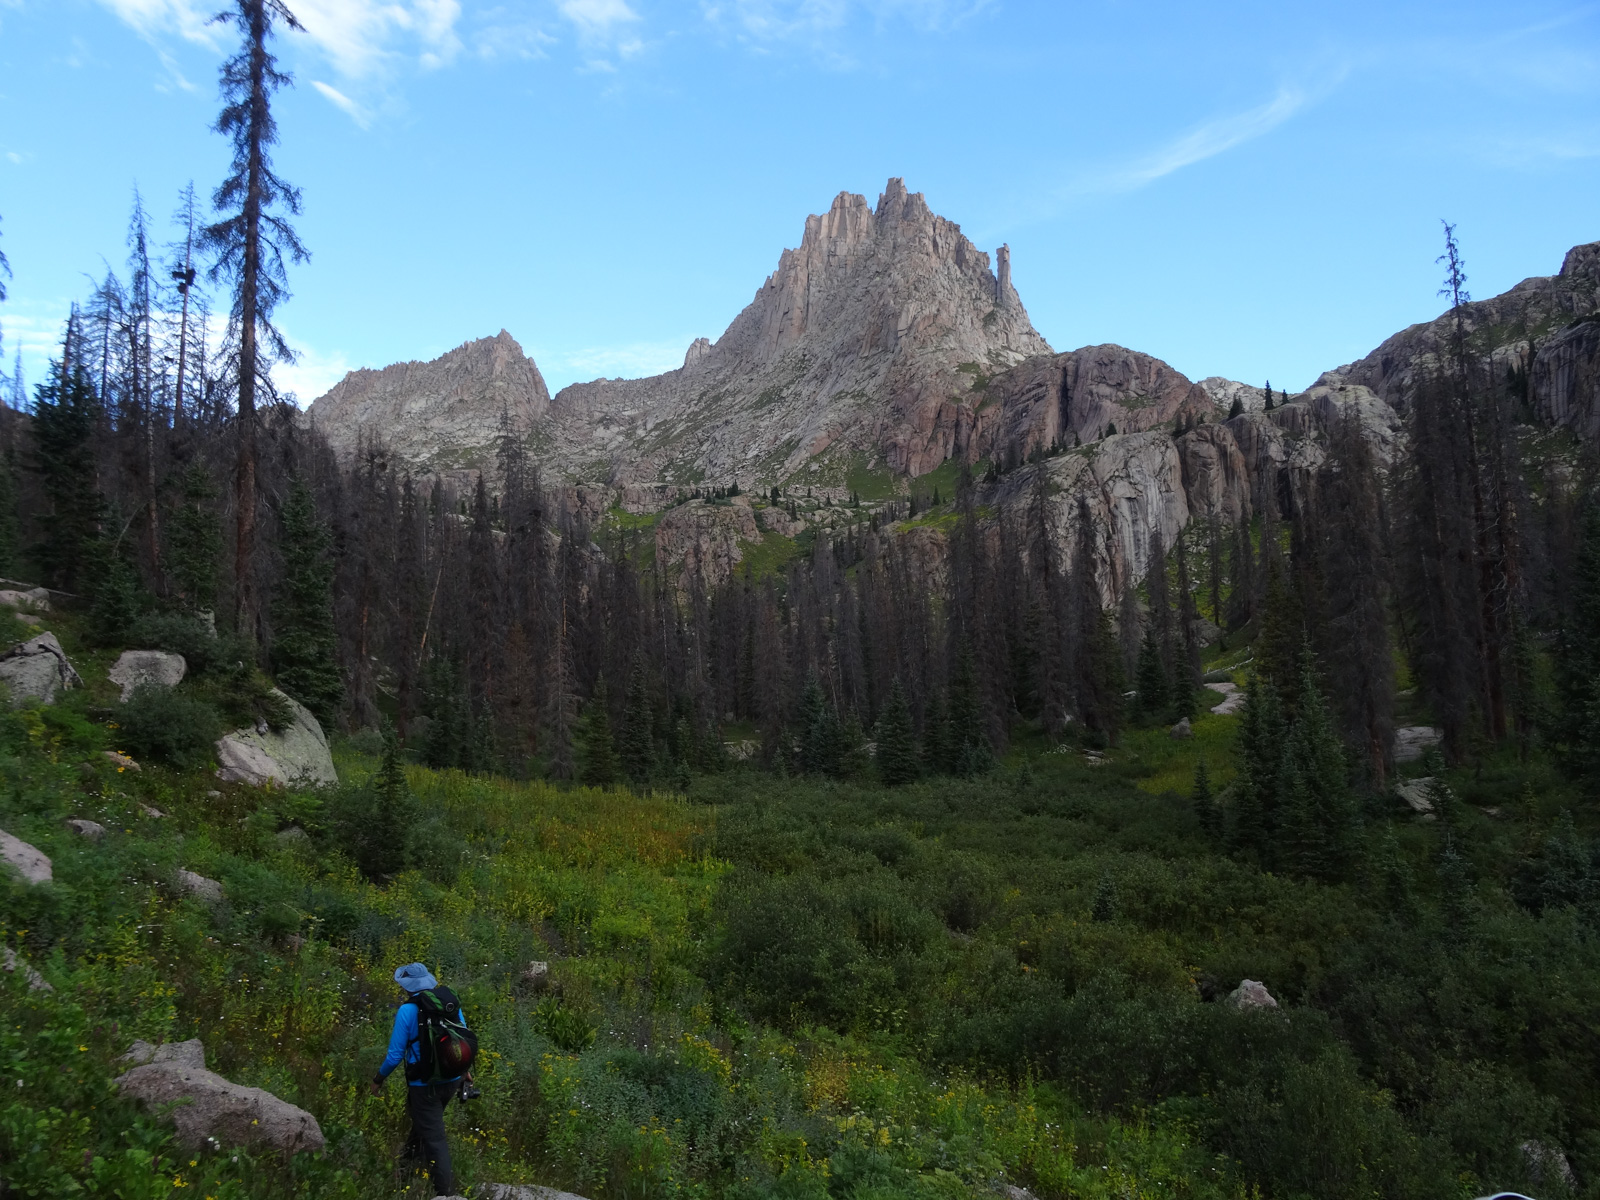
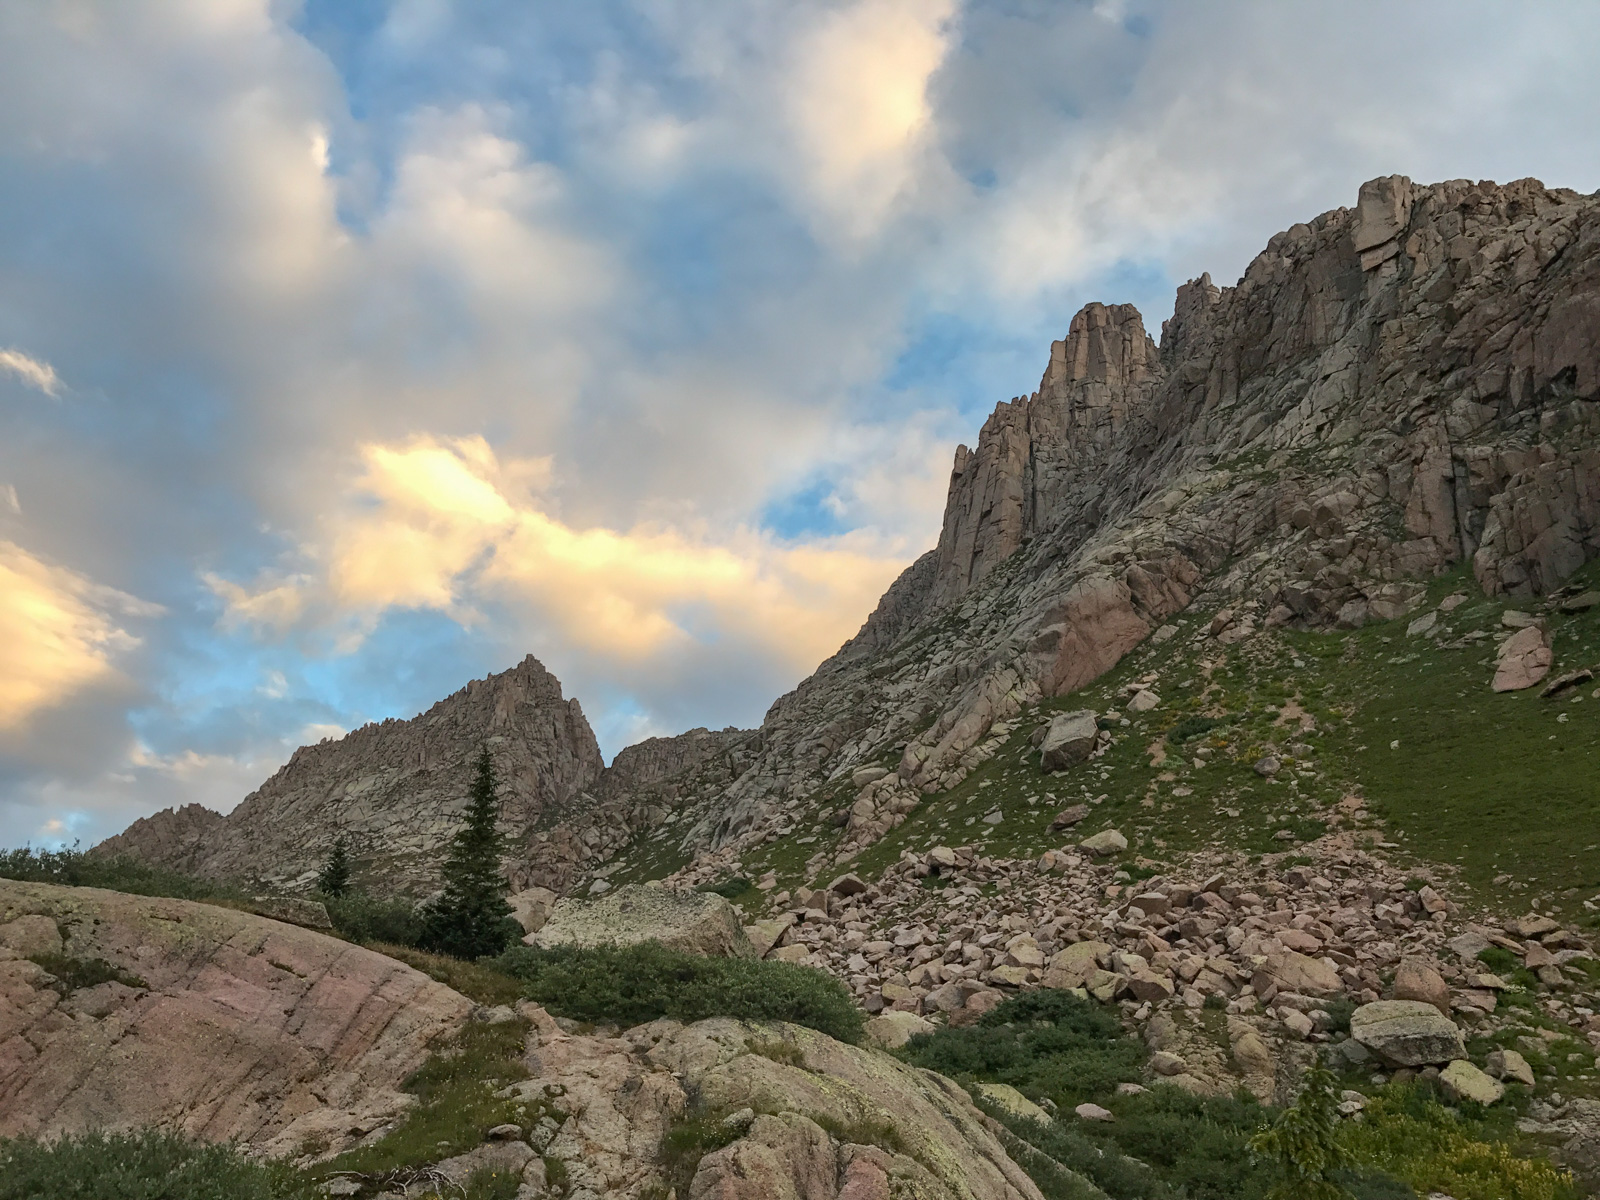
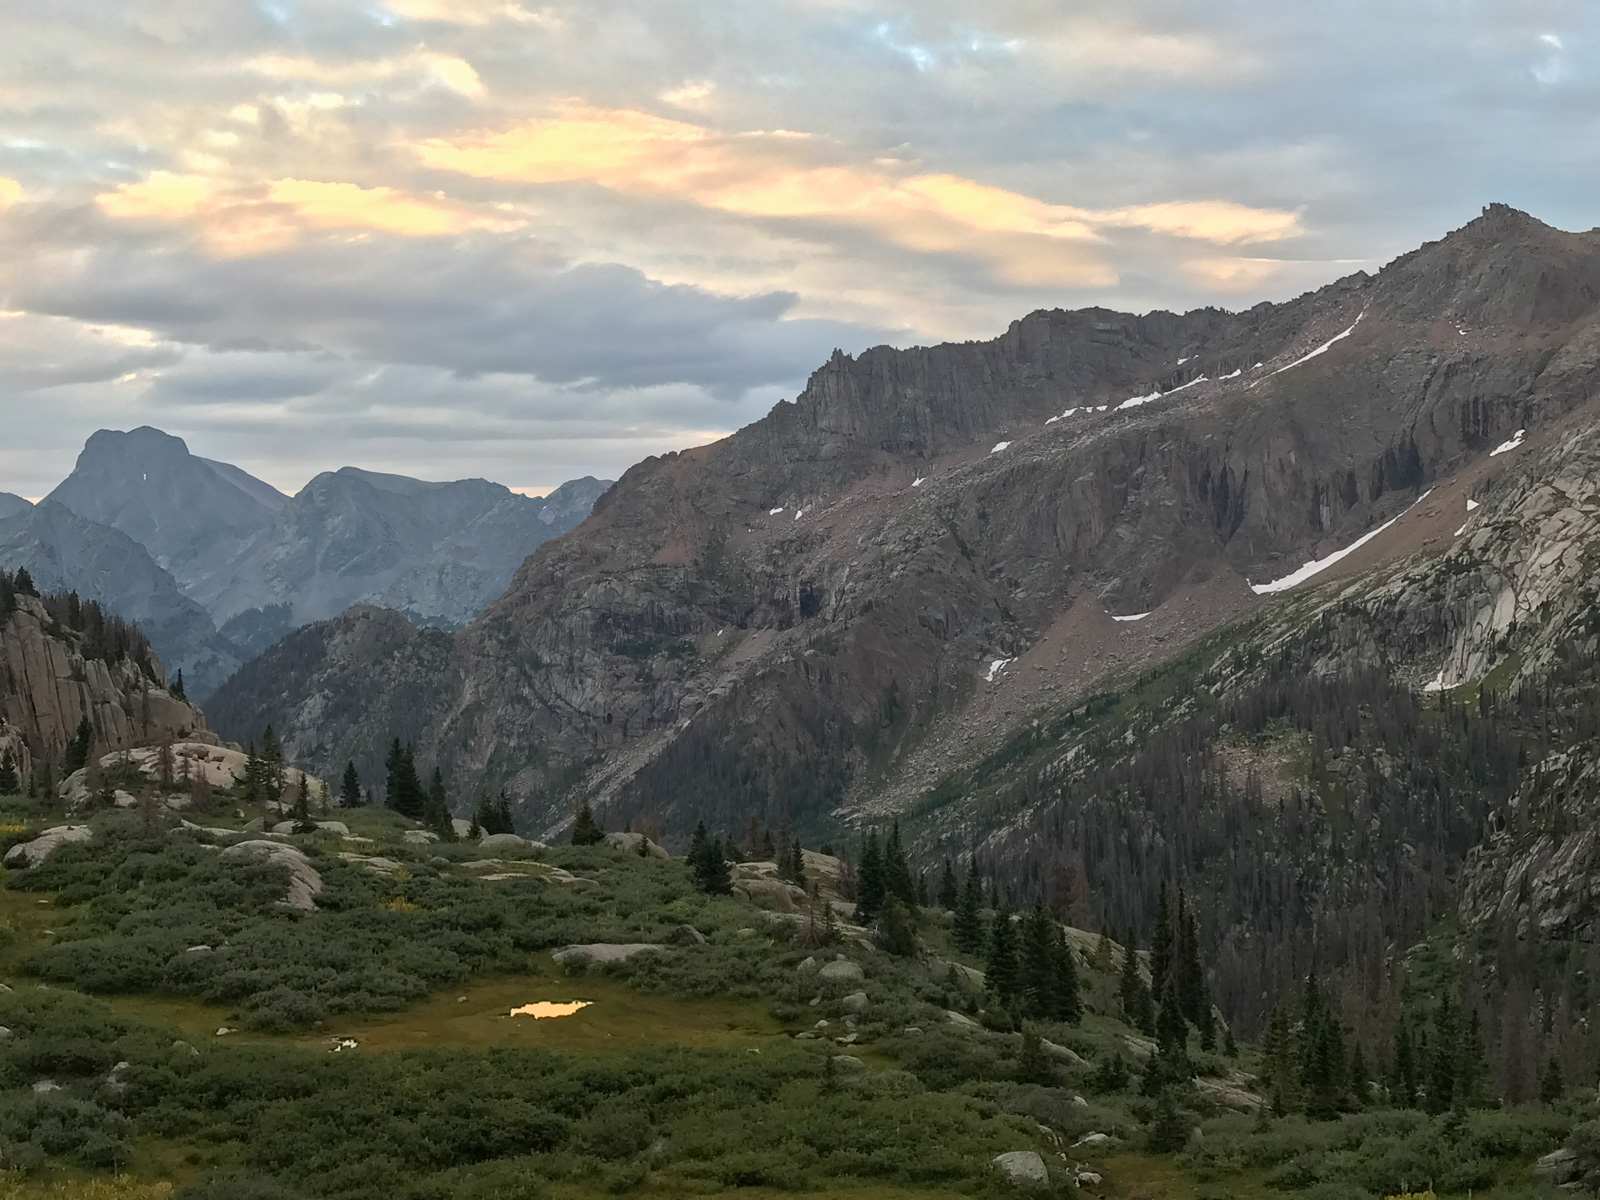
We had a tough time finding / following the trail from the cairned turn-off for Thunder Pyramid. We ended up bushwhacking up steep forested garbage until we reached the first cliff band. We followed that cliff band to our left to a weakness and followed that weakness up to another cliff band. This pattern continued until we found ourselves above treeline looking back on the Maroon Bells before sunrise.
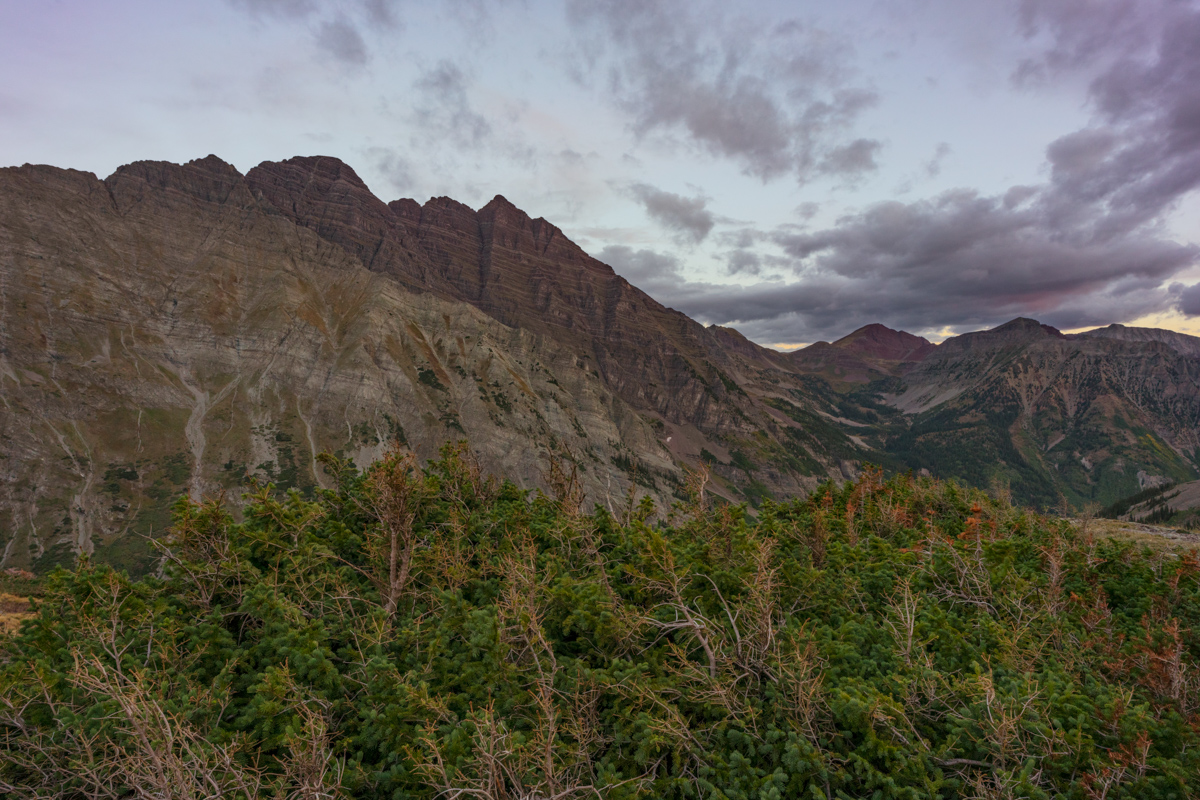
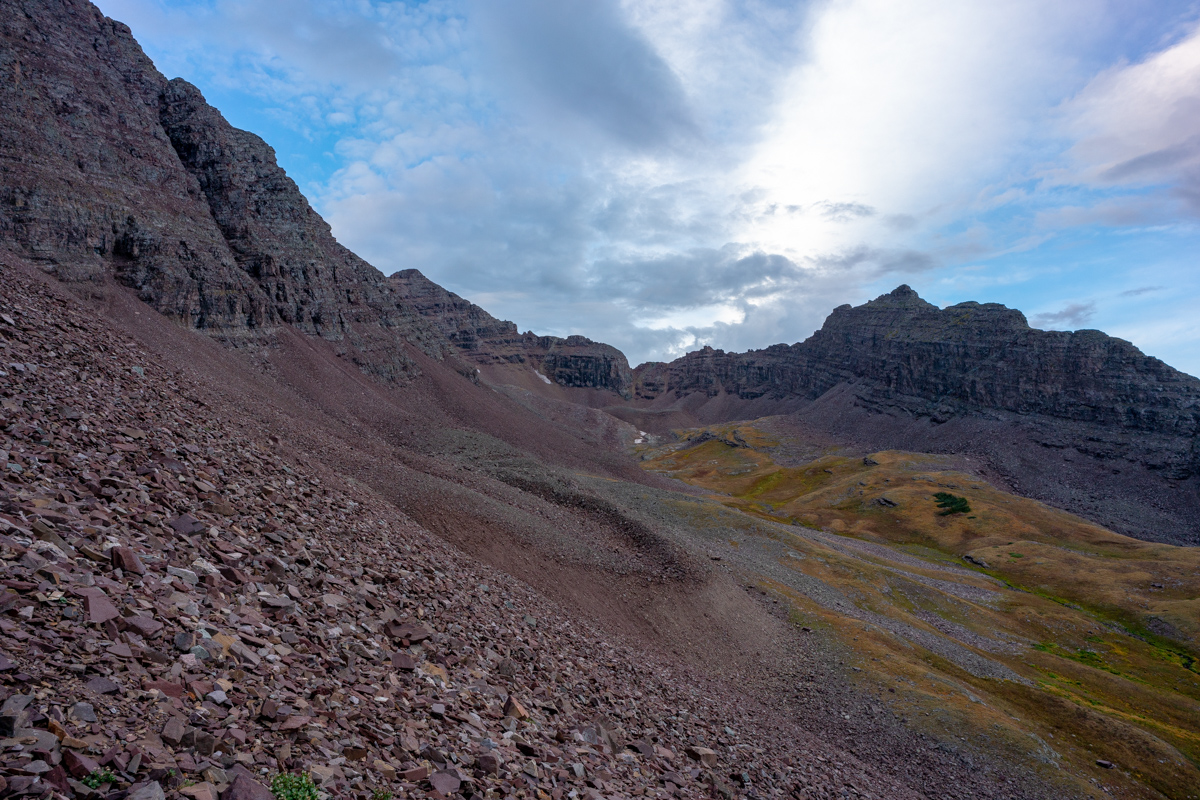
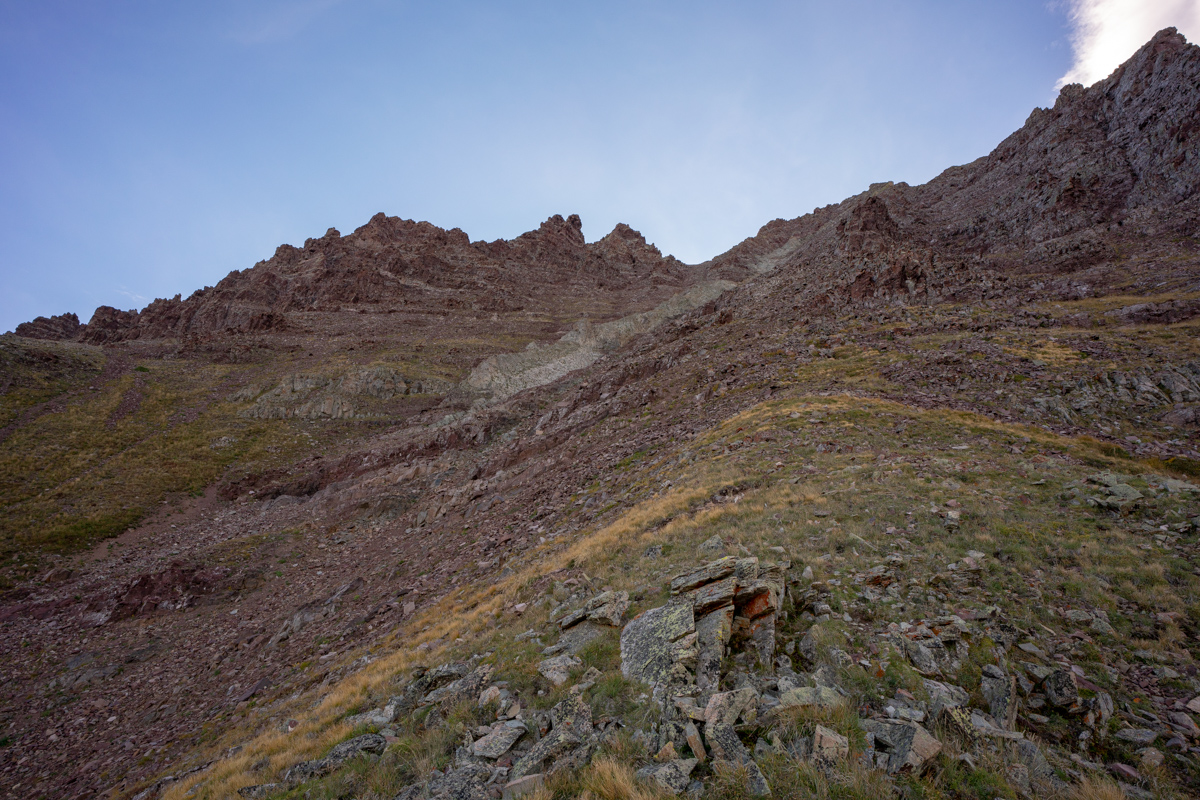
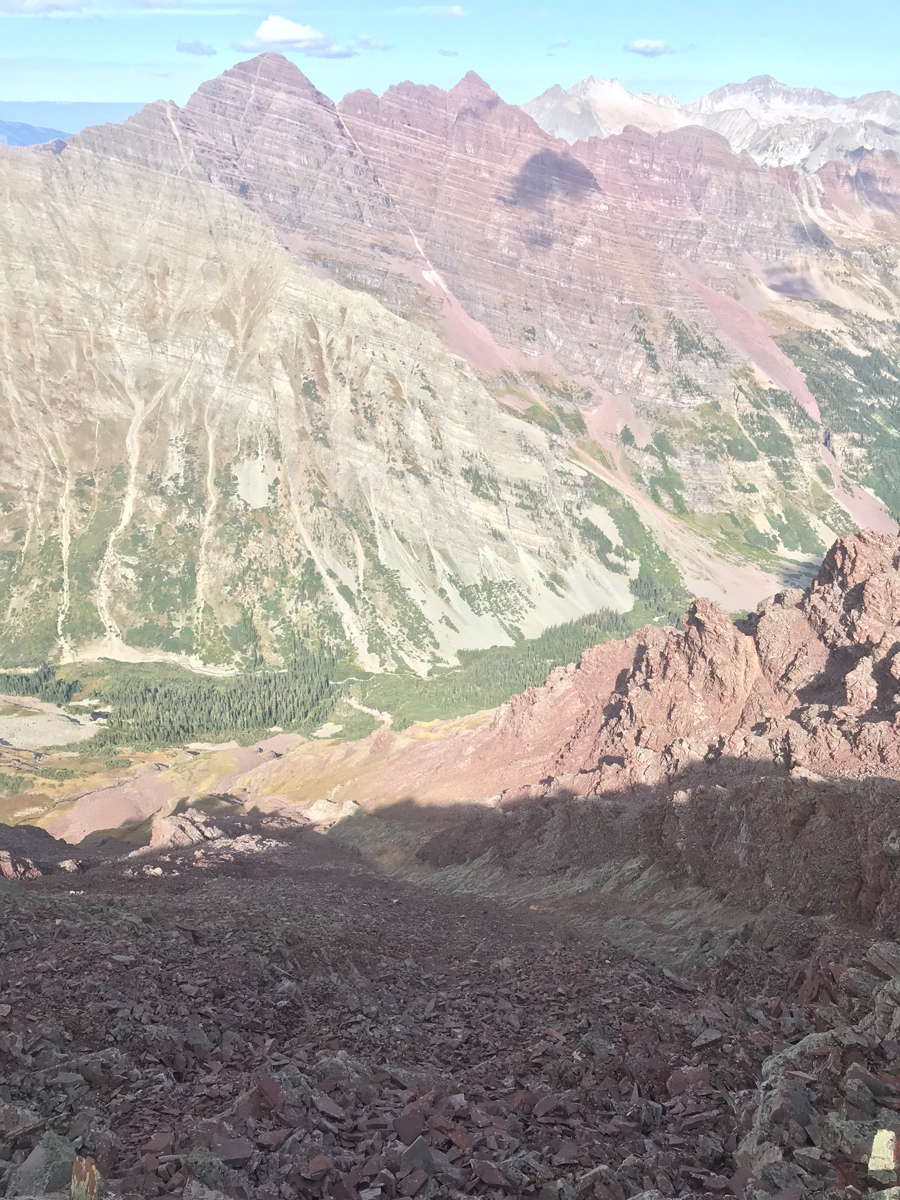
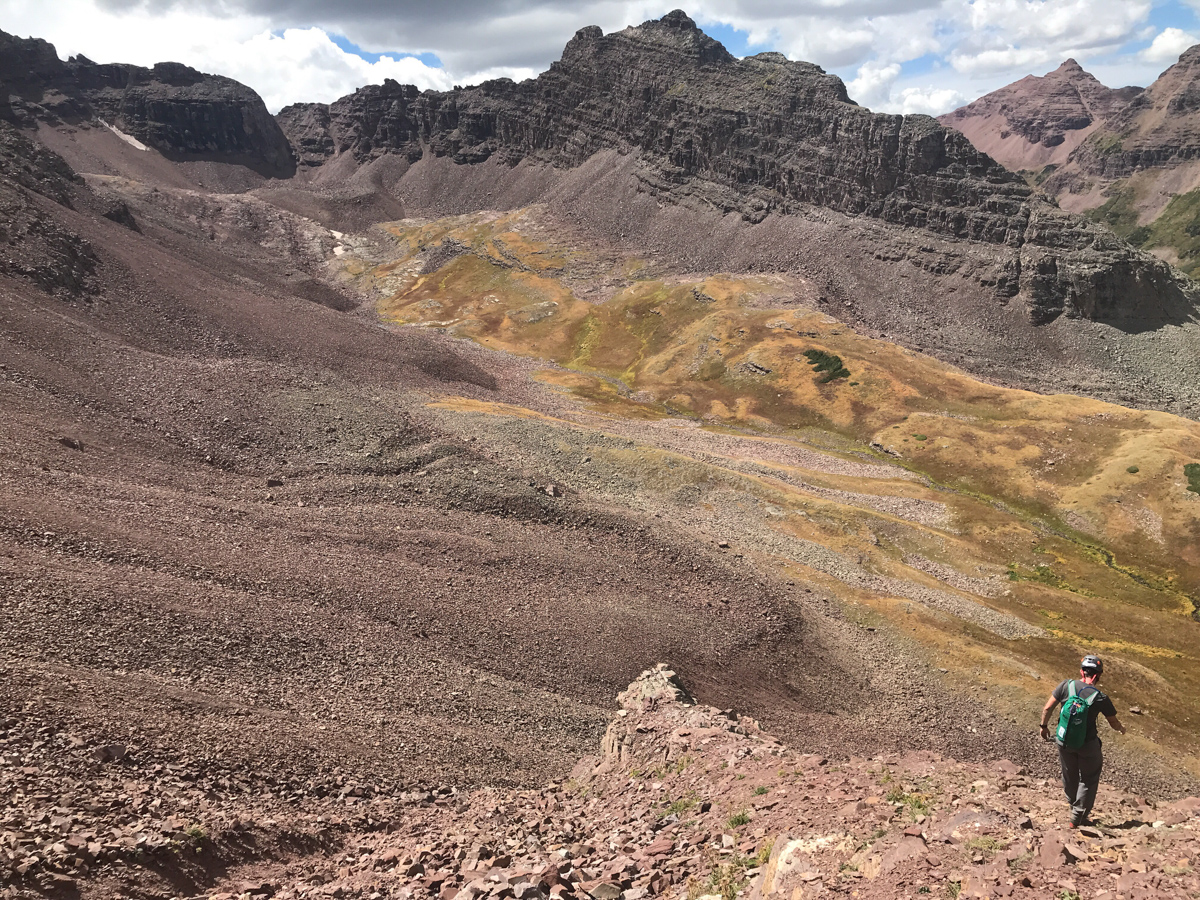
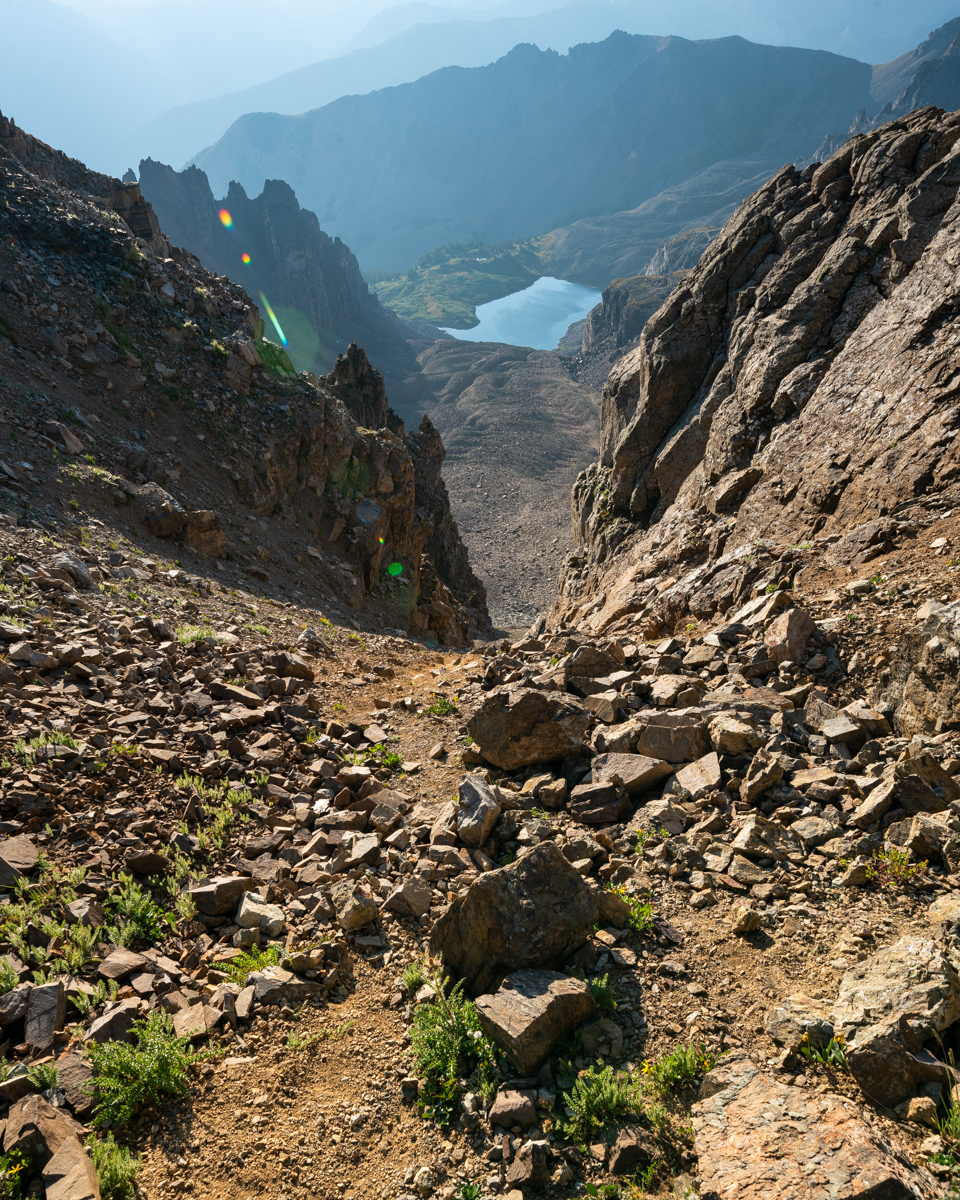
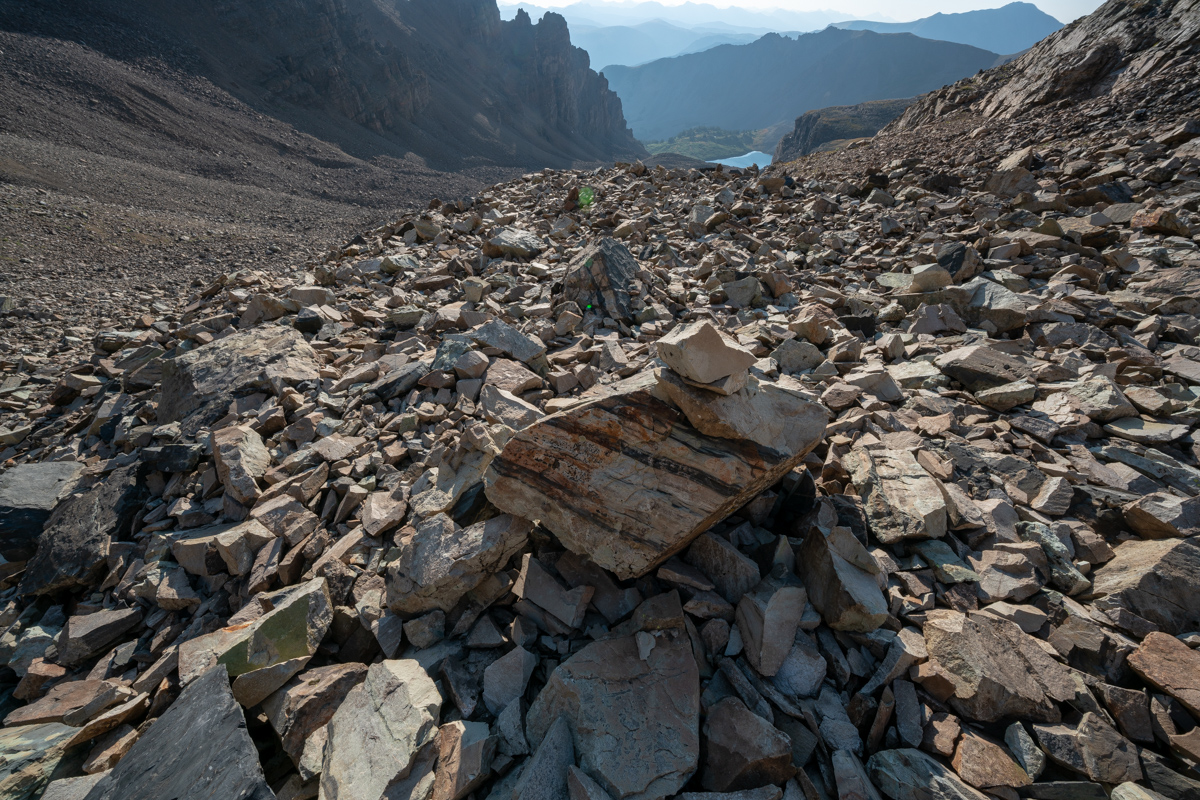
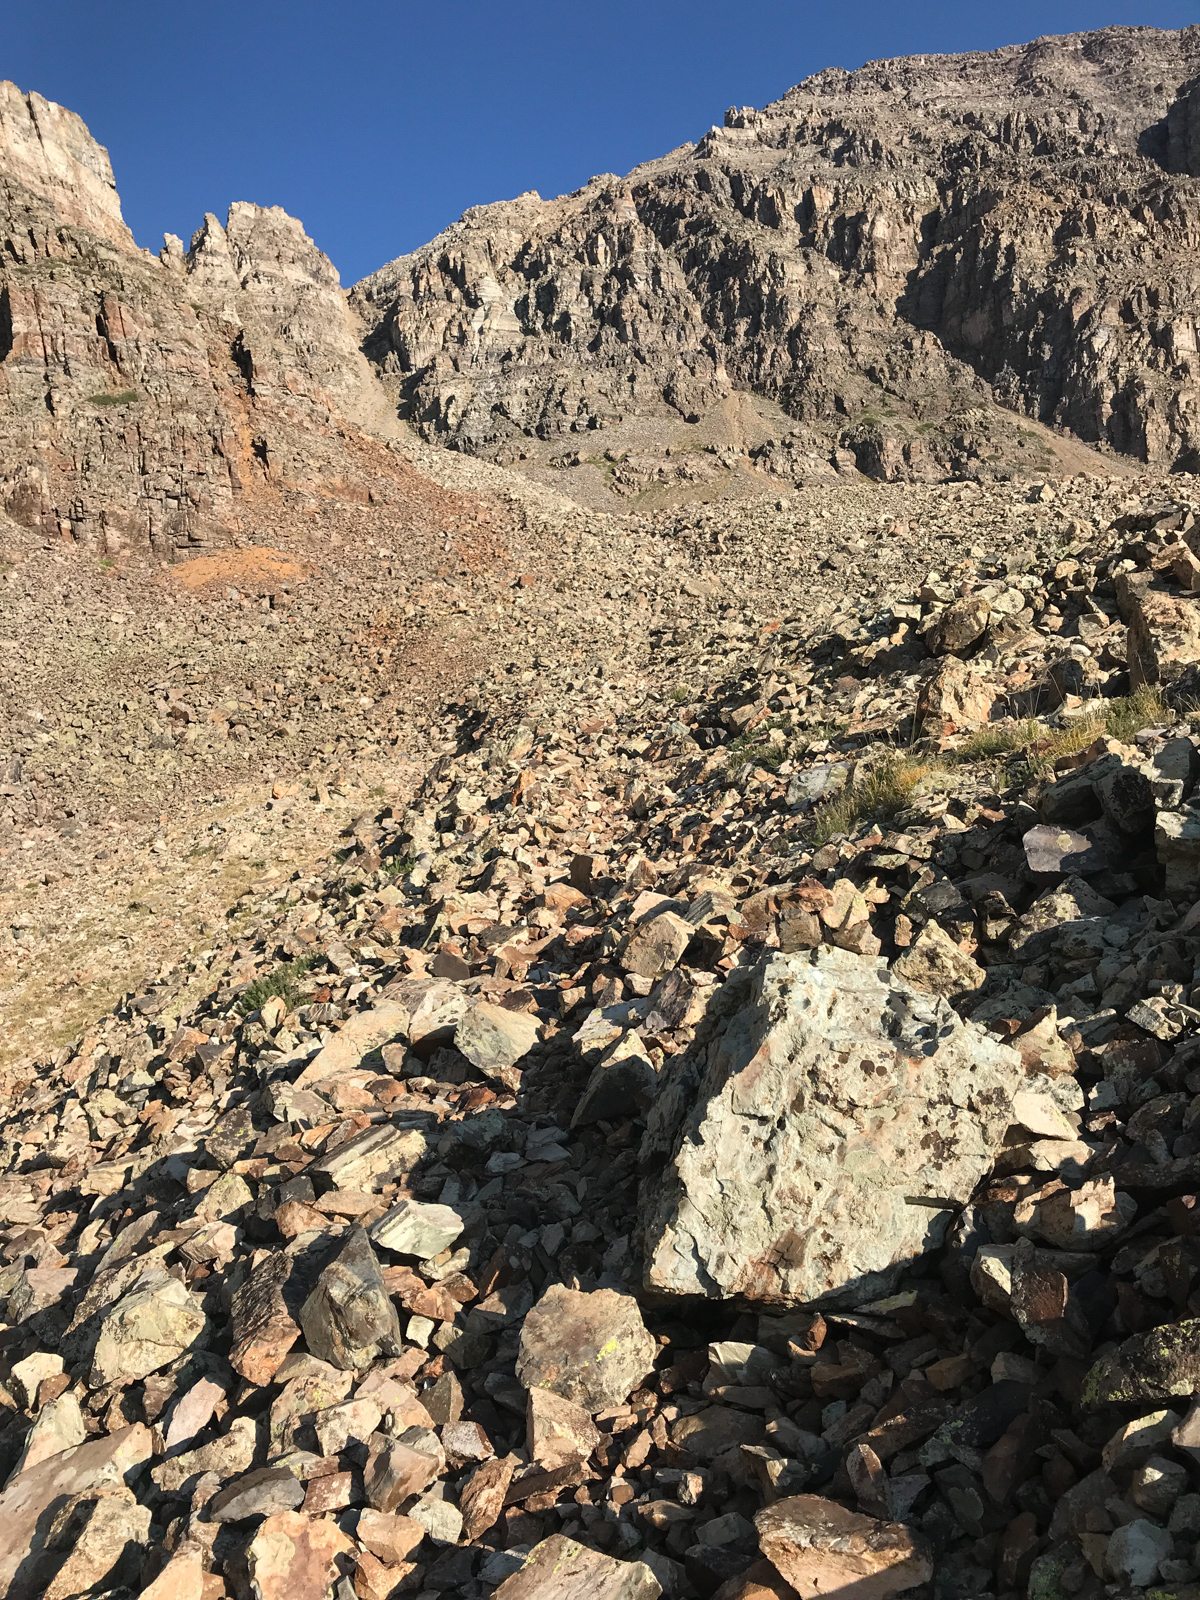
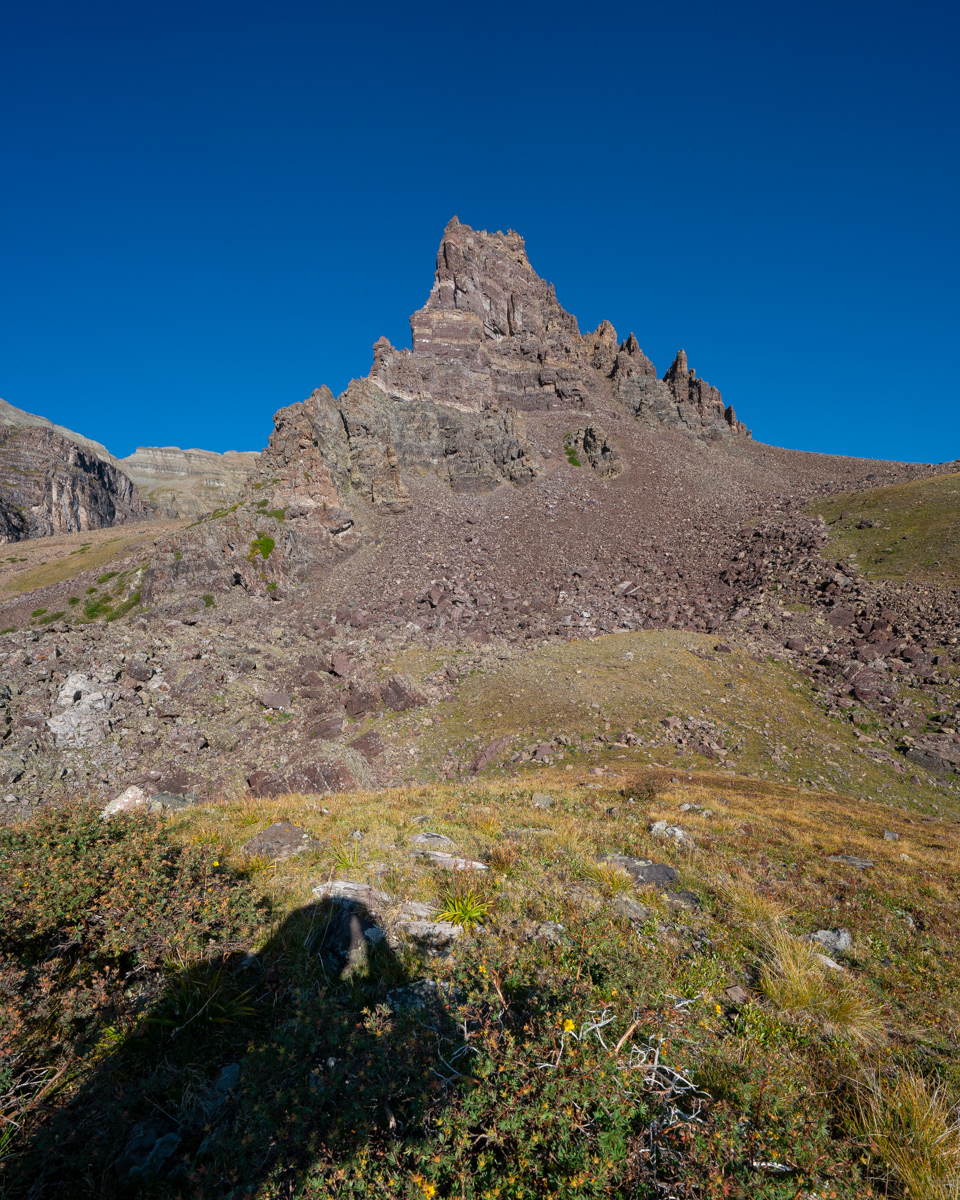
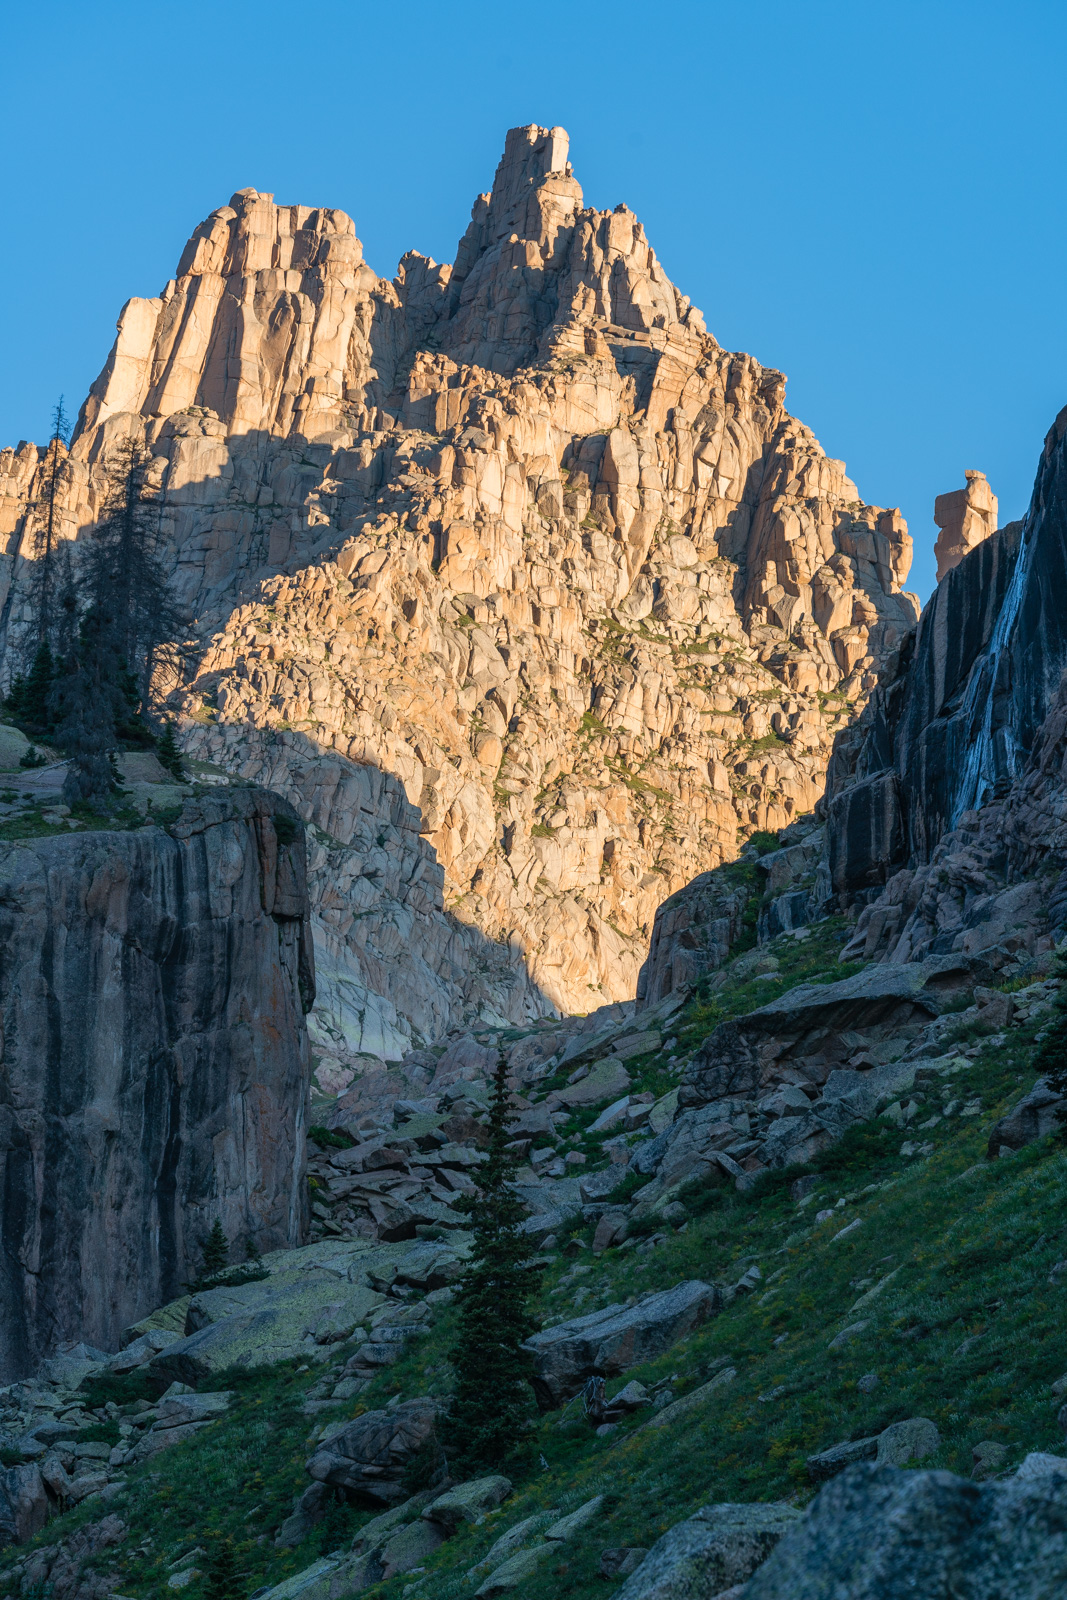
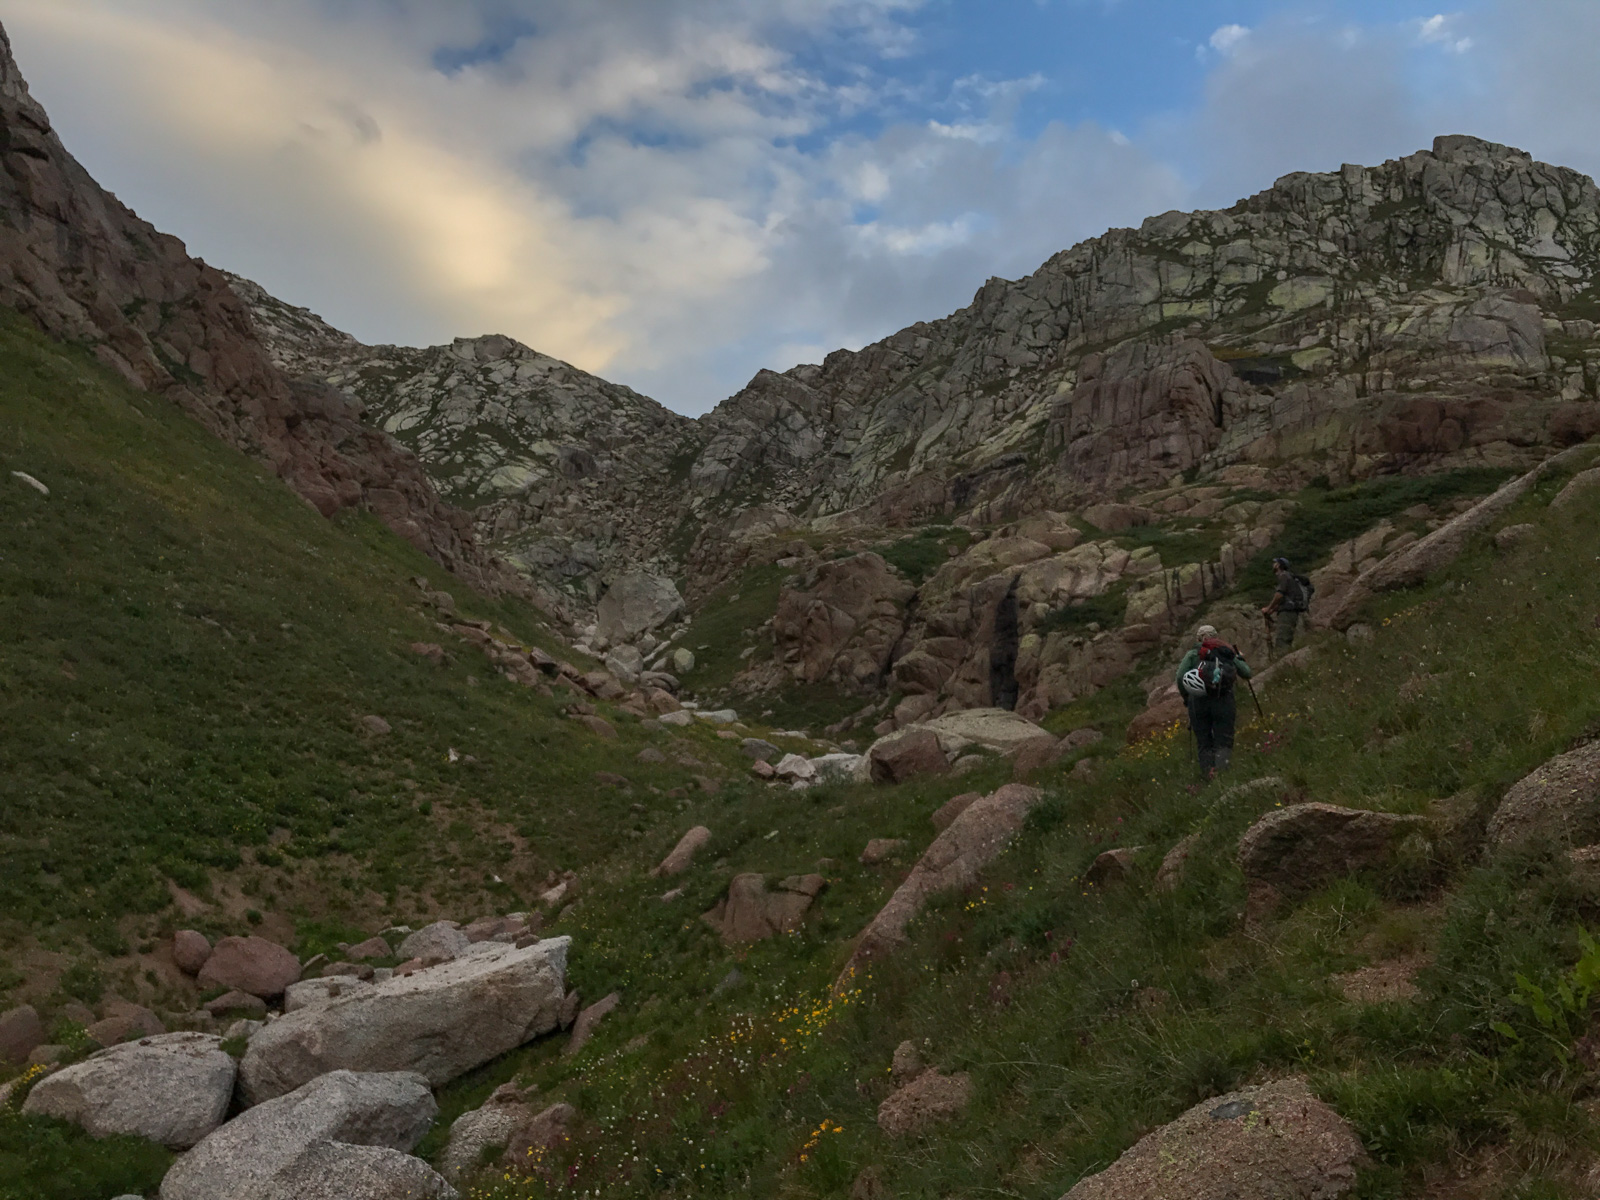
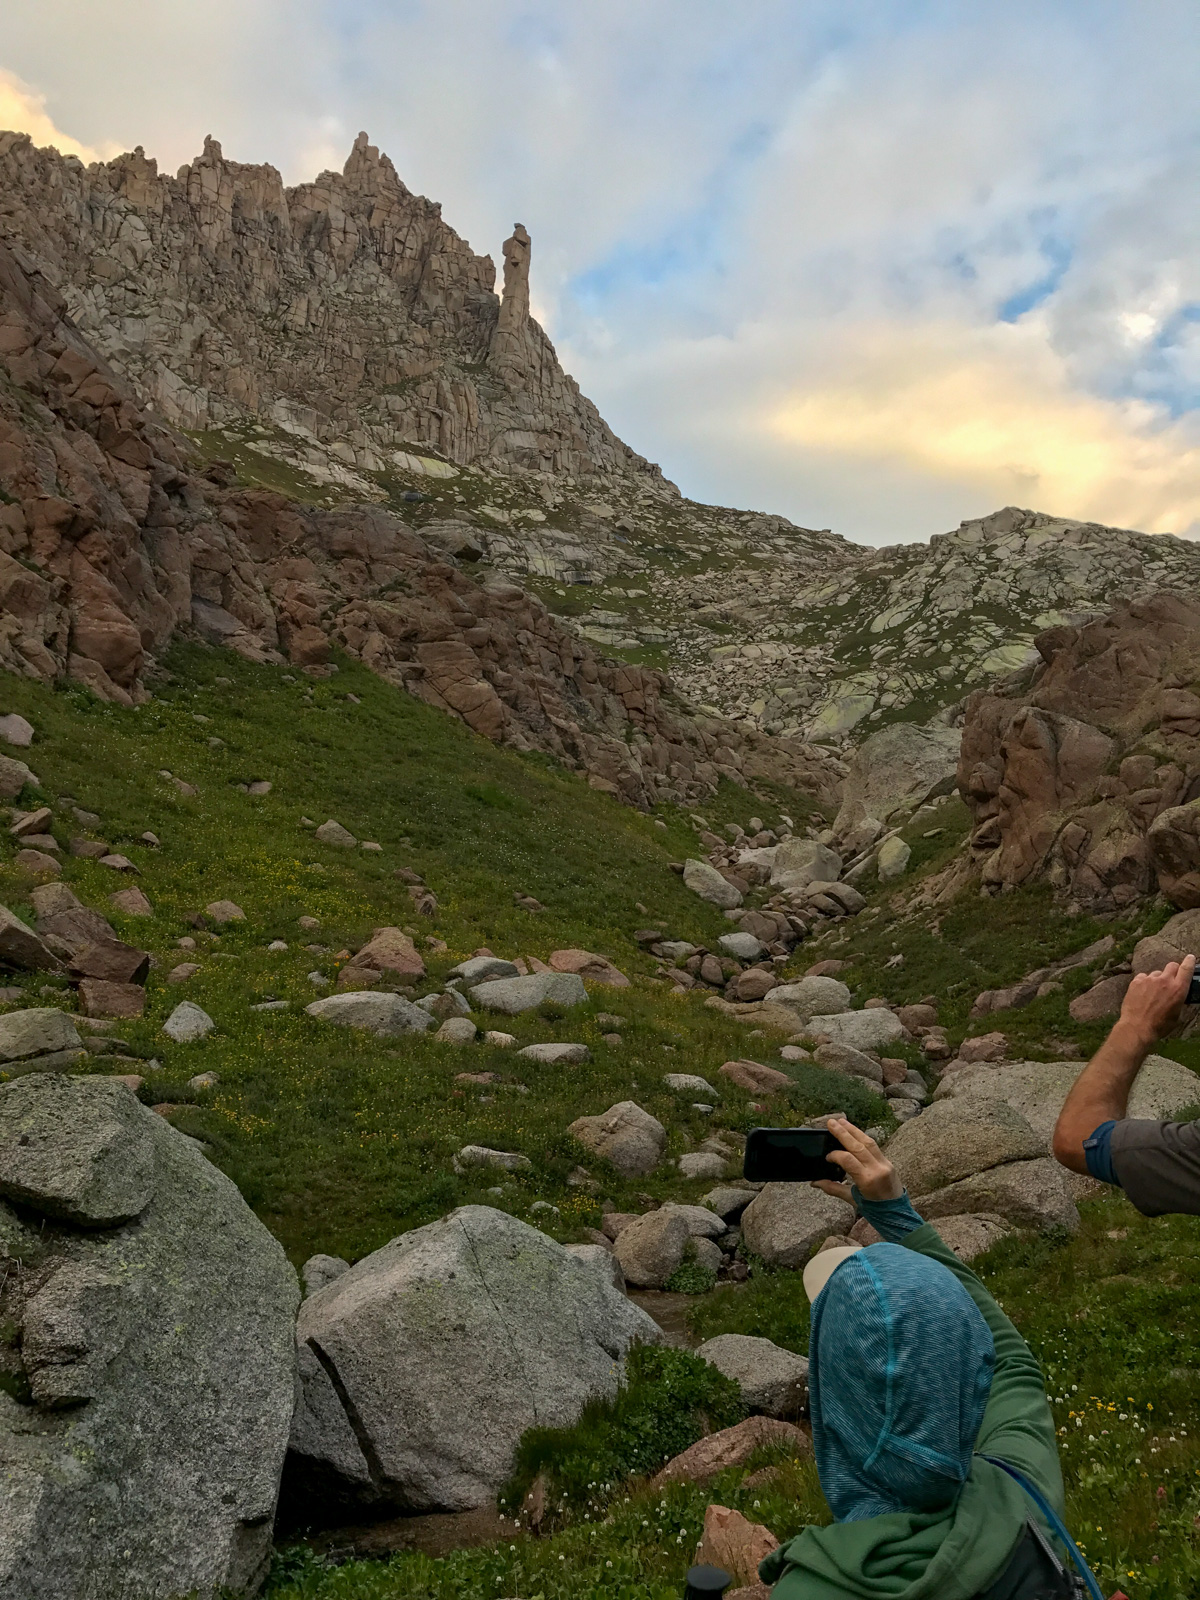
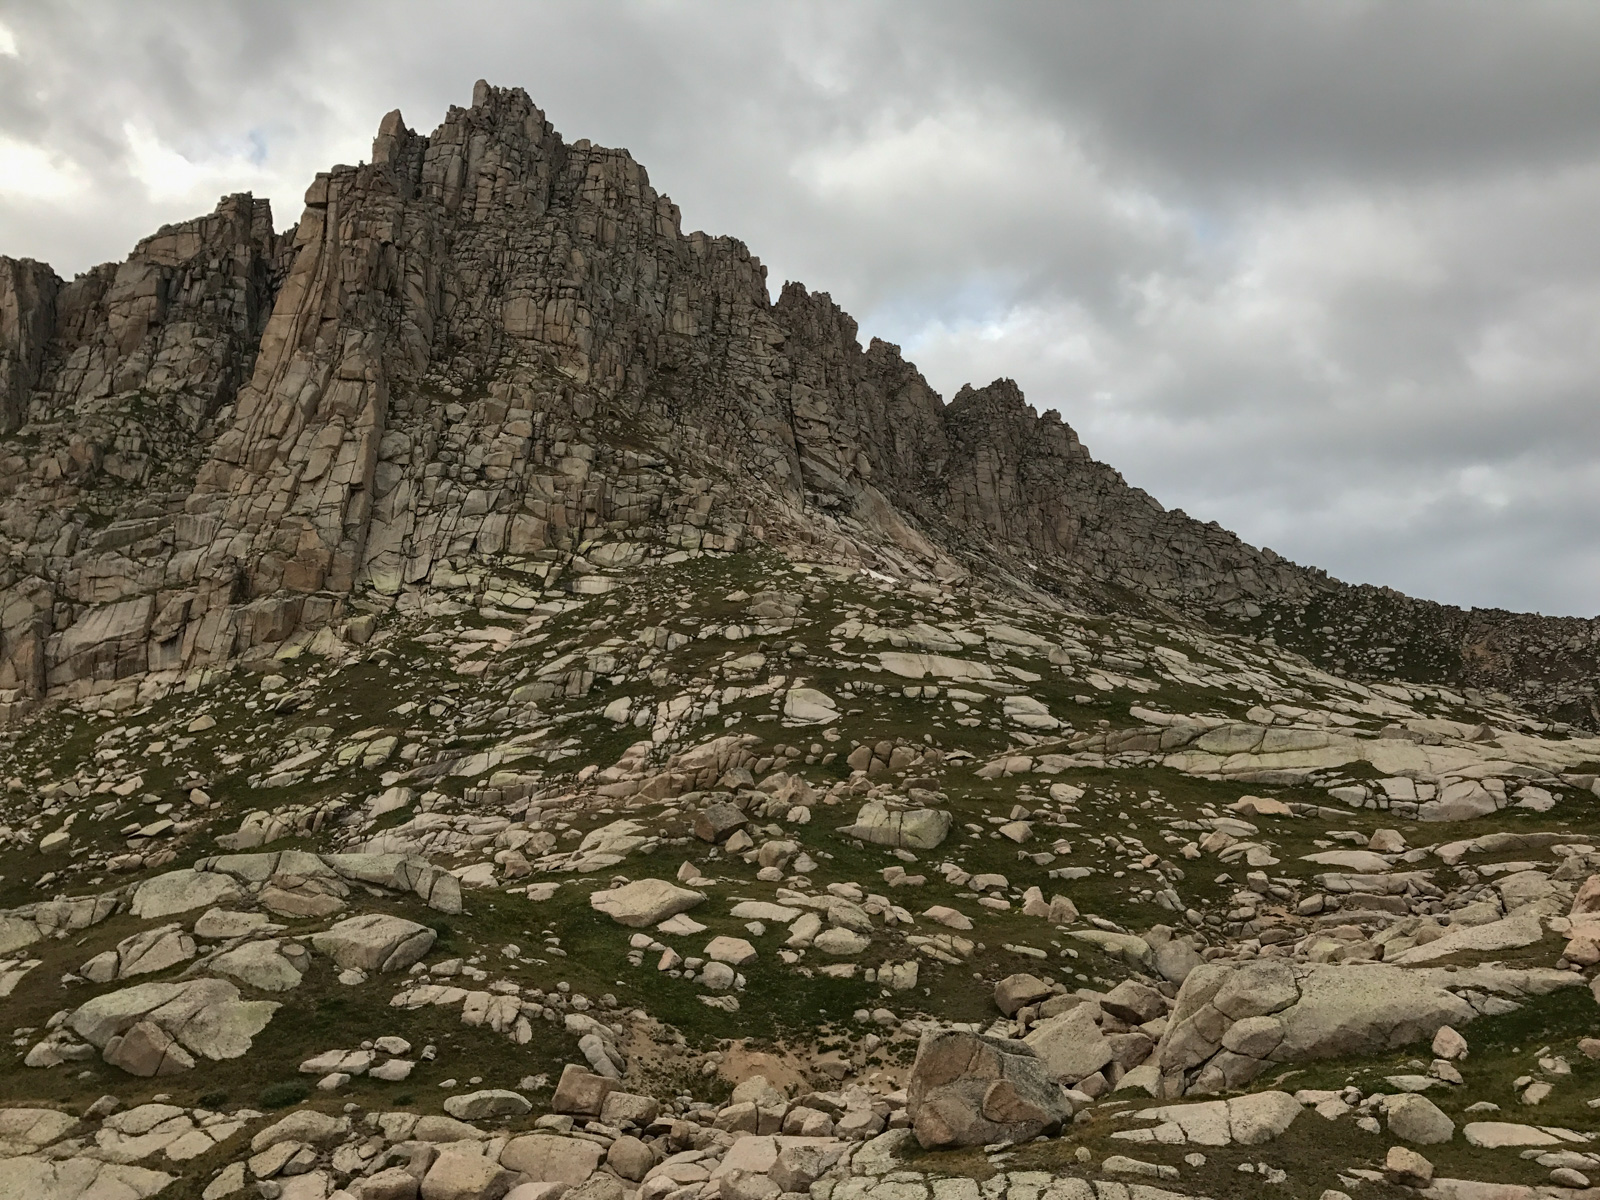
The sight of Thunder Pyramid above us was certainly sobering. Clouds were already forming to the north and we felt like the hardest parts were still yet to come. We knew the next step was to identify a steep gully of talus and follow it more or less to the base of the famous white gully. We decided on the gully to the left of the really large one filled with junky talus.
The talus was not too terrible or awful, but it was certainly made of the same garbage Elk Mountains stuff we had grown distateful of on Maroon and Pyramid in previous climbs. I personally found it quite inviting compared to my experience on Cathedral Peak!
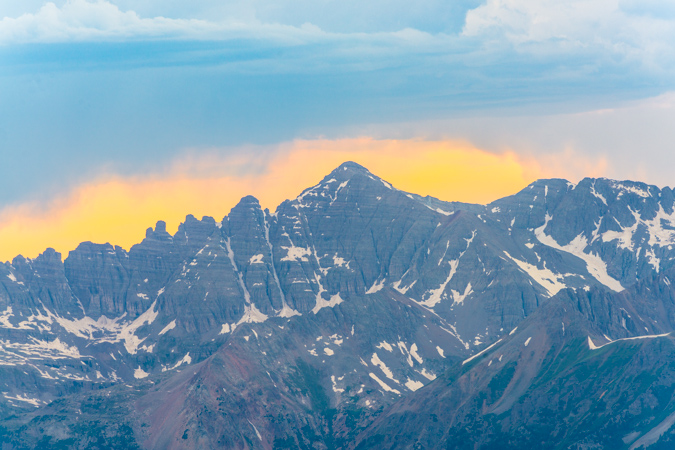
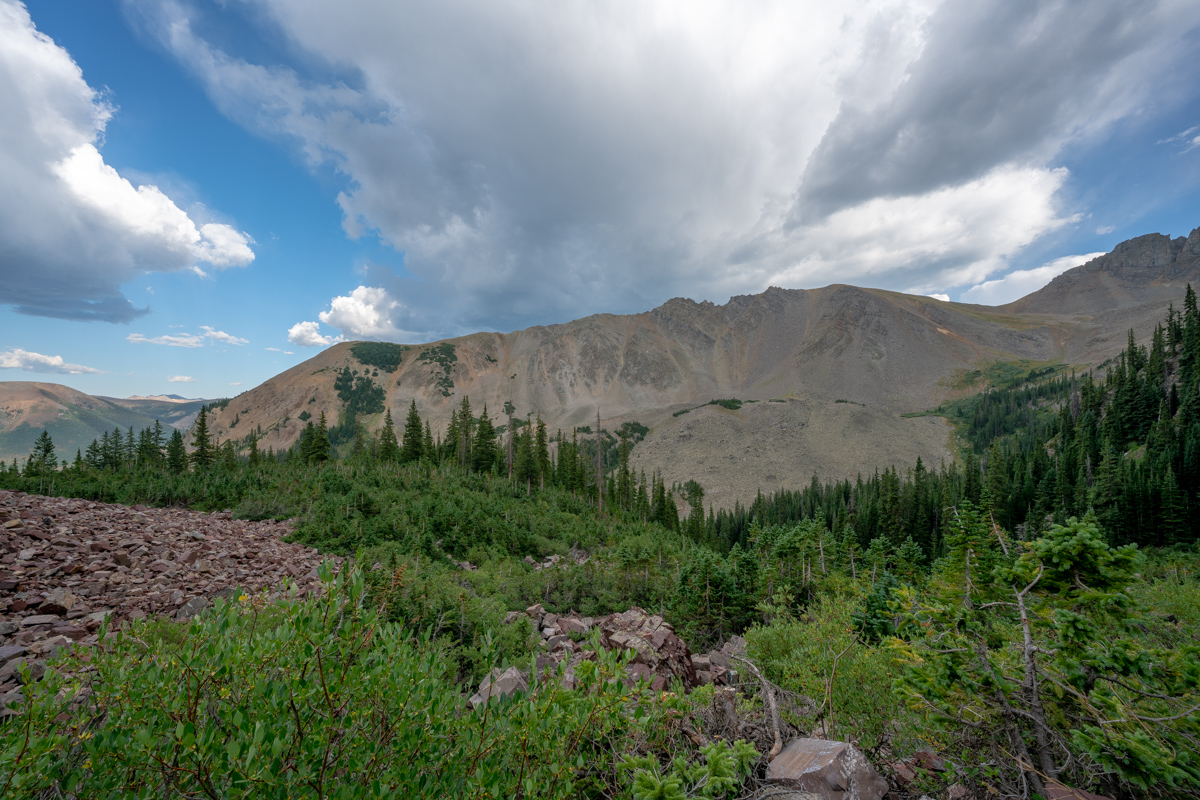
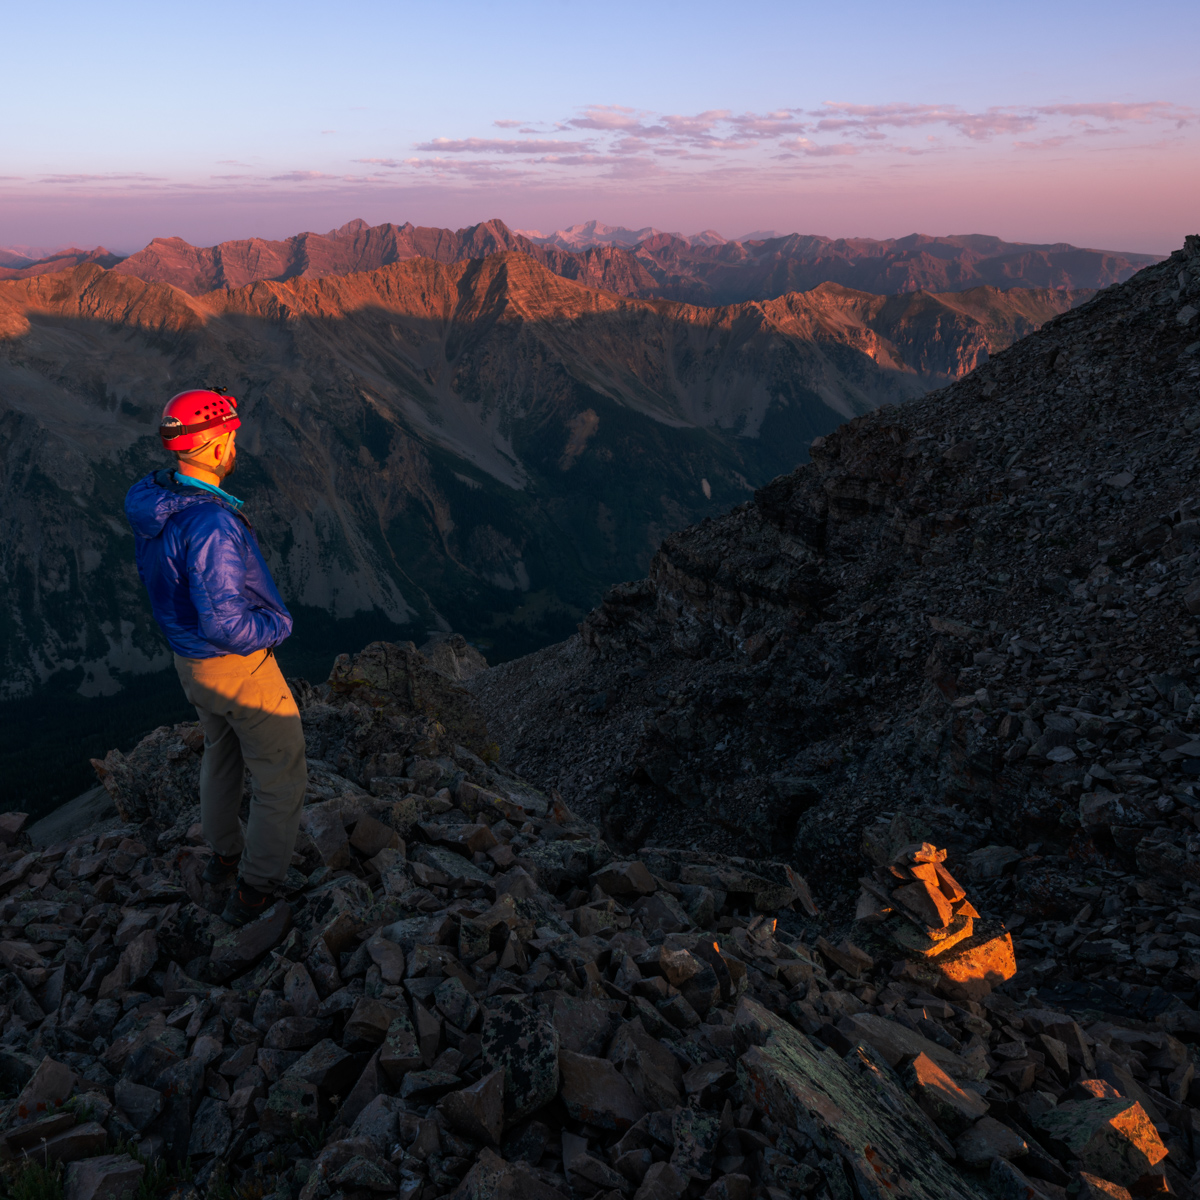
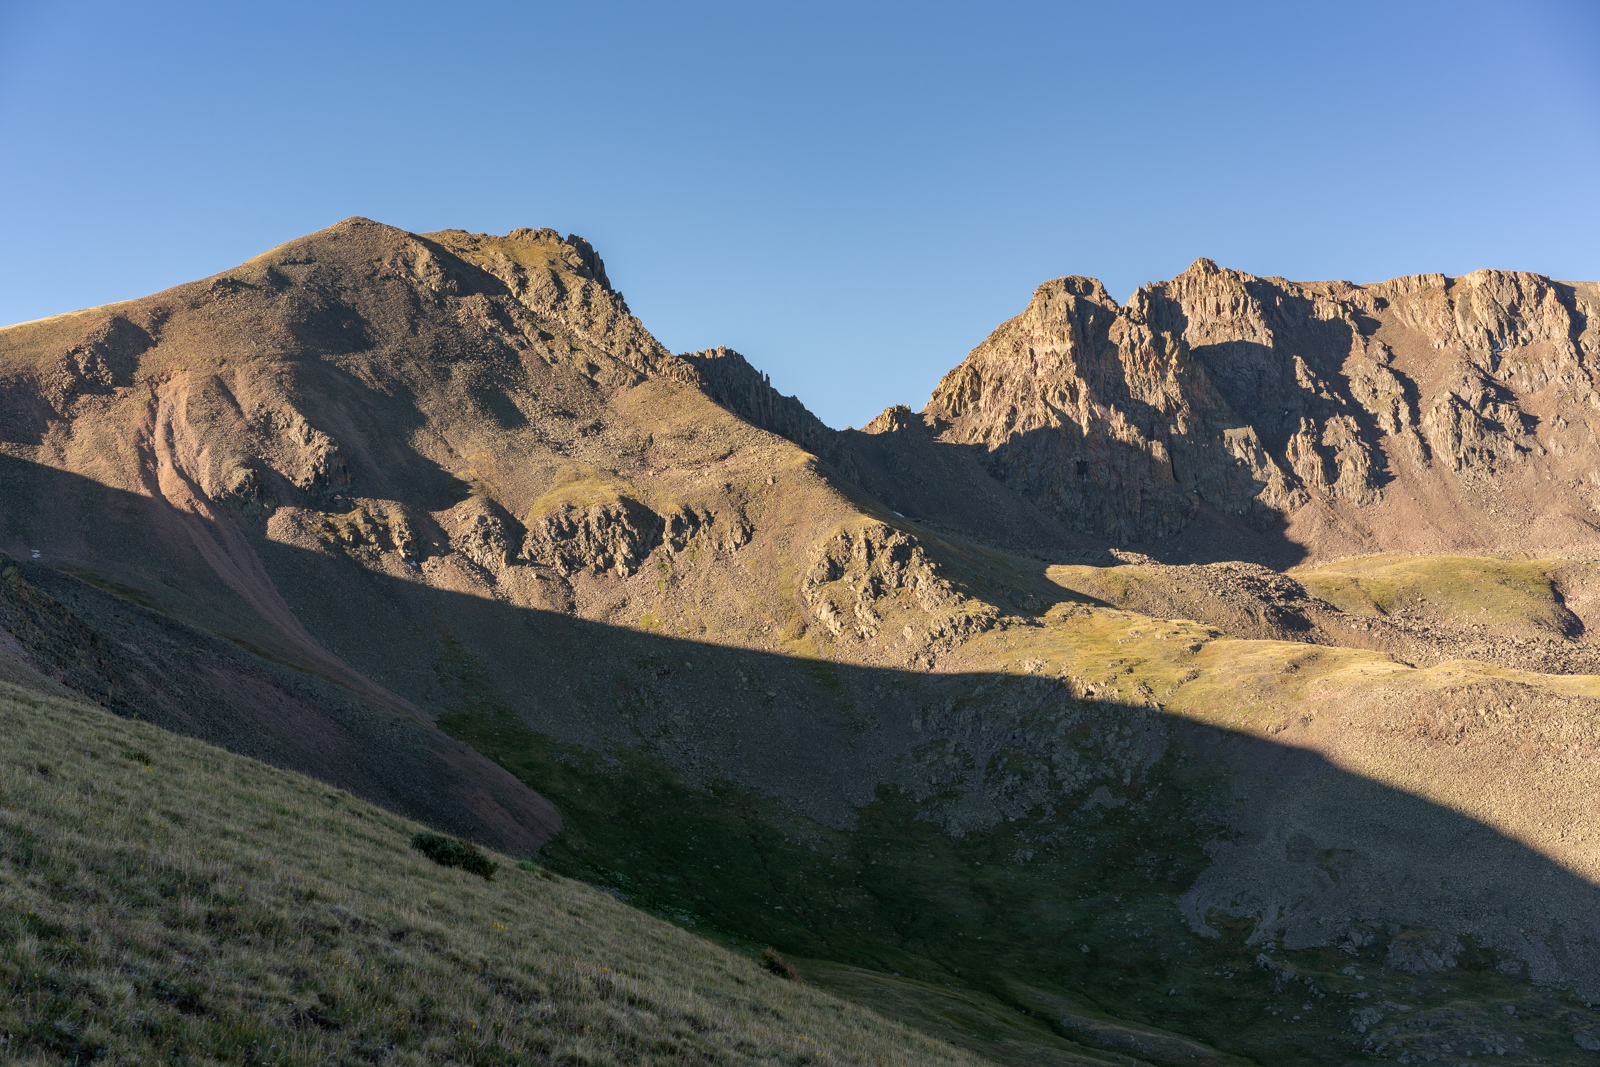
As we ascended the gully, the light over on Buckskin Benchmark to the northwest was looking quite fine!
And naturally my gaze was constantly drawn by the Maroon Bells. What a magnificent pair of peaks to be able to stare at throughout the day.
Silas was armed with cell phone and Spot GPS, and I was armed with my Sony A7R2 and my cell phone equipped with Gaia GPS. Technology has really come a long way in a short amount of time since I started documenting these climbs!
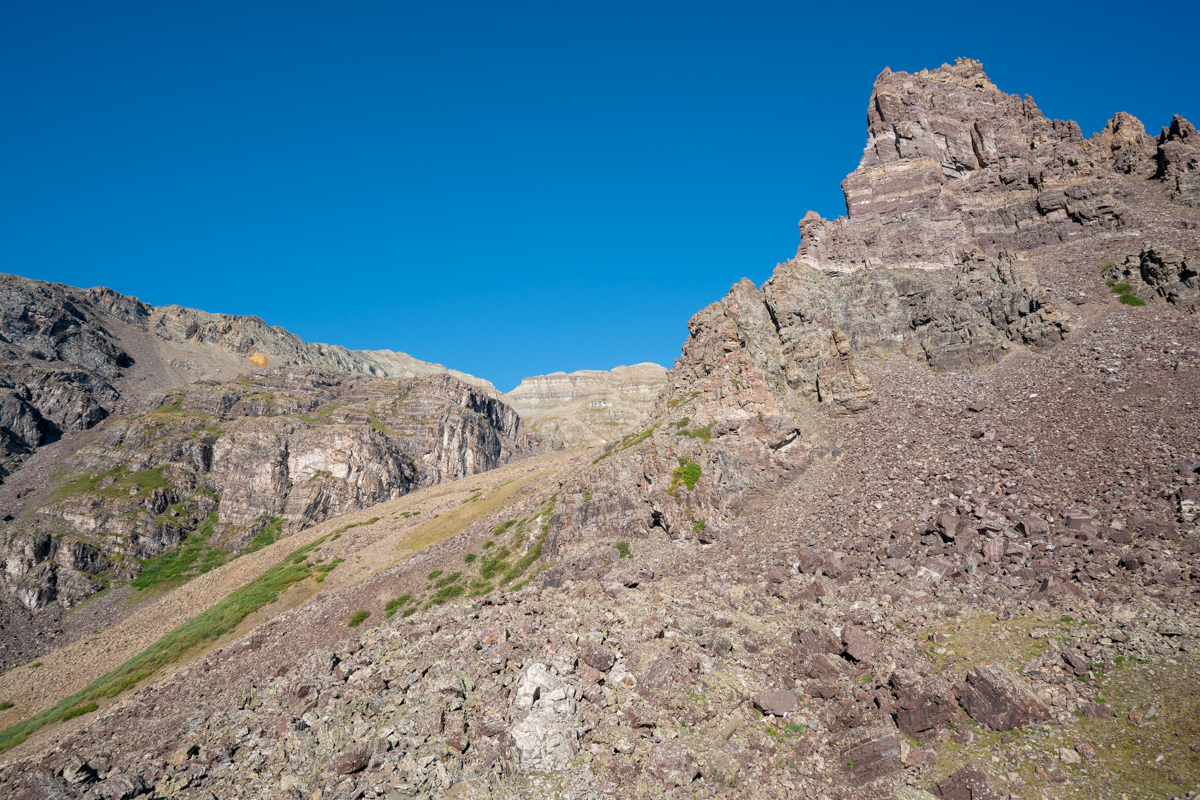
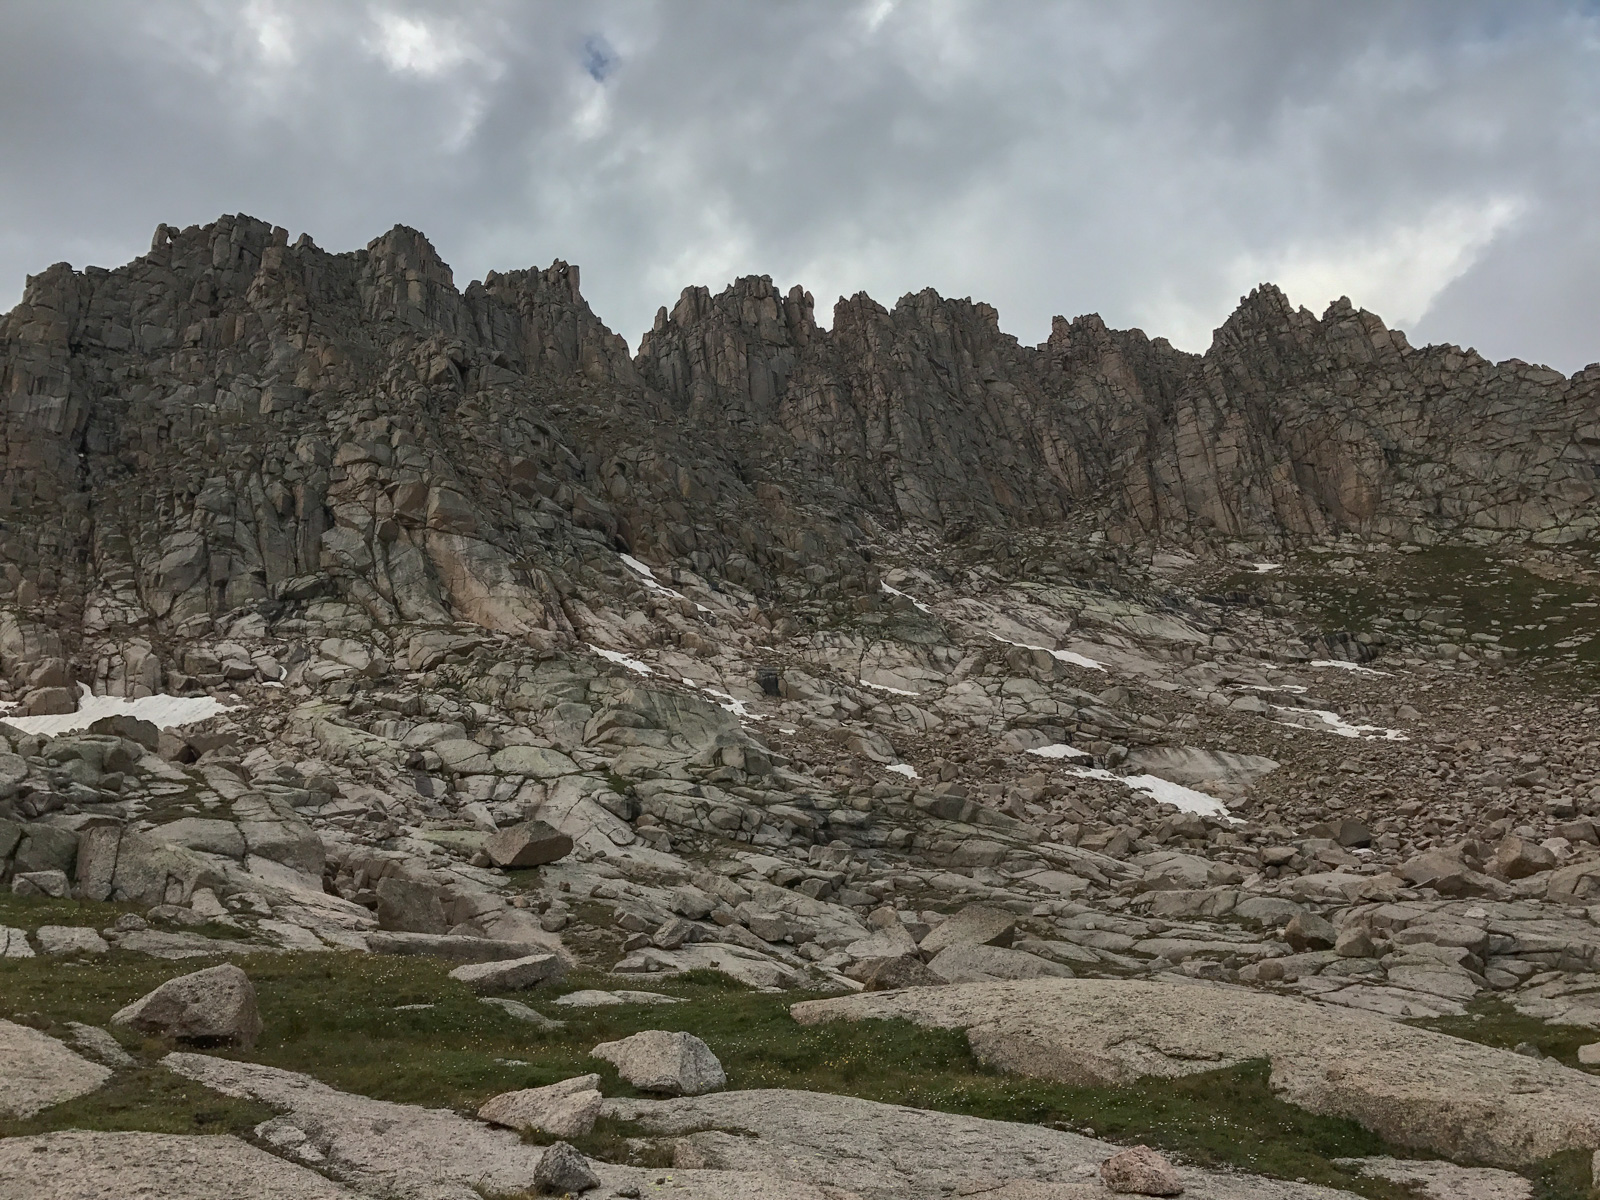
As we climbed up into the gully, the views above Len Shoemaker Ridge were getting really nice. I don't love climbing on the rocks in the Elks, but damn they make for great scenery!
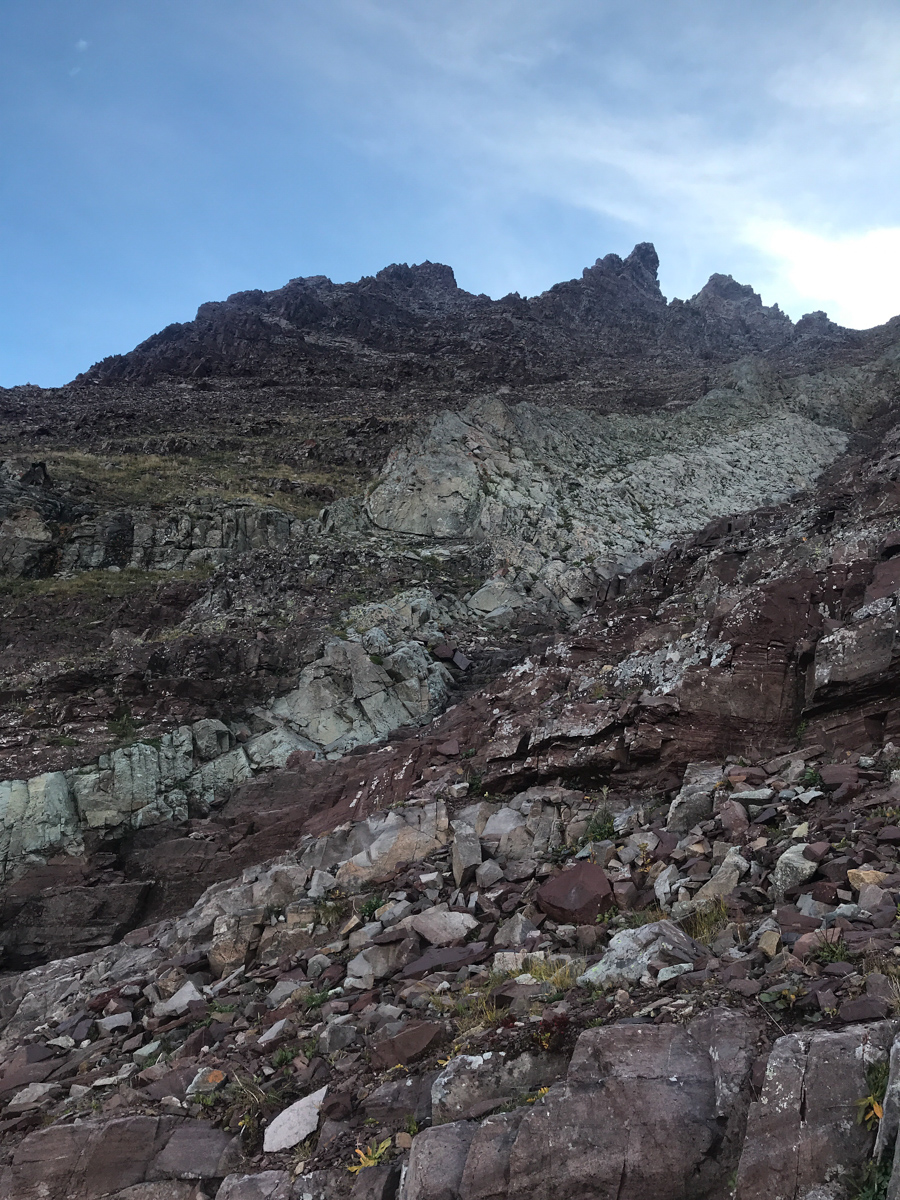
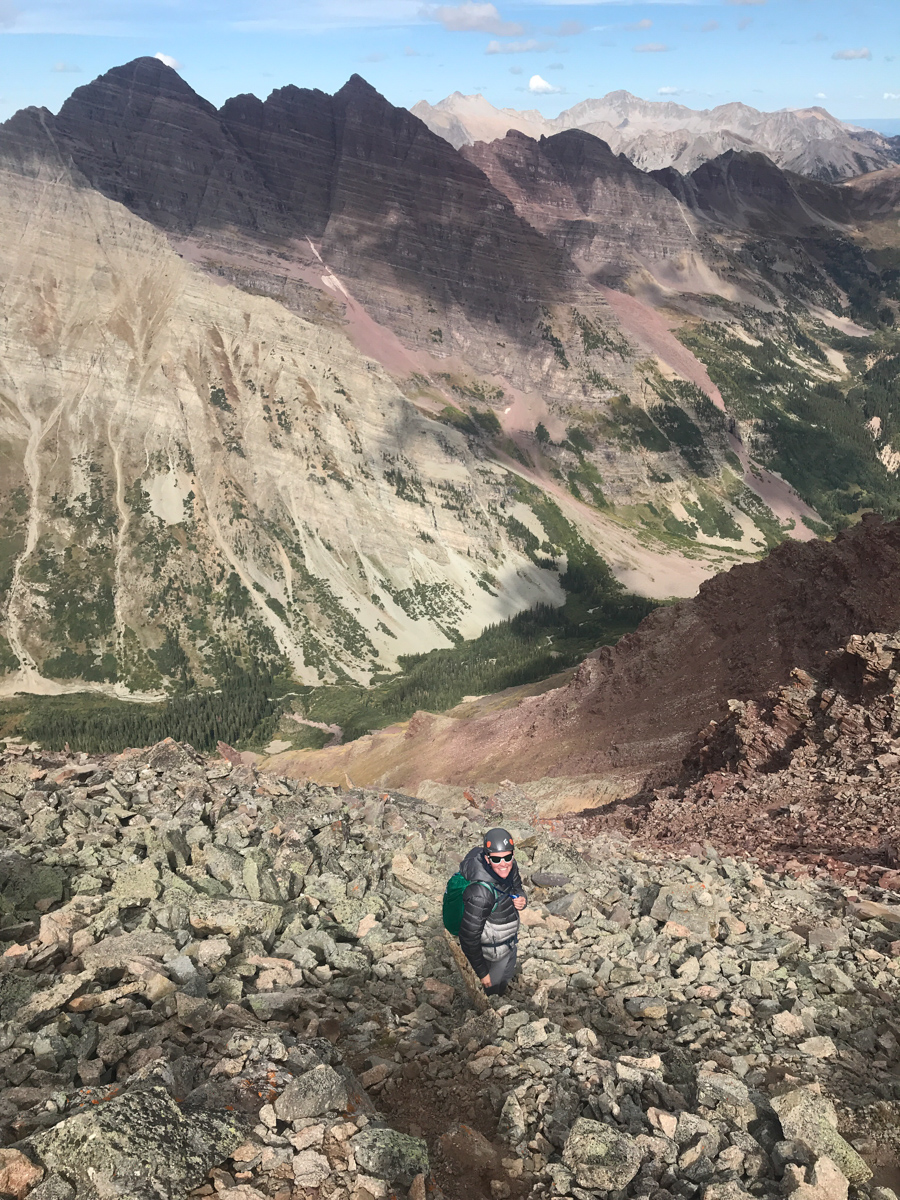
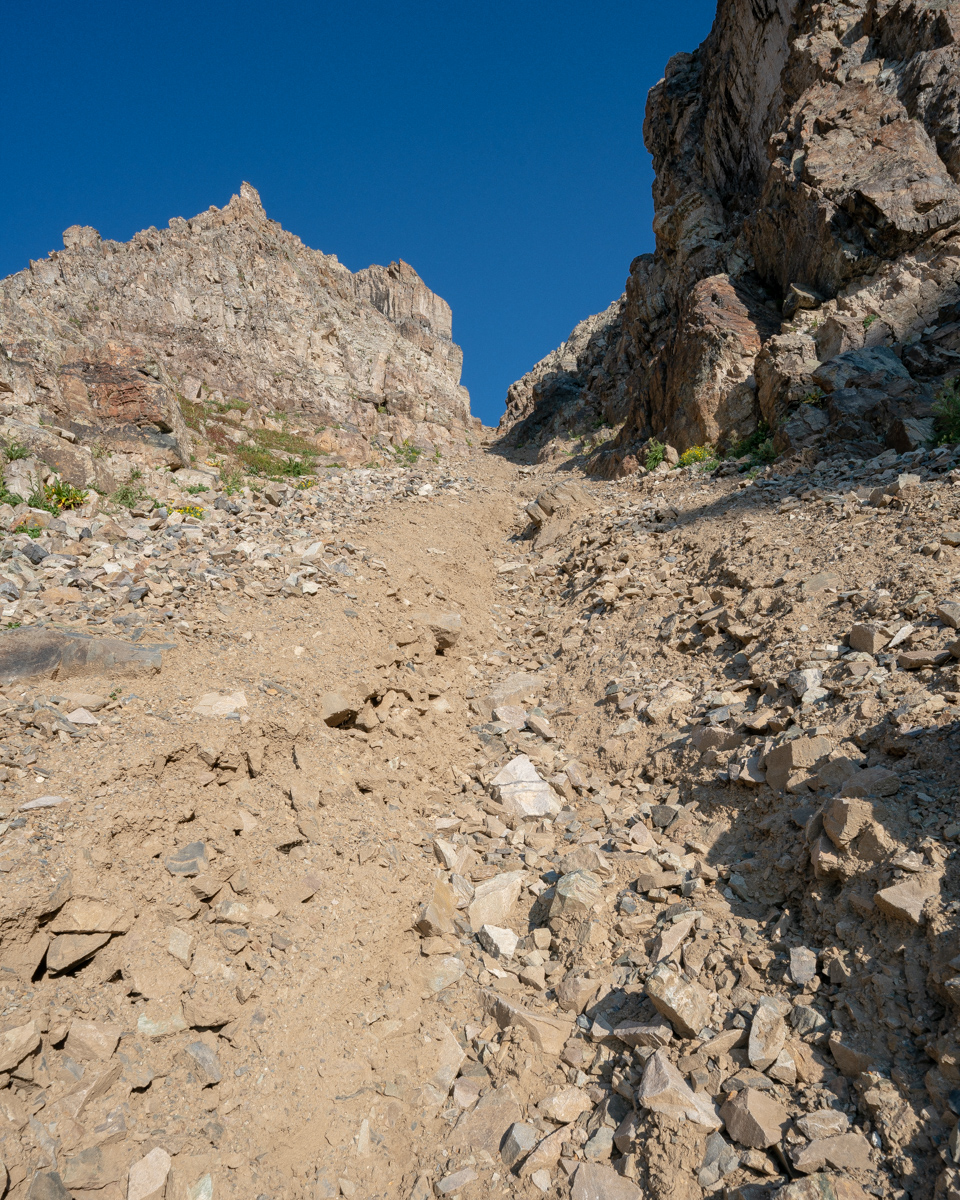
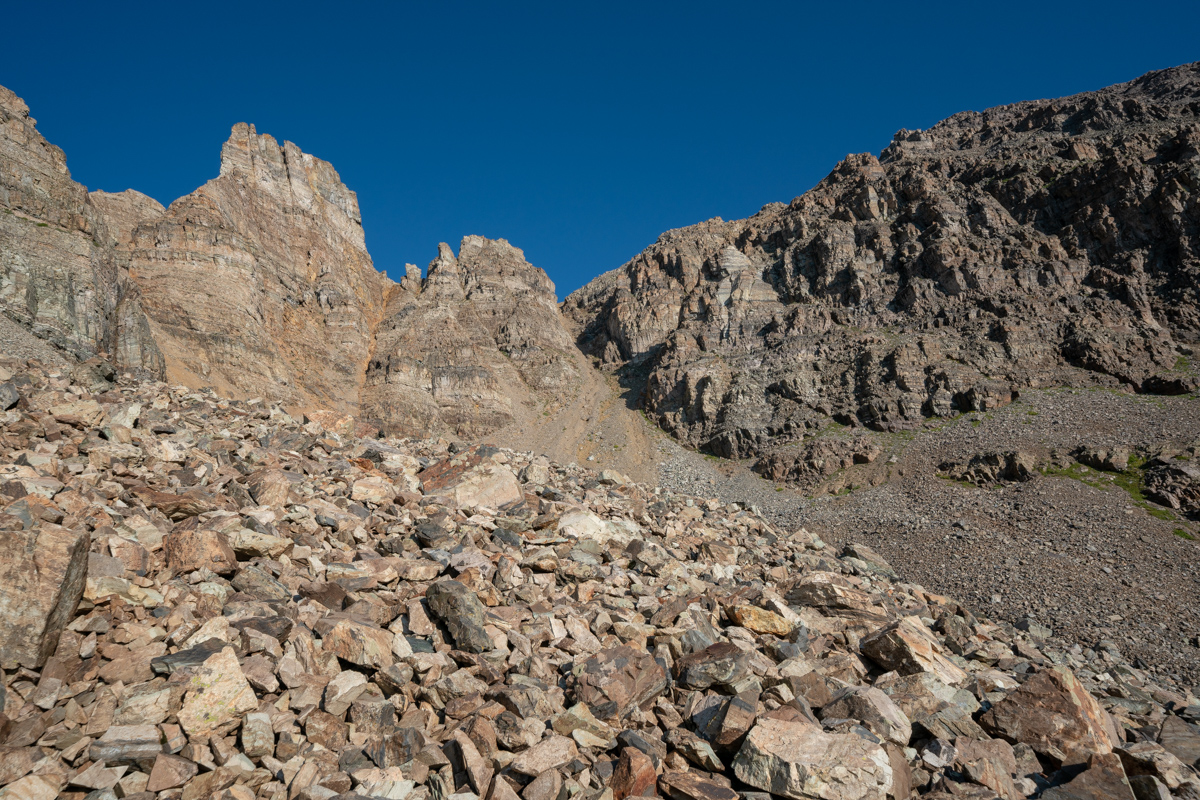
Below you can see another good view of the gully we chose to climb up, which I felt was very solid class 3 climbing all the way up until we turned off to the left.
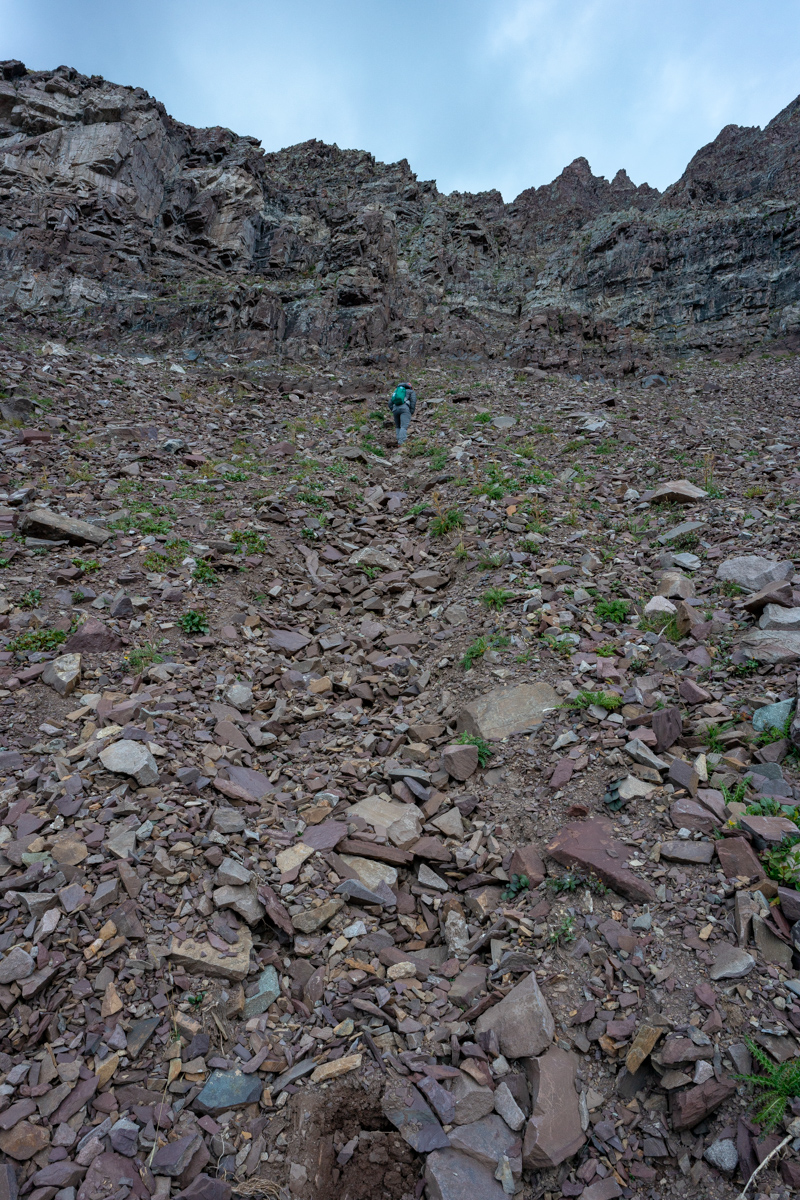
More views of the class three climbing...
And finally the sun hits the Bells and makes me a happy dude.
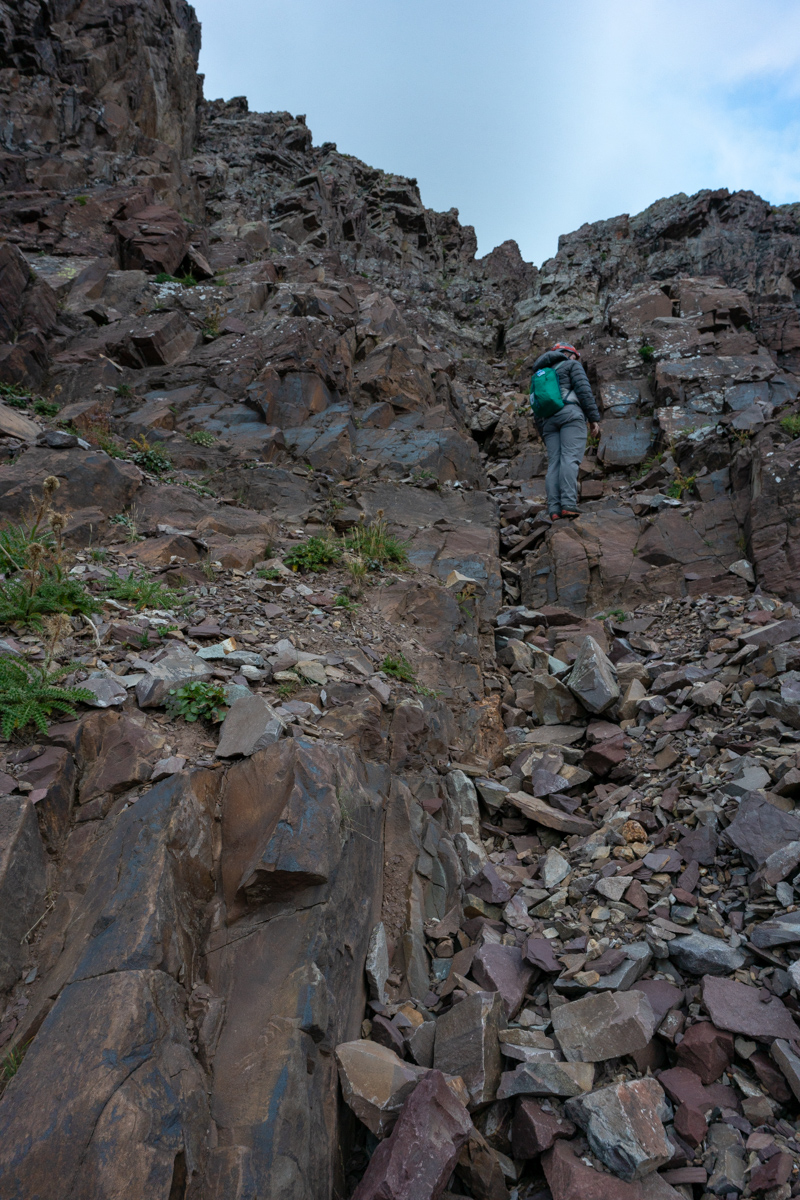
I took advantage of the great views of the Bells to showcase the terrain down below us in the gully. I think this photo does a good job of showing you the complexity of the rock in this section.
I also found myself quite enamored by Bellview Mountain, which is seen left (south) of the Bells in the photo below. I really would like to climb that one someday. I bet its an incredible vantage of the Bells; aptly named indeed.
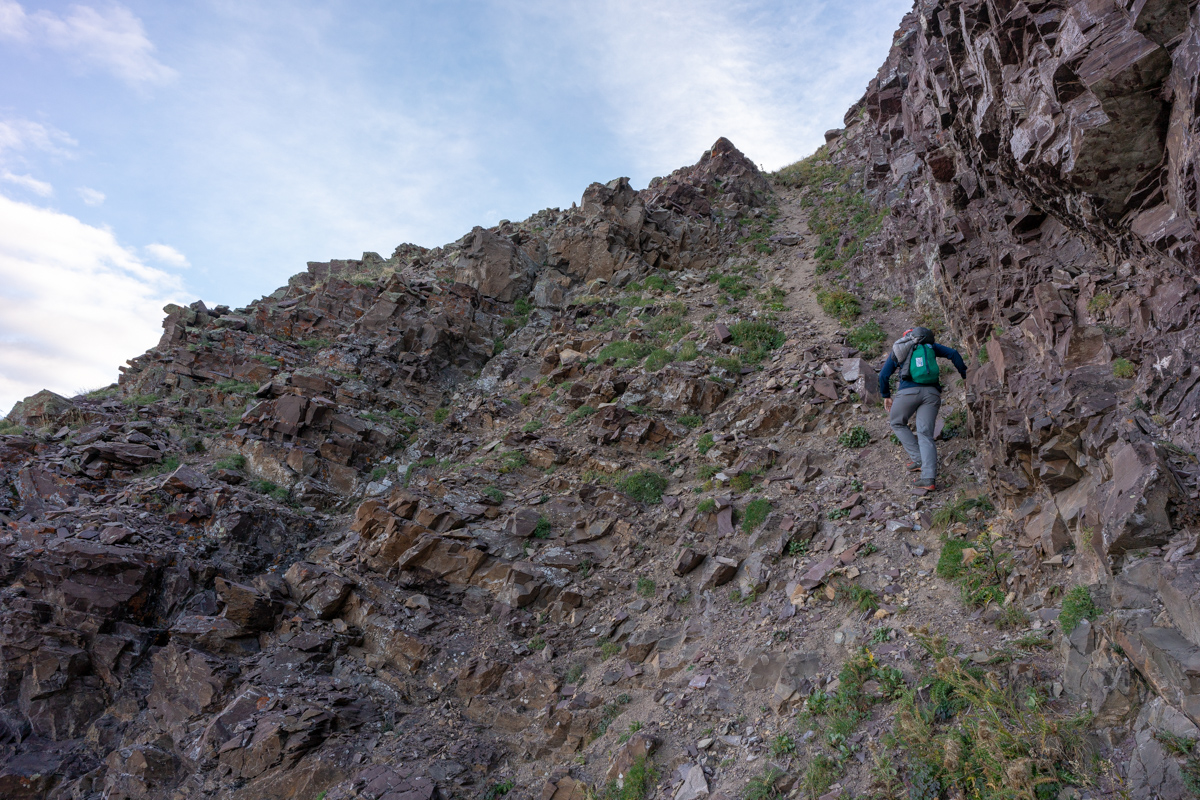
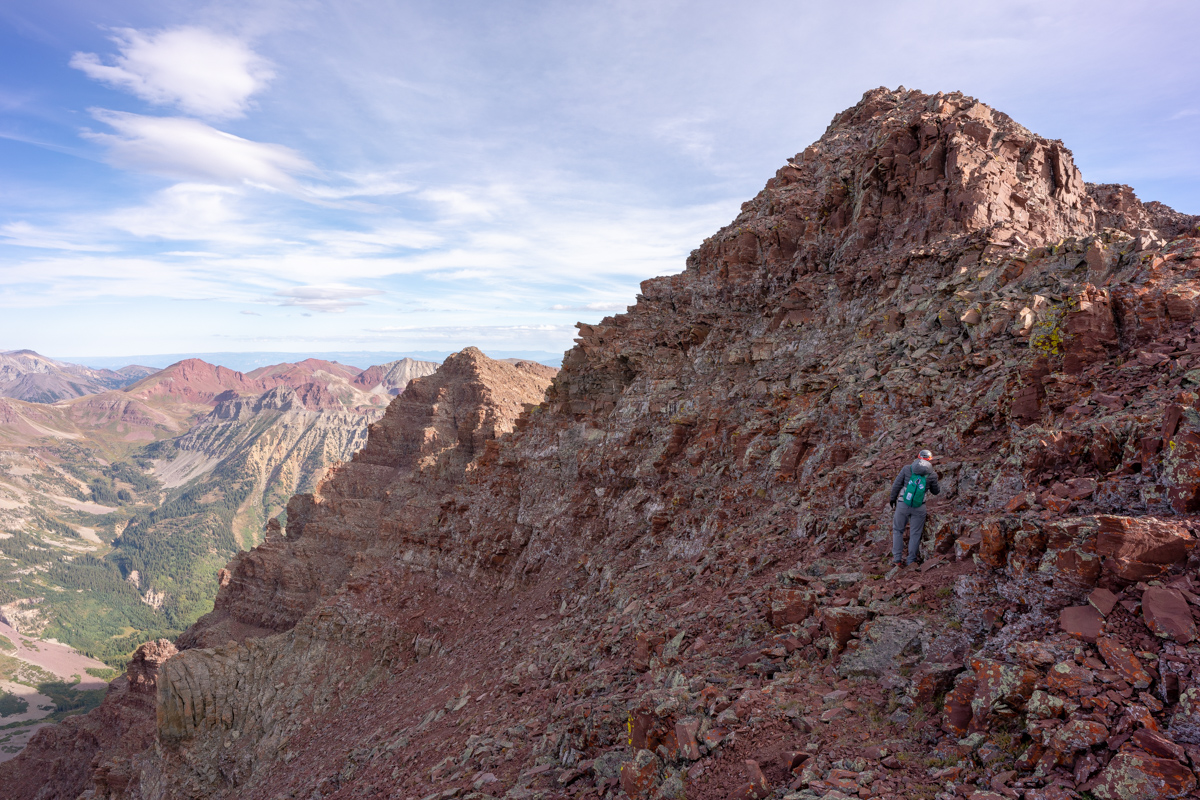
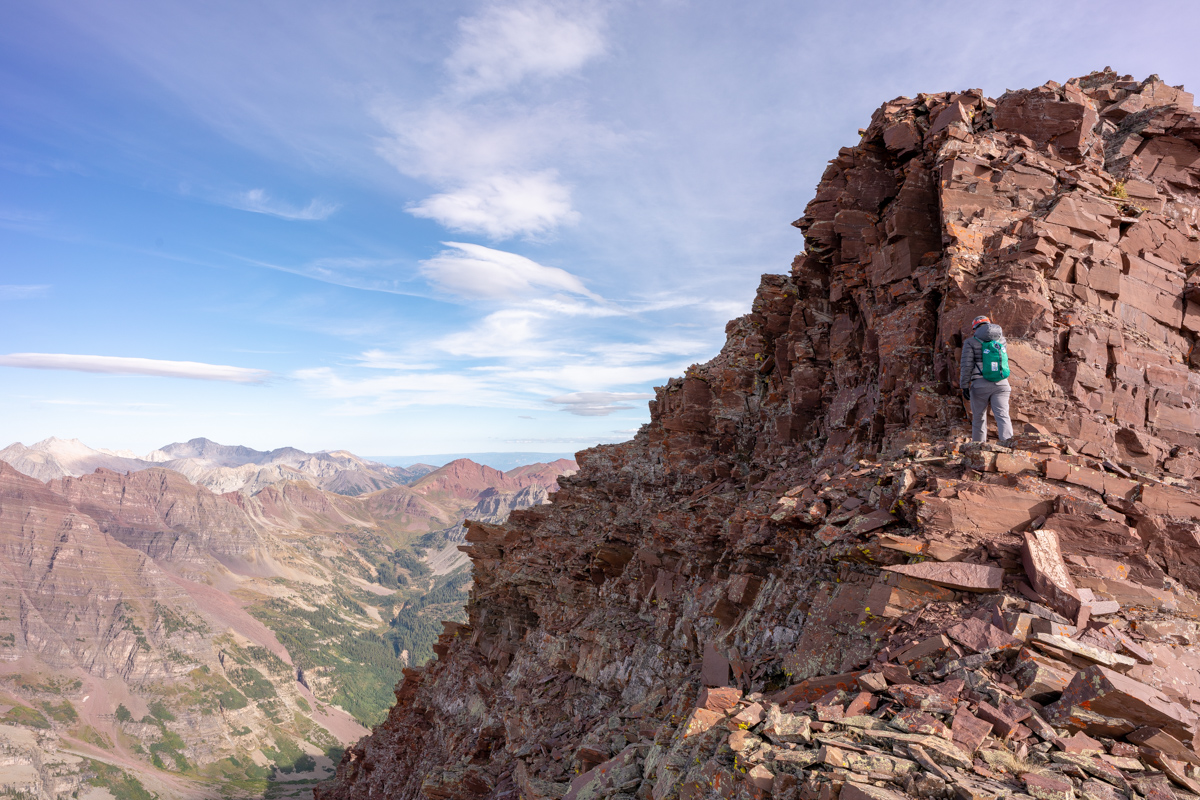
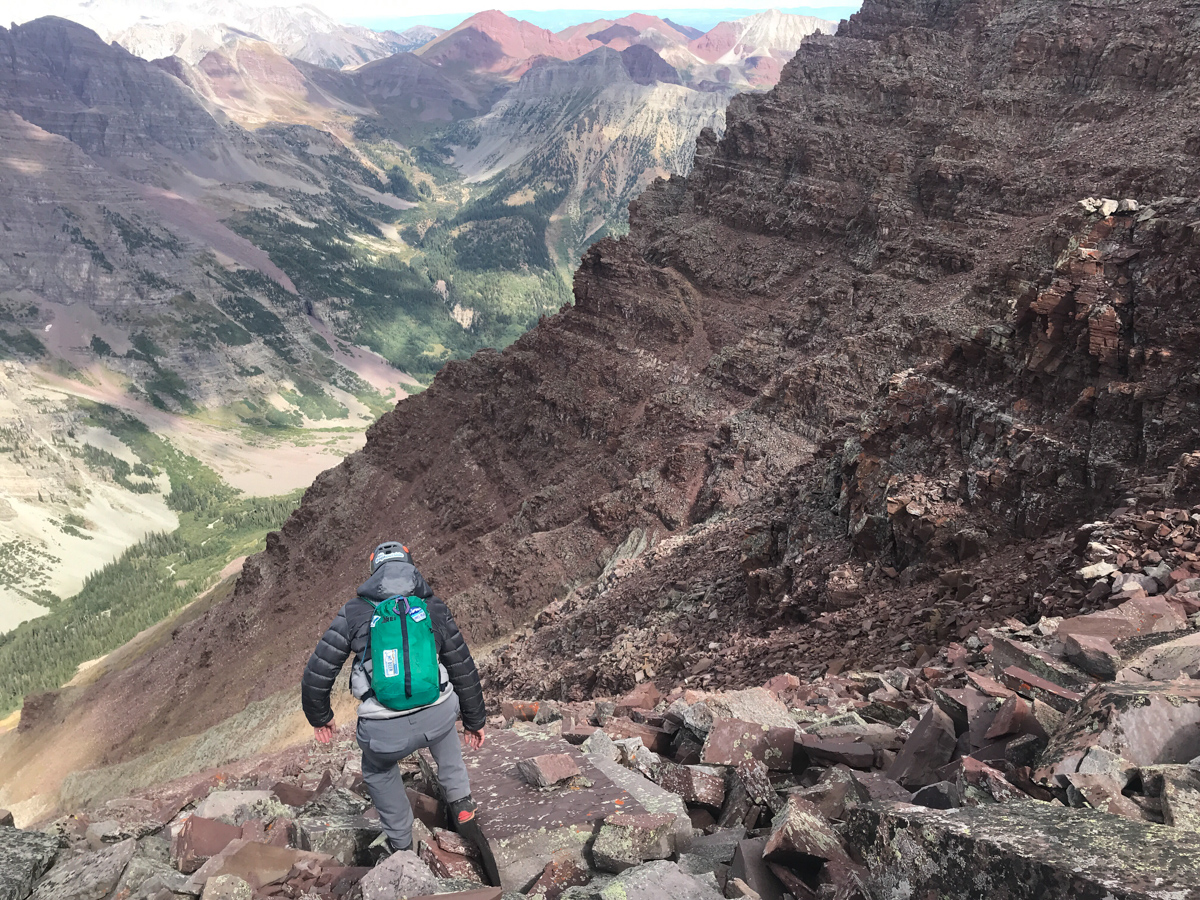
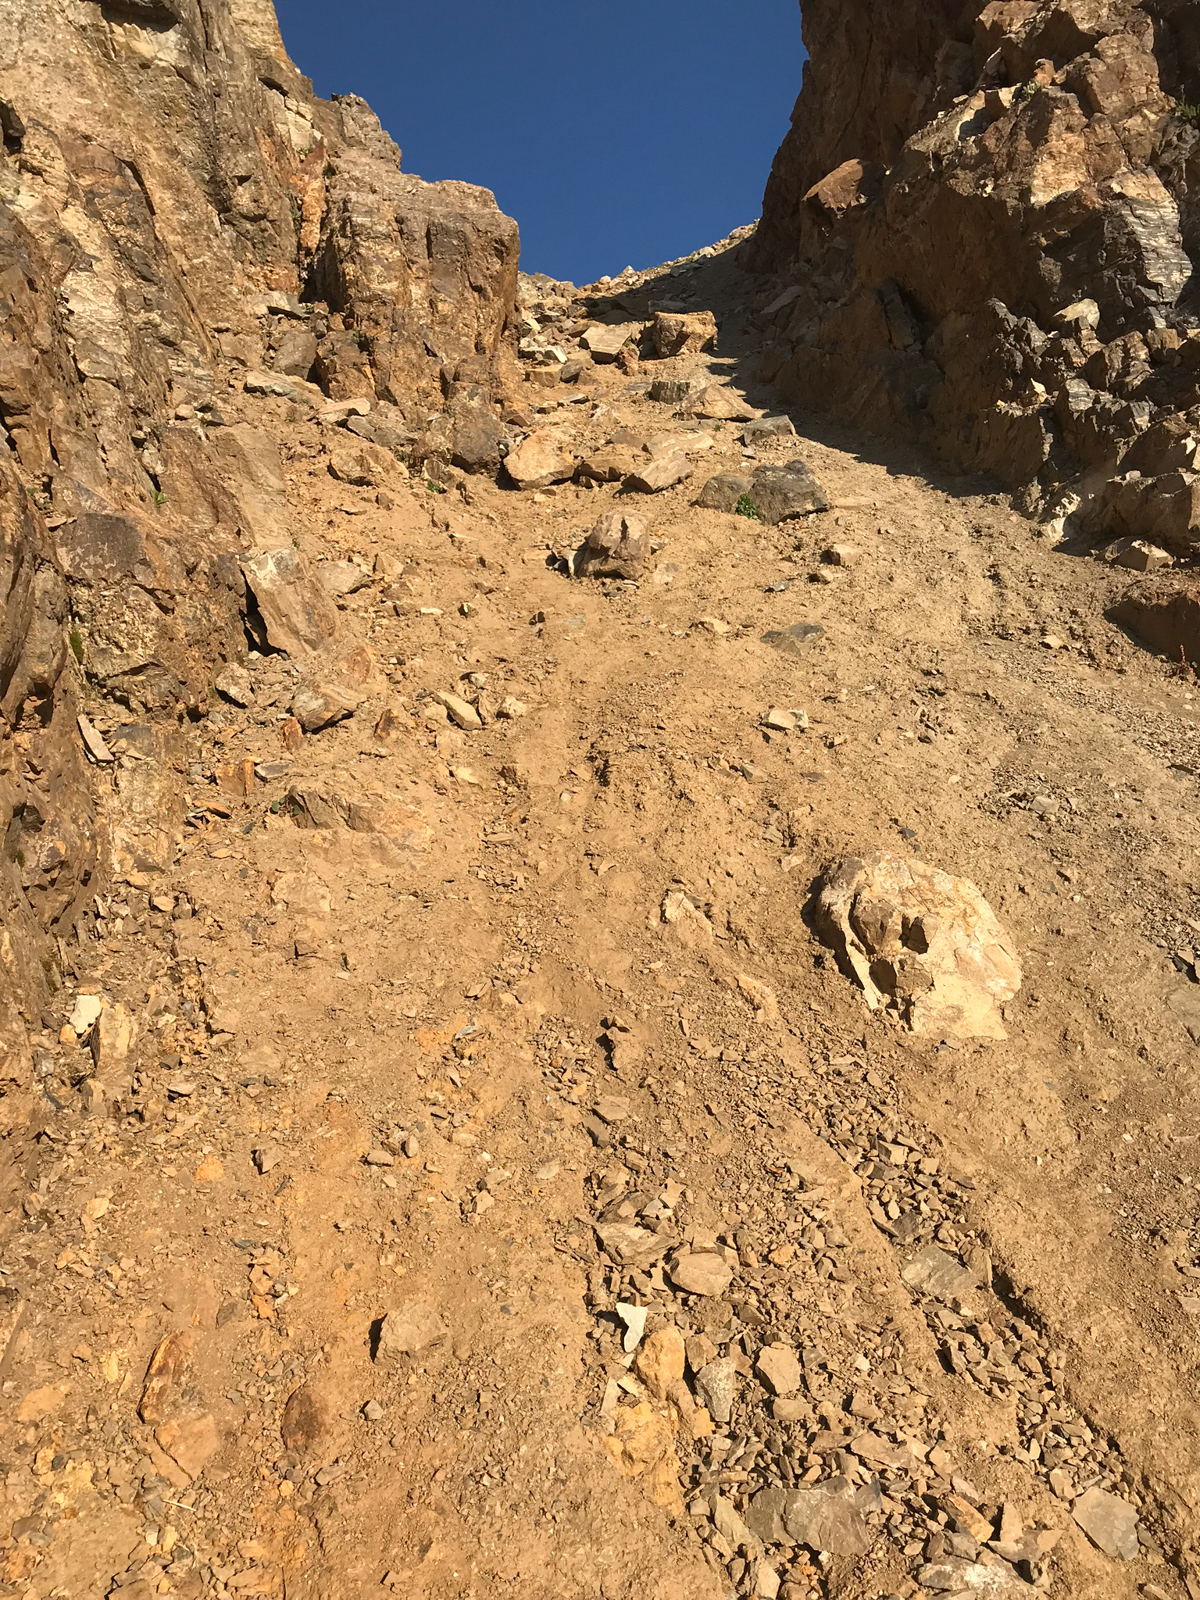
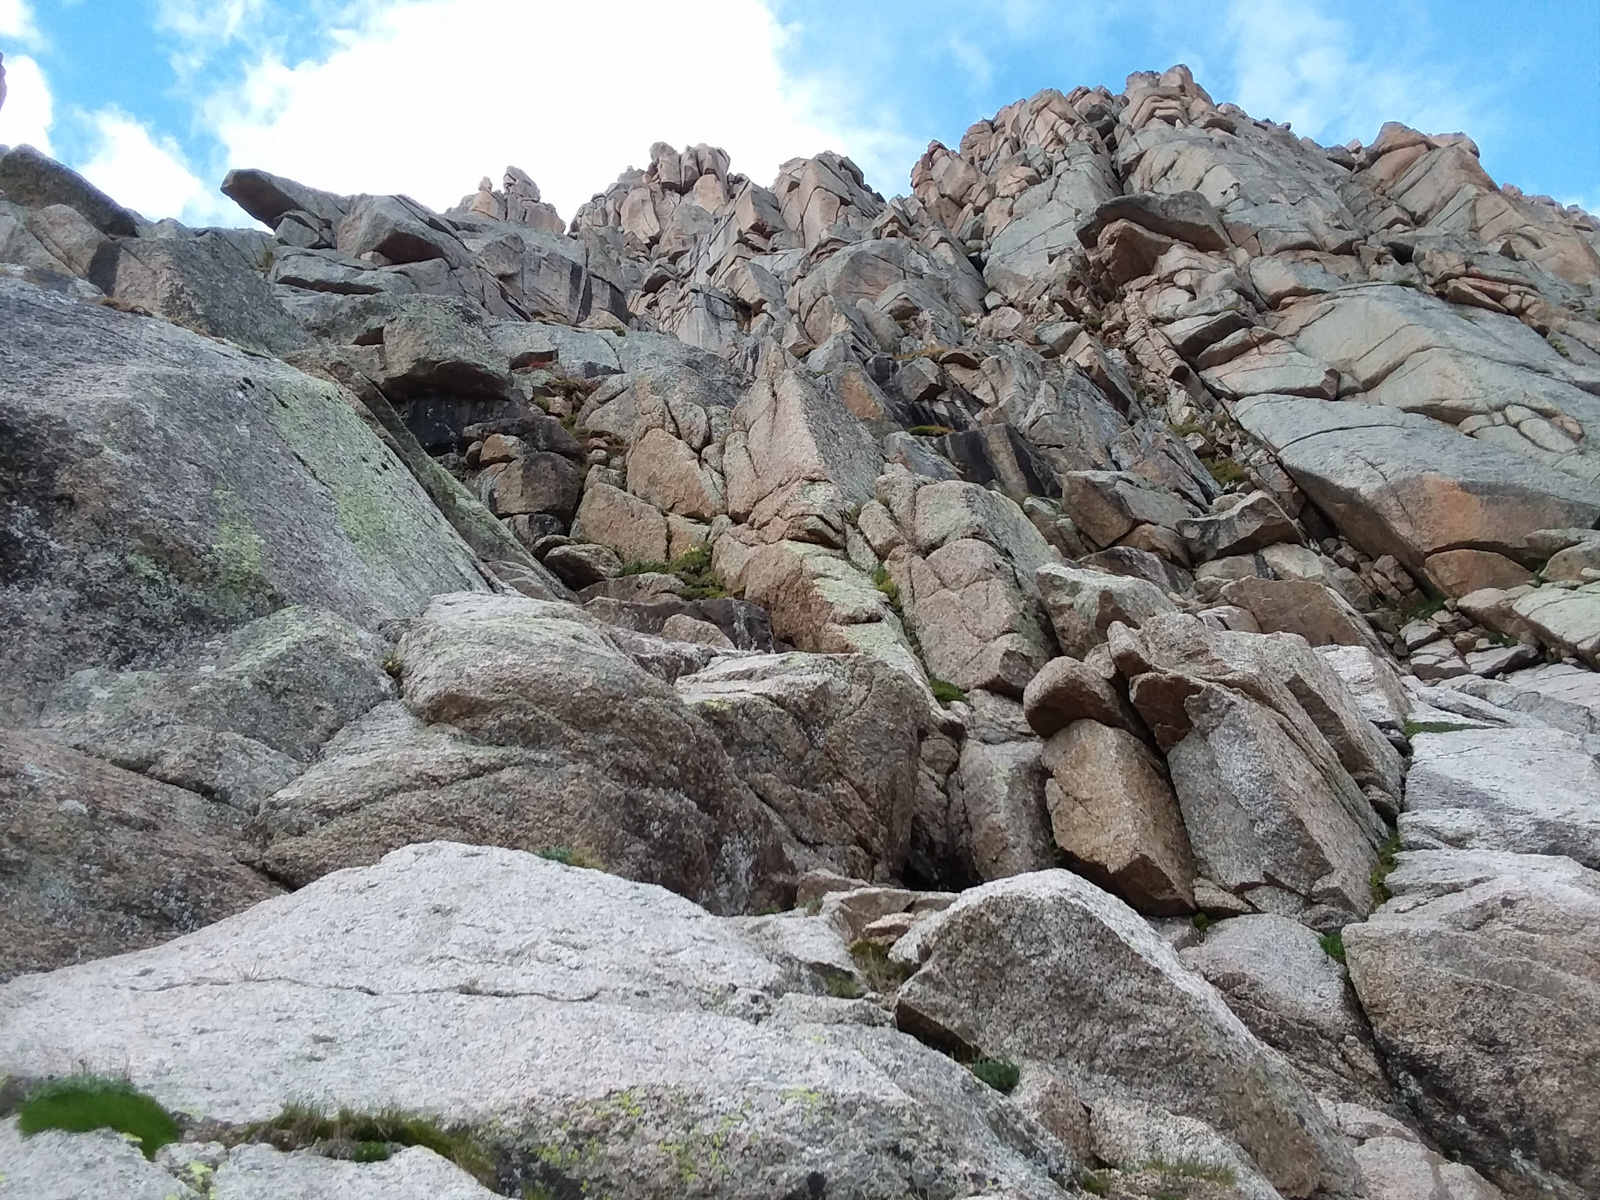
Once we reached the top of this gully, we saw a noticable trail heading left up a very steep dirt and rock slope below the next cliff band. We decided to take it. I knew it would probably lead to the base of the white gully. The trail is what I describe as a "climber's trail," aka - not very solid, very loose, and very steep!
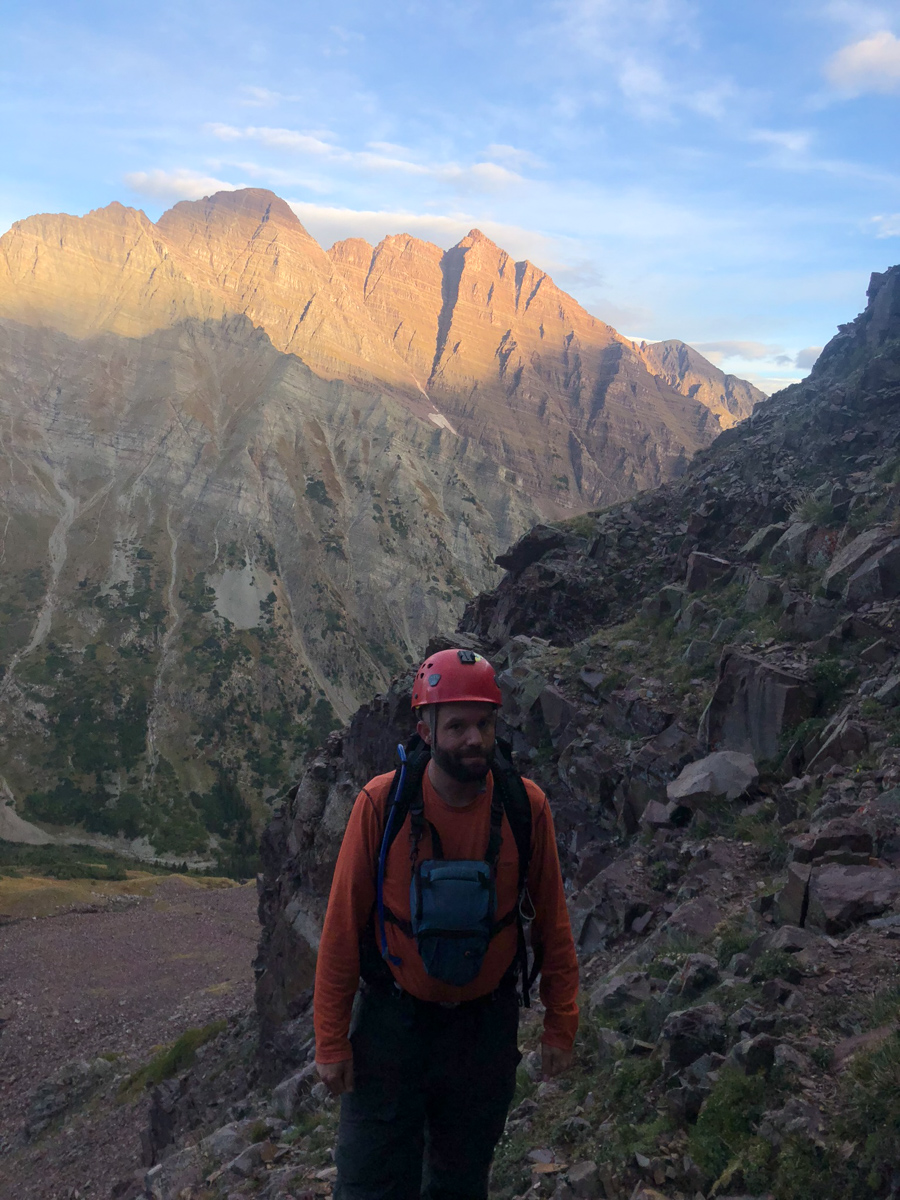
After reaching the top of this section, our view of the Bells really opened up and I could not have been more happy with it.
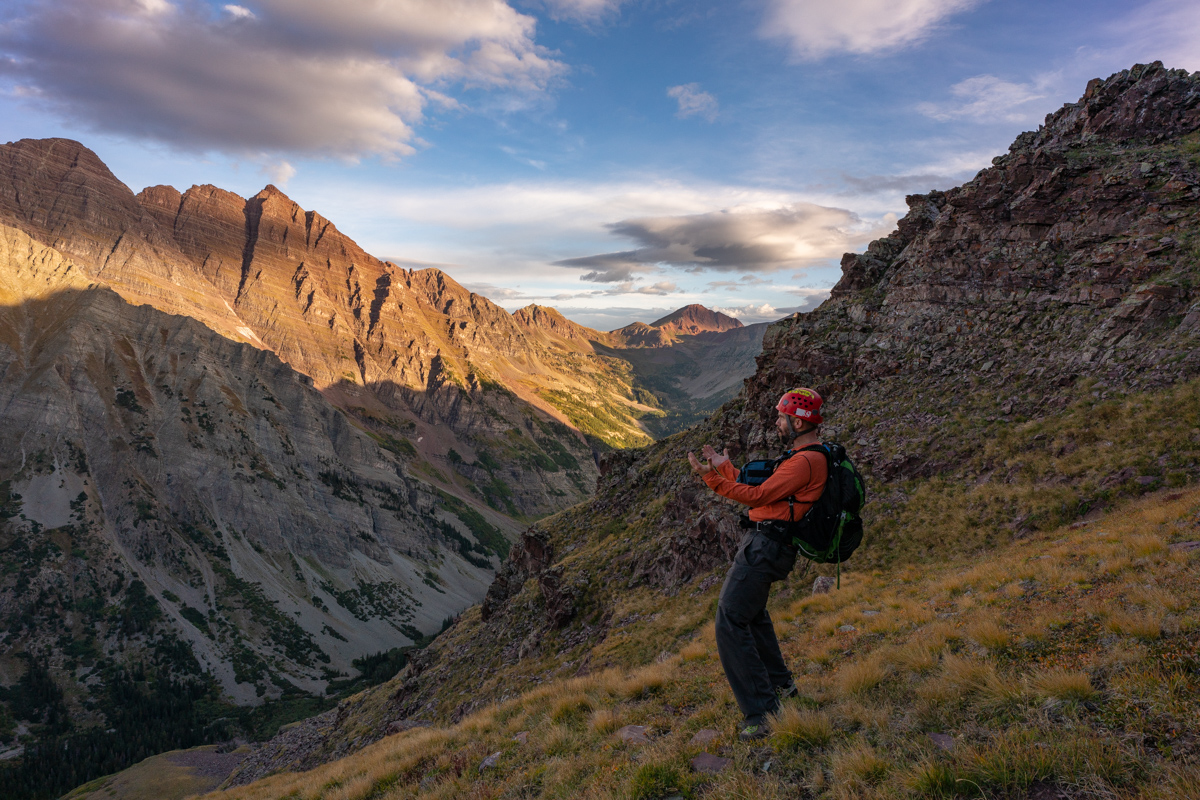
Indeed, the famous white gully came into full view and revealed our future. I was excited to reach this section finally. There was a decent trail all the way up to the base of the gully from here.
As predicted, the white gully was much less daunting up close than from afar. Many of climbers warned me of the loose nature of the rock in the white gully and I was prepared for anything.
It was at this point that I decided to film the rest of the journey to the top with my GoPro Hero 4. I created a 30 minute video which is in hyperlapse format with pauses at key moments. I'm not a professional video editor nor do I have the time to edit this to give it full justice, but I figure it serves as a nice beta for folks wanting to know more about the white gully, the final segment, etc. Also, its fun for me to look back on later in life.
About halfway up the white gully, we began to get great views of all the 14ers in the area. The below shot really intrigued me. It includes Maroon, North Maroon, Snowmass, and Capitol all in one frame. Nice! By the way, I did not find the white gully to be loose at all! We chose to stay high on the left side in the white stuff and it was very solid. Once exiting the gully to the right, things get much dicier.
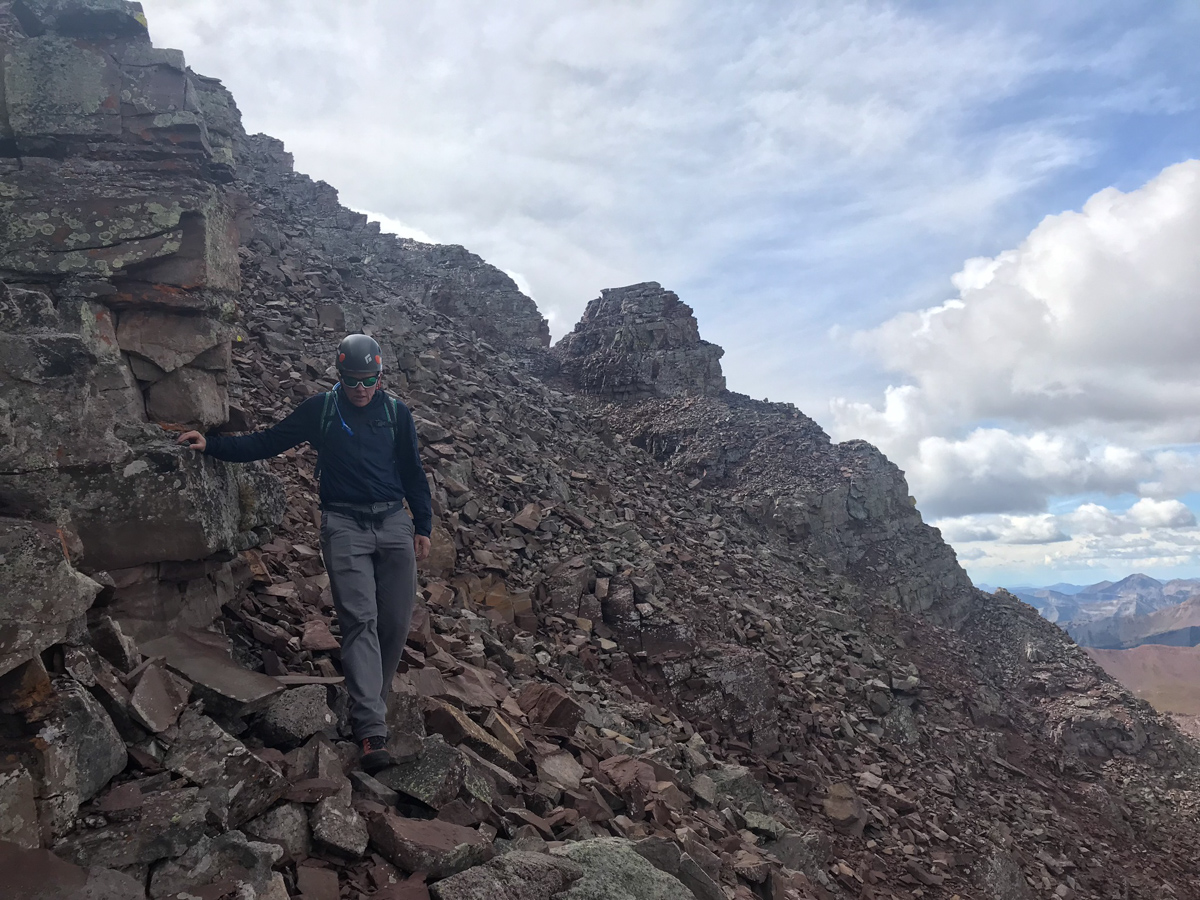
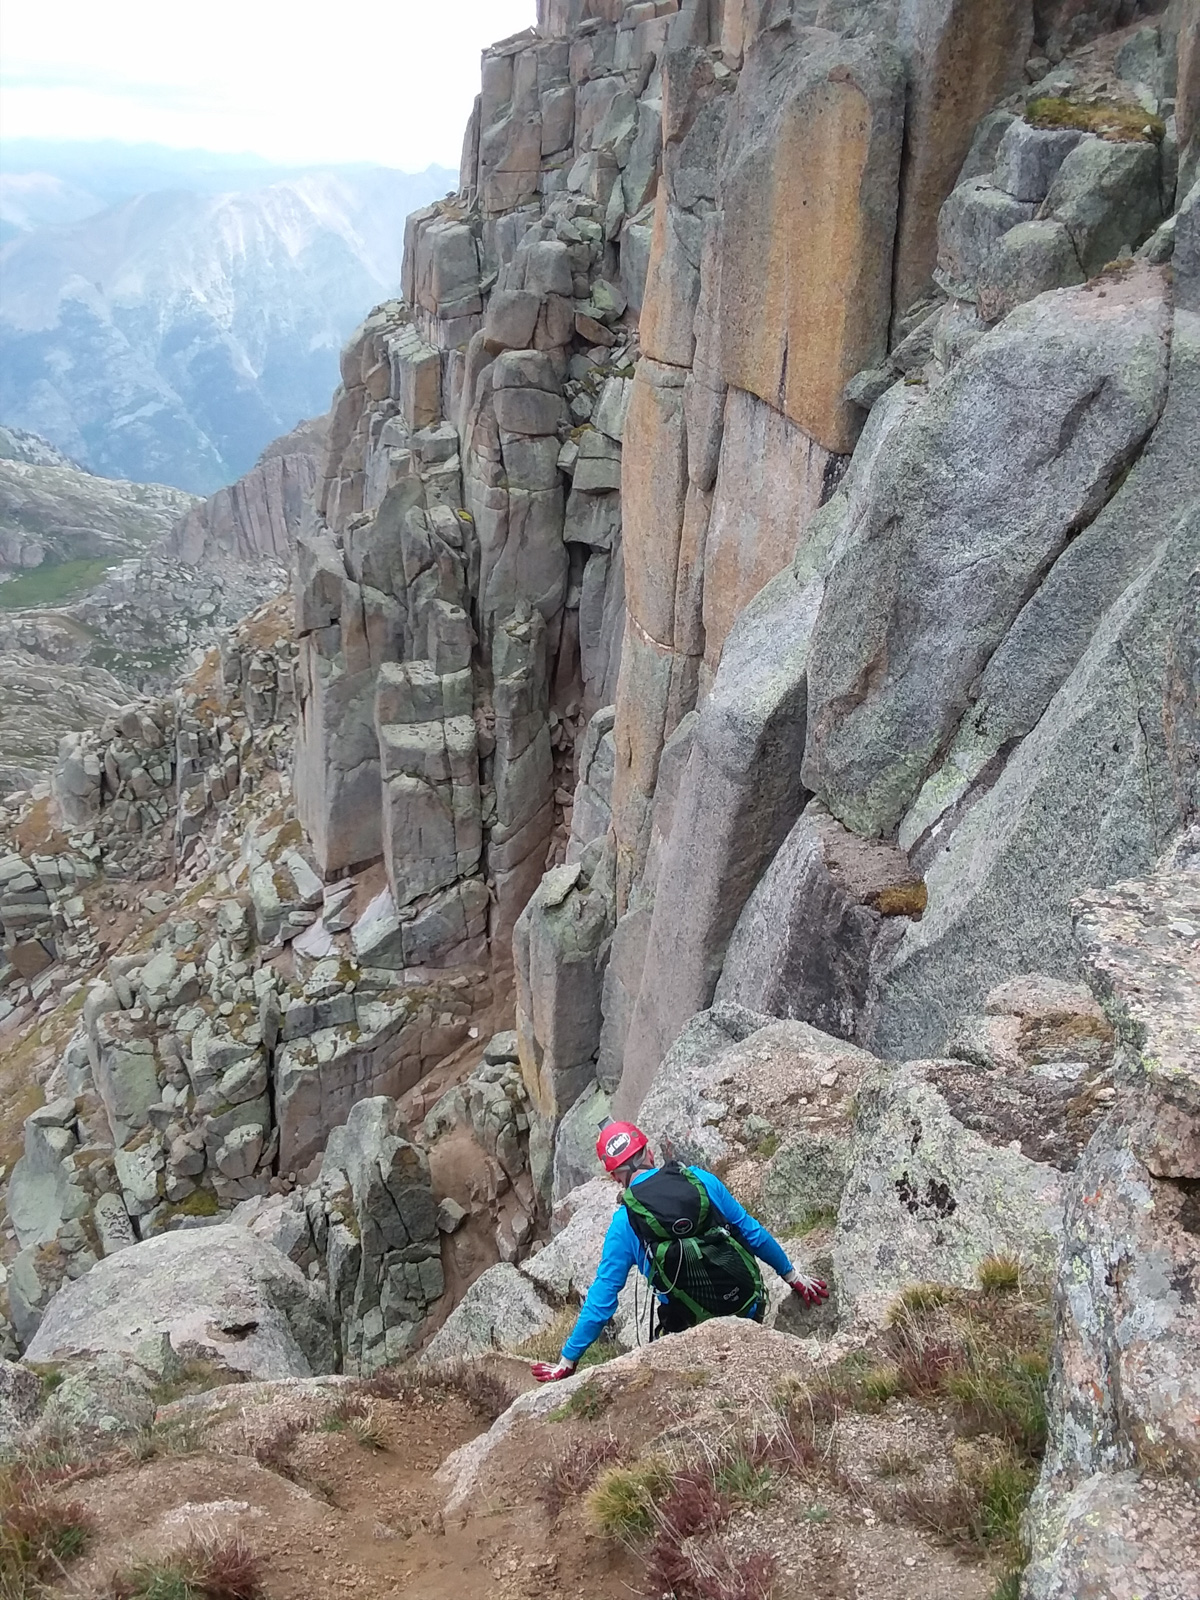
We exited at 13,400 ft. just as Roach suggests. There's a pretty obvious spot to exit below some cliff bands. We had to pick our way through some very nasty rock and maybe strayed a bit too far right into the next gully when we should have stayed high on the "ridge" here, but nothing was obvious at this point. We just went a couple feet at a time, making sure to stay close to each other and stay very mindful about potential rockfall above and below. It is more a mental exercise than a physical one from this point forward.
Just below the saddle between Thunder Pyramid and Lightning Pyramid, we found it best to cut under more cliff bands and stay high on lighter colored rock as pictured above.
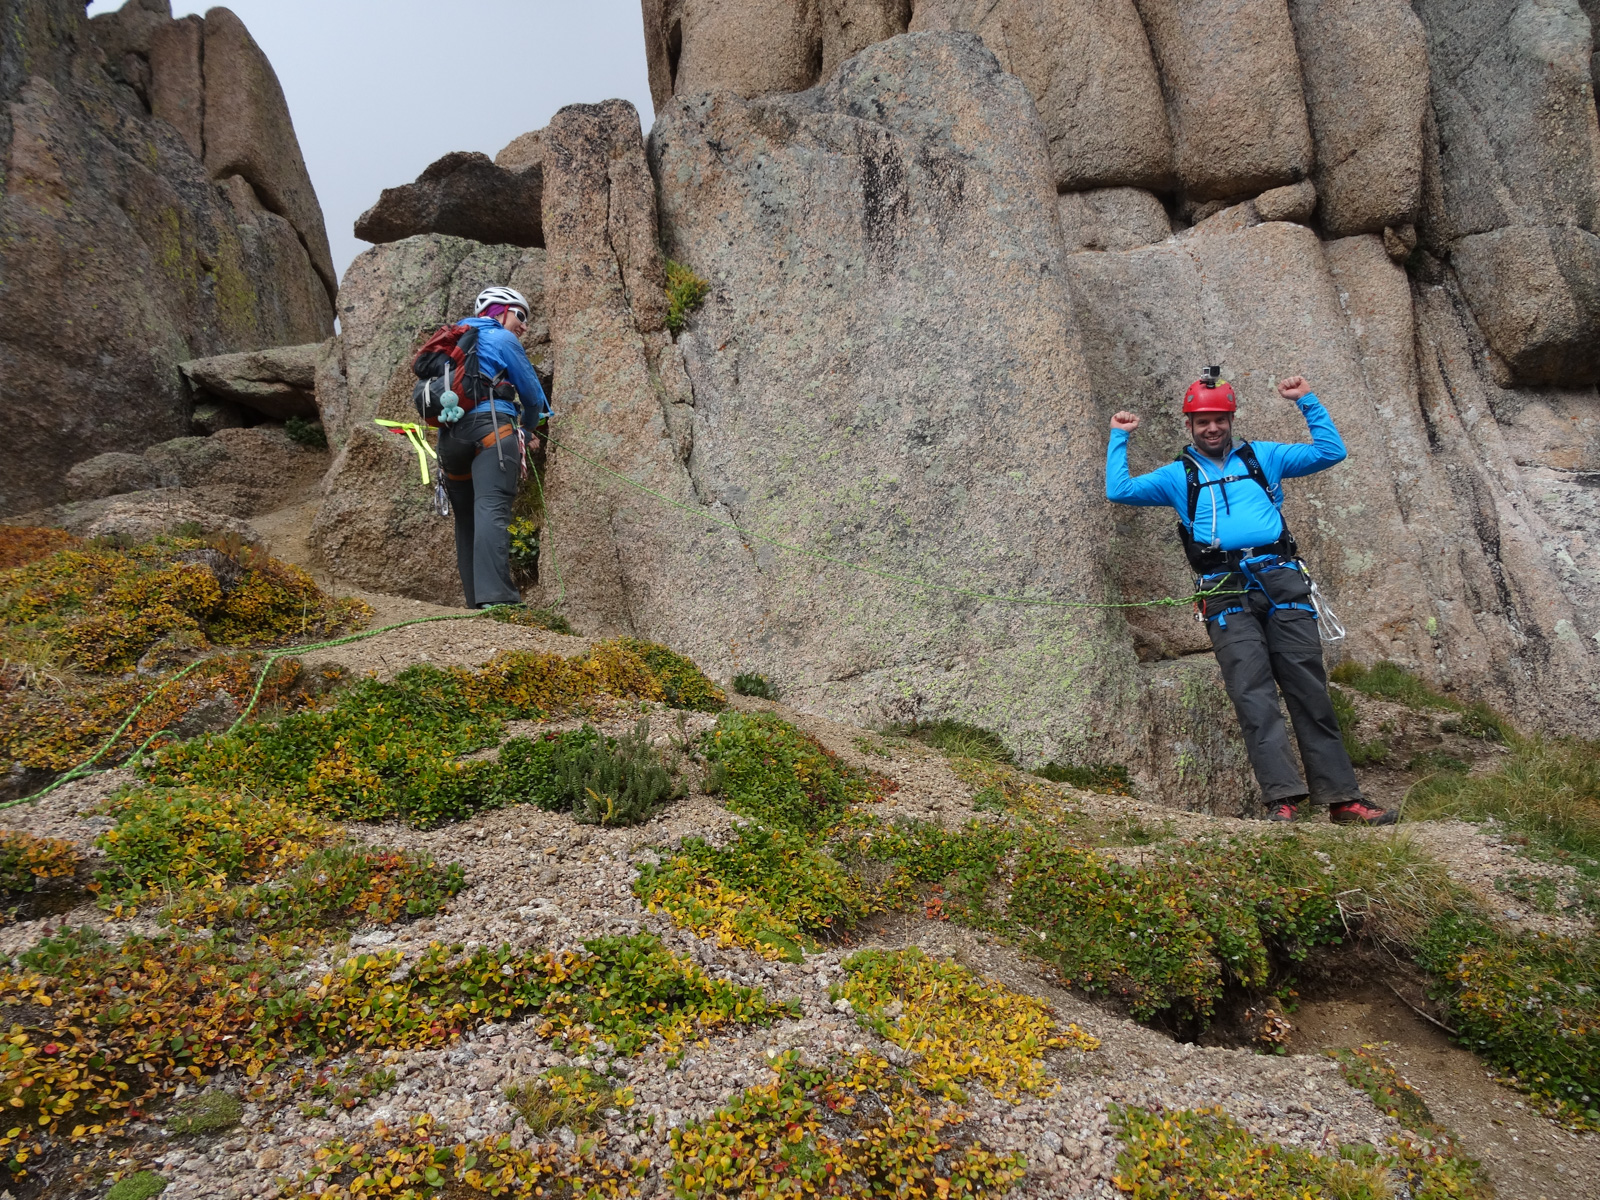
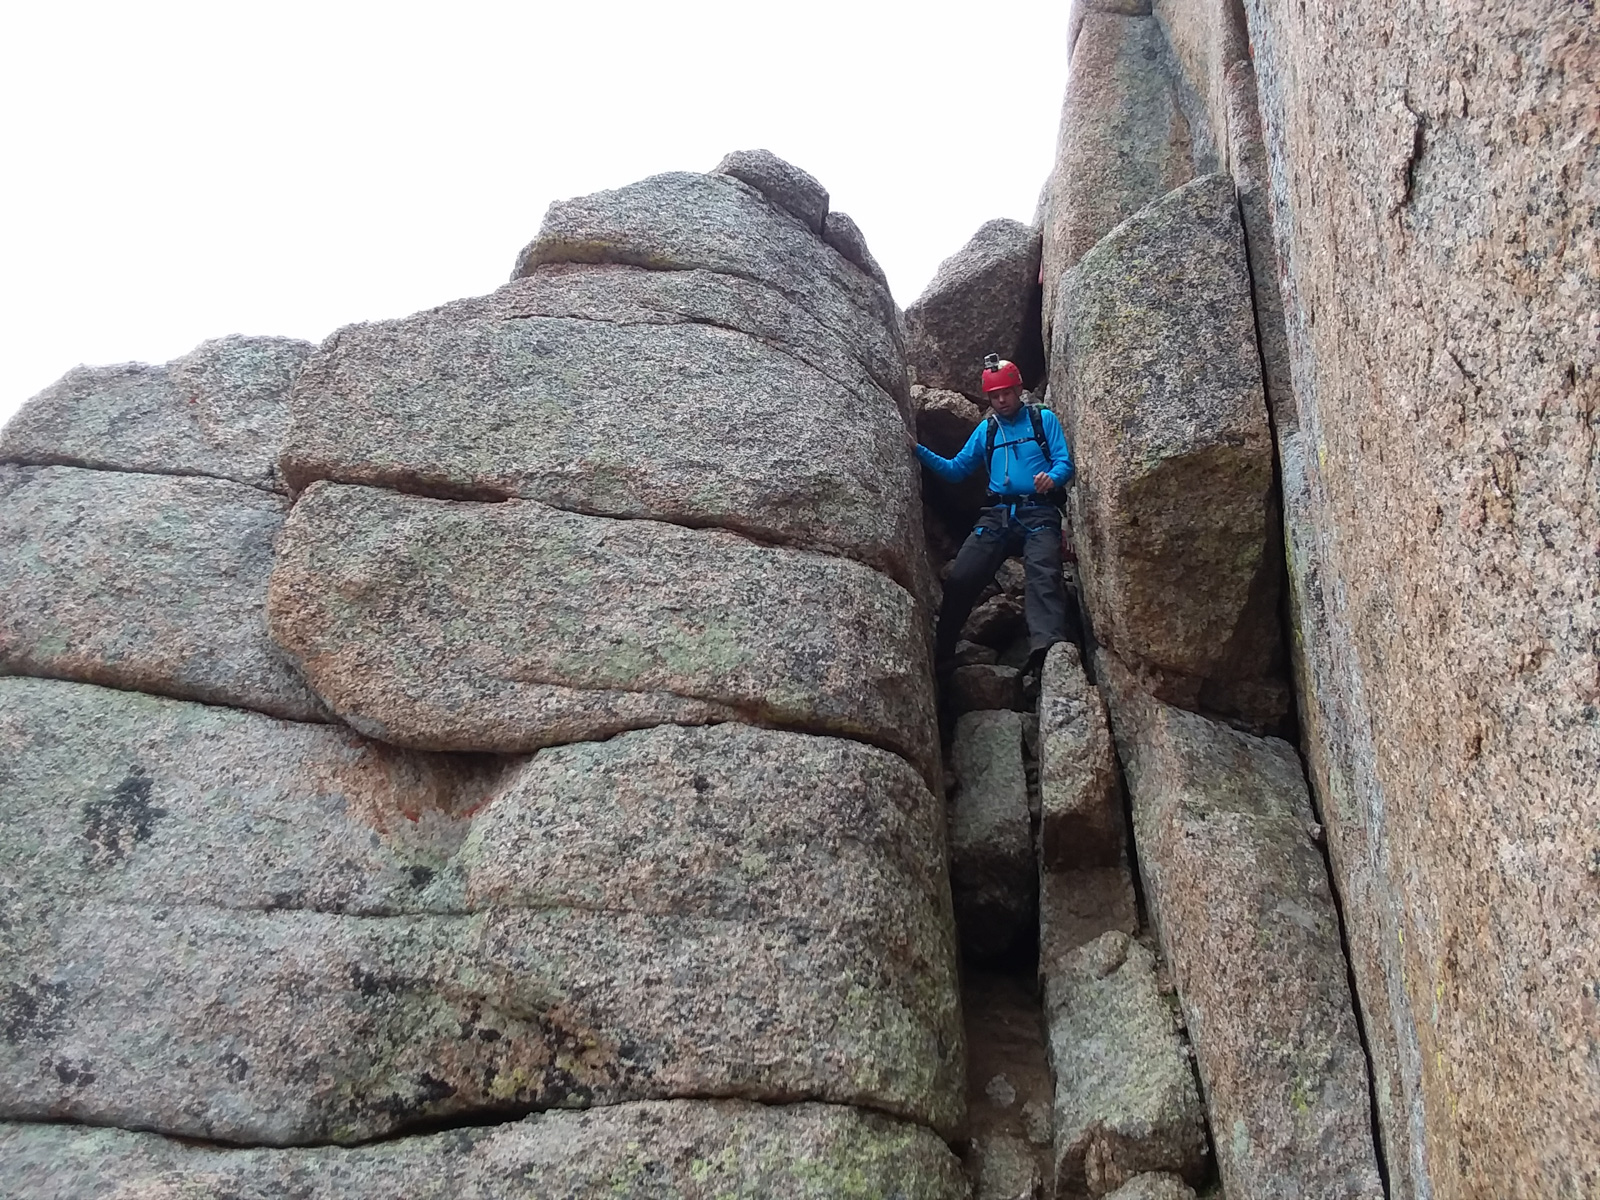
Once we reached the saddle, it was very clear where to go next and we were feeling very excited to be so close to the top!
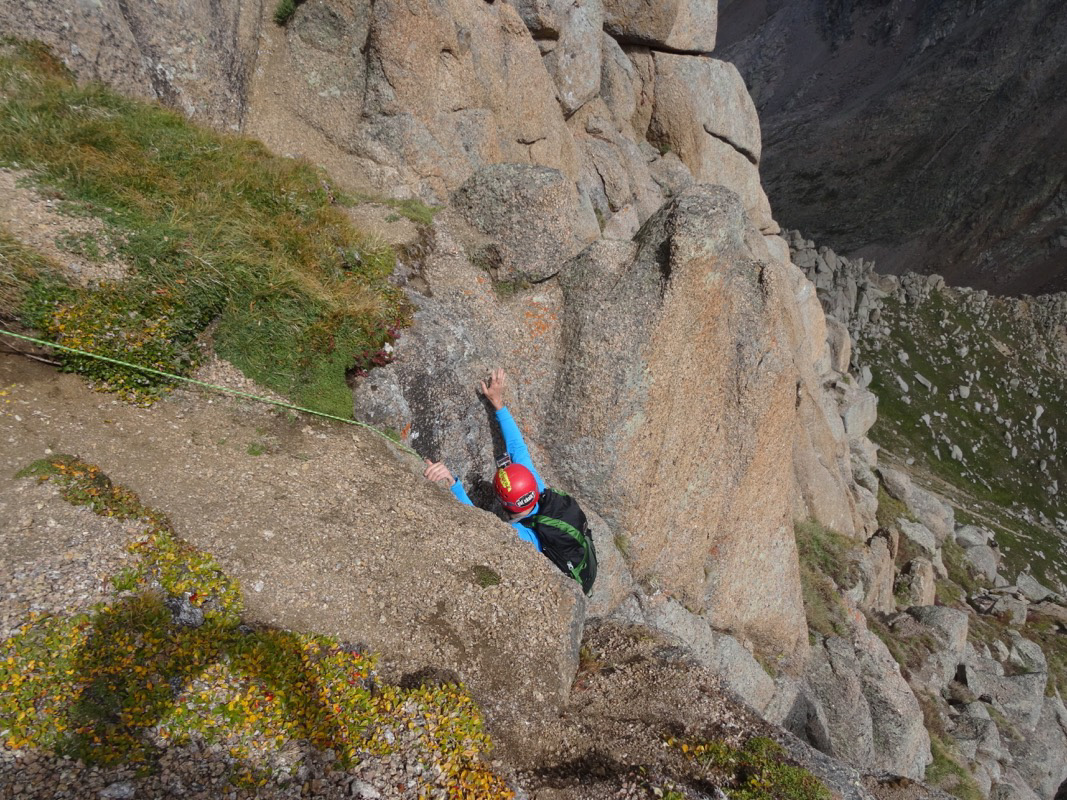
I let Silas go first as I wanted him to film me ascending the final section.
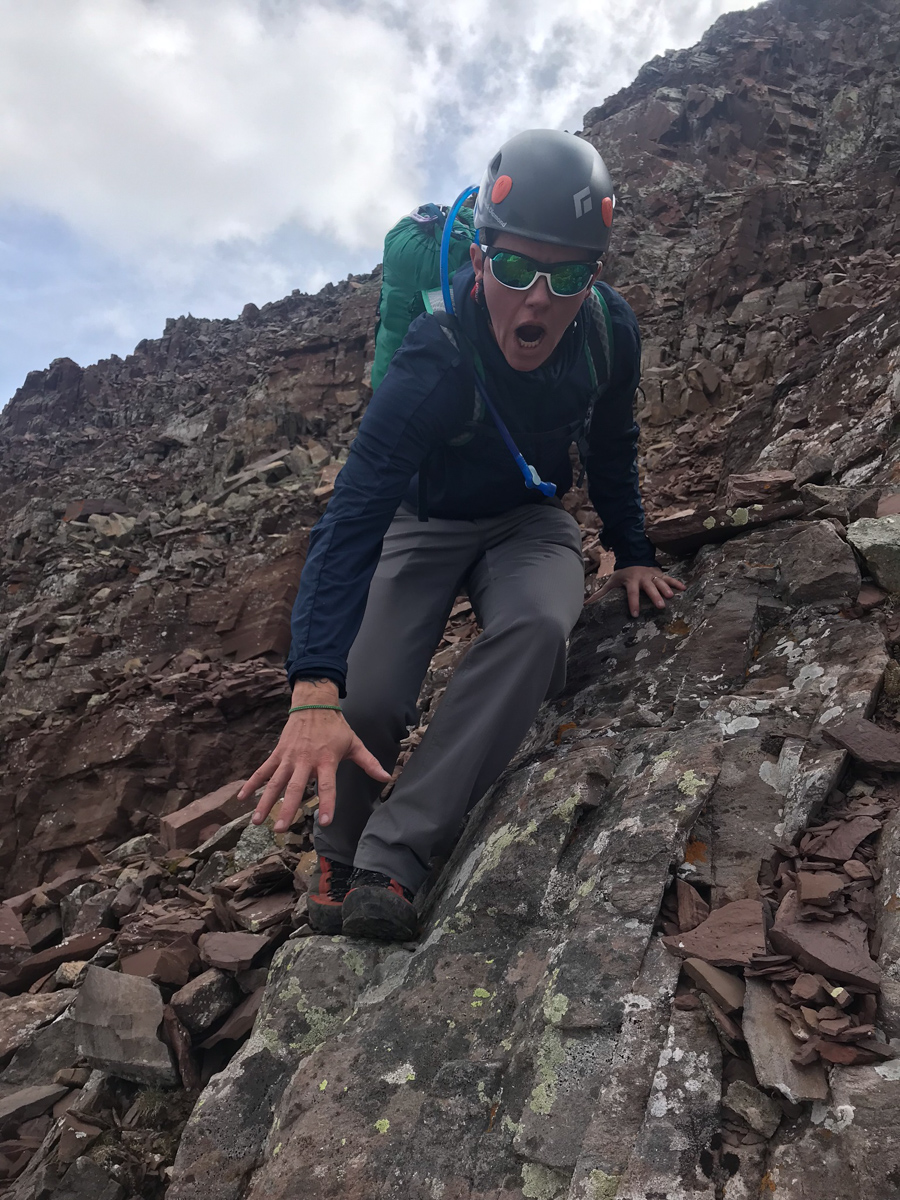
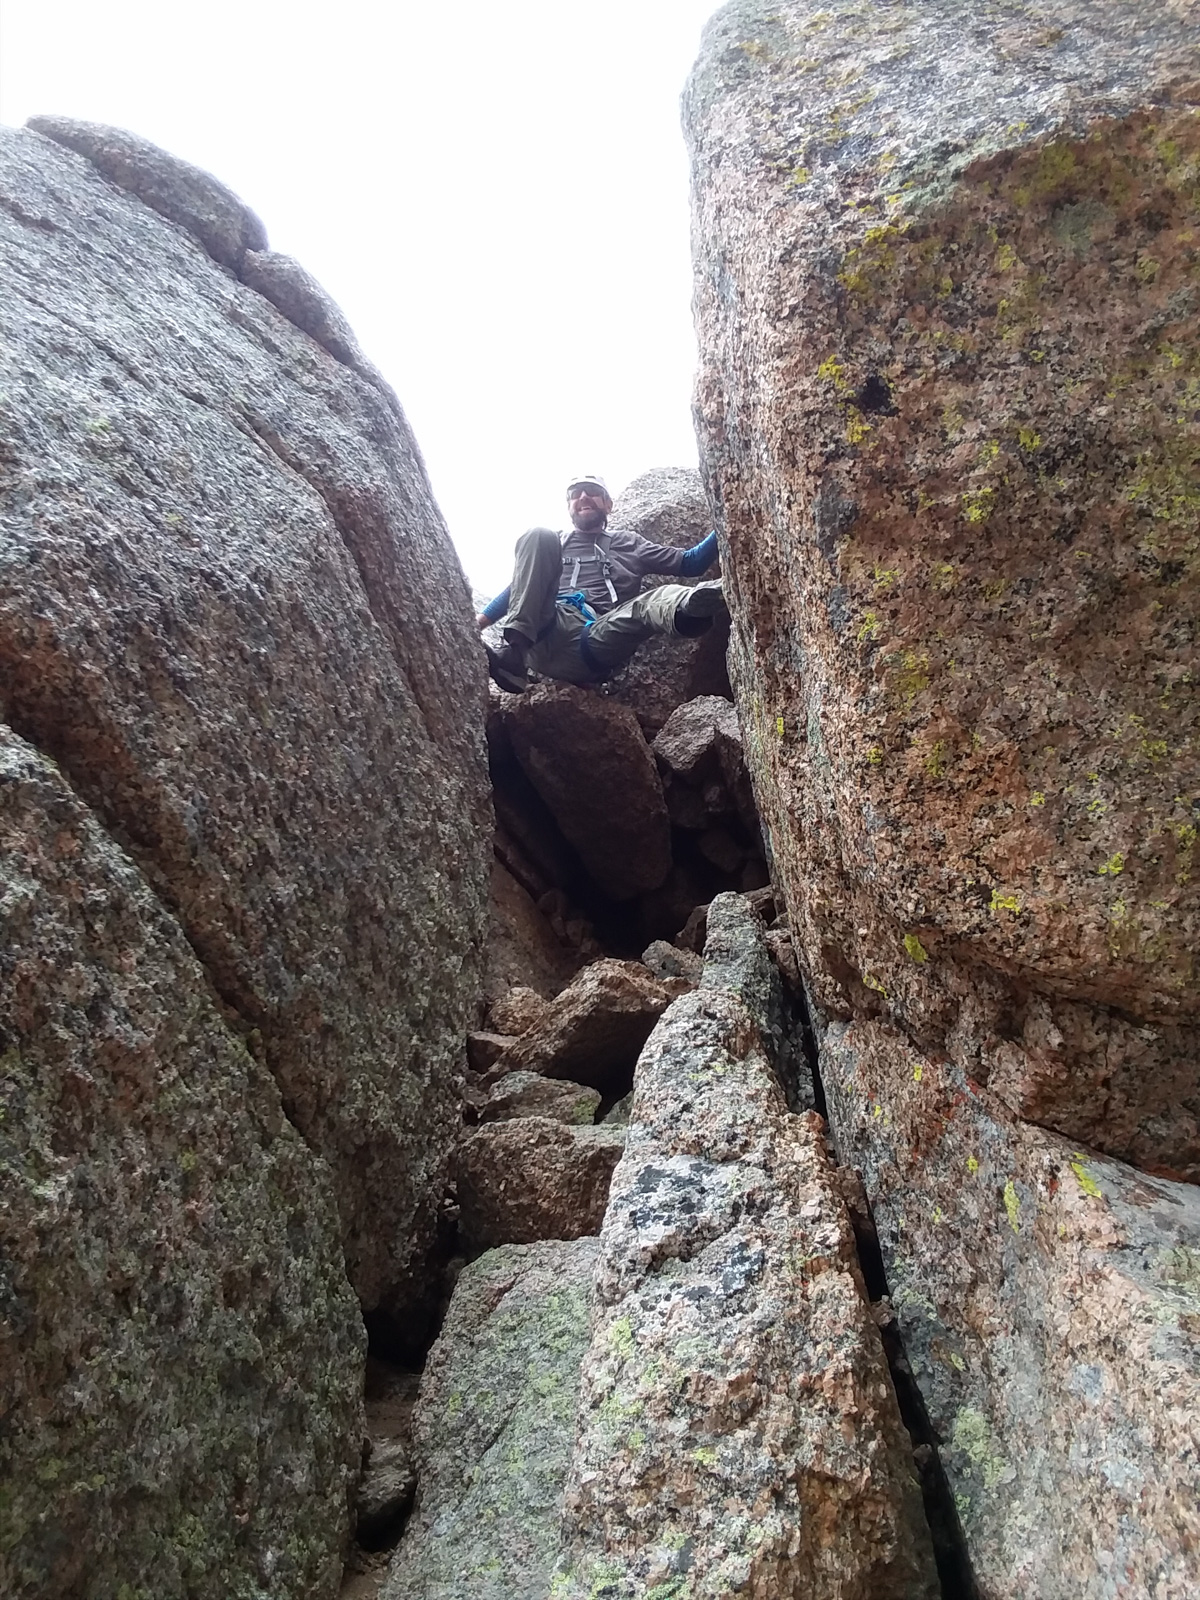
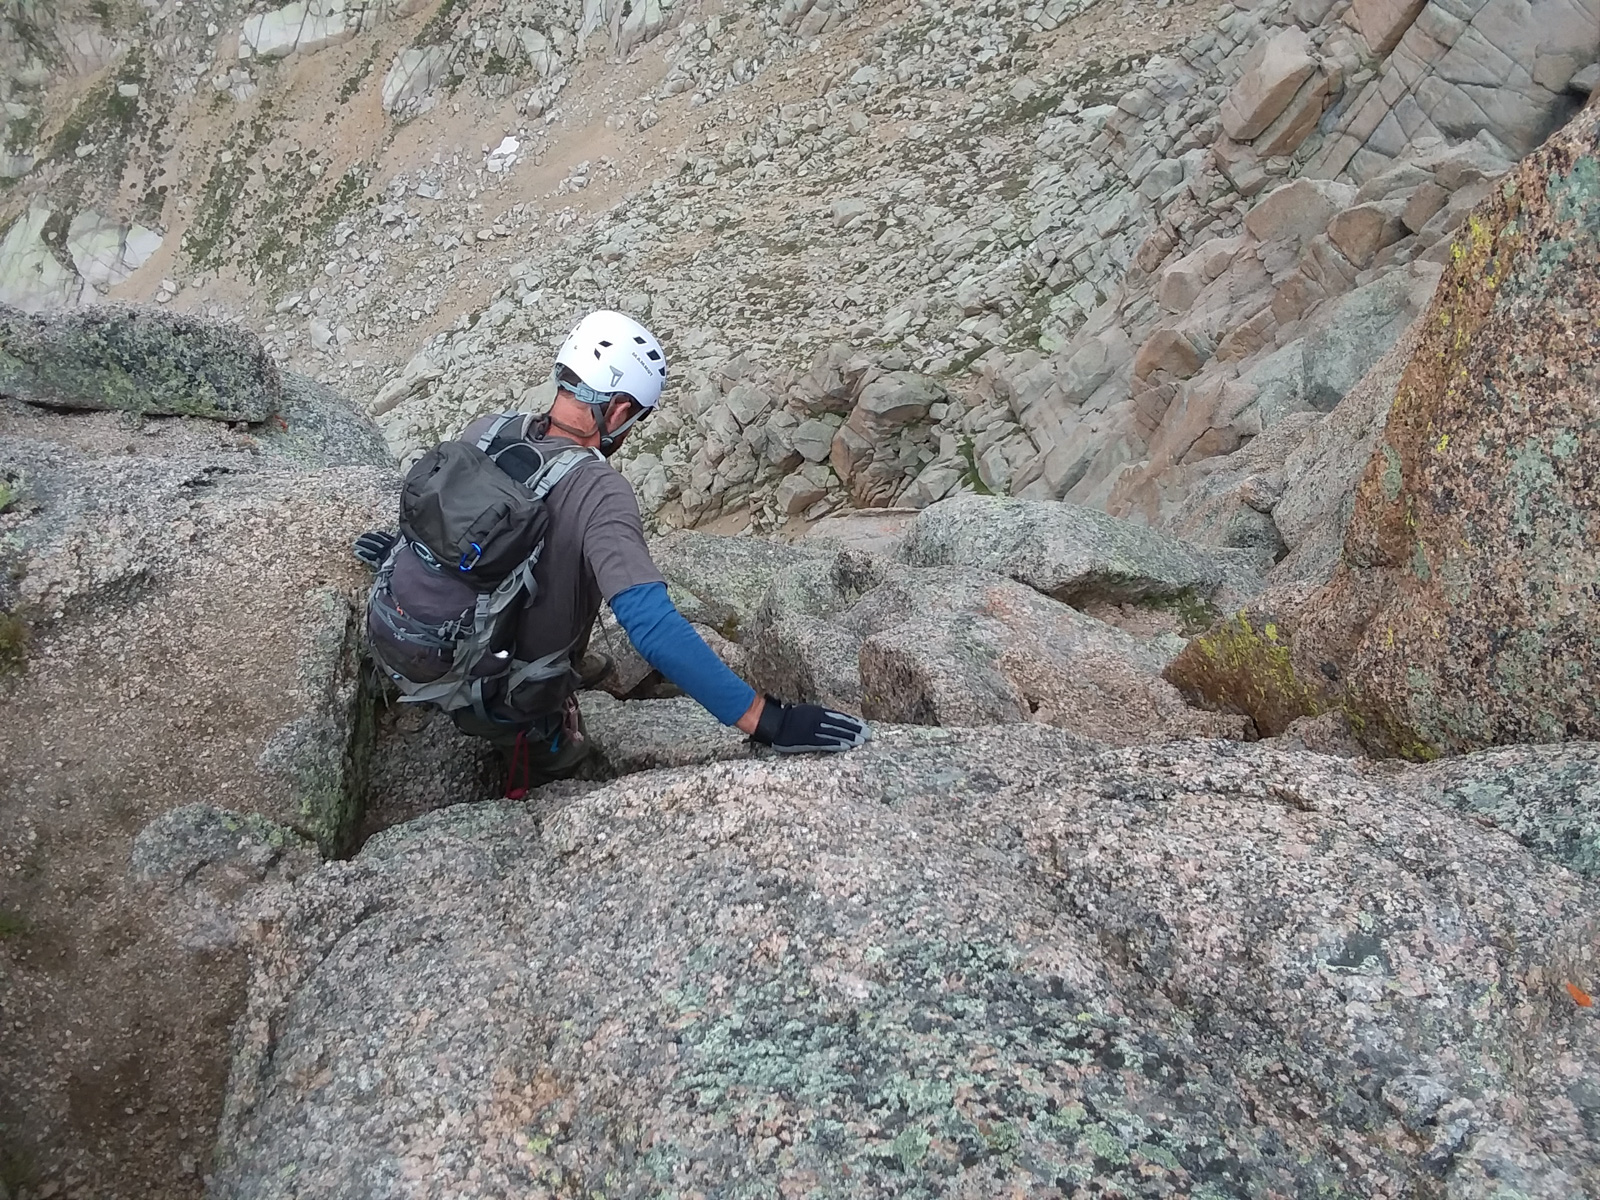
They very last section, which you can see on the earlier YouTube video, was pretty simple to find the solution too, but it did require some easy class 3 chimney climbing. A real joy, to be honest. We just had to be ultra careful about the loose rock above the chimney, as it was ubiquitous and precarious. Below is Silas' film of me arriving at the summit. What a crazy feeling it was.
Nerd move! Number 100!
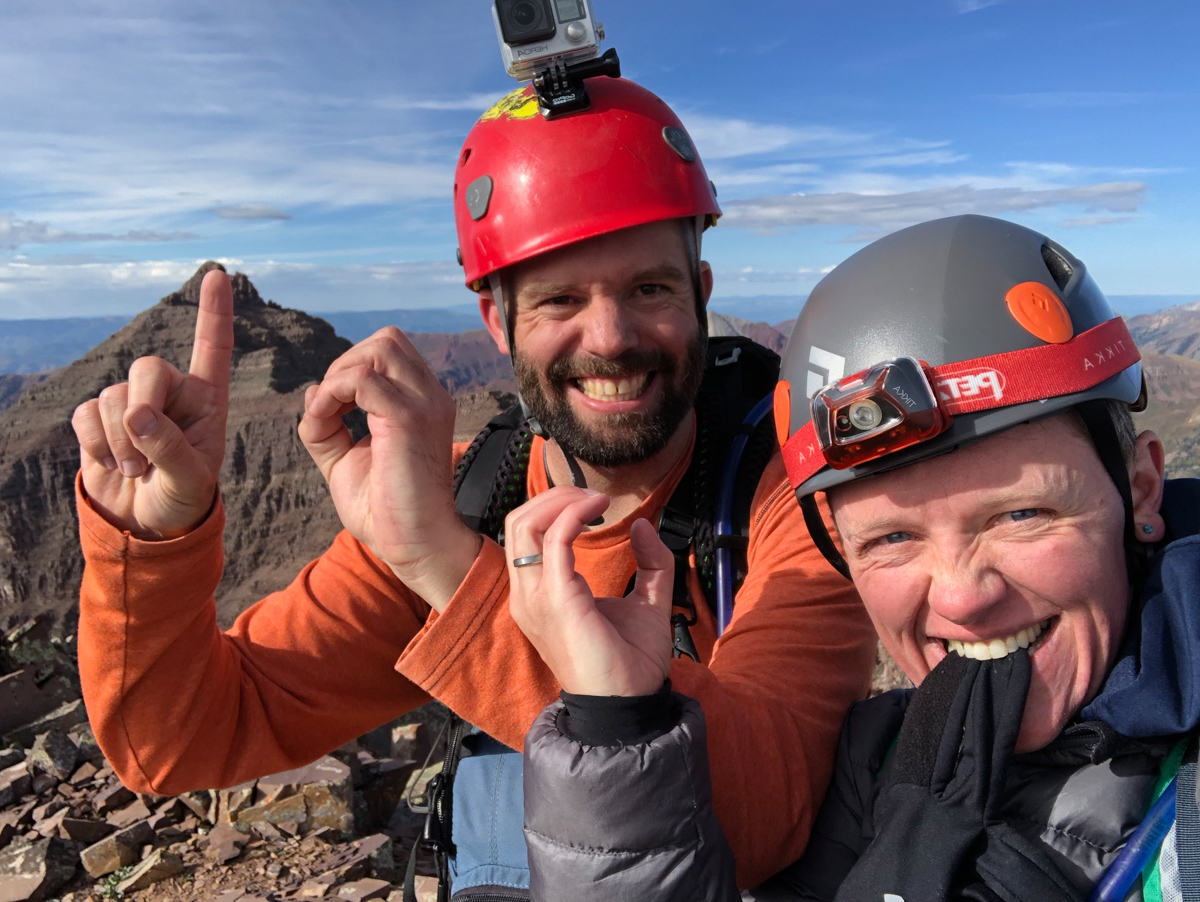
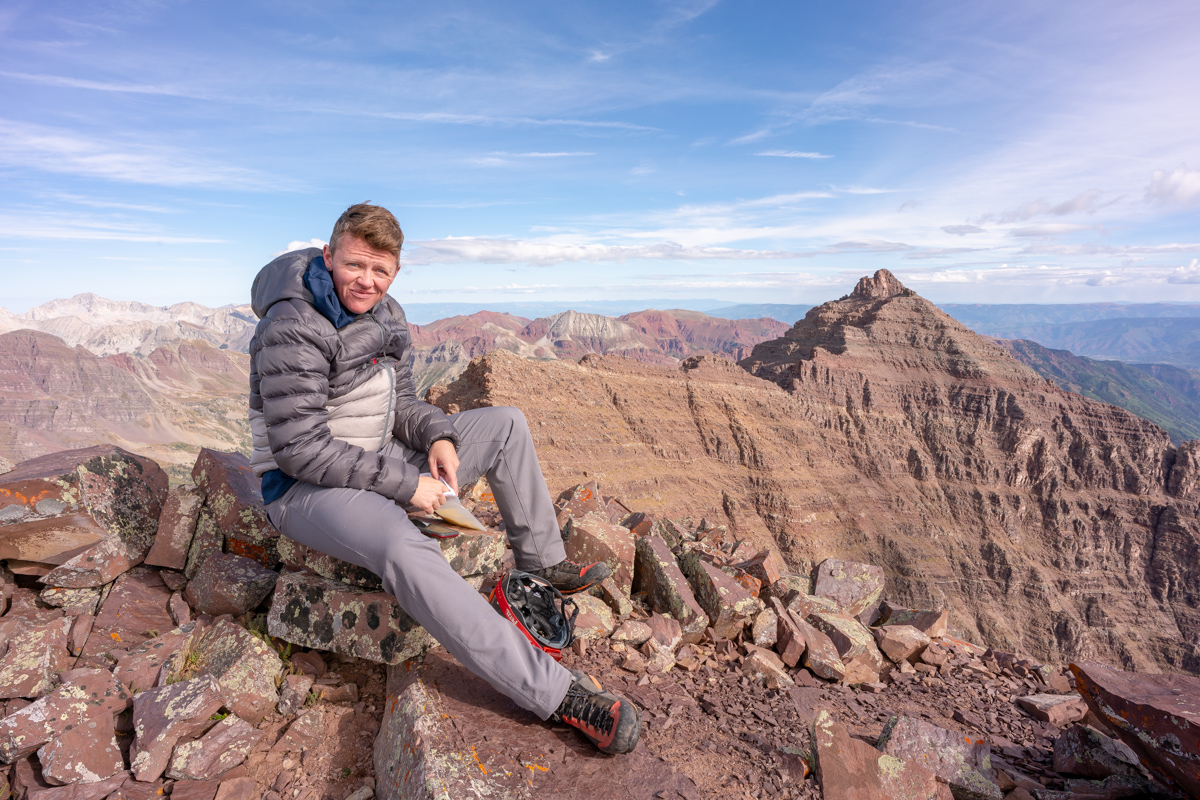
Upon arrival, the first order of business was for Silas to surprise me with a letter written by my mom and dad for Silas to read upon us reaching the summit. It was so incredibly heart-felt and I teared up big time. The video of me reading it is below. Thanks mom and dad!
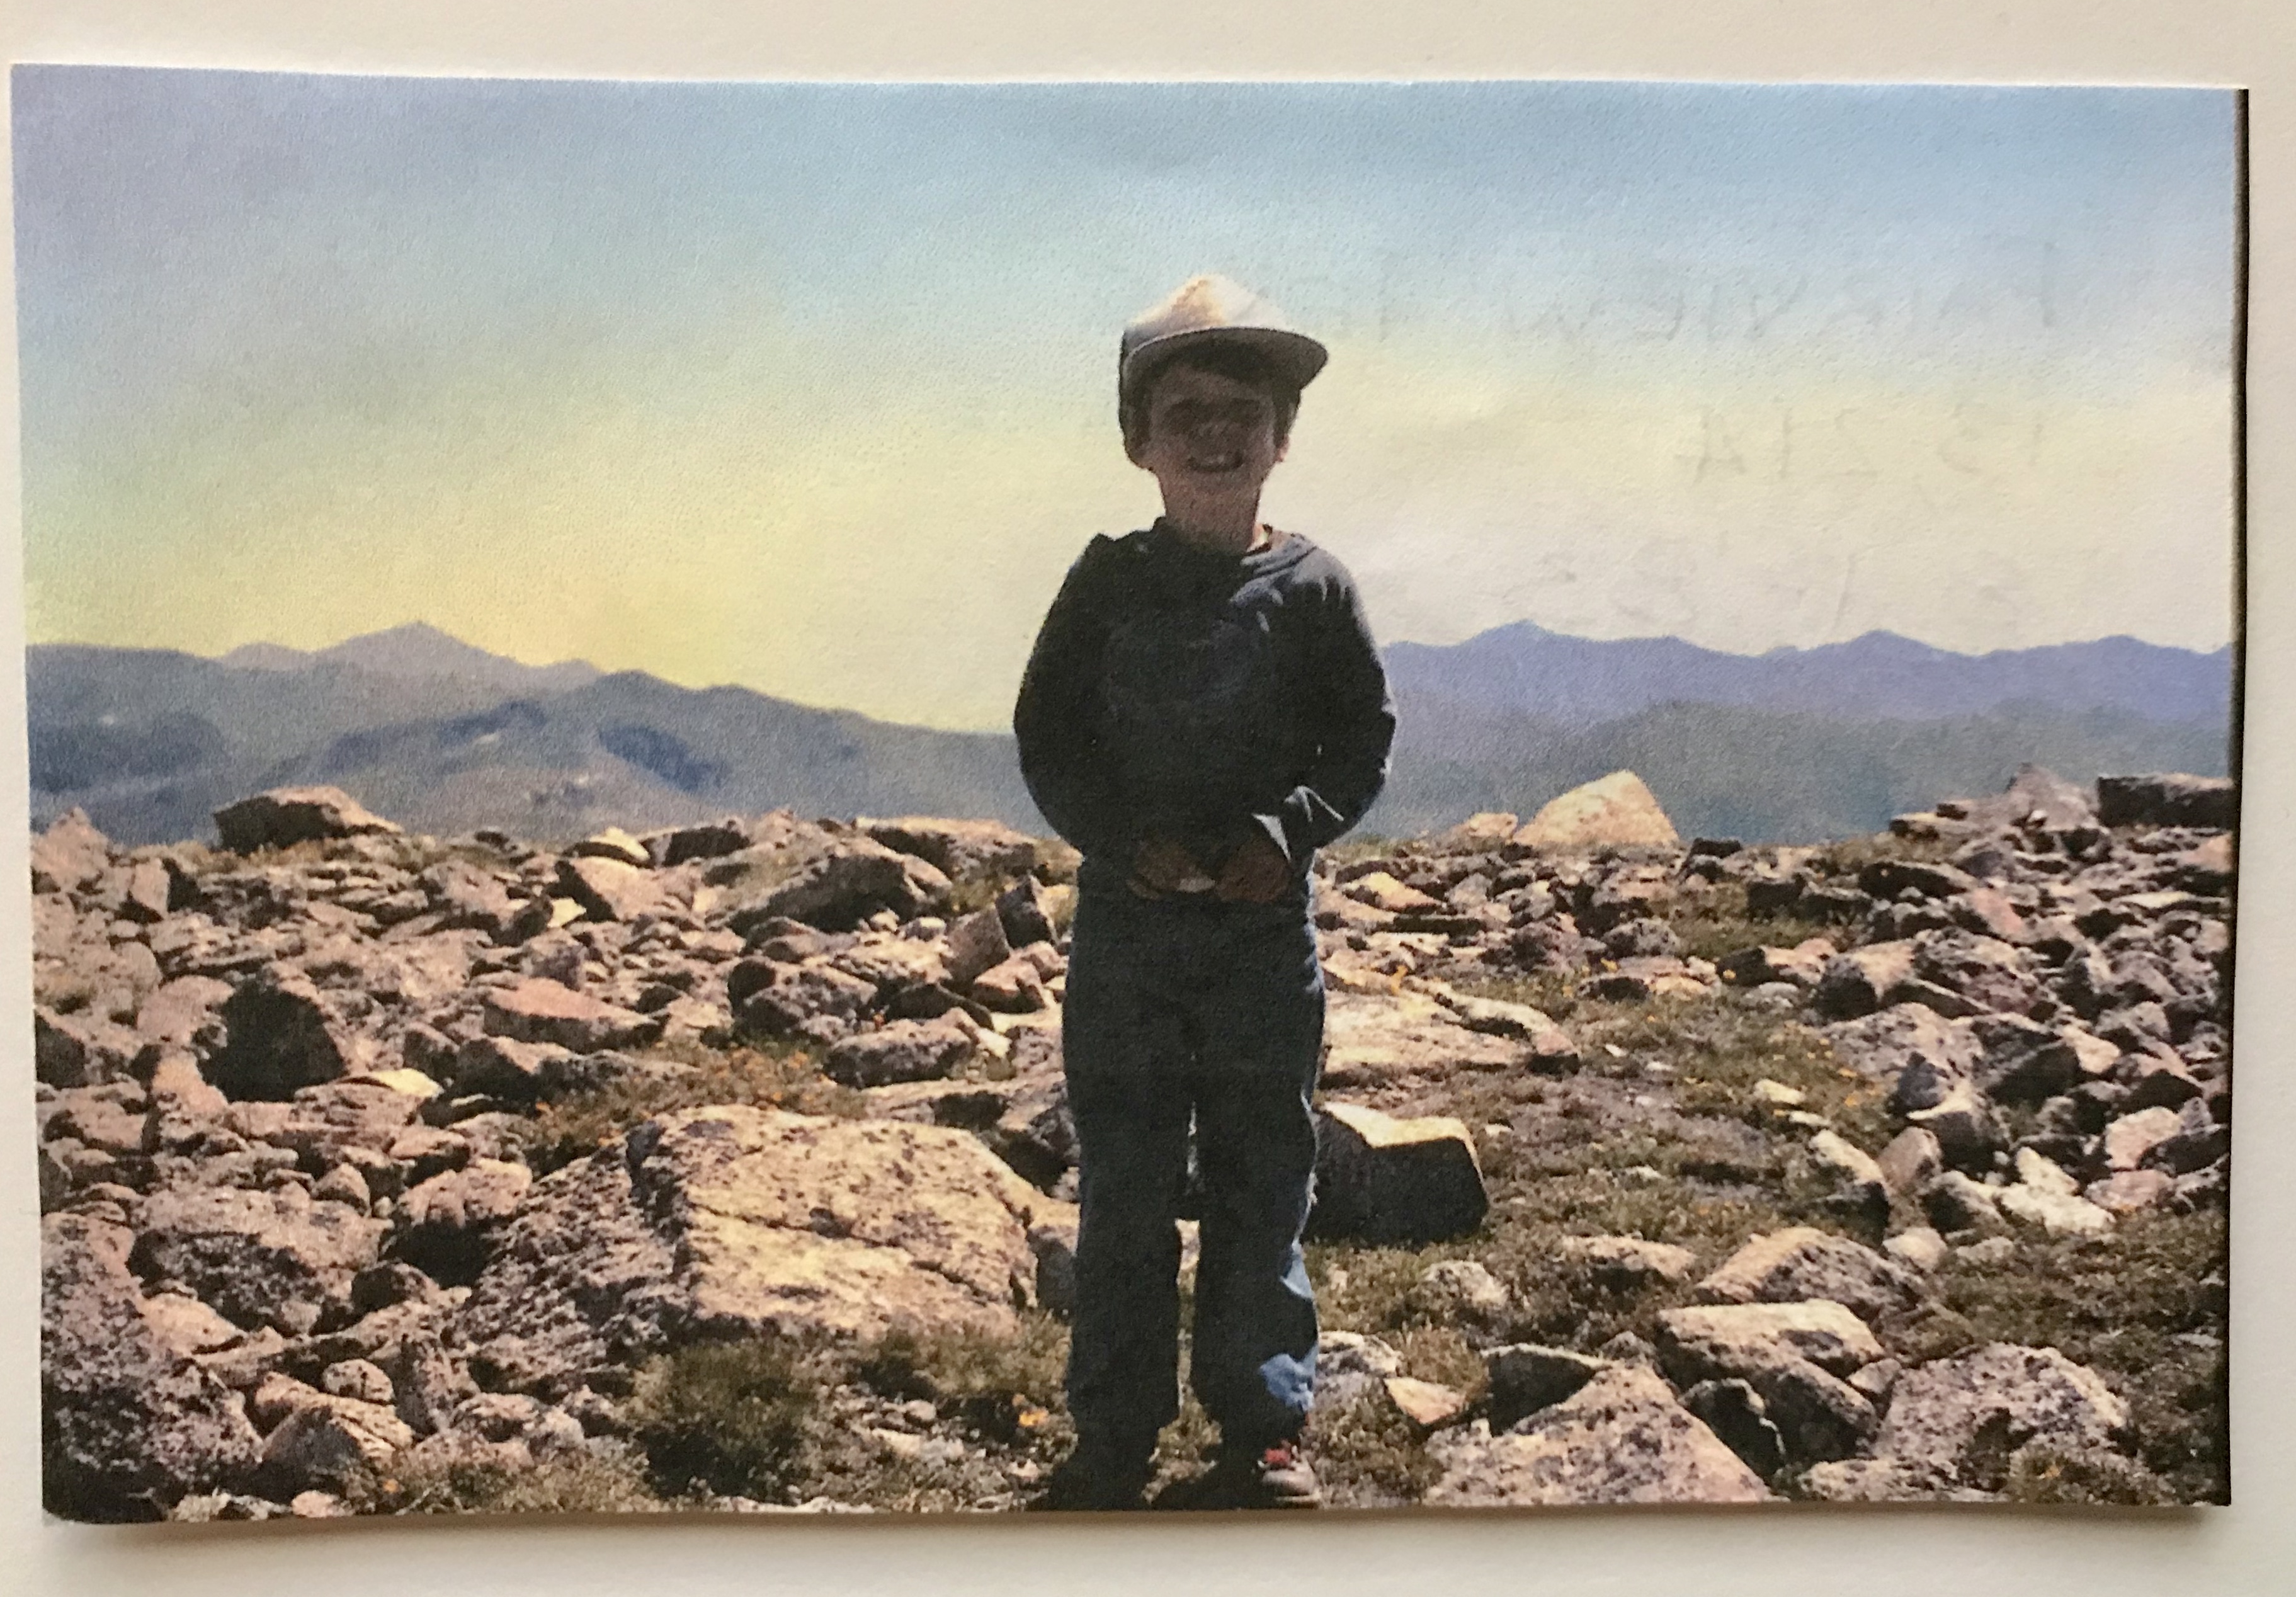
And of course, here's the photo they sent with it - me standing on my first 13er - Fairview Peak at age 4. Good stuff!
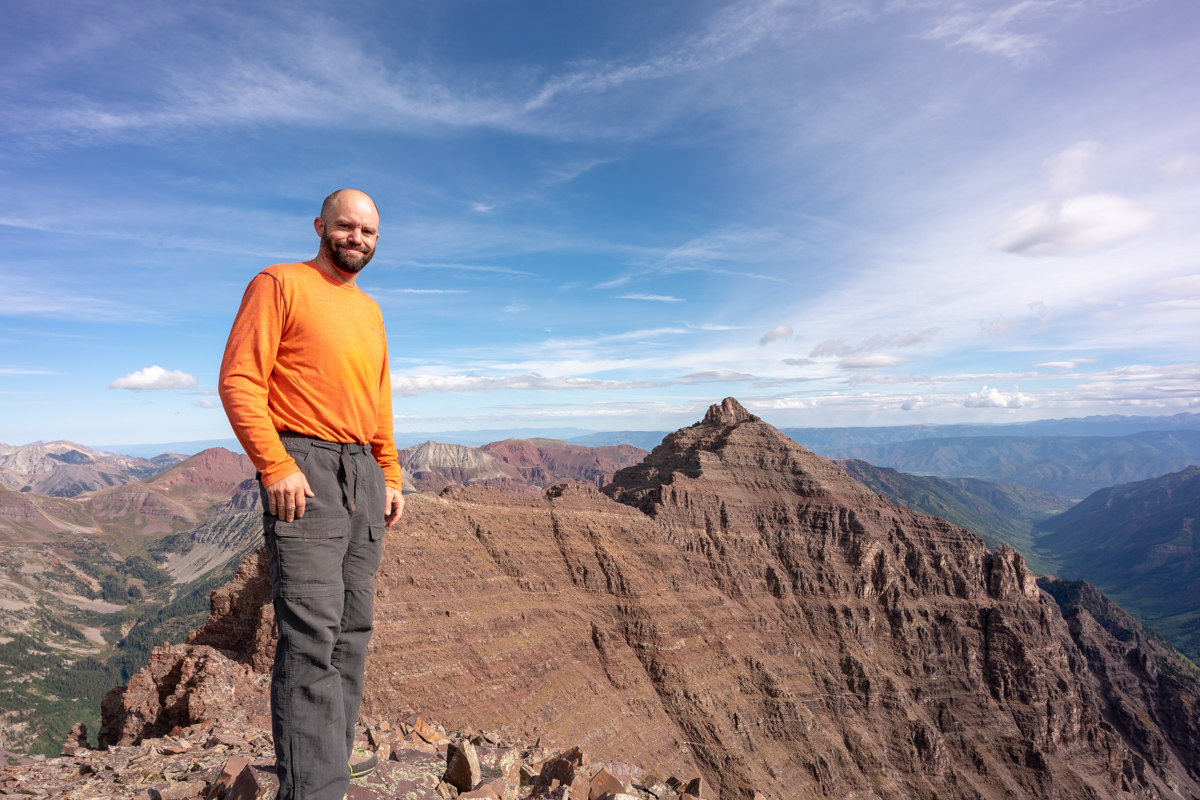
It was so great celebrating this one on top with Silas, who I think was more elated than me!
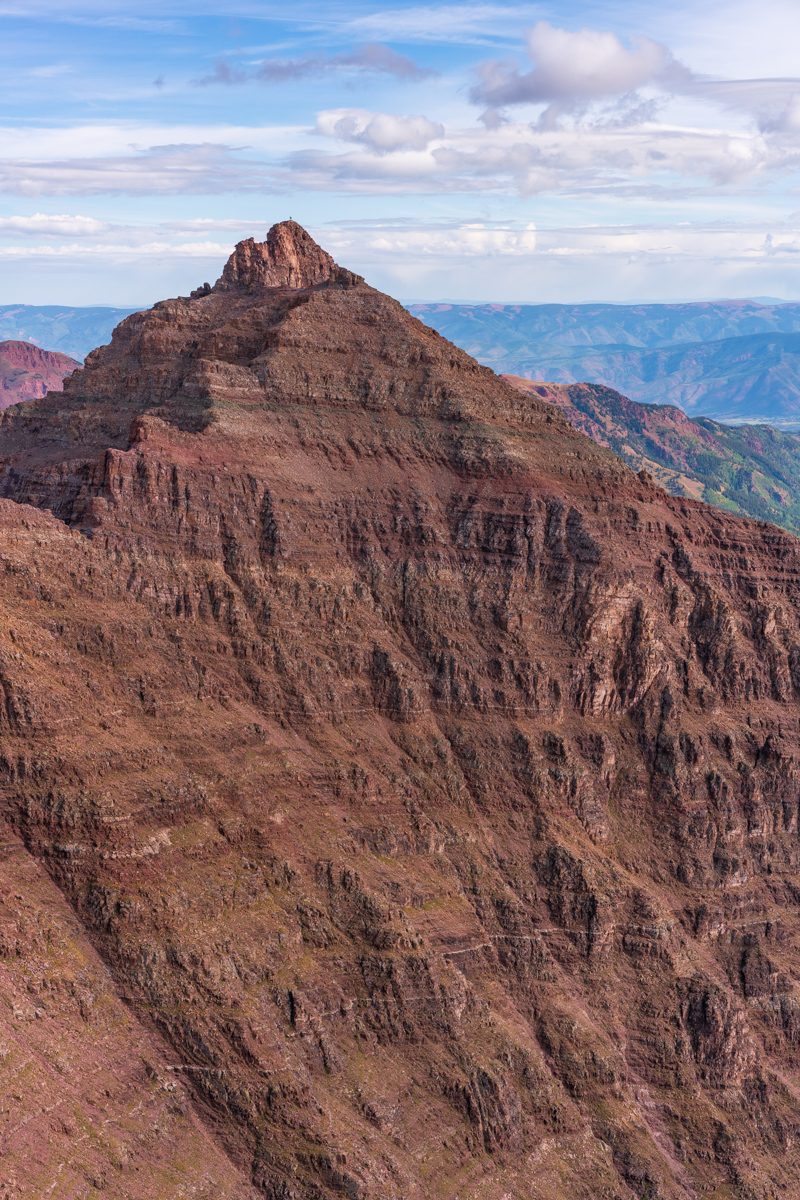
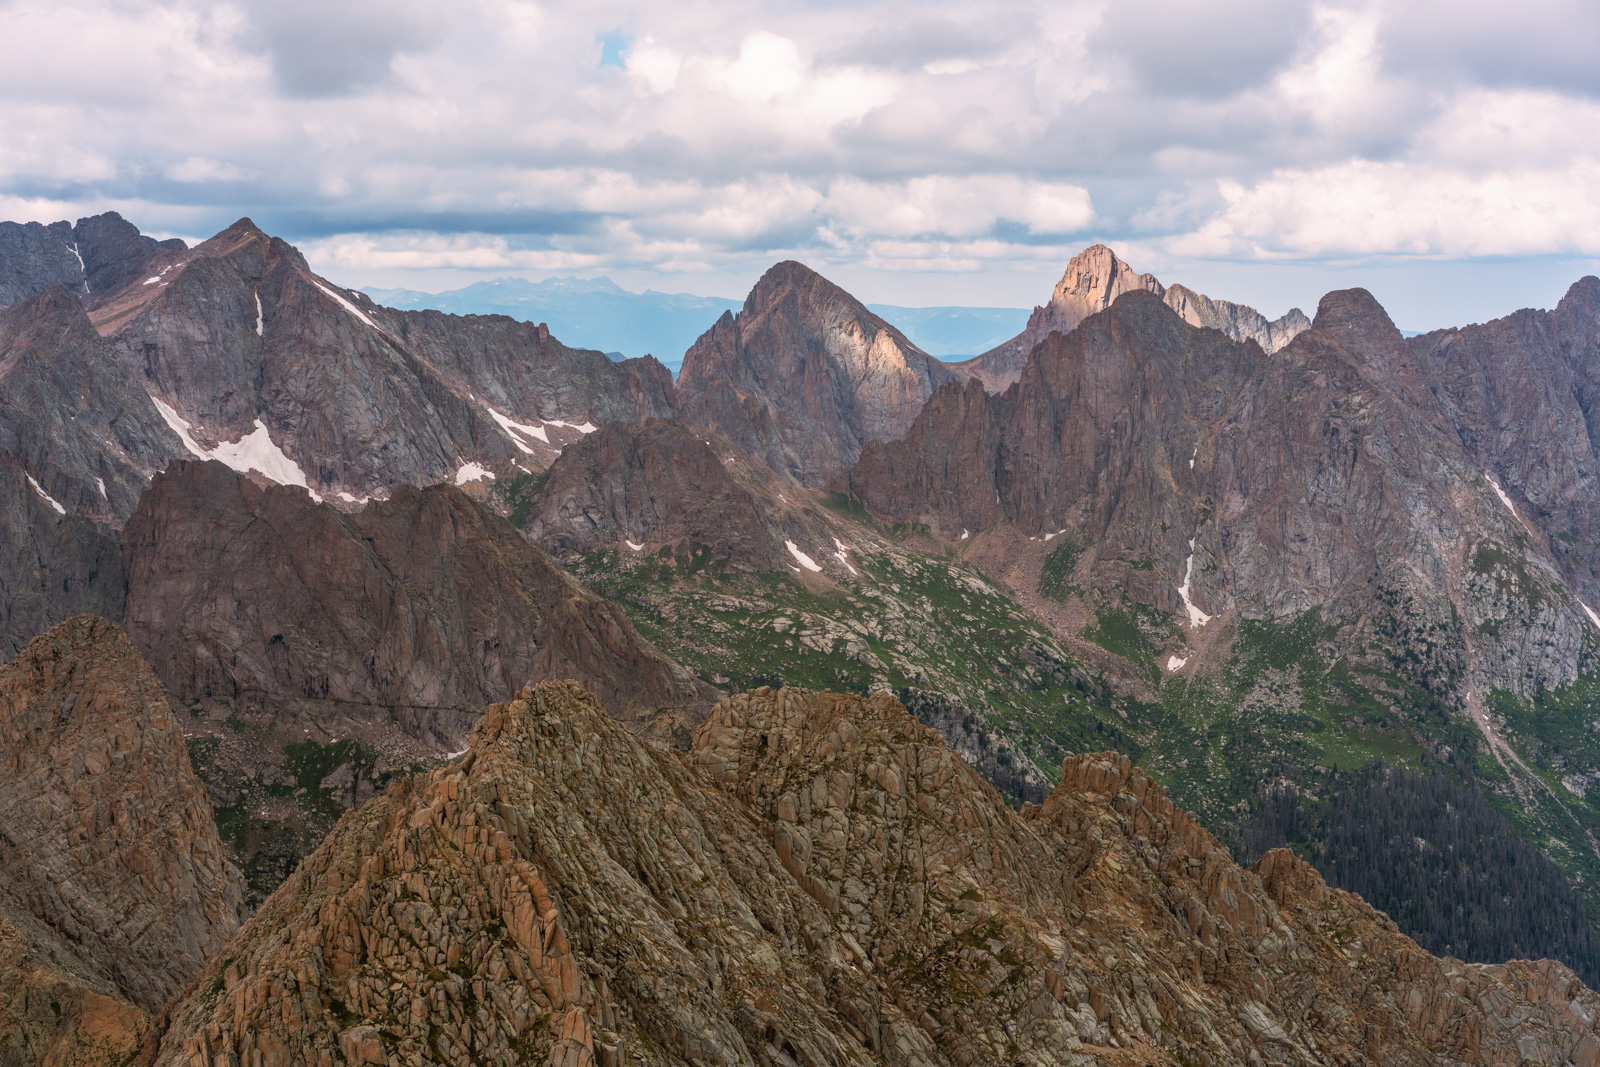
It was also really cool to have a view of Pyramid from here, which I finished the 14ers on in 2012.
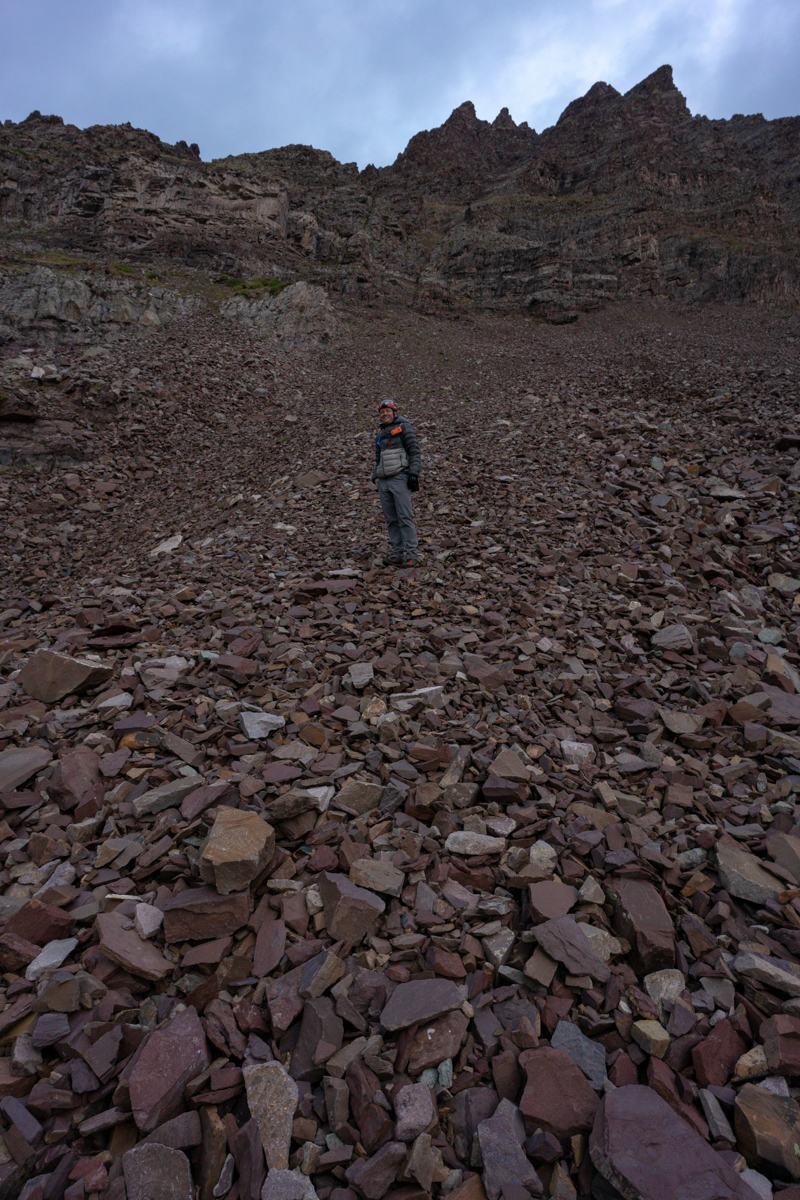
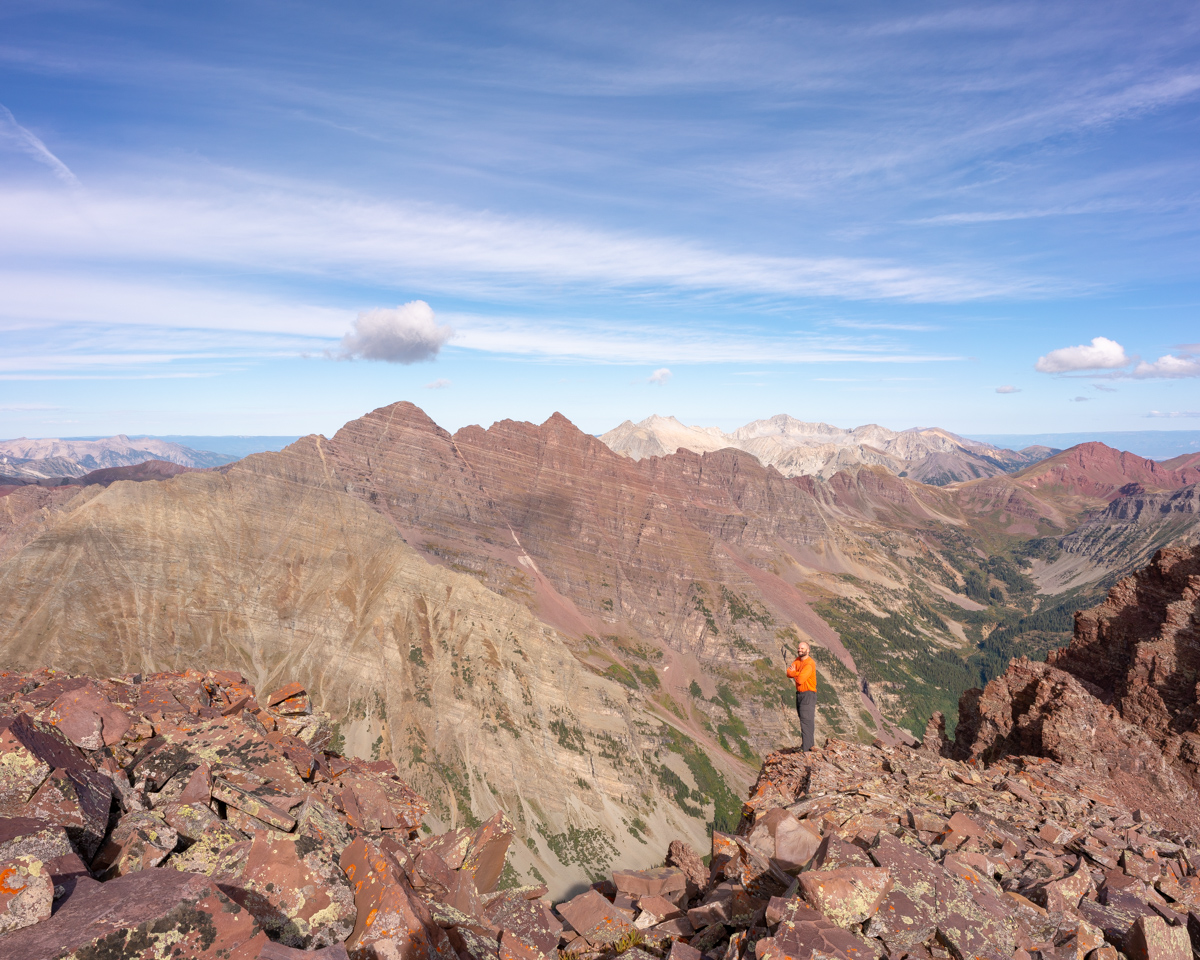
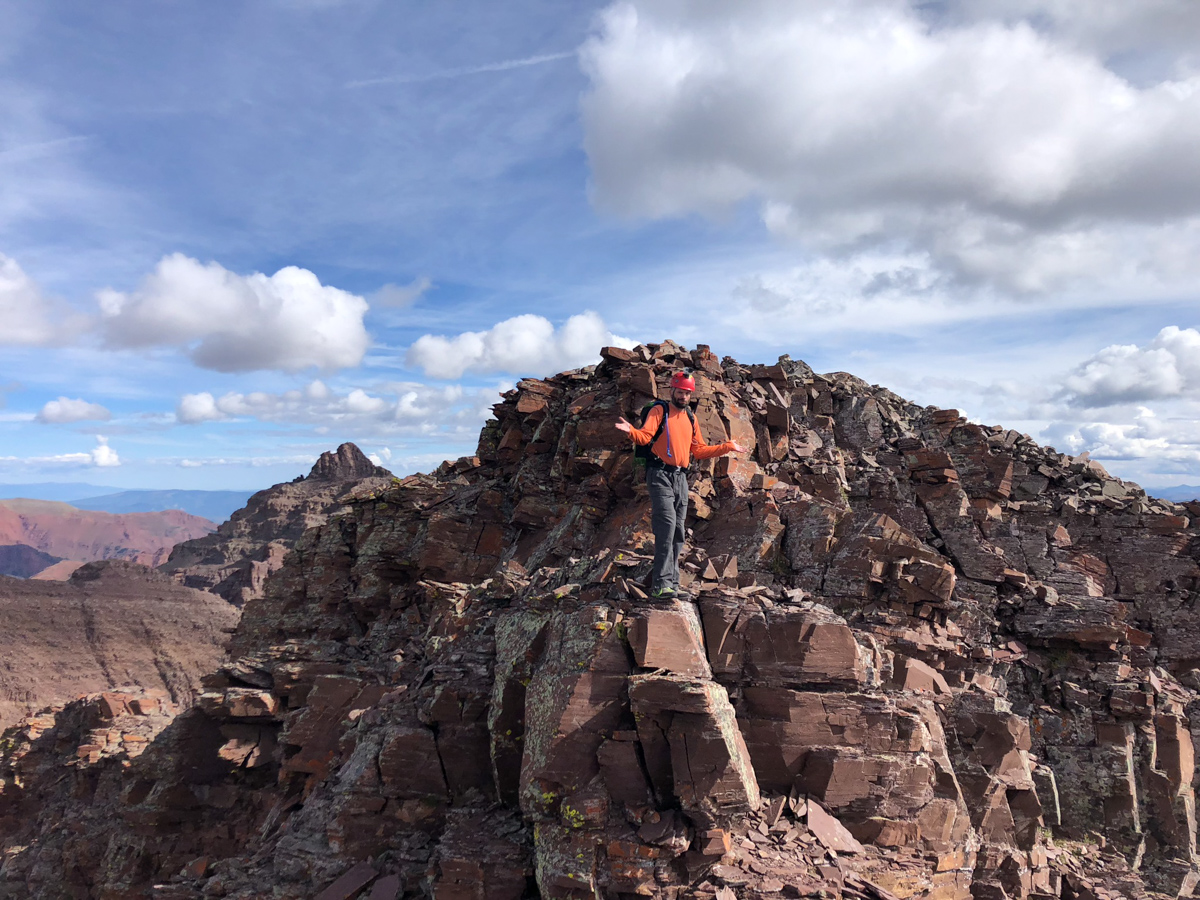
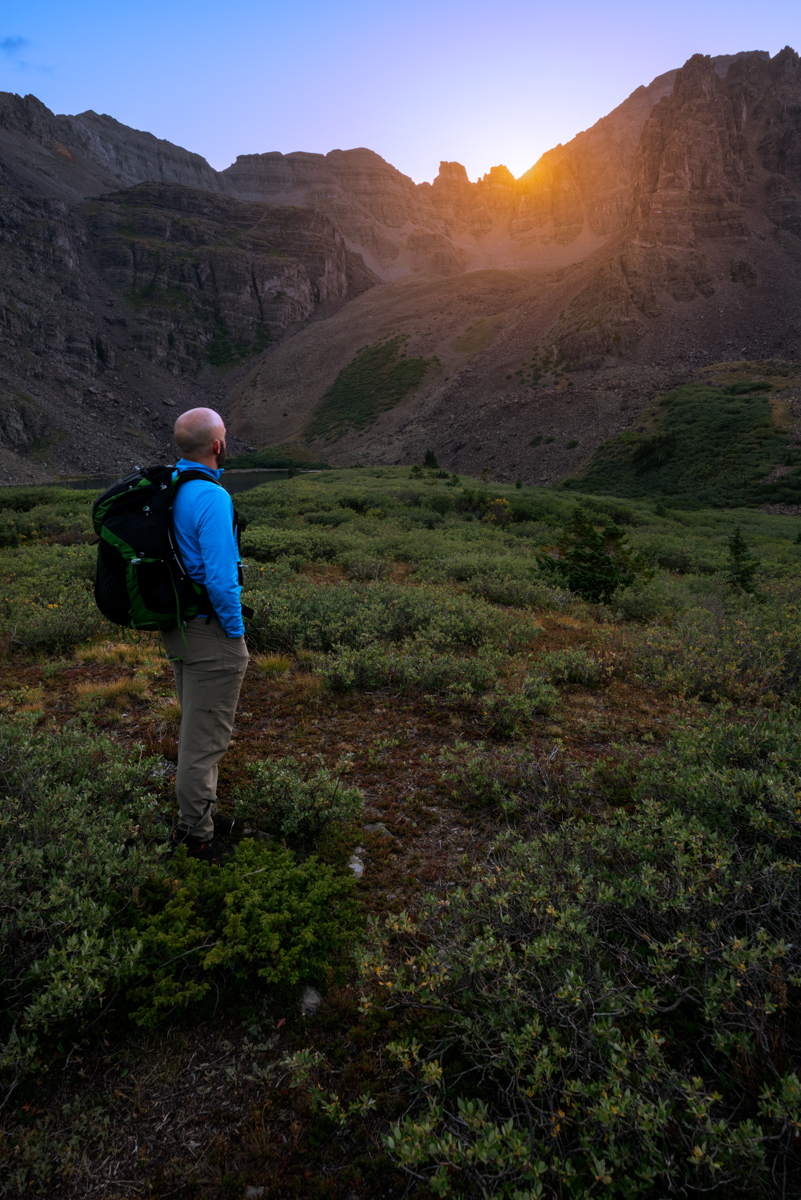
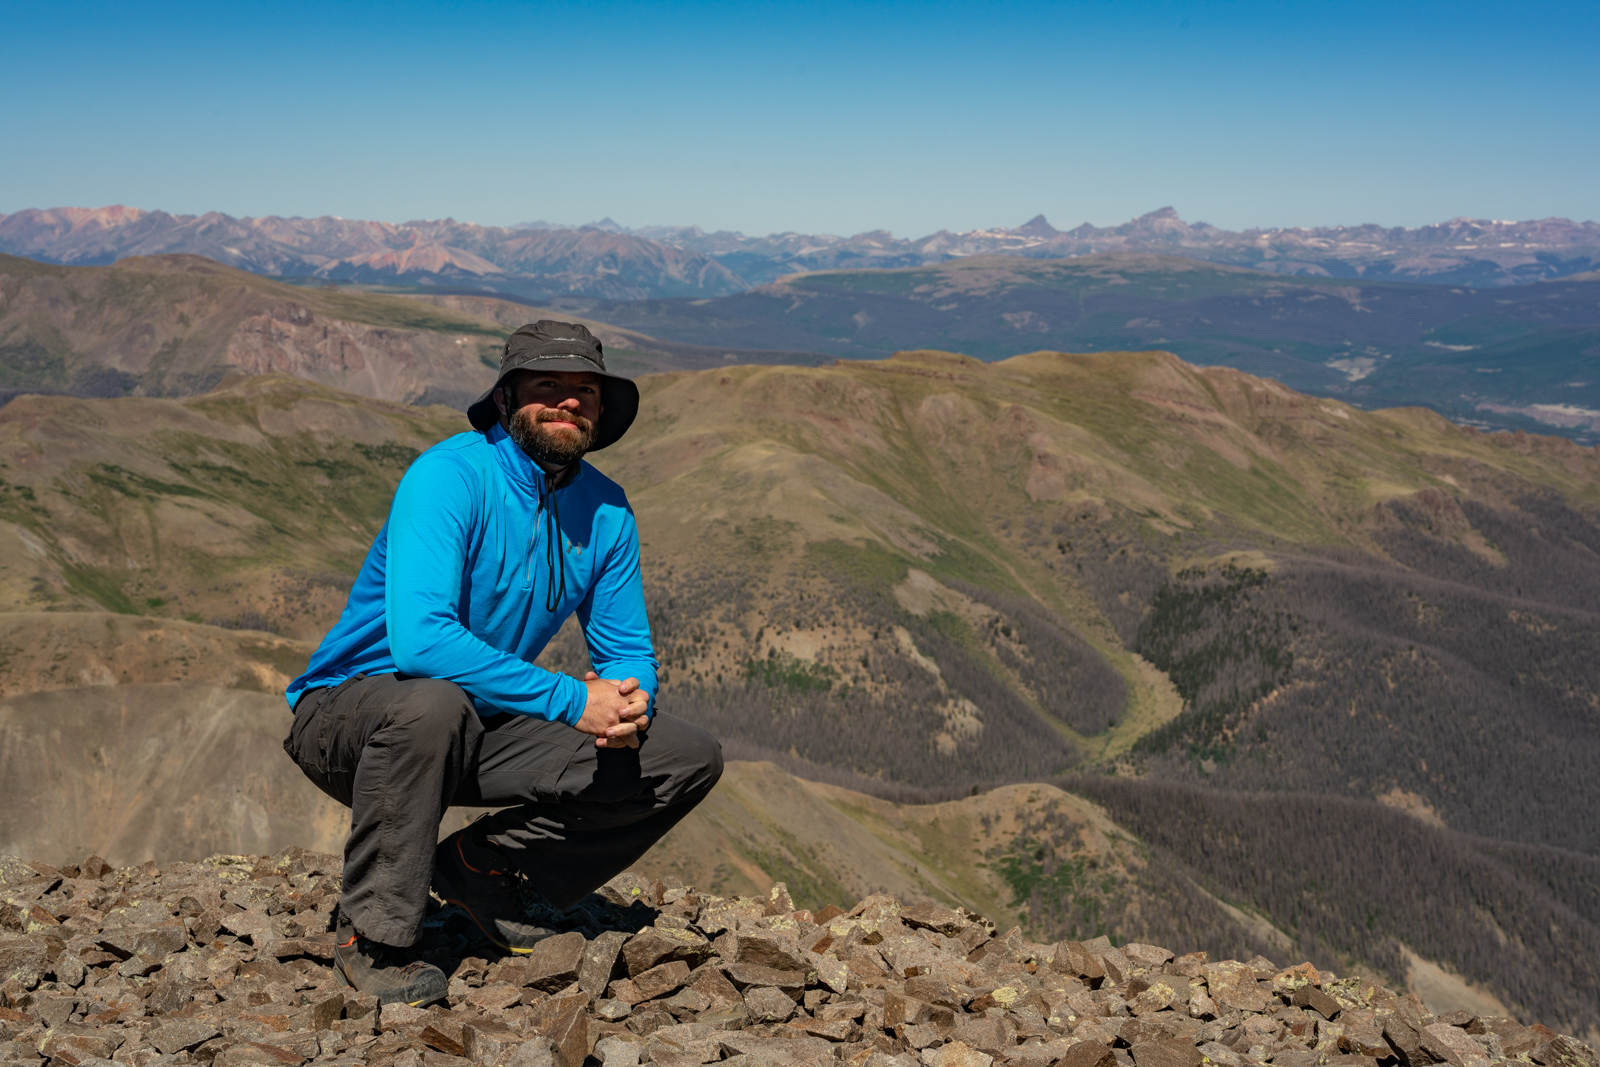
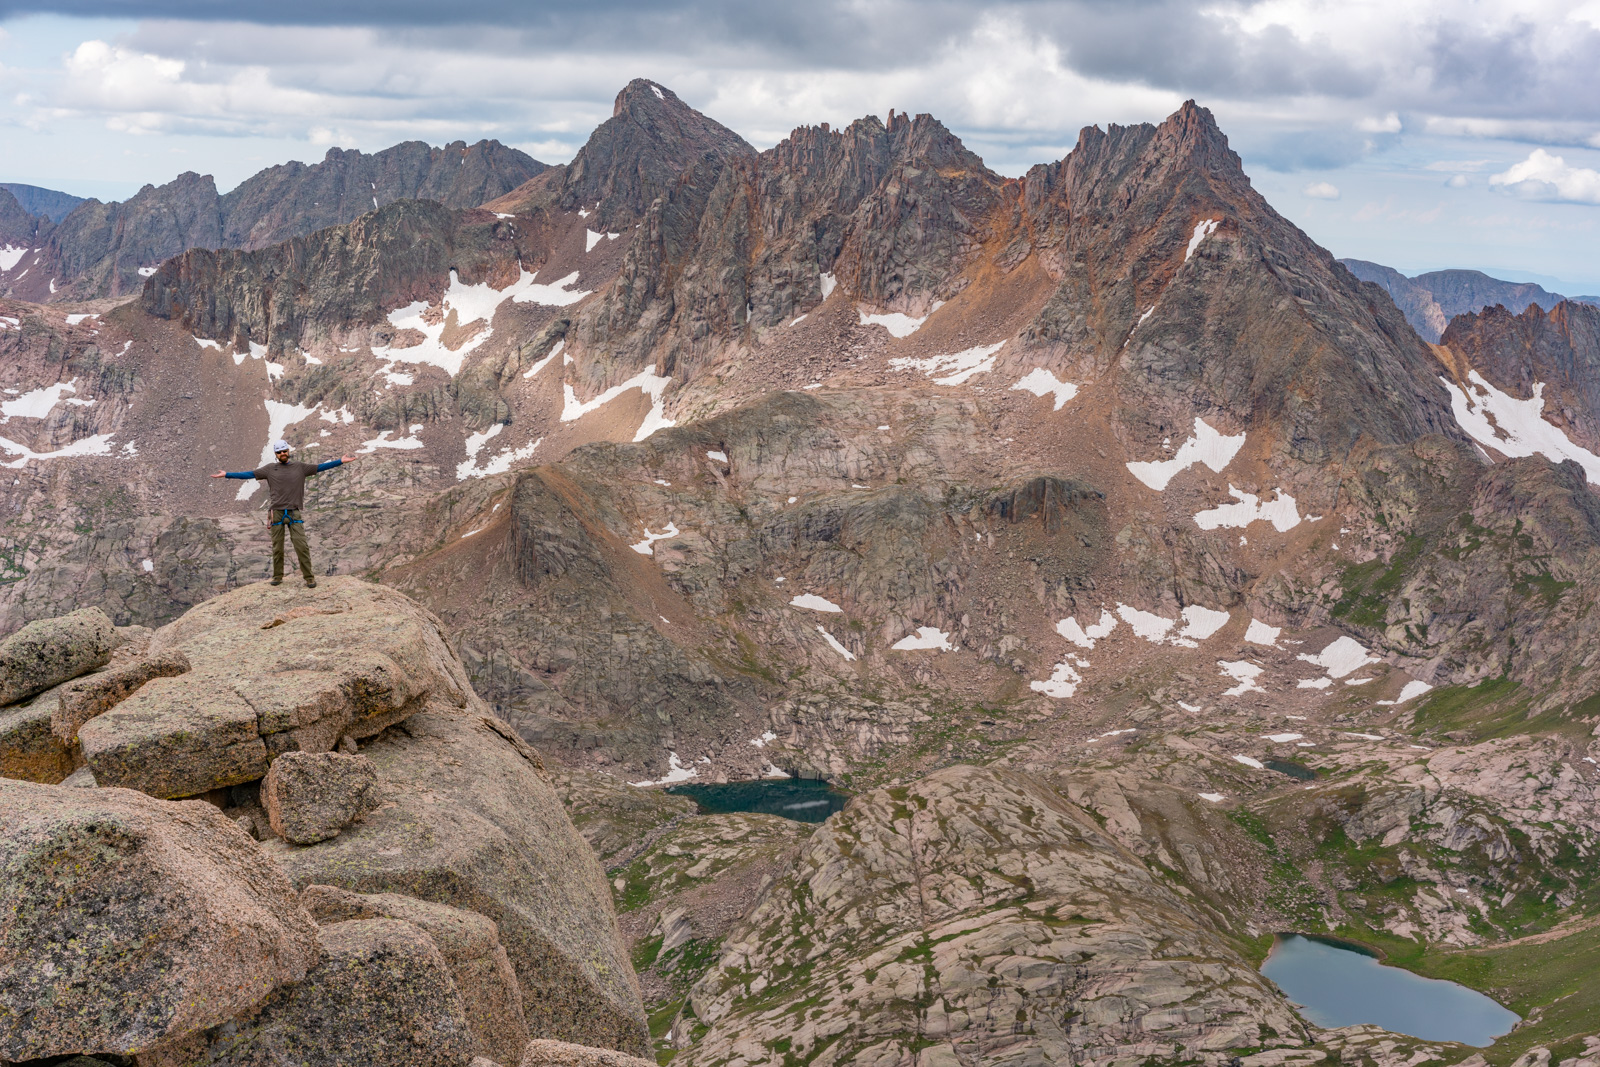
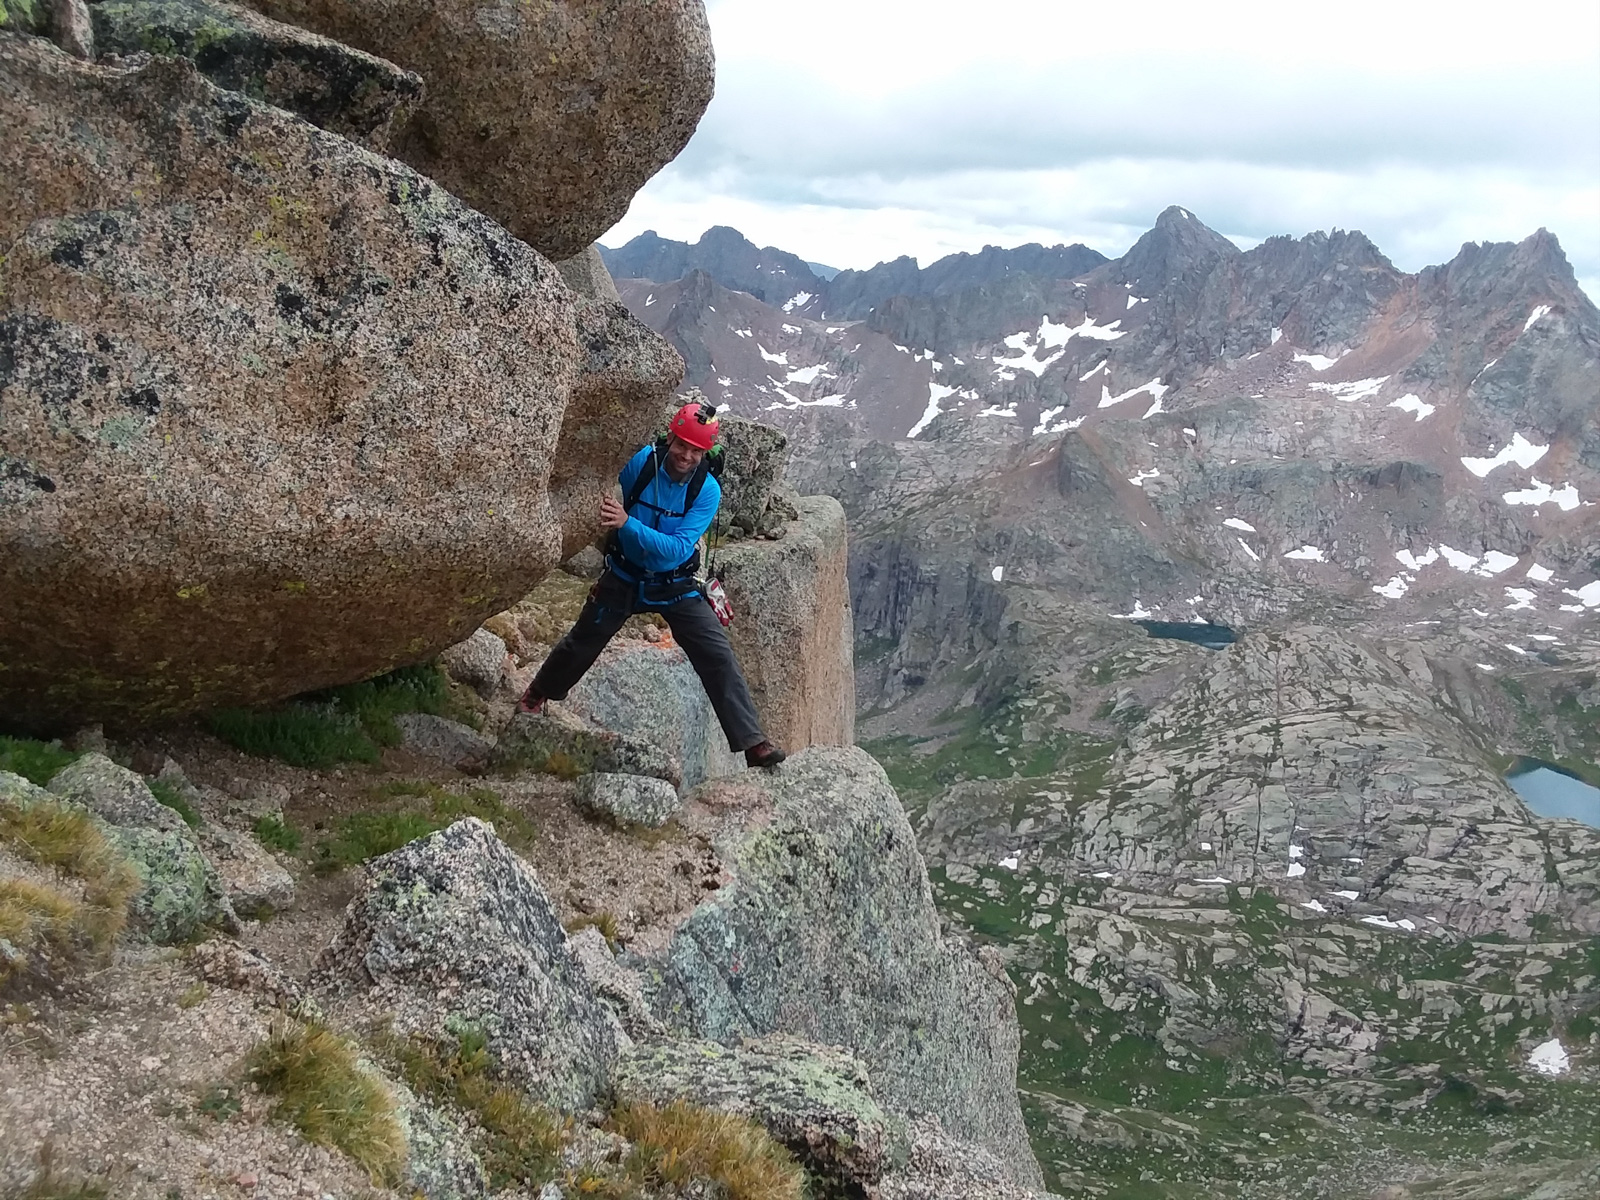
The scale of these mountains is so hard to describe in photos; however, I think adding me to the frame helps.
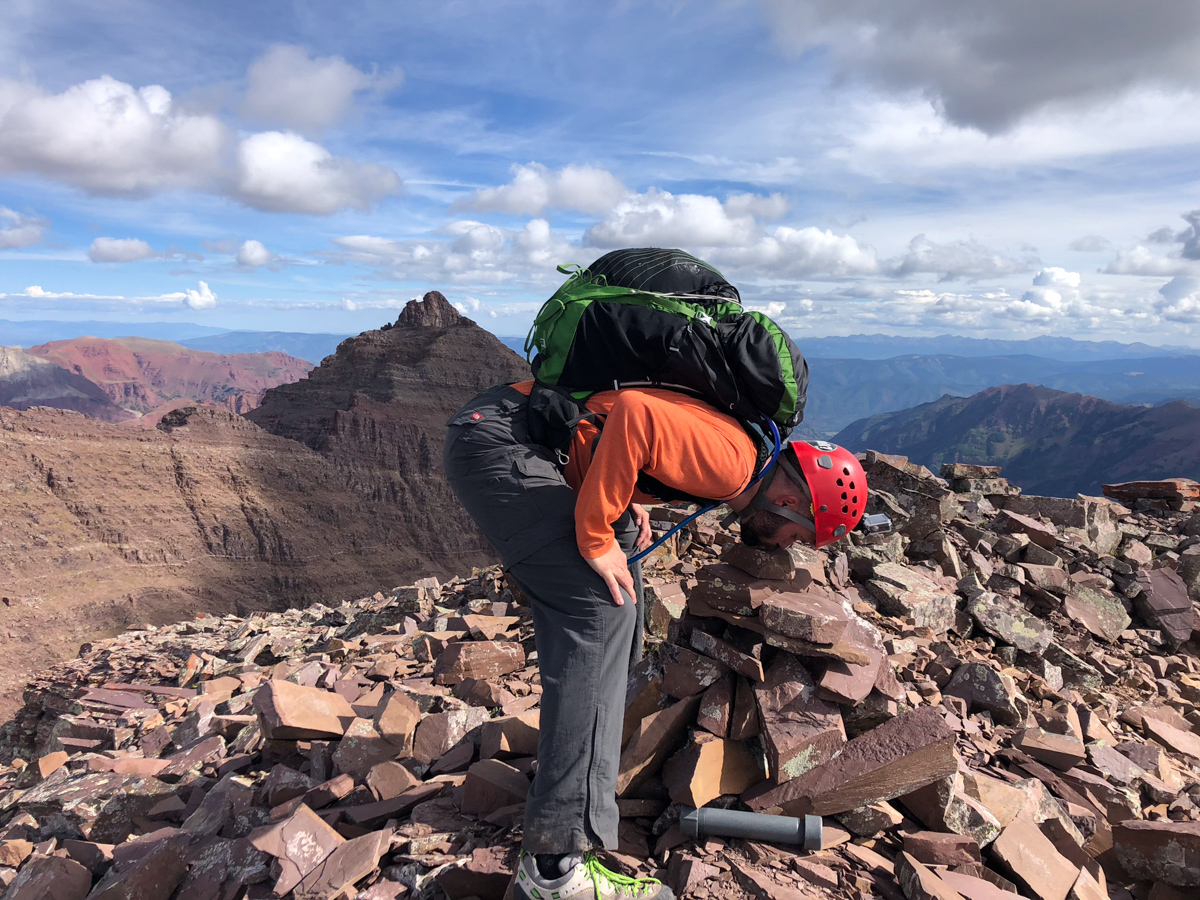
I had a special surprise for Silas too. I brough my 100summits.com T-shirt with me and a sharpee so he could check off the last box for Thunder Pyramid. What a great feeling!
I wonder why they call these the Pyramids?
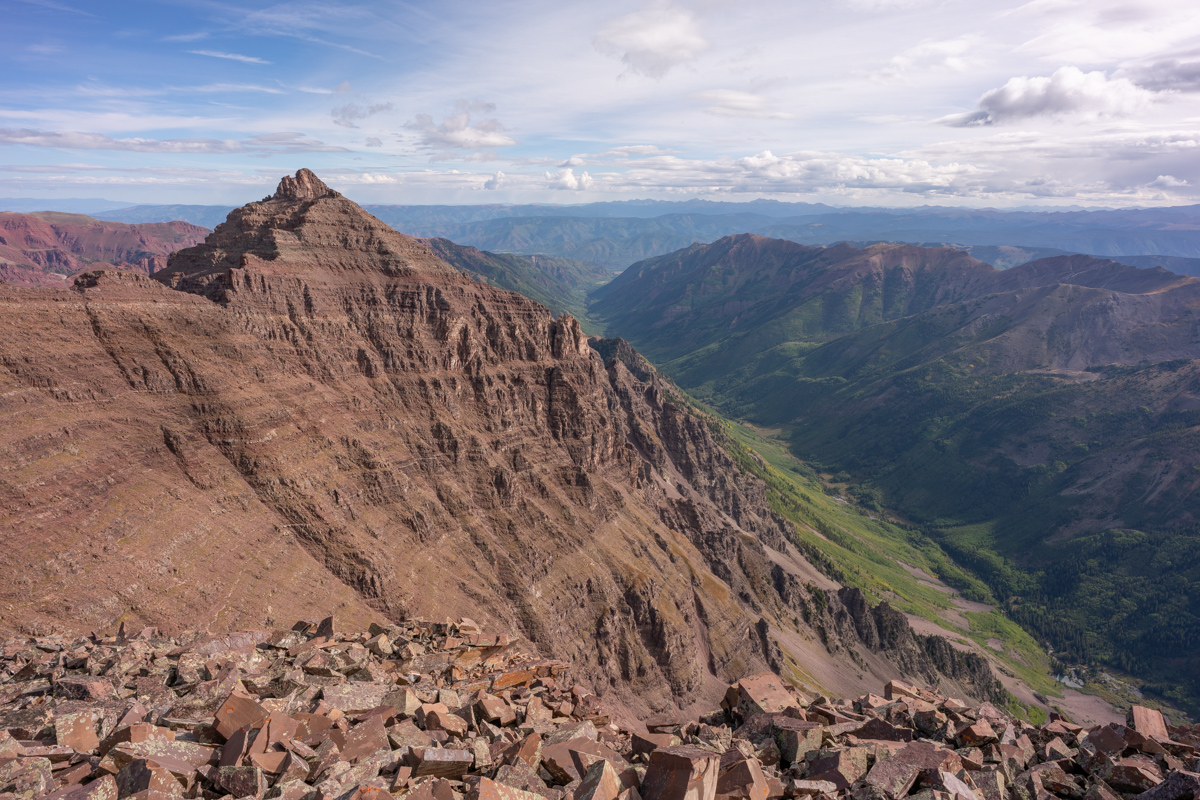
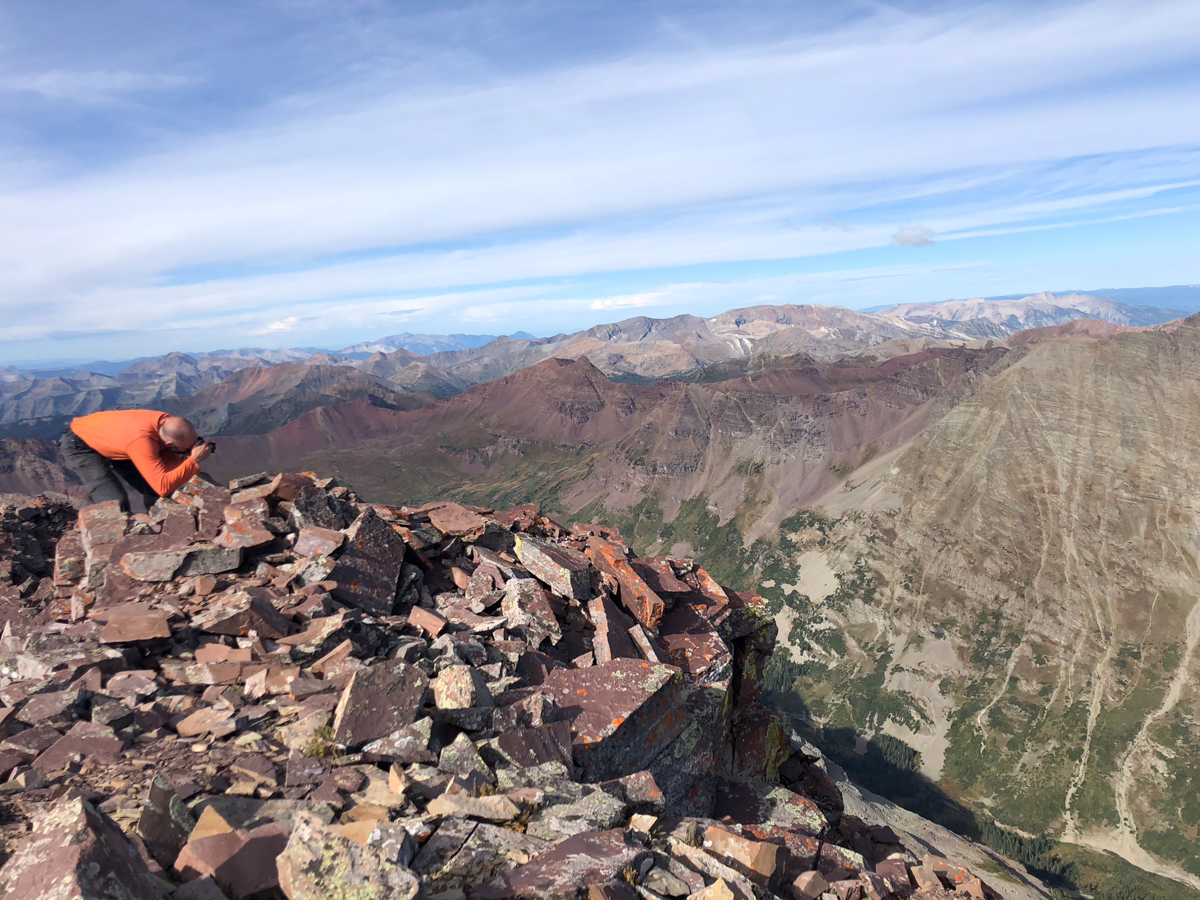
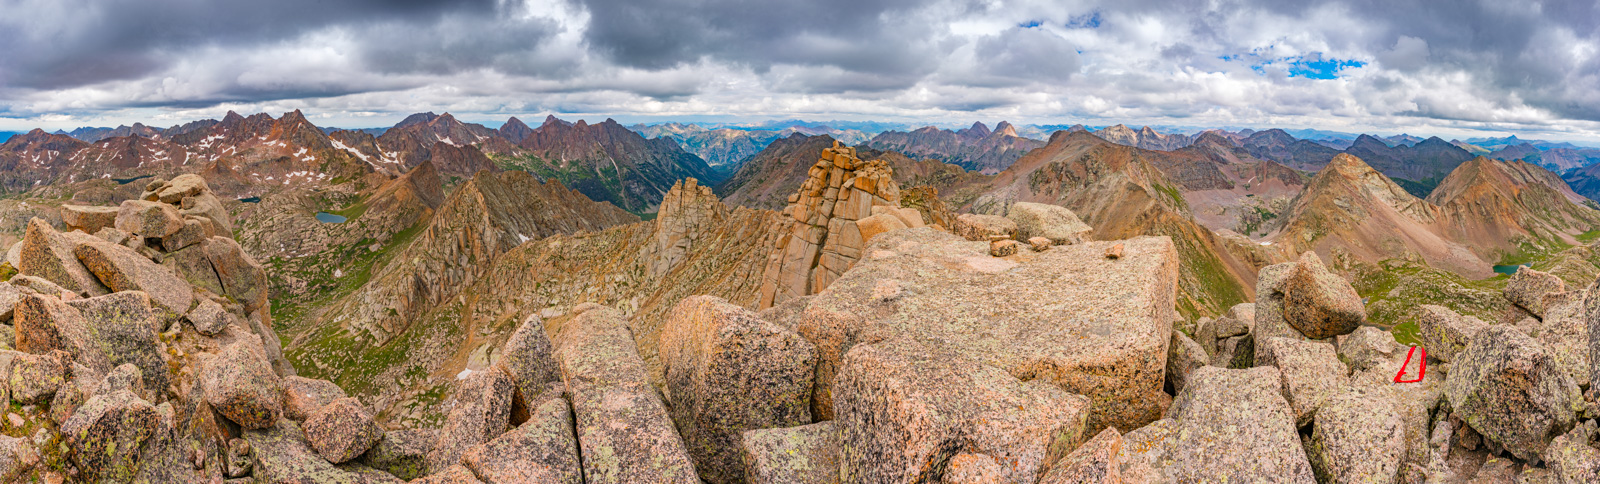
Silas caught me in the act of composing a photo while there. I really wanted something to show off the gnarly rocks in the foreground while including all of the great peaks of the area, so I had to get really low!
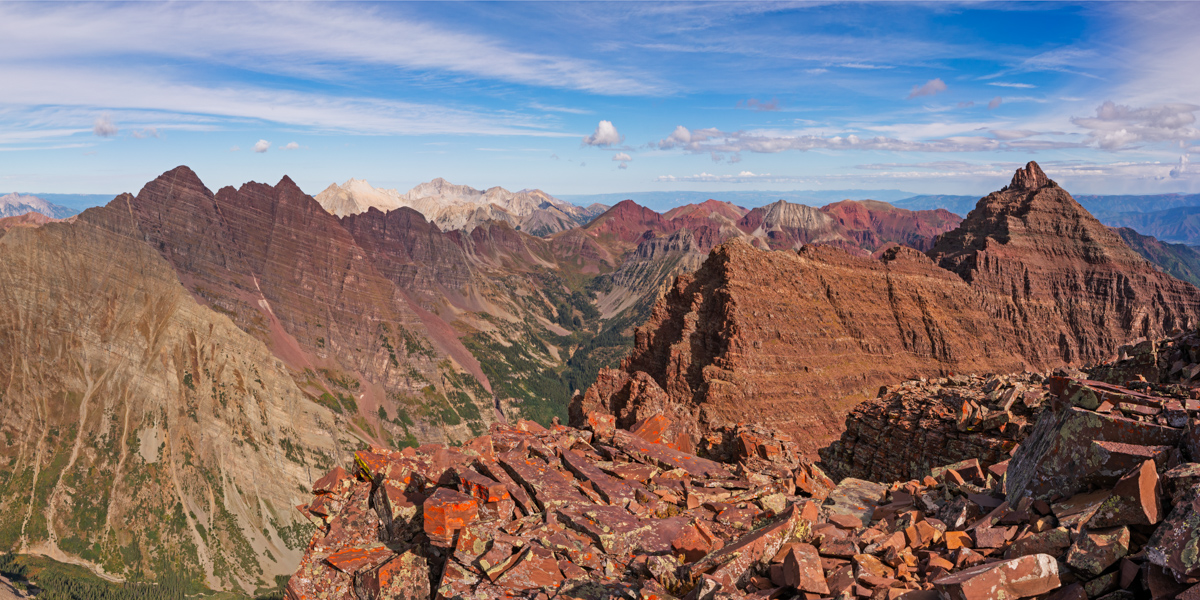
And the result:
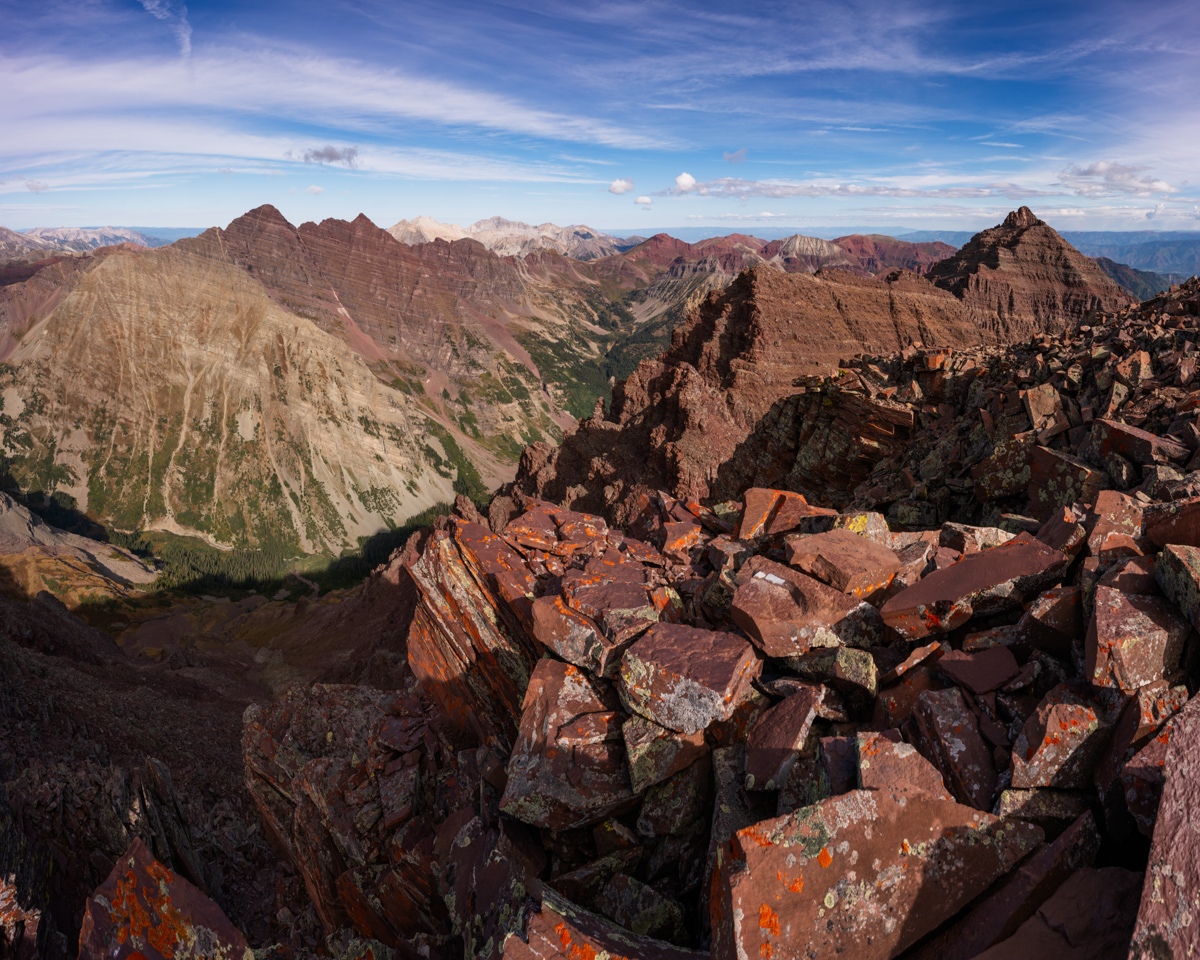
Another angle:
I felt like I needed a shot of Castle and Condundrum too, even though the light to the east was quite harsh. I think they still look quite formidable from here though. It was crazy to think just a couple weeks ago I was on Cathedral at sunrise looking this direction.
We also noticed a pair of hikers on top of Pyramid. This photo really shows off the scale of that peak well.
I decided to sign the summit register and have Silas video it for posterity.
I also felt compelled to kiss the top of the mountian for some reason before departing. It was fun Thunder Pyramid - thanks for the ride!
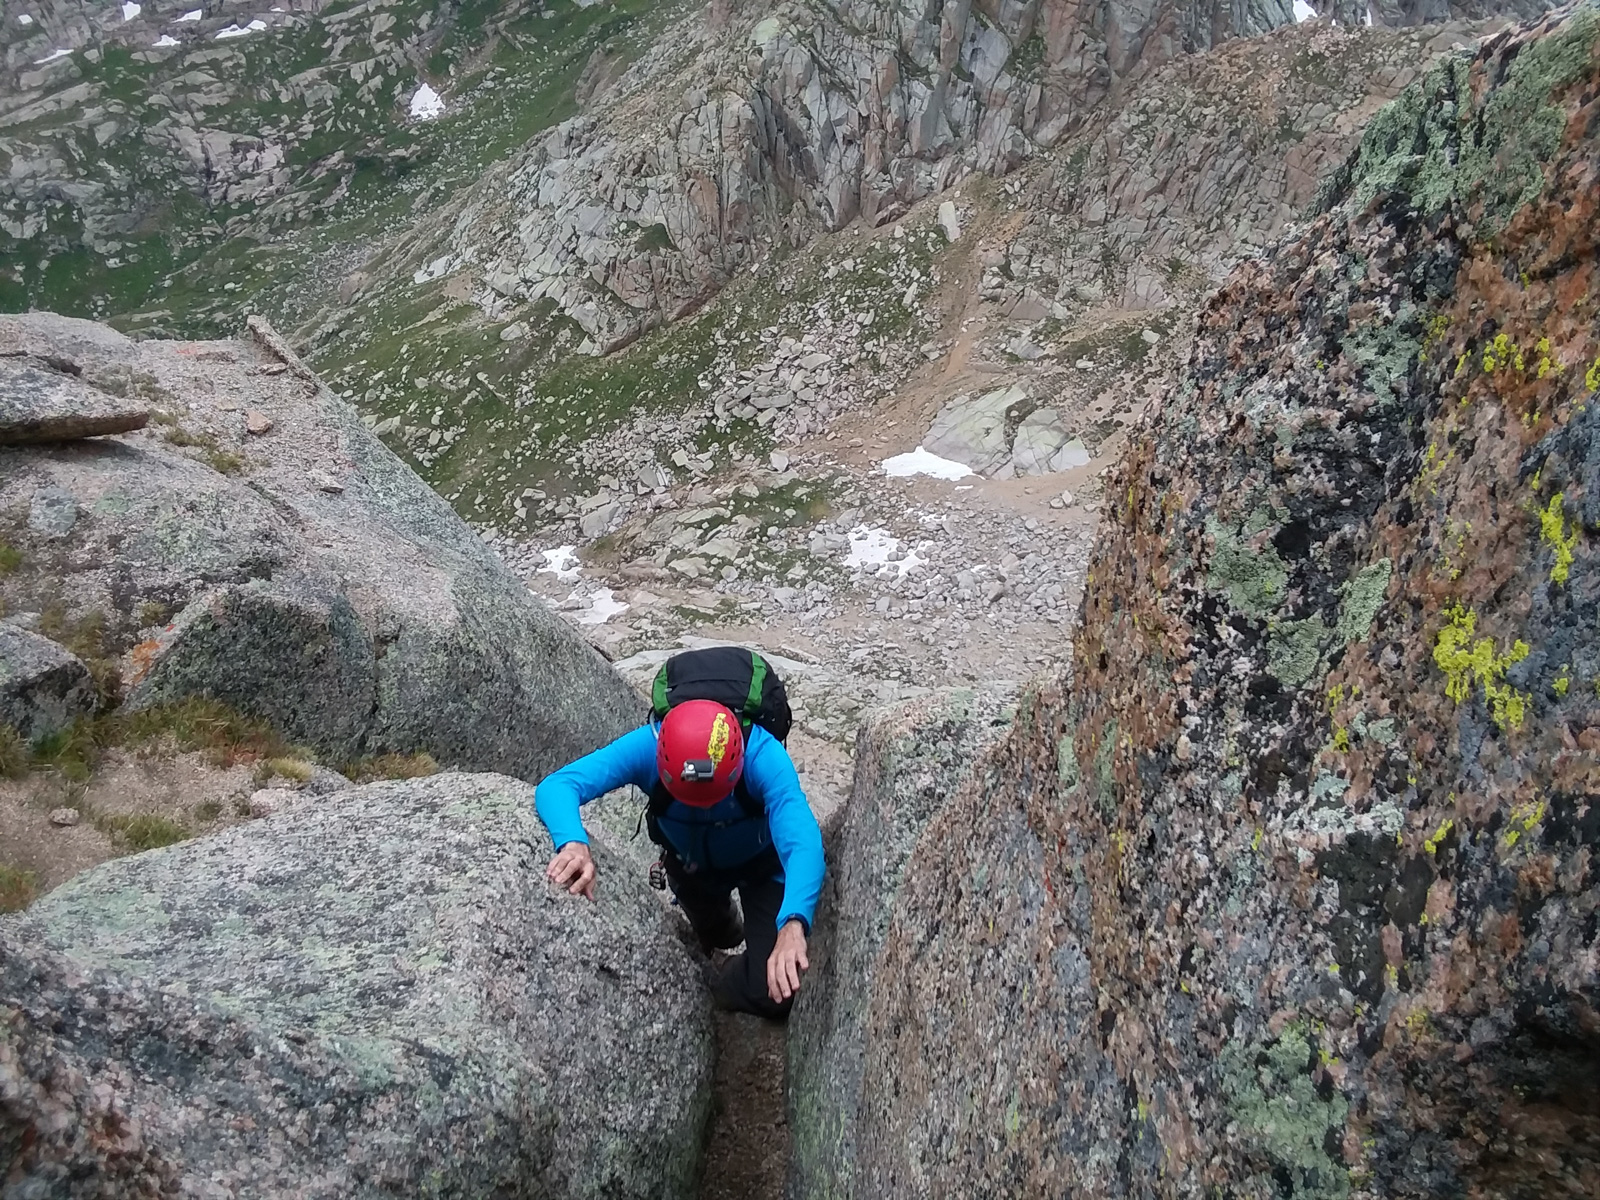
The journey down began and I was still on cloud 9 but knew we needed to be extra safe on the descent. There were sections near the summit that had decent exposure and made Silas quesy to look back at me on the edges. I was like, "what's the big deal?" :-)
Upon reaching the saddle the view down was sobering. It looked incredibly nasty. Fun.
We made our way down carefully, picking mostly the same route as before, except we stayed a bit higher towards the top of the ridge instead of going south into the gully.
The rock here is especially loose and nasty. Great care should be taken to navigate down. I got some fun action shots of Silas in the act.
Don't fall!
Here is a good view of the spot we chose to turn off from the White Gully, only in reverse.
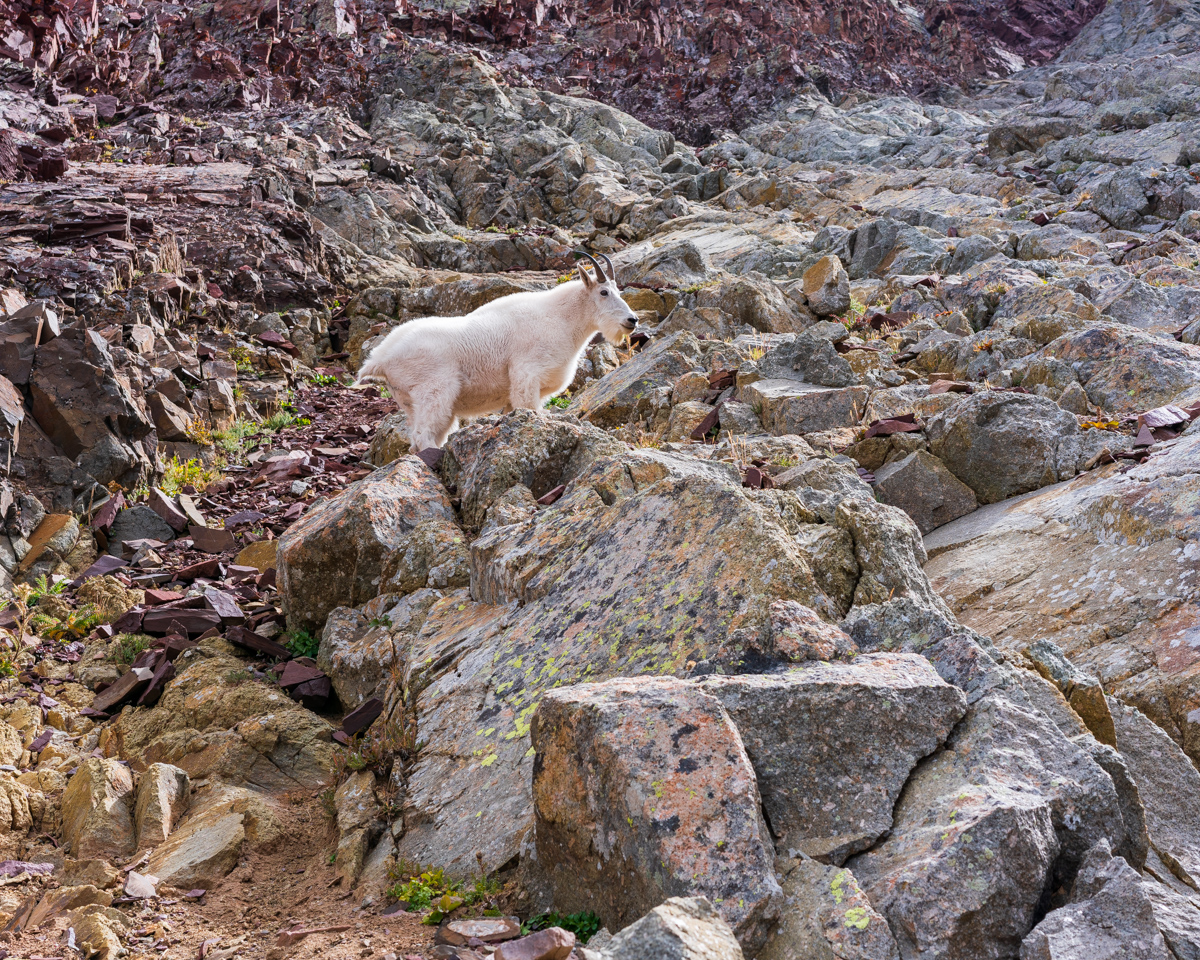
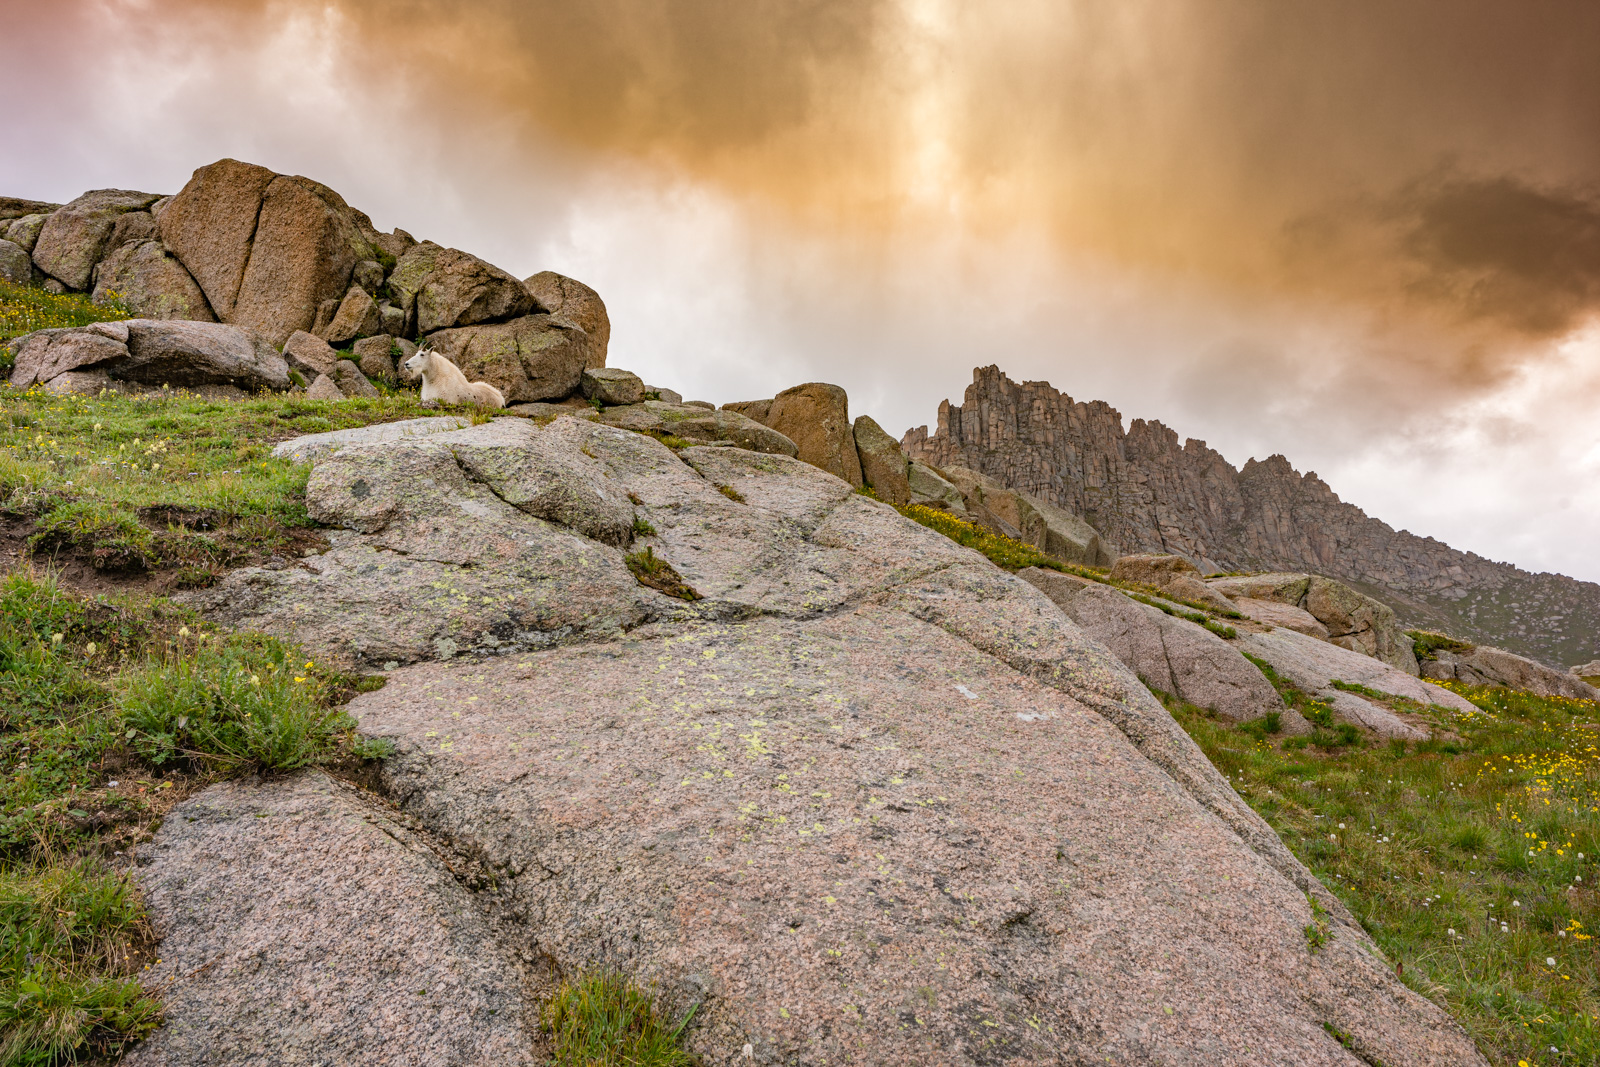
Upon reaching the white gully, we were equally excited and dismayed by the appearance of a mountain goat below us. Despite our efforts, he kept climbing right up the gully towards us and eventually above us. We now not only had to contend with our own rock fall, but also the rock fall from the goat. Fortunately, he did not knock any rocks down on us!
Reaching the bottom of the white gully was a relief, and, we were pleasantly surprised at how well the weather had held up!

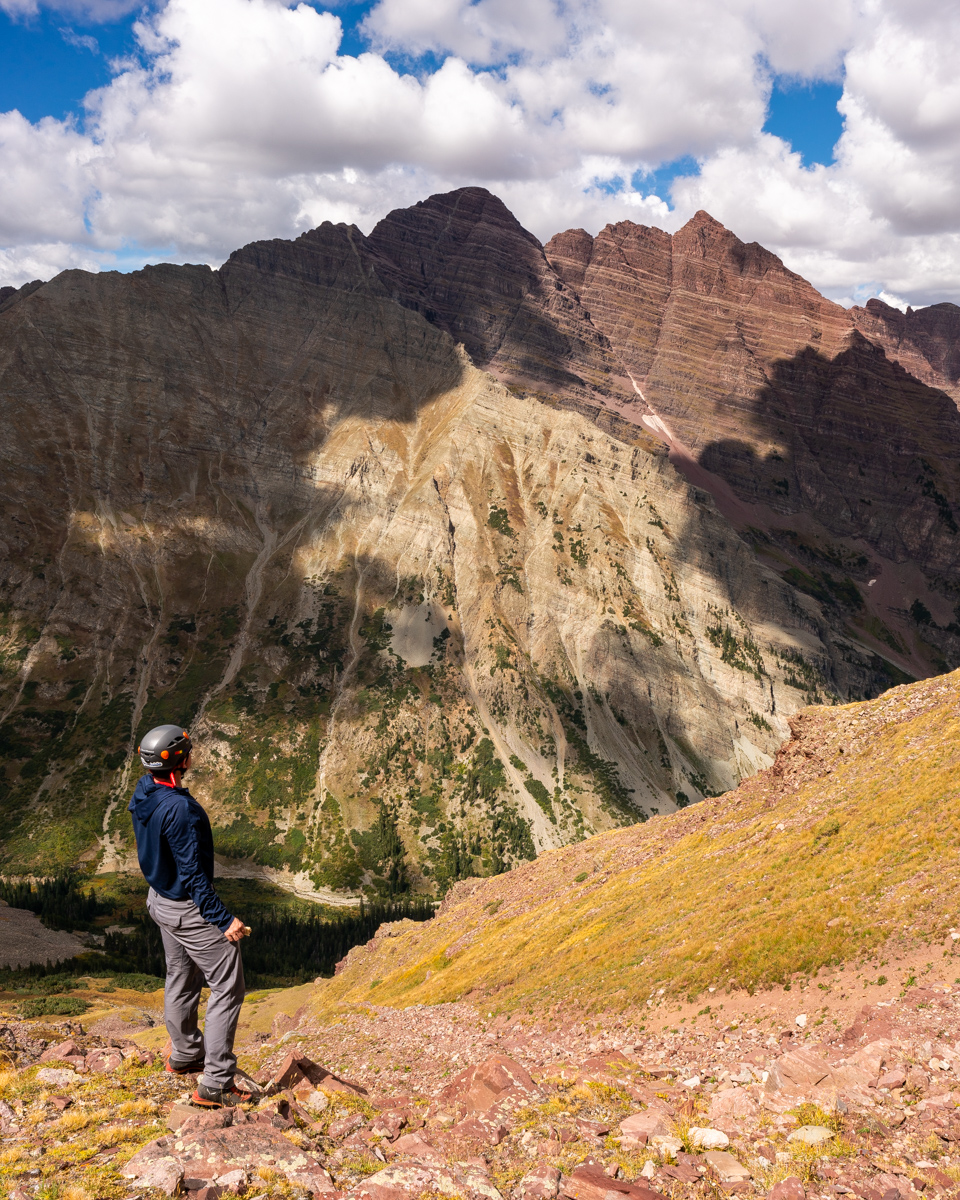
I absolutely love the next shot of Silas gazing at North Maroon (which he climbed the following day).
We made it to the turn off for the very first gully and found that dirt/rock section to really suck - here's a good view of Silas entering that section. It was super steep and very unpleasant.

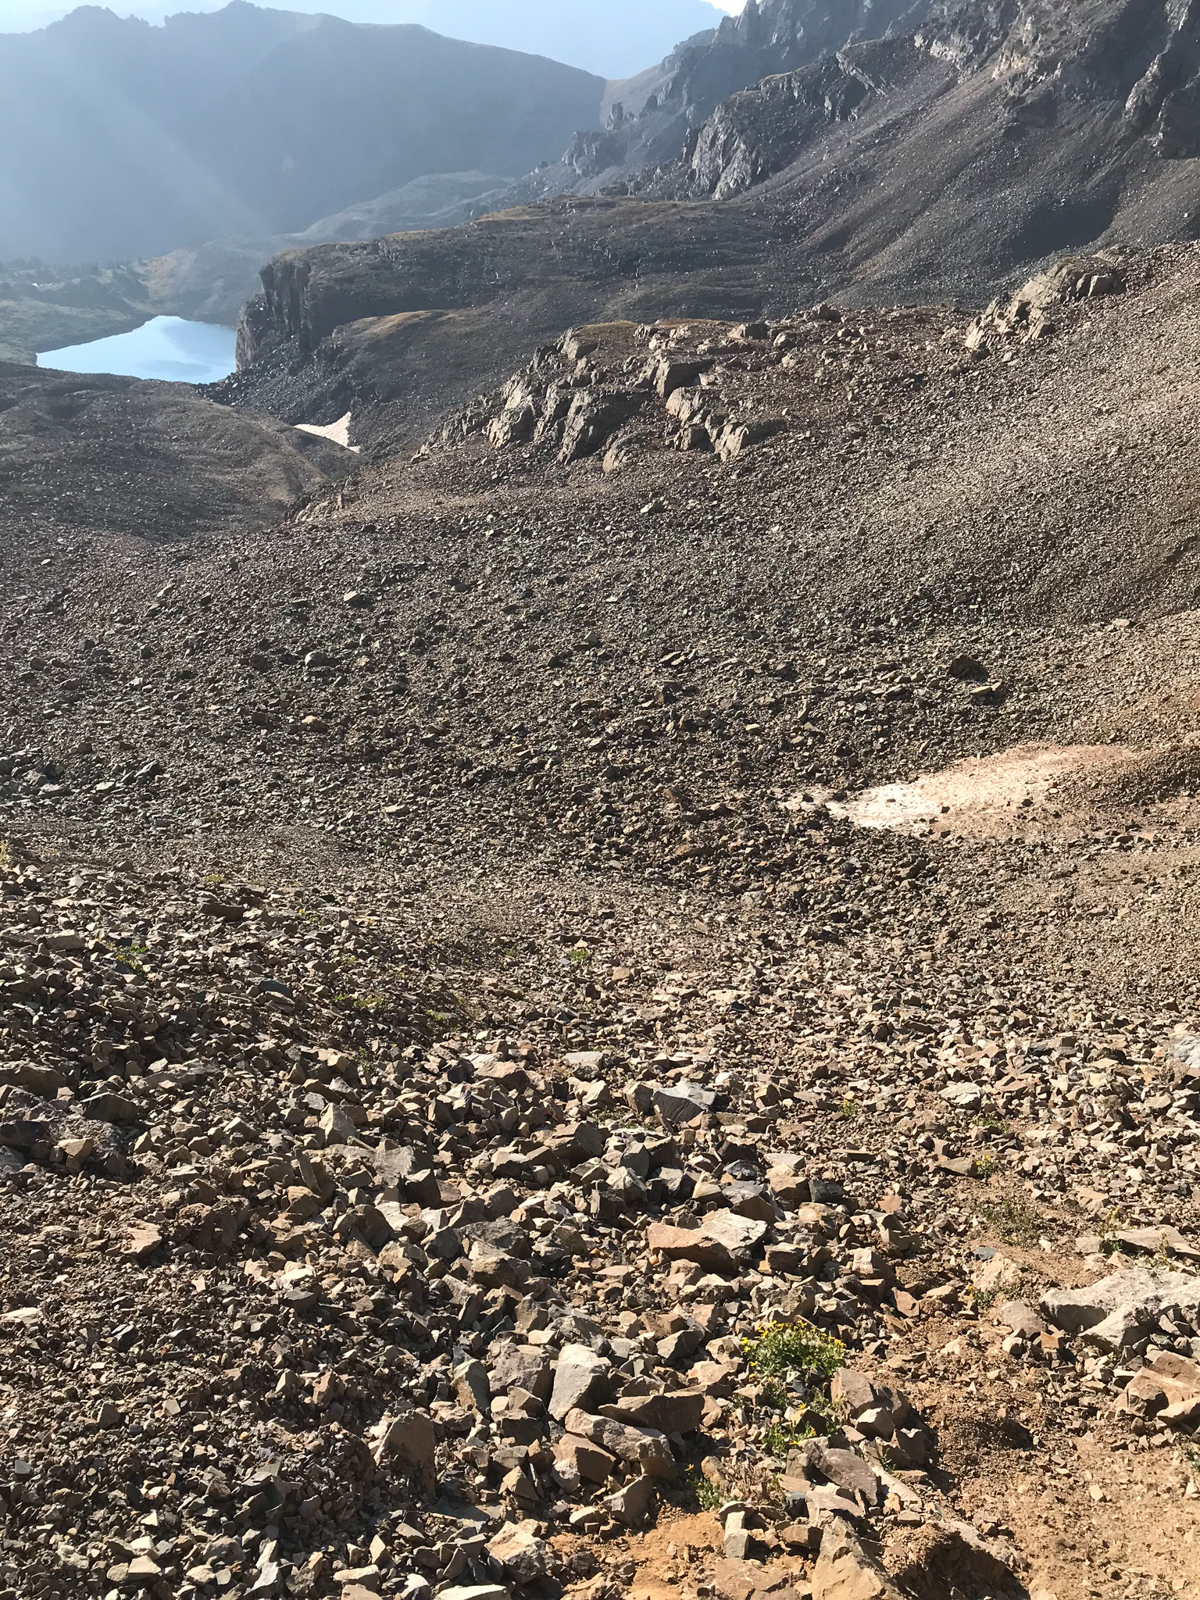
We opted to follow the far left gully to exit, which was much less steep but much more loose and filled with nasty talus. At least the view of Len Shoemaker ridge was good.
Every step in this gully was dangerous. It was a real ankle destroyer.
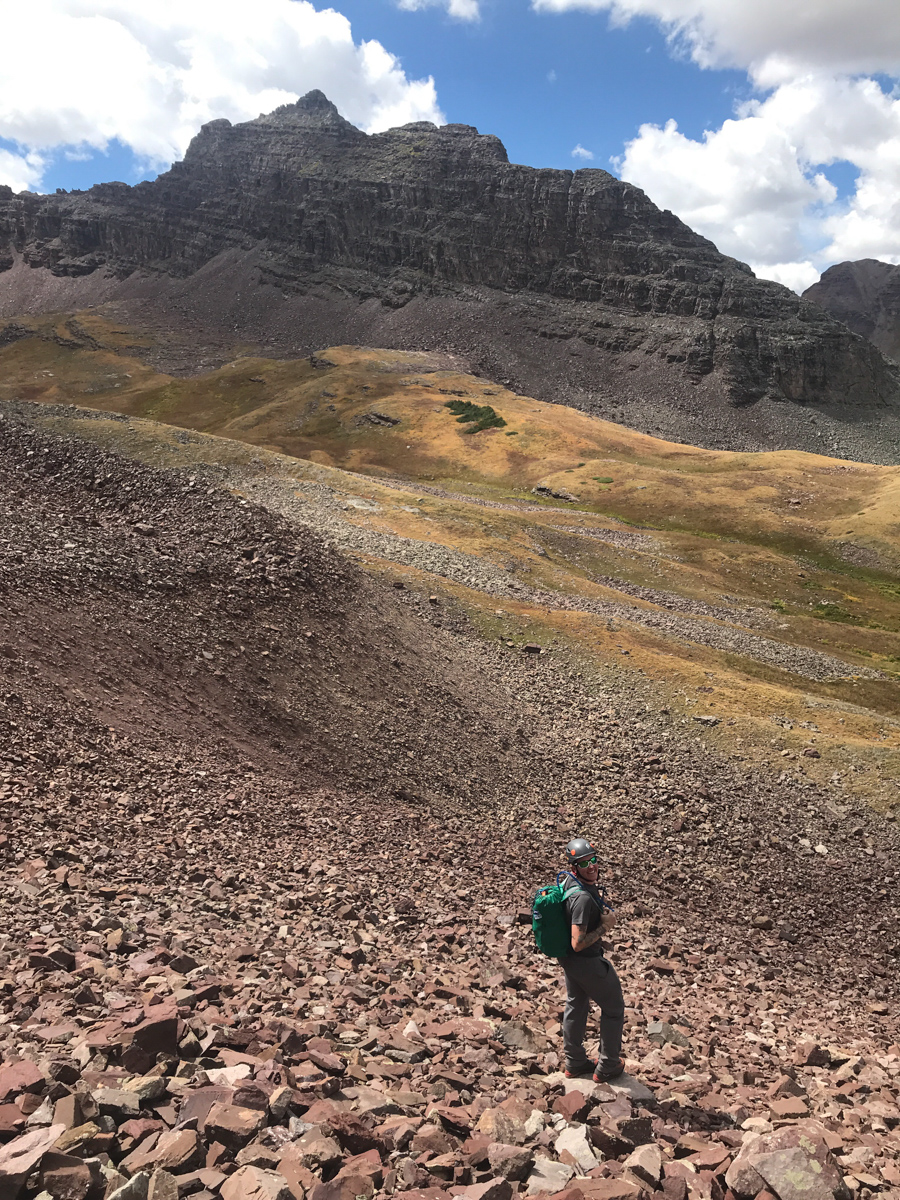
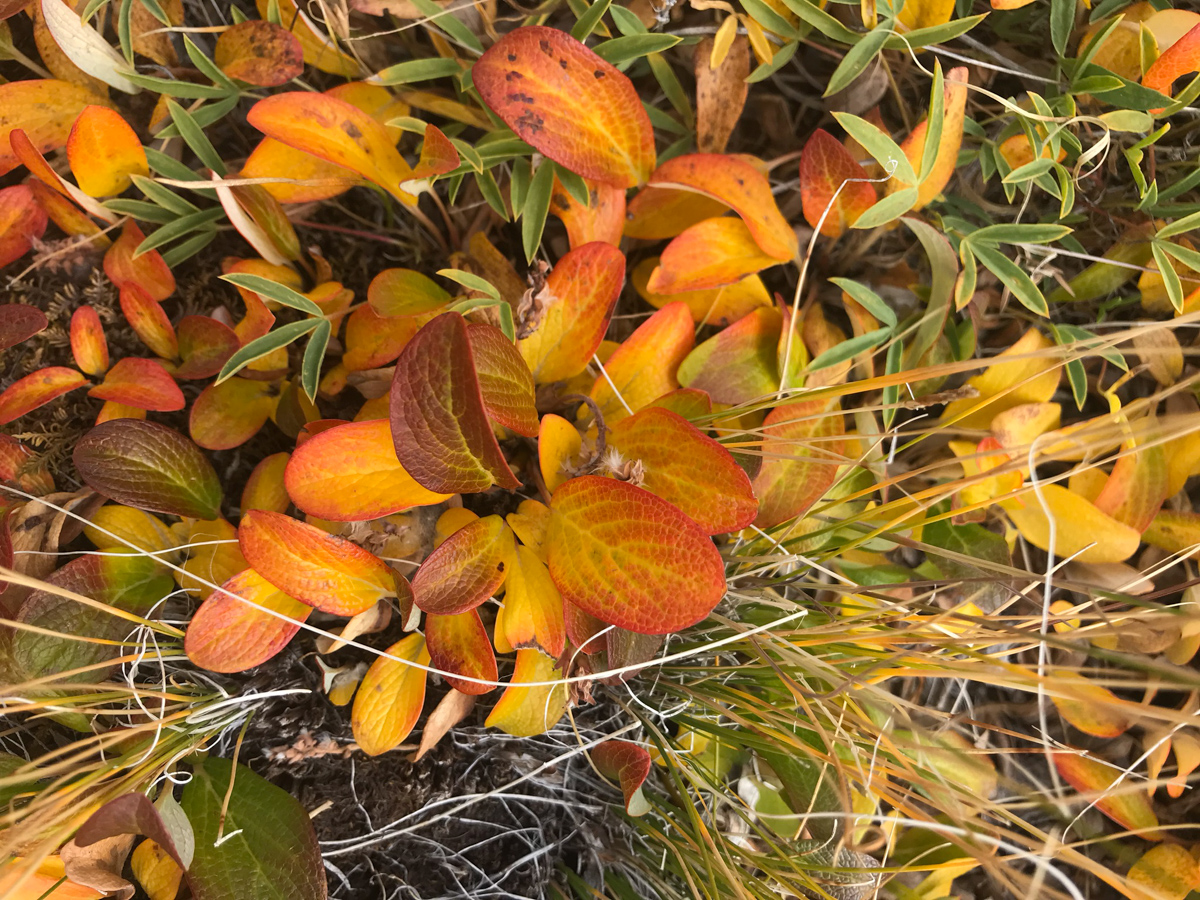
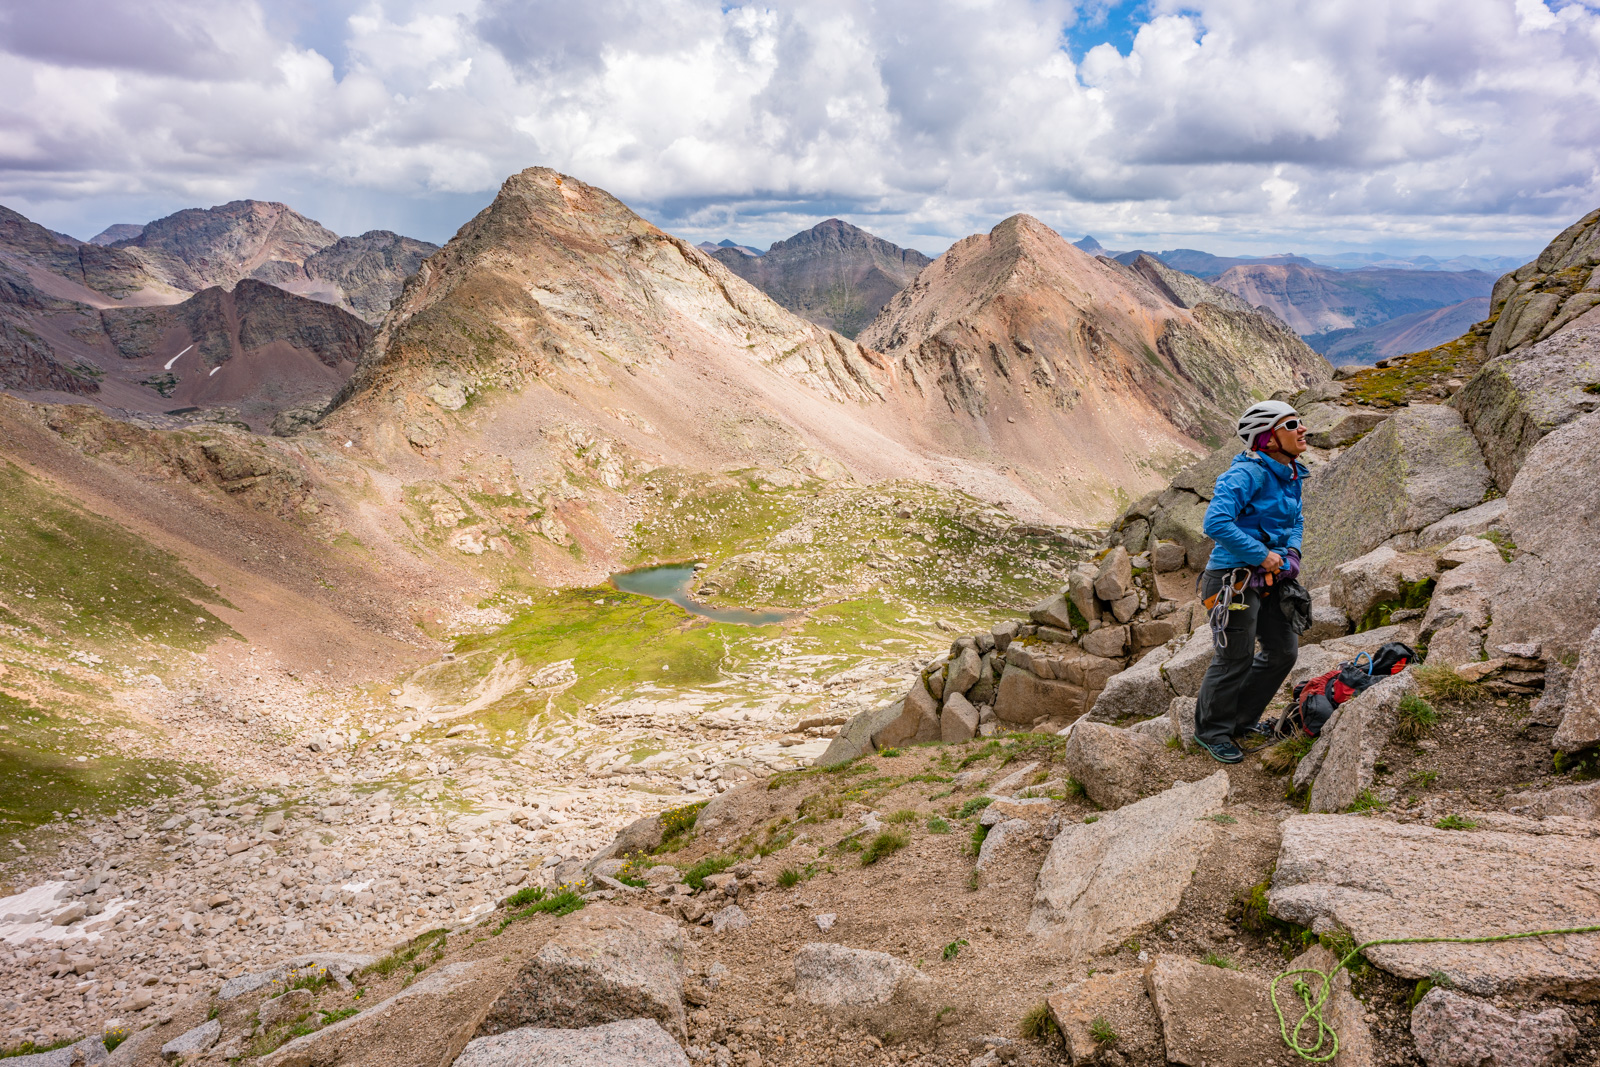
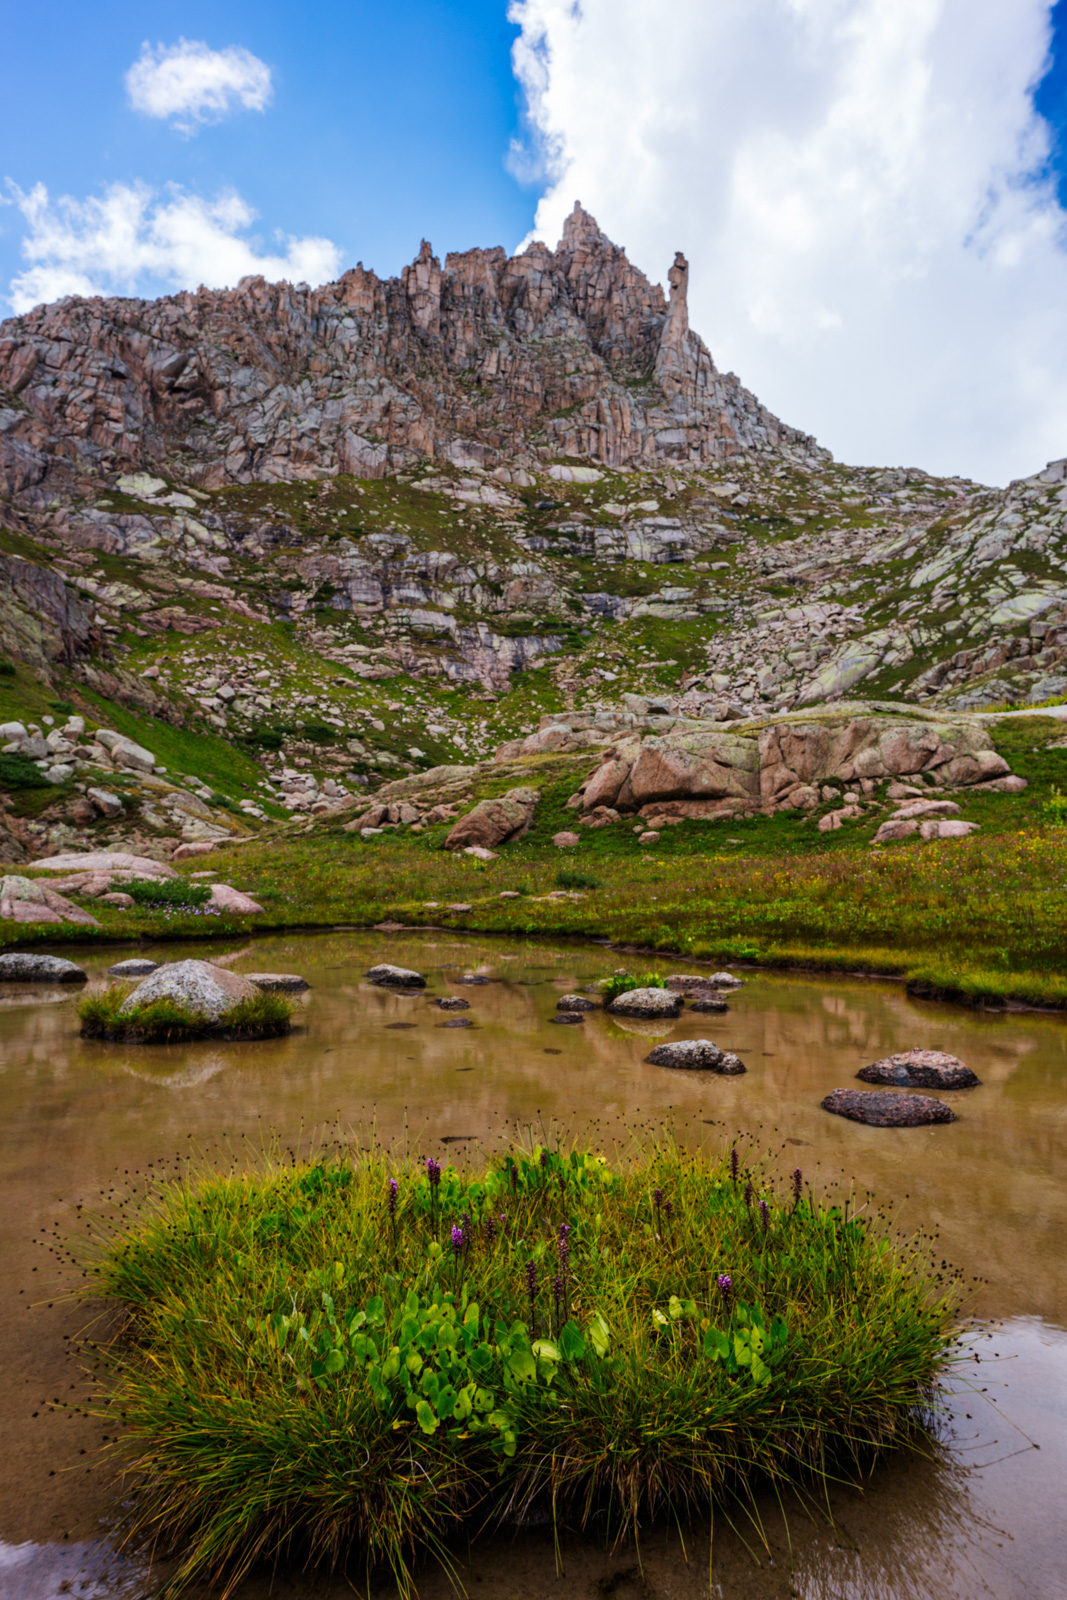
Upon reaching the flat surface below the talus field, we stopped to admire the foliage - the tundra had turned yellow and orange, reminding us that fall had arrived.
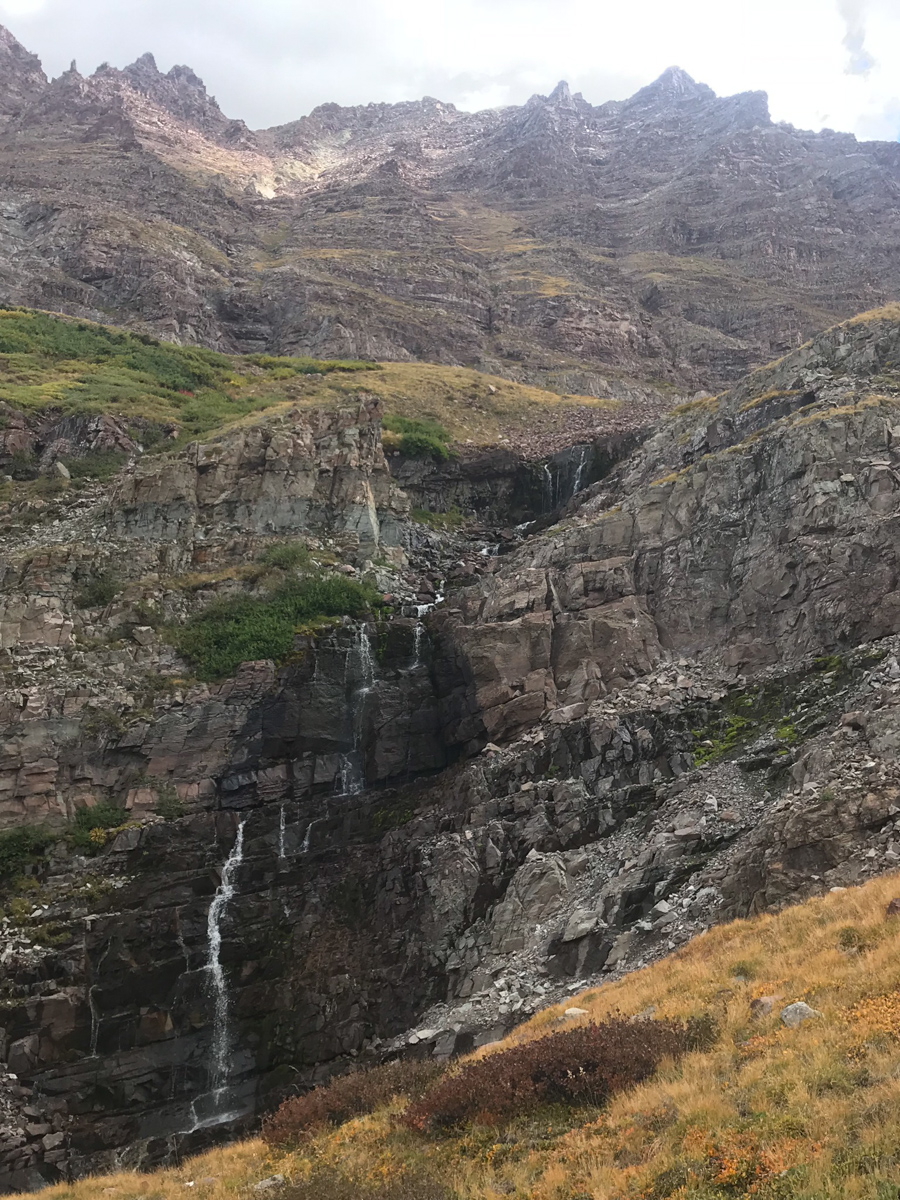
A look back up Thunder Pyramid below some waterfalls we found - a glorious sight indeed.
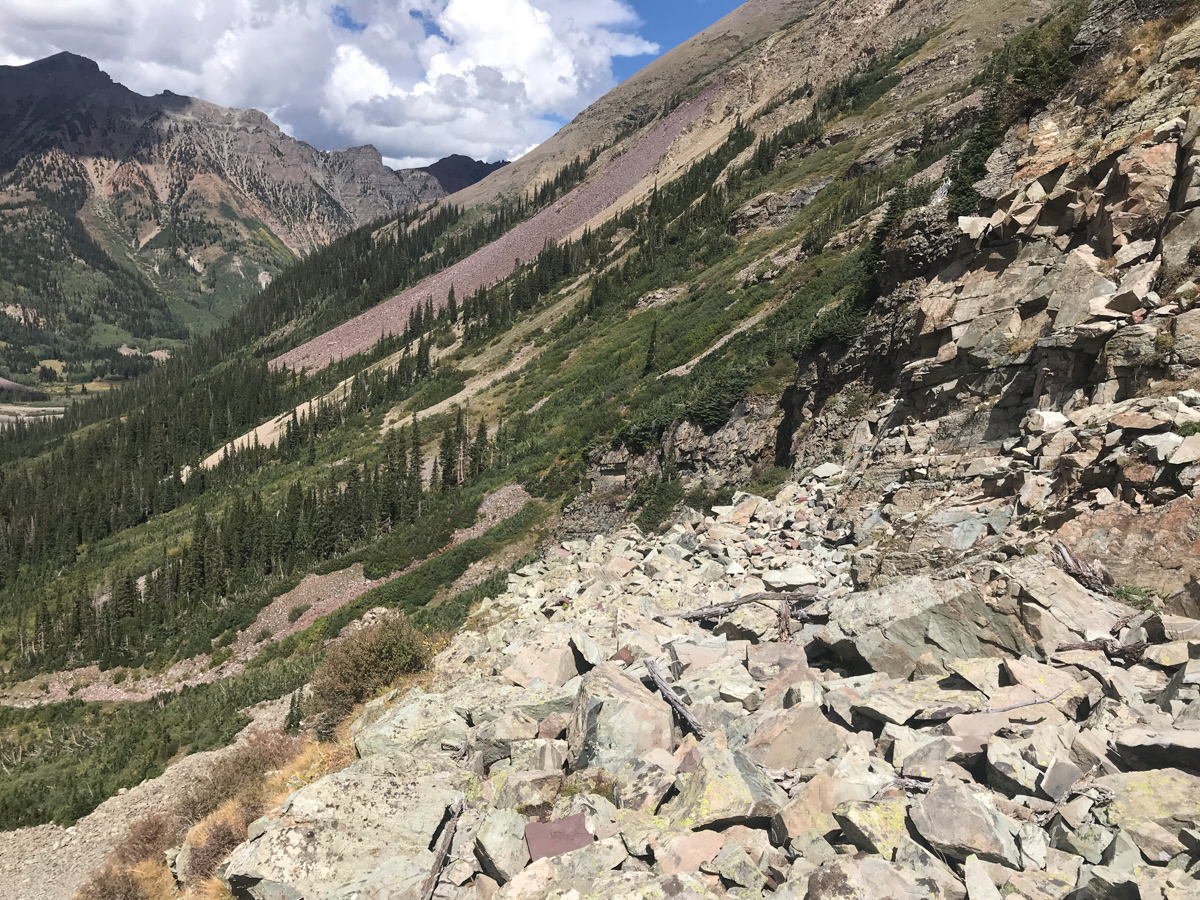
We picked our way down pretty much following our ascent route - here you can see one of the sections where we navigated below and above two cliff bands by following a nice rocky section.
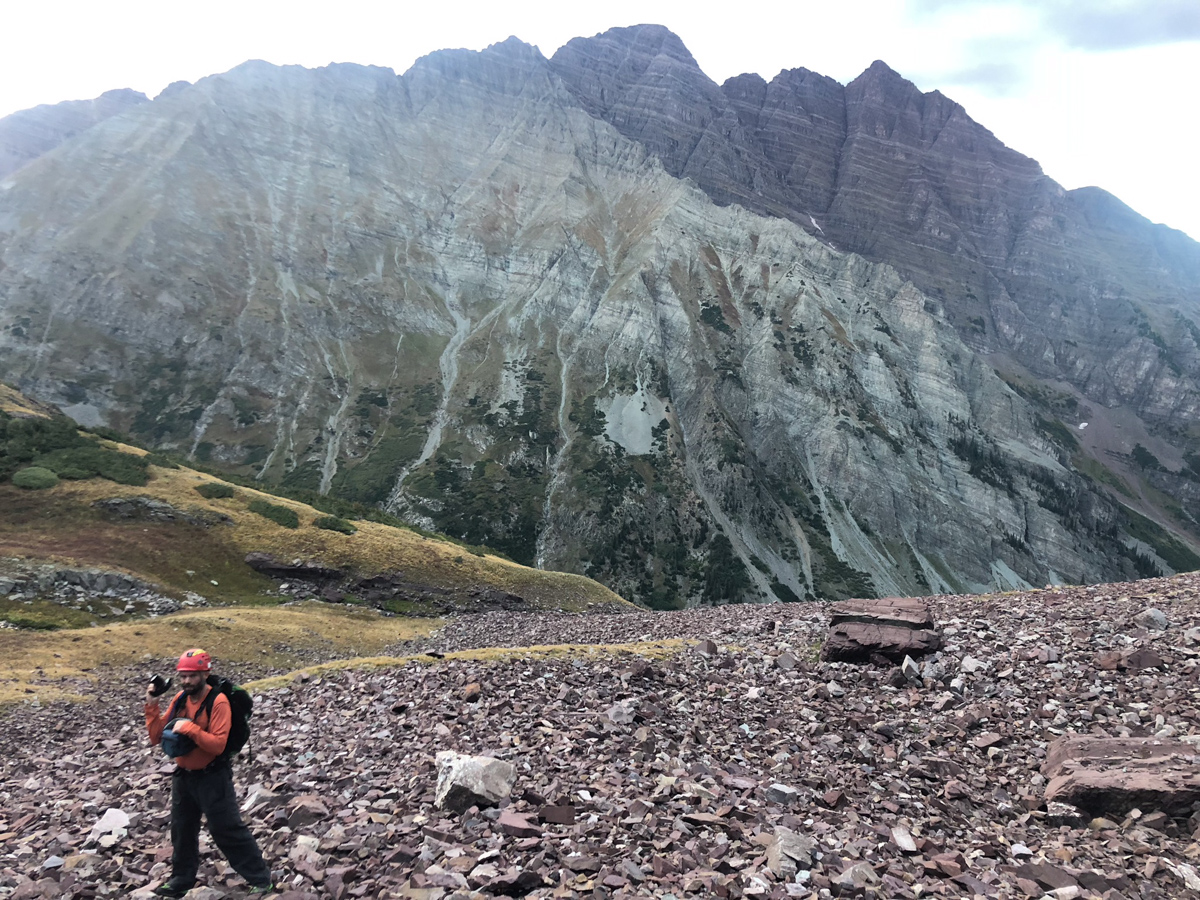
At treeline we found some very large plastic peices that we think were from a downed helicopter. They appeared to be part of the cockpit and were about 2' by 2' in size. Silas carried them out. We reached the base of the peak without incident! Success! Upon reaching our campsite, we found a Ranger talking to an older gentleman who seemed a bit out of breath. I confirmed it was the father we had told the son to go back to get earlier in the morning. It had apparently taken them this long to get him down to our campite near Crater Lake. He thanked us for helping his son Austin, saying when Austin came back for him, he had fallen asleep. They eventually airlifed them both out from the lake, which quite the specticle to witness. I got some photos and video of the event.
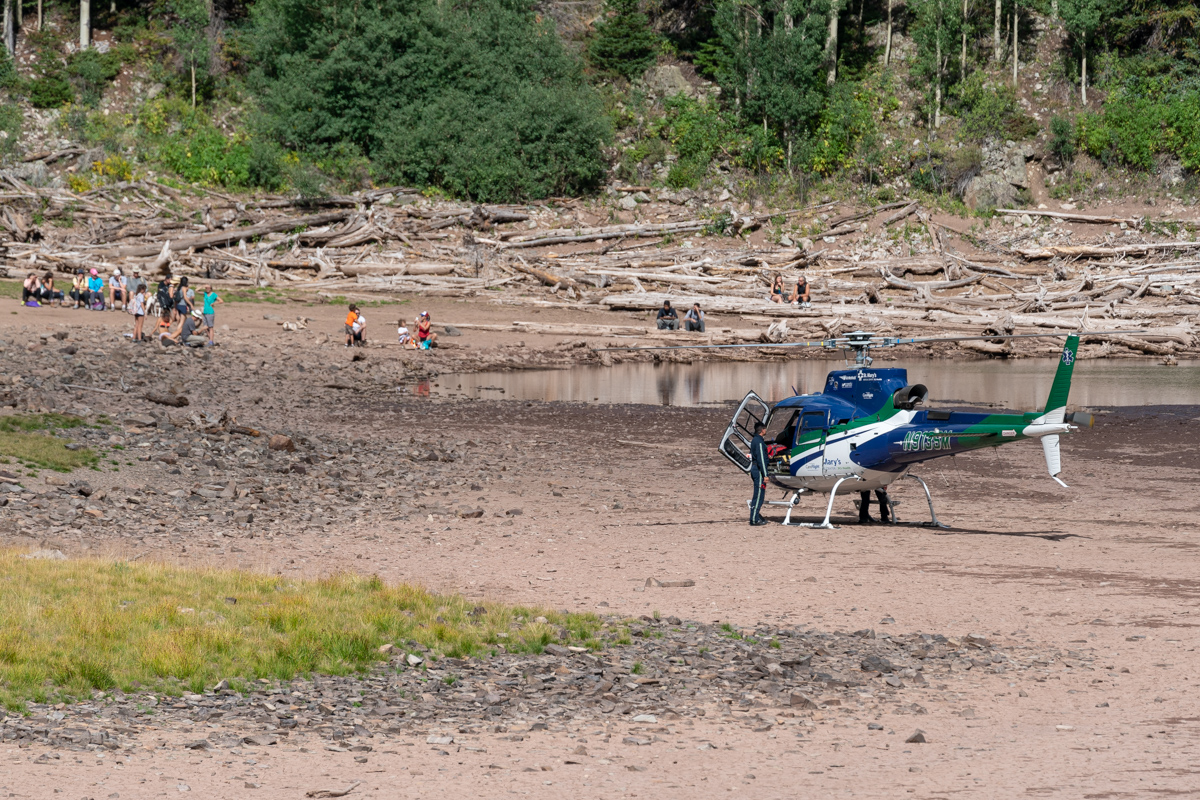
It was impressive seeing the pilots navigate the lake with the helicopter.
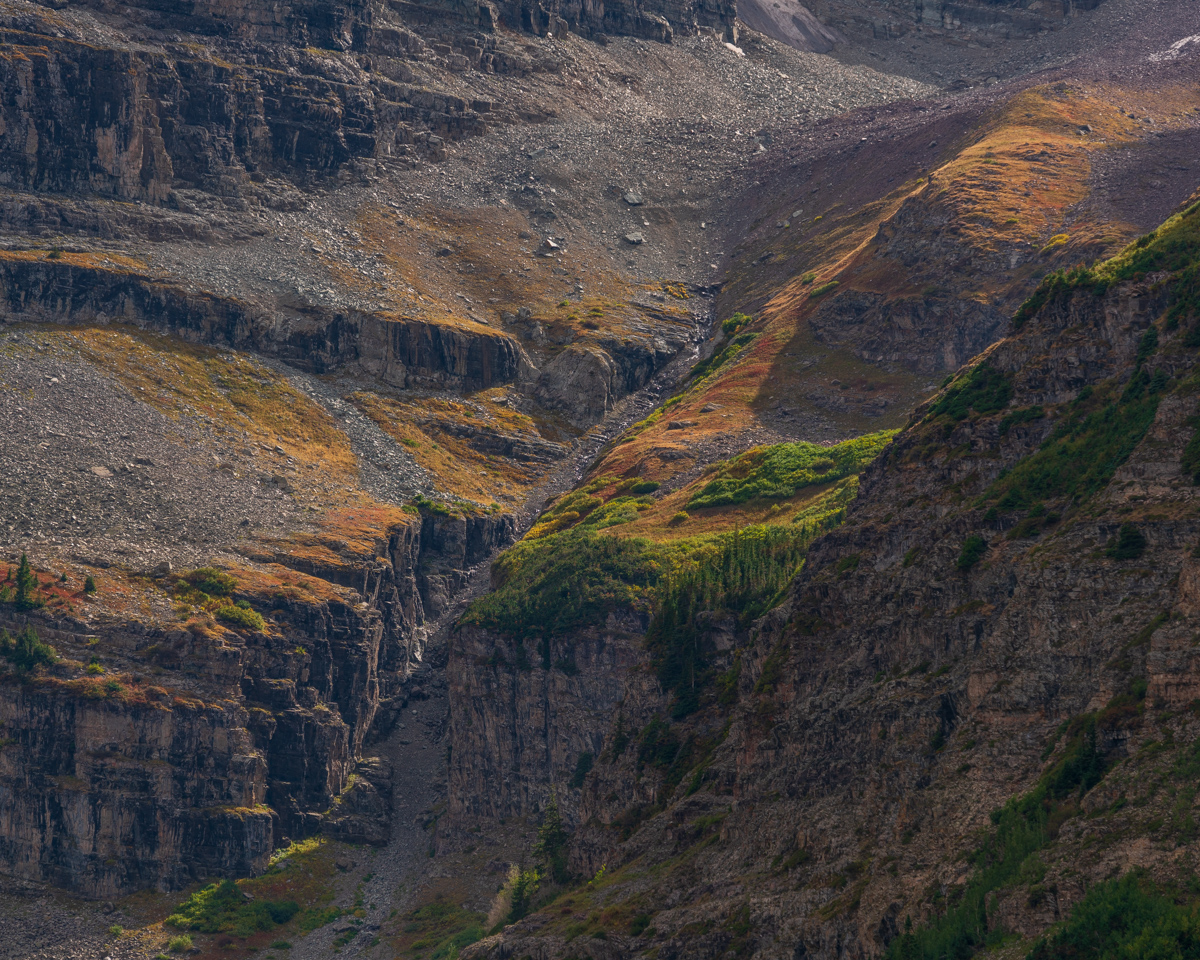
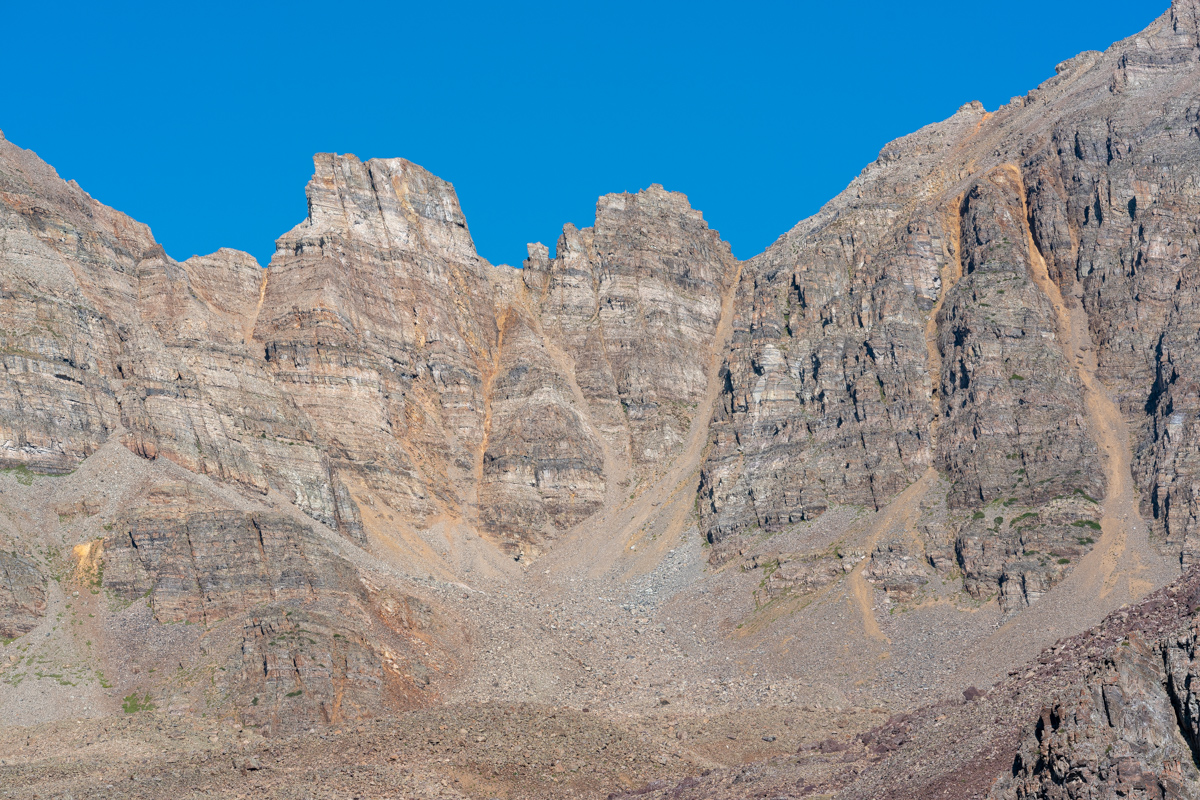
Once the drama stopped, I stopped to get some photos of the surrounding area with my telephoto lens. The light in the steep gullies below North Maroon was particularly mesmerizing.
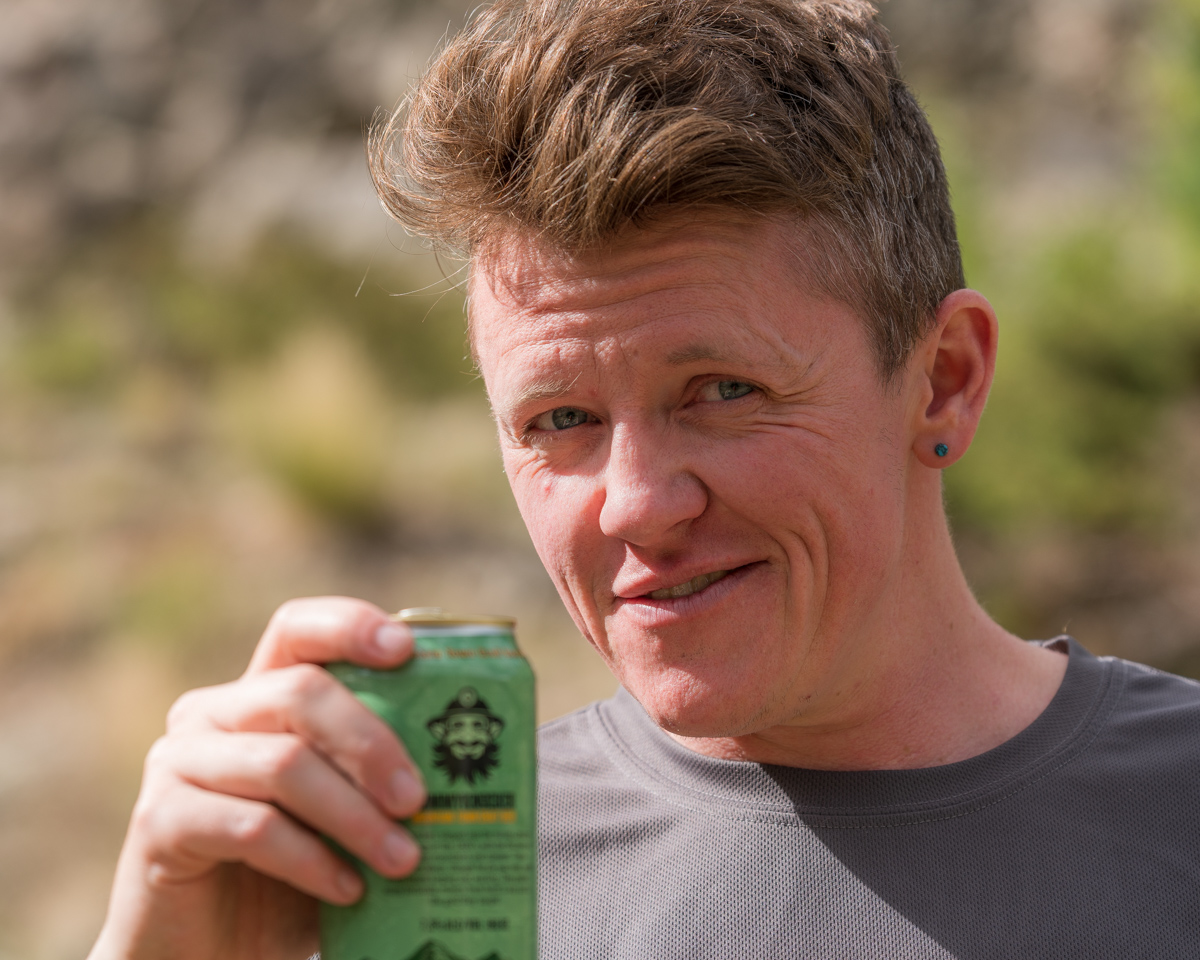
And of course we celebrated with camp beer!
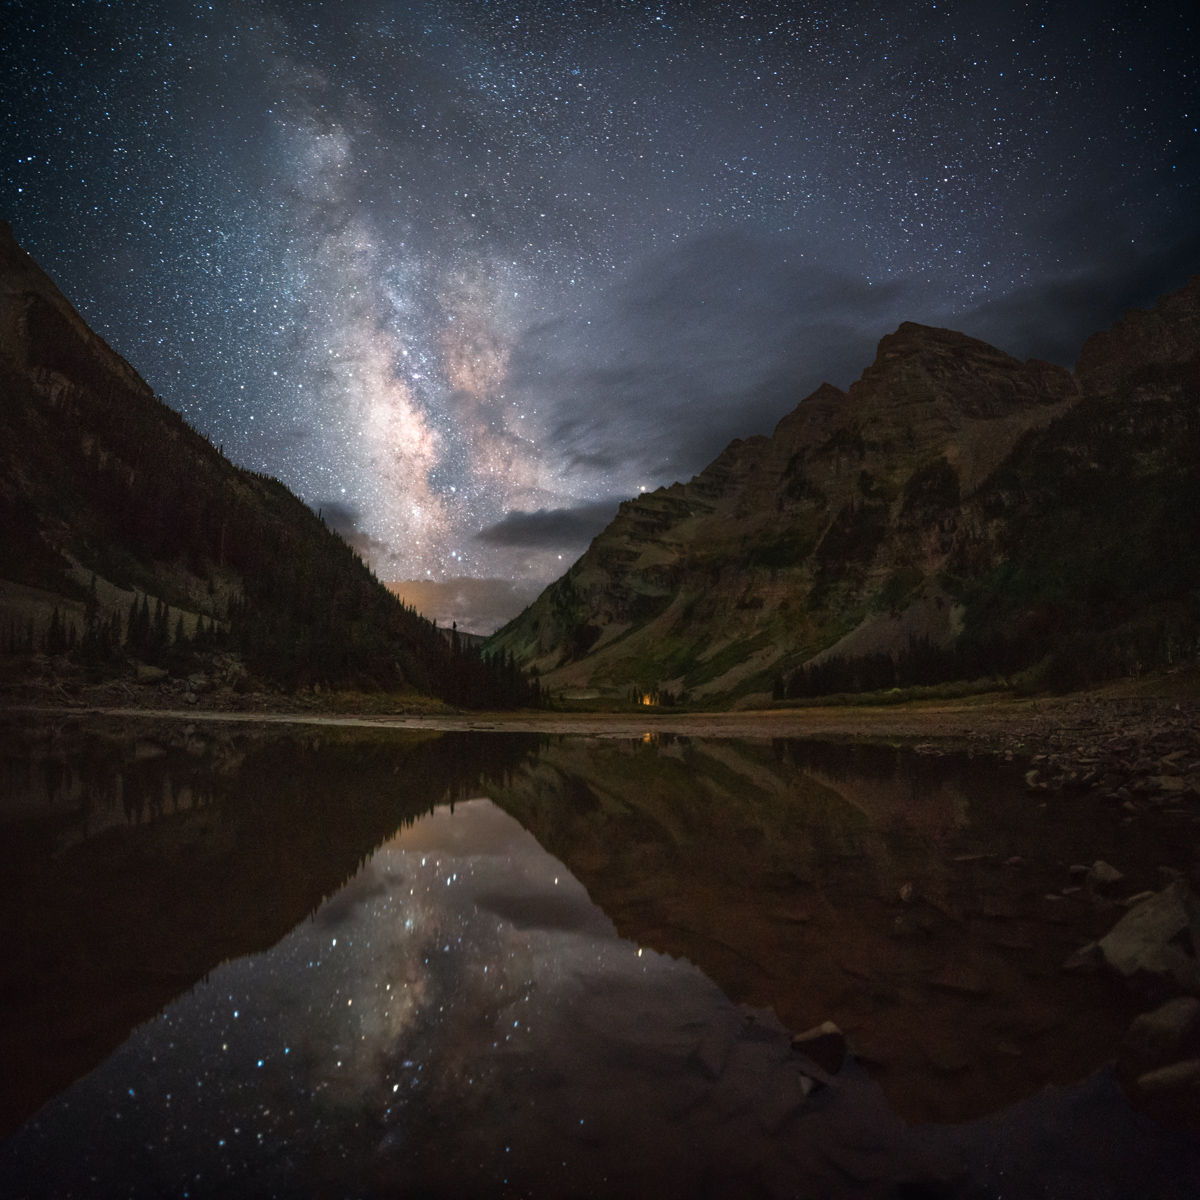
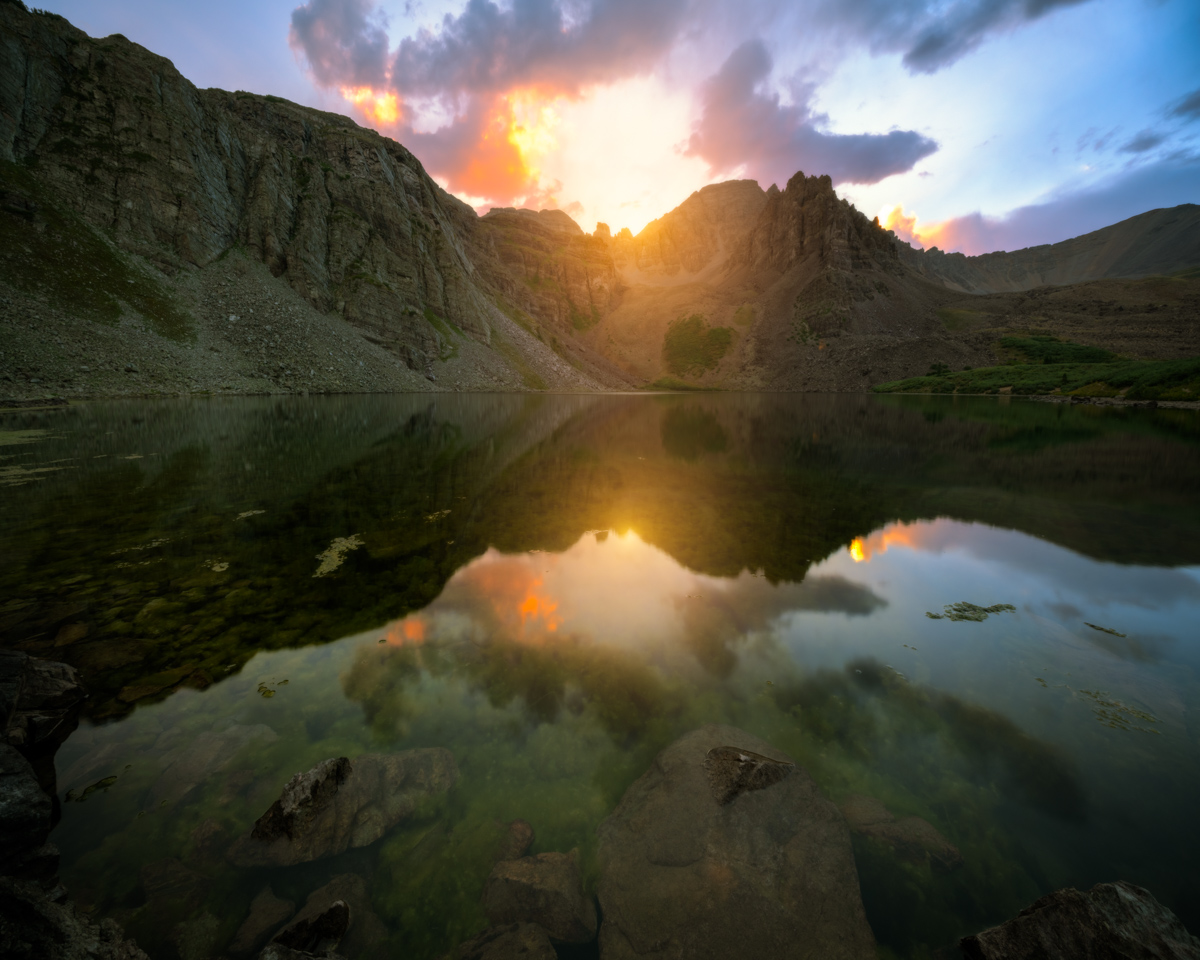
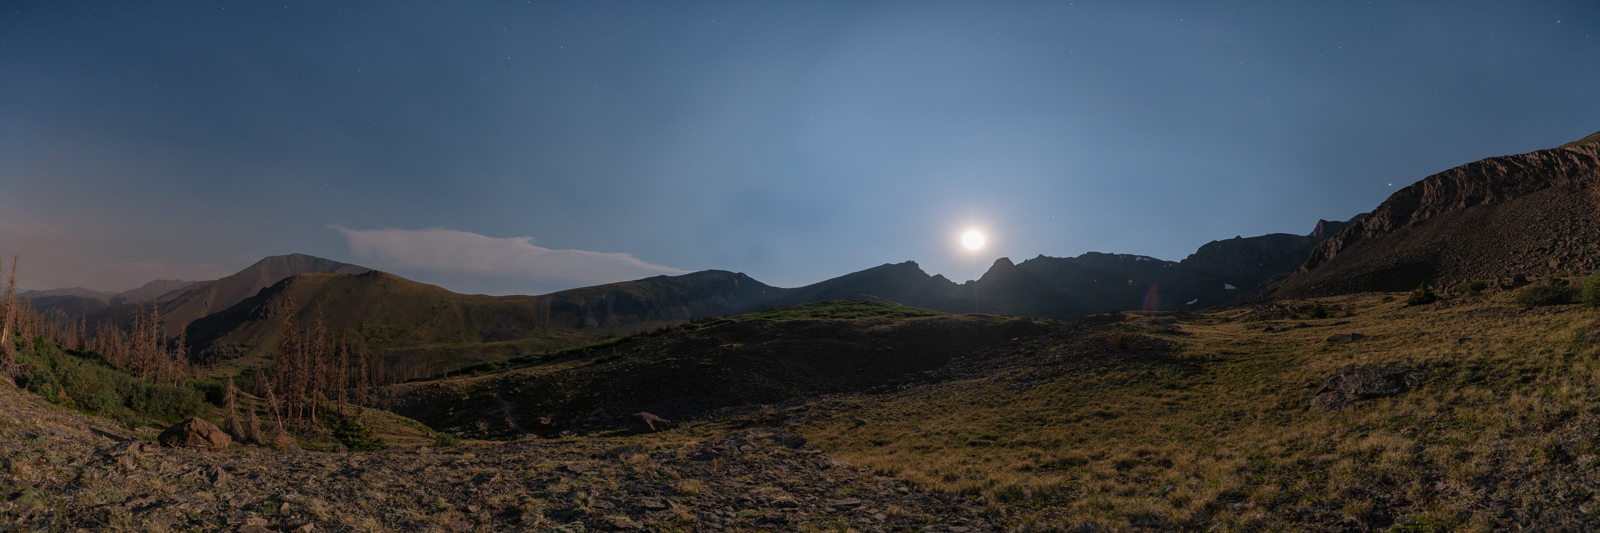
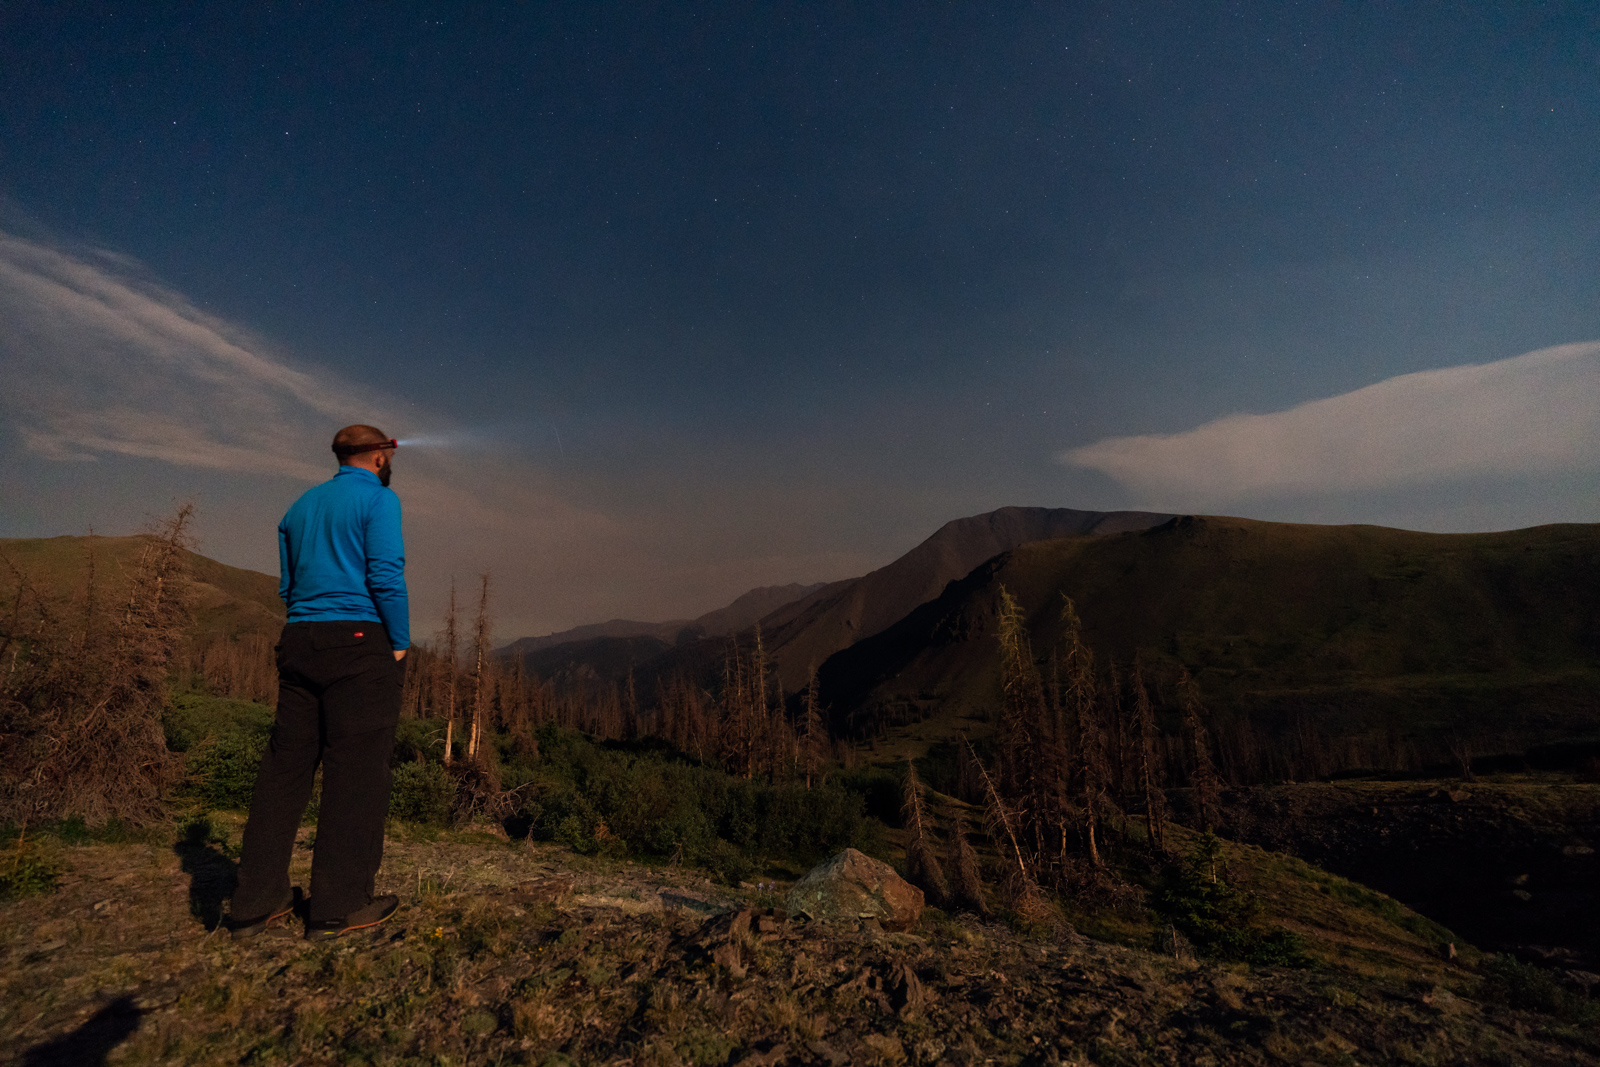
After telling Todd about the climb and settling in for the night at a new campsite, I decided to head down to Crater Lake for some night photos. Using my new 15mm wide angle lens, I was able to get the whole lake, both Bells, and the Sleeping Sexton in one photo. Nice.

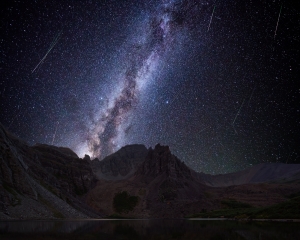
I was particularly excited to re-create a photo I shot here several years ago with inferious camera equipment - the Milky Way in the valley gap between the Maroon Bells and Pyramid Peak. I think it was quite the success.
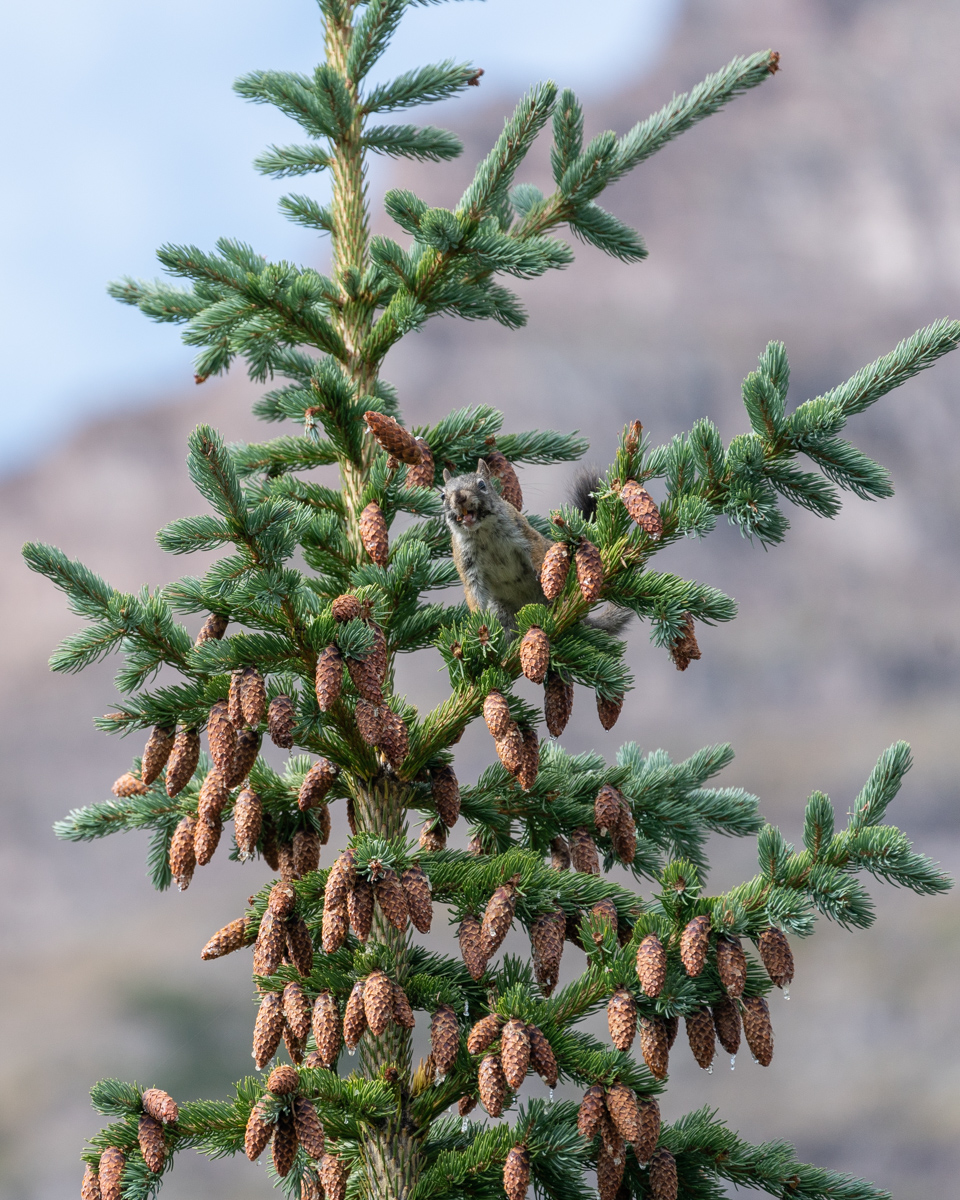
Day 3 - a rest day for me and a climb of North Maroon for Silas. I spent a great deal of the day putzing around with my camera and talking with my friend Todd. We were confronted by a Forest Service Ranger for camping in the wrong location. Apparently the correct site 6 was further back away from the trail than we realized. The sign we camped near said site 6 and was heavily impacted. He forced us to pack up and move to another spot. We were happy to comply. Note - the signage is pretty spotty and not very useful in general. Many camp sites have huge signs saying "restoration in progress, no camping," and others have no signage at all. It is wildly inconsistent and the marked sites are, well, not very well-marked. Noted. Since Silas was away on North Maroon, we had to figure out how to coordinate the move. We packed all of Silas' gear up into his pack and moved to site 8 (which was WAY better, by the way). We came back to site 6 and Silas had just arrived back from North Maroon. Perfect timing! I decided to get some photos of a squirrel that was throwing pine cones on the ground (which is hilarious to watch).
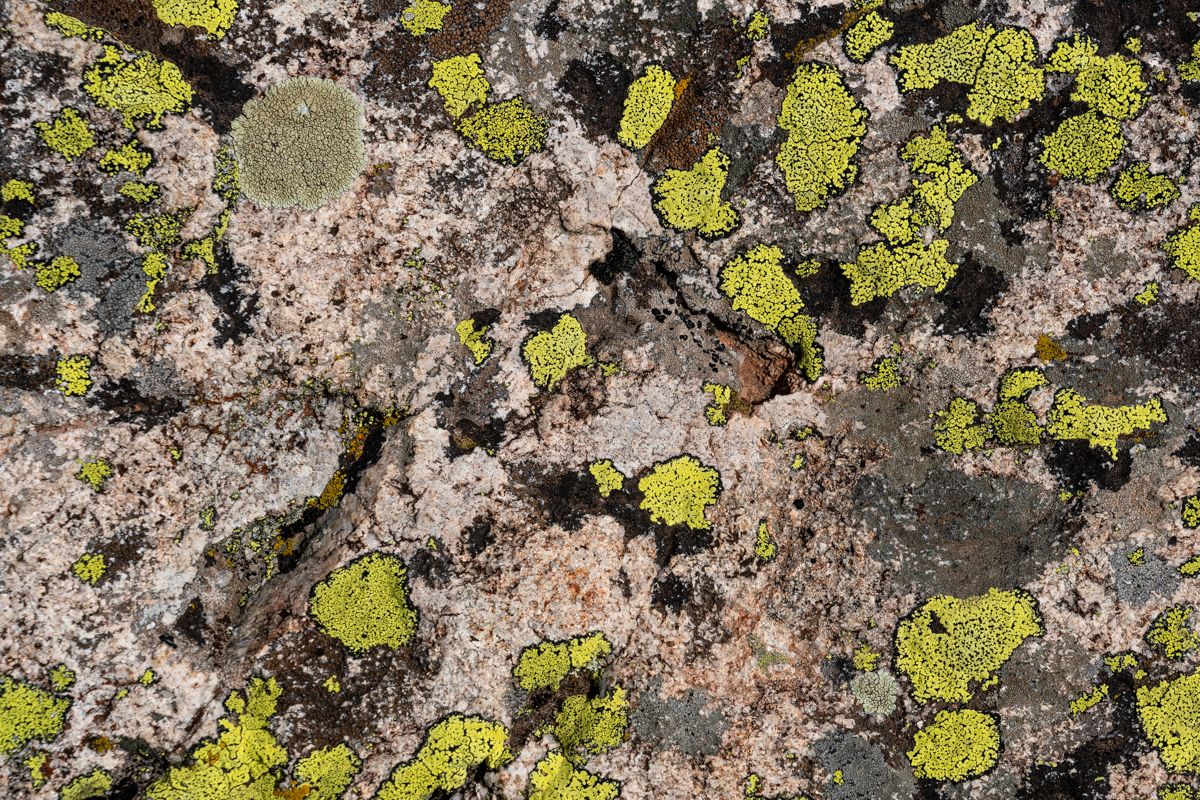
I also decided to get some abstract shots of a rock covered in moss... boring for some, probably, but interesting to me.
And of course, the setting moon was fun to photograph over the Sleeping Sexton.

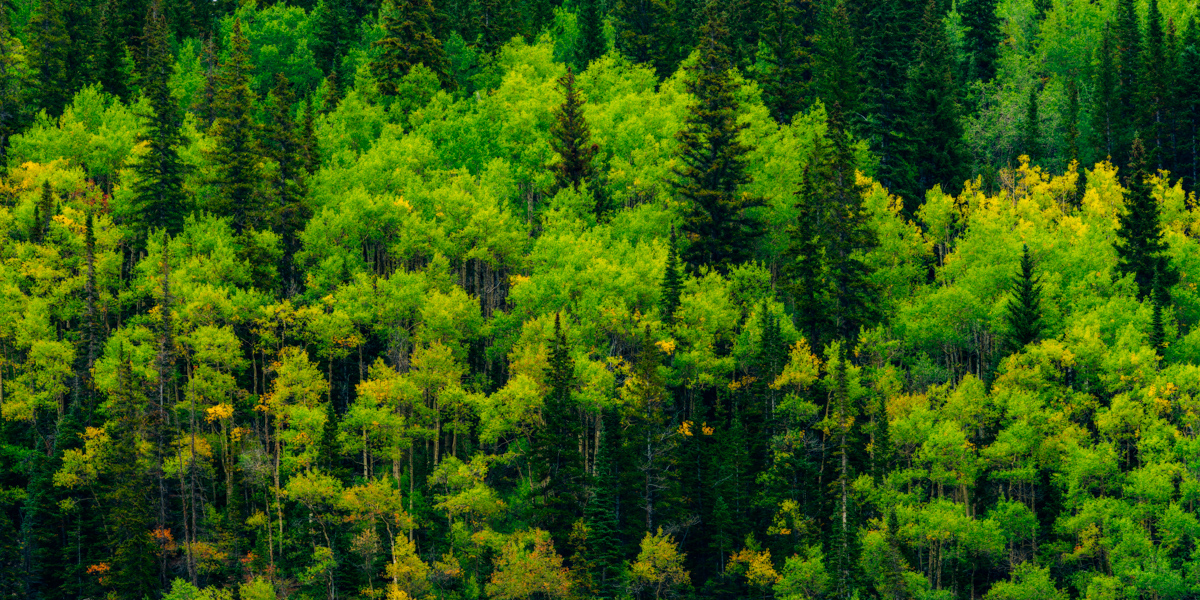
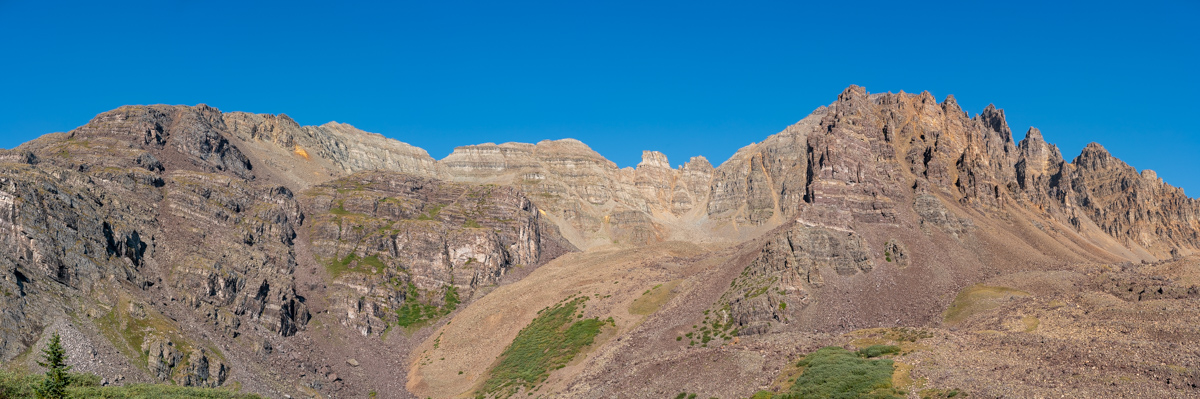
After we all napped in the rain at site 8, I set-off to photograph the area with my telephoto lens. The foliage was just starting to change color and I really enjoyed phtographing the area.
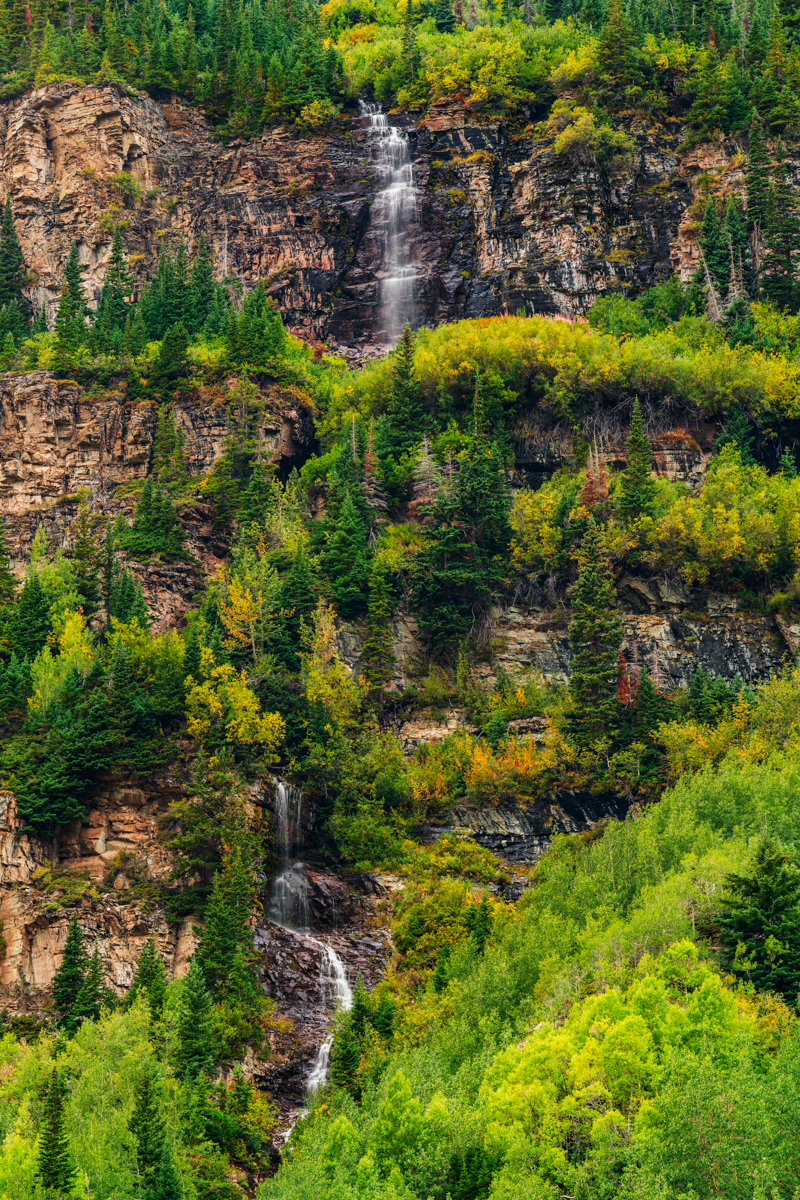
After the rain, there was a significant waterfall that appeared above us below North Maroon, and it was also fun to photograph.
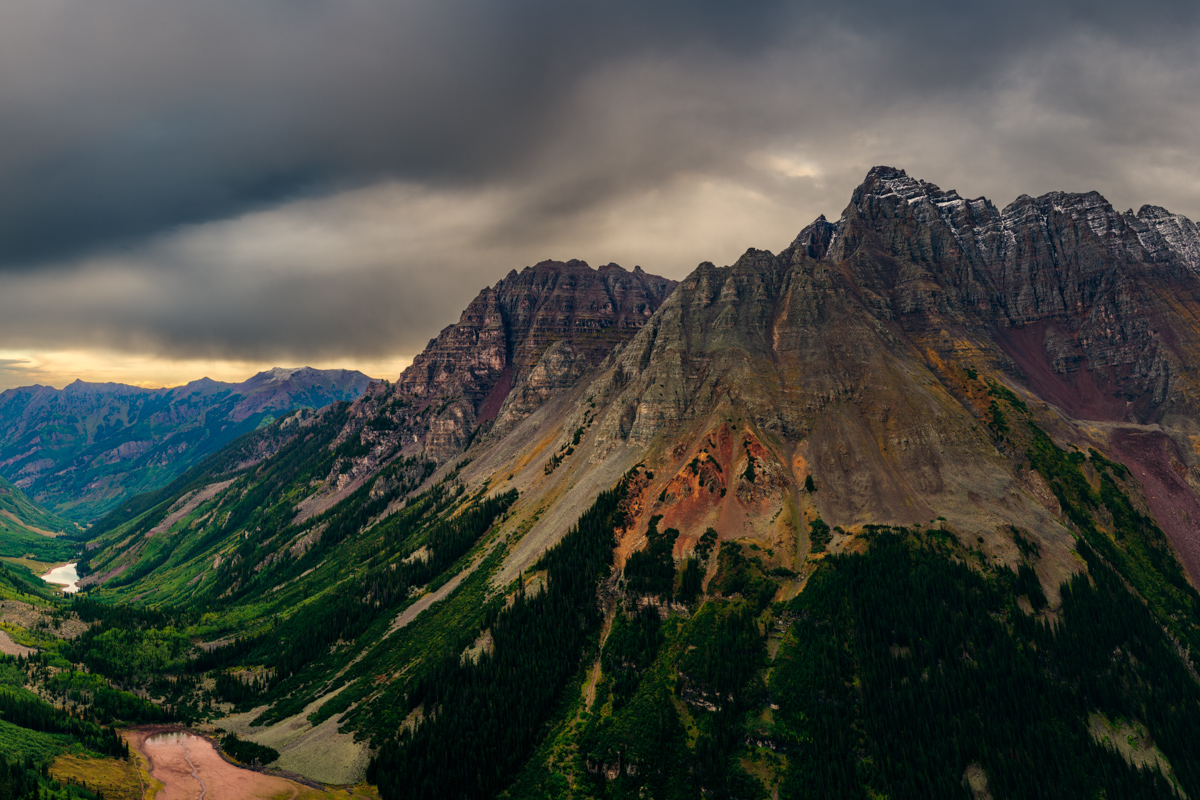
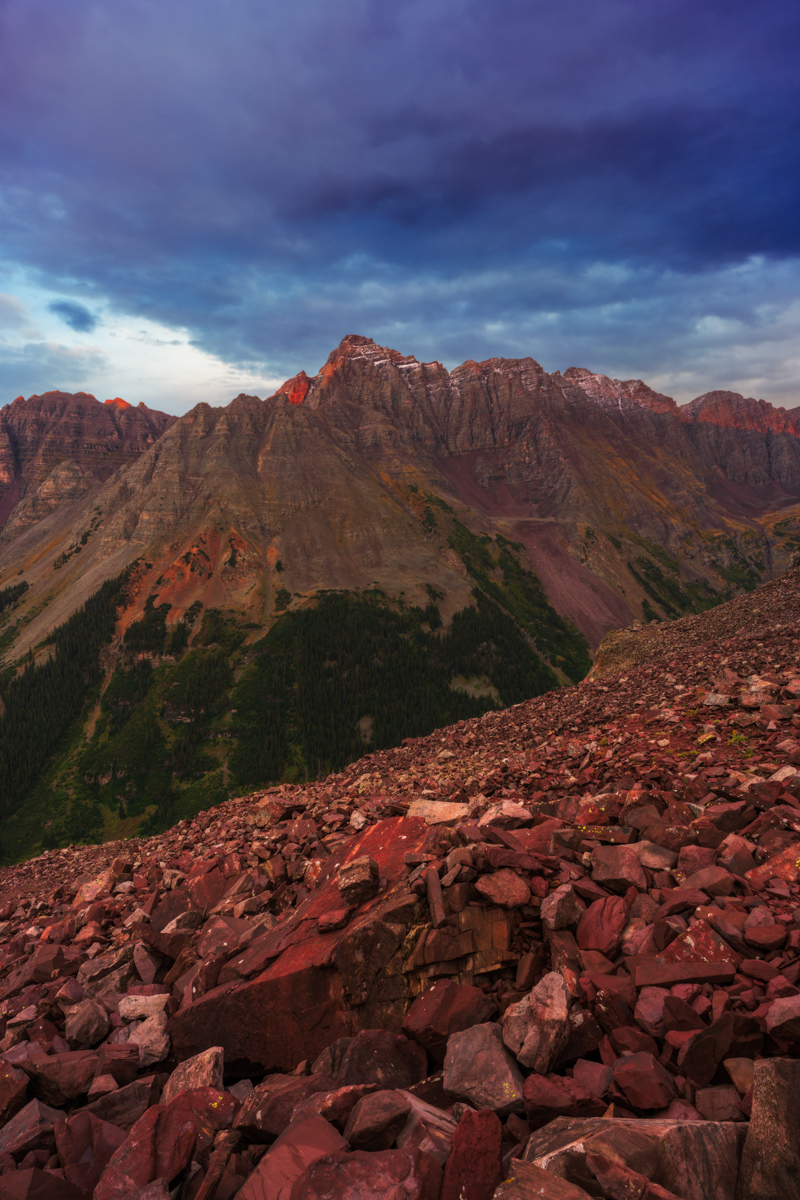
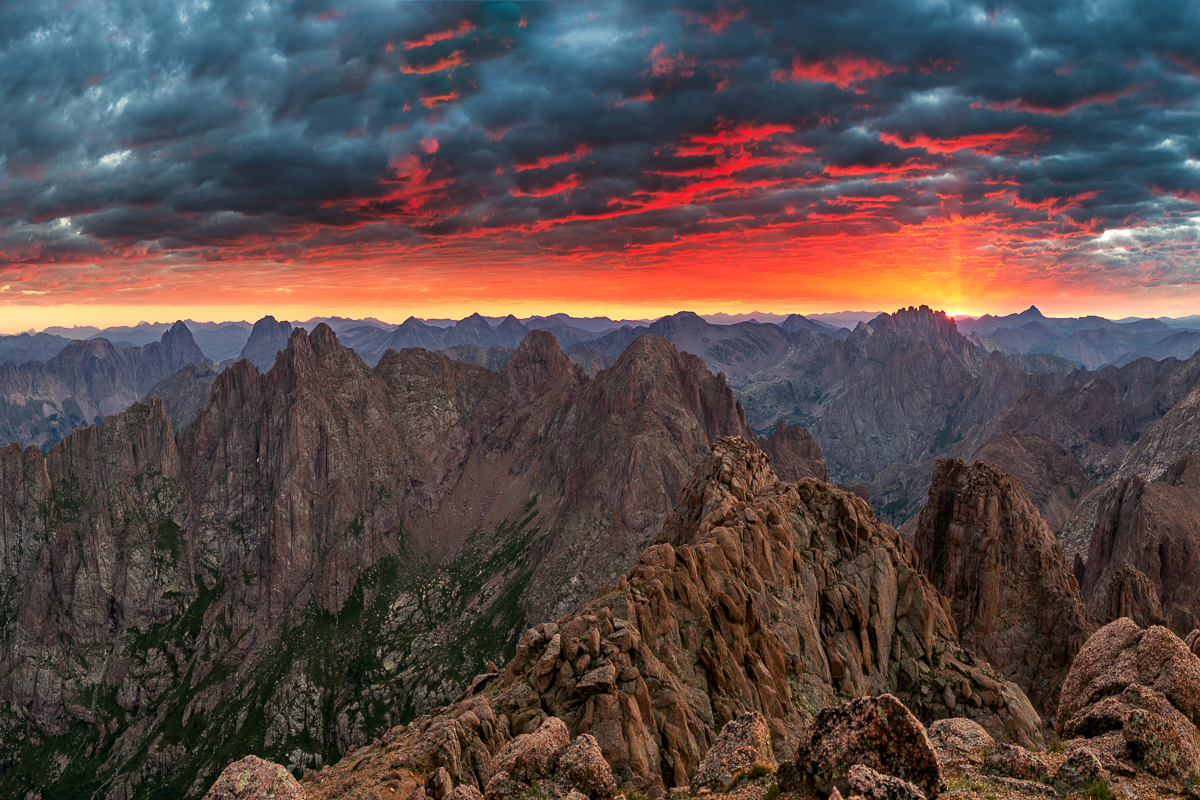
A very large weather system moved into the area around 4 PM and we were glad we were not climbing. I had a vision in my mind of snow being dropped onto Pyramid and Thunder Pyramid during the storm and thought there could be a possibility that the storm would break at sunset and produce some amazing results. I really wanted to commemorate the trip and experience with one last photograph of Pyramid and Thunder Pyramid in these conditions, so I sold Silas on the idea of hiking all the way back up North Maroon's slopes to get a good view of these two peaks at sunset. We hiked in the rain for a couple of hours up the trail for North Maroon, which was pretty miserable. Honestly, who does this?
When we arrived, I stopped at the very long boulder field below North Maroon, which was very wet and slippery. I noticed a climber at the other end of the boulder field who was moving incredibly slowly back down the mountain. He was maybe moving one rock per minute. He was obviously in pain. I later learned his name was Scott and he was from Woodland Park, CO. I yelled out to him.
Matt: "Hey man, are you OK!"
Scott: "Yep, just hurt my ankle and can't put any pressure on it."
Matt: "Do you need any water or Ibuprofen?"
Scott: "I'm good man."
Matt: "Well, I'll wait for you up here to make sure you get down OK."
Scott: "Thanks man, appreciate it."
Silas and I waited below the boulder field for another hour and he still had not come down. I decided to climb back up to the boulder field and found that he was really high above the trail. I went to him and helped him get down to safety, one step at a time. He was badly hurt. We gave him some ibuprofen and wrapped his ankle in an ace bandage and he went on his way down the mountain.
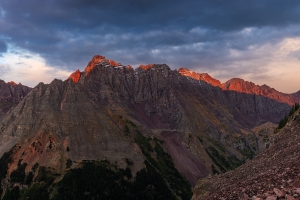
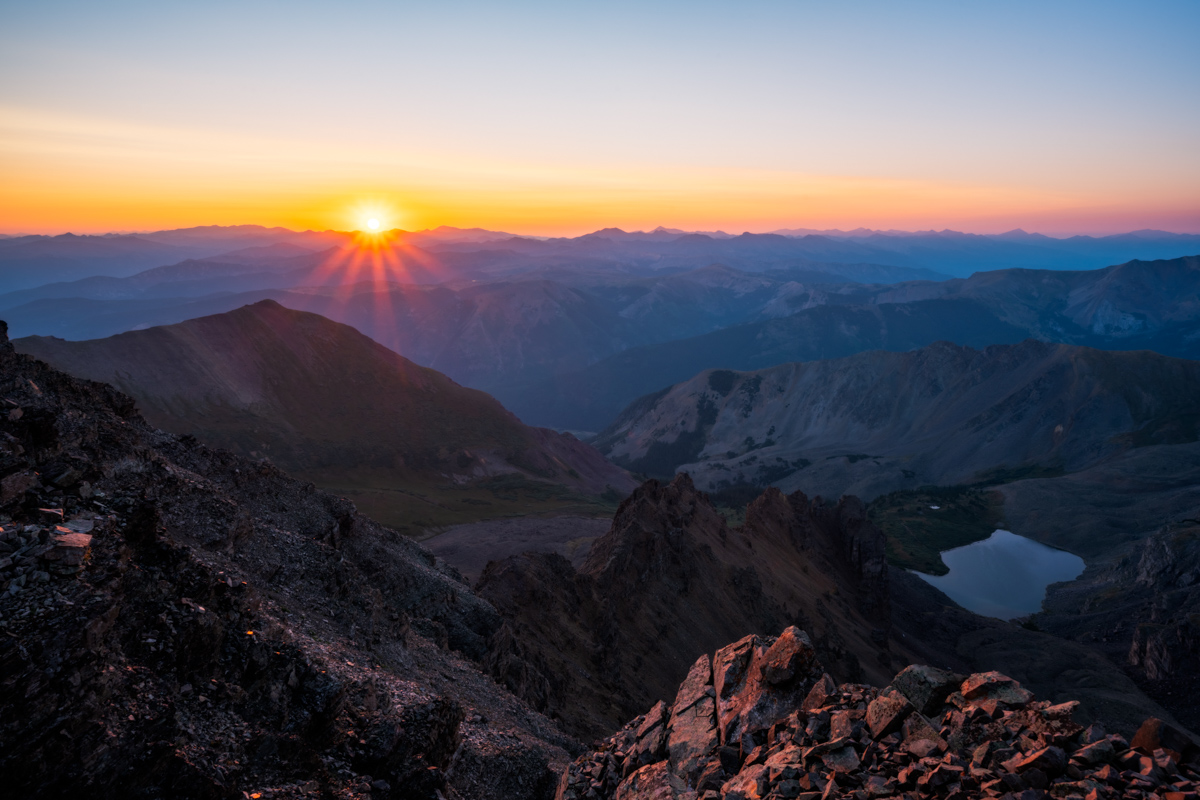
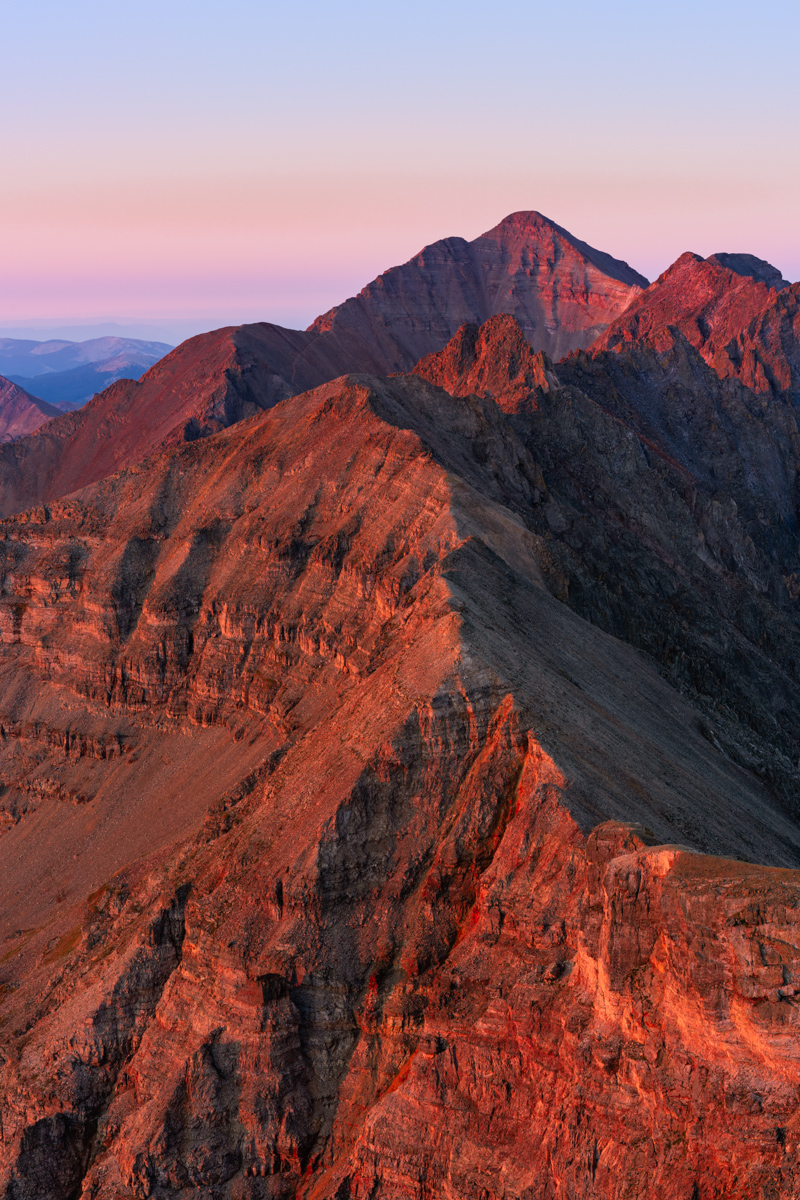
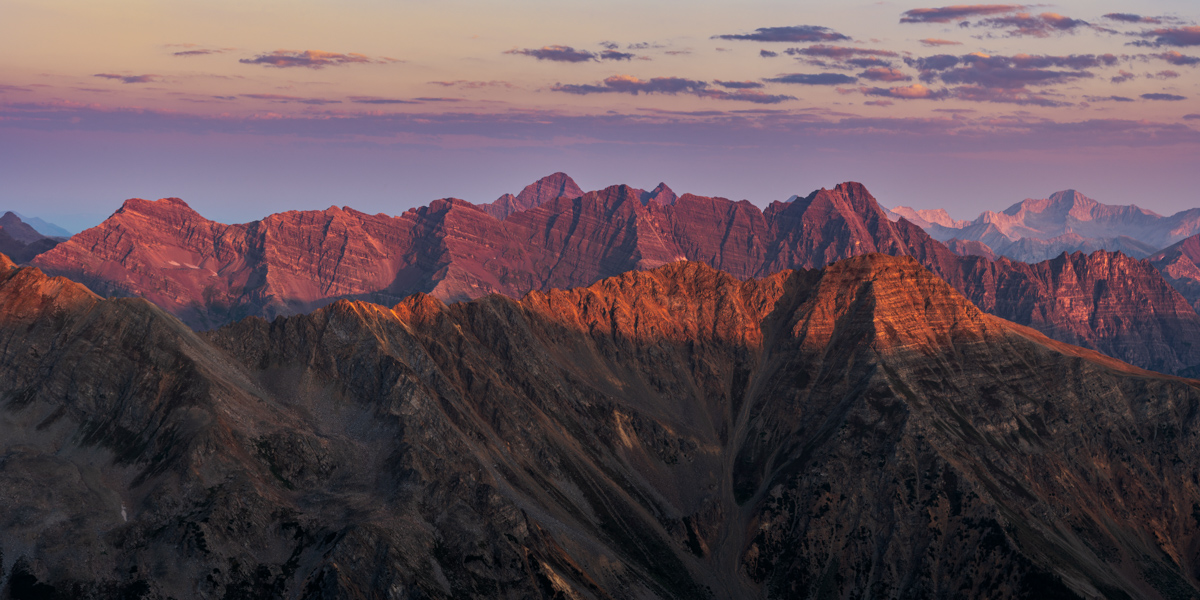
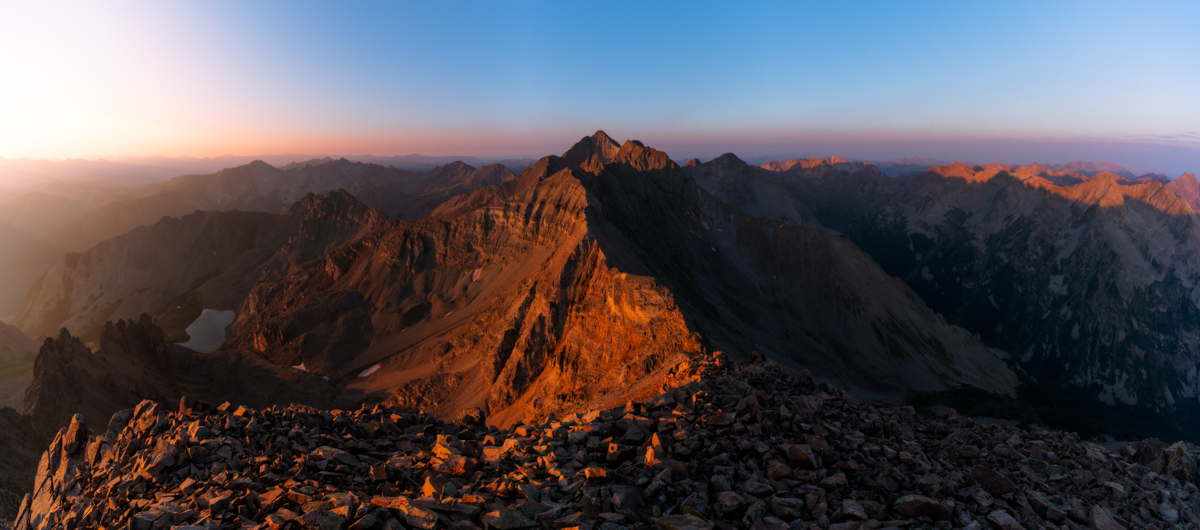
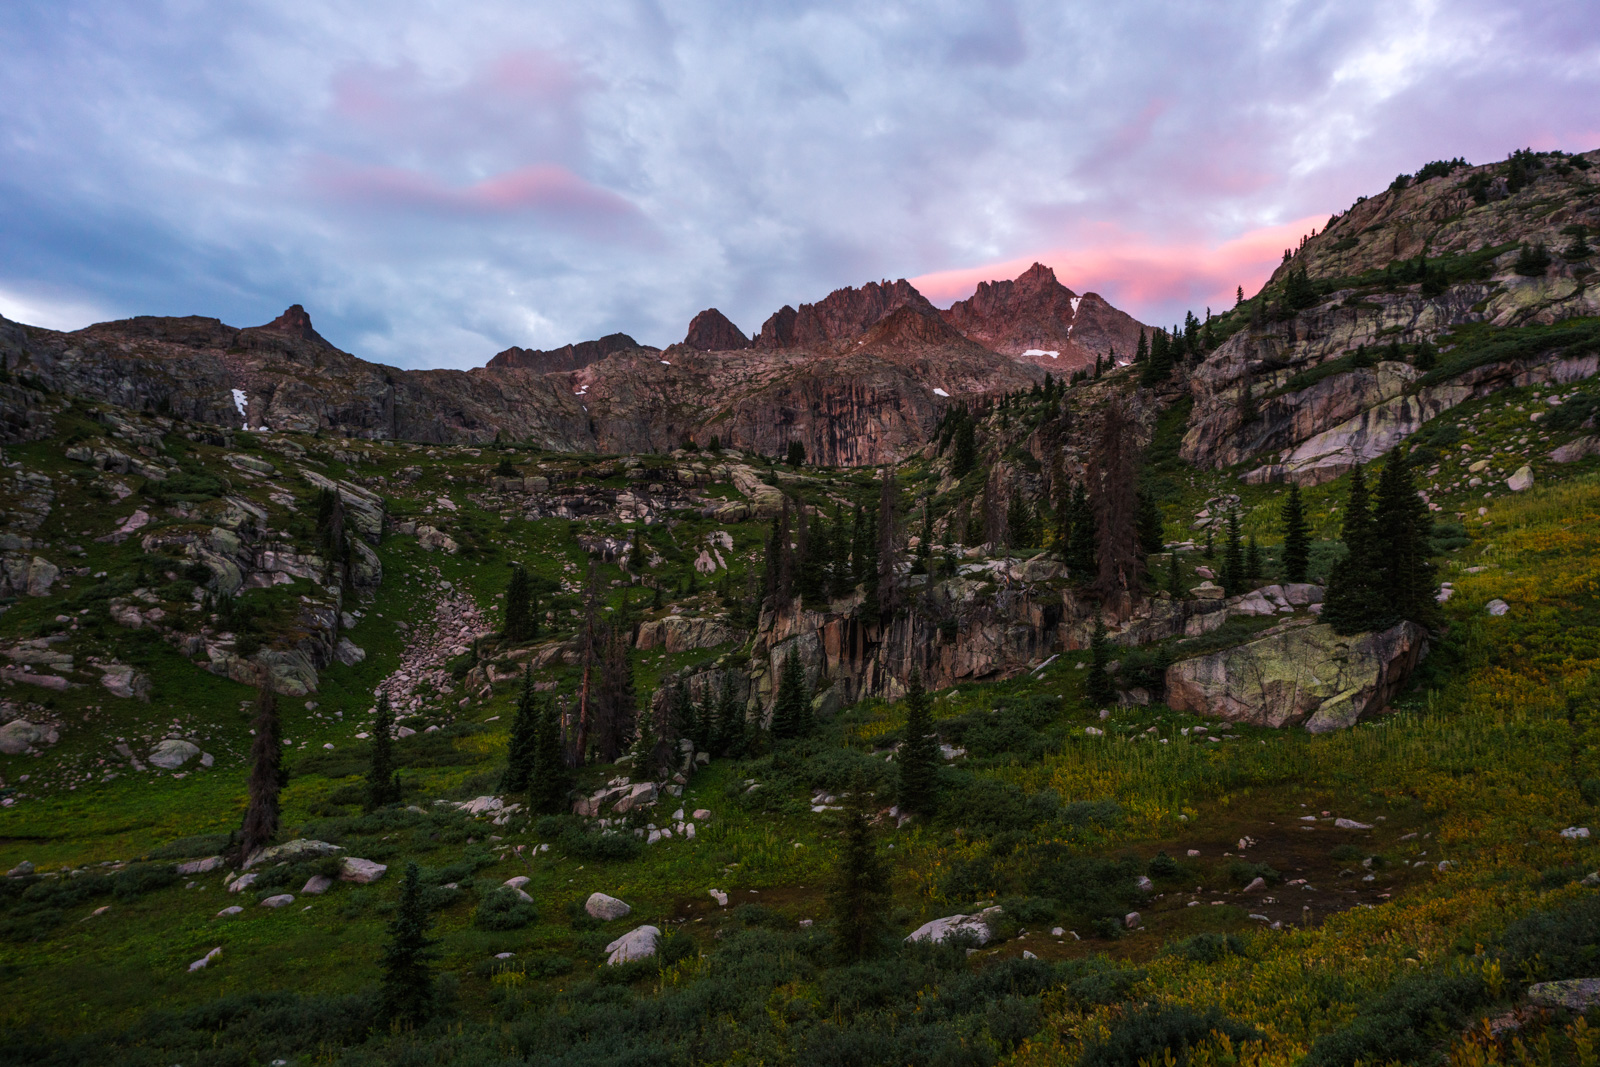
The clouds and light were quite dramatic and I was really holding out hope that the clouds would break for just a minute to light up the peaks with alpenglow.
Alas, my wish was granted! I was so elated! Silas caught the whole thing on video.
I really loved this scene. Not the best, compositionally, but damn, the light! Pyramid and Thunder Pyramid covered in snow with alpenglow, just as I had envisioned. Yes!
I am really proud of this image. I had the vision. I had the perseverence to try to get it. I was prepared. Execution was good too. Hallelujuah, this is what its all about for landscape photographers!

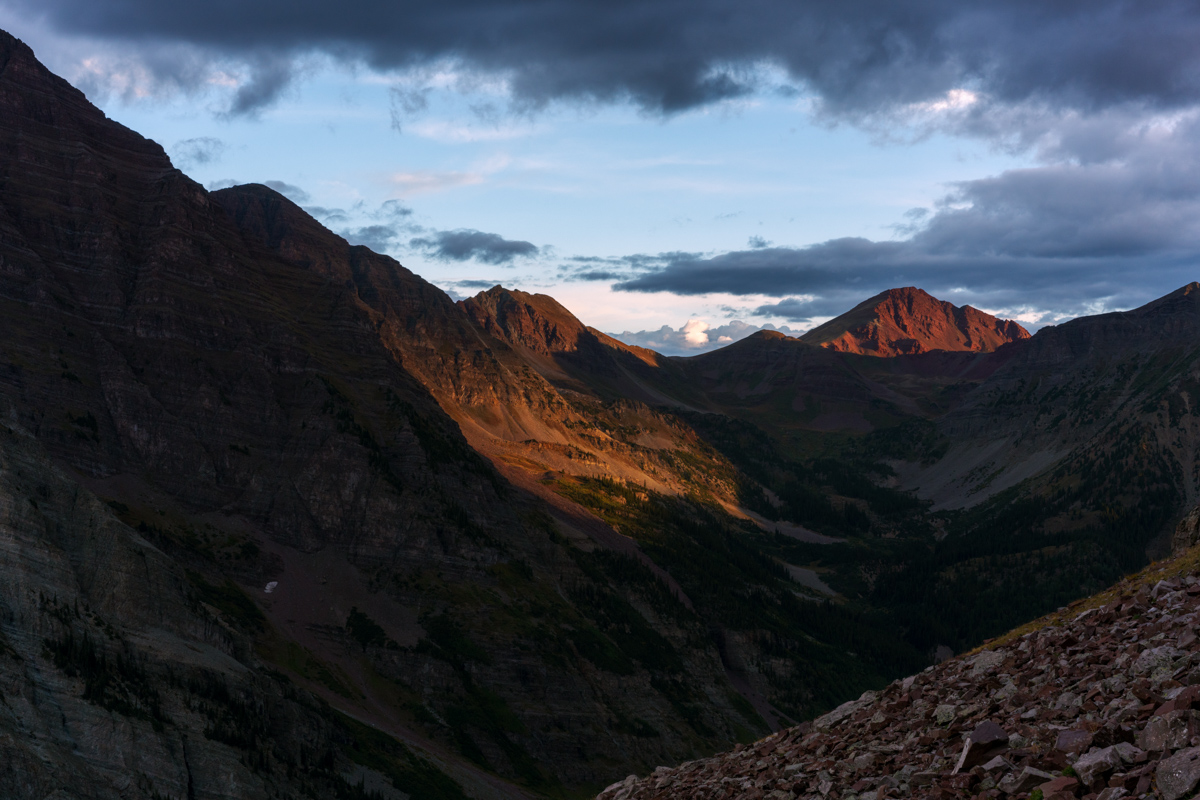
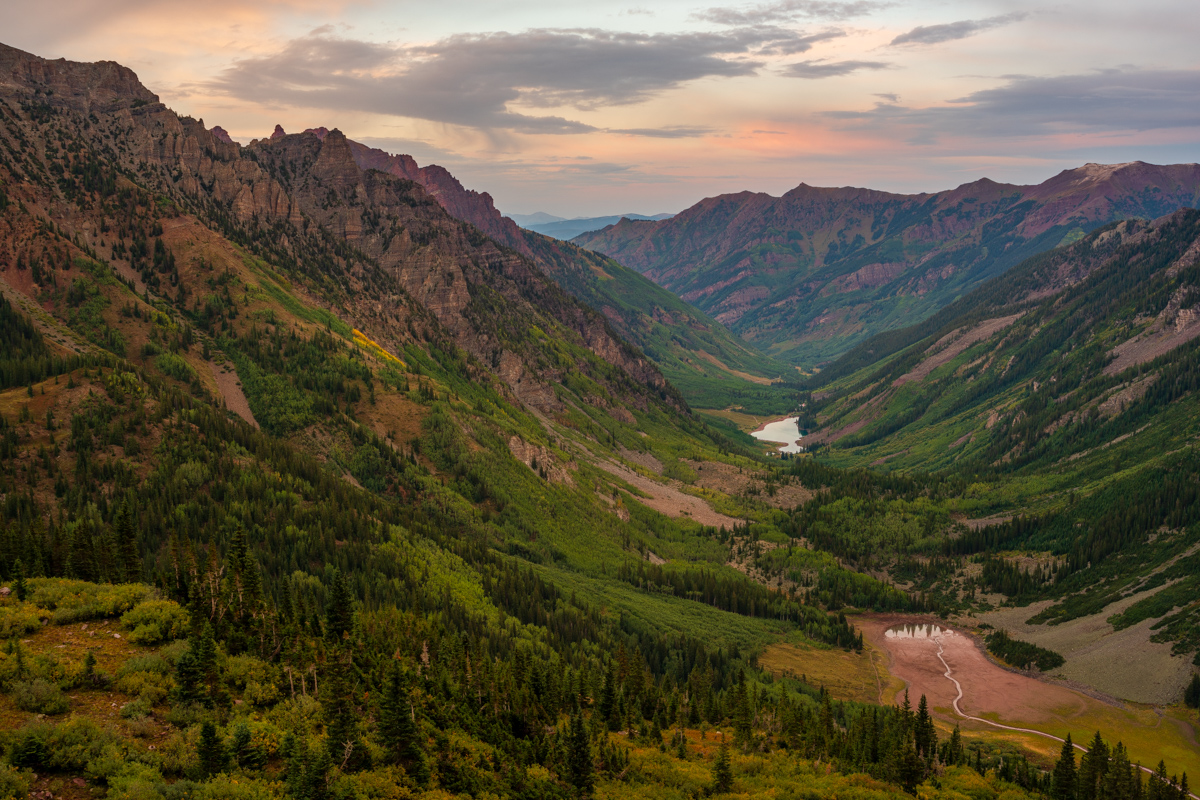
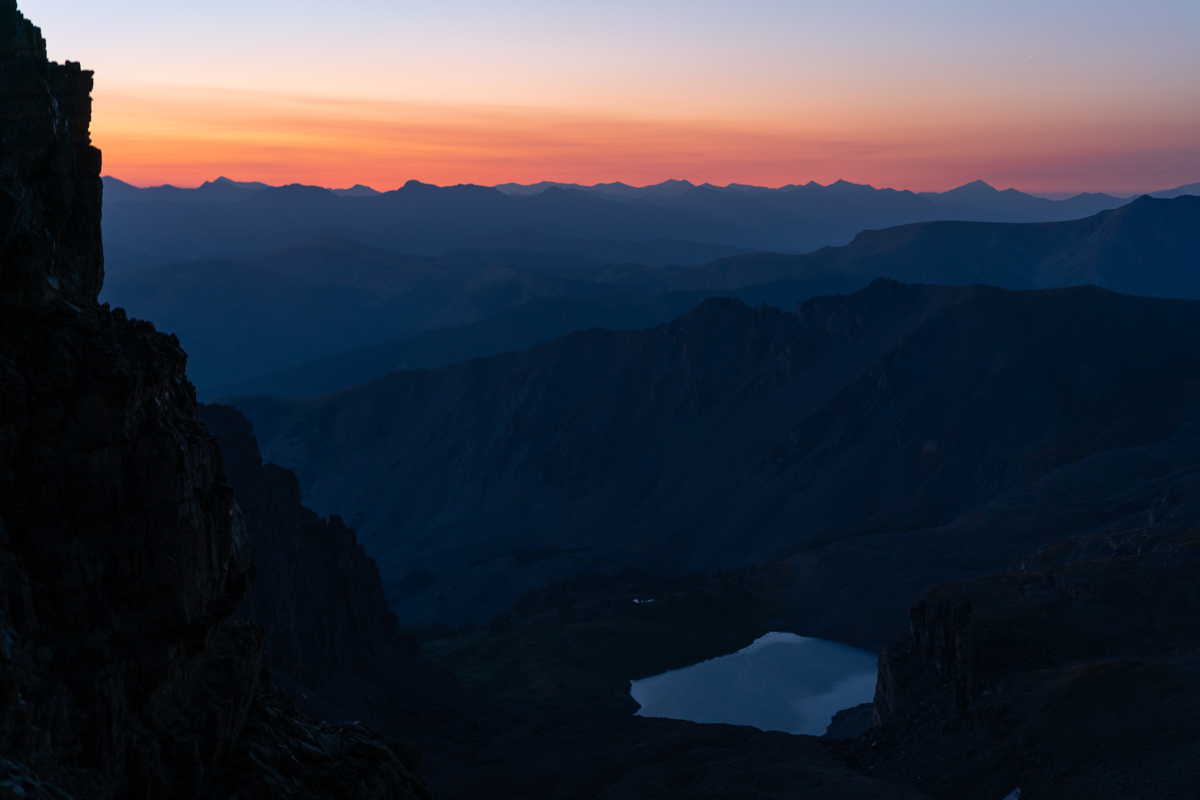
The light to the north was pretty great too! Looking down on Crater Lake and Maroon Lake was quite a treat.
After sunset, we left. On the way down, we ran into three hunters, a father and two sons who were hunting Mountain goats. They said they saw our injured hiker earlier and he was doing OK. Good! We returned to camp very late and ate a very late dinner and had beers. What a great trip! The next morning, we packed up and head out at 10 AM. Naturally, upon arriving at Maroon Lake, the shit-show of tourists not obeying the Forest Service signs was even worse. I loudly but politely asked several parties to not cross the rope and that they should read the sign. I bet the forest service hates this new system. I can't imagine policing it 24/7.
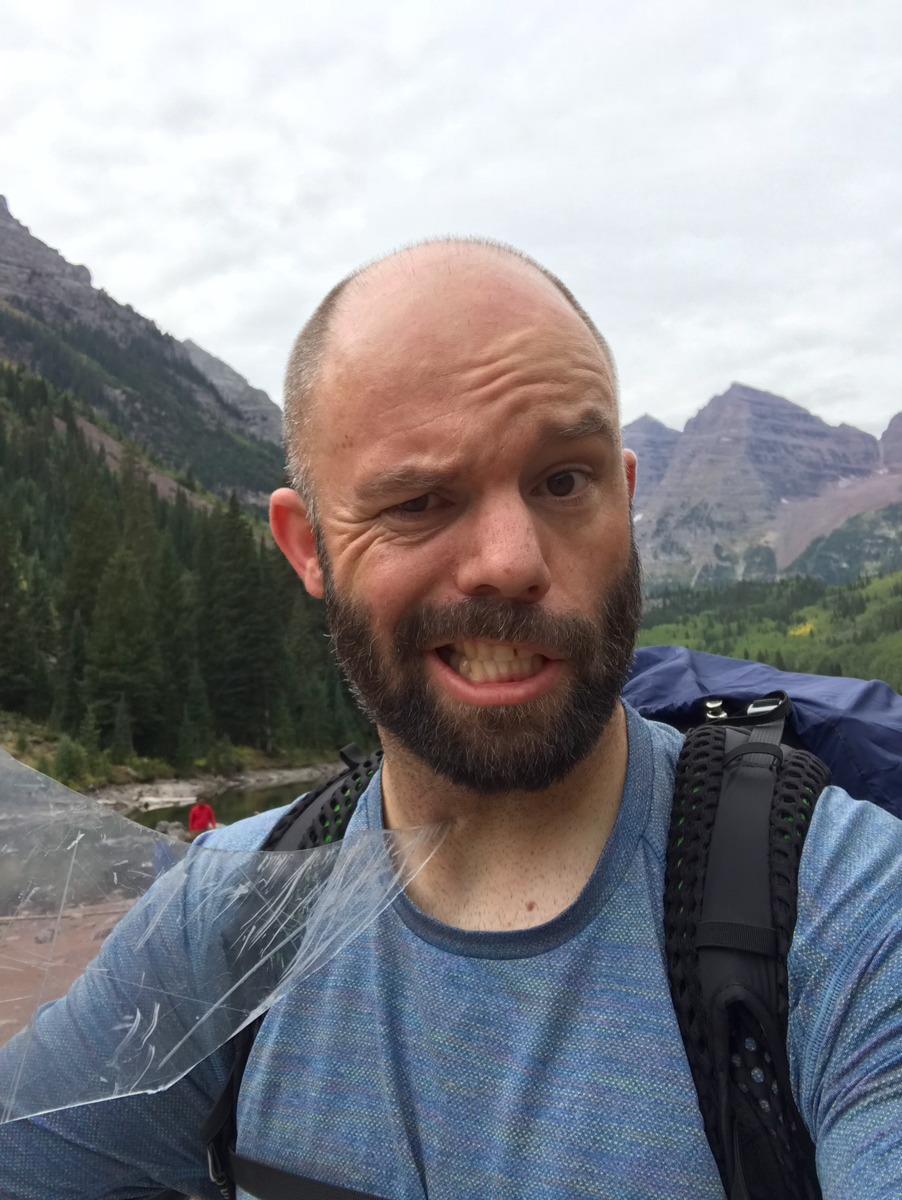
I think I looked pretty menacing with the plastic helicopter cockpit part we found...
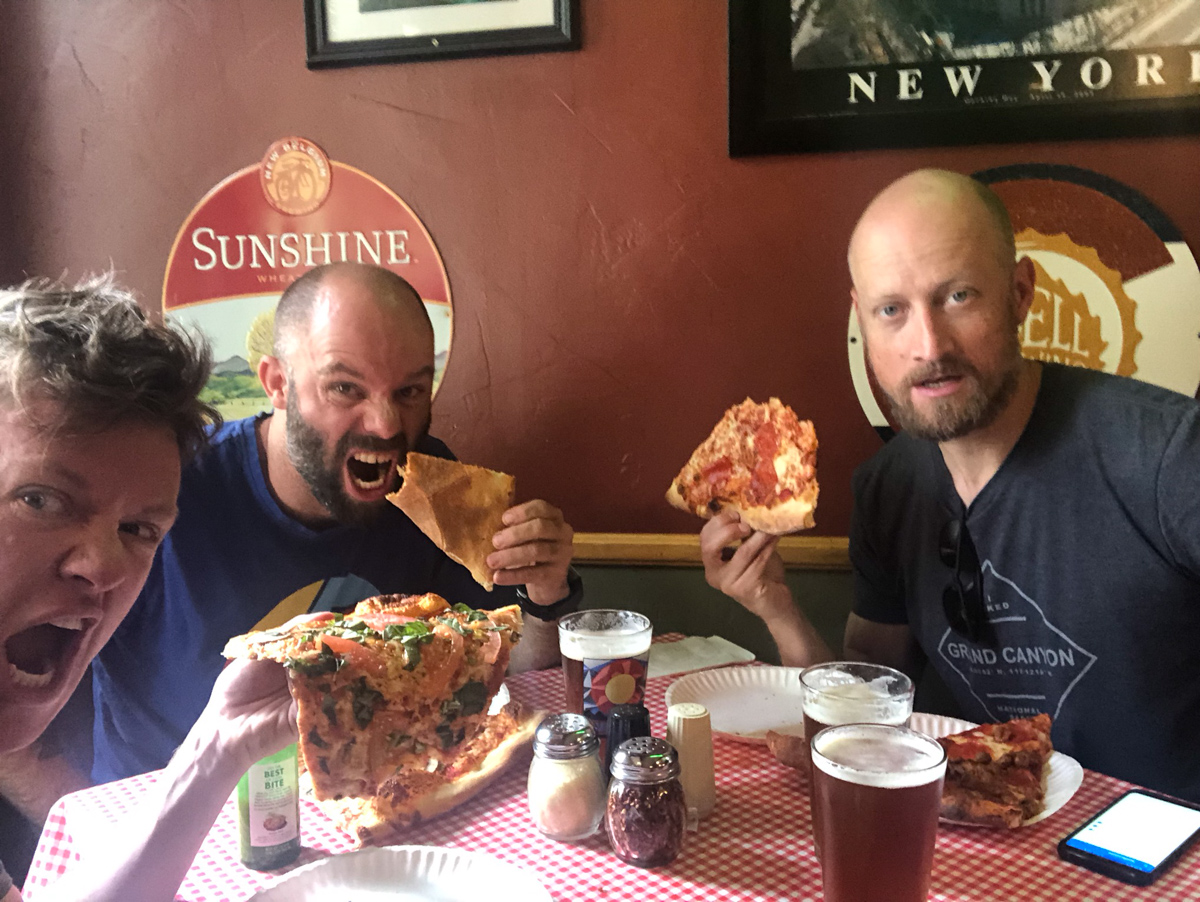
A successful trip deserves a trip for beer and pizza. We stopped at NY Pizza in Aspen for our celebration meal.
Wow, that concludes this report. My final Centennial!
A few thanks are in order -
Thanks to Silas Musick for being such an amazing climbing partner. We celebrated on 14 of those 100 summits together and I consider you my best friend - all because of our mutual passion for mountains and the outdoors. You're a beautiful human.
Thanks to Natalie Moran for taking me up Jagged, Dallas, and Teakettle. You're a fabulous climber and a great person.
Thanks to Terry Matthews (RIP) for accompanying me on my first class 3 climbs in 2008 when I got back into this pursuit. You are missed.
Thanks to Ethan Beute - our climbs on obscure 13ers kept me going - miss you man!
Thanks to Regina Primavera - you're a great friend and it has been fun catching summits with you since 2011.
And lastly, thanks to my parents for getting me going on this crazy journey 35 years ago. The photo Silas posted was actually my first 13er - Fairview Peak - I was 4 yrs old.
I created my little website in 2009 mostly to teach myself how to build one but also to document and share my journey with my friends and family. I know my dad regrets not having something similar to look back on. Hope it’s at least been somewhat useful to others as well.
Next up? I have no idea. I don't think it’s the bi-centennials.
I have some photography projects I want to tackle, including a book of photos of the Centennials...
Here is a photo that might help folks see the general route we took:
And a link to the Gaia GPS track:
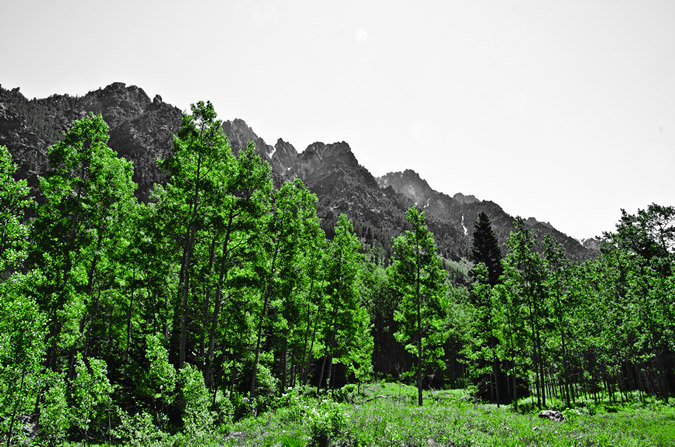
Cathedral Peak in August - Photographing the Perseid Meteor Shower and Sunrise from the Summit
 Cathedral Peak as seen from Grizzly Peak in 2013
2018 is the year! I WILL complete the quest to climb the highest 100 mountains in Colorado! Cathedral Peak marked #99 and was only one of two peaks standing between me and my dreams. I set off for Aspen at noon on a Saturday. My plan was relatively simple yet ambitious: Backpack to Cathedral Lake, set-up camp, photograph sunset, find a composition for the Perseid Meteor Shower, photograph the Perseid Meteor Shower, sleep (maybe), climb Cathedral Peak in the dark, photograph sunrise from the summit. Seems doable, right? I have made it somewhat of a tradition to photograph the Perseid Meteor Shower whenever I can. Last year's was a total dud due to the moon being full, so I chose not to photograph it; however, the year before I photographed it from the saddle between Pigeon and Turret, which was also ambitious (and quite rewarding). I was hopeful for a similar outcome at Cathedral Lake.
I have been dreading the climb of Cathedral for several years. Most people climb it in early summer when there is ample snow in the incredibly steep couloir leading to the summit saddle. I personally dislike snow climbing, but also did not have high hopes for climbing up that gully when it was all hard dirt and rock; however, I needed this peak and so it was on!
As always, you can see and download my full route and GPS tracks over on the incredible app, Gaia GPS, which I use on my iPhone to plan, track, and follow my routes on these trips. It is absolutely invaluable and worth every cent. I personally love that you have full access to all USGS topo maps and National Geographic Trails Illustrated maps as well. You can use the app while in airplane mode and even save maps for offline use. To get a nice discount on the application, follow this link and you'll also support my efforts to keep this site running.
My full stats for this particular climb, which included summiting Cathedral Peak (13,943 ft.):
- Peaks climbed: 1
- Miles hiked: 8.5
- Time: 5 hours, 23 minutes
- 3,987 ft. elevation gain
For this trip, I decided to pack quite a lot of camera gear (by the way, these are affiliate links and using them helps me pay for this site and to bring you better content):
- Sony A7R2 Camera
- Sony 12-24 f/4 lens
- Zeiss Loxia 21mm f/2.8 lens
- Sony 55mm f/1.8 lens
- Sony 70-300 FE telephoto lens
- Feisol Tournament 3442 tripod
As usual, I used the beta from Gerry Roach's High Thirteener Guidebook. I was still using the 1st edition of the book; however, his new edition is available on Amazon after many years of waiting - rejoice!
I reached the Cathedral Lake Trailhead at 5 PM. It was not very full and that made me smile. I embarked up the steep trail which Roach describes as unrelenting and pretty much did not stop until I reached the lake. The hike is steep but the trail is great and the scenery is wonderful as well.
As you climb the trail, the view opens up quite a bit across Castle Creek to reveal Ashcroft Mountain.
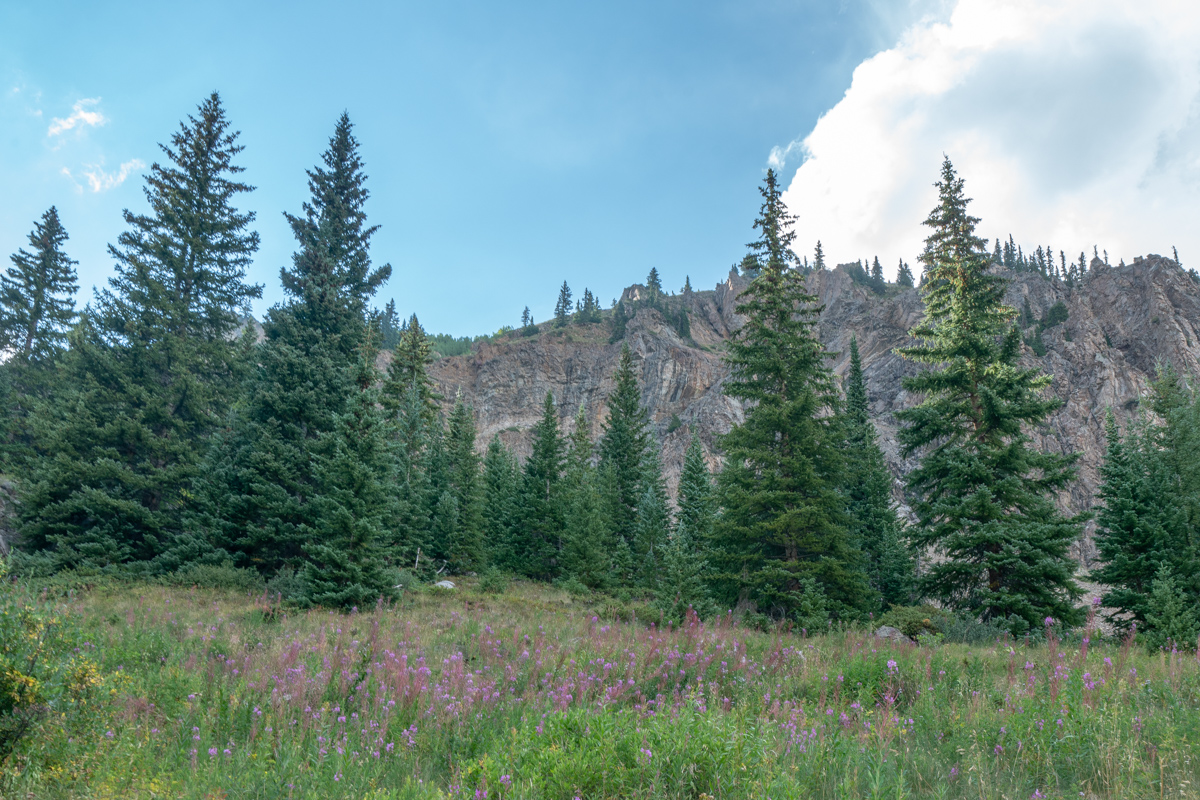
The fireweed had all grown super tall and looked really eerie.
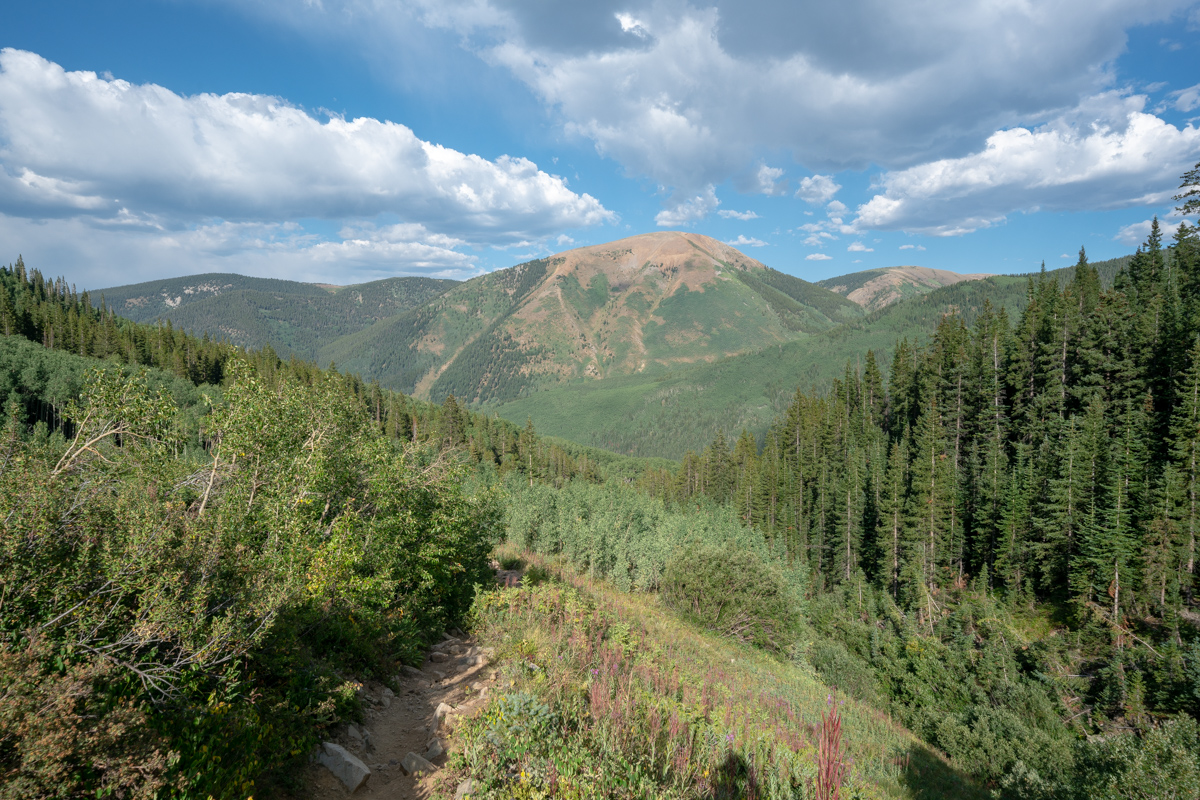
As I continued up, the eastern flanks of Malamute Peak began to reveal themselves.
The area just before the lake has ample camping and some great sites near the stream. I opted to find a spot a little higher up near some small trees with a wonderful view of Cathedral Peak (center) and Leahy Peak (right).
I set-up my campsite at 6:30 PM and began hydrating my dinner. Knowing I would need a good hour for it to hydrate, I hiked to the lake and found some spots to photograph the sunset from. It was really pretty and I was the only person up there except for a fisherman, who left shortly after I arrived. Being the only soul around at a high mountain lake is equal parts scary and serene.
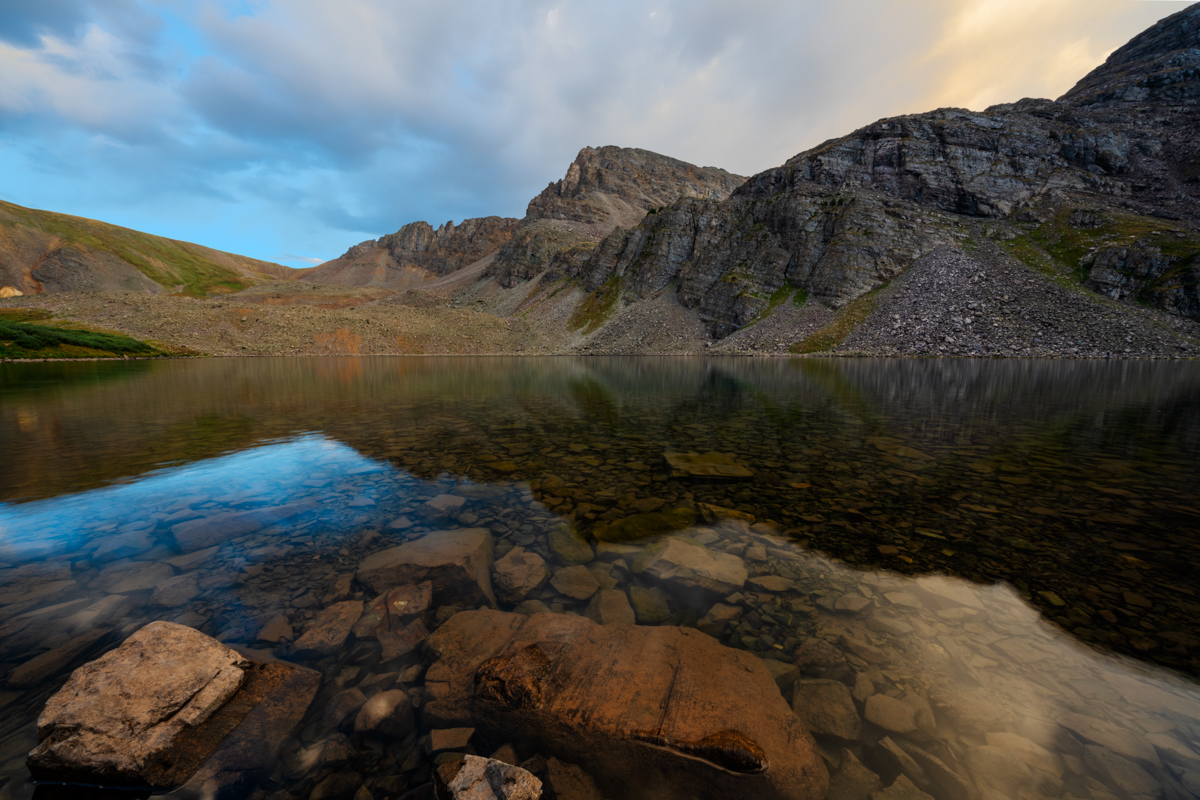
The sunset looked like it would open up over Cathedral Peak, so I repositioned myself on the eastern shore for some great shots of Cathedral Peak.
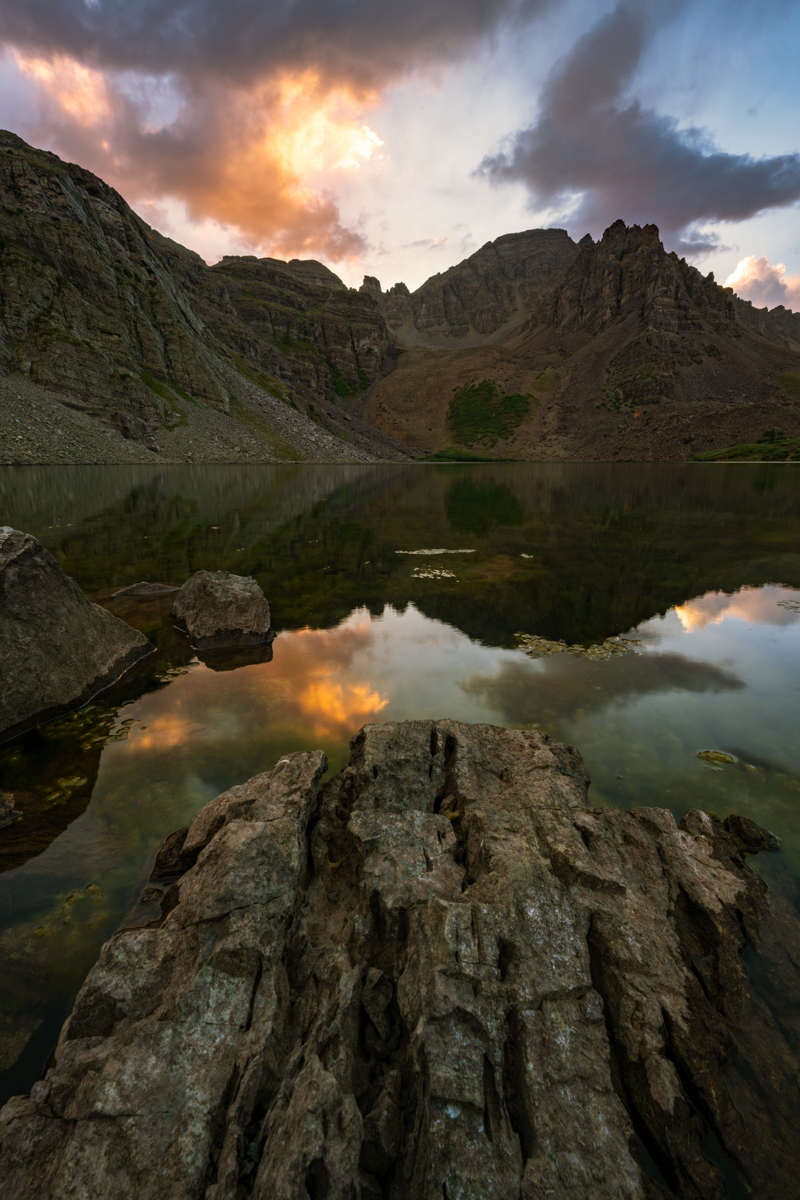
The light was bright, intense, and really colorful.
I decided it was time to go back and get ready for bed. I enjoyed one last gaze at the parting light before bed.
I set my alarm for 1:30 AM so I could photograph the Perseid Meteor Shower. I ended up waking up at 11:30 PM to some strange sounds (maybe just wind). I decided to get up and set-up my camera for the Meteor Shower. The Milky Way was ablaze to the south and I was loving it.

I found a nice compositon including Cathedral Lake and the Milky Way and set-up my camera to shoot on a time-lapse automatically every 31 seconds. I lay on my back and watched the meteors for about an hour or so - it was one of the best displays of the Perseids I could remember. Huge streaks across the sky. It was pitch black - no light from cities, no moon. I decided to leave my camera there all night and get some sleep. I wanted to shoot sunrise from the summit of Cathedral.

I got up at 3:45 AM, found my camera again, packed it up, and began my journey in the dark up Cathedral, following the description in Roach's book. I was not able to find the "mining trail" he describes until about 500 feet of elevation gain above the lake. I bushwhacked up a steep grassy slope and encountered the great trail heading west. I followed cairns all the way to the base of the infamous gully, where I watched the beginnings of sunrise. The gully itself was atrocious. It was some of the nastiest terrain I can ever recally climbing up. Class 3 loose dirt and rock. Maybe snow climbing would have been fine after-all! Oh well, I suffered up the steep gully and made great time.
The terrain between the saddle and the summit was pretty interesting. It reminded me of Vermillion Peak or Hagerman Peak. It was loose in spots but relatively easy to find good solid holds. Some care was needed to ensure a good route up, but all-in-all I did not find it overly difficult to ascend. I reached the top just in time for sunrise, which was glorious to say the least!
I was so focused on the Elk Mountain 14ers to my west, including the Maroon Bells, Pyramid Peak, and Capitol Peak that I had forgotten about Castle Peak to my south. I caught it in the corner of my eye and my jaw dropped. Castle never looked so good in the early light. So much red!
Of course the Elk Mountain 14ers looked amazing as well.
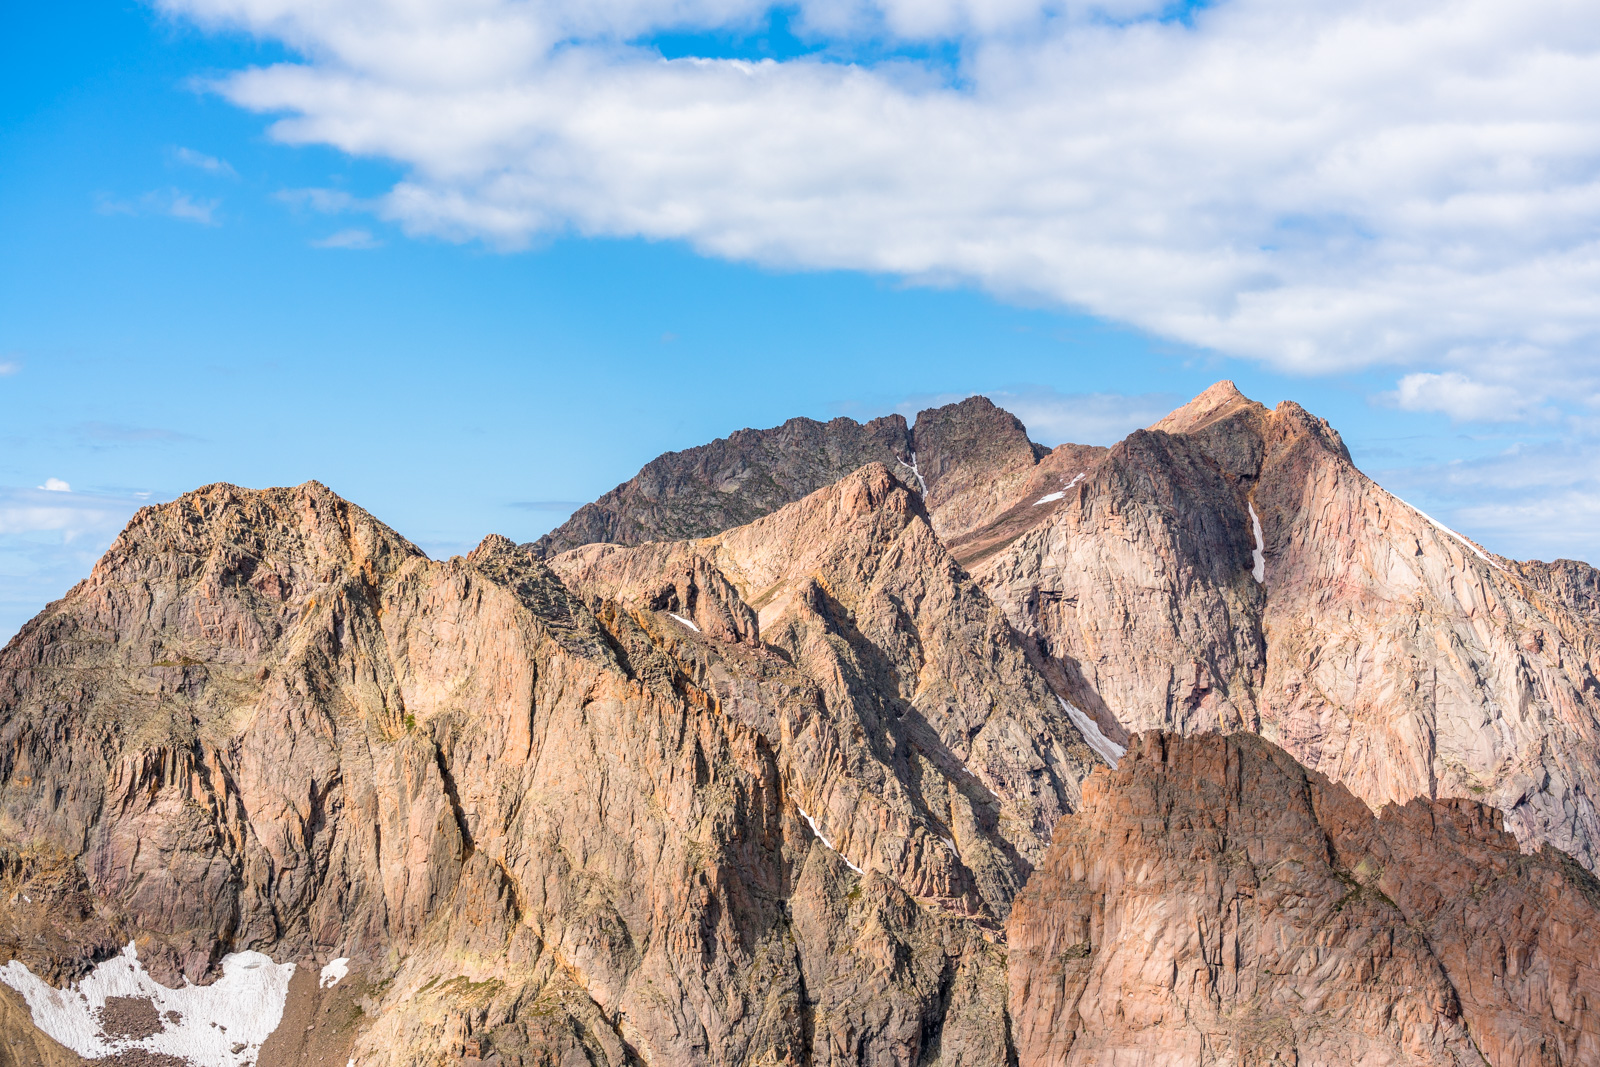
This telephoto rendition showcases all the great peaks, including, from left to right, Maroon Peak, Thunder Pyramid (my last Centennial), North Maroon Peak, Pyramid Peak, and Capitol Peak.
It was a magical display of light and might.
It was maybe not the most incredible display of color that I remember, but it was a damn good sunrise, and I was proud to have photographed another sunrise from the top of a Centennial.
The clouds and haze from the California wildfires added some interesting dynamics as well.
#99 was in the bag! Next up - Thunder Pyramid!
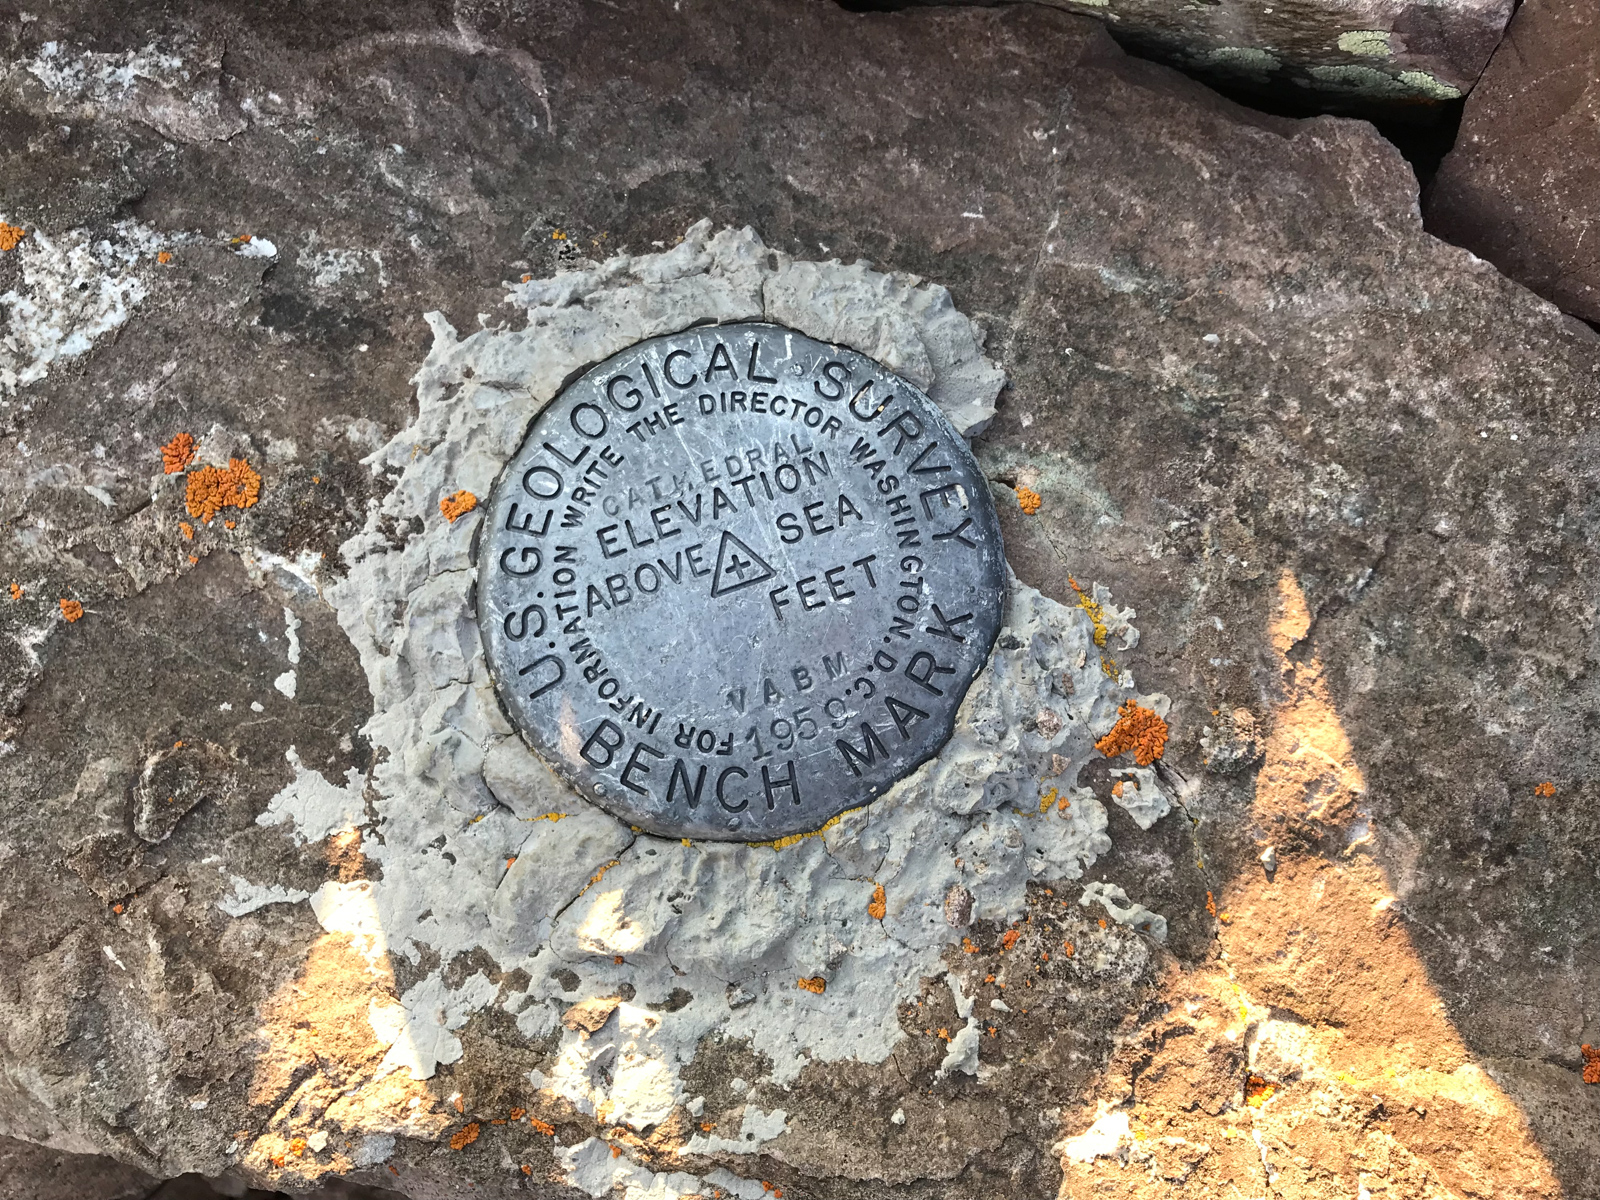
The Cathedral summit marker, looking great after 59 years.
I did not spend a ton of time on the top. I let my friends and family know I had made it to the top and then I made my way down. I reached the gully again in no time and prepared myself for hell.
This next photo is looking back up the gully from just a little ways down. It was so steep, loose, and nasty.
More from the nasty gully, to give you a good sense of what it is like when dry.
I finally reached the bottom of the gully and my feet were sore. What a nasty spot. I don't recommend it.
The next photo shows the highest cairn I was able to locate before the gully, in case anyone needs a good marker for their climb. Going down from here was pretty easy on a well-marked trail on precarious but mostly solid rock and boulder.
Here is a look back towards the start of the gully.
And another view of the gully from a little lower.
I loved the castle-like rock formations here, they were really cool to look at.
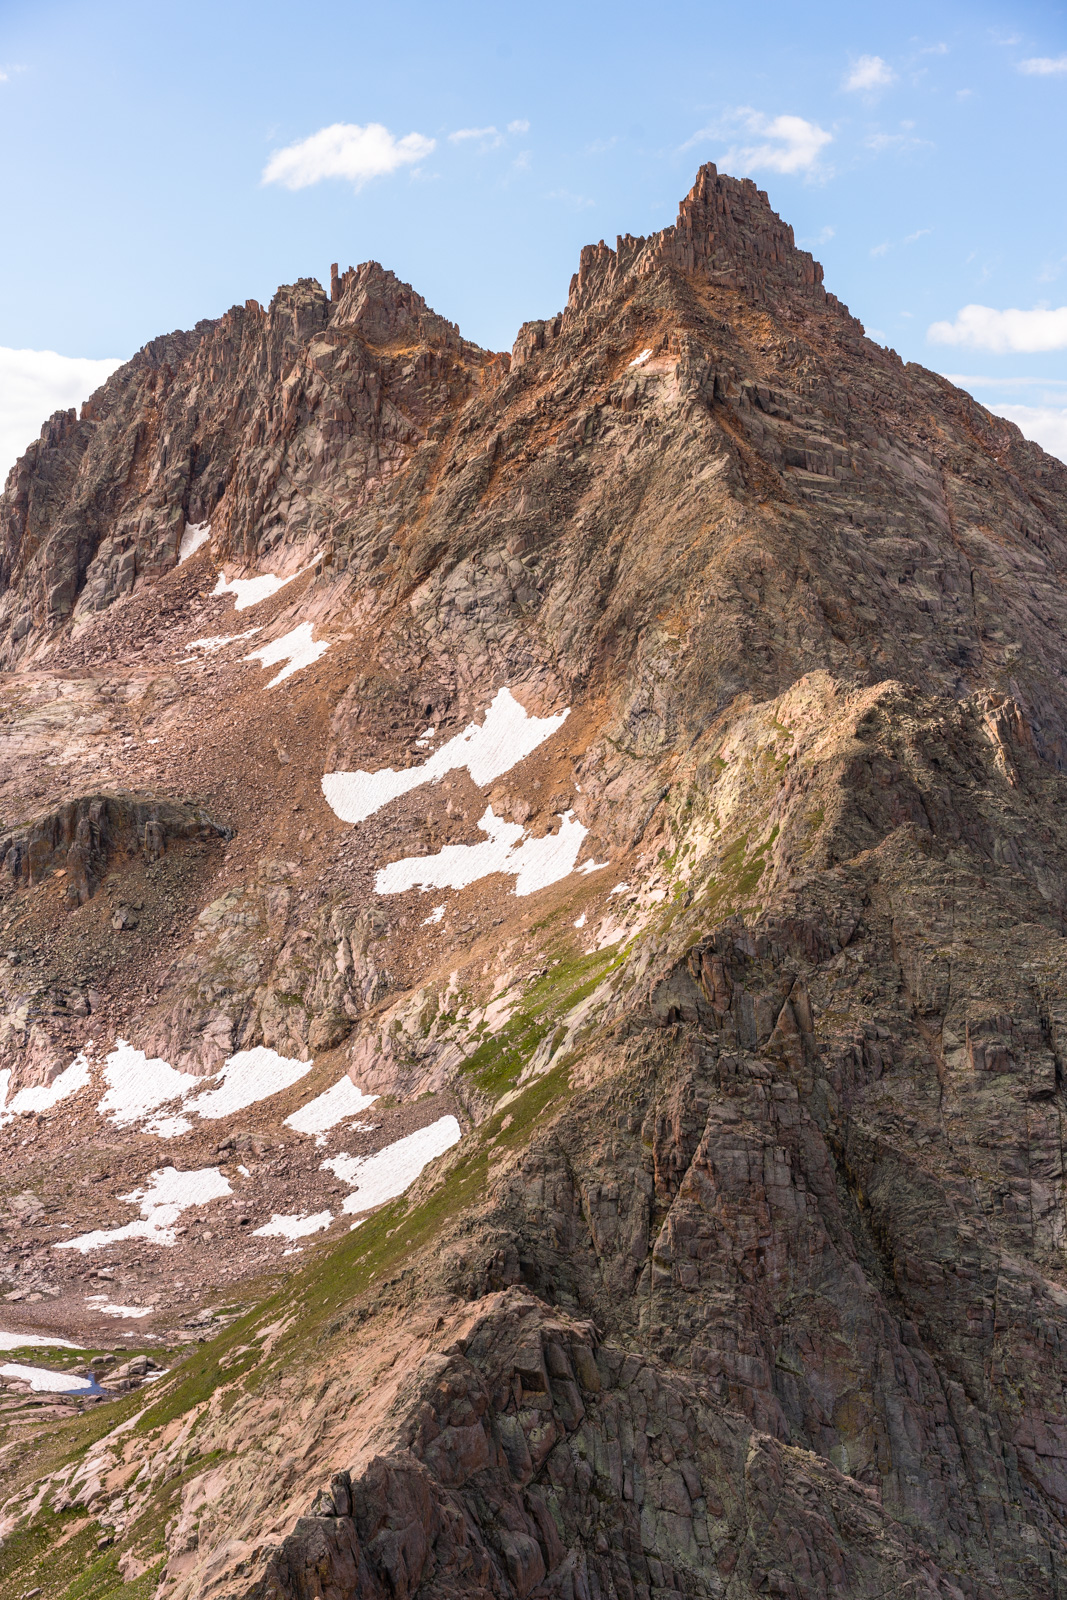
The eastern wing of Cathedral was especially impressive, towering over the whole area like some sort of watchman.
I made it back to my campsite at about 9 AM. I felt great about my time and my legs and feet were feeling strong still. The next photo shows a zoomed in view of the gully (right of middle) and shows just how crazy steep it is.
I took one more parting panorama of the area from camp to remember the day.
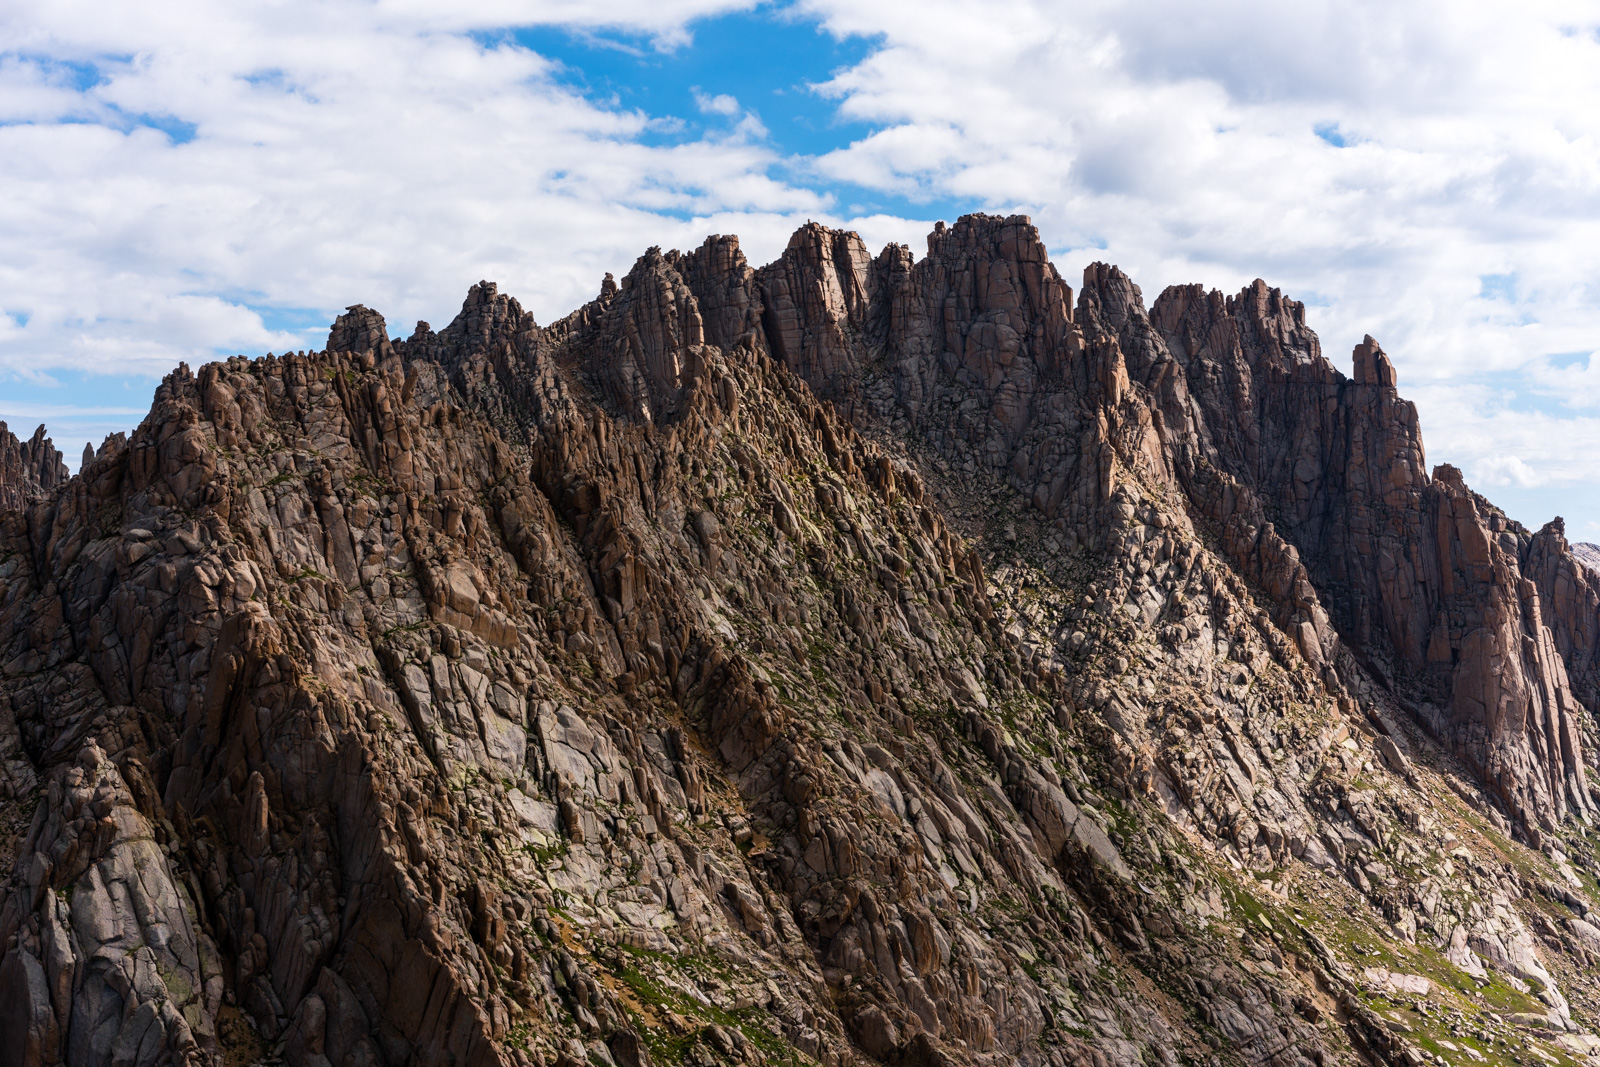
I could not help but get a telephoto black and white shot of the pinnacles east of Cathedral - so impressive!

Farewell Cathedral! Your eastern friend Leahy Peak looks way more inviting! =)
Thanks for reading. I hope you enjoyed my photos and description. One more to go!
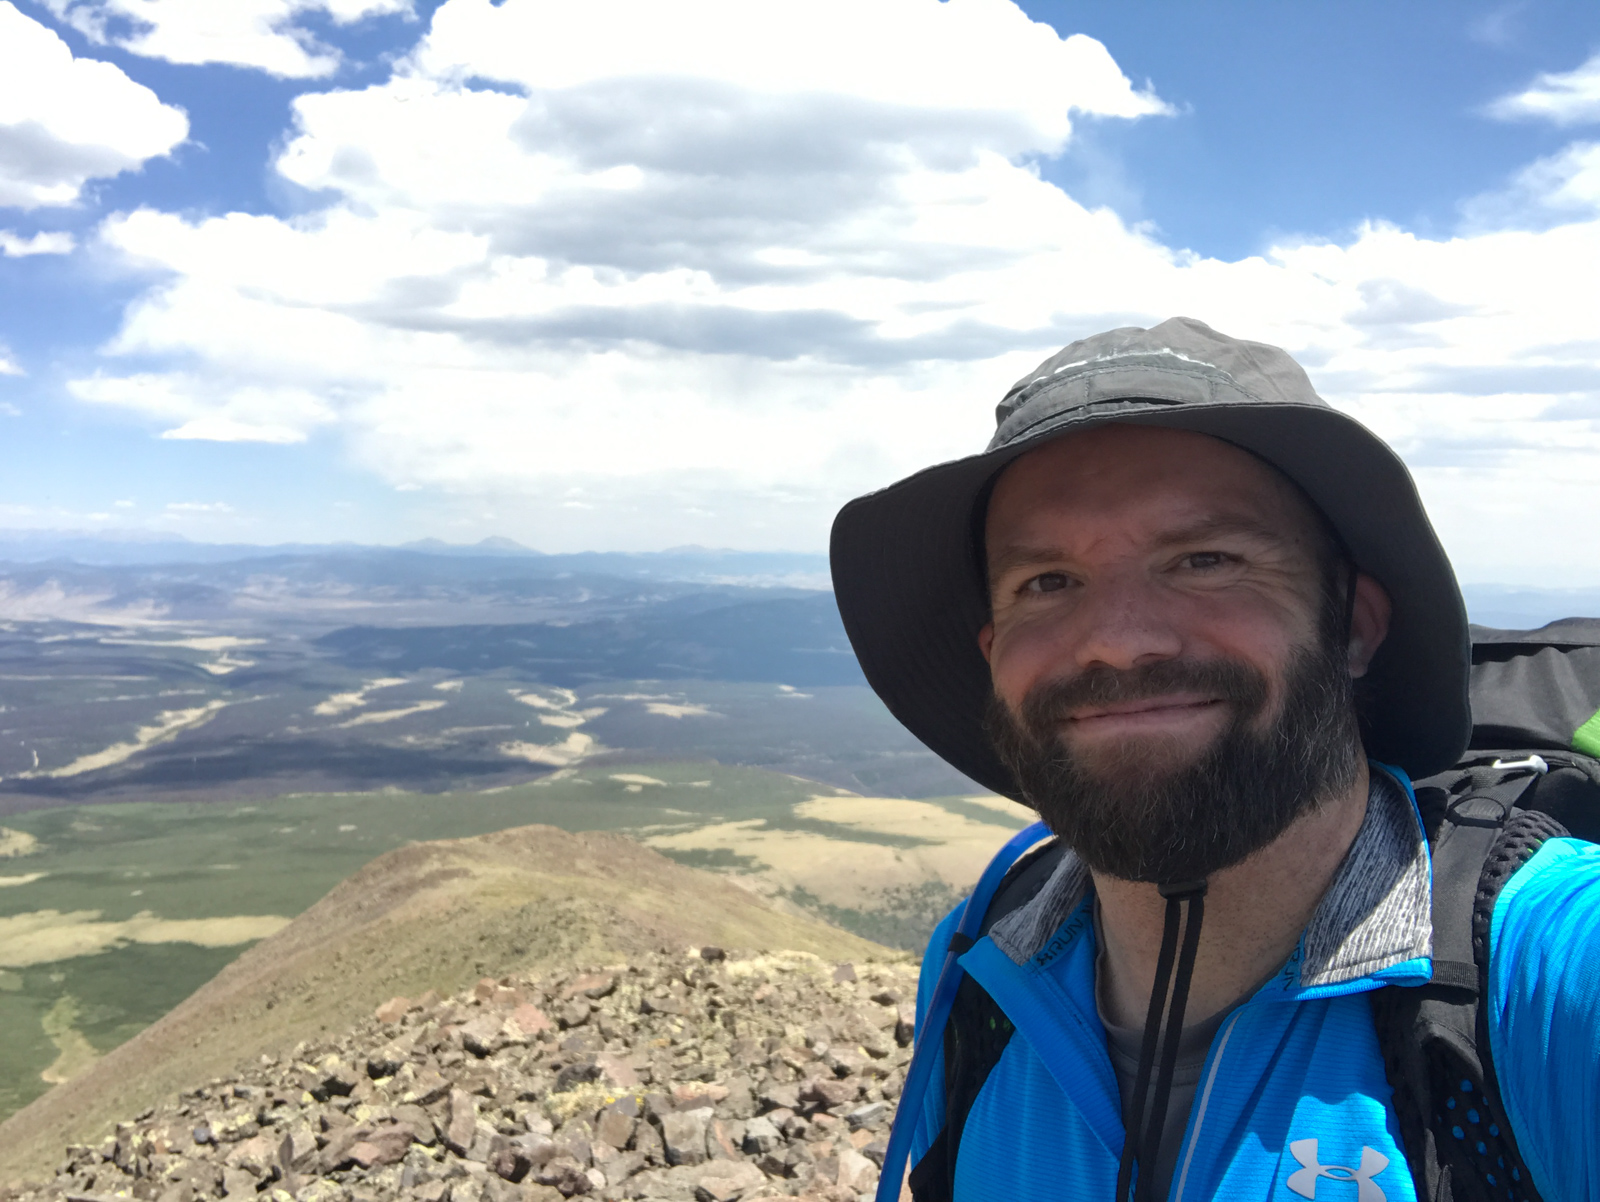
Backpacking in the La Garita Wilderness Area - Climbing San Luis Peak and Stewart Peak

2018 will be the year that I finish my lifetime goal of climbing the highest 100 mountains in Colorado. Or at least that is what I keep telling myself to stay motivated! Having climbed Dyer Mountain back in May, and Silverheels and Buckskin earlier in June, I found myself faced with only five mountains left to complete my goal: Stewart, North Apostle, Ice Mountain, Cathedral, and Thunder Pyramid.
I've been eyeing Stewart ever since I moved to Durango in 2015 and it was the very last Centennial I had left in the San Juan Mountains, which is kind of crazy to think about for me considering how many Centennials there are in the San Juans! I had made plans to climb it on several occasions but never could pull it off due to weather or some other unforeseen event. At the absolute last minute, I changed my plans from climbing Cathedral to climbing Stewart. I threw all of my backpacking and climbing gear into my car late Thursday after work and head east on Highway 160 towards Creede. I did not know what route I would take when I left the house. I had tentatively sketched out two routes - one was the standard route following the Cebolla Trail which required five hours of driving time from my home in Durango even though as the crow flies it was only 75 miles from my house. The other route was to go to Creede and drive past the Equity Mine and backpack in. There were a couple of choices to make for that route too - I could go up and over San Luis Pass, down Cascade Creek, up Bondholder Meadows and up the Cebolla Trail to Baldy Chato and ultimately Stewart; or, I could be super adventurous and hike up San Luis Pass, take the Colorado Trail to the base of the 14er San Luis Peak, climb that, climb Baldy Alto, climb Stewart Peak, and then loop all the way back down via the Cebolla Trail and back up to San Luis Pass. It sounded absolutely nuts so that's what I chose.
As always, you can see and download my full route and GPS tracks over on the incredible app, Gaia GPS, which I use on my iPhone to plan, track, and follow my routes on these trips. It is absolutely invaluable and worth every cent. I personally love that you have full access to all USGS topo maps and National Geographic Trails Illustrated maps as well. You can use the app while in airplane mode and even save maps for offline use. To get a nice discount on the application, follow this link and you'll also support my efforts to keep this site running.
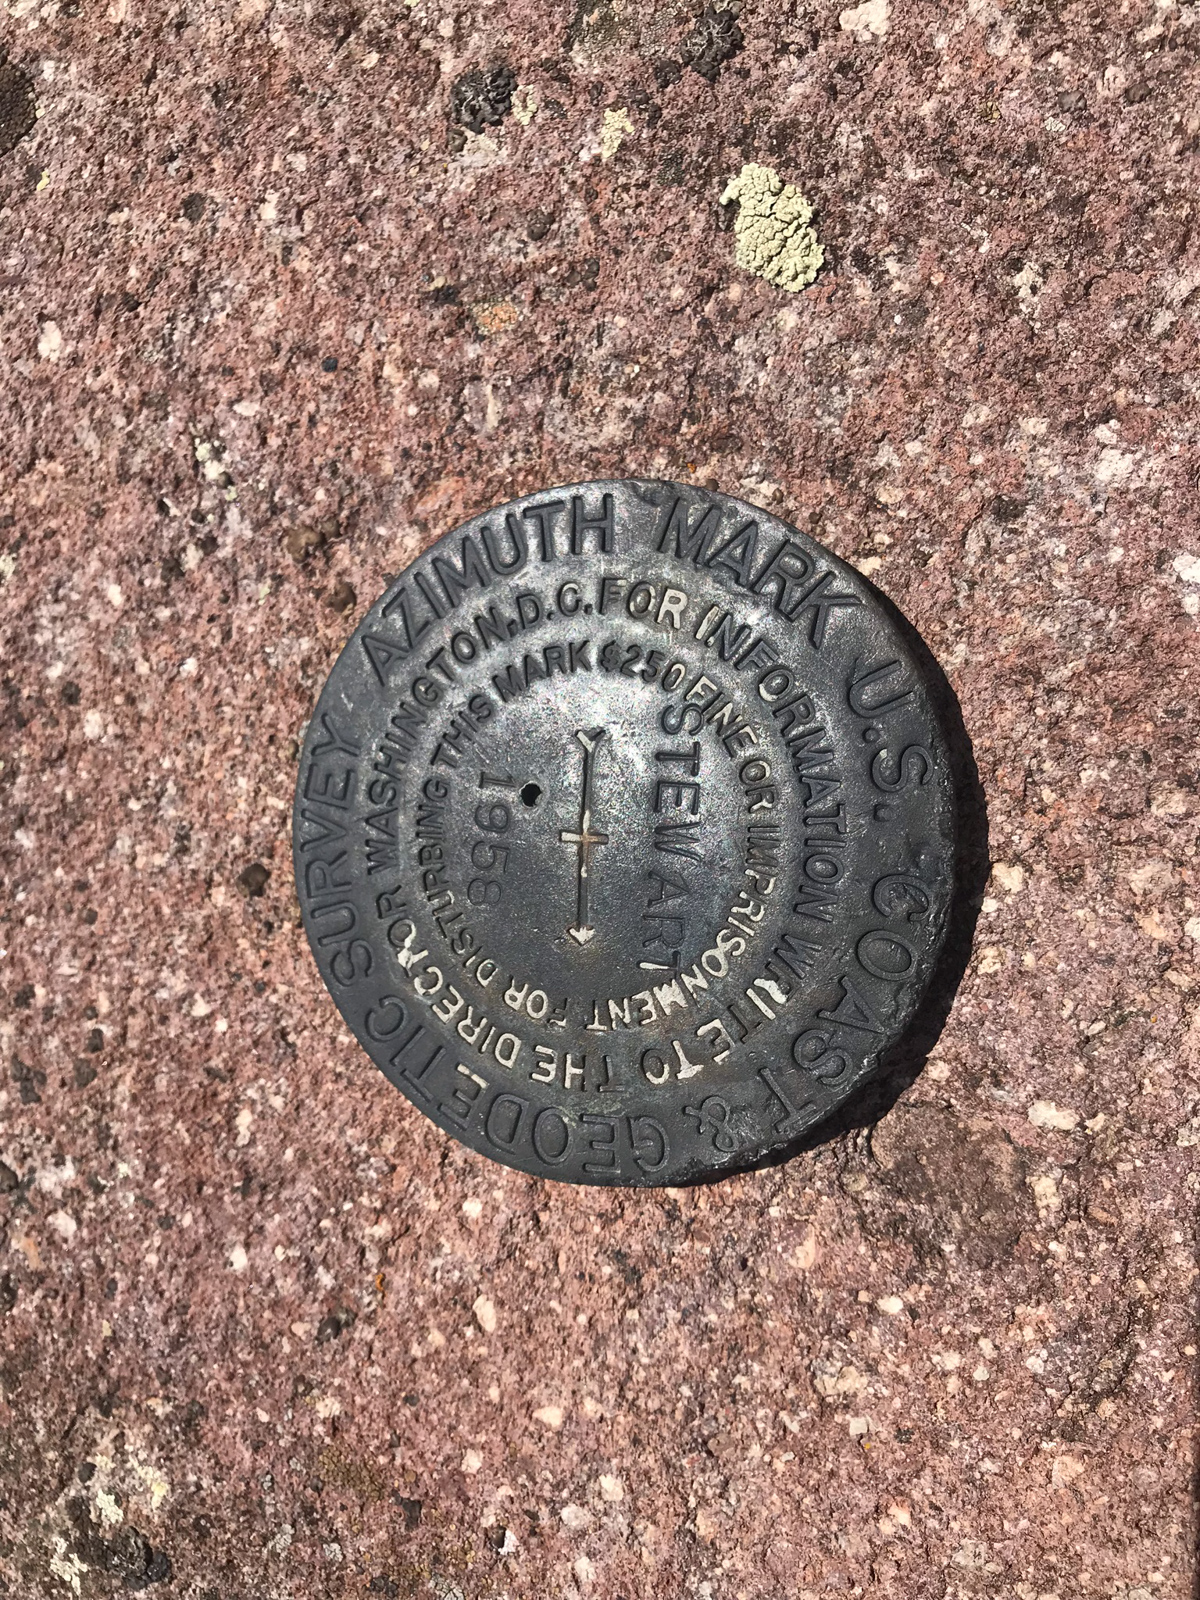
My full stats for this particular backpack and climb, which included summiting 14er San Luis Peak (14,014 ft), 13er Baldy Alto (13,698 ft), 13er "Column Ridge" (13,795 ft), 13er Stewart Peak (13,983 ft), and 13er Baldy Chato (13,401) all in one day with my backpacking pack. I'm not bragging, but damn that felt gooood.
- Peaks climbed: 5
- Miles hiked: 22
- Nights: 2
- Time: 14 hours, 22 minutes
- 5,619 ft. elevation gain
- Elk seen: over 400!
For this trip, I decided to pack quite a lot of camera gear (by the way, these are affiliate links and using them helps me pay for this site and to bring you better content):
- Sony A7R2 Camera
- Sony 12-24mm wide angle lens
- Sony 55mm f/1.8 lens
- Sony 70-300 telephoto lens
- Feisol Tournament 3442 tripod
As an aside, you can use this link to learn why I shoot with the Sony system and to find a tool I built to help you choose a camera system for backpacking.
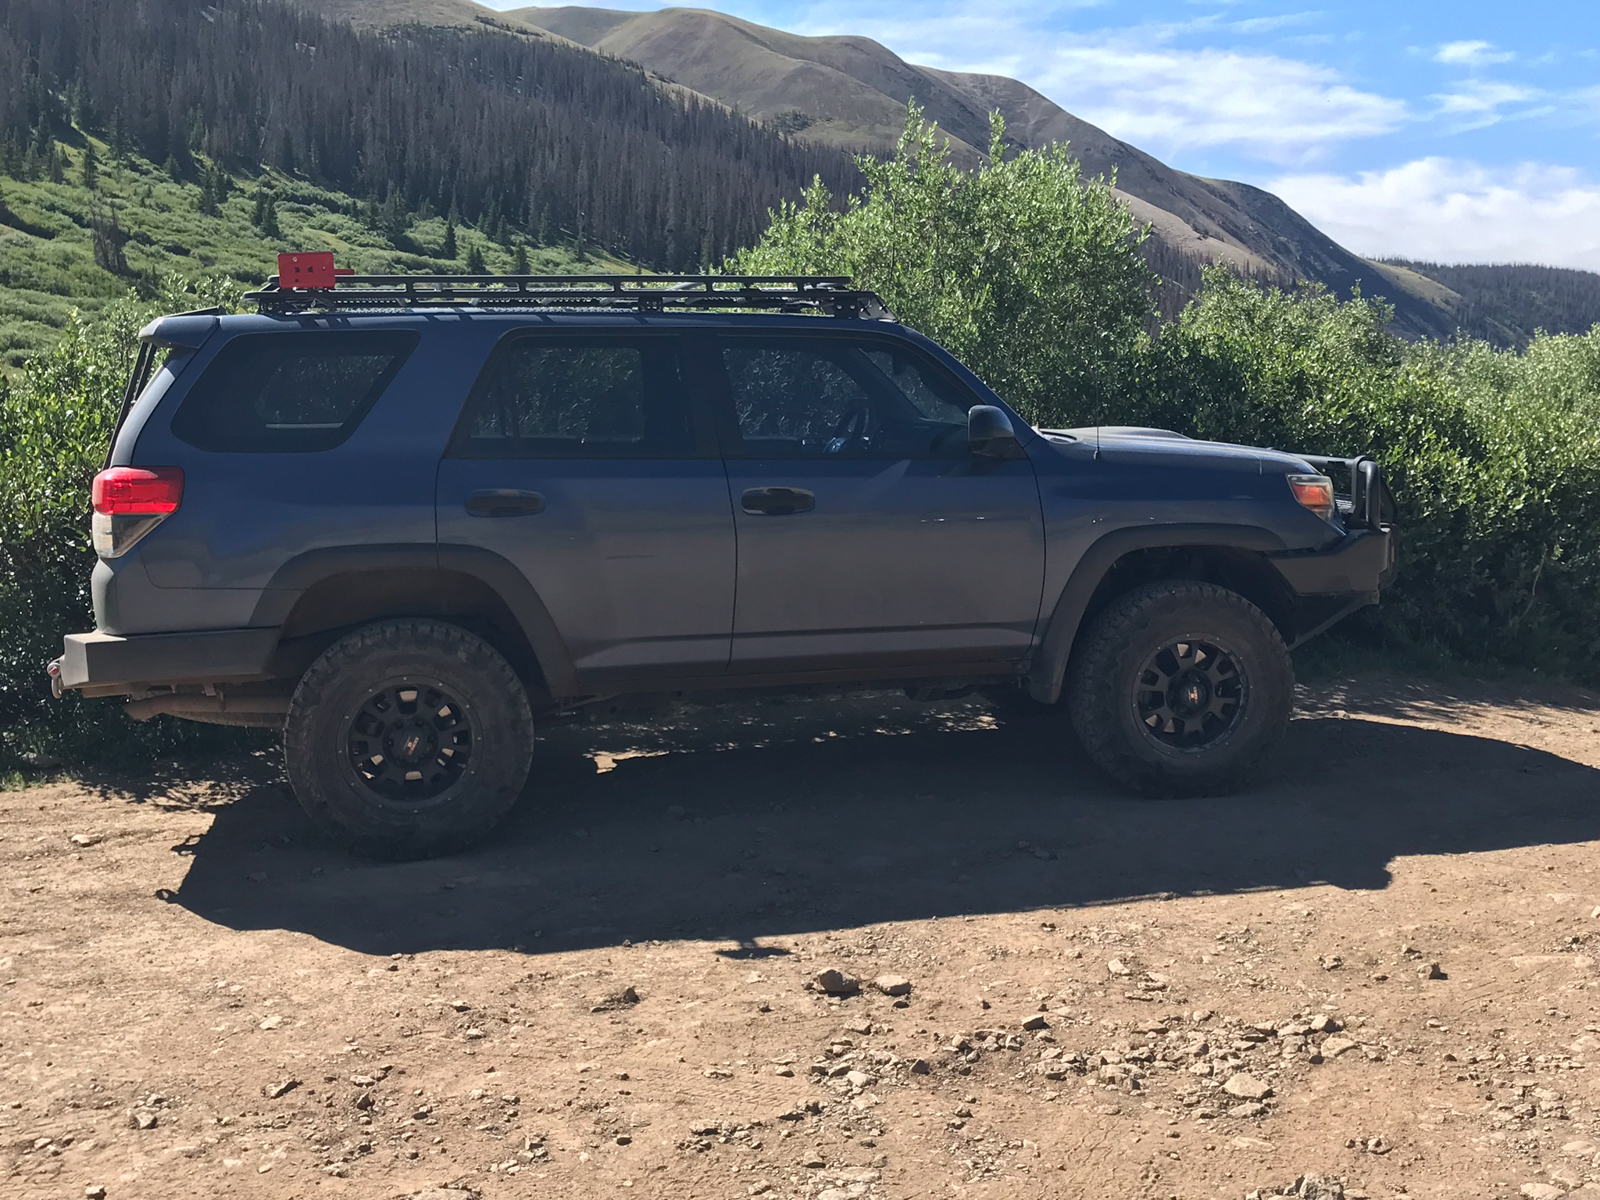
I arrived at the 4WD drive trailhead in my trusty Toyota 4-Runner at 9:45 PM. I debated sleeping in the car and getting an early start but I was still full of energy, so I donned my gear and headlamp and head off up the trail towards San Luis Pass, which I knew to be only about a half mile up the trail. Hiking in the dark is always eerie when you are by yourself - every movement, sound, and shadow reminds you that at any given moment a mountain lion could end your existence. I had to push that out of my mind a lot on the first night. I hiked 3 miles and found a nice campsite right off of the Colorado Trail at around 11:30 PM. I did not get much sleep due to aforementioned thoughts of mountain lions (which was probably totally irrational). I took a couple of photos before going to bed:
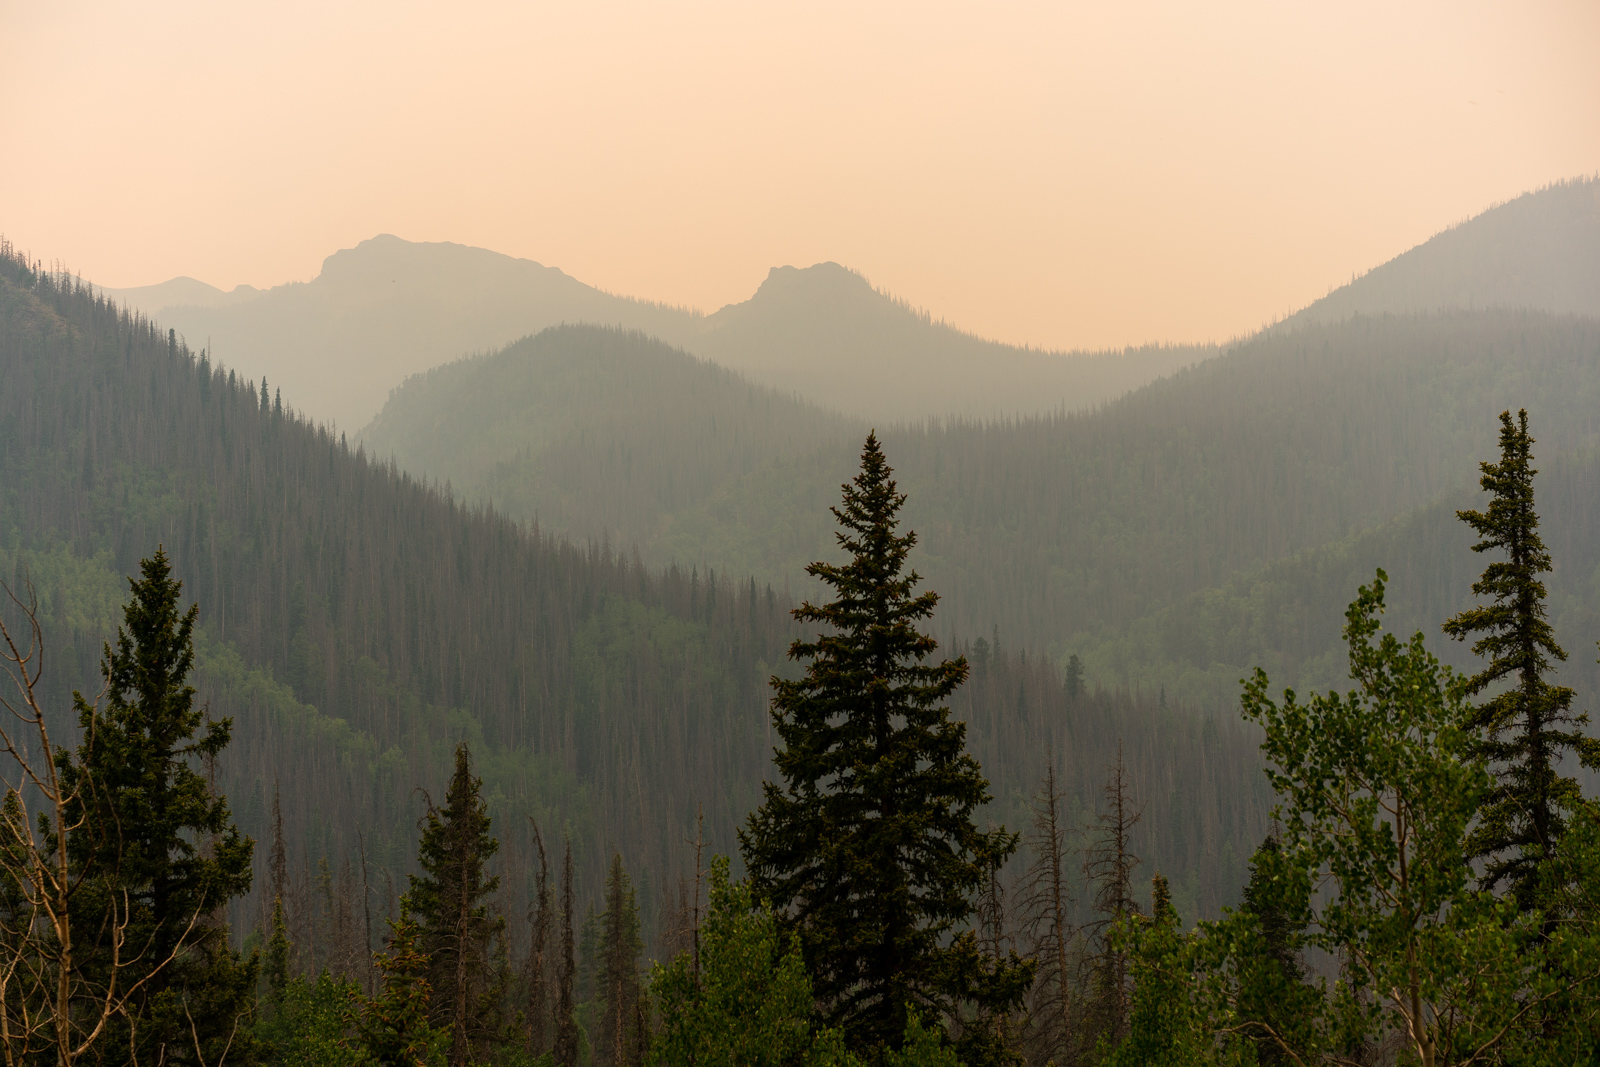
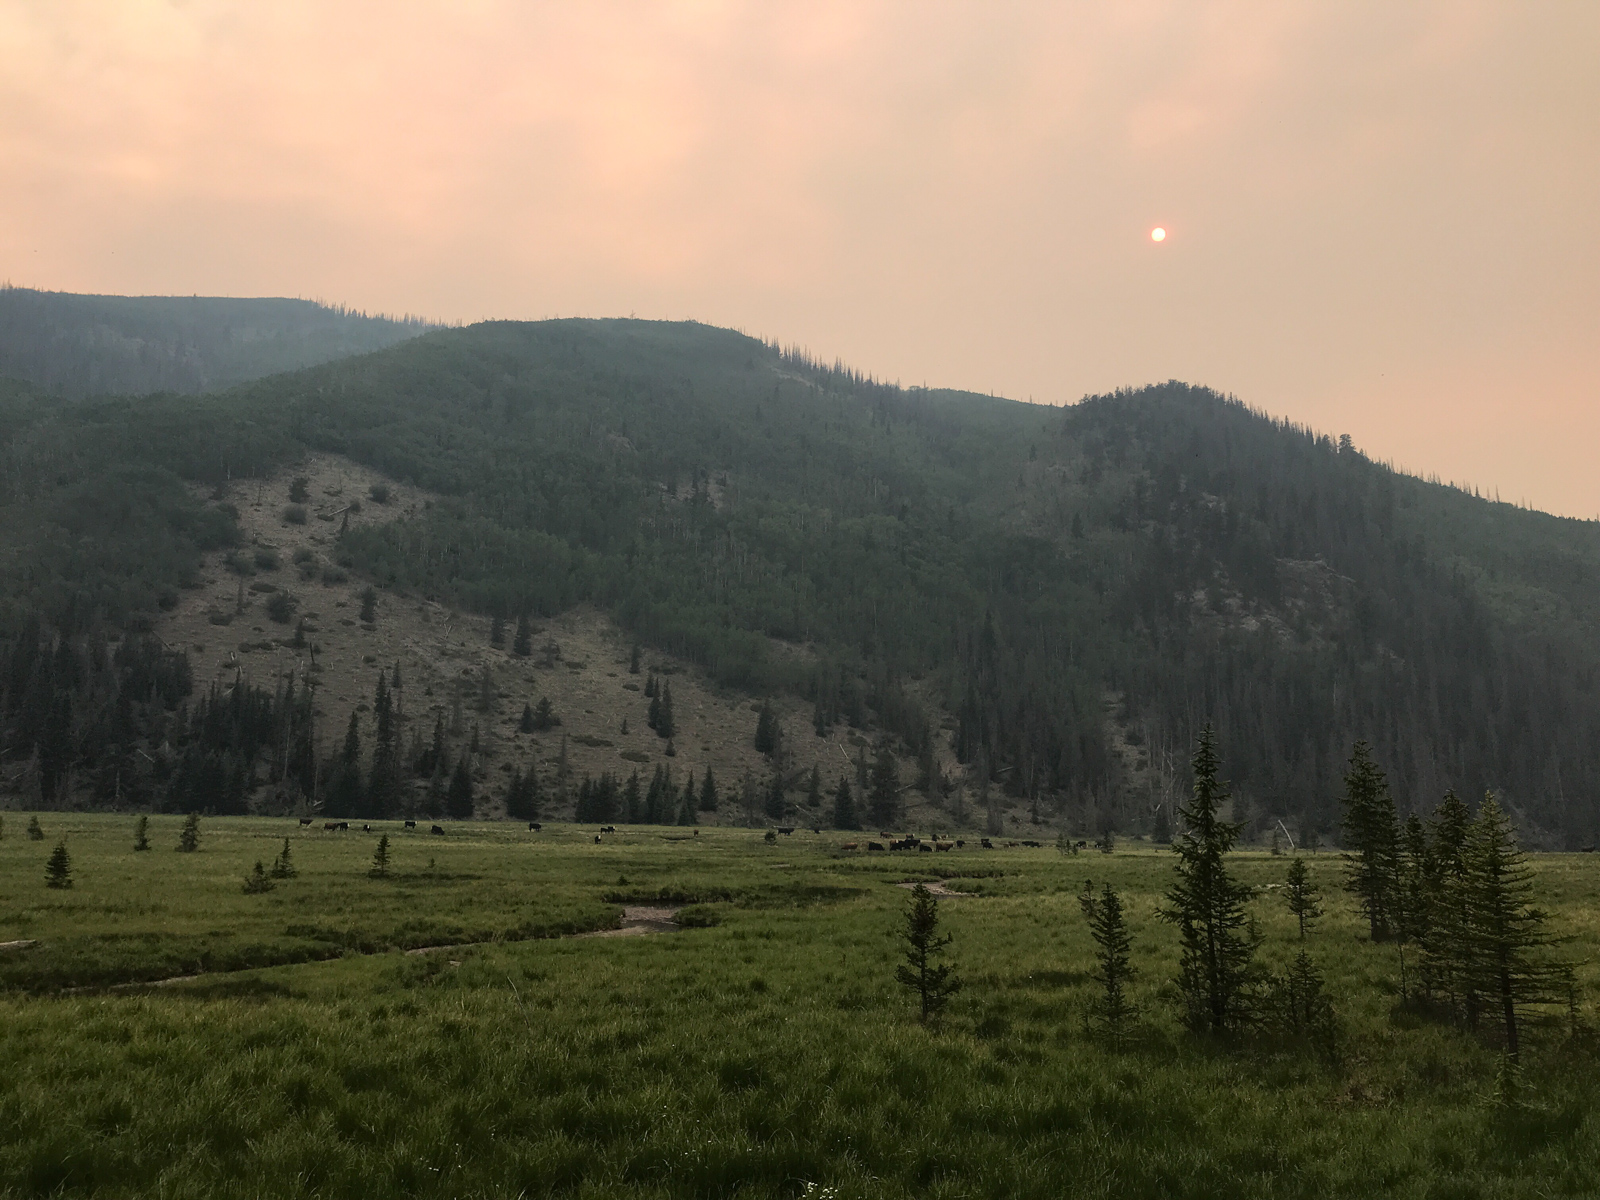
The moon was in full force and smoke was in the air from the blazing "416 Fire" that was raging near Durango all month. The air quality here was not great either, but I managed.
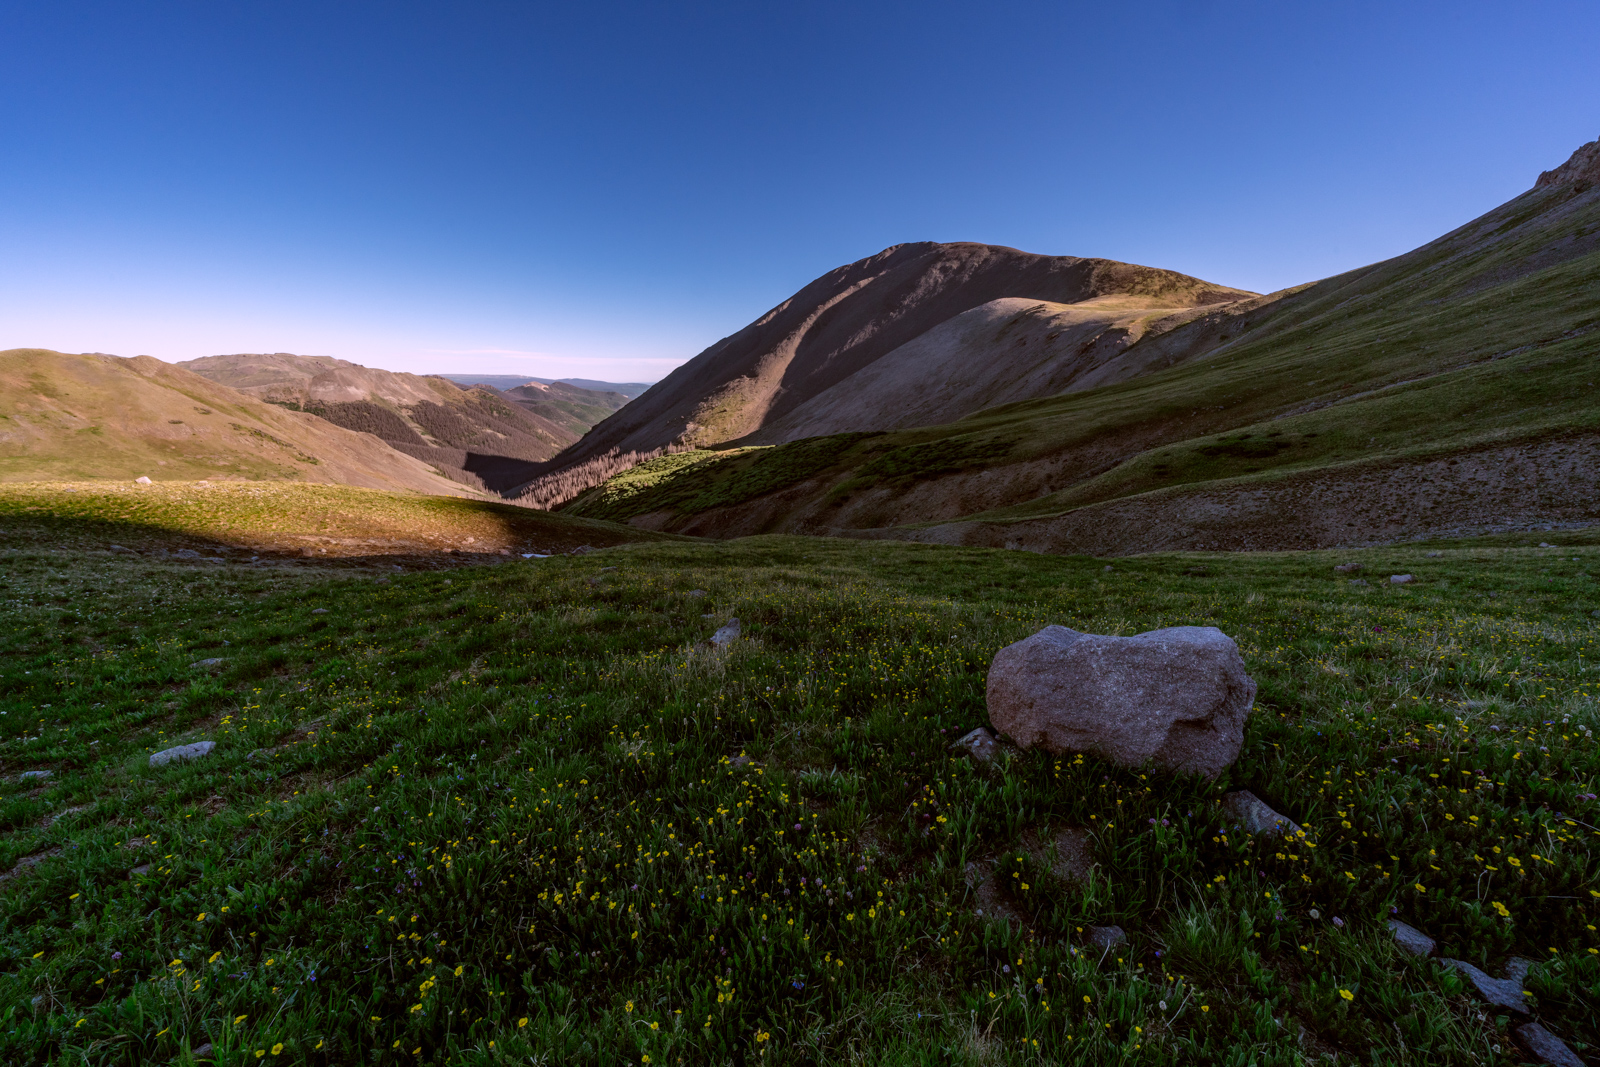
I set my alarm for 4:30 AM, hoping to photograph something interesting at sunrise. I think I got maybe 3 hours of sleep total and tossed and turned all night long. It was cold and the moon was quite bright. I was greeted at dawn with a nice vibrant display of light on UN13,285 to the North of me.
I found several different compositions nearby and had a good time shooting with the Sony 12-24 wide angle lens.
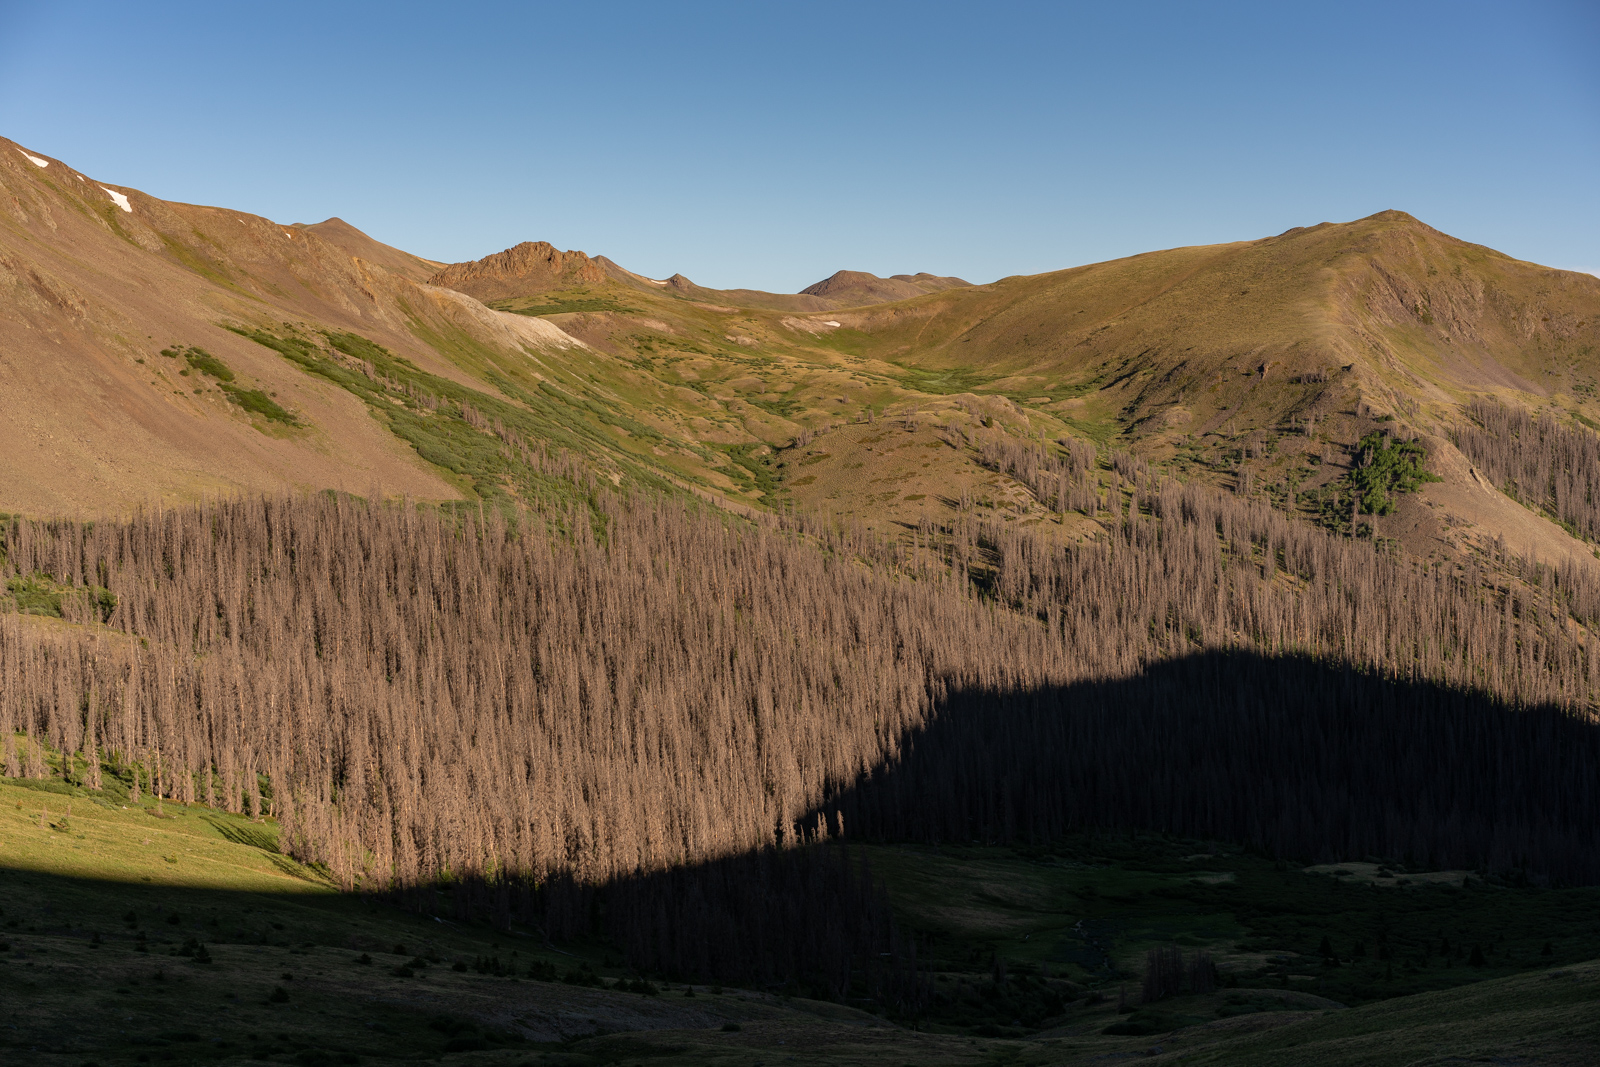
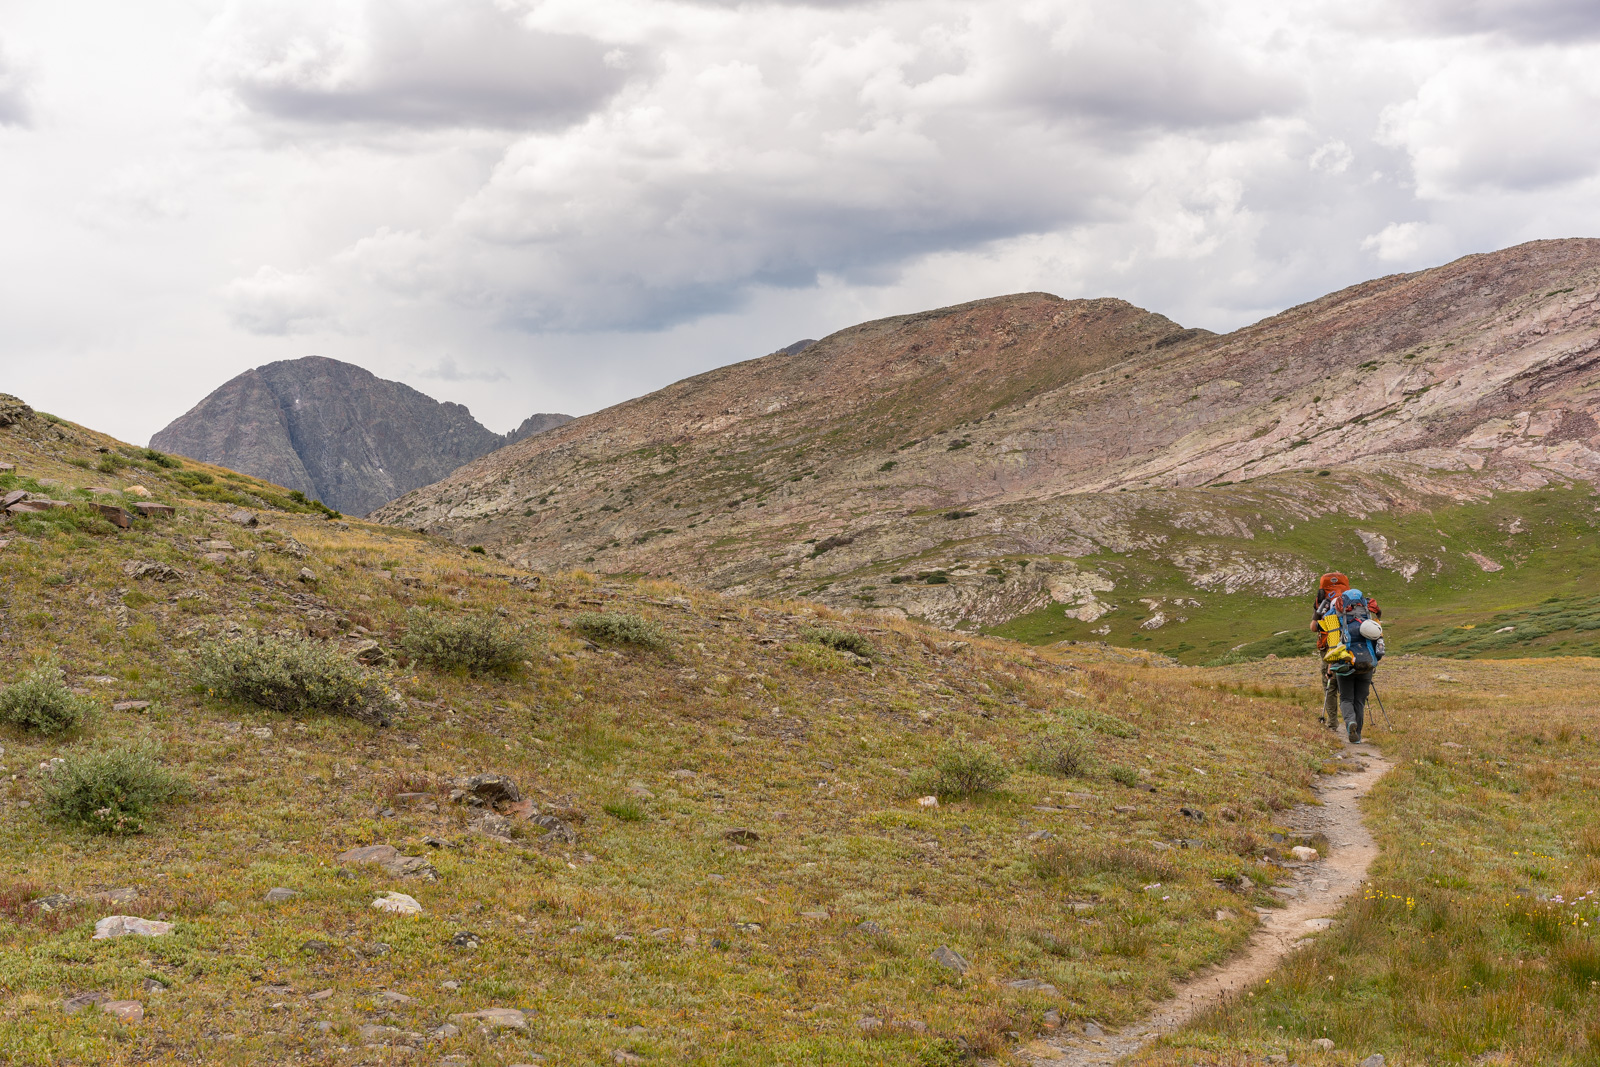
After shooting sunrise, I packed up all my gear, ate some food, and head out. I expected the trail to be very straight-forward until my turn-off for San Luis Peak, being that it was the Colorado Trail and heavily trafficked. Indeed, it was a very nice trail and easy to follow. The scenery around me was pretty nice as well. I totally think this is one of the better sections of the Colorado Trail there is.
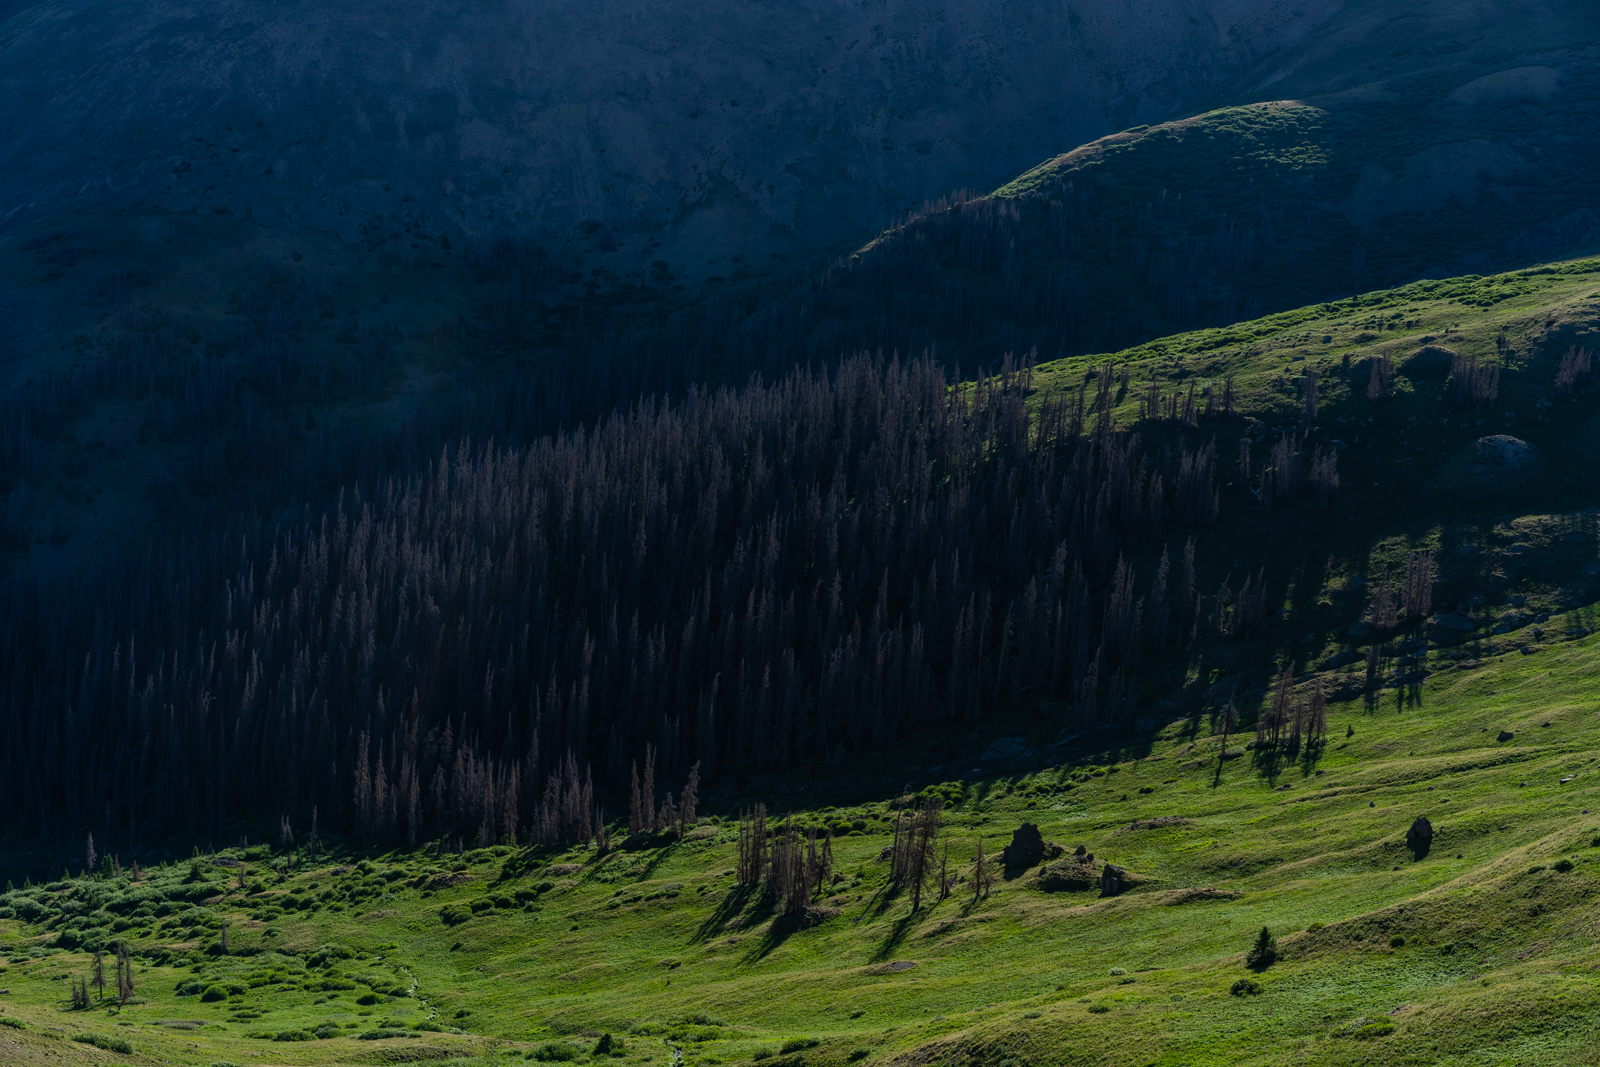
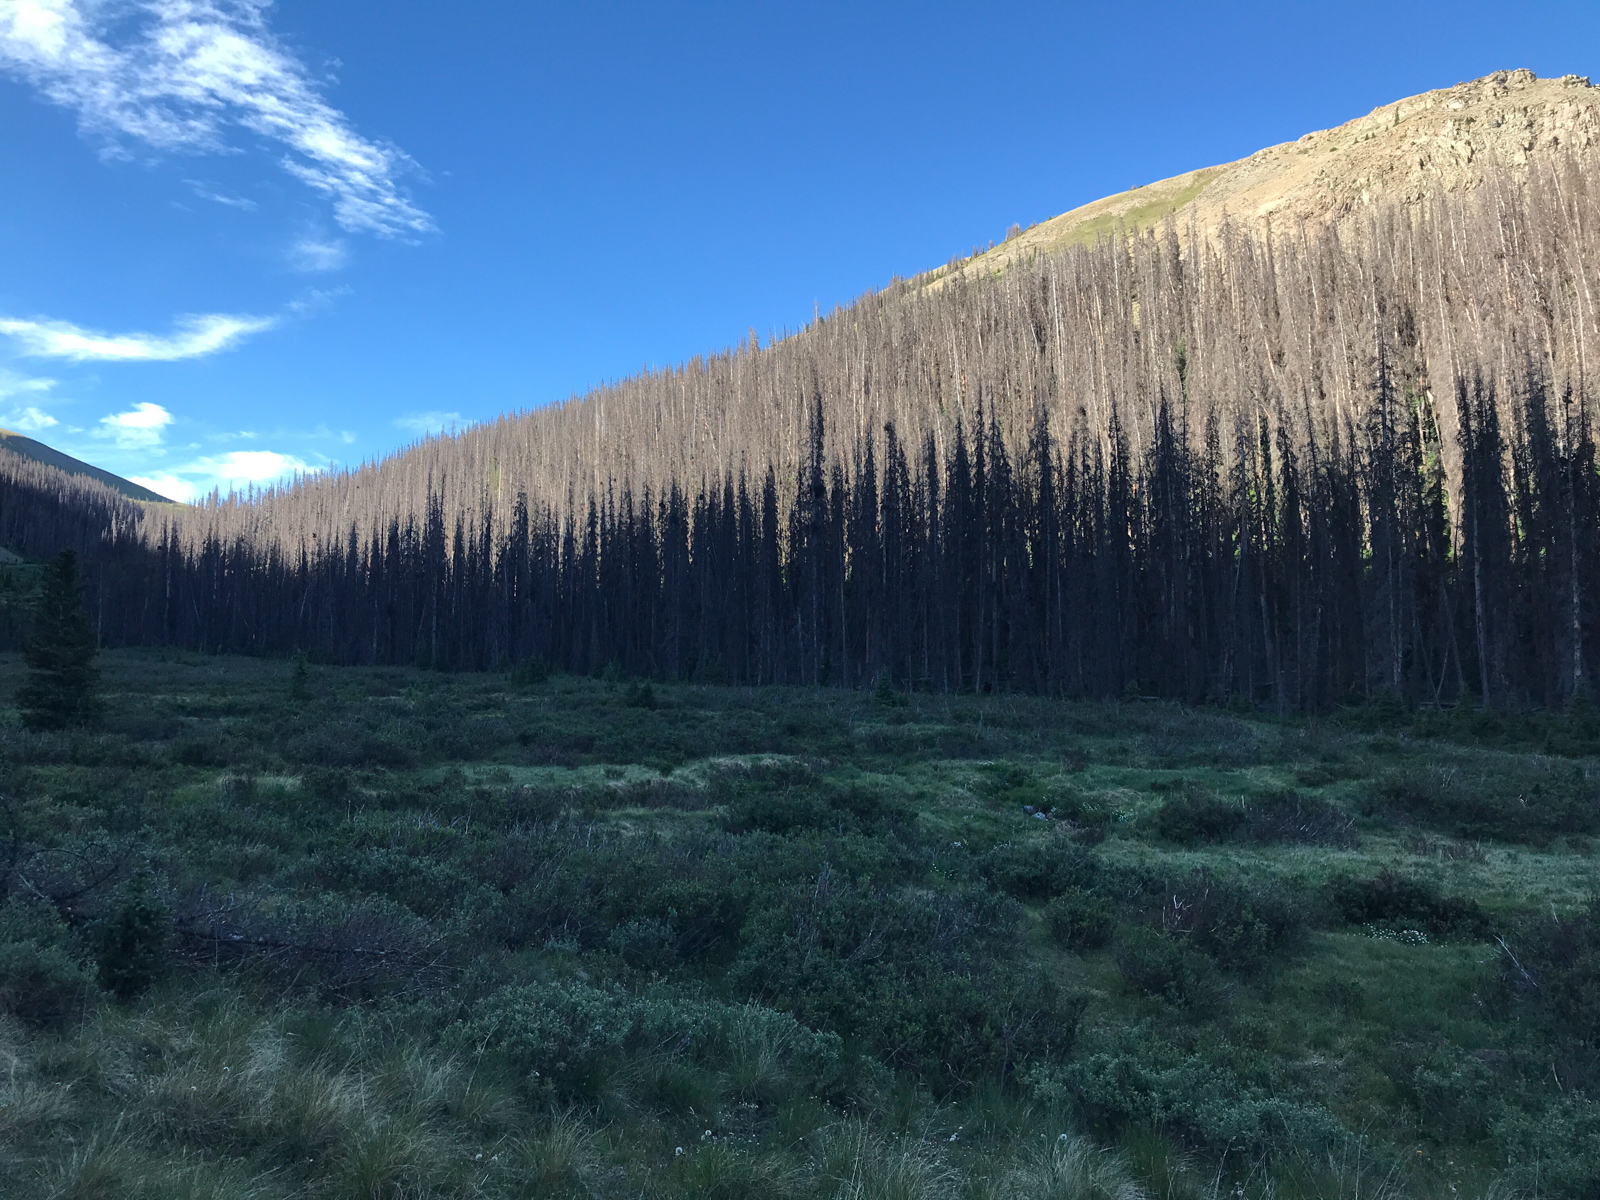
The only downfall for hiking in this part of Colorado is the immense Beetle Kill, caused by the mountain pine beetle. In years past, the temperature was much colder in the winter and it killed off most of the beetles; however, due to climate change, these beetles were able to thrive and destroy many trees in this part of Colorado. It is truly devastating to see the impact.
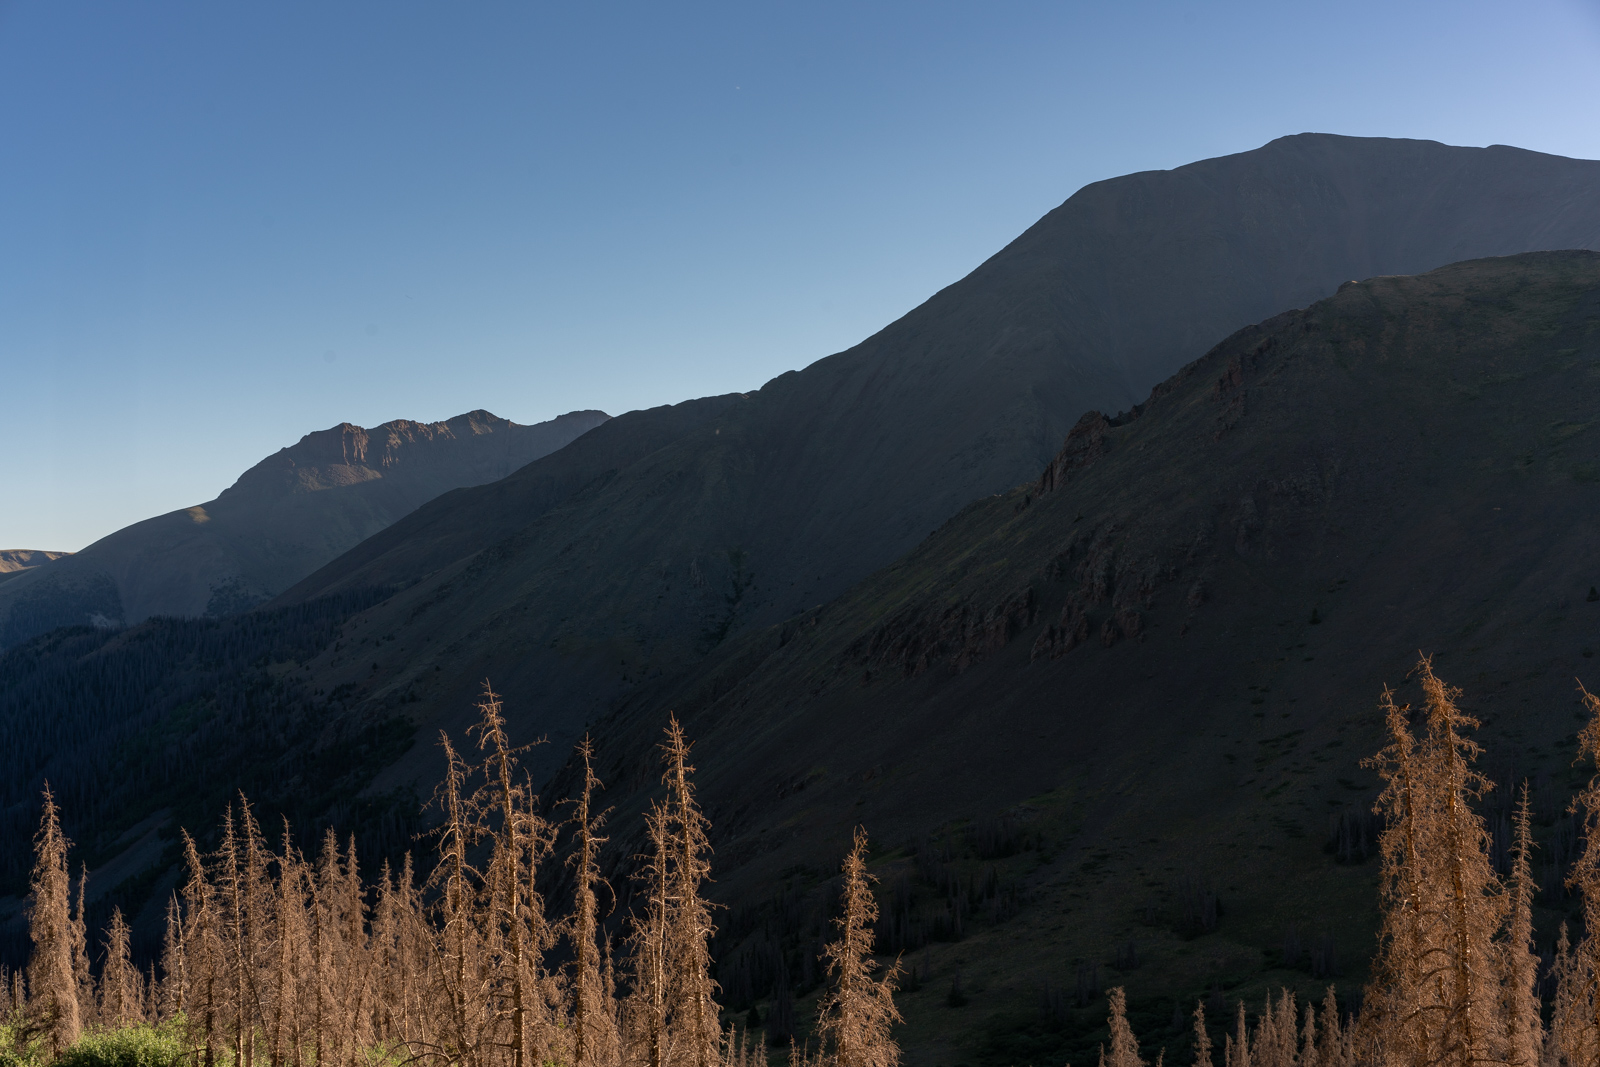
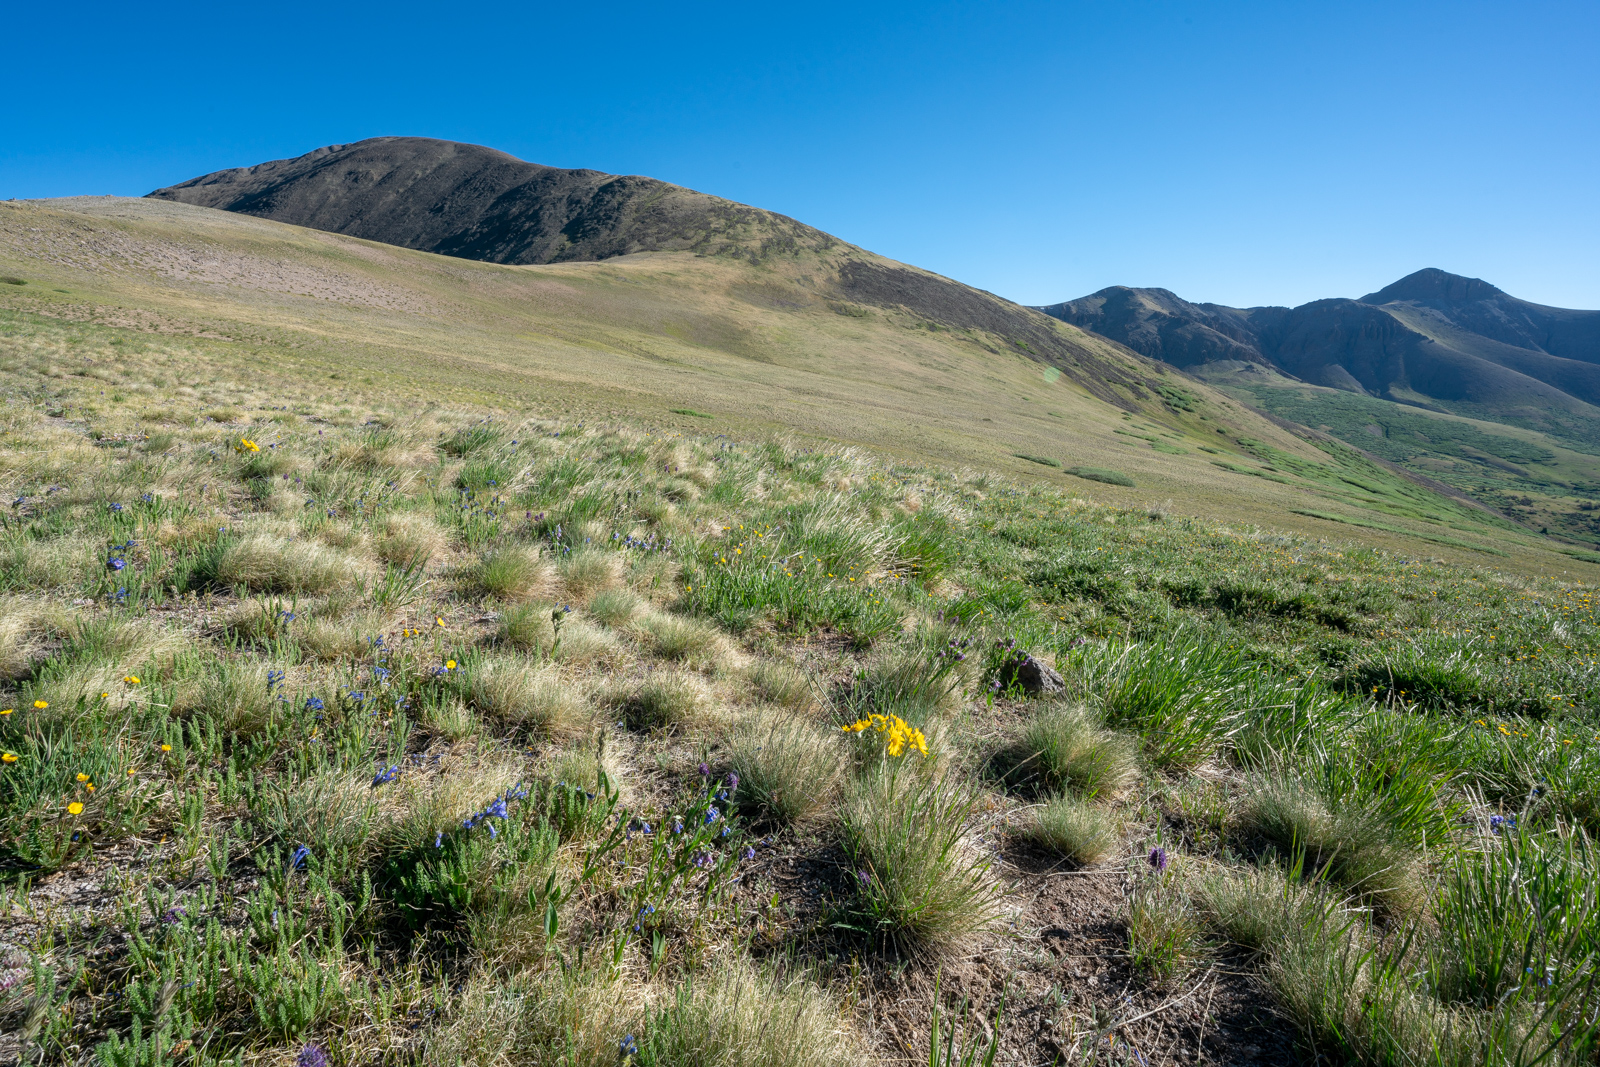
I kept on hiking, keeping a strong pace uphill. My first destination, San Luis Peak, loomed in the distance above me.
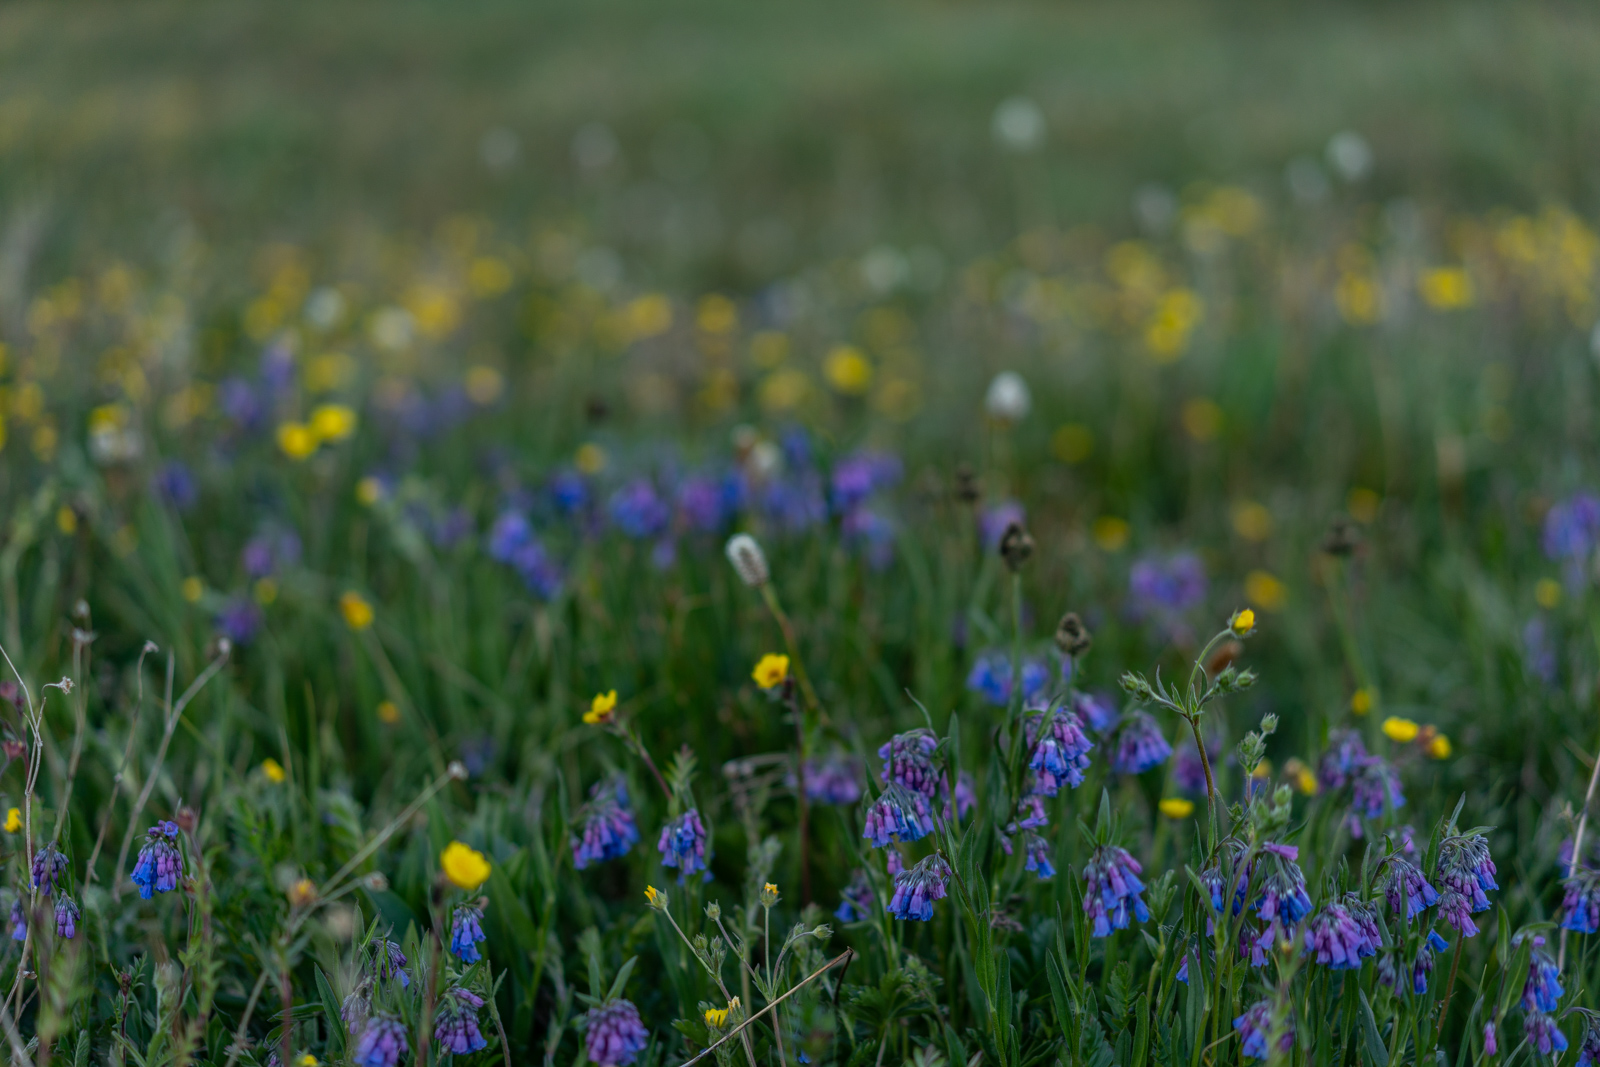
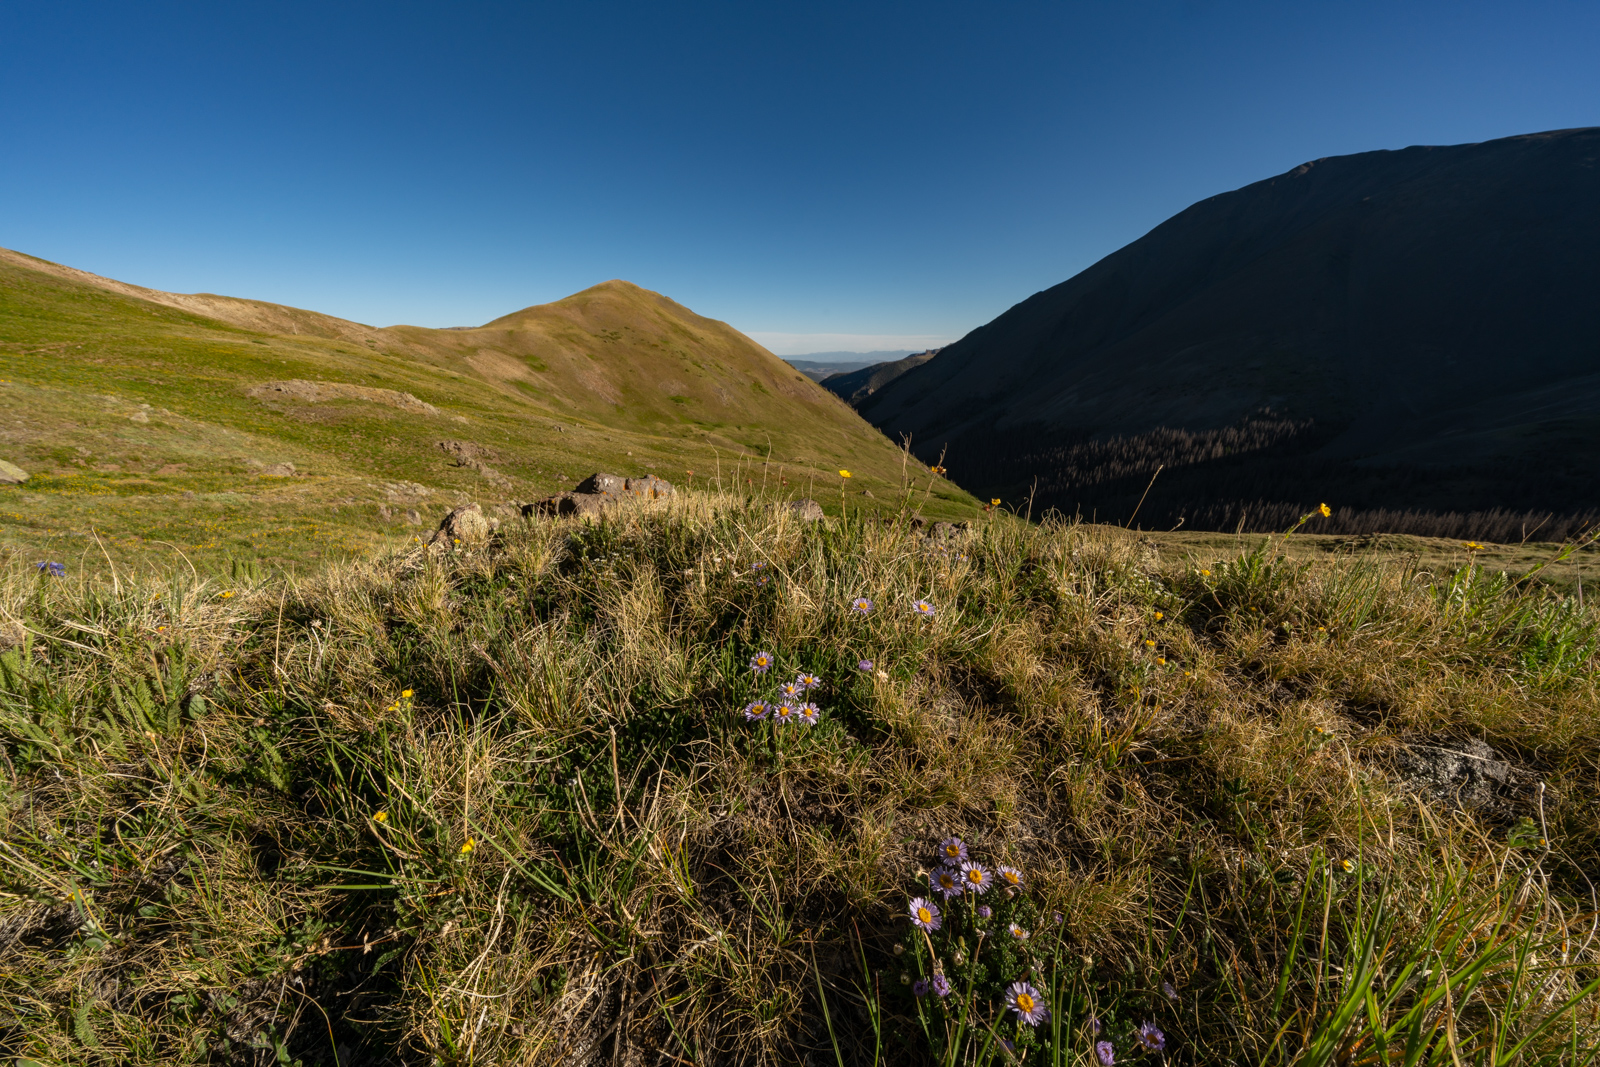
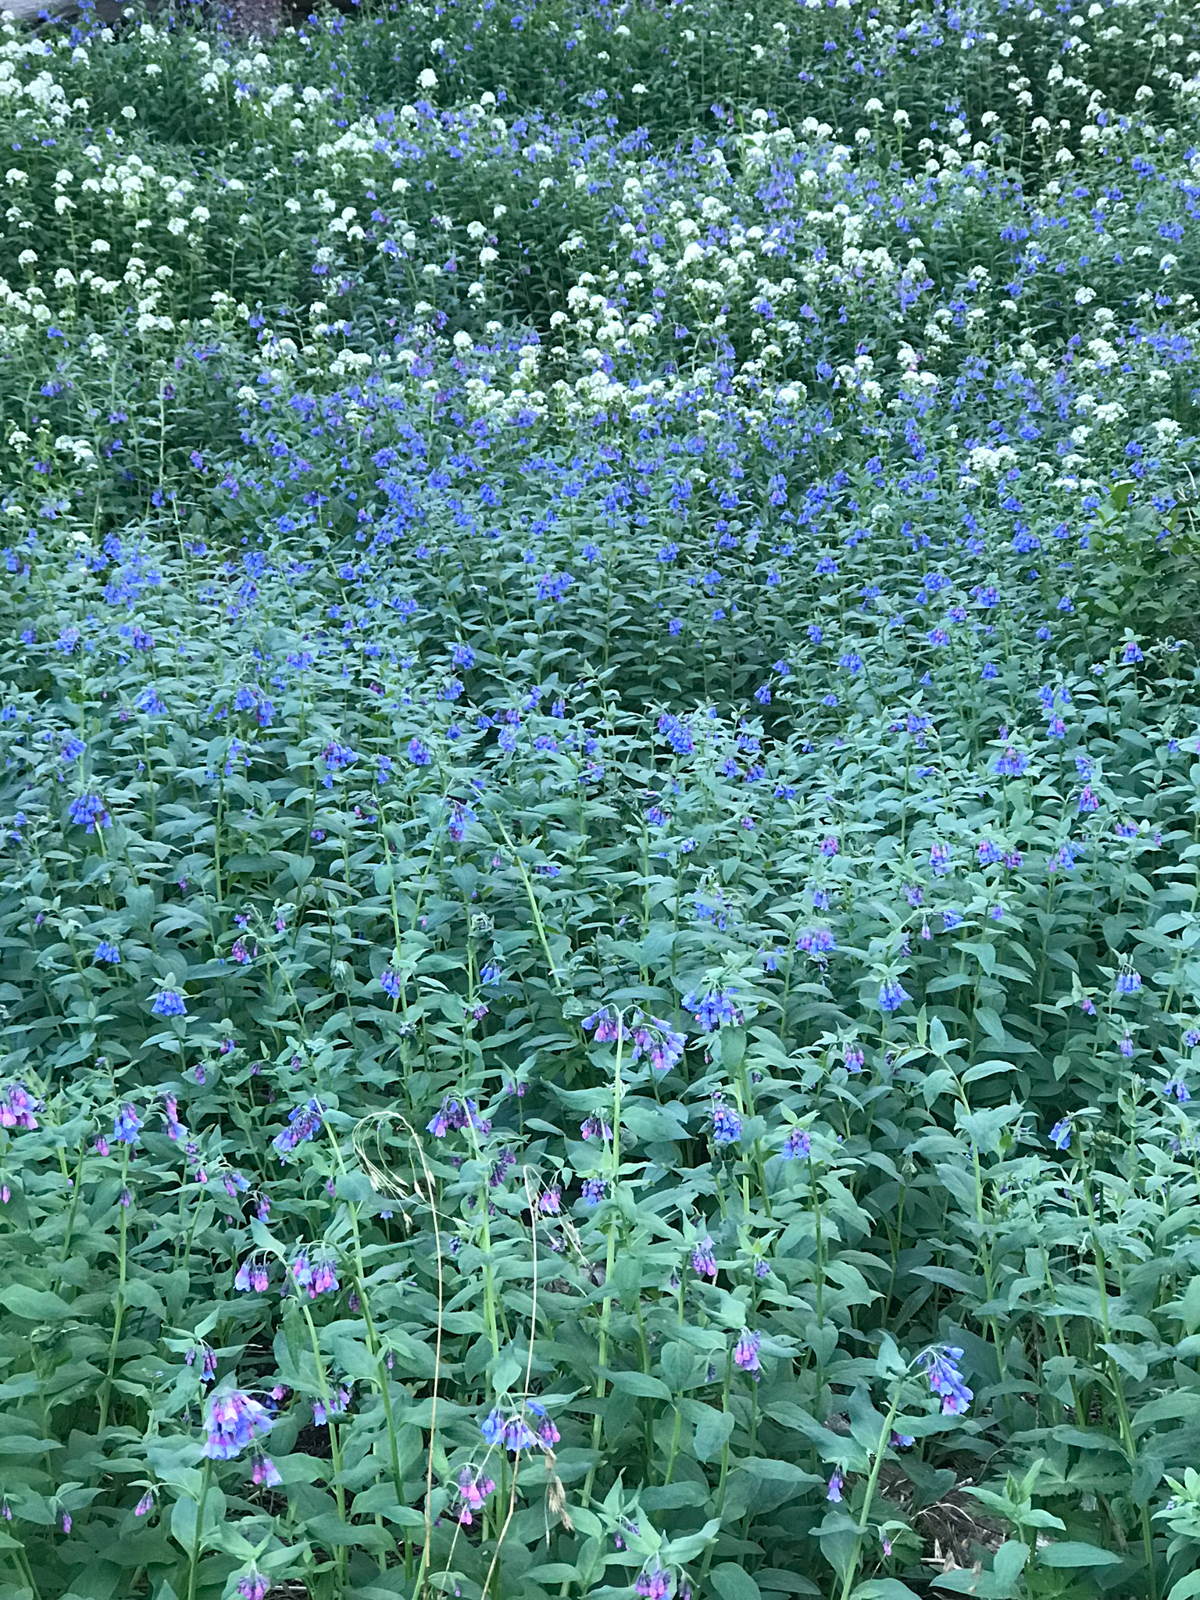
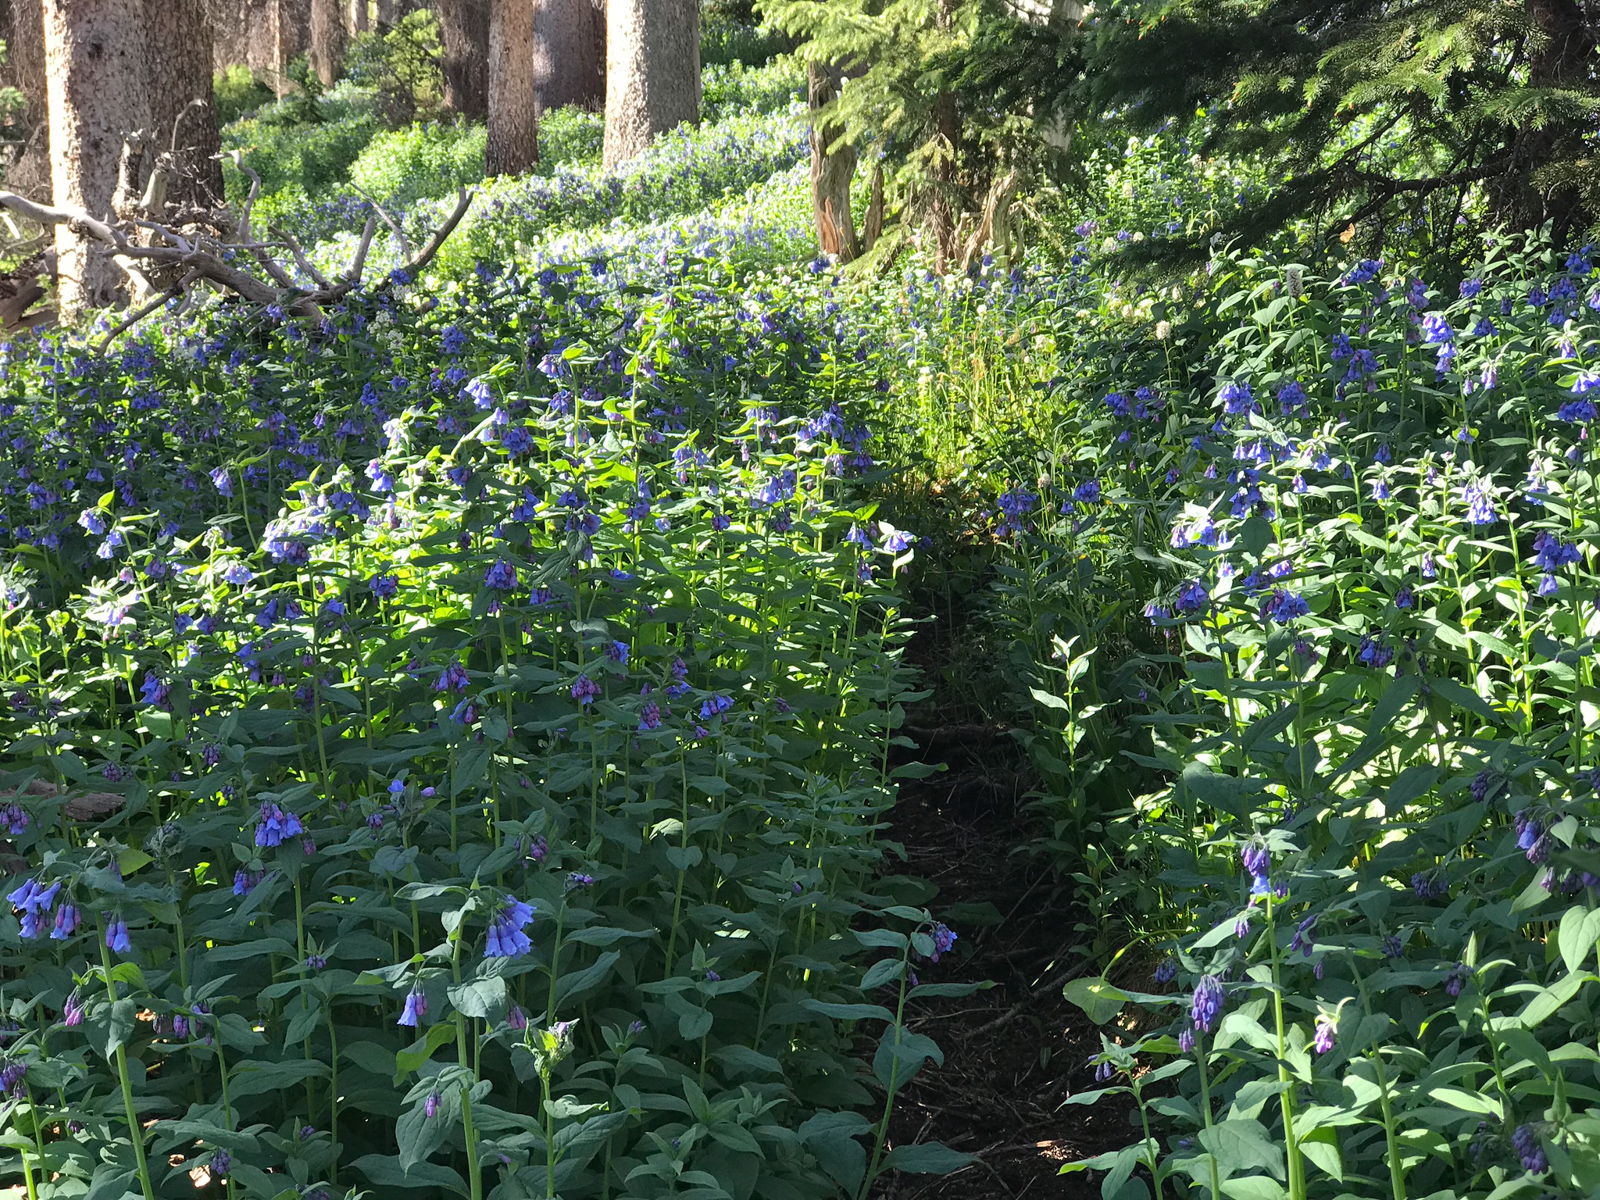
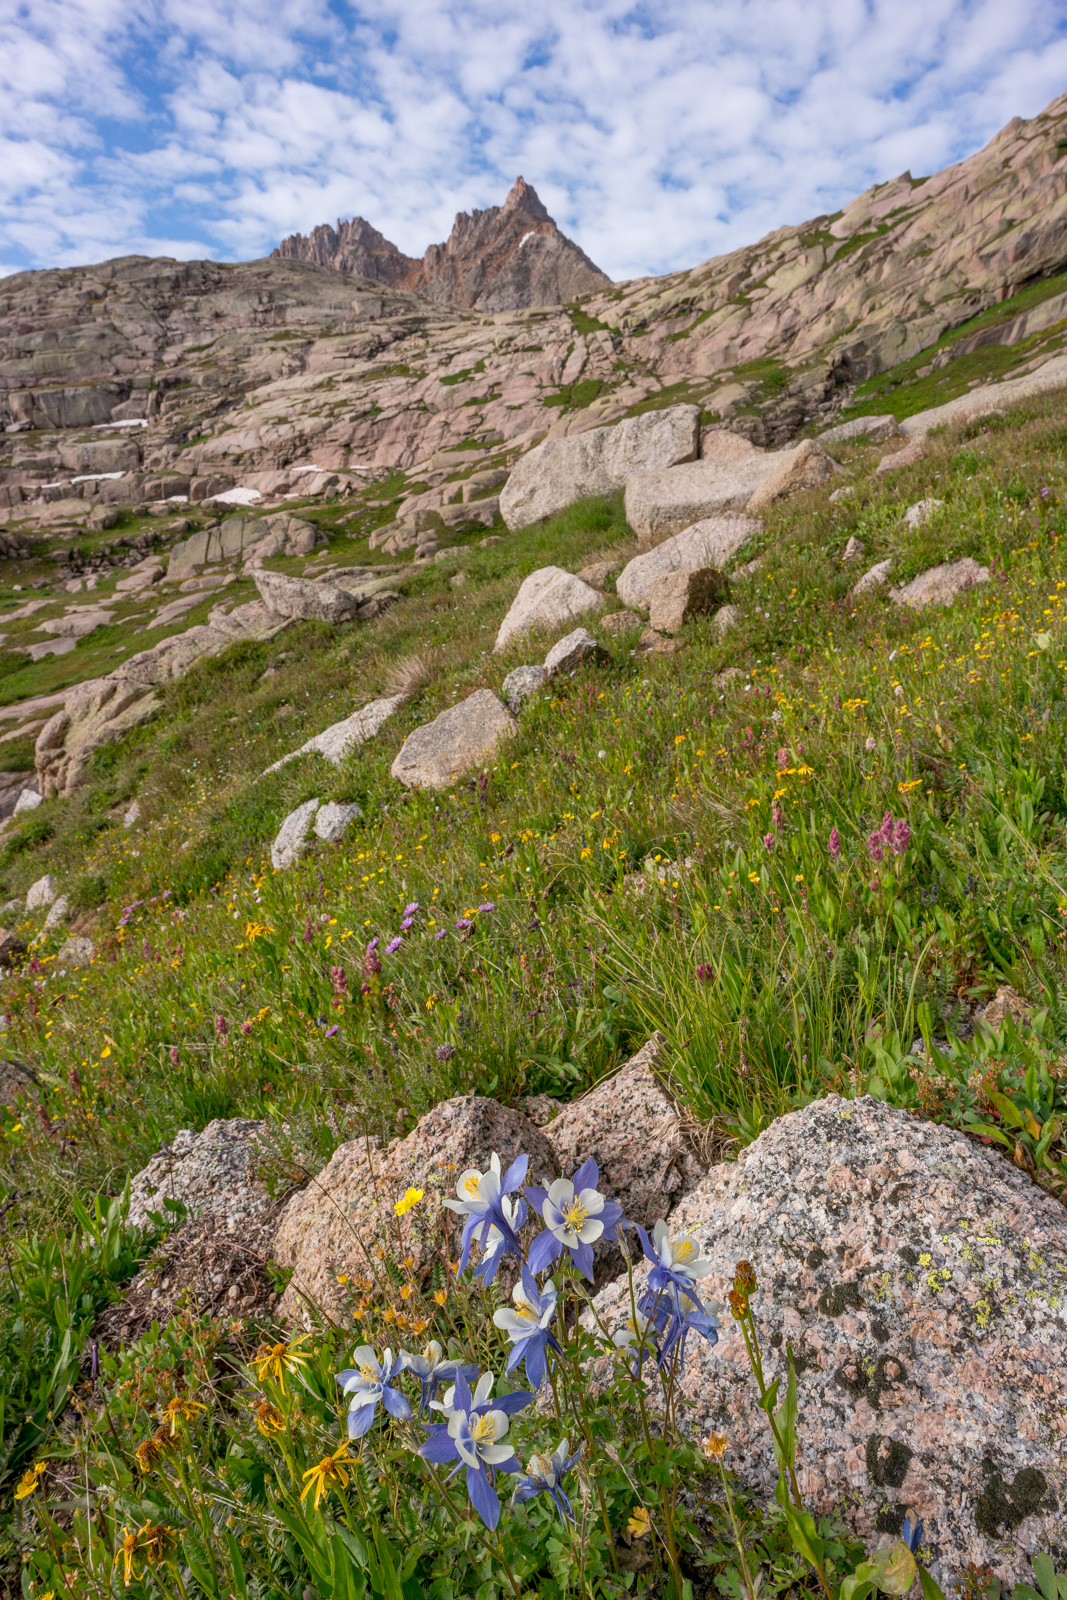
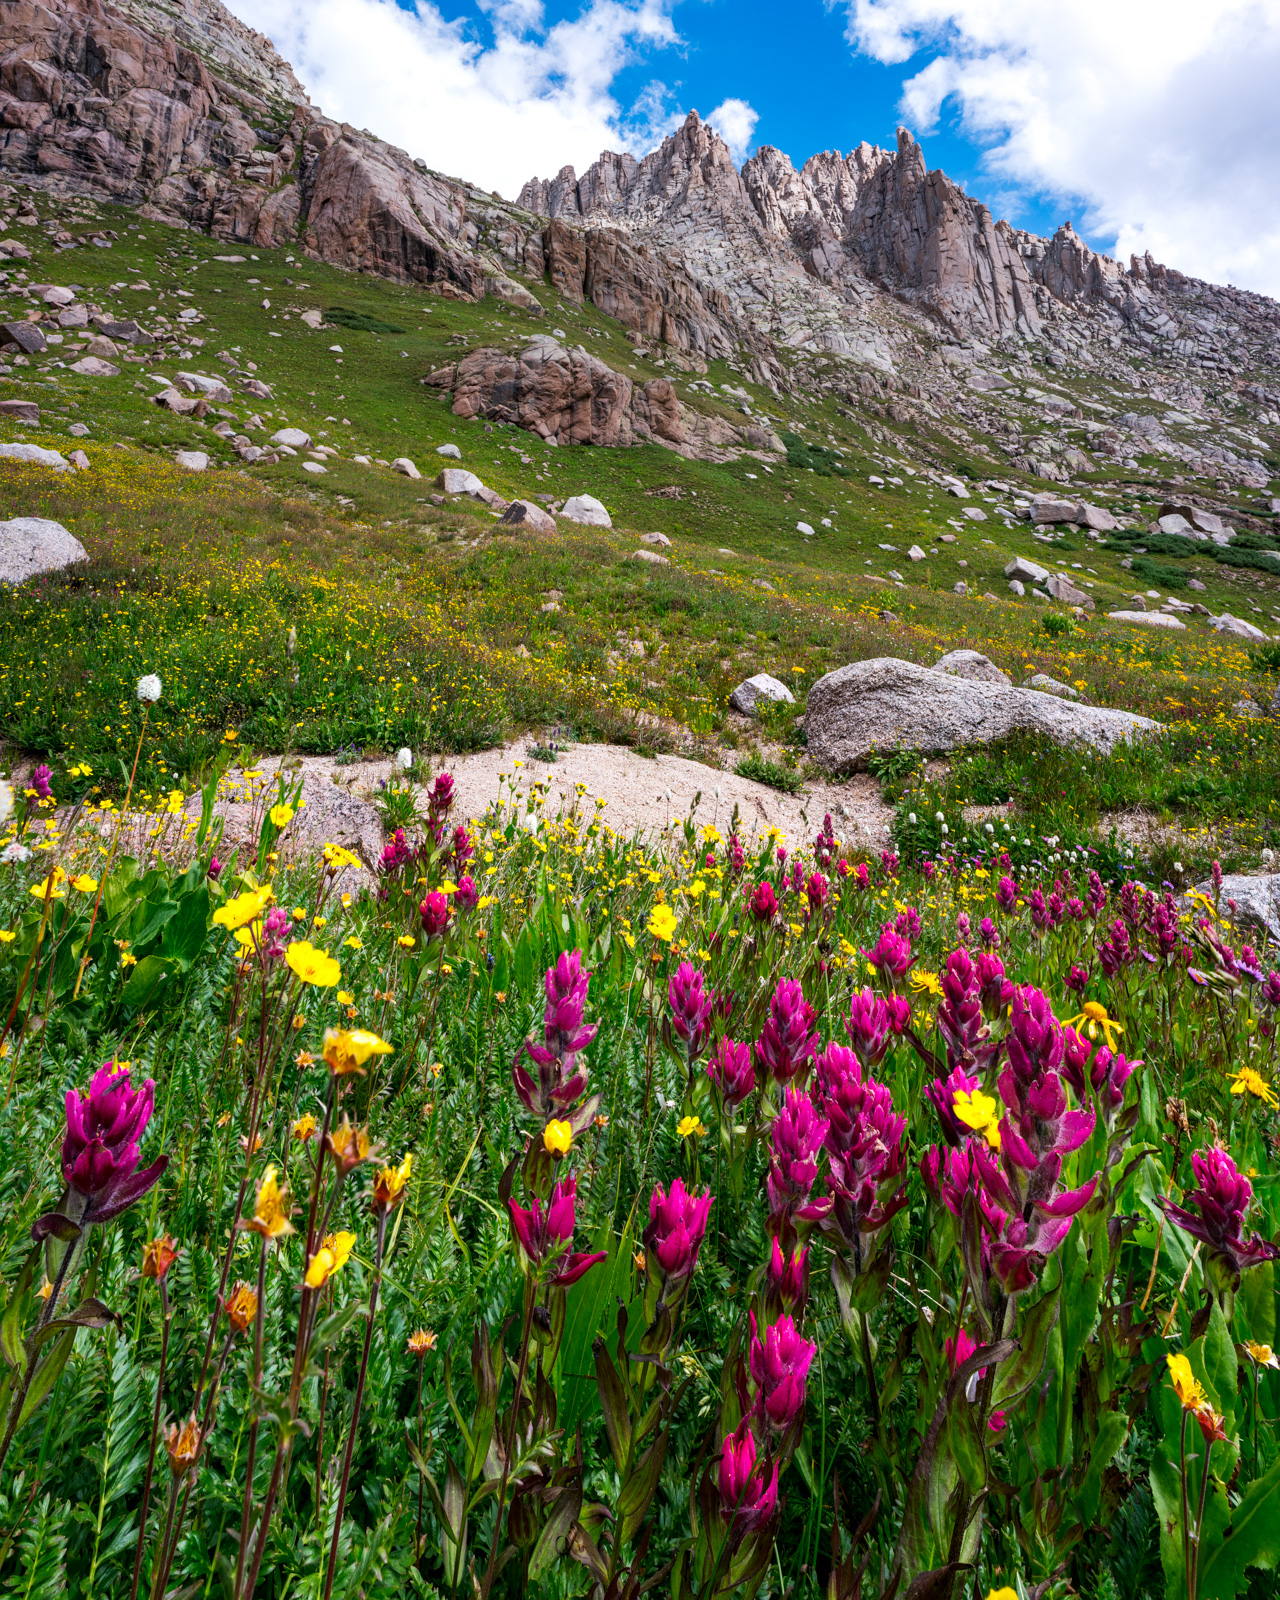
The area was covered in wildflowers, including this nice stand of yellow paintbrush or Castilleja Flava.
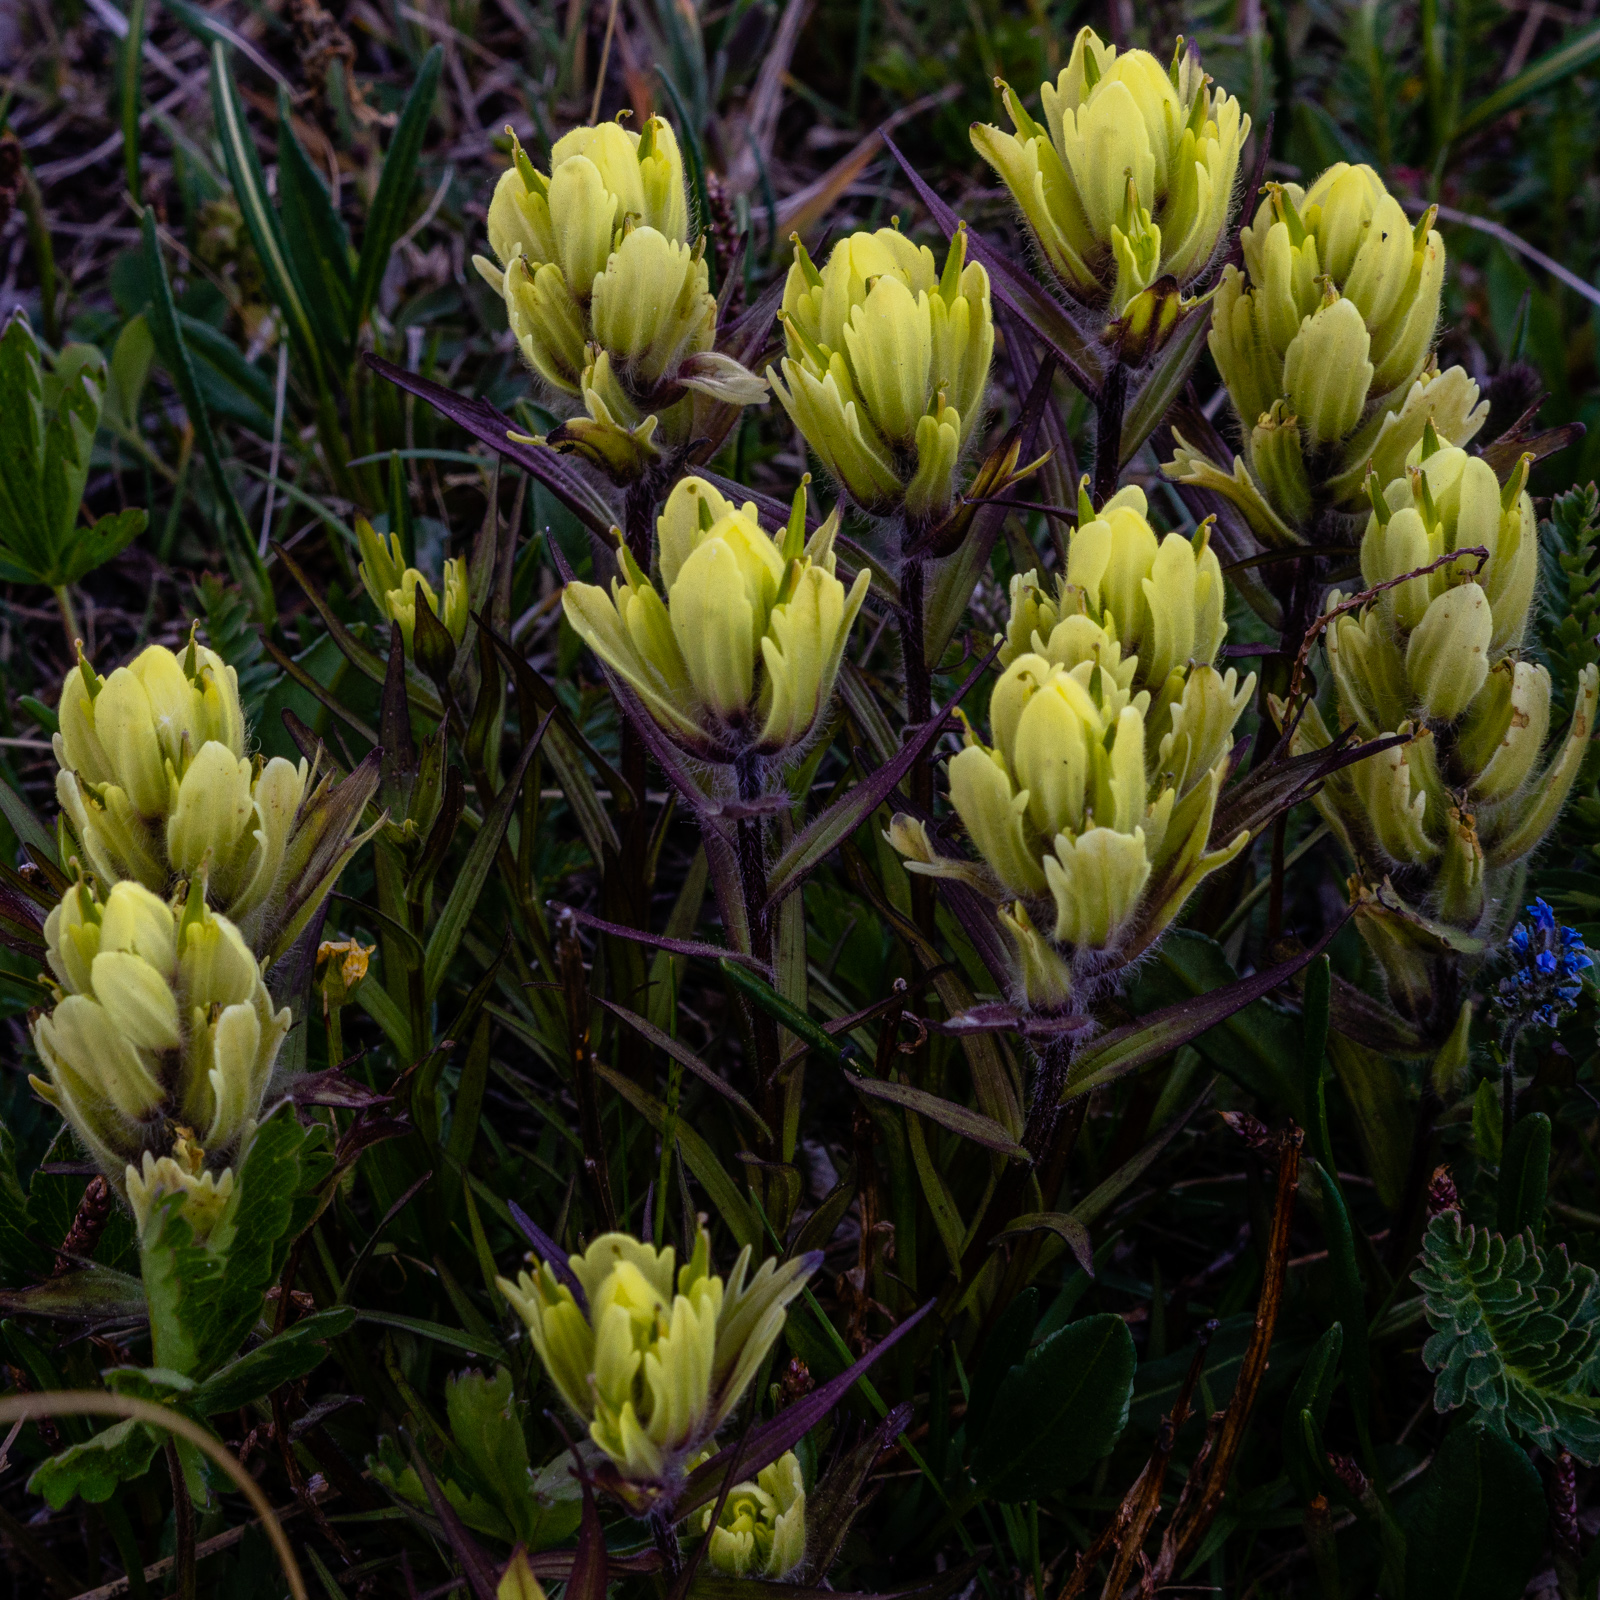
I enjoyed the opportunity to use my creative license and my Sony 55mm lens to take some different shots of these flowers throughout the trip.
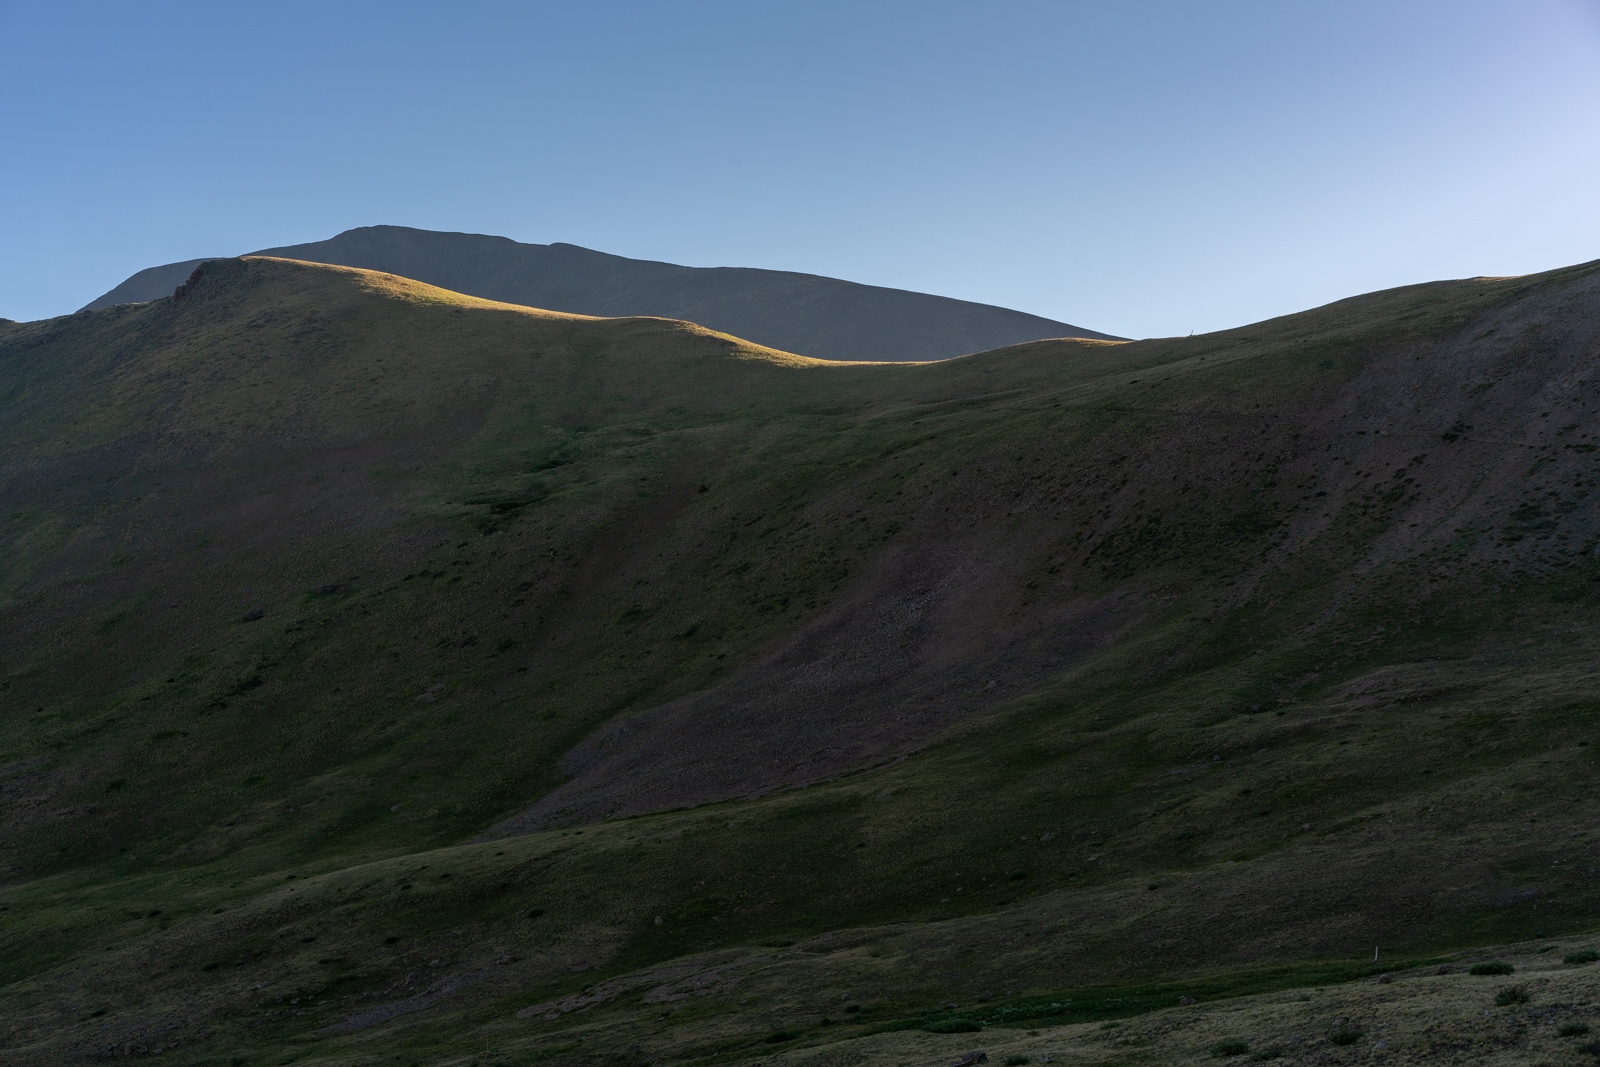
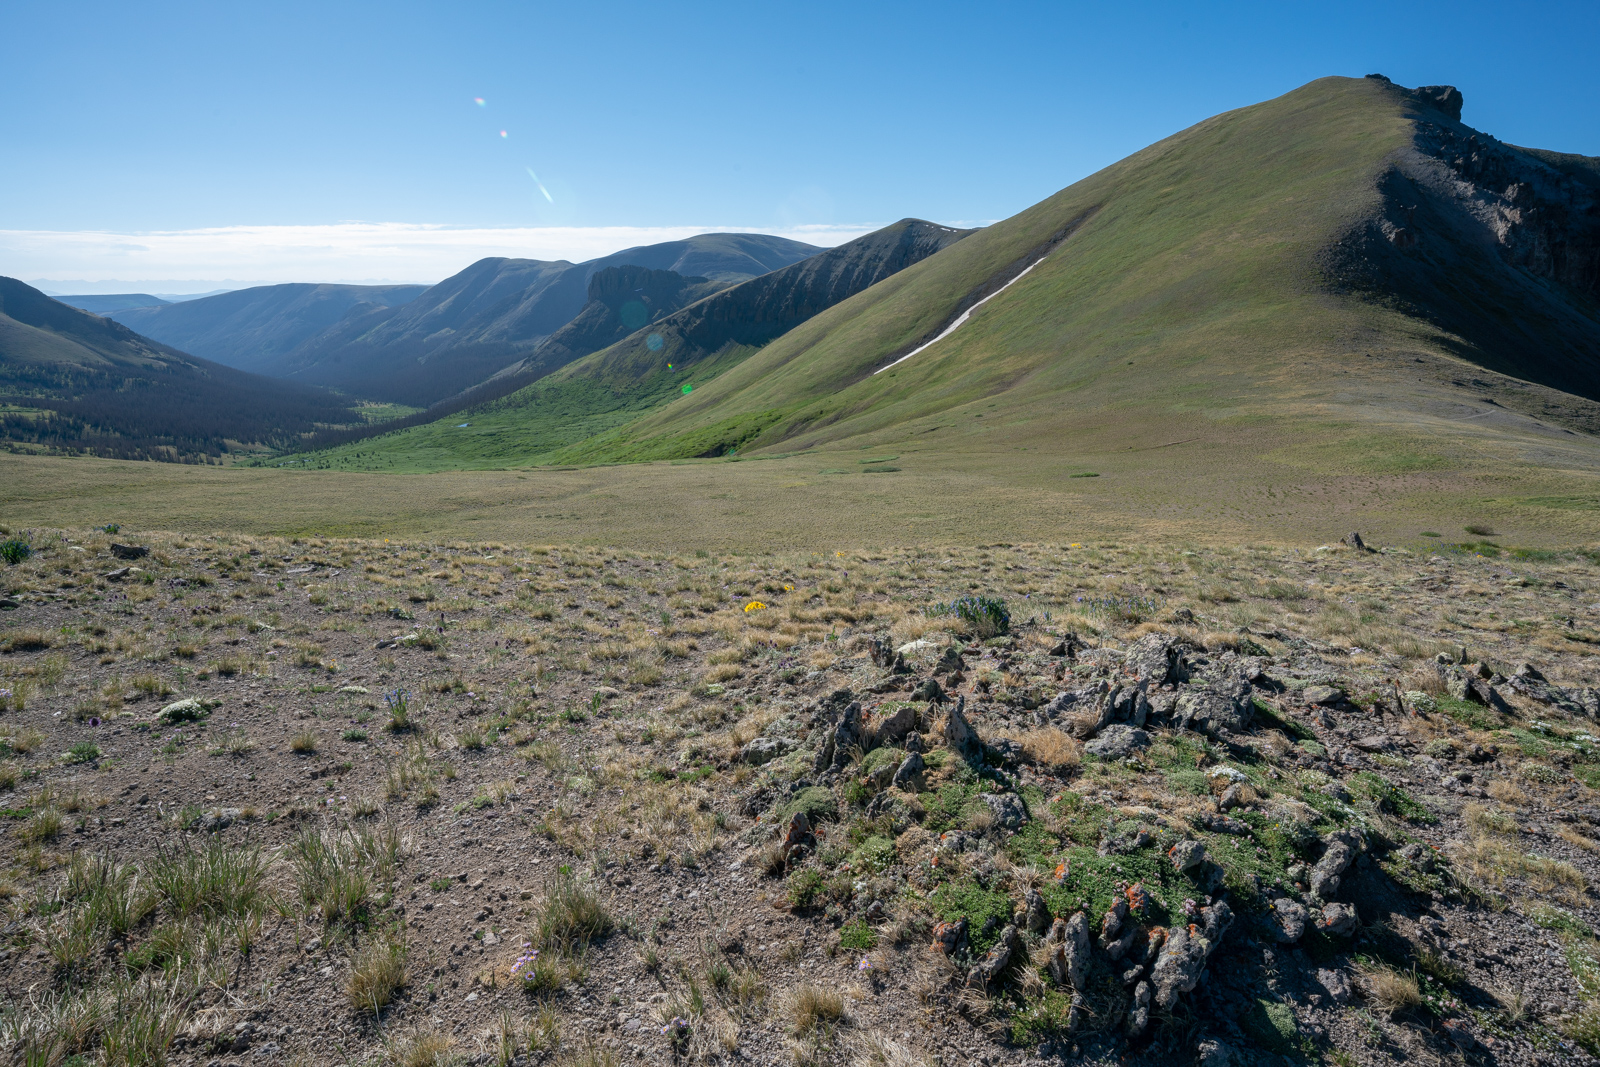
I was making incredibly good time and could already look back on San Luis Pass in the distance.
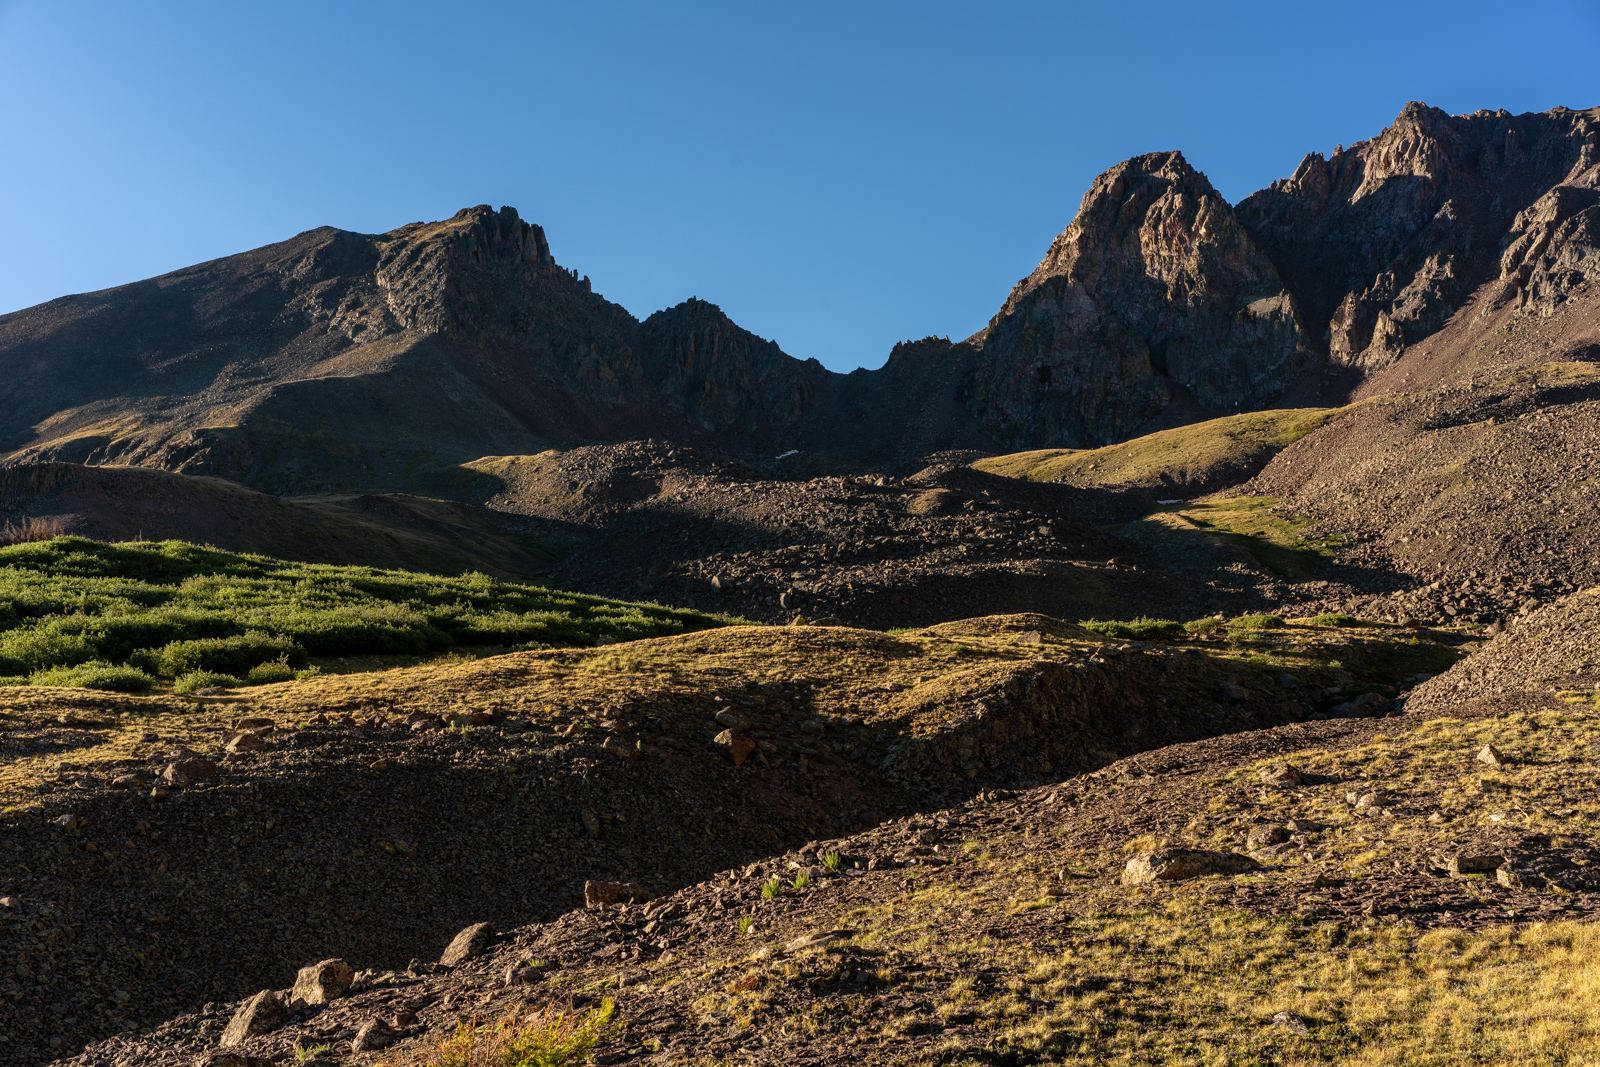
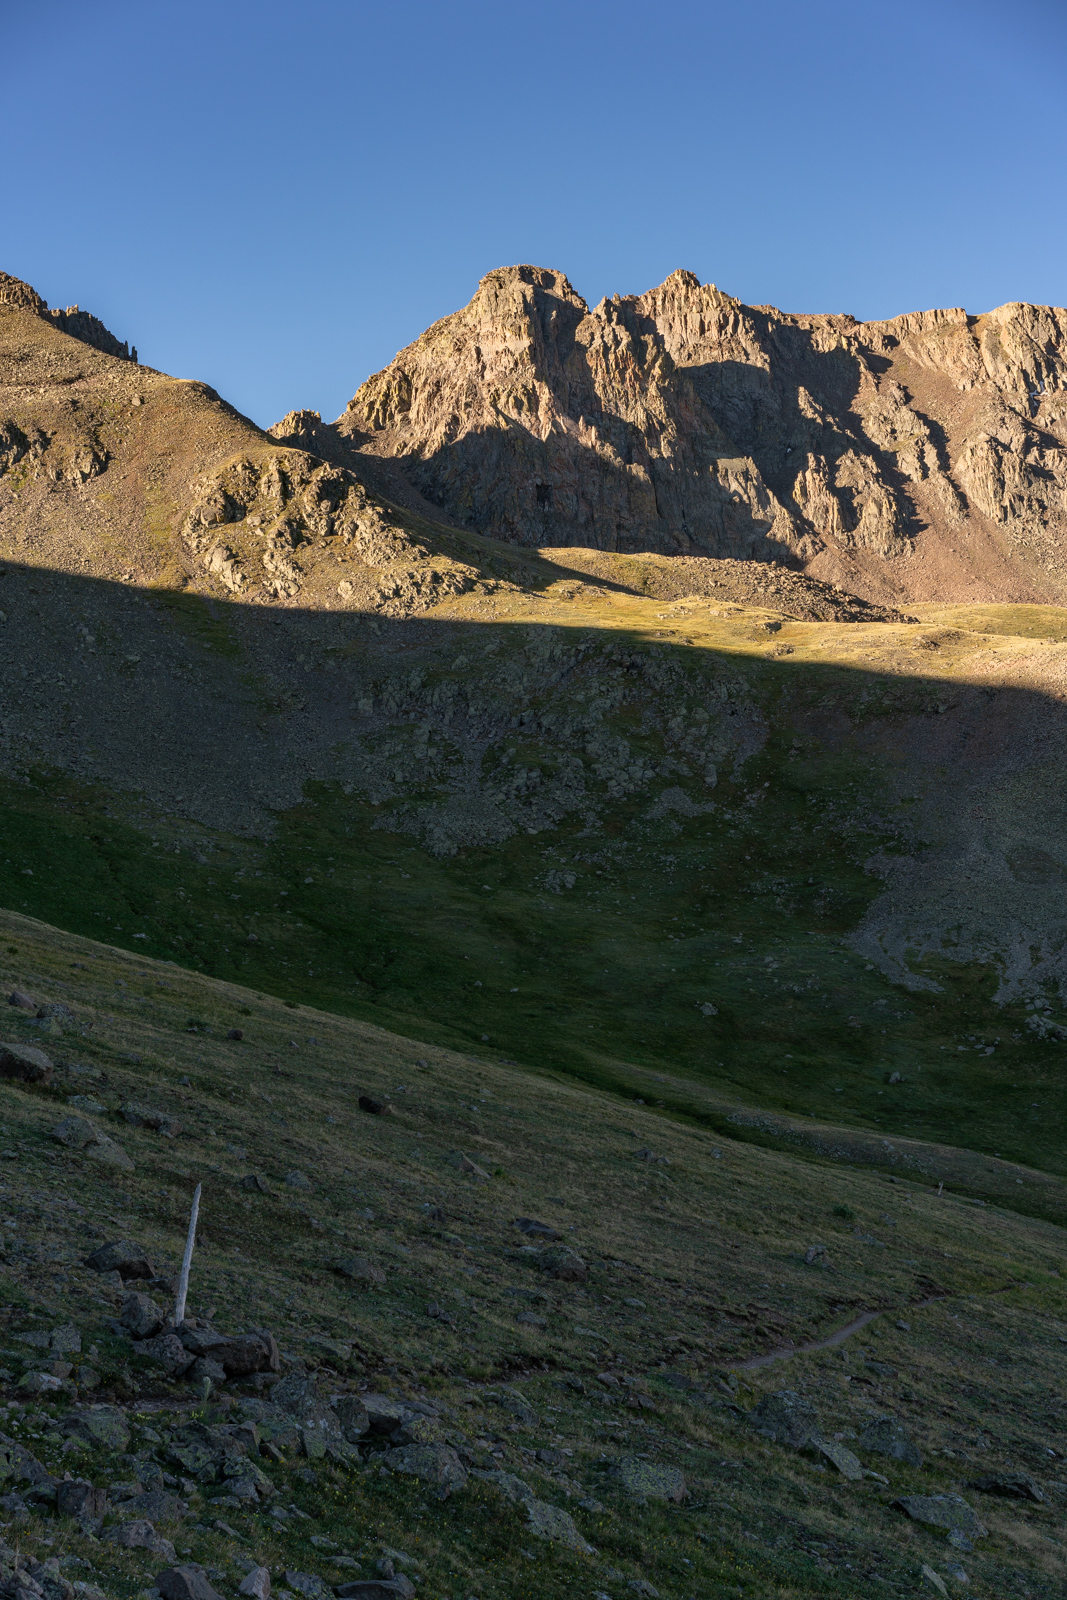
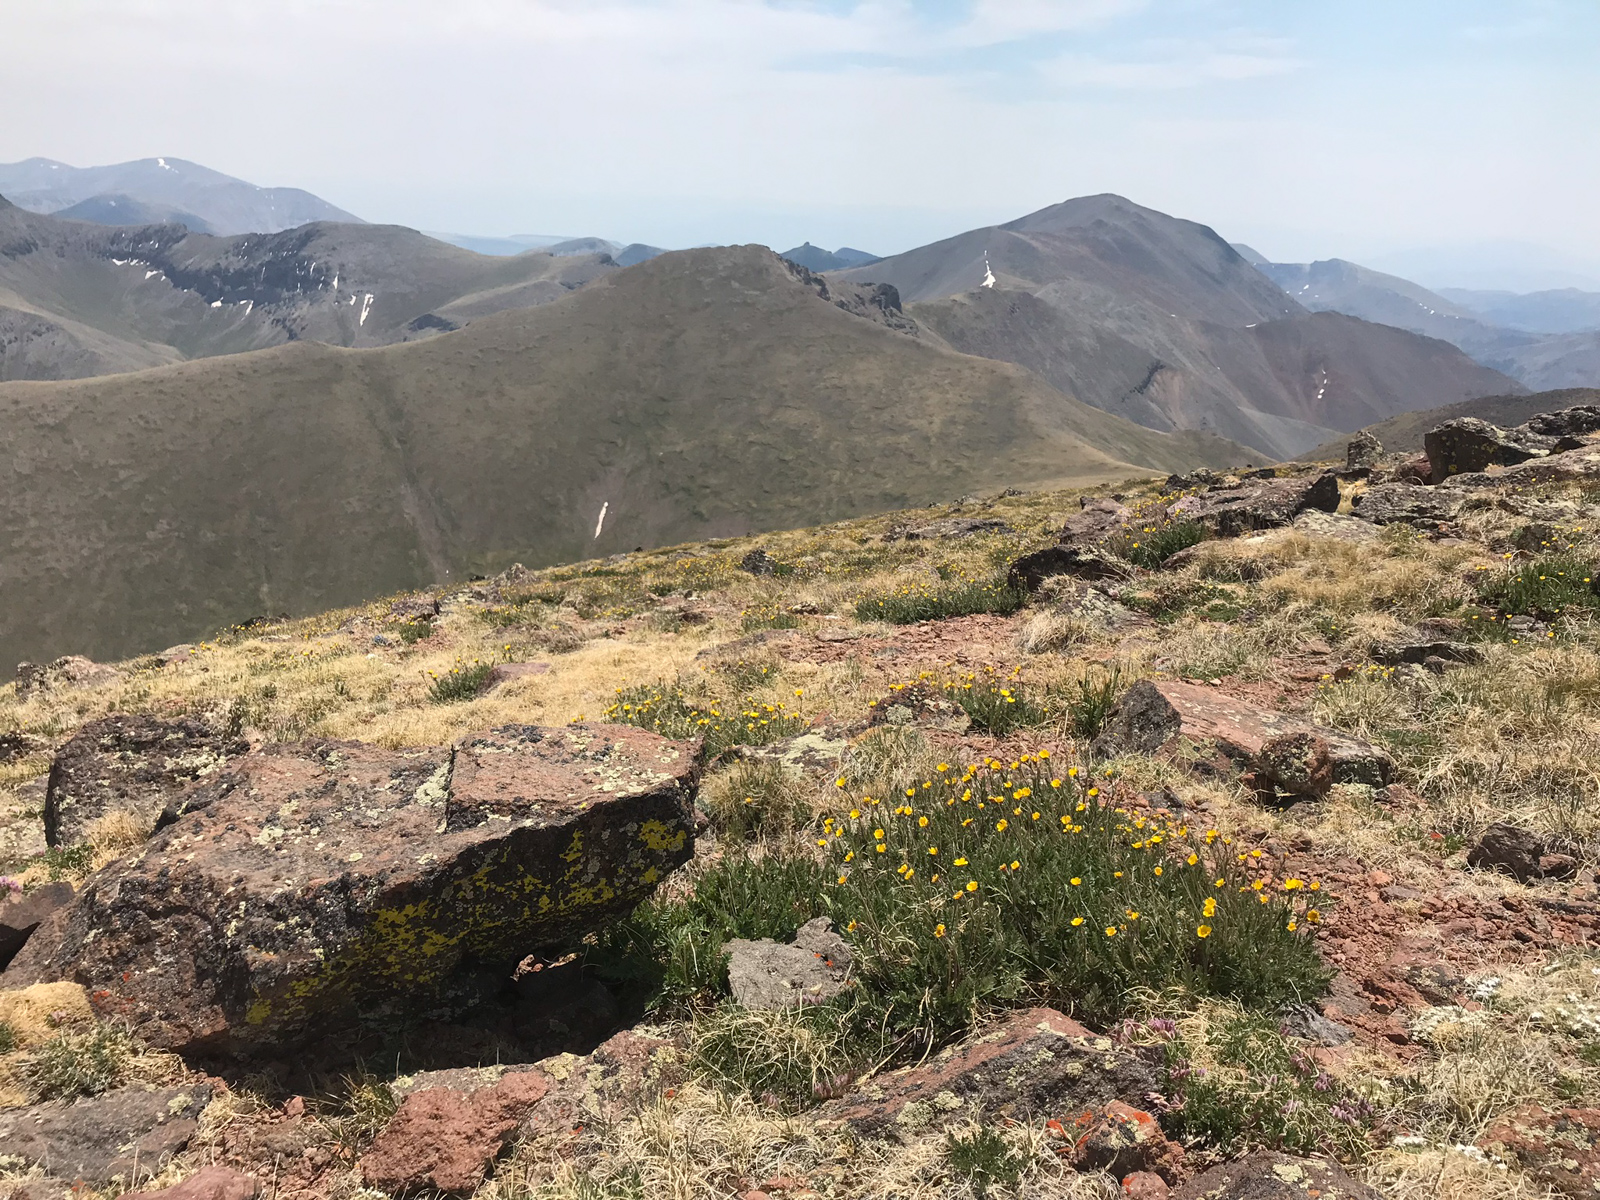
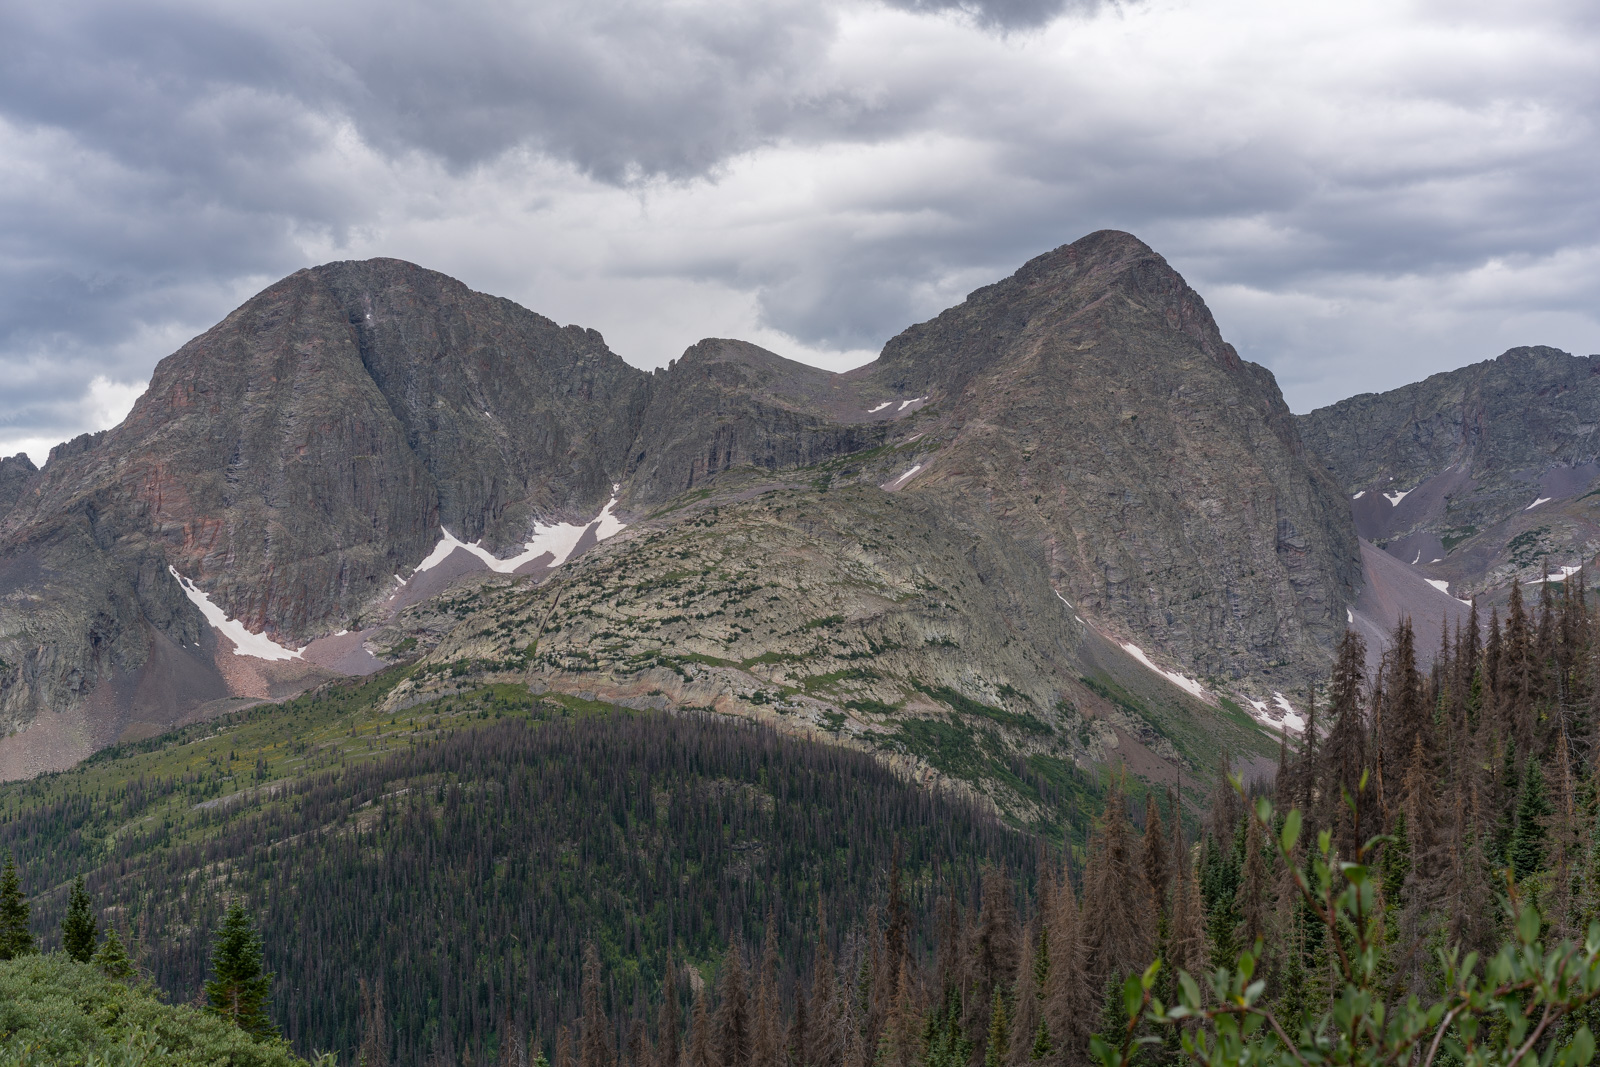
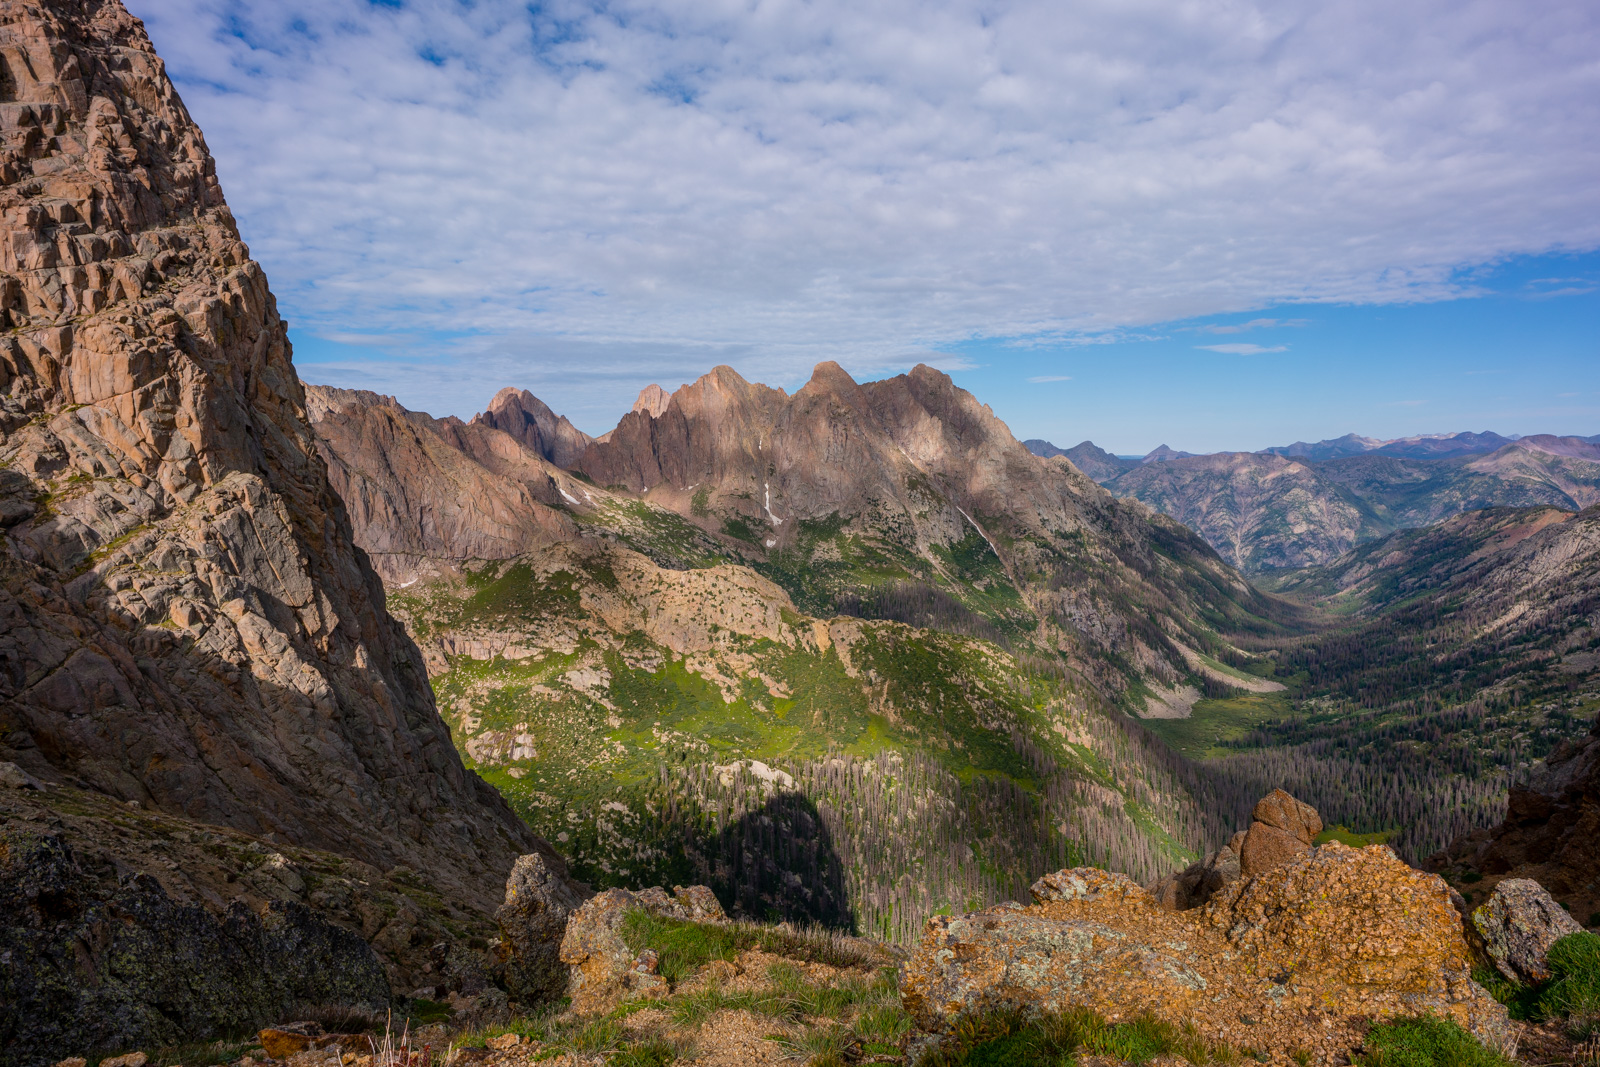
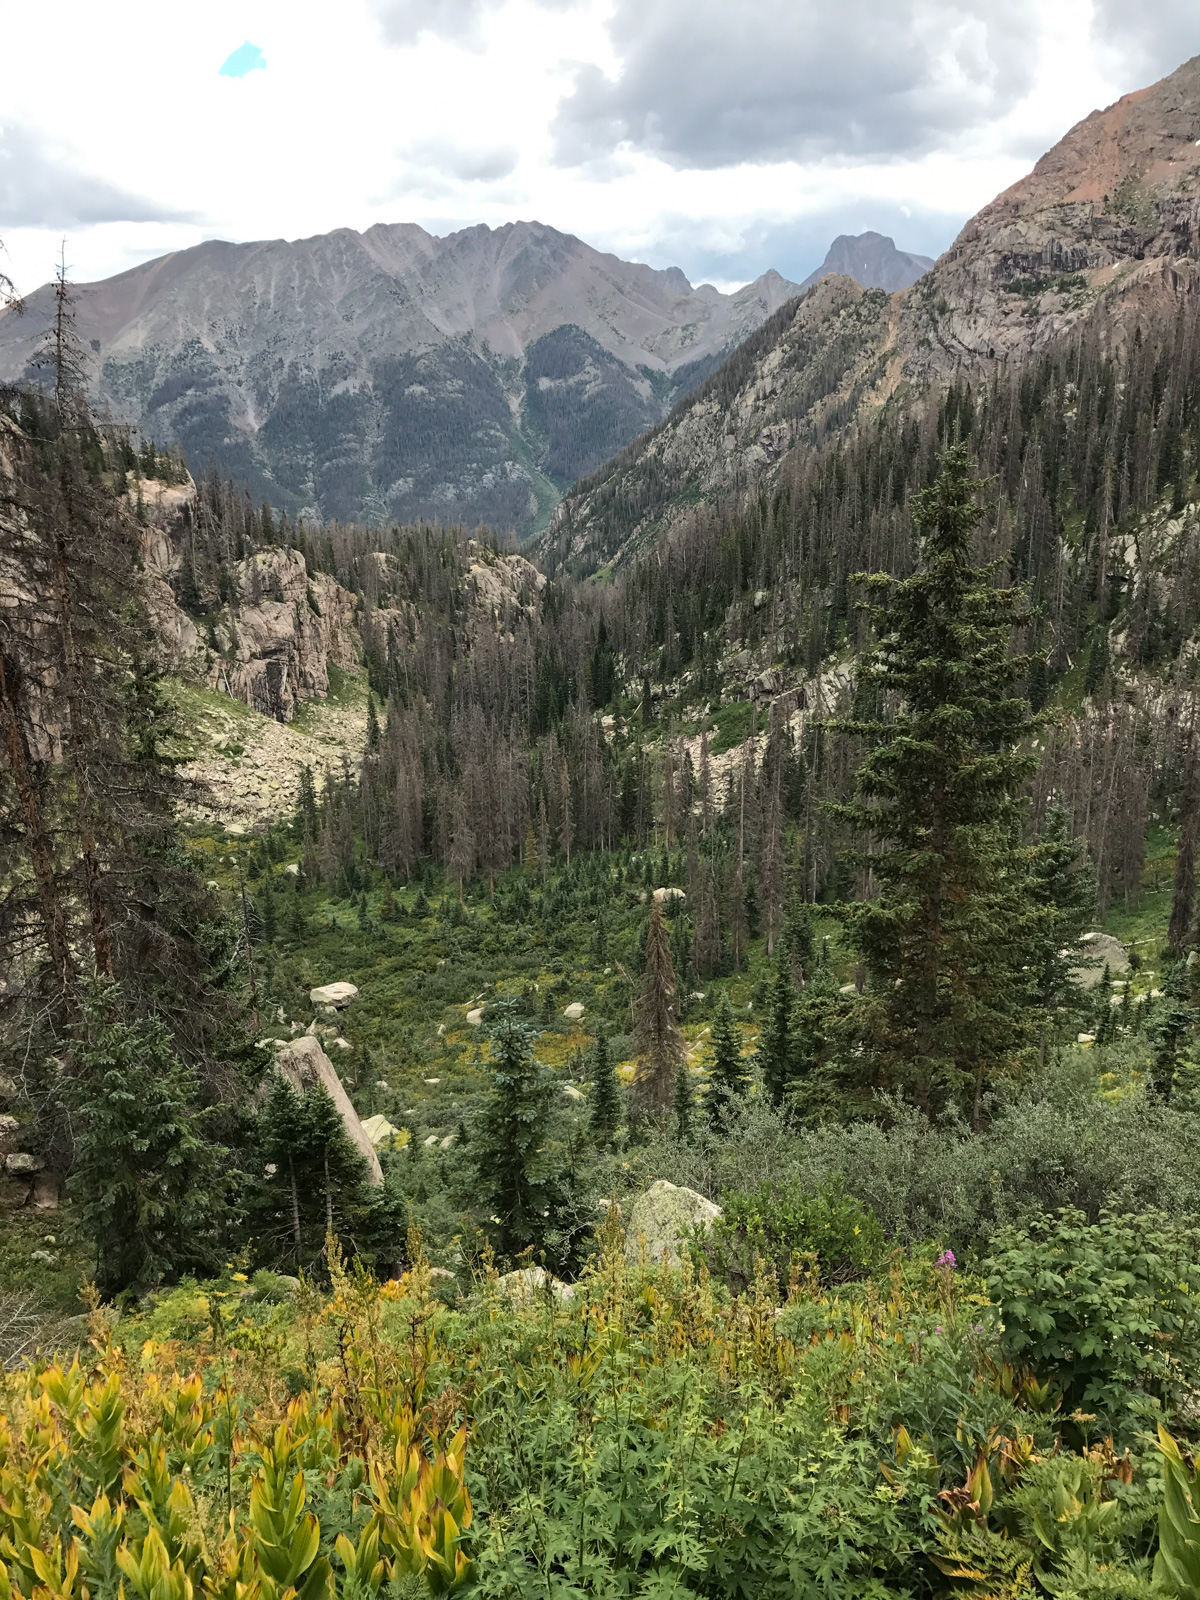
As I climbed, the views kept getting better and better. The La Garitas are amazing.
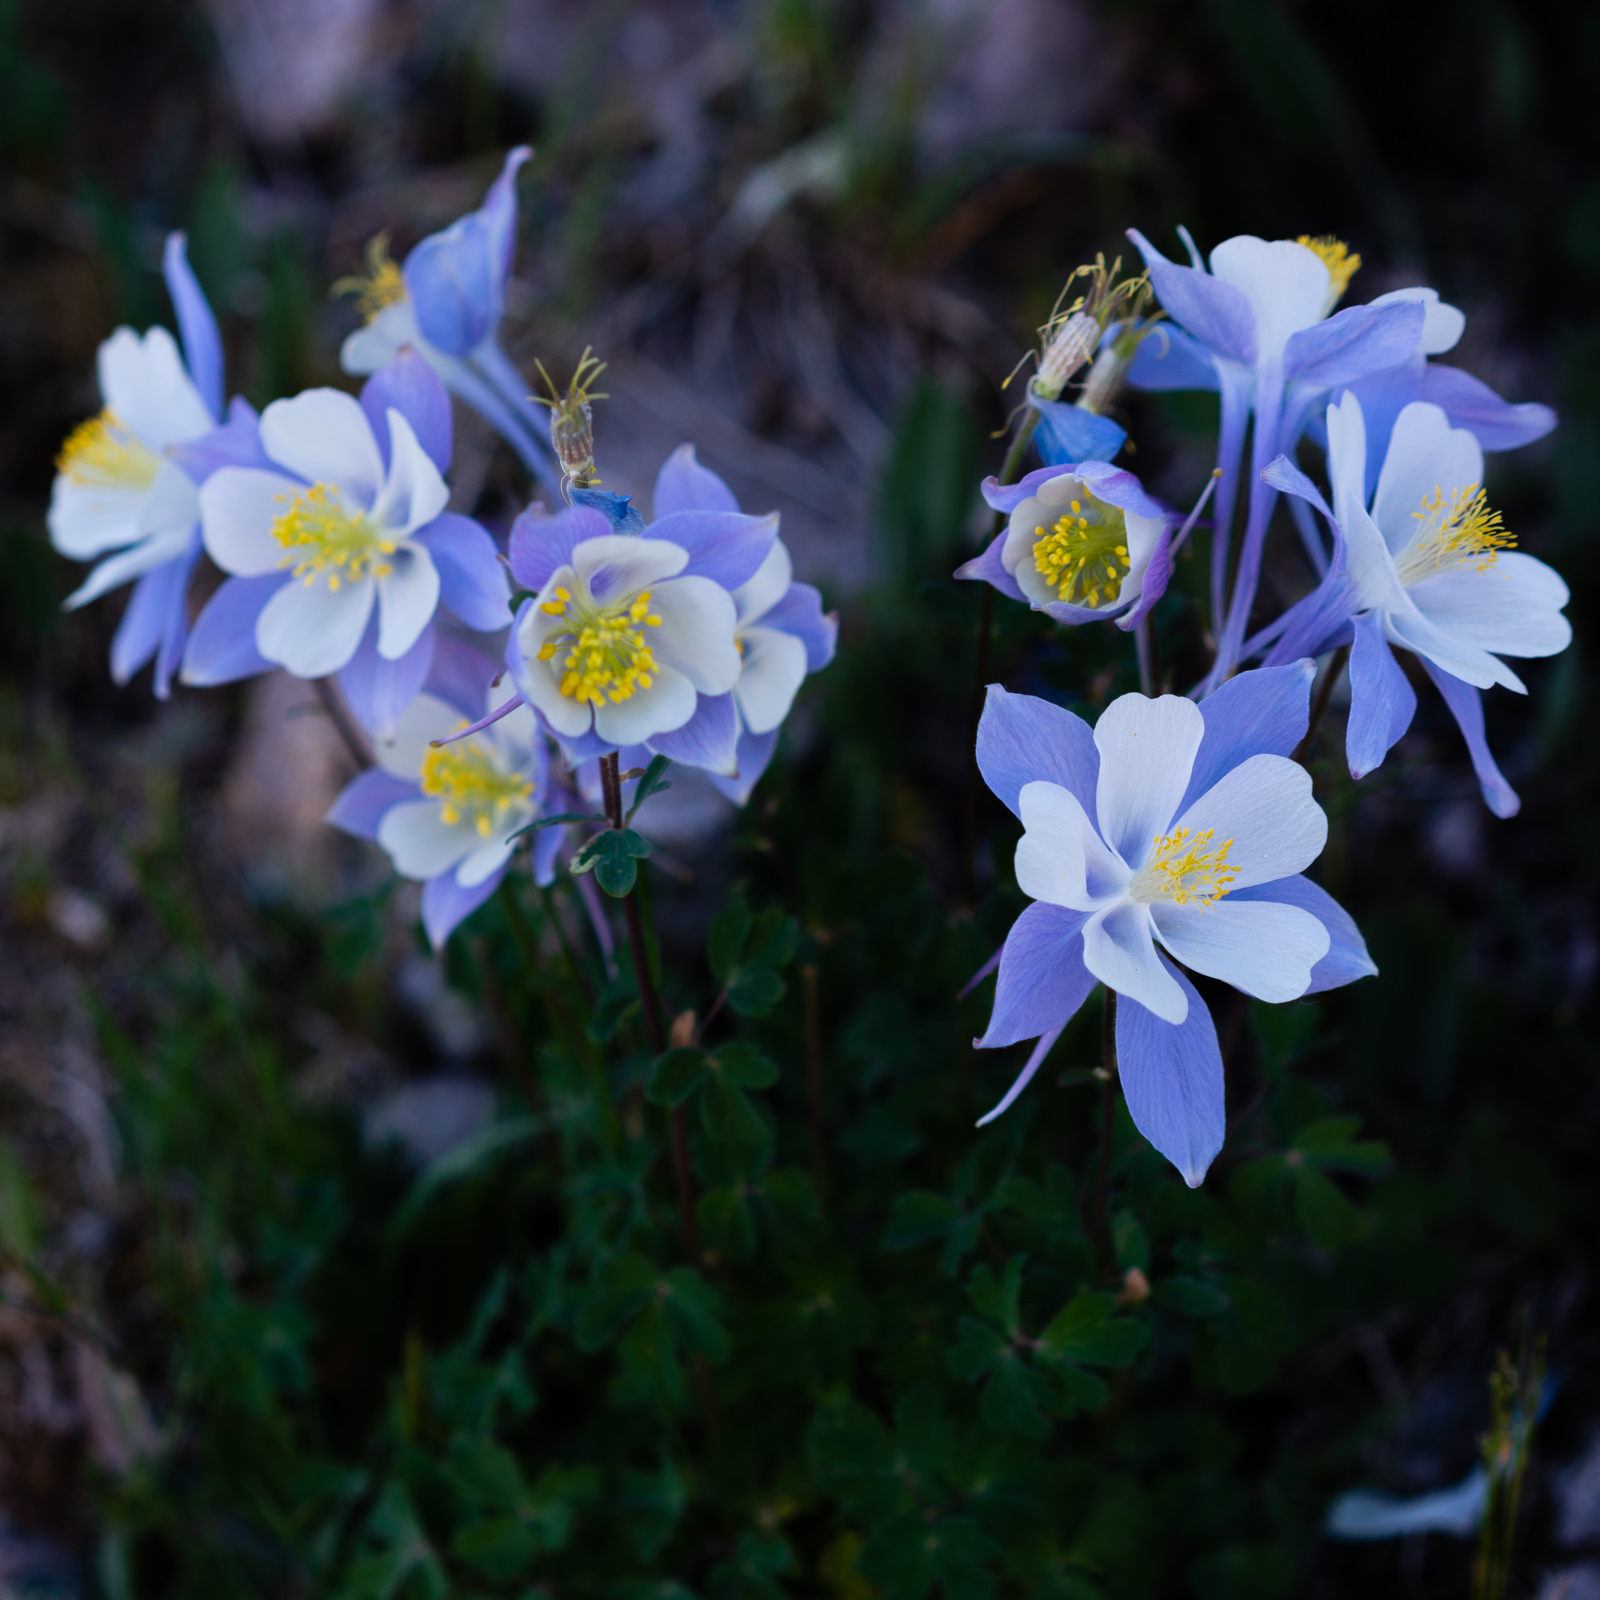
I also enjoyed seeing and photographing many sections of healthy Columbine flowers, the official state flower of Colorado.
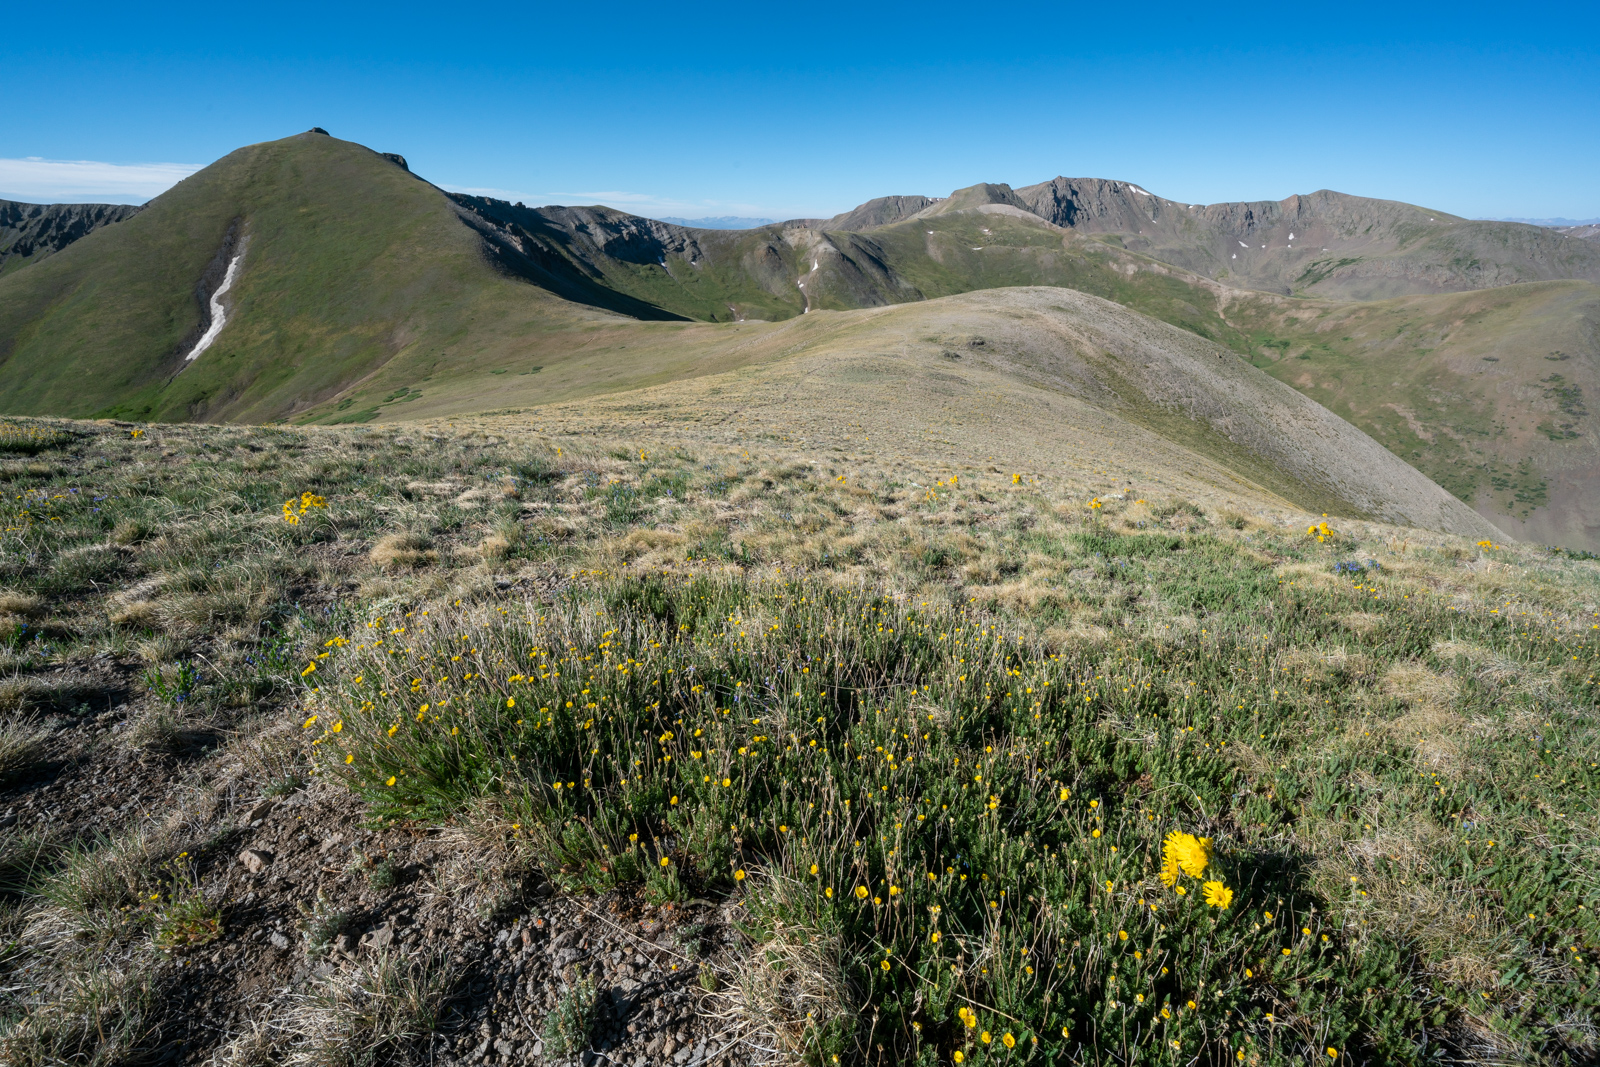
The ruggedness and remoteness of the La Garitas was always top of mind for me as my surroundings were devoid of people and filled with rugged mountains and vast, open fields of tundra.
As the sun continued to make its journey across the sky, it provided some nice side-light to the hillsides and trees around me, making for some beautiful scenes to photograph.
Anyone that knows me as a photographer knows that I'm somewhat obsessed with sunstars. I decided to try out the sunstar on the Sony 12-24 - while it is not nearly as good as the Loxia 21 or the Canon 16-35, it does make for a well-defined star. My only complaint is that it does come with quite a bit of flare.
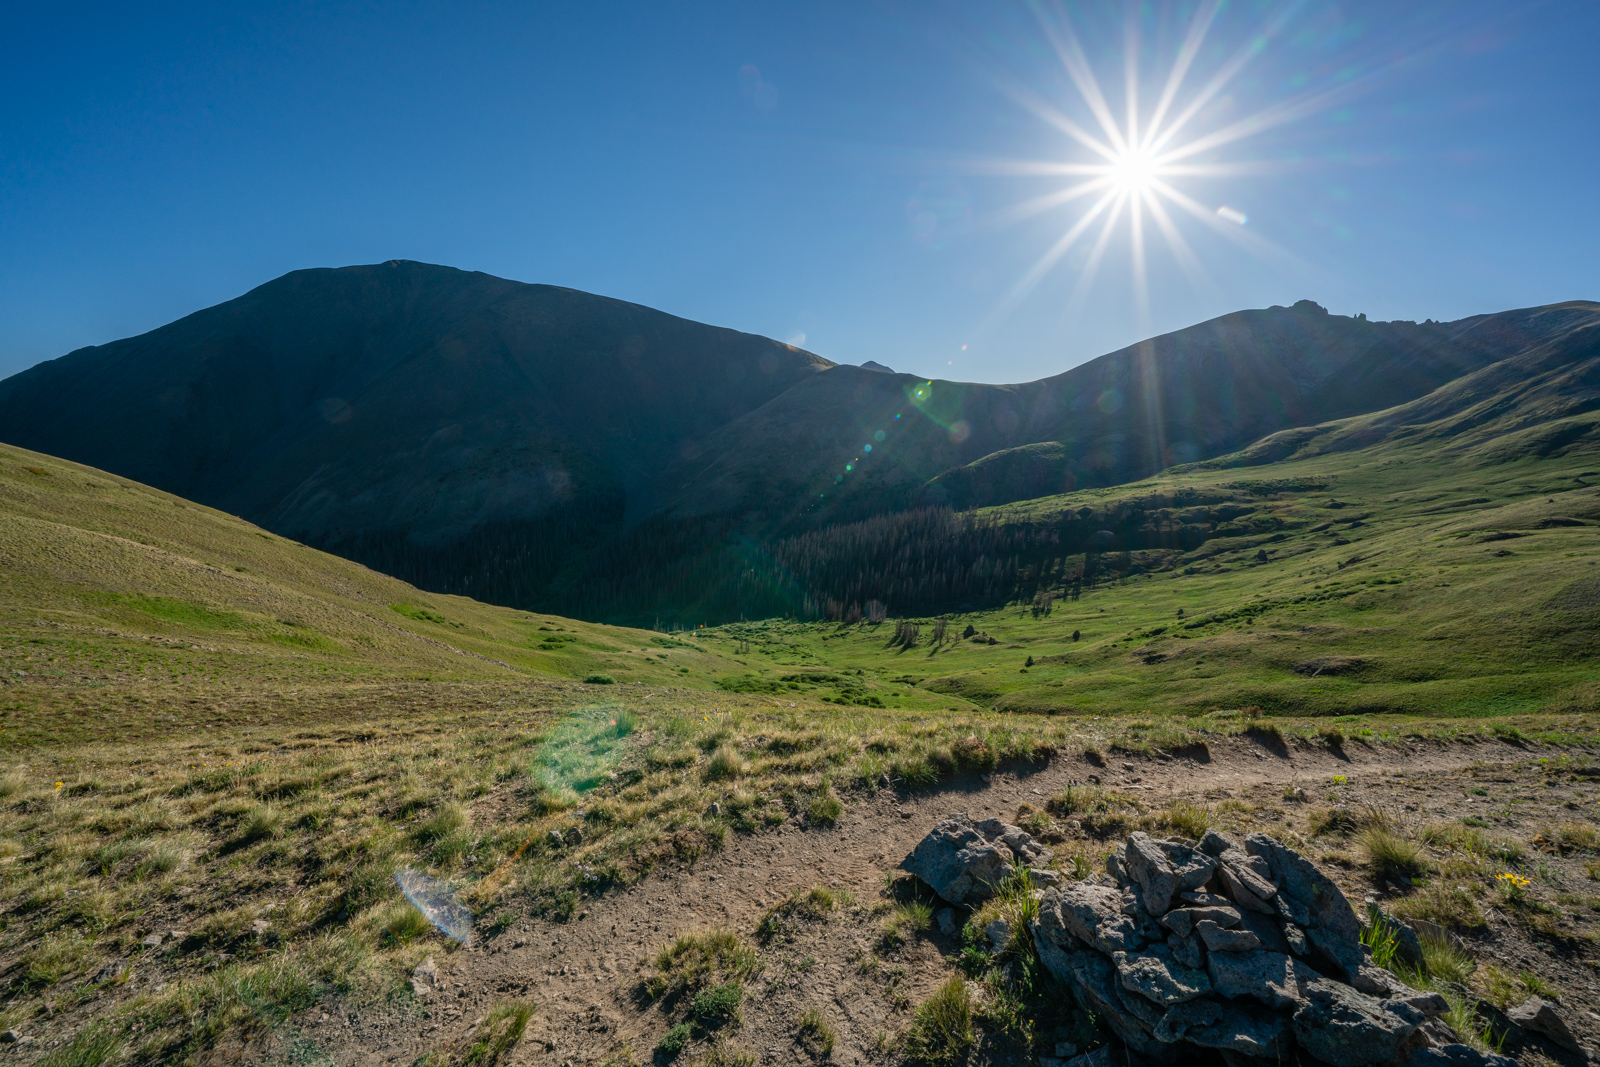
The other advantage to using this lens is that it can take in a great deal of terrain in a single exposure, which allowed me to get close to the flowers and still show off the huge scene in front of me.
San Luis continued to loom above as I wrapped my way around the valley. The smoke from the 416 fire was already starting to settle into the area again to the west.
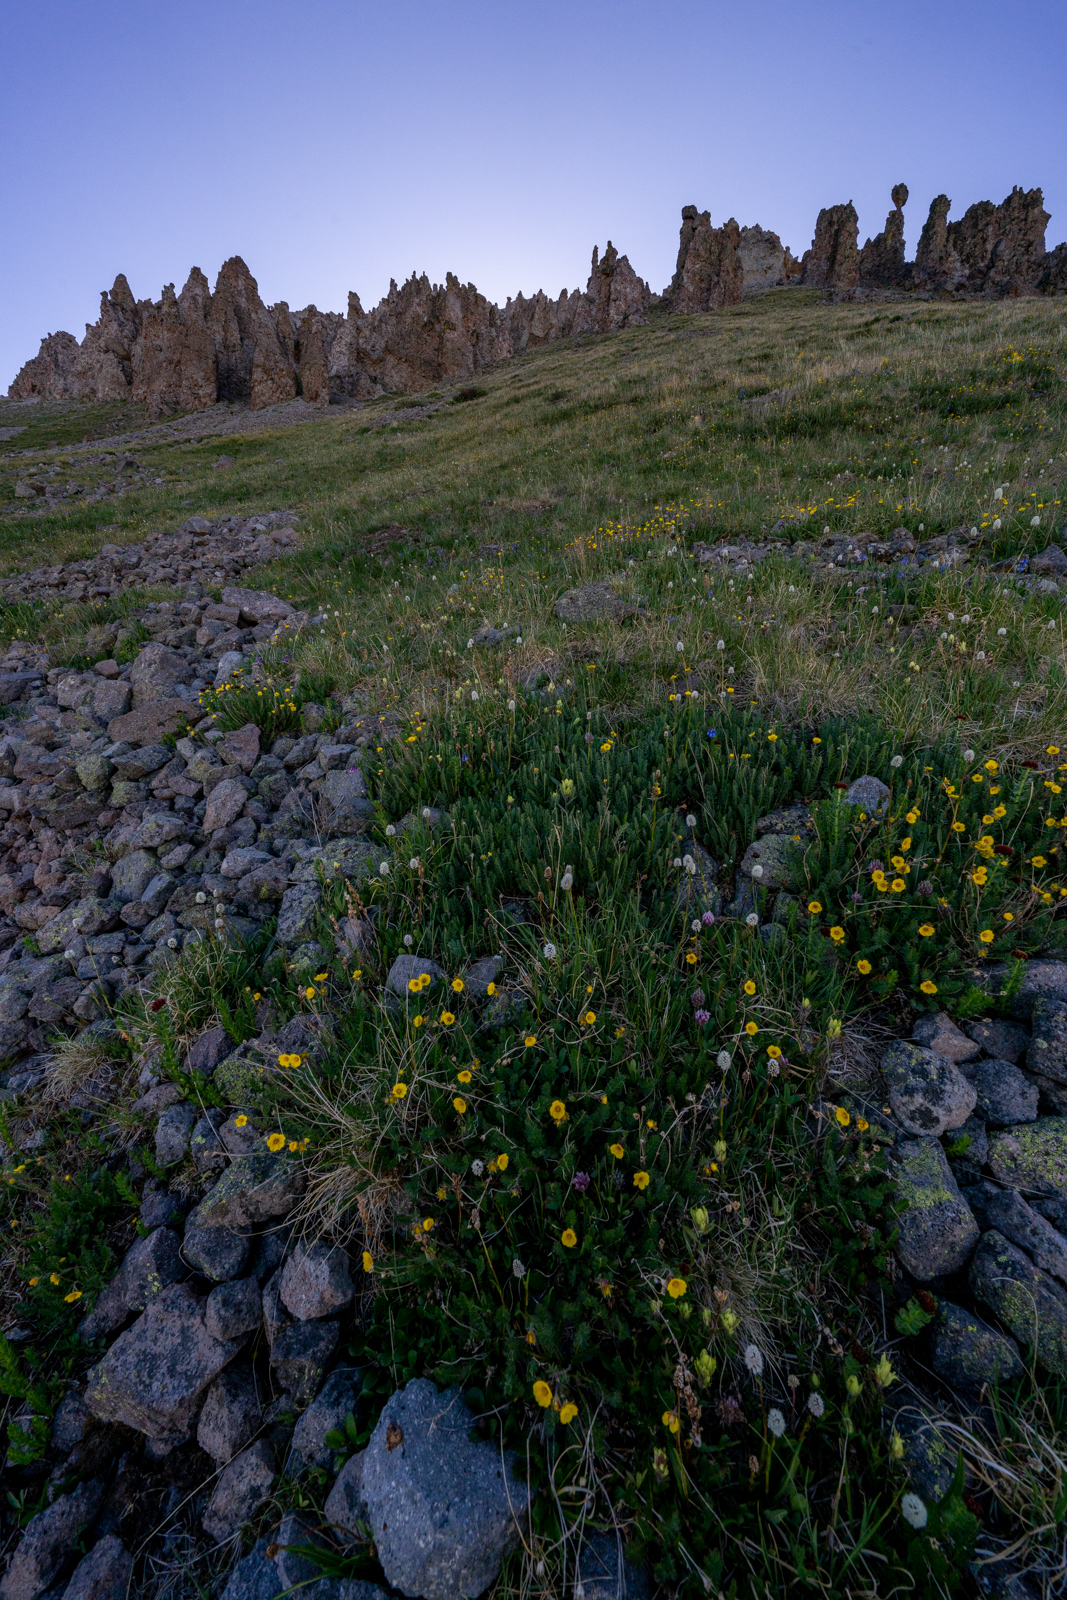
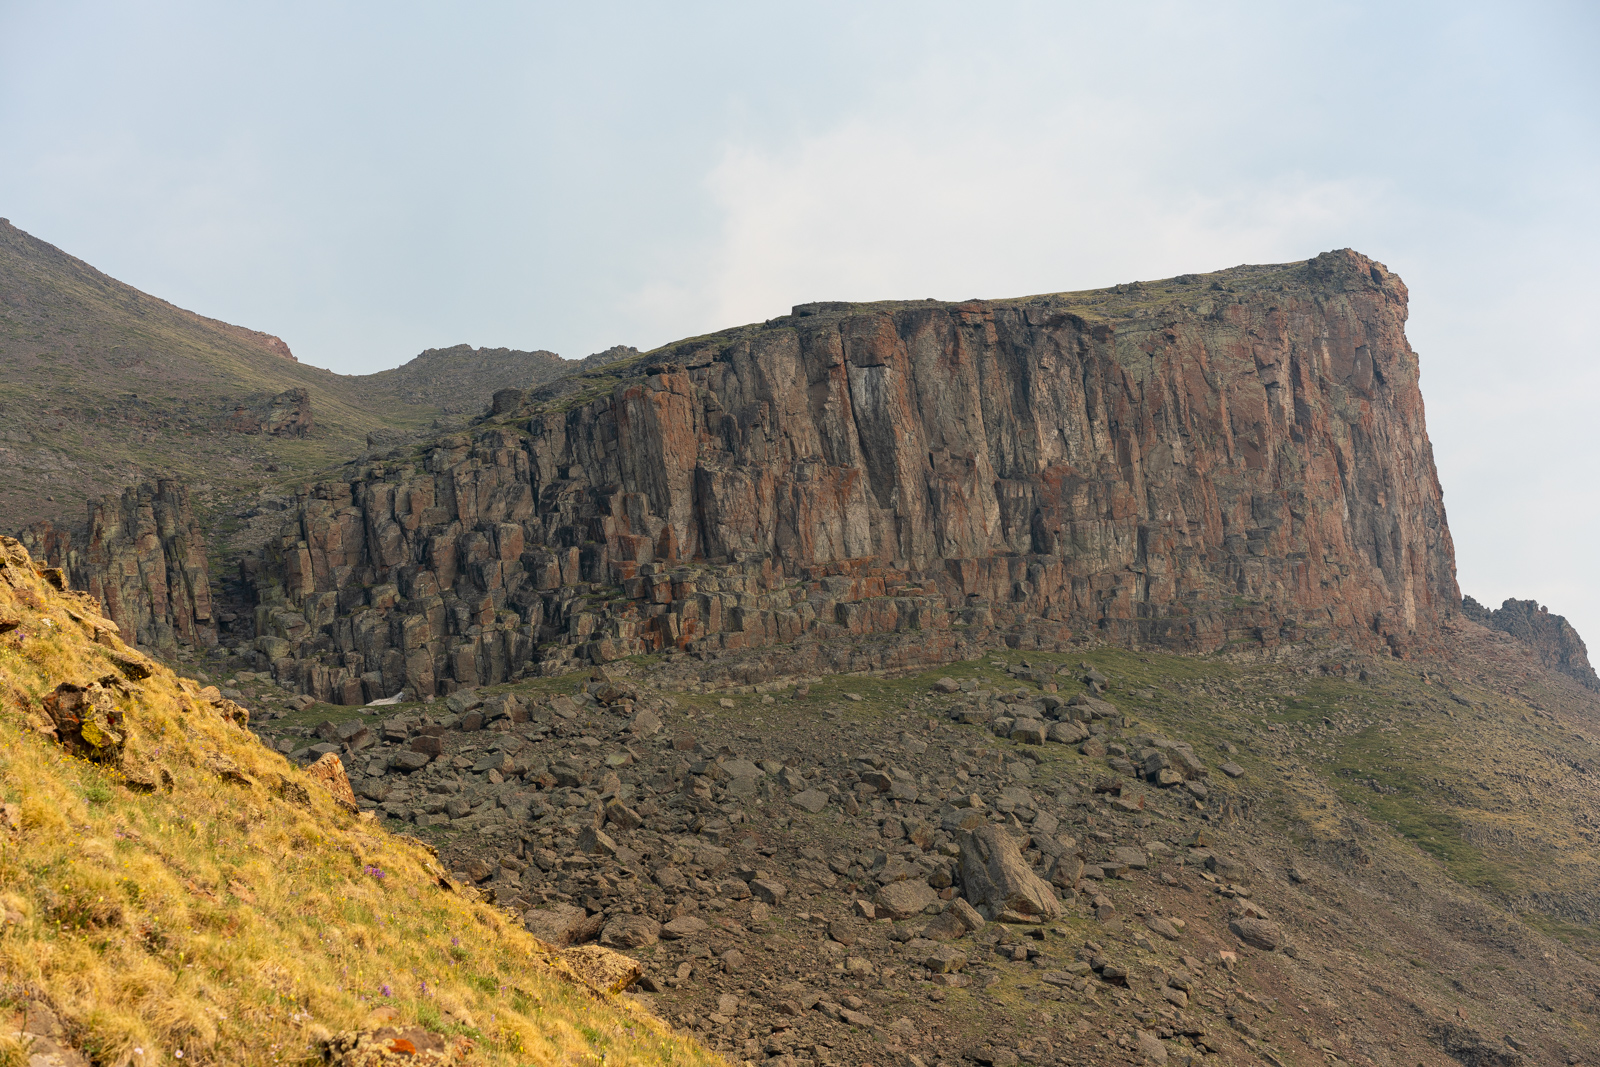
I loved the variable terrain on the Colorado Trail and the different rock features to the east. They were so fascinating to study as I hiked up.
Again, employing the 12-24 lens, I was able to get a ton of flowers in the shot as well as the funky rock formations above me to the east.
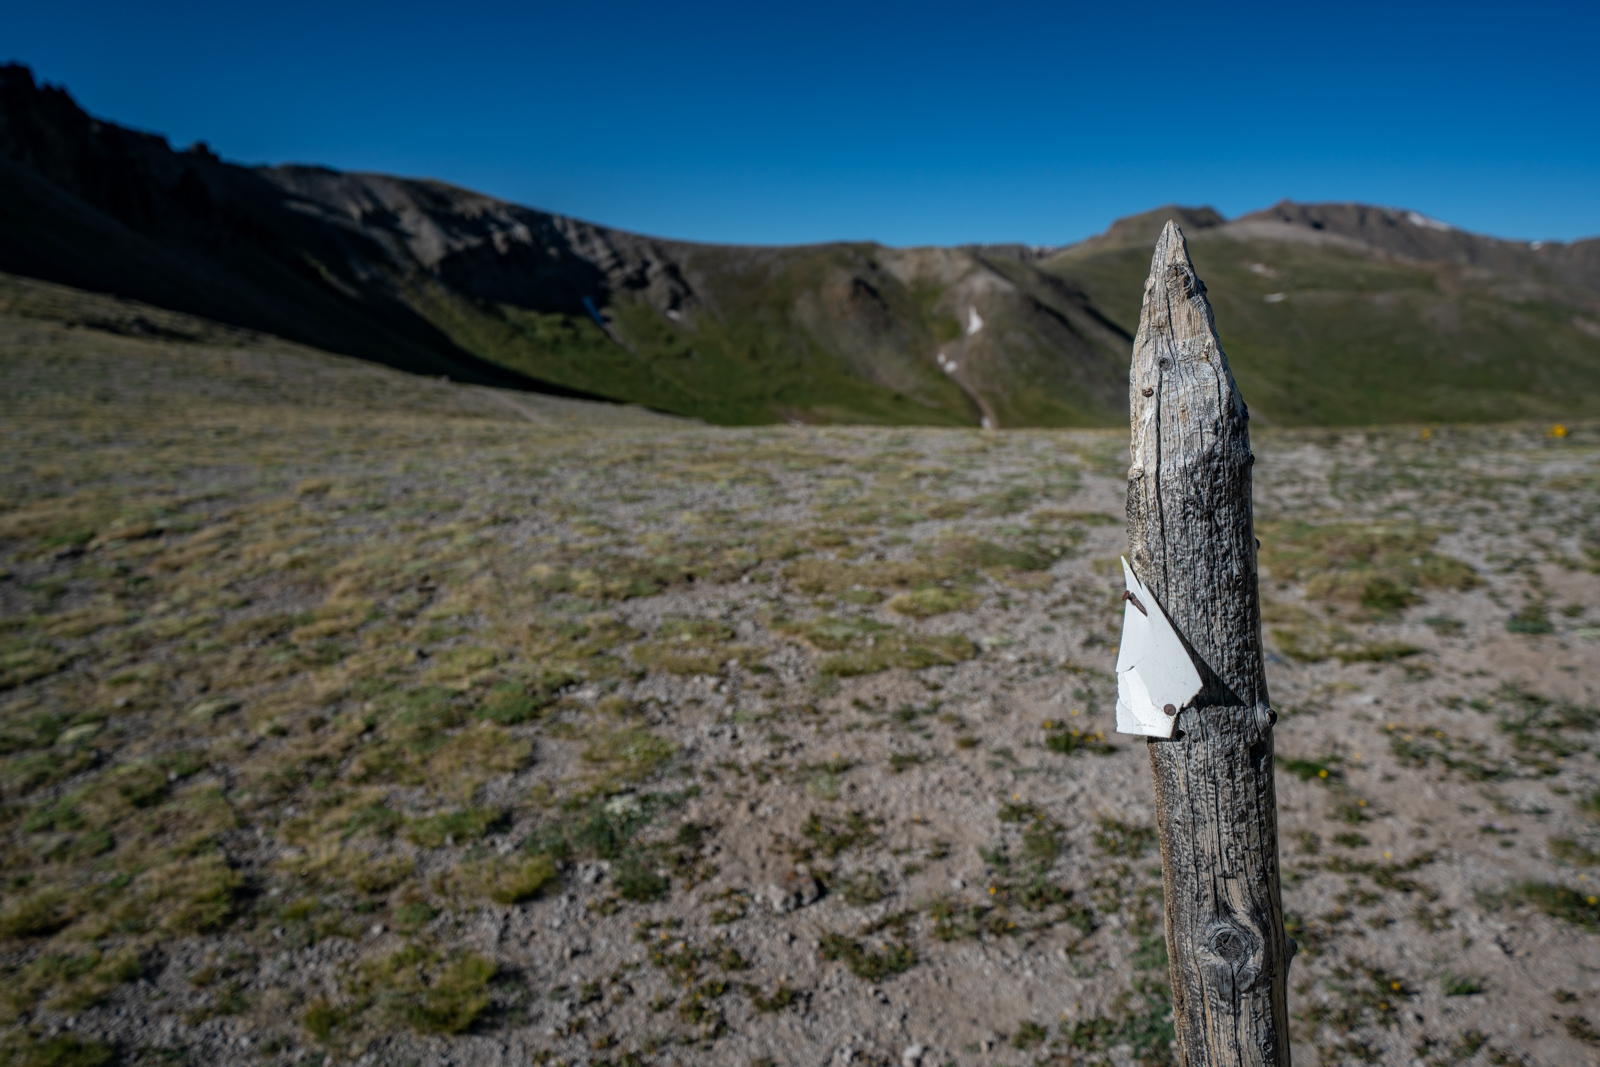
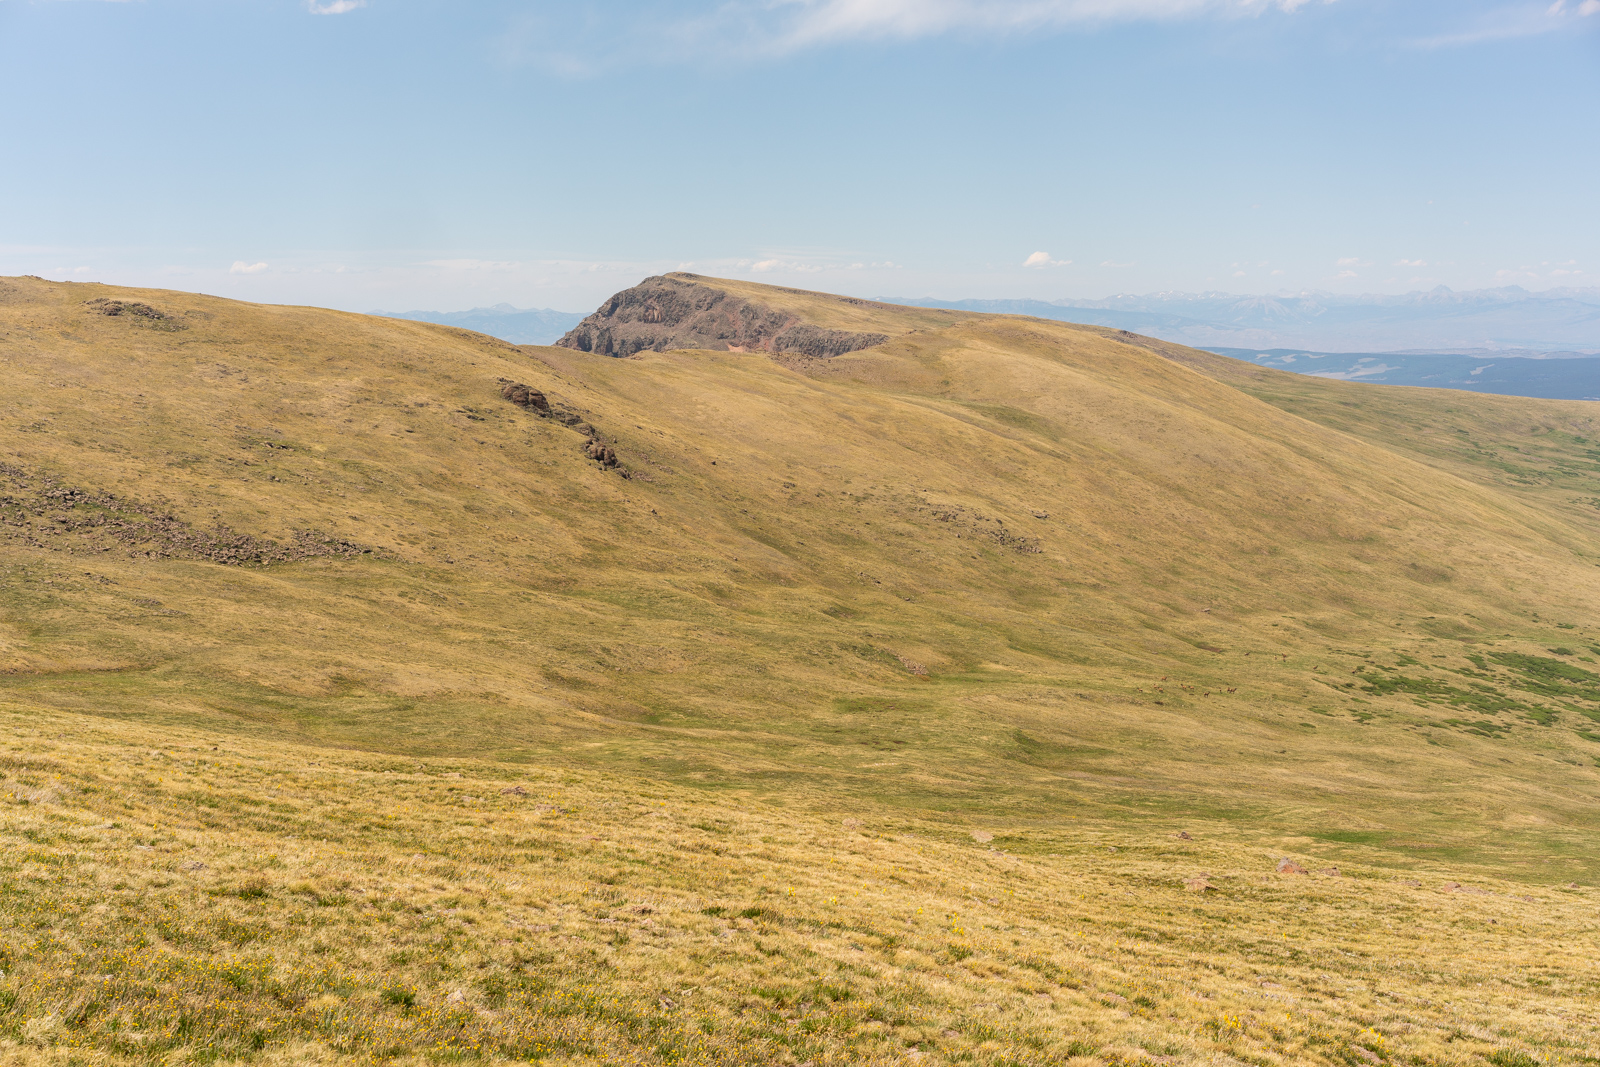
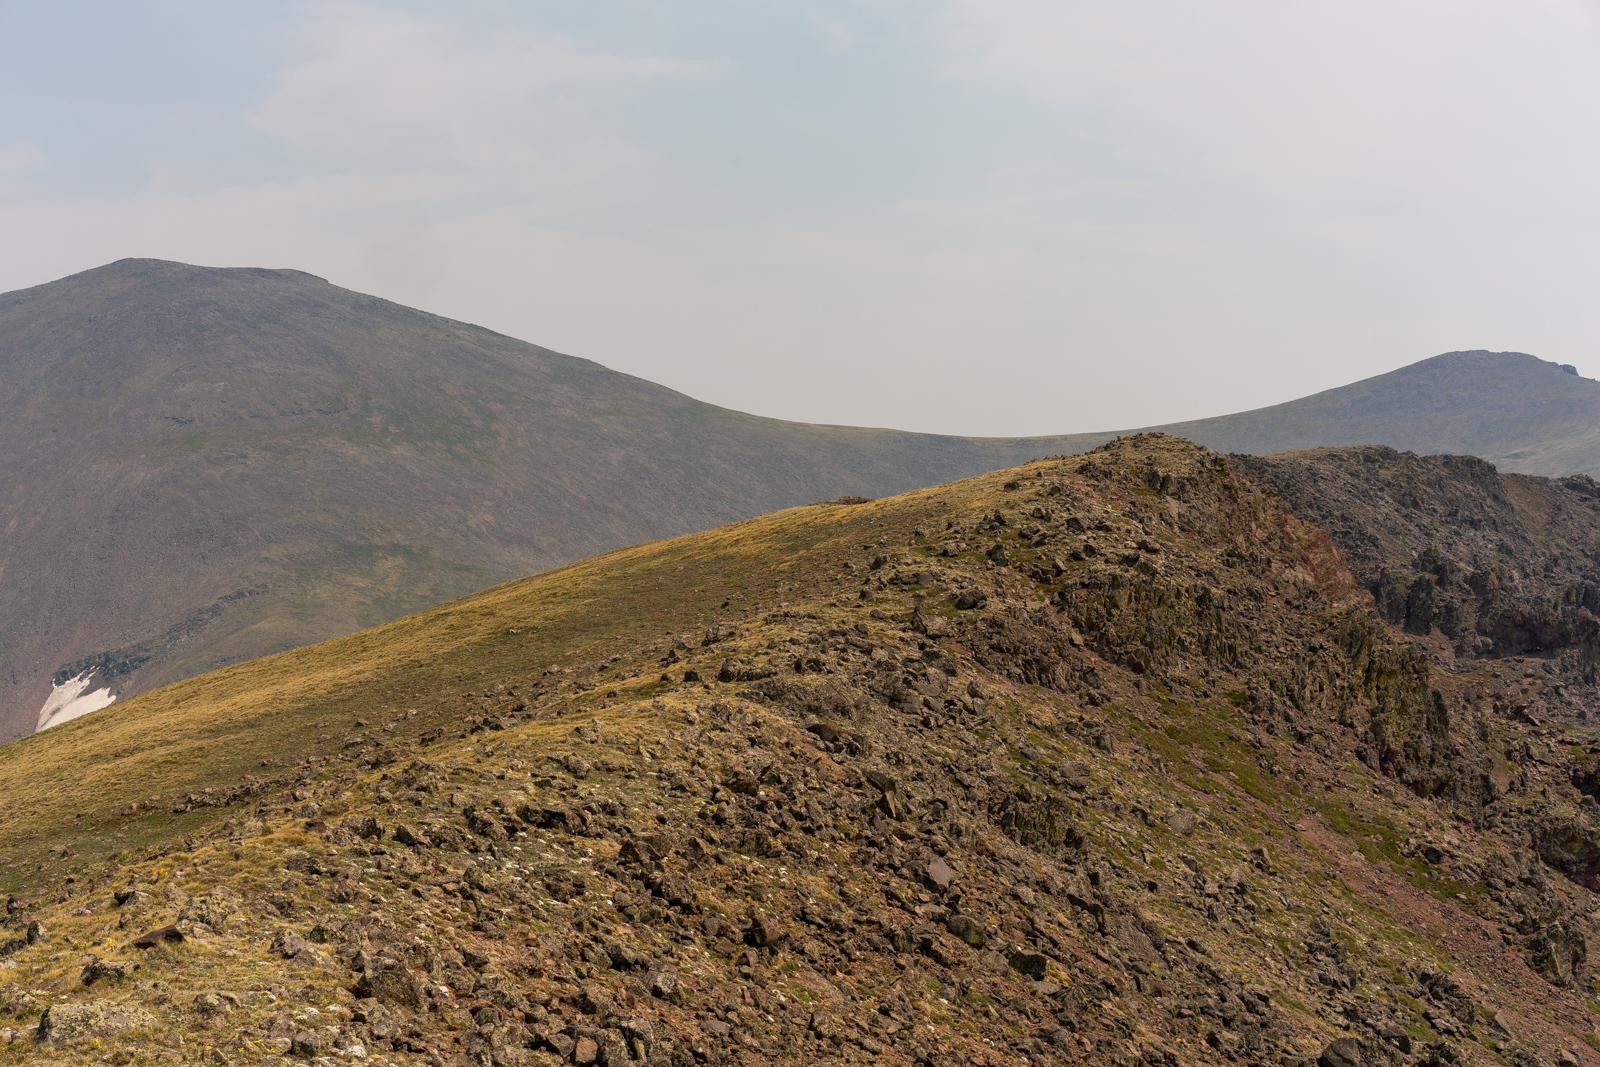
I finally reached the saddle to the south of San Luis Peak at around 8:30 AM and enjoyed the classic Colorado Trail sign post.
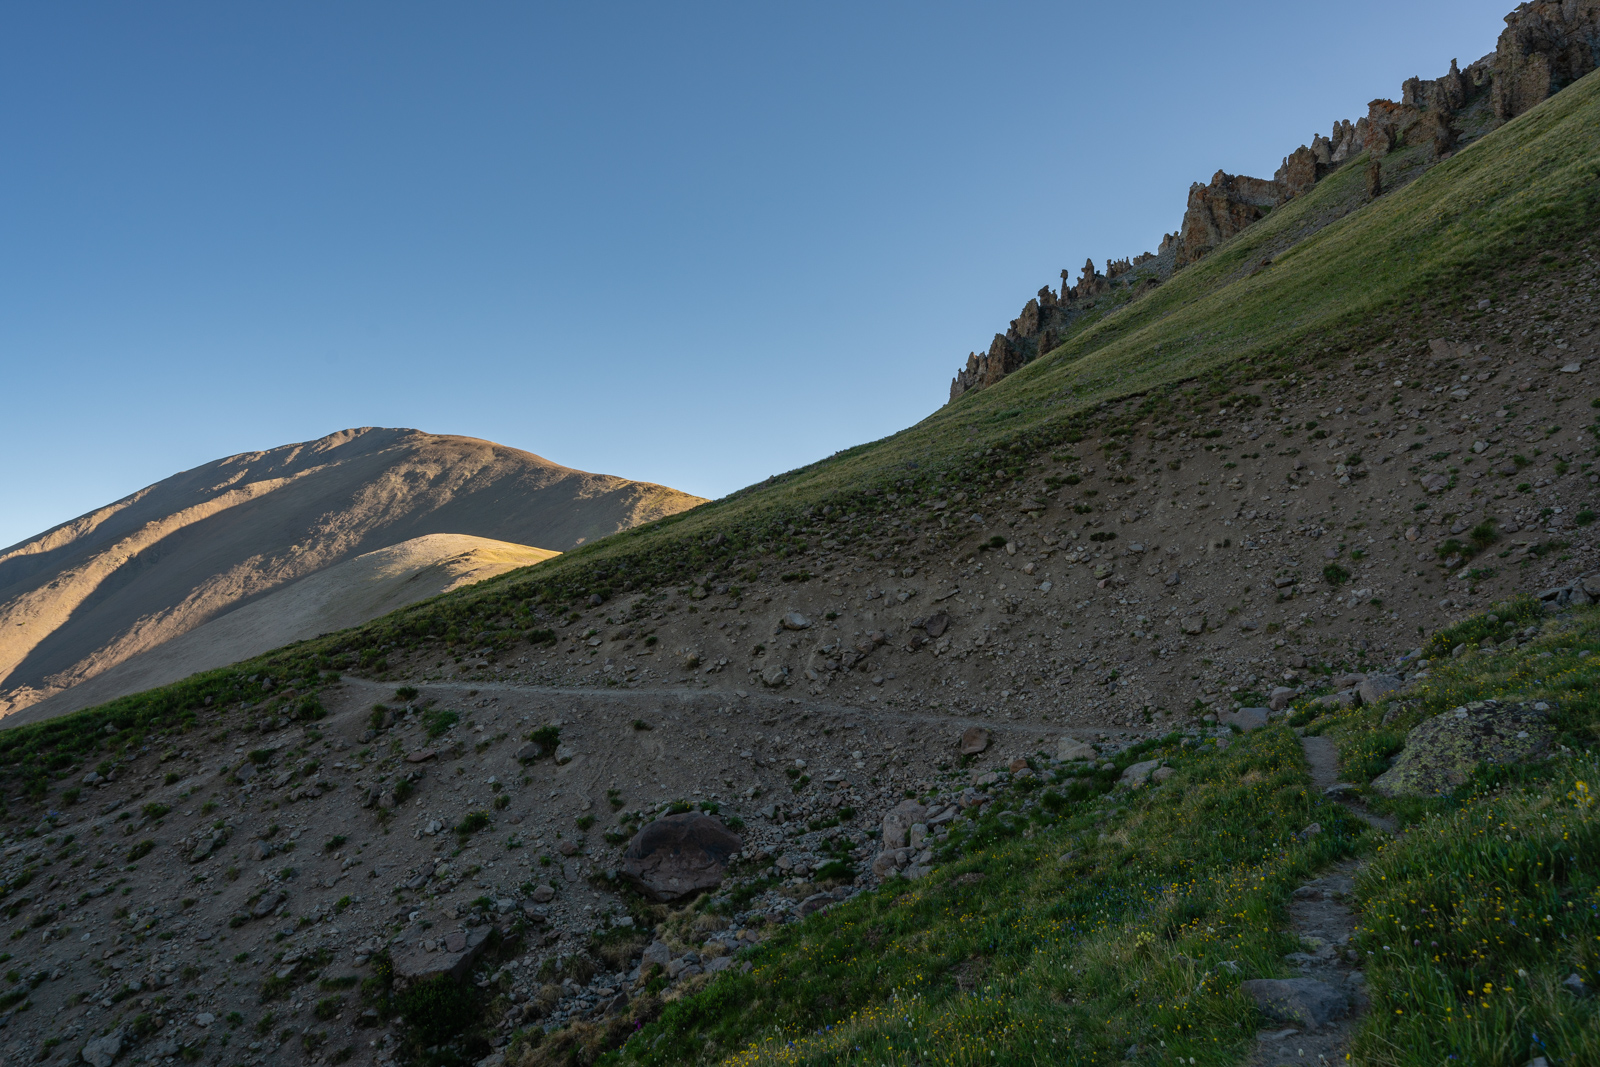
This is where I broke off from the Colorado Trail and began to ascent up San Luis Peak to really begin the fun for the day. The steepness increased and my speed decreased. Organ Mountain could be seen to the east from here.
Across the saddle from me rested another inviting and un-named 13er. Maybe next year.
Using the wide angle lens, I could really demonstrate the scale of this place - surrounded by mountains and Tundra in every direction. Yep - that's the San Juans I've come to love.
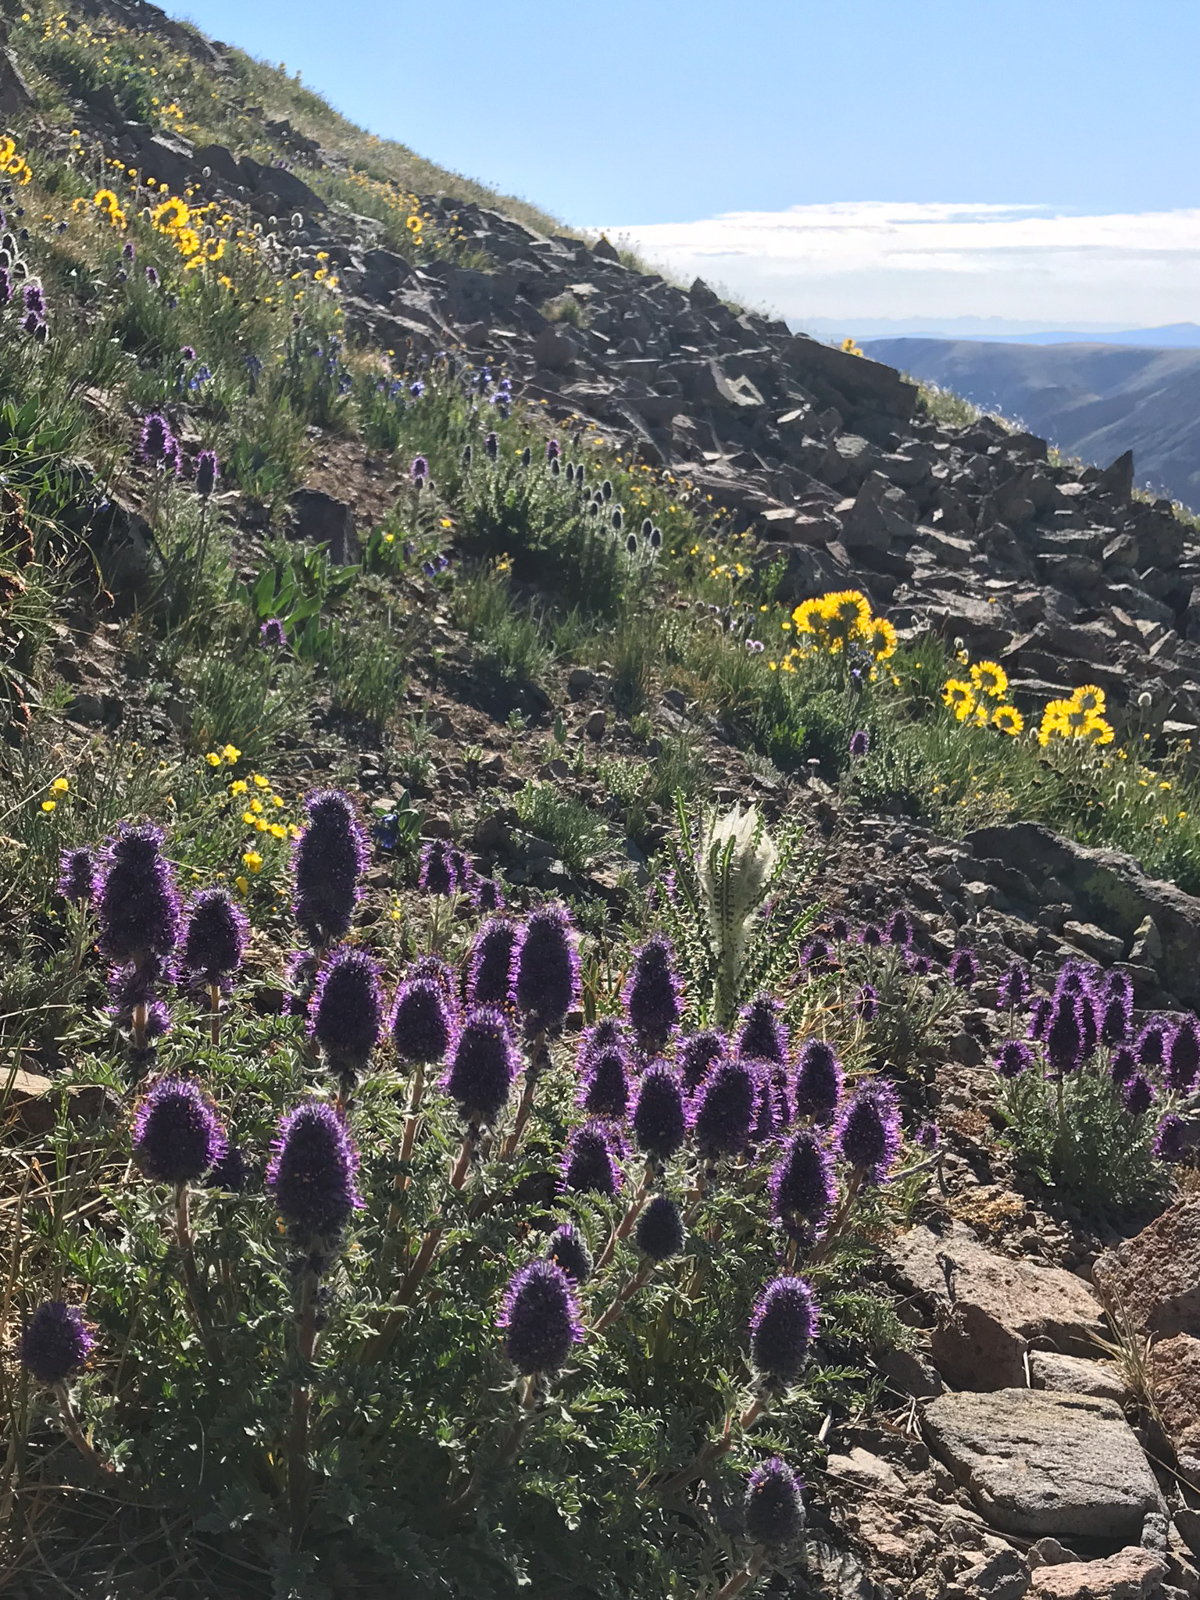
As I continued up San Luis Peak's steep south slopes, I put away my camera and used my iPhone to take some snapshots and video on the way up. The wildflowers were stunning and ubiquitous!
Organ Mountain loomed high above Cochetopa Creek to my east and caught my gaze pleasantly throughout the whole hike up San Luis Peak.

I stopped to rest and took some video of the flowers. It was VERY windy.
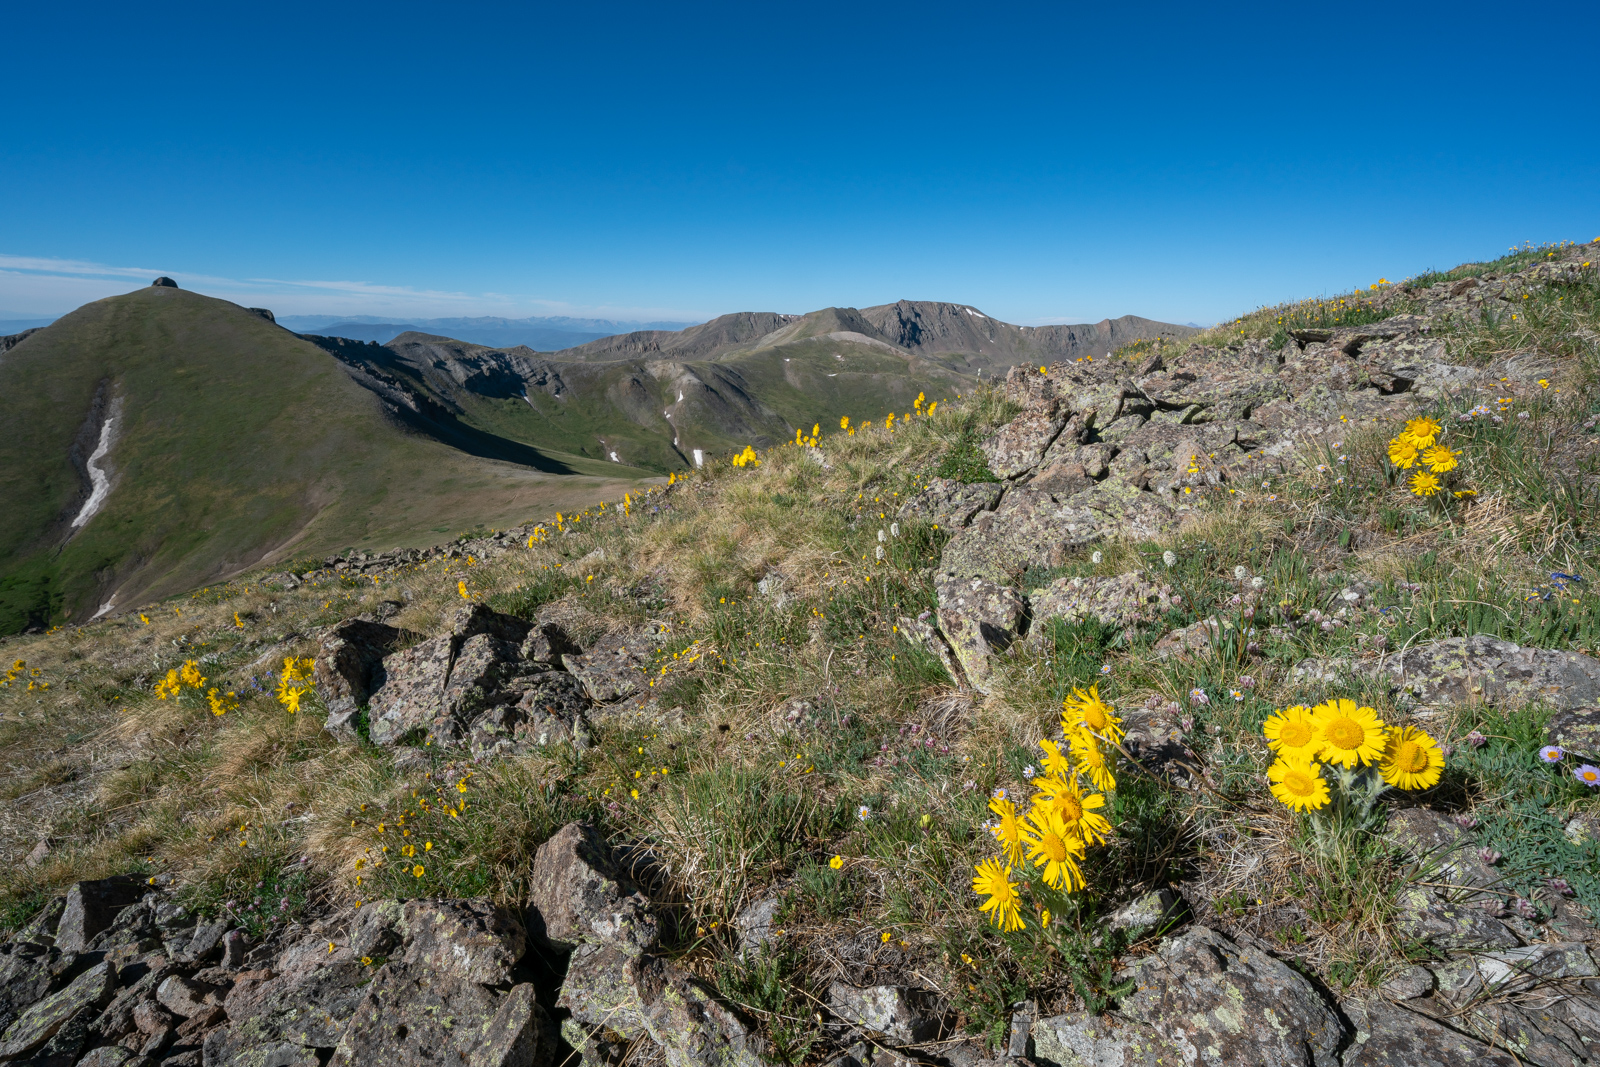
The alpine sunflowers were everywhere and made the hike utterly enjoyable.
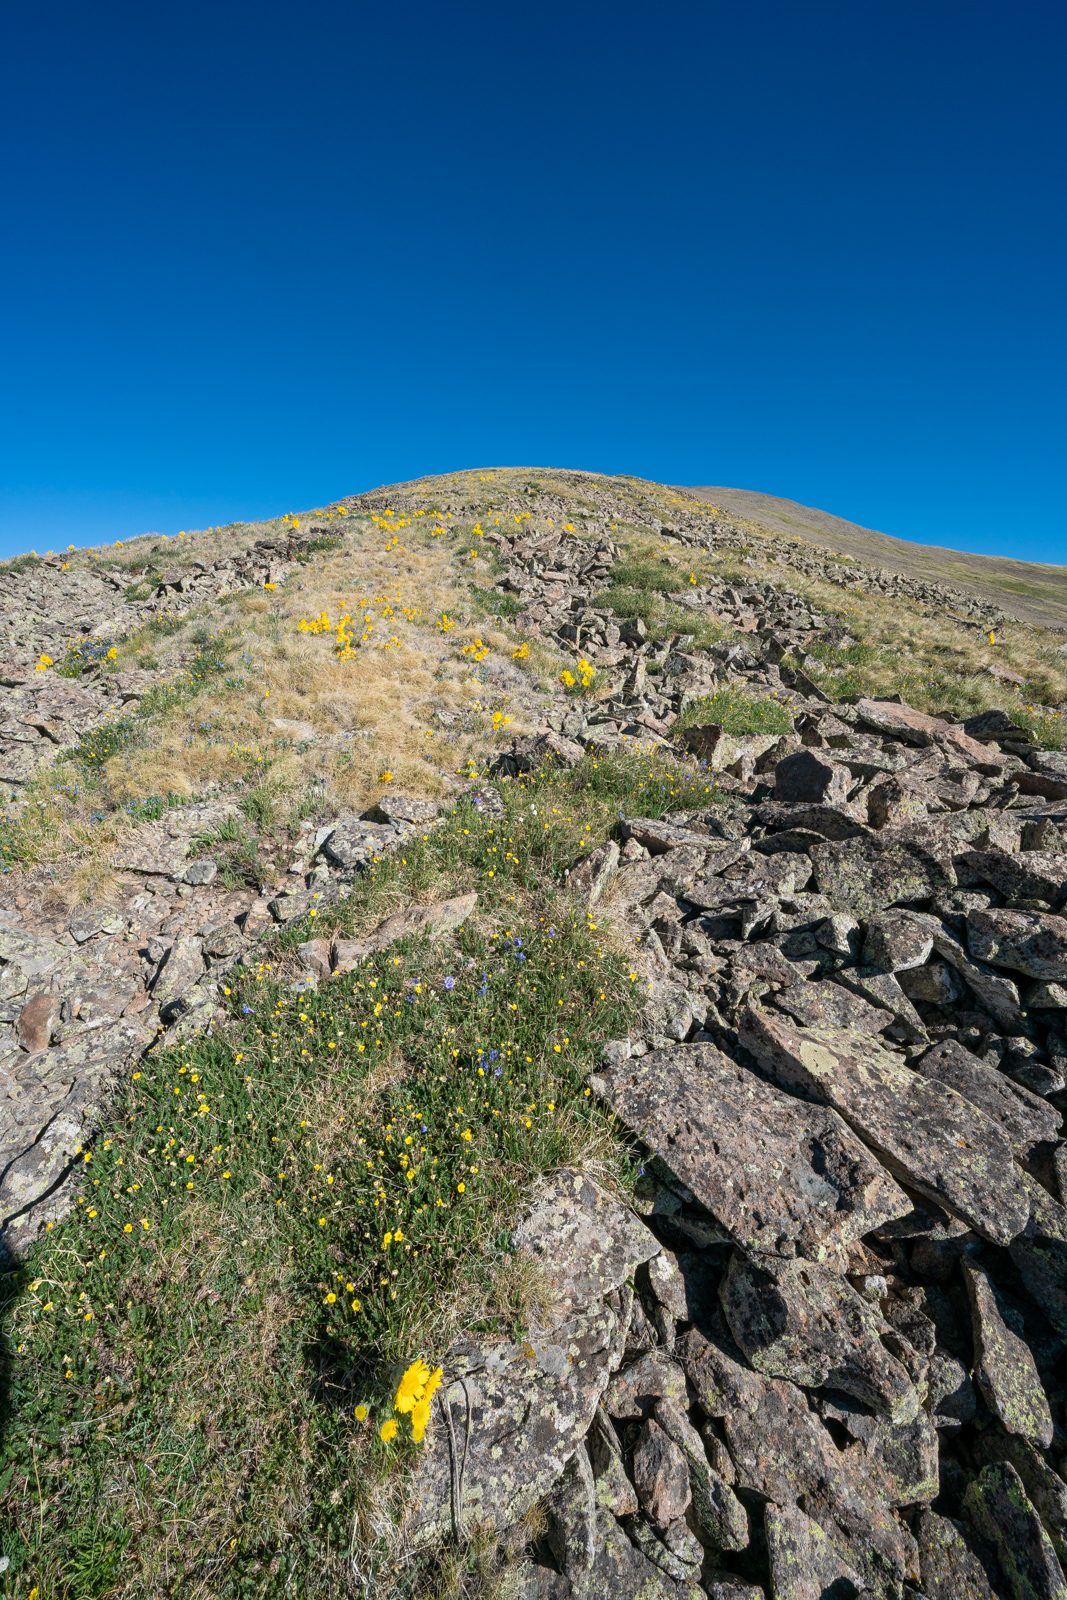
As you can see above, the flowers were in full bloom and made for quite the scene.
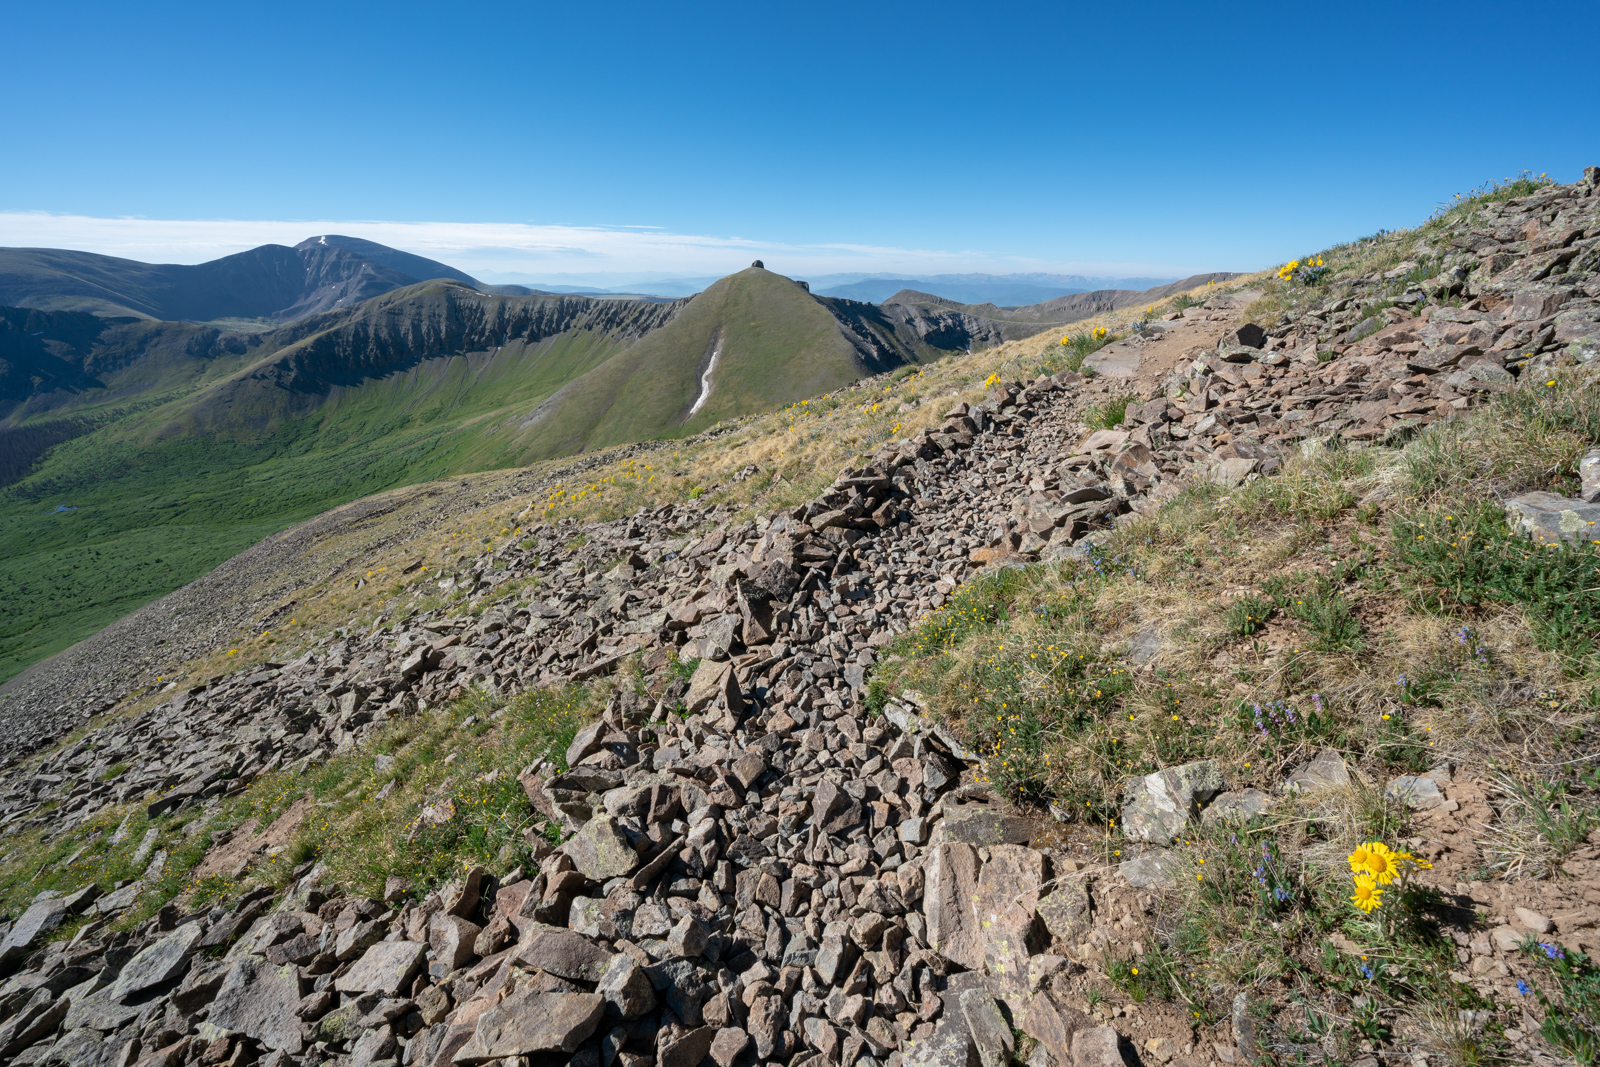
The trail going up the south side of San Luis Pass was in great condition, I figured it was due to trail workers on the Colorado Trail from the year before. I arrived on the summit of San Luis at about 10:30 AM and enjoyed the view all around me. To the north, I made out a figure climbing the standard route of San Luis towards me with Column Ridge looming above him.
I set-up my tripod, got some snacks, drank some water, shot some live video on Instagram, and was joined on the summit by a physical therapist from Montrose. I took a self-portrait using my tripod and chatted with this the guy from Montrose for a bit before heading off towards my next destination: Baldy Alto. I needed to downclimb two ridges and ascent Baldy Alto before I could gain access to the basin containing my real prize - Stewart Peak.
I took a huge panorama from the summit as well, which showed all of the smog from the 416 fire but also the massive glory that is the San Juans.

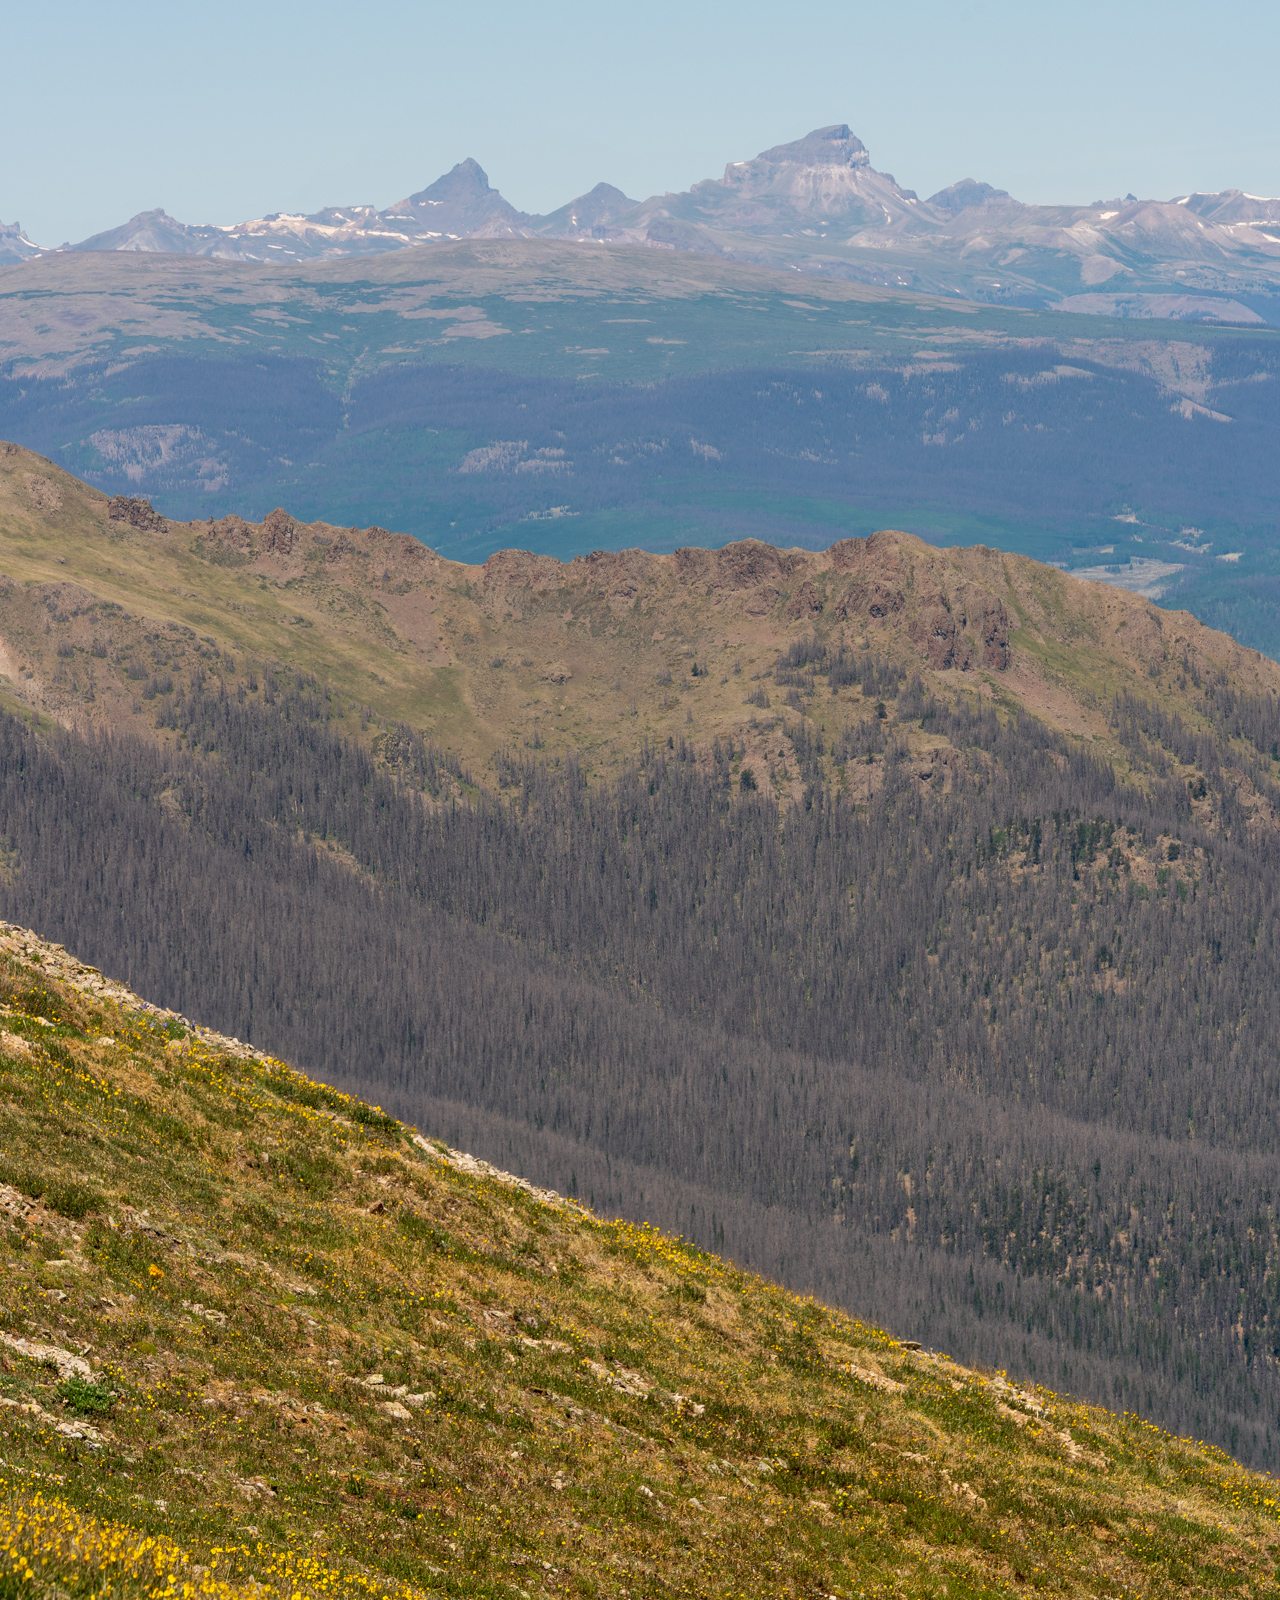
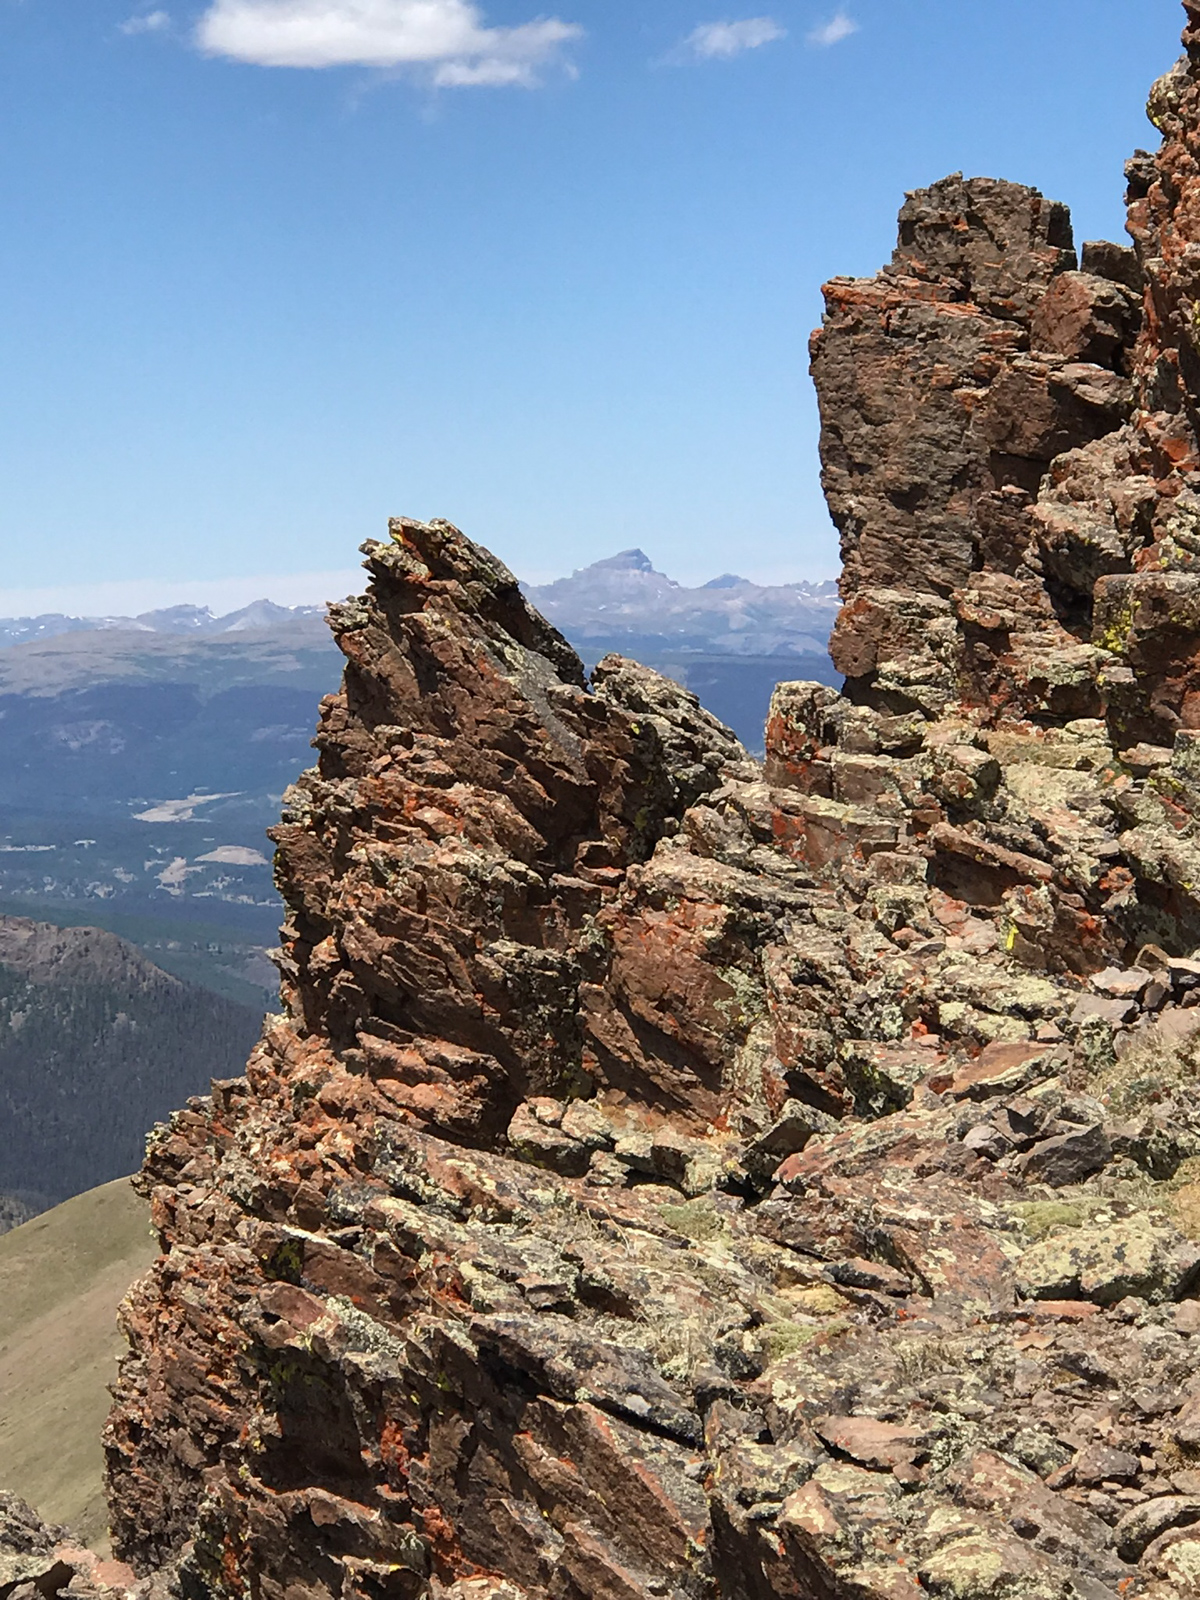
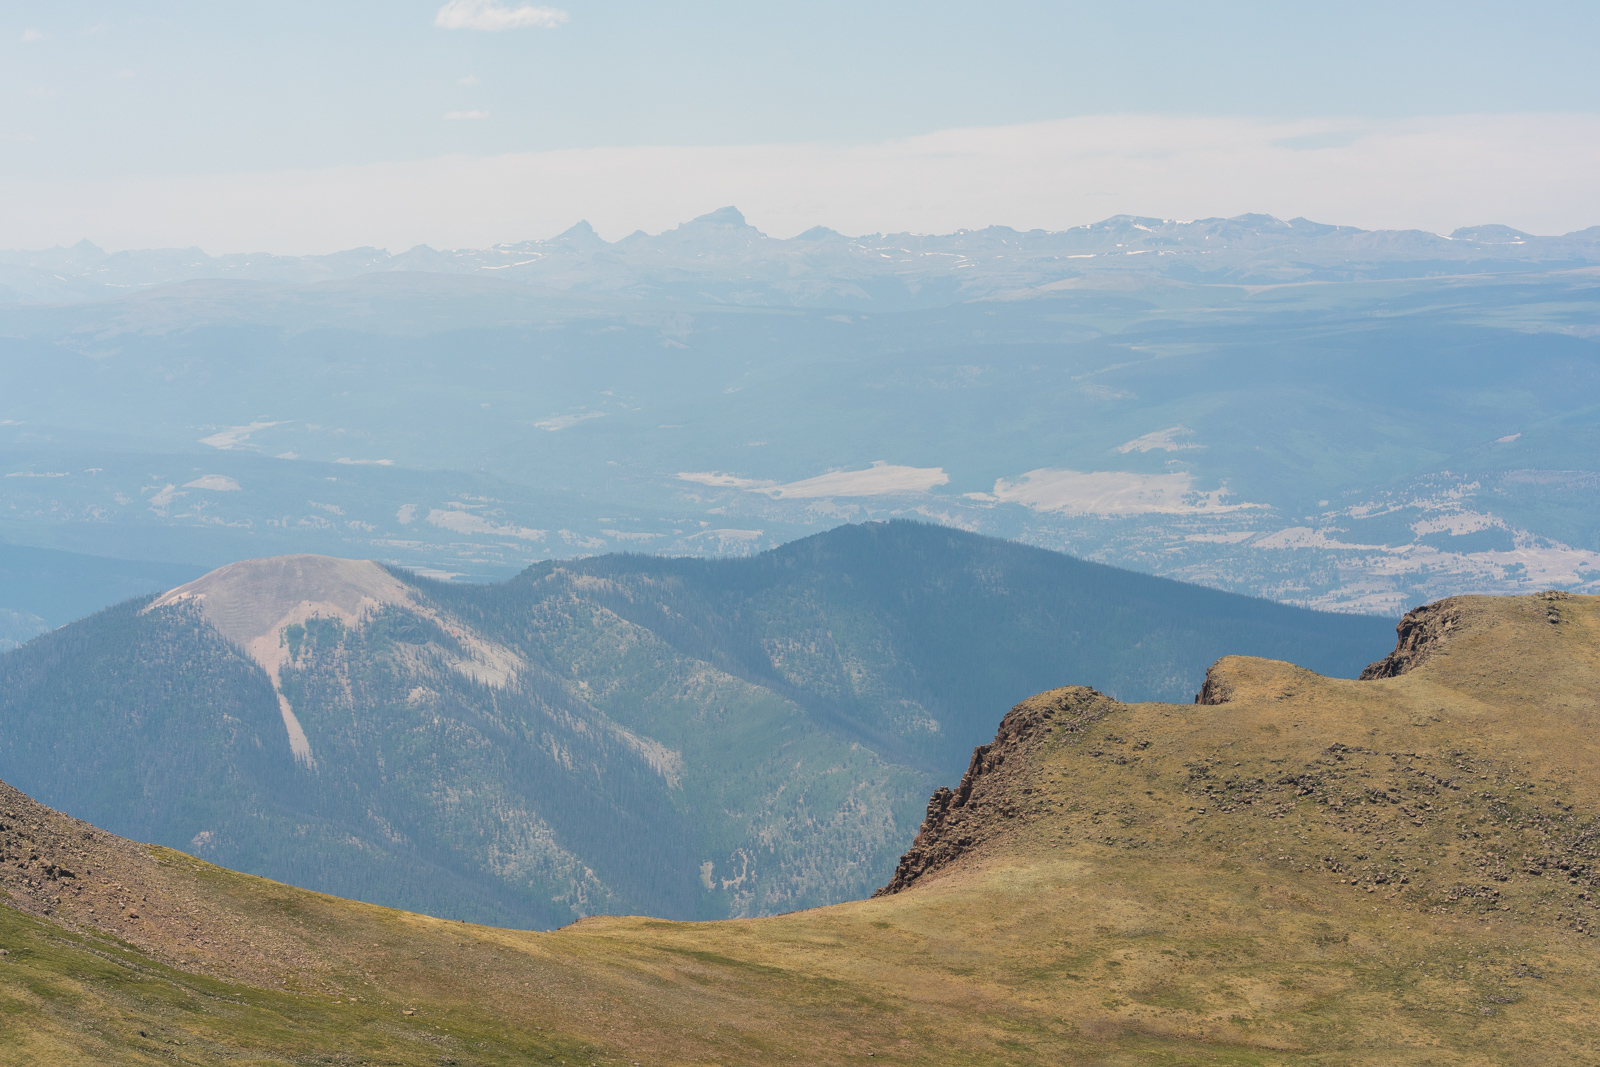
San Luis Peak also offered some fantastic views of the 14ers Uncompahgre and Wetterhorn, which always seem to draw my gaze whenever I'm climbing in the San Juans.
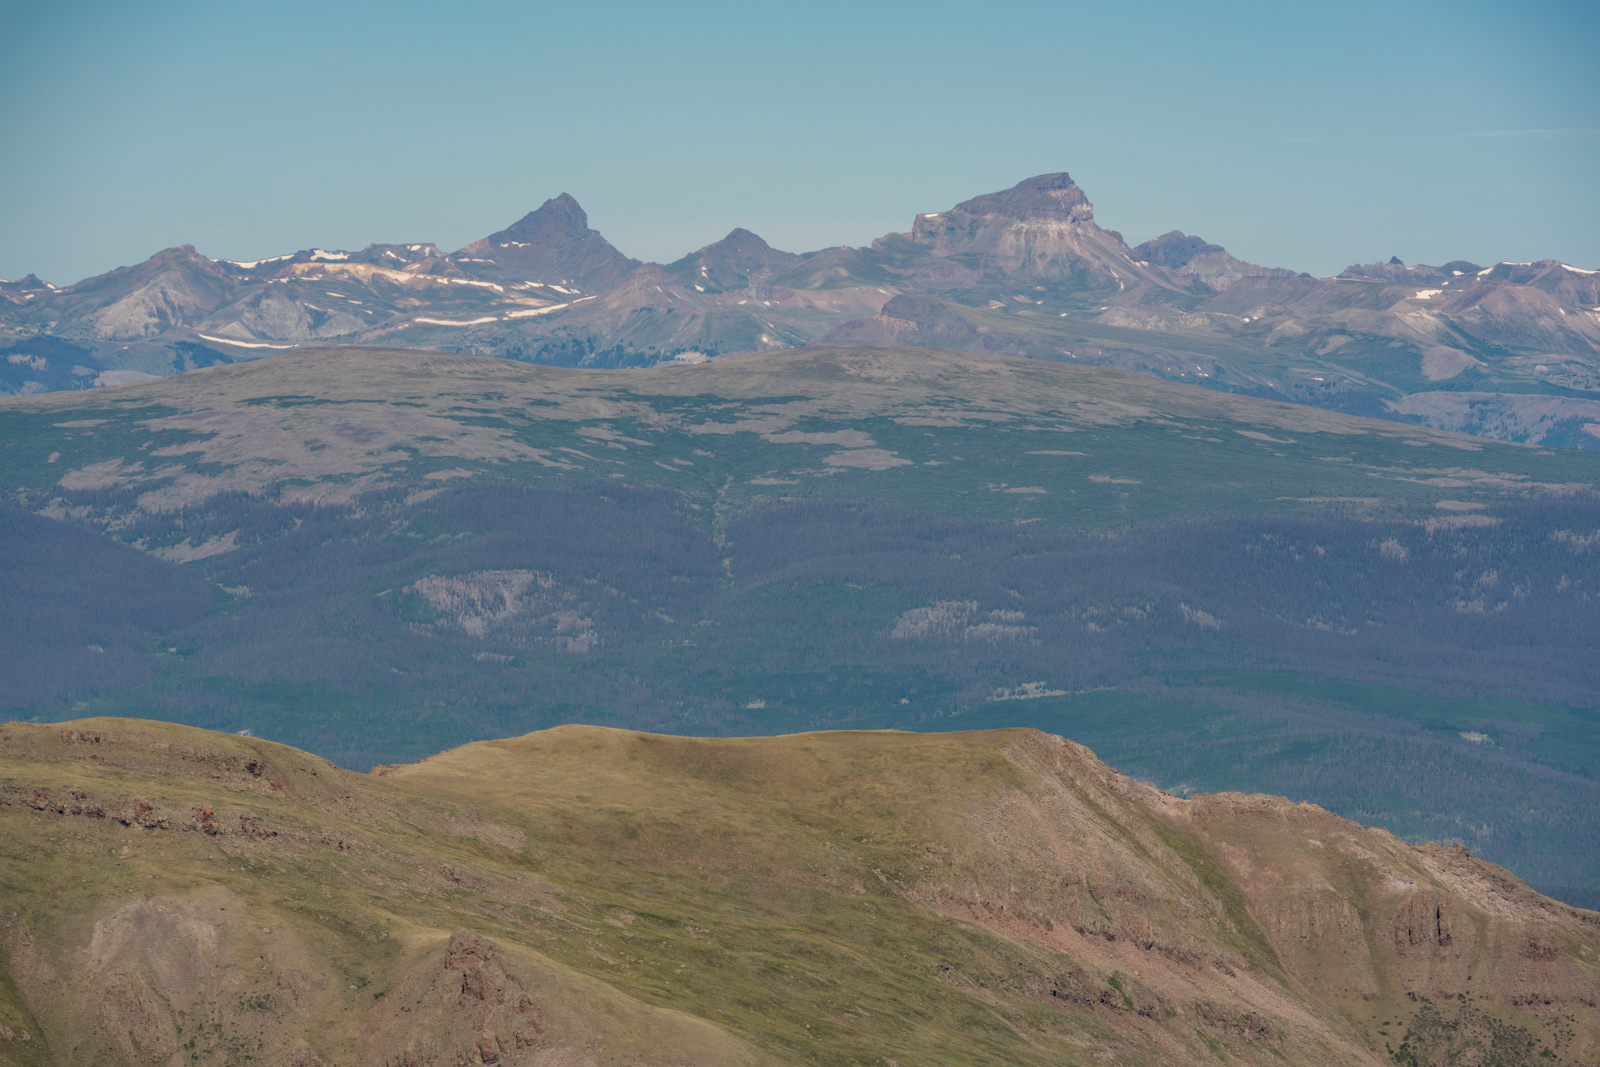
Those are two very sexy peaks!

I also loved the telephoto vantage shown above of Snow Mesa and all of the Needle Mountains and the Grenadier Range in the distance. Epic.
The haze from the fire was really starting to move in, but I loved seeing just how far I had come on the trail that day, as seen on the bottom of the photo above.
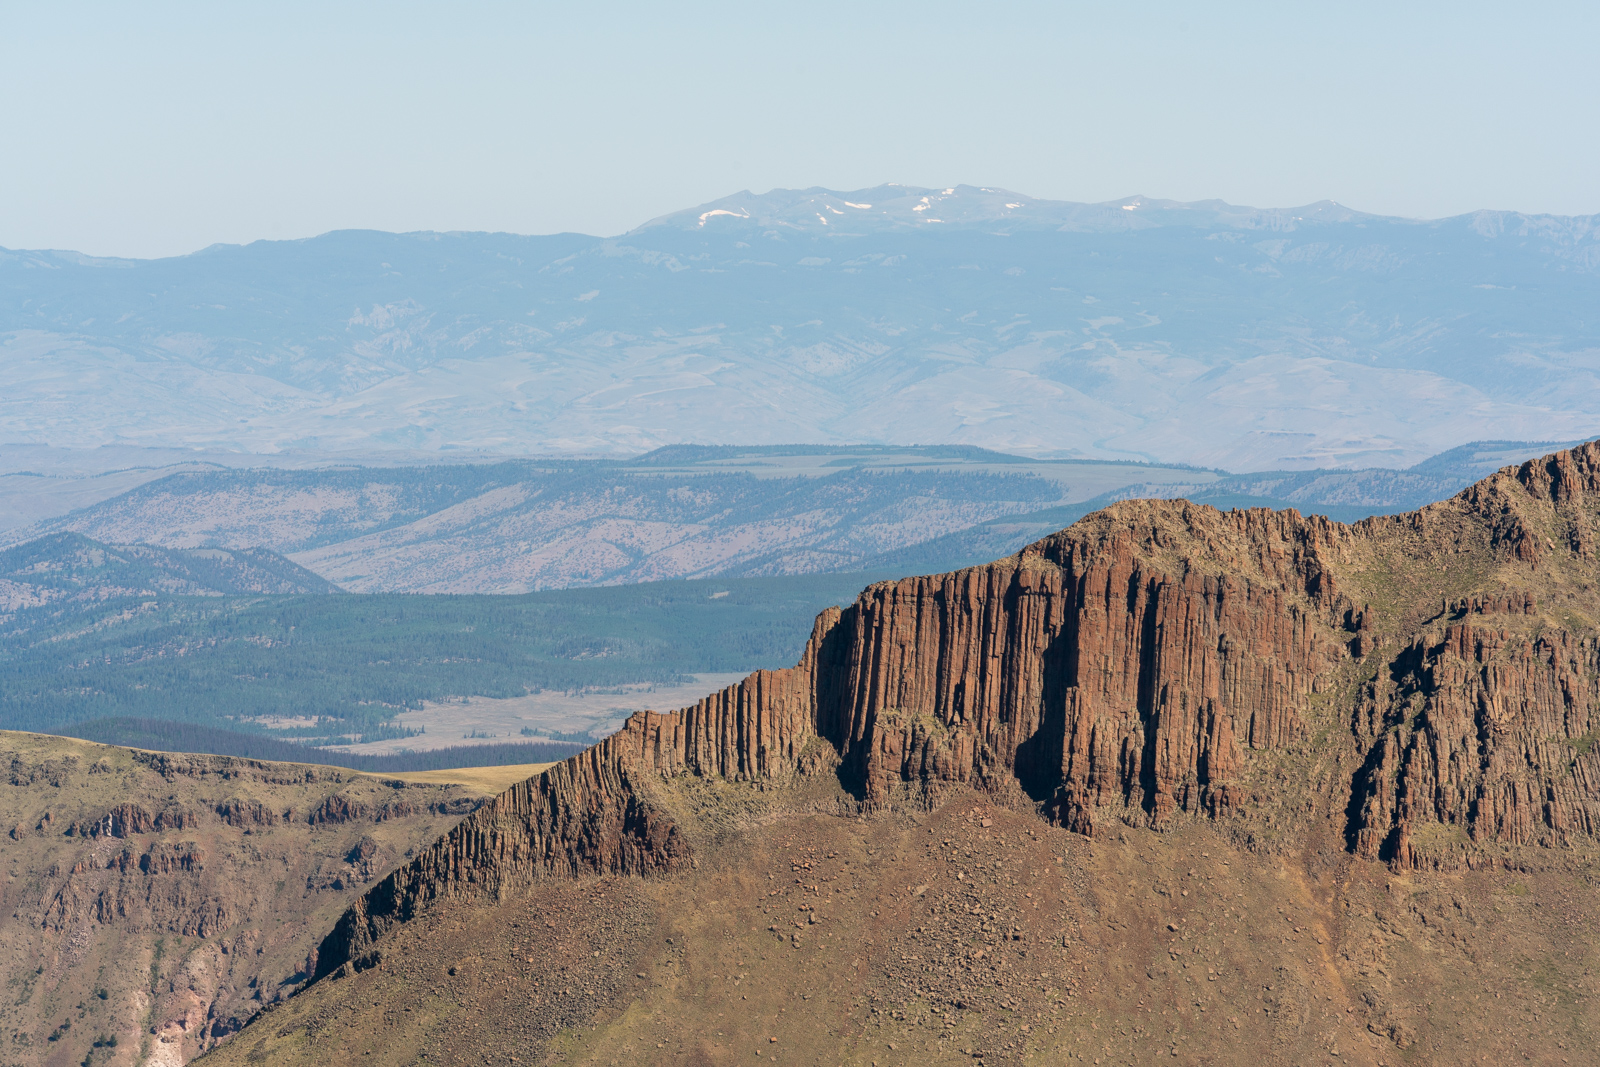
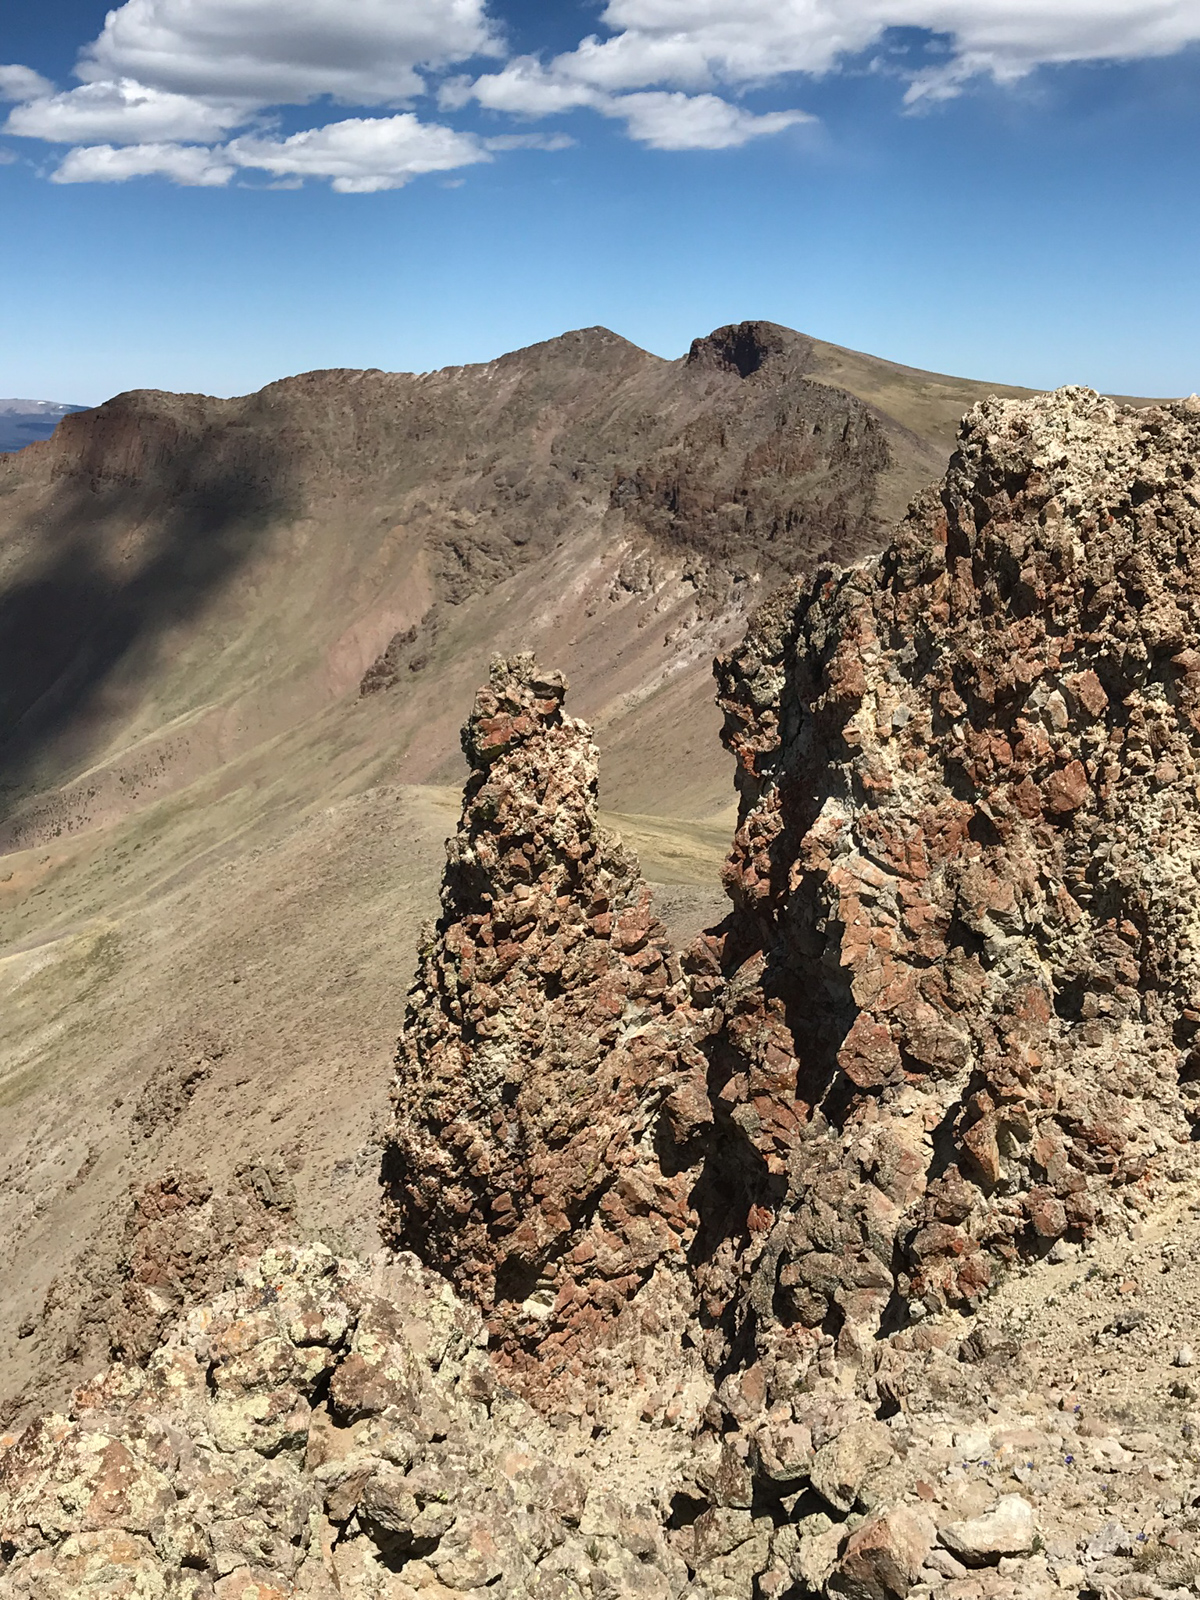
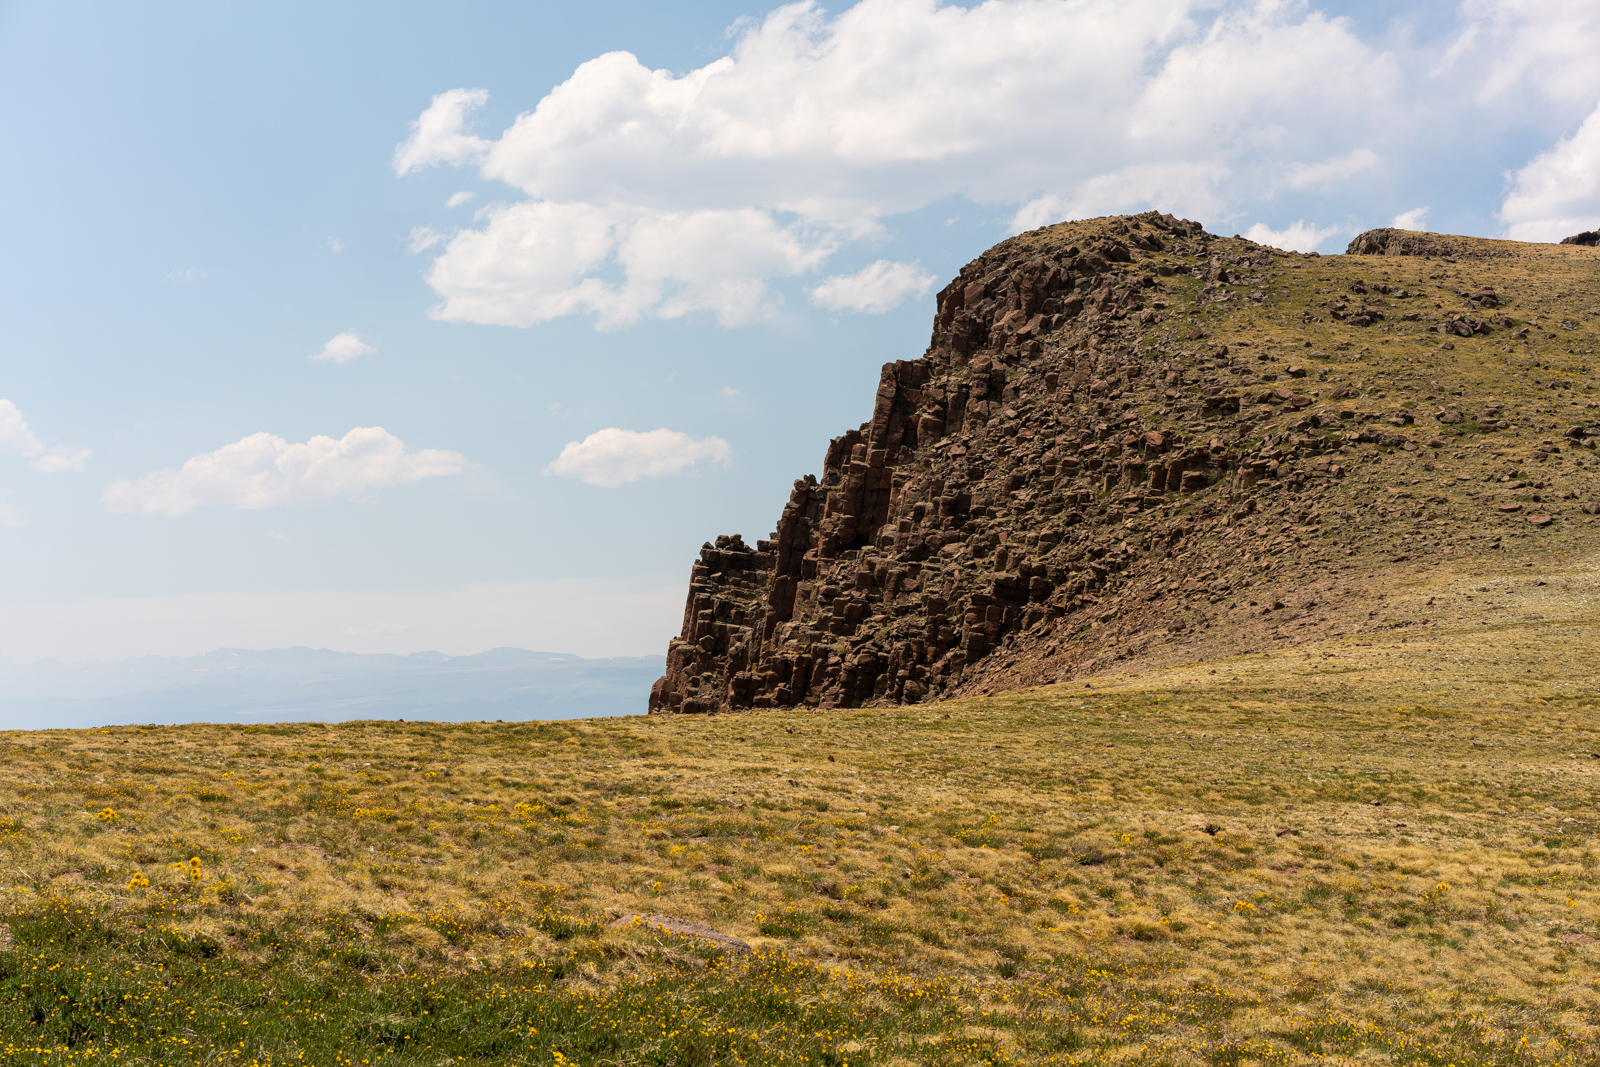
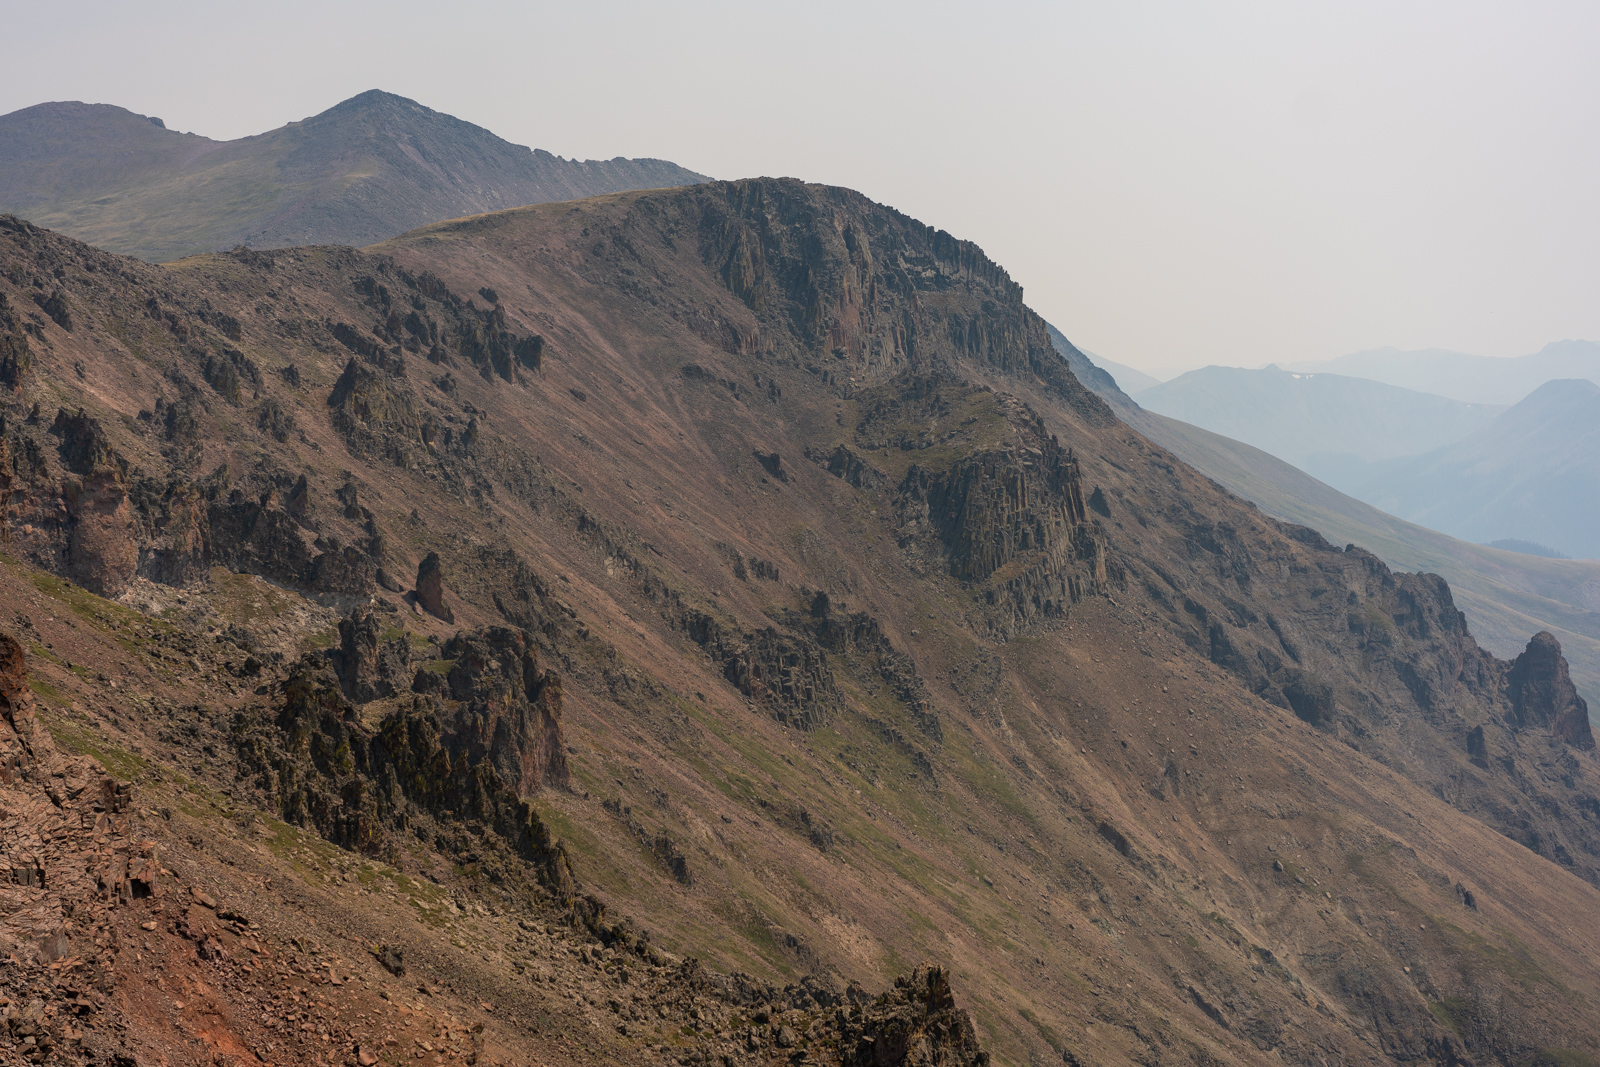
The 13er Column Ridge also looked impressive as hell from San Luis. Those basalt columns (I'm guessing) were quite daunting from this angle.
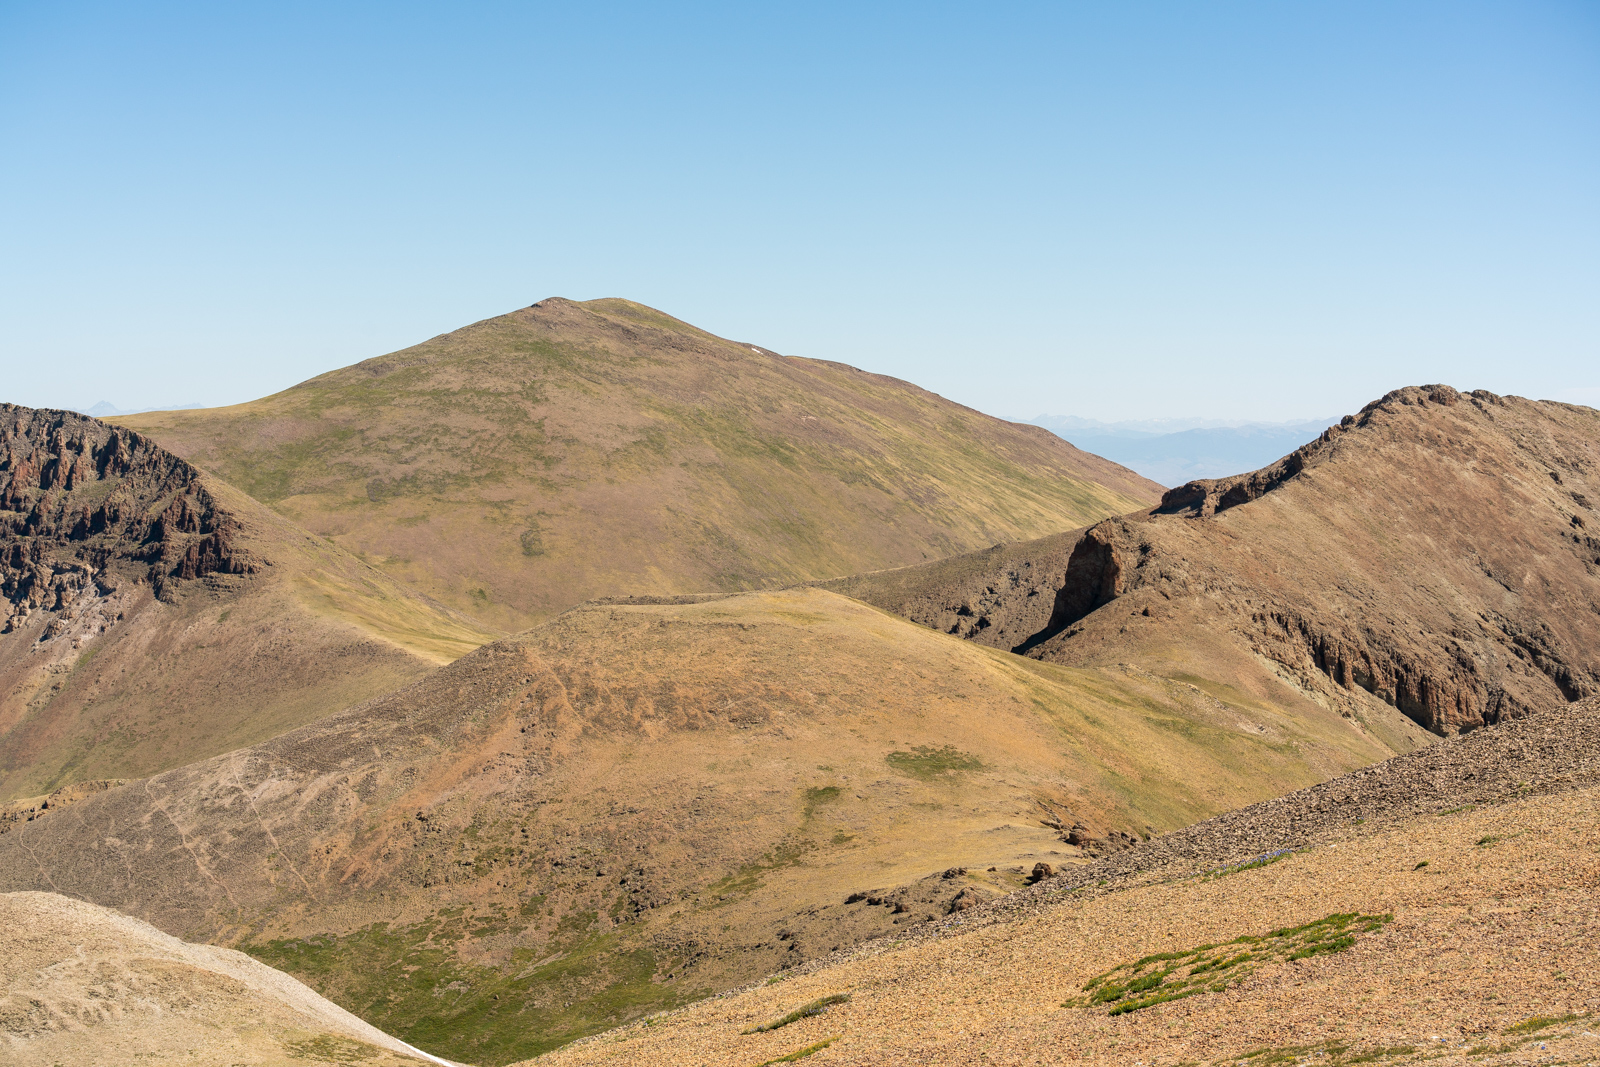
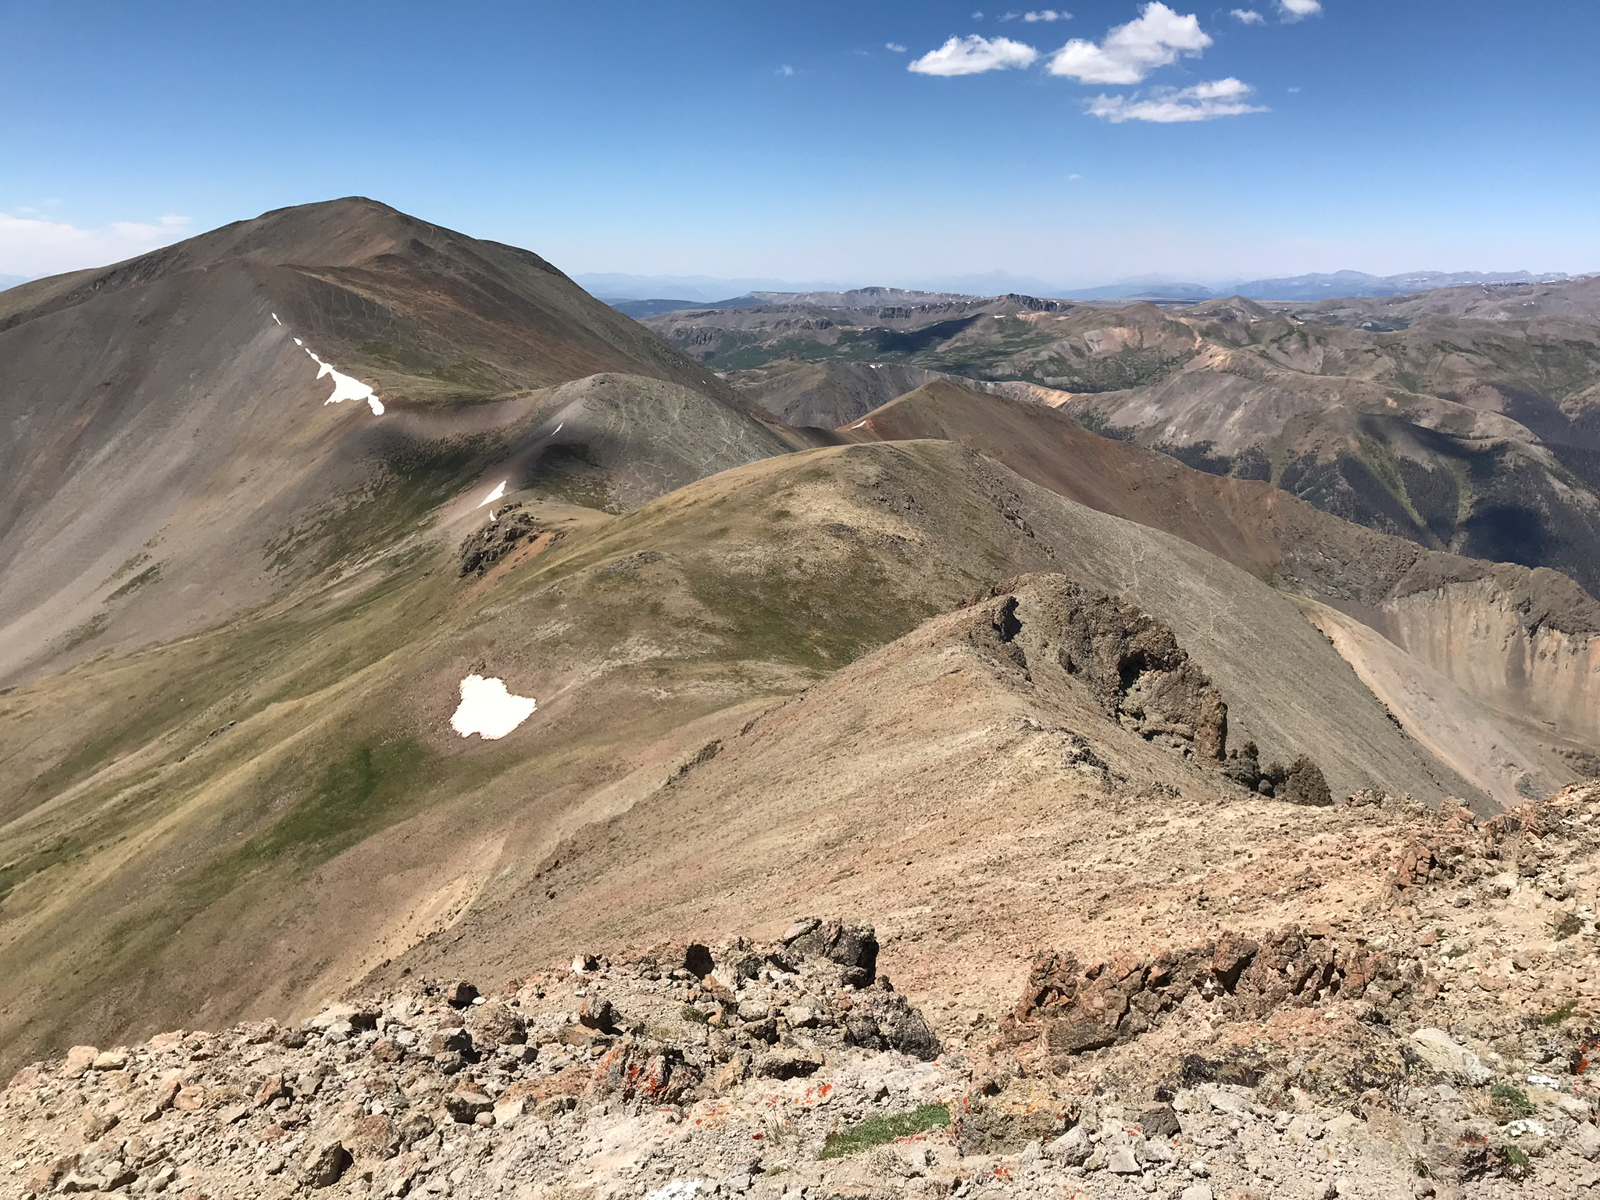
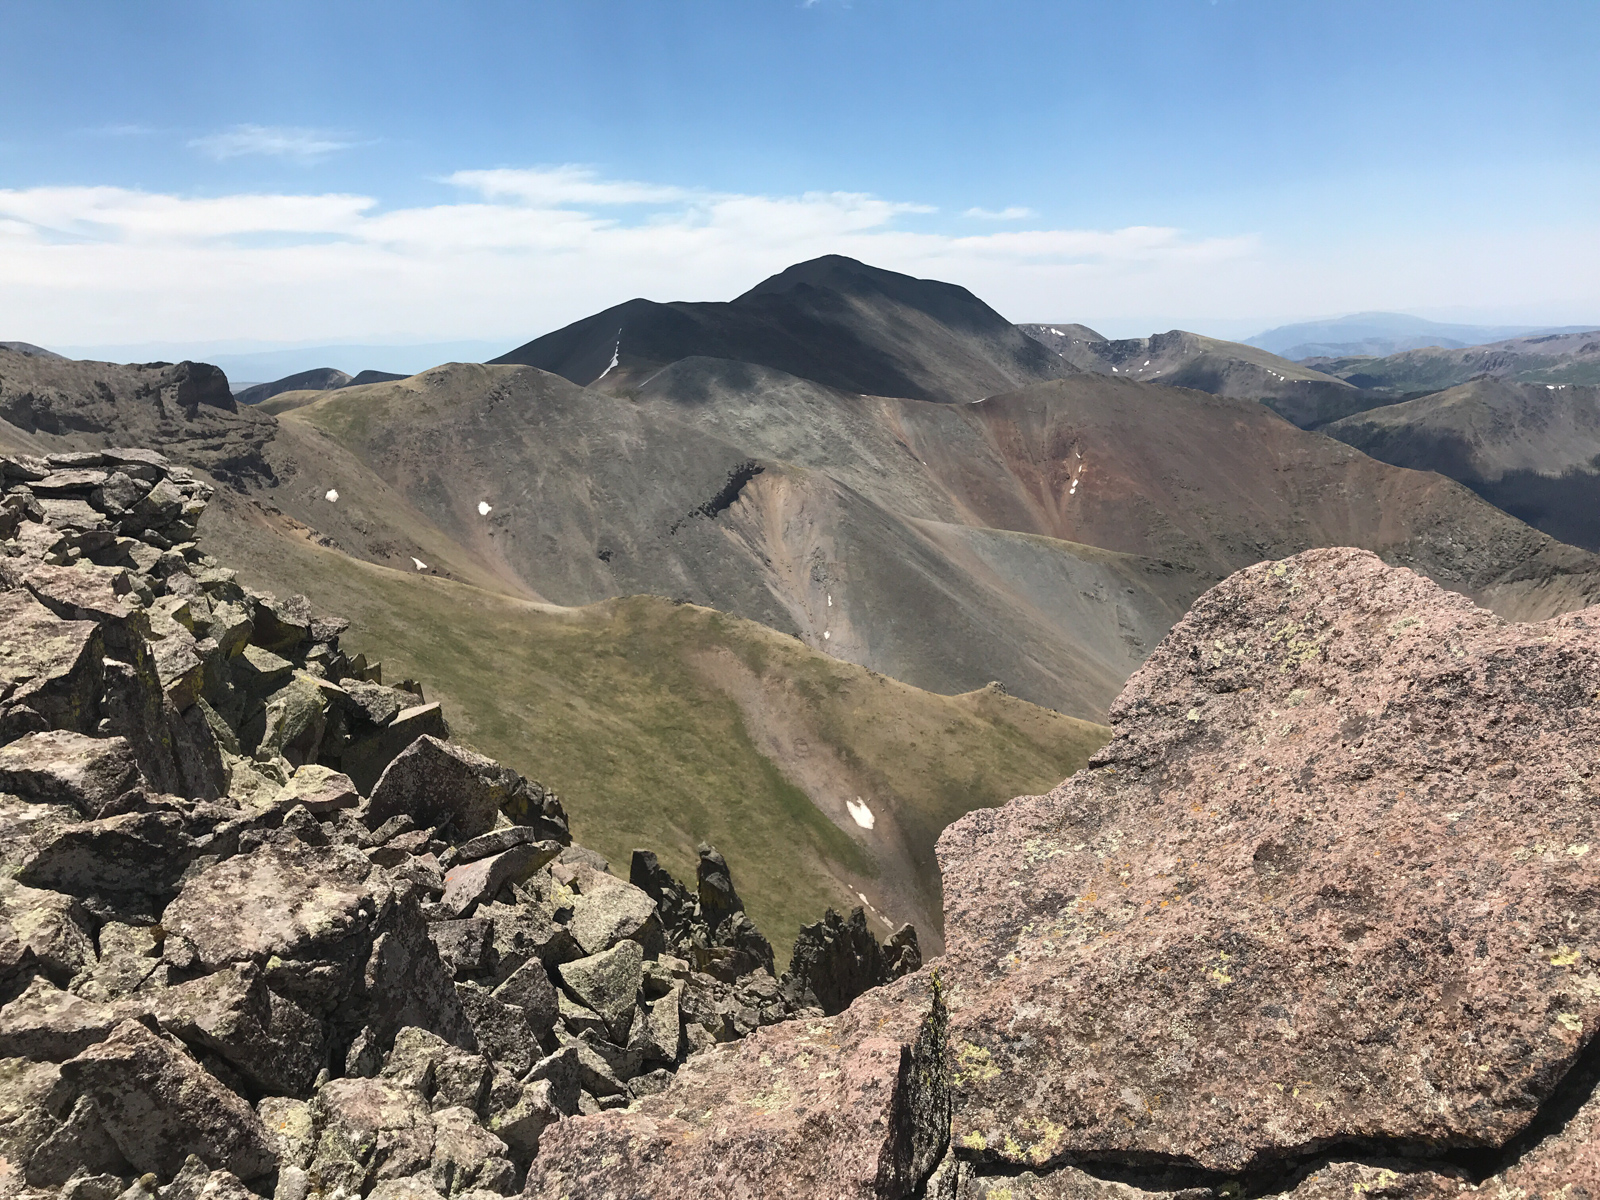
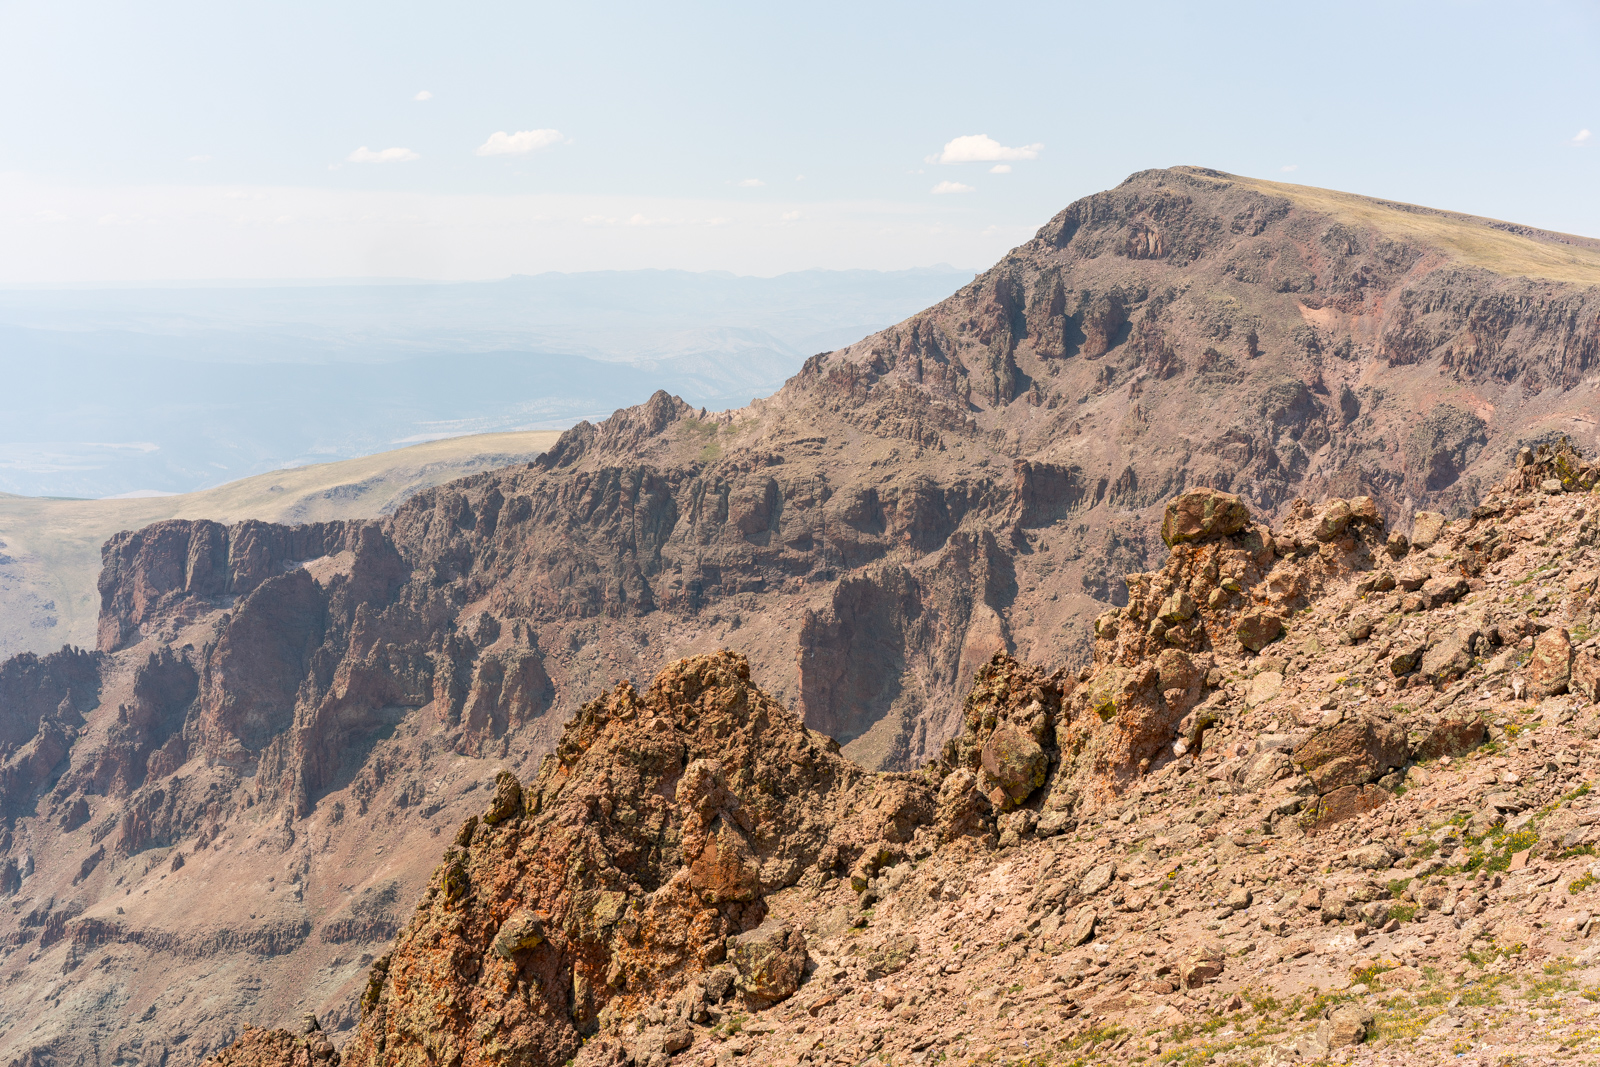
And lastly, a view looking north of Stewart (center) and Baldy Alto (right).
I took one last shot of Organ Mountain and began my descent towards Baldy Alto. It was a long way across from here and I knew that I would not find myself on a trail again for several hours. Buckle up.

Stewart was a long ways away. Forunately, the weather was looking like it would hold for the rest of the day. One less thing to worry about.
Patches of flowers were everywhere.
Uncompahgre and Wetterhorn still made me look west constantly. So damn pretty.

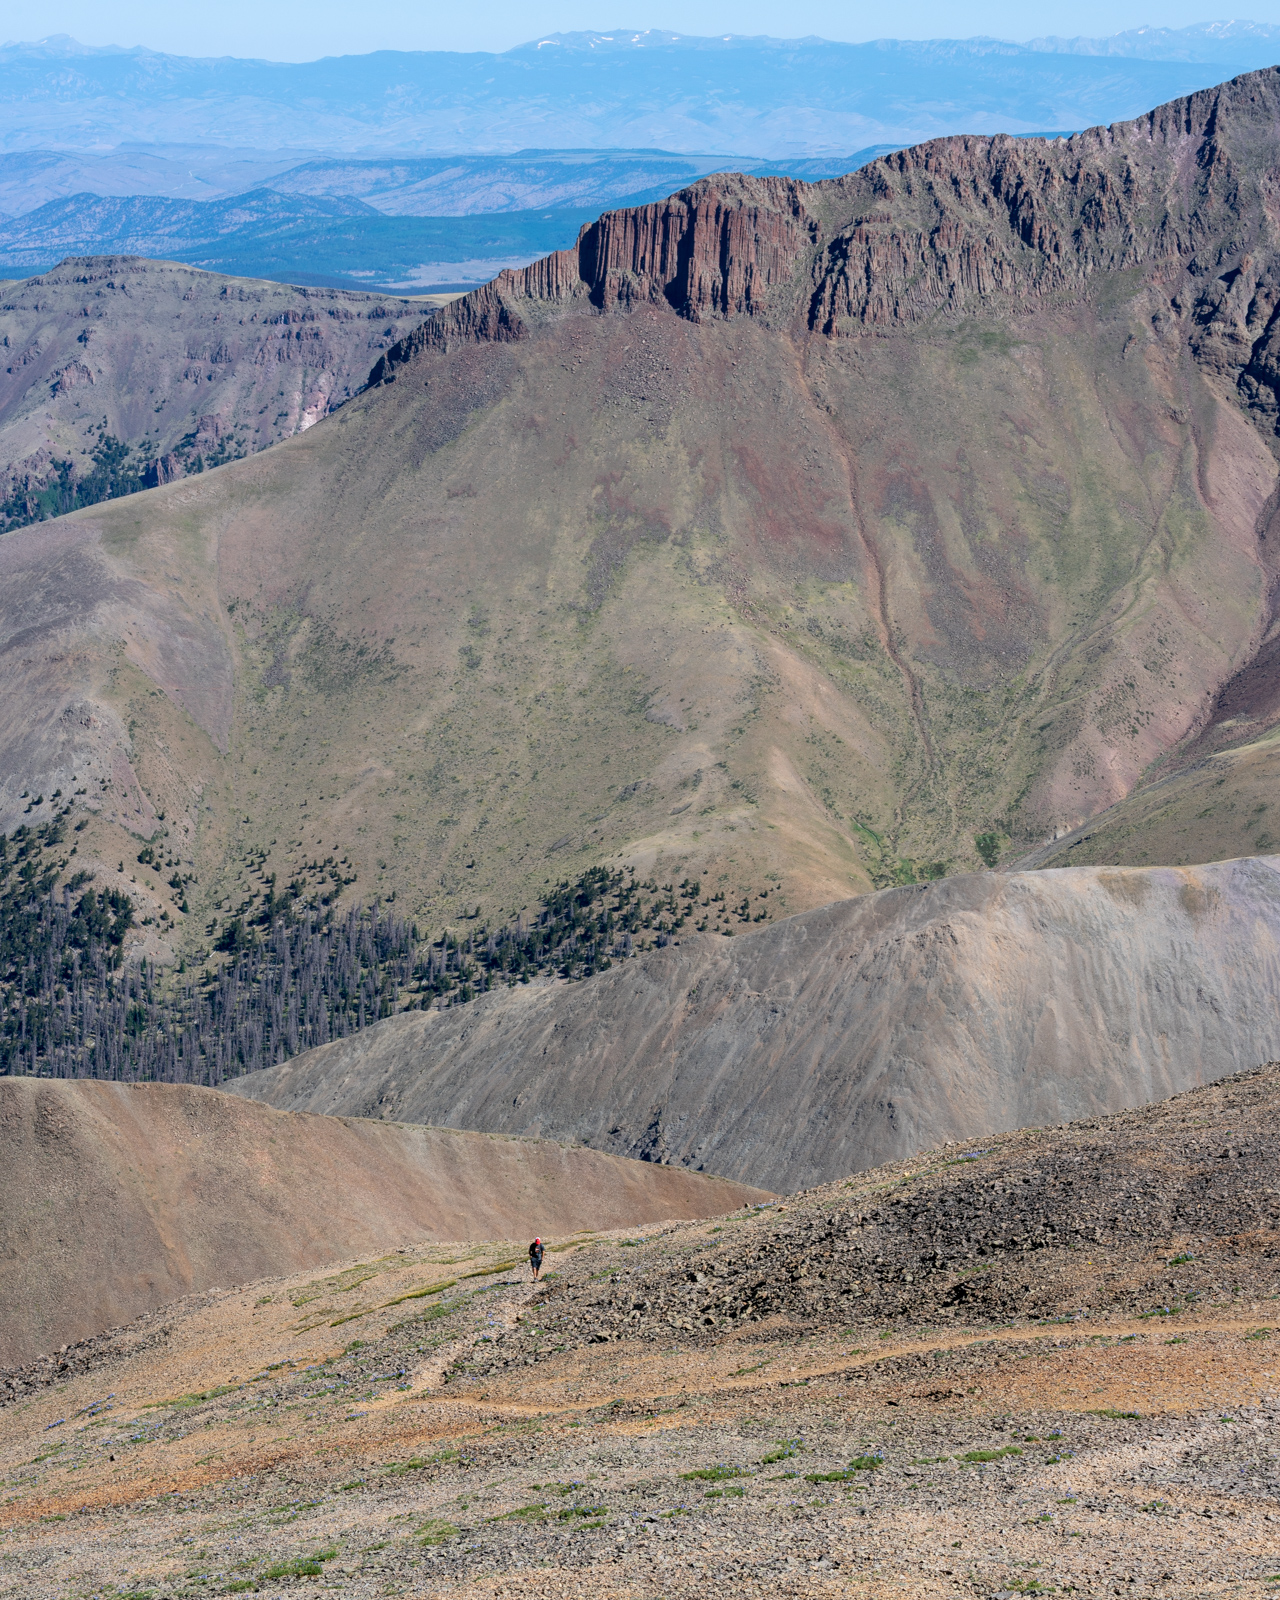
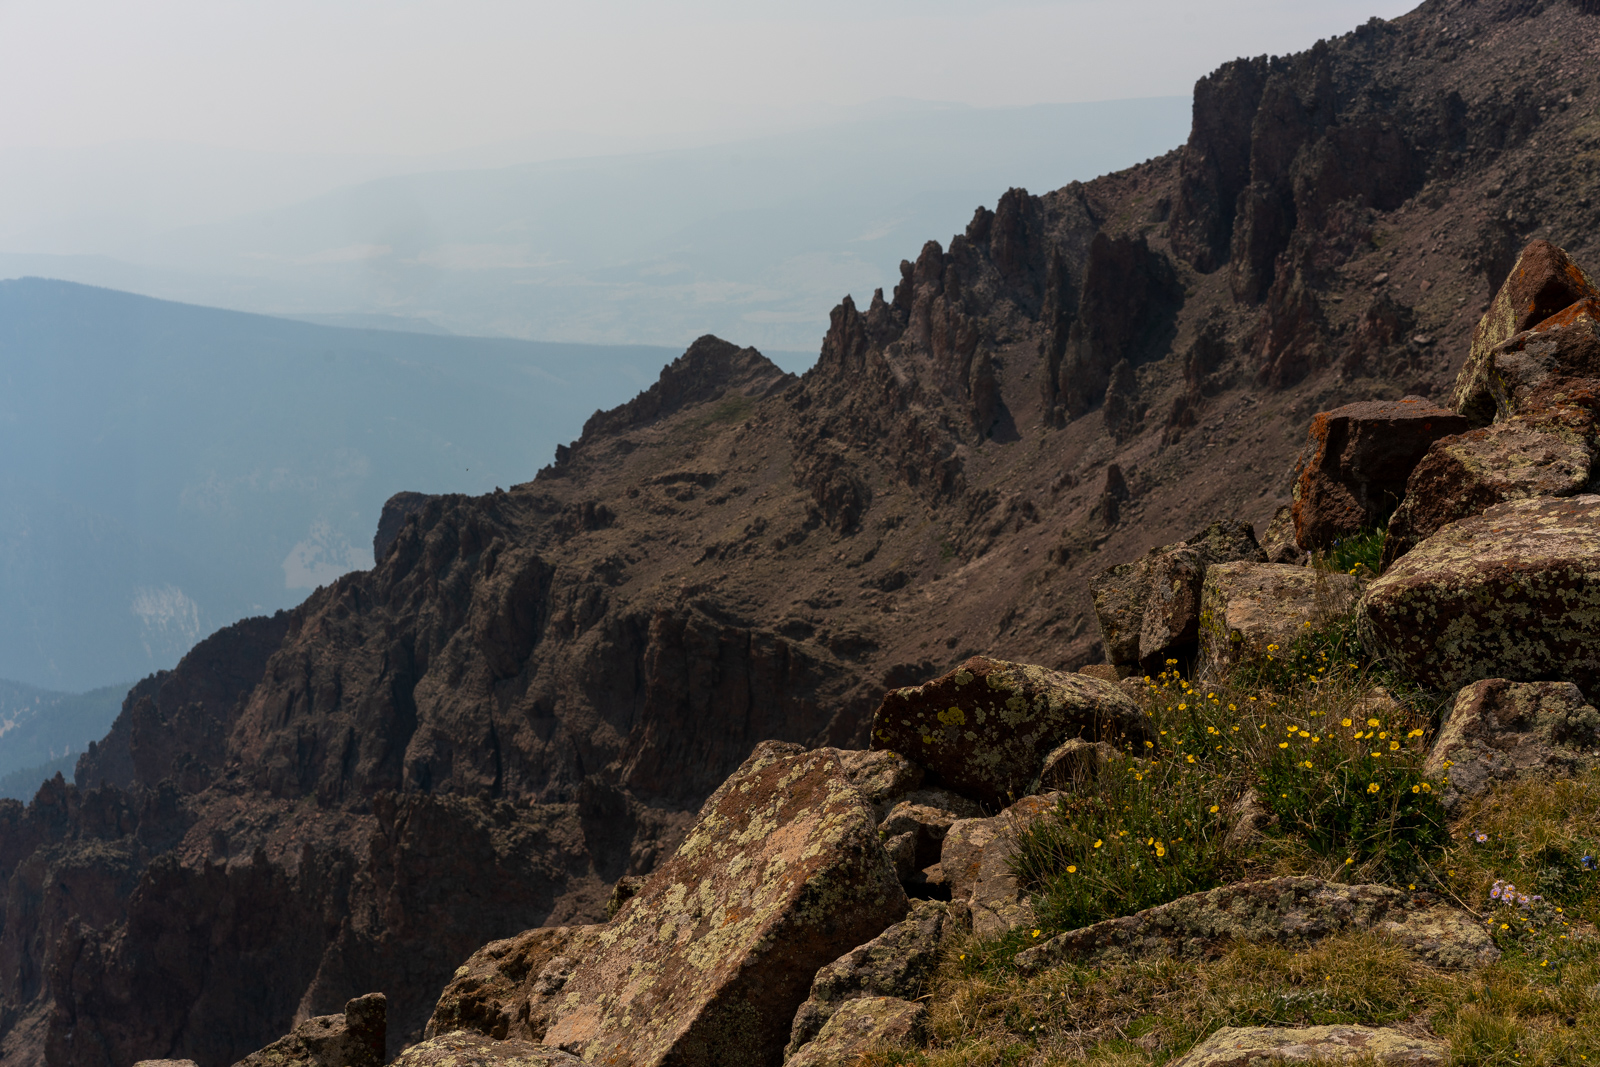
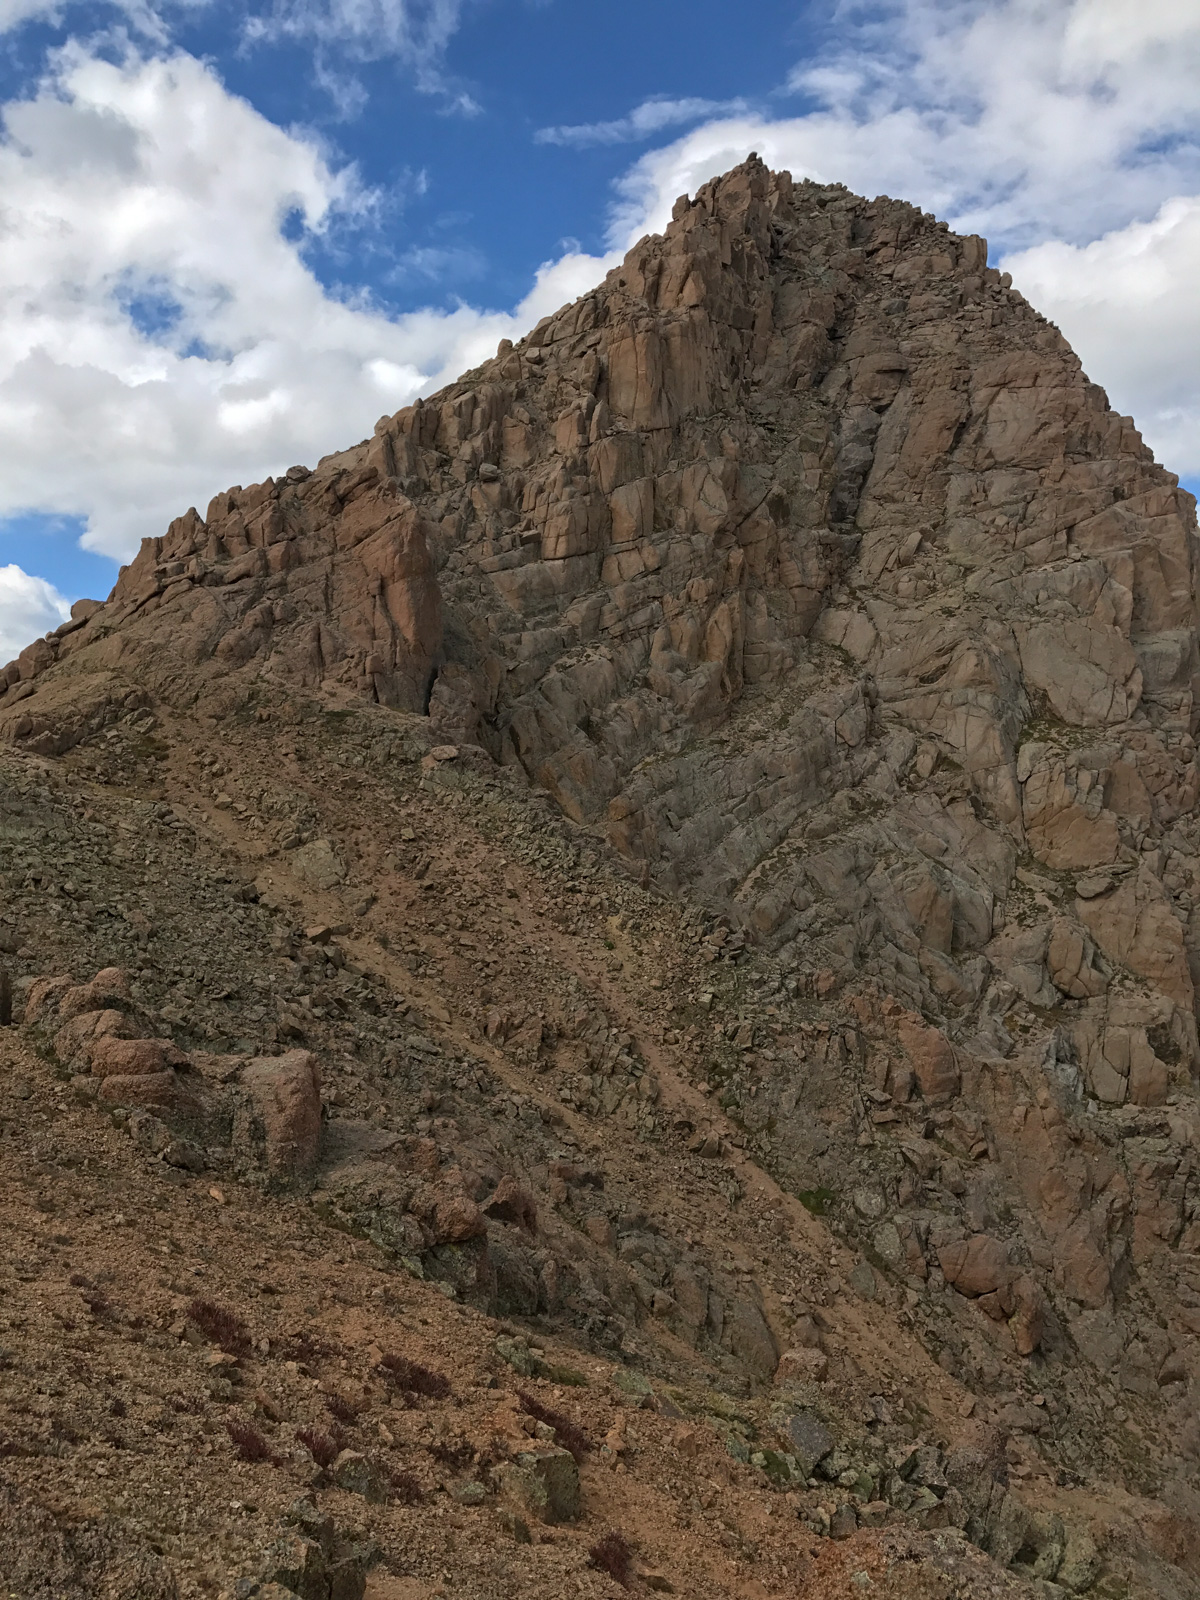
I reached the base of Baldy Alto and studied it, looking for a weakness and a route up. It seemed like it was pretty solid all the way up, so I just decided to make small switchbacks up the very steep rock and dirt. It worked without any issues.
There were some really gnarly rocks on Baldy Alto and the north side of the mountain was a cornucopia of conglomerate that would surely make one regret an attempt at passage.
Looking back on San Luis, I had come quite a distance to Baldy Alto and knew my journey was only just starting to get exciting. I still had a long ways to hike and the wind was absolutely brutal!
More rocks on Baldy Alto!
From Baldy Alto, I pretty much went on a straight line on the ridge towards Column Ridge and enjoyed some very steep terrain before reaching its summit at around 1:15 PM. I still felt good and knew I still had an insane amount of distance to travel before I could enjoy sleep.
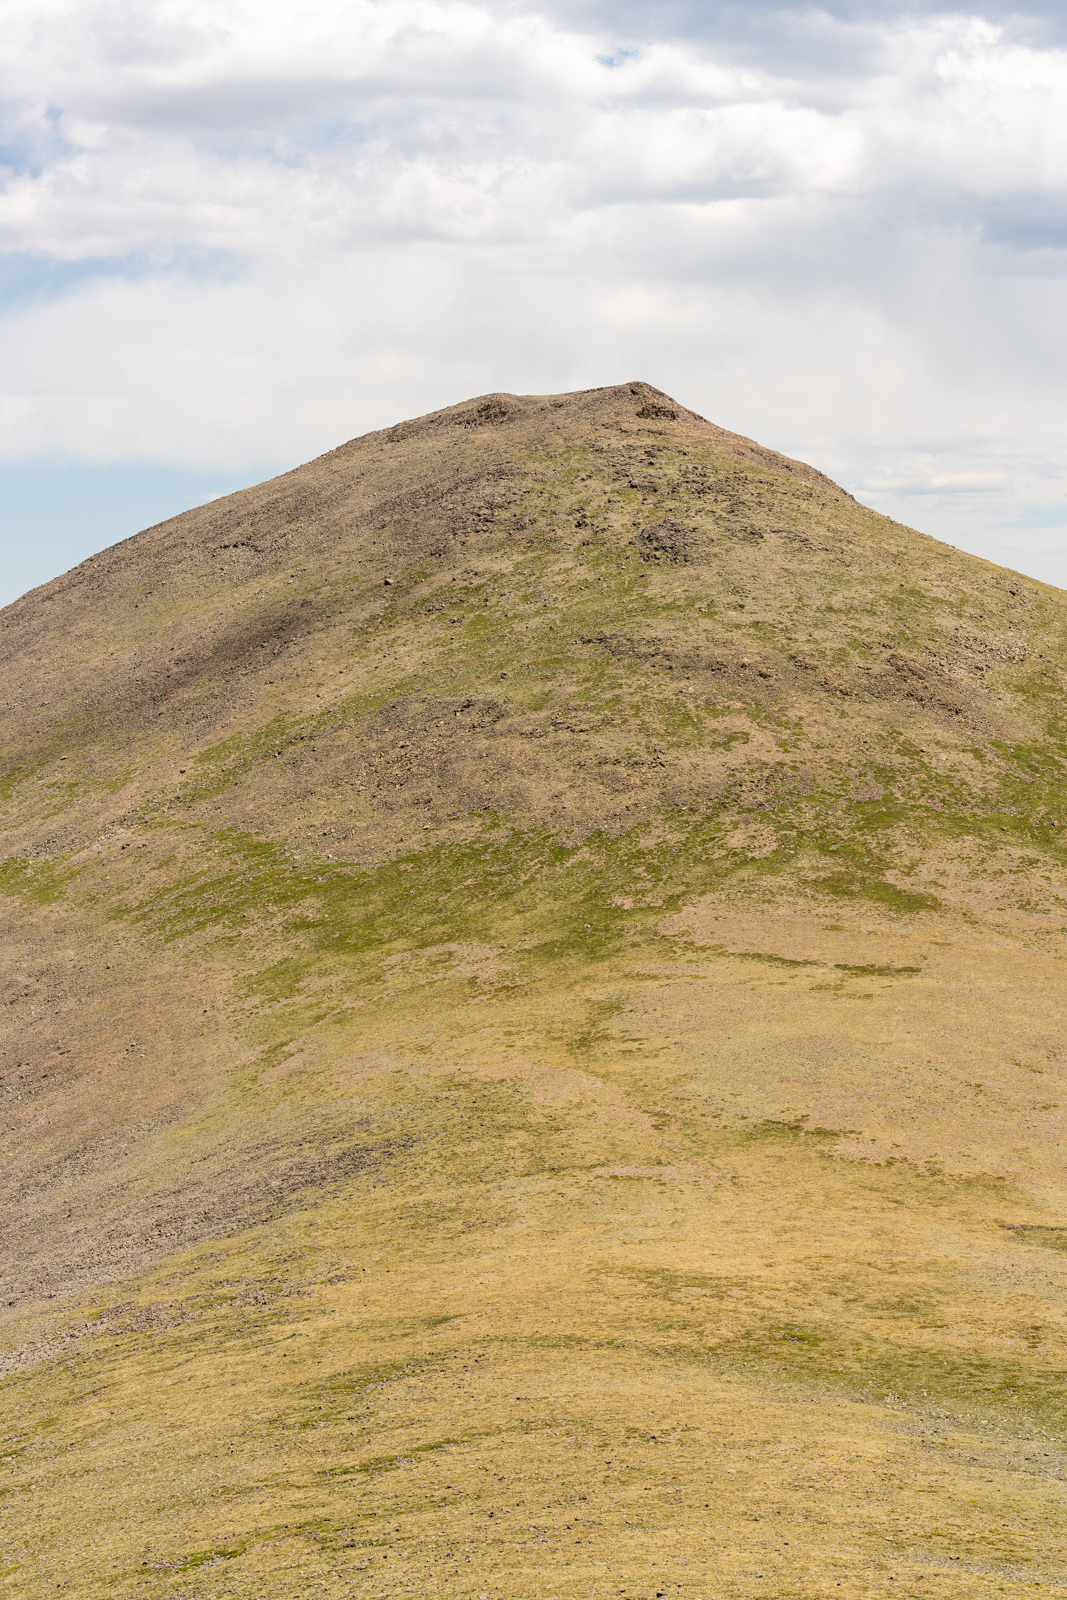
From Column Ridge, I enjoyed my view of Stewart Peak - it was so close yet so far away!
I plowed up Stewart, and foundt the summit to be quite rewarding. I noticed on the way up that there was a small herd of about 15-20 elk grazing below Stewart to the north.
I took a rest on Stewart and notified my friends and family that I had made it to the top of #96/100. Only four more to go!
A look back at San Luis Peak made my journey feel quite epic. I had traveled quite a long way.
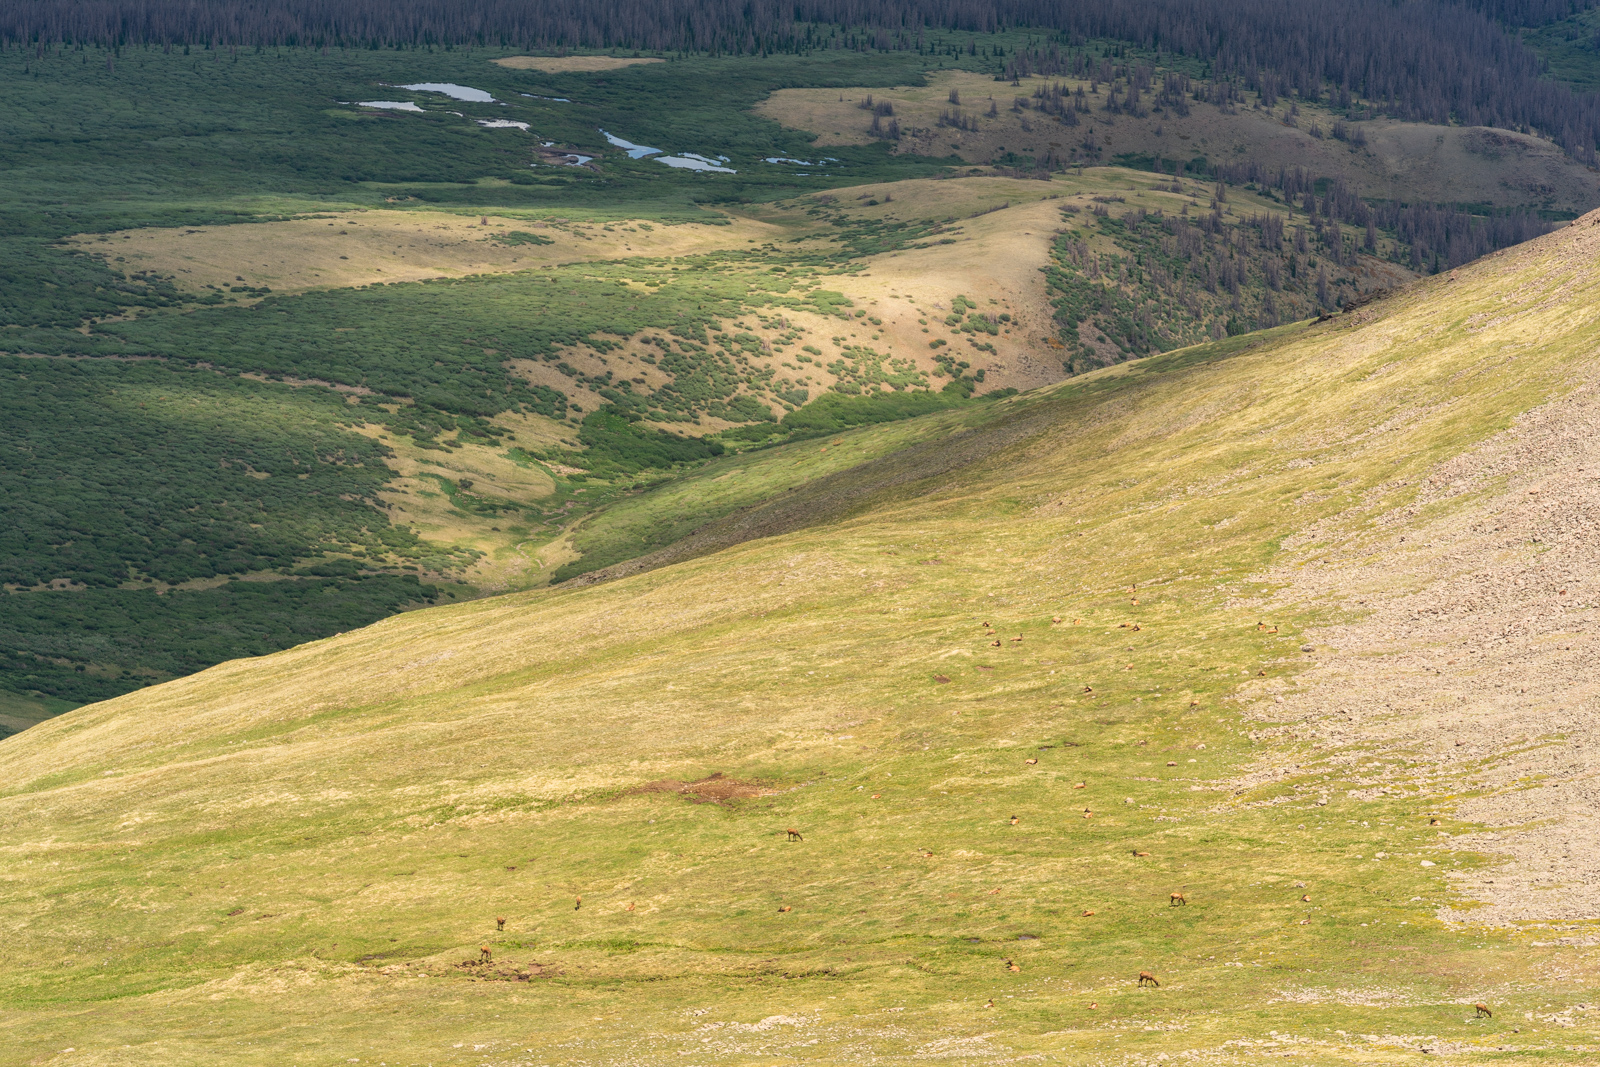
I started down Stewart and found an upper vantage point where I could photograph the elk again - they were so peaceful below me in the meadow.
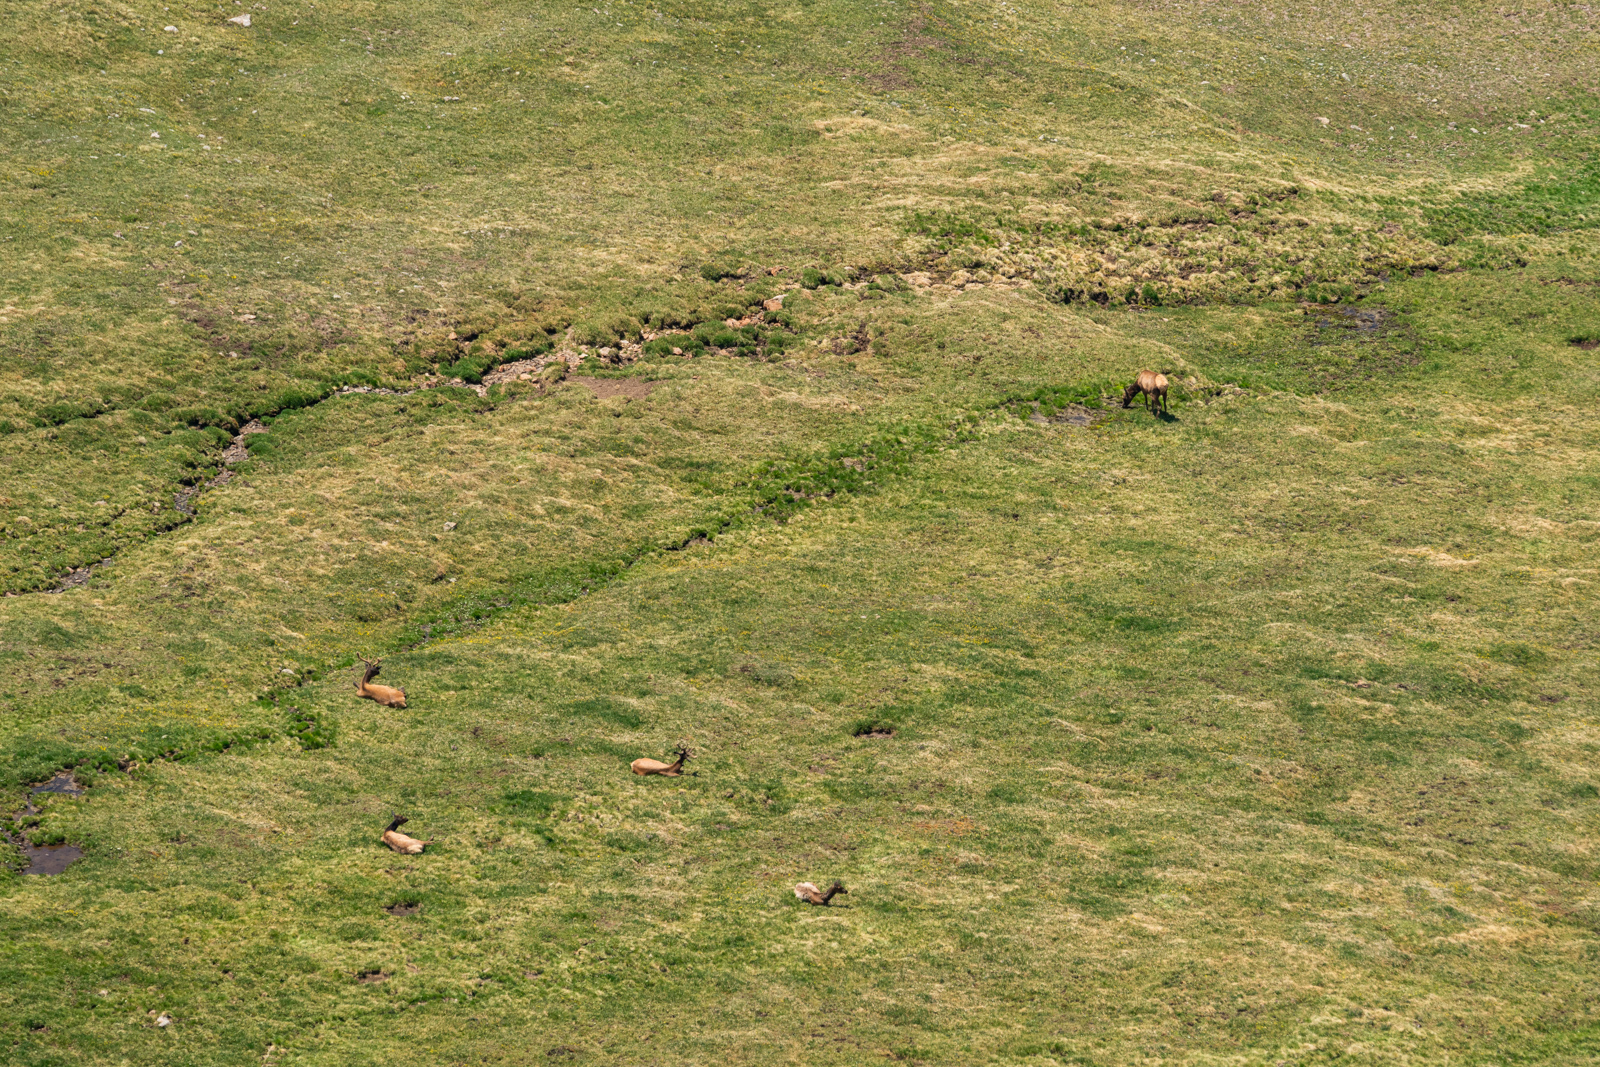
After reaching the saddle, the elk had finally noticed me and began to run. Unfortunately for them, they chose to run right towards the ridge I was heading for, so it ended up being a long day of them running away, finding a spot, running away, and finding another spot. I felt bad for them.
My next destination was a connecting saddle across the way that would take me all the way over to Baldy Chato and then to the Cebolla Trail. The smoke from the fire was starting to get worse and I could barely make out Uncompahgre and Wetterhorn to the west.
As you can see below, the saddle was a gentle rolling hillside that connected to Baldy Chato in the distance. You can make out the herd of elk below me on the right.
Forunately for me, the flowers continued to impress and the rock faces to my west kept me entertained.
The walk across the valley to the other ridge was quite long.

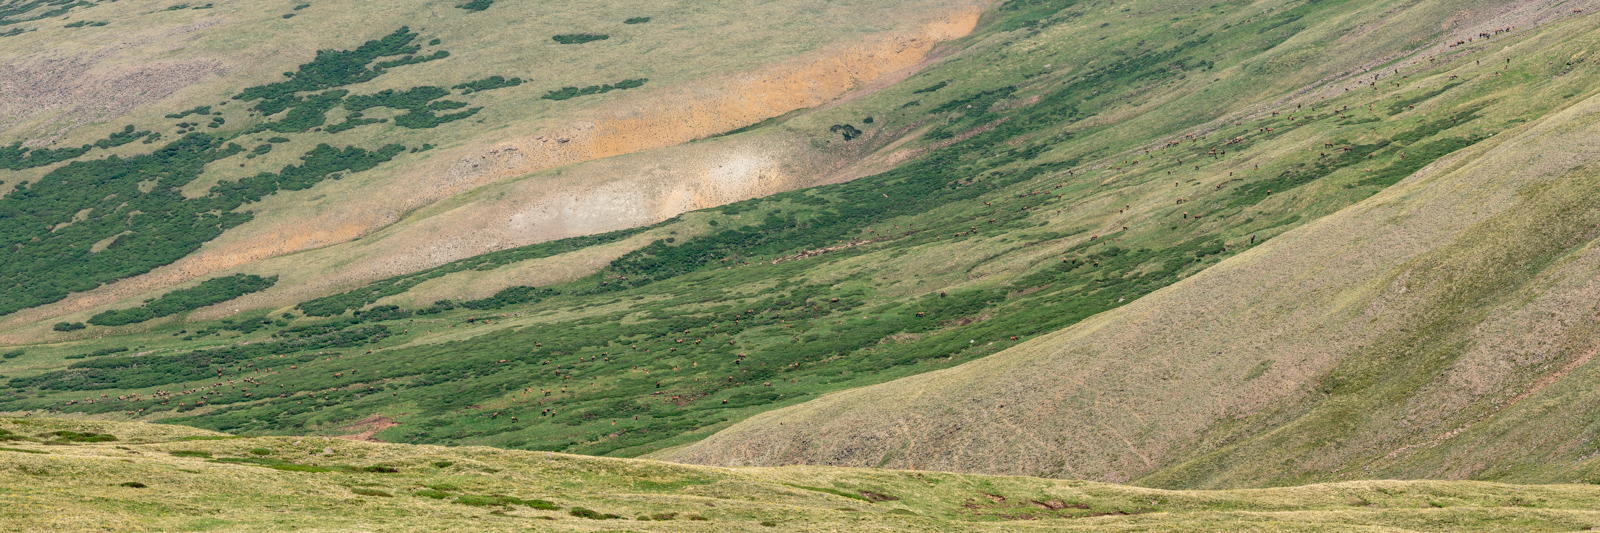
Upon reaching the other ridgeline, my view to the east opened up. Willow Mesa was filled from top to bottom with a massive herd of over 400 elk as illustrated in the telephoto panorama below. How many can you count? It was truly one of the most unique scenes I'd ever seen in all my life.
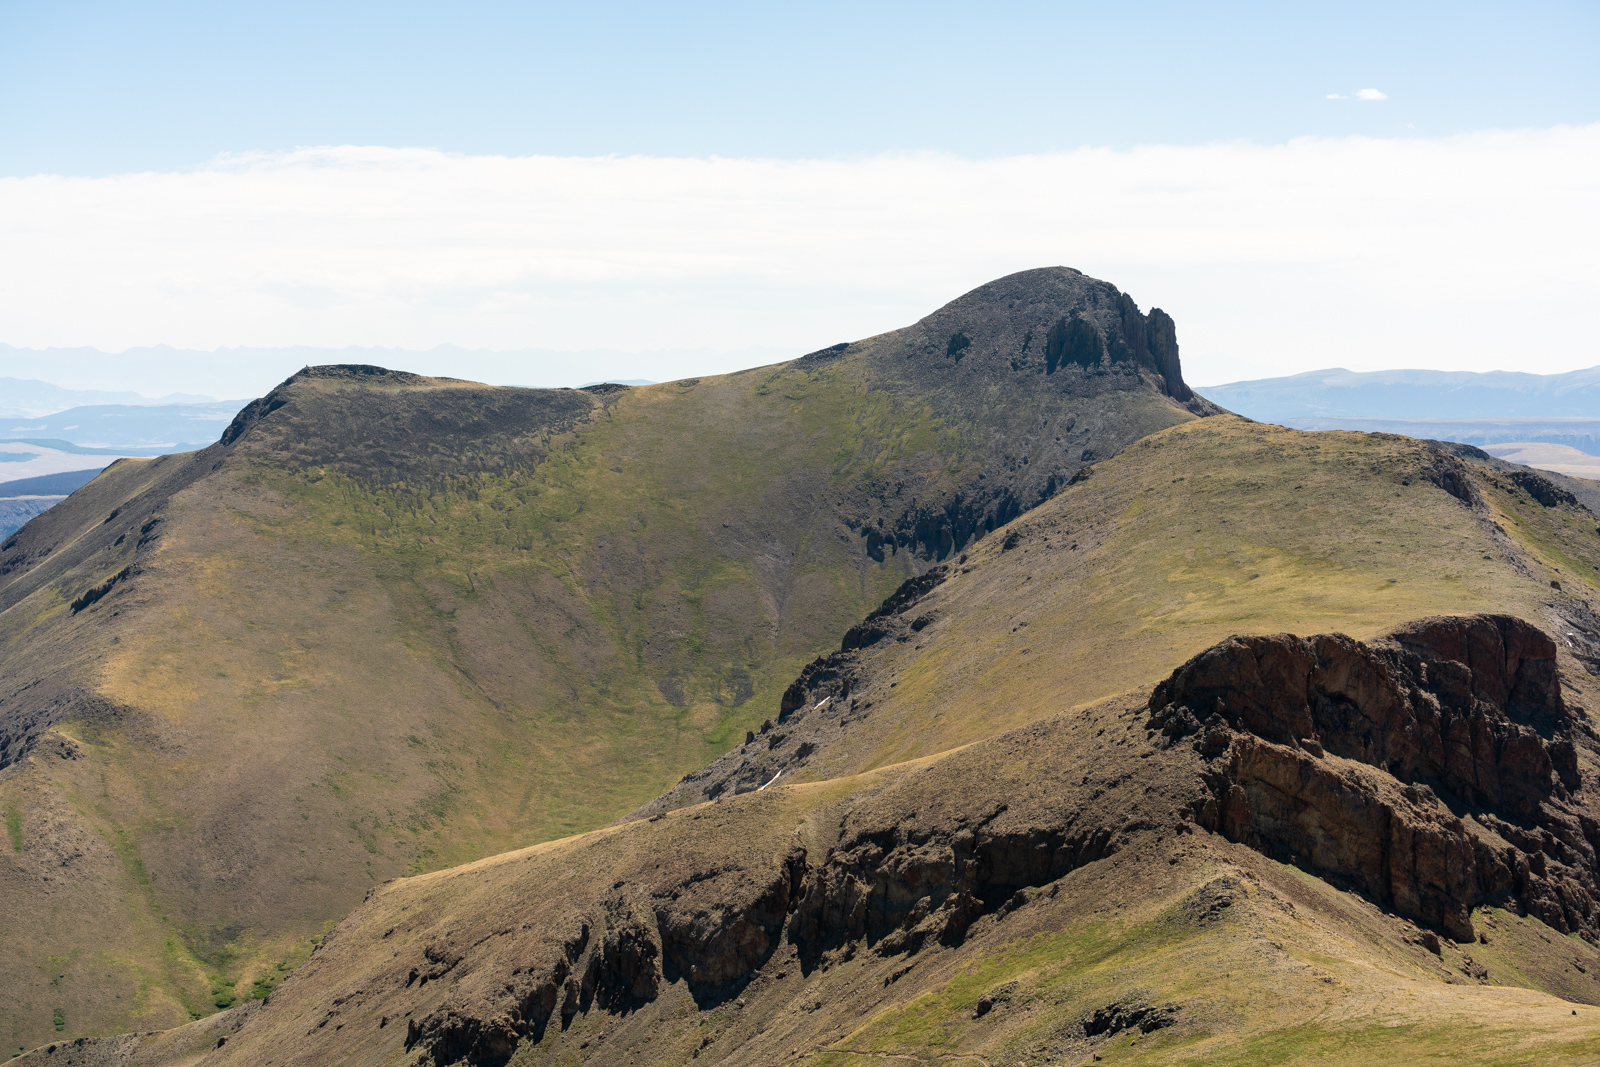
I enjoyed watching the elk for a bit and continued my way over towards Baldy Chato, which was quite a long ways away. Baldy Chato is spanish for "stub nose" as you can probably see the resemblance of below.
Having made a lot of progress towards Baldy Chato, looking back on Stewart showed how far I had come and also illustrated just how hazy it had become. Yuck.
The haze dominated my view and my lungs and was not very fun.
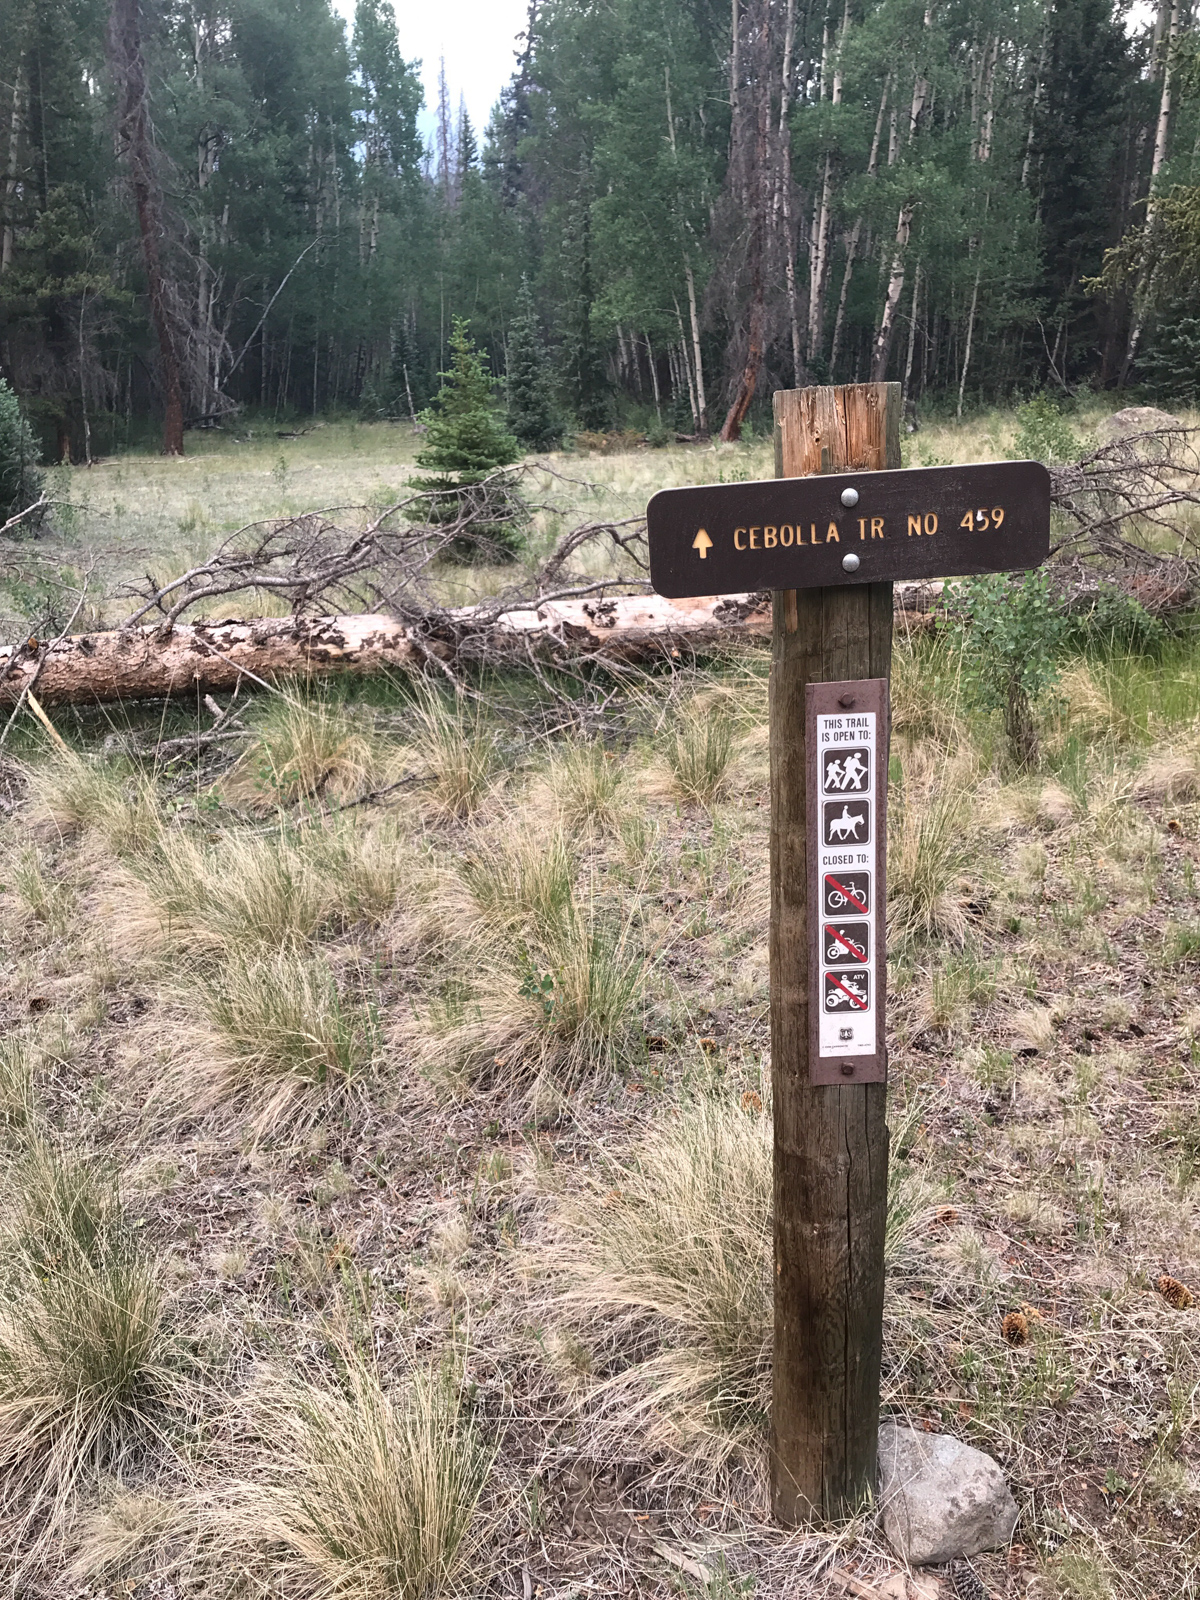
I finally reached the summit of Baldy Chato and climbed down to the trail intersection for the Cebolla Trail. I believe that Cebolla means Onion in Spanish and I had always wondered why the trail was called this. As I ventured down the very steep Cebolla Trail, I began to see the resemblance of an onion in the rock outcroppings below Baldy Chato. Or I was really tired. Either way, I found the rocks to be really awesome to look at and they kept my brain going for a good long time on the steep descent of the Cebolla Trail towards Bondholder Meadows.
I decided to stop and get a nice vertical panorama of the rock feature, which impressed the heck out of me.
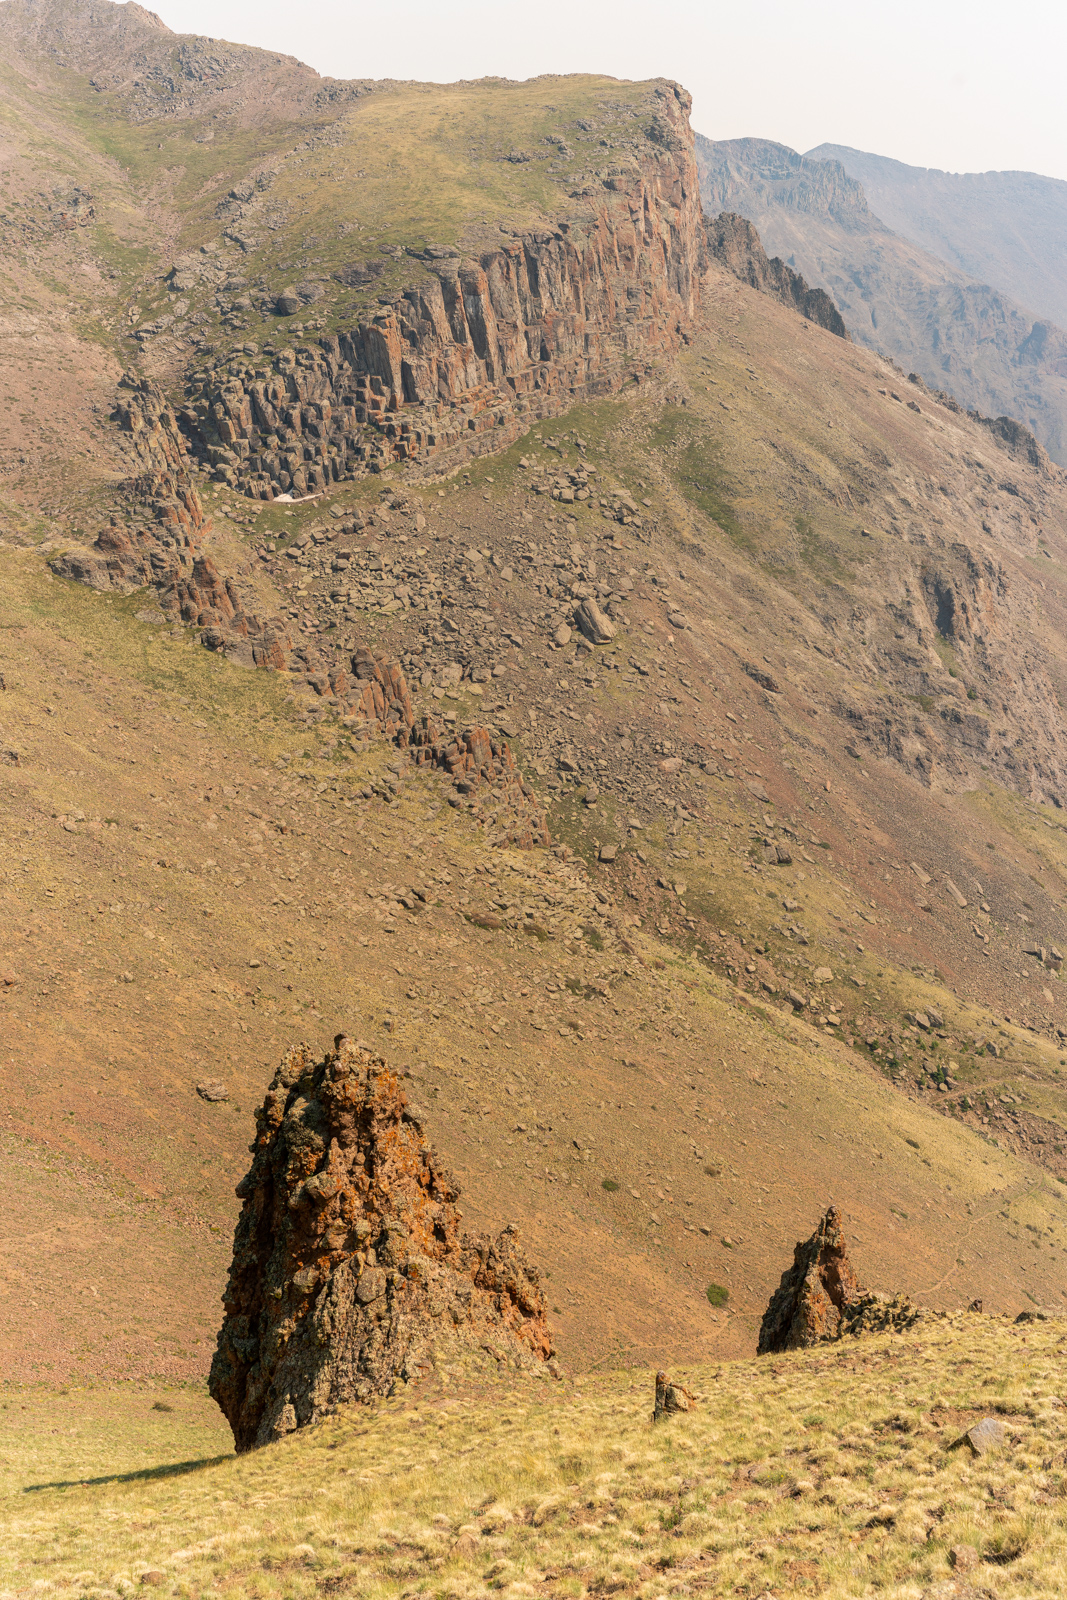
It kept my gaze for a very long time...
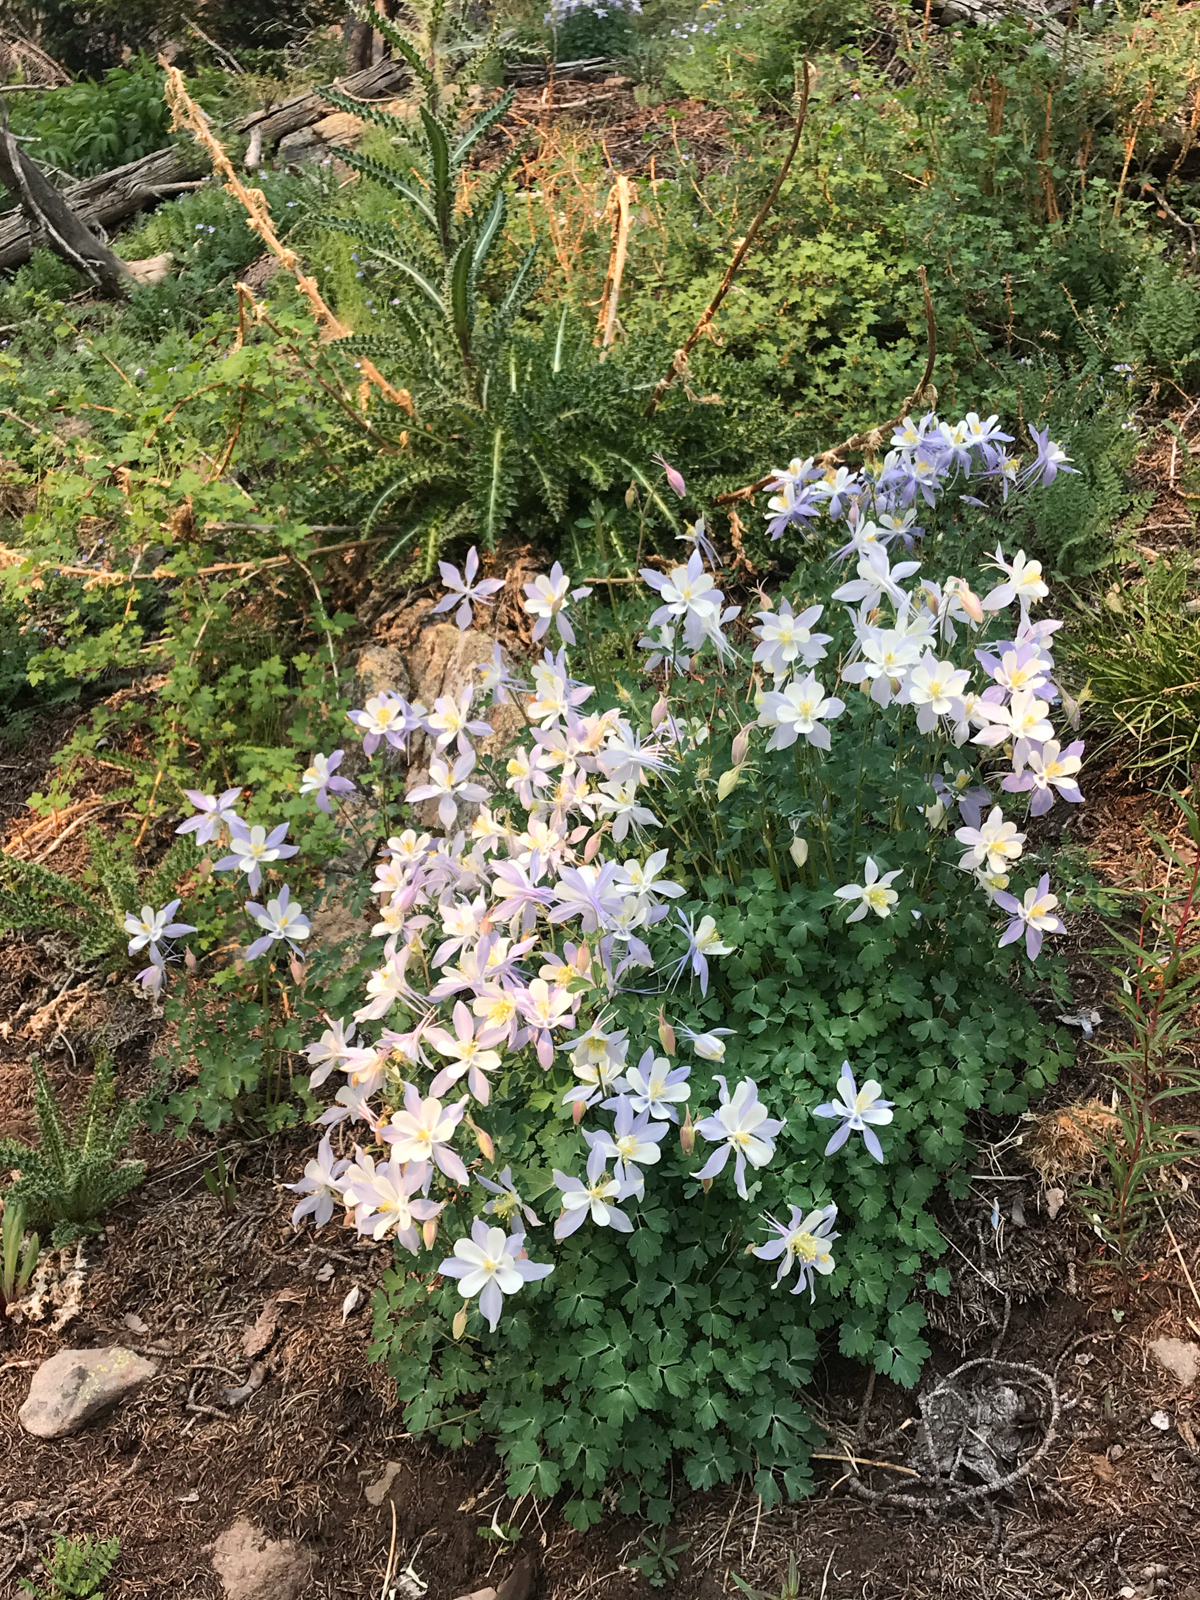
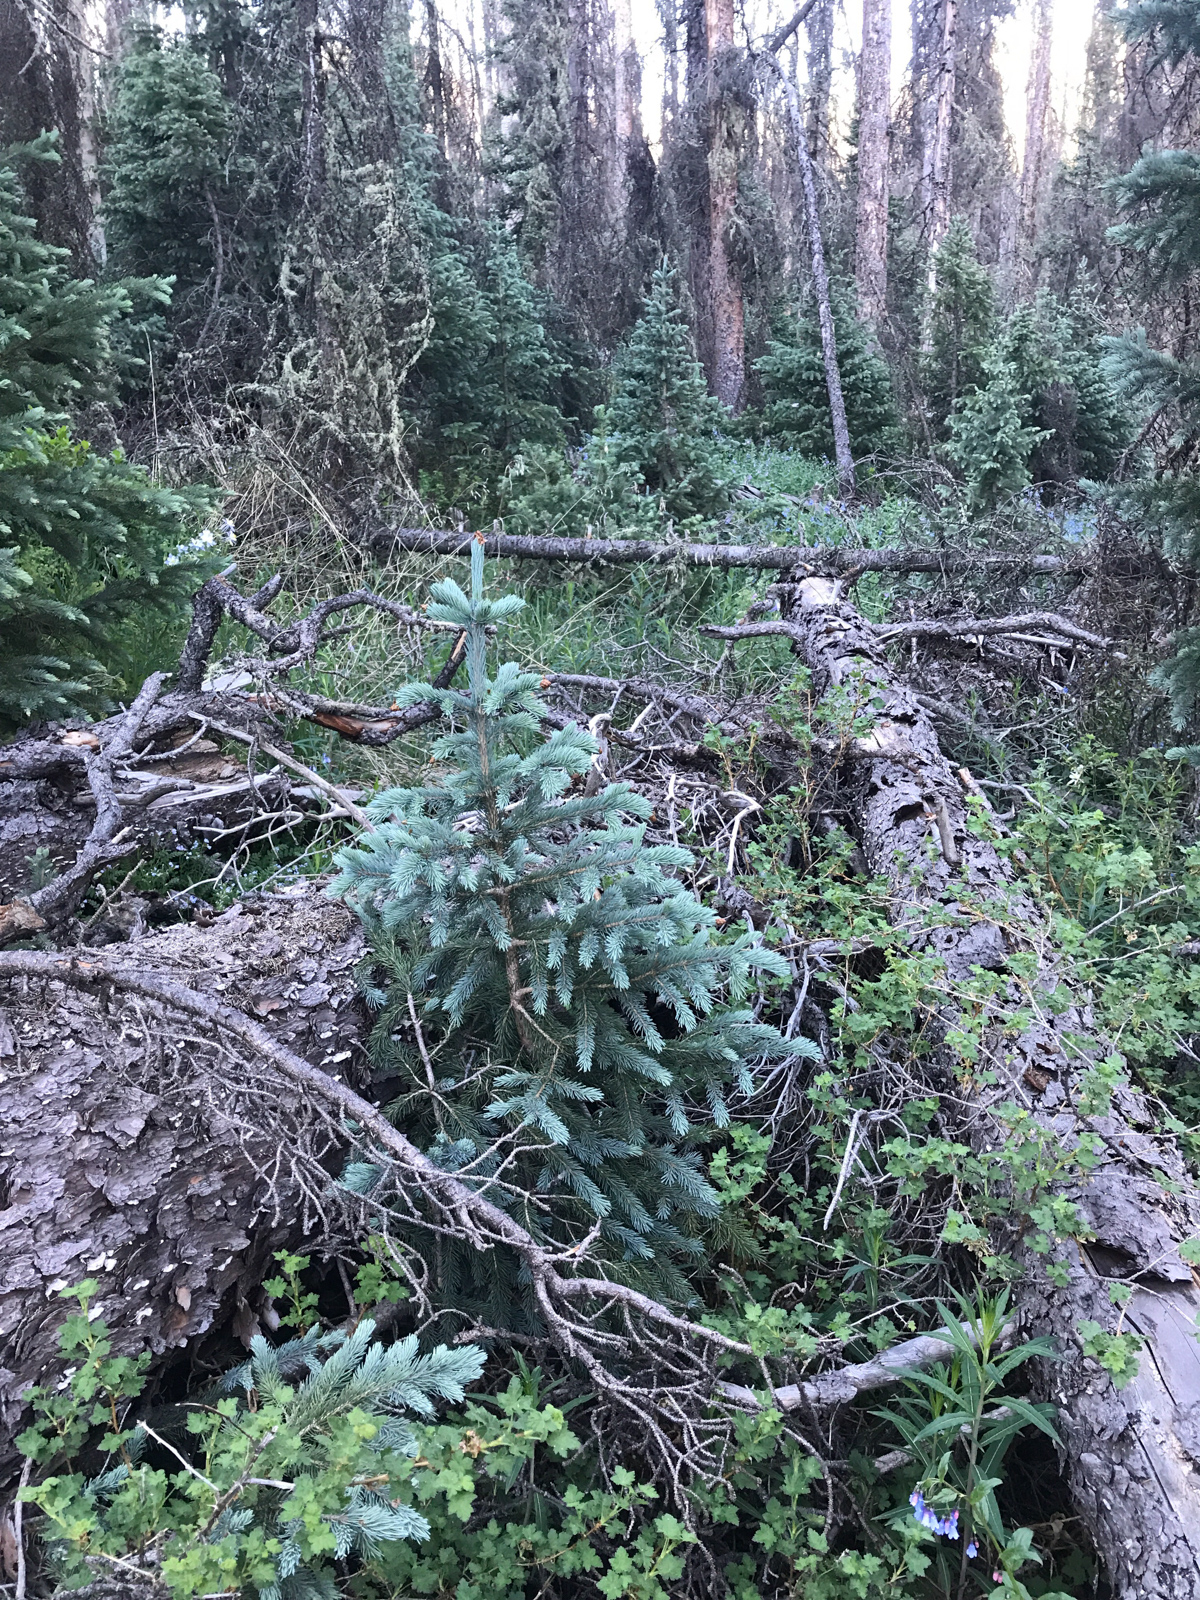
I finally reached tree-line (holy cow, I was above tree-line for almost 20 hours) and found myself on the worst kind of trail imaginable - one that barely exists. I had to pull my phone out to look at Gaia GPS almost every few seconds because I kept losing the trail, almost all the way down to Bolnholder Meadows. It was really dense vegetation and difficult to find ways through. There was significant downfall (fallen trees) and it appeared that the only people that had used the trail in recent memory were sheepherders. At one point I found myself staring at a huge patch of grass that had been laid in the night before and my mind could only conjure a black bear lying there. That's the nature of hiking alone - your mind goes crazy. Fortunately, the patches of Columbine I found were world class and some of the largest I had ever seen.
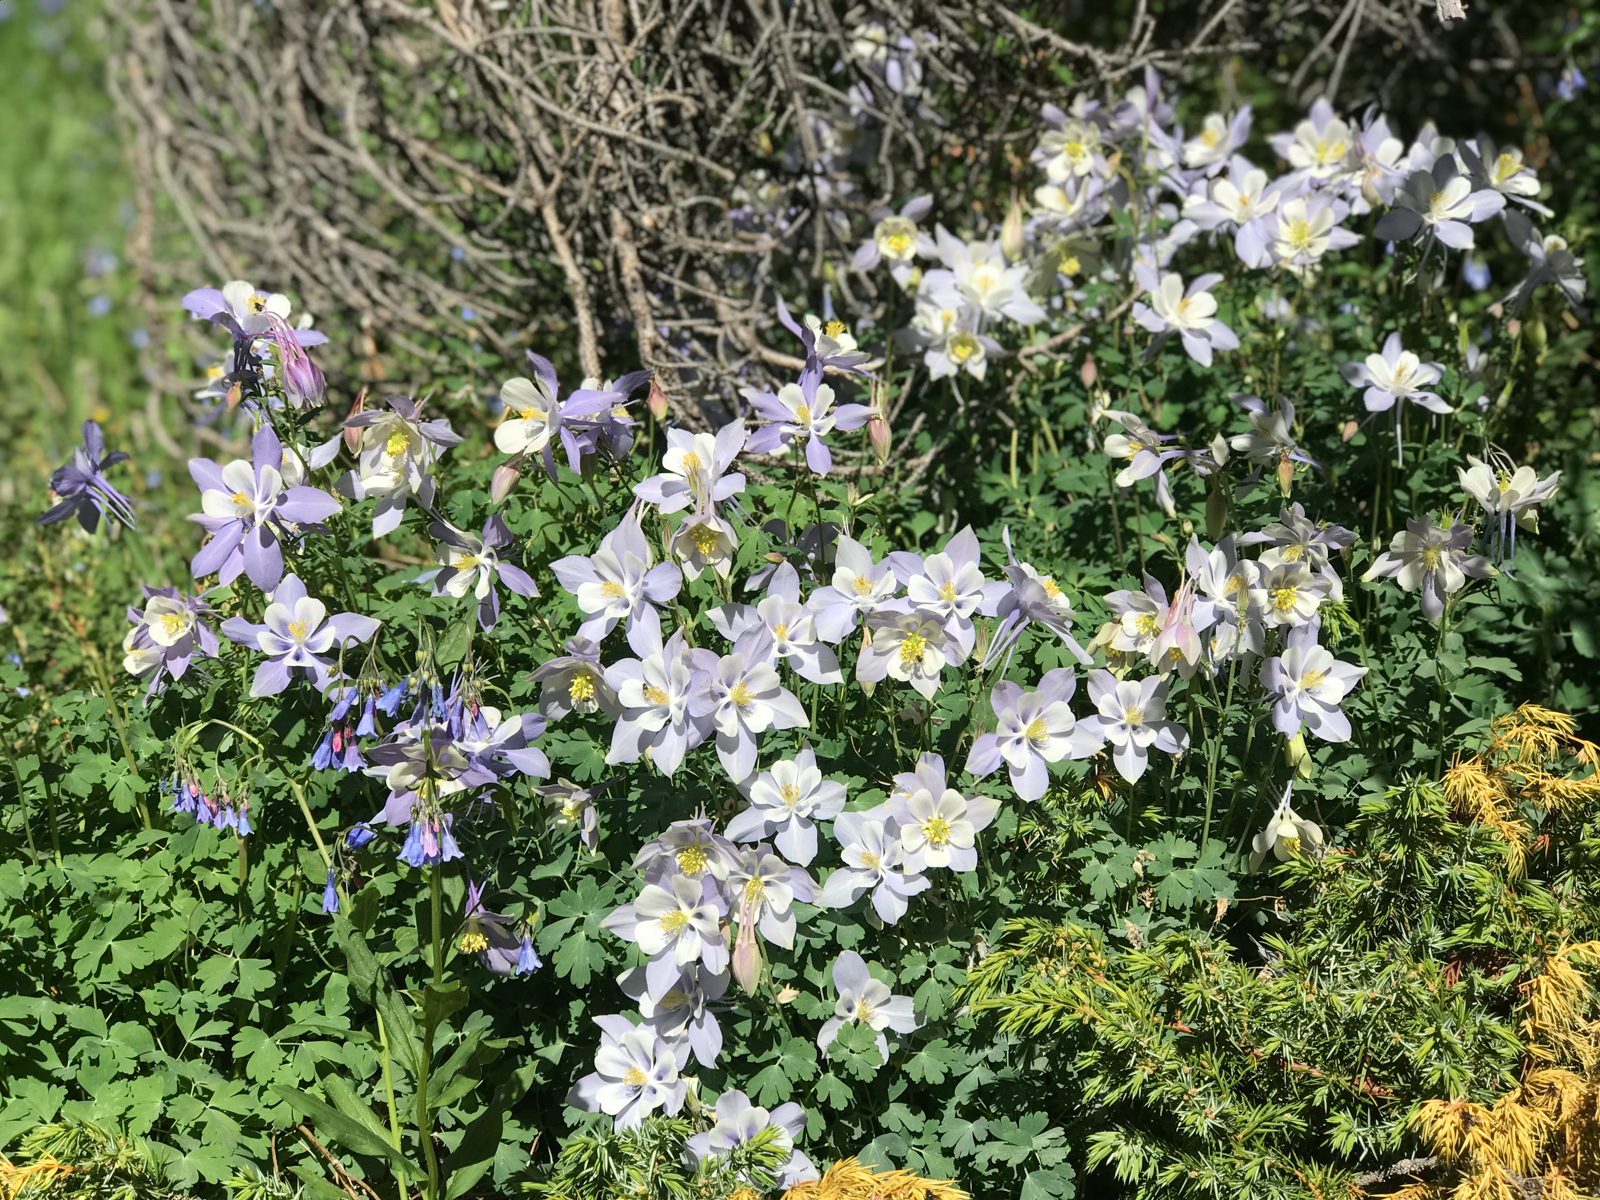
I can't say I'd ever seen such a large patch of Columbine before.
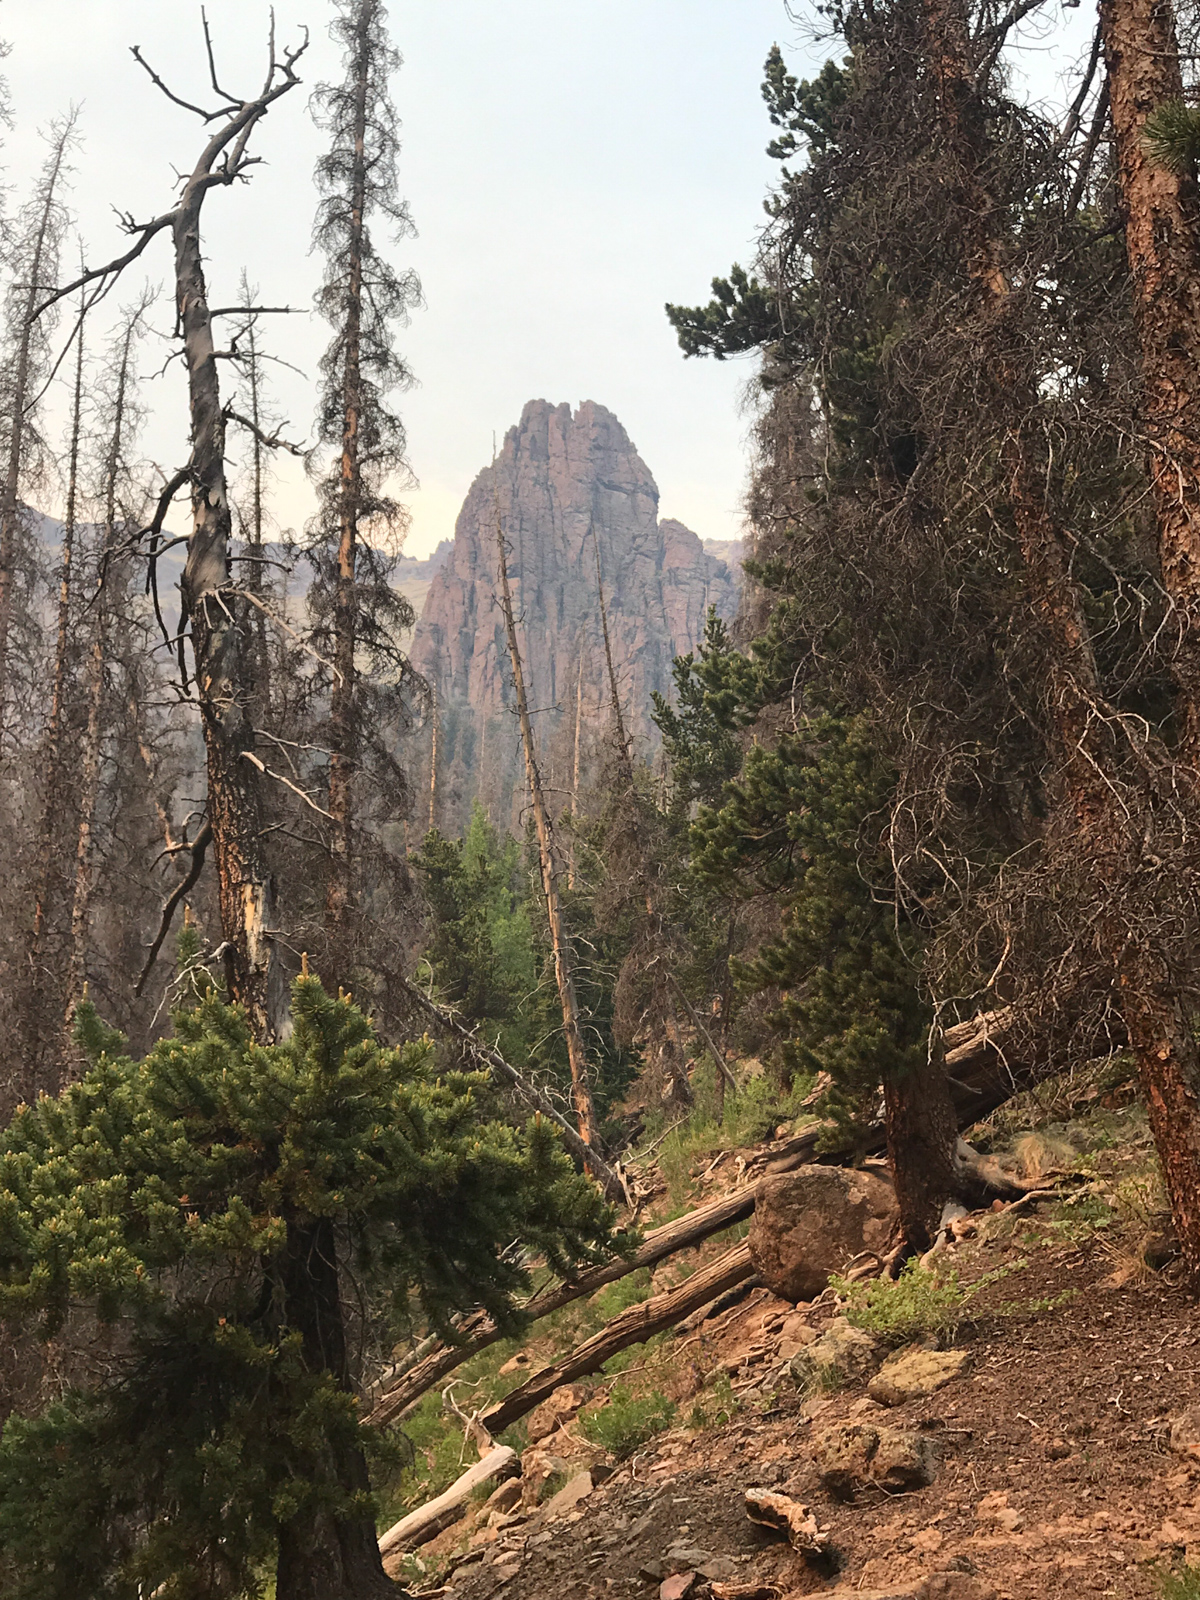
There were huge rock spires in several directions, making for a very unique experience.
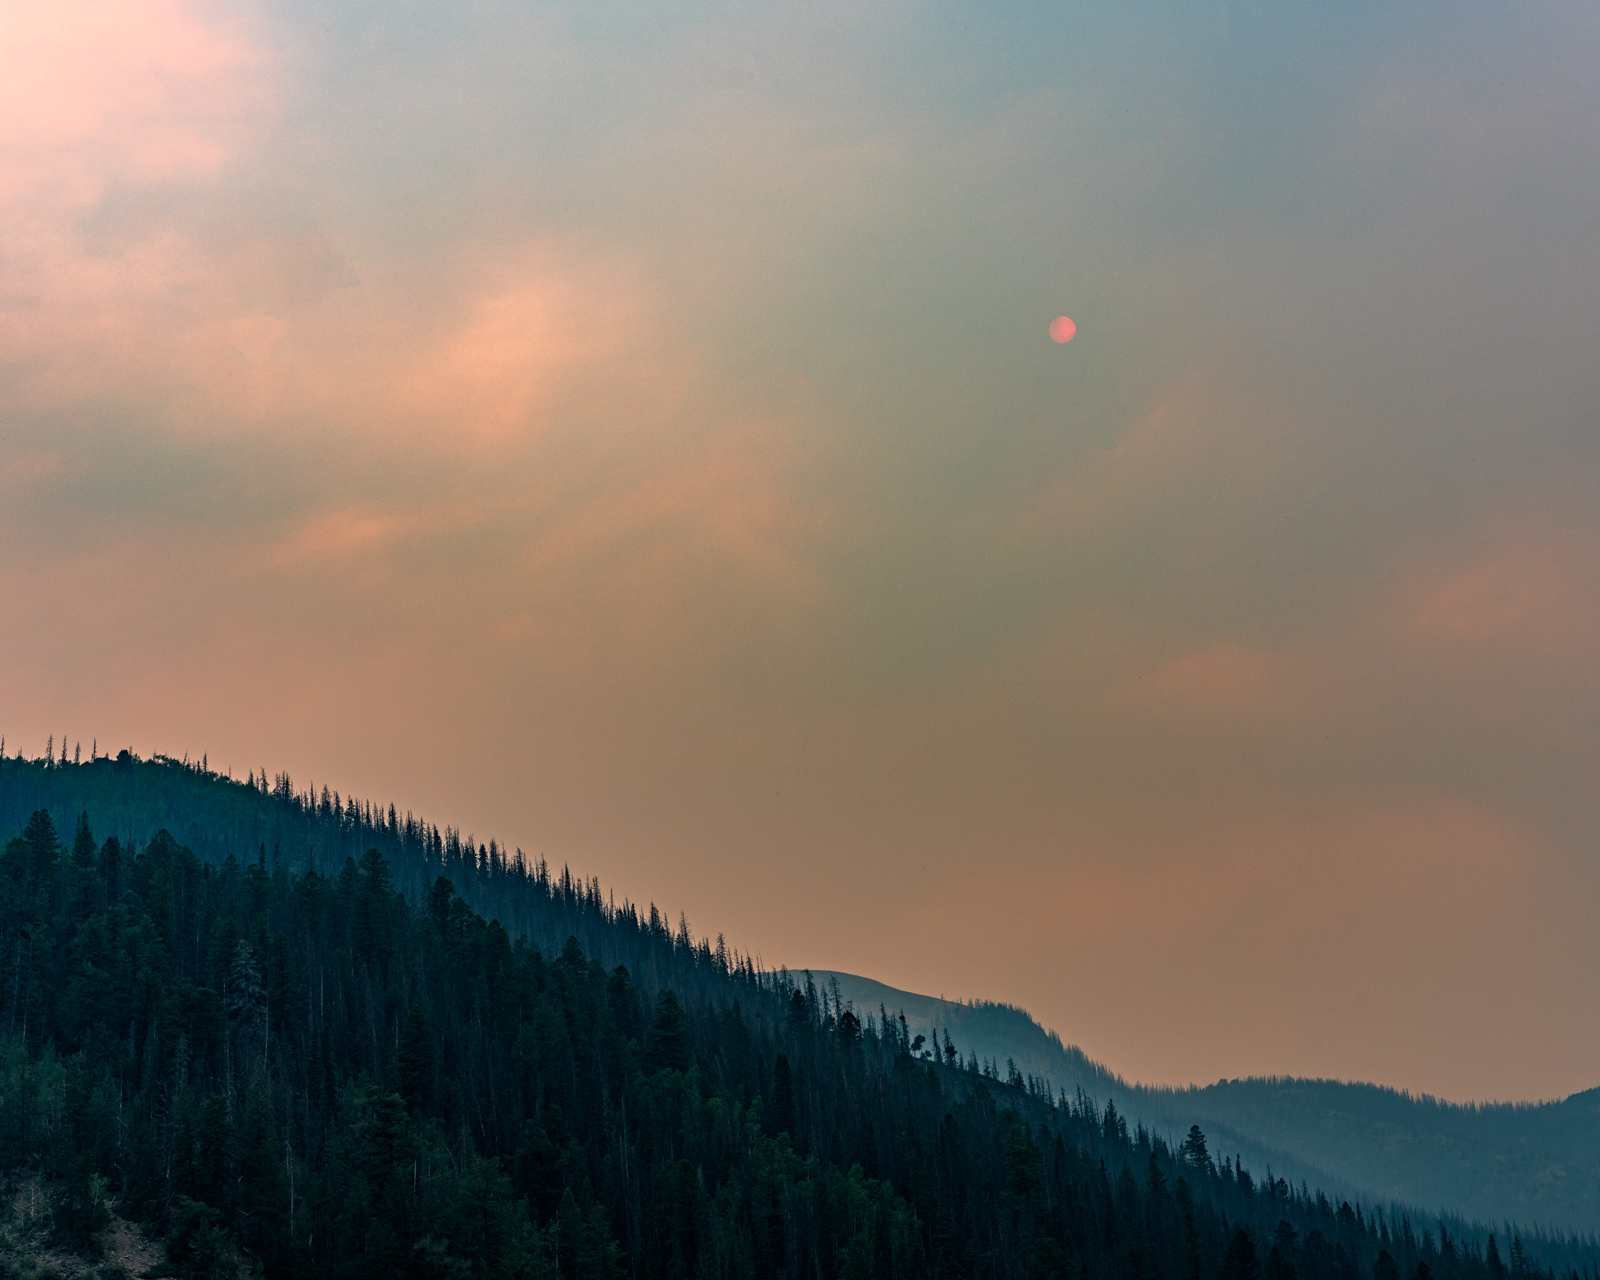
The later it became, the more smoke filled the air. I was not looking forward to sleeping in this haze.
At one point, the smoke was so think that it obscured the sun, coloring it red.
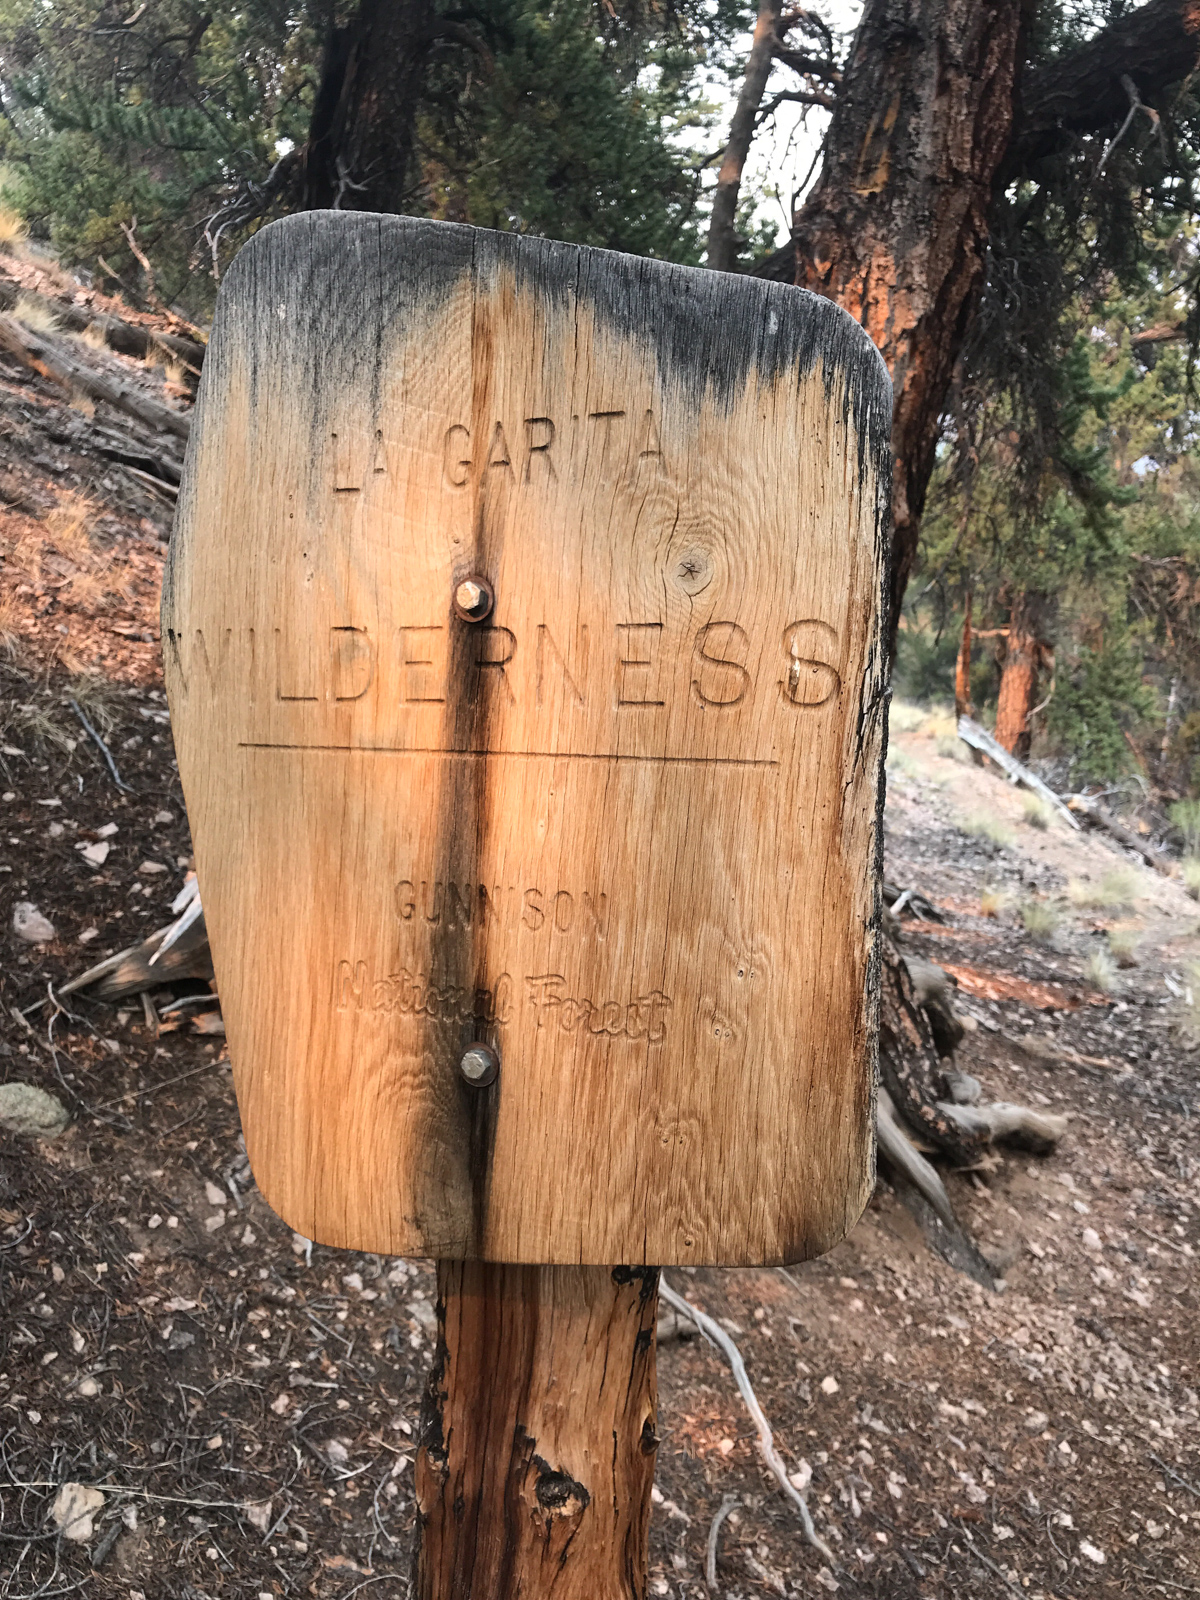
As I said before, the trail was really difficult to follow for almost the whole way down to Bondholder Meadows. I did find a Wilderness boundary sign which told me I was on the right track. Also, thank god for Gaia GPS.
I finally found the intersection of the Cebolla Trail and the Bondholder Trail at about 6 PM and was feeling exhausted. At least I knew the terrain for the rest of the day would be flat.
In doing my research about this area, I was not sure what I would find in Boldholder Meadows. It looked like there was ample water and a lot of flat area for camping. When I arrived, the whole area opened up to show that it was filled with cattle grazing on private property behind a gated fence. I knew that forest service access was on the other end of the valley, so I knew that I was not really trespassing as they are required to provide access to the trail... or at least that's what I told myself. If you own that property and I was trespassing, I'm sorry, I had no idea and I absolutely had to make it to the Cascade Creek trail at the end of the valley to make it back up to San Luis Pass.
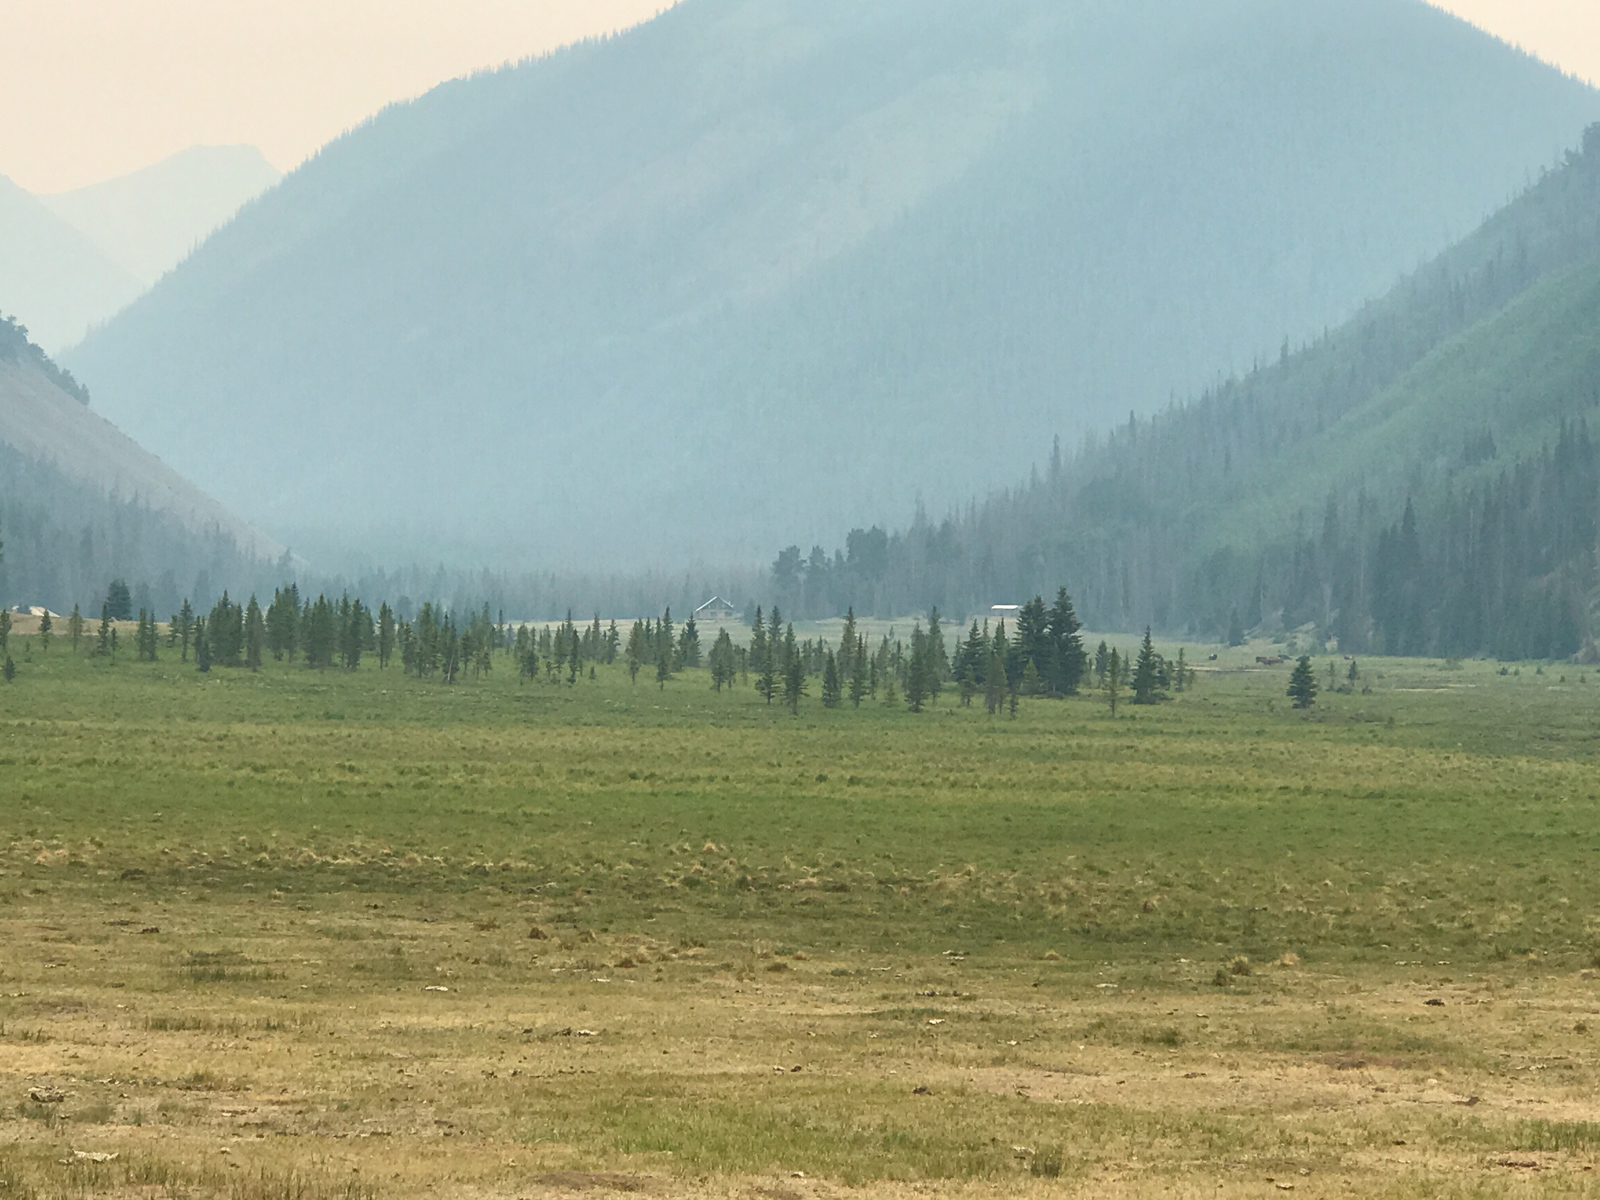
The below cell phone shot shows that there were some structures in the valley in addition to the cattle (and haze).
I found a very small cabin at the very end of the valley next to the river, a gated fence, and a trail register. I decided this area would be perfect to set-up camp even though I was on someone's property. Going up Cascade Creek this late was not advisable since I knew by looking on the Gaia GPS map that the terrain was steep and did not look to have any good campsites for several miles. I looked at the trail register and there was only one entry from the previous two years - 56 soldiers from the 110th Mountain Division doing mountain training. Awesome. I set-up camp in the valley away from any trails at 7 PM and enjoyed my dinner - a dehydrated Mountain House meal. I went to bed at 8:30 PM. I was promptly woken up at 1 AM by several howling coyotes that seemed to be within 100 yards or so of me. Paranoid and alone, I got out of my tent and looked around for the beasts with my headlamp, hoping to scare them away. I could not fall asleep for a long time, my imagination running wild. I woke up at 6 AM, ate some pop tarts, packed up, and began my ascent up the Cascade Creek Trail towards San Luis Pass, about 4 miles away. The trail I found myself on was pretty good at first, but as it gained elevation, it became really difficult to navigate and I found myself once again consulting Gaia GPS frequently to re-find the trail in the thick overgrown forest and huge stands of beautful wildflowers.
I even took some video of my experience on this "trail."
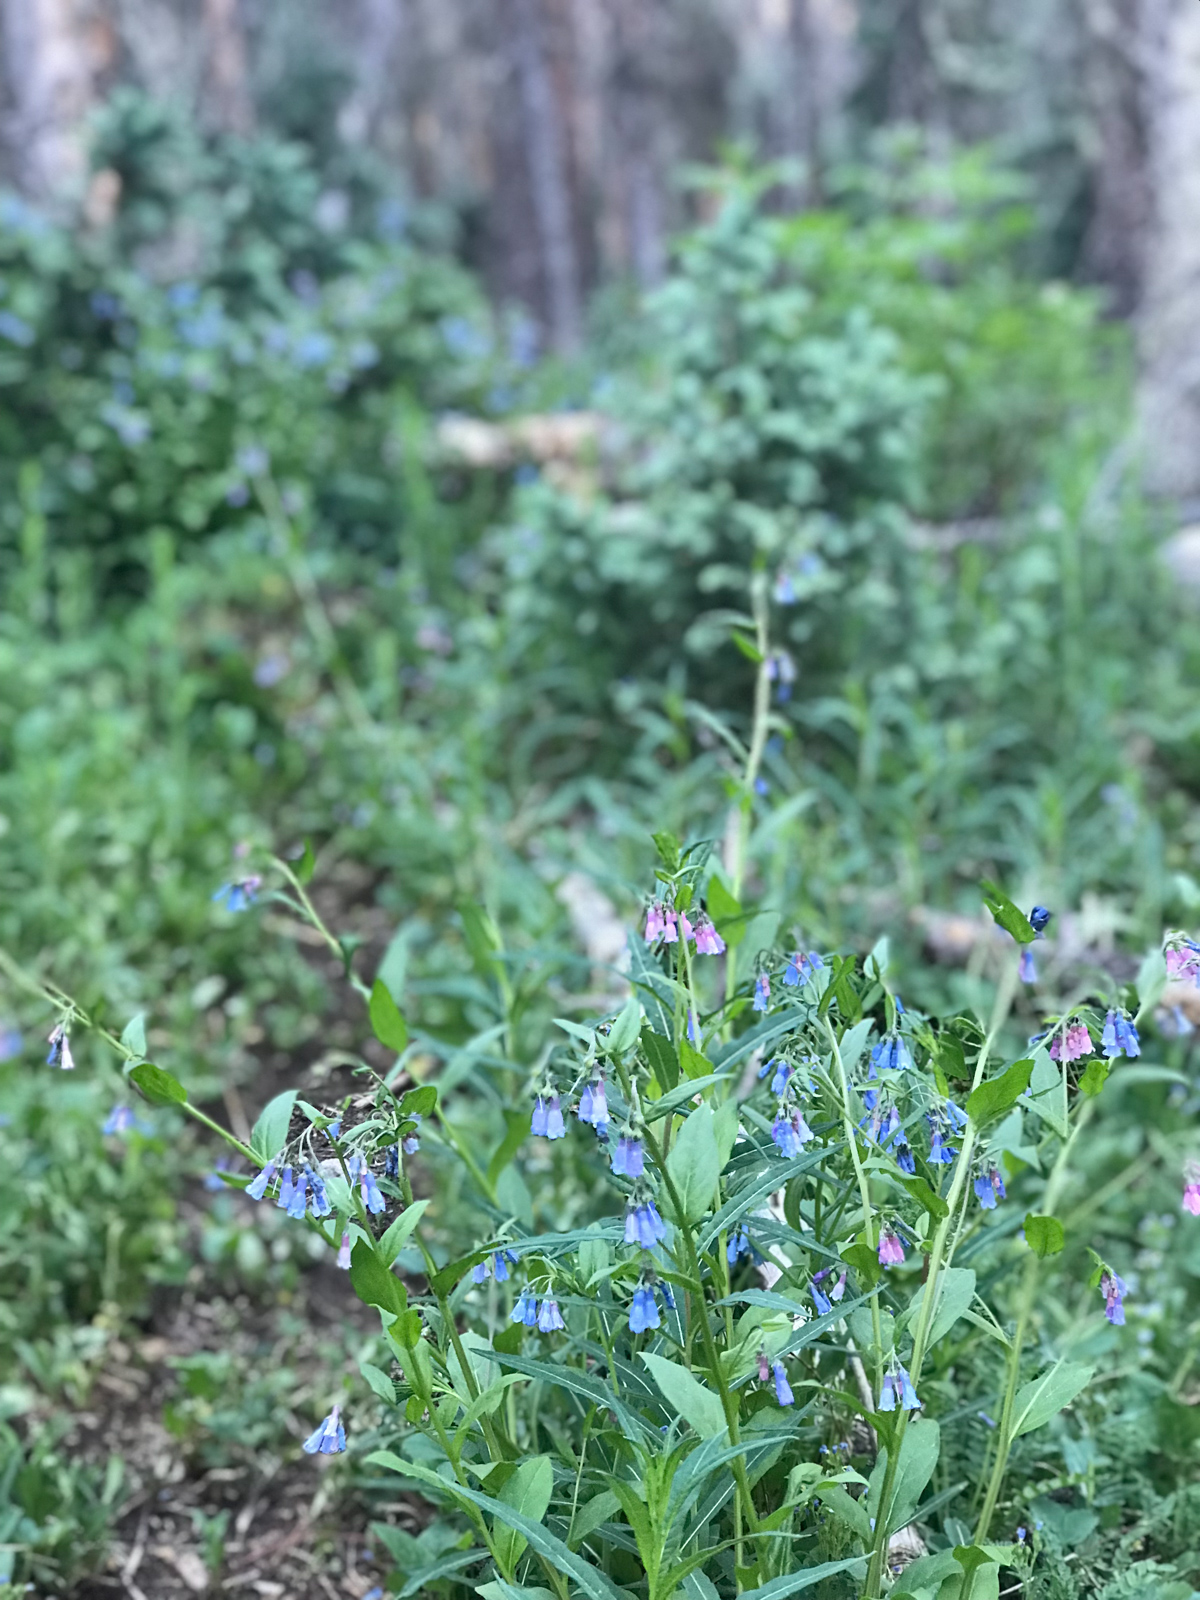
The photo above showcases the "trail" and the photo below showcases an example of the amazing wildflowers I found myself hiking through. What a place! It was so wild, remote, and secluded.
The trail weaved through huge patches of various wildflowers and kept me quite entertained throughout the morning.
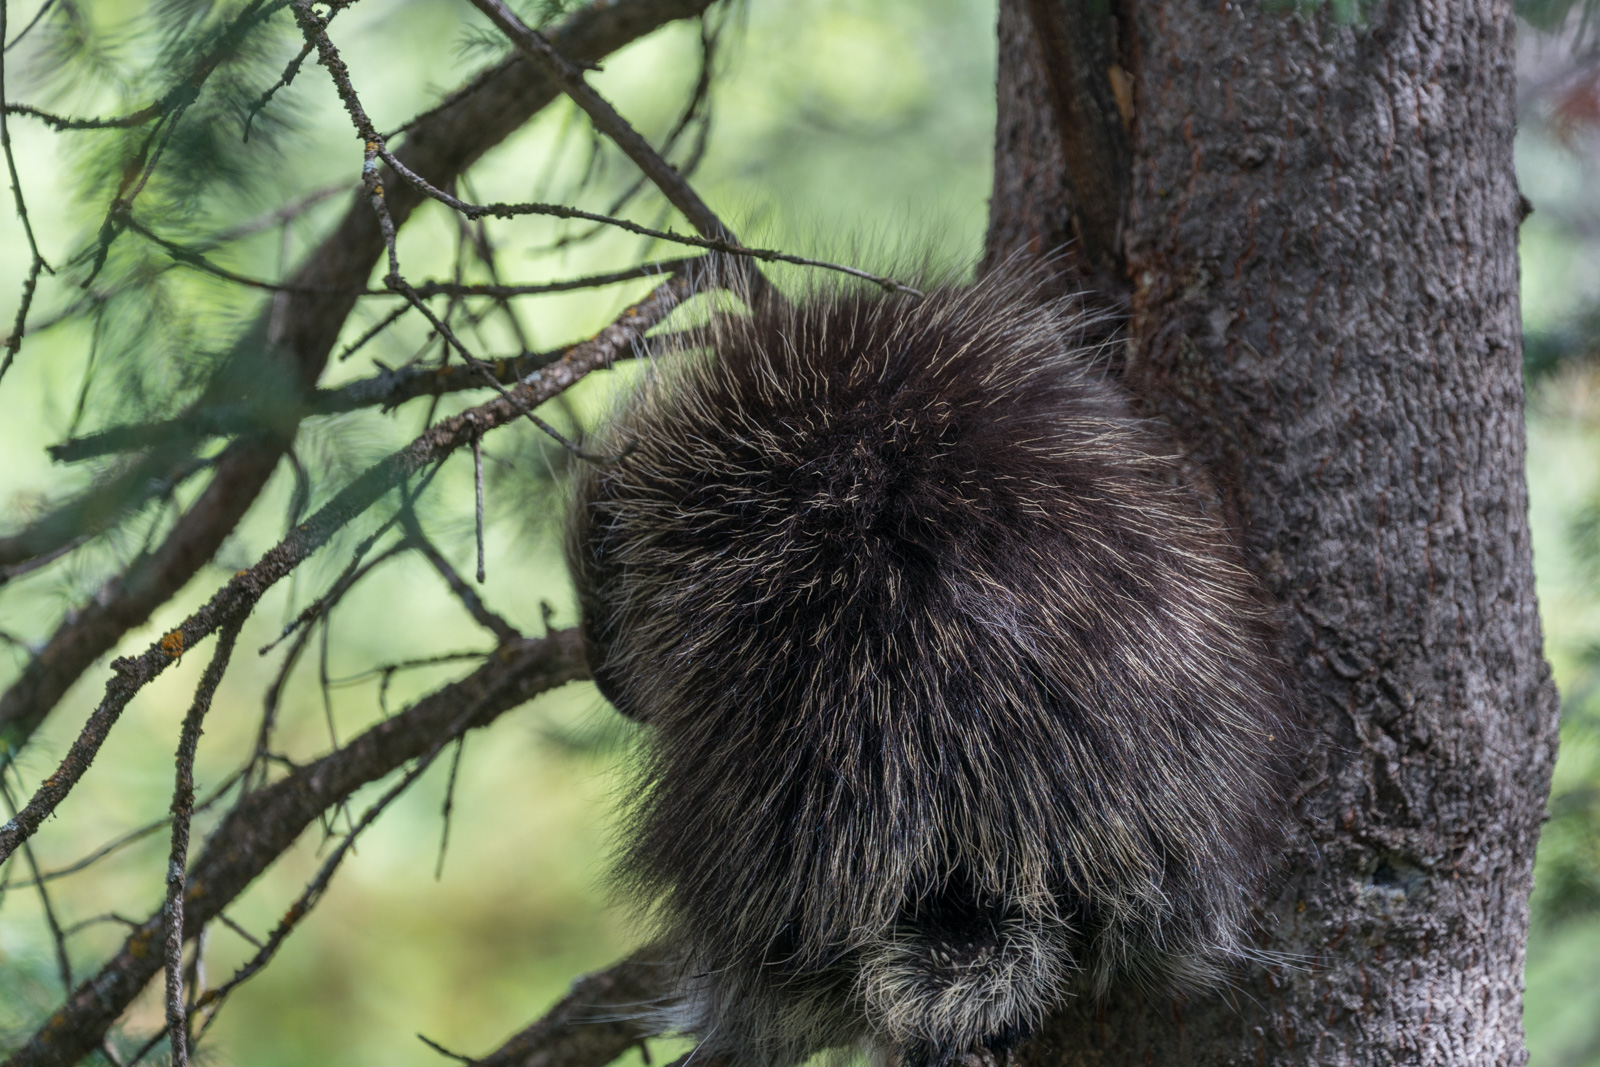
I reached the half-way point for the day and found myself in a huge open area with willows, water, and lots of opportunity for camping. Noted. As I continued up the trail, I made out some movement in my vision to my left across the small creek. I looked and found myself gazing at a porcupine. I kept my distance and kept moving. He ignored me and grazed on wildflowers as he slowly bumbled up the creek.
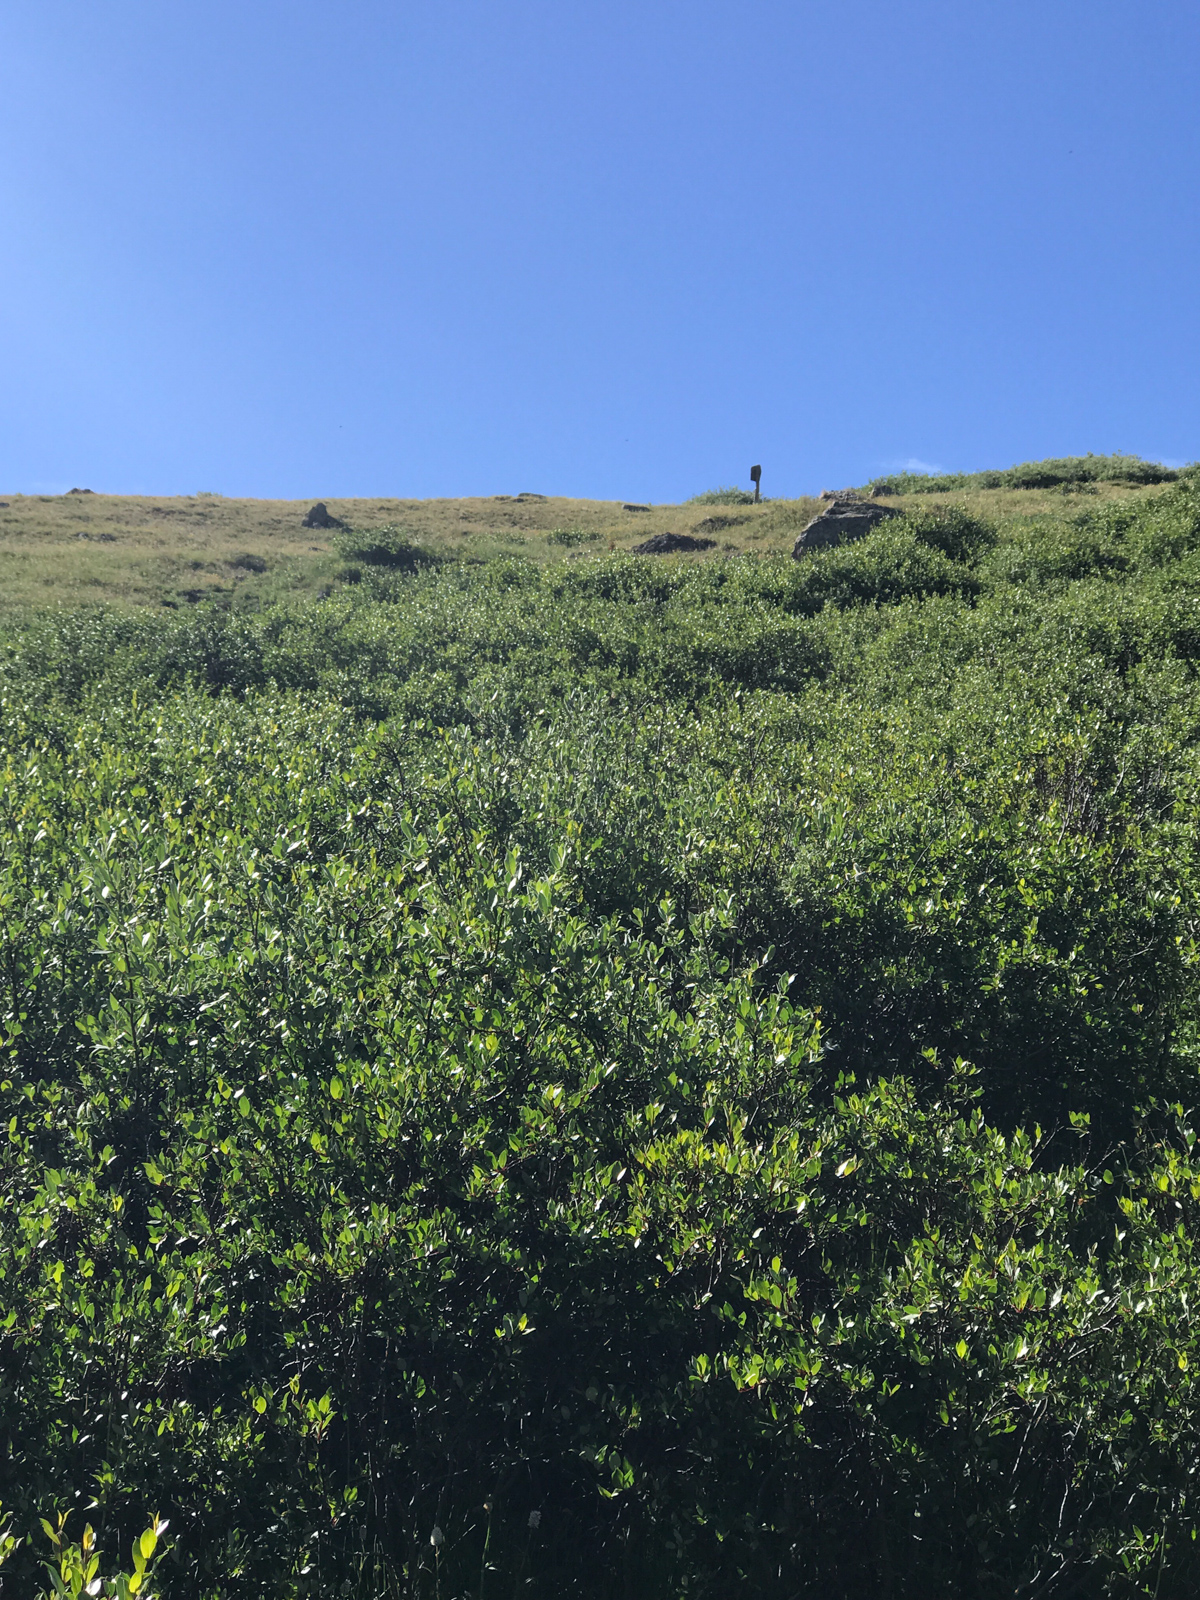
At last, I could make out the Wilderness sign above at San Luis Pass. I was almost there!
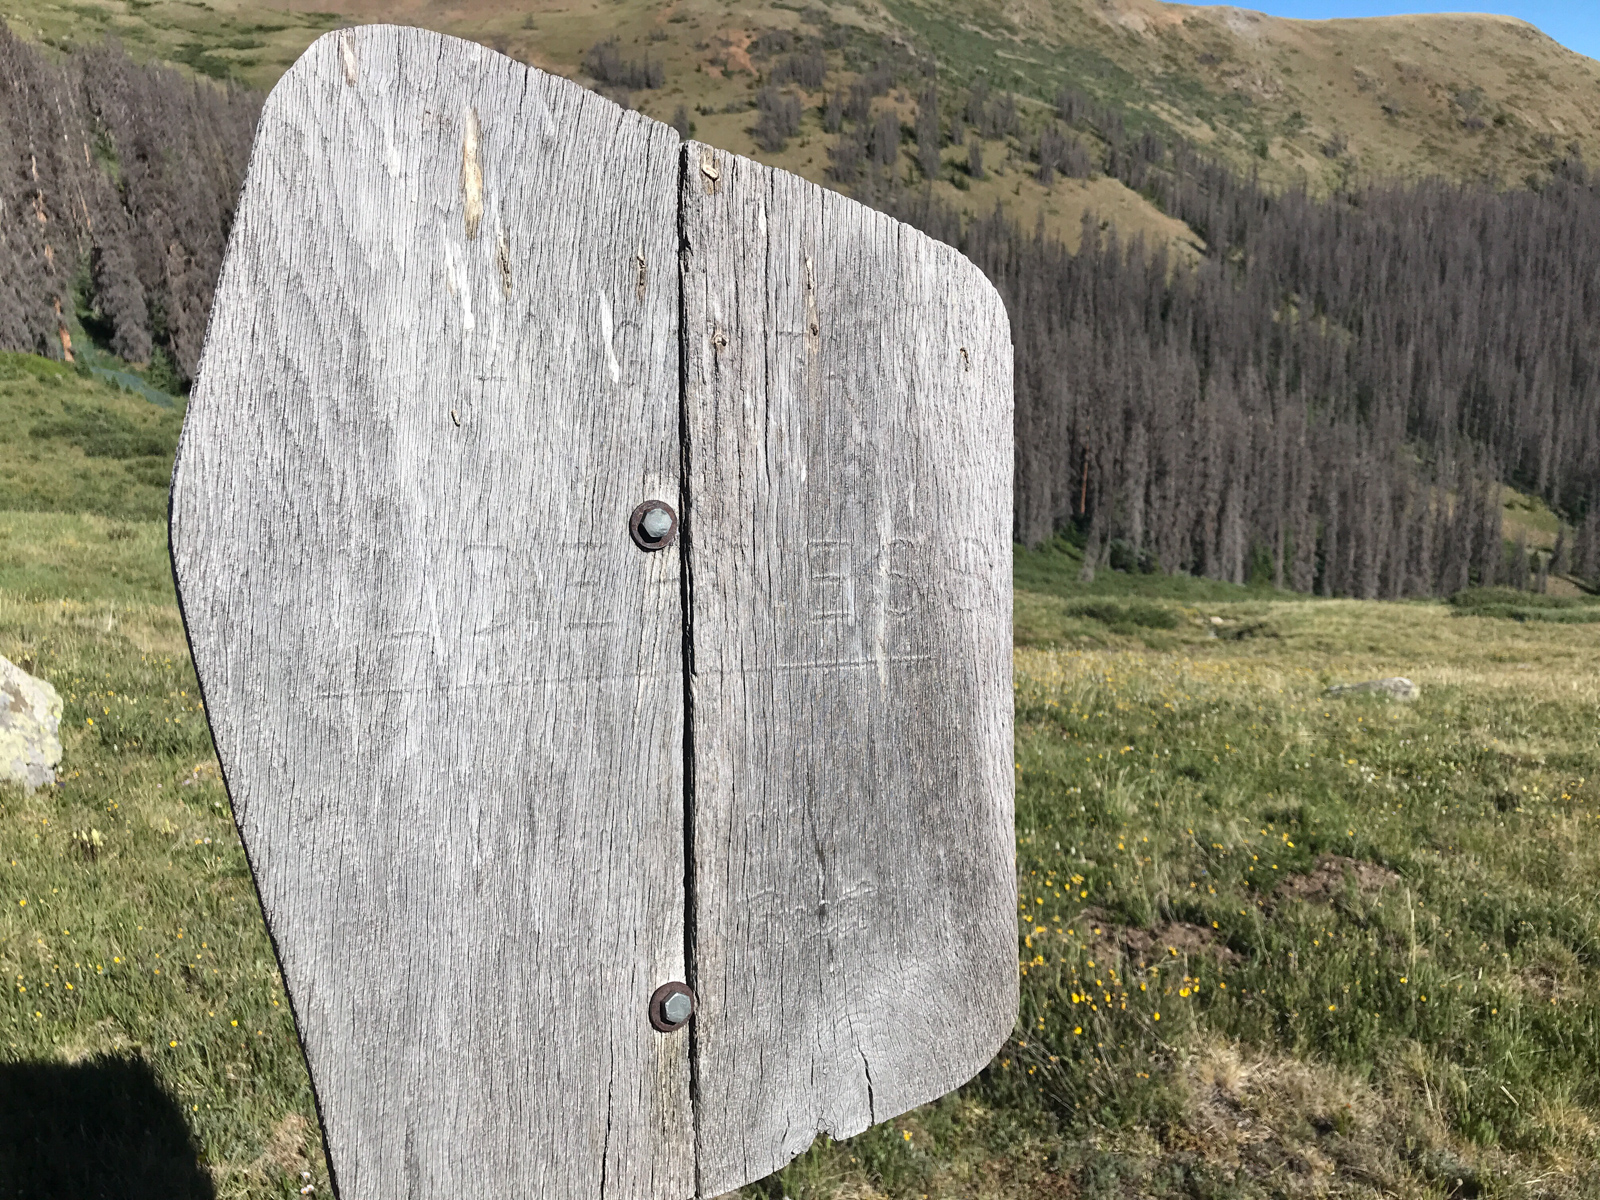
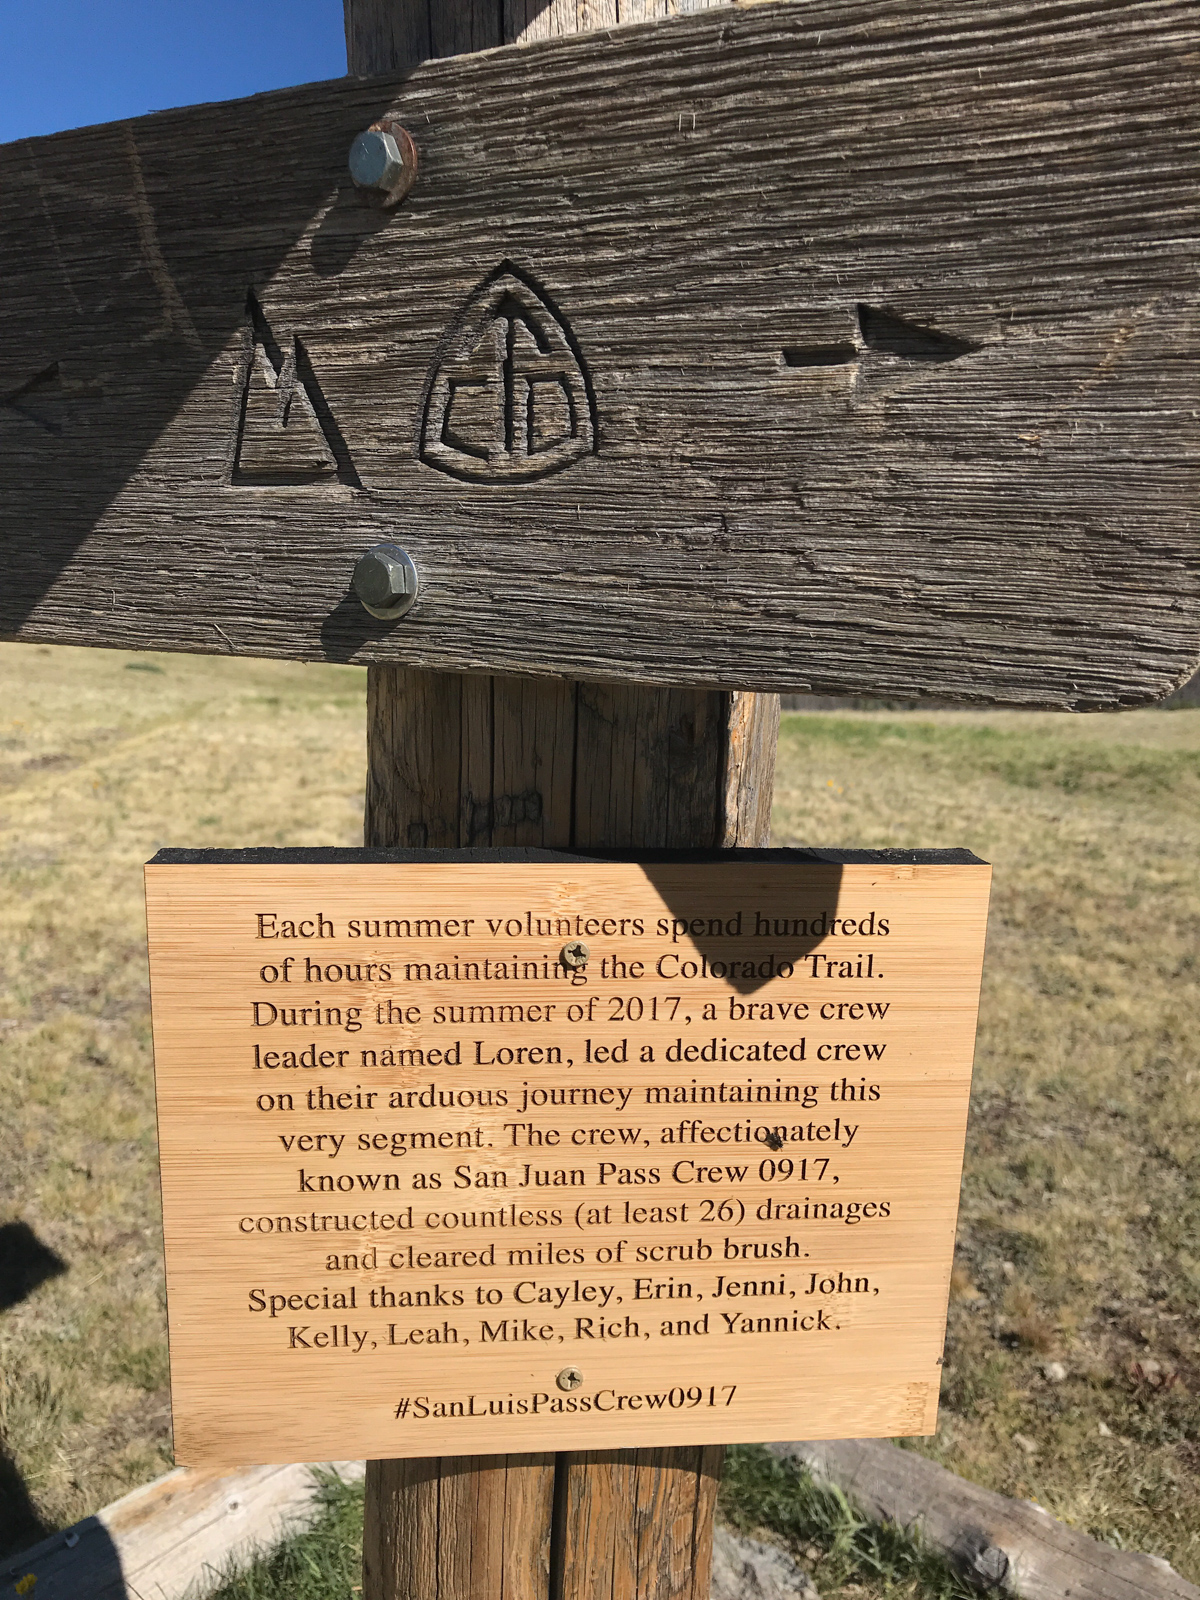
I made it to San Luis Pass at 9 AM and enjoyed the sign there, commemorating the work of the trail crew from the year prior. Nice work!
The rest of the hike down to the 4WD parking lot was uneventful and I was pleased to find my vehicle in one peice. What a trip!
Climbing Jagged Mountain and Knife Point - Sojourn to Sunlight Basin
13,824 ft. Jagged Mountain has always provided ample intrigue from every angle I have ever viewed it from. It has always looked virtually unclimbable to me, representing the raw essense of Colorado's Weminuche Wilderness Area - untouched and unseen by most, scaled and appreciated by even fewer. I attempted Jagged Mountain once before in September of 2013, where my climbing partner Jeremy and I found ourselves huddled in a tent for four days during the worst flooding in Colorado's recent history. I last saw the summit of Jagged Mountain from my perch atop 13,835 ft. Turret Peak at sunrise last summer. The sun rose just behind Jagged and I felt even more of an affinity for its summit.
As 2017 unfolded, I saw that the Great American Eclipse would be happening in late August. I penciled in a trip to Wyoming to view the eclipse in totality; however, in July, my friend Natalie Moran posted on Facebook that she was looking for an additional partner for Jagged Mountain and I knew I had to jump on the opportunity to go. Since Jagged requires roped climbing, I only wanted to go with someone with experience on that mountain or with alpine technical climbing. Having climbed Dallas Peak and Teakettle Peak with Natalie in the past, I knew it would be a great trip. The trick of course was finding a way to squeeze in some photographs of the eclipse during this trip. The plan was to meet Natalie and her friend Shawn Poliquin in Silverton on Sunday morning, drive up and over Stony Pass down to Beartown Trailhead, and then backpack up and over Hunchback Pass and then into Sunlight Basin. My pack weighed in at 38.5 pounds, which was pretty good considering I had brought climbing gear, three lenses, and my tripod.
In December, I decided to switch out all of my camera gear for a much lighter experience for backpacking. Previously, I was carrying the Nikon D800 and the holy trinity.
For this particular trip, I decided to bring the following photography equipment:
Camera: Sony A7R2
Tripod: Feisol Tournament 3442 Carbon Fiber Tripod
Ballhead: Photo Clam Pro Gold II
Wide Angle Lens: Zeiss Loxia 21mm f/2.8
Mid-Angle Lens: Zeiss 55mm f/1.8
Telephoto: Sony FE 70-300
Total weight: 8.3 Pounds.
My total weight using my previous Nikon equipment: 14 pounds. I'll take the nearly 6 pounds in weight savings! My legs certainly thanked me considering the round-trip stats for this trip was 30.9 miles!
You can see the full GPS file and stats over on Gaia GPS, which is by far my go-to app for backpacking and mountaineering. It is so insanely useful, I use it on trips like this for many purposes, including planning and route-finding. You can purchase it here and help support the site.
One aspect of this particular trip that made me nervous was the drive to Beartown. I decided to take my wife's stock 2001 Jeep Cherokee through some encouragement from my co-worker and Bi-Centennial finisher, Terri Horvath. She was right, the road was not too bad, and the two creek crossings were manageable in August. I would hate to see them in early July.
Natalie, Shawn, and I arrived at Beartown at around Noon. At the suggestion of my co-worker, Terri, I surrounded my vehicle with mothballs to deter the infamous marmots that love to chew on spark plug wire assemblies.
Natalie and Shawn were planning to stay about 8 or 9 days in the Weminuche, where-as I was only planning a 4 day stay, so my pack was much less crazy than theirs.
DAY 1: The approach to Sunlight Basin.
Natalie looked as if she had brought her whole house with her on the way up Hunchback Pass.
The grind up Hunchback Pass was not too terrible as the views were outstanding. We were also racing some storm clouds and wanted to be down into the trees of Vallecito Creek as quickly as possible.
As we wound our way up the switchbacks above treeline, Hunchback Mountain came into view, the last standing peak at the end of the mighty Vallecito Creek basin. I remember climbing Hunchback way back in 2000 when I worked with Colvig Silver Camps - we were taking a group of kids from Highland Mary Lakes all the way to Vallecito Campground. That was the first time I experienced this mighty and amazing area, and I am so thankful I did!
I was excited to see this area again from this vantage point. As we arrived at the summit of Hunchback Pass, the first views of 13,617 ft. "The Guardian" came into view. The Guardian is essentially the last in line and furthest east peak of the mighty Grenadier Range.
As we rounded the corner, both 13,628 ft. Mount Silex (right) and 13,617 ft. The Guardian (left) came into view. It was magical.
As we descended into Vallecito Basin, the weather looked as though it would bring some rain, so we decided to stop to get some snacks and to put on our rain gear. Shawn was pleasantly surprised to find that he had grabbed the wrong pack cover when he left the house. Surprisingly enough, it worked great!
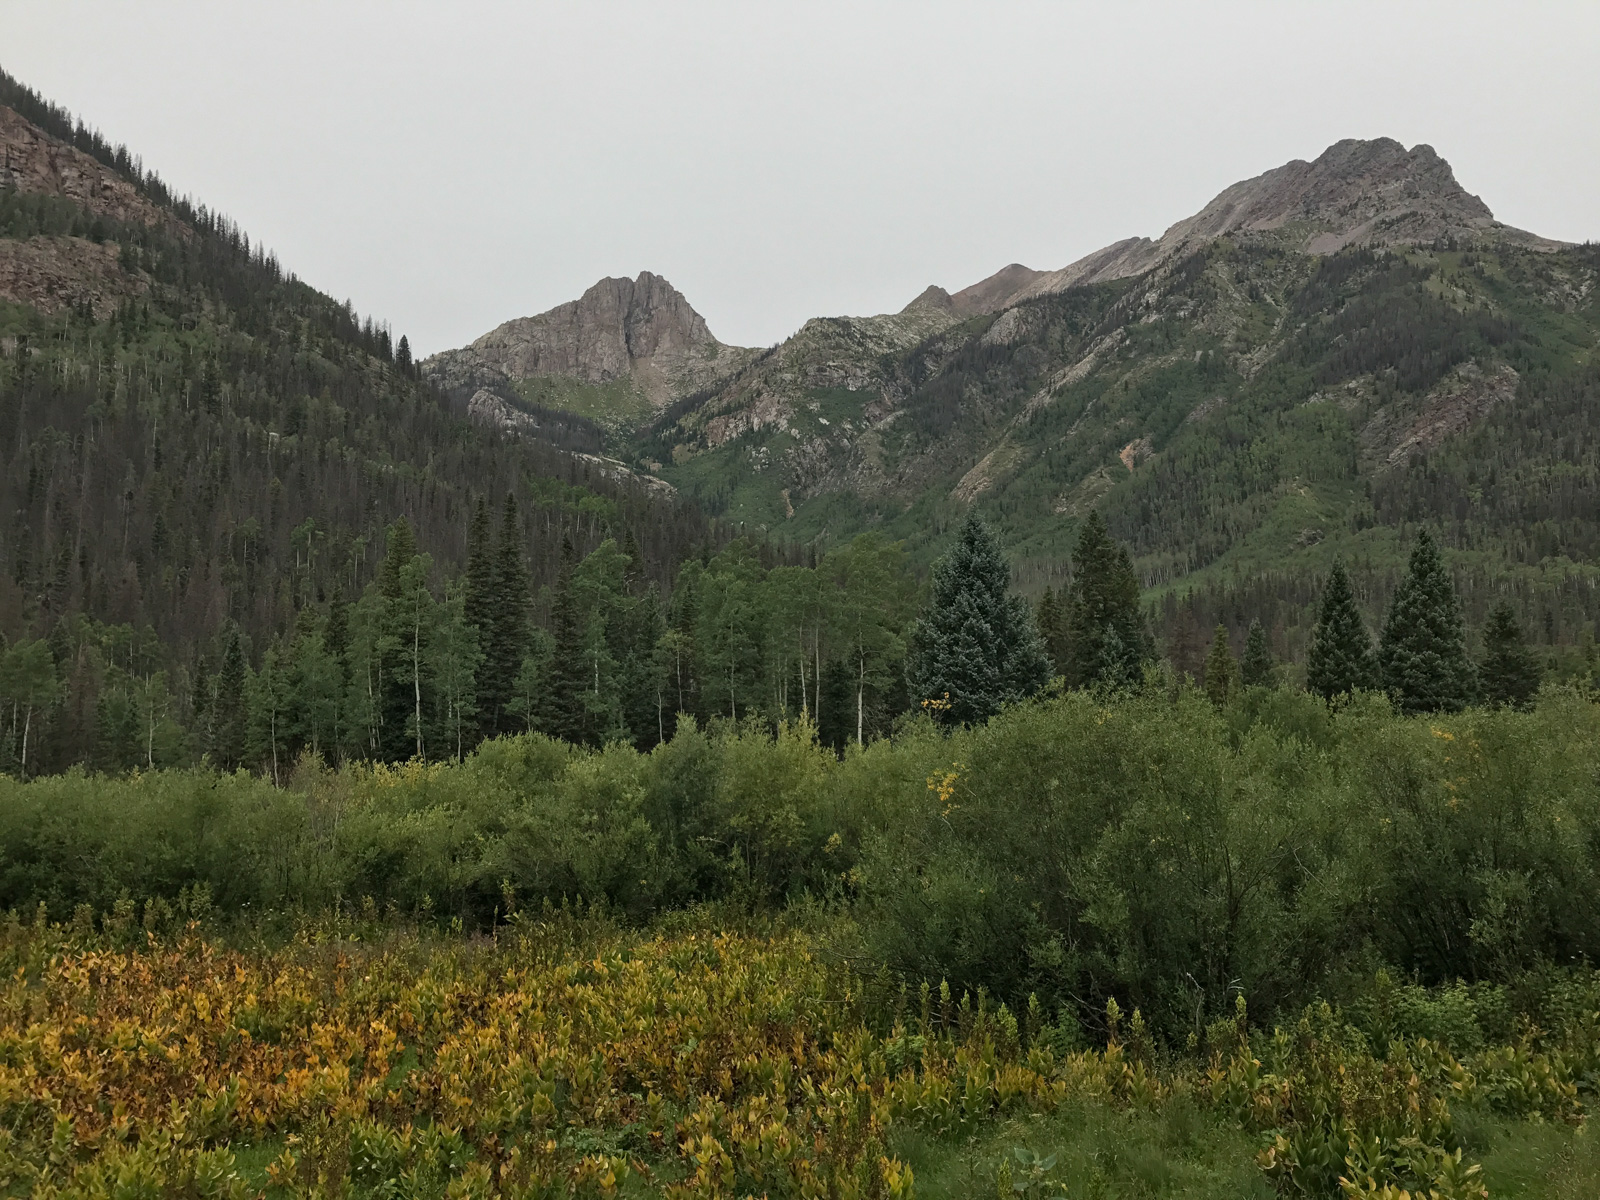
Rain covers on, we continued the gruelling hike down into the basin, with the northern flanks of some of the San Juan's greatest peaks looming in the distance, including Greylock Mountain and Thunder Mountain.
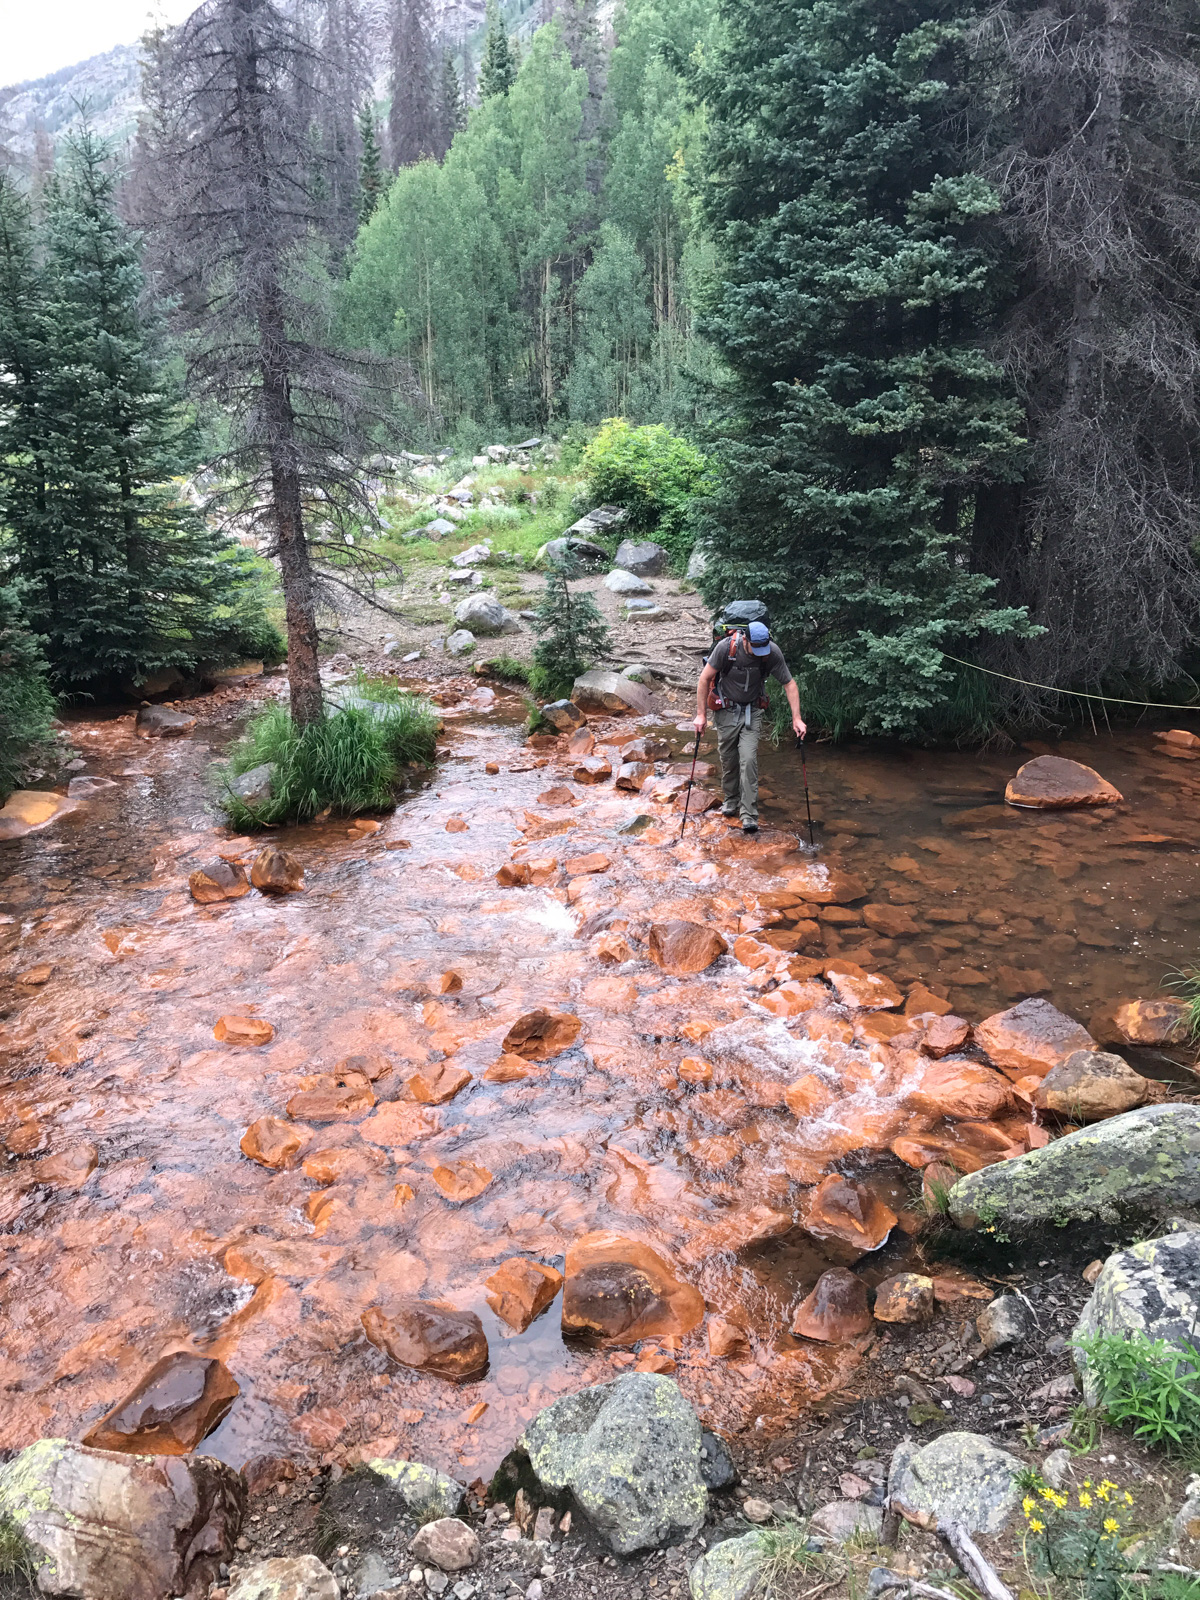
After negotiating several switchbacks into the forest below, we found ourselves at Rock Creek, which is stained an orange color, I presume from mining activity far above. We crossed without any problems.
Before long, we found ourselves walking through thick plants covered in Red Elderberries, mixed in with numerous raspberry plants, which made for tasty snacks (the raspberries, not the poisonous elderberries).

Having a lot of luck with the rain so far, we found ourselves at the turn-off for Sunlight Creek.
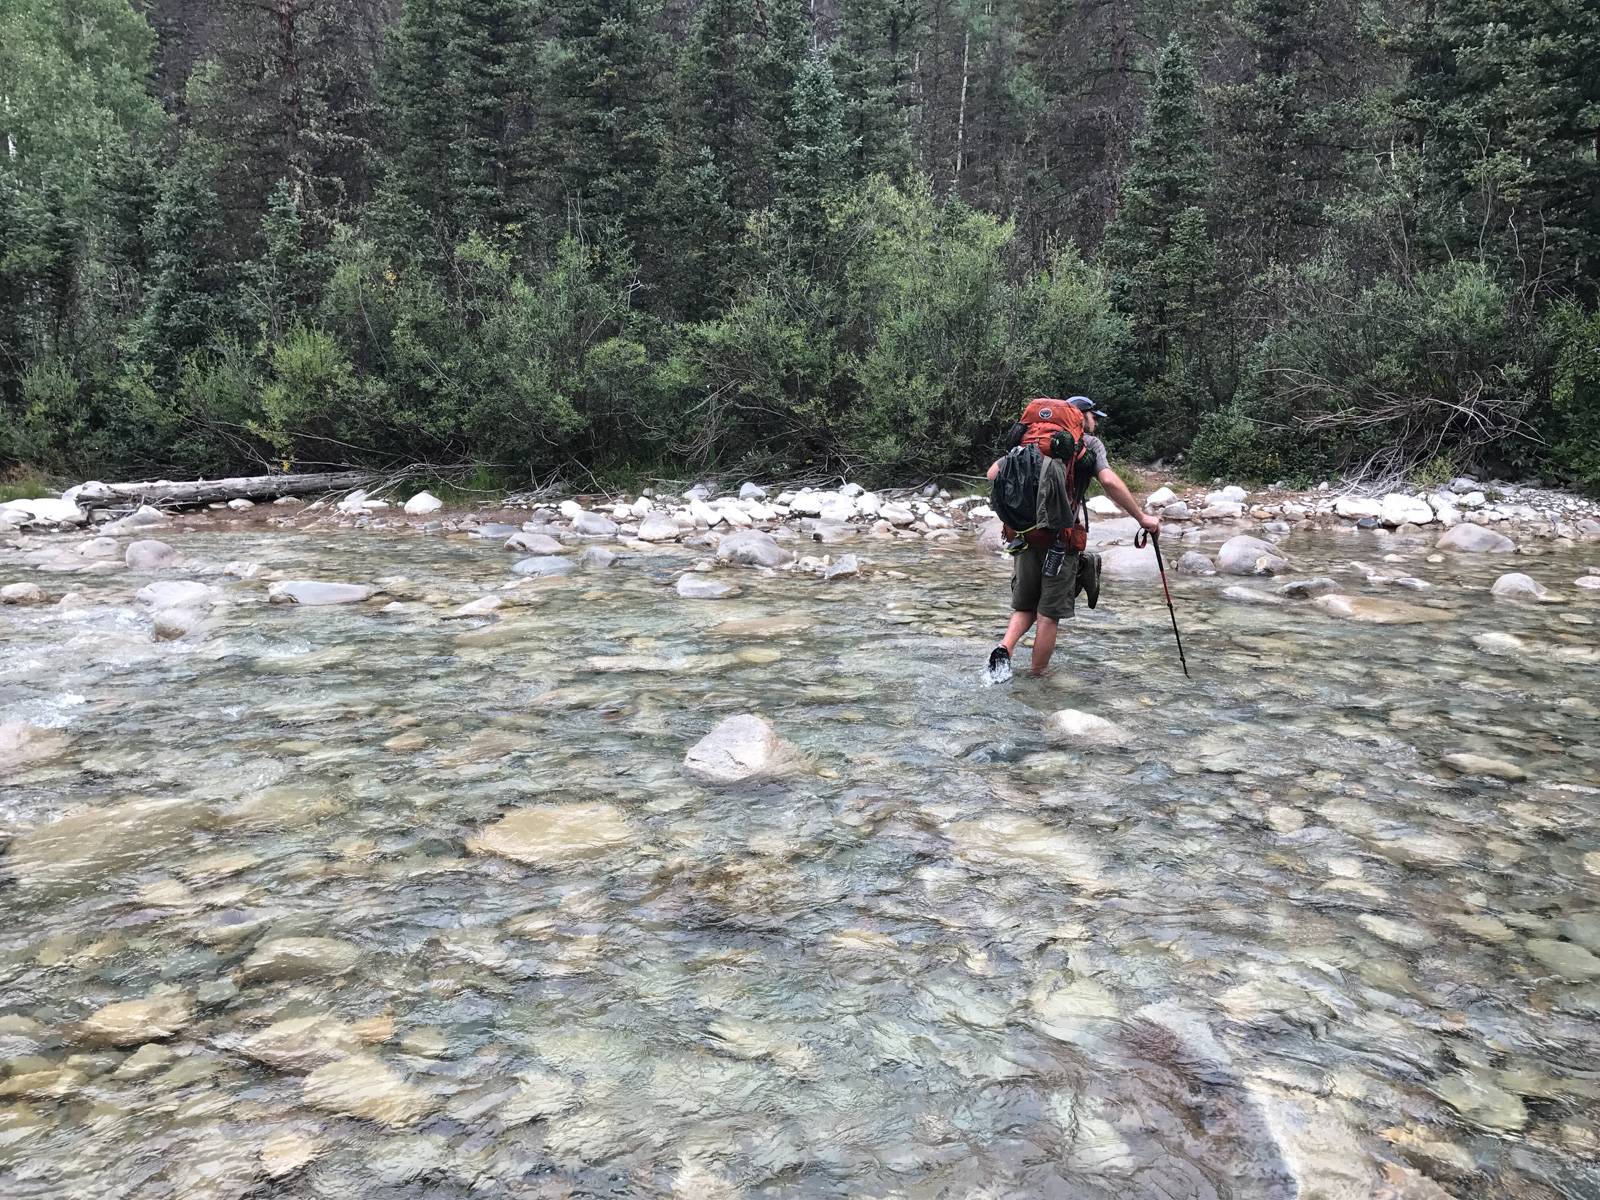
We found ourselves at Vallecito Creek and Shawn and Natalie decided to switch to their water shoes. I opted to keep my mountaineering boots on (I really did not have a choice). I managed to cross without getting my feet wet. Shawn took a nice stroll through the creek.
Shortly after crossing the Vallecito, Shawn and Natalie put back on their normal footwear and we were off to the races. About 5 minutes into the hike, we were forced to cross Sunlight Creek and this time Natalie and Shawn kept their normal footwear on. Both dipped into the water on accident and got wet, so they had to stop and get new socks on. Bummer!

We continued to blaze up the almost hidden trail up Sunlight Creek, which was very dense in spots and really hard to navigate. Do you see a trail?
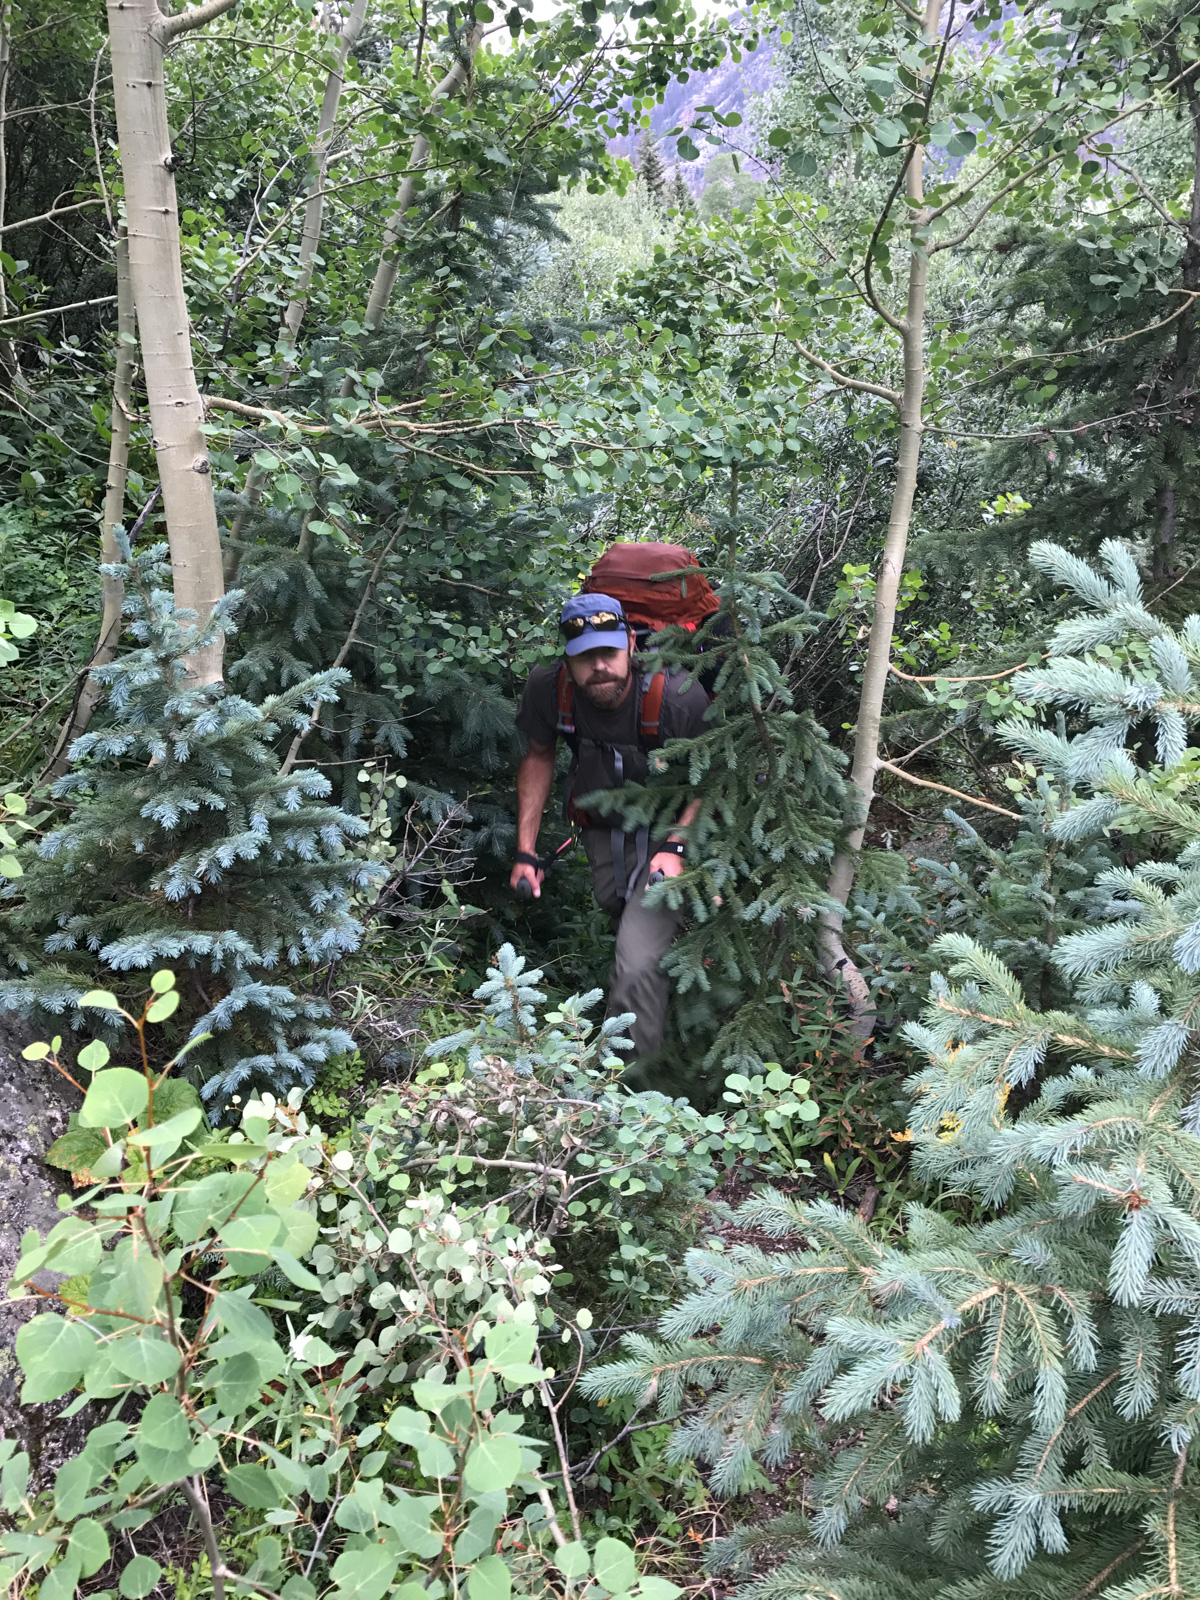
This trail was wicked steep and full of overgrowth, deadfall, and crazy twists and turns. At least the view was good at times!
At one point in the trail, before it reaches the creek again, we were tempted to go up to the right; however, the correct right is to go down and cross the creek again and then go right up towards Jagged Mountain. This is the view of the terrain we found when we went too high.
Once across the creek again, the trail was very hard to navigate through logs, wildflowers, and huge boulders. The terrain was steep, steeper than most approaches, and it was relentless.
As you can see, the trail was filled with all kinds of fun obstacles, and Natalie was growing weary with her huge pack. We were ready for camp.
Finally, we found a lovely campsite just across the creek on the right hand side below some large cliffs with a great view of the eastern face of Jagged Mountain. The campsite, if you are looking at a USGS topo map, is located just under the "l" and the "i" in Sunlight Creek at about 11,000 ft. just before the trail begins a sharp climp up to the upper basin.
We set-up our tents, ate dinner, and crashed. The plan was to get up and go up into the upper basin for a warm-up climb of either Knife Point or Peak 10. It rained a little over-night and I was exhausted but ready for the good fight!
DAY 2: Summit of the impressive 13,265 ft. Knife Point and photographing the Eclipse.
The alarm was set for 5:30 AM (not a terribly early start). We welcomed the easier day, having just killed our legs on our 12 mile approach into the basin. The early light on Jagged looked fantastic.
We took our time going up into the upper basin, and appreciated the fantastic views of Jagged Mountain on the way up. Shawn snapped this shot of me hiking in.
A look back towards the huge cliffs above our campsite showcased some interesting clouds that were forming for the day, which did not bode well for my opportunities to photograph the eclipse.

As we climbed up higher, the views of Jagged Mountain only improved.
The late summer color of the Corn Lily plants was a nice complement to the high clouds above Jagged.
Shawn and Natalie admired Peak 10 as it came into view. I marvelled at how insane it looked. It sounded like Natalie wanted to give it a go.
As we climbed up below Jagged, I found the wildflowers quite difficult to avoid pointing my camera at. I loved how these flowers pointed straight up and into Jagged's base.
At this point, we had to make a decision. Natalie had already climbed Knife Point and both Shawn and Natalie were looking for something challenging. I was looking for a good vantage to photograph the eclipse and had always admired Knife Point from afar, so we decided to split ways - I chose Knife Point and Shawn and Natalie chose to do Peak 10. Our plan was to meet back up in the basin below Jagged and then hike back down together, unless weather looked bad, then we would meet at camp. Worked for me.
Knife Point really caught my attention in 2013, when I saw it from No Name Basin:
I continued my hike up into the upper basin and was enthralled by the huge variety of wildflowers. 14er Sunlight Peak poked out above it all and looked amazing.
The climb up to the ridge between Peak 10 and Knife Point was very steep, but it was eased by the beautiful flowers I found along the way.
I reached the saddle and the views west towards Pigeon, Monitor, and Animas above No Name basin were great to say the least. I stopped here to take it all in and enjoy a snack.
Unbeknownst to me, Shawn had seen me gain the saddle and snapped some photos of me from Peak 10's flanks.
I scrambled up the ridge and took in the route for Knife Point. It looked like staying east and then going up the blocking face would work great.
The climb up Knife Point was not terribly difficult. I would rate it class 2 with one or two easy class 3 moves mixed in for fun, which were mostly avoidable with careful route finding. The views of Sunlight Peak on the way were breathtaking!
I reached the summit of Knife Point without any problems and enjoyed the amazing views of the Needle Mountains, including Sunlight Peak, Sunlight Spire, Glacier Point, Eolus, North Eolus, Pigeon Peak, Turret Peak, Animas Mountain, and Monitor Peak. What a mighty string of peaks it was to behold!
I set-up my tripod for some more detailed photo work, anticipating the eclypse. Again, unbeknownst to me, Shawn had taken some photos of me from Peak 10, this time of me setting up my tripod and shooting some photos from the summit of Knife Point.
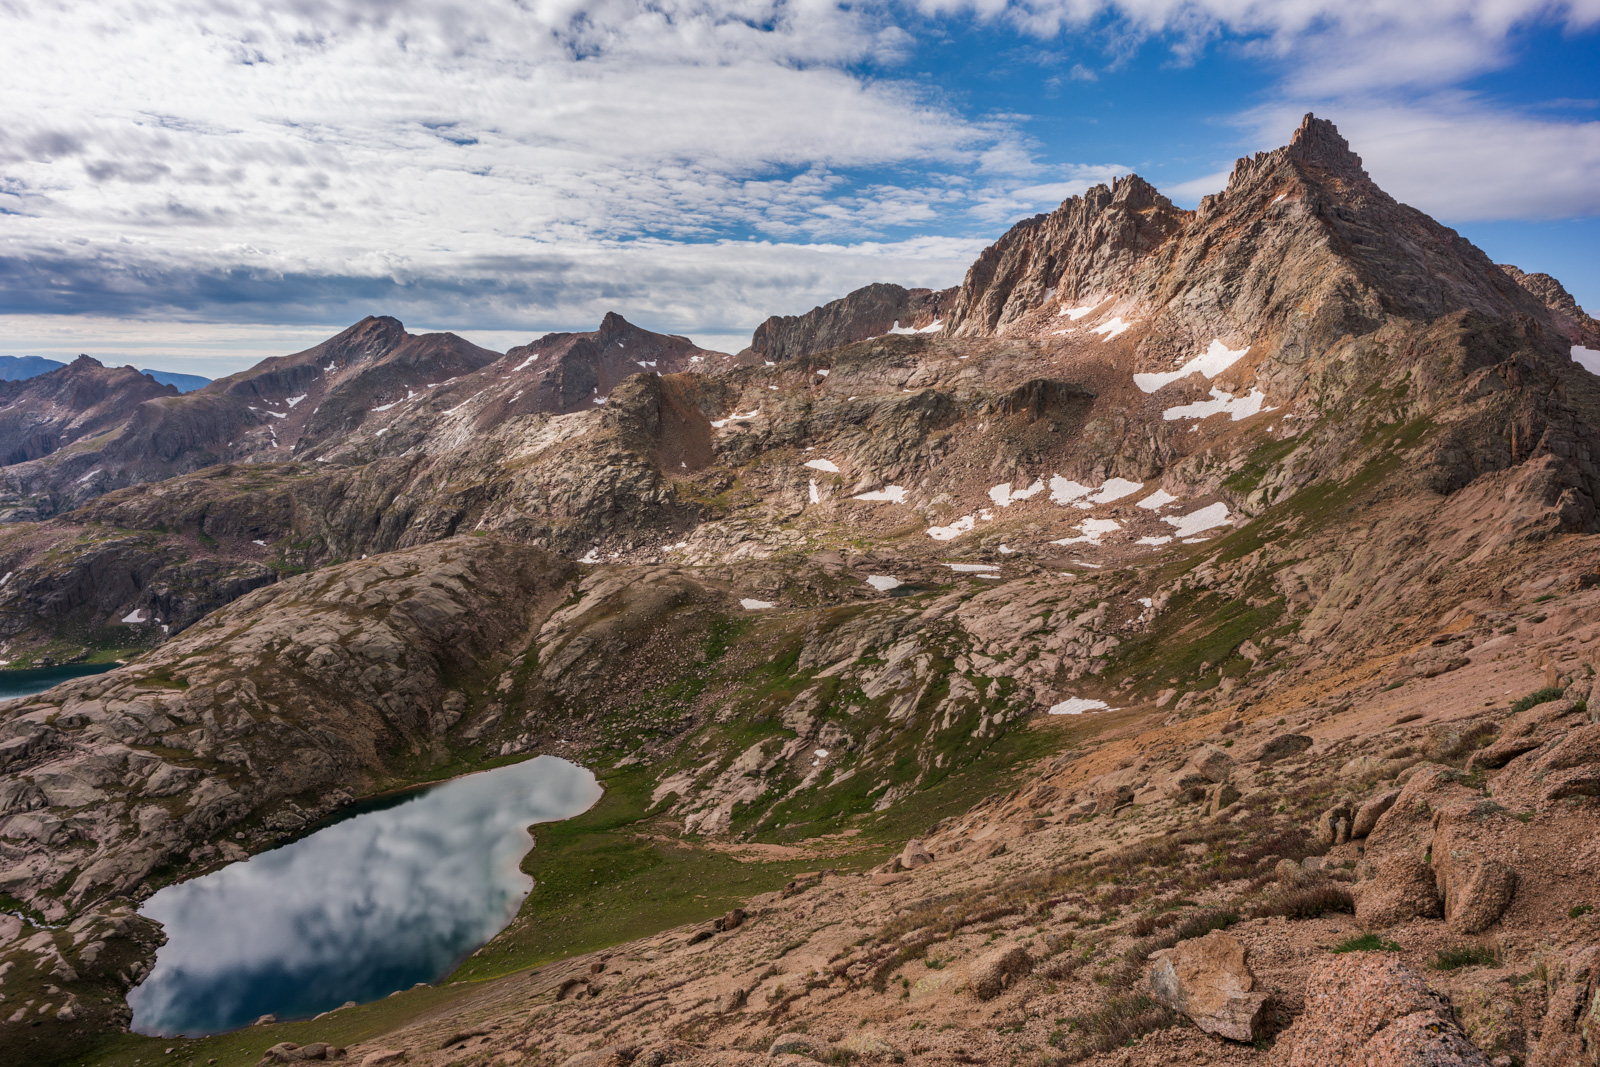
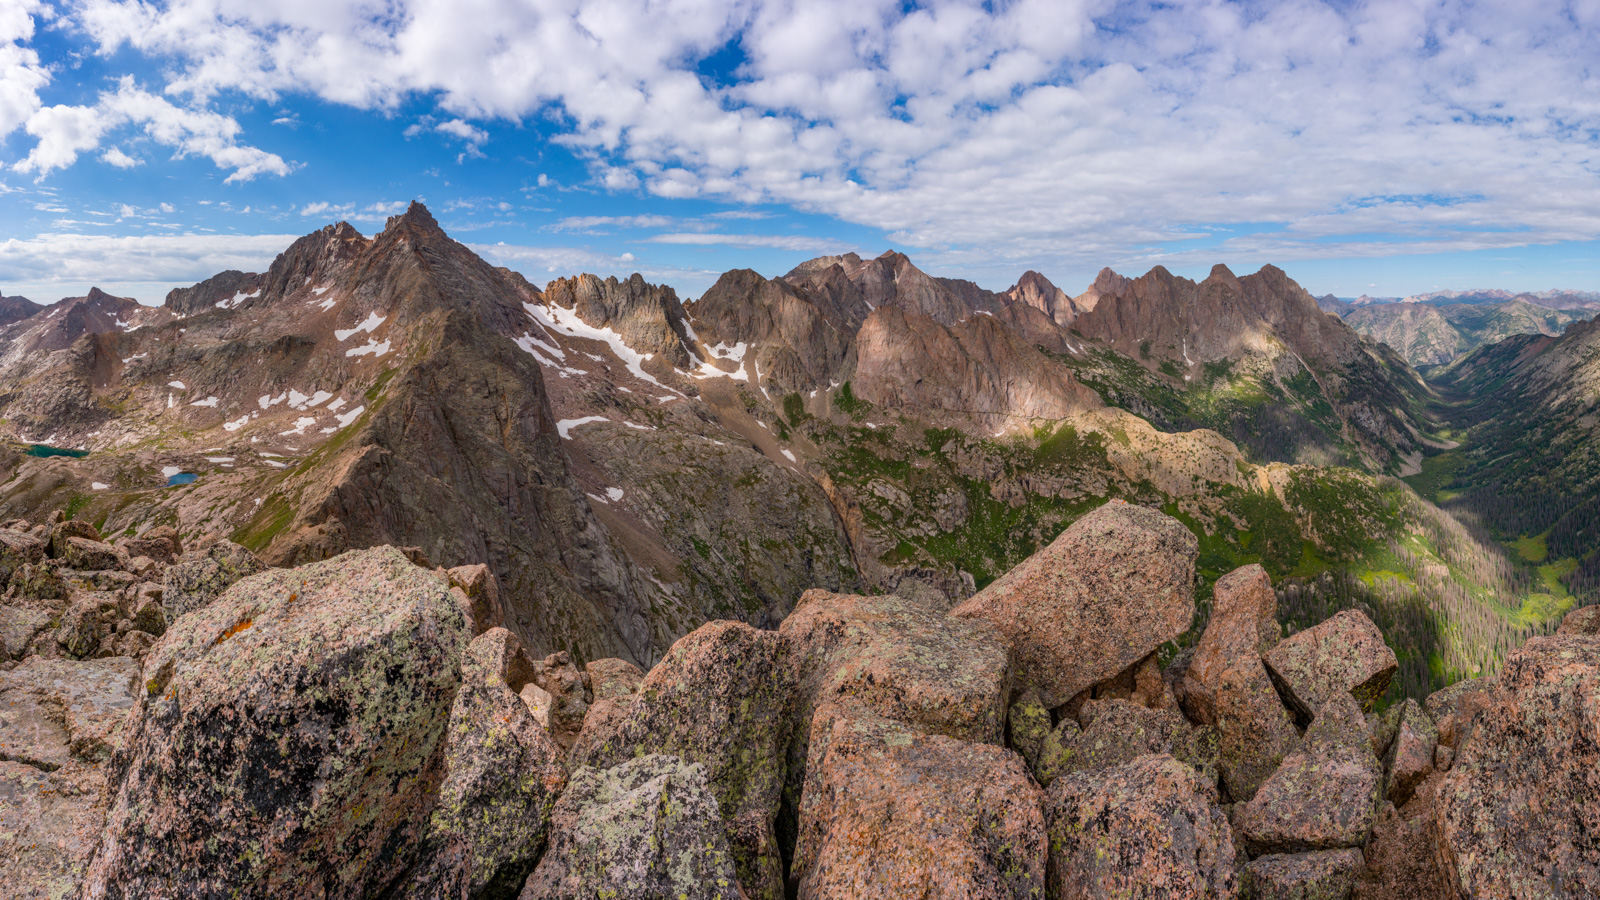
Knife Point might just be one of the more photogenic locations to photograph, as it offers impressive views of some of Colorado's most incredible peaks, including Sunlight, Eolus, and Windom, Pigeon, Turret, Monitor, and Animas, as well as Arrow Peak, Vestal Peak, and of course, Jagged Mountain, as seen in this 250 degree view.
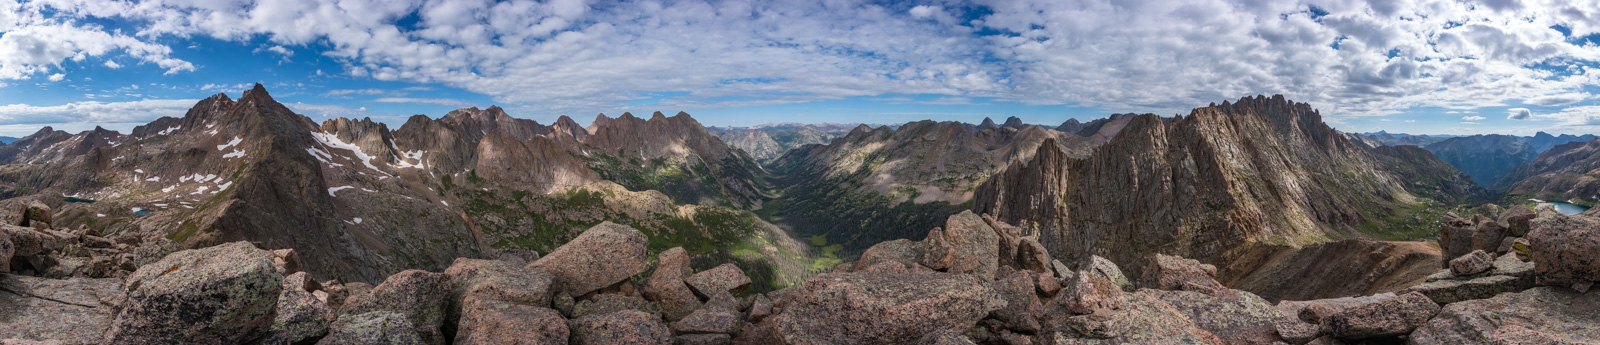
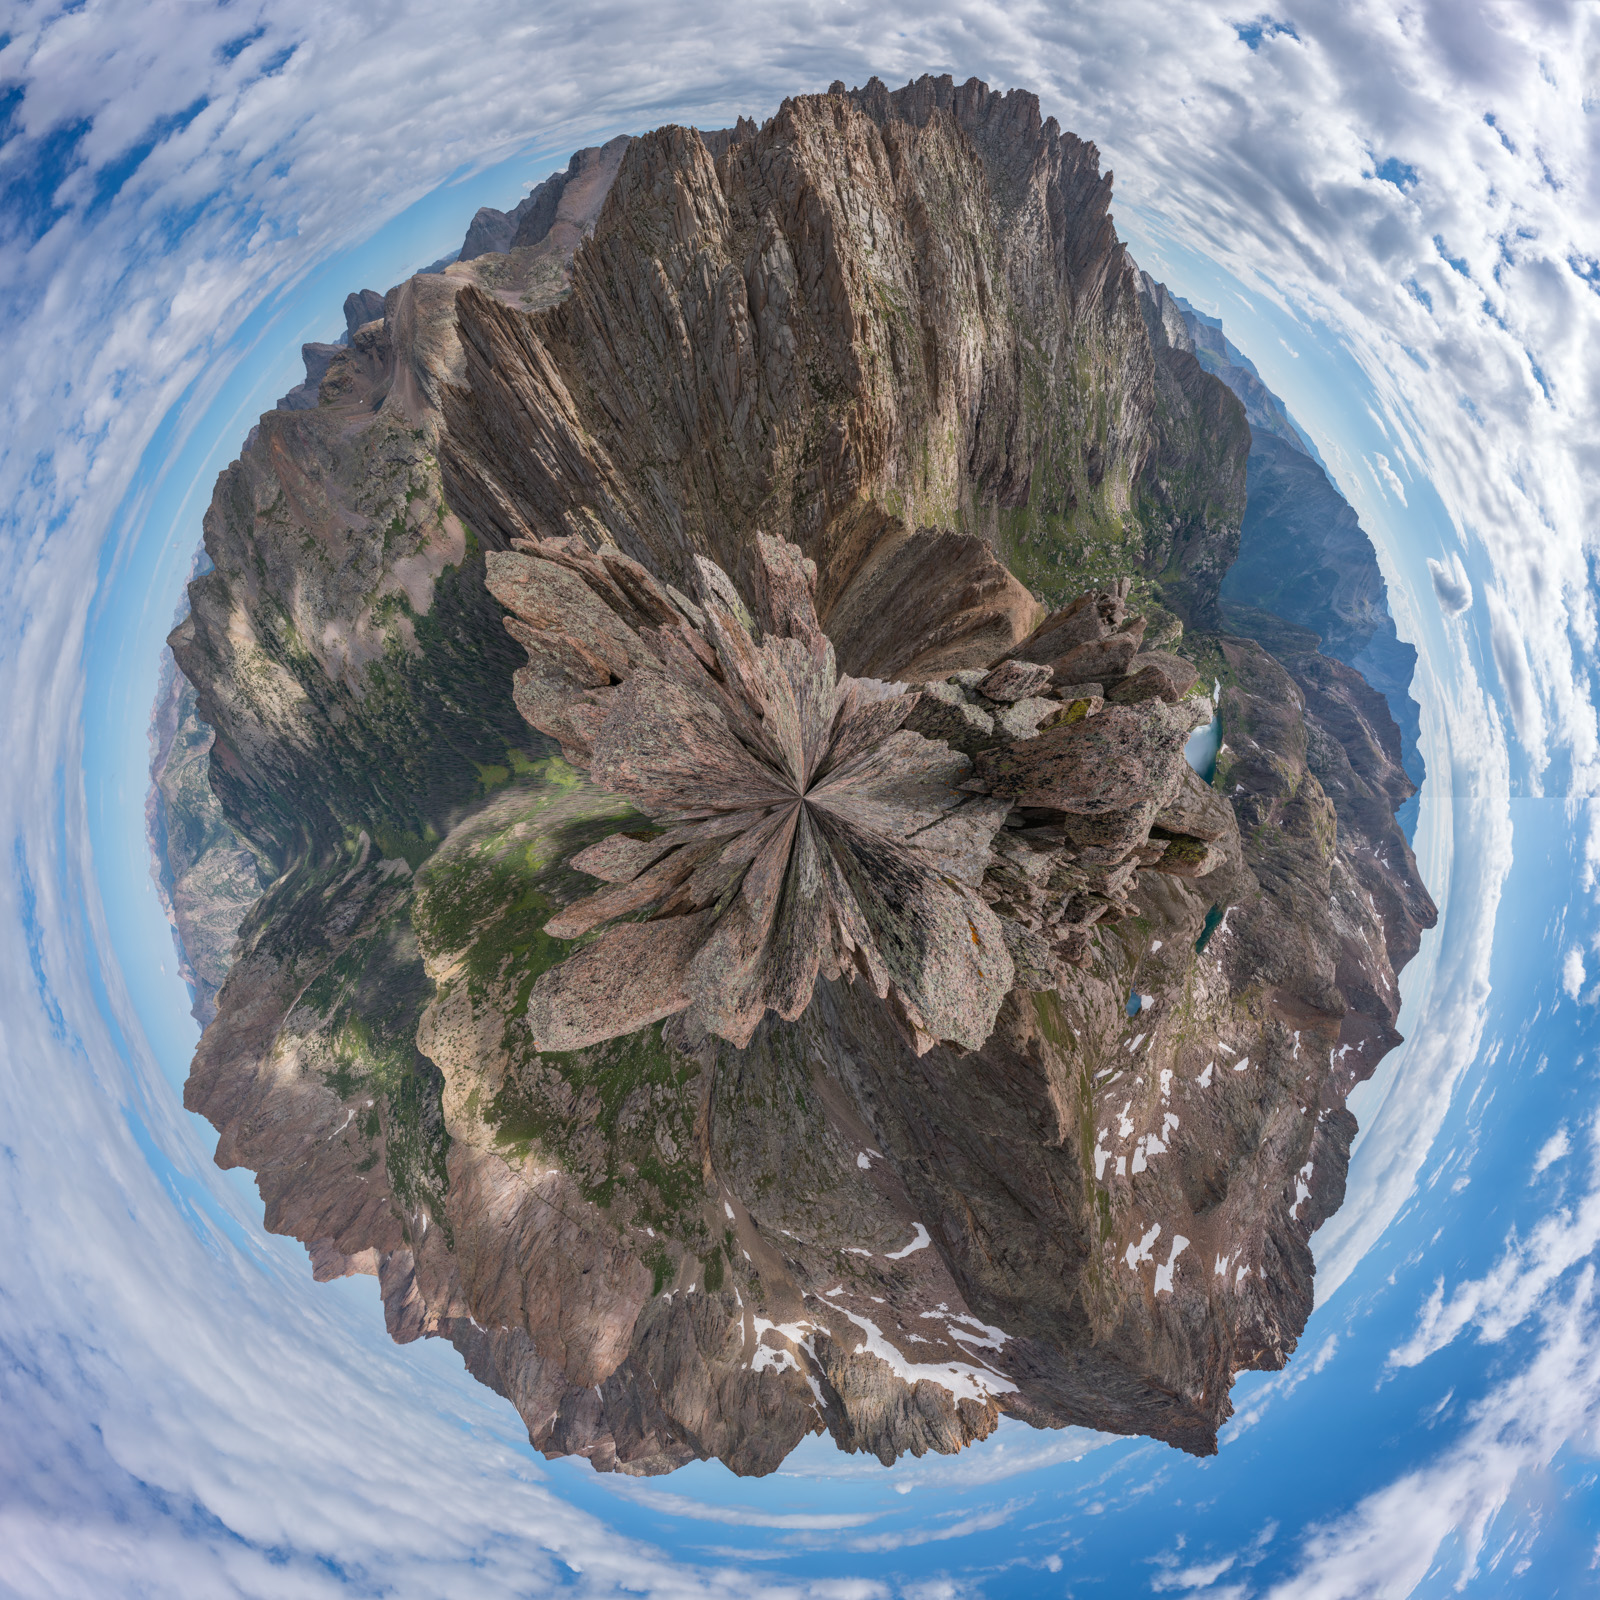
Another fun view of this scene is to take a 360 degree panorama and turn it into a planet. I call this one "Planet Weminuche."
I was thankful that I lugged my heavy telephoto lens up to the top, as I could get a nice and tight zoomed in view of Pigeon Peak, one of my faves.
And of couse a slightly less zoomed in view of the whole group, including Turret Peak, Pigeon Peak, Monitor Peak, and Animas Mountain. So freaking good looking!
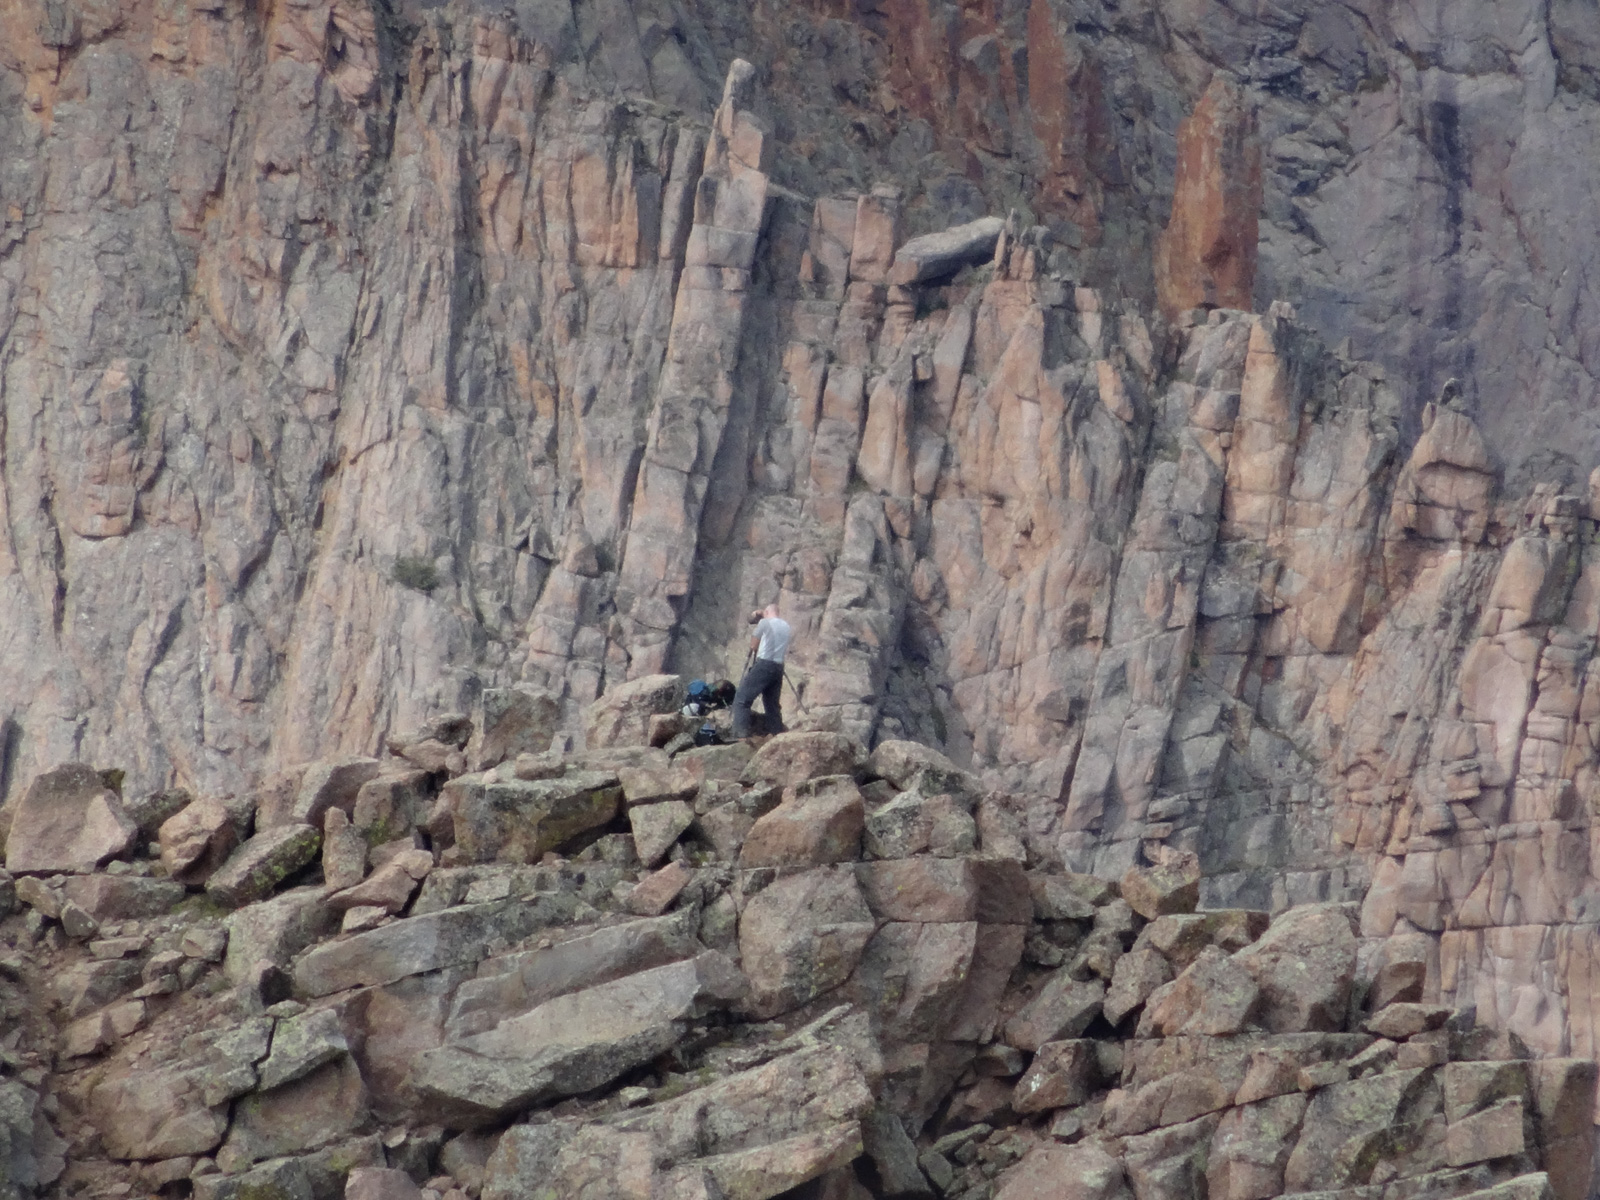
I also really appreciated the tight view of Sunlight and Sunlight Spire. Amazingly, hidden in this photograph is a tiny person I found while exploring the image from home. See the subsequent cropped photo to see if you can spot them.
Zoomed in view of where the person is - it's like Where's Waldo.

I could hear some people celebrating over on Sunlight and probbaly Eolus. Glacier Point, Eolus, and North Eolus looked mighty from this vantage as well.
My gaze kept taking me back over to Arrow and Vestal, which rose high above a small lake between Knife Point and there, with the nasty rock of Peak 10 in the foreground.

Of course, I could not help but study Jagged Mountain - it was just scary and impressive looking from here.
Just before the eclipse, I got in one more shot of Sunlight by itself. I really loved how the ridge sweeps up from below and terminates at the summit like some impressive mountain god.
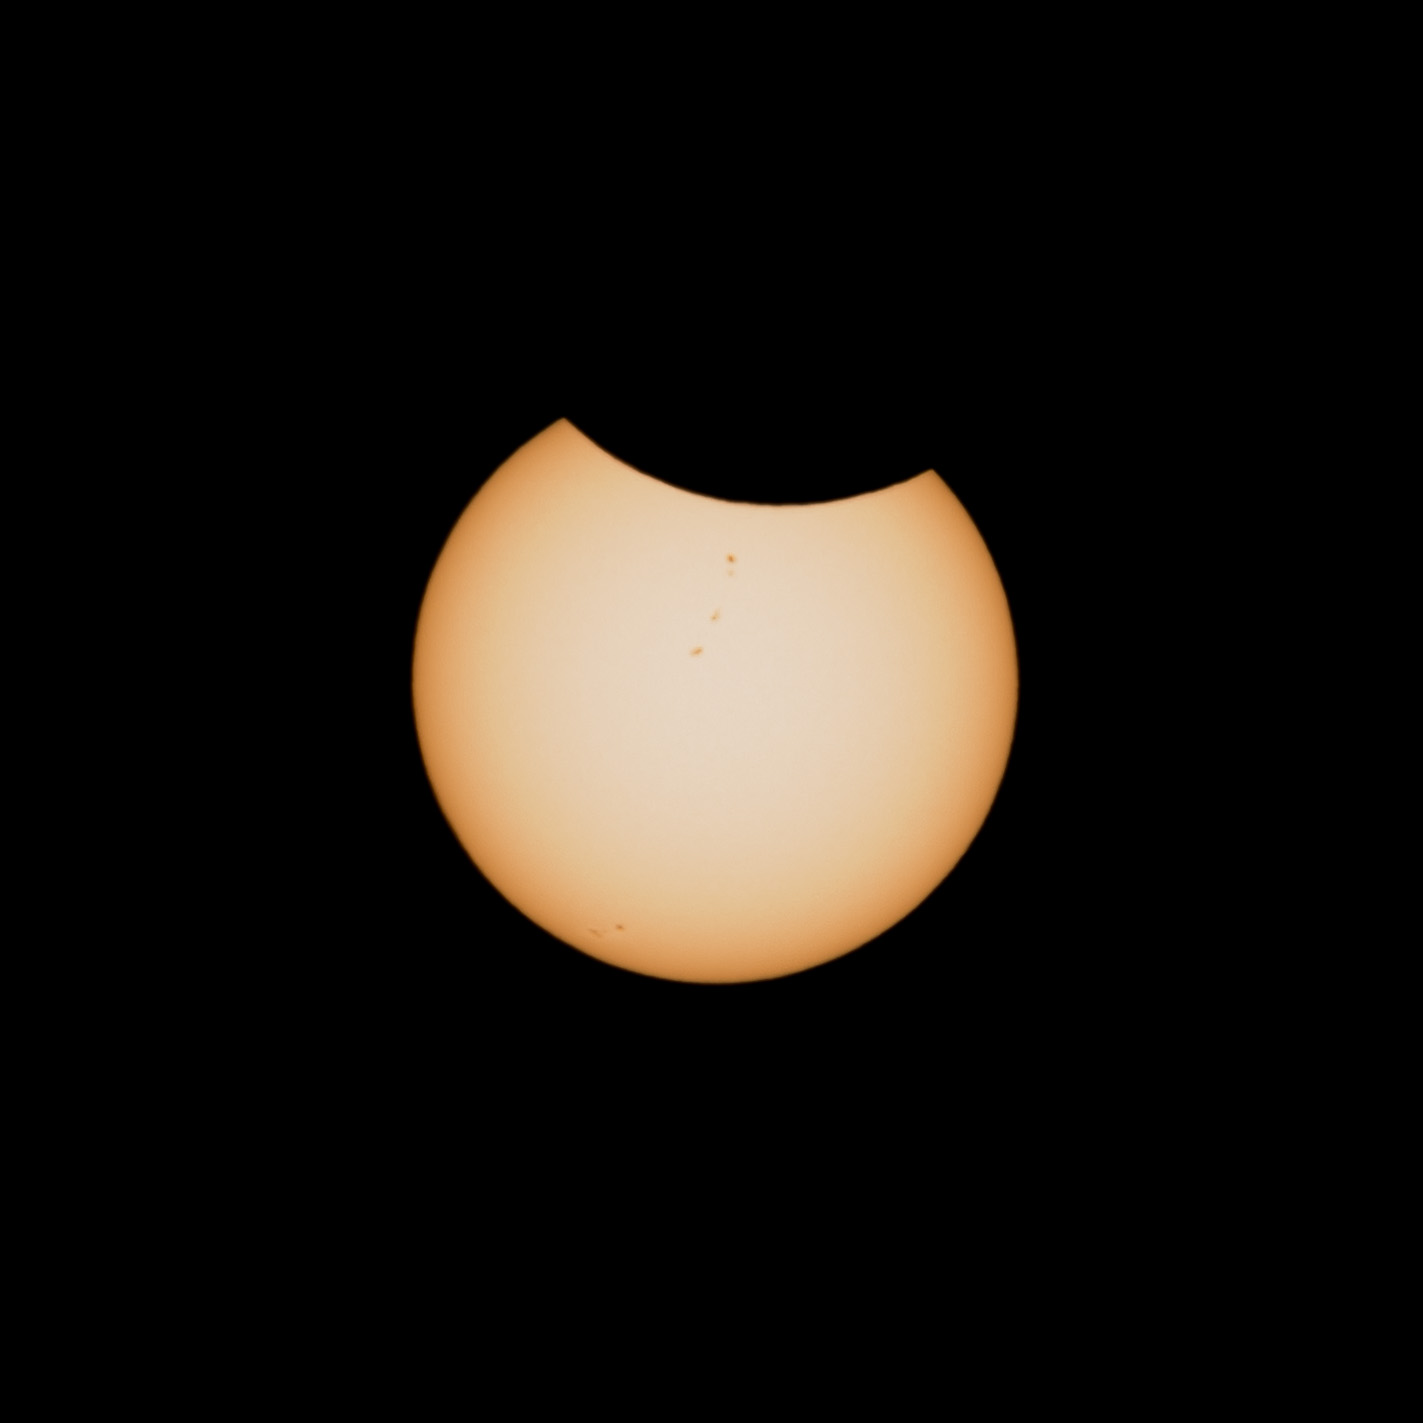
Unfortunately, clouds began to really move in and obscure my view of the sun just before the eclipse began. Additionally, the clouds did not appear to be too friendly at all; however, I might just be the only person on earth that can say they photographed a solar eclipse from the top of a 13,000 ft. mountain.
Since the weather looked iffy, I decided to descend back into the basin. I could not make out Natalie or Shawn on Peak 10 with my bare eyes or my telephoto lens, so I took my time on my way down, looking for a nice scene to snap some more shots of Jagged paired with some wildflowers - this time, Rosy Paintbrush, probably my favorite flower.
I waited around for about an hour for Natalie and Shawn. I did not see them or hear them, so I decided to go down. One last look back, I made Shawn out on the ridge between Knife Point and Peak 10! He must have scrambled over from Peak 10 (impressive). I was tired and my feet were sore, so I headed back down.
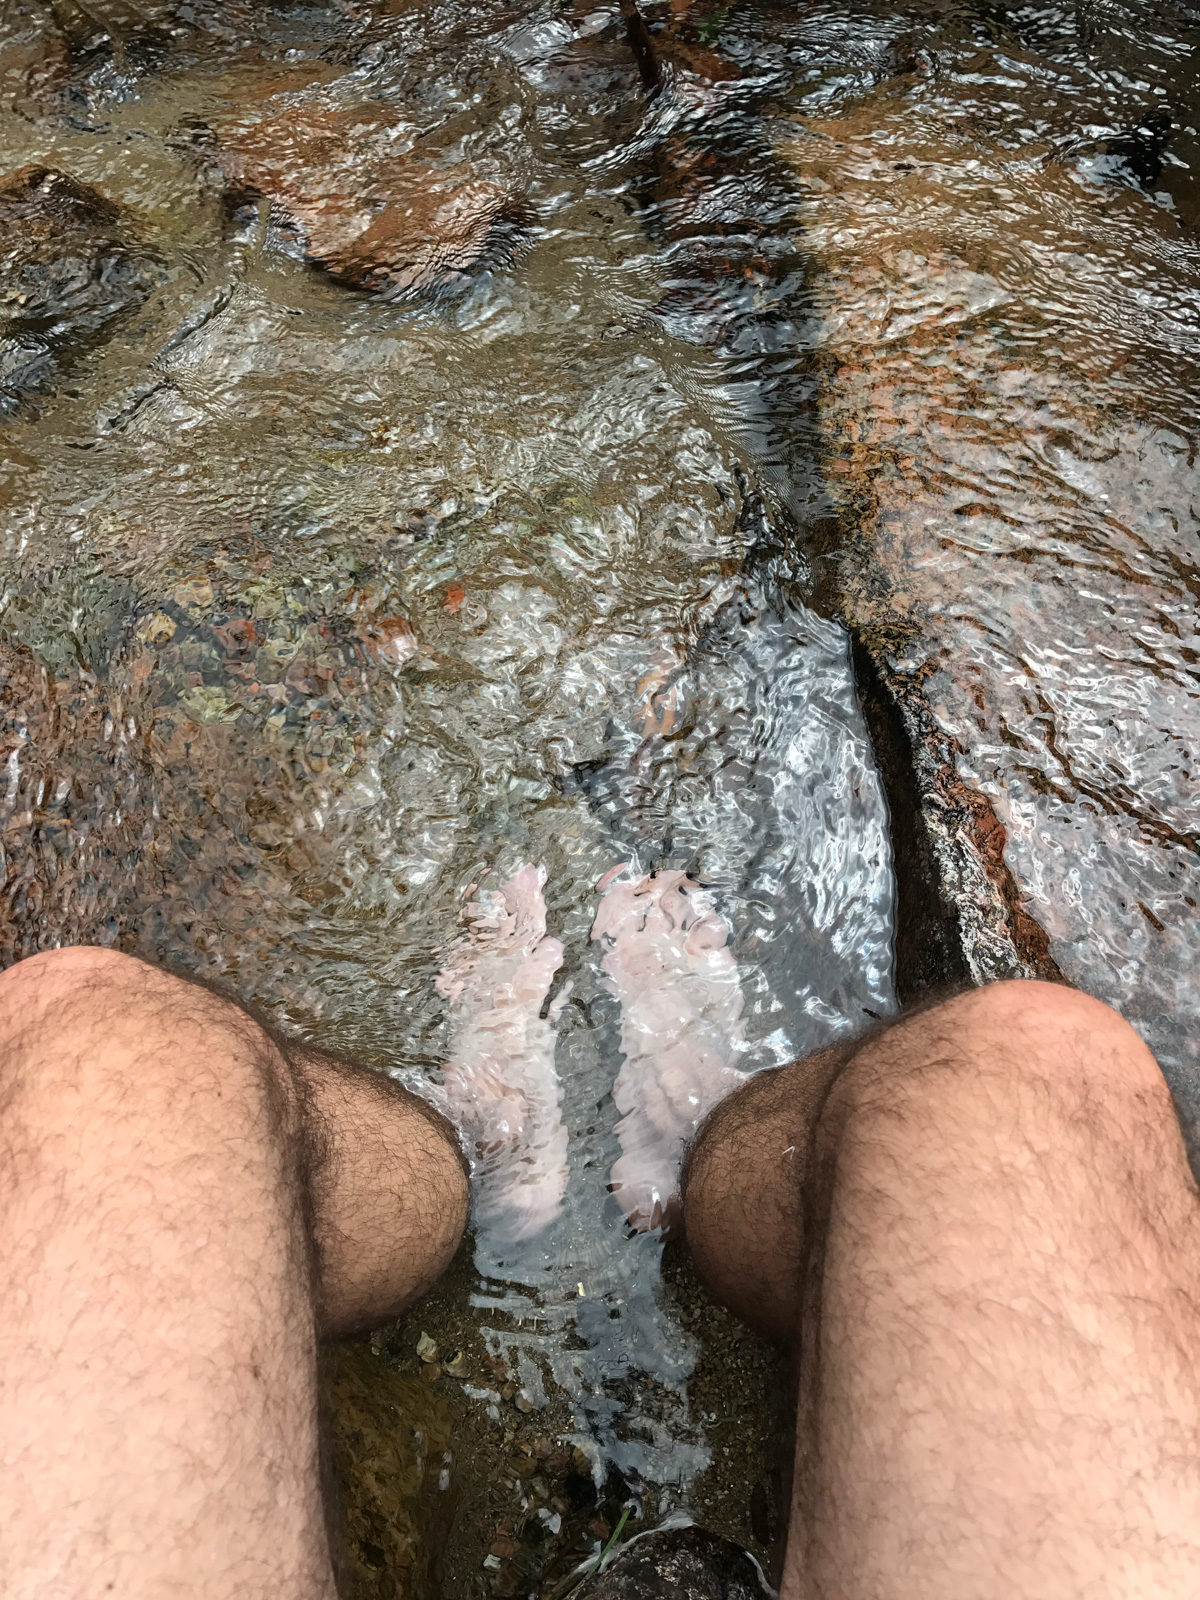
I arrived back at camp and decided to soak my feet in the creek. For some reason, my boots had shrunk since I last wore them and they were really encroaching on my achilles heels. Awww, sweet cold relief!
Natalie and Shawn both came into camp shortly after my arrival and we talked about our climbs. All was well and we made plans for a 4:30 start for Jagged Mountain. My nerves were getting more and more knotted.
DAY 3: 4:30 AM start and climb of Jagged Mountain.
Beep. Beep. Beep. Time to wake up and crush another Centennial. That's what I kept telling myself anyways. Let's do this! We got up, packed up our ropes and harnesses, re-filled water, and were off! We arrived in the upper basin just in time for some nice sunrise light above Sunlight Peak. No tripod today.
From the upper basin, the plan was to swing around the west face of Jagged and up into the lower basin between Jagged Mountain and Leviathan Peak. We were able to find a nice trail up from Sunlight Creek and made our way up, admiring Peak 10 and Jagged most of the way around the bend.
A nice pink and orange hue eminated from a small tarn below us and between us and Mount Oso in the distance.
Once around the west face of Jagged, we finally found the beginning of the steep climb up to the basin below Jagged's north face. We each decided on a separate route up from here - Shawn went right and around the huge blocky, grassy slopes. Natalie went left and up where some goats were grazing, and I decided to go pretty much straight up the grassy ledges. I think each of our routes had different advantages.
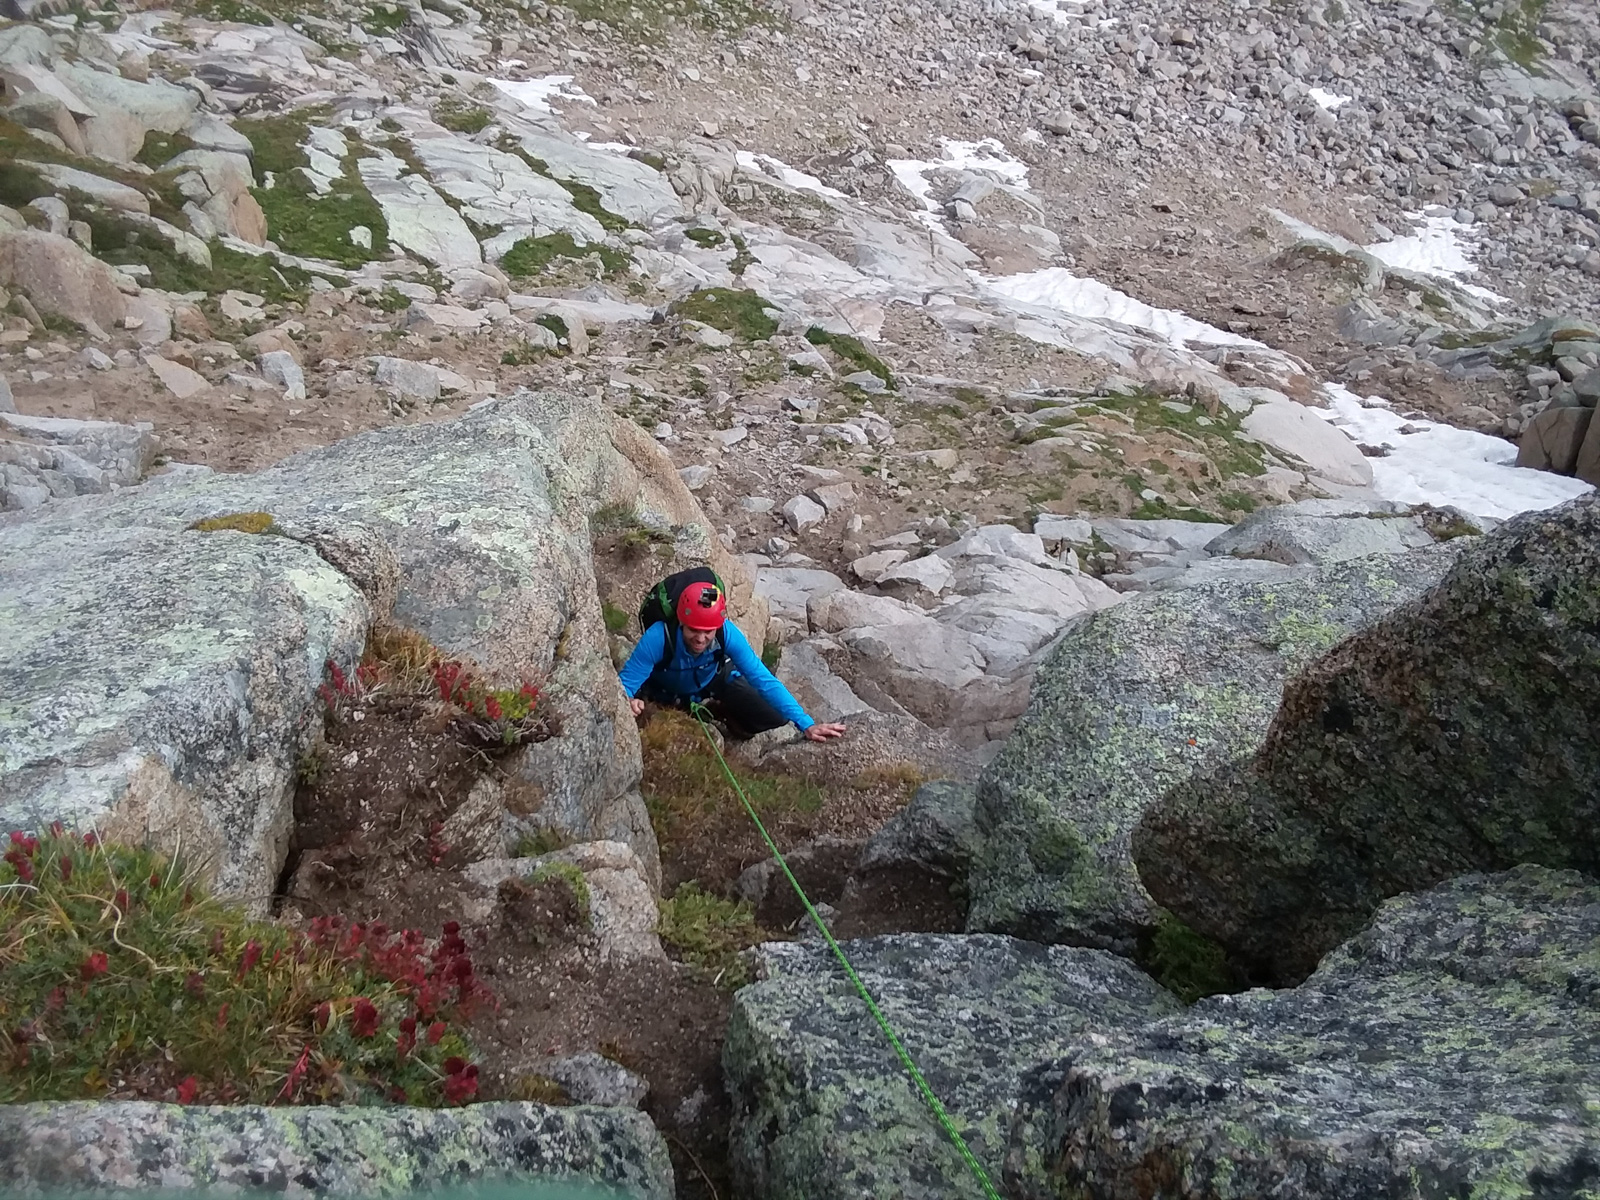
Jagged was impressive from this vantage.
We each reached the area below Jagged's north face at about the same time, which afforded some pretty remarkable views of what lie ahead.
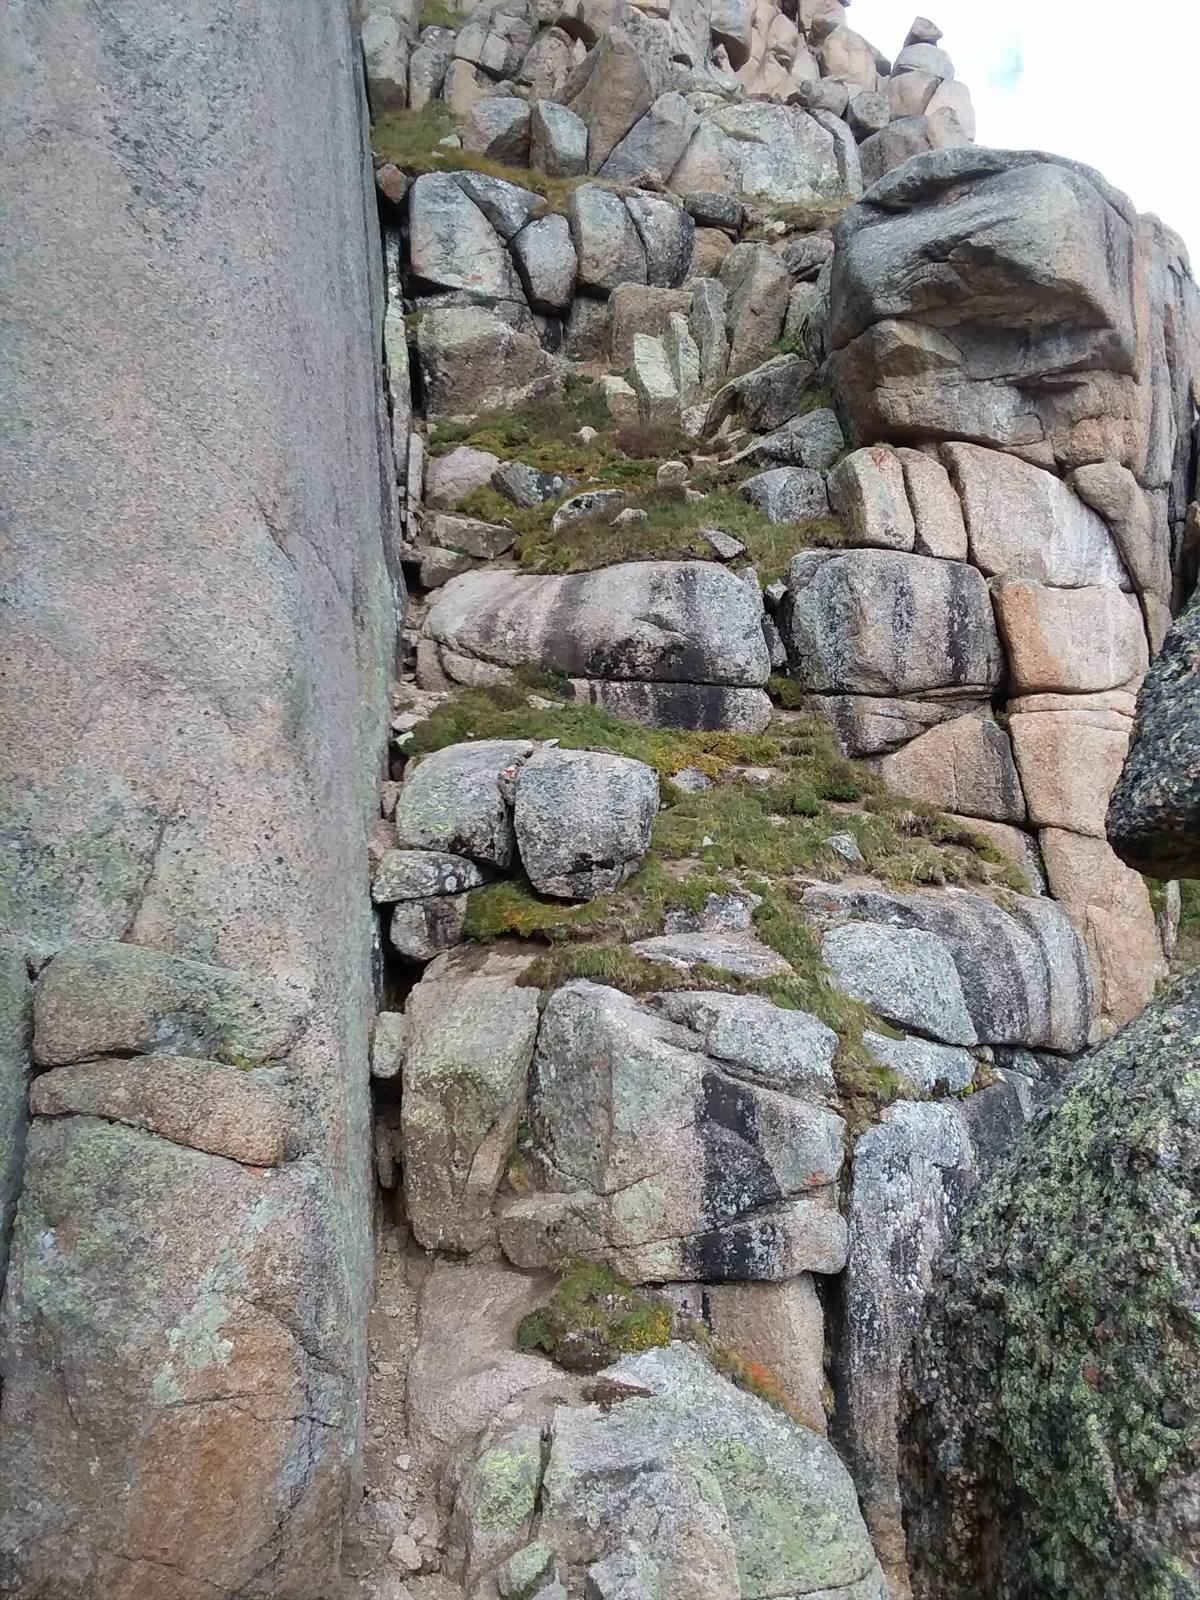
If you had not studied the route before hand, seeing this jumbled mess of rock that was called Jagged would look mighty itimidating.
We more or less found the route all the way over from Jagged Pass to our right and followed the grassy slopes to the first crux of the route, which requires rope for the faint of heart (that's me). We geared up here, and Shawn and I realized we had identicle harnesses.
Looking up the first crux, it looked pretty straight forward, but Natalie said there was some moves that would make me appreciate having a rope. She was right. I should say from this point forward, I was mostly focused on getting GoPro footage and climbing, and did not take any photos until nearly the end of the climb. Thank you to both Shawn and Natalie for your images, they helped pull off the trip report!
Shawn went first without rope and around a different way altogether without any issues. Natalie led the rope up and placed a small cam about halfway up and then set-up an anchor to belay me from. Here's a shot from Natalie of me coming up.
Here I started my GoPro footage, which I'll admit is a little like being on a rough boat at sea... but hopefully it gives you an idea of what the climb is like.
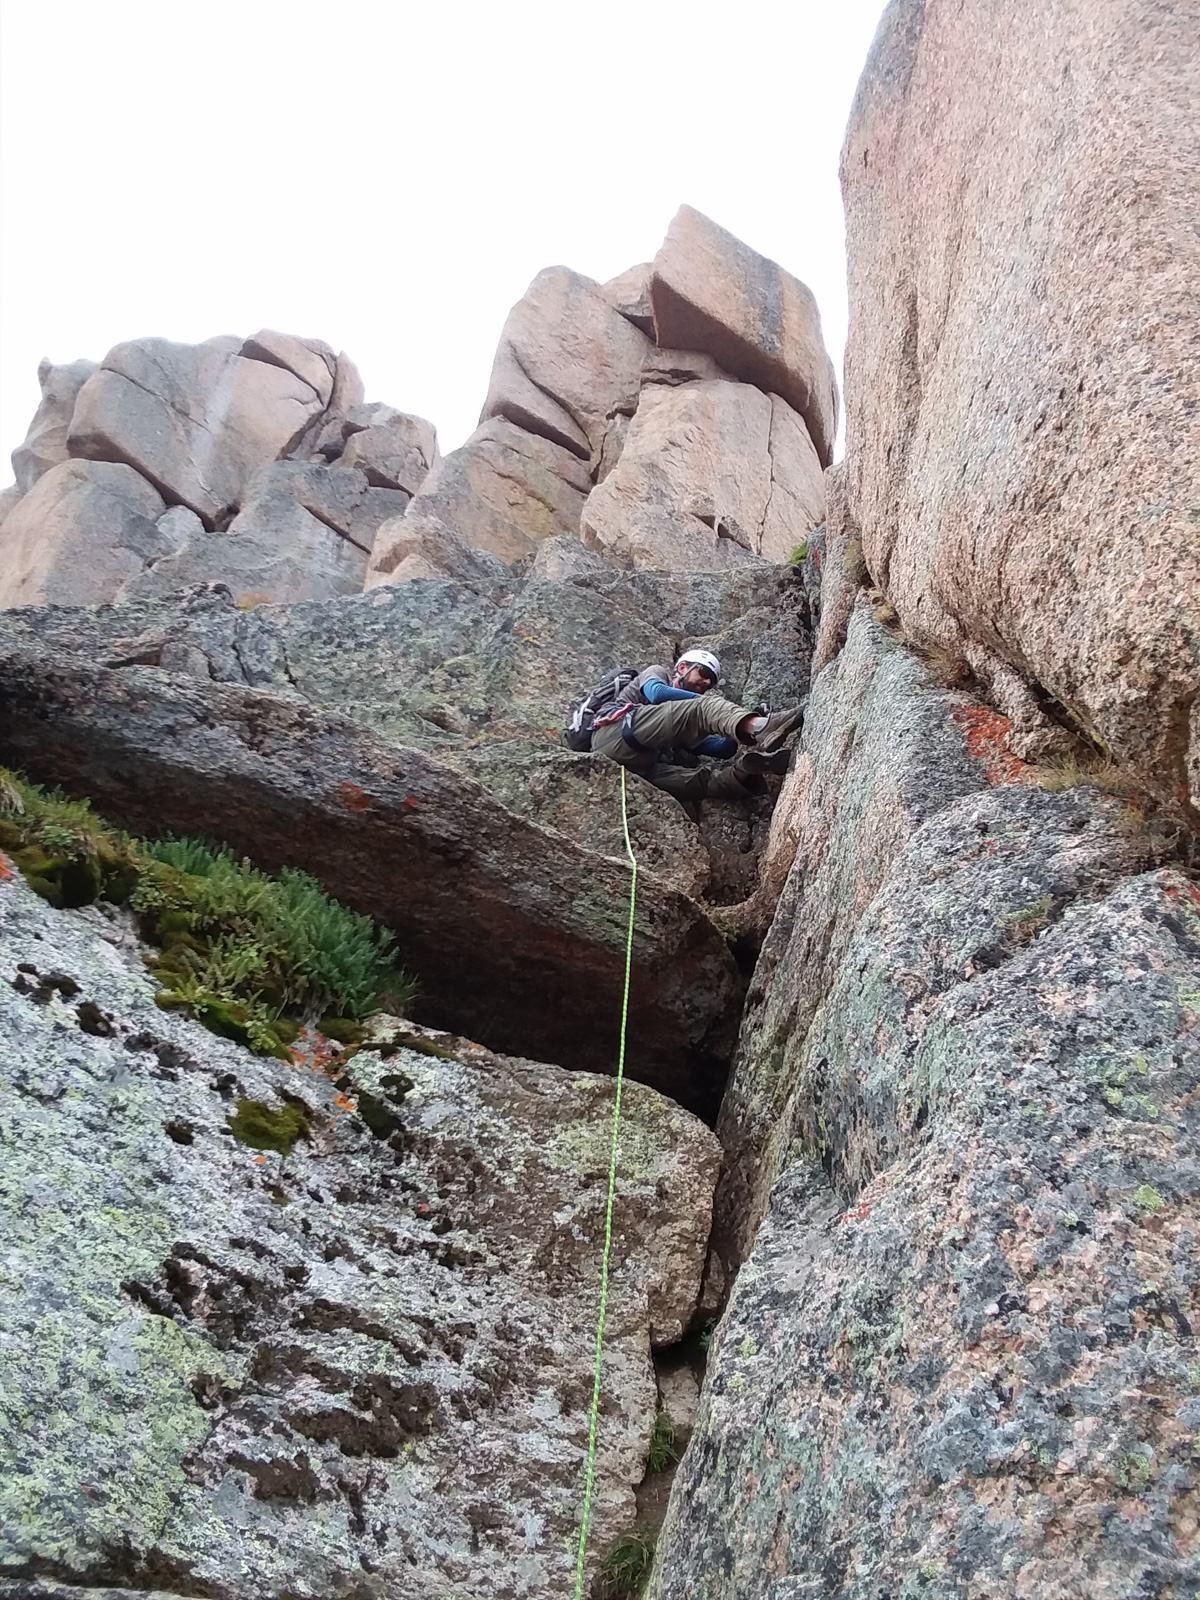
After the first crux, which had some spicy moves to contend with, we quickly made work of the grassy ledges above us, weaving right and up to the next crux, which consisted of a small 7 foot tall boulder (lower left) which we treated as a chimney, and some easy scrambling up above. I was thankful to be on rope here as I slipped on the very first move (which unroped would have been just annoying but potentially dangerous) trying to get up into the wedge.
The belay station for the second crux offered a nice view of the exposure we were facing on a consistent basis.
The third crux was the spiciest of all, which Shawn decided to free climb up with our rope. It involved some easy moves down low with a really challenging finish requiring some committed movement above big exposure.
The final move kept me stumped for a minute... as documented by Shawn.
Topping out on the third crux felt great. That last move is quite a tough one in my opinion.
Almost there!
The video section for the third crux is HERE.
After the third crux, a quick scramble up revealed the notch which took us to the south side of Jagged. The south side was incredibly exposed - one false step and you would fall to your death without question. We all slowly weaved our way up and around the back side, picking our steps carefully. One move in particular leaves you above nothing but air and a strange jutted out boulder that awkwardly prevents you from easily going around the side of the mountain (as seen just in front of me in the photo below).

The backside was awesome... I loved it! Here's video from the notch between the two sides and the chimney.
We reached the next crux of our climb, the "class 3" chimney, which I would personally rate at class 4, but I might be generous! Shawn seemed to enjoy it quite a bit!
Natalie and Shawn seemed to enjoy watching me squirm up the chimney, which I found to be quite fun!
Upon reaching the top of the chimney, I was really excited. This mountain was easily one of the hardest but also one of the most fun that I've ever done.
Here is the footage of the chimney climb.
After the chimney, only one small section remained, which required some adept scrambling up and then across a chasm. Even though there was only about four feet between one side and the other, it was a very committed move to get across to the last step as seen below.
Here is footage from the final push to the summit.
And finally at last - we topped out! Thanks for the photo Shawn! What an exhilarating moment!
What does a nerdy photographer do when he gets to the top of Jagged Mountain? Take a 360 panorama, of course!
We made a makeshift tripod out of rocks and got a sweet shot of the three of us on top. What a day!

I saw a photo opportunity as well - there was a sweet ledge at the south end of the summit, overlooking Windom, Sunlight Spire, and Sunlight, so I sent Shawn down for a shot of him, and then a shot of me.
Such an awesome spot!!!

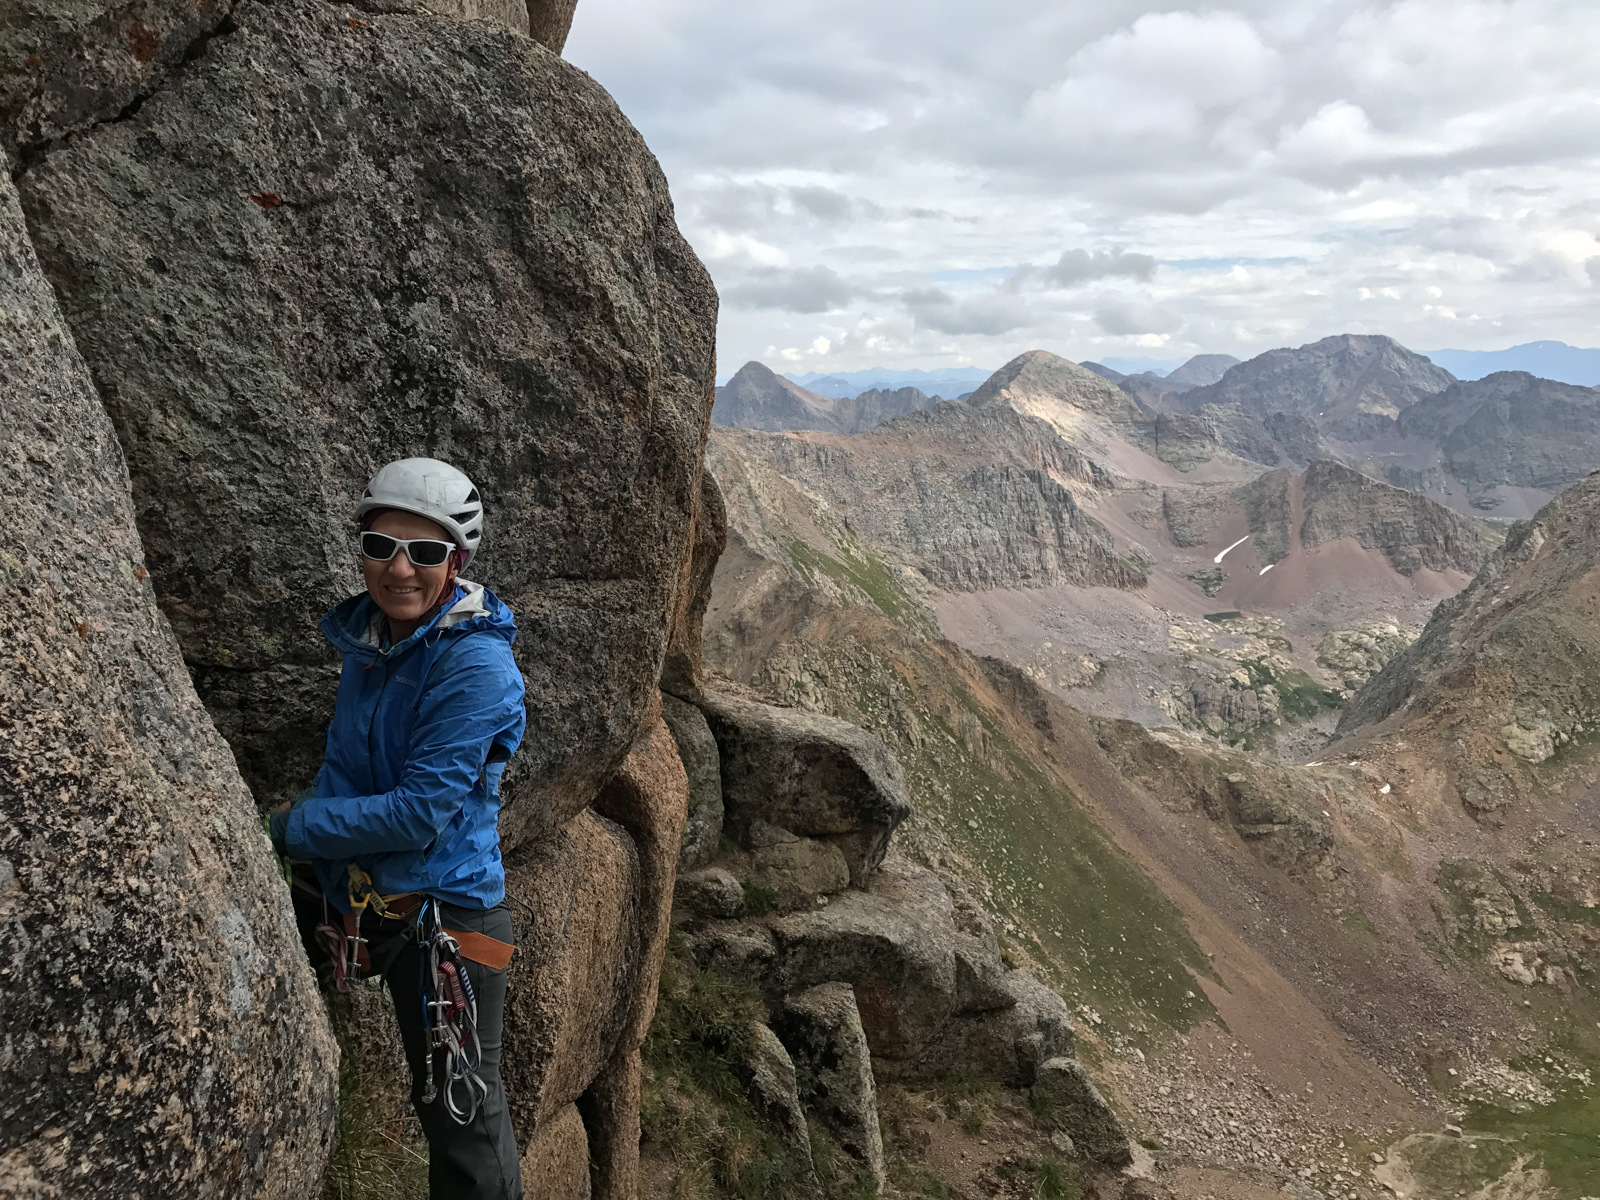
I also wanted to get a shot of Natalie with two of my favorite peaks behind her - Arrow Peak and Vestal Peak.
As we were packing up to head down, the clouds broke and shined light on Pigeon Peak. I got excited and photographed it. So awesome.
All good things must come to an end, so we decided to head back down before getting stuck in some nasty weather. It looked like it should hold for us for at least an hour or two. Shawn went first. Here's a shot of him negotiating the first tough move back down.
I found downclimbing the chimney to be a lot of fun, using my feet and back as leverage for the first and last section.
The tricky move back around the jutted out boulder was a little easier on the way back for some reason.
Directly after the tough move, there's a way to go up instead of around, so both Natalie and I chose that option instead, finding it to be easier.
Back on the north face, we quickly made our way down to the 3rd crux.
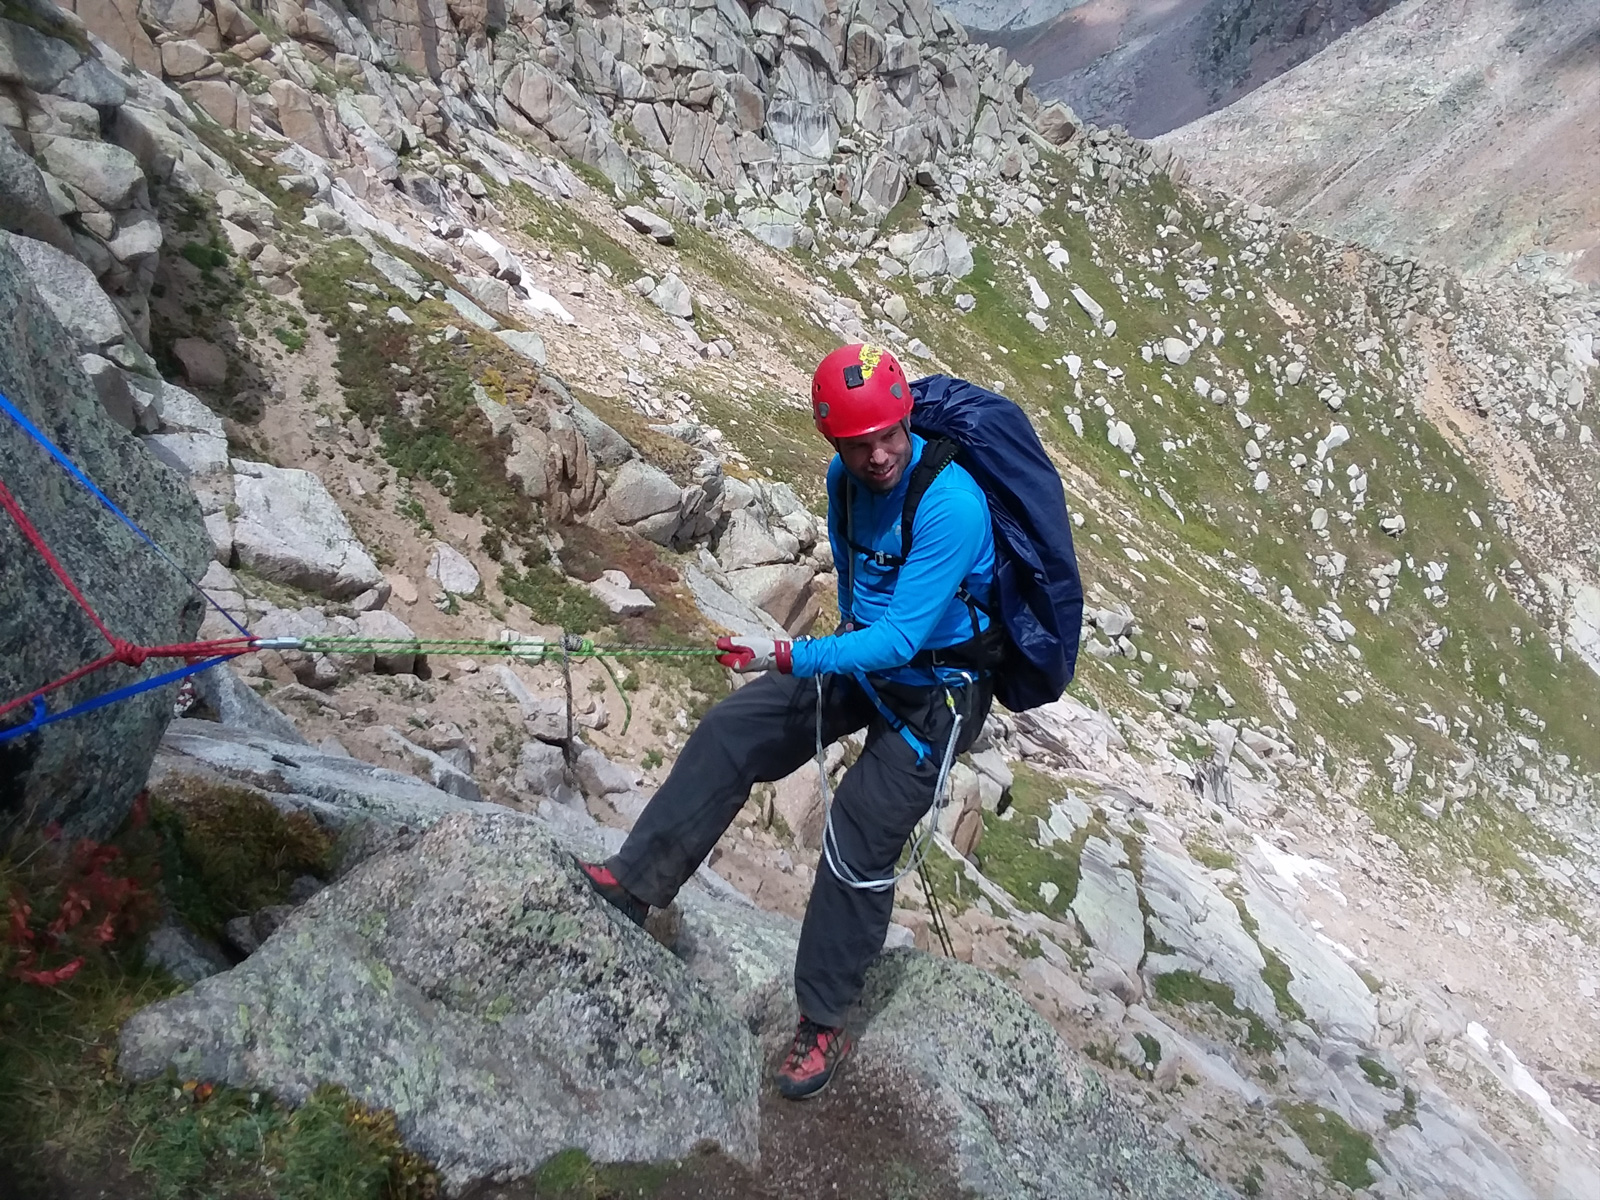
We rapped down without any problem, tying together two 30 meter ropes using a water knot. The next section was quite easy to rappel as well.

I found the final rappel the hardest, just due to how long it was down the gully. Here we go! Thanks for the shots Shawn!
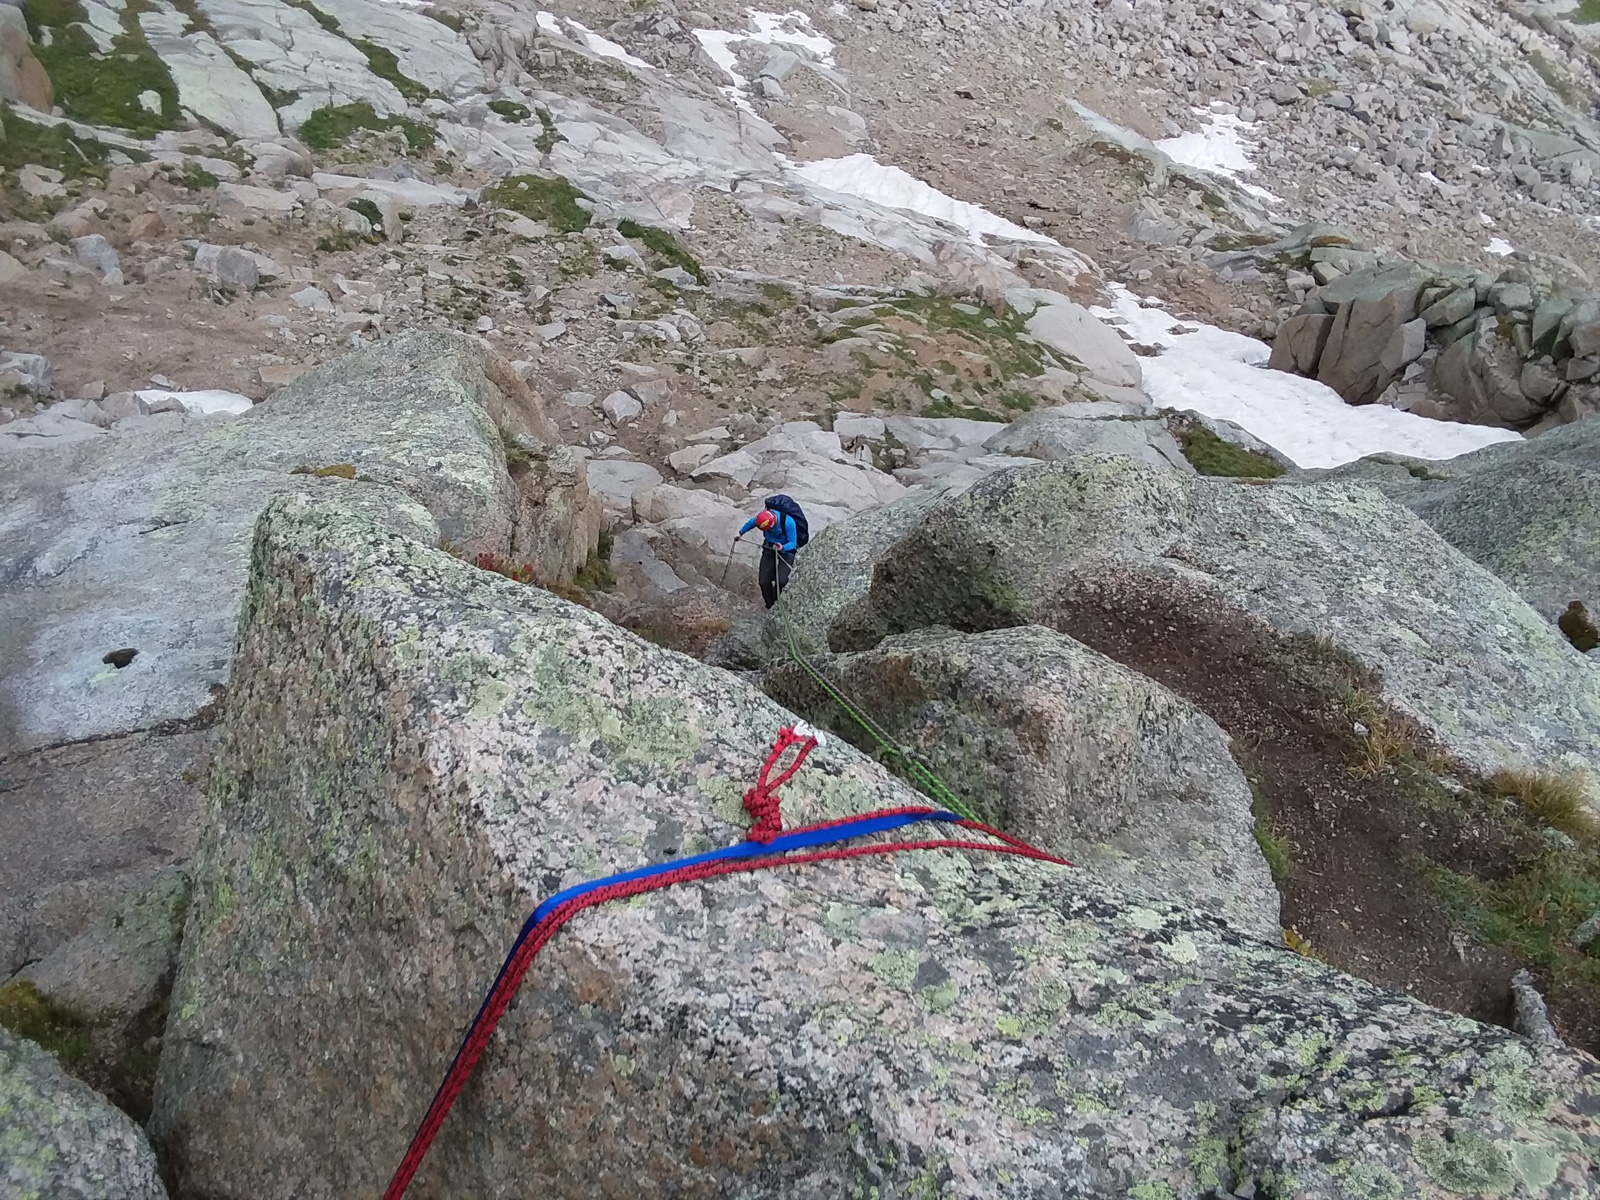
A look back up shows just how long the first crux really is!
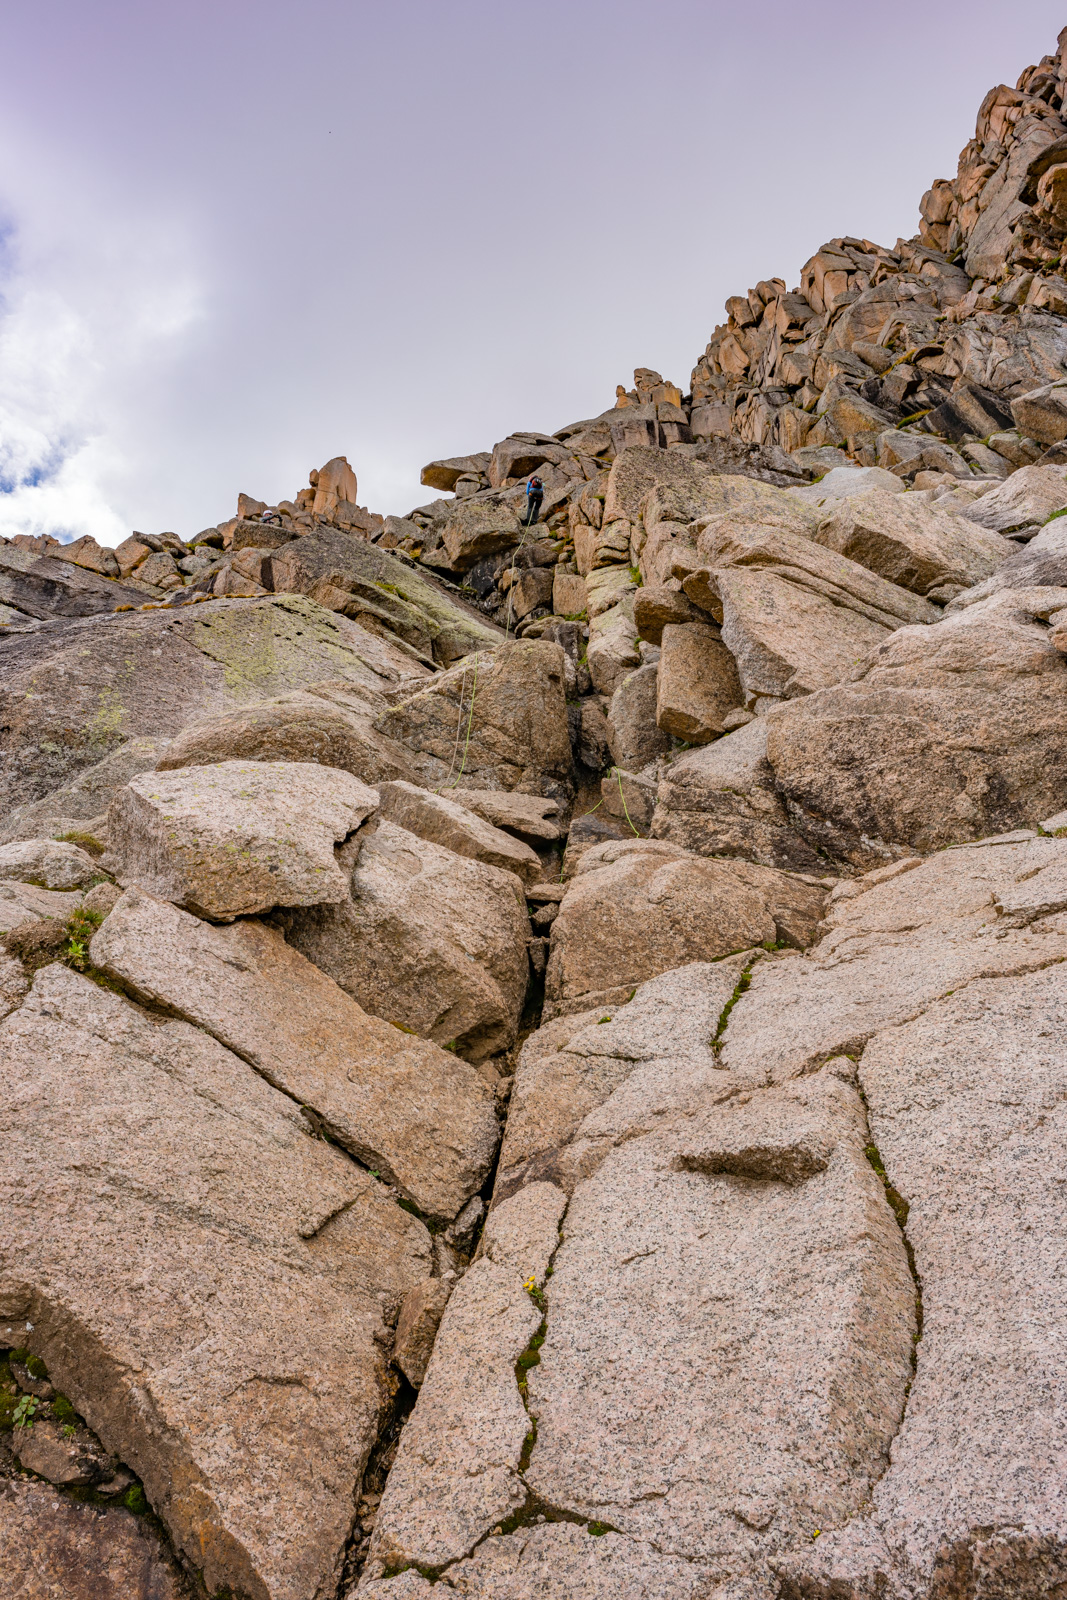
Natalie stopped to appreciate the view as well as Shawn rappelled down last. The views of Leviathan were awesome from here.
We all made it down safely from the tough sections and got ready for some rain and graupel (you know, that stuff that's like tiny hail). It was good that we avoided a "Graupel rappel." Har har. We all decided to go down the way Shawn came up as it sounded like the most scenic route. It was awesome. We ran into a solo goat while some interesting rain storms passed by.
As we lowered into the basin, the atmospheric clouds added some nice effect to Sunlight and Windom.
It was hard to keep moving with a view like this. Natalie and Shawn forged ahead and are seen bottom left.
As we got lower, we found this really awesome pond with a killer view of Jagged Mountain. I was pumped.
Natalie stopped to take it all in below Jagged.
We finally reached the lower sections just before rejoining the main trail and stumbled on a nice little pond which reflected Sunlight nicely.
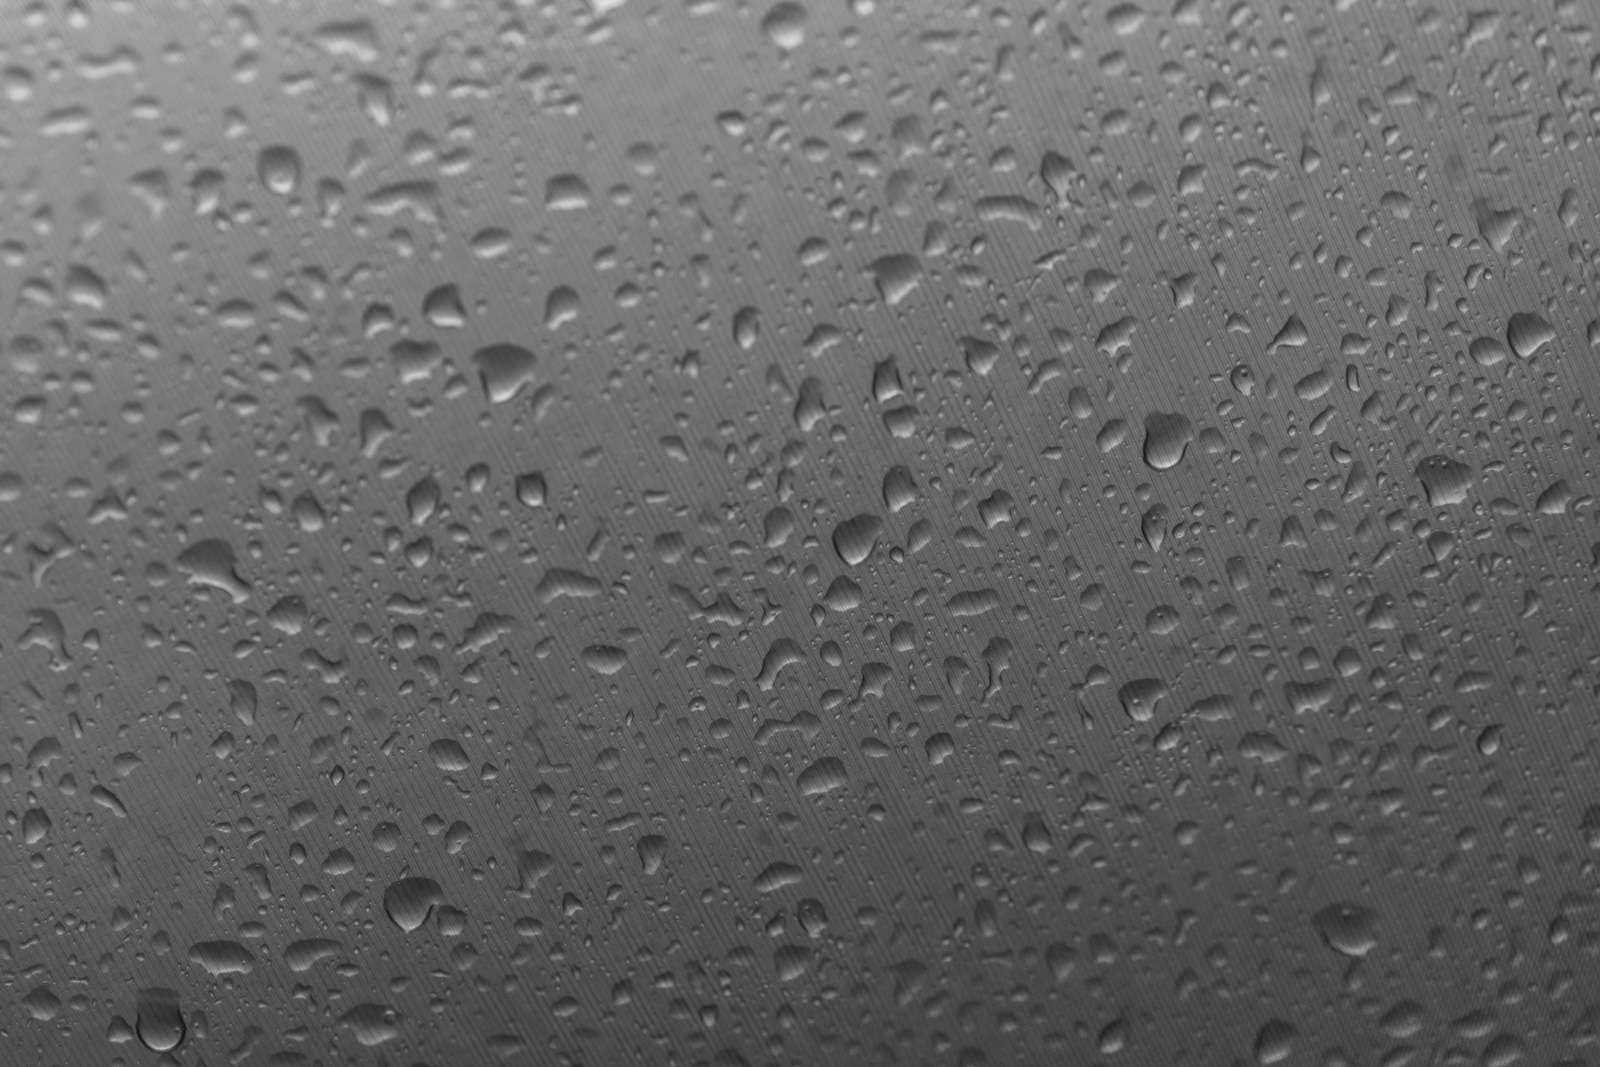
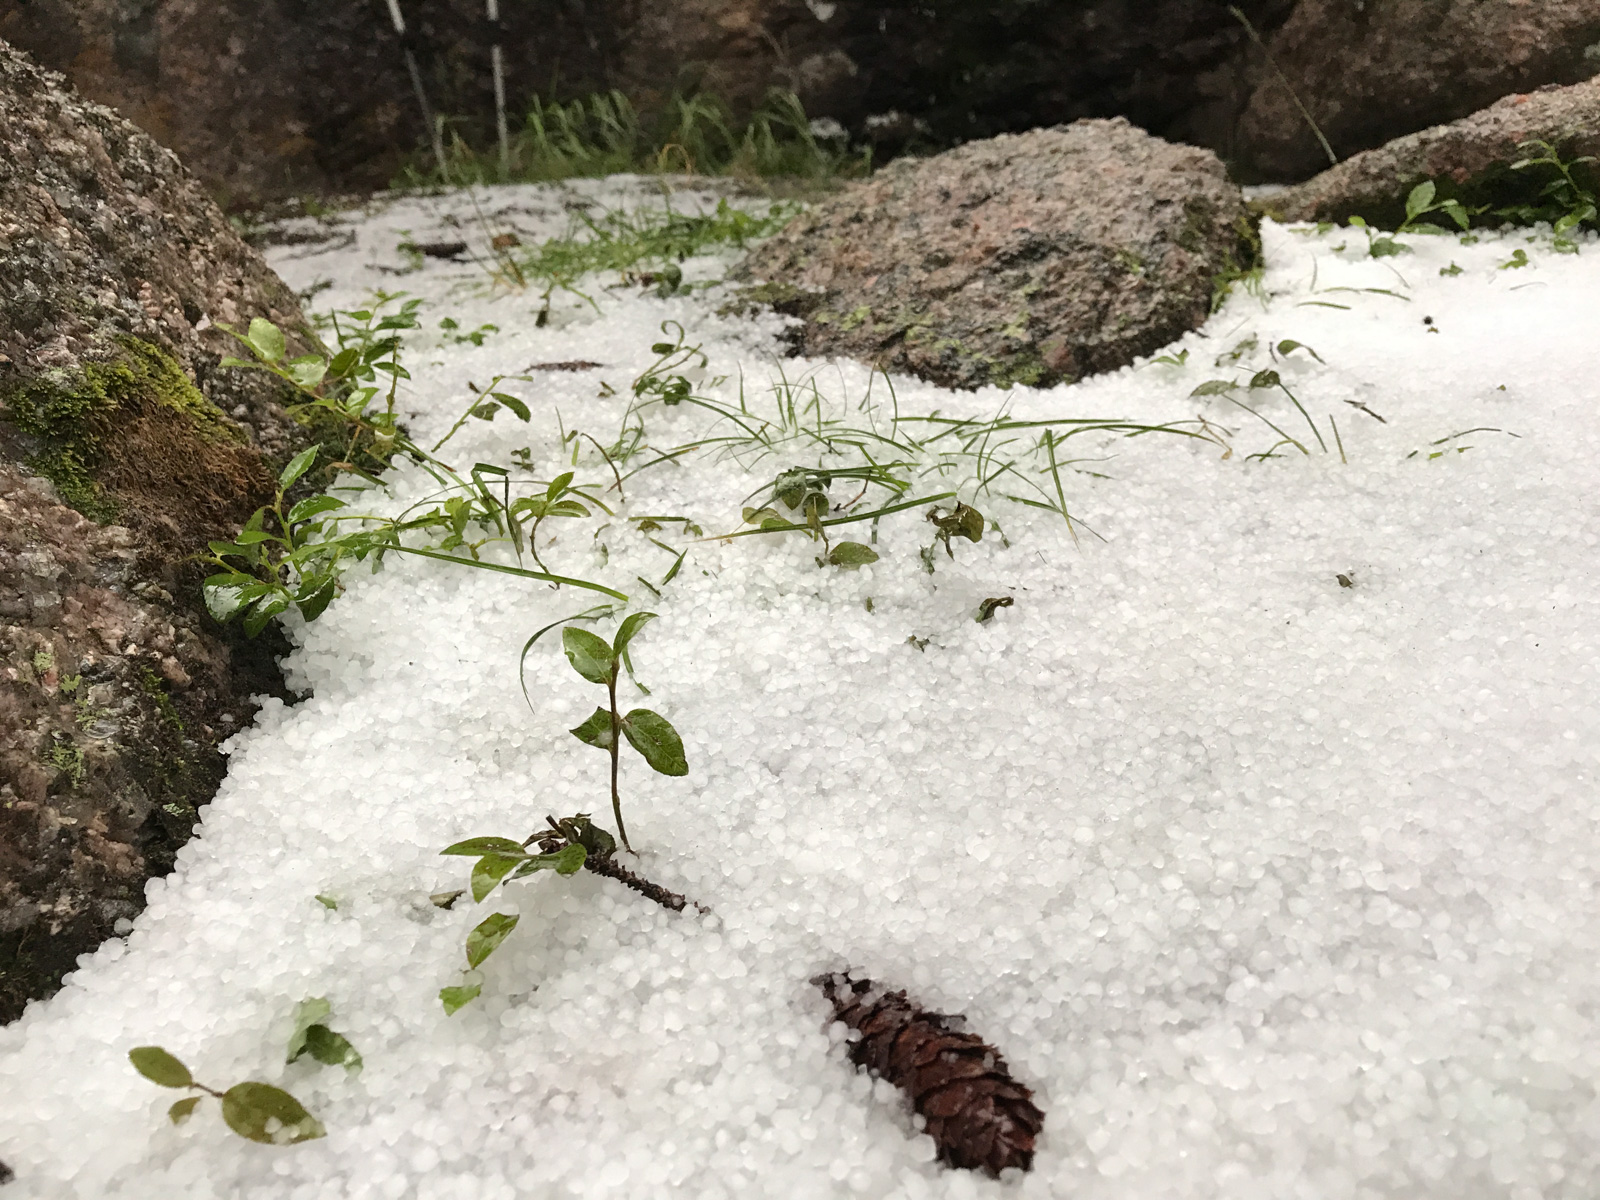
We reached our campsite without any issues. Shortly after, it began to rain... and then hail, for a couple of hours straight. It was a lot of water! I was oddly not that tired and decided to try to read and then take a photo of the water on my tent.
After the storm stopped, I poked my head outside to see the damage. Holy moley! Look at all that ice!
We finally decided to eat dinner and crash, as I was planning on an early hike out the next day, and it would be a tough one for sure.
DAY 4: Hike back over Hunchback Pass to Beartown.
Rise and shine. This would be a tough day. At least it started out well with a parting gift from Jagged Mountain at sunrise!

On the way out, everything, I mean EVERYTHING was wet. The dense vegetation along sunlight creek was almost unbearable. All of my clothes and both feet were soaked. Good times.
I stopped after Vallecito Creek to change socks and rinse out my boots as well as to put on some dry clothes. I chatted with a nice couple camped there and then departed. I kept my head down for most of the way back but got lucky to catch a porcupine sitting at eye level in a tree right next to the trail. I decided to go around.
It took me about 6 hours to get from camp to my car in Beartown, and I really slowed down at Hunchback Pass - I had just run out of gas. It did not help that my water reservoir was leaking and I had to stop frequently to pump water. After cresting Hunchback Pass, I was welcomed with a nice view of UN 13,308 across the valley. A nice parting gift from the Weminuche, my favorite place on earth.
Thanks again to Natalie and Shawn, you guys were amazing partners! Here's to Natalie, who led us up!
Thanks for reading! I hope you enjoyed this one. Sorry if it was slow to load! Lots of photos!
Climbing Pigeon Peak & Turret Peak via Ruby Basin - a sleepless soul-filling adventure

I first admired Pigeon Peak's utterly impressive east face from the summit of Arrow Peak in 2010 on one of the most epic trips I've been on in my life. Ever since then, I knew that a trip up Pigeon Peak would be in my future. It only took 6 years, but I finally pulled it off. If someone would have told me at the start of the year that I was going to photograph the Perseid Meteor Shower from the saddle between Pigeon Peak and Turret Peak this year I would have just laughed it off. After living in Portland, Oregon for two years, I had developed a bit of a beer gut and lost some of my "mountaineering shape" I had worked on while going after the 14ers from 2008 - 2012. A year ago the idea of pushing myself hard enough to photograph the best meteor shower of the year from 13,000 ft. would have been laughable... but here we are in 2016 and that's exactly what I did. In fact, the details of my trip, in retrospect, are a bit staggering to take in, at least for my old 37-year-old body. The full details show nicely on my GaiaGPS track, which is downloadable. You can purchase GaiaGPS here and help support the site.
8/12/16 - 8:30 AM - depart Durango on the Durango & Silverton Narrow Gauge train
8/12/16 - 11:30 AM - dropped off at Needleton by the Durango & Silverton Narrow Gauge train
8/12/16 - 3:00 PM - arrived at Ruby Lake
8/12/16 - 5:00 PM - arrived at meadow in upper Ruby Basin below Turret Needles
8/12/16 - 10:30 PM - departed without sleep for the Turret Peak / Pigeon Peak saddle to photograph the Perseid Meteor Shower
8/12/16 - 11:45 PM - arrived at Pigeon / Turret saddle and began photographing Perseid Meteor Shower
8/13/16 - 2:00 AM - moon sets (still no sleep, too cold)
8/13/16 - 4:30 AM - arrived at Turret Peak summit
8/13/16 - 5:21 AM - began photographing sunrise from Turret Peak summit
8/13/16 - 6:15 AM - left Turret Peak summit to head back to saddle
8/13/16 - 6:45 AM - arrived at saddle
8/13/16 - 8:00 AM - arrived at secondary saddle to enter North Pigeon Creek basin and descend down 1,700 ft. to climb Pigeon Peak
8/13/16 - 8:15 AM - arrived at base of Pigeon Peak on northwest side of Pigeon
8/13/16 - 9:40 AM - arrived at summit block of Pigeon and class 4 section
8/13/16 - 10:00 AM - arrived on Pigeon summit
8/13/16 - 11:30 AM - arrived at secondary saddle and began to regain Pigeon / Turret saddle
8/13/16 - 12:55 PM - arrived back at camp in upper Ruby Basin (commence sleep for the first time since 6 AM on 8/12/16 - that's 31 hours of being awake without sleep)
8/13/16 - 7:00 PM - photograph sunset from upper Ruby Basin
8/14/16 - 7:30 AM - photograph sunrise from upper Ruby Basin
8/14/16 - 9:00 AM - leave upper Ruby Basin and hike out
8/14/16 - 10:00 AM - arrive at Ruby Lake
8/14/16 - 12:05 PM - arrive at Needleton and wait for train
The grand total was 9,286 ft. of vertical ascent in 10 hrs, 52 mins of movement with a total of 19.3 miles of distance covered. Not bad!
To some (like Andrew Hamilton) those stats not might seem very impressive, but it felt pretty great to me, especially considering the extra 10 pounds of photography weight I was carrying.
So, from the beginning... where was I? Ah, yes, taking the train from Durango. I had originally planned on going to climb Silex and The Guardian with Natalie Moran from 14ers.com, who I had done Dallas Peak and Teakettle Mountain with me back in 2013; however, I did not think I was going to be able to get the day off of work, so I cancelled... and at the last minute on Thursday night I was able to swing the day off, so I made hasty plans to get Pigeon and Turret under my belt. Knowing that the Perseid Meteor Shower was peaking Thursday and Friday night with the radiant (the part of the sky where the meteors originate) coming out of the north east, I made plans to hike all the way up into Ruby Basin and try for the Pigeon / Turret saddle with a view looking north east towards Animas Mountain and Monitor Peak, all illuminated by the setting moon until 2 AM. These plans were of course made possible by studying maps, reading Roach's 13ers guide, and by using a great app called PhotoPills, which I've written more about HERE.
The trip on the train went without a hitch and the scenery was nice, but nothing compared to what was in store for me soon.
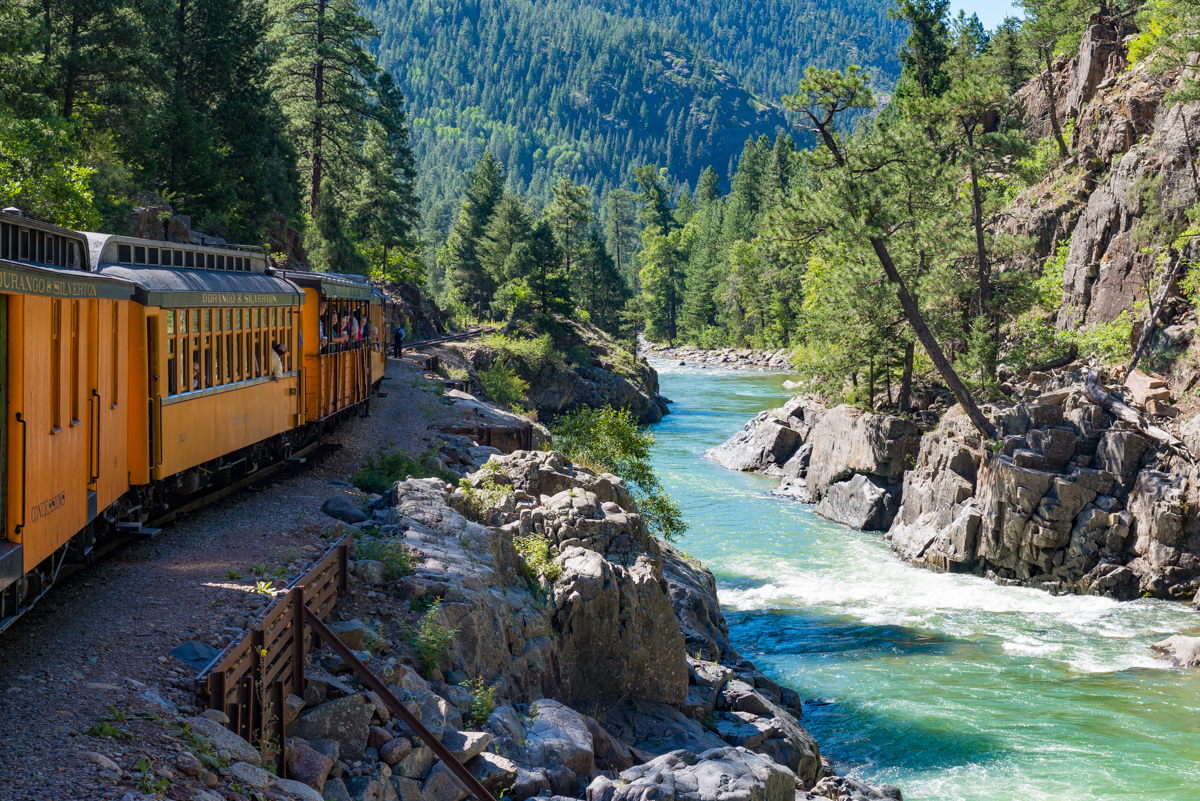
The train stopped at Needleton and at least 40 people got off to begin their backpacking trips in the area. The brakeman responsible for unloading the packs was throwing them off the box car in a rush, much to everyone's dismay. Water bottles, food, stoves, bags, and more went flying out of people's packs. I later found that my water filter was damaged in the ordeal. I was thinking about filing a complaint with the train company becuase this employee clearly did not care about anyone's stuff. I was lucky none of my camera equipment was damaged. I crossed the bridge over the Animas and watched as everyone else headed south towards Chicago Basin, while I went north for Ruby Lake & Ruby Basin. It turned out only two other people from our train went up into Ruby Basin with me, but I would not run into them until my second day. In preparation for this backpack, I read and re-read Roach's descriptions for the approach. It sounded pretty intense: "...this is a very rough approach. A direct ascent up Ruby Creek from the Animas is so difficult it has left several strong people speechless." Wow, those are pretty strong words from Roach, who I have often teased in other trip reports as being vague or non-descript. I took Roach's cautionary words with a grain of salt and went for it. I felt pretty strong and was up to the task, so I began. Luckily, I had my friend Natalie Moran's GPS track downloaded into my phone via GaiaGPS so that I could roughly keep track of the trail. This was particularly helpful right off the bat when trying to locate the turn-off from the Animas River Trail into North Pigeon Creek.

Shortly into this trail, it became steep. Steep and unrelenting. I had pared down my pack weight to 38 pounds, not bad considering all of my camera gear; however, this trail was downright brutal. Roach was not joking. I kept my eyes peeled for a carving of a columbine flower, which was supposed to signify that I was on the right trail up to Ruby Lake; but, I never did find it on the way up. I figured out later what I did wrong though. When I reached the small creek crossing for North Pigeon Creek (the only one), I spotted what I thought was the trail up off to the left on the side of the hill. That is the trail I followed (which eventually petered out and ended up in a bushwhack straight up until I found the right trail). The correct trail was to the right and up from the creek crossing, which I learned on the way back down. At least the views back across the Animas towards West Needle Mountain and the Twilights was great.
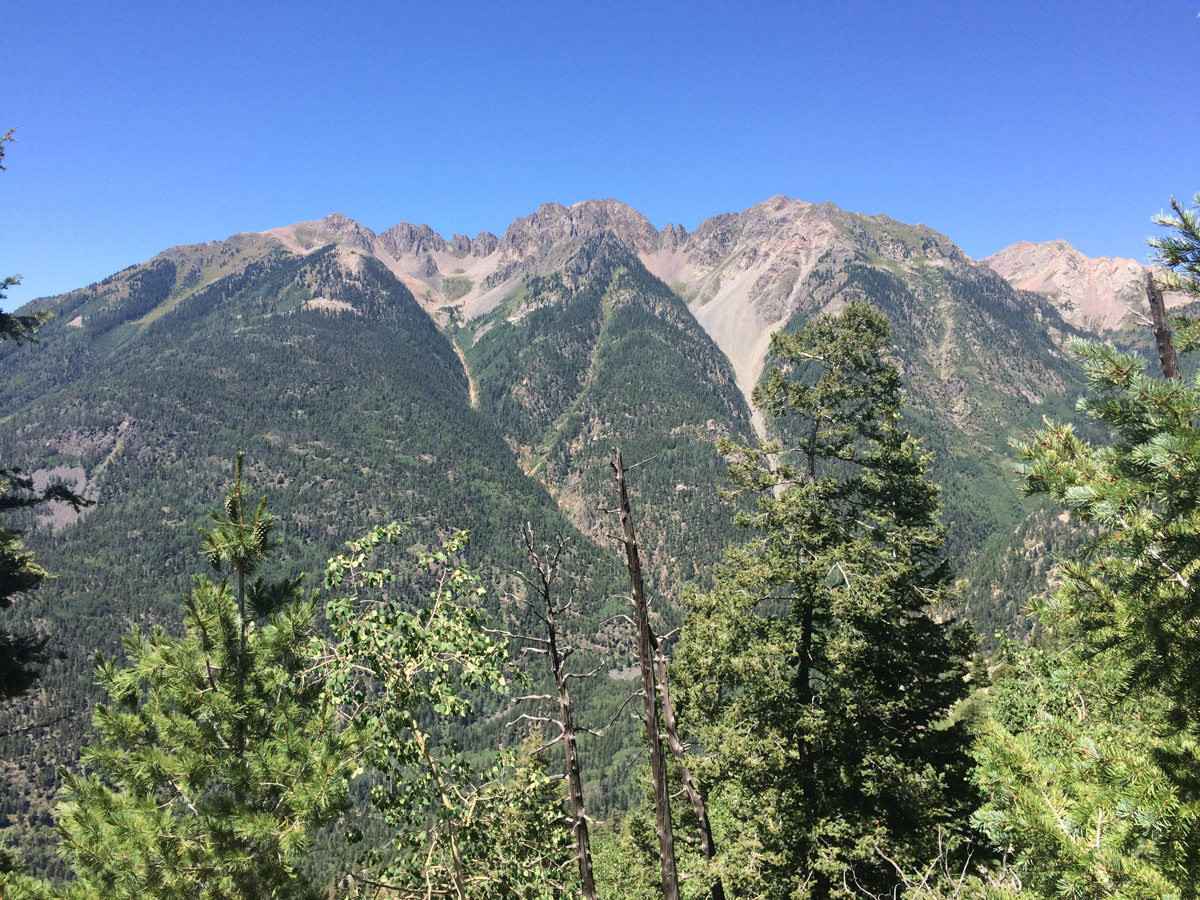
In preparation for this trip, I was looking through lots of trip reports and stumbled across a familar name. It was the name of one of my newest co-workers, Terri Horvath, who is a bi-Centennial finisher (she's climbed the highest 200 mountains in Colorado). Terri provided me with some excellent tips which kept me from going even more off course than I already had, including some solid advice in locating the "high trail" that Roach describes in his route descriptions. Right after a very steep step down, I looked to the right to find the proper trail. This trail worked steeply up and down above Ruby Lake and finally dropped me right at the base of the lower lake, with views of Ruby Lake finally realized.
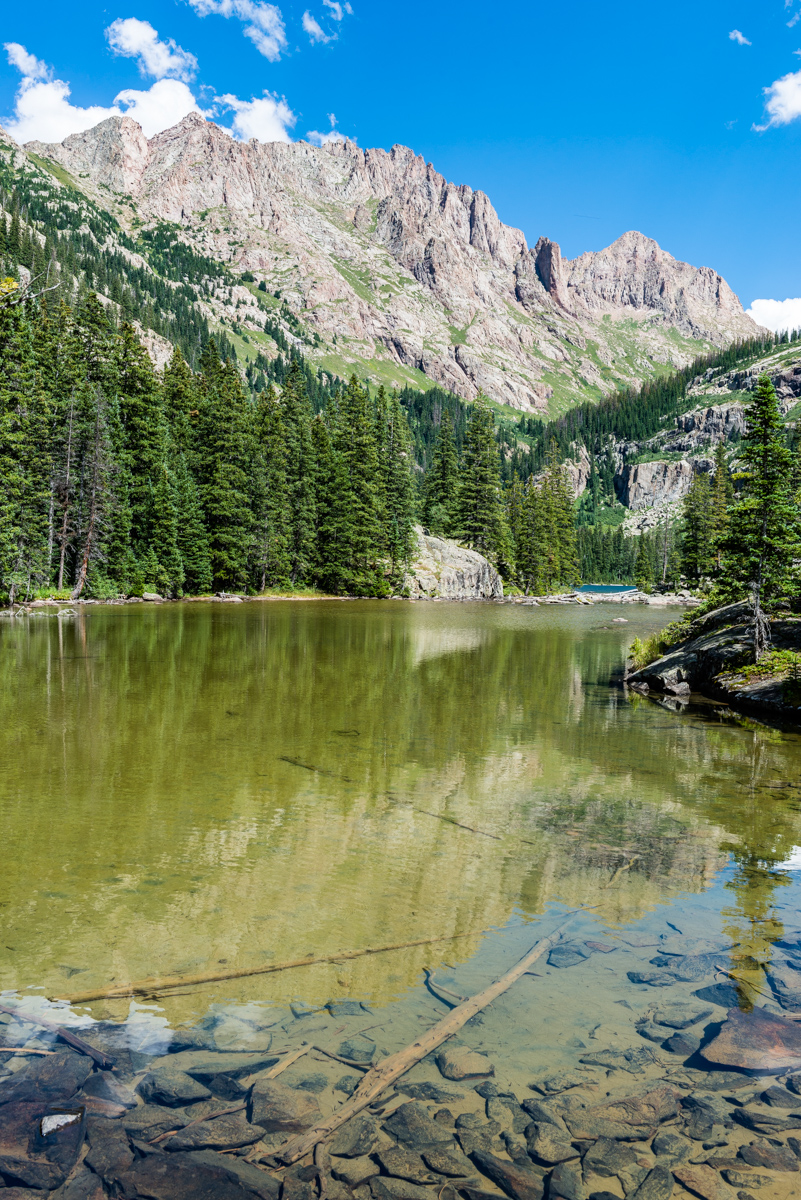
Upon reaching Ruby Lake, I ran into a group of five guys from Denver that were really great to chat with, one of which being a fellow photographer named Jarad Switzer. We commiserated on the gruelling hike into the basin and then I shared my plans to shoot the meteor shower that night which I think left them all thinking I was a little bit crazy. Was I? Probably. I kept a solid pace up to the lake, making it there in 3 hours 30 minutes from Needleton. I continued on. The views of Pigeon began to blow me away. This thing is truly unbelievable!
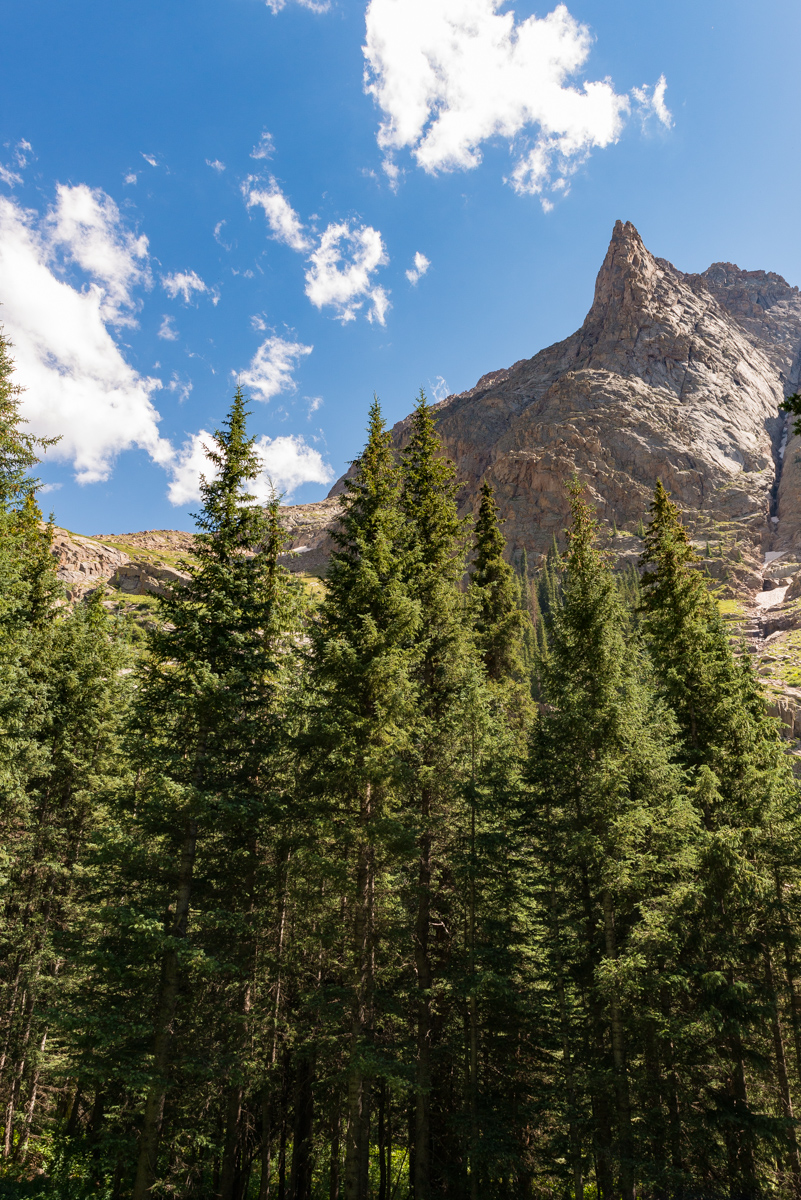
The trail became really hard to follow after the lake and was really only followable due to some well-placed cairns (thank you to whoever put those there). It weaved left above the cliffs at the headwall of the lake and through some really rugged terrain consisting of many fallen trees and steep hillsides. It reminded me quite a bit of No Name Creek, just one basin north of where I was at. My expression tells the story, I think.
Upon breaking into upper Ruby Basin, the trail flattened out considerably and opened up to some amazing views above. The willow maze in the upper basin was actually not that hard to navigate, having been trampled through enough times to make it easy to find the weaknesses. The meadow in the upper basin below the Turret Needles and Pigeon came into view and I was quite excited until I noticed two other tents. I was hopeful that the people camped there would not mind another person joining them in the meadow. It turns out that the meadow is quite large and it would take quite a few parties worth of tents to fill it up. I arrived at the meadow at 5 PM and was pretty exhausted. I was at the opposite end of the meadow from these other backpackers, who later informed me that they had unsuccessfully attempted the east face of Pigeon earlier in the day which caught my attention. The climber, named Rex (or Max,?) explained that he had climbed Pigeon's east face 20 years prior and that he wanted to see if he could do it again. Impressive! I set up my tent and destroyed my dinner in preparation for a night of photography and sleeplessness. I had hoped to catch some sleep, which was really just a pipe dream. No sleep was obtained. I did get some decent photos around camp though.
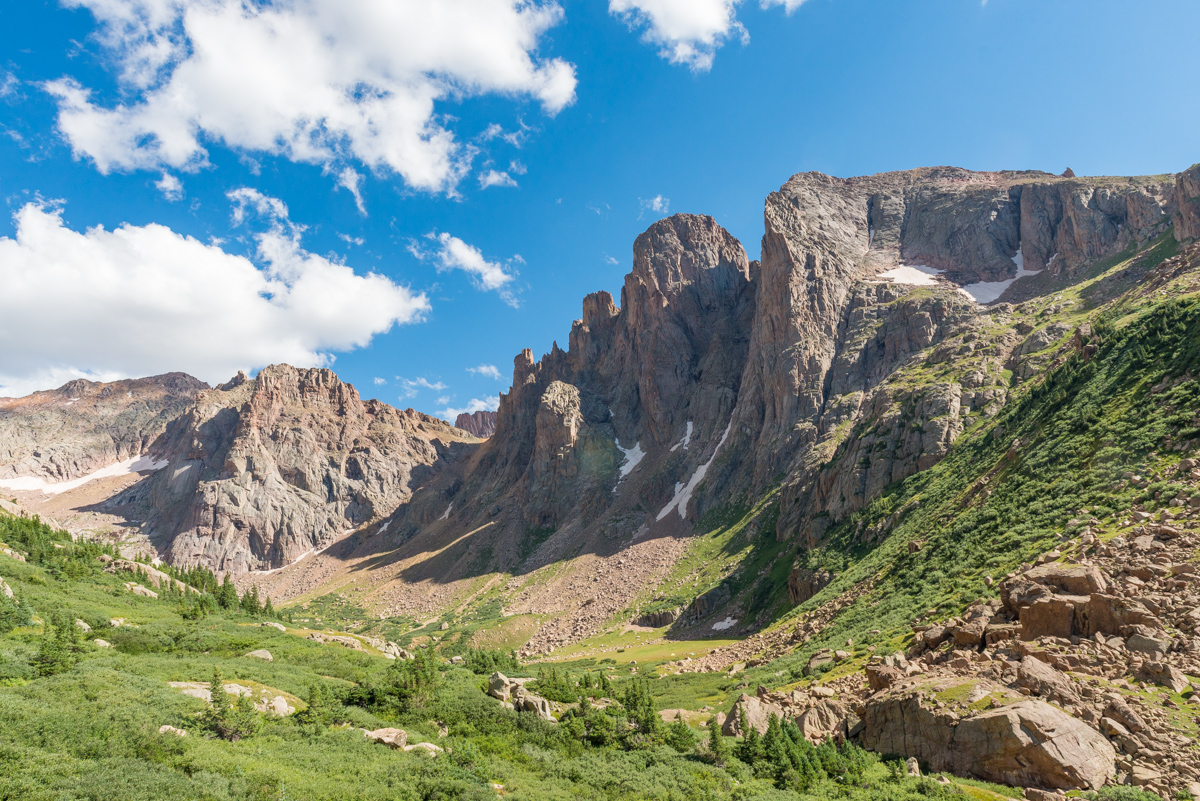
The Turret Needles were the most impressive feature of the basin and I decided to camp right below them about 100 feet away from the stream. Knowing that I would not have any trees to hang my food from, I had purchased an Ursack the day before from Backcountry Experience in Durango. The Ursack is designed to withstand the chewing of rodents like marmots and mice, which I anticipated finding lots of at the upper basin. I also employed a technique that I read about in another trip report where I suspended my food sack from the side of a cliff - a technique I also used at Lillie Lake on my Chicago Basin backpacking trip in 2011. At any rate, the wildflowers were still quite prolific in the upper basin, and I was pretty much in heaven as a photographer.
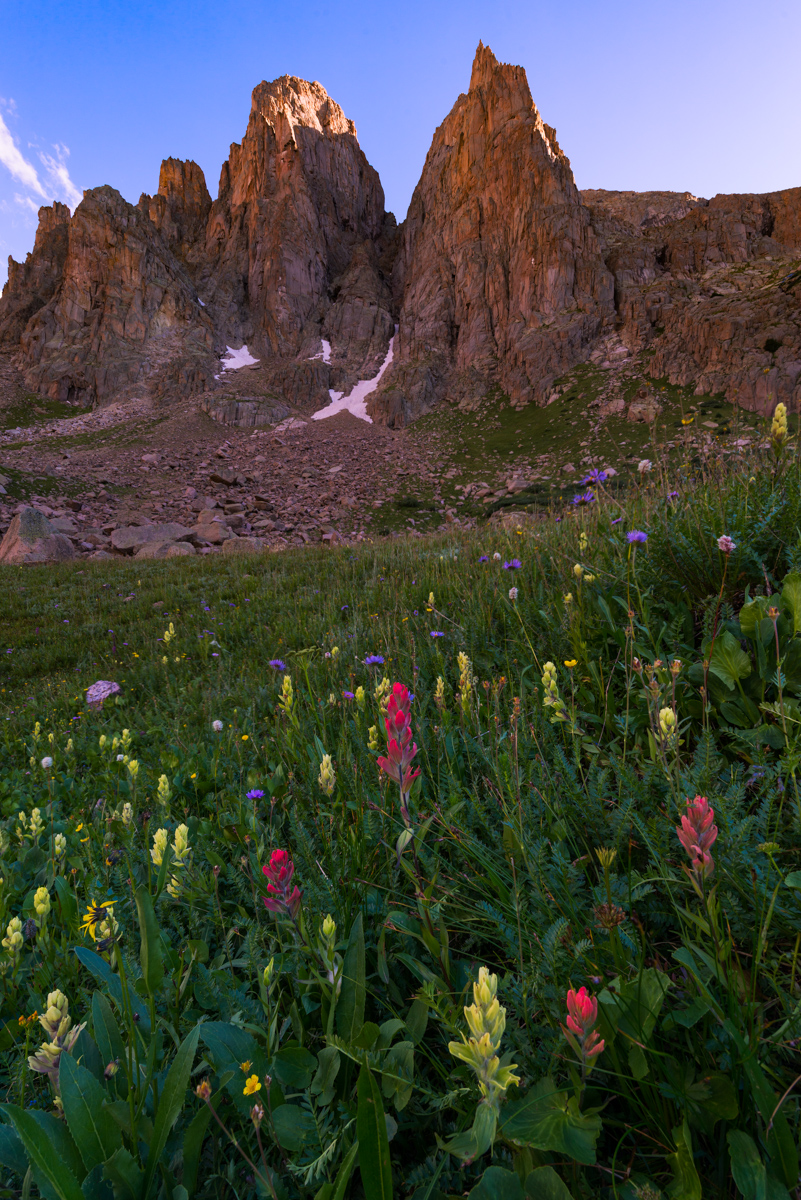
I shot exclusively with my Nikon 14-24 f/2.8 lens, and my Nikon 24-70 f/2.8 lens attached to my Nikon D800, which is getting a bit long in the tooth. Someday I'd love to upgrade to a D810 or maybe something lighter from Fuji or Sony.
I set my alarm for 10:20 PM, but never actually slept. When the alarm went off, I bounced right out of my sleeping bag and out the door. The climber I met in the meadow had indicated that the "best" route up to the saddle was to take a little gully just to the left of where it looked like the obvious trail went. Taking their advice in the dark was pretty daunting - but it did manage to get me up very high quickly above the meadow. I followed cairns in the dark and enjoyed the views behind me of Animas Mountain and Monitor Peak, which were illuminated by the moon. Pigeon cast a long shadow across the peaks and was a constant reminder of just how much more climbing was ahead.
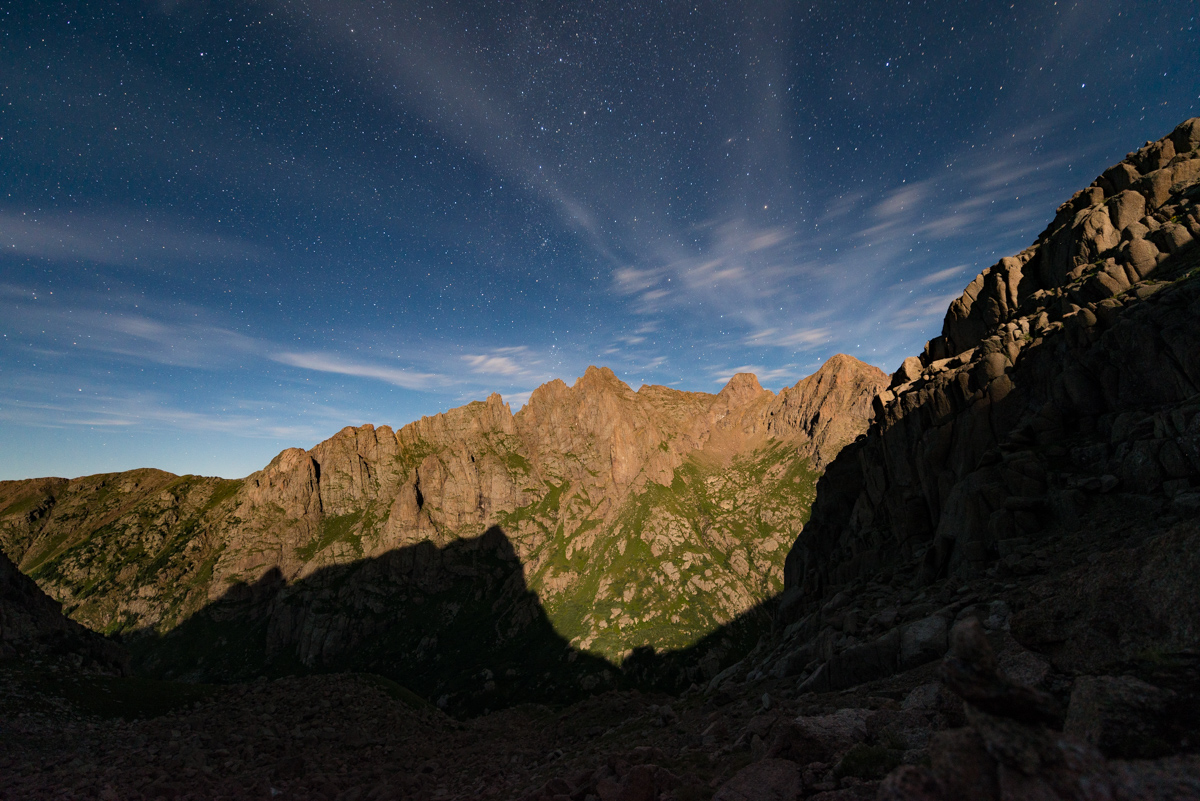
As I climbed into the area just below the saddle, I found myself in a large boulder field which I did not recall being described in any of the route descriptions. I'm not sure if I can explain it or not, but trying to locate cairns within a boulder field in the dark is pretty fun... and by fun what I mean is pretty pointless. Fortunately, I had my phone with GaiaGPS and could keep myself on route for the most part. Above this large boulder field I found the terrain smooth out a bit and I stopped again to get another photograph of the mountains behind me, the scene accentuated by this really awesome rock formation to my right, which was also illuminated by the moon.
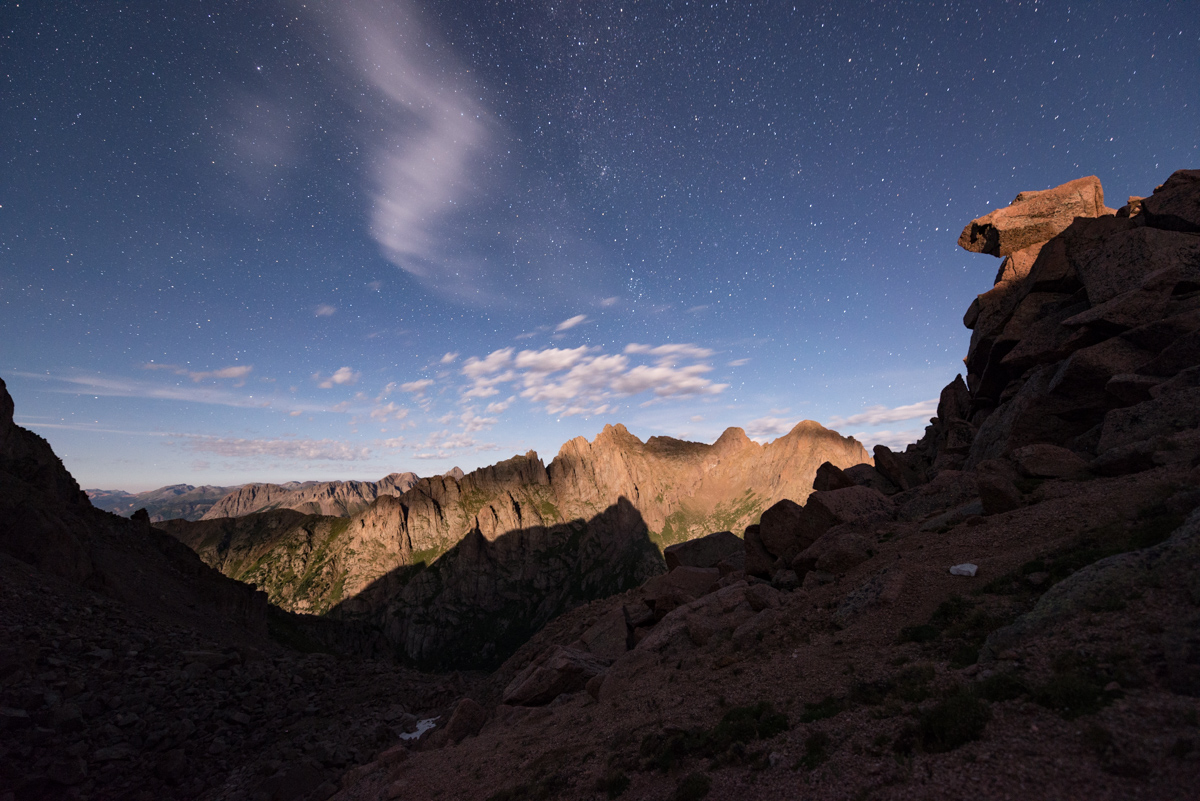
Upon reaching the saddle, I was of course not happy to find that there was some pretty cold breeze blowing over the top of the saddle. I knew that I was going to be in for a rough night of freezing my ass off. But hey, at least Pigeon looked absolutely stunning with the southeast face lit up by the moon.
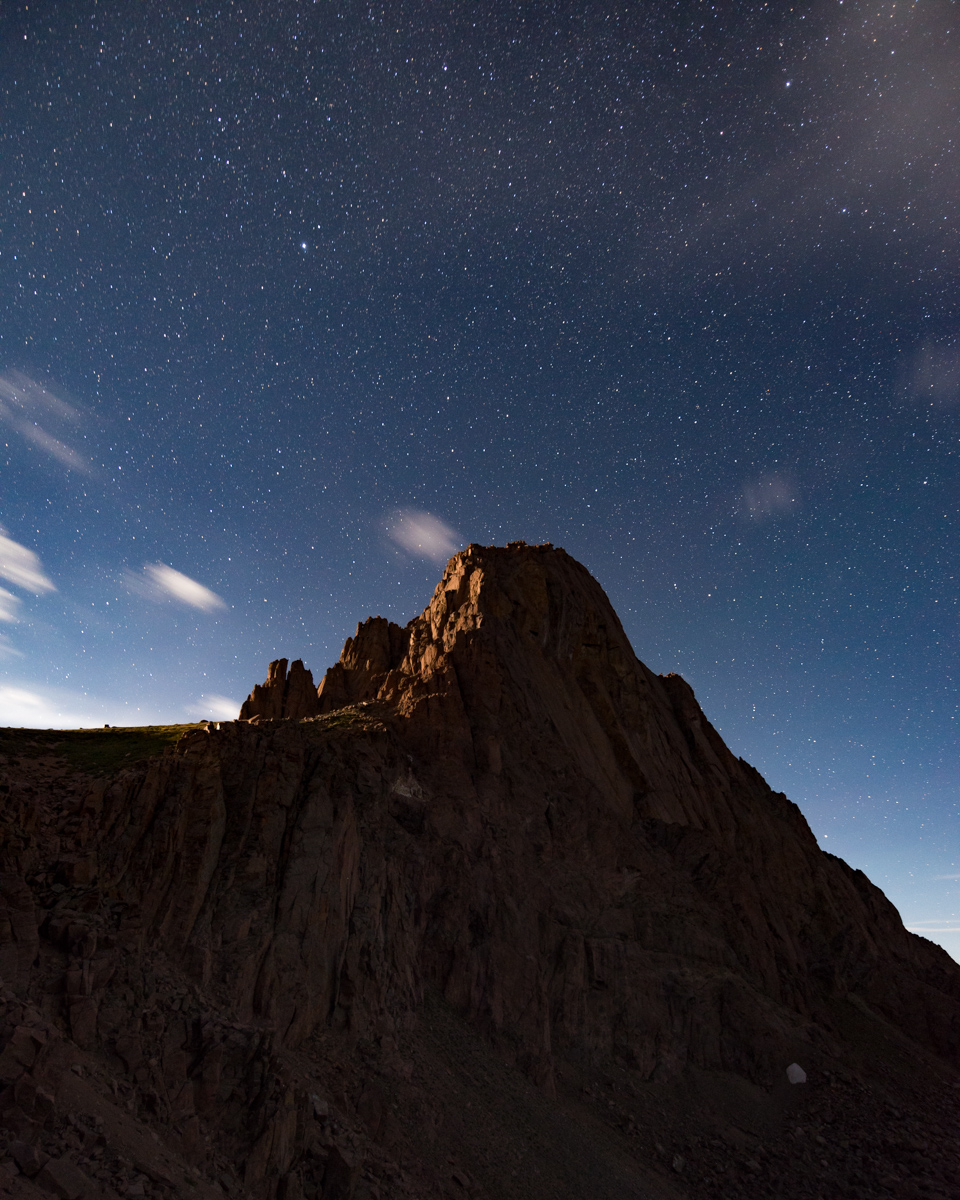
I found a nice spot to set-up my tripod for the night among some larger rocks that would be useful as a bed/chair/rest area in the cold wind. I clearly did not bring up enough warm clothing, because I basically shivered for 3 hours straight at this location, watching meteros streak by. In total, I believe I was able to capture about 15-30 meteors in my frame from 12 AM to 3 AM. The meteors were absolutely amazing to watch from this elevation, and I could even see the town of Silverton down below to the left.
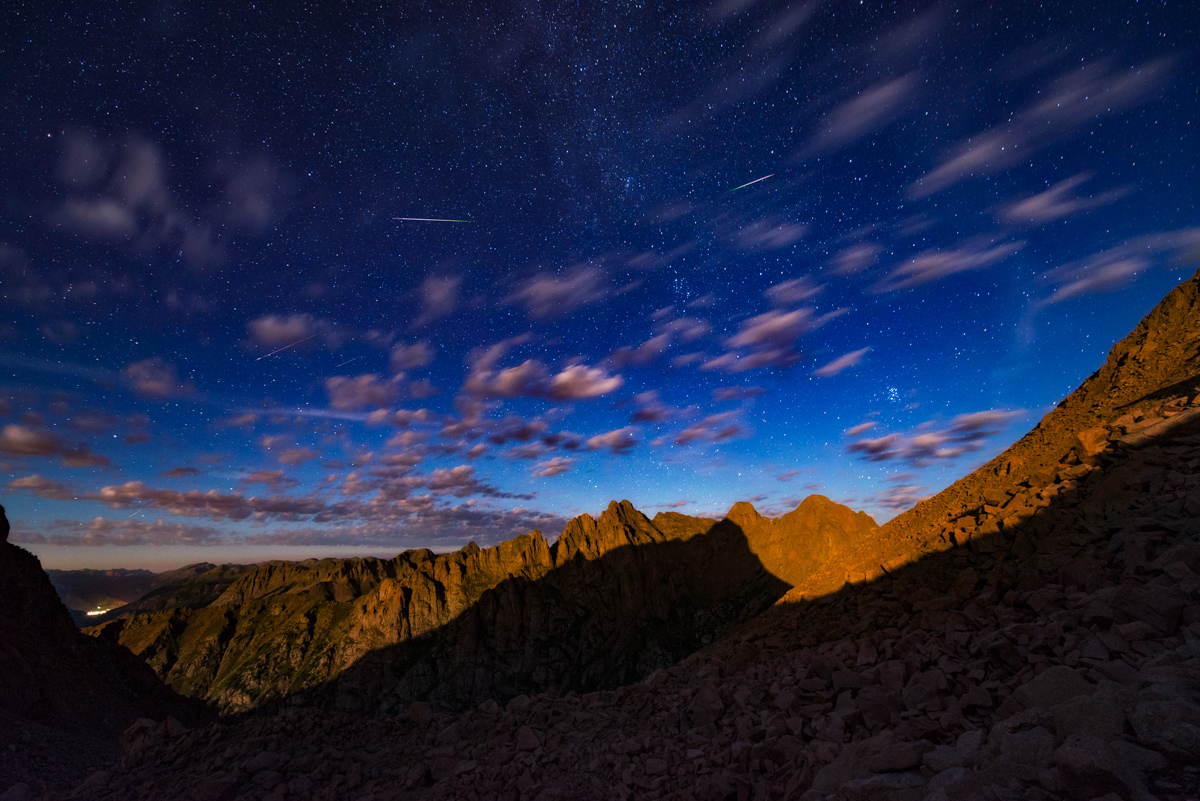
I combined the photos into some star trail sequences which turned out pretty well, and even did some timelapse video, which has music, so be warned!
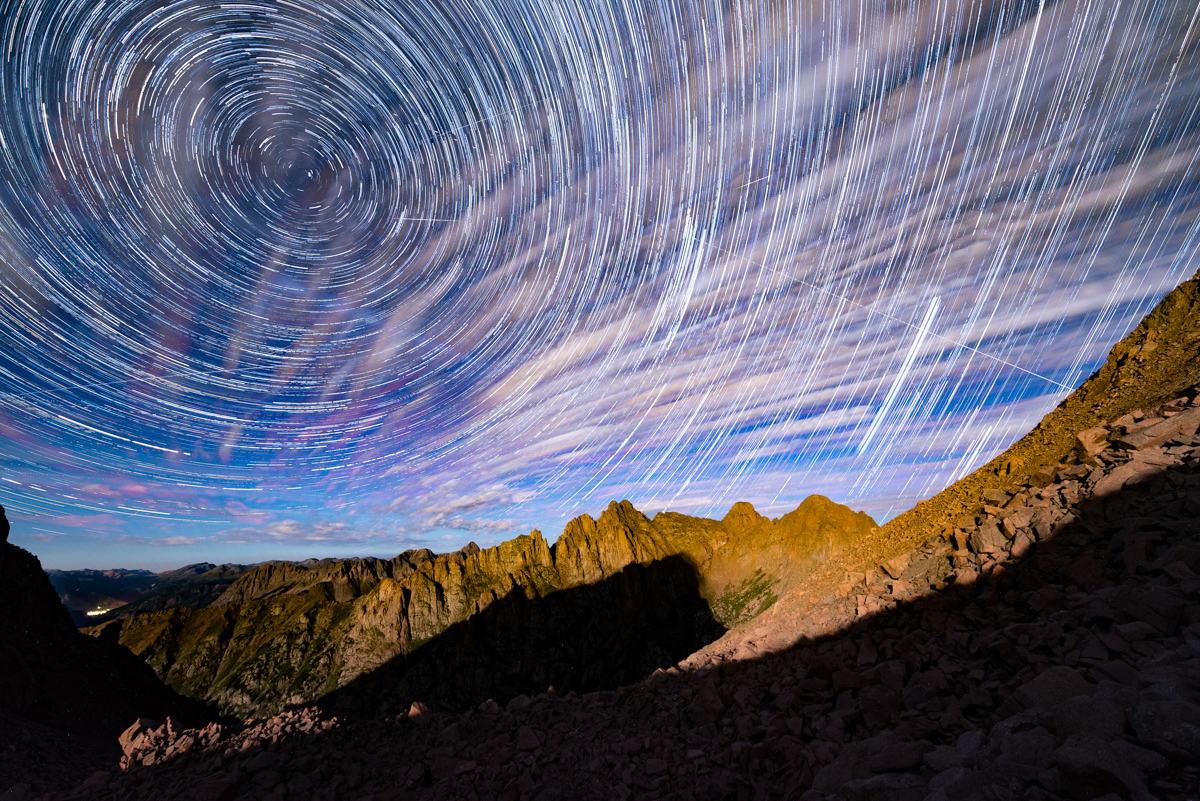
More star trails!
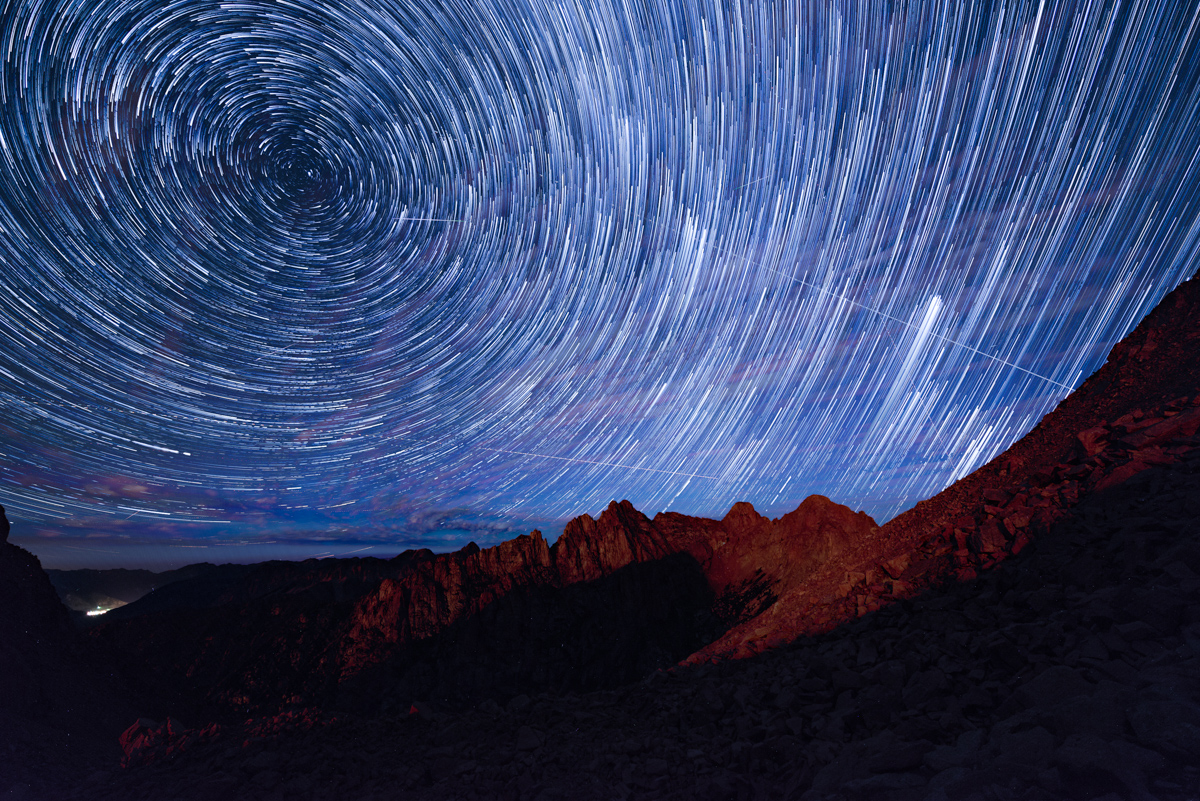
I noticed that a lot of meteors were originating at the apex of the night sky, so I turned my camera to portrait orientation for the last half of my shooting, this time in pitch black. I know I have some more photo editing to do to really highlight my work on the saddle, but this is what I have so far.
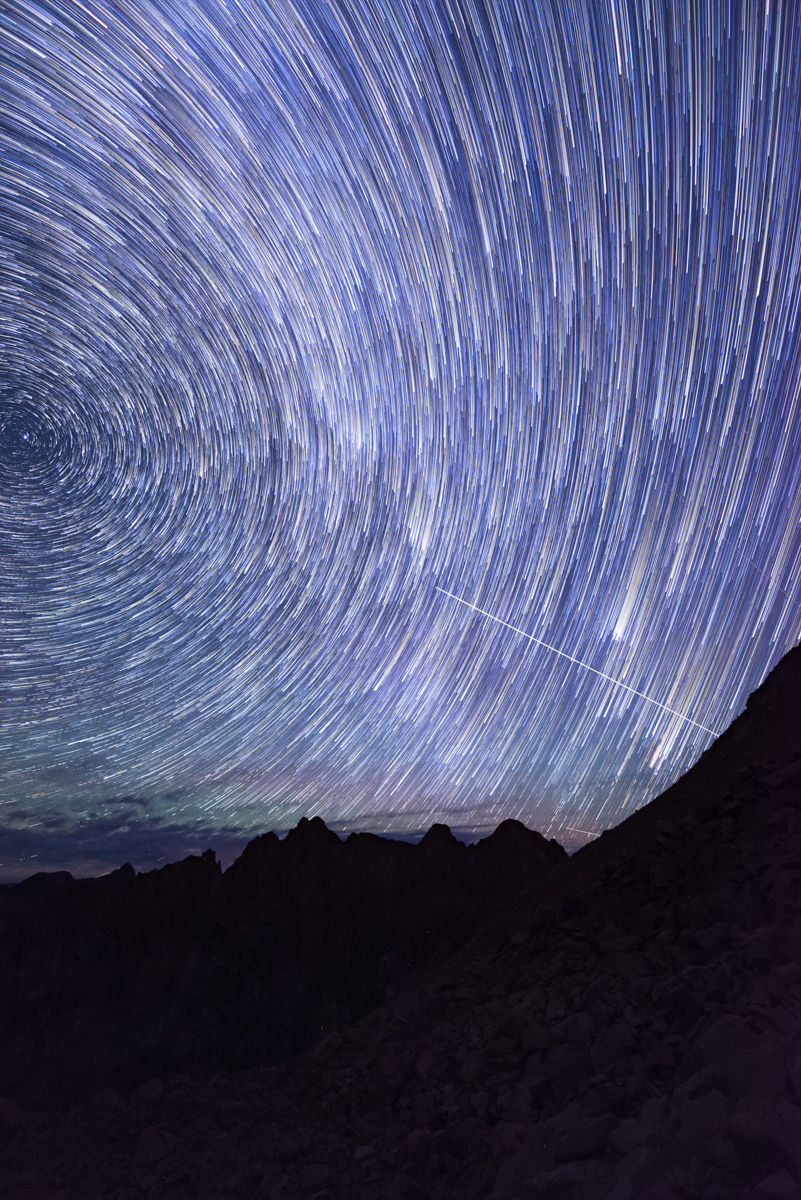
After freezing for a couple of hours I decided it was time to begin my ascent of Turret Peak. I also noted that since the moon had set that I might be able to get a glimpse of the Milky Way Core, which might open up a nice opportunity to photograph the Milky Way arching over Pigeon Peak. I pulled that off just below Turret's summit and even got a meteor in the last frame of the panorama - awesome!
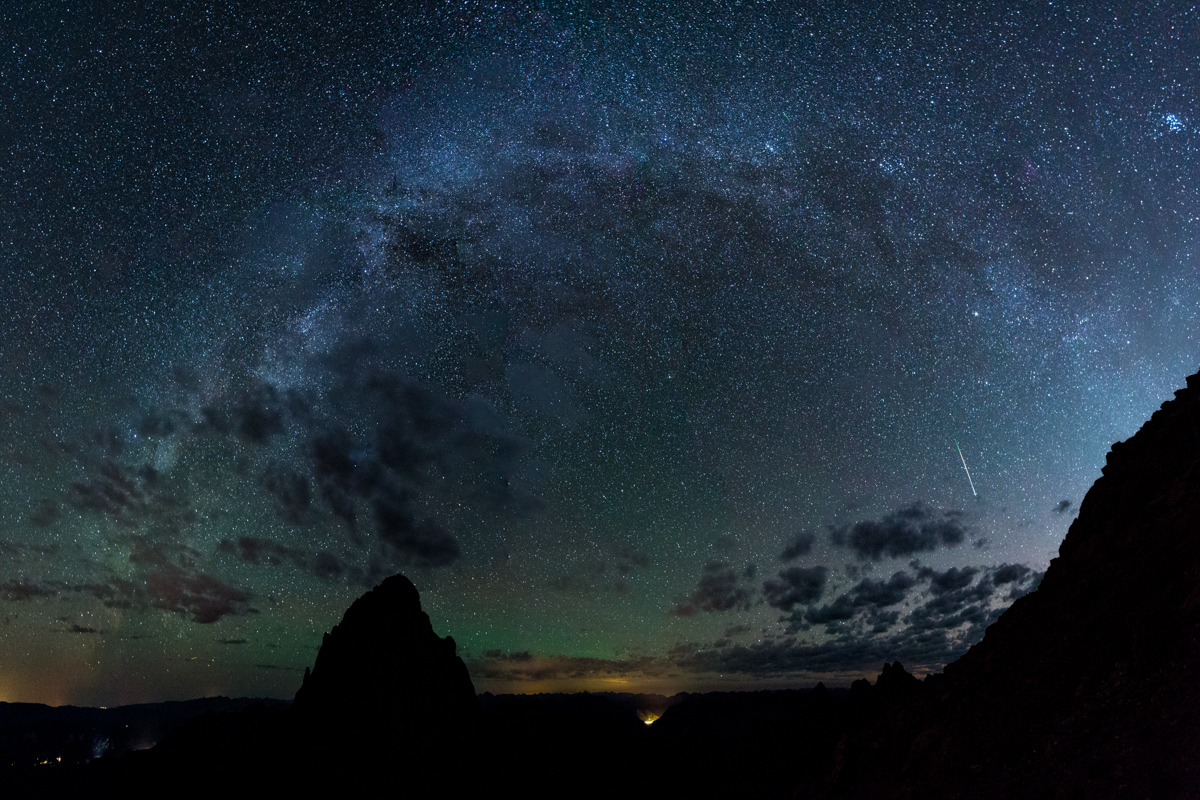
I arrived at the summit of Turret at 4:30 AM and felt completely wiped out. I think this photo says it all.
I saw some familar names on the summit register, including Andrew Hamilton from just a few weeks prior. His notes stated "Jupiter ---> Vestal" which I found quite interesting. If I'm reading it correctly, he started on Jupiter and this was just a spot in between his final destination of Vestal. That seemed like madness to me.
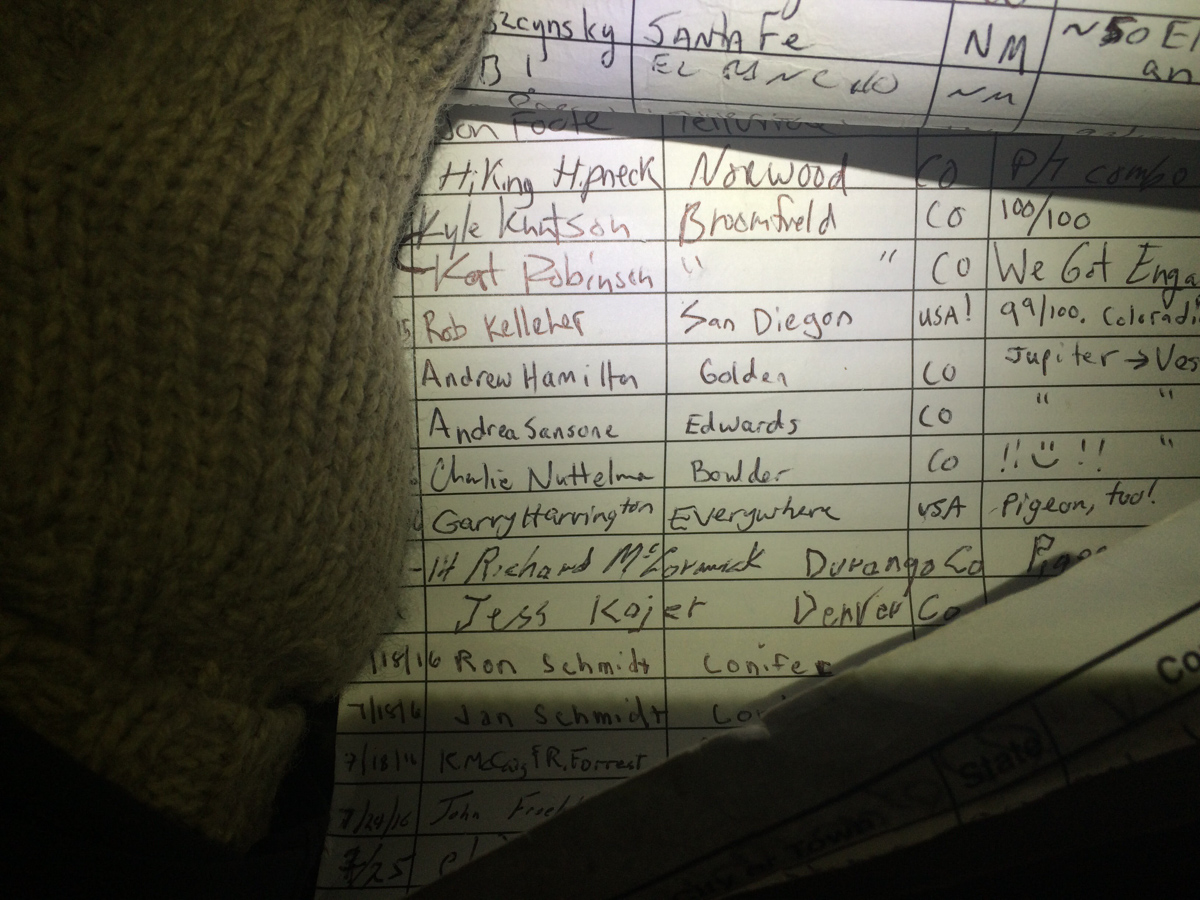
As I sat on Turret pondering life and getting my energy back up, I noted that the horizon behind Jagged Mountain was looking pink. There were a lot of low clouds, which was either going to spell disaster or complete success for photographing sunrise. It turned out to be a totally amazing sunrise to say the least. I would rate it as top three summit sunrises of my life, with the other two being North Eolus in 2011 and Uncompahgre in 2015, both of which I photographed (those links will take you to those photos). This one was pretty special though. The Grenadiers, including Arrow and Vestal as well as the Trinities were all nicely visible, accented by the Needles of Animas and Monitor. The sun was rising just behind Jagged Mountain and Rio Grande Pyramid and made for a really incredible showcase of color. Pinks, reds, oranges, and purples colored the sky and clouds. I am very proud of this one, which is available for sale on my photography website (click on it to follow there). I can't wait to print it up nice and big for display here in Durango.
I was also able to get a nice panorama of this scene to include Pigeon Peak at left sweeping all the way over to the right to include North Eolus and Eolus. Unfortunatley, the light, sky, and clouds of about 1/2 of this scene were not very exciting, so I cut those out. Still - an amazing scene to say the least!
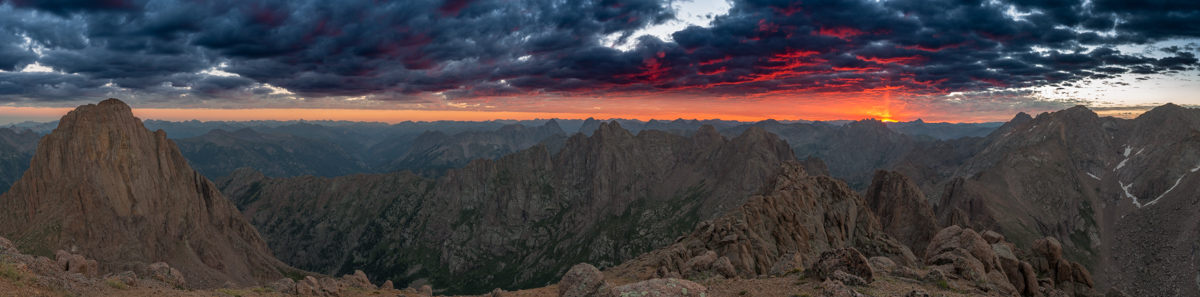
A few minutes later I was packing up to head down to the saddle again and noticed the light across to the La Plata Mountains and the Animas River below was looking quite nice as well, so I shot that.
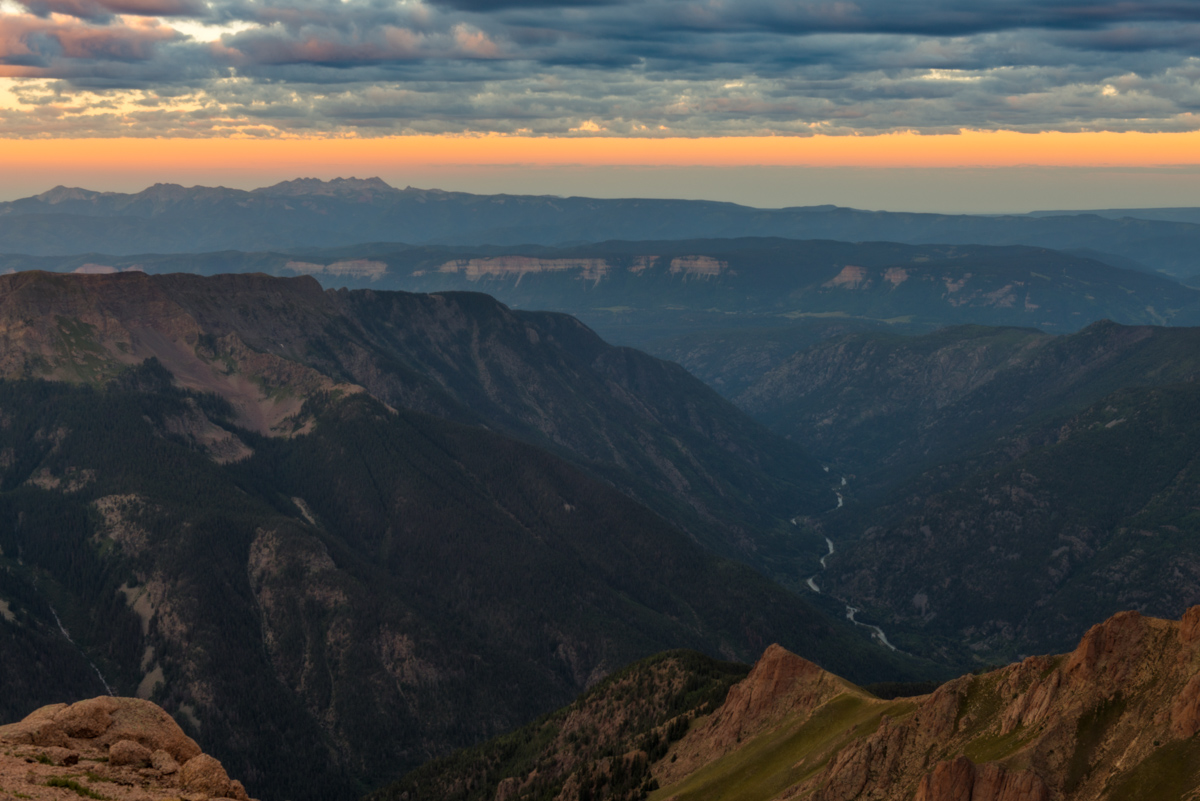
Then I noticed the clouds above Jagged Mountain looking awfuly amazing, with beams of light come down through them from the sun. I guess I could spend more time up here.

Lastly, I set-up for a quick self-timer shot of myself with some of my favorite peaks behind me. What a morning!
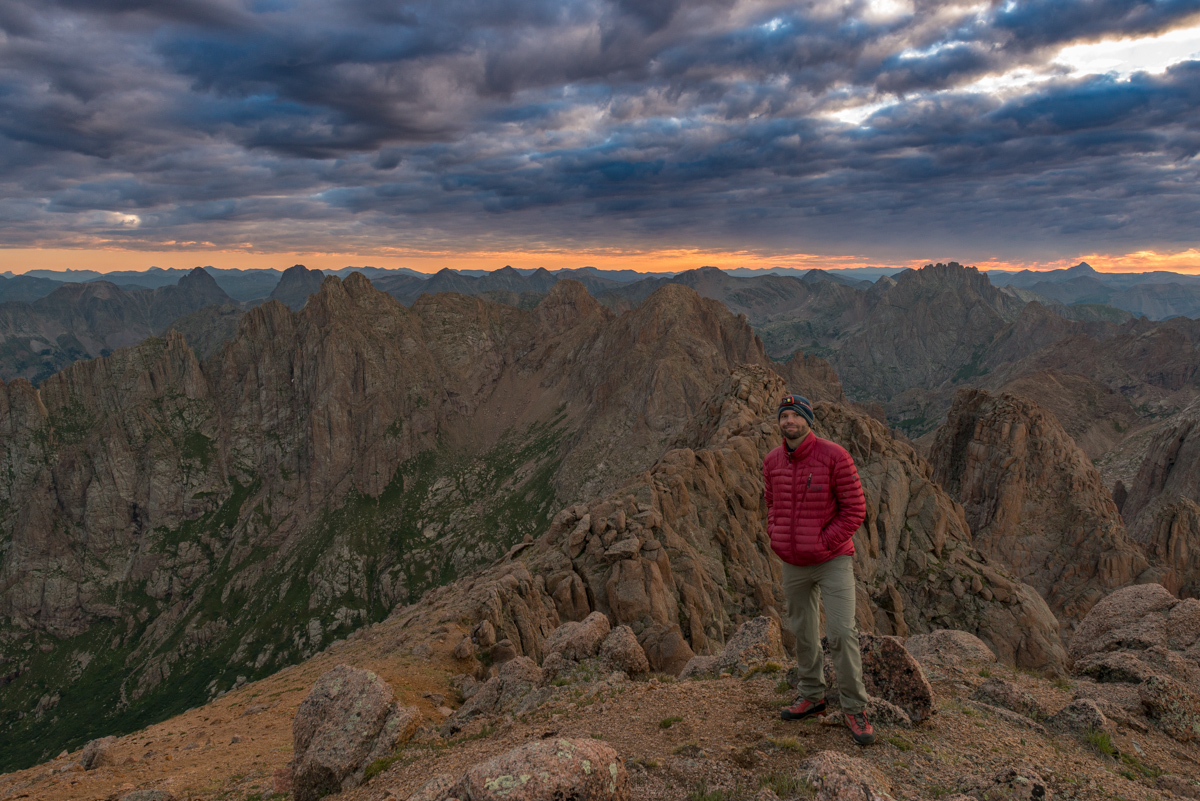
I packed up and set sights on my next objective - Pigeon Peak. I knew that in order to climb Pigeon from here I would have to descend down to the saddle and then down to another notch between Pigeon and a small un-named point southwest of it. After that, I would be forced to drop to 12,200 feet on the west face of Pigeon and all the way back up again to 13,972. I was not sure I could handle it, but the thought of coming this far and not getting Pigeon kept me motivated.
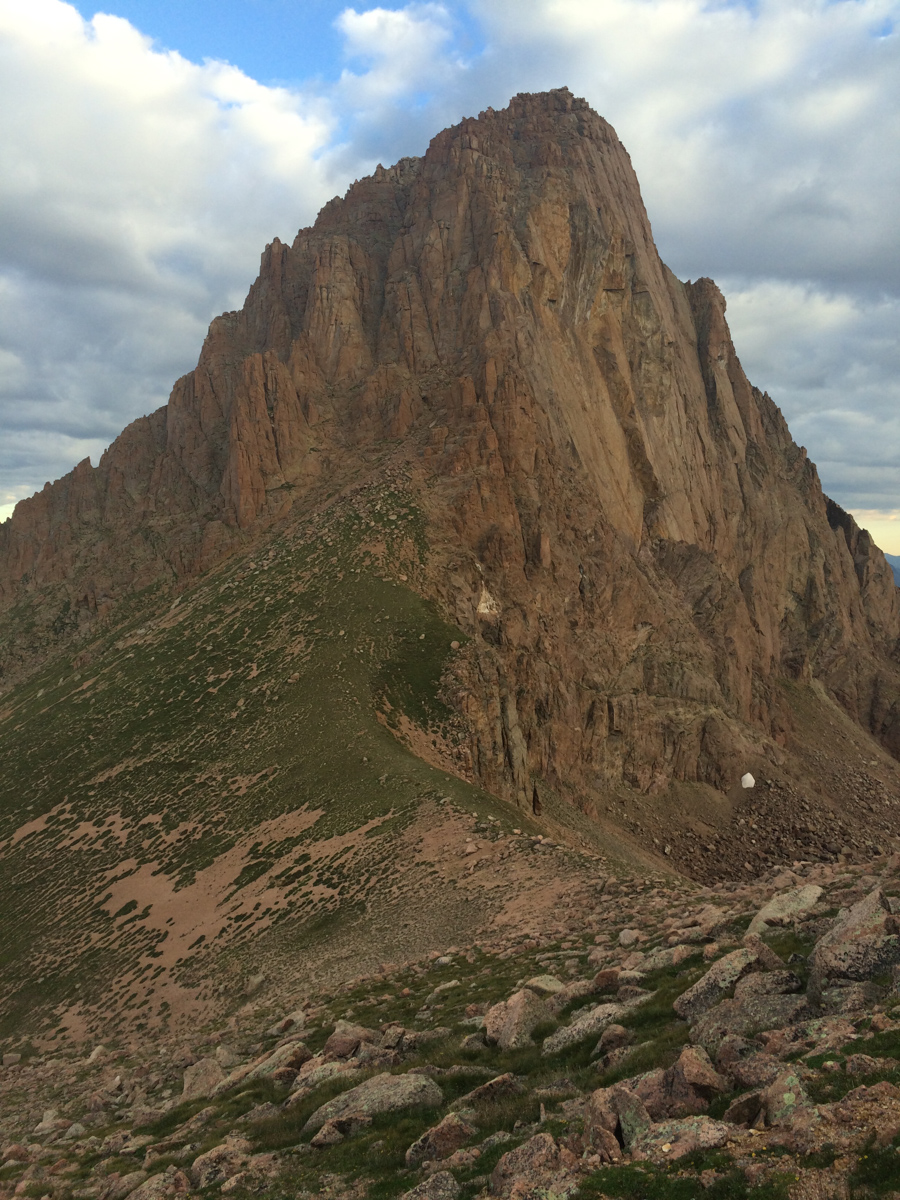
On the way down to the saddle, I enjoyed the light hitting the peaks around me and made a note of the small notch left of Pigeon, which was my next target (as seen just right of the large 'white' rock outcropping and below the illuminated peak in the photo below).

Reaching the saddle again was no problem and the scenery was incredible. The wildflowers at 13,000 ft. absolutely astounded me, in particular, these rosy paintbrush caught my attention.
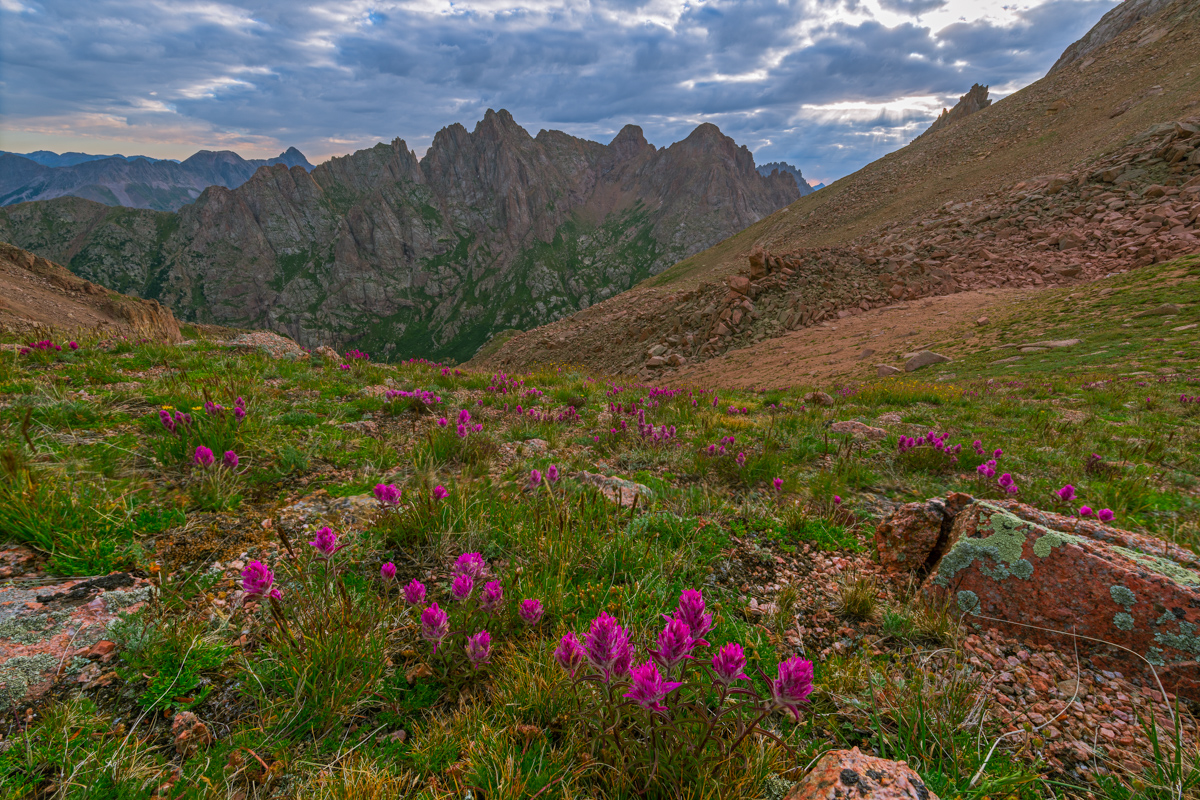
Pigeon towered above me as a reminder of the pain I would endure if I wanted to summit today. I could see how a confident and equipped climber could take this gully off the ridge, but it was something way outside of my comfort zone and ability.

I descended from the saddle to my left towards the notch and reached it quickly. I undershot (went too high) the notch a little and had to downclimb some sketchy rock to reach the notch, which greeted me with a view west of West Needle and the Twilights. A look down to my next destination was demoralizing to say the least. It looked so steep, and knowing I'd have to come back up it was not a welcoming thought.
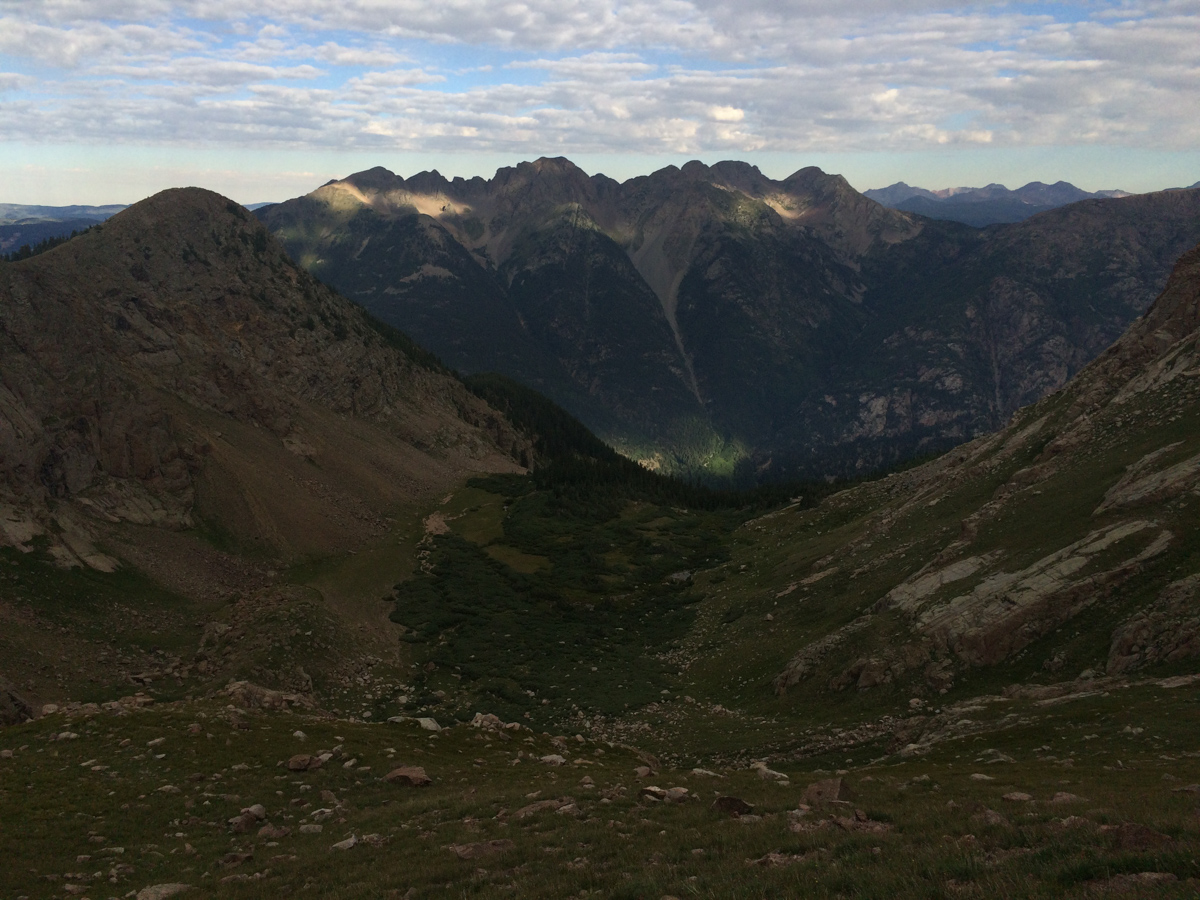
I reached the bottom of the descent without any issues and wrapped around the side of Pigeon to find myself at 12,200 feet with another 1,700 feet of gain to go on un-marked terrain. My legs were tired. I was hungry and tired. The clouds were concerning as well. Everything looked OK to my west, but I could no longer see to the east. The climb up the steep grassy dirt was awful. I had to stop about every 30 steps to catch my breath, which was not normal for me, but understandable given how long I'd been out. I was eventually passed by a young man and his dog that had came up from North Pigeon Creek. He flew by in ease. Jealous.
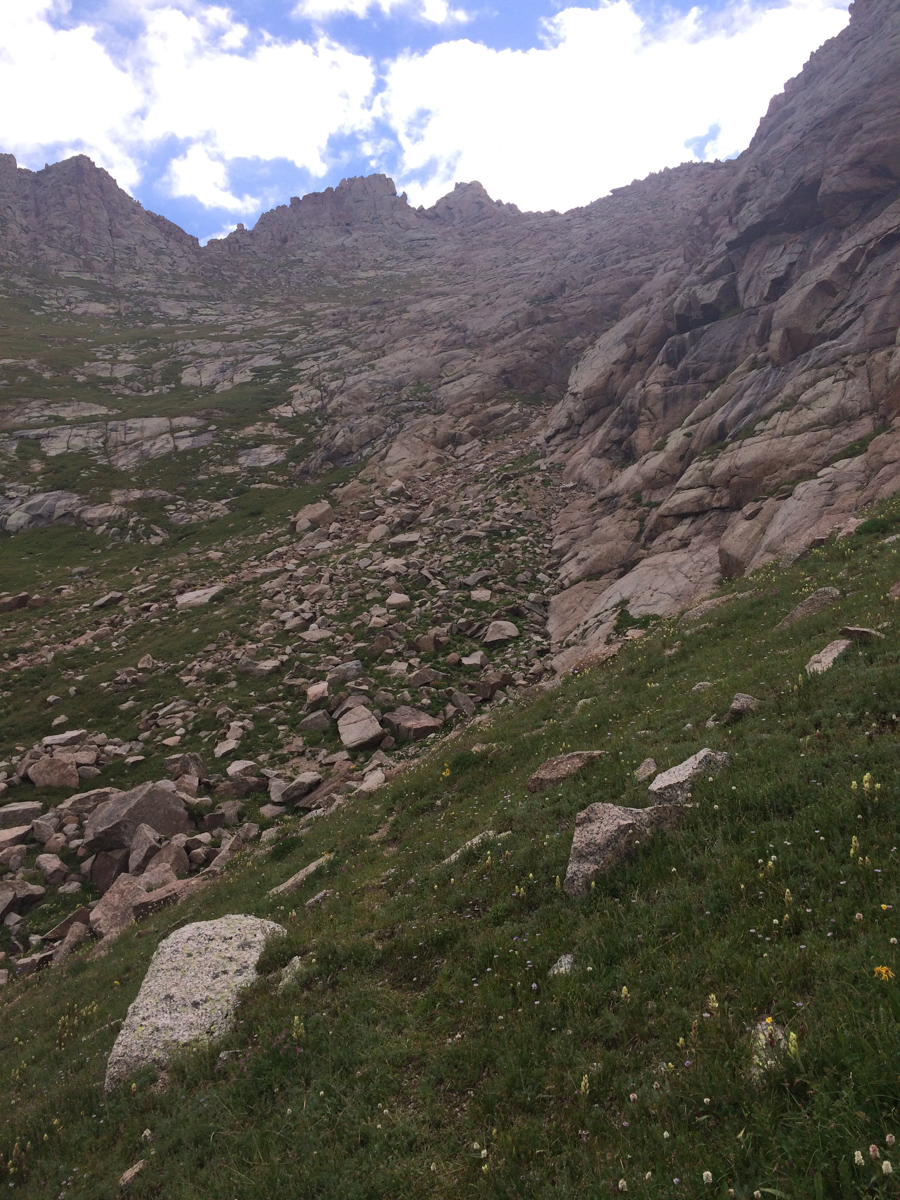
This young man and his dog stirred up some mountain goats while I pontificated my ability to finish, all documented in a quick video on my phone:
Alas, I was able to reach the top of the long gully leading up to a notch that looked back down to the meadow in upper Ruby basin and my campsite, some 2,000 feet below.
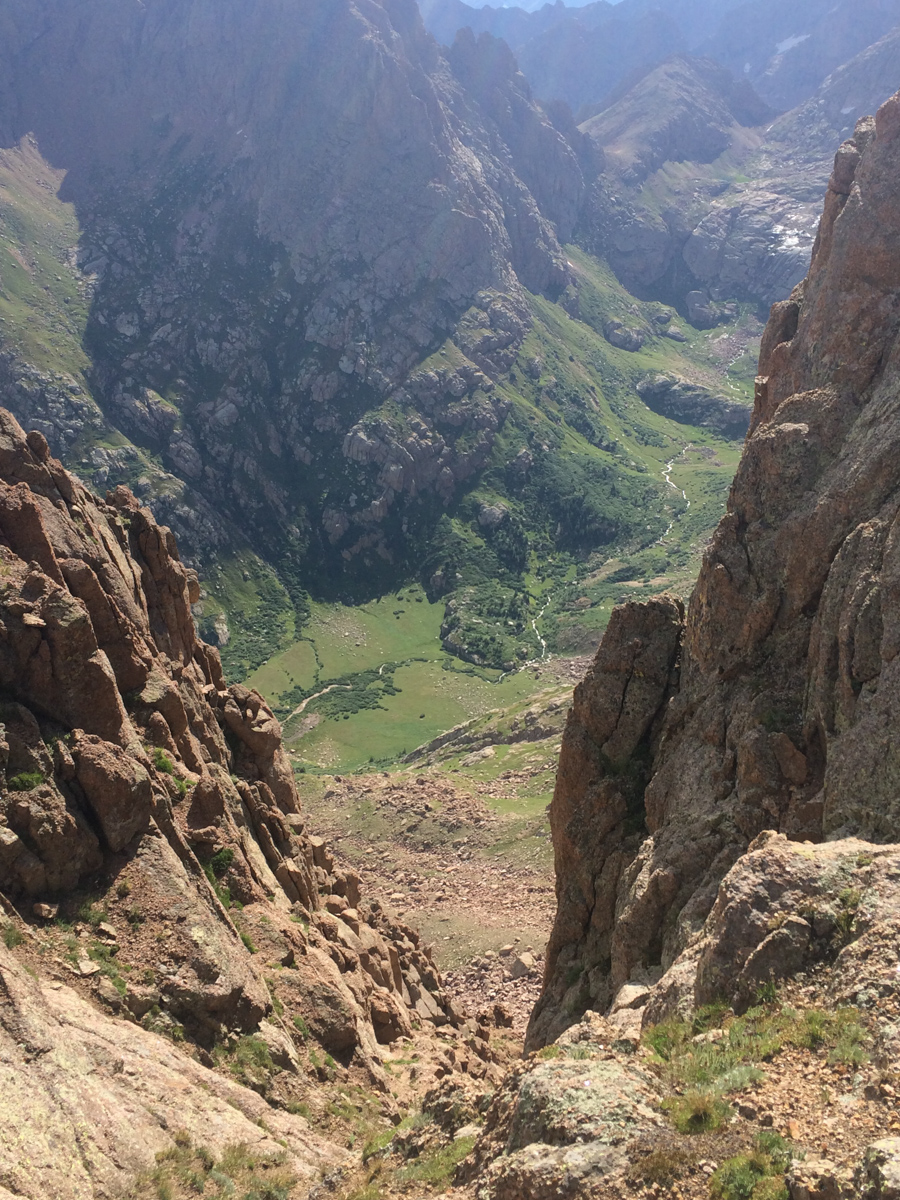
I quickly found the class 4 weakness in the summit block, just right of the terminus of the gully at the top of the grassy dirt slopes and made it over there in no time. Navigating the actual class 4 section was another story though. I enjoy exposure more than most; however, I found this move to be quite challenging, especially with all that camera weight on my back. I actually thought about leaving my backpack there but reminded myself of a classic Gerry Roach saying, "never leave your lunch," and kept it on. The class 4 section was only two or three moves deep, but there was a slight overhanging feel to the rock and the holds were a bit awkward for me. I think being alone played a part in making it feel harder than it was as well. A mistake here would have been fatal.
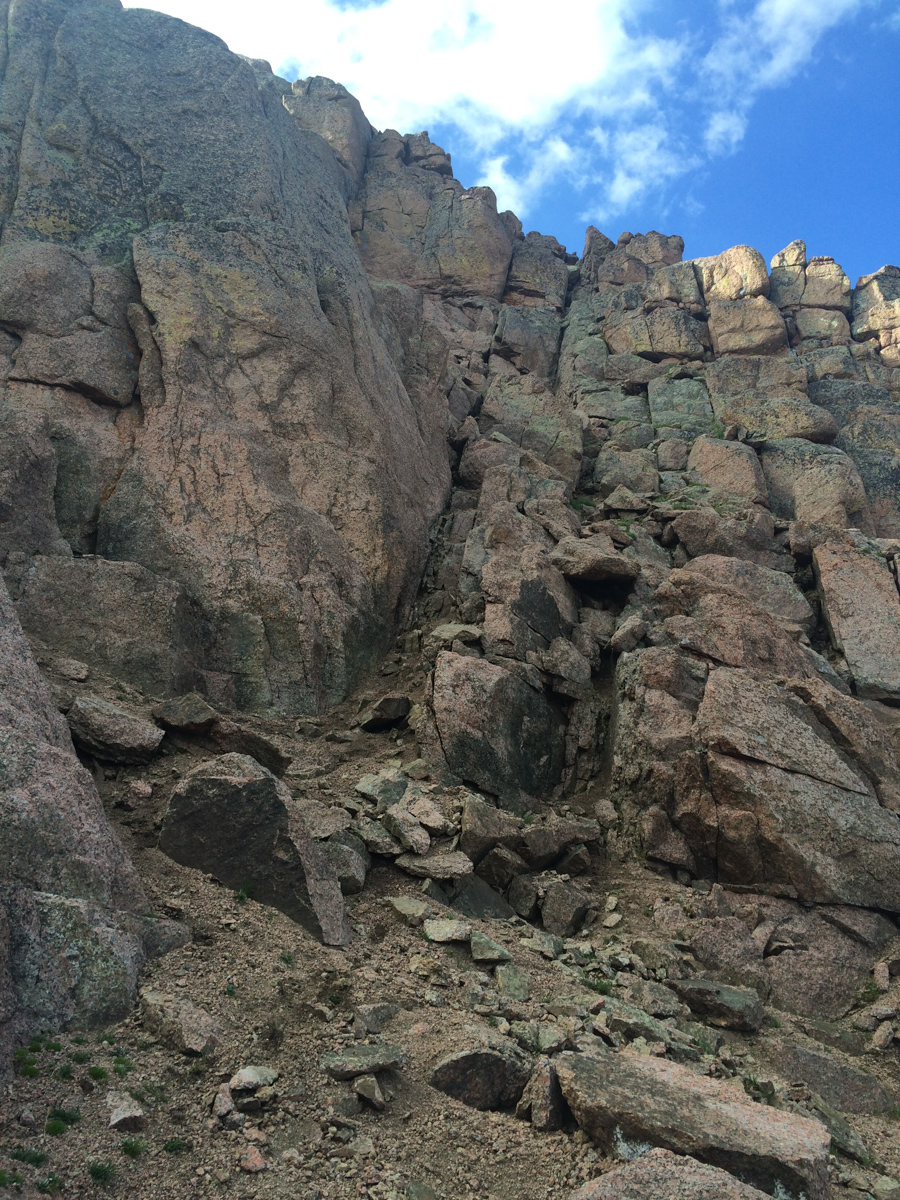
Alas, I reached the summit and enjoyed the view from my 89th Centennial. Only 11 to go! Here's a 360 degree view from Pigeon.

And here's the same photo made into a planet to show a different perspective.
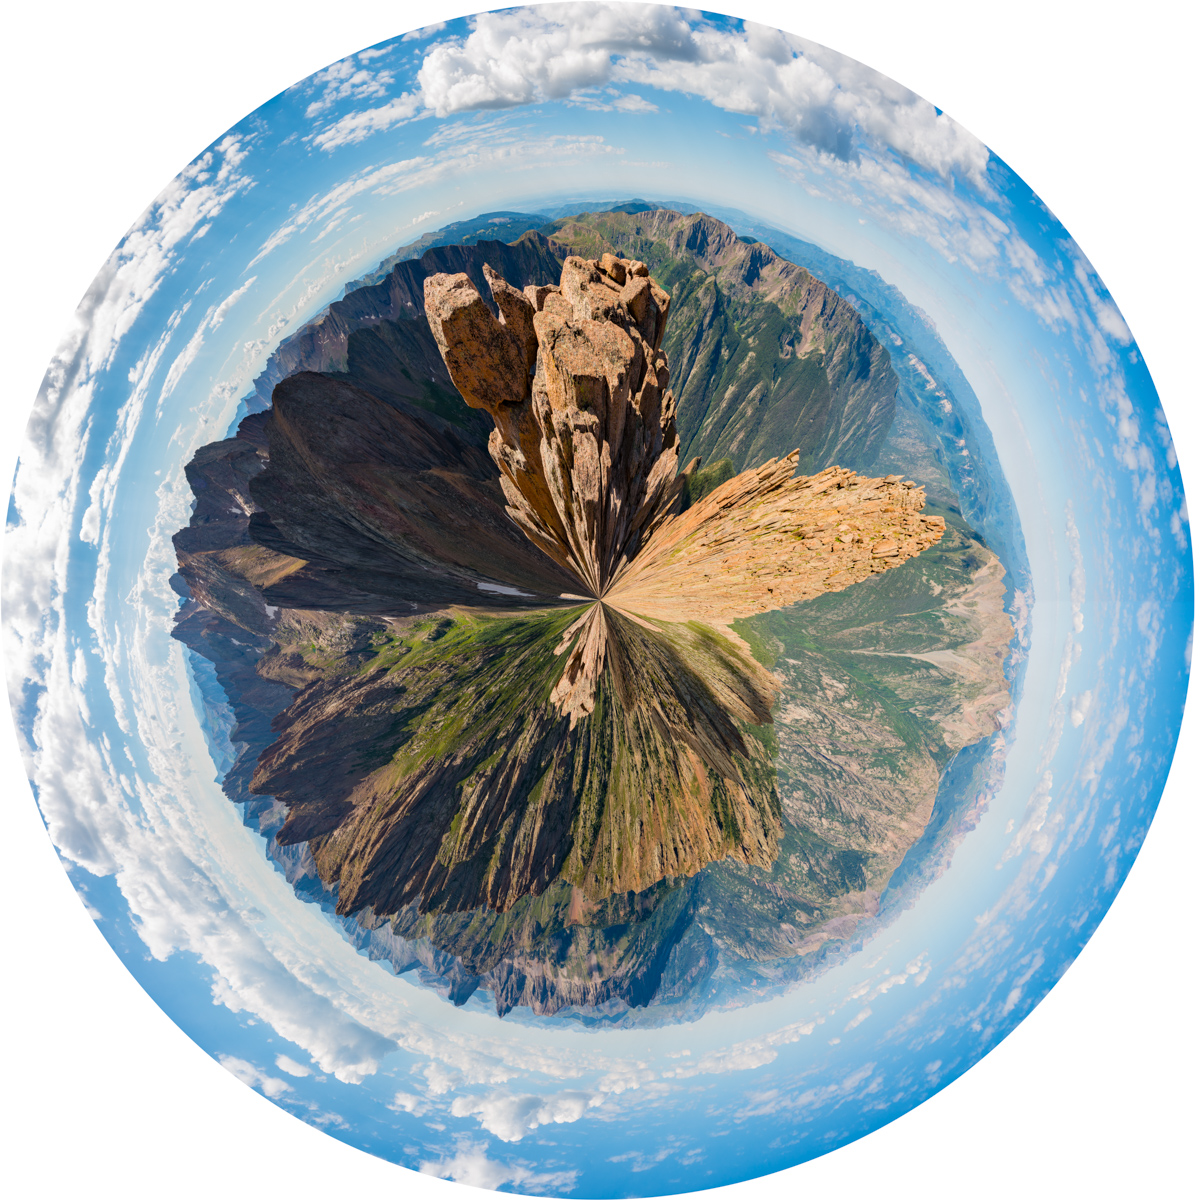
The Grenadiers looked amazing as usual. I still think the view from Arrow Peak looking back towards Pigeon is the best I've had. Unbelievable.
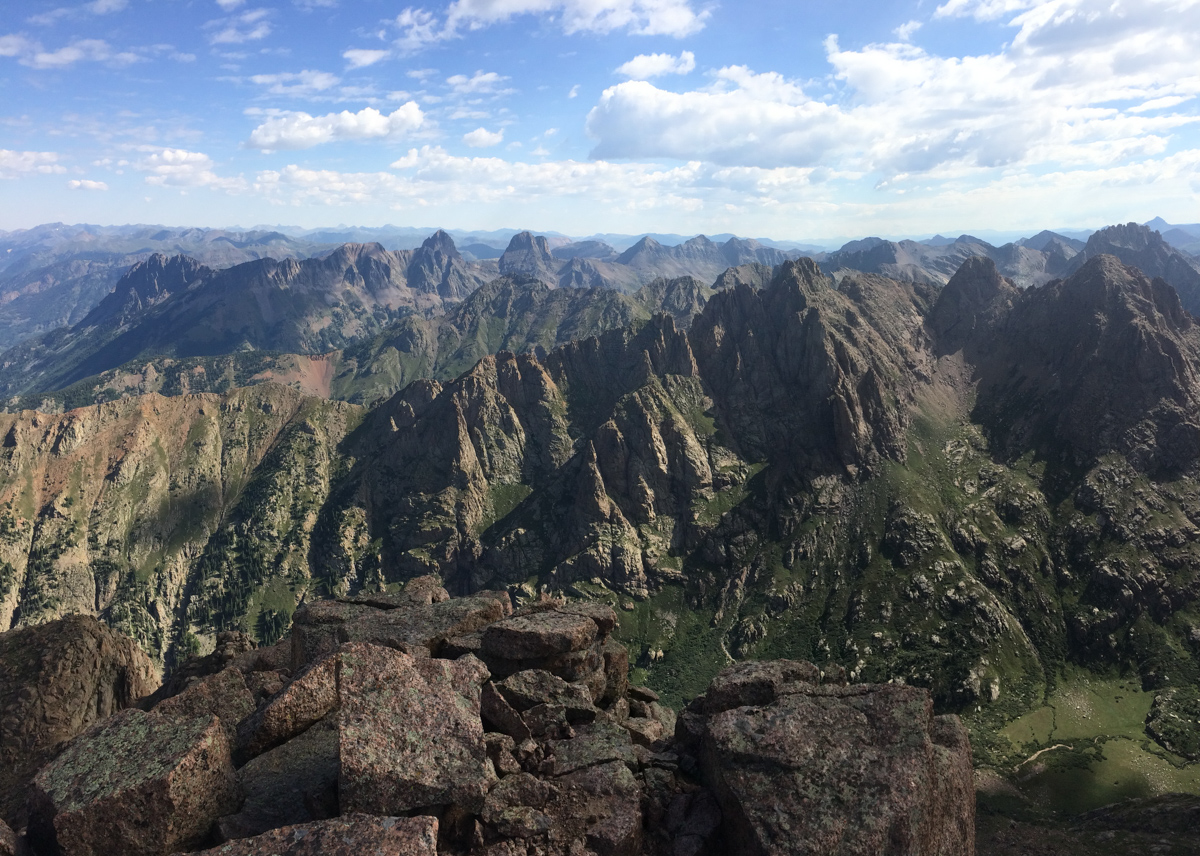
While the clouds did not seem too threatening, I was quickly reminded of just how much more work laid ahead of me before I was safely back in my tent. I still had to safely downclimb Pigeon without dying and then make it down 1,700 feet and back up again to the Pigeon - Turret saddle, and then back down to upper Ruby basin. Yikes. I departed without delay, eating as I climbed down. I serendipitously found an alternative route to the class 4 route by following some cairns to the left of the class 4 section which was quite a relief since I did not really want to go down that way. The class 3 alternative was much easier to downclimb and brought me back to the same general area to allow a safe descent back towards North Pigeon Creek, which went quite quickly following the loose dirt and scree. I re-climbed up to the lower saddle below Pigeon in less time than I thought I would need and found myself gazing back up at Turret. My legs were feeling the burn to say the least!
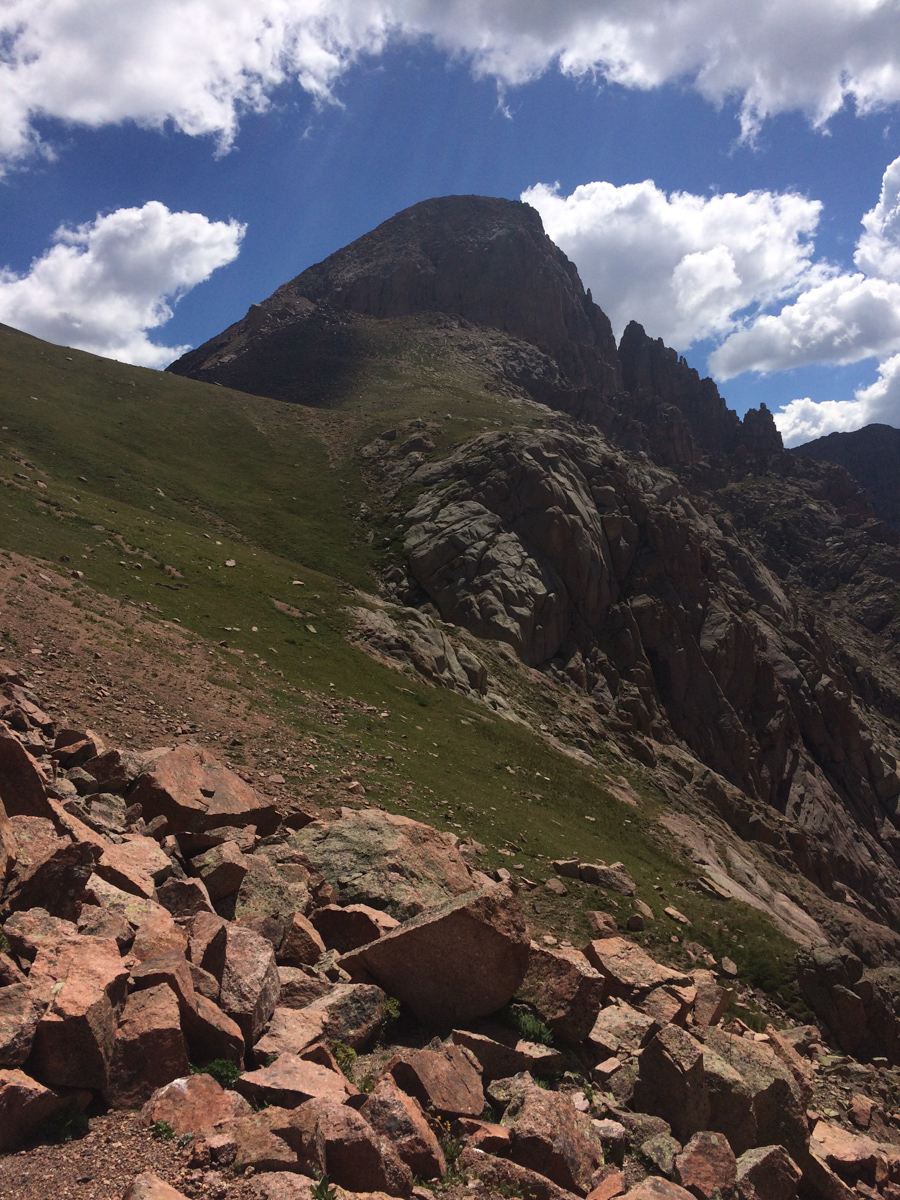
Upon reaching the saddle between Pigeon and Turret, I ran into two young hikers I had seen on the train the day before. I talked to them for awhile and learned that they had camped at Ruby Lake and were thinking of ascending both Turret and Pigeon. I gave them some tips and it seemed as though they were going to just head up Turret for the day. I was starving and exhausted and told them I was going to go pass out in my tent. I quickly descended down towards the basin without any issues except for the constant feeling of hunger. I could not keep enough food in my system. To make it worse, I had really painful and annoying heartburn, I think caused by drinking Gatorade, but who knows. This later was quite annoying at dinner because I could not eat all of my food - I felt like I wanted to throw it up after every bite despite wanting to devour it. Maybe I was eating too quickly?
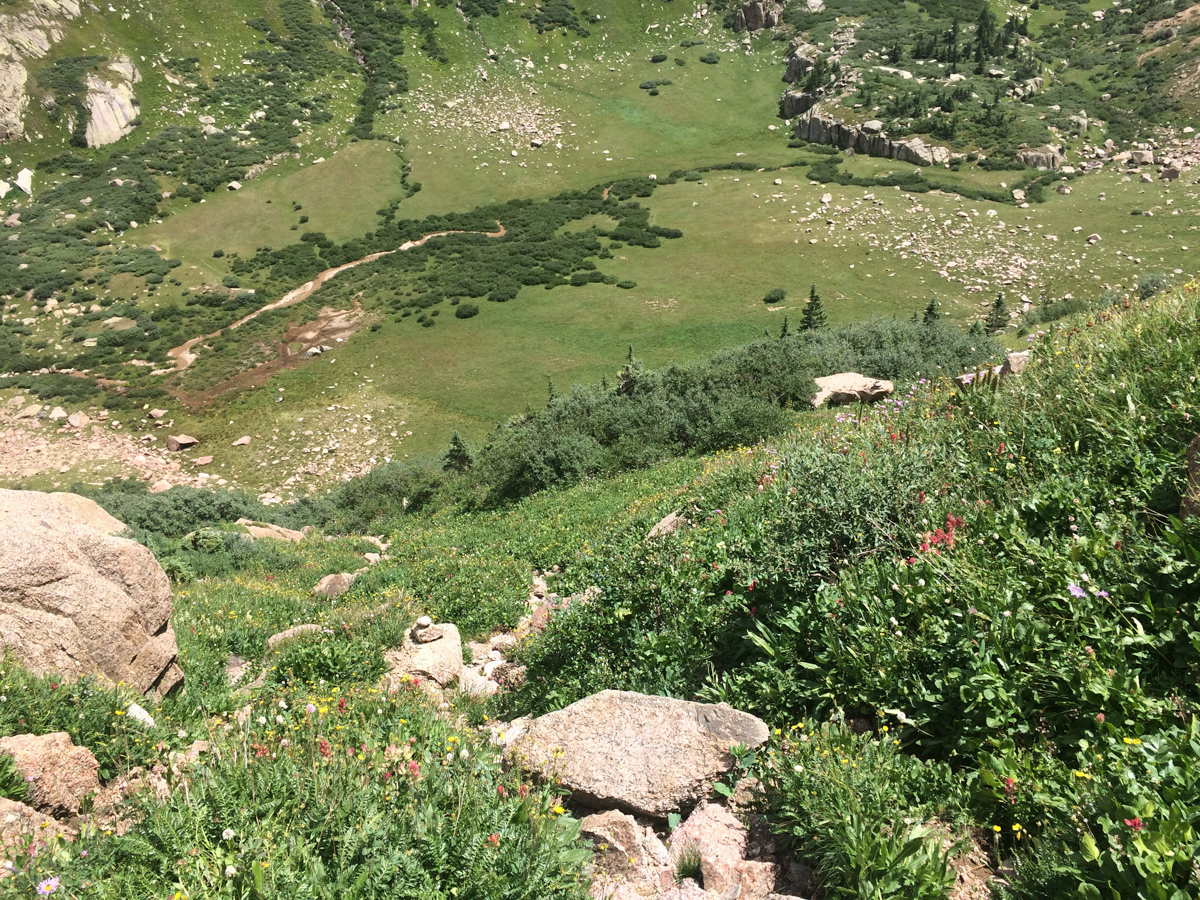
Making it back to camp was a great feeling and I had the whole meadow to myself.
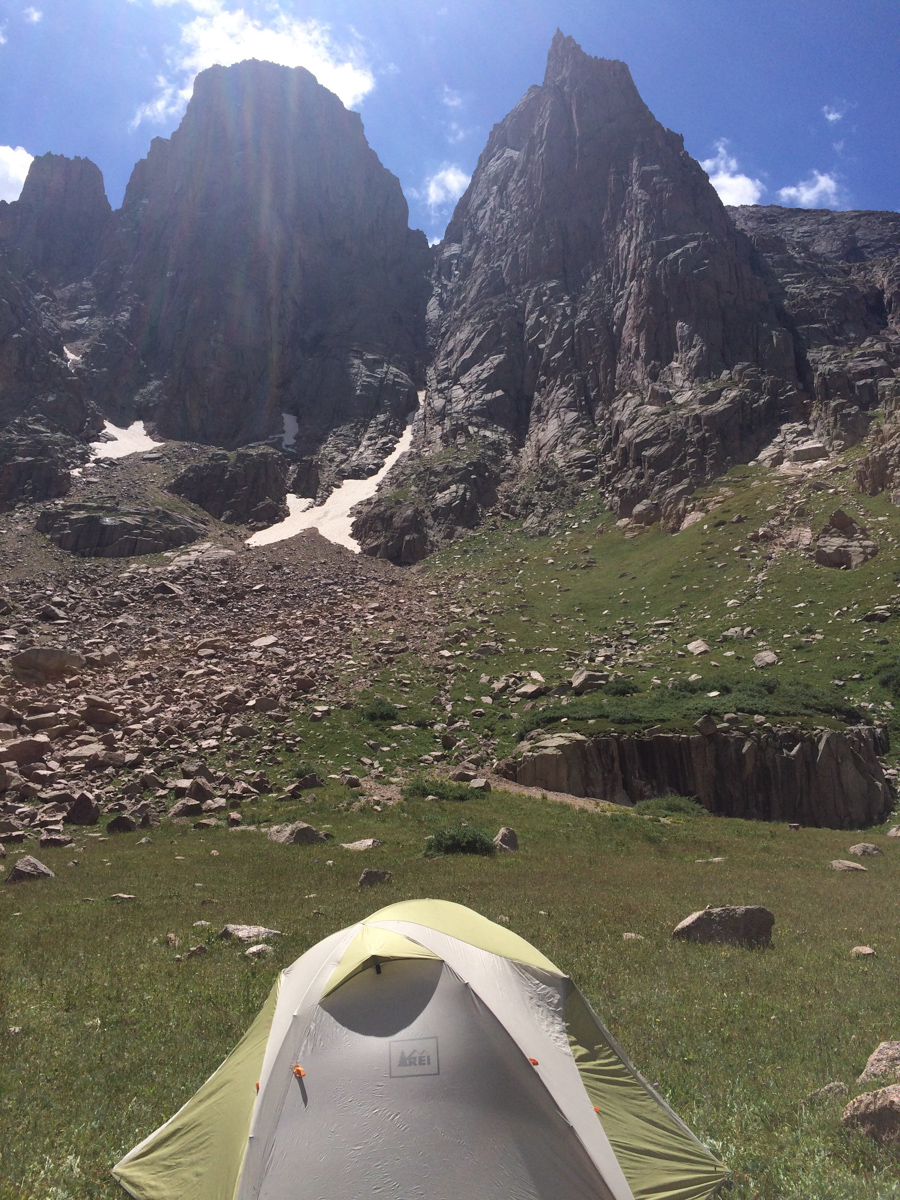
Except for the five goats that joined me later on after I napped for three hours in the nude.
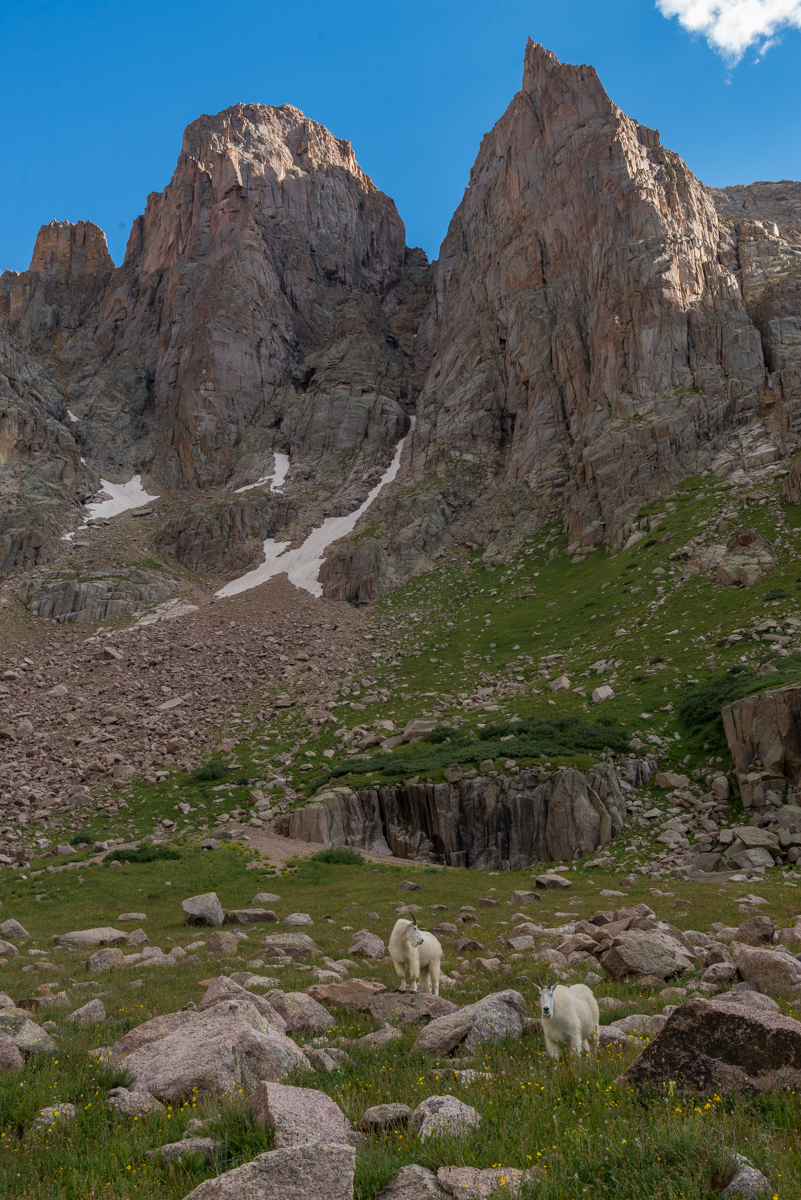
These goats were foraging around my tent pretty much all evening and night so I made the most of the situation and filmed a timelapse of the mountain goats grazing for about an hour long.
After filming the goats and eating dinner, I decided I still had some energy left in me before bed, so I found some flowers to photograph and some spots to shoot for sunset. I was particularly happy with how this photo of a single columbine flower turned out below Turret Needles.
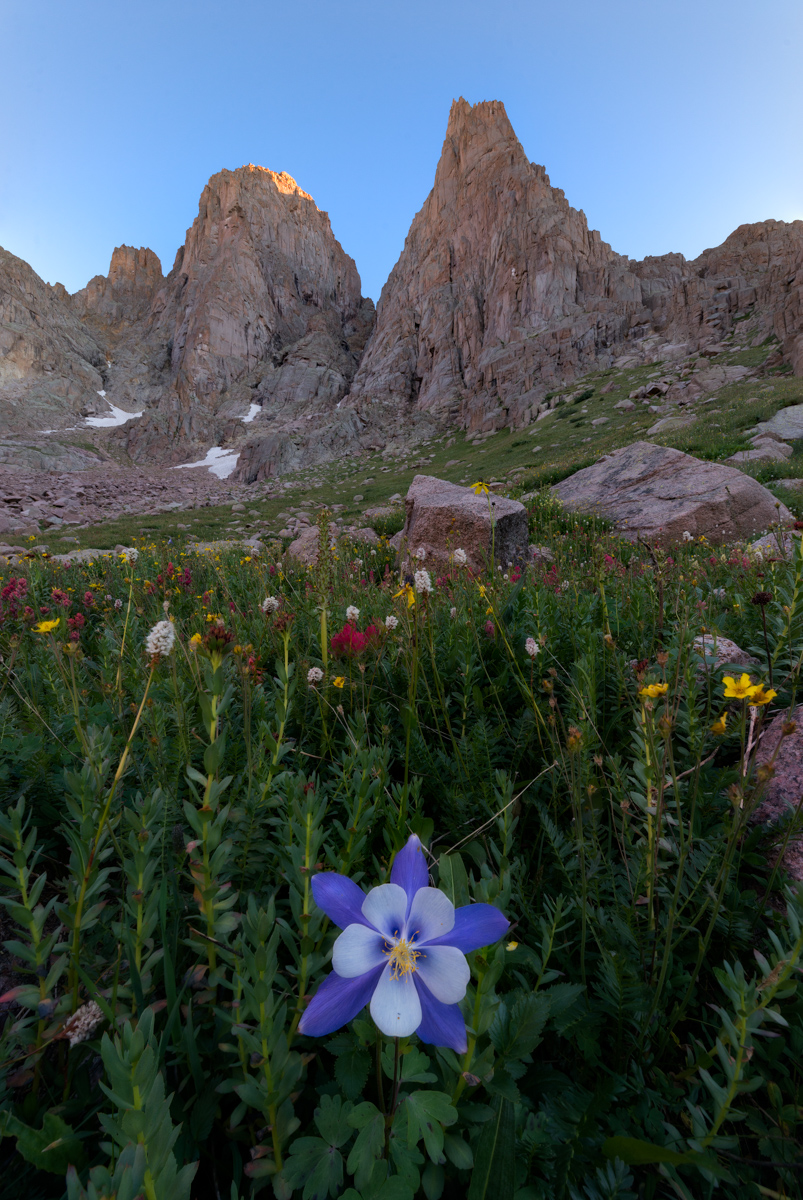
Sunset was pretty remarkable, especially with the assortment of wildflowers at my feet above my campsite, which you can barely see in the middle of the photo.
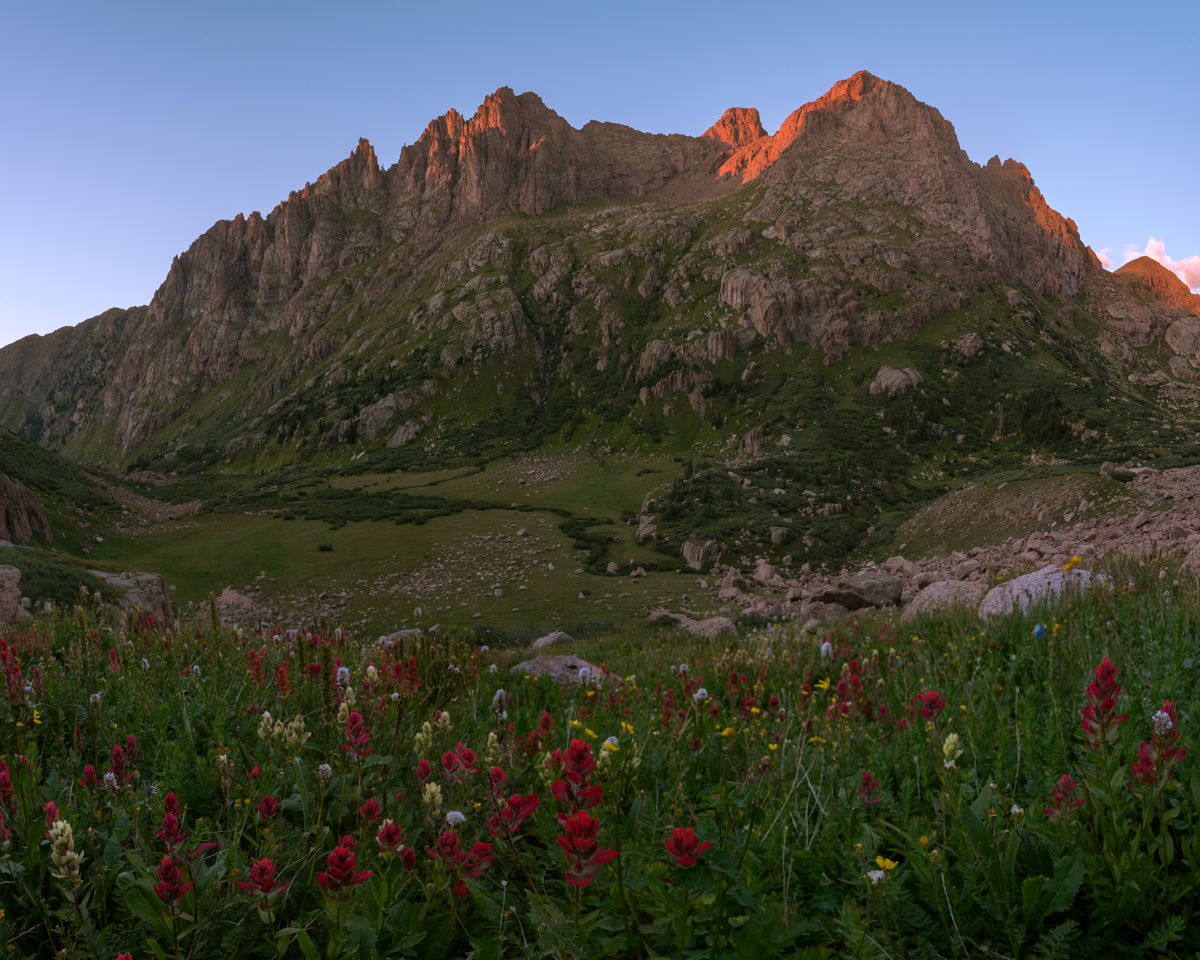
After photographing sunset, I was ready to turn in for the night. My heartburn kept me up a lot of the night, which was incredibly frustrating given how exhausted I was; however, I did get some pretty solid sleep from about 2 AM until 6 AM, at which point I was woken up by some heavy breathing outside of my tent. I opened it up and found a large mountain goat staring right into my door. I tried to get a photo of him, but he lazily scurried off before I could. I made some coffee (the Starbucks Via Blonde Verdana is pretty amazing), packed up, and photographed sunrise.
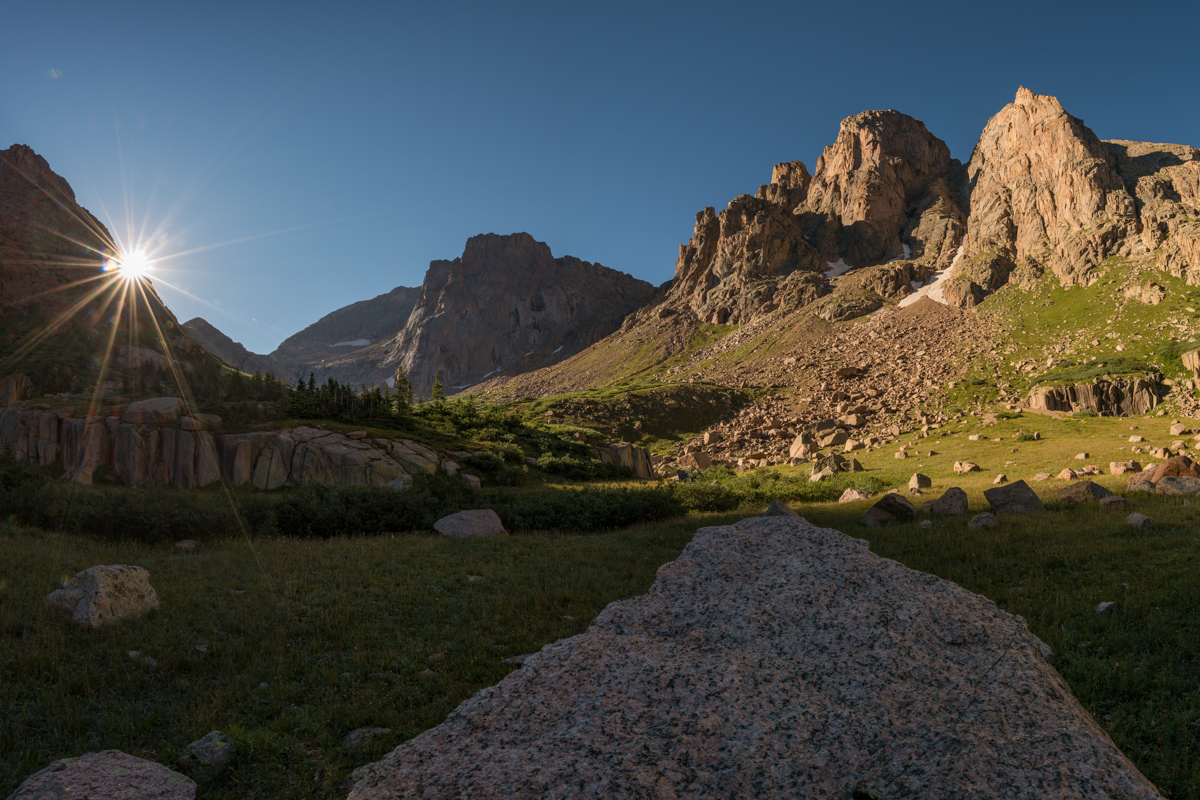
I left my campsite at 9 AM. Even though my train was not supposed to pick me up until 3:30 PM, I wanted to get down earlier to try to get on an earlier train. The views down were just as good as going up and Pigeon dominated the scene.
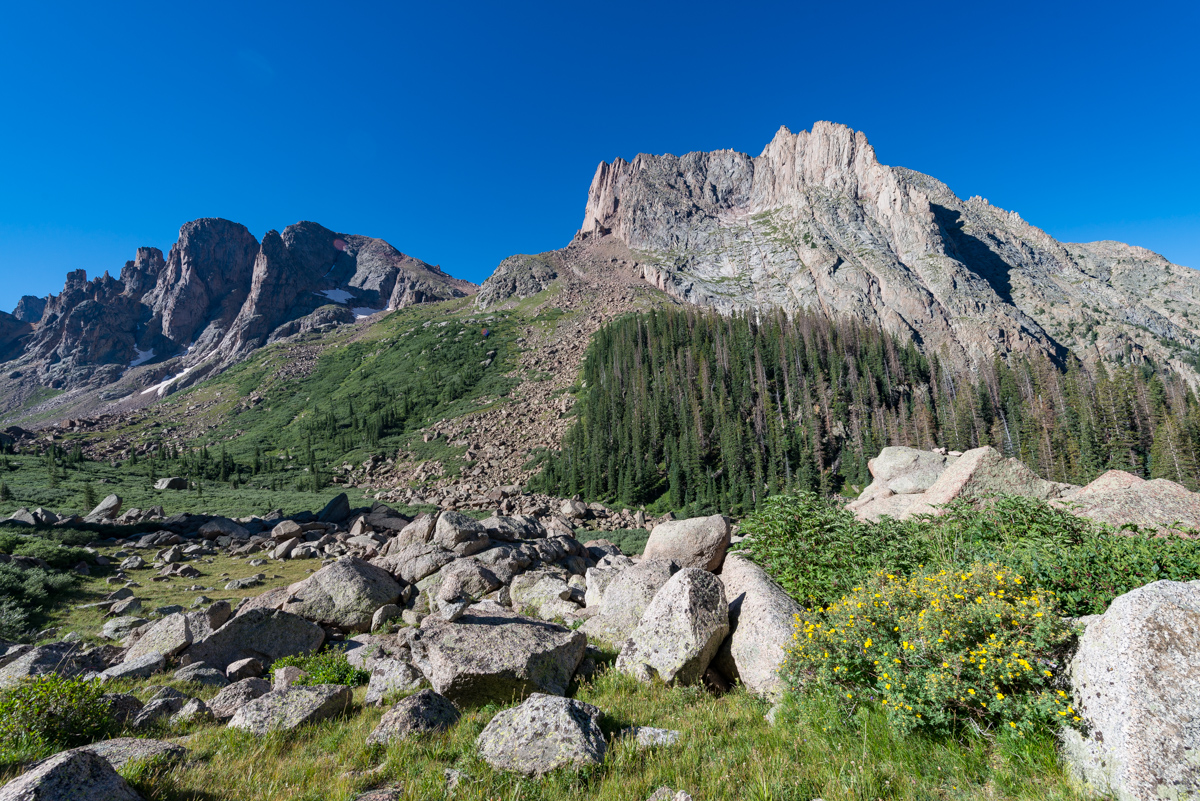
I made it down to Ruby Lake quite quickly and ran into those two climbers from yesterday, named Jacob and Rose. Turned out that Jacob works for the train and Rose attends Fort Lewis College. Really nice kids! I then later learned that one of my employees at work is married to Jacob's cousin. Small town!
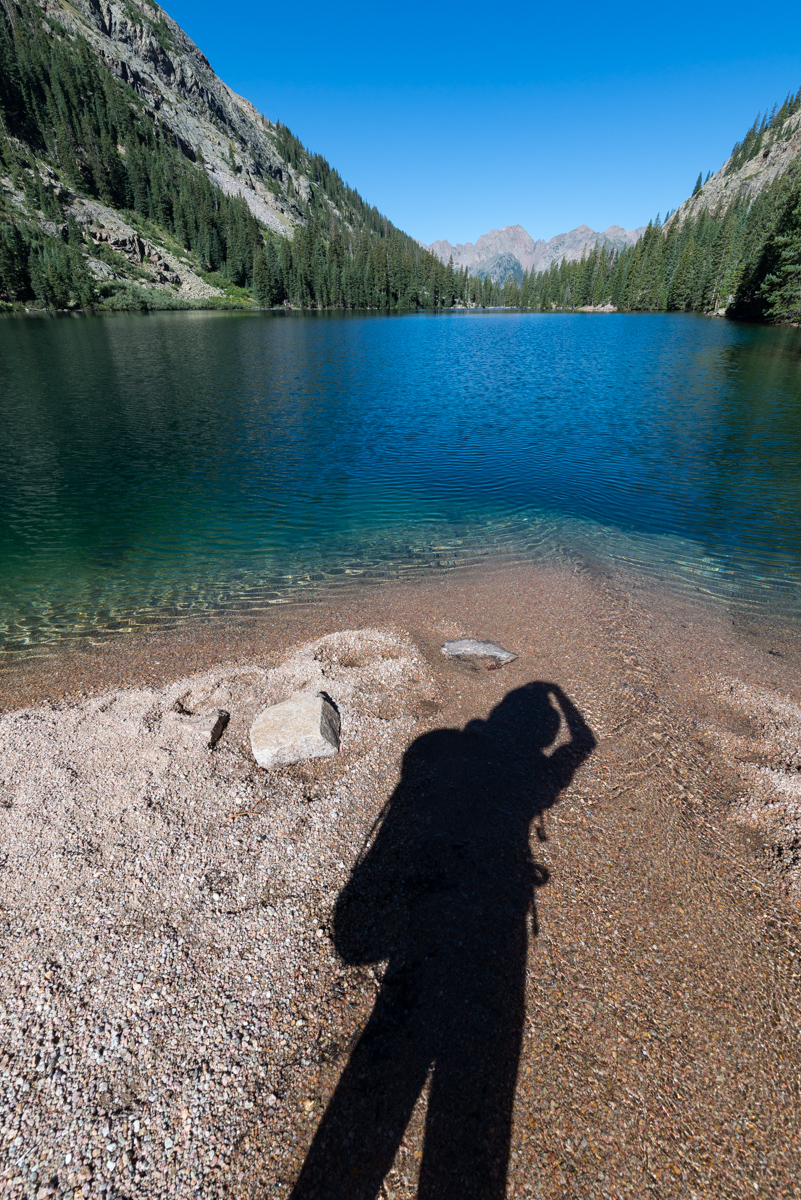
Routefinding on the way down was not as hard and I even found the tree with the Columbine carved into it - which is noted nicely on my GaiaGPS track.

I made it back to the bridge crossing the Animas at 12:05 PM without any problems and found myself among several other people waiting for the train. Apparently the train had derailed in Durango and was an hour and a half late. I wound up waiting there until 4:30 PM while hanging out with two guys from Arkansas, one of which had just moved to Greely, Colorado for work.
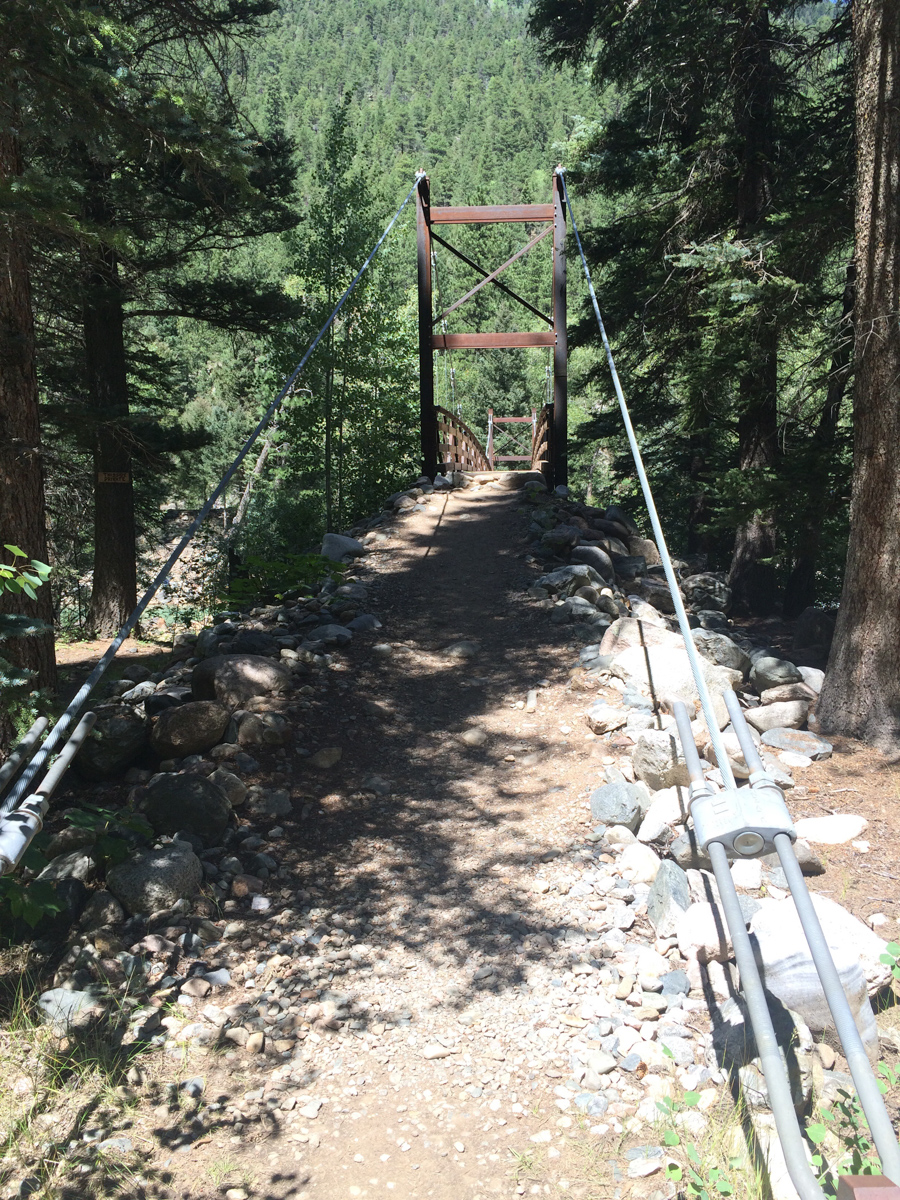
Once the train finally arrived heading to Silverton (I did not board this one), it was a mad dash to get on board.
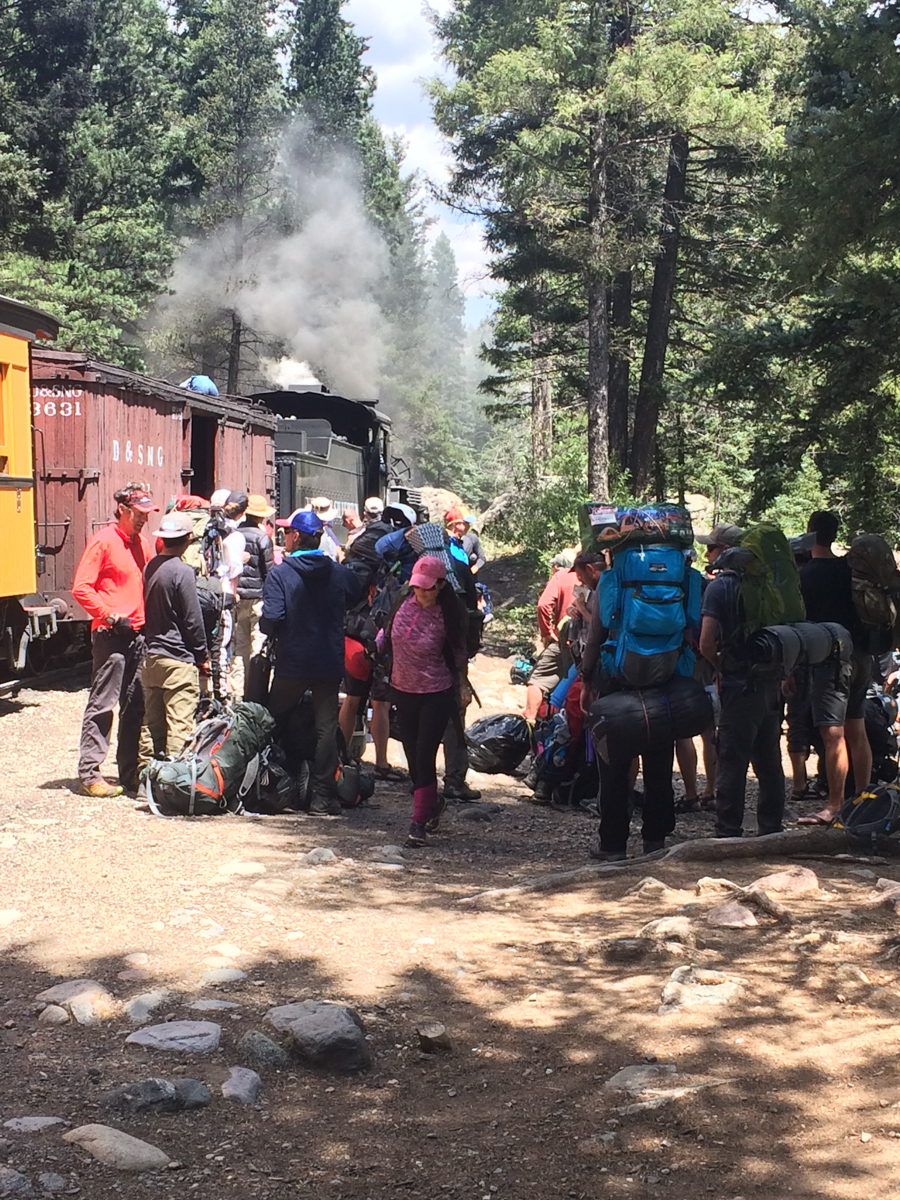
I ended up riding on the train with Jacob and Rose and we had a nice talk about how great it is to live in Durango and how lucky we felt to be this close to such amazing mountains. Life is good.
Adventures in Silverton, Colorado: Backpack to Island Lake and summit U.S. Grant Peak
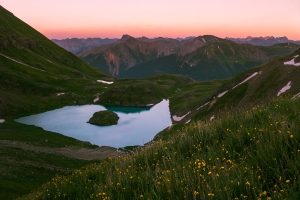
After visiting Ice Lake Basin in August of 2013, I knew that I had to return to the area to photograph the wildflowers there at peak season (mid-July). After moving back to Colorado in November of 2015, I knew that one of my first destinations would be the Ice Lake Basin area. I also wanted to get my wife into backpacking so I got her equipped with some light gear and we both began exercising together to get ready for the primetime hiking season. Since my wife was new to backpacking, I decided to get our pack weight as low as possible. My friend Todd Myers loaned us a great book on Ultralight Backpacking by Mike Clelland which offered some great tips to get our weight down. The items I picked up for my wife included a new sleeping bag, a new sleeping pad, and a new backpack. We were able to get her pack weight under 15 lbs, which I think is a huge success. Here's the short list of gear we picked up for her:
1. REI Joule Women's Sleeping Bag - my wife sleeps super cold and this bag kept her nice and cozy at 12,500 ft, and it only weighs 2 lbs 2 oz. Success.
2. Therm-a-rest NeoAir XLite Sleeping Pad - while this is probably the lightest sleeping pad I've ever seen and it packs down to almost nothing, my wife complained it was a bit too small. Get the longer version.
3. Osprey Tempest 30 backpack - this pack was the perfect size for what she was carrying and weighed under 2 lbs. Awesome.
For myself, I picked up a new backpack as well, the Osprey Exos 48 - a perfect size pack for a tent, bag, pad, food, cookware, and my camera system.
We weighed all of our gear using a kitchen scale and used the awesome gear planner from Erik the Black to calculate our total weight. The whole planning thing helped my wife get into the ordeal and get excited, I think.
Lastly, we invited some of new friends from Durango, including Todd, Autumn, and Ellen. Good times were for sure going to be had! From my last adventure up to Ice Lake Basin, I knew about a shortcut by taking the road up to Clear Lake and then parking at the 1st switchback. This saves about 1,000 feet of total climbing. We arrived at the small parking area, which was empty (a good sign for sure). Our adventure began immediately by crossing the strong creek coming down from Clear Lake. This was my wife's very first stream crossing and she did it like a champion. The trail was steeper than I remembered and my wife struggled a great deal on the way up, but our group was supportive and I was SO proud of her determination. She rocked it! As we entered lower Ice Lake Basin, we had a decision to make - to continue on to Ice Lake Basin, to stay at the lower Ice Lake Basin, or to go to Island Lake, which was somewhere I had never been. The group unanimously voted to go to Island Lake since we anticipated the weekend to be quite busy with wildflower peepers and we thought Island Lake would be a little less busy. I personally had no problems with this since I could head over to Ice Lake no problem to take photos if I wanted. We made quick work up towards Island Lake as sunset approached and I captured a shot of the last light as we gained elevation quickly. The wildflowers were insane. By the way, you can check out the map of where we went and the GPS / GPX file over on Gaia GPS, who generously gave me a free Pro account. I love Gaia GPS - such an awesome app! You can purchase it here and help support the site.
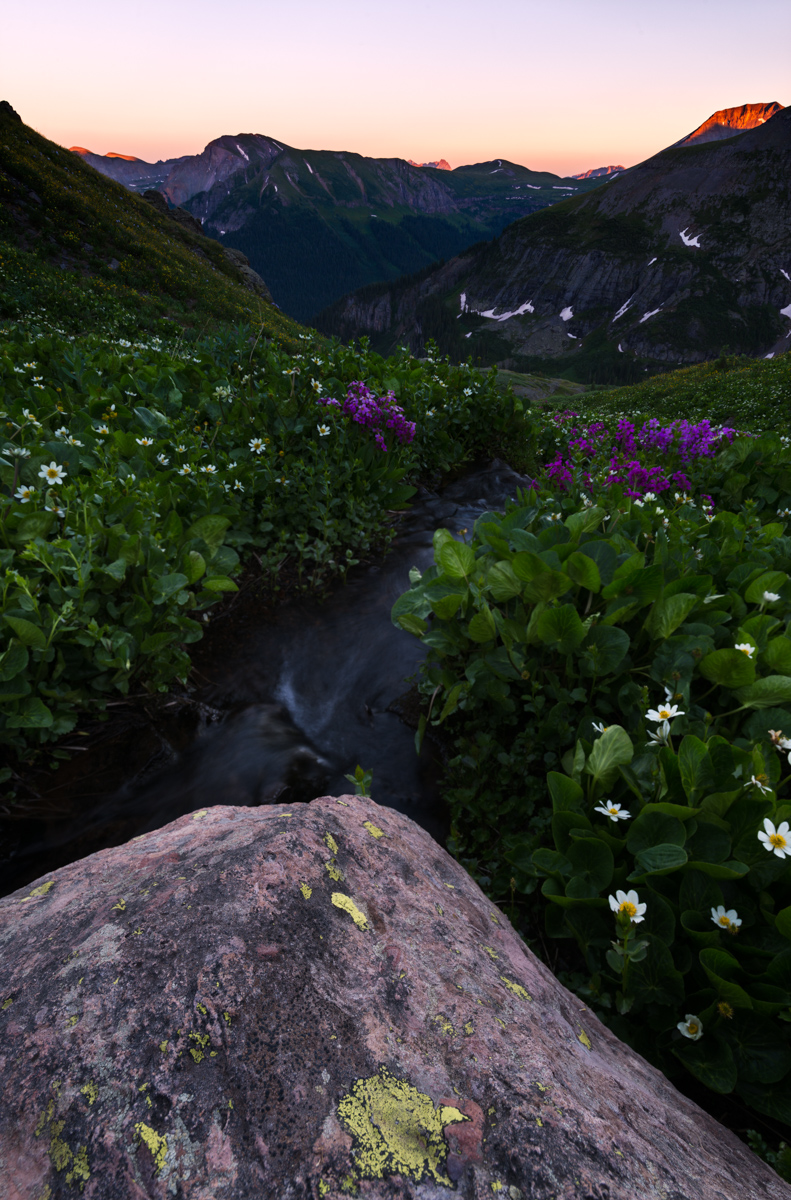
Upon arriving in the upper basin near Island Lake, the whole area opened up to the South and East, revealing views of the Grenadiers, the Chicago Basin 14ers, and Rolling Mountain (right). As you can see, the yellow paintbrush were stunning.
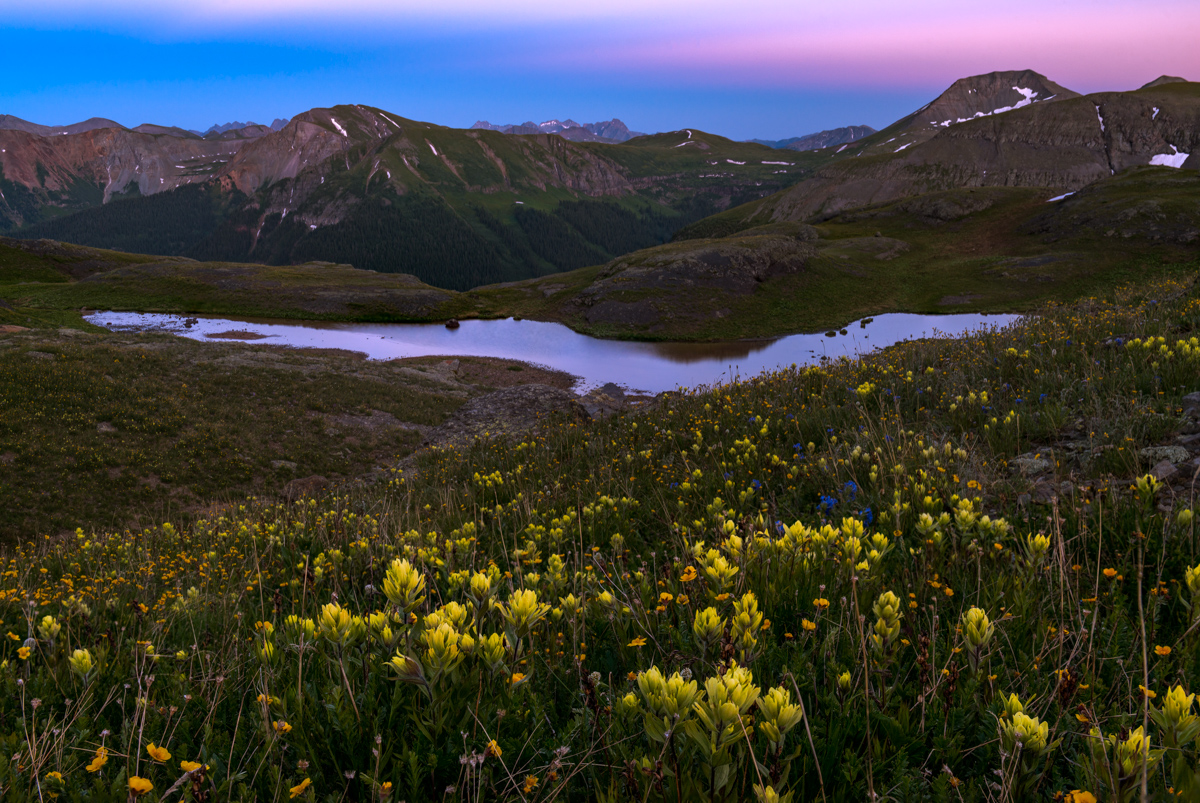
Our group found a great spot right by Island Lake to camp and we proceeded to get set-up. We were alone at the lake (or so we thought) and just loved the solitude. I knew that I would have some great opportunities for some photography at night - I had studied the projections for the moon's brightness, location, and time of rise/set as well as the location of the Milky Way and the time it would rise and set - all using a handy app called PhotoPills. Since the moon was looking to be quite bright and nearly full, I knew that I would shoot in two sessions - early at night for the bright moon illumination, and later in the very early morning after the moon had set. So - I set off to take some photos using the bright moon light to provide some ambient light in the basin. The Milky Way was barely visible, but the moon provided some light to bring out the flowers in the basin and the summit of U.S. Grant Peak.
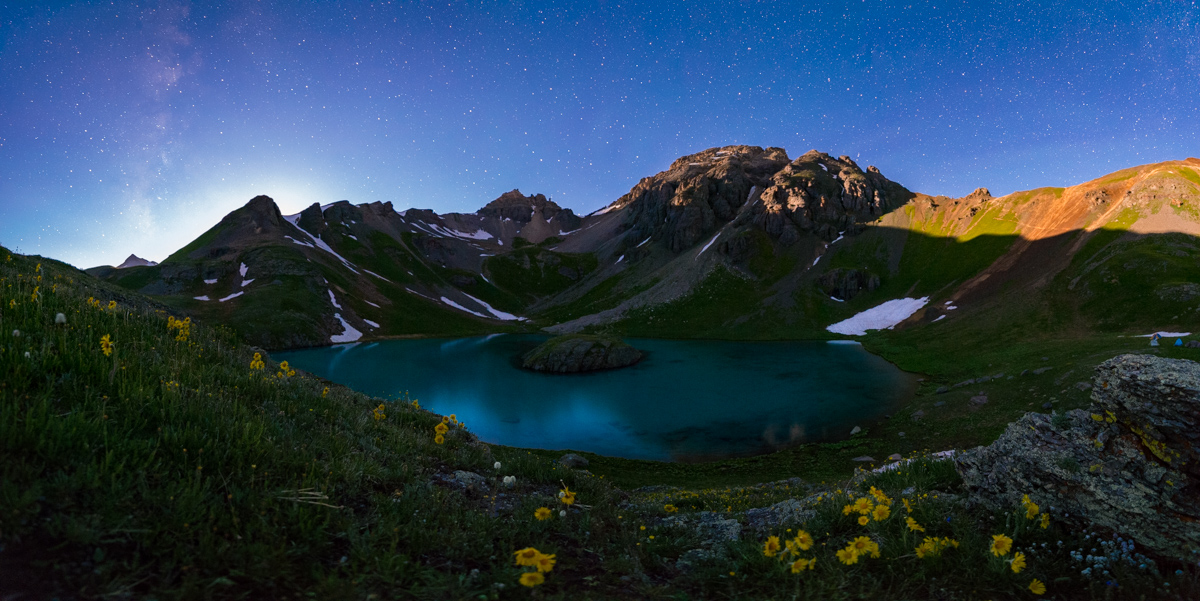
The lake was mesmerizing. I could sit there and take it in for hours.
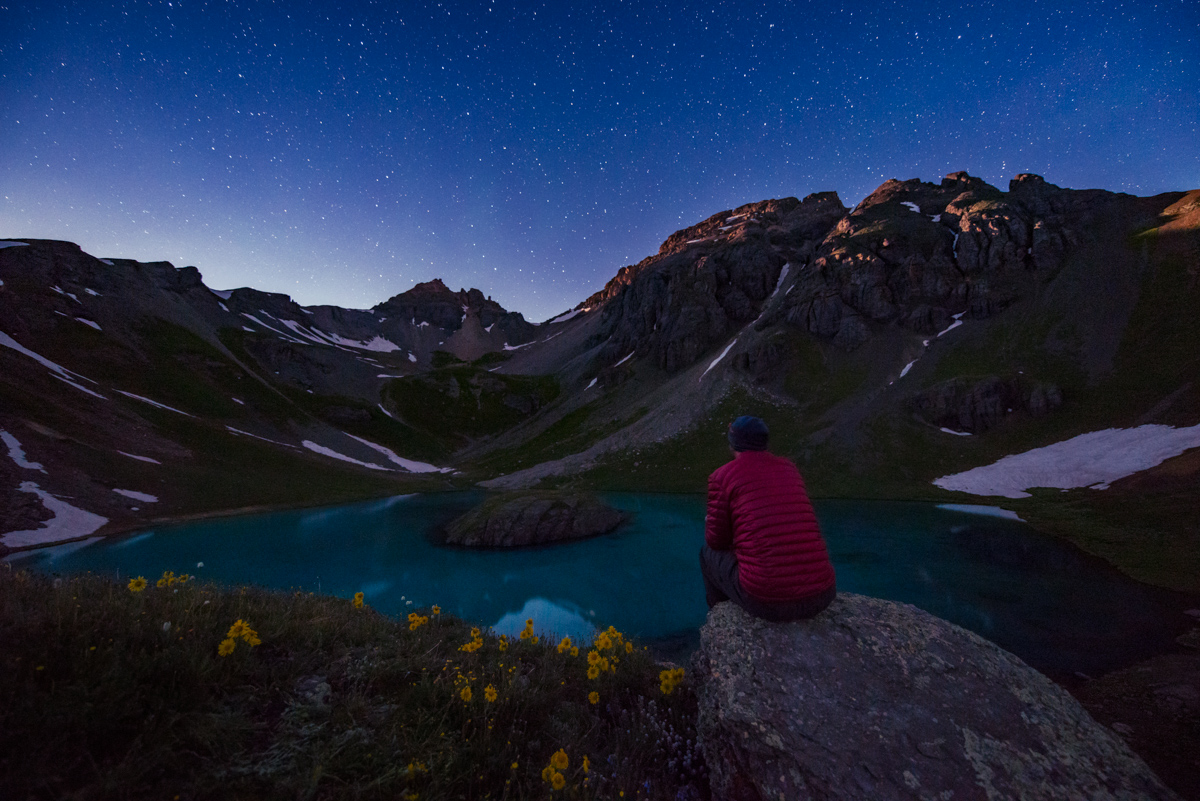
After wandering around for awhile taking photos, I decided to re-join the group at our campsite and go to bed. I set my alarm for 2 AM so that I could find a cool spot to photograph the Milky Way. Sleep is over-rated. None of us slept all that well - it was eerily quiet and everyone could hear everyone else move in their bags, open and close zippers, etc. It was pretty tough to get any sleep. I got out of the tent at about 1:45 AM and looked for a good spot to shoot the Milky Way, as planned. I found a little shallow lake nearby that had a nice view over towards the Ice Lake Basin 13ers. I was able to find a way to place my tripod in the center of the lake (it was really only about 3 inches deep), and loved how I could get the reflection of the Milky Way in the water. An amazing sight, for sure!
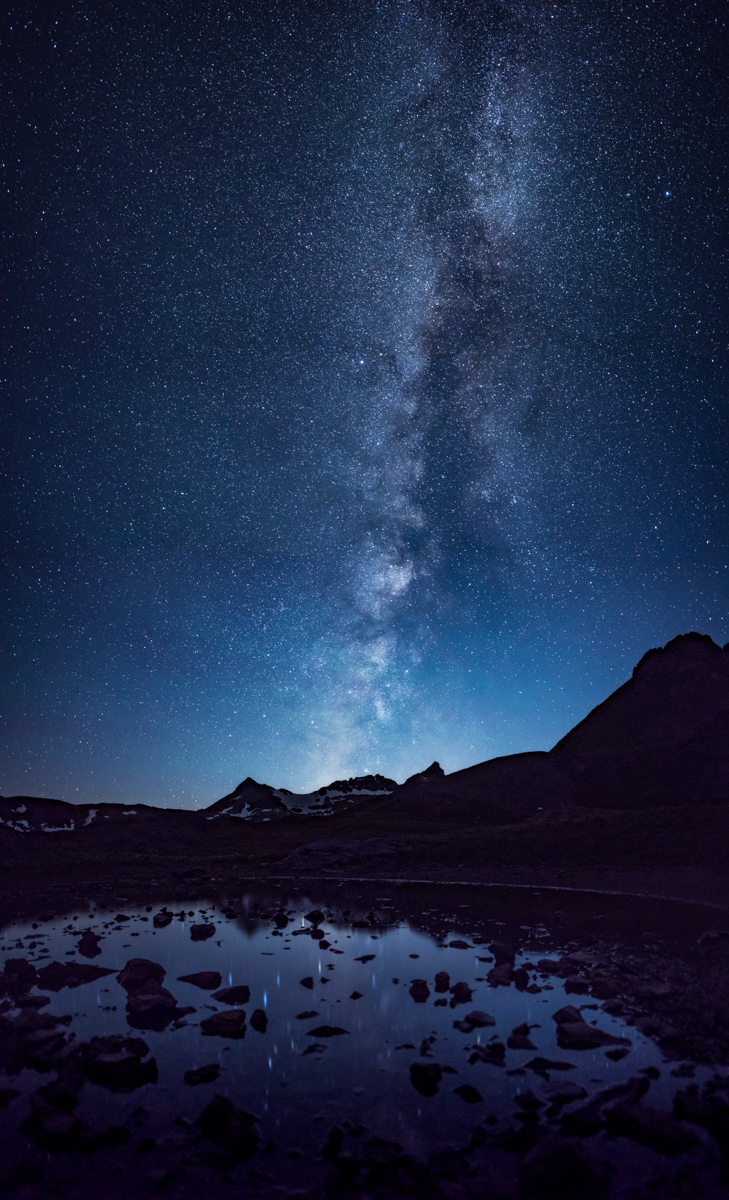
I really wanted to get a 180 degree panorama of the full Milky Way reflected in the water, and was able to pull it off after some work on my settings. The airglow (those high, green looking clouds) was looking awesome as well.
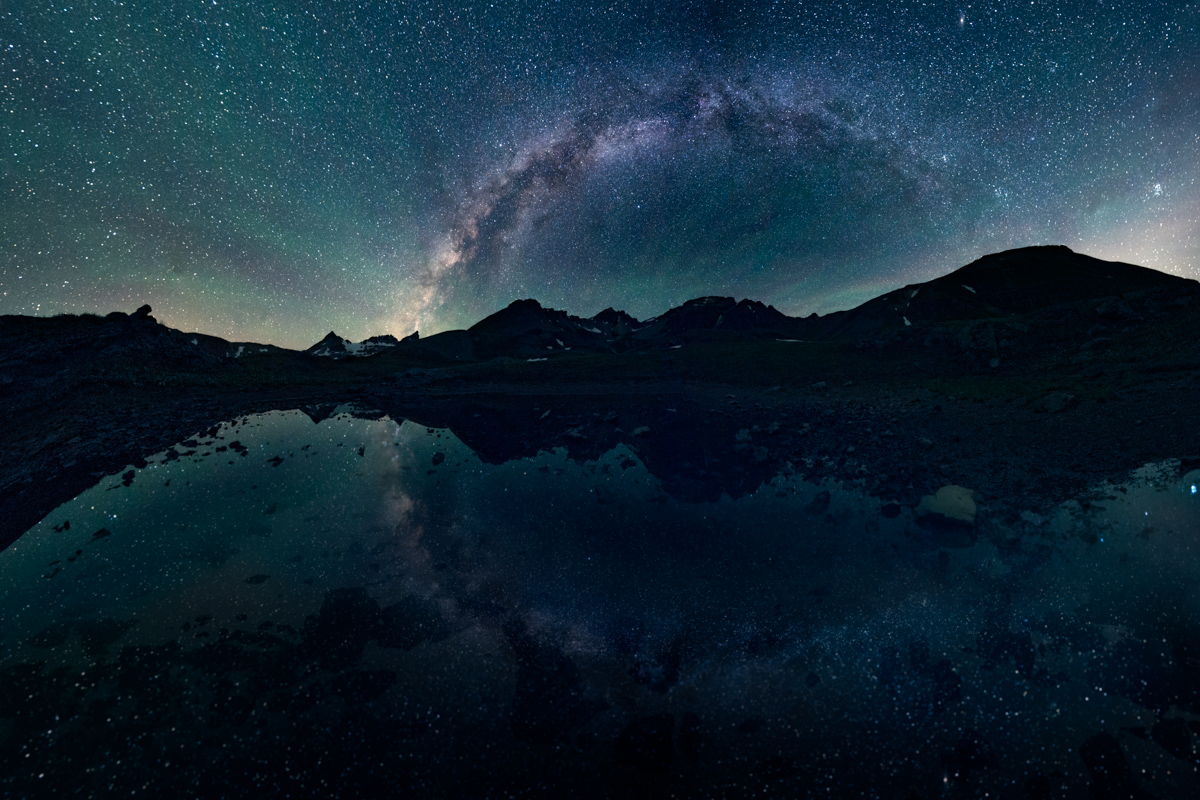
I played around a little with my headlamp as well, wanting to add a human element to the scene. I think it worked out pretty nicely.
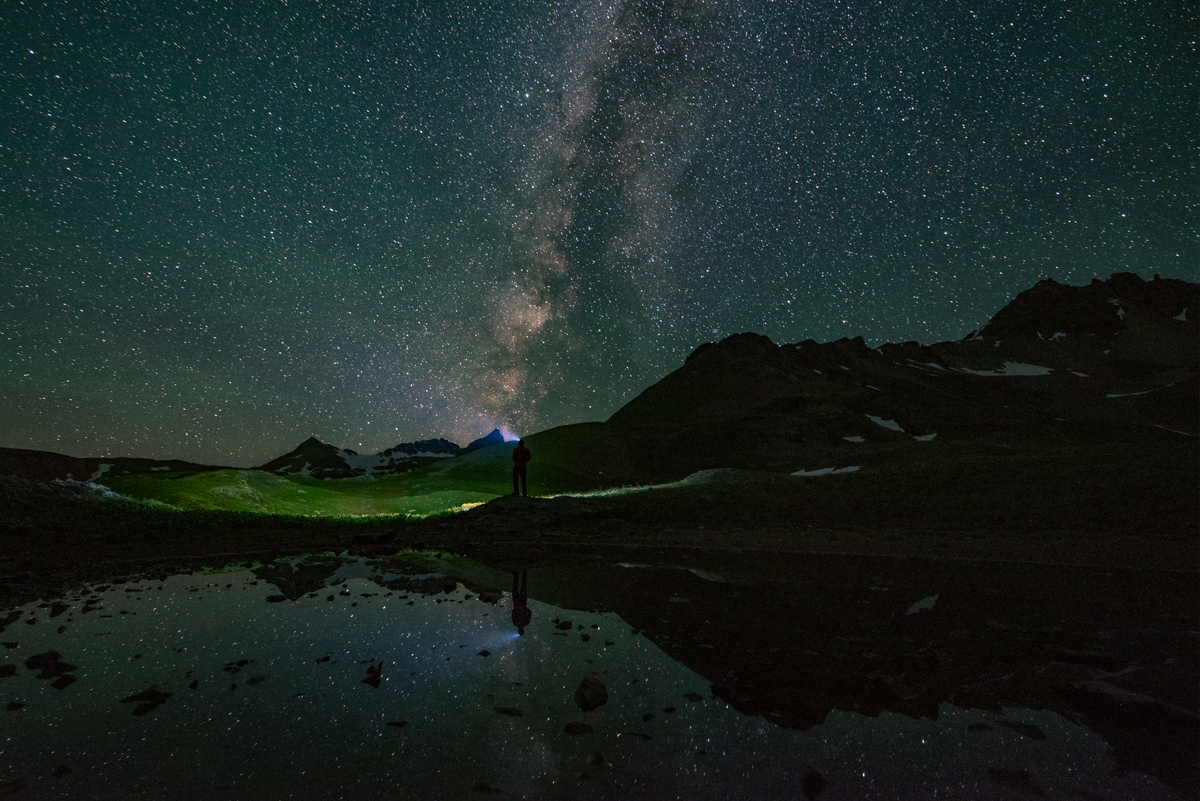
I went back over to Island Lake to set-up for one last shot before going to back to bed. This was a photo that I shot as a tattoo concept that I have been thinking about for awhile - imagine the flowers or a campfire at the bottom on the wrist and then the tattoo works its way up the arm to the mountain and then the Milky Way. I think it would look great, personally.
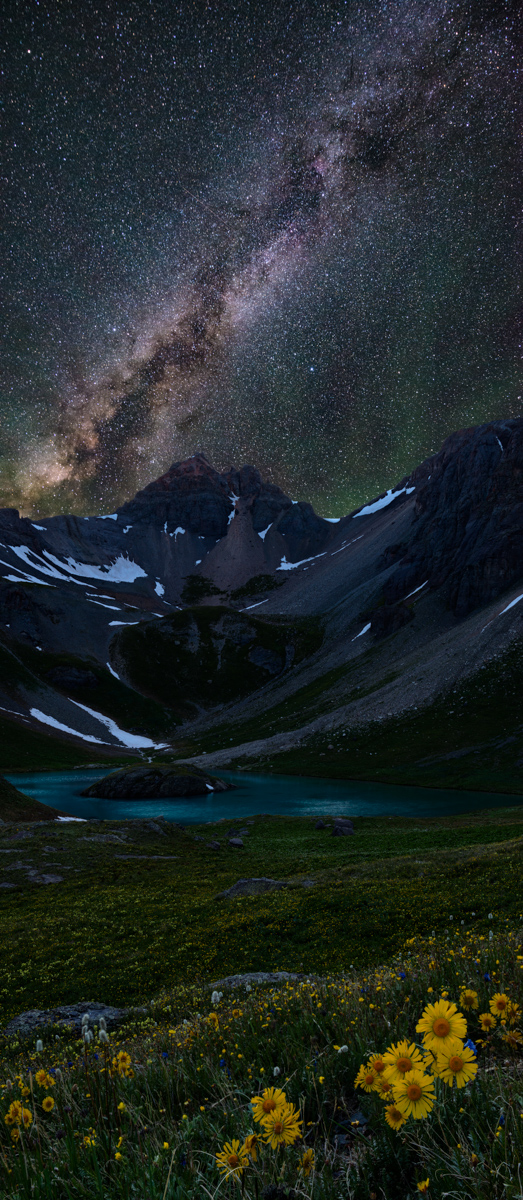
I went to bed again around 4 AM, getting about 4 hours of sleep total. We all woke up and enjoyed the amazing view from the lake and noticed some hikers heading up U.S. Grant Peak. I threw out the idea of doing the same and everyone agreed to give it a shot. So, we made breakfast and got ready for an adventure up U.S. Grant Peak. Normally I do a lot of research before climbing any peak; however, for this one, I decided to just see how things would go and turn-around if needed. I knew there was some challenging class 3 or 4 sections but had no idea what would be in store for us. Exciting!
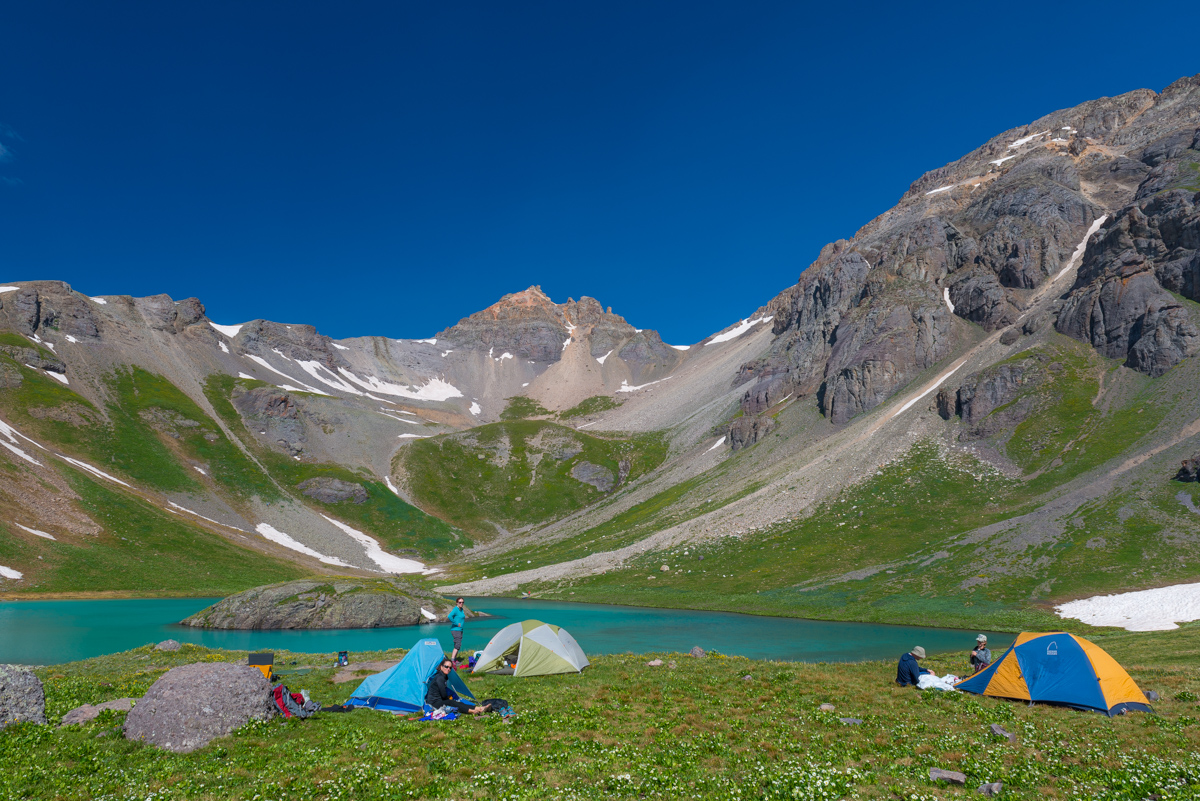
Off we went towards U.S. Grant peak - our goal was to gain the saddle between the two small areas of snow to the right of the peak above the lake seen above.
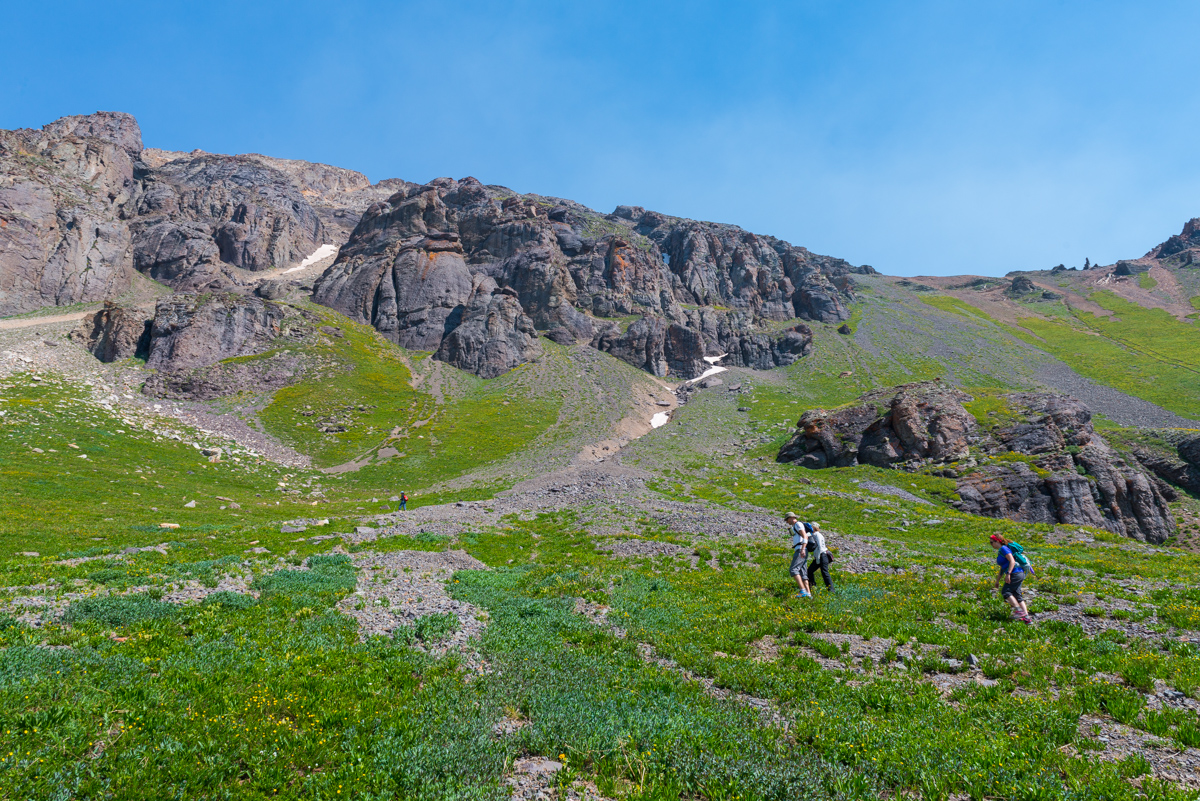
While we were hiking up there was a large group of day hikers having a bit of fun on the island - one even took a backflip off the lake. I'm thinking that was pretty damn cold. More on that later.
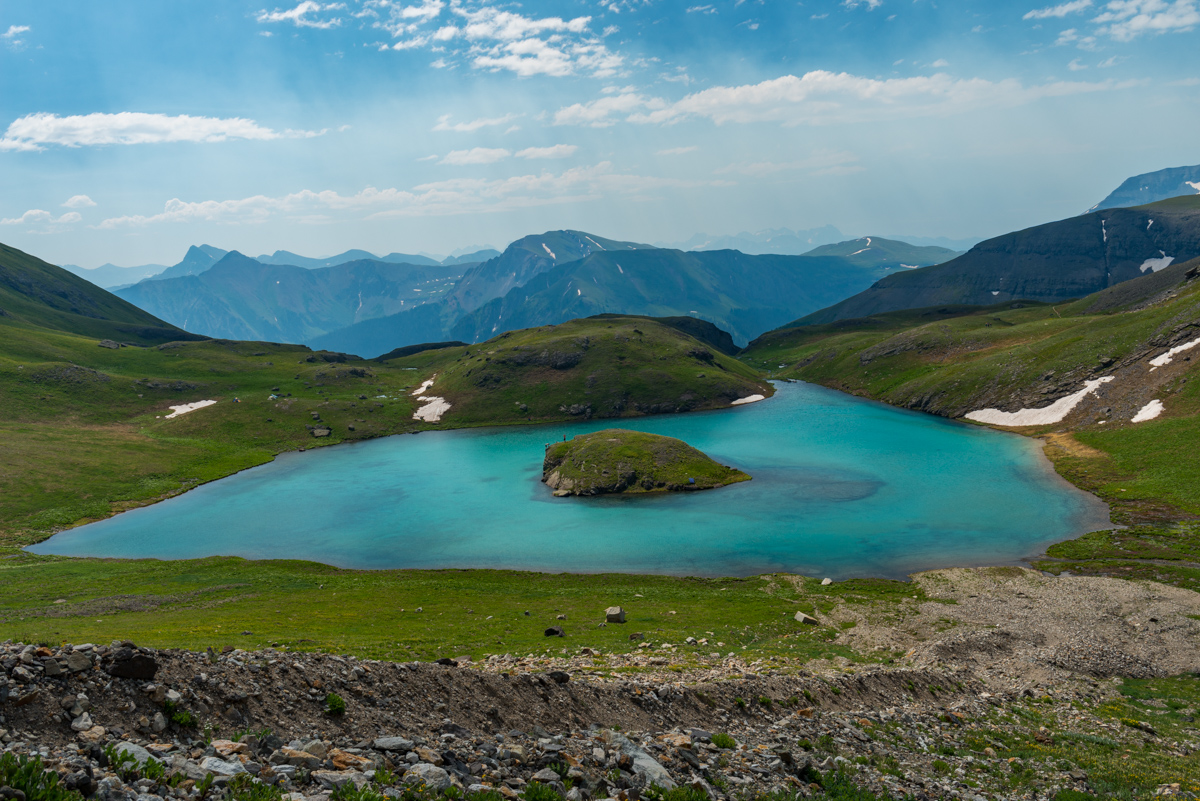
We reached the last section with grass and that is where my wife decided to rest while we continued on. She had an amazing view to take in.
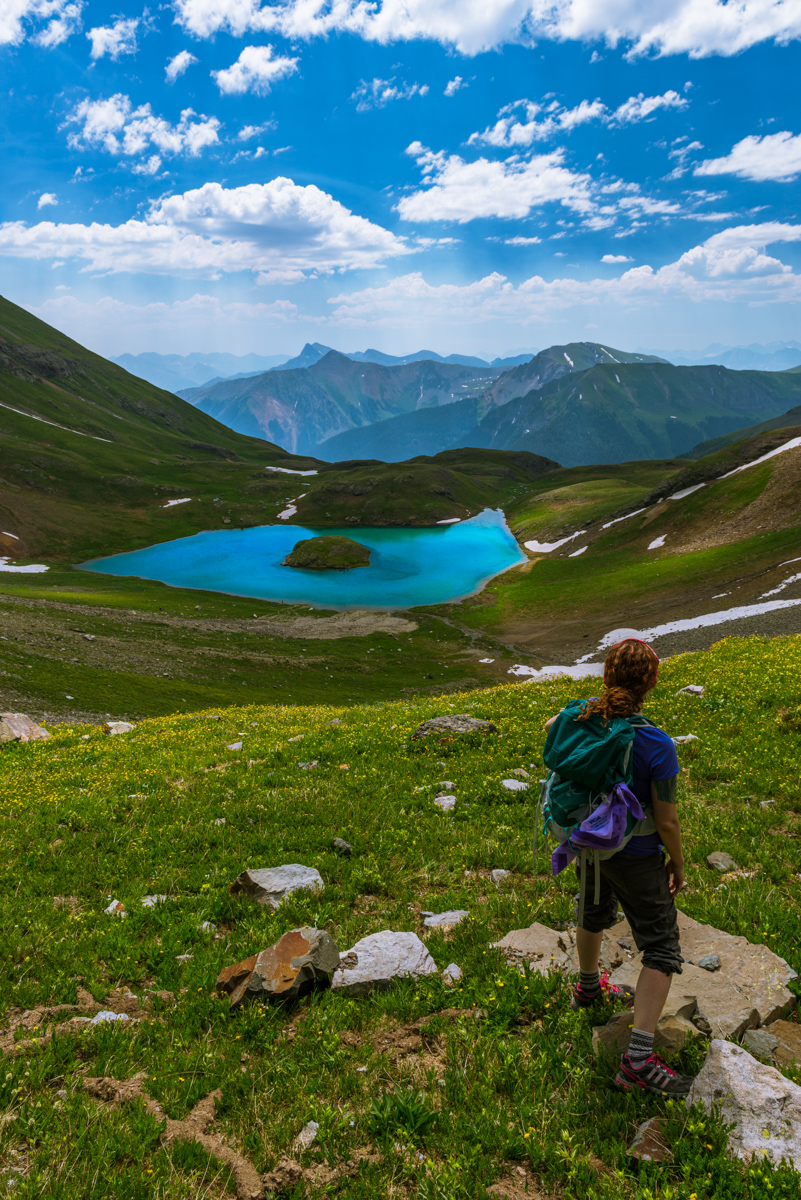
There was a very lightly travelled trail up to the ridge up the muddy dirt and scree. My legs were feeling great so I took the lead, which was awesome because then I could stop and take photos of my friends climbing up. This was a particularly memorable climb because it was Autumn's first mountain climb in Colorado, one I'm sure she will remember.

The higher we got, the better the view was, which eventually opened up fully to reveal the San Juans in their glory, from Pigeon all the way over past Vestal and again past Jones and Handies (right to left).
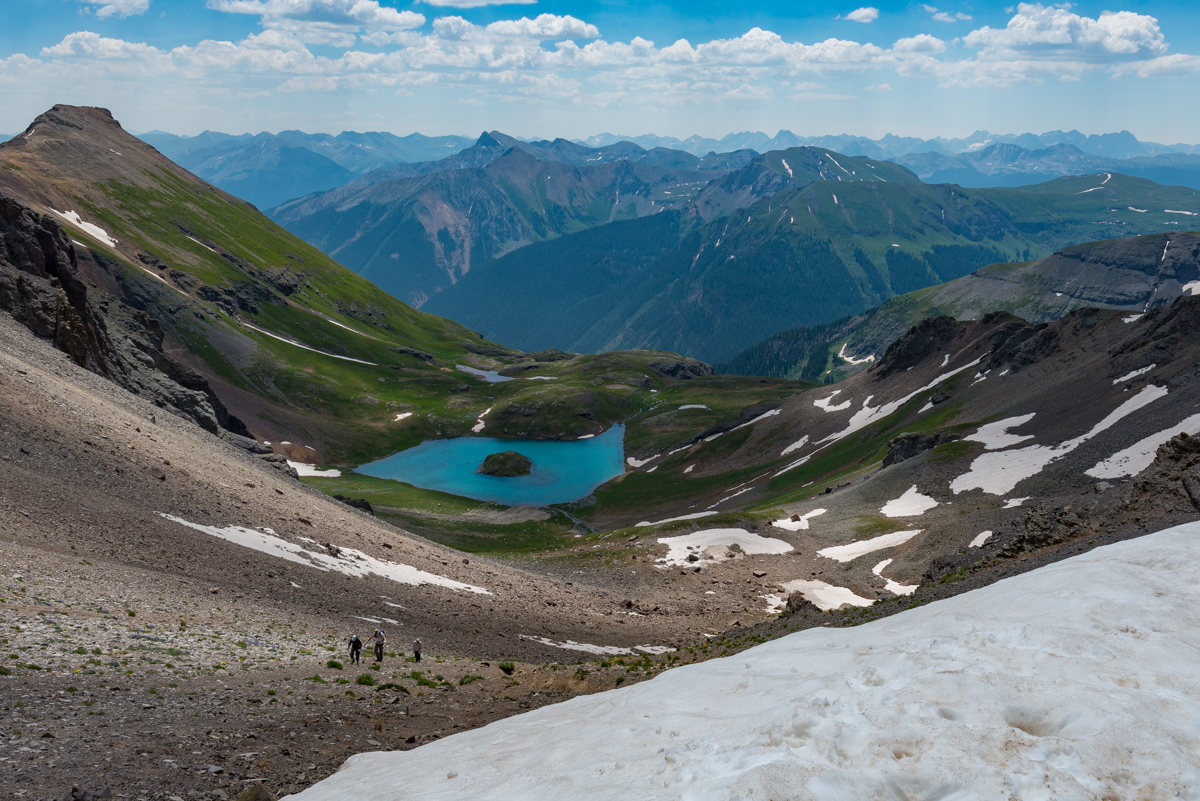
Upon reaching the ridge, I was greeted with a glorious view of Mount Wilson (left), Gladstone (left of center), and Wilson Peak (center). It was great seeing them from this vantage point since I had just climbed Gladstone and Wilson Peak the weekend before from Bilk Basin.
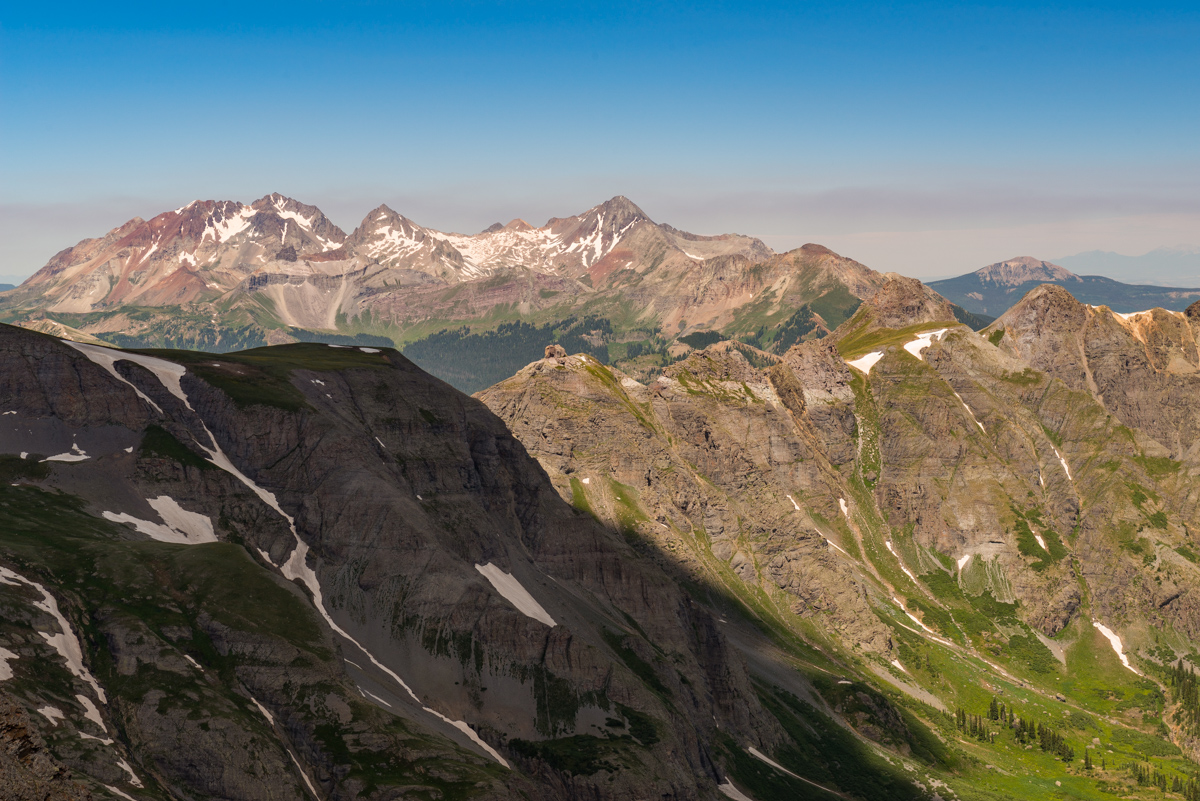
Ellen and Todd joined me on the ridge to take in all of the awesomeness.
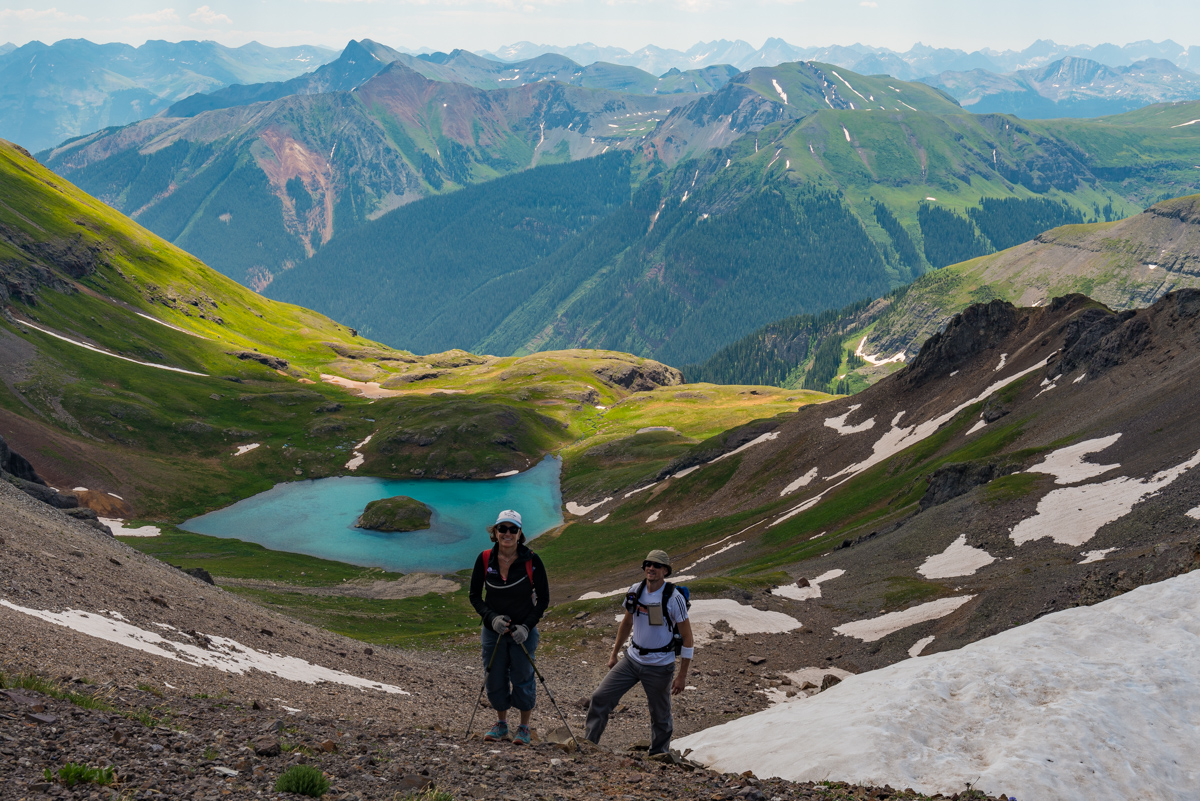
From the ridge we took a right turn and followed a very solid but slightly loose trail straight up the ridge. Here is a view looking down that ridge.
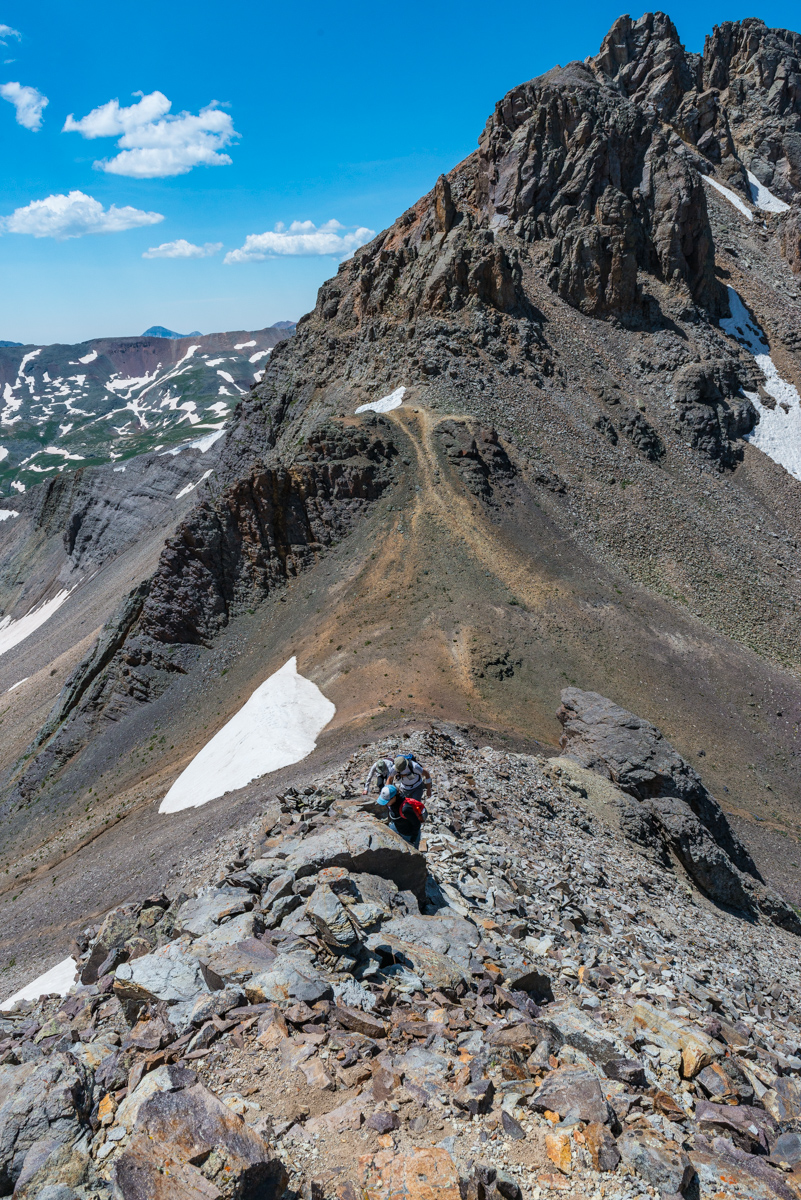
The view back down to Island Lake dominated my mind as we scrambled up the relatively easy class 2+ scree.
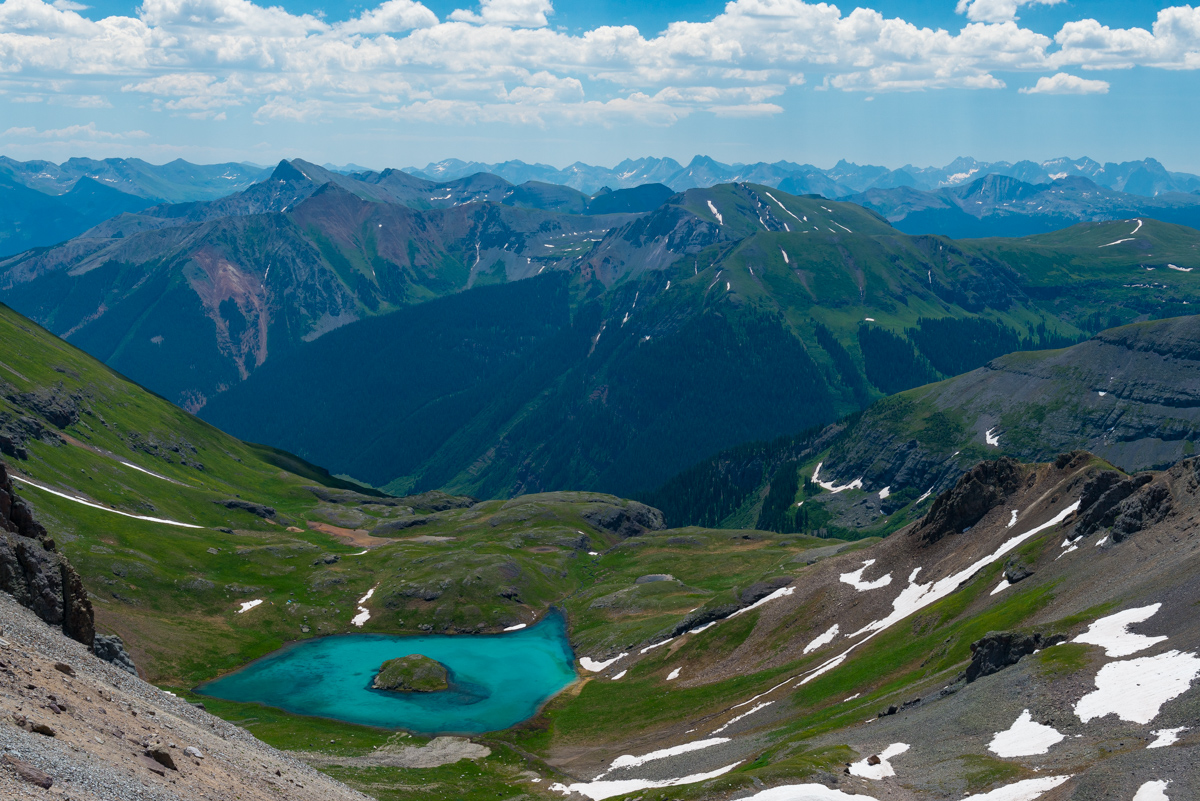
Eventually, looking back we could see Pilot Knob's gnarly summit block behind us over in Ice Lake Basin. The group continued the slog up the loose scree, which was pretty manageable.
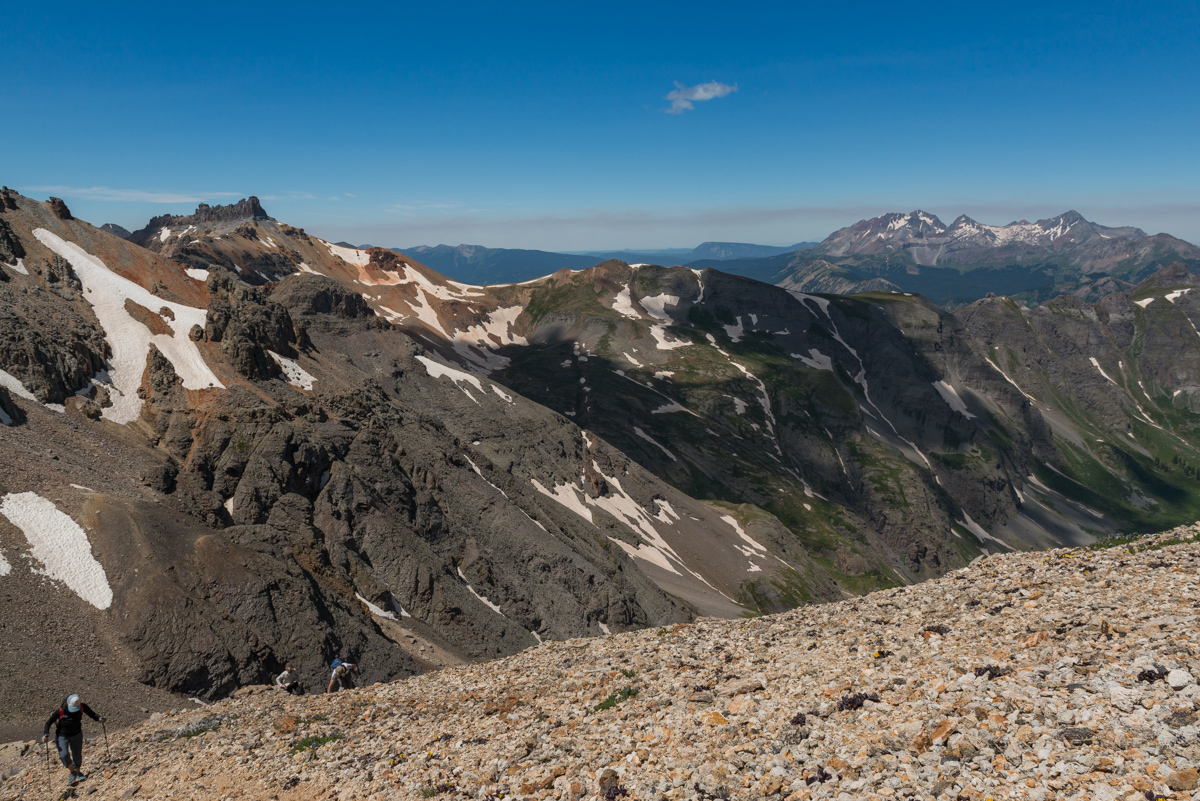
I live for this kind of terrain but I think my friends thought I was a little crazy for enjoying it. The rock was pretty much what you'd expect in the San Juans.
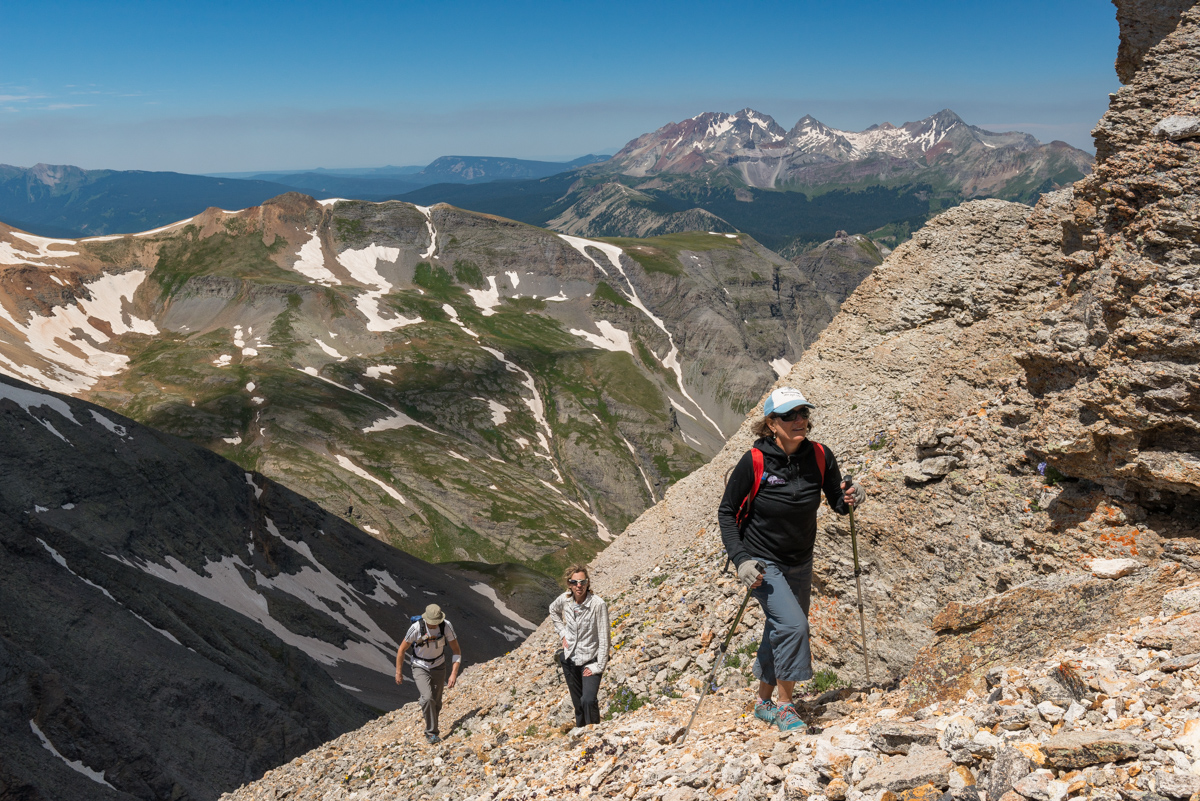
We eventually found ourselves in a steep orange gully with great hand-holds on the sides which was fairly loose. Sticking close to the wall made for pretty easy navigation.

The full beauty of Ice Lake Basin presented itself as we gained elevation, showcasing both Ice Lake and Fuller Lake. The weather looked like it would hold for the whole day.
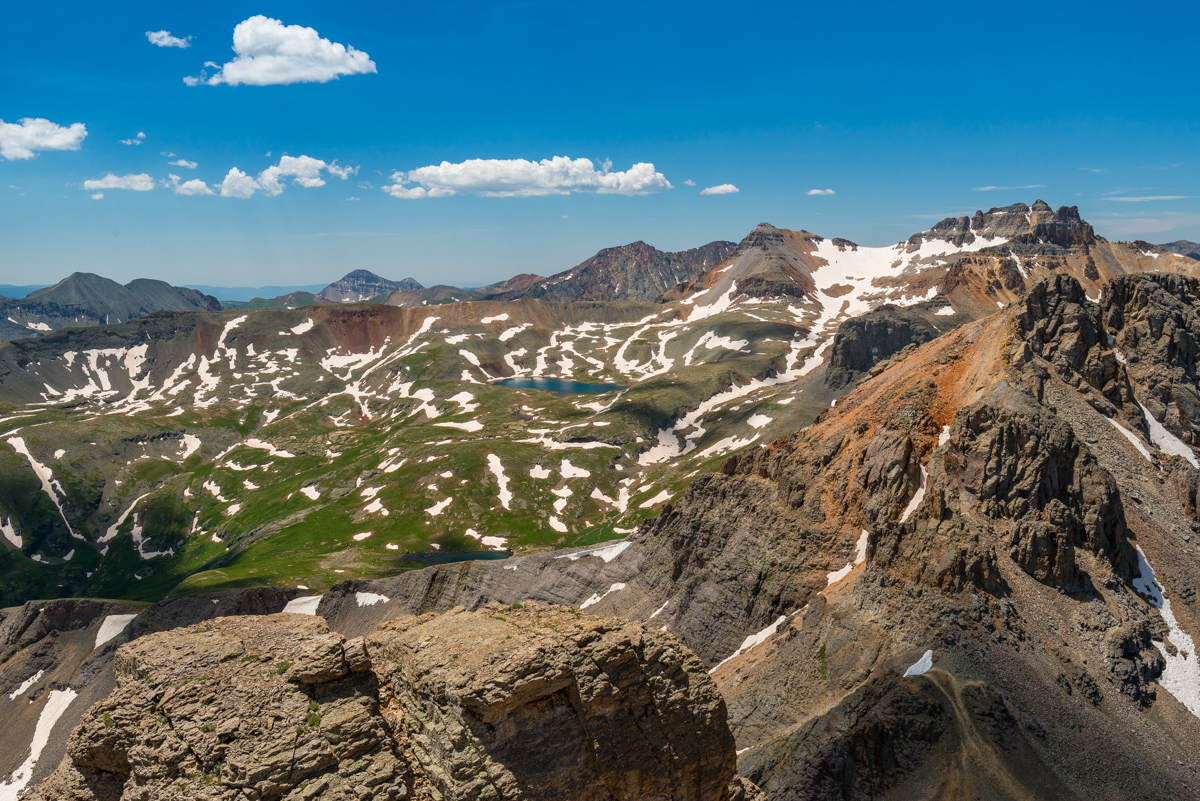
Honestly, I think I could have stayed up there for hours on end, taking in the views in every direction. It was just the reason I moved back to Colorado.
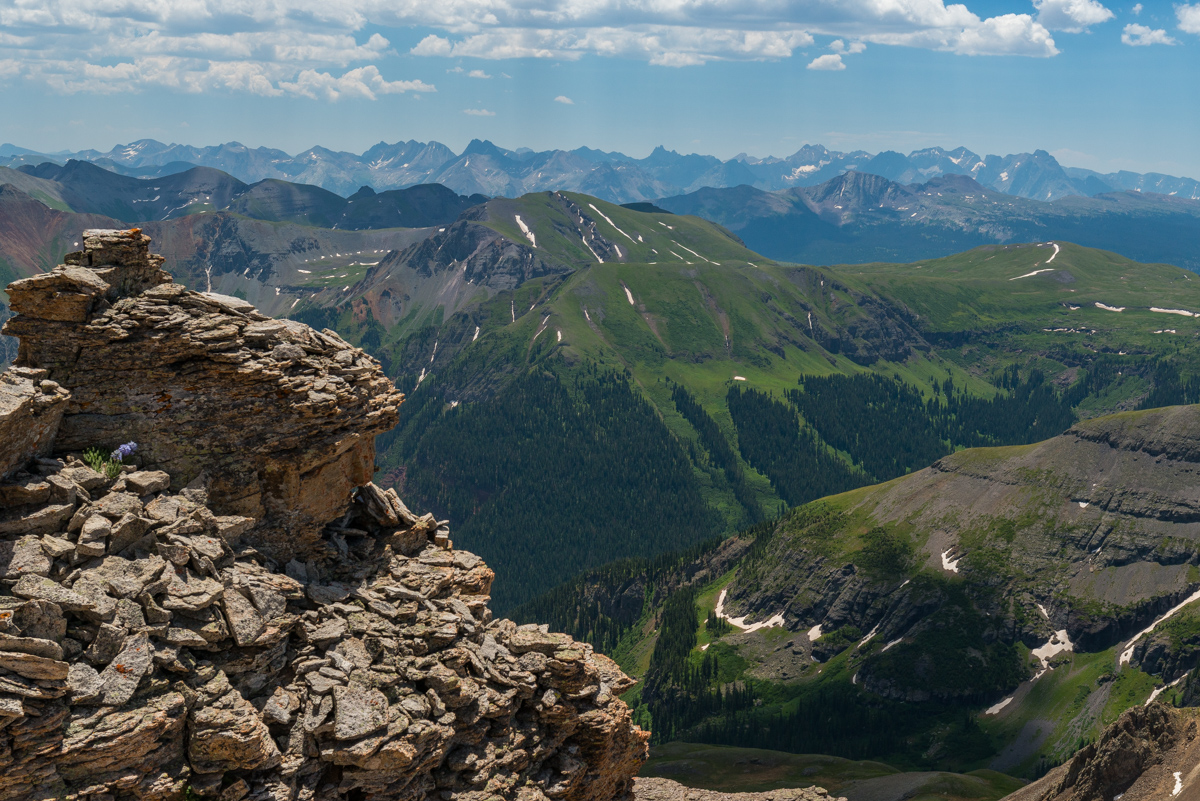
Island Lake pretty much stayed in view the entire way up, a nice beacon and reminder of just how high we had climbed in such a short amount of time.
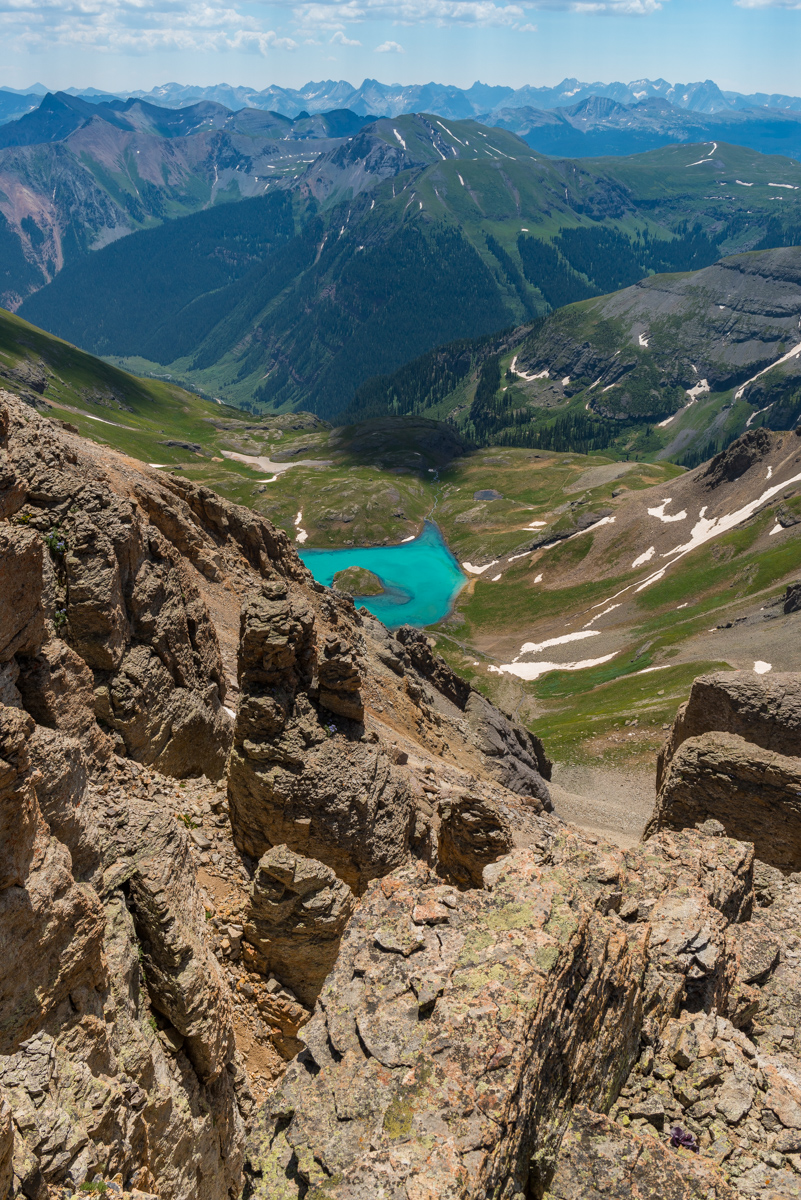
At last we reached the crux of the climb, which I had no idea existed. We got to this wall and wondered if we had taken a wrong turn or if we needed to go around, or, what? Upon close examination I decided it was the only way up. It consisted of three or four relatively exposed moves up to a small ledge, which wrapped around to the right. I went first and Ellen decided to join me. Todd and Autumn decided to stay behind because it looked too difficult.
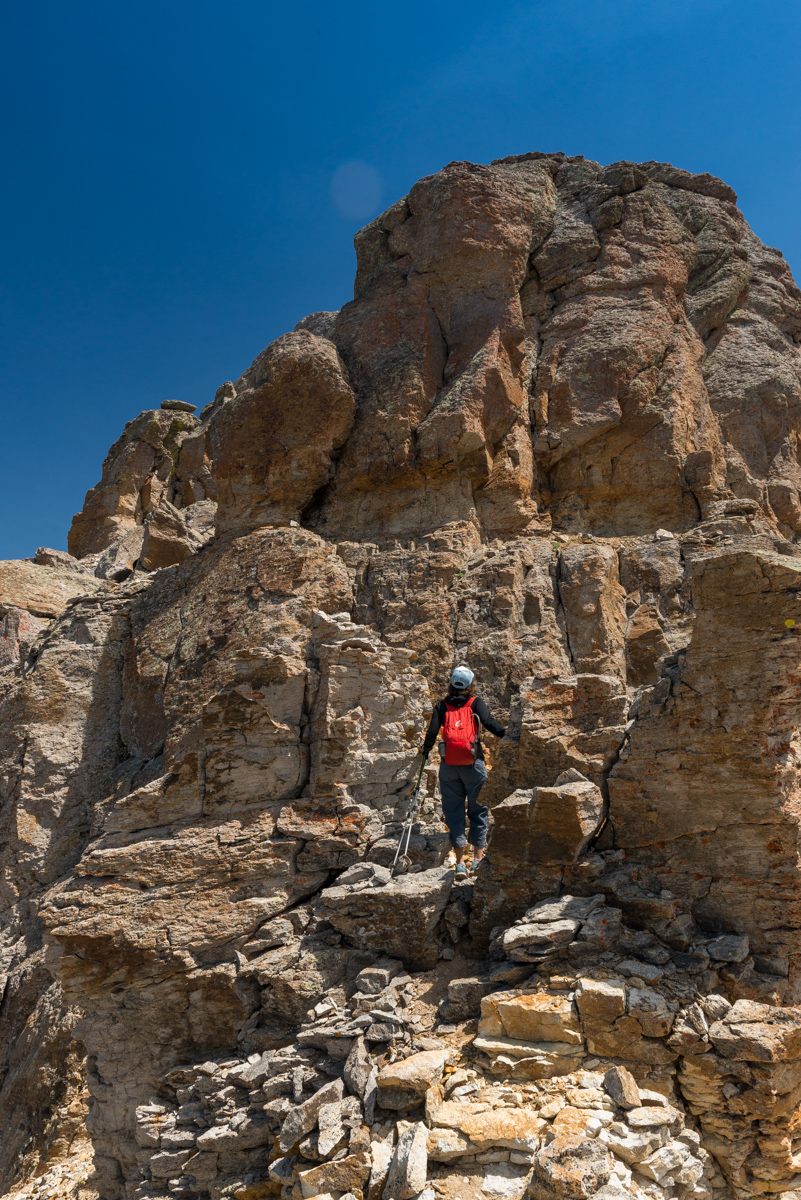
When Ellen and I got to the top, about 3 minutes later Todd and Autumn joined us - we were so excited that they decided to come up the wall. Even though the shots are out of sequence, I thought it best to show how hard the wall looked, on our way down, with Todd and Autumn still needing to downclimb it (below).
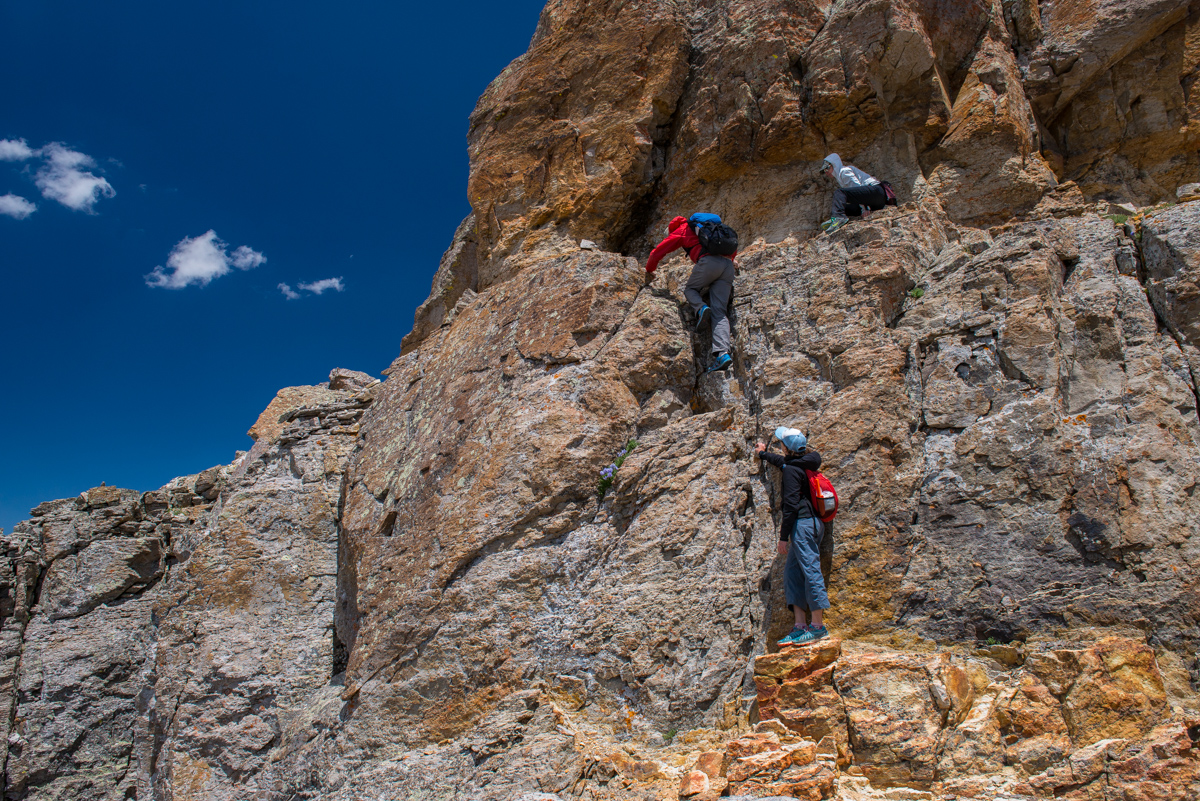
The top was magnificent. Here's Ellen topping out on a summit filled with purple wildflowers (their name always escapes me).
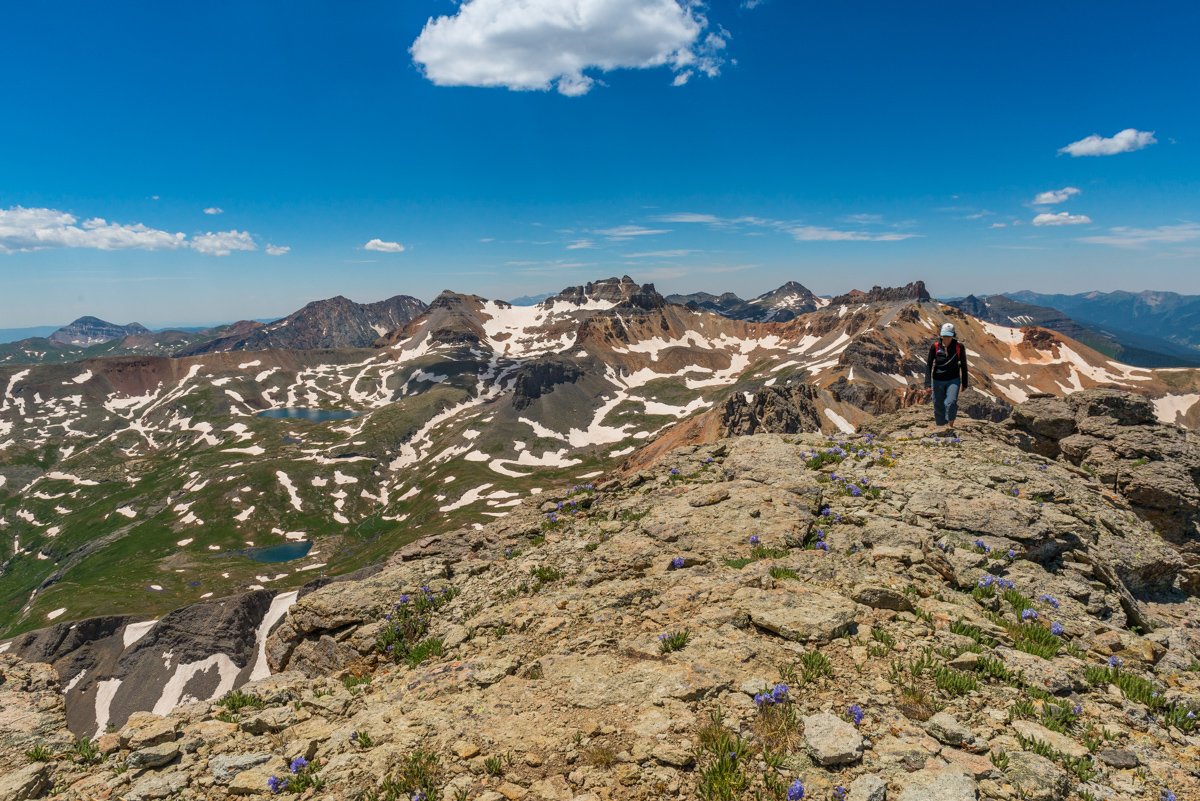
From the summit you could make out every major summit in the San Juans, including Uncompagre and Wetterhorn (top center).
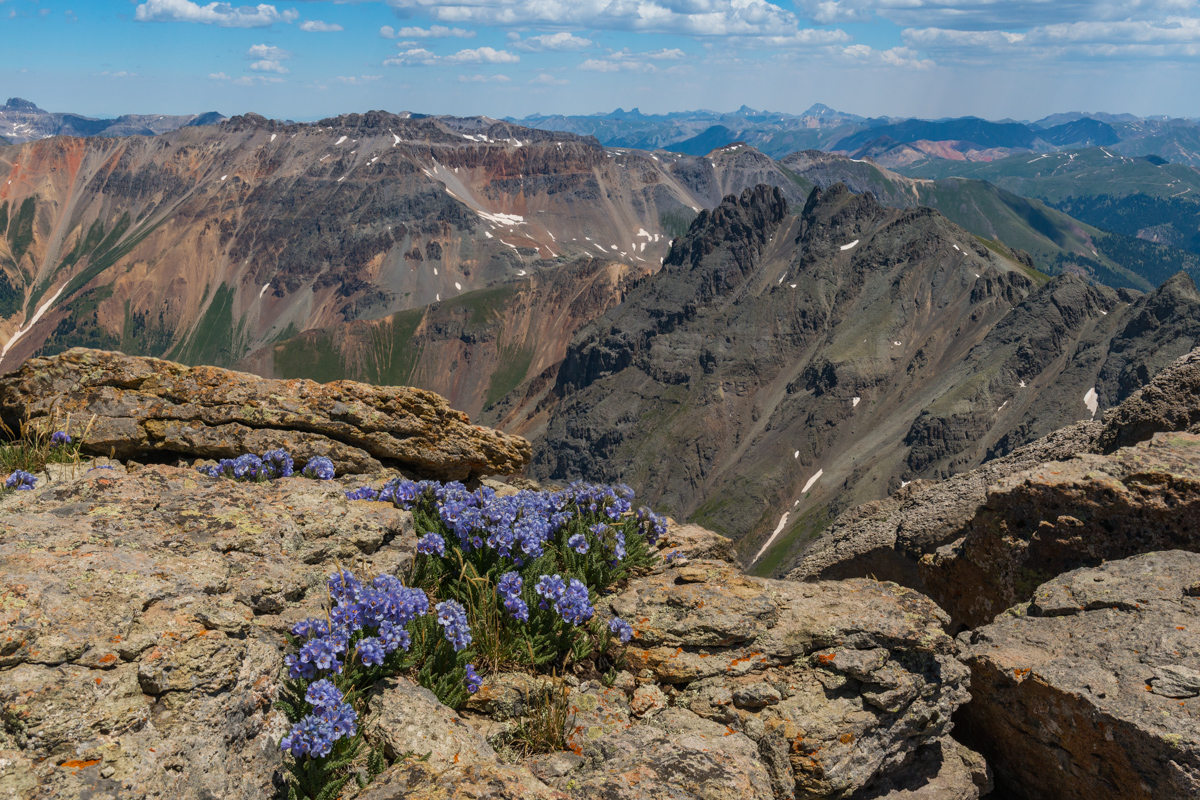
My gaze kept going back over to the San Miguels to the west. They were so damned impressive.
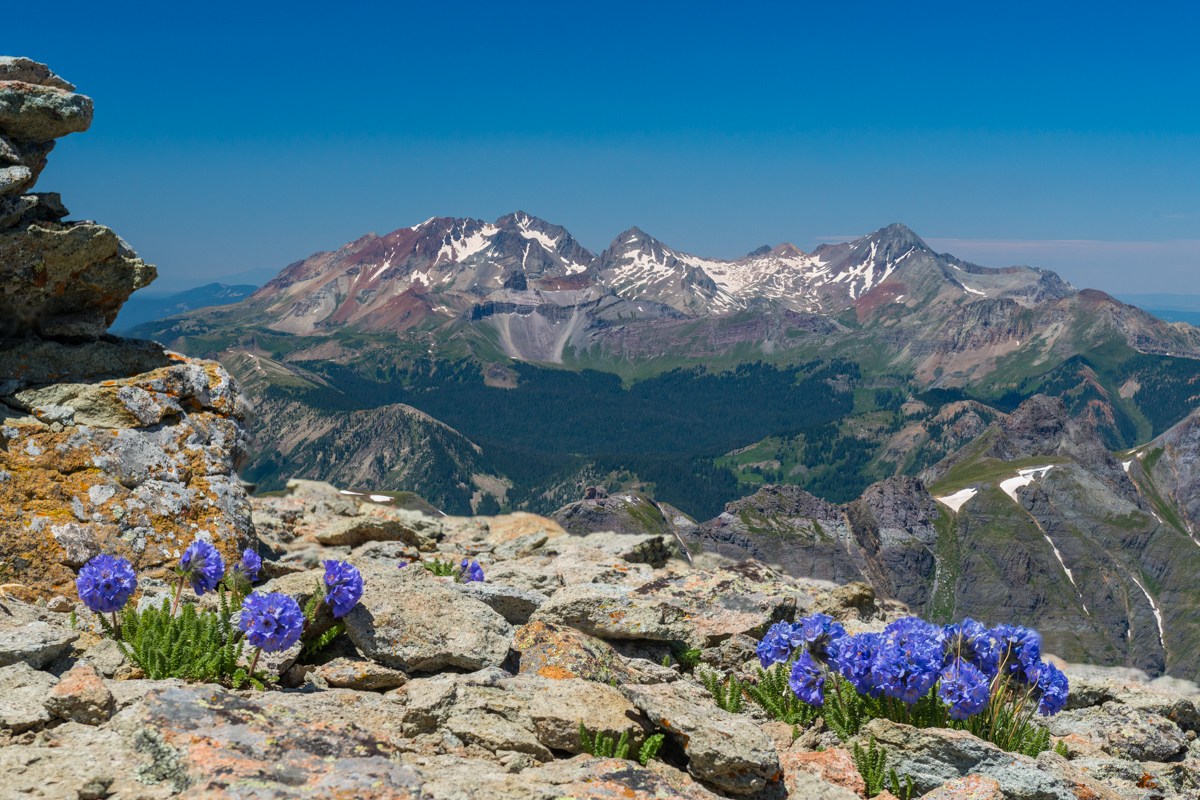
Next, a 180 degree view showing most of the San Juans and Ice Lake Basin, and Island Lake. So amazing.
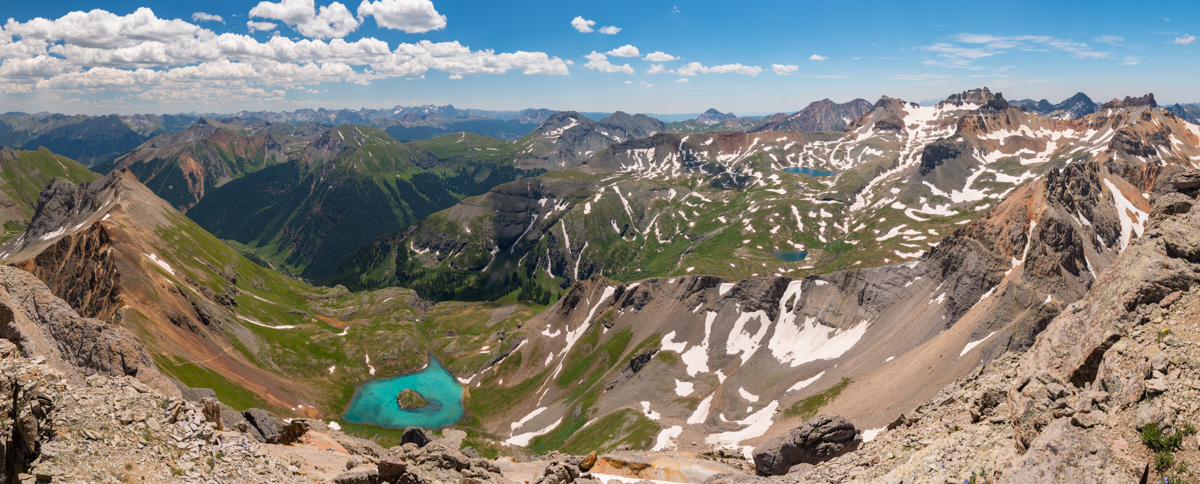
A quick group photo was in order, so I set up the tripod and self-timer. All I remember is that Todd invented a new food item on top - a burrito consisting of Peanut Butter, Fritos, and slices of apple. Apparently it was quite delicious.
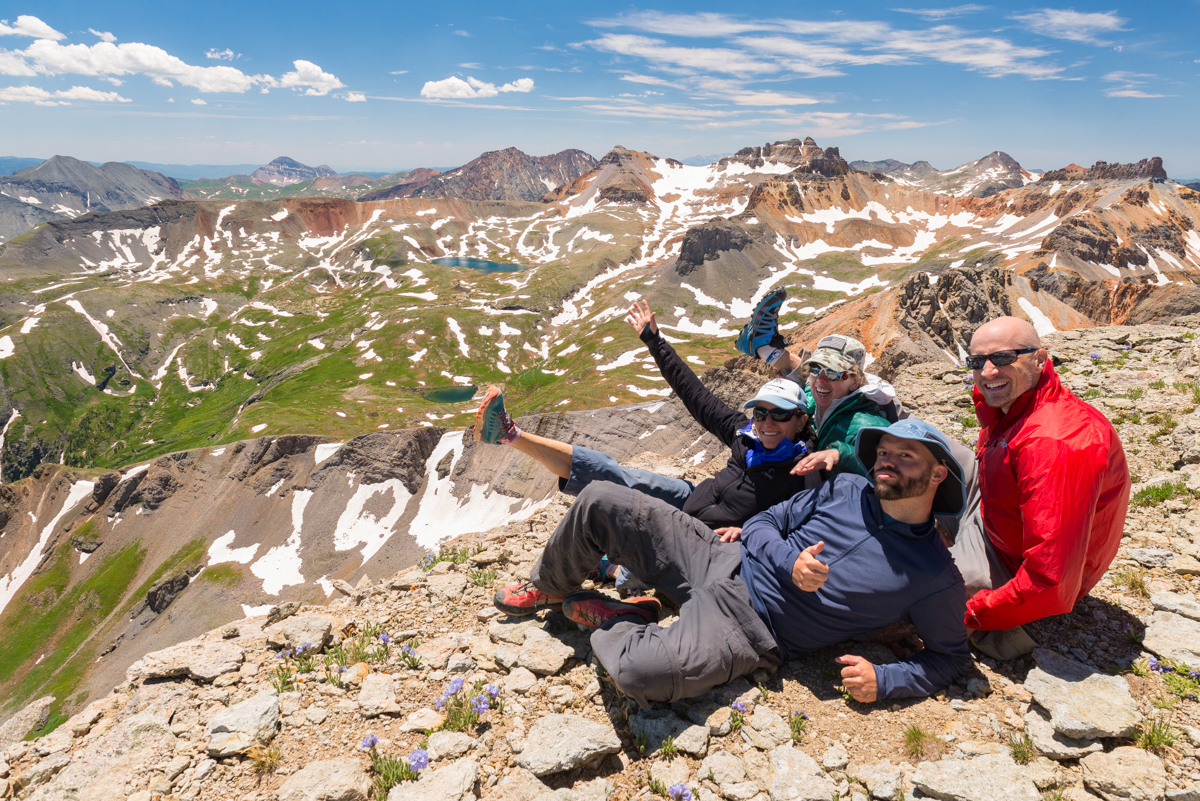
After enjoying lunch, we head back down, without any issues at all. We all faced-in on the crux and it was surprisingly easier than I thought it would be. Now, remember above where I said the lake was cold? When we were about 1/2 way down the ridge, I noticed a group of people huddled around our tents at the lake. I was not too concerned until I saw them open Todd's tent. My first reaction was, "what the heck are they doing, trying to steal beer or something?" I raced down the mountain at a quick pace and caught up with the group. As I approached they asked if they were invading our campsite. I replied, "well, yes, kind of...". They apologized and said that their son (probably about 14) had swam in the lake and was getting hypothermia and needed somehwere to lay down and warm up, and was that OK? I felt horrible for thinking they were doing something bad and replied, "of course not - not a problem at all, and that makes total sense!" The rest of our group arrived and we helped them ensure he had food and was warm before they departed the basin. We rested up and as the sun dropped lower and lower I decided to get the camera out and take some photos of sunset at the lake. It was a pretty nice one. The marsh marigolds and fireweed looked awesome.

The last light left an impression on the fireweed that I knew would look fantastic in camera. I think I was right.
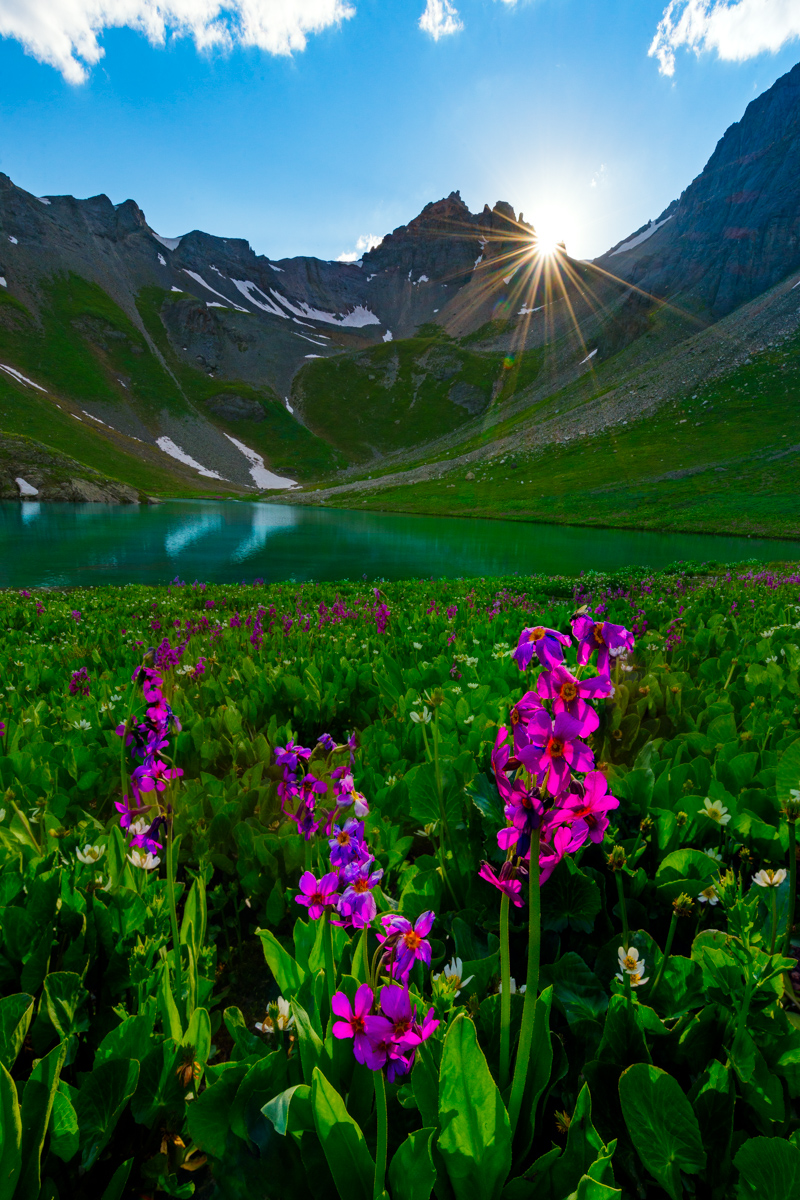
After dinner, I decided that I wanted to hike back up to the top of the grassy area below the ridge for U.S. Grant. I know that sounds crazy but I had a vision for some shots looking back over the lake at sunset. I hoped the clouds would stick around, and they were looking like they might, so I took a chance and hiked back up the mountain again. Todd thankfully joined me and kept me company. Unfortunately, the clouds did not cooperate much, but I think I still got some decent shots, including one with the nearly full moon in it.
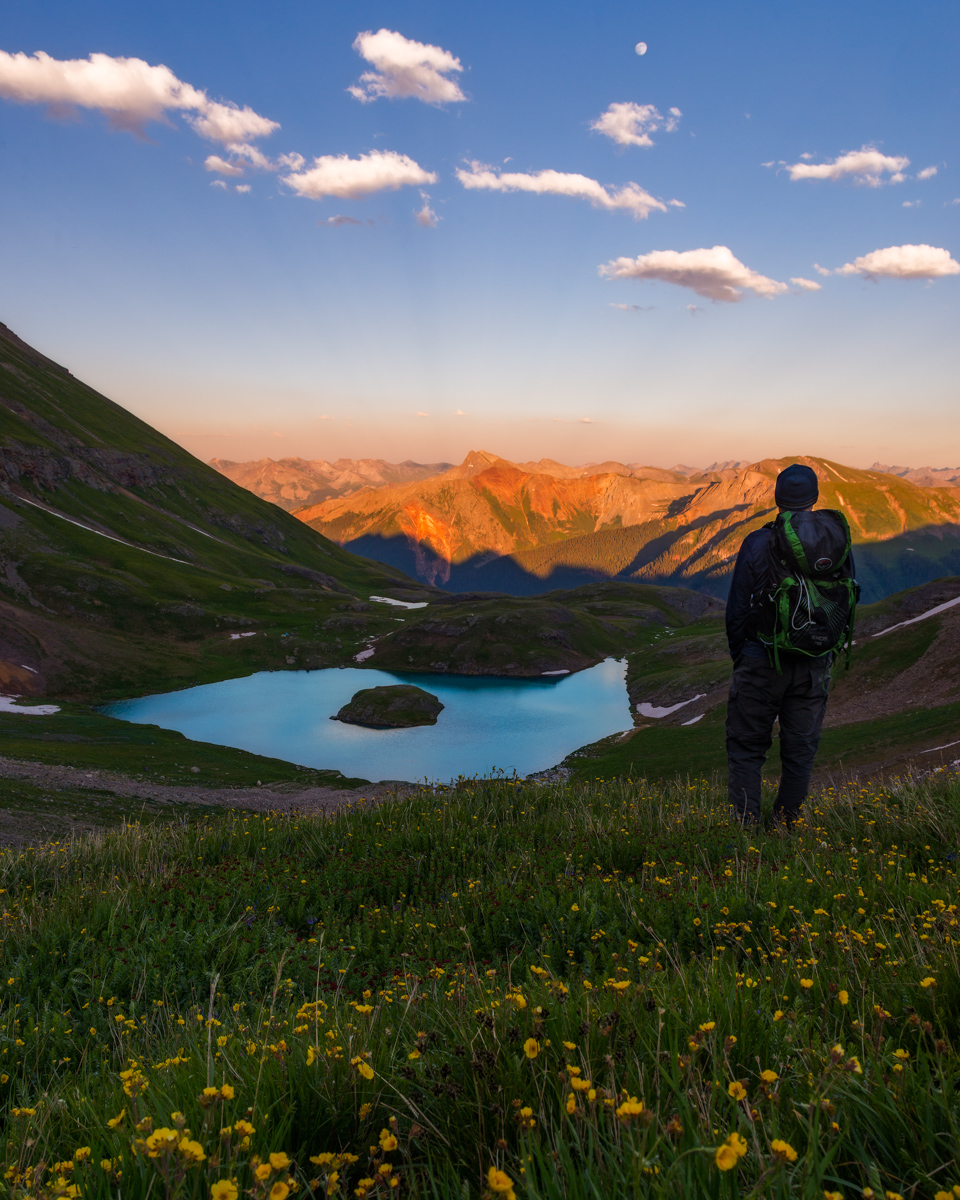
As the last light kissed the tops of the Chicago Basin 14ers, I took advantage and snapped off a two-row panorama to include the pink sky (which was a bit hazy from fire I presume), the lake, and some wildflowers.

It was quite a memorable sunset, for sure. Flowers + sunset + Island Lake + San Juan Mountains in alpenglow = awesome.
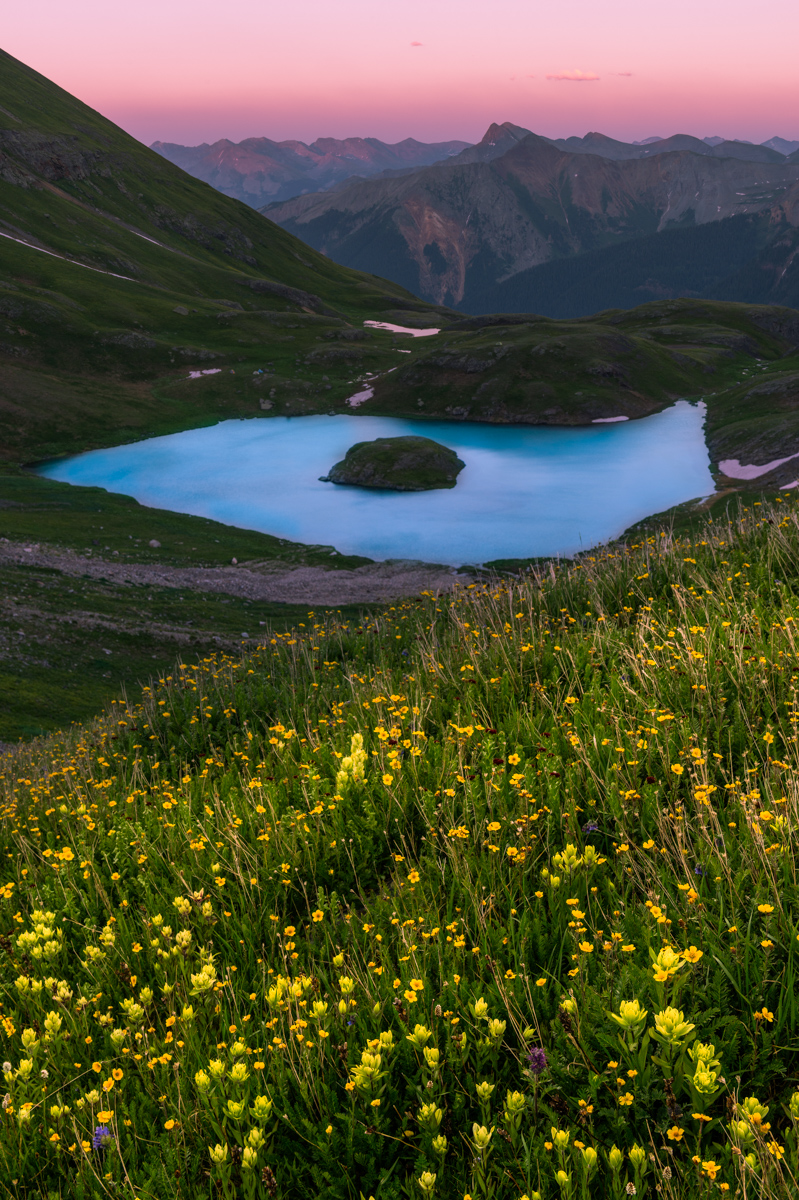
We head back down to our tents and got some much needed sleep. I never did make it over to Ice Lake for sunrise wildflower photos. Maybe next year! As a reminder, you can take a look at my GPS and/or KML file for this hike over on Gaia GPS. Prints of my photos are always available on my photography website (if you see one you like and can't find it, let me know). Thanks for reading!
Gladstone Peak and Wilson Peak from Bilk Basin - A Backpacking Trip Never to be Forgotten
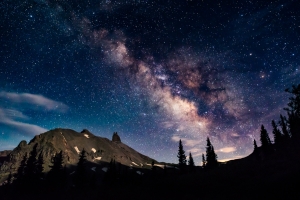
Backpacking into the wilderness is an activity that is not easily surpassed. There is something about the raw nature of it all, like a tribute to our roots as human beings, which makes it such a powerful experience. Pair that experience with the ascent of two of Colorado's more challenging Centennial peaks, all while being with one of your favorite humans on Earth, and you have yourself a recipe for unforgettable memories. When my friend Silas asked me to go with him to climb Wilson Peak and Mount Wilson again, I knew we would be in for an adventure to remember. Even though I'd already done both Wilsons already, I welcomed the opportunity to help to help him finish off the 14ers, just like he had with me on Pyramid Peak in 2012. Silas and I have done a lot of hiking and climbing together - I counted that this was our 18th summit together since 2011. When I met Silas in 2011, he went by Sarah and had recently had a suicide attempt. Since then, Silas has really turned his life around - he got married, he had a child, and he has made a successful career as a non-profit badass. I'm still getting used to the idea of calling Sarah by Silas, but it is growing on me quickly.
Our hike started with Silas telling me about the recent development of not feeling comfortable in his body as a woman and wanting to transition to a man. At first I was really skeptical just as his wife was; however, when Silas told me after our trip that the decision was official, it washed over me and made me smile. No matter what, I love this person for who they are, man or woman, and really, it just does not matter one bit. Anyways, my guess is that you're here to read about climbing and not Silas, I digress.
I enjoyed the short drive to Telluride from my new home in Durango. It felt so awesome to be so close to the best climbing and wilderness in the state!
We both eventually agreed on an alternative route into the area since I'd been up there via Navajo Basin and the Rock of Ages Trailhead already and wanted to try something new... plus Bilk Basin offered stunning views of Lizard Head Peak to the south and east and by my calculations offered some pretty amazing photographic opportunities since the Milky Way would be rising behind Lizard Head Peak. So, we settled on Bilk Basin via the Sunshine Mesa trailhead. This trailhead was not terribly hard to find using both Roach's 13er guidebook and other online resouces. Silas met me in Telluride and we drove up to the trailhead together.
For this particular trip, I opted to bring my Nikon D800, my Nikon 14-24 f/2.8 lens, and my Nikon 24-70 f/2.8 lens. I felt like those two lenses would cover the ranges I'd want to be shooting on this trip, even though they were both quite burly. Nothing really beats the 14-24 for night photography. I also decided to bring my new GoPro 4 with me to shoot some footage using my helmet mount during the ascent of Gladstone. Additionally, I know it sounds crazy, but I'm on my 3rd pair of the La Sportiva S EVO Trango boots - they are so good for mountaineering in Colorado - really there is not a better boot for me and my feet in my experience. I love the higher rubber on the sides because they protect my feet during difficult scrambles and I know I can step anywhere with confidence, plus they are super lightweight. You can pick up a pair from Bentgate, a great local Colorado gear shop.
The hike up into Bilk Basin was pretty outstanding - I really enjoyed this approach and think it is the best of the three that I've done into this area.
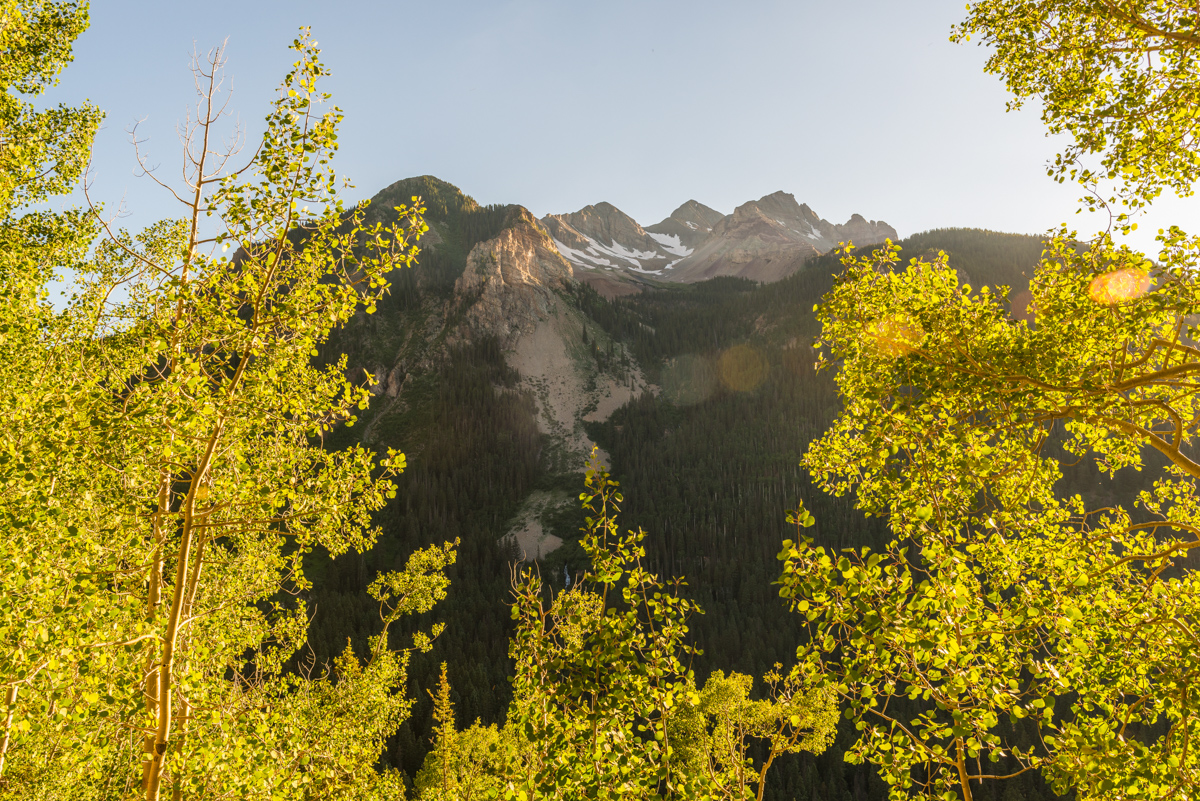
The trail was very full of wildflowers and interesting features like this crazy tall flower.

About 1/2 way up the Basin we encounted a stream crossing, which was not in any of the guidebooks to my knowledge. The location of the crossing was right after some old abandoned mining buildings, which I had read about before and seen on the USGS Topo map.
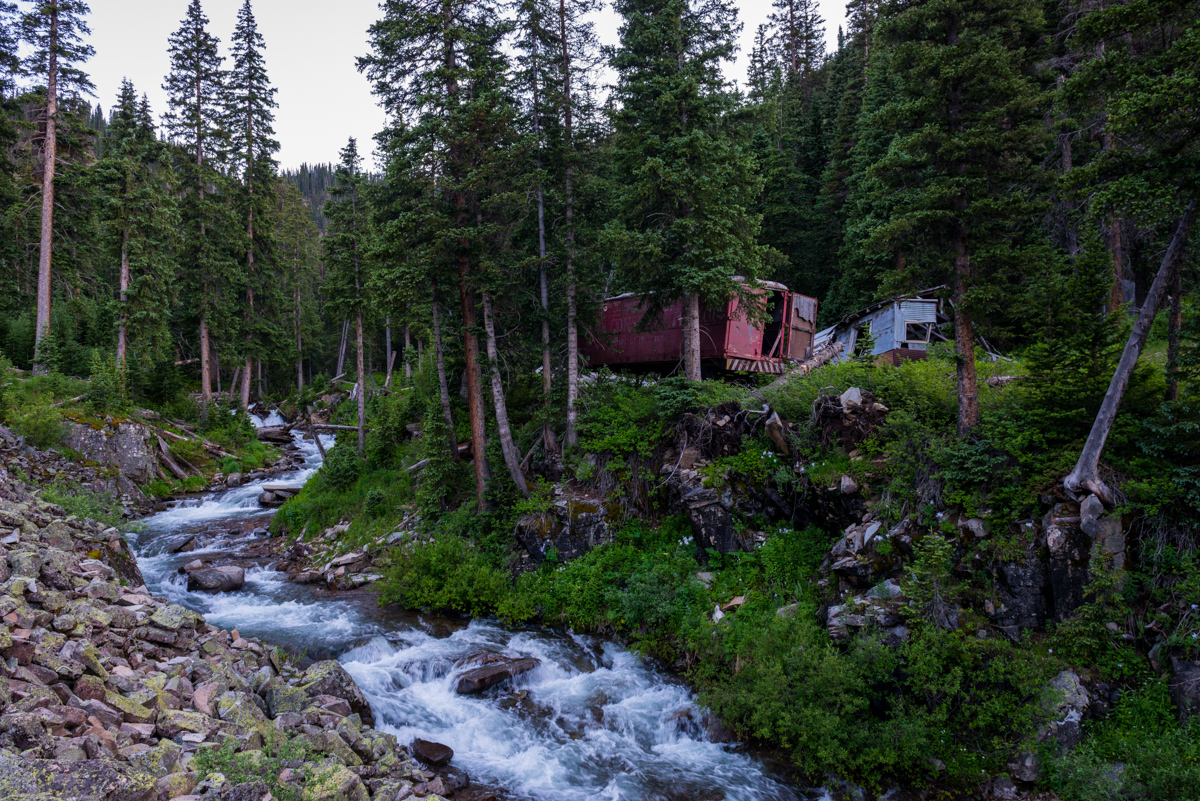
Instead of crossing the creek where it made sense, I wondered if the trail kept going higher since I had not read about the crossing. We ventured up into the valley further and even found ourselves on the creekbed, but eventually did decide to head across where the log dam was at after the mine.
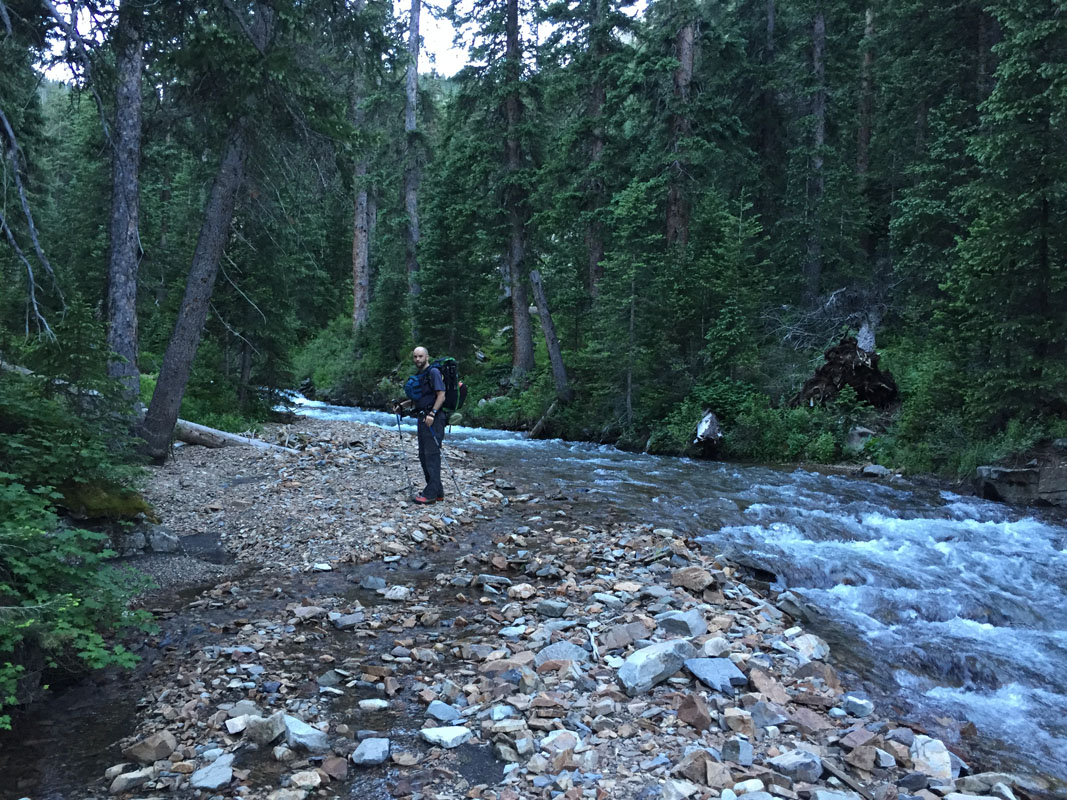
It was a pretty easy log jam crossing, and it reminded me of the log jam at Snowmass, except not nearly as insane or difficult. I went first as Silas photographed me.
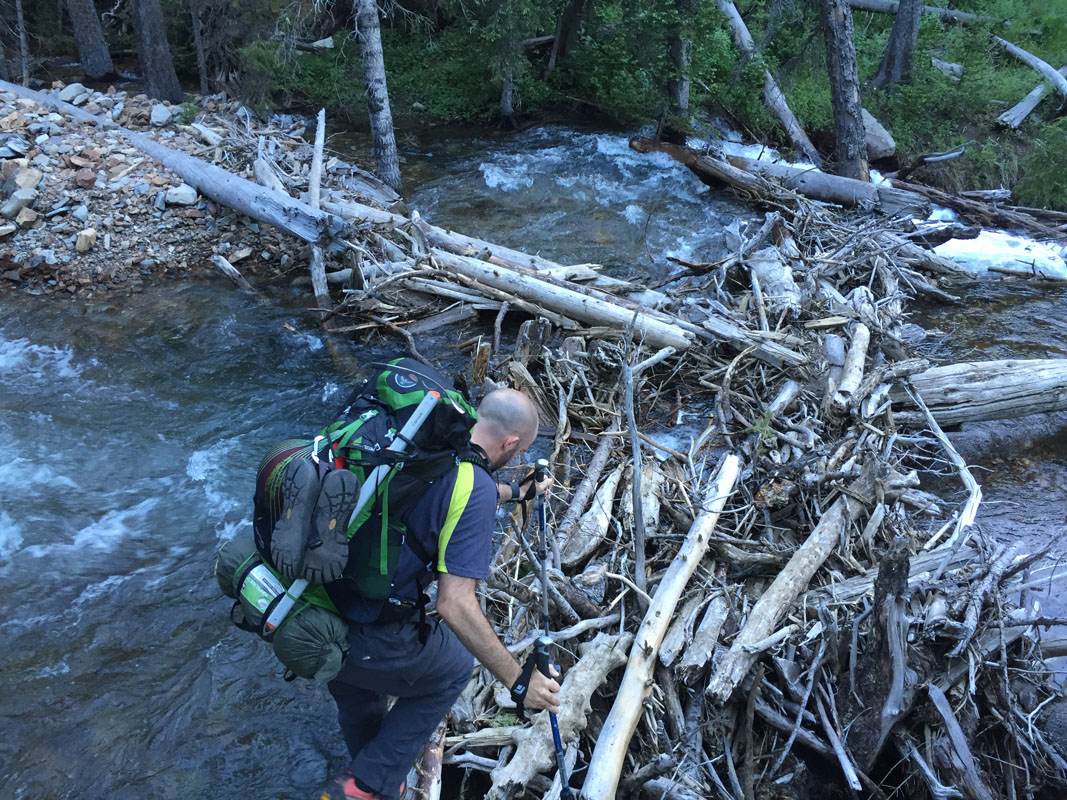
And then Silas followed. It was a bit tricky dropping down onto the logs but in the end it was no problem at all.
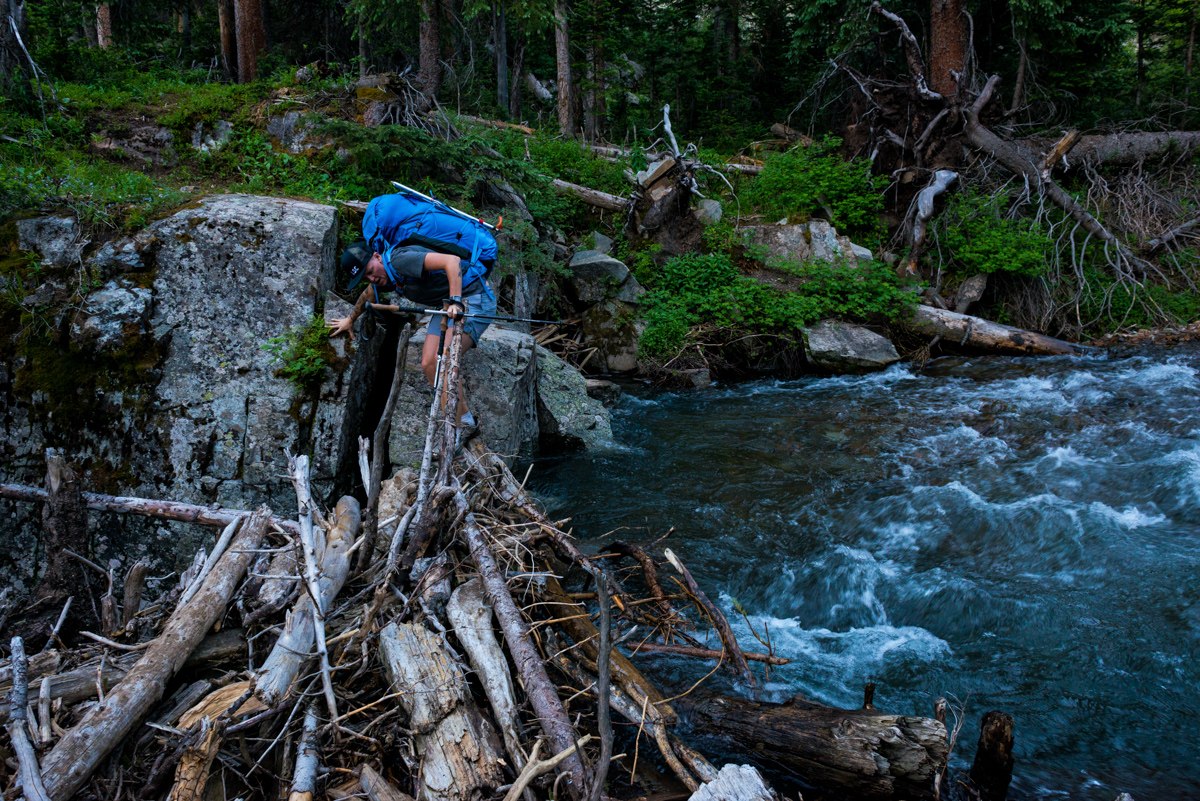
The early evening light was quite nice paired with the dark forest and the aquamarine creek.
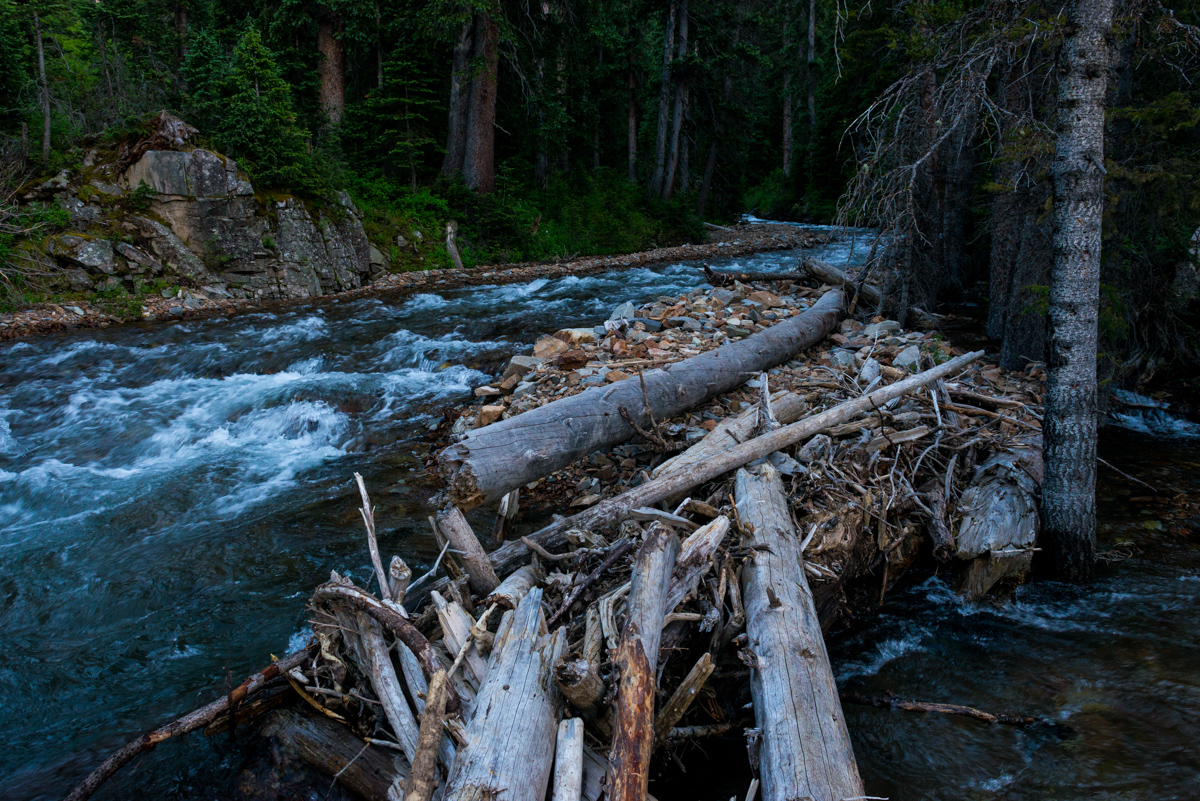
Ahhh... Wilderness.
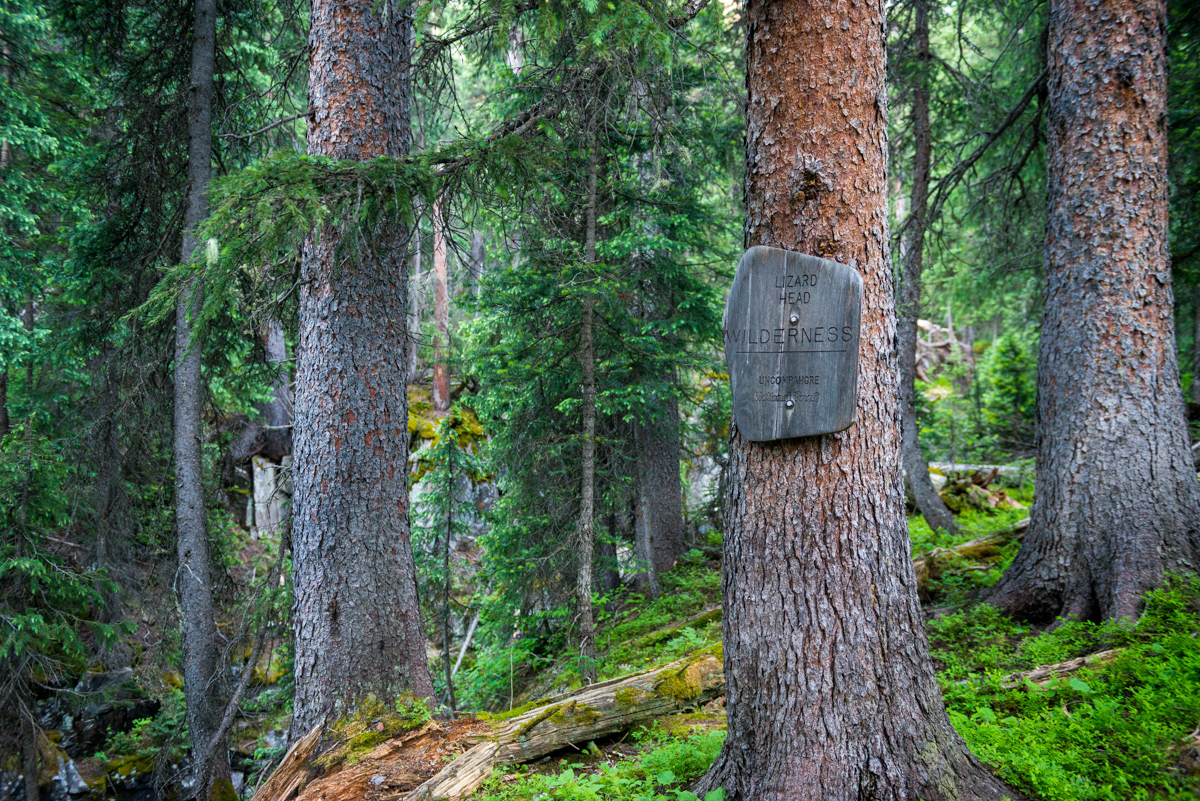
After crossing the creek, the trail was very straightforward, following the creek until eventually going up some switchbacks. The evening light was lovely.

Silas enjoyed the view.
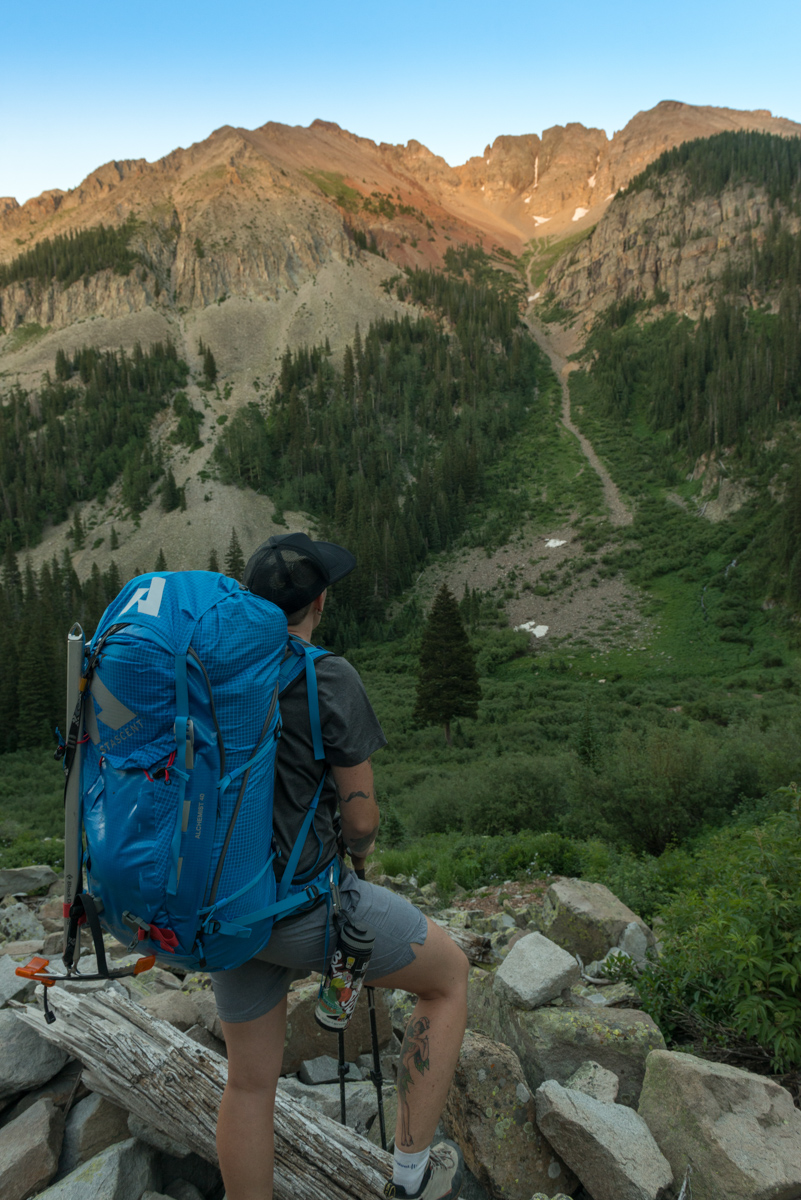
About 2/3 of the way up into the basin, the light began to change dramatically, with clouds hovering over the Mount Sneffels Wilderness Area across the valley from us. The last of the sun illuminated the summits of Campbell, Dallas, Gilpin, and Sneffels. I had to stop to capture it.
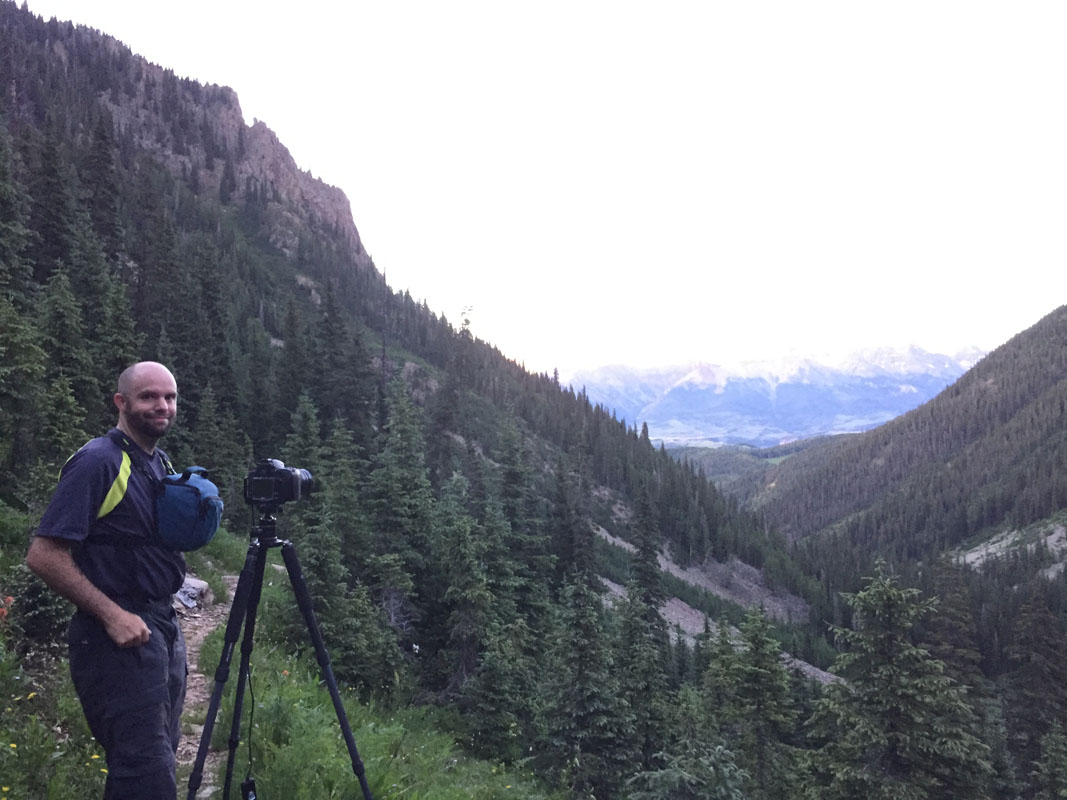
Well worth the stop, I think. For this one, I used a Circular Polarizer on my 24-70 lens in order to get greater color and tonal saturation and to reduce haze. Prints of this one are available HERE.
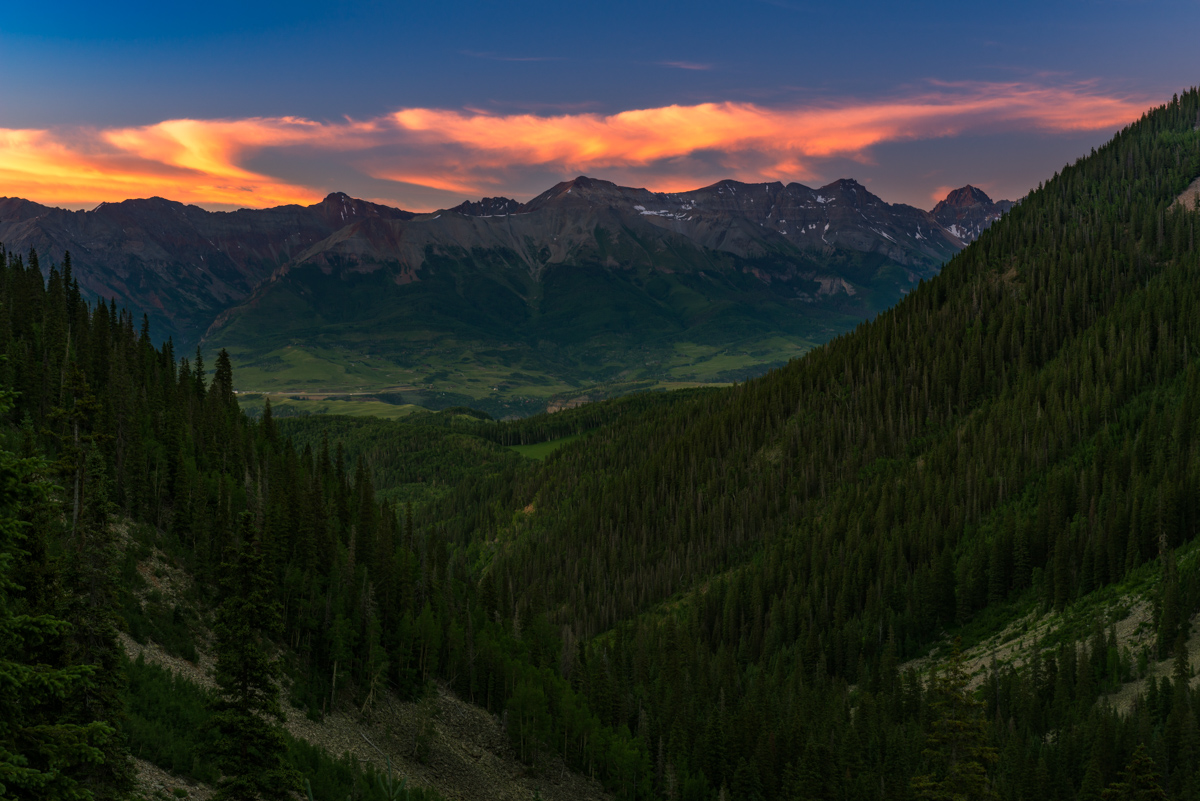
We managed to make it into Bilk Basin at dark and had trouble locating the trail going up to the lake below Wilson Peak (objective/camp possibility #1). We thought the basin would make for a good camping area too but it was super marshy down below and we did not want to get wet. We opted to try to follow where the trail that goes up to the Lizard Head Trail was supposed to be by using Gaia GPS GPS on my phone. Gaia is so amazing! You can purchase it here and help support the site. Since there was no trail to follow, we had to rely on technology. What an amazing application. It shows your location on a USGS map, tracks your progress, and even works in airplane mode. It is the best $20 I've ever spent in my life. We found some campsites just below the Lizard Head Trail and opted to stay there since we were both tired and the lake was a good distance away yet. After setting up my tent, I shot single long exposure of the Milky Way from camp. I kept the shutter open for 241 seconds for this shot using a cable shutter release in order to bring out the foreground. Then I crashed into bed at 11 PM to rest up for our big day of climbing. We set our alarm for 4 AM and declared that our 1st goal would be Gladstone Peak, followed by Wilson Peak.
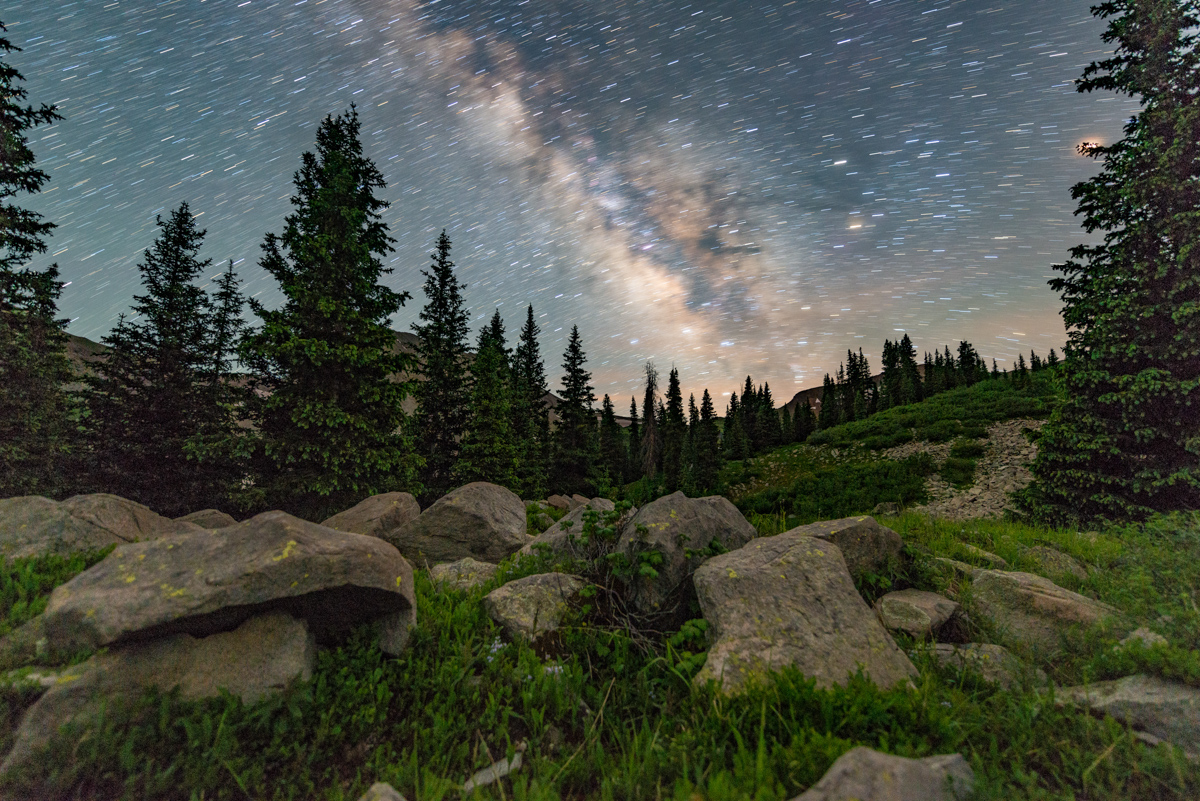
Silas and I got very little sleep but that is the name of the game when it comes to mountaineering and backpacking. We got out of our tent quickly and started off in the dark at around 4:15 AM. We followed the trail by our campsite south and west for a very short distance and found the Lizard Head trail that comes up from the Cross Mountain trail at Lizard Head Pass and turns west towards Gladstone and Wilson Peak. We followed that trail west but it ended abruptly at the creek after about a quarter mile. According to the map, the trail appeared to cross the creek here and continue up into the basin following switchbacks, but the creek was way too deep and flowing fast for our comfort, so we bushwhacked up the hill, following the creek closely. After about 200 feet of elevation gain, we located the trail again and another creek crossing, which was much more desireable and easy to cross. We crossed here and followed the trail up into the basin in the dark. It was not terribly difficult to stay on the feint trail; however, we did have some trouble from time to time. Luckily, I had Gaia GPS to help me stay on course. After about an hour we found the small lake we had hoped to reach the night before. It was a glorious lake to say the least, nestled at the base of Wilson Peak with views of Lizard Head to the southeast. I set-up my tripod and camera for some blue hour photography (the hour prior to sunrise but before the beloved Golden Hour) and Silas enjoyed the view as well. As I was setting up, Silas was able to photograph some deer that paid us a visit on the ridge behind us.
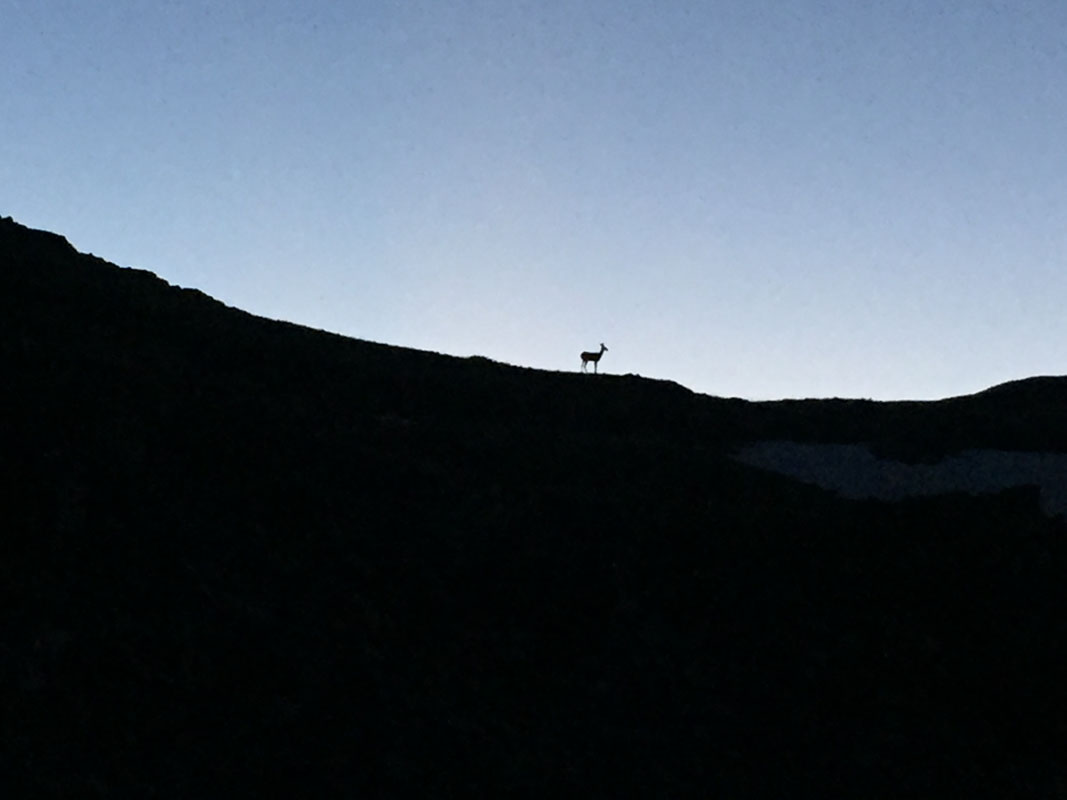
I was incredibly impressed with this location. The low light prior to sunrise coupled with the huge towering massif of Wilson Peak made for a delightful photographic subject. P.S. on some of my photos in this trip report, you can click on it, which takes you to my photography website, where prints can be purchased. I wanted to disclose that up front so that readers were not expecting to be able to click on it to see a larger version.
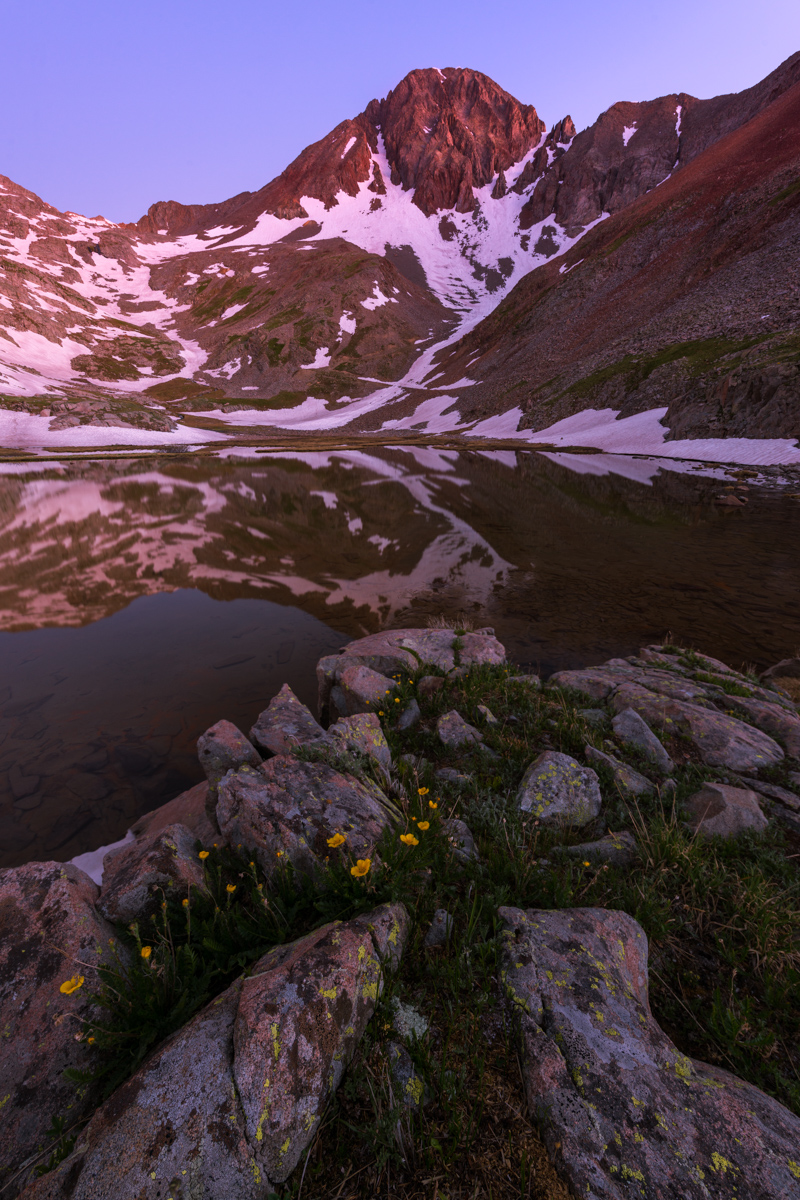
I also combined some shots for a panorama of Wilson Peak (right) showcasing the long ridge over to Gladstone (left of center).
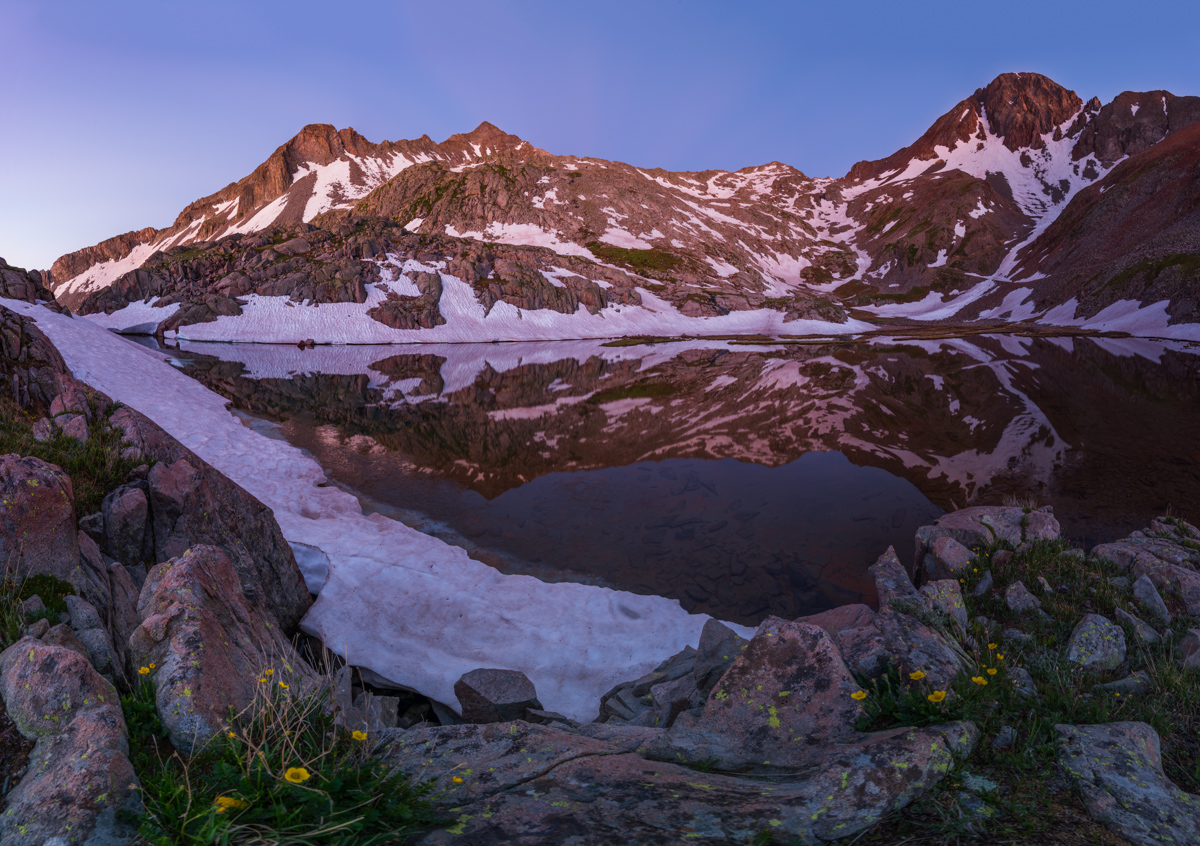
When I finished shooting at the lake, I started packing up my gear when I looked back and saw the clouds changing color. I raced up the hillside back where we came from and set-up for this shot of the sunrise and Lizard Head Peak. What an amazing sight!

Finally, we continued on, having spent about 45 minutes total at the lake.
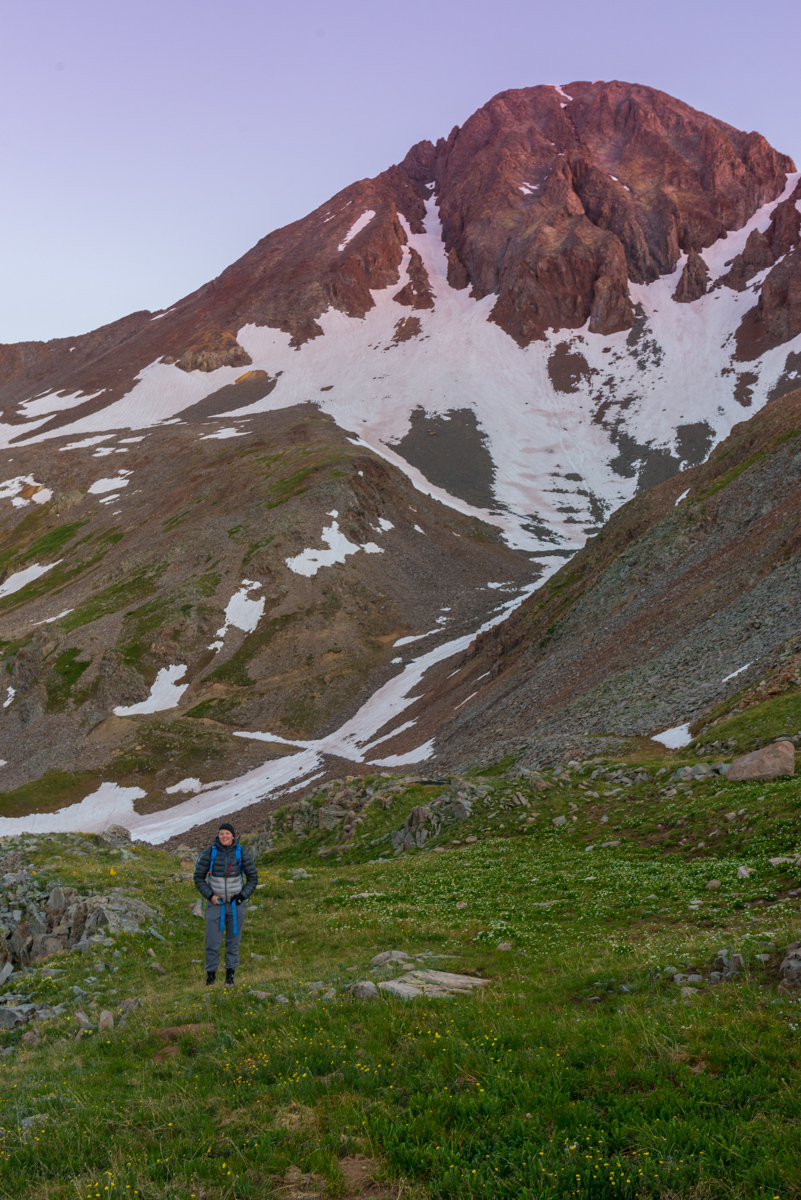
I think Silas and I were equally jacked up and elated by the sights from the lake - it was quite tremendous indeed.
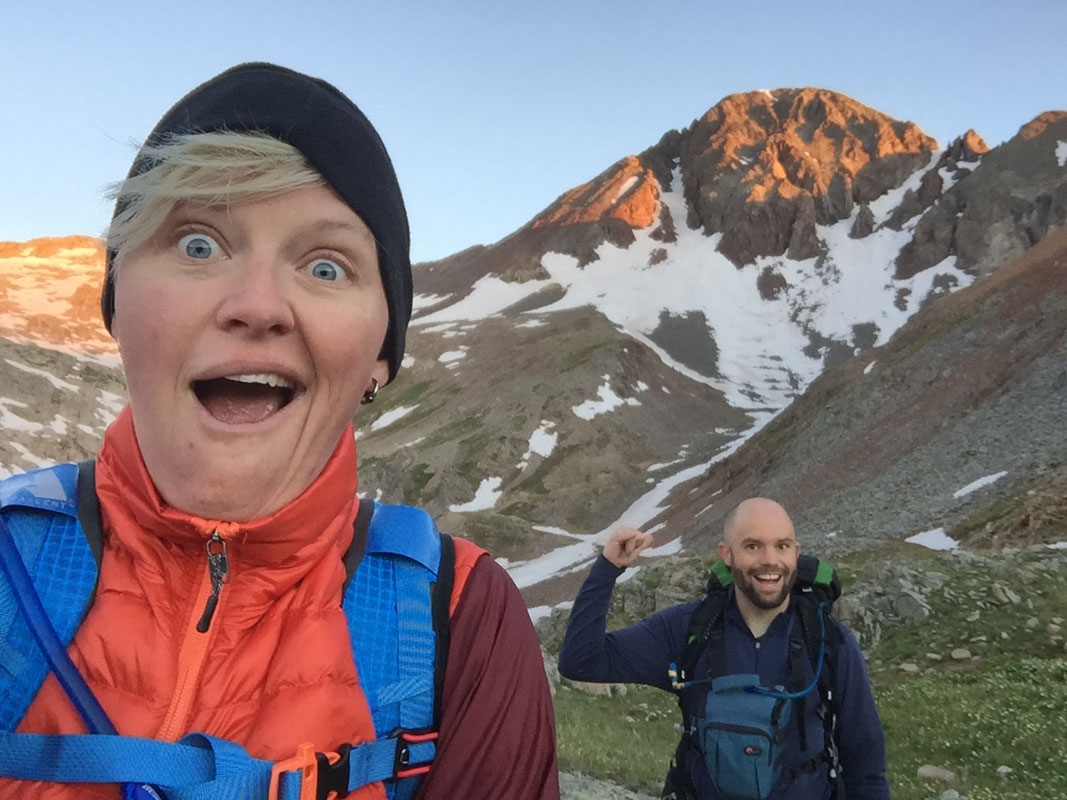
Just when I thought I was done using the tripod for the morning, I noticed some alpine sunflowers blooming and the early light of Wilson Peak, well, peaking. I had to stop and get this one. I have always admired the work of Jack Brauer and he has a shot with Wetterhorn Peak and alpine sunflowers that I've always greatly admired, so that was my inspiration for this shot.
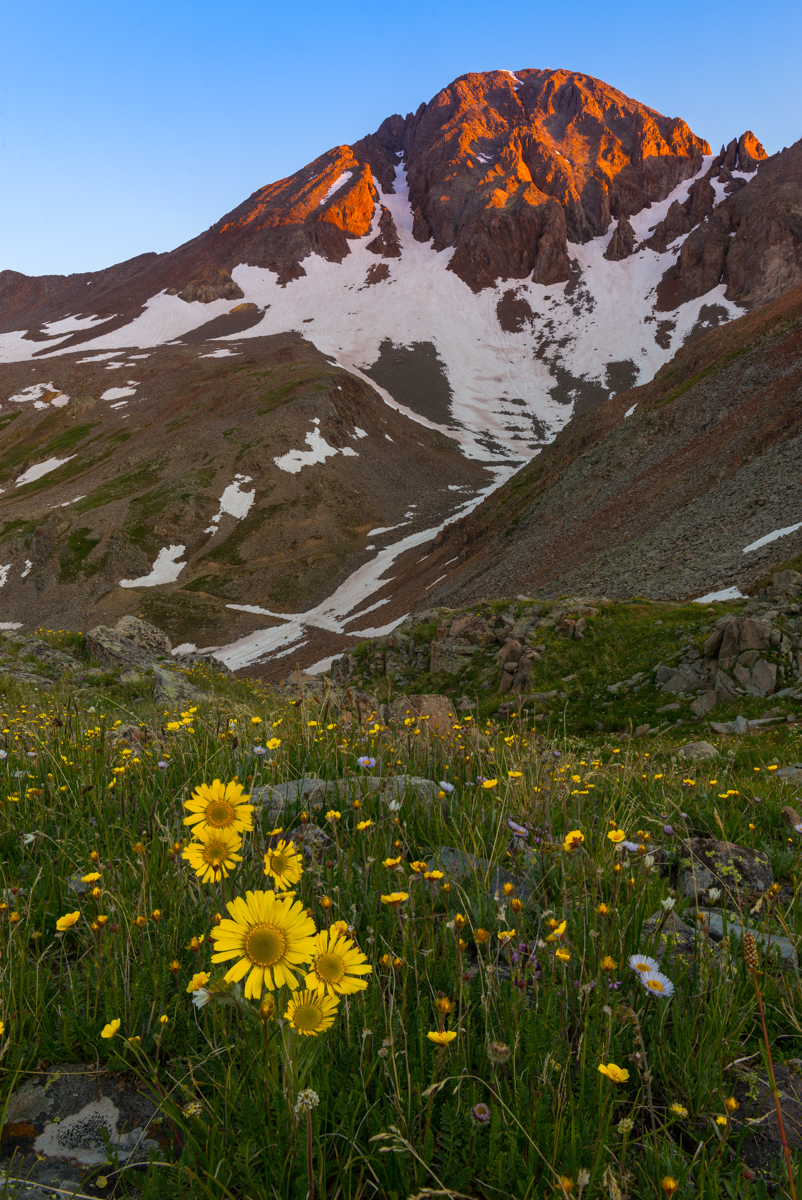
As we contined up the basin, we kept our eyes on Gladstone.
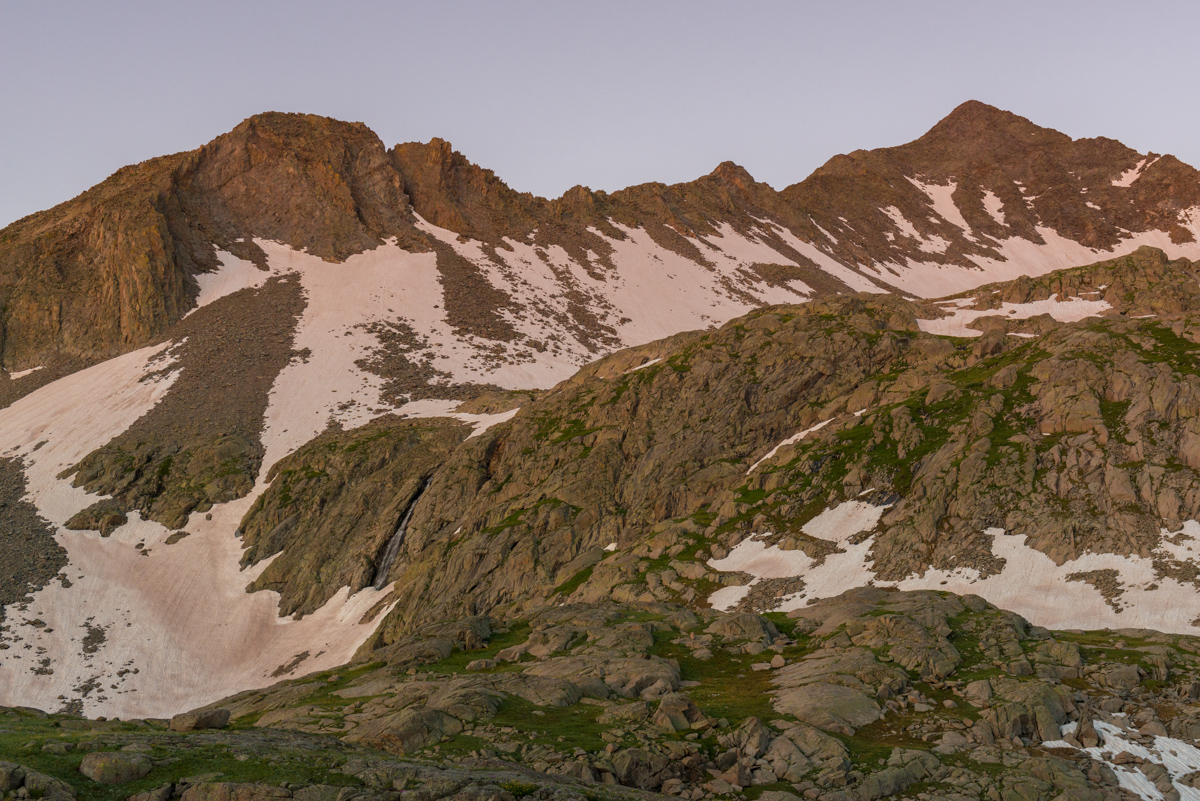
The early light from the sunrise was looking good behind us, constantly changing the amazing beauty of Lizard Head Peak. I could not stop looking.
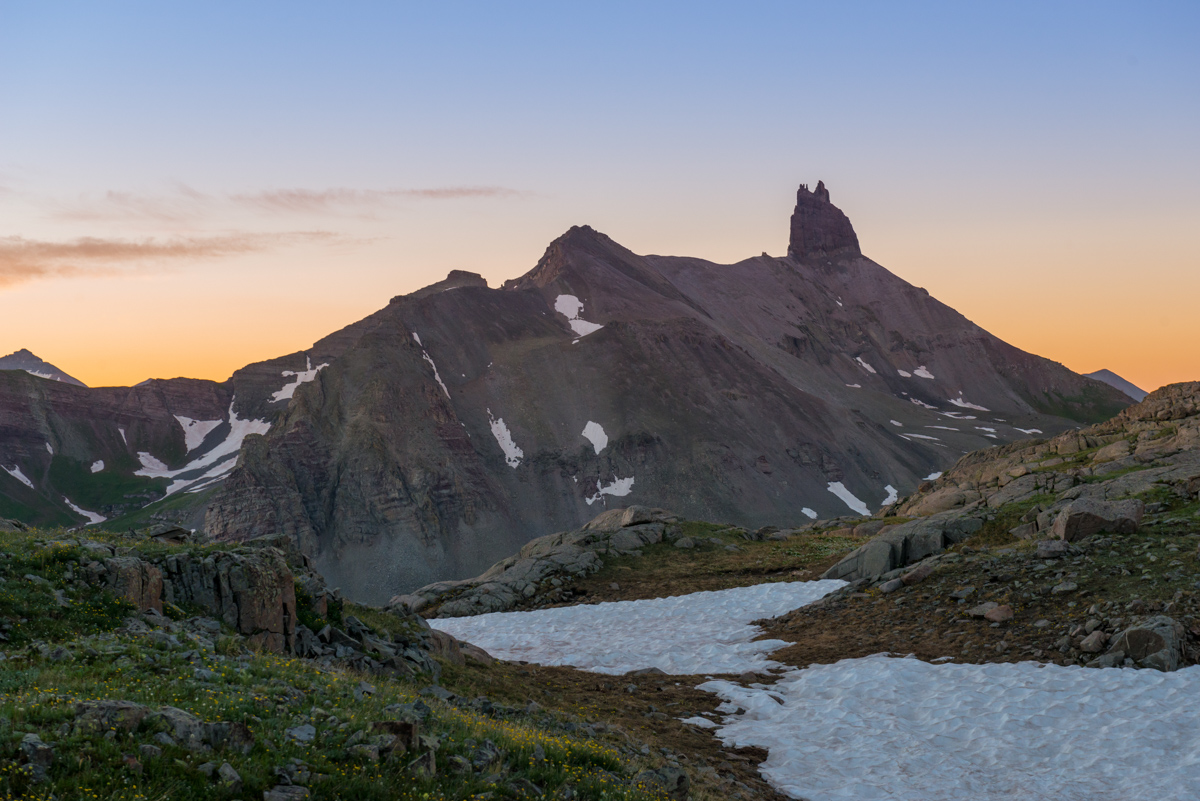
Finally, the sun hit in full force and illuminated all of Gladstone and created some wonderful light for this reflection in the lake.

Lizard Head Peak kept looking better and better behind us, and I could not help but stop and take photos - it was truly fabulous.
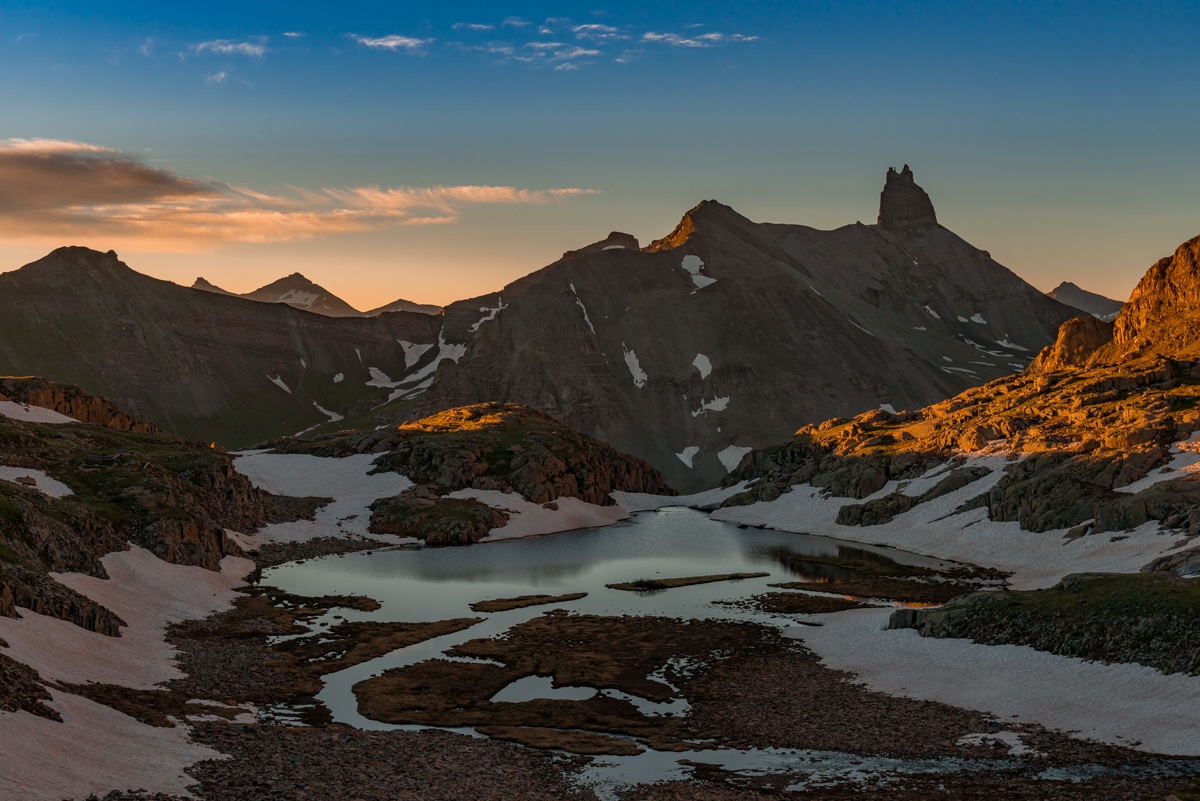
I'm sure Silas was sick of me constantly looking back, but I think we were both pretty stoked to have this basin to ourselves to witness this great sunrise.
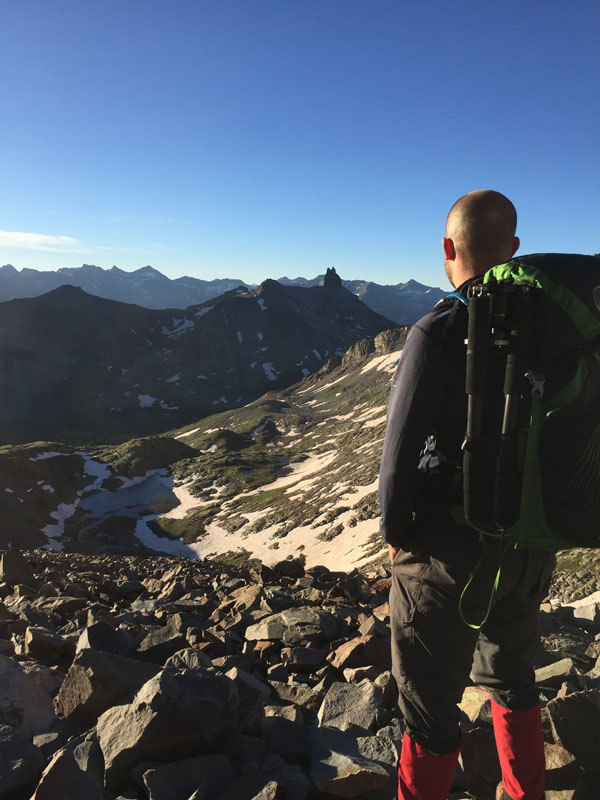
Silas kept her gaze above at Gladstone and the nasty, crumbly ridgeline between Wilson Peak and Gladstone. It was intimindating for sure.
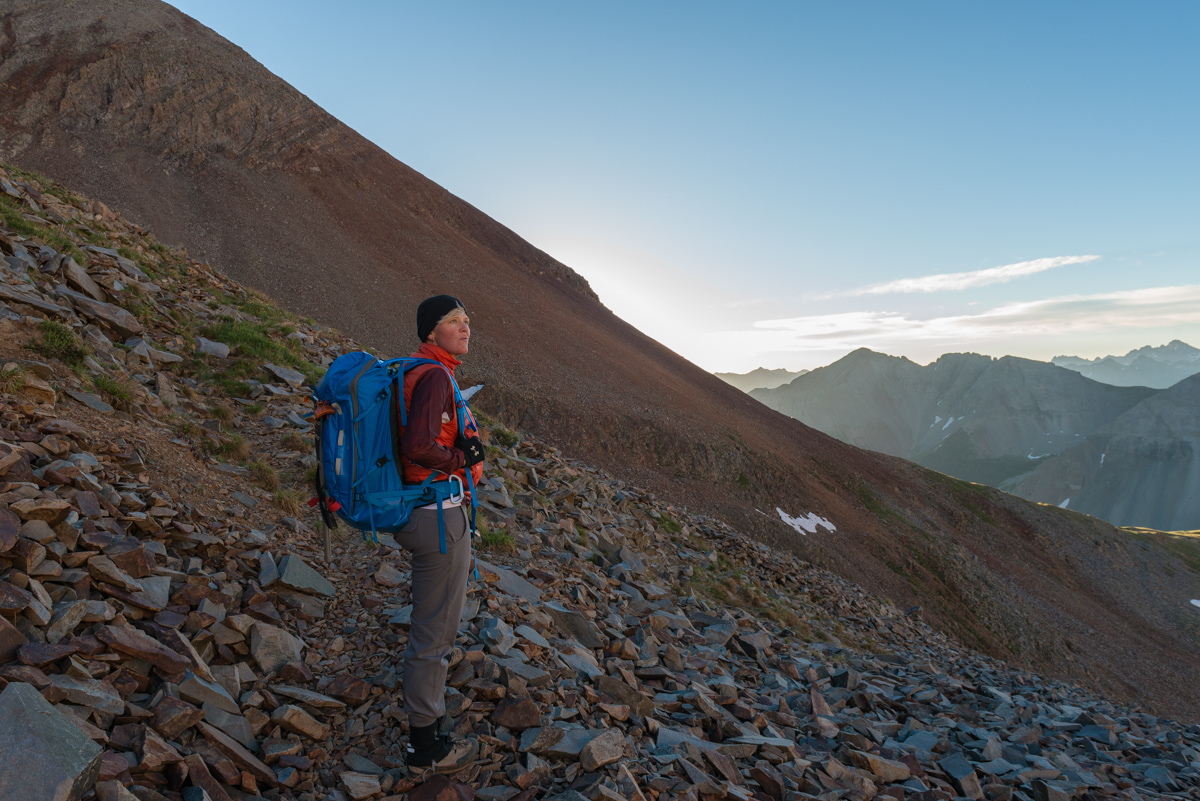
More sunrise beauty behind us - this time with the gorgeous Ice Lake Basin peaks including U.S. Grant, Pilot Knob, Golden Horn, and Vermillion showing up to the left of Lizard Head Peak. I was paying close attention to those peaks since my plan was to hit Ice Lake Basin the following weekend. What an amazing thing it is to live this close to such incredible scenery.
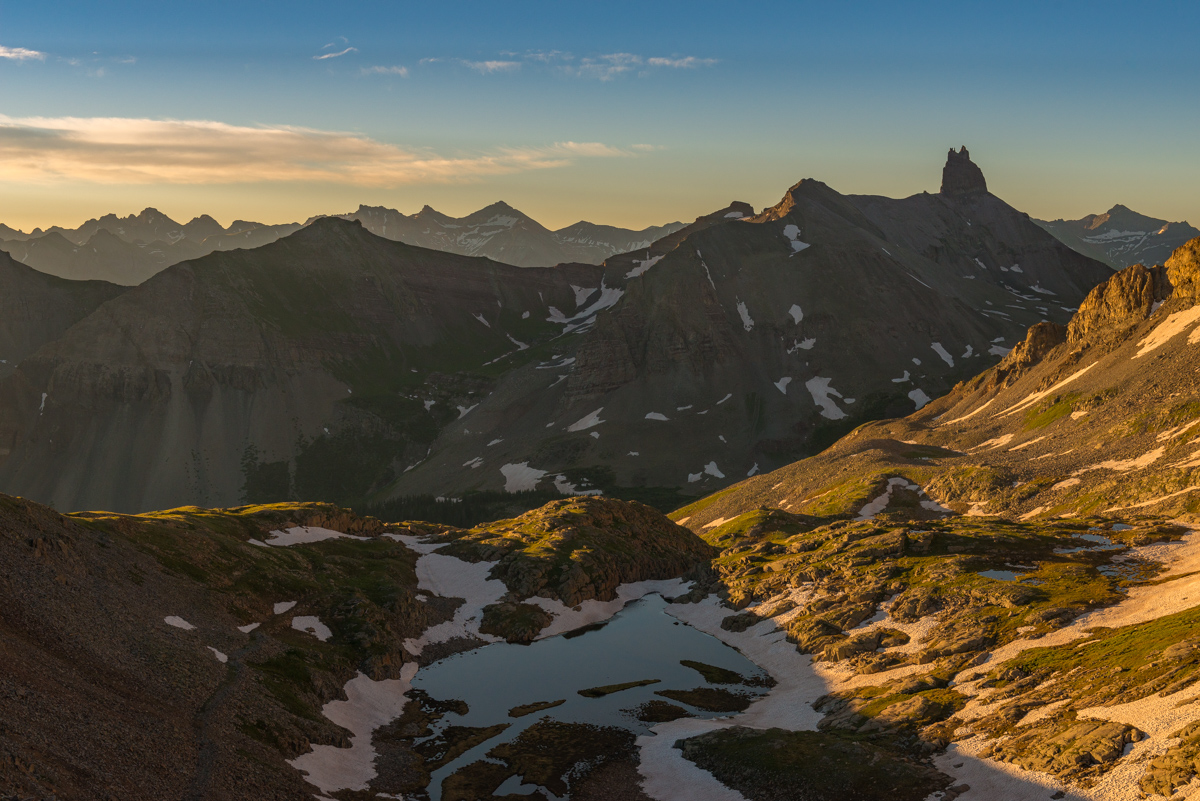
Alas, we continued up the long steep slopes of Bilk Basin, heading towards the most southernly weakest point between Gladstone and Wilson Peak.
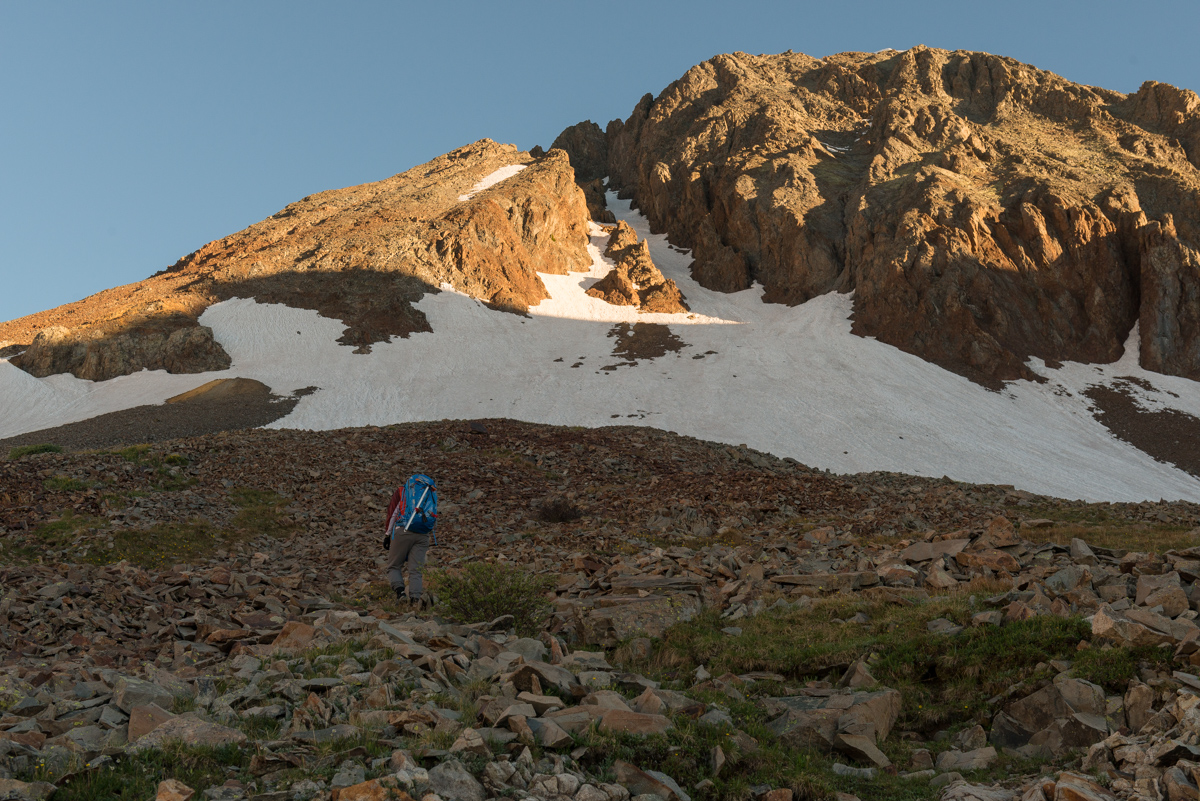
As we climbed higher into the remote basin, Mount Wilson finally came into view just left of our target on the ridge. We had a lot of snow between us and Gladstone and knew we had some snow travel in our future. Fortunately, we had both brought ice axes and did some mental preparation for some snow travel. I even spent some time refreshing my memory for snow travel by reading a couple pages of Freedom of the Hills before leaving home. Actually, that probably saved my life. More on that later.
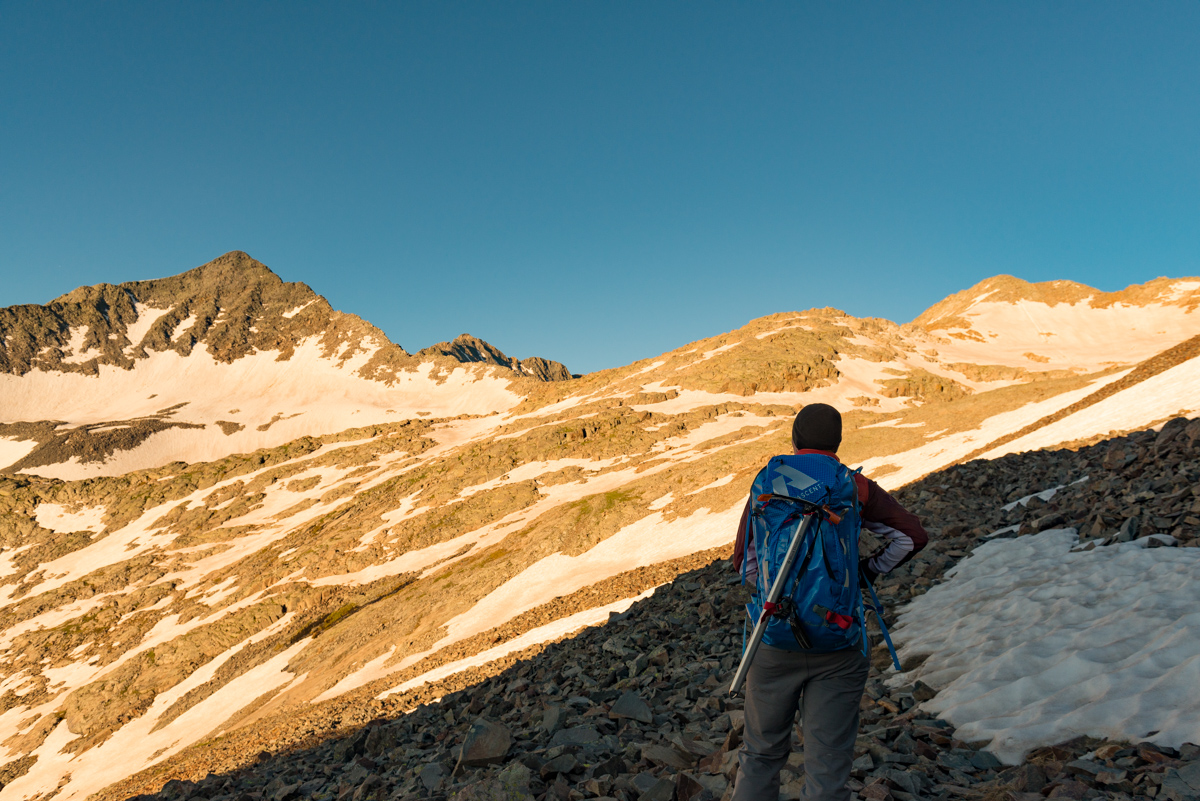
Finally, the sun came into view and I took advantage by getting a nice sunstar photo looking back east.
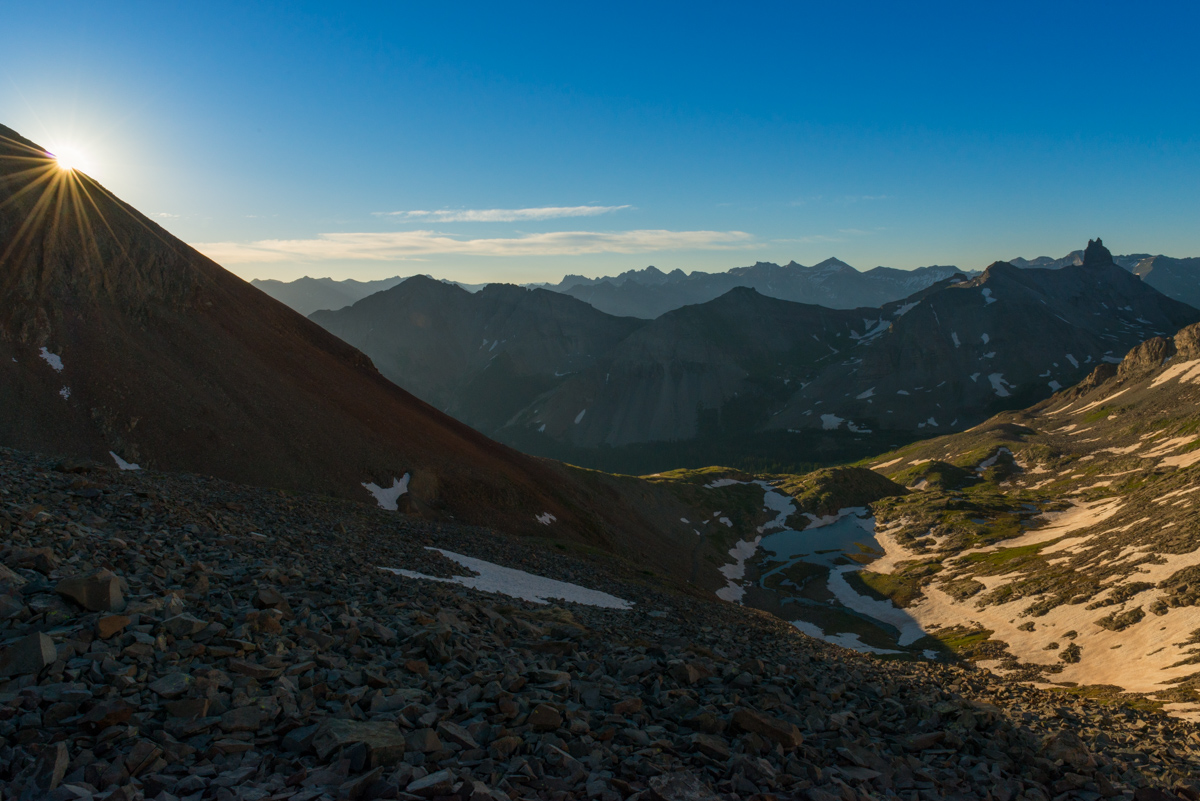
Silas also enjoyed the view of Lizard Head and the Ice Lakes peaks to our east. It was hard not to stare, honestly.
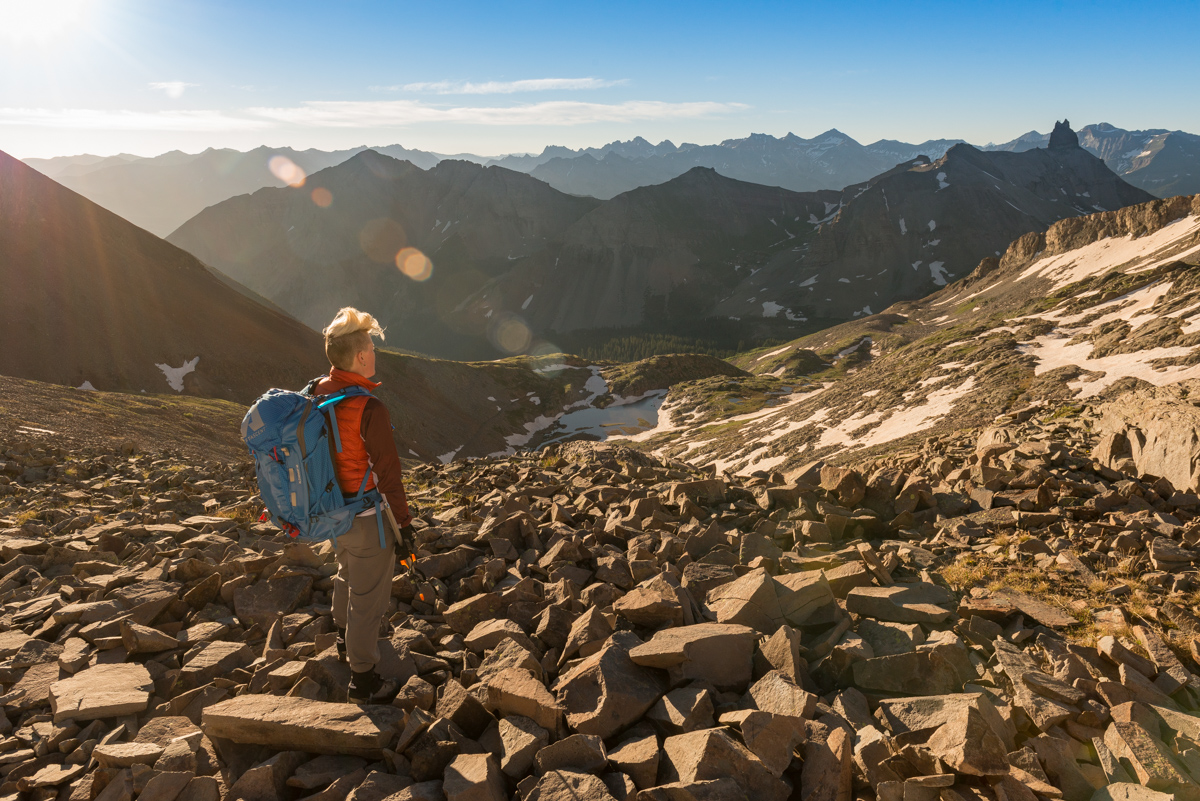
Climbing higher and higher into Bilk Basin and closer to our 1st objective. Silas weighs our route and contemplates life...
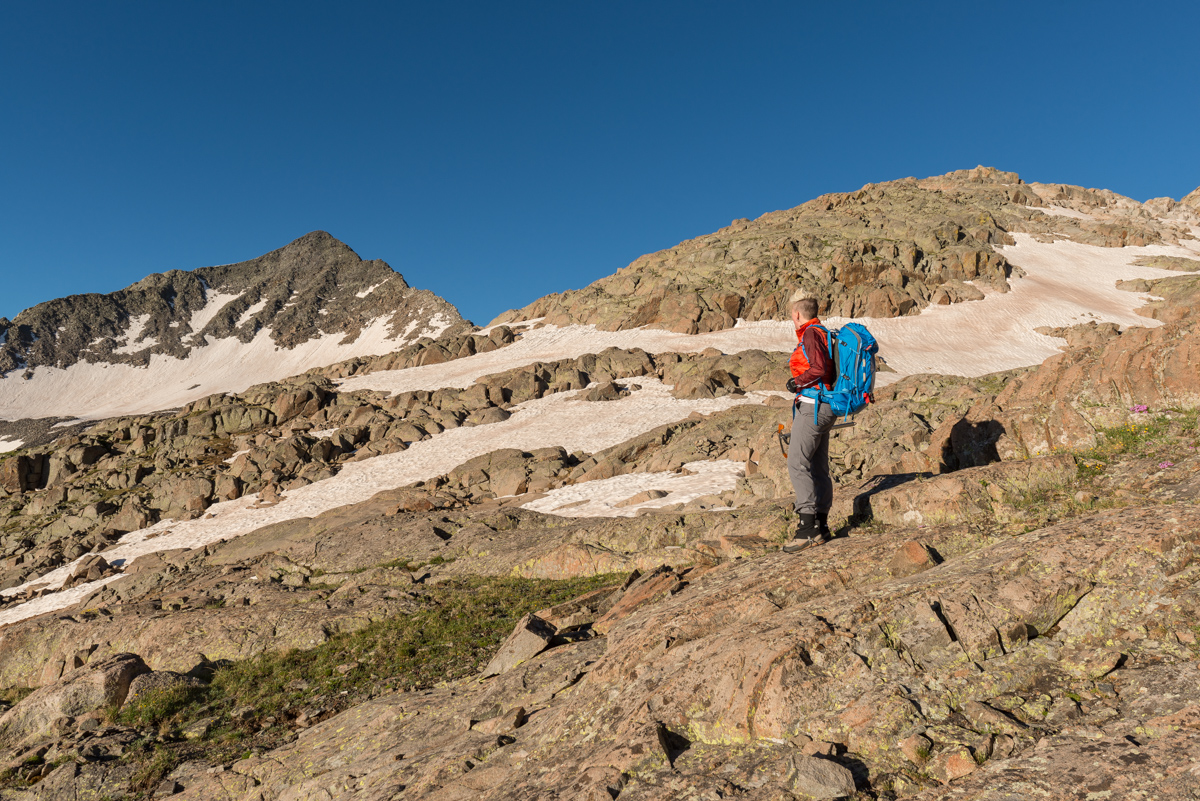
The snow travel began in full effect. The snow at this point was quite hard and finding our footing was a challenge. We did not bring crampons, which was fine. We just took our time and slowly ascended carefully.
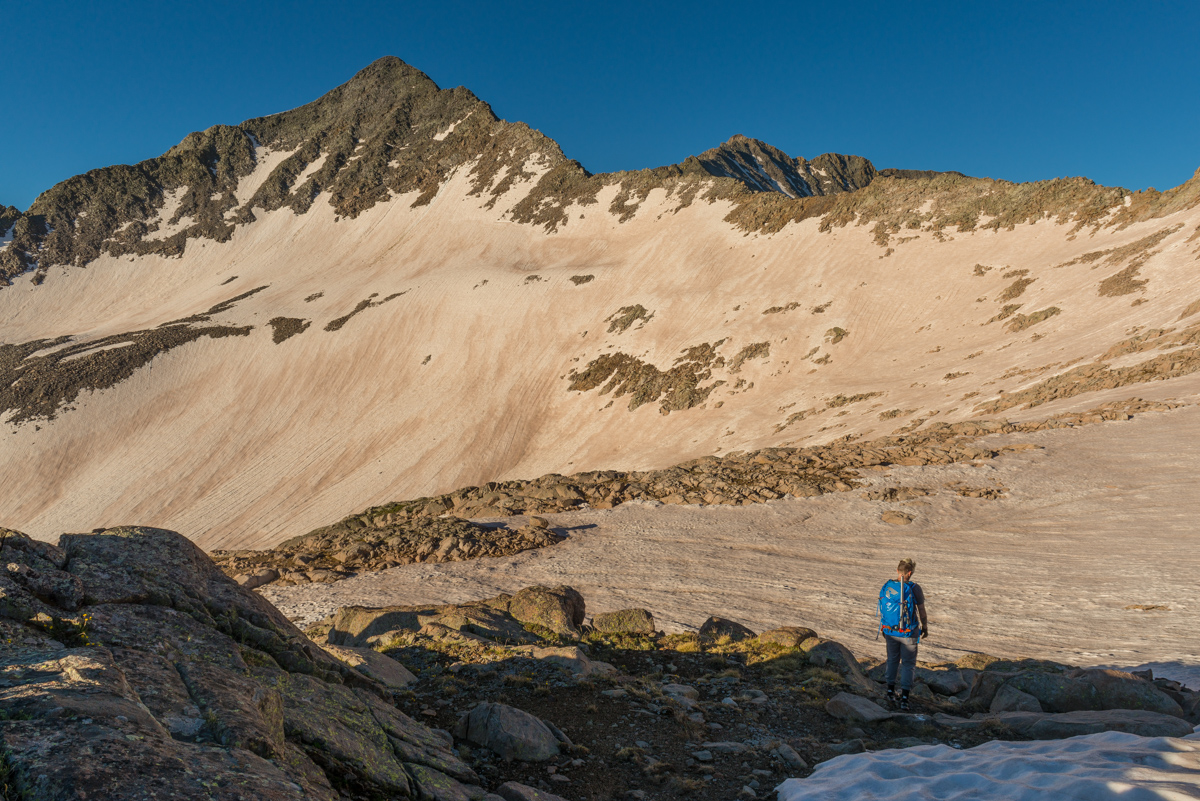
Just a leisurely stroll up a giant snowfield...
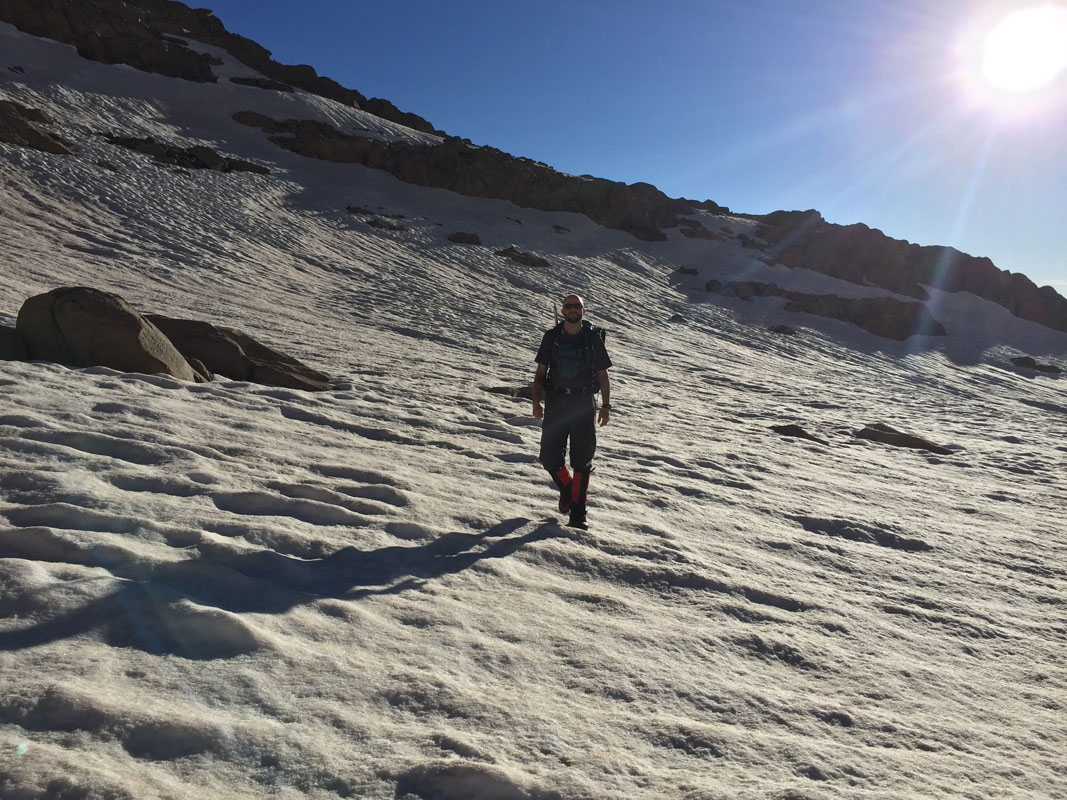
The snow was quite blinding in the early sun, but it was quite warn and there was no wind at all. I had a feeling that this snow would be quite soft later in the day. We contined towards our destination - the notch just above and left of Silas in the photo below.
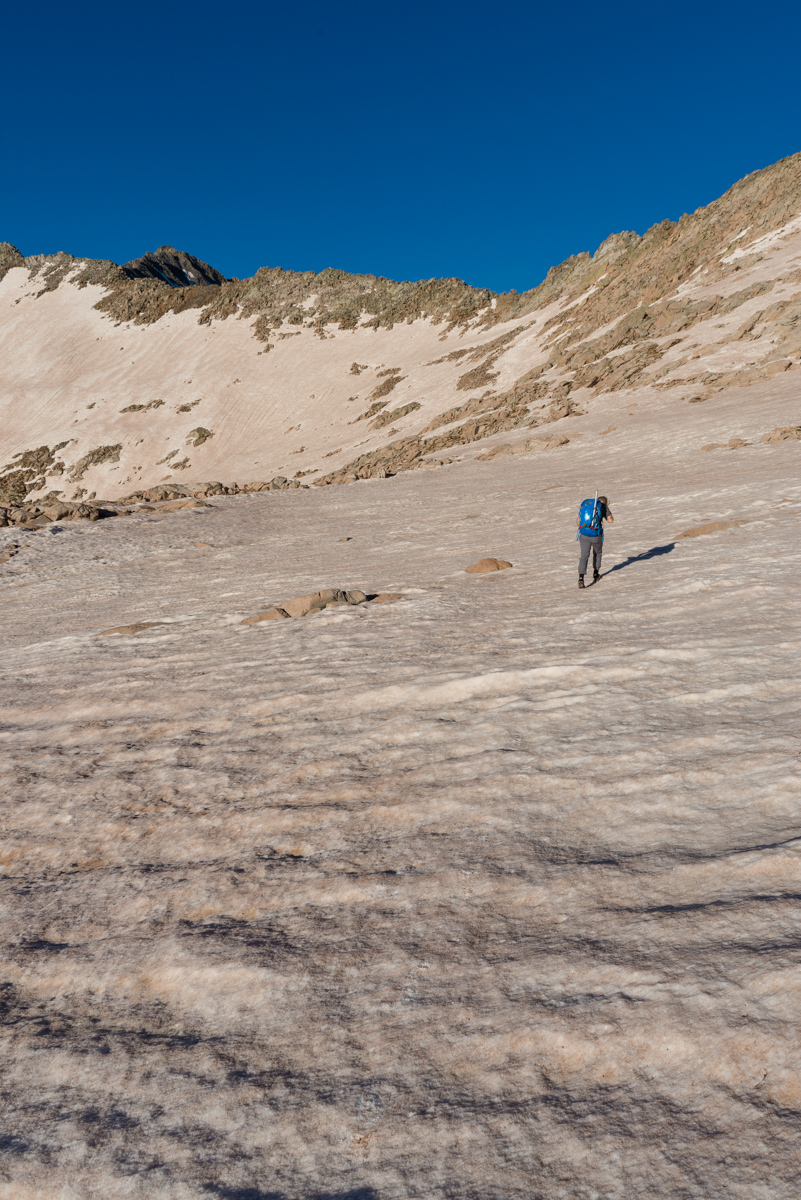
Without much trouble, we reached the Gladstone Peak - Wilson Peak saddle and enjoyed views of Navajo Basin to the west. I was really happy we chose Bilk Basin - the view on the way up was really quite a bit better than that of both the Navajo Basin and the Rock of Ages routes, in my opinion.
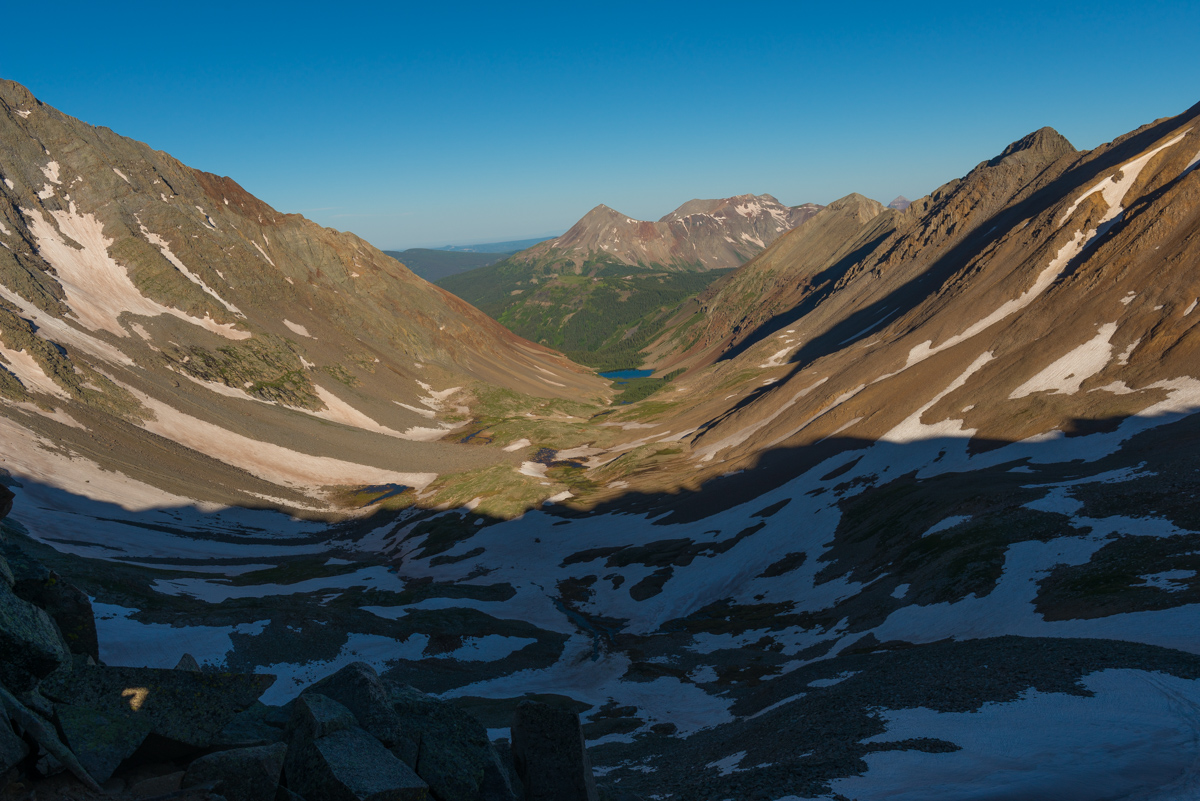
It was time to gear up. We both donned our helmets and mentally prepared for the ridge. I had read a lot of horror stories about this ridge up Gladstone and knew that we needed to remain vigilant throughout the morning to stay safe. I also decided it was a good time to finally use my GoPro that my wife bought me. I attached it to my helmet and we set sail.
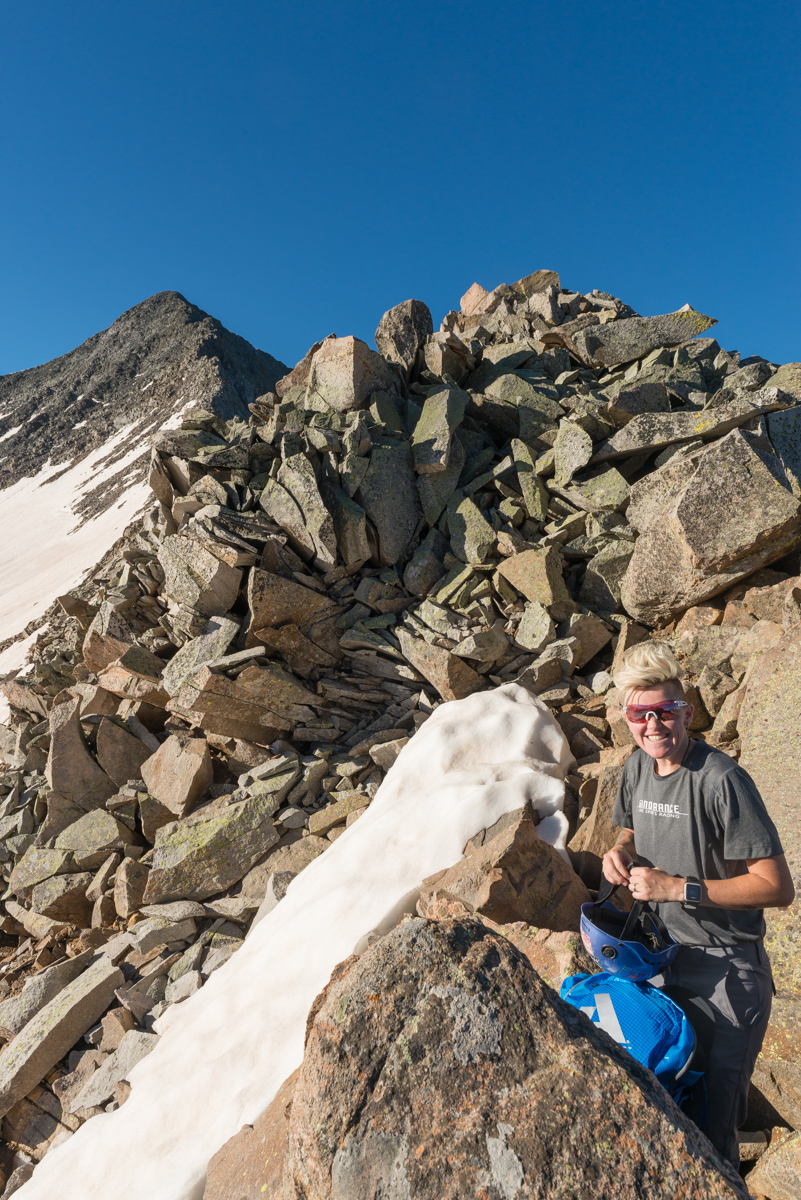
Let's rock! It was good to be doing a hardcore scramble again. I love this type of stuff. Unfortunately, this particular scramble was frought with potential peril.
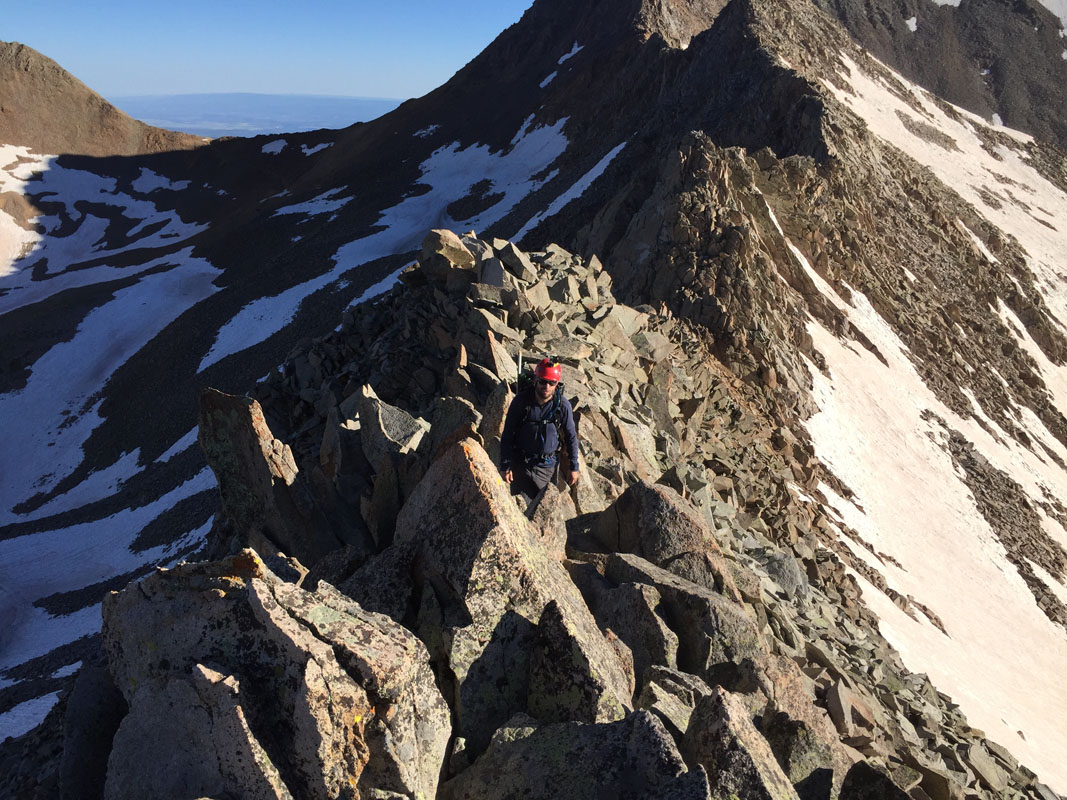
The rock on the way up Gladstone was chossy, loose garbage. Every time I looked up to find the next rock to step on, my thought was, "there's that rock, which is held up by that rock, which is held up by that rock, which holds up this rock." It was mentally exhausing to say the least. I tested every step, every hold, and kicked rocks before placing my weight on them. I was also extra careful to watch Silas as he ascended, making sure I could dodge a rock at any time. I'm so glad I did... because as you can see in the GoPro video below, I had a near miss that would have been very harmful, perhaps fatal. This video gives you a taste of the journey up Gladstone. I have about 40 minutes of footage that I condensed into 3-4 minutes. The video is a bit shaky - so be warned! I smoothed it out a bit which caused some strange effects, but I think it a bit more watchable now.
The high risk climbs like this always feel good when you reach the top, but for this one, I had a pretty bad feeling the whole time we were on top because I knew we had to go back down the same way and it was not something I looked forward to. Alas, we enjoyed the summit and our company while some people were yelling in joy from over on Mount Wilson. Wilson Peak loomed in the distance to the north and I was apprehensive to give it a go at this point. I was running really low on water and my body felt a bit tired from the near miss.
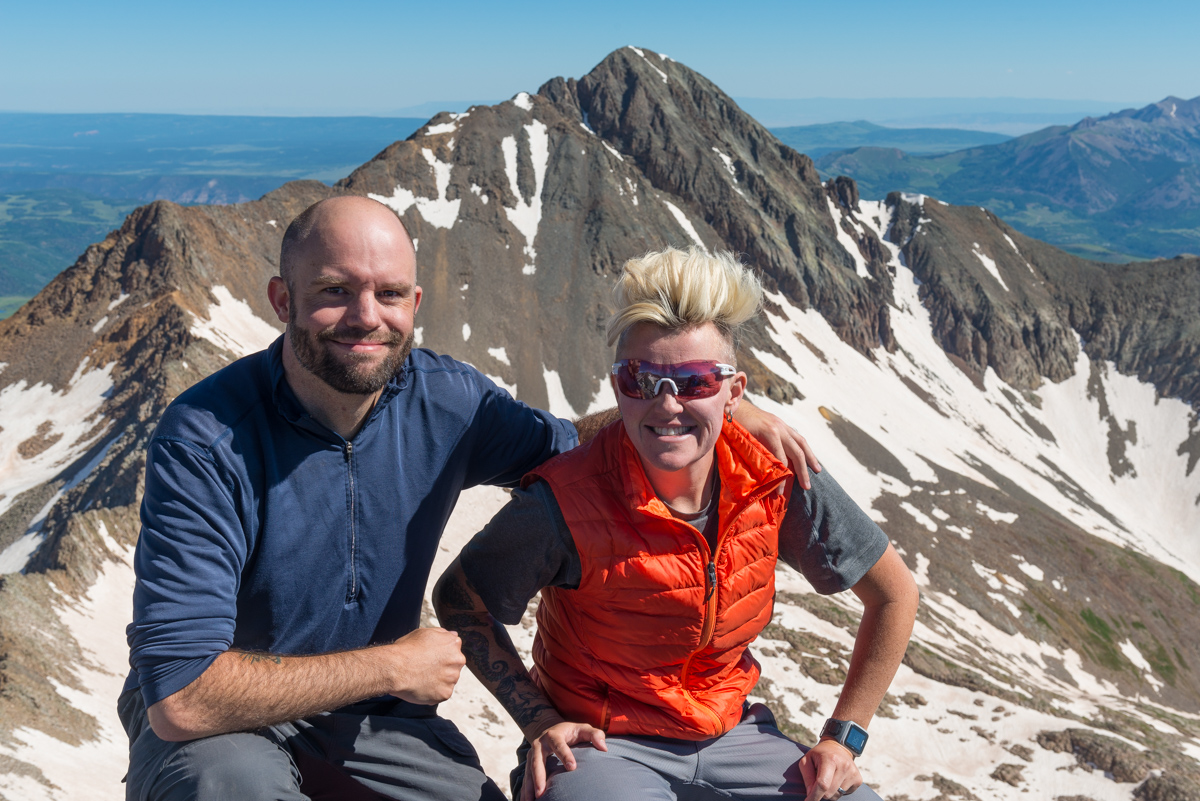
A 360 summit panorama from Gladstone...
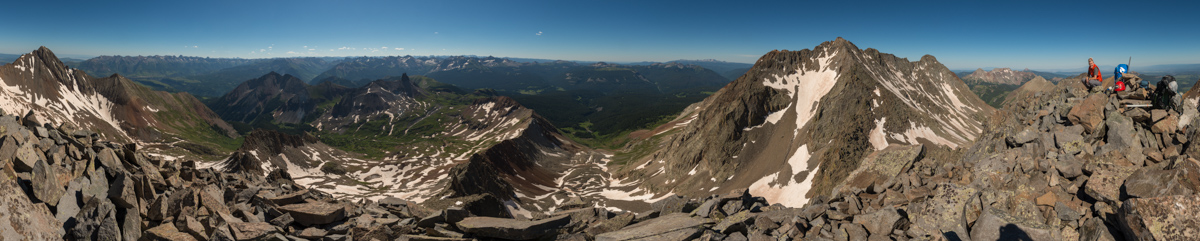
One of my favorite features to stare at from up here was Lizard Head Peak and the long shadow it cast below with a sea of amazing mountains behind. Really tough to beat.
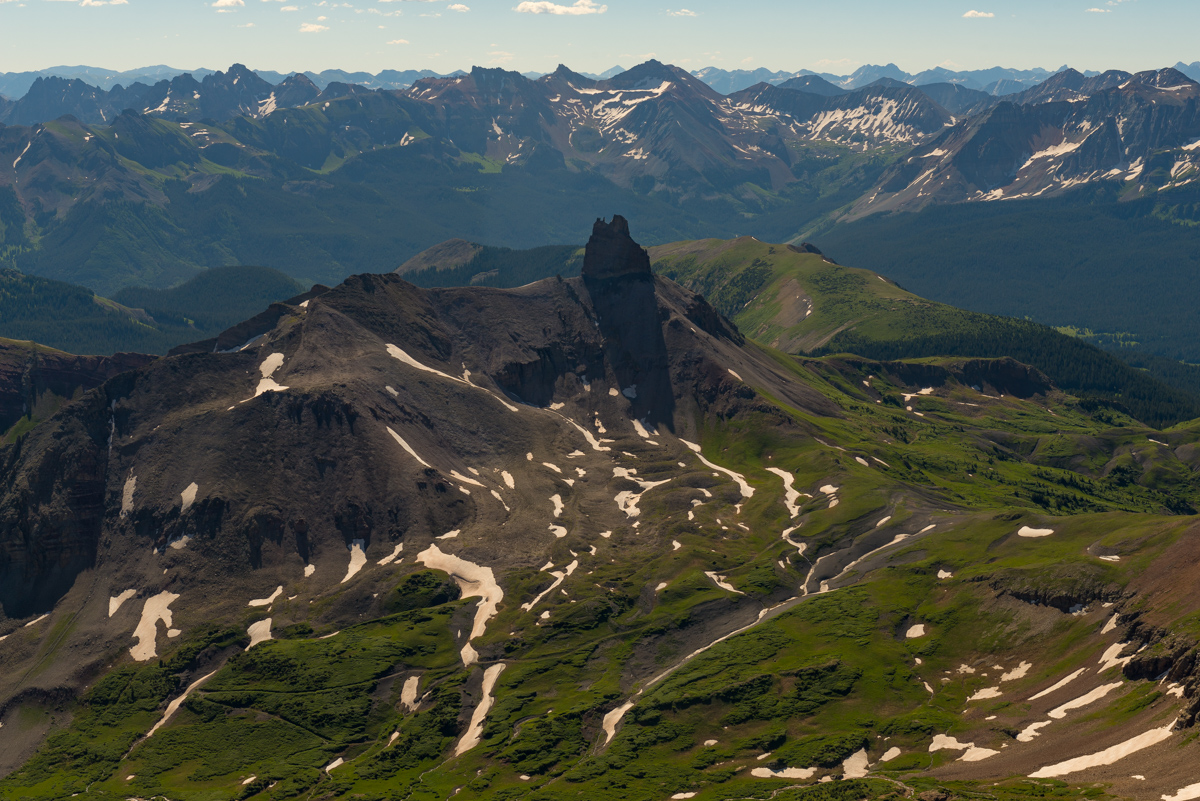
Also visible were Dallas Peak, Mount Sneffels (left of center), Teakettle (center), Potosi, Wetterhorn, and Uncompahgre (right of center), all above the town of Telluride. Pretty amazing view from this part of Colorado, for sure.
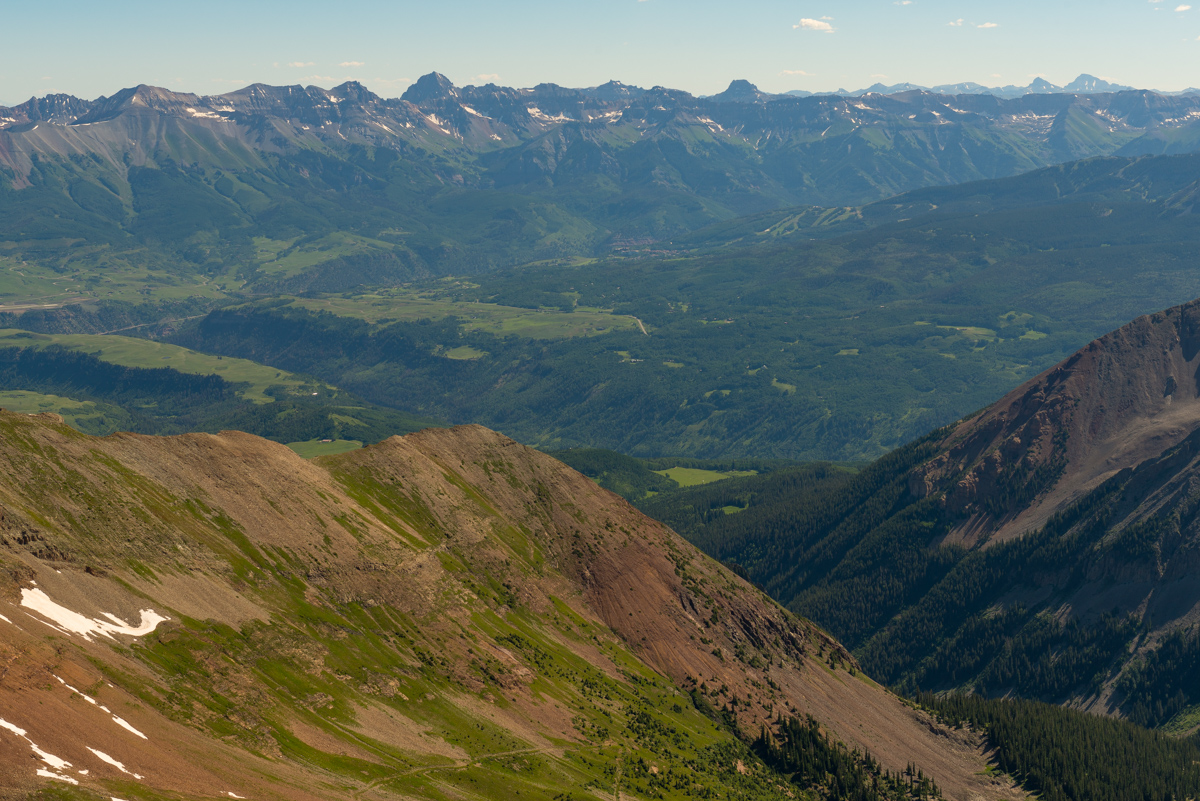
After enjoying the summit for awhile and posting updates to our loved ones, we decided to head down. For the way down, we stayed high on the ridge the entire way, which proved to be more challenging in some ways but much, much more stable than on the way up, where we decided to dodge left below the ridge (which in retrospect was a mistake). We also decided to see how we both felt once reaching the saddle again and decide on Wilson Peak from there. Since I was basically out of water, it was going to be an interesting decision. The views east were great so I was pretty happy no matter what.
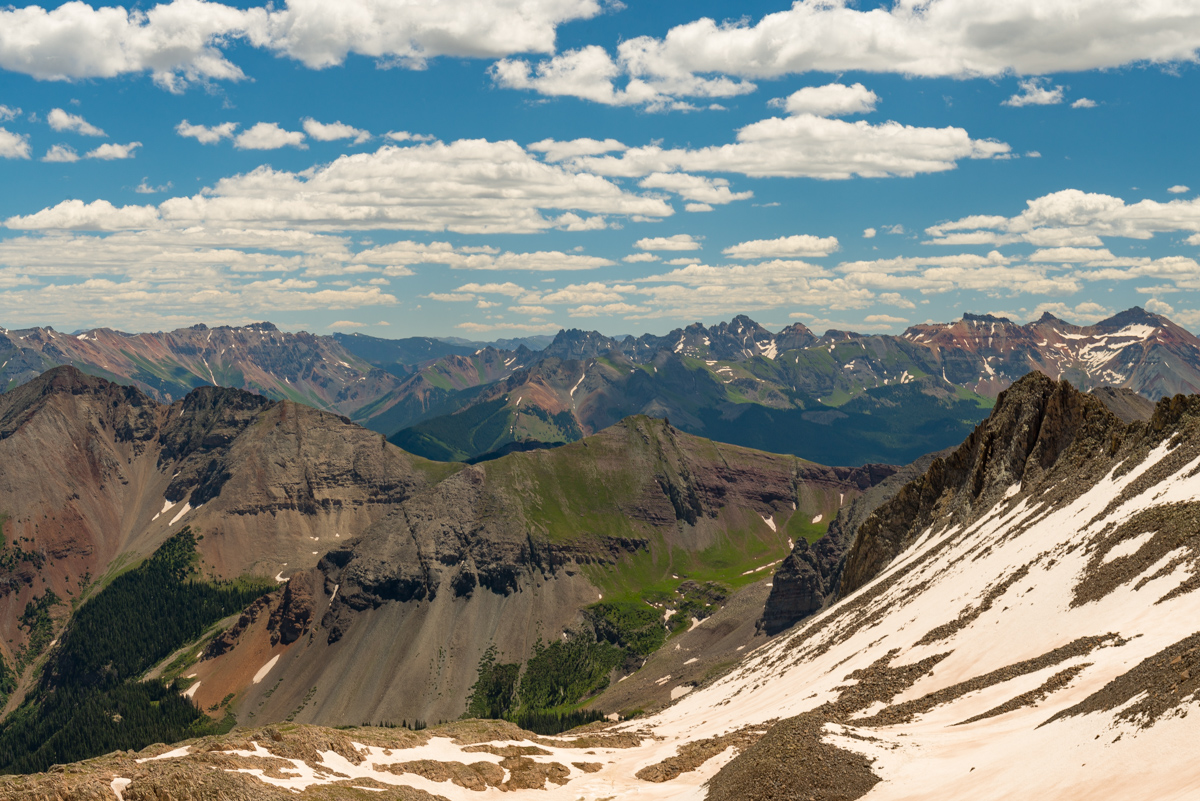
More awesome views looking east on the way down...
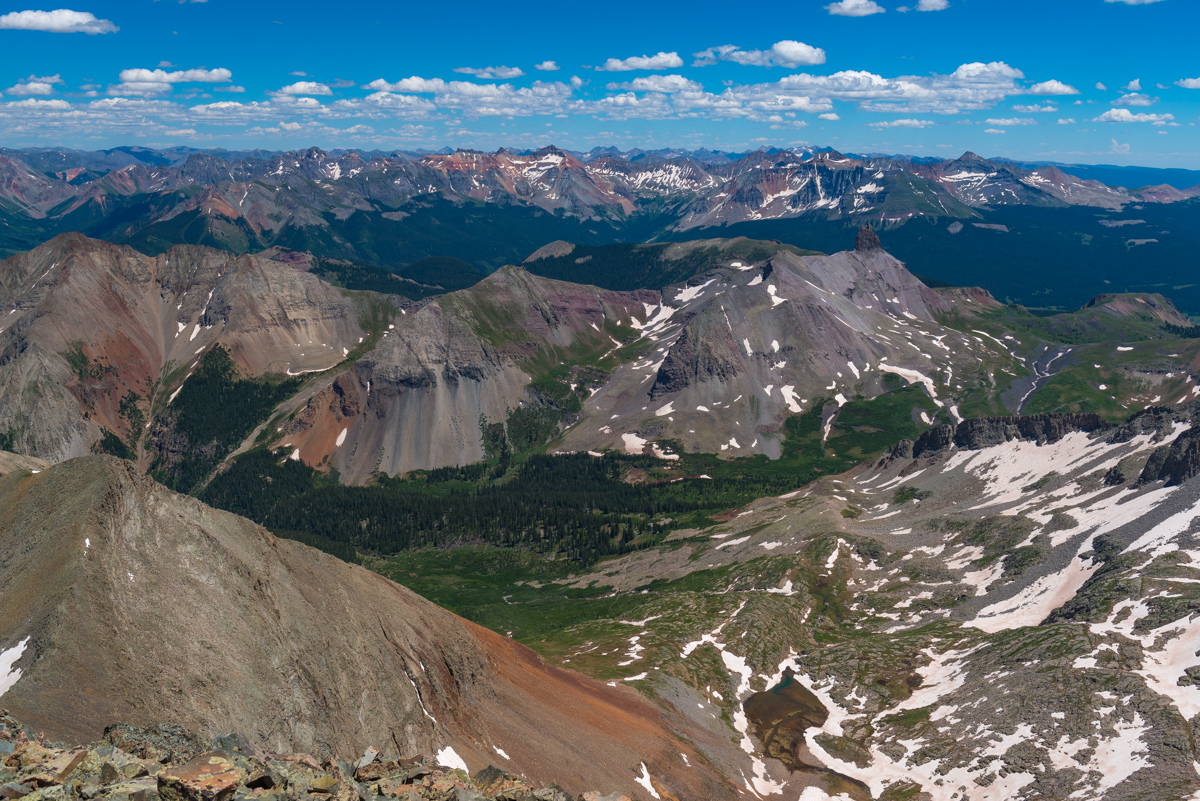
Being goofy...
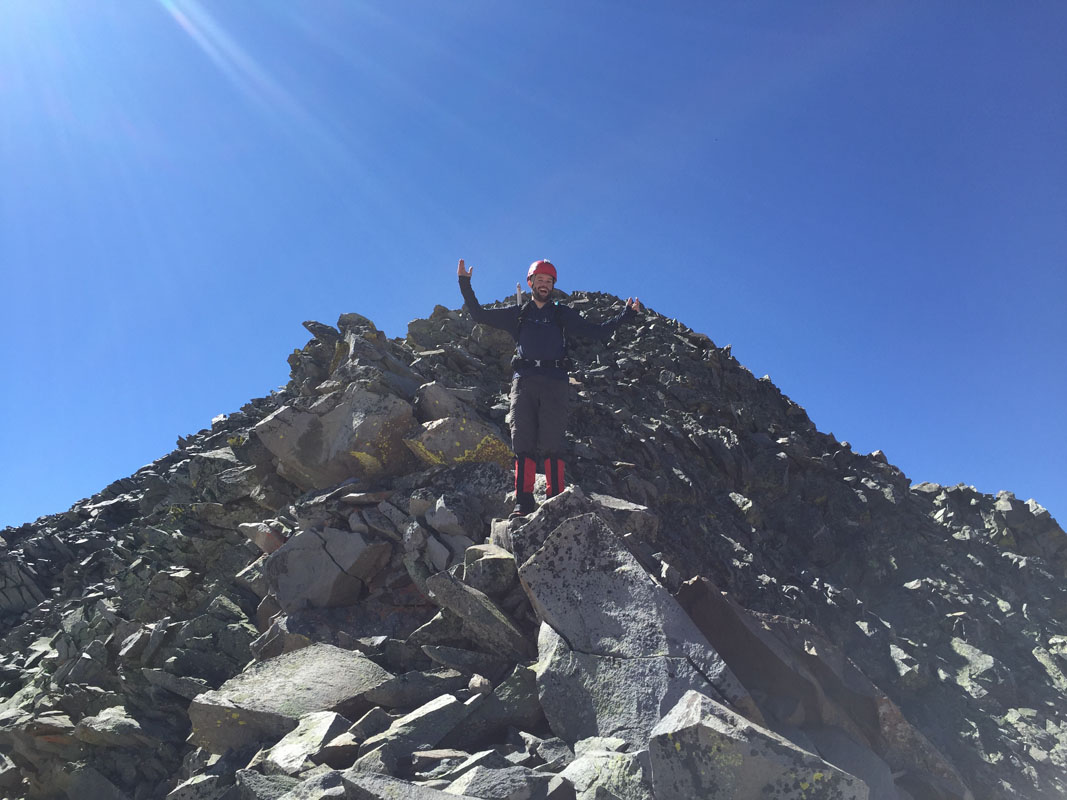
There was a really awesome section on the way down which had a pretty committing move up a sheer face that probably saved us a lot of downclimbing into the nasty section of the ridge. Here is a glimpse of that section which I think was one of the highlights of the whole day.
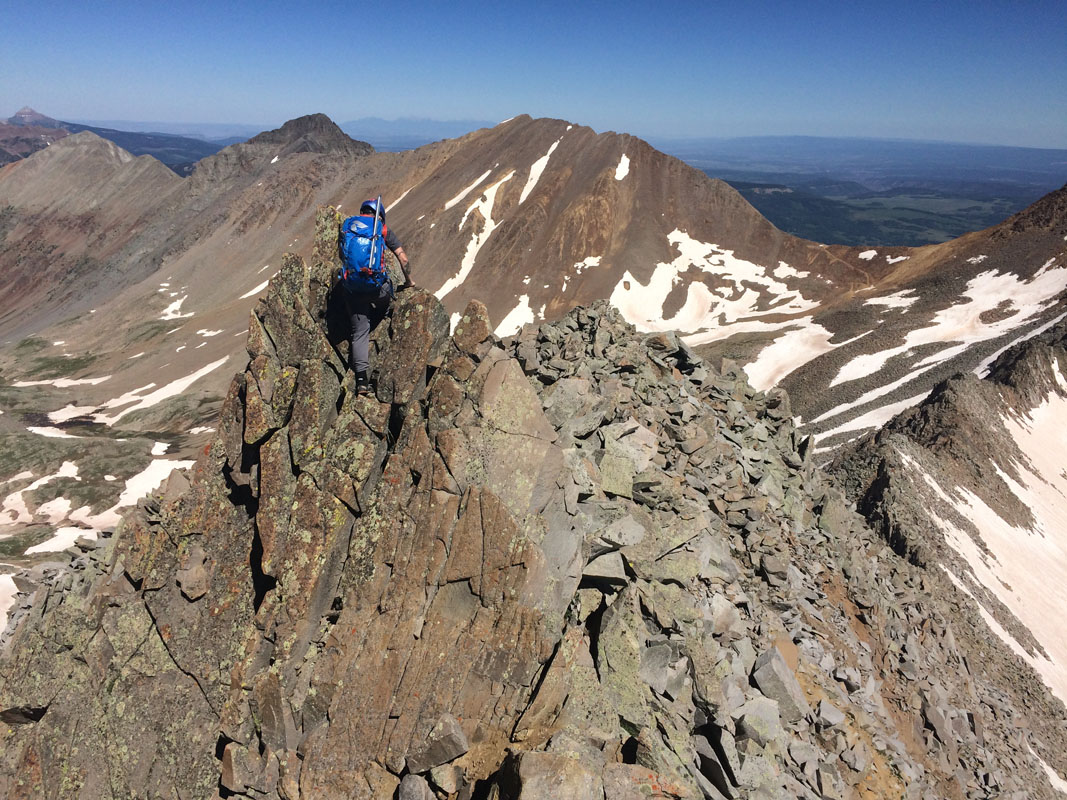
The way down was tricky to say the least. I had to do some interesting manuevers to get across some sections.
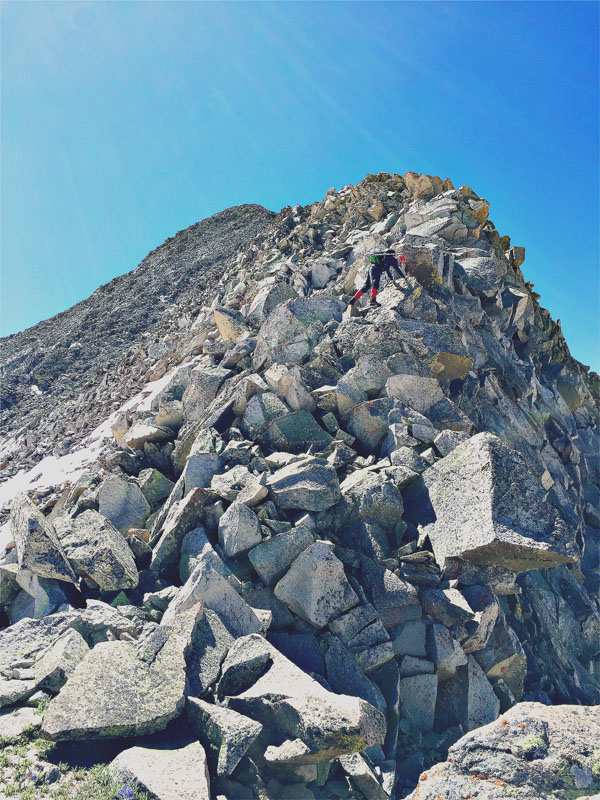
We found ourselves at the top of a gully filled with snow and decided it made sense to fill up my Camelbak with snow and try to get it to melt so that I had water. It actually worked pretty well. We packed the Camelbak very tightly and after awhile it did melt some (about an ounze every 15 minutes. After every sip, I blew hot air back into the tube and the reservior, which helped facilitate the melting process. It was at this point we decided that we would keep going up to Wilson Peak.
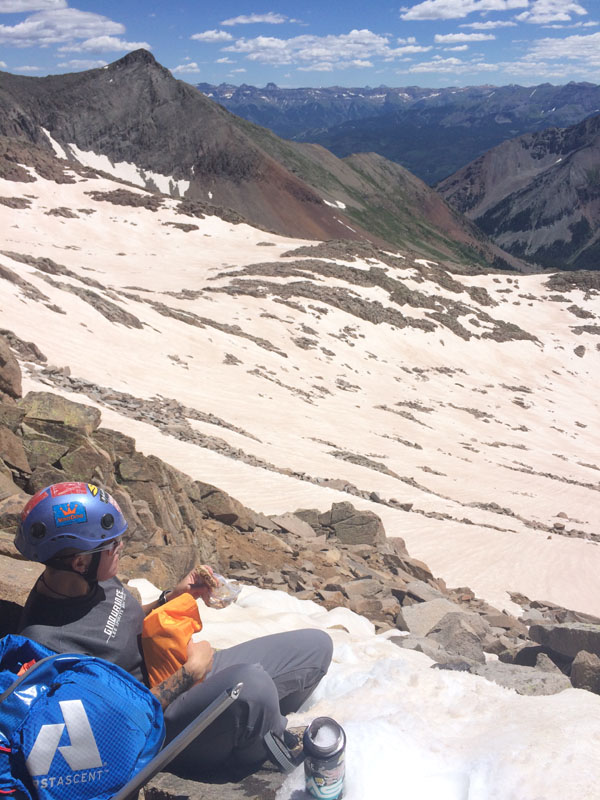
To get to Wilson, we had to go around a small un-ranked 13er between Gladstone and the Rock of Ages saddle. Roach recommends dropping into the Navajo Basin side, but we thought that the Bilk Basin side looked more doable on the snow. I don't regret the decision to do that; however, the snow was steep and soft and made for slow travel with our ice axes. At one point, Silas started to slide and had to self-arrest, which worked like a charm.
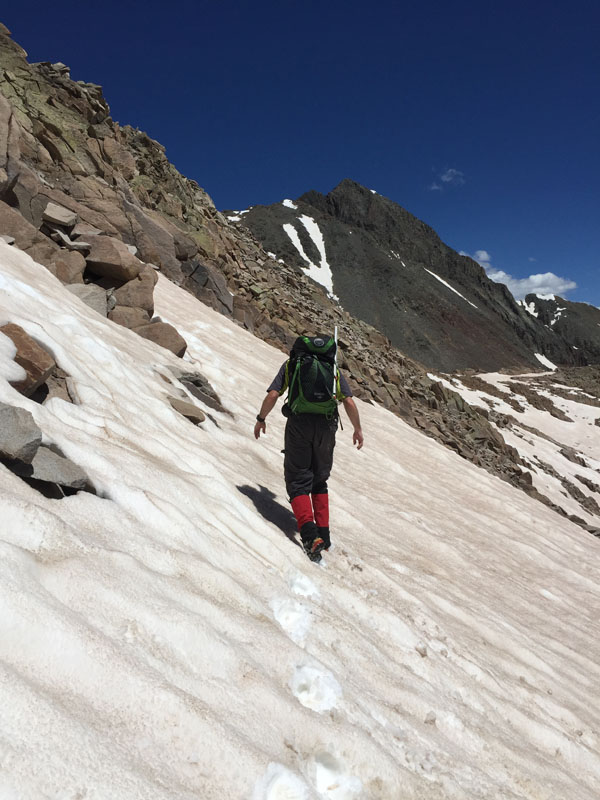
Crossing snowfields sideways is just awkward and slow. Some sections were totally melted and made for uncomfortable and surprising post holing (which sucked)... and other sections were harder and more dangerous. I really dislike snow travel.
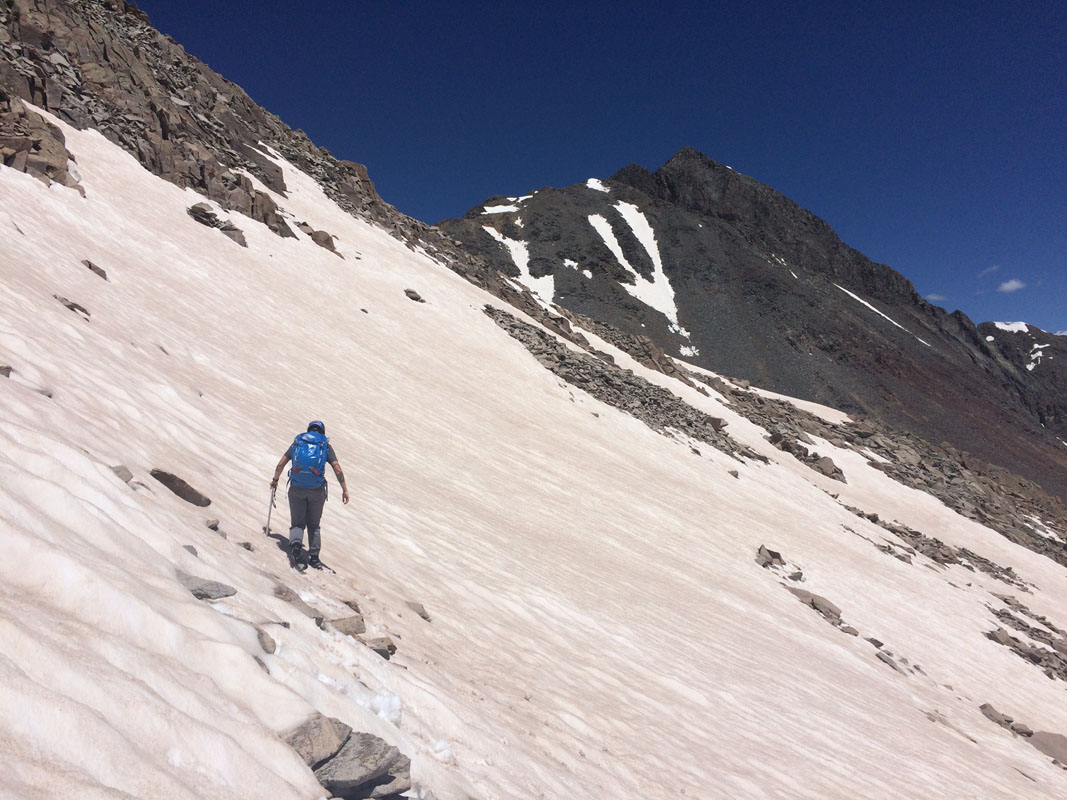
Silas looked bad-ass though...
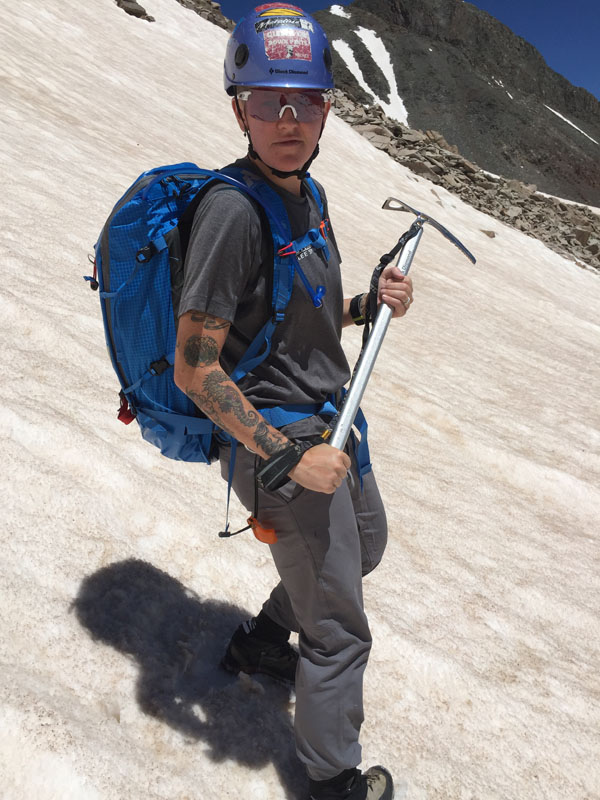
We finally made it to the Rock of Ages saddle and committed to going up Wilson Peak. We passed a lot of people on the way, none of which were wearing helmets, which was a little surprising given the looseness and seriousness of this climb. To each their own, I guess.
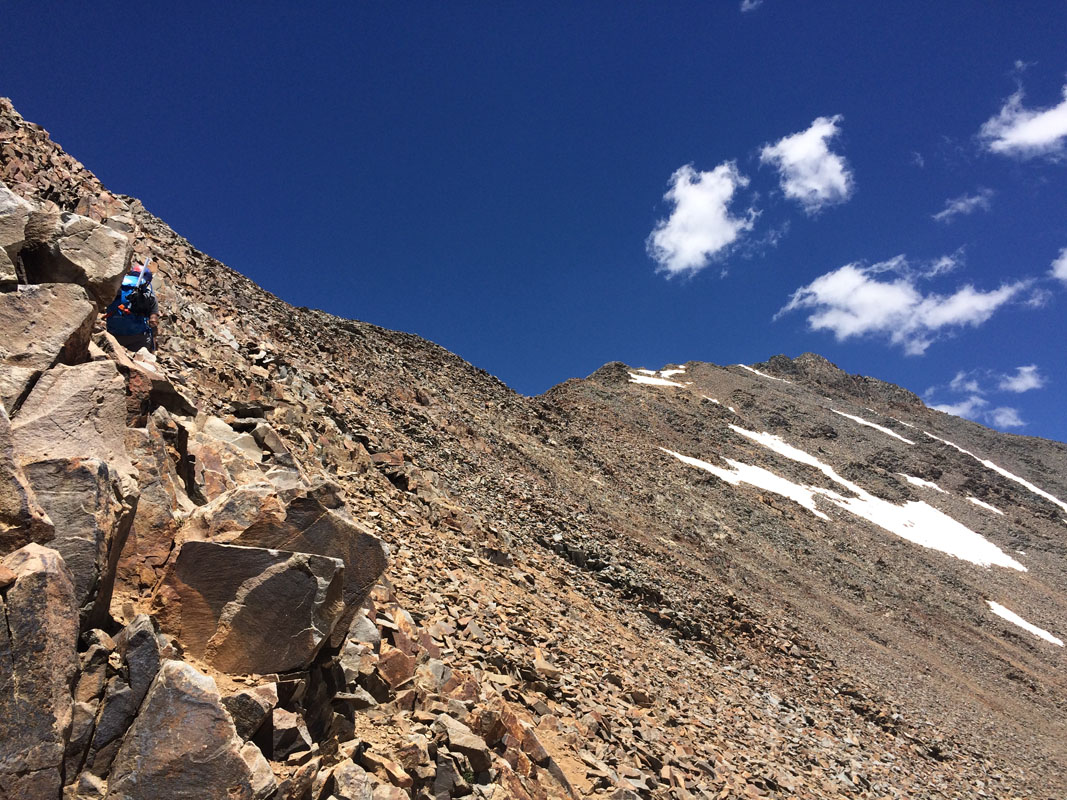
Near the top of Wilson Peak, Silas got to hang out with a Marmot.
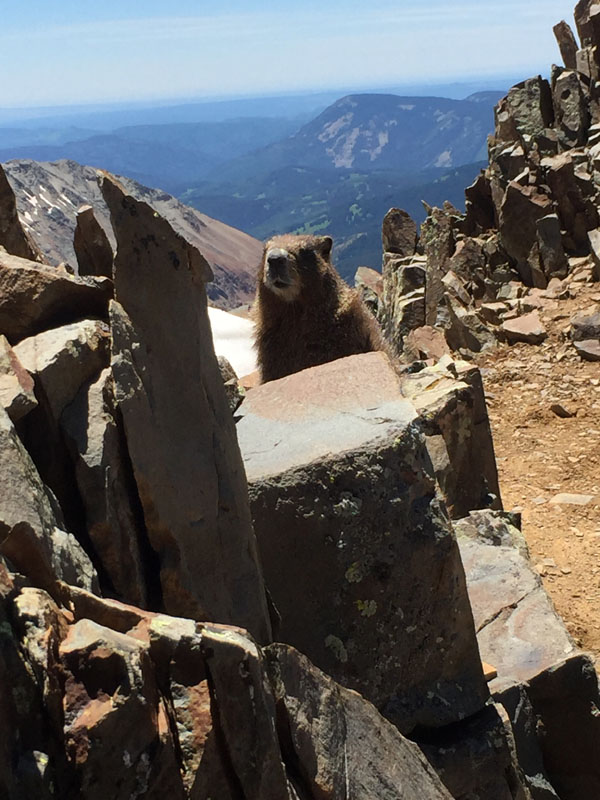
Wilson Peak is probably one of the more challenging and enjoyable 14ers. This was my second time up and I still found it to be quite fun, even after a very long day on Gladstone already under the belt. The rock on Wilson Peak is mostly picked through and the loose stuff mostly kicked or pulled down off the mountain. It still demands respect; however, and the sheer steepness of the final section is a real nail-biter. The consequences of any mistakes would be fatal for sure.
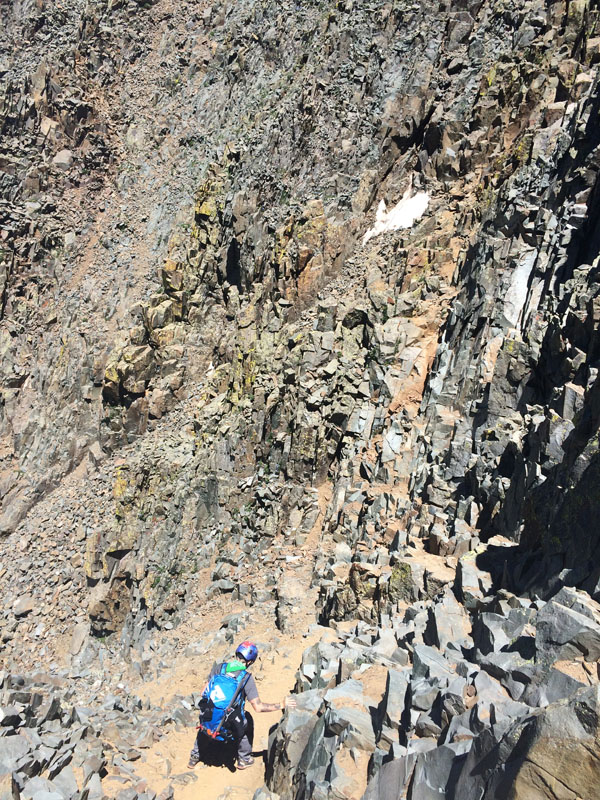
Silas topped out on Wilson Peak just before me and I was able to snap a quick shot on my cell phone of that moment - pretty awesome - two peaks in one day.
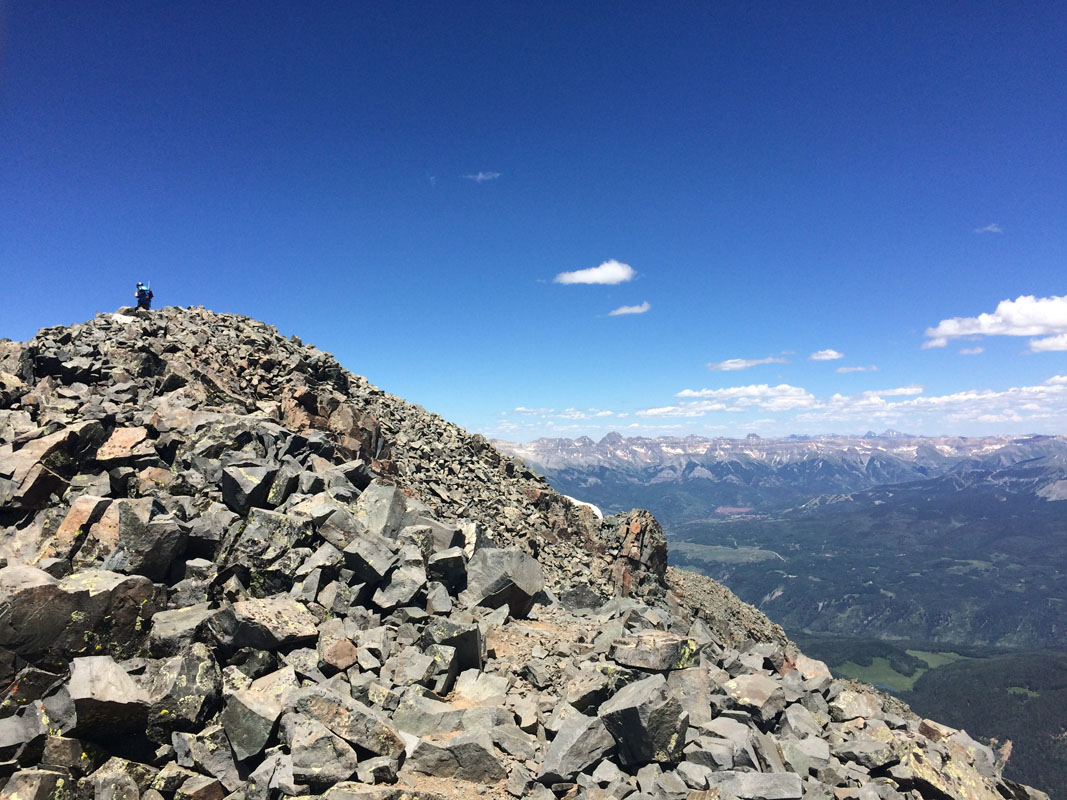
I setup the tripod and we got a self-timer shot of us celebrating.
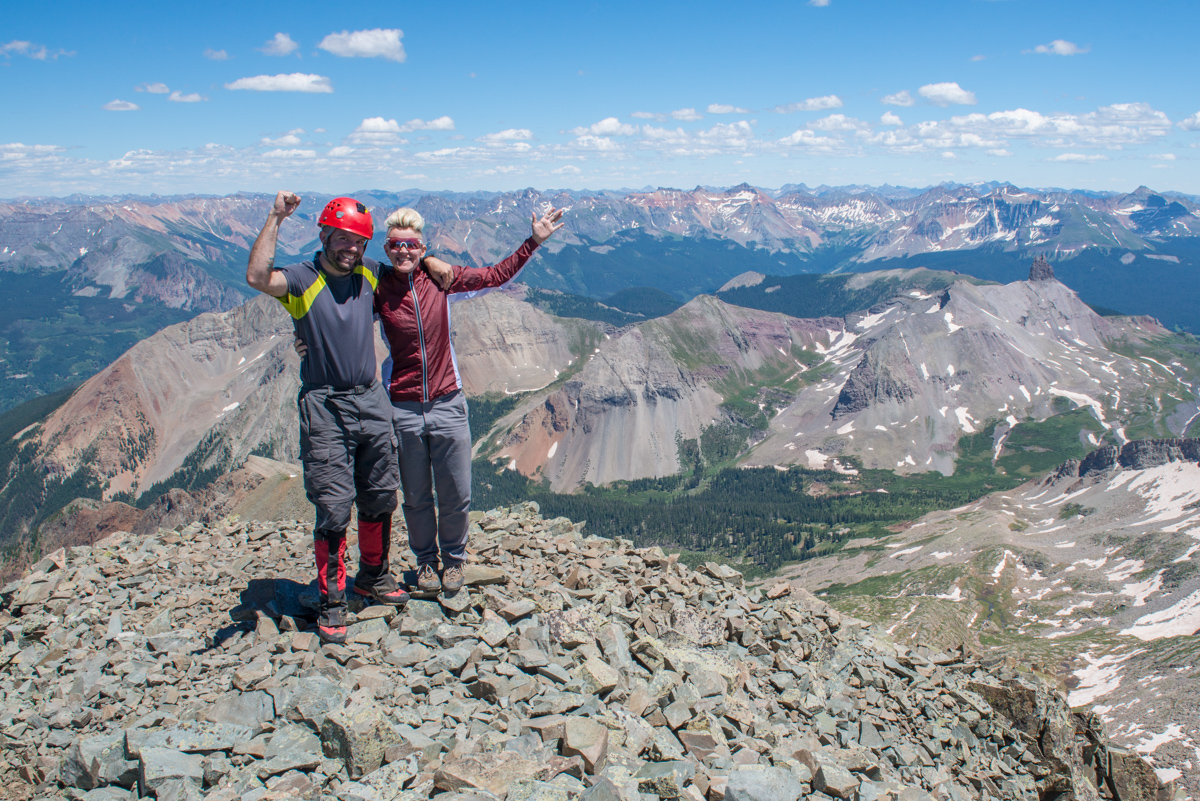
We spent very little time on top and headed back down. Our plan was to take the Wilson Peak trail down just before the Rock of Ages saddle where it meets up with snow that decends into Bilk Basin and to glisade down from there. The plan, while super smart, was not devoid of risk, as I later found out. We reached the snow field and Silas went first. Silas used his axe and feet to keep the brakes on and made it down about 300 feet without issue. I followed on the same path (mistake #1) and sat down in the snow, readied my axe, and started to go. After mere seconds, my speed increased behind a point where I could slow myself with my axe and I began to worry. I knew that I was out of control and heading straight for Silas. This was bad. I'm not sure why, but I remained calm (maybe I read that in Freedom of the Hills) and did not yell or scream even though I was careening out of control towards Silas. I dug my elbows and feet in - nothing. It hurt like a bitch. Per what I read in Freedom of the Hills for an uncontrolled slide, I flipped over on my chest and planted my axe deep into the snow with the long end going into the snow and my hands firmly holding onto the axe part. It worked! I stopped immediately. Silas said he was going to take video of me but before he knew it, I was right next to him. Yep - that's because I was travelling at like 30 miles an hour down the hillside. Two close calls in one day - not OK. We carefully decended the rest of the snow without incident. I grew tired from the lack of water, and I had also run out of food. Fantastic. Way to prepare! We finally reached running water above the lake at the creek that feeds Bilk Basin and we stopped to refill our water. I had fortunately brought my water filter with me (which I usually don't do) and I began to engorge myself with sweet, sweet water. Too much of it... like a half gallon. Whoops. Now I felt sick from drinking too much water too quickly. Not my best day. When we reached the lake, I stopped to vomit, another first. Nothing really came out but it still sucked just the same. I thought we were done with the shenannagins until we reached the creek crossing from earlier in the morning. Guess what? It was about 3 feet higher from all of the snow melt! Fantastic. We both knew we had to keep going down and look for another way to cross. The below photo shows just how much water was coming down...
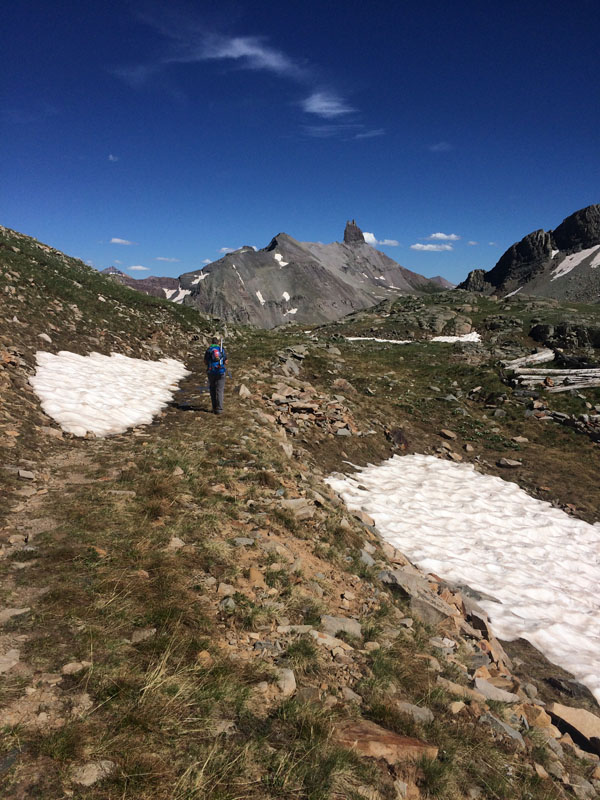 |
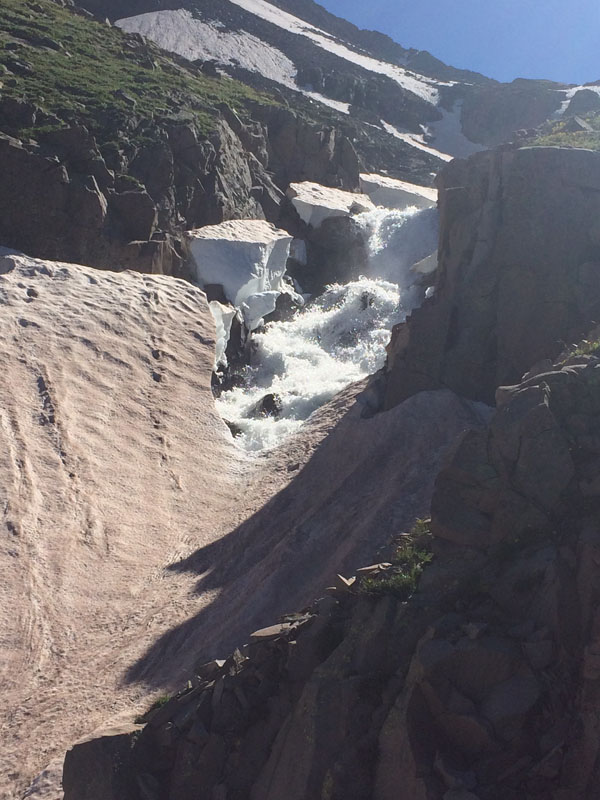 |
Unfortunately, we never did find another place to cross and had to go all the way back down to the start of the basin through Willows and fallen trees. It was a slog. We were both absolutely destroyed, mentally and physically. We had to climb all the way back up about 200-300 feet to our campsite through an area without a trail. Awesome. When we got to the top of the hill to the feint trail leading to our campsite, I vomited again. Excellent. We reached camp and Silas hooked me up with some electrolyte water. That shit works! I was feeling great after about 20 minutes of rest and ready to rock and roll again, excited for photographing sunset. Unbelievable. Sunset looked like it was going to be a total dud. The first "wave" of light after the sun set was pretty dull, some weak yellows and golds in the sky... then out of nowhere I looked back and saw the sky filled with small clouds all turning pink and purple. I ran out to a decent spot out of camp and barely had enough time to snap off this shot of sunset... which faded after only 2-3 minutes. We ate dinner and celebrated our accomplishments.
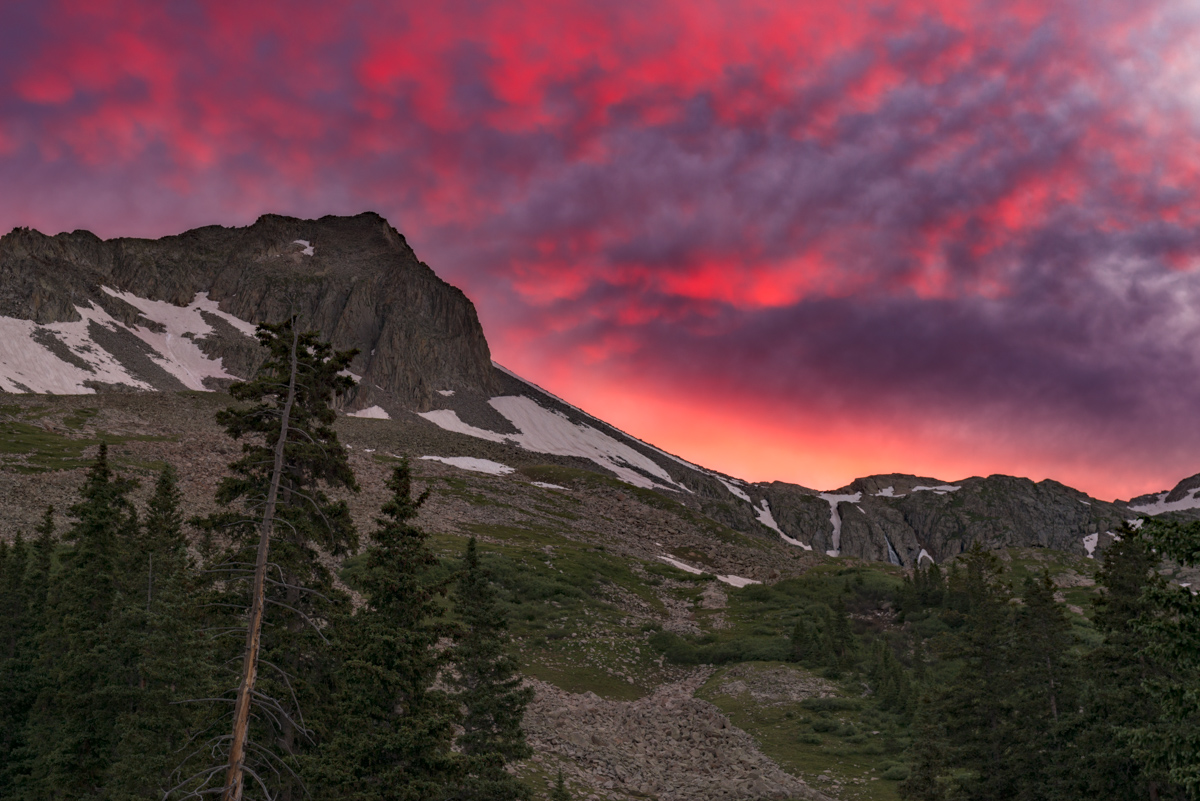
After dinner, I was totally exhausted. I knew that I really wanted to get some Milky Way photographs over Lizard Head Peak, but was not sure if I could make it long enough awake to pull it off. I slowly hiked up the hill to the south of our camp to find a spot. I was so exhausted after finding my spot to shoot that I set up my camera on my tripod, found a spot to lay down in the grass, and set my alarm on my phone to wake up two hours later so I could not miss the amazing night sky scene. This one did not disappoint - the dark skies of Southwest Colorado are not easily surpassed in quality. The position of the Galactic Core above Lizard Head's impressive massif was just about perfect with the dimly illuminated moon shining just the right amount of light onto Lizard Head Peak. This is a single exposure shot using the Nikon D800, using the 14-24 f/2.8 lens at f/2.8 at 24mm for 15 seconds at ISO 6400 and in-camera noise reduction.

I also was able to shoot some pretty nice panoramas, sweeping from right to left, getting 13,113 ft. Lizard Head Peak (right), 12,930 ft. Sunshine Mountain (center), and all of the Mount Sneffels area peaks in one photograph, above Telluride.
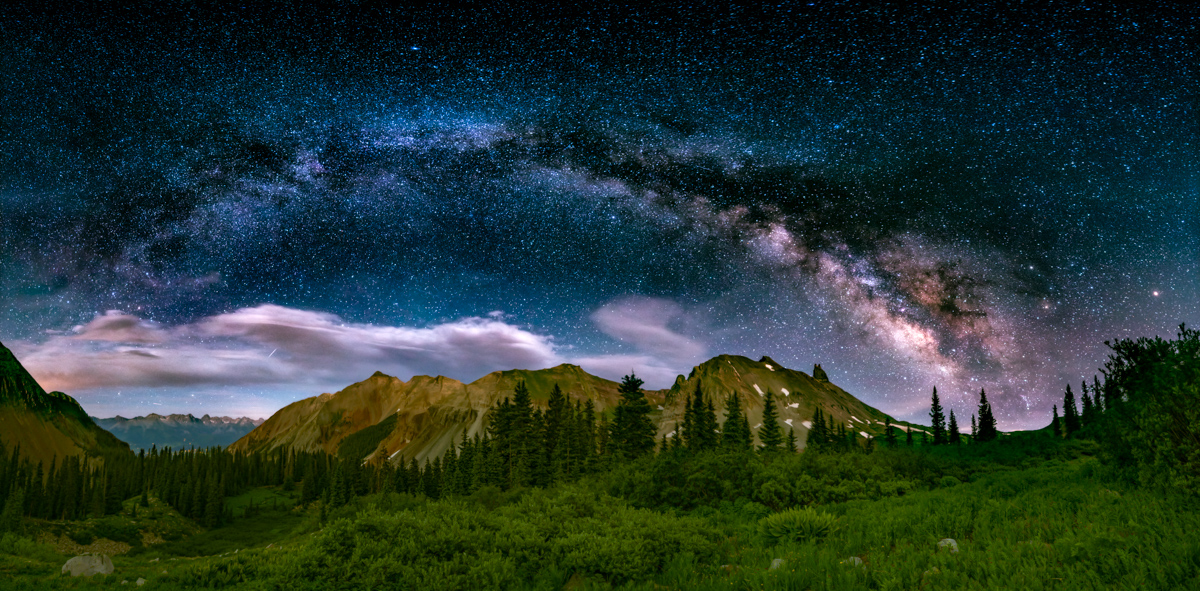
Lastly, I went for it all, getting Wilson Peak in the mix in a 360 degree panorama. The clouds were a really awesome compliment to the Milky Way.
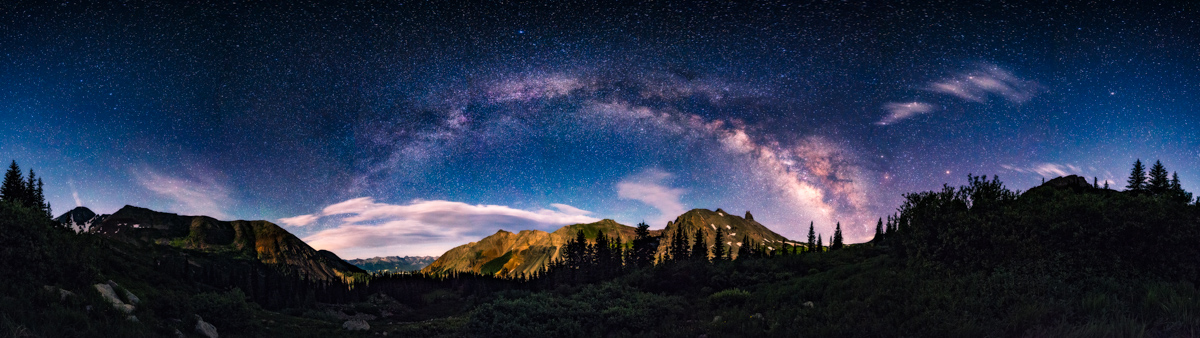
I was pleased with my efforts to capture the night sky and head back to camp to get some much needed sleep. We decided to sleep in and then hike out, which meant Silas would have to return another day to get Mount Wilson. The "trail" down Bilk Basin from the Lizard Head trail was non-existent. We had to cross through some really huge fallen trees before we reached the creek again and trail out. Add in yet another memorable experience, why not?

We cruised down the Sunshine Mesa trail in no time, passing some day hikers on the way. We settled on Tellurde Brewing for our final stop to get some brews and to commemorate our unforgettable backpacking adventure before heading home.
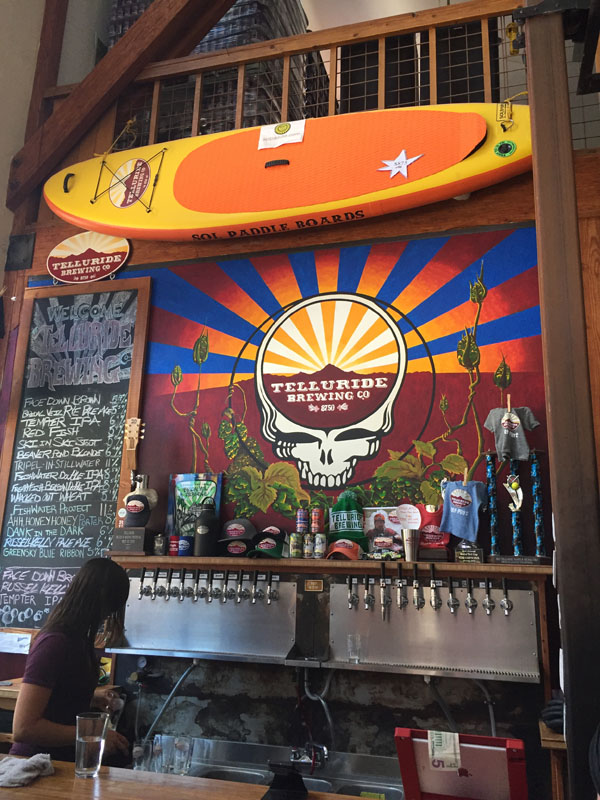
Tellurude Brewing has some fantastic beers! I think my favorite was the Freshwater Double IPA or the Brown on nitro. Yum!
You can view and download my GPS track from Gaia GPS HERE. Hope that it is useful!
Climbing Crestone Needle in Autumn and a Fall Colors Photography Expedition
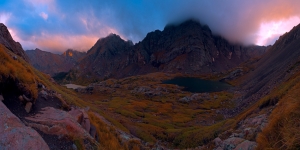
It is no secret that I moved to Portland, Oregon in January 2014 – lured by a much more walkable city than Colorado Springs, filled with breweries, vegan food, and citizens of a much similar political and philosophical mindset. I’m not going to lie though; I miss my friends and I miss the Colorado Mountains deeply. I was born in Colorado and have been climbing Colorado’s high peaks since 1982. The mountains run deep within my veins. So, when I knew I would be spending a week in Colorado over the last week of September, I jumped all over the opportunity and locked in a three-day backpacking stint into the South Colony Basin beneath Crestone Needle and Crestone Peak in the mighty Sangre de Cristo Mountains with my best friend Sarah Musick. Our goals were simple: enjoy the wilderness, enjoy our time together, and climb mountains.
Packing for a longer backpacking trip involving a lot of photography gear with limited space in the backpack due to travel constraints was quite a challenge. I decided to use my Osprey Talon 44 (hardly a backpacking pack) and go as light as possible, opting to take two lenses paired with my Nikon D800: the Nikon 14-24 and the Nikon 24-70. I really wanted to bring my Nikon 70-200 for wildlife and other landscape uses; however, that lens weighs a ton and takes up quite a bit of space in the pack, so it had to stay behind for this one. I felt pretty good about the weight of my pack after it was all said and done – weighing in at just 40 lbs. - with a tripod, two lenses, a gripped D800, filters, a tent, pad, sleeping bag, gloves, hats, food, and stove. Not bad! Sarah would be bringing a water filter and a gas canister for the stove, so we were good to go! Bare-bones backpacking – always a little nerve-wracking, but easy on the back and knees!
The final challenge to solve before ensuring a successful trip was to secure transportation. My wife and I left a car in Colorado; however, she needed it for work as she telecommutes from Portland but when we are in Colorado she drives into work. In the 25th Hour we were able to get Sarah’s wife to let us use her Subaru Forester for the somewhat difficult South Colony Road, which I had driven successful many times in the past in similar vehicles. With all the details finalized, we departed from my parent’s house in Colorado Springs at around 10:30 AM on the morning of September 21st for the picturesque South Colony Basin. We arrived around 12:30 PM without incident. I left a small bag of raisins and a half-filled water bottle in the cup-holders below the dash, saving them as a prize upon our return on Tuesday. The parking lot was sparsely filled, mostly by what seemed to be trucks and SUVs of hunters or day-hikers, based on the people we passed on the trail on the way up.
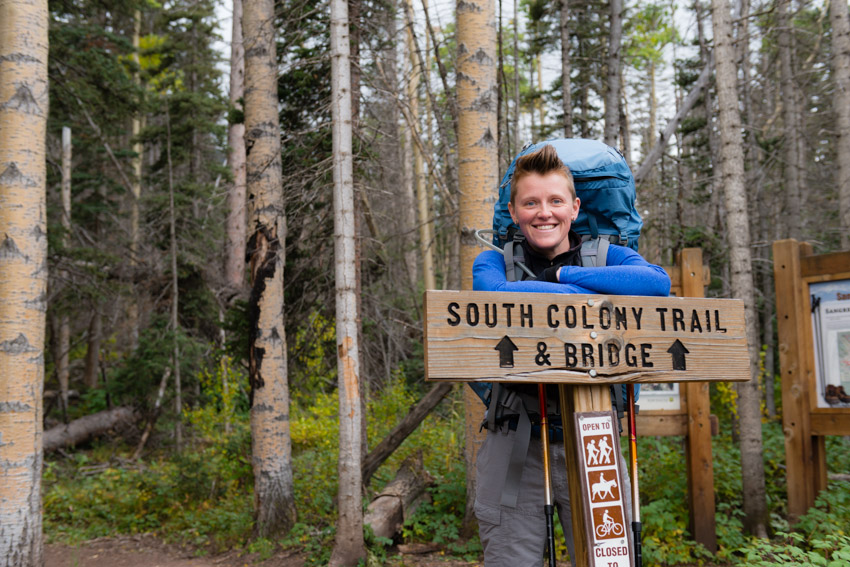
Upon starting our hike we were immediately struck by the amazing fall colors that had adorned the aspen trees and scrub oak lining the sides of the trail (which is really the remnants of an old 4WD road which was closed in 2009 at the current terminus of the South Colony Road).
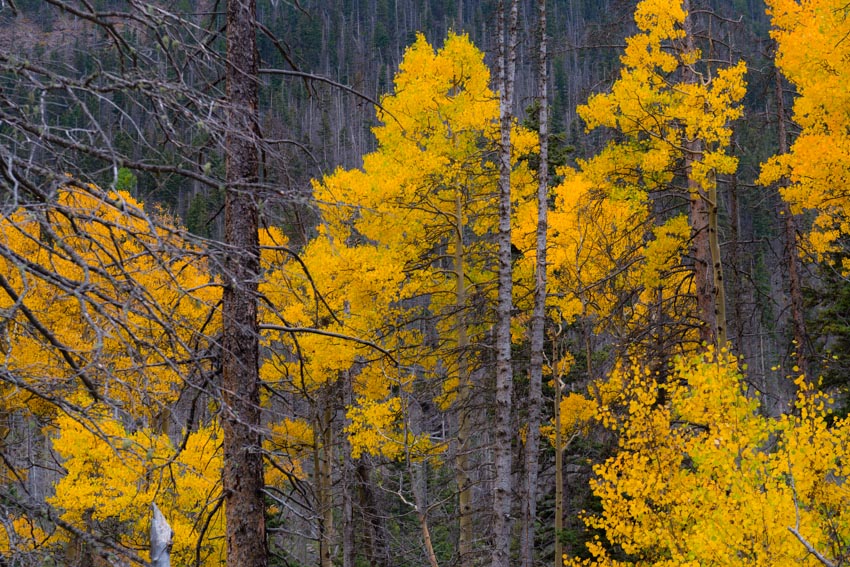
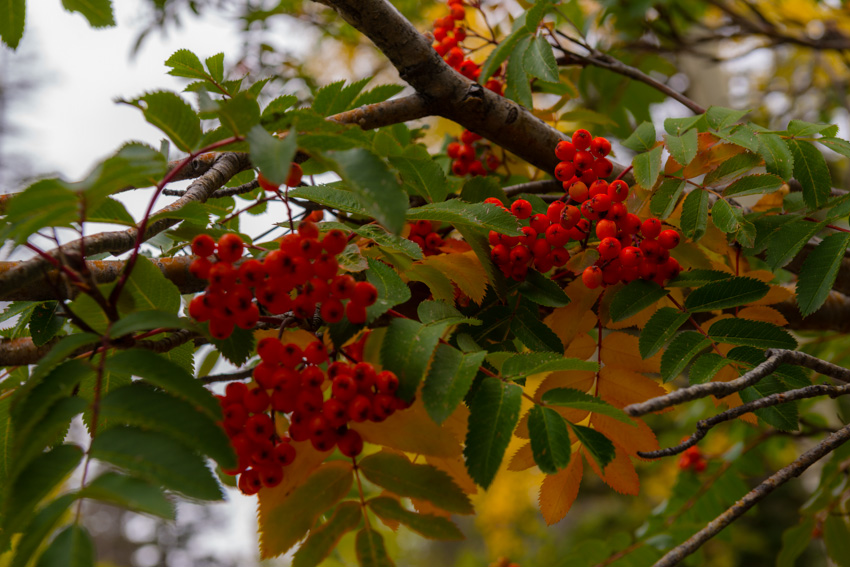
The trees were nearing peak color – hues of yellow, gold, crimson, and green filled the air, all held tight by a low layer of clouds which came all the way down to the valley floor. The formidable clouds were ubiquitous and ominous – a clear and mostly unwelcome portent for the events yet to come on our voyage into the Sangre de Cristo Wilderness.
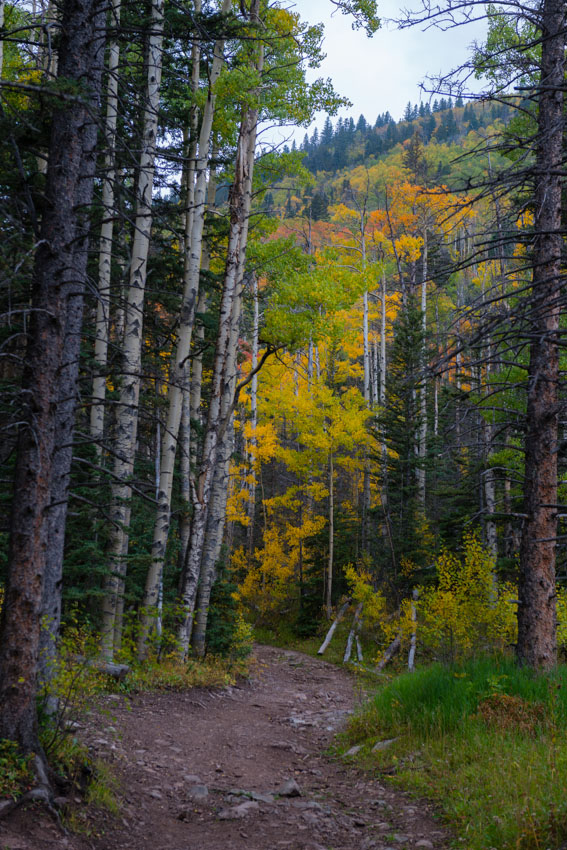
This was the third time I ventured up this particular trail, the first being on my ascent of Humboldt Peak in 2007 with my friend Ethan – the first 14er I climbed after a very long hiatus from climbing in my twenties and the first real shift towards a healthier lifestyle. The second time was during my visit last year as the Vice President of the Board of Directors for Rocky Mountain Field Institute (RMFI), the non-profit organization responsible for amazing conservation stewardship in the South Colony Basin including the construction and maintenance of the entire incredibly well-built network of trails leading to the 14ers in the area. Due to the popularity of this pristine and ecologically sensitive area, there are numerous campsites and social trails littered across the basin which have required a lot of hours of hard labor from RMFI staff, volunteers and Earth Corps students to clean up and maintain these sites and trails. If this basin is important to you in any way, I would urge you to donate to RMFI to ensure the area is available for the enjoyment of future generations. You can check out the amazing work they did in the South Colony Basin in this video:
Our hike up the old road was completely uneventful, having passed a few hikers on their way out, presumably there to enjoy the changing fall colors for the day. The wooded basin offered up a plethora of sensory delights – red and orange berries, earthy scents from the rotting leaves, fresh and clean air blown in by the weather system that had settled into the basin, and a humid wetness on the skin. Given the wet and stormy weather that had moved into the basin, our hopes of accomplishing anything more than finding a suitable campsite for the three days we would be there had dissolved and our focus was singularly placed on locating our temporary home. We joked about just staying in the basin forever, and how that might work – living in a cave in the side of the mountain, finding food, sewing clothing out of marmot pelts, and even speculation about other issues which caused us to laugh heartily.
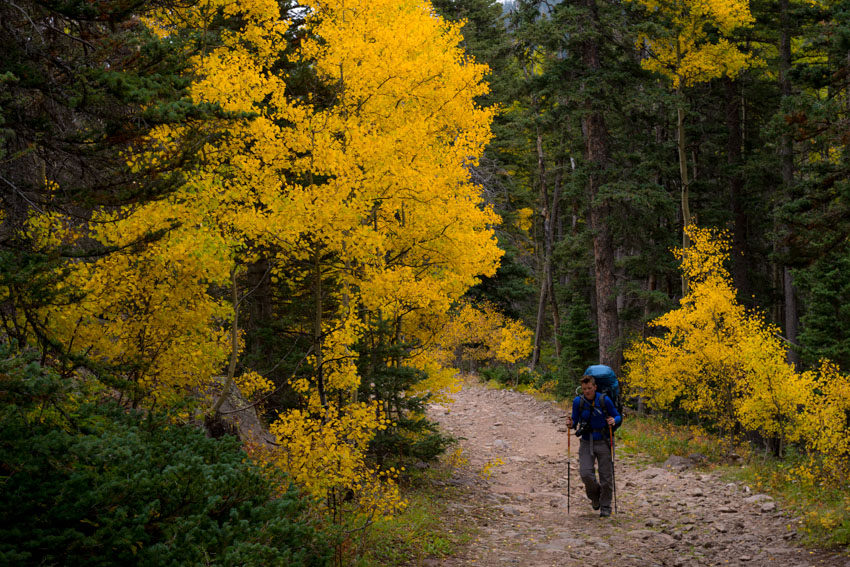
Every other time I had been into the basin I had taken the first trail on the right from the old upper 4WD parking lot, which is more direct and steeper than the trail going over the footbridge which goes directly to the trail leading up to Broken Hand Pass. For this trip, we opted to take the trail over the footbridge so we could easily find the connecting trail to Crestone Needle. Knowing from other adventures into the basin that the trails were connected higher up by way of a network of trails between campsites near where I took one of my favorite shots of Crestone Needle last year with a stream in the foreground, we decided to aim for that area to camp at. Even though Crestone Needle was completely hidden within the very low clouds, finding the location was easy since my image from that spot is burned into my memory, being one of my absolute favorite photographs of all time. We unpacked right there at the site just above the stream from this location and placed my tent on a dry and flat area near an old fire ring at the campsite. The tent site had cracks in the soil, indicating that this might be a place where water pooled; however, we understood from the weather forecast that we were to only expect about a quarter inch of rain over the next couple of days, so we felt safe to put our tent there. This turned out to be a horrible mistake!
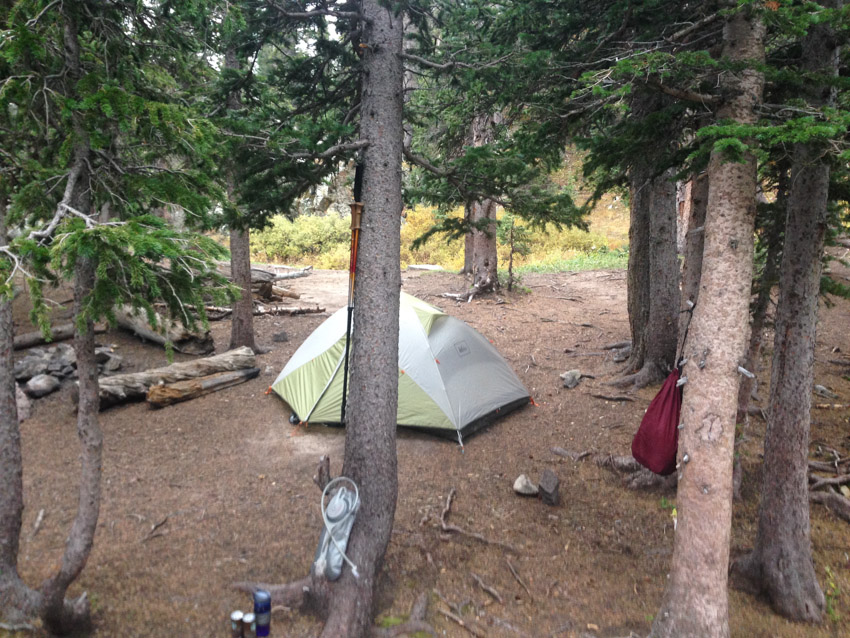
Shortly after getting our tent setup and our food hung in a nearby dead tree, the rain began. Hooray. I was somewhat dreading the rain, having spent the entirety of my previous backpacking trip in Colorado in a tent for four days below Jagged Mountain last September. I did not want a repeat of that trip, not even in the slightest; however, I welcomed the opportunity to catch-up on some much needed sleep and to spend time catching up with Sarah. Sarah took many opportunities to document our sleep adventure...
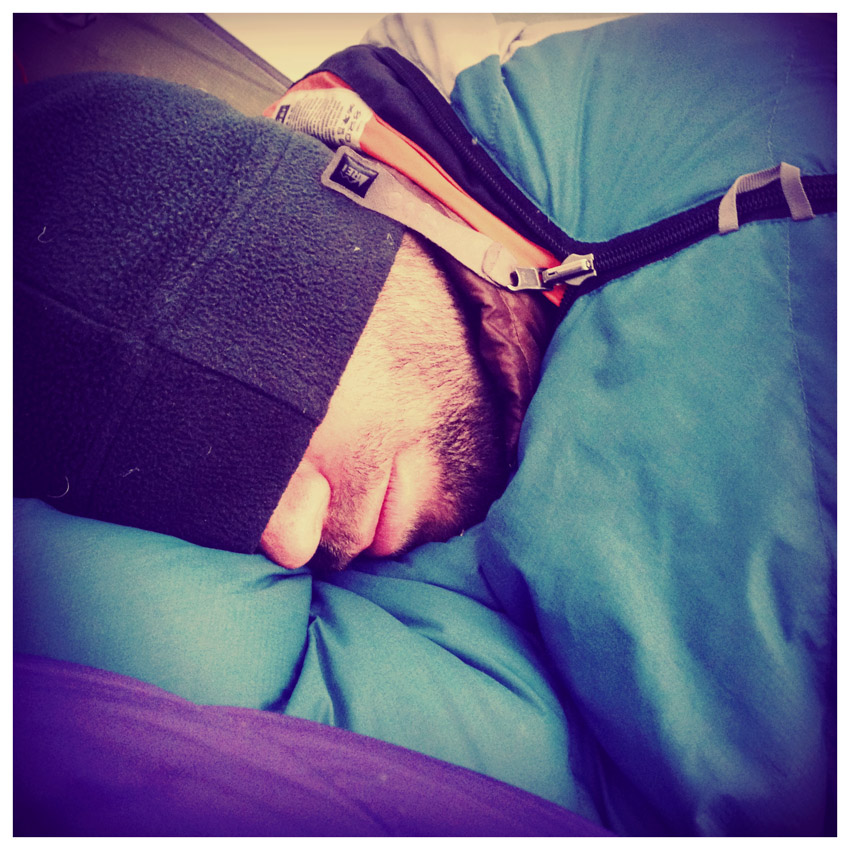 |
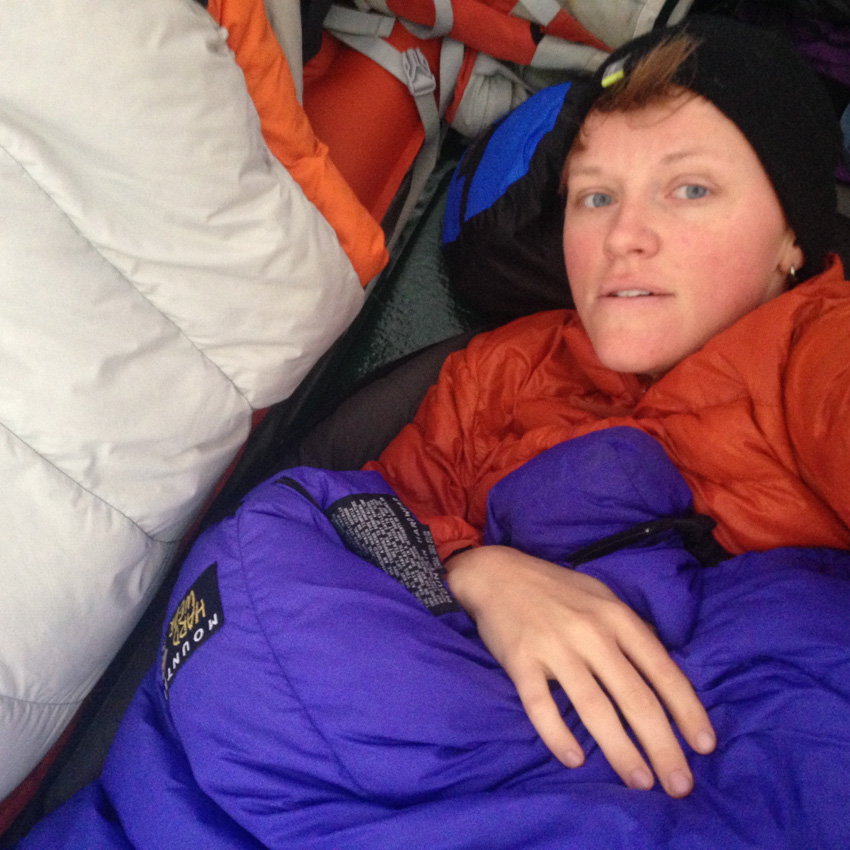 |
The rain and strong wind was unrelenting, a shock for sure. We kept an eye on our tent situation, finding that water had quickly begun to pool near and around the base of the rainfly. We napped off and on as the rain continued and in the early evening we began to take notice of the water situation with a greater level of concern. Sarah noticed that water had begun to seriously pool under the tent and we decided to take action, despite the fact that the rain did not subside.
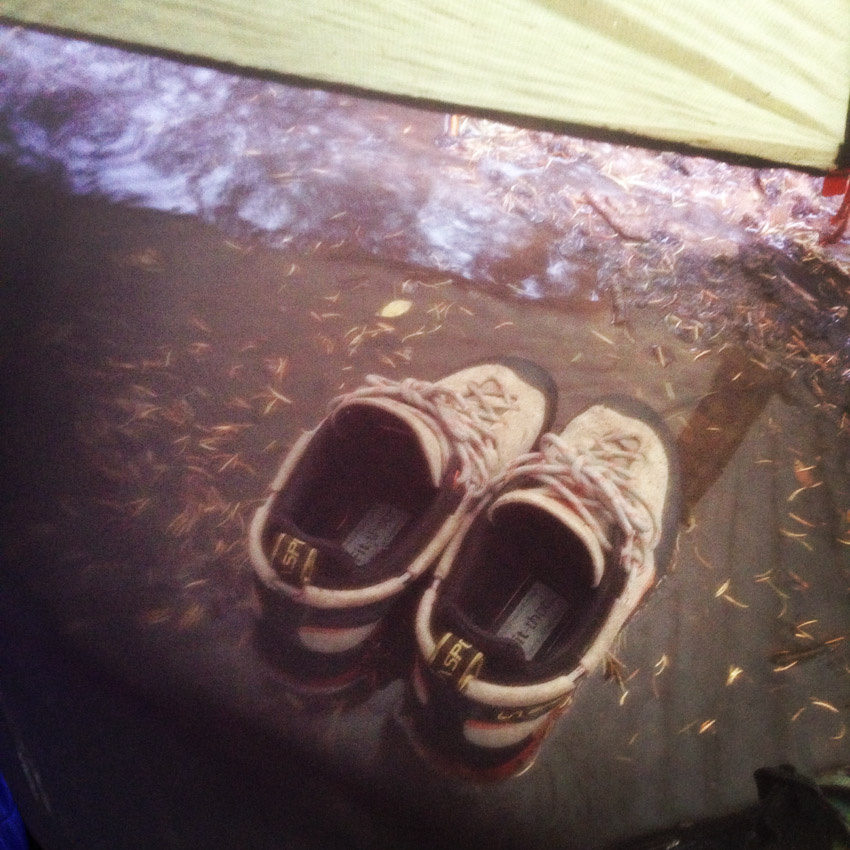 |
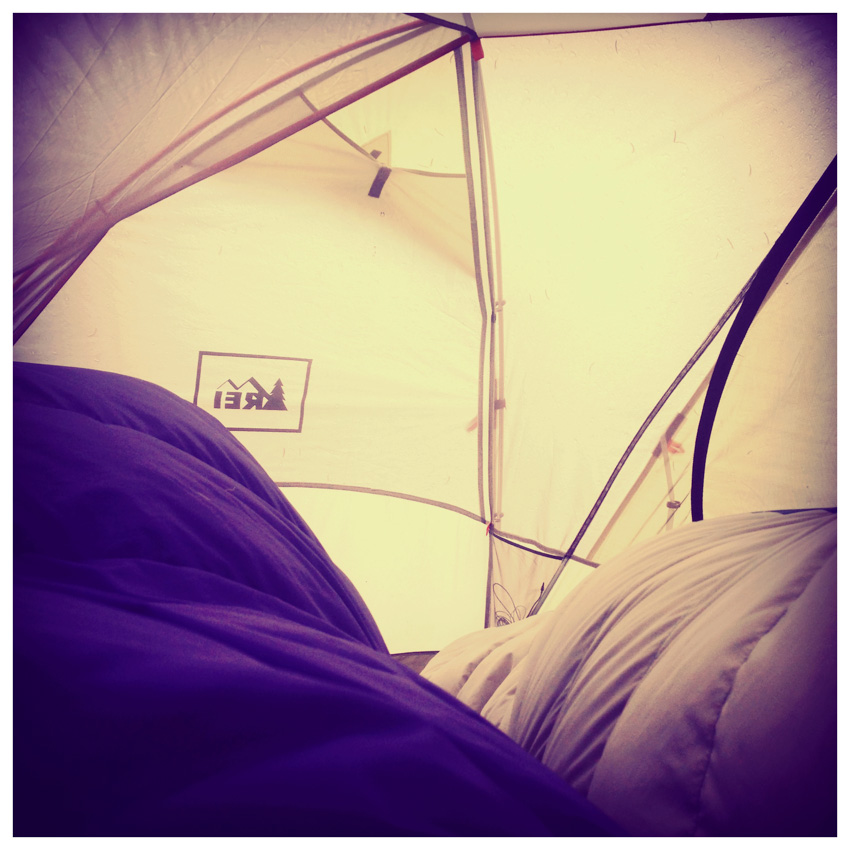 |
We hurriedly packed everything into our packs and relocated the tent down the hill under some trees on top of a nice soft bed of pine needles. Sarah documented the whole ordeal.
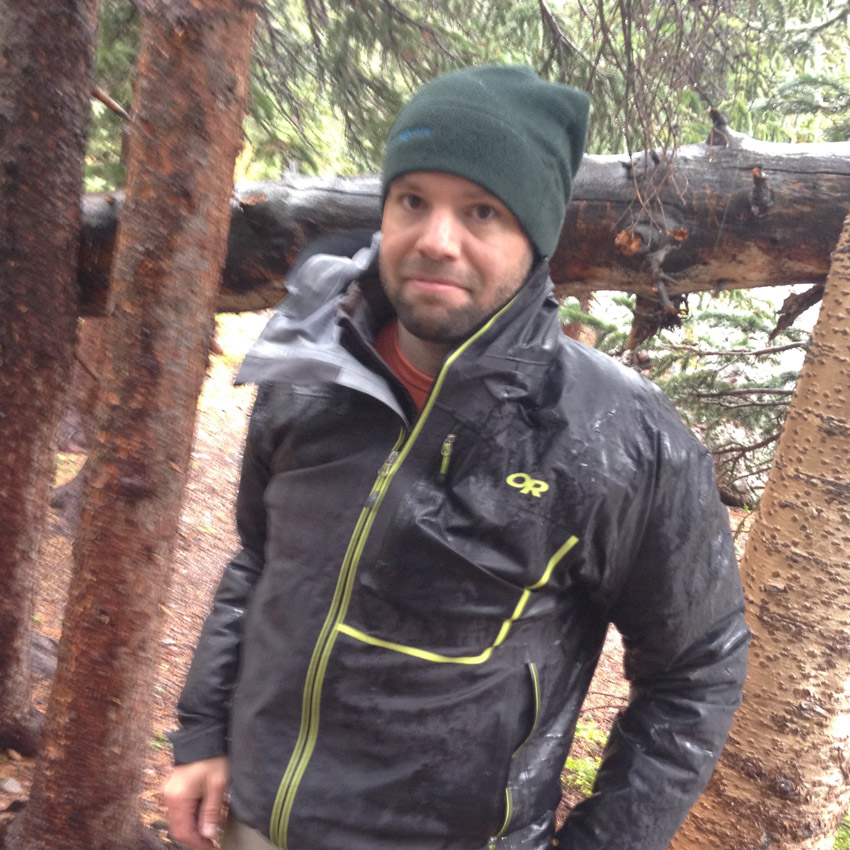 |
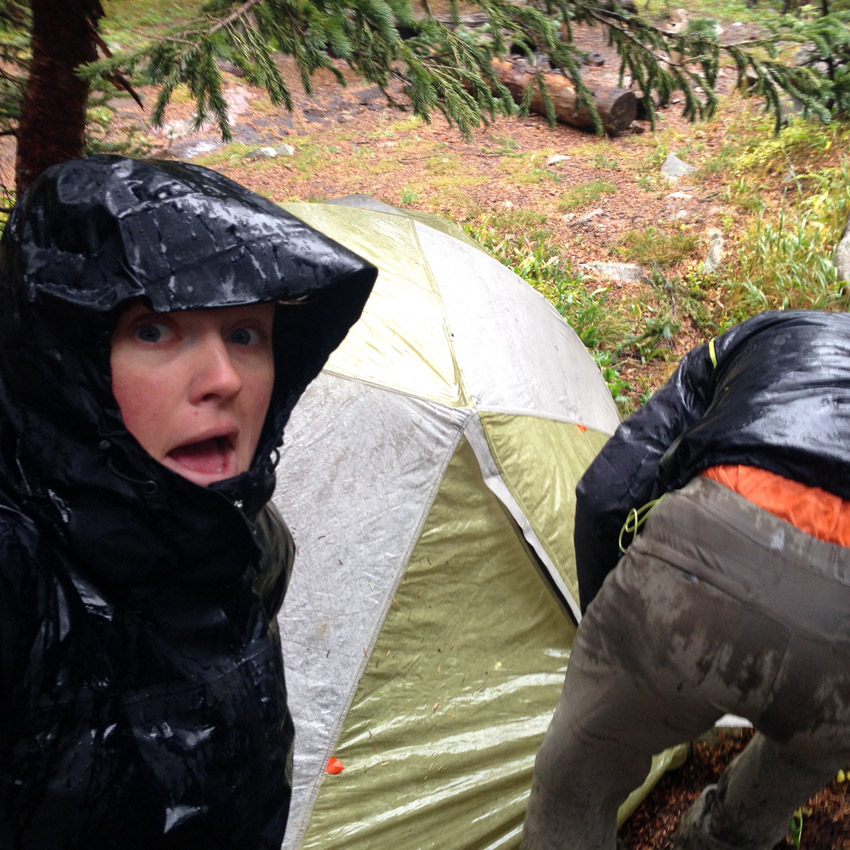 |
We felt quite lucky – even though the tent was on top of a lake of water; the inside had remained mostly dry! Consider this a tried and true endorsement for the REI Quarterdome – a truly versatile backpacking tent, not the lightest nor the heaviest tent around; however, it kept us dry and withstood strong wind without any problems. Our old tent's location now looked like this:
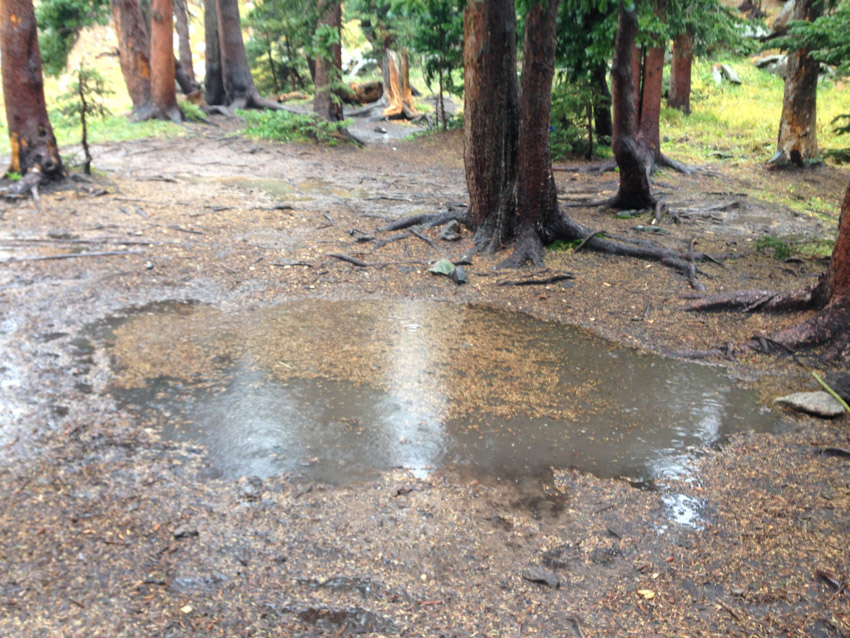
The rain stopped just long enough for us to heat up some food, which we took full advantage of, returning to our sleeping bags to stay warm. The valley was caught in some sort of weather system, trapping moisture, clouds, fog and wind in the basin and continually obscuring all of the peak right above us.
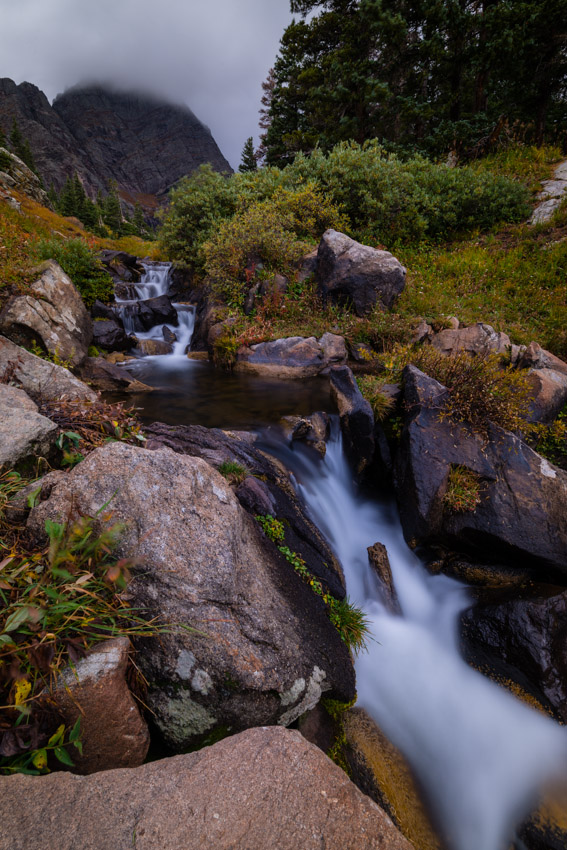
As darkness descended, we found ourselves in need of replenishing our water supply; however, Sarah’s water filter was not working, so we were forced to resort to using my old iodine tablets, which I keep in my first aid kit for such occasions. Drinking the iodine treated water brought back fond memories of working at Colvig Silver Camps in 2000 near Durango – I did not mind one bit. Here I am filtering some water in the rain.

We decided to set our alarm for 4 AM, hoping the rain would subside and allow for an ascent of one of the three 14ers in the basin. As we discussed our priorities for the trip, having climbed all of the 14ers already, I had very little to add, only hoping that Crestone Needle would be on the top of our list since it was my favorite 14er to climb. Sarah needed all three of the 14ers; however, she thought that she could save Humboldt for another trip and that Crestone Needle was high on her list. With that being said, we figured that aiming to climb Crestone Needle first would be a good idea... [Click Next to continue reading]
The rain did not subside and the wind increased in its fury through the night, rushing down through the trees in a cyclical pattern every 30-45 seconds in a violent yet harmonic nature, the sounds of the wind rushing through the pine needles creating a natural cacophony both aiding and preventing good sleep. 4 AM came and went without a break in the rain or wind, forcing us to sleep in, knowing we would likely have to scratch off at least one of the peaks from our list for the trip. Unfortunately, the weather did not subside until late in the afternoon, at which point we were both wearing from a lack of both caloric intake and physical activity; however, we decided to head up towards the upper basin and if we felt up for it, a climb of Humboldt. The basin was still mostly shrouded in clouds and fog; however, the hike up was quite pleasant, the cold and musky autumn air brushing our exposed faces, reminding us pleasantly of our sense of place and time.
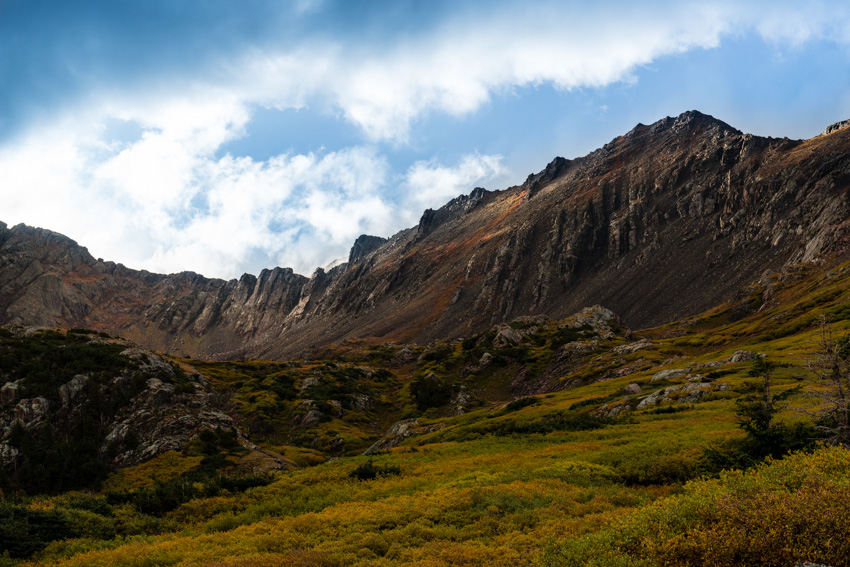
As we climbed further up into the basin, it became immediately clear to me that the conditions were not ideal for summiting Humboldt; however, the mixture of clouds, fog, and light would make for some pretty dynamic photographs from the lower slopes of Humboldt, looking down at both South Colony Lakes an out across to Milwaukee Peak, Broken Hand Peak and Crestone Needle, the upper third of which was still enshrouded in fog.
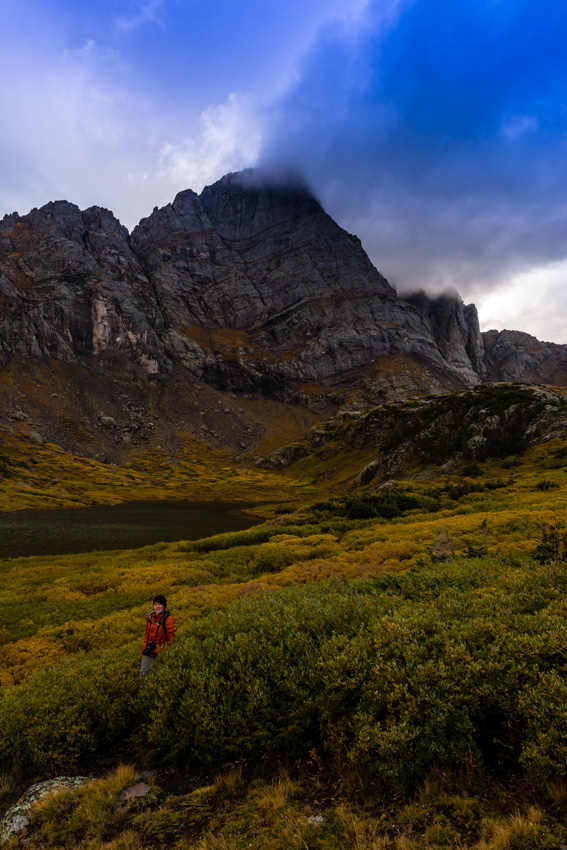
I found a perch on the side of Humboldt and waited patiently for the light to further develop across the basin from us, watching small holes develop in the clouds, revealing bits and pieces of the mountains and higher clouds painted with soft evening light.

I was completely engrossed in what was unfolding before us and was ecstatic to be there to photograph it.
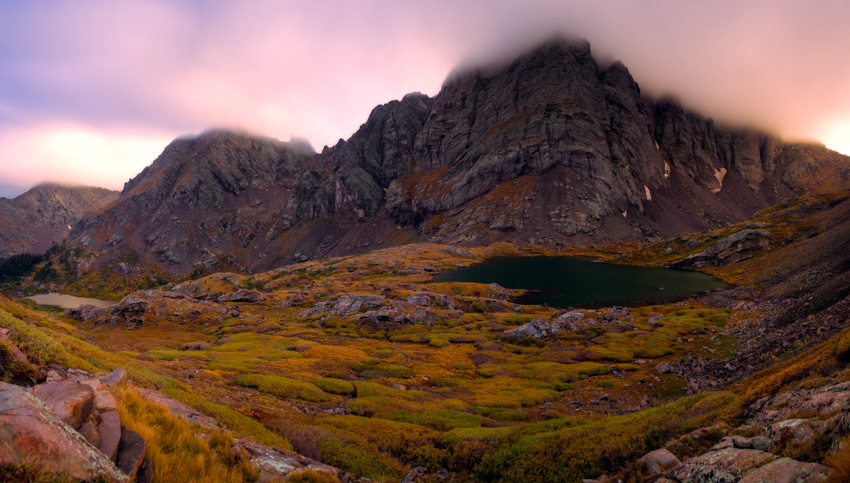
The light in the basin was pretty great, and I was quite pleased with the images I was able to take while huddling over my tripod in the cold wind.

The golden hour peaked quickly and left me with one final opportunity to shoot the light over on Milwaukee Peak and Broken Hand Peak.

After capturing the magic, we headed back down to our campsite where we were greeted with a ton of strong wind and more rain. We set our alarms for O-dark-30 and hit the sack, hoping for better weather on Tuesday... [Click Next to continue reading]
Monday night and Tuesday morning will filled with lots of strong wind, which came in predictable waves down the valley and through the pine needles above. Sleep was a hit-or-miss proposition. The alarm went off. More wind. I stepped outside the tent, no sky or mountains were visible and it was cold as hell. We decided to go back to sleep for a bit.
Finally, around 8 AM we got geared up and made a run for Crestone Needle. This was a very late start by our standards; however, we felt as though the weather could not get much worse, so why not give it a try. The plan was to head for the top of Broken Hand Pass and re-assess the weather from there.
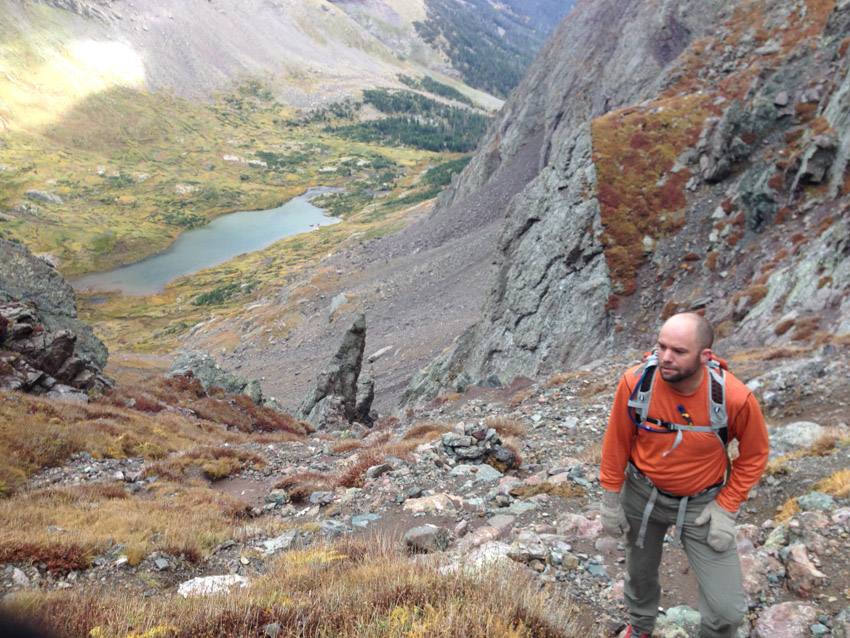
We made great time up Broken Hand Pass, stopping for nothing. Once on top, the weather was amazingly surreal as well as a little discouraging. Fast moving clouds, driven by the strong wind, were rushing from down below on the eastern side of the ridge and up and over us and Crestone Needle. It was quite a sight!
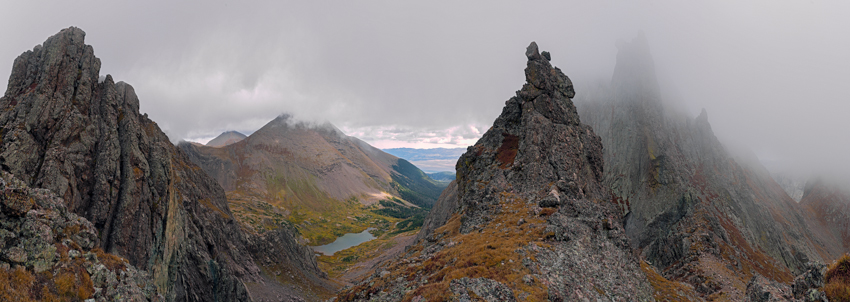
The air was thick with moisture, but at no point were we concerned about precipitation. It was chilly, but nothing terribly unbearable. We decided to press-on. Having climbed Crestone Needle once before, I was well equipped mentally for what was to come. I was confident we could find out way up and back down without incident. We had both studied the route again and had very few doubts that we could not reach the top safely.
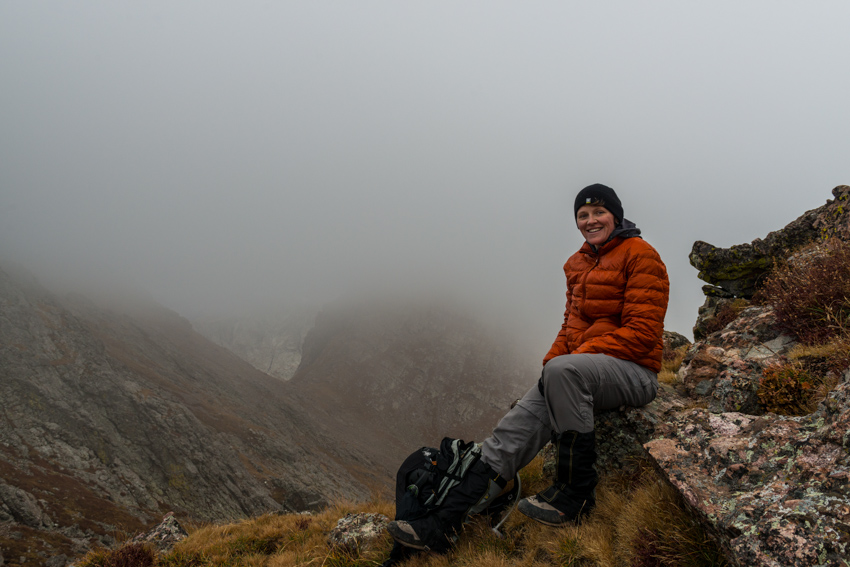
Crestone Needle was not visible through the thick, fast moving clouds, but it did not deter us. If anything, the insane weather made the experience even more epic.
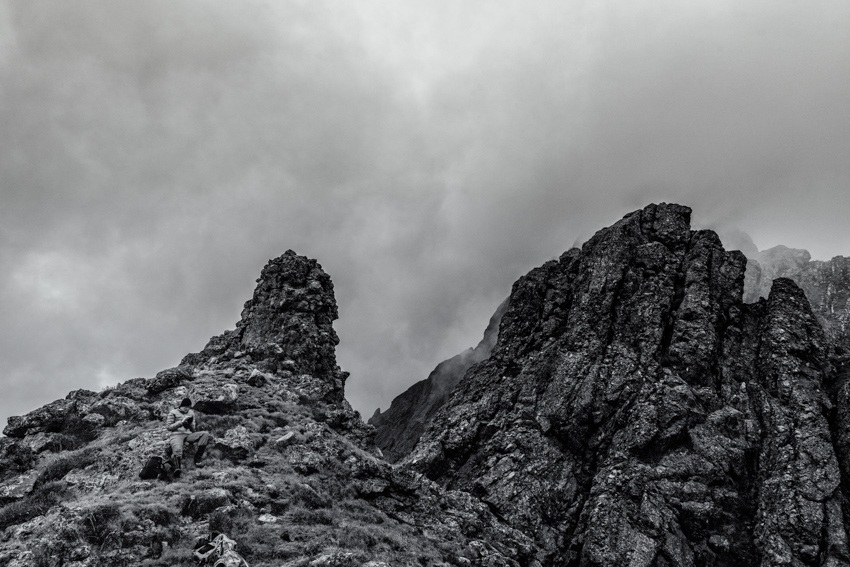
The garden of rock before us was really amazing to see again. At this point, I put my camera away to free my hands up to do the real climbing.
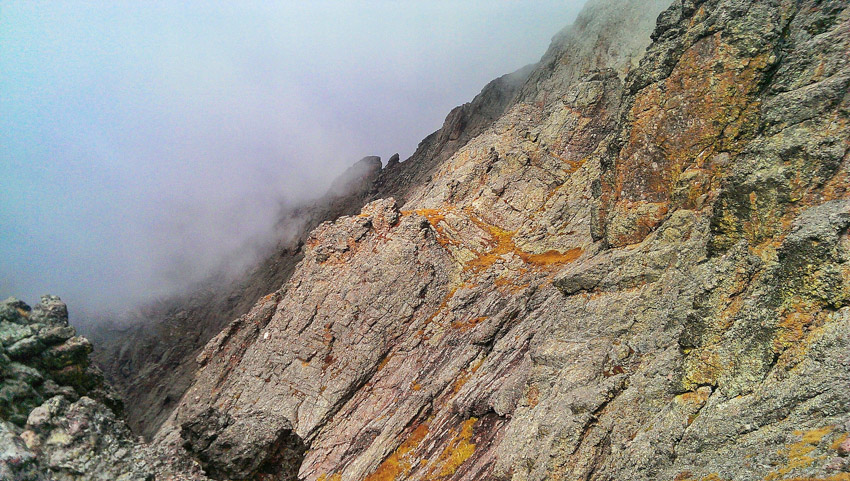
We took one last look down at Upper Colony Lake and Humboldt Peak before beginning the adventure up the fun parts of Crestone Needle.
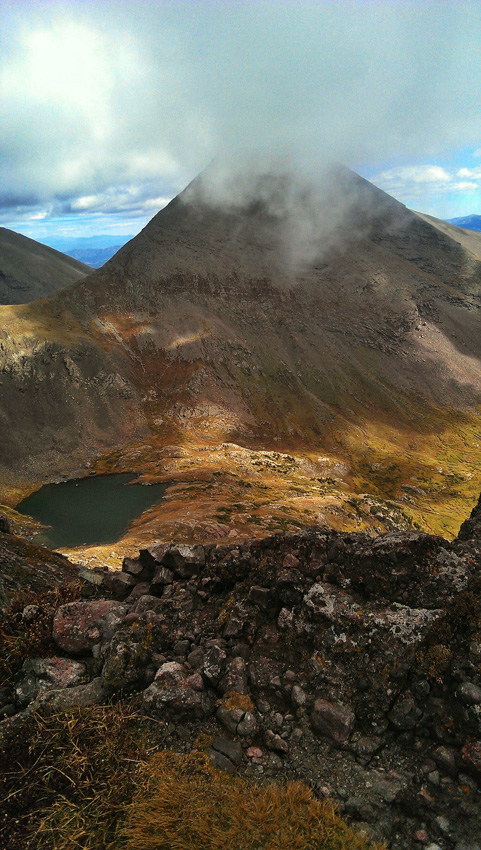
There is nothing like being on the side of Crestone Needle. Something about the quality and steepness of the rock, I immediately was swept back to 2009 when I had climbed it with Terry Mathews (RIP). Sarah and I reached the infamous dihedral which signals the typical crossing over to the west gully. We decided to stay in the east gully for the class 4 variation, which certainly did not disappoint! After Broken Hand Pass, I did not shoot a single photo with my camera on the way up, so all the photos were taken with either my HTC One or Sarah’s Iphone 5.
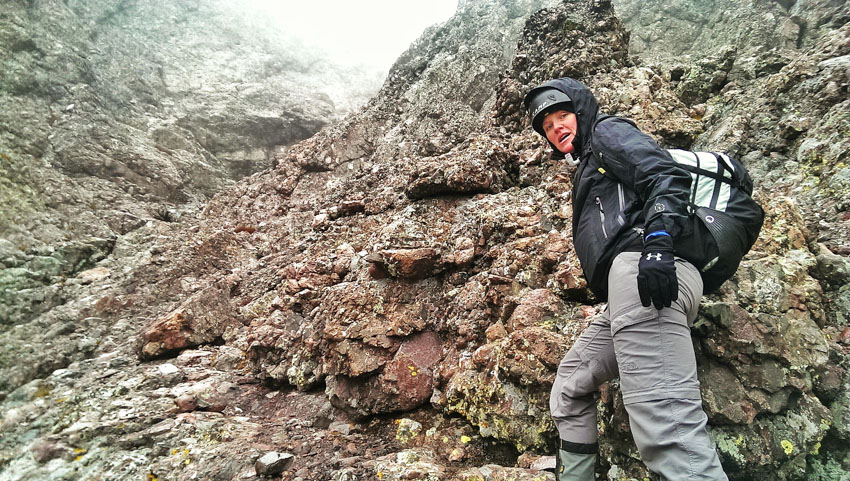
It was a real joy climbing this beast with Sarah with me. Having tackled many difficult peaks with Sarah in the past, including the Maroon Bells, Pyramid, Snowmass, Hagerman, and the Chicago Basin 14ers.
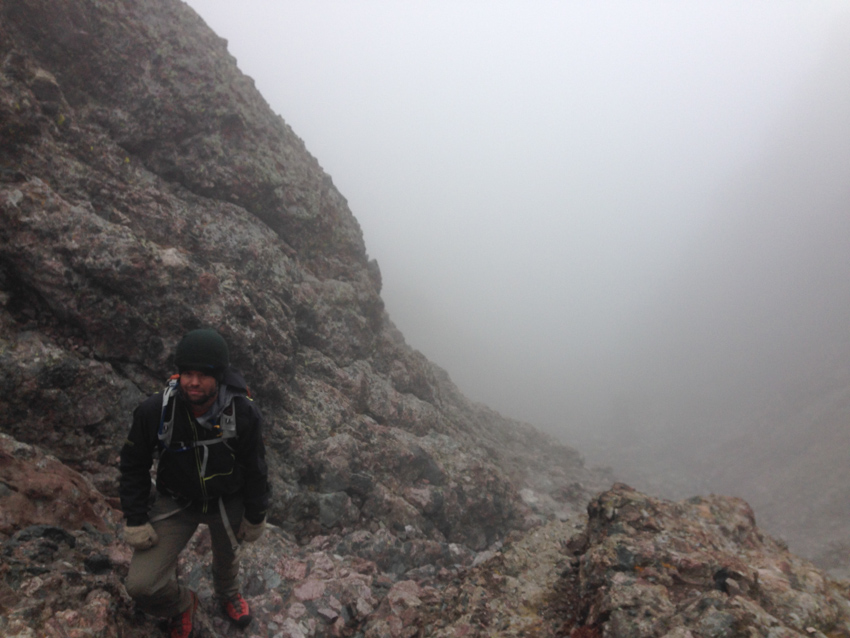
The class 4 variation up the east gully was quite a pleasant challenge on the way up, but I was getting concerned with route finding and safety for the descent. Visibility was decreasing as we climbed and the terrain was all starting to look alike.
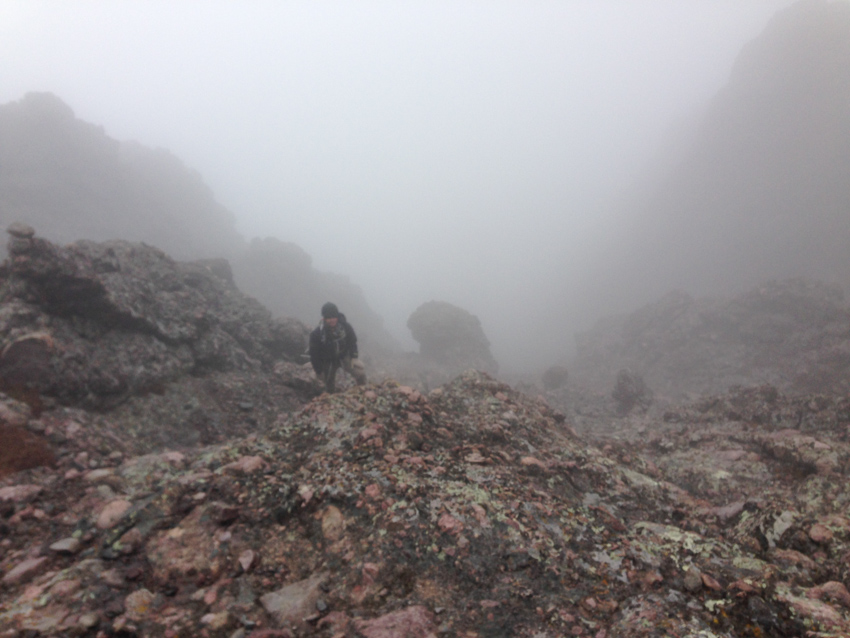
Fortunately, we were able to identify several cairns on the way up, including some duct tape on a few rocks here and there (small squares, which were quite nicely visible from above). Sarah was snapping some awesome shots of me on the way up, including this one of me negotiating the summit ridge.
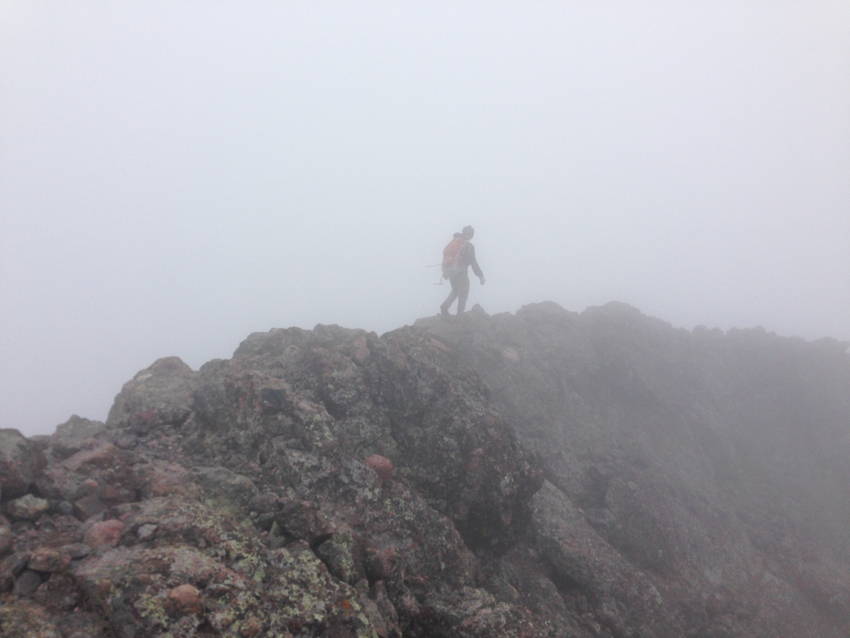
We reached the summit block in quick time and scrambled over the very skinny connecting arête to claim the summit. We had absolutely zero visibility and opted to stay there for only about a minute or so. We head right back down the way we came, following the cairns and duct tape we had seen before. The upper 200 feet of the east gully was pretty easy down-climbing; however, it got really dicey after that. We tried as best we could to stay on the route we came up on and for the most part were successful in that. It was surprisingly easy to remember the way down even though we could not see much. I was pretty happy we stayed in the east gully, as trying to find the switching point from west gully to east would have been difficult in the fog. I am not going to lie though, the climbing here was intense. The rock was wonderful, but it was quite exposed and surely a fall would have been fatal.
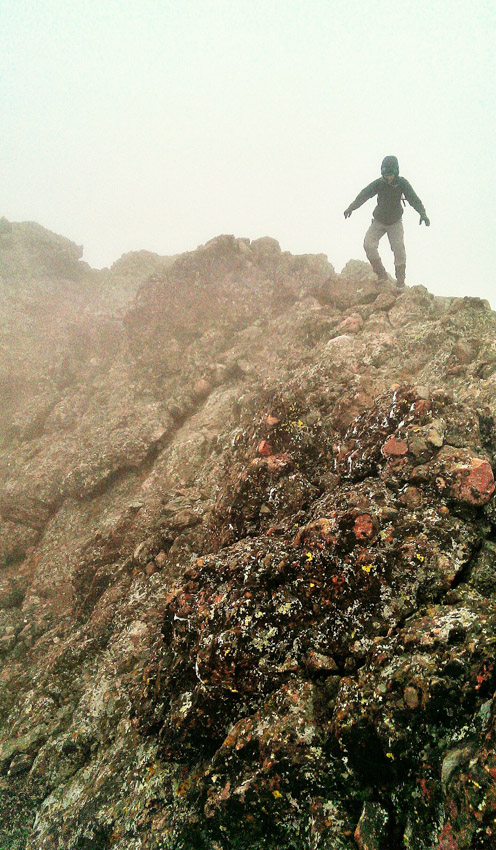 |
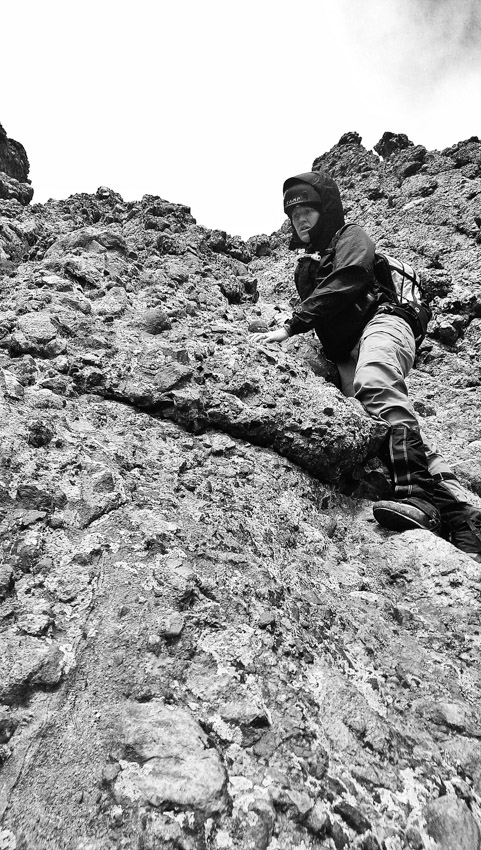 |
After many tough sections, we finally made it back down to the easier parts below the dihedral and made our way back towards Broken Hand Pass.
Sarah and I were quite excited about our successful climb of a beast of a mountain in whacky weather conditions.
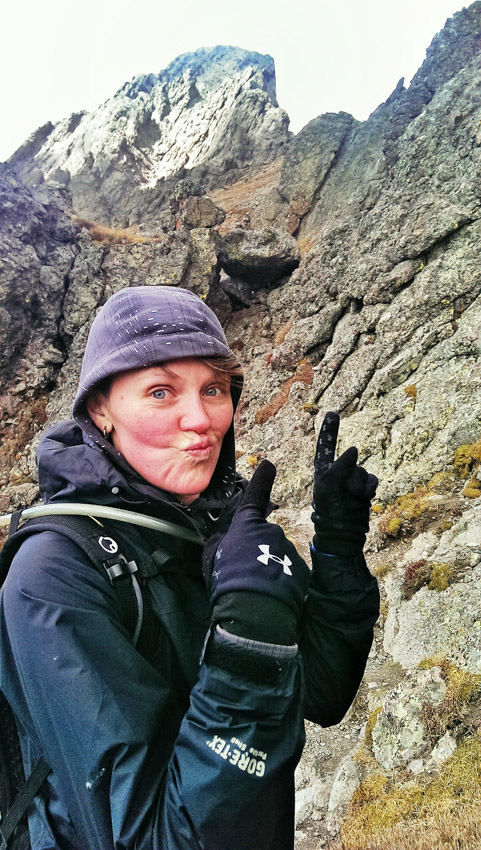
The clouds were breaking up a little and revealed all of the awesome peaks to our south and west, including Broken Hand Peak (at left).
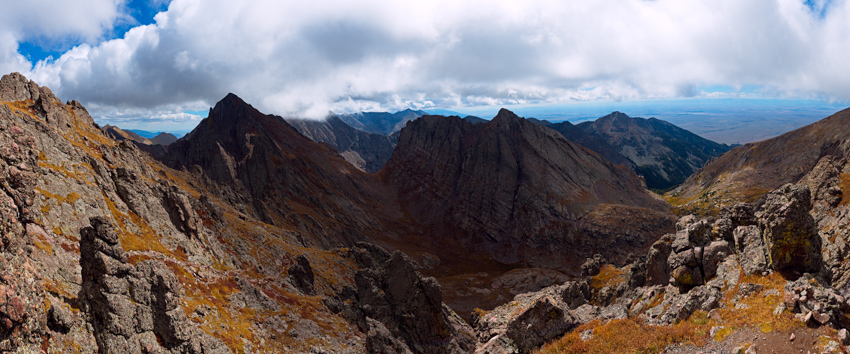
What a rush! Just what the doctor ordered for me – an awesome day climbing in the Sangre de Cristo Mountains! On our way down Broken Hand Pass, we encountered a ton of those funky spikey flower plants called Frosty Ball Thistle, and I just had to get some photos of them with the back light coming through.
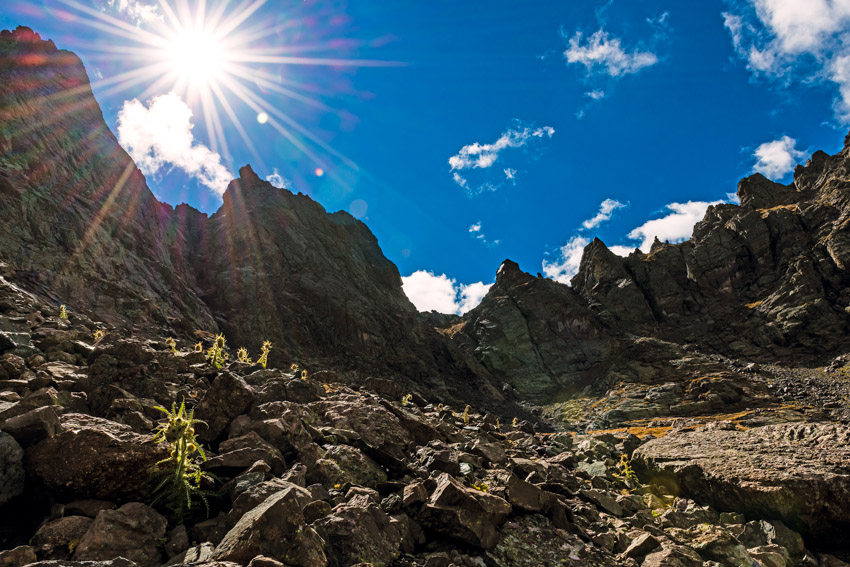
The hike down from Broken Hand Pass was totally a joy, mostly due to the amazing trailwork provided by RMFI. Upon reaching the main trail, we celebrated and enjoyed the unobscured views of Crestone Needle for the first time.
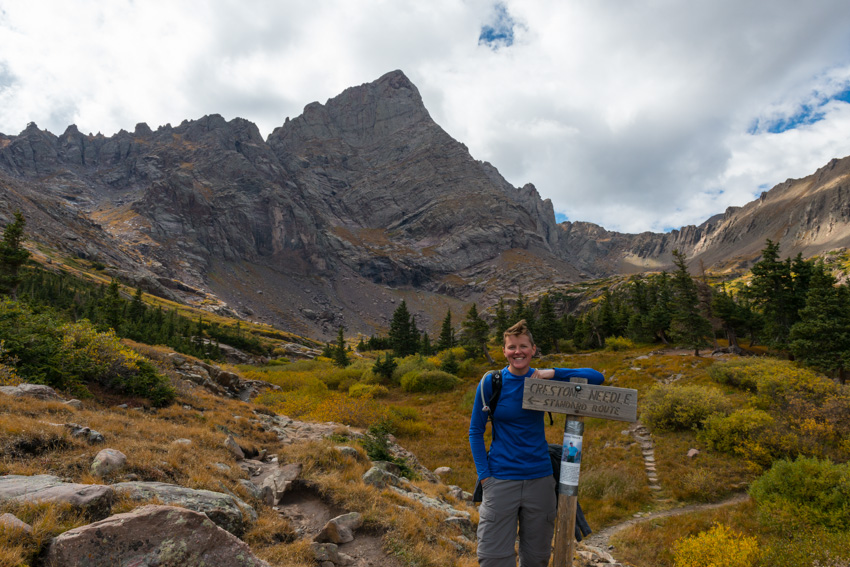
I stopped one last time on the way down to get a black and white shot of Crestone Needle, which I think turned out quite well.
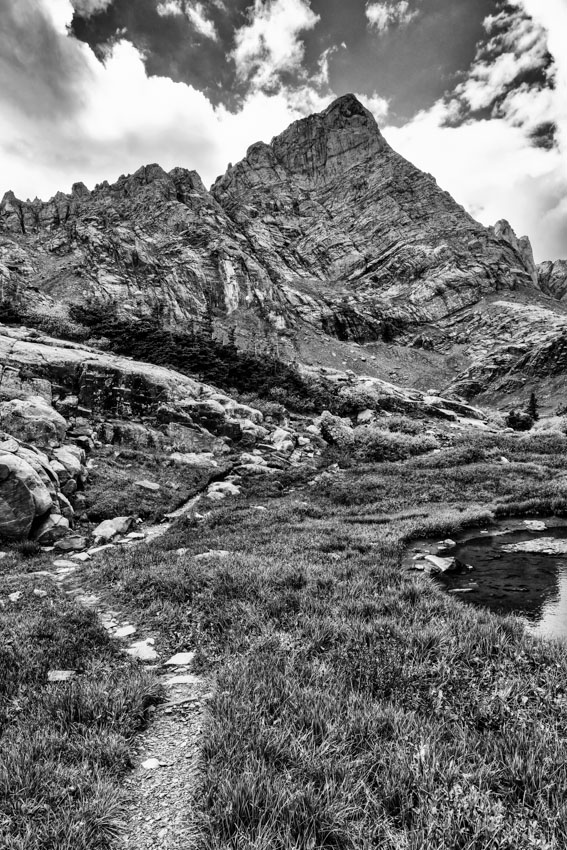
We made it back to our campsite and began to pack up. I wanted to get one more parting shot of Crestone Needle using a ND Filter, so I set it up and captured a mid-day shot of the flowing water in front of Crestone Needle.
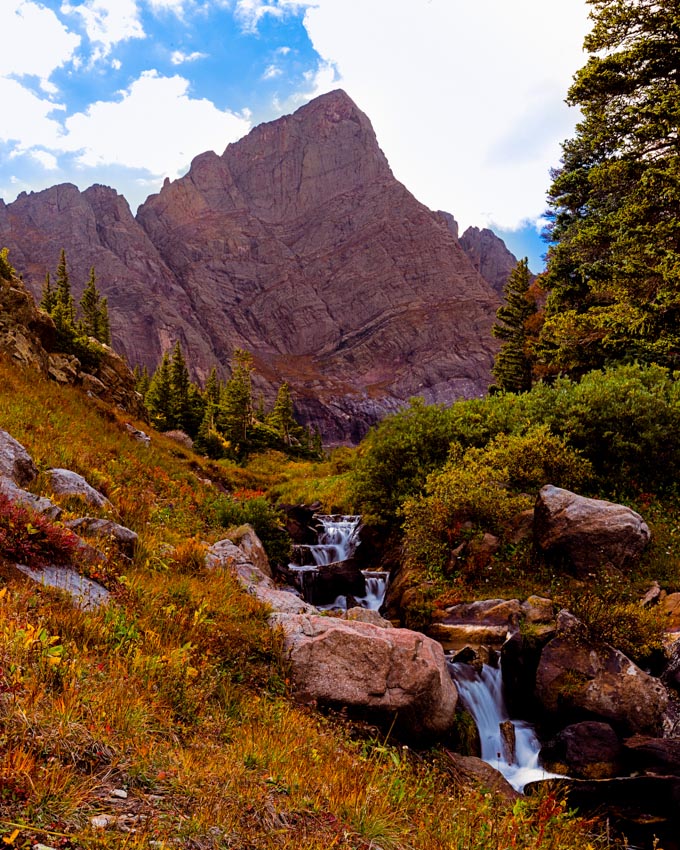
On the way out, we encountered all kinds of awesomeness, including several deer and some really friendly birds that were super photogenic and happy. What a lovely basin. I stopped one last time to get a a shot of the trees on the lower part of the trail before we go back to the car.
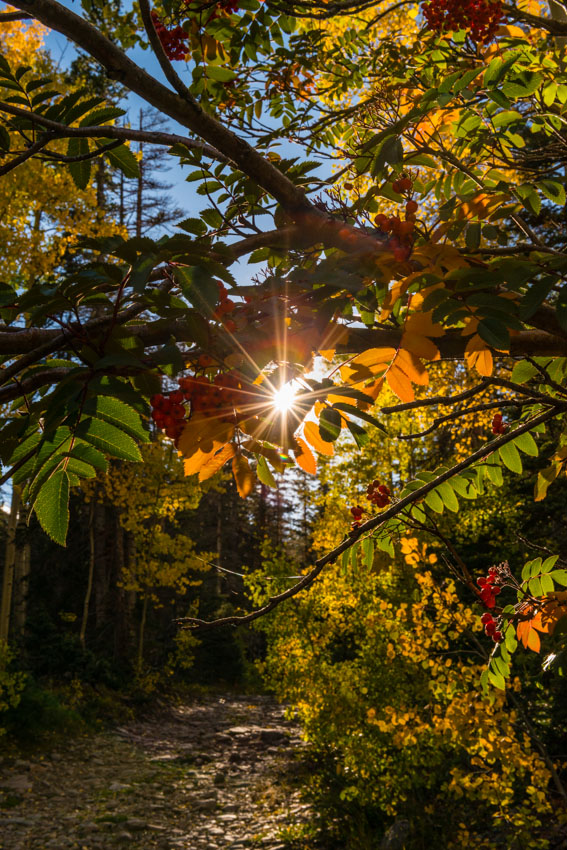
Upon getting back to the car, we found the bag of raisins I had left in the cup holder with a hole in it and lots of shavings around it - apparently a mouse had gotten into the vehicle and helped itself to a helping of raisins. Gross! We drove out carefully on the really horrible South Colony Basin road and enjoyed an amazing sunset over the Crestones to the west of us. A great ending to an amazing day.
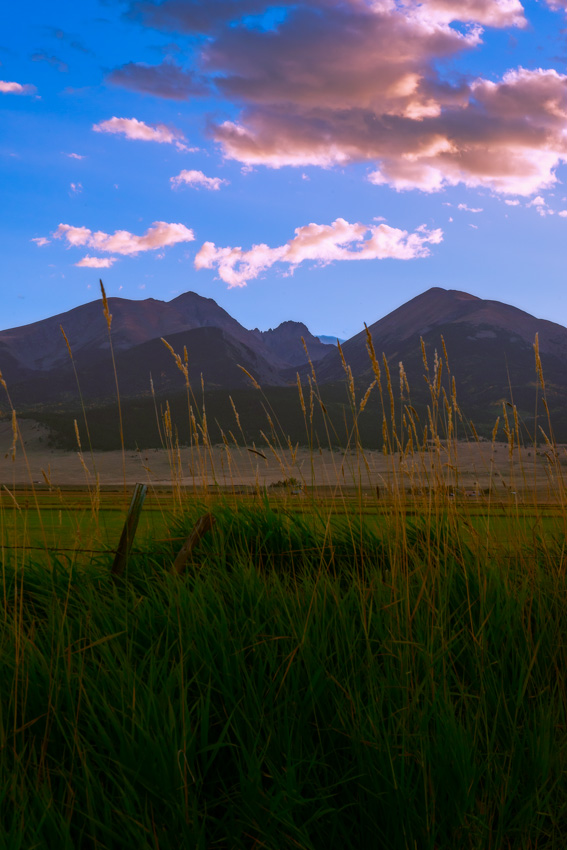
I ended the trip with a nice panorama of the Sangre de Cristo Mountains taken from Horn Creek Road just south of Westcliffe.
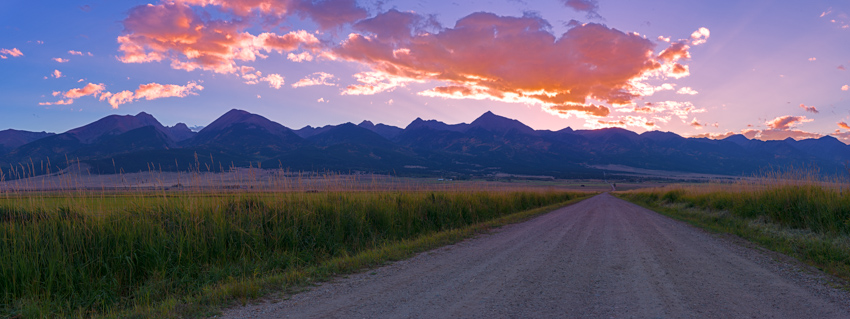
... [Click Next to continue reading]
I got up very early the next morning to do a fall colors photography shoot and birding expedition with my mom. We left the house around 5 AM from Colorado Springs and made our way up to Wilkerson Pass. The early light on the peaks to the west was fantastic, although I still would have loved to have some clouds! Spinney Mountain Reservoir was a nice element between us and Mount Princeton above it. From left to right - Antero, Princeton, Yale, Columbia, Harvard and Buffalo Peaks. Awesome.
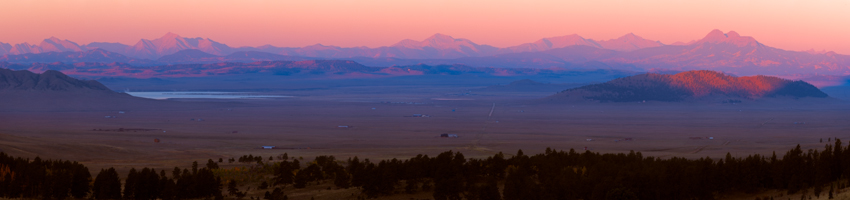
The plan was to head to the St. Elmo area south of Mount Princeton to photograph the fall colors and keep our eyes out for birds as my mom is very into birding. On the way through South Park, we located a really awesome Great Blue Heron feeding on fish in the mist above the South Platte River.
We made our way up towards St. Elmo in no time at all and were immediately rewarded with awesome color on the hillsides around us.
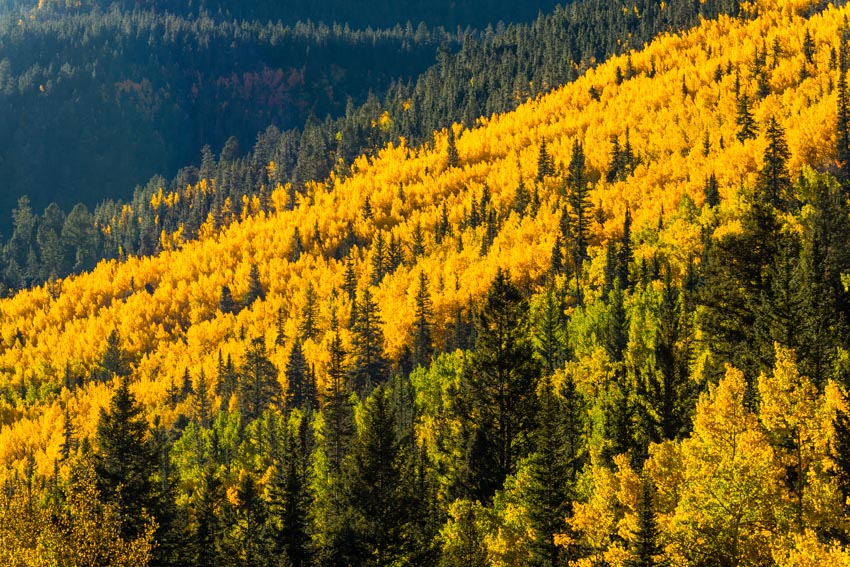
I saw an amazingly photogenic aspen grove off the road and had my mom stop the car, where I spent the next 30 minutes shooting the awesome light and color in the aspen grove.
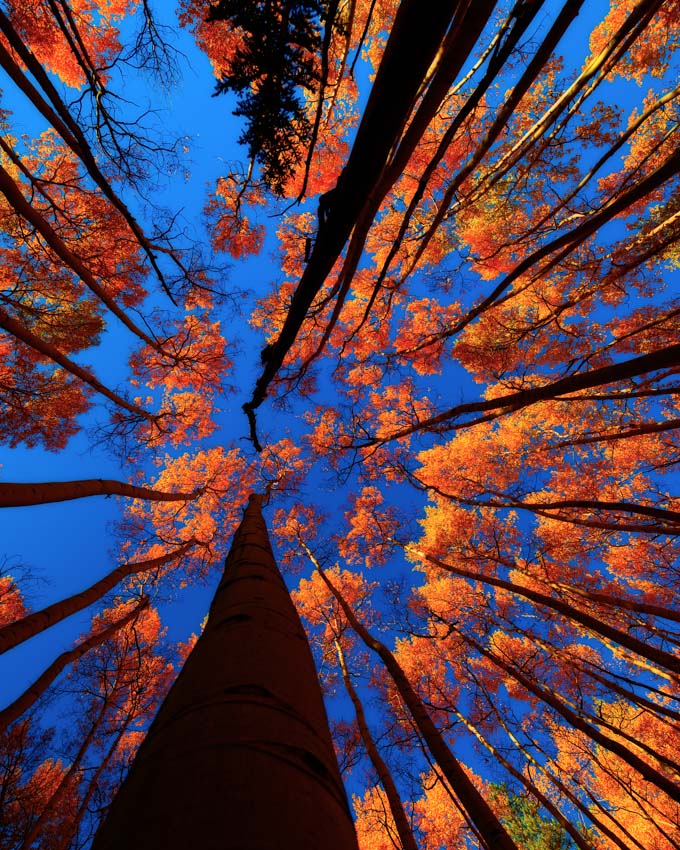
The grove afforded me some great opportunities to try out new techniques and processing concepts that I've been wanting to try, including this abstract use of motion blur and aspen trees.
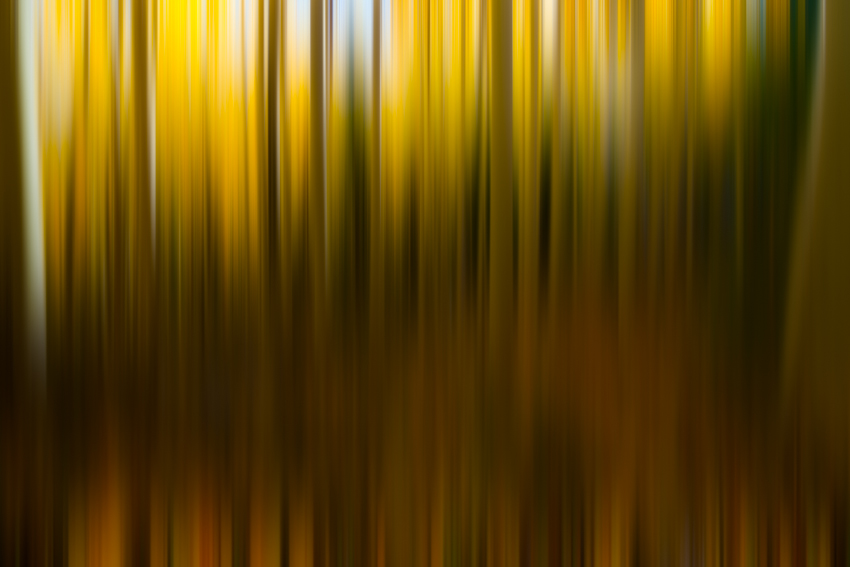
I fell in love with this aspen grove, and could probably shoot fall colors in Colorado for days on end without blinking. This was probably my favorite shot of the whole trip, and I immediately made it available for print purchases (you can click on the photo to learn more about that).
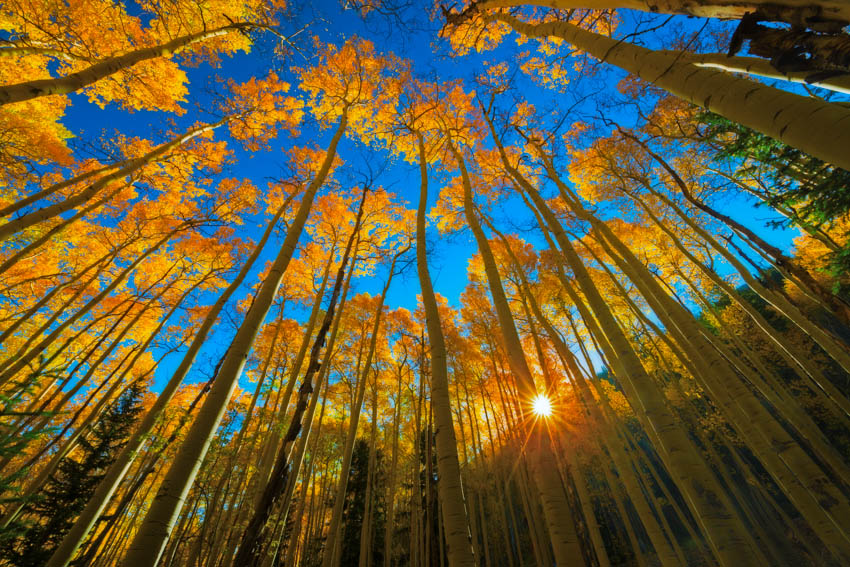
I also found this super cool pine tree covered in yellow aspen leaves that drew my attention and reminded me of a Christmas tree.
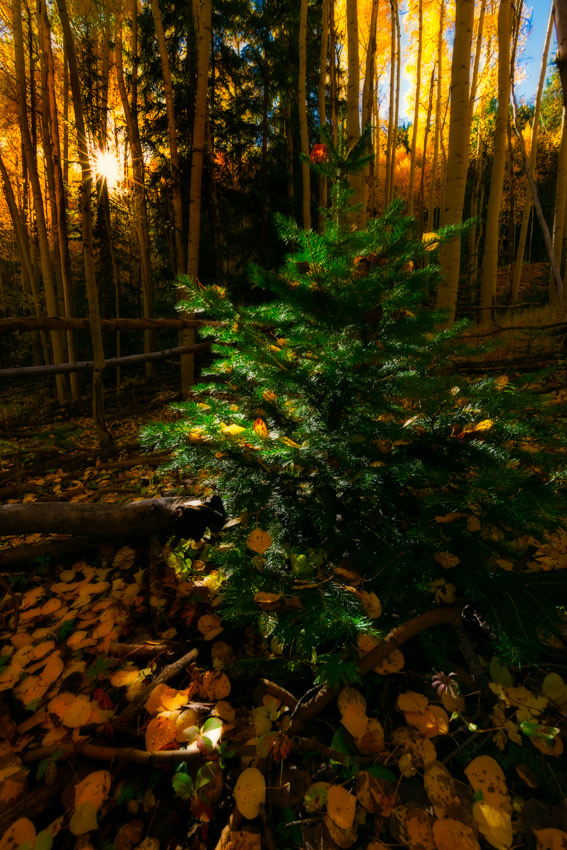
We finally made it to the town of St. Elmo and stopped for awhile to enjoy the fresh crisp air and fall colors.
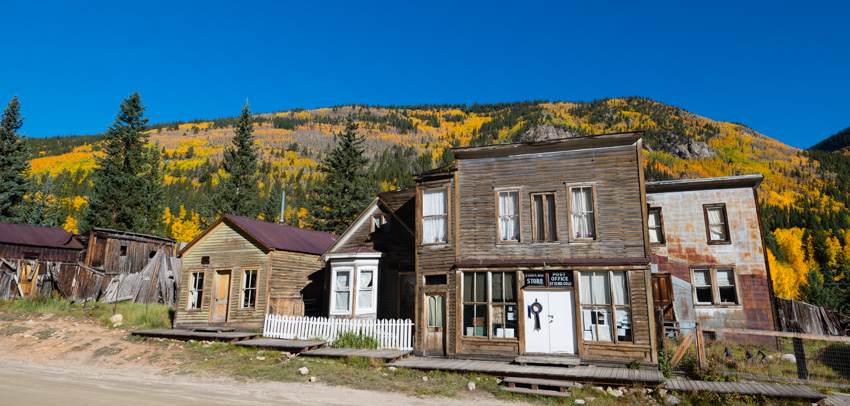
I found these awesome cabins further into the town and thought they were the perfect forground to showcase the area and the fall colors.
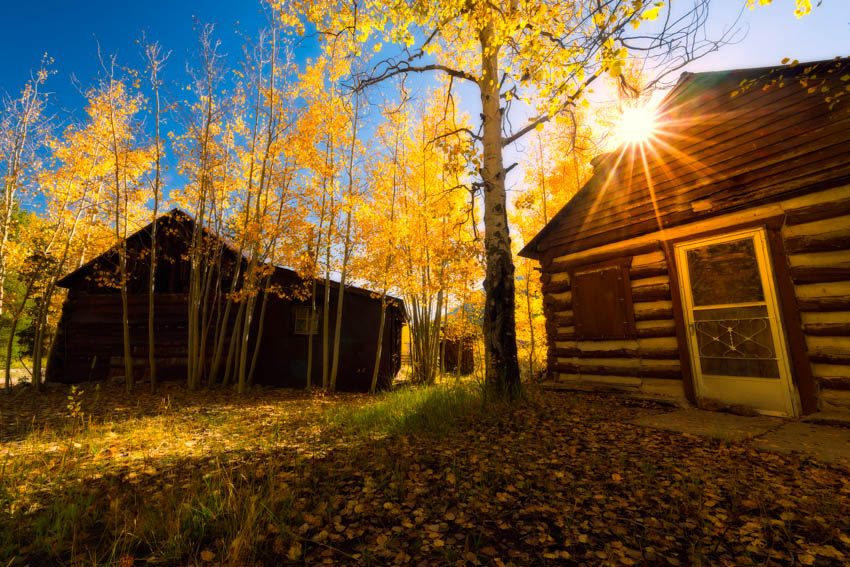
I had a good time using my 70-200 to pick out some patterns in the trees in the hillside across the way from St. Elmo, it was quite fun trying to find the best compositions.
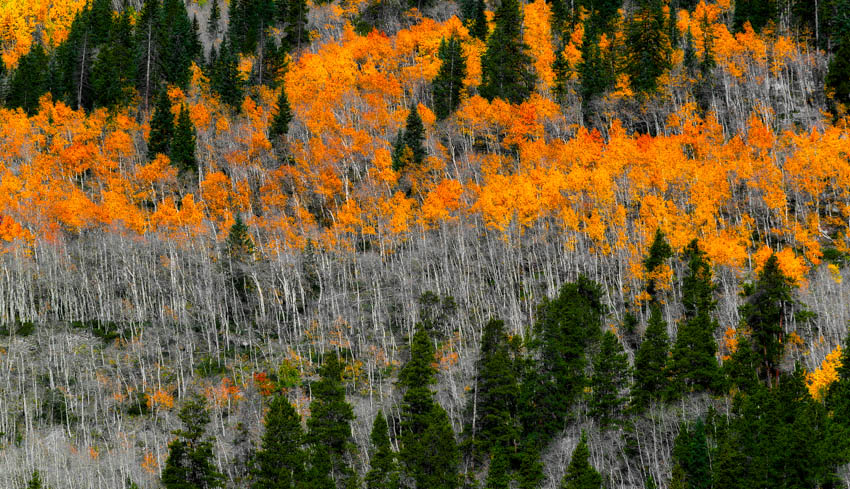
Perhaps my second favorite shot of the day was of this huge mountainside filled with aspen trees changing colors, with an old mining structure anchoring it at the bottom of the frame. So beautiful!
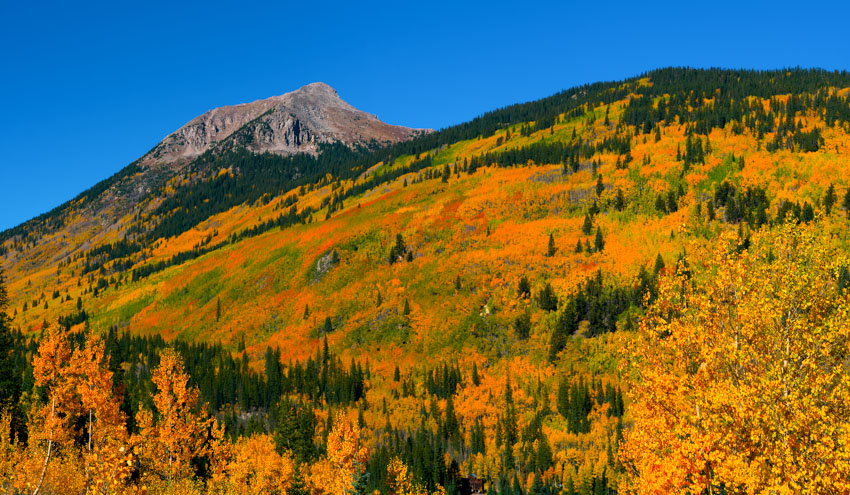
I found another great aspn grove to try out another abstract motion technique as well.

My mom and I decided to leave the St. Elmo area and head over to the Buffalo Peaks area It was a nice drive up into the hills and we were greeted with many wonderful changing fall color scenes.
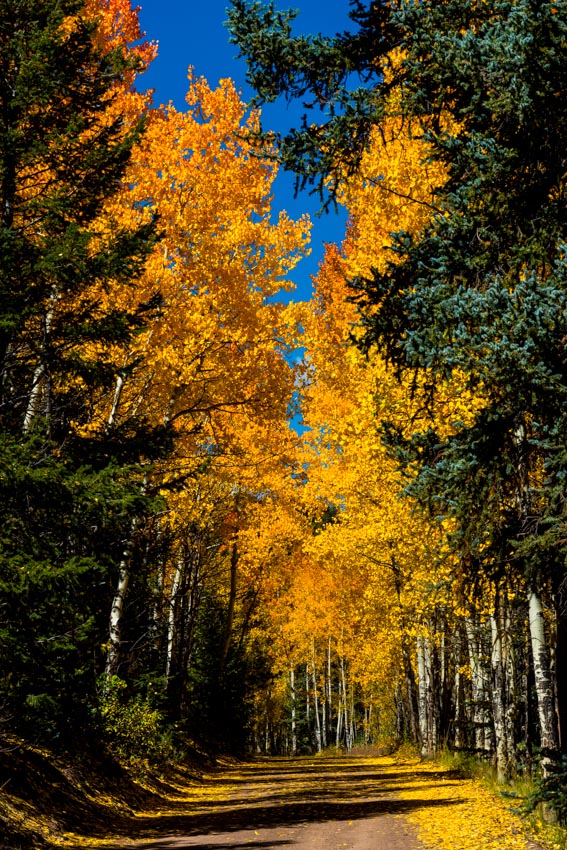 |
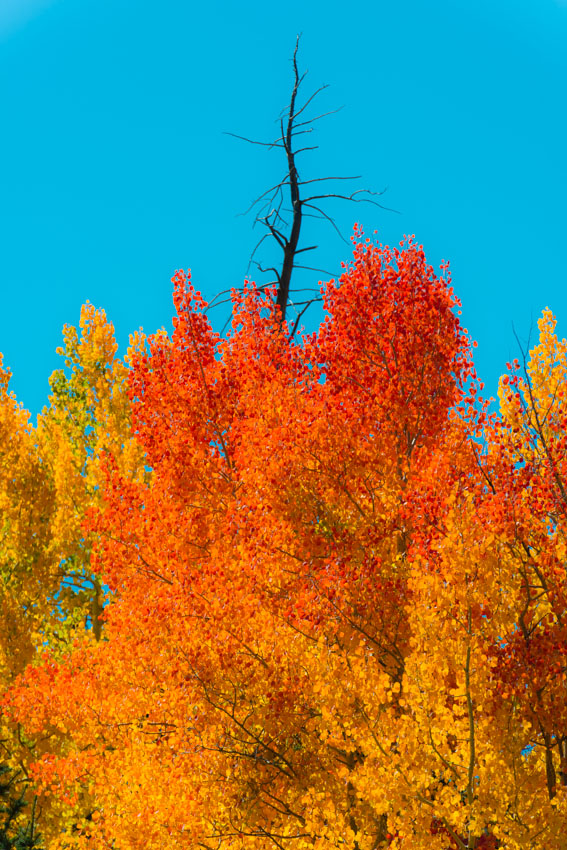 |
I was happy to find a nice vantage to snap off this huge panorama of the Buffalo Peaks with the changing fall colors featured prominently.
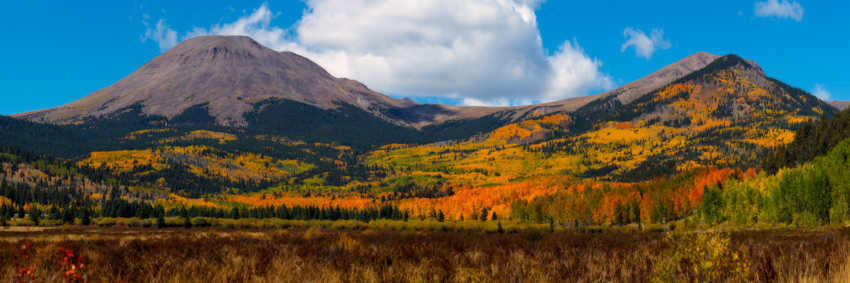
We also found the foundation of an old cabin here and it made for a nice foreground feature.

I was also happy to get my mom to get into a self-timer photo with me with the Buffalo Peaks scene behind us in the harsh mid-day sun (can't always shoot at the golden hour, right).
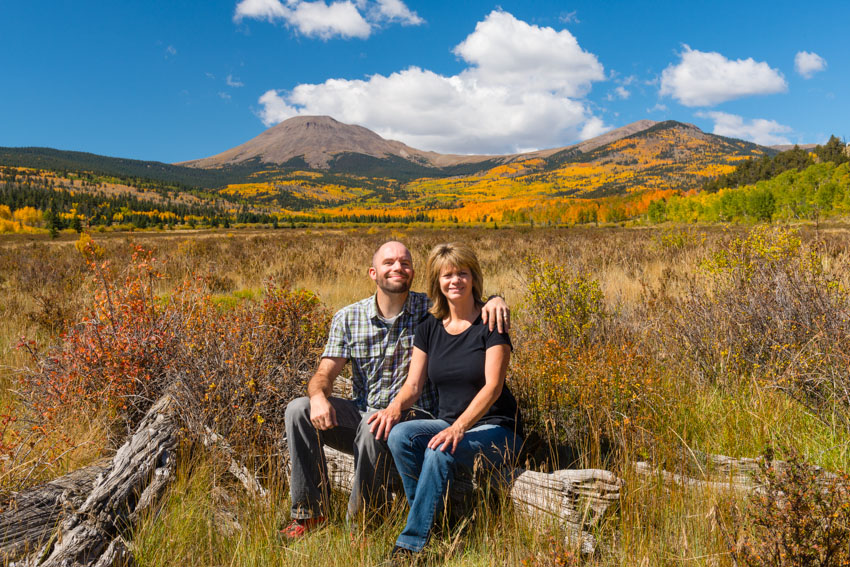
On our way out, I stopped one last time to shoot this telephoto panorama of Highway 285 and Antero Reservoir with cattle and old cabins in the scene. What a pretty day!
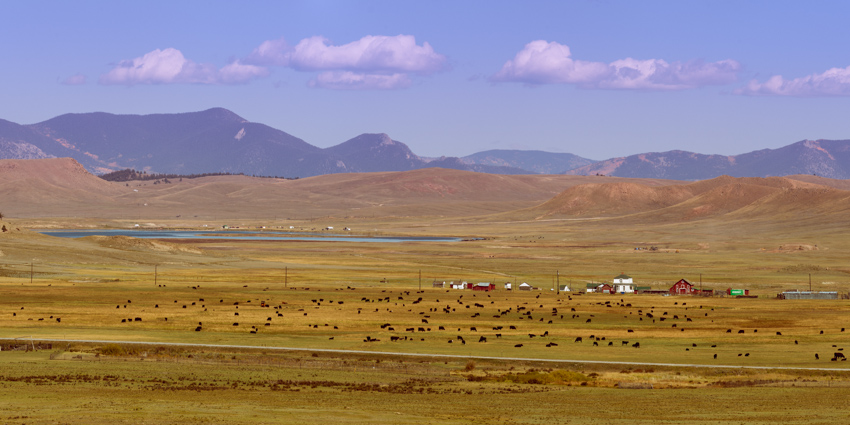
While our trip was not filled with epic scenes from my more favorite areas like Kebler Pass, Ohio Pass, Owl Creek Pass or anything from the San Juans, I was still pleased to get into the mountains to photograph the changing fall colors with my mom. It was a great mother-son trip and I know it meant a lot to my mom to spend th day with her. Any chance to get into the Colorado mountains in the autumn is a welcome day for me. I hope you enjoyed my photographs and trip report. I would love to hear from you on your thoughts about the trip report or the photos, or if you have any questions about my photos. Please feel free to leave a message below or to contact me. Thanks for stopping in!
Perseid Meteor Shower at Ice Lake Basin and a climb of Vermillion Peak
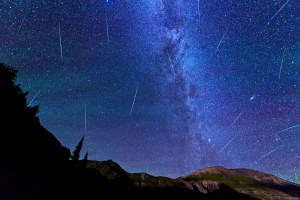
When the dates for the 2013 Perseid Meteor Shower were released, I knew I wanted to schedule some time in a very remote location to capitolize on the opportunity to capture as many meteor shower photos as possible. I did a little research and took a look at my remaining Colorado Centennials that were left to climb and enthusiastically declared that the Ice Lake Basin would be the perfect location. I knew that the trip would be amazing for a photographer, but perhaps boring for someone that is not into photography. I reached out to my friend Ryan Fonkert to see if he would be interested in joining me on a tour-de-Ice-Lake-Basin to shoot the Perseids and to climb Vermillion Peak. Without any hesitation he said he would join me.
Photographing meteor showers has only recently been something I've wanted to do, and my first successful foray into that realm of photography was back in December 2012 for the Gemind Meteor Shower, where I was able to come away with this photo:

Ice Lake Basin has long been on my radar as a location to visit. Ideally, I wanted to visit the area during the peak of wildflower season due to the idyllic photograpy opportunities afforded at the upper Ice Lake. Unfortunately, the Perseid Meteor Shower falls in mid-August, so this time would have to mostly be a scouting mission for wildflower-style photos.
Ryan and I carved out a chunk of time on our calendars to coincide with the Perseid Meteor Shower peak; we went with Sunday, August 11th through Wednesday, August 14th, knowing the Perseids would peak on Monday night, but also allowing us some flexibility in case of weather or other uncontrollable variables. We made preparations to spend three nights at 11,000 ft and higher, with weather forecasts showing significant rain and/or snow. Sunday afternoon we gathered at my house and departed for the long journey from Colorado Springs to Silverton via Highway 50. I was particularly excited for this trip for a billion reasons, one main reason being that Ryan and I had a ton of interests and world views in common. We were both atheists, both photography geeks, both vegetarians, and both fairly liberal in our political beliefs (don't hold it against us). It was going to be great to be able to chat about all of those awesome topics while camped in one of Colorado's premeir backpacking destinations.
We stopped in Montrose for dinner and wound up at Denny's. How sad for two vegetarians. I'm going to have to do more research before the next time I pass through Montrose needing food. The waitress looked at me really oddly when I asked her to withhold the giant sausage that came with my breakfast skillet, but the food was decent enough and the high sodium would probably be a benefit for the hike in. Since both Ryan and I were mostly heading in to do major photography work, our packs were insanely heavy. I was carrying a similar load as to what I had taken up Grizzly Peak a few months prior, with the additon of a couple more lenses and some large filters for my Nikon 14-24 lens.
Ryan and I were able to reach the turn-off for the South Mineral Creek Trailhead, located just two miles north of Silverton on Highway 550 at around 9 PM. We opted for the short-cut along the Clear Lake Road as described in Roach, which shaves off about a mile and a half total for the hike in and out of the Ice Lake Basin. We loaded up our packs (mine was just over 60 pounds) and head out. We were immediately greeted by the loud and insane waterfall described in Roach, which was highly enjoyable to cross beneath in the dark with 60 pounds on my back.
Here is a full list of photography equipment that I brought on this trip and the approximate weight of each item. I purchased a new tripod and ballhead for this trip alone, because my other tripod, while solid, was quite heavy. The new tripod and ballhead weighed less than half as the old setup, which helped some on weight, no doubt.
| Item | Weight (lbs) |
| Feisol Tournament CT-3442 Tripod w/ Photo Clam Pro Gold II Easy PQR Ballhead | 3.3 |
| Nikon D800 DSLR w/ Kirk L-Bracket | 2.8 |
| Nikon 14-24 f/2.8 Lens | 2.0 |
| Nikon 24-70 f/2.8 Lens | 2.0 |
| Nikon 50mm f/1.4 D Lens | 0.5 |
| Nikon 105mm f/2.8 D Micro Lens | 1.5 |
| Fotodiox Wonderpano Filter Kit w/ 5-stop ND filter & 6x8 grad ND for Nikon 14-24 lens | 2.0 |
| Nikon 300mm f/4 D Lens | 3.0 |
| 1.4x Teleconverter | 0.5 |
| Total | 17.6 |
The skies were quite clear on the hike in and we were thinkng we would be afforded some great opportunities to capture some meteor photos on the very first night; however, mother nature had other thoughts in mind. The hike in was quite uneventful until we reached what we believed was the lower Ice Lake Basin. I took out my very bright Brinkman light, which I use for light painting of distant foregrounds for astrophotography. The light was able to show us the area and we headed towards the very upper section of the lower basin. After some wandering in the dark, we stumbled upon an amazing campsite right next to the creek and a huge waterfall nestled at the very edge of the basin. The campsite was equipped with a ready-made bear-bag tree and someone had even salvaged some old mining equipment to form a nice metal bench next to the fire-ring, which we never did use. We setup our camp in the dark quickly so that we could venture out to photograph some meteors; however, by the time we finished setting-up, clouds had already moved into the basin, obscuring our view of the stars above. I was able to get one kind of cool photo of the night skies the first night while utilizing the Brinkman light to illuminate a distant mountain-top to our north east.
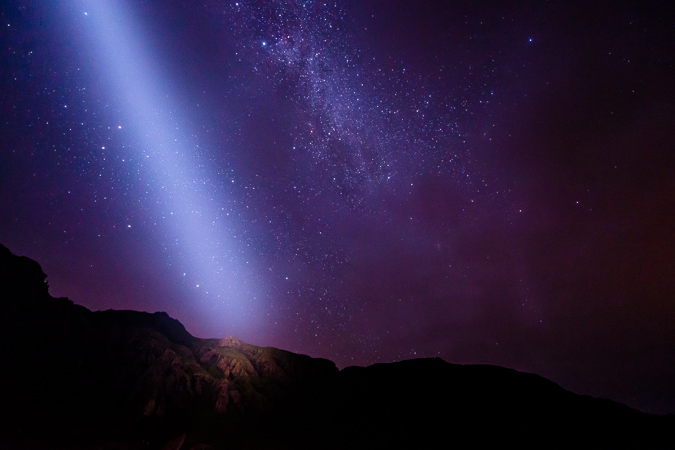
After a failed attempt of photographing the night sky, we decided to hit the sack and see what the next day would bring. We awoke pretty early and the sky was already filling with dark clouds. Sure enough, the sound of thunder came early, around 9 AM and we were more or less stuck to our camp area for the duration of the day. Not that we were complaining though, Ice Lake Basin is a pretty great place to be "stuck" for the day. We had pockets of sunshine and decent weather, so we kept going out around the basin for short photography hikes and then back to camp when weather became nasty. This yielded both Ryan and I many opportunities to capture some great images, especially of the ubiquitous waterfalls that were in the lower basin. It was one of the most awesome places I had ever camped, and I am eager to return, no question.
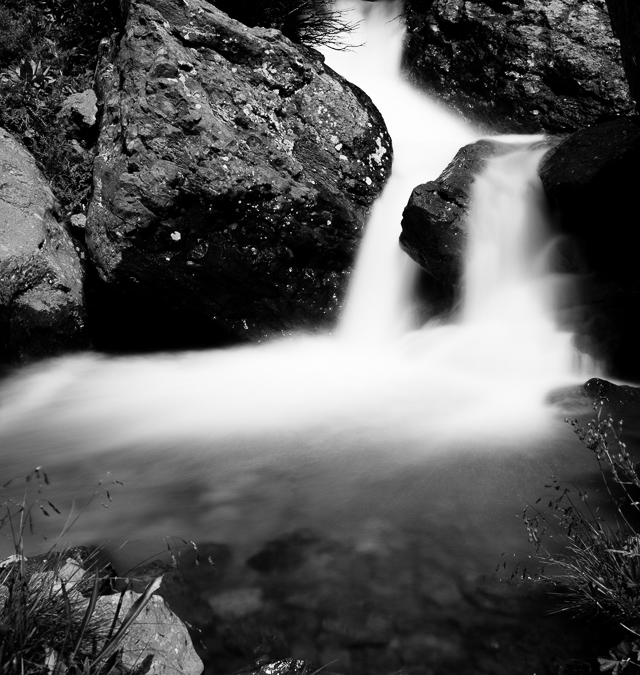
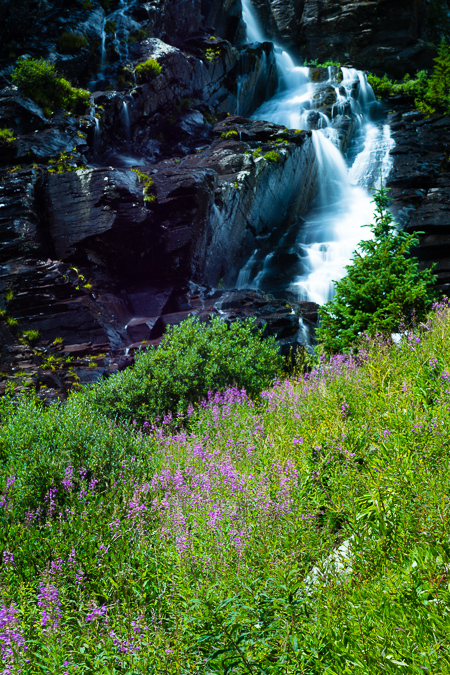 As I mentioned before, our campsite was nestled against the headwall of the upper basin and was directly below a huge series of waterfalls that terminated in a huge field of wildflowers. It was really quite the scene and kept our minds off of the occasional thunder we would hear above. I took advantage of my 9-stop ND filter for taking photos of the waterfall and enjoyed the challenge of the changing light. There were endless opportunities to take photos of the waterfalls and I think I could have probably spent an entire day looking for a better composition or angle. I know Ryan came away with some real stunners too.
Ryan ventured off across the basin to photograph his own waterfalls while I tended to the huge one behind our campsite.
I tried a variety of spots near our campsite and ventured quite closely to the incredible series of waterfalls that came from the upper basin just above us to the west. I don't generally processing in black and white a lot, so I decided to shoot for black and white instead of color for the waterfalls, focusing more on the available light vs. the colors in the area. It proved to be a great way to study the subject and yielded some fairly good results I think. I loved the textures and lines that intertwined between both the rocks and the moving water and really loved how the ND filter treated the scene with a silky smooth aura.
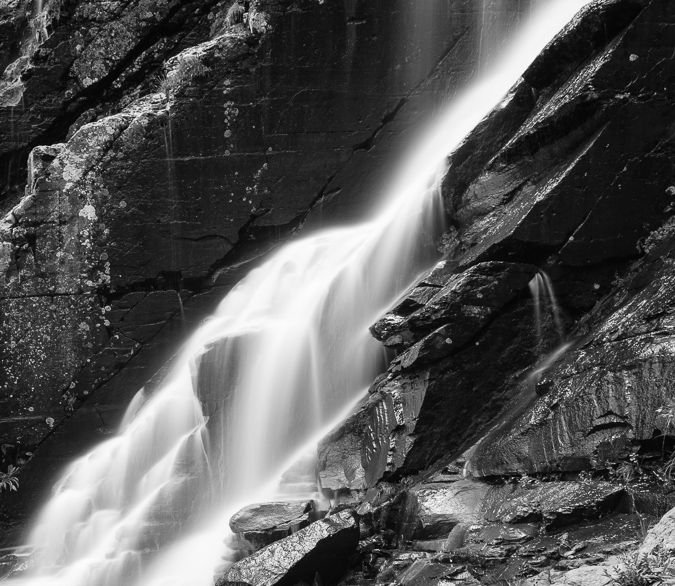
Black and White waterfalls taken with a 9-stop ND filter - a study in light and texture.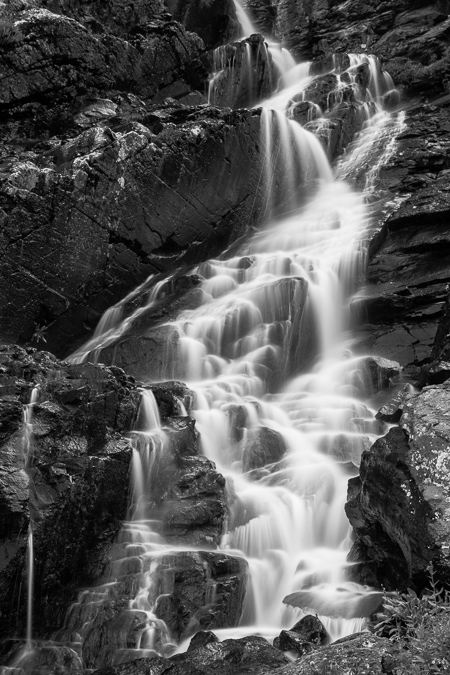
Ryan and I had a lot of time to kill due to the less-than-stellar weather in the basin, so we took turns taking shots of each other. Here's Ryan sporting his Sony and Minolta equipment and myself rocking the Nikon gear on the new tripod.
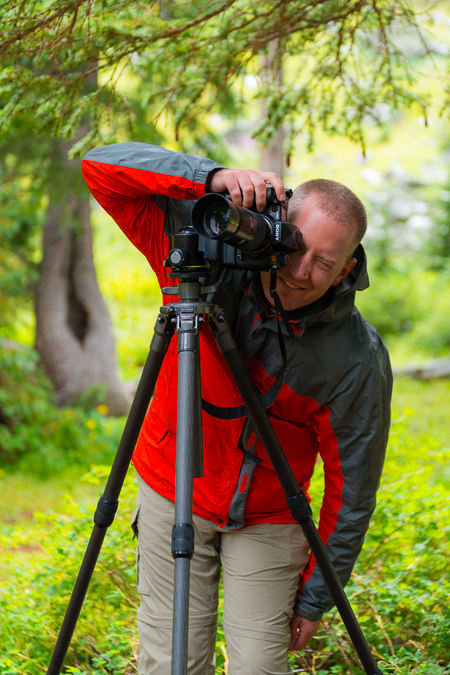 |
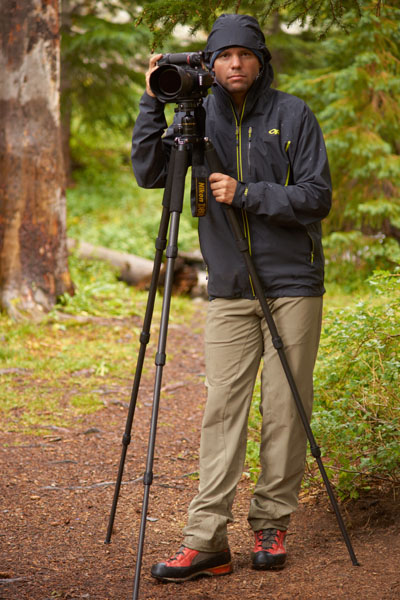 |
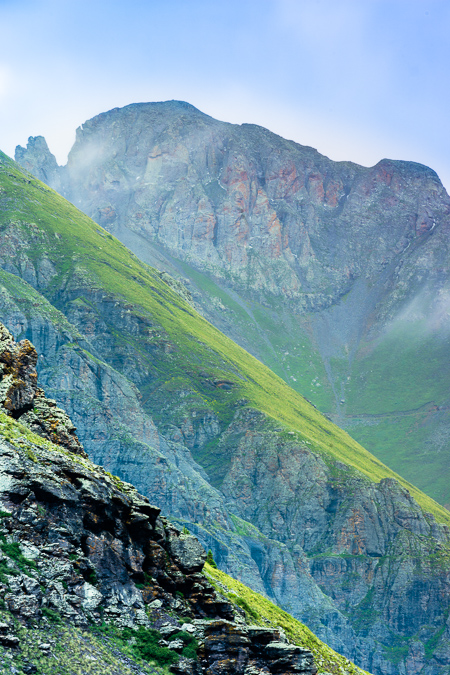
The "on again-off again" weather was both annoying and awesome. On one hand, it kept us close to camp, but on the other hand, it kept bringing in some interesting light and photography subjects to keep us busy. The heavy moisture in the air had created a lot of cool fog-like features in the valley below. Water vapor would rise up from the valley and up into the mountains across the valley from us. As we watched the weather continually change, the temperature kept fluctuating as well, keeping us on our toes and in and out of various layers. It also gave us some opportunity to widdle down on the over-abundance of food we both brought into the valley with us.
Even though the peak of wildflower season had passed, I was quite impressed with the quanitity and quality of wildflowers in the lower basin. I spotted all kinds of amazing flowers, including the Indian Paintbrush, Rocky Mountain Columbine, Mountain Bluebells, Parry's Primrose, Rose Crown, and more. I felt pretty happy to have brought the 105mm macro lens as I'd always wanted to get a nice macro shot of an Indian Paintbrush, so I ventured off to find the best one near our campsite. I found a few good subjects close-by and captured a few decent shots of one.

As the light shifted and the day progressed, I kept my eyes on a huge field of purple wildflowers up the hill from us. The sun shifted perfectly and I ran up to get some photos there. I was even lucky enough to get a rainbow in the photo, which was a huge bonus, no doubt. The field also looked out into the distance at one of the more impressive peaks of the area - Sultan Mountain.
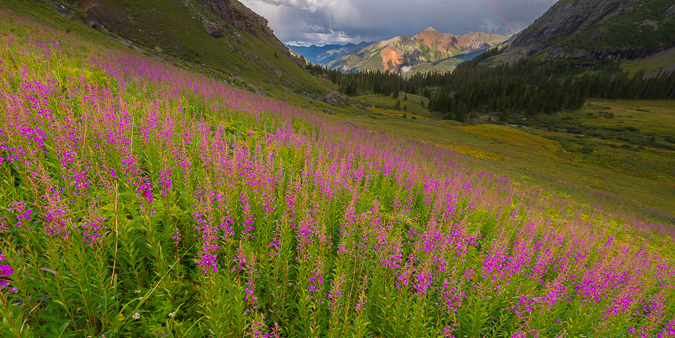
As the storms passed over, I grabbed a self-photo from the wildflower field. What a peaceful place.
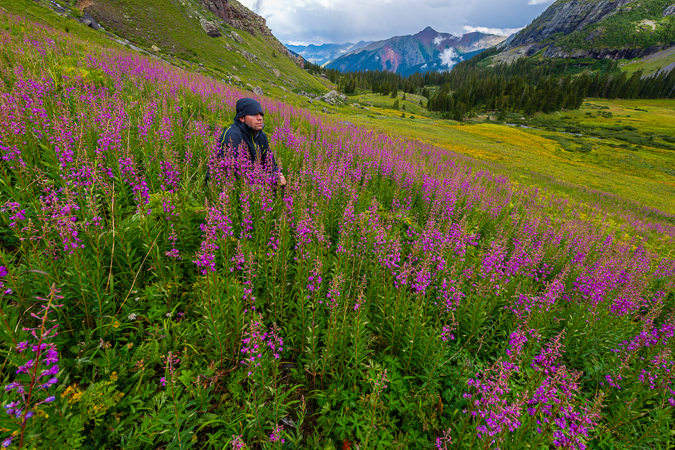
At this point, Ryan joined up with me from the area he was photographing from near the huge string of skinnier waterfalls across the basin from our campsite. He told me I could probably get some awesome shots over there with my ND filter, so I headed that direction, but not before he fired off a hero shot of me carrying my gear.
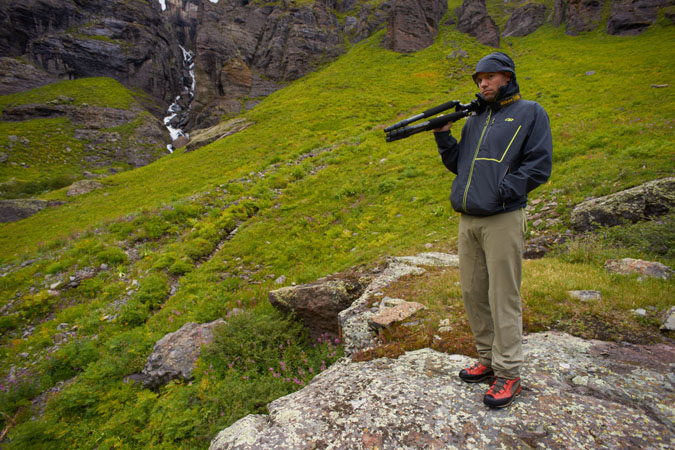
I headed on over to the fast-moving waterfall system up the hill from us and found some amazing scenery there - wildflowers galore with a raging waterfall, including more of those purple flowers and some Columbine as well.
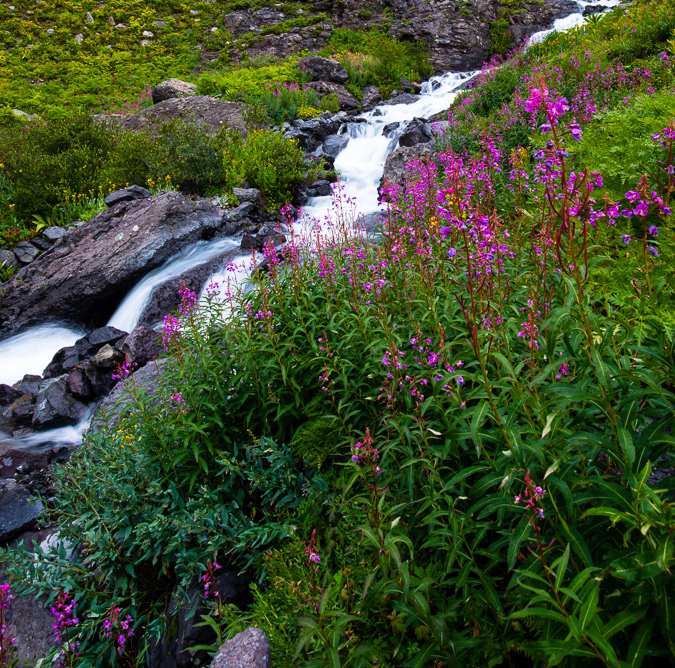
I had to climb onto a really precarious island with cliffs and waterfalls on each side to get this shot of these magnificent Columbine.
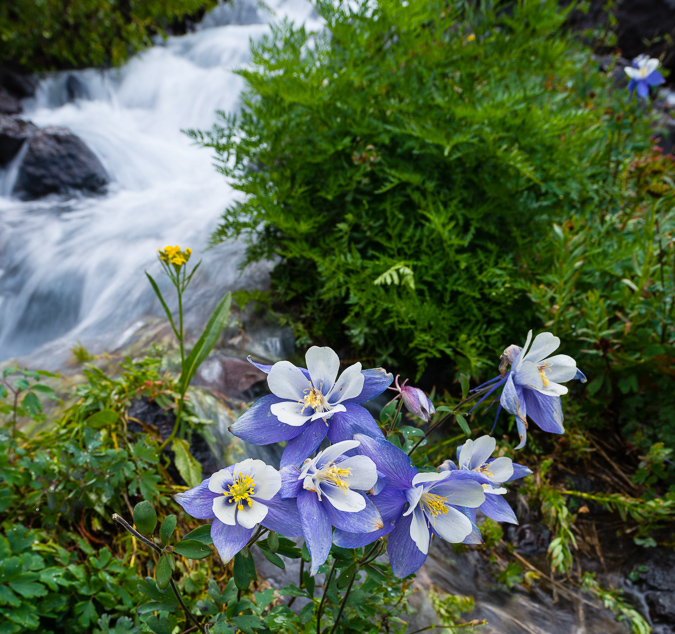
I headed on back down towards camp and noticed the light continue to improve through sunset. I decided this would be the perfect opportunity to finally get to use my Fotodiox Wonderpana Filter system for the Nikon 14-24. As you may or may not know, the Nikon 14-24 is probably the best full-frame wide angle lens you can get, but it has one major flaw - it is unable to take filters since the lens hood is built into the lens. To compensate for this, you have to get elaborate and complicated filter systems if you want to use filters on this amazing lens. Filters are pretty important for certain applications like the highly dynamic light at sunrise or sunset, where the sky is very bright but the foreground is dark. To adjust for this, you use what are called graduated neutral density filters which basically are dark on top and clear at the bottom, allowing you to expose for the foreground and still get a perfect exposure on the brighter sky. This worked out pefectly for this sunset shot I took from the stream.
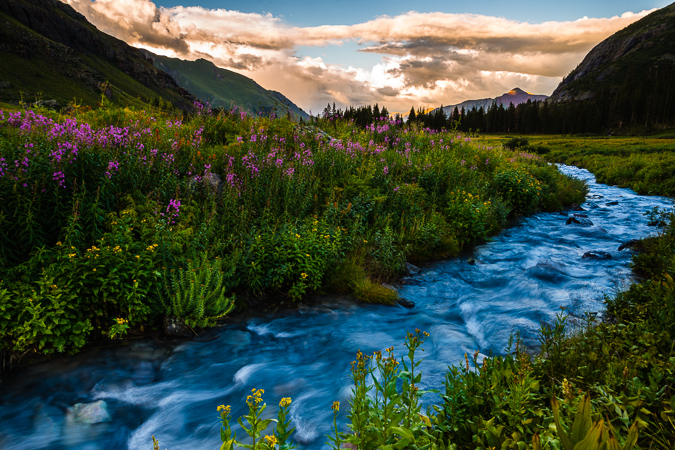
After getting some dinner and packing some of our things away, we kept a close eye on the clouds above, knowing that this second night would be the peak of the meteor shower. The clouds began to clear out, so we decided to head up into the upper basin and find a good spot to get shots of the Perseids. The hike up to Ice Lake from our campsite was pretty easy and finding the lake was no problem at all, even in the dark. As we set-up for our photos, we began to get nervous as the clouds began to return and we could see lightning in the distance to our north and west. Not good! Either way, I wanted a few shots from this area at night, so I set-up my tripod and got a few photos. The moon had not quite set yet but was behind some clouds, which made for a wicked silhouette of Golden Horn.
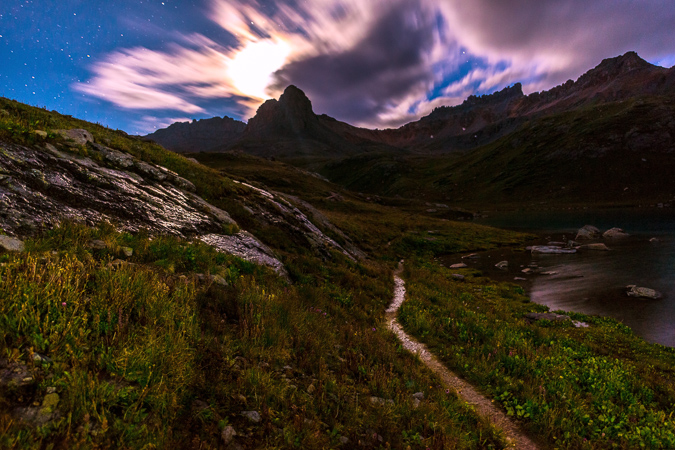
Additionally, the Milky Way made a brief appearance as well with the moon lighting up the passing clouds above.
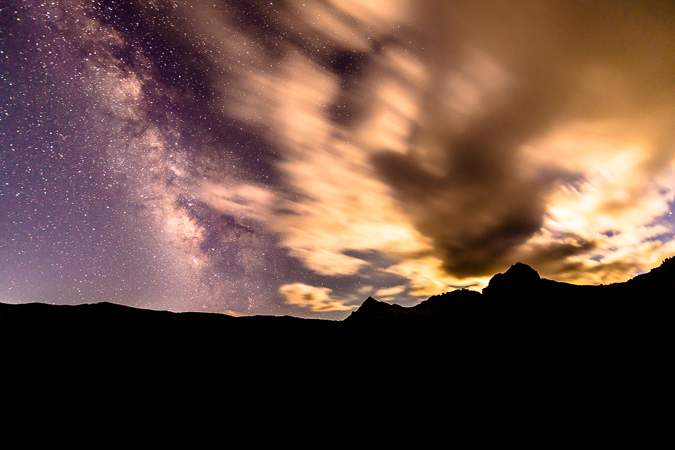
Having seen some lightning and not really knowing how our luck would last, we decided to make the safe decision and head back down towards our campsite, which was very frustrating. I was hoping to setup at the shores of the lake for my meteor shower photos, so I was a bit disappointed; however, about halfway back down from the upper basin we noticed that the clouds had decided to dissipate, so we found a safe and acceptable spot with a nice clear view to the north and east where the Perseid Meteor Shower was radiating from. We setup our tripods and started the fun of doing a long series over several hours to capture as many meteors as possible. The moon was still high enough to light up the foreground too, so it made for a fairly decent spot to get the meteors from. I was quite pleased with my results, netting 19 meteors in total.
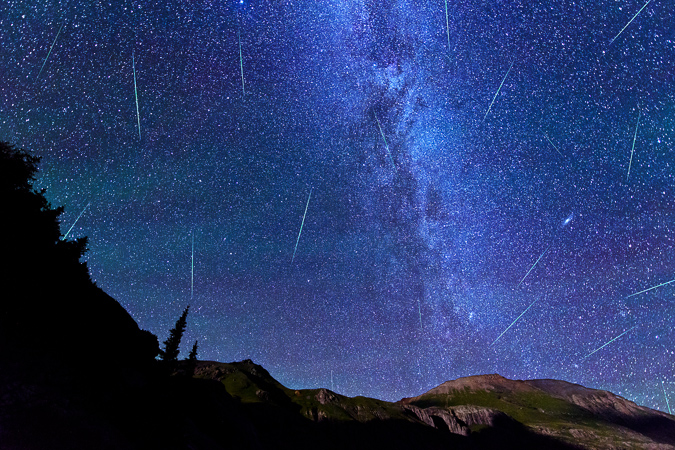
After freezing our butts off for a couple hours, we began to pack up our things, but not before I attempted a vertical panorama from horizon to horizon of the Milky Way. Before I was able to get this shot, I noticed that my lens was covered in condensation, which was a real bummer. I wondered how long it had been this way. I went into my camera to see and only a few shots were ruined. The temperature change from having the camera in my chest pack during the hike up and the very cold night must have caused the condensation - lesson learned!
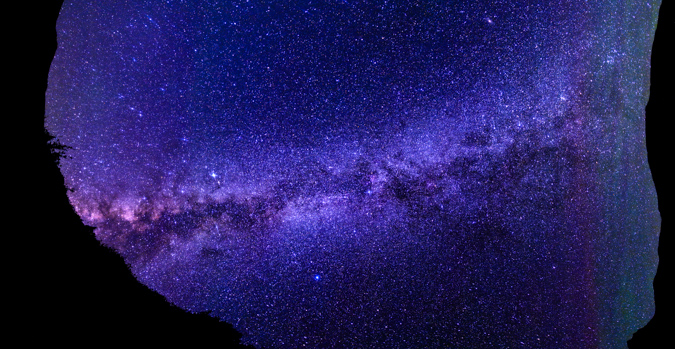
We head back down to our campsite without incident (other than some super cold toes) and went to sleep, prepared to attempt Vermillion Peak in the morning.
We got up a little later in the morning than I'm normally used to for summit attempts, but we were up really late taking photos of the meteor shower. It is always a challenge for me to balance my desires for mountaineering and my desires for photography. While they make quite a synergistic pair, they also sometimes compete with each other, mostly because of the time factor. We made it up to Ice Lake and were blown away at the beauty of this magnificent lake. I've never seen a bluer lake in all of my life.
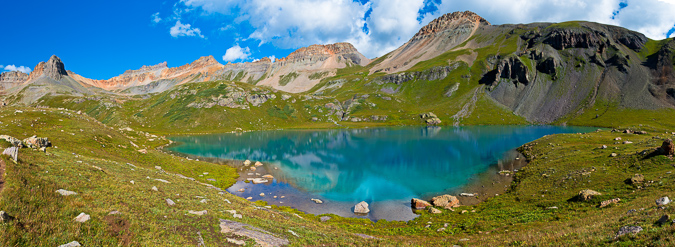
I already knew I wanted to come back to the lake another time of year and get sunrise photos with wildflowers. It was just the most insane spot!
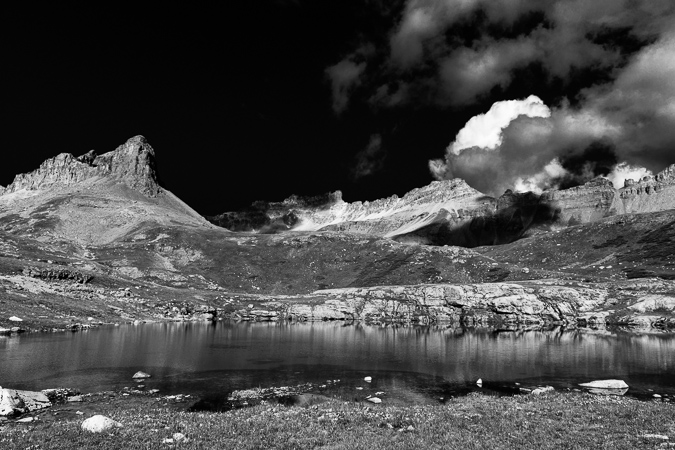
We found another small lake on our way up towards Vermillion and it was surrounded by wildflowers, including this nice Rose Crown as seen in the bottom left corner. Golden Horn made a nice reflection in the lake, and we could finally begin to make out Vermillion behind it.
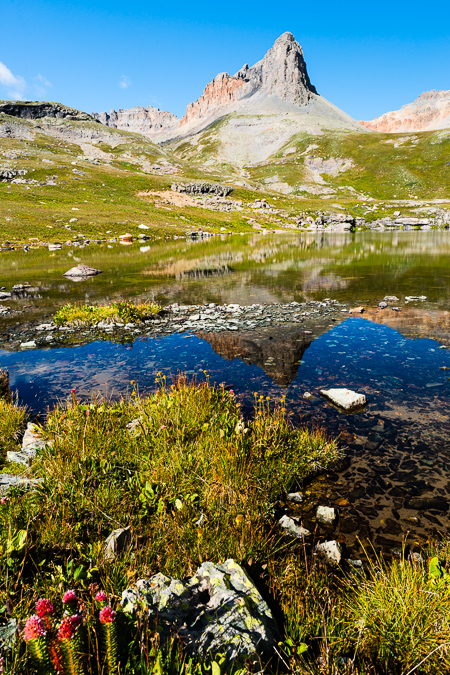
The trail ascended up into the upper basin towards Fuller Lake and the views back down at Ice Lake were intense. I was still blown away by the blue hues in the lake.
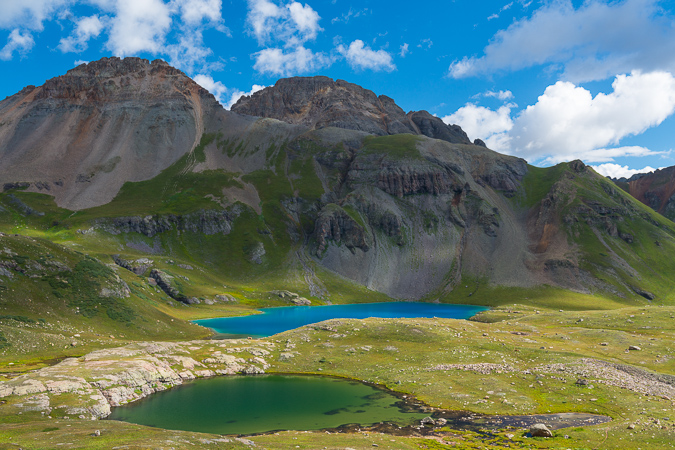
Climbing further up the trail provided some great views of Golden Horn, which demanded a great deal of respect. The naming of Golden Horn was quite apt, as the sides of it were quite golden indeed.
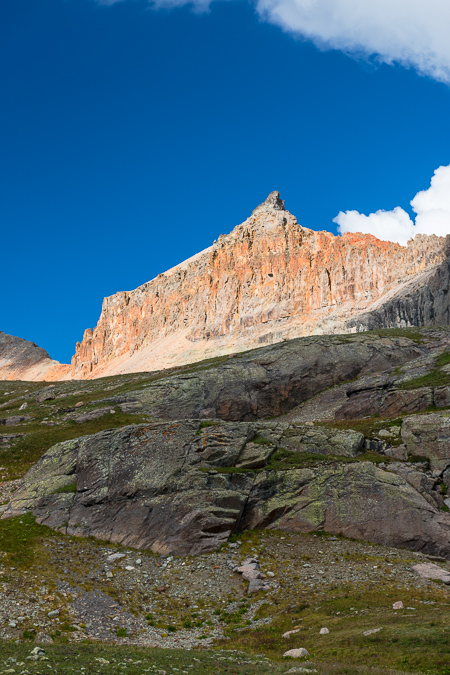 |
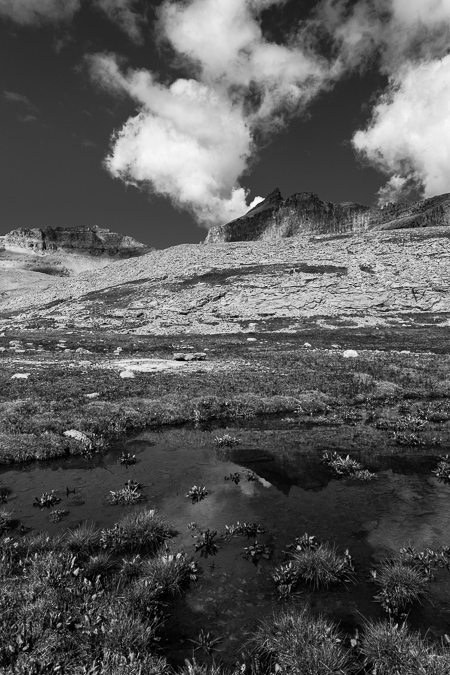 |
As we got further up the basin, we found yet another pond with Fuller Peak (left) and Vermillion (right) towering above. In addition, there was a really interesting building up there, or at least the remains of one. We speculated as to what the purpose of the building was, settling on the thought that it was probably used up into the middle of the last century for miners.
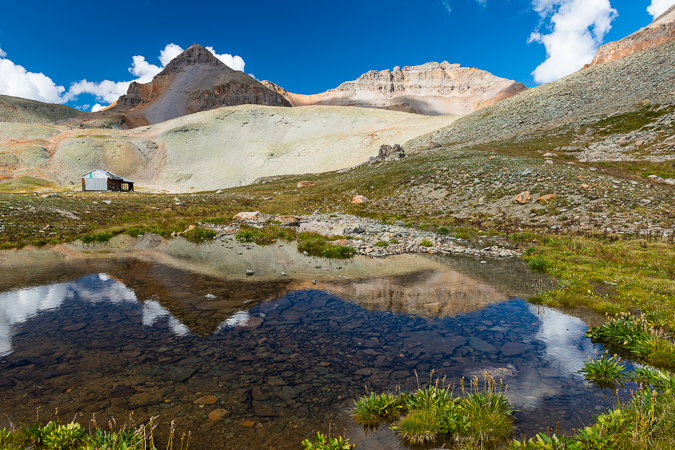
The building was in pretty good condition, with an intact roof and even some old bed springs still inside.
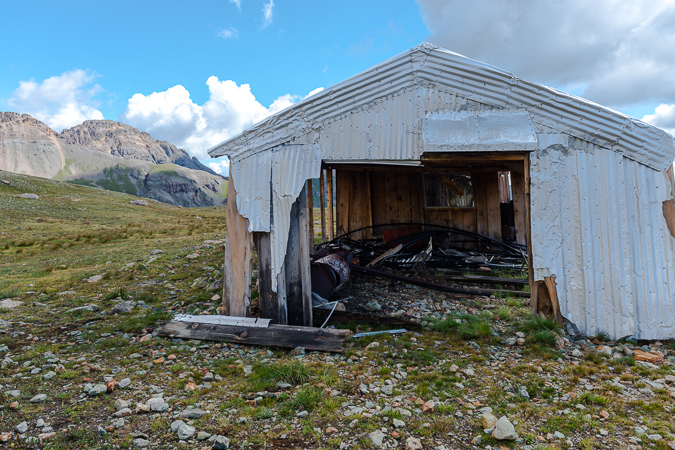
A look back over at Golden Horn revealed that weather seemed to be moving in, but it still seemed pretty spotty. We noted the weather and kept moving up the basin, weaving up a short boulder field above the structure to find a nicely worn trail with numerous cairns.
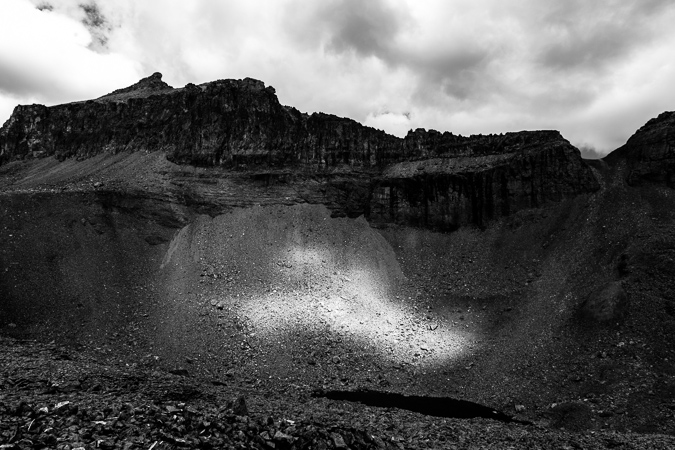
We could make out the nicely worn trail heading up to the saddle between Fuller and Vermillion, and kept heading in that direction.
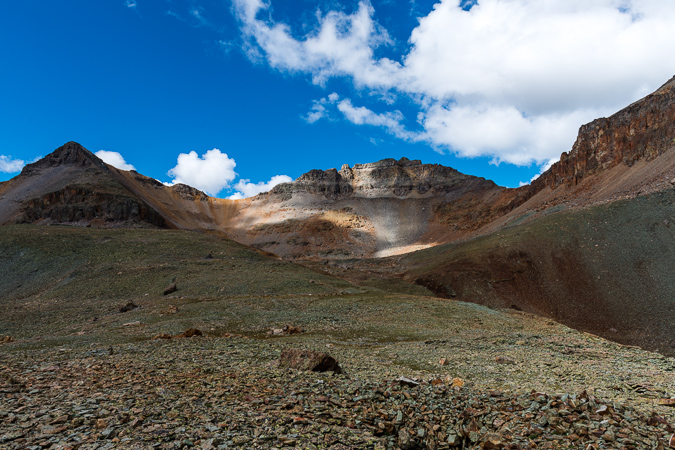
The trail brought us up a nice rocky bench towards Vermillion and was a very pleasant hike up. The clouds continued to hold, so we kept on trucking. A look back at Ryan showed I was keeping a pretty good pace. Ryan indicated to me to keep going at my own speed, so I did.
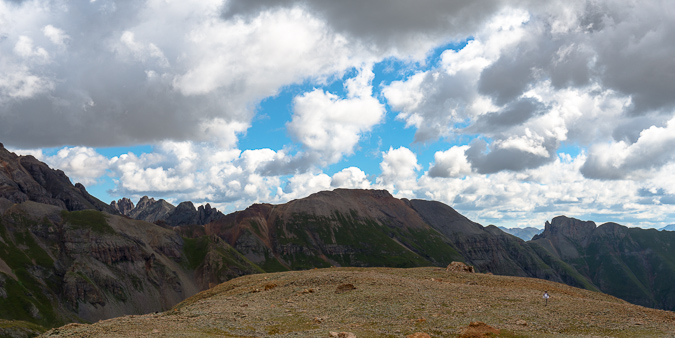
We reached a small stone fortress near the end of the trail and stopped to put on some rain gear as light graupel had begun to come down. The weather still seemed OK but I must admit I was getting a bit nervous. We continued up and lost the trail at the base of Fuller, so we began to weave across a large loose boulder field, which proved to be a huge pain in the butt to cross.

Once we were able to get through the loose and physically rigorous boulder/scree fest, we found ourselves looking down and across at the proper trail. Oh well! We made our way across the boulders to the trail without any issues.
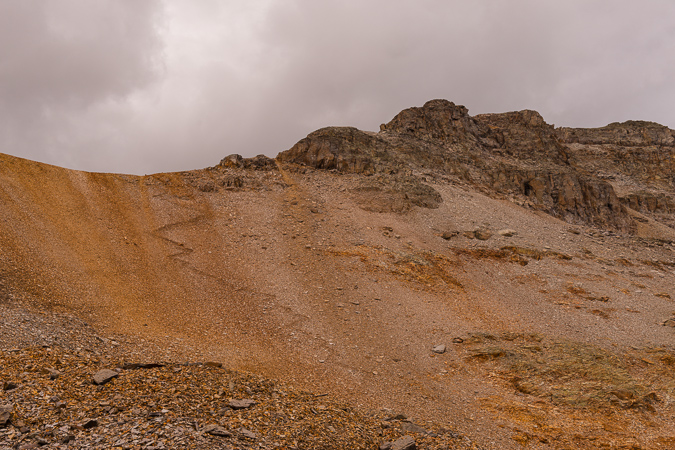
I was able to quickly make it up the saddle - my legs were feeling really great despite the lack of recent climbing I had done this year. From the saddle, I could easily make out a lot of mountains in the area, including the famous Wilsons, the distant Grenadiers and a really awesome looking peak to the south west that was covered in small bits of snow from the recent storms.
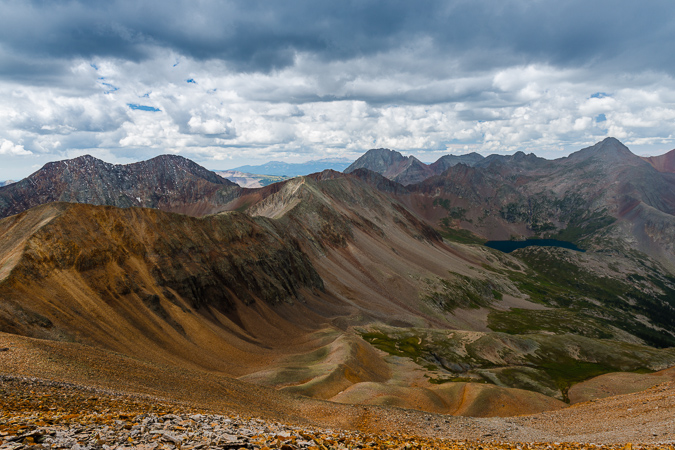
A look over at Fuller proved it was not a very long distance from the saddle, and I made tentative plans to come back and grab that peak if time and weather permitted after Vermillion. Looking back down at Ice Lake revealed Ryan's position about a quarter of the way up the trail to the saddle and all of the lakes we had passed throughout the day's journey. What an amazing view it was.
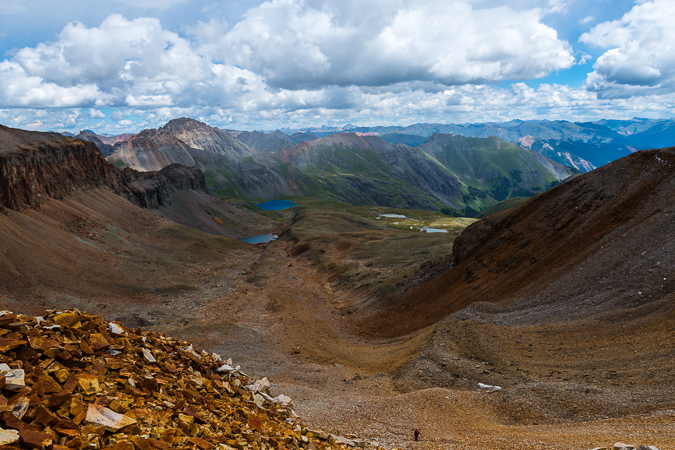
In the distance to the east I could now make out Uncompahgre and Wetterhorn, which is always a nice treat!
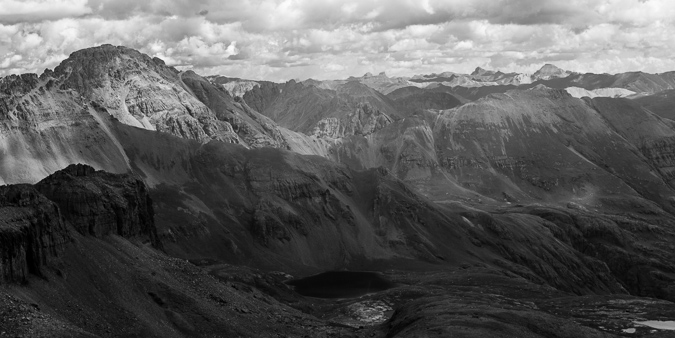
From the saddle, the trail leads up the back side of Vermillion. The trail is very well-worn and easy to follow. The rock on the back side was also very interesting.
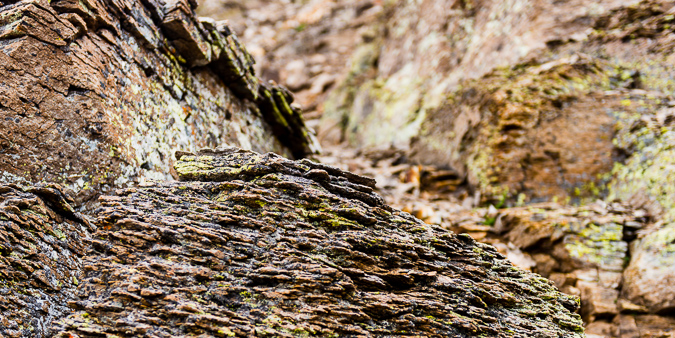
A look back down towards the saddle showed just how worn and accessible the trail really was. It was also awesome seeing the Grenadiers in the distance above the ridge.
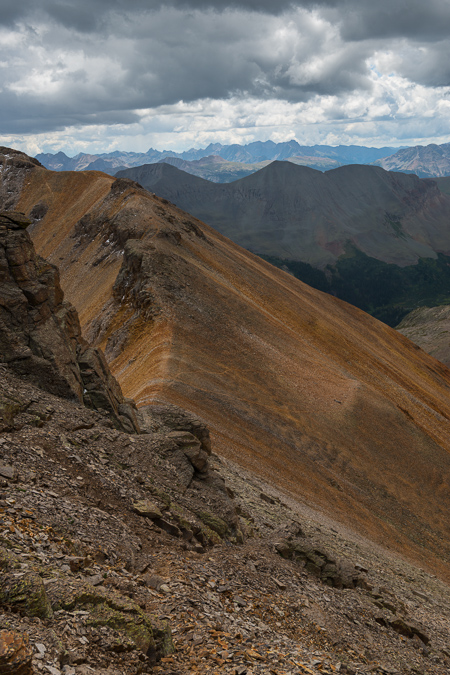
I reached an obvious end to the trail which had wrapped around the back side of Vermillion on a series of ledges and realized that it was time to head up a steep gully and onto the upper section to the summit, which was all fairly obvious to me at this point.
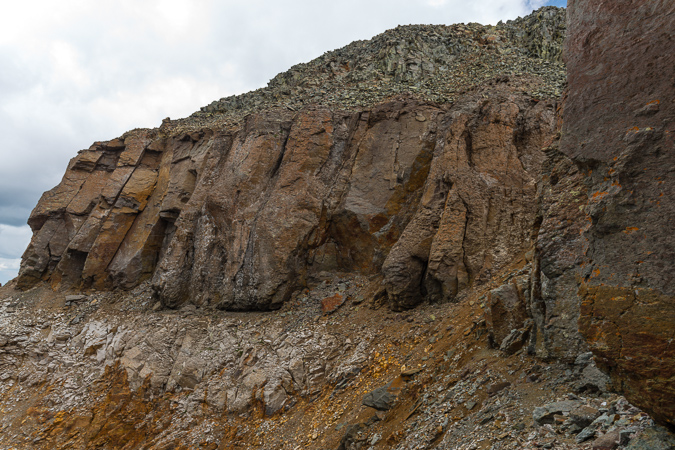
Once I reached the top of the golden gully, I looked back and down towards the awesome snow-covered mountain, which I later realized was one of the many mountains in Colorado named Grizzly.
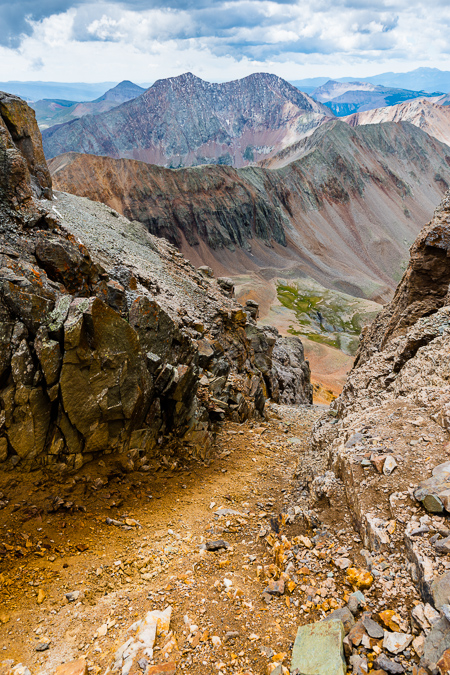
You could also make out Engineer Mountain beyond Grizzly to the south. I was able to reach the summit without any issues and was amazed at all of the green rocks on the summit. I guess it is pretty obvious why the mountain was named Vermillon.
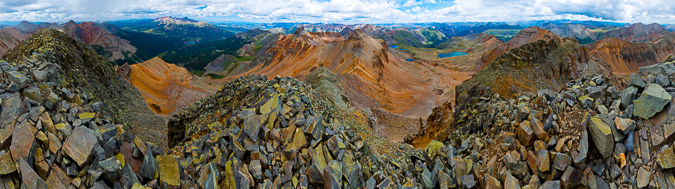
I posed for a few self-portraits using my tripod while I watched the weather nervously. The view of Golden Horn, Pilot Knob (just to my right), Sneffels (in the distance) and other notable San Juan giants was pretty killer from Vermillion.
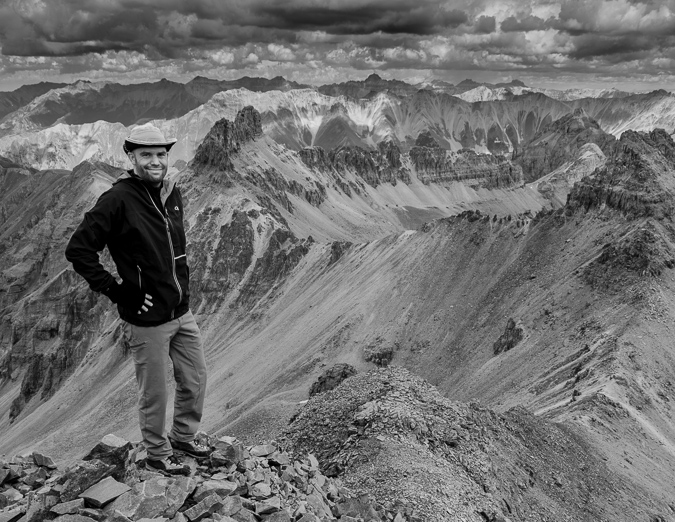
I snapped off one more set of panoramas.
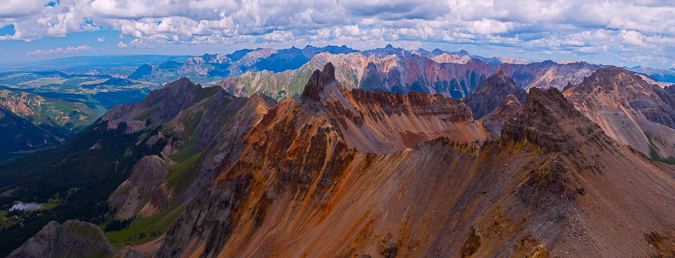
A look to the west caught my attention. Out of nowhere a giant storm had developed, with what appeared to be significant precipitation. I hastily packed my things and head back down towards the saddle. I ran into Ryan about halfway back to the saddle, where he had decided to give-up due to fatigue. The storm passed us to the south, fortunately, as seen below.
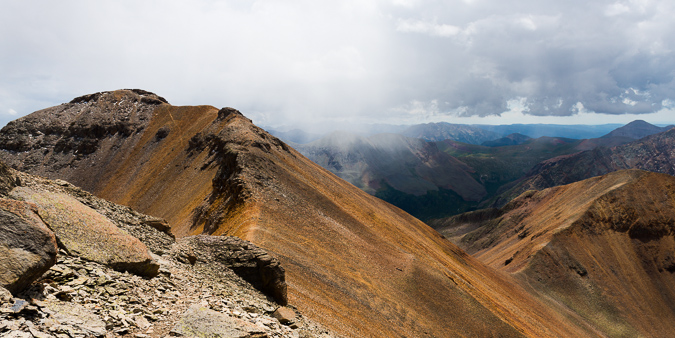
I reached the saddle fairly quickly and told Ryan I was going to head up and get Fuller really quickly. I made short order of Fully, ascending in just 10 minutes. From there, I was able to survey the basin again, with some interesting views back down towards Ice Lake and back at Vermillion.
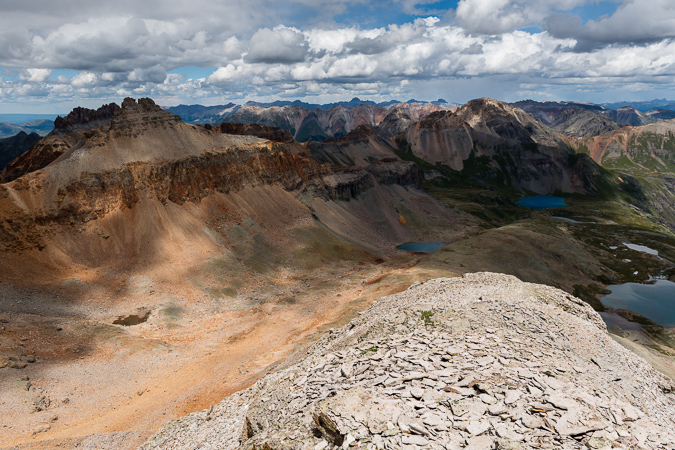
On my way back down to the saddle, I was momentarily pleased with the bright colors and contrast between the red rocks on Fuller and the green vegetation below at Lake Hope, which rested at the foot of San Miguel Peak to the west.
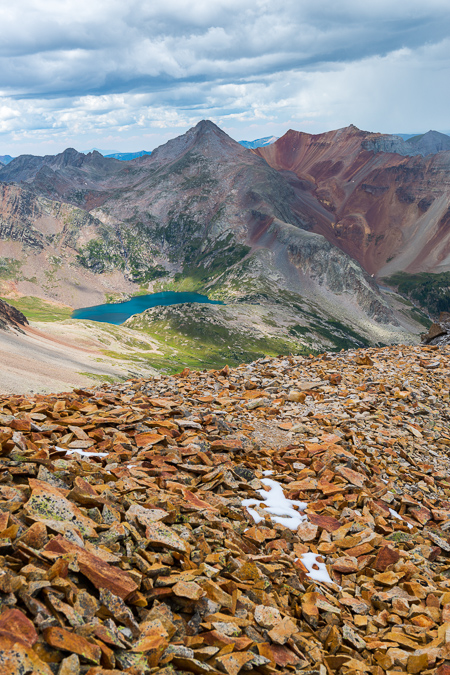
I rejoined Ryan at the saddle and we made it back over below the rock shelter that sat beneath Fuller in no time at all.
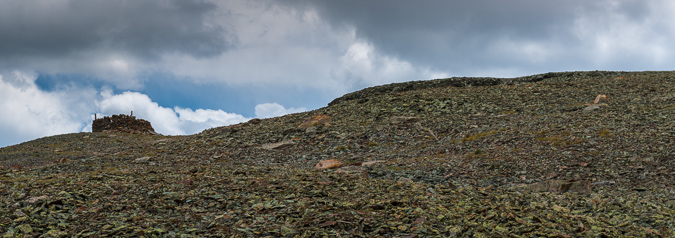
A look back at Vermillion showed Ryan and the scope of the peak we had just came down from.
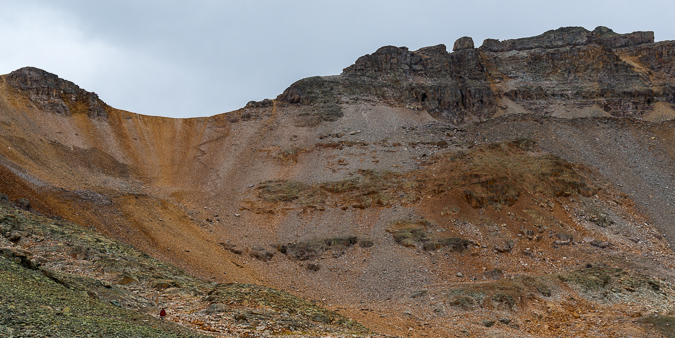
Ryan and I were amazed at just how much old mining equipment was just left up there. We saw lots of large tubing strewn about the mountain and even this handy wheelbarrow that looked to be quite old.
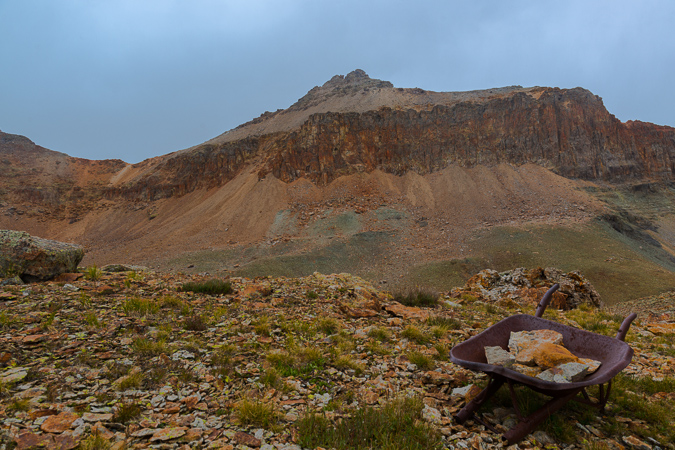
Coming down the basin was not a problem and the weather cooperated to our surprise and glee. Ryan and I took frequent stops to take photos of the area.
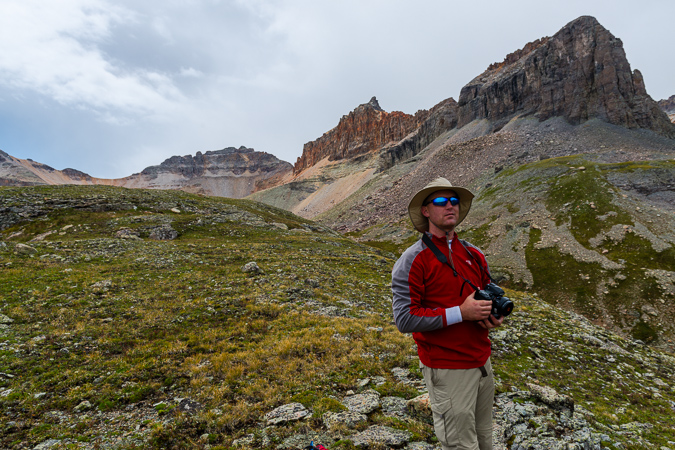
On the way down I found a very small pond with a large boulder in it that made for a nice landscape scene with Vermillion and Golden Horn reflected in the pool.
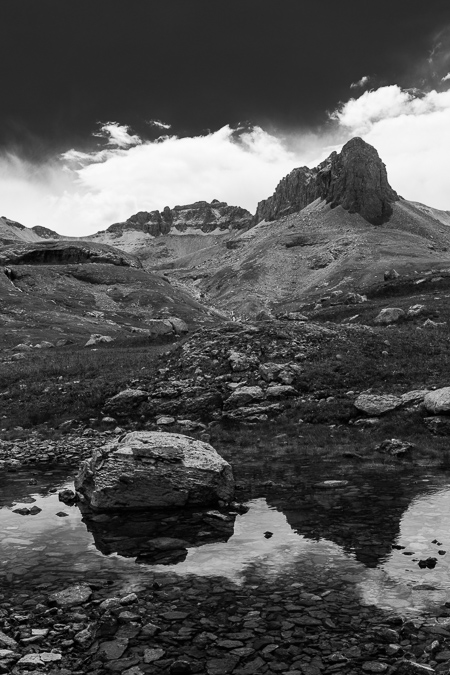
Once back down at Ice Lake itself, we stopped for some quick photos. I found some Rose Crowns and did a little focus stacking to get both the flowers and the distant peaks in focus.
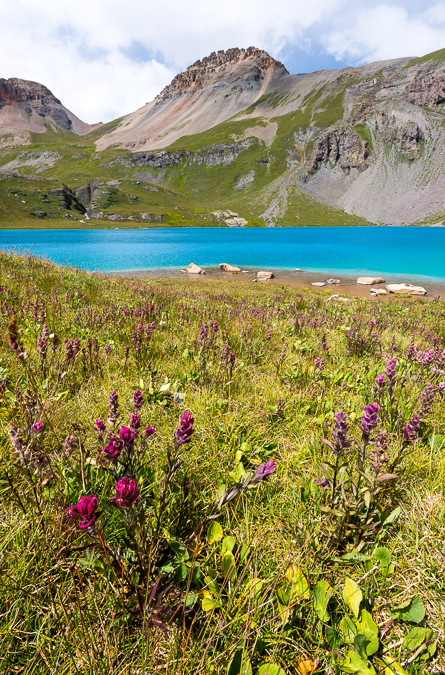
You can really see how this basin would be incredible when the flowers are at their peak. I also found some interesting rocks on the shore to photograph from, and Ryan was able to get a photo of me perched on one of the rocks preparing for a shot.
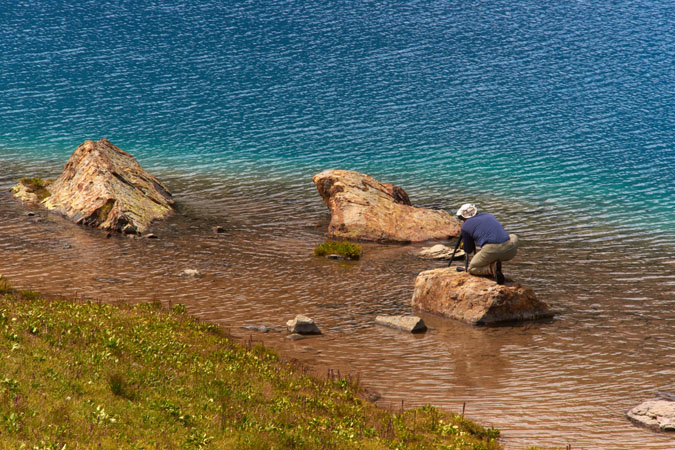
And here's the shot I was composing.
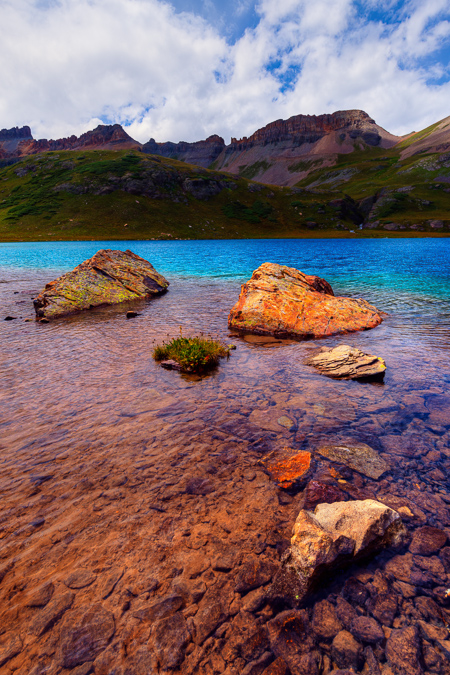
Once we finished up at the lake we head back down the trail towards camp. We found a great vantage point where we could see Sultan Mountain and the lower Ice Lake.
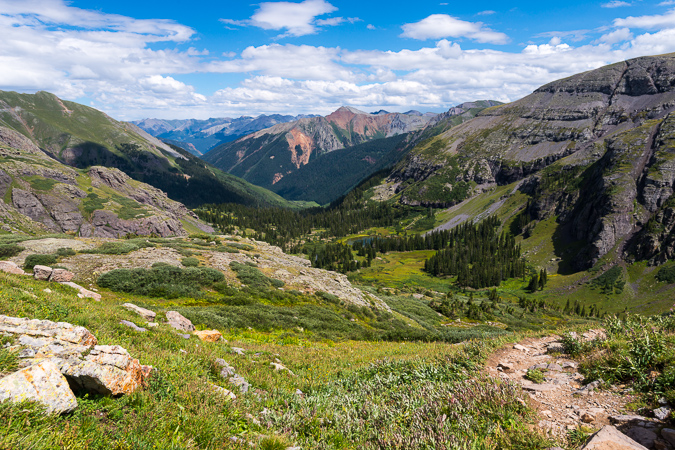
Here is a map of where we were at and what routes we took on the various days.
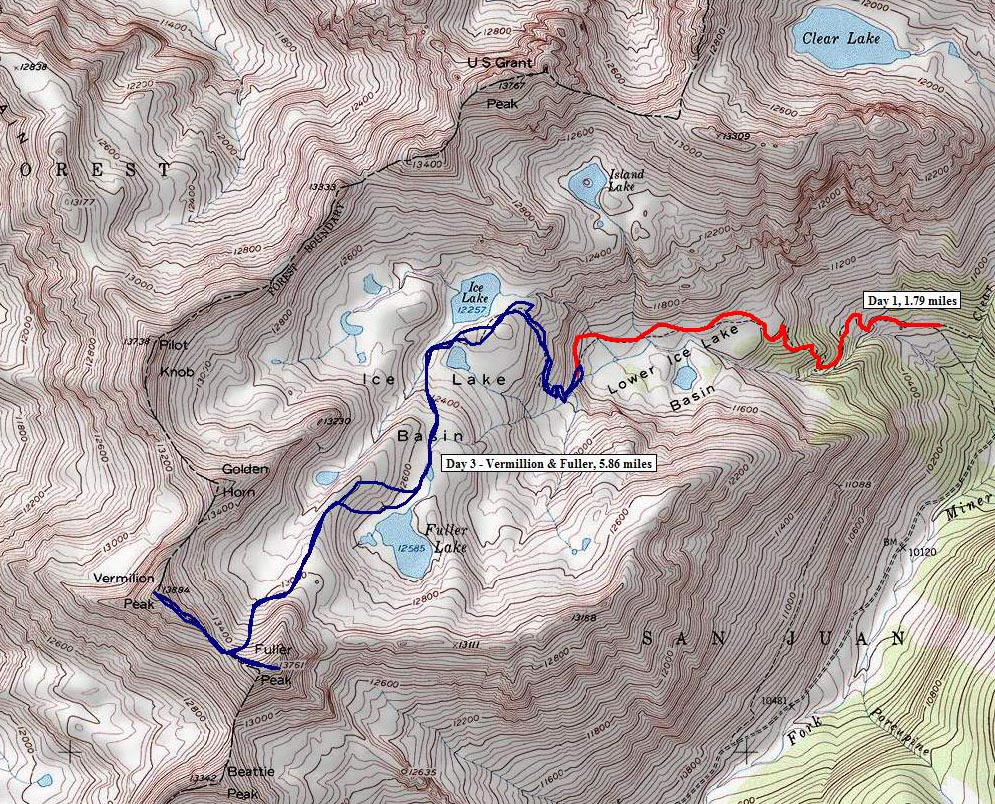
As sunset arrived in the lower basin where we were camped, I could not help but notice the great light. Sure enough, the sunset hit the clouds just right and made for a nice light show.
 Having one more night in the basin was quite the blessing. The night sky was quite clear on this last night and it made for some great star viewing. I decided to put together a few different star trails, this first one taken looking almost straight up at the sky. The stars form small looking meteors using a special processing technique.
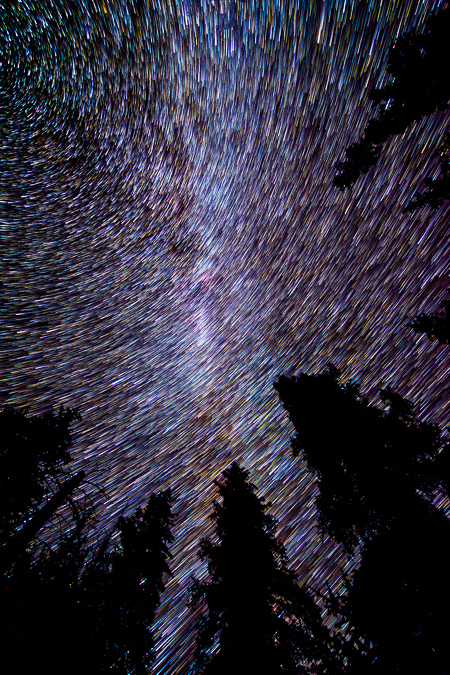
I really enjoy doing star trails with trees in the foreground. I love how the stars weave in and out of the trees.
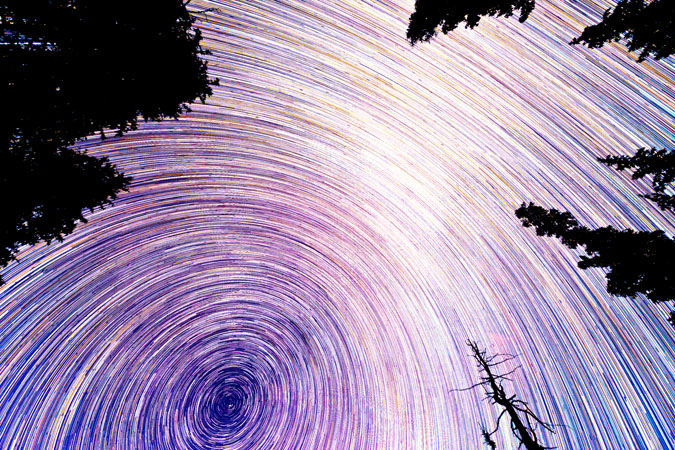
The following morning was pretty calm as we packed up. There were several marmots out and about that we could photograph while we packed and it made for a nice break between tasks.
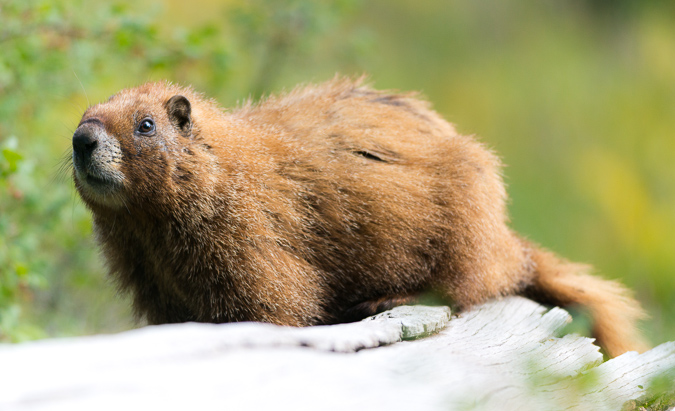
We hiked out and ran into a couple that were camped across from us in the basin. It turned out that the woman knew one of my friends that I reguarly climb with - such a small world. It was nice talking with you Becky!
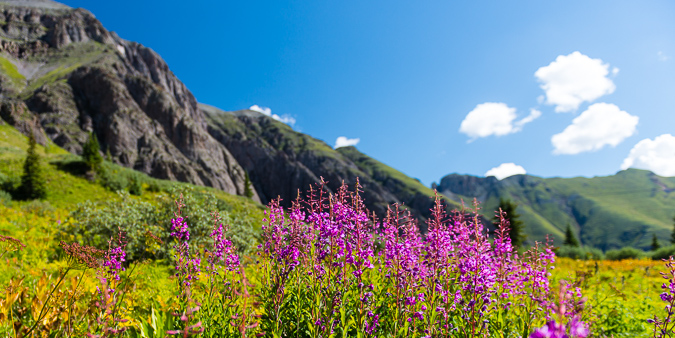
Almost back to the car and we ran into that awesome waterfall again. I had to stop and get a parting shot of it using the 9-stop ND filter.
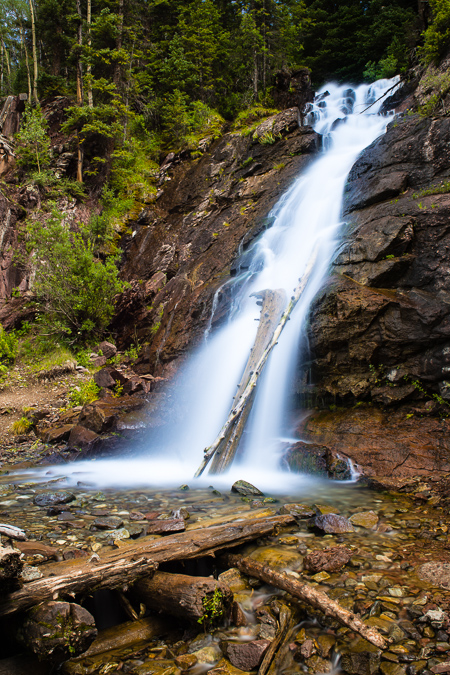
On the drive out we noticed some really cool cliff bands in the basin as well, so we had to stop to get photos of that too. It is amazing where nature will allow trees to grow.
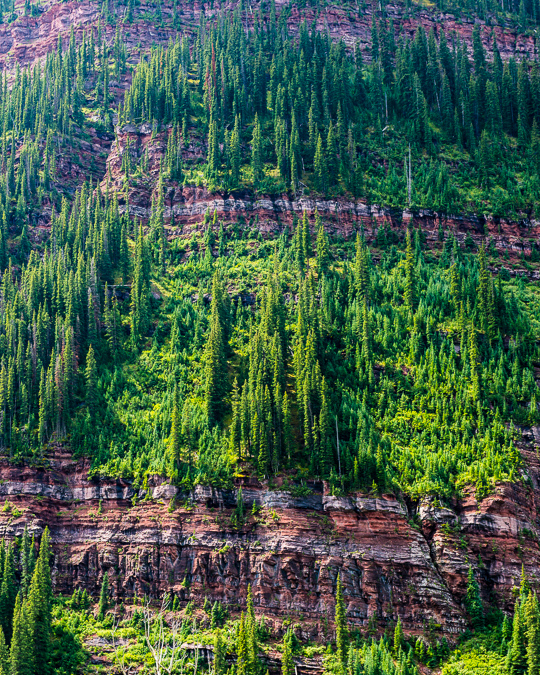
We stopped in Silverton for lunch and found a very nice restaurant called the Teller House. We were served some very tasty vegeterian burritos from their friendly staff, who filled our Odell Cutthroat Porter frequently. On the drive home, we bumped into a massive storm cell that was east of Canon City. It was one of the most impressive storm clouds I'd seen in awhile. We also learned that Manitou Springs had severe flooding while we were gone, due to the Waldo Canyon Burn Scar. What a memorable summer it had become.
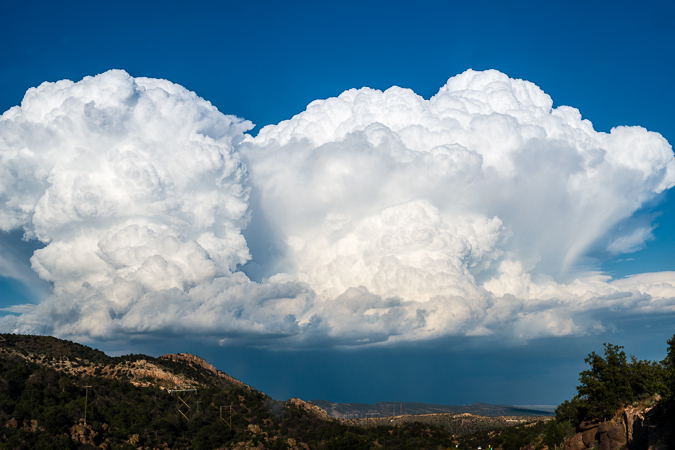
Lastly, I put together a short time-lapse video from the lower Ice Lake Basin. The first two sequences were created in-camera on my Nikon D800 and the Milky Way sequence was built using iMovie and still images. My friend Nicole Buetti allowed me to use her music for my video. Stay tuned for more time-lapse movies featuring Nicole's amazing music later this year! To hear more of her music, go check out her website!
Backpacking to Snowmass Lake - A Photographic Gem
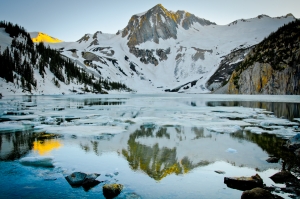
When Regina and I embarked from Colorado Springs, the plan was to backpack up to Snowmass Lake and climb Snowmass Mountain, putting me within 10 climbs of completing all of the 14ers in Colorado. Unfortunately, some unforeseen circumstances prevented us from reaching the summit of Snowmass Mountain, which I will go into detail about later on. Fortunately, there was ample opportunity for photography, and that opportunity was not passed on.
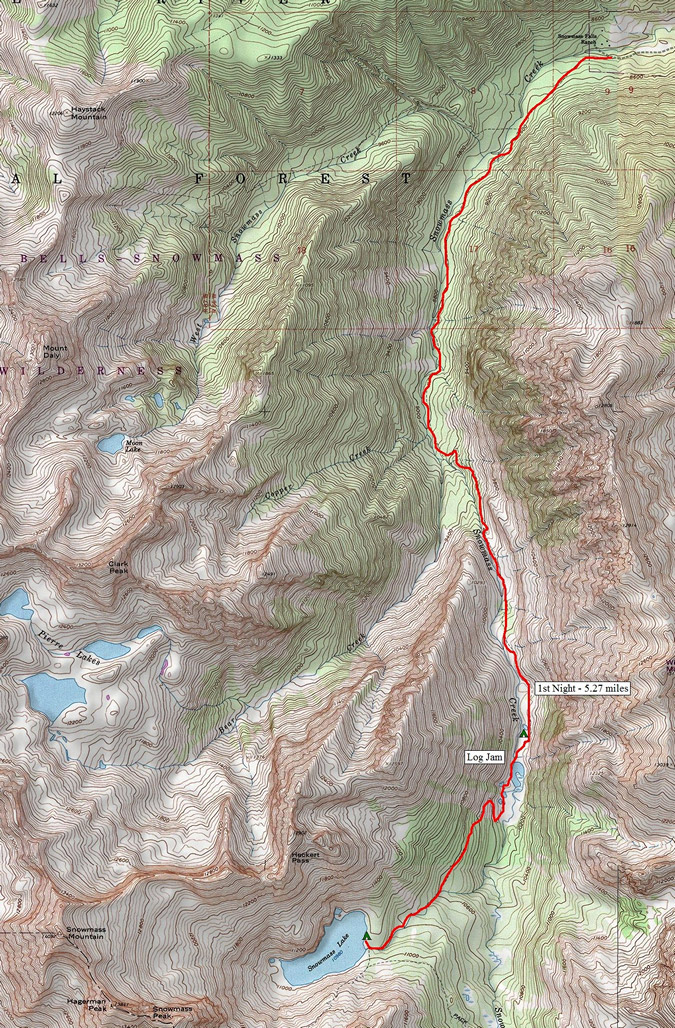
For those that follow my trip reports, Regina is a friend of mine that I met through 14ers.com and our relationship could best be described as one of two siblings. My wife is 100% cool with me hiking with another woman, and if another person asks me about it, I may just roll my eyes. Now that we have that out of the way, let's move on with the report! Regina and I departed Colorado Springs on Friday June 24th and reached the Snowmass Lake trailhead at around 8 PM. We were both very psyched about our first backpacking trip of the year, and had prepared for the many possible scenarios we were anticipating, including deep snow, an ice/snow climb, and wet weather. With that being said, we both packed our snowshoes, crampons and ice axes. I was also very excited to finally test out my brand new Lowepro Toploader Zoom 50 AW camera bag, as pictured below. The idea behind the bag is that it is held to your chest by this harness and makes your DSLR easily accesible. Time would tell!
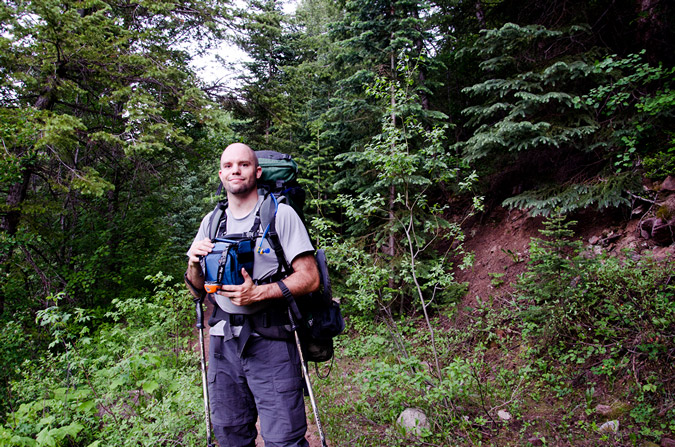
The hike up the Snowmass Lake trail (I believe it is actually referred to as the Snowmass Creek trail). takes you right into the Maroon Bells - Snowmass Wilderness Area and did not disappoint in terms of aesthetic beauty.

One of the things that Regina and I were concerned about was the infamous logjam crossing, where you must cross a huge stream via randomly scattered logs. This was not something we were looking forward to, given the fact that the snowmelt was particularly high this year and because we were carrying a lot of weight on our backs. About a mile into the hike, our fears of Snowmass Creek having a lot of water in it were confirmed...
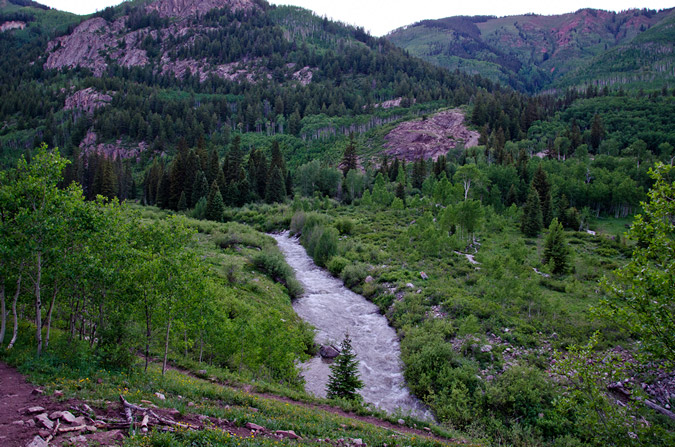
Would we be able to safely cross the logjam in the dark? The idea was quickly losing favor among the two of us; however, we kept our quick pace, which was aided by the great views of the surrounding peaks and forest.
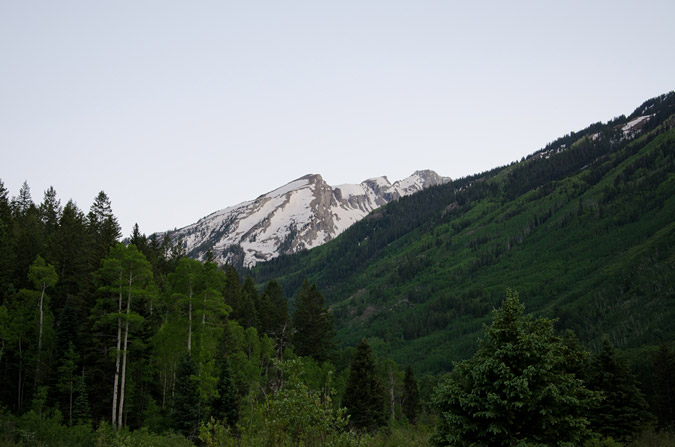
As we hiked up the trail in our heavy packs, the daylight faded quickly, and soon we were forced to employ the use of our headlamps to guide our hike.
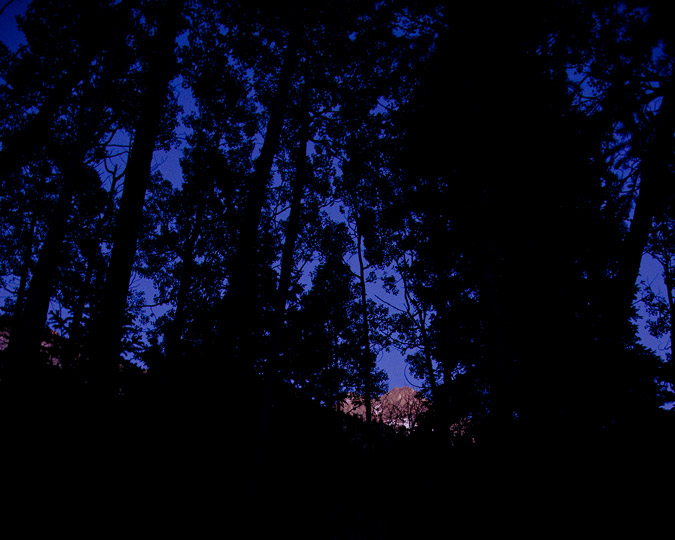
The plan was to get as far as we could in the dark before setting up camp for the night and making a go out of Snowmass Mountain the following day. From the trailhead, the lake was a good 8 miles up, which meant a good portion of our hike would be in the dark. Shortly after the sunset and the trail became dark (but before we turned on our headlamps), a dark object walked across the trail in front of Regina, which frightened us both. I quickly turned on my headlamp and discovered that it was a porcupine. We let him pass on through and continued on up the trail in the dark. Periodically, our headlamps would catch the eyes of various wildlife in the dark shadows of the night. For the most part, we identified them as deer, but given we were in the wild and it was dark, our imaginations were going in a much different direction!
After a short while, Regina began to get sick and threw up all over the trail (sorry about that to the folks that came up the next morning). Surely this would not be a portent for things to come? Regina said she felt much better, so we kept on heading up the trail in the dark. As midnight approached, we decided to stop and see where we were at. I pulled out my GPS and discovered that we were about 1/8 of a mile from the logjam - a perfect stopping spot for the night. We decided to set-up camp in one of the better campsites I've seen on any backpacking trip, right next to Snowmass Creek. Since this was her first backpacking trip, I showed Regina how to hang our food bags by nylon rope and how to setup camp.
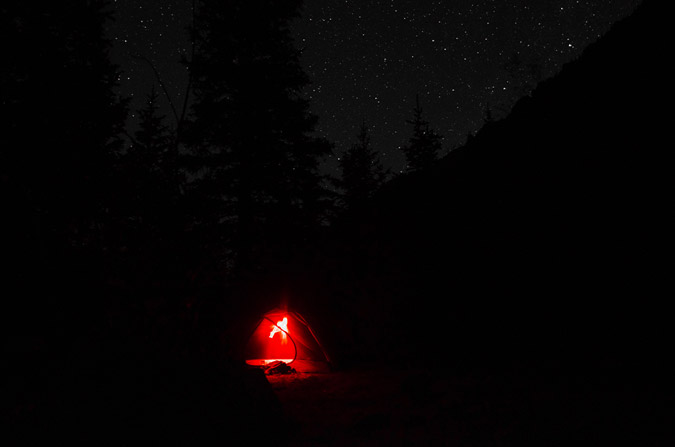
Since it was so late and because Snowmass would require crampons on hard snow, we decided the best plan would be to get plenty of rest, pack the rest of the way up to Snowmass Lake the next day, take it easy, and go to bed early for a super-early ascent of Snowmass Mountain on Sunday. We woke up the next morning at around 9 AM, listening to a group that had just came down from Snowmass Mountain talk about the logjam. They were making jokes about how the logs would sink and that people were almost falling in, etc. Was the logjam really that bad?
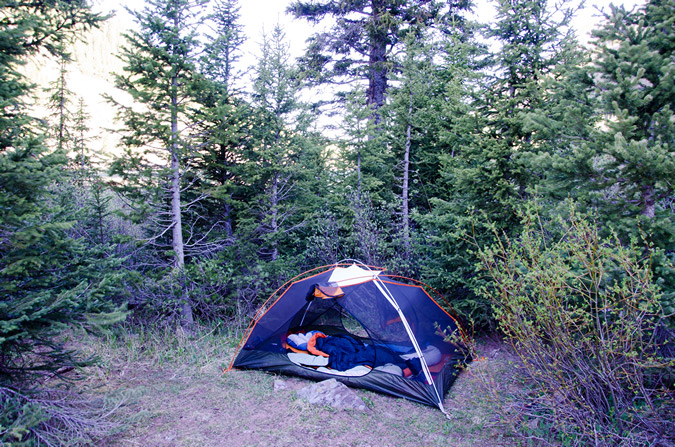
We quickly packed up and headed towards the logjam. At first sight - the logjam confirmed our worst fears - it looked incredibly daunting.
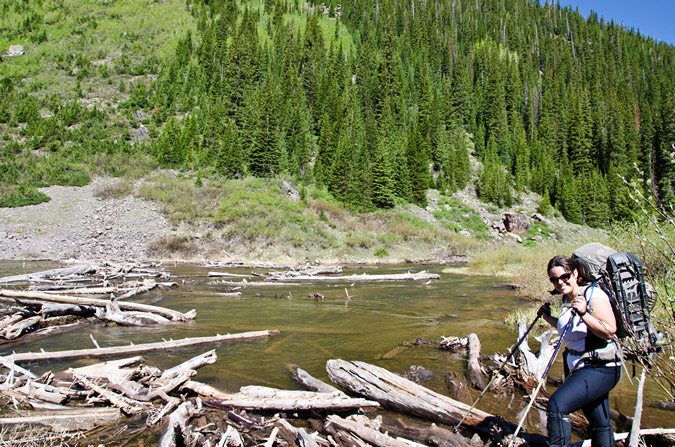
The water was about 3 or 4 feet deep in spots, and was rushing quite quickly under the logs. If the views were not so incredible, the logjam would have been a real bummer!
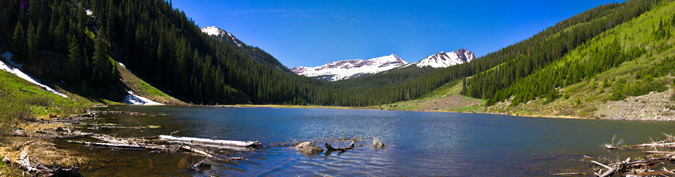
There was little to no consistency in the reliability of each log, and each log required a good test before we used it. Trekking poles were quite useful, but at times they gave me a false sense of security because I would put some of my weight on them when they were not secure on a log, causing me to get off balance. Care must be taken to successfully cross the logjam as it is a good 100 ft to the other side! I stopped halfway across to take a 180 degree panoramic photo to show the length of the crossing.
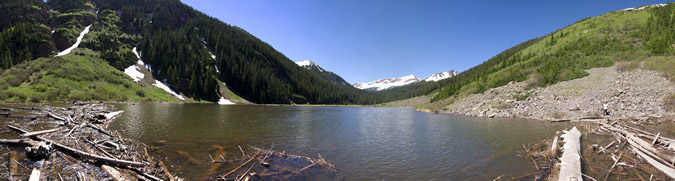
After successfully crossing the logjam, we quickly made our way up the trail, which followed the now wide and pristine Snowmass Creek. The whole area was like a giant beaver pond, with lakes and creeks intertwining with the beauty of the Elk Mountains at the head of the valley. The trail quickly begins to work uphill again and soon views of the pristine valley below can be made.
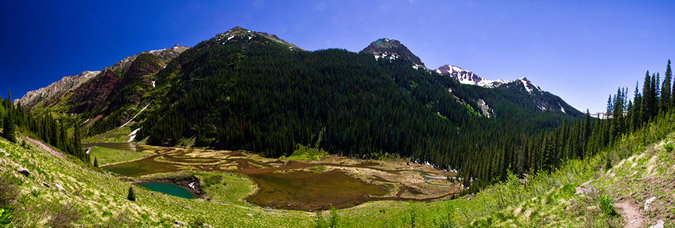
The rock in the mountainside was quite red, a clear indication that the Maroon Bells were closeby.
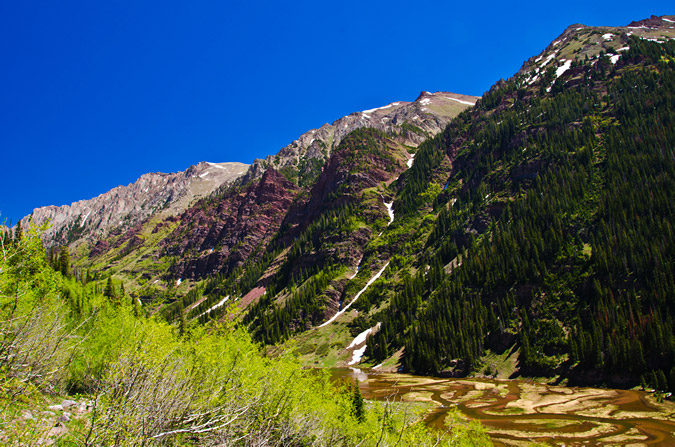
The trail quickly weaved into the trees towards Snowmass Lake above and to the east, and we were quickly reminded that there was a ton of snow in this area still. Would we finally get to use our snowshoes? Not so much - the snow as hard enough and sporadic enough that snowshoes were not required. Another trip where I packed my snowshoes for no reason! Oh well.

This was the hardest section of the hike, with the snow banks rising and falling throughout the trail, making travel slow and laborious with heavy packs on. Nonetheless, we arrived at the trail junction for Snowmass Lake and headed on up, following Snowmass Creek, which was quite full of water.
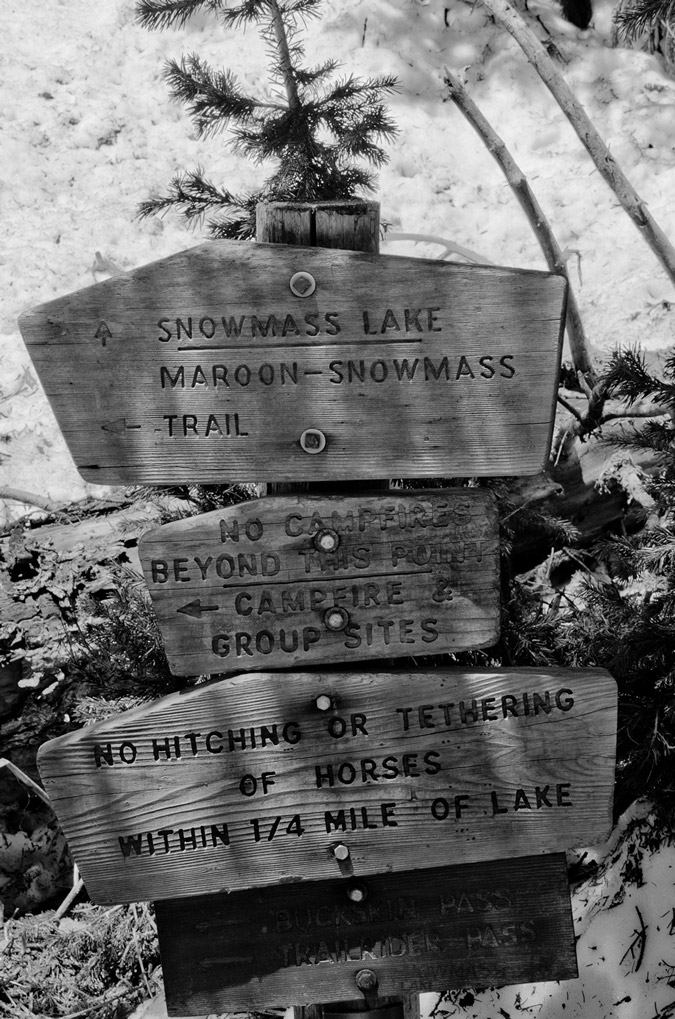

Soon, we reached a huge waterfall next to the trail, with a giant log in front of it. I decided to take a break, take my pack off, and cross onto the log to get some HDR shots of the waterfall from the middle of the log. Getting onto the log proved quite tricky, with the area around the creek full of snow and ice and dirt; however, I managed to make it onto the log without drowning or falling in. Yay for me.
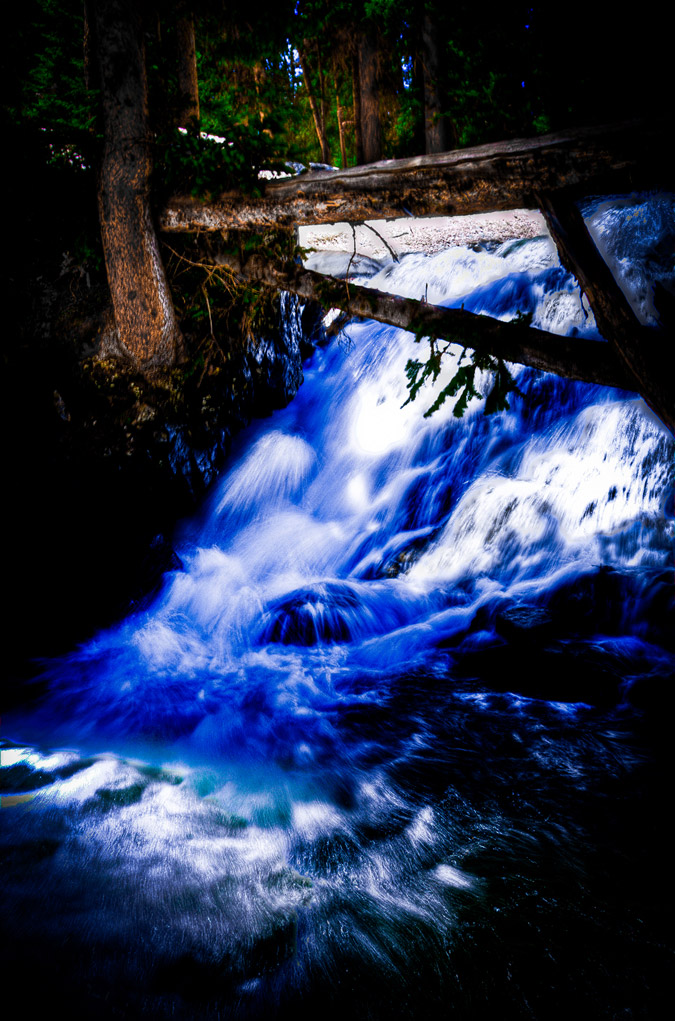
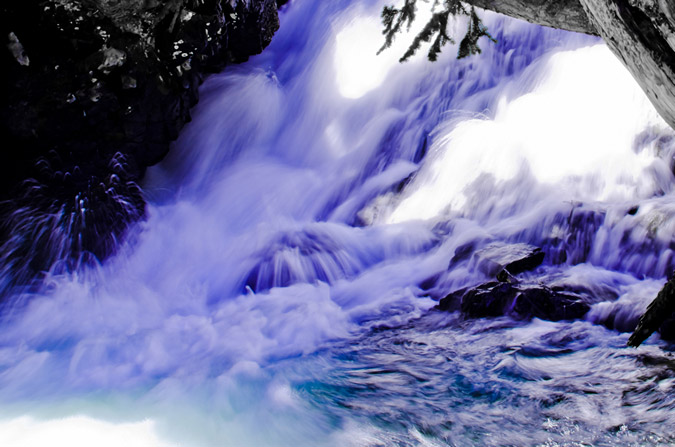
About 200 feet past this waterfall, we finally reached the head of Snowmass Creek and the first views of Snowmass Peak with Snowmass Lake in the foreground. How exciting!
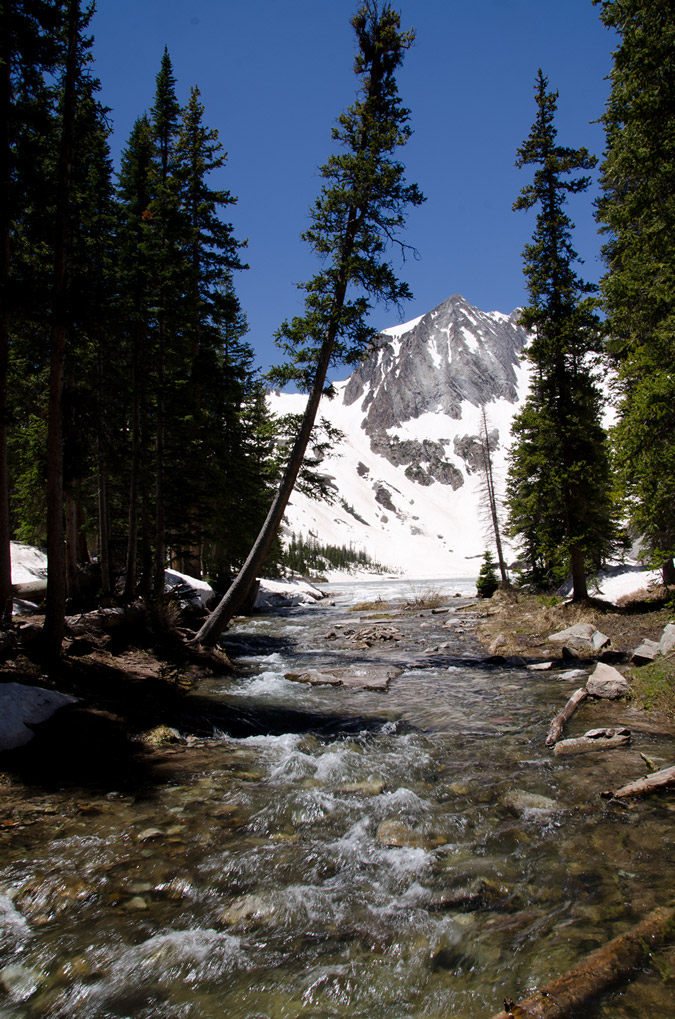
The first order of affairs was to locate a suitable campsite. Most of the area was full of deep snow, so options were quite limited. Sticking to the "100 ft away from lakes" rule proved nearly impossible due to the snow and marshy conditions. Nevertheless, we found a great spot near the lake and creek and set up for the day. It was pretty great to finally get a glimpse of Snowmass Mountain as well, which was tucked away to the right of Snowmass Peak, the lower 13er at the head of Snowmass Lake. Even better, the moon was passing just above Snowmass Mountain, making for some fun photography.
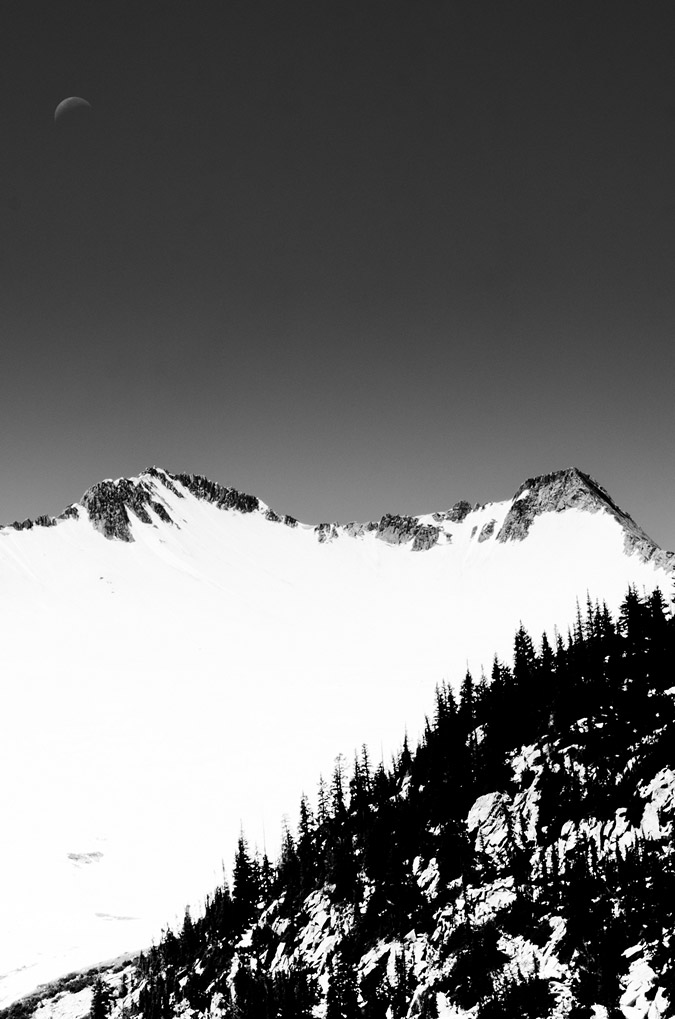
Throughout the day, the lighting shifted and the winds died down, making for better or worse photography conditions, depending on the combination of the two. For the most part, the Golden Hour proved to be the best time to shoot, which did not surprise me in the least.
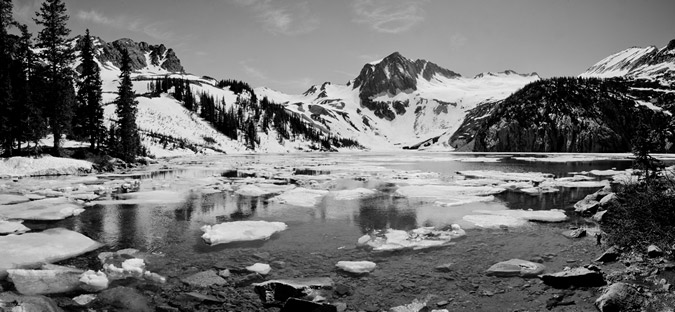
For the most part, Regina and I just kicked it at the lake for the day, watching the wildlife and the insane beauty of the lake. This also gave me the opportunity to play around with my camera and try to get some decent shots.
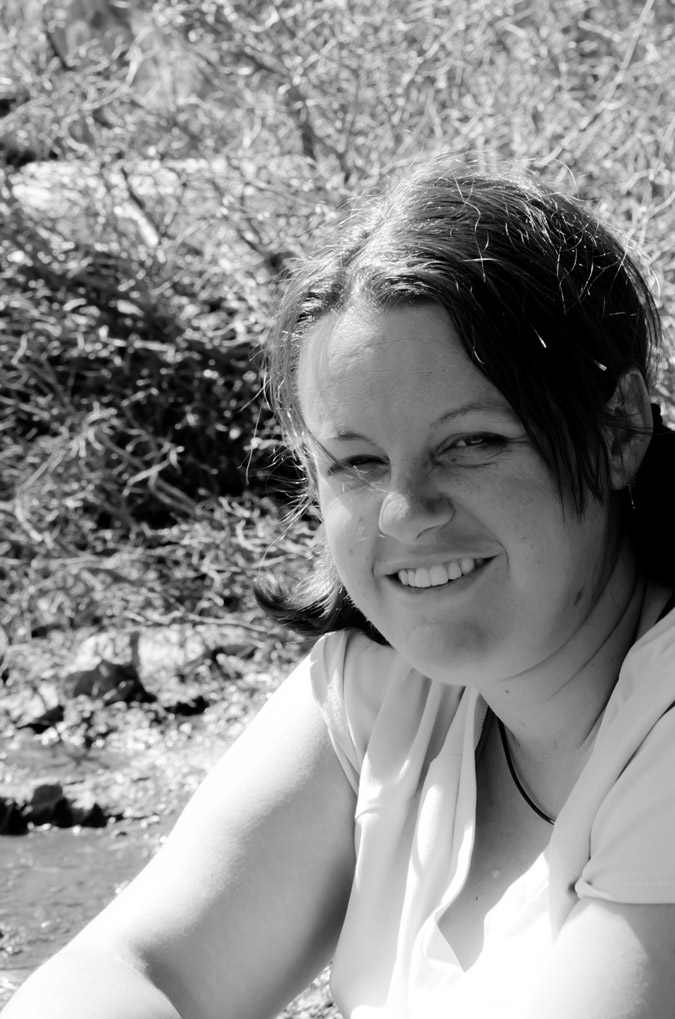
About an hour or two after we arrived at the lake, another group of gentlemen came to the lake, sporting a pistol and a Canon EOS Digital Rebel attached to a fully extended tripod. They were nice enough guys, hailing from Elizabeth, but I could not help but wonder how fun that tripod was to carry up to the lake and if they would be using the pistol for fun or for protection. I was hoping for the latter, based on my horrible experience at Huerfano Valley a couple of years ago. The two confirmed they were just hikers, not climbers, and were just there for the night.
Another hour later, two more guys came up the trail and were looking to camp nearby. One looked familiar, so I asked him if his name was Corey. He said it was - and sure enough, it was one of my Facebook friends! Corey was up at the lake with his friend Robbie as they were planning on climbing Snowmass on Sunday, the same as us. They were planning for a 4 AM start and we were planning for a 2 AM start. Regina and I talked for awhile off and on with both Corey and Robbie throughout the afternoon, getting to know each other. It is always remarkable to me how quickly people that climb 14ers can get to know each other and how, generally speaking, everyone is so friendly. It was a real pleasure sharing a campsite with them. Regina got to spend some quality time getting to know Corey:
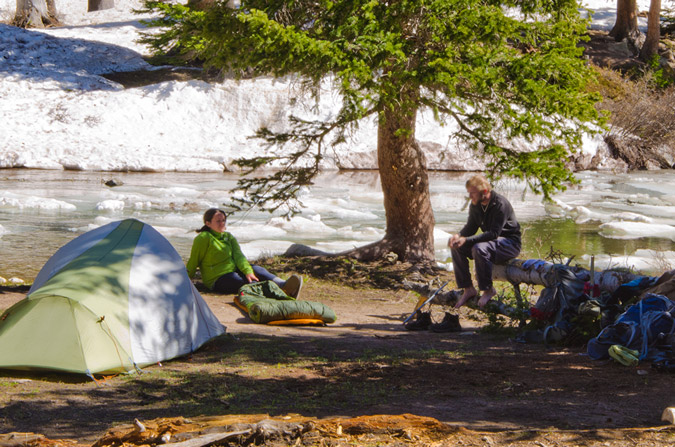
The lake was thawing out throughout the day, which was actually really fun to watch. Chunks of ice and snow would calve off of the icy glacier that was now Snowmass Lake and flow down into Snowmass Creek and out to sea. It was really fun to watch, and quite peaceful too. Soon, the sun began to get lower and lower on the horizon, which piqued my photographic instinct quickly. I was off to get as many quality shots as possible of the lake, hoping to get both HDR and standard photos. HDR has quickly become one of my more favorite photographic mediums. Its almost like opening a present at Christmas when you begin working with the files at home - you never quite know what you're going to get!
First up - the HDR version:
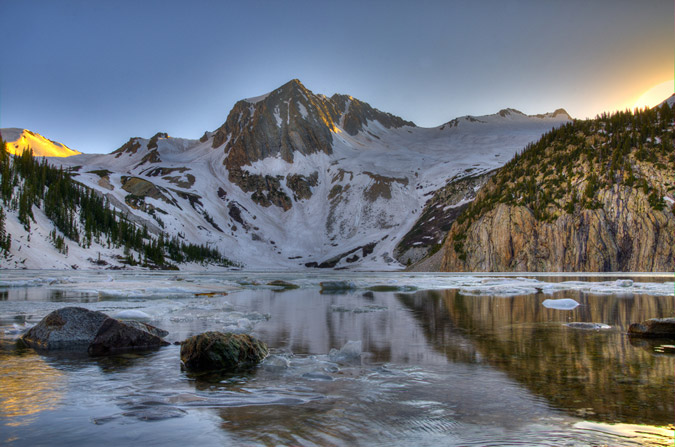
And the standard version, which won me my second Flickr Explore Award, which was quite exciting! Explore is Flickr’s Daily Artist Showcase. Every day Flickr admins choose 500 of the most interesting images determined by “interestingness”. I have placed that photo in my portfolio and for sale section if you are interested in purchasing a print.
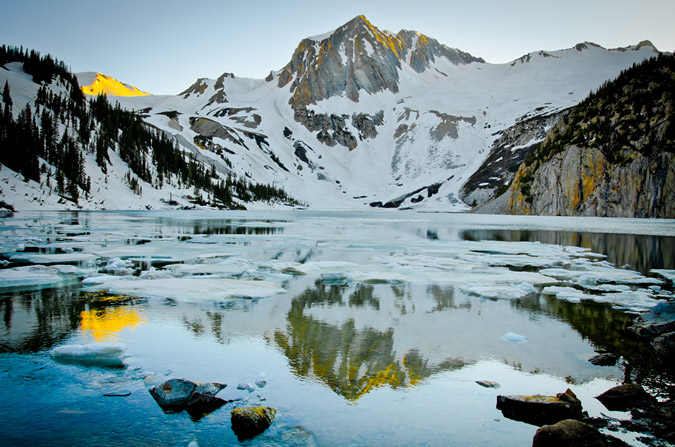
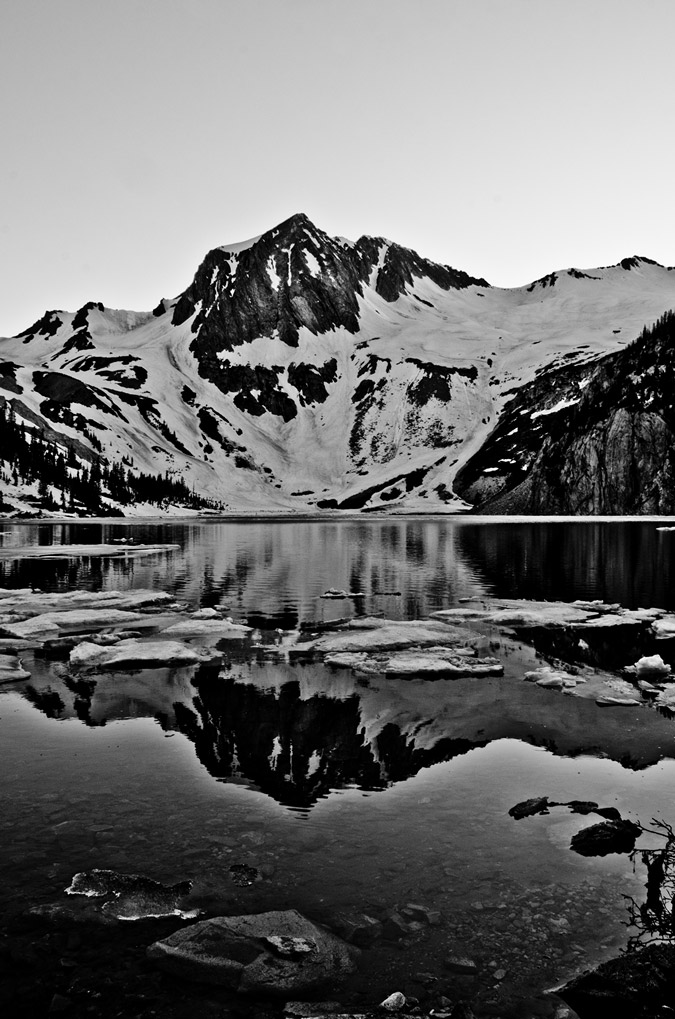 The views from the shores of the lake were outstanding. Quite possibly ranking in the top 10 views of all time for me personally. The impressive features of Snowmass Peak, paired with the crazy cliff walls below Snowmass Mountain made for quite a great spot to sit and soak it all in. To make things even more fun, close to dusk, a huge, feral, rugged looking porcupine decided he would come and hang out with us. This guy was seriously oblivious to our presence, and it was actually somewhat challenging getting him to go away without putting myself in a dangerous place.
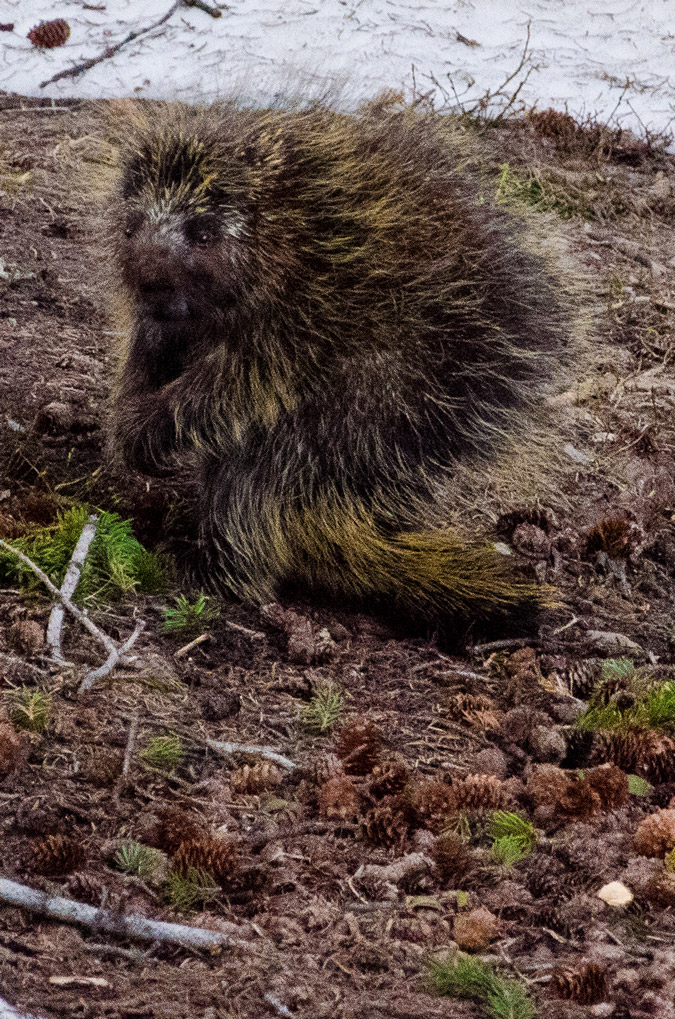
With all of the excitement over the porcupine and the heavenly sunset, I decided it was time to hit the sack. We had set our alarms for 1:45 AM, anticipating a 2 AM start. It was sadistic, I know, but we felt it was necessary given the conditions. The alarm went off and I got up fast, because I wanted to take advantage of a quick photographic opportunity to capture the Milky Way, or at least attempt it. Additionally, I was hoping that I could get some photos of the stars reflected in the lake as well. Both concepts challenged my photographic mind, and away I went to try to get some good shots. The challenge with shooting in low light, as in pitch dark, is always figuring out the best combination of aperture, ISO and shutter speed. Of course, I guess this can be said about any other form of photography, but the concepts are of particular sensitivity in low light conditions. I opted to set the camera at a slightly higher ISO (400) to increase the sensitivity of my cameras sensor. Additionally, I went for a 20 second exposure instead of a 30 second exposure since I did not want the stars to blur / move across the frame at all. Lastly, I opted to set my camera at the lowest aperture the lens would handle (f/3.5) to allow the maximum amount of light into the lens. These combinations produced fairly good results.
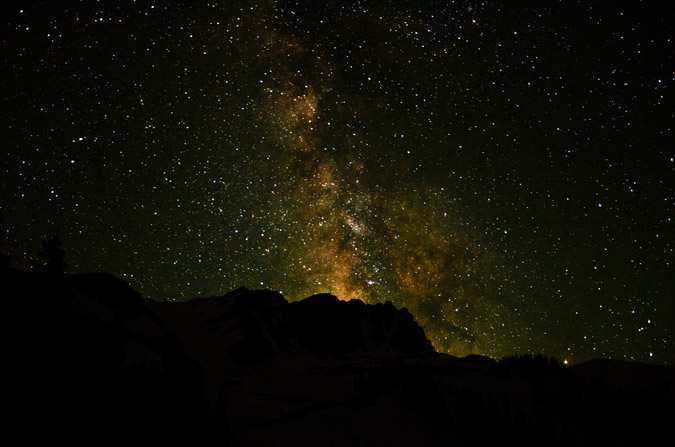
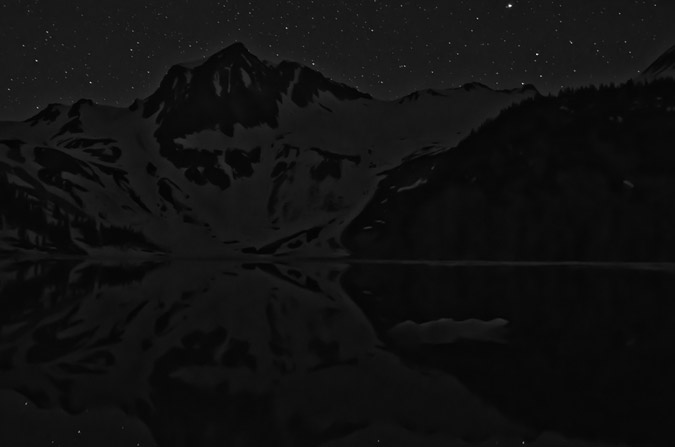
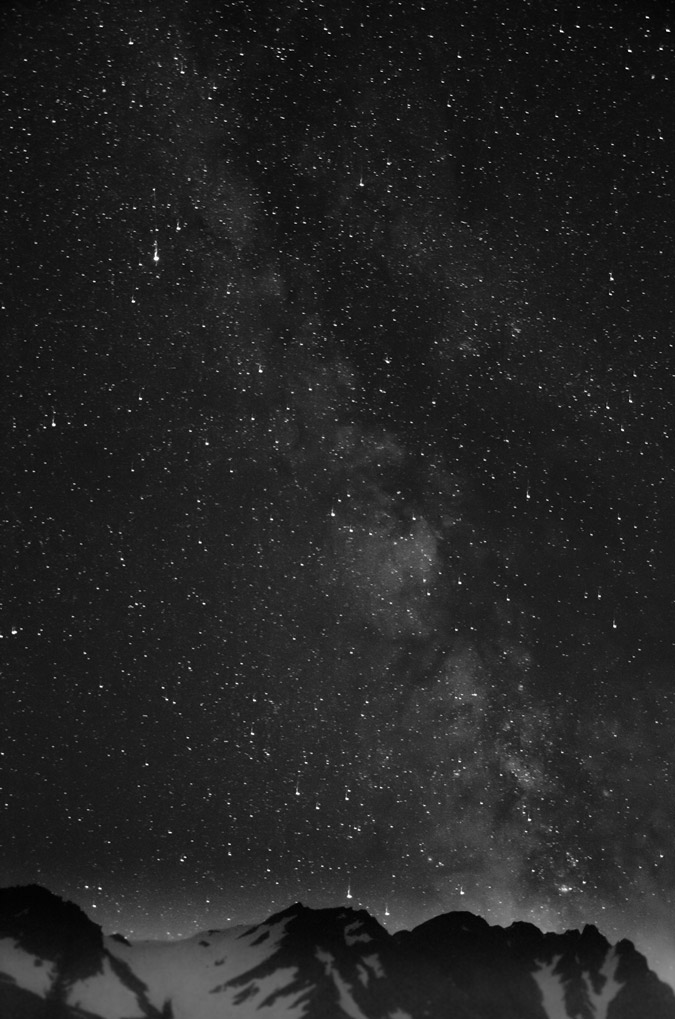 Unfortunately for me, the photographic success would not lead into climbing success. This is quite an embarrasing story for me, since I pride myself on preparation. As Regina and I wrapped around the steep snow banks to the left of Snowmass Lake, heading for Snowmass Mountain, we quickly realized that crampons would be required. No problem right!? Wrong. Shortly after putting the crampons on and continuing, my crampons would come right off my boot, necessitating frequent and long stops to get them back on. Finally, Regina and I decided that there was something wrong with my crampons and that no matter how we tried to get them to stay on my boots, they just would not stay. We decided to abort the mission at about 3:45 AM and headed back to camp. I was quite furious with myself, since I had personally tested the crampons at home, putting my boots into them, strapping them down, and making sure they fit. Apparently that effort was not as good as it could have been. It turns out, after inspection at home, that my crampons were adjusted in such a way that they were too big for my boots. Most modern crampons self-adjust their size; however, the crampons I own are hand-me-downs from my dad. Surprisingly, the same model is still manufactured by Seattle Manufacturing Corporation. Anyways - lesson learned! USE your equipment before you trust it with your life. We went back to camp, slept for a bit longer, and then packed up and headed back down to the trailhead. I was not in a great mood because this was one of the only mountains I've ever been turned back from, and it was completely my own fault. If it were weather or altitude sickness or some other uncontrollable event, that would be one thing, but to have the mountain turn us back because I was too stupid to test my crampons - not cool. It was not a total loss though, the photos turned out great, and I was able to get some fun and creative shots of wildflowers on the way out. If any of you know the names of these flowers, please, by all means let me know!
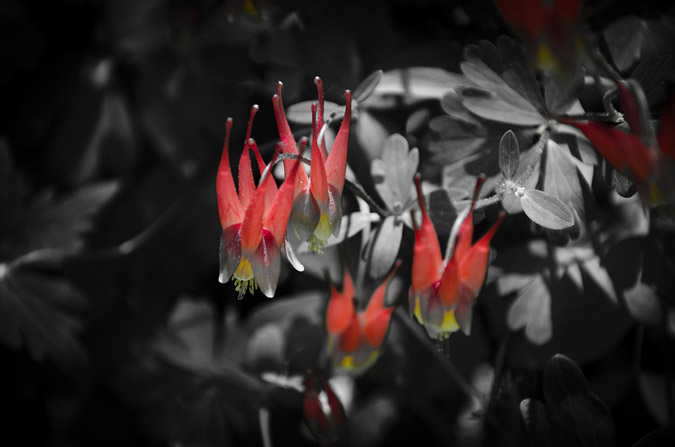
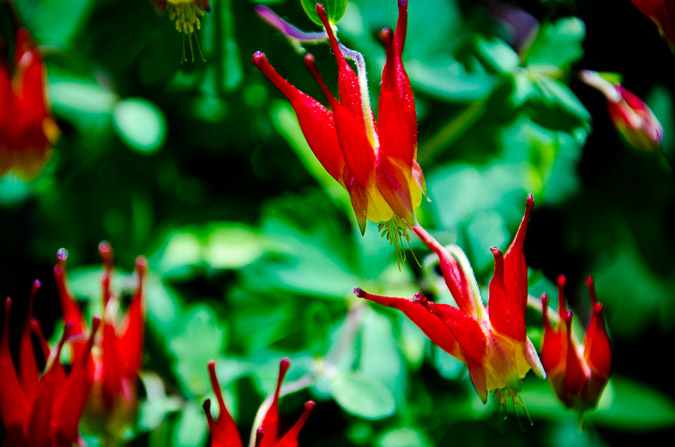
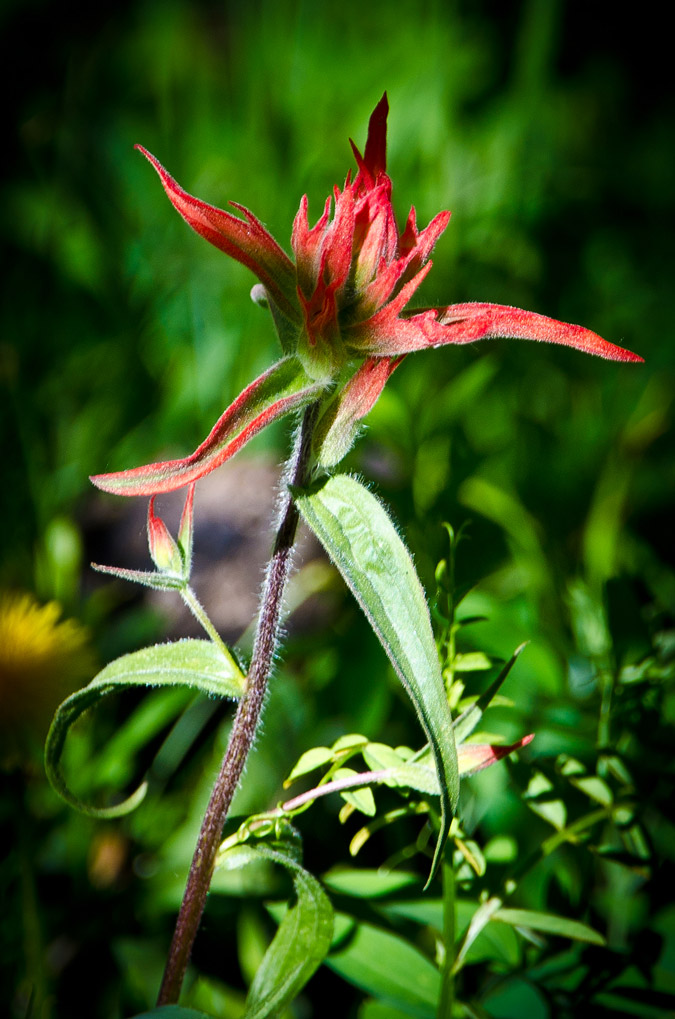
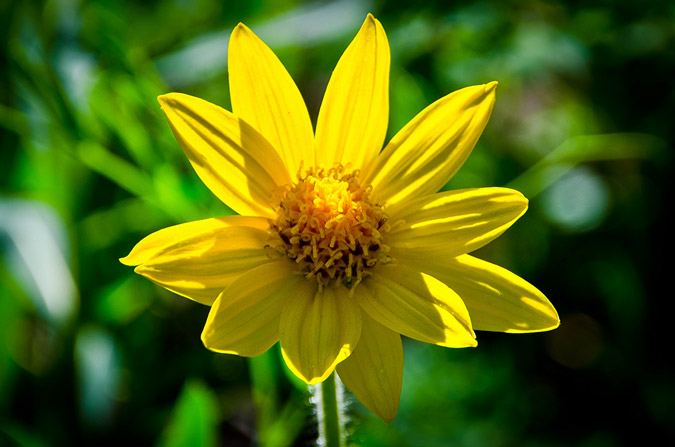
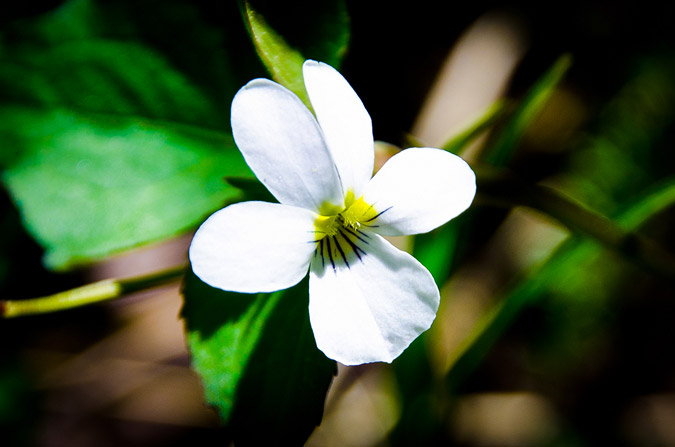
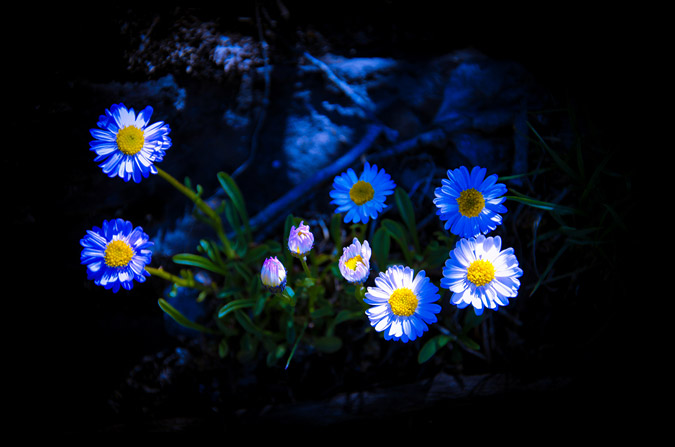

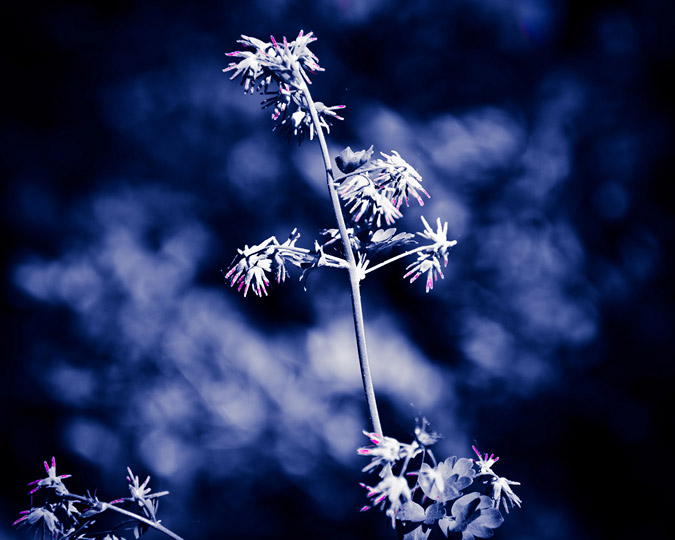
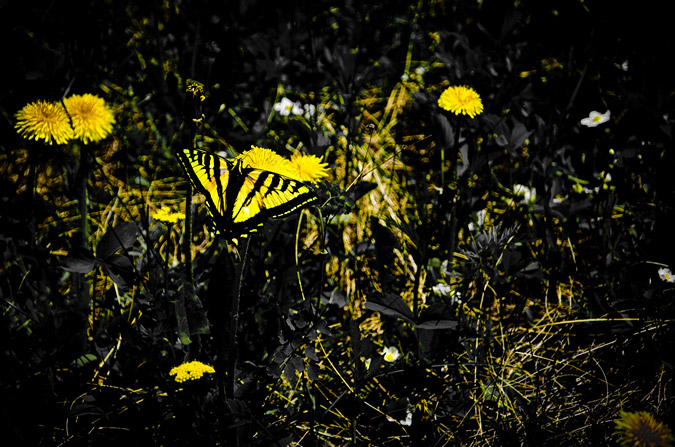
The most memorable part of the trip was yet to come though - and it certainly made up for the rest. On our way out, Regina took a nasty fall on the logjam! At first it was quite a scary experience. I was right behind her, and had to talk her through getting herself back up out of the water. She had managed to completely submerge one of her legs and was drenched. Fortunately, Regina is a good sport, and within a matter of minutes we were both laughing about it.
Lastly, we were able to get some great views of the backside of Snowmass that we did not get to see on the way up, which were quite stunning!
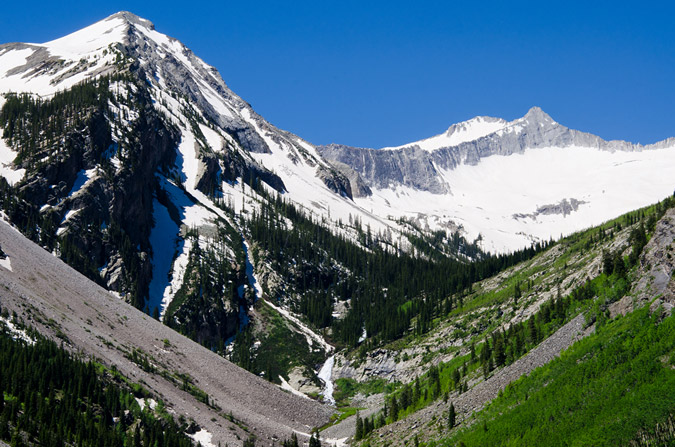
All-in-all, I would rate this hike quite highly on my list of hikes that I have done. The views from Snowmass Lake are worth it by themselves, and the logjam provides an excellent adventure.
And in case you were wondering - the new camera bag totally lived up to my expectations - I will end up writing a full-blown review of that product for sure!
Until next time Snowmass Mountain... I'll be back!