Displaying items by tag: Crestone Needle
Climbing Crestone Needle in Autumn and a Fall Colors Photography Expedition
It is no secret that I moved to Portland, Oregon in January 2014 – lured by a much more walkable city than Colorado Springs, filled with breweries, vegan food, and citizens of a much similar political and philosophical mindset. I’m not going to lie though; I miss my friends and I miss the Colorado Mountains deeply. I was born in Colorado and have been climbing Colorado’s high peaks since 1982. The mountains run deep within my veins. So, when I knew I would be spending a week in Colorado over the last week of September, I jumped all over the opportunity and locked in a three-day backpacking stint into the South Colony Basin beneath Crestone Needle and Crestone Peak in the mighty Sangre de Cristo Mountains with my best friend Sarah Musick. Our goals were simple: enjoy the wilderness, enjoy our time together, and climb mountains.
Packing for a longer backpacking trip involving a lot of photography gear with limited space in the backpack due to travel constraints was quite a challenge. I decided to use my Osprey Talon 44 (hardly a backpacking pack) and go as light as possible, opting to take two lenses paired with my Nikon D800: the Nikon 14-24 and the Nikon 24-70. I really wanted to bring my Nikon 70-200 for wildlife and other landscape uses; however, that lens weighs a ton and takes up quite a bit of space in the pack, so it had to stay behind for this one. I felt pretty good about the weight of my pack after it was all said and done – weighing in at just 40 lbs. - with a tripod, two lenses, a gripped D800, filters, a tent, pad, sleeping bag, gloves, hats, food, and stove. Not bad! Sarah would be bringing a water filter and a gas canister for the stove, so we were good to go! Bare-bones backpacking – always a little nerve-wracking, but easy on the back and knees!
The final challenge to solve before ensuring a successful trip was to secure transportation. My wife and I left a car in Colorado; however, she needed it for work as she telecommutes from Portland but when we are in Colorado she drives into work. In the 25th Hour we were able to get Sarah’s wife to let us use her Subaru Forester for the somewhat difficult South Colony Road, which I had driven successful many times in the past in similar vehicles. With all the details finalized, we departed from my parent’s house in Colorado Springs at around 10:30 AM on the morning of September 21st for the picturesque South Colony Basin. We arrived around 12:30 PM without incident. I left a small bag of raisins and a half-filled water bottle in the cup-holders below the dash, saving them as a prize upon our return on Tuesday. The parking lot was sparsely filled, mostly by what seemed to be trucks and SUVs of hunters or day-hikers, based on the people we passed on the trail on the way up.
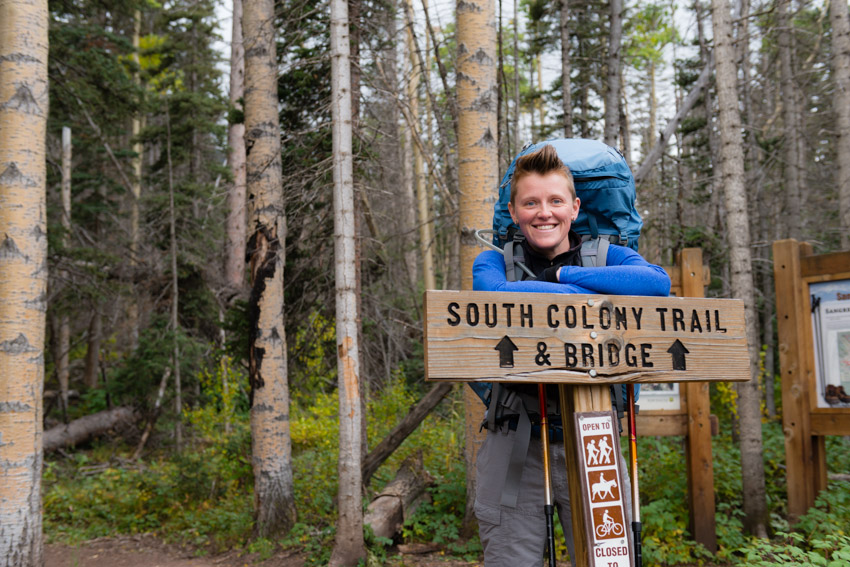
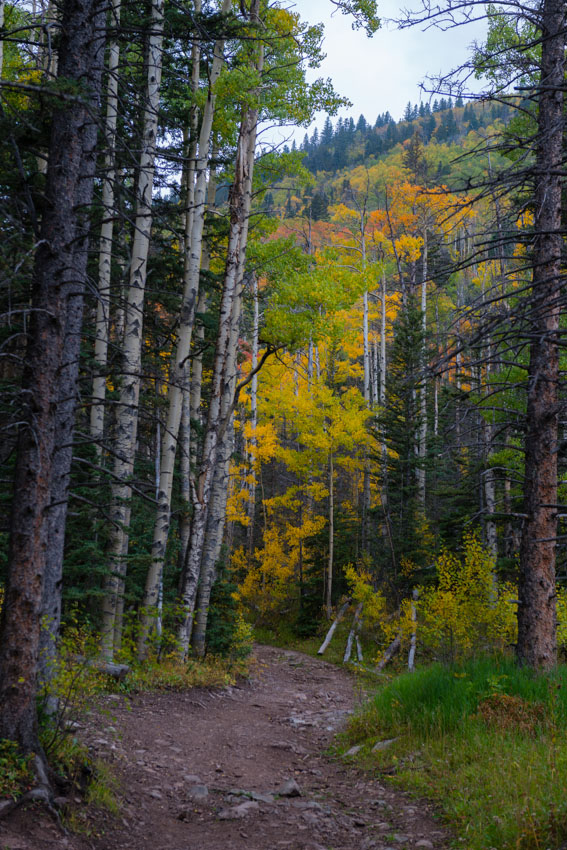
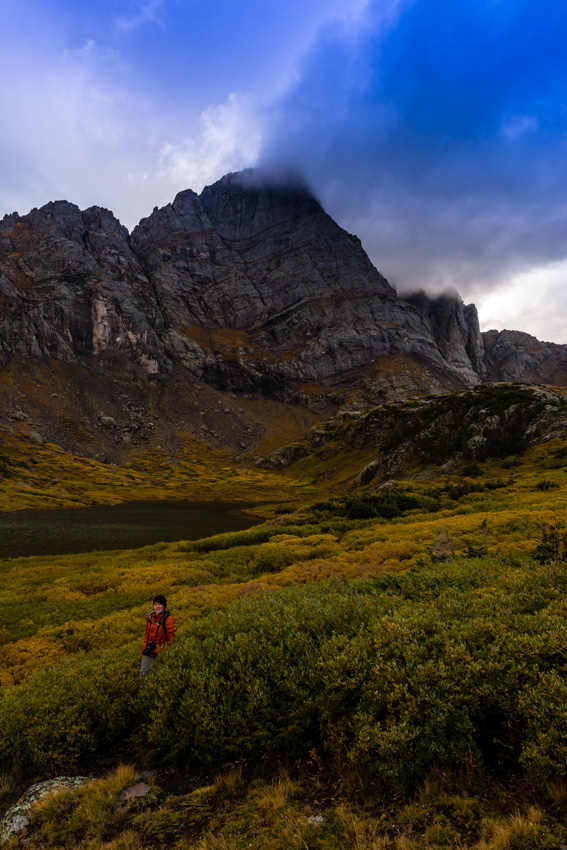
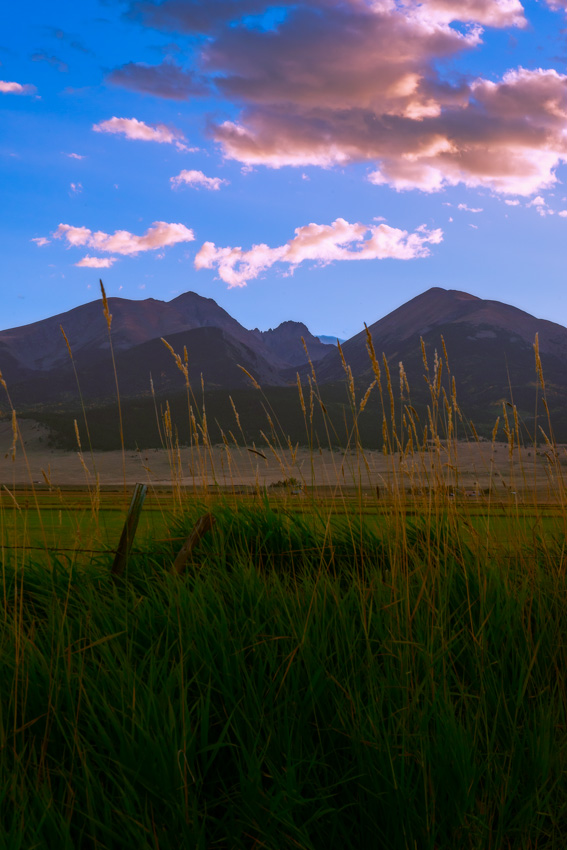
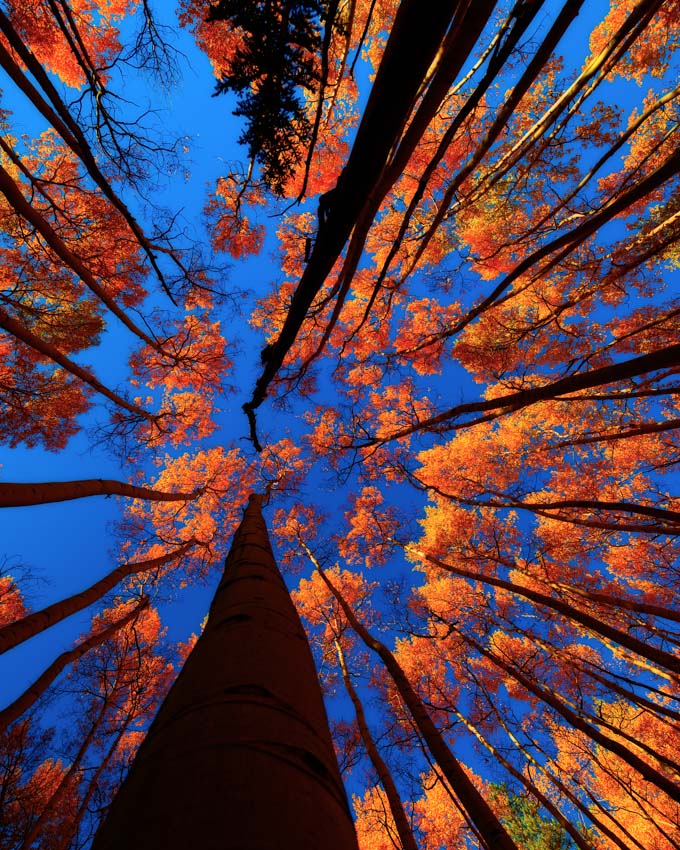
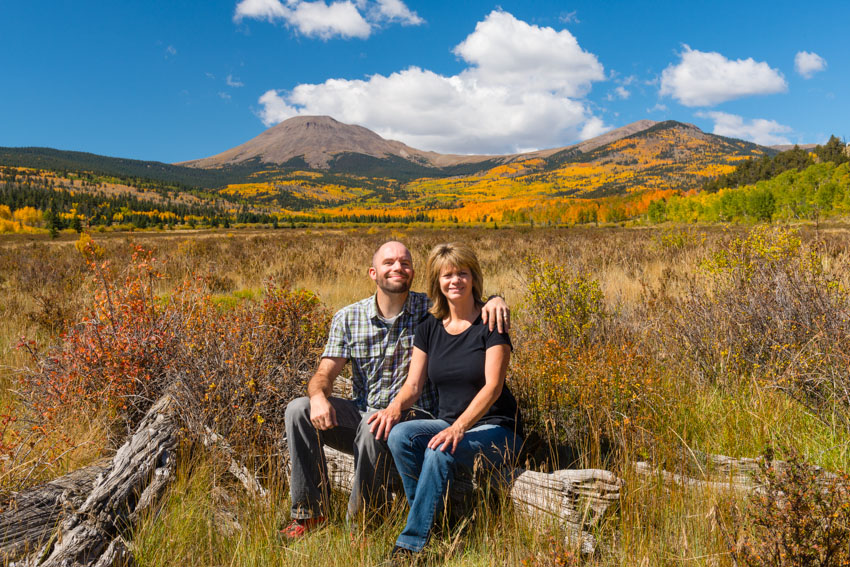
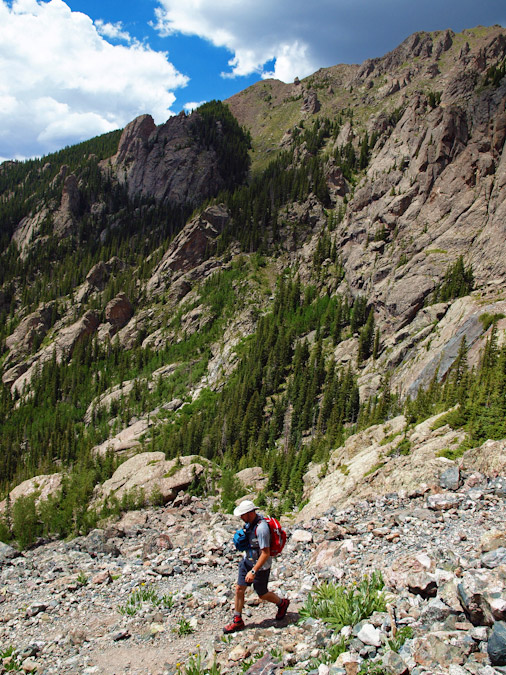
Upon starting our hike we were immediately struck by the amazing fall colors that had adorned the aspen trees and scrub oak lining the sides of the trail (which is really the remnants of an old 4WD road which was closed in 2009 at the current terminus of the South Colony Road).
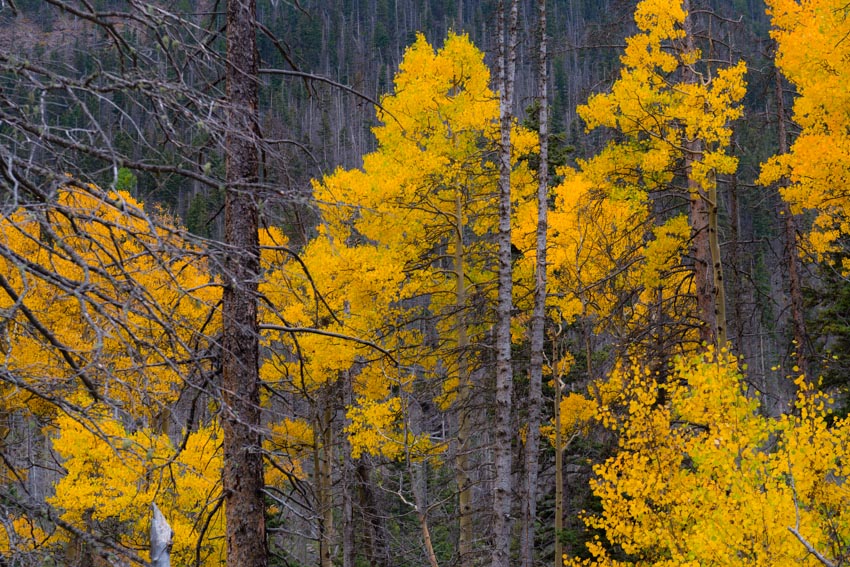
The trees were nearing peak color – hues of yellow, gold, crimson, and green filled the air, all held tight by a low layer of clouds which came all the way down to the valley floor. The formidable clouds were ubiquitous and ominous – a clear and mostly unwelcome portent for the events yet to come on our voyage into the Sangre de Cristo Wilderness.
This was the third time I ventured up this particular trail, the first being on my ascent of Humboldt Peak in 2007 with my friend Ethan – the first 14er I climbed after a very long hiatus from climbing in my twenties and the first real shift towards a healthier lifestyle. The second time was during my visit last year as the Vice President of the Board of Directors for Rocky Mountain Field Institute (RMFI), the non-profit organization responsible for amazing conservation stewardship in the South Colony Basin including the construction and maintenance of the entire incredibly well-built network of trails leading to the 14ers in the area. Due to the popularity of this pristine and ecologically sensitive area, there are numerous campsites and social trails littered across the basin which have required a lot of hours of hard labor from RMFI staff, volunteers and Earth Corps students to clean up and maintain these sites and trails. If this basin is important to you in any way, I would urge you to donate to RMFI to ensure the area is available for the enjoyment of future generations. You can check out the amazing work they did in the South Colony Basin in this video:
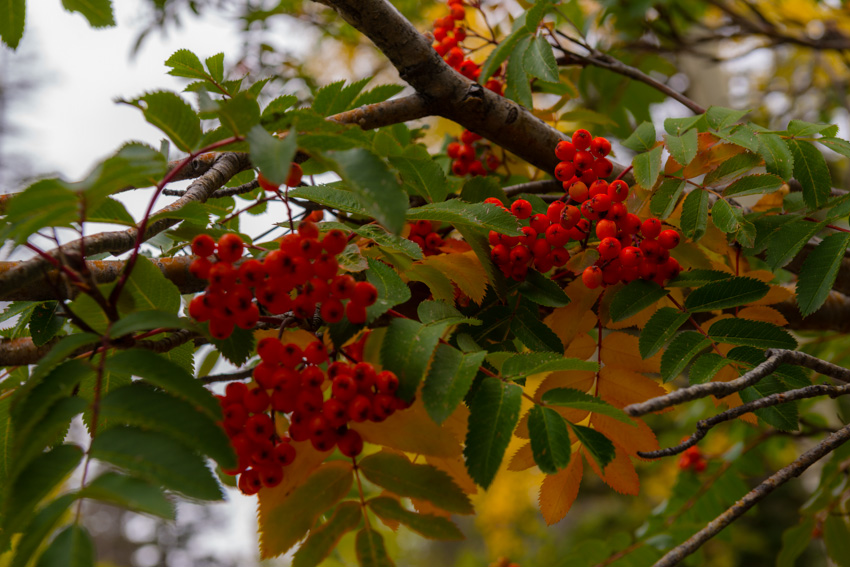
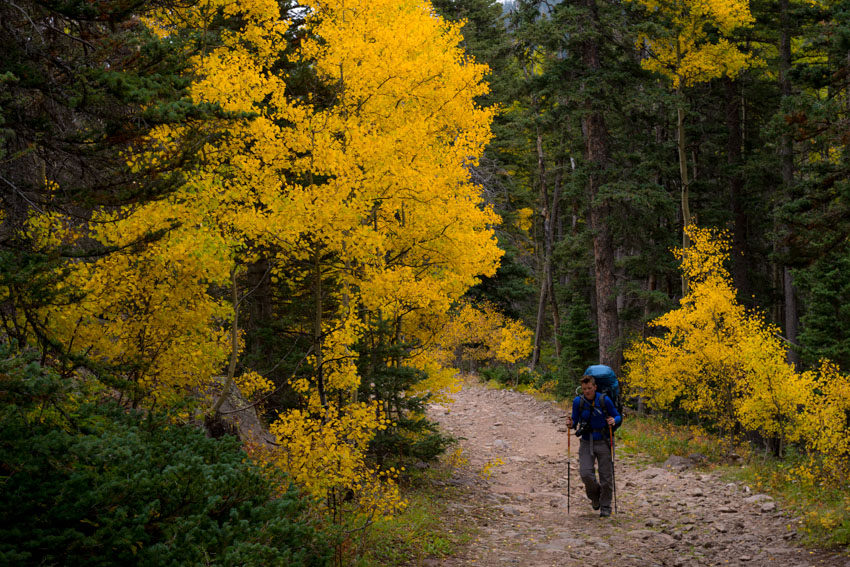
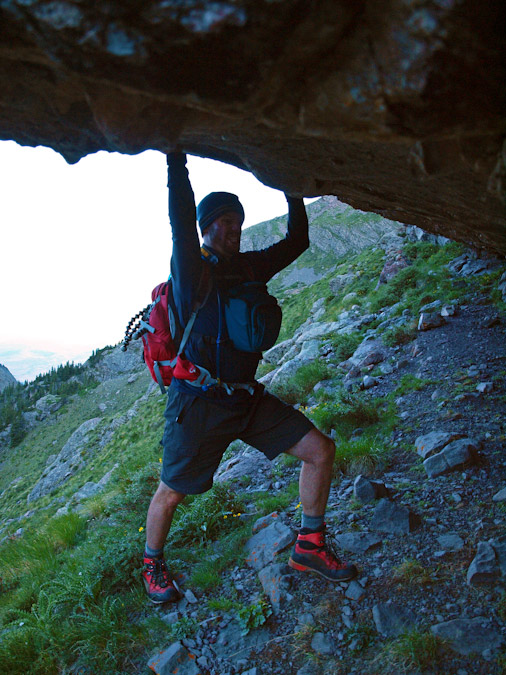
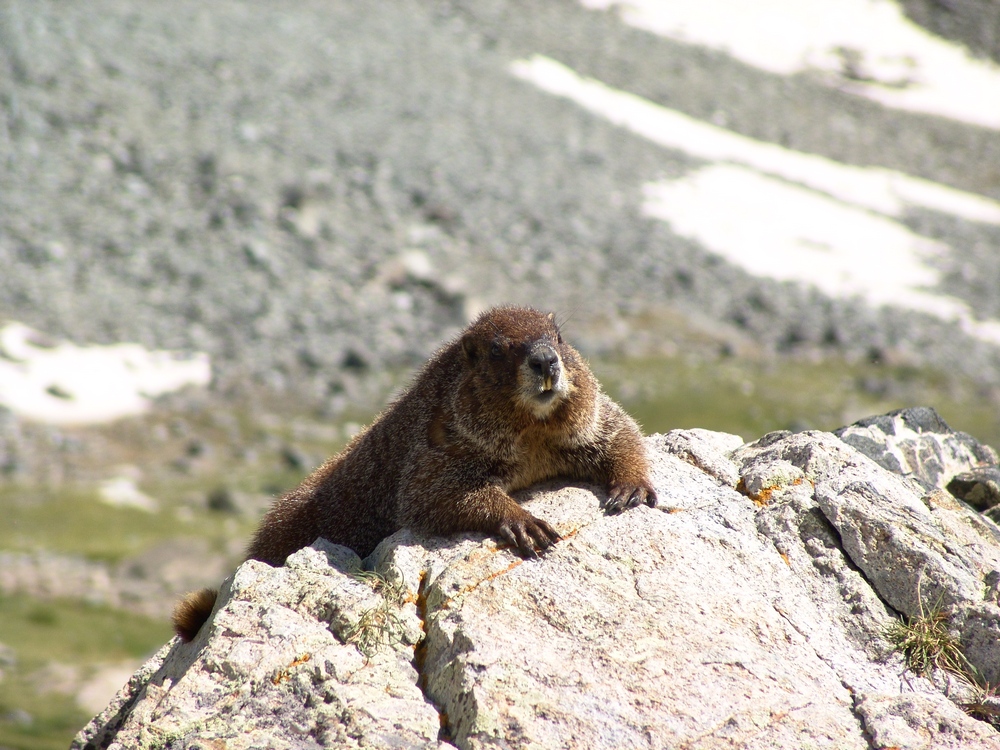
Our hike up the old road was completely uneventful, having passed a few hikers on their way out, presumably there to enjoy the changing fall colors for the day. The wooded basin offered up a plethora of sensory delights – red and orange berries, earthy scents from the rotting leaves, fresh and clean air blown in by the weather system that had settled into the basin, and a humid wetness on the skin. Given the wet and stormy weather that had moved into the basin, our hopes of accomplishing anything more than finding a suitable campsite for the three days we would be there had dissolved and our focus was singularly placed on locating our temporary home. We joked about just staying in the basin forever, and how that might work – living in a cave in the side of the mountain, finding food, sewing clothing out of marmot pelts, and even speculation about other issues which caused us to laugh heartily.
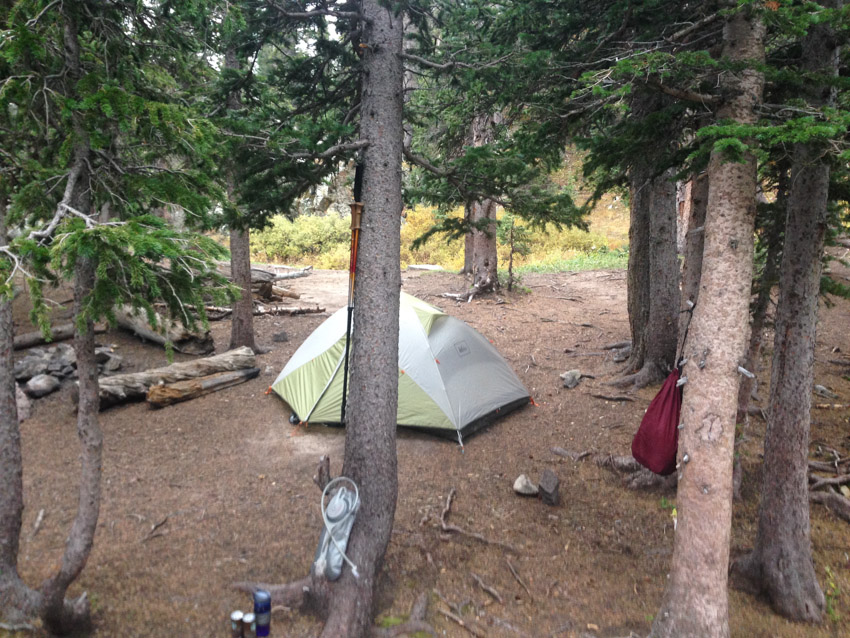
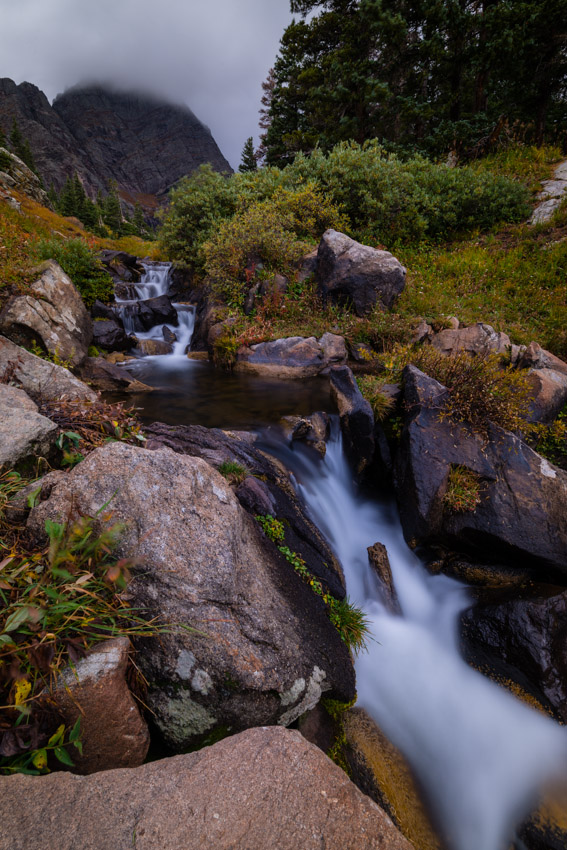
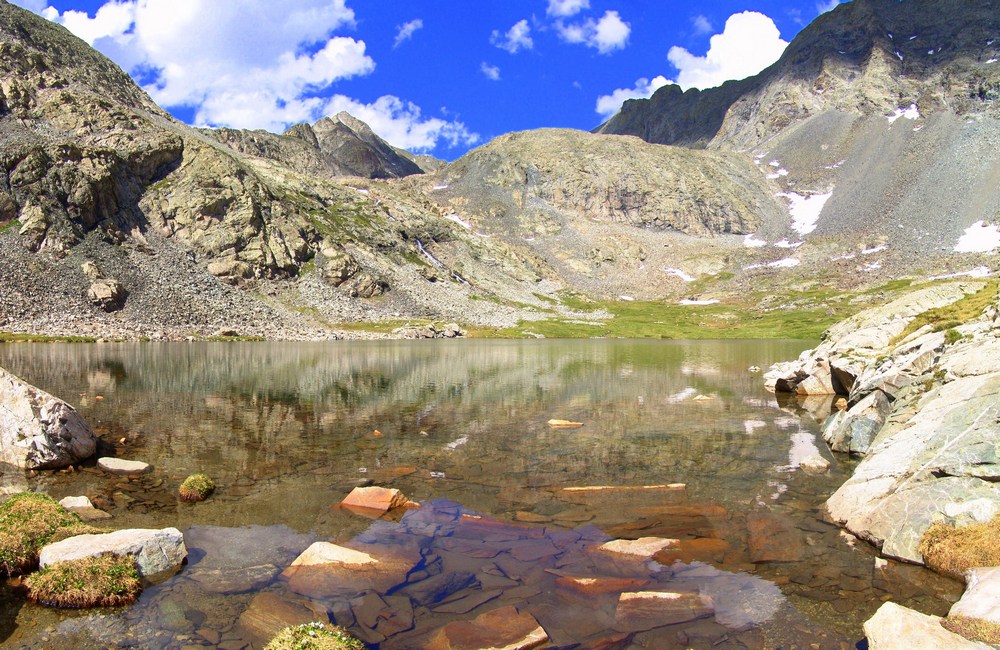
Every other time I had been into the basin I had taken the first trail on the right from the old upper 4WD parking lot, which is more direct and steeper than the trail going over the footbridge which goes directly to the trail leading up to Broken Hand Pass. For this trip, we opted to take the trail over the footbridge so we could easily find the connecting trail to Crestone Needle. Knowing from other adventures into the basin that the trails were connected higher up by way of a network of trails between campsites near where I took one of my favorite shots of Crestone Needle last year with a stream in the foreground, we decided to aim for that area to camp at. Even though Crestone Needle was completely hidden within the very low clouds, finding the location was easy since my image from that spot is burned into my memory, being one of my absolute favorite photographs of all time. We unpacked right there at the site just above the stream from this location and placed my tent on a dry and flat area near an old fire ring at the campsite. The tent site had cracks in the soil, indicating that this might be a place where water pooled; however, we understood from the weather forecast that we were to only expect about a quarter inch of rain over the next couple of days, so we felt safe to put our tent there. This turned out to be a horrible mistake!
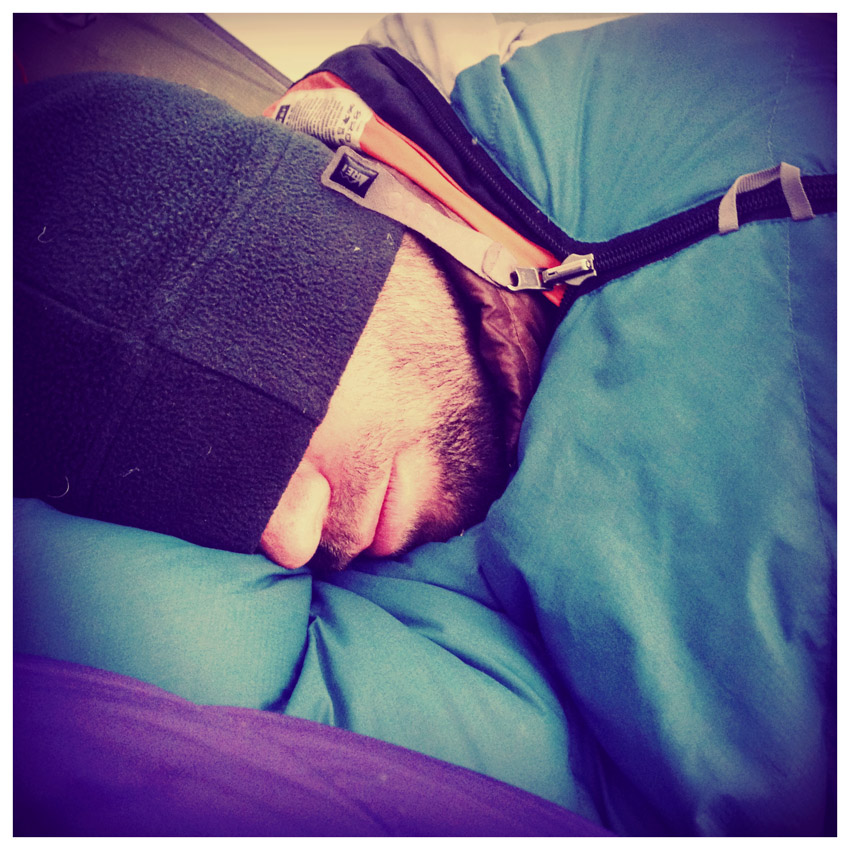
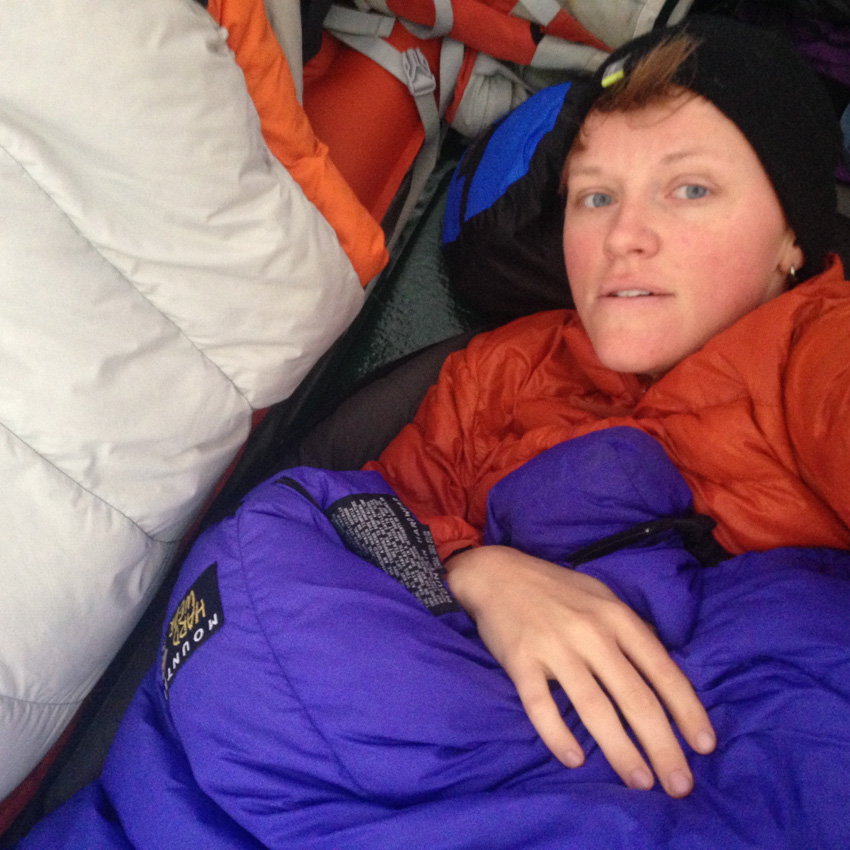
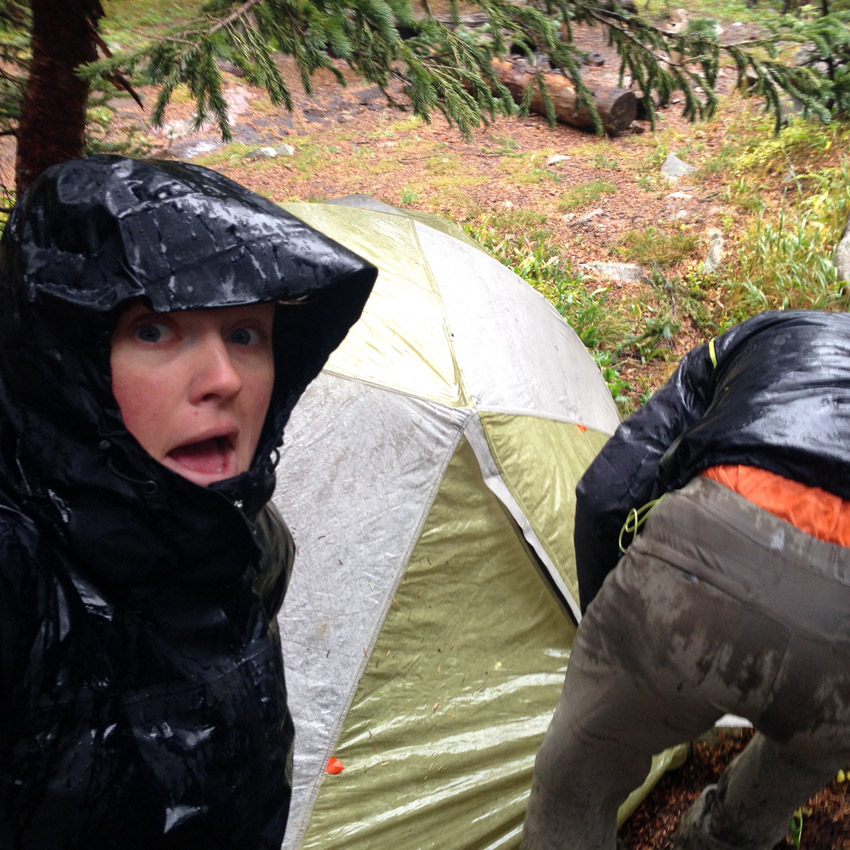
Shortly after getting our tent setup and our food hung in a nearby dead tree, the rain began. Hooray. I was somewhat dreading the rain, having spent the entirety of my previous backpacking trip in Colorado in a tent for four days below Jagged Mountain last September. I did not want a repeat of that trip, not even in the slightest; however, I welcomed the opportunity to catch-up on some much needed sleep and to spend time catching up with Sarah. Sarah took many opportunities to document our sleep adventure...
 |
 |
The rain and strong wind was unrelenting, a shock for sure. We kept an eye on our tent situation, finding that water had quickly begun to pool near and around the base of the rainfly. We napped off and on as the rain continued and in the early evening we began to take notice of the water situation with a greater level of concern. Sarah noticed that water had begun to seriously pool under the tent and we decided to take action, despite the fact that the rain did not subside.
 |
 |
We hurriedly packed everything into our packs and relocated the tent down the hill under some trees on top of a nice soft bed of pine needles. Sarah documented the whole ordeal.
 |
 |
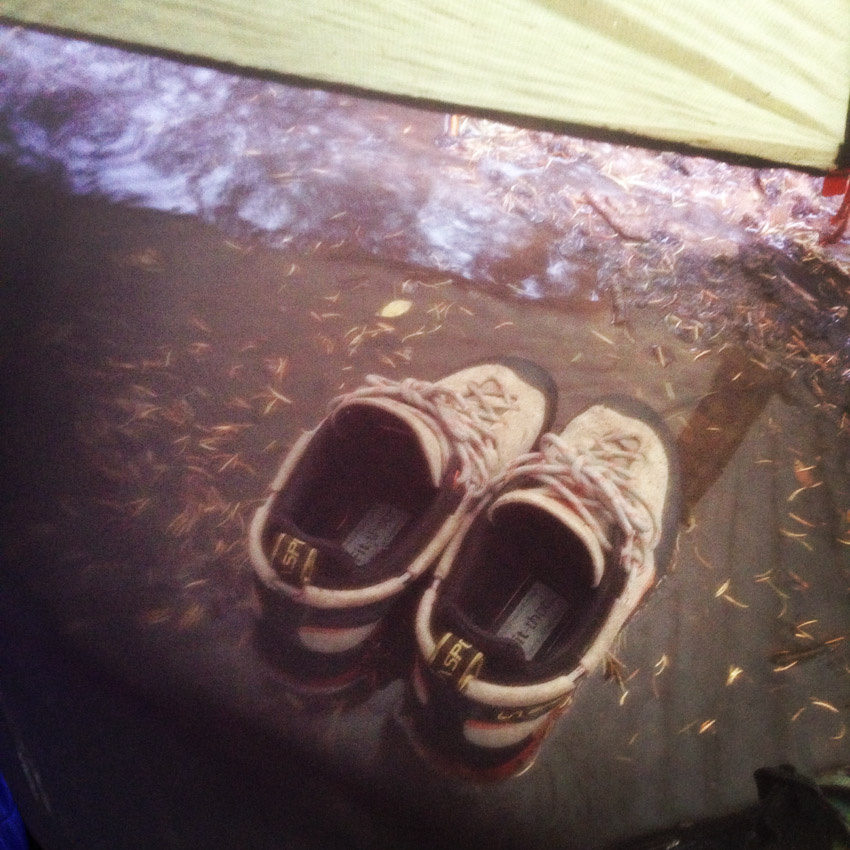
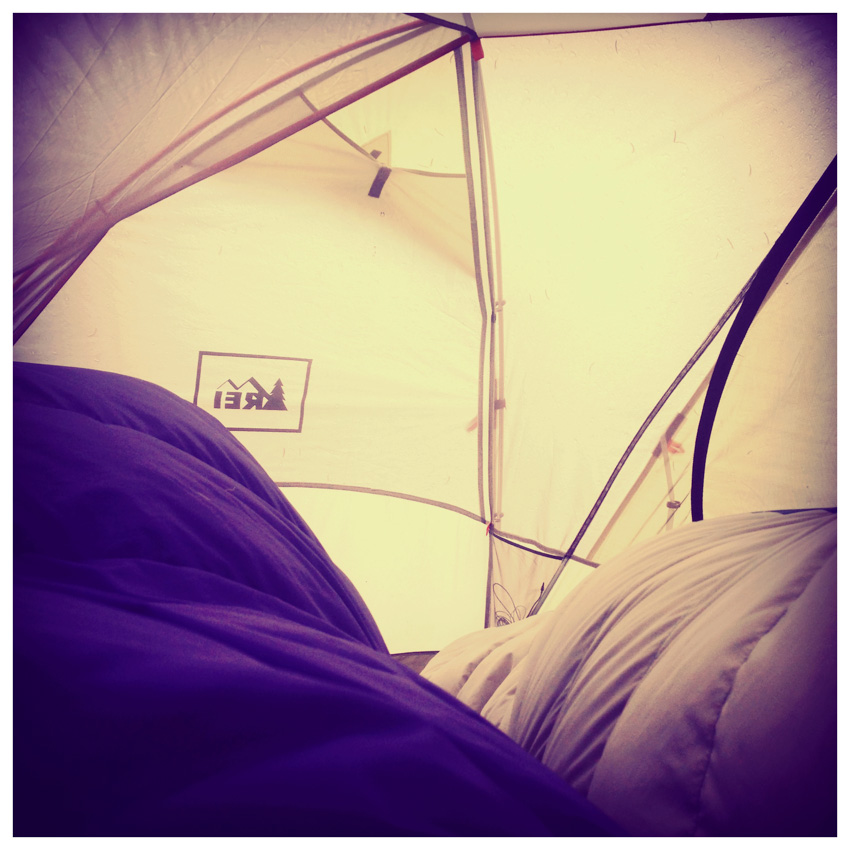
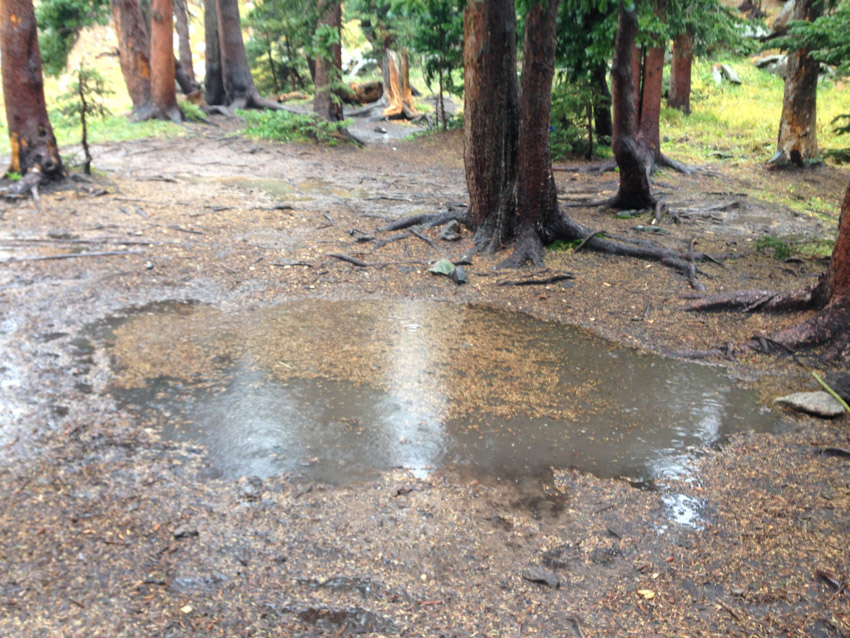
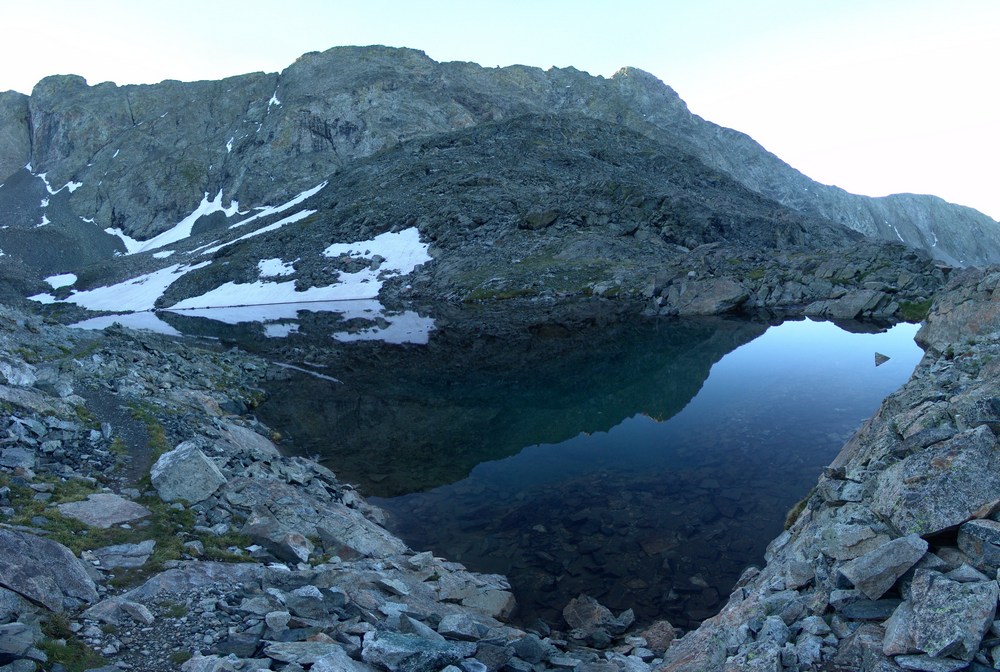
We felt quite lucky – even though the tent was on top of a lake of water; the inside had remained mostly dry! Consider this a tried and true endorsement for the REI Quarterdome – a truly versatile backpacking tent, not the lightest nor the heaviest tent around; however, it kept us dry and withstood strong wind without any problems. Our old tent's location now looked like this:
The rain stopped just long enough for us to heat up some food, which we took full advantage of, returning to our sleeping bags to stay warm. The valley was caught in some sort of weather system, trapping moisture, clouds, fog and wind in the basin and continually obscuring all of the peak right above us.
As darkness descended, we found ourselves in need of replenishing our water supply; however, Sarah’s water filter was not working, so we were forced to resort to using my old iodine tablets, which I keep in my first aid kit for such occasions. Drinking the iodine treated water brought back fond memories of working at Colvig Silver Camps in 2000 near Durango – I did not mind one bit. Here I am filtering some water in the rain.

We decided to set our alarm for 4 AM, hoping the rain would subside and allow for an ascent of one of the three 14ers in the basin. As we discussed our priorities for the trip, having climbed all of the 14ers already, I had very little to add, only hoping that Crestone Needle would be on the top of our list since it was my favorite 14er to climb. Sarah needed all three of the 14ers; however, she thought that she could save Humboldt for another trip and that Crestone Needle was high on her list. With that being said, we figured that aiming to climb Crestone Needle first would be a good idea... [Click Next to continue reading]
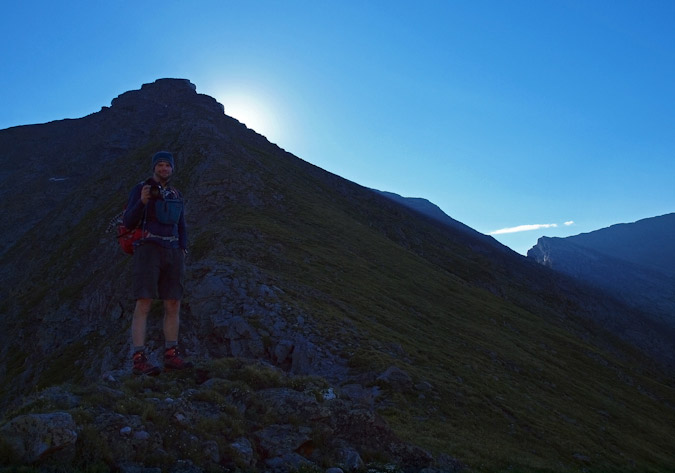
The rain did not subside and the wind increased in its fury through the night, rushing down through the trees in a cyclical pattern every 30-45 seconds in a violent yet harmonic nature, the sounds of the wind rushing through the pine needles creating a natural cacophony both aiding and preventing good sleep. 4 AM came and went without a break in the rain or wind, forcing us to sleep in, knowing we would likely have to scratch off at least one of the peaks from our list for the trip. Unfortunately, the weather did not subside until late in the afternoon, at which point we were both wearing from a lack of both caloric intake and physical activity; however, we decided to head up towards the upper basin and if we felt up for it, a climb of Humboldt. The basin was still mostly shrouded in clouds and fog; however, the hike up was quite pleasant, the cold and musky autumn air brushing our exposed faces, reminding us pleasantly of our sense of place and time.
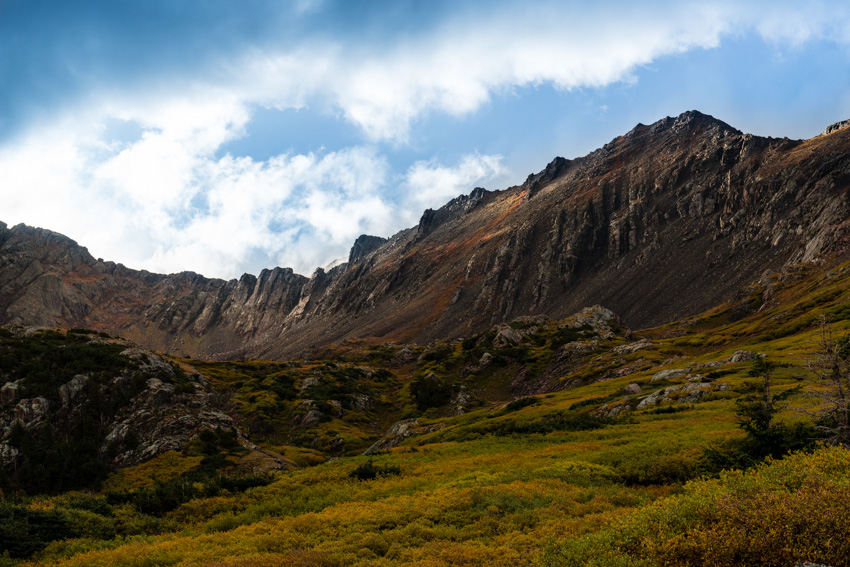
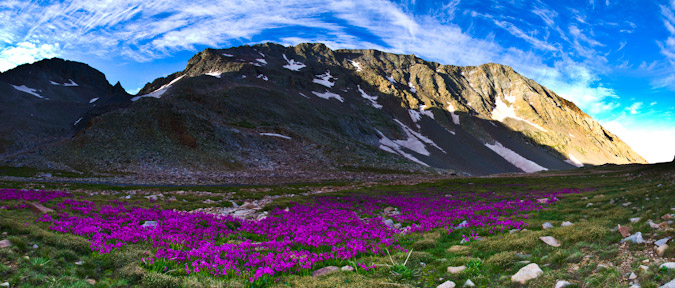
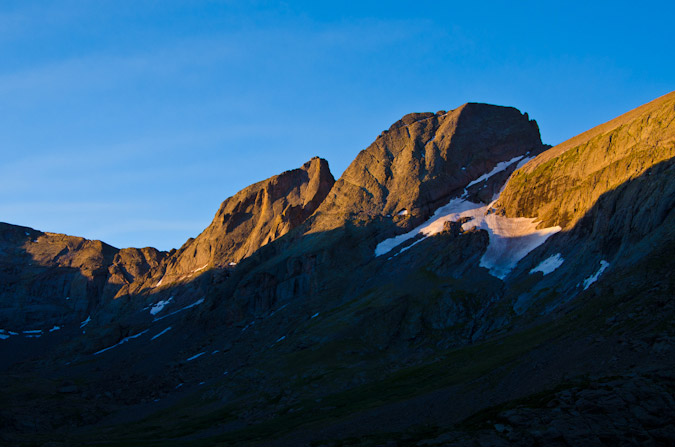
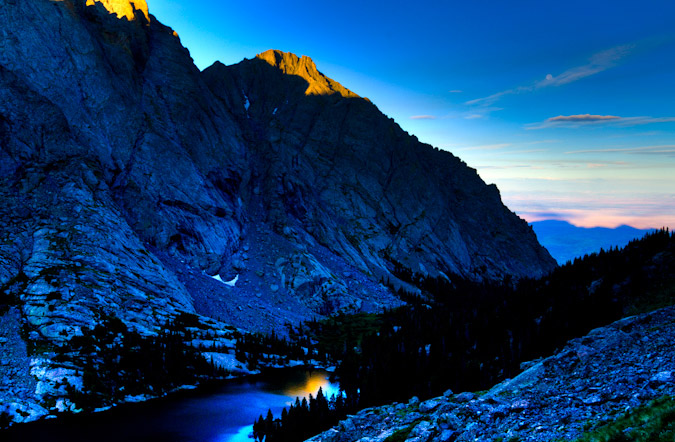
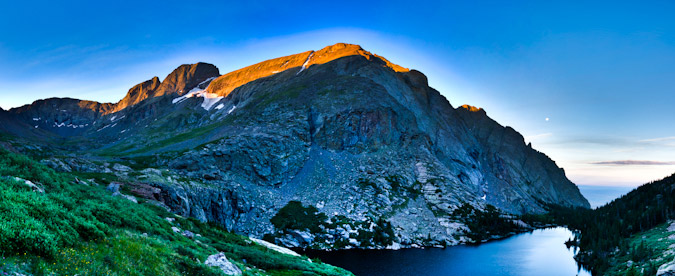
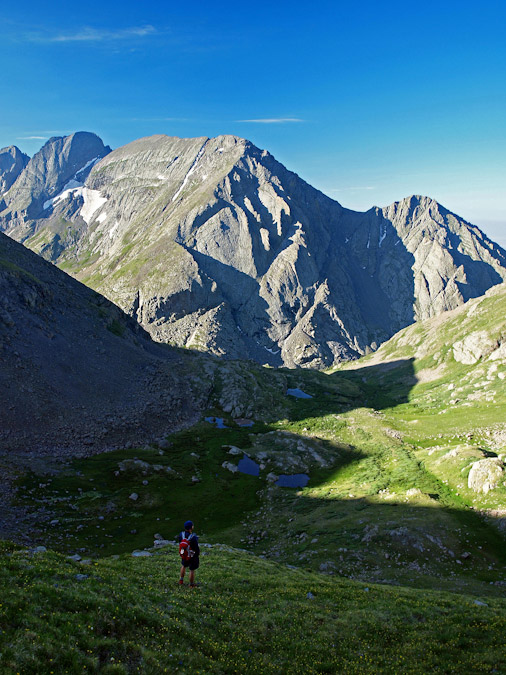
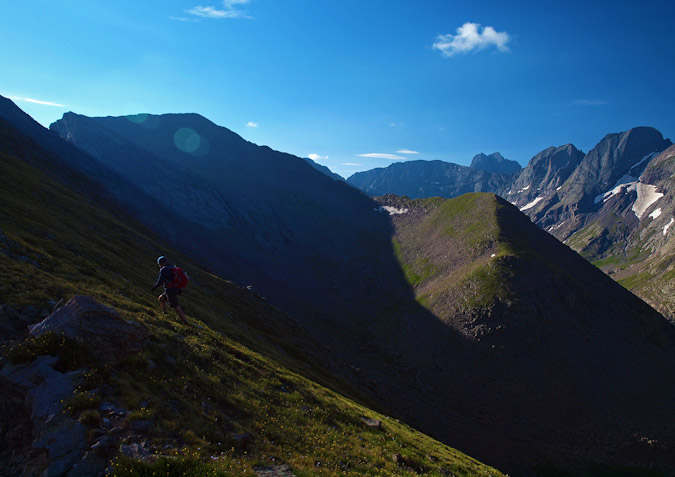
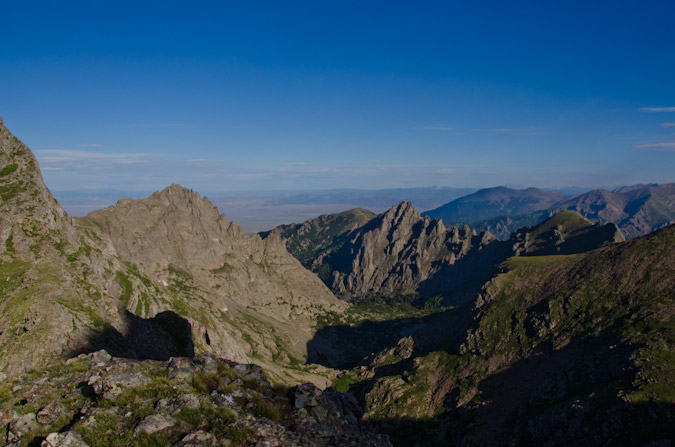
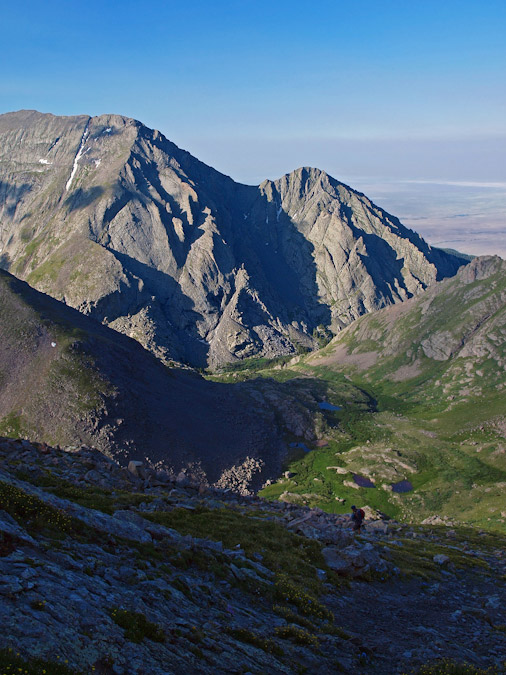
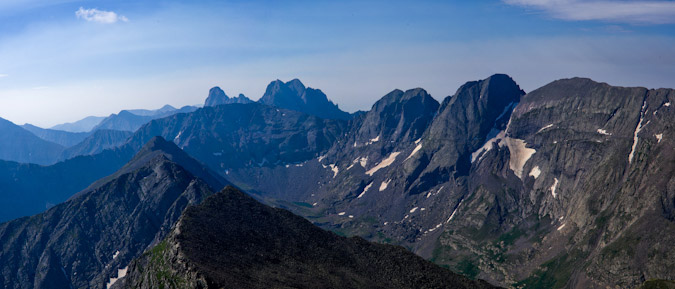
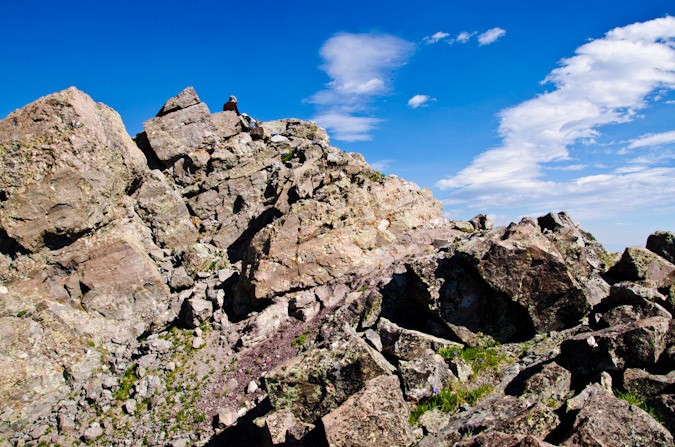
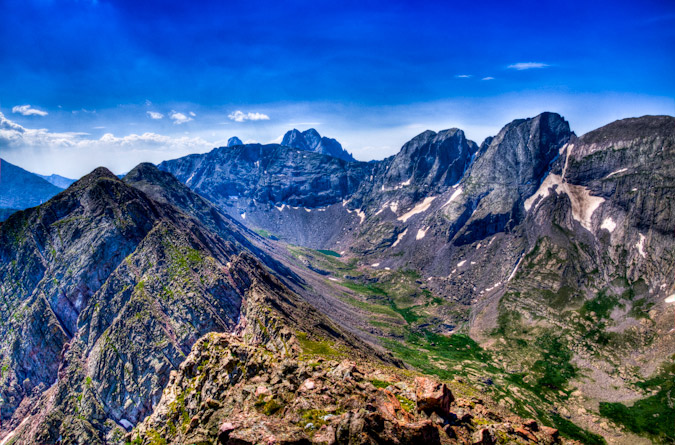
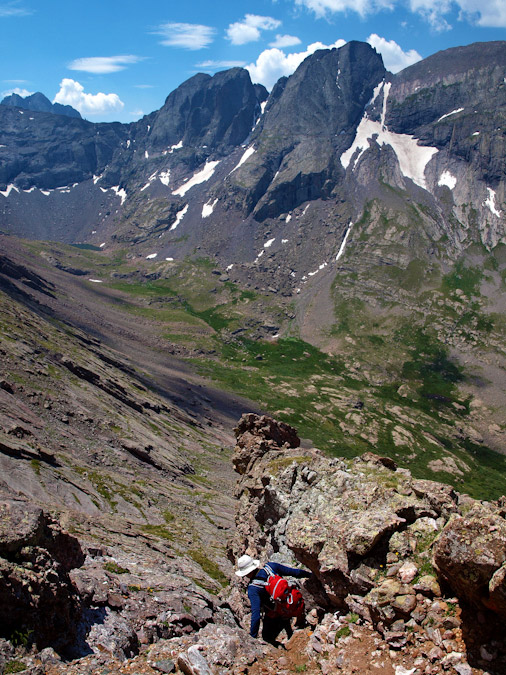
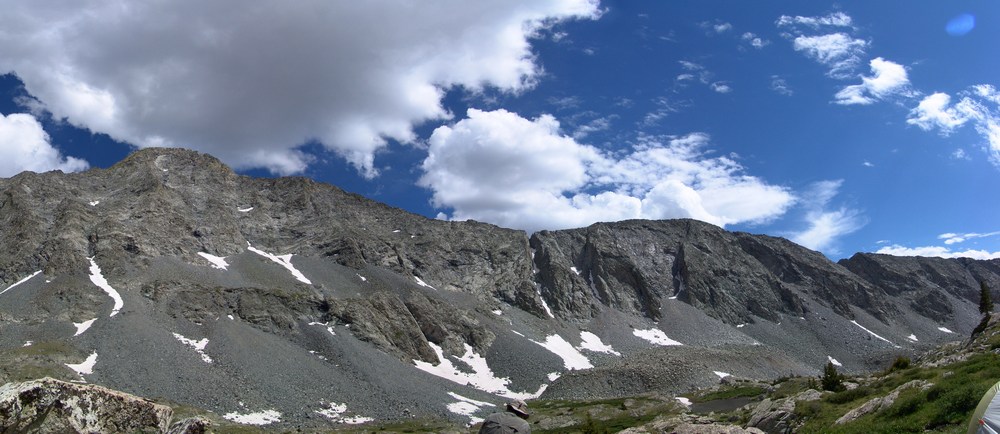
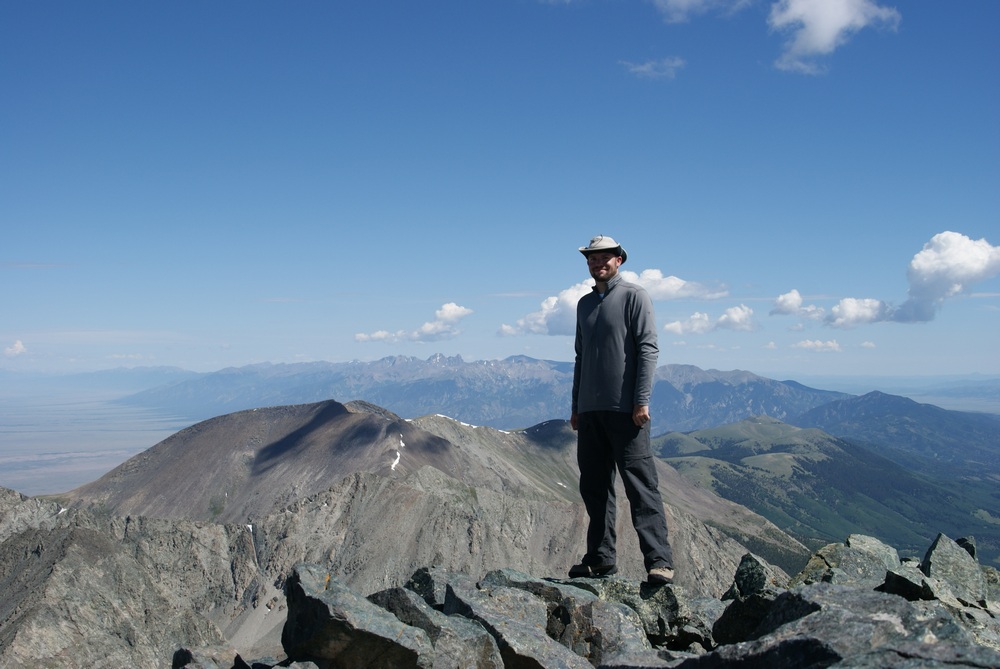
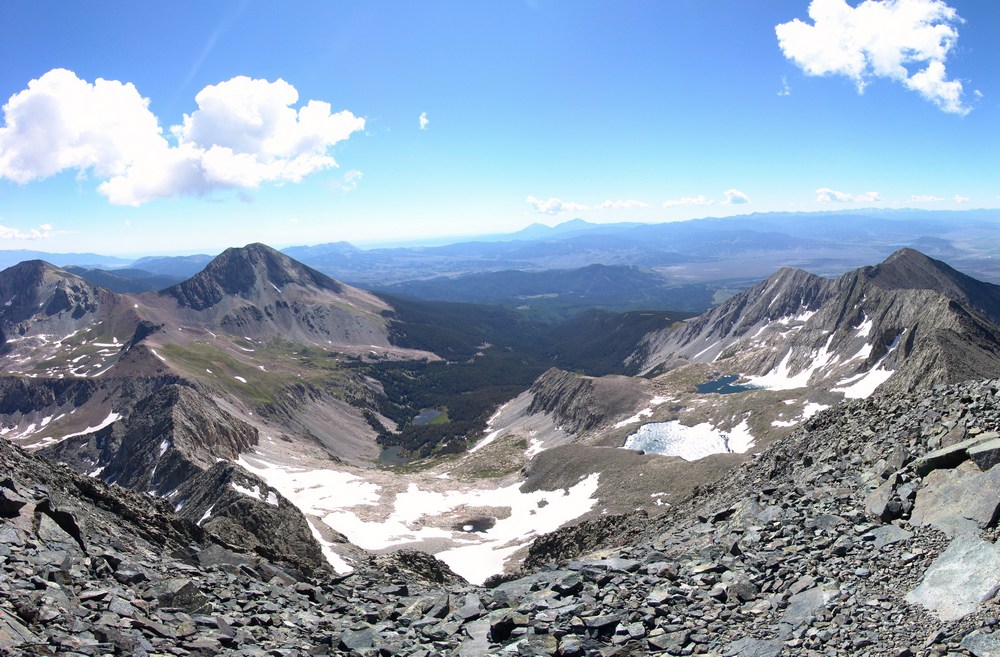
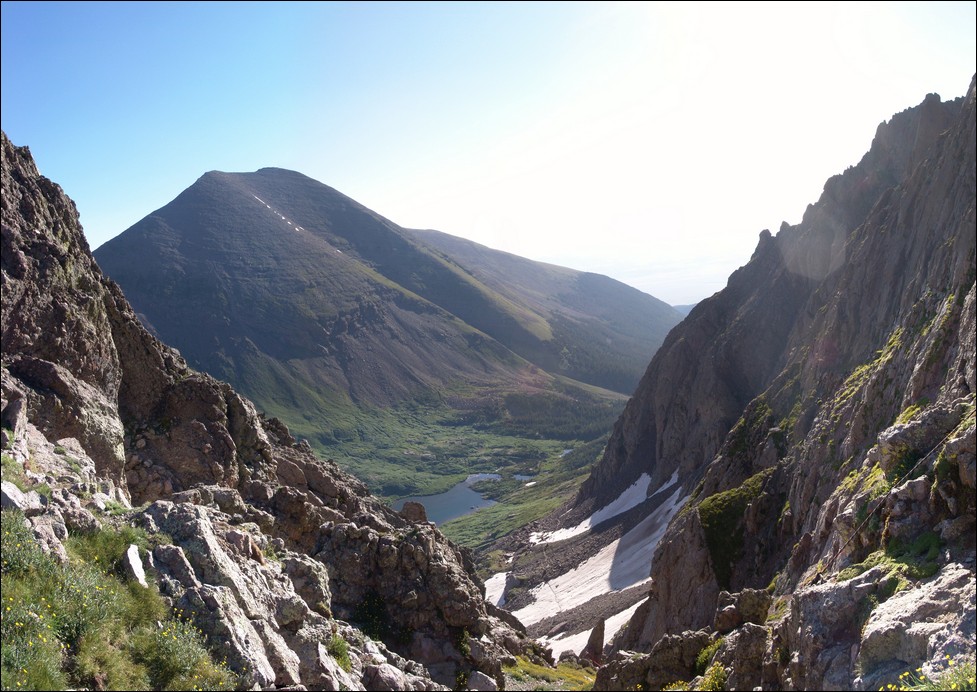
As we climbed further up into the basin, it became immediately clear to me that the conditions were not ideal for summiting Humboldt; however, the mixture of clouds, fog, and light would make for some pretty dynamic photographs from the lower slopes of Humboldt, looking down at both South Colony Lakes an out across to Milwaukee Peak, Broken Hand Peak and Crestone Needle, the upper third of which was still enshrouded in fog.
I found a perch on the side of Humboldt and waited patiently for the light to further develop across the basin from us, watching small holes develop in the clouds, revealing bits and pieces of the mountains and higher clouds painted with soft evening light.

I was completely engrossed in what was unfolding before us and was ecstatic to be there to photograph it.

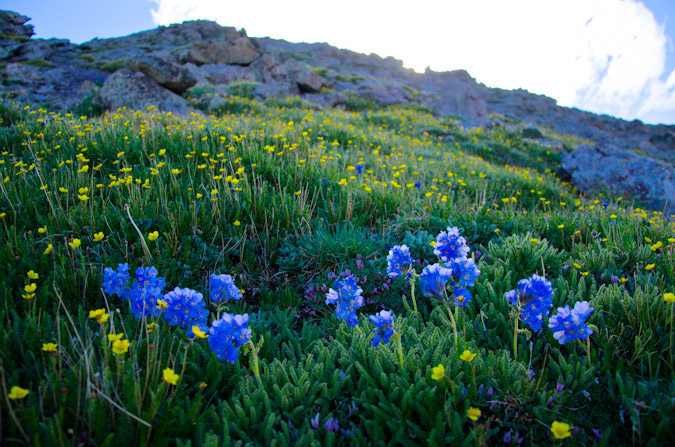
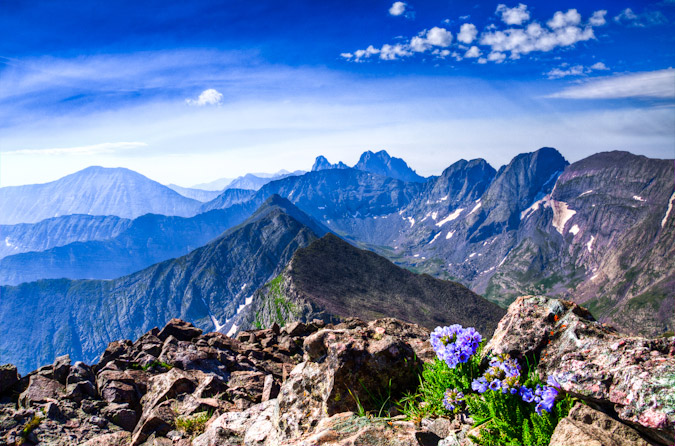
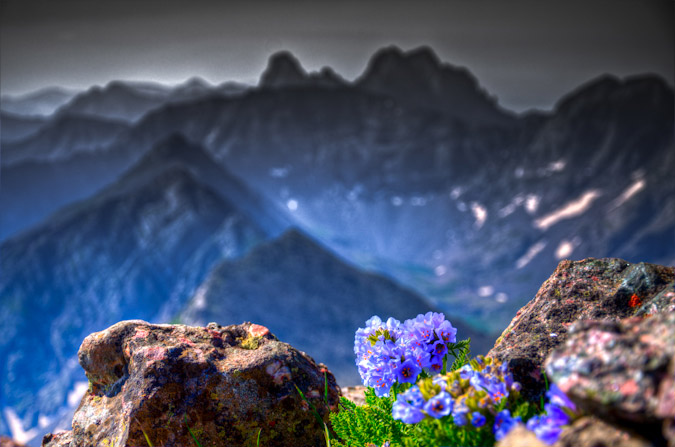
The light in the basin was pretty great, and I was quite pleased with the images I was able to take while huddling over my tripod in the cold wind.

The golden hour peaked quickly and left me with one final opportunity to shoot the light over on Milwaukee Peak and Broken Hand Peak.

After capturing the magic, we headed back down to our campsite where we were greeted with a ton of strong wind and more rain. We set our alarms for O-dark-30 and hit the sack, hoping for better weather on Tuesday... [Click Next to continue reading]
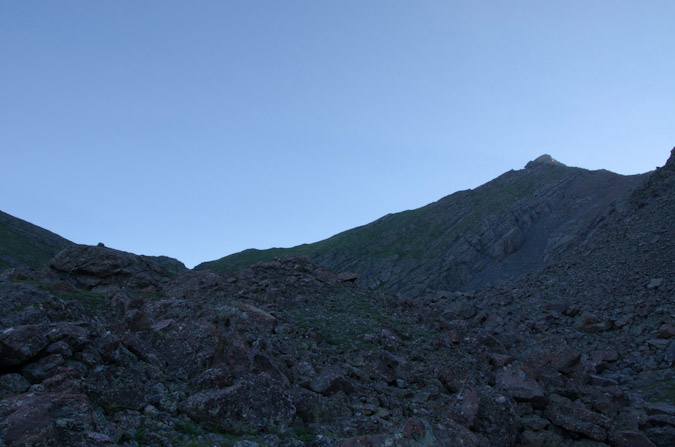
Monday night and Tuesday morning will filled with lots of strong wind, which came in predictable waves down the valley and through the pine needles above. Sleep was a hit-or-miss proposition. The alarm went off. More wind. I stepped outside the tent, no sky or mountains were visible and it was cold as hell. We decided to go back to sleep for a bit.
Finally, around 8 AM we got geared up and made a run for Crestone Needle. This was a very late start by our standards; however, we felt as though the weather could not get much worse, so why not give it a try. The plan was to head for the top of Broken Hand Pass and re-assess the weather from there.
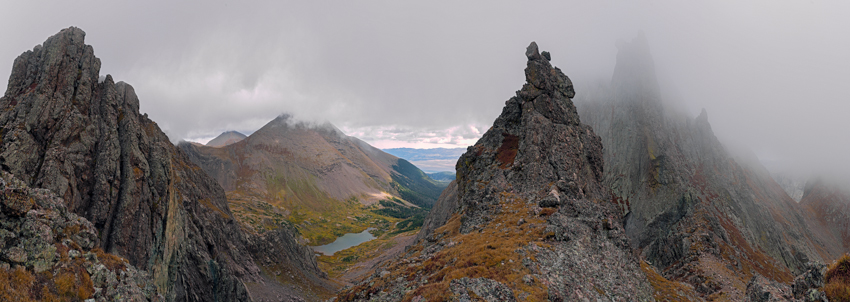
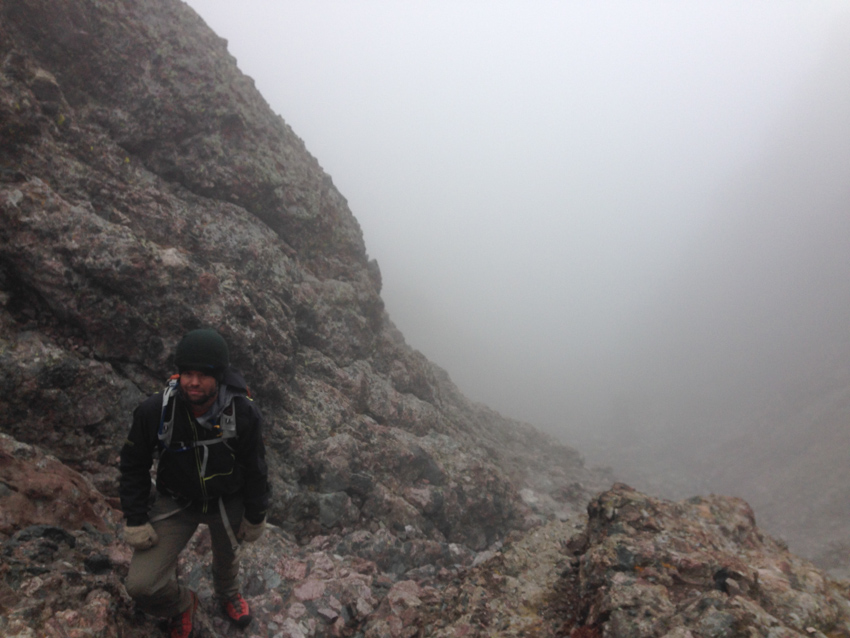
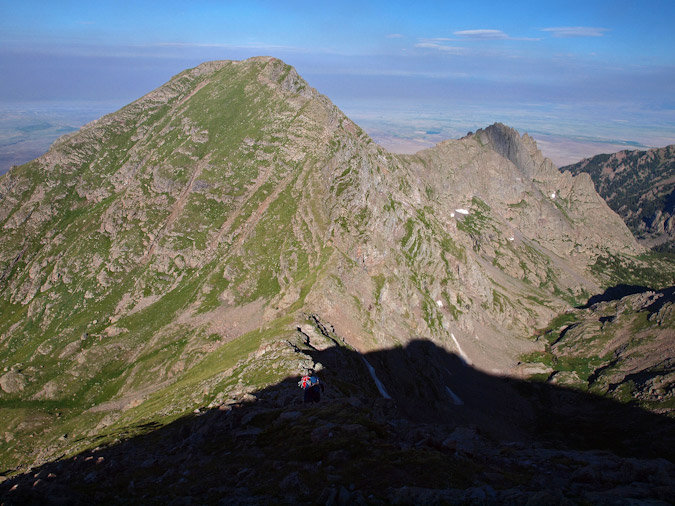
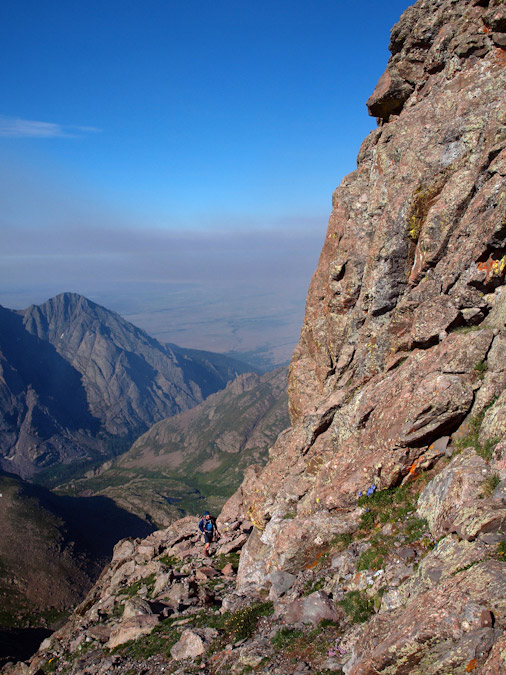
We made great time up Broken Hand Pass, stopping for nothing. Once on top, the weather was amazingly surreal as well as a little discouraging. Fast moving clouds, driven by the strong wind, were rushing from down below on the eastern side of the ridge and up and over us and Crestone Needle. It was quite a sight!
The air was thick with moisture, but at no point were we concerned about precipitation. It was chilly, but nothing terribly unbearable. We decided to press-on. Having climbed Crestone Needle once before, I was well equipped mentally for what was to come. I was confident we could find out way up and back down without incident. We had both studied the route again and had very few doubts that we could not reach the top safely.
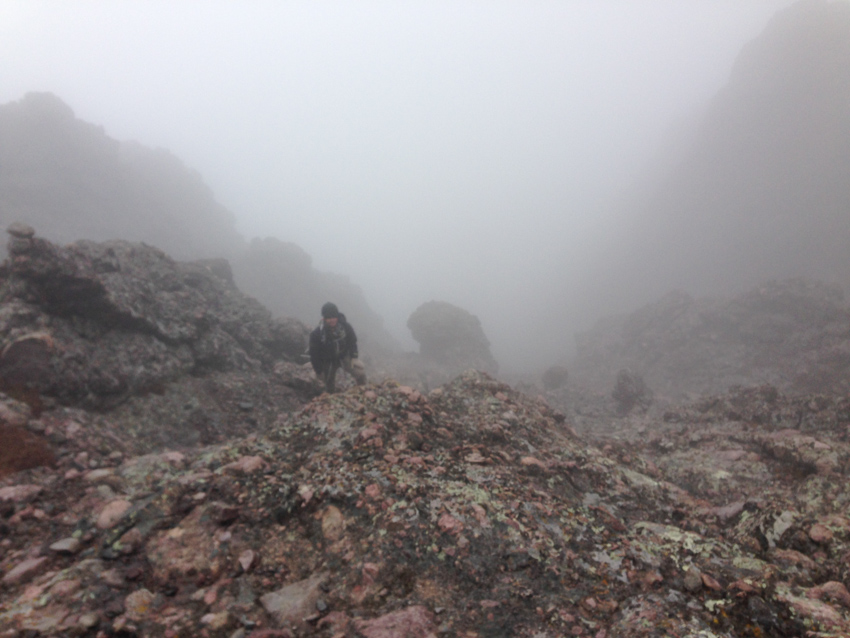
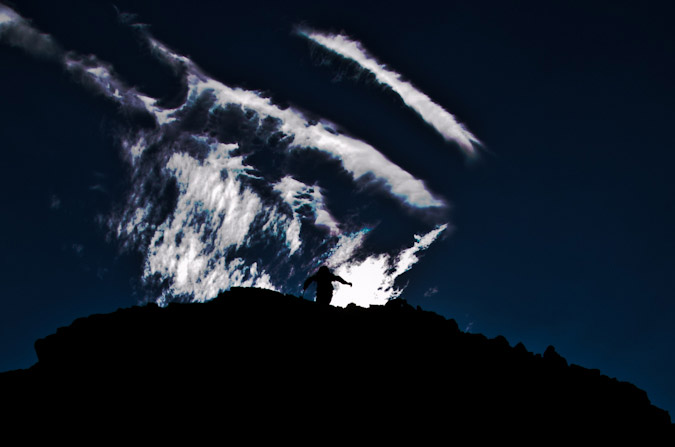
Crestone Needle was not visible through the thick, fast moving clouds, but it did not deter us. If anything, the insane weather made the experience even more epic.
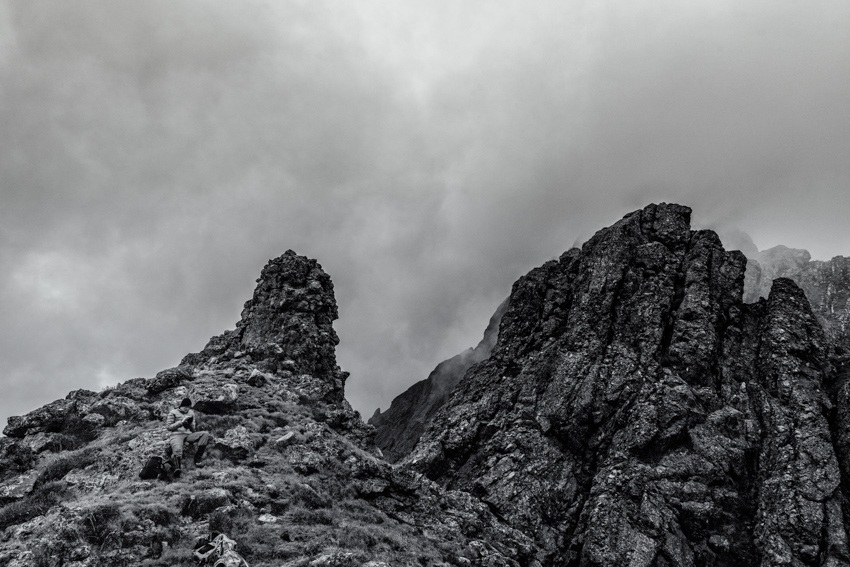
The garden of rock before us was really amazing to see again. At this point, I put my camera away to free my hands up to do the real climbing.
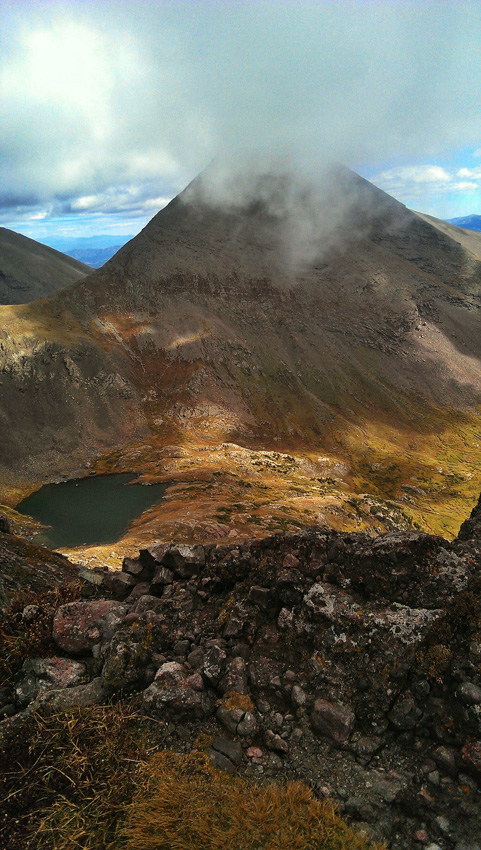
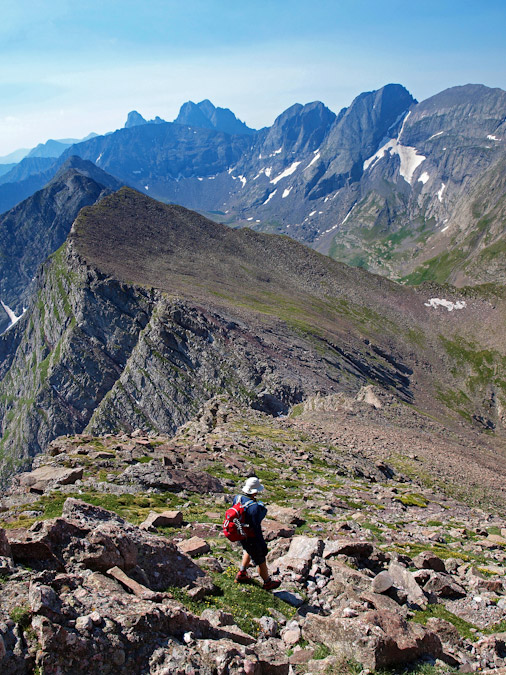
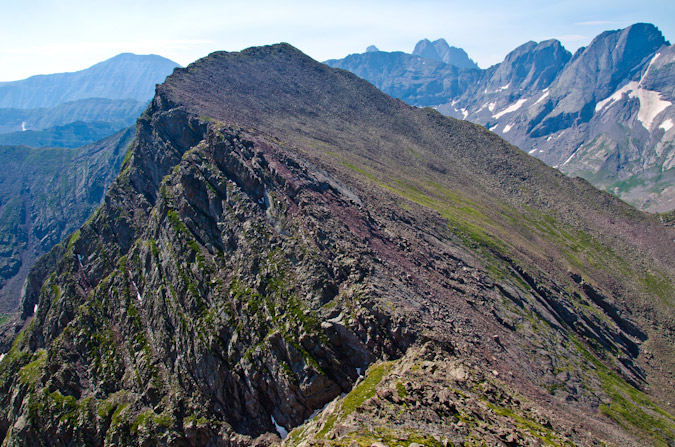
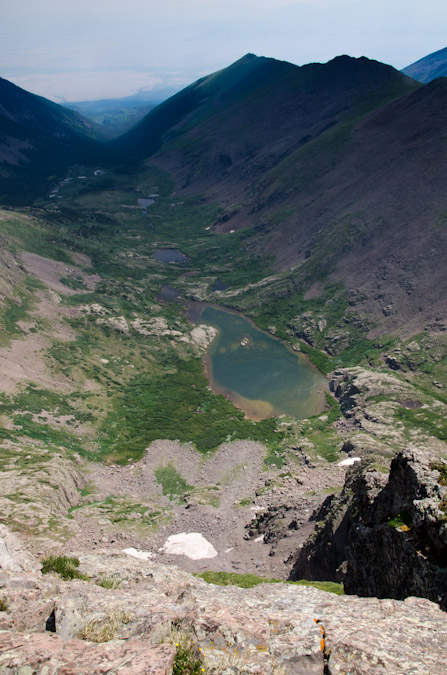
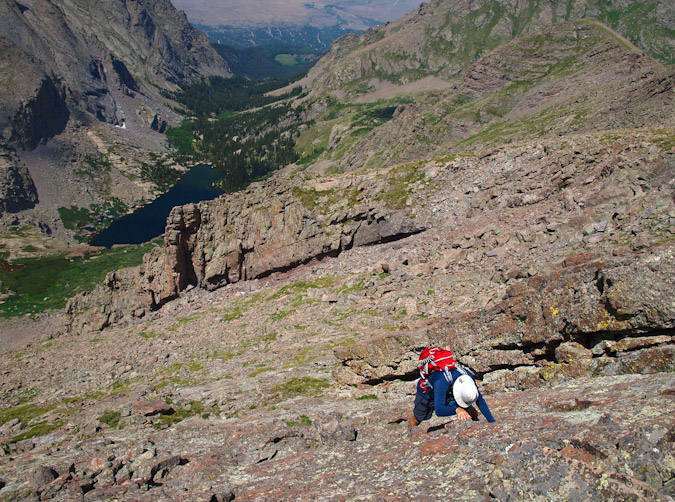
We took one last look down at Upper Colony Lake and Humboldt Peak before beginning the adventure up the fun parts of Crestone Needle.
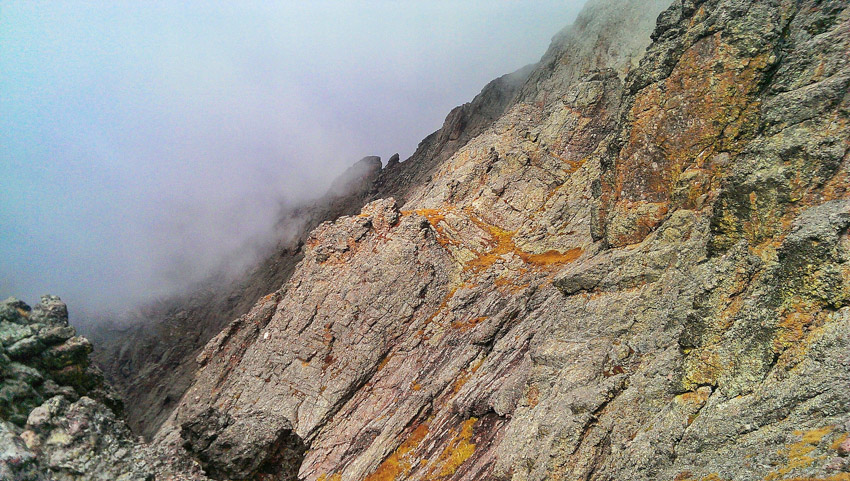
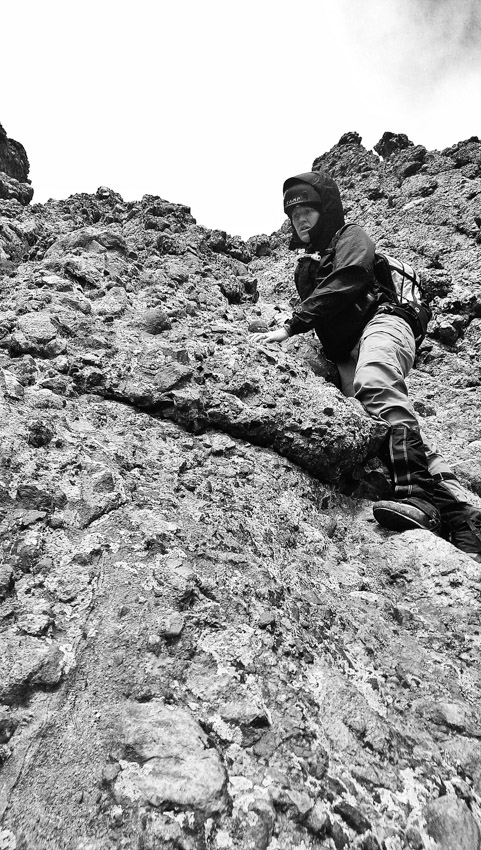
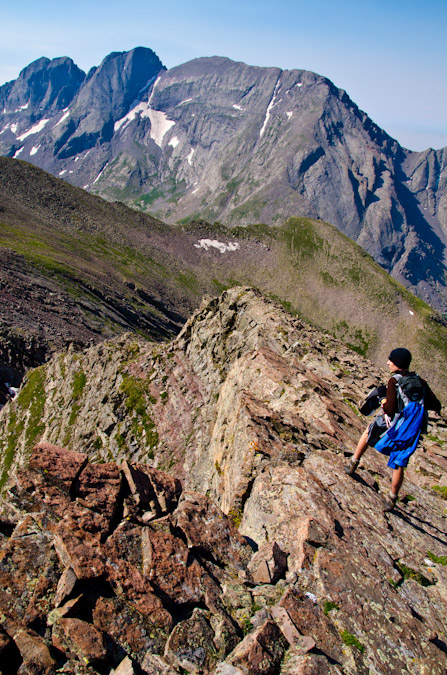
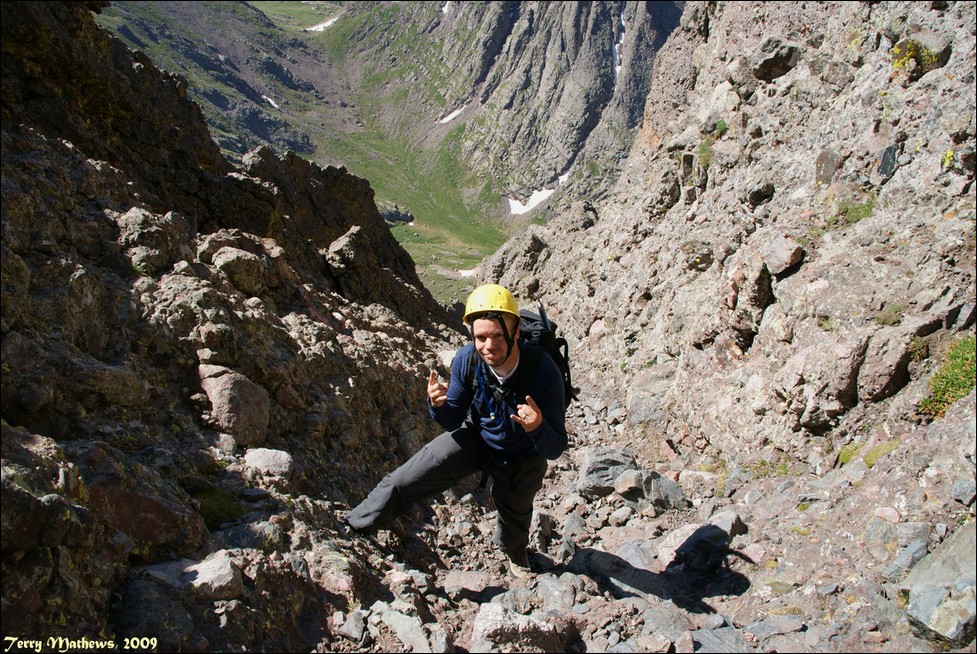
There is nothing like being on the side of Crestone Needle. Something about the quality and steepness of the rock, I immediately was swept back to 2009 when I had climbed it with Terry Mathews (RIP). Sarah and I reached the infamous dihedral which signals the typical crossing over to the west gully. We decided to stay in the east gully for the class 4 variation, which certainly did not disappoint! After Broken Hand Pass, I did not shoot a single photo with my camera on the way up, so all the photos were taken with either my HTC One or Sarah’s Iphone 5.
It was a real joy climbing this beast with Sarah with me. Having tackled many difficult peaks with Sarah in the past, including the Maroon Bells, Pyramid, Snowmass, Hagerman, and the Chicago Basin 14ers.
The class 4 variation up the east gully was quite a pleasant challenge on the way up, but I was getting concerned with route finding and safety for the descent. Visibility was decreasing as we climbed and the terrain was all starting to look alike.
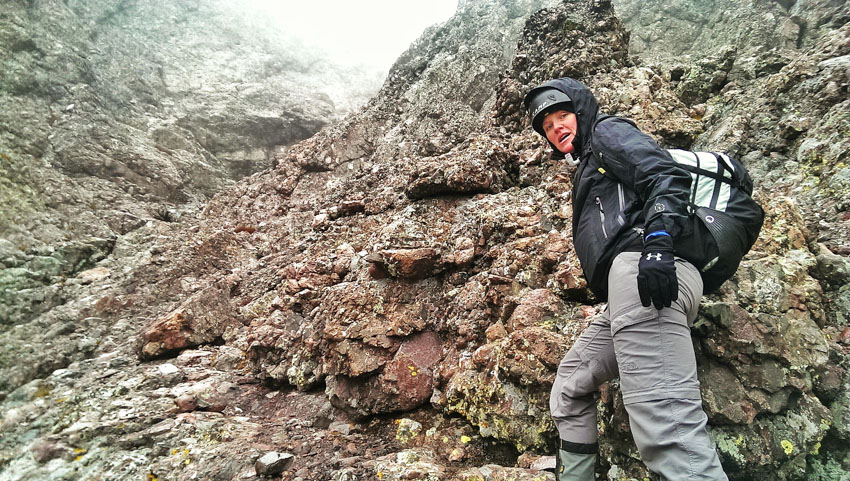
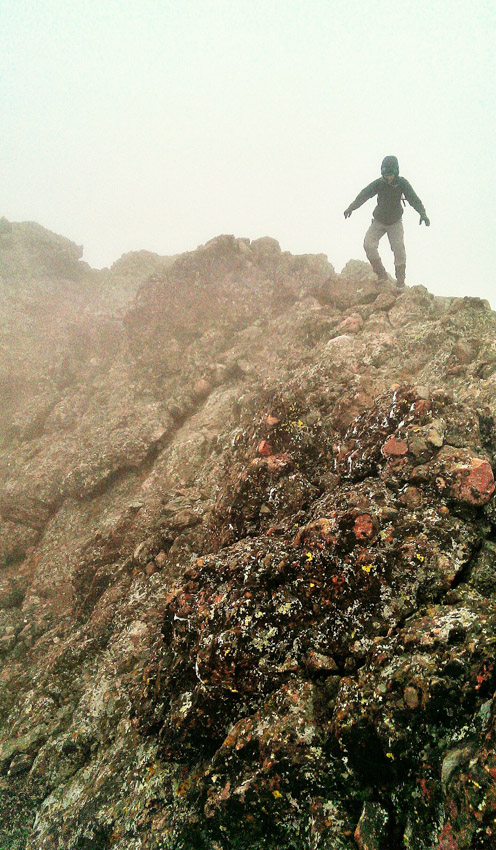
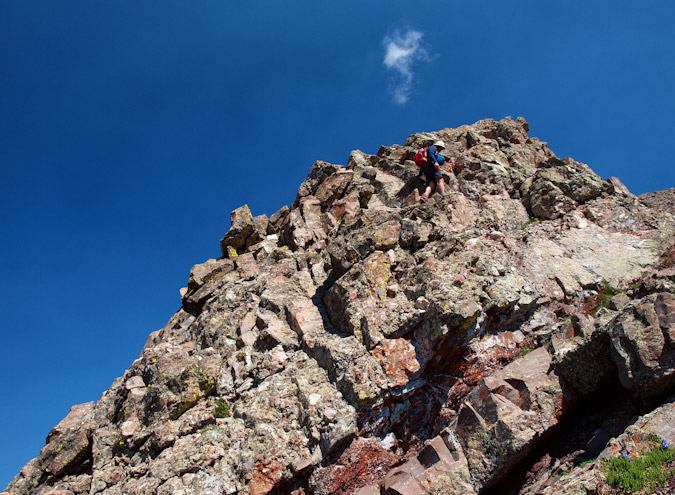
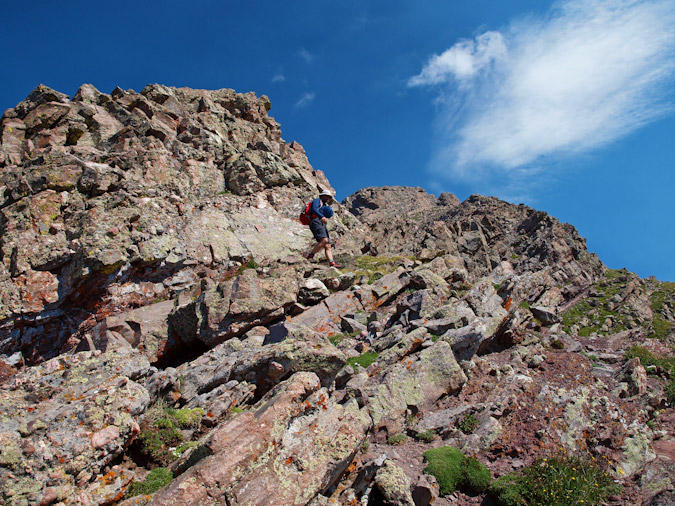
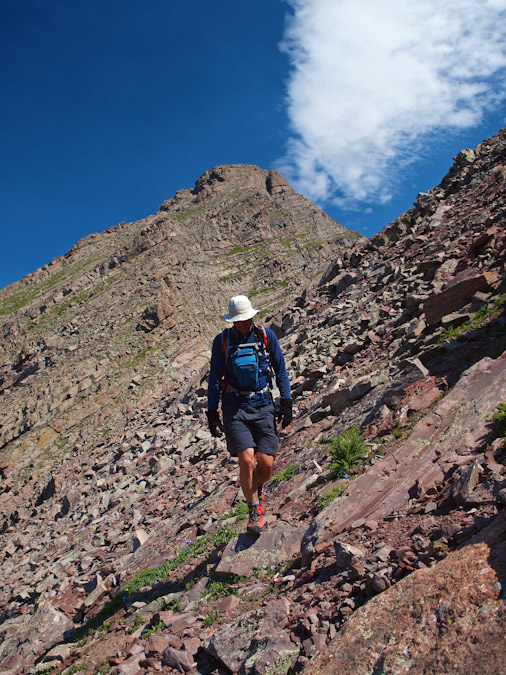
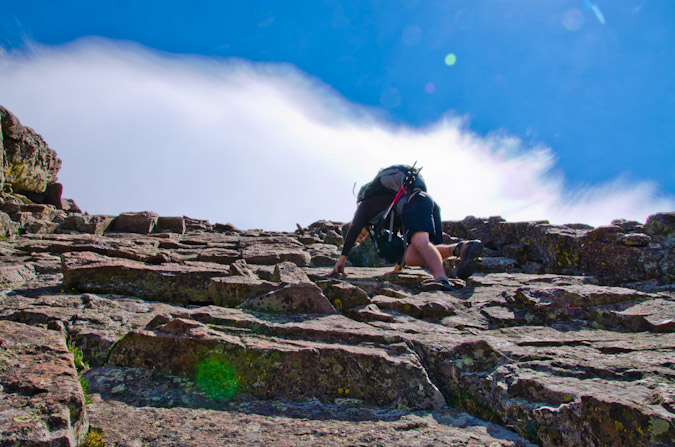
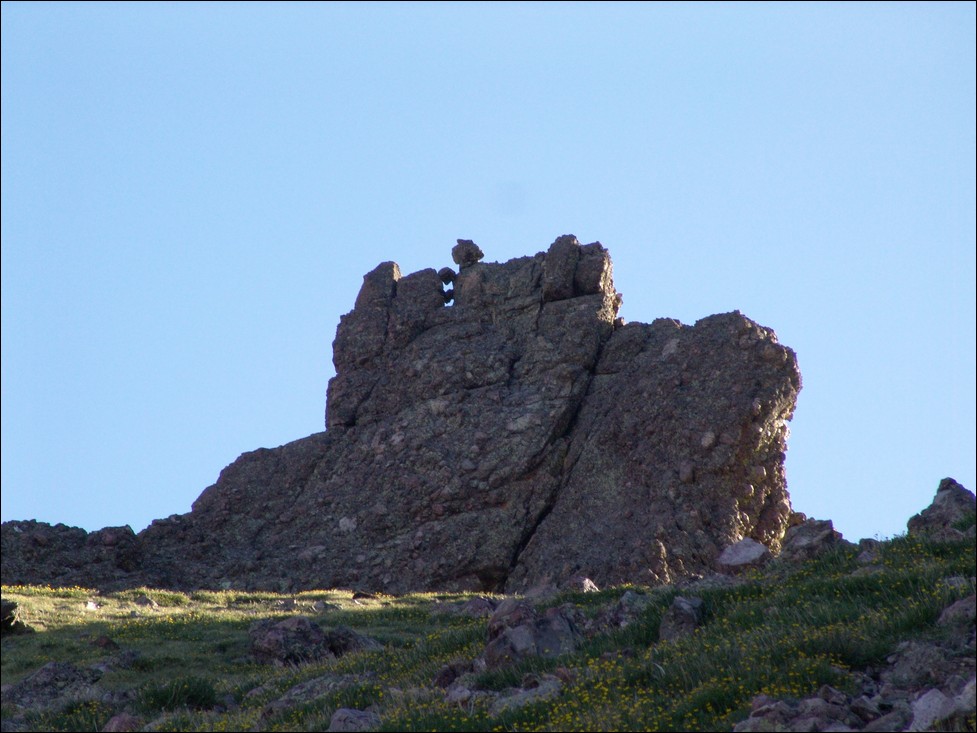
Fortunately, we were able to identify several cairns on the way up, including some duct tape on a few rocks here and there (small squares, which were quite nicely visible from above). Sarah was snapping some awesome shots of me on the way up, including this one of me negotiating the summit ridge.
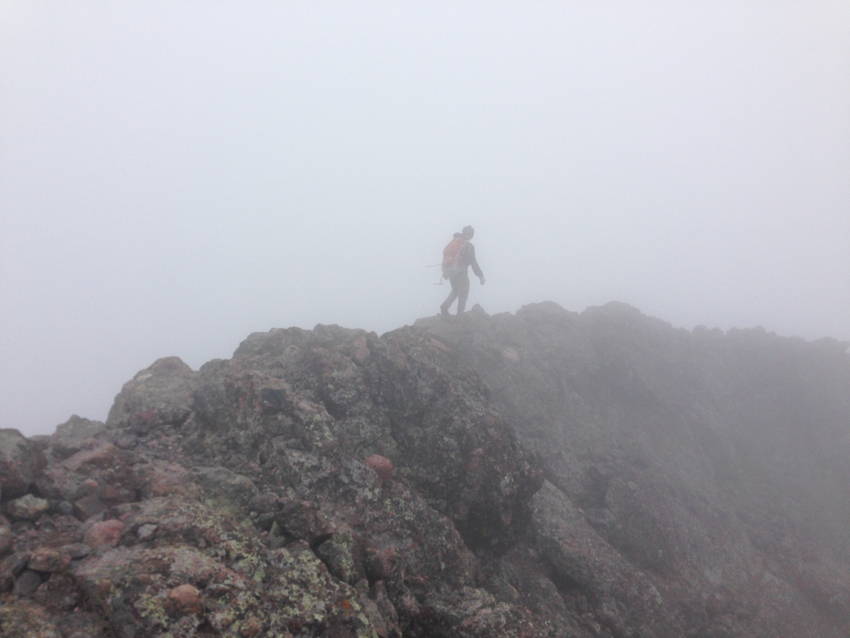
We reached the summit block in quick time and scrambled over the very skinny connecting arête to claim the summit. We had absolutely zero visibility and opted to stay there for only about a minute or so. We head right back down the way we came, following the cairns and duct tape we had seen before. The upper 200 feet of the east gully was pretty easy down-climbing; however, it got really dicey after that. We tried as best we could to stay on the route we came up on and for the most part were successful in that. It was surprisingly easy to remember the way down even though we could not see much. I was pretty happy we stayed in the east gully, as trying to find the switching point from west gully to east would have been difficult in the fog. I am not going to lie though, the climbing here was intense. The rock was wonderful, but it was quite exposed and surely a fall would have been fatal.
 |
 |
After many tough sections, we finally made it back down to the easier parts below the dihedral and made our way back towards Broken Hand Pass.
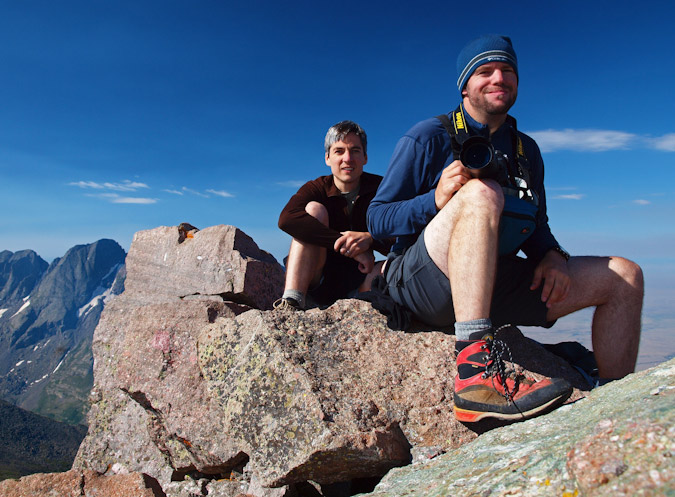
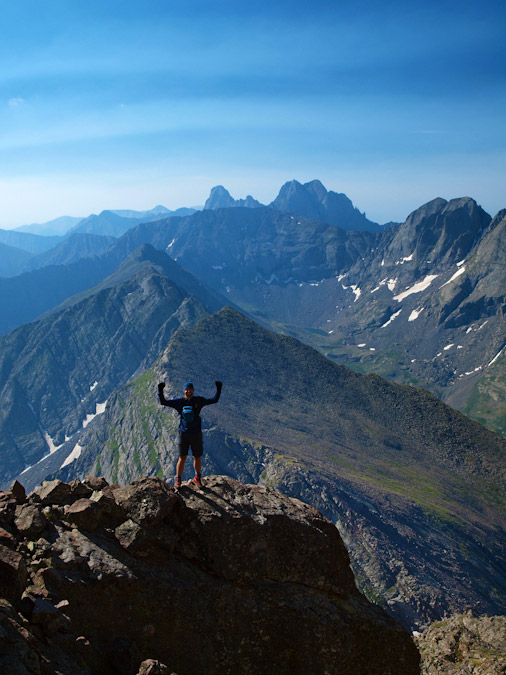
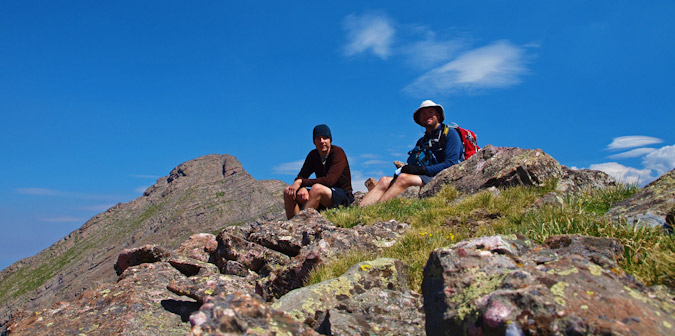
Sarah and I were quite excited about our successful climb of a beast of a mountain in whacky weather conditions.
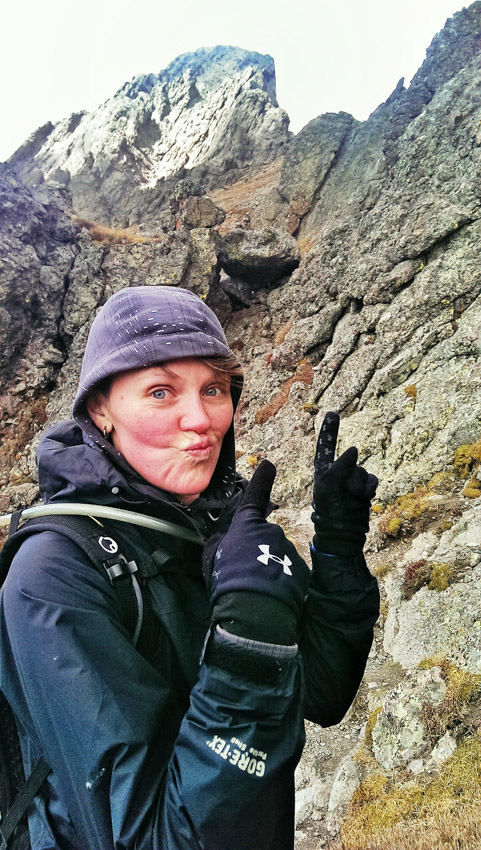
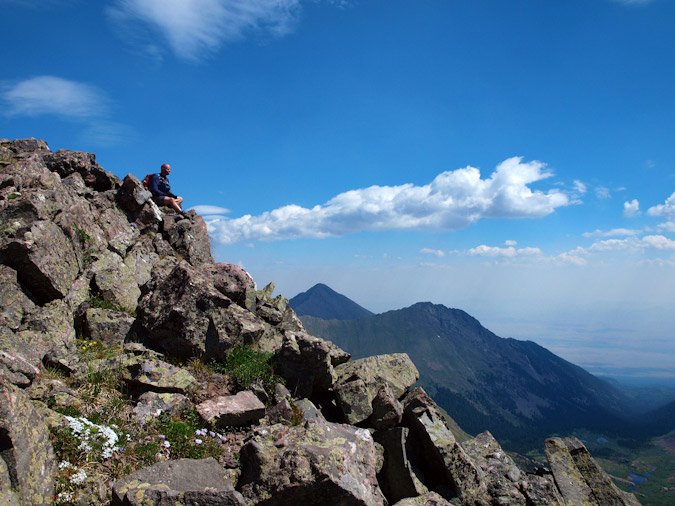
The clouds were breaking up a little and revealed all of the awesome peaks to our south and west, including Broken Hand Peak (at left).
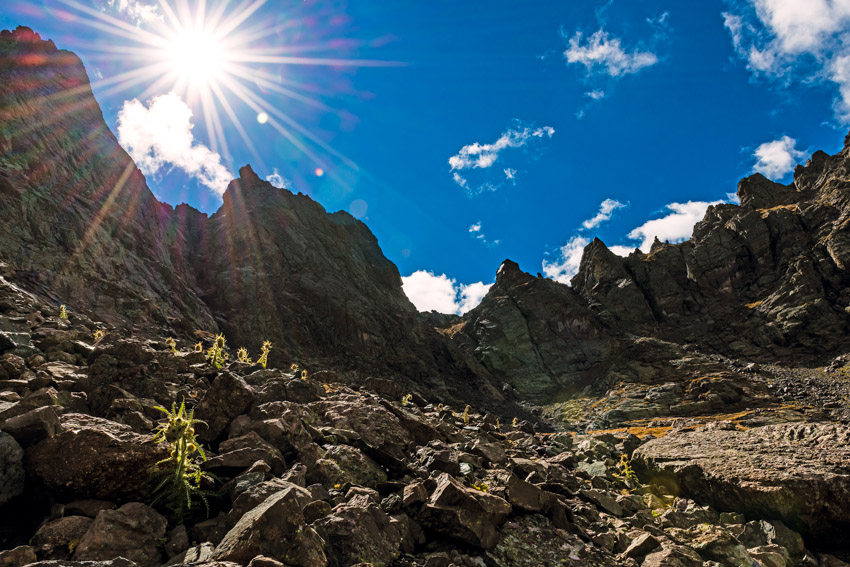
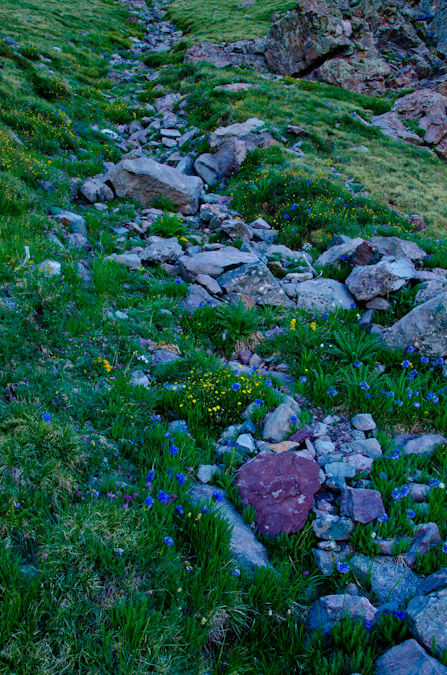
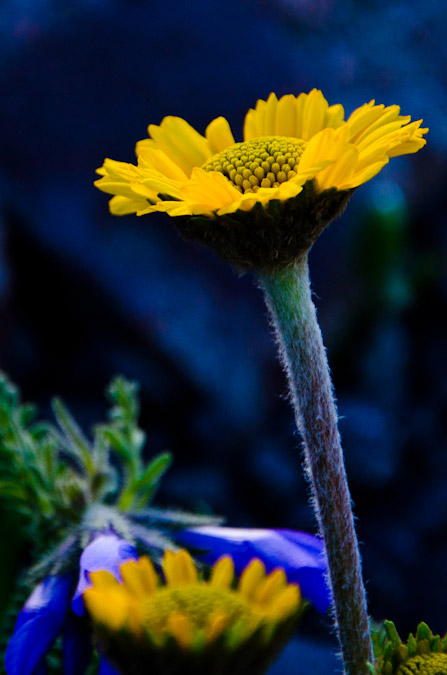
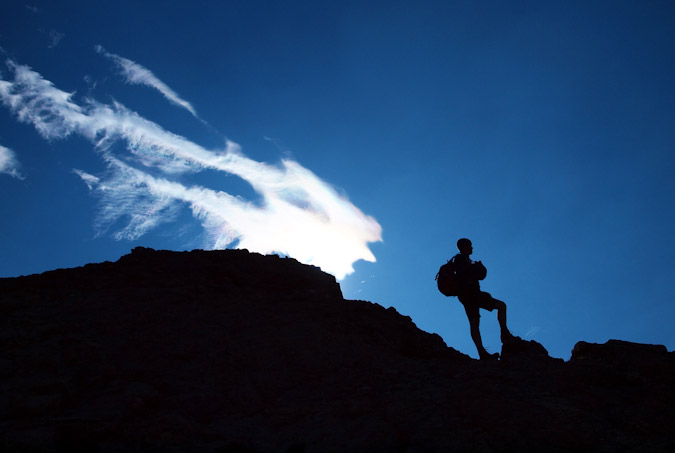
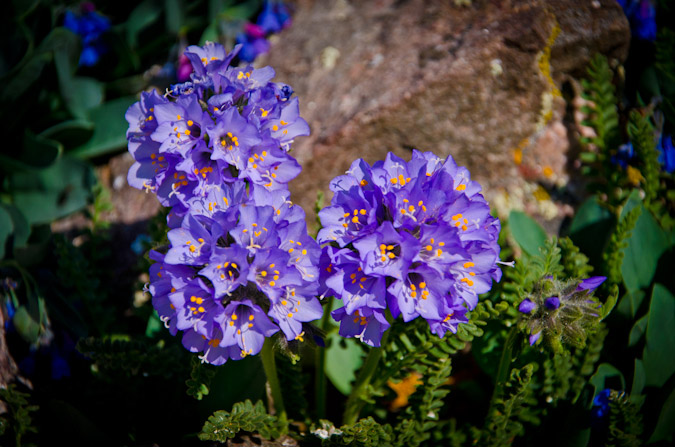
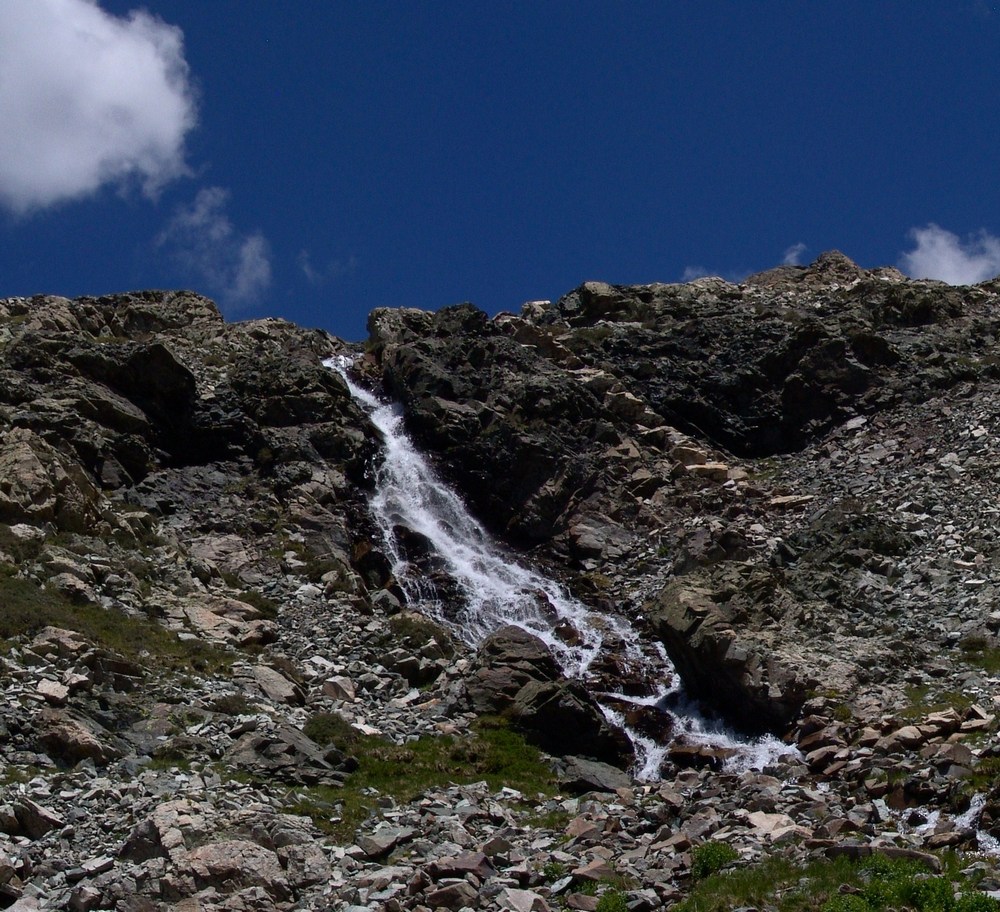
What a rush! Just what the doctor ordered for me – an awesome day climbing in the Sangre de Cristo Mountains! On our way down Broken Hand Pass, we encountered a ton of those funky spikey flower plants called Frosty Ball Thistle, and I just had to get some photos of them with the back light coming through.
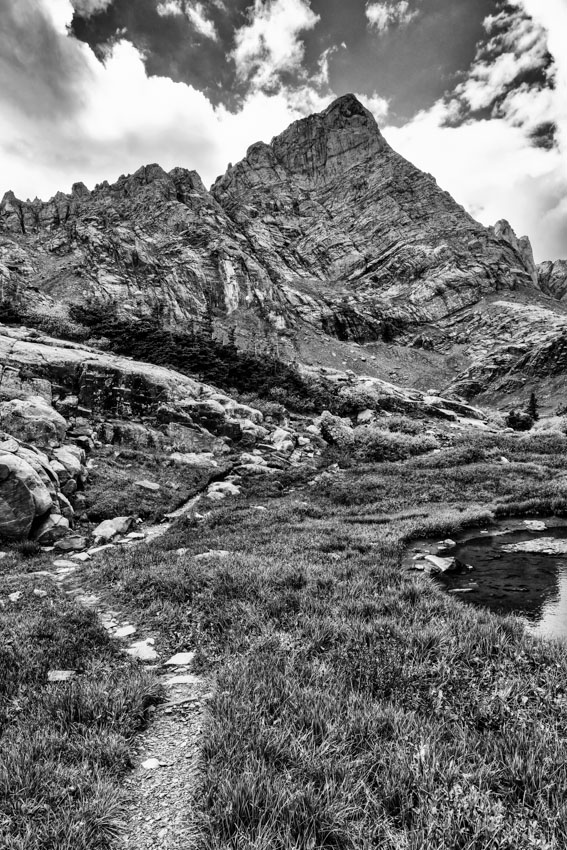
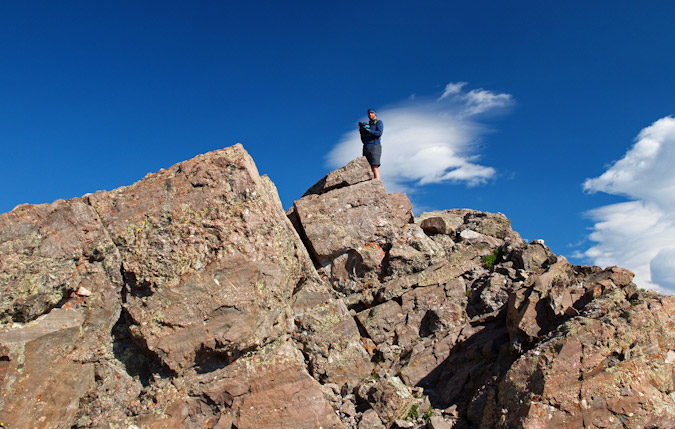
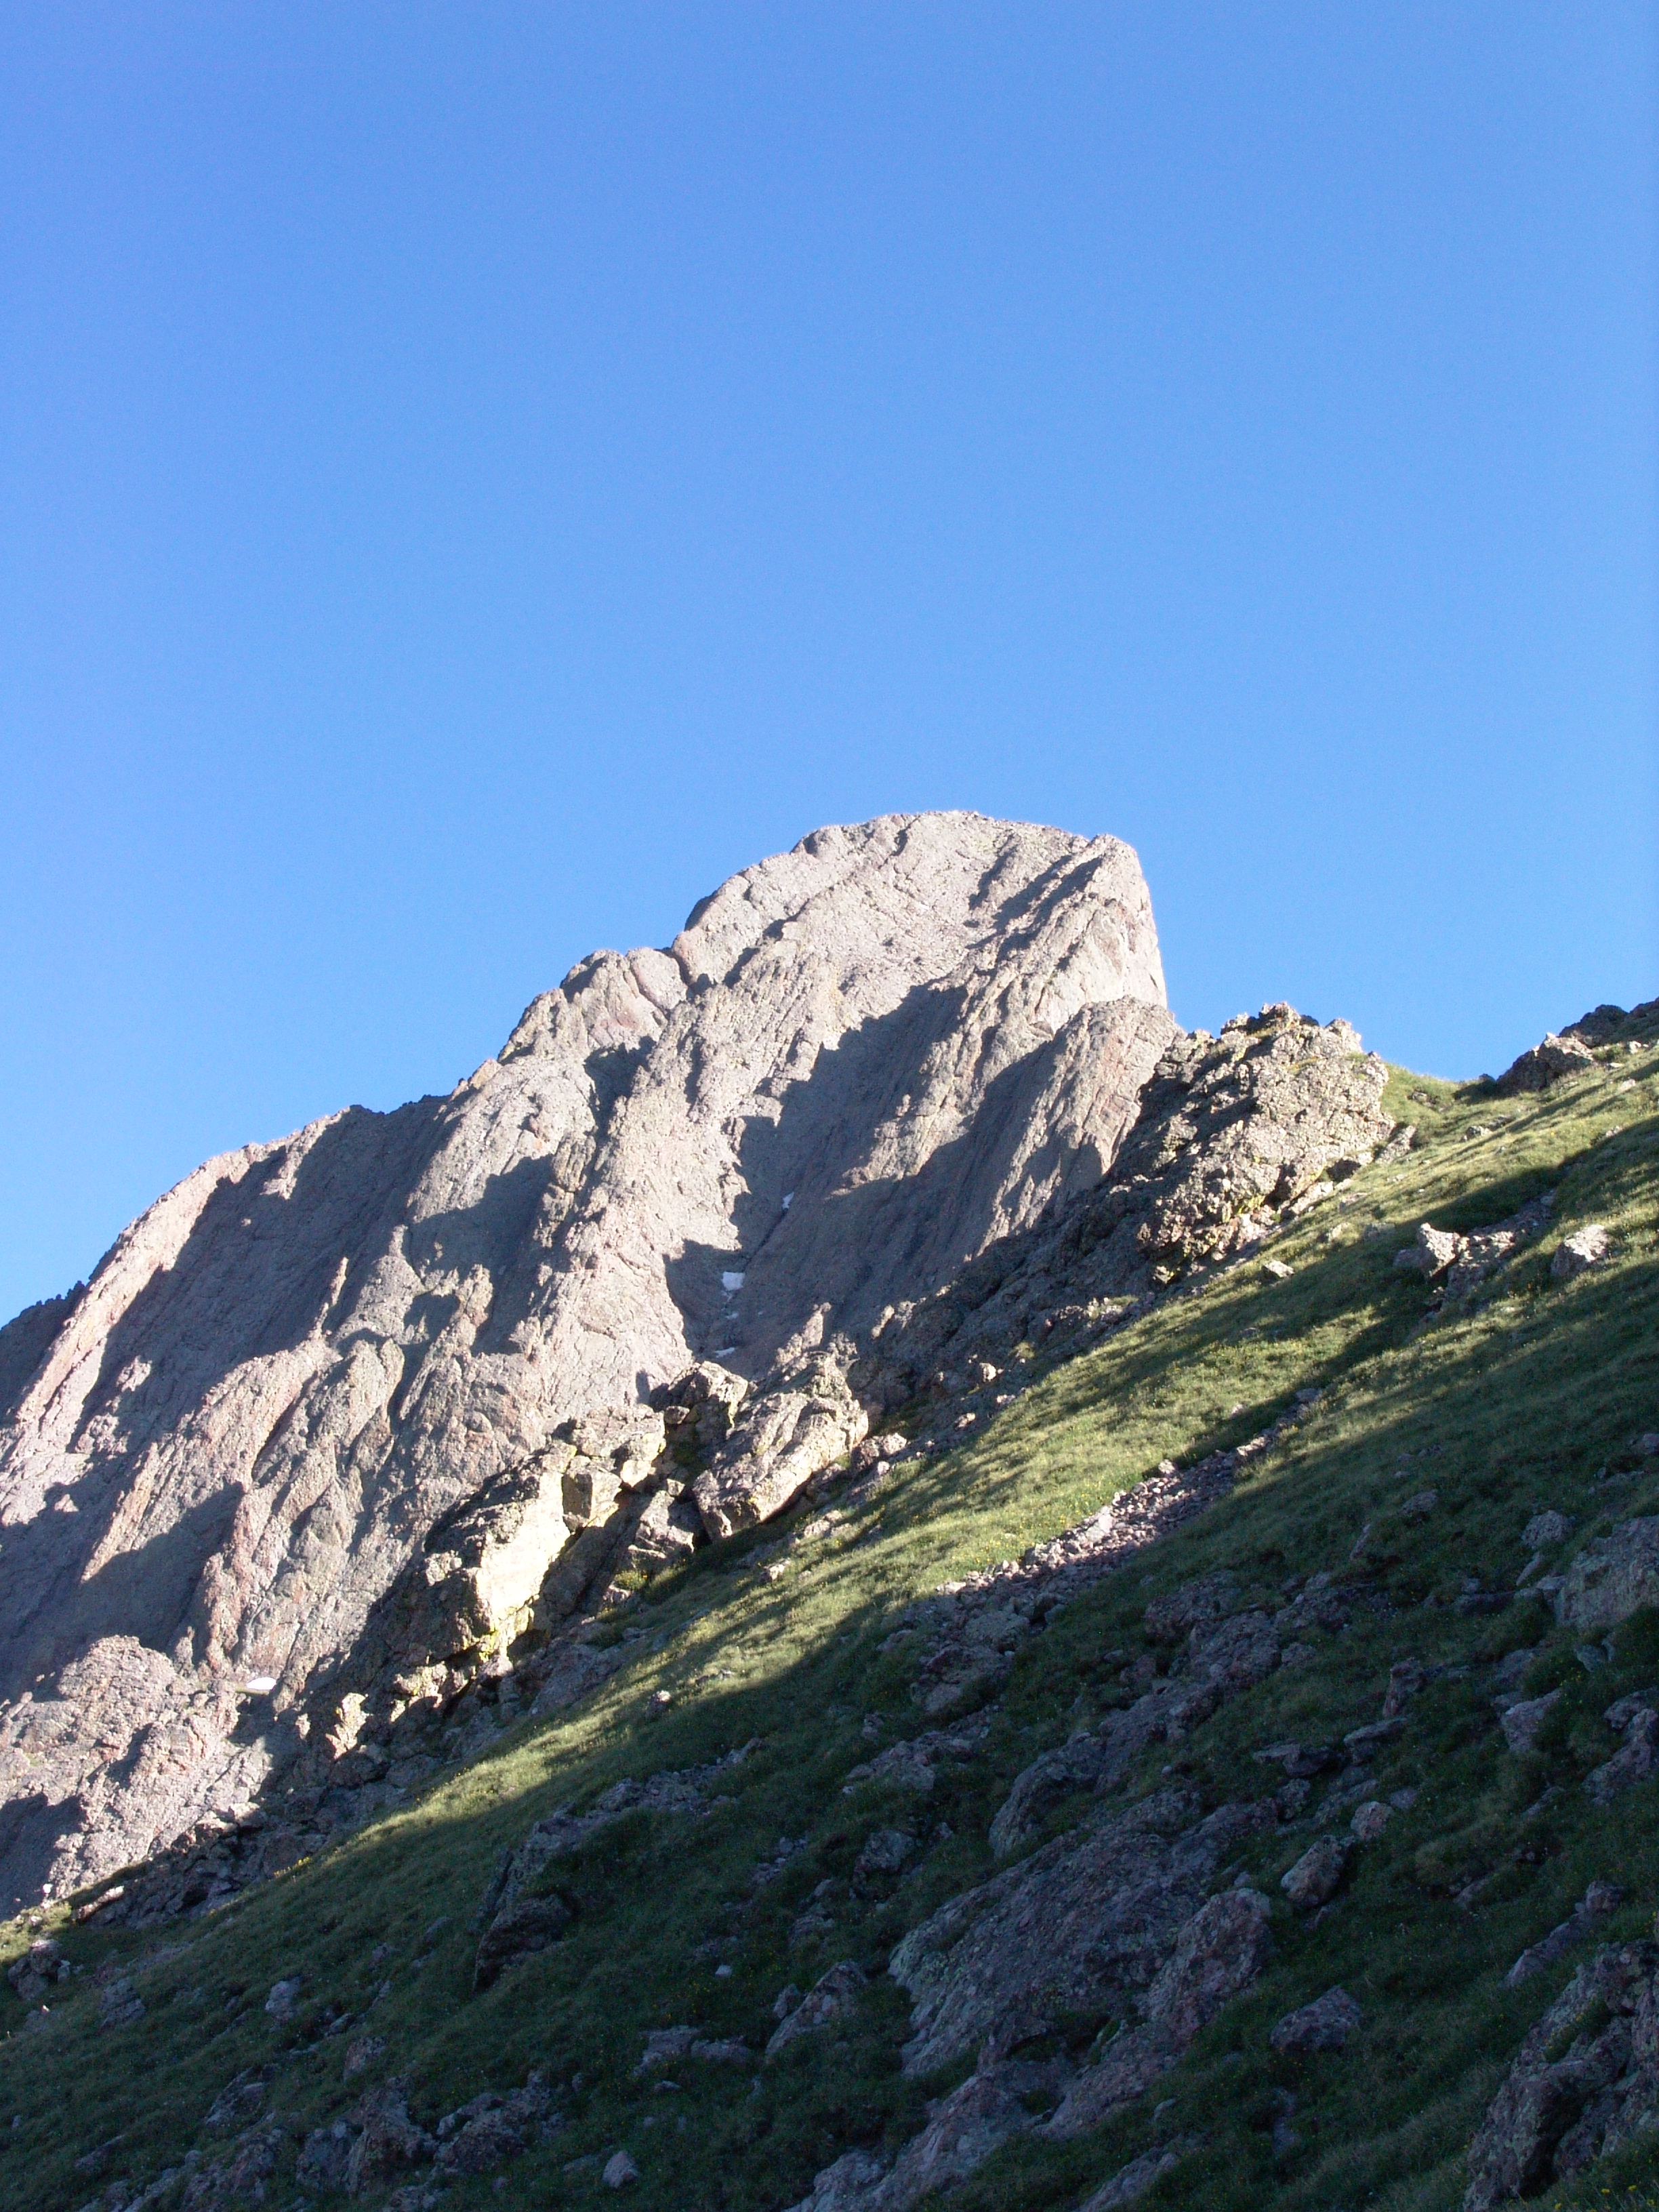
The hike down from Broken Hand Pass was totally a joy, mostly due to the amazing trailwork provided by RMFI. Upon reaching the main trail, we celebrated and enjoyed the unobscured views of Crestone Needle for the first time.
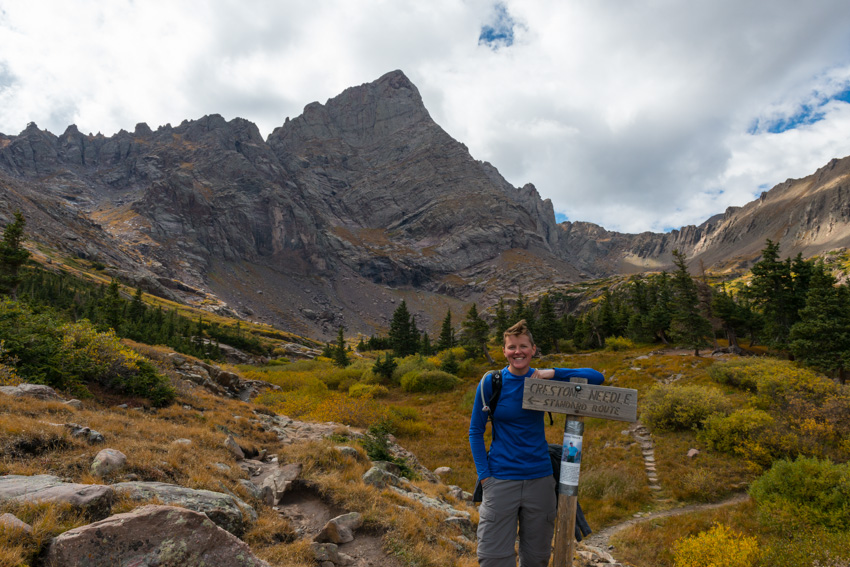
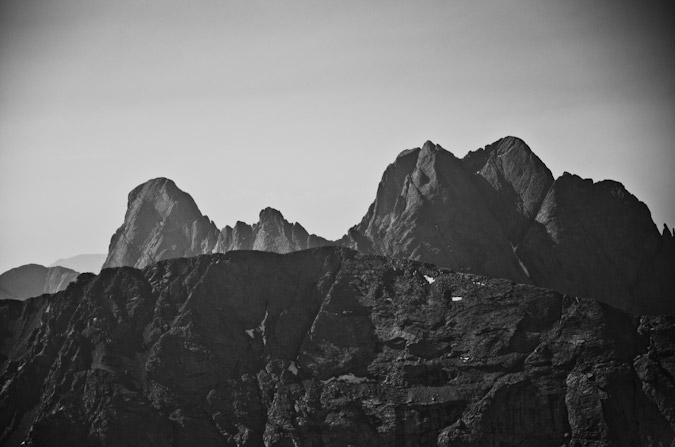
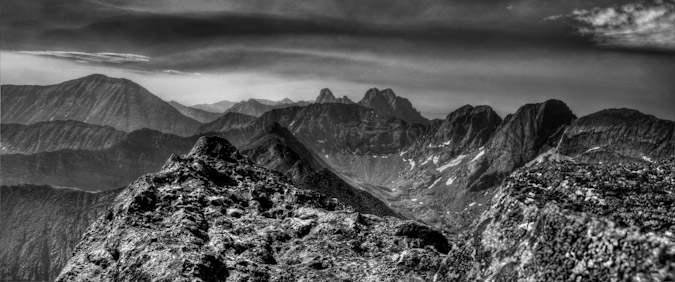
I stopped one last time on the way down to get a black and white shot of Crestone Needle, which I think turned out quite well.
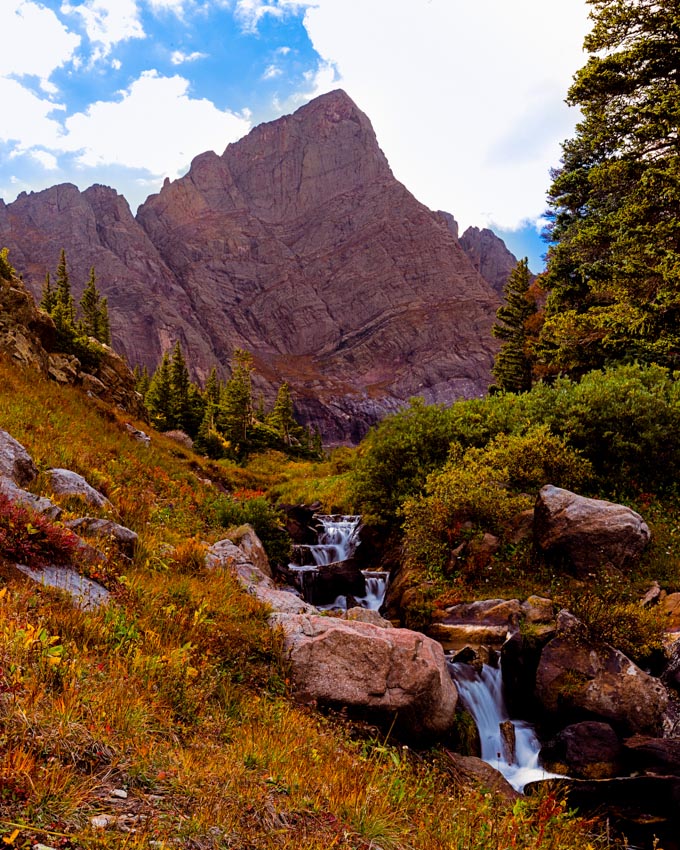
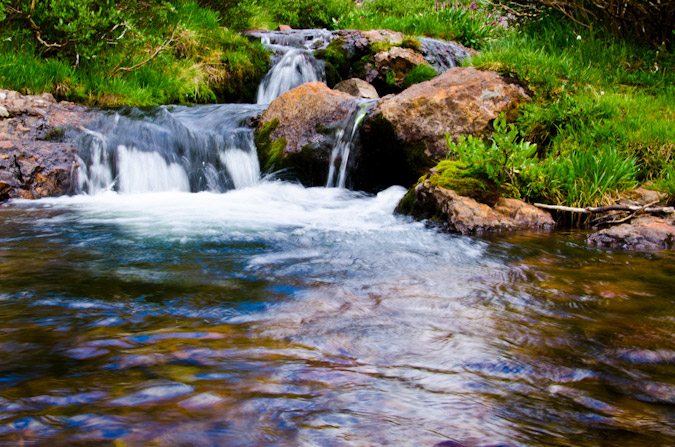
We made it back to our campsite and began to pack up. I wanted to get one more parting shot of Crestone Needle using a ND Filter, so I set it up and captured a mid-day shot of the flowing water in front of Crestone Needle.
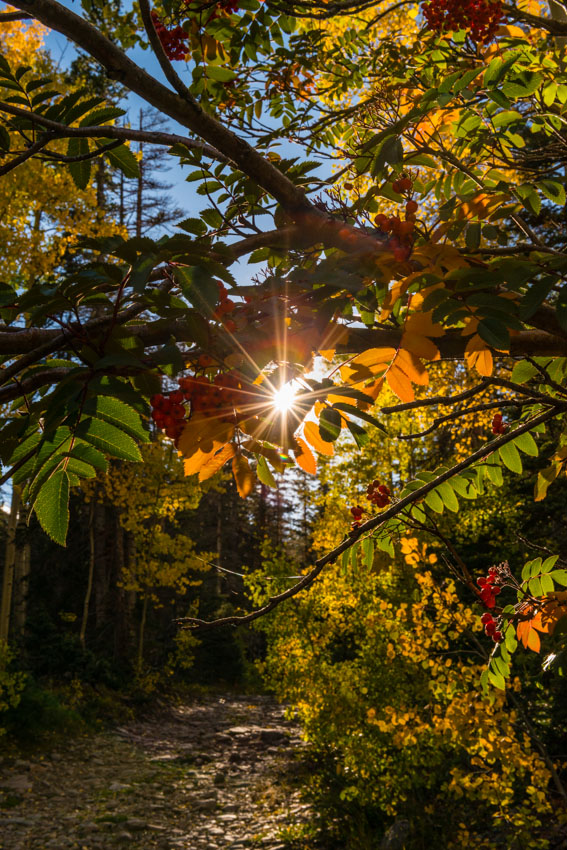
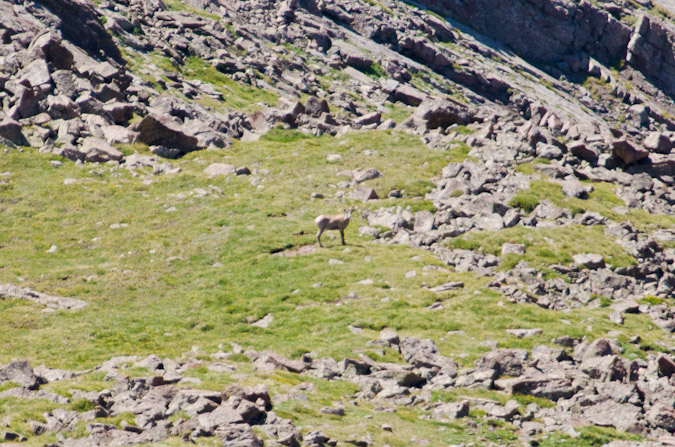
On the way out, we encountered all kinds of awesomeness, including several deer and some really friendly birds that were super photogenic and happy. What a lovely basin. I stopped one last time to get a a shot of the trees on the lower part of the trail before we go back to the car.
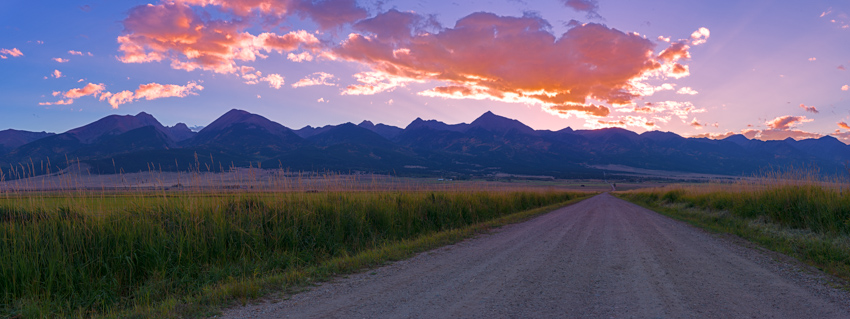
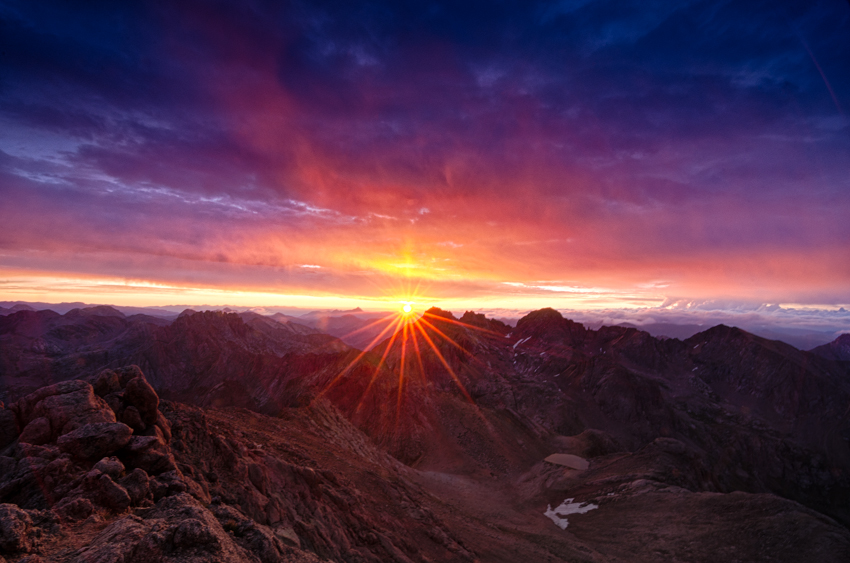
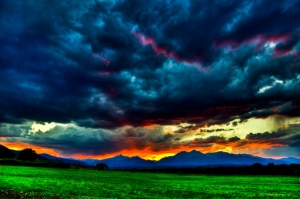
Upon getting back to the car, we found the bag of raisins I had left in the cup holder with a hole in it and lots of shavings around it - apparently a mouse had gotten into the vehicle and helped itself to a helping of raisins. Gross! We drove out carefully on the really horrible South Colony Basin road and enjoyed an amazing sunset over the Crestones to the west of us. A great ending to an amazing day.
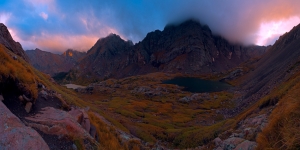
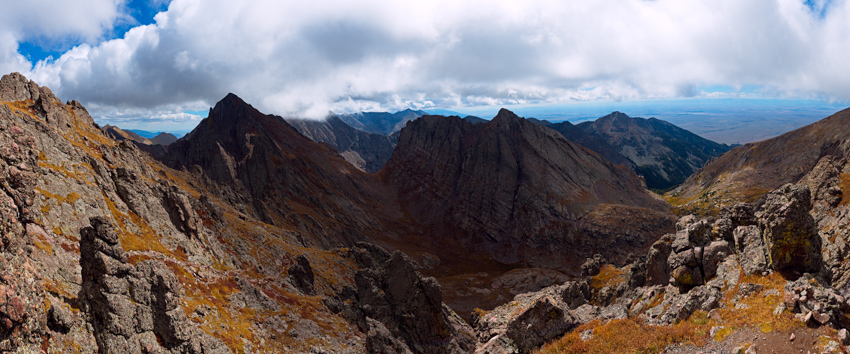
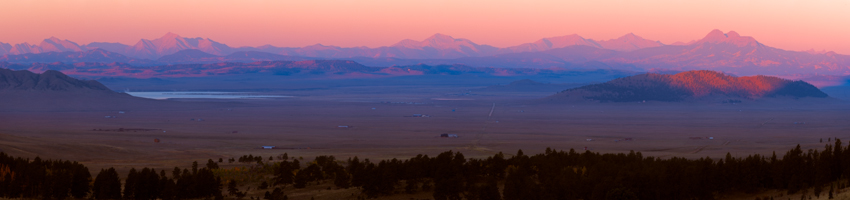
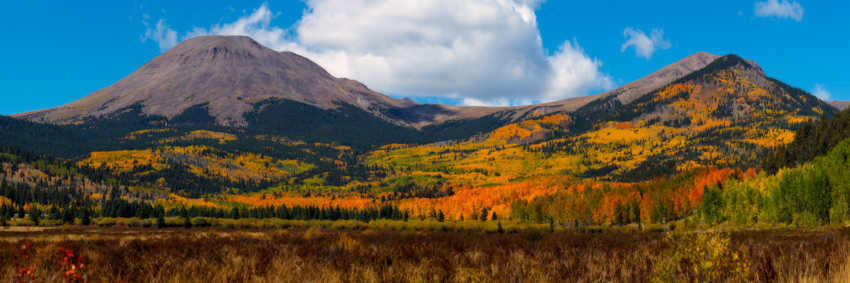
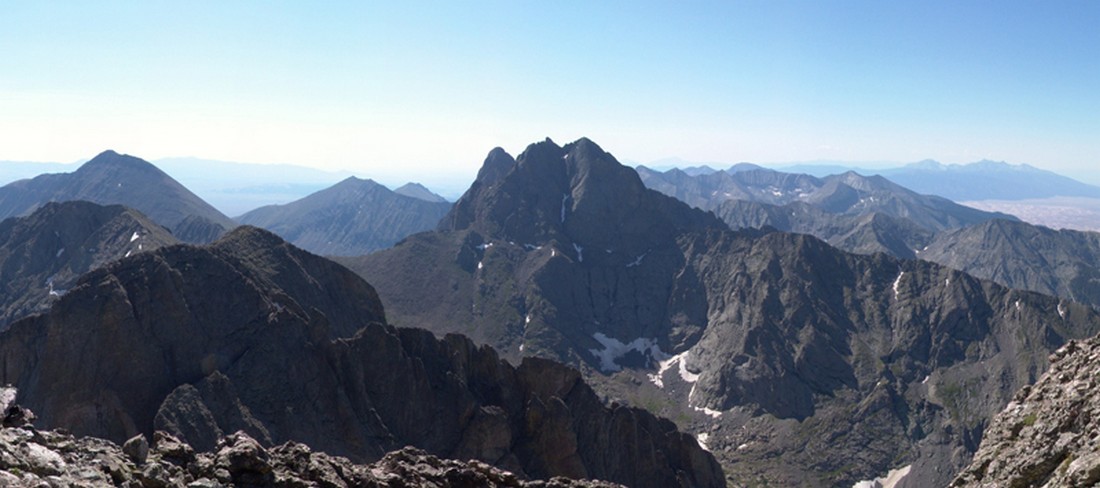
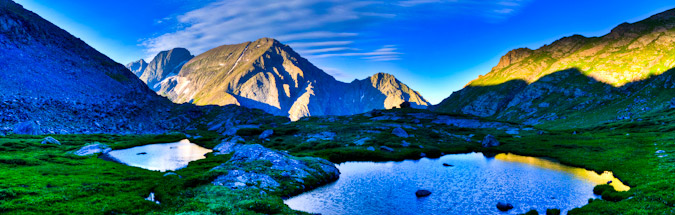
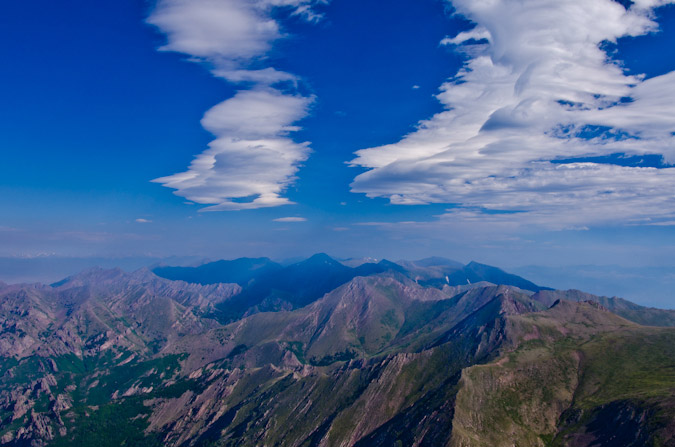
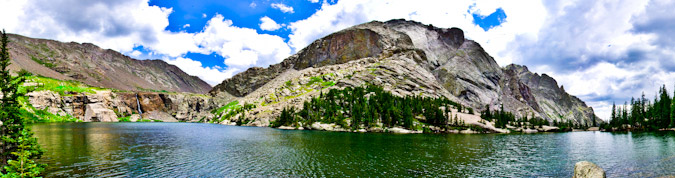
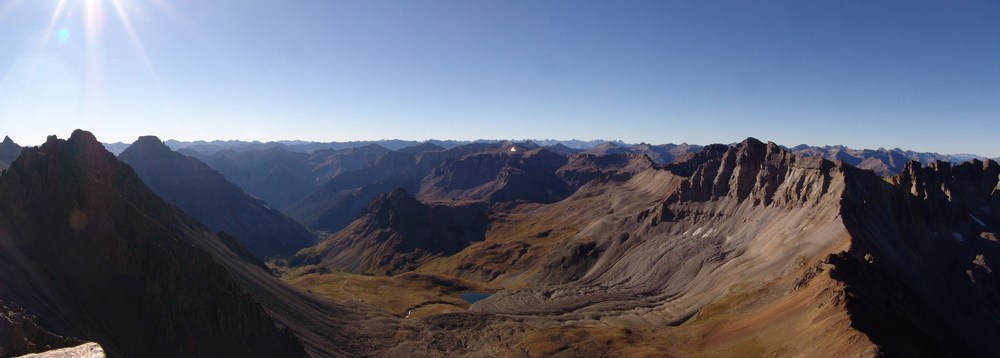
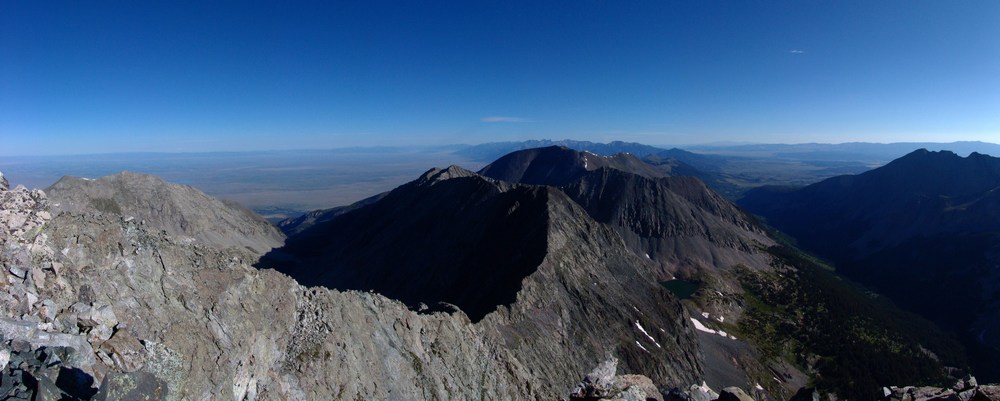
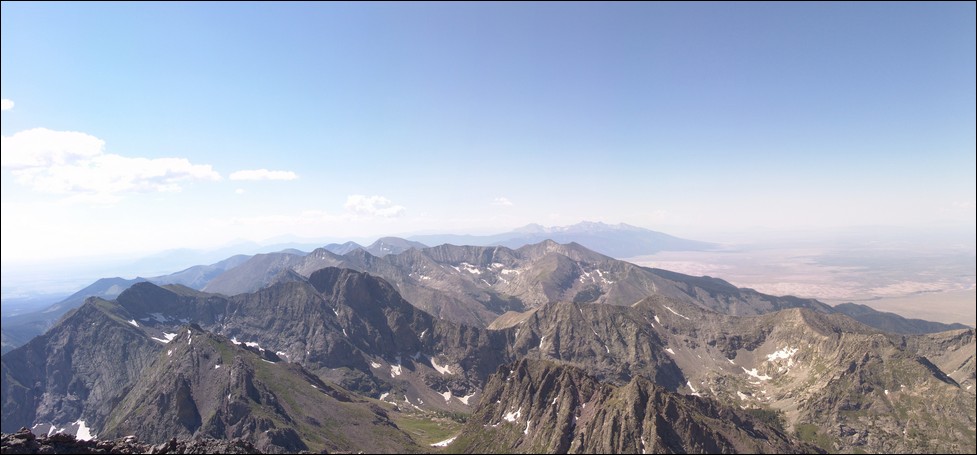
I ended the trip with a nice panorama of the Sangre de Cristo Mountains taken from Horn Creek Road just south of Westcliffe.
... [Click Next to continue reading]
I got up very early the next morning to do a fall colors photography shoot and birding expedition with my mom. We left the house around 5 AM from Colorado Springs and made our way up to Wilkerson Pass. The early light on the peaks to the west was fantastic, although I still would have loved to have some clouds! Spinney Mountain Reservoir was a nice element between us and Mount Princeton above it. From left to right - Antero, Princeton, Yale, Columbia, Harvard and Buffalo Peaks. Awesome.
The plan was to head to the St. Elmo area south of Mount Princeton to photograph the fall colors and keep our eyes out for birds as my mom is very into birding. On the way through South Park, we located a really awesome Great Blue Heron feeding on fish in the mist above the South Platte River.
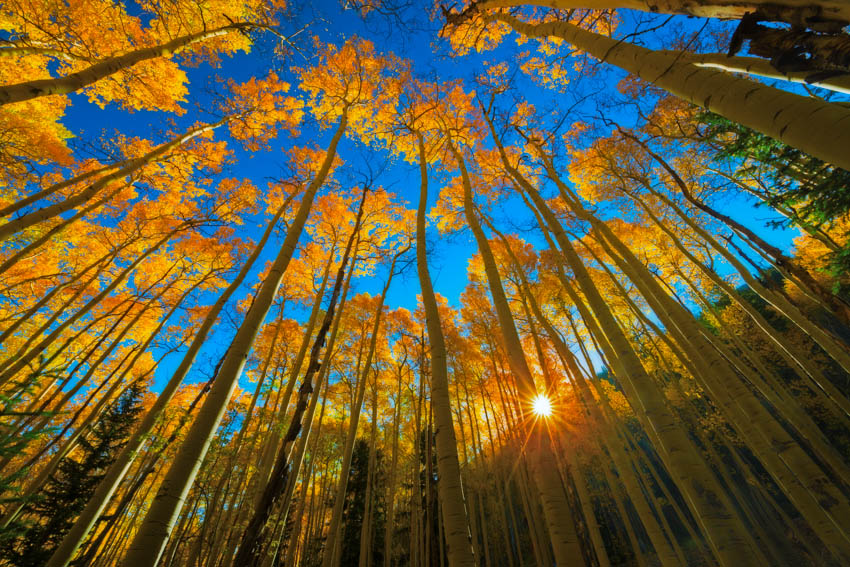
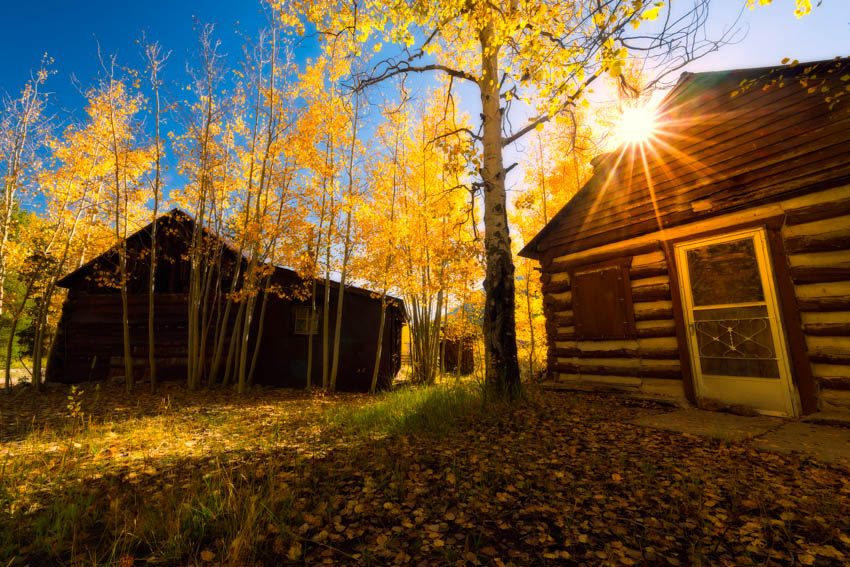
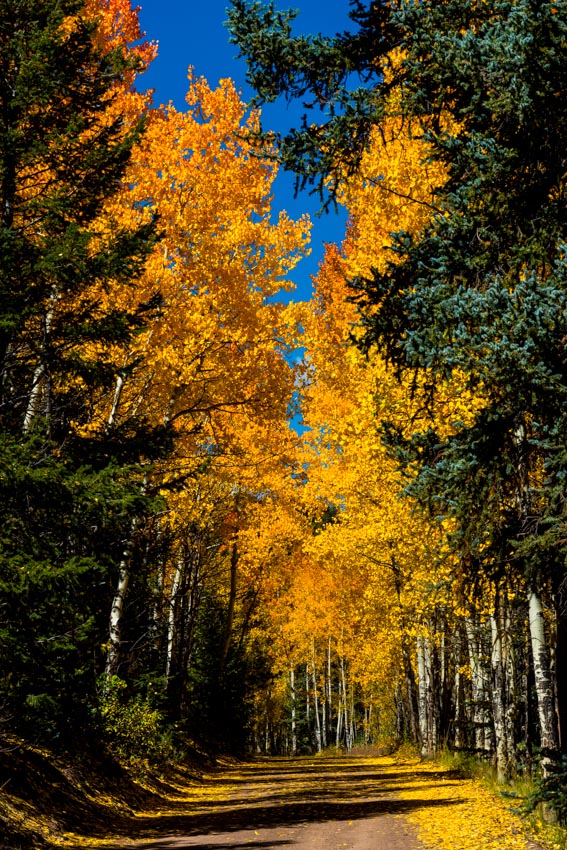
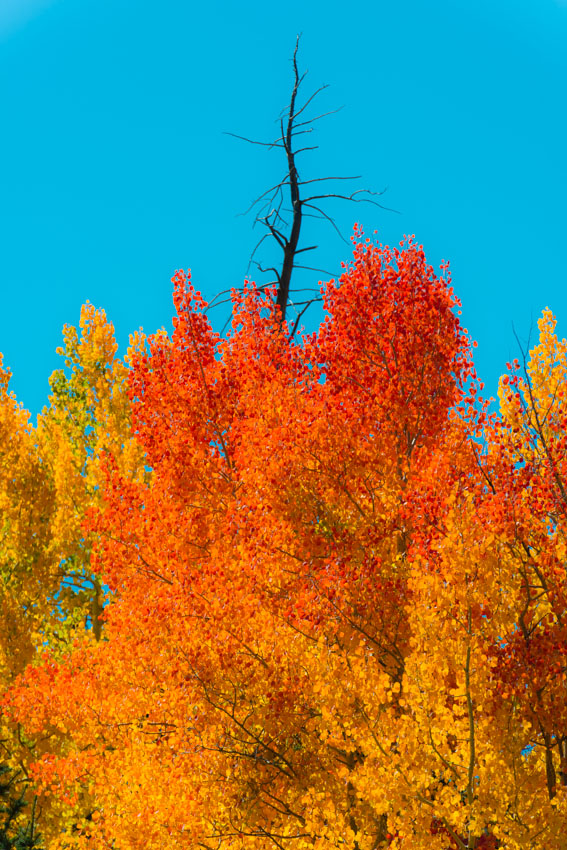
We made our way up towards St. Elmo in no time at all and were immediately rewarded with awesome color on the hillsides around us.
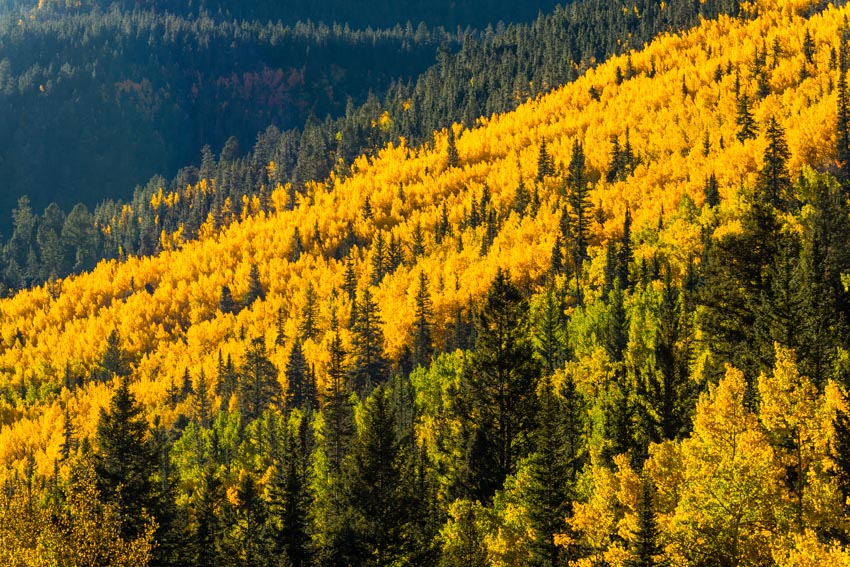
I saw an amazingly photogenic aspen grove off the road and had my mom stop the car, where I spent the next 30 minutes shooting the awesome light and color in the aspen grove.
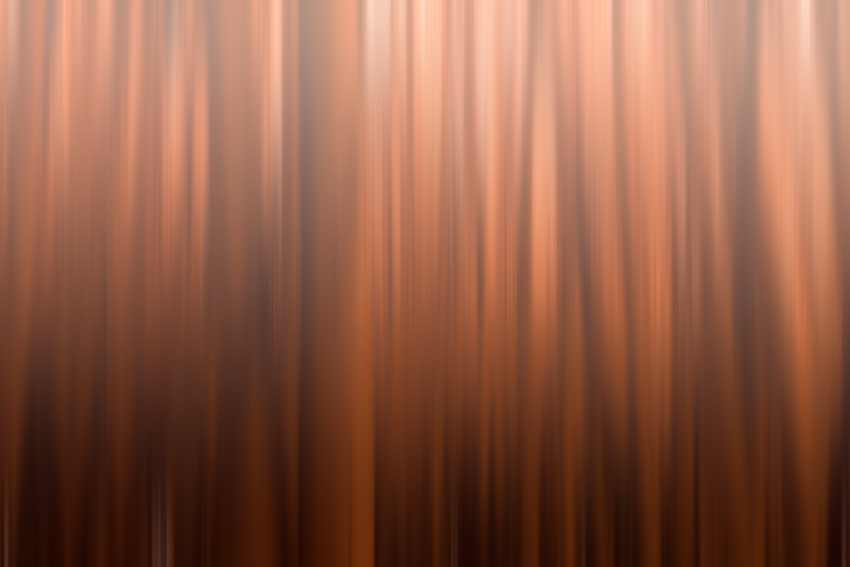
The grove afforded me some great opportunities to try out new techniques and processing concepts that I've been wanting to try, including this abstract use of motion blur and aspen trees.
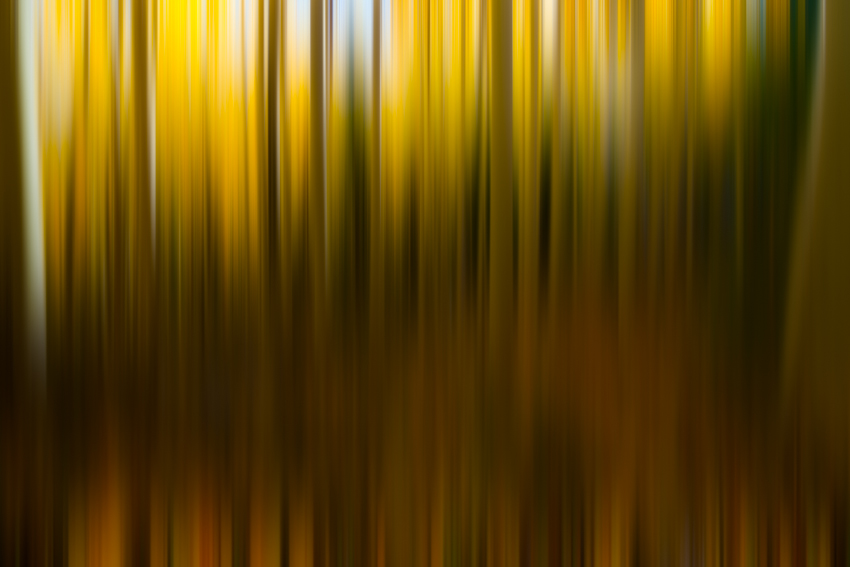
I fell in love with this aspen grove, and could probably shoot fall colors in Colorado for days on end without blinking. This was probably my favorite shot of the whole trip, and I immediately made it available for print purchases (you can click on the photo to learn more about that).
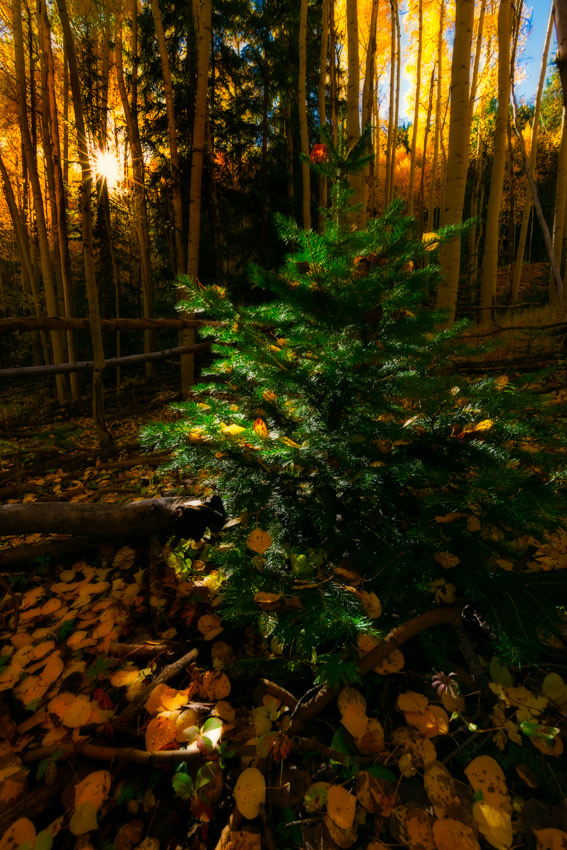
I also found this super cool pine tree covered in yellow aspen leaves that drew my attention and reminded me of a Christmas tree.
We finally made it to the town of St. Elmo and stopped for awhile to enjoy the fresh crisp air and fall colors.
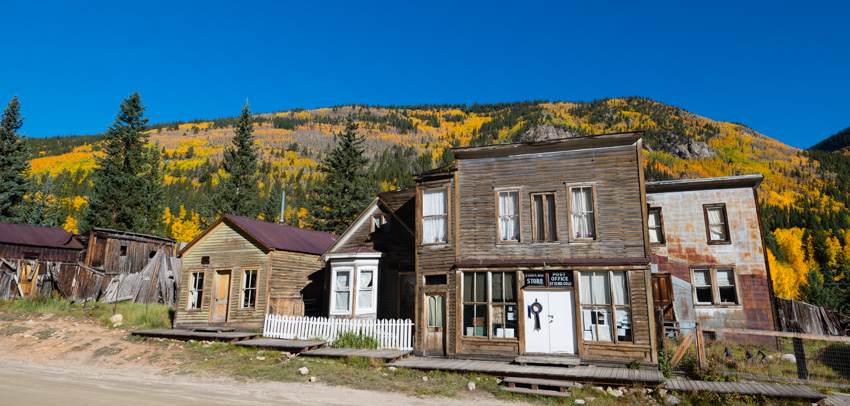
I found these awesome cabins further into the town and thought they were the perfect forground to showcase the area and the fall colors.
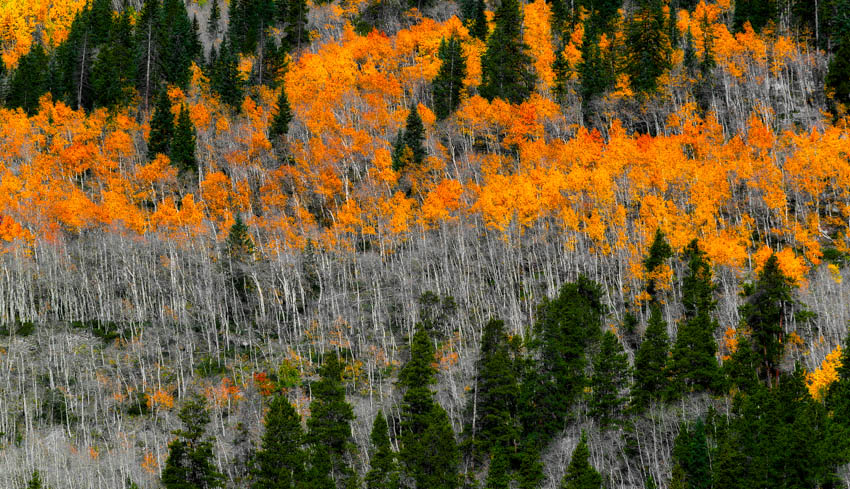
I had a good time using my 70-200 to pick out some patterns in the trees in the hillside across the way from St. Elmo, it was quite fun trying to find the best compositions.
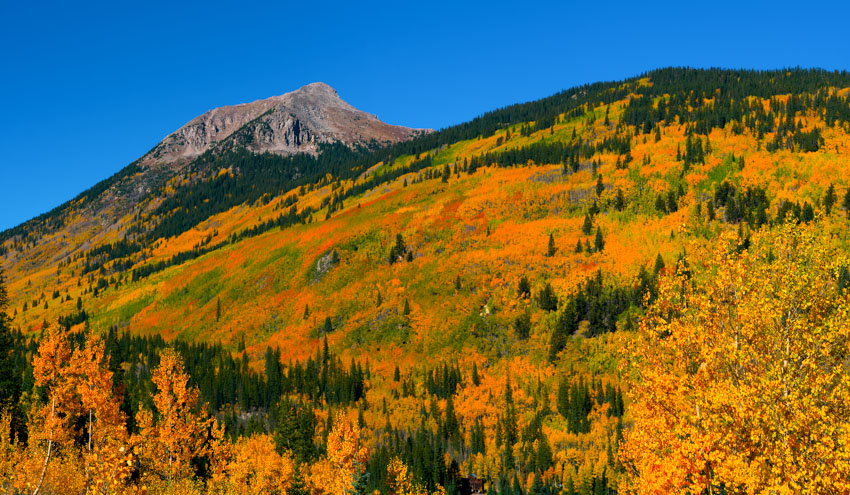
Perhaps my second favorite shot of the day was of this huge mountainside filled with aspen trees changing colors, with an old mining structure anchoring it at the bottom of the frame. So beautiful!
I found another great aspn grove to try out another abstract motion technique as well.
My mom and I decided to leave the St. Elmo area and head over to the Buffalo Peaks area It was a nice drive up into the hills and we were greeted with many wonderful changing fall color scenes.
 |
 |
I was happy to find a nice vantage to snap off this huge panorama of the Buffalo Peaks with the changing fall colors featured prominently.
We also found the foundation of an old cabin here and it made for a nice foreground feature.

I was also happy to get my mom to get into a self-timer photo with me with the Buffalo Peaks scene behind us in the harsh mid-day sun (can't always shoot at the golden hour, right).
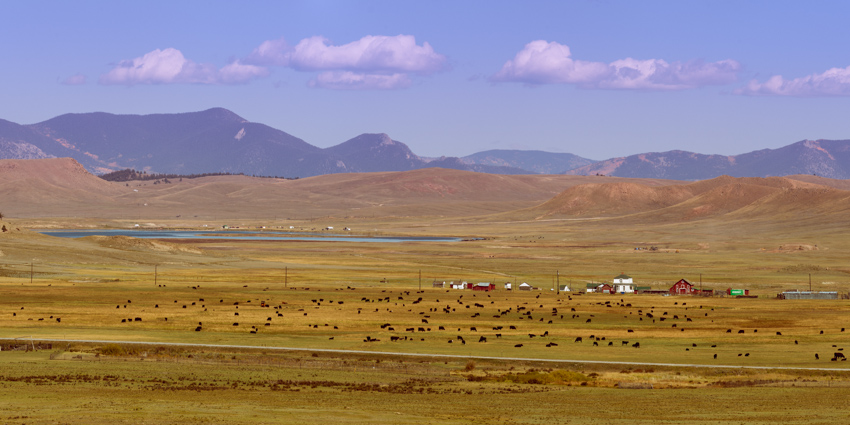
On our way out, I stopped one last time to shoot this telephoto panorama of Highway 285 and Antero Reservoir with cattle and old cabins in the scene. What a pretty day!
While our trip was not filled with epic scenes from my more favorite areas like Kebler Pass, Ohio Pass, Owl Creek Pass or anything from the San Juans, I was still pleased to get into the mountains to photograph the changing fall colors with my mom. It was a great mother-son trip and I know it meant a lot to my mom to spend th day with her. Any chance to get into the Colorado mountains in the autumn is a welcome day for me. I hope you enjoyed my photographs and trip report. I would love to hear from you on your thoughts about the trip report or the photos, or if you have any questions about my photos. Please feel free to leave a message below or to contact me. Thanks for stopping in!
Colorado's 12 Hardest 14ers to Climb
Colorado's Fourteeners (14ers) are legendary. Each of the 53 ranked peaks offers unique challenges and rewards. They are the some of the most amazing mountains in the world and have been the number one object of adoration for hundreds of thousands of Coloradoans. Indeed, according to the Colorado Fourteeners Initiative (CFI), approximately half a million people attempt to climb a fourteener each year. Climbing 14ers is a dangerous activity; however, good planning, fitness, and awareness of the potential hazards will provide climbers with good opportunities to accomplish these monsterous peaks. Each year I'm usually asked one of two questions - which 14ers are the easiest; and, which 14ers are the hardest? I decided to lay out the hardest 14ers here for you in this article. Let me know how I did based on your own experience. Lastly, it might be a good idea to arm yourself with the most up-to-date information about mountaineering accidents in Colorado. Who knows, reading about these tragic events may just save your life. Additionally, I highly recommend obtaining GaiaGPS for your phone. It allows you to see your track and location on a USGS map overlay even in airplane mode. It has saved me so many times. You can purchase it here and help support the site.
While it may make sense to simply use the only existing data available regarding mountaineering accidents in Colorado to determine 14er difficulty, my experience has been that the difficulty of a peak is more than just cold, hard facts. Indeed, Longs Peak is not nearly as difficult as, say, Capitol Peak; however, it has far more accidents due to the sheer number of inexperienced and/or unaccomplished people attempting it each year. With that being said, I'm going to use a mixture of my personal experience and some subjective ratings to present my case to you. For these ratings it is assumed that the climber is approaching via the standard route in "normal" conditions. I've intentionally left out un-ranked 14ers such as North Maroon and El Diente - assume they can be bundled with Maroon Peak and Mount Wilson, respectively. Additionally, consideration of any traverses between 14ers was not considered for these ratings.
I will rate each mountain's difficulty ranking based on four equally weighted variables:
1. Sustained difficulty: this rating establishes the peak's sustained difficulty over the course of the entire climb
2. Most difficult section: this rating establishes the difficulty of the peak's most difficult section
3. Terrain: this rating establishes the difficulty of the peak's overall terrain, taking exposure and looseness of rock into account
4. Access: this rating establishes the difficulty to reach this peak or how long it takes to get to the top
Feel free to let me know if you disagree with my ratings!
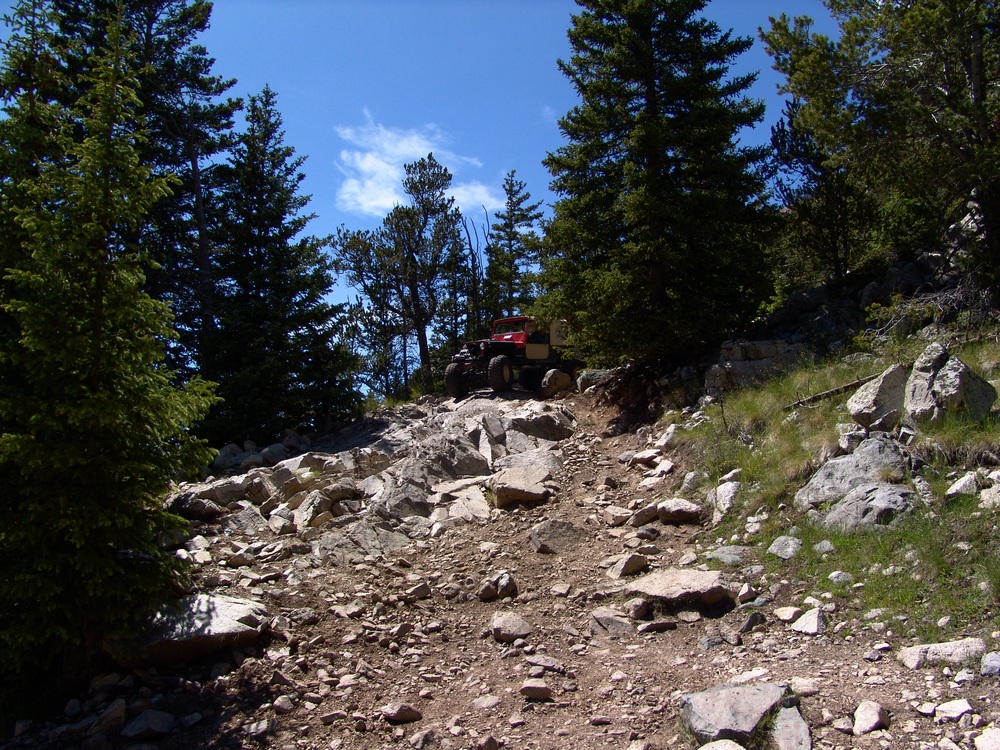
#1. Capitol Peak

While Capitol Peak has only seen two deaths since 2010 compared to five on Longs Peak (as of August 2014), it is arguably the most difficult 14er in Colorado, as I attested in my 2010 trip report. As pictured above in the panoramic taken between Capitol Peak and K2 near the infamous Knife Edge, the terrain is rugged, exposed, loose and dangerous. Not only does Capitol Peak have some very difficult sections, it has, in my opinion, the highest sustained difficulty out of any of the 14ers. The climb up Capitol is relentless and requires mountainners to focus on the mountain's terrain for a very long period of time. There are very few breaks to be had and simple mistakes can and do prove to be fatal. Additionally, Capitol Peak requires a lot of time to accomplish and once you are past the knife edge, you are committed to at least two hours more of climbing. This makes the mountain especially mentally taxing as those are two hours straight of focused climbing on rugged terrain where you also have to keep a keen eye on the weather. Lastly, access to Capitol, while doable in a single day, usually requires an arduous backpacking trip to Capitol Lake and a very early start on a subsequent day. Let's see how Capitol Peak rates in the four domains:
| Sustained Difficulty: 10/10 | |
| Most difficult section: 9/10 | |
| Terrain: 10/10 | |
| Access: 9/10 | |
| Total: 38/40 |
#2. Mount Wilson
Mount Wilson is easily one of the most challenging 14ers in Colorado to climb - the standard route, while mostly straight-forward, has many difficult sections of very loose rock at the summit. The summit block itself has stopped many people in their tracks, just a few feet from the summit. The exposure there is intense and not for the feint of heart. Examples of this can be seen in my trip report from 2011. In addition to the tremendous exposure found on the summit block, Mount Wilson's approach from the Rock of Ages trailhead is fairly long and quite committing, with a lot of up-and-down climbing (unless approached from Kilpacker Basin or Navajo Basin). The difficult section of climbing found on the upper 1/3 of the route is difficult to negotiate and offers many challenges for climbers of all levels. The rock on Mount Wilson is extremely loose and many people have perished on the slopes between Mount Wilson and the un-ranked beast to the west - El Diente.
| Sustained Difficulty: 10/10 | |
| Most difficult section: 9/10 | |
| Terrain: 10/10 | |
| Access: 7/10 | |
| Total: 36/40 |
#3. Little Bear Peak

Out of all of the Fourteeners, Little Bear Peak is quite possibly my least favorite and least likely to be something I'd like to repeat. The approach is terrible - either a long slog on a rocky road in hot weather or an insane jeep ride over some of Colorado's toughest jeep obstacles (OK - those are kind of awesome). My ascent in 2010 was quite memorable, notably - the infamous "Hourglass" section just about scared me to death. Many people have perished in the Hourglass over the years, including one of the most memorable deaths in the past 5 years - Kevin Hayne. The Hourglass presents some very difficult climbing, with few good hand-holds and potentially fatal ice and water sections, not to mention the hazard of frequent rockfall from above. While Little Bear Peak is very straight-forward and mostly an easy climb, the Hourglass section marks it as one of the toughest mountains around.
| Sustained Difficulty: 6/10 | |
| Most difficult section: 10/10 | |
| Terrain: 10/10 | |
| Access: 7/10 | |
| Total: 33/40 |
#4. Pyramid Peak

Pyramid Peak, while not having many known fatalities, presents some truly heinous climbing obstacles, especially in wet conditions. The rock in the Elk Mountains is notoriously loose and nasty - making it very suspect in down-climbs and even more dangerous in rain or snow. The approach to Pyramid is fairly straightforward, albeit somewhat long and committing once above tree-line. The terrain on Pyramid is steep almost the entire climb and once above tree-line the mountain demands your concentration for the duration. While Pyramid is likely one of my favorite climbs of all time, it is not for a beginner climber and should be taking quite seriously. Of course, the views from the summit are to die for.
| Sustained Difficulty: 8/10 | |
| Most difficult section: 8/10 | |
| Terrain: 9/10 | |
| Access: 6/10 | |
| Total: 31/40 |
#5. Maroon Peak

The photo above was taken from the summit of Pyramid Peak looking out across the valley at the Maroon Bells and their insane stature. The whole area is steep and impressive, which comes with some inherent dangers and difficulties. The Maroon Bells have claimed many lives through the years and are certainly some of the most dangerous mountains in America. Of particular note, the traverse between Maroon Peak and North Maroon has claimed several victims and is a force to be reckoned with. Maroon Peak is a steep monstrosity full of beauty and loose rock as well as an intricate network of rocks, spires and falling rock that a blessing and a curse. Maroon Peak holds some of Colorado's worst rock and even the most experienced climbers have been subdued by the dangerous terrain found there.
| Sustained Difficulty: 8/10 | |
| Most difficult section: 8/10 | |
| Terrain: 9/10 | |
| Access: 6/10 | |
| Total: 30/40 |
#6. Snowmass Mountain

Snowmass Mountain is usually climbed in the early months of summer, when the face of the mountain is mostly covered in snow, making for somewhat easier travel up the snow in crampons; however, the rock beneath the snow is quite loose and is constantly shifting due to erosion. Indeed, Snowmass has proved to be particularly dangerous in the past few years due to these shifting conditions and has claimed a couple lives in the past 5 years. Snowmass' upper slopes contains large white boulders that look secure but are often quite loose and came come crashing down at any moment. The approach on all routes of Snowmass requires quite a bit of travel, which increases the difficulty.
| Sustained Difficulty: 8/10 | |
| Most difficult section: 6/10 | |
| Terrain: 7/10 | |
| Access: 8/10 | |
| Total: 29/40 |
#7. Sunlight Peak
Sunlight Peak is one of the few 14ers requiring class 4 climbing to reach the summit and is generally preceded by a very long backpacking trip and a steep ascent into the Twin Lake basin. Terrain in the Chicago Basin where Sunlight resides is notoriously loose and dangerous as well as highly susceptible to frequent and quickly changing extreme weather conditions. The summit block of Sunlight presents a particularly interesting challenge for climbers and many people skip the summit block altogether if there is any moisture on the rock. Many people may rate Sunlight's next door neighbor, Windom Peak, as being the more difficult of the two; however, I personally found Sunlight to have more challenging route-finding and climbing requirements. Since Sunlight is often paired with Eolus and Windom on the same day and often as the last peak climbed, it presents even more inherent danger as many climbers attempting it are more exhausted than if doing Sunlight on its own.
| Sustained Difficulty: 7/10 | |
| Most difficult section: 8/10 | |
| Terrain: 6/10 | |
| Access: 8/10 | |
| Total: 29/40 |
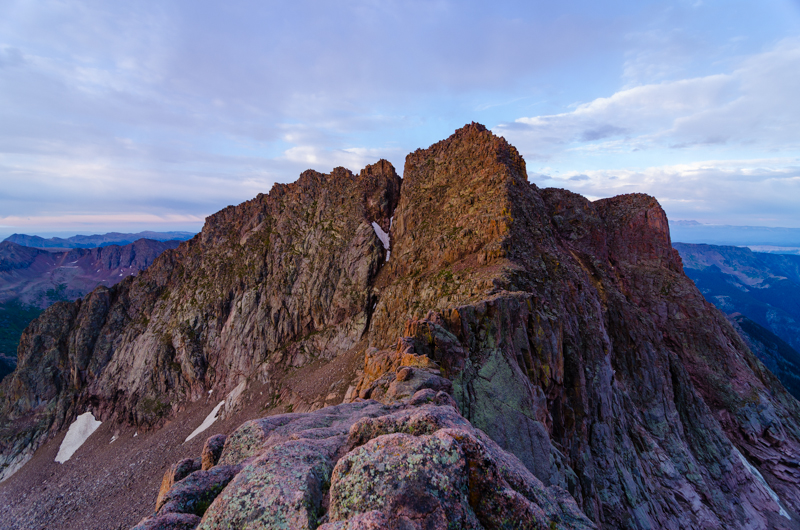
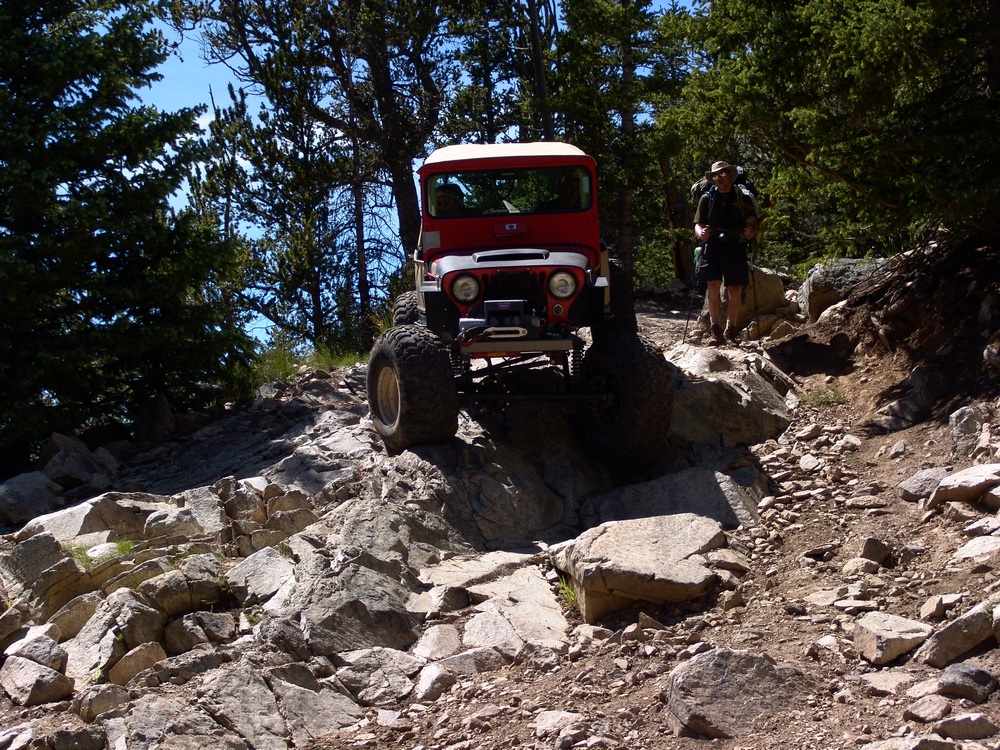
#8. Crestone Needle

Coming in at number 8 on my list of Colorado's most difficult 14ers to climb is the venerable, impressive and just-plain-freaking-awesome Crestone Needle - my favorite 14er of all. The standard route of Crestone Needle brings you up a steep approach and then plants you right in a series of difficult route-finding challenges and some of the steepest yet most solid rock there is. Even though the rock is quite solid and sturdy, make no mistake - an error in judgement would likly prove fatal, especially in severe weather conditions. Indeed, Crestone Needle has claimed many lives and is a surely one of the most dangerous peaks in the Sangre de Cristo Range. Most approachs require a backpack trip or a very early start and once above tree-line the terrain is quite extreme.
| Sustained Difficulty: 7/10 | |
| Most difficult section: 7/10 | |
| Terrain: 9/10 | |
| Access: 5/10 | |
| Total: 28/40 |
#9. Longs Peak
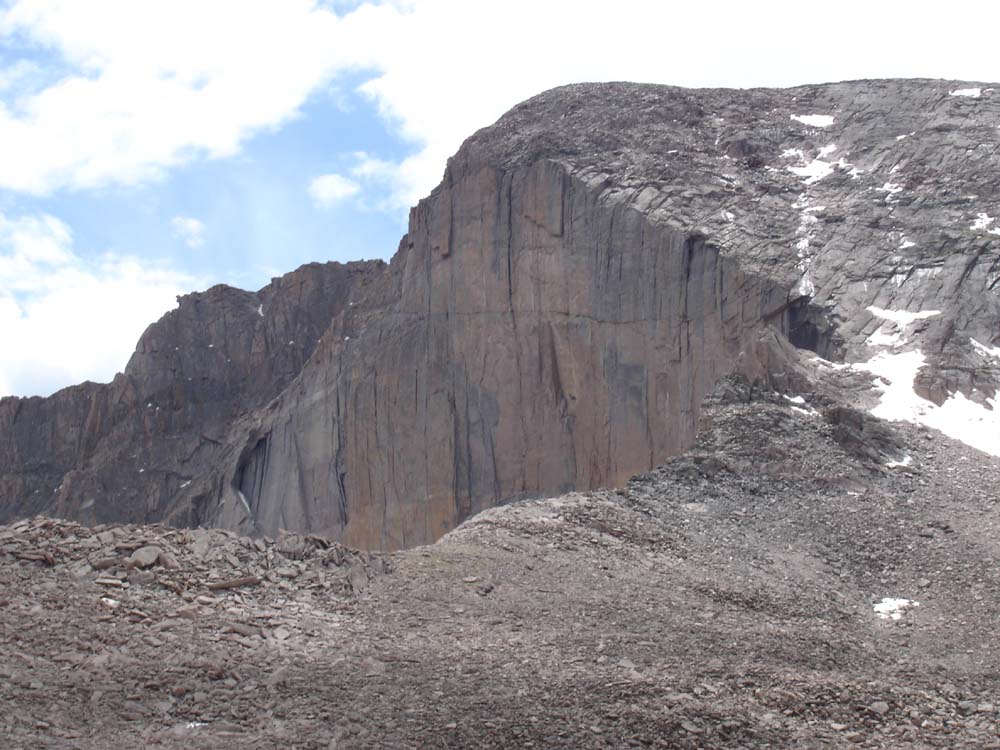
Longs Peak, located within the heart of Rocky Mountain National Park, is likely Colorado's most frequently visited mountain other than perhaps Greys and Torreys. This mountain's location in a National Park makes it a very popular destination by people from all over the world and it often lures inexperienced climbers on its more dangerous upper sections where people find themselves ill-equipped to complete the climb, both mentally and physically. Perhaps the most notable part of Longs Peak's approach is the sheer length of the climb, a full-day affair to be sure. A simple google search of Longs Peak deaths will just tell you how dangerous this peak really is, especially on the upper areas such as the Narrows and the Trough. Additional hazards plaguing this peak are the frequent deposits of snow and ice early and late in the climbing season that often contribute to the dangerous nature of the climb.
| Sustained Difficulty: 9/10 | |
| Most difficult section: 6/10 | |
| Terrain: 8/10 | |
| Access: 5/10 | |
| Total: 28/40 |
#10. Kit Carson Mountain
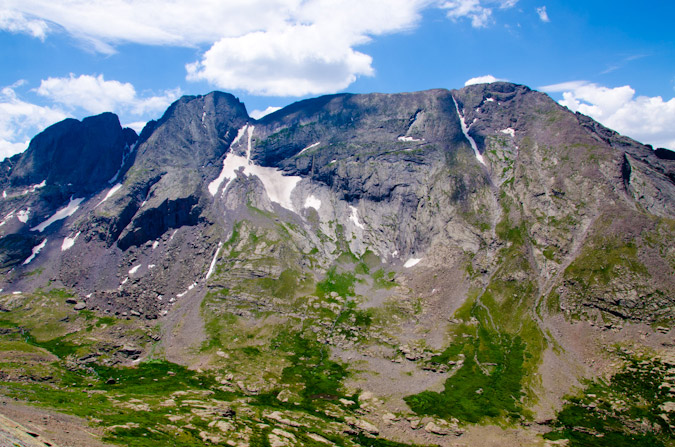
Kit Carson Mountain is one of the Sangre de Cristo giants located right by Crestone Peak and Crestone Needle. The approach to Kit Carson's standard route involves a lengthy backpacking trip and an ascent over the less impressive, albeit quite steep 14er, Challenger Point. The steep approach, coupled with a downclimb mired in confusion and difficult route-finding, makes Kit Carson quite eligible for this list. Several climbers have perished on Kit Carson in recent years, almost always due to off-route climbing.
| Sustained Difficulty: 8/10 | |
| Most difficult section: 6/10 | |
| Terrain: 6/10 | |
| Access: 7/10 | |
| Total: 27/40 |
#11. Mount Eolus
Mount Eolus marks the second of the Chicago Basin 14ers to make this list and arguably the more difficult of the three, despite my lower rating here. Eolus' "Catwalk" and steep, confusing route on the upper third of the mountain make it a top contender. The approach for Eolus is quite taxing as well and many climbers reaching the upper sections of Eolus find themselves out of energy and weakened - a terrible combination when paired with the rugged and loose terrain of the San Juan Mountains.
| Sustained Difficulty: 6/10 | |
| Most difficult section: 7/10 | |
| Terrain: 6/10 | |
| Access: 8/10 | |
| Total: 27/40 |
#12. Crestone Peak
Crestone Peak has single-handedly claimed many climbers' lives over the past several years due to the loose and difficult terrain found on the upper sections of the mountain. While the mountain's standard route is mostly straight-forward, there are certainly sections that demand one's full attention and good climbing skills in order to ensure a successful summit. Like Crestone Needle, Crestone Peak's approach is a very long day up very steep trails and rock formations, increasing the difficulty of this impressive peak found in the awesome Sangre de Cristo Mountains.
| Sustained Difficulty: 6/10 | |
| Most difficult section: 7/10 | |
| Terrain: 6/10 | |
| Access: 8/10 | |
| Total: 27/40 |
How did I do? Would you have rated them differently? How so? I'd love to hear your thoughts!
A Mad Scramble in the Sangres - Mount Adams and UN 13,580
Mount Adams is one of the last mountains in the top 100 in the Sangre de Cristo Range that I've yet to climb. It has always drawn my attention on other hikes in the area, and I had hopes of climbing it this spring. Instead, I opted to climb California Peak with Ethan, which was a great hike. Originally, I had planned to climb Pyramid Peak this weekend; however, none of my climbing partners had crampons, so we decided to hit Mount Adams instead. I had always read great things about climbing Mount Adams, and Gerry Roach has the west ridge route marked as a classic climb. Since I have more or less always agreed with Roach's ratings for "classic climbs," I figured that it would be the best way to climb it. So, Ethan and I agreed to take the west ridge route instead of the standard route. Feel free to read more about Roach's 13'er guidebook HERE.
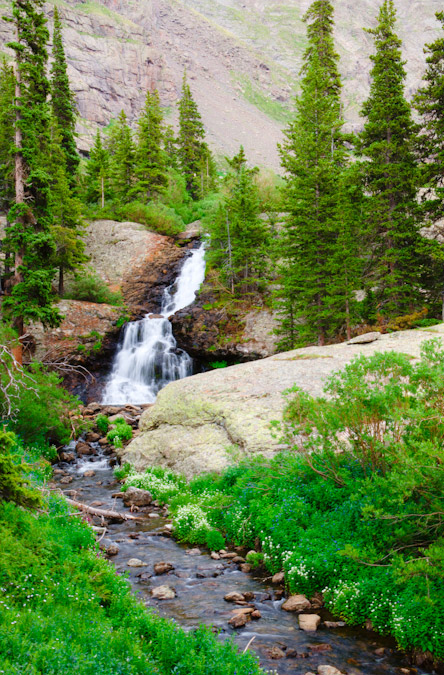
This was particularly exciting since I have wanted to go back to Willow Lake for awhile now. Willow Lake is truly a magical place, and should be designated as a wilderness area, in all honesty. The lake is pristine, with a giant waterfall at its head. Additionally, it is surrounded by some of the most rugged and aesthetically remarkable mountains in Colorado, including Kit Carson Peak, Challenger Point, Columbia Point, Crestone Peak and Crestone Needle, not to mention Mount Adams!
Mount Adams is the 66th highest ranked summit in Colorado, sitting at 13,931 ft. 69 more feet and it would be climbed much more frequently, not that Ethan and I are complaining that we didn't see another soul on the summit...
Looking at the maps while driving over, Ethan and I also thought it might be fun to tack on another peak or two while we were out, so we decided that once we reached the summit of Adams, we would evaluate the conditions and how we felt and then decide on the next steps.
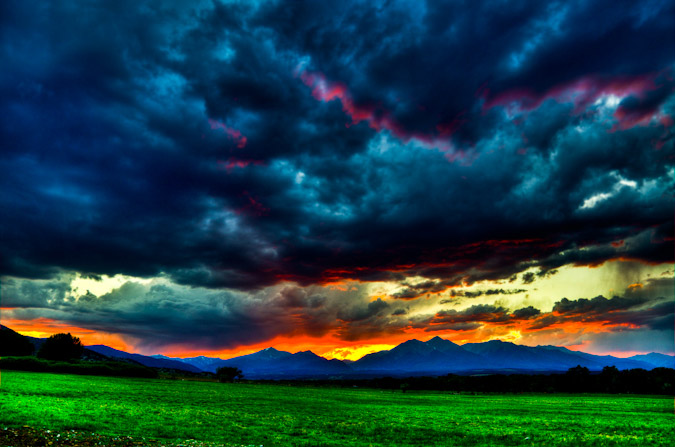
The drive over to the town of Crestone was remarkably unremarkable except for two incredible details. First, the pizza at Amicas in Salida was incredible, as usual. Second, the sunset as we were leaving Salida was insane. We drove out of town, heading west into Poncha Springs, and decided we HAD to pull over and take photos of this rediculous sunset. For my photos, I opted to do a minor HDR treatment since the foreground was quite interesting -we had stopped just in front of a huge grassy area used for cattle to pasture on. The results were stunning, with the sunsetting directly behind Mount Shavano.
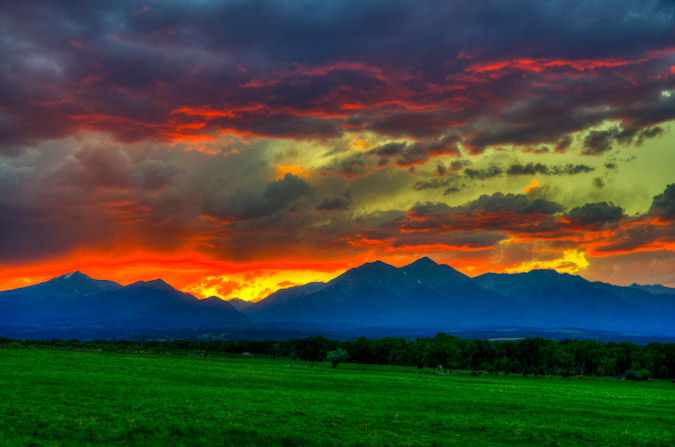
Here's a zoomed-out version of the same scene, which I personally prefer.
We arrived at the Willow Lake trailhead around 10 PM, set-up Ethan's tent, and hit the sack, with our alarm set for 2 AM. We wanted to ensure that we had enough time to reach the summit of Adams before the weather hit. As soon as the alarm went off, we packed up quickly and hit the trail. The hike was an interesting one since there was a full moon and because we did not get a ton of sleep. Nevertheless, we hiked quickly and reached the base of Willow Lake within 2.5 hours.
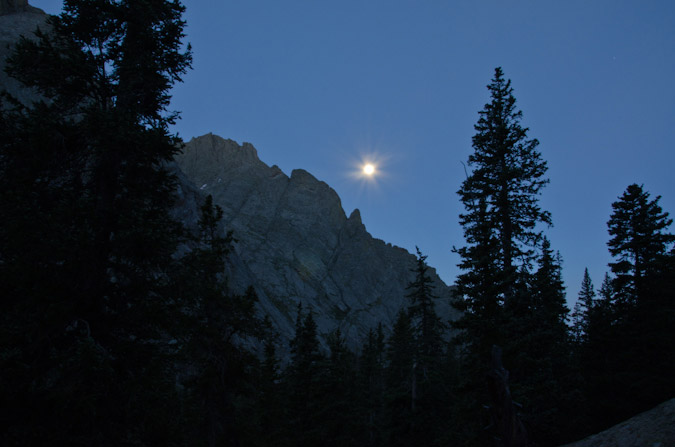
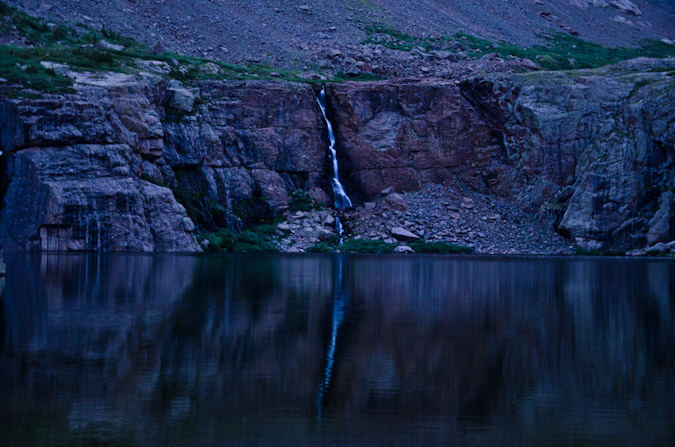
The full moon made for some pretty fun photography opportunities, although photographing the moon is always a big challenge unless you have a really nice zoom lens. Most photos you will see of the moon and of a scene are two images layered as one, since it is literally impossible to photograph the moon and your foreground without either overexposing the moon (like above) or underexposing your foreground. Anyways, seeing Willow Lake again was great. We rested there for a good 30 minutes and took some photos. The waterfall was just as awesome as I had remembered it to be.
We saw lots of tents on the way up, probably 15 total. Lots of people were up here to climb the 14ers. We were the only group doing Mount Adams though. We gained the trail to the left of the lake and began to ascend above the lake in quick order, stopping every once in awhile to get some photos.
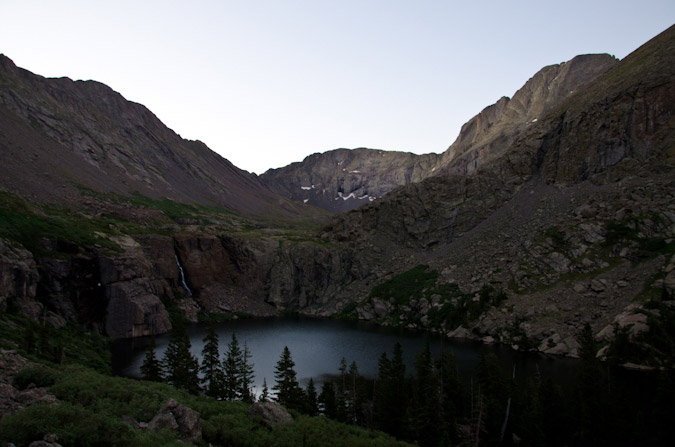
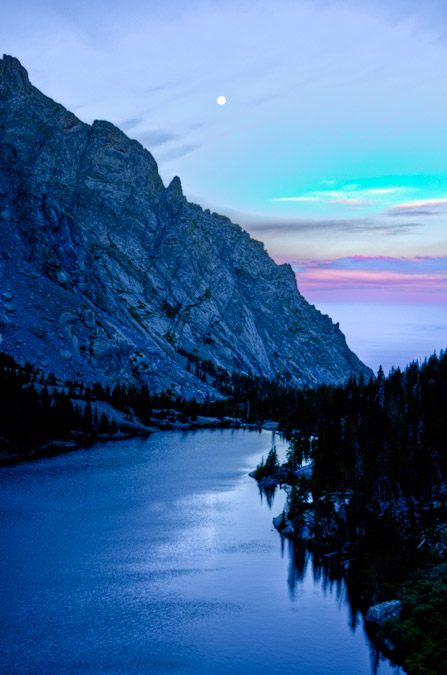
Before we knew it, we had gone too far and were nearly at the head of the lake near the waterfall. While we knew we were somewhat off-route, we decided to get into a good position to get photos of the sunrise and the full moon over Willow Lake.
We then turned sharply south to gain elevation into the small basin beneath Mount Adams. Since there is no trail up there, we just followed beneath the termination of a large cliff wall that led into the area, looking back from time to time to catch the sunlight on Kit Carson Peak.
I've always like the geology of this area, which is comprised of clastic sedimentary rocks, which appear as large pebbles that are cemented together. These rocks sometimes erode, to leave behind some really interesting features. For more information on Crestone Conglomerate, check out this interesting website.
As we gained the basin, we could not help but notice the amazing hues cast onto Willow Lake by the sun hitting the southern aspects of Challenger Point.
Indeed, the alpenglow on KIt Carson Peak and Challenger Point were quite impressive, and coupled with the moon and the lake it made for a perfect scene to hone my HDR skills. If you've ever wondered how to do HDR, you can do like I did, and read about it a ton, or watch this perfectly succinct tutorial from Trey Ratcliff.
We kept on hiking up into the basin towards Mount Adams and stumbled upon a pair of really nice looking ponds. The ponds were surrounding by wildflowers and separated by a huge jutting rock feature, which made for quite a lovely subject for an HDR panoramic. Additionally, the clouds were insane, and continued to be all day long.
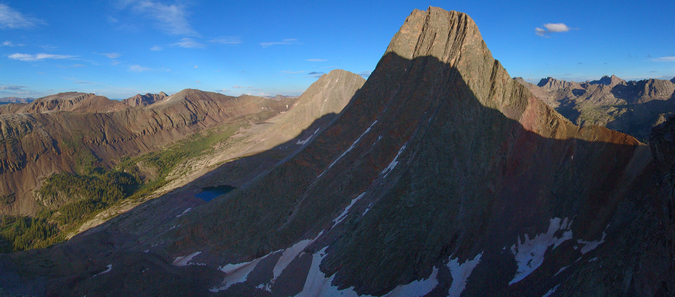
After a few more minutes, Mount Adams finally came into view for the first time.
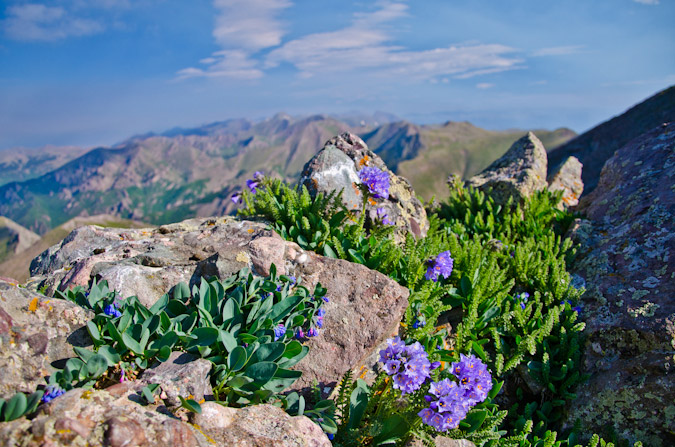
The route seemed quite straight-forward to us, so we opted to just follow a rock gully up towards the ridge, which was strewn with all sorts of wildflowers.
|
|
|

Ethan was a superb photography this day - he captured many many photos of me throughout the journey, all of which I really enjoyed his perspective and composition on.
We finally gained the ridge!
We were able to look down at South Crestone Lake and some 'miniture' Crestone Needle looking mountains.
As we continued up, Crestone Peak came into view, and eventually Crestone Needle as well.

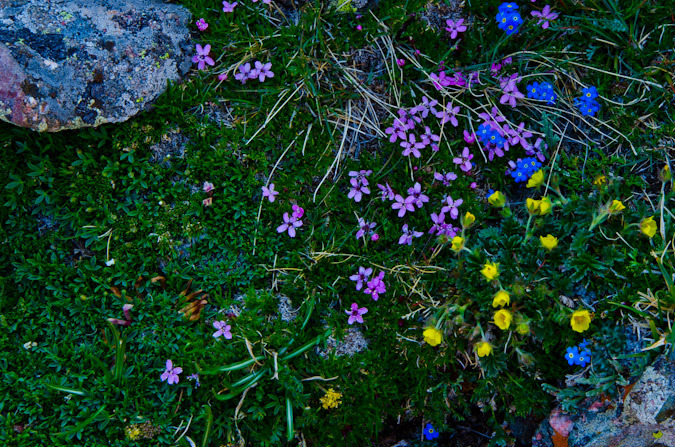
The wildflowers on Mount Adams were amazing.
|
|
|
And the route up the west ridge was fabulous. In some sections, it really reminded me of Crestone Needle, just not as steep. The same type of rocks made for some enjoyable route-finding. I shall hereby dub Mount Adams, "Baby Crestone Needle." The similarities in the rock were remarkable.
The clouds continued to look awesome, and so I was able to get this photo of Ethan gaining the ridge higher up.
I was also able to get a really nice panoramic photo of Ethan gaining the ridge with the nutty clouds behind him. Click to see a larger version.

Check out this cloud - it looks like its going to eat my soul - thanks Ethan!
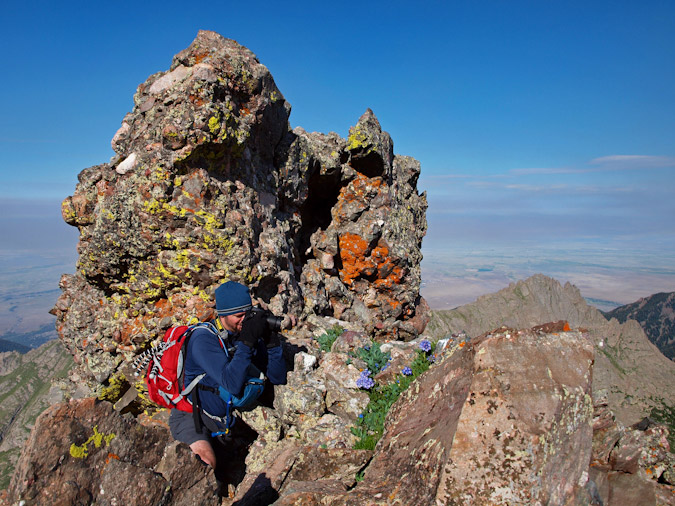
We stopped frequently to shoot photos. This is an all too familiar scene - me shooting photos of flowers. Thanks for catching me in the act, Ethan!
We kept on truckin' up to the summit block, which proved to have some enjoyable class 3 options if one so chose, so we did.
Finally, we reached the summit and took a congratulatory summit shot using Ethan's camera on self-timer.
Mount Adams was a great climb, for sure. The summit was superb, with excellent views in all directions.
We also had some insane smoke appear out of nowhere in the valleys around us, and before we knew it, the smoke was gone. It was truly odd. It was almost as if the valley below was on fire and then put out before we knew it. A look to the north revealed some crazy looking clouds over Rito Alto, Venable and Comanche.
We also found an awesome spot with a great vantage point for a celebration pose. We took advantage and marvelled at the sheer depth below us from where we stood.
|
|
|

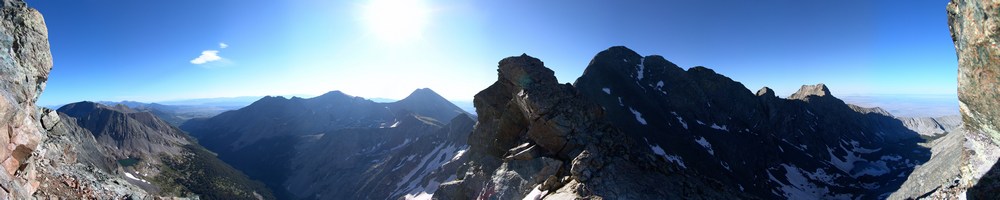
Naturally, my focus was on Crestone Needle and Crestone Peak, two of my favorite mountains in Colorado. They are so distinguishable and quite honestly some of the freakishly looking peaks there are in Colorado. In fact, Crestone Needle ranks just 4th on the "Most Impressive" list (for ranked peaks) that is based on the work of David Metzler and the ORS/RORS scales.
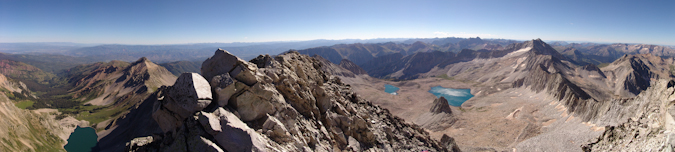
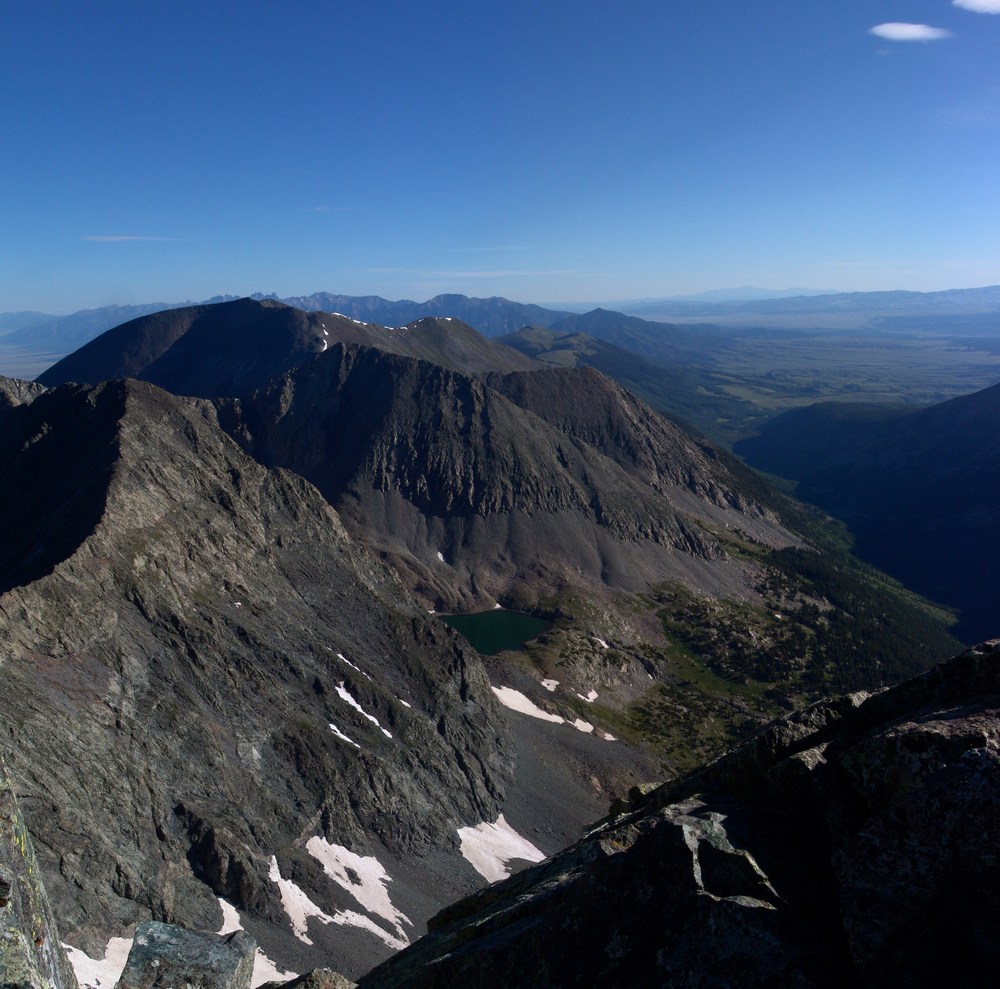
A view to the east revealed Fluted Peak (far left), Horn Peak (left, in distance) and the Horn Lakes below. UN 13,580 (ranked 201) was directly south, with UN 13,541 and Obstruction Peak and Humboldt behind. Additionally, Crestone Needle and Crestone Peak stood out like sore thumbs with Columbia Point, Kit Carson Peak and Challenger Point all towering over the basin below.

A closer look at the 14ers of the area. Left to right - Crestone Needle, Crestone Peak, Columbia Point (13er, ranked 56th), Kit Carson Peak and Challenger Point.
Ethan was loving the views and the clouds.
And so was I...
Alas - a perfect summit does not last forever, so we decided to head south towards UN 13,580 and beyond to see what we could accomplish. The dramatic nature of the cliffs to our left kept us on our toes and in amazement for quite a long distance.
|
|
|
Also, the traverse over to 13,580 proved to offer some really fun challenges, including this class 3 manuever above a hugely exposed section.
But it also offered some fun boulder scrambling on very solid rock.
UN 13,580 was not too far from us, and the views kept us from moving too quickly.
The rock was all totally solid, but in places it was awkward walking on slanted slopes of what felt like giant fissures in the earth.
|
|
|

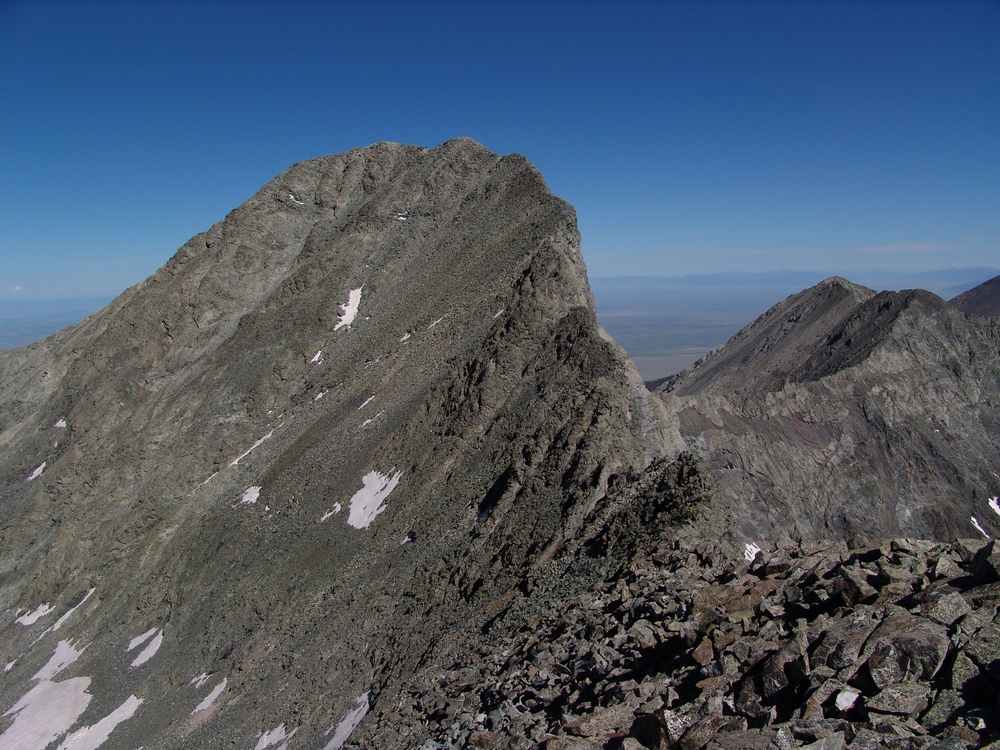
A look back at Mount Adams...
We finally reached the summit of UN 13,580 and enjoyed as what Gerry Roach describes on page 155 as "a startling view of Horn Lake." I don't disagree with Roach one bit on this detail, but what I do disagree with him on is that he describes UN 13,580 as a bi-centennial, meaning it is in the top 200 in Colorado ranked by elevation. According to my list, it is ranked 201 and just shy of that mark. When I built my database, I ranked mountains in the following order:
- By elevation
- By prominence
- By isolation
- By name
So, if two mountains had the same elevation and prominence, the mountain with more isolation is ranked higher. This seemed like the most fair way to rank mountains that had very similar characteristics. I am not sure how Roach or any others rank them.
Subsequently, according to my database, which is based almost entirely off of data compiled by John Kirk of Listsofjohn.com, Clark Peak, a 13er in the Elk Range, is also sitting at 13,580 ft. Additionally, it has the exact same prominence as UN 13,580, making them tied in most regards. The mountain with more isolation (Clark Peak) gets ranked higher.
Sorry to get on that soap-box... here's a self-timer of Ethan and I on UN 13,580.
And Ethan with the Crestones in the background...

With me enjoying the "startling views."
It was really cool signing the summit register for this rarely climbed peak. At the top of the register was Gerry and Jennifer Roach, followed later by John Kirk (of ListsofJohn fame), Susan Joy Paul (a regular on 14ers.com and a Facebook friend), and Doug Hatfield, another regular 14ers.com contributor who quoted on the summit register, "100/100 in Custer County," meaning, this was the last ranked peak in this county that he needed to finish. Quite an accomplishment!
Naturally, the Crestones just kept my gaze for much of our time resting on UN 13,580, so I decided to get some more HDR shots, as well as a non-HDR shot.

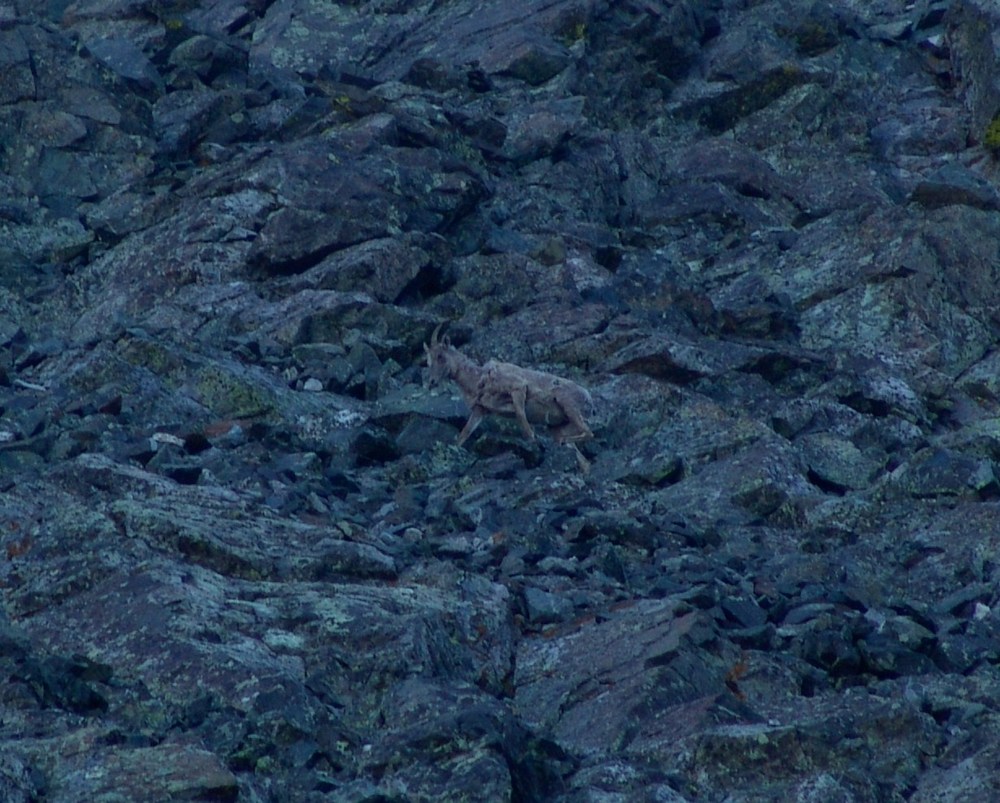
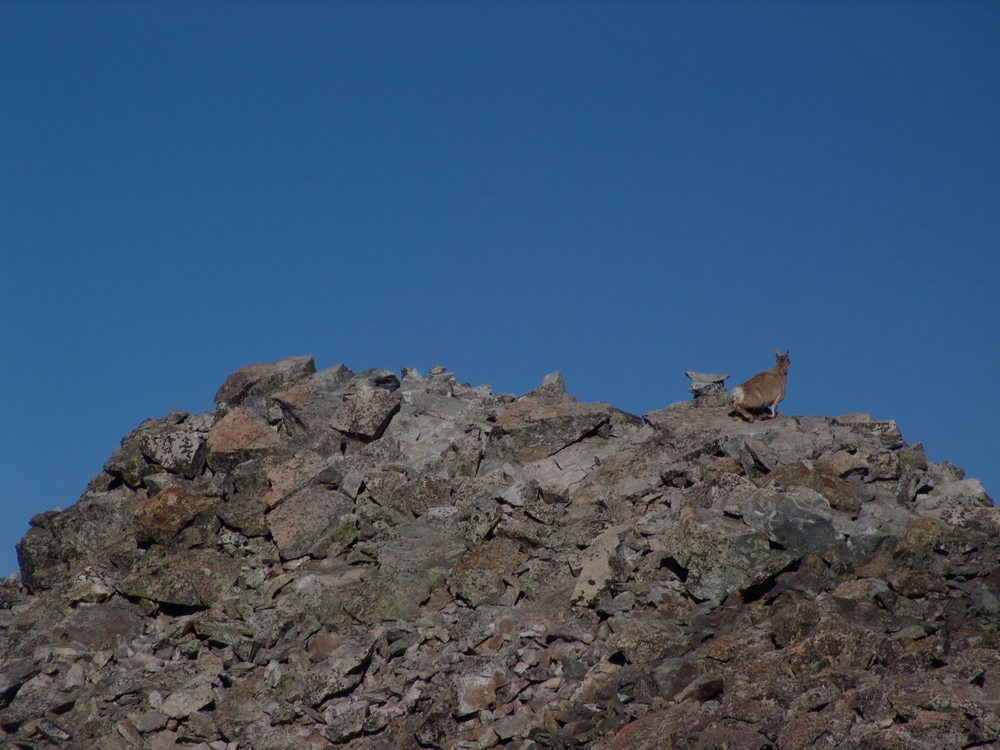
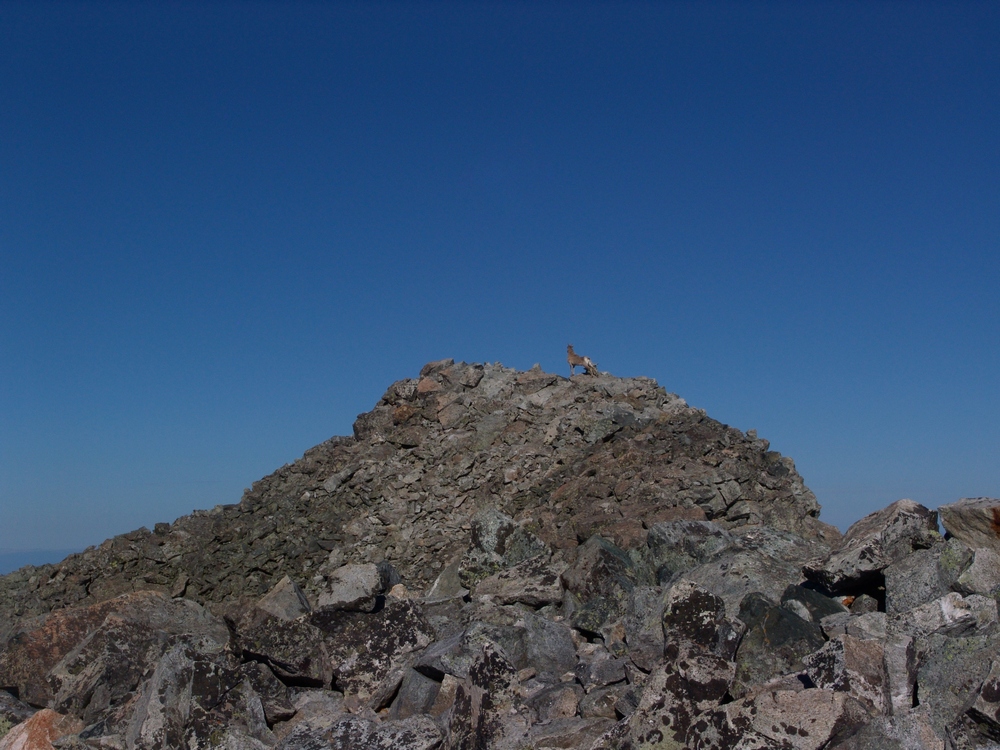
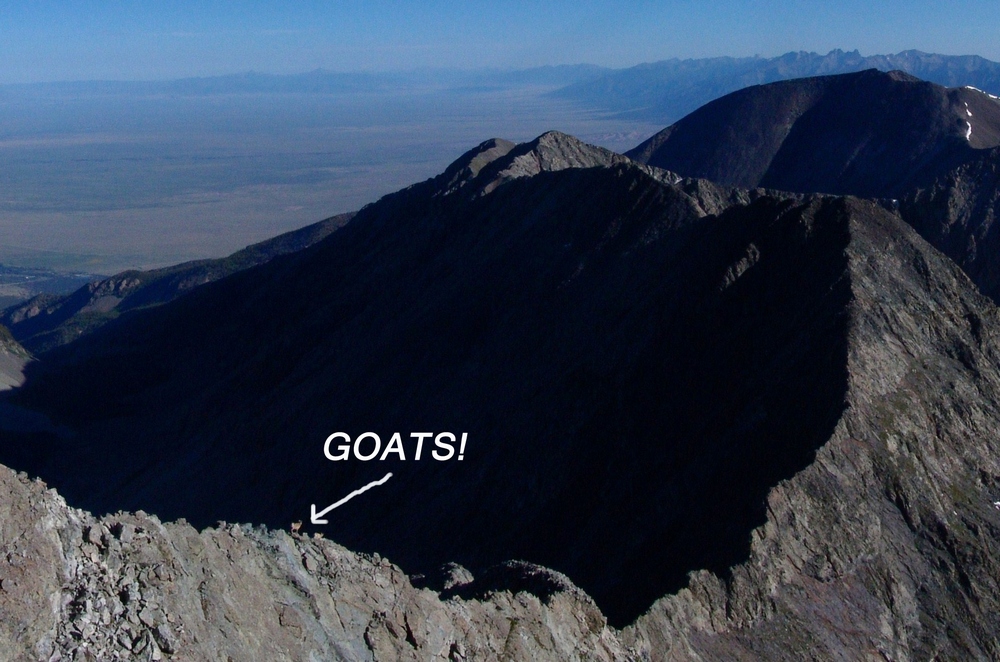
We decided to keep going along the ridge to see where it would take us. Much to our surprise, a lone goat crested the ridge to greet us below to the south.
"We're gonna climb that one now?"

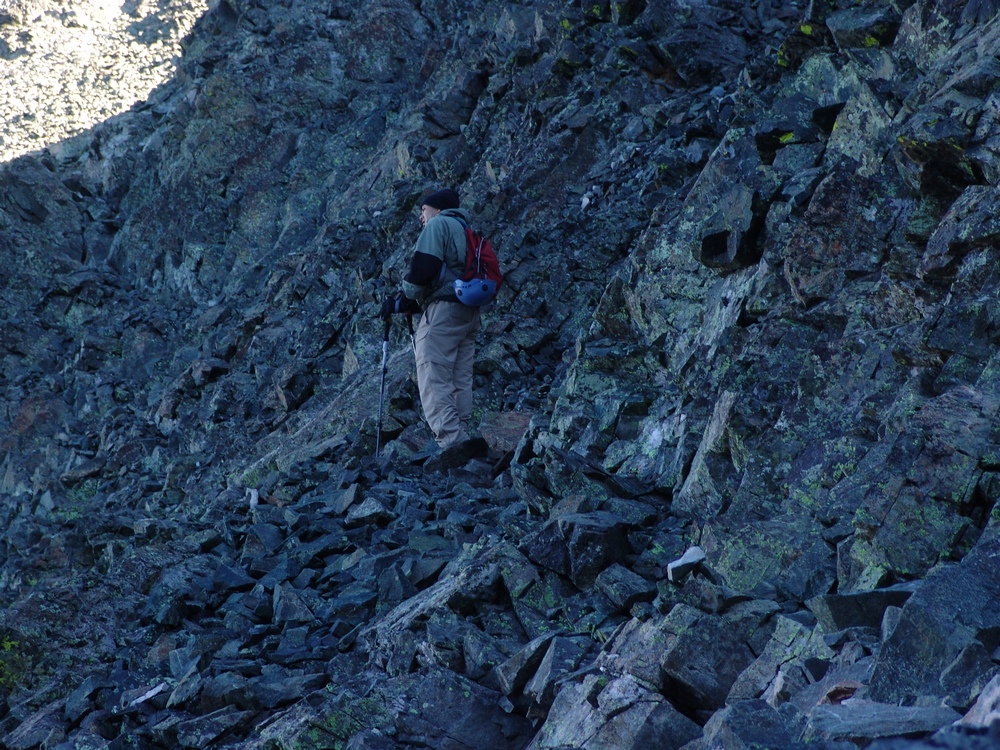
Unfortunately, the storm clouds starting building to the west, so we opted to bail at the first opportunity. Since there's no trails in this terrain, we had to do some heavy route-finding. This ended up being quite enjoyable and challenging, and afforded us with plenty of class 4 down-climbing opportunities.
We found a crazy gully just below the first set of slabs we had down-climbed, and decided that the terrain on the other side of this mini-ridge below the gully looked much better as an exit. Unfortunately, the gully was loose and chossy, with eroded garbage and hardened mud. It was a real nightmare to downclimb. I went first, and faced-in for many sections. I kicked down tons of loose debris and tested every hold. It was quite a mess. Once I was down, I yelled up to Ethan that I was clear. Ethan had a bit more trouble, mostly because he was schlepping his trekking poles on his pack still (I opted to not bring any), and his camera bag was not of the LowePro Toploader variety that I have grown to love. His bag got into his way and he had to stop and re-pack the whole thing into his main pack. Almost down, Ethan had a few more moves left. He faced in and placed all of his weight on his feet, which were being held by what appeared to be a very solid and large boulder. Ethan shifted his weight to another rock, and as he did, the rock he was just standing on crumbled and disintegrated, causing huge blocks to go down the rest of the gully and down the mountain. Ethan was quite lucky. Here's some views of the nasty gully:
|
|
|
After the lame gully, we were greeted by a series of steep ledges that had interesting holds, probably rated at class 3 or 4.
A look back up the ledges:
And over to Kit Carson and Challenger...
We descended this section pretty quickly, having to shift directions a few times due to the bands of ledges terminating a few times. I rested a few minutes at the base of the boulder field we came down and found a new friend.
The columbine flowers were really nice too!
Another look back up the insanity we down-climbed...
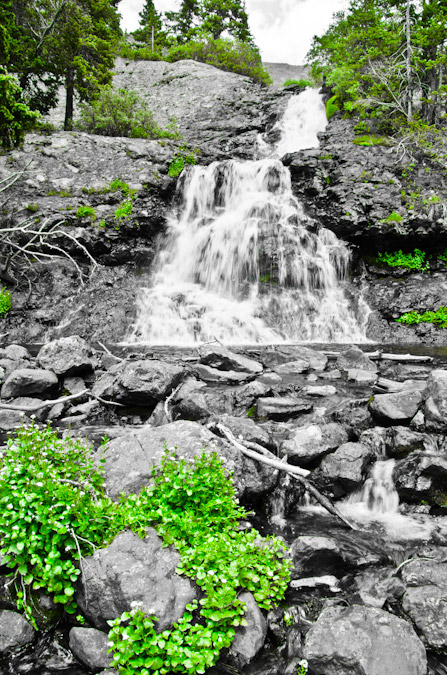
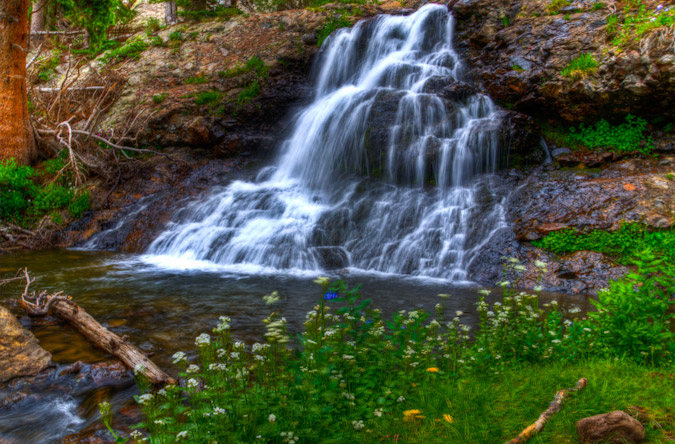
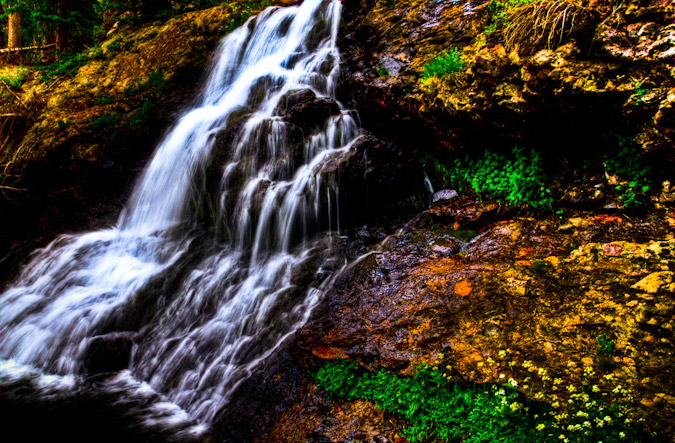
We re-joined the trail that leads up to Challenger Point and headed towards the waterfalls above Willow Lake.
Which were quite amazing!

Finally, we made it back around and to the lake in short order.

When I was here in 2009, I took a panoramic photo series from the lake, which included the waterfall and a really interesting rock in the lake. I always regretted that photo because it cut the top off of Challenger Point. Not this time!
Also, we stopped below the lake to get some amazing shots of the lower waterfall near the trail.
The hike out was pretty uneventful after the waterfalls, except of course for the insane amount of switchbacks on the lower trail. We made it back to the car at 4 PM on the nose, just 14 hours after we started...
|
|
|
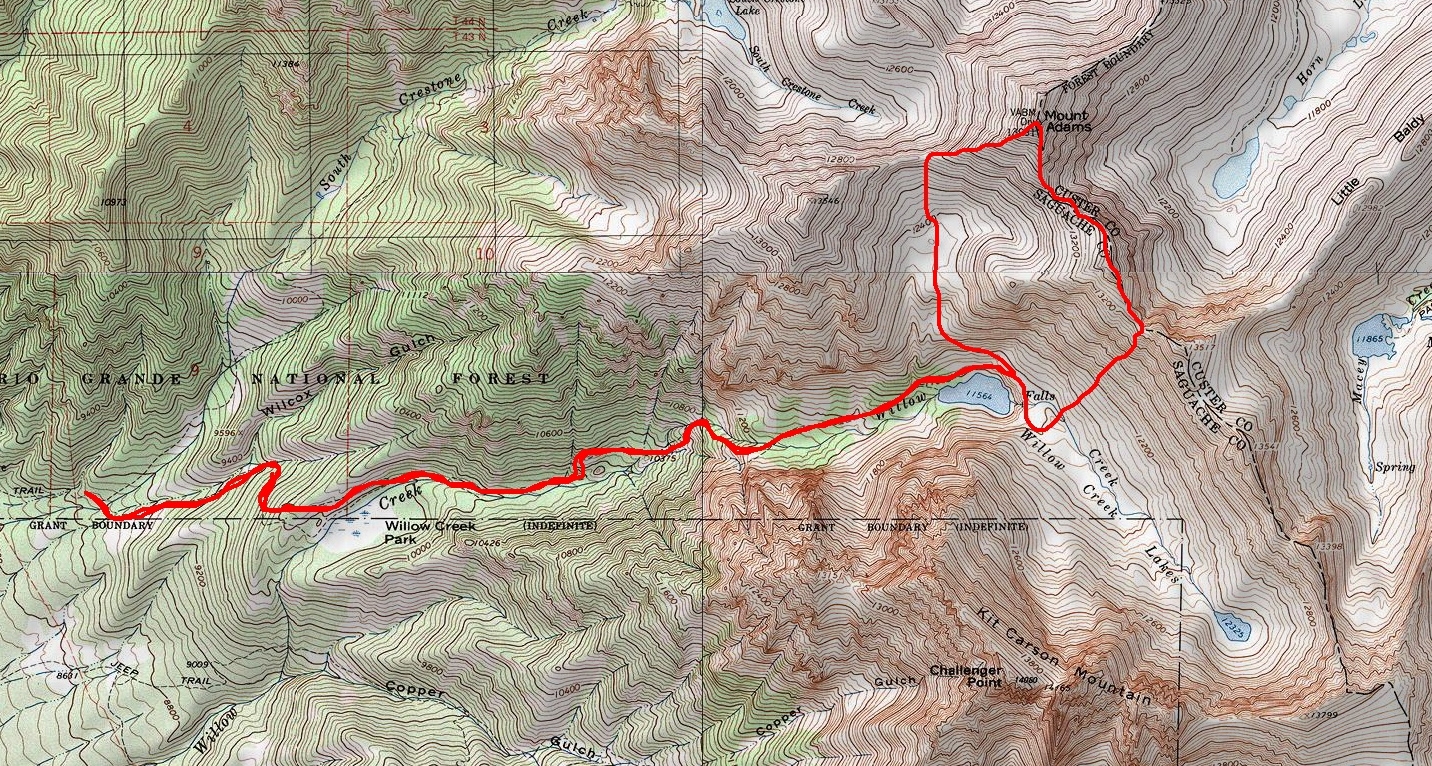
Here's a look at the map, showing our route and elevation profile. Feel free to click on each to see larger versions.

As always, if you liked this report, please feel free to follow 100summits on Twitter or Facebook! Also, if you're planning on doing any online shopping and if you enjoyed the content, please help keep the site going by using the links on this page to help fund the site. And last but not least, if you are interested in purchasing photography from me, please take a moment to read this page for more details. Thanks for stopping by!
Top 5 Stunning Colorado Locations
Colorado is easily one of the most scenic places in the whole world, so creating this set of lists was not an easy task by any stretch of the imagination. Having lived in Colorado my whole life and having visited nearly every mountain range the State has to offer, I wanted to reflect on my absolute favorite locations as well as highlight the places I’ve not yet visited. If you’ve not yet had the opportunity to visit some of these places, I would highly recommend that you do so immediately! Without further ado, here is my list of the top five stunning locations in Colorado that I have visited:
- Vestal Basin. Vestal Basin is a very remote valley located deep within the Weminuche Wilderness Area 32 miles northeast of Durango, Colorado. The surrounding mountains are members of the Grenadier Range, which is a sub-range of the San Juan Mountains. Vestal Basin is home to one of the most aesthetically inspiring mountains in Colorado, Vestal Peak. Vestal Peak towers above the basin in a upwards sloping fashion and contains one of the most classic climbs in all of Colorado up what is known as Wham Ridge. Vestal Peak is easily recognized from all directions by the dramatic and awe-inspiring Wham Ridge. Next door to Vestal Peak lies the also impressive Arrow Peak, which also has similar traits, in that it rises to the sky in a very dramatic fashion. A trip up these two incredible peaks should be on any serious Colorado mountaineer’s bucket list.
- Capitol Lake / Elk Mountains. Capitol Lake sits at the base of Capitol Peak, located deep within the Elk Mountains 13 miles west of Aspen, Colorado. Access to some of Colorado’s most stunning peaks is granted from this location, including the challenging task of summiting Capitol Peak via its famous Knife Edge. Once above tree-line, views of other famous peaks, such as The Maroon Bells and Pyramid Peak are seen to the southeast. The Elk Mountains are a truly magical place to behold.
- Mount Sneffels Wilderness Area. This pristine wilderness area is located 10 miles south of the town of Ridgway, Colorado in the San Juan Mountains. The area is home to the famous Yankee Boy Basin and several incredible mountains within the highest 100 of Colorado, including Mount Sneffels, Teakettle Mountain and Dallas Peak. Dallas Peak is arguably the most difficult mountain to climb out of the highest 100 in Colorado. The rugged terrain and incredible foliage located in this area are something every visitor to Colorado should take time to see. Especially beautiful in the fall, the wilderness area’s aspen trees change to a magical display of deep gold, red and yellow, all with the dramatic and spectacular Mount Sneffels in the background. This area is a must-see for natives and out-of-state visitors alike.
- Colony Lakes / Cottonwood Creek. These two magical lakes rest at the eastern base of Crestone Needle, Crestone Peak and Humboldt Peak in the Sangre de Cristo Range, 13 miles southwest of the town of Westcliffe, Colorado. Cottonwood Creek runs on the western side of Crestone Peak and Crestone Needle and provides remote access to one of the densest, most pristine wilderness Colorado has to offer. Unfortunately, access to Cottonwood Creek is currently problematic due some private property complications at the trailhead near Crestone, Colorado. Hopefully this area will be opened back up someday so that others can fully appreciate the natural wonder and beauty this area has to offer. Access to the Colony Lakes is still available by way of a four-wheel drive road that recently was re-developed by the Forest Service. There is plenty of controversy surrounding this access point as well, due to damage to the ecosystem at the lakes above.
- Highland Mary Lakes. Highland Mary Lakes are some of the most remote lakes in Colorado located quite deep within the Weminuche Wilderness Area in the San Juan Mountains, southeast of Silverton, Colorado. The lakes are located on the Colorado Trail on a stretch of earth that is completely above tree-line for several miles in each direction. It is truly insane to be on such an elevated plateau with some of Colorado most splendid mountain vistas surrounding you. This location is a favorite attraction of mountain goats as well. An amazing 3-5 day backpacking trip can be made by traveling from north to south or south to north from the silverton-side trailhead of these lakes all the way to Vallecito Reservior or vice-versa. The trek is truly magnificent. Be sure to coordinate a car shuttle ahead of time!
-
The top 5 places in Colorado that I’d like to visit but not had a chance to yet:
- Ice Lake Basin. Ice Lake Basin is a remote area west of Silverton, Colorado. From what I understand, this is one of the most incredible places in Colorado and I cannot wait to see it myself. The basin provides access to some of Colorado’s greatest peaks, including U.S. Grant Peak, Pilot Knob, Vermillion Peak and Fuller Peak.
- Chicago Basin. Chicago Basin is home to three of Colorado’s 14ers, Sunlight Peak, Windom Peak and Eolus Peak. Located deep within the San Juan Mountains’ Needle sub-range, these mountains are quite possibly some of the most photogenic and rugged looking out of any set in the State. While travel to the area is popular due to the access provided for the area’s 14ers, it is still tops on my list of places to visit.
- Indian Peaks Wilderness Area. Indian Peaks Wilderness Area is located northwest of Denver, Colorado, just south of Rocky Mountain National Park. While this area boasts no 14ers and only one peak over 13,500 ft, it is apparently a very pristine mountain range full of incredible hikes and challenging climbs.
- Gore Range. The Gore Range is a relatively unknown area north of Vail, Colorado and obtains some of Colorado’s most glaciated and rugged looking peaks. Many mountains in this range have never been named, mostly because of the remoteness of the area.
- West Elk Wilderness Area. This swath of wilderness is located north of Crested Butte, Colorado is home to some of the most insane images of autumn colors ever imaginable.
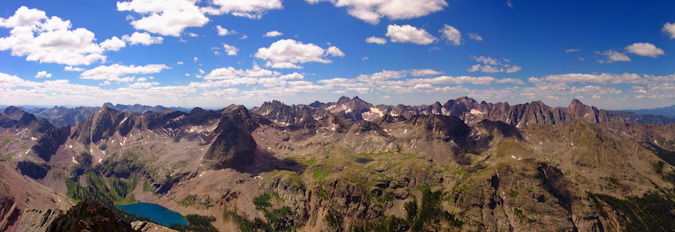
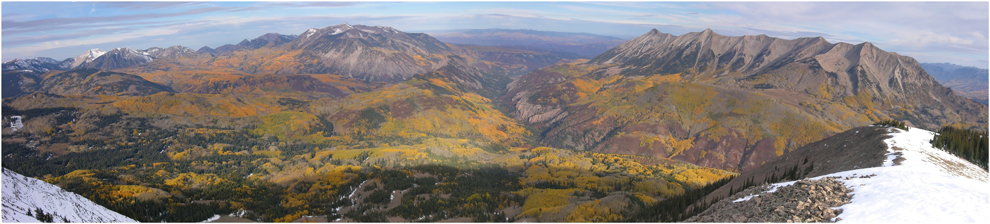
Photo by KAE Photography
What areas not covered have you been to that you’d like to share? Have any places you have yet to visit that you want to? I’d love to hear about your thoughts.
{fcomment}
Blanca Peak and Ellingwood Point - Introduction to the Sangres
Blanca Peak has always mystified me. It is one of the most prominent mountains in Colorado - it towers over the San Luis Valley and the Great Sand Dunes National Park. It is easily one of the most impressive looking mountains in the State, from almost any angle. With that being said, it was quite exciting to finally get to climb it along with its neighbor, Ellingwood Point.
Here are some meaningful statistics from this adventure:
Blanca Peak - 14,345 ft. (ranked 4th highest in Colorado)
Ellingwood Point - 14,042 ft. (ranked 42nd highest in Colorado)
Total mileage: Approximately 10 miles
Elevation gain: 4,600 ft.
My friend Terry and I started our epic July climbs with a bang by heading down to the Sangres to tackle some of the most impressive mountains in the State. To accomplish this - we would need to backpack up a fairly long road to reach some high mountain lakes.
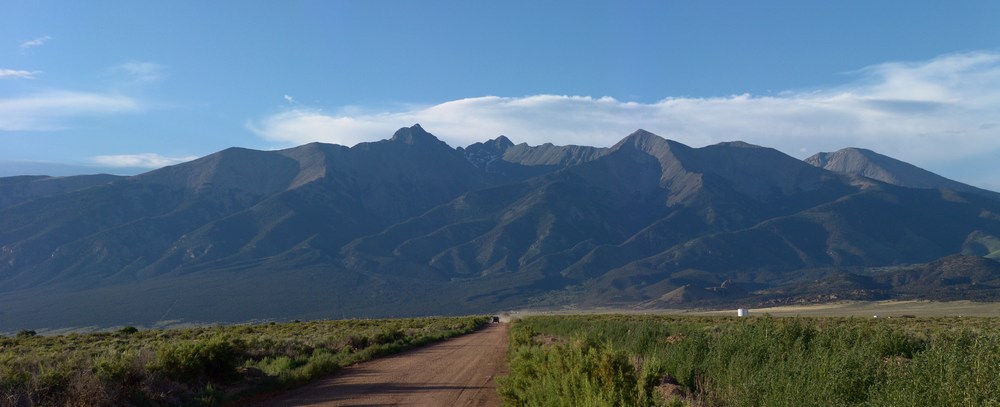
Terry picked me up at my house on Friday morning at about 7AM and we started the drive down to Walsenburg. Once we reached Walsenburg, we headed west over La Veta Pass and then through the towns of Fort Garland and Blanca. From Blanca, some pretty awesome views of the Blanca massif can be seen. Blanca is the highest one in the middle towards the back and Little Bear is the pointy one on the left.
Next we headed north towards the Great Sand Dunes and turned up towards Lake Como. The Lake Como road is one of the premier 4-wheeling roads in the State, as evidenced by the three Rubicons at the start of the road. We started up the road in Terry's Blazer and encountered what I believe to be some of the most intense off-roading I've ever seen. Terry was a total champ! He was able to maneuver up the crazy road over some impressive and daunting obstacles and got us to a large camping area at about 10,000 ft. Turns out Terry damaged his engine mounts in the process. Here is a nice article on the road we were driving on.
In 2010, I went up the same road with my friend David, and there are more photos of that adventure in my Little Bear report.
The road is full of obstacles called "Jaws" which we stopped just short of. We got out of the vehicle and started our backpacking adventure. My pack weighed in at 55 lbs and Terry's weighed 40 lbs. I guess I carried heavier food!?
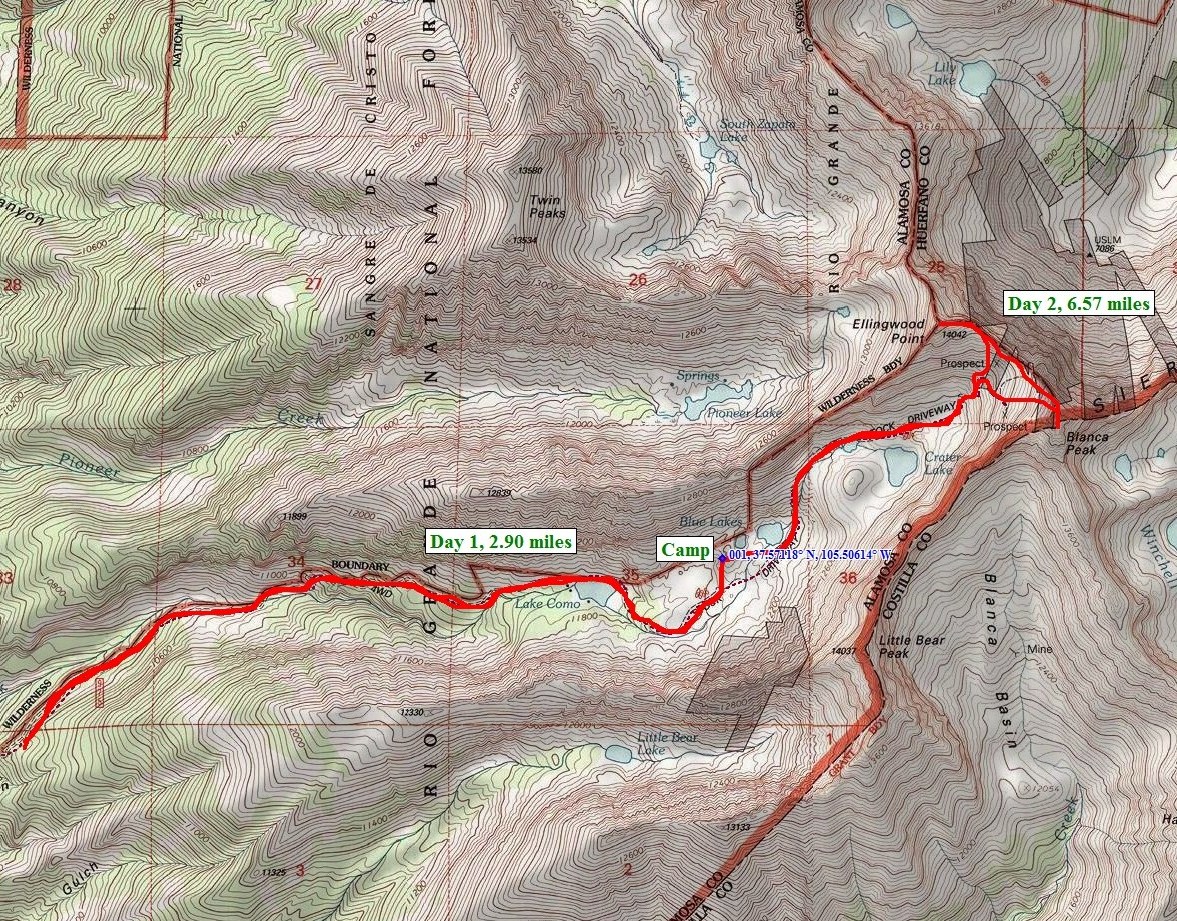
Here is the overall route we took up the valley and eventually up to the top of the peaks:
The hike took us up past the infamous "Jaws" obstacles and eventually we landed at Lake Como. We passed Lake Como and continued up the valley towards Little Bear Peak, Ellingwood Point, and Blanca Peak. We finally stopped above tree-line at 12,200 feet to set-up our camp-site. Here is a nice panoramic photo of the view from our campsite:
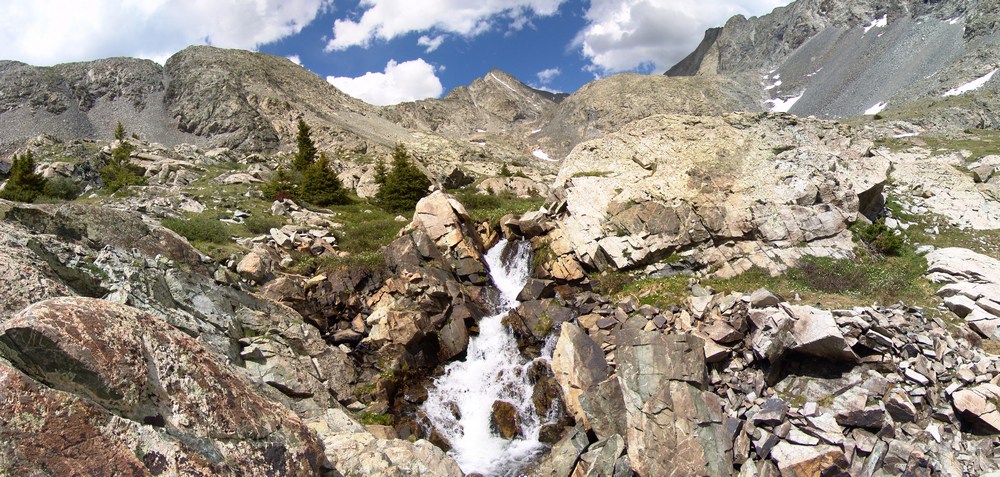
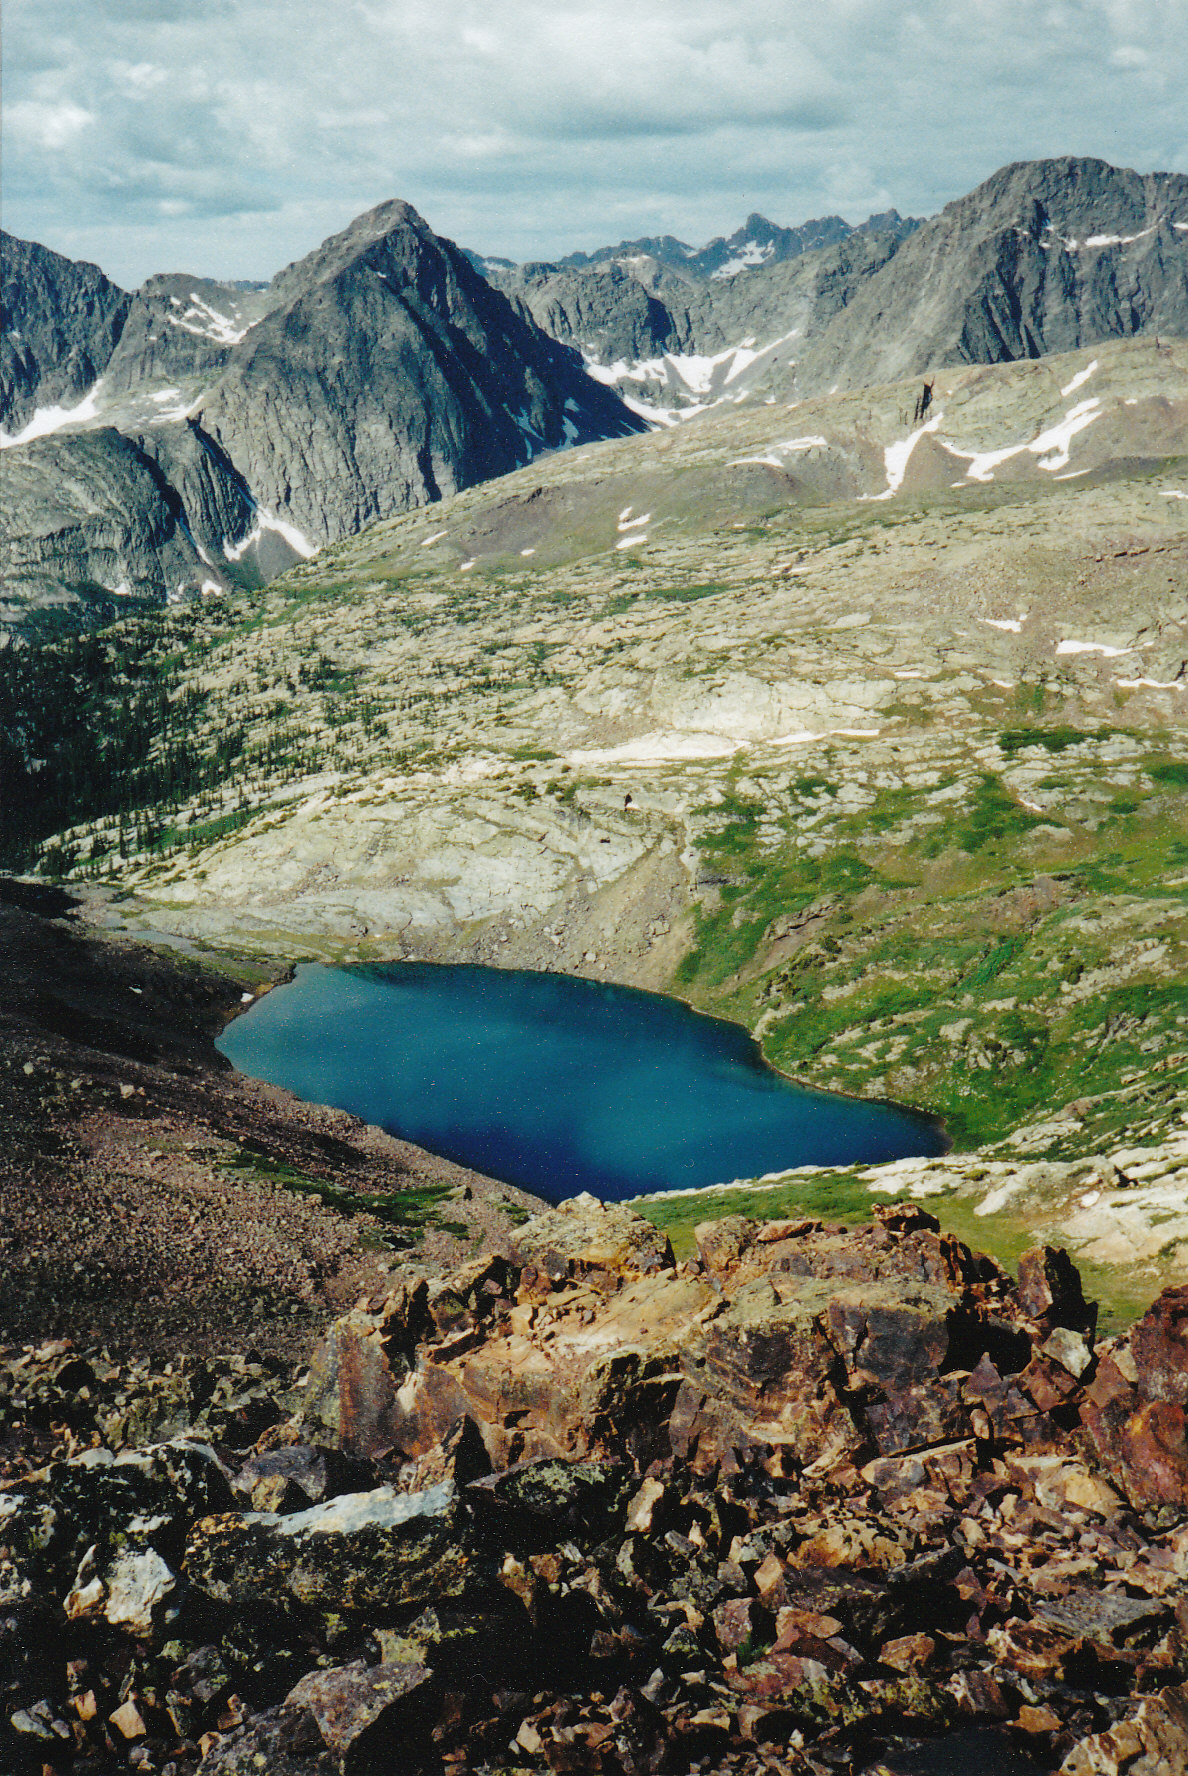
We were camped right next to a mini-waterfall that looked right up at Ellingwood Point. After we unpacked and got settled in, we decided to take a short hike further up the trail to one of the Blue Lakes. On the way there, I saw a small bird scurry past me. My first thought was, that bird can't fly! Then my second thought was, that's a baby bird! Sure enough, there were several small baby birds right in the area that were standing very still.
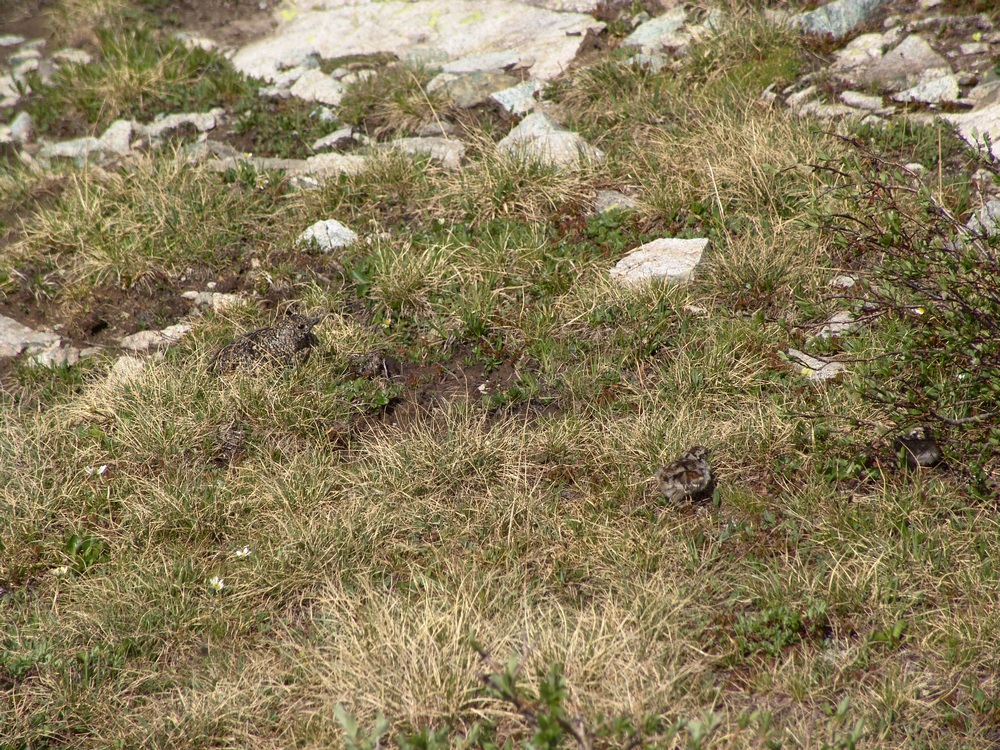
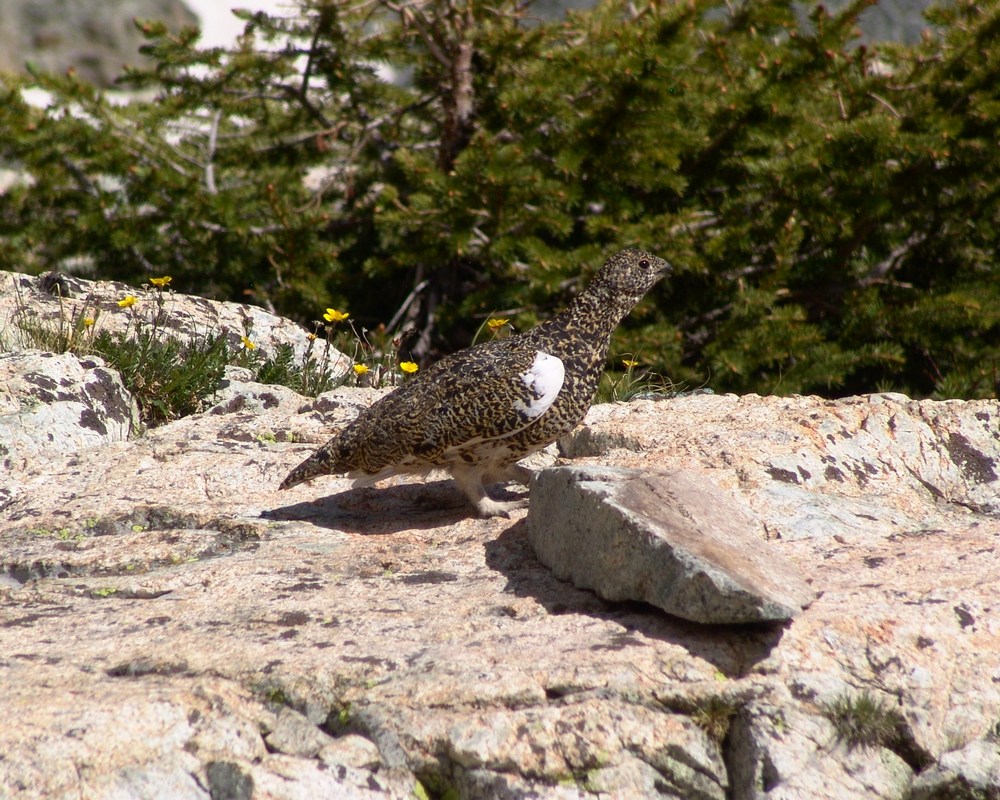
Then I spotted the mama bird - a full-grown Ptarmagin hiding in the brush:
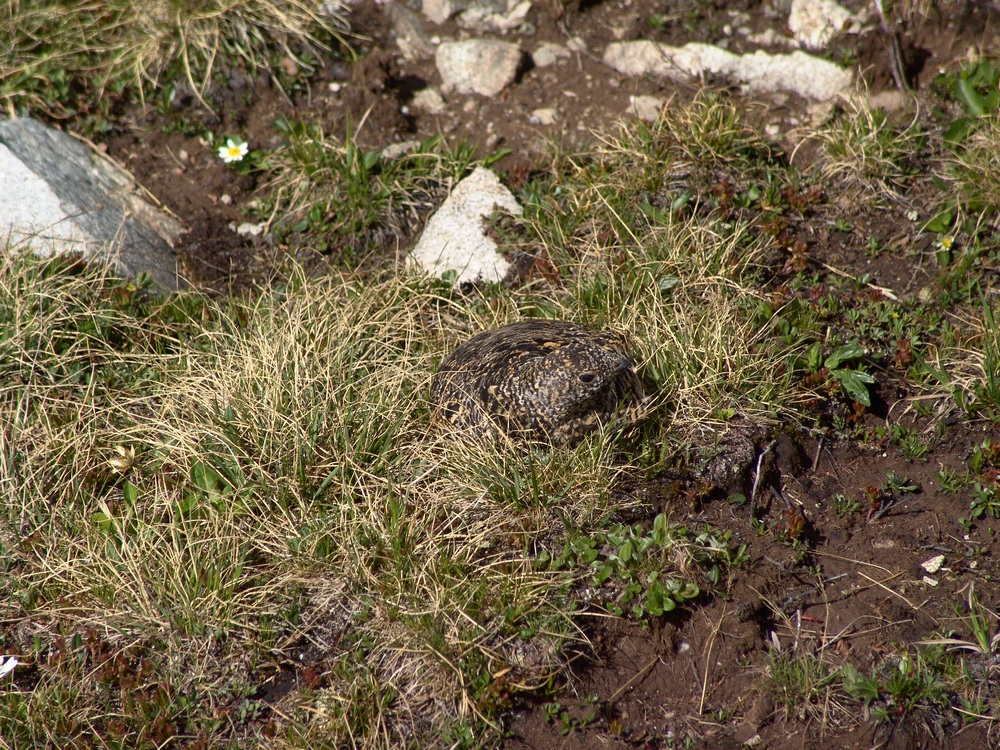
She got up and started running around me like a crazy lady (can't blame her - I was invading her space and she was protecting her chicks) and I took one more picture of her and continued up to the lake.
At the lake, we were able to get more awesome views of Ellingwood Point (left of center) and the waterfall at the base of the headwall for the Blanca / Ellingwood Point saddle.
From the lake you could see all the way up and down the valley, including nice views of Little Bear.
On the way back to our camp-site, we encountered a very friendly Marmot hanging out on a rock. This whole area was full of marmots and we were very careful to hang our food bags in a tree to prevent Marmots from eating our food.
When we returned to camp, we both set-off to prepare dinner. Terry boiled some water for his freeze-dried meal and I opened up a can of tomatoes, chicken, and green chilies. I got out my pre-chopped onion and sauteed everything together and made some yummy burritos. My pack may have weighed a lot, but I got to eat well, so it was worth it.
We saw that rain was on the way so we prepared our area for rain and got into Terry's tent. The rain was fairly heavy and lightning was off-and-on the rest of the evening. I was particularly uncomfortable being so high during a lightning storm, but we survived... We set the alarm for 4:30 AM and went to sleep.
At about 1AM I woke up to the loud sound of rocks falling. I think a goat knocked down some rocks in the valley, which sounded like fireworks in the middle of the night. At 4:30 we both got up and prepared for the climb. I ate some breakfast bars and Terry boiled more water for another freeze-dried meal. In the process he melted some plastic on his stove on accident. Fortunately, it appeared that his stove was still functional. We started up the trail around 5:30 AM as the sun was just beginning to light up the valley. Shortly after we began, we reached one of the upper lakes. The lake was pretty cool because it was reflecting the light that had just started to shine on Little Bear - right of center.
The lakes were really calm and provided some nice views.

We continued up the trail and began the steel climb up snow fields and boulders. We followed cairns towards the saddle between Ellingwood Point and Blanca and heard the sound of rocks falling above us. A pair of Mountain Goats were doing the traverse from Blanca to Ellingwood above us!
Terry finally reached the trail connecting Blanca and Ellingwood just below the saddle and he led us up towards Ellingwood.
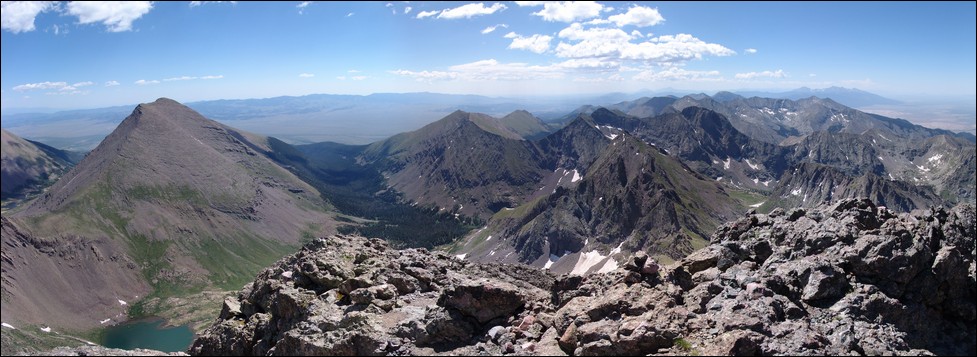
Finally we reached the saddle between Blanca and Ellingwood and were afforded the first very impressive views of the morning. We could begin to make out Crestone Needle (the pointy mountain peaking through left of center).
I also took a 300 degree pano from here, which turned out really nicely. On the right you can see the Lake Como valley from where we came from, and on the left you can see the Huerfano River valley and Mount Lindsey, which I climbed last weekend.
We continued up Ellingwood Point and kept looking back behind us in awe of the sheer size of Blanca Peak. It really is impressive. Here's some panos of Blanca and Little Bear, across the valley from us:
While I was taken by all of the views and therefore occupied by photo-taking, Terry was making great progress towards the top of Ellingwood. He couldn't see it, but unfortunately he was not the first to summit Ellingwood today. The goats were!
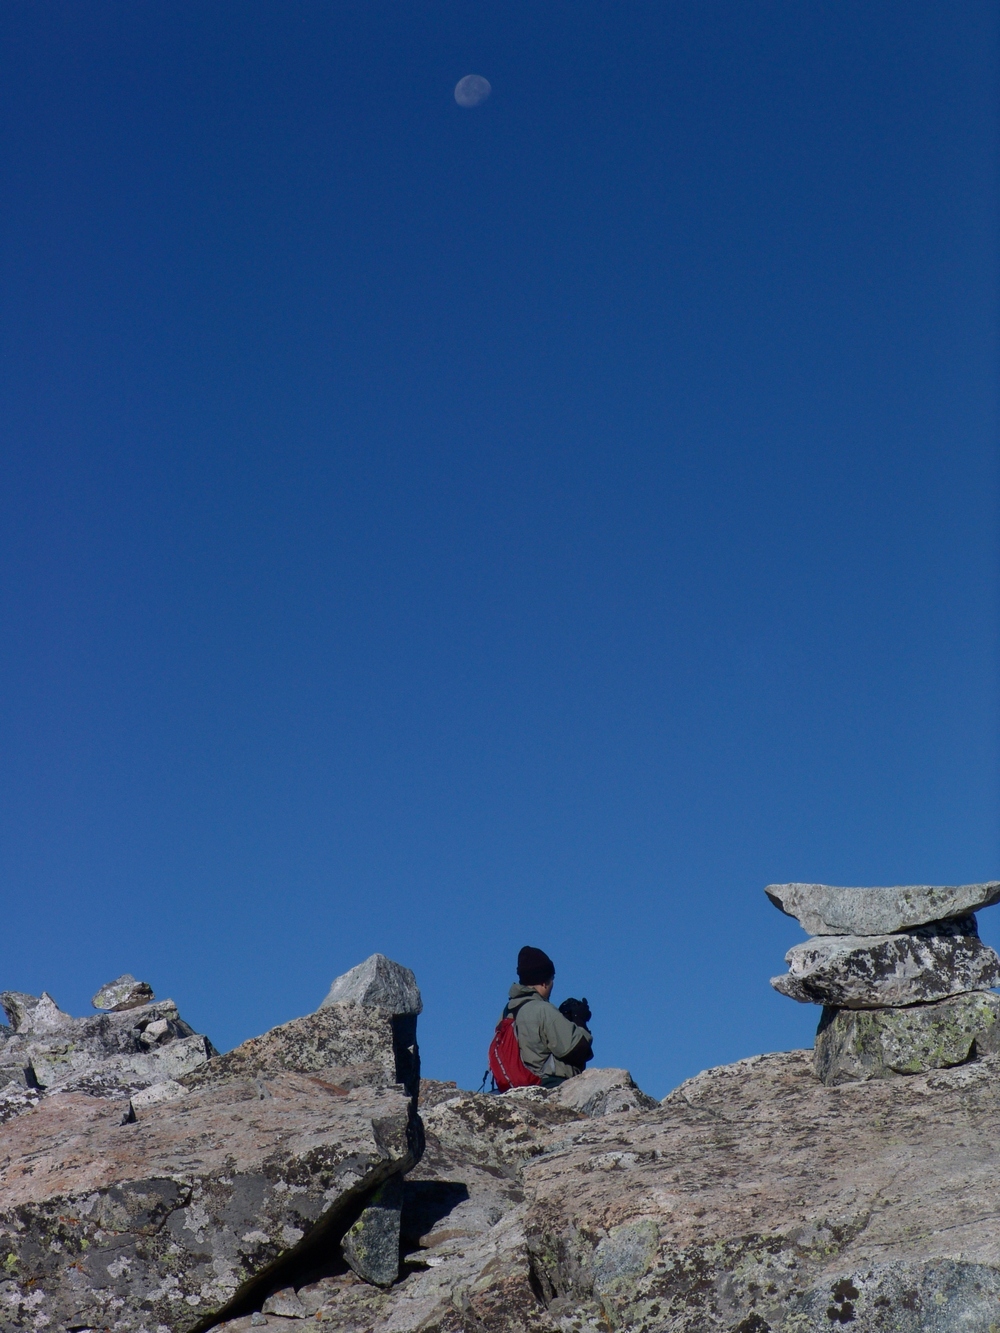
As Terry approached the summit, the goats left and Terry was afforded solitude once more on Ellingwood. Here's Terry with the moon above him as he took in the views from atop Ellingwood:
As I reached the false summit of Ellingwood, I looked to my right (north) and saw an impressive ridge connecting Ellingwood to California Peak. If you look closely at this pano, you can see something really cool...
... goats!
Here's a zoomed in view of the Goats! They were doing the traverse down the spiny ridge. It was really amazing seeing wildlife this high.
I finally reached the summit and Terry was already taking pictures. He took this one of me as I was also taking photos:
Here's a 360 pano from Ellingwood. Under the sun is Lindsey, and left of Terry is Little Bear and finally Blanca:

Terry and I stayed on top for about 20 minutes, watching groups of people summit Blanca and Little Bear across the valley. We refueled and began the traverse over to Blanca. This was a fairly sketchy route, perhaps because we stayed pretty high on the airy ridge. To our east was a sheer drop-off of at least 1,000 feet. The route required some careful footholds, ledge-walking, and even an icy couloir. Terry went down the icy couloir first, acting like Spiderman on the edge. I decided to around the ice and then right through it, using my hand to pick up ice and snow and throwing it out of my way. We started up Blanca and passed one gentleman coming over from Blanca. Looking back at Ellingwood, you can see the route we took, basically right down the ridge and up again towards Blanca.
The scramble up Blanca was fairly straightforward class 2+ climbing and I eventually reached the summit. Terry summited about 10 minutes later and we both began to take pictures like crazy. The weather was absolutely perfect - no wind. Terry took my summit shots, and then we both started walking around the summit block in search of great photos.
I took my normal 360 pano...

...and then took some higher detail panos of Lindsey Peak and the Winchell lakes to our Southeast.
Here's a zoomed in view of one of the Winchell lakes:
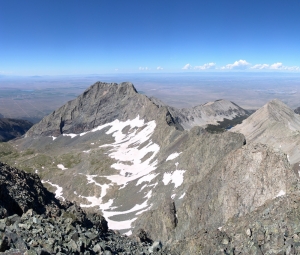
Then I took a very detailed set of photos of Little Bear and the traverse from Little Bear to Blanca - one of the hardest traverses in the State. You can also see Lake Como in the valley to the right of Little Bear.

After hanging out on the summit for awhile, we decided to head back down, which turned out to be fairly uneventful except for the awesome views. We eventually got back down to the waterfall, which I had to take a picture of!
When we got back to camp, we both decided it would make sense to just pack-out today, so we packed up our camp and headed back down towards Terry's vehicle. At Como Lake, we encounted a large group of 4-wheelers, one of which we followed down most of the trail to watch him go over the Jaws obstacles. His Willy's Jeep made the Jaws look more like baby teeth:
The hike back down to the car was fairly uneventful after seeing the Willys.
We then drove into Blanca to have some good food to prepare us for the drive home.
Crestone Needle and Peak via Cottonwood Creek
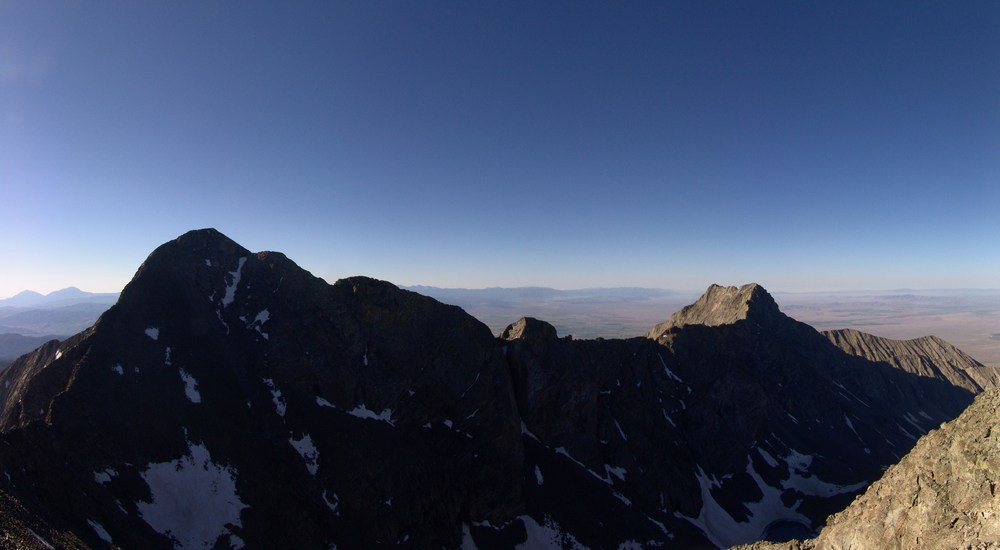
What an adventure! Never in my dreams did I think I would ever conquer the mighty Crestone Needle and Crestone Peak. After seeing them from two years ago, I figured I’d never have the testicular fortitude to attempt them. Here is Crestone Needle and Crestone Peak (right of Crestone Needle) as seen from the summit of Humboldt.
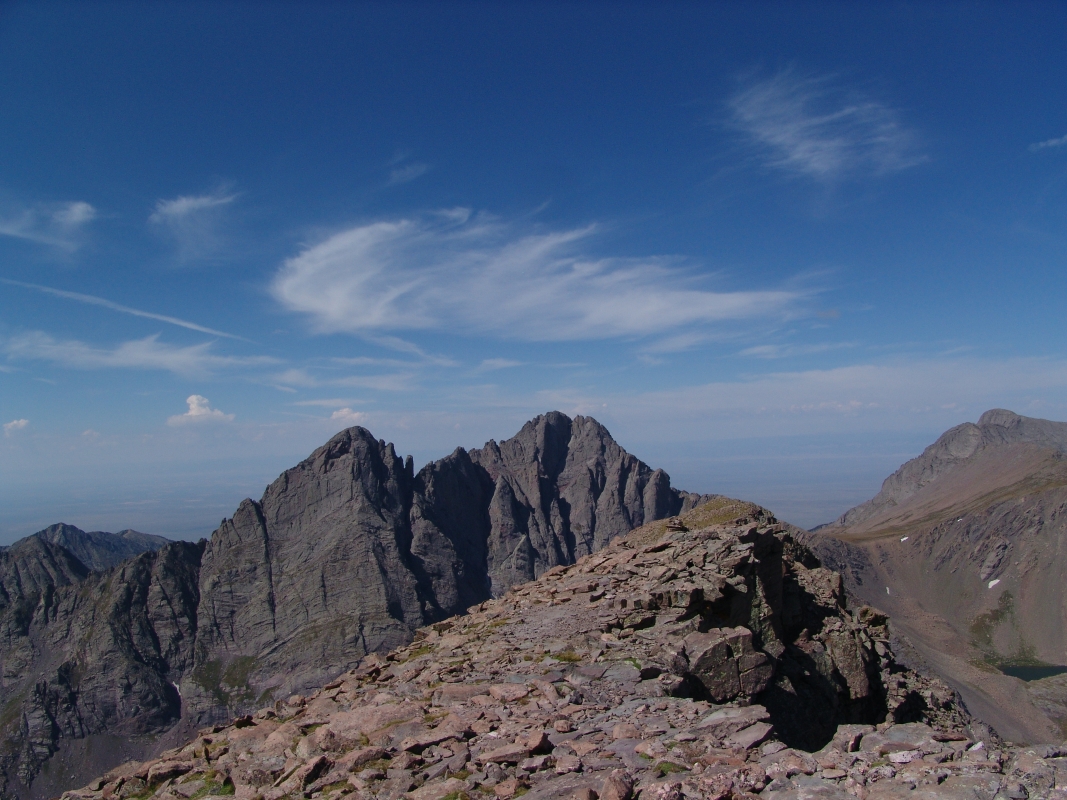
Alas – when I read my friend's itinerary for his mountain climbs back in April 2009, I saw the Crestones and decided it would be the best chance I’d get to give them a shot…
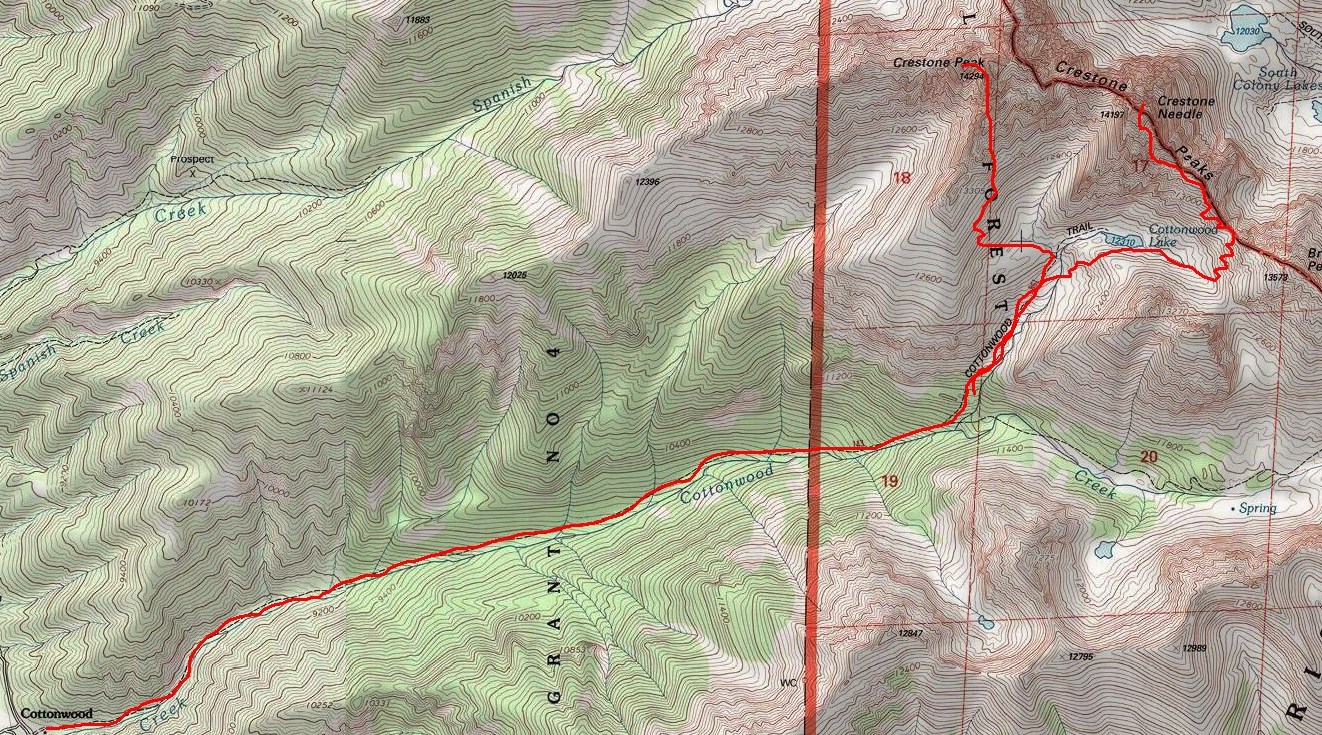
My friend Terry picked me up from my house at 5 AM on Thursday morning. We headed out for the long journey towards Buena Vista and eventually the small town of Crestone. The route Terry chose for these climbs was a rarely traveled backpacking trail from the west side of the mountains, up the Cottonwood Creek drainage.
The trailhead is on private property owned by the Manitou Foundation, a religious organization set-up to provide property easements for the purpose of religious worship and pilgrimage. Earlier this month, Terry was able to obtain written permission from the Manitou Foundation to park on their property and begin up the trail towards Crestone Needle and Crestone Peak. Below is a map of the route we ended up taking on our adventures.
We arrived at the trailhead around 10 AM after driving around the area looking for the proper place to begin our hike. Due to the fact that this trail is off-limits to the general public, trail maintenance has not occurred on the trail for many years. The trail was very primitive and at many points in our day we lost the trail due to having to hike around heavy deadfall (basically a ton of dead trees blocking the trail). In addition to the trail being very faint, the trees in this forest were covered in heavy moss and spider webs. The spider webs were getting all over us and getting in our face, making the hike up quite the annoying yet adventurous journey.
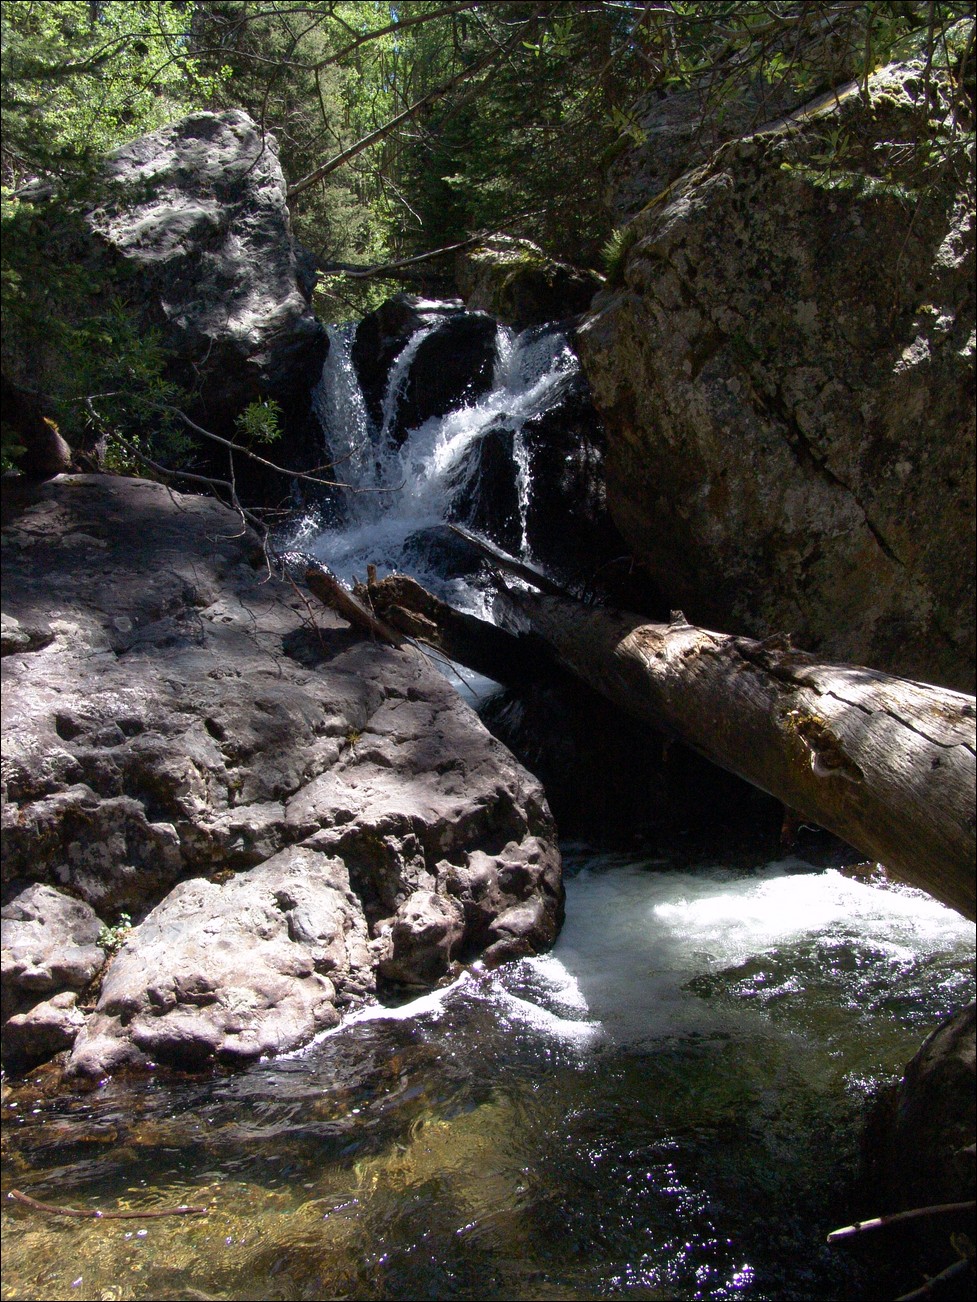
This was quite possibly the most intesnse bushwhacking, insane trail I've been on with a heavy backpack. At many times, the route was not visible at all, and the trail is lost easily. Take caution! The trail led us to a very pristine waterfall, one of many.
We scanned the area constantly for cairns in order to find our way. Unfortunately, a set of cairns led us up a very steep and rocky section that lasted for at least thirty minutes, but allowed for us to avoid some wet slab-like rocks that would have presented their own unique challenge. The rocky section was quite difficult given the fact that I had a 60 pound backpack on.
During our trek up the trail, I kept a close eye on my GPS, which has the TOPO! maps from National Geographic synced up with it. I monitored our position to ensure we were heading the right direction. As we approached a split in the trail that was critical to our route, I became nervous as the GPS showed our direction
heading up the wrong trail on several occasions. This resulted in Terry and I doing some bushwhacking through some heavily wooded areas and up a very steep gully towards our proper destination. Finally, our bushwhacking paid off when we found the proper trail leading up towards Cottonwood Lake
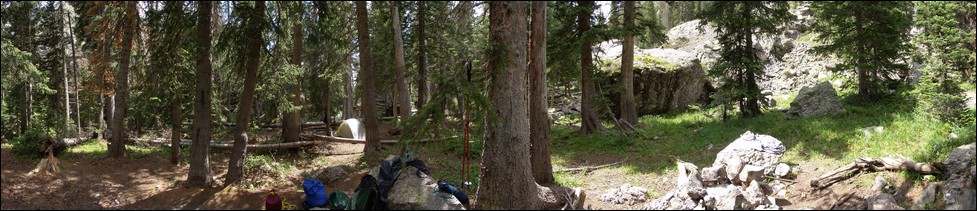
(where we had tentatively planned on making camp). Terry noticed that the trail we had found was the very trail we had left to do the bushwhacking, so it would seem that the trail splitting to the southeast was never revealed to us. After a very short time, we came to a very ideal campsite underneath a waterfall at the base of a large boulder field. At this point we had been hiking for 5 hours and decided we would camp here.
Here’s a nice 360 view of our campsite.
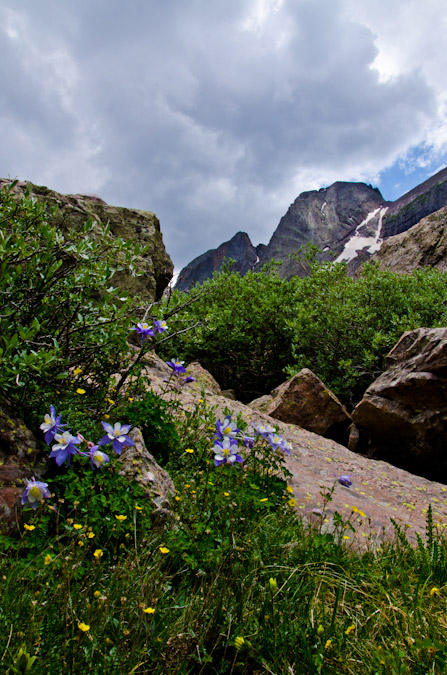
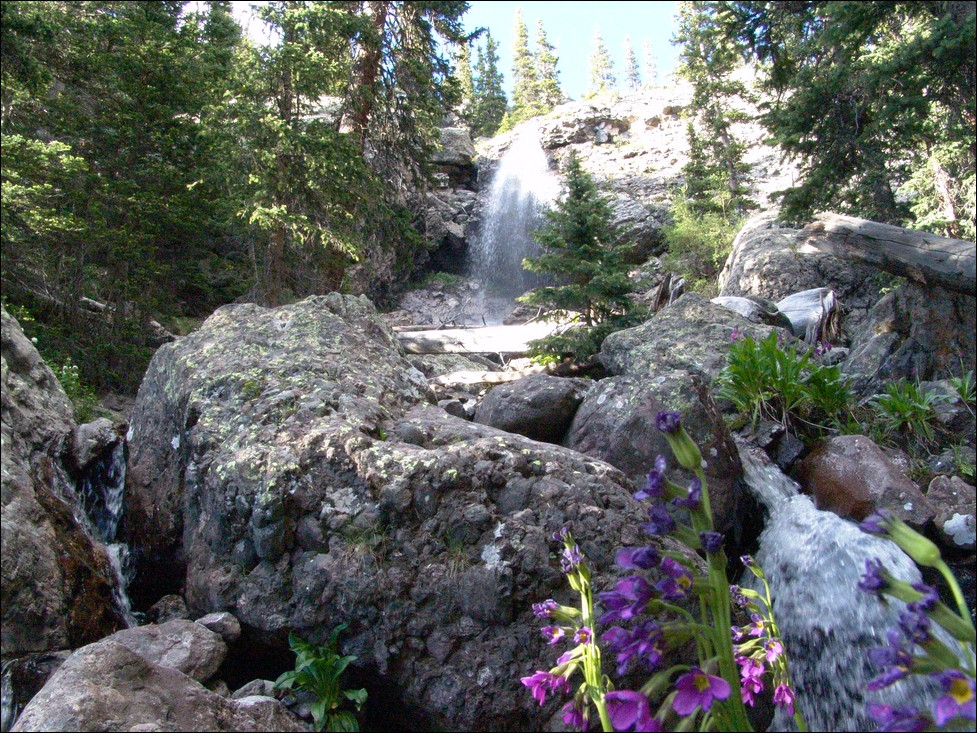
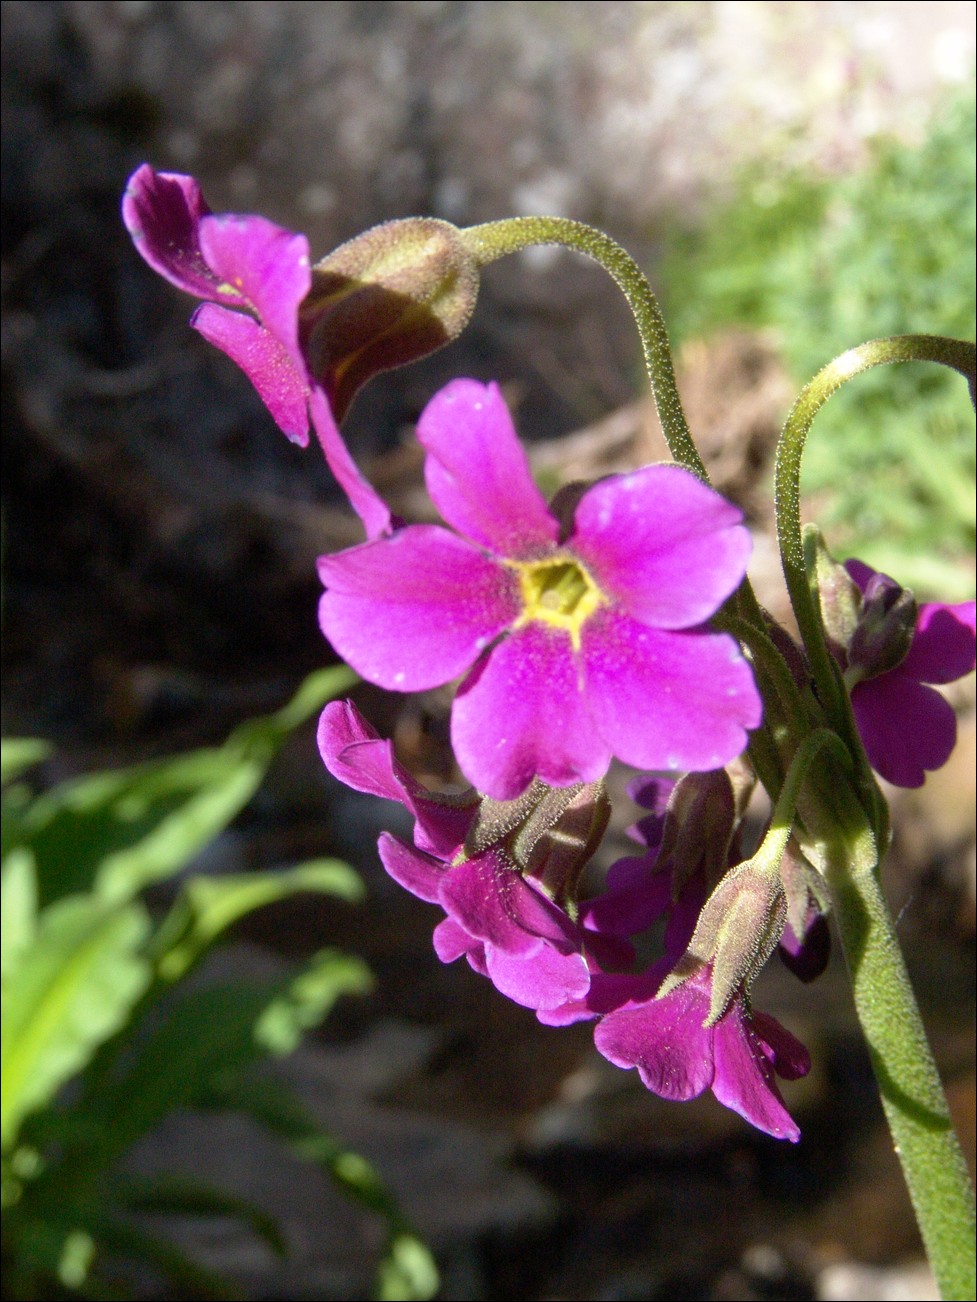
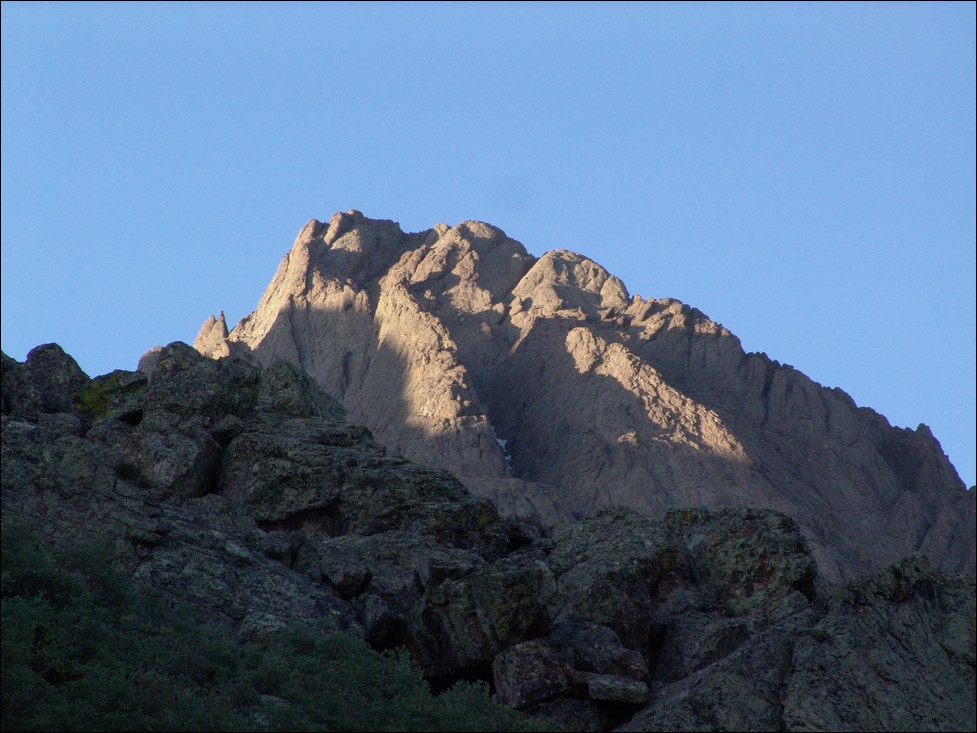
After setting-up camp, eating, and taking in some pretty sweet views of the waterfall right next to our camp (pictured below), I decided to take a quick hike up to see if I could get a sneak peek at Crestone Needle. (pictured below the flower). Seeing Crestone Needle brought some anxiety mixed with excitement to me, and I began thinking about the difficult climb we were about to attempt.
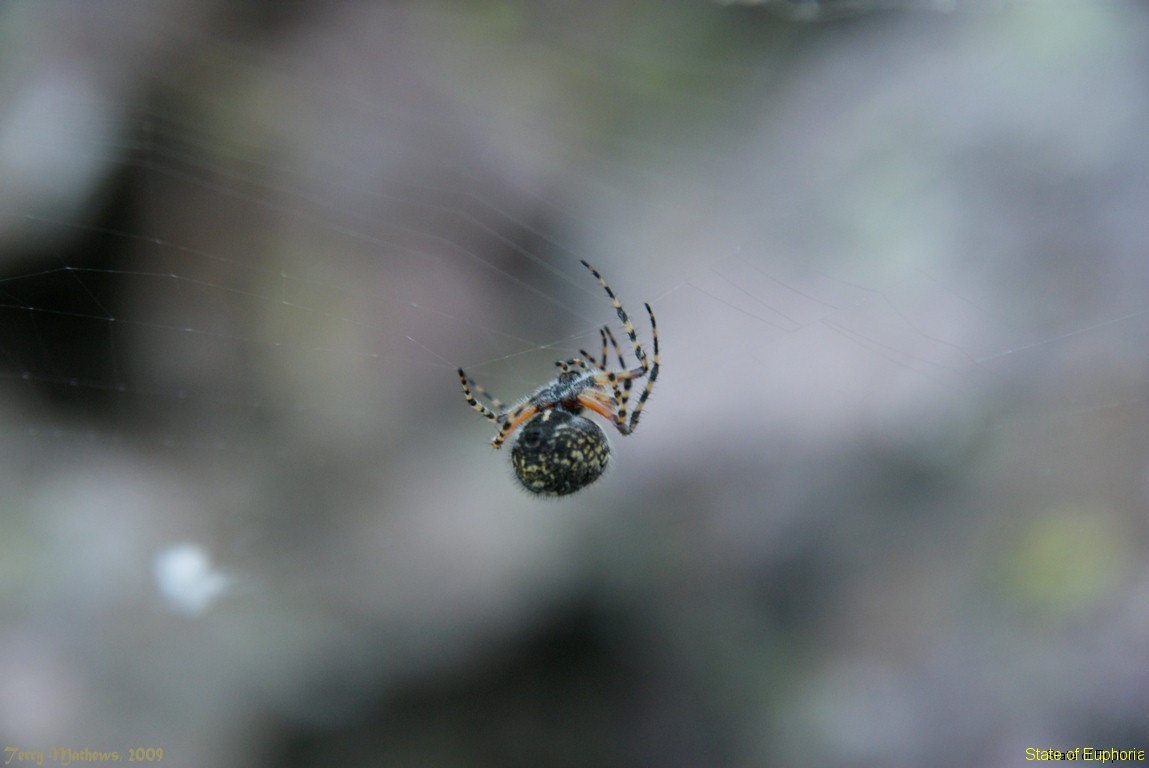
Terry set his alarm for 5 AM, which came way to soon given the level of exhaustion we had reached during our backpack up that crazy trail. We quickly ate breakfast and started up the steep trail above our campsite towards Cottonwood Lake. The trail was once again poorly maintained and poorly marked. We followed some cairns here and there up a large basin full of willows, spiders and steep waterfalls. Terry got a cool photo of one of ths high-altitude spiders we saw:
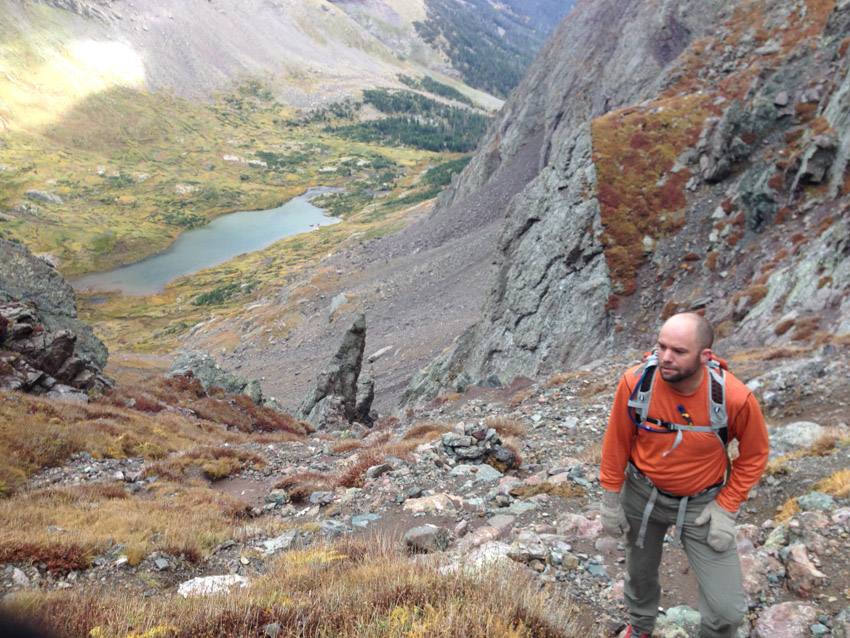
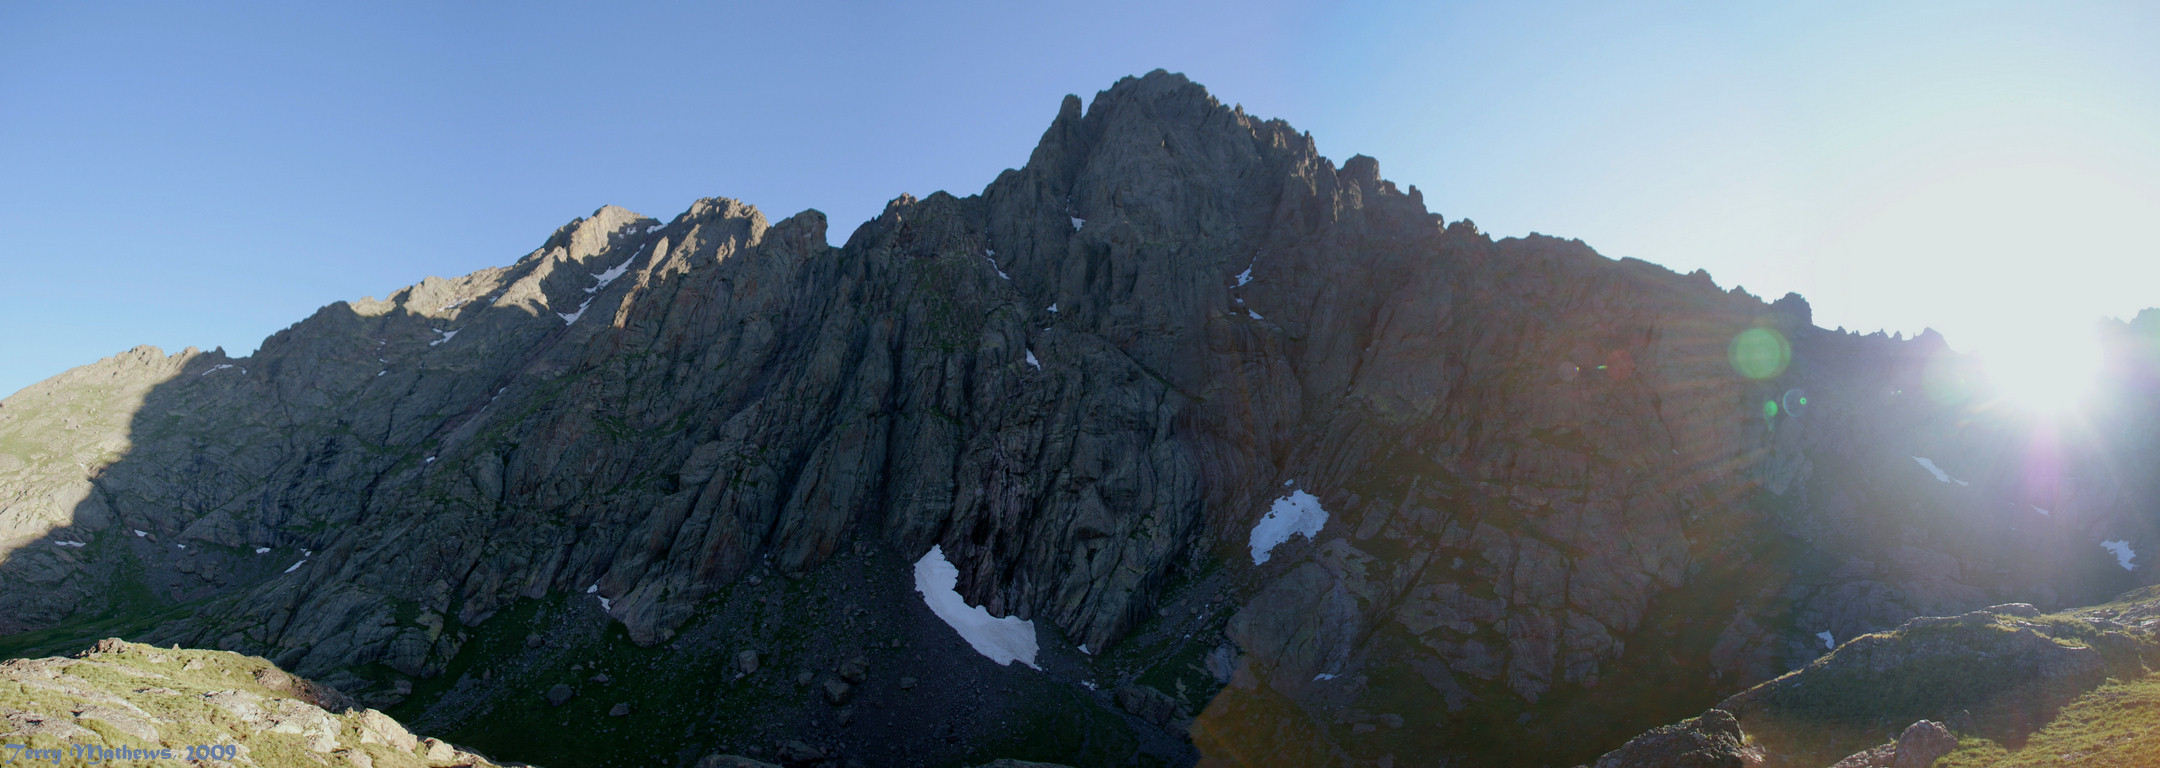
We decided to head east once we were quite high in the basin below Crestone Peak and Crestone Needle. About 3/4 of the way up the basin my daypack decided it would break, so I was forced to jerry-rig it so that it would still work. The shoulder strap ripped from the hip area, so I tied it to another strap coming up from the hip belt. Whatever works! We reached the top of the basin and realized we were quite high above the lake and that we would need to down climb to the trail leading up to Broken Hand Pass. Unfortunately the photos I took from this vantage point did not come out as intended; however, Terry got a great shot of the vantage we had of Crestone Needle and Crestone Peak:
Once we down climbed to the trail leading up Broken Hand Pass, we were able to get to the far east area of the basin and head up towards Broken Hand Pass. Terry and I felt sorry for the climbers that chose to climb these two mountains from the other side of the pass, as they would be required to climb up it twice for each mountain – ouch!
Climbing up Broken Hand Pass, one does not have to stretch their imagination too far to see why it is called Broken Hand Pass, as you can see a view of some rock that looks exactly like a closed fist that is next to what appears to be a second arm that has the hand broken off of it.
At the top of the pass, a large pulley system is set-up, with ropes and an intricate system of PVC pipes. Terry and I did not have much of a clue as to what this was for, but we later found out that day that the Rocky Mountain Field Institute uses the device to hoist large rocks from the top of the pass down the north side of the pass to fix the trail to prevent erosion.
From the top of Broken Hand Pass, we were able to check out the lower South Colony Lake and Humboldt across the way. Here’s a nice panoramic photo of that view:
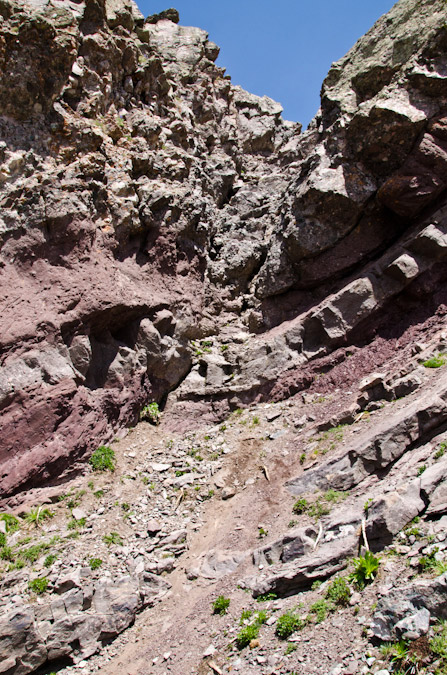
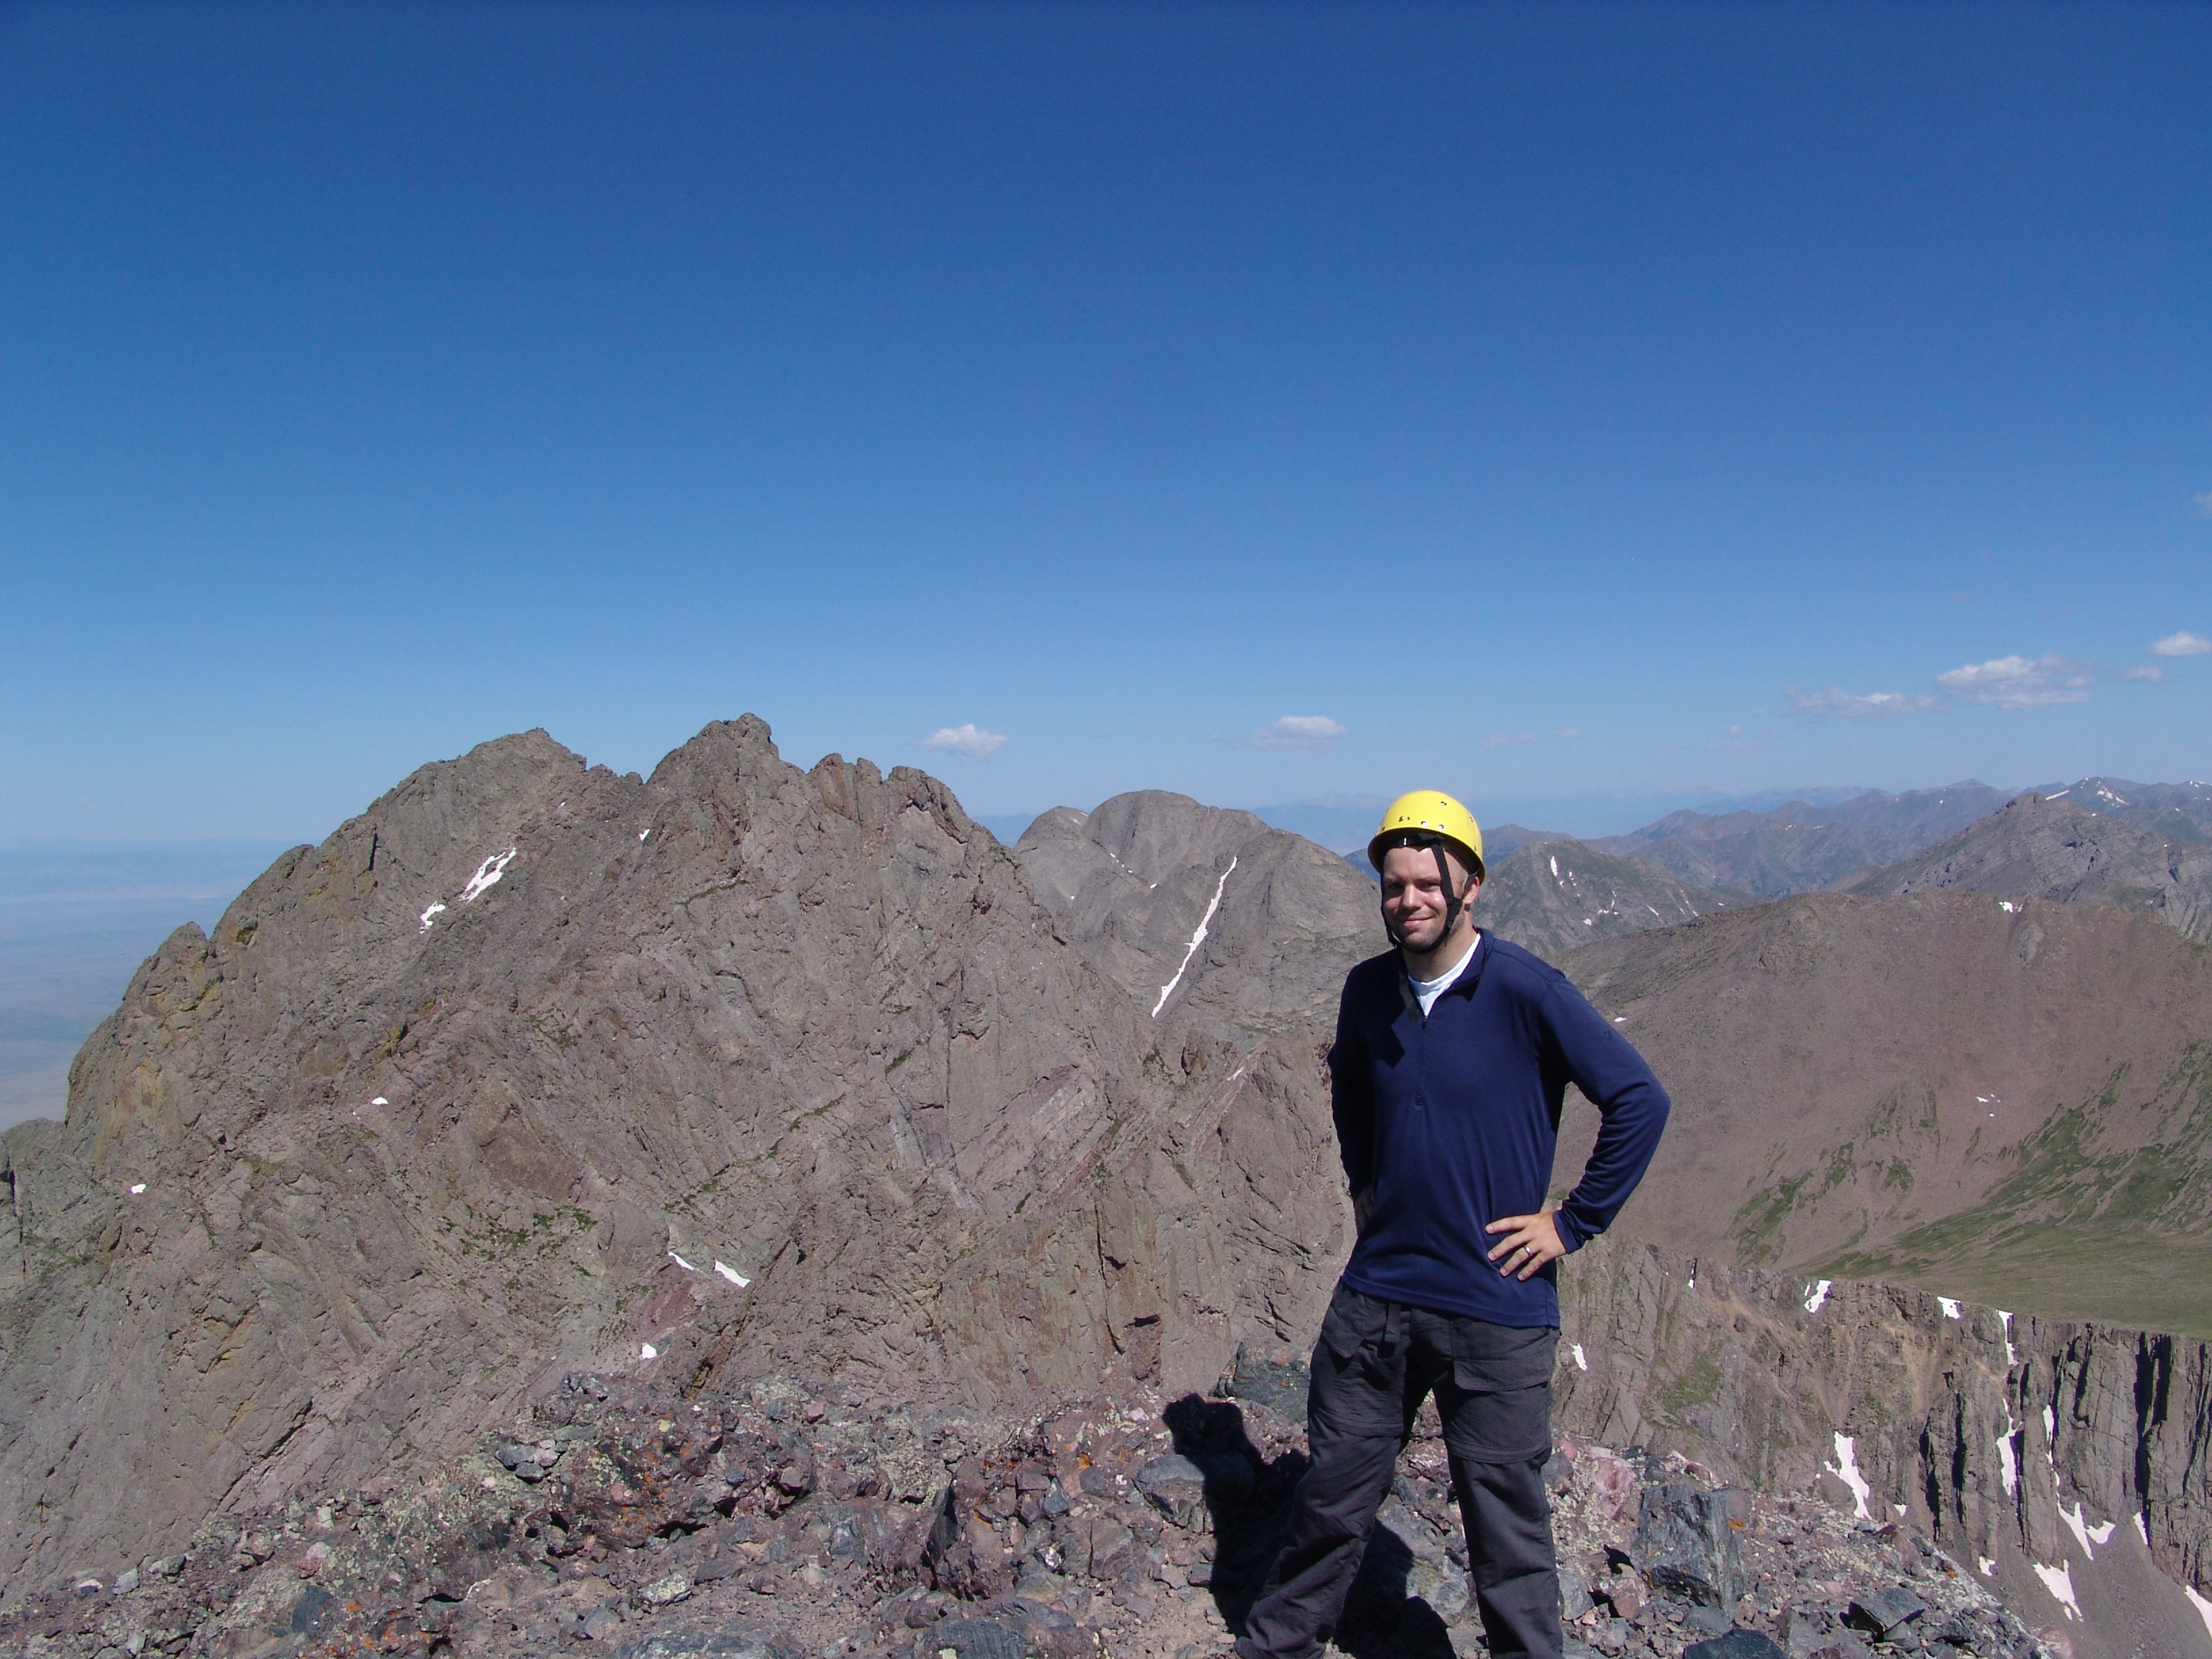
At this point, Terry and I decided it was a good time to don our climbing helmets, a first for me in all of my mountain climbing adventures. From here we could see Crestone Needle looming above us, taunting us with its intimidating rock formations that we would be forced to carefully scale.
You can see two distinct gullies, one directly facing us, and another to its left, obscured by a rib running the length of the Needle. The standard route up the Needle takes you half-way up the east gully and then over the rib to the west gully and up to the summit. It sounds a lot more simple than it really is.
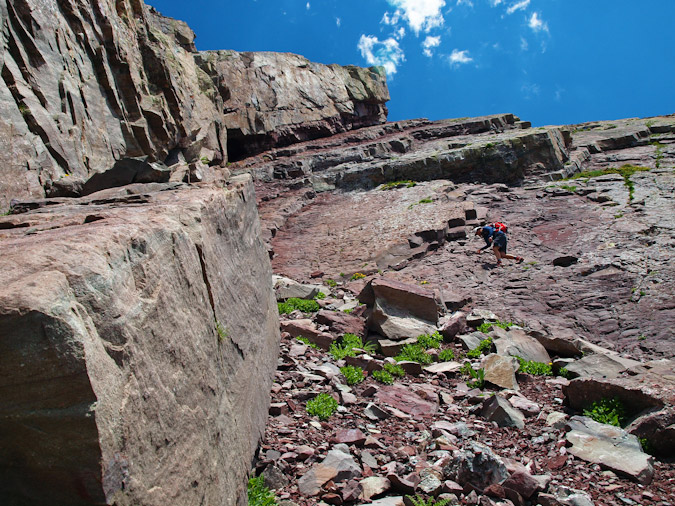
We followed the well-established trail over to the base of the east gully and started up. The rock on Crestone Needle is most impressive, a climber’s dream.
The entire mountain is made up of a mixed conglomerate of granite, quartz, and other rock. The rock had numerous large rocks cemented together making it quite easy to locate hand-holds and foot-holds for climbing. Here is a view up the east gully.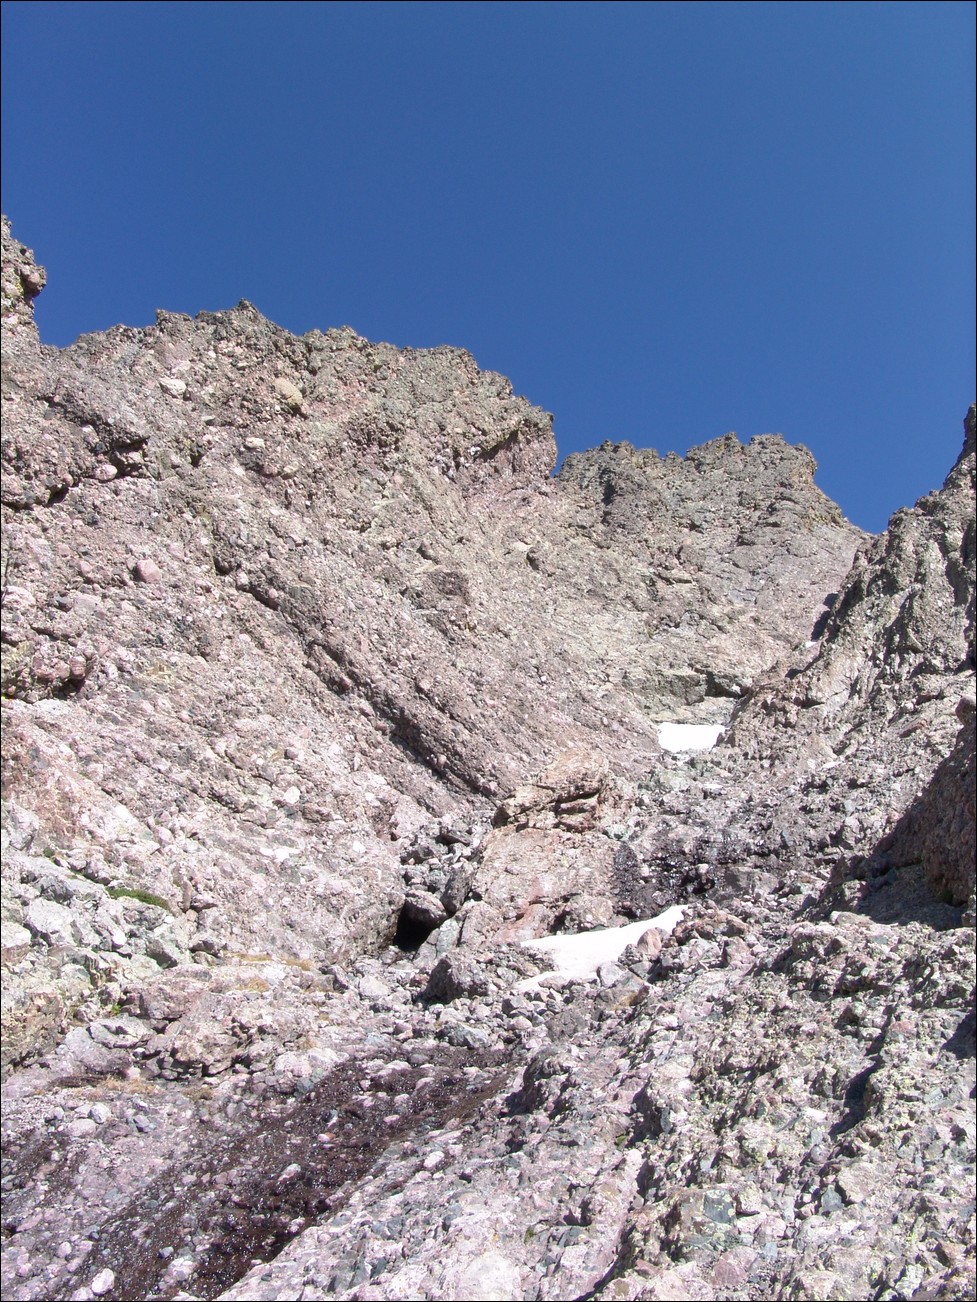
Terry and I were quite pleased with how solid the rock was and how stable the route seemed to be.
The hard part of climb was finally upon us – the transfer from the east gully to the west gully. The east gully takes you to a large dihedral with a large amount of snow at its base. We were forced to cross right at this snow over to the other side of the gully. This required a very unstable move by which we were forced to smear ourselves to the side of the wall, reach up, and push off and up at an angle to the more stable ledge just above the end of the dihedral.
We scrambled up the side of the gully up to a notch leading over to the west gully. Here is a shot of me climbing up the west gully courtesy of Terry. You can tell that this was not a good place to be for someone that is afraid of heights.
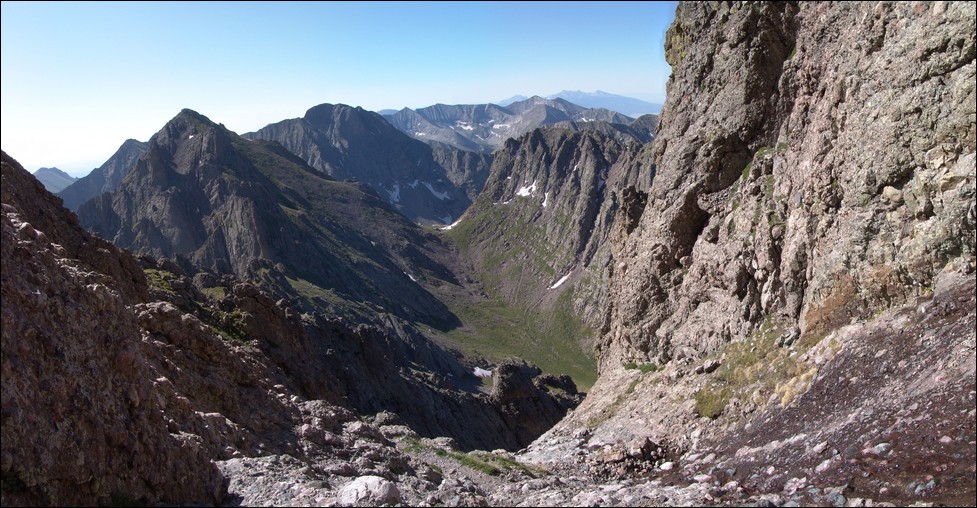
I was able to take some nice shots combined into pano of the gully looking down towards the basin we came from to give you a good idea of the steepness of the climb.
After climbing up the west gully for about 600 feet, we reached the summit block of Crestone Needle! I was very eager to gain the summit, so I passed
Terry and celebrated on top.
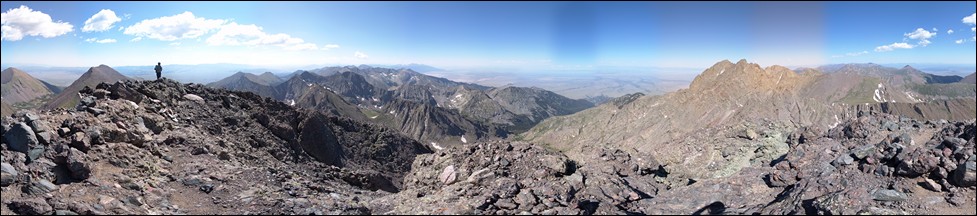
This was probably one of the most invigorating climbs of my life. Here’s a 360 degree panoramic photo from the summit. Apologize for some image quality issues...
I have since figured out how to use my camera... Colony Baldy and Humboldt can be seen on the left to the left of Terry. The southern Sangres can be seen in the distance including Blanca, Little Bear, and Ellingwood Point and of course the Sand Dunes National Park. At right are Crestone Peak with Kit Carson, Challenger Point, and Kat Carson to its right. Finally, Mt. Adams can be viewed at far right.
Here’s another pano to the north and northeast showing Crestone Peak, Kit Carson, Challenger Point, Mount Adams, Colony Baldy, and Humboldt.
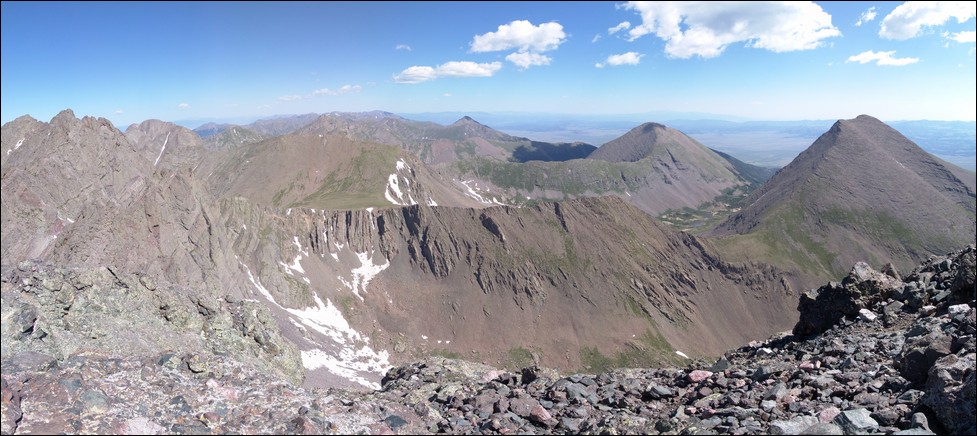
And another view north and northwest of Broken Hand Mountain, Milwaukee Peak, Pico Aislado and of course the Southern Sangres.
And yet another view of the upper South Colony Lake beneath Humboldt and with the Sangres to our south.
Terry was nice enough to take a shot of me on the top, with Crestone Peak behind me.
After spending about 30 minutes on top, we decided to head down. It was pretty cool having the summit of a 14er to ourselves. On the way down,
Terry snapped this shot of me looking up the west gully.
We were able to reach the bottom of the gullies without incident. The rock was super stable and I really can’t say enough good things about how fun this climb is.
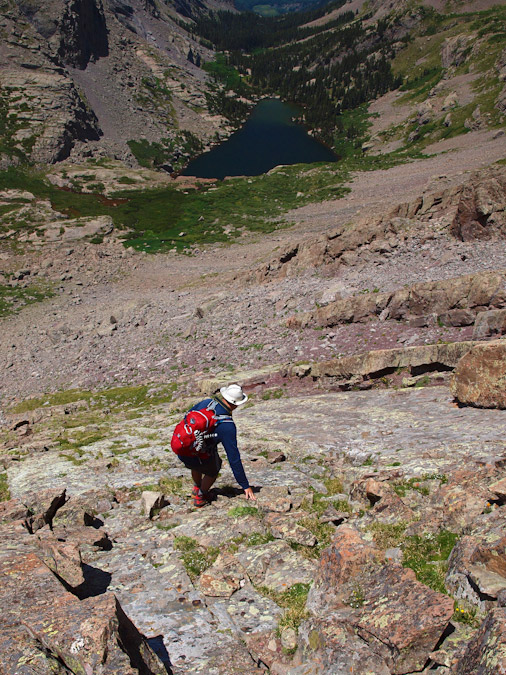
From the start of the gully section, I went over to a spot where I was able to look down upon Cottonwood Lake and the basin we climbed up from.
We climbed up from the basin on the right.
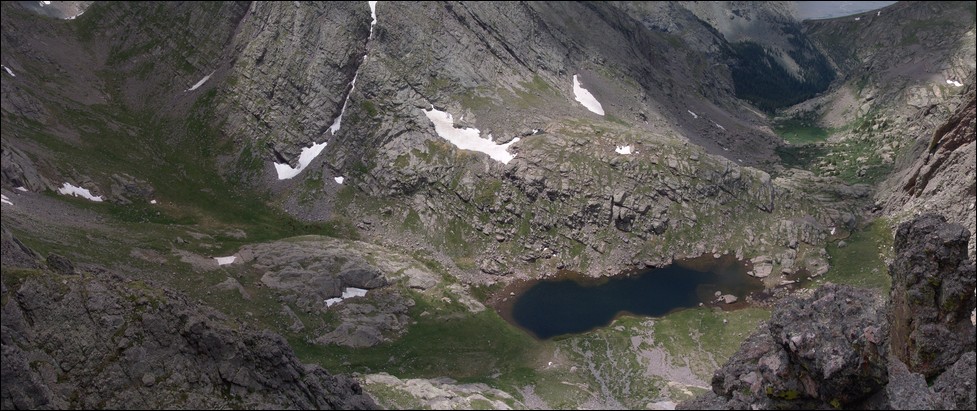
We got back down to Broken Hand Pass, chatted with the Rocky Mountain Field Institute for a bit, and headed down towards the lake. We passed a few people that had been on Crestone Peak and learned that we would indeed need our ice axes for Crestone Peak. Due to how tired we were, we decided that we would have to do Crestone Peak on day 3. We got near the lake and I decided to take some shots for this pano of our surroundings.
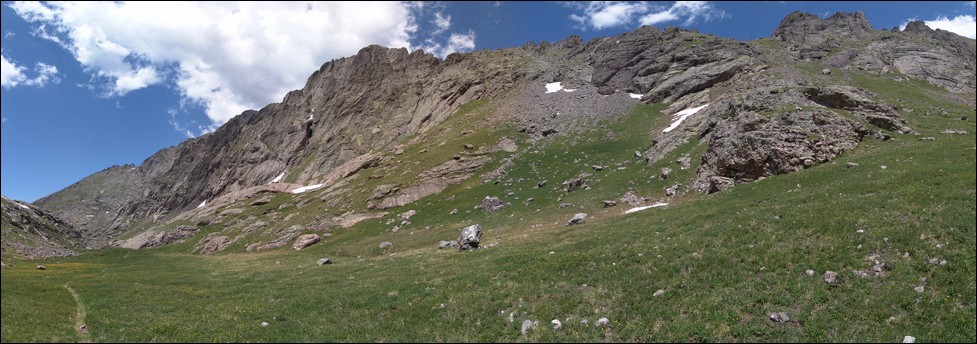
On the way back down the basin towards our camp, I decided to build some cairns to ensure we would be able to find the best possible route up the trail again in the morning. We made it back down to our campsite, ate, and went to sleep. We were both really tired and decided to get up an hour later the next day so that the sun would have more time to soften up the snow on Crestone Peak for our ascent.
Day 3 – Crestone Peak. We woke up at 6 AM and headed back up the basin towards Crestone Peak.
We followed my cairns and made great time, reaching the base of Crestone Peak at about 7:30 AM. There was a couple of groups ahead of us in the “red gully,” the standard route up the peak. Due to this, we knew that we would have to be cautious of rock-fall from above during our climb up.
At the base of Crestone Peak, I took some photos for this pano. You can see the red gully running right up the middle of the mountain with snow lining much of the route.
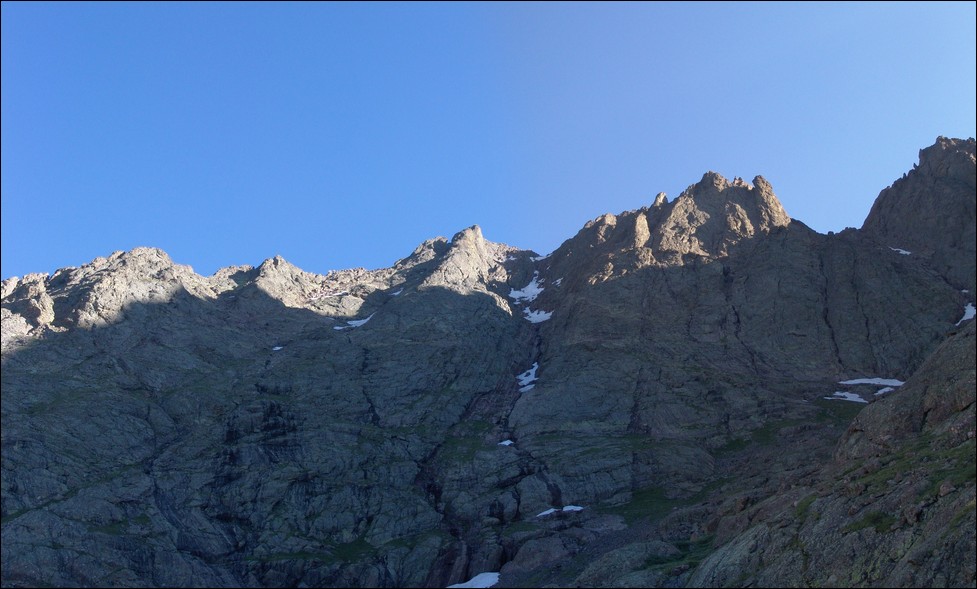
We started up the red gully, which was a tiring and difficult task. Right before we reached the main snowfield near the top, the group above us kicked down a very large boulder and screamed “ROCK!” It spun rapidly towards us down the gully. It passed about 20 feet away from us and Terry yelled below to warn those behind us coming up the gully.
The rocks falling down from above were fairly common, so we were forced to remain very vigilant going up.
We were able to avoid the first two snowfields but the third and largest we decided to go right straight up. We got out our ice axes and began our ascent,
with a group on our heels. Terry kick-stepped up the mountain slowing, driving his axe into the snow in between each step. It was an arduous but very fun process.
I was just totally excited to be using my dad’s ice axe for the first time. At the top of the snowfield, we were about 200 feet from the top of the gully. We made it to the top, avoiding the looser rock in this area in order to prevent us from killing those below us.
The pucker factor was not as high as I thought it would be despite the steepness and exposure, as seen by this shot Terry took:
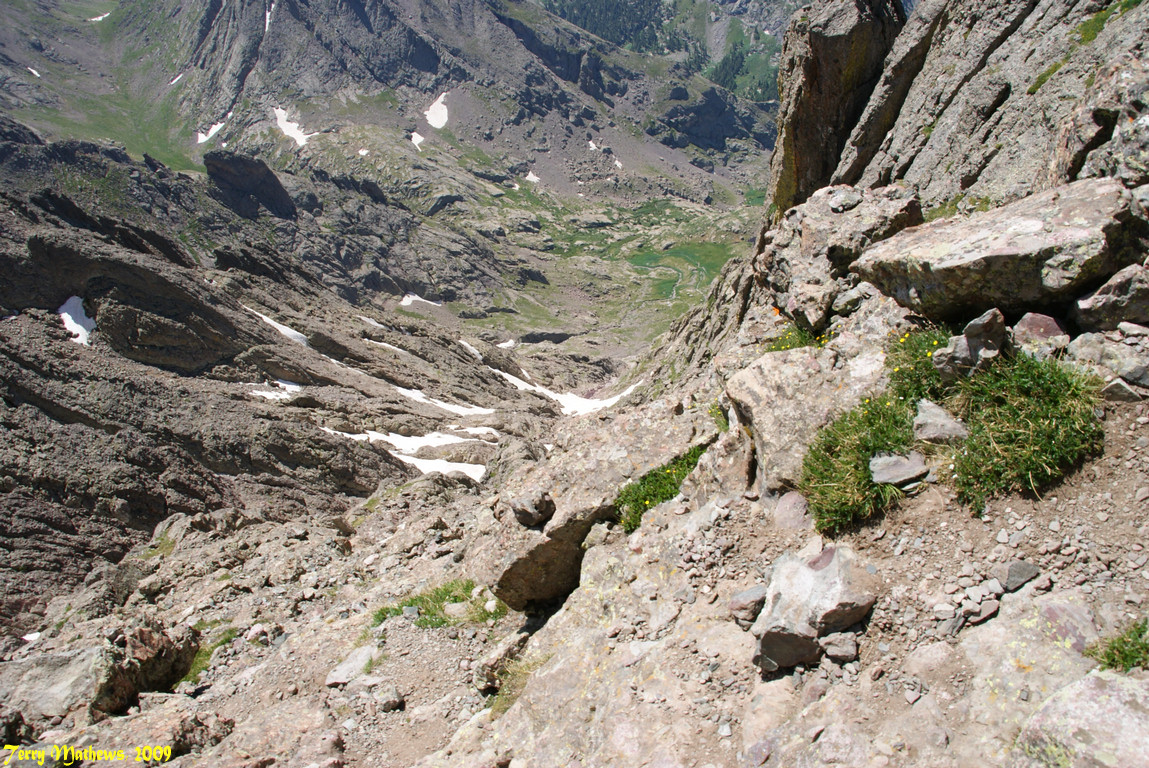
Once at the saddle at the top, it was a quick scramble to our left to the summit. From the summit, you gain pretty sweet views of Crestone Needle pictured at left of this pano.
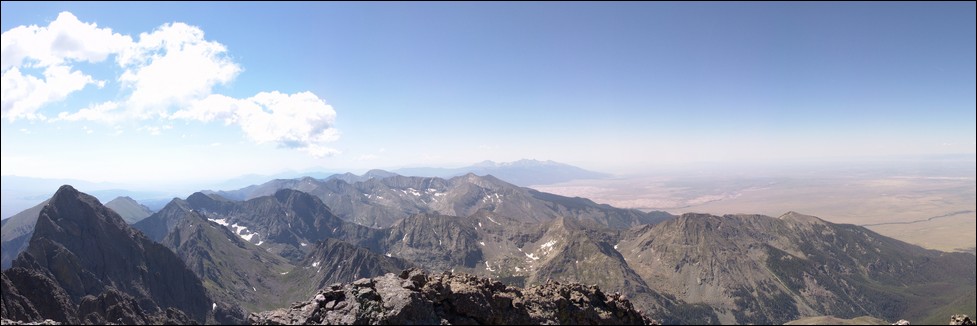
You also get some nice views of Kit Carson and Challenger, which would be our goals for next weekend.
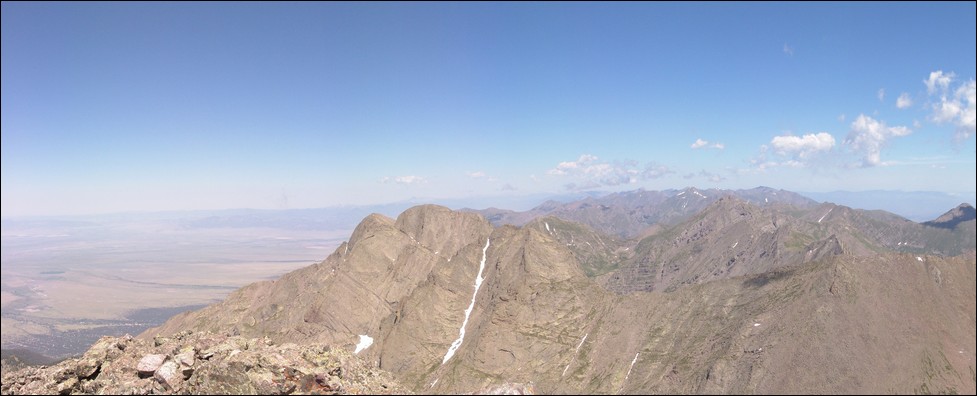
And of course the obligatory summit pose:
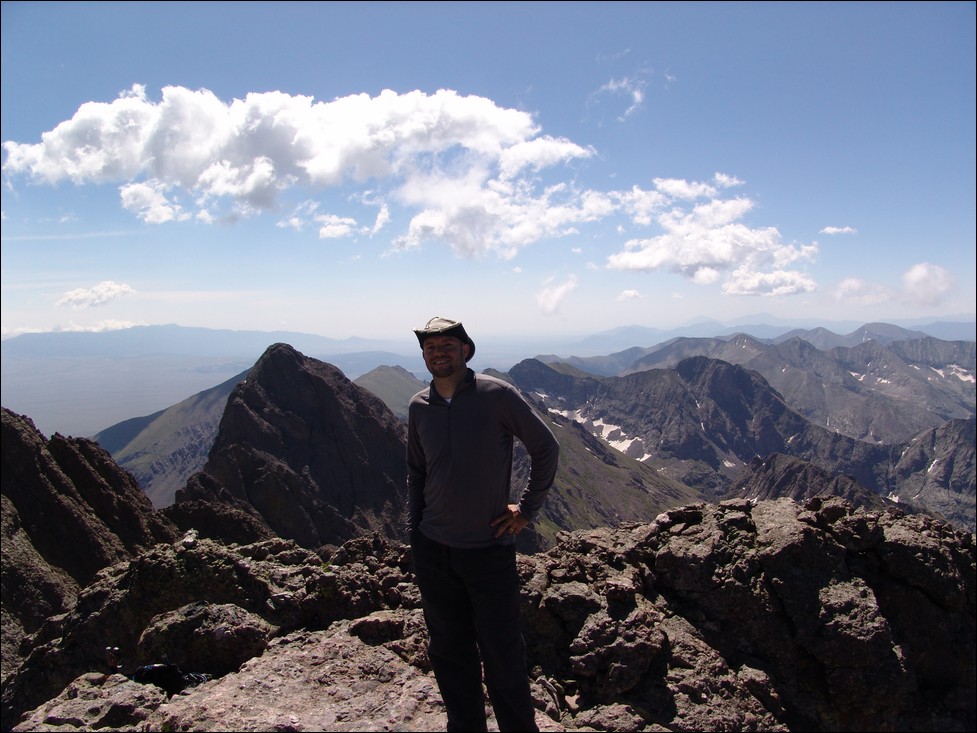
We spent almost an hour on top, most of which was in the company of several other climbers. We decided to head down as the clouds began to build near us.
We decided to decent the snow, and I wanted to go all the way down the snow, while Terry departed the snow as soon as he was able. I really felt like the snow as soft and that there
was no risk of falling. I felt pretty comfortable about going down the snow, especially with my new best friend – the ice axe. Here’s a picture Terry took of me having a blast going down the snow.
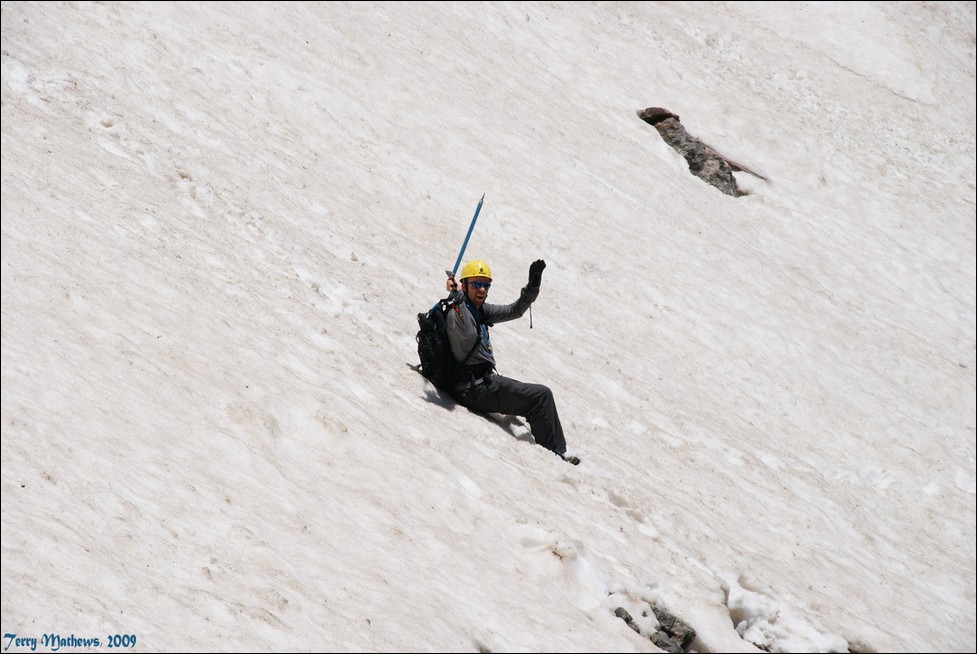
We passed several groups going up and then stopped at the bottom of the red gully and beyond to take a photo of the basin, the peak, and the red gully above.
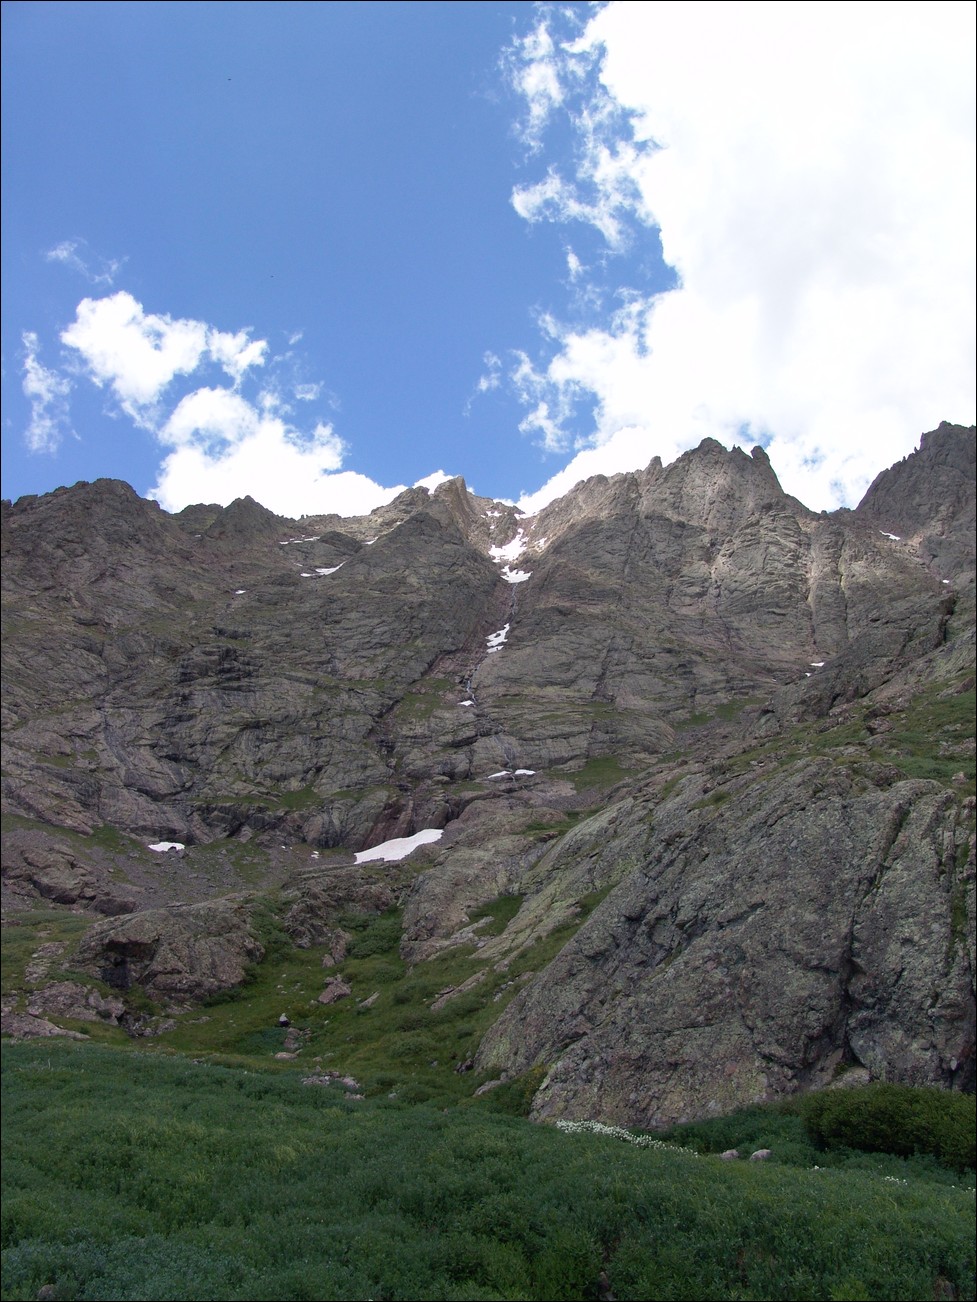
We slogged back down to our campsite and decided to pack-up and head back down the 3.5 miles back to Terry’s truck. It took us 3 hours to reach his vehicle at 8 PM and we left for Colorado Springs. Terry got some awesome shots of the sun setting to our west as we drove off into the sunset.
What a great trip, one I will remember for the rest of my life!
Sangre de Cristo Range
The Sangre de Cristo Range spans over 180 miles from Colorado into New Mexico and is known by many locals for its solid congolmerate rock and its steep relief, rising out of the San Luis Valley. The festive town of Crestone sits at the base on the western side of the range and serves as a gateway to many of the lesser-known summits in the area. Another famous aspect of this mountain range is the Great Sand Dunes National Park, which rests at the western base of this range and can be seen from many of the summits of this range.