Displaying items by tag: Matt Payne
Maroon Peak and Pyramid Peak - finishing a goal 27 years in the making
Two amazing summits; 11,060 ft. elevation gain, 21.5 miles... and a whole lotta' fun.
Introduction
Last year, I had plans to complete my long quest to climb all of Colorado’s 14ers. I had the calendar all lined up, trips planned, gear ready and my legs were in great shape. If all went to plan, I was to finish on Windom Peak after a long summer of knocking out some of Colorado’s toughest peaks. Unfortunately, as is so common in this sport of mountaineering and peak-bagging, those plans were interrupted. An unsuccessful attempt on Snowmass Mountain in June left me with one less weekend available. A complete re-arrangement of the calendar ensued and for the third straight year, my plans of climbing Maroon Peak and Pyramid Peak were delayed. However, this worked out to my advantage – as I had always dreamed of completing the 14ers on Maroon Peak and then on Pyramid Peak, which purportedly is one of the most difficult mountains as well as one of the most rewarding summits. Finally, my time had come to complete this incredible journey that started when I was six-years-old – the completion of the 14ers. Lots of hard work over the past 3 years have culminated in this moment.
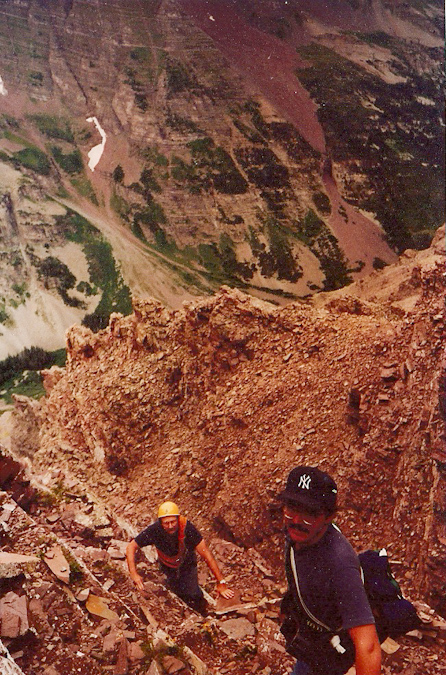
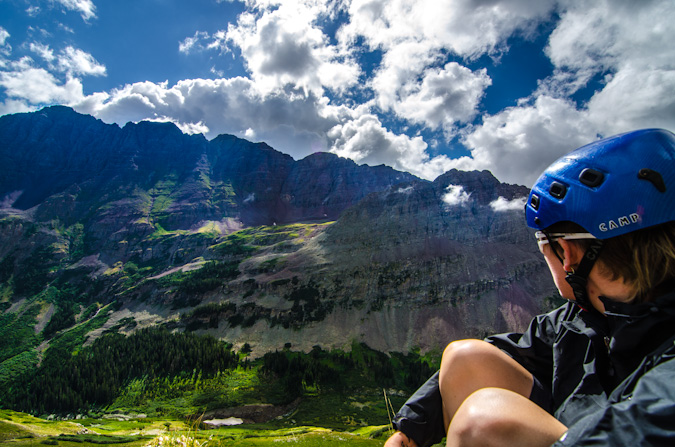
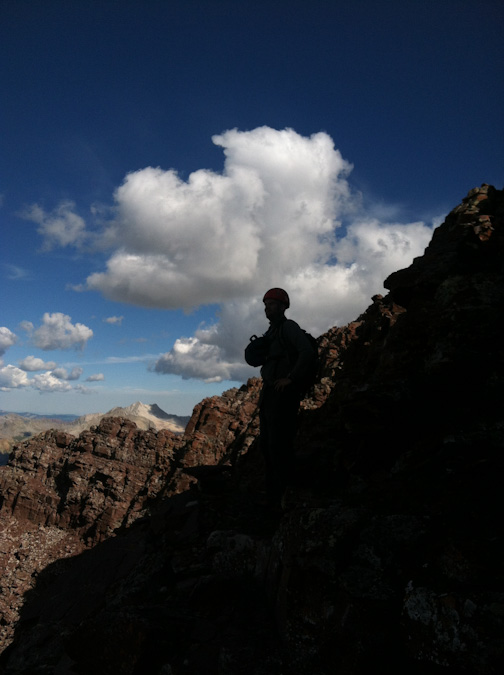
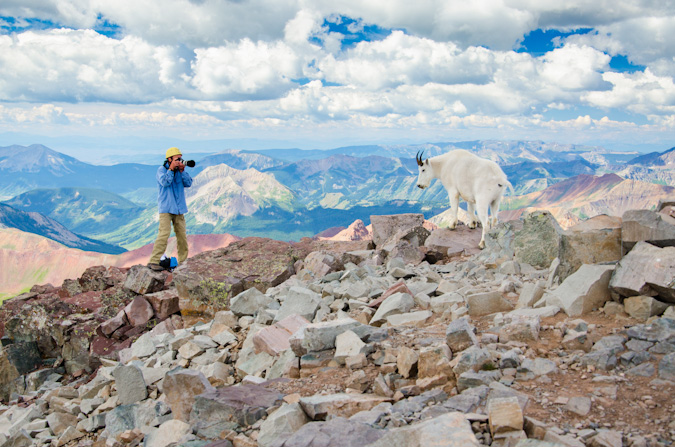
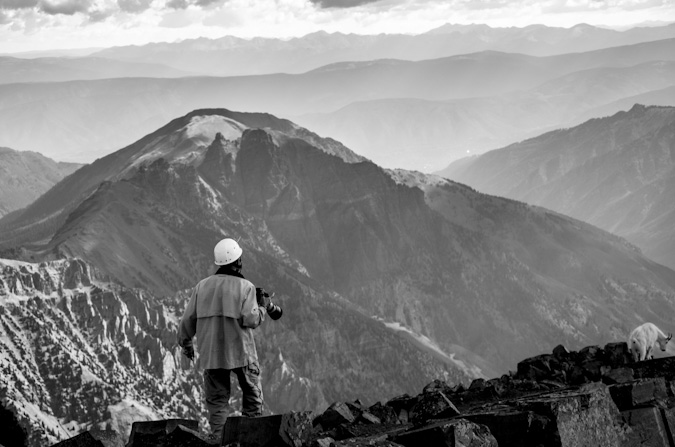
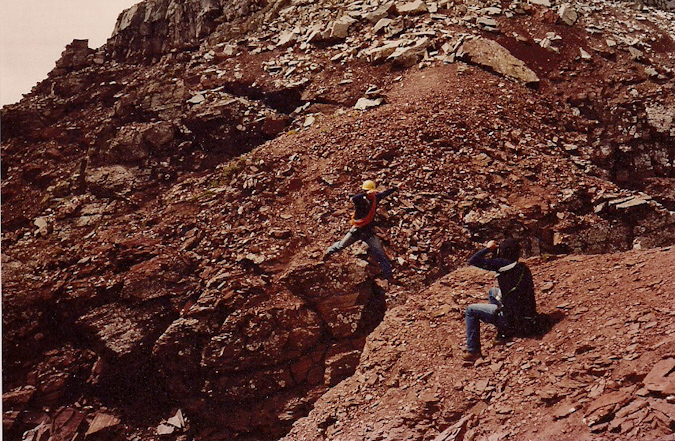
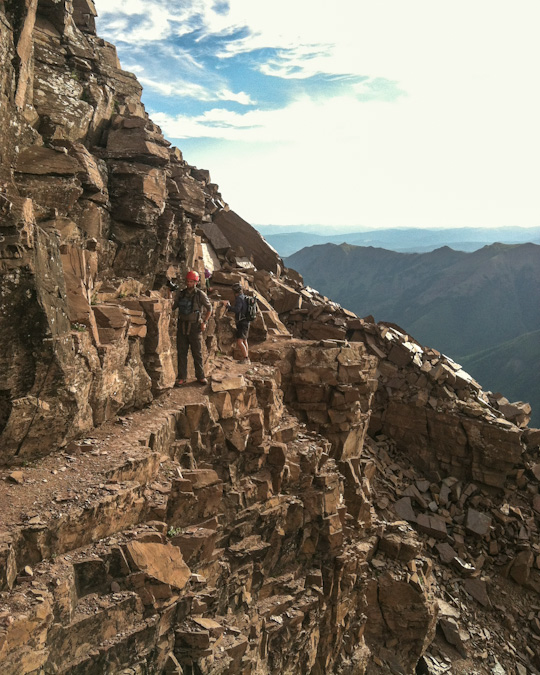
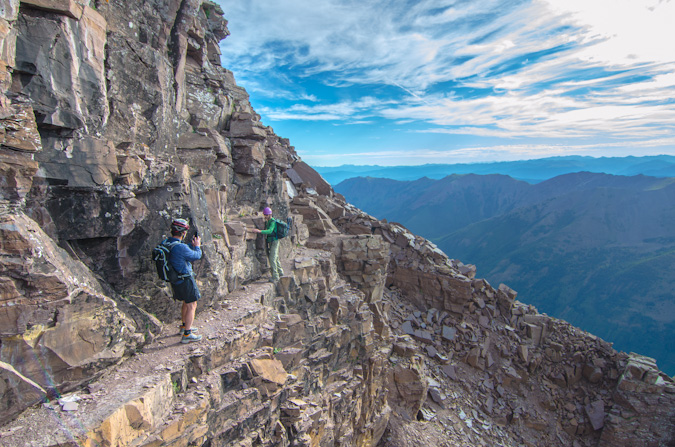
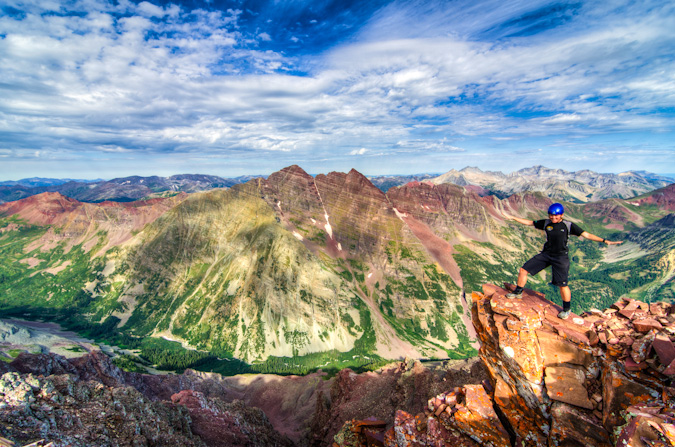
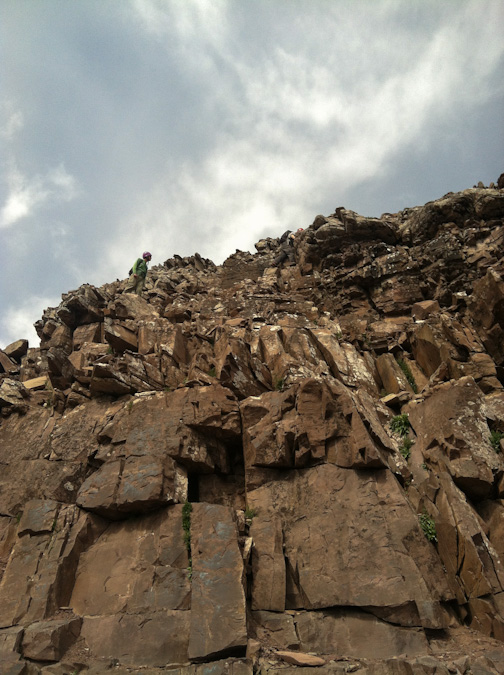
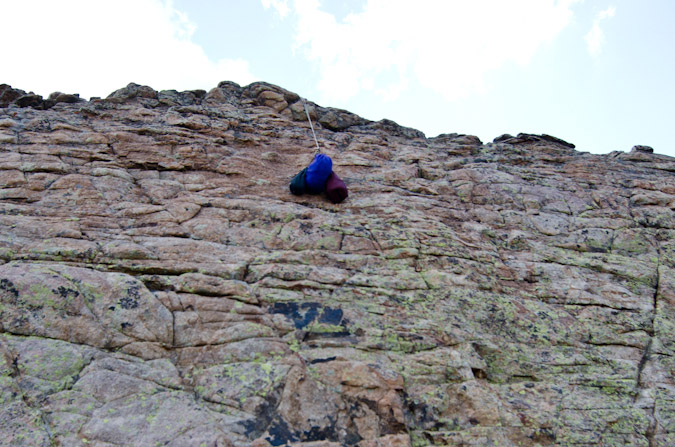
Ever since I was a child, I recall being mesmerized by the Maroon Bells, for both their scenic wonder and beauty and their dangerous mystique. My dad, Ray Payne, climbed the Bells back in August 1987 and returned home regaling his conquest with stories of incredible mountaineering feats (it must have sounded insane to my then 9-year-old ears) and near-death encounters with “The Deadly Bells.” Here's an old-school shot of my dad (yellow helmet) asending Pyramid Peak, rope in tow.
Per Wikipedia (and per my own witness of the sign), the term “Deadly Bells” refers to a U.S. Forest Service sign on the Maroon Lake access trail which calls the mountains "The Deadly Bells" and warns would-be climbers of "downsloping, loose, rotten and unstable" rock that "kills without warning". Sounds like my kind of mountain! Unlike other mountains in Colorado, the Maroon Bells are composed of metamorphic sedimentary mudstone that has hardened into rock over millions of years. This mudstone is weak and fractures readily, giving rise to dangerously loose rock along almost any route. This same mudstone is responsible for the Bells' famous and distinctive maroon color. The Bells got their "deadly" name in 1965 when eight people died in five separate accidents. Since then, many climbers have perished while attempting these dangerous peaks, including Spencer James Nelson in 2010.
In fact, just before leaving for this trip, I had learned that there was a missing hiker on the Maroon Bells. This news had cast a shadow on the trip and I had hoped he was found safely. The hiker was a New York City Paramedic named Lenny and had not reported to work. It later turned out that he took a fall and perished on North Maroon and was found the very same day we arrived.
Given the danger factor and overall awesome factor surrounding the fact that I was planning to complete the 14ers on these deadly mountains, I was quite nervous the week leading up to this trip. I think I had started packing four or five days before the trip, which is uncommon for even me and my neurotic trip planning. To make matters even worse, the trip had quite a few loose ends on the logistics side of things – originally I had planned to head-out Tuesday night with my climbing partner, Sarah, we’d climb some mountains, and then our other climbing partner, Ethan, would join us at Crater Lake on either Saturday or Sunday. Then a few wrenches got thrown into the mix – Sarah found out she had to work a cycling event on Sunday, and Ethan would be unable to join us on Friday. To make matters even more interesting, my Jeep Wrangler came up with some mechanical issues the day before we were supposed to leave. It was not looking good for team Payne. I called Sarah and we finally worked out all the details. Ethan would not be joining us after-all, and Sarah could drive. Crisis averted.
I decided to backpack using my Osprey Talon 44 instead of my regular backpacking pack – the huge and insane discontinued Dana Design Terraplane - a monstrous 95 Liter pack. Instead, I opted for the smaller 44 Liter pack so that I would force myself to take less gear and food and hopefully save some damage to my knees, which were still recovering from the massive 45 mile trip Sarah and I took last year to the Chicago Basin. To round things out, I opted to also purchase a knee brace, in hopes of preventing pain and further damage on this trip.
Choosing camera equipment for a trip such as this was a challenge, especially given the fact that I wanted to keep my over-all weight low without sacrificing my ability to take great photos. So, I opted to bring my Gitzo carbon-fiber tripod (which is quite solid and somewhat heavy despite being crafted out of carbon-fiber), Nikon D7000, a few filters, a shutter release cable (for long exposures), and two lenses – the Tokina 11-16 f/2.8 and the Nikkor 18-105 VR f/3.5-5.6. This would give me the ability to shoot very wide shots and some versatility with a zoom in the 18-105.
Day 1: The drive in
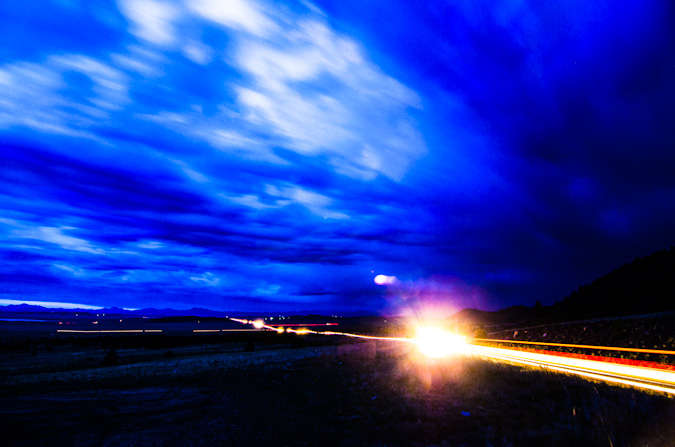
Loaded-up and ready to rock – Sarah picked me up from my house in Colorado Springs at 7 PM. We departed for our speedy adventure up Highway 24, which afforded us some pretty gruesome views of the damage caused by the Waldo Canyon Fire just the month prior. We stopped at the top of Wilkerson Pass to check-out the remnants of a thunderstorm there, hoping to capture some of that footage on film; however, all I was able to get was a long exposure of the cars driving through South Park below.
Thanks to some recon data provided by 14ers.com member Bill Wood, I knew our goal was to find the over-night parking lot just below the Maroon Lake trailhead. We found that lot at around midnight and prepared for what would become a very short 4-hour nap in the back of Sarah’s skinny pick-up truck.
Day 2: The backpack in to Crater Lake and an attempt on Maroon Peak
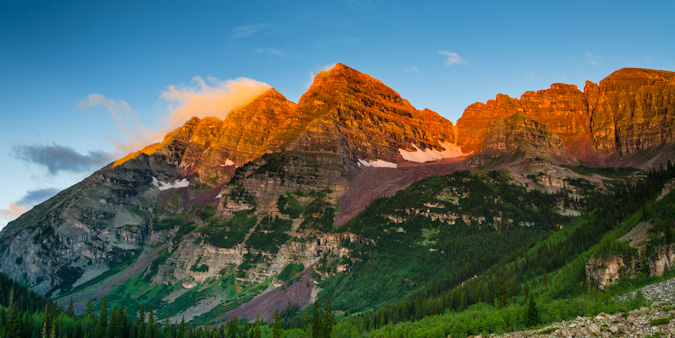
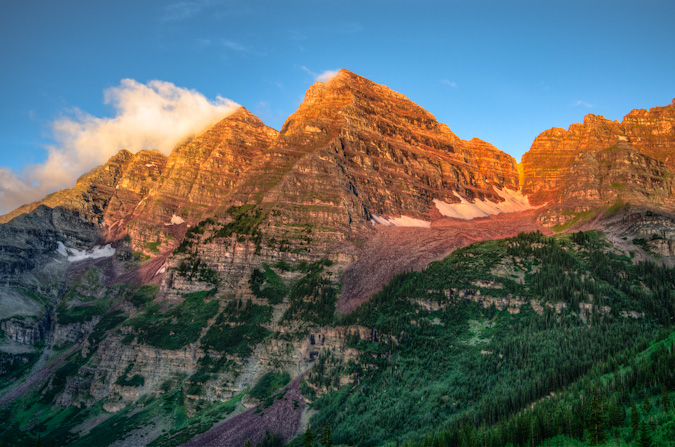
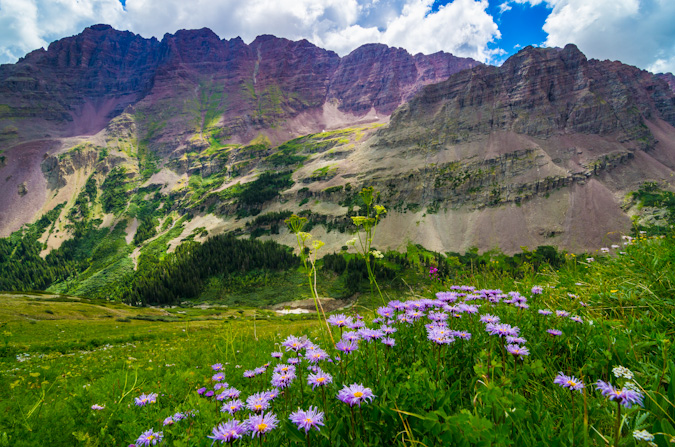
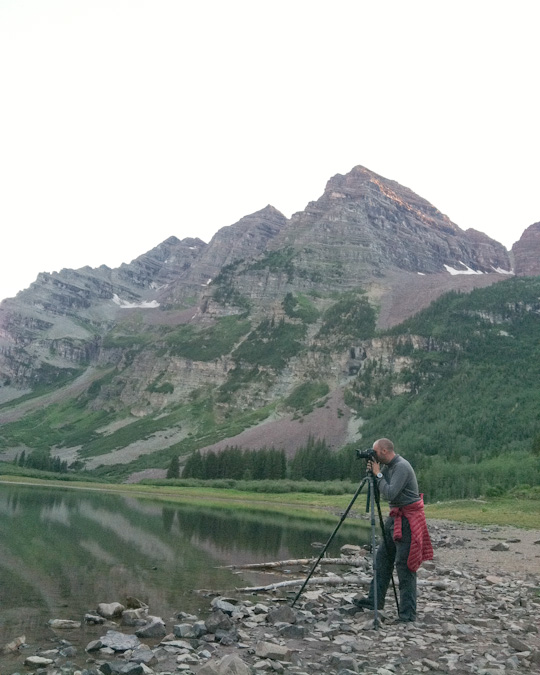
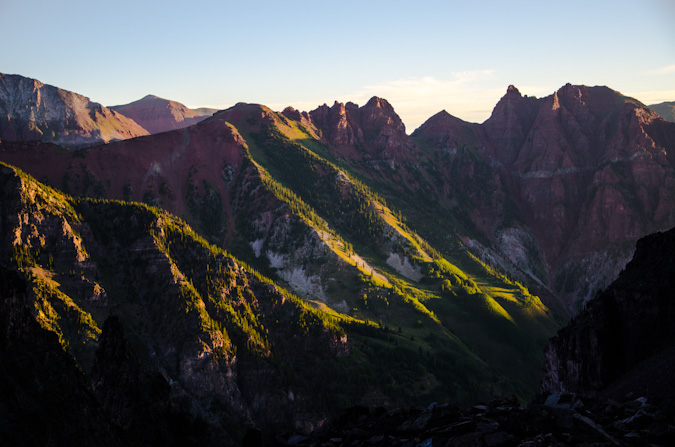
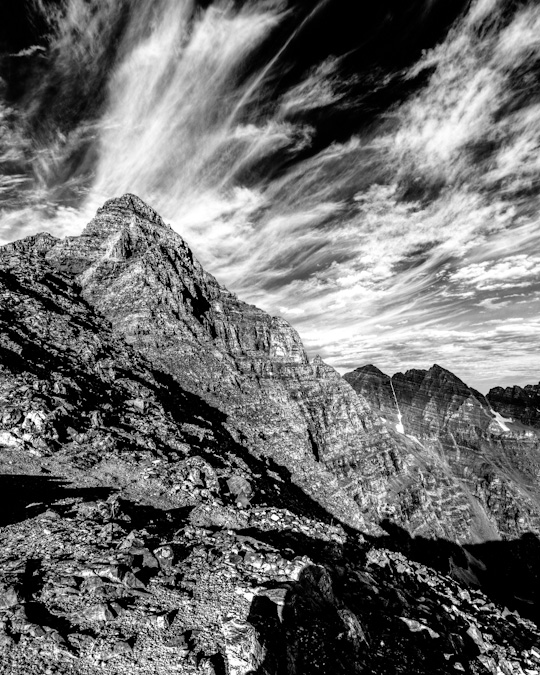
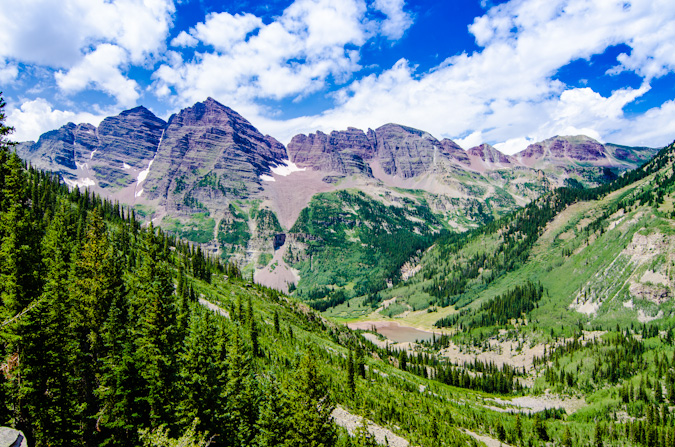
We were rudely awoken at around 3:45 AM by some guys next to us prepping for their hike, who were loud and even making jokes about how we were probably not too happy about how loud they were. Such is life at popular 14er trailheads, even on a Wednesday morning. We debated the night before about our intents and goals for this first day in the area, and decided to wake-up at a reasonable time (4:30 AM) to begin backpacking up into the basin to find a campsite, with the option to attempt Maroon Peak (weather dependent). We rose groggily from the truck and prepared our backpacks, which for me is always an interesting challenge with a large tripod attached. We began the hike in the dark and were passed quickly by a solo hiker looking to tackle Pyramid Peak by himself. Best of luck to that guy. The hike up towards Crater Lake was quite uneventful, and after a quick 1.5 miles, we stopped shortly before sunrise so I could quickly bushwhack up a hillside to photograph the Maroon Bells while the light was good. I did several versions at various focal lengths and lighting.
During this photo shoot, I made a nearly dire mistake when I switched lenses. I put my Tokina in my camera bag, which was attached to my chest. I forgot to zip it up, so when I leaned over, the lens rolled out onto the rocks. Fortunately, absolutely no damage was done. Close call!
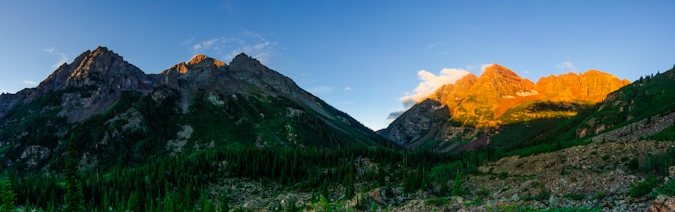
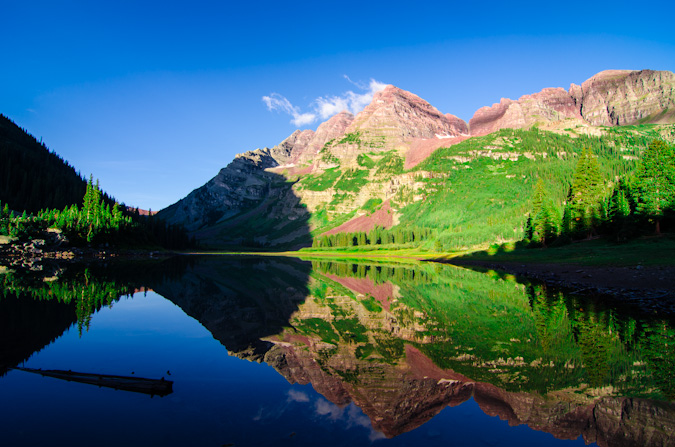
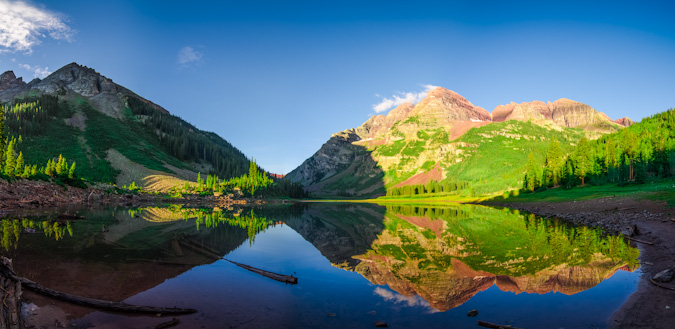
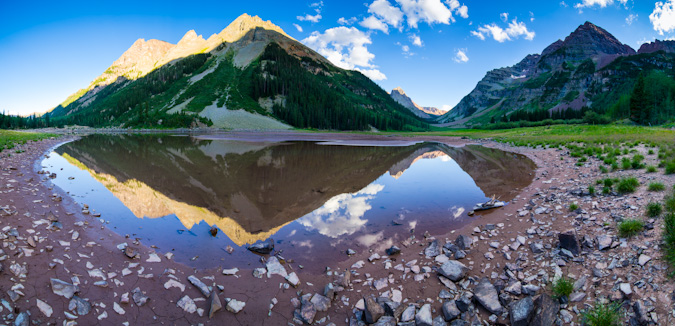
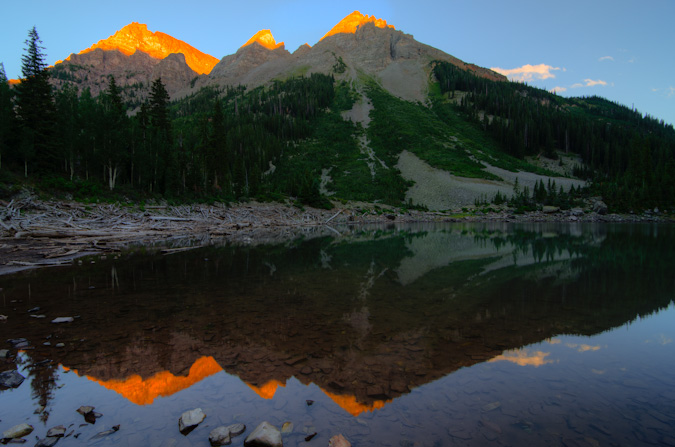
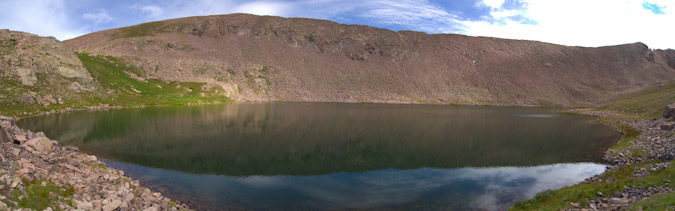
After shooting sunrise at the Maroon Bells, we made our way up the rest of the way to Crater Lake, where we would try to locate a campsite. Upon first arrival at the lake, the reflections of the Maroon Bells in the very still water and post-sunrise light were absolutely fantastic.
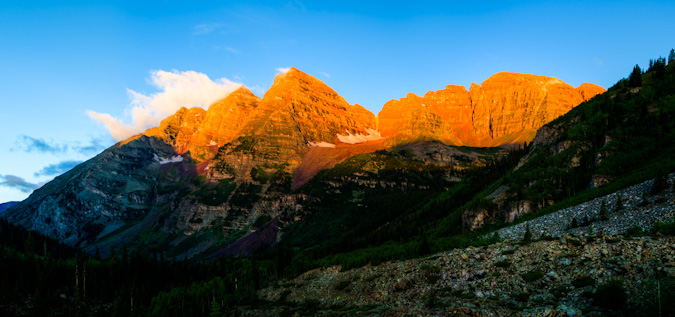
A wider view, including the Pyramid Peak massif:
The search for a campsite was on, and I had been given some good tips from Bill Wood that we should shoot for campsites 6-11. We finally landed on campsite 9, slightly south and west of Crater Lake on a large hillside. Sarah later joked it was no wonder the campsite was open, because you have to hike up a hill away from the water to reach it.
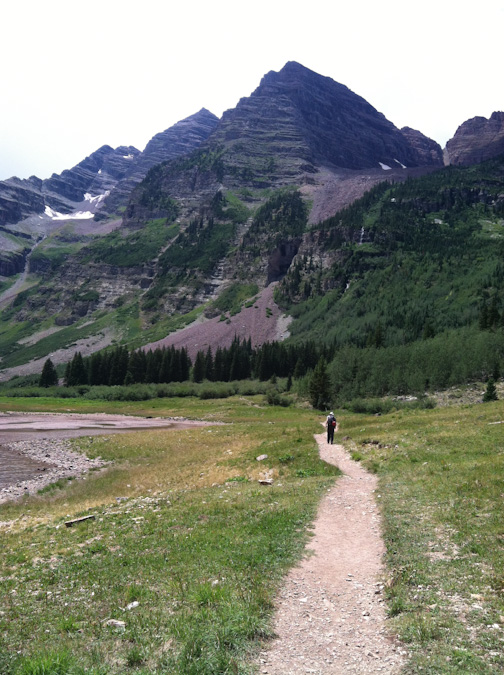
We quickly made camp, setting-up the tent and all of our stuff, and finally had summit packs ready by 8 AM. Not exactly the best start time for a 14er of Maroon’s caliber, but we thought we’d give it a shot either way, so off we went. We followed the trail quite a long ways up the valley to the south and reached the oh-so recognizable warped tree described by the 14ers.com guide.
After the tree, the real work was before us, and the Maroon Peak southeast slopes trail lay before us in all of its steep glory. The trail started quite steeply, much like the Manitou Incline.
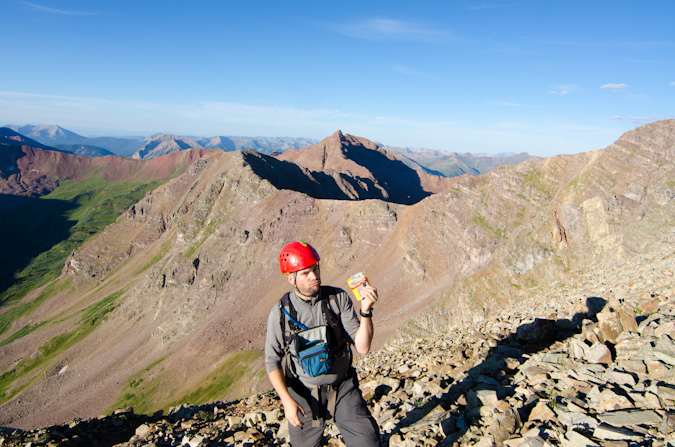
We reached well above tree-line before my stomach started to really give me issues. I could not figure out why I was not feeling well, so we stopped at around 12,400 ft. This turned out to work out just fine, because weather was starting to build above, the clouds that were hanging low all morning had never really left. I later figured out that the culprit to my stomach issue was the Cliff Bar Builder’s Bar I had ate.
Sarah and I sat around for a bit, contemplating our options.
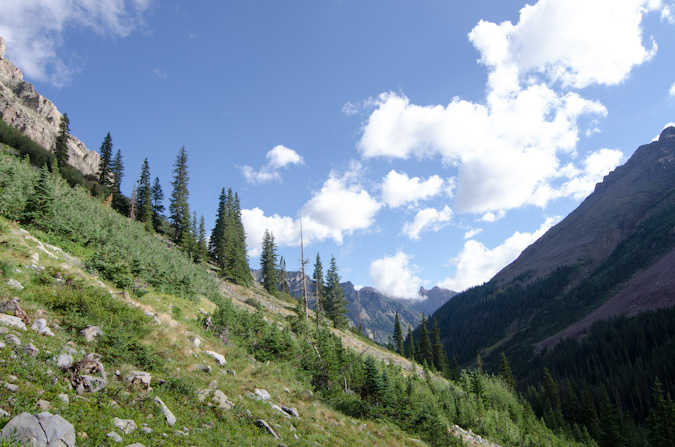
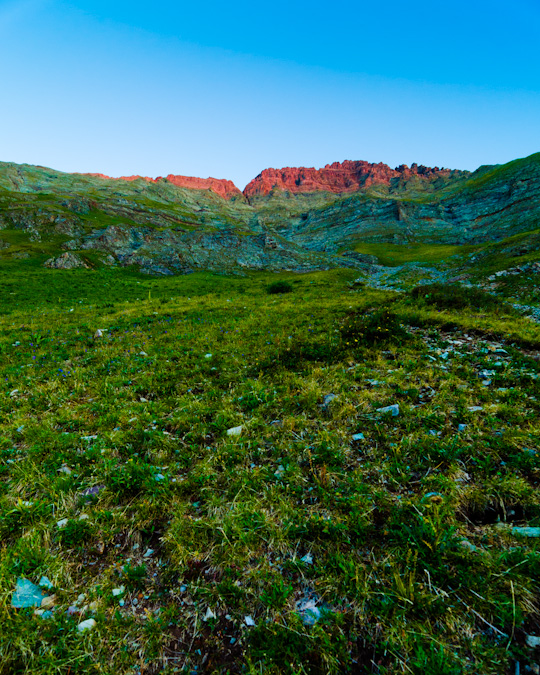
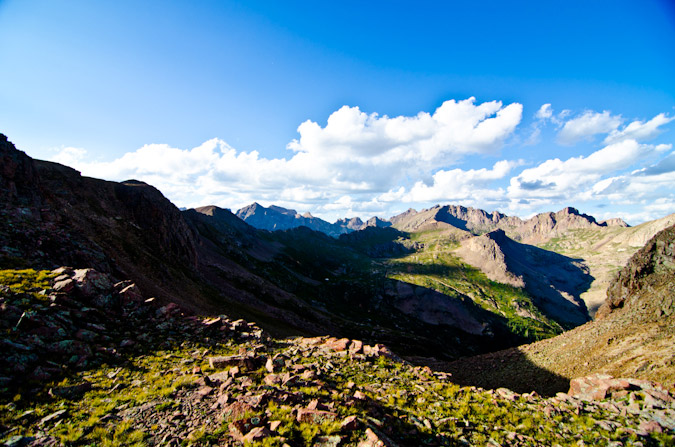
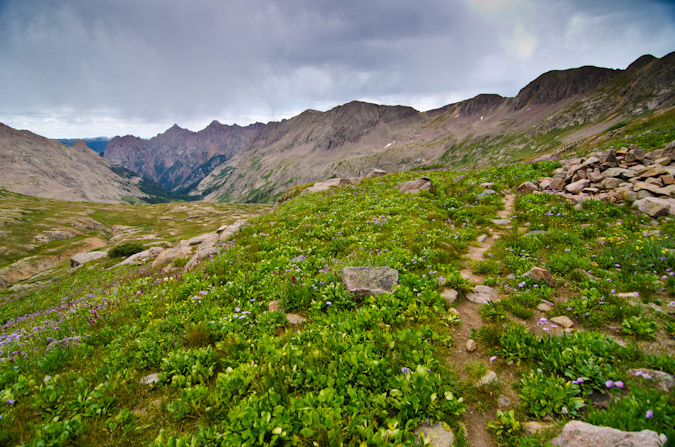
We had picked a pretty great place to stop. The views in all directions were great. We did not feel rushed at all.
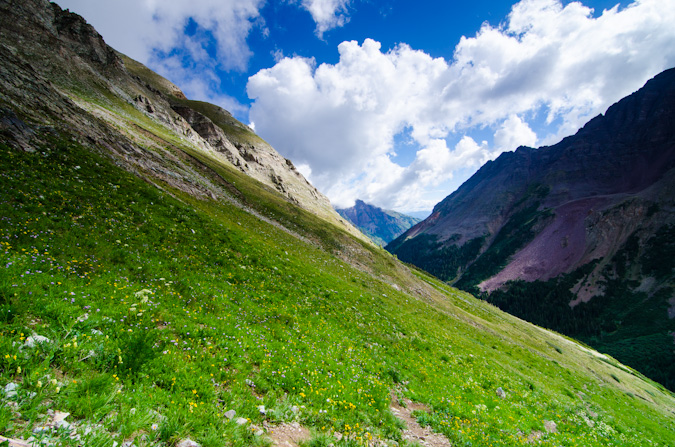
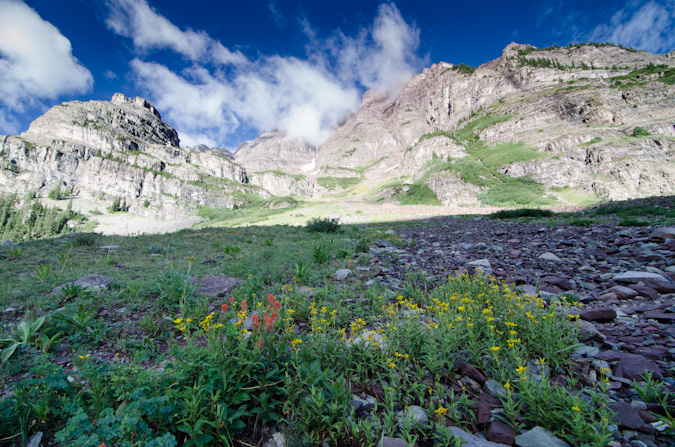
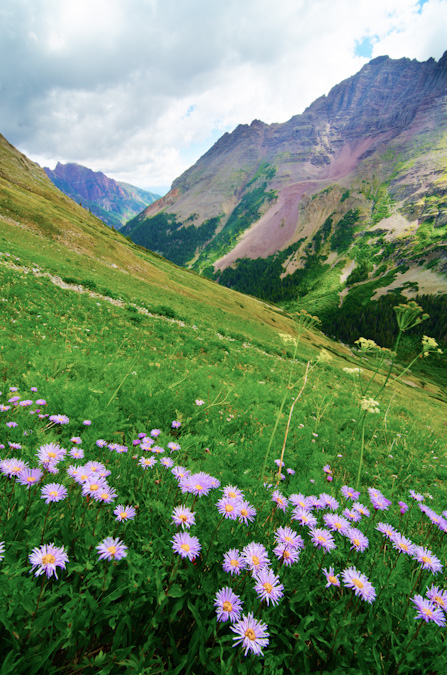
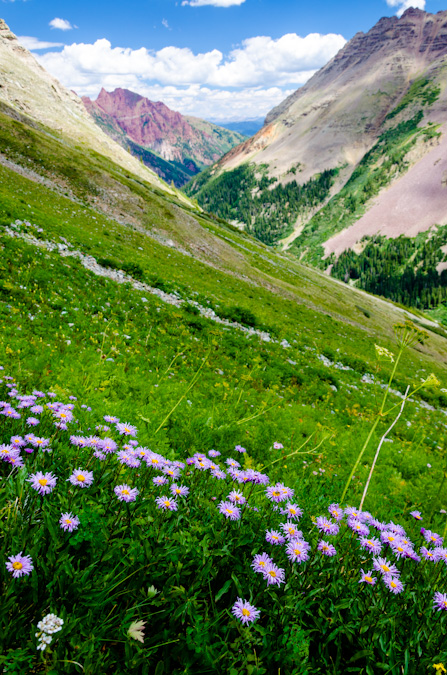
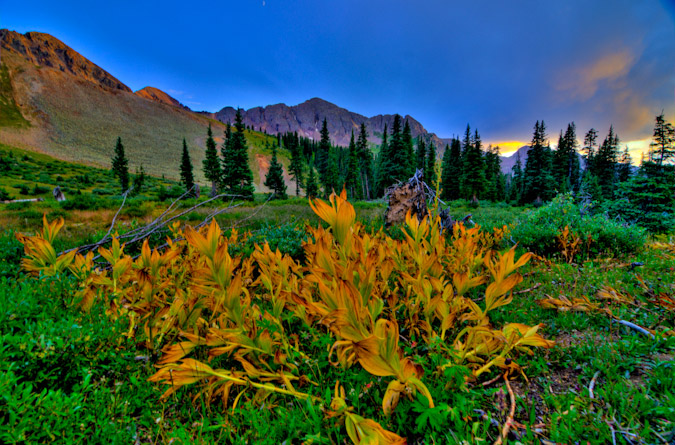
Even though my stomach was in pain, we found ourselves near a large meadow of wildflowers, which made for some fun photography.
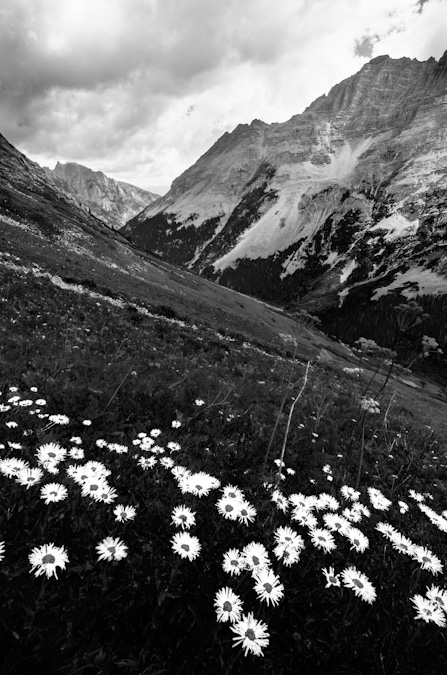
It was a really cool spot, and since it seemed were not going to do any more climbing, I took the liberty of taking a ton of shots.
We headed on down and later ran into a group of three guys coming down as well. They were attempting Maroon as well and were turned back due to the weather just short of the ridge. These three guys were very cool, and we had a nice conversation about the area and climbing the Centennials. We all headed on down to the main trail, where we intersected two more hikers coming up to investigate the location of the Maroon Peak trail turn-off. This would not be our last encounter with these two guys, as we would later run into them twice more the following day.
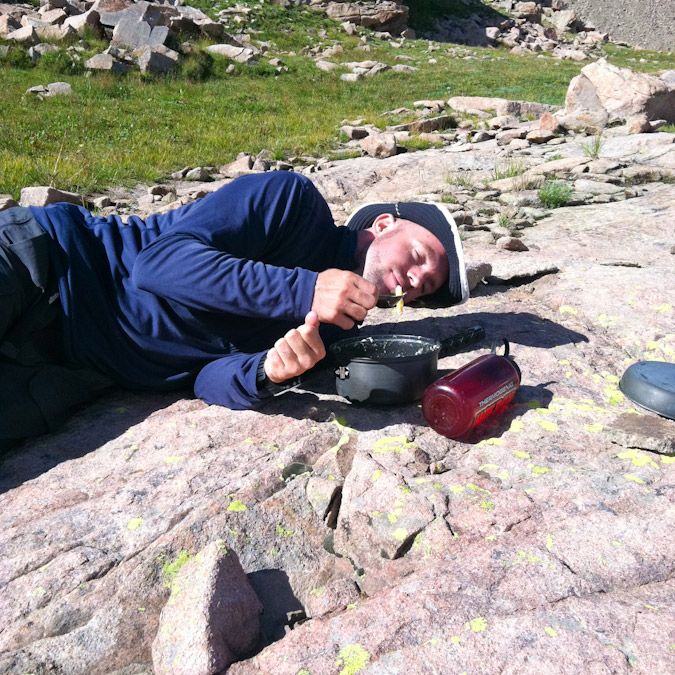
Sarah and I hiked back to camp and took naps. After our short naps, we cooked up some food and I prepared my camera equipment for a walk down to Crater Lake for sunset shots and later night photography.
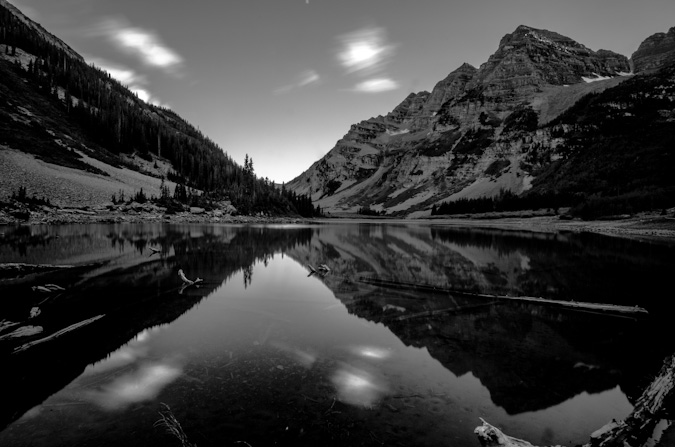
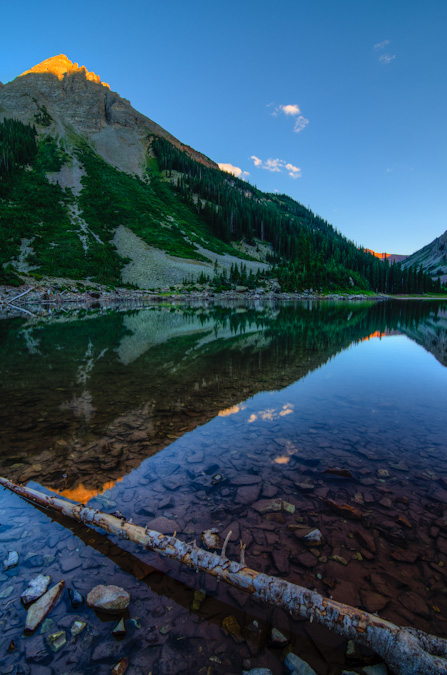
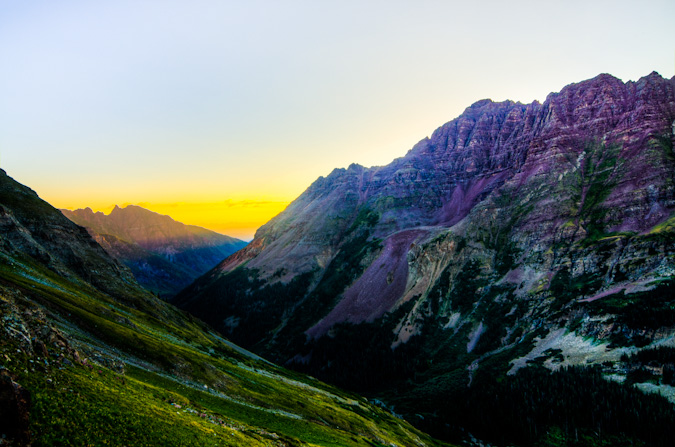
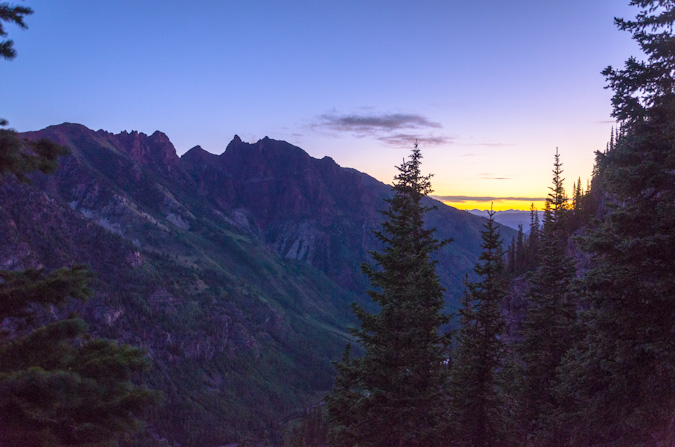
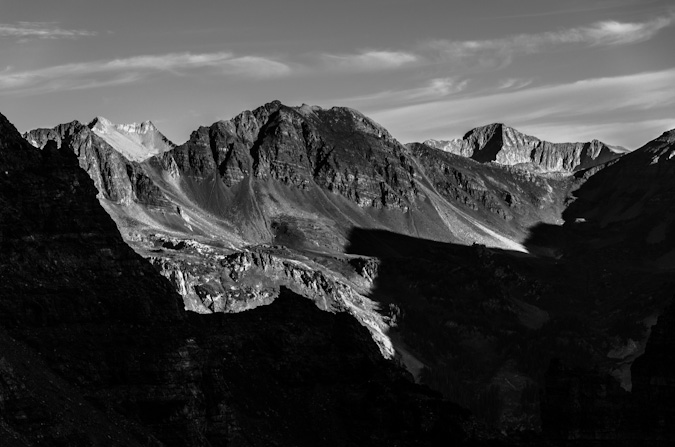
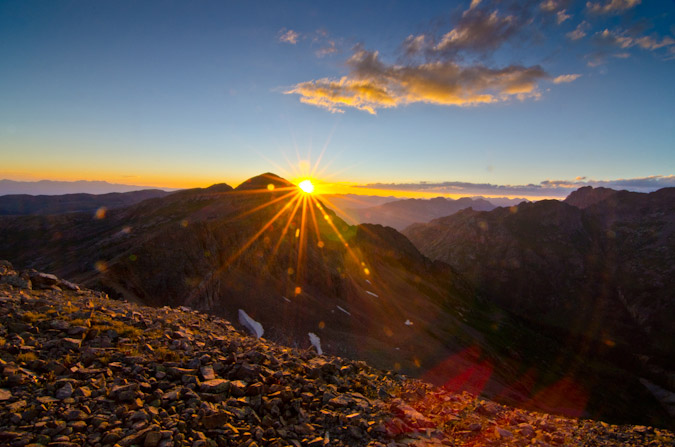
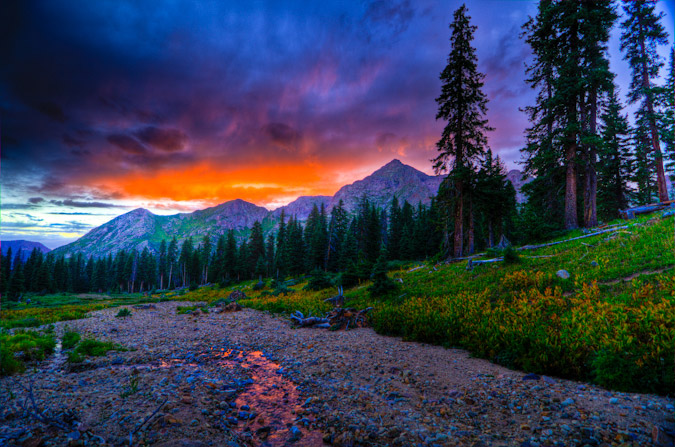
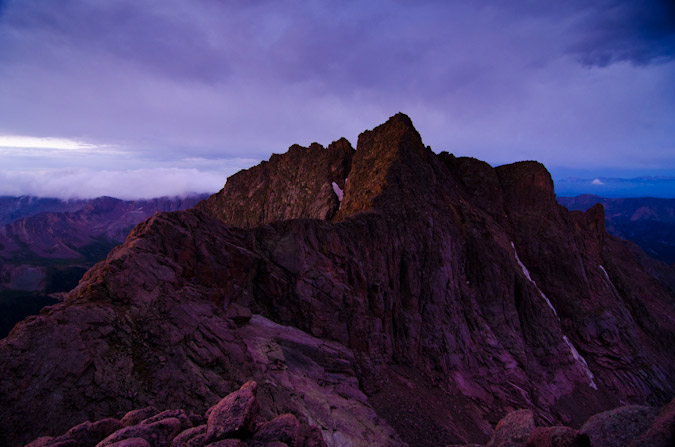
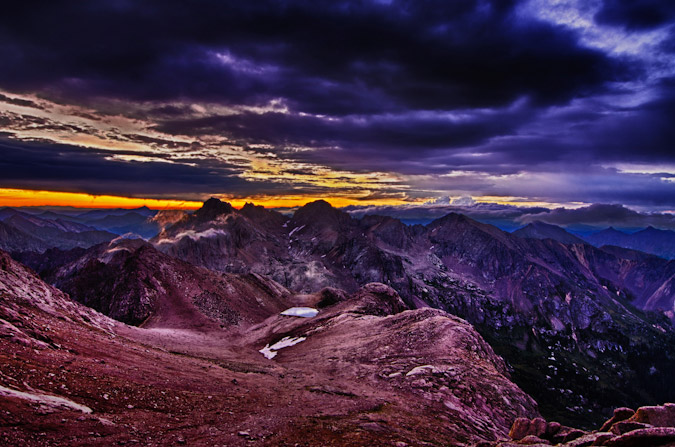
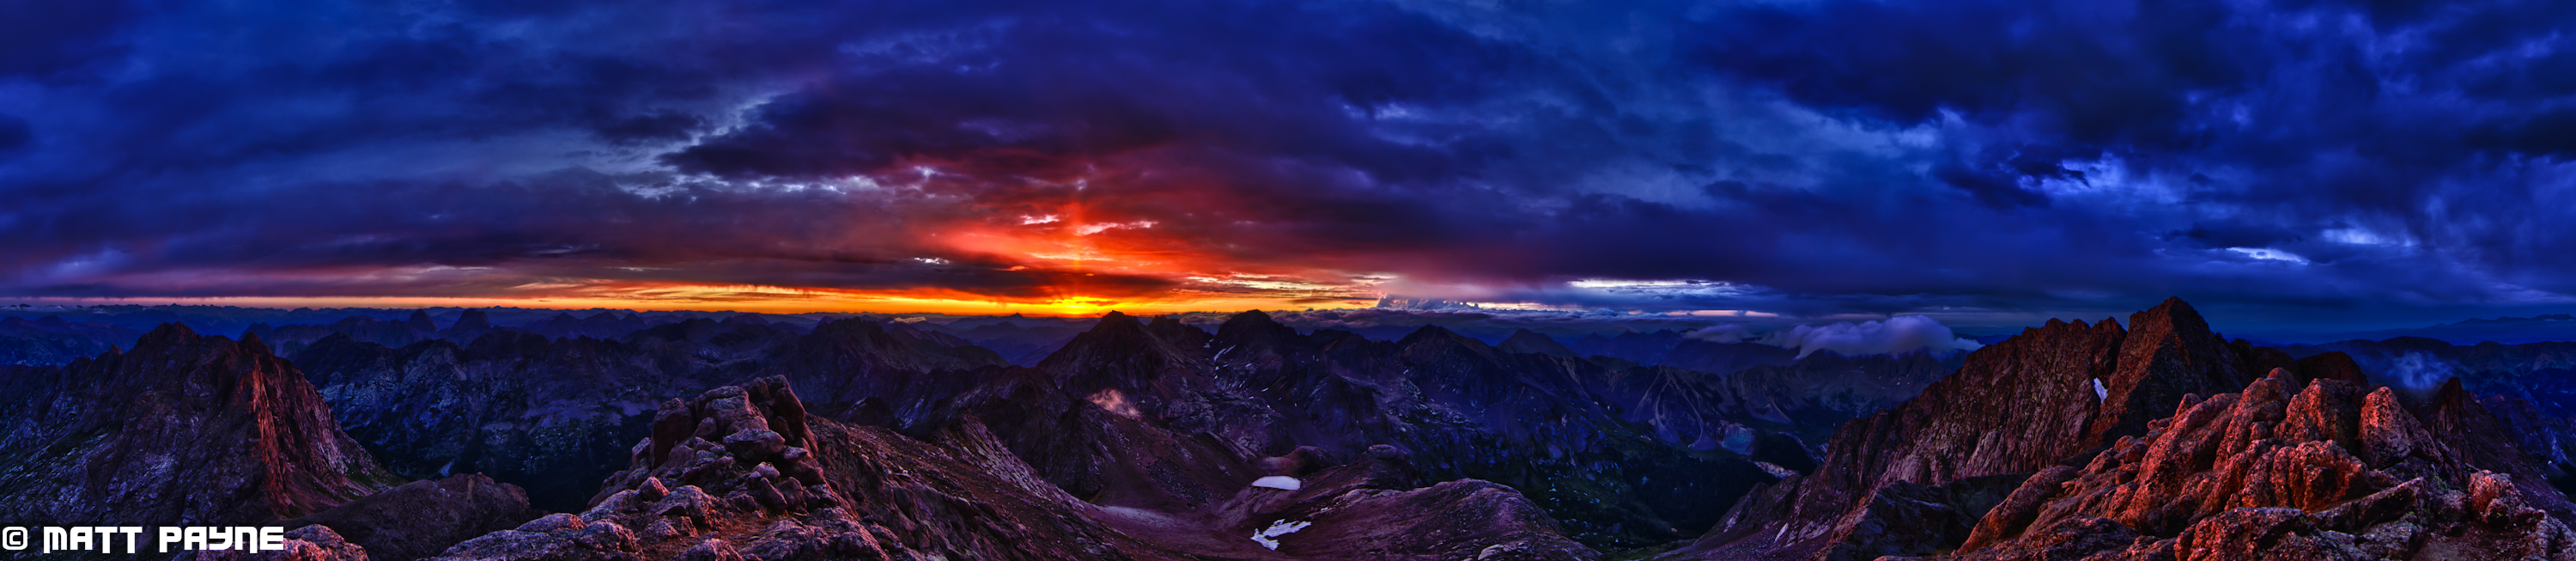
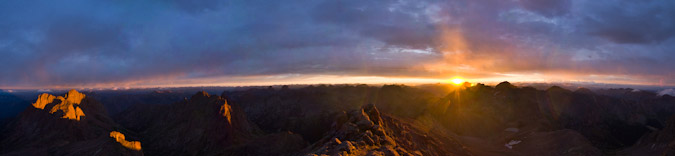
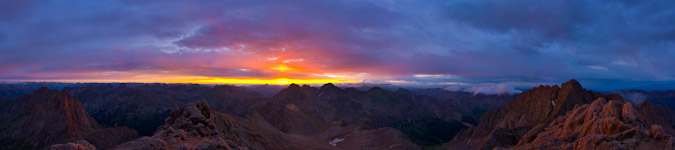
Upon arriving at the lake, I was immediately in my happy place, having many quite interesting landscape shots to attempt. I waited for the sun to set and the magic started to happen, lighting up the tips of the surrounding mountains to our East, which were part of the Pyramid Peak massif. I also tried out my ND filter and did some longer exposures of the clouds and Maroon Peak.
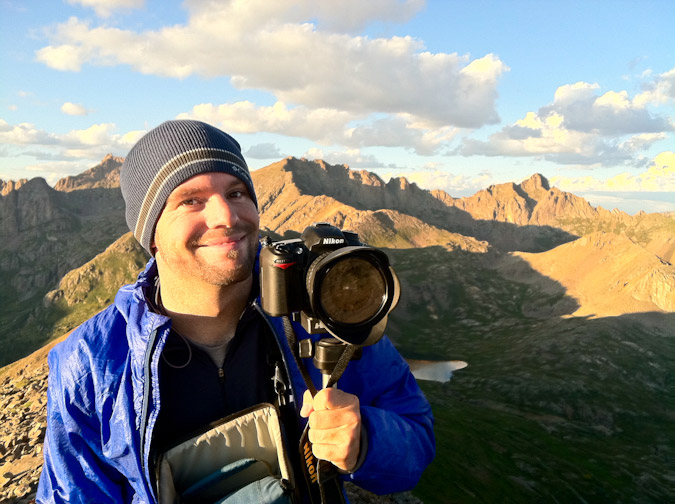
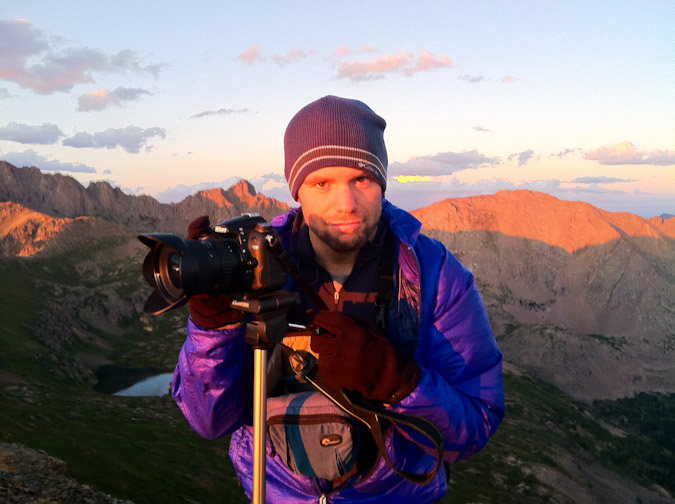
Sarah was able to sneak a shot of me geeking out on my camera.
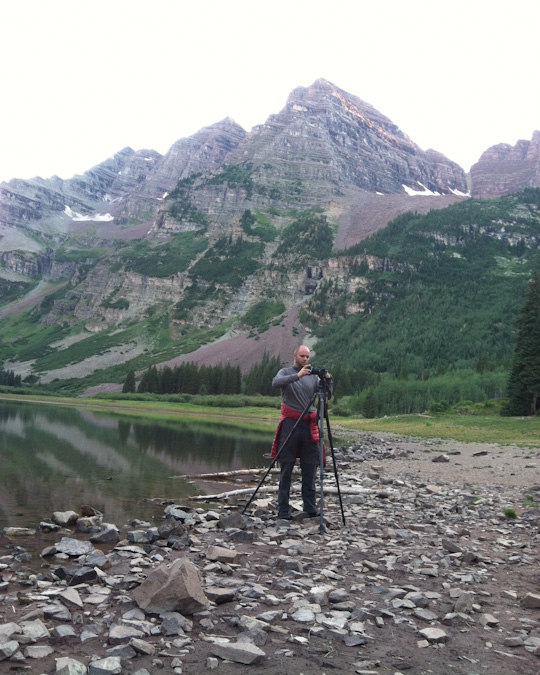
Composing the shot...
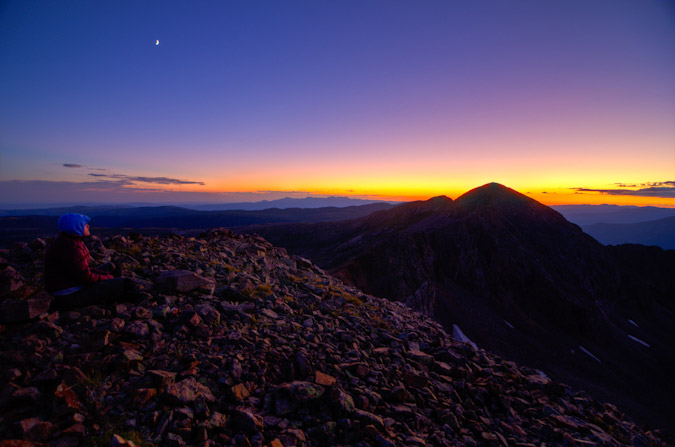
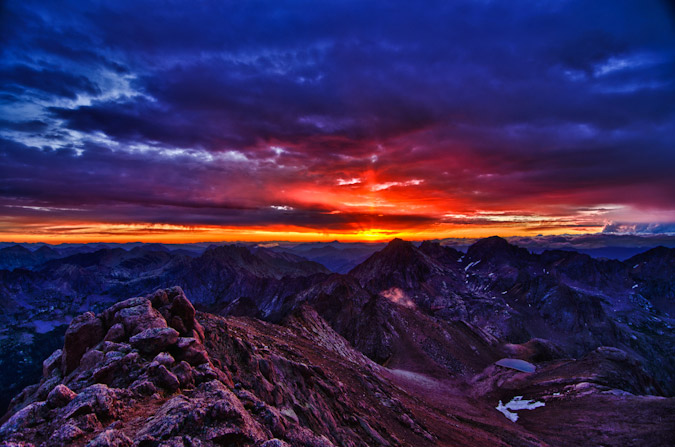
The sun was setting and the light started doing its thing.
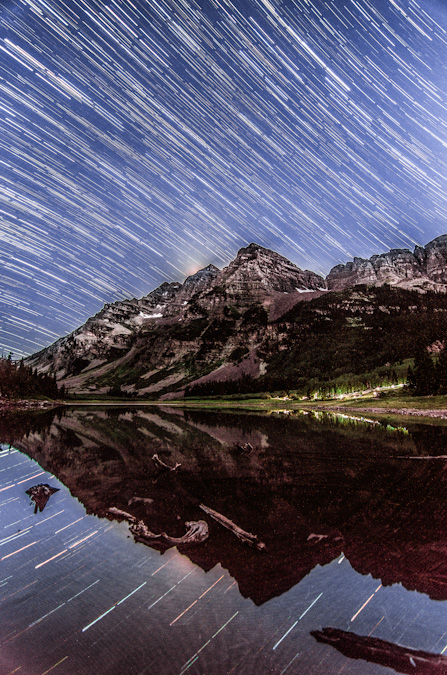
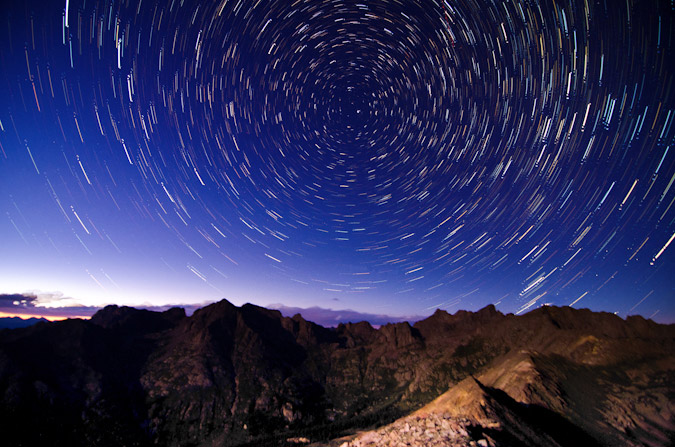
After the sun went down, Sarah went back to the tent to get some sleep. I stayed out and set-up for something I had been planning for a long time - star trails over the Maroon Bells, reflected in Crater Lake. This worked out pretty nicely, there was a group hiking in the dark up the trail and so my long exposures got their head lamps in the shot too, which I opted to keep in. The "break" in the trails is from my intervalometer stopping unexpectedly on me and me having to restart the sequence. Bummer! Still turned out great though, I think. You can see where the moon had just set over Maroon Peak's upper left cliff bands.
While photographing the star trails using the intervalometer on my camera, two sets of eyes appeared near me at the lake. I rose and walked closer to find two deer, one a quite large buck. I was both relieved and amazed. I’m not really sure how well I could defend myself against a mountain lion.
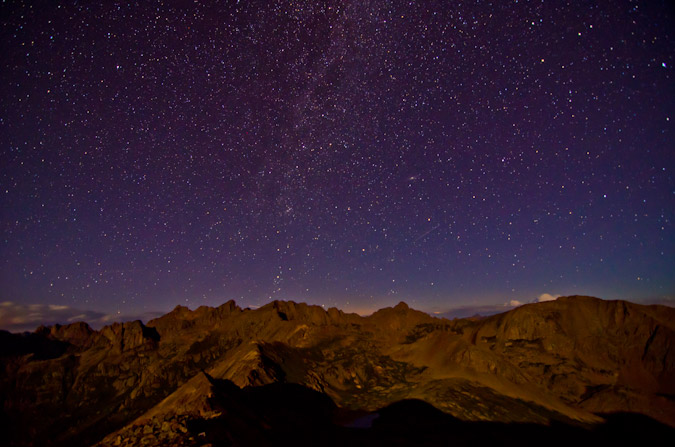
After shooting star trails above the Maroon Bells, I took advantage of the scene and clear night and took some fantastic shots of the Milky Way. My two favorite was this single shot of the Milky Way reflected in the lake, and the next one, which is a 9-shot panoramic of the Milky Way above the Pyramid Peak massif. Click on the single shot if you'd like to learn more or purchase it.
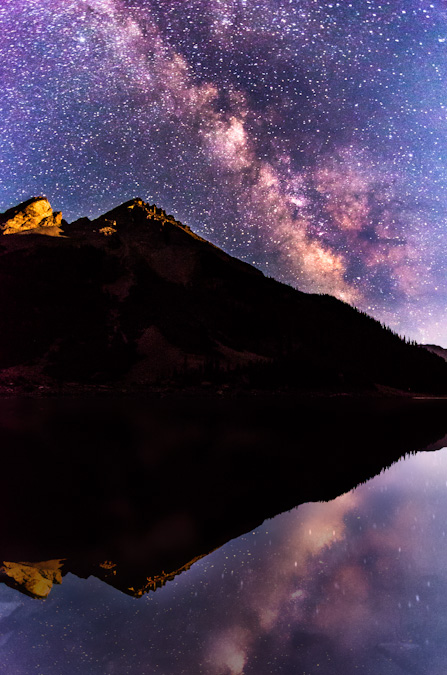
I just could not get over how clear the sky was!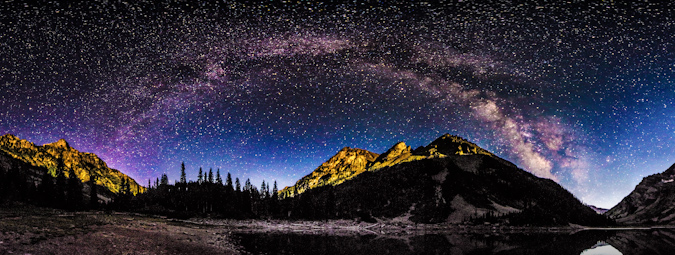
After capturing what I felt at the time were some great photos, I decided it was time to hit the sack, since our departure time for Maroon Peak was looming just a few hours away. I came back to the tent, where I found Sarah wide awake still. Apparently a field mouse had managed to find our tent and was crawling over the top of it, which kept freaking Sarah out. In fact, about 30 minutes later, the mouse bumped past the side of the tent next to Sarah’s face, which caused her to freak out and elbow me like she was trying to win a Karate match. It was awesome.
Day 3: Early start and successful summit of Maroon Peak - 14,156 ft.
Sarah’s iPhone alarm sounded off and sounded just like a self-destruct sequence, in fact, it was just like this YouTube video.
Mixed with my dream that President Obama had confiscated the valley we were in for national security reasons, and my head was all kinds of whacked out – too much, too early.
Nonetheless, we rose like zombies and hit the trail at a brisk pace at a quarter past 4 AM and head back up the valley to the Maroon Peak turn-off, in the dark. By the time we were working our way up the steep trail, the sun had begun to illuminate the mountainside and we were moving at a very steady pace.
Two of the three climbers from the prior day passed us quickly, having a deadline to meet – they were extremely fast – good on them! We kept our pace going at a good rate and eventually caught up with the two gentleman from the day before that were looking for the trail.
They were moving very slowly and had mentioned that there was only two others ahead of them other than the two we knew about – a photographer and their friend.
A photographer you say? This piqued my interest instantly. Who was ahead of me? Did I know them or of them?
The trail was one of the steepest I could remember. Exhausting, but a wonderful workout all the same.
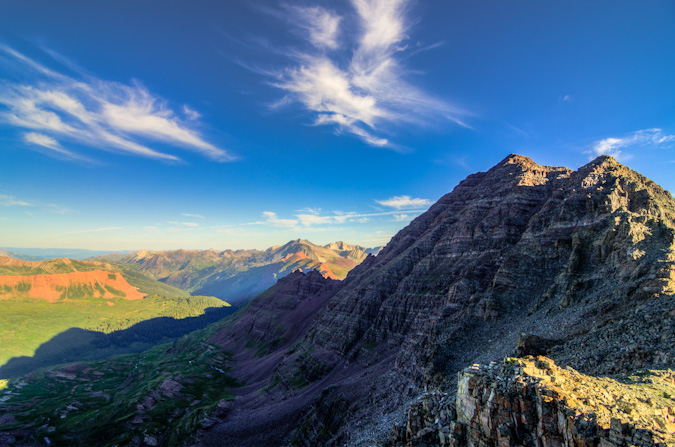
Before long at all, Sarah and I crested the ridge after 2,800 feet of grueling non-stop high angle grinding. As Bill Middlebrook describes on the 14ers.com route description, “Conquering the East Slope is a major achievement, but now the more technical terrain remains.” Indeed. Time to refuel.
Sarah had maintained an excellent pace up Maroon Peak so far and was kicking my butt. Did I mention that while I'm at home editing photos, she's out racing single speed mountain bikes? Yeah. Wonder who's in better shape?
The remaining section of the ridge was more of the same; however, we had much better views of the surrounding area.
Once we reached the ridge, it was only a short section of maybe 400 feet to tackle before reaching the hard part.
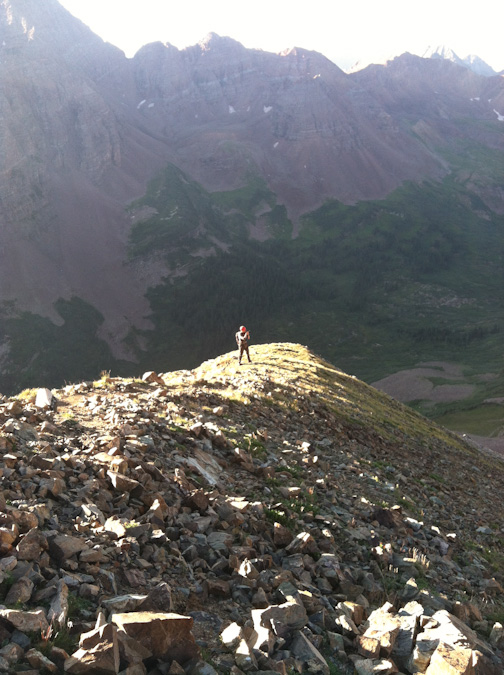
The ridge section was still fairly steep, but the excitement of seeing the rest of Maroon Peak's impressive face kept us moving quickly.
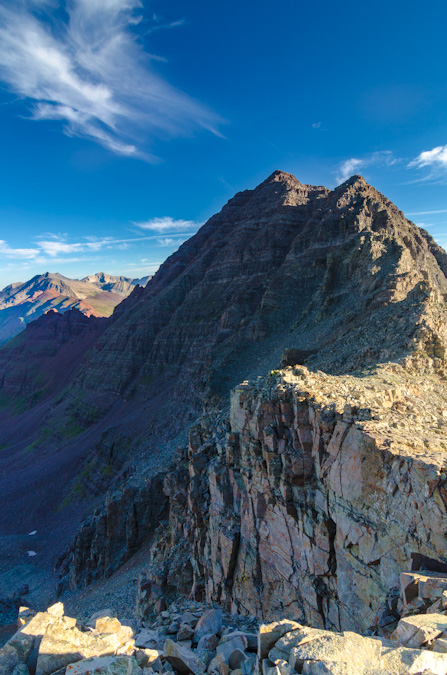
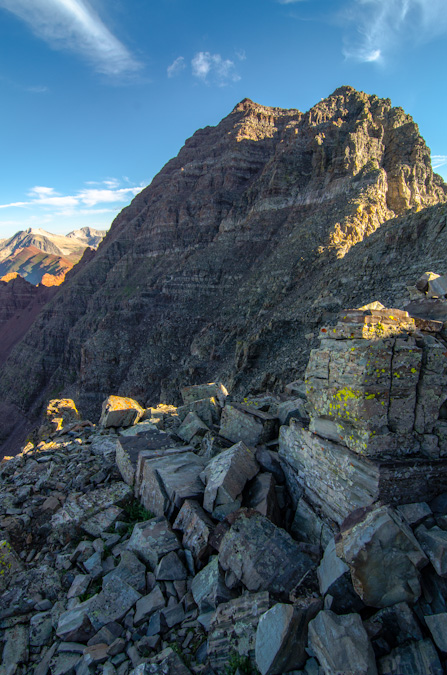
Reaching the crest of the final ridge was exhilarating as always, made especially sweet by the awesome visage of Maroon Peak, which loomed in front of us like a giant sentinel.
Sarah and I followed the rest of the route religiously, having had a bad experience off-route last year on Snowmass. We took a break for food, and I ate another Honey Stinger Waffle which was delicious – these things are the real deal. The fun begins.

From the ridge crest, the route went very easily, much to my surprise and partial disappointment. I was expecting an epic class 3 adventure; however, Maroon Peak is more like class 2 with a sprinkle of class 3 in some lame locations. It looked intimidating as hell though.
The trail is very obvious most of the route and there are actually only a few spots you need to actually make a decision and “climb.” That being said, the terrain was still quite dangerous and we were vigilant. The views... oh man. So amazing. Intense.
Shortly after entering the more dangerous terrain, we ran into the other companion of the two guys we had passed earlier. He wanted to know how far behind they were. He was not very thrilled to learn about their slow pace, but the weather seemed to be holding so I felt like they still had a shot.
For the most part, the first section after the ridge involves following the trail up and over a bunch of small gendarmes near the ridgetop. As predicted, we found ourselves having to climb a small gully into a small and secluded alcove, which offered great views to the west.
Just at the top of this gully rested our next problem - a small gully with great hand and foot holds heading up.
On the other side of this gully, parts of Maroon Peak were back in view. The route certainly did not look obvious from here, but it worked out.
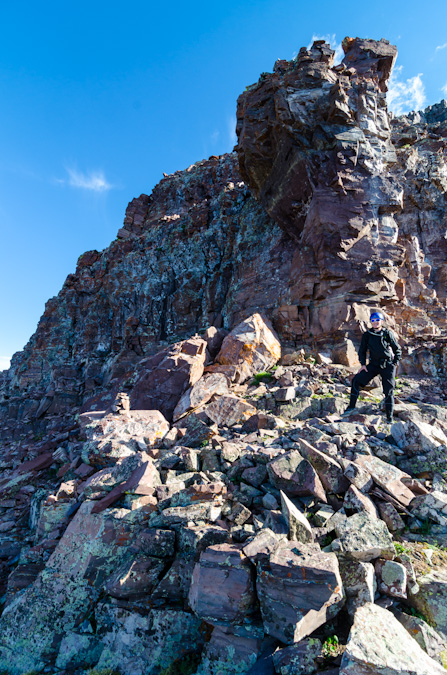
The most dangerous section was probably the set of gullies you can choose to ascend about 2/3 of the way through the route as pictured here.
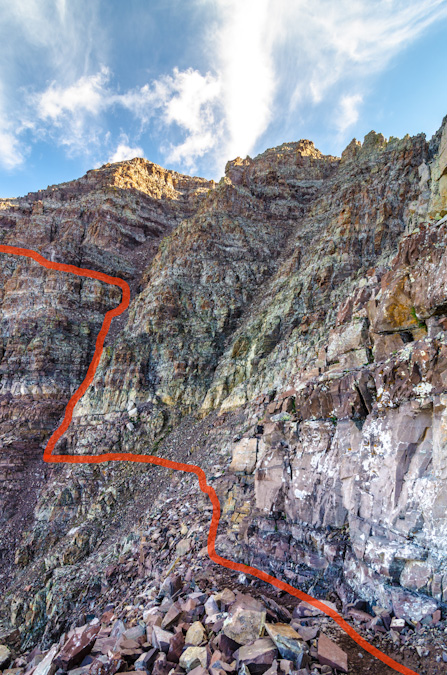
We chose to climb the second gully and then follow a ledge system to the left. I feel that under the right circumstances and a lot of climbers, this section could be quite dangerous due to rockfall. Most of the rest of the route seemed quite safe with the occasional ledge area that was exposed. It looks worse than it is, trust me. Here's a view from the top of the gully, looking back across where we had come from.
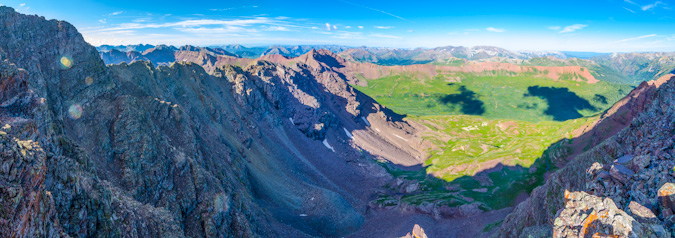
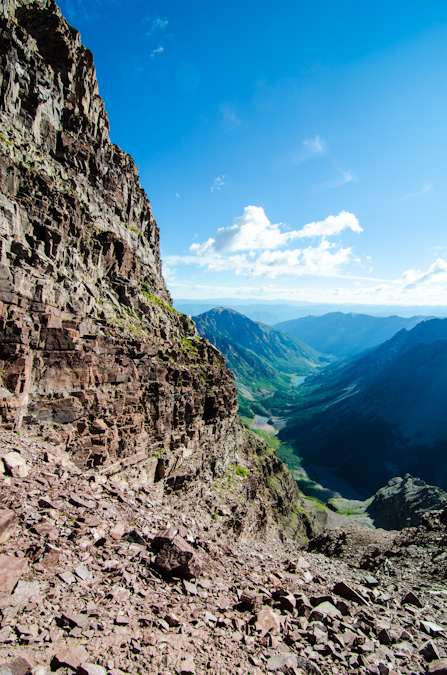
At this point it felt like a great time to stop and soak in the views. It does not get much better than this.
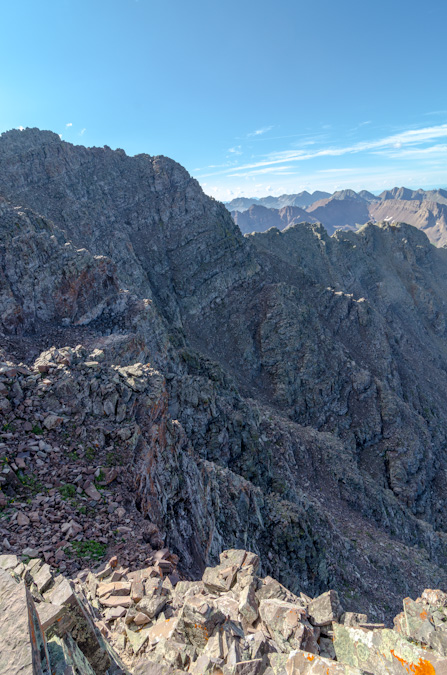
The rock features on Maroon Peak were quite remarkable and made for a wonderful hiking experience. There were many times where I kept saying to myself, "I'm really here, this is one awesome place!"
Looking up or down made you feel so small. The sheer ruggedness and steepness of these peaks is easy to appreciate.
The final stretch of the climb includes a large boring dirt and rock section that reminded me of Columbia Peak, meaning, it was fairly awful – the kind of stuff that goes two steps up and you slide one step down.
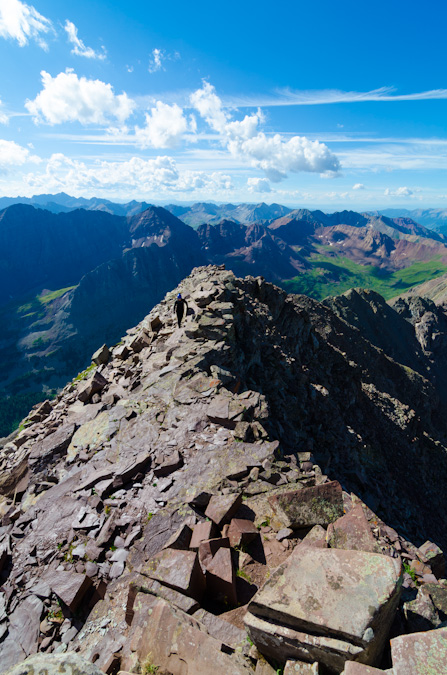
Once at the top of this area, you climb a really short but interesting ledge system onto the flank of the peak and follow a long series of quite solid and fun-to-explore ledges before reaching the final summit ridge.
Pyramid Peak dwarfed Sarah.
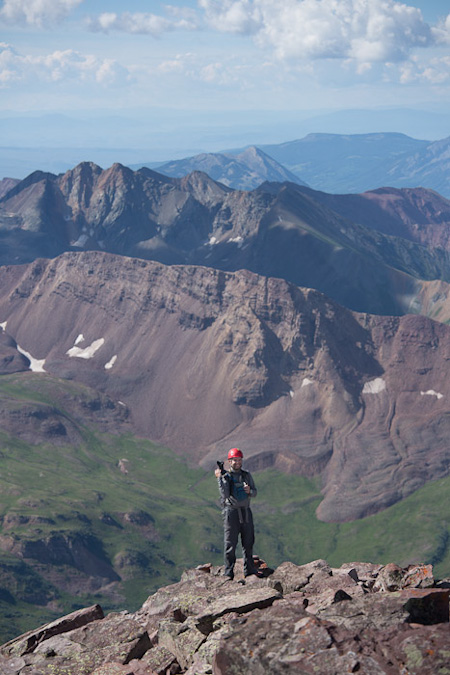
Sarah, while only equipped with an iPhone, took some awesome shots on this trip as well. One of my favorites was this one she took of my near the summit.
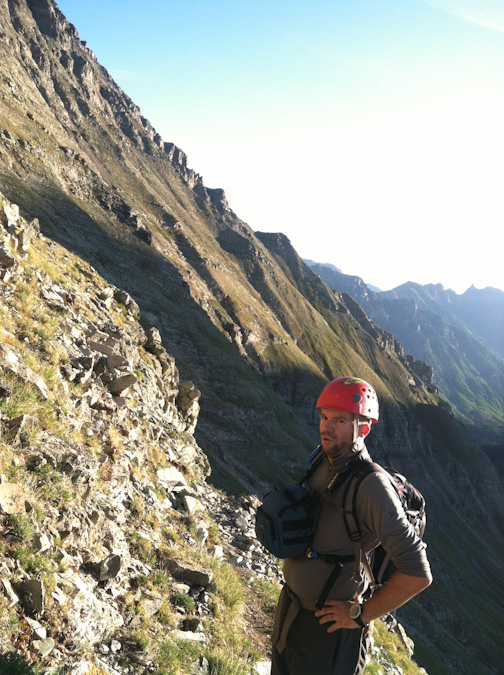
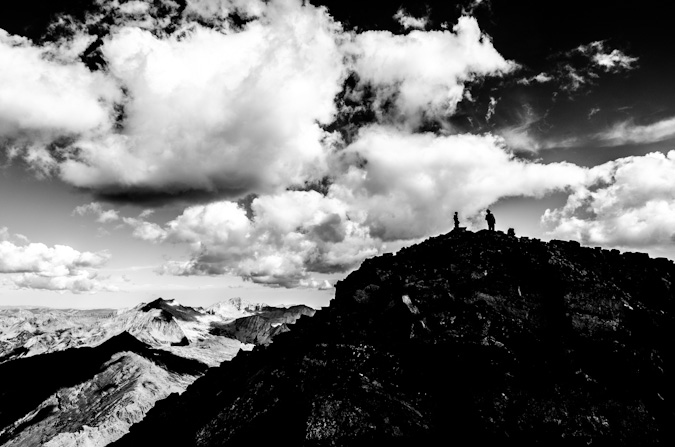
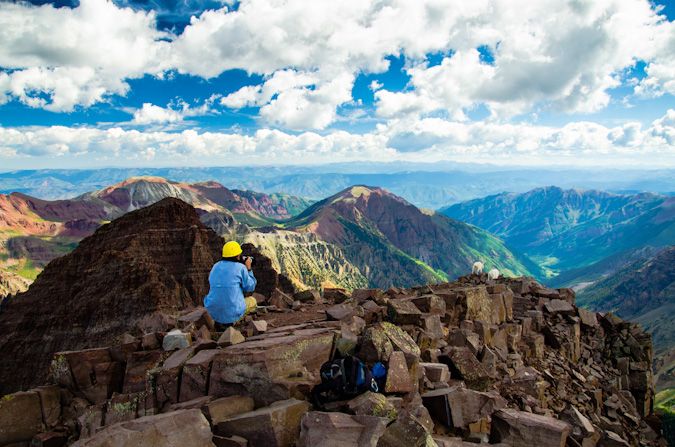
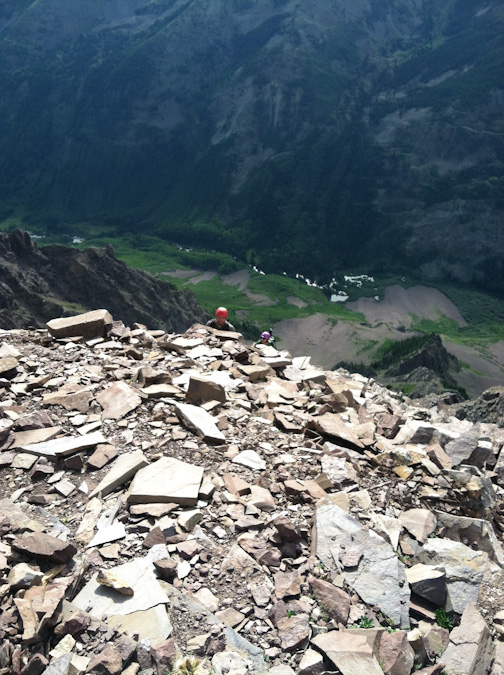
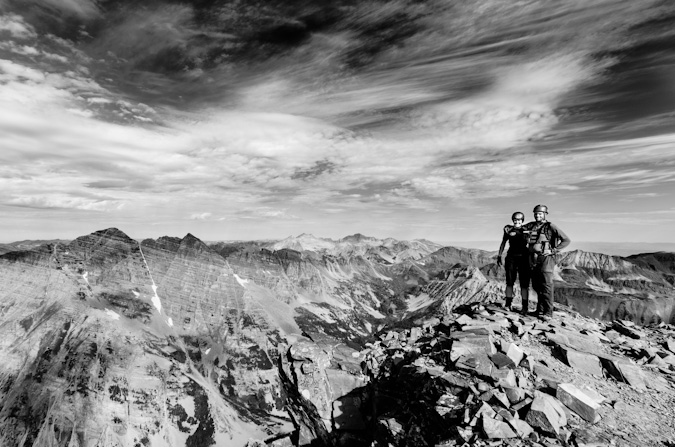
Upon reaching the final summit ridge, I saw a man with a yellow helmet on the summit, in fact, the same yellow Edelrid helmet my dad handed down to me and seen in the photos of him in this report. He yelled down at me that it “was a great photo” and to “stay put if I didn’t mind.” This must be the photographer we learned about. While I waited for the light to get right for him to take my shot, I took a high contrast shot of him and Sarah on the summit.
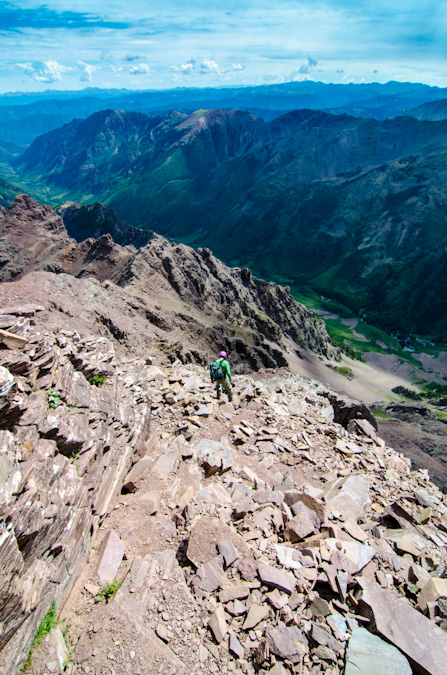
He then snapped off this cool shot of me climbing the final section to the summit.
We got up to join him and he pulled out his business card. It was none other than the legendary Glenn Randall. Readers may recall Glenn’s name from an article I wrote earlier this year where I shared my thoughts on the twenty best Colorado landscape photographers. In fact, Glenn’s revered in the mountaineering-photography community as a pioneer, for, as he later explained to me, he has photographed sunrise from thirty-eight 14ers. This is a most impressive feat. Glenn explained that he was just on a recon mission today, because he was going to be doing Maroon Peak tomorrow as well to photograph sunrise from there. He was setting waypoints and familiarizing himself with the route. He had just done sunrise at Pyramid Peak the day before. Glenn’s dedication to this sub-set of photography is most impressive – in order to achieve sunrise on a peak like Maroon Peak – he would need to begin hiking at midnight and carry over 20 pounds of photography equipment with him to the summit. I was humbled to have met such a great photographer that I had modeled a great deal of my own personal work after.
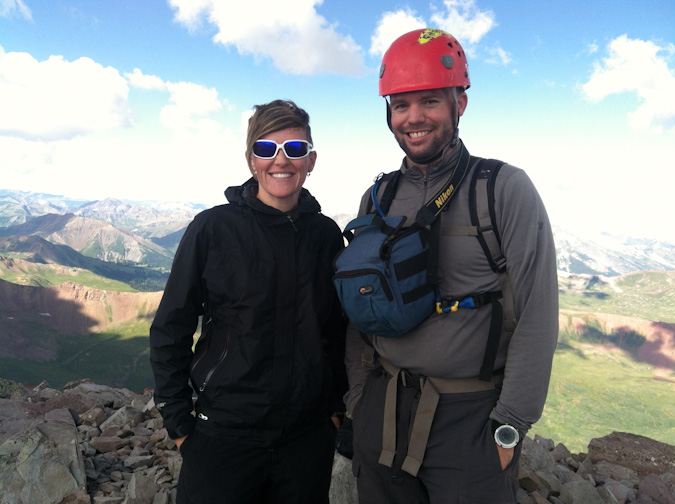
Glenn gladly took our photo with Sarah's phone.
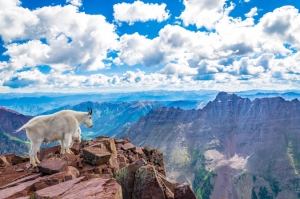
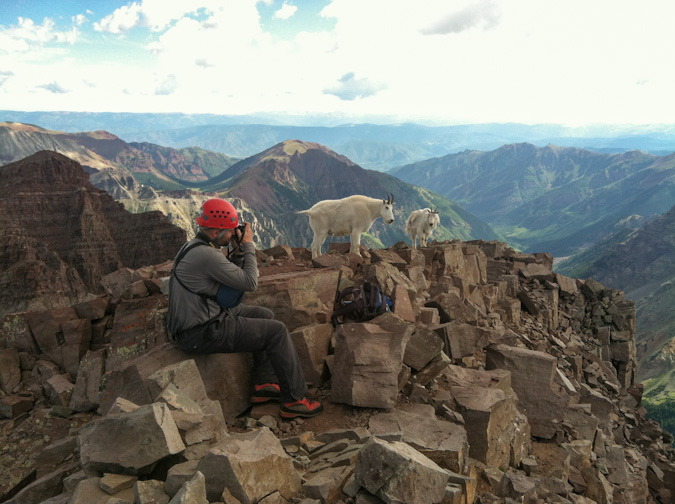
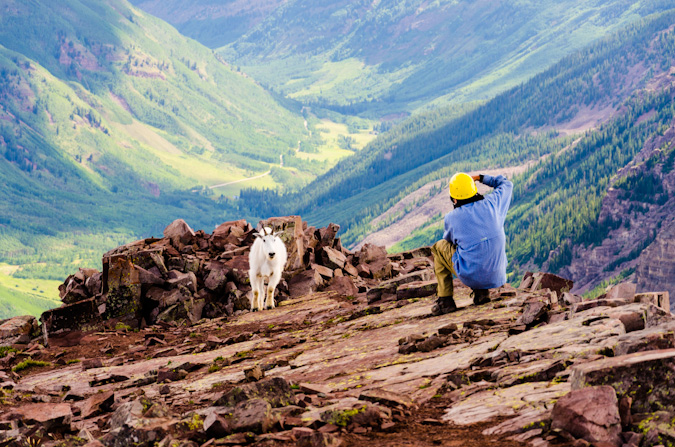
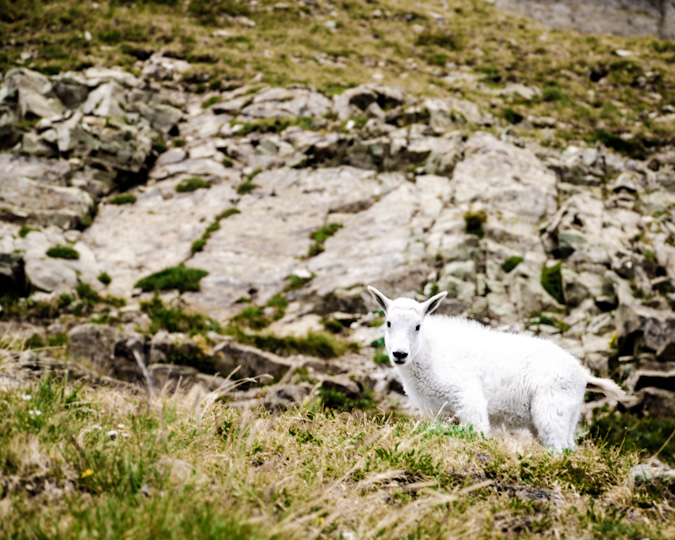
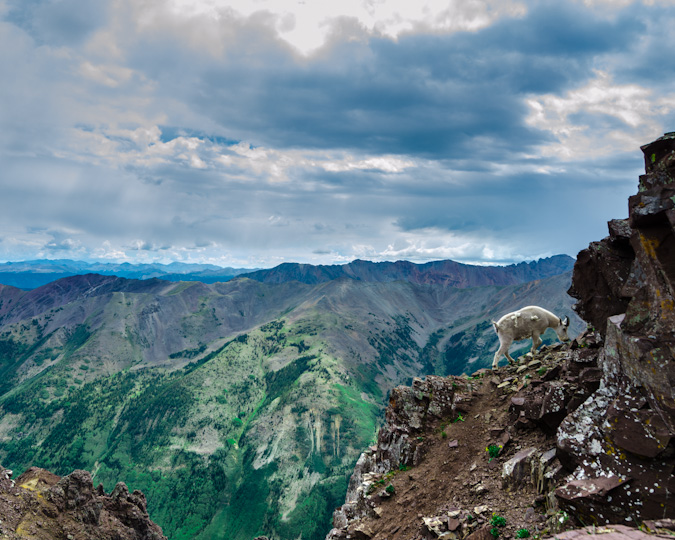
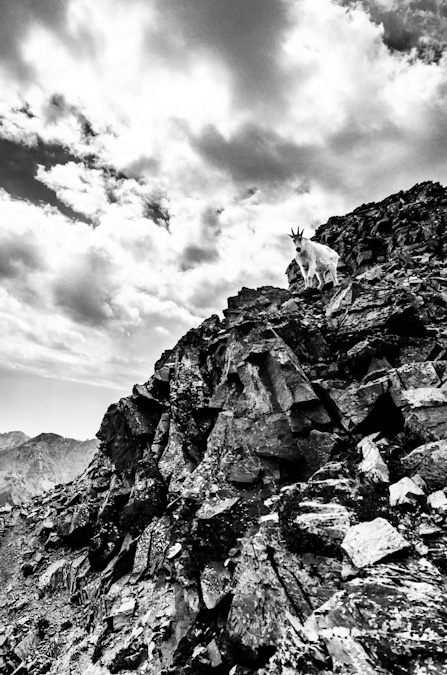
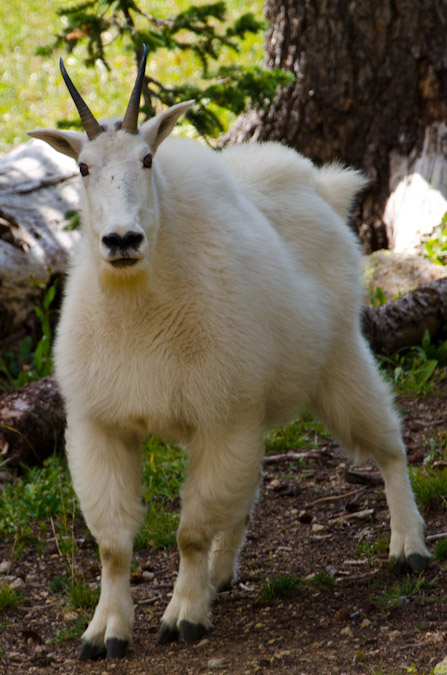
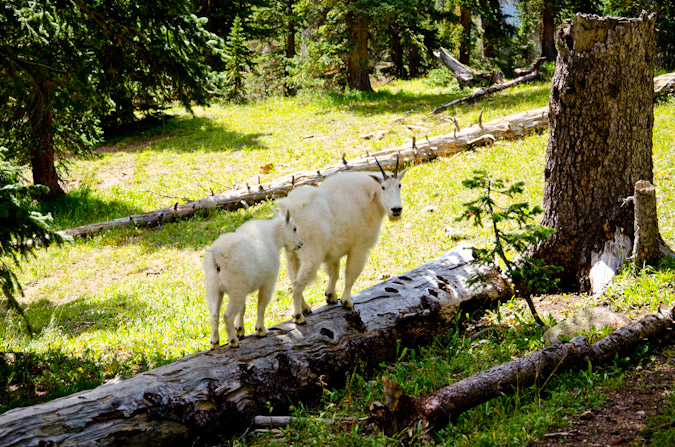
Glenn and I talked shop for quite awhile and he decided to head down. Shortly after though, two mountain goats came strolling up the side of the mountain from the descending route area with none other than Glenn behind them.
It was such a fun day on the summit, sharing the photographic experience with a true pro. I had fun composing images of the goats and of Glenn. I might be geeking-out a little, but it really was an incredible experience.
Sarah was able to get some incredible shots of all of the action too. Some of my favorites.
These were quite friendly goats, often coming within feet of me.
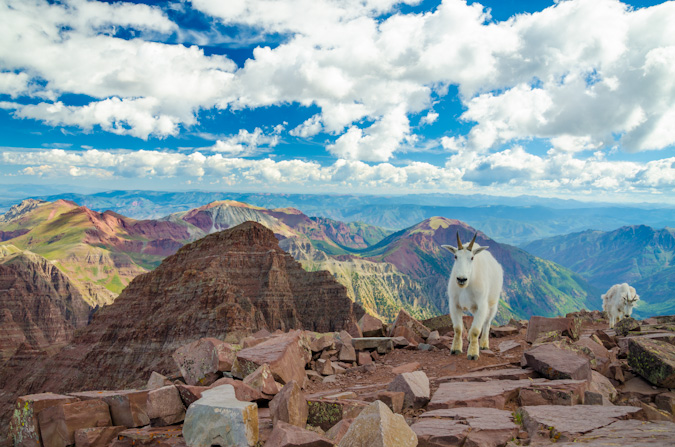
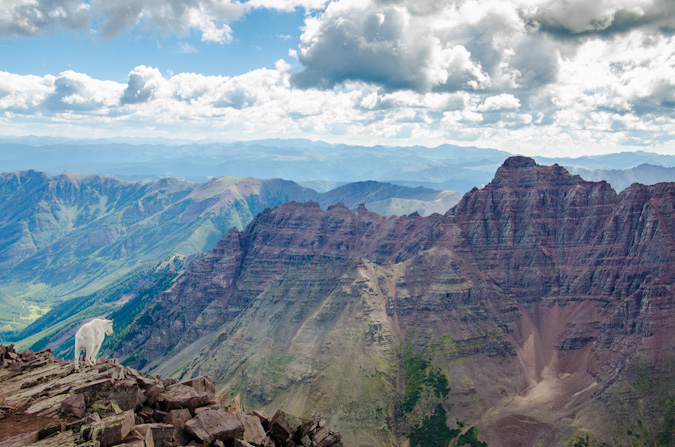
Pyramid Peak made for a killer backdrop for the goat.

I bet Glenn got some really great shots of the goats... he was sporting a quite nice Canon Fx camera and a 70-200 lens.
I took so many fun shots of the goats, and I hesitated to post so many here, but they turned out so great, I had to share.
My favorite shot of the mix was this shot of this goat peering out towards Pyramid Peak, foreshadowing the day to come, where I would complete the 14ers.
Through all the excitement, I had to stop and take some shots of Sarah and a couple panoramics.
The traverse over to N. Maroon looked like a lot of fun, but it was not on the agenda.

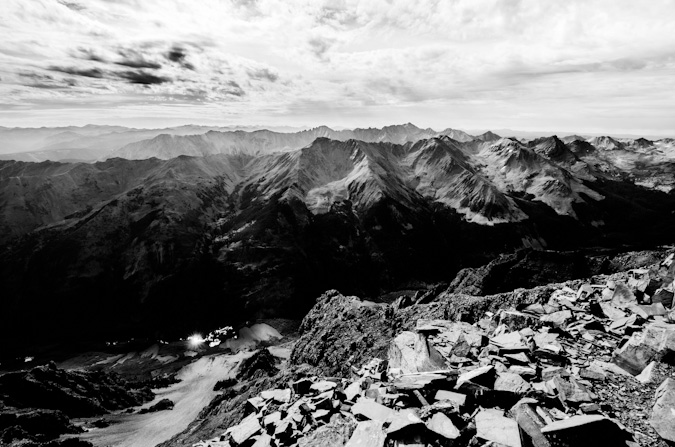
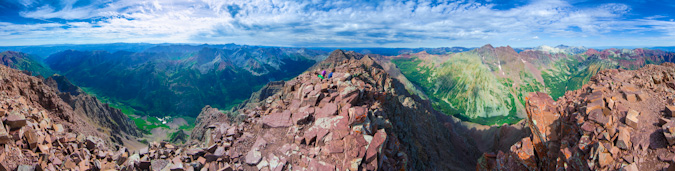
The obligatory 360 panoramic... which demonstrated how large of a summit Maroon Peak really had... and how amazing the views around us were.
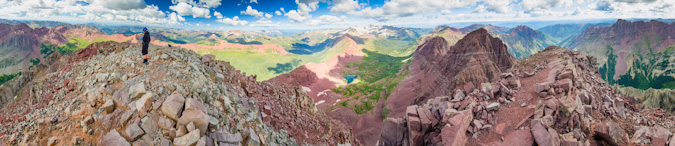
The white coilour for Thunder Pyramid stuck out like a sore thumb above Len Shoemaker ridge.
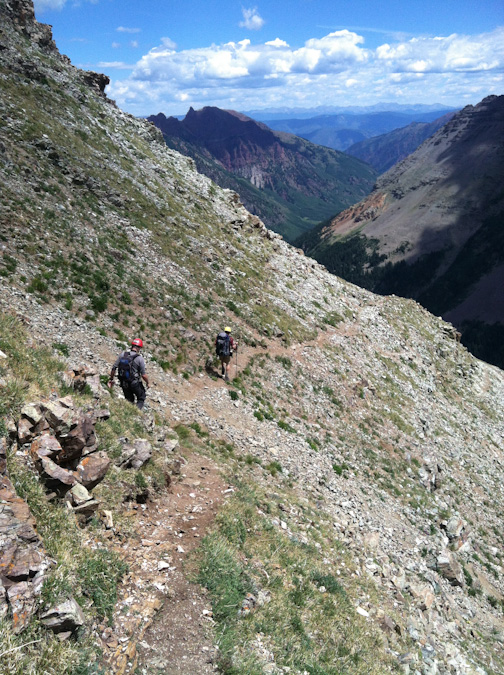
The weather began to look a little shaky after a long time spent at the summit, so we all decided to head down together. On the way down, Glenn was a really great mountaineer, concerned with safety and route selection in many of the same ways Sarah and I were. It was such an honor to spend the afternoon chatting about photography methods, gear and stories while down-climbing. I felt kind of bad for Sarah but she rolled with it and contributed a great deal to the conversation, having many stories of our mountaineering adventures to convey.
On the way down, at the earlier described gullies, we opted to go with Glenn down a different gully. I think the original gully we took on the up-climb was sturdier (the second of the two when coming up, the first of the two when coming down). Other than this small section, we sailed down the mountain’s route, eventually running into the lone guy we had encountered earlier that was waiting for his friends. Indeed, he was again waiting for his friends and explained that they were very slow and he was concerned because he said they were very set on doing the traverse between Maroon Peak and North Maroon Peak, which is very dangerous and requires a great deal of time. He asked that we try to convince his partners not to attempt the traverse based on the weather and their slow speed.
Shortly after this, we ran into the ambiguously odd duo again as Glenn tried to convey the seriousness of the traverse given their speed and the weather. They did not seem convinced this was problem for them and so I hoped that I would not be reading about them on 14ers.com in the Memoriam section (if you guys are reading, I hope you got down safely). We continued on and eventually reached the ridge safely without any issues.
The hike down was relaxing. No threat of weather to worry about.
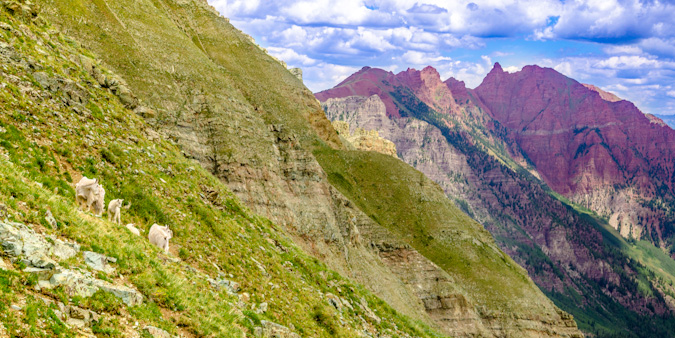
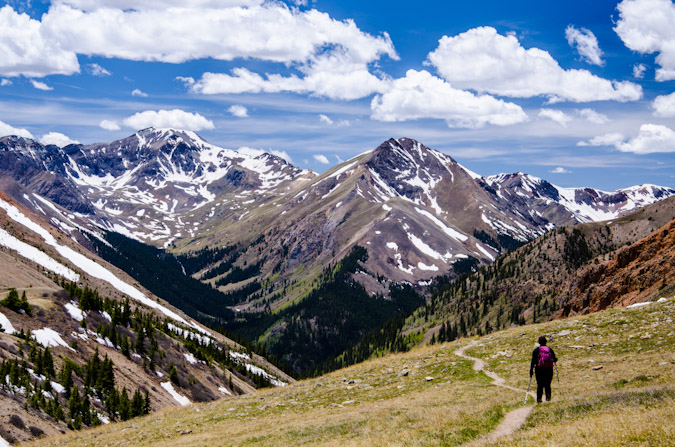
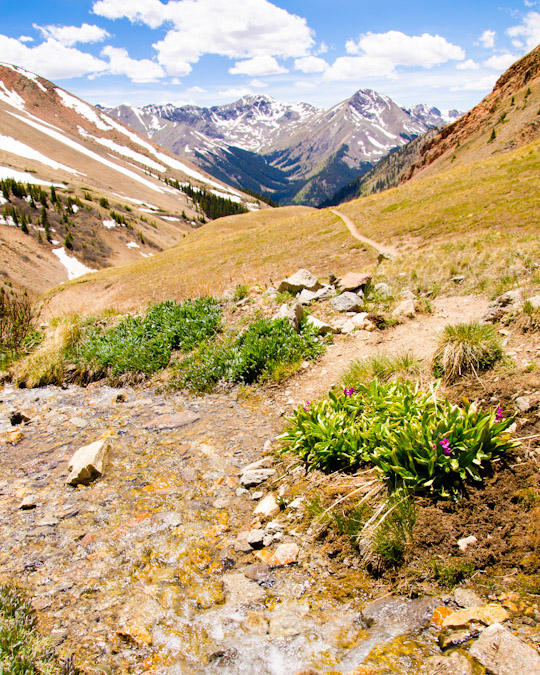
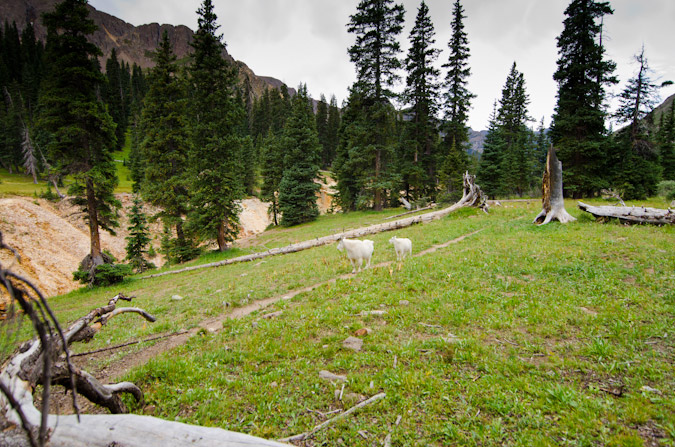
From here, we casually followed the steep trail back down from the summit, stopping occasionally to take photos of flowers and a small group of mountain goats, which consisted of two adults and two tiny baby goats (so adorable). This prompted me to wonder about the breeding habits of mountain goats and the herd consistency, so I made a mental note to read about that when I got home. I did learn that it was likely that we saw two females (nannies) with their two kids (babies) – as I learned from this almighty Wikipedia article.
The wildflowers were so fantastic on this hike, it reminded me a little bit of the wildflowers we saw the prior year on our hike up into Lead King Basin.
Glenn left us about halfway down to move a little faster so that he could get some rest before his epic sunrise hike. Sarah and I continued down at a decent pace and found ourselves back at camp at approximately 1:45 PM. The weather was holding quite well for the Elk Mountains, and we were starving. We cooked some food and took naps that lasted well into the late evening and eventually the night. We were certainly well rested for the next climb.
Day 4: Early start and successful summit of Pyramid Peak - 14,018 ft.
The alarm went off and we climbed out of the tent and started hiking at 4:15 for Pyramid Peak. The hike down to the lake and to the trail split off in the darkness was a fun experience as always. Once we found the turn off for Pyramid Peak, we were greeted by a couple that was heading up to do Pyramid as well. They were moving quite quickly and left us in their dust in no time at all. We were both thankful to have a really well-constructed trail to start the day on - the Colorado Fourteeners Initiative built an absolutely bomber trail up the first section of Pyramid in 2006 and it does not disappoint. The trail climbs steeply out of the valley over large boulders and is very well-maintained. Before we knew it, we were starting to get the first sunlight of the day at pre-dawn.
After switching back and forth up the steep slopes, the trail deposited us at the base of a giant boulder field, nick-named the "Ampitheater" due to the fact that it has three of its four sides surrounded by steep sections of Pyramid Peak.
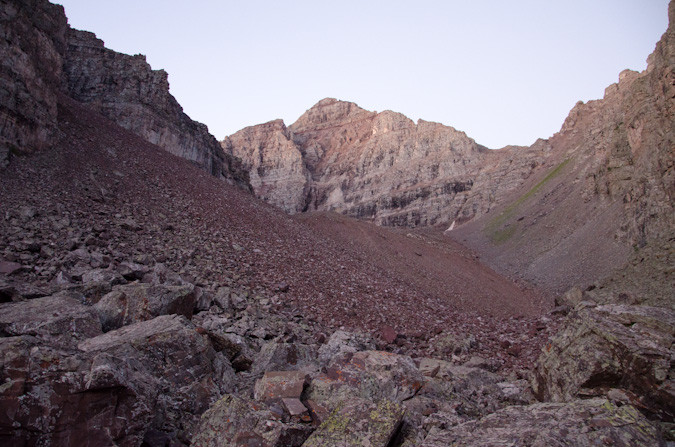
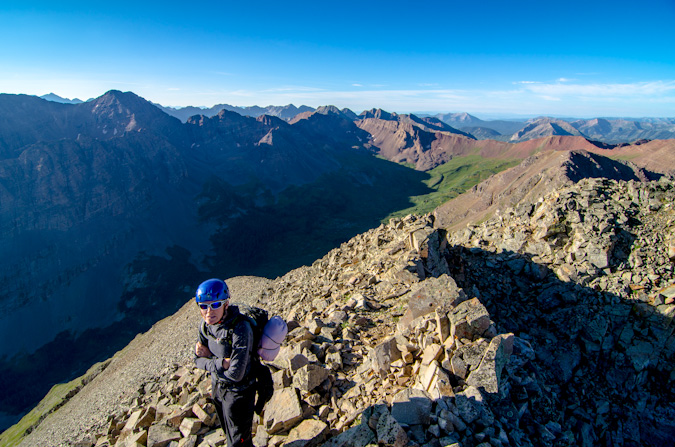
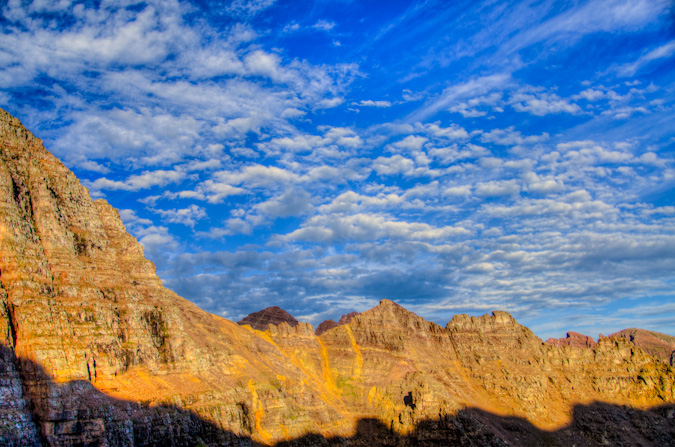
As we rose up the Ampitheater, the views to the north became better and better, with the soft light of sunrise illuminating the surrounding peaks.
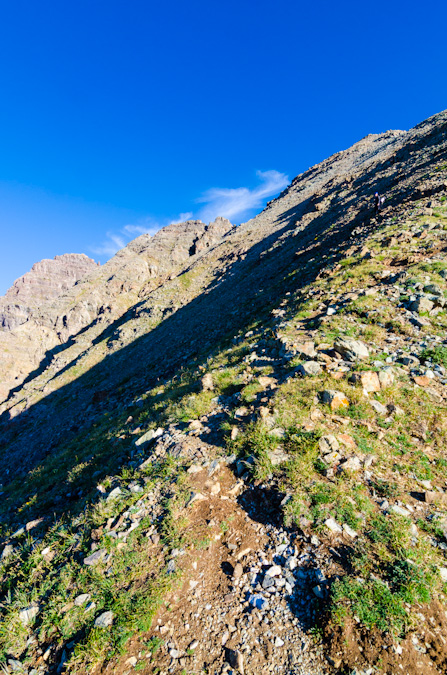
Eventually, we reached the top of the Ampitheater and were greeted with our next task, climbing up a very steep scree and dirt gully to the ridge. We were both overcome with glee over the prospect of such fun hiking (just kidding). Fortunately, the views behind us were starting to get good, with Snowmass Mountain and Capitol Peak poking above the ridgeline in the Ampitheater.
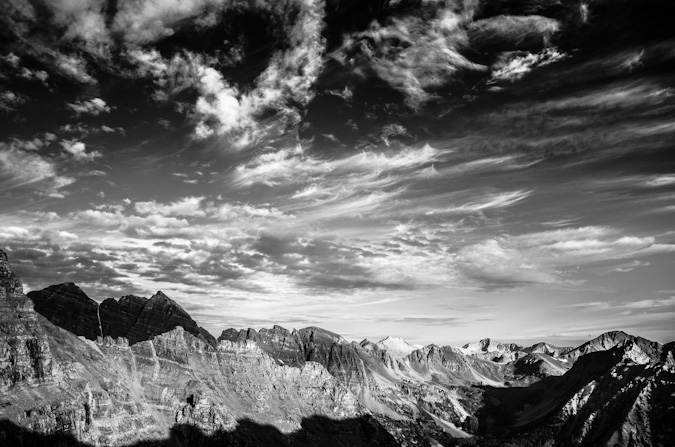
In addition to this, the clouds above were looking phenomenal, and the Maroon Bells were beginning to poke up above the ridge too.
The hike up this section was gruelling to say the least. It was steep, loose and unrelenting. The occasional break to look back was worth the climb though.
At last, we reached the top of this devilish section of climbing and our day's objective finally came into view for the first time. Pyramid Peak erupted above us like some freakish volcano. Here's a groovy photo with all of the mighty Elk 14ers in view - Pyramid, Maroon, North Maroon, Snowmass and Capitol. 
Sarah and I stopped for a bit at the top of this section to rest, eat and study up on the route. Sarah enjoyed what had become her signature staple food of the trip - PB&J on a hot dog bun. Yep. 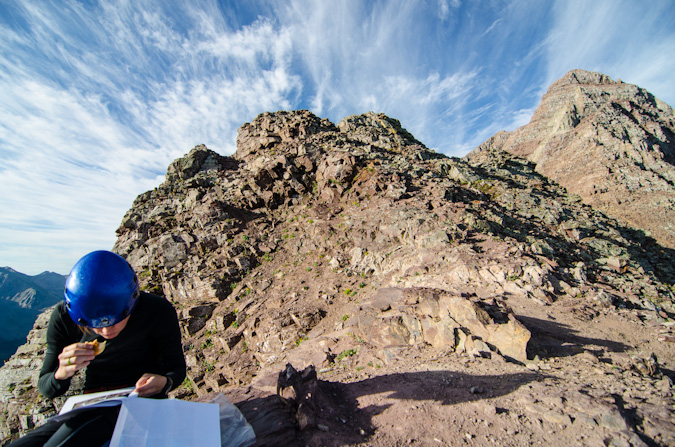
The clouds continued to provide a very dramatic feel for the whole morning.
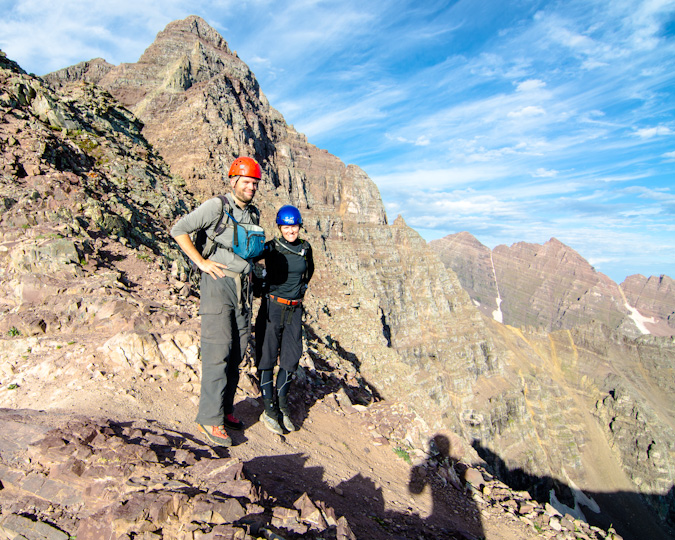
After a short rest, two climbers joined us on the saddle - they were named Doug and Martin and asked to join us for the rest of the climb so that we would not kick rocks down on each other. This seemed like a great plan to us; although at first glance, Sarah and I were both a little taken back by Doug's bicycle helmet. Fortunately, it turned out he would be one of the safest climbers I've been with.
Doug snapped off a group photo for Sarah and I and we departed for the difficult section of the climb.
The route was quite obvious for most of the remaining part of the climb, with several cairns and a clear trail in many sections. At one point, we found ourselves at a section that was a huge crevasse in the trail, which totally reminded me a photo I remembered seeing of my dad when he climbed Pyramid Peak. Indeed, the crevasse was jumped by me both up and down. Here's a photo from the 1980s of my dad jumping a similar crevasse.
We reached the infamous "ledge" which proved to be a challenge with my camera bag affixed to my chest. Sarah captured this photo of me being quite relaxed while crossing, with camera in hand.
I had the camera out for a reason though, as I wanted to get a closer shot of Doug and Martin crossing this awesome section.
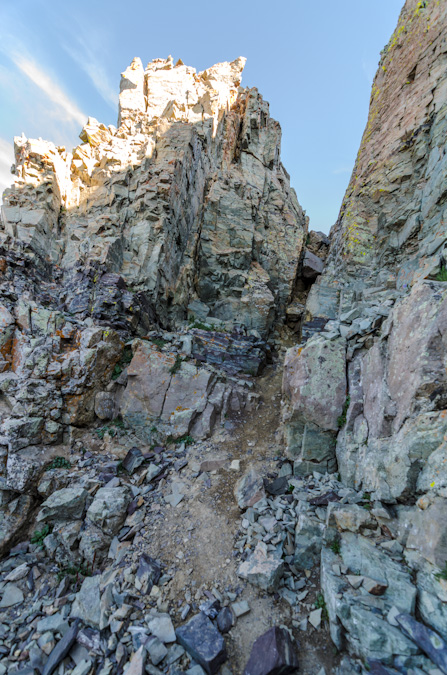
At last, we reached the infamous green gully, which turned to be the most enjoyable section to upclimb. It was quite solid and easy going, with little to no loose rocks to contend with. It was very steep though, and a miscalculation would prove fatal. Climbing to the top of this section was quite a lot of fun.
We then reached what many consider to be the crux of this route up Pyramid Peak, a section where you can choose between a very exposed class 3 section or an unexposed but more dangerous class 5 section. Coming down from this area were the two climbers we met earlier in the morning near the lake - they had already summited and were coming down, so we waited for them before continuing. As a group, we had a nice discussion about the route and the other two climbers departed.
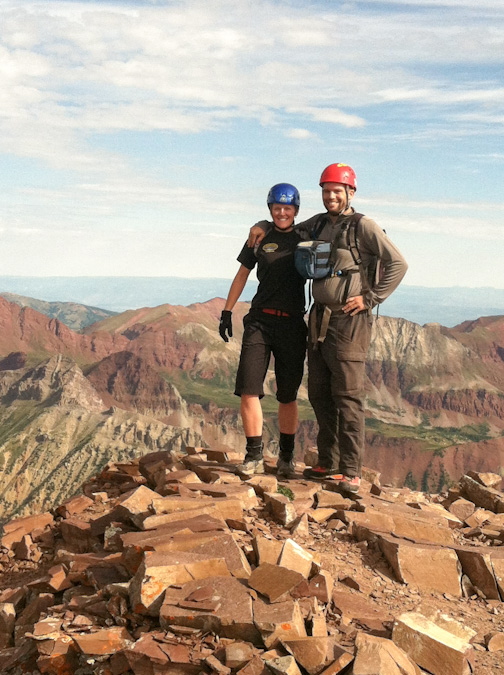
The crux move was spicy but nothing too hard. I thought the summit block on Mt. Wilson was harder and more exposed for sure. The rest of the climb was as simple as weaving our way up cairned sections of ledges. Before we knew it, we were on the summit. Sarah was up first and captured a photo of me summiting my last 14er.
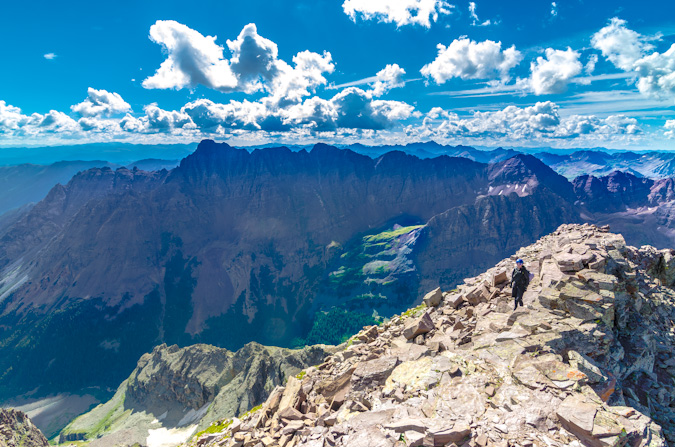
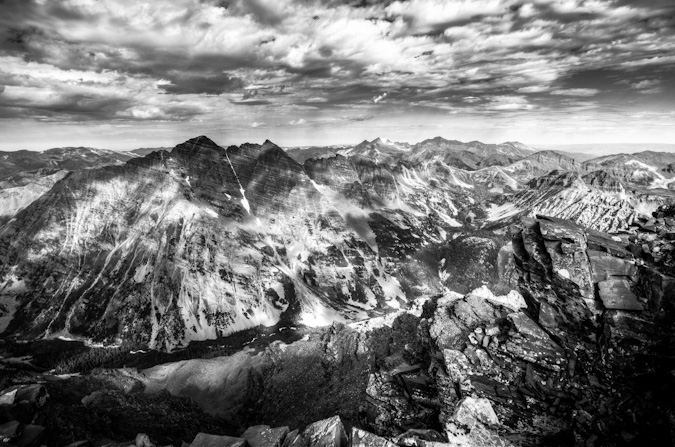
As I reached the top, I took one last look back behind me at the east Elks - they looked so good.
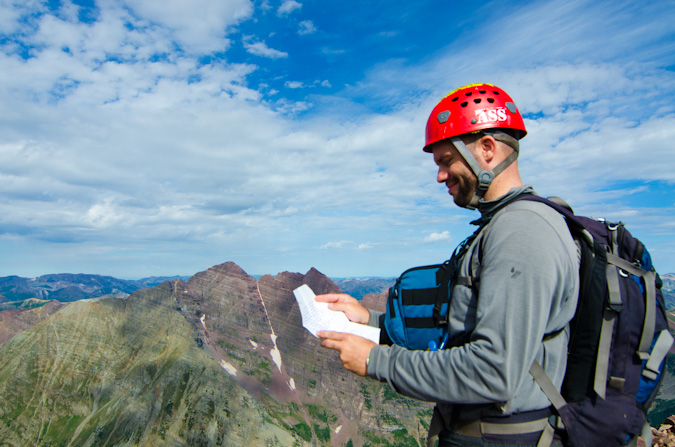
The feeling was surreal, exciting, sad, happy and relieving, all at the same time. It was a flood of feelings for sure, but they were all welcome feelings. I felt like I had accomplished something quite remarkable (even though thousands have done it before me). Perhaps it had something to do with the length of the time it took to finish, or the length of the time I had had the goal. Either way - it was pretty darn awesome! Sarah gave me a big hug and then dropped a huge surprise on me. She prefaced the surprise with the something like the following words, "Angela wanted me to give this to you when you got to the top... I ensured it was not a divorce letter or anything like that, but don't shoot the messenger!"
She then handed me a white folded envelope with my name on it. Inside was the most thoughtful, humorous and loving message I could ever ask for from my wife. Sarah said, "she said you might cry." Which of course, I did a little.
Sarah and I celebrated the amazing day and basked in all of the glory that I knew would come from the views from Pyramid Peak. It was the perfect mountain to finish on. The views of the Maroon Bells, Len Shoemaker ridge, Snowmass Mountain, Capitol, Castle, Conundrum, Cathedral and the rest of the killer Elk Mountains were absolutely surreal and wonderful.
The famous Pyramid Peak diving board was a very inviting spot for photos, and Sarah decided to go surfing. I did an HDR and a non-HDR of this, for fun. You can mouse-over or click to see the non-HDR version.
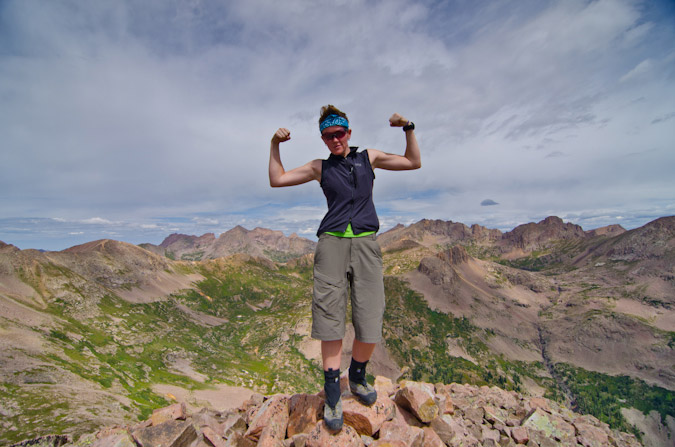
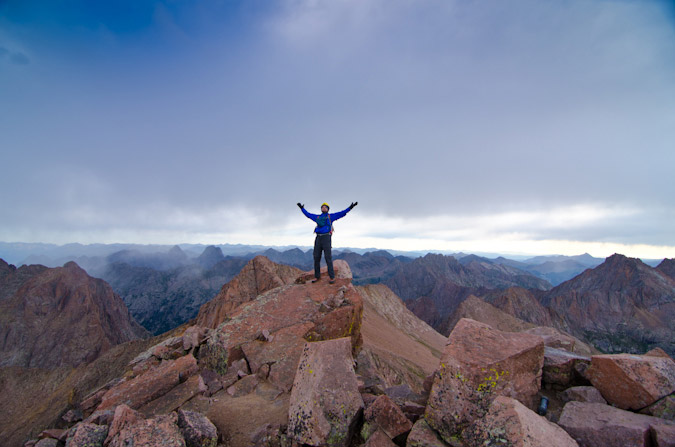
...and my celebratory pose!
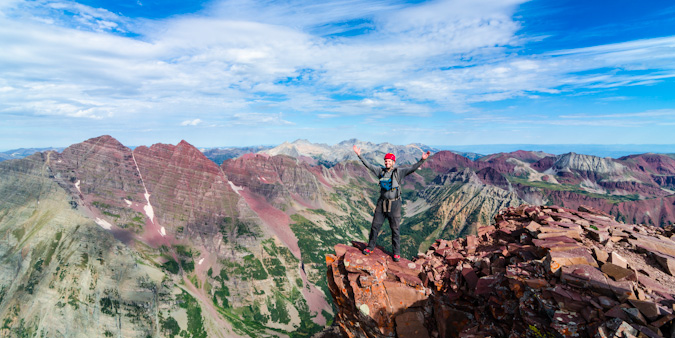
It felt like a small little party up there, spirits were high, weather was looking good, and the views were to die for.
After some food, I fired off a 360 degree panoramic from the summit. One of my favorites to date.
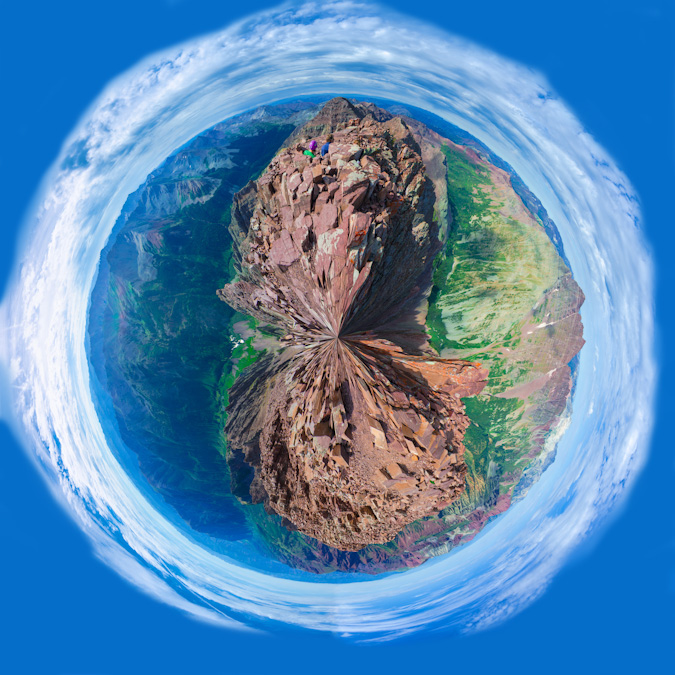
The same 360 degree pano made for a wonderful planet too... for more on those see this article...
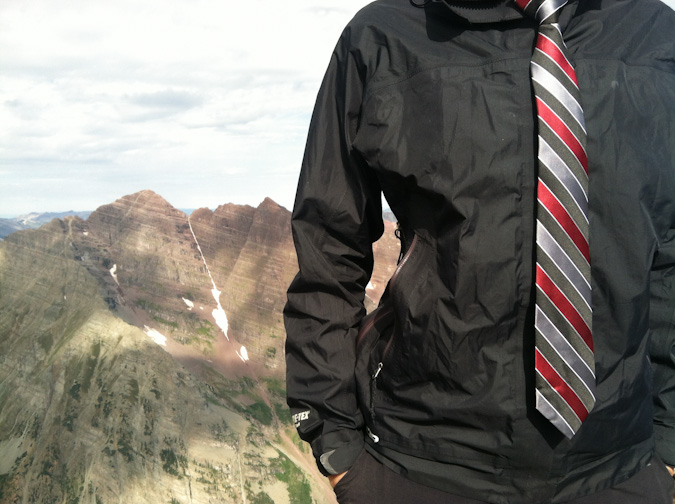
One of Sarah's more awesome traditions is that every Friday she wears a tie and takes a photo of it. This Friday would be no exception!
Weather was starting to build to the west, so we decided to start to pack up our stuff. I still was in awe of the sheer nature of the valley below - how steep the walls were, how amazing the features of the rock were. I'm not religious at all, but this is as close as you can get to a religious experience.
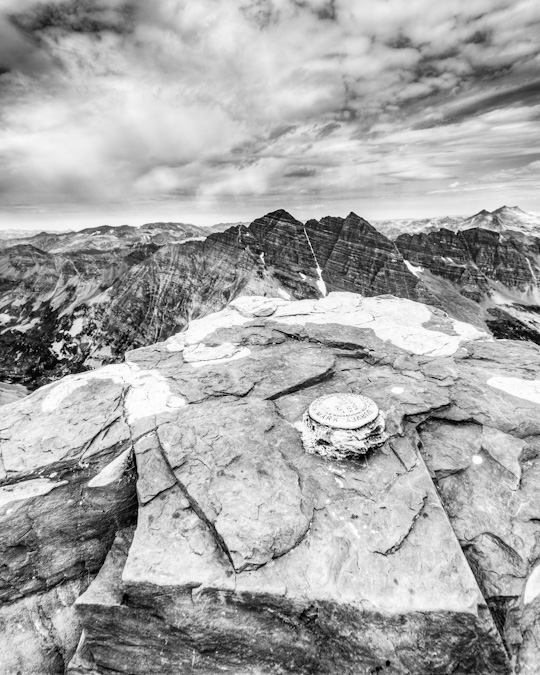
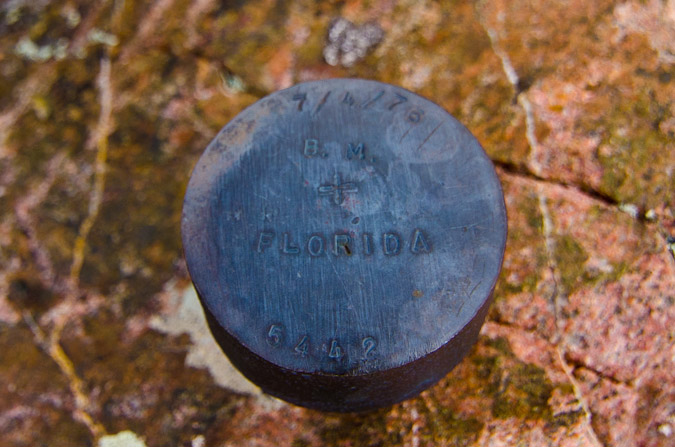
Before we left, I wanted one more parting shot from Pyramid with the USGS marker.
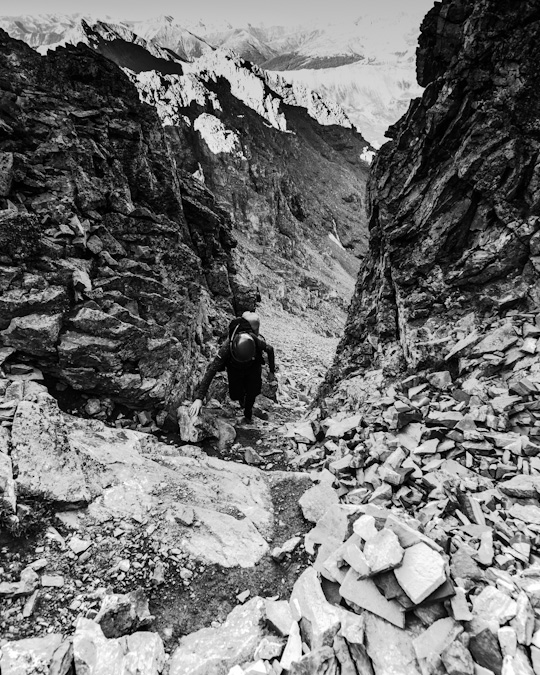
Downclimbing Pyramid Peak was slow going. It always feels much more awkward to downclimb the steeper terrain and Pyramid was no exception. Our group took special care not to dislodge any rocks onto each other and we staggered our decents and ensured we were each clear of a run-out section before the next person started. It was pretty fun climbing though.
Pyramid was one steep mountain, with lots of loose rock to beware of.
I was still amazed at how rugged the terrain was on Pyramid - it looks so unclimbable from all directions, and even when you're up there it feels quite surreal.
The slowest and most challenging part of the downclimb was the green gully. We took turns decending into sections and just as we reached the bottom of it, small rain drops started to slowly fall. We had made it through the hard sections just in time.
Luckily for us, the rain lasted only a short time and we were able to reach the saddle quickly and safely. Upon arrival, we were greeted by a lone mountain goat, who was probably licking up the urine others had deposited there earlier in the day...
This mountain goat was quite photogenic and decided to pose just for me on the rocks above.
After enjoying the company of the goat, we decided to head on down the most wonderfully exciting and enjoyable dirt and scree fest that was the descent off of the ridge back into the Ampitheater. We both ran out of water at this point and decided to hoof it down as fast as we could, with plans of heading on out of the valley that evening. The thought of a celebratory meal in Aspen was too much to pass up. Once out of the ampitheater, the CFI trail down was quite solid. I could not really imagine how awful this trail would be before this work was done. I took one final parting shot of the Maroon Bells on the way down Pyramid.
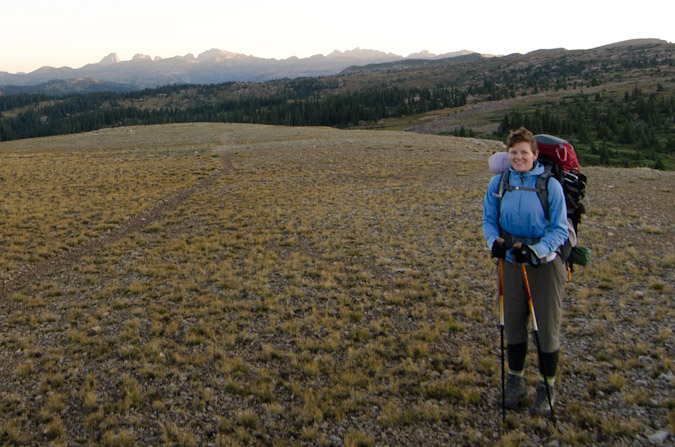
Sarah snapped off one last shot of me hiking back to camp. This is one happy dude.
We got back to our campsite and packed up after refilling our water. Our legs were tired. Our souls were refreshed. It was time for beer and pizza. We headed out and I took one final "classic" shot of the Maroon Bells from Maroon Lake with the "Deadly Bells" sign. "DO NOT ATTEMPT IF NOT QUALIFIED."
I'm not sure if I was qualified or not, but I felt greatly accomplished and quite humbled to have experienced them either way.

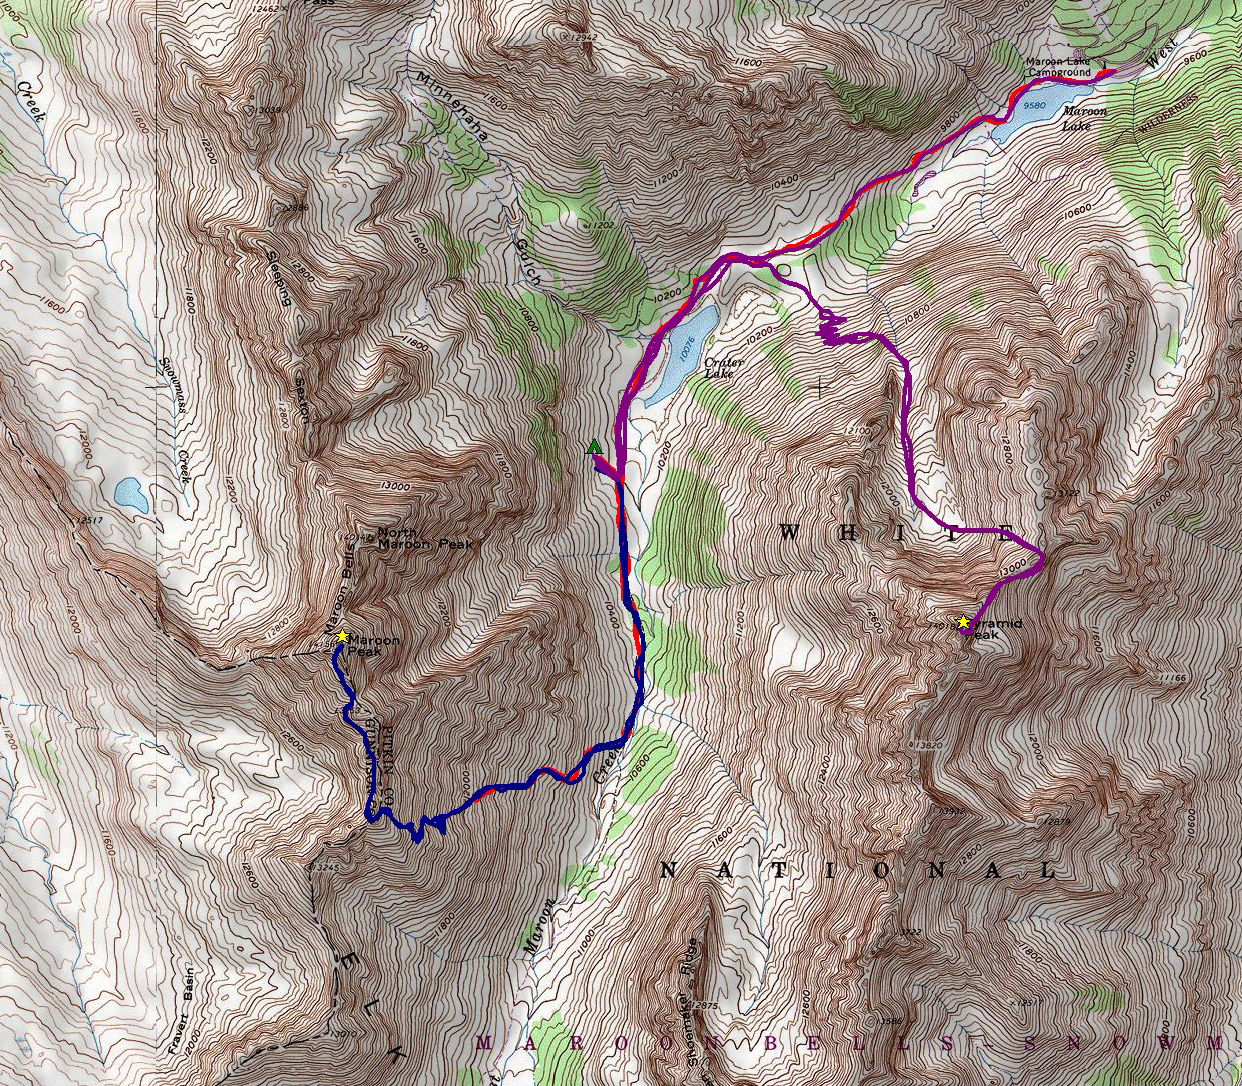
A final look at the route map. Click on it for a larger version.
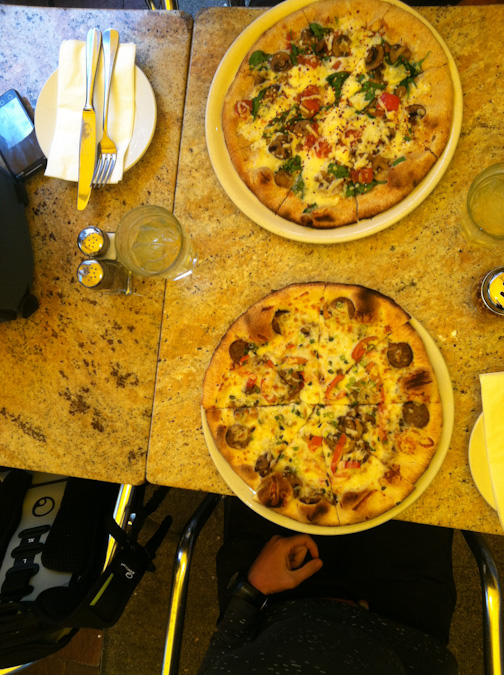
We decided on a restaraunt called Mezzaluna in Aspen for our celebration dinner. I had a vegetarian pizza (did I mention I'm a vegetarian) with truffle oil and Sarah had a sausage pizza. Two margaritas were served and congratulations were in order.
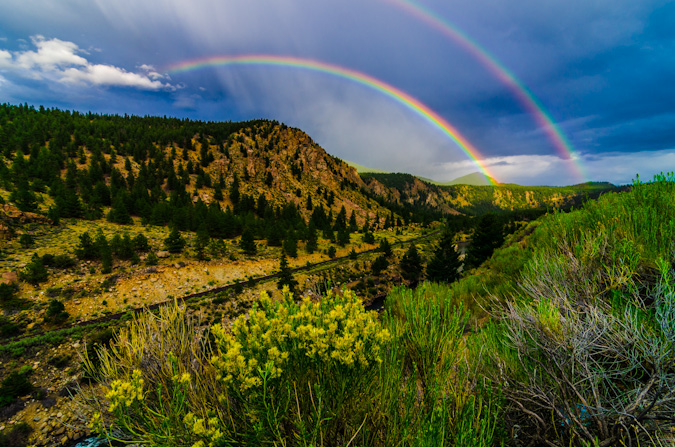
After leaving Aspen and dropping off of Independence Pass towards Buena Vista, we were greeted with a rare double rainbow, which capped off our most excellent trip in fine order. I could not have asked for a better trip, partner, or experience to finish the 14ers.
Conclusion and acknowledgements
A goal that takes 27 years to complete is one worthy of relishing, reflection and sincere acknowledgements to those that helped make it possible.
After fracturing my L5 vertabrae in 1995, I was not sure if I would ever be able to realize some of my goals. Fortunately, through hard work and incredible support from my family, I fully recovered from that and learned a great deal about work ethic. This quest for the mountains has tought me so many valuable lessons about life, about people, about myself...
Most importantly, it has taught me that despite people having severe differences of opinion on matters such as religion, politics or otherwise, something like the great mountains of Colorado can bring those people together to share in life-changing experiences that bind people unlike any other force. I hope to build on those lessons and continue to better myself as a person - my friends and family know there is plenty of room for growth.
To Sarah Musick: Thank you so much Sarah! It was such an honor to share those last two summits with you - you have been a true inspiration to me and my quest to finish. Your support over this past year has been fantastic. You are truly an amazing human being.
Of course, an achievment like this is never possible without the support of others, who are for sure some of the finest people I've had the pleasure to meet.
1. 1st - to my wife, Angela Payne (one fine Vegan chef with a killer sense of humor) - who has given me more support than I ever could have asked for - allowing me to chase my dreams is the best gift a person can give!
2. To my parents, they have been an inspiration for this life-long goal and I would have never have started without them introducing me to the mountains of Colorado at such a young age. My dad's goal to complete the highest 100 began in the 1970's and it quickly became my own goal as well.
3. To my family’s close friend – Dave LeShane – who also was on the quest for the highest 100 when I was a child – and inspired me to dream for the stars while climbing various 13ers with me as a child. Your wisdom, guidance and support over the years was like having a super-awesome uncle with bad-ass climbing stories.
4. To my regular climbing partners - Sarah Musick, Ethan Beute, Jeremy Park, and Regina Primavera (Yalegirl09) - you guys have been absolutely awesome to climb with! Your support, humor, talks, patience, insight and overall awesomeness has grounded me and reaffirmed my faith in mankind's future.
Sarah - you are one of the most amazing people I've ever met - our short but fantastic friendship has been such a blessing for me.
Ethan - our talks and hikes are always some of my most enjoyable days and most memorable experiences - I hope we can continue what I believe to be an incredible friendship!
Jeremy – while we have not done any 14ers together, we’ve known each other since high school and have been amazing friends ever since. Our epic adventure on Vestal’s Wham ridge will always be one of my fondest moments in my life!
Regina - you are one crazy, amazing and true friend! Our hikes are always a great time and I have enjoyed our talks!
5. To my other climbing partners, mostly from 14ers.com –
Terry Mathews (tmathews) - it was so great getting back into climbing with you back in 2009. Our adventures and introductions to class 3 on Crestone Needle, Crestone Peak, Blanca, Ellingwood, Kit Carson and Challenger were fantastic.
Micah (mountainmicah83)- dude – our epic day on Harvard and Columbia will never be forgotten - while I had hoped we could get out more – it was still awesome to learn rope/climbing skills from you and Matt!
Mike Vetter and Travis Arment - what can I say Mike - anyone who would drive all the way from South Dakota to climb Huron Peak with me is one awesome dude. Our adventure up Capitol Peak with the accomplished Travis Arment was unforgettable. You guys are fantastic people.
Barry Johnson (Johnson) – our climb of Shavano in 2009 was my re-introduction to the 14ers after a long hiatus – thank you for joining me on that fantastic day!
Mike (fiemus) and Bob Hay – our hike up Yale was great – learning about all of Mike's SAR stories was one of my favorite days in the hills.
Kara Bauman, Will (WillV), Alli Kolega and Tom Shaar – our climb of Mt. Wilson was absolutely wonderful! Thank you for allowing me to join you guys on such a fabulous adventure!
6. To Bill Middlebrook for creating and maintaining 14ers.com – it has been very helpful for me in this crazy pursuit.
7. All the other awesome mountaineers, climbers and hikers in this community - we need to continue to focus on our common goals and dreams.
Thank you for all for the inspiration to write these, and thank you for reading...
{fcomment}
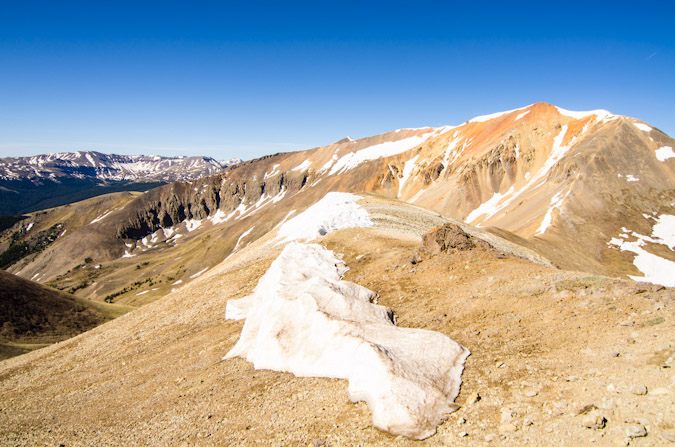
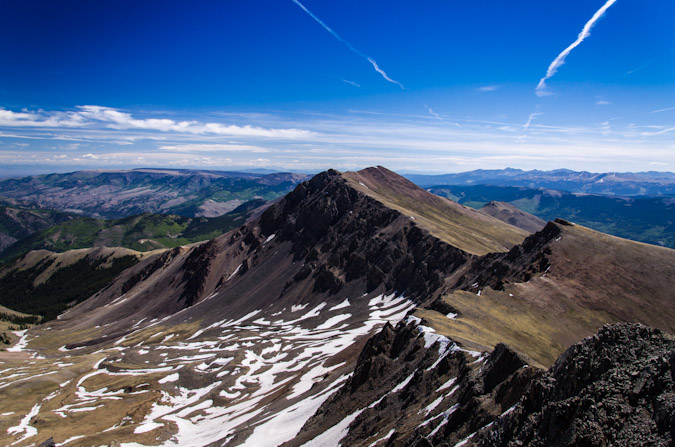
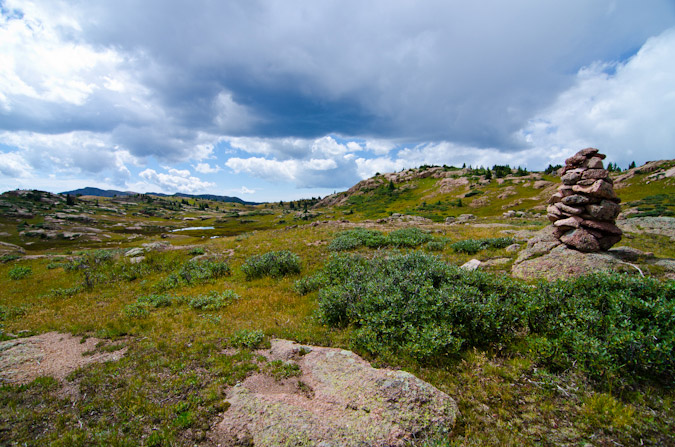
Drinking in the Milky Way and Crushing Centennials - UN 13,832 and UN 13,811
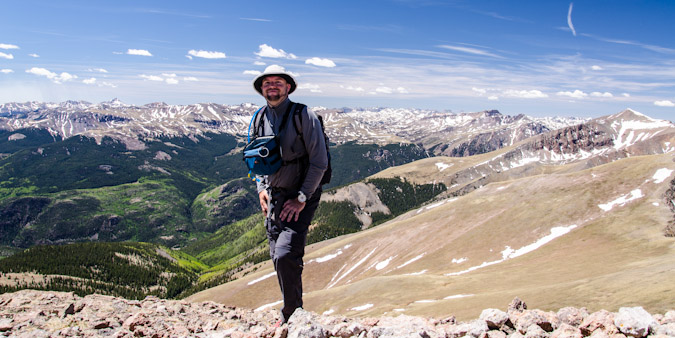
UN 13,832 and UN 13,811 (UN = Unnamed) have been on my radar for quite a few years now. My dad and I were hoping to tackle them both back in 2009 but weather steered us elsewhere. I've also eyed them as a potentially fantastic winter climb from the Williams Creek TH, but have not had the ability to string together the time to pull that off either. So, when I figured I had the opportunity to take a vacation day and do some climbing, I quickly picked out these two gems. I coached my son's first t-ball game and then afterwards drove to Lake City for an estimated 1 AM arrival at the trailhead. I planned to meet my friend Regina there (she was coming down from Denver via Highway 285) and get a few hours of sleep before we set off to climb early Friday, June 1st.
Interestingly enough, UN 13,832 and UN 13,811 are the only two mountains of the highest hundred peaks in Colorado (Centennials) with neither an official nor unofficial name. These two fantastic thirteeners (ranked #90 & #99 respectively) are located just east of the 14ers Redcloud and Sunshine near Lake City, Colorado. If you're like me, you are wondering why these two mountains in the highest 100 are unnamed. These unnamed mountains are located within a large section of BLM (Bureau of Land Management) land, specifically, BLM's Redcloud Wilderness Study Area. According to Summitpost, "in 2004, these two mountains were "protected" from being named when the USGS turned down a proposal to christen them after two of Colorado's mountaineering pioneers, Carl Blaurock and Bill Ervin. Apparently the policy is to not approve new names of mountains within wilderness or wilderness study lands, and a competing Blaurock/Ervin naming proposal was selected for a pair of peaks in the central Sawatch Range."
With all that being said, I needed something to do to keep me awake on my drive down to Lake City... so I focused on trying to think of clever names for these two mountains. With the close proximity to Sunshine and Redcloud, I figured it might be fitting to name UN 13,832 something to do with the moon. The sun shines, then it sets... the clouds get red (Redcloud), then the moon rises. How about "Moonrise" for UN 13,832 and "Not Last" for UN 13,811 (since it's ranked #99 / 100)? Let's see if they stick anywhere.
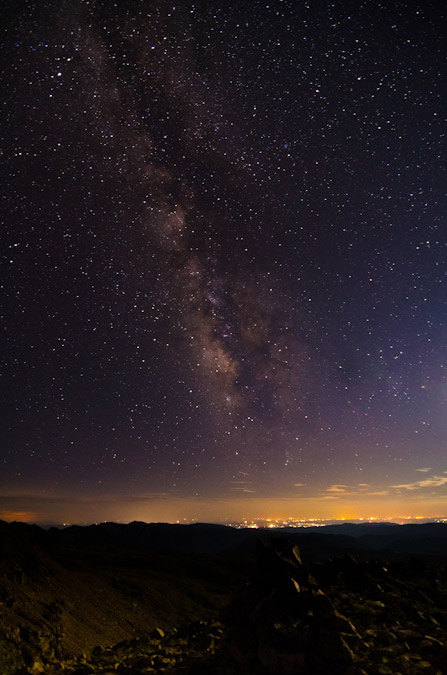
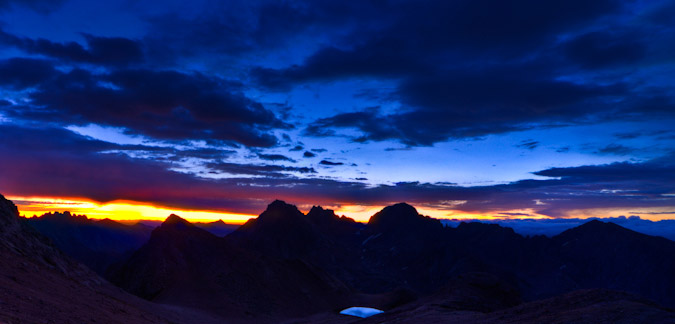
Speaking of the moon, on the way down to Lake City, I decided that it would be pretty awesome to stop near Lake San Cristobal and get a shot of the stars and moon, so that's just what I did. I stopped right off the road heading towards the trailhead and took a 5-shot vertical pano (my camera was vertically orientated vs. horizontally oriented) of the Milky Way, moon, and Lake San Cristobal. I think it worked fabulously! Please click to see a larger version or to purchase on my photography website.
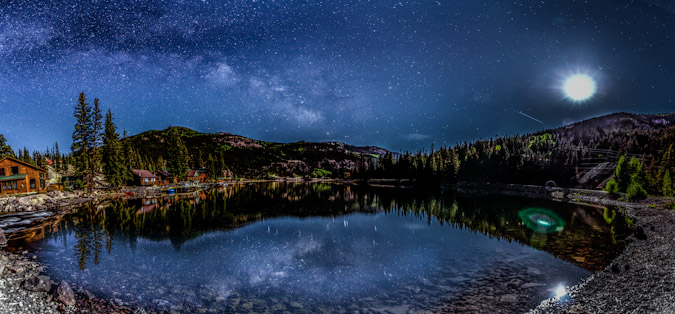
With the shot I had envisioned complete, I continued on up the road towards the trailhead. I finally reached my destination at around 12:45 AM and decided it was suitable to sleep under the stars in my sleeping bag, so I set out to do just that. Shorly after I settled in, Regina arrived and set-up her gear to do the same. I took the time to take one last set of photos (why not). This one turned out even more magical, I think. It is 7 veritical shots as a panoramic of the Milky Way over "Sundog," the 13,432 ft. mountain connected to Sunshine Peak's north ridge. The moon had just set and allowed for a great scene. I was actually inspired by another photographer's (David Kingham) photo from last month and wanted to give this a shot. Click on it to see a larger version on my photography website.

We crashed at 1:45 AM and decided to set the alarm for 5:45 AM, which came all-too quickly. There was one other hiker at the TH that started before us (and did wake me a few times by starting his car), so solitude was looking to be guaranteed. I promptly threw down some coffee soymilk (which was surprisingly good and filling) and we departed! I knew from the get-go that I wanted to do what Roach calls "Point Fever," which is to say, combining UN 13,832, UN 13,632 and UN 13,811. The route is a long but easy 12.8 miles and gains 4,727 ft. in elevation. A nice leg burner. [Colorado's Thirteeners - Roach & Roach, pg. 222]
Here is a map of the route we took from the Silver Creek TH (click for larger version):

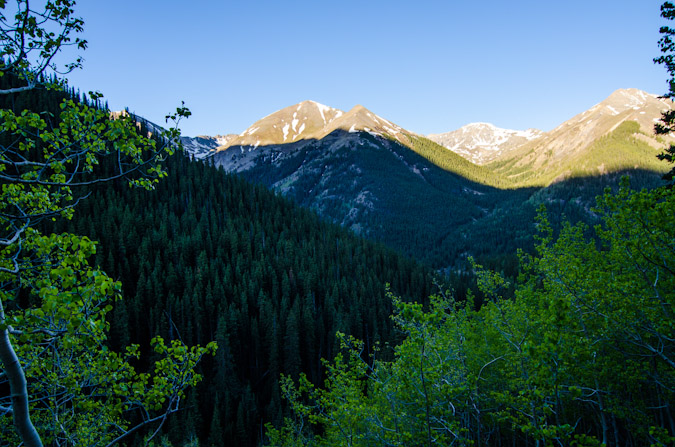
So, that's just what we set-out to accomplish. The semi-early start granted us a nice view of Handies Peak and Whitecross Mountain across the valley. It was really great seeing them from this side since my climb of them with my dad in 2010 on Father's Day.
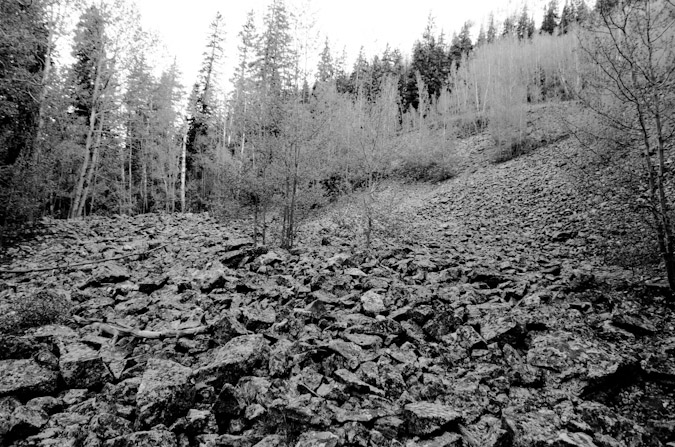
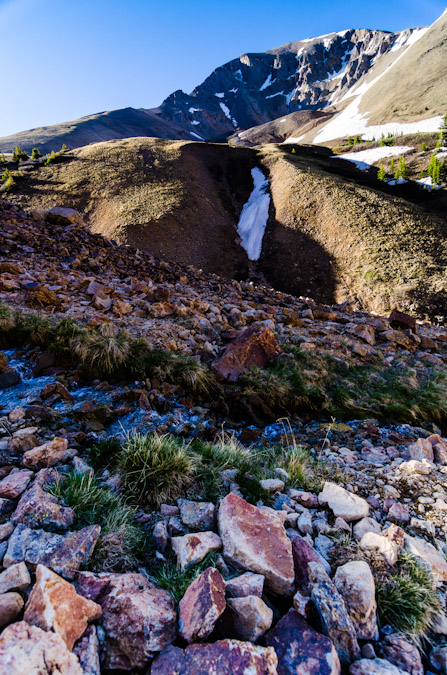
As we climbed on the trail, we stumbled upon an open area with boulders. I was immediately struck with a rush of nostalgia, remembering vividly coming through that part of the trail and seeing a marmot during my climb of Redcloud and Sunshine in 1987 at the age of 9. Crazy!
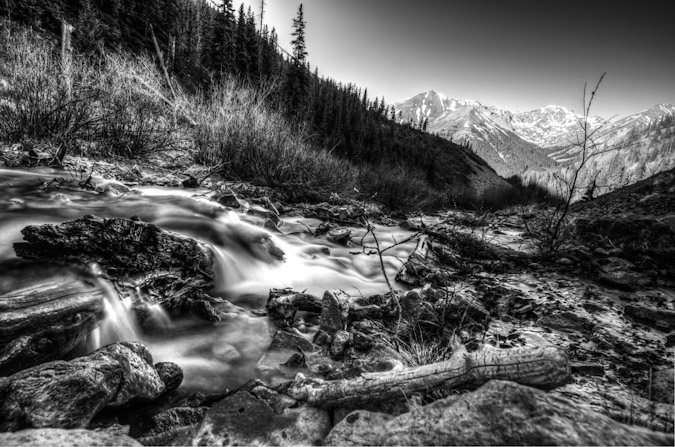
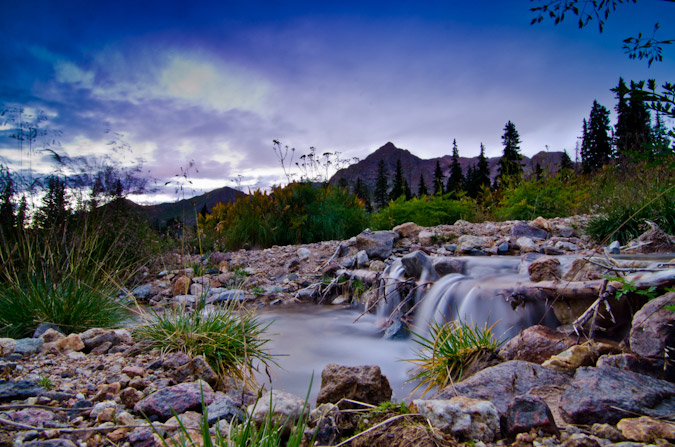
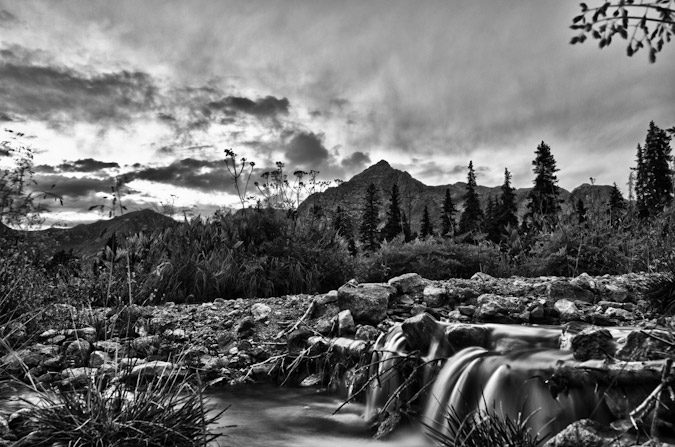
Before long, we were gaining altitude and came across a nice stream. It seemed the perfect spot to test out my 9-stop ND filter, so I put it on my Tokina 11-16 lens and did a very long exposure. I liked how it turned out.
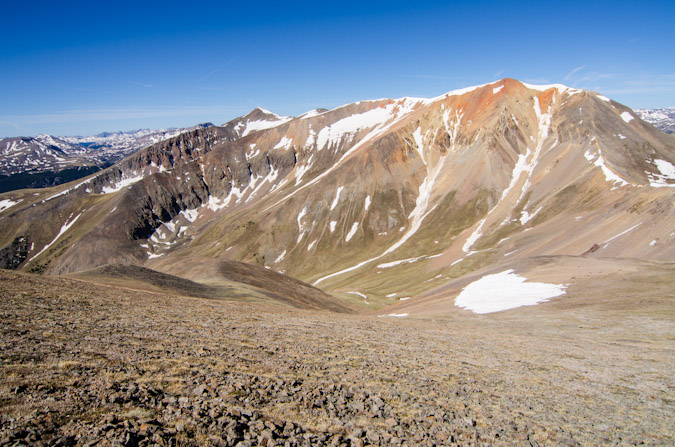
As we gained elevation, parts of Redcloud came into view to our right. It was immediately taken aback by how little snow was left. It was truly remarkable. Indeed, Colorado's state-wide snowpack levels are at 2% of normal. Very dry.
Regina was setting a nice pace for us and the weather was holding up quite nicely. I had no worries about my chances of summiting both 13ers.
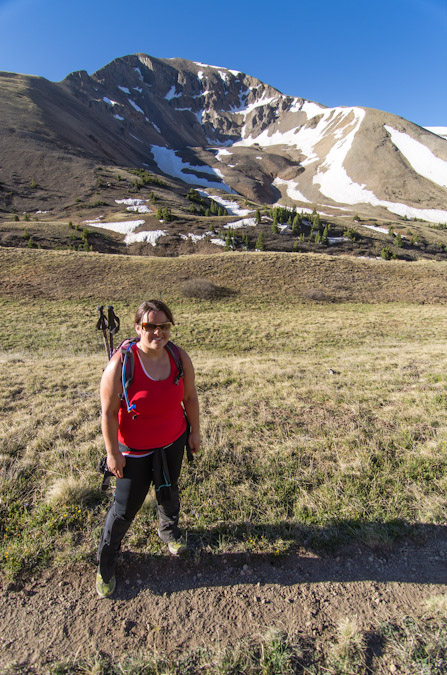
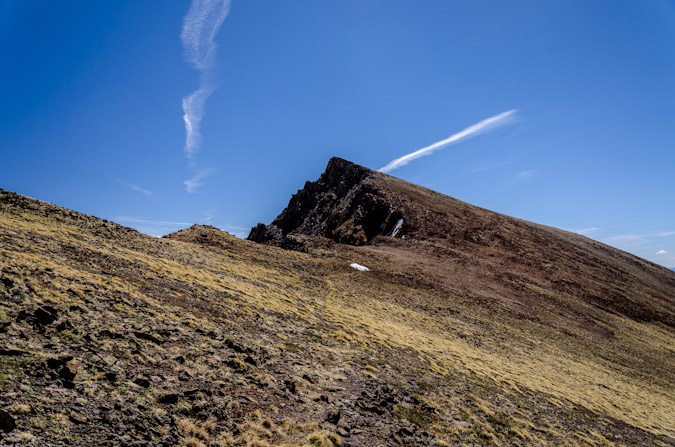
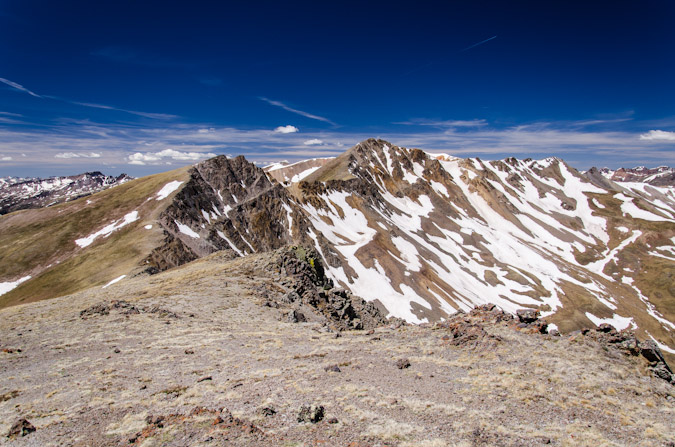
Before we knew it, we found ourselves gaining the ridge between UN 13,832 and Redcloud. We had also caught up from the guy that left before us that morning.
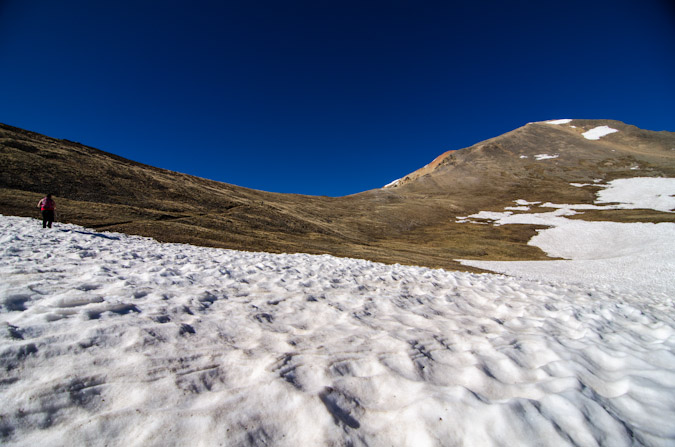
Gaining the saddle was no problem, and the views were great from there. As expected, the other hiker turned up to climb Redcloud. Solitude was guaranteed at this point. Here's a 360 degree view from the saddle, with Redcloud at far right and UN 13,832 just under the sun.

The hike from here was just long and gentle - easy class 1 / 2 stuff. Here's a view of UN 13,832 as we approached from the ridge.
Looking back at Redcloud, with Sunshine barely peaking up over the ridge.
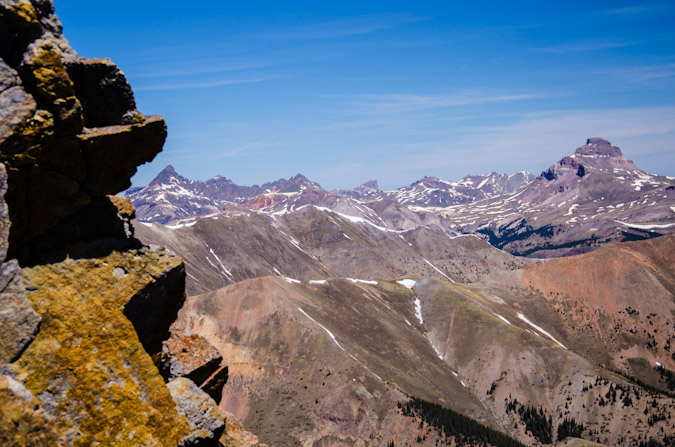
And finally, Uncompahgre Peak came into view for us!
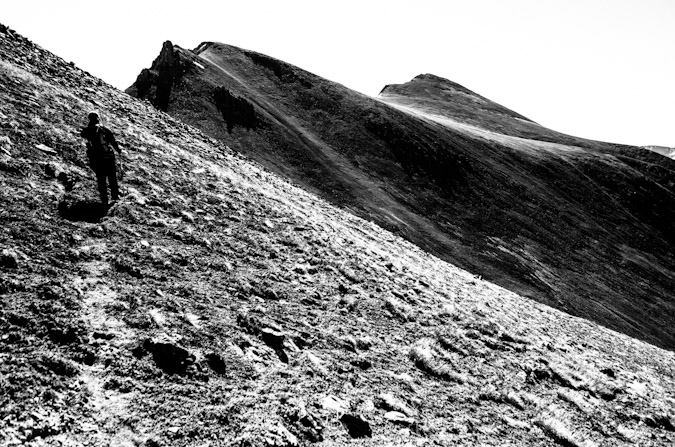
Heading up towards the next saddle made for easy and fun trail / ridge walking.
I was impressed by how far apart Sunshine was from Redcloud - much further than I remember.
We finally topped out on UN 13,832 at around 10:30 AM. Regina was loving the view of Wetterhorn and Uncompahgre, no doubt.
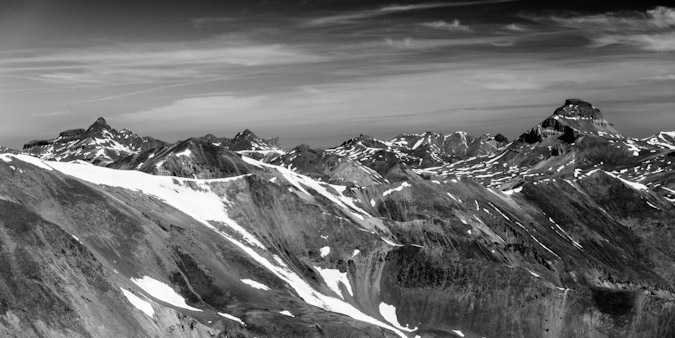
Also awesome was the view of the Grenadiers and the Needles. Eolus, Sunlight, Windom, Silex, Guardian and others all stuck out quite prominantly. This perspective really shows you how far part Eolus is from Sunlight. Pretty amazing.
I also did not mind the great view of Wetterhorn from here. Such a cool looking mountain!
Regina decided she was not going to continue over to UN 13,811, so I fired off a few more shots, including the below panoramas, and headed off for UN 13,811. Regina was going to wait for me below the saddle of Redcloud and UN 13,832.

The San Juans are truly great.
UN 13,811 was still quite a ways off, as seen from this next shot.
I began my hike over and was constantly drawn to the view of Wetterhorn and Uncompahgre. I just loved those two mountains.
UN 13,632 was one obstacle in the path to UN 13,811, so I needed to go up and over it as well.
All while still enjoying my view...
Within about an hour, I finally made it over to UN 13,811 to complete my 75th Centennial. Pretty impressive and almost there!
I snapped off a few shots for a panorama from 13,811 also , still in shock over how little snow was truly left.

The view back over to 13,832 was sobering to say the least. I was starting to feel a little tired in the legs, so I was not really looking forward to the hike back. I did however, really enjoy the surprising view of 13,832 from here.
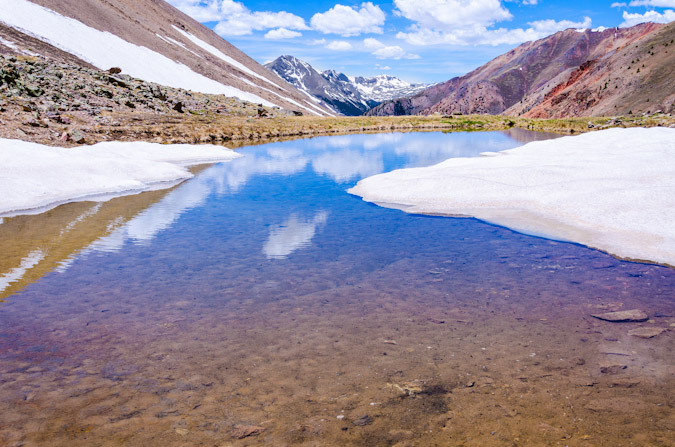
I headed back over to UN 13,832, which was quite the demoralizing slog. I reached the saddle of Redcloud and UN 13,832 in quick order and met up with Regina at a small tarn below Redcloud Peak. THe view of Whitecross was very cool from there.
And of course Handies and Whitecross were our guides for the duration.
Regina led the way while I snapped off this super great shot of her hiking out. I think this was one of my favorites from the hike.
We crossed over a small stream that had some wildflowers growing at it. I thought it was a nice looking scene to stop and enjoy.
Before long, we had reached treeline again and Handies was all that we could make out above the trees.
The remainder of the hike went without incident. I will say that these two mountains are pretty fun. The hike is very long, but affords welcoming views of very recognizable 14ers and 13ers in the area. Solitude is almost a given, since most people in the area are there to tackle the more famous 14ers Redcloud and Sunshine. I think you will also enjoy the hike if you choose to take it.
We stopped in Gunnison on our way home for some much needed sustanance at our favorite Mexican food place on Main St. Until next time... I hope you enjoyed this trip report!
{fcomment}
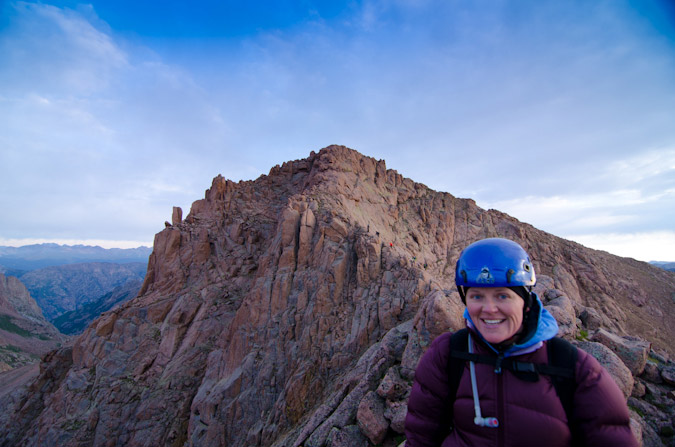
Sunsets, Sunrises and Mountain Goats - Chicago Basin from Endlich Mesa
Day 1: Backpack from Endlich Mesa to Lillie Lake
Day 2: Climb one 13er, backpacking over Trimble Pass and Columbine Pass
Day 3: Sunrise from North Eolus, summit of Eolus and Sunlight
Day 4: Climb of Windom Peak and pack-out
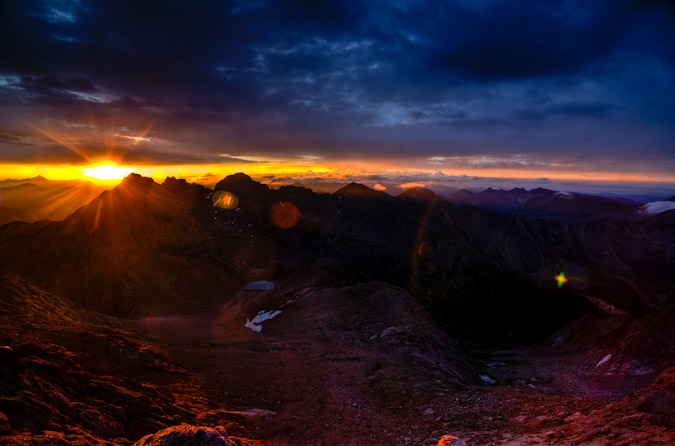
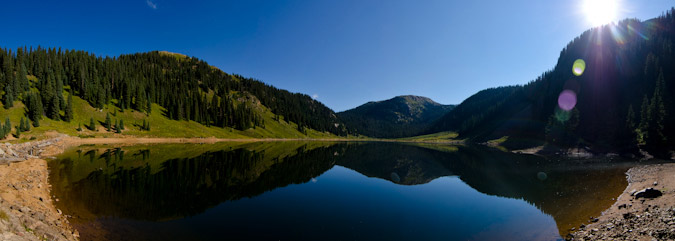
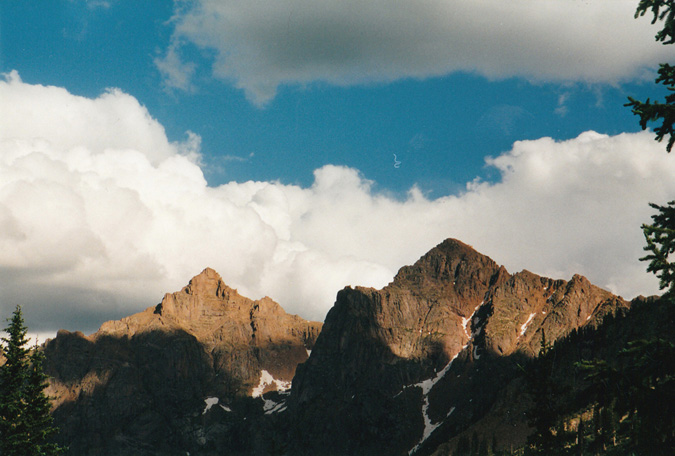
The Weminuche Wilderness Area and the mountains it contains are quite possibly some of the most incredible places on Earth. My first memory of the area was from 2000, when I led a group of 8th and 9th graders from Highland Mary Lakes to Vallecito Reservoir as part of my employment with Colvig Silver Camps. I remember fondly the views of the Needle and Grenadier sub-ranges and never thought in a million years I'd actually climb them. From many vantage points, the mountains in this area look unclimbable and untouchable. Indeed, the Needle sub-range of mountains which consists of Pigeon Peak, Turret Peak, Monitor Peak, Mount Eolus, Sunlight Peak and Windom Peak were some of the few mountains not explored by the Hayden or Wheeler surveys. According to Rhoda of the Hayden Survey, the weather pattern of the Needle sub-range was quite impressive: "Early in the day we noticed clouds hovering about the quartzite peaks, as we had seen them so often before. They never completely veiled all the peaks in the group, but early each day began to circle about them in a restless sort of way, like so many mighty lions about their lair. To us this apparent restlessness suggested a concsiousness of their terrific destructive power, which only awaited a mandate from the 'God of Storms' to be set in motion. We even now held these peaks in awe, as there seemed to be established somwhere in their midst a regular 'manufactory of storms.'1 Based on this notation, it is no wonder that Mount Eolus is named after the Greek God of Winds. Indeed, the clouds and winds were quite notable this trip, as seen in this preview...
With only five ranked 14ers left to climb, I was eager to finally get into Chicago Basin and climb those restless peaks. The route I chose for this adventure has been in the making for two years now, piecing together various adventures I'd had in the area in the past. In 2001, I hiked from Vallecito Reservoir and to Columbine Pass and climbed Jupiter Peak. In 2000, I did a backpacking trip from the start of Endlich Mesa to City Reservoir. With these two separate trips embedded in my memory, I knew it would be quite an adventure to go from Endlich Mesa to Chicago Basin and back. Adventure indeed.
45 miles round-trip.
16,600 ft. elevation gain.
4 days.
Here's a map of our adventure - please click on it to see the full version (including the rest of the map that you can't see here):
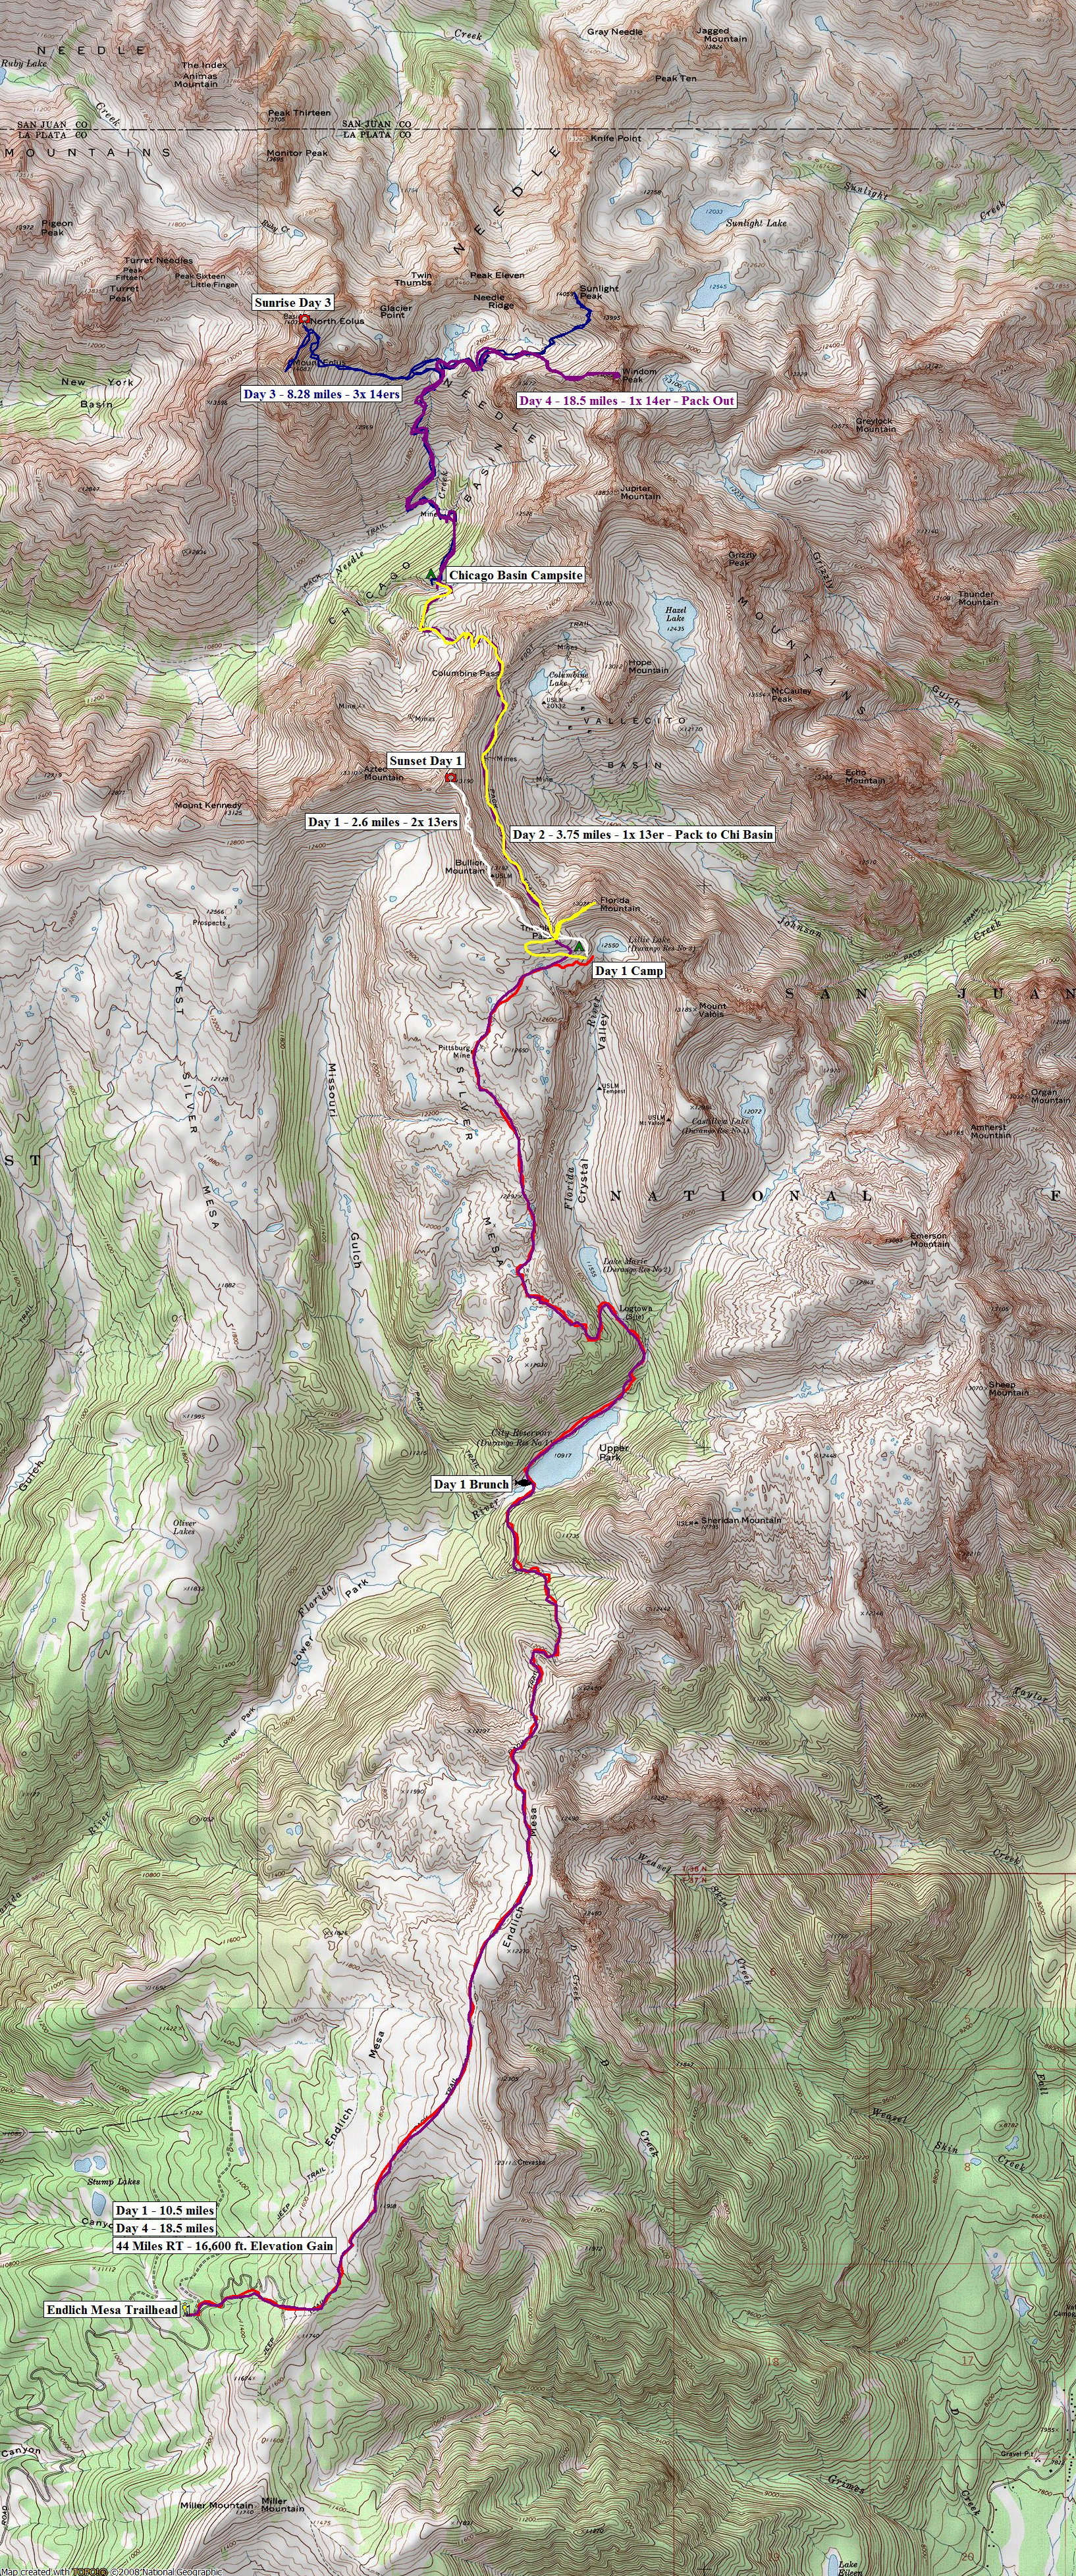
Day 1: Backpack from Endlich Mesa to Lillie Lake; summit two 13ers - 13.1 miles, 4,083 ft. elevation gain.
Two years ago, I had planned to do this trip with my dad. The Chicago Basin 14ers were three of the seven 14ers he had not climbed and I wanted to share those summits with him. Unfortunately, he suffered a freak knee accident this past Christmas and has not been able to hike this year, so I planned the trip with my new friend, Regina. Another set of unfortunate events happened, and I had a last-minute scheduling conflict on the dates Regina and I had chosen for the trip; however, another freak incident happened and I was able to clear some dates on my calendar and go on the trip with another friend, Sarah Musick. I explained the somewhat insane trip plan with Sarah and she bought-in right away, knowing that it would be a monster of an adventure. The plan was to drive to the Endlich Mesa trailhead on Thursday night, backpack as far as possible on Friday, backpack to Chicago Basin on Saturday, climb the 14ers on Sunday and Monday, and backpack all the way out on Tuesday for the drive home. It would be a feat no matter how you looked at it. The only positive to the approach was that we would be starting at 11,250 ft. elevation! All packed and ready to go on Wednesday night, I weighed my pack - 58 pounds! This was going to be painful! Sarah and I had opted to eat well this trip, so the bulk of the weight was in food, but trust me, it paid off later! So - off we went from Colorado Springs for the Endlich Mesa trailhead, which was up a long 9-mile forest service road north and east of Lemon Reservoir near Durango, Colorado. Earlier in the year, I had gotten some great information from Barry Raven from 14ers.com about how to get to the trailead - HERE is the map he shared with me, which I found highly useful in finding the trailhead in the dark.
We slept in Sarah's truck and set our alarm for 5:00 AM, which came after a night of rain. We secured our gear and kissed civilization good-bye. I had pre-prepared some an awesome breakfast for us to cook consisting of bacon, scrambled eggs and hash browns; however, neither of us were remotely hungry, so we opted to pack it in and eat a late breakfast somewhere on the trail. More pack weight! We ascended the Endlich Mesa trail fairly quickly in the early morning and reached the expansive and flat Endlich Mesa in no time at all, with views in all directions.
To the east, the mesa dropped off and revealed some pretty country.
Before too much longer, I was filled with glee as the first views of Pigeon Peak's east face were revealed, as well as the mountains of Chicago Basin. How far away they looked!

I was really excited to finally use my new camera lens, the Tokina 11-16 f/2.8 super wide angle. It is the highest-rated and best-reviewed wide angle lens for the Nikon DX format camera on the market. The lens is really hard to get these days because of the earthquake and tsunami that hit Japan. I was able to score one from Craigslist and have been itching to get it into action!
The wide angle view was really awesome and I knew I was going to have a lot of fun on this trip. Just in case, I had packed my 18-105mm lens for other shots. Oy vey! More pack weight! Sarah's pack was pretty heavy too, but she was a real trooper!
The mountains behind Sarah were indeed the mountains we were aiming for. Wow. Just wow.
We continued up the mesa, which was a very fun approach. It was mostly flat, with a few sections of up-and-down. The views were great the whole way in.
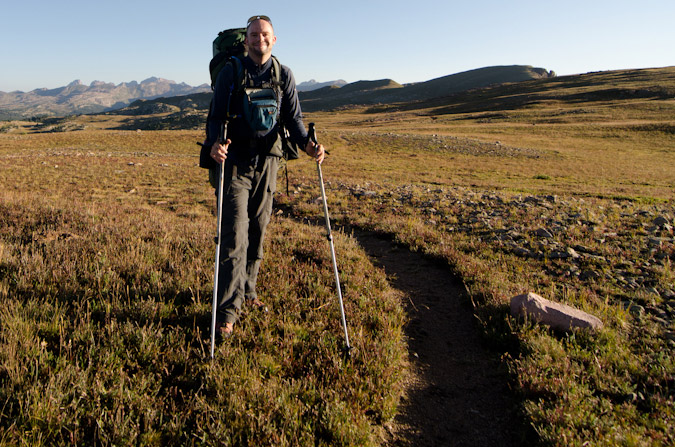
Sarah was able to capture just how geeked-out I looked for the hike...
We continued on and after enjoying some spectacular views from the mesa, headed on down towards City Reservoir, where we planned to cook some breakfast. The hike down to the reservoir was steep, and we both knew it was going to be one hell of a hike back up at the conclusion of the trip.
We stopped at Durango City Reservoir and enjoyed the early morning light on the water.
The Soup Nazi unpacked and prepared breakfast.
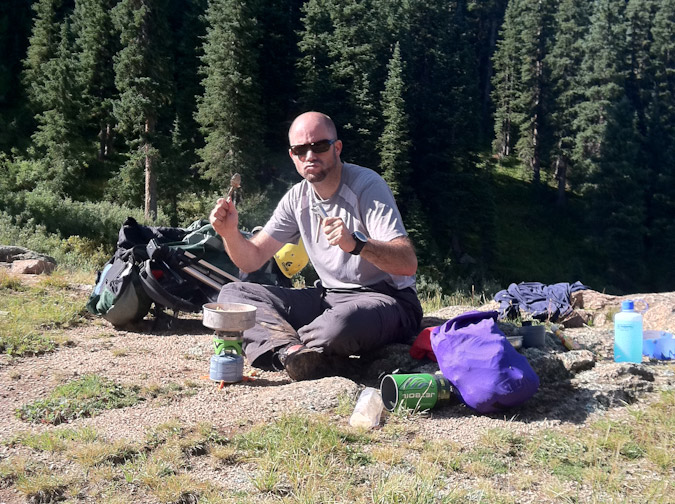
No Soup for YOU!
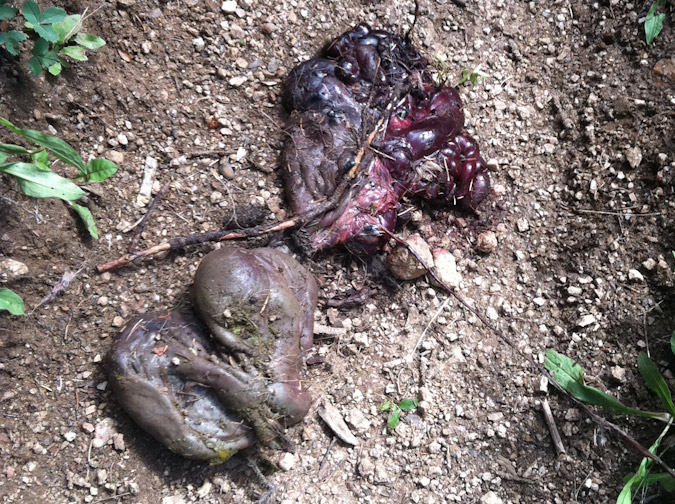
The breakfast was amazing. Two other backpackers passed us on the trail, one of which I later learned was "alwetend" from 14ers.com. These two guys had on packs that weighed at most 30 pounds and looked as though they were in lightweight ascent shoes. Jealousy set-in. We packed up and headed-out. For some reason, we felt like we were both moving much slower than before. It must have been the bacon. The trail heading up towards our second objective for the day, Lake Marie, was pretty steep (with heavy packs on anyways). We passed by the entrails of something on the way, perhaps a deer? Or perhaps someone with a heavy pack on puked their guts out... thanks Sarah for taking a photo!
At 11:30 AM we reached Lake Marie. Above it to the left (west) was Silver Mesa, where we were heading next. Above it to the north was Florida Mountain, which had at its base City Reservoir #2 aka Lillie Lake.
Climbing up to Silver Mesa was pretty straight-forward. The trail was clearly marked and it followed the USGS topo to a tee. Once on the second mesa of the day, we knew we were committed. We knew that our day's fate was sealed and that we needed to find a campsite somewhere between here and Trimble Pass before dark. I had my sights set on Lillie Lake, which was just below Trimble Pass. While exposed to the elements at such a high elevation, it was a great location to aim for due to the presence of water. So we worked our way up the Mesa at a slow pace. Huge cairns marked the way the whole way in.
Storms moved in and we put on our rain gear. Fortunately, it did not rain for long...
We reached a nice stopping place about halfway up Silver Mesa. Lake Marie was seen far below and the summit of Florida Mountain was seen far above. Here's a nice view of that whole scene in a 360 panoramic, with the lake to the left and the summit to the right.

At this point we were both pretty delerious and tired. Everything was funny.
We soldiered on up Silver Mesa further, which provided literally a highway of silver for us to hike on and up through a large notch.
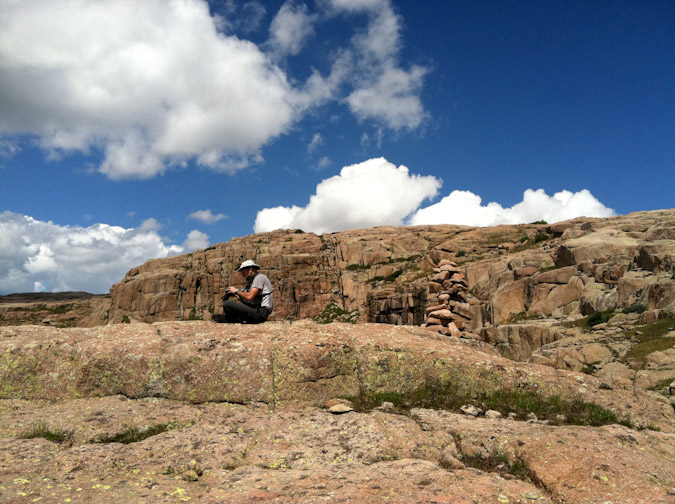
 We stopped again about 3/4 of the way near the Pittsburgh Mine and ate some food. Sarah swears I was meditating in this photo, but I'm pretty sure I was just enjoying the views!
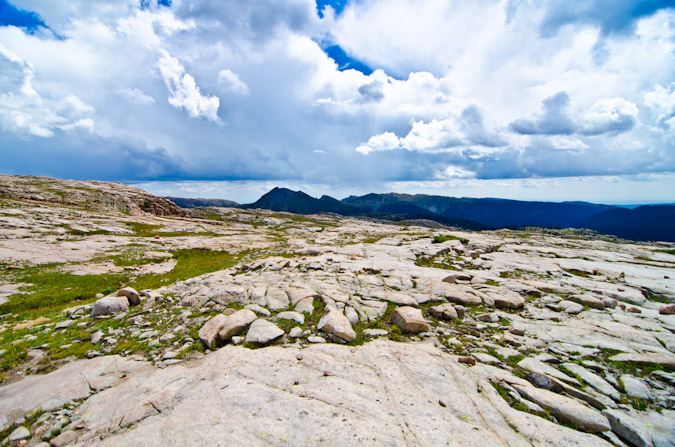
Indeed the views back to the south of Endlich Mesa and Sheridan Mountain were great, and it really put things into perspective in terms of how far we had already hiked. The large map I linked to early in the report really gives you a great idea of this as well.
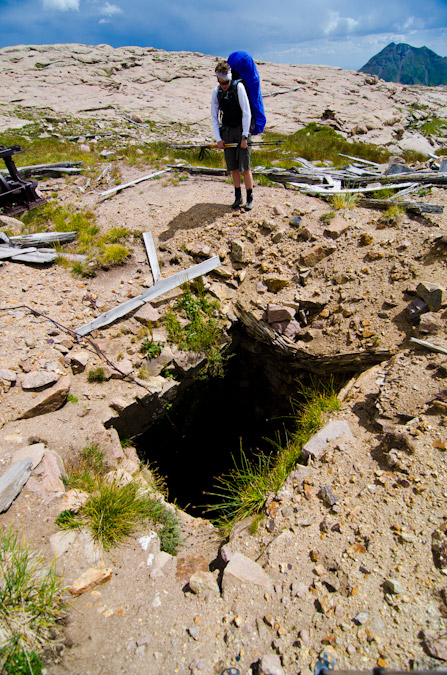
Break time was over and onward we trekked to Pittsburgh Mine, which I had vague recollections of for some reason. I'm not sure if I had visited this place before, but was awfully familiar to me. At any rate, the mine was great. It still had a great deal of equipment and huge holes to look out for. One spot was easily 30-40 feet deep, and Sarah and I marvelled at it for a few minutes.
The whole area looked like a tornado hit it. Maybe it was the God of Wind, ÆOLUS (actual spelling on the Eolus summit marker)!
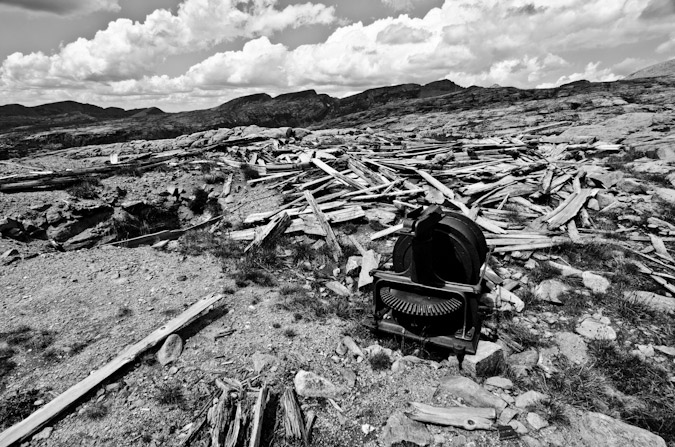
In a way, the scene really made you feel like an old miner.
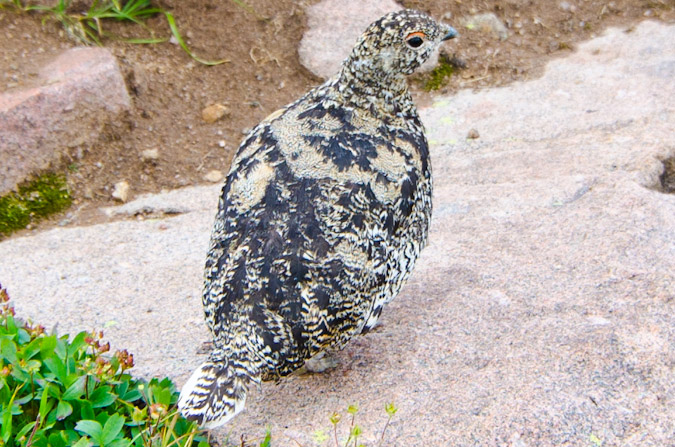
Once past the mine, we were almost to Lillie Lake. We could taste it. Sarah stopped me to ask how much further. I looked at the GPS and told her, "one more mile." This turned out to be the joke of the trip, as it really turned out to be more like two miles since my estimation was as the crow flies. On the way to the lake, I stumbled upon a family (flock?) of Ptarmagin, or snow chicken, which are surprisingly approachable since their only known predator is the golden eagle. This was a rare instance where I did not want the wide angle lens, but it would have to suffice.
We continued on and found several small pools on the way.
We reached Lillie Lake, a mere 10.5 miles from the start of Endlich Mesa trailhead, and found an amazing campsite just above the lake to the west. The campsite was nestled against a large cliff about 50 ft. high, and surrounded on all sides by ramps of rock except to the south, which led to a cliff overlooking the Marie Lake drainage. We were beat and we were starving!
We cooked up our first dinner of the trip - pasta alfredo. It was so good, but I really struggled to put away my half...
Since there were no trees above tree-line (imagine that), I thought of a great way to hang our food on the 50-ft. rock wall. I had read about this method in a trip report posted on 14ers.com for Pigeon Peak and it worked great! We used a large rock at the top as an anchor and suspended the food bags on the rock wall.
Having refueled and rested, I somehow convinced Sarah that we should climb a 13er and watch the sunset from it. So, away we went with small day-packs, water, a camera and a tripod. We made our own trail above the lake and bushwhacked up to Trimble Pass, where our first close-up views of Chicago Basin were found, with much jubilation.
Our attention was turned to the northwest, to Bullion Mountain's 13,182 ft. summit. This would be our target 13er. Bullion is the slightly steep sloped mountain on the left.
Sarah and I cranked it out on weary legs. The views back south were sobering. We had really come a long ways in one day.
We reached the summit of Bullion Mountain in just 40 minutes and realized we had plenty of time and legs left. I set my sights on un-ranked, un-named point 13,190 to the north, as it would provide superb views of Chicago Basin. The ridge looked like it would go just fine, with maybe one tricky section to navigate across.
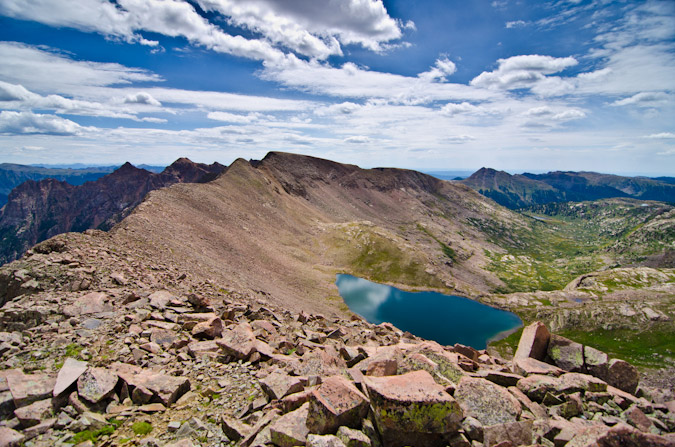
The views of Columbine Pass and Columbine Lake were great from Bullion Mountain, as were the Chicago Basin 14ers and the mighty 13ers Jupiter Mountain and Grizzly Peak.
About halfway across to UN 13,190, we stopped to admire the constrasted view of Johnson Creek below and the towering wall that is Organ Mountain and Amherst Mountain to the east. Organ Mountain demanded our attention and respect for the remainder of the trip. Sarah was particularly mesmerized by its impressive stature and was drawn to gaze upon it repeatedly. Organ Mountain is the pointy peak one mountain to the left of the furthest mountain on the right-hand-side of the photo (Amherst Mountain).
Indeed, Organ and Amherst were impressive peaks. Back in 2001, when I had backpacked up Vallecito Creek and Johnson Creek with my parents, I had admired them tremendously from below, and I even recalled taking several photos of them with my crappy 35mm camera at the time. I was able to dig one of those up and scan it.
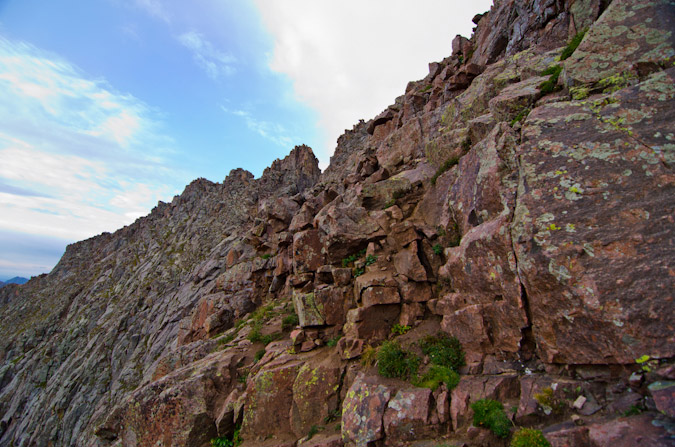
Sarah and I kept on trucking, and encountered a fun yet challenging section of the ridge that required some class 3 climbing. We easily manuvered that section but wondered how fun that would be in the dark later on. The Chicago Basin 14ers were still looking great in the late day sun.
We slogged up the scree slope to the top of UN 13,190 and celebrated. 10.5 miles of backpacking plus two 13ers was a pretty impressive day.
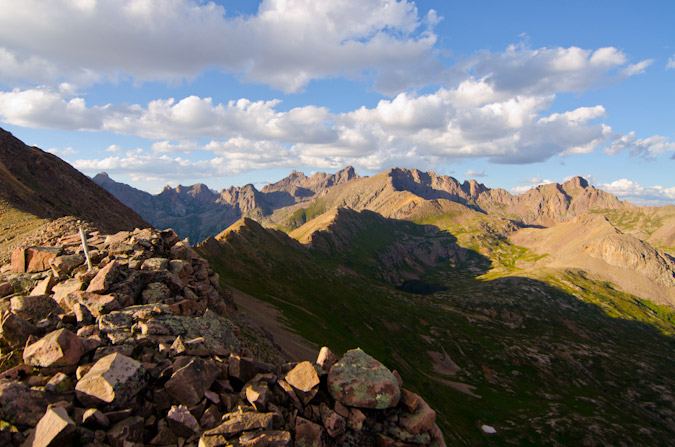
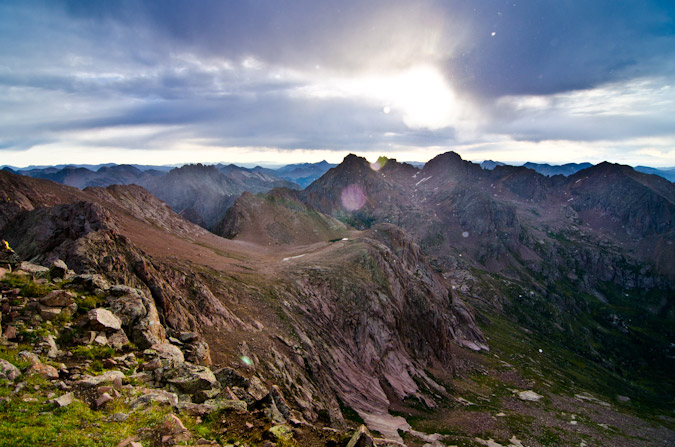
I promptly set-up my tripod on the summit and began taking some photos. Having a tripod on top of a mountain offers some pretty good advantages, starting with consistency. The ease in which photos are to take using a tripod, especially panoramic photos, is well worth the effort. Additionally, the quality of photos increases a great deal. Here's a 360 panoramic from the summit, with the sun cresting over Aztec Mountain (which I wanted to climb so badly, but we ran out of time and energy):

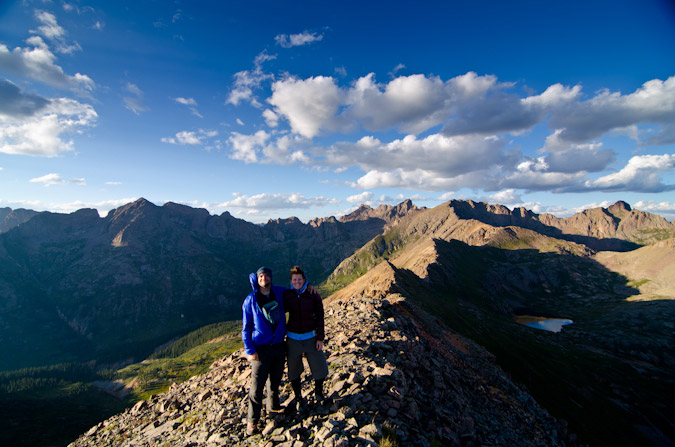
A tripod also makes it easier to do self-timer shots with groups of people, which we took advantage of! This is a view looking north at Chicago Basin and Columbine Lake. You can really appreciate the wide view afforded by my new lens.
For the photography geeks out there, one of the cool things about this lens is that it has 13 elements in 11 groups, which can make for some really great star-burst effects when stopped-down to f/22. The small aperture makes for a really small hole for the light to pass through, and the result is a diffraction spike, which are also explained HERE. Check out my results:
Sarah got to play witness to all this photography geeking-out and documented it with her super-awesome iPhone camera.
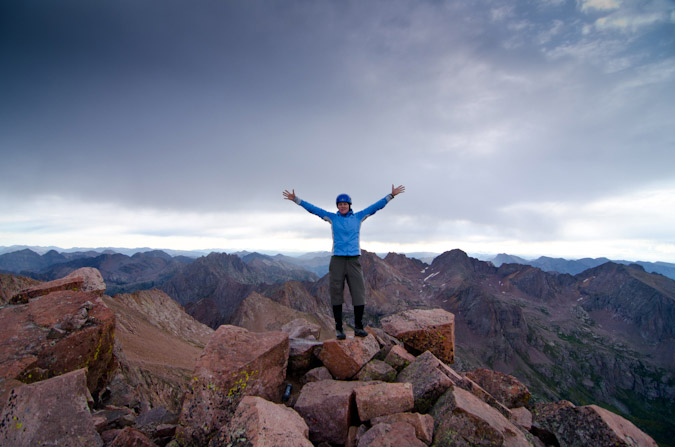
The sun continued to set and the moon began to show itself as well. It was a new moon, and it looked really great in the darkening sky. I captured Sarah witnessing her first sunset from the top of a mountain in HDR. Her words: "one of the five greatest moments of my life."
I was a pretty happy guy too, having witnessed only one other sunset from the summit of a mountain, which was from Arrow Peak last year, as documented in THIS trip report.
I tried my hand at my first HDR panoramic of the trip, which I believe turned out pretty well. Chicago Basin looked awesome.

Having witnessed her first sunset from the top of a mountain, Sarah was elated. I took full advantage of this and convinced her that we should stay on top for another hour or two to watch the stars and the milky way (and for me to photograph them). I was really glad she agreed, and we made sure we were bundled up for what we knew was going to become a cold night on the top. A thunderstorm boomed in the far distance behind Chicago Basin, and lit up the clouds behind it in the dark.
Before this trip, I did a little homework. I read some blogs and watched some videos on shooting stars, specifically the work of Ben Canales, who won the National Geographic Traveler's photography contest. This video of his, was very helpful for me, and I learned two tricks from it. The first trick was the 600/focal length rule, which basically states that when shooting stars in photography, to get a shot without blurry stars from star movement, you can shoot a maximum of x seconds, where x = 600/your focal length. In my case, I was shooting at 11mm, so I could shoot almost a full minute exposure without star blur. The second trick I learned was to take test shots at your highest ISO (in my case 26,600) to look for good shots. Check out his video for more! I wanted to get a good shot of the Milky Way with my new lens. At f/2.8, I could really gather a lot of light and it proved worth the investment.
Lastly, I wanted to get some fun star trails over Chicago Basin, and again this proved quite effective. I only did it for about 30 minutes, so it is not as impressive as it could be; however, we needed to get some rest for the big day ahead of us. For this shot, I found the North Star and centered the shot on it. To locate the North Star (which is stationary in the sky, and appears as a pin-point in star trails), find the big dipper. The two bottom right stars that comprise the Big Dipper form a line that points to the North Star.
I also decided to throw together a really short time-lapse of the sunset with the stars. Someday I'd like to do a full day's worth!
We head back over to Bullion Mountain in the dark and were able to find out campsite without any problems. Its funny how good of a memory your mind has, even in the darkness of night. We crashed and slept in, letting the heat of the morning sun wake us up.
Day 2: Climb one 13er, backpacking over Trimble Pass and Columbine Pass to our campsite in Chicago Basin - 800 ft. elevation gain with 1,750 ft. lost, 3.75 miles.
Having a good night's sleep, we were able to quickly pack-up our stuff and eat some breakfast bars. I took a quick hike up to Lillie Lake for one last view before our departure. It was an awesome place and I was happy to have visited it. Lake Marie sat far below, seemingly waving us goodbye, for now...
One cool fact about Lillie Lake - it is the headwaters for the city of Durango's water supply - the Florida River - and sits beneath a relatively unimpressive 13er, Florida Mountain, which we had our sights set on for the start of the day.
A better view of the area, with our campsite at far right -
We packed up and trudged up to Trimble Pass. We left our packs here and strolled up to the summit of Florida Mountain's 13,076 ft. summit to enjoy views of Chicago Basin and Johnson Creek.

Sarah was especially excited to be on top of her fourth 13er, all with me.
It even had a cute little benchmark on the top, which was fairly unique.
Lillie Lake was especially pretty from this vantage, and was nice to see in actual sunlight...
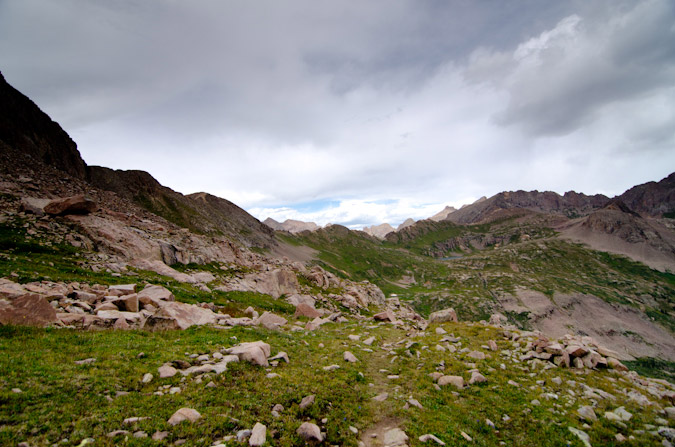
We returned to our packs and began the arduous journey over to Columbine Pass. This section of the hike was quite pretty. We really loved the views from here and only passed two other hikers the whole way over. Looking back on Trimble Pass - we had already come a long ways...

... but we had a long ways to go yet before the top of Columbine Pass. We'd have to return this way? Yikes.
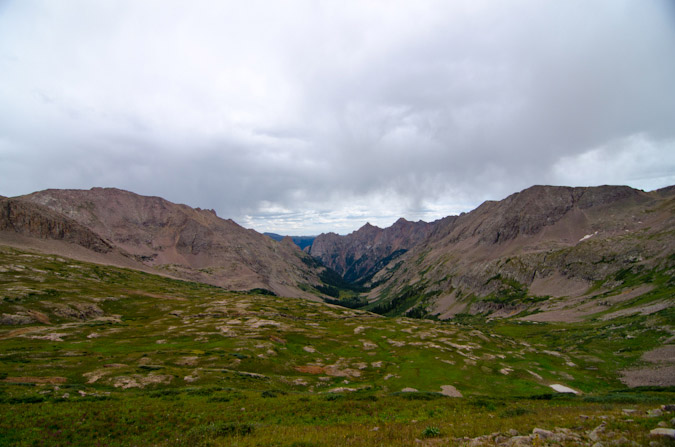
Organ Mountain still drew our attention and made for quite the scenic backdrop to an otherwise desperate slog under the weight of our monstrous packs.
Amazingly, there were still quite a few wildflowers in this basin, and they provided quite a lovely foreground for Columbine Lake and the Chicago Basin '3' -
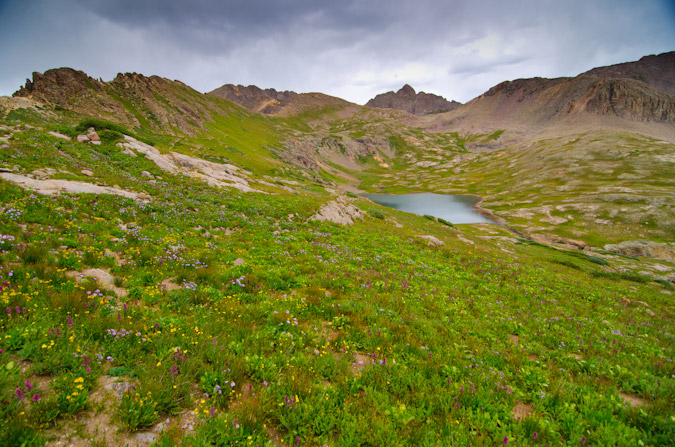
The flowers also proved to be quite a nice foreground for Trimble Pass and the rugged Organ Mountain.
At 1:30 PM, just three hours after we left camp, we had arrived at Columbine Pass. We were greeted to Chicago Basin by wind, rain, and thunderstorms, which all quickly subsided. Storm clouds hovered over Eolus and heeded the command of the God of Wind.
The path down from Columbine Pass was a fairly straight-forward one, following a very worn trail on somewhat steep scree and dirt.
We descended into the Basin in quick order. I had tentative plans to find a campsite closer to Columbine Pass rather than going down deep into the basin. My reasoning for this was two fold. For starters, there would certainly be less people up higher near Columbine Pass, and I prefer not to camp near a ton of people. Lastly, this would afford an easier ascent from Chicago Basin on our exit day. Indeed, we located a very clean and impacted site just into the trees and called it our home. As soon as we arrived, two mountain goats, a mom and a baby, arrived to greet us to the neighborhood.
It was at this point that I knew that I did not haul my heavy 18-105mm lens in vain. I swapped lenses and took some closer shots of the goats.
Peculiar animals - they always seemed to gravitate to difficult terrain, even in a huge meadow...
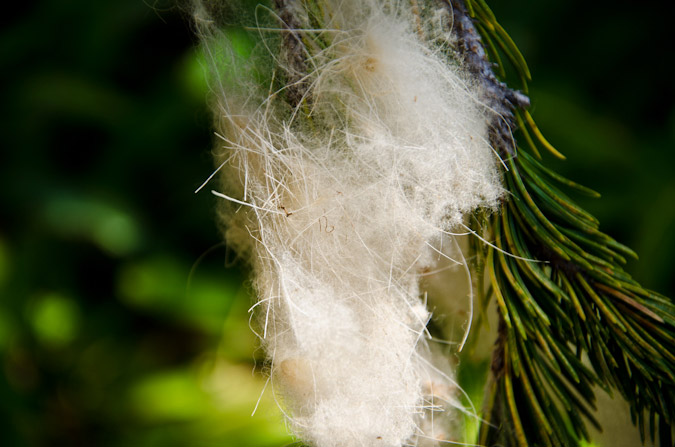
And they always seemed to leave behind some of their fur - must be their welcoming gift to us!
I swapped lenses again as we prepared dinner. Tonight's meal would consist of a wonderful medly of jambalaya and sausage. Hell yes.
We devoured the food and Sarah went in and took a nap. I decided to venture up the valley to see what trouble I could get into with my camera. The sun was setting and I knew it might present some fun opportunities. I found a few good spots and gave it a shot.
Here is Aztec Mountain in HDR:
I followed the stream that entered our campsite up a ways and found a nice view of the sunset over Eolus.
I found the water to be a fun subject to play around with.
... in black and white too...
I went back to camp and found a deer was trying to eat our food, which we had not quite hung yet. I shooed the dear off and hung our food and hit the sack. We wanted to get a sunrise summit and hopefully all four 14ers, so we set the alarm for 3 AM...
Day 3: Sunrise from North Eolus, summit of Eolus and Sunlight - 5,112 ft. elevation gain, 8.7 miles.
The alarm sounded and we rose out of the tent like two zombies. Two long days of backpacking had taken its toll on our bodies. We were both sore and tired, and we knew that today was going to be huge. We also knew it would pay large dividends if we committed to going hard and strong. We raced out of camp in the darkness with our headlamps guiding the way. I knew we were looking for a sign that would point us up another trail to Twin Lakes. We dropped 500 ft. in elevation to the valley floor and crossed the fairly large drainage coming down from Twin Lakes. We ran into a solo hiker that was coming up and he said he was heading to Twin Lakes as well. I was certain we had not passed the turn-off yet, so I asked him if he passed it. He did not really know what I was talking about, nor did he know what Columbine Pass was. I was not terribly sold on his sense of direction, but decided we should follow him for a minute to see if we passed the turn-off by mistake. About 20 seconds in, I decided to look again at my map and sure enough, we had not yet reached the turn-off. I tried to signal him but his head-phones prevented him from hearing us, so we turned back and headed down further and found the turn-off within minutes. Up we went without him towards Twin Lakes. We hiked fast. Blazingly fast, considering the amount of miles and elevation we'd done the past 48 hours. We reached Twin Lakes in the dark at 5:00 AM, which felt great. We knew we needed to turn left and find the trail up to Eolus. This proved difficult, so I just went with my instincts based on what I had read. We found ourselves in the right general area below some cliffs without a trail. Through urging from Sarah, I consulted the GPS and sure enough, we were roughly 50 feet below the trail, and we found it right away. We continued up the steep trail towards Eolus and found the ramp leading up to a flat bench before the saddle between Eolus and North Eolus. The sun was just beginning to light the Earth at this point in time, and it was magical. The low light created great silhouettes of Sunlight and Windom, and the small lake below looked like a sheet of glass.
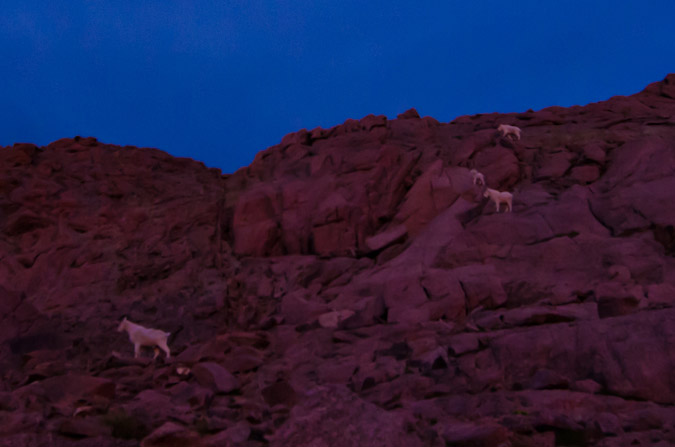
We continued up towards the saddle and found another herd of goats coming down from above. The baby goats were making an adorable high-pitch sound that could only be encapsulated thusly, "eeeeeeeeeeeeeeeeeeeeeeeeeeeee!"
It was truly a gift to be able to witness these creatures in their true habitat. I know that Chicago Basin trip reports are oft too full of tales of mountain goats, but in this case, I really felt like I witnessed something special, watching these beasts navigate this rugged terrain. I coined a geeky phrase while watching them, which I shared with Sarah - "Wanting to Buy - Mountain Goat skills."
Pushed by the imminent sunrise, we climbed on, and reached the Eolus - North Eolus saddle. The famous Mount Eolus catwalk and Mount Eolus were looking mighty fine in the early light.
Looking up at North Eolus, I knew it would be an incredible vantage point for sunrise, and so we went for it. In true form, we reached the summit just moments before sunrise. I was jubilant and ecstatic, like a kid on Christmas, and I captured some footage on video:
For all of you detractors of HDR photography out there - I decided to showcase both methods (HDR and non-HDR) for this trip report, to please everyone and to demonstrate the difference. You can mouseover / click to see the other version. Here is what greeted us at the summit (mouseover / click to see the non-HDR version).
Slowly but surely, the sun began to poke through the clouds, which were the most insane feature of the scene - absolutely magically dramatic.
This next shot is non-HDR, and one of my favorites from the entire summer.
I was in heaven (probably quite literally). The views of Pigeon, Turret, Monitor, Animas, Arrow, Vestal, Sunlight, Windom and even Rio Grande Pyramid were stunning. Breathtaking. Here's a near-360o panoramic. Click to see a larger version.

The HDR Panoramic version turned out pretty well too, although in this case, I almost prefer the non-HDR version, except for the fact that the clouds look INSANE in HDR (click for a higher resolution version).
I have about 20 versions of these panoramics that I can't set my mind on picking a favorite, so I decided so share a few more...
As we were both getting pretty chilly, we decided to get a quick group photo and head out. Click / Mouseover to see non-HDR version.
We found ourselves back at the catwalk, which was impressive. Sarah and I immediately began reciting the classic Right Said Fred 1992 song, "I'm Too Sexy."
Once we reached the catwalk, I could not help but sing, "I shake my little toosh on the catwalk" and do a little wiggle. After revisiting that video, I can't help but feel a little light in the feet if you know what I mean...
Sarah was kind of nervous for the catwalk, but her smile said otherwise.
Once past the catwalk, we were greeted by some really fun and intricate ledges on the face of Eolus. I had read some about them, but nothing is quite like being there. It kind of reminded me of the final sections of Crestone Peak, only a ton more of it.
One thing was blantantly clear - a mis-step and you would be tumbling to your death. In a moment's notice, the sky became filled with small snow-flakes, adding to the magic of the morning.
At 7:40 AM, we reached the top of Mount Eolus and it was a great feeling. We felt like we had accomplished so much this trip.
It was so awesome to see Arrow and Vestal again after my trip up them last year. Soon after we summited, a solo hiker joined us on top. I mentioned how awesome Arrow and Vestal looked and he asked me what they were. It made me very sad. My reply in my head: "Only the two coolest mountains in Colorado!" He said I was wierd for climbing 13ers before 14ers... sigh. They are seen just left of me in my summit photo.
The views looking down the valley we had just came up were so awesome. In the dark, you can't fully appreciate the scale of your hike, but once above, it becomes really clear that what you accomplished was huge.

After spending about 10 minutes on top, we decided to head down, knowing we still had more mountains to climb before the weather got really bad. The clouds seemed to be holding in our area, but looked crazy in other areas. Time would be of the essence if we were to get all three in one day. On the way down, we passed one older guy with huge calves that provided the absolute best opportunity for laughter for Sarah and I. I should not jest, but when you're tired, almost everything is funny. He was wearing almost no gear, super old-school boots, no helmet... and socks on his hands for gloves - yep. Also on the way down, we saw a large group closely together, coming up. I was almost certain that it was either a guided trip or some sort of vacation group. As we passed them, they were indeed somewhat odd, but very enthusiastic to be up there nonetheless, and that's what matters! They were coming quite slowly and when we passed them, they were studying maps and routes and 14ers.com printouts. They also appeared to be wearing helmets that were fit for people twice their size. At least they had helmets. You can see them as small dots in the photo below.
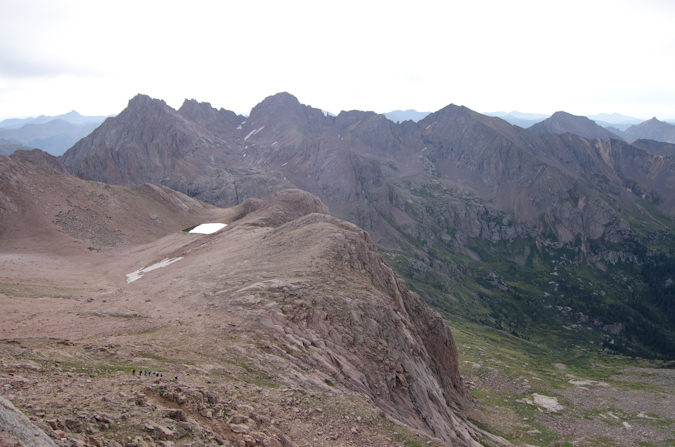
The way down was fast. Too fast. I felt like I was at cruising speed. My legs felt great, like adamantium.
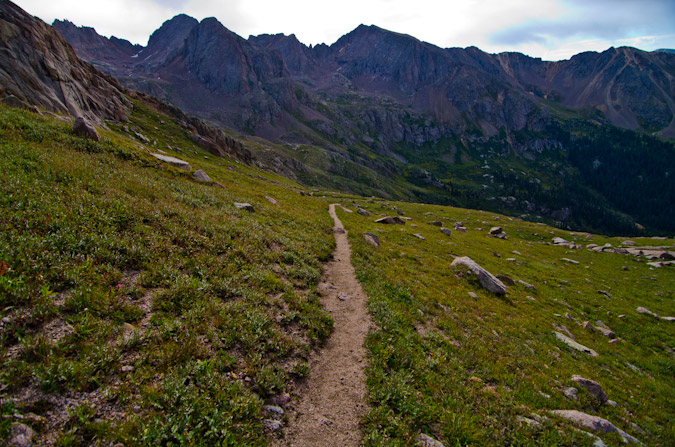
Naturally, we passed a solo goat on the way down. Those guys were everywhere!
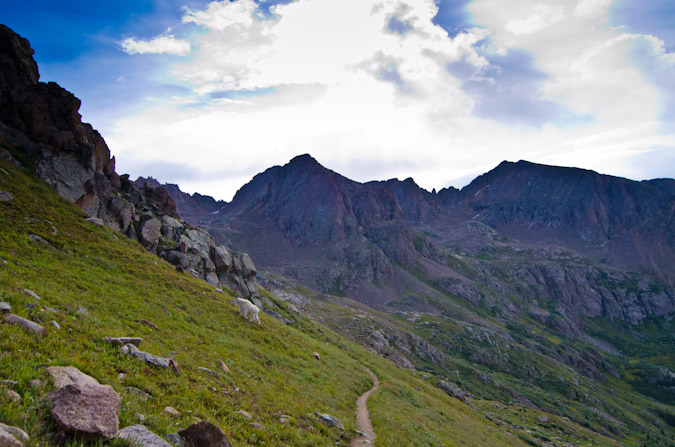
We rounded the corner and the Twin Lakes came into view, including Needle Ridge, Sunlight and Windom. Spectacular!
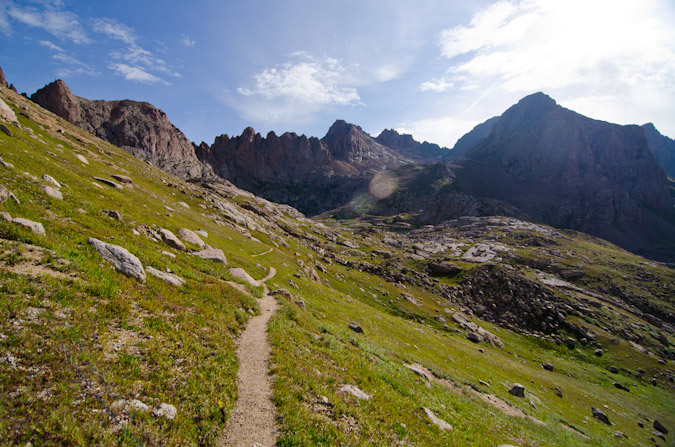
I raced down to the lakes, knowing it was just going to be a feast for my eyes and camera. Right as we reached the lake, a friend of mine, Will, who joined me for my hike of Mt. Wilson last month, met up with us. He was gracious enough to refill my Camelbak bladder with purified water. He was planning to head up Eolus, as he had done Sunlight and Windom the day before. I set-up my tripod at the lake and started shooting photos. Will captured the moment.
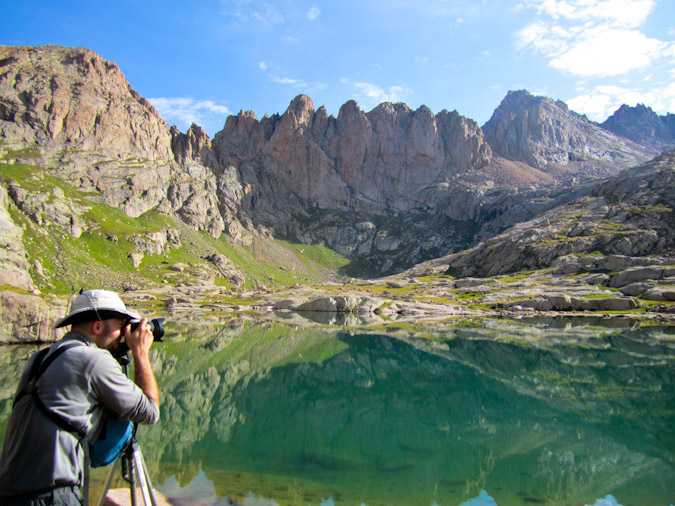
For this particular scene, I decided to do HDR since the sun was in the scene, which made it really tough to get all of the dynamic light into the shot. I would be the first to agree that this shot is totally over the top, but I love it just the same.
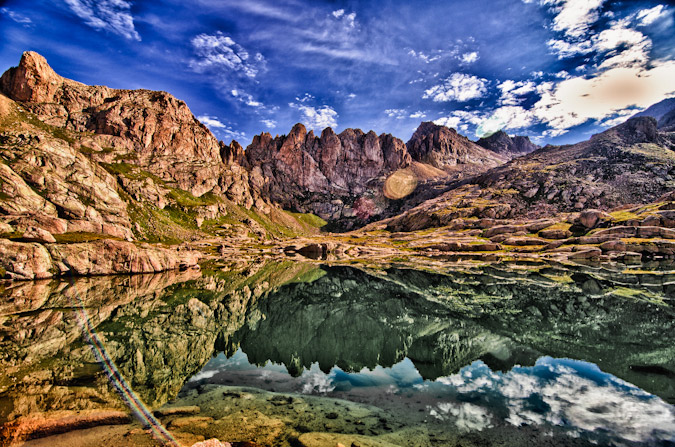
I also decided to get a shot of me at the lake, using the tripod and the self-timer.

Sarah and I refueled by eating some awesome tortillas w/ peanut butter and honey we had made the night before and then set-off for Sunlight. The trail up Sunlight was so awesome. The incredible work of the Colorado 14ers Initiative was obvious here. Huge cairns marked the way. Stone-work that would make a dwarf from Lord of the Rings envious demarcated the trail, paving a highway up the slope of the mountain.
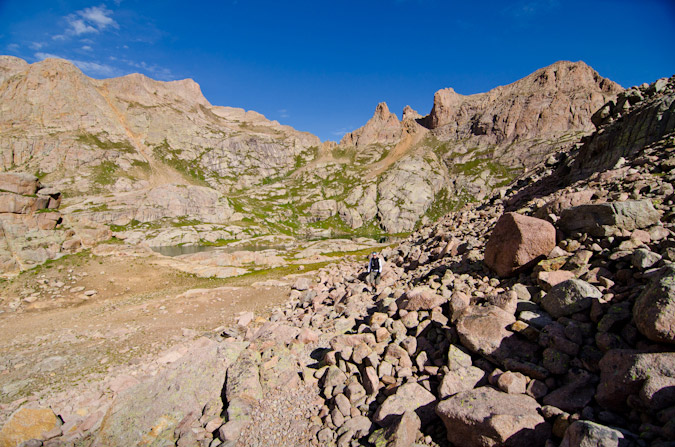
As we climbed, the Twin Lakes were looking as awesome as ever.
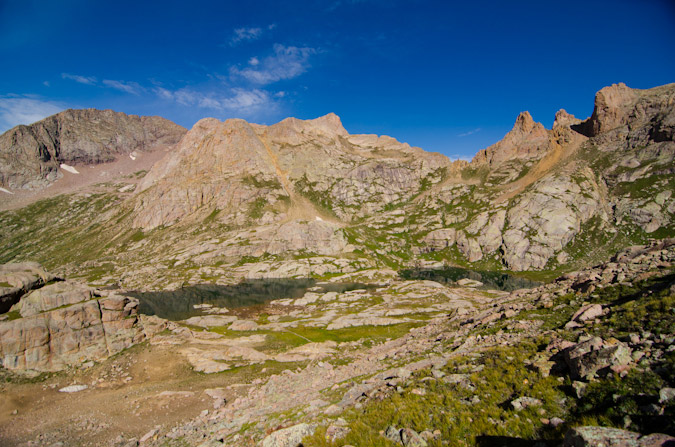
And the cairns were monsterous. Looking back at Eolus was also humbling.
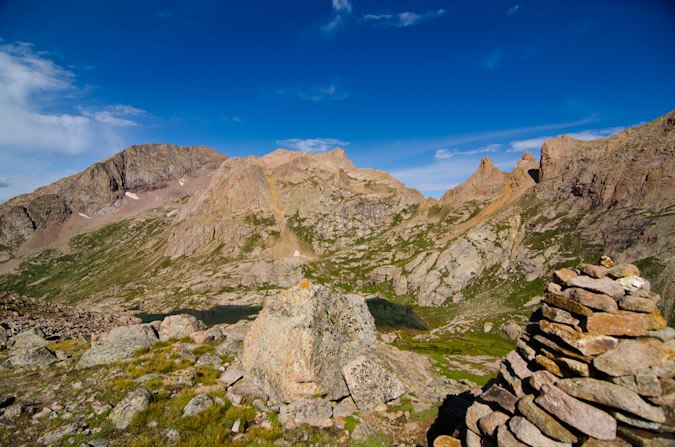
Looking up, we still had a ways to go to reach the Sunlight Peak - Sunlight Spire saddle (top - center).
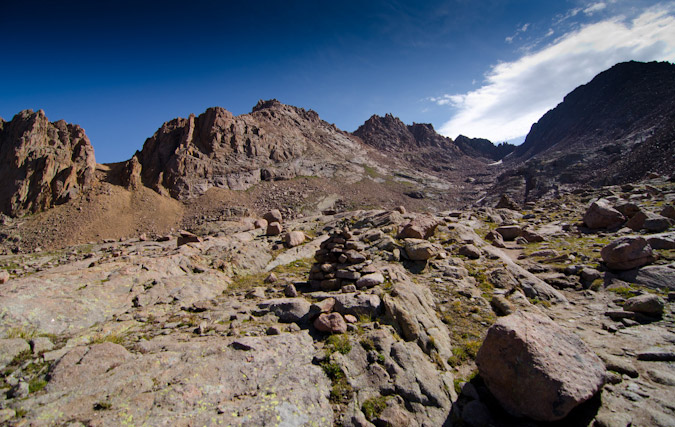
The cairns also provided some good resting areas.
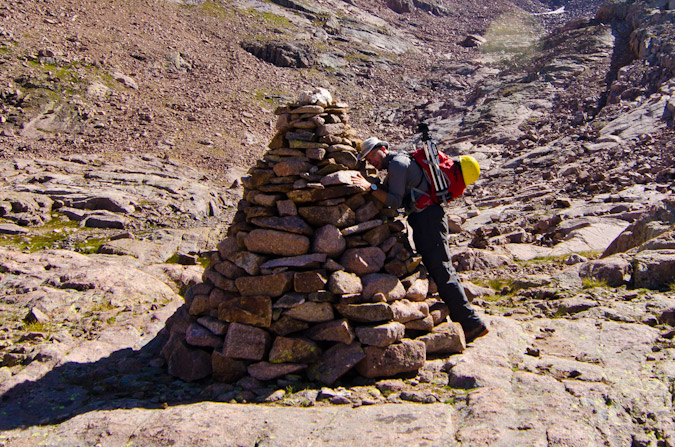
We reached the top of the basin and started climbing up towards Sunlight.
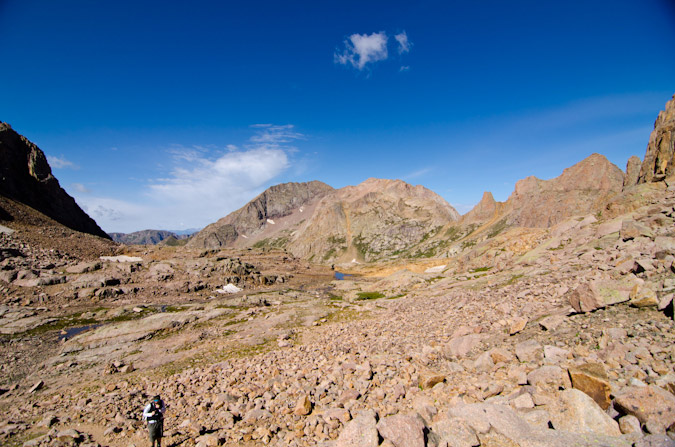
Which became steeper the higher we got, and eventually the paved road provided by CFI ended, and scree began.
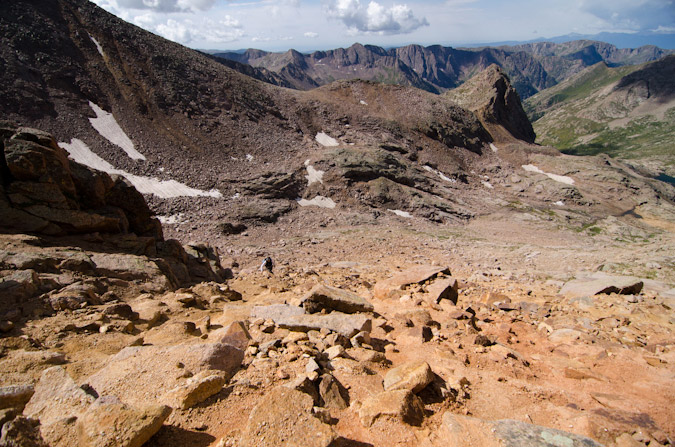
I reached the saddle and admired the views to the north of Jagged Peak, which is one of the last few mountains in the highest 100 I have left to climb.
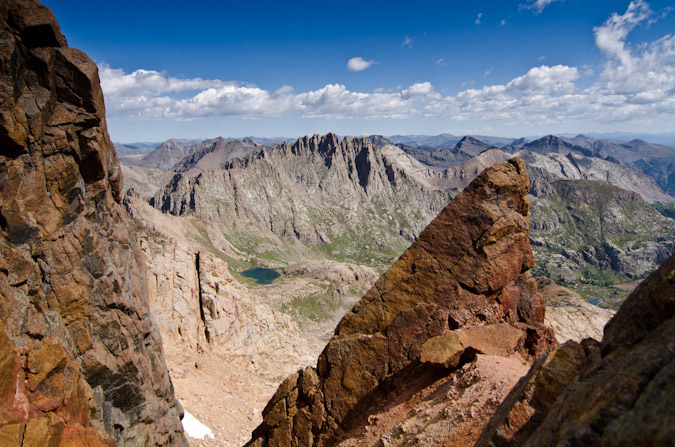
Sunlight was still high above from the saddle, as evidenced by this 360 panoramic photo with Sunlight at center.

At this point, Sarah was feeling light-headed. I knew her stamina was OK but something was going on with her body. I suggested that perhaps she needed more protein, since we had not had much through the day. I pulled out the huge log of summer sausage and we snacked for a bit. Sure enough, within minutes, she felt much better and we were off to the races again. A view back at Windom and the clouds forming above provided motivation.
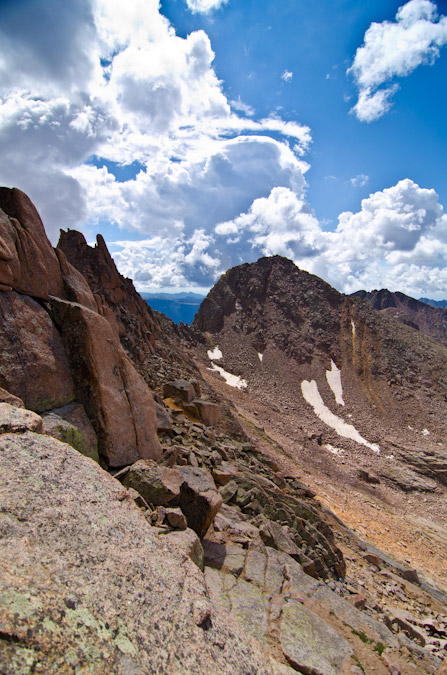
We reached a small gap during the climb, which was quite challenging to say the least, and I loved the window. The views of Rio Grande Pyramid and "The Window" were great! So this photo is called - "The Window through the Window."
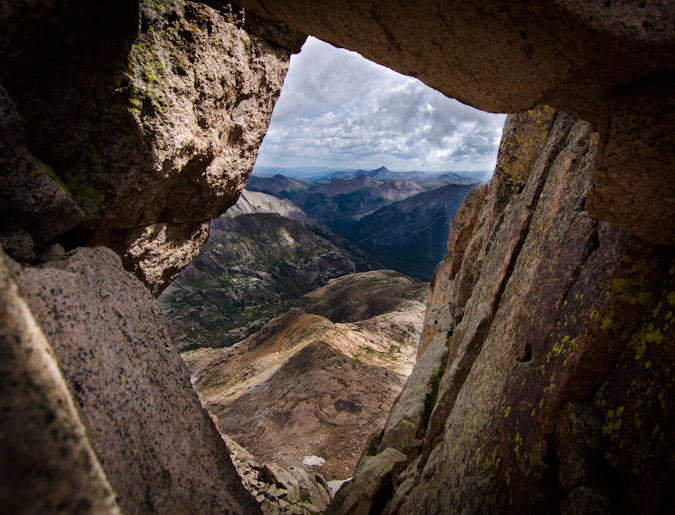
We found ourselves actually using some climbing skills - and head up a small chimney.
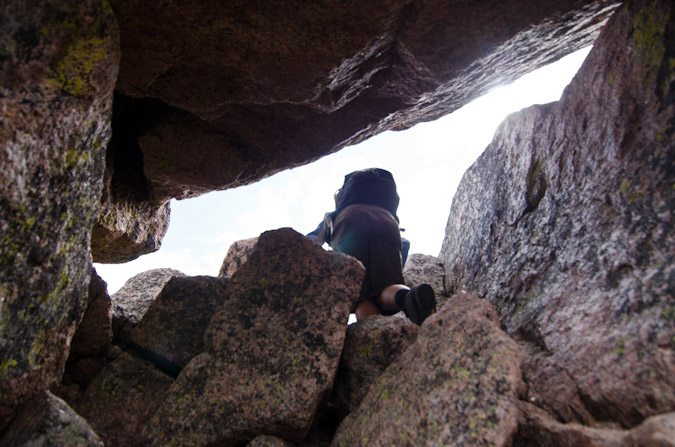
We reached the summit of Sunlight Peak at 11:45 AM, which felt pretty great considering we had been on Mount Eolus just 4 hours prior. The weather was moving in though, and that dampened our spirits. An exciting climb like this should feel amazing when you get to the top, but the thought of being electricuted tends to temper those feelings for a while. I managed to get a few panoramics anyways, which show how nasty the storm moving in looked.
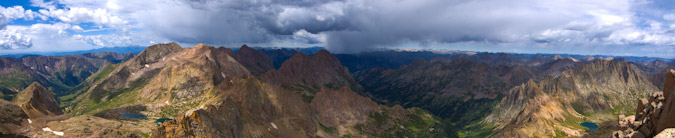
Here's a near 360 pano:

And a quick summit photo by way of Sarah, including Sunlight Spire's incredible summit just left of my camera bag:
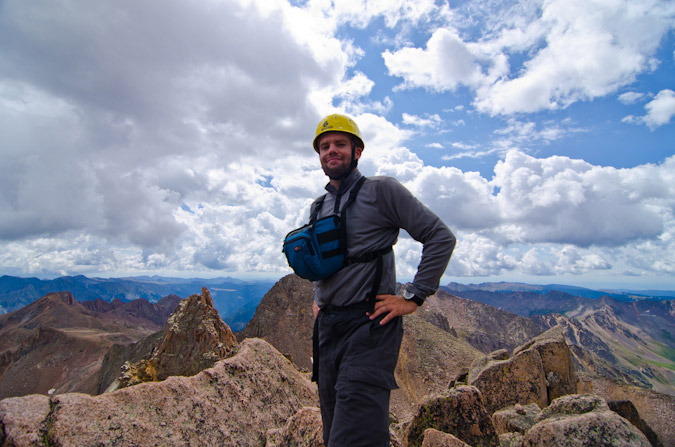
The air filled with graupel, a sign that things were not going to be good - weather-wise. We reached the Sunlight Peak - Sunlight Spire saddle in quick order, passing several people still heading up. Not sure if that is the best idea to head up when the storm is depositing ice on the rocks, but that's just me. Here's my reaction to that!
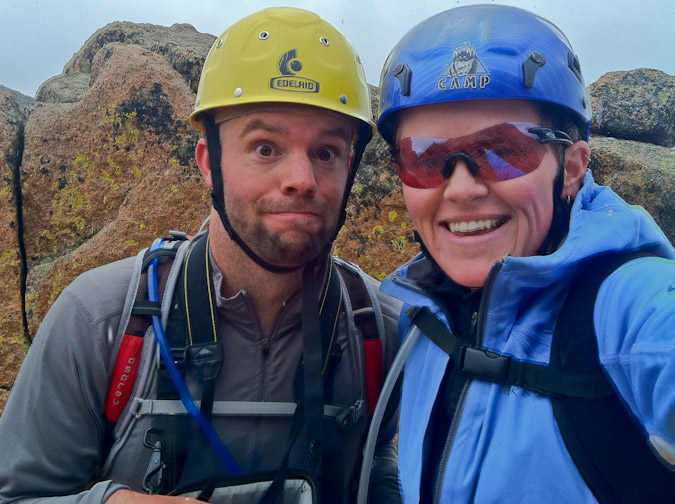
Here comes the weather!

The crazy kids in tennis shoes and cotton hoodies kept going up through the graupel and thunder, but we booked it down to safety and took refuge.
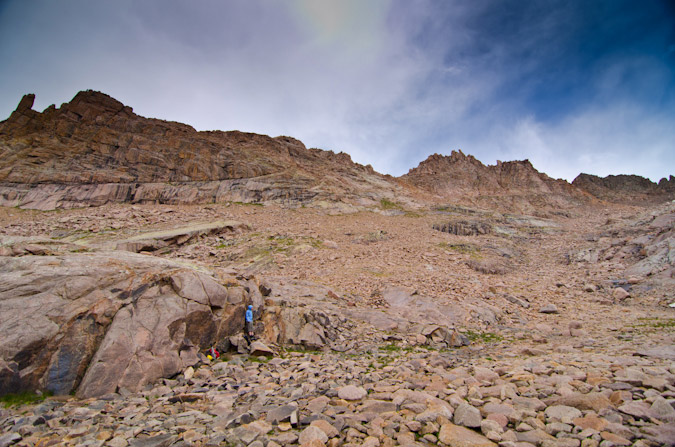
Luckily for our friends in cotton and tennis shoes, the weather let up, dumping only light amounts of rain in the area. The rocks were slick though, and that was a real concern to us, even though Windom was just 1,100 feet up from our safety spot. We sat for awhile, watching the weather, contemplating our next moves. Would we be able to wait out the storm? Would it be safe to go up? We sure did not like the thought up coming up again in the morning on tired legs. We finally agreed that it made the most sense to head down, especially given the fact that it was still slightly raining and the rocks were getting wet and it was still sounding off with thunder. Even on the way down, I stepped on a large wet rock slab that was slightly at an angle and it dropped me on my side like a hit from a middle linebacker. I was fine but it was a good reminder that we had made the right choice to go down. Even still, more and more people kept heading up. Madness.
The views on the way down were still great though, including this wonderful shot of some waterfalls below Twin Lakes.
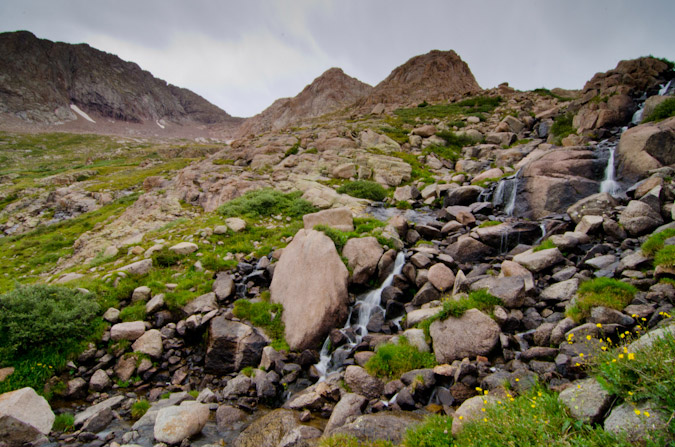
The weather persisted most of the way down into Chicago Basin.
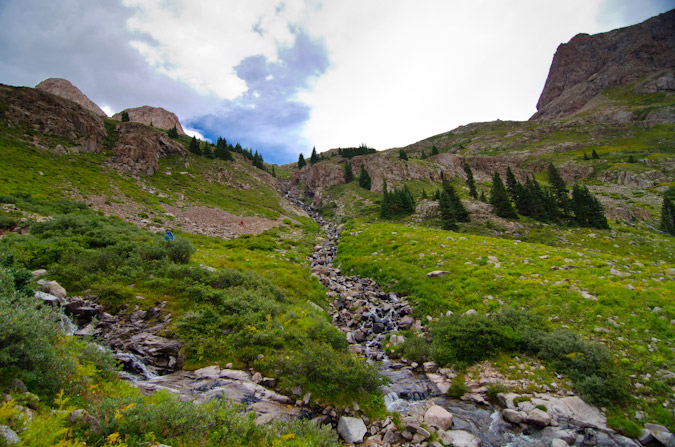
And in true San Juan Mountain form, the weather started to dissipate as we got lower...
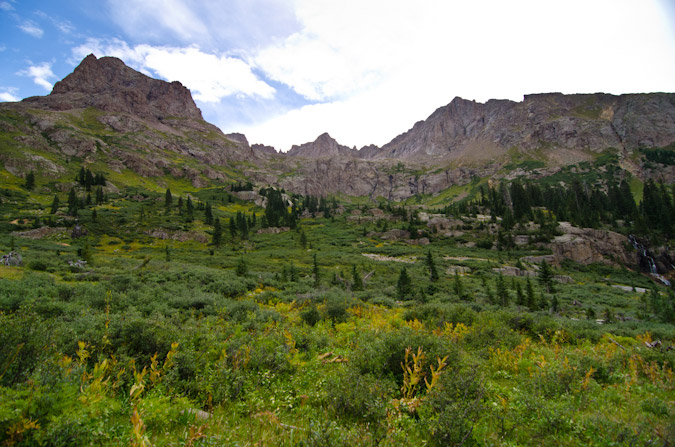
We reached our campsite slightly demoralized, tired, and sore. My knee was starting to really hurt from all of the pounding it had received on the downclimbs, which did not bode well for the climb up and down Windom for the following day. Such is life on a quest for mountain tops. Sarah decided to take a nap and sulk over our defeat, while I decided to eat some food and think about the day's highs and lows and the strategy for the following days. As we were moping, a herd of goats decided to come see what all the whining was about and one of them even decided to piss on our pity parade.
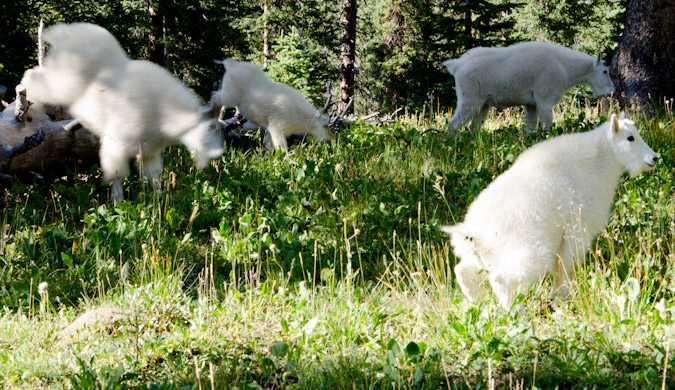
This herd was pretty big - I believe there were 7 of them total, including two babies, a real scruffly looking one, and a bigger grandpa type.
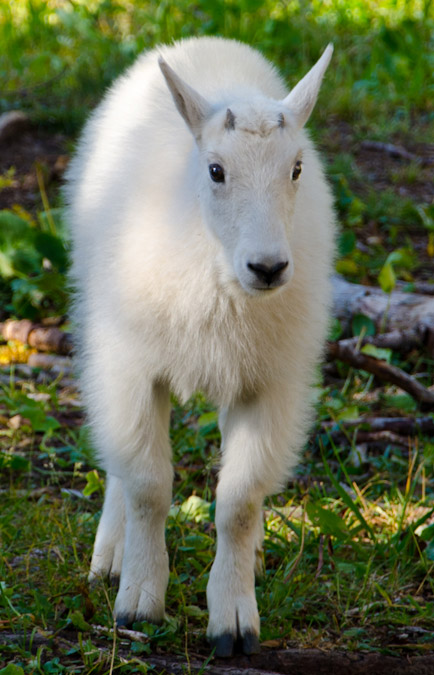
Here's Mr. Scruffly:
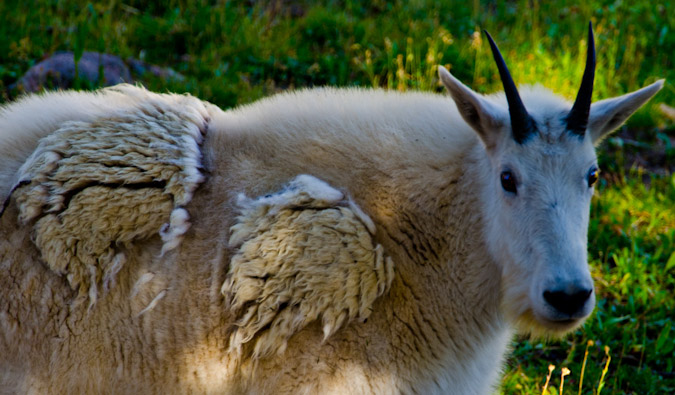
And my favorite goat photo... I was photographing them from near a fallen tree when all the sudden this baby goat decided to jump on the tree and walk towards me - he came all the way down and started nibbling on the tree - it was really cool.
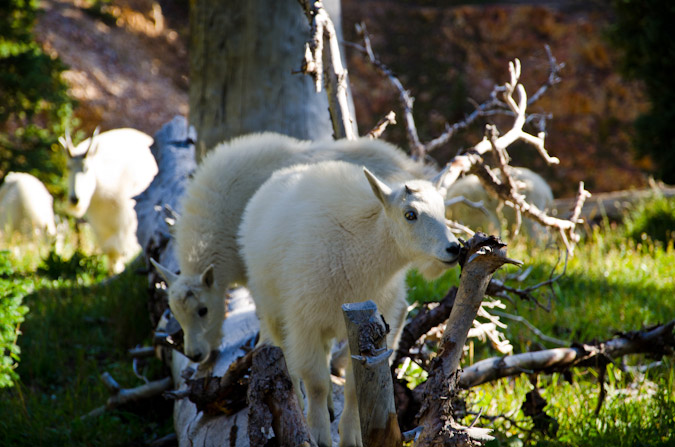
One of them kept a good eye on me. I think he was making sure I was not going to attack them or something. It was funny to watch them interact so closely. Sometimes the babies would go under a female for milk and they would get shoed off. Sometimes one goat would kick another goat out of a grazing spot in a fury. They were hilarious.
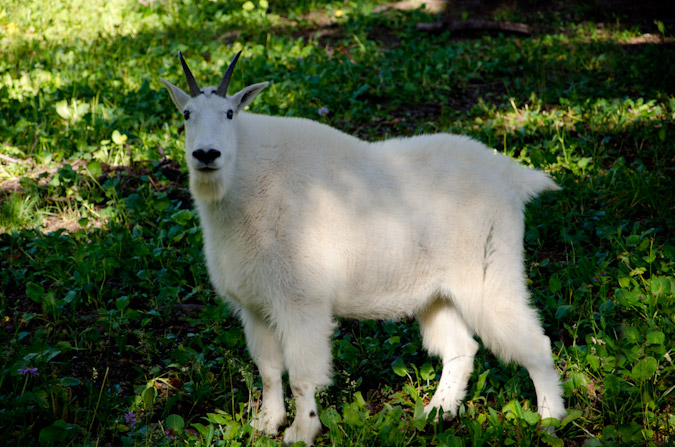
I probably got too excited about the goats, but I've been waiting years to see goats up close again, so it was a real treat.
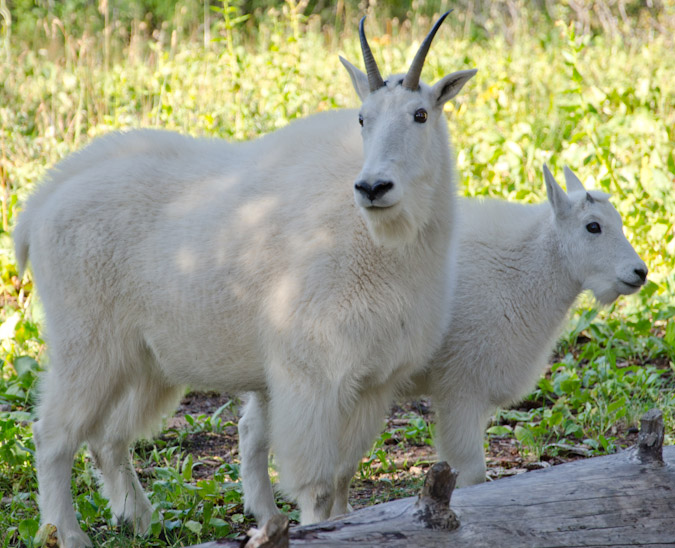
It was really funny how close they got to our campsite! One time, one of them charged another one, and did not see that Sarah was right behind the other goat. When he turned to run, he almost jumped right into Sarah!
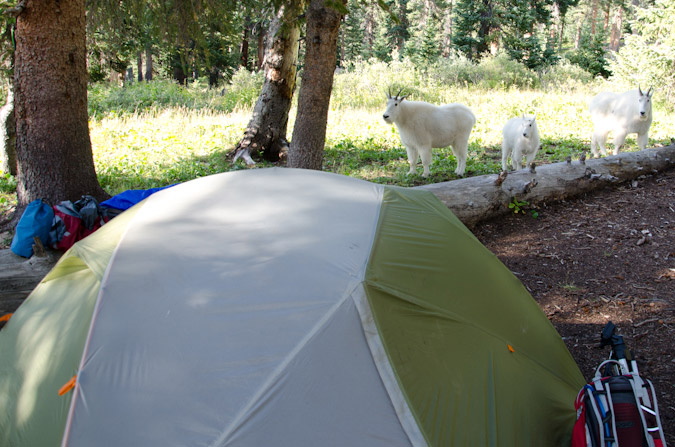
They were really fun to photograph.
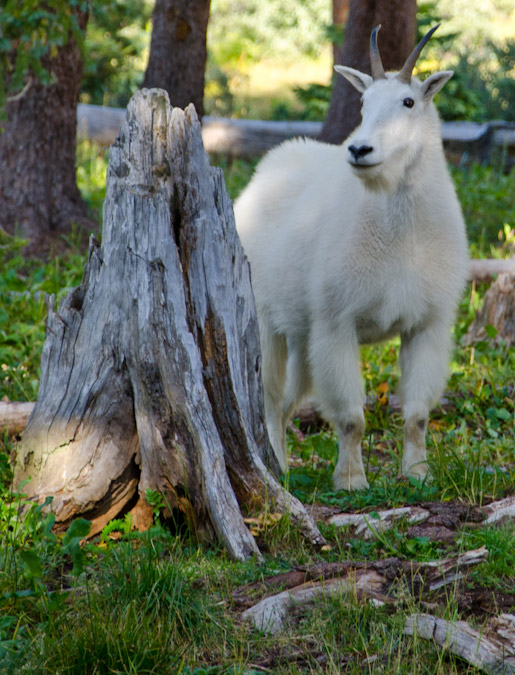
This little guy was playing king of the hill. I think he ended up losing.
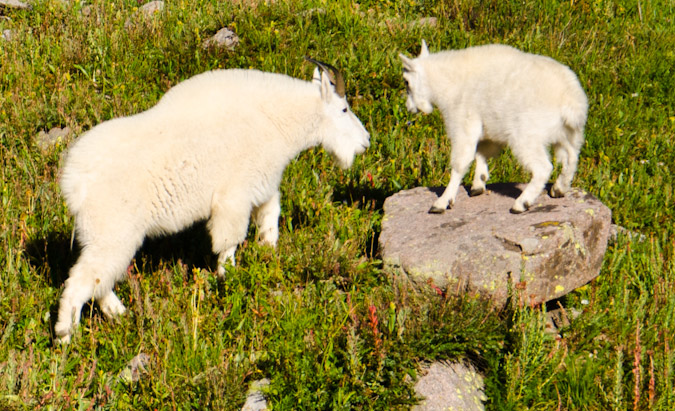
I did some video footage of the goats as well -
After the goats were dispursed from our campsite, we cooked dinner. Our dinner consisted of a glorious mixture of mashed potatoes, country gravy and spam - a tried and true recipe from the annals of the backpacking hall of fame. The alarm was set for 3:30 AM and we crashed hard into the gelatinous wall of sleep that always greets you after a hard day of mountain climbing.
Day 4: Climb of Windom Peak and pack-out - 19 miles, 6,500 ft. elevation gain - 20 hours of hiking...
3:30 AM came all too soon, and I hit snooze twice. So, we did not leave camp until 4:15 AM. The going was slower and we were feeling pain. In fact, I was quickly questioning my physical capability to complete the climb, and we had not even reached Twin Lakes. Halfway up Twin Lakes, I had to stop and take some vitamin-I (Ibuprofen), as the pain my knee was excruciating. The pain quickly faded and we reached the lakes in the darkness of the early morning.
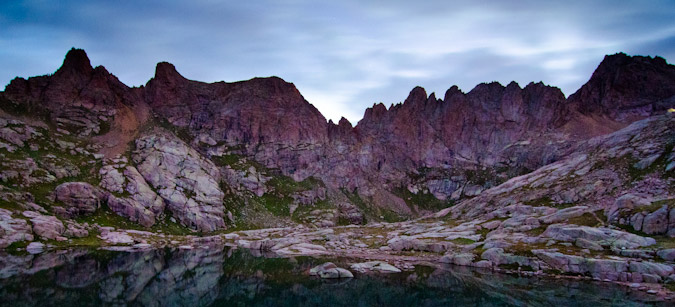
Hiking up to the Windom side of the basin was accomplished in short order, and the stellar light of sunrise kissed the mountains around us.
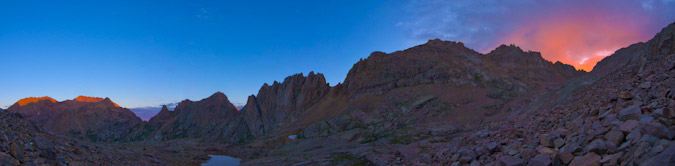
We reached the saddle between Peak 18 and Windom pretty quickly. On the hike down from Eolus, one of the climbers in the cluster of oddly-equipped people told us that Windom was underestimated. We were not quite sure what the heck he meant by that, considering so far both Eolus and Sunlight were both more difficult. There was a trail 3/4 of the way up Windom. We finally did find out what he meant, since the trail gave way to some very fun scrambling on class 3 rock if you wanted it. Many inappropriate jokes were exchanged between Sarah and I regarding the 'underestimation' of Windom and we were off to the races. We both agreed that had we done this climb while wet, it would have been quite dangerous. The views of Sunlight Spire and Sunlight were great. Loved it. Here you can see sun light just hitting Sunlight Spire with Windom's steep class 3 rock on the right.
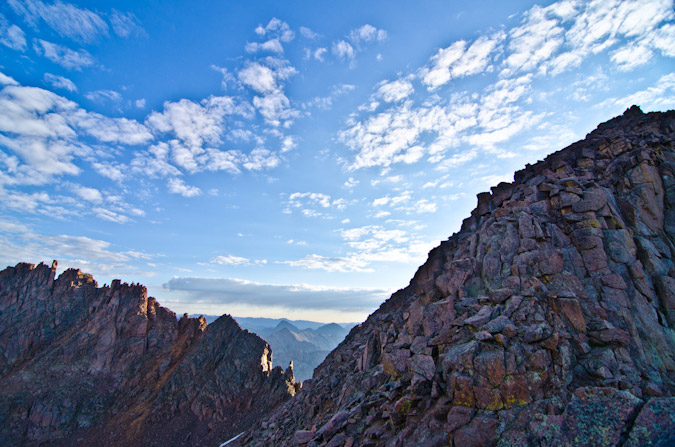
We reached the summit block and the views to the east were insane. The sun had been shrouded by some odd clouds, and light beamed forth like needles cutting through a gray sheet in front of car headlights. Unnamed lake at 13,100 ft. to the east was also a real treat - a sheet of glass suspended in heaven.
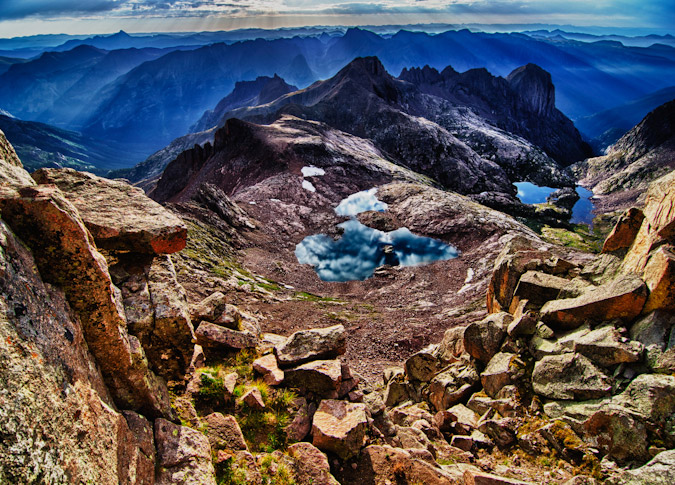
I reached the summit first and just felt complete and total gratification for our efforts. After the demoralizing defeat the day before, this summit was delicious.
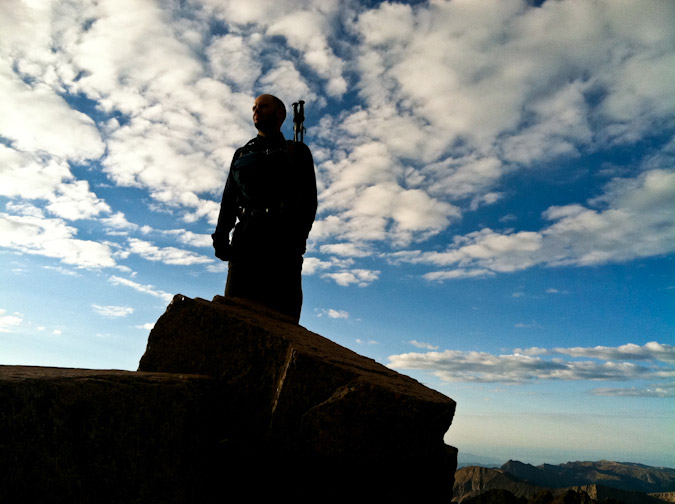
The summit of Windom was curious. It was a series of huge blocks, all seemingly suspended by some unknown force.
It was hard to believe that I had finally made it to Windom's summit. I had first admired this summit back in 2001, when I climbed Jupiter in a cotton t-shirt with my dad. Wow, have I come a long way! Check out that summit shot from 2001!
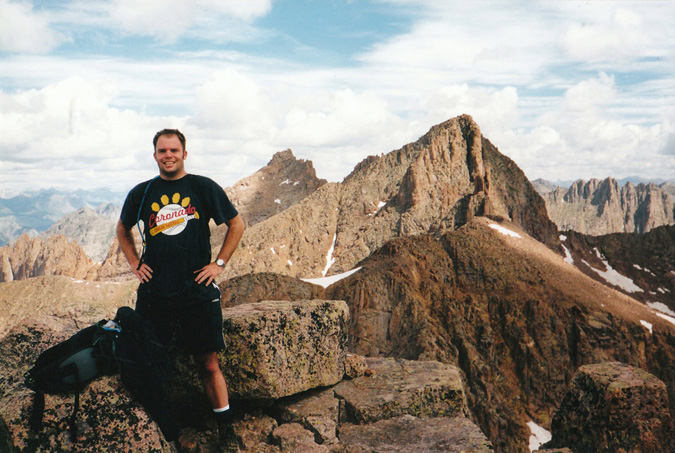
Due to the absolute absurd (meaning awesome) lighting, the opportunity for HDR photography was endless. I opted to just go for it. Sarah was pleased with this summit as well. It was totally under-rated - great challenge, great route and great views.
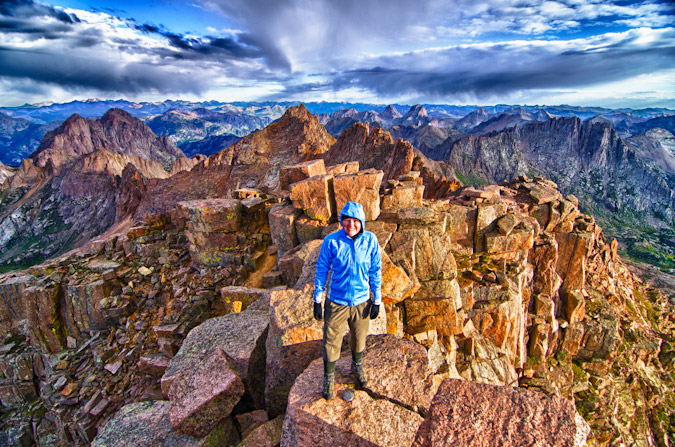
Sarah snapped off three bracketed photos of me on Windom's summit block - and the HDR result was WAY over-the-top, but epic looking either way.
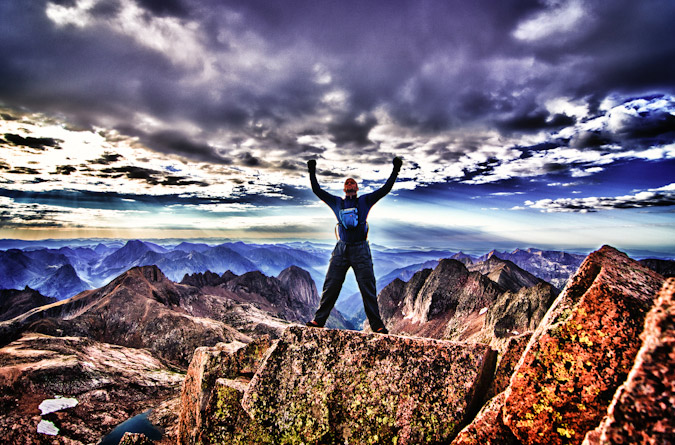
At this point I did some pano work and went for the classic 360 HDR pano. I fell in total love with the results. The way the light just penetrates the low clouds just floored me. The details on Sunlight and Sunlight Spire were magnificent. Thank you Tokina 11-16! Check out the larger verison by clicking on it.

Windom provided such a great view of Arrow and Vestal too...
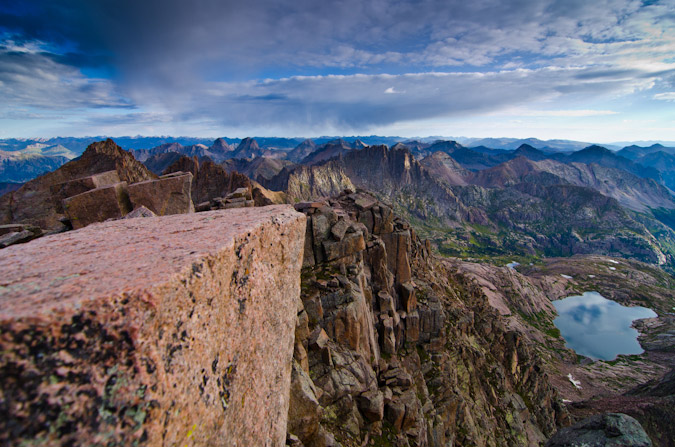
We headed down and enjoyed the views of Eolus all the way down.
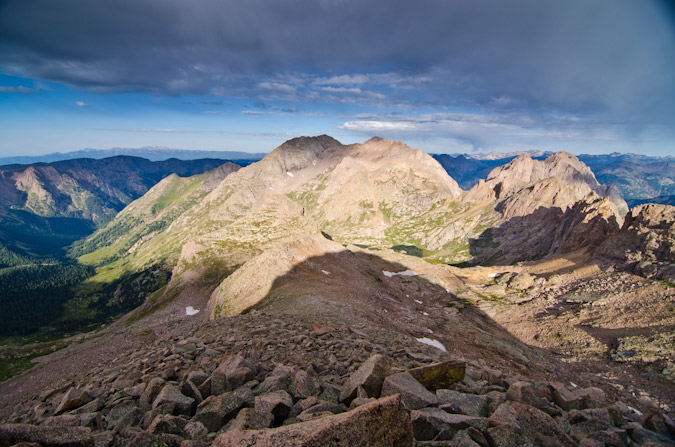
Before we knew it, we had already reached the trail junction for Columbine Pass and headed back to camp. We passed an old mine again but this time stopped to take pictures. Another group had mentioned that the mine was actually pretty cool to explore, but that was not high on our list.
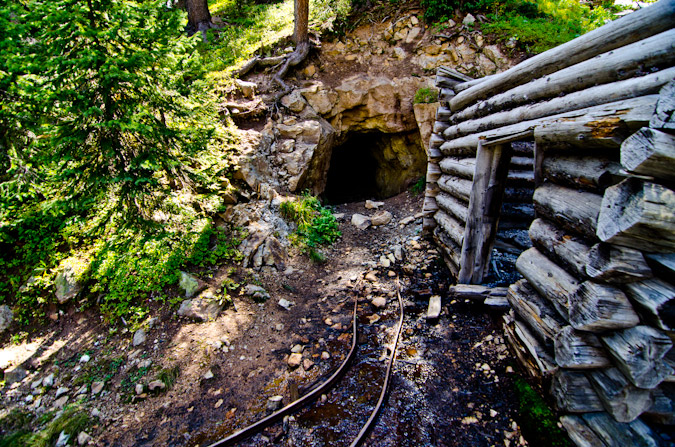
We reached camp at about 11:15 AM and packed up. We set our minds to the idea of getting all the way back to the car today. It was a lofty goal, to be sure, but we felt like we could do it, plus for some reason my legs decided that they were no longer sore. So we departed at 12:00 PM, with rain gear at the ready, and minds determined. Hell or high water, we were going to make it to the car. The climb out of the basin to Columbine Pass was gruelling. It was painful and slow. The weight of our packs and the fatigue of the weekend's work had us moving a consistent snails pace. We reached Columbine Pass and looked back - it felt great to get this far already, but we knew that the day had just begun...
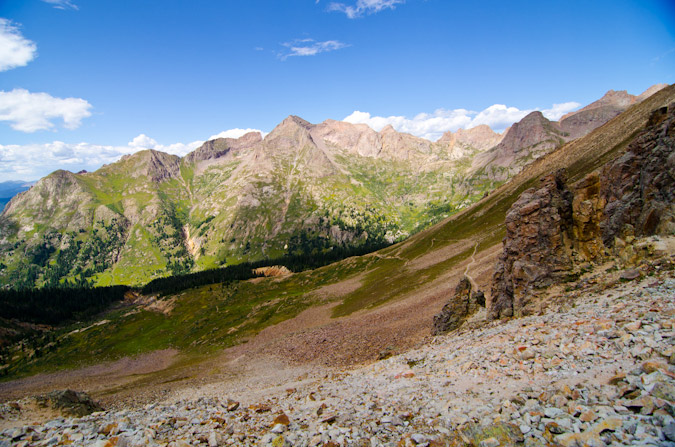
A look over the other side of the pass revealed clear weather and an inviting Columbine Lake. Trimble Pass - here we come! I turned on a podcast of Mike and Tom Eat Snacks - which had me in stitches for most of the hike up to Trimble Pass. Sarah was comforted by the idea that she was hiking with a madman.

The journey from Columbine Pass to Trimble Pass was pleasant, albeit slow and methodical.
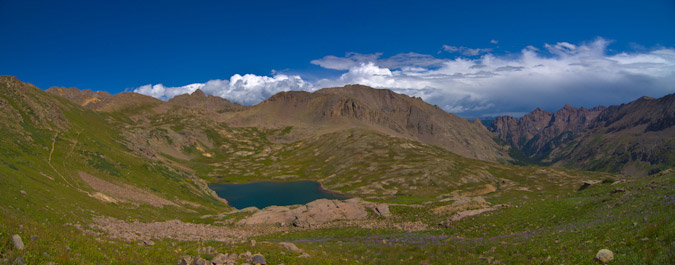
We reached Trimble Pass at 3:30 PM. We were still tired and sore, and required some time to rest, but we soldiered on.
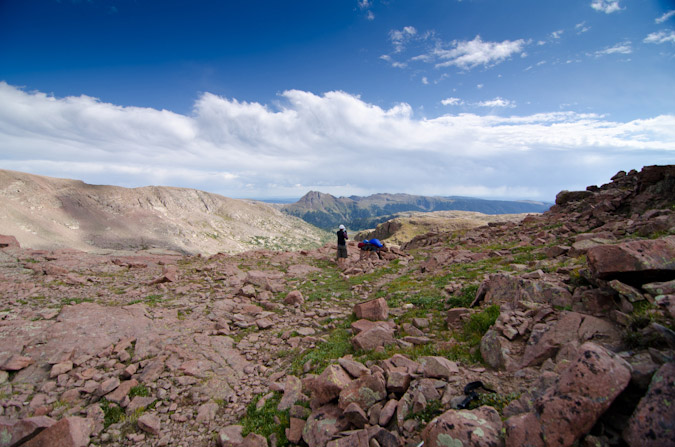
As we downclimbed from Trimble Pass onto Silver Mesa, I took one final parting shot of Chicago Basin... what a great place!
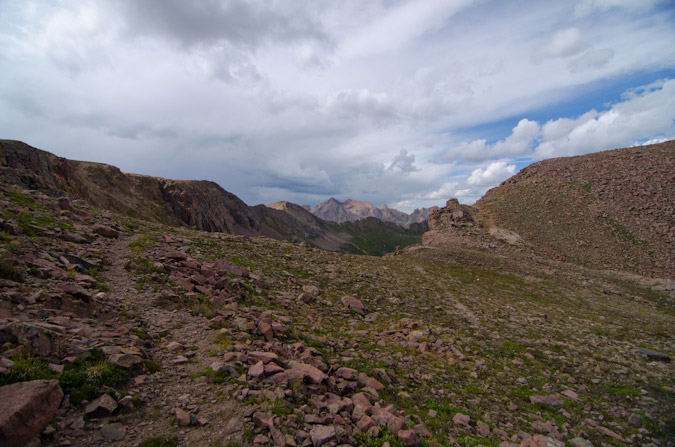
As we marched across Silver Mesa to the beat of our own music or podcast, we could not help but notice a huge storm brewing to the west. It looked as though it was moving our direction, so we kept eyes on it constantly. It was quite a sight either way.
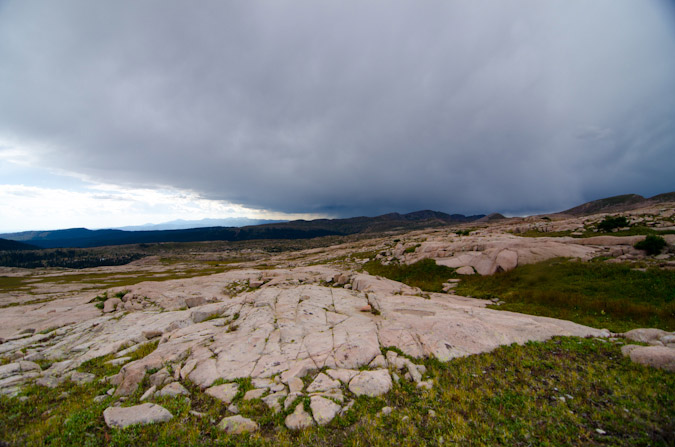
Silver Mesa had so many inviting campsites that tempted us. We kept going.
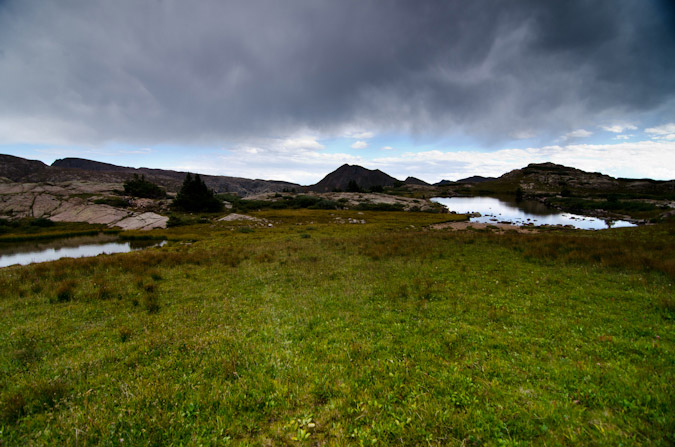
Before we knew it, we were at Lake Marie again. Just below Lake Marie we stumbled across a man from Boulder with four llamas. He was looking for Lake Marie. He had been up the trail and did not see it. I showed him where he was on the map. He thanked me. We were puzzled how one can miss a giant lake, but did not question it a whole lot, as we were focused on a mission. A mission of muscle-pounding and soul-crunching. We reached City Reservoir. It was also teasing us with its ample camping potential...
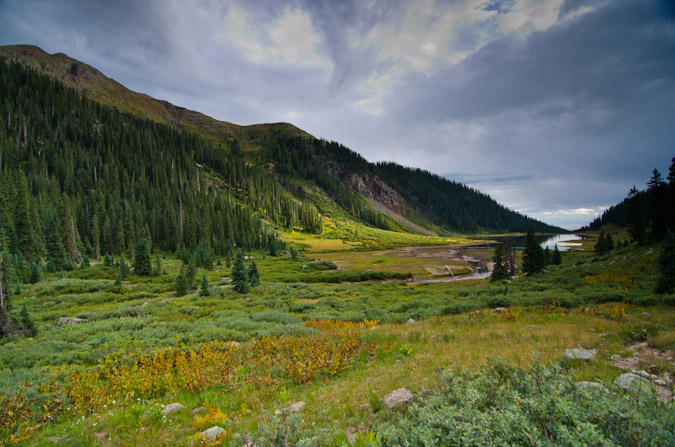
We cruised past City Reservoir and began a maddening climb out of the basin and towards Endlich Mesa. I found an interesting tree trunk to keep my attention off my aching bones.
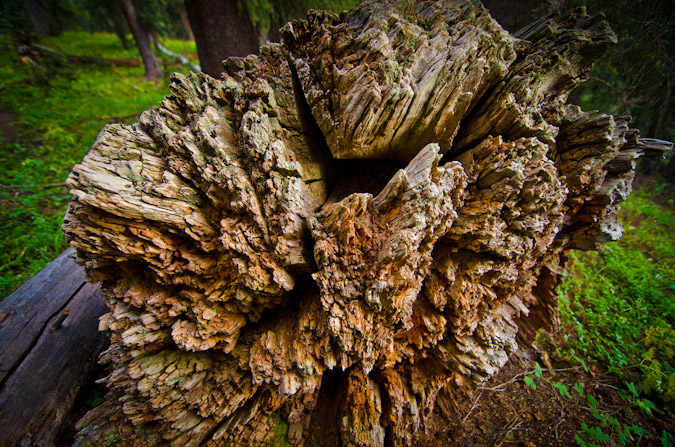
Darkness came quickly. We reached the beginning of Endlich Mesa around 9:00 PM. It was snowing. We were tired. We were hungry. We were quite certainly in foul moods. Sarah wanted food and so did I. I did not want to make camp though, so we got some light food out and ate. I confirmed our location on GPS. Only a few more miles to go. We finally reached the car at 11:30 PM and collapsed into sleeping bags in the truck. It was the best shitty night of sleep I've ever had.
This trip was the most physically demanding thing I've ever done. I pushed my body to its limits. I lost 6 pounds. I think both Sarah and I conquered some inner demons on this trip. It was, in retrospect, one of the greatest trips of my life.
Thanks for reading! I leave you with a playful creation - the world of Chicago Basin!
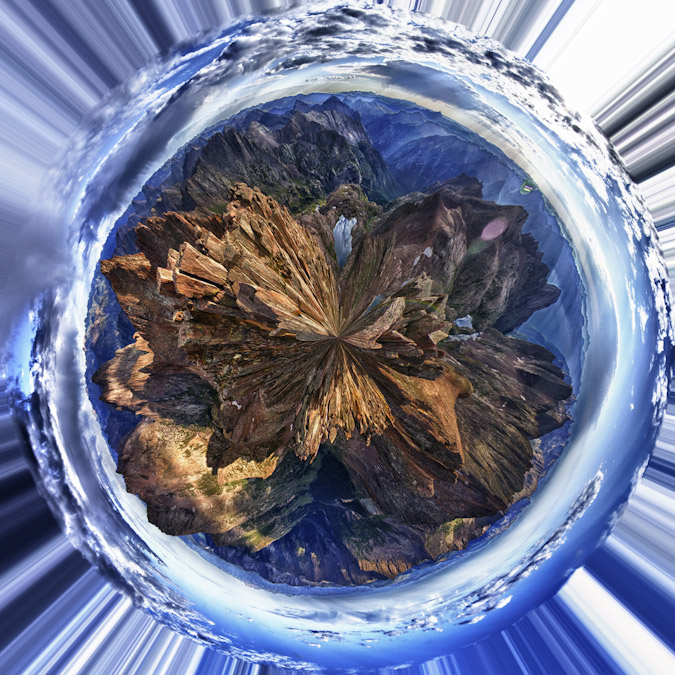
Citations:
1 Rhoda, Summits to Reach, pp 31-32
{fcomment}
KRCC Radio Interview
I had the rare opportunity to sit down with Noel Black and Craig Richardson of KRCC Radio last week to discuss the website for their "The Big Something" program. It was a great time - these guys really ask some fun questions! I am going to be obtaining the full interview soon; however, feel free to listen to the interview on their website - it is the slideshow at the bottom. I hope you enjoy!
Tabeguache Peak from Jennings Creek - a chilly and rewarding November hike
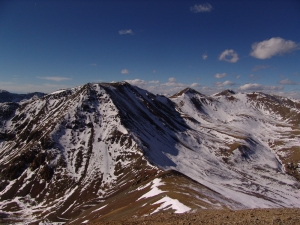
If you've followed any of my other trip reports this year or last year, you'd know that Tabeguache Peak is officially my nemesis. After one failed attempt last year (2009) due to weather, another failed attempt this May due to exhaustion after summiting Shavano, and then a 3rd failed attempt in September due to trying to knock off too many 13ers in one day, I felt I needed to return to conquer this beast of a mountain. Tabeguache is not a technically challenging 14er, or even inaccessible due to distance or other factors, so why has it given me and tons of other hikers problems? Quite simply, the standard route is a really long day that I'd not been in shape to do in past attempts, and the alternate routes are either "off-limits" or remote. After reading up about the Jennings Creek approach thanks to my friend Regina, who had summited Tabeguache eariler this year via Jennings Creek and thanks to my friend Terry who accomplished the same just a couple weeks ago, I felt that it was a good approach and that I had a high likelihood of success. Additionally, I had conferred with Aaron Johnson last year on Summitpost that the route was viable. The Jennings Creek trailhead was closed in 2002 by the Forest Service because the upper portions of the trail had major erosion and it was becoming quite an eyesore with no solution in sight. Fortunately, however, the trail leading to the Jennings Creek drainage is not closed off for those wanting to gain access to other portions of the area, such as the west ridge of Tabeguache. Please note that the route I used was not on the closed trail and that it is important for hikers to stay off of that route due to the damage caused on the mountain.
Having been instructed wisely by my wife to find a hiking partner for this November hike, I dialed-up a fellow 100summits.com member, Curt Kennedy to see if he wanted to go. It was a last minute invitation, but Curt was game. We agreed on the route and plan, and he drove down from Denver to pick me up early on Sunday morning for our climb. After a quick drive over Highway 24, down Highway 285 to Highway 50 West, we turned off on Chaffee County Road 240 and hit the trailhead after approximately 7.45 miles. The trailhead can be really hard to spot - the exact coordinates are: 38.60070o N and 106.27929o W. We arrived at the trailhead around 8:30 AM and started hiking at around 9:00 AM, which was a little late for my typical taste, but I felt we would be in good shape.

Curt Kennedy preps for a long day of hiking.
Here are some meaningful metrics from our adventure:
Total elevation gain: 3,533 ft.
Total distance hiked: 7.14 miles
Total time hiking: Approximately 10 hours
Total wildlife sightings: 1 (Mountain Goat)
Our planned route would take us up the trail and into the Jennings Creek valley, where we would follow the drainage up to the saddle between Carbonate Mountain and Tabeguache Peak. From there, we would ascend the ridge up to the first false summit at 13,936 ft., and then over to the summit of Tabeguache.

After hiking only a short distance, we noticed that already a storm was starting to build to the west. Since the weather forecast was only 10% chance of precipitation, I was not concerned that it would prevent us from accomplishing our goal. Regardless, the storm did pass through briefly and drop trace amounts of snow, which was a very peaceful yet exciting experience to have winter knocking on the door.
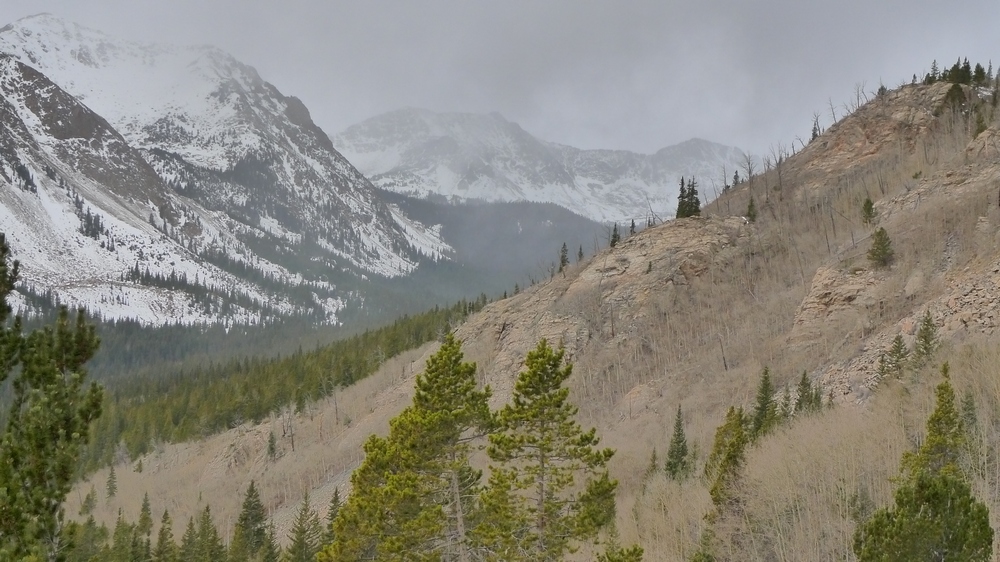
A storm moves in to the west of Jennings Creek. Photo by Curt Kennedy.
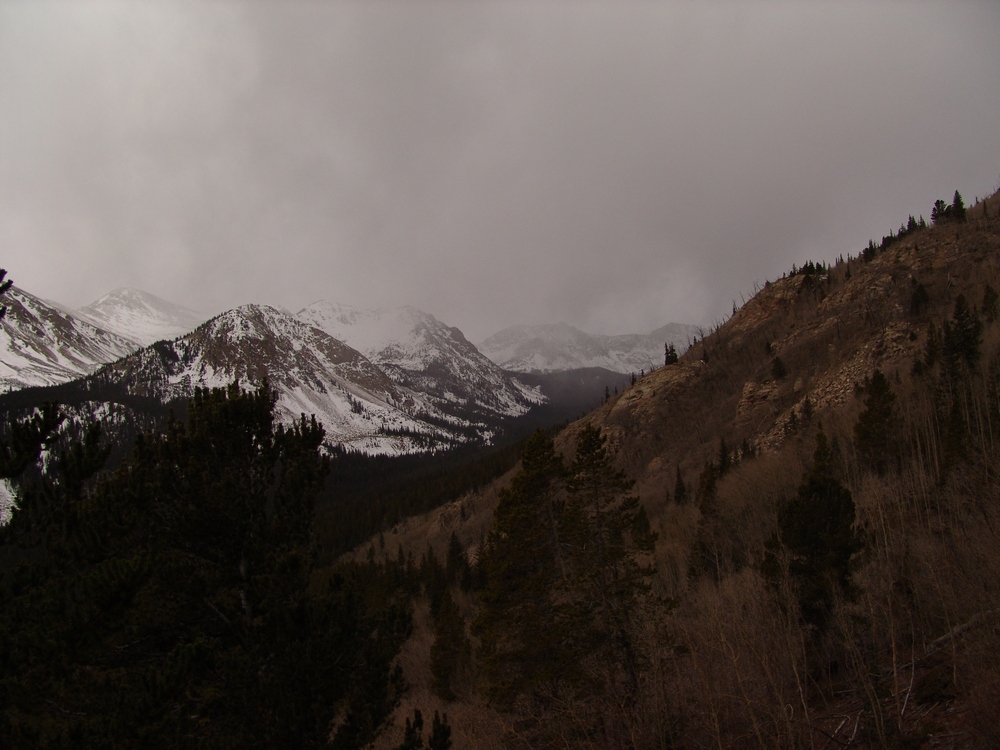
The skies darkened as the storm moved in on us early in the day.
From here on out, the wind became a factor, blowing steadily throughout the day at speeds varying between 10 and 30 or 40 MPH.
After a short hike up into the basin, the trail turned east to head up the closed restoration area and we continued straight north towards the top of the Jennings Creek valley. Both Curt and I greatly enjoy hiking off-route, due to the added challenge and the unexplainable feeling of excitement you get when conducting exploration.
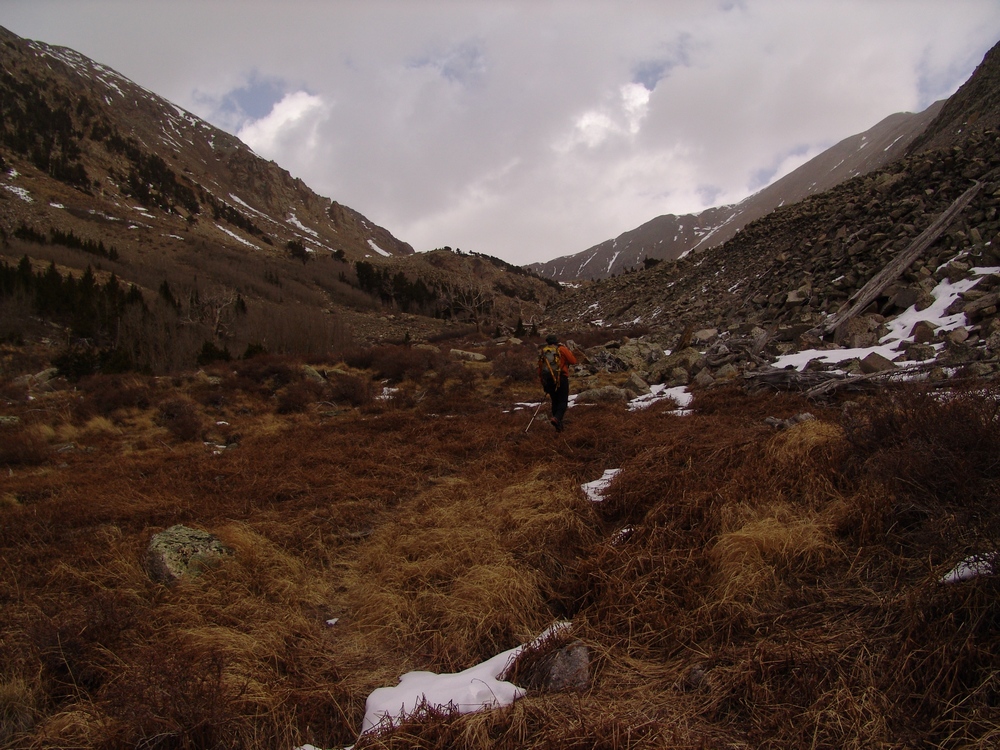
Curt hikes up the basin.
The basin itself is not very challenging or difficult. There was a faint, relatively easy trail leading up the valley. We had seen boot prints in the snow periodically, most likely from the group Terry was in just the previous weekend. Speaking of snow, both Curt and I were prepared with gaiters; however, we never encountered much more than a few inches the entire day. The south-facing valley and ridges fared well over the past few weeks, granting us with bare ground on much of the terrain we would cross.
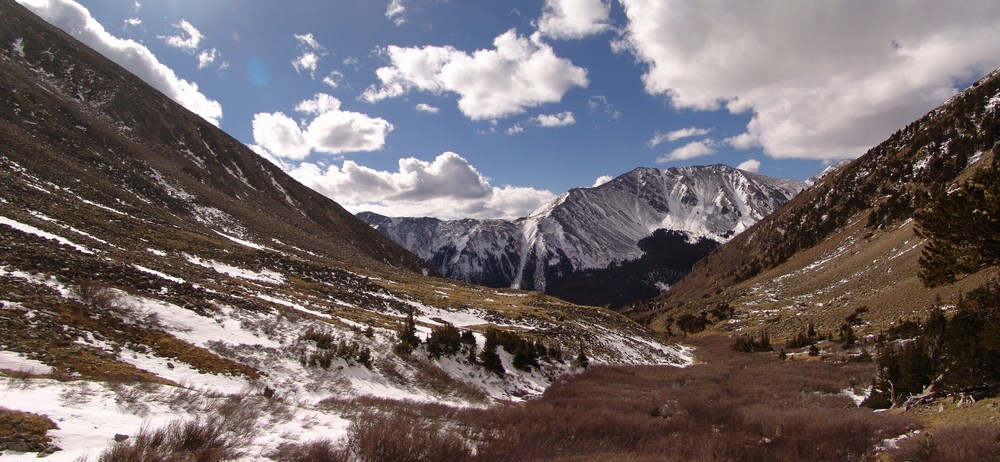
Looking back down the Jennings Creek valley.
The valley itself is littered with ancient-looking trees, placed in almost guardian-like poses throughout the hike up into the basin.The views of Taylor Mountain were ubiquitous while hiking up the basin, as evidenced by the above photo and the one below, which demonstrates the elderly presence of the trees in the valley.


Tundra grass grows on this ledge which rested in front of our view of Taylor Mountain - photo by Curt Kennedy
Our pace up the valley was steady - not too fast, not too slow. We took minimal breaks and enjoyed the amazing weather.
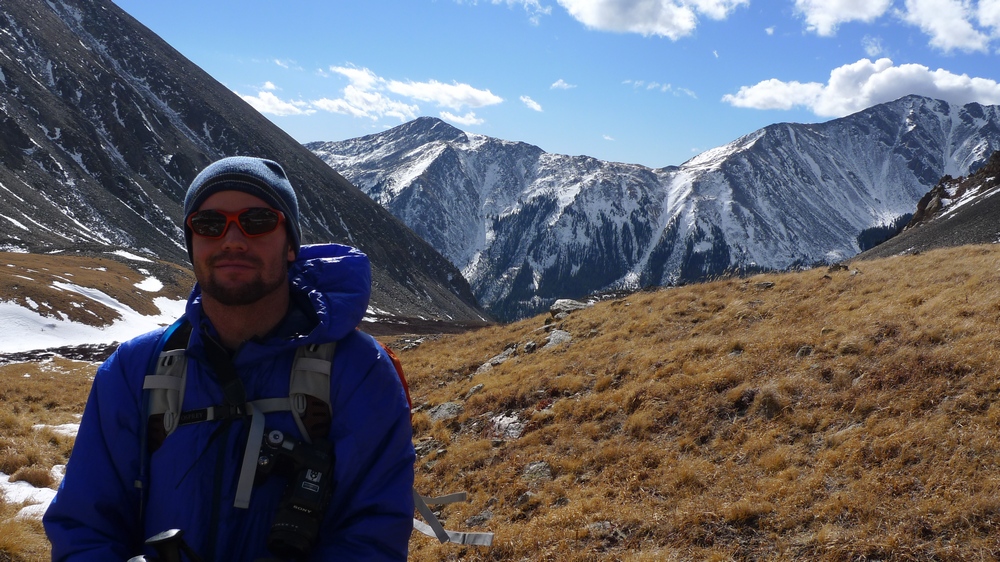
Matt Payne in the Jennings Creek basin - photo by Curt Kennedy
Before long, we gained our first views of Carbonate Mountain, located just west of Tabeguache Peak. I had been on the summit of Carbonate Mountain just a couple months ago, which was somewhat frustrating being that close to Tabeguache and not having the energy to reach it.
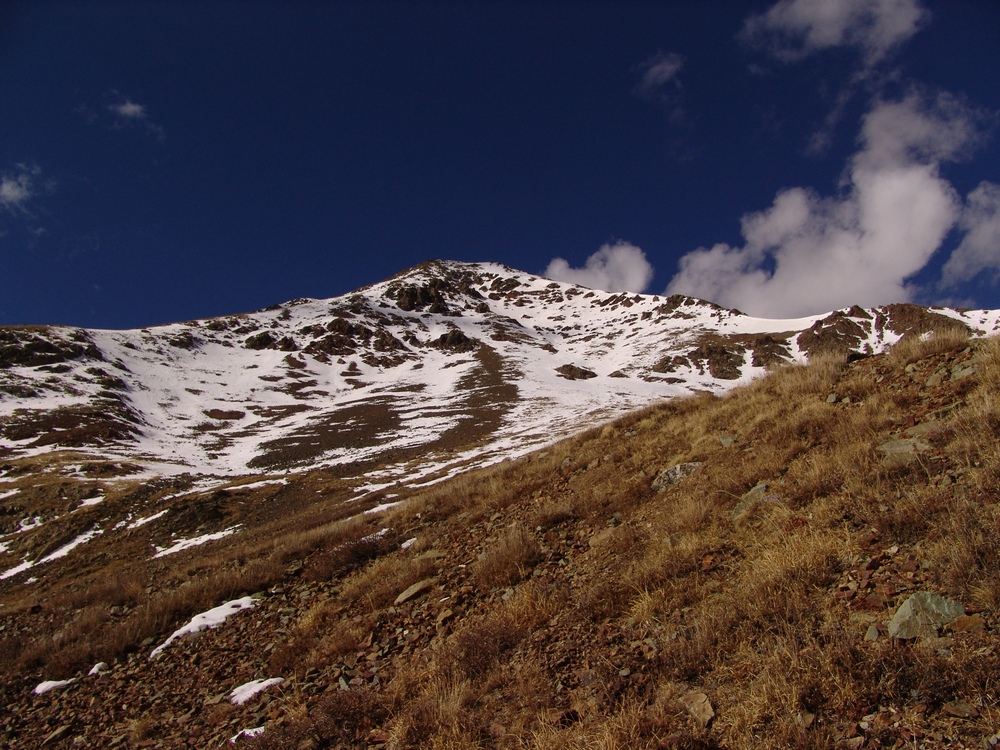
Carbonate Mountain.
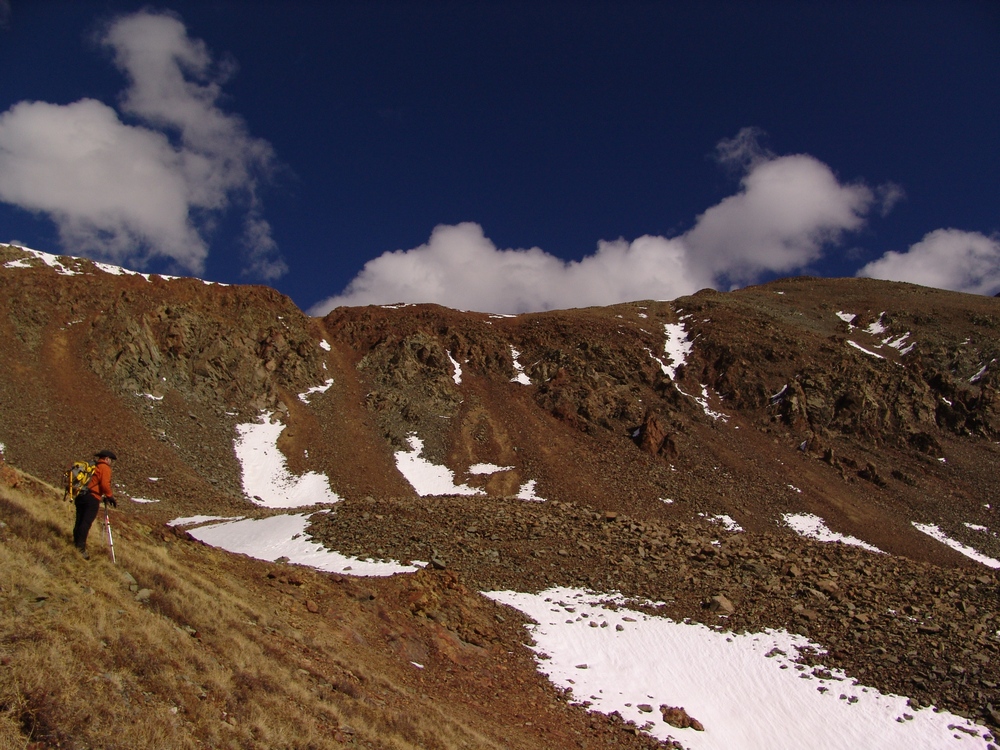
Curt surveys the valley.
After taking a short break near the base of the ridge between Carbonate and Tabeguache, we quickly gained the ridge and began our grueling ascent up the steep and long west ridge of Tabeguache.
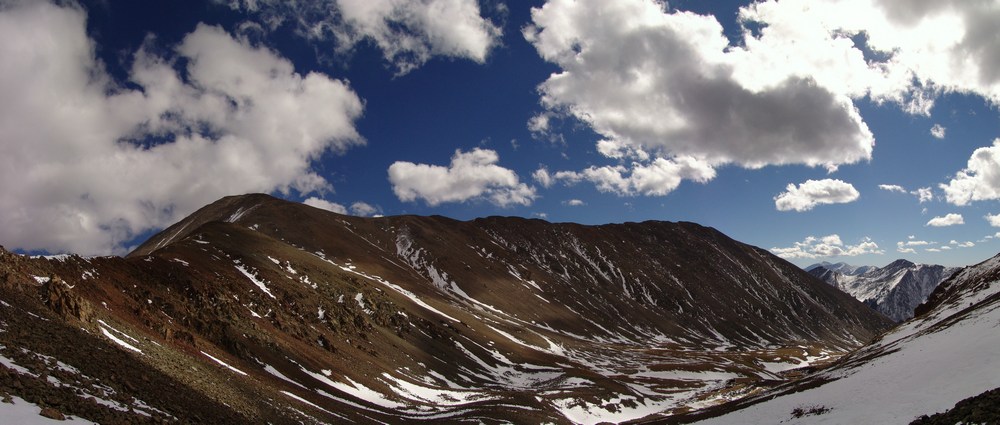
Tabeguache's west ridge.
Views from the ridge were spectacular. The Jennings Creek basin was littered with small snow drifts everywhere, making for a very interesting pattern as viewed from above on the ridge.
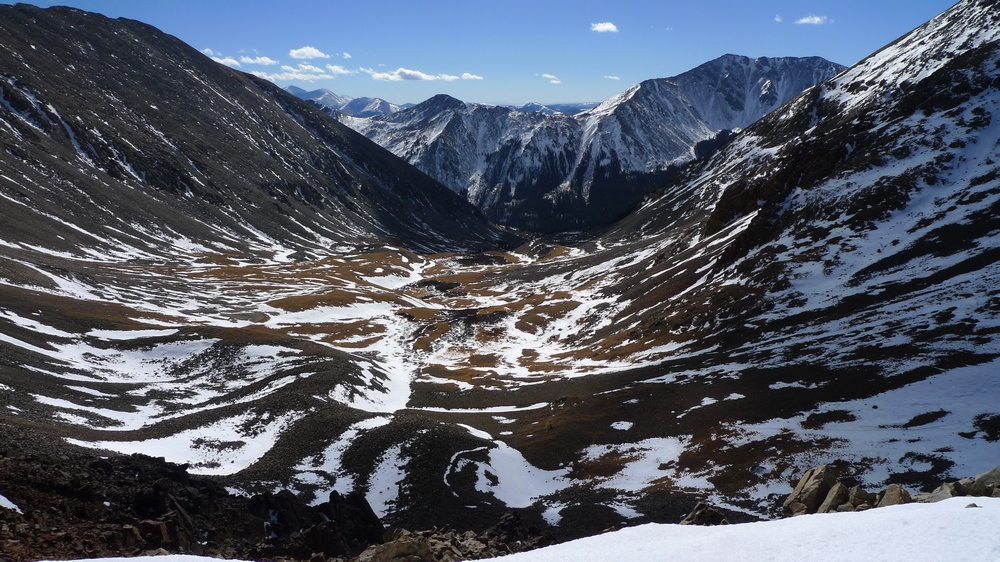
Jennings Creek valley. Photo by Curt Kennedy
Additionally, the view of Antero was great, which revealed that there was very little snow in this portion of the state.
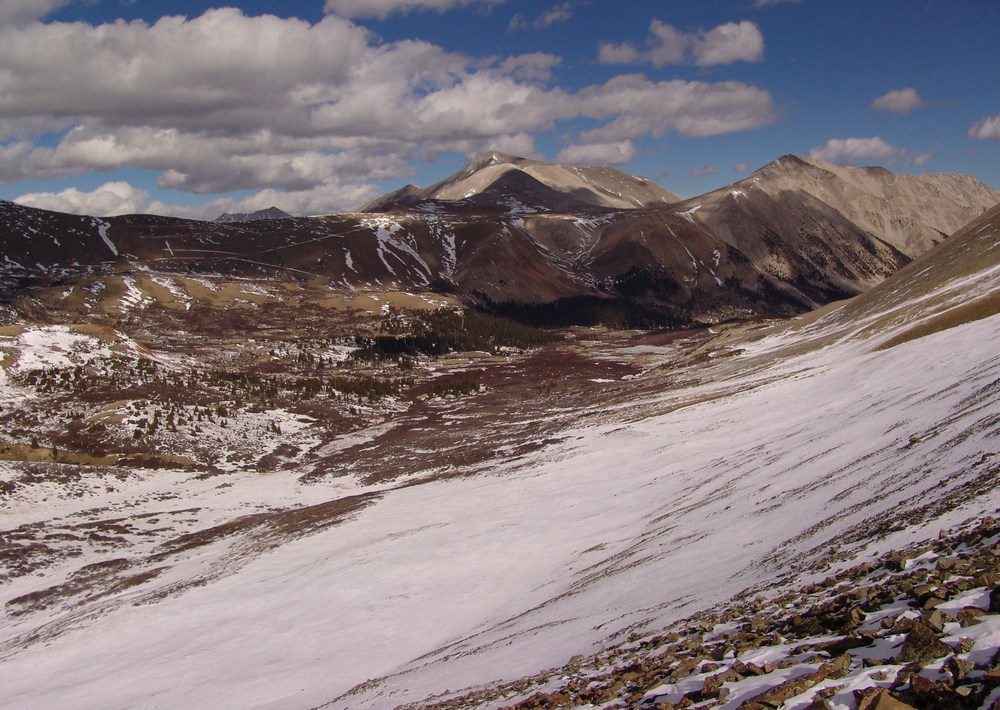
Antero as seen from the Tabeguache - Carbonate ridge.
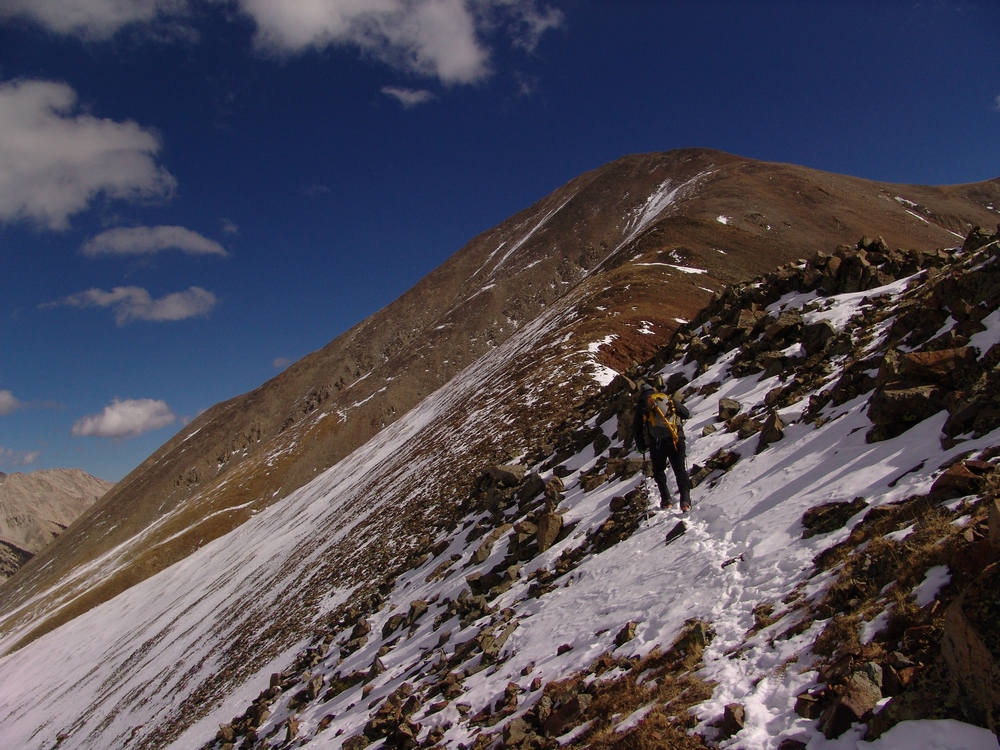
Curt plowed through the light snow leading up the ridge-line.
Once we gained elevation, the view back to Carbonate was outstanding. The ridge heading up Carbonate should probably not be under-estimated due to it's steepness and ability to hold snow, as evidence by the following photo.
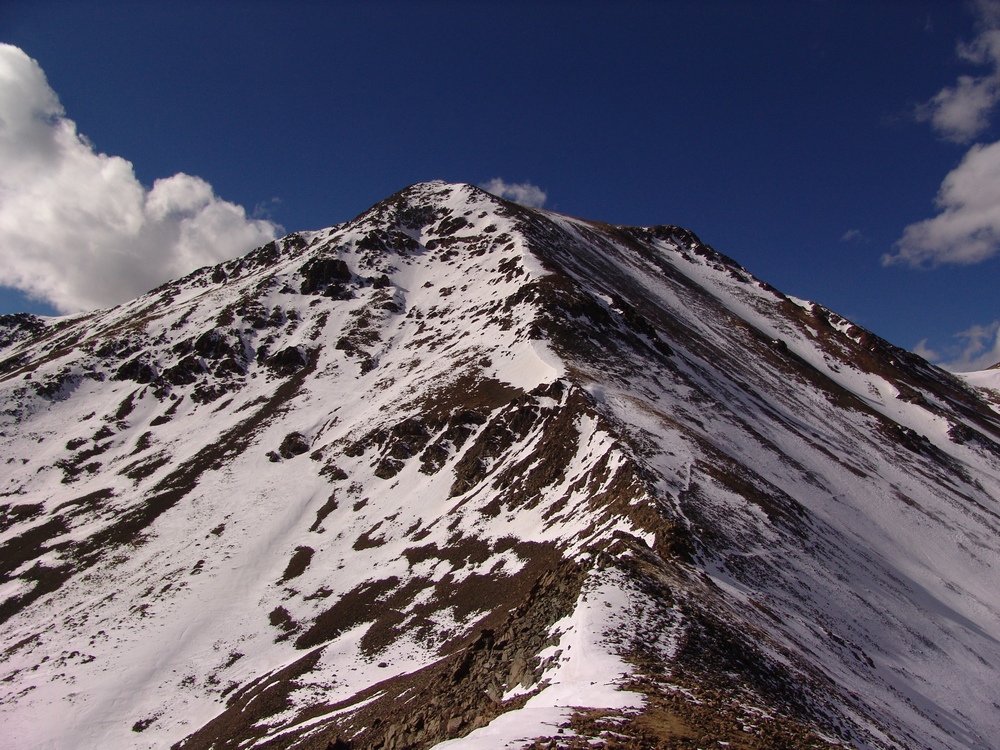
Carbonate's east ridge.
Eventually, views of Cyclone and Grizzly were available, which was an interesting perspective since I had climbed them earlier in the year.

After reaching the first false summit of Tabeguache, the rest of the climb came into view and put a damper on our excitement. Tabeguache was still quite a long distance away from where we stood.
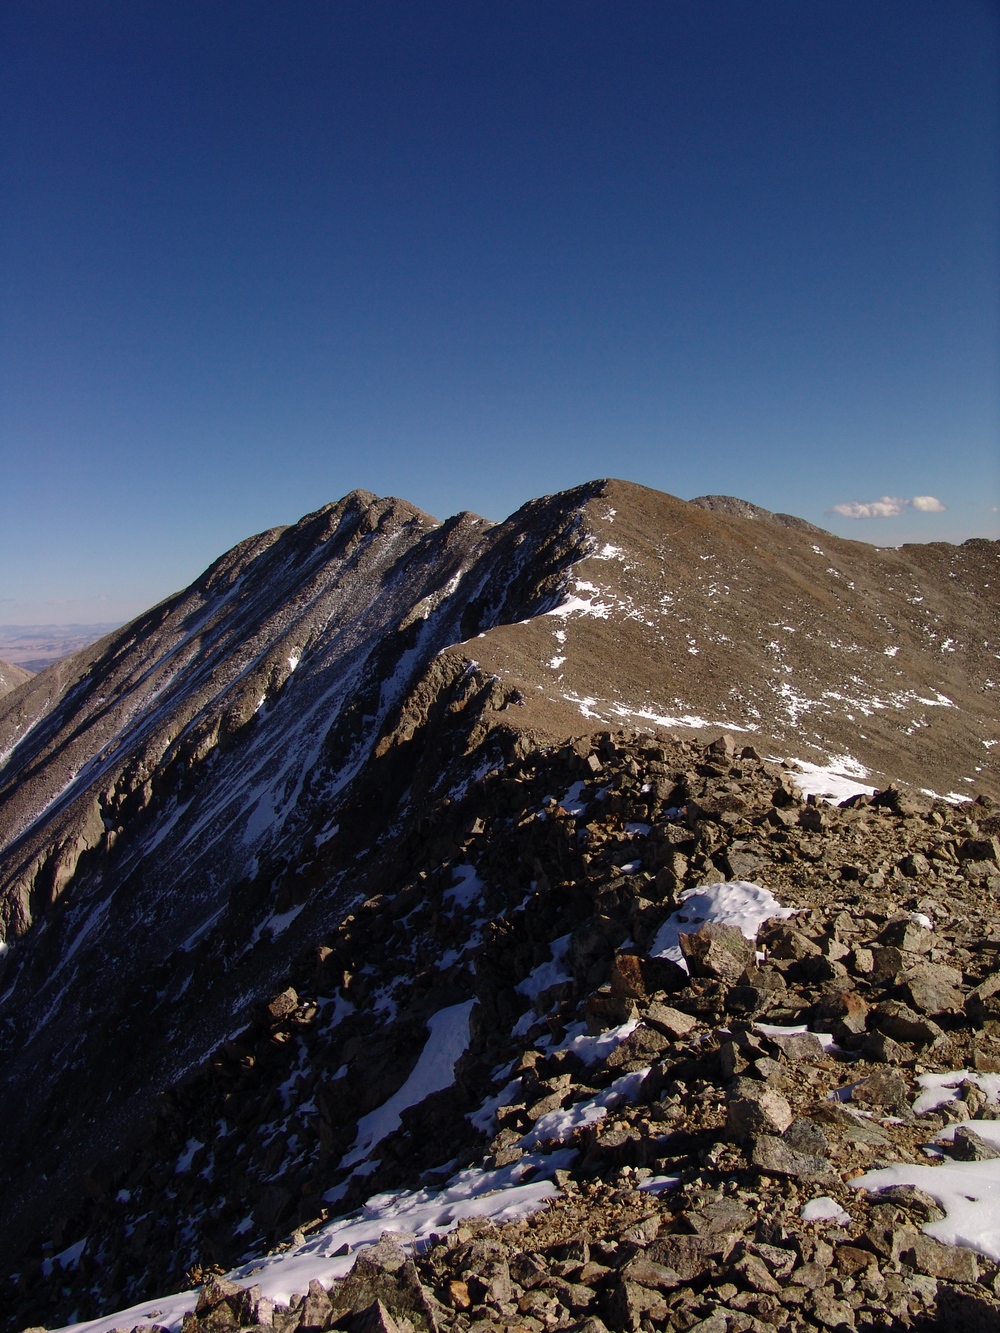
Tabeguache as seen from point 13,936ft.

Curt Kennedy is seen at left in this large panoramic photo taken from point 13,936ft.
This vantage also offered excellent views of both Taylor Mountain and Mount Aetna, two of the most southern summits in the Sawatch range.
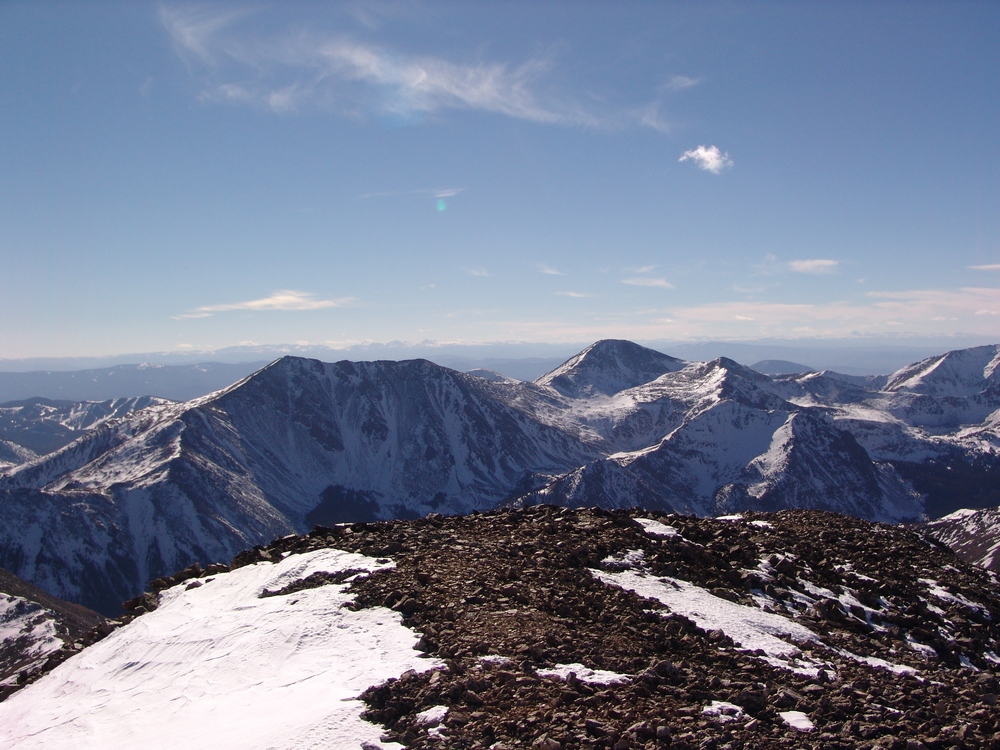
I headed up towards Tabeguache at a brisk pace. For some reason, when I'm close to the summit of a mountain, my body shifts into high gear and I'm able to tap into an unknown energy source. It seemed that Curt was holding back and throughout my ascent to Tabeguache, I looked back to see that Curt was OK. Soon, I realized that Curt had stopped his ascent for some reason and that he was signaling me to continue without him. The terrain on the final two summit sections of Tabeguache were quite challenging, much to my satisfaction and surprise. By going up and over the top of every obstacle, I found myself completing class 3 moves to reach the summit of Tabeguache. It was a nice additional challenge that I somehow knew my nemesis would find a way to provide. I believe that people should take caution on this route due to this final section. While it was well within my comfort zone, I could see someone signing up to climb Tabeguache with the expectation of an easy walk-up, only to find themselves doing some class 3 moves outside of their comfort zone or skill level.
Reaching the summit of Tabeguache was very satisfying. Having had my previous attempts foiled, I was quite elated to finally put an end to this mountain's curse on me. Conversely, I was a little disappointed in how close Shavano appeared to be from this vantage point. Nothing at all what I had remembered when viewing Tabeguache from Shavano's summit back in May.
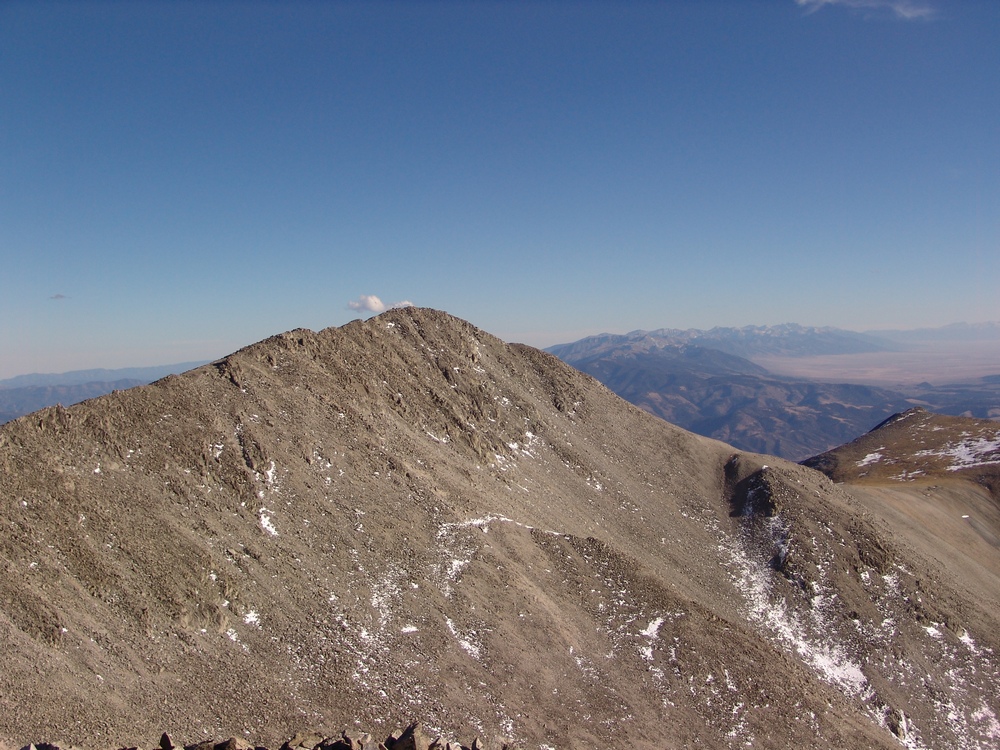
Shavano and the Sangre de Cristo range in the distance.
I set-up the self-timer to take the obligatory summit shot, took a few photos to later create a pano with, ate some light food, and headed back over to see what Curt's hold-up was.
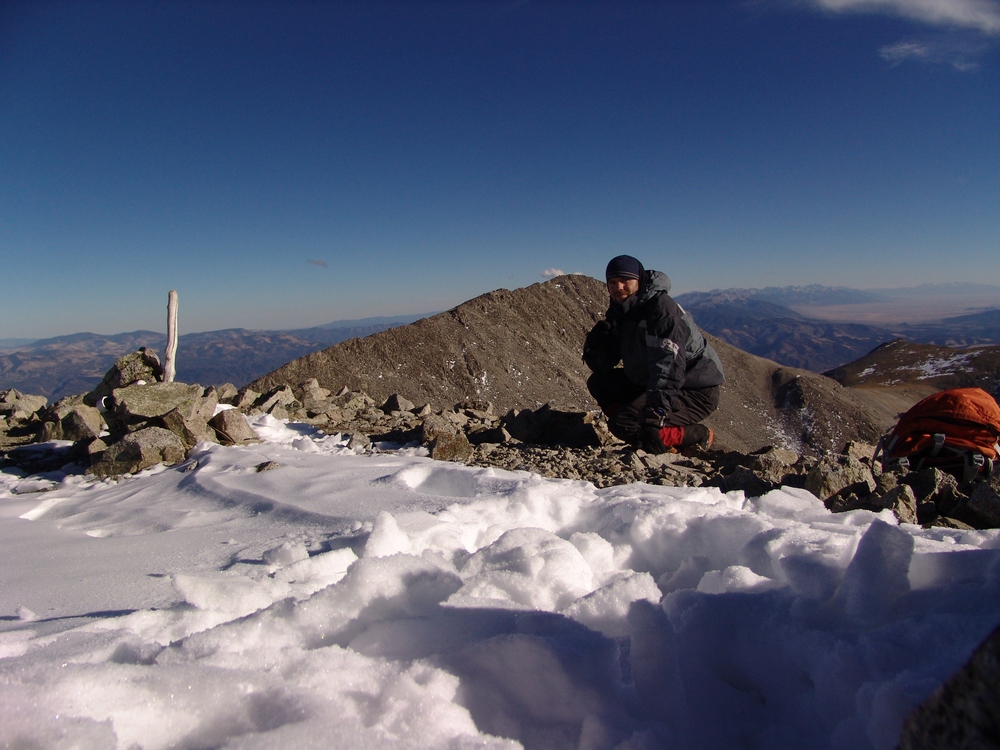
Matt Payne poses in this self-timer on Tabeguache Peak.

A 360 degree pano from the summit of Tabeguache Peak
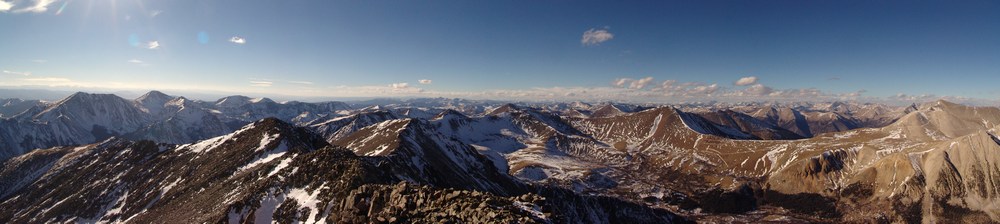
Looking west and north from Tabeguache.
I quickly made it back over to Curt, who was waiting for me on the false summit at 13,936 ft. He explained that he had developed a leg cramp on the way over to Tabeguache and was glad that I understood that he was not wanting me to wait for him on top. Unfortunately, his leg cramp was quite severe, and it greatly reduced his mobility and usage of his left leg. Our descent speed would be greatly reduced by his injury. We carefully climbed back the same route we had climbed up, being careful not to disrupt Curt's leg too much. When we reached the saddle between Tabeguache and Carbonate, the sun was already down and the light in the area was getting dimmer and dimmer by the minute. Fortunately, we both had head lamps packed and plenty of warm clothing. By the time we reached the trees at the lower half of the basin, we were in complete darkness. We were quite careful to select our route and ensure that we did not miss the trail. After much searching and good teamwork, Curt and I were able to find the trail heading back down to the trailhead. Due to our hike in the dark, I am sure that this trip will go down in memory as one of the more exciting and enjoyable ones I've had.
Kit Carson Mountain, Challenger Point, Columbia Point, and "Kitty Kat Carson" - An Elevated Playground

Kit Carson Mountain is a very prominent mountain located in the Sangre de Cristo Range. The area surrounding Kit Carson Mountain is both rugged and pristine, with views of amazing peaks such as Crestone Needle and Crestone Peak in abundance. The hike to Kit Carson Mountain by way of the Willow Creek trailhead is nothing short of astounding, with breathtaking vistas available the whole way up. To put it lightly, this is one of the best hikes in Colorado, bar none.
Here are some meaningful statistics from my adventure up these amazing mountains:
Challenger Point – 14,081 ft – ranked 34th highest in Colorado
Kit Carson Peak – 14,165 ft – ranked 23rd highest in Colorado
Columbia Point – 13,980 ft – ranked 56th highest in Colorado
“Kitty Kat Carson” – 13,980 ft – unranked
Total distance traveled: Approximately 15 miles
Total elevation gain: 6,500 ft.
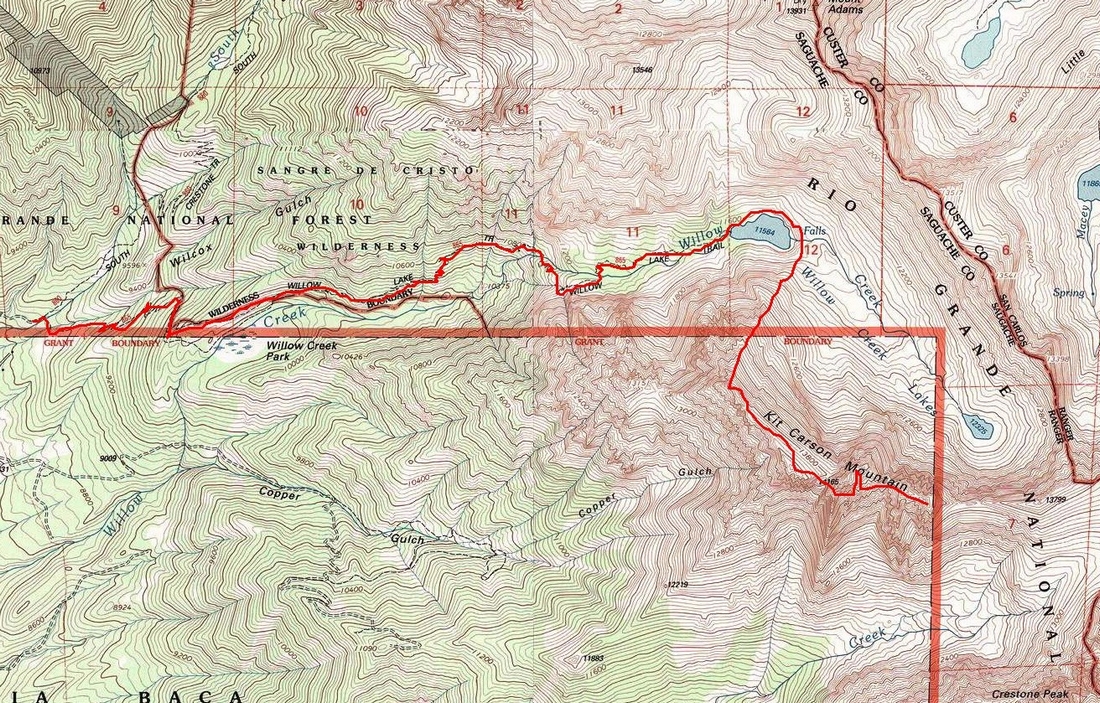
By now you might be wondering what makes a mountain ranked versus unranked. This is a fairly controversial topic in the climbing community. Basically, there is only one factor to consider when determining if a mountain should be "ranked" and that is prominence. The prominence of a peak is the height of the peak’s summit above the lowest contour line encircling it and no higher summit. Prominence is interesting to some mountaineers because it is an objective measurement that is strongly correlated with the subjective significance of a summit (and how difficult it is to climb). Peaks with low prominences are either subsidiary tops of some higher summit or relatively insignificant independent summits. Peaks with high prominences tend to be the highest points around and are likely to have extraordinary views. In the case of Colorado mountains, most mountaineers use a cutoff of 300 ft / 91 m to determine whether or not a mountain is ranked or not. So using “Kitty Kat Carson” above as an example, since there’s only 80 ft in elevation drop between itself and Columbia Point, it is not ranked. Alternatively, since there is 360 ft in elevation drop between Columbia Point and Kit Carson Peak, it is ranked.
I picked up my friend Terry from his condo at 5 AM on Friday and departed for the quaint town of Crestone. We arrived at the Willow Creek Trailhead at about 9 AM. There were several vehicles at the trailhead, which was kind of surprising given that it was still early on a weekday. This was going to be our third backpacking trek in as many weeks. This week I was able to get my pack down to 45 pounds, thanks in part to some lightweight food my mom graciously provided to me the previous day. We began our hike up the trail, which was well travelled. About 5 minutes into our hike, a gentleman with a long gray beard was coming down the trail and was very friendly to us, warning us of electrical storms. I commented to Terry that this was not my first rodeo and that the man reminded me of Jesus. I was hoping that his presence was not a sign of things to come… bearded man looking like Jesus appears out of nowhere and warns us of lightning… The trail was such a nice change from last week since it was actually easy to follow and was clearly maintained and free of vegetation and confusing side trails. The trail makes many large switchbacks up a gradual slope and then at the top of this slope it drops you right next to a huge meadow, accompanied by great views of part of Challenger Point.
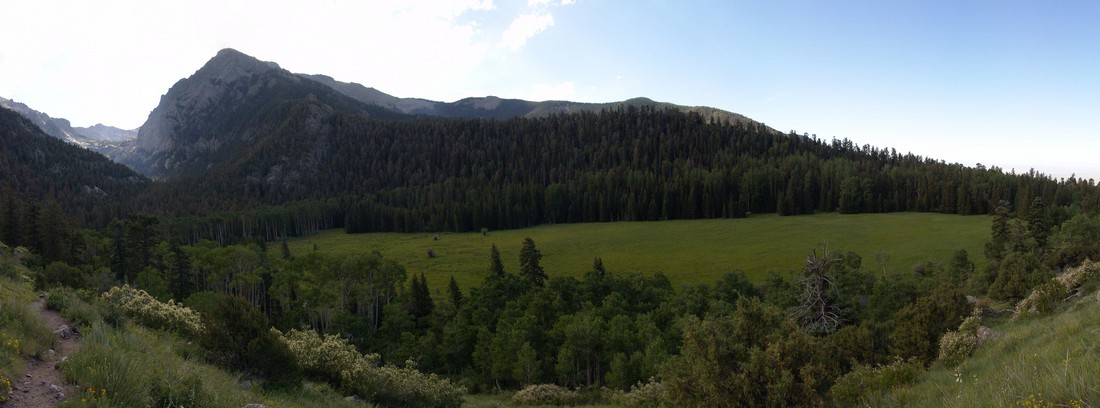
After awhile, the trail brought us closer and closer to Challenger’s headwall.
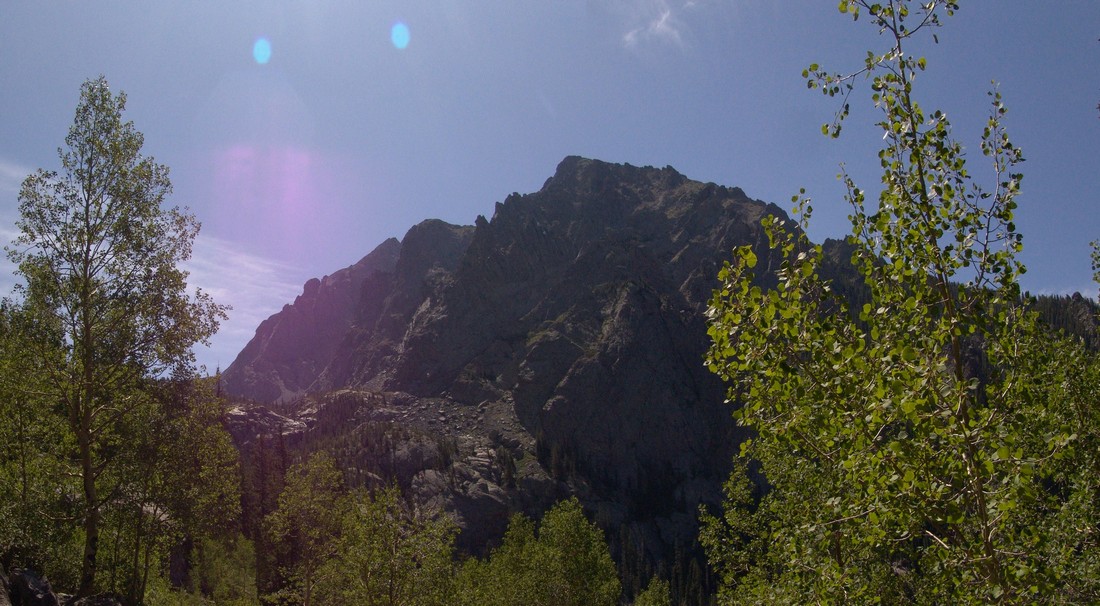
Shortly thereafter, the trail begins a long series of shorter switchbacks leading to the north and east until a large waterfall is exposed at the base of the headwall.
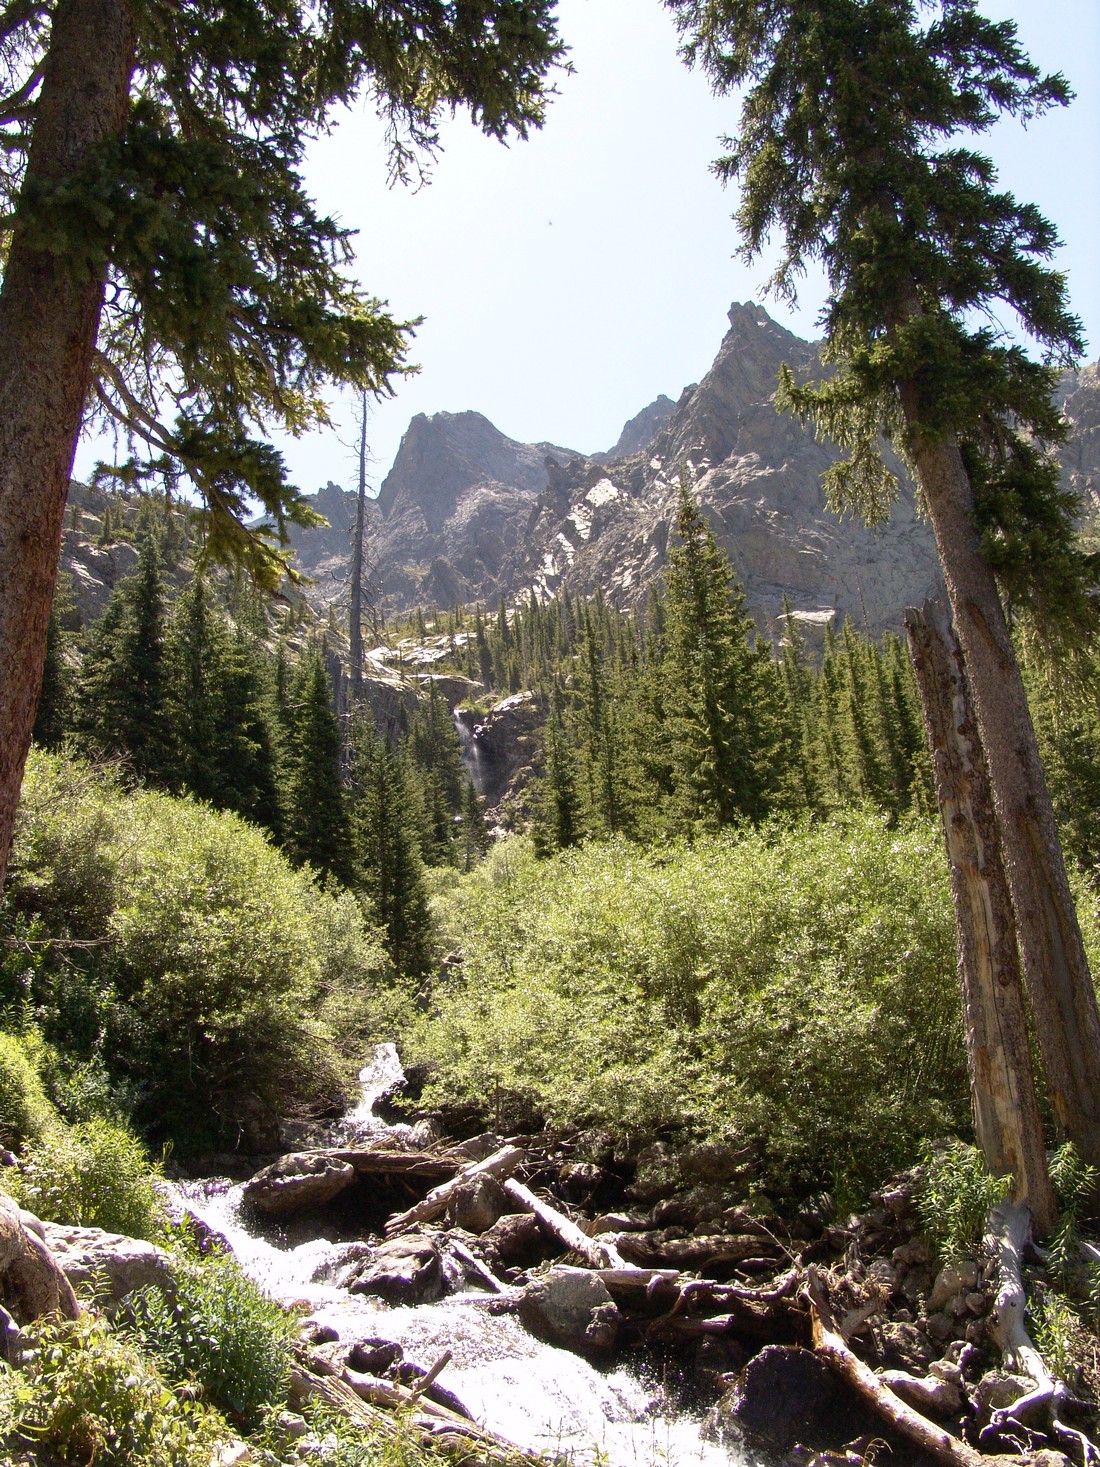
After gaining the headwall and hiking further up the trail, we were right at the base of Willow Lake. Being that we were in a Wilderness area, camping was restricted to areas no closer than 300 ft of the lake. One of the very first campsites we encountered had some Big Horn sheep grazing at it.
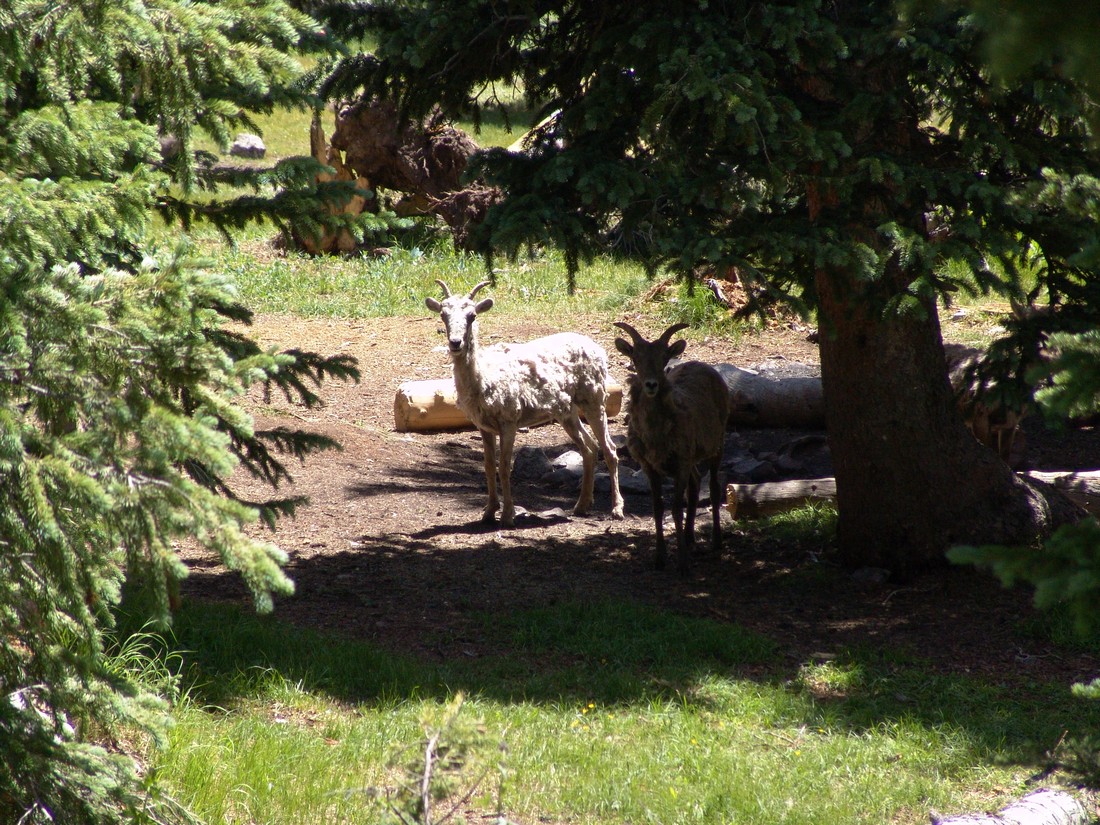
The sheep quickly scattered up the valley towards the lake. 
We kept going on the trail and found a really wonderful campsite left of the trail nestled in some trees. The funny thing was that the sheep were hanging out in this campsite. I was able to take several pictures of the sheep after we were able to claim the campsite as our own. This was one of the cooler things that has happened to me this year because one of my lifelong goals has been to see Bighorn sheep up close in the wild.
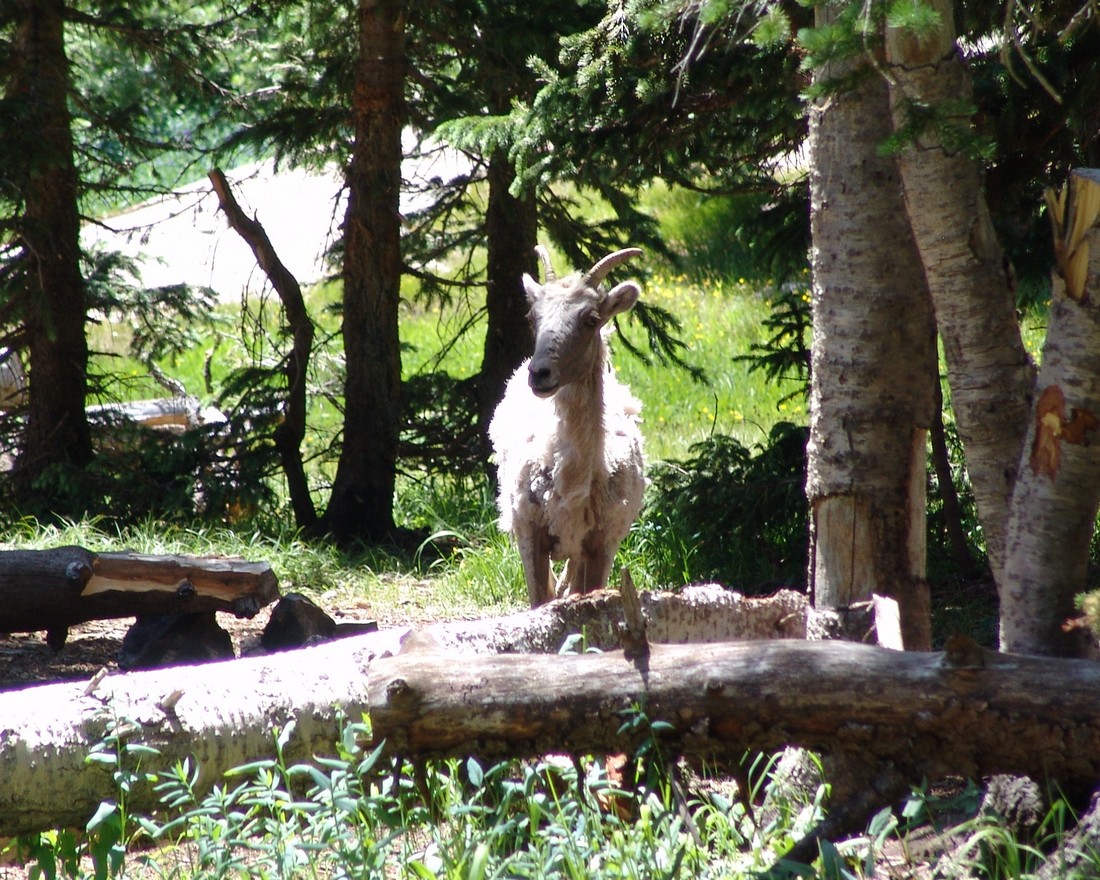
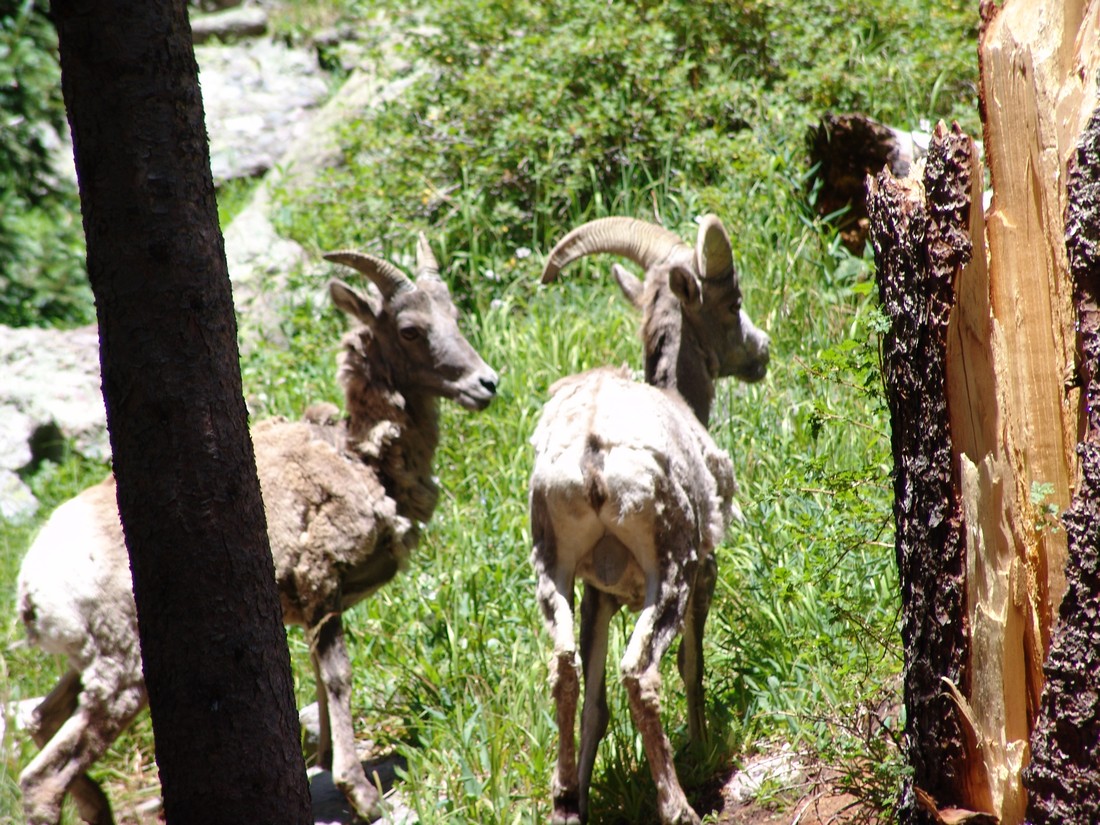
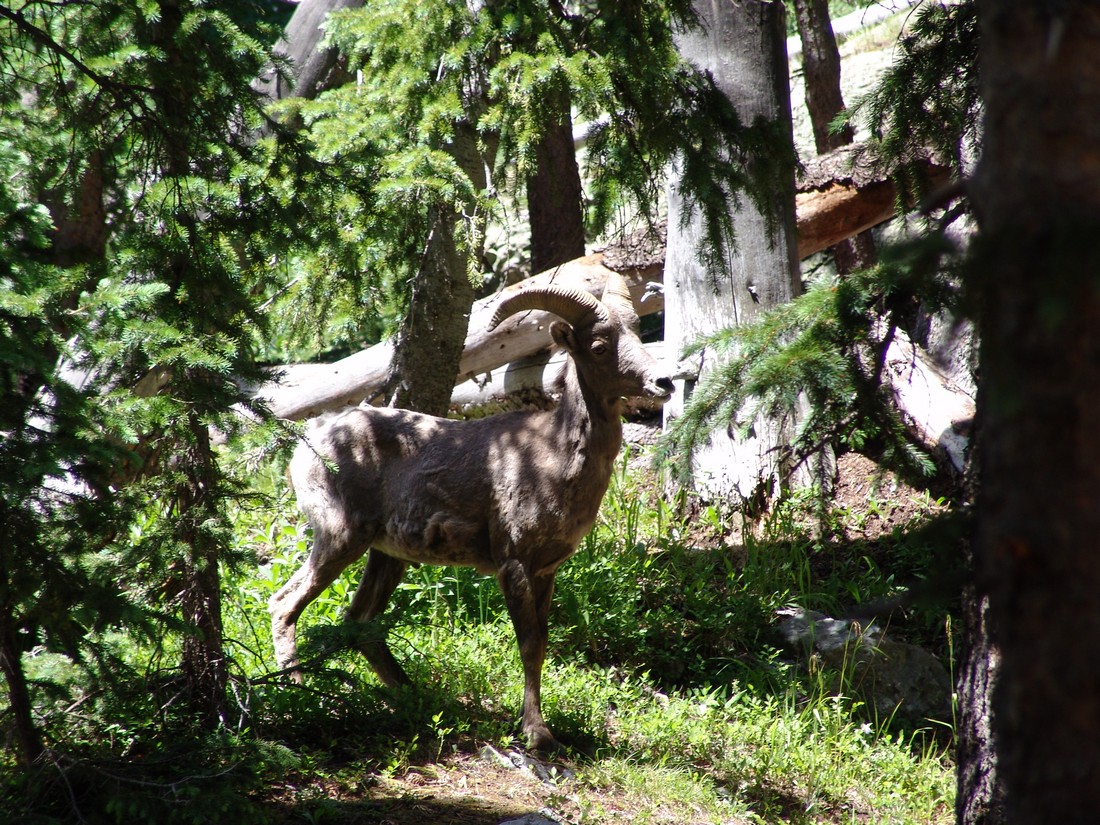
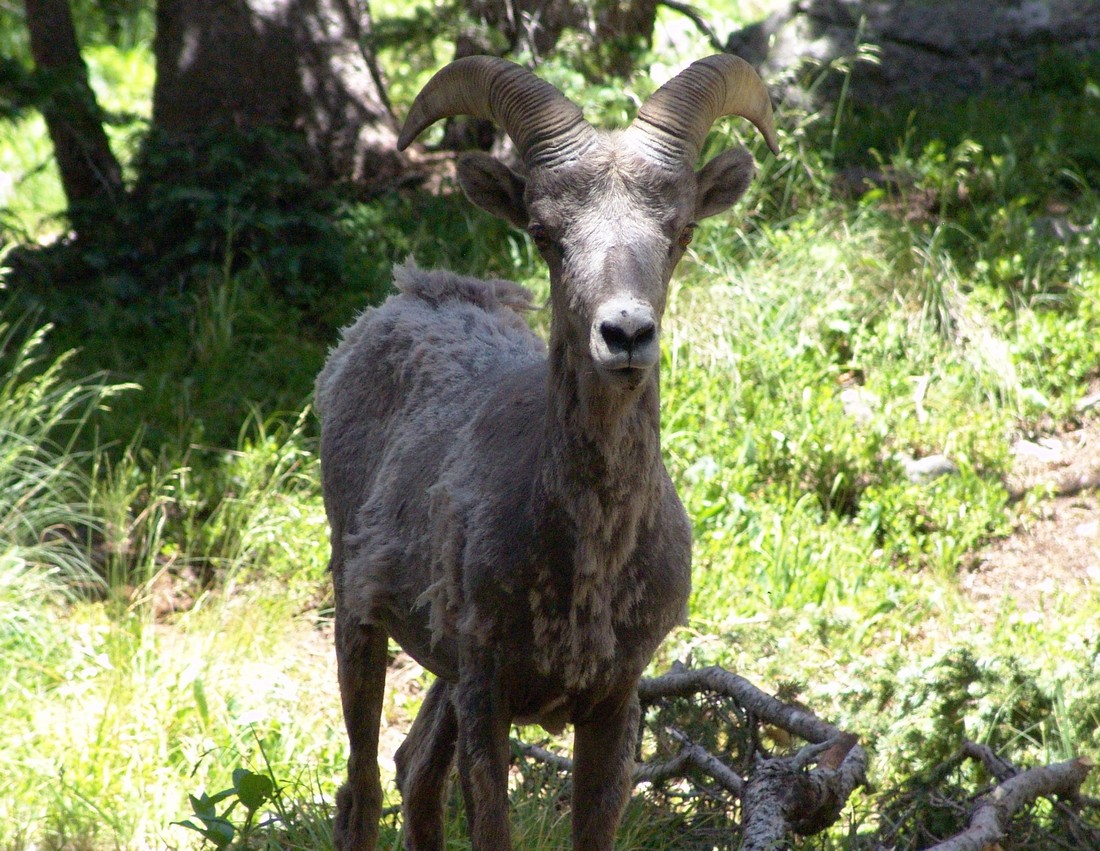
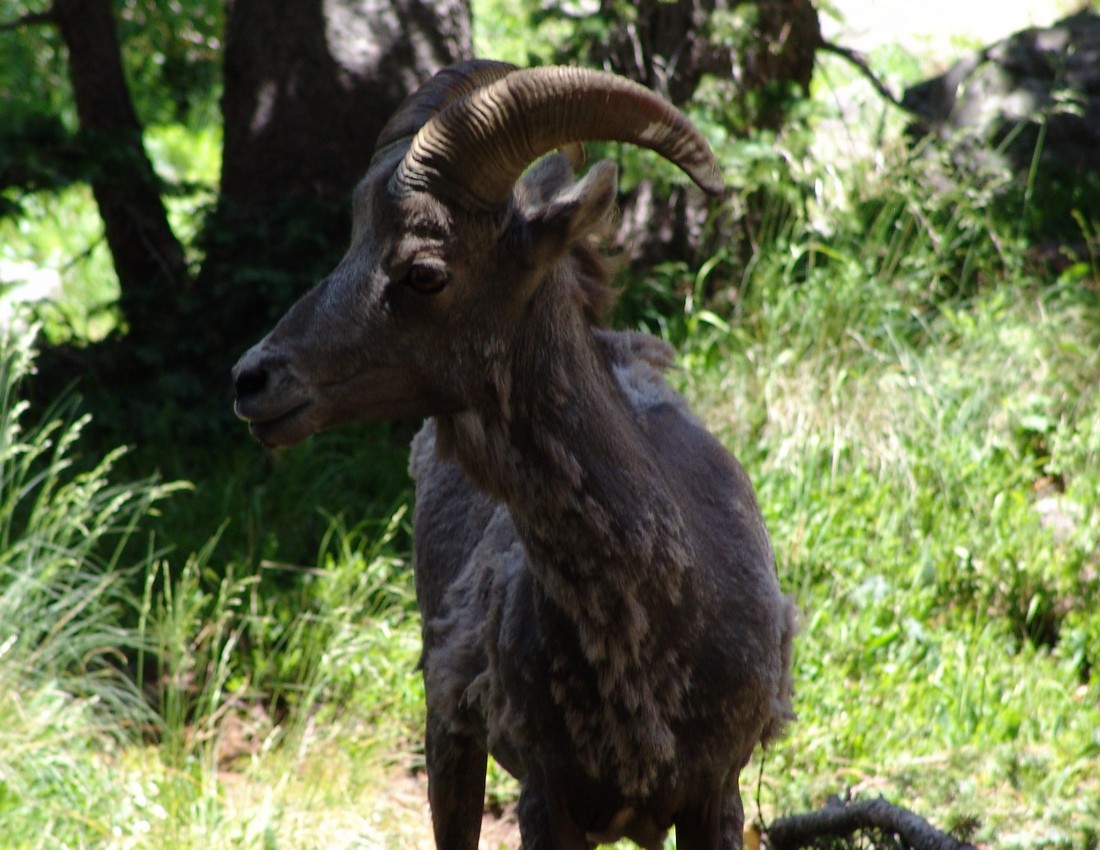
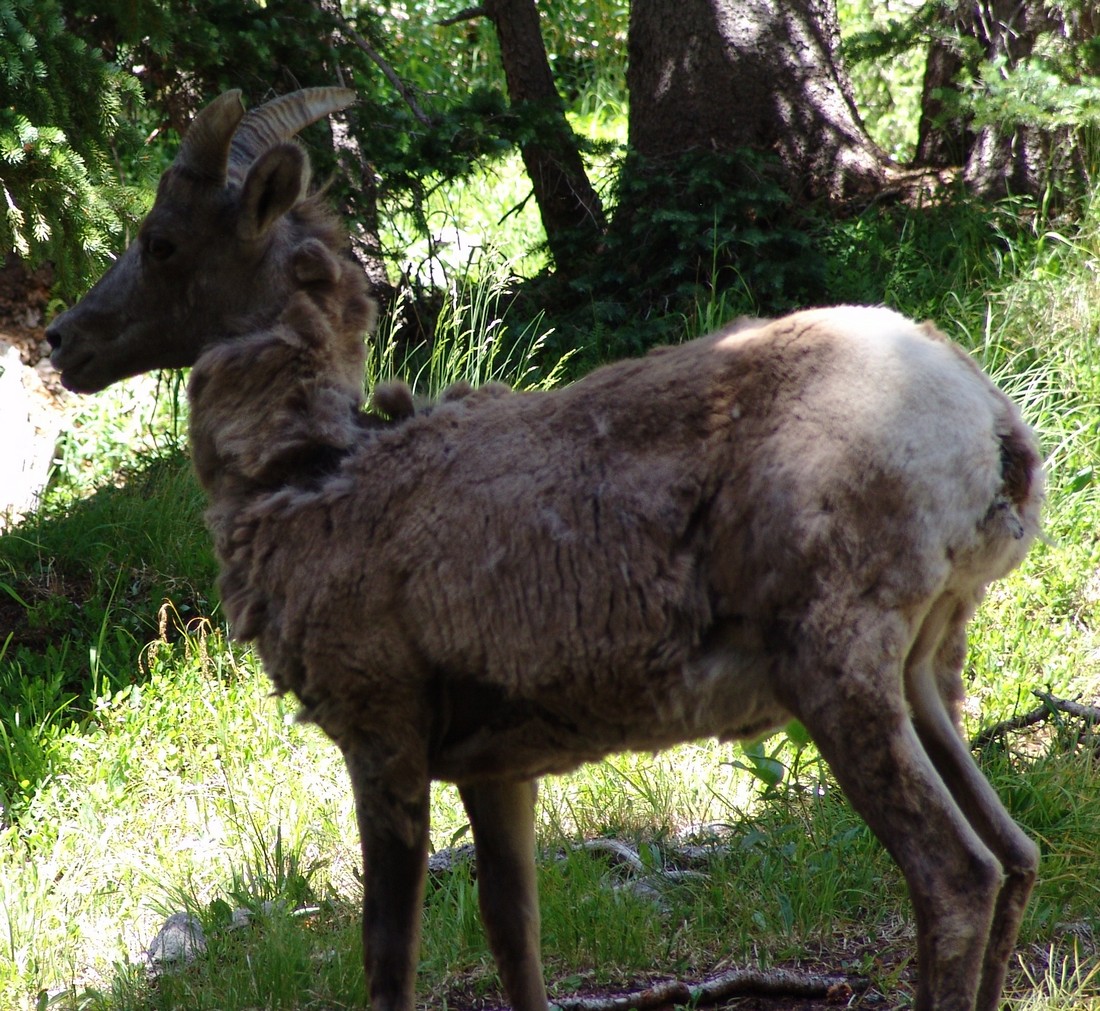
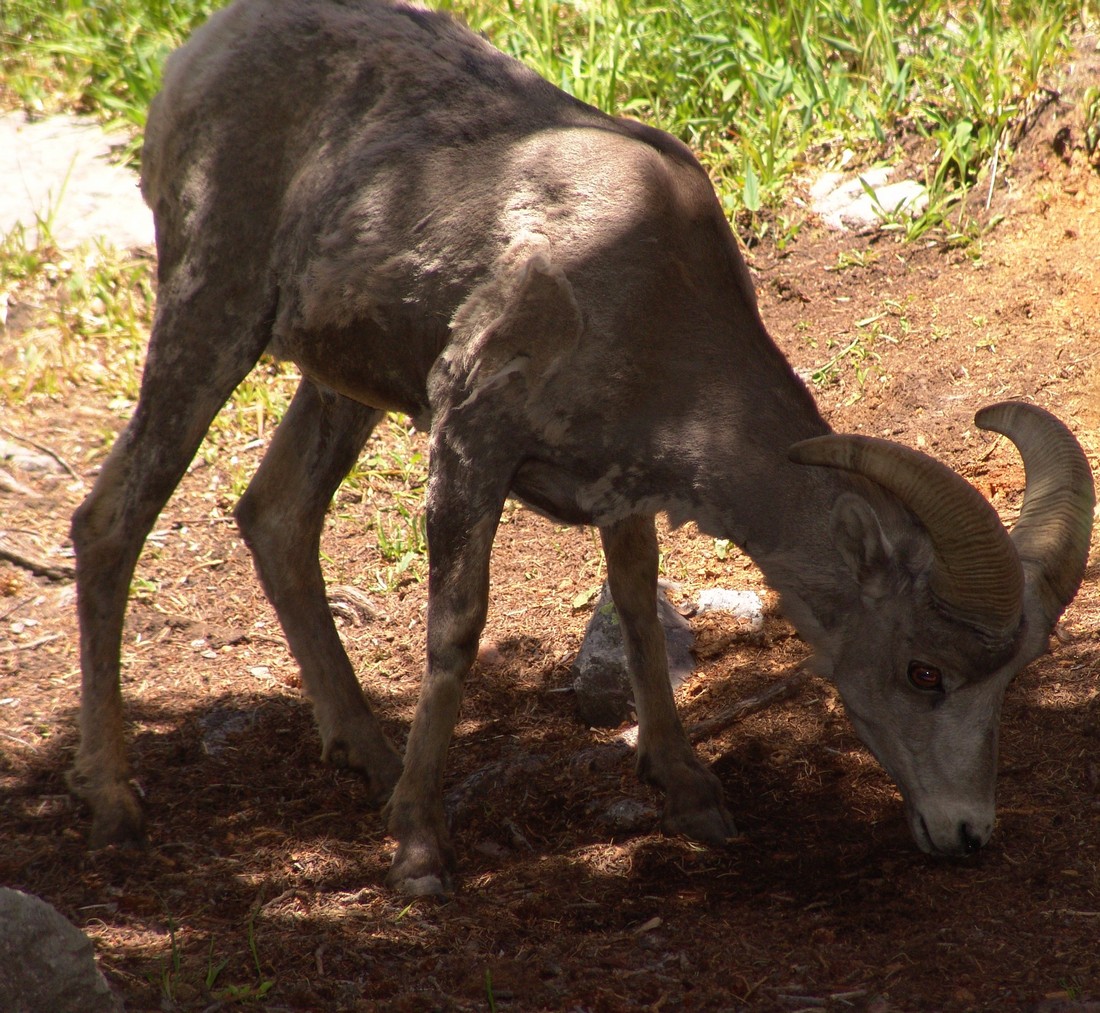
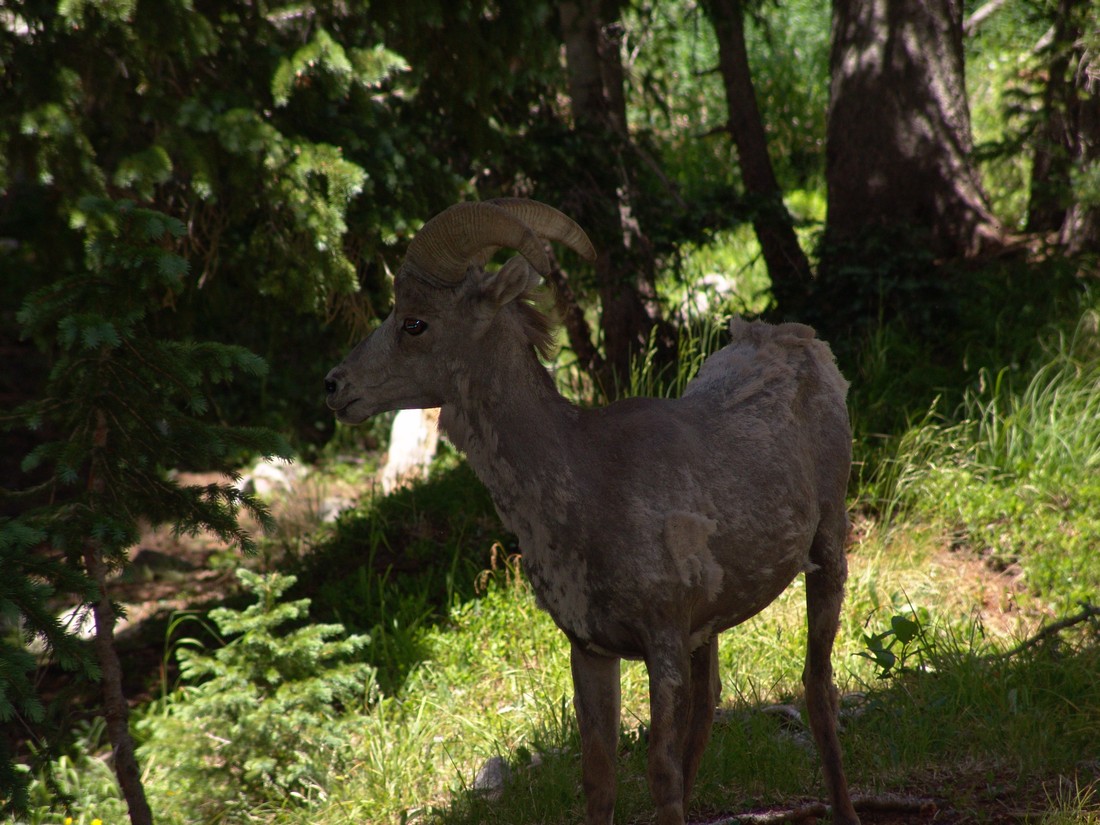
After we were able to chase off the sheep, we set-up camp. The campsite was very nice, with an established fire pit and logs all around it for seating. Here is the view we had of Challenger Point’s north face:
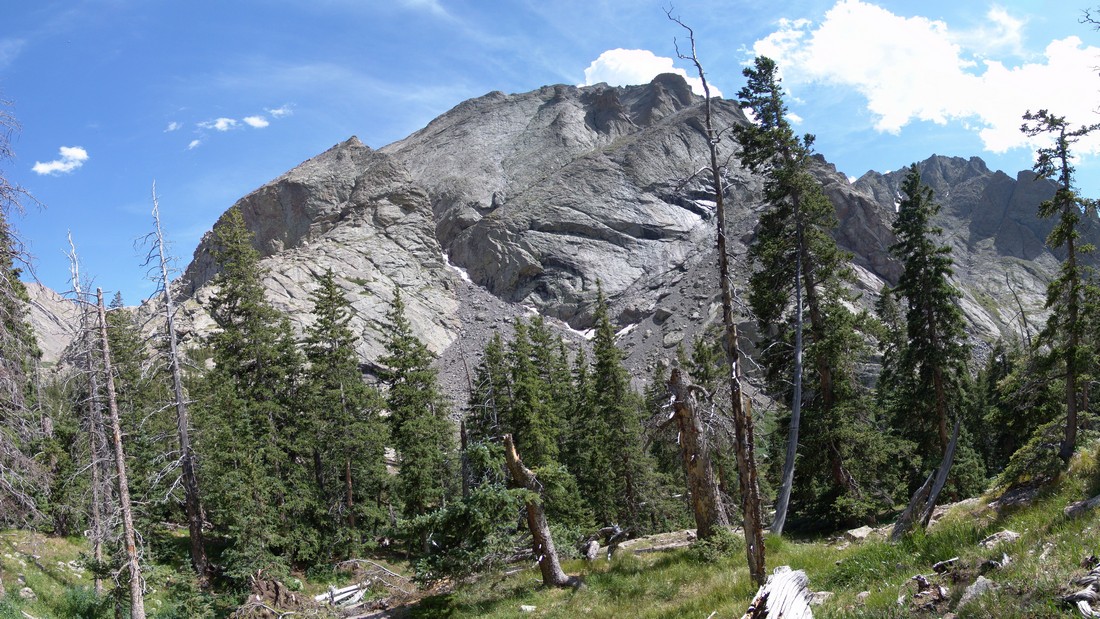
After setting-up camp, we decided to head up the lake to see what it was like. Boy, were we in for a scenic treat! The lake had a giant waterfall at its head and was surrounded by small cliffs where the waterfall was at. Here’s some stitched panoramic photos from the lake: 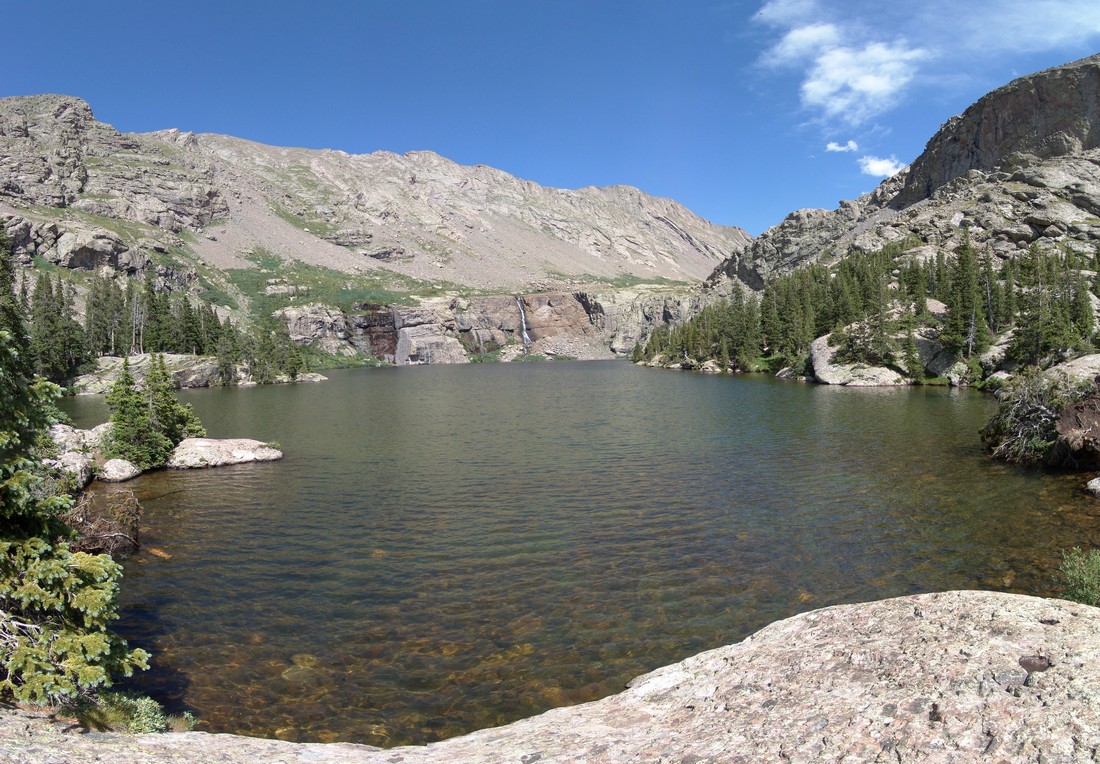
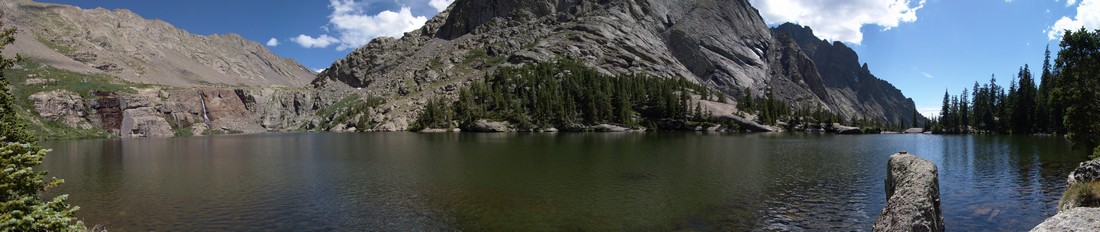
After soaking in as much of the lake as we could, we decided to head back to camp, cook dinner, and call it a night. We woke up at 4 AM the next day and quickly readied ourselves for what was going to be a very long but rewarding day.
We hiked up past the lake and began up the valley to the south. Quickly Kit Carson and Challenger came into view (left and right respectively):
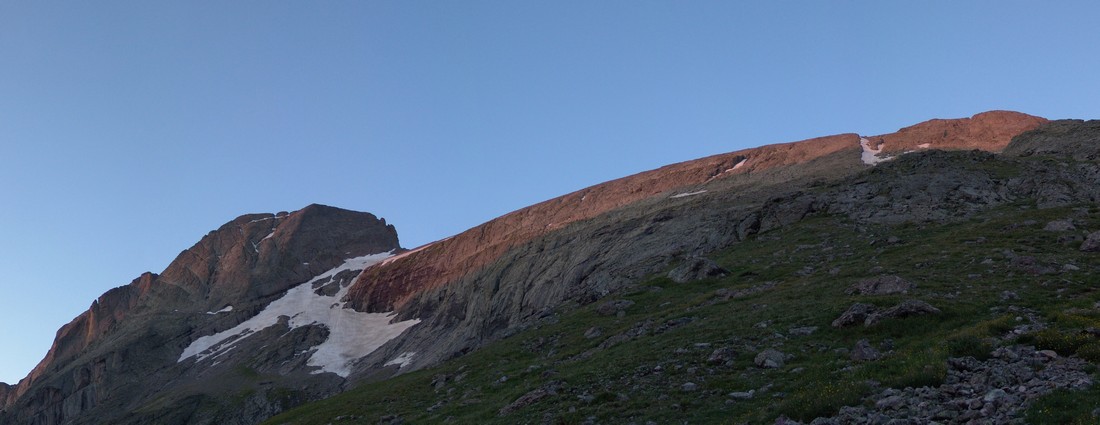
I think Kit Carson looks like a Klingon’s forehead. Who’s with me?

I originally thought that this was “The Prow,” a semi-famous section of Kit Carson that is a a notorious rock-climbing route; however, it turns out that “The Prow” is on the other side of Kit Carson and is seen from Columbia Point.
Another view looking up the valley at Kit Carson (right) and the adjoining ridge to its South and East.

We climbed up the grassy slopes of Challenger Point and then up a loose talus section to the ridge. From the ridge we could see the top of Challenger Point and looking down we could see the upper Willow Lake and the sun’s reflection on it.

We started climbing up the ridge to the southeast towards Challenger Point. Here is a view from near the summit of what the ridge climbing looked like. 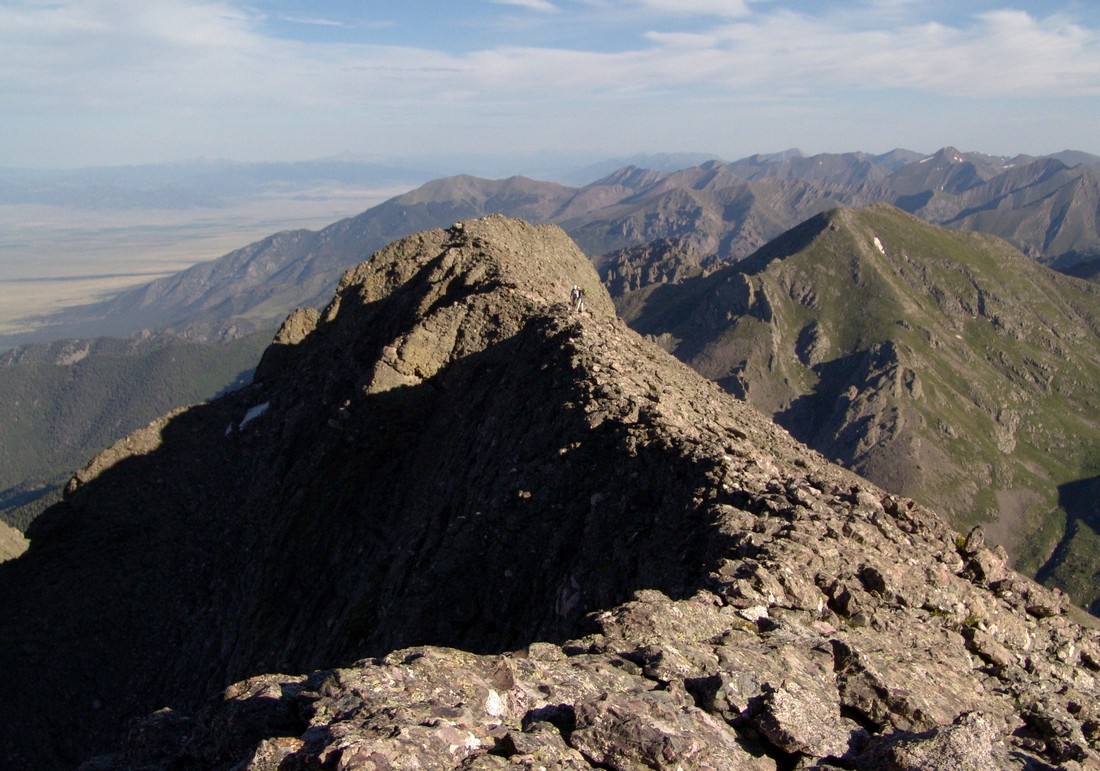
A few minutes later and we arrived on top, with Kit Carson and Crestone Peak in full view and the Blanca group in the distance to the South. 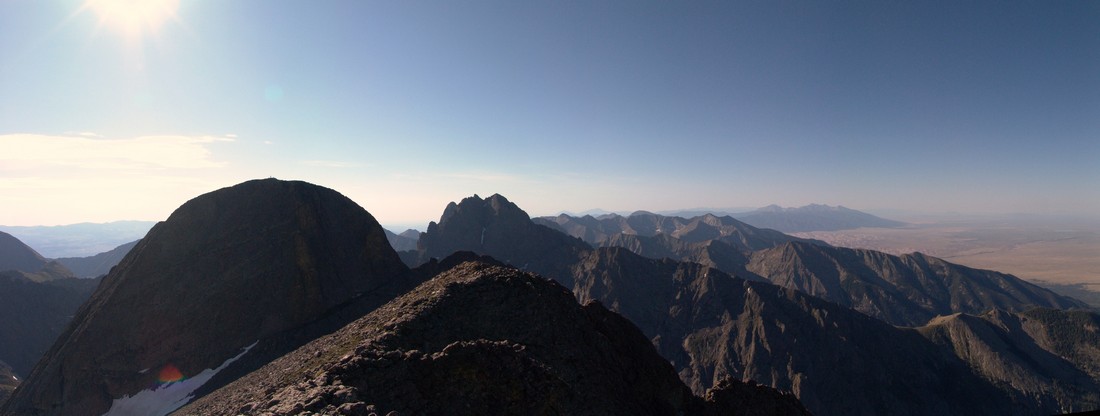
Looking east we could see Mount Adams poking up towards the sky. 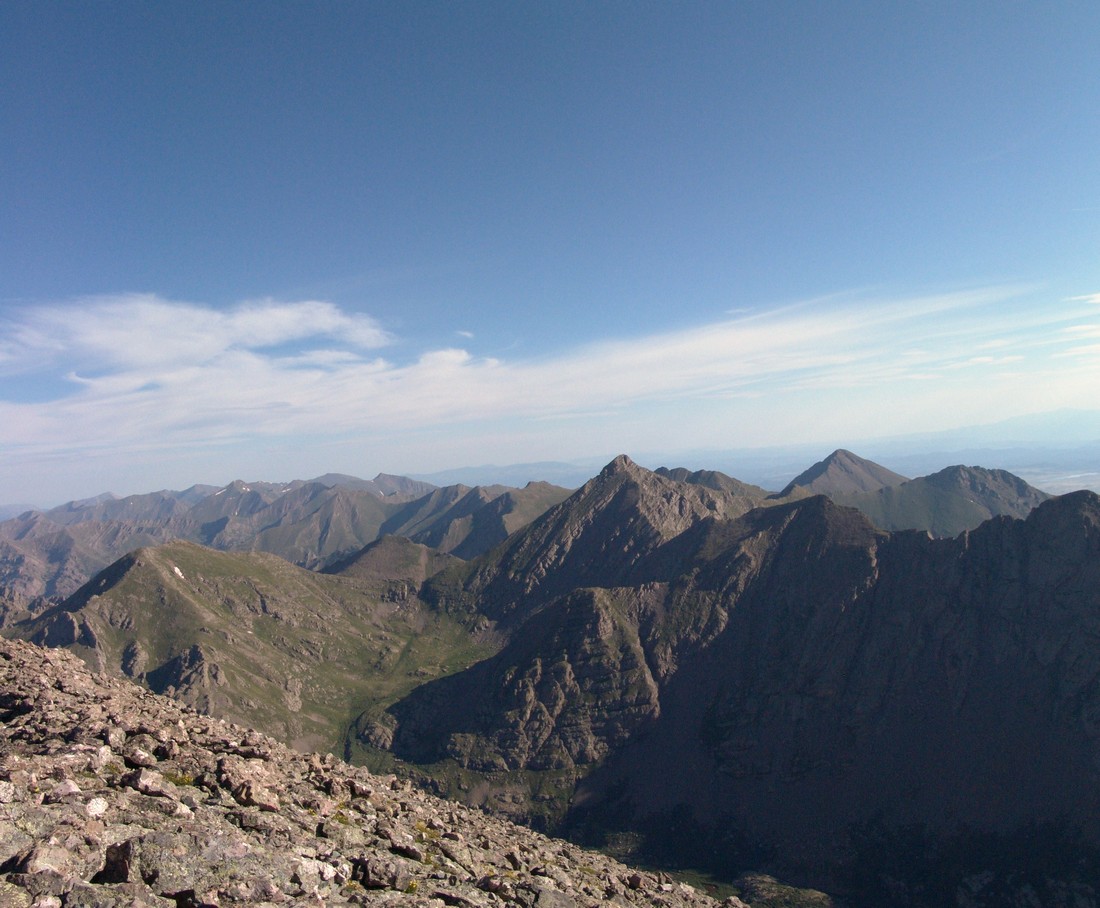
And here’s a shot of me on the summit looking southeast towards Crestone Peak and Kit Carson: 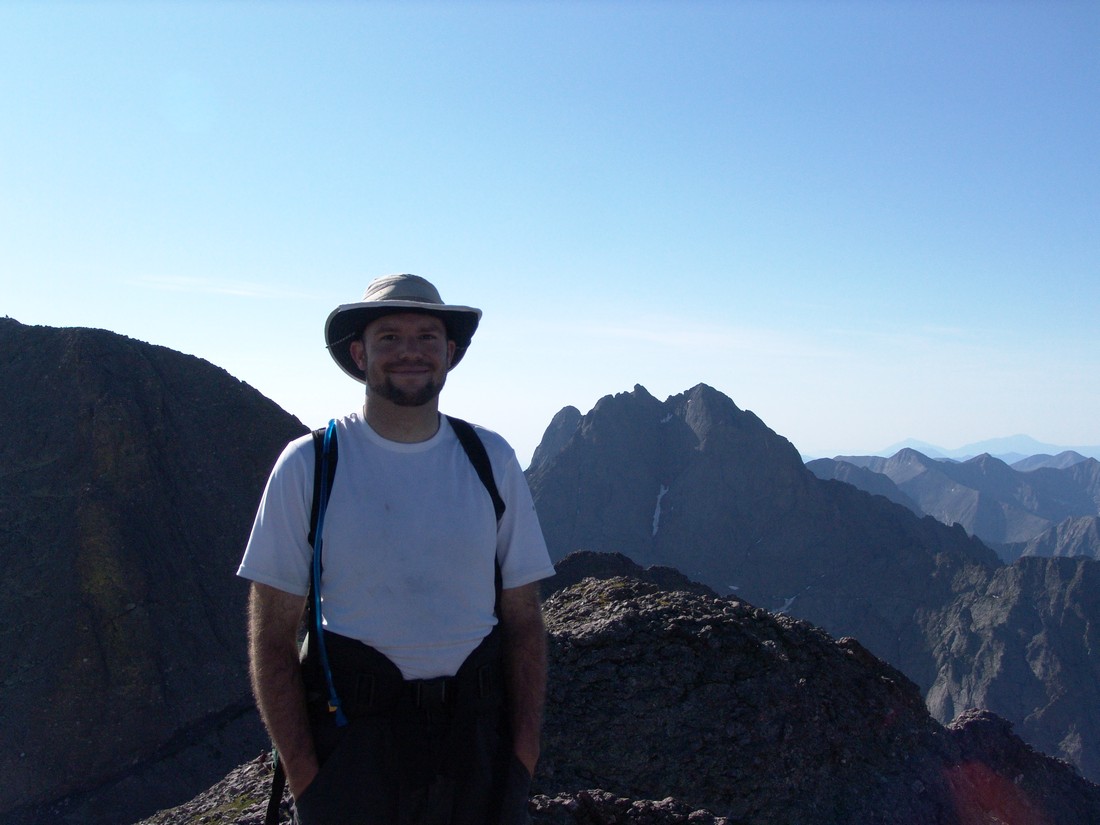
On top of Challenger Point rests a plaque dedicating the mountain to the Challenger shuttle disaster of 1986. 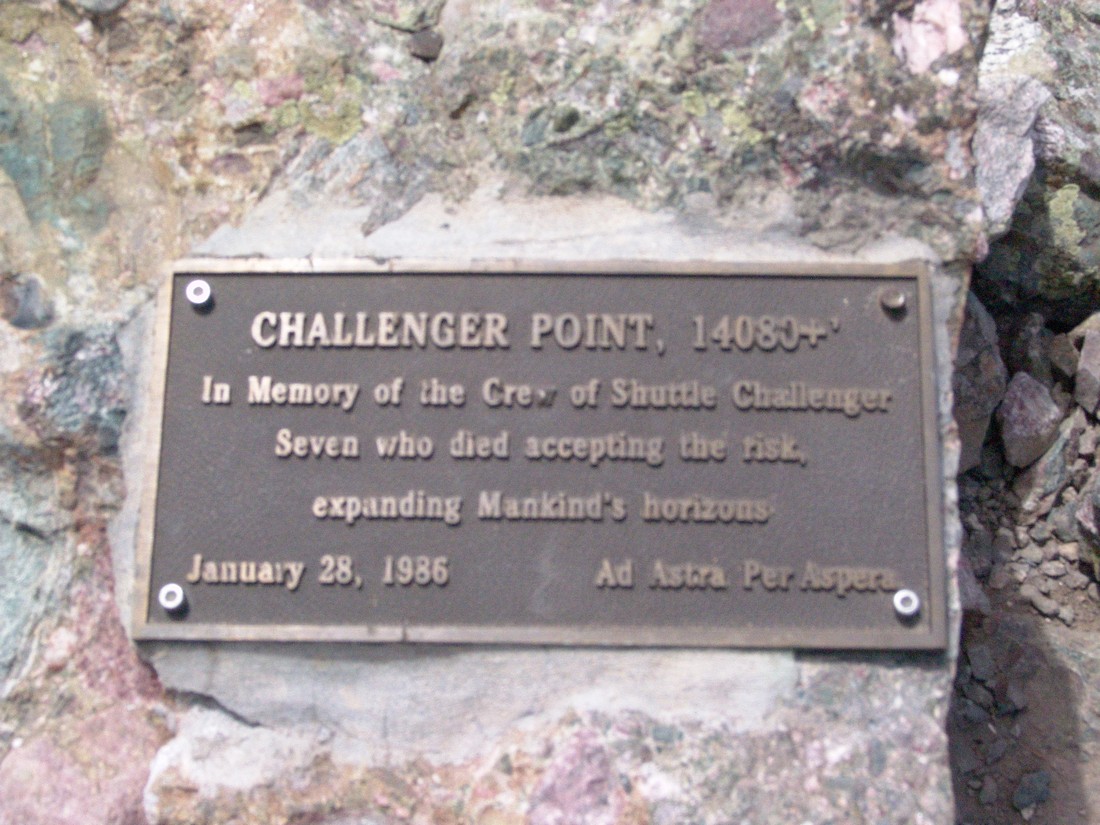
After refueling on top of Challenger Point, we began the journey down Challenger Point’s southeast ridge towards Kit Carson and the Kit Carson Avenue, a long ledge leading around the side and then around the back of Kit Carson. Here’s a look at some of the perilous cliffs below Kit Carson Avenue and subsequently, a photo of the Avenue and the route up it. 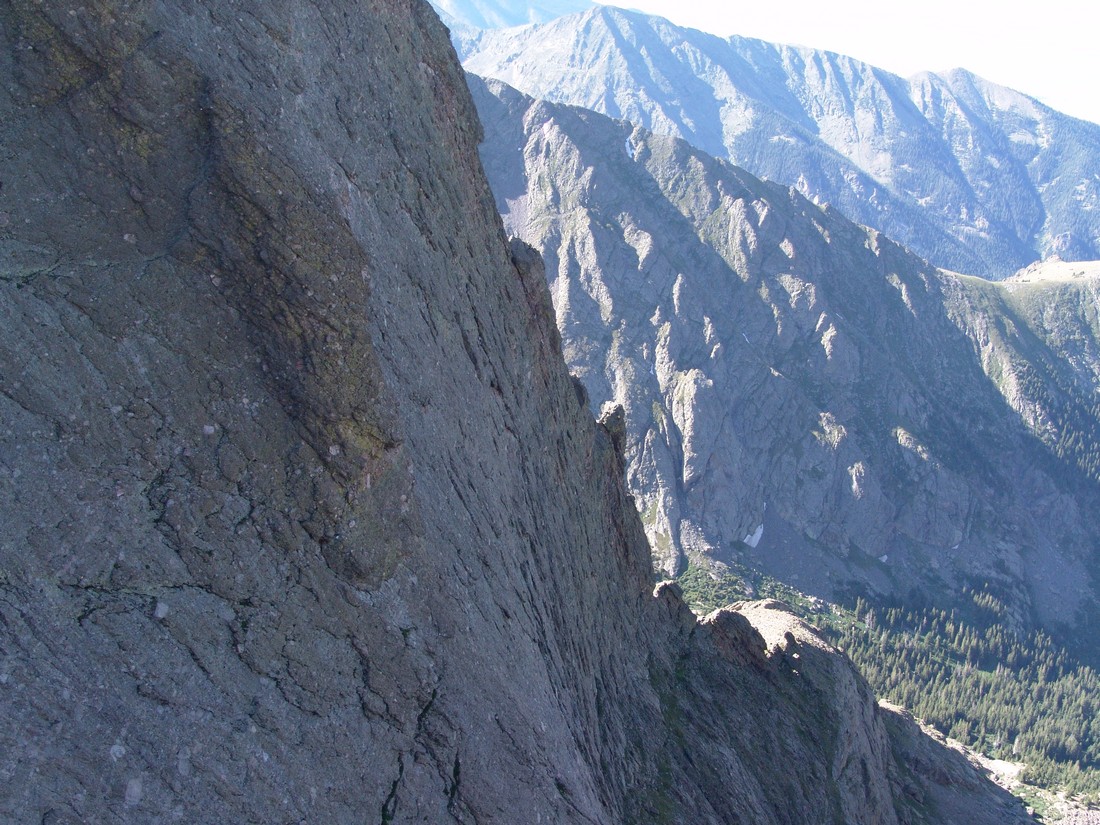
The Avenue looks pretty sketchy from here but in reality it was a nice ledge with plenty of room for walking. Once at the top of the Avenue, you once again can see the awesome Crestone Peak (center) and Columbia Point (left) with the back-side and downward heading remainder of Kit Carson Avenue. 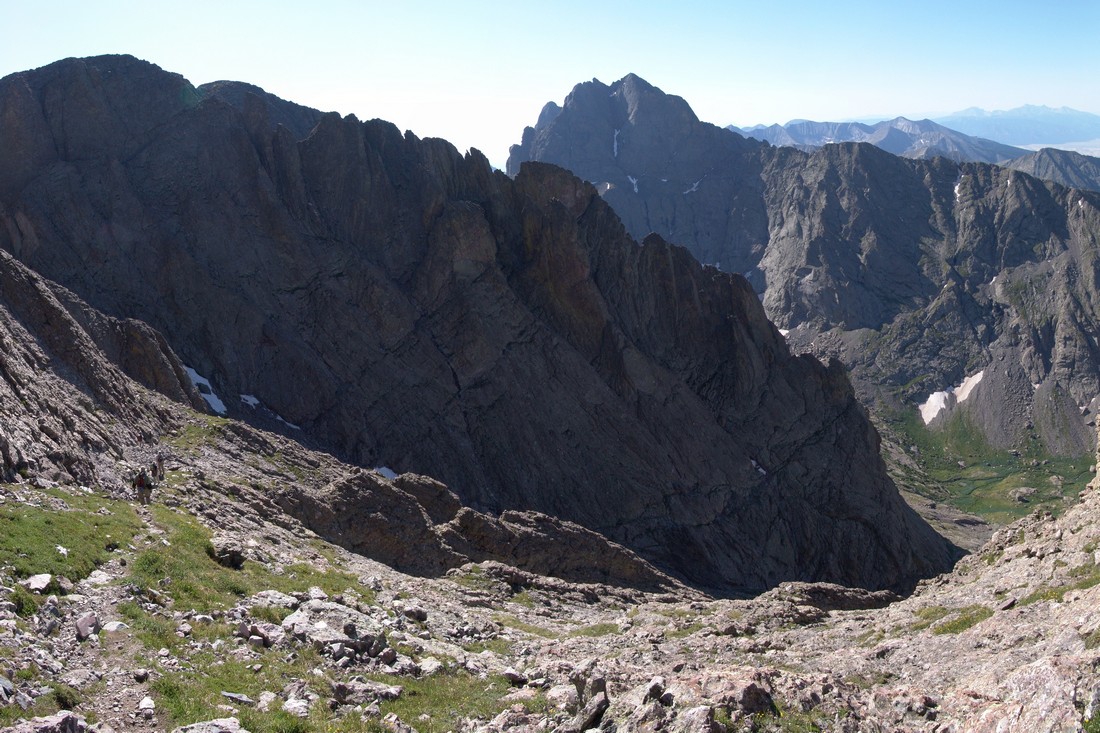
Going down the Avenue, I was struck by the really remarkable geological formations. It appeared to me that water had eroded the underside of Kit Carson in the Avenue, making it look like something had burrowed its way right through the rock all the way down.
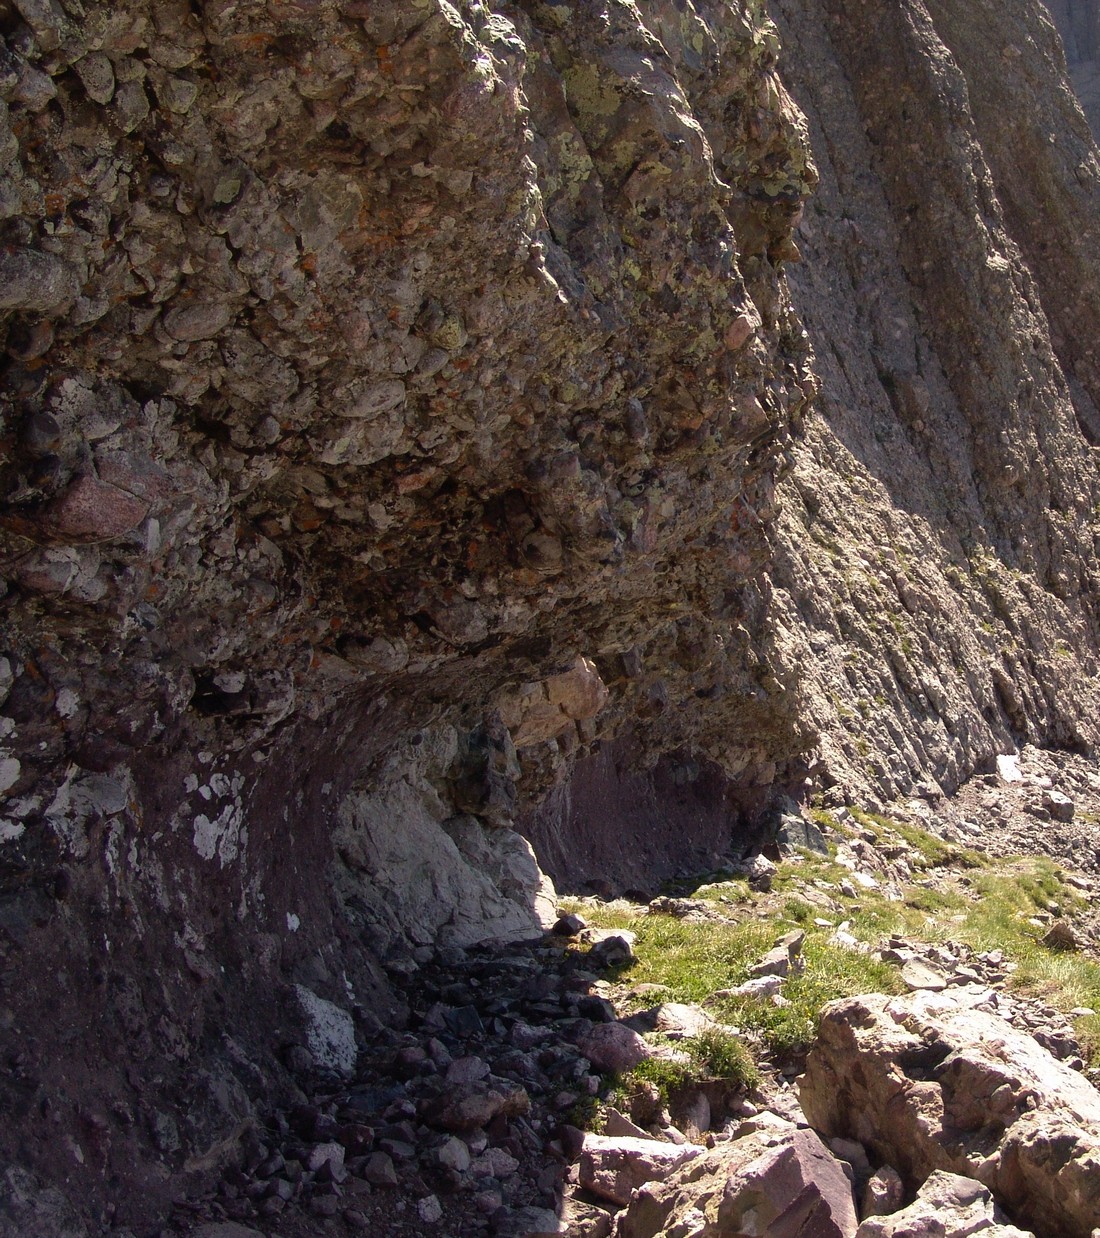
And another view looking down the Avenue – it looks far less intimidating than it did from the top of Crestone Peak. 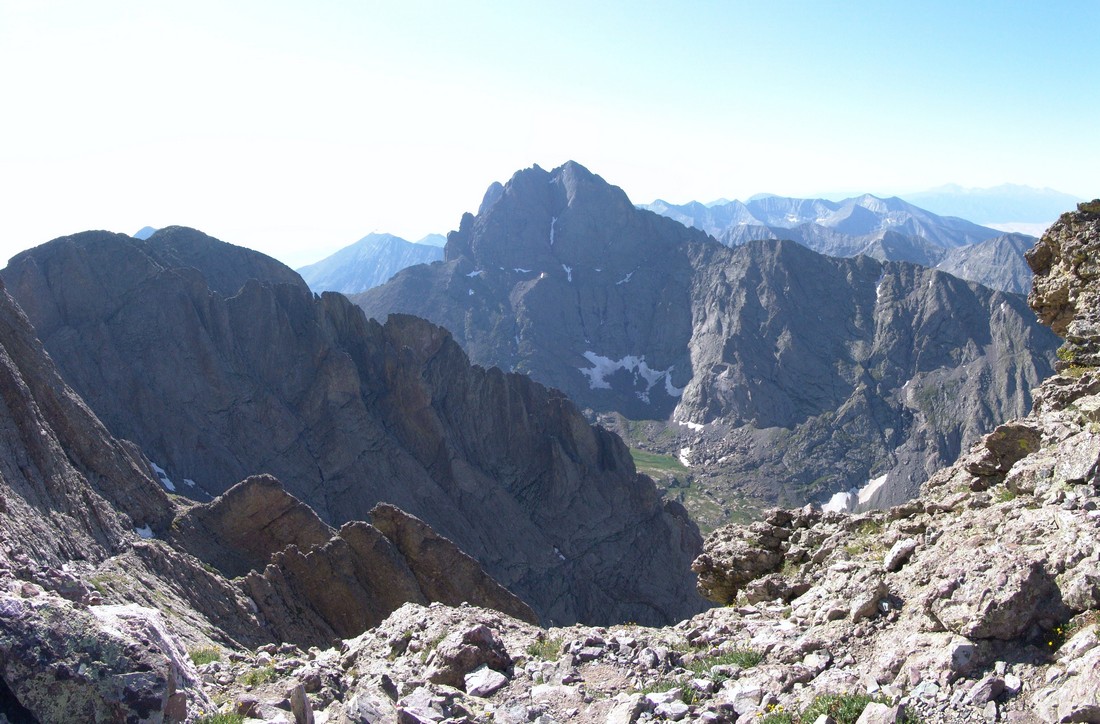
Once we reached the bottom of the Avenue, the route took us sharply to the northwest. The climbing was pretty standard class 2 stuff. Near the top of this last section Terry ran out of gas and took a break to rest. I decided to make the final push to the top after visually verifying that Terry was not injured and was continuing. Here’s a shot looking towards Columbia Point and Crestone Peak again. Take special note on the intimidating nature of Columbia Point (closest peak) from this vantage point, as it was the side of that mountain that I would later climb… Looking at Columbia Point you can see a small fin that is separated from the mountain by a small gap. That is the fin I would later ascend to reach the top (more later). 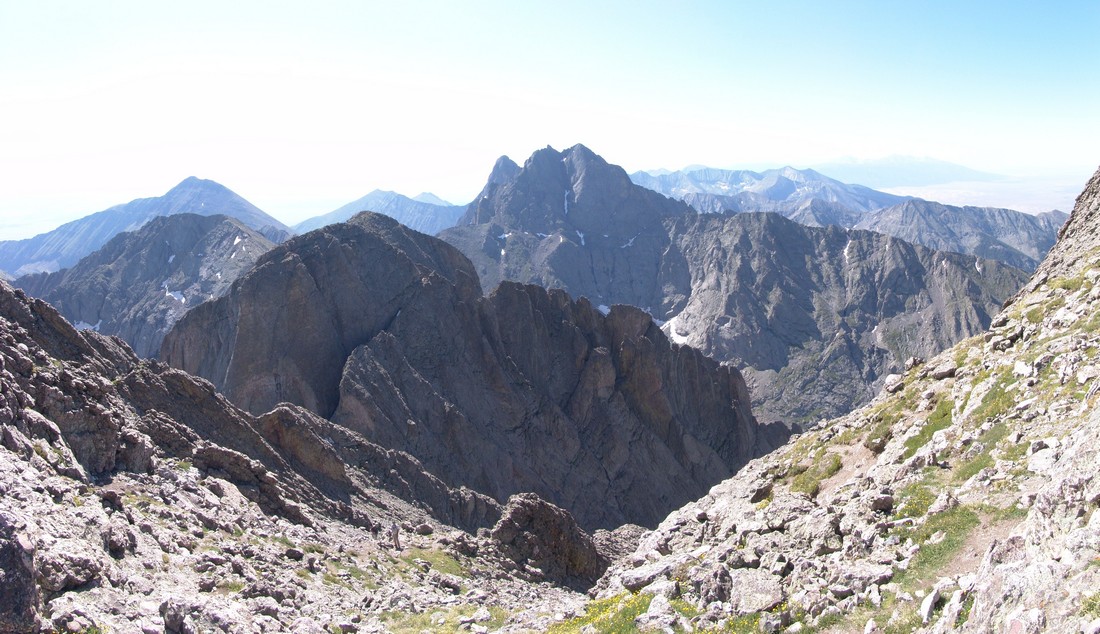
From here, reaching the top of Kit Carson was a breeze. There were several other groups on top. Here’s some stitched photos looking towards Challenger Point. This is a good view of the route we had to come up earlier in the day. Basically starting from the large lake pictured right of center, you climb up the grassy section and then up the rocks to the ridge. 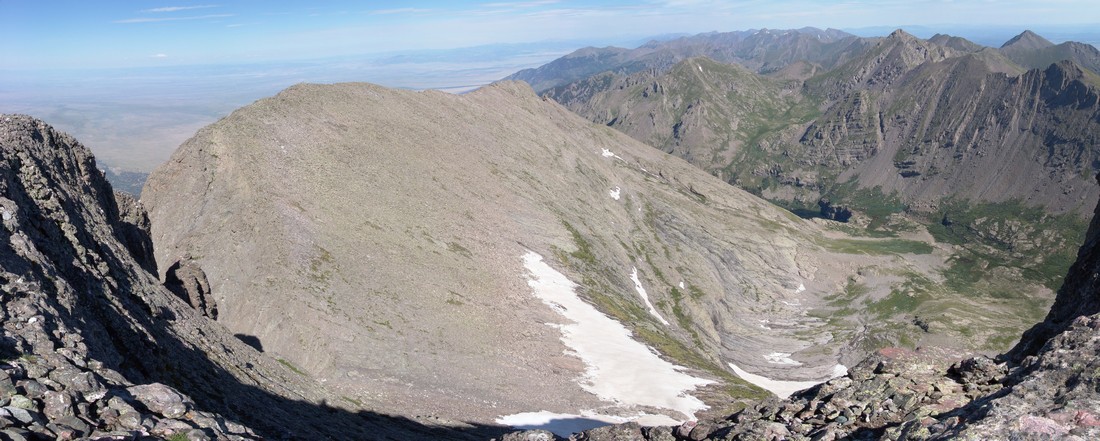
Speaking of the lake, here’s a really high-detail pano of it.
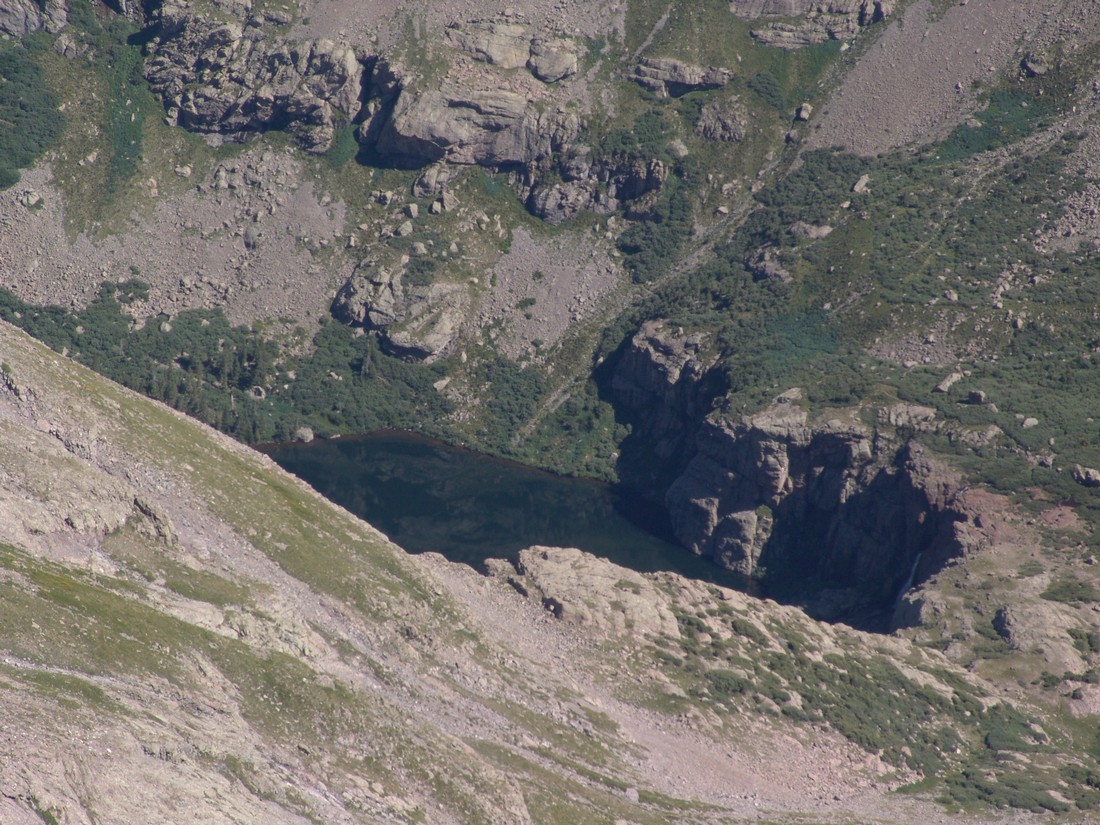
And a shot looking south. 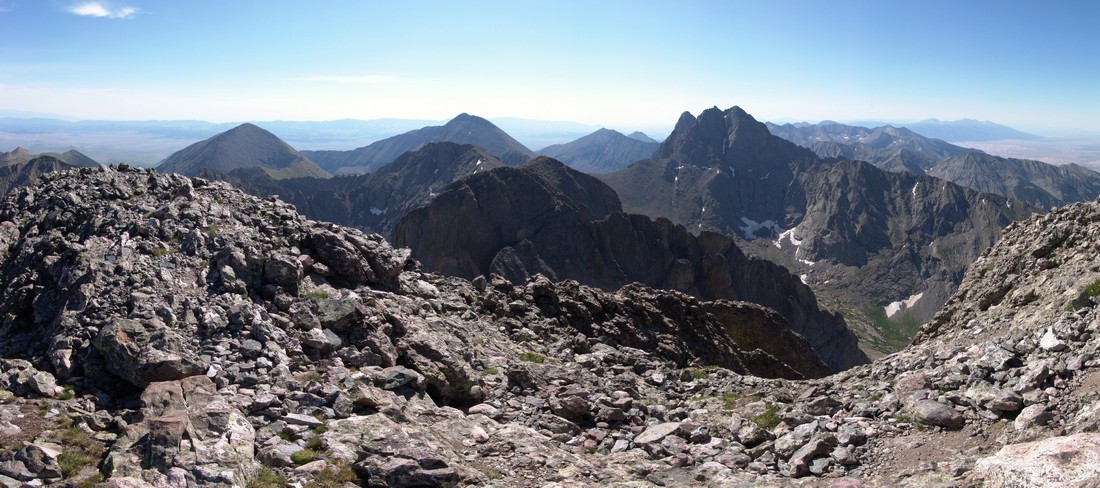
And a 180 degree pano with Columbia Point in center. 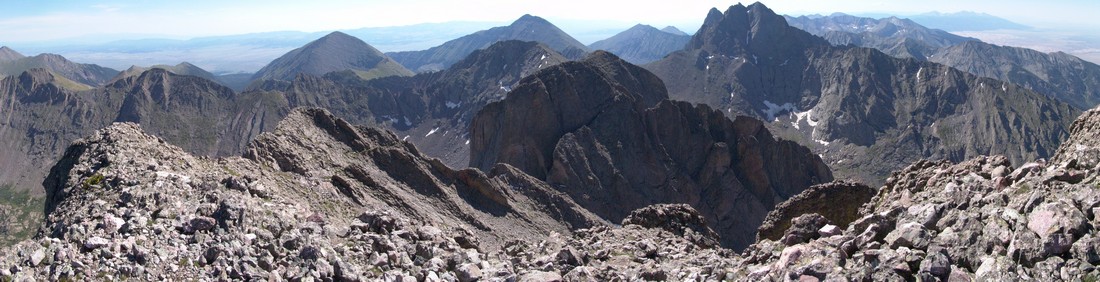
And of course here I am flexing victoriously on the summit. 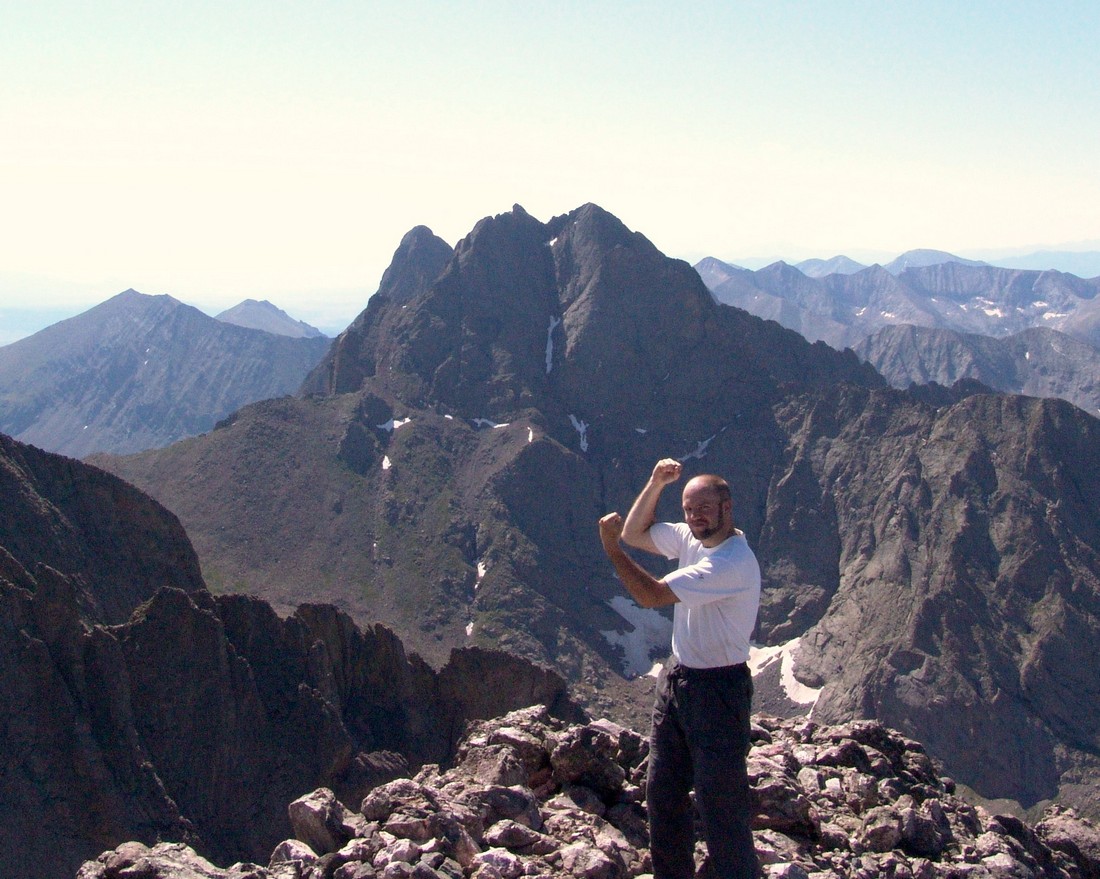
After a quick snack on top I decided it was time to go back down and decide if I was going to climb Columbia Point. Terry had already headed down and would not be attempting Columbia Point. After running into another climber on the way down and picking his brain on the approach for Columbia Point and assessing the weather, I decided to give it a shot solo. This was possibly the most technically challenging climbs I’ve done to date. The route was not well-established and there was a couple of spots where I was exposed and could have fallen to my demise. Here’s a picture outlining my rough route up. 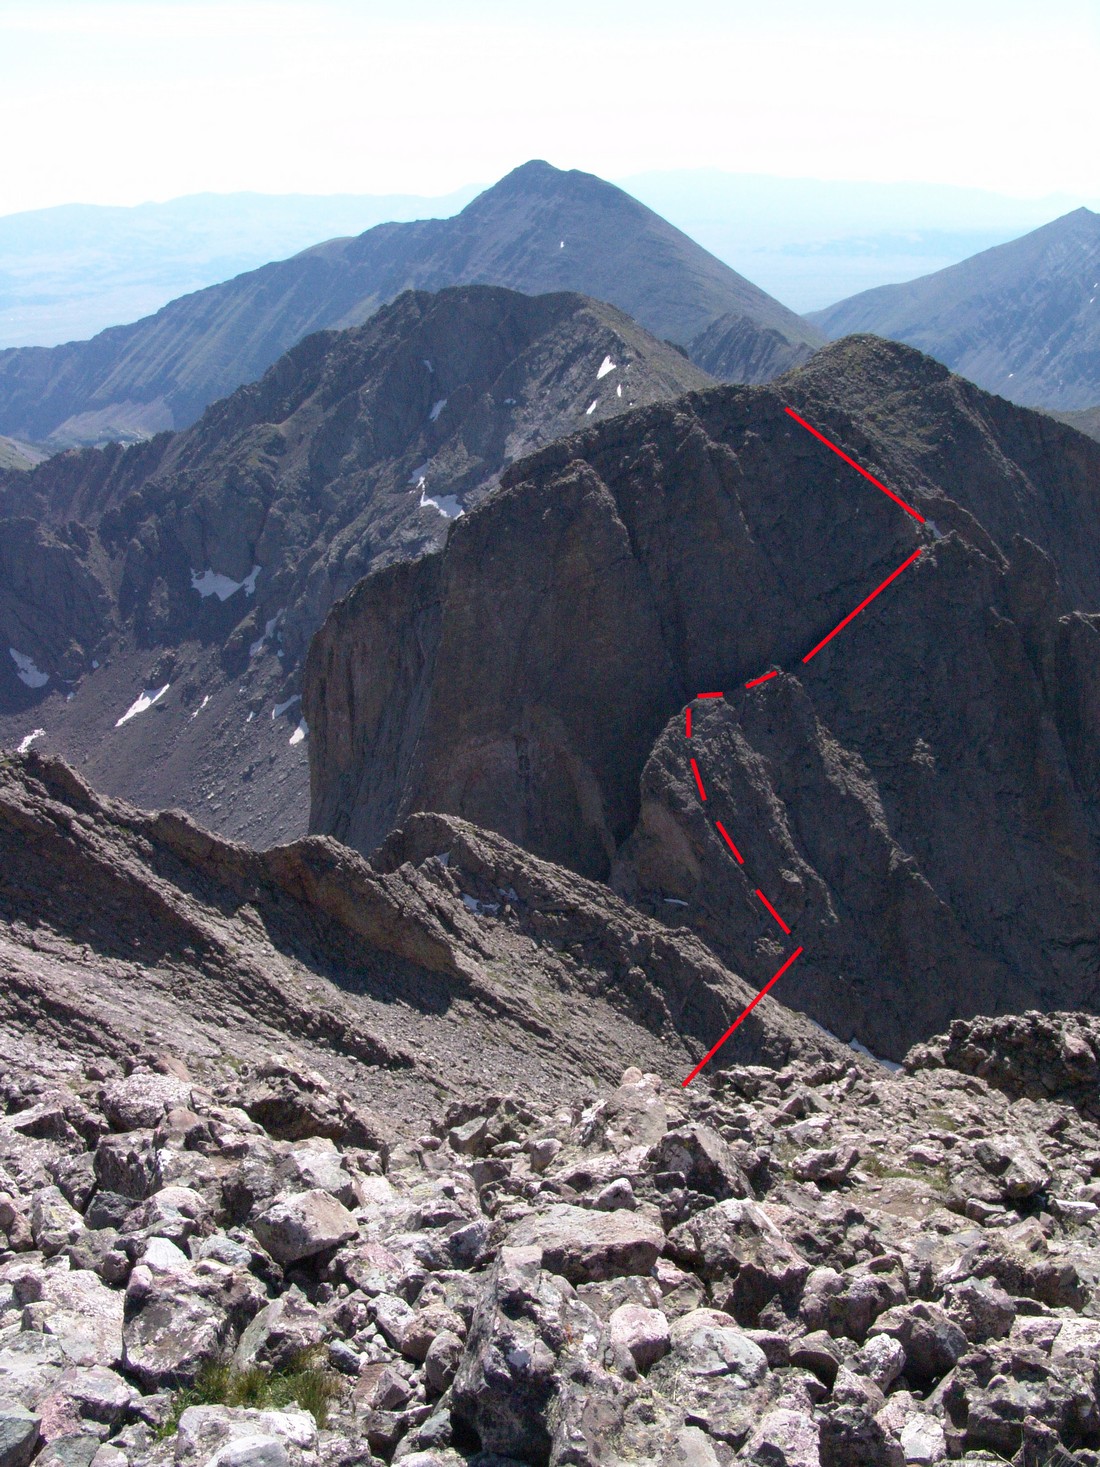
Once I reached the top of the first gully of the fin (5th red line from bottom), I had to make a really risky move to down-climb about 10 feet to the next section of the fin. I sat there for at least two minutes and contemplated the move’s risk and thought of turning around. I would definitely rate the move as Class 5 (Class 5: Technical free climbing involving rope, belaying, and other protection hardware for safety. Un-roped falls can result in severe injury or death) as it was 100% vertical and required both hand holds and footholds. Even though I still had on my backpack and had my camera around my neck, I decided that I had the skills and the mental acuity to give it a shot. This move was really tricky as I had to somehow flip myself around and onto the face of the rock wall, with 300 feet of exposure (Empty space below a climber, usually referring to a great distance above the deck through which the climber could fall) to the left and a steep rocky slope below me to the right. I took a photo of the spot but it really does not do it any justice. Perspective is everything. I was amazingly cool during the attempt but did find myself shaking a little and my heart was racing pretty fast. Once I secured myself onto the face of the wall, I descended several feet down, ensuring that my hands and feet had secure holds with each move. In retrospect, this was a very risky move and leaving the gully earlier to avoid it would have been prudent. After this, the route was pretty straight forward up the fin and then up the steep ridge. It was hand over hand the rest of the way up. I reached the top and took photos of the mountains surrounding me; Crestone Needle, Crestone Peak, and Kit Carson. 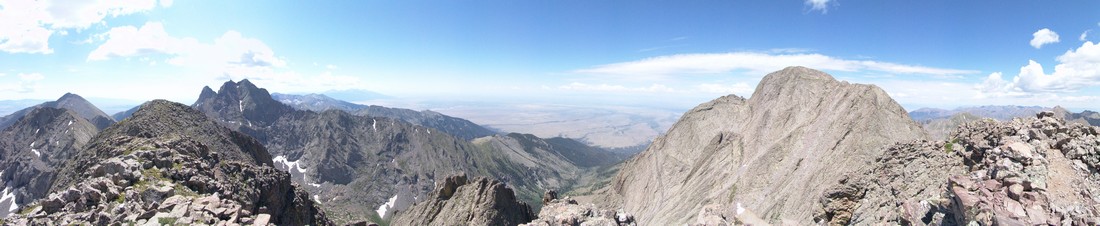
At this point, “The Prow” of Kit Carson was readily apparent to the left of Kit Carson’s summit.
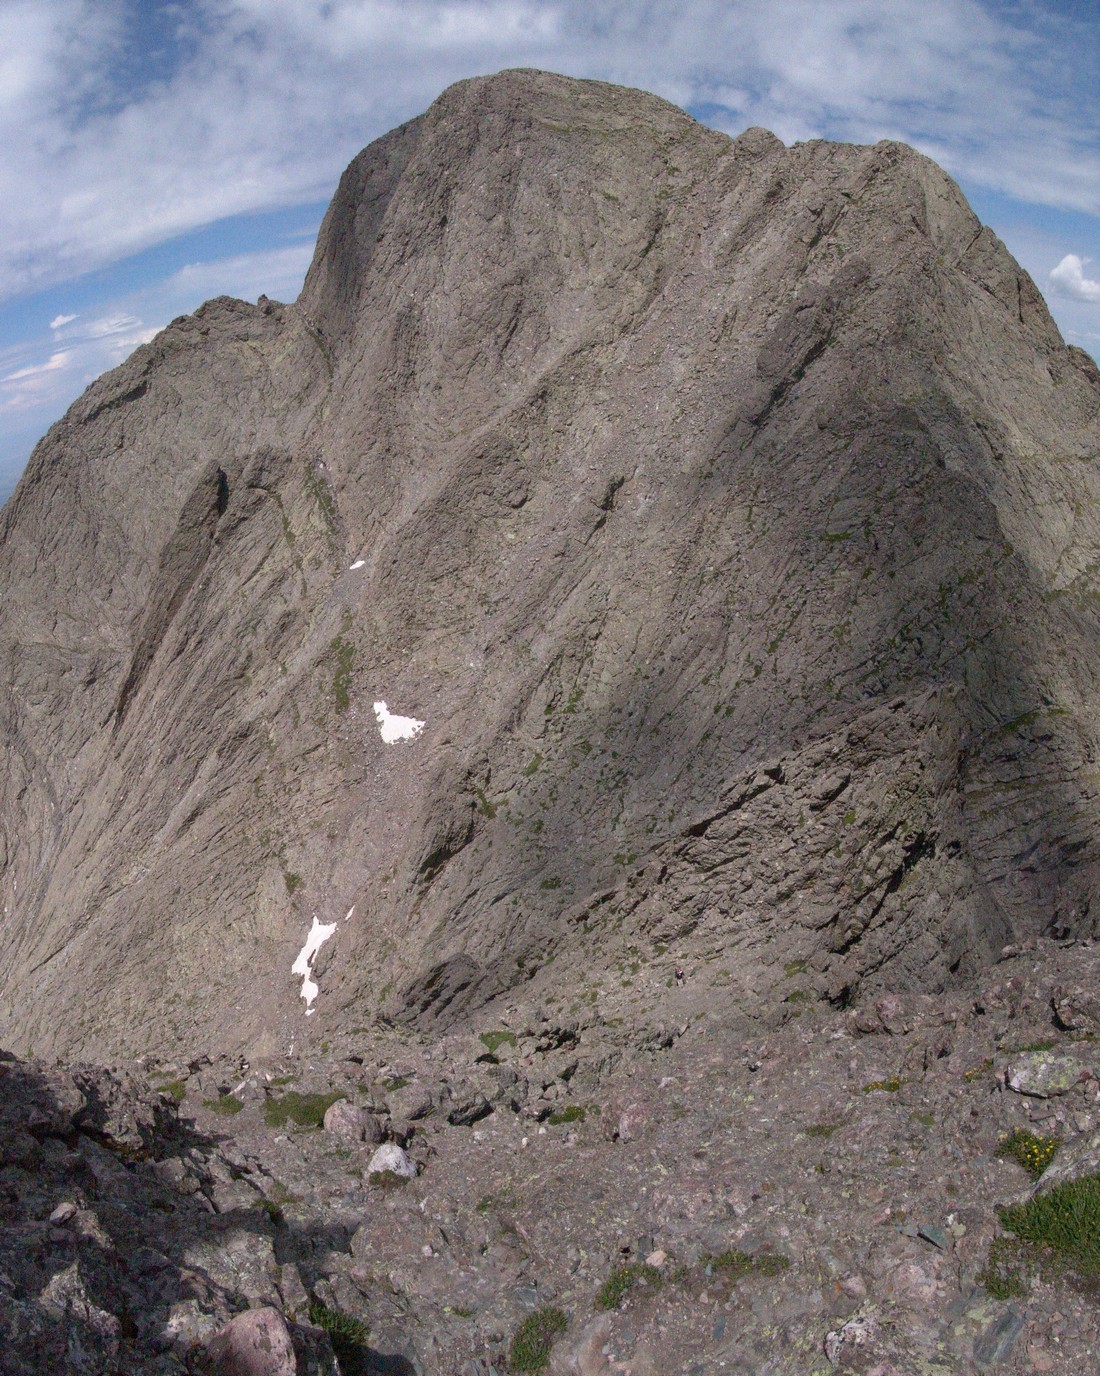
After taking pictures I took some time to search for something I had heard about… I was unable to locate a plaque that was dedicated to the Columbia shuttle disaster of 2003 as seen here:
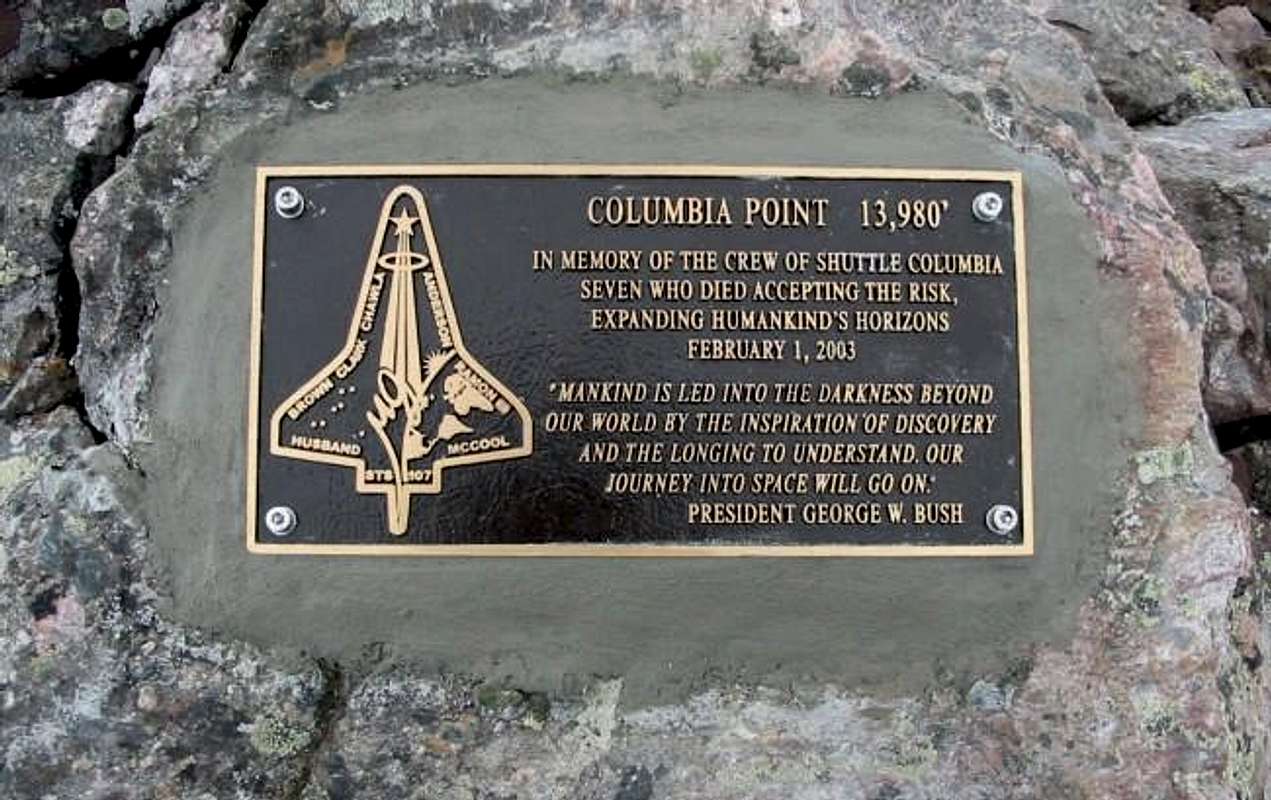
This was a real disappointment because it was one of the reasons I wanted to climb this mountain. I searched around the summit in all directions but could not find it. Frustrated, I second-guessed that I was truly on the summit of Columbia Point and not “Kitty Kat Carson,” an unranked 13’er right next to Columbia Point to the south. You can see it behind Columbia Point in the photo above. Even though a summit register on top said I was on Columbia Point, I wanted to go over to the other summit to be sure. After a quick trip over to “Kitty Kat Carson,” I determined that I was indeed on Columbia Point previously; however, the trip was well worth it as I was able to get some pictures of the full-on and un-obscured view of Crestone Needle and Crestone Peak.
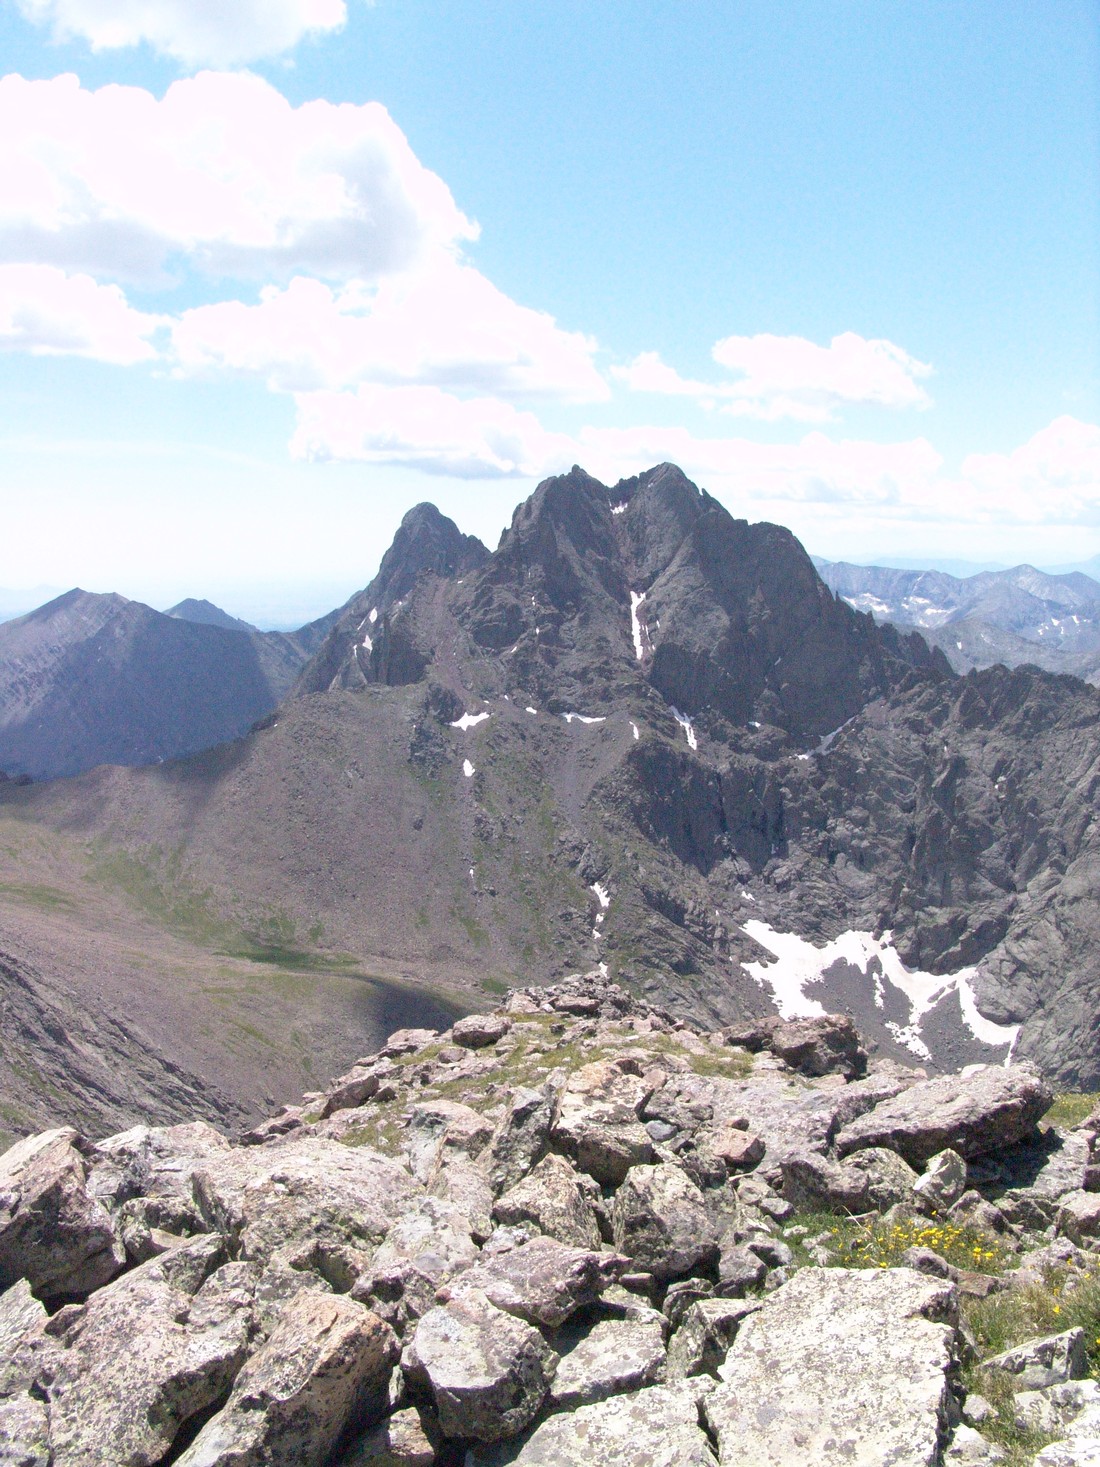
After enjoying the views from “Kitty Kat Carson,” I decided to go BACK over to Columbia Point one more time to try to find the plaque. Unfortunately I was not able to find it. Looking east, I noticed that some clouds were building so I decided it was time to head back towards Kit Carson and back up the Kit Carson Avenue. Another look back towards Kit Carson revealed that another climber was coming up Columbia Point so I knew I needed to be careful not to kick any rocks down on him.
I reached the top of the Outward Bound Couloir between Kit Carson and Columbia Point and headed back over towards Kit Carson Avenue by way of a steep gully with a large rock terraced over it, which created a nice and tight fit back over to the Kit Carson side of the couloir.
After reaching the top of Kit Carson Avenue, I climbed back down to the saddle between Kit Carson and Challenger Point and decided to re-summit Challenger Point as to ensure that the same route we took to get up would be the one used to get down. Once at the top of Challenger Point again, the nasty weather was building and looking more and more ominous.
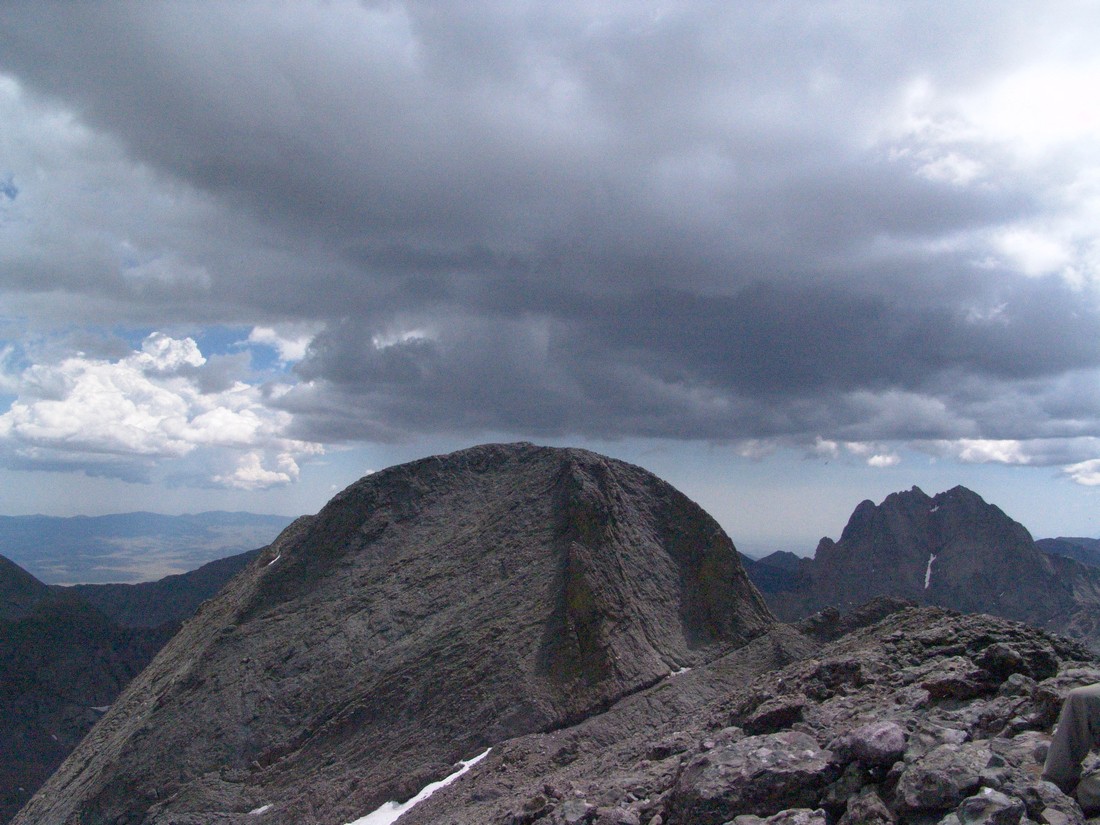
Fortunately the weather cooperated just enough to let us get back down to the lake in our haste. It was pretty cool seeing the flora down there since it was dark earlier in the morning when we were coming up. 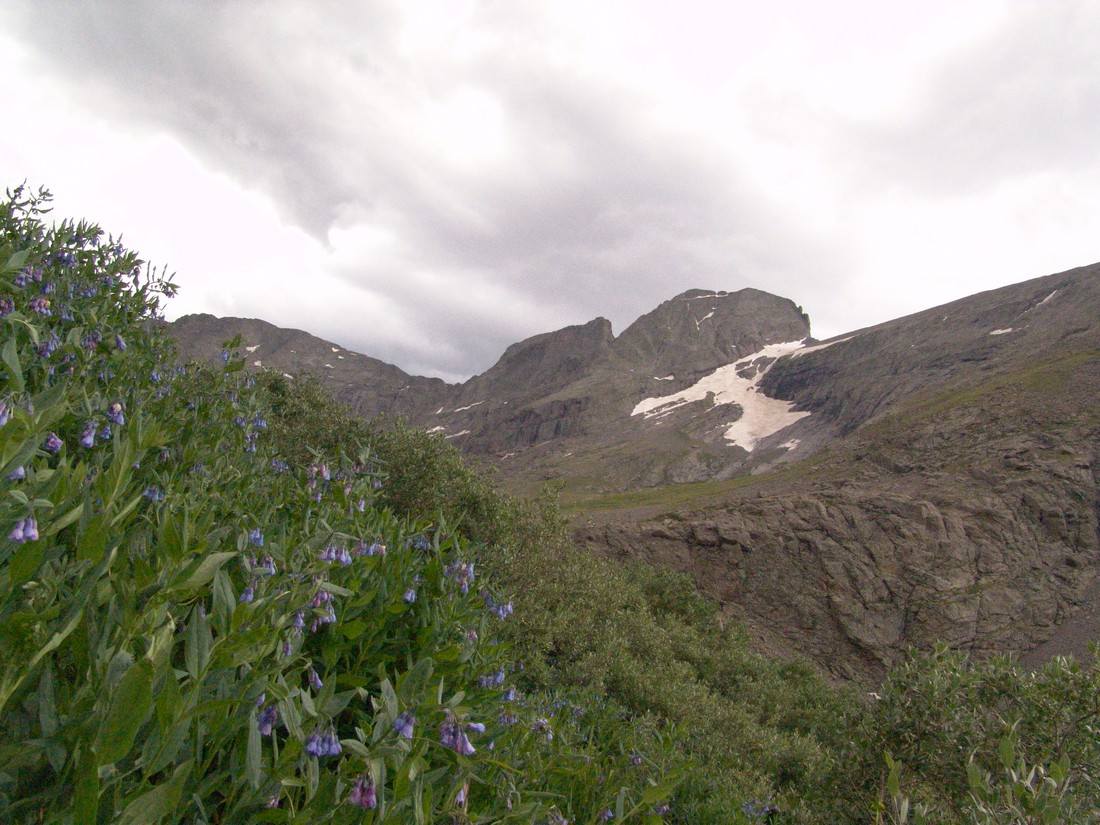
We made it back to camp, packed-up, and headed out. We got back to Colorado Springs at about midnight and I was exhausted.
I would rate this climb highly. It is challenging, offers many routes, and there are several peaks to ascend in the area. All in all, this is a must-do climb for any serious Colorado mountain climber.
Mount Antero - A Great 14er Season Starter

Mount Antero is one of the easiest mountains to identify as you are driving into Buena Vista from Colorado Springs. It is a very pointed peak to the South of Mount Princeton. Mount Antero towers above the Arkansas River Valley as one of the mighty 14ers in the Southern Sawatch.
Here are some fun statistics from this adventure:
Mountain climbed:
Mount Antero. 14,269 feet. 10th highest in Colorado
Elevation gain: 3,401 ft.
Total miles: 6.4 miles
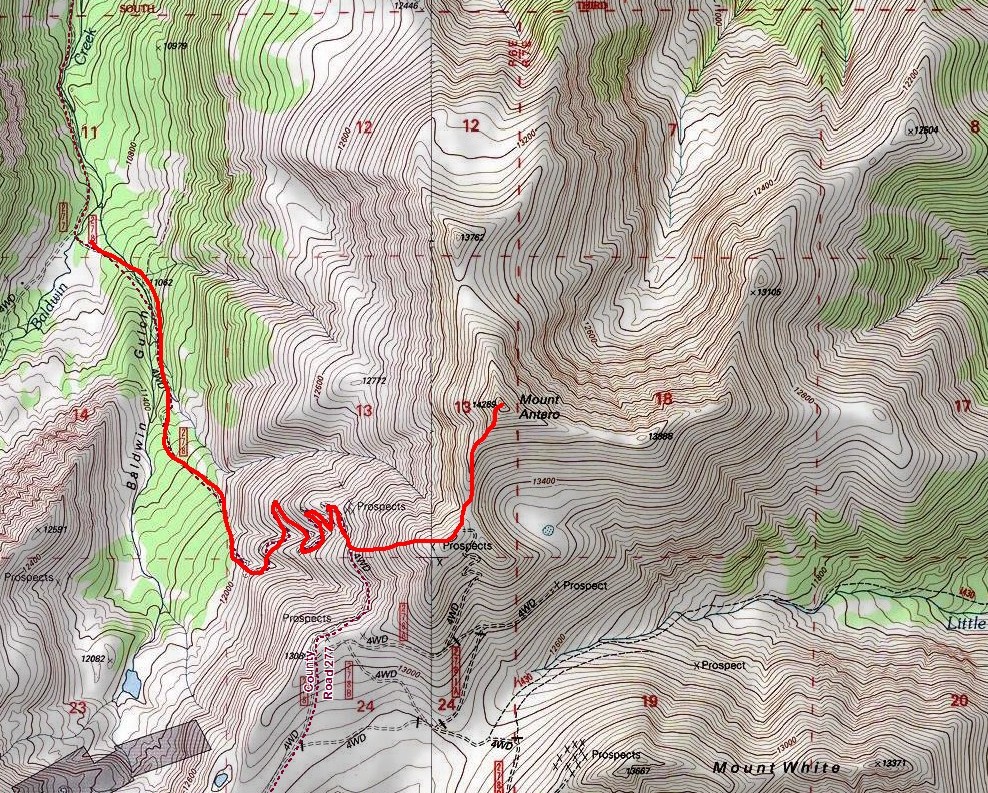
My mission, and it was a fun mission indeed, was to reach the top of Mount Antero. Being out of shape and out of the climbing game for quite some time, I had exercised all Spring for this summer's adventures. This was an adventure indeed... Wind. Cold. Wildlife.
I drove from Colorado Springs on Friday night and made record time since the wife forced me to eat at home instead of on the way (thanks babe). I arrived at the turnoff for the Baldwin Lakes at around 8 PM and met up with Randy from 14ers.com there. We had met on 14ers.com and agreed to conquer Antero together. His cousin Daniel met us there and I decided to drive up the road where I would sleep for the night.If you've never been up the Baldwin Lakes road, its quite the adventure, especially if you're in a stock-equipped vehicle. My 2007 Jeep Grand Cherokee handled it like a champ, but not because I'm very good at driving off-road, that's for sure. The whole time I was driving up, I was white-knuckled and cringing for the inevitable scrape on the underside of my vehicle.
Fortunately it never came. On the way up the road I had two interesting moments. The first moment was when I was about half-way up and a big mammal was right in the road in front of me about 20 yards away. My vehicle startled it and it scurried off the road but I recognized it clearly - a porcupine. I had the wherewithal to not get out and investigate, but was glad I could see such a wild fella in the woods.The second interesting moment was at the stream crossing at the road intersection for Baldwin Gulch and Baldwin Lakes. I crossed the stream reluctantly, as this was something I had never done in my Jeep and I was not sure how deep the water was. I had read on 14ers.com that the stream was passable by a stock 4x4 truck, so I figured my Jeep would be OK. I was right, but I had trouble sleeping all night because all I could do was conjure up images of my Jeep being stuck in the water on the way down! Note, the water looked a heck of a lot deeper in the dark than in the daylight!

Baldwin Creek in early June - not for the faint of heart or stock-equipped vehicles...or, maybe, people afraid to get stuck, like me!
I set the alarm for 5 AM and tried to sleep in the car on a slight angle - always a fun endeavor. I woke up the next morning and shortly afterwards Randy and Daniel were at my car to start the hike. We started up the road and you could barely make out Antero in the darkness:
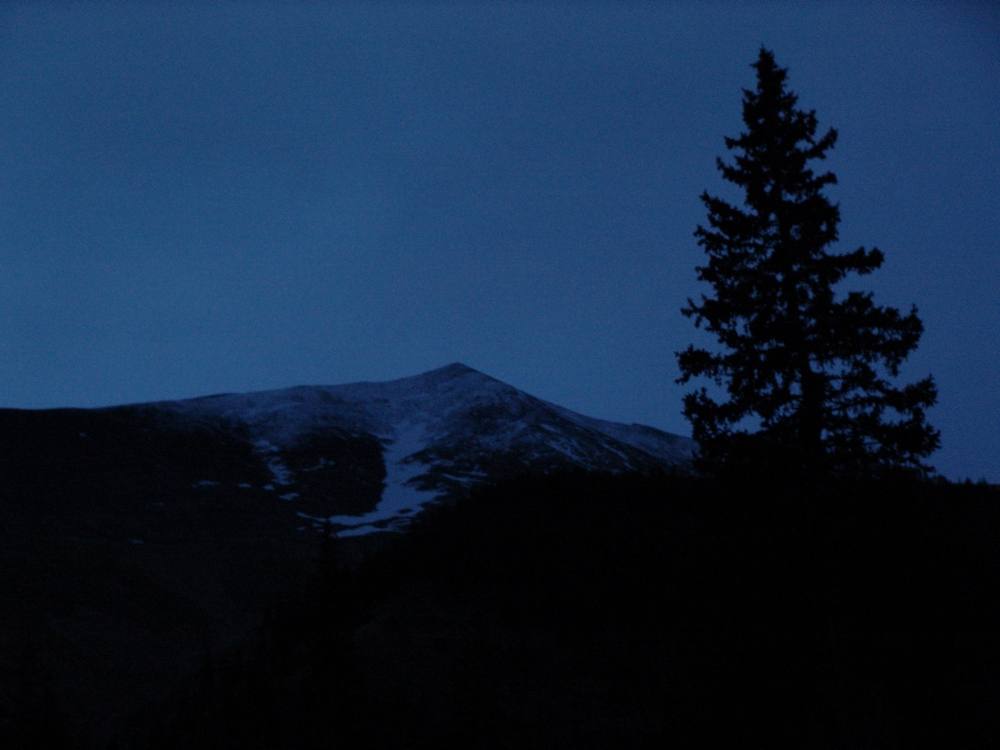
Its important to note that Antero has a well-developed 4x4 Jeep road going up the majority of the way up until about 13,800. This does not make it "easy" necessarily, but it certainly takes a lot of the mystery out of the hike. Randy blazed the trail ahead and set the pace for the morning:
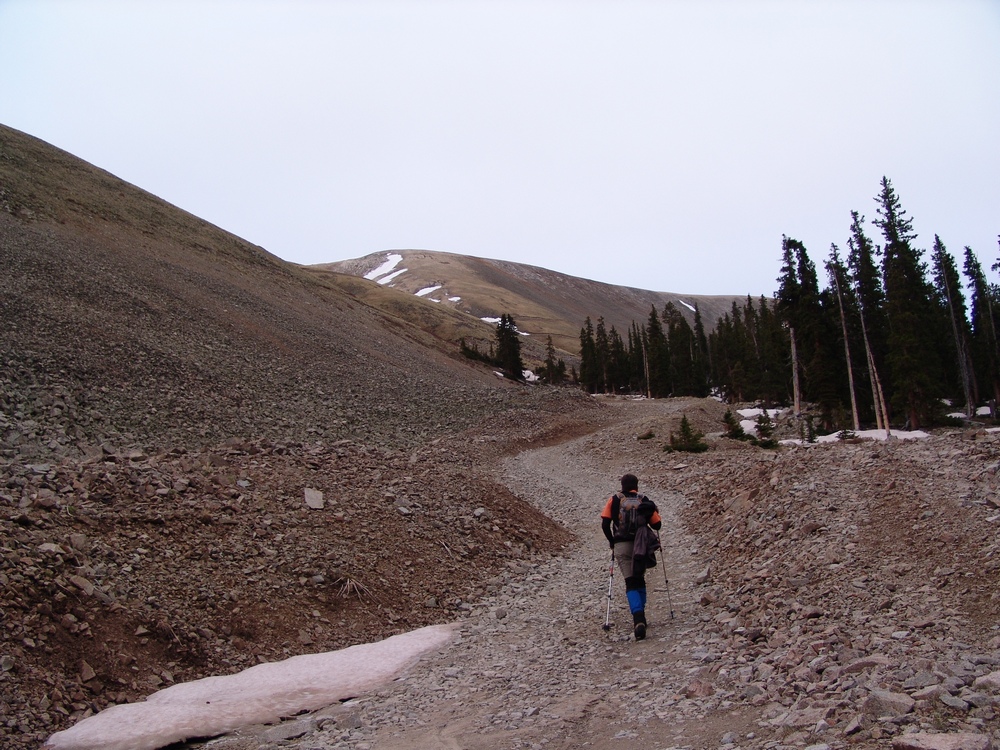
The road switches back and forth up the side of Antero, as seen from my picture taken from the top of Mount Shavano just the week prior:
Its also important to note that there is some considerable mining interest on Antero. Apparently there have been some very nice and quite valuable aquamarine finds on this peak, including the largest aquamarine specimen ever found in North America, as evidenced by this article. As we climbed up, the sun began to rise and we were able to make out North Carbonate and Baldwin lake below it to our west. I climbed North Carbonate, now called Cronin Peak, on 9/1/1985 when I was just 6 years old. My memories from that climb are vivid, as we were pushed from the top by lightning. That made this climb even more nostalgic.
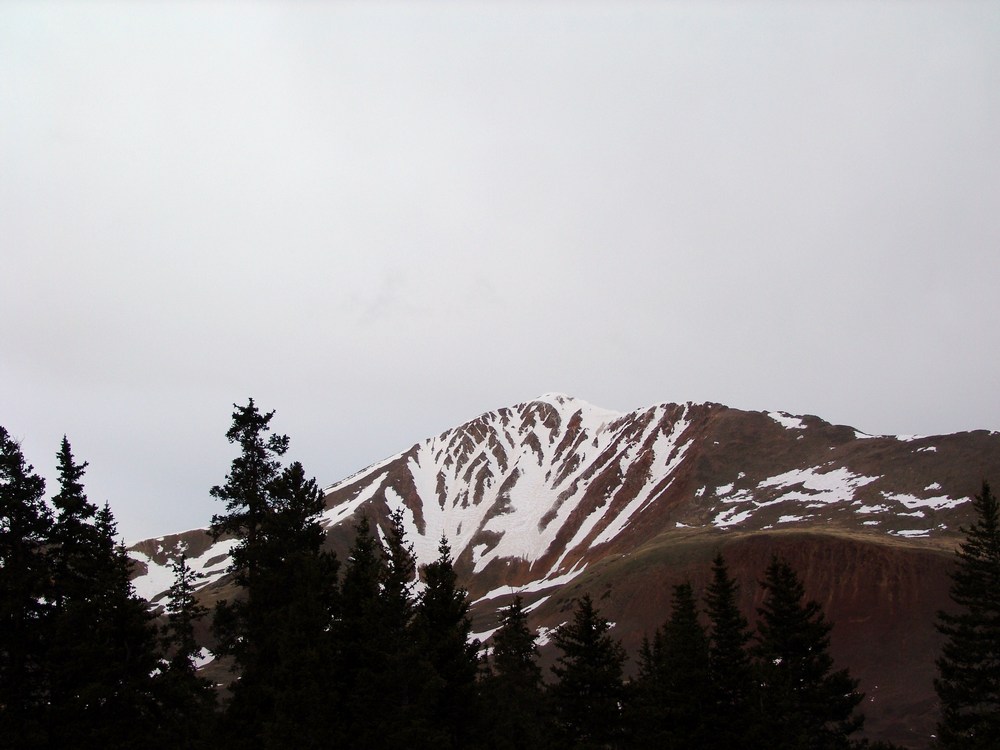
Additionally, as we gained elevation we could see down the Baldwin Gulch valley where we came from.
The road we were hiking on was full of snow drifts pretty much the whole way up, making a very formidible barrier for all of the miners that make this mountain their home during the summers. I'll come back to that later.
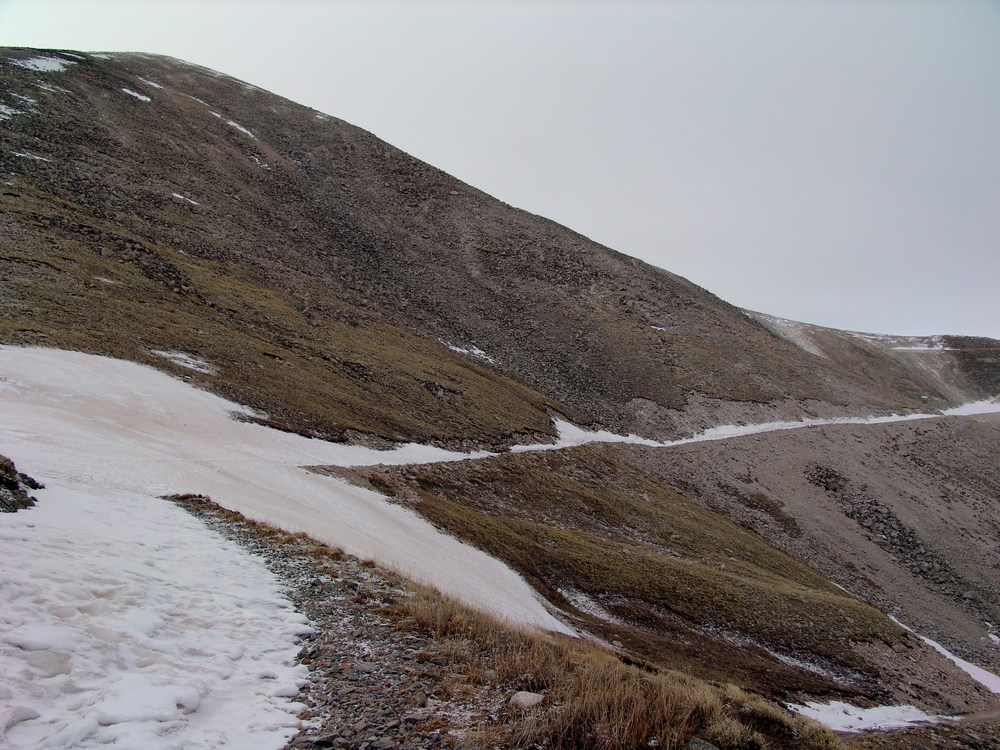
Antero loomed above us and was shrouded in shadow for much of our ascent. We spotted some elk on the road as we climbed, which was a very surprising but welcoming sight in the cold morning.
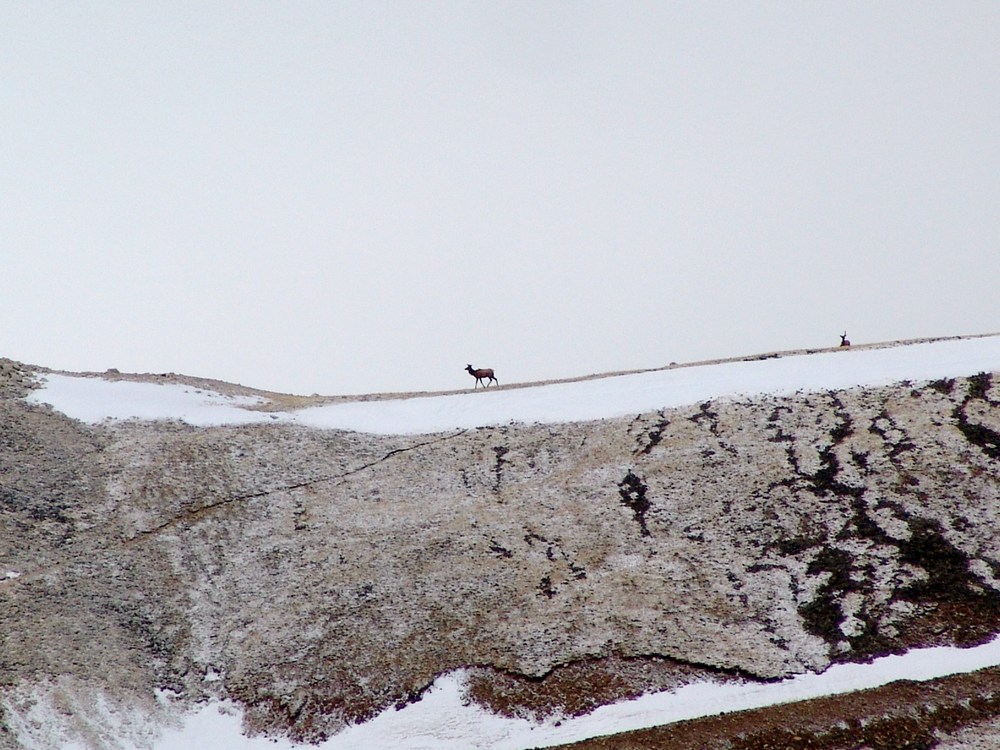
The elk stayed on the road for quite awhile as we approached and we came within 200 yards of them at one point.
Finally, we were able to get to the top of the first ridge that separates the Baldwin Gulch from Brown creek valley. Numerous jeep trails cross and intersect on this part of the mountain, which did deter somewhat from the spectacular views of Shavano and Tabeguache:
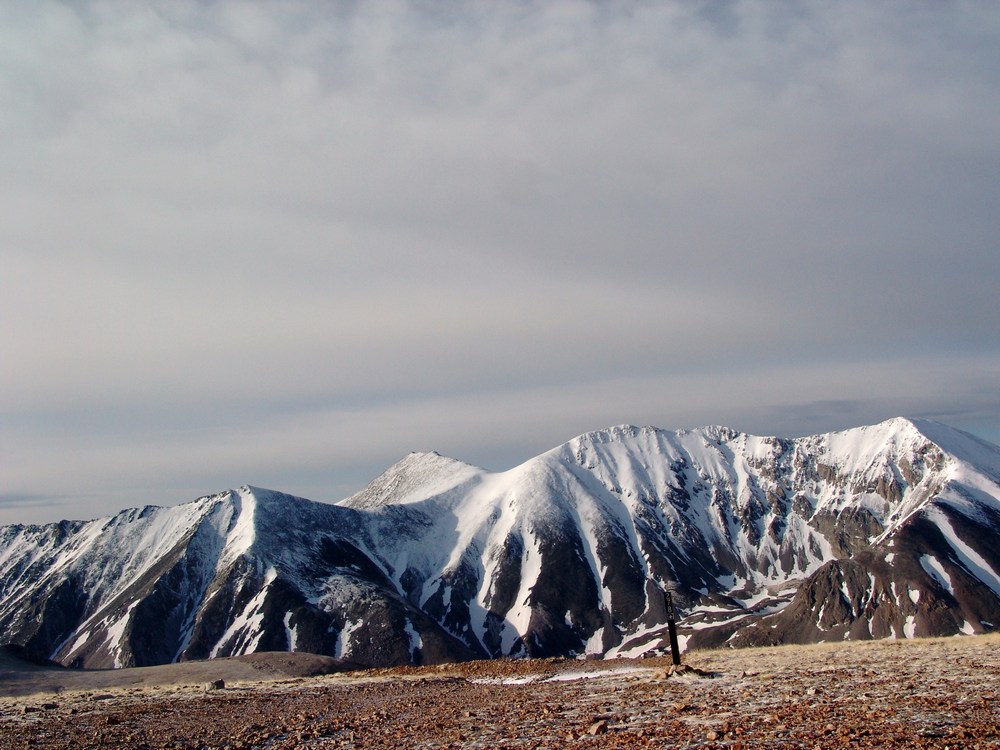
At this point we decided to take a "short-cut" up the ridge by doing some boulder-hopping, which is quite challenging with trekking poles, something I've not grown accustomed to yet.
Looking back from the ridge we were climbing you could see the large basin/ridge we had came from that leads to the upper Brown creek valley.
The northern Sawatch range broke out in the distance from the ridge we were climbing, and we could see that the weather was going to cooperate for us today.
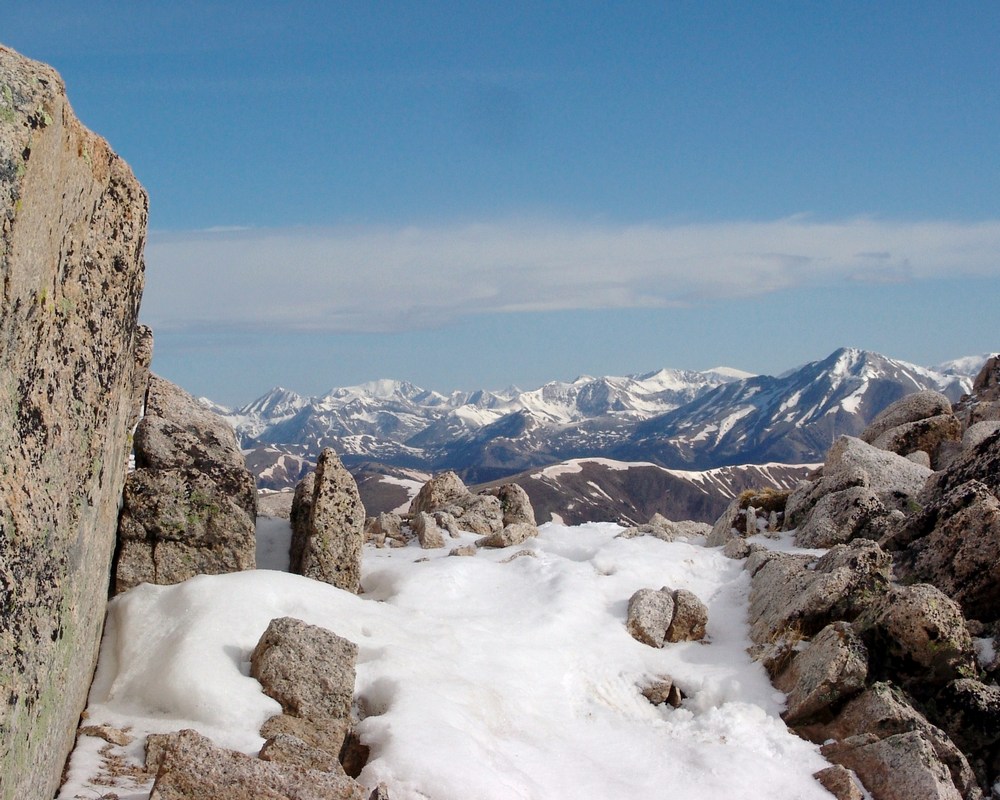
The sun was finally cresting over the ridge at this point and was quite the contrast to the snow we were hiking on. The sunglasses were quickly dug out of my jacket and worn for much of the rest of the hike.Once we reached the top of the ridge we could see our final destination - the summit of Antero. Unfortunately, the wind at this point was maddening and brutally pounding our faces. We estimated that for the remainder of our climb, the wind on the ridge and the summit was about 50 MPH and gusts were up to 70 MPH. This, combined with 25 degree weather, made for a wind chill of about 5 degrees. My thin gloves were not cutting it at all, and my hands were punished. The North Face pants and jacket I was wearing were doing a superb job of keeping the rest of my body warm; however, and I was able to alternate keeping one hand in my pocket while using the other hand to hold both of my trekking poles.

We continued up the ridge, covered mostly with snow. The snow was hard enough to walk on and postholing was kept to a minimum, although, at one point, I did sink to about chest level in a snow drift.We continued up the ridge towards Antero, using the small rock formations as protection from the wind. The heavily fortified sections of rock were welcoming as the wind was beating them with a loud fury. I was really qutie impressed with the way in which the rock stopped the wind and created such amazing sound.
Here is a video I shot from the windy ridge:
Another great picture opportunity presented itself to me about halfway up the ridge, and I stopped to see if I couldn't capture it. My photography skills are not that good, but I think this picture came out pretty well.
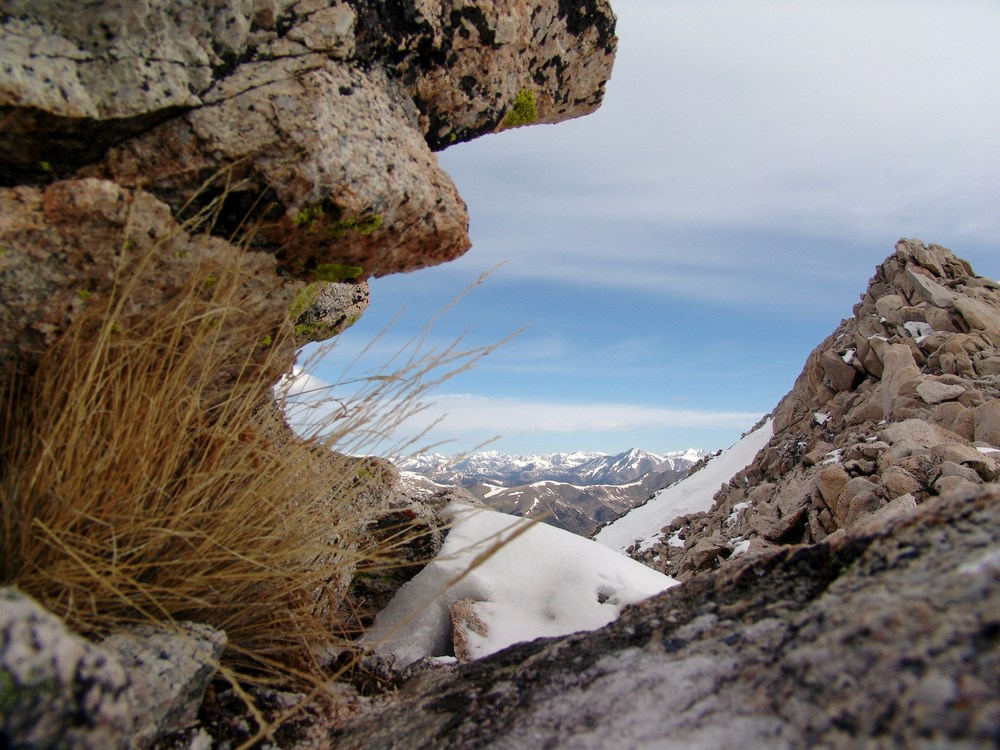
Pictures from the rest of the climb did not happen because taking a picture in the wind and steep snow would have surely ended tragically for me. It was all I could do to keep my balance in the slippery, steep snow with the wind beating me down. At one point I lifted my hand up to my face and the wind caught my trekking pole and slammed it right into my face. The wind really was quite incredible. At one point I really felt as though I was on some epic climbing expedition.

I was able to summit a few seconds after a gentleman that had passed us right near the top. I took his picture and waited for Randy to arrive a few minutes later. Daniel took his time and was able to summit about 10 minutes after Randy.
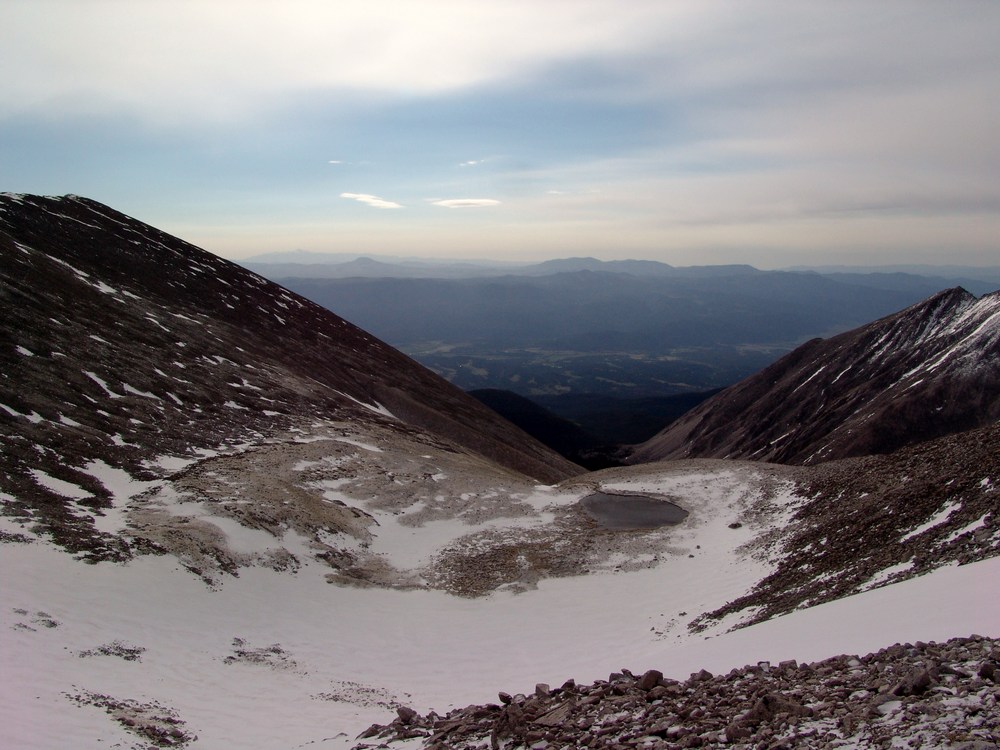
A small lake near the summit of Antero.
Once Daniel was on top, I asked him to take a few shots of me, which gave me a chance to pose. Something about being on the top of a high mountain reminds of you of the corny scene from Titanic.

Poor Daniel had lugged a tripod to the top and never used it, but I took full advantage of it! I took a nice pano from the top, but unfortunately because of the wind, it was really hard to get it straight. The pano I ended up with was only partial, but still impressive nonetheless.

On the way back down I got one final shot of myself posing in front of Cronin. When we neared the stream crossing where my jeep was crossed, we encountered a gentleman that was shoveling the snow from the road. We theorized that he was an aquamarine miner based on his decor and by some of the things he said. It sounds like there's quite the mining operation on Antero in the summer.
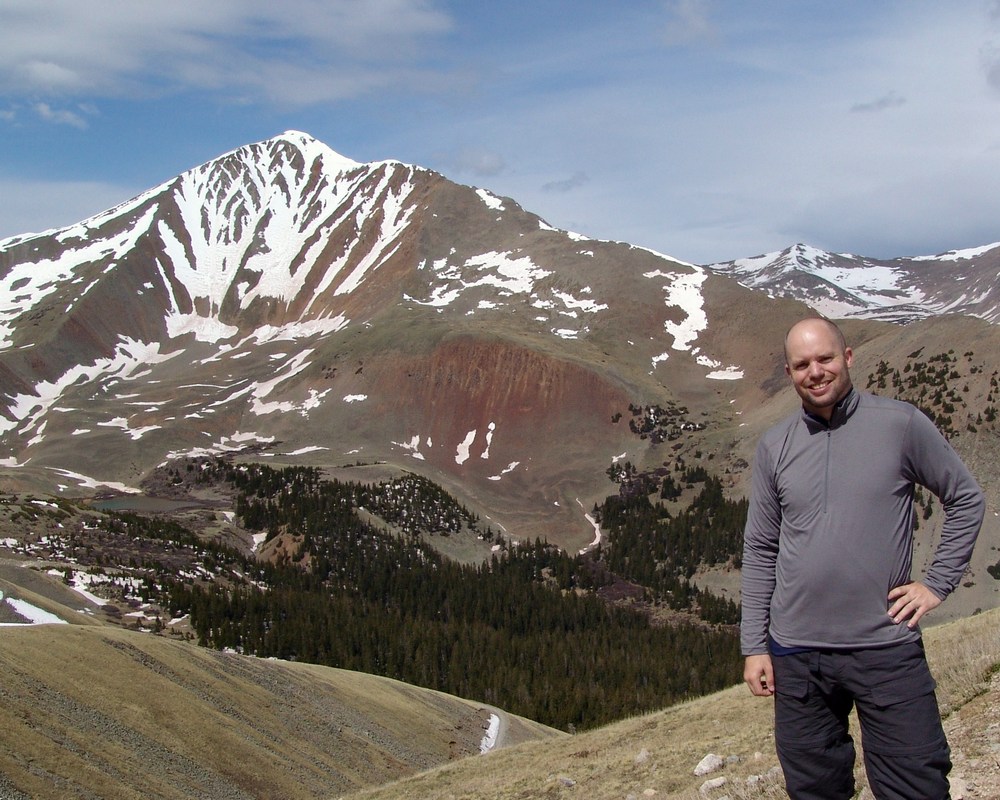
We made amazing time back to the bottom and my Jeep made it across the stream easily - thankfully!
Mount Massive - A Frozen Wonderland
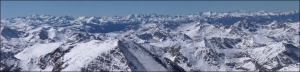
Some fun information about this great hike:
Mt. Massive - 14,421 ft. - 2nd highest in Colorado; third highest mountain in the contiguous U.S.
8 miles round-trip via Southwest slopes route
3,950 ft. elevation gain
More snow than I expected...
I thought that my climbing season had ended after being snowed on in mid-September on Grays and Torreys; however, I got the itch to climb again this weekend. Serendipitously, a fellow climber from Colorado Springs, Rob, posted on 14'ers.com that he was going to Mt. Massive on Saturday and that anyone from Colorado Springs was welcome to join him. I jumped all over the opportunity and we made plans to meet at 4:15 AM on the west-side of town to car pool. Rob had his friend Brad with him and we departed for Mt. Massive at around 4:30 AM.

Our route took us directly up the snowy south face of Massive.
On the way over we had good conversation, shared stories about our climbs and got to know each other. We arrived at the turn-off for Mt. Massive at 6:45 and met up with two other climbers from Denver. We reached the trail-head and began hiking at 7:40 AM. Right at the trail-head lies a memorial to the soldiers that died in a helicopter crash earlier this year on Mt. Massive. Here are some photos of the Memorial, notice a section of the helicopter is seen as well:

A memorial cross for the victims of the Blackhawk Helicopter crash on Mount Massive, 2009.

The forecast for the day was clear skies and a high of 60, and wow the weatherman did not disappoint! We swiftly hiked up the valley and reached the turn-off for Mt. Massive. Our view back down the valley was stunning:

The trail was covered in snow, making for a quite interesting hike. As we gained elevation, the trail became less and less apparent and eventually we just started hiking straight up towards Massive.
Looking back towards Elbert, you can see our footprints through the snow...

None of really expected to see so much snow, but it made for a very challenging hike. The snow was up to 3 ft. in depth in some spots, and it was quite slippery due to the 30-40 degree slopes were climbing on. We stopped several times to rest on the way up, and about halfway up I was able to take some shots, combined here into a smaller panoramic photo:

After approximately three hours, we were able to reach the saddle, which joined us with the standard route. By now I was pretty tired, partially due to the extra effort required by the snow, and partly due to the fact that I had not had much to eat. I made sure at this point to eat some snacks, and we headed back up. We found ourselves climbing up some pretty deep snow, as evidenced by this shot, looking up the ridge towards the summit, taken on our way back down:

After trudging through the snow, we were able to reach the summit at 12:40 PM, a full 5 hours after we started. The snow really took a lot out of us! I was just really glad I brought my gators and had tons of warm clothing... Here is my obligatory summit pose, with the Elk range behind me:
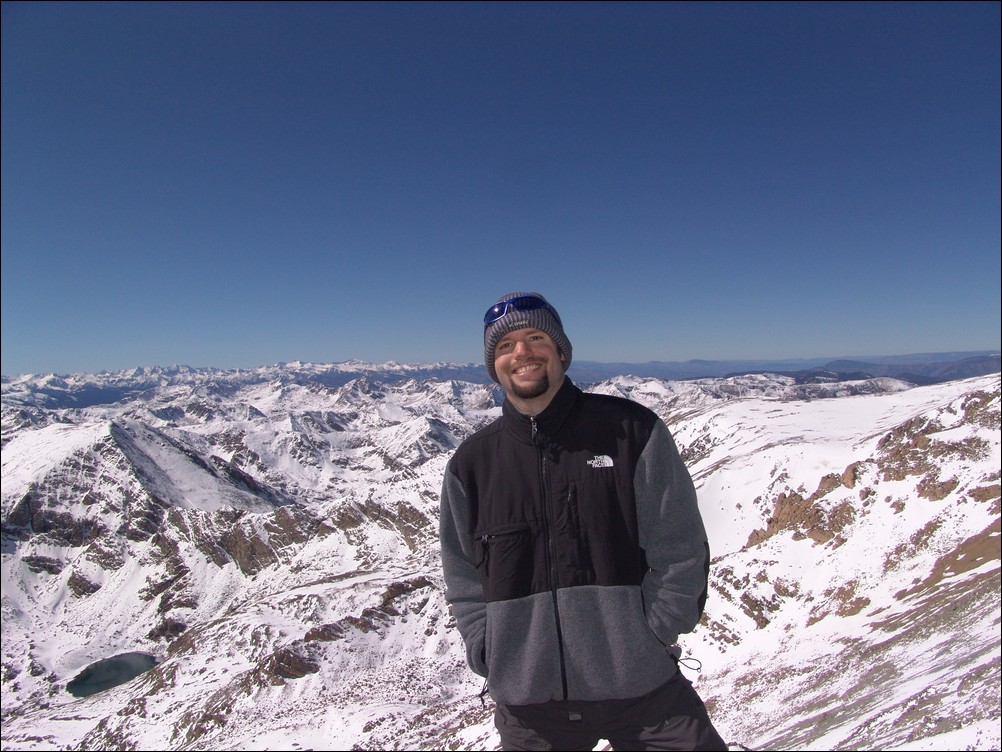
And of course my traditional 360 degree pano:

Before we left from the summit, I took some zoomed in shots of the Elk range, including the Maroon Bells. This stitched pano is one of my favorites from this 2009's shots:

We headed back down and had a good time rumbling down the snowy slopes. I took one last set of the valley, combined into a pano here:
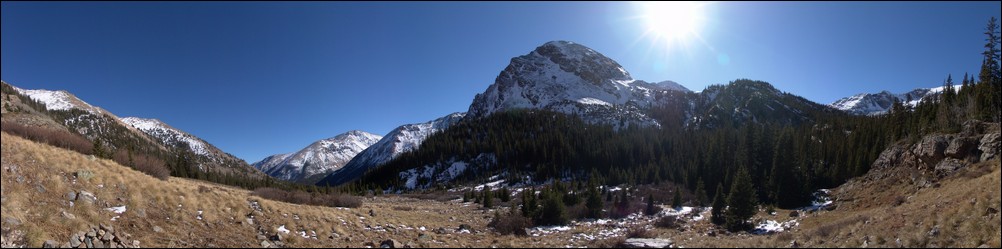
All in all, I would highly recommend this route for Mount Massive. Even in October, the route is solid, and I could see this being feasible even through November or later.
Capitol Peak: On The 'Edge'
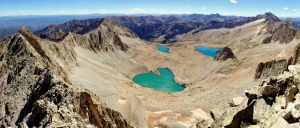
Capitol Peak carries a mystique among hikers and climbers in Colorado. First climbed in 1909 by Percy Hagerman and Harold Clark, Capitol Peak is often revered as the most difficult 14er in Colorado. Capitol Peak towers above treeline in the Elk Mountains of Colorado, a crumbling mass of granite, shaped into a rugged pyramid with spiny ridges. While I have a great respect for Capitol Peak, I felt that I had personally prepared myself for the climb through graduation along the difficulty continuum of climbs in Colorado. Having summited several of Colorado's harder Centennials (highest 100 mountains), including Crestone Needle, Crestone Peak, Vestal Peak and Little Bear Peak, I felt that I had the skills and mental toughness to complete Capitol. Capitol is well-known for its "Knife Edge," a 150 ft. narrow and jagged section found on the main route of Capitol Peak. The Knife Edge is very exposed on both sides, making it a mental challenge for many climbers. Many personal friends and family members as well as reports on the internet had built up Capitol's Knife Edge's difficulty in my mind; infact, YouTube is full of videos of people climbing the Knife Edge, some recklessly crossing it like a tightrope. I was hopeful that it was more hype than people it made it out to be...
Here are some meaningful metrics from this amazing trip:
Peaks summited:
Capitol Peak: 14,130 ft. (ranked 29th in Colorado)
"K2": 13,664 ft. (unranked)
Total elevation gain: 5,300 ft.
Total distance hiked: 17 miles
Total time hiking: Approx. 14 hours
Total photos taken: 356
Total distance driven: 520 miles
Trip duration: 1 day, 19 hours

K2 (far left) and Capitol Peak (far right) seen in this dramatic panoramic. Click for high resolution version (15 mb).
That being said, Capitol Peak was not without other dangers. Many climbers have perished on Capitol over the years, oddly enough, very few of the deaths have occurred on the Knife Edge. In 2009, James Flowers, the United States Paraolympic Swim Coach, perished on the Northeast side of "K2," a sub-peak of Capitol Peak, as reported by the Aspen Times. Needless to say, great caution, respect, and preparation would be required if I were to successfully climb Capitol. First on my list for preparation was to find capable partners. This is often difficult in the mountaineering community, since many climbers inflate their abilities or do not disclose their limitations to potential partners.
Earlier this summer, I climbed Huron Peak with Mike Vetter, a Sioux Falls, South Dakota resident and an up-and-coming star in the IT realm and CEO of DataSync. Mike and I made plans to climb again this year and we set our sights on Capitol Peak. Mike invited his friend, Travis Arment, an avid marathon runner. Neither Mike nor Travis had extensive experience climbing class 4 peaks; however, having hiked with Mike in the past, and knowing that Mike was a comfortable and avid rock climber, I knew I could trust him to make solid decisions and that they would both be personally responsible enough to turn-around if the climb became too difficult. We all exchanged plans via Facebook, ensured we all had the proper gear and knowledge, and established ground rules for the climb in case something unexpected happened. Travis and Mike flew in to Denver on Friday, August 13th. I picked them both up from Castle Rock, where Travis' aunt lives, on Saturday morning and we departed for Capitol. The total drive from Colorado Springs was approximately 260 miles and took roughly 5 hours.
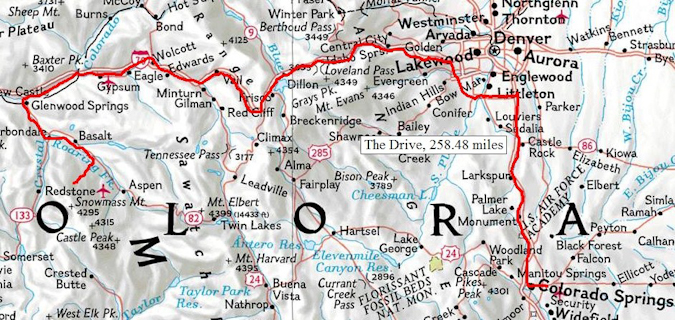
We arrived at the trailhead for Capitol at about 10:00 AM and were hiking by 10:30 AM. As usual, my pack was the heaviest and largest, weighing in at just over 50 lbs.
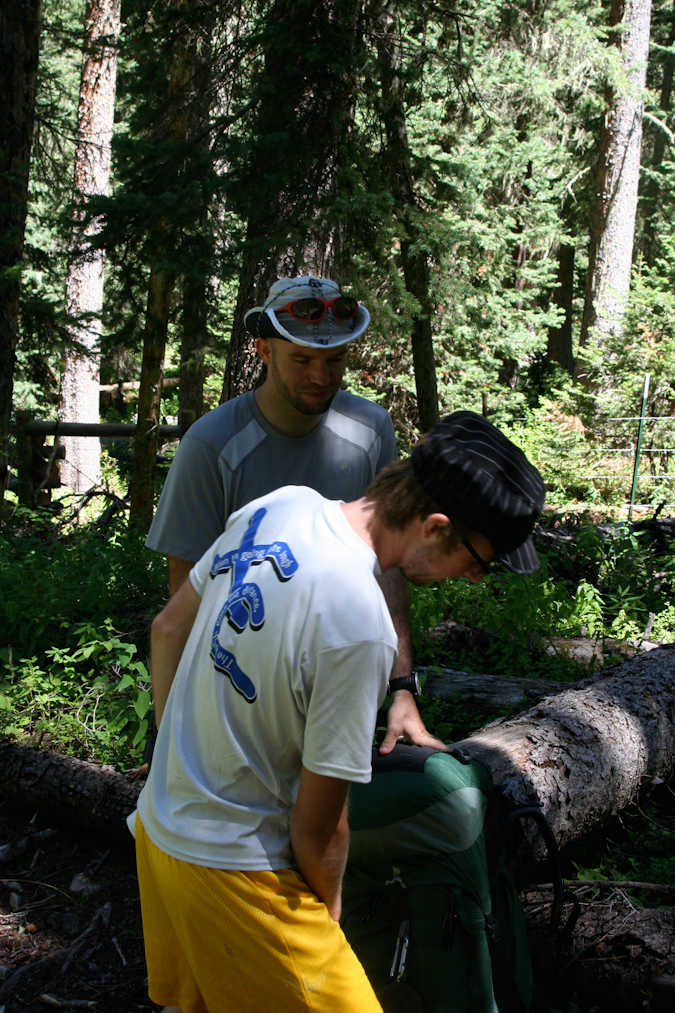
Mike's pack was medium-sized and Travis literally backpacked with a daypack. We made sure to give Travis a hard time for having the smallest pack, and Mike was quick to point out that he was carrying half of Travis' stuff. Travis was a great sport about it and agreed to share his tasty snacks on the hike up.
There are two trails for Capitol Peak - the standard trail and the "ditch trail." We chose the ditch trail due to its lack of elevation loss and gain at the start of the hike. The ditch trail is aptly named, following an irrigation ditch along the side of a ridge line which wraps around towards Capitol Peak. The irrigation ditch is used to provide water for cattle, which are known to graze this part of the Elk Mountains in large numbers.

The topo map of our route. Want to make your own maps like this? Check out the TOPO! program from National Geographic!

Capitol Peak seen from the trailhead.

Matt Payne and Travis Arment on the Capitol Peak Ditch Trail - photo by Mike Vetter
After about a mile and a half of hiking on the trail, it leaves the ditch and heads uphill, gaining half of the ridge to the west. Before we knew it, the trail meandered into a great opening, revealing Capitol Peak. Capitol Peak remained in view for much of the remainder of the hike up to Capitol Lake.
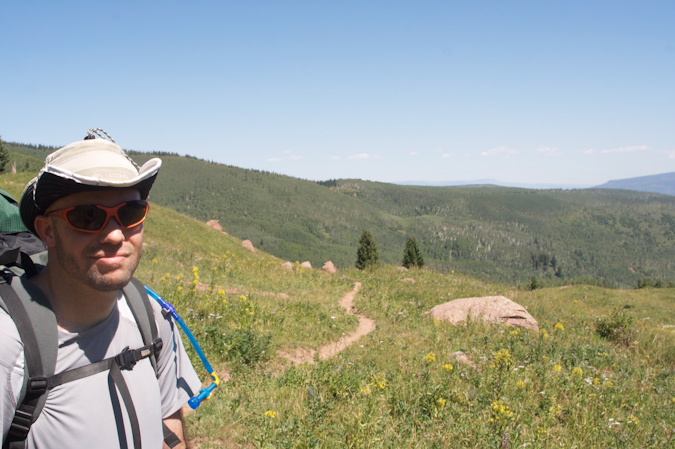
Matt Payne on the trail
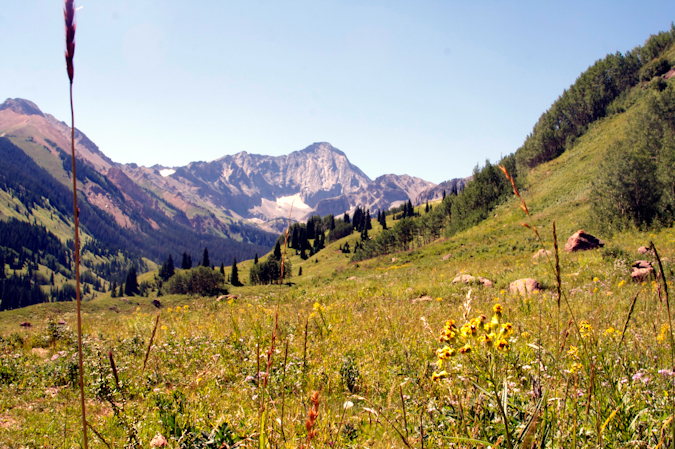
Capitol Peak, about 1/3 of the way up to Capitol Lake from the trailhead.
On the way up the trail, we passed many raspberry plants, sometimes stopping to grab a snack to help fuel our ascent.
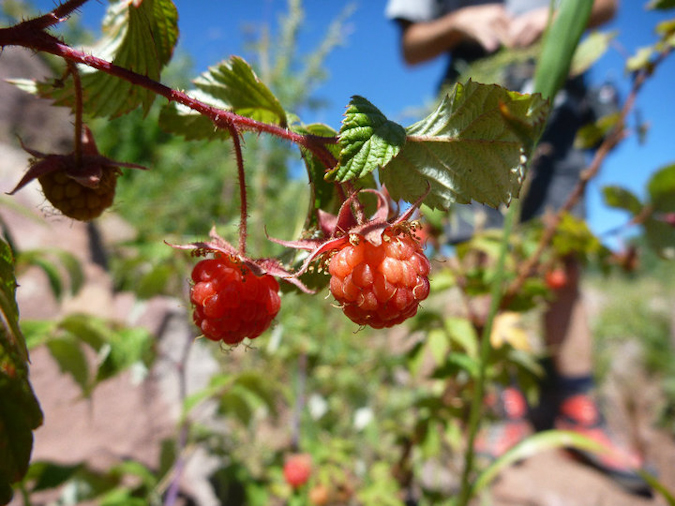
Wild Raspberries - photo by Travis Arment
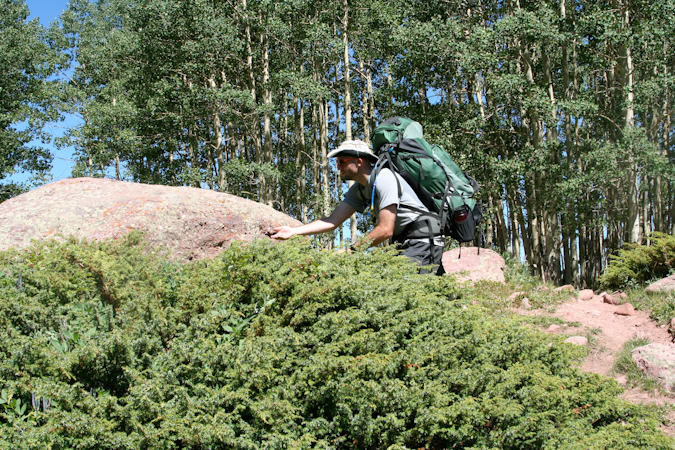
Matt Payne braves the spiky bush to score some berries.
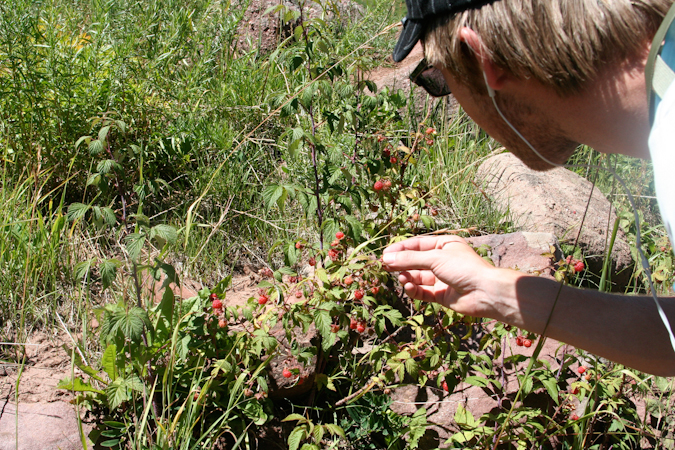
Travis Arment reaches in to score some berries.
Eventually, the trail reaches the Capitol Lake basin and intersects two side trails leading to two campsite areas, each split into four campsites (#1 through #4 and #5 through #9). We found ourselves camped at site #6, a quaint spot in the trees up on a hill.
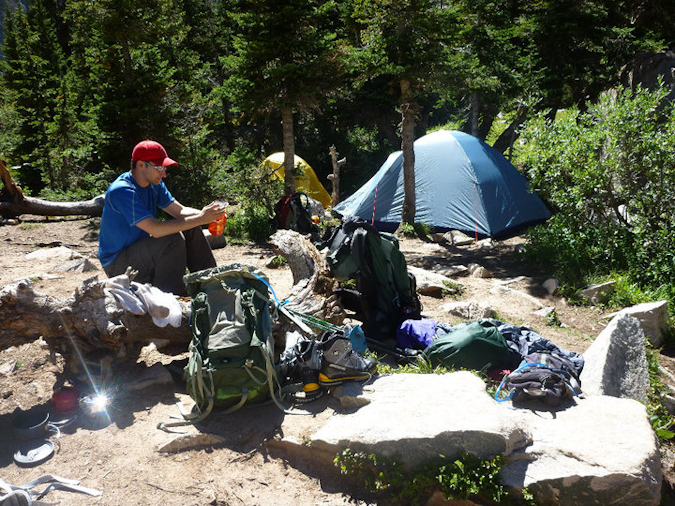
Mike Vetter unpacks at our campsite.
After we got situated at our campsite, we took a small nap. The hike up to Capitol Lake was pretty exhausting for all of us. After our short nap, we took a walk down to the lake with our cameras and took pictures. The lake rests right below Capitol itself and was a great area to relax and take in the afternoon sun.

Capitol Lake sits beneath Capitol Peak in this 1800 panoramic photo taken above the shore.
Mike went down to the lake to fill up his water bottles, using his steri-pen to sterilize the water. Unfortunately, the steri-pen bested Mike's weary intellect and he gave up on the endeavour, conceding that my Ketadyn Hiker Pro filter would later suffice. Mike and I went down to the stream near our campsite before cooking dinner and refilled all of our water. The area surrounding Capitol Lake is really quite gorgeous, with Capitol looming over the whole area like some kind of ancient protector of its treasure.
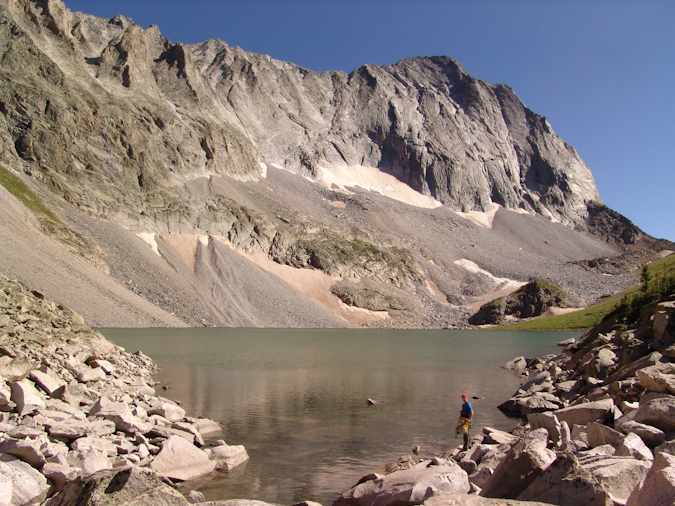
Mike Vetter filling his water up at Capitol Lake.
I pulled out my food for the night - a custom-made soup with dehydrated vegetables and pasta with chicken. Mike and Travis were somewhat jealous of this fancy treat at first; however, the meal was about the saltiest thing I've ever ate. Mike and Travis cleaned up on their Knorr Pasta side meals and we all hit the sack at around 8 PM, with the alarm set for 4 AM.
4 AM came all too soon, despite the long night of sleep we all enjoyed. I scarfed down some homemade zuchinni bread that my wife made for me and we all grabbed our backpacks and headed for Capitol. The trail for Capitol happened to be the same trail used by our campsite, which perpendicularly intersects the Capitol Lake trail just below Capitol Lake. We made our way up the switchbacks in quick order, passing several groups. Being that it was quite early in the morning, we could see all the other hikers in the area ascending beneath us and above us. We counted about 15 to 20 other headlamps heading up.
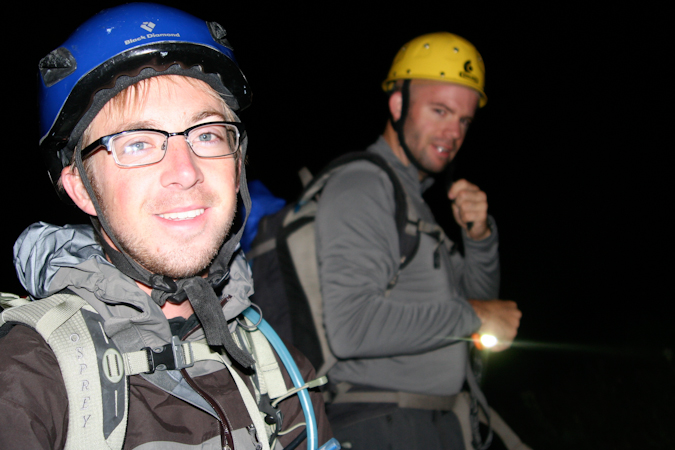
Travis Arment (left) and Matt Payne (right) excited to be on the trail to Capitol Peak.
We reached the Mount Daly - Capitol Peak saddle about 30 minutes into the hike and enjoyed some pretty awe-inspiring sunrise views from there, which Mike documented on video:
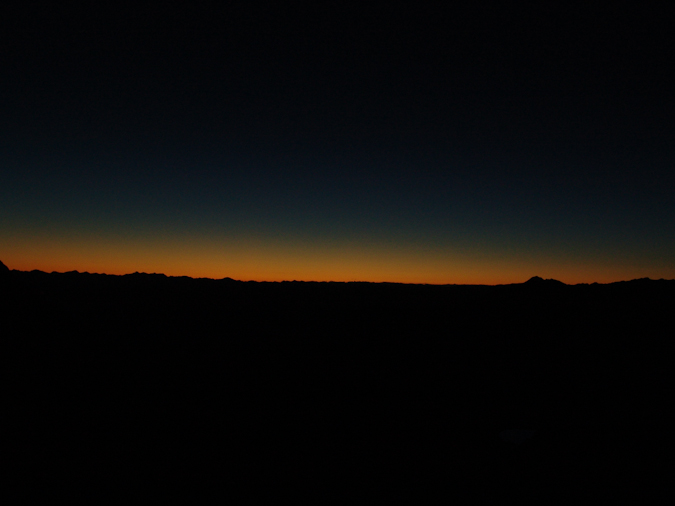
Sunrise
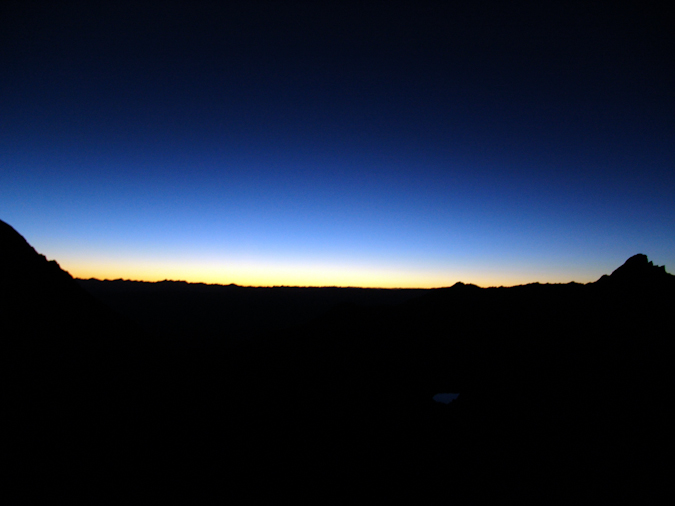
Sunrise... again
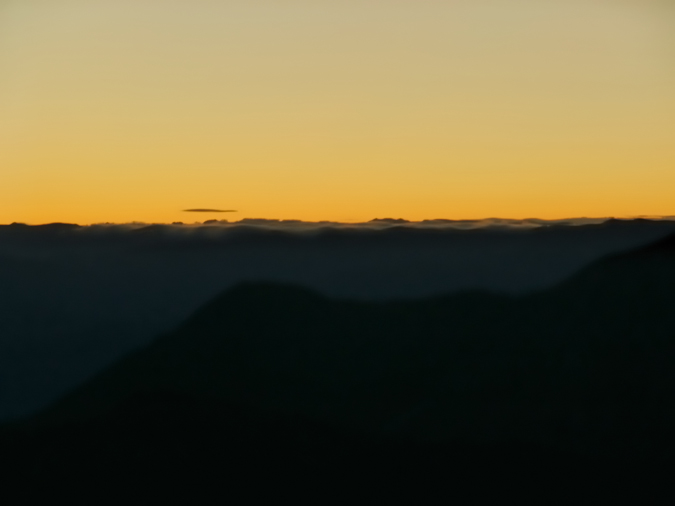
Clouds rest in the light of sunrise to the east.
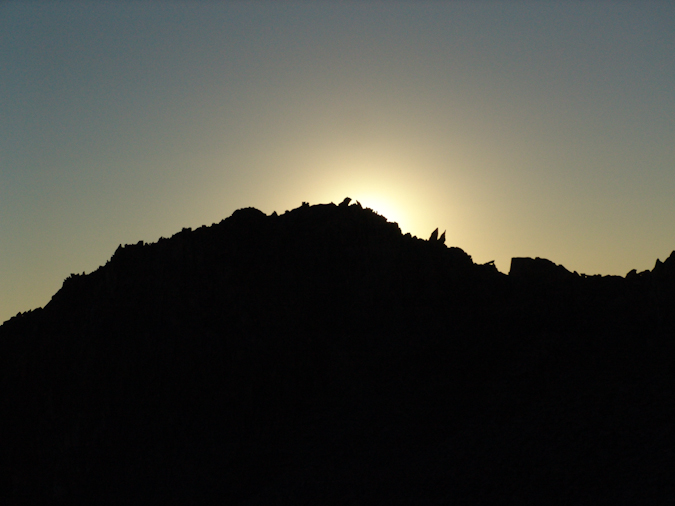

We continued up and over the ridge and descended a well traveled gully to reach the beginning of a very long stretch of boulders to the north and east of K2. The trail here mostly consisted of cairns and boulders, making for fun travel in the early light.
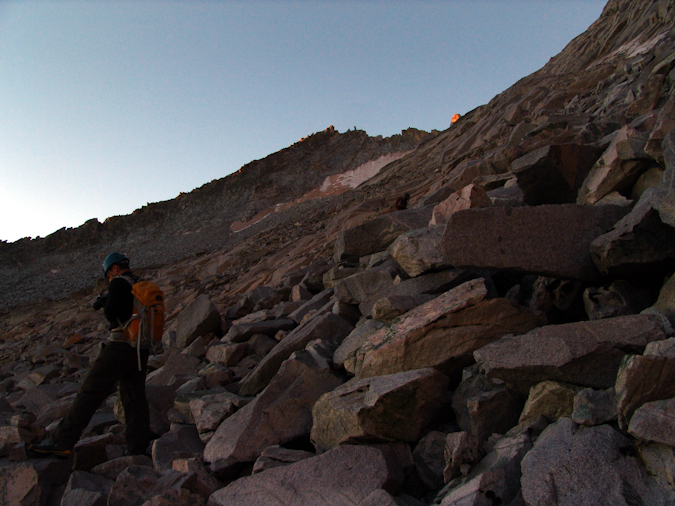
Mike Vetter hikes up the immense boulder field.
Out of nowhere, as if we were not expecting it, the sun blasted alpenglow onto the mountains surrounding us.

Mount Daly basked in alpenglow in the early morning.
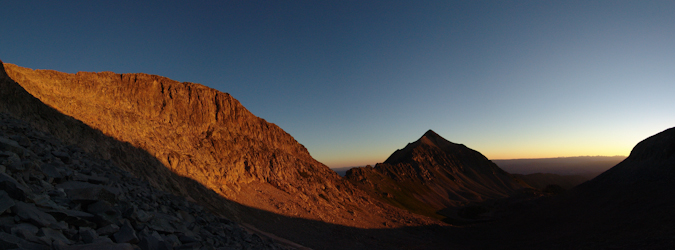
Mount Daly in Alpenglow.
The trail eventually lead us to a snowfield, which was mostly ice. I had been warned by the snowfield by a fellow hiker, Terry Mathews. We tested our footing on the snow and ice and decided to cross it, cautiously. There were great footsteps already kicked into the snow, and the relief was not terribly steep at this point. We all made it across quite easily and continued up the boulders. We saw a large snowfield at the top of the basin on the K2 - Clark Peak saddle's face and knew that we needed to turn right before then to reach K2. We decided to head up a very solid class 4 section.
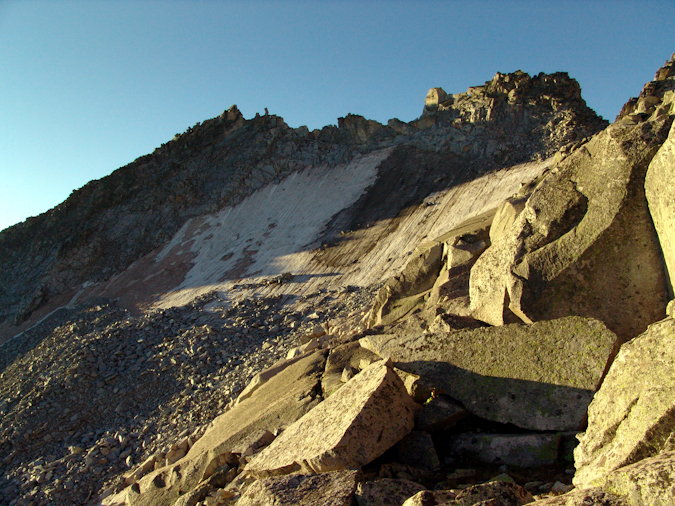
A snow and ice field adorns the face of the saddle between K2 and Clark Peak.
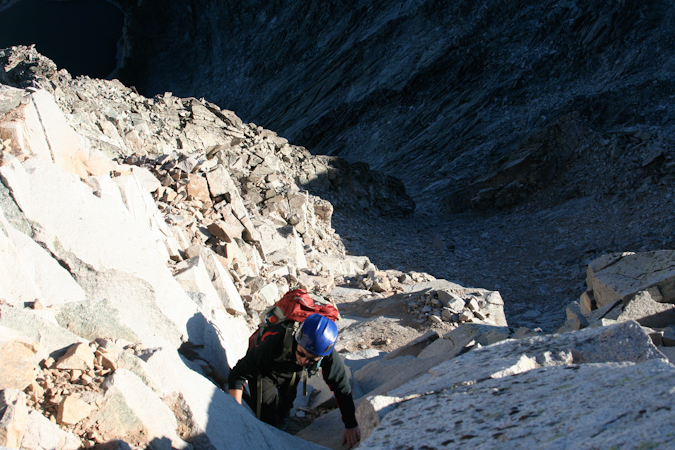
Travis up-climbing the solid Class 4 terrain leading to the base of K2.
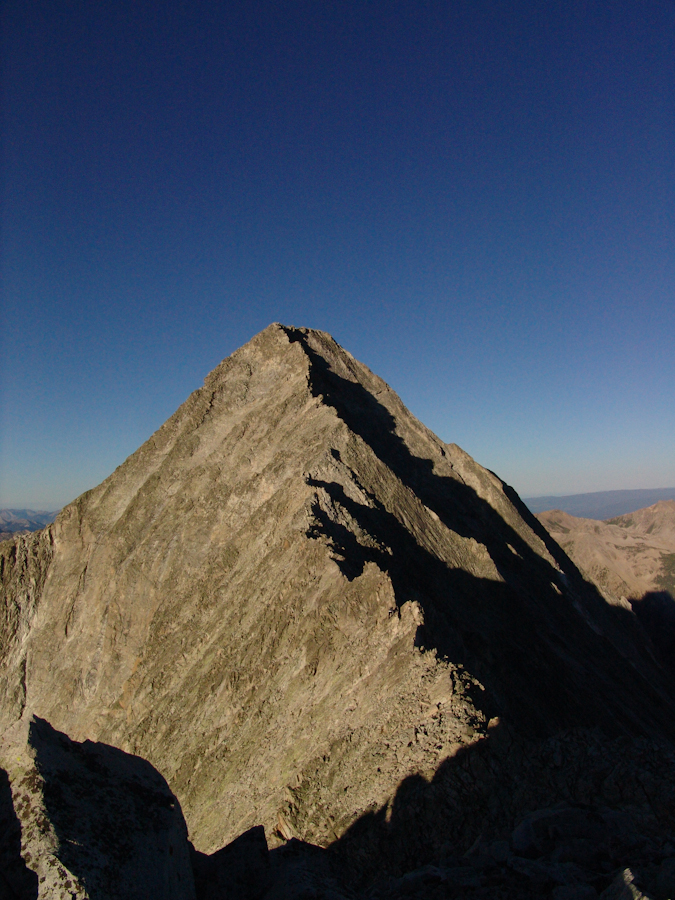 Once reaching the top of the ridge between K2 and Clark Peak, we realized that we still had quite a ways to go before reaching K2. The terrain became much flatter and we were able to get to the top of K2 in short order. Many parties opt to skip K2, arguing that the approach is more difficult; however, we did not want to miss out on the views from K2's summit.
To reach the top of K2, we broke off from the main trail just after it winds itself to the right of K2 and climbed a steep but solid dihedral to the summit. Capitol Peak looked ominous from K2, dwarfing it's surroundings.
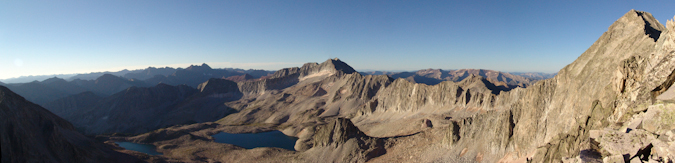
Capitol Peak, Snowmass Mountain, and the Maroon Bells come into view from the summit of K2.
The down-climb from K2 was trickier than expected, and it forced us to backtrack a little bit to meet back up with the proper trail which winds around the side of K2. The terrain here is steep, loose, and slightly exposed.
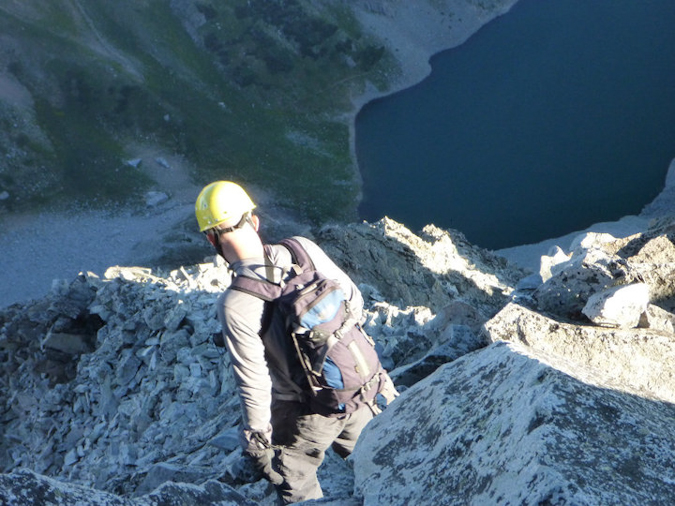
Matt Payne downclimbing from K2.
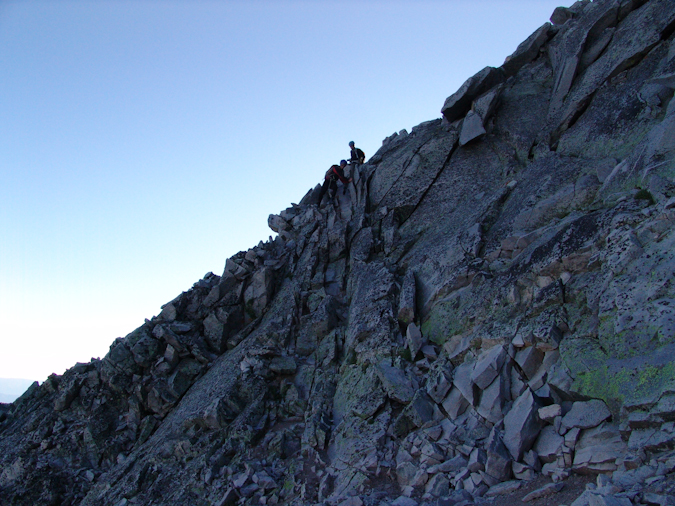
Downclimbing K2 to reach the K2 - Capitol saddle.
I had read some reports of people dying near K2 in the past, and had always wondered how this was possible. Undoubtedly, there did not seem to be any obvious threats to one's life until we reach the backside of K2 and saw the impressive cliffs surrounding K2 and Capitol Peak. One false move and a climber could find themselves in a world of hurt.
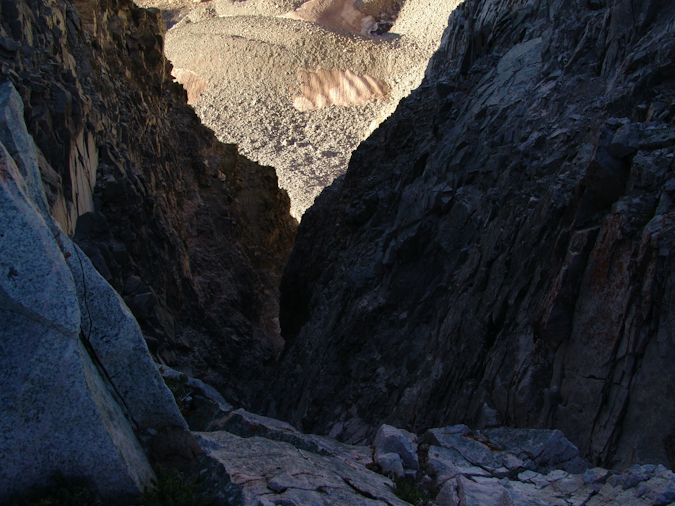
A huge cliff greets climbers reaching the base of K2. Don't slip here...
The remainder of the climb was amazing. Capitol's ridge is a spine of crumbling boulders and jagged knives, a real tribute to the harsh and remote wilderness that the Elk Mountains call home.
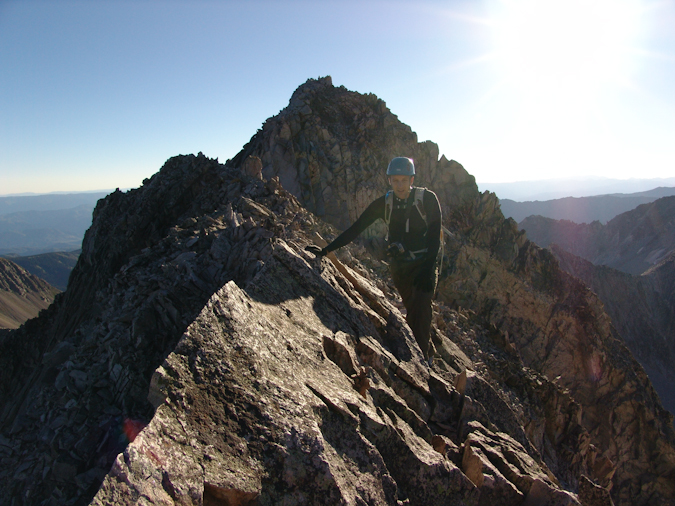
Mike with K2 in background.
At this point we knew we were quickly approaching the fabled Knife Edge. The North Face of Capitol Peak shot up like an angry beast from the pits of hell. Ok - maybe not that freakish, but it was sincerely one of the more impressive rock faces I've seen. Either side of Capitol presented thousands of feet of exposure and immediately reminded you of the need for caution and careful routefinding. A fall anywhere from here on would almost certainly be fatal.
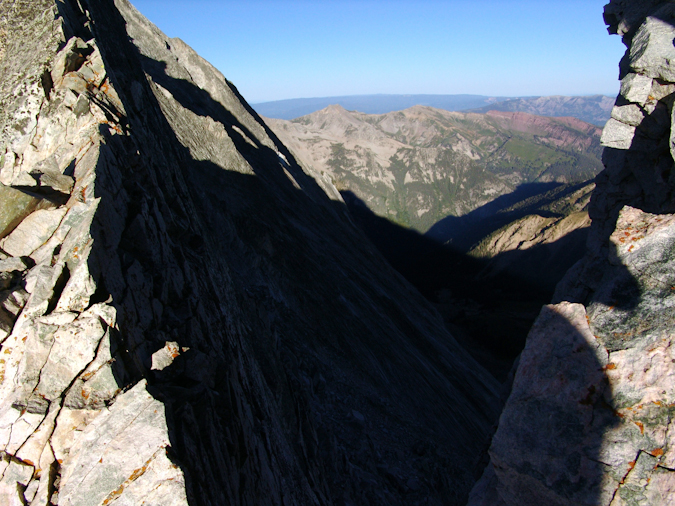
Capitol Peak's North Face - not a good place to fall.
Fortunately, the views from this part of the climb were unreal. The sun slowly rose above, providing light for the most incredible vistas of the Elk Mountains.
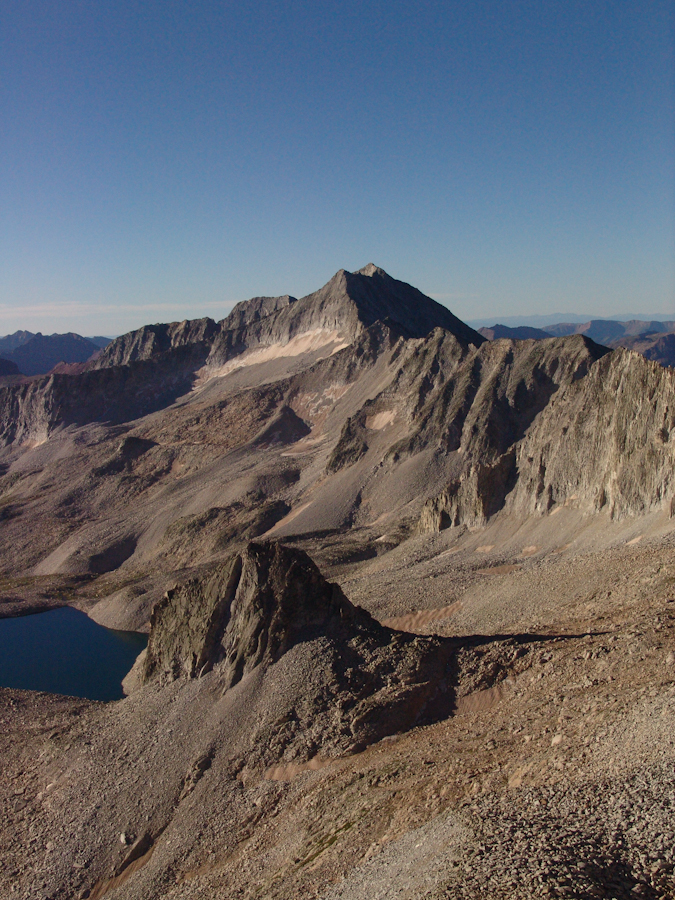
Snowmass Mountain, Capitol Peak's closest 14er neighbor.
We traversed across small ledges and quirky chimneys and found ourselves with what must have been the Knife Edge. K2's previously daunting surroundings now felt much easier.
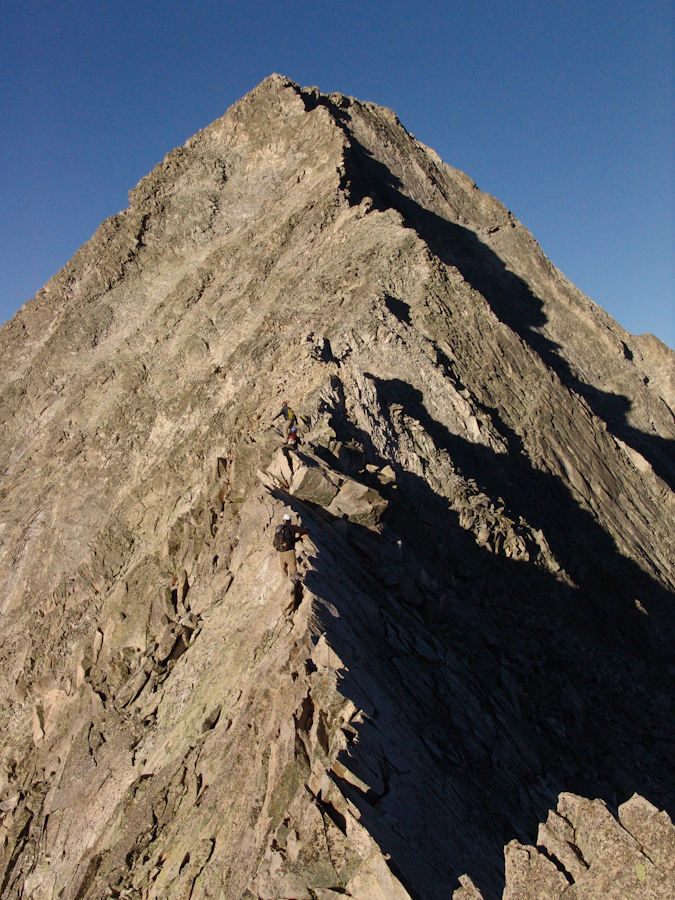
Nearing Capitol Peak's Knife Edge
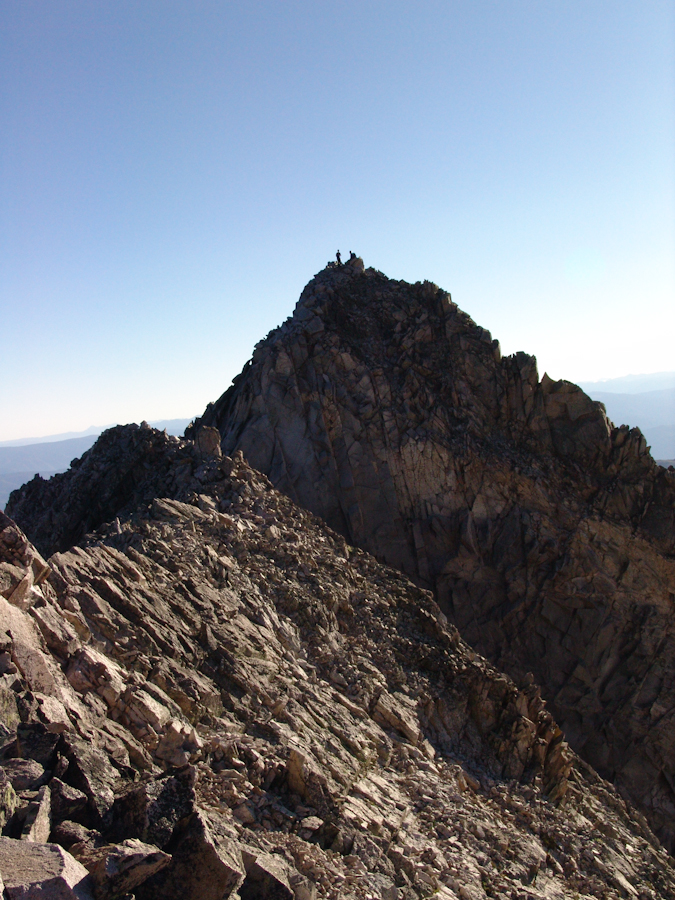
Looking behind: K2 and climbers reaching it's summit.
We finally reached the Knife Edge, gathered our wits about us, and gave it a go. The plan was for Mike to go first, and then to take video with his camera of us crossing. We watched the group before us, and they mostly employed a mix between the 'scoot on your ass' method and the 'hang from one side like monkey bars' method for crossing. We figured to follow suit, as both strategies seemed to appeal in their own ways.

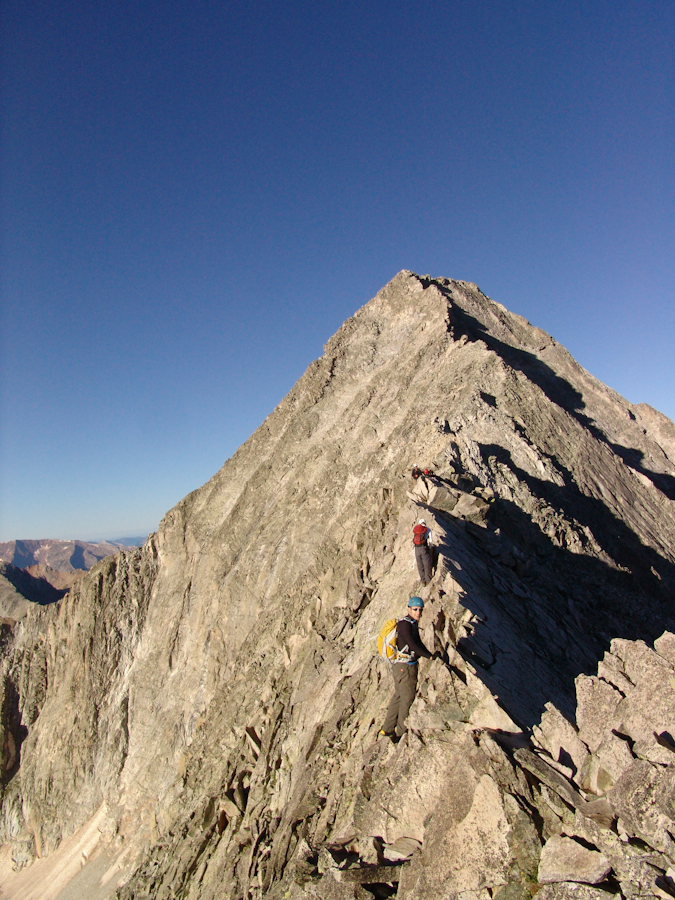
Mike Vetter ready to cross the Knife Edge.
Mike made it across without a hitch and took this revealing photo while crossing, looking down one of the sides. It goes to show how freaky and exposed it really was.
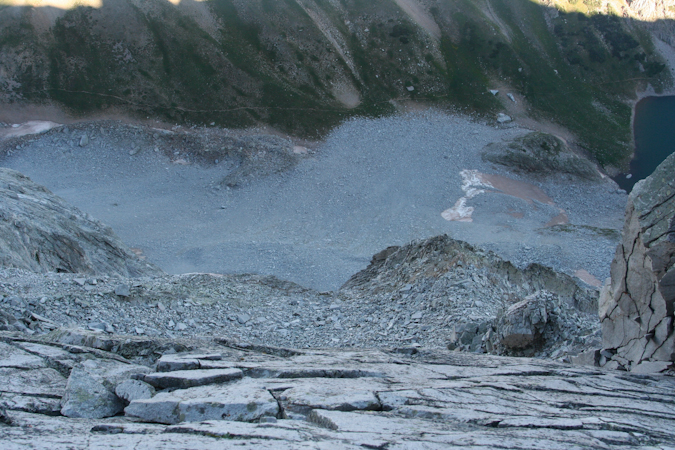
I crossed second, making sure I had perfectly solid holds on the rock as I crossed. I employed a mix between scooting and hanging from a side and made it across fairly quickly. The technical nature of the crossing is not terribly difficult or physically demanding; however, the mental requirement to cross was great, knowing that one mistake meant death. Needless to say, don't get yourself too hyped up for the Knife Edge. It is dangerous but the risk is quite manageable with caution, careful movements and mental toughness. I did find myself breathing heavily at the end, mostly from the excitement of the whole thing.
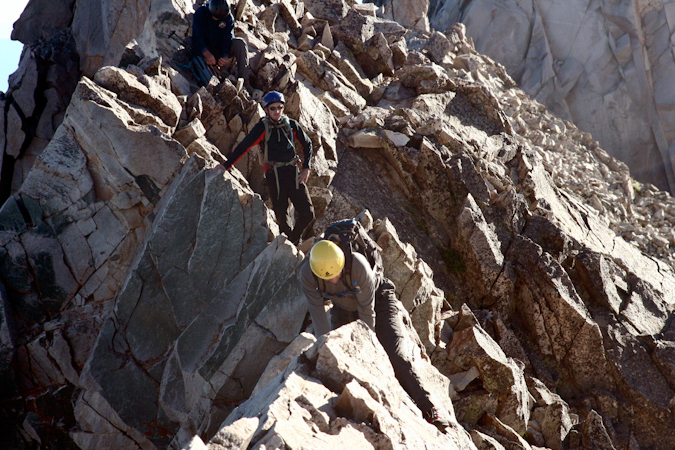
Matt Payne starts the Knife Edge - photo by Mike Vetter.
Mike compiled some video of our crossings of the Knife Edge and placed them on YouTube:
After the Knife Edge, the going got much easier, mostly a Class 3 / 4 scramble across a fun boulder ridge. We reached somewhat of an impasse about 3/4 to the summit, having to choose to either continue straight ahead and around the left side of Capitol per the standard route's description, or to head straight up to the ridge, ascending Class 5.2 / 5.3 terrain. Being the adventurers we are, we chose the latter and went straight up. The route was solid, challenging, and enjoyable, with minimal exposure and many places to rest. All in all, I would recommend taking the upper ridge route if you feel comfortable with light Class 5 climbing and steeper terrain. Never did any of us feel unsafe on this section; although, Travis did mention later that it was somewhat spooky for him. Fortunately, Travis is an excellent athlete and managed to power himself up the steep section without any problems. We were very cognizant of the rockfall potential, taking special caution not to pull rocks down on people below us.
Once reaching the ridge again, we stopped to rest and recoup our strength for the final summit push.
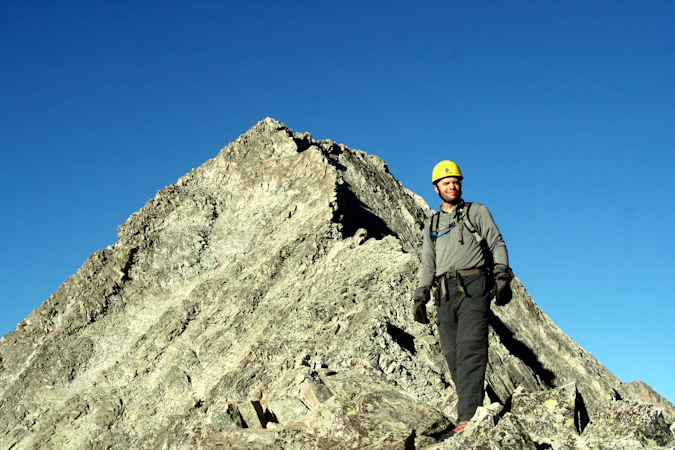
Matt Payne with Capitol's summit block. Almost there.
From here, the summit push was quite fun, with Class 4 and low Class 5 moves required. We were quite pleased with our choice to go the high route, enjoying both the challenge and the solidness of the route. We watched several climbers take the lower route, a looser, chossier, and less enjoyable section of the mountain.
Mike and I took some video footage of this section:
We reached the summit at 10:15 AM as one of the first groups up. The views were outstanding and the company was superb. A group from Ft. Collins joined us on the summit, and conversation quickly went to skiing Capitol Peak. Being probably the hardest 14er to ski, theorized on the possible ski routes and I swapped stories and names of climbers we both knew of that had either skied it or attempted to, referencing Brian Kalet and Jordan White of 14ers.com fame.
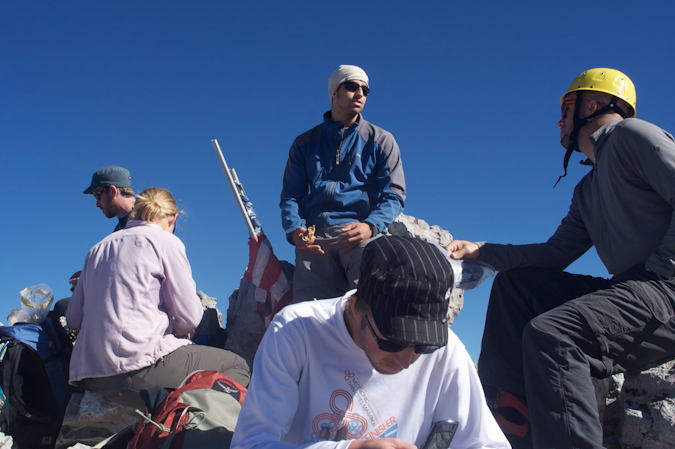
The summit party. Travis tinkers with his cell phone while Matt converses with fellow climbers.
After refueling with Resees Peanut Butter Cups and Raisins, I went on a photo frenzy.

A 3600 view from the summit of Capitol Peak. Click for high resolution view.
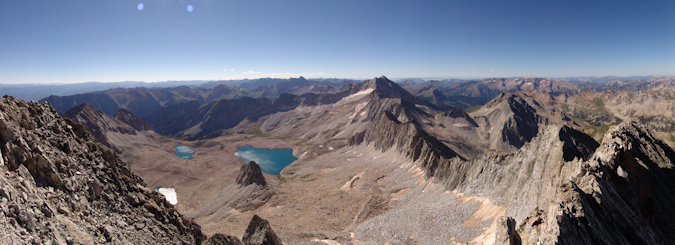
A panormaic view of the Pierre Lakes, Snowmass Mountain, and the rest of the awesome Elk Mountains.
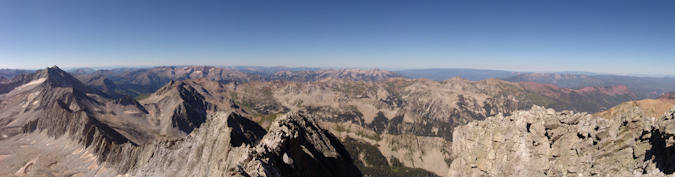
A panoramic photo looking north and west from Capitol Peak. The Snowmass - Capitol ridge strikes me as being quite impressive.
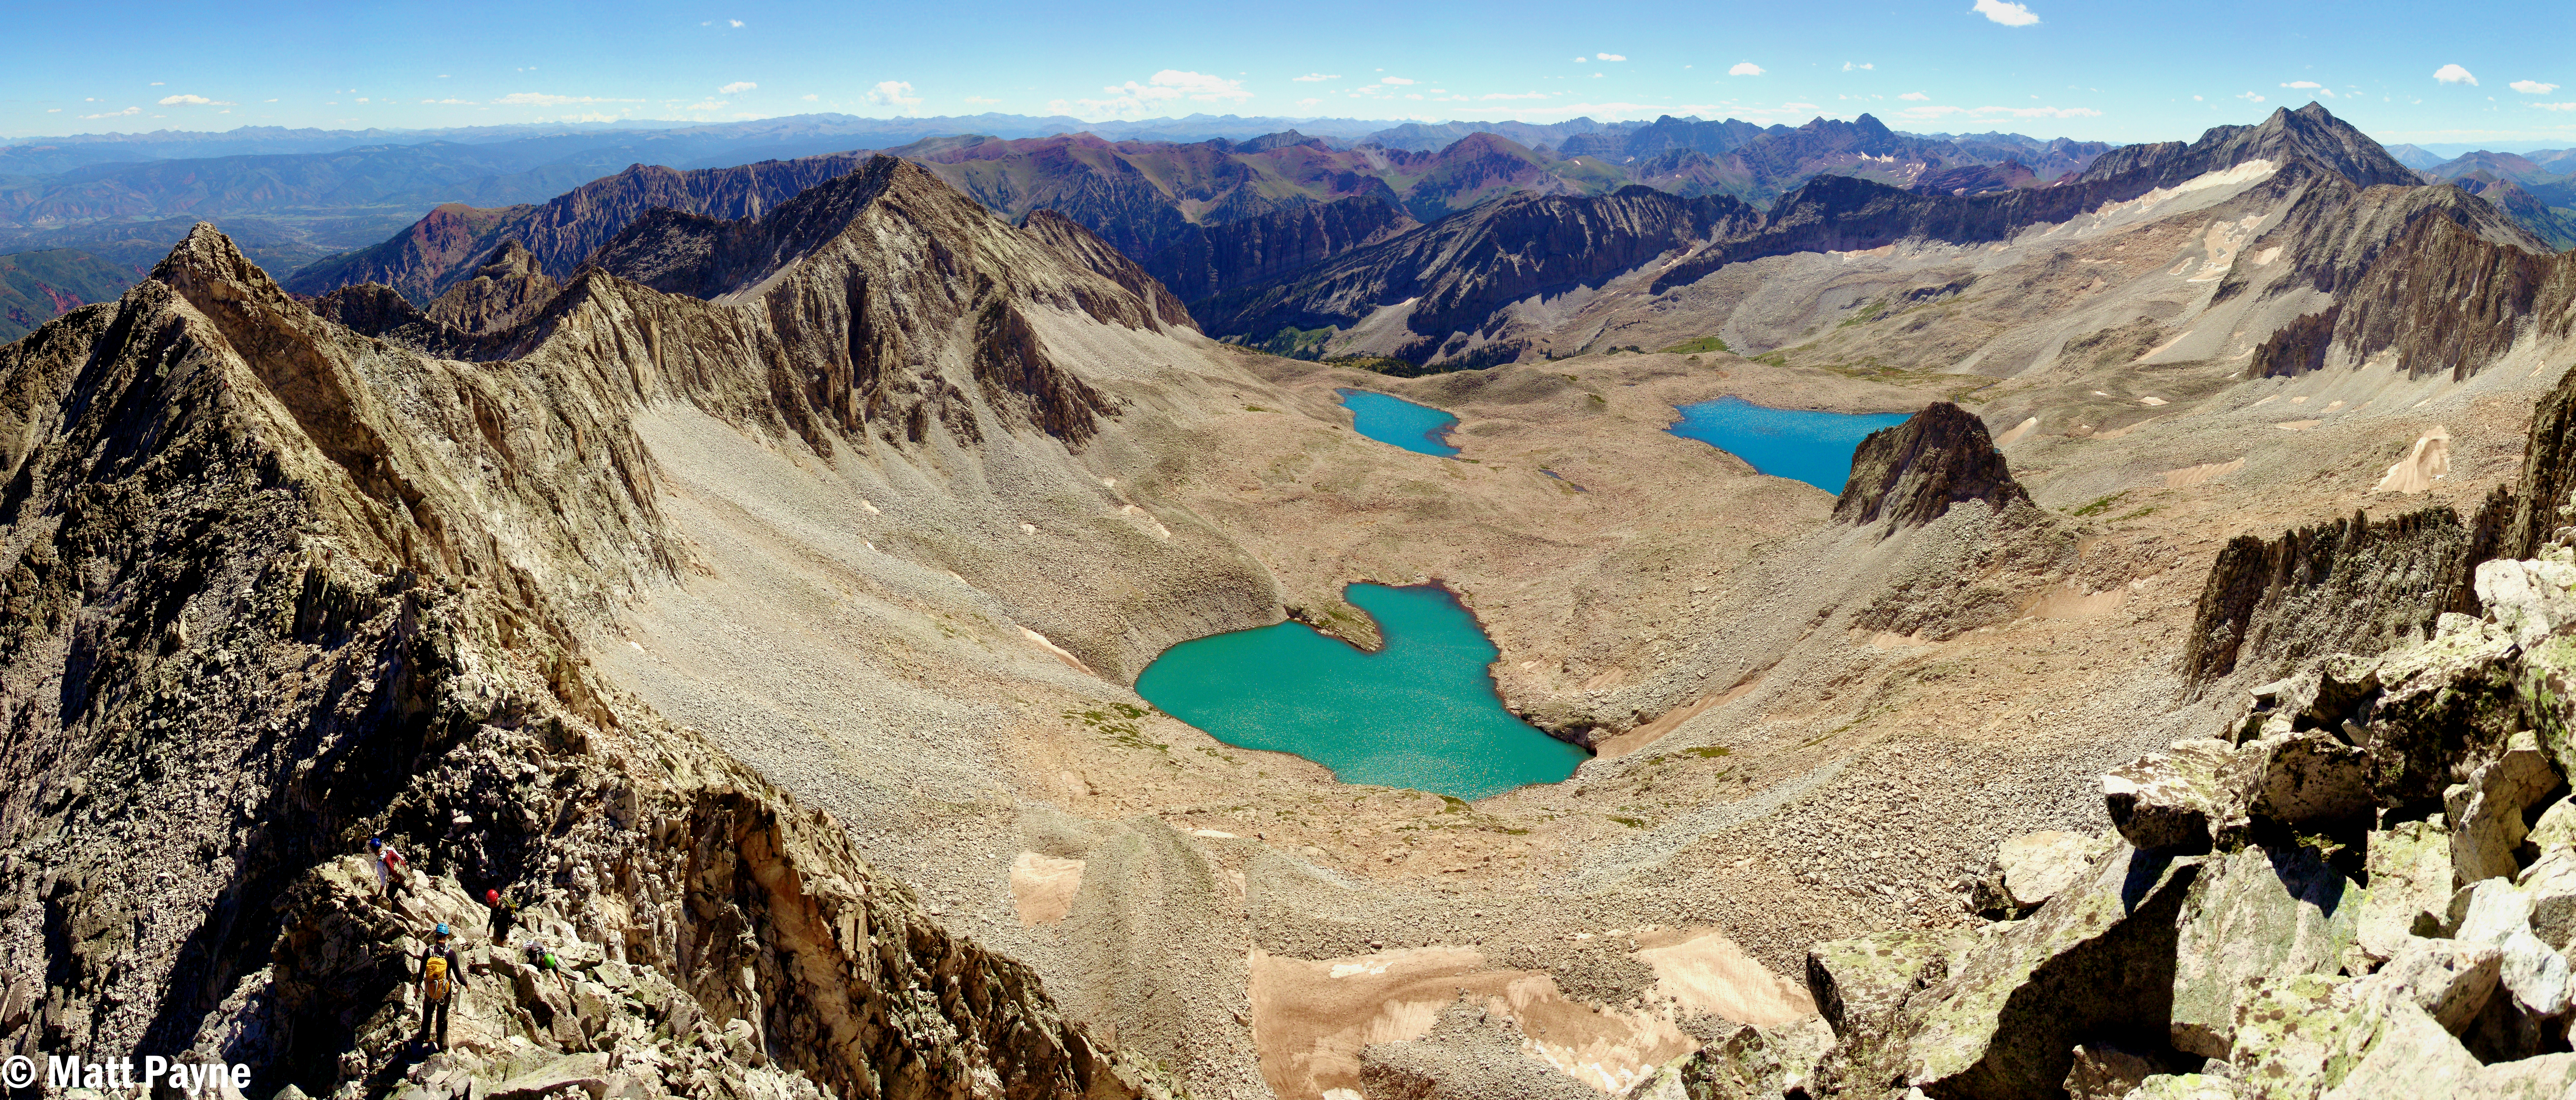
A massive panoramic photo of the Snowmass Basin, K2, Maroon Bells, and Snowmass Mountain. Click for high resolution version (26 meg file). How many climbers can you count?

A zoomed in panoramic photo of the Maroon Bells and Pyramid Peak. Click for full resolution version.

A super zoomed in view of the Maroon Bells.
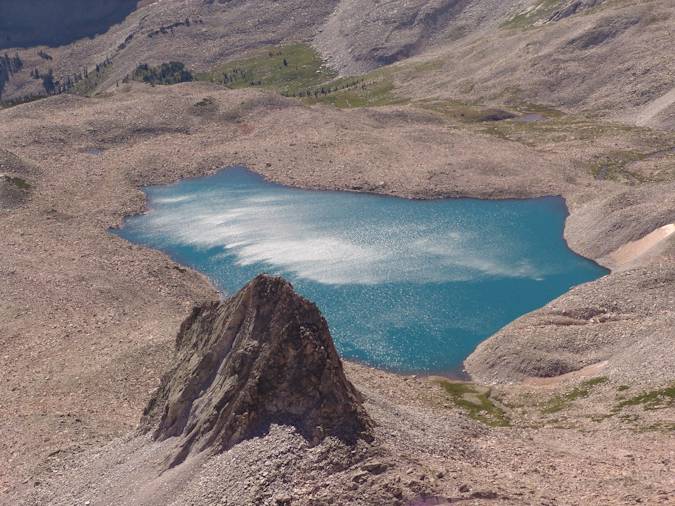
A zoomed in view of one of the Pierre Lakes.
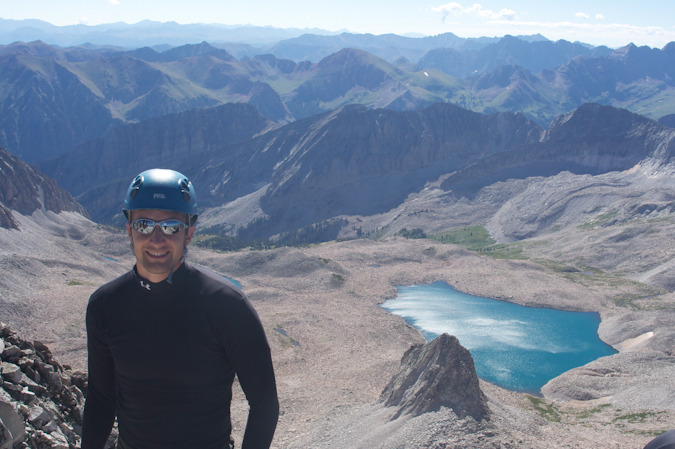
Mike Vetter on the summit of Capitol Peak.
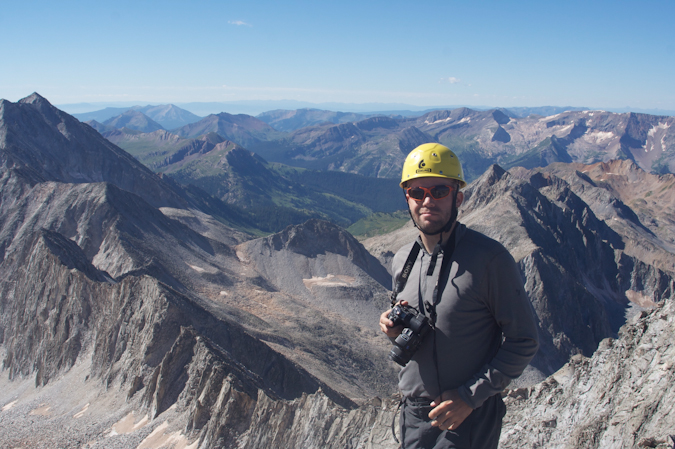
Matt Payne on the summit of Capitol Peak.
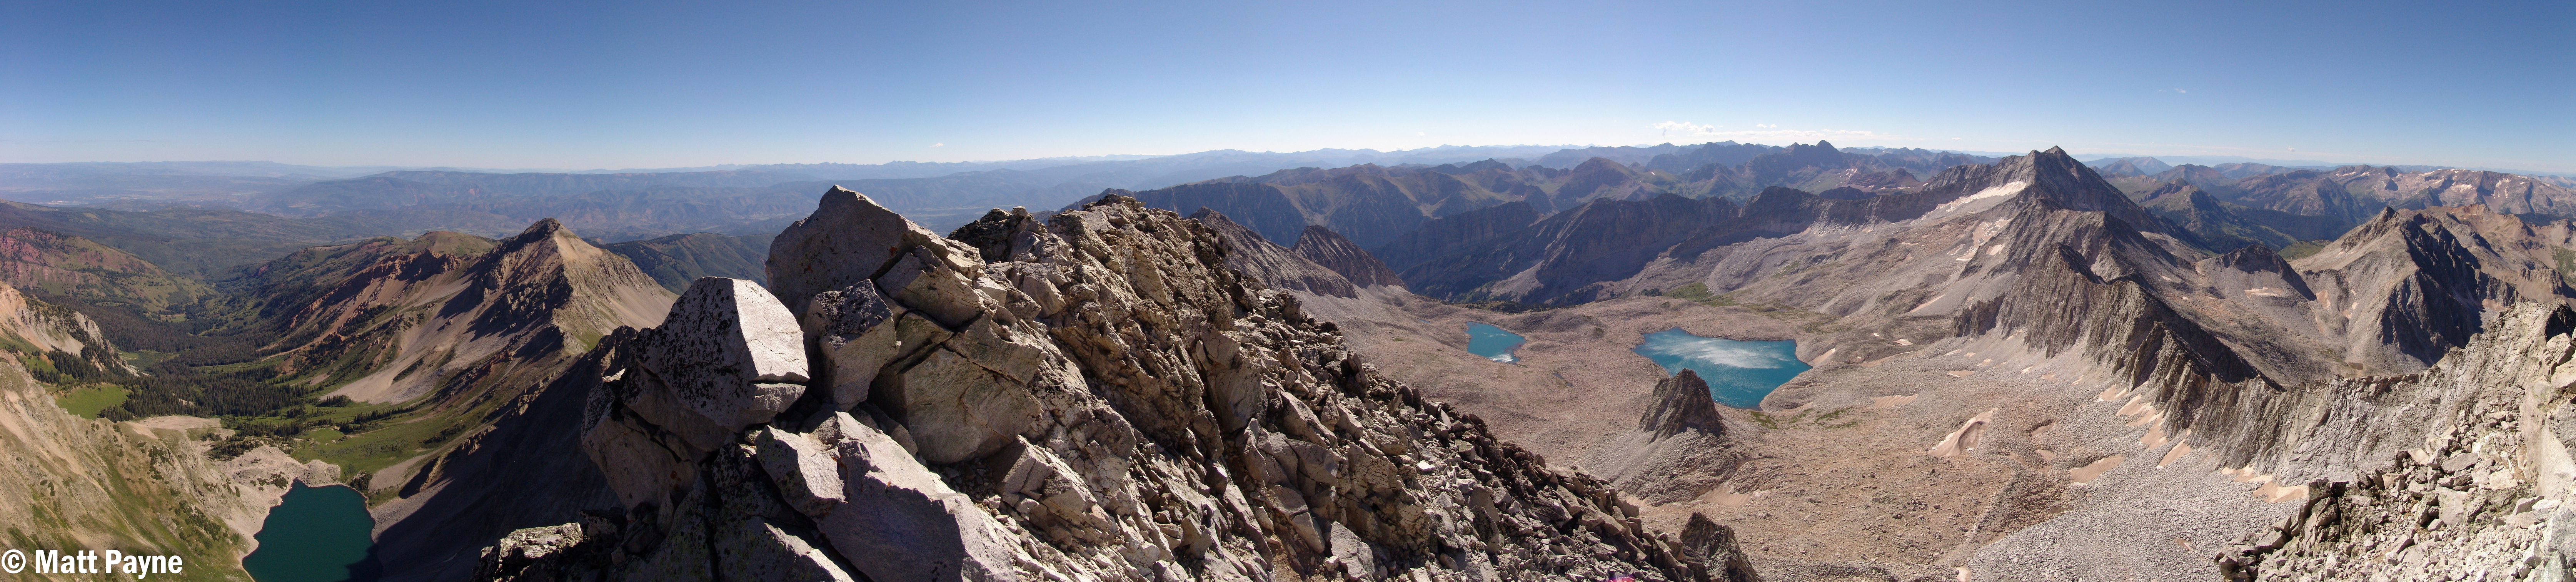
A panoramic view looking down at Capitol Lake, Mount Daly, and across Capitol's ridge to the Pierre Lakes and the rest of the Elk Mountains. Click for high resolution version.
Mike was able to capture some video from the summit as well:
With no threat of weather in any direction, we decided to hang out on the summit for about an hour, enjoying the views. We eventually headed down and chose to follow the standard route. The rock was nasty through this section of down-climbing, and required good concentration, footing tests (make sure the rock does not fall when you step on it), and patience. Most accidents occur on the way down, so we were vigilant and cautious. Travis was able to capture this perspective of the rock and exposure beneath us on the down-climb.
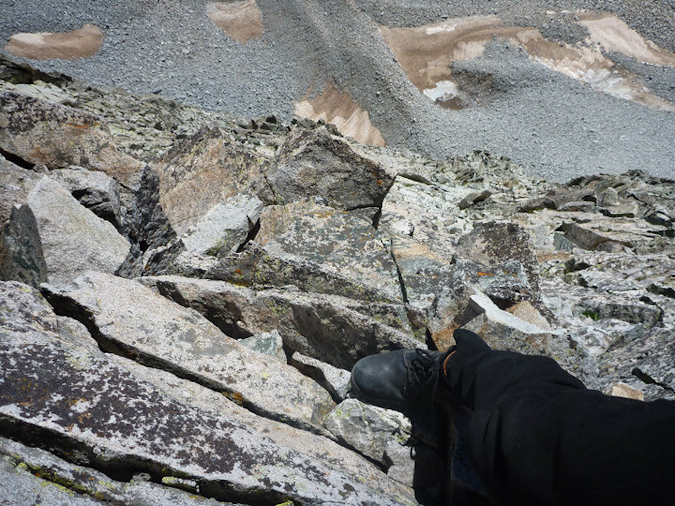
Travis plants his foot firmly on a ledge during the down-climb from the summit of Capitol Peak.
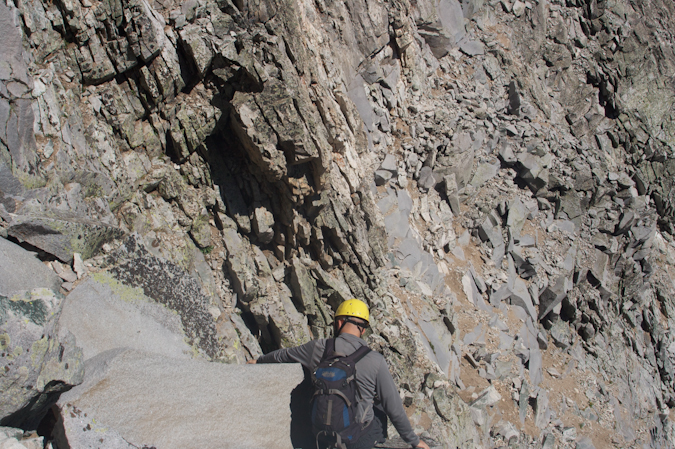
Matt Payne carefully down-climbs from Capitol Peak.
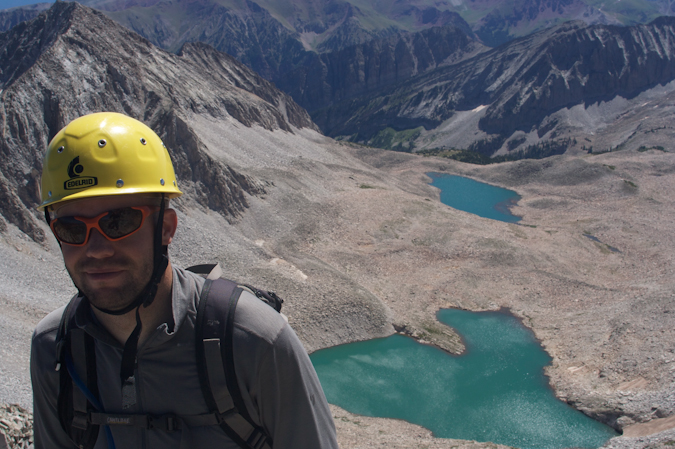
Matt Payne with one of the Pierre Lakes in background.
About halfway back to the Knife Edge, a group of climbers were coming up Capitol below us, without helmets. They asked us if this was the way to go and we responded that it was one of the ways up. It surprised me to see how oblivious they were that we were climbing above them on loose rock. I ordered my group to stop moving until they were in a safe location below us. It really is no wonder that more people do not perish on these mountains. Ironically and sadly enough, we later learned that a 20-year-old hiker died the day before on Maroon Peak from rockfall that had come from above him. Even though he was wearing a helmet, the rock that struck him had enough force to knock him loose from the mountain and caused him to fall to his death. I strongly believe that if people took more caution and paid attention to their surroundings and used some common sense, there would be less deaths. If you need a good climbing helmet, check out this one.
We reached the Knife Edge at approximately 12 PM and crossed it in much the same fashion as before, except this time, I went first. I generously used the 'scoot on your butt' maneuver to get across.
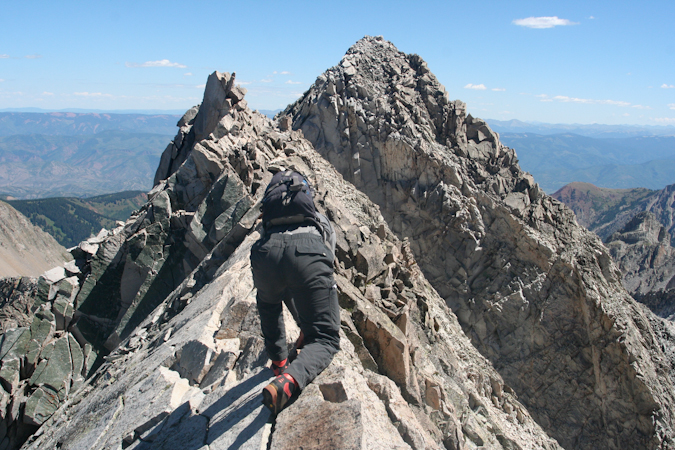
Matt Payne crosses back over the Knife Edge on Capitol Peak, heading towards K2.
Mike captured yet another great shot from the Knife Edge, looking down at Capitol Lake:
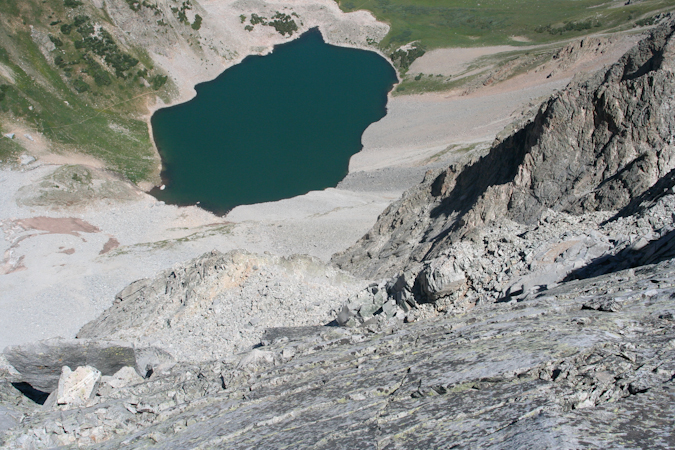
The climb back down from K2 was fairly straight-forward but tiring. We were ready for some pizza at Beau Jo's Pizza, no doubt. We finally reached the snowfield again, and it was much softer this time, with rivers of slush flowing down it. It was somewhat scary, but I tested the footing and it felt great, so we crossed again.
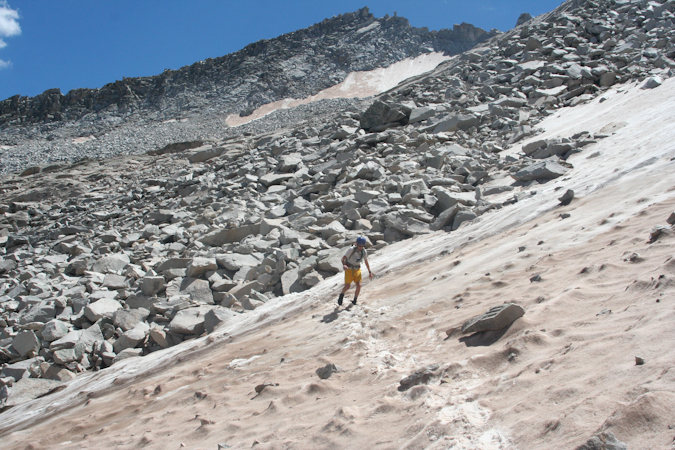
Travis Arment crosses the snowfield beneath K2. Photo by Mike Vetter.
We made great time back to the Daly - Capitol saddle and I sprinted the last stretch to the saddle, anticipating the victorious beer that would be consumed once back to civilization.
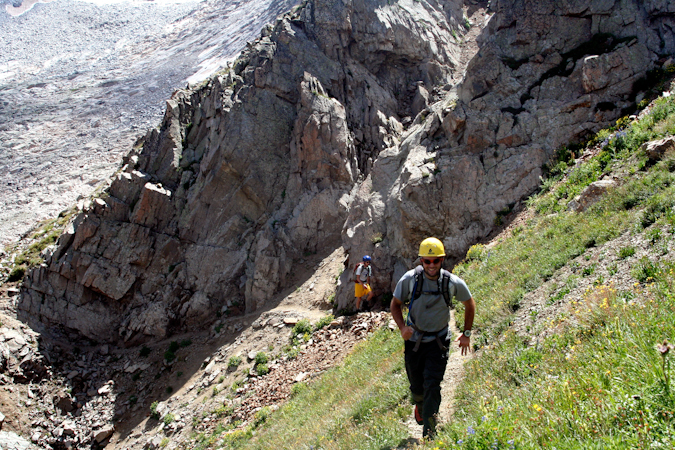
Matt Payne runs the final section on the back side of the ridge between Capitol and Daly. Photo by Mike Vetter.
On the way down the hillside, Mike stopped to take some great shots of the wildflowers found on Capitol's northeast shoulder:
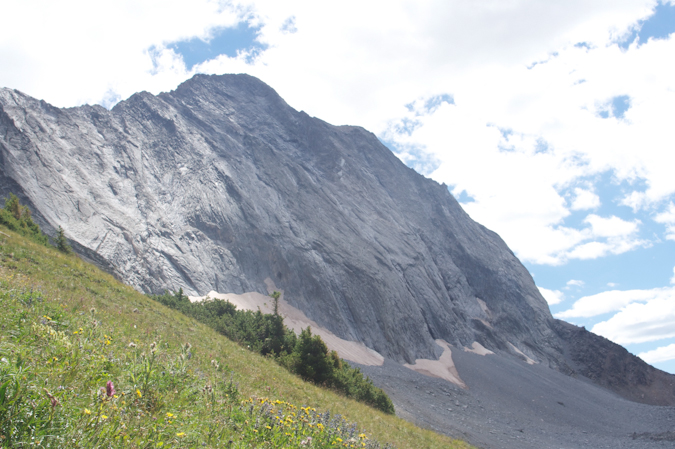
We made it back to camp at 2:15 PM and packed up. We refilled our water and headed out. Travis and I were motivated solely by the prospect of cold beer and fresh pizza.
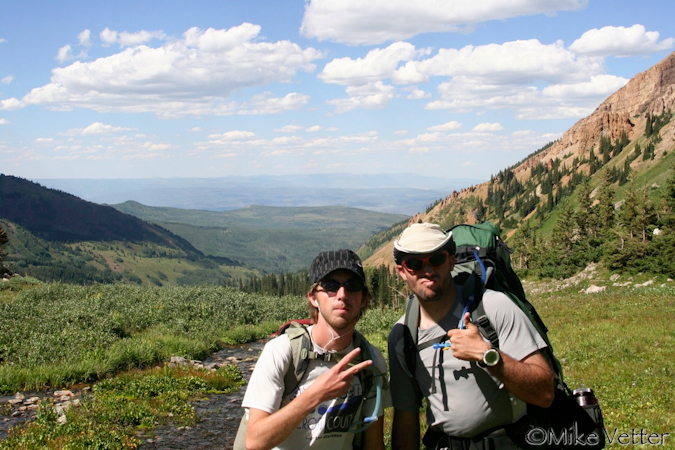
I hope you enjoyed this trip report. We surely enjoyed the trip and I personally can't wait to join Mike and Travis for our next adventure.
Little Bear Peak: A Slippery Proposition
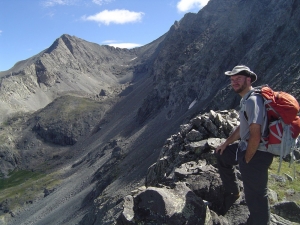
What an action-packed trip this was! From off-roading one of Colorado's most difficult 4x4 trails to witnessing a full-scale Search and Rescue operation! As if climbing one of Colorado's most challenging 14ers wasn't enough!
To start off, here is a break-down of relevant numbers from this adventure up Little Bear Peak:
Peak summited:
Little Bear Peak: 14,037 ft. (ranked 44th in Colorado)
Total elevation gain: 2,360 ft.
Total distance hiked: 2.54 miles
Total time hiking: Approx. 5 hours
Photos taken: 252
Search and Rescue operations witnessed: 1
Little Bear Peak sits impressively next to Blanca Peak in the Sangre de Cristo Mountains of Colorado and is considered one of the most dangerous and perilous mountains in Colorado due to a section near the top called the Hourglass and the Bowling Alley. In fact, just this year, a climber named Kevin Hayne perished on Little Bear from falling at the Hourglass section. A full report of those events can be found here. For a semi-comprehensive (not regularly updated) list of all accidents on Little Bear, check out John Kirk's site.
Having backpacked the long, steep road from the base of Blanca Peak last year to climb Blanca Peak and Ellingwood Point, I was not looking forward to another slog up the road to climb Little Bear. Fortunately, my college roommate and great friend, David Deramo, was back in the state from his long 2 year stay in Japan. Dave owns one of the most awesome Jeep Cherokees I've ever seen. Dave purchased the Jeep when we were in college in 1999 and has put work into it each year since. It went from a stock 1989 Jeep to an awesome rock-crawling machine over the course of many years. Dave has put a lot of work and time into his Jeep, and I was eager to see what it could do. Dave agreed early in the year to drive up the road with me and attempt to climb Little Bear.
Dave drove down from his home in Winter Park with his Jeep on a borrowed trailer, towed by a borrowed Ford half-ton pickup on Friday, August 6th and stayed the night at my place in Colorado Springs. We woke up at a reasonable time and made the drive over La Veta pass and met up with his friend from Durango, Lance. Lance owns 4x4 & More in Durango, Colorado and specializes in custom 4x4 jobs. His own Jeep, another older Jeep Cherokee, does not look like it belongs on the insane Blanca Peak trail; however, Lance keeps his Jeep looking stock but has some nasty tricks up his sleeve, including air suspension that adjusts using switches in his cab. Lance knows his stuff!
When we arrived at the start of the road and began unloading Dave's Jeep from the trailer, a couple of Search and Rescue (SAR) team-members began to assemble. Apparently someone had an accident on Ellingwood Point earlier in the day. Learning about a SAR mission did not do much to instill confidence in me for our trip up Little Bear.
The drive up the road was fun. Dave's Jeep really performed well. He runs a 5.5 inch lift with 35" ProComp XTerrain tires with ARB lockers and tons of other upgrades. For those not familiar with the road, it is truly one of the most insane roads I've seen. The road itself consists of really rocky terrain with several rock crawling obstacles known as Jaws 1, 2, and 3. Dave made Jaws 1 look like a bump in the road.

Jaws 1.
Jaws 2 is somewhat scarier, due to its off-camber feel and the considerable risk for tumbling off the side of the mountain. Dave needed a couple of attempts, but also made Jaws 2 look pretty easy. Lance's seemingly unfit Jeep also did great over Jaws 2, much to my surprise. Lance's Jeep is such a sleeper - it looks completely incapable of doing these obstacles, but the tricks he can pull make him just able to make it over the problems.

Lance makes it over Jaws 2 in his stock-looking Jeep Cherokee. Lance is a total off-roading master.

Dave heads up Jaws 2.
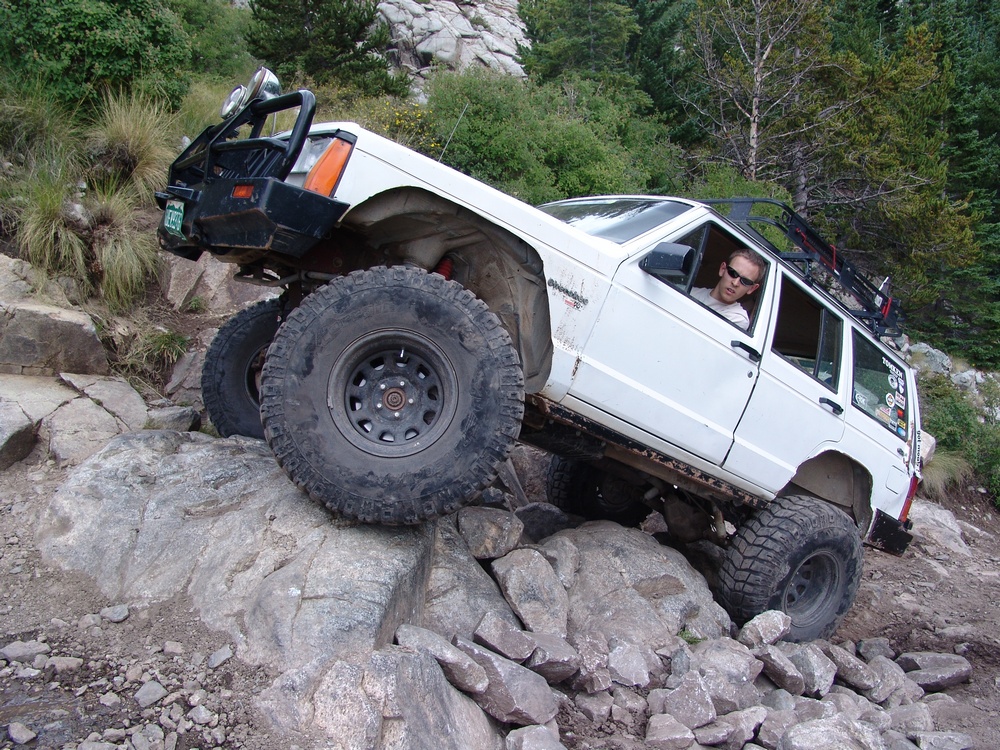
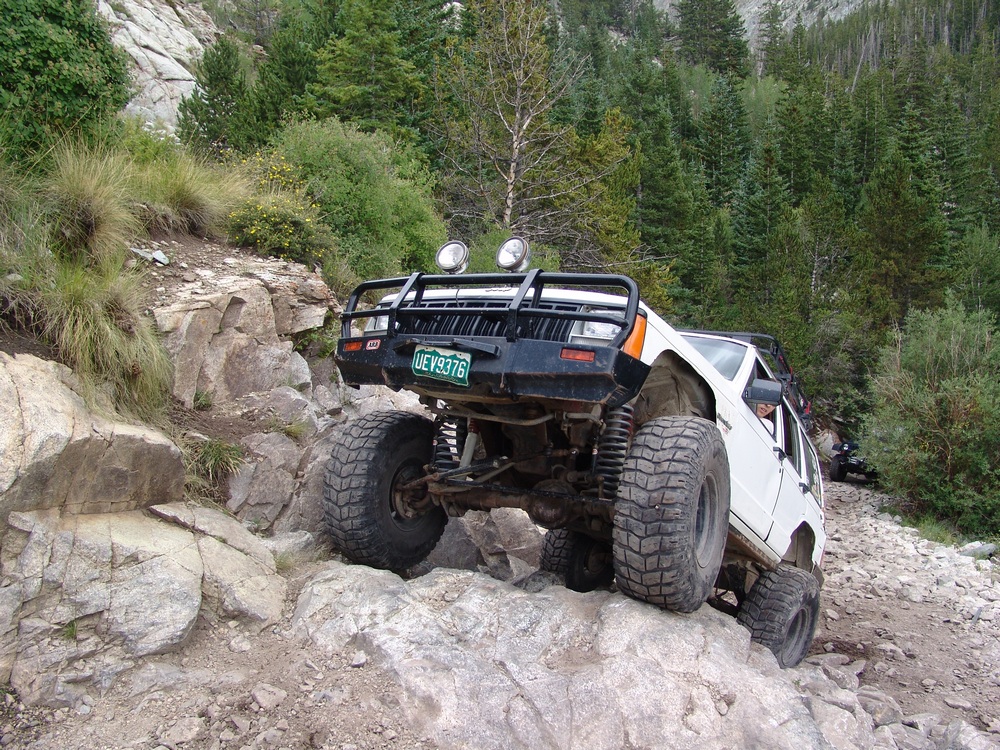
Jaws 3 is a little different than the other two obstacles, having a trickier line than the other two. Most consider Jaws 3 to be the hardest obstacle.
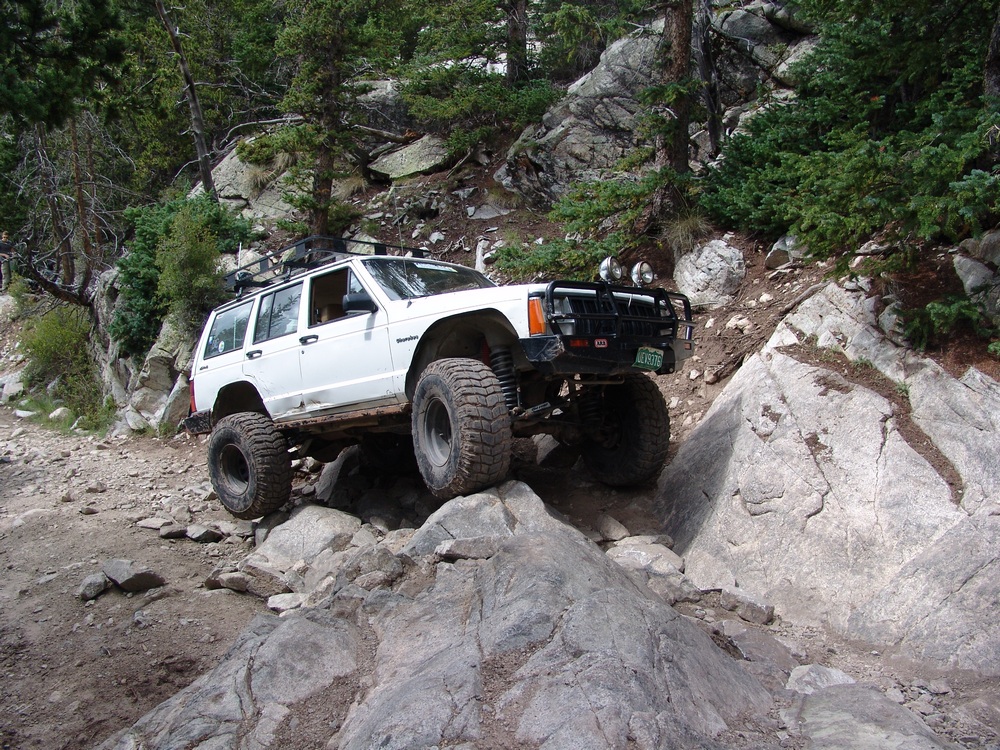
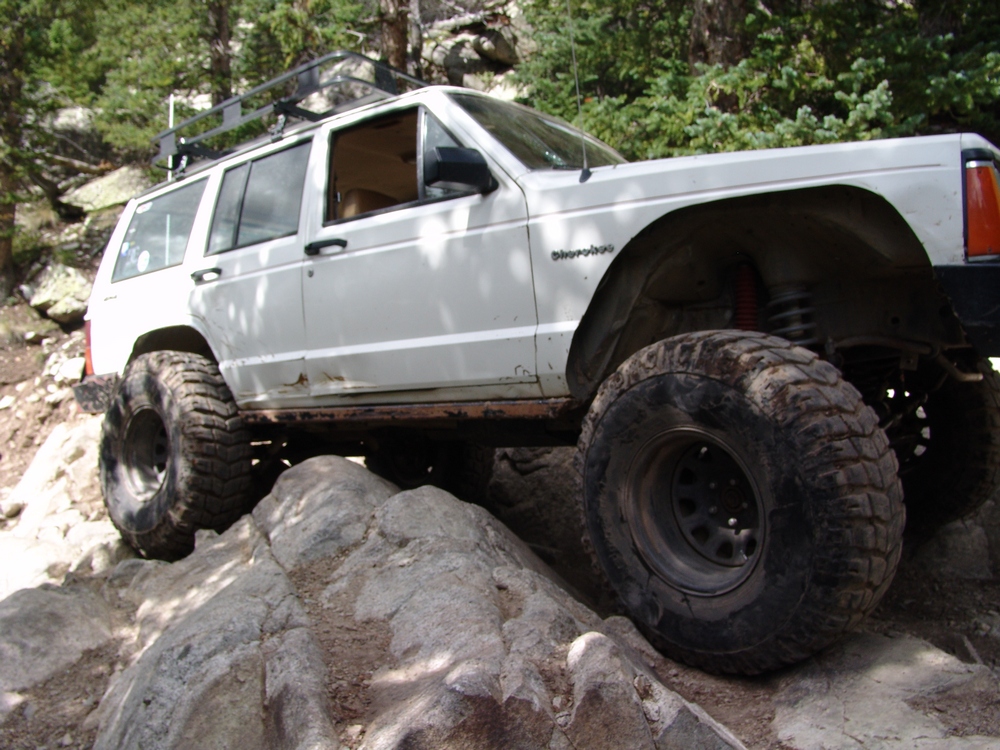
Once over Jaws 3, we were at Lake Como. Lake Como had many 4x4 vehicles parked at it and many campers lined its shores. We aimed for the south-eastern shore to look for camping and enjoyed the views of Little Bear Peak.

A spotlight shines on Little Bear Peak
We found a great campsite at the far end of the lake and unpacked our gear and made camp. A couple of guys in a Jeep Rubicon also joined us at our camp site. They were also planning on climbing Little Bear Peak, so it was a natural fit. Once our camp was made, we all drove up the road to see if we could complete the final obstacle. It was no problem for our group and we easily made it to the end of the road past Blue Lake. As soon as we arrived, the weather turned nasty, with hail and rain pounding the area. A couple of SAR team members, George and Stefan, approached Dave and I and asked us if we could give them a ride down to Lake Como. George and Stefan were really friendly guys and conveyed the SAR situation to us. A woman with Epilepsy had suffered a seizure and later dislocated her shoulder from a fall. Her injuries were severe enough to merit SAR extraction due to her pain. The entire story can be found on the link above or in the trip report posted by someone involved. It really is a fascinating tale that many mountaineers can learn from.
Here are the lessons I personally learned from the SAR incident: 1) Be sure to find out if your hiking partner(s) have a medical condition. If they do, learn about how it afflicts them and how to treat it. Additionally, make sure your group agrees on the rules of engagement - how you will handle an emergency. These are important things to consider before hiking with others, especially strangers. 2) If you have a medical condition - please disclose it to your fellow hikers before they agree to hike with you. Fully disclosing this to your partners is only fair and offers them the opportunity to learn more and to decide if they want to take on the risk of accompanying you on the hike. If your medical condition worsens while climbing, please turn-around and head back to camp before the situation worsens and SAR is called.

Blue Lake before the storm
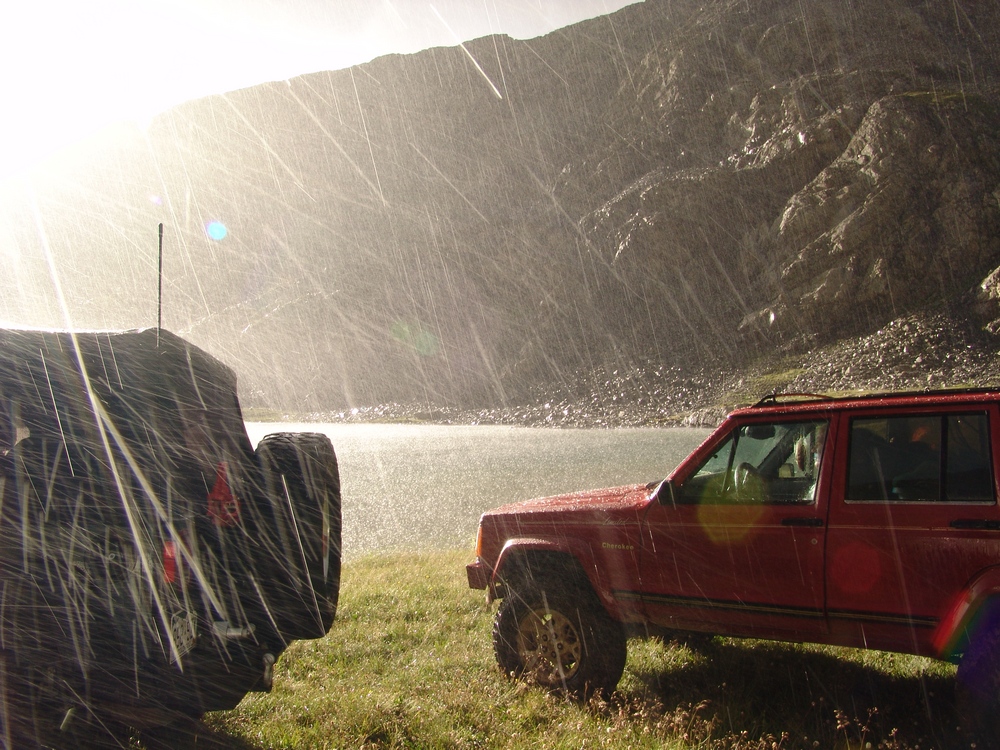
Blue Lake during the storm
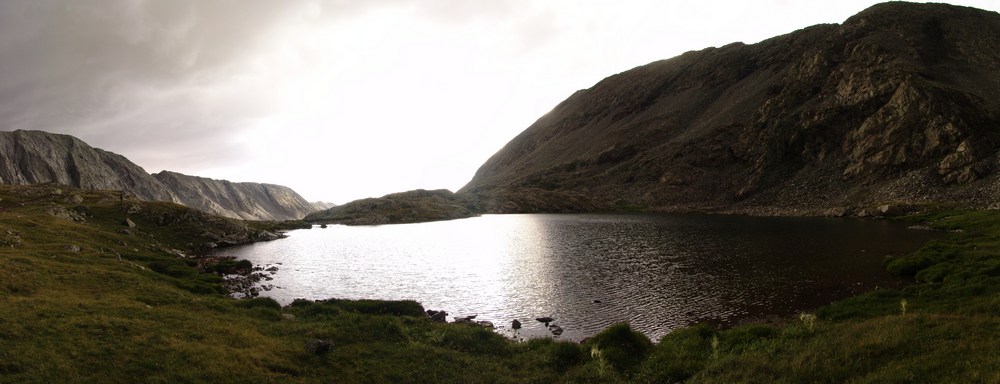
Blue Lake after the storm
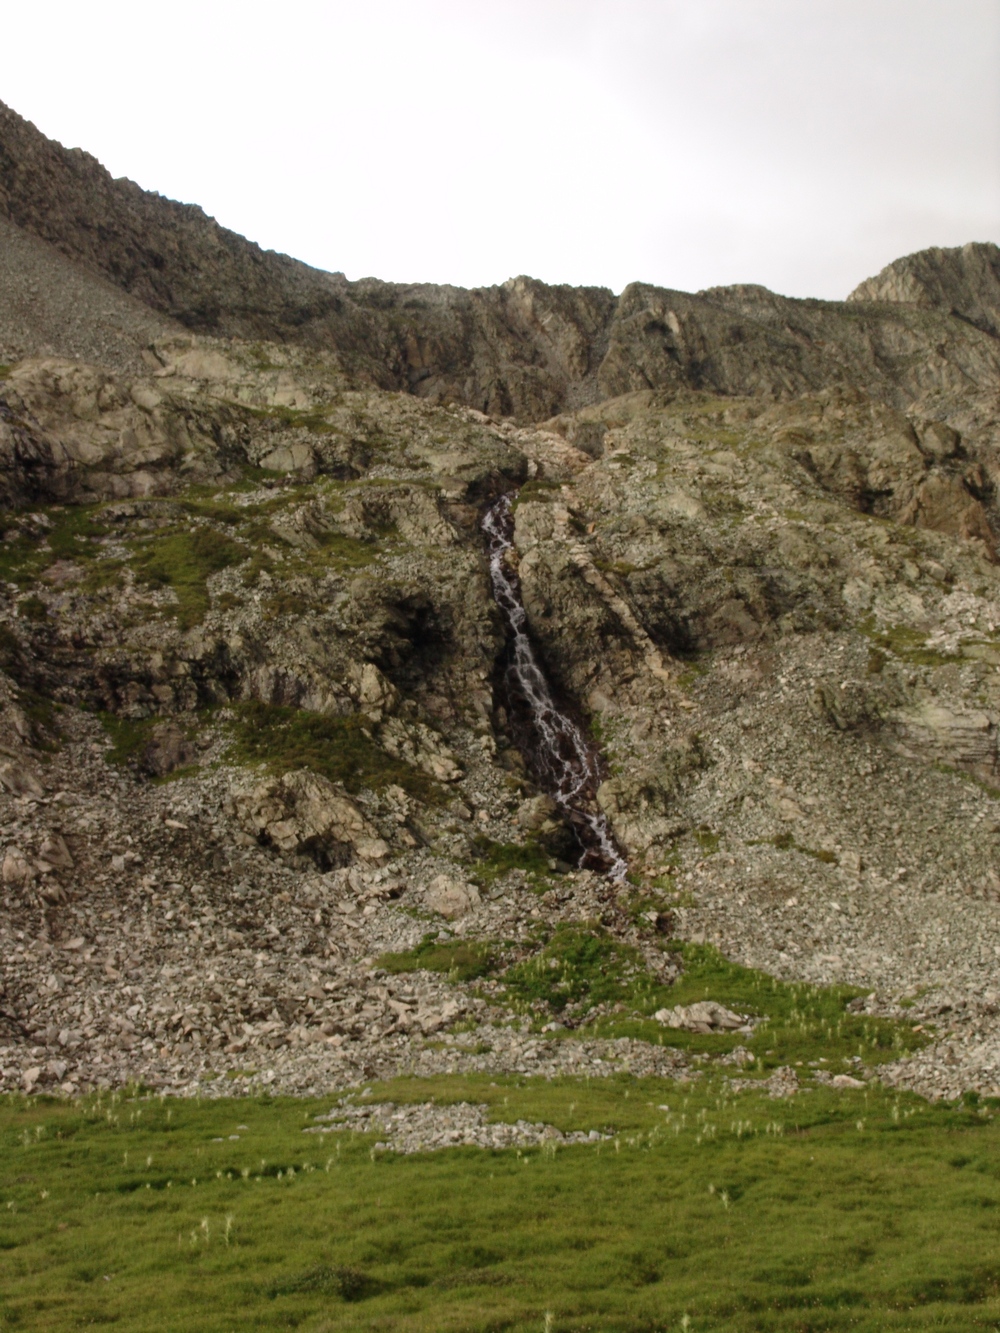
The waterfall seen above Blue Lake, just before the headwall of Blanca Peak.
Dave and I returned to camp and ate dinner. Our group spent some time around a camp-fire, exchanging stories with some hikers that had came down from helping the SAR team. Dave and I eventually crashed and set the alarm for 4 AM. Given that there was a lot of lightning and rain that night, we wanted to get an early start on Little Bear.
We woke up at 4:30 after mashing the snooze button a few times and set away for the Little Bear turn-off at the top of the hill above Lake Como. We scrambled the boulders and made our way up the very steep gully leading to Little Bear's ridge. Caution should be taken in this gully, as the rock is loose. We made quick work of the gully and stopped to take some photos.
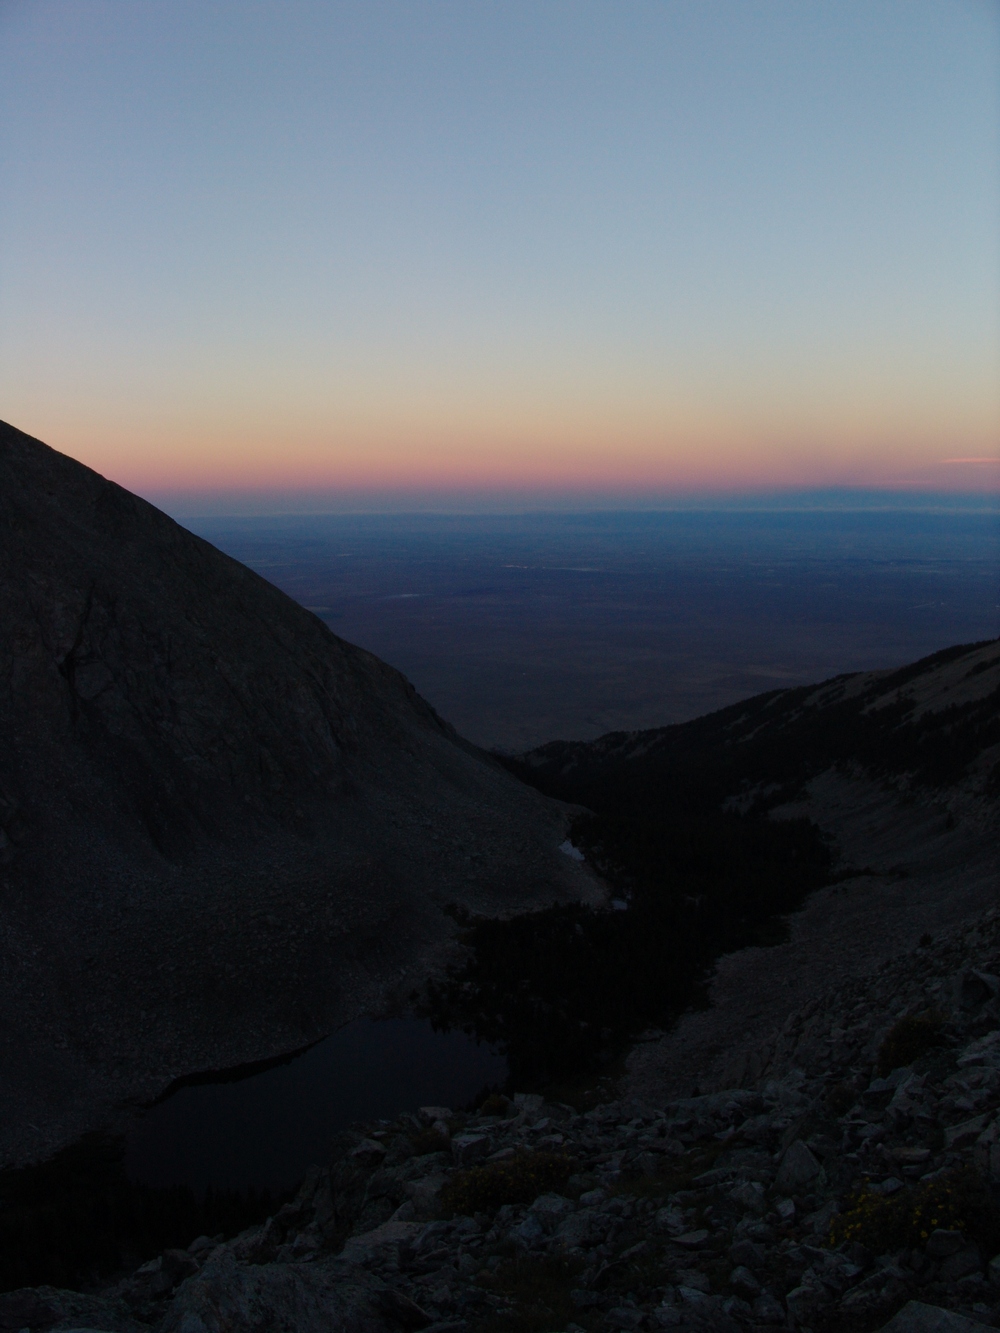
Looking west towards Alamosa.

The steep gully leading to Little Bear's ridge.

Ellingwood Point at sunrise
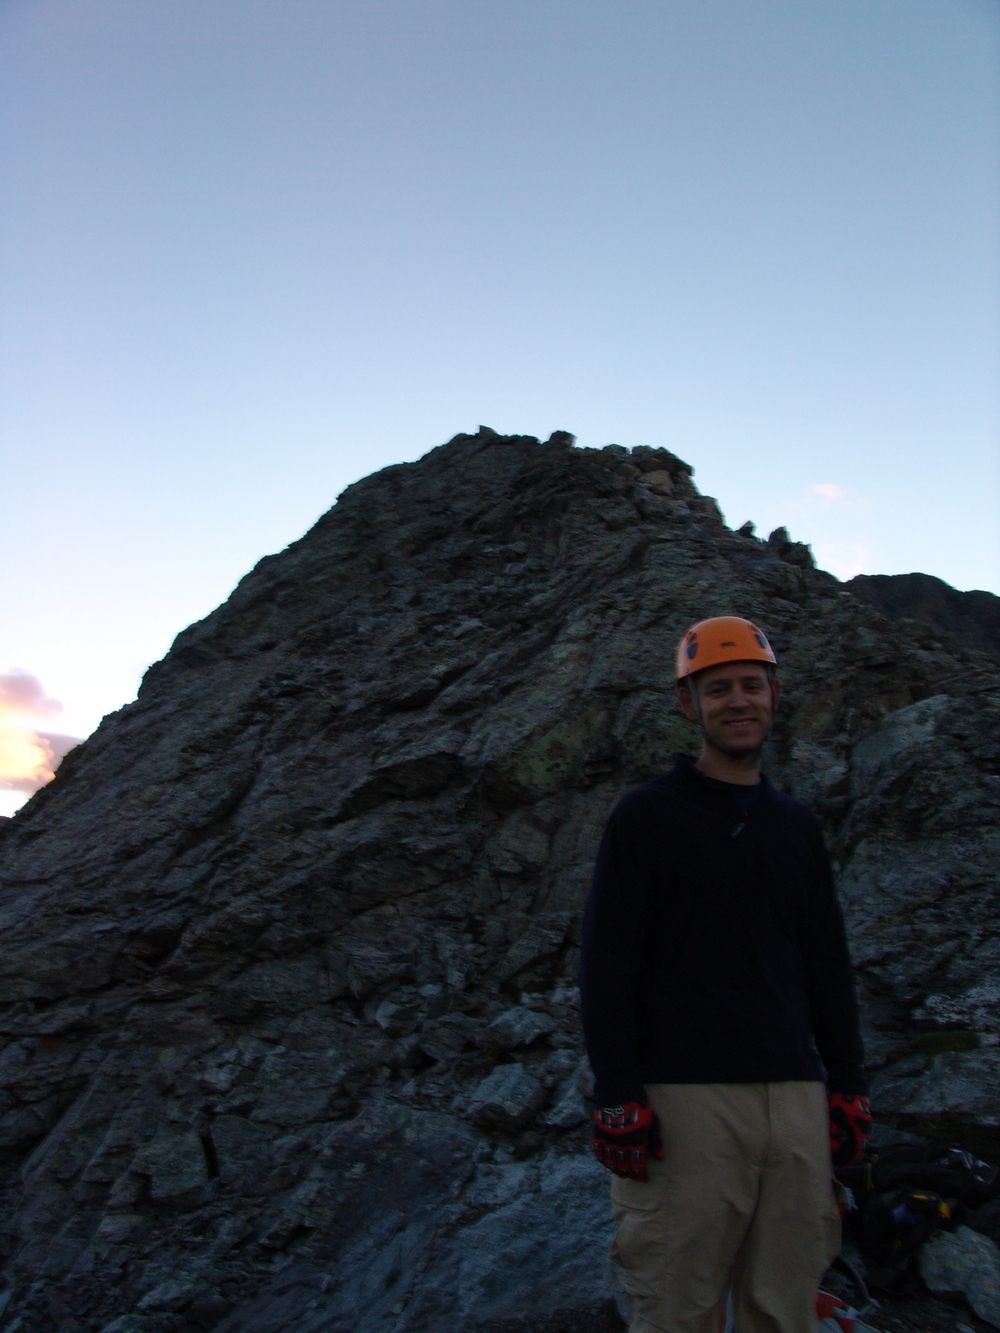
Dave at the top of the gully.
We made our way across the mountainside, just below the ridge towards Little Bear. The trail is faint but well-marked by cairns and is easy terrain. We reached about the half-way mark from the gully and Little Bear and gained our first great views of Little Bear.
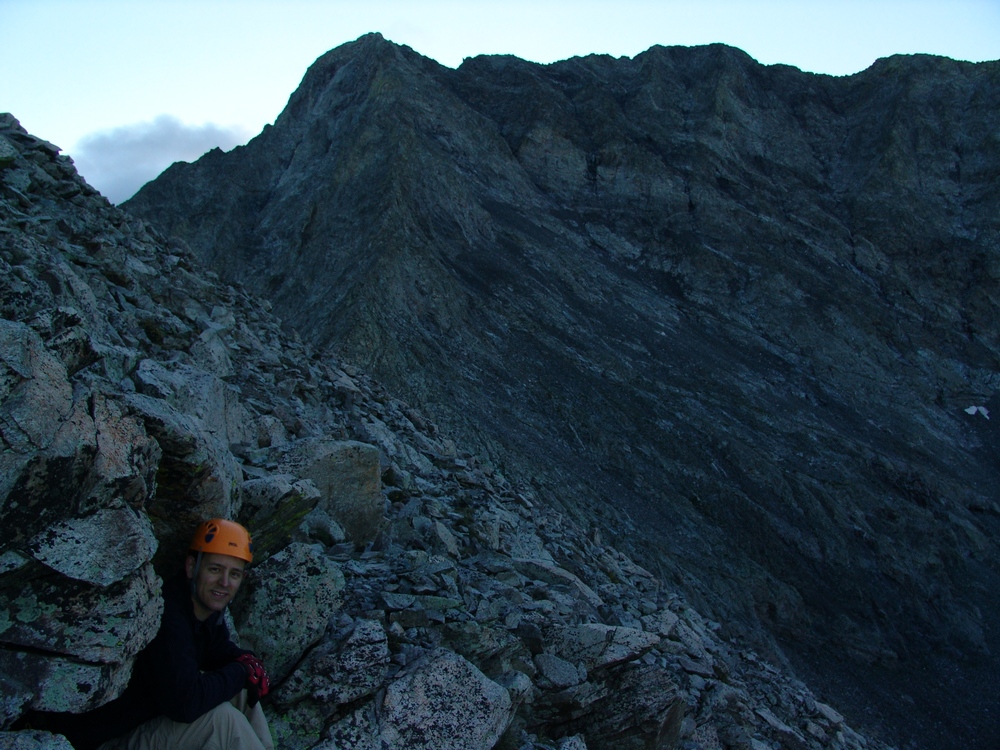
Dave takes shelter with Little Bear's impressive face behind him.
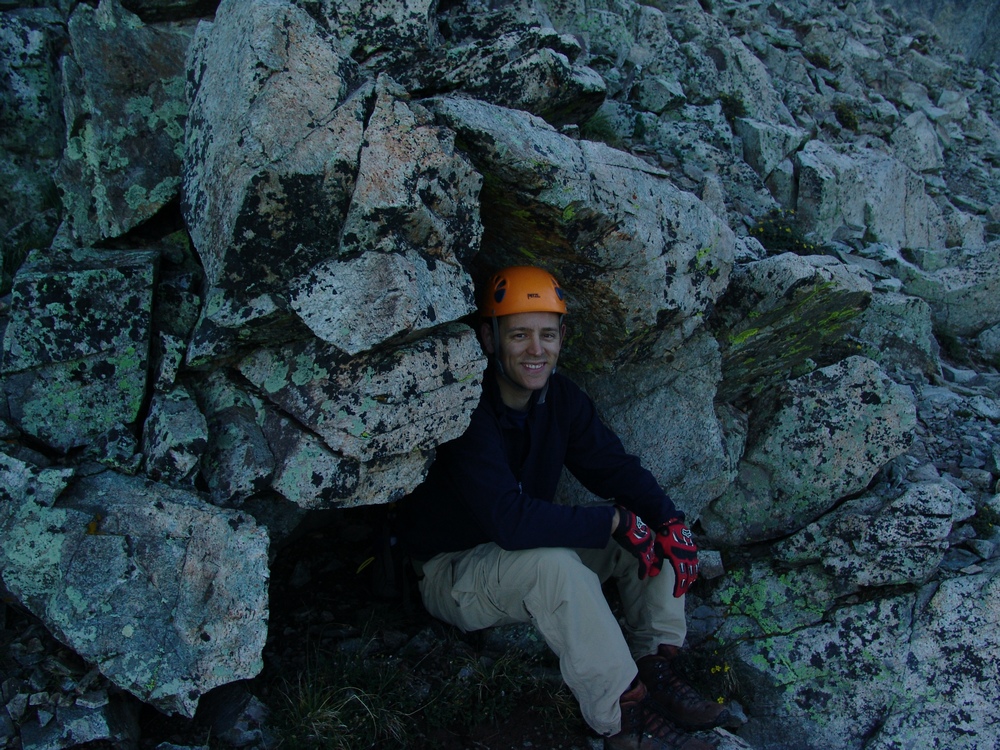
Dave's Cave.
We quickly made our way to the base of Little Bear and were greeted by the famous Hourglass. The Hourglass is the deadliest section of this climb, for obvious reasons. Water runs down the center of this narrow and steep gully, forcing climbers higher to the left in order to get past the start of the gully. The whole section above the Hourglass is referred to as "The Bowling Alley," since rocks kicked down from above are all funnelled inwards, creating a dangerous situation for those climbing up. Since we wanted to avoid rockfall from above, we were glad we got up early and were the first to reach the Hourglass. Since it had rained a lot the night before, the rocks everywhere in the Hourglass were wet. We were able to find some patches of dry rock and slowly and meticulously made our way up the gully.
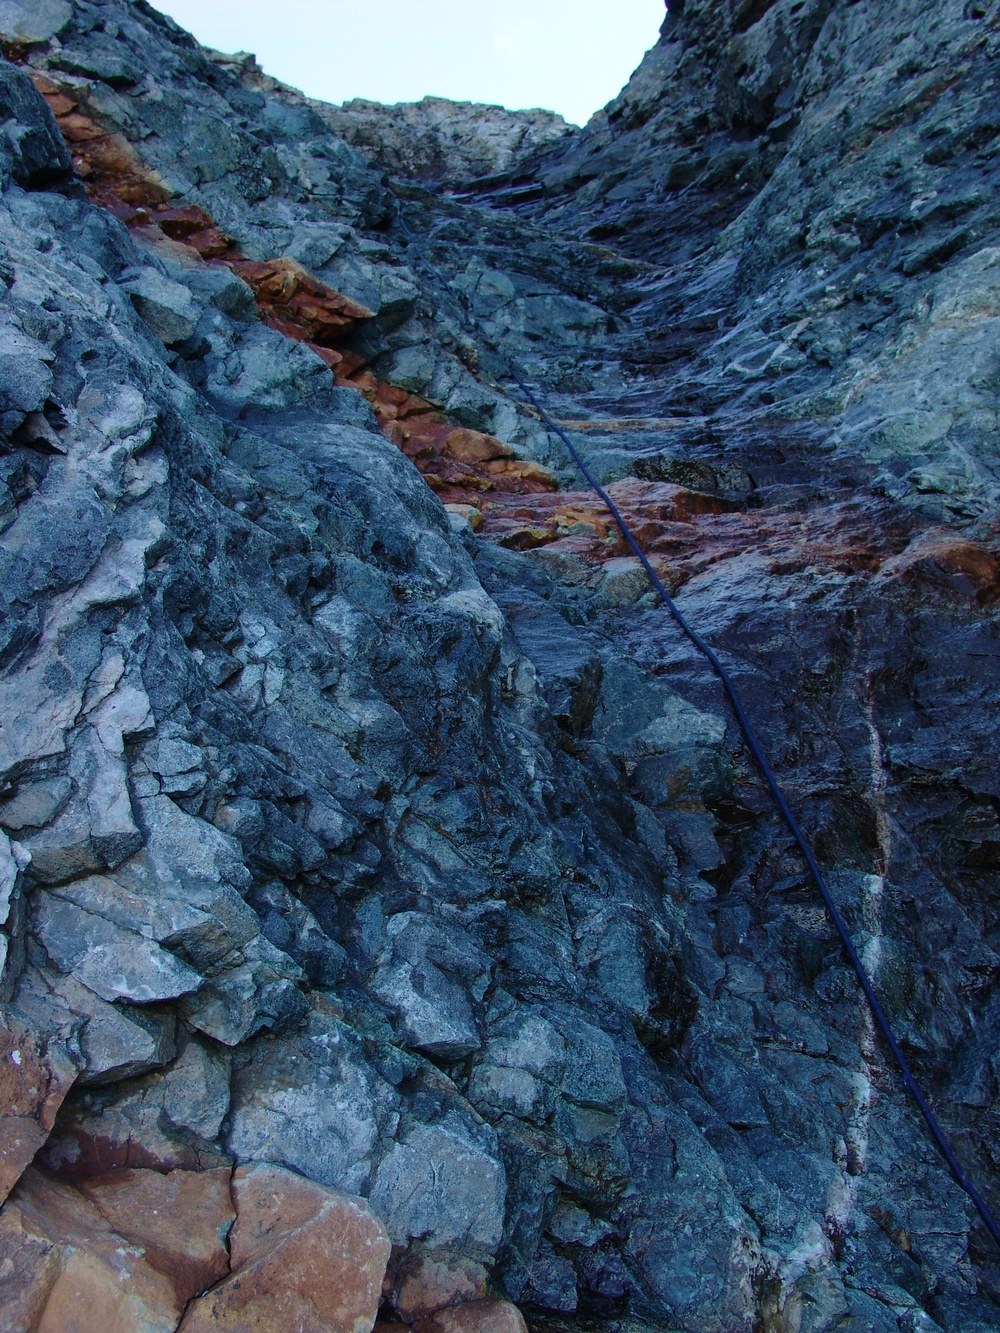
The Hourglass.
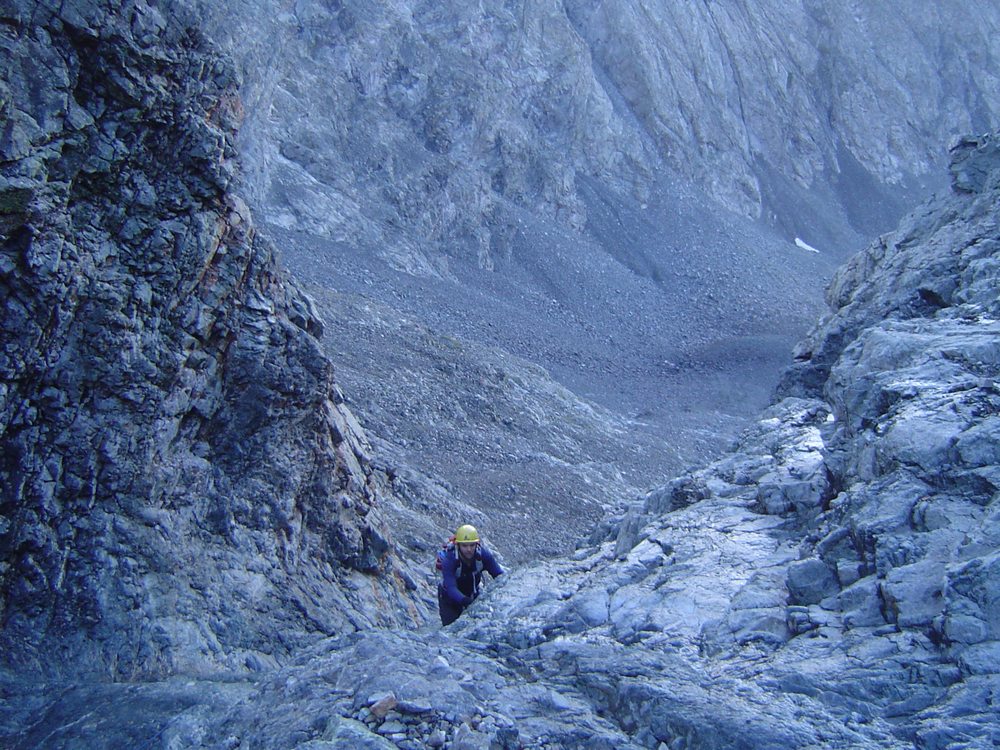
Matt Payne ascends the Hourglass. Note the steepness and wetness of the rock. Handhold and foothold selection was paramount to success.
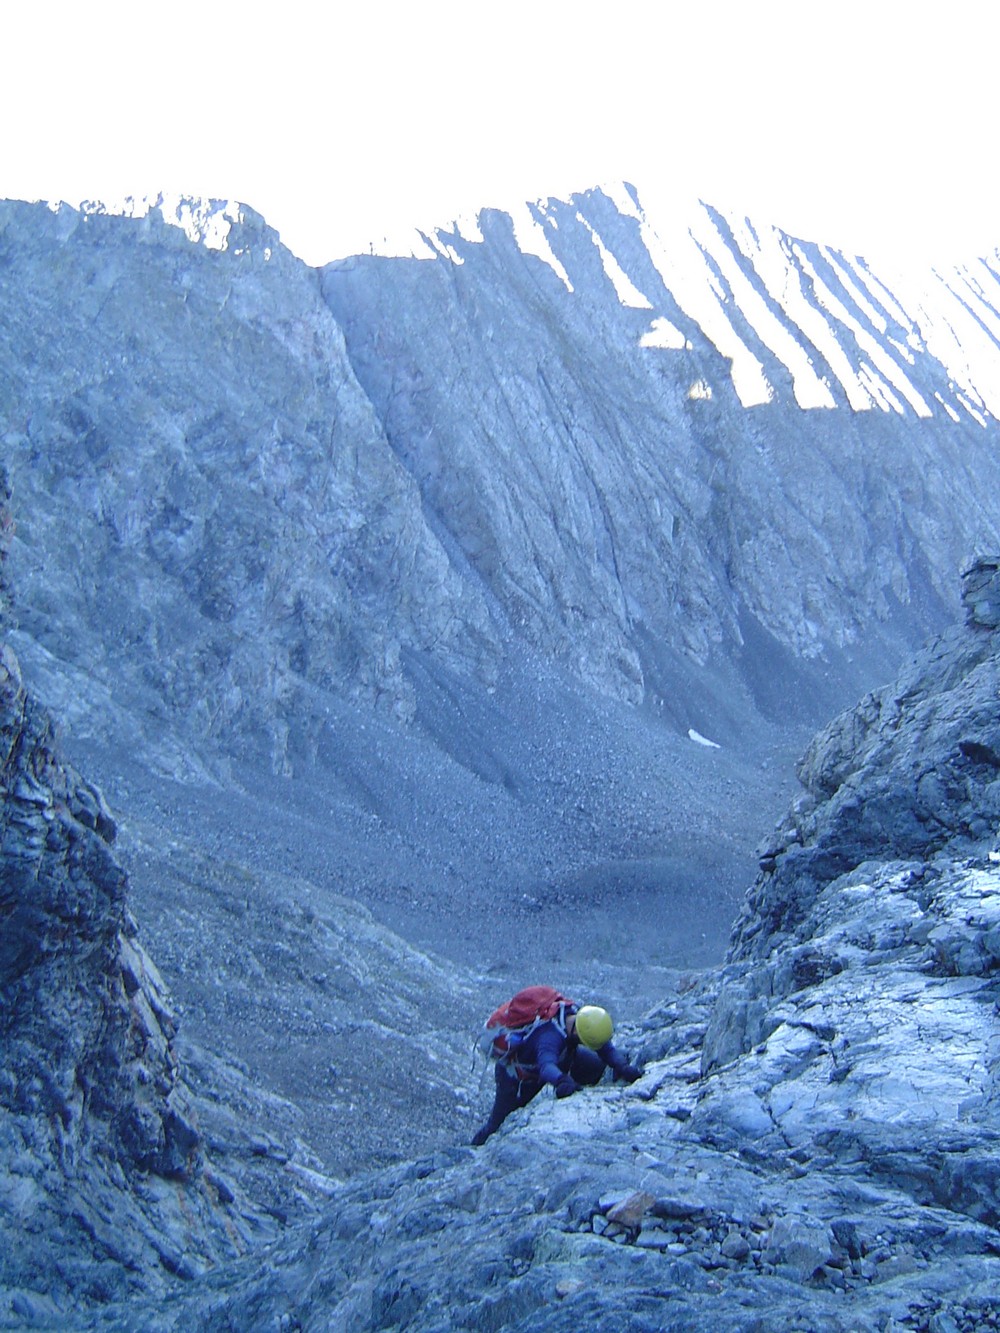
A fall here would have been fatal. Take caution!
The first 10 - 20 feet of the Hourglass are scary. Holds are minimal and the rock is wet. Extra special caution should be taken here and only those comfortable climbing class 4 and class 5 terrain should continue. If you're afraid of heights, this is not for you. Routefinding in the Hourglass was fairly difficult. The rocks were all wet and dirt was loose, making our climb upwards a slow and calculated process. We were eventually able to find some cairns to the left of the Hourglass and make our way up to the summit. The summit itself provided insane views of Blanca Peak, Ellingwood Point, the Spanish Peaks, Mount Lindsey, and the rest of the Sangre de Cristo Mountains.

Dave tops out on Little Bear's summit.

A great view of the connecting ridge between Little Bear and Blanca Peak. The traverse between Blanca and Little Bear is considered one of the most difficult in the State of Colorado.

A 3600 panoramic photo from the summit of Little Bear Peak - click on photo for full resolution version.
We also got to witness the SAR extraction of the injured climber.

Flight for Life rescues an injured climber.
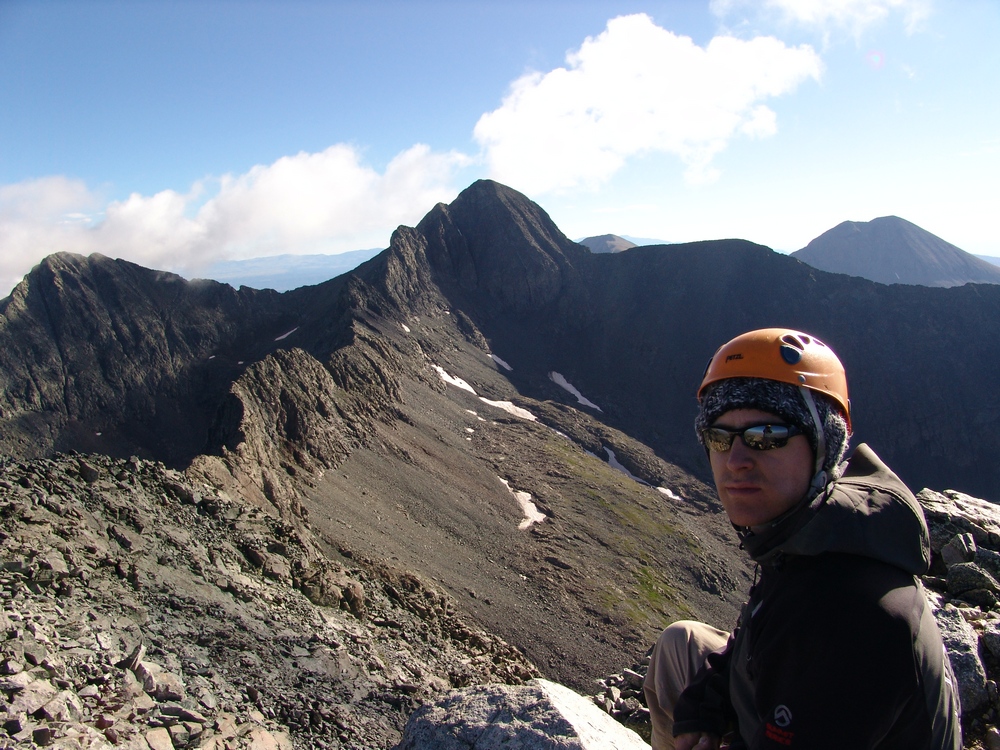
Dave on the summit of Little Bear.
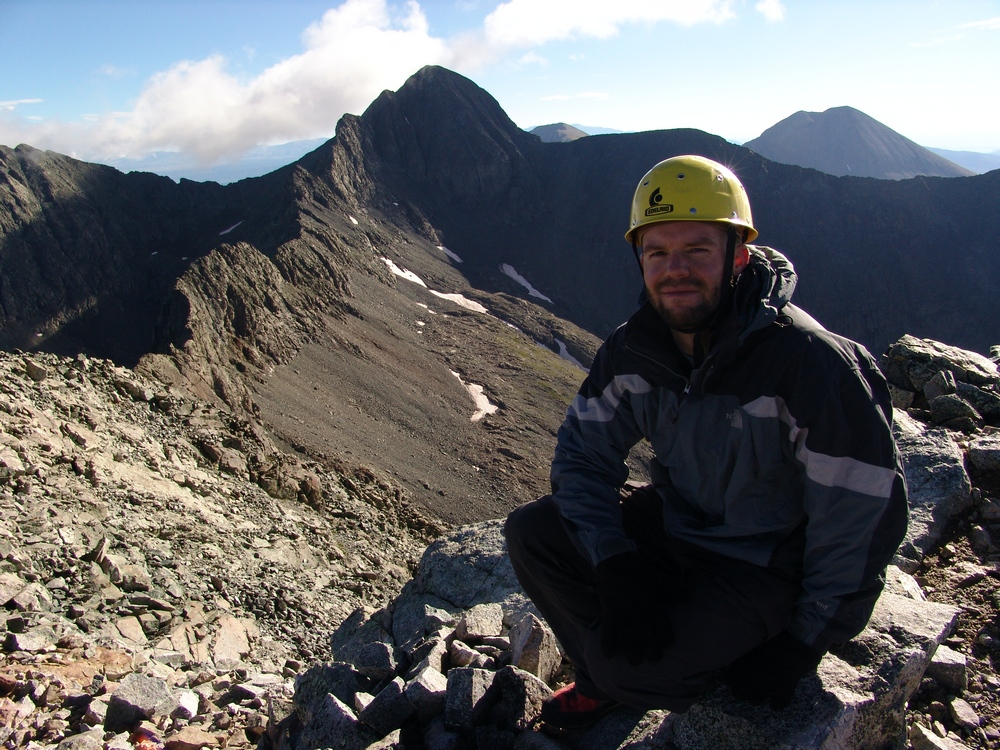
Matt Payne on the summit of Little Bear.
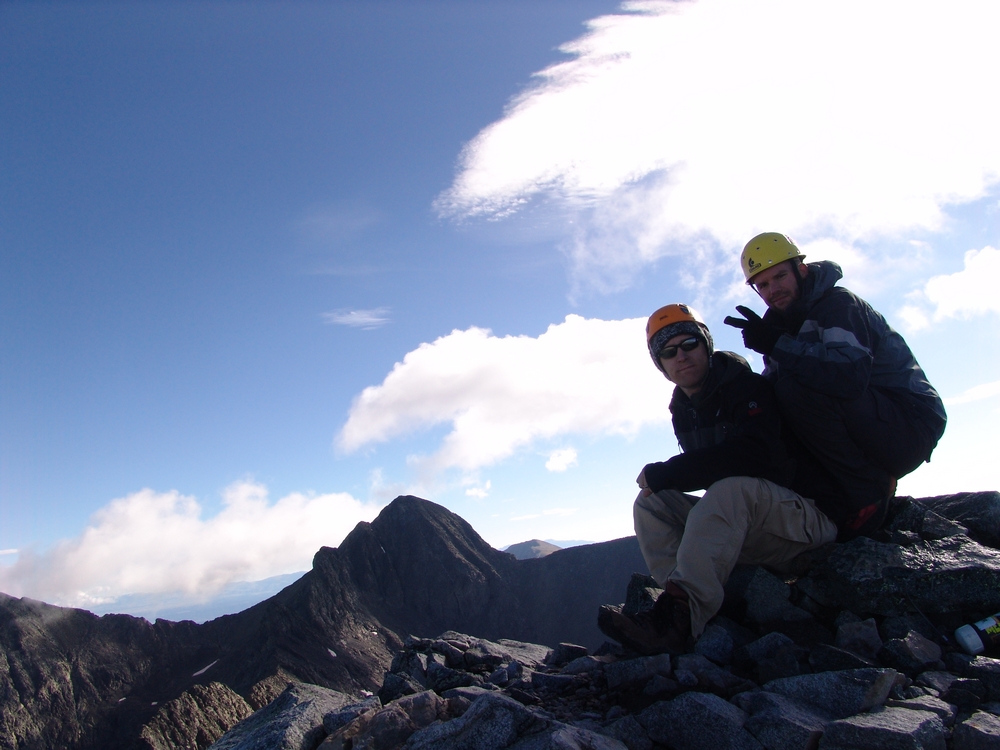
Matt and Dave on the summit - using a self-timer.
One of the neat things you can see from the summit of Little Bear is the crop circles down in the San Luis Valley.
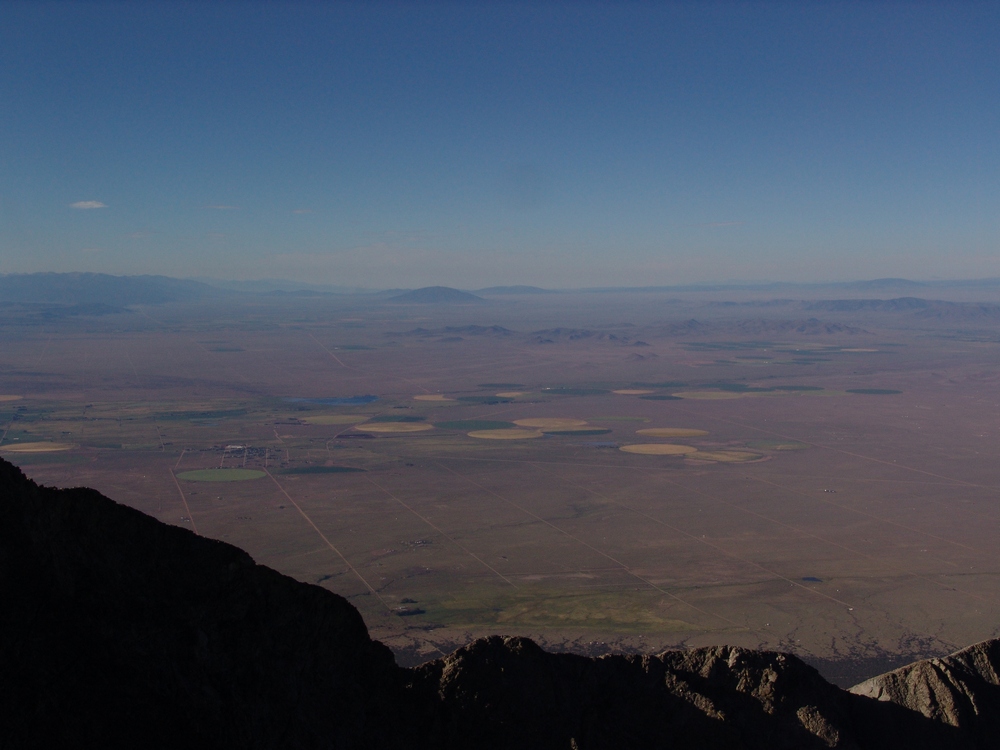

Clouds roll over Ellingwood Point and Blanca Peak.
A group of two climbers joined us on top for a short time and we all agreed to down climb together, as to avoid rockfall.
The wind was quite chilly on the summit, so we departed after spending no more than 30 minutes on top. The four of us made our way down to the start of the roped section of the Hourglass. I was concerned with how this was going to work, given the steepness and wetness of the rock here. Our plan was to use the rope as a handhold and slowly descend while facing the rock, one at a time. The process turned out to be quite the success, as none of us slipped or had difficulty making our way down the roped and scary section.
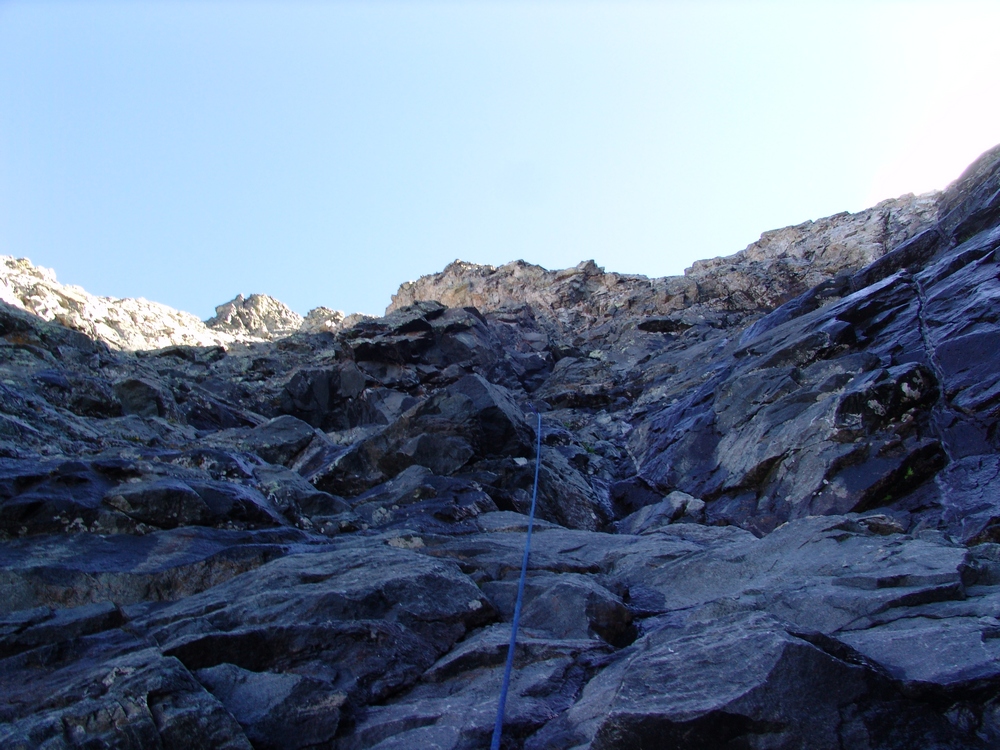
Looking up at the fixed rope in the Hourglass
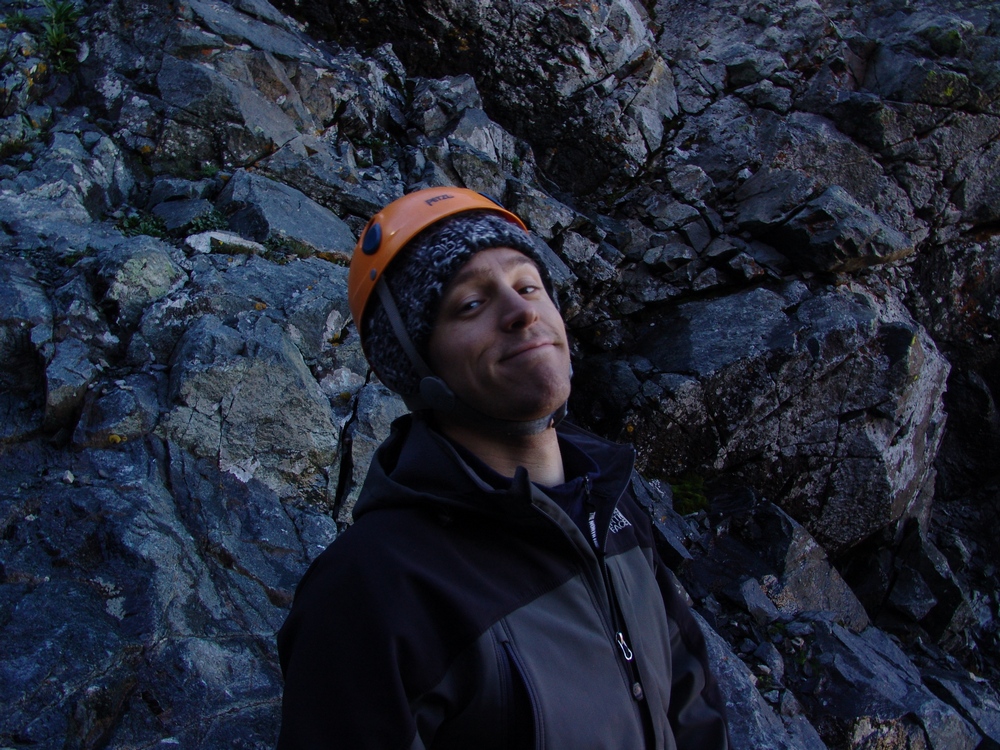
Dave is ready to downclimb the Hourglass.
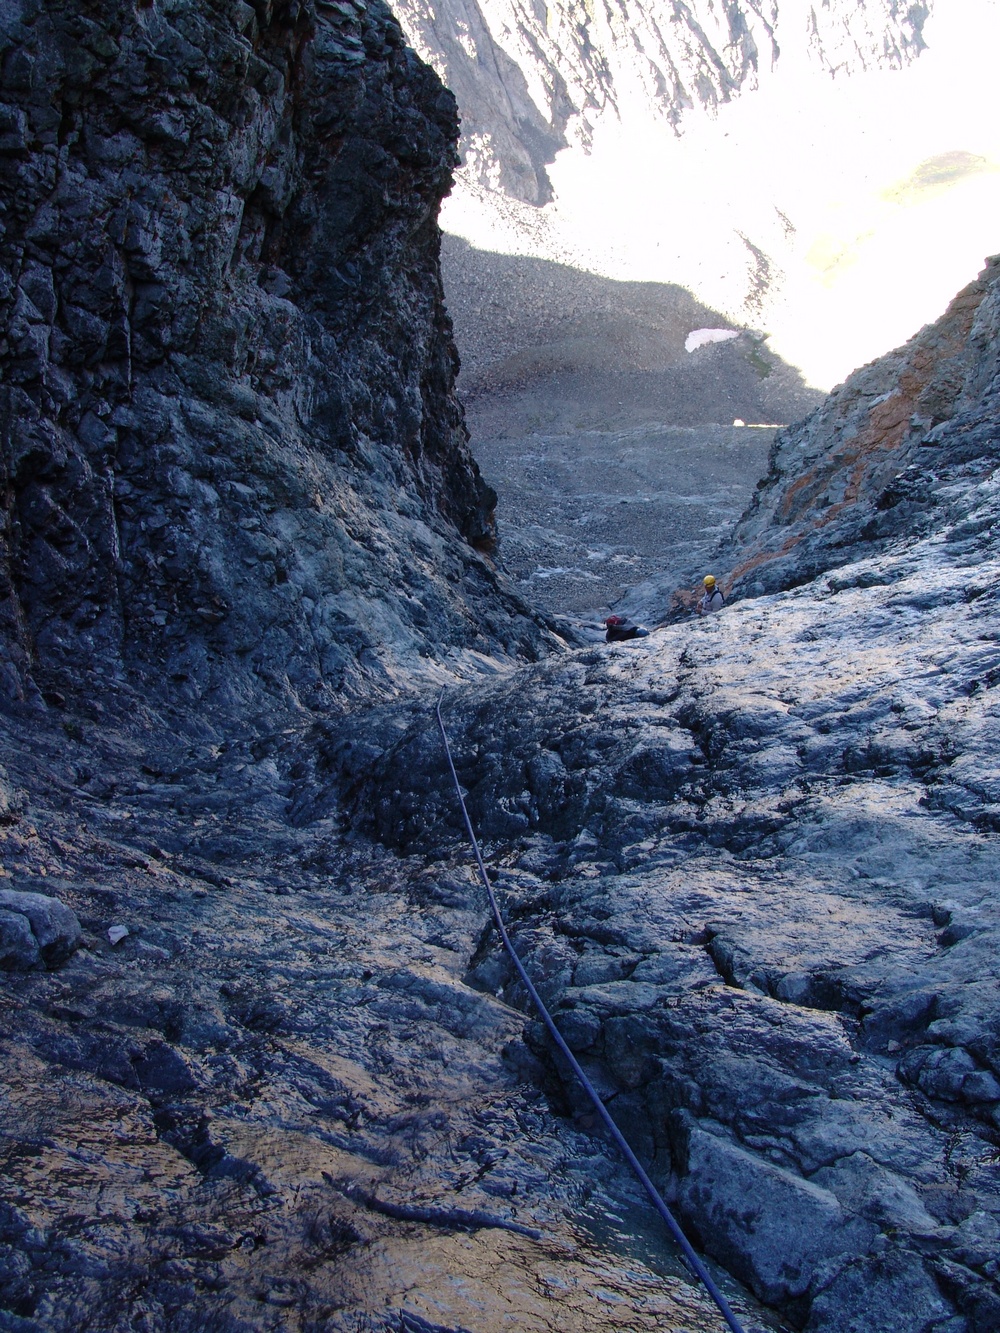
Looking down the Hourglass and the wet terrain.
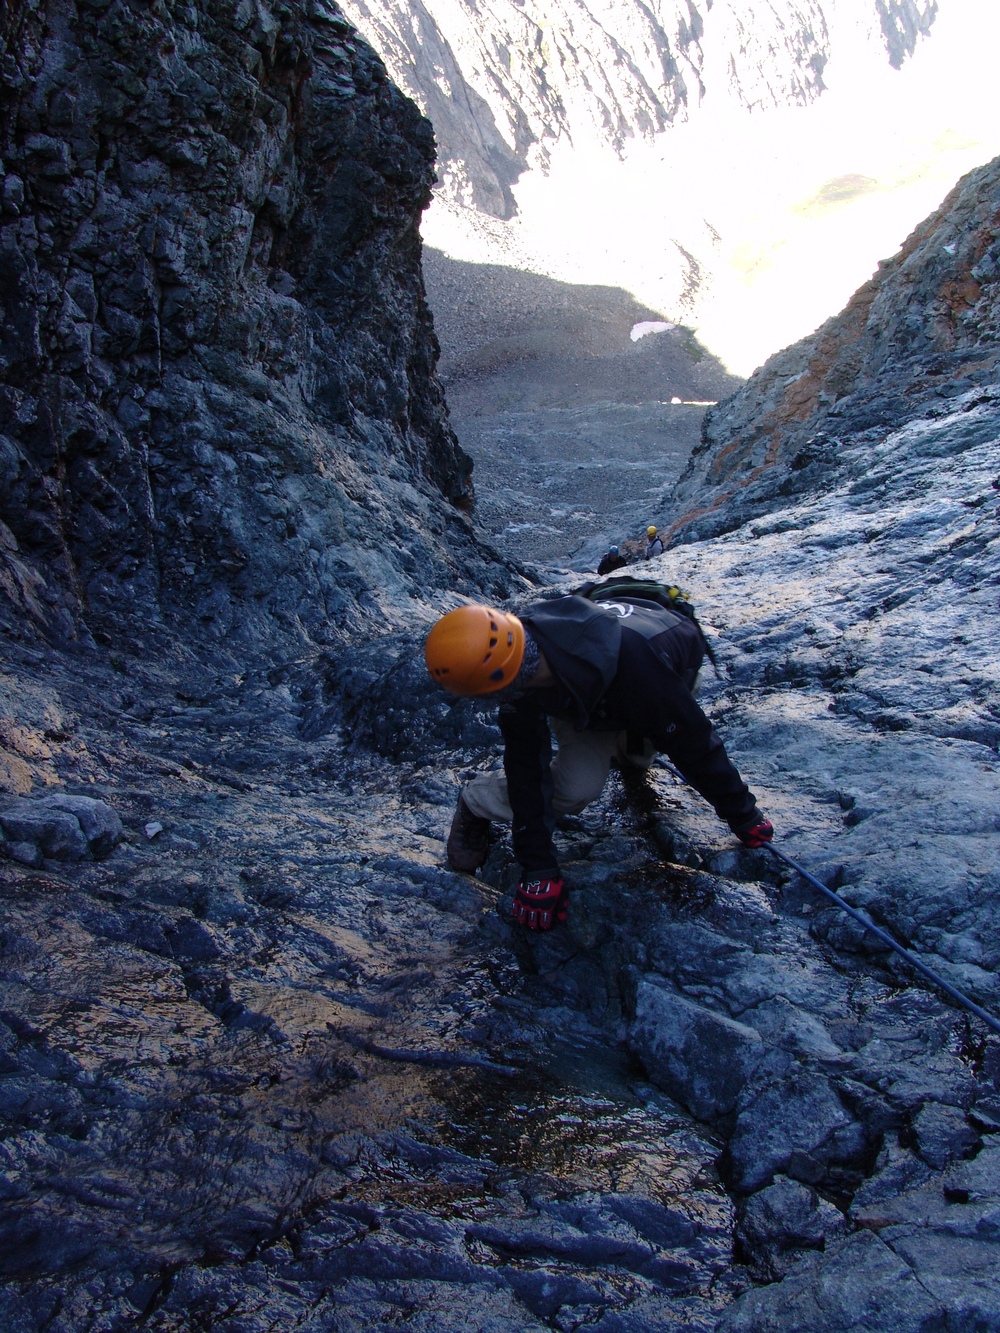
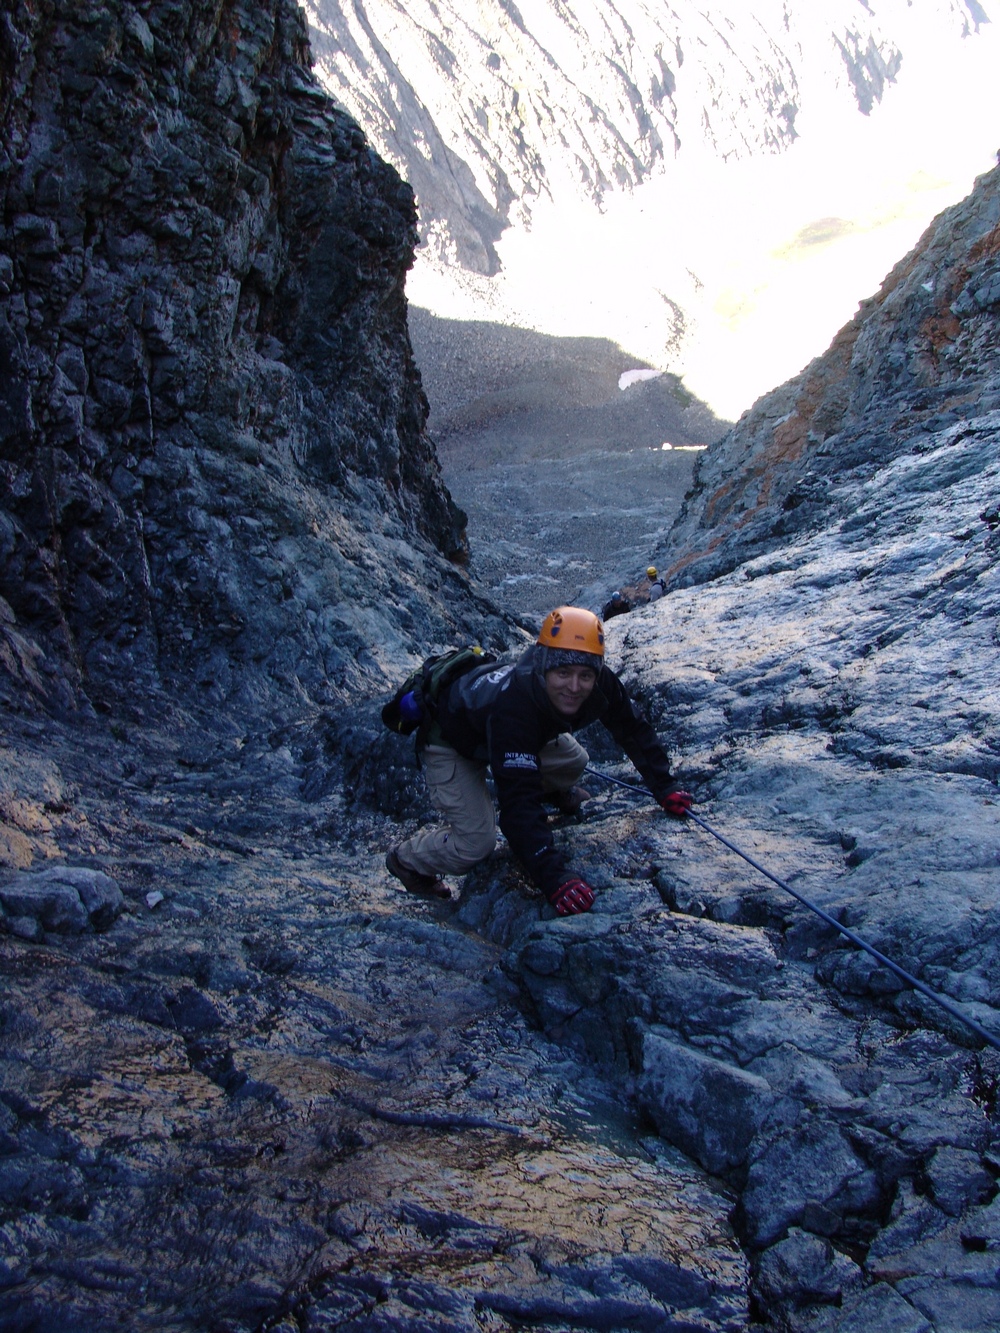
Dave starts down the Hourglass.
After successfully making it down through the Hourglass, the four of us headed back over below the ridge of Little Bear. We all decided to go up and over the ridge instead of below, which enabled us to get some great views of Lake Como and the surrounding area, including Ellingwood Point.

Ellingwood Point sits at the top of the Lake Como basin.

Dave with Little Bear in the background.
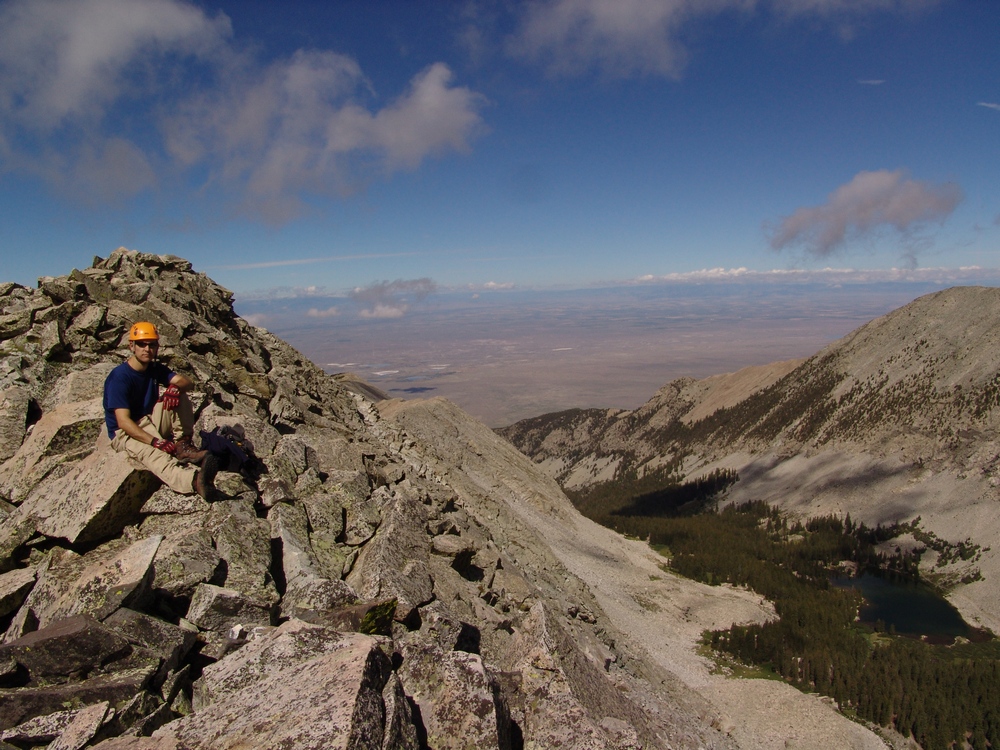
Dave and Lake Como.
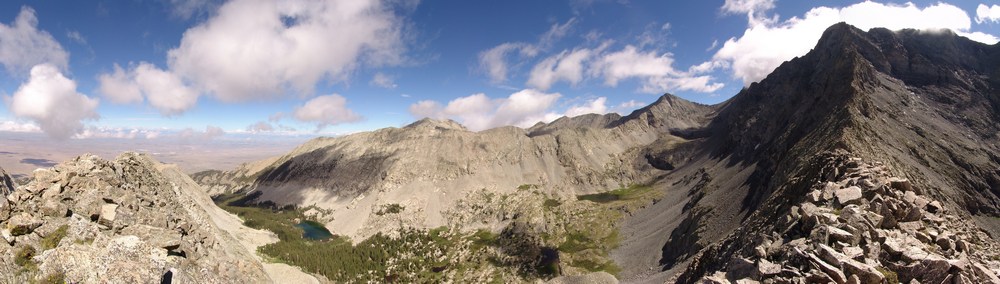
Little Bear and the Lake Como basin.
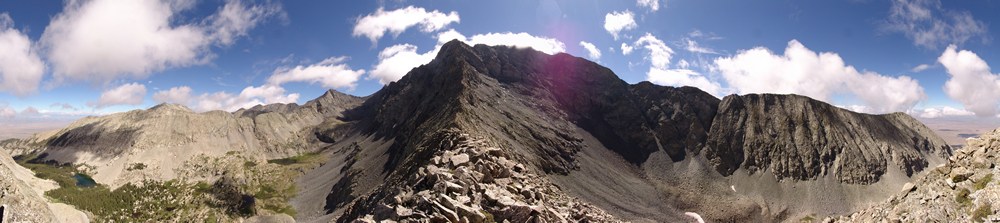
Little Bear splits two valleys.

Matt on the Little Bear ridge.
We made it back safely to our campsite and quickly packed up and drove down. Dave's Jeep once again performed quite well over the obstacles going down.
Overall, I would rate Little Bear as one of the most difficult 14ers. The exposure and risk at the Hourglass, coupled with the rockfall potential, make Little Bear very dangerous and not for the beginner climber. I would highly recommend climbing helmets and would even advocate the use of rope and a harness with belay devices for the down-climb. If you're in need of a good climbing helmet, this one from Backcountry.com looks go be a nice buy.
Update on the injured climber we saw on Ellingwood Point: I posted what we had witnessed and discussed with the SAR team on a thread on 14ers.com, which erupted into a lively discussion about hiking with people that have pre-existing medical conditions. The consensus from that discussion was that it is very much the responsibility of someone with a pre-existing medical condition to disclose that condition to their fellow hikers before embarking on a hike, especially if that medical condition may place you or your partners in serious danger, such as what happened in this case. Unfortunately, Elisabeth did not respond well to that discussion on 14ers.com and basically called the whole forum a bunch of expletives. Later on, she sent me a private message requesting that I delete that thread because of the stress it had caused her and because she was unable to obtain employment because of the content of the thread. She claimed that she was being singled out becuase of her condition; however, my guess is that employers saw how immature her response to the whole situation was and did not want to hire someone with such a way of interacting with others. Anyways, I refused to delete the thread and she threatened to sue me for libel and slander because I had implied that her injury was a direct result of her pre-existing medical condition (which of course is not what I had typed at all). I had suggested that it was possible that her epilepsy could cause her to be weaker physically and that would cause you to have a higher probability of falling and hurting yourself. Anyways, I eventually had Bill at 14ers.com delete the thread but I still have the discussion saved as a .pdf if anyone is interested in reading it. Bottom line, I believe a lot can be learned from the mistakes of others, and we should embrace the opportunity to learn at all times.