Displaying items by tag: Sangre de Cristo Mountains
Climbing Crestone Needle in Autumn and a Fall Colors Photography Expedition
It is no secret that I moved to Portland, Oregon in January 2014 – lured by a much more walkable city than Colorado Springs, filled with breweries, vegan food, and citizens of a much similar political and philosophical mindset. I’m not going to lie though; I miss my friends and I miss the Colorado Mountains deeply. I was born in Colorado and have been climbing Colorado’s high peaks since 1982. The mountains run deep within my veins. So, when I knew I would be spending a week in Colorado over the last week of September, I jumped all over the opportunity and locked in a three-day backpacking stint into the South Colony Basin beneath Crestone Needle and Crestone Peak in the mighty Sangre de Cristo Mountains with my best friend Sarah Musick. Our goals were simple: enjoy the wilderness, enjoy our time together, and climb mountains.
Packing for a longer backpacking trip involving a lot of photography gear with limited space in the backpack due to travel constraints was quite a challenge. I decided to use my Osprey Talon 44 (hardly a backpacking pack) and go as light as possible, opting to take two lenses paired with my Nikon D800: the Nikon 14-24 and the Nikon 24-70. I really wanted to bring my Nikon 70-200 for wildlife and other landscape uses; however, that lens weighs a ton and takes up quite a bit of space in the pack, so it had to stay behind for this one. I felt pretty good about the weight of my pack after it was all said and done – weighing in at just 40 lbs. - with a tripod, two lenses, a gripped D800, filters, a tent, pad, sleeping bag, gloves, hats, food, and stove. Not bad! Sarah would be bringing a water filter and a gas canister for the stove, so we were good to go! Bare-bones backpacking – always a little nerve-wracking, but easy on the back and knees!
The final challenge to solve before ensuring a successful trip was to secure transportation. My wife and I left a car in Colorado; however, she needed it for work as she telecommutes from Portland but when we are in Colorado she drives into work. In the 25th Hour we were able to get Sarah’s wife to let us use her Subaru Forester for the somewhat difficult South Colony Road, which I had driven successful many times in the past in similar vehicles. With all the details finalized, we departed from my parent’s house in Colorado Springs at around 10:30 AM on the morning of September 21st for the picturesque South Colony Basin. We arrived around 12:30 PM without incident. I left a small bag of raisins and a half-filled water bottle in the cup-holders below the dash, saving them as a prize upon our return on Tuesday. The parking lot was sparsely filled, mostly by what seemed to be trucks and SUVs of hunters or day-hikers, based on the people we passed on the trail on the way up.
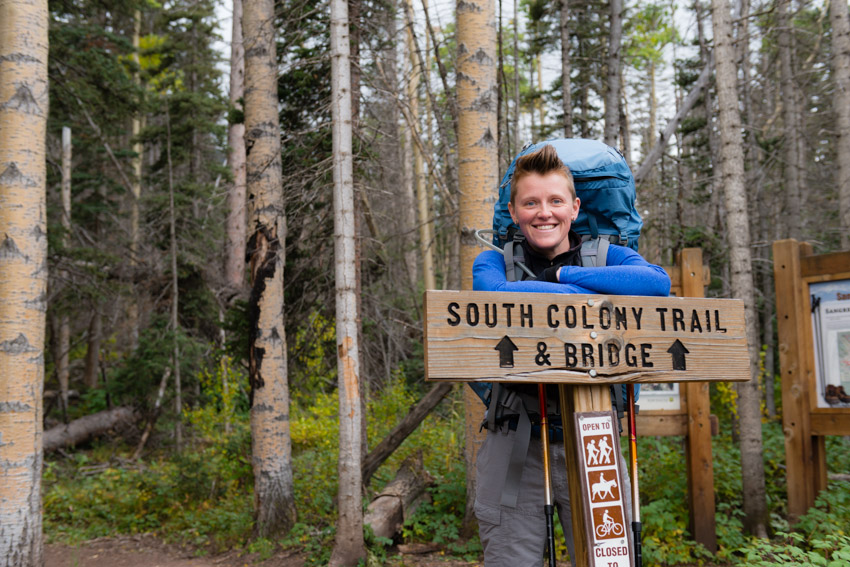
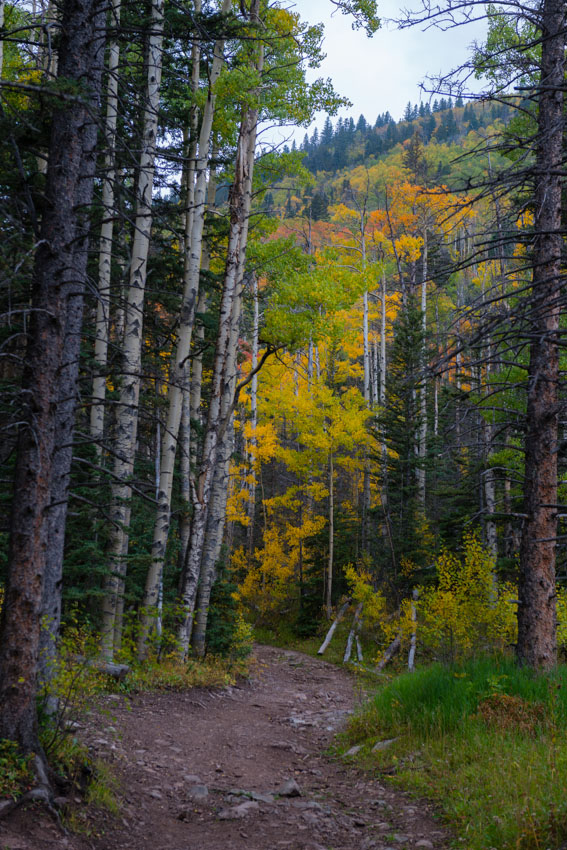
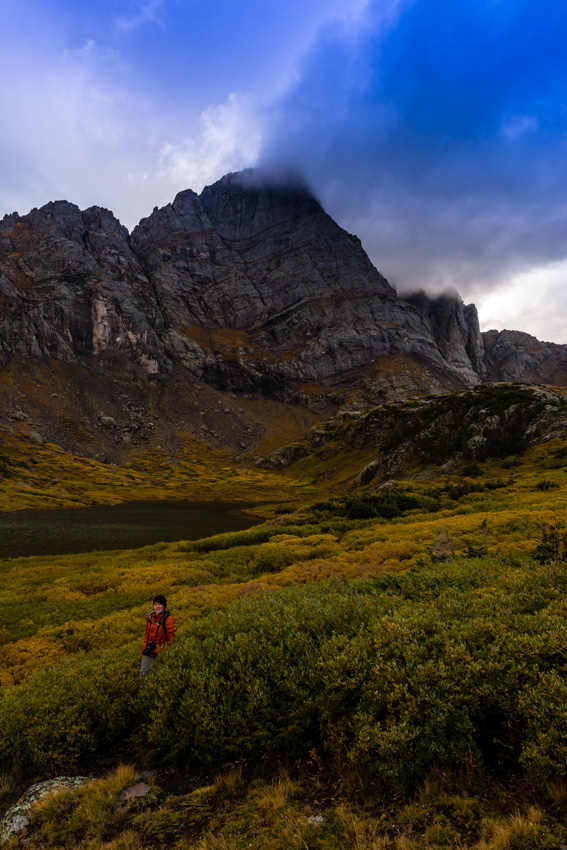
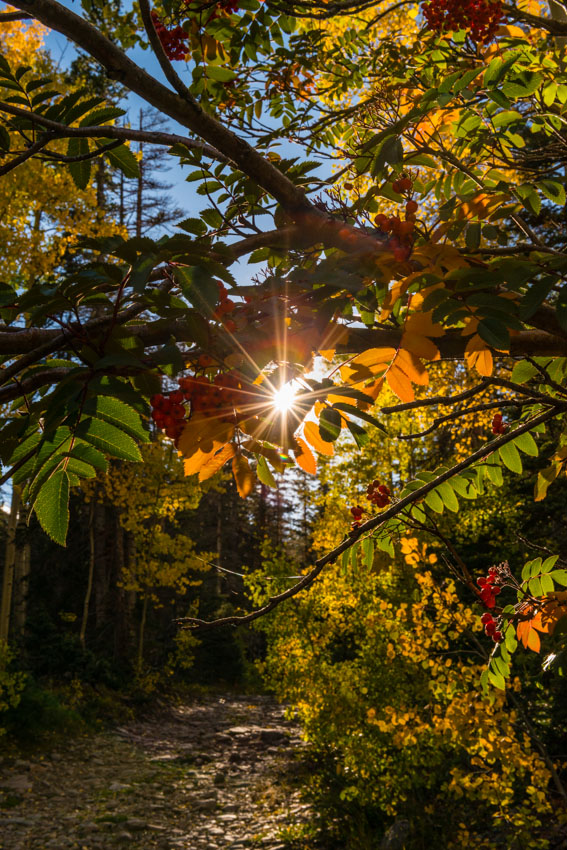
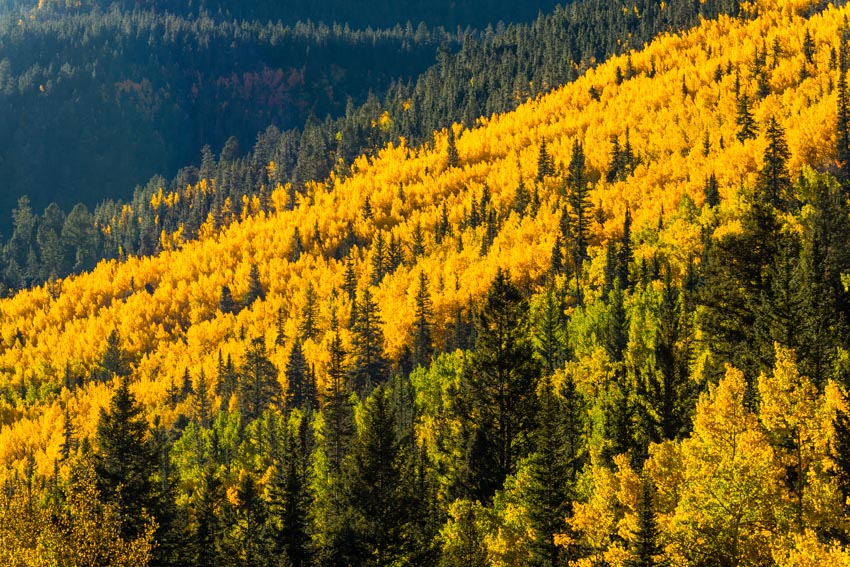
Upon starting our hike we were immediately struck by the amazing fall colors that had adorned the aspen trees and scrub oak lining the sides of the trail (which is really the remnants of an old 4WD road which was closed in 2009 at the current terminus of the South Colony Road).
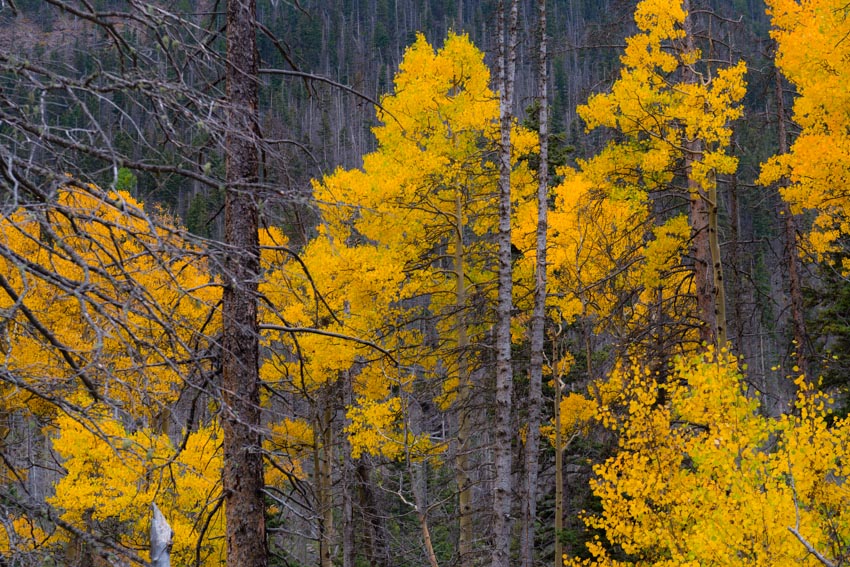
The trees were nearing peak color – hues of yellow, gold, crimson, and green filled the air, all held tight by a low layer of clouds which came all the way down to the valley floor. The formidable clouds were ubiquitous and ominous – a clear and mostly unwelcome portent for the events yet to come on our voyage into the Sangre de Cristo Wilderness.
This was the third time I ventured up this particular trail, the first being on my ascent of Humboldt Peak in 2007 with my friend Ethan – the first 14er I climbed after a very long hiatus from climbing in my twenties and the first real shift towards a healthier lifestyle. The second time was during my visit last year as the Vice President of the Board of Directors for Rocky Mountain Field Institute (RMFI), the non-profit organization responsible for amazing conservation stewardship in the South Colony Basin including the construction and maintenance of the entire incredibly well-built network of trails leading to the 14ers in the area. Due to the popularity of this pristine and ecologically sensitive area, there are numerous campsites and social trails littered across the basin which have required a lot of hours of hard labor from RMFI staff, volunteers and Earth Corps students to clean up and maintain these sites and trails. If this basin is important to you in any way, I would urge you to donate to RMFI to ensure the area is available for the enjoyment of future generations. You can check out the amazing work they did in the South Colony Basin in this video:
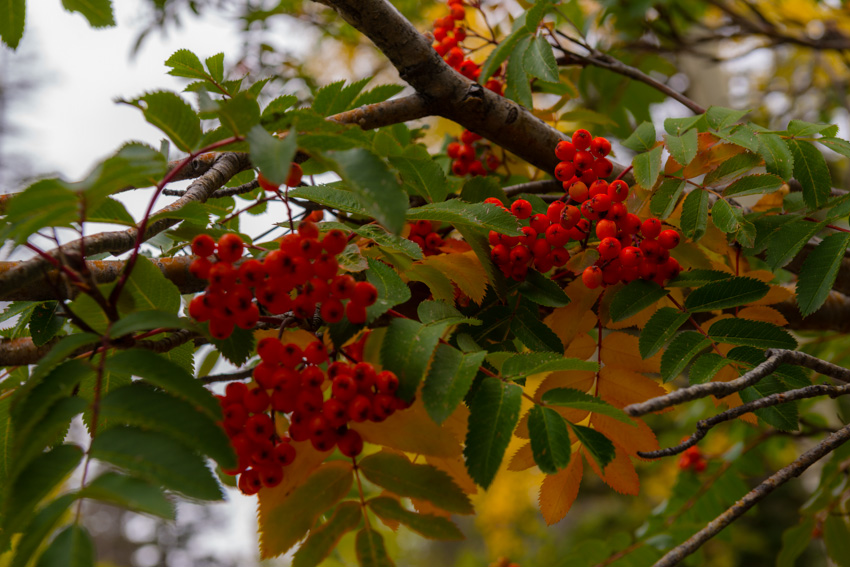
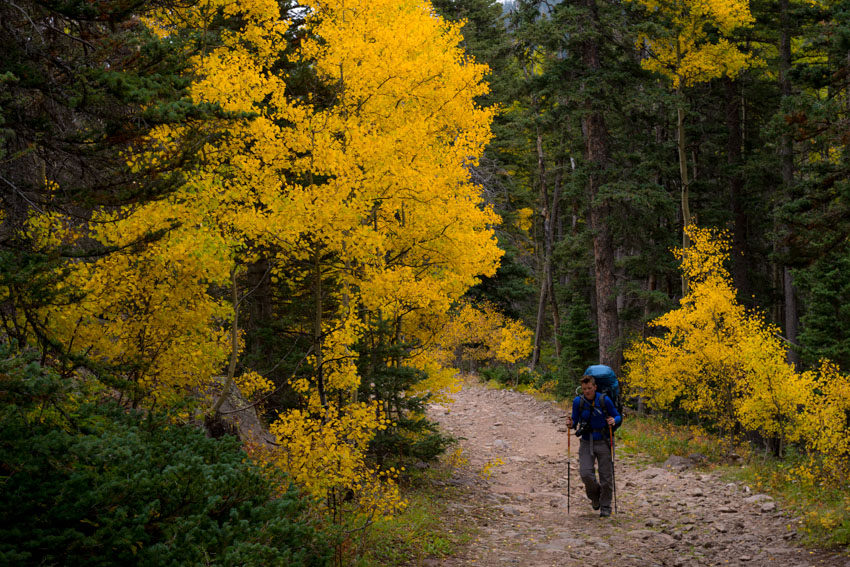
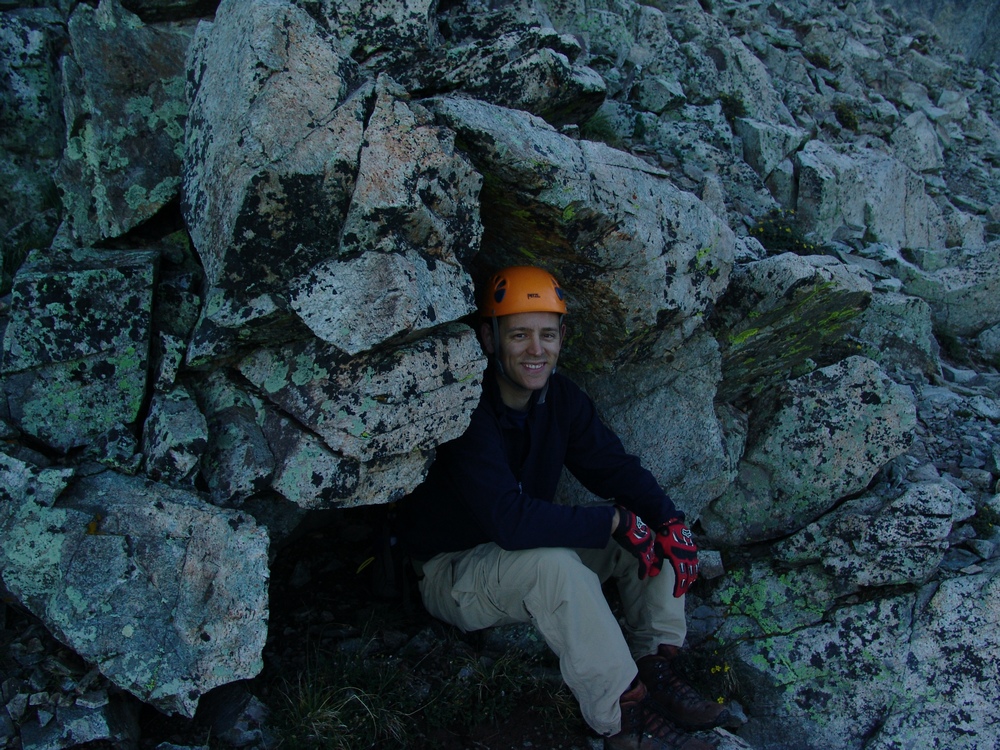
Our hike up the old road was completely uneventful, having passed a few hikers on their way out, presumably there to enjoy the changing fall colors for the day. The wooded basin offered up a plethora of sensory delights – red and orange berries, earthy scents from the rotting leaves, fresh and clean air blown in by the weather system that had settled into the basin, and a humid wetness on the skin. Given the wet and stormy weather that had moved into the basin, our hopes of accomplishing anything more than finding a suitable campsite for the three days we would be there had dissolved and our focus was singularly placed on locating our temporary home. We joked about just staying in the basin forever, and how that might work – living in a cave in the side of the mountain, finding food, sewing clothing out of marmot pelts, and even speculation about other issues which caused us to laugh heartily.
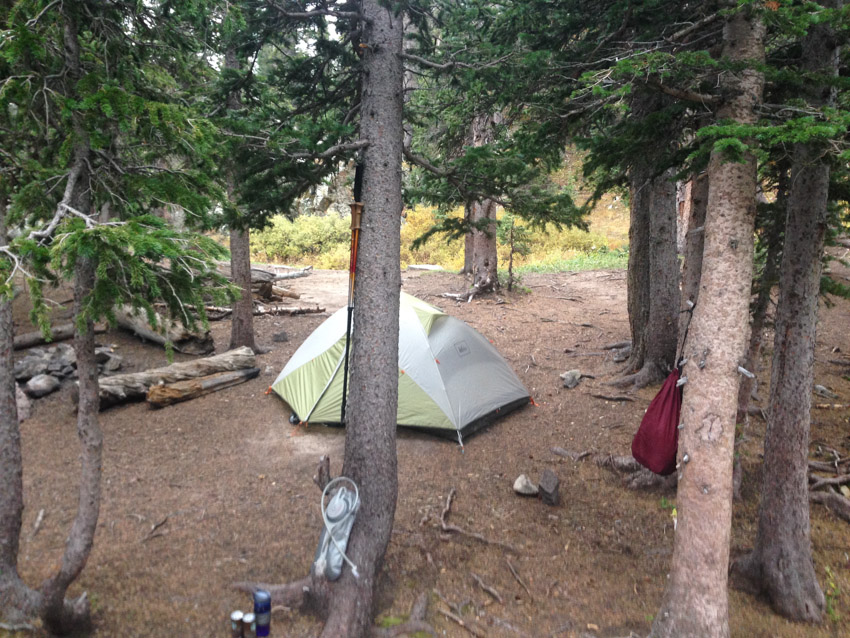
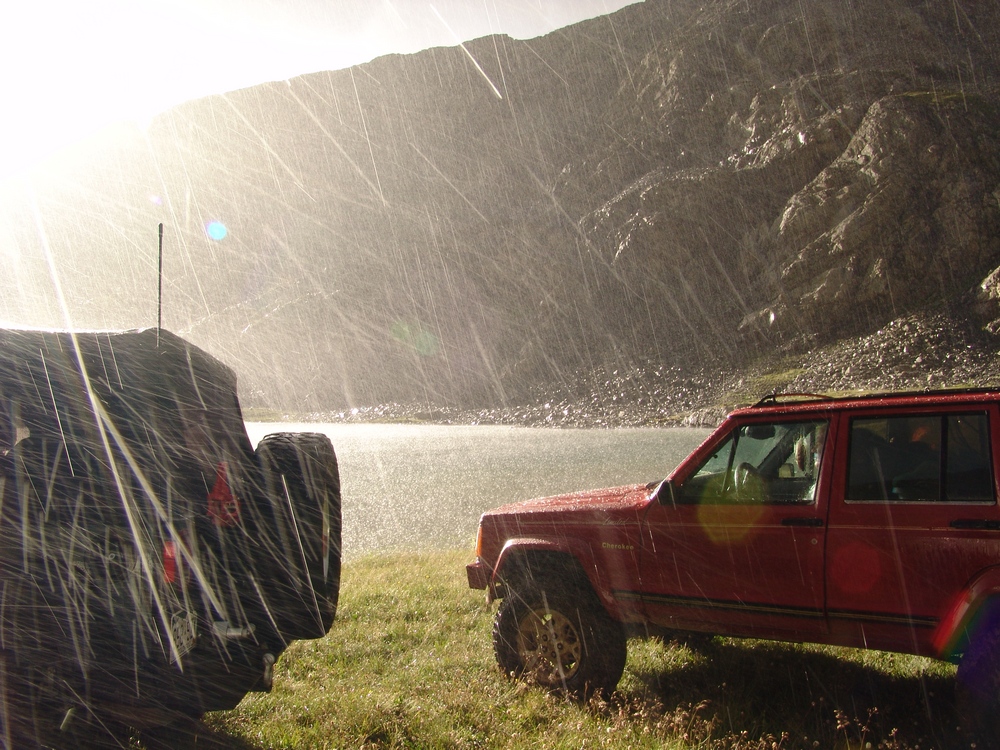
Every other time I had been into the basin I had taken the first trail on the right from the old upper 4WD parking lot, which is more direct and steeper than the trail going over the footbridge which goes directly to the trail leading up to Broken Hand Pass. For this trip, we opted to take the trail over the footbridge so we could easily find the connecting trail to Crestone Needle. Knowing from other adventures into the basin that the trails were connected higher up by way of a network of trails between campsites near where I took one of my favorite shots of Crestone Needle last year with a stream in the foreground, we decided to aim for that area to camp at. Even though Crestone Needle was completely hidden within the very low clouds, finding the location was easy since my image from that spot is burned into my memory, being one of my absolute favorite photographs of all time. We unpacked right there at the site just above the stream from this location and placed my tent on a dry and flat area near an old fire ring at the campsite. The tent site had cracks in the soil, indicating that this might be a place where water pooled; however, we understood from the weather forecast that we were to only expect about a quarter inch of rain over the next couple of days, so we felt safe to put our tent there. This turned out to be a horrible mistake!
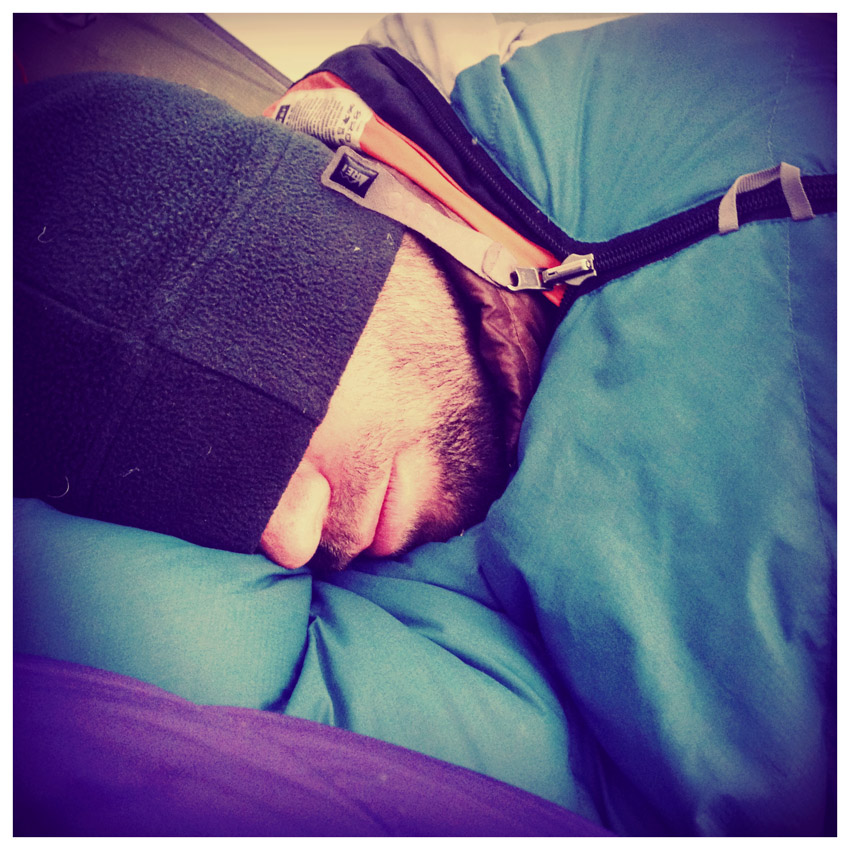
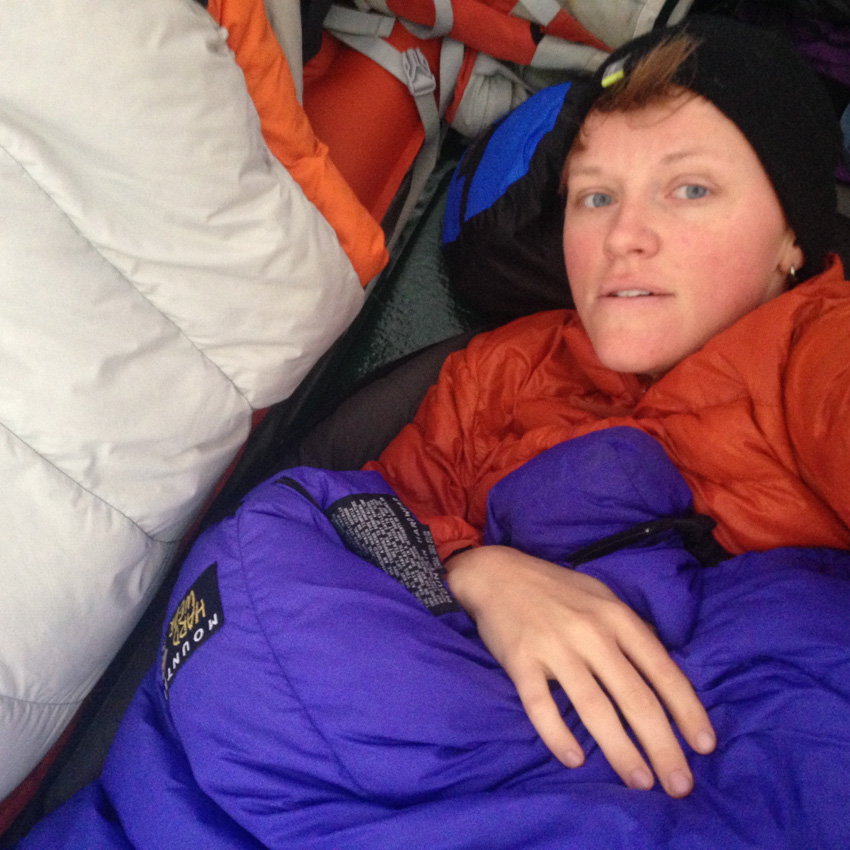
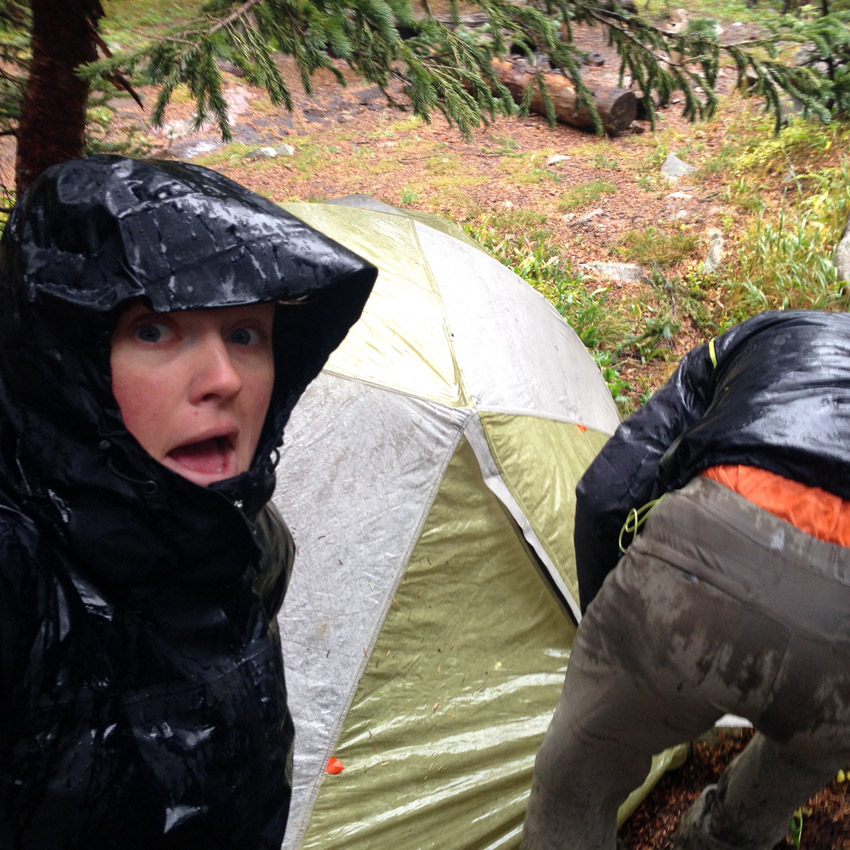
Shortly after getting our tent setup and our food hung in a nearby dead tree, the rain began. Hooray. I was somewhat dreading the rain, having spent the entirety of my previous backpacking trip in Colorado in a tent for four days below Jagged Mountain last September. I did not want a repeat of that trip, not even in the slightest; however, I welcomed the opportunity to catch-up on some much needed sleep and to spend time catching up with Sarah. Sarah took many opportunities to document our sleep adventure...
 |
 |
The rain and strong wind was unrelenting, a shock for sure. We kept an eye on our tent situation, finding that water had quickly begun to pool near and around the base of the rainfly. We napped off and on as the rain continued and in the early evening we began to take notice of the water situation with a greater level of concern. Sarah noticed that water had begun to seriously pool under the tent and we decided to take action, despite the fact that the rain did not subside.
 |
 |
We hurriedly packed everything into our packs and relocated the tent down the hill under some trees on top of a nice soft bed of pine needles. Sarah documented the whole ordeal.
 |
 |
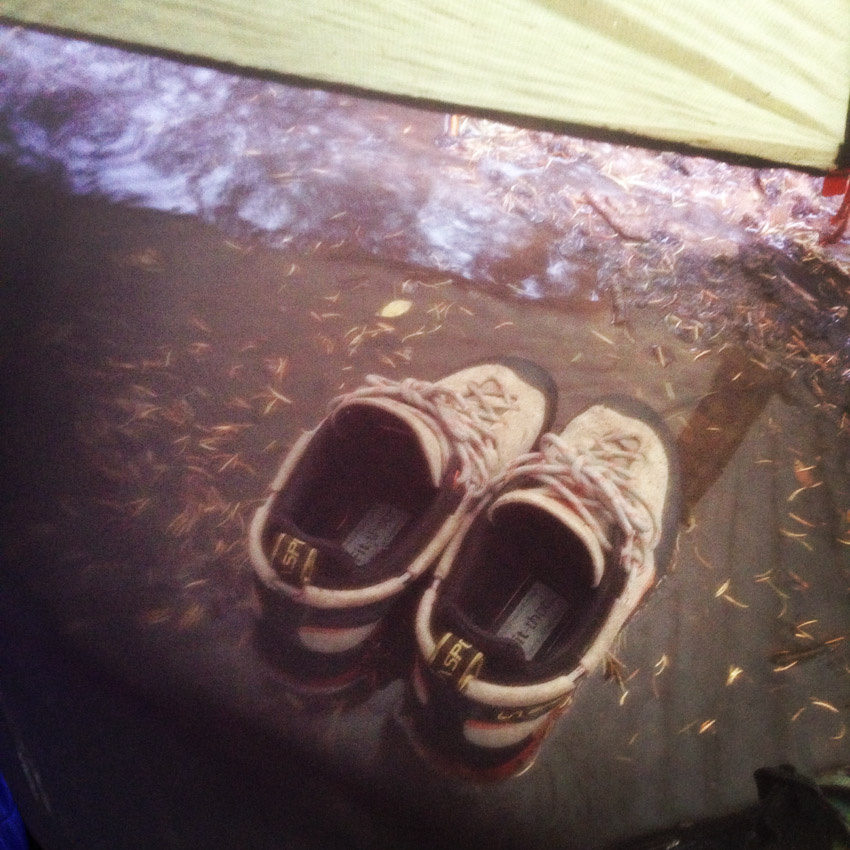
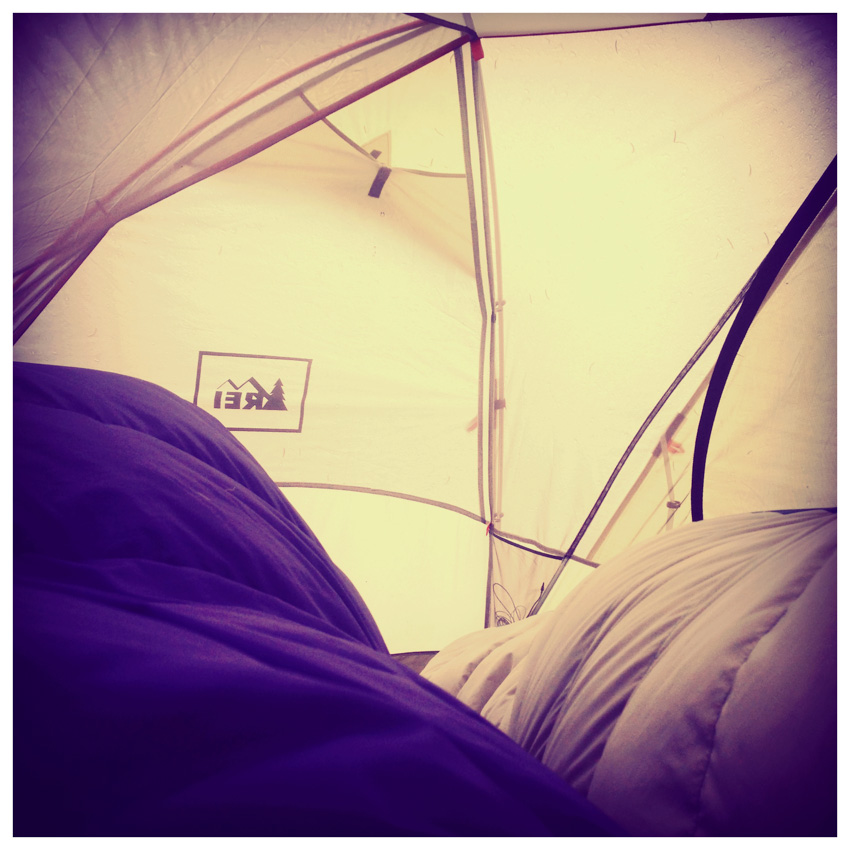
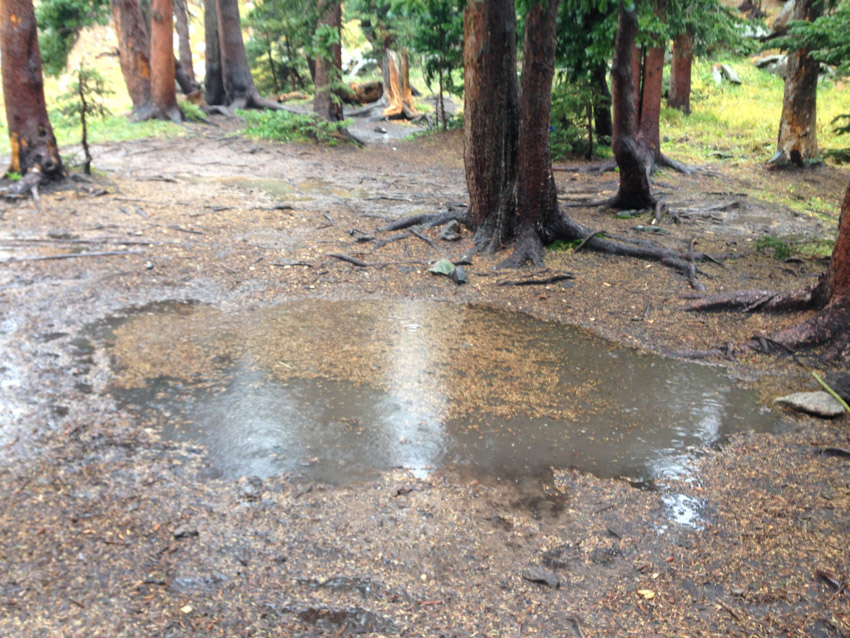
We felt quite lucky – even though the tent was on top of a lake of water; the inside had remained mostly dry! Consider this a tried and true endorsement for the REI Quarterdome – a truly versatile backpacking tent, not the lightest nor the heaviest tent around; however, it kept us dry and withstood strong wind without any problems. Our old tent's location now looked like this:
The rain stopped just long enough for us to heat up some food, which we took full advantage of, returning to our sleeping bags to stay warm. The valley was caught in some sort of weather system, trapping moisture, clouds, fog and wind in the basin and continually obscuring all of the peak right above us.
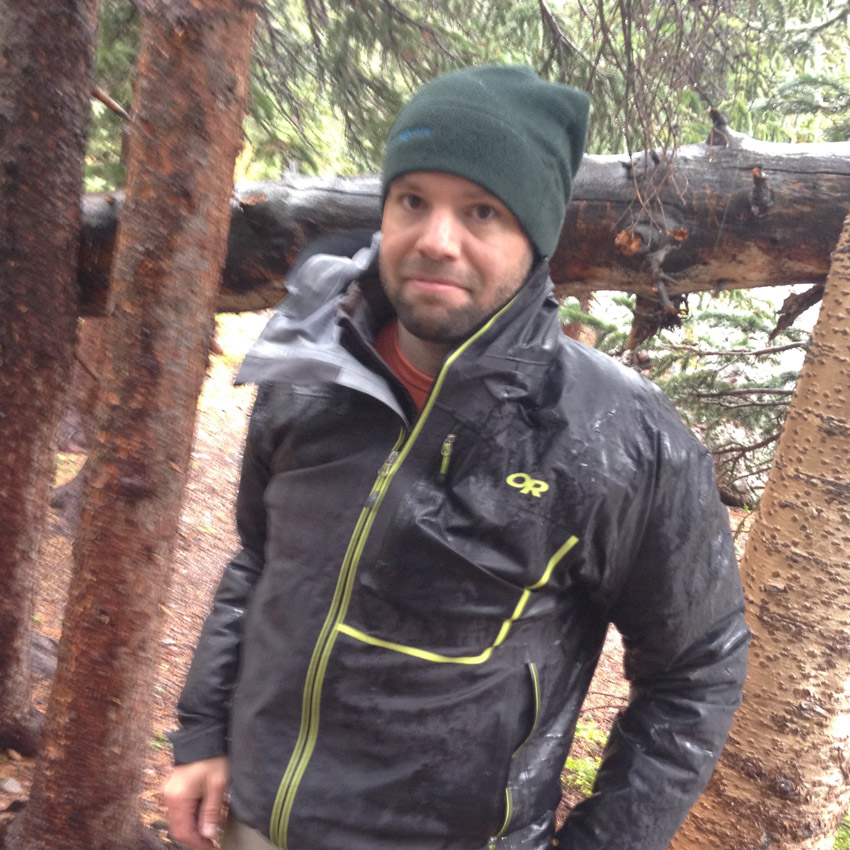
As darkness descended, we found ourselves in need of replenishing our water supply; however, Sarah’s water filter was not working, so we were forced to resort to using my old iodine tablets, which I keep in my first aid kit for such occasions. Drinking the iodine treated water brought back fond memories of working at Colvig Silver Camps in 2000 near Durango – I did not mind one bit. Here I am filtering some water in the rain.

We decided to set our alarm for 4 AM, hoping the rain would subside and allow for an ascent of one of the three 14ers in the basin. As we discussed our priorities for the trip, having climbed all of the 14ers already, I had very little to add, only hoping that Crestone Needle would be on the top of our list since it was my favorite 14er to climb. Sarah needed all three of the 14ers; however, she thought that she could save Humboldt for another trip and that Crestone Needle was high on her list. With that being said, we figured that aiming to climb Crestone Needle first would be a good idea... [Click Next to continue reading]
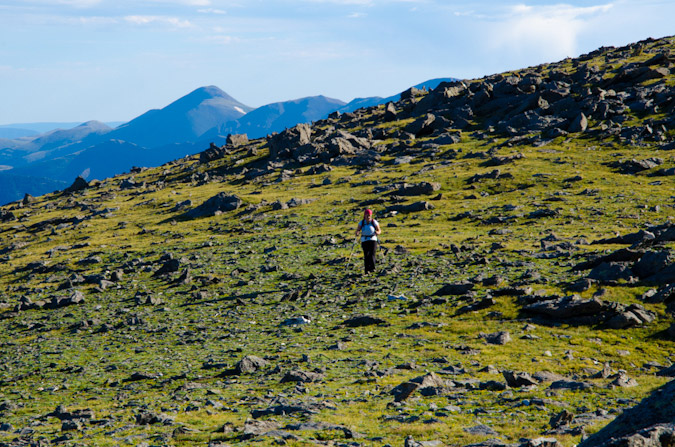
The rain did not subside and the wind increased in its fury through the night, rushing down through the trees in a cyclical pattern every 30-45 seconds in a violent yet harmonic nature, the sounds of the wind rushing through the pine needles creating a natural cacophony both aiding and preventing good sleep. 4 AM came and went without a break in the rain or wind, forcing us to sleep in, knowing we would likely have to scratch off at least one of the peaks from our list for the trip. Unfortunately, the weather did not subside until late in the afternoon, at which point we were both wearing from a lack of both caloric intake and physical activity; however, we decided to head up towards the upper basin and if we felt up for it, a climb of Humboldt. The basin was still mostly shrouded in clouds and fog; however, the hike up was quite pleasant, the cold and musky autumn air brushing our exposed faces, reminding us pleasantly of our sense of place and time.
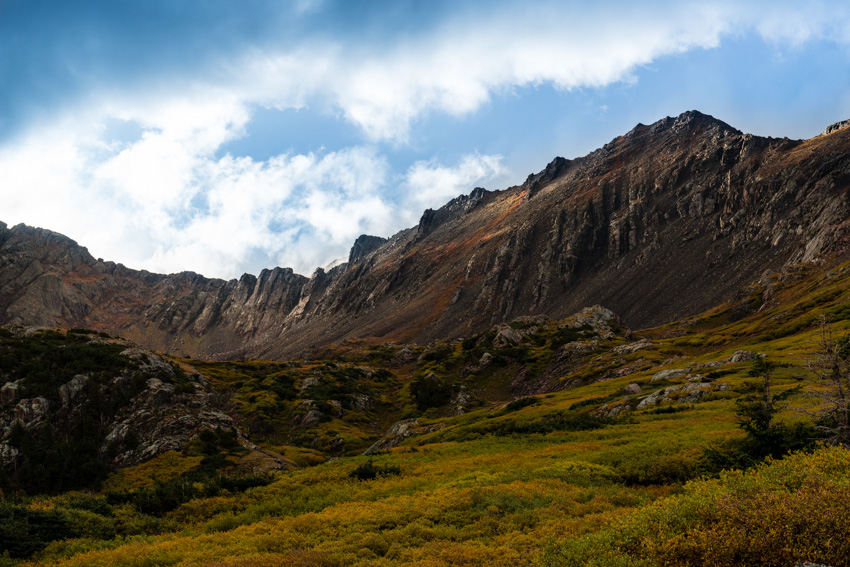
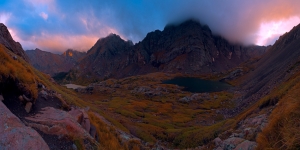
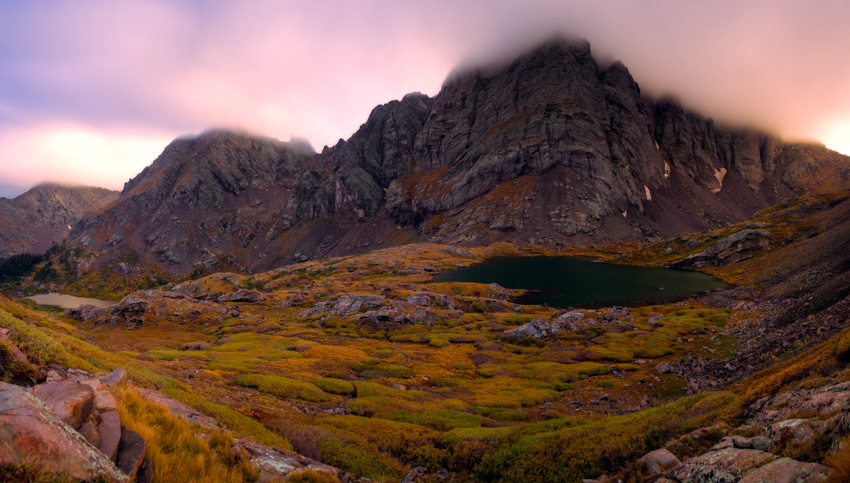
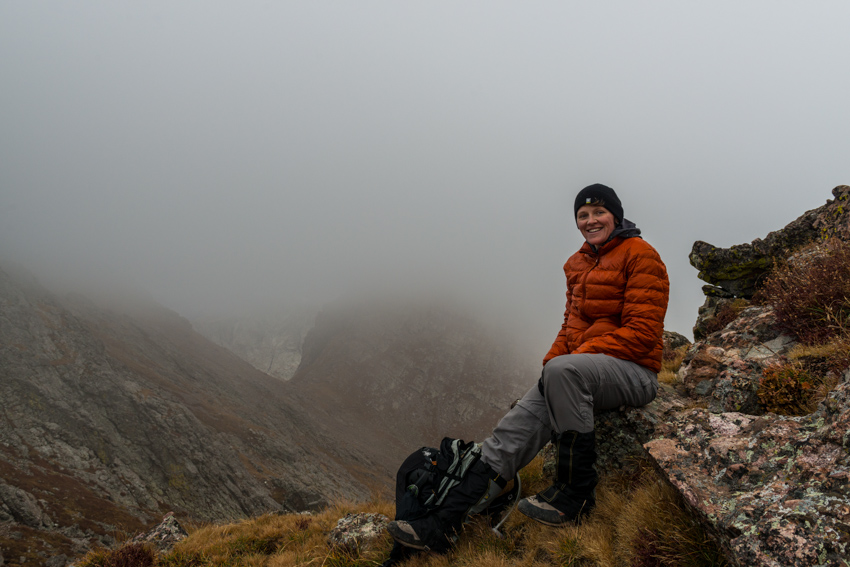
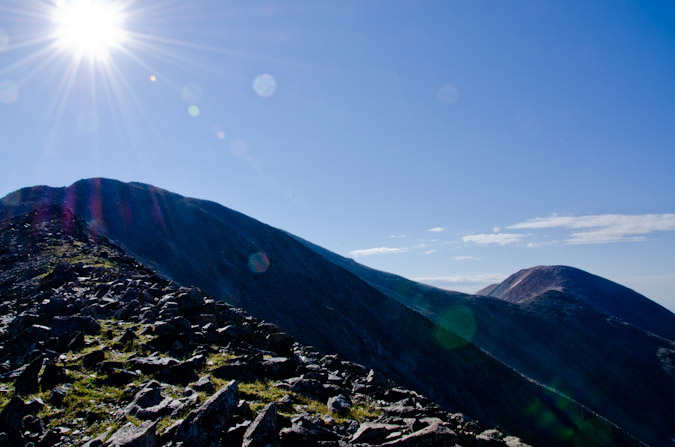
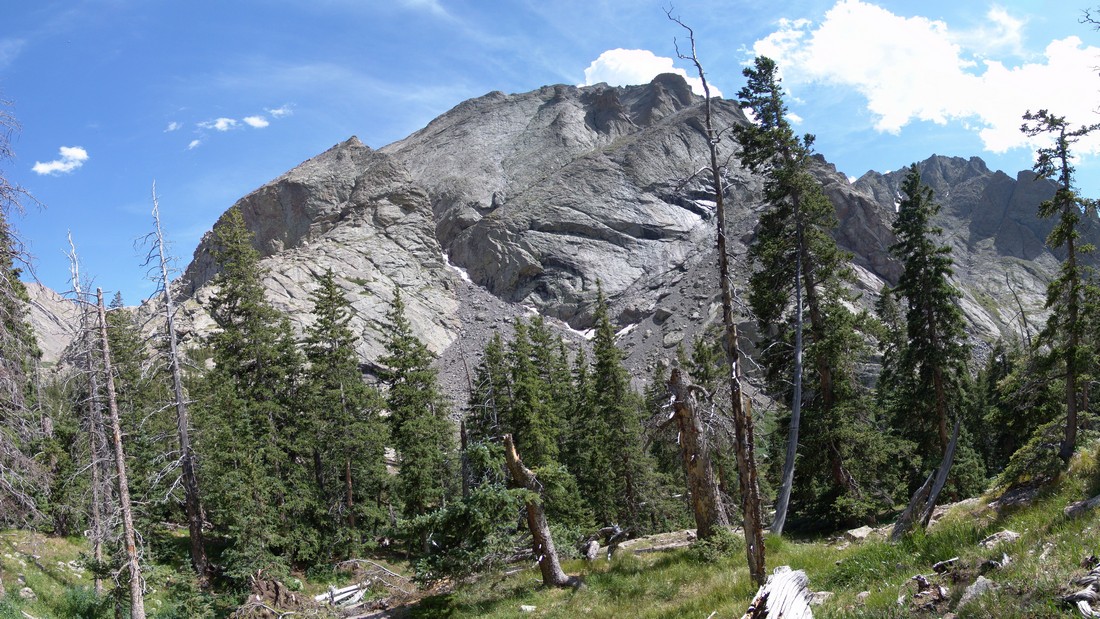
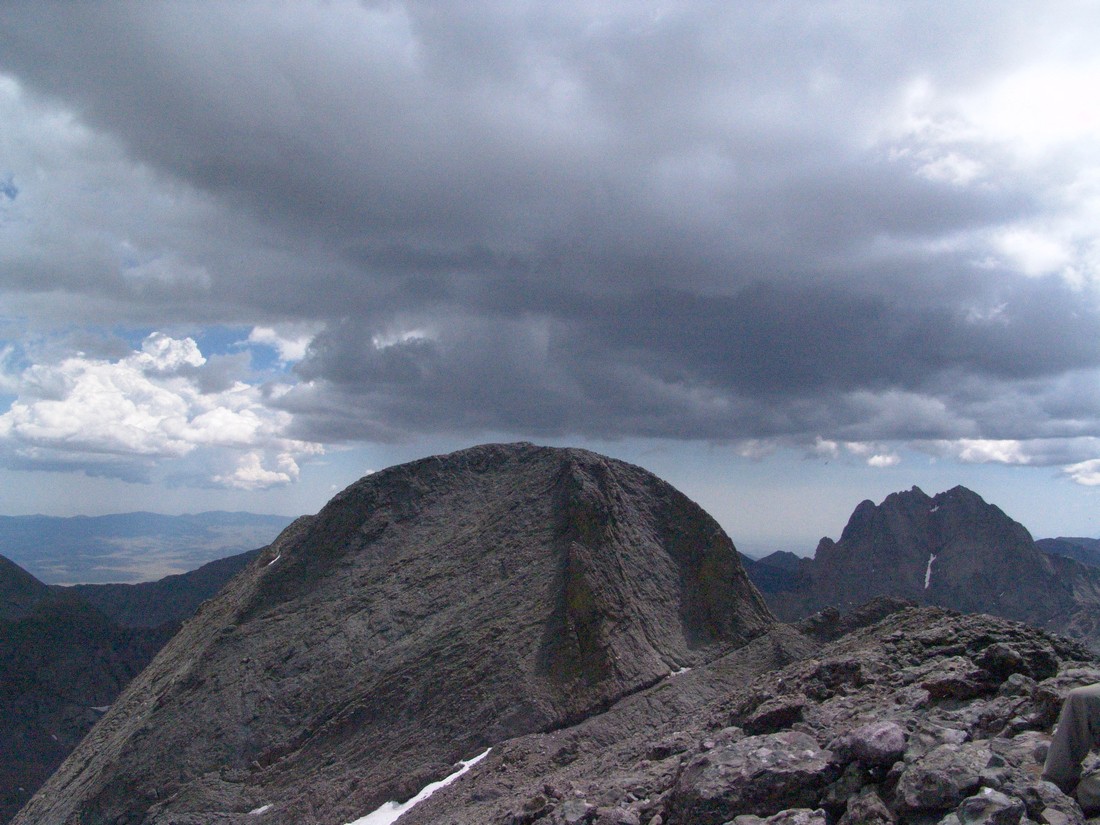
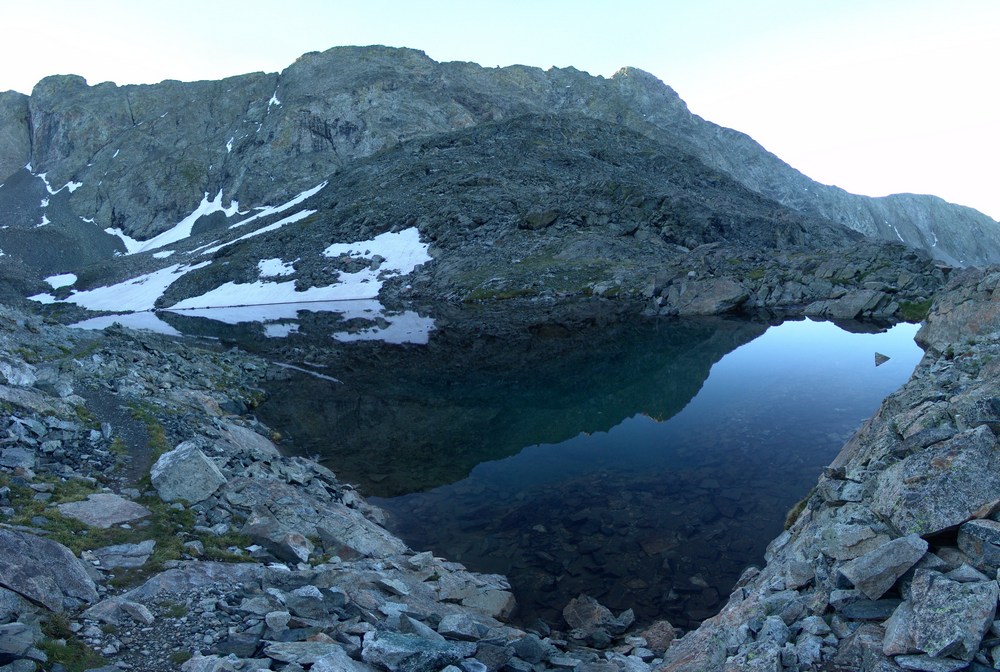
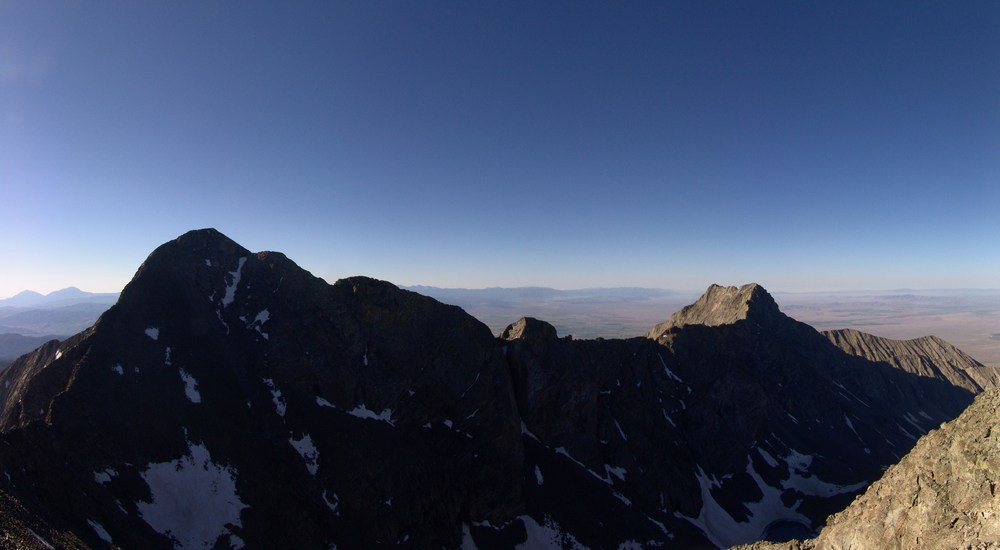
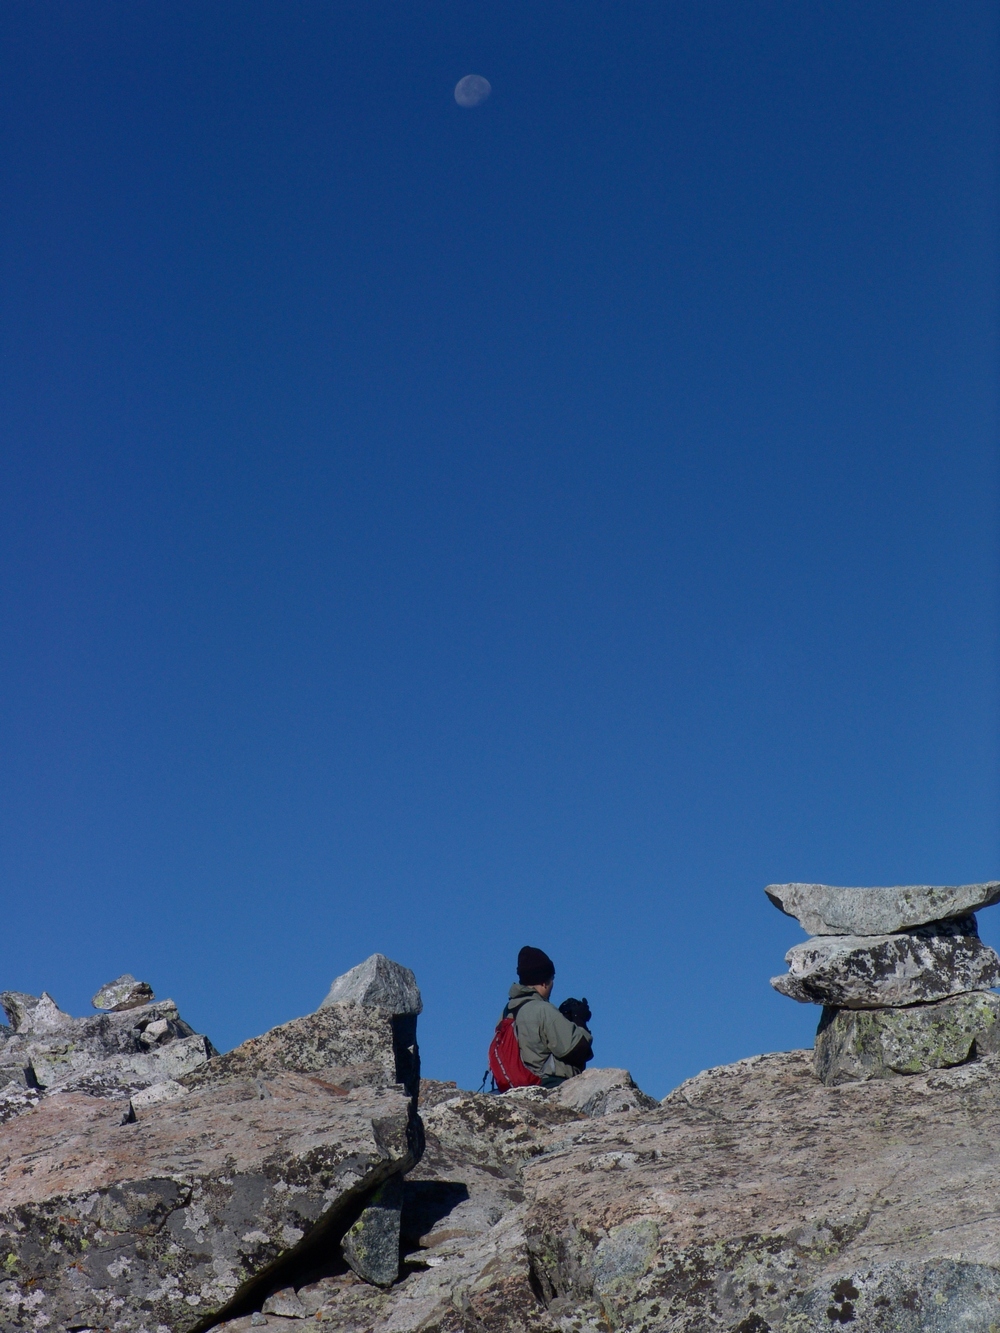
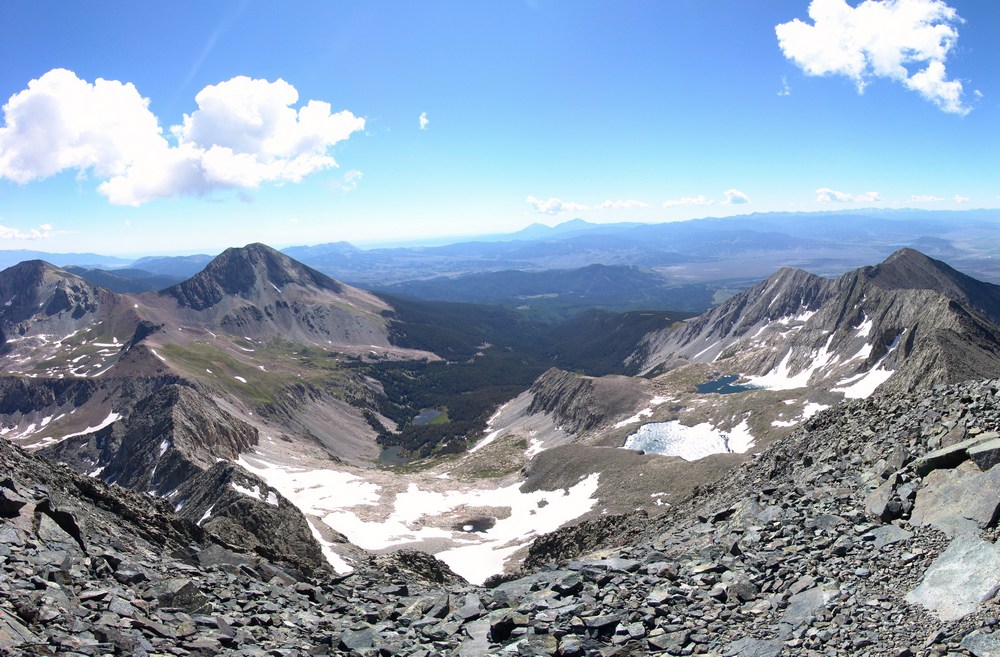
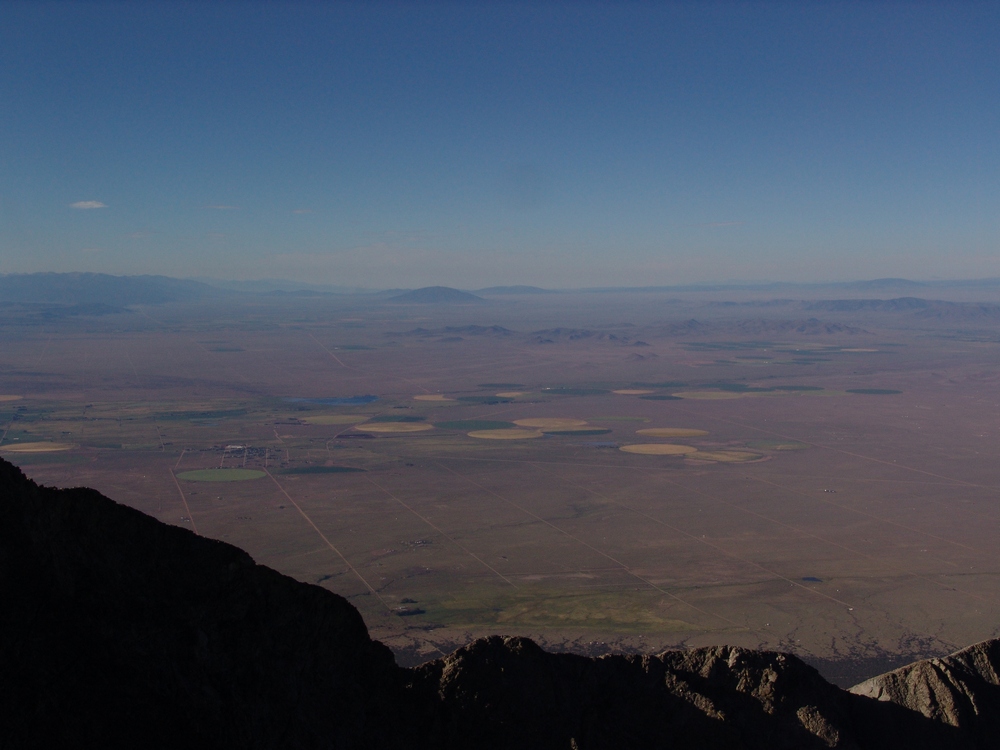
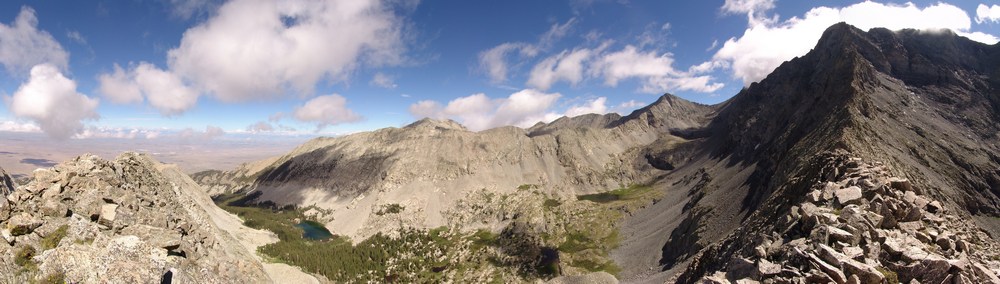
As we climbed further up into the basin, it became immediately clear to me that the conditions were not ideal for summiting Humboldt; however, the mixture of clouds, fog, and light would make for some pretty dynamic photographs from the lower slopes of Humboldt, looking down at both South Colony Lakes an out across to Milwaukee Peak, Broken Hand Peak and Crestone Needle, the upper third of which was still enshrouded in fog.
I found a perch on the side of Humboldt and waited patiently for the light to further develop across the basin from us, watching small holes develop in the clouds, revealing bits and pieces of the mountains and higher clouds painted with soft evening light.

I was completely engrossed in what was unfolding before us and was ecstatic to be there to photograph it.
The light in the basin was pretty great, and I was quite pleased with the images I was able to take while huddling over my tripod in the cold wind.

The golden hour peaked quickly and left me with one final opportunity to shoot the light over on Milwaukee Peak and Broken Hand Peak.

After capturing the magic, we headed back down to our campsite where we were greeted with a ton of strong wind and more rain. We set our alarms for O-dark-30 and hit the sack, hoping for better weather on Tuesday... [Click Next to continue reading]
Monday night and Tuesday morning will filled with lots of strong wind, which came in predictable waves down the valley and through the pine needles above. Sleep was a hit-or-miss proposition. The alarm went off. More wind. I stepped outside the tent, no sky or mountains were visible and it was cold as hell. We decided to go back to sleep for a bit.
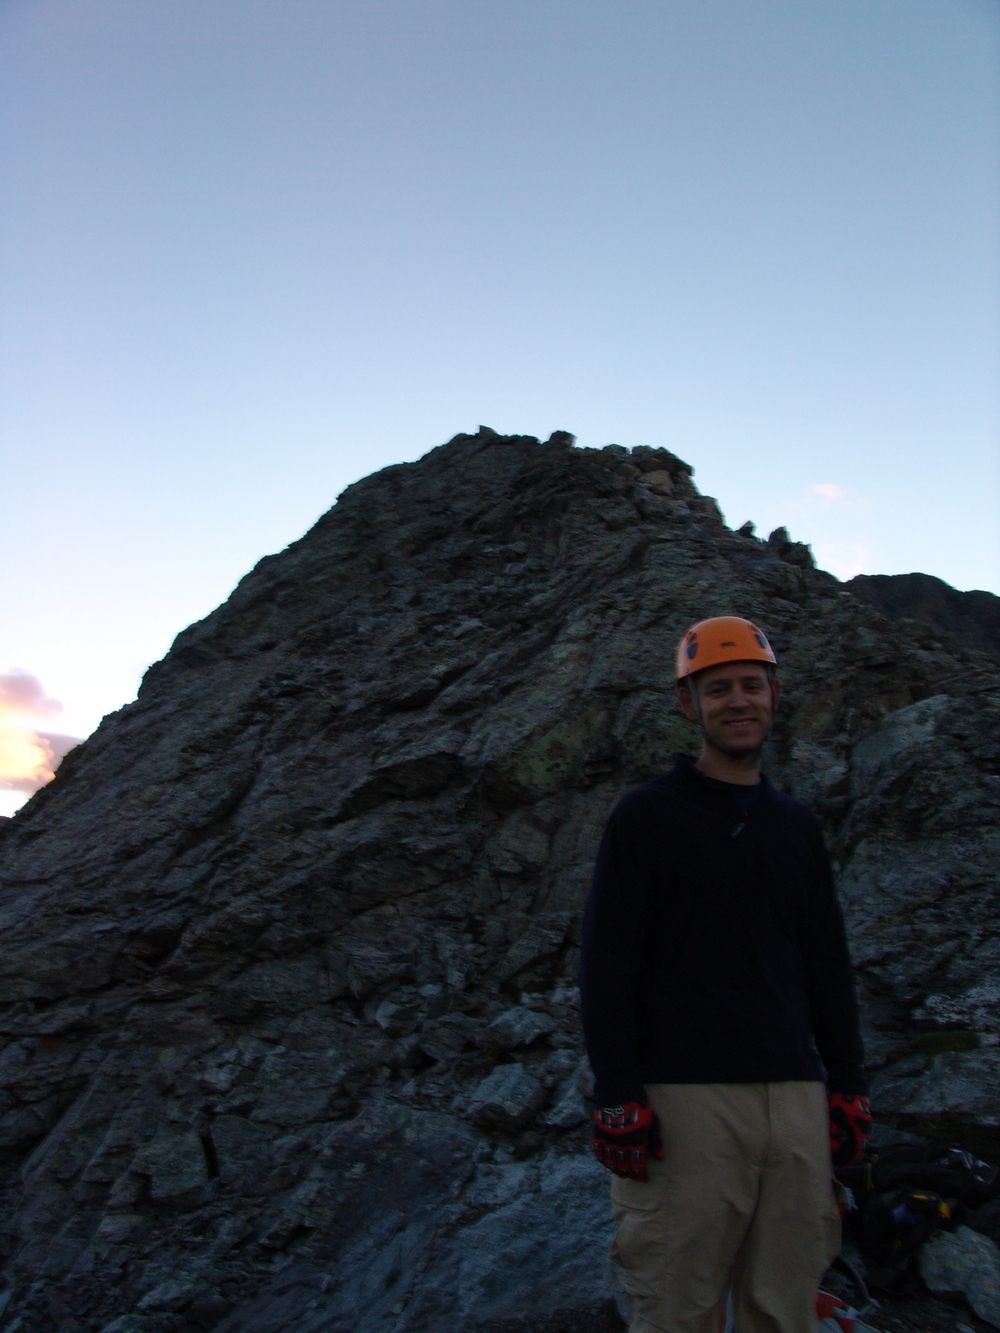
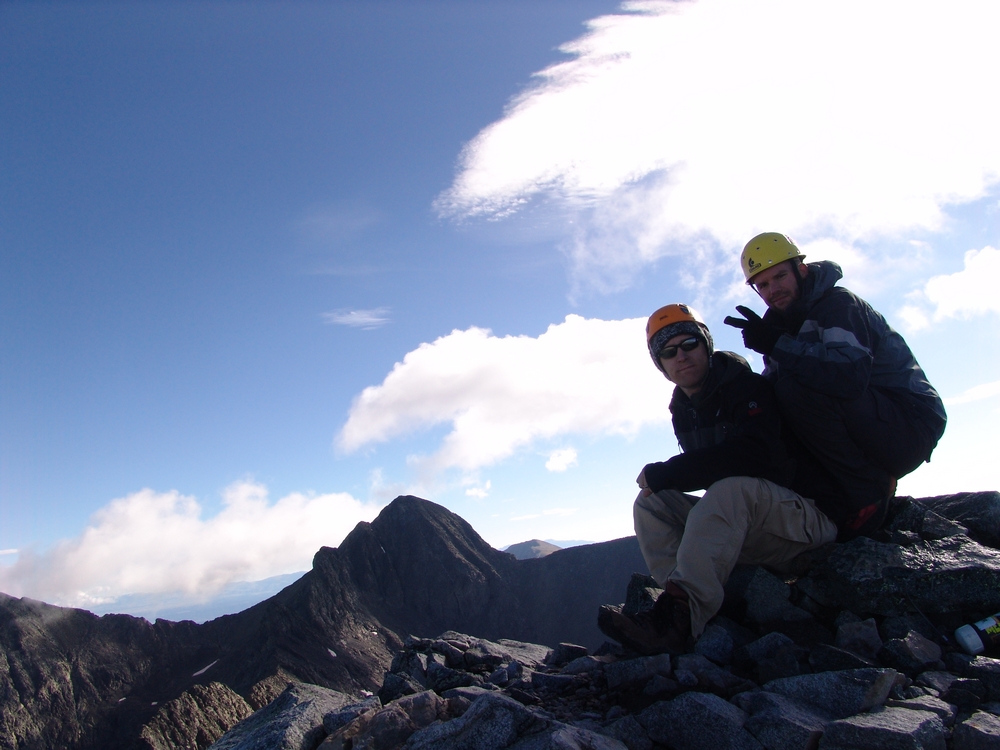
Finally, around 8 AM we got geared up and made a run for Crestone Needle. This was a very late start by our standards; however, we felt as though the weather could not get much worse, so why not give it a try. The plan was to head for the top of Broken Hand Pass and re-assess the weather from there.
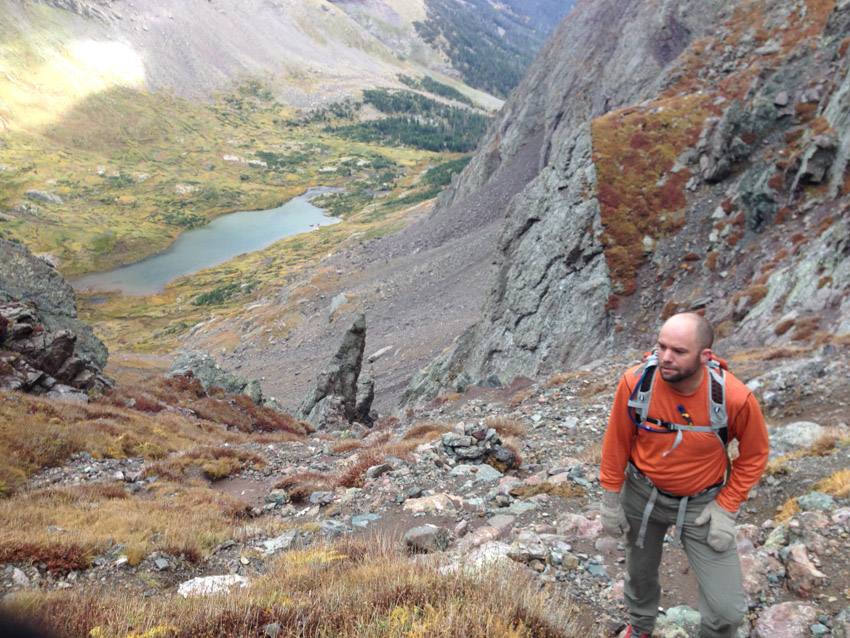
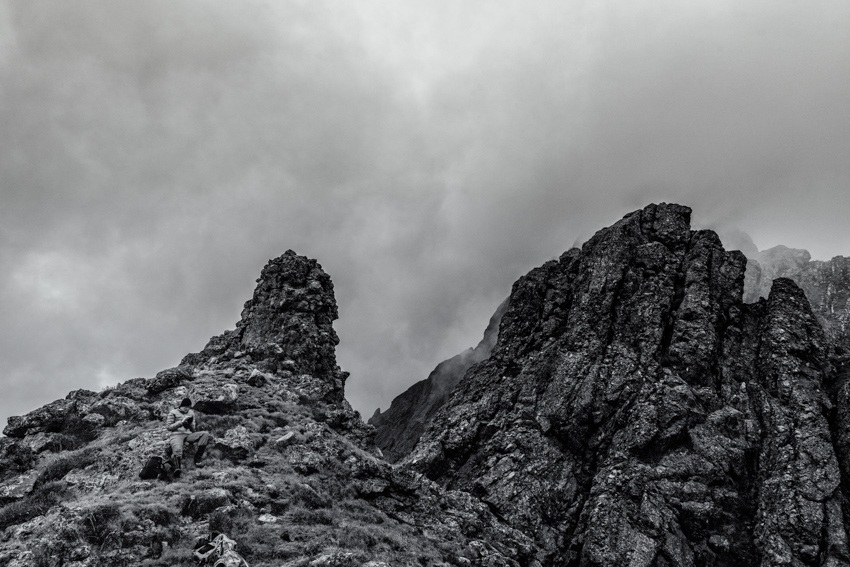
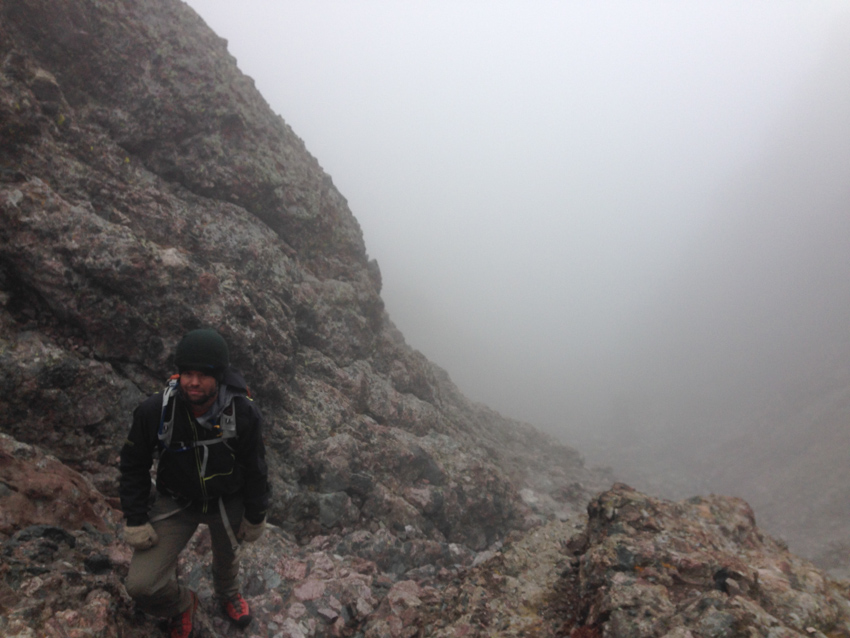
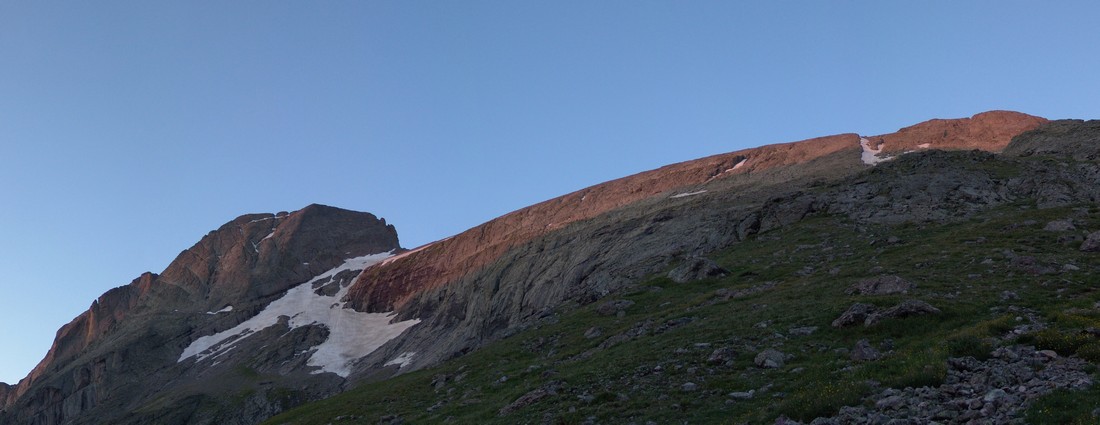
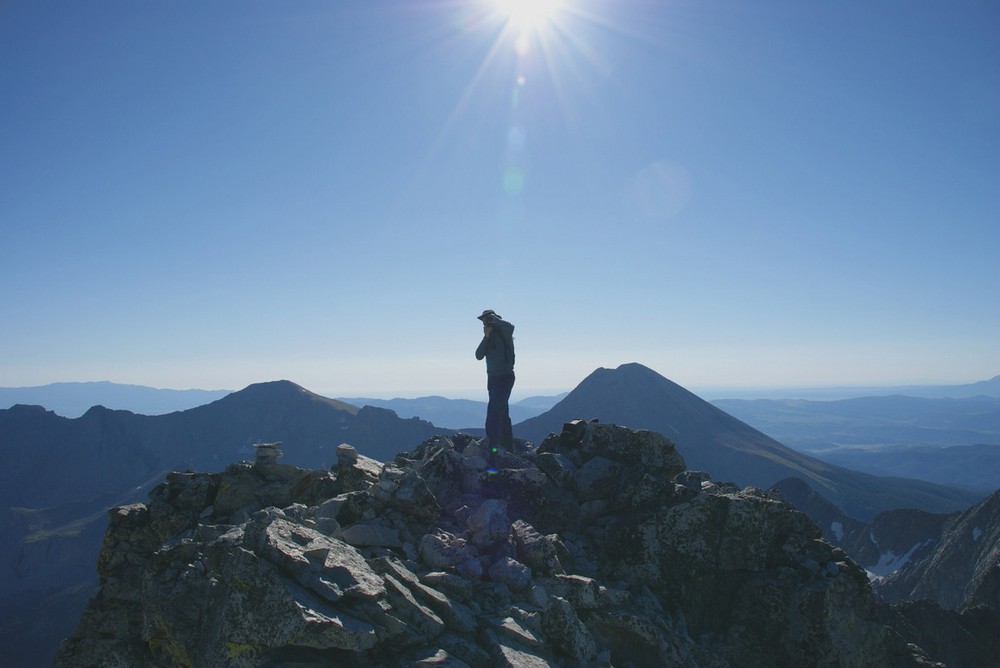
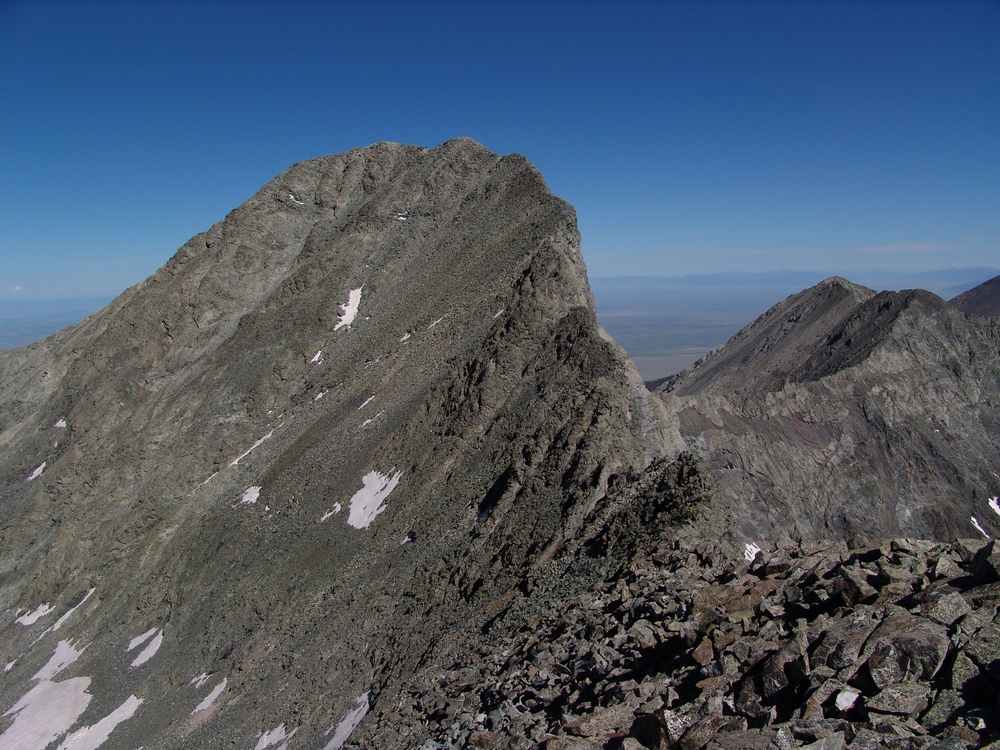
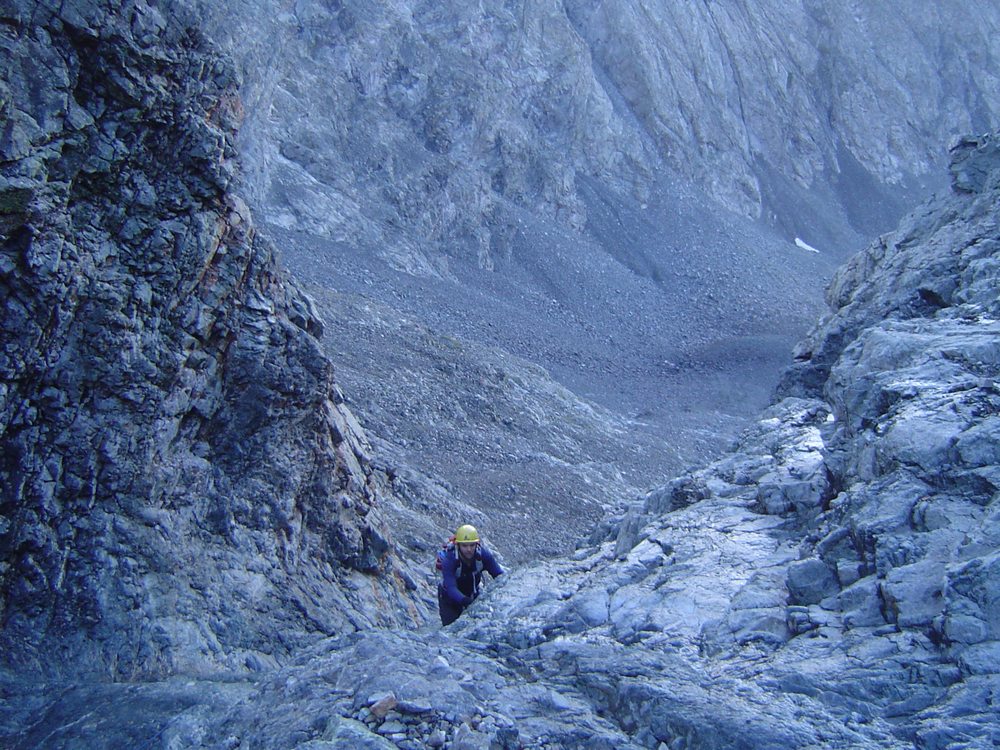
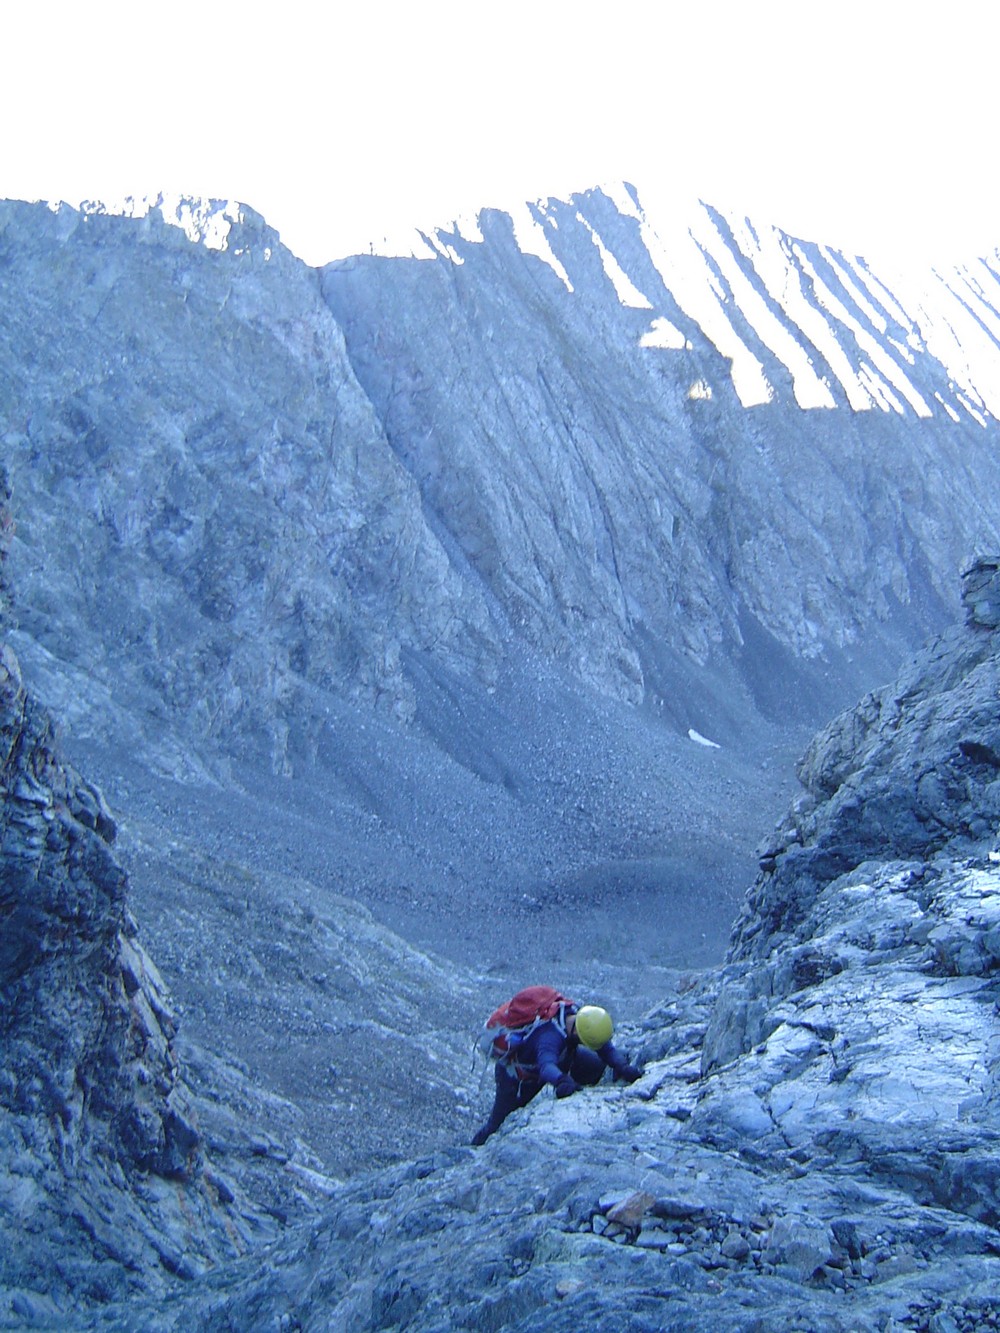
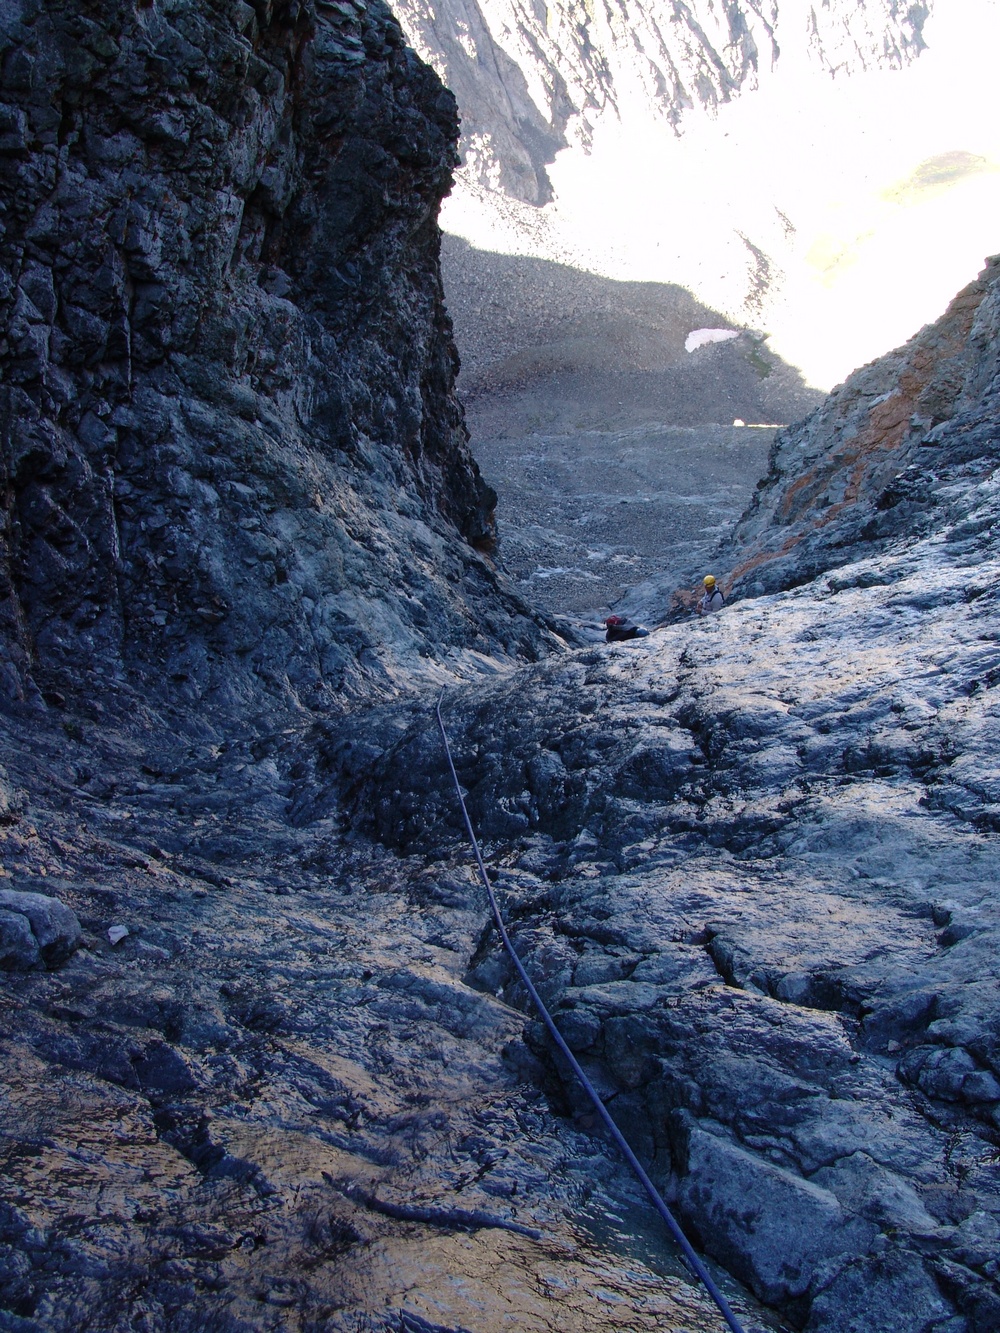
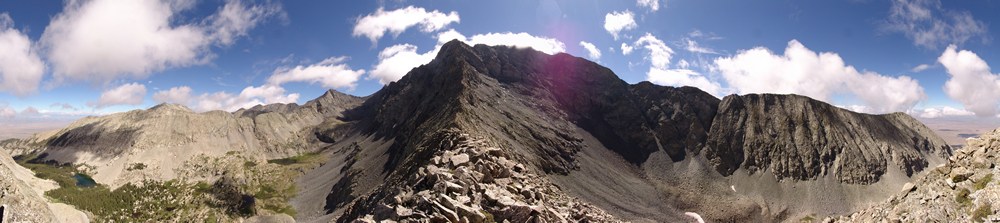
We made great time up Broken Hand Pass, stopping for nothing. Once on top, the weather was amazingly surreal as well as a little discouraging. Fast moving clouds, driven by the strong wind, were rushing from down below on the eastern side of the ridge and up and over us and Crestone Needle. It was quite a sight!
The air was thick with moisture, but at no point were we concerned about precipitation. It was chilly, but nothing terribly unbearable. We decided to press-on. Having climbed Crestone Needle once before, I was well equipped mentally for what was to come. I was confident we could find out way up and back down without incident. We had both studied the route again and had very few doubts that we could not reach the top safely.
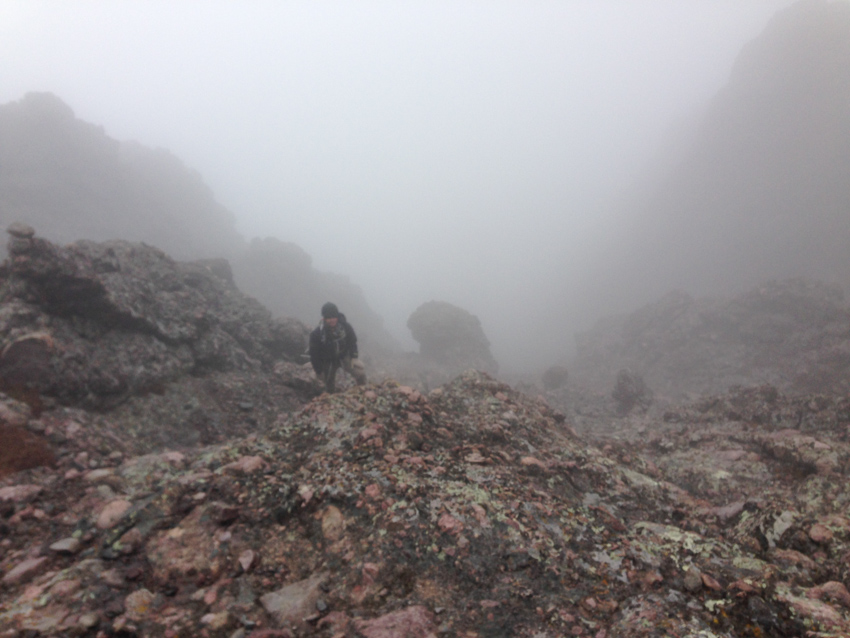
Crestone Needle was not visible through the thick, fast moving clouds, but it did not deter us. If anything, the insane weather made the experience even more epic.
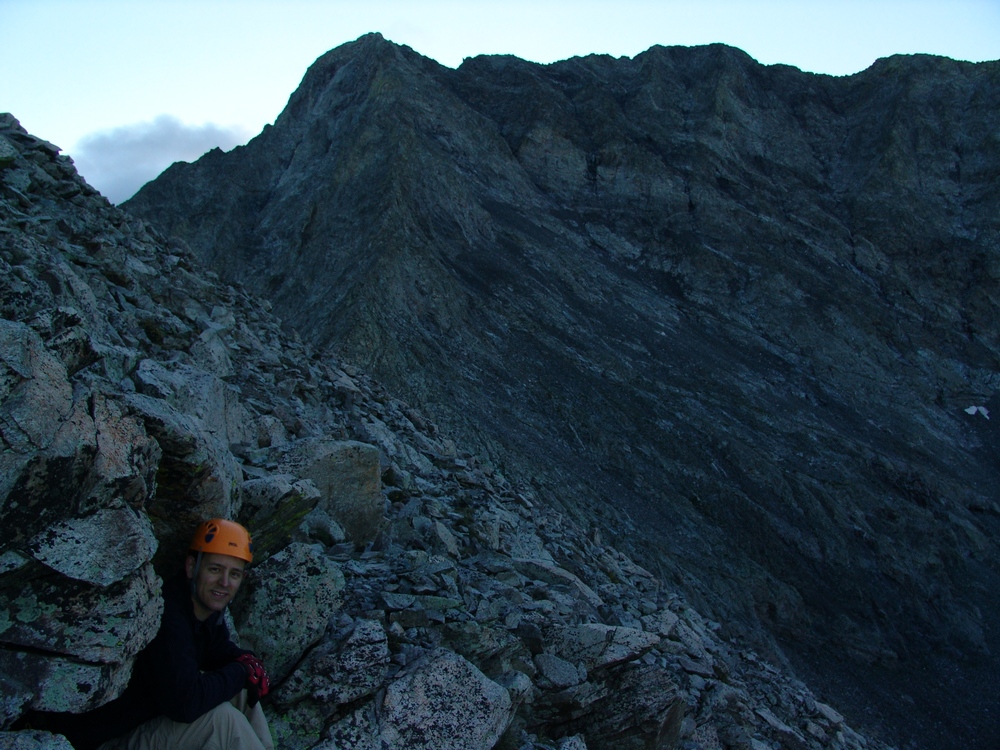
The garden of rock before us was really amazing to see again. At this point, I put my camera away to free my hands up to do the real climbing.
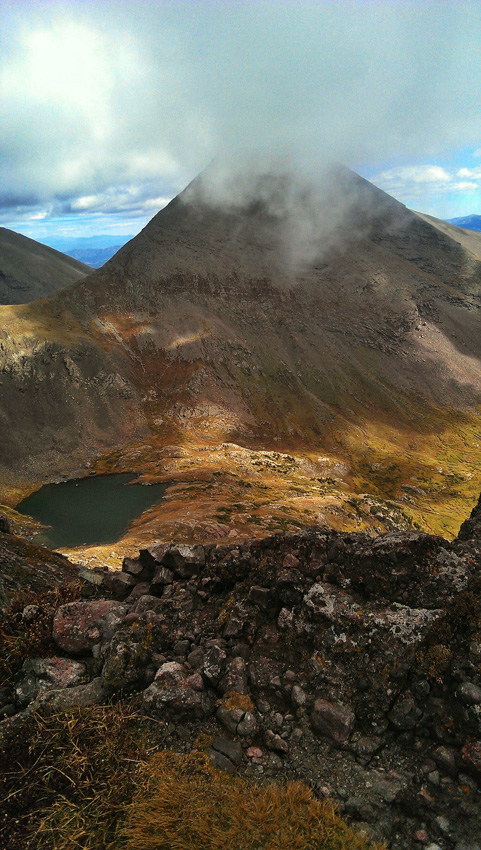
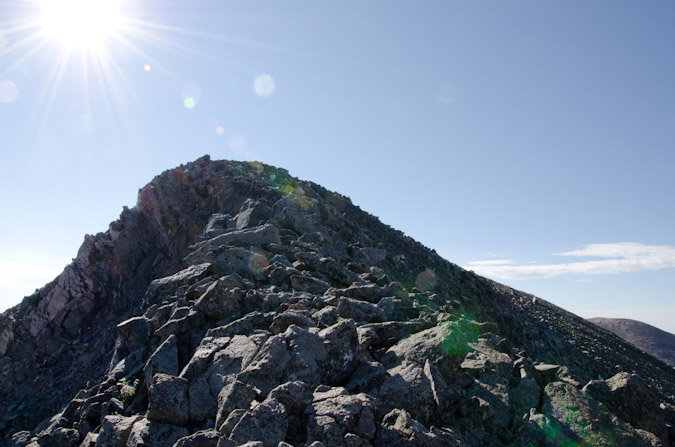
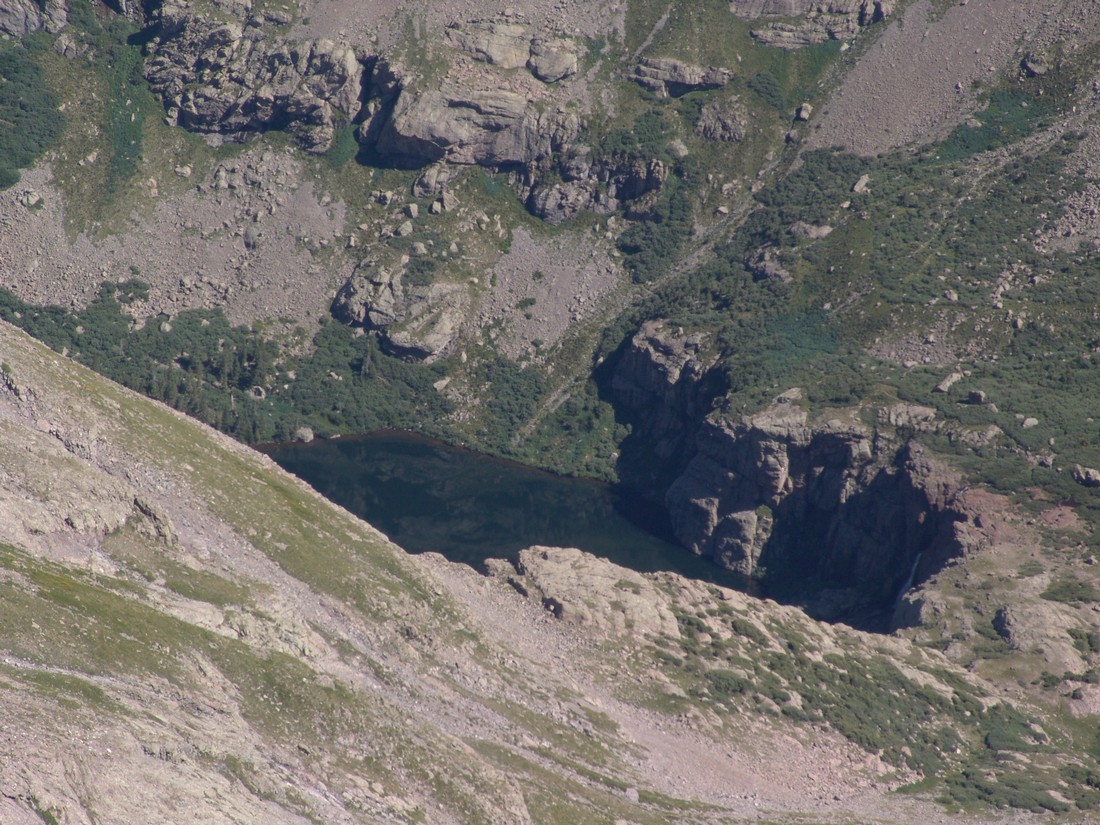
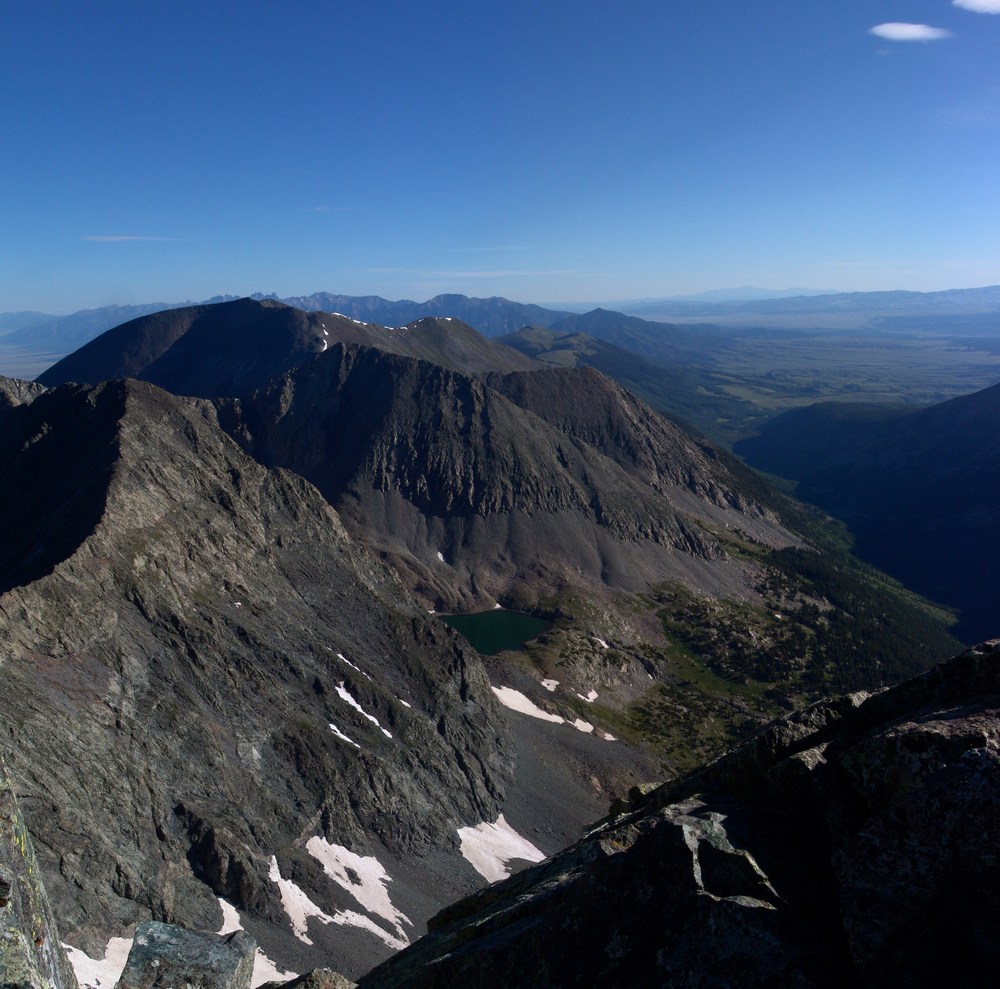
We took one last look down at Upper Colony Lake and Humboldt Peak before beginning the adventure up the fun parts of Crestone Needle.
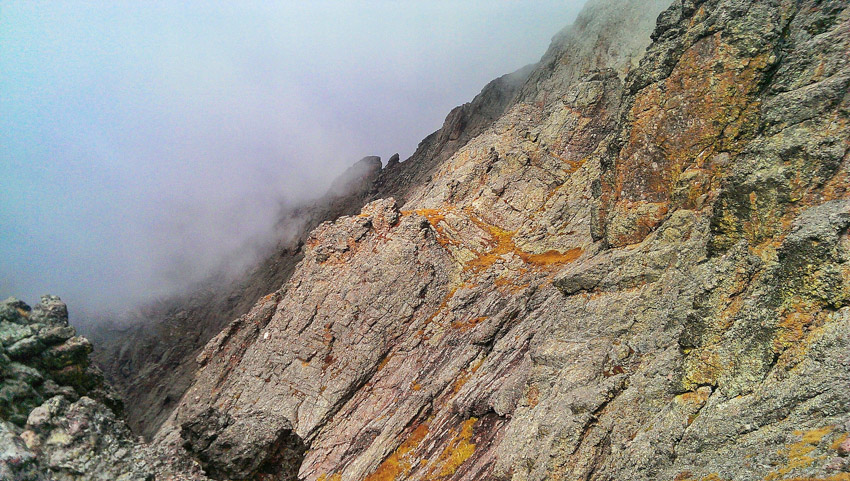
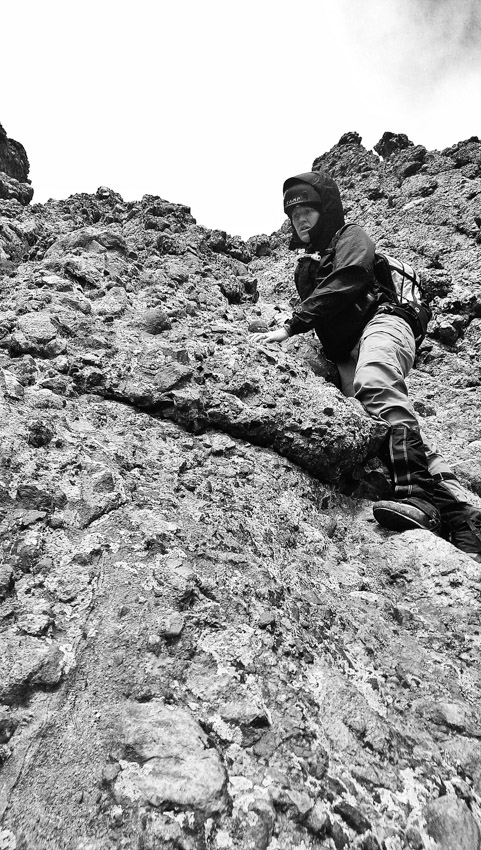
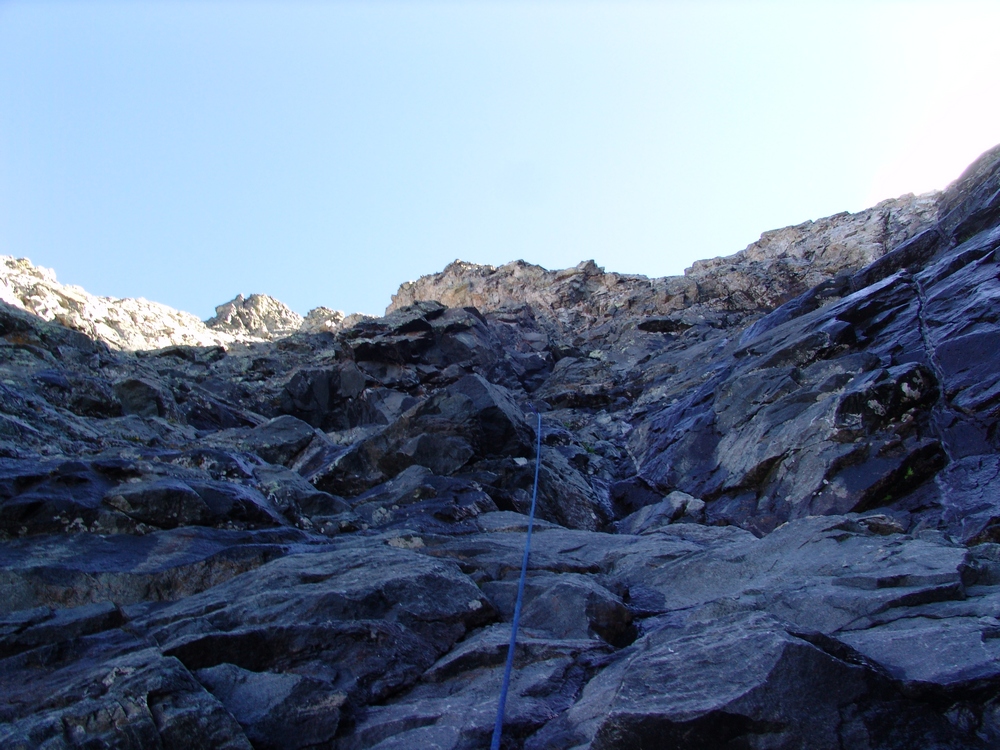
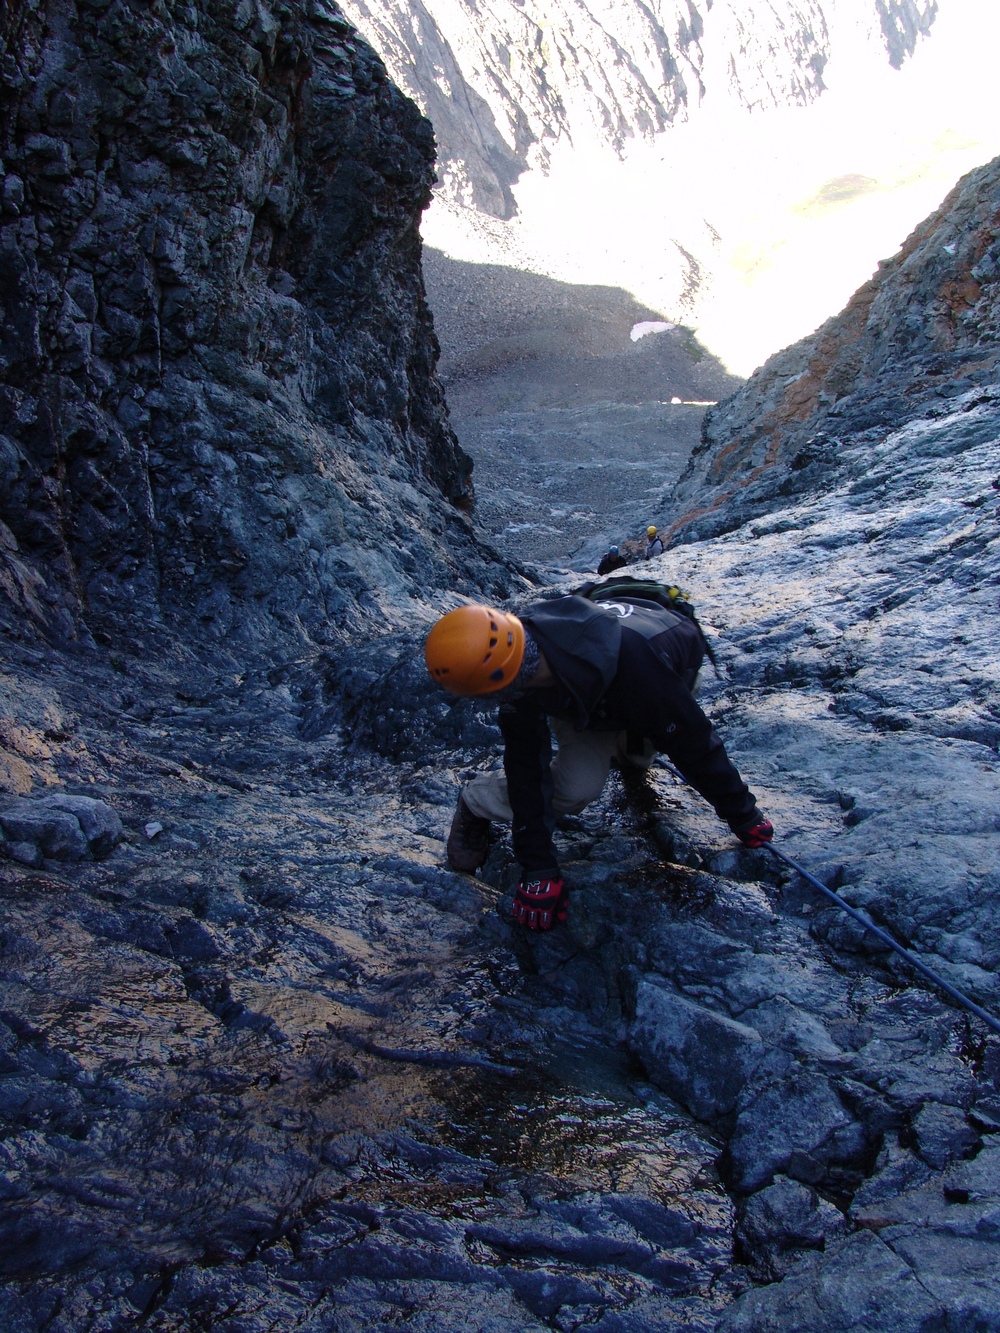
There is nothing like being on the side of Crestone Needle. Something about the quality and steepness of the rock, I immediately was swept back to 2009 when I had climbed it with Terry Mathews (RIP). Sarah and I reached the infamous dihedral which signals the typical crossing over to the west gully. We decided to stay in the east gully for the class 4 variation, which certainly did not disappoint! After Broken Hand Pass, I did not shoot a single photo with my camera on the way up, so all the photos were taken with either my HTC One or Sarah’s Iphone 5.
It was a real joy climbing this beast with Sarah with me. Having tackled many difficult peaks with Sarah in the past, including the Maroon Bells, Pyramid, Snowmass, Hagerman, and the Chicago Basin 14ers.
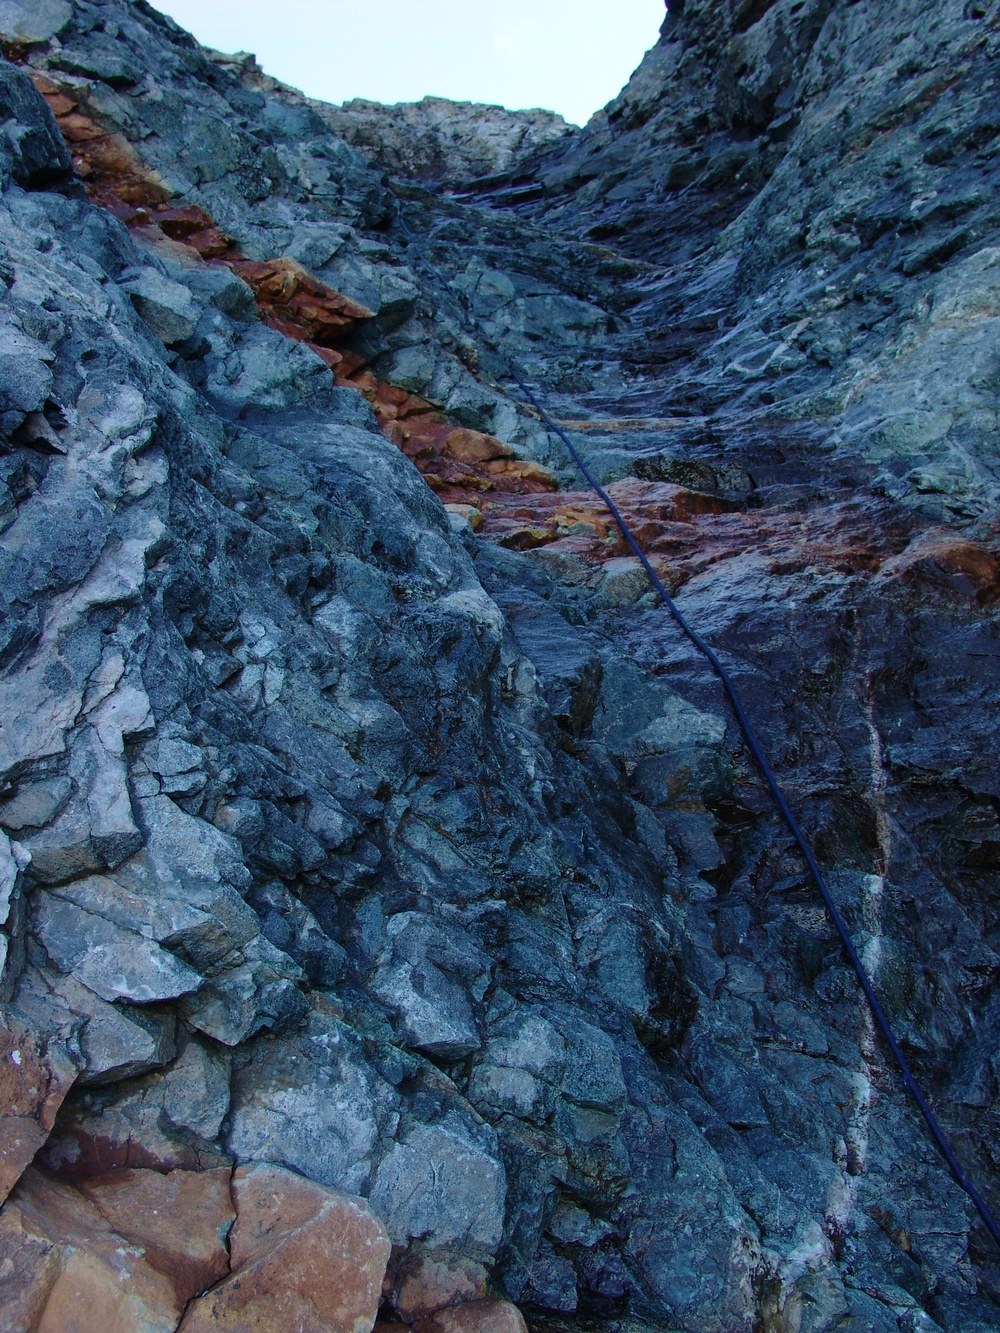
The class 4 variation up the east gully was quite a pleasant challenge on the way up, but I was getting concerned with route finding and safety for the descent. Visibility was decreasing as we climbed and the terrain was all starting to look alike.
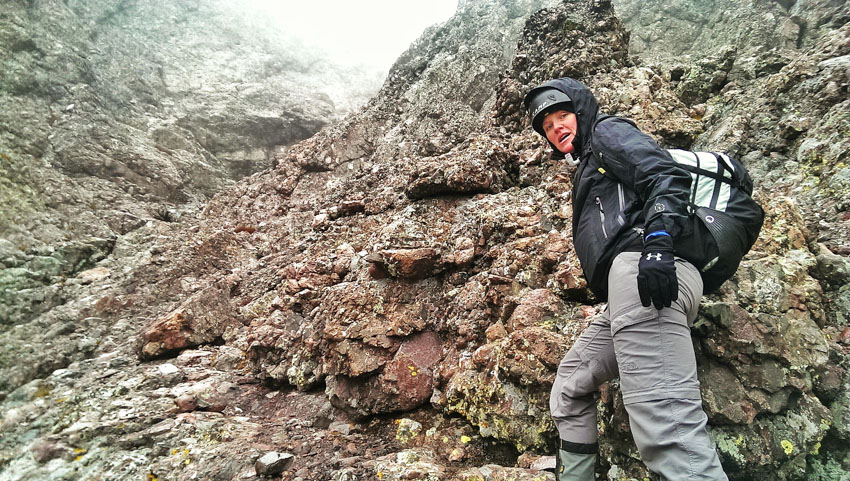
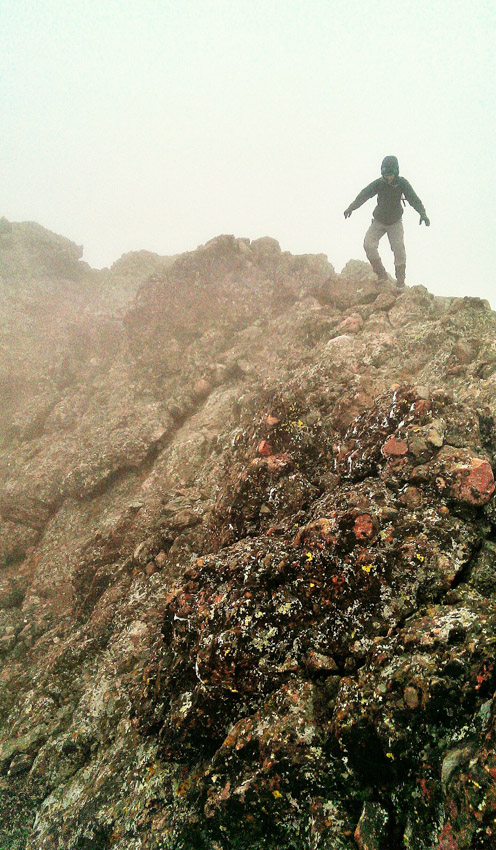
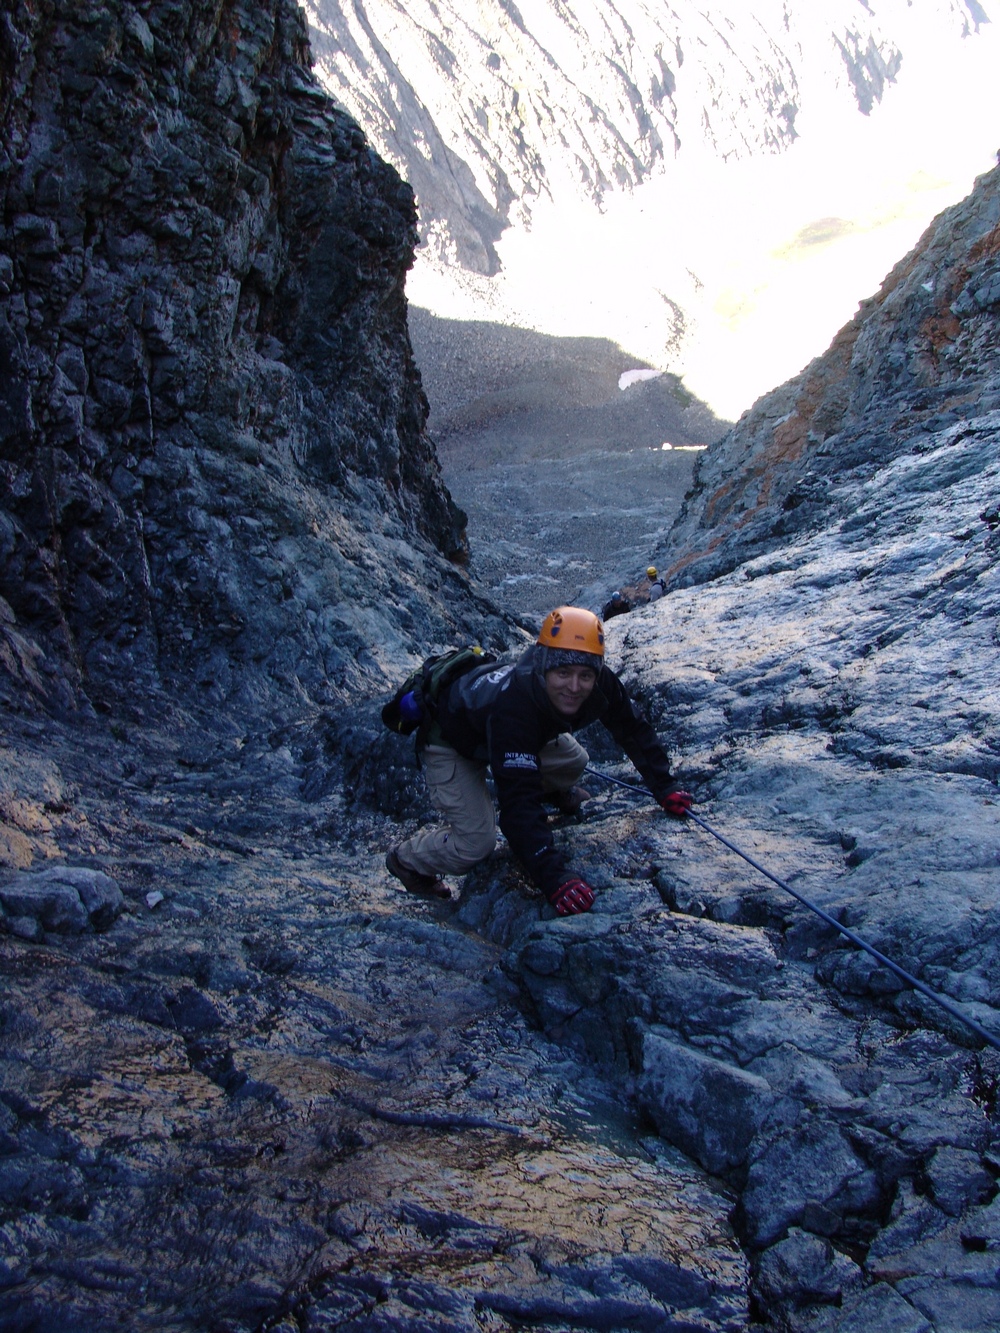
Fortunately, we were able to identify several cairns on the way up, including some duct tape on a few rocks here and there (small squares, which were quite nicely visible from above). Sarah was snapping some awesome shots of me on the way up, including this one of me negotiating the summit ridge.
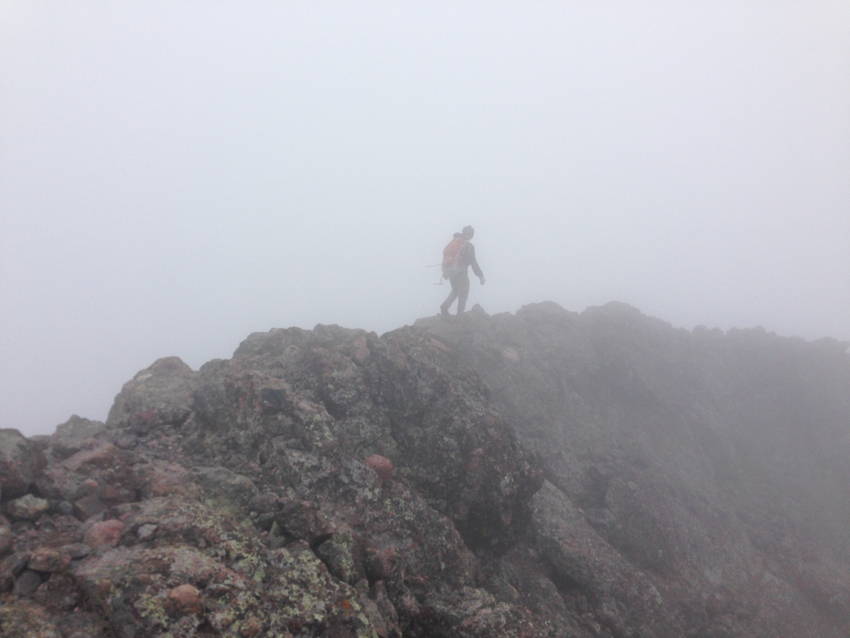
We reached the summit block in quick time and scrambled over the very skinny connecting arête to claim the summit. We had absolutely zero visibility and opted to stay there for only about a minute or so. We head right back down the way we came, following the cairns and duct tape we had seen before. The upper 200 feet of the east gully was pretty easy down-climbing; however, it got really dicey after that. We tried as best we could to stay on the route we came up on and for the most part were successful in that. It was surprisingly easy to remember the way down even though we could not see much. I was pretty happy we stayed in the east gully, as trying to find the switching point from west gully to east would have been difficult in the fog. I am not going to lie though, the climbing here was intense. The rock was wonderful, but it was quite exposed and surely a fall would have been fatal.
 |
 |
After many tough sections, we finally made it back down to the easier parts below the dihedral and made our way back towards Broken Hand Pass.
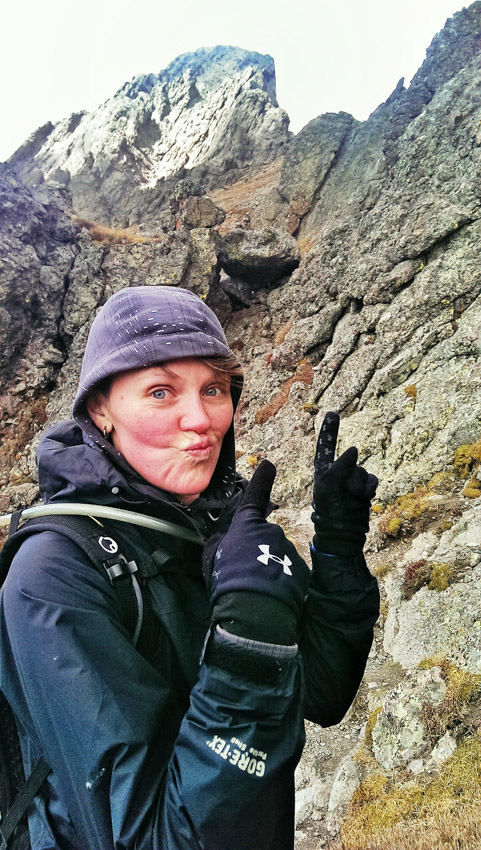
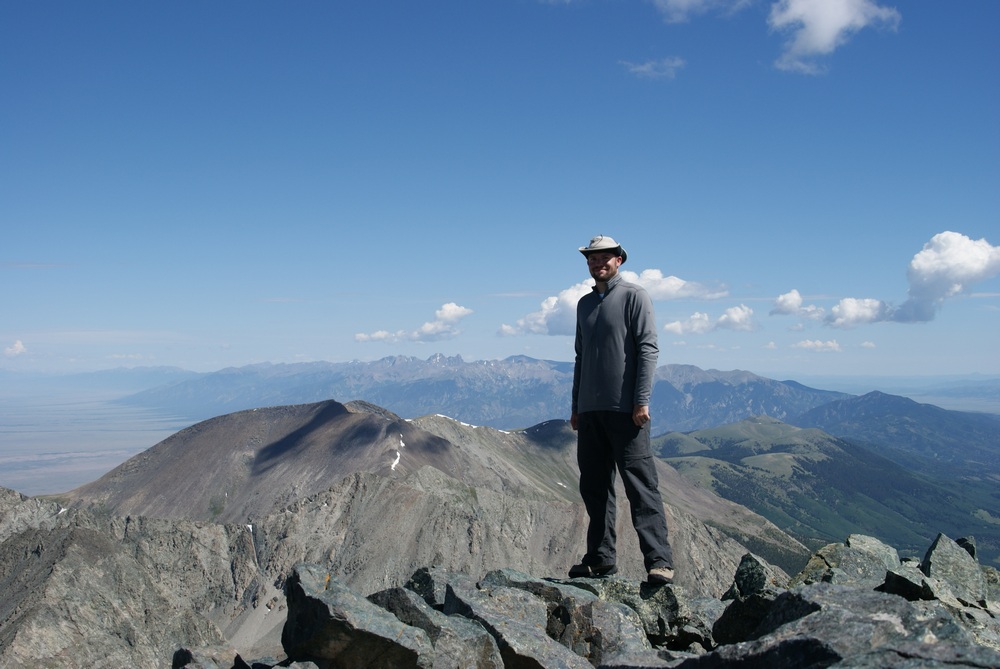
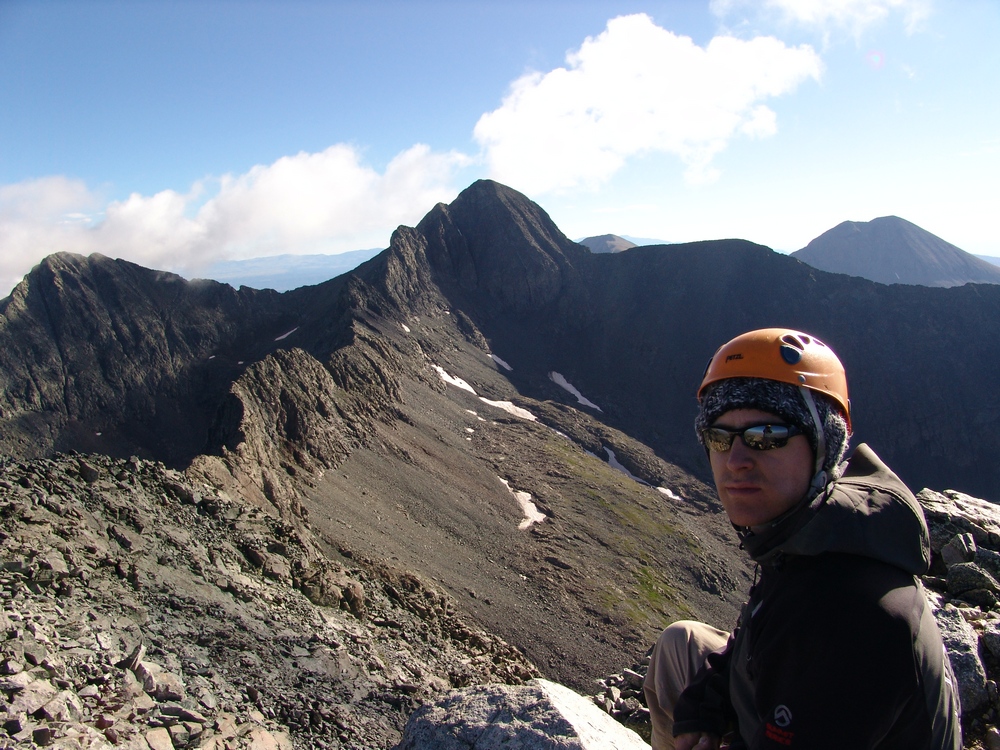
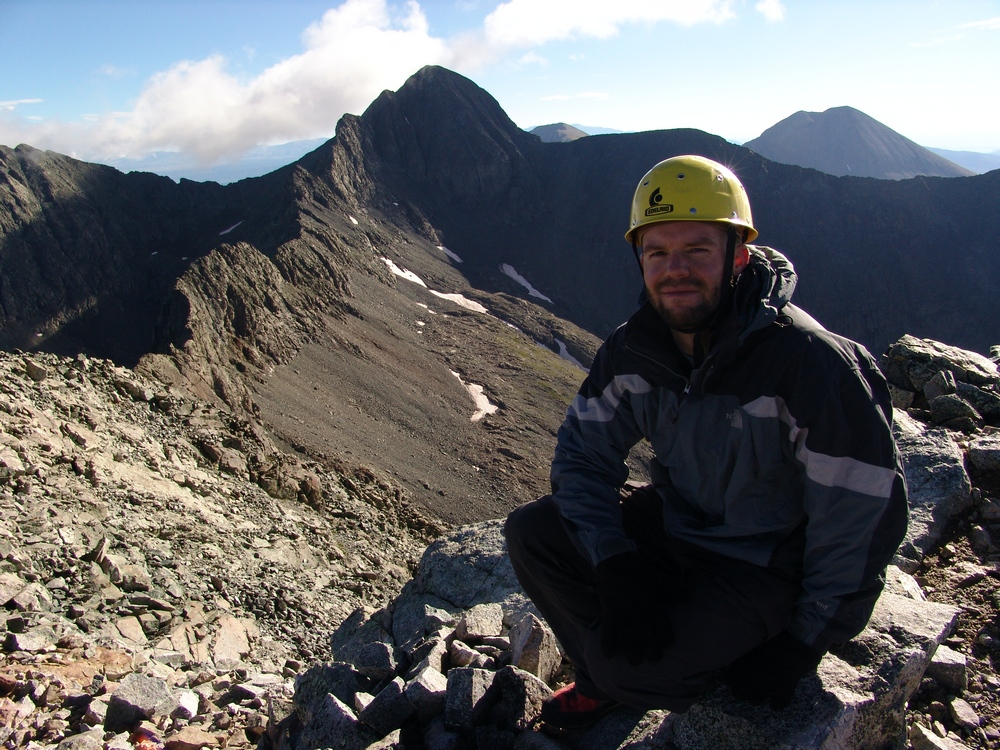
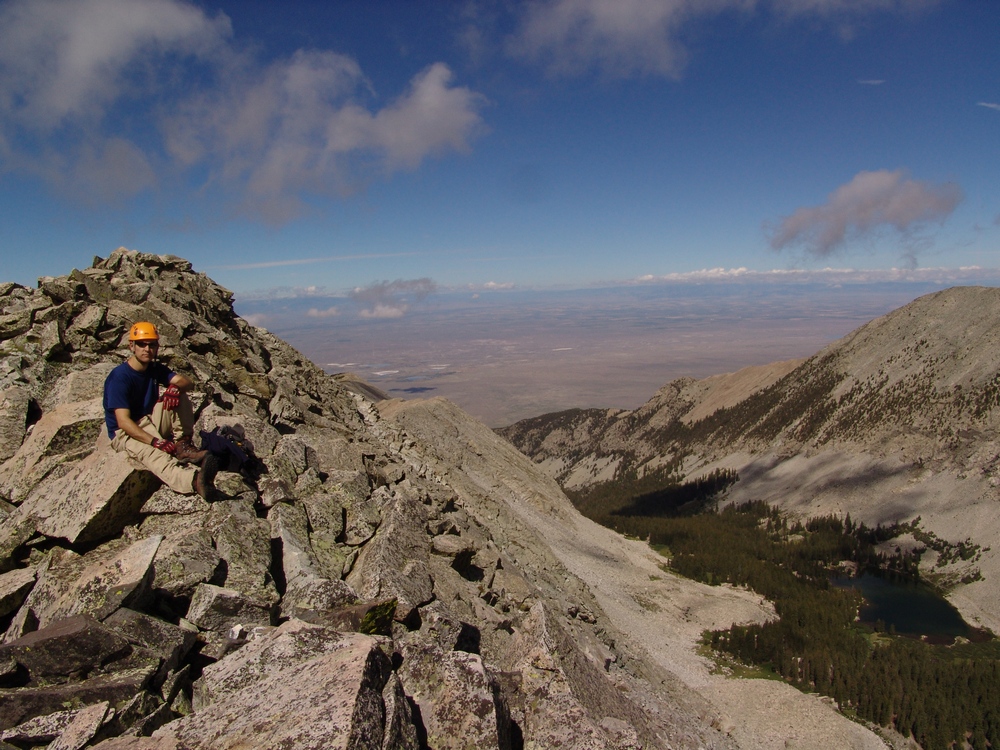
Sarah and I were quite excited about our successful climb of a beast of a mountain in whacky weather conditions.
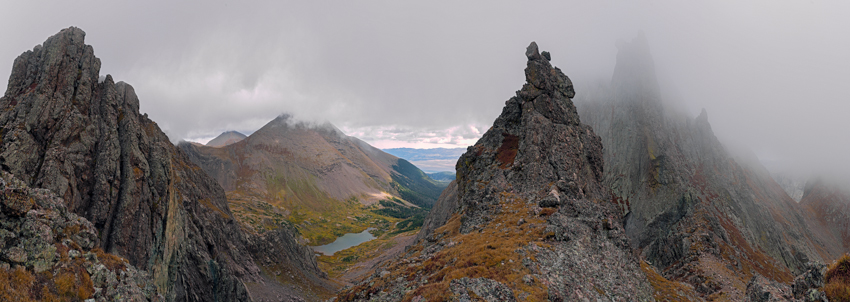
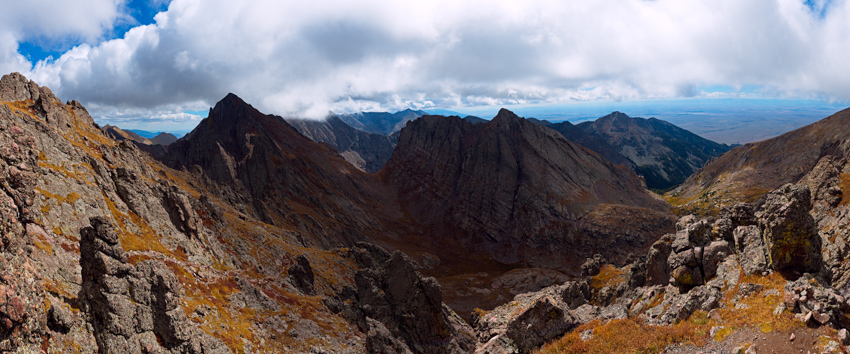
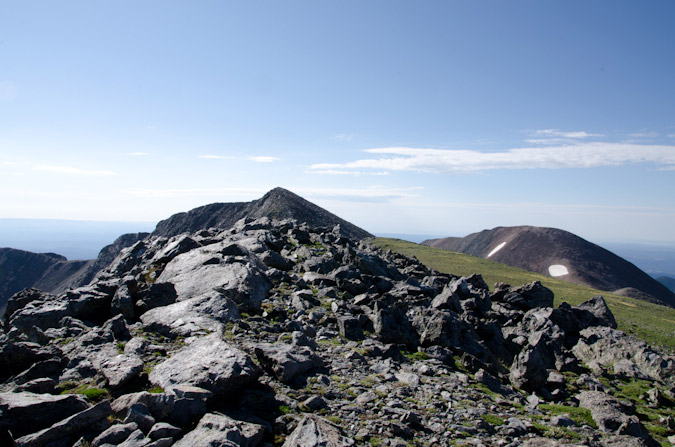
The clouds were breaking up a little and revealed all of the awesome peaks to our south and west, including Broken Hand Peak (at left).
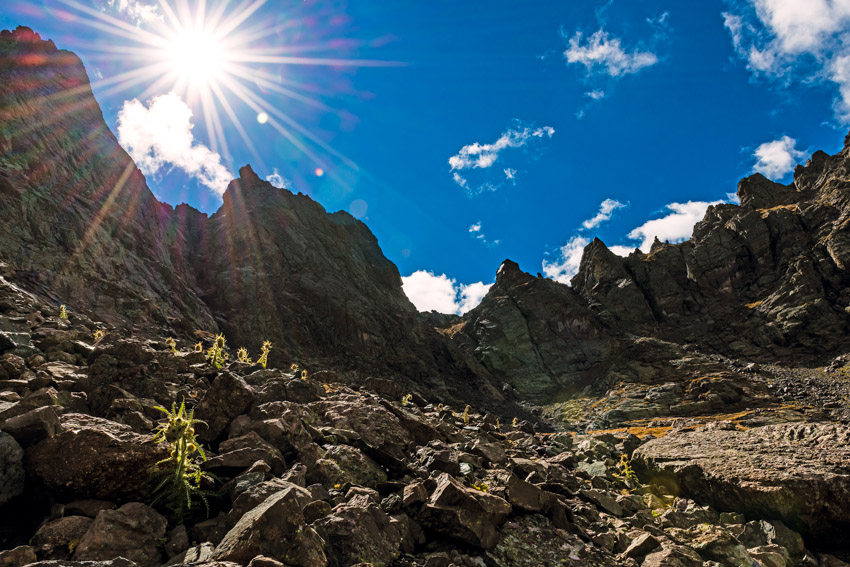
What a rush! Just what the doctor ordered for me – an awesome day climbing in the Sangre de Cristo Mountains! On our way down Broken Hand Pass, we encountered a ton of those funky spikey flower plants called Frosty Ball Thistle, and I just had to get some photos of them with the back light coming through.
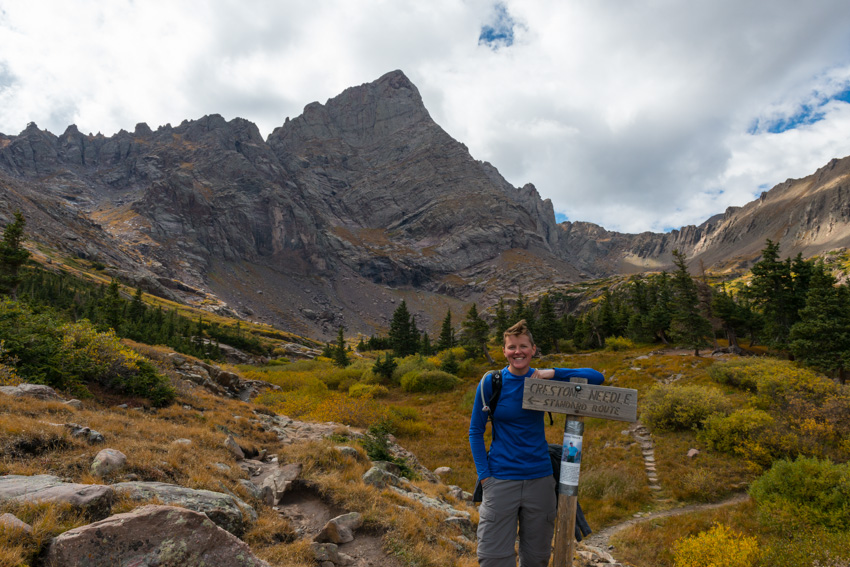
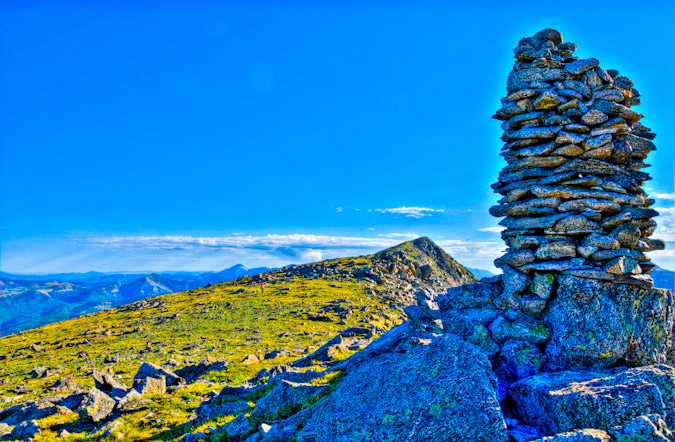
The hike down from Broken Hand Pass was totally a joy, mostly due to the amazing trailwork provided by RMFI. Upon reaching the main trail, we celebrated and enjoyed the unobscured views of Crestone Needle for the first time.
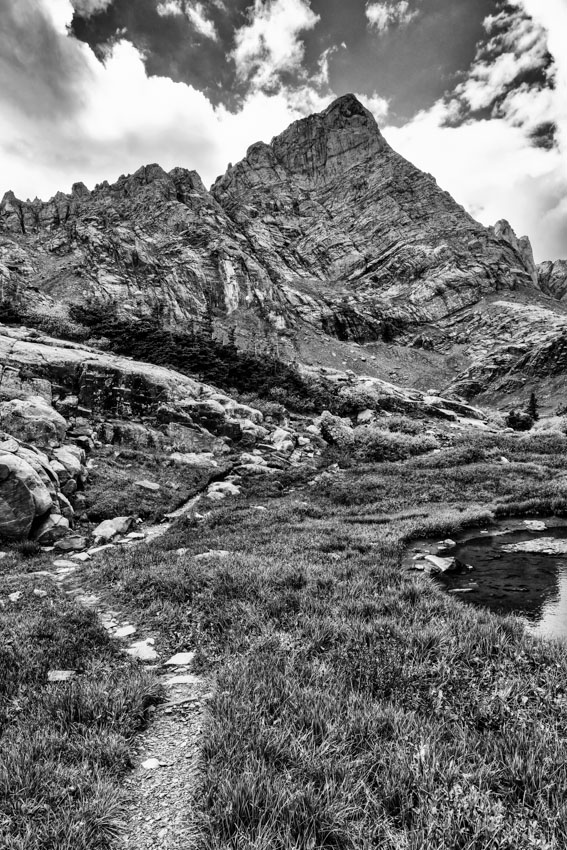
I stopped one last time on the way down to get a black and white shot of Crestone Needle, which I think turned out quite well.
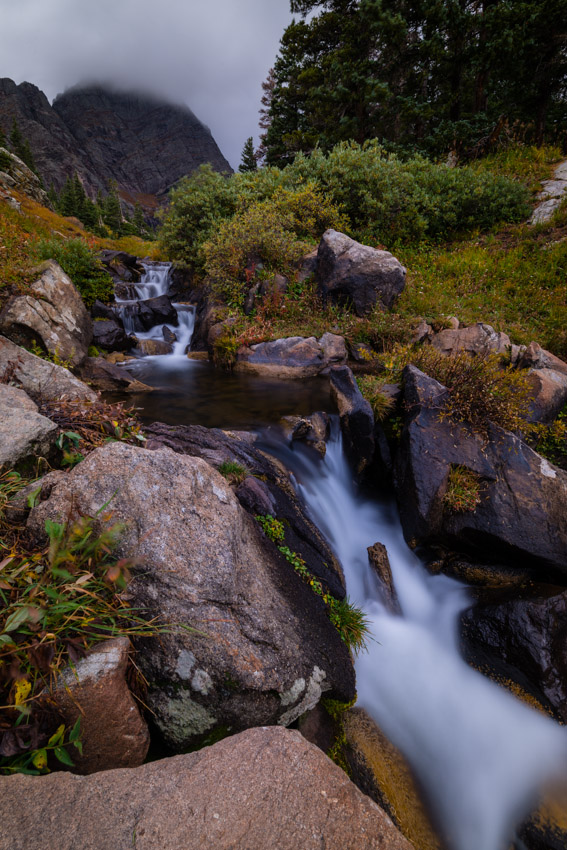
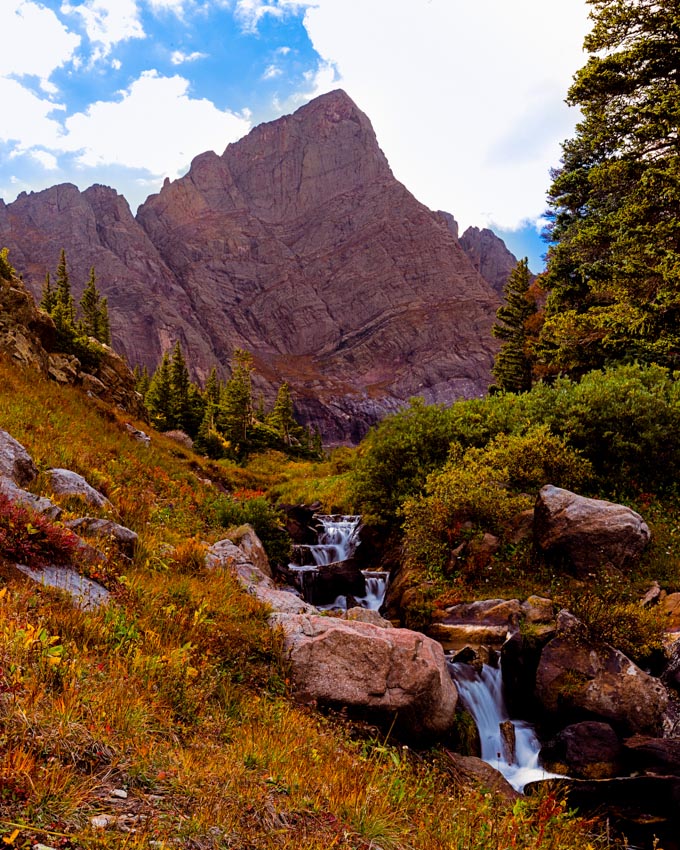
We made it back to our campsite and began to pack up. I wanted to get one more parting shot of Crestone Needle using a ND Filter, so I set it up and captured a mid-day shot of the flowing water in front of Crestone Needle.
On the way out, we encountered all kinds of awesomeness, including several deer and some really friendly birds that were super photogenic and happy. What a lovely basin. I stopped one last time to get a a shot of the trees on the lower part of the trail before we go back to the car.
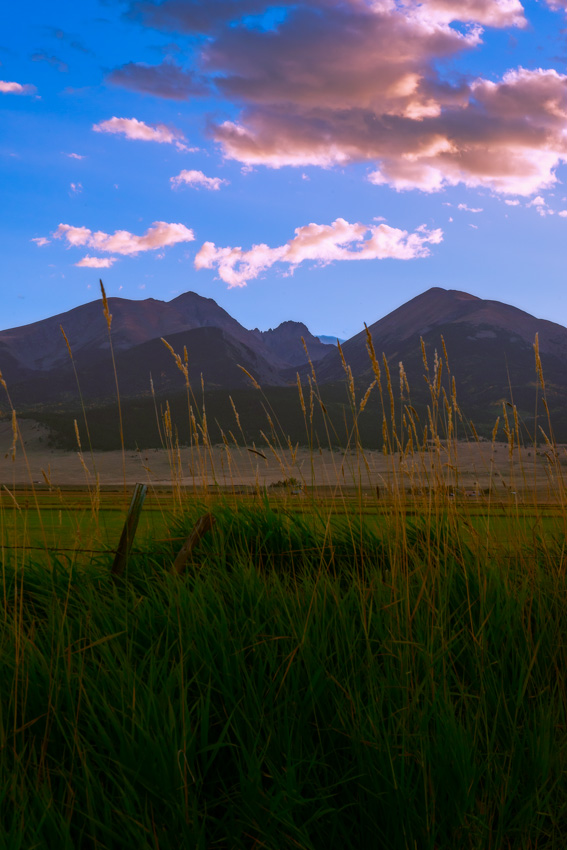
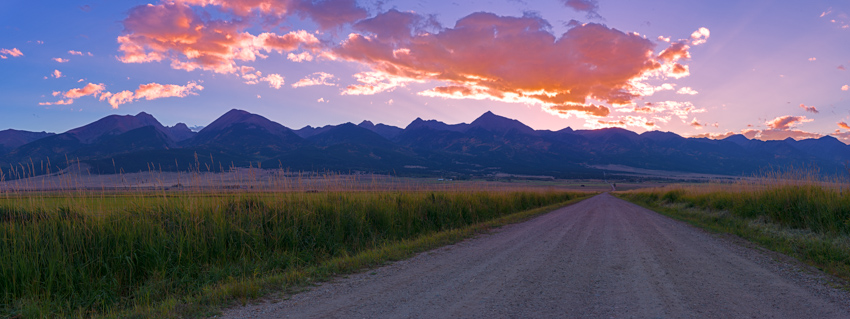
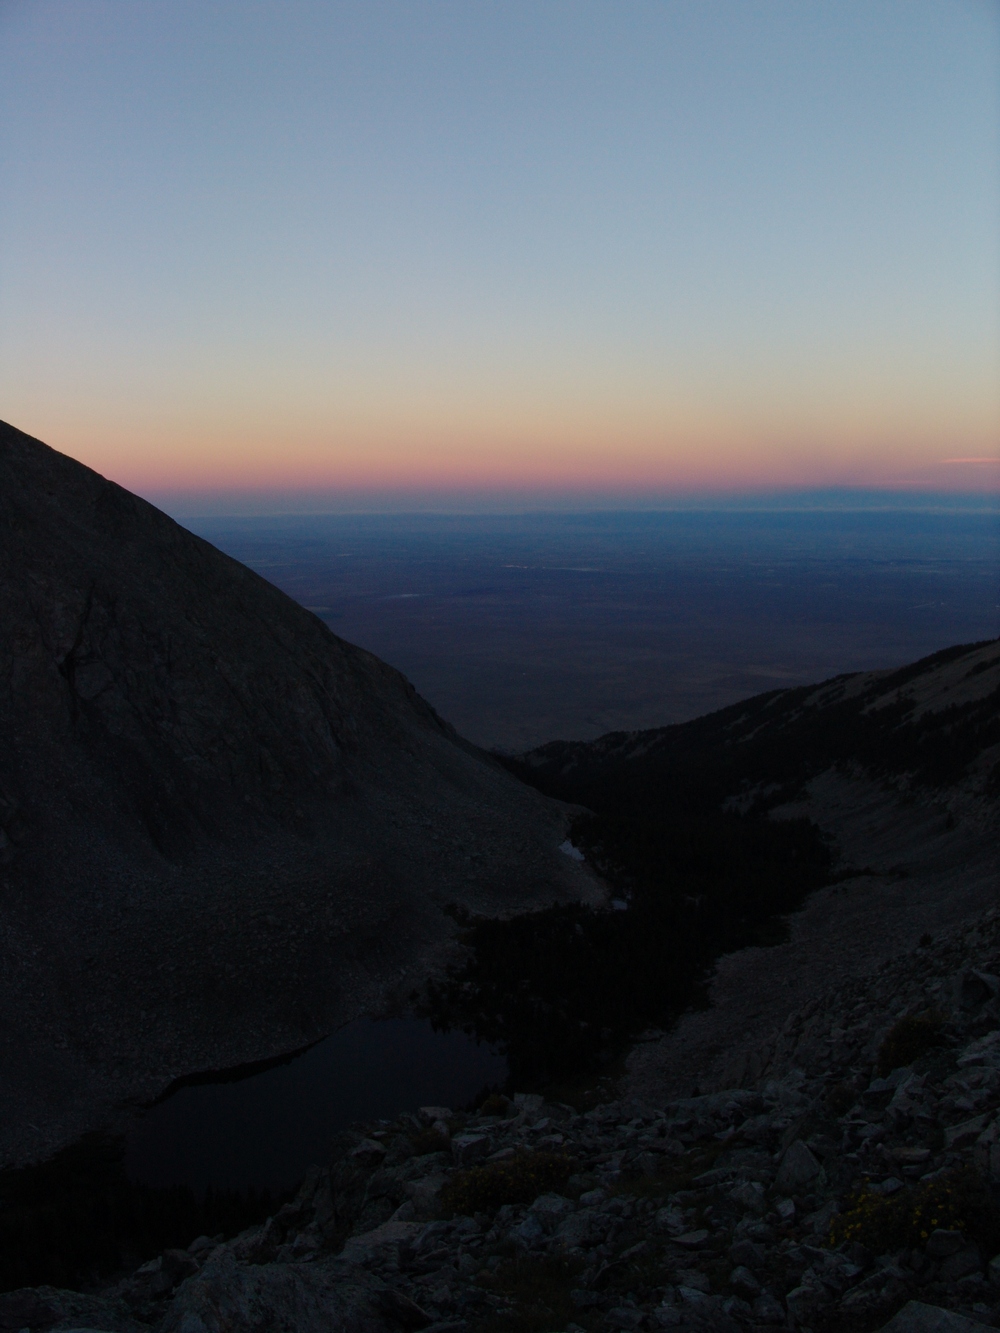
Upon getting back to the car, we found the bag of raisins I had left in the cup holder with a hole in it and lots of shavings around it - apparently a mouse had gotten into the vehicle and helped itself to a helping of raisins. Gross! We drove out carefully on the really horrible South Colony Basin road and enjoyed an amazing sunset over the Crestones to the west of us. A great ending to an amazing day.
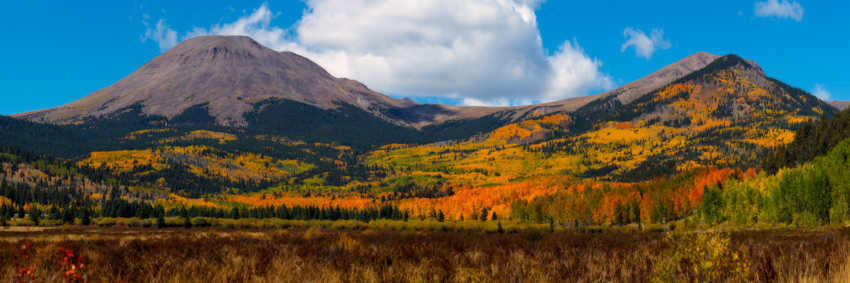
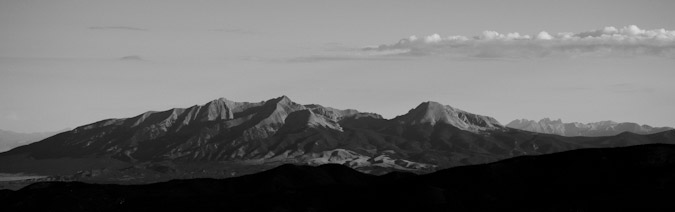
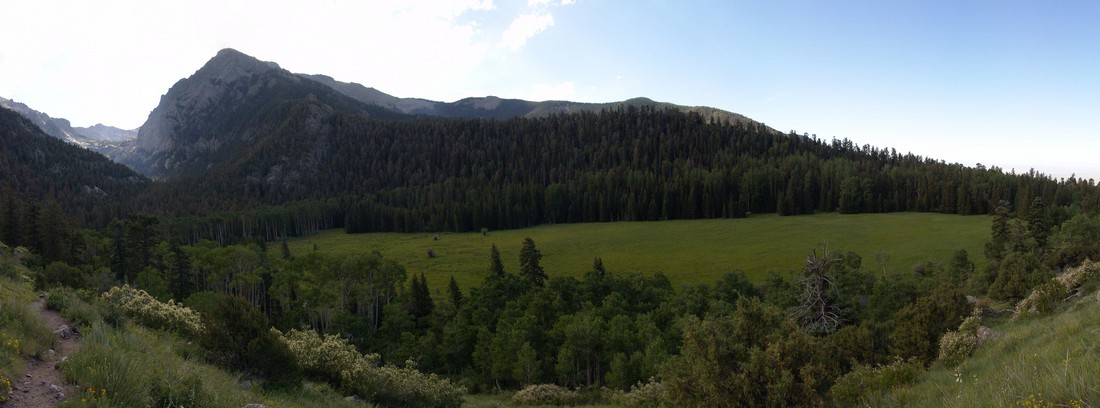
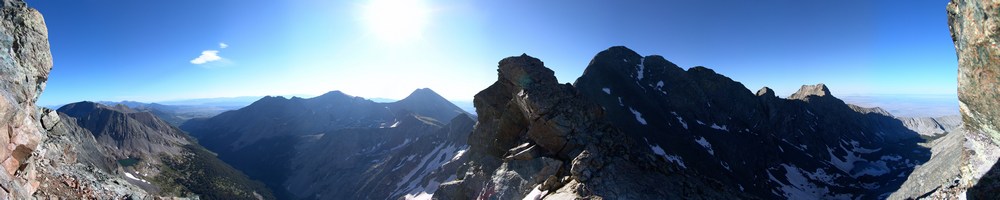
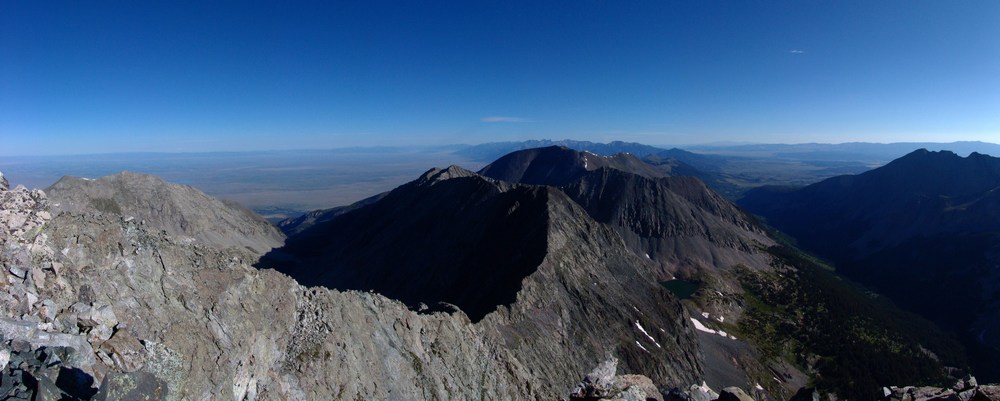
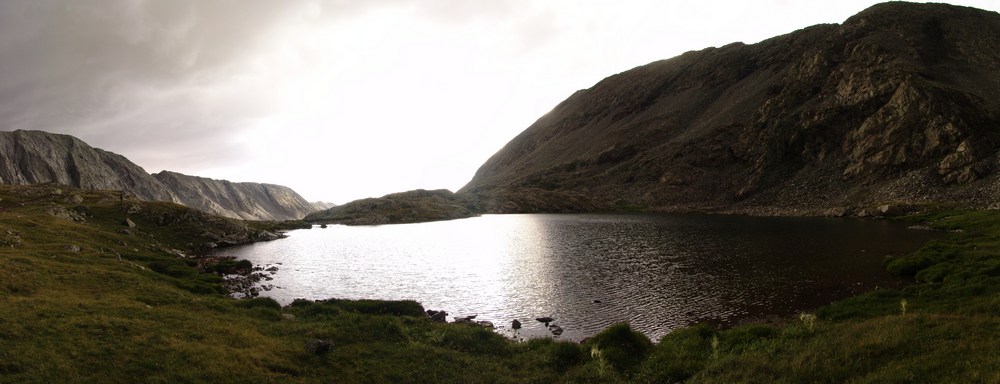
I ended the trip with a nice panorama of the Sangre de Cristo Mountains taken from Horn Creek Road just south of Westcliffe.
... [Click Next to continue reading]
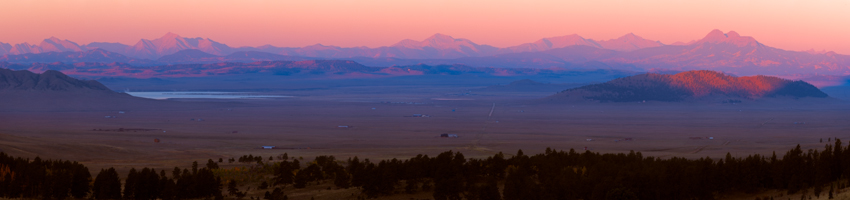
I got up very early the next morning to do a fall colors photography shoot and birding expedition with my mom. We left the house around 5 AM from Colorado Springs and made our way up to Wilkerson Pass. The early light on the peaks to the west was fantastic, although I still would have loved to have some clouds! Spinney Mountain Reservoir was a nice element between us and Mount Princeton above it. From left to right - Antero, Princeton, Yale, Columbia, Harvard and Buffalo Peaks. Awesome.
The plan was to head to the St. Elmo area south of Mount Princeton to photograph the fall colors and keep our eyes out for birds as my mom is very into birding. On the way through South Park, we located a really awesome Great Blue Heron feeding on fish in the mist above the South Platte River.
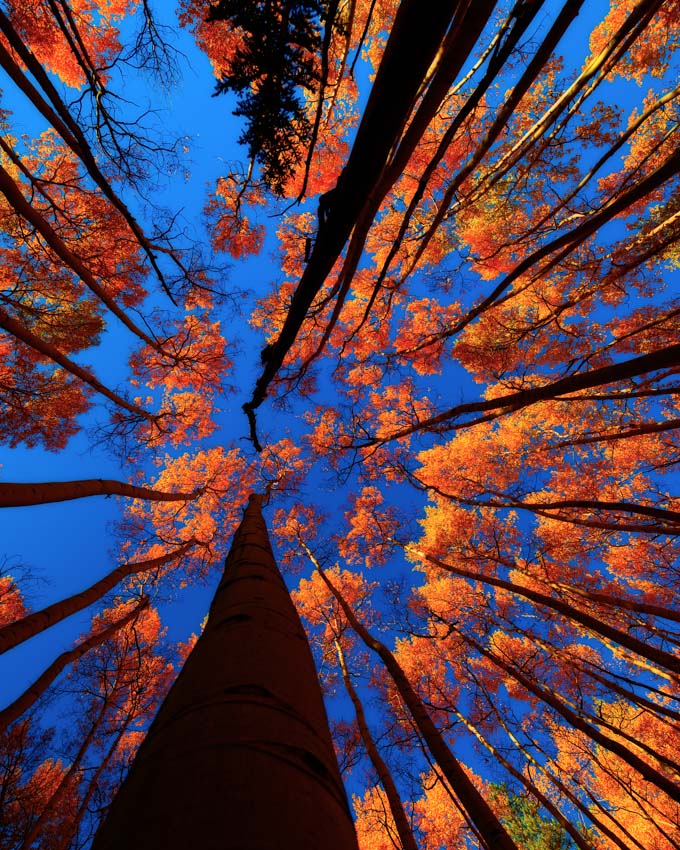
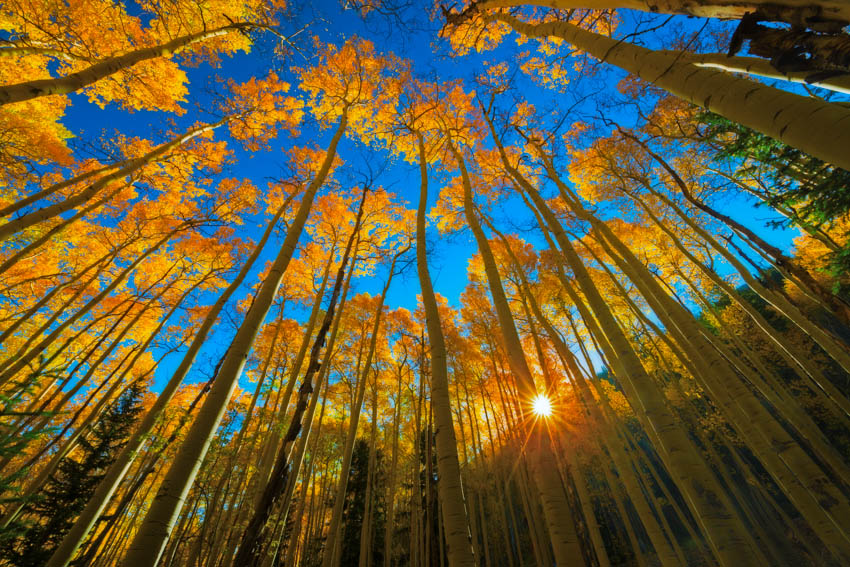
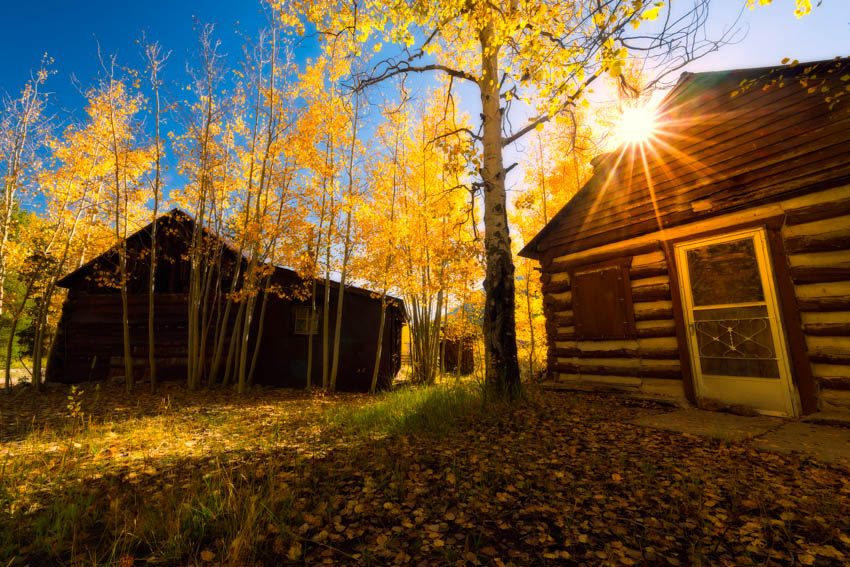
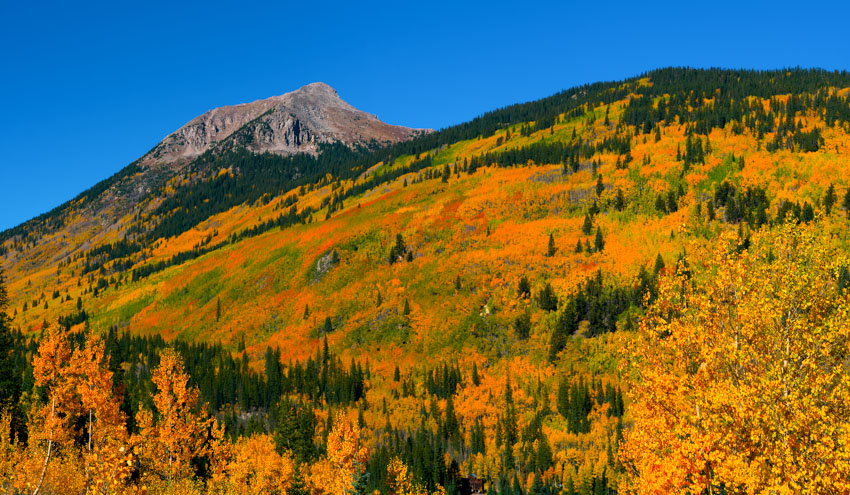
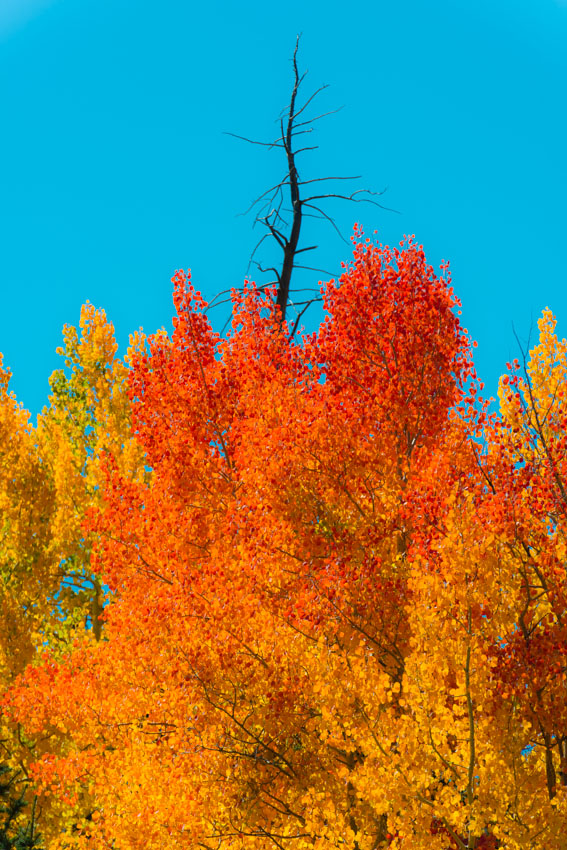
We made our way up towards St. Elmo in no time at all and were immediately rewarded with awesome color on the hillsides around us.
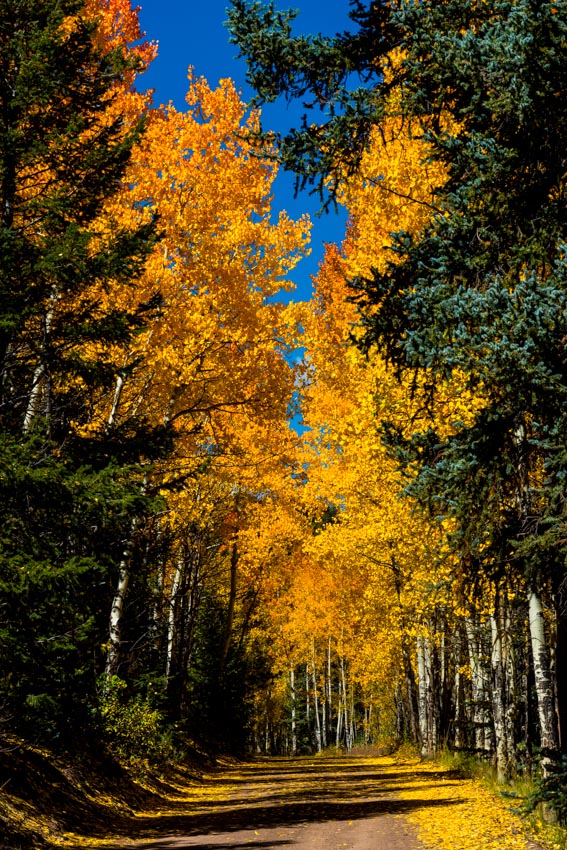
I saw an amazingly photogenic aspen grove off the road and had my mom stop the car, where I spent the next 30 minutes shooting the awesome light and color in the aspen grove.
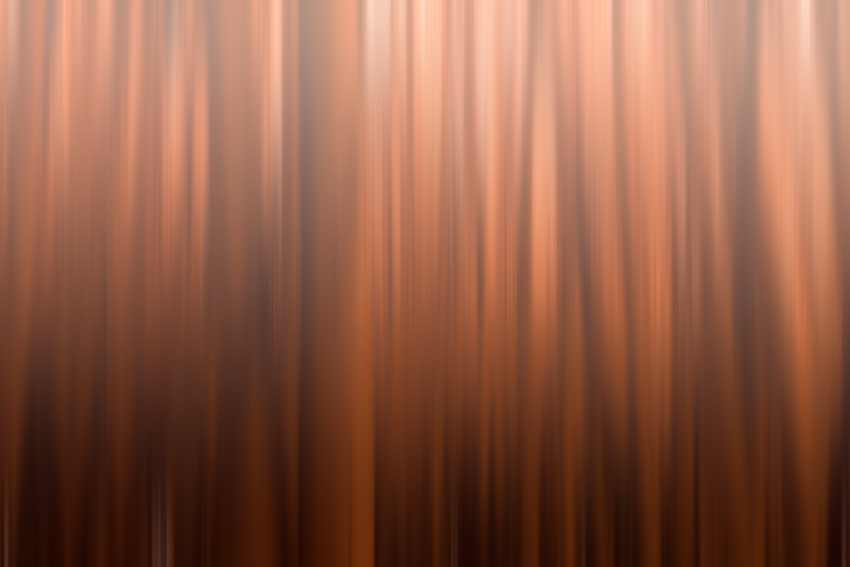
The grove afforded me some great opportunities to try out new techniques and processing concepts that I've been wanting to try, including this abstract use of motion blur and aspen trees.
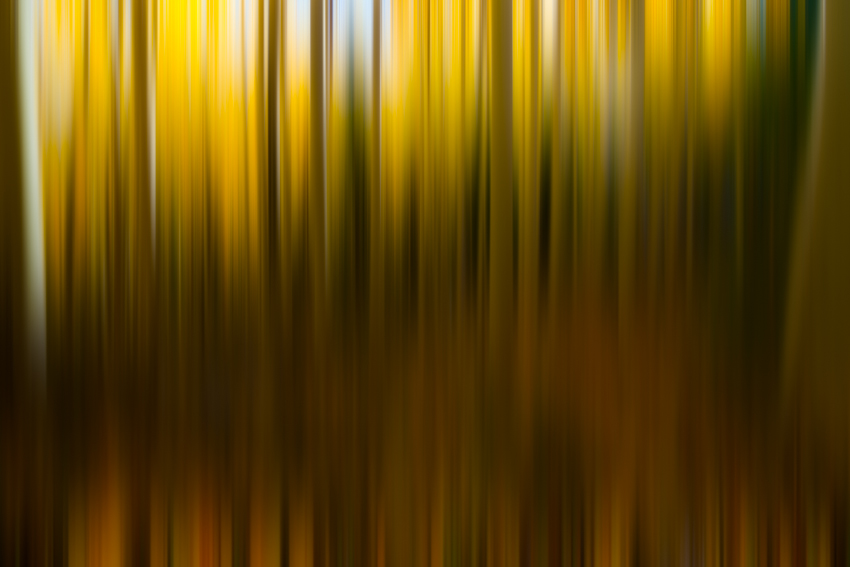
I fell in love with this aspen grove, and could probably shoot fall colors in Colorado for days on end without blinking. This was probably my favorite shot of the whole trip, and I immediately made it available for print purchases (you can click on the photo to learn more about that).
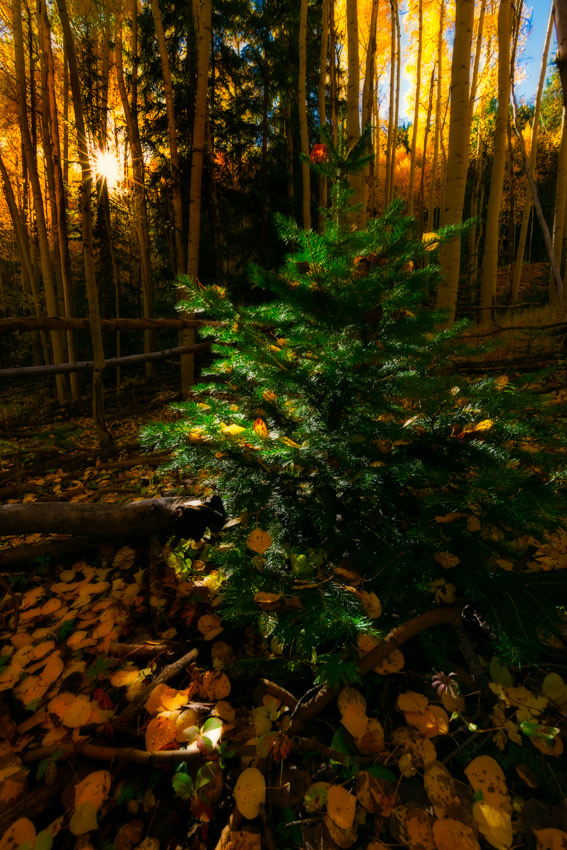
I also found this super cool pine tree covered in yellow aspen leaves that drew my attention and reminded me of a Christmas tree.
We finally made it to the town of St. Elmo and stopped for awhile to enjoy the fresh crisp air and fall colors.
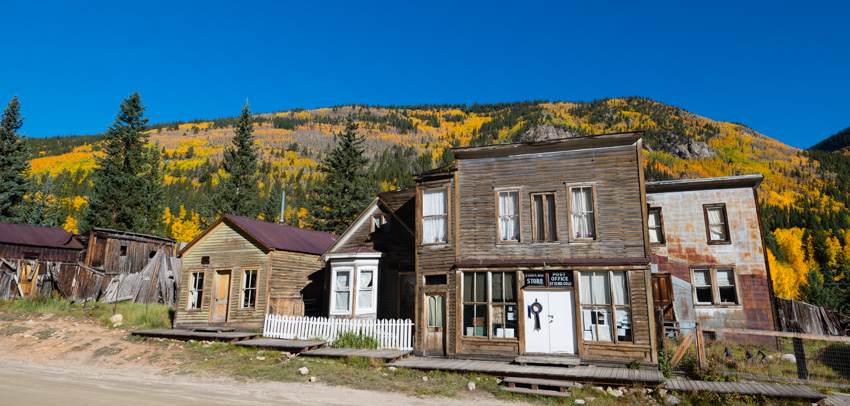
I found these awesome cabins further into the town and thought they were the perfect forground to showcase the area and the fall colors.
I had a good time using my 70-200 to pick out some patterns in the trees in the hillside across the way from St. Elmo, it was quite fun trying to find the best compositions.
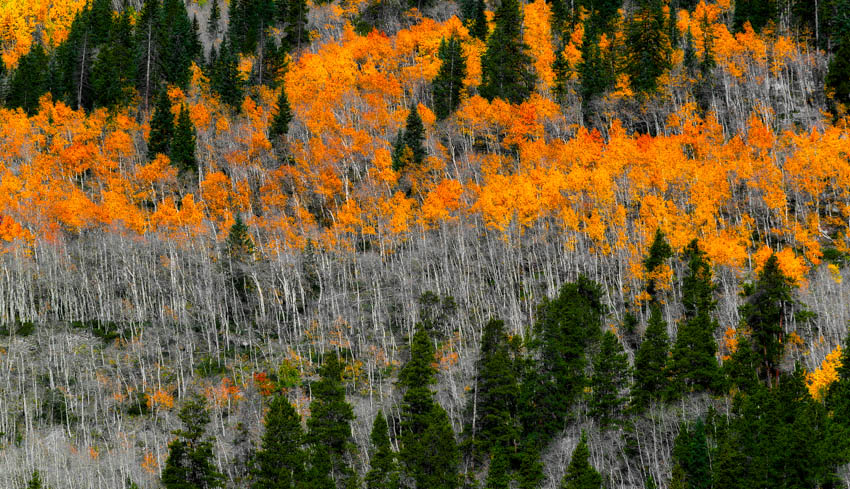
Perhaps my second favorite shot of the day was of this huge mountainside filled with aspen trees changing colors, with an old mining structure anchoring it at the bottom of the frame. So beautiful!
I found another great aspn grove to try out another abstract motion technique as well.
My mom and I decided to leave the St. Elmo area and head over to the Buffalo Peaks area It was a nice drive up into the hills and we were greeted with many wonderful changing fall color scenes.
 |
 |
I was happy to find a nice vantage to snap off this huge panorama of the Buffalo Peaks with the changing fall colors featured prominently.
We also found the foundation of an old cabin here and it made for a nice foreground feature.

I was also happy to get my mom to get into a self-timer photo with me with the Buffalo Peaks scene behind us in the harsh mid-day sun (can't always shoot at the golden hour, right).
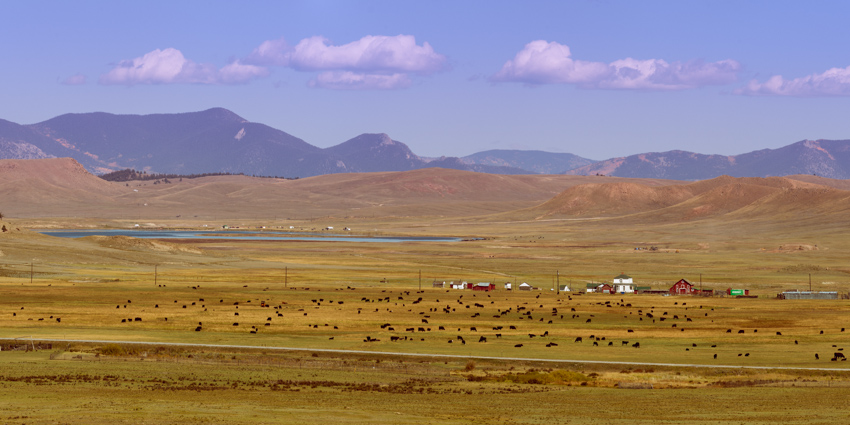
On our way out, I stopped one last time to shoot this telephoto panorama of Highway 285 and Antero Reservoir with cattle and old cabins in the scene. What a pretty day!
While our trip was not filled with epic scenes from my more favorite areas like Kebler Pass, Ohio Pass, Owl Creek Pass or anything from the San Juans, I was still pleased to get into the mountains to photograph the changing fall colors with my mom. It was a great mother-son trip and I know it meant a lot to my mom to spend th day with her. Any chance to get into the Colorado mountains in the autumn is a welcome day for me. I hope you enjoyed my photographs and trip report. I would love to hear from you on your thoughts about the trip report or the photos, or if you have any questions about my photos. Please feel free to leave a message below or to contact me. Thanks for stopping in!
Culebra Peak and Red Mountain - Finishing the Sangre de Cristos

Quite a few people save Culebra Peak (ranked 41st – 14,047 ft.) as their last 14er; however, I wanted to just get it out of the way sooner rather than later. If you’re wondering why I am talking about this mountain as if it is like a trip to the dentist – there’s a reason – it costs $100 to climb it and another $50 if you want to do Red Mountain (ranked 70th – 13,908 ft.). The Culebra sub-range of the Sangre de Cristo Mountains has been embroiled in controversy for years. In fact, the New York Times once called it “the hottest environmental dispute in the Rockies.” Imagine – 77,500 acres of pristine alpine terrain with elk and timber in huge supply, including one of Colorado’s coveted 14ers – all owned by one person. The land used to be called the Taylor Ranch and was renamed the Cielo Vista (heavenly view) Ranch by the newest (and present) owners, Bobby Hill and Richard Welch. The story goes back to 1843, when a long series of events carved the land up into parcels, which were shrouded in controversy due to non-traditional land use rights built into the deeds of the land. Essentially, descendents of the original Mexicans that occupied the land before the Mexican-American War of 1846 – a conflict caused by the annexation of Texas – claimed that they had communal rights to the land to include logging and livestock grazing. The land was purchased by Jack Taylor in 1960 for $500,000 with the provision in the deed that the land was subject to the claims of the local people; however, Jack Taylor had no intention of honoring that issue, and many lawsuits ensued. Additionally, Jack Taylor was known to beat trespassers and arsonists that frequented his property due to the controversy.
Eventually, Jack Taylor was jailed himself for taking matters into his own hands and had an assassination attempt on his life in 1975. After that, he rarely returned, all the while the land was being poached for hunting, climbing and other uses. Eventually, Jack Taylor died in 1988 and the land was passed on to his son, Zachary Taylor, who continued to log the forest of the land, which caused even greater controversy. Long story short, climbing access to Culebra has been mixed over the years, and it has always been a sore topic for many that are on the quest to complete the 14ers. Personally, I have mixed feelings about the practice of charging money to allow someone to walk on your property. On one hand – it is a piece of entrepreneurial genius. On the other hand – it barely feels right for someone to “own” a mountain. I am sure that I am not the only person to think about this and I am sure I won’t be the last!

Now that I am done with the brief history lesson – here’s the details if you’re ever interested in climbing Culebra and Red Mountain yourself. Reservations are required if you want to pay to climb - to reserve a space, call the office in Glen Rose, TX at 254-897-7872. They usually start taking reservations in mid-May and spaces go quickly. They are quite friendly – and send you a packet of materials about the mountain and their rules. The only real downside to the arrangement (other than the rather exorbitant cost) is the fact that you are not permitted to start at your own time – you are required to wait at the property gate until 6 AM, at which time they open the gate and escort you to the ranch proper, where you are required to pay and listen to a speech on how to drive up the road to the trailhead. All-in-all the whole experience left me with a foul taste in my mouth. I felt like herded cattle – like a child being told what to do. I suppose this is out of necessity for the ranch owners; however, I cannot help but voice my distaste for the whole affair. To their credit – they are super nice people and seem to run a very clean operation. OK - rant over.
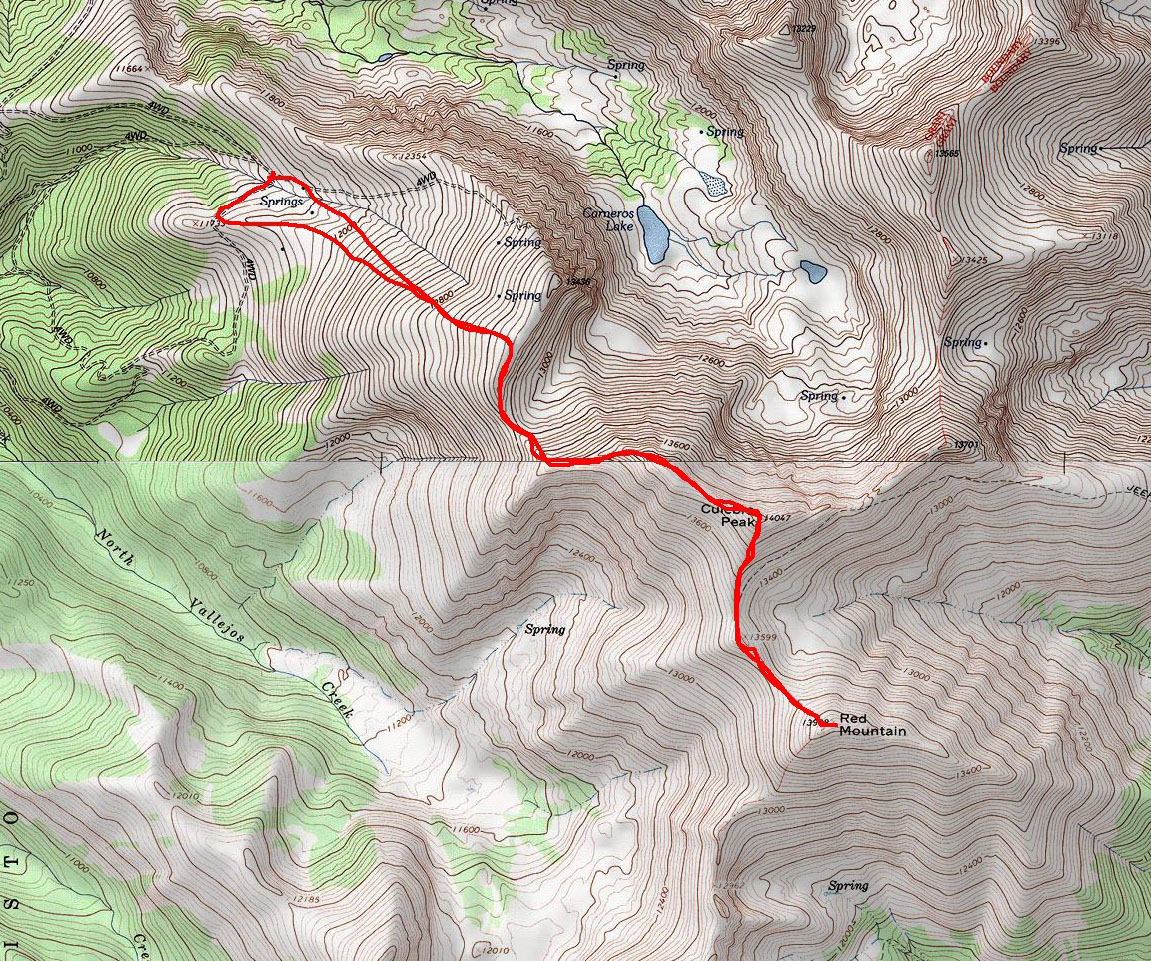
So, Regina and I made reservations back in May for both Culebra and Red Mountain. Since Red Mountain is in the top 100, I felt obliged to add it on. So – Regina and I left for the town of San Luis on Saturday - 7/23/11 to stay the night at the gate of the Cielo Vista Ranch and await for the 6 AM cattle herding to the ranch proper. We arrived rather late on Saturday and set-up our campsite in what seemed to be a desolate desert in the middle of nowhere. I was not going to let that bother me though – I wanted to experiment with some star trails photography and light painting. The results were very appealing.
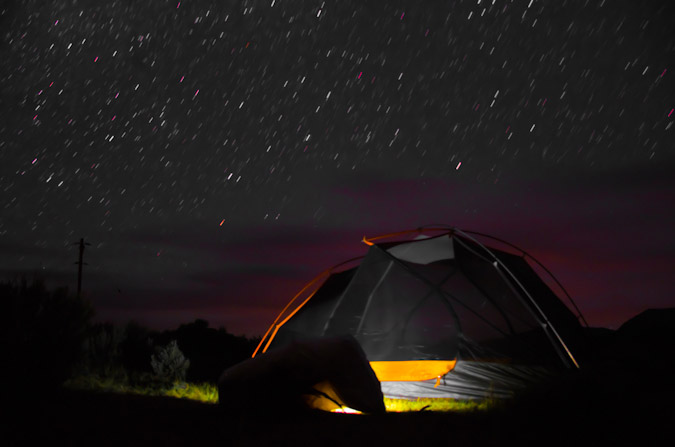
I decided to use the tent as a foreground subject and was able to locate the North Star and centered it above the tent so that the stars rotated around the North Star in a concentric circle pattern.

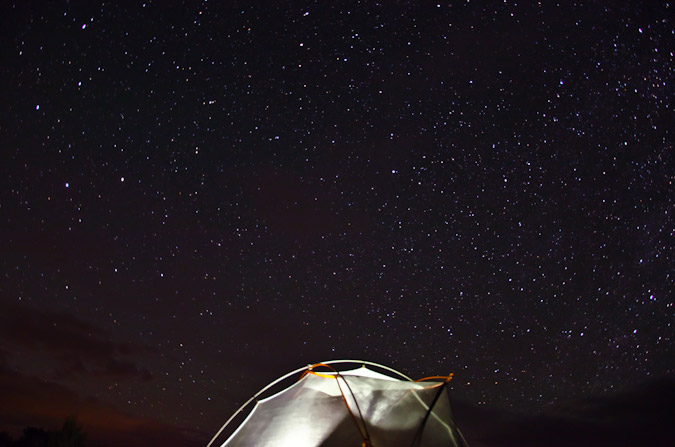
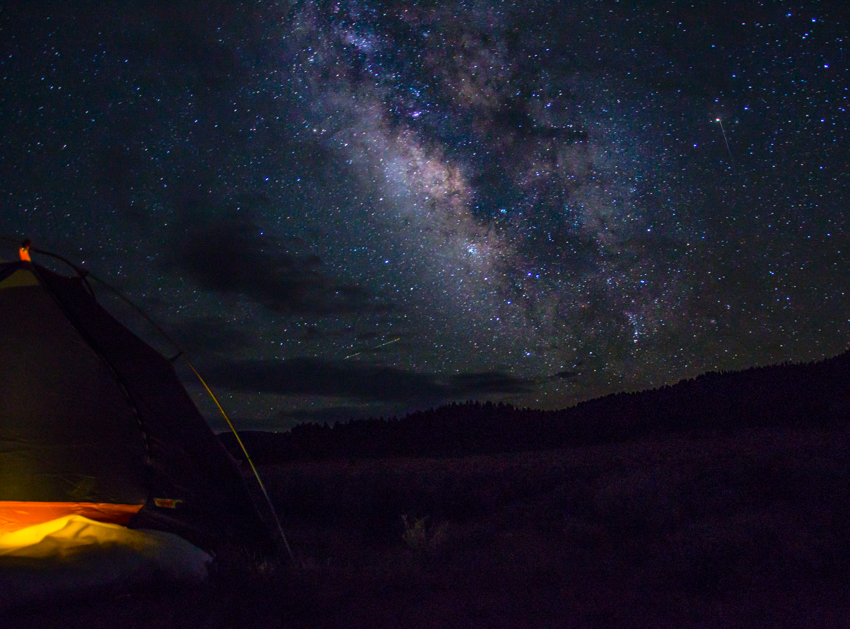
Additionally, I was able to get some pretty nice photos of the Milky Way and other night sky features.
We set our alarm for 5:30 AM and hit the sleeping bags. We got up and followed the herd of cattle at the gate up to the ranch, where we got in line to pay our fees (cash or check only) and to wait for further instructions. Once instructions on how to drive your car in 4-high vs. 4-low were given in great detail, we drove to the upper trailhead, where we found ourselves at the base of the start of Culebra Peak. On the side of the mountain were probably 40-50 elk running up the ridge – quite a sight – but unfortunately too quick for me to get a photo.
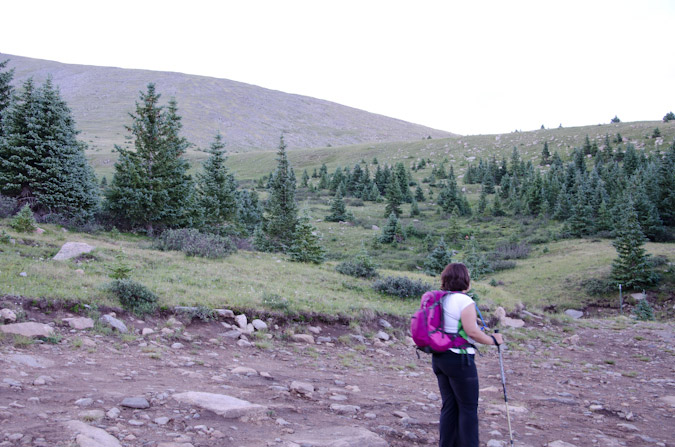
Since the ranch bills this mountain as being the most pristine 14er experience, there are no trails. We set-off up an old road to the west and joined up with the northwest ridge and began our climb, which mostly consisted of hiking on moderately steep grass and rock up the ridge to join another ridge.
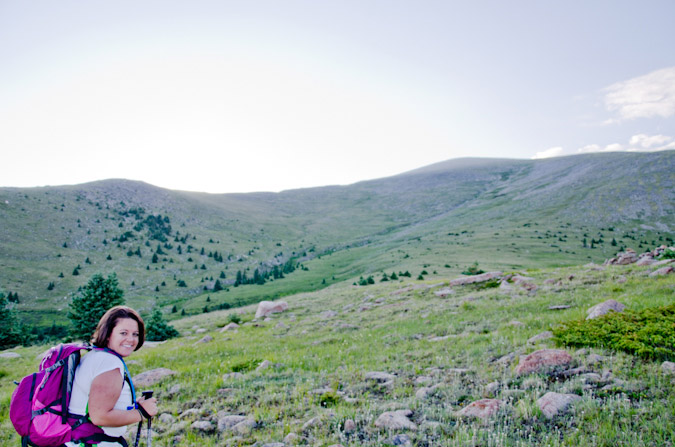
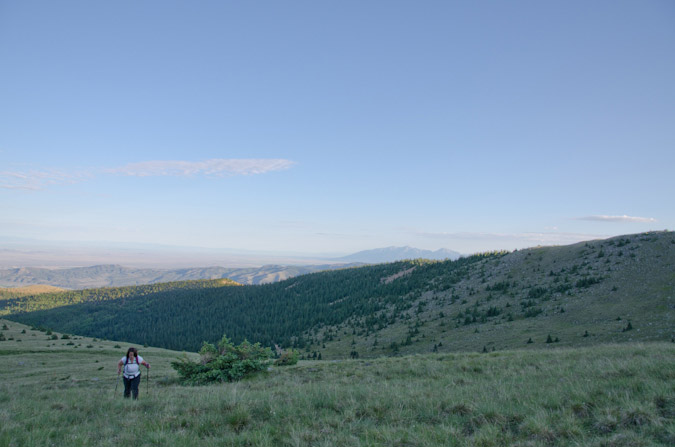
I was feeling really strong, and made it to the ridge in little time, waiting for Regina periodically to catch-up.
Once the ridge is reached, you find yourself standing before a giant cairn and a lofty view of Culebra Peak.
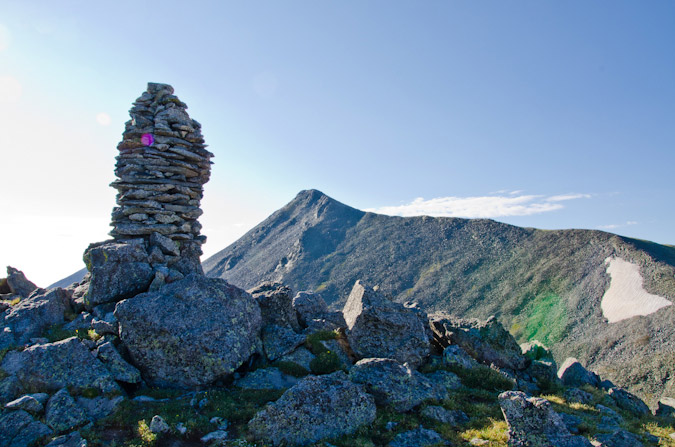
The route from here was quite obvious – follow the ridge to the top, which is just what we did. I found the route somewhat pleasant, with minor scrambling challenges here and there, but mostly the route was class 1 and quite boring, in all honesty.
Contributing to the relative boring nature of this hike, Culebra lacks much in terms of scenic opportunity. The only notable mountains in view from Culebra are Blanca, Little Bear, and Lindsey far to the north, with some minor 13ers nearby (Trinchera to the Northeast, Vermejo and Purgatoire Peaks to the South).
Needless to say, I was not terribly impressed by much of the views from Culebra – which is not to say it was ugly – it just was not spectacular or notable in comparison to many other mountains I’ve climbed. About ¾ of the way up, I decided to take a 360 degree panoramic set, which turned out great.


The rest of the hike up to Culebra’s summit was easy, with one minor false summit to go over and some fairly easy boulders to navigate over.
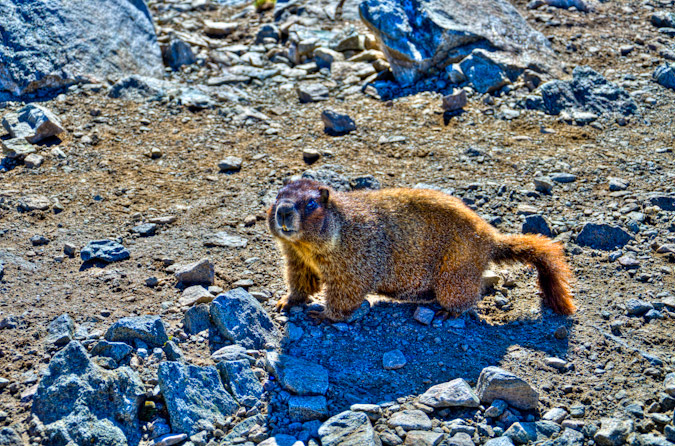
Once on top, I waited for Regina for about 30 minutes and took some photos. The summit was full of quite friendly marmots, which were not afraid to come right up and try to eat my backpack.
Once Regina arrived, we took a few more photos and then Regina explained that she did not feel well, so she hung out on the summit and told me to go ahead and hit Red Mountain real fast.

I hustled down the ridge and up to Red Mountain in no time at all – making it over in just under 25 minutes from Culebra. Views from Red Mountain were a little better, so I took a nice 360 panoramic from there, signed the register, and headed back over to Culebra.

With Culebra and Red Mountain complete, I was left with 34 of the highest 100 and the 15 from the Sangre de Cristo Range completed. It felt great. I hustled back over to Culebra in just over 30 minutes and was pleased to see that Regina had already headed back down.
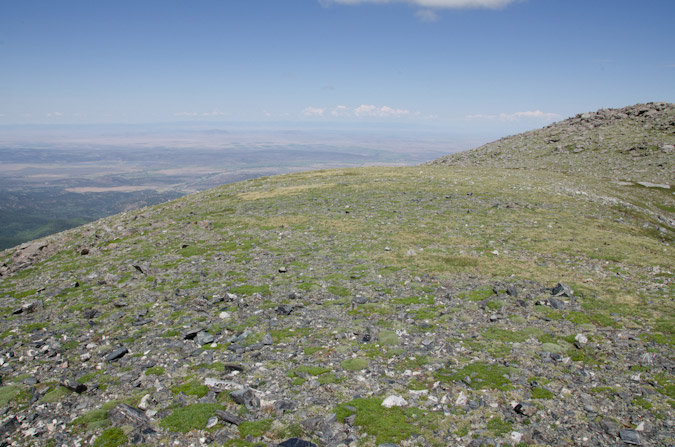
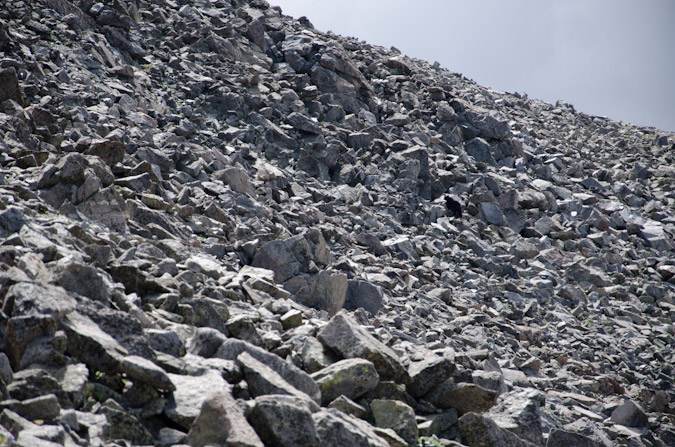
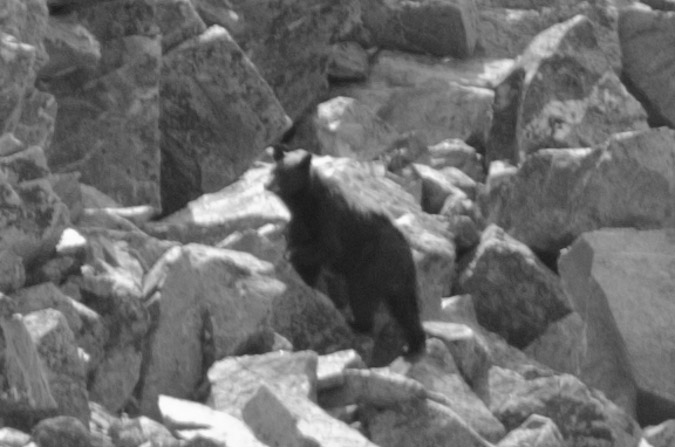
I embarked back down the ridge and was greeted abruptly by yelling from below. Two women were screaming: “There is a bear 40 yards to your left – stay on the ridge!” WHAT!? I’ve never heard of a bear above treeline before, nor have I seen one in the wild, period. That says a lot considering how often I hike. I looked at my altimeter watch and I was at 13,600 ft. Unbelievable! What the hell was the bear doing at 13,600 ft? I did not want to stick around and find out, so I quickly headed for the two women and saw the bear rummaging in the boulders – I presume he was looking for bugs to eat. He was a young bear – maybe 2 years old.
I kept on hiking and eventually rejoined Regina on last section of the down climb from Culebra. We were able to make it back to the car just before hearing the first thunder from a storm that had quickly built above Culebra. We were both thankful to be off the mountain and headed out. We stopped a few times to get photos of Culebra and also of the Blanca massif from the town of San Luis.

Next up – Snowmass Mountain and Hagerman Peak!
Just a reminder - this site costs me time and money to maintain - if you find it useful, please consider supporting the site by remembering to use the affiliate links, especially if you purchase photography related gear from Adorama. Thanks!
{fcomment}
Kit Carson Mountain, Challenger Point, Columbia Point, and "Kitty Kat Carson" - An Elevated Playground

Kit Carson Mountain is a very prominent mountain located in the Sangre de Cristo Range. The area surrounding Kit Carson Mountain is both rugged and pristine, with views of amazing peaks such as Crestone Needle and Crestone Peak in abundance. The hike to Kit Carson Mountain by way of the Willow Creek trailhead is nothing short of astounding, with breathtaking vistas available the whole way up. To put it lightly, this is one of the best hikes in Colorado, bar none.
Here are some meaningful statistics from my adventure up these amazing mountains:
Challenger Point – 14,081 ft – ranked 34th highest in Colorado
Kit Carson Peak – 14,165 ft – ranked 23rd highest in Colorado
Columbia Point – 13,980 ft – ranked 56th highest in Colorado
“Kitty Kat Carson” – 13,980 ft – unranked
Total distance traveled: Approximately 15 miles
Total elevation gain: 6,500 ft.
By now you might be wondering what makes a mountain ranked versus unranked. This is a fairly controversial topic in the climbing community. Basically, there is only one factor to consider when determining if a mountain should be "ranked" and that is prominence. The prominence of a peak is the height of the peak’s summit above the lowest contour line encircling it and no higher summit. Prominence is interesting to some mountaineers because it is an objective measurement that is strongly correlated with the subjective significance of a summit (and how difficult it is to climb). Peaks with low prominences are either subsidiary tops of some higher summit or relatively insignificant independent summits. Peaks with high prominences tend to be the highest points around and are likely to have extraordinary views. In the case of Colorado mountains, most mountaineers use a cutoff of 300 ft / 91 m to determine whether or not a mountain is ranked or not. So using “Kitty Kat Carson” above as an example, since there’s only 80 ft in elevation drop between itself and Columbia Point, it is not ranked. Alternatively, since there is 360 ft in elevation drop between Columbia Point and Kit Carson Peak, it is ranked.
I picked up my friend Terry from his condo at 5 AM on Friday and departed for the quaint town of Crestone. We arrived at the Willow Creek Trailhead at about 9 AM. There were several vehicles at the trailhead, which was kind of surprising given that it was still early on a weekday. This was going to be our third backpacking trek in as many weeks. This week I was able to get my pack down to 45 pounds, thanks in part to some lightweight food my mom graciously provided to me the previous day. We began our hike up the trail, which was well travelled. About 5 minutes into our hike, a gentleman with a long gray beard was coming down the trail and was very friendly to us, warning us of electrical storms. I commented to Terry that this was not my first rodeo and that the man reminded me of Jesus. I was hoping that his presence was not a sign of things to come… bearded man looking like Jesus appears out of nowhere and warns us of lightning… The trail was such a nice change from last week since it was actually easy to follow and was clearly maintained and free of vegetation and confusing side trails. The trail makes many large switchbacks up a gradual slope and then at the top of this slope it drops you right next to a huge meadow, accompanied by great views of part of Challenger Point.
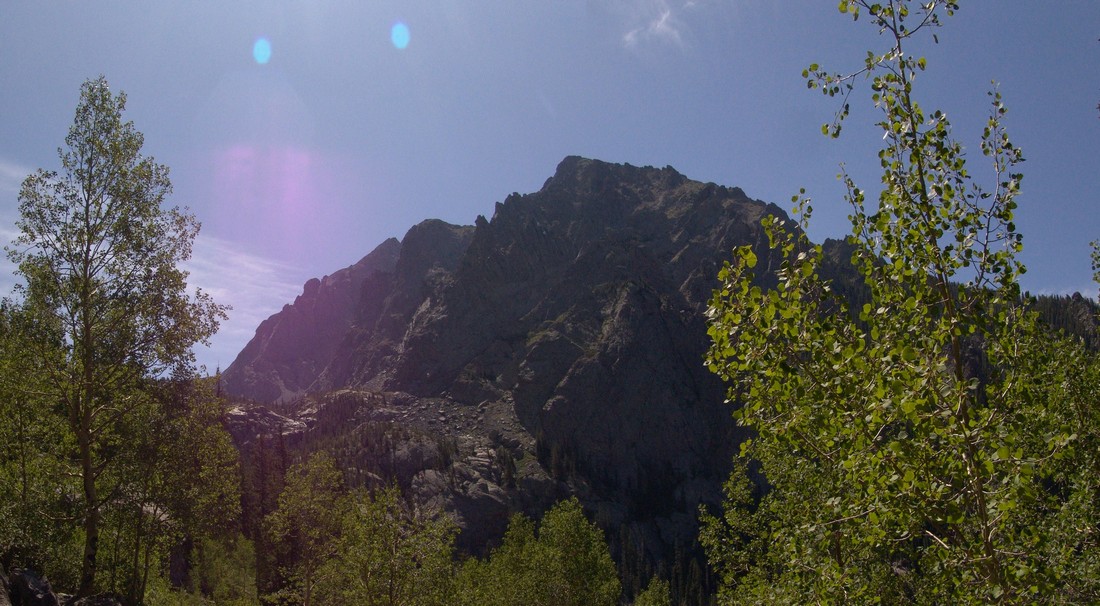
After awhile, the trail brought us closer and closer to Challenger’s headwall.
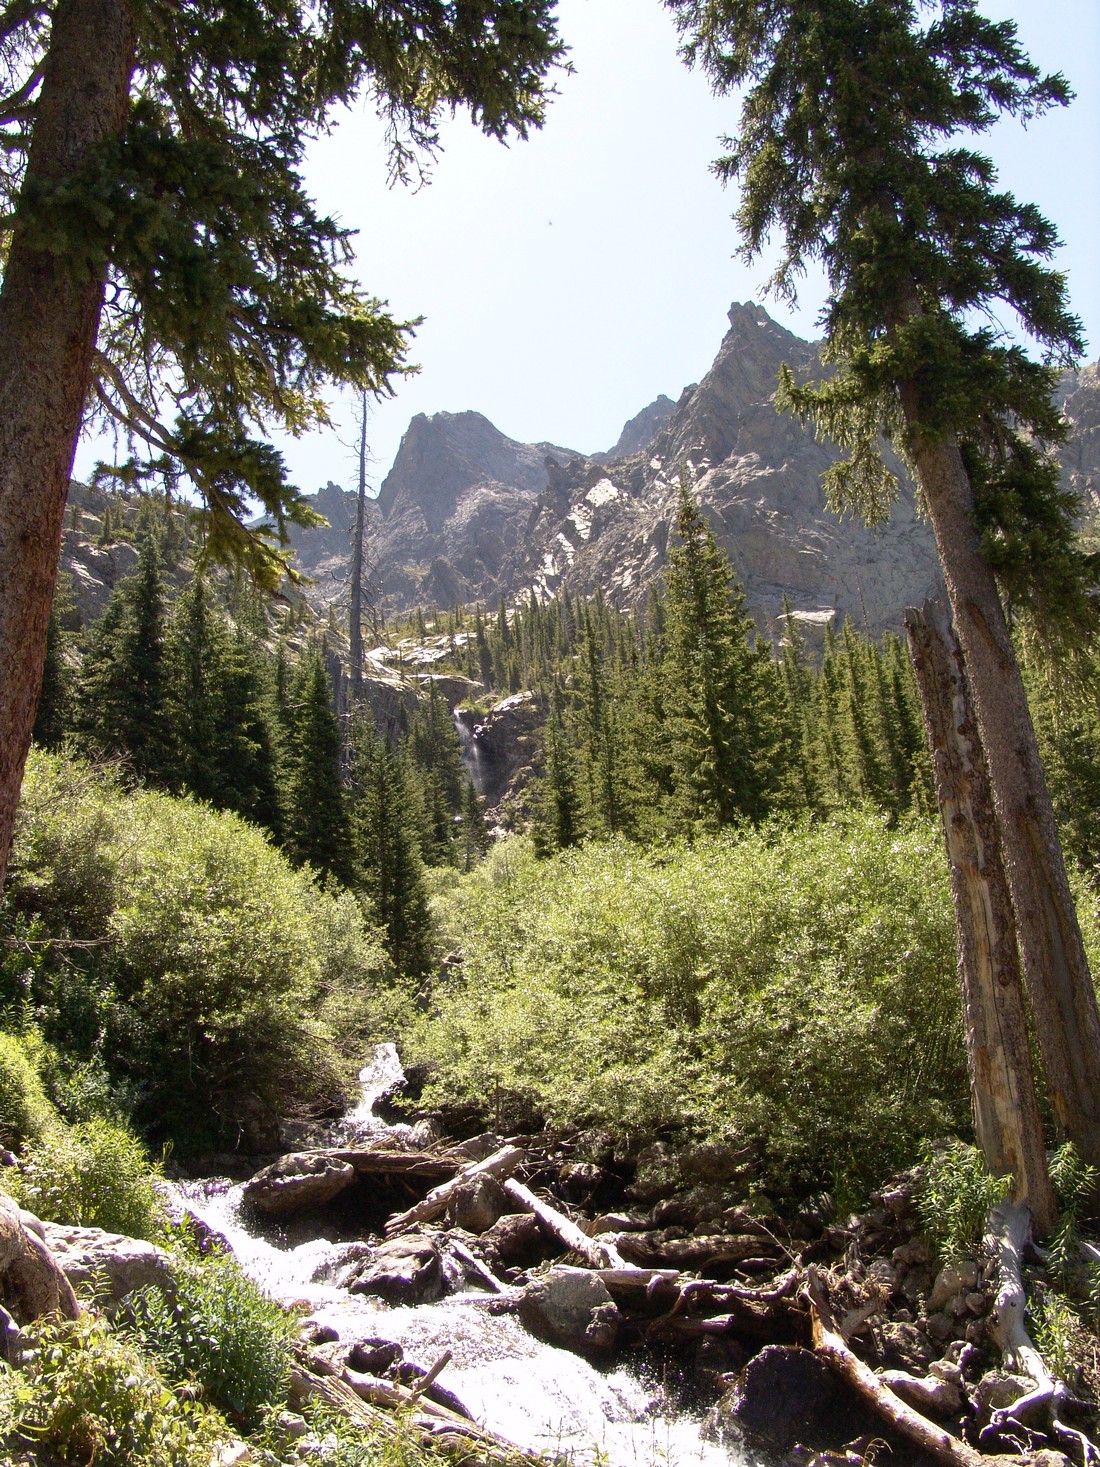
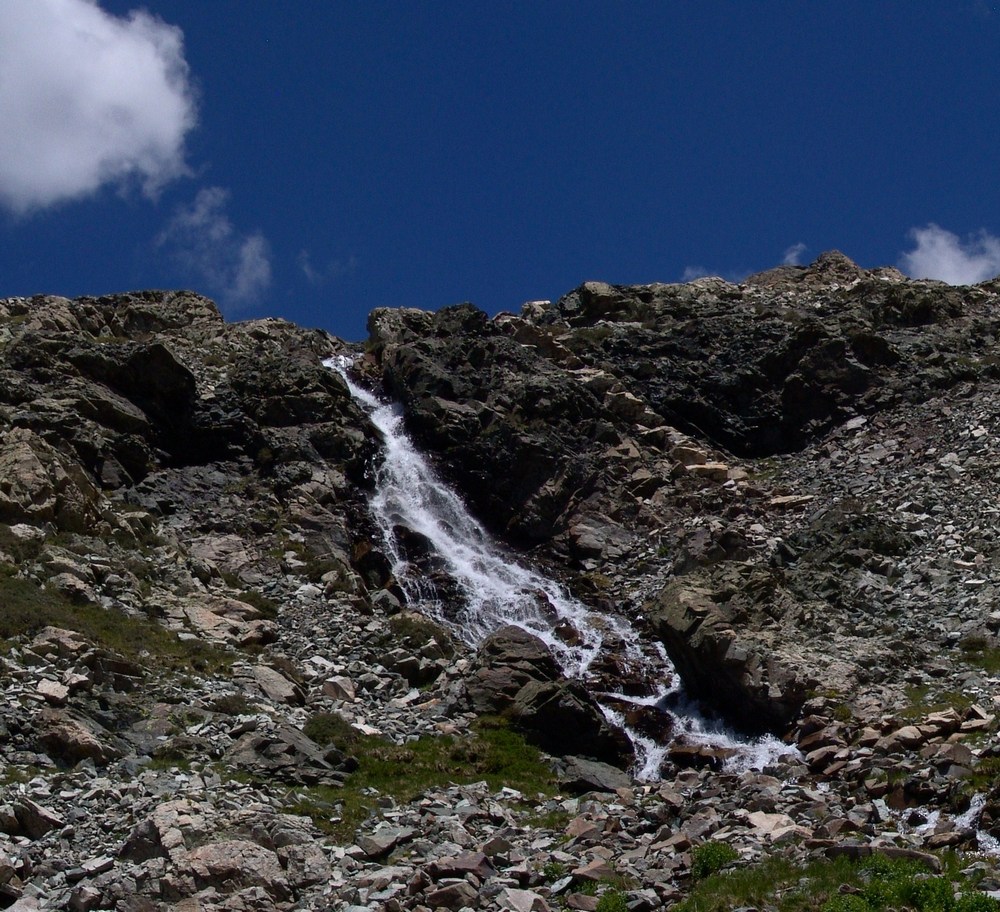
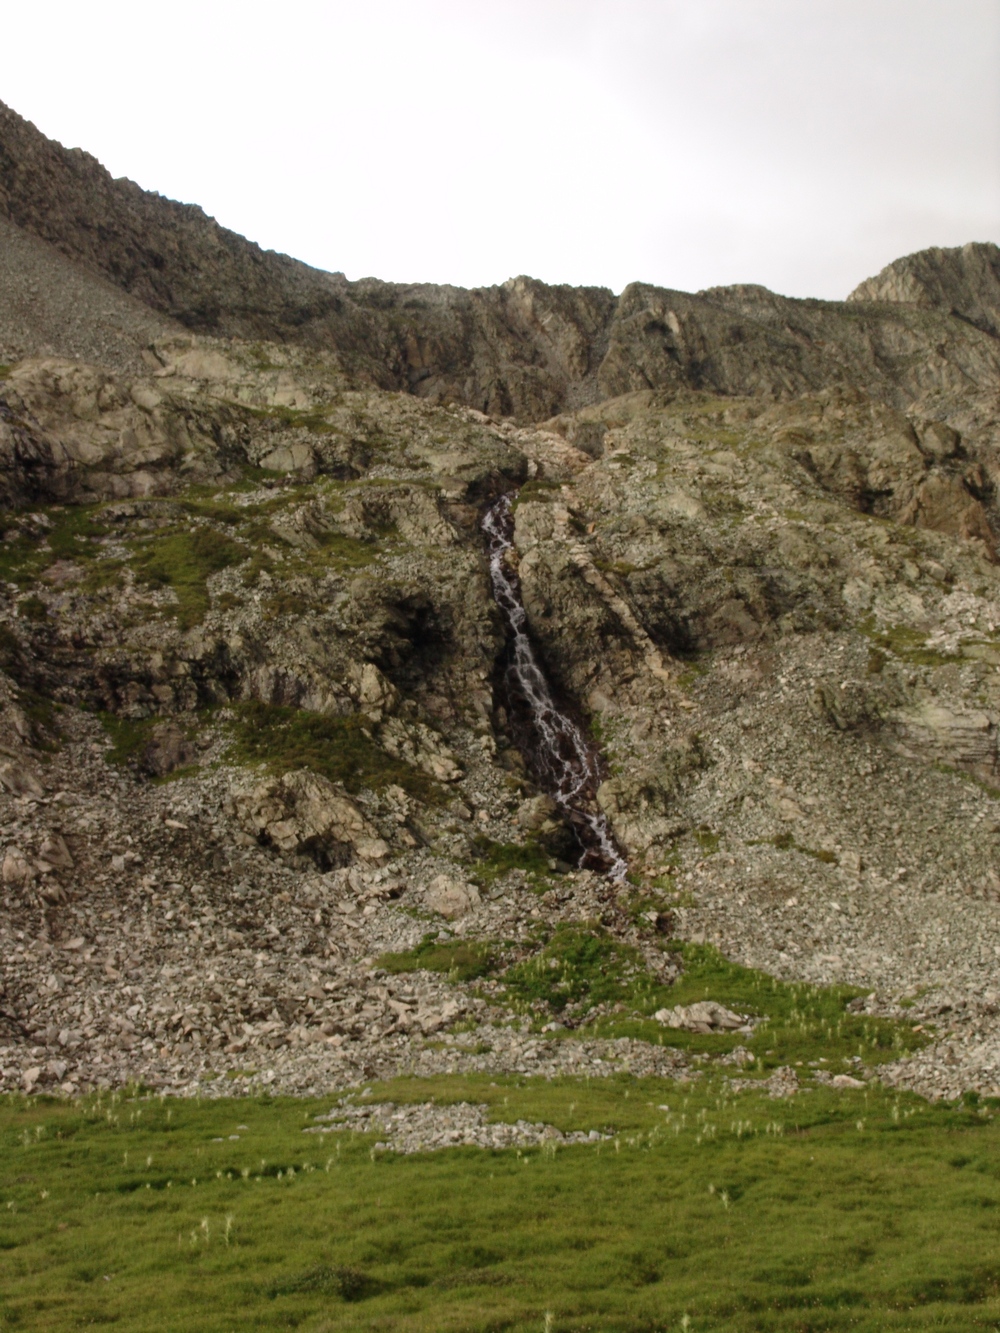
Shortly thereafter, the trail begins a long series of shorter switchbacks leading to the north and east until a large waterfall is exposed at the base of the headwall.
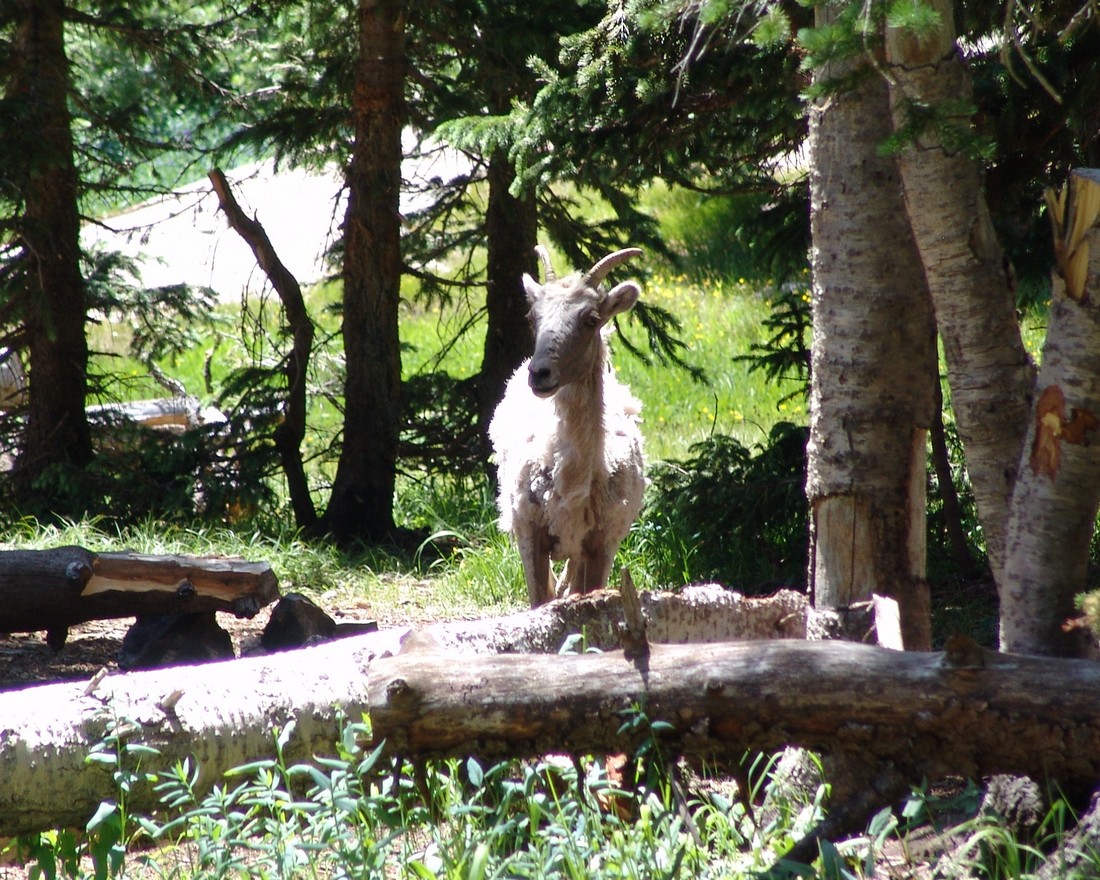
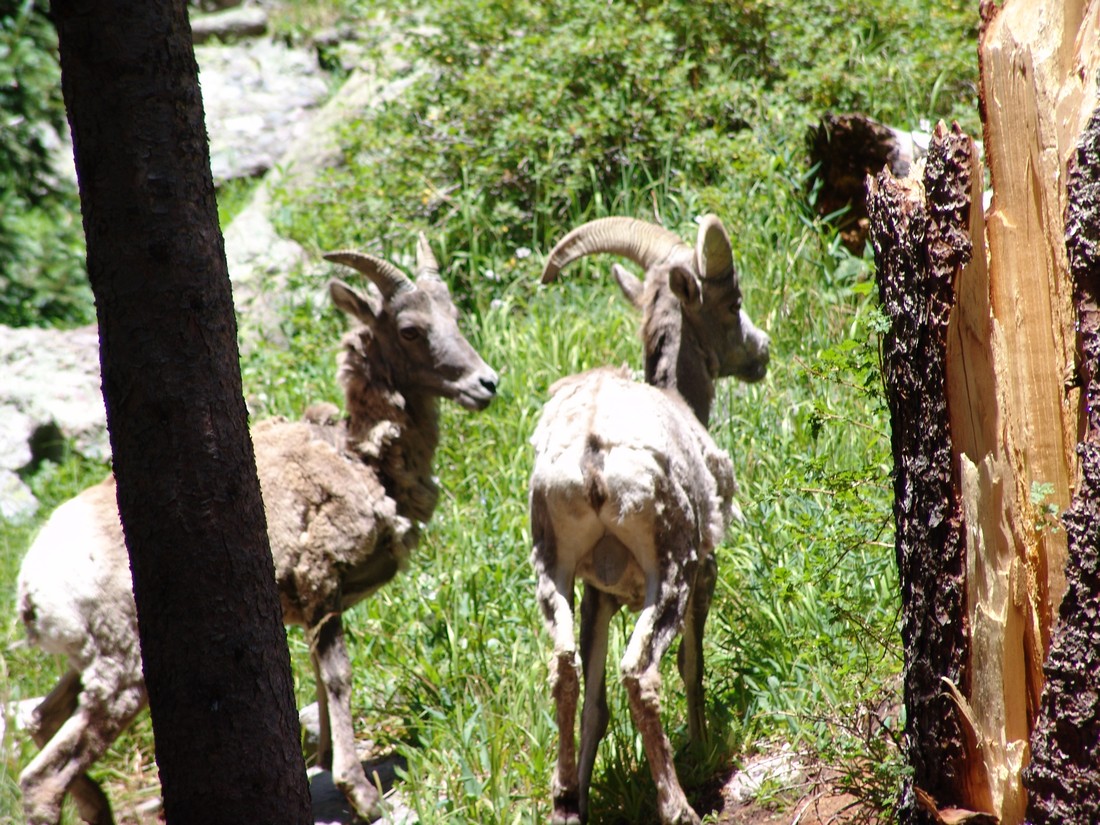
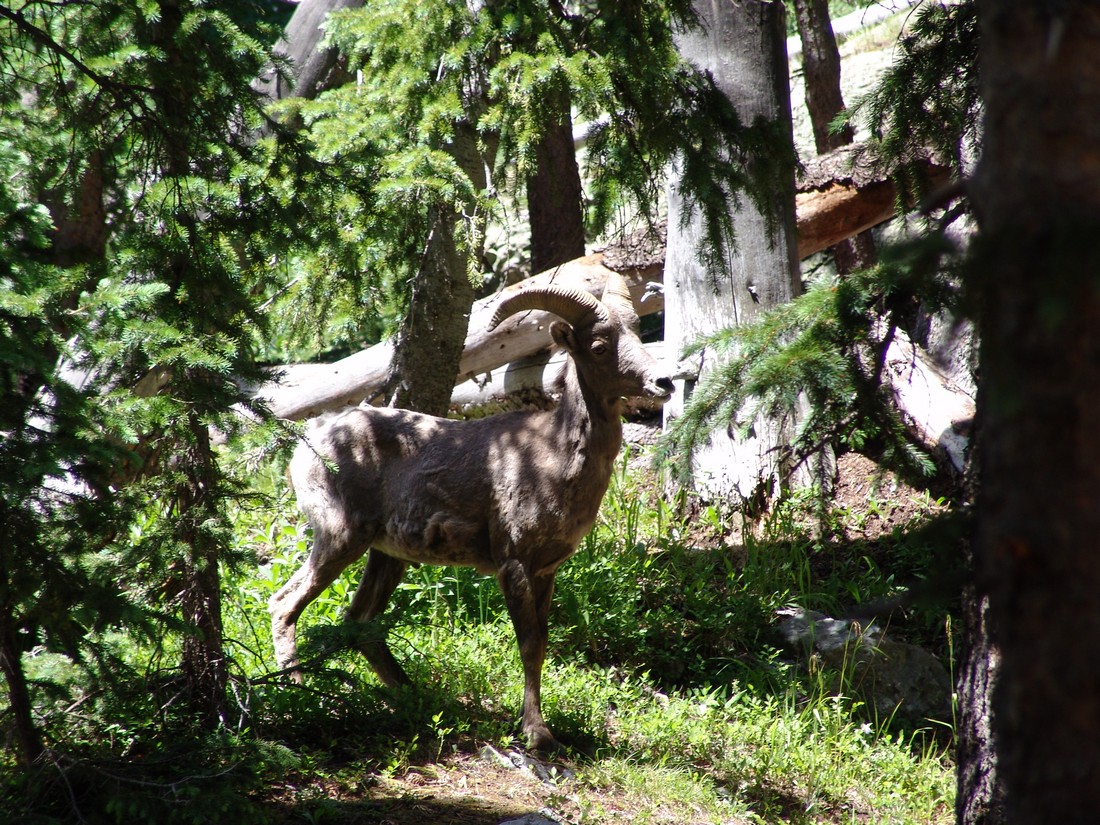
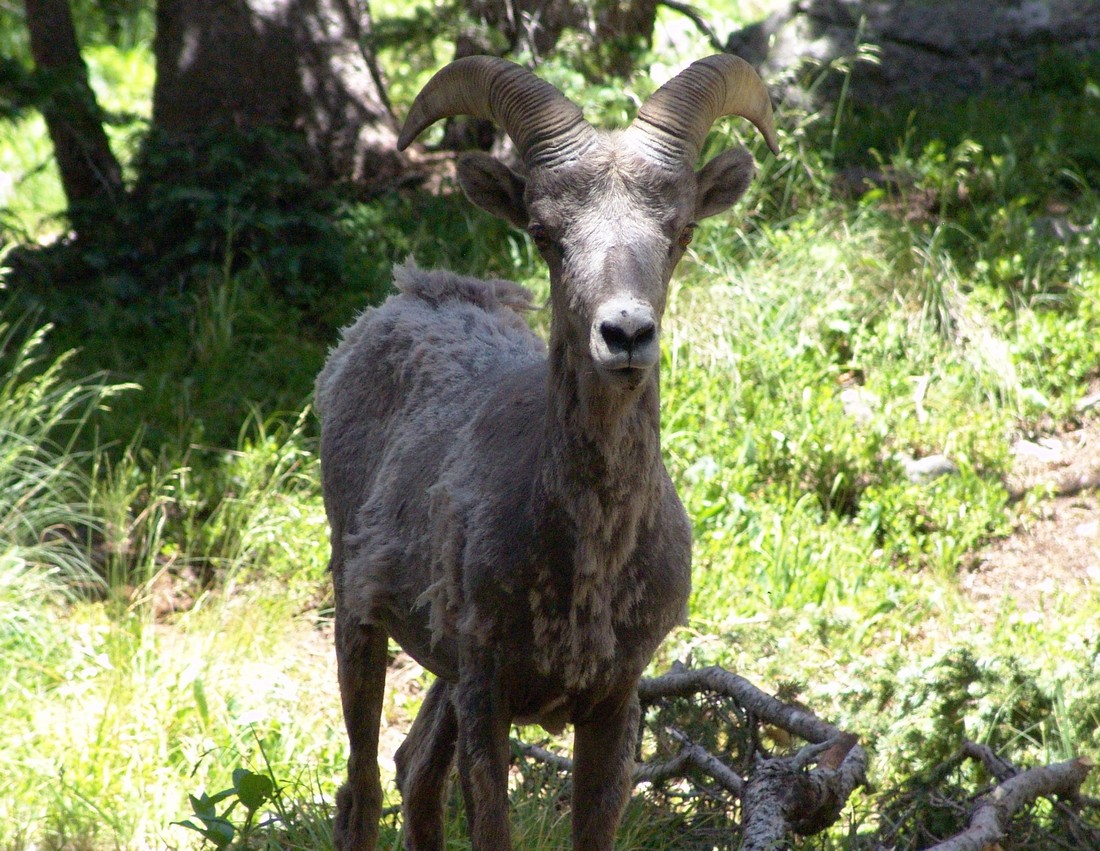
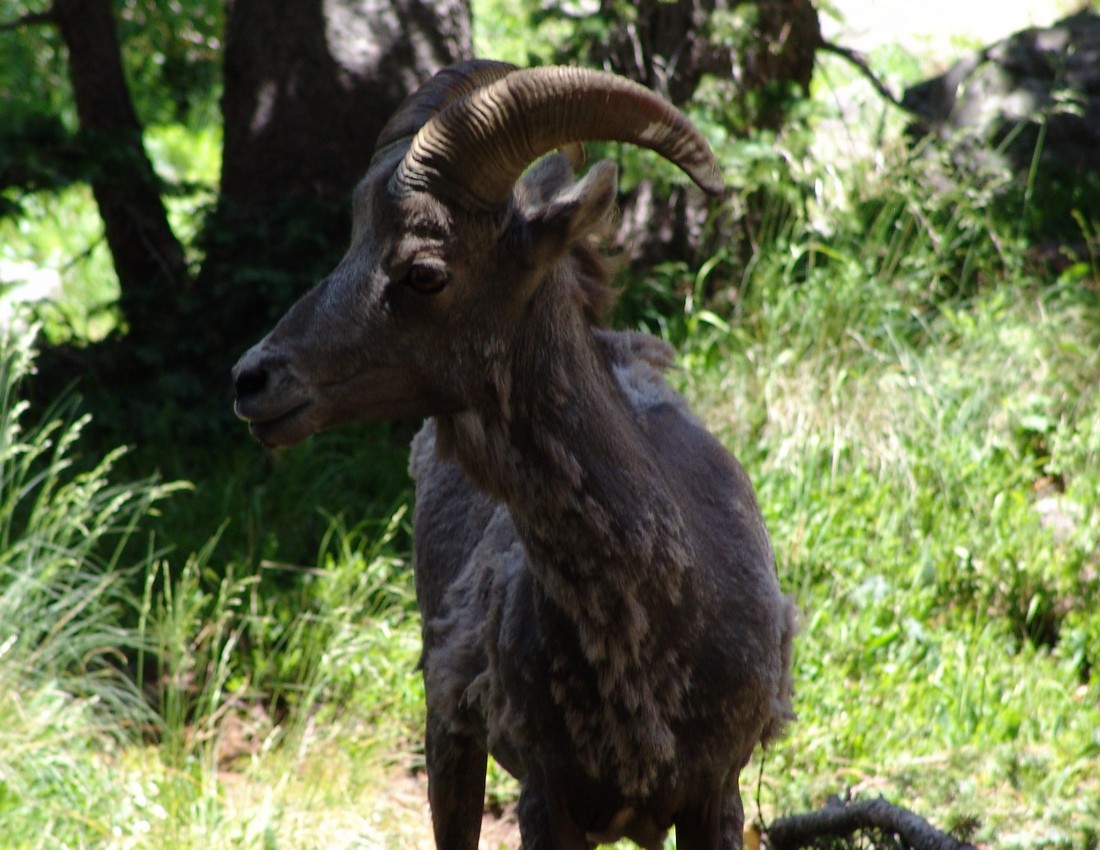
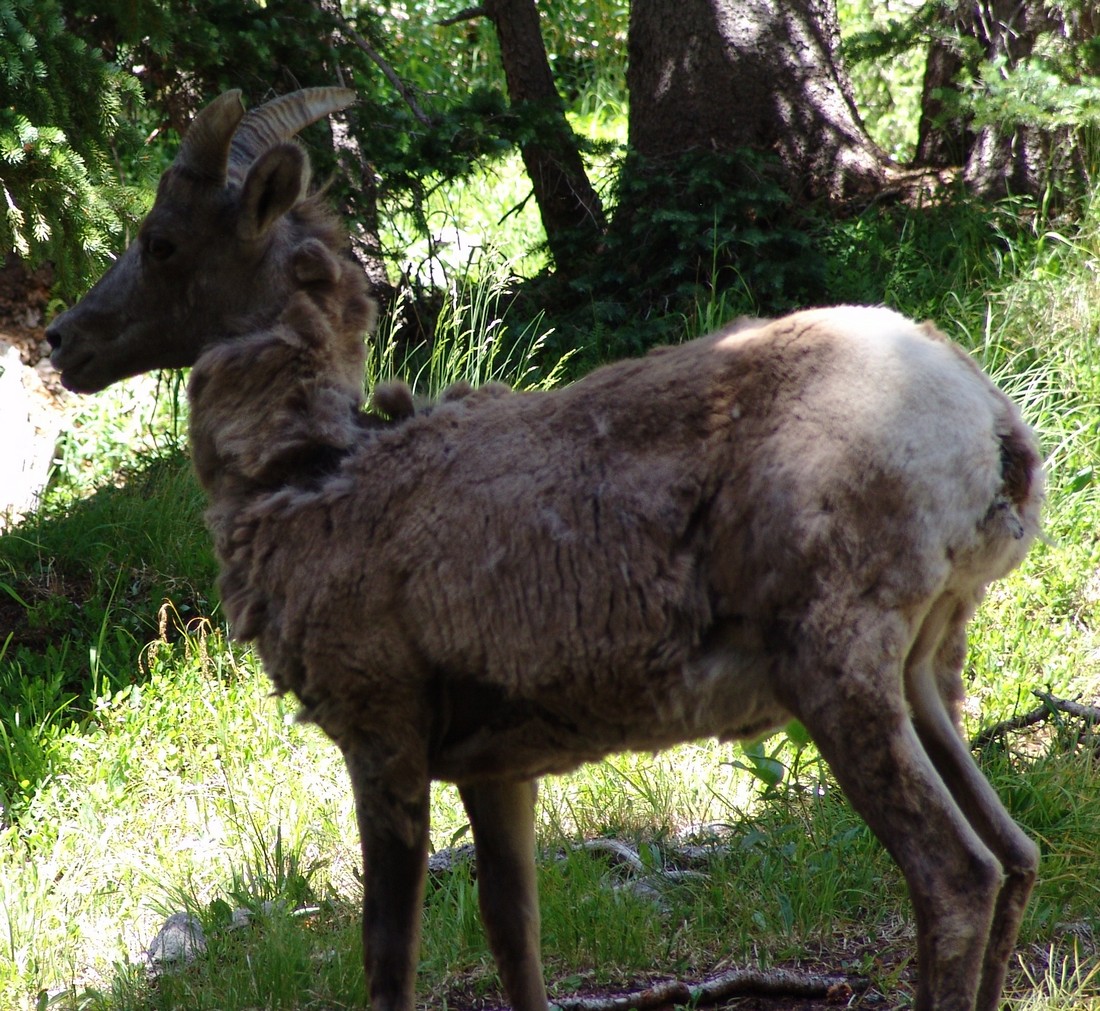
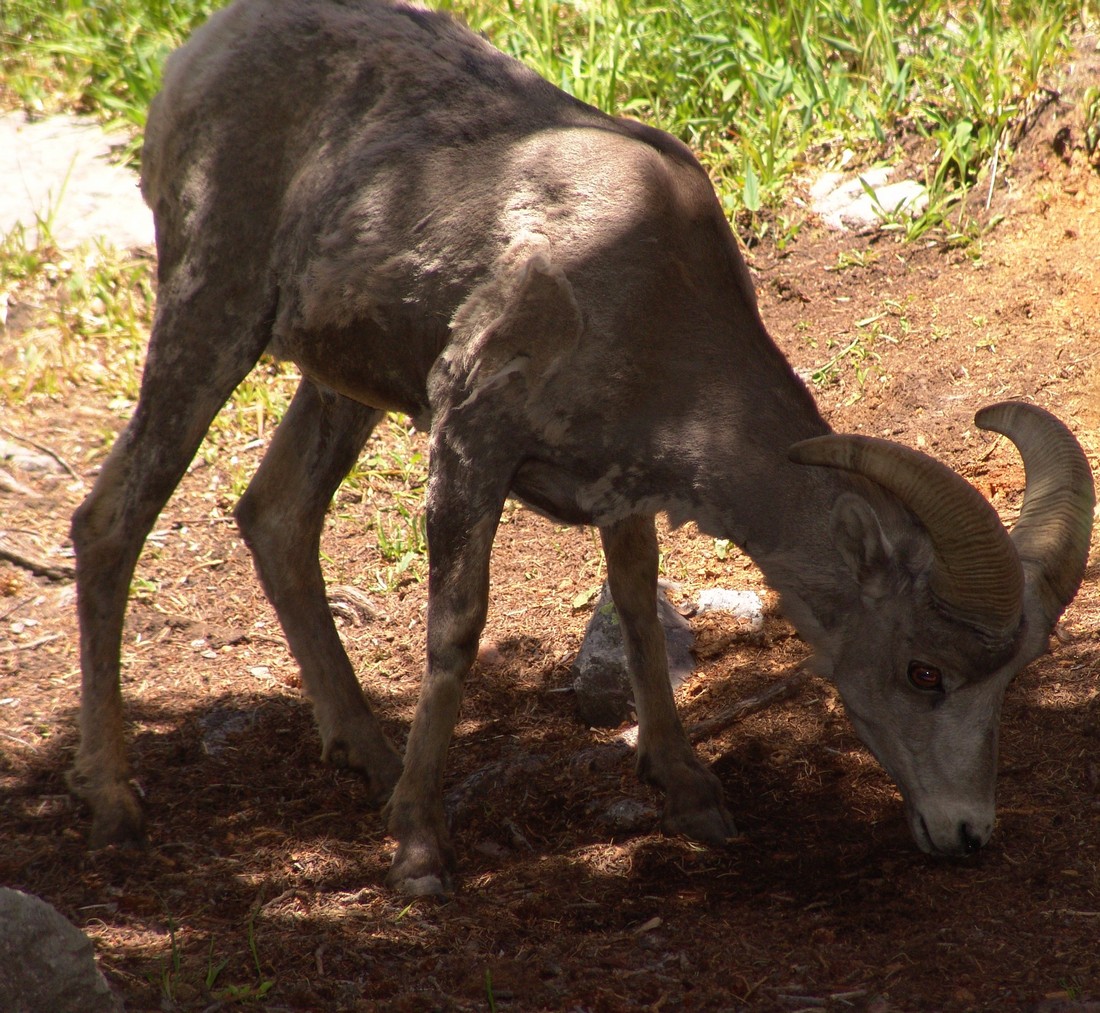
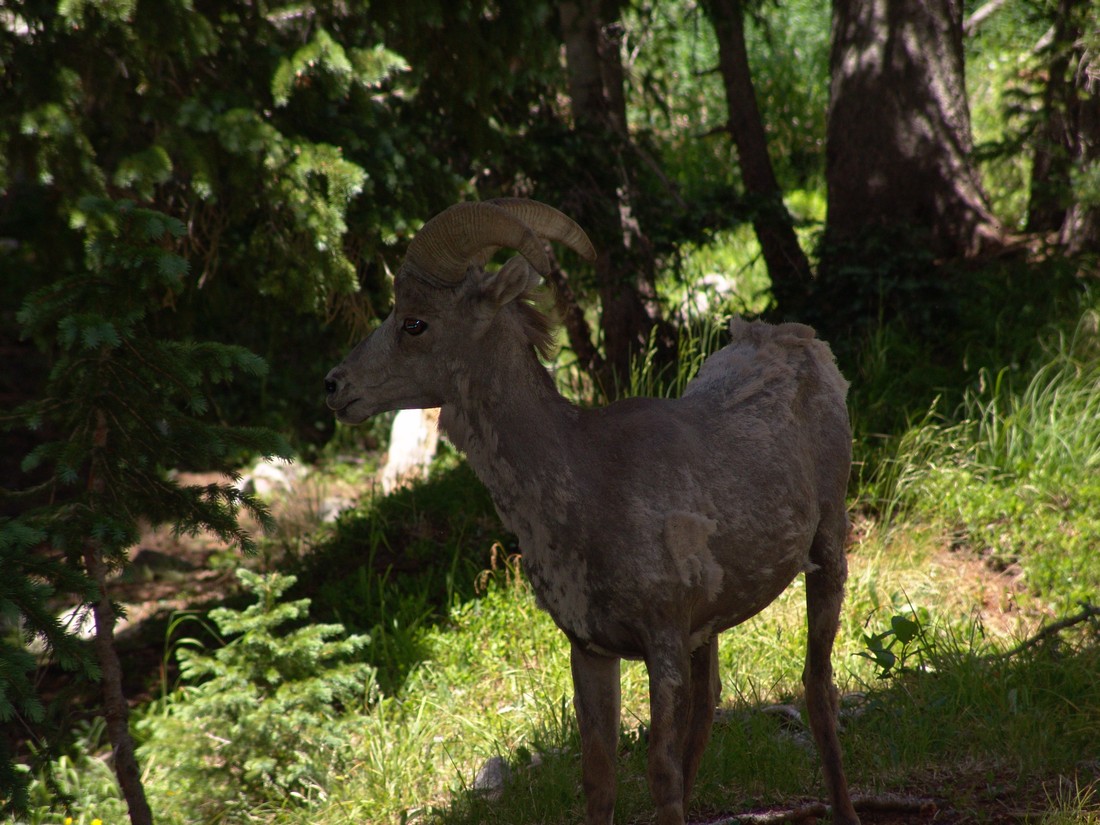
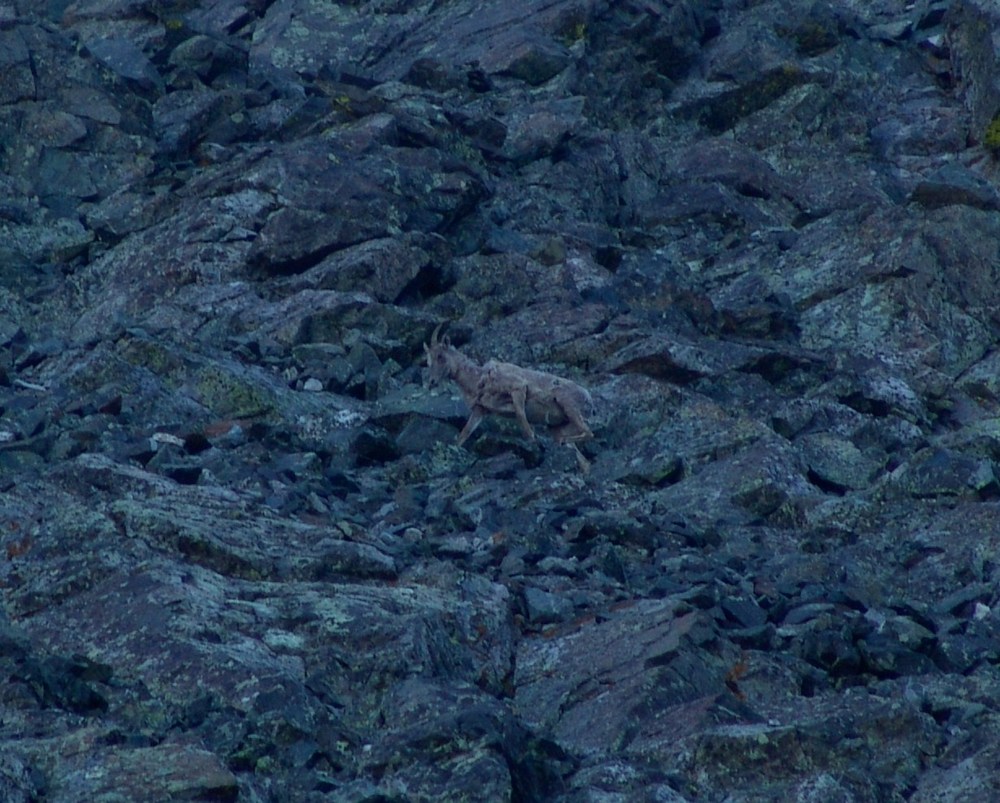
After gaining the headwall and hiking further up the trail, we were right at the base of Willow Lake. Being that we were in a Wilderness area, camping was restricted to areas no closer than 300 ft of the lake. One of the very first campsites we encountered had some Big Horn sheep grazing at it.
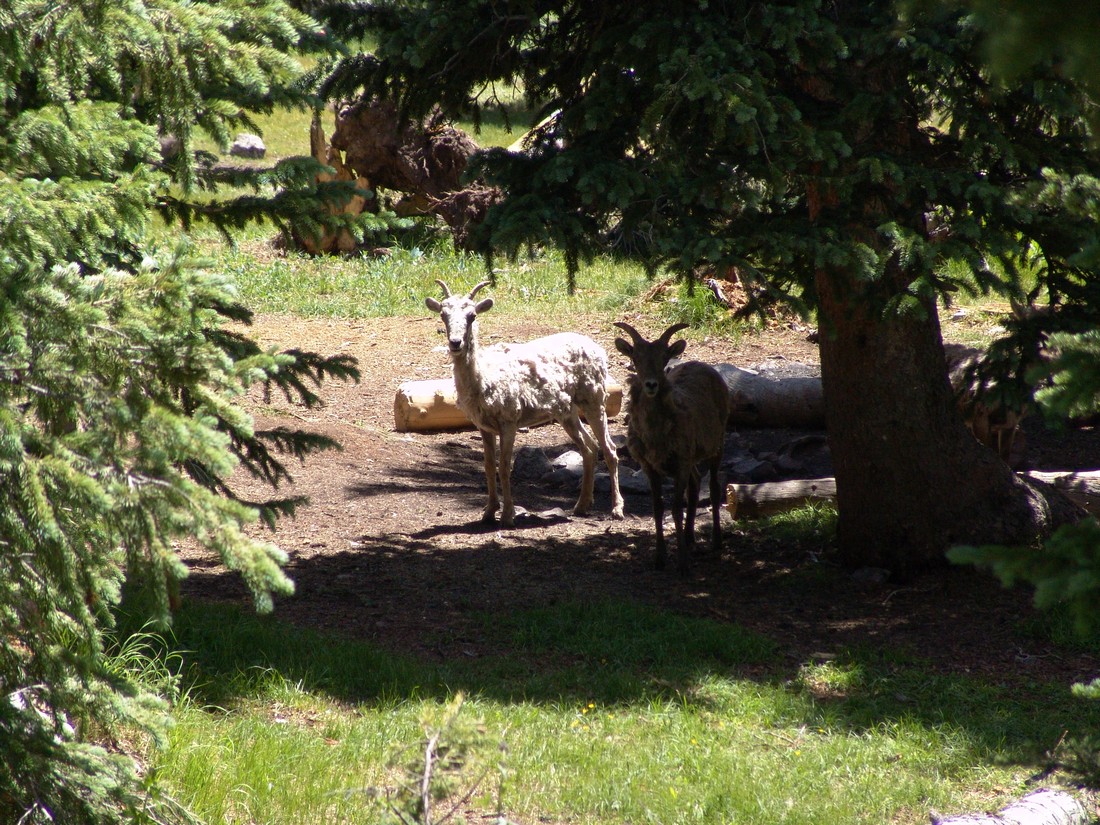
The sheep quickly scattered up the valley towards the lake. 
We kept going on the trail and found a really wonderful campsite left of the trail nestled in some trees. The funny thing was that the sheep were hanging out in this campsite. I was able to take several pictures of the sheep after we were able to claim the campsite as our own. This was one of the cooler things that has happened to me this year because one of my lifelong goals has been to see Bighorn sheep up close in the wild.
After we were able to chase off the sheep, we set-up camp. The campsite was very nice, with an established fire pit and logs all around it for seating. Here is the view we had of Challenger Point’s north face:
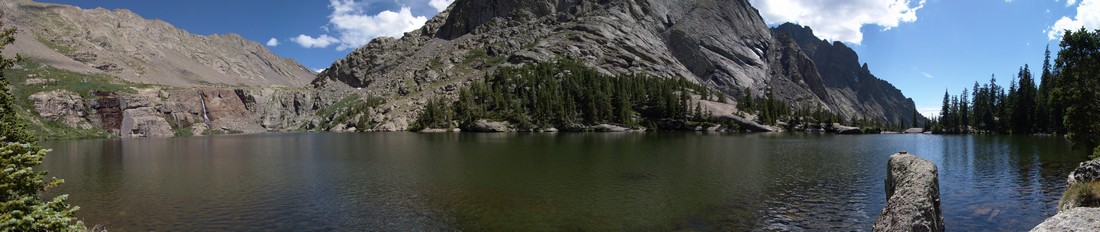
After setting-up camp, we decided to head up the lake to see what it was like. Boy, were we in for a scenic treat! The lake had a giant waterfall at its head and was surrounded by small cliffs where the waterfall was at. Here’s some stitched panoramic photos from the lake: 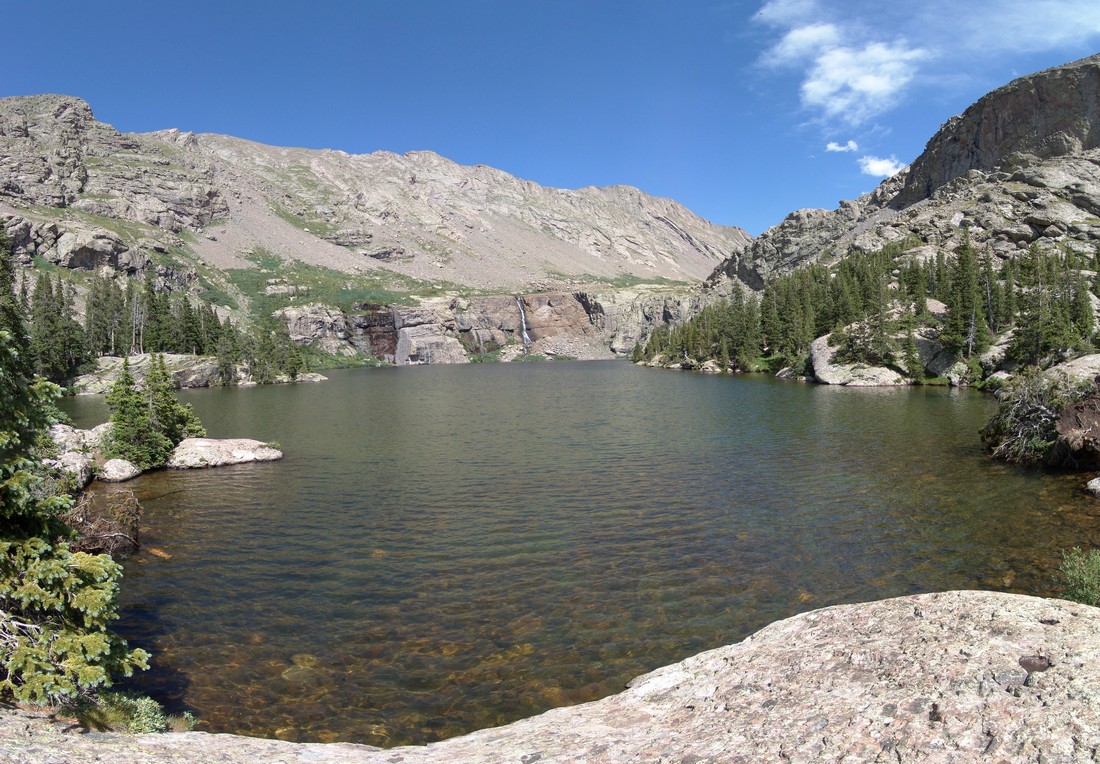
After soaking in as much of the lake as we could, we decided to head back to camp, cook dinner, and call it a night. We woke up at 4 AM the next day and quickly readied ourselves for what was going to be a very long but rewarding day.
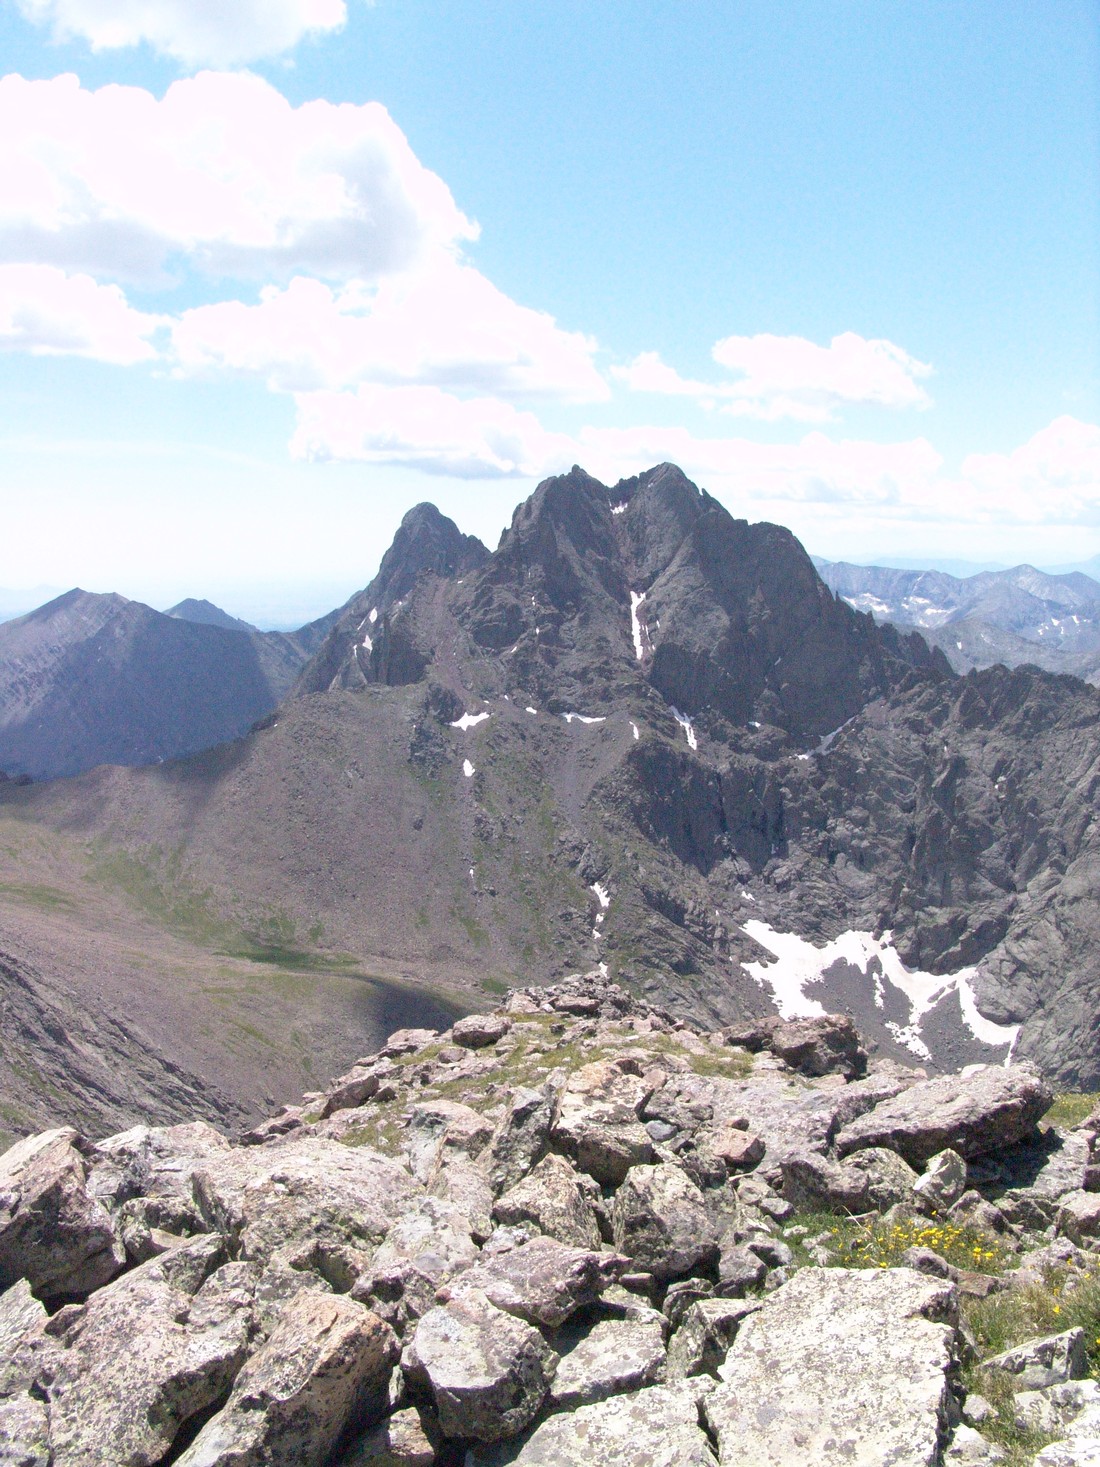
We hiked up past the lake and began up the valley to the south. Quickly Kit Carson and Challenger came into view (left and right respectively):
I think Kit Carson looks like a Klingon’s forehead. Who’s with me?

I originally thought that this was “The Prow,” a semi-famous section of Kit Carson that is a a notorious rock-climbing route; however, it turns out that “The Prow” is on the other side of Kit Carson and is seen from Columbia Point.
Another view looking up the valley at Kit Carson (right) and the adjoining ridge to its South and East.

We climbed up the grassy slopes of Challenger Point and then up a loose talus section to the ridge. From the ridge we could see the top of Challenger Point and looking down we could see the upper Willow Lake and the sun’s reflection on it.

We started climbing up the ridge to the southeast towards Challenger Point. Here is a view from near the summit of what the ridge climbing looked like. 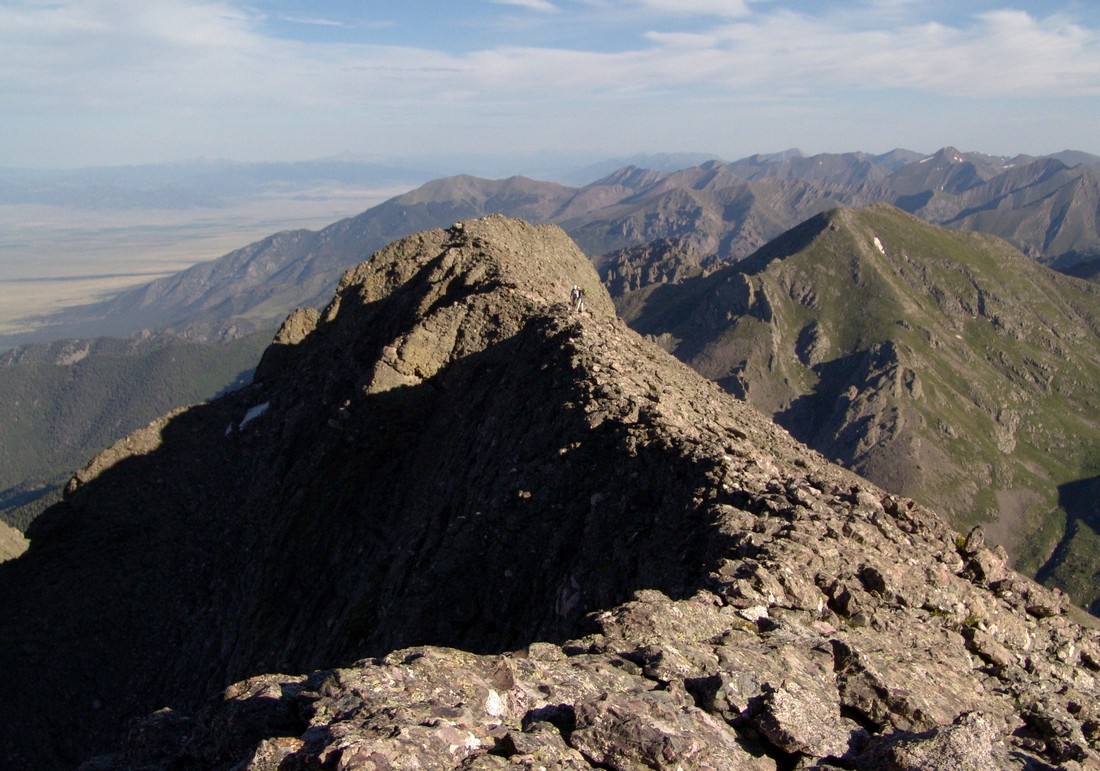
A few minutes later and we arrived on top, with Kit Carson and Crestone Peak in full view and the Blanca group in the distance to the South. 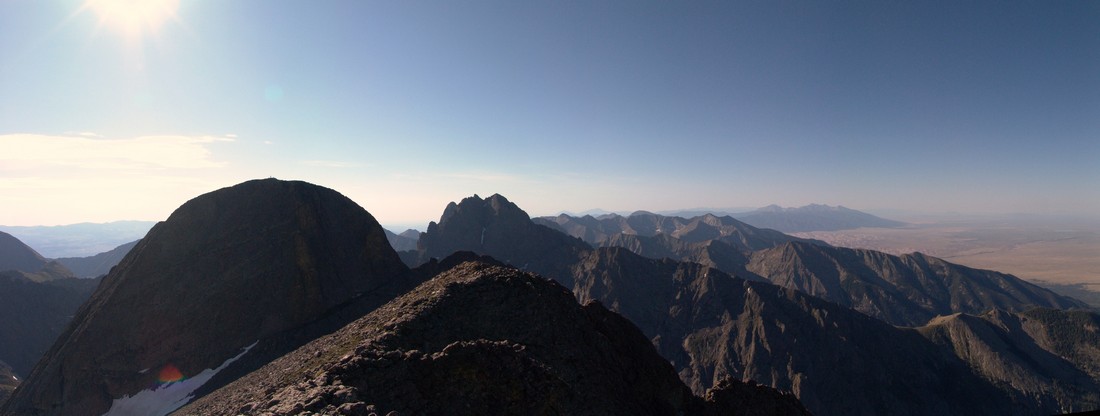
Looking east we could see Mount Adams poking up towards the sky. 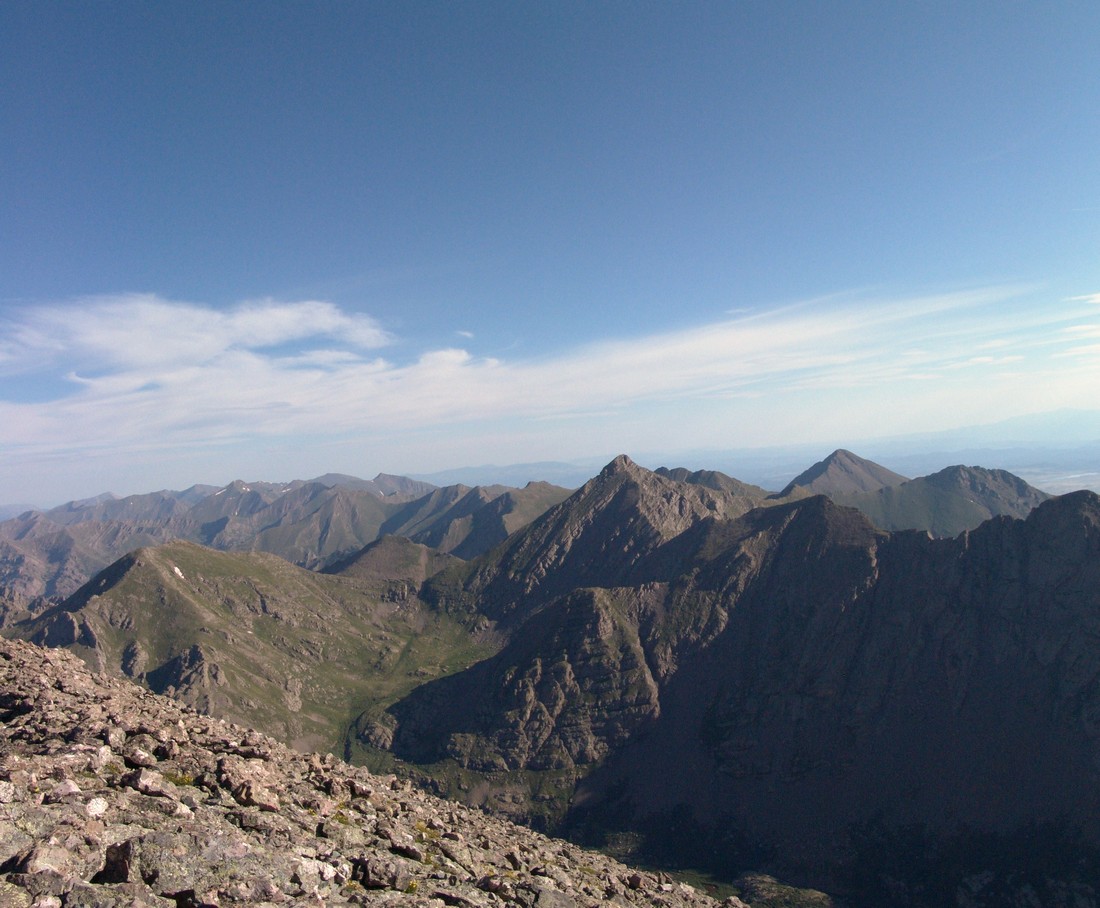
And here’s a shot of me on the summit looking southeast towards Crestone Peak and Kit Carson: 
On top of Challenger Point rests a plaque dedicating the mountain to the Challenger shuttle disaster of 1986. 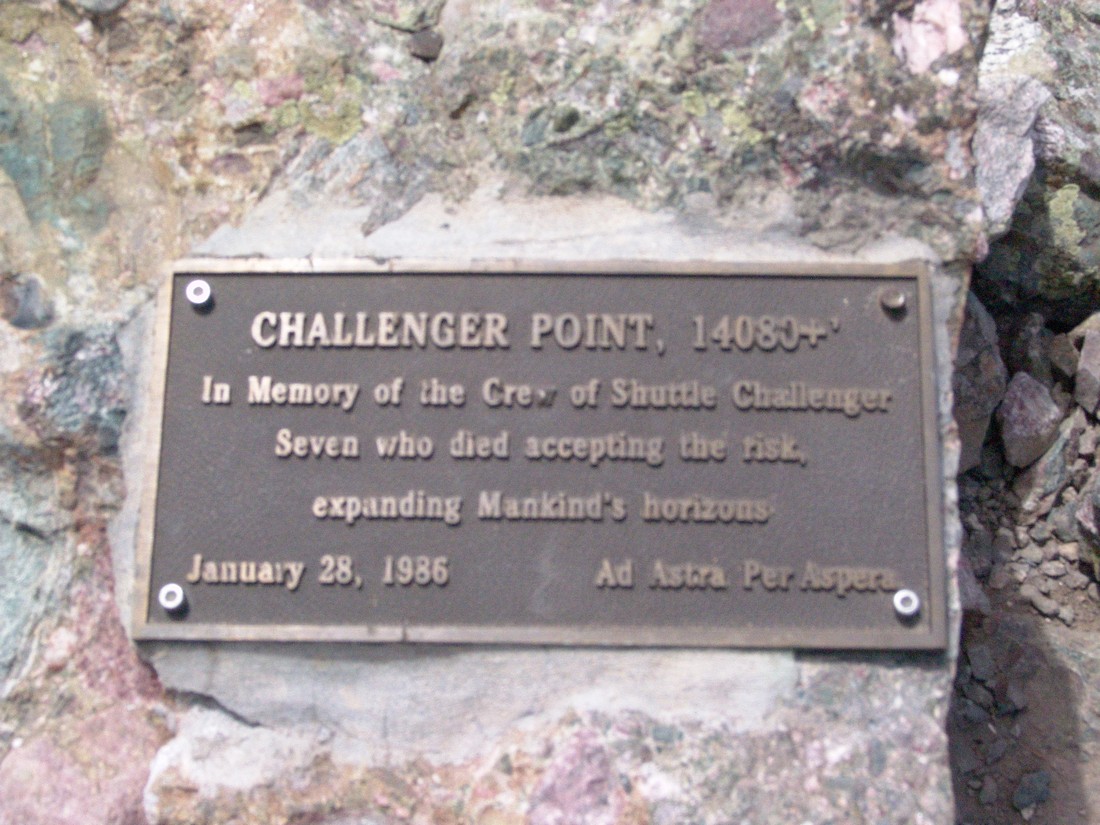
After refueling on top of Challenger Point, we began the journey down Challenger Point’s southeast ridge towards Kit Carson and the Kit Carson Avenue, a long ledge leading around the side and then around the back of Kit Carson. Here’s a look at some of the perilous cliffs below Kit Carson Avenue and subsequently, a photo of the Avenue and the route up it. 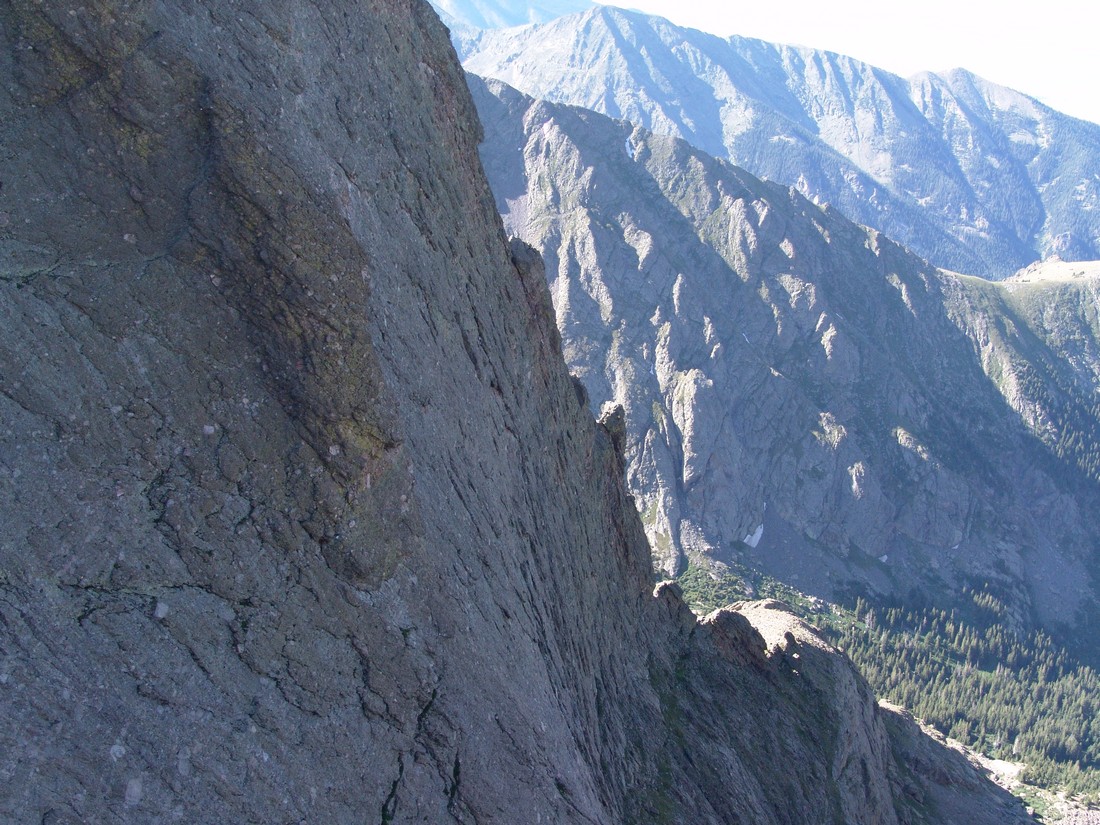
The Avenue looks pretty sketchy from here but in reality it was a nice ledge with plenty of room for walking. Once at the top of the Avenue, you once again can see the awesome Crestone Peak (center) and Columbia Point (left) with the back-side and downward heading remainder of Kit Carson Avenue. 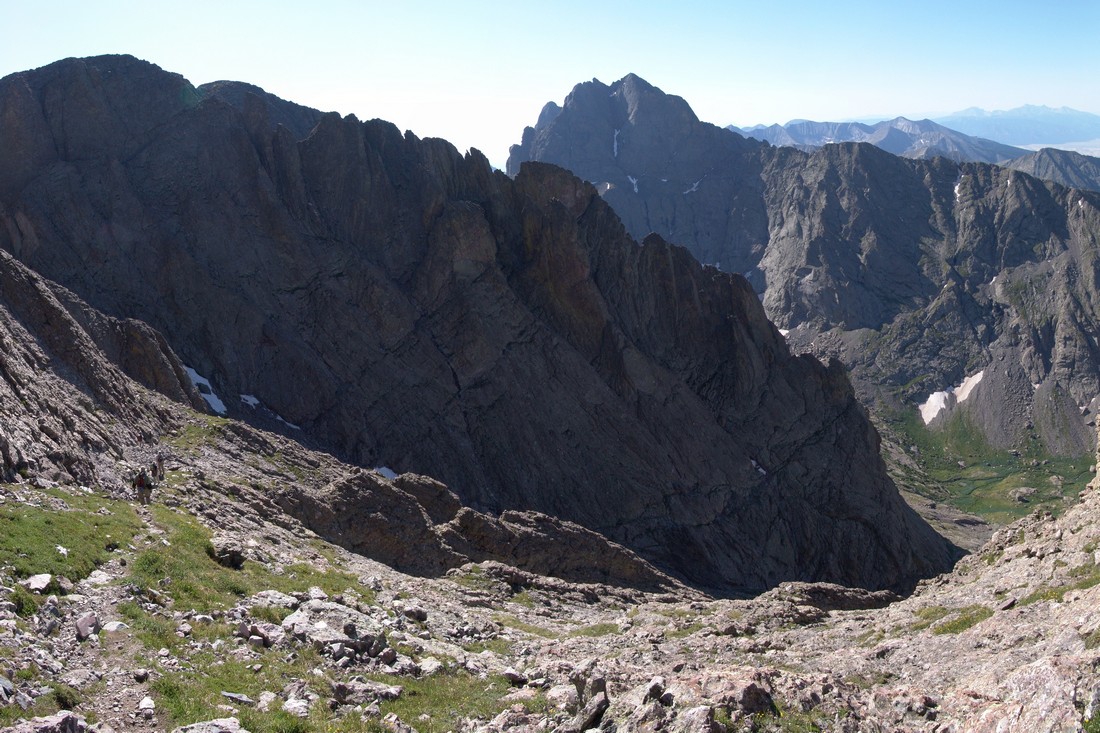
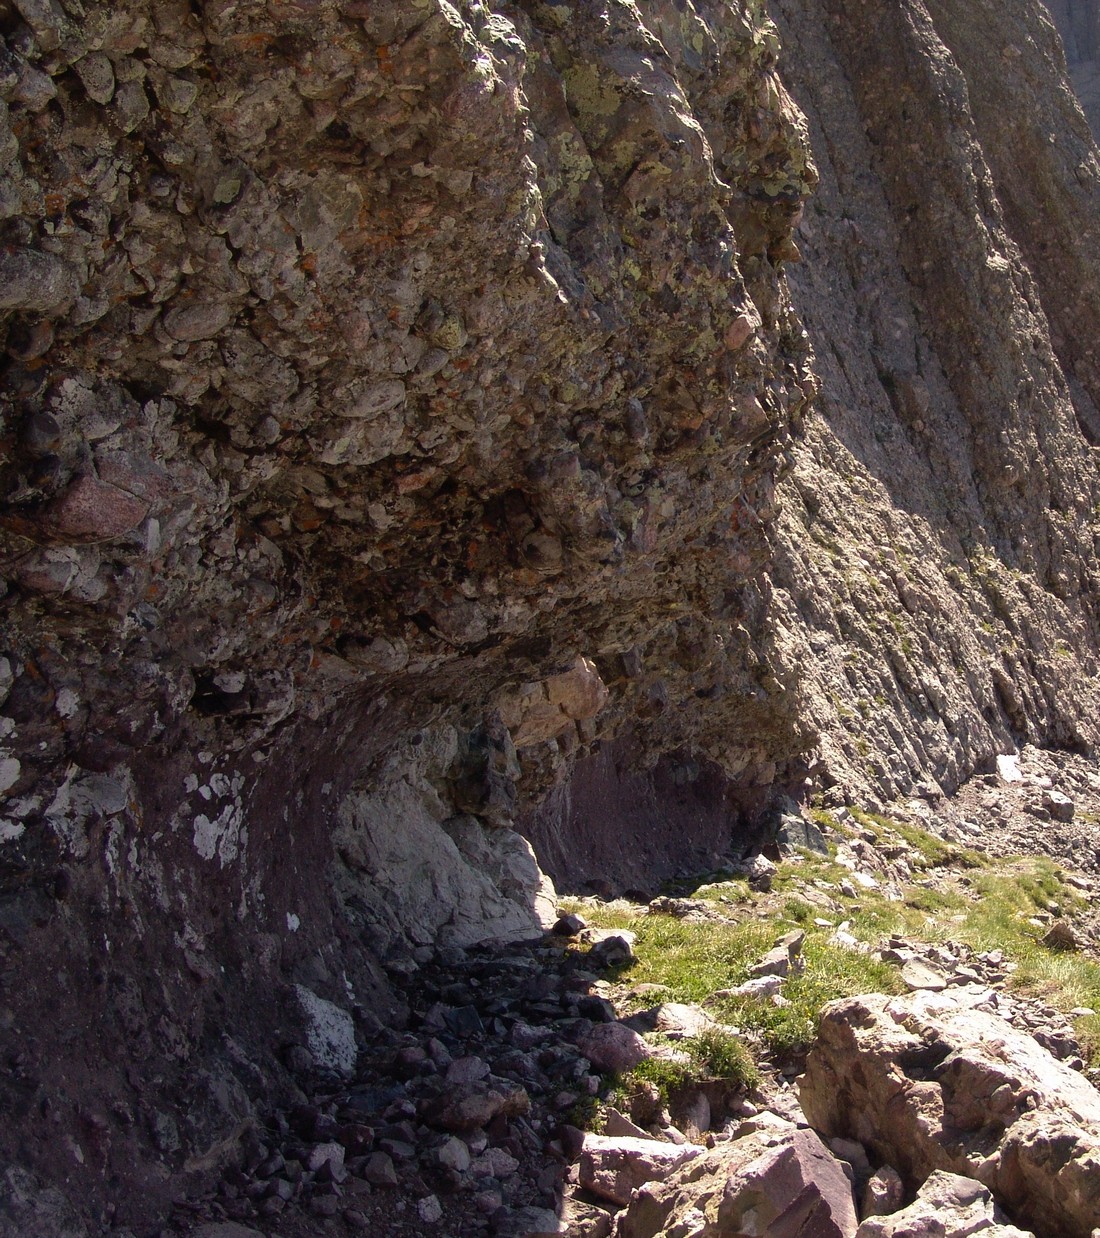
Going down the Avenue, I was struck by the really remarkable geological formations. It appeared to me that water had eroded the underside of Kit Carson in the Avenue, making it look like something had burrowed its way right through the rock all the way down.
And another view looking down the Avenue – it looks far less intimidating than it did from the top of Crestone Peak. 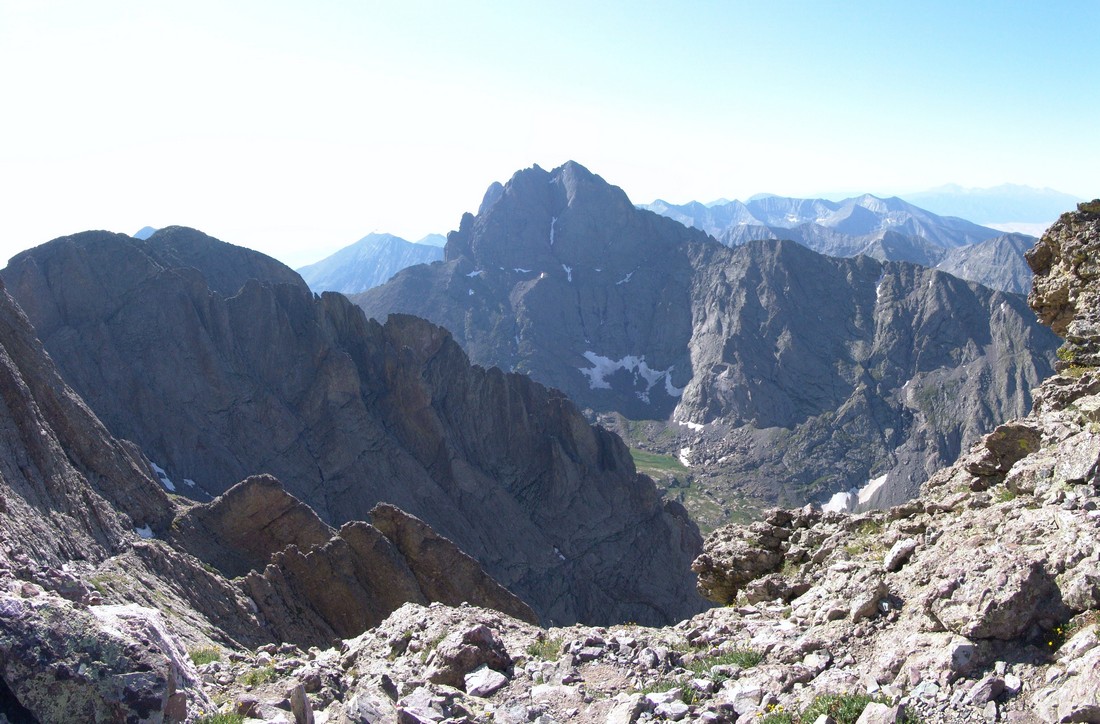
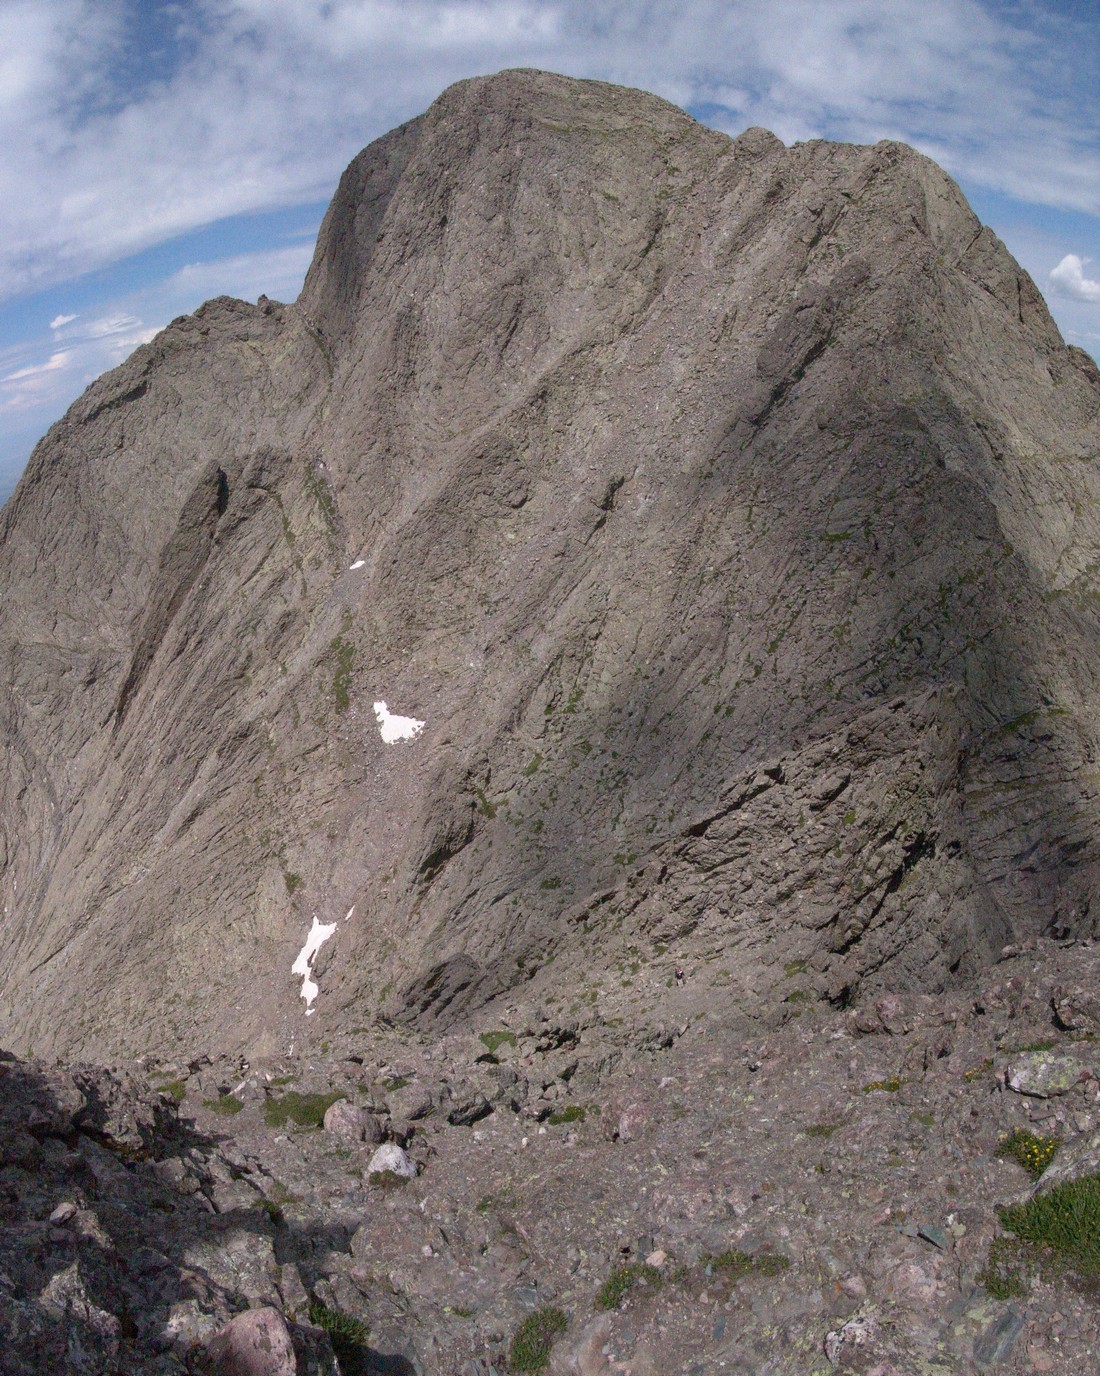
Once we reached the bottom of the Avenue, the route took us sharply to the northwest. The climbing was pretty standard class 2 stuff. Near the top of this last section Terry ran out of gas and took a break to rest. I decided to make the final push to the top after visually verifying that Terry was not injured and was continuing. Here’s a shot looking towards Columbia Point and Crestone Peak again. Take special note on the intimidating nature of Columbia Point (closest peak) from this vantage point, as it was the side of that mountain that I would later climb… Looking at Columbia Point you can see a small fin that is separated from the mountain by a small gap. That is the fin I would later ascend to reach the top (more later). 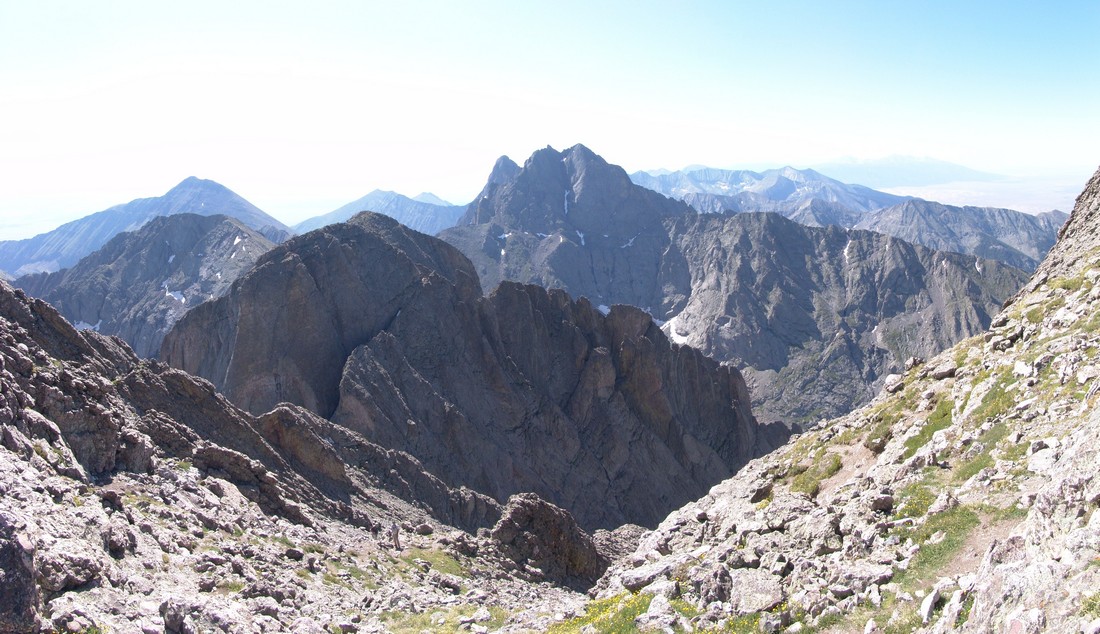
From here, reaching the top of Kit Carson was a breeze. There were several other groups on top. Here’s some stitched photos looking towards Challenger Point. This is a good view of the route we had to come up earlier in the day. Basically starting from the large lake pictured right of center, you climb up the grassy section and then up the rocks to the ridge. 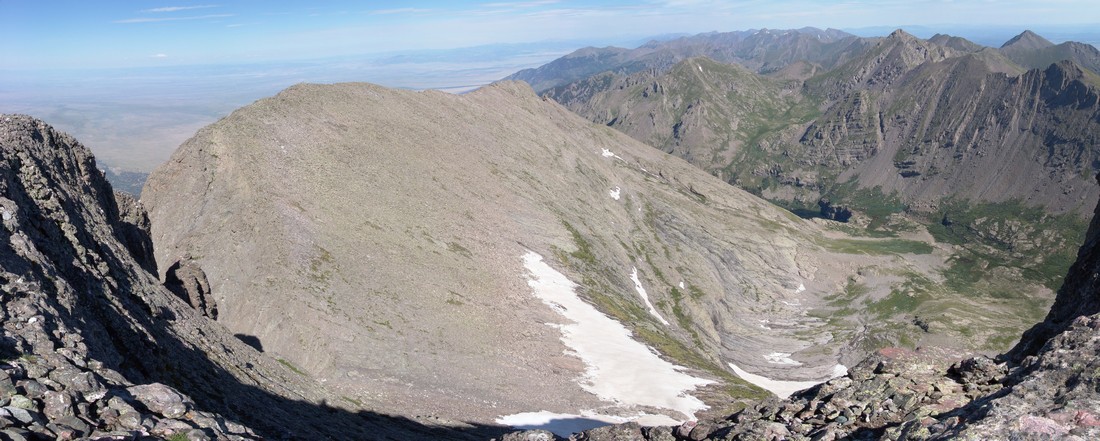
Speaking of the lake, here’s a really high-detail pano of it.
And a shot looking south. 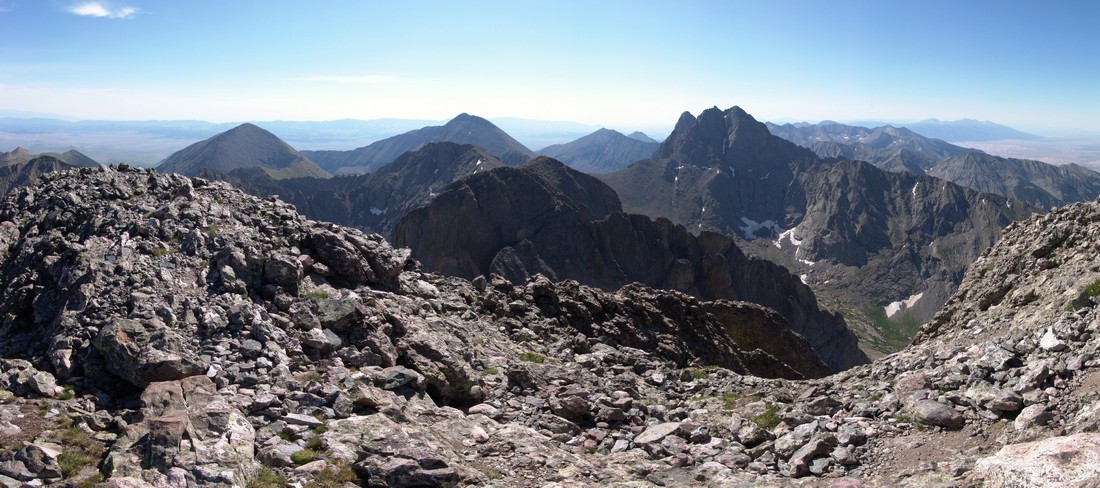
And a 180 degree pano with Columbia Point in center. 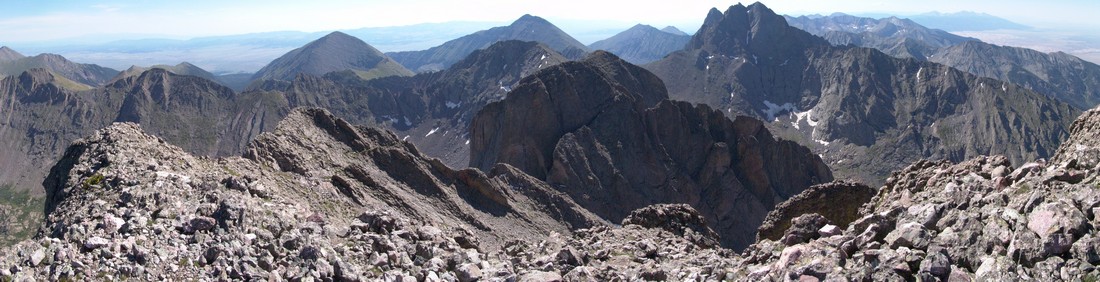
And of course here I am flexing victoriously on the summit. 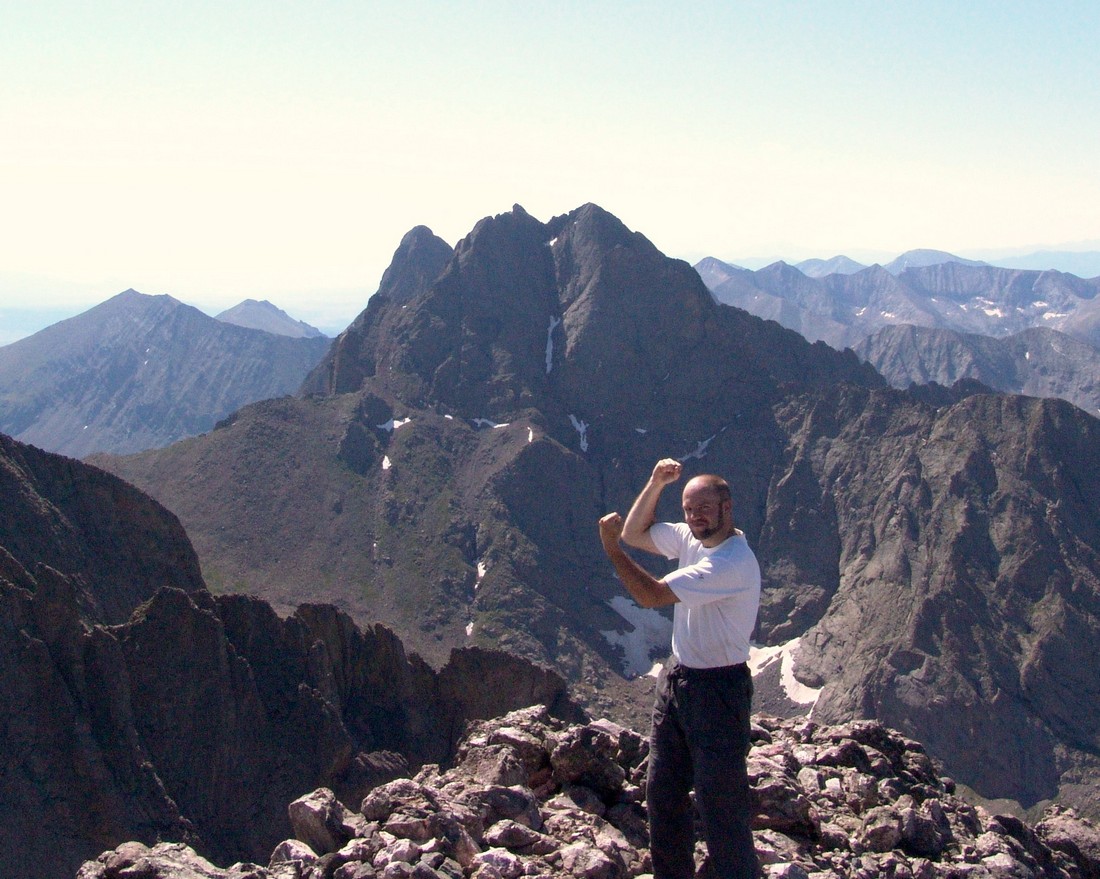
After a quick snack on top I decided it was time to go back down and decide if I was going to climb Columbia Point. Terry had already headed down and would not be attempting Columbia Point. After running into another climber on the way down and picking his brain on the approach for Columbia Point and assessing the weather, I decided to give it a shot solo. This was possibly the most technically challenging climbs I’ve done to date. The route was not well-established and there was a couple of spots where I was exposed and could have fallen to my demise. Here’s a picture outlining my rough route up. 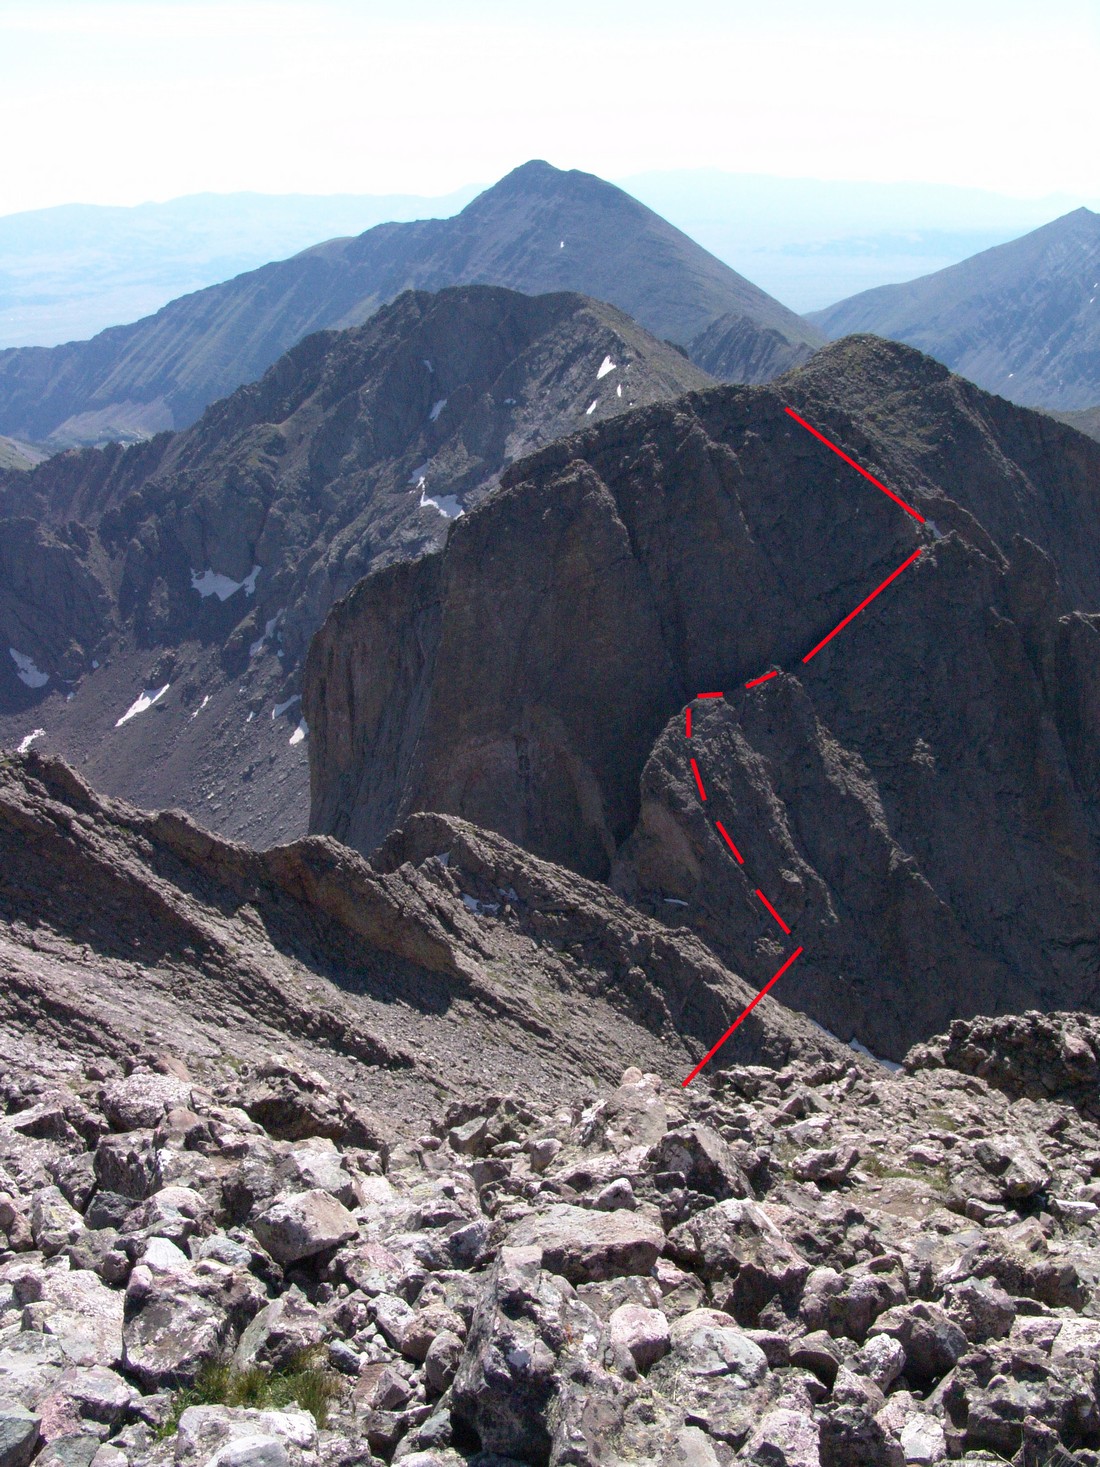
Once I reached the top of the first gully of the fin (5th red line from bottom), I had to make a really risky move to down-climb about 10 feet to the next section of the fin. I sat there for at least two minutes and contemplated the move’s risk and thought of turning around. I would definitely rate the move as Class 5 (Class 5: Technical free climbing involving rope, belaying, and other protection hardware for safety. Un-roped falls can result in severe injury or death) as it was 100% vertical and required both hand holds and footholds. Even though I still had on my backpack and had my camera around my neck, I decided that I had the skills and the mental acuity to give it a shot. This move was really tricky as I had to somehow flip myself around and onto the face of the rock wall, with 300 feet of exposure (Empty space below a climber, usually referring to a great distance above the deck through which the climber could fall) to the left and a steep rocky slope below me to the right. I took a photo of the spot but it really does not do it any justice. Perspective is everything. I was amazingly cool during the attempt but did find myself shaking a little and my heart was racing pretty fast. Once I secured myself onto the face of the wall, I descended several feet down, ensuring that my hands and feet had secure holds with each move. In retrospect, this was a very risky move and leaving the gully earlier to avoid it would have been prudent. After this, the route was pretty straight forward up the fin and then up the steep ridge. It was hand over hand the rest of the way up. I reached the top and took photos of the mountains surrounding me; Crestone Needle, Crestone Peak, and Kit Carson. 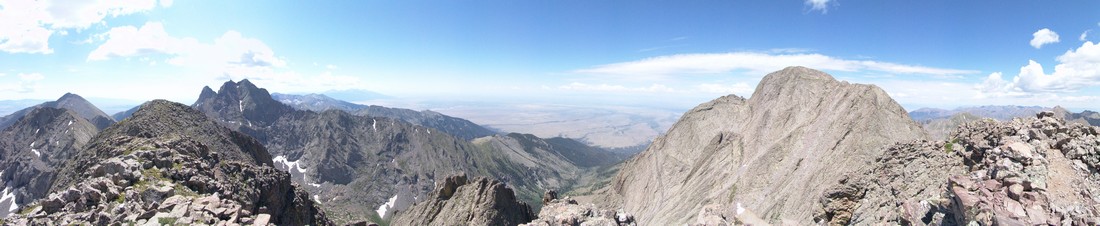
At this point, “The Prow” of Kit Carson was readily apparent to the left of Kit Carson’s summit.
After taking pictures I took some time to search for something I had heard about… I was unable to locate a plaque that was dedicated to the Columbia shuttle disaster of 2003 as seen here:
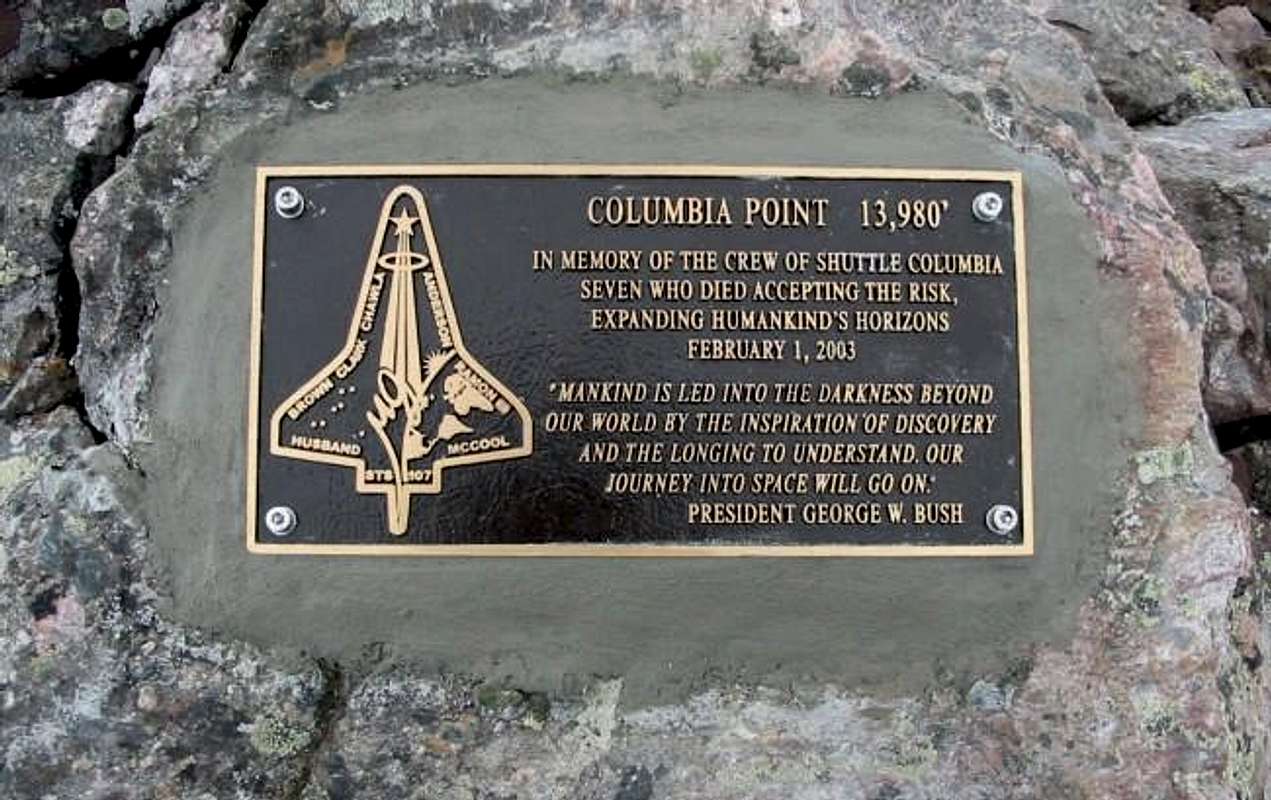
This was a real disappointment because it was one of the reasons I wanted to climb this mountain. I searched around the summit in all directions but could not find it. Frustrated, I second-guessed that I was truly on the summit of Columbia Point and not “Kitty Kat Carson,” an unranked 13’er right next to Columbia Point to the south. You can see it behind Columbia Point in the photo above. Even though a summit register on top said I was on Columbia Point, I wanted to go over to the other summit to be sure. After a quick trip over to “Kitty Kat Carson,” I determined that I was indeed on Columbia Point previously; however, the trip was well worth it as I was able to get some pictures of the full-on and un-obscured view of Crestone Needle and Crestone Peak.
After enjoying the views from “Kitty Kat Carson,” I decided to go BACK over to Columbia Point one more time to try to find the plaque. Unfortunately I was not able to find it. Looking east, I noticed that some clouds were building so I decided it was time to head back towards Kit Carson and back up the Kit Carson Avenue. Another look back towards Kit Carson revealed that another climber was coming up Columbia Point so I knew I needed to be careful not to kick any rocks down on him.
I reached the top of the Outward Bound Couloir between Kit Carson and Columbia Point and headed back over towards Kit Carson Avenue by way of a steep gully with a large rock terraced over it, which created a nice and tight fit back over to the Kit Carson side of the couloir.
After reaching the top of Kit Carson Avenue, I climbed back down to the saddle between Kit Carson and Challenger Point and decided to re-summit Challenger Point as to ensure that the same route we took to get up would be the one used to get down. Once at the top of Challenger Point again, the nasty weather was building and looking more and more ominous.
Fortunately the weather cooperated just enough to let us get back down to the lake in our haste. It was pretty cool seeing the flora down there since it was dark earlier in the morning when we were coming up. 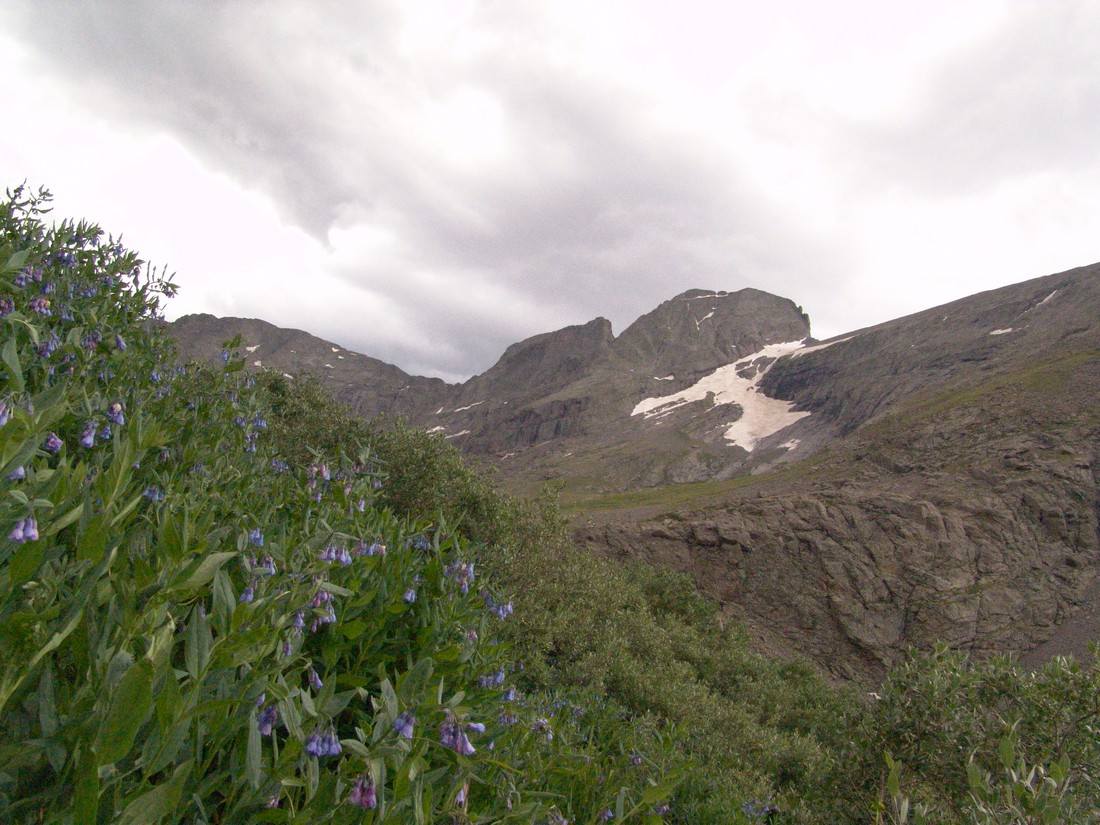
We made it back to camp, packed-up, and headed out. We got back to Colorado Springs at about midnight and I was exhausted.
I would rate this climb highly. It is challenging, offers many routes, and there are several peaks to ascend in the area. All in all, this is a must-do climb for any serious Colorado mountain climber.
Blanca Peak and Ellingwood Point - Introduction to the Sangres
Blanca Peak has always mystified me. It is one of the most prominent mountains in Colorado - it towers over the San Luis Valley and the Great Sand Dunes National Park. It is easily one of the most impressive looking mountains in the State, from almost any angle. With that being said, it was quite exciting to finally get to climb it along with its neighbor, Ellingwood Point.
Here are some meaningful statistics from this adventure:
Blanca Peak - 14,345 ft. (ranked 4th highest in Colorado)
Ellingwood Point - 14,042 ft. (ranked 42nd highest in Colorado)
Total mileage: Approximately 10 miles
Elevation gain: 4,600 ft.
My friend Terry and I started our epic July climbs with a bang by heading down to the Sangres to tackle some of the most impressive mountains in the State. To accomplish this - we would need to backpack up a fairly long road to reach some high mountain lakes.
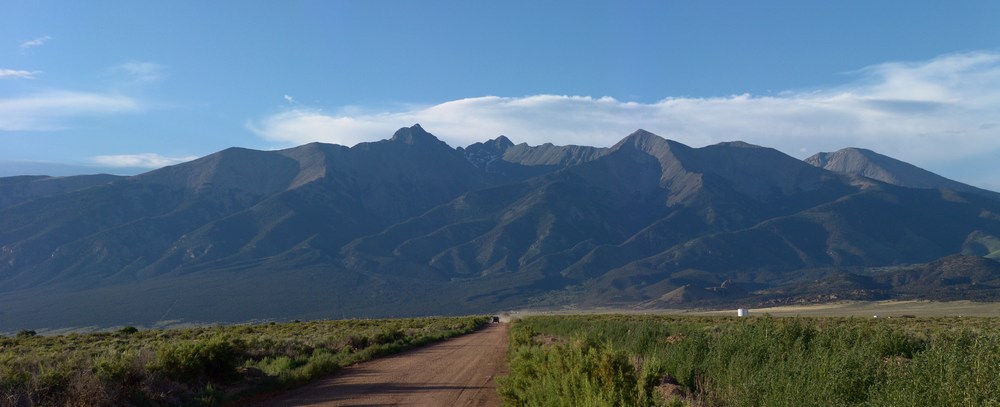
Terry picked me up at my house on Friday morning at about 7AM and we started the drive down to Walsenburg. Once we reached Walsenburg, we headed west over La Veta Pass and then through the towns of Fort Garland and Blanca. From Blanca, some pretty awesome views of the Blanca massif can be seen. Blanca is the highest one in the middle towards the back and Little Bear is the pointy one on the left.
Next we headed north towards the Great Sand Dunes and turned up towards Lake Como. The Lake Como road is one of the premier 4-wheeling roads in the State, as evidenced by the three Rubicons at the start of the road. We started up the road in Terry's Blazer and encountered what I believe to be some of the most intense off-roading I've ever seen. Terry was a total champ! He was able to maneuver up the crazy road over some impressive and daunting obstacles and got us to a large camping area at about 10,000 ft. Turns out Terry damaged his engine mounts in the process. Here is a nice article on the road we were driving on.
In 2010, I went up the same road with my friend David, and there are more photos of that adventure in my Little Bear report.
The road is full of obstacles called "Jaws" which we stopped just short of. We got out of the vehicle and started our backpacking adventure. My pack weighed in at 55 lbs and Terry's weighed 40 lbs. I guess I carried heavier food!?
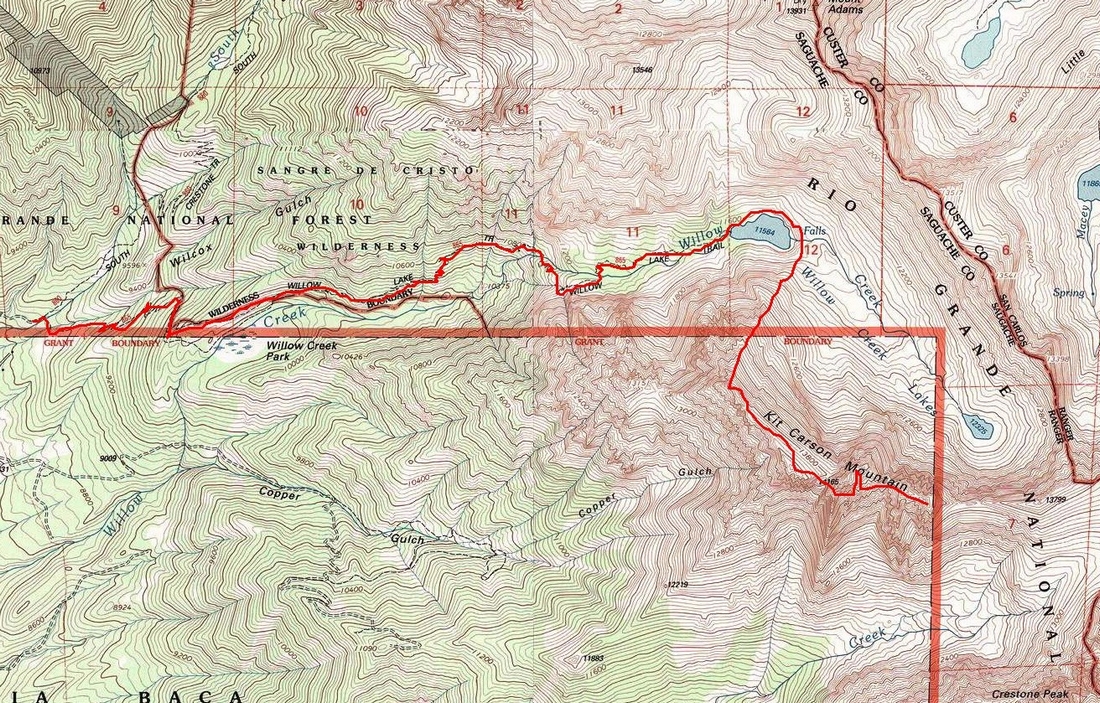
Here is the overall route we took up the valley and eventually up to the top of the peaks:
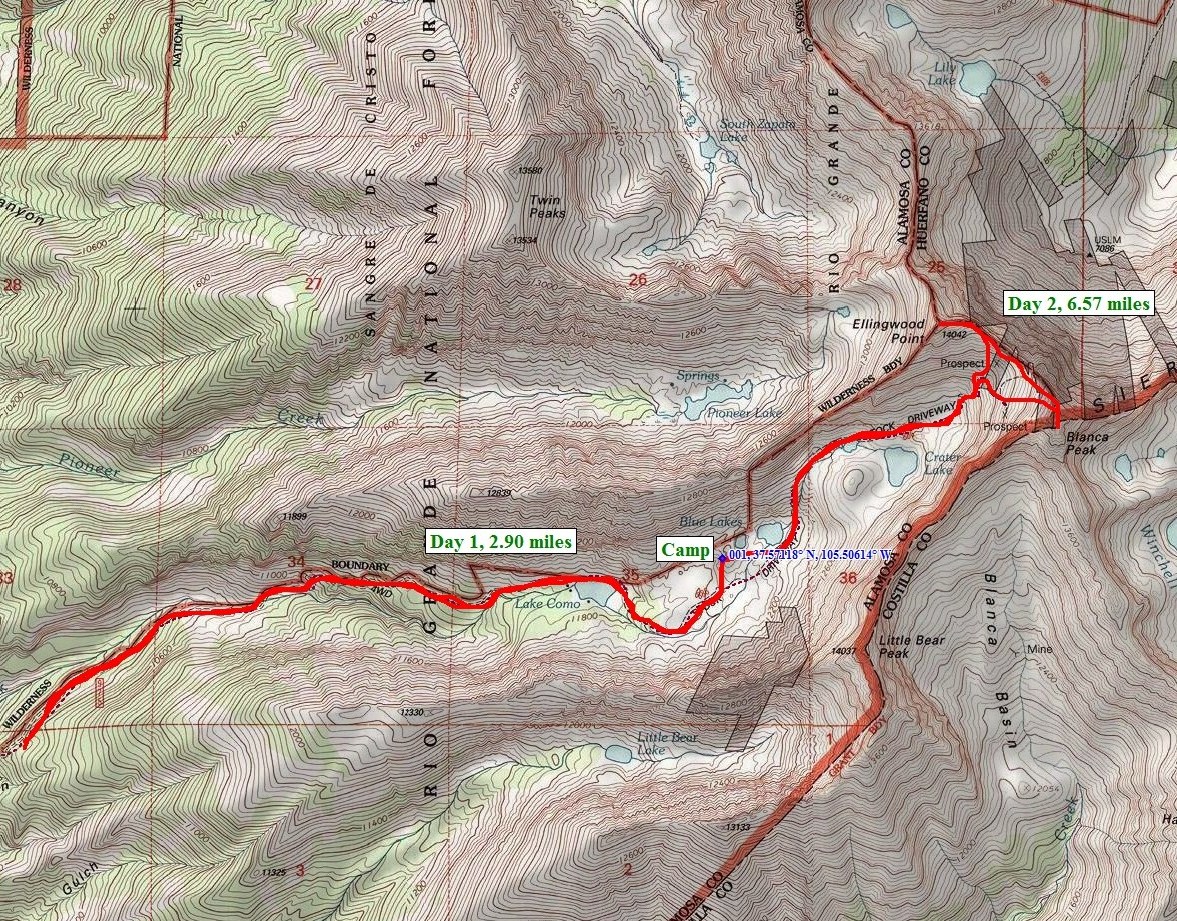
The hike took us up past the infamous "Jaws" obstacles and eventually we landed at Lake Como. We passed Lake Como and continued up the valley towards Little Bear Peak, Ellingwood Point, and Blanca Peak. We finally stopped above tree-line at 12,200 feet to set-up our camp-site. Here is a nice panoramic photo of the view from our campsite:
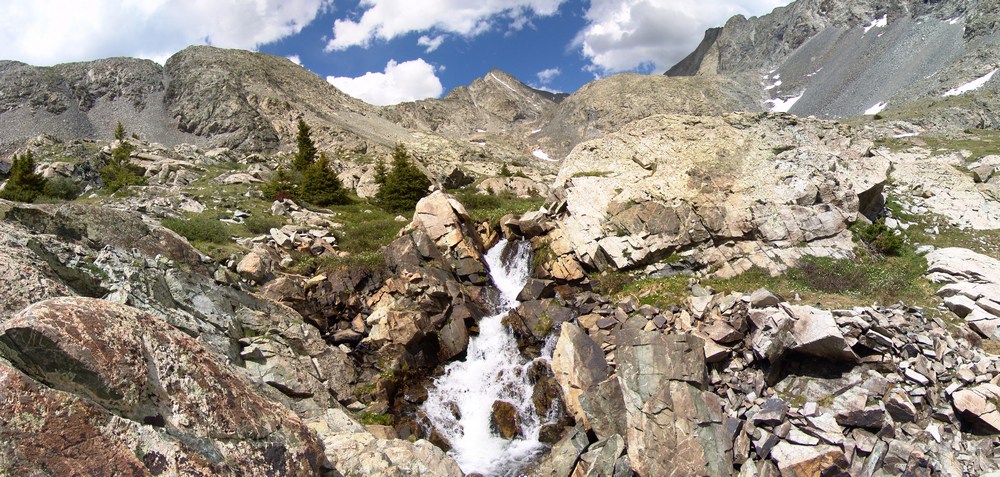
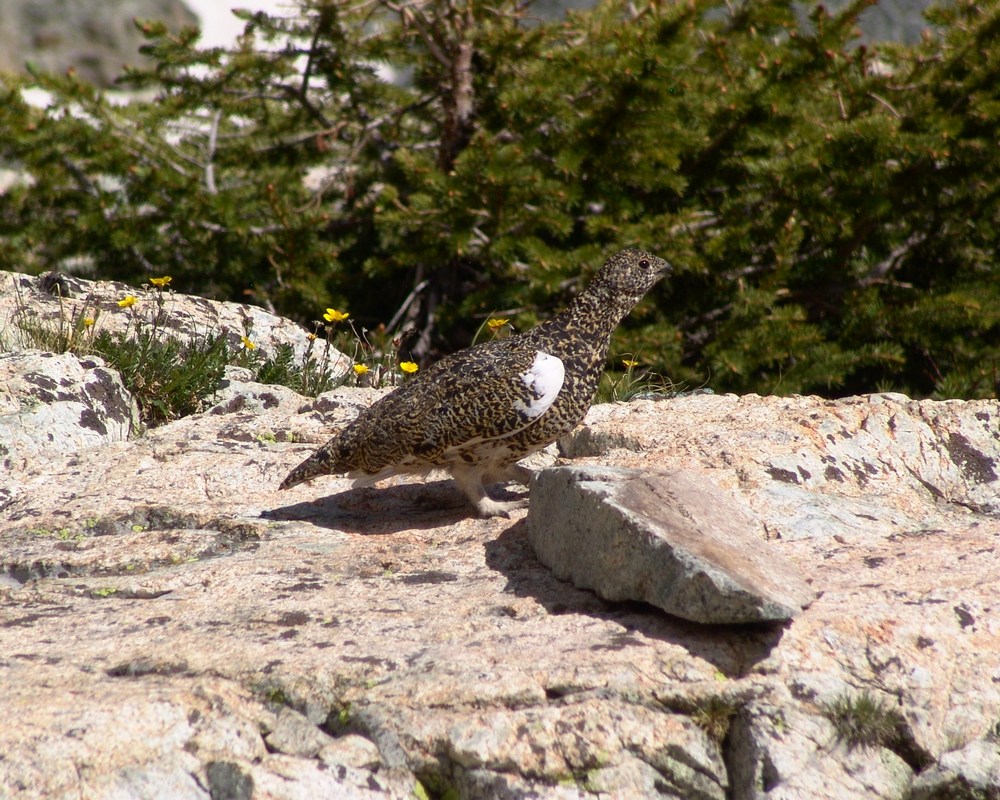
We were camped right next to a mini-waterfall that looked right up at Ellingwood Point. After we unpacked and got settled in, we decided to take a short hike further up the trail to one of the Blue Lakes. On the way there, I saw a small bird scurry past me. My first thought was, that bird can't fly! Then my second thought was, that's a baby bird! Sure enough, there were several small baby birds right in the area that were standing very still.
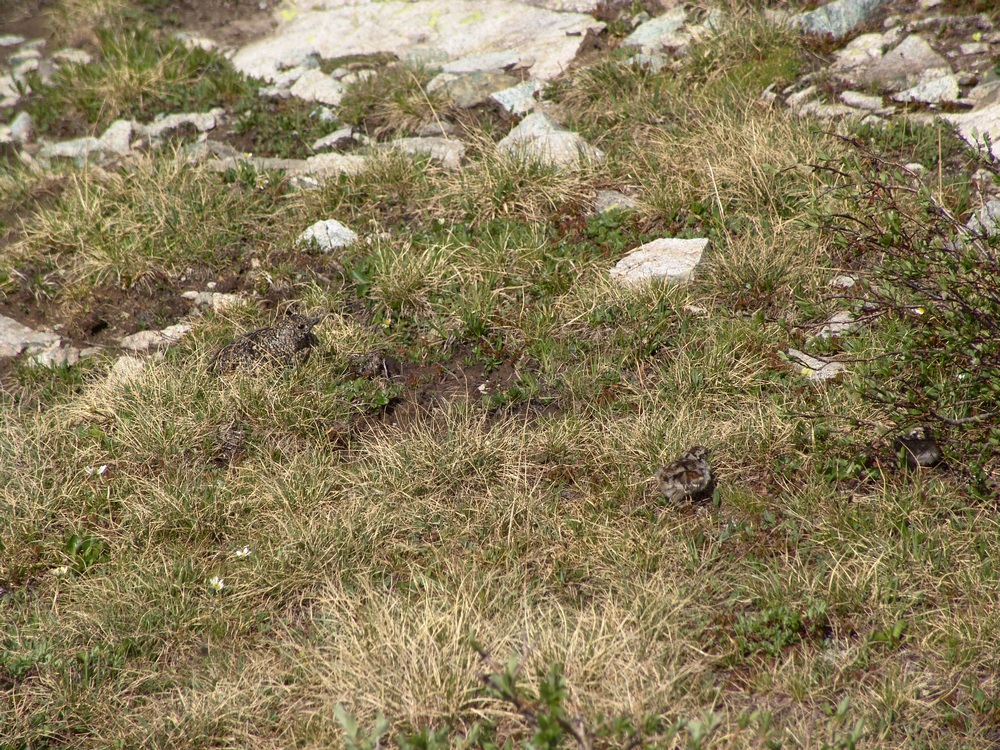
Then I spotted the mama bird - a full-grown Ptarmagin hiding in the brush:
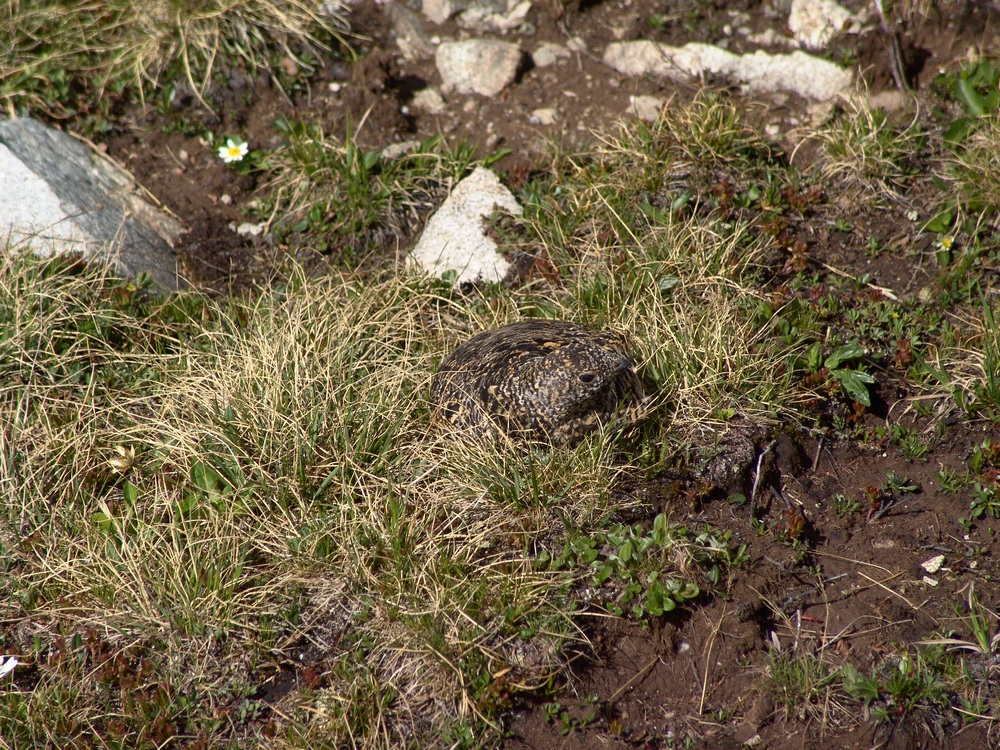
She got up and started running around me like a crazy lady (can't blame her - I was invading her space and she was protecting her chicks) and I took one more picture of her and continued up to the lake.
At the lake, we were able to get more awesome views of Ellingwood Point (left of center) and the waterfall at the base of the headwall for the Blanca / Ellingwood Point saddle.
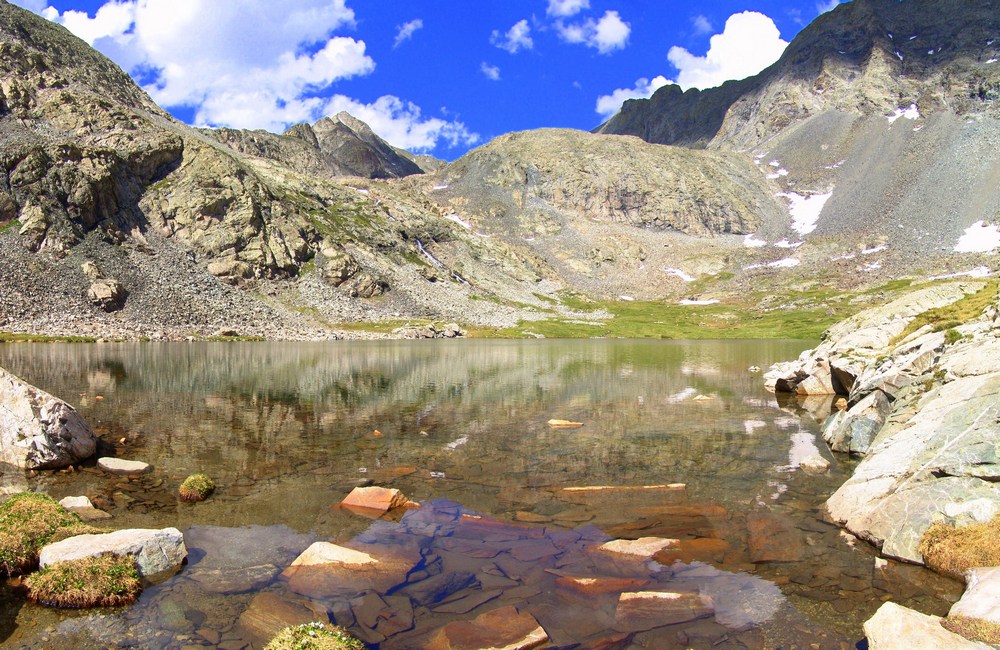
From the lake you could see all the way up and down the valley, including nice views of Little Bear.
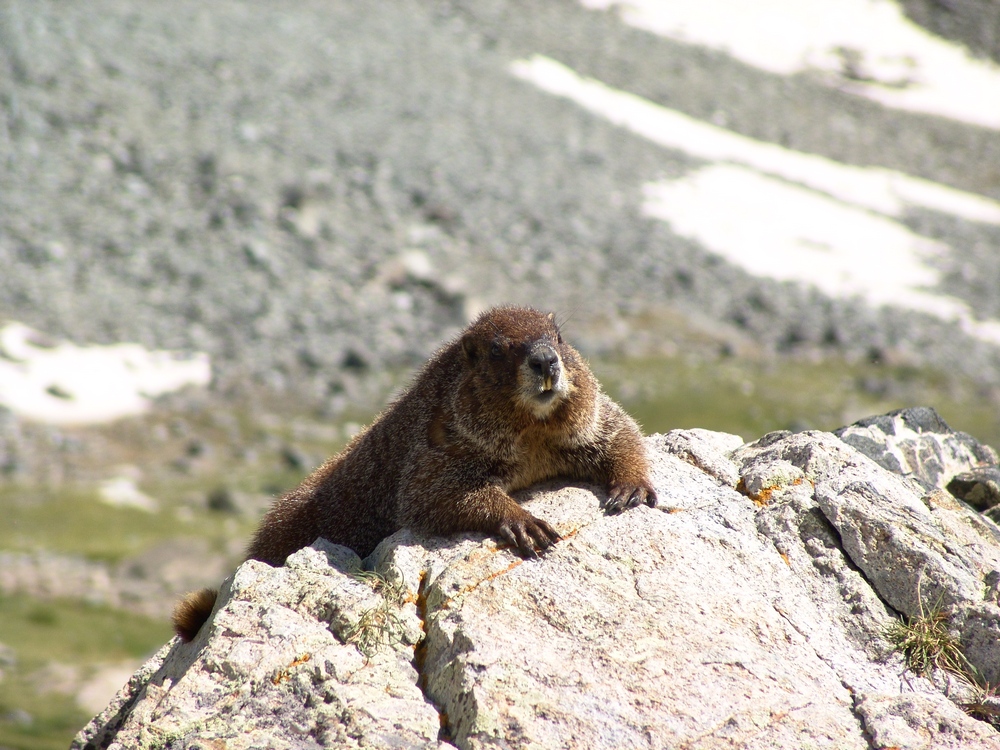
On the way back to our camp-site, we encountered a very friendly Marmot hanging out on a rock. This whole area was full of marmots and we were very careful to hang our food bags in a tree to prevent Marmots from eating our food.
When we returned to camp, we both set-off to prepare dinner. Terry boiled some water for his freeze-dried meal and I opened up a can of tomatoes, chicken, and green chilies. I got out my pre-chopped onion and sauteed everything together and made some yummy burritos. My pack may have weighed a lot, but I got to eat well, so it was worth it.
We saw that rain was on the way so we prepared our area for rain and got into Terry's tent. The rain was fairly heavy and lightning was off-and-on the rest of the evening. I was particularly uncomfortable being so high during a lightning storm, but we survived... We set the alarm for 4:30 AM and went to sleep.
At about 1AM I woke up to the loud sound of rocks falling. I think a goat knocked down some rocks in the valley, which sounded like fireworks in the middle of the night. At 4:30 we both got up and prepared for the climb. I ate some breakfast bars and Terry boiled more water for another freeze-dried meal. In the process he melted some plastic on his stove on accident. Fortunately, it appeared that his stove was still functional. We started up the trail around 5:30 AM as the sun was just beginning to light up the valley. Shortly after we began, we reached one of the upper lakes. The lake was pretty cool because it was reflecting the light that had just started to shine on Little Bear - right of center.
The lakes were really calm and provided some nice views.

We continued up the trail and began the steel climb up snow fields and boulders. We followed cairns towards the saddle between Ellingwood Point and Blanca and heard the sound of rocks falling above us. A pair of Mountain Goats were doing the traverse from Blanca to Ellingwood above us!
Terry finally reached the trail connecting Blanca and Ellingwood just below the saddle and he led us up towards Ellingwood.
Finally we reached the saddle between Blanca and Ellingwood and were afforded the first very impressive views of the morning. We could begin to make out Crestone Needle (the pointy mountain peaking through left of center).
I also took a 300 degree pano from here, which turned out really nicely. On the right you can see the Lake Como valley from where we came from, and on the left you can see the Huerfano River valley and Mount Lindsey, which I climbed last weekend.
We continued up Ellingwood Point and kept looking back behind us in awe of the sheer size of Blanca Peak. It really is impressive. Here's some panos of Blanca and Little Bear, across the valley from us:
While I was taken by all of the views and therefore occupied by photo-taking, Terry was making great progress towards the top of Ellingwood. He couldn't see it, but unfortunately he was not the first to summit Ellingwood today. The goats were!
As Terry approached the summit, the goats left and Terry was afforded solitude once more on Ellingwood. Here's Terry with the moon above him as he took in the views from atop Ellingwood:
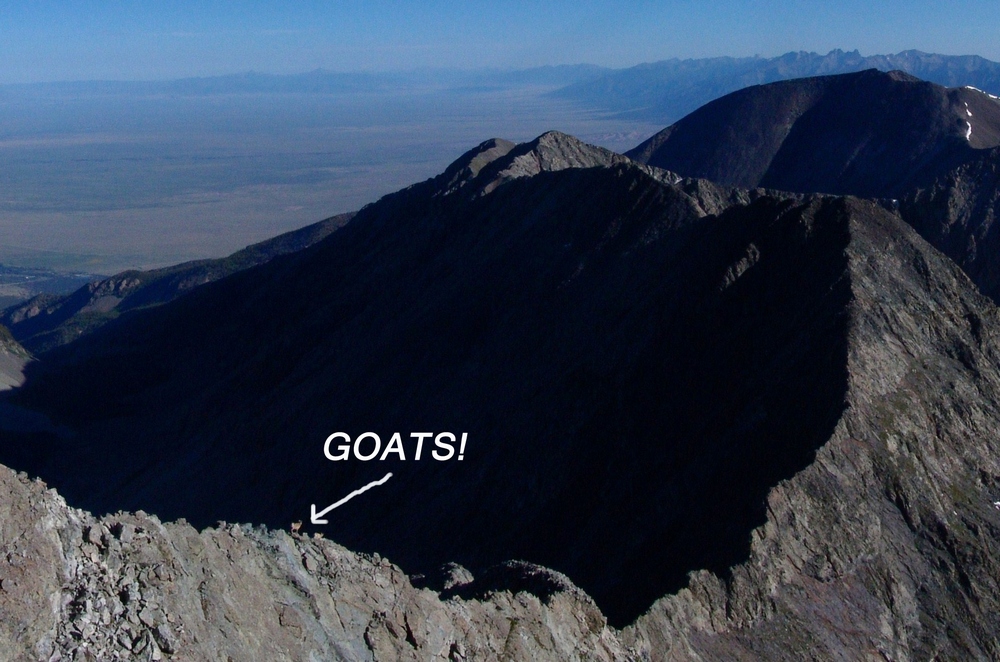
As I reached the false summit of Ellingwood, I looked to my right (north) and saw an impressive ridge connecting Ellingwood to California Peak. If you look closely at this pano, you can see something really cool...
... goats!
Here's a zoomed in view of the Goats! They were doing the traverse down the spiny ridge. It was really amazing seeing wildlife this high.
I finally reached the summit and Terry was already taking pictures. He took this one of me as I was also taking photos:
Here's a 360 pano from Ellingwood. Under the sun is Lindsey, and left of Terry is Little Bear and finally Blanca:

Terry and I stayed on top for about 20 minutes, watching groups of people summit Blanca and Little Bear across the valley. We refueled and began the traverse over to Blanca. This was a fairly sketchy route, perhaps because we stayed pretty high on the airy ridge. To our east was a sheer drop-off of at least 1,000 feet. The route required some careful footholds, ledge-walking, and even an icy couloir. Terry went down the icy couloir first, acting like Spiderman on the edge. I decided to around the ice and then right through it, using my hand to pick up ice and snow and throwing it out of my way. We started up Blanca and passed one gentleman coming over from Blanca. Looking back at Ellingwood, you can see the route we took, basically right down the ridge and up again towards Blanca.
The scramble up Blanca was fairly straightforward class 2+ climbing and I eventually reached the summit. Terry summited about 10 minutes later and we both began to take pictures like crazy. The weather was absolutely perfect - no wind. Terry took my summit shots, and then we both started walking around the summit block in search of great photos.
I took my normal 360 pano...

...and then took some higher detail panos of Lindsey Peak and the Winchell lakes to our Southeast.
Here's a zoomed in view of one of the Winchell lakes:
Then I took a very detailed set of photos of Little Bear and the traverse from Little Bear to Blanca - one of the hardest traverses in the State. You can also see Lake Como in the valley to the right of Little Bear.

After hanging out on the summit for awhile, we decided to head back down, which turned out to be fairly uneventful except for the awesome views. We eventually got back down to the waterfall, which I had to take a picture of!
When we got back to camp, we both decided it would make sense to just pack-out today, so we packed up our camp and headed back down towards Terry's vehicle. At Como Lake, we encounted a large group of 4-wheelers, one of which we followed down most of the trail to watch him go over the Jaws obstacles. His Willy's Jeep made the Jaws look more like baby teeth:
The hike back down to the car was fairly uneventful after seeing the Willys.
We then drove into Blanca to have some good food to prepare us for the drive home.
Little Bear Peak: A Slippery Proposition
What an action-packed trip this was! From off-roading one of Colorado's most difficult 4x4 trails to witnessing a full-scale Search and Rescue operation! As if climbing one of Colorado's most challenging 14ers wasn't enough!
To start off, here is a break-down of relevant numbers from this adventure up Little Bear Peak:
Peak summited:
Little Bear Peak: 14,037 ft. (ranked 44th in Colorado)
Total elevation gain: 2,360 ft.
Total distance hiked: 2.54 miles
Total time hiking: Approx. 5 hours
Photos taken: 252
Search and Rescue operations witnessed: 1
Little Bear Peak sits impressively next to Blanca Peak in the Sangre de Cristo Mountains of Colorado and is considered one of the most dangerous and perilous mountains in Colorado due to a section near the top called the Hourglass and the Bowling Alley. In fact, just this year, a climber named Kevin Hayne perished on Little Bear from falling at the Hourglass section. A full report of those events can be found here. For a semi-comprehensive (not regularly updated) list of all accidents on Little Bear, check out John Kirk's site.
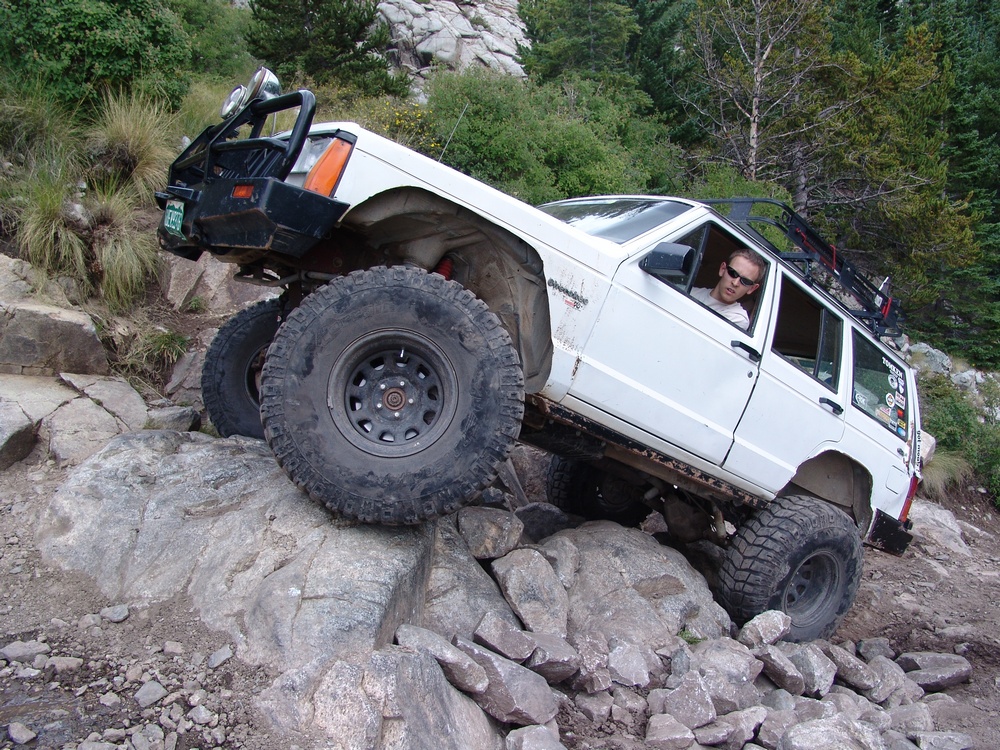
Having backpacked the long, steep road from the base of Blanca Peak last year to climb Blanca Peak and Ellingwood Point, I was not looking forward to another slog up the road to climb Little Bear. Fortunately, my college roommate and great friend, David Deramo, was back in the state from his long 2 year stay in Japan. Dave owns one of the most awesome Jeep Cherokees I've ever seen. Dave purchased the Jeep when we were in college in 1999 and has put work into it each year since. It went from a stock 1989 Jeep to an awesome rock-crawling machine over the course of many years. Dave has put a lot of work and time into his Jeep, and I was eager to see what it could do. Dave agreed early in the year to drive up the road with me and attempt to climb Little Bear.
Dave drove down from his home in Winter Park with his Jeep on a borrowed trailer, towed by a borrowed Ford half-ton pickup on Friday, August 6th and stayed the night at my place in Colorado Springs. We woke up at a reasonable time and made the drive over La Veta pass and met up with his friend from Durango, Lance. Lance owns 4x4 & More in Durango, Colorado and specializes in custom 4x4 jobs. His own Jeep, another older Jeep Cherokee, does not look like it belongs on the insane Blanca Peak trail; however, Lance keeps his Jeep looking stock but has some nasty tricks up his sleeve, including air suspension that adjusts using switches in his cab. Lance knows his stuff!
When we arrived at the start of the road and began unloading Dave's Jeep from the trailer, a couple of Search and Rescue (SAR) team-members began to assemble. Apparently someone had an accident on Ellingwood Point earlier in the day. Learning about a SAR mission did not do much to instill confidence in me for our trip up Little Bear.
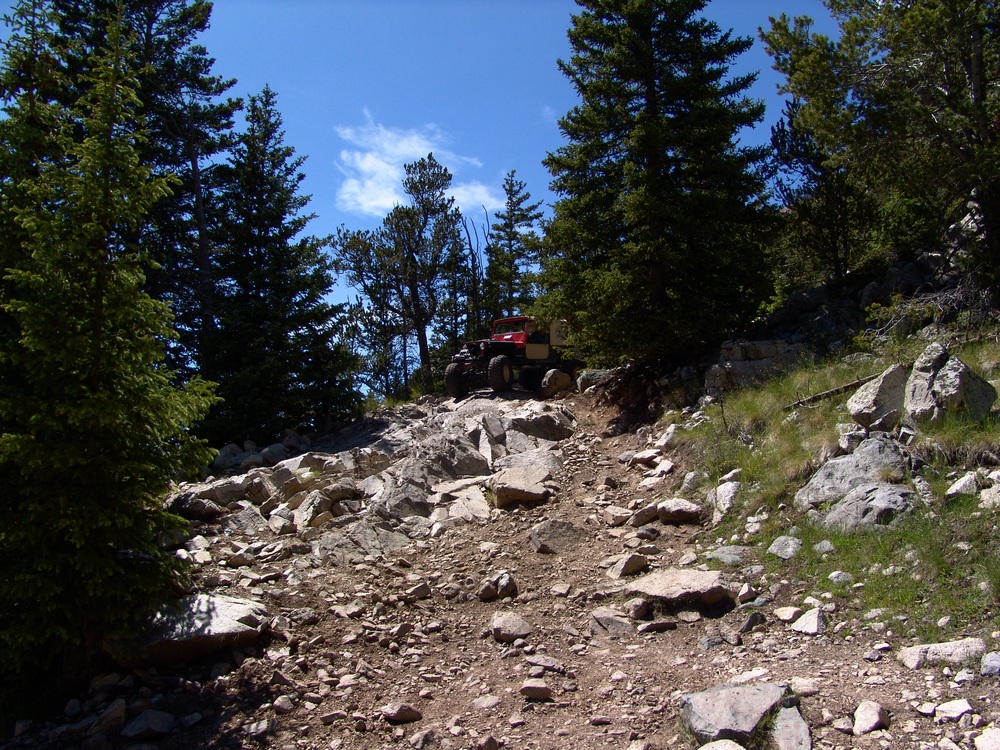
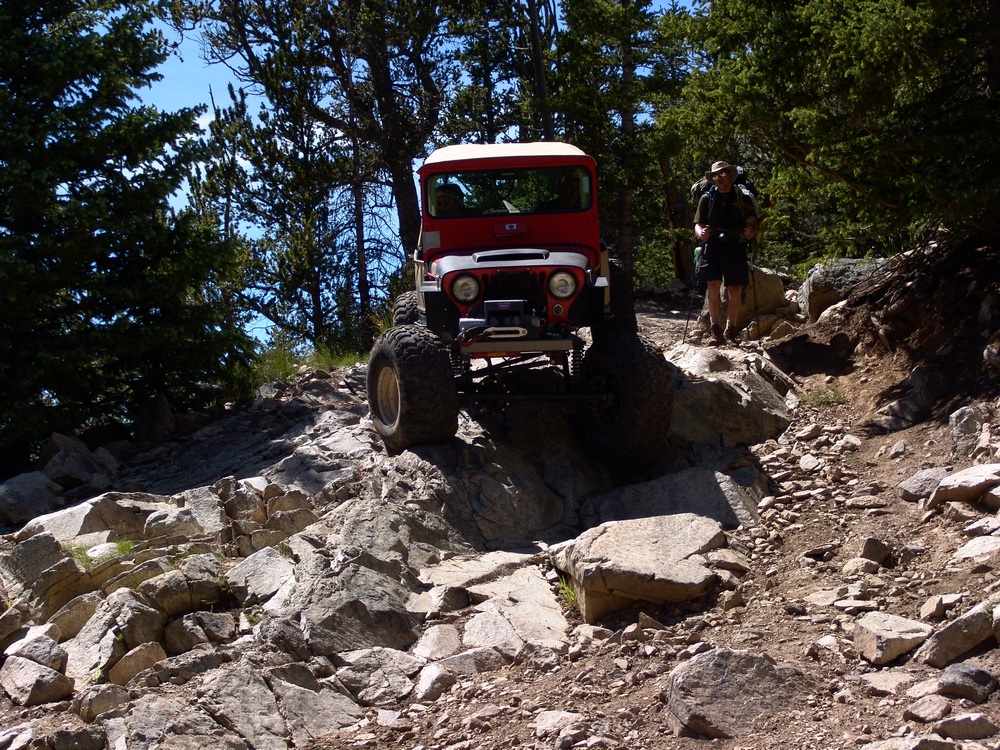
The drive up the road was fun. Dave's Jeep really performed well. He runs a 5.5 inch lift with 35" ProComp XTerrain tires with ARB lockers and tons of other upgrades. For those not familiar with the road, it is truly one of the most insane roads I've seen. The road itself consists of really rocky terrain with several rock crawling obstacles known as Jaws 1, 2, and 3. Dave made Jaws 1 look like a bump in the road.

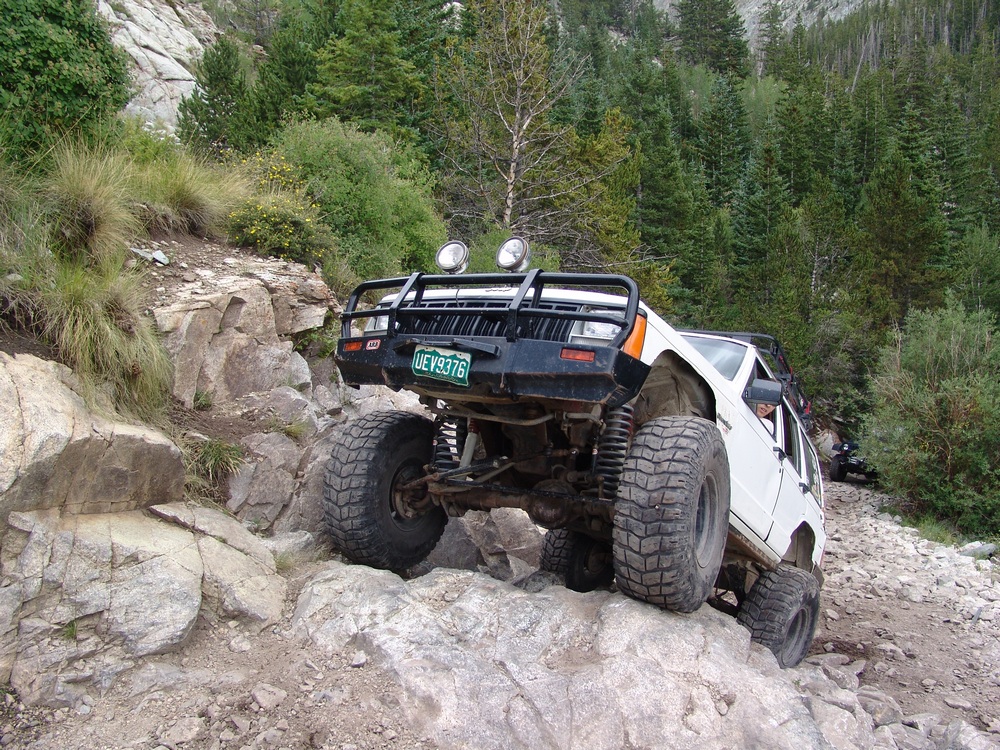
Jaws 1.
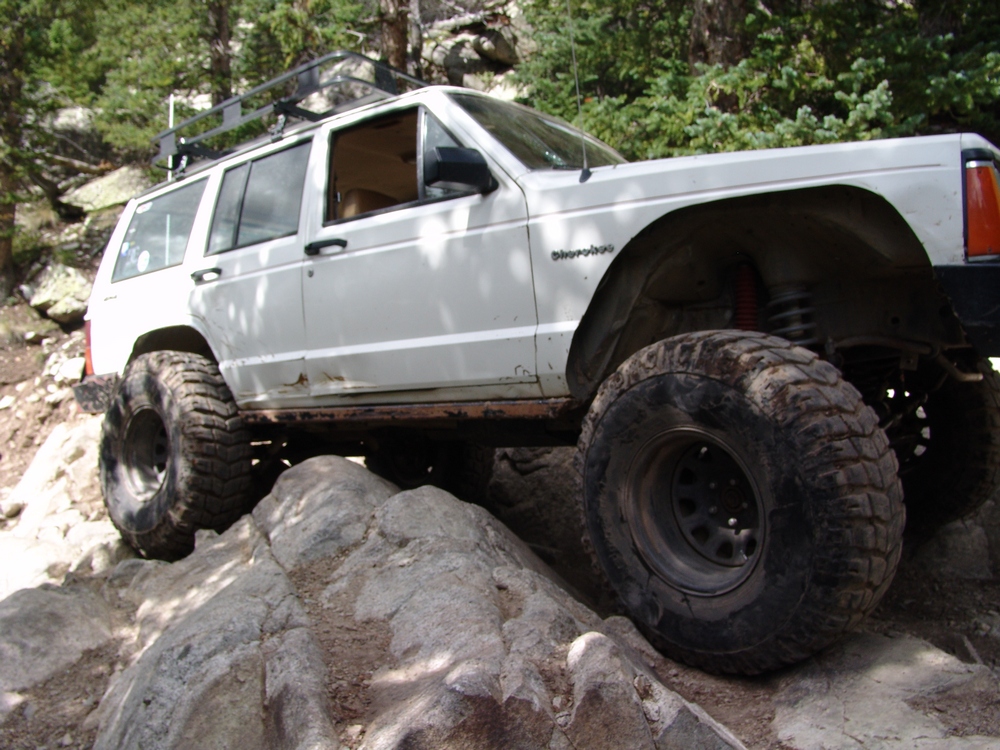
Jaws 2 is somewhat scarier, due to its off-camber feel and the considerable risk for tumbling off the side of the mountain. Dave needed a couple of attempts, but also made Jaws 2 look pretty easy. Lance's seemingly unfit Jeep also did great over Jaws 2, much to my surprise. Lance's Jeep is such a sleeper - it looks completely incapable of doing these obstacles, but the tricks he can pull make him just able to make it over the problems.

Lance makes it over Jaws 2 in his stock-looking Jeep Cherokee. Lance is a total off-roading master.

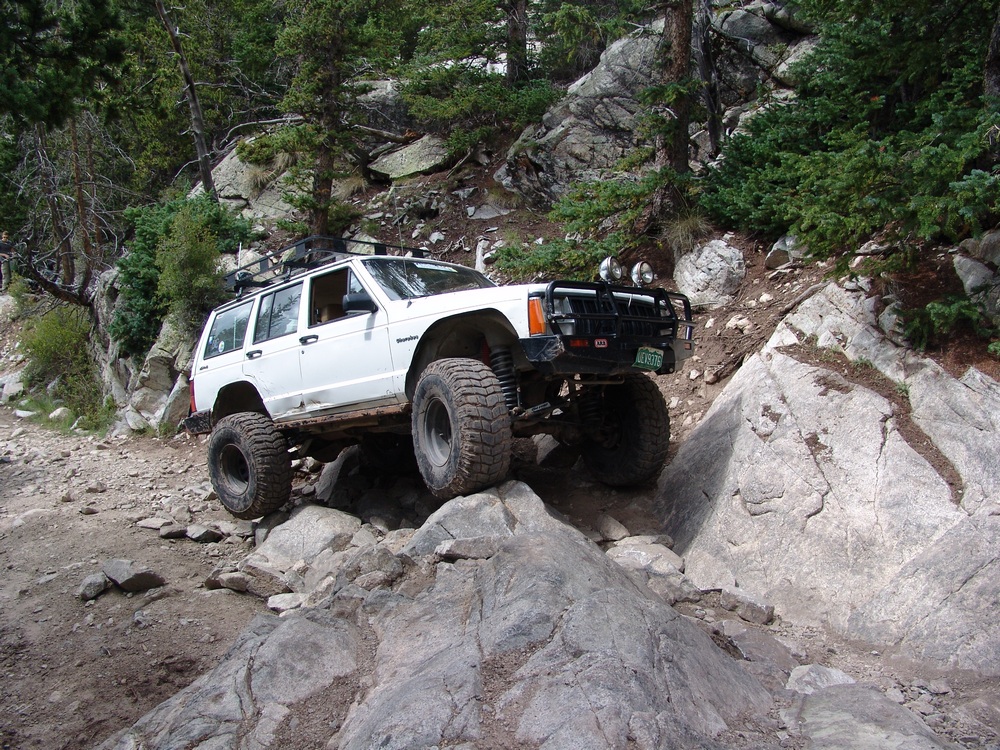
Dave heads up Jaws 2.
Jaws 3 is a little different than the other two obstacles, having a trickier line than the other two. Most consider Jaws 3 to be the hardest obstacle.
Once over Jaws 3, we were at Lake Como. Lake Como had many 4x4 vehicles parked at it and many campers lined its shores. We aimed for the south-eastern shore to look for camping and enjoyed the views of Little Bear Peak.

A spotlight shines on Little Bear Peak
We found a great campsite at the far end of the lake and unpacked our gear and made camp. A couple of guys in a Jeep Rubicon also joined us at our camp site. They were also planning on climbing Little Bear Peak, so it was a natural fit. Once our camp was made, we all drove up the road to see if we could complete the final obstacle. It was no problem for our group and we easily made it to the end of the road past Blue Lake. As soon as we arrived, the weather turned nasty, with hail and rain pounding the area. A couple of SAR team members, George and Stefan, approached Dave and I and asked us if we could give them a ride down to Lake Como. George and Stefan were really friendly guys and conveyed the SAR situation to us. A woman with Epilepsy had suffered a seizure and later dislocated her shoulder from a fall. Her injuries were severe enough to merit SAR extraction due to her pain. The entire story can be found on the link above or in the trip report posted by someone involved. It really is a fascinating tale that many mountaineers can learn from.
Here are the lessons I personally learned from the SAR incident: 1) Be sure to find out if your hiking partner(s) have a medical condition. If they do, learn about how it afflicts them and how to treat it. Additionally, make sure your group agrees on the rules of engagement - how you will handle an emergency. These are important things to consider before hiking with others, especially strangers. 2) If you have a medical condition - please disclose it to your fellow hikers before they agree to hike with you. Fully disclosing this to your partners is only fair and offers them the opportunity to learn more and to decide if they want to take on the risk of accompanying you on the hike. If your medical condition worsens while climbing, please turn-around and head back to camp before the situation worsens and SAR is called.

Blue Lake before the storm
Blue Lake during the storm
Blue Lake after the storm
The waterfall seen above Blue Lake, just before the headwall of Blanca Peak.
Dave and I returned to camp and ate dinner. Our group spent some time around a camp-fire, exchanging stories with some hikers that had came down from helping the SAR team. Dave and I eventually crashed and set the alarm for 4 AM. Given that there was a lot of lightning and rain that night, we wanted to get an early start on Little Bear.
We woke up at 4:30 after mashing the snooze button a few times and set away for the Little Bear turn-off at the top of the hill above Lake Como. We scrambled the boulders and made our way up the very steep gully leading to Little Bear's ridge. Caution should be taken in this gully, as the rock is loose. We made quick work of the gully and stopped to take some photos.
Looking west towards Alamosa.

The steep gully leading to Little Bear's ridge.

Ellingwood Point at sunrise
Dave at the top of the gully.
We made our way across the mountainside, just below the ridge towards Little Bear. The trail is faint but well-marked by cairns and is easy terrain. We reached about the half-way mark from the gully and Little Bear and gained our first great views of Little Bear.
Dave takes shelter with Little Bear's impressive face behind him.
Dave's Cave.
We quickly made our way to the base of Little Bear and were greeted by the famous Hourglass. The Hourglass is the deadliest section of this climb, for obvious reasons. Water runs down the center of this narrow and steep gully, forcing climbers higher to the left in order to get past the start of the gully. The whole section above the Hourglass is referred to as "The Bowling Alley," since rocks kicked down from above are all funnelled inwards, creating a dangerous situation for those climbing up. Since we wanted to avoid rockfall from above, we were glad we got up early and were the first to reach the Hourglass. Since it had rained a lot the night before, the rocks everywhere in the Hourglass were wet. We were able to find some patches of dry rock and slowly and meticulously made our way up the gully.
The Hourglass.
Matt Payne ascends the Hourglass. Note the steepness and wetness of the rock. Handhold and foothold selection was paramount to success.
A fall here would have been fatal. Take caution!
The first 10 - 20 feet of the Hourglass are scary. Holds are minimal and the rock is wet. Extra special caution should be taken here and only those comfortable climbing class 4 and class 5 terrain should continue. If you're afraid of heights, this is not for you. Routefinding in the Hourglass was fairly difficult. The rocks were all wet and dirt was loose, making our climb upwards a slow and calculated process. We were eventually able to find some cairns to the left of the Hourglass and make our way up to the summit. The summit itself provided insane views of Blanca Peak, Ellingwood Point, the Spanish Peaks, Mount Lindsey, and the rest of the Sangre de Cristo Mountains.

Dave tops out on Little Bear's summit.

A great view of the connecting ridge between Little Bear and Blanca Peak. The traverse between Blanca and Little Bear is considered one of the most difficult in the State of Colorado.

A 3600 panoramic photo from the summit of Little Bear Peak - click on photo for full resolution version.
We also got to witness the SAR extraction of the injured climber.

Flight for Life rescues an injured climber.
Dave on the summit of Little Bear.
Matt Payne on the summit of Little Bear.
Matt and Dave on the summit - using a self-timer.
One of the neat things you can see from the summit of Little Bear is the crop circles down in the San Luis Valley.

Clouds roll over Ellingwood Point and Blanca Peak.
A group of two climbers joined us on top for a short time and we all agreed to down climb together, as to avoid rockfall.
The wind was quite chilly on the summit, so we departed after spending no more than 30 minutes on top. The four of us made our way down to the start of the roped section of the Hourglass. I was concerned with how this was going to work, given the steepness and wetness of the rock here. Our plan was to use the rope as a handhold and slowly descend while facing the rock, one at a time. The process turned out to be quite the success, as none of us slipped or had difficulty making our way down the roped and scary section.
Looking up at the fixed rope in the Hourglass
Dave is ready to downclimb the Hourglass.
Looking down the Hourglass and the wet terrain.
Dave starts down the Hourglass.
After successfully making it down through the Hourglass, the four of us headed back over below the ridge of Little Bear. We all decided to go up and over the ridge instead of below, which enabled us to get some great views of Lake Como and the surrounding area, including Ellingwood Point.

Ellingwood Point sits at the top of the Lake Como basin.

Dave with Little Bear in the background.
Dave and Lake Como.
Little Bear and the Lake Como basin.
Little Bear splits two valleys.

Matt on the Little Bear ridge.
We made it back safely to our campsite and quickly packed up and drove down. Dave's Jeep once again performed quite well over the obstacles going down.
Overall, I would rate Little Bear as one of the most difficult 14ers. The exposure and risk at the Hourglass, coupled with the rockfall potential, make Little Bear very dangerous and not for the beginner climber. I would highly recommend climbing helmets and would even advocate the use of rope and a harness with belay devices for the down-climb. If you're in need of a good climbing helmet, this one from Backcountry.com looks go be a nice buy.
Update on the injured climber we saw on Ellingwood Point: I posted what we had witnessed and discussed with the SAR team on a thread on 14ers.com, which erupted into a lively discussion about hiking with people that have pre-existing medical conditions. The consensus from that discussion was that it is very much the responsibility of someone with a pre-existing medical condition to disclose that condition to their fellow hikers before embarking on a hike, especially if that medical condition may place you or your partners in serious danger, such as what happened in this case. Unfortunately, Elisabeth did not respond well to that discussion on 14ers.com and basically called the whole forum a bunch of expletives. Later on, she sent me a private message requesting that I delete that thread because of the stress it had caused her and because she was unable to obtain employment because of the content of the thread. She claimed that she was being singled out becuase of her condition; however, my guess is that employers saw how immature her response to the whole situation was and did not want to hire someone with such a way of interacting with others. Anyways, I refused to delete the thread and she threatened to sue me for libel and slander because I had implied that her injury was a direct result of her pre-existing medical condition (which of course is not what I had typed at all). I had suggested that it was possible that her epilepsy could cause her to be weaker physically and that would cause you to have a higher probability of falling and hurting yourself. Anyways, I eventually had Bill at 14ers.com delete the thread but I still have the discussion saved as a .pdf if anyone is interested in reading it. Bottom line, I believe a lot can be learned from the mistakes of others, and we should embrace the opportunity to learn at all times.