Displaying items by tag: Snowmass Mountain
Colorado's 12 Hardest 14ers to Climb
Colorado's Fourteeners (14ers) are legendary. Each of the 53 ranked peaks offers unique challenges and rewards. They are the some of the most amazing mountains in the world and have been the number one object of adoration for hundreds of thousands of Coloradoans. Indeed, according to the Colorado Fourteeners Initiative (CFI), approximately half a million people attempt to climb a fourteener each year. Climbing 14ers is a dangerous activity; however, good planning, fitness, and awareness of the potential hazards will provide climbers with good opportunities to accomplish these monsterous peaks. Each year I'm usually asked one of two questions - which 14ers are the easiest; and, which 14ers are the hardest? I decided to lay out the hardest 14ers here for you in this article. Let me know how I did based on your own experience. Lastly, it might be a good idea to arm yourself with the most up-to-date information about mountaineering accidents in Colorado. Who knows, reading about these tragic events may just save your life. Additionally, I highly recommend obtaining GaiaGPS for your phone. It allows you to see your track and location on a USGS map overlay even in airplane mode. It has saved me so many times. You can purchase it here and help support the site.
While it may make sense to simply use the only existing data available regarding mountaineering accidents in Colorado to determine 14er difficulty, my experience has been that the difficulty of a peak is more than just cold, hard facts. Indeed, Longs Peak is not nearly as difficult as, say, Capitol Peak; however, it has far more accidents due to the sheer number of inexperienced and/or unaccomplished people attempting it each year. With that being said, I'm going to use a mixture of my personal experience and some subjective ratings to present my case to you. For these ratings it is assumed that the climber is approaching via the standard route in "normal" conditions. I've intentionally left out un-ranked 14ers such as North Maroon and El Diente - assume they can be bundled with Maroon Peak and Mount Wilson, respectively. Additionally, consideration of any traverses between 14ers was not considered for these ratings.
I will rate each mountain's difficulty ranking based on four equally weighted variables:
1. Sustained difficulty: this rating establishes the peak's sustained difficulty over the course of the entire climb
2. Most difficult section: this rating establishes the difficulty of the peak's most difficult section
3. Terrain: this rating establishes the difficulty of the peak's overall terrain, taking exposure and looseness of rock into account
4. Access: this rating establishes the difficulty to reach this peak or how long it takes to get to the top
Feel free to let me know if you disagree with my ratings!
#1. Capitol Peak

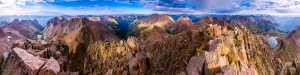
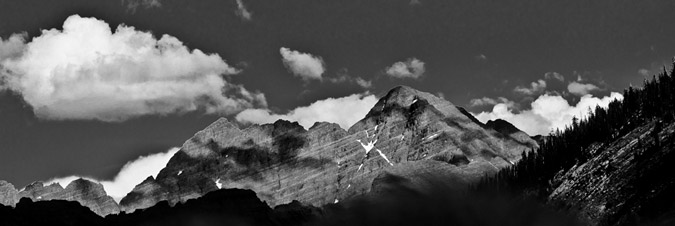
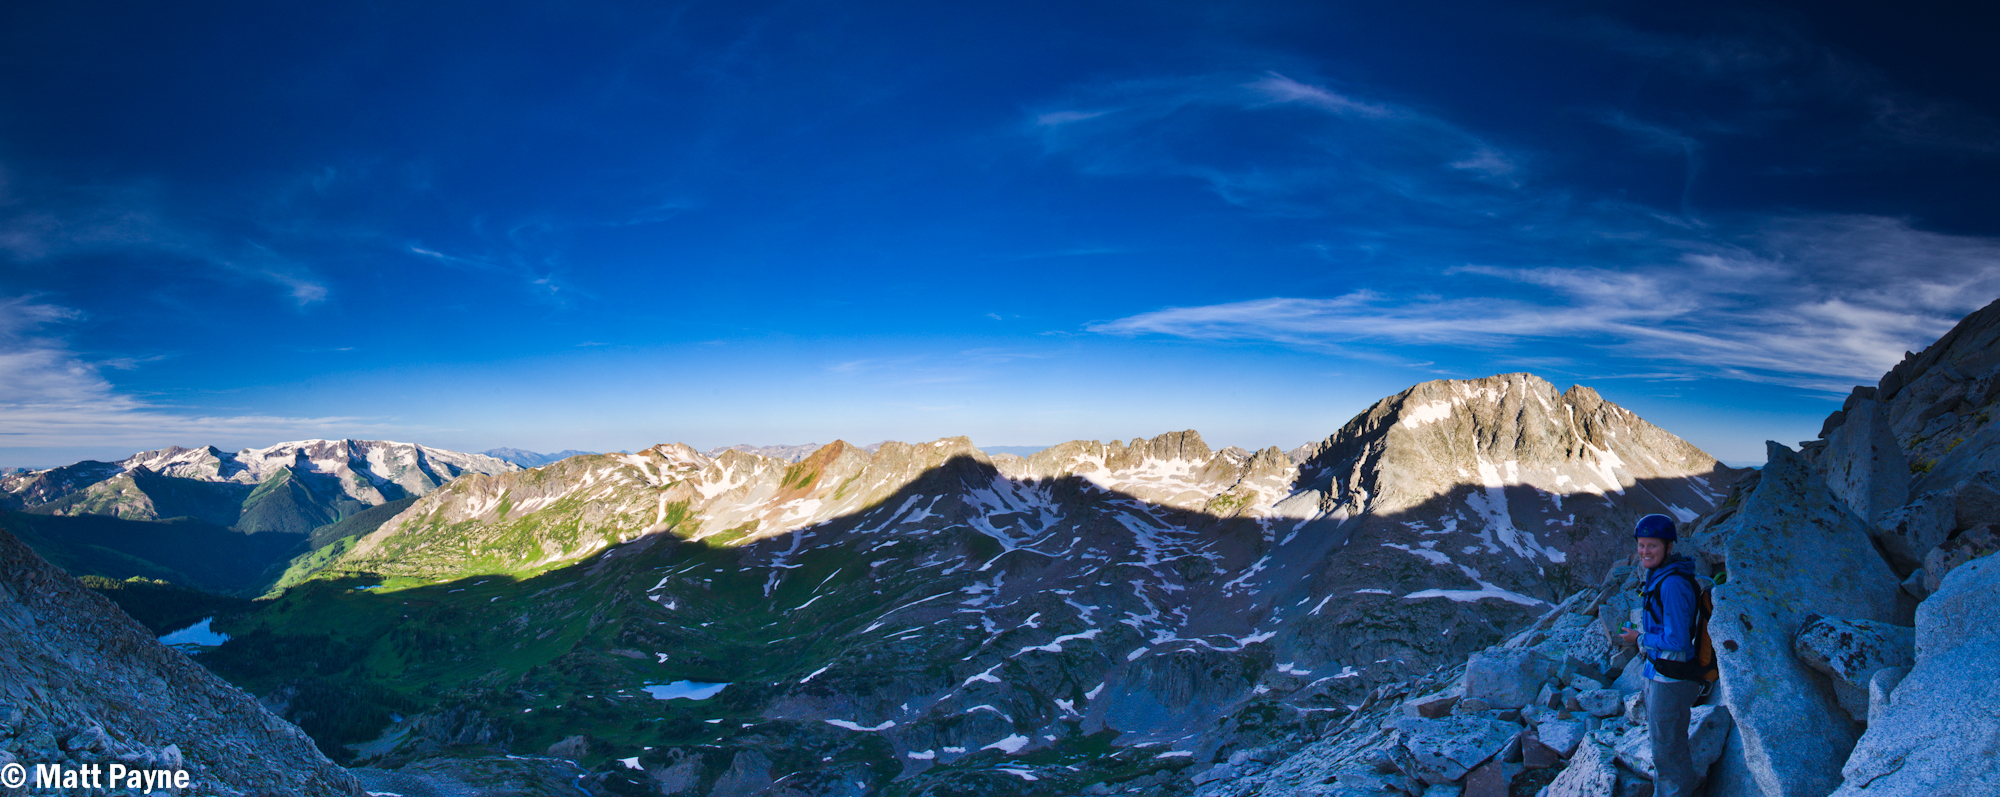
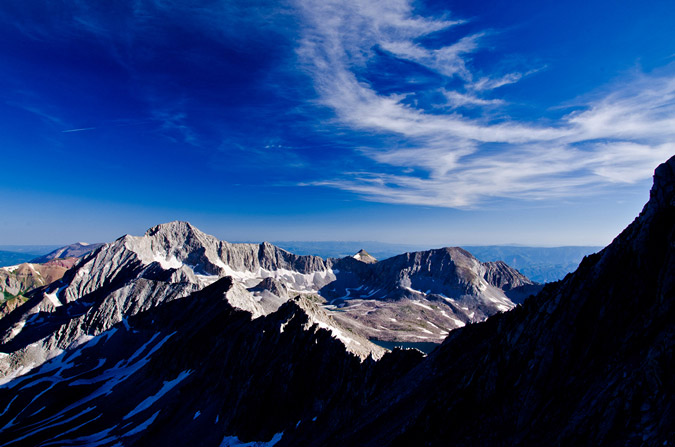
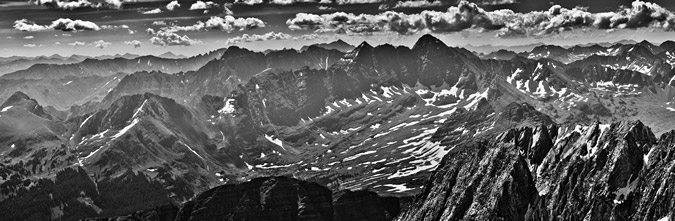
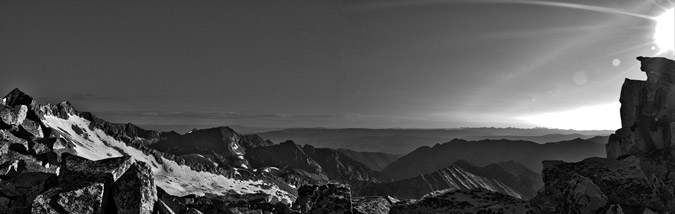
While Capitol Peak has only seen two deaths since 2010 compared to five on Longs Peak (as of August 2014), it is arguably the most difficult 14er in Colorado, as I attested in my 2010 trip report. As pictured above in the panoramic taken between Capitol Peak and K2 near the infamous Knife Edge, the terrain is rugged, exposed, loose and dangerous. Not only does Capitol Peak have some very difficult sections, it has, in my opinion, the highest sustained difficulty out of any of the 14ers. The climb up Capitol is relentless and requires mountainners to focus on the mountain's terrain for a very long period of time. There are very few breaks to be had and simple mistakes can and do prove to be fatal. Additionally, Capitol Peak requires a lot of time to accomplish and once you are past the knife edge, you are committed to at least two hours more of climbing. This makes the mountain especially mentally taxing as those are two hours straight of focused climbing on rugged terrain where you also have to keep a keen eye on the weather. Lastly, access to Capitol, while doable in a single day, usually requires an arduous backpacking trip to Capitol Lake and a very early start on a subsequent day. Let's see how Capitol Peak rates in the four domains:
| Sustained Difficulty: 10/10 | |
| Most difficult section: 9/10 | |
| Terrain: 10/10 | |
| Access: 9/10 | |
| Total: 38/40 |
#2. Mount Wilson
Mount Wilson is easily one of the most challenging 14ers in Colorado to climb - the standard route, while mostly straight-forward, has many difficult sections of very loose rock at the summit. The summit block itself has stopped many people in their tracks, just a few feet from the summit. The exposure there is intense and not for the feint of heart. Examples of this can be seen in my trip report from 2011. In addition to the tremendous exposure found on the summit block, Mount Wilson's approach from the Rock of Ages trailhead is fairly long and quite committing, with a lot of up-and-down climbing (unless approached from Kilpacker Basin or Navajo Basin). The difficult section of climbing found on the upper 1/3 of the route is difficult to negotiate and offers many challenges for climbers of all levels. The rock on Mount Wilson is extremely loose and many people have perished on the slopes between Mount Wilson and the un-ranked beast to the west - El Diente.
| Sustained Difficulty: 10/10 | |
| Most difficult section: 9/10 | |
| Terrain: 10/10 | |
| Access: 7/10 | |
| Total: 36/40 |
#3. Little Bear Peak

Out of all of the Fourteeners, Little Bear Peak is quite possibly my least favorite and least likely to be something I'd like to repeat. The approach is terrible - either a long slog on a rocky road in hot weather or an insane jeep ride over some of Colorado's toughest jeep obstacles (OK - those are kind of awesome). My ascent in 2010 was quite memorable, notably - the infamous "Hourglass" section just about scared me to death. Many people have perished in the Hourglass over the years, including one of the most memorable deaths in the past 5 years - Kevin Hayne. The Hourglass presents some very difficult climbing, with few good hand-holds and potentially fatal ice and water sections, not to mention the hazard of frequent rockfall from above. While Little Bear Peak is very straight-forward and mostly an easy climb, the Hourglass section marks it as one of the toughest mountains around.
| Sustained Difficulty: 6/10 | |
| Most difficult section: 10/10 | |
| Terrain: 10/10 | |
| Access: 7/10 | |
| Total: 33/40 |
#4. Pyramid Peak

Pyramid Peak, while not having many known fatalities, presents some truly heinous climbing obstacles, especially in wet conditions. The rock in the Elk Mountains is notoriously loose and nasty - making it very suspect in down-climbs and even more dangerous in rain or snow. The approach to Pyramid is fairly straightforward, albeit somewhat long and committing once above tree-line. The terrain on Pyramid is steep almost the entire climb and once above tree-line the mountain demands your concentration for the duration. While Pyramid is likely one of my favorite climbs of all time, it is not for a beginner climber and should be taking quite seriously. Of course, the views from the summit are to die for.
| Sustained Difficulty: 8/10 | |
| Most difficult section: 8/10 | |
| Terrain: 9/10 | |
| Access: 6/10 | |
| Total: 31/40 |
#5. Maroon Peak

The photo above was taken from the summit of Pyramid Peak looking out across the valley at the Maroon Bells and their insane stature. The whole area is steep and impressive, which comes with some inherent dangers and difficulties. The Maroon Bells have claimed many lives through the years and are certainly some of the most dangerous mountains in America. Of particular note, the traverse between Maroon Peak and North Maroon has claimed several victims and is a force to be reckoned with. Maroon Peak is a steep monstrosity full of beauty and loose rock as well as an intricate network of rocks, spires and falling rock that a blessing and a curse. Maroon Peak holds some of Colorado's worst rock and even the most experienced climbers have been subdued by the dangerous terrain found there.
| Sustained Difficulty: 8/10 | |
| Most difficult section: 8/10 | |
| Terrain: 9/10 | |
| Access: 6/10 | |
| Total: 30/40 |
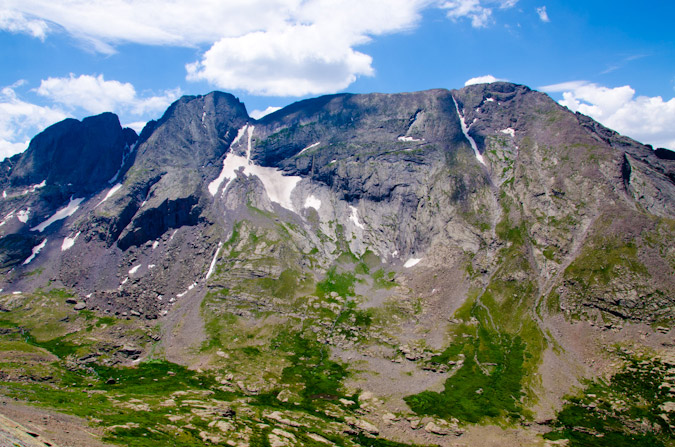
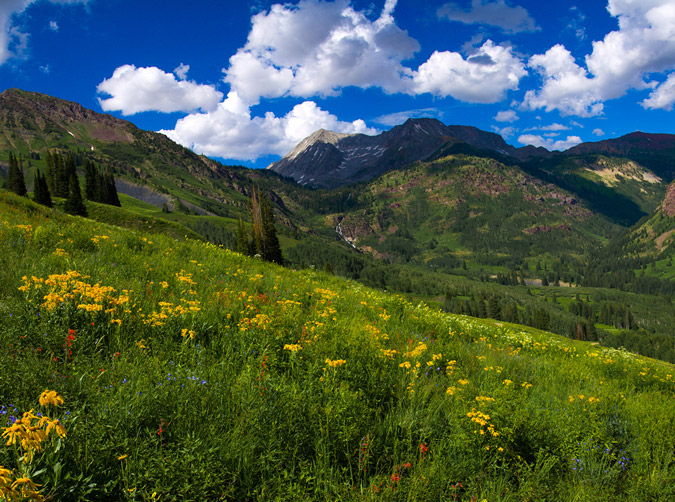
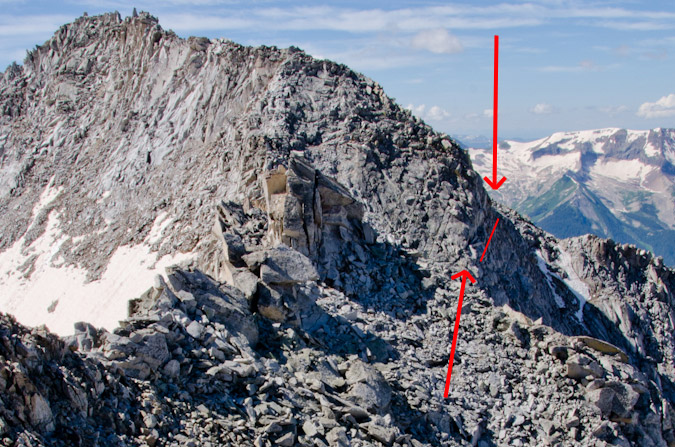
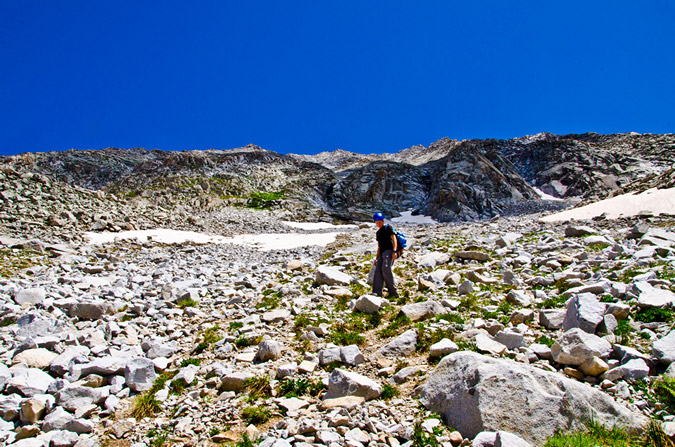
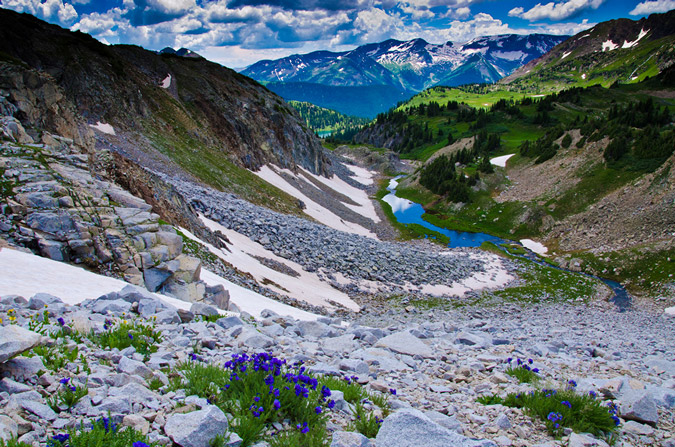
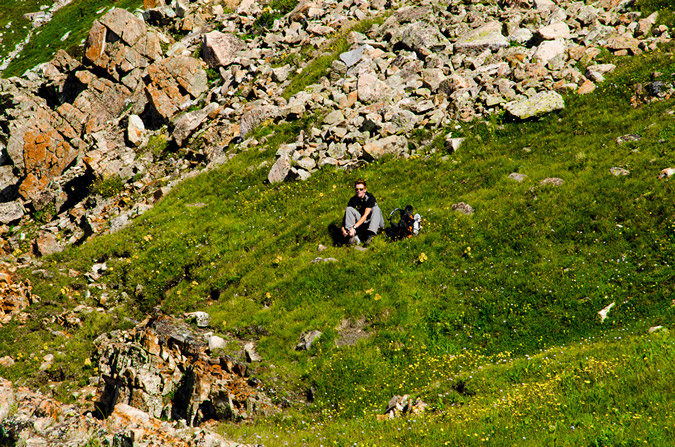
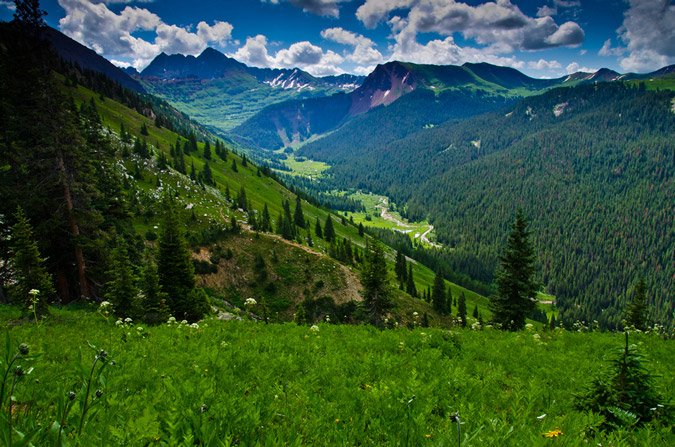
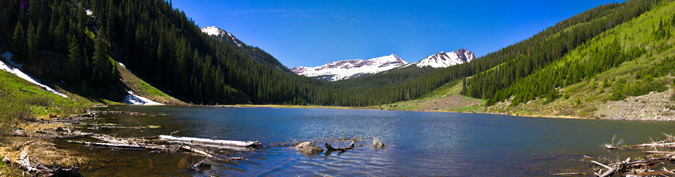
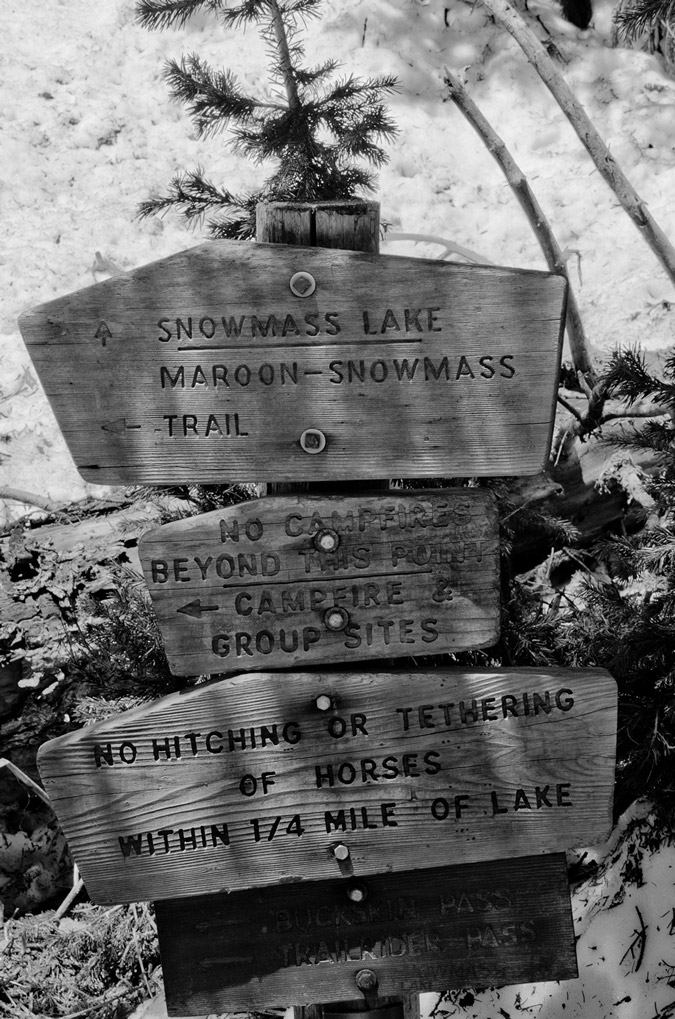
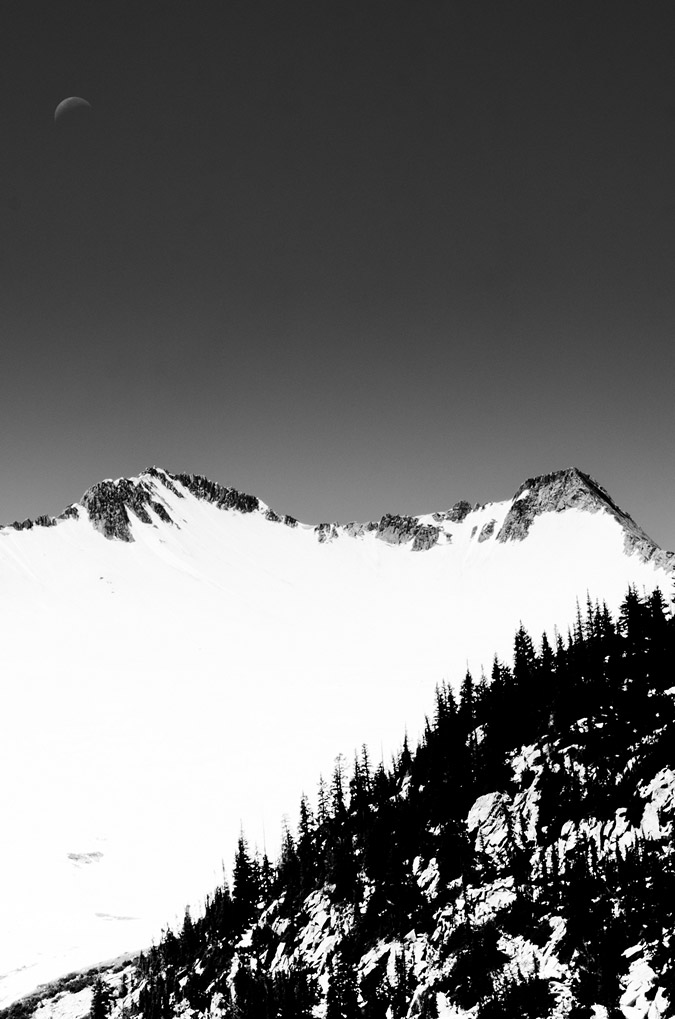
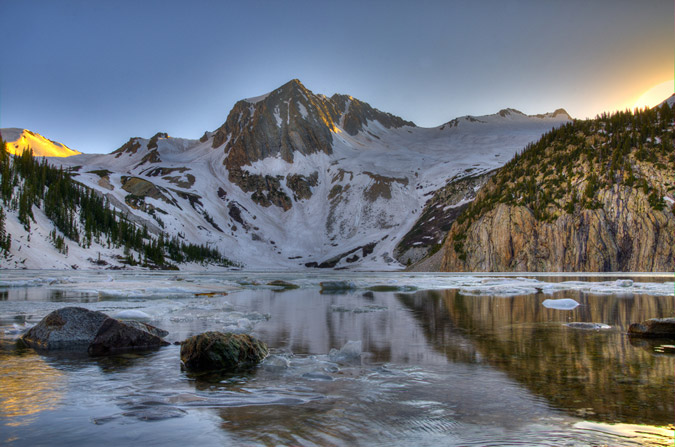
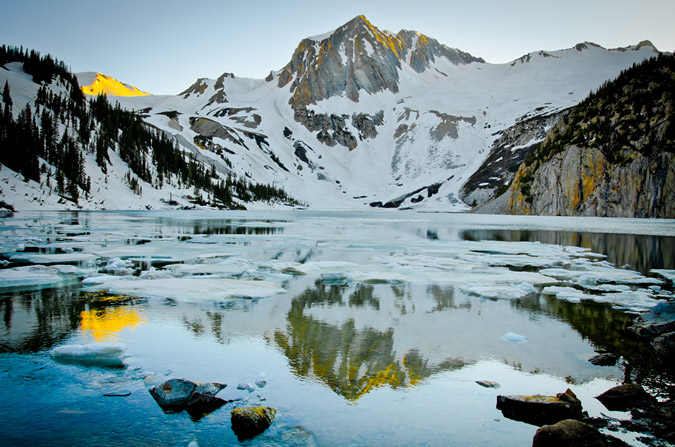
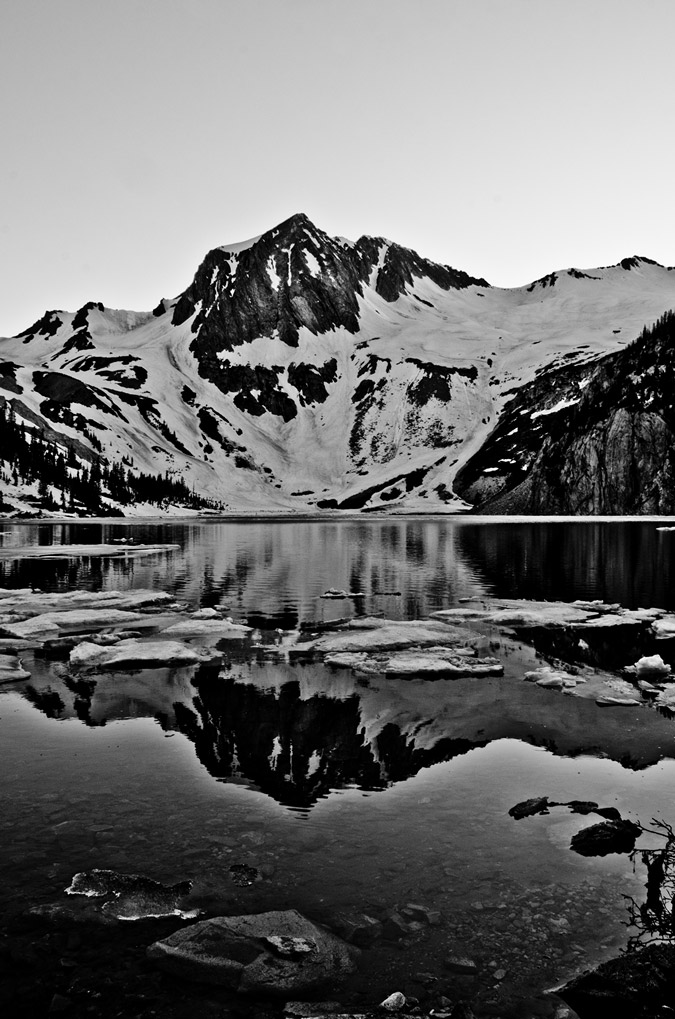
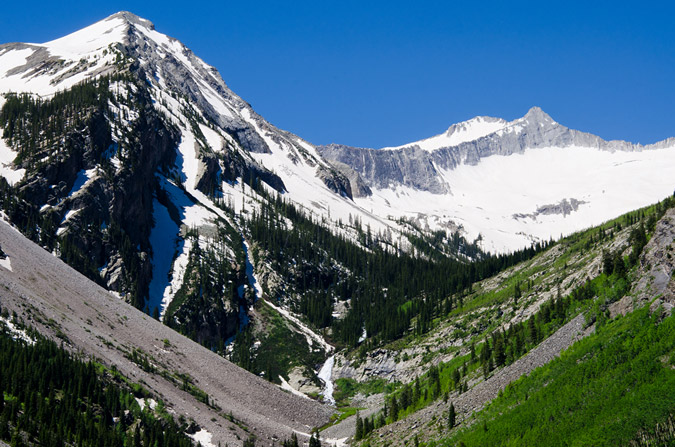
#6. Snowmass Mountain

Snowmass Mountain is usually climbed in the early months of summer, when the face of the mountain is mostly covered in snow, making for somewhat easier travel up the snow in crampons; however, the rock beneath the snow is quite loose and is constantly shifting due to erosion. Indeed, Snowmass has proved to be particularly dangerous in the past few years due to these shifting conditions and has claimed a couple lives in the past 5 years. Snowmass' upper slopes contains large white boulders that look secure but are often quite loose and came come crashing down at any moment. The approach on all routes of Snowmass requires quite a bit of travel, which increases the difficulty.
| Sustained Difficulty: 8/10 | |
| Most difficult section: 6/10 | |
| Terrain: 7/10 | |
| Access: 8/10 | |
| Total: 29/40 |
#7. Sunlight Peak
Sunlight Peak is one of the few 14ers requiring class 4 climbing to reach the summit and is generally preceded by a very long backpacking trip and a steep ascent into the Twin Lake basin. Terrain in the Chicago Basin where Sunlight resides is notoriously loose and dangerous as well as highly susceptible to frequent and quickly changing extreme weather conditions. The summit block of Sunlight presents a particularly interesting challenge for climbers and many people skip the summit block altogether if there is any moisture on the rock. Many people may rate Sunlight's next door neighbor, Windom Peak, as being the more difficult of the two; however, I personally found Sunlight to have more challenging route-finding and climbing requirements. Since Sunlight is often paired with Eolus and Windom on the same day and often as the last peak climbed, it presents even more inherent danger as many climbers attempting it are more exhausted than if doing Sunlight on its own.
| Sustained Difficulty: 7/10 | |
| Most difficult section: 8/10 | |
| Terrain: 6/10 | |
| Access: 8/10 | |
| Total: 29/40 |
#8. Crestone Needle

Coming in at number 8 on my list of Colorado's most difficult 14ers to climb is the venerable, impressive and just-plain-freaking-awesome Crestone Needle - my favorite 14er of all. The standard route of Crestone Needle brings you up a steep approach and then plants you right in a series of difficult route-finding challenges and some of the steepest yet most solid rock there is. Even though the rock is quite solid and sturdy, make no mistake - an error in judgement would likly prove fatal, especially in severe weather conditions. Indeed, Crestone Needle has claimed many lives and is a surely one of the most dangerous peaks in the Sangre de Cristo Range. Most approachs require a backpack trip or a very early start and once above tree-line the terrain is quite extreme.
| Sustained Difficulty: 7/10 | |
| Most difficult section: 7/10 | |
| Terrain: 9/10 | |
| Access: 5/10 | |
| Total: 28/40 |
#9. Longs Peak
Longs Peak, located within the heart of Rocky Mountain National Park, is likely Colorado's most frequently visited mountain other than perhaps Greys and Torreys. This mountain's location in a National Park makes it a very popular destination by people from all over the world and it often lures inexperienced climbers on its more dangerous upper sections where people find themselves ill-equipped to complete the climb, both mentally and physically. Perhaps the most notable part of Longs Peak's approach is the sheer length of the climb, a full-day affair to be sure. A simple google search of Longs Peak deaths will just tell you how dangerous this peak really is, especially on the upper areas such as the Narrows and the Trough. Additional hazards plaguing this peak are the frequent deposits of snow and ice early and late in the climbing season that often contribute to the dangerous nature of the climb.
| Sustained Difficulty: 9/10 | |
| Most difficult section: 6/10 | |
| Terrain: 8/10 | |
| Access: 5/10 | |
| Total: 28/40 |
#10. Kit Carson Mountain
Kit Carson Mountain is one of the Sangre de Cristo giants located right by Crestone Peak and Crestone Needle. The approach to Kit Carson's standard route involves a lengthy backpacking trip and an ascent over the less impressive, albeit quite steep 14er, Challenger Point. The steep approach, coupled with a downclimb mired in confusion and difficult route-finding, makes Kit Carson quite eligible for this list. Several climbers have perished on Kit Carson in recent years, almost always due to off-route climbing.
| Sustained Difficulty: 8/10 | |
| Most difficult section: 6/10 | |
| Terrain: 6/10 | |
| Access: 7/10 | |
| Total: 27/40 |
#11. Mount Eolus
Mount Eolus marks the second of the Chicago Basin 14ers to make this list and arguably the more difficult of the three, despite my lower rating here. Eolus' "Catwalk" and steep, confusing route on the upper third of the mountain make it a top contender. The approach for Eolus is quite taxing as well and many climbers reaching the upper sections of Eolus find themselves out of energy and weakened - a terrible combination when paired with the rugged and loose terrain of the San Juan Mountains.
| Sustained Difficulty: 6/10 | |
| Most difficult section: 7/10 | |
| Terrain: 6/10 | |
| Access: 8/10 | |
| Total: 27/40 |
#12. Crestone Peak
Crestone Peak has single-handedly claimed many climbers' lives over the past several years due to the loose and difficult terrain found on the upper sections of the mountain. While the mountain's standard route is mostly straight-forward, there are certainly sections that demand one's full attention and good climbing skills in order to ensure a successful summit. Like Crestone Needle, Crestone Peak's approach is a very long day up very steep trails and rock formations, increasing the difficulty of this impressive peak found in the awesome Sangre de Cristo Mountains.
| Sustained Difficulty: 6/10 | |
| Most difficult section: 7/10 | |
| Terrain: 6/10 | |
| Access: 8/10 | |
| Total: 27/40 |
How did I do? Would you have rated them differently? How so? I'd love to hear your thoughts!
Snowmass Mountain and Hagerman Peak - Magic in the Elk Mountains

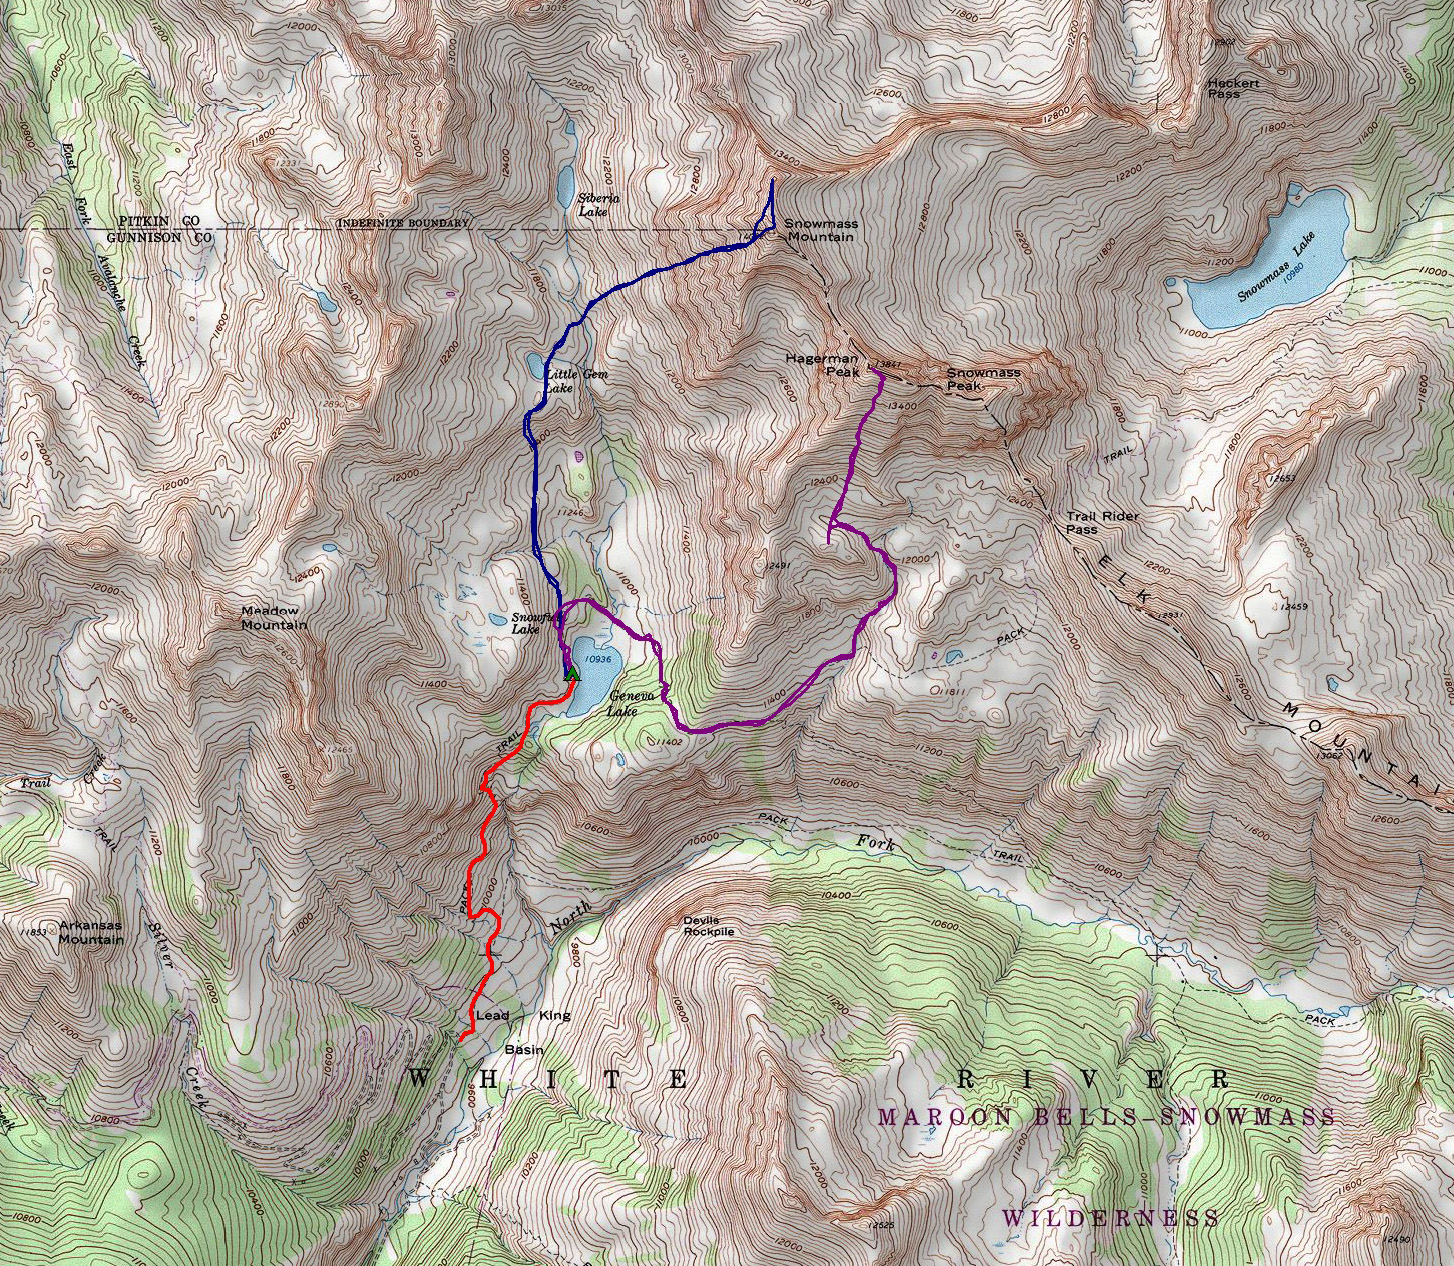
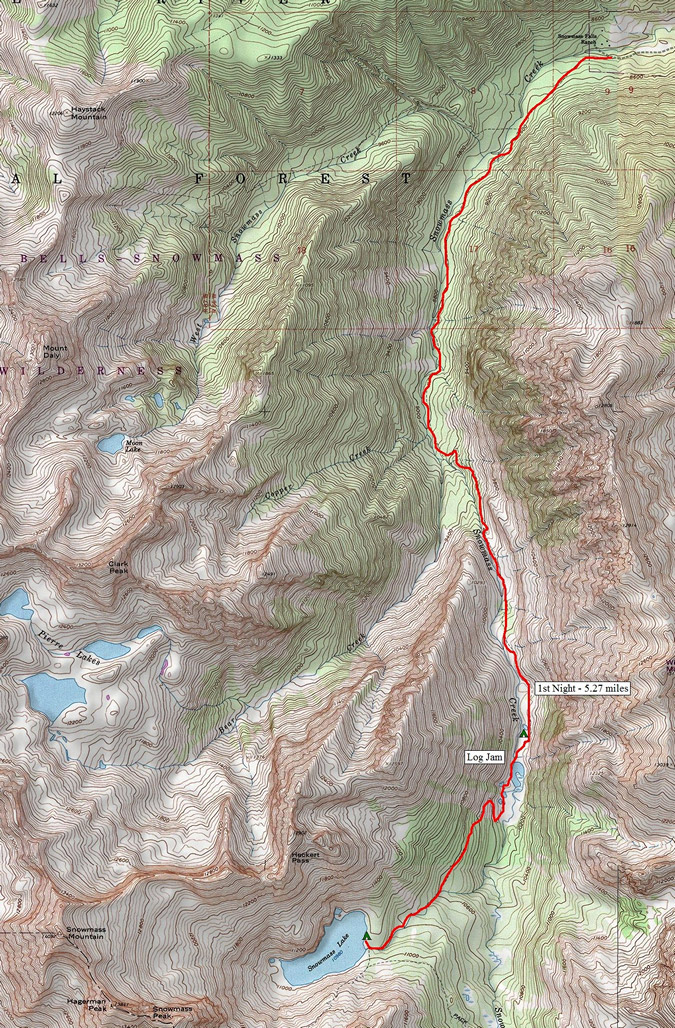
Day 1: Drive to Lead King Basin and Backpack to Geneva Lake ~ 1,400 ft. elevation gain ~ 3 miles
Day 2: Snowmass Mountain via the West Ridge Route ~3,000 ft. elevation gain ~ 6 miles
Day 3: Hagerman Peak via the standard route (south ridge) ~3,000 ft. elevation gain ~ 6 miles
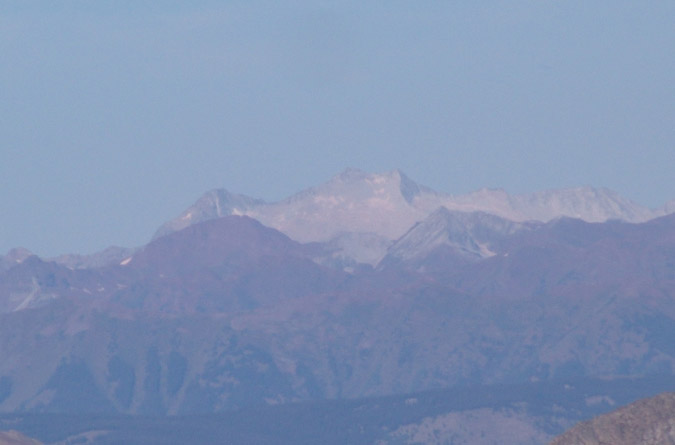
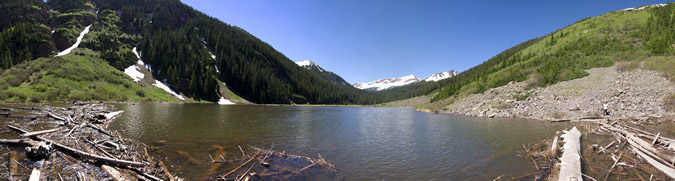
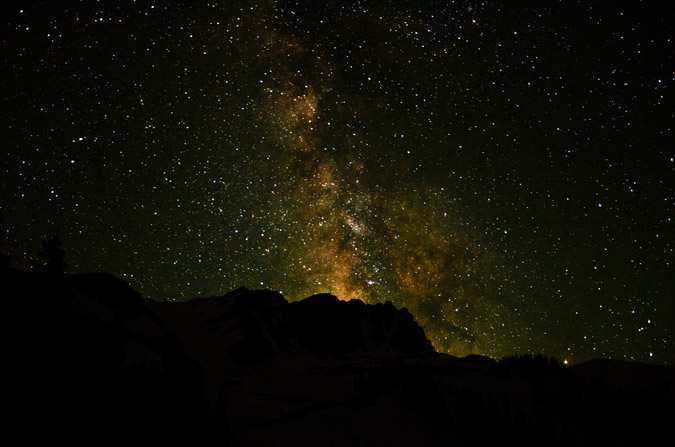
Snowmass Mountain and Hagerman Peak have sustained my attention for quite a few years. Ever since I first recall setting eyes on Snowmass Mountain from the summit of La Plata in 2005, I was in awe. The massive snow field that sits in the bowl that is Snowmass Mountain is simply breathtaking and totally recognizable from the summit of many mountains in Colorado. Here are a few examples of how easy Snowmass Mountain is to recognize, from various shots I’ve taken over the past few years of Snowmass Mountain from various summits:
From Huron Peak - June 2010:
From La Plata Peak - July 2005:
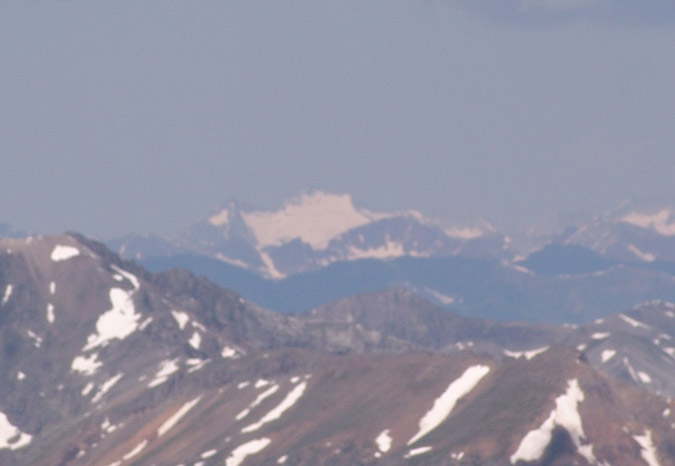
From Mount Massive - October 2009:
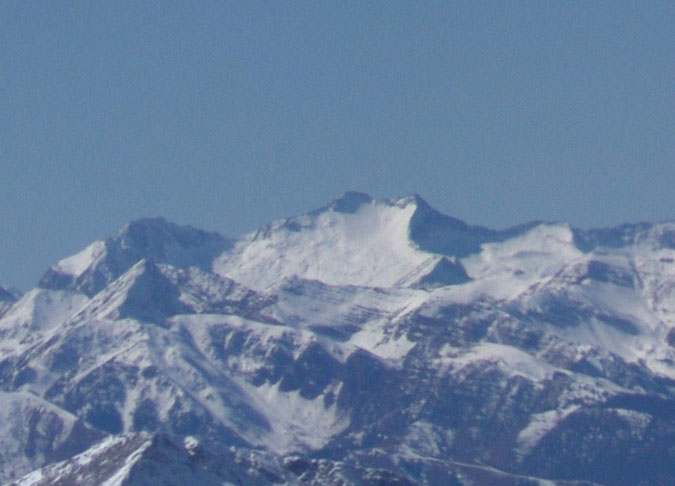
From Mount Elbert - August 2009:
Snowmass Mountain and Hagerman Peak have a very storied history and are deserving of a few paragraphs to paint those details:
Snowmass is the 31st highest mountain in Colorado and rises to 14,092 ft. and is the 4th highest in the Elk Mountains. Snowmass was named originally by the Hayden Survey of 1873 and was simply called “Snow Mass” because of the huge snow field beneath the summit. The Ute Indians called it “Cold Woman” because it was often believed to be the source of bad weather. Some pioneers called it White House Peak, but that name did not stick. 1 Interestingly enough, there is a restaurant in Carbondale that we ate at on the way home called White House Pizza – which was delicious by the way - I wonder if it is named after this historical fact.
Hagerman Peak is the 88th highest mountain in Colorado and rises to 13,841 ft. and is the 8th highest in the Elk Mountains. Hagerman Peak is named after the legendary Aspen, Colorado businessman and mountaineer Percy Hagerman, who was the first person to climb Maroon Peak in 1908 and the first person to climb Hagerman Peak as well. From Hagerman’s Book, “Notes on Mountaineering in the Elk Mountains of Colorado, 1908-1910,” Hagerman describes the area around Snowmass Mountain and Hagerman Peak: “These peaks are among the finest in the Rockies for a number of reasons. They have big streams and fine large lakes; they are rugged, steep and forbidding in appearance; some of them are richly colored; and finally, the upper stretches have not been scarred with mining claims.”2
Hagerman Peak is rarely climbed due to its remote location and difficulty (and because it is not a 14er). In fact, we saw only a handful of names on the summit register dating back to 2009 – many of which I did recognize (props to Ryan Kowalski for picking Hagerman as his 99th Centennial to climb – he eventually finished on Pikes Peak of all mountains).
Enough with the history – let’s get on with the trip report, starting with a TOPO map of our journey (click for a larger version):
Day 1: Drive to Lead King Basin and Backpack up to Geneva Lake
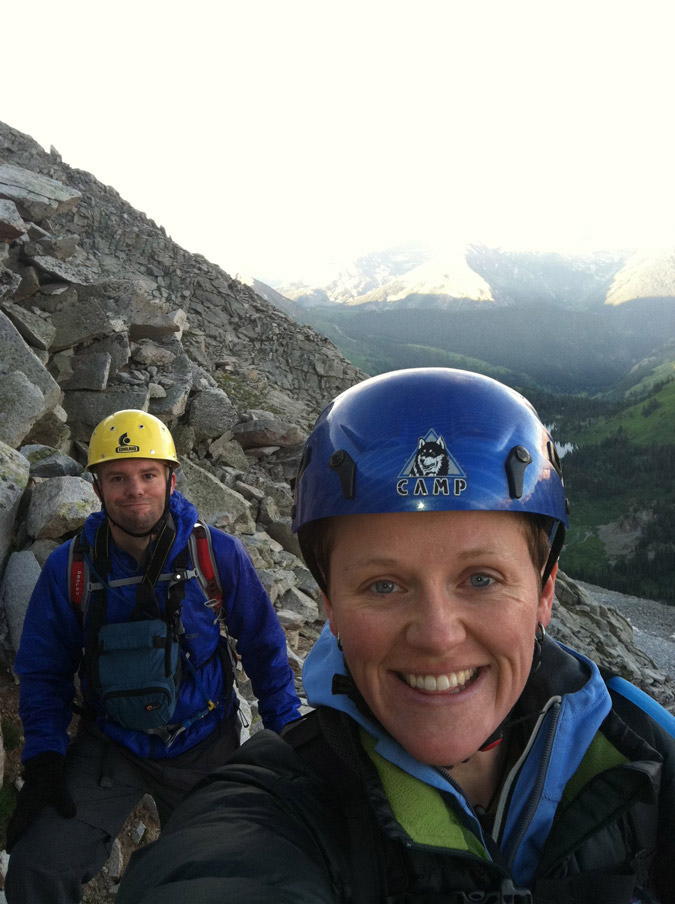
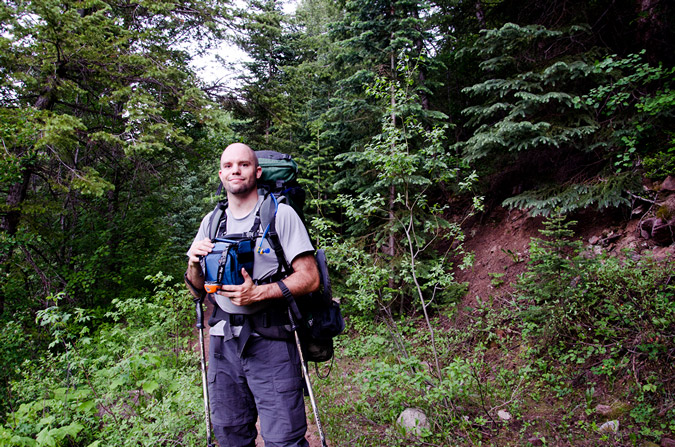
I was desperate. Desperate for the mountains, desperate for a climb, desperate for a climbing partner. After my miserable failure on Snowmass in June, I really wanted to get vengeance. If I were to finish the 14ers this year, that meant knocking out either Snowmass Mountain or Wilson and El Diente. Due to the insane rain that the Telluride area has received as of late, and thanks to a stern warning from a friend from 14ers.com, Jim (dancesatmoonrise) about the nasty conditions of the Wilsons after a lot of rain, I opted not to head down to the Wilsons. Instead, I contacted another friend, Ryan (monster5) to see how the conditions on Snowmass’ west ridge route were. Ryan was involved in a rescue attempt the prior weekend on Snowmass for 25-year-old Sean Wylam, another 14ers.com member. Sean eventually succumbed to his injuries and died, which was a real blow to the 14er climbing community. The thought of Sean’s death on Snowmass did damper my enthusiasm to climb it; however, I was determined not to let that stop me. Additionally, I chose another, more technically challenging route, but one that did not involve the use of crampons or snow. Lastly, I knew that this route would also give me good access to Hagerman Peak, which is another mountain in the highest 100. Bonus! I searched all week long for a partner. I knew that one of my regular partners, Regina, would not be up for the challenge (too technical), and I knew my other go-to partner, Ethan, would not be able to do a multi-day trip. Another friend, Micah (mountainmicah83) was already occupied for the weekend as well.
Enter Sarah Musick, friend, musician (no joke - that is really her last name – check her out on YouTube), ball-smasher (ask me later about that one) and last-minute climbing partner hero of the year! Here's Sarah on YouTube:
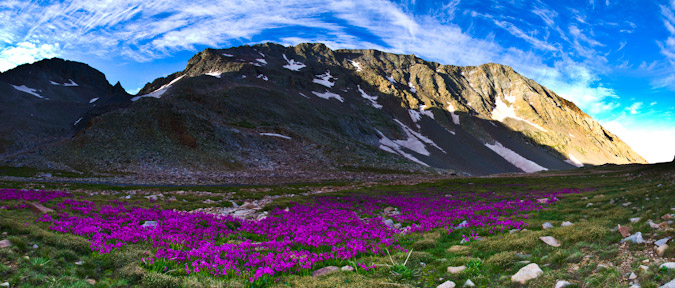
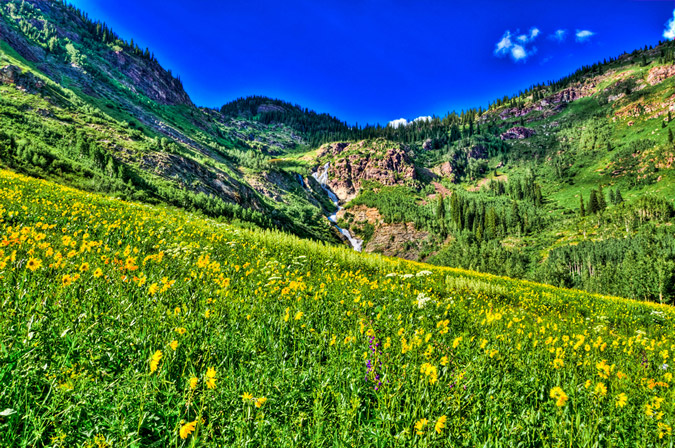
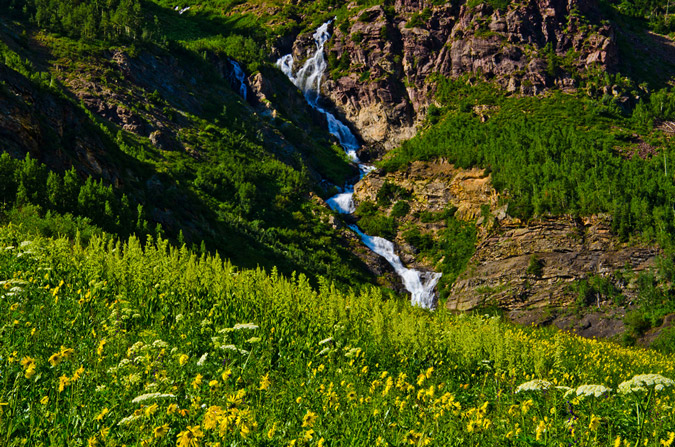
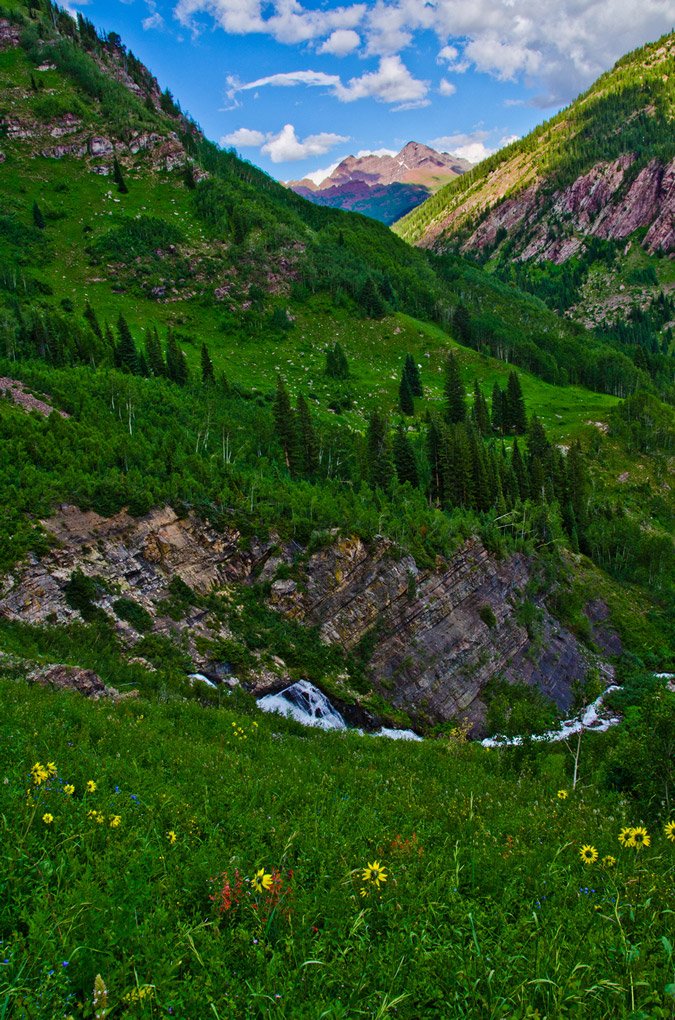
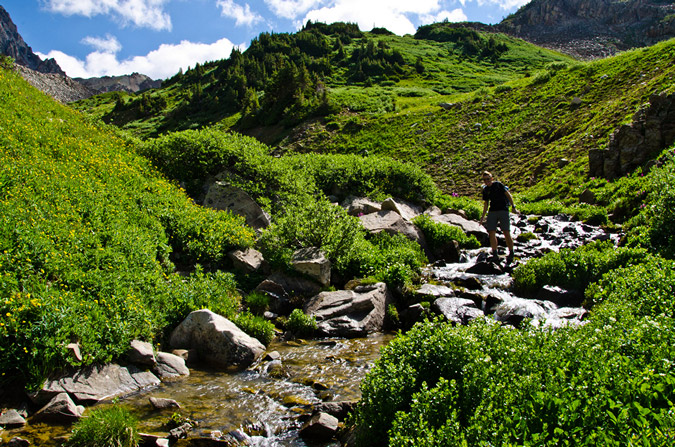
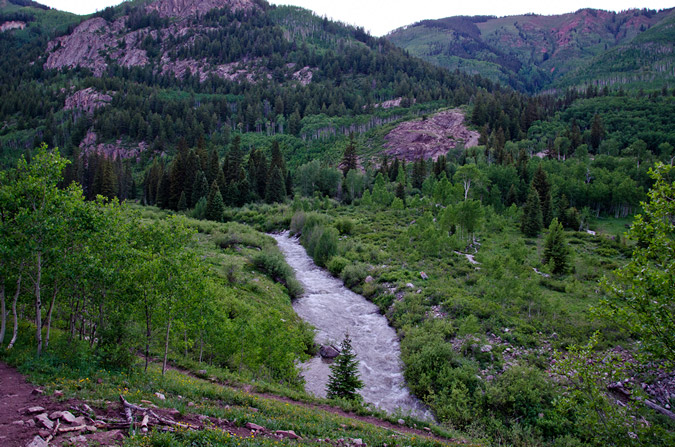
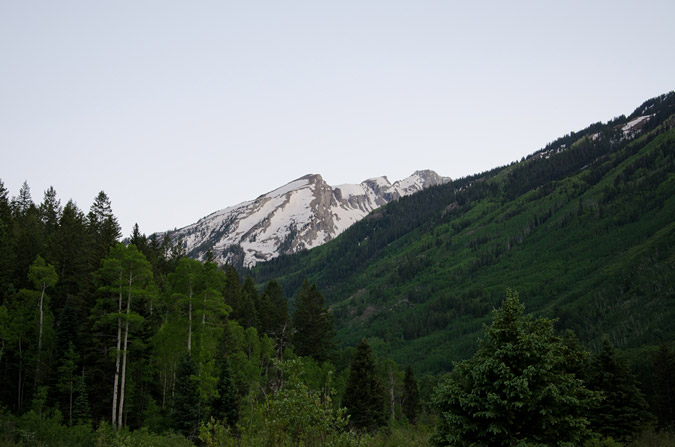
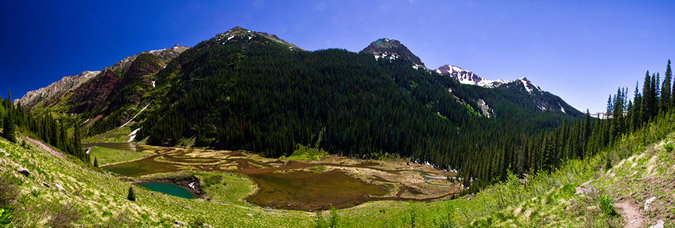
Sarah was able to get the green light at the final hour to join me on my trip to Snowmass – and I was totally excited! I really was not sure if I would be able to go without a partner because my wife might have just taken my car keys away if I didn’t have a partner lined up. After watching Sarah perform at Stargazers Theatre on Thursday night, I was able to pack for the trip. I had Friday off of work and was ready to rock. I picked Sarah up at her house at 10 AM and we departed for Carbondale. We stopped in at a burger joint in Carbondale and headed for Marble. The drive up from Marble was interesting. I was definitely glad that I had my lifted Jeep Grand Cherokee. I would rate the road a 6/10 on the difficulty scale for off-roading, as it did provide some rocky sections and a pretty formidable creek crossing. I think most stock SUVs could handle the road with caution. We found what we thought was the trailhead, but were not sure since it said “Silver Creek Trail.” We confirmed that it was not the right trail and kept going up the road another 2 miles up. All-in-all, the road into Lead King Basin is a good 15 miles of off-road adventure. I have never seen an area so full of wildflowers in my entire life! Wildflowers were everywhere, and the Lead King Basin offered spectacular views in almost every direction, all filled with flowers. Especially amazing were the views of Snowmass Mountain and Hagerman Peak. A huge waterfall crashes down from the Geneva Lake Basin into the Lead King Basin beneath the mountains.
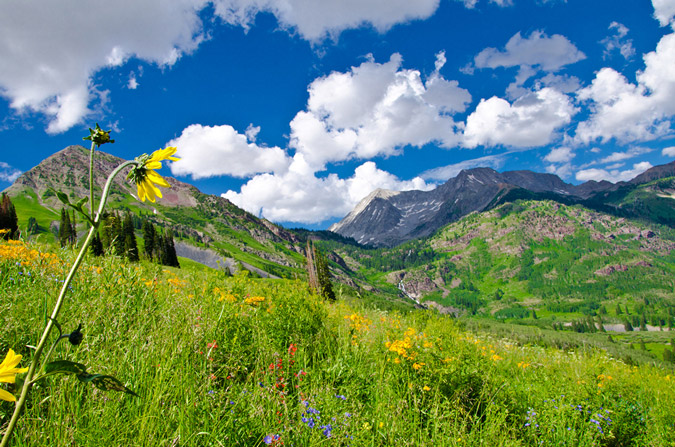
Wildflowers galore in Lead King Basin with Snowmass Mountain (left) and Hagerman Peak (right) in the background. Our route for Snowmass Mountain would take us right up that steep left side.
My Jeep’s temp gauges were all going into the red and I was perplexed. Well, it turned out that I had burned / leaked all of my coolant. No big deal, I had extra in the back. We parked at the real trailhead, which was totally obvious and labeled as the Geneva Lake trail. We headed up the trail at about 5 PM.
Some of the wildflowers that we saw on the trail were actually taller than me! The Wilderness Designation for this area is completely appropriate, that was obvious.
Along the way, there was an incredible opportunity to take photos of the wildflowers. We found ourselves standing smack dab in the middle of a field the size of three football fields, all filled with huge wildflowers. It was incredible. I was thankful that I had packed in my tripod (thanks for the advice Kane Englebert).
I brought the tripod for a couple of reasons. The first reason was that HDR photos are much better with a tripod since the tripod reduces and prevents movement of the camera, making the HDR photos easier to combine. The second reason is to do better panoramic photos.
The use of the tripod for this field of wildflowers proved great and I put together an HDR version and a non-HDR version for you to see the difference. By mousing over the photo, you can see the HDR version. You can really see how the HDR processing allows for a richer texture and you can see how the dynamic range of the darks and shadows are brought forward.
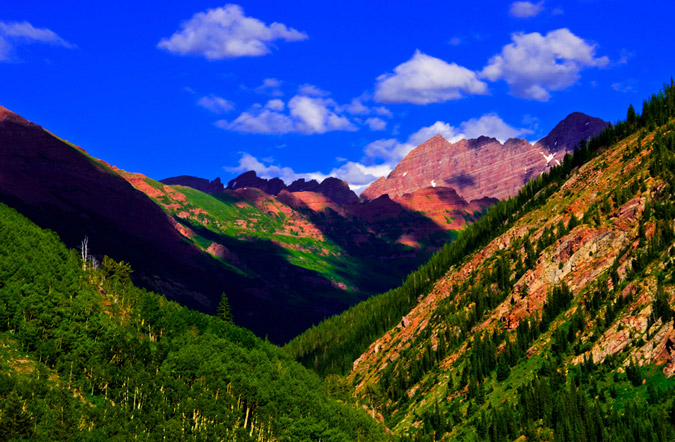
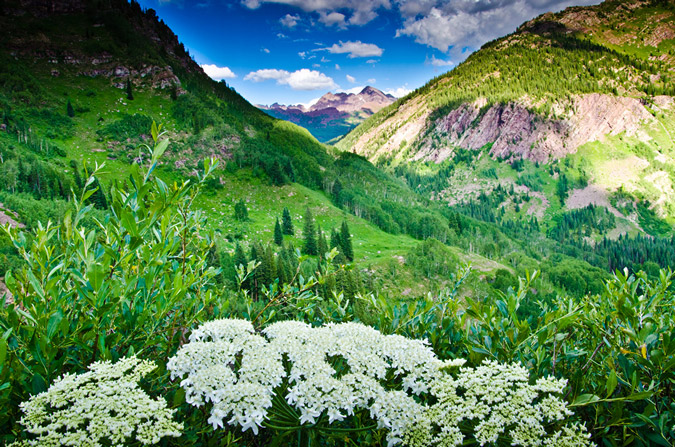
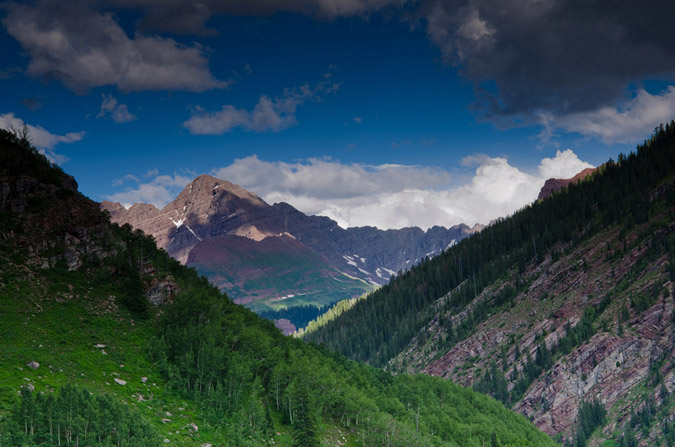
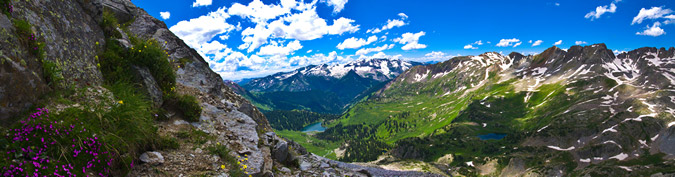
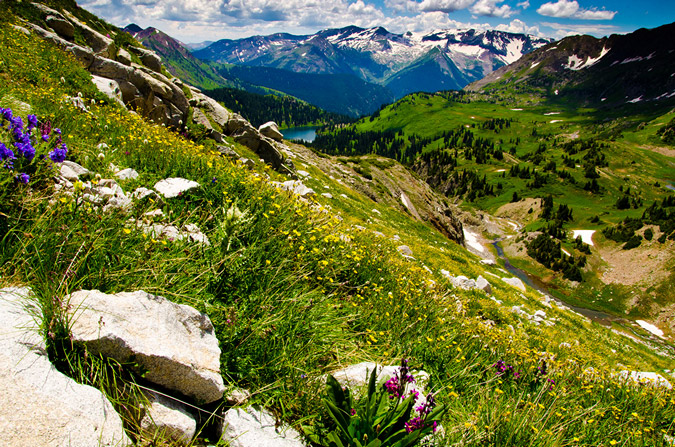
What was even more exciting was that the Maroon Bells peak through on the way up the trail to Geneva Lake as well. Thanks to the rift caused by the Fravert Basin, views of Maroon Peak were spectacular from the trail.
The wildflowers continued as we climbed up towards Geneva Lake. It was madness, truly.
This was the first time I had seen the Maroon Bells this close up with a decent camera and I was not going to let the opportunity go to waste!
We reached Geneva Lake in quick order (about 2 hours) and found one of the six designated campsites near the lake. We opted to camp in site #2 even though we later found site #4 and #5 to be the superior sites. Site #2 sat on a large hill above the lake’s western shores and was right off of the trail. It was highly impacted, and offered several trails down to the lake for water fetching purposes. We found it to be quite a nice site. Camping at sites that are not designated for camping is prohibited at the lake; however, we noticed that it really did not deter others throughout the weekend from making sites of their own. Tisk Tisk!
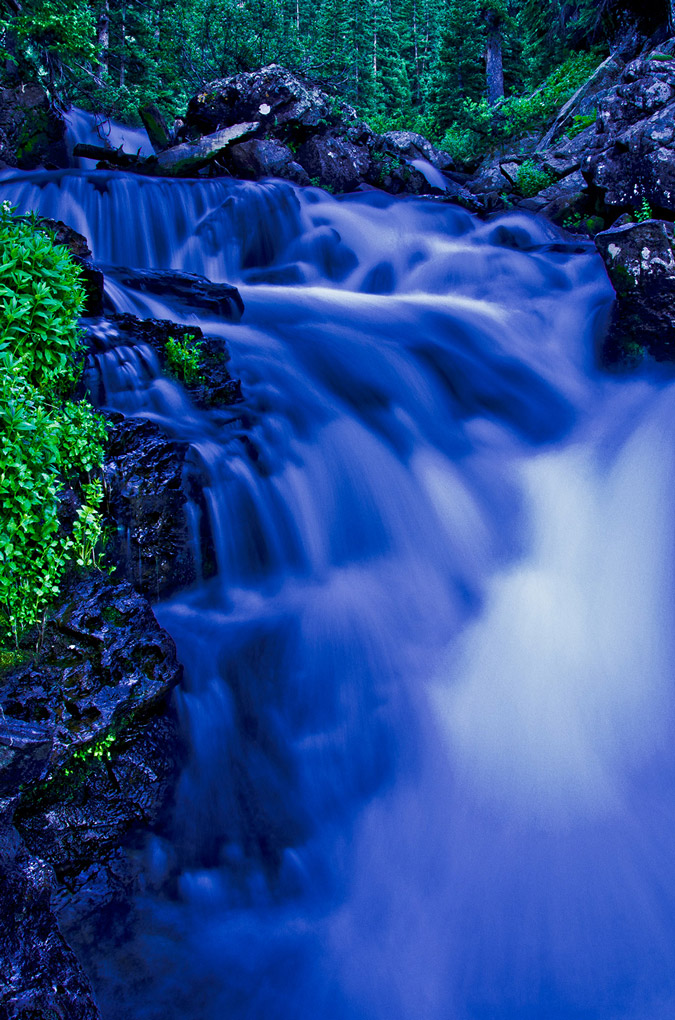
After we got all set-up, I decided to go check out the lake and stumbled upon a huge waterfall near the mouth of the lake’s south shores. The waterfall was really rushing quickly and difficult to get down to, but I managed to get my tripod and camera into place for some fun shots of the water.
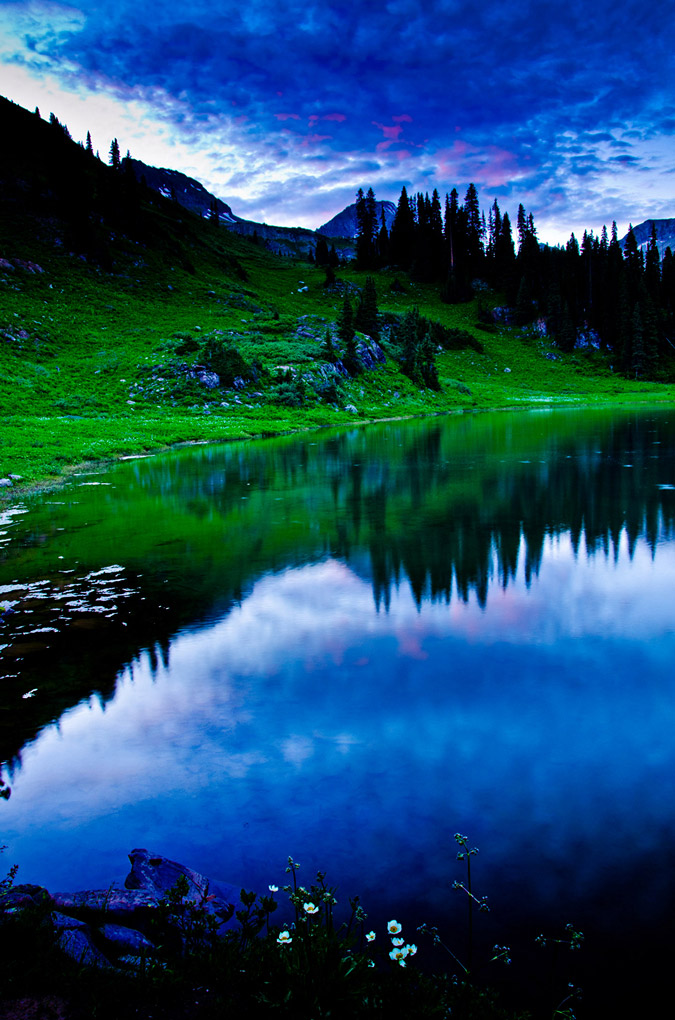
Next, my attention was on getting set-up for the sunset and for star trails photography, which I was pretty excited for. I set-up my tripod on the shores of the Geneva Lake and went to work.
I was so busy checking out the lake that I almost missed an opportunity to catch the last of the sun's light on some clouds over the lake. I think if I were to take this shot 3 minutes earlier, the clouds would have been even more vibrant. Oh well!
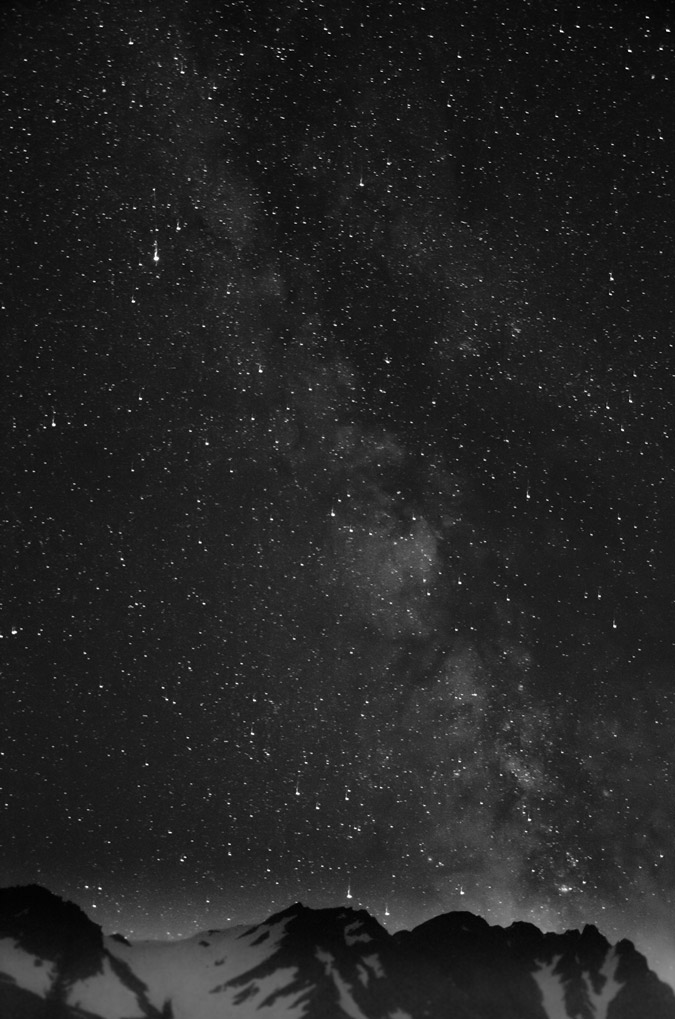
For this trip's star trails photo, I decided to do something a little different based on some techniques I've been reading about. Instead of just doing the night sky, I wanted the scene to be a bit more interesting this time. I decided to start the process earlier and take it deeper into the night, so I set-up before the sunlight had totally faded and started - ending after an hour and a half of photos. I opted for an f-stop of 5.6 instead of 3.5 (to allow for a slightly better depth of field) and I stuck with 30 second exposures. All-in-all, this photo is a compilation of 115 photos. The North Star is just out of frame on the top-left.
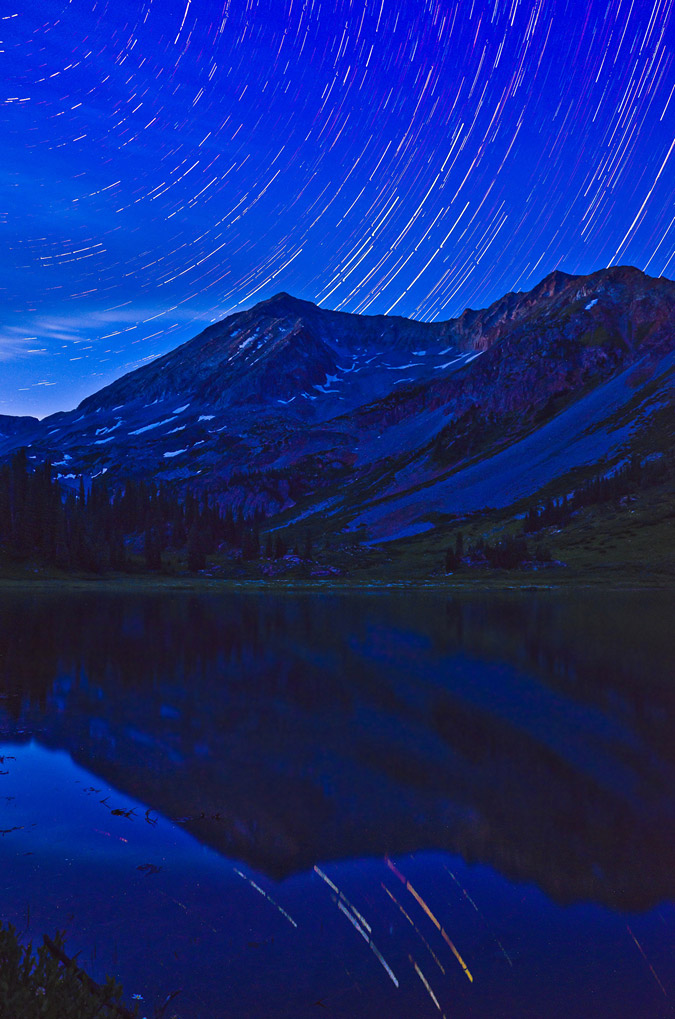
I really loved how the stars reflected in the lake too!
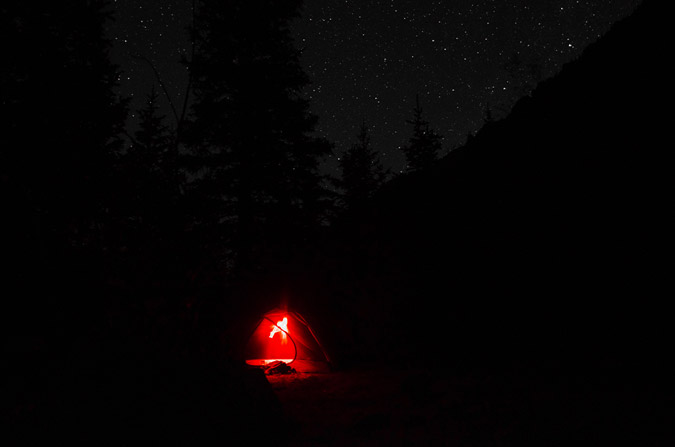
After nearly falling asleep while sitting next to my tripod in the dark, I decided it was time to hit the sack. Knowing that we were entering dangerous and unknown territory to ascend Snowmass Mountain's west ridge, we opted for a slightly later start, but not too late so we could be down before storms. Before our 3:30 AM and 4:00 start came, we were both awakened by a really pissed off coyote across the lake from us. That guy was howling and barking for a good 30 minutes and would have startled anyone, I don't care what you say!
Day 2: Snowmass Mountain via the West Ridge Route
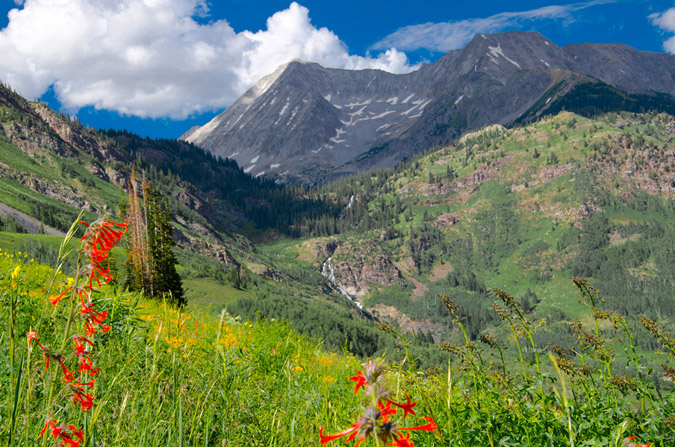
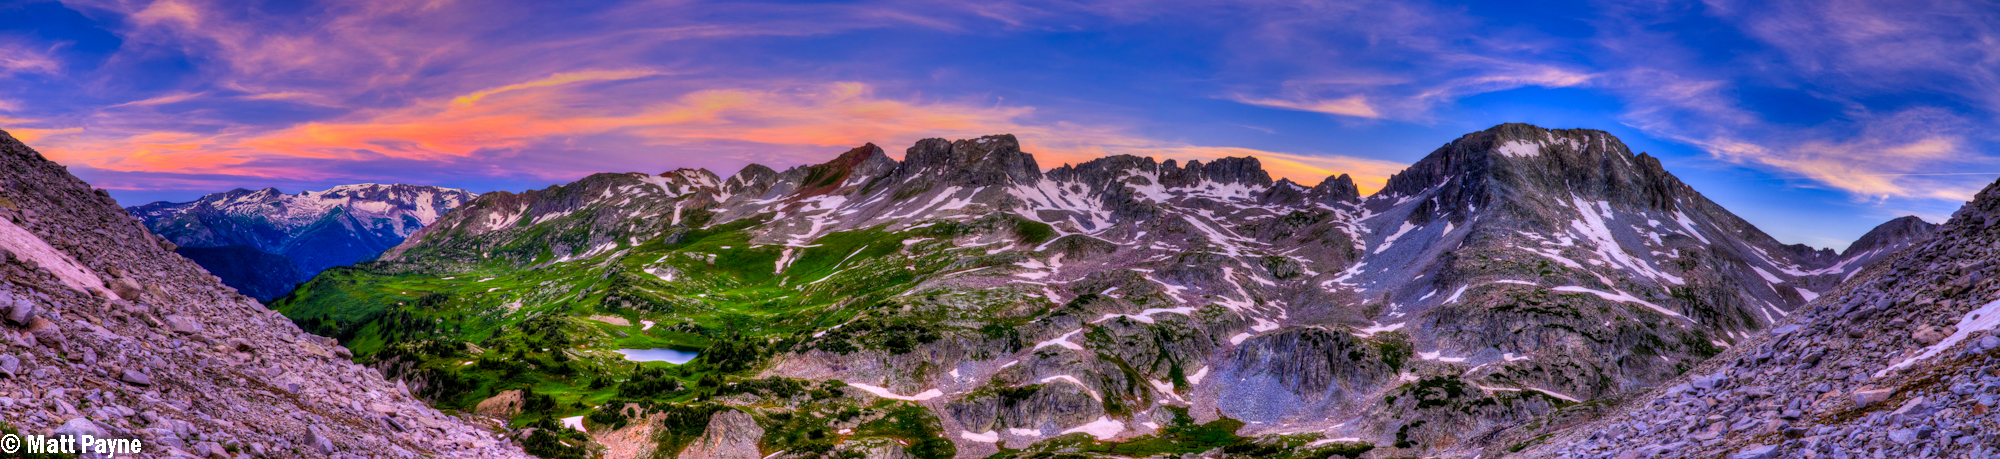
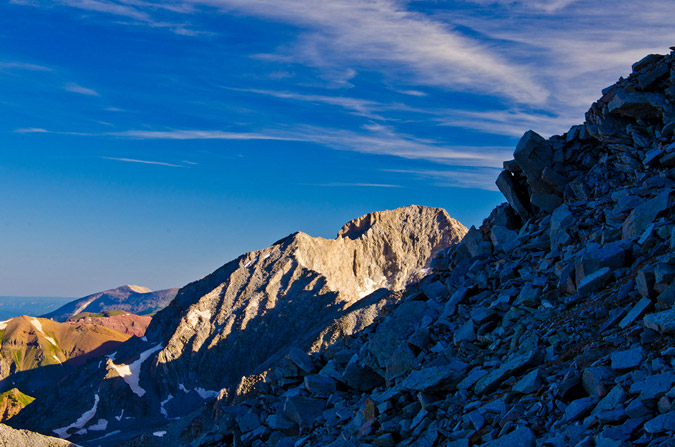
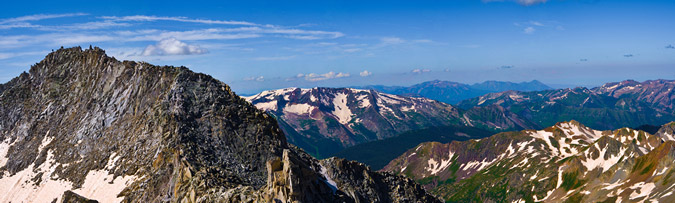
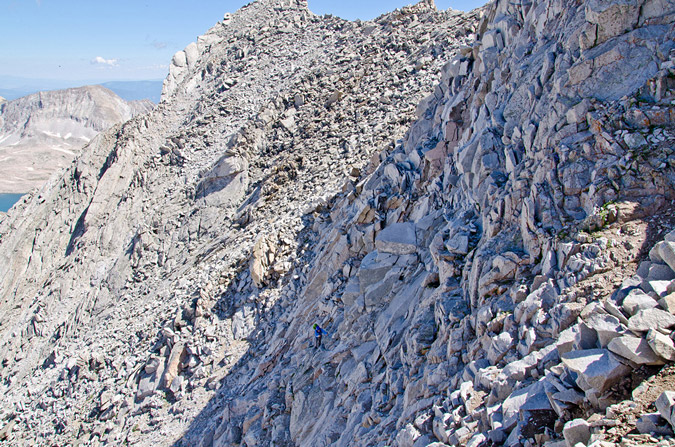
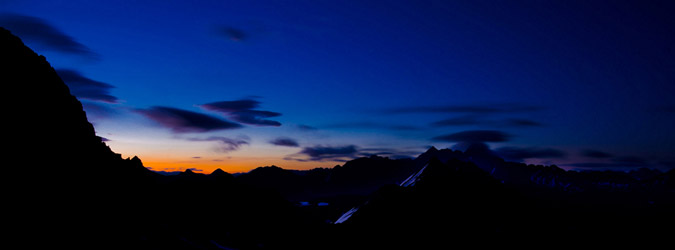
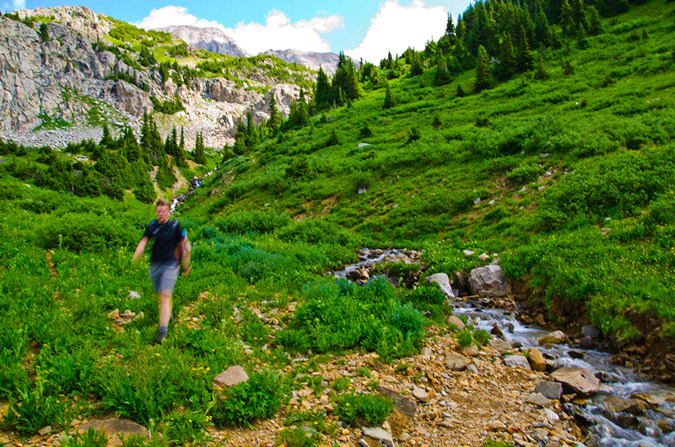
Hiking in the dark is always interesting, especially when you don't know where you're going. We had the description from 14ers.com in print and on my Android phone 14ers.com app (thanks Bill), and headlamps with fresh batteries. We were able to find our way pretty easily though, and before we knew it we were heading up the insanely steep slopes of Snowmass' west ridge. The trail to this point had been very easy to follow except for a few spots and the route finding had begun since there was no trail after we crossed over creek that feeds Geneva Lake coming down from Siberia Lake. It was all scree, boulders and dirt from here on out. I made a quip to Sarah: "Welcome to the next three hours of your life!" We both laughed and continued up to a flatter section that was clearly perfect for a tripod. Since the sunlight was getting a bit better, I decided it was prime time to set-up for some HDR panoramic photography. The clouds and sky were an orange-pink-purple color to the south and west over the Raggeds Wilderness Area and Treasure Mountain. Additionally, Little Gem Lake was barely in view, which we had passed on the way up. Lastly, "Siberia Peak," a quite prominent and impressive mountain connected via a ridge with Capitol Peak was in the right 1/3 of the frame. Hauling a tripod up the side of a mountain is a pain in the butt, no question about it; however, the rewards are well worth it. Click on the photo for a much larger version.
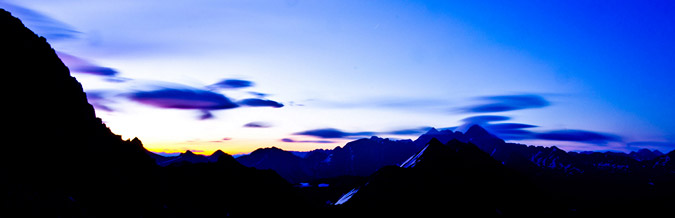
We hung out in the cold for a bit longer, allowing the sun to just paint the tops of "Siberia Peak." You can really see the difference between HDR and non-HDR in the below photo (non-HDR) and the above photo (HDR).

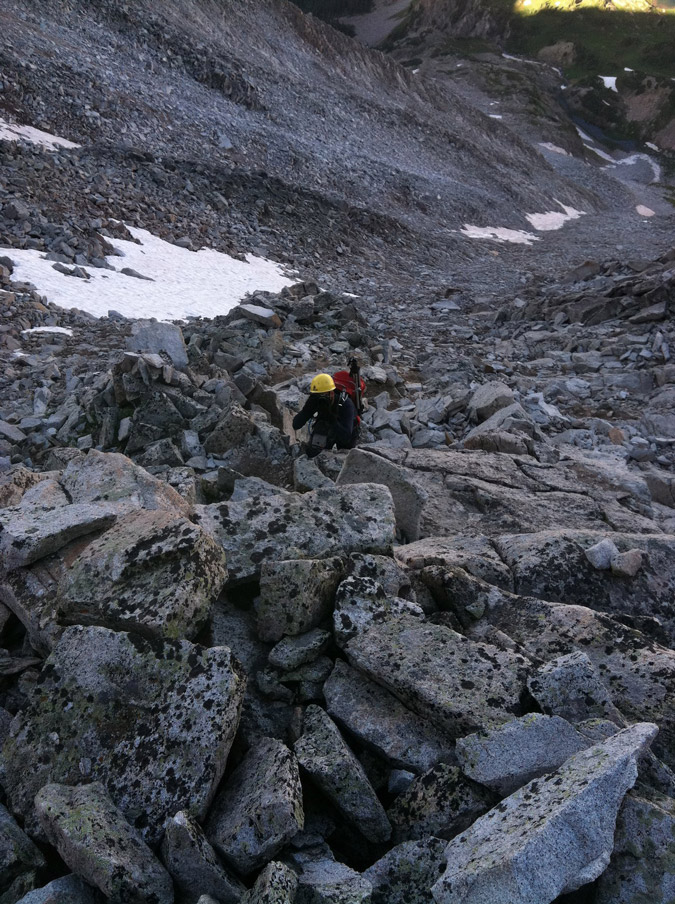
I packed away my tripod and woke Sarah up and defrosted her (just kidding on both accounts). We headed up the side of Snowmass and located the obviously correct gully that was full of vegetation at its base. The climbing from here on out was quite enjoyable, despite what I had read about the route. You could choose between loose dirt and scree (great for coming down, not so much going up) or huge boulders and class 3/4 scrambling. We opted for the fun scrambling and it was one of the most fun routes I've been on. Sarah was loving the terrain too, which was a relief since you never know if a new climbing partner will like this sort of climbing or not. It takes a different breed to enjoy scrambling on steep boulders.
Sarah and I also have another thing in common - we both love taking pictures of wildflowers. She recently just gave her partner one of the coolest birthday presents there is - a bunch of framed photos of wildflowers that her partner had taken on 14er hikes.
As we climbed, the views became progressively better. Finally, Geneva Lake came into view for the first time and Sarah and I stopped to admire it, as seen in the below panoramic which includes Geneva Lake, Little Gem Lake and Sarah. Sarah (and anyone else) - click to see a much bigger version!
We were both just loving the scrambling!
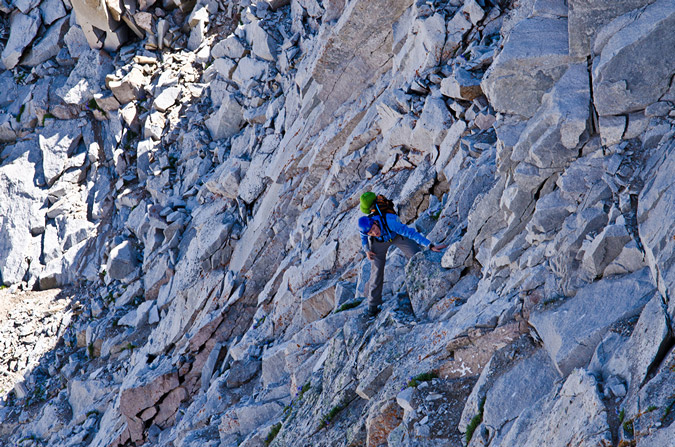
We kept climbing up, opting to stay close to the tops of the higher ridge that was on the left side of the gully. Sarah was able to document my climb up.
 |
 |
And of course, I was able to photograph her photographing me - man we are nerds!
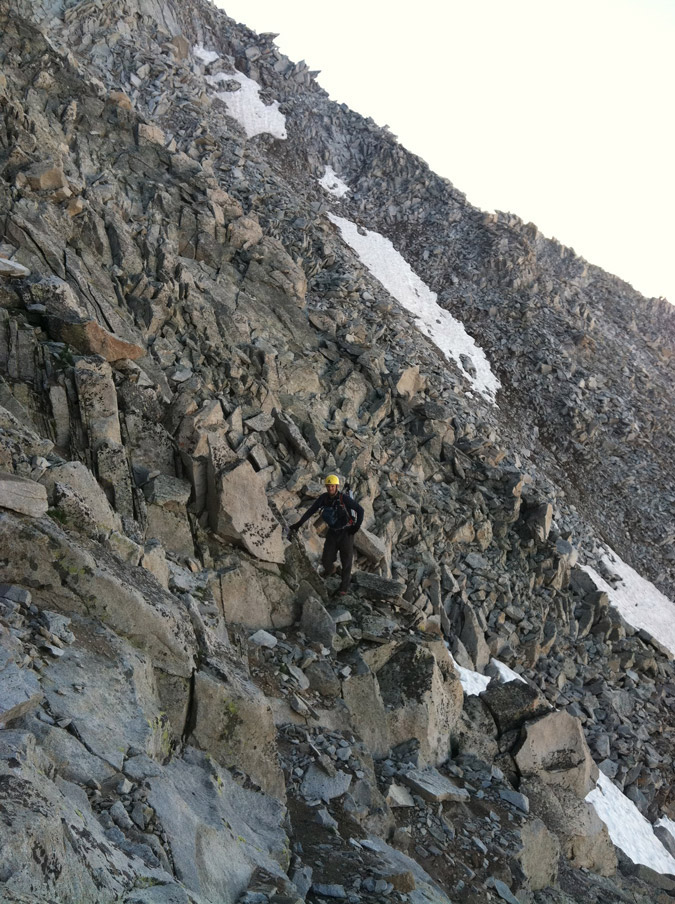
The rock was more solid than advertised, but we were very careful to test every hold and every step. Every once in awhile we were surprised by a loose rock or two, but so far, nothing had really warranted the dangerous warnings that I had read about on numerous sites and trip reports.
Staying near the ridge's top proved to be a great strategy because it offered us some really early views of the magnificent Capitol Peak, which I climbed last year and subsequently won a copy of Gerry Roach's 14ers guidebook through contest put on by his publisher for the efforts I put into my trip report. Not to digress, but I am really glad that people read, enjoy and use these reports, considering the fact that a report such as this one takes me roughly 16 hours of work between photo editing and writing.
Both Sarah and I were excited to see Capitol Peak... maybe me more than her - what do you think?
Pierre Lakes came into view as well, sitting below Capitol Peak.
Sarah caught me gazing at Capitol:
I felt this was also a great time to stop for a minute to get a really awesome panoramic. The basin below had really opened up quite a bit and the contrast from the low sun had made for some nice photo conditions. Click on the photo for a much larger version!
Continuing up the ridge line felt like the best way to go, despite the fact that we often ran into some obstacles that were challenging. Someone else must have agreed since we found a really groovy cairn up there too.
We finally crested the ridge and the first views of North Snowmass came into view. North Snowmass is one of two points that makes up Snowmass Mountain and is not ranked, but is 20 ft. above 14,000 ft. and has a whopping 40 ft. of prominence.
Sarah and I decided that on our way back we would for sure venture over to it, but for now we would concentrate on getting to the real summit of Snowmass Mountain. Here's a view of North Snowmass from the top of the ridge with Capitol Peak rising in a quite intimidating fashion to the north of the connecting ridge between North Snowmass and Capitol Peak.
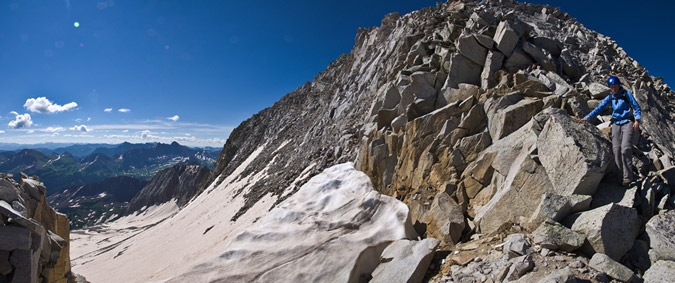
From here, we opted to stay high on the ridge, which I affectionately nicknamed "Exposure-Palooza" after the famous rock band tour of the same namesake. The exposure from this ridge was fabulous. I was totally loving it despite Sarah telling me I was out of my mind. It was perfect exposure - totally manageable on one side (west) and totally freakishly nuts on the other (east). Sarah was a trooper though and kept up with me through the exposure-filled ridge scramble.
I think the exposure had grown on Sarah too, and before long I caught her flirting with it.
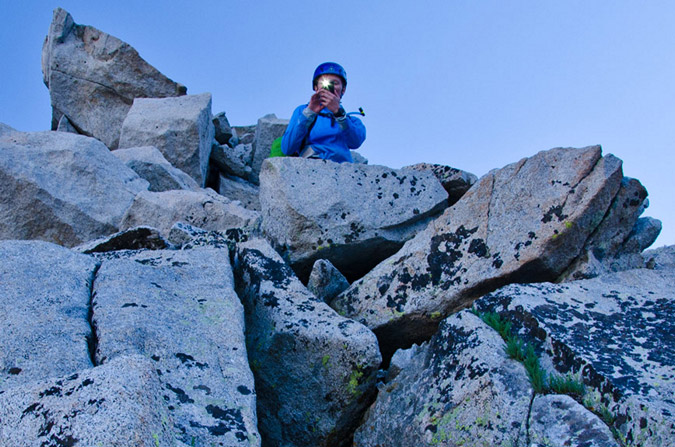
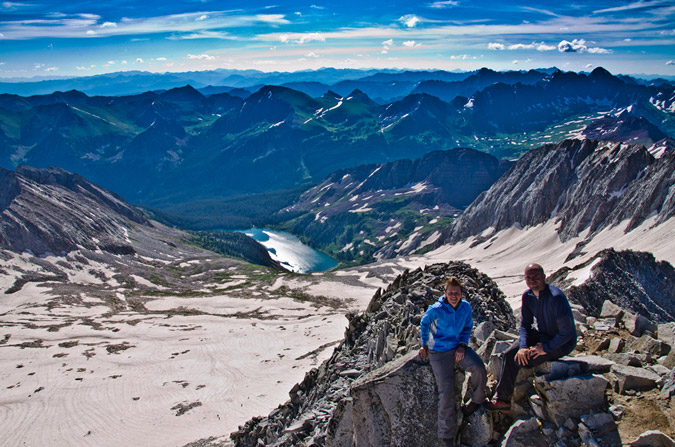
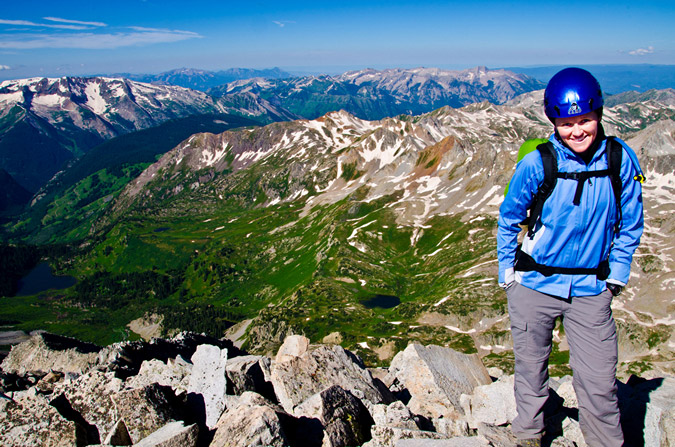
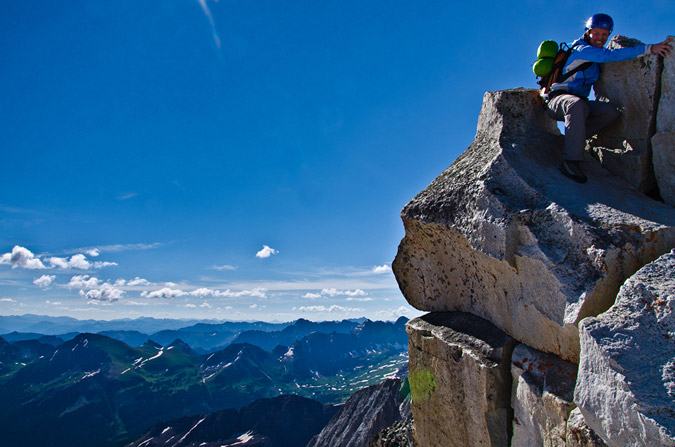
We reached the summit just shy of 9 AM, which meant we had made excellent time. There was still no sign of storms and we had the summit to ourselves. We could see some people below starting to make their way up, so I knew my time was limited to get a panoramic photo with my tripod. I set the tripod up right on the summit block, with one of the legs about 6 inches away from the greatly exposed face. This made for some adventurous maneuvering around the tripod as I shot. Sarah thought for sure I would step off the side and die. I'll admit, it was a bit surreal operating a tripod on the summit of Snowmass!
I tried to do some HDR work, but I don't think the lighting was best for it, so I opted to post-process a non-HDR version and an HDR version.

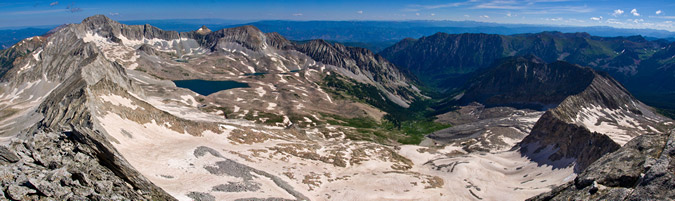
260 Degree Panoramic from Snowmass Mountain - at left - Capitol Peak - center - Snowmass Lake - right - Hagerman Peak
 360 Degree HDR Panoramic from Snowmass Mountain
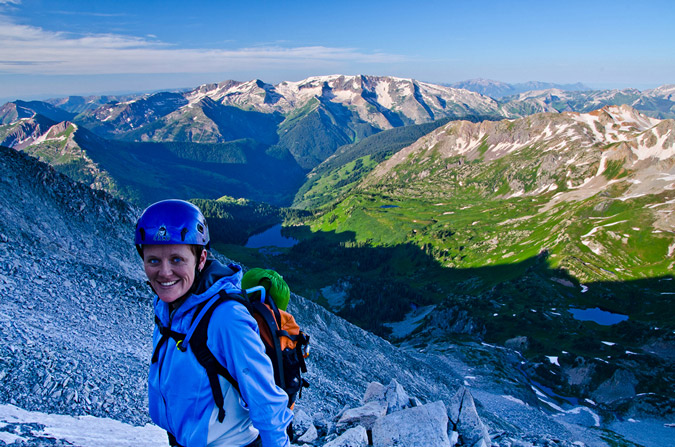
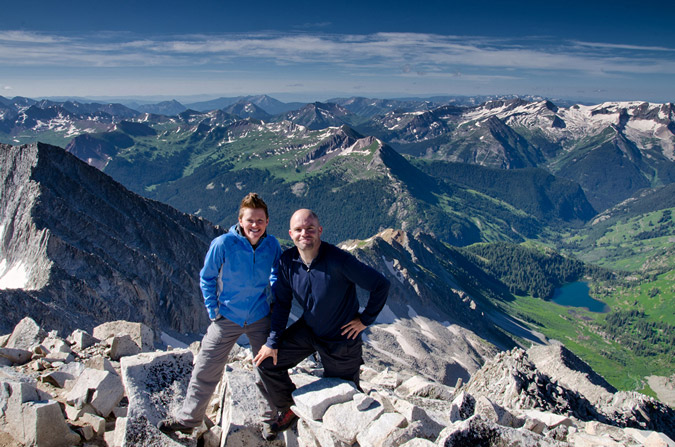
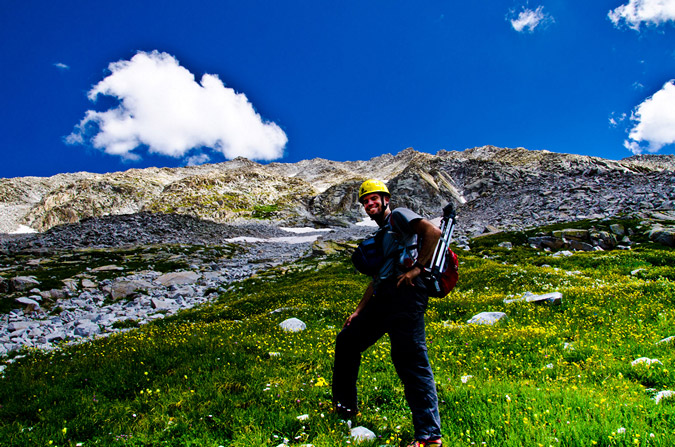
This was Sarah's 15th 14er and she was pretty excited. As for me - it was #48. Another advantage of having a tripod on the summit - it makes for great summit portrait shots! Hooray for self-timers and tripods!
Eventually another climber (a 14ers.com member but I can't recall his user name) joined us on the summit from the standard route and took notice of the crazy guy behind the camera on a tripod. It was a pretty funny conversation:
Me: "How's it going!?"
Him: "Great man, you?"
Me: "Could not be better!"
Him: "What's your name?"
Me: "Matt."
Him: "Matt Payne?"
Me: "Yep!"
Him: "Oh cool - I love your pictures!"
Me: "Awesome - thanks man!"
He must have figured that I was the only person crazy enough to take a tripod up Snowmass Mountain. Haha. Either way, it was quite flattering and I really thought it was awesome that he knew who I was.
He reported to us that he wore only microspikes up the huge snowfield and that it was a challenge but doable. He had wished he had crampons but it seems they are not necessary at this time. Good to know for other climbers doing the standard route. He departed after only a few minutes and Sarah and I watched as another climber came up the snowfield, except this time, this climber went all the way up the basin and ascended North Snowmass via a very steep and sketchy rock face.
My attention was kept by the powerful Maroon Bells to the east of us, and so I decided to try my hand at a zoomed-in panoramic at 105mm. You can also click on the photo to view a larger version of it on Flickr in a new window - feel free to comment!
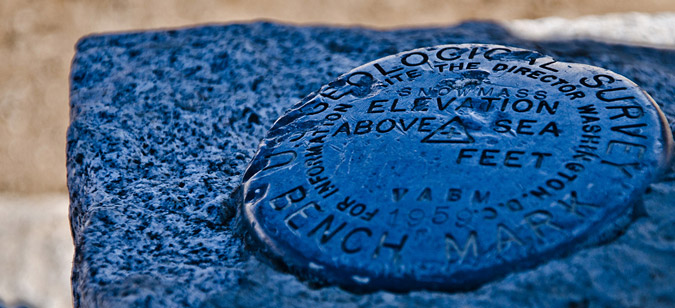
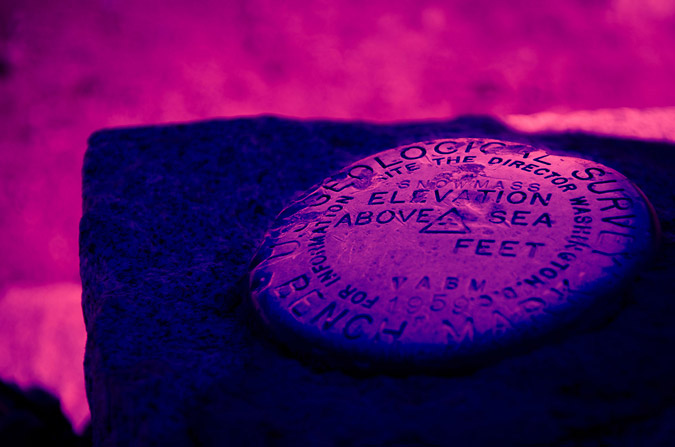
Sarah and I figured we had spent enough time on top - so I took some shots of the USGS marker. The second one has some split toning applied to it in Adobe Lightroom.
Sarah packed up and re-attached her helmet to her dome. She asked me one last time if we should do the traverse to Hagerman Peak from here. I explained that I had read several reports of that traverse and that it did not sound like something we would want to do. Take a look for yourself, or read lordhelmut's trip report.
I thought that the exposure was just as fun on the way down as it was on the way up. Sarah agreed.
Sarah and I reached the joining saddle between the down-climb back to camp and the traverse over to North Snowmass. The terrain below looked loose and nasty. We took our time and staggered it so that I would go down 20 feet and then step to a side, let her know she could come down while I stayed put, and then repeat until down to the saddle. The reason for this strategy is to prevent rockfall injury. It worked wonderfully.
On the way over to North Snowmass I had to perform some last minute heroics to prevent the mountain from falling down. Good thing I drank some gatorade!
We were able to join the solo hiker that had gone up to North Snowmass via the standard route just as another climber hit the summit of Snowmass Mountain.
Let me know if that is you on top of Snowmass and I can show you a larger version!
The reason I wanted to head over to North Snowmass was because I knew the views of Capitol Peak and the Pierre Lakes basin would be great - and I was totally right about that concept, no question!
Sarah was really in love with this place and commented that it was easily the most gorgeous 14er she'd been on to date. The connecting ridge between Snowmass and Capitol was quite intimidating. I know of only a handful of people that have successfully completed that traverse, and I am certain that each of them is either certifiably insane or... as Samuel Jackson would say, "One Bad Mutha $%^&*#."

Even without the tripod set-up, I was able to get a decent panoramic from North Snowmass, which included both Snowmass Mountain and Capitol Peak.

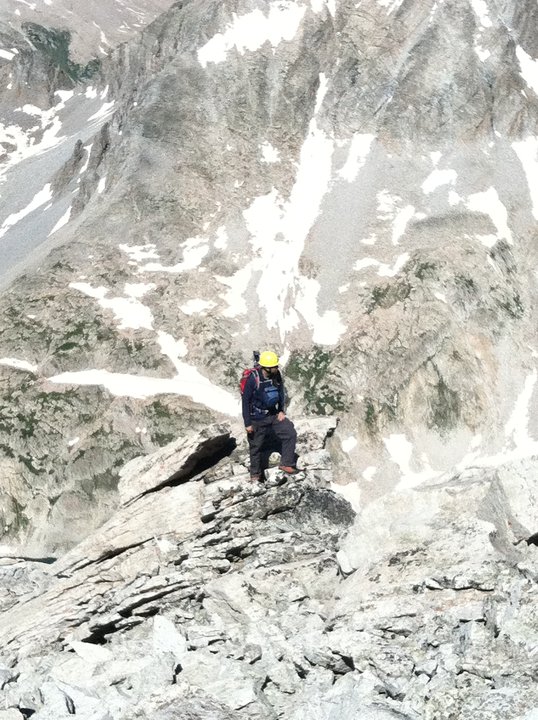
The last order of affairs was to get a really good glimpse of the valleys below, which Sarah caught me in the act of doing.
We decided to head back to the ridge for our downclimb. Now - this is where I made a critical error in judgement and should be critisized repeatedly, especially given my propensity to evaluate mountaineering accidents. Let me be clear - I was an idiot. A moron. A completely foolish jack-ass. There, I said it. Now you don't need to. If I had not made it out alive, I would fully expect someone to write an entire article about how stupid I was and how ironic the death was given my mountaineering safety articles. It really goes to show that even the most experienced people can make errors and find themselves in a bad place. There's no question in my mind that no one is immune to it. When Sarah and I head back towards the saddle between North Snowmass and Snowmass, I decided it would be a fine and dandy idea to take a short-cut to re-join the ridge for our descent. Instead of going back up the ridge we came down, I thought we could get away with going around the side and to the ridge. I figured that if we encountered anything too crazy that we could turn around and go back the way we came. From my vantage point, it looked totally doable to just skirt around the side. If you look at the photo below you can see what I saw - the ridge where we needed to head down from and the ledgy system that connected us to it.
What we found was something totally inviting yet progressively challenging. It was kind of like each time you passed an obstacle it got easier for a moment and then you found another slightly harder obstacle until you were up against an almost impossible one that was slightly more psychologically reasonable than turning around. I am not sure if that makes sense or not, but it did to me at the time. What we found ourselves in was a mess - a real pickle. The rock was loose. Insanely loose. Dangerously loose. And it was exposed with class 5 sections. Each foothold and handhold was tested by both of us with great diligence - which is probably what saved our lives. Eventually, I found myself perched on a ledge with nothing but veritcal rock above and below me, with a huge boulder between me and the next part of the ledge. The only reasonable foothold was a large protruding boulder below me that looked to be held in place by air and spiderwebs. I knew it would not hold, but I also knew I had no where else to go. So I asked Sarah what it looked like from her point of view. "It looks like it is going to go at any second." Crap. I triple tested all of my holds again and put a small amount of weight on it with my right foot. Sure enough - the huge rock went crashing down the mountain. I still get chills even thinking about it. I could feel the mountain shake each time it bounced below me. Not a good feeling. Too late to turn back. In what felt like a move out of a Spiderman movie, I crouched backwards while holding solid holds with my hands and found myself on the other side of the boulder obstacle in a move that must have looked like a circus act to Sarah. My heart racing, I stopped to take it all in and relax for a bit. What the hell were we doing? Why was I risking my life for a short-cut? So stupid. I kept saying it out loud too. "Sorry Sarah. I'm stupid. Sorry. Ahhhhh why am I so dumb!?" I think Sarah was regretting this climb now. I didn't blame her. The terrain we found ourselves in was rugged and surreal, sure - but wow - death defiance was not what I signed up for this week. Sarah smartly resigned to down-climbing below my spot and up a gully nearby, where she rejoined me at another crux. A small triangular rock was wedged vertically into the ledge, held in by only a half inch of rock. It was the only handhold between me and death. Footholds were scarce too - a small patch of dirt and rock about half a foot in diameter terminating in air. After this move, the route was clear to the ridge. I tested everything over and over again like Howard Hughes washing his hands. When your life is at risk a little OCD goes a long way. I nailed the move and breathed deep sigh of relief. Sarah watched me and gave it a go. Before she could even get to the crux, she stepped on some rocks and sent about 20 large rocks crashing down - with quite real psychological demoralizing impact. Sarah was freaked out. I talked her through getting to a safe place. Fortunately, her OCD rock-testing was on par with mine. She decided (smartly) again to down-climb for a safer area and eventually we were able to re-join each other on the ridge. Some short-cut. Lesson learned. Short-cuts are stupid, especially in the Elk Mountains! Here's some views of what we found ourselves in.
It was really irresponsible of me to put Sarah's life into this sort of danger and for that I will always feel bad.
After we rejoined on the ridge, we talked about the adventure we just had and how stupid it was. We were both pretty shaken. We were overly careful after this point and it slowed our descent a bit, but that was OK by both of us. Finally, we were able to reach the vegetation at the bottom of the 2000 ft. gully and enjoy more solid ground.
The wonderfully gorgeous flowers almost calmed my nerves, almost.

It was an impressive mountain to downclimb. Looking back, you really gained a sense of accomplishment at how far we had gone and how steep the mountain really was.
We ran into one other guy heading up as we were coming down. I was not quite sure what he was going to accomplish since storm clouds had already began to form in the area, but he seemed quite determined and I felt I had no place preaching to him about safety after the complete debacle I had just escaped (turns out he came walking by our campsite a few hours later stating he was turned around by weather - I was glad he made it down safely).
At this point I was just happy to be alive and enjoying the multitude of incredible wildflowers.

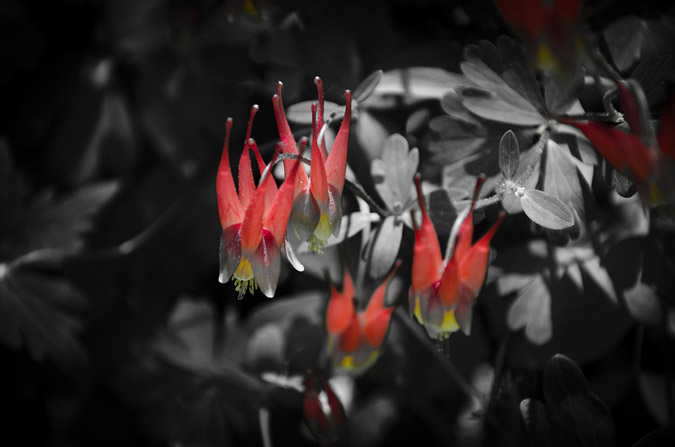
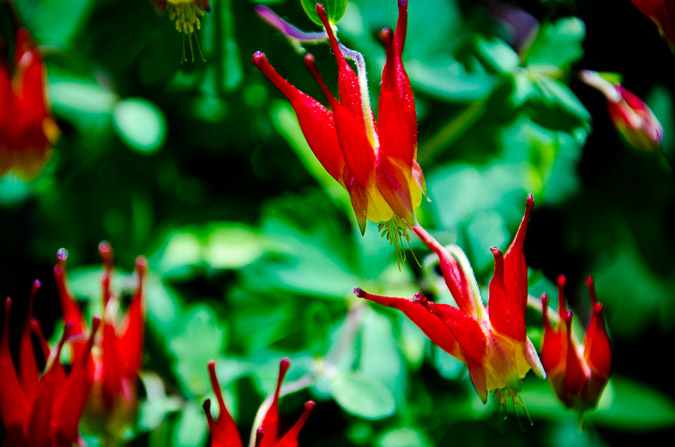
Speaking of wildflowers - I had never seen so many Columbine flowers. They were everywhere!
I stopped for one last look back up Snowmass Mountain. The gully with all of the green at the base was the one we went up.
We reached Little Gem Lake in no time at all and enjoyed the views from there.

Below Little Gem Lake was a really nice mountain creek draining out - it was surrounded by flowers, making for a really nice scene!
I could not help myself from stopping several times on the way back to Geneva Lake to take photos of the wildflowers and waterfalls that were everywhere. What a magical place!
The ubiquitous columbine flowers made for great backgrounds and bokeh subjects for other flowers in the area, which I accentuated in this desaturated photo. A lot of people ask me what bokeh is. According to Wikipedia, bokeh is is the blur, or the aesthetic quality of the blur, in out-of-focus areas of an image, or "the way the lens renders out-of-focus points of light." Differences in lens aberrations and aperture shape cause some lens designs to blur the image in a way that is pleasing to the eye (or not pleasing to the eye). Further research on the origin of this word took me to this article, where the author goes on to explain that, "it is a Japanese word meaning, roughly, "fuzzy," and it is used to describe old people with cobwebs in their heads among several other things — including the out-of-focus areas of photographs, which, I'm told, might more specifically be referred to as "boke-aji." So, long story short, the correct pronounciation is: BOW (as in bows and arrows) KUH (like Cuss). They even did a YouTube Video on it...

We finally reached our campsite at about 2:30 PM and cooked some delicious food. By now, other groups had made their way into the basin and a family of four had made camp just above us in a site out of view from our campsite. Sarah and I were pretty tired, so we took a nap while a thunderstorm rolled through the area. I've always loved sleeping in a tent during the rain.
Here's an elevation profile of our long day up Snowmass Mountain. Feel free to click on it for a larger version.

For day three, we decided it would be best for a 2:30 wake-up and a 3:00 start in hopes of catching the sunrise at some point for photography purposes.
Day 3: Hagerman Peak via the standard route (south ridge)
2:30 AM came pretty quickly and when it did, I asked Sarah if she wanted me to hit snooze. Hilarious half-awake banter ensued:
Me: "Want me to hit snooze?"
Sarah: "I don't want to ruin your sunrise."
Me: "That sounds like a tragic country song."
Sarah: (laughter)
Me: (singing voice and fluctuating notes) "Don't wanna ruin your sunrise."
Sarah: "It could be a song about a one-night-stand - leaving before the other person wakes up."
Both: (heavy laughter)
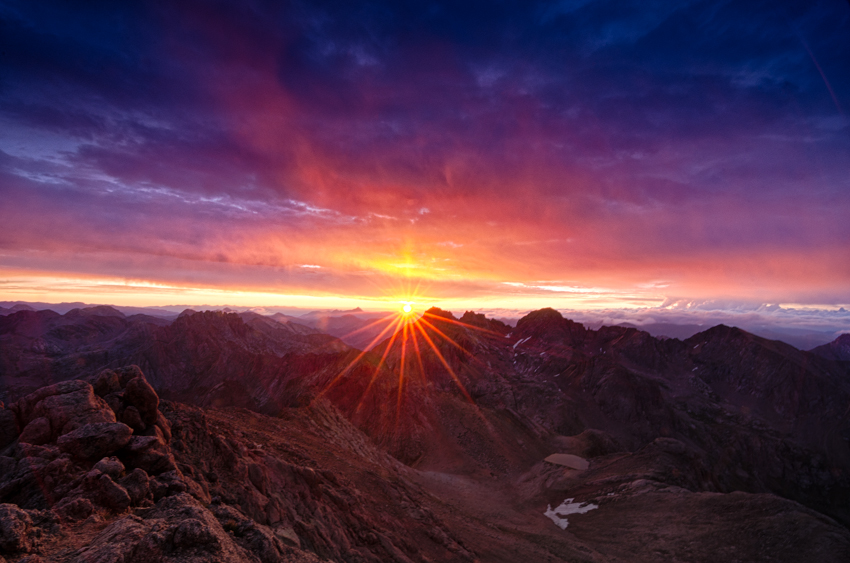
We opted not to hit snooze and embarked on another darkness-filled adventure. I had copied the notes from Gerry Roach's Colorado Thirteeeners guidebook as a reference, which proved quite handy despite the fact that we were in complete darkness all the way to the base of Hagerman. Despite our success in reaching the base of Hagerman, it did not come without some really tough route finding. For starters, the route was quite confusing and after the turn-off from the Trail Rider Pass trail, there was no trail. We found the creek drainage Roach describes in the route easily but were somewhat astounded and questioned the route when we found ourselves walking IN the creek since it was quite a narrow drainage (photos of the route during the daytime can be found later in this report). Additionally, the route went straight up the side of a hill through steep willow trees. Trails are for the weak, I suppose. Fortunately the willow trees were sturdy and we could use them to aid our climbing. Next, we found ourselves on top of a small 12,000 ft. mountain thinking it was the ridge after following the directions in the route description, only to realize it was opposite our current location. All was well though. We found what we thought was a gully Roach describes in the route, which turned out to be a much harder gully to the west of the actual gully. According to Roach, the gully was supposed to lead us to a "commodious grassy bench" but we had no idea what the hell a commodious grassy bench looked like, so that was not much help. Turns out, by the way - that commodious means spacious. Who knew!? We found ourselves on the south ridge pretty quickly. Unfortunately, because of the poor quality of the route and our misdirection, we did not reach the top in time for sunrise; however, we were able to make it to about 12,500 ft. and in view of the Maroon Bells and Pyramid Peak. There were some clouds hovering around Maroon Peak and it made for a very dramatic morning at first.
We were in pretty good position for sunrise and it was decent lighting for an HDR panoramic attempt. I feel like it turned out pretty well. The HDR process brings out all of the dynamic range of each bracketed photo, and in this case, it made for a graduated sunrise effect, ranging from pink to orange to purple. Quite stunning. Click on the photo to see a larger version.

Once the photo session was over, Sarah and I packed up and headed up Hagerman's south ridge, which we found to be pretty straight-forward and enjoyable. It was quite similar to Snowmass the day before - offering a choice between dirt and scree or boulders. We once again opted to up-climb the boulders and later down-climb the dirt and scree.
We reached the saddle between Hagerman Peak and Snowmass Peak (not to be confused with Snowmass Mountain - Snowmass Peak is an un-ranked 13er to the southwest of Hagerman, named only due to its dramatic view from Snowmass Lake) and enjoyed the amazing views below, as seen in the below panoramic from the saddle (click on the photo to see a larger version).

We stopped short of the summit for a bit to take it all in. What an amazing weekend we had had.
We reached the summit of Hagerman in no time at all from here after scrambling over a very small false summit. We could see a group of climbers below, heading up Snowmass Mountain from Snowmass Lake. I was pretty sure that this was the group that had talked to me earlier in the week about joining them, including Kara Bauman.
Sarah was pretty excited to reach the summit of her first 13er!
Once again, I was blessed with the powers of the tripod to ease my summit panoramic photography. Click on the photo to see a larger version.

If you'd like to see a very large version of this photo in flash with the ability to zoom in and out and move around, check out this page, but be warned - it is 22 megs!
We set-up for a summit portrait with Snowmass Mountain behind us.

After a few more minutes on the summit, we decided to head down the same way we came up.
The downclimb was quite a bit easier due to the slightly wet dirt and scree, which made for quite an enjoyable boot ski down.
During the downclimb we finally properly identified the commodious bench, which quickly became the subject of many jokes. The "commode" as it was referred as from now on served its purpose well.
The commodious grassy bench offered one other benefit as being a great place for photography of the Maroon Bells.
Directly next to the grassy bench was the gully we were supposed to take up earlier in the dark. Here's what the gully looks like if you are wanting to know.
We followed some rocky ledges (as described in Roach's book down and the rest of the route was fairly easy to follow back down the drainage.
Here are some photos showing the route down, obviously in reverse order if you were coming up. Hopefully these can serve as a better guide to you than Roach's book did for us.
The "trail" for Hagerman going up a "narrow drainage."
The willows you must upclimb for the standard route of Hagerman Peak.
The "excellent campsite" on Hagerman's standard route
This is where you turn off to go up the creek and faint trail for Hagerman's standard route.
The hike back to Geneva Lake was pleasant and the views along the way were great. Here's another vantage of the Fravert Basin.
And a sweet view of Siberia Peak from a clearing on the trail.
And back at Geneva Lake!
After reaching our campsite, we quickly tore down camp and packed out, making it back to the car just shy of noon - making for a great weekend of climbing!
These two mountains will forever hold a special place in my memory and my heart - if you've never been to Geneva Lake and the Lead King Basin - you really should! It is a magical place.
Here is an elevation profile of Hagerman Peak and then one of the entire trip - feel free to click on each to see a larger version.


Thanks for reading! Just a reminder - this site costs me time and money to maintain - if you find it useful, please consider supporting the site by remembering to use the affiliate links, especially if you purchase photography related gear from Adorama. Thanks!
References:
- http://www.tosv.com/uploads/FileUpload/mtnnames.pdf - Snowmass and its peaks: the name game. Catherine Lutz.
- Notes on Mountaineering in the Elk Mountains of Colorado, 1908-1910. Percy Hagerman.
{fcomment}
Backpacking to Snowmass Lake - A Photographic Gem
When Regina and I embarked from Colorado Springs, the plan was to backpack up to Snowmass Lake and climb Snowmass Mountain, putting me within 10 climbs of completing all of the 14ers in Colorado. Unfortunately, some unforeseen circumstances prevented us from reaching the summit of Snowmass Mountain, which I will go into detail about later on. Fortunately, there was ample opportunity for photography, and that opportunity was not passed on.
For those that follow my trip reports, Regina is a friend of mine that I met through 14ers.com and our relationship could best be described as one of two siblings. My wife is 100% cool with me hiking with another woman, and if another person asks me about it, I may just roll my eyes. Now that we have that out of the way, let's move on with the report! Regina and I departed Colorado Springs on Friday June 24th and reached the Snowmass Lake trailhead at around 8 PM. We were both very psyched about our first backpacking trip of the year, and had prepared for the many possible scenarios we were anticipating, including deep snow, an ice/snow climb, and wet weather. With that being said, we both packed our snowshoes, crampons and ice axes. I was also very excited to finally test out my brand new Lowepro Toploader Zoom 50 AW camera bag, as pictured below. The idea behind the bag is that it is held to your chest by this harness and makes your DSLR easily accesible. Time would tell!
The hike up the Snowmass Lake trail (I believe it is actually referred to as the Snowmass Creek trail). takes you right into the Maroon Bells - Snowmass Wilderness Area and did not disappoint in terms of aesthetic beauty.

One of the things that Regina and I were concerned about was the infamous logjam crossing, where you must cross a huge stream via randomly scattered logs. This was not something we were looking forward to, given the fact that the snowmelt was particularly high this year and because we were carrying a lot of weight on our backs. About a mile into the hike, our fears of Snowmass Creek having a lot of water in it were confirmed...
Would we be able to safely cross the logjam in the dark? The idea was quickly losing favor among the two of us; however, we kept our quick pace, which was aided by the great views of the surrounding peaks and forest.
As we hiked up the trail in our heavy packs, the daylight faded quickly, and soon we were forced to employ the use of our headlamps to guide our hike.
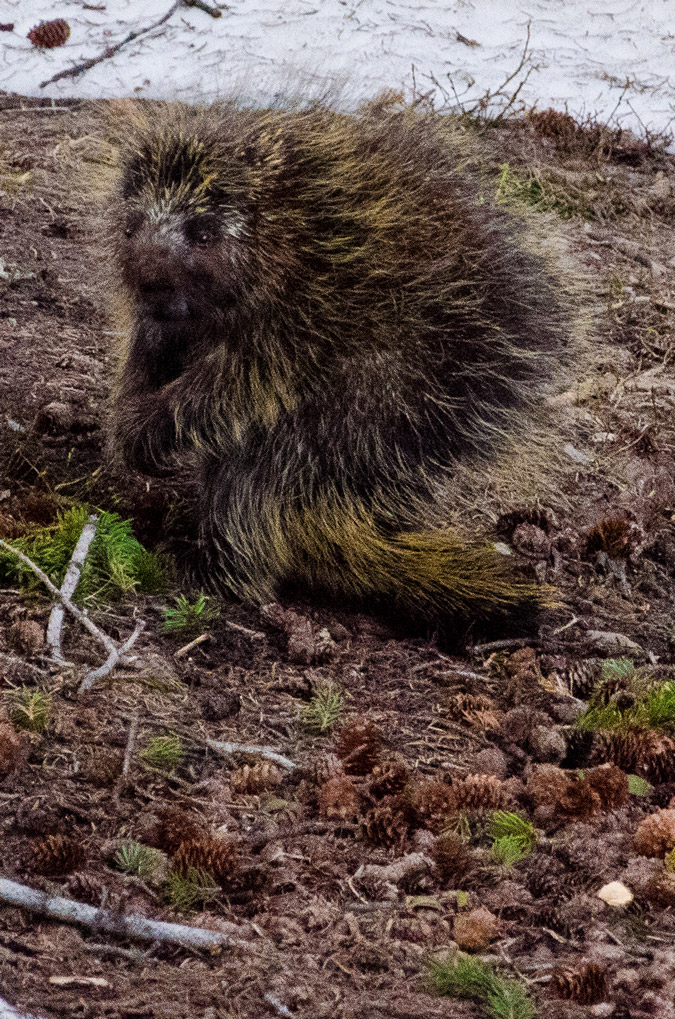
The plan was to get as far as we could in the dark before setting up camp for the night and making a go out of Snowmass Mountain the following day. From the trailhead, the lake was a good 8 miles up, which meant a good portion of our hike would be in the dark. Shortly after the sunset and the trail became dark (but before we turned on our headlamps), a dark object walked across the trail in front of Regina, which frightened us both. I quickly turned on my headlamp and discovered that it was a porcupine. We let him pass on through and continued on up the trail in the dark. Periodically, our headlamps would catch the eyes of various wildlife in the dark shadows of the night. For the most part, we identified them as deer, but given we were in the wild and it was dark, our imaginations were going in a much different direction!
After a short while, Regina began to get sick and threw up all over the trail (sorry about that to the folks that came up the next morning). Surely this would not be a portent for things to come? Regina said she felt much better, so we kept on heading up the trail in the dark. As midnight approached, we decided to stop and see where we were at. I pulled out my GPS and discovered that we were about 1/8 of a mile from the logjam - a perfect stopping spot for the night. We decided to set-up camp in one of the better campsites I've seen on any backpacking trip, right next to Snowmass Creek. Since this was her first backpacking trip, I showed Regina how to hang our food bags by nylon rope and how to setup camp.
Since it was so late and because Snowmass would require crampons on hard snow, we decided the best plan would be to get plenty of rest, pack the rest of the way up to Snowmass Lake the next day, take it easy, and go to bed early for a super-early ascent of Snowmass Mountain on Sunday. We woke up the next morning at around 9 AM, listening to a group that had just came down from Snowmass Mountain talk about the logjam. They were making jokes about how the logs would sink and that people were almost falling in, etc. Was the logjam really that bad?
We quickly packed up and headed towards the logjam. At first sight - the logjam confirmed our worst fears - it looked incredibly daunting.
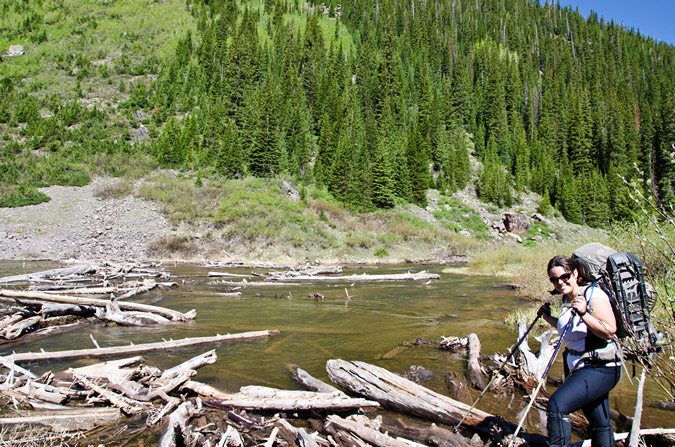
The water was about 3 or 4 feet deep in spots, and was rushing quite quickly under the logs. If the views were not so incredible, the logjam would have been a real bummer!
There was little to no consistency in the reliability of each log, and each log required a good test before we used it. Trekking poles were quite useful, but at times they gave me a false sense of security because I would put some of my weight on them when they were not secure on a log, causing me to get off balance. Care must be taken to successfully cross the logjam as it is a good 100 ft to the other side! I stopped halfway across to take a 180 degree panoramic photo to show the length of the crossing.
After successfully crossing the logjam, we quickly made our way up the trail, which followed the now wide and pristine Snowmass Creek. The whole area was like a giant beaver pond, with lakes and creeks intertwining with the beauty of the Elk Mountains at the head of the valley. The trail quickly begins to work uphill again and soon views of the pristine valley below can be made.
The rock in the mountainside was quite red, a clear indication that the Maroon Bells were closeby.
The trail quickly weaved into the trees towards Snowmass Lake above and to the east, and we were quickly reminded that there was a ton of snow in this area still. Would we finally get to use our snowshoes? Not so much - the snow as hard enough and sporadic enough that snowshoes were not required. Another trip where I packed my snowshoes for no reason! Oh well.

This was the hardest section of the hike, with the snow banks rising and falling throughout the trail, making travel slow and laborious with heavy packs on. Nonetheless, we arrived at the trail junction for Snowmass Lake and headed on up, following Snowmass Creek, which was quite full of water.

Soon, we reached a huge waterfall next to the trail, with a giant log in front of it. I decided to take a break, take my pack off, and cross onto the log to get some HDR shots of the waterfall from the middle of the log. Getting onto the log proved quite tricky, with the area around the creek full of snow and ice and dirt; however, I managed to make it onto the log without drowning or falling in. Yay for me.
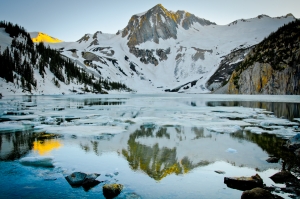
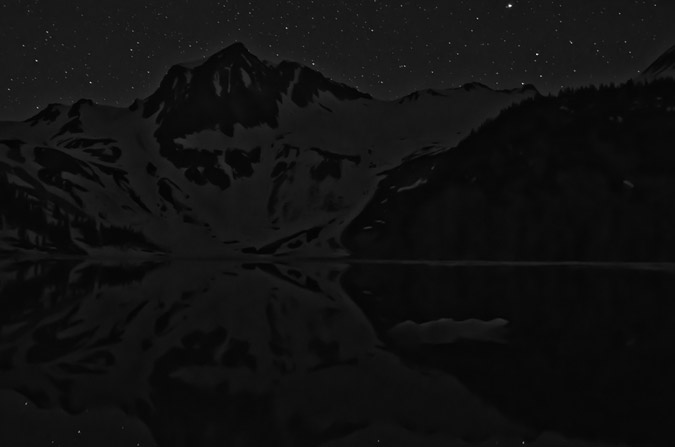
About 200 feet past this waterfall, we finally reached the head of Snowmass Creek and the first views of Snowmass Peak with Snowmass Lake in the foreground. How exciting!
The first order of affairs was to locate a suitable campsite. Most of the area was full of deep snow, so options were quite limited. Sticking to the "100 ft away from lakes" rule proved nearly impossible due to the snow and marshy conditions. Nevertheless, we found a great spot near the lake and creek and set up for the day. It was pretty great to finally get a glimpse of Snowmass Mountain as well, which was tucked away to the right of Snowmass Peak, the lower 13er at the head of Snowmass Lake. Even better, the moon was passing just above Snowmass Mountain, making for some fun photography.
Throughout the day, the lighting shifted and the winds died down, making for better or worse photography conditions, depending on the combination of the two. For the most part, the Golden Hour proved to be the best time to shoot, which did not surprise me in the least.
For the most part, Regina and I just kicked it at the lake for the day, watching the wildlife and the insane beauty of the lake. This also gave me the opportunity to play around with my camera and try to get some decent shots.
About an hour or two after we arrived at the lake, another group of gentlemen came to the lake, sporting a pistol and a Canon EOS Digital Rebel attached to a fully extended tripod. They were nice enough guys, hailing from Elizabeth, but I could not help but wonder how fun that tripod was to carry up to the lake and if they would be using the pistol for fun or for protection. I was hoping for the latter, based on my horrible experience at Huerfano Valley a couple of years ago. The two confirmed they were just hikers, not climbers, and were just there for the night.
Another hour later, two more guys came up the trail and were looking to camp nearby. One looked familiar, so I asked him if his name was Corey. He said it was - and sure enough, it was one of my Facebook friends! Corey was up at the lake with his friend Robbie as they were planning on climbing Snowmass on Sunday, the same as us. They were planning for a 4 AM start and we were planning for a 2 AM start. Regina and I talked for awhile off and on with both Corey and Robbie throughout the afternoon, getting to know each other. It is always remarkable to me how quickly people that climb 14ers can get to know each other and how, generally speaking, everyone is so friendly. It was a real pleasure sharing a campsite with them. Regina got to spend some quality time getting to know Corey:
The lake was thawing out throughout the day, which was actually really fun to watch. Chunks of ice and snow would calve off of the icy glacier that was now Snowmass Lake and flow down into Snowmass Creek and out to sea. It was really fun to watch, and quite peaceful too. Soon, the sun began to get lower and lower on the horizon, which piqued my photographic instinct quickly. I was off to get as many quality shots as possible of the lake, hoping to get both HDR and standard photos. HDR has quickly become one of my more favorite photographic mediums. Its almost like opening a present at Christmas when you begin working with the files at home - you never quite know what you're going to get!
First up - the HDR version:
And the standard version, which won me my second Flickr Explore Award, which was quite exciting! Explore is Flickr’s Daily Artist Showcase. Every day Flickr admins choose 500 of the most interesting images determined by “interestingness”. I have placed that photo in my portfolio and for sale section if you are interested in purchasing a print.
 The views from the shores of the lake were outstanding. Quite possibly ranking in the top 10 views of all time for me personally. The impressive features of Snowmass Peak, paired with the crazy cliff walls below Snowmass Mountain made for quite a great spot to sit and soak it all in. To make things even more fun, close to dusk, a huge, feral, rugged looking porcupine decided he would come and hang out with us. This guy was seriously oblivious to our presence, and it was actually somewhat challenging getting him to go away without putting myself in a dangerous place.
With all of the excitement over the porcupine and the heavenly sunset, I decided it was time to hit the sack. We had set our alarms for 1:45 AM, anticipating a 2 AM start. It was sadistic, I know, but we felt it was necessary given the conditions. The alarm went off and I got up fast, because I wanted to take advantage of a quick photographic opportunity to capture the Milky Way, or at least attempt it. Additionally, I was hoping that I could get some photos of the stars reflected in the lake as well. Both concepts challenged my photographic mind, and away I went to try to get some good shots. The challenge with shooting in low light, as in pitch dark, is always figuring out the best combination of aperture, ISO and shutter speed. Of course, I guess this can be said about any other form of photography, but the concepts are of particular sensitivity in low light conditions. I opted to set the camera at a slightly higher ISO (400) to increase the sensitivity of my cameras sensor. Additionally, I went for a 20 second exposure instead of a 30 second exposure since I did not want the stars to blur / move across the frame at all. Lastly, I opted to set my camera at the lowest aperture the lens would handle (f/3.5) to allow the maximum amount of light into the lens. These combinations produced fairly good results.
 Unfortunately for me, the photographic success would not lead into climbing success. This is quite an embarrasing story for me, since I pride myself on preparation. As Regina and I wrapped around the steep snow banks to the left of Snowmass Lake, heading for Snowmass Mountain, we quickly realized that crampons would be required. No problem right!? Wrong. Shortly after putting the crampons on and continuing, my crampons would come right off my boot, necessitating frequent and long stops to get them back on. Finally, Regina and I decided that there was something wrong with my crampons and that no matter how we tried to get them to stay on my boots, they just would not stay. We decided to abort the mission at about 3:45 AM and headed back to camp. I was quite furious with myself, since I had personally tested the crampons at home, putting my boots into them, strapping them down, and making sure they fit. Apparently that effort was not as good as it could have been. It turns out, after inspection at home, that my crampons were adjusted in such a way that they were too big for my boots. Most modern crampons self-adjust their size; however, the crampons I own are hand-me-downs from my dad. Surprisingly, the same model is still manufactured by Seattle Manufacturing Corporation. Anyways - lesson learned! USE your equipment before you trust it with your life. We went back to camp, slept for a bit longer, and then packed up and headed back down to the trailhead. I was not in a great mood because this was one of the only mountains I've ever been turned back from, and it was completely my own fault. If it were weather or altitude sickness or some other uncontrollable event, that would be one thing, but to have the mountain turn us back because I was too stupid to test my crampons - not cool. It was not a total loss though, the photos turned out great, and I was able to get some fun and creative shots of wildflowers on the way out. If any of you know the names of these flowers, please, by all means let me know!

The most memorable part of the trip was yet to come though - and it certainly made up for the rest. On our way out, Regina took a nasty fall on the logjam! At first it was quite a scary experience. I was right behind her, and had to talk her through getting herself back up out of the water. She had managed to completely submerge one of her legs and was drenched. Fortunately, Regina is a good sport, and within a matter of minutes we were both laughing about it.
Lastly, we were able to get some great views of the backside of Snowmass that we did not get to see on the way up, which were quite stunning!
All-in-all, I would rate this hike quite highly on my list of hikes that I have done. The views from Snowmass Lake are worth it by themselves, and the logjam provides an excellent adventure.
And in case you were wondering - the new camera bag totally lived up to my expectations - I will end up writing a full-blown review of that product for sure!
Until next time Snowmass Mountain... I'll be back!
Capitol Peak: On The 'Edge'
Capitol Peak carries a mystique among hikers and climbers in Colorado. First climbed in 1909 by Percy Hagerman and Harold Clark, Capitol Peak is often revered as the most difficult 14er in Colorado. Capitol Peak towers above treeline in the Elk Mountains of Colorado, a crumbling mass of granite, shaped into a rugged pyramid with spiny ridges. While I have a great respect for Capitol Peak, I felt that I had personally prepared myself for the climb through graduation along the difficulty continuum of climbs in Colorado. Having summited several of Colorado's harder Centennials (highest 100 mountains), including Crestone Needle, Crestone Peak, Vestal Peak and Little Bear Peak, I felt that I had the skills and mental toughness to complete Capitol. Capitol is well-known for its "Knife Edge," a 150 ft. narrow and jagged section found on the main route of Capitol Peak. The Knife Edge is very exposed on both sides, making it a mental challenge for many climbers. Many personal friends and family members as well as reports on the internet had built up Capitol's Knife Edge's difficulty in my mind; infact, YouTube is full of videos of people climbing the Knife Edge, some recklessly crossing it like a tightrope. I was hopeful that it was more hype than people it made it out to be...
Here are some meaningful metrics from this amazing trip:
Peaks summited:
Capitol Peak: 14,130 ft. (ranked 29th in Colorado)
"K2": 13,664 ft. (unranked)
Total elevation gain: 5,300 ft.
Total distance hiked: 17 miles
Total time hiking: Approx. 14 hours
Total photos taken: 356
Total distance driven: 520 miles
Trip duration: 1 day, 19 hours

K2 (far left) and Capitol Peak (far right) seen in this dramatic panoramic. Click for high resolution version (15 mb).
That being said, Capitol Peak was not without other dangers. Many climbers have perished on Capitol over the years, oddly enough, very few of the deaths have occurred on the Knife Edge. In 2009, James Flowers, the United States Paraolympic Swim Coach, perished on the Northeast side of "K2," a sub-peak of Capitol Peak, as reported by the Aspen Times. Needless to say, great caution, respect, and preparation would be required if I were to successfully climb Capitol. First on my list for preparation was to find capable partners. This is often difficult in the mountaineering community, since many climbers inflate their abilities or do not disclose their limitations to potential partners.
Earlier this summer, I climbed Huron Peak with Mike Vetter, a Sioux Falls, South Dakota resident and an up-and-coming star in the IT realm and CEO of DataSync. Mike and I made plans to climb again this year and we set our sights on Capitol Peak. Mike invited his friend, Travis Arment, an avid marathon runner. Neither Mike nor Travis had extensive experience climbing class 4 peaks; however, having hiked with Mike in the past, and knowing that Mike was a comfortable and avid rock climber, I knew I could trust him to make solid decisions and that they would both be personally responsible enough to turn-around if the climb became too difficult. We all exchanged plans via Facebook, ensured we all had the proper gear and knowledge, and established ground rules for the climb in case something unexpected happened. Travis and Mike flew in to Denver on Friday, August 13th. I picked them both up from Castle Rock, where Travis' aunt lives, on Saturday morning and we departed for Capitol. The total drive from Colorado Springs was approximately 260 miles and took roughly 5 hours.
We arrived at the trailhead for Capitol at about 10:00 AM and were hiking by 10:30 AM. As usual, my pack was the heaviest and largest, weighing in at just over 50 lbs.
Mike's pack was medium-sized and Travis literally backpacked with a daypack. We made sure to give Travis a hard time for having the smallest pack, and Mike was quick to point out that he was carrying half of Travis' stuff. Travis was a great sport about it and agreed to share his tasty snacks on the hike up.
There are two trails for Capitol Peak - the standard trail and the "ditch trail." We chose the ditch trail due to its lack of elevation loss and gain at the start of the hike. The ditch trail is aptly named, following an irrigation ditch along the side of a ridge line which wraps around towards Capitol Peak. The irrigation ditch is used to provide water for cattle, which are known to graze this part of the Elk Mountains in large numbers.

The topo map of our route. Want to make your own maps like this? Check out the TOPO! program from National Geographic!

Capitol Peak seen from the trailhead.

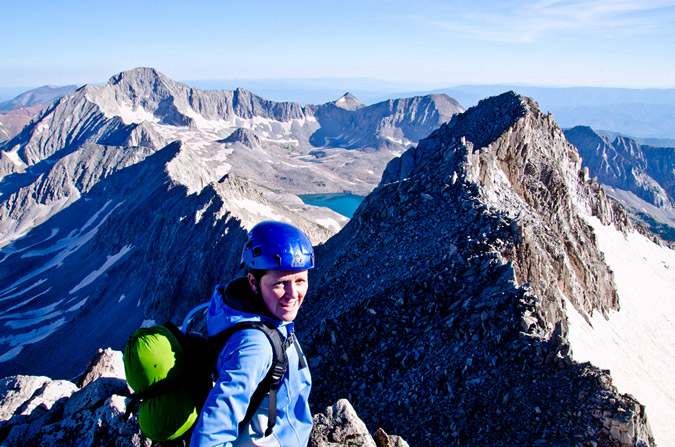
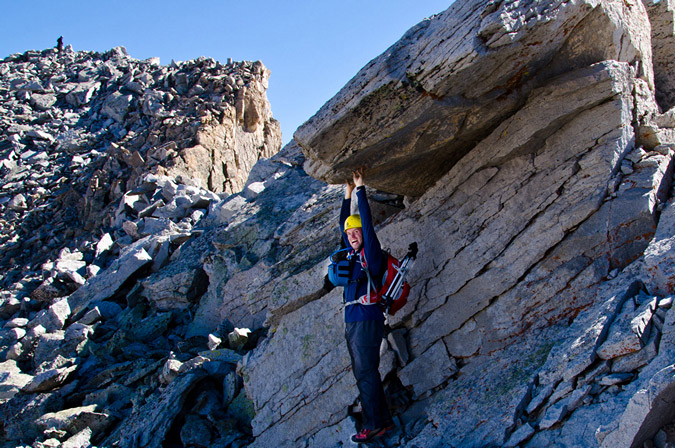
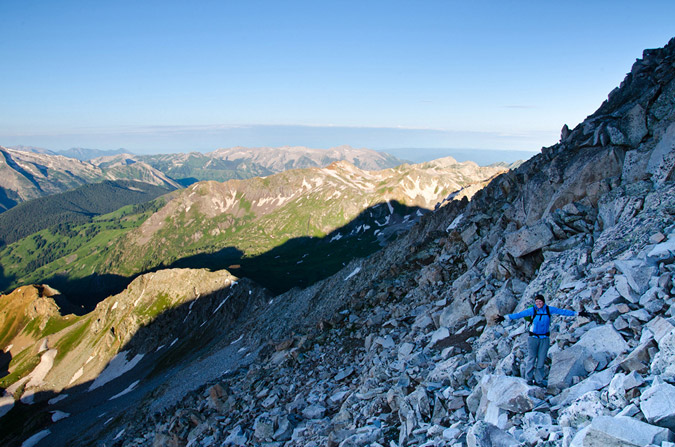
Matt Payne and Travis Arment on the Capitol Peak Ditch Trail - photo by Mike Vetter
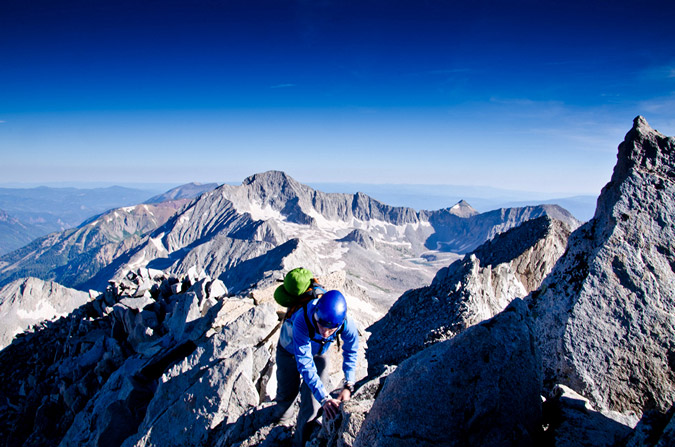
After about a mile and a half of hiking on the trail, it leaves the ditch and heads uphill, gaining half of the ridge to the west. Before we knew it, the trail meandered into a great opening, revealing Capitol Peak. Capitol Peak remained in view for much of the remainder of the hike up to Capitol Lake.
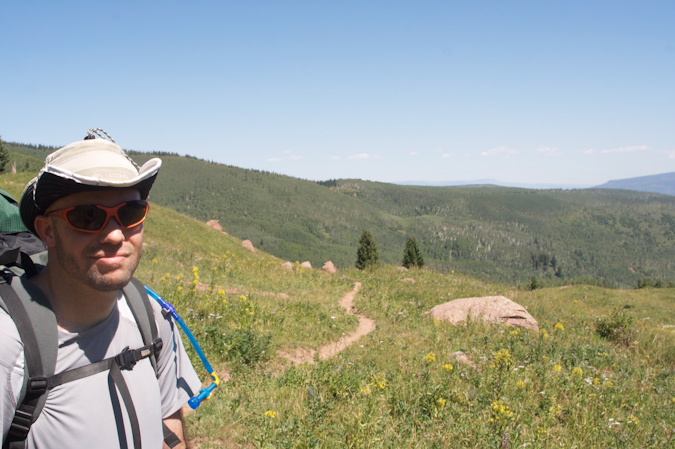
Matt Payne on the trail
Capitol Peak, about 1/3 of the way up to Capitol Lake from the trailhead.
On the way up the trail, we passed many raspberry plants, sometimes stopping to grab a snack to help fuel our ascent.
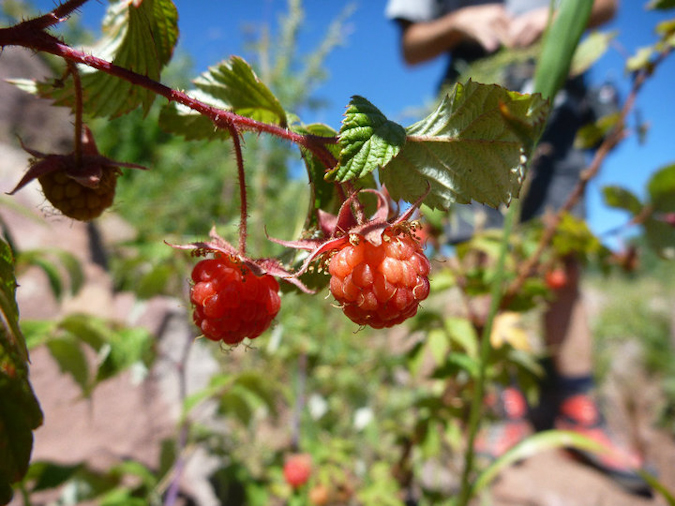
Wild Raspberries - photo by Travis Arment
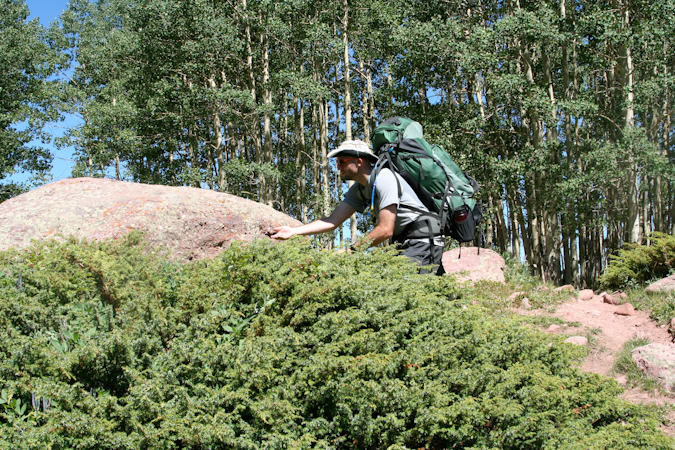
Matt Payne braves the spiky bush to score some berries.
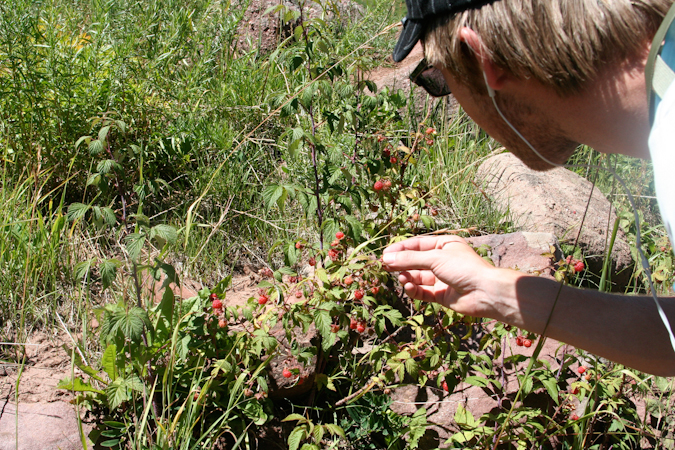
Travis Arment reaches in to score some berries.
Eventually, the trail reaches the Capitol Lake basin and intersects two side trails leading to two campsite areas, each split into four campsites (#1 through #4 and #5 through #9). We found ourselves camped at site #6, a quaint spot in the trees up on a hill.
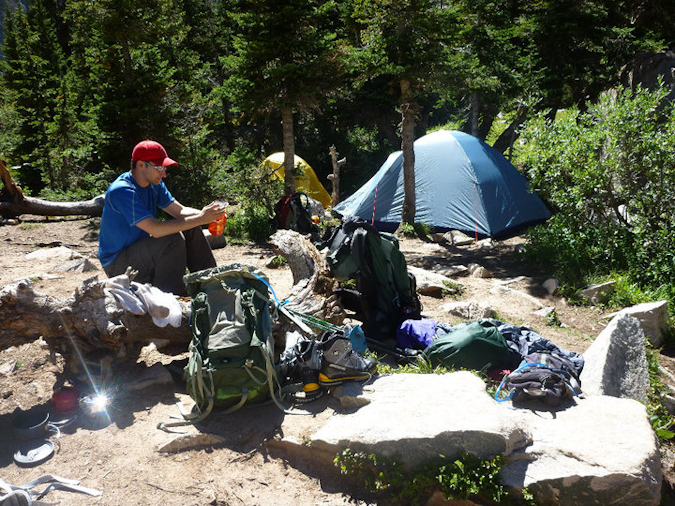
Mike Vetter unpacks at our campsite.
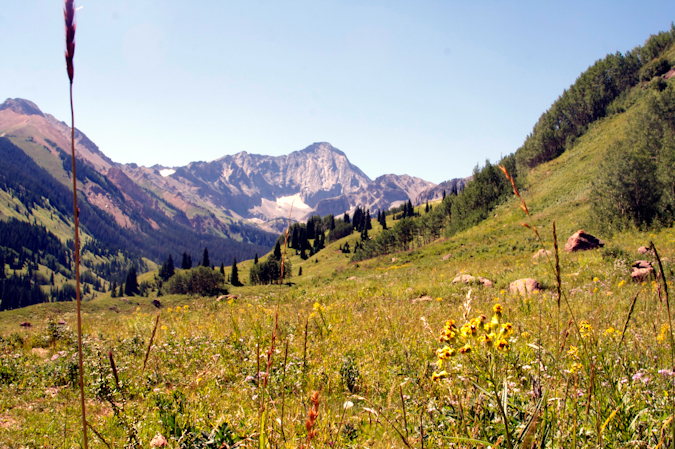
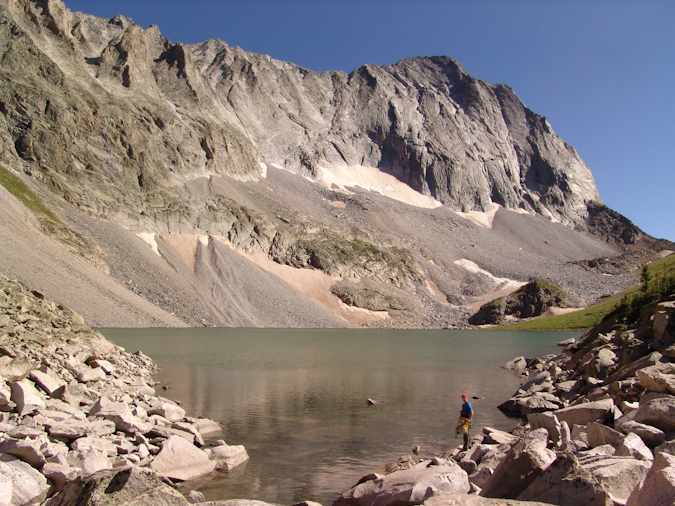
After we got situated at our campsite, we took a small nap. The hike up to Capitol Lake was pretty exhausting for all of us. After our short nap, we took a walk down to the lake with our cameras and took pictures. The lake rests right below Capitol itself and was a great area to relax and take in the afternoon sun.

Capitol Lake sits beneath Capitol Peak in this 1800 panoramic photo taken above the shore.
Mike went down to the lake to fill up his water bottles, using his steri-pen to sterilize the water. Unfortunately, the steri-pen bested Mike's weary intellect and he gave up on the endeavour, conceding that my Ketadyn Hiker Pro filter would later suffice. Mike and I went down to the stream near our campsite before cooking dinner and refilled all of our water. The area surrounding Capitol Lake is really quite gorgeous, with Capitol looming over the whole area like some kind of ancient protector of its treasure.
Mike Vetter filling his water up at Capitol Lake.
I pulled out my food for the night - a custom-made soup with dehydrated vegetables and pasta with chicken. Mike and Travis were somewhat jealous of this fancy treat at first; however, the meal was about the saltiest thing I've ever ate. Mike and Travis cleaned up on their Knorr Pasta side meals and we all hit the sack at around 8 PM, with the alarm set for 4 AM.
4 AM came all too soon, despite the long night of sleep we all enjoyed. I scarfed down some homemade zuchinni bread that my wife made for me and we all grabbed our backpacks and headed for Capitol. The trail for Capitol happened to be the same trail used by our campsite, which perpendicularly intersects the Capitol Lake trail just below Capitol Lake. We made our way up the switchbacks in quick order, passing several groups. Being that it was quite early in the morning, we could see all the other hikers in the area ascending beneath us and above us. We counted about 15 to 20 other headlamps heading up.
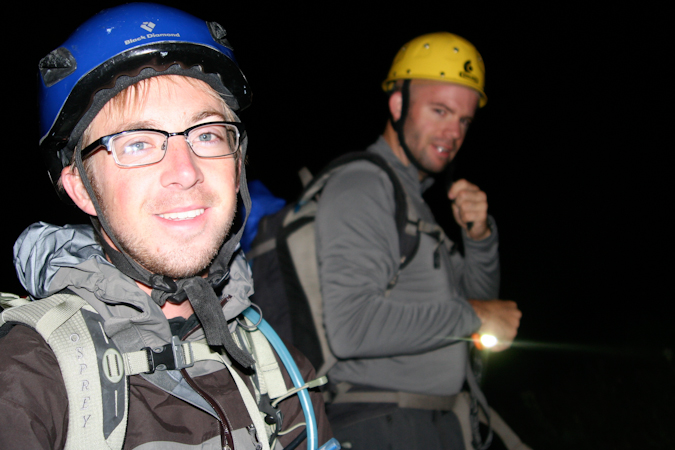
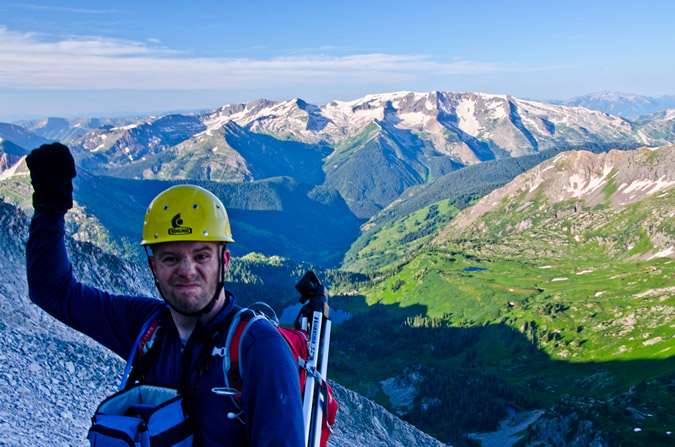
Travis Arment (left) and Matt Payne (right) excited to be on the trail to Capitol Peak.
We reached the Mount Daly - Capitol Peak saddle about 30 minutes into the hike and enjoyed some pretty awe-inspiring sunrise views from there, which Mike documented on video:
Sunrise
Sunrise... again
Clouds rest in the light of sunrise to the east.

We continued up and over the ridge and descended a well traveled gully to reach the beginning of a very long stretch of boulders to the north and east of K2. The trail here mostly consisted of cairns and boulders, making for fun travel in the early light.
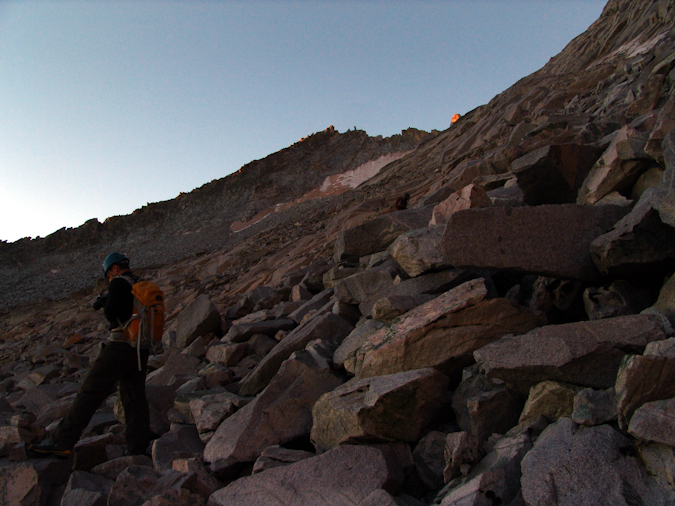
Mike Vetter hikes up the immense boulder field.
Out of nowhere, as if we were not expecting it, the sun blasted alpenglow onto the mountains surrounding us.

Mount Daly basked in alpenglow in the early morning.
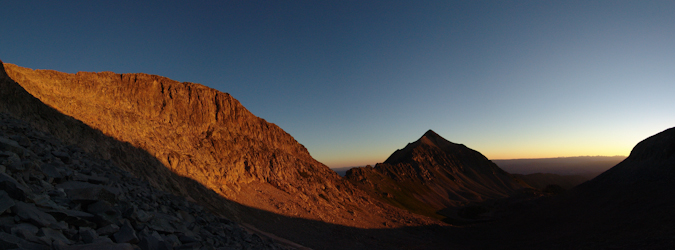
Mount Daly in Alpenglow.
The trail eventually lead us to a snowfield, which was mostly ice. I had been warned by the snowfield by a fellow hiker, Terry Mathews. We tested our footing on the snow and ice and decided to cross it, cautiously. There were great footsteps already kicked into the snow, and the relief was not terribly steep at this point. We all made it across quite easily and continued up the boulders. We saw a large snowfield at the top of the basin on the K2 - Clark Peak saddle's face and knew that we needed to turn right before then to reach K2. We decided to head up a very solid class 4 section.
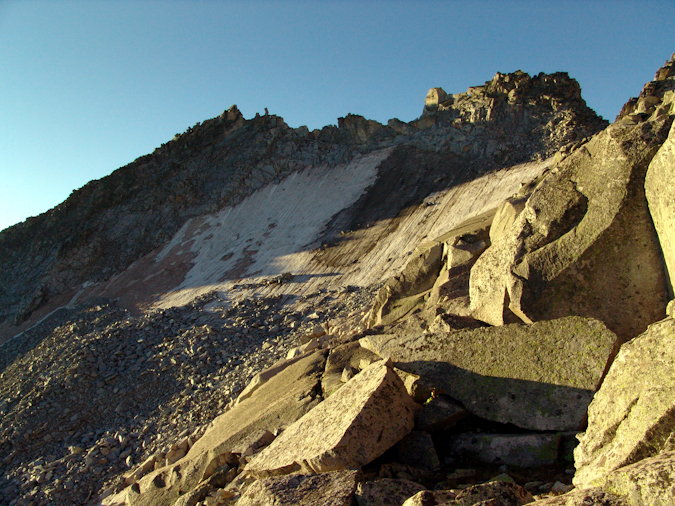
A snow and ice field adorns the face of the saddle between K2 and Clark Peak.
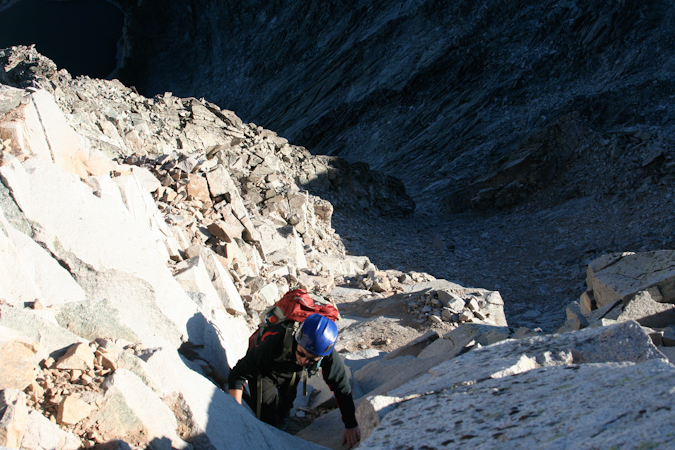
Travis up-climbing the solid Class 4 terrain leading to the base of K2.
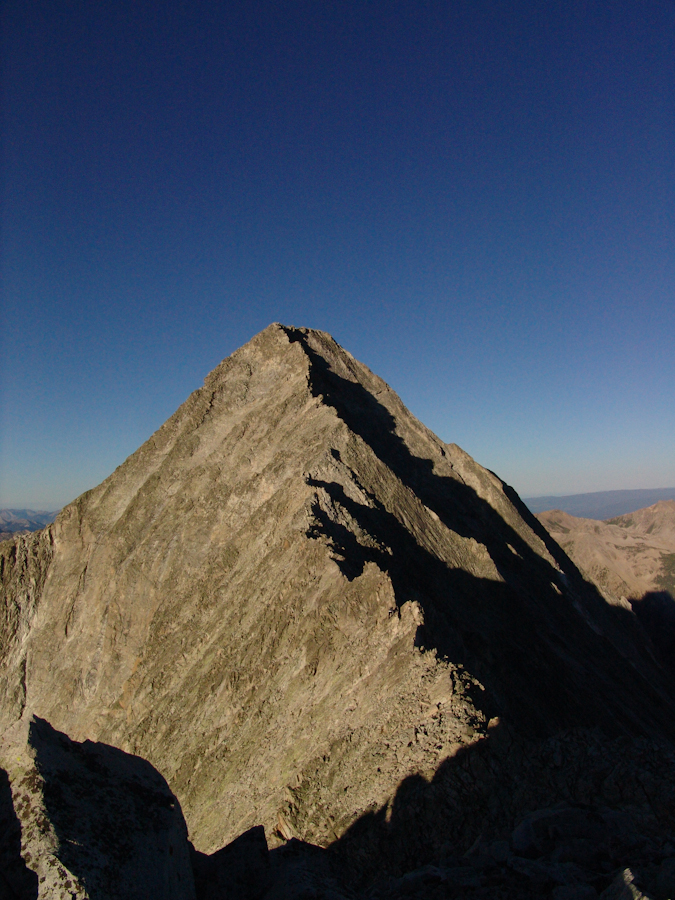 Once reaching the top of the ridge between K2 and Clark Peak, we realized that we still had quite a ways to go before reaching K2. The terrain became much flatter and we were able to get to the top of K2 in short order. Many parties opt to skip K2, arguing that the approach is more difficult; however, we did not want to miss out on the views from K2's summit.
To reach the top of K2, we broke off from the main trail just after it winds itself to the right of K2 and climbed a steep but solid dihedral to the summit. Capitol Peak looked ominous from K2, dwarfing it's surroundings.
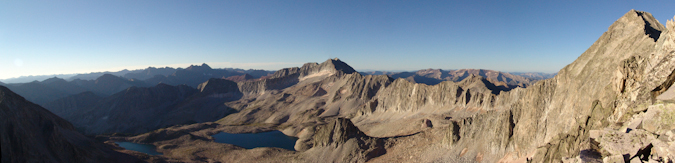
Capitol Peak, Snowmass Mountain, and the Maroon Bells come into view from the summit of K2.
The down-climb from K2 was trickier than expected, and it forced us to backtrack a little bit to meet back up with the proper trail which winds around the side of K2. The terrain here is steep, loose, and slightly exposed.
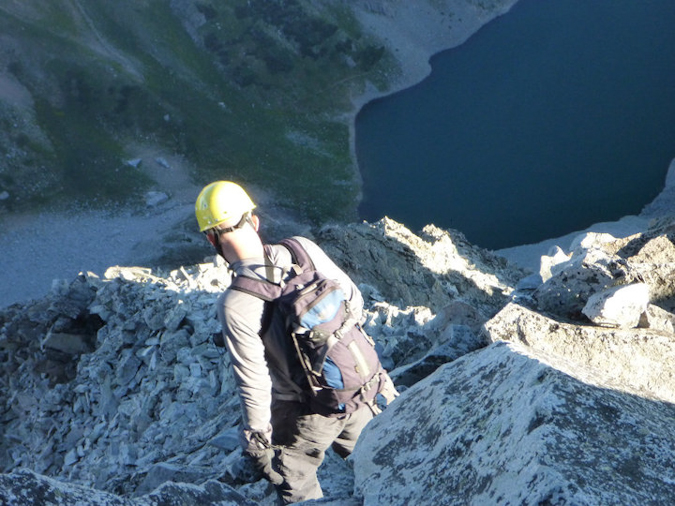
Matt Payne downclimbing from K2.
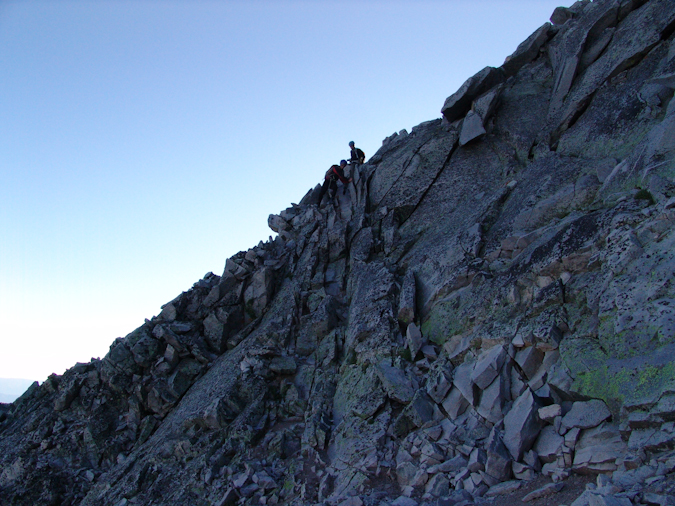
Downclimbing K2 to reach the K2 - Capitol saddle.
I had read some reports of people dying near K2 in the past, and had always wondered how this was possible. Undoubtedly, there did not seem to be any obvious threats to one's life until we reach the backside of K2 and saw the impressive cliffs surrounding K2 and Capitol Peak. One false move and a climber could find themselves in a world of hurt.
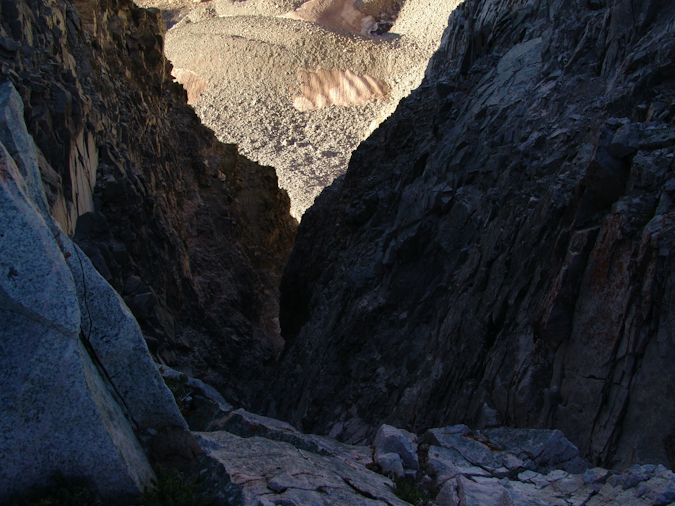
A huge cliff greets climbers reaching the base of K2. Don't slip here...
The remainder of the climb was amazing. Capitol's ridge is a spine of crumbling boulders and jagged knives, a real tribute to the harsh and remote wilderness that the Elk Mountains call home.
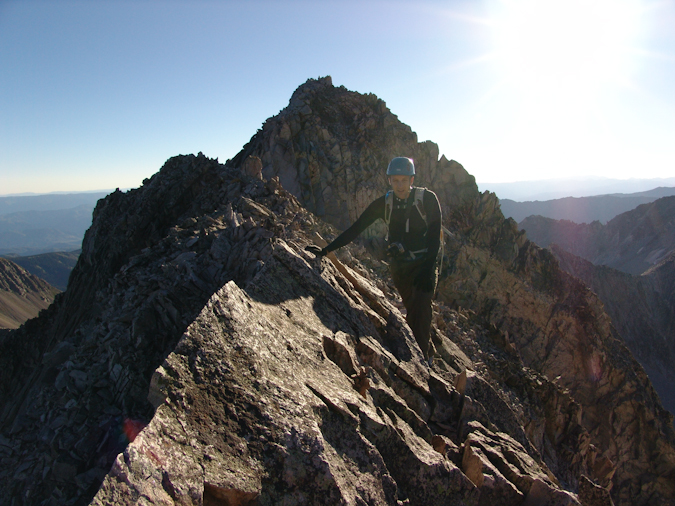
Mike with K2 in background.
At this point we knew we were quickly approaching the fabled Knife Edge. The North Face of Capitol Peak shot up like an angry beast from the pits of hell. Ok - maybe not that freakish, but it was sincerely one of the more impressive rock faces I've seen. Either side of Capitol presented thousands of feet of exposure and immediately reminded you of the need for caution and careful routefinding. A fall anywhere from here on would almost certainly be fatal.
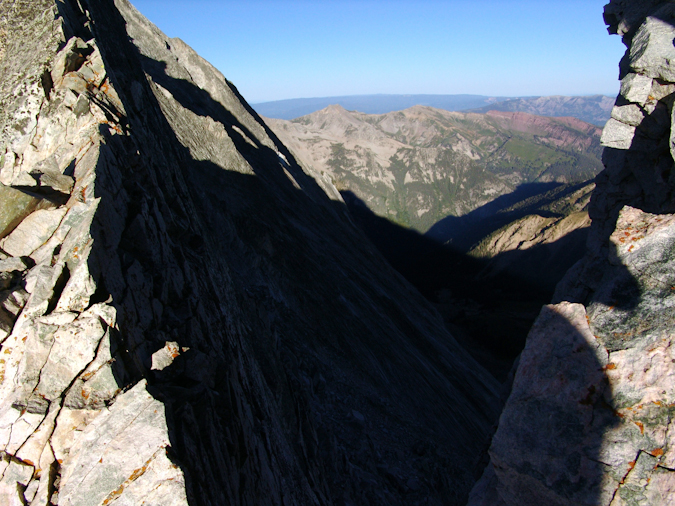
Capitol Peak's North Face - not a good place to fall.
Fortunately, the views from this part of the climb were unreal. The sun slowly rose above, providing light for the most incredible vistas of the Elk Mountains.
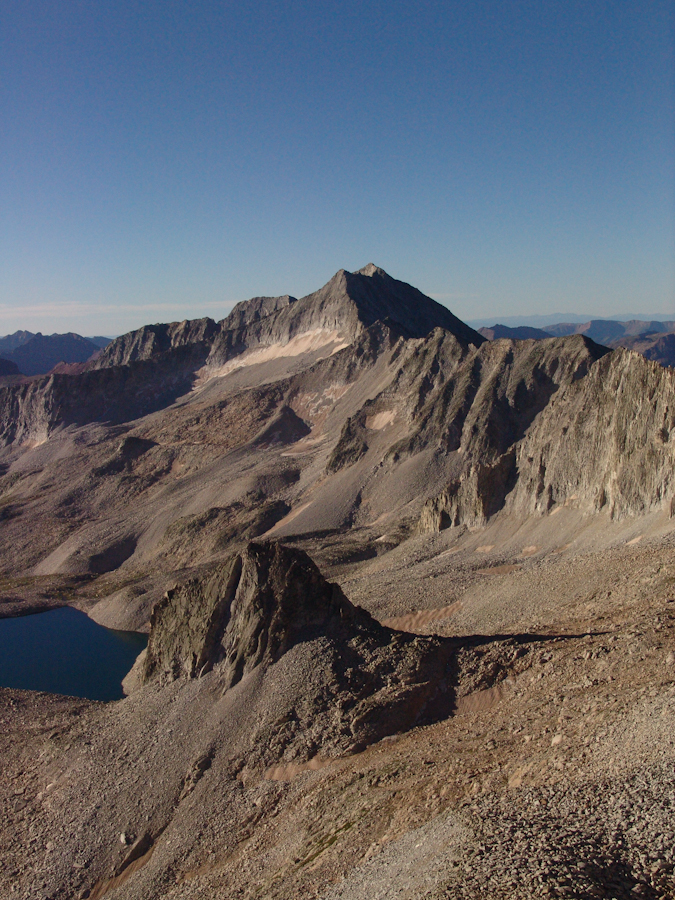
Snowmass Mountain, Capitol Peak's closest 14er neighbor.
We traversed across small ledges and quirky chimneys and found ourselves with what must have been the Knife Edge. K2's previously daunting surroundings now felt much easier.
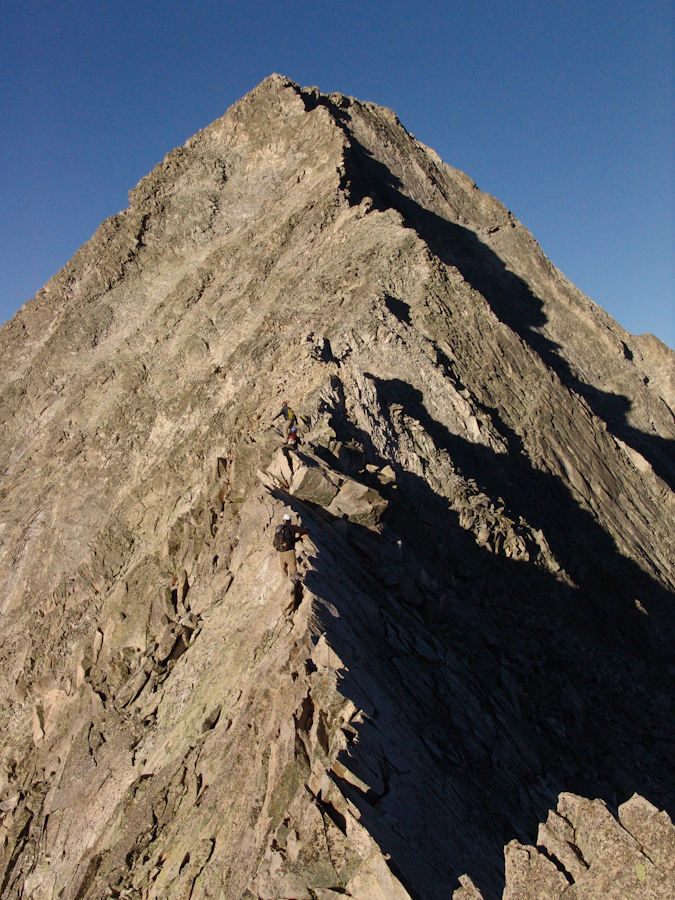
Nearing Capitol Peak's Knife Edge
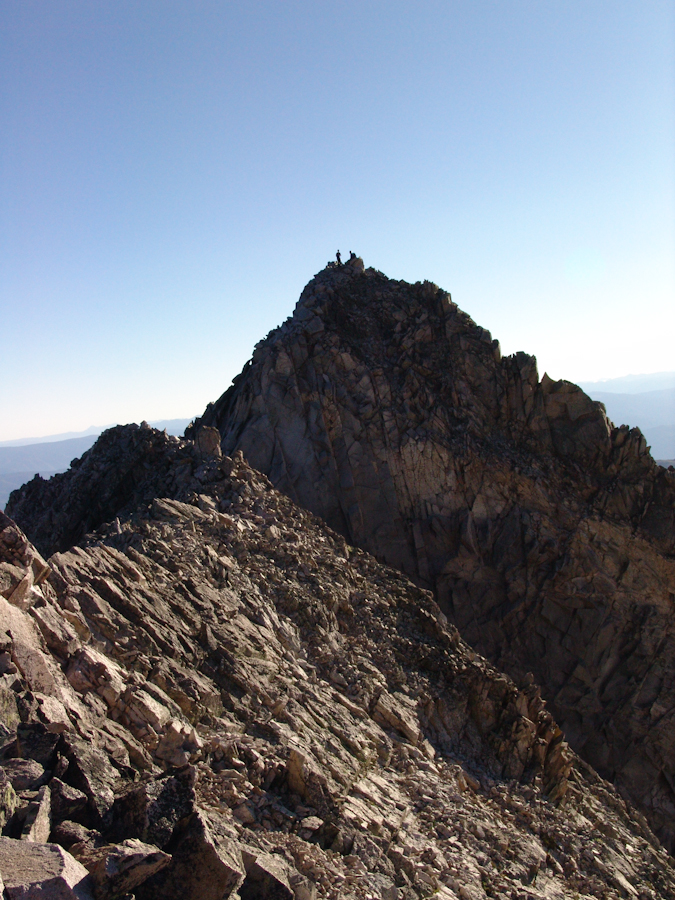
Looking behind: K2 and climbers reaching it's summit.
We finally reached the Knife Edge, gathered our wits about us, and gave it a go. The plan was for Mike to go first, and then to take video with his camera of us crossing. We watched the group before us, and they mostly employed a mix between the 'scoot on your ass' method and the 'hang from one side like monkey bars' method for crossing. We figured to follow suit, as both strategies seemed to appeal in their own ways.

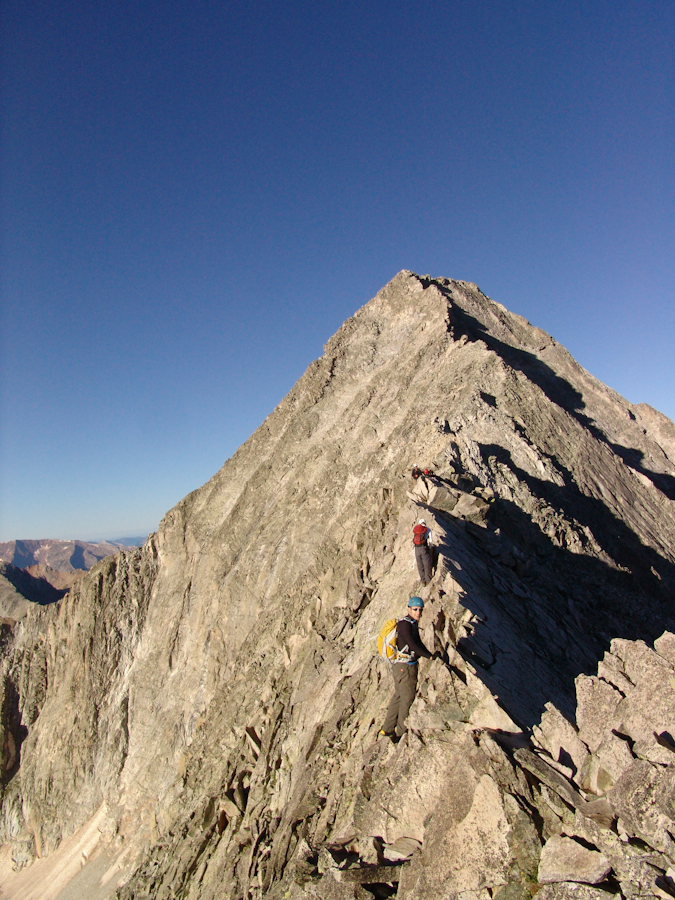
Mike Vetter ready to cross the Knife Edge.
Mike made it across without a hitch and took this revealing photo while crossing, looking down one of the sides. It goes to show how freaky and exposed it really was.
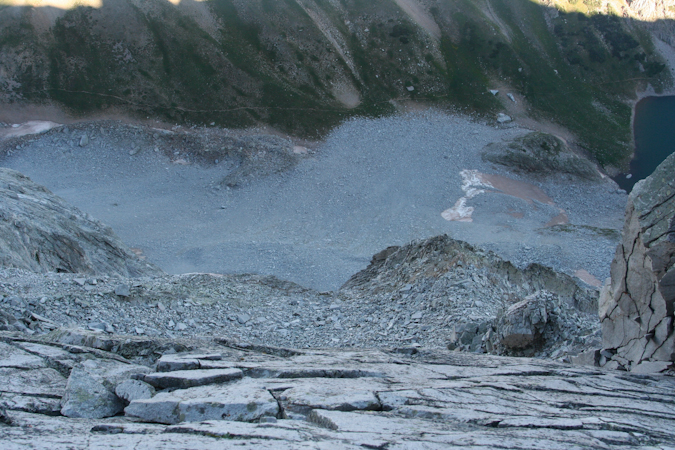
I crossed second, making sure I had perfectly solid holds on the rock as I crossed. I employed a mix between scooting and hanging from a side and made it across fairly quickly. The technical nature of the crossing is not terribly difficult or physically demanding; however, the mental requirement to cross was great, knowing that one mistake meant death. Needless to say, don't get yourself too hyped up for the Knife Edge. It is dangerous but the risk is quite manageable with caution, careful movements and mental toughness. I did find myself breathing heavily at the end, mostly from the excitement of the whole thing.
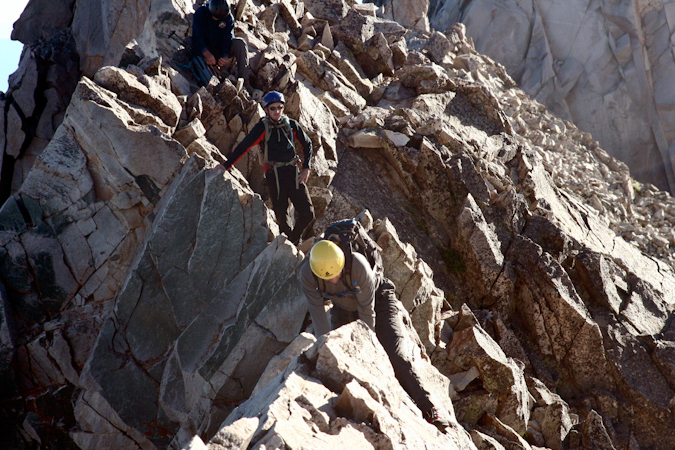
Matt Payne starts the Knife Edge - photo by Mike Vetter.
Mike compiled some video of our crossings of the Knife Edge and placed them on YouTube:
After the Knife Edge, the going got much easier, mostly a Class 3 / 4 scramble across a fun boulder ridge. We reached somewhat of an impasse about 3/4 to the summit, having to choose to either continue straight ahead and around the left side of Capitol per the standard route's description, or to head straight up to the ridge, ascending Class 5.2 / 5.3 terrain. Being the adventurers we are, we chose the latter and went straight up. The route was solid, challenging, and enjoyable, with minimal exposure and many places to rest. All in all, I would recommend taking the upper ridge route if you feel comfortable with light Class 5 climbing and steeper terrain. Never did any of us feel unsafe on this section; although, Travis did mention later that it was somewhat spooky for him. Fortunately, Travis is an excellent athlete and managed to power himself up the steep section without any problems. We were very cognizant of the rockfall potential, taking special caution not to pull rocks down on people below us.
Once reaching the ridge again, we stopped to rest and recoup our strength for the final summit push.
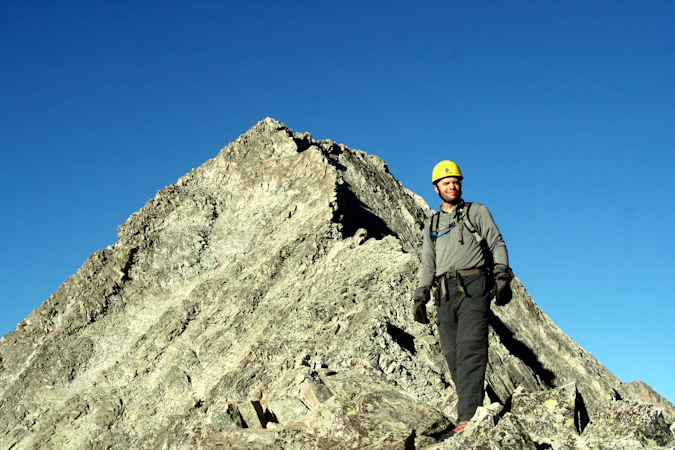
Matt Payne with Capitol's summit block. Almost there.
From here, the summit push was quite fun, with Class 4 and low Class 5 moves required. We were quite pleased with our choice to go the high route, enjoying both the challenge and the solidness of the route. We watched several climbers take the lower route, a looser, chossier, and less enjoyable section of the mountain.
Mike and I took some video footage of this section:
We reached the summit at 10:15 AM as one of the first groups up. The views were outstanding and the company was superb. A group from Ft. Collins joined us on the summit, and conversation quickly went to skiing Capitol Peak. Being probably the hardest 14er to ski, theorized on the possible ski routes and I swapped stories and names of climbers we both knew of that had either skied it or attempted to, referencing Brian Kalet and Jordan White of 14ers.com fame.
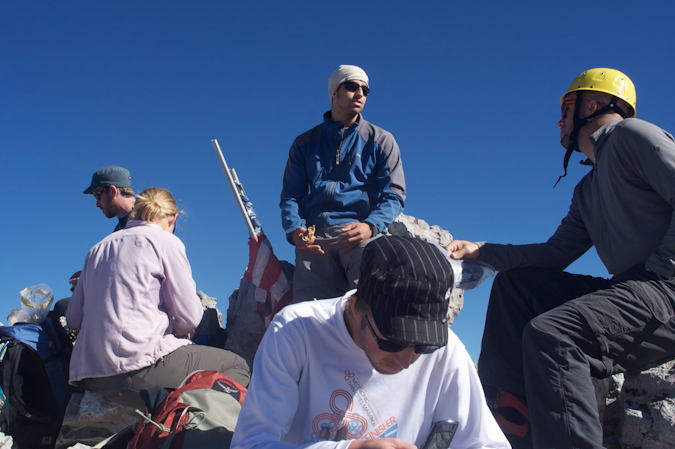
The summit party. Travis tinkers with his cell phone while Matt converses with fellow climbers.
After refueling with Resees Peanut Butter Cups and Raisins, I went on a photo frenzy.

A 3600 view from the summit of Capitol Peak. Click for high resolution view.
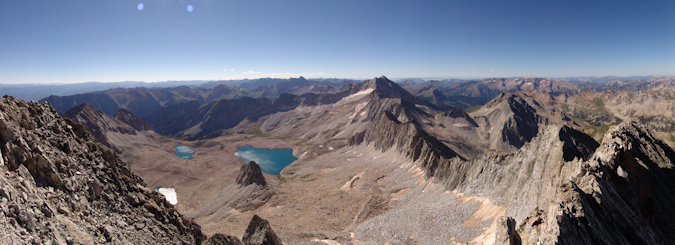
A panormaic view of the Pierre Lakes, Snowmass Mountain, and the rest of the awesome Elk Mountains.
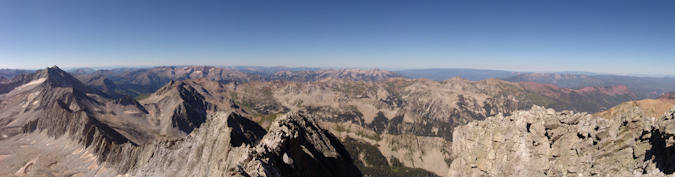
A panoramic photo looking north and west from Capitol Peak. The Snowmass - Capitol ridge strikes me as being quite impressive.
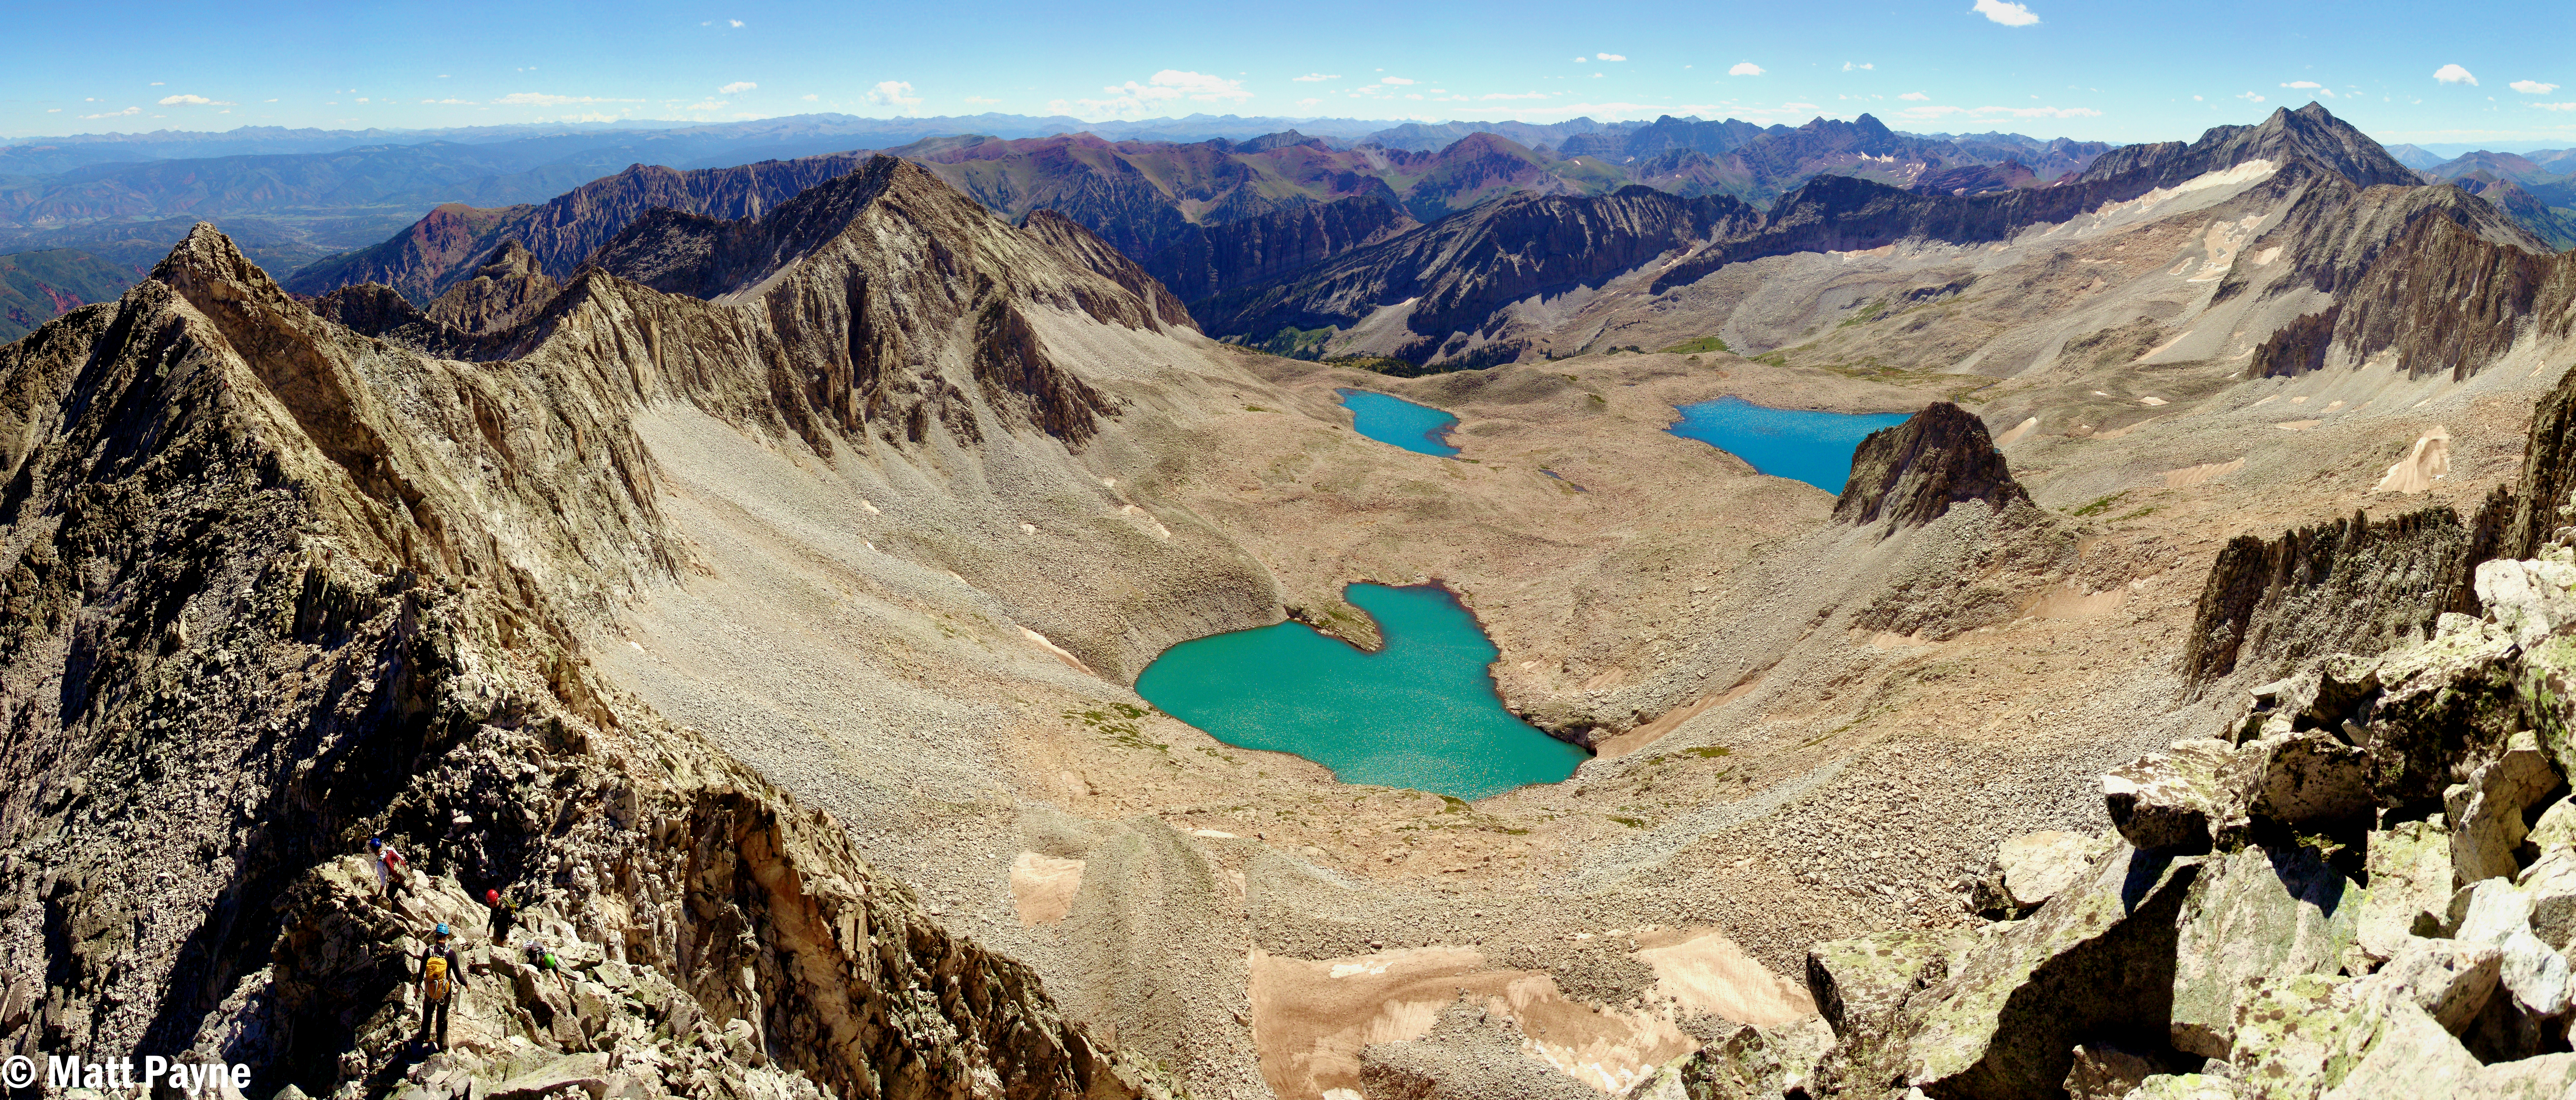
A massive panoramic photo of the Snowmass Basin, K2, Maroon Bells, and Snowmass Mountain. Click for high resolution version (26 meg file). How many climbers can you count?

A zoomed in panoramic photo of the Maroon Bells and Pyramid Peak. Click for full resolution version.

A super zoomed in view of the Maroon Bells.
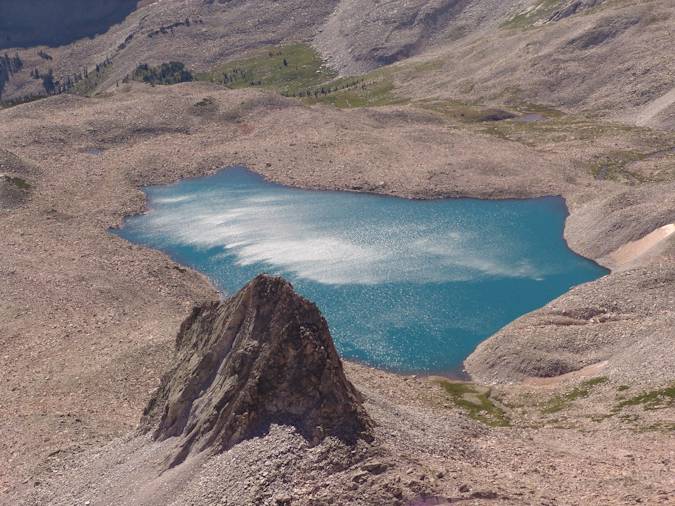
A zoomed in view of one of the Pierre Lakes.
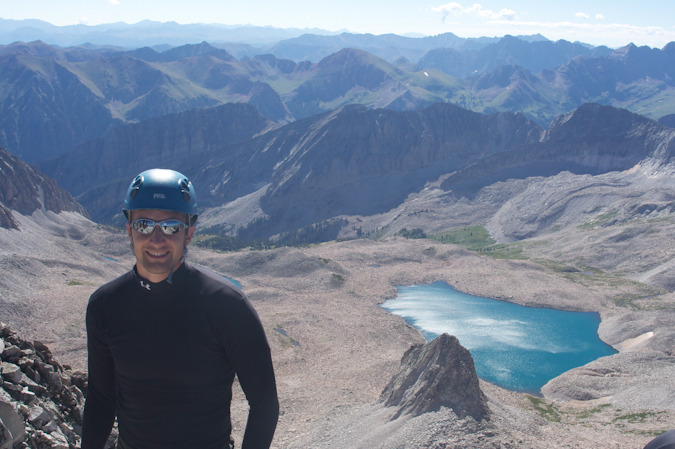
Mike Vetter on the summit of Capitol Peak.
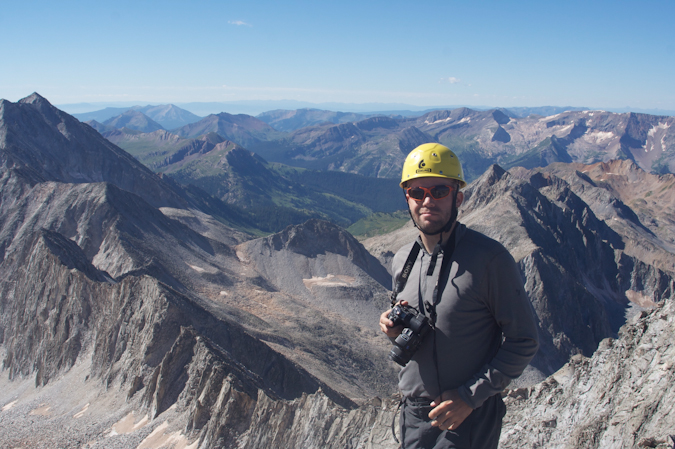
Matt Payne on the summit of Capitol Peak.
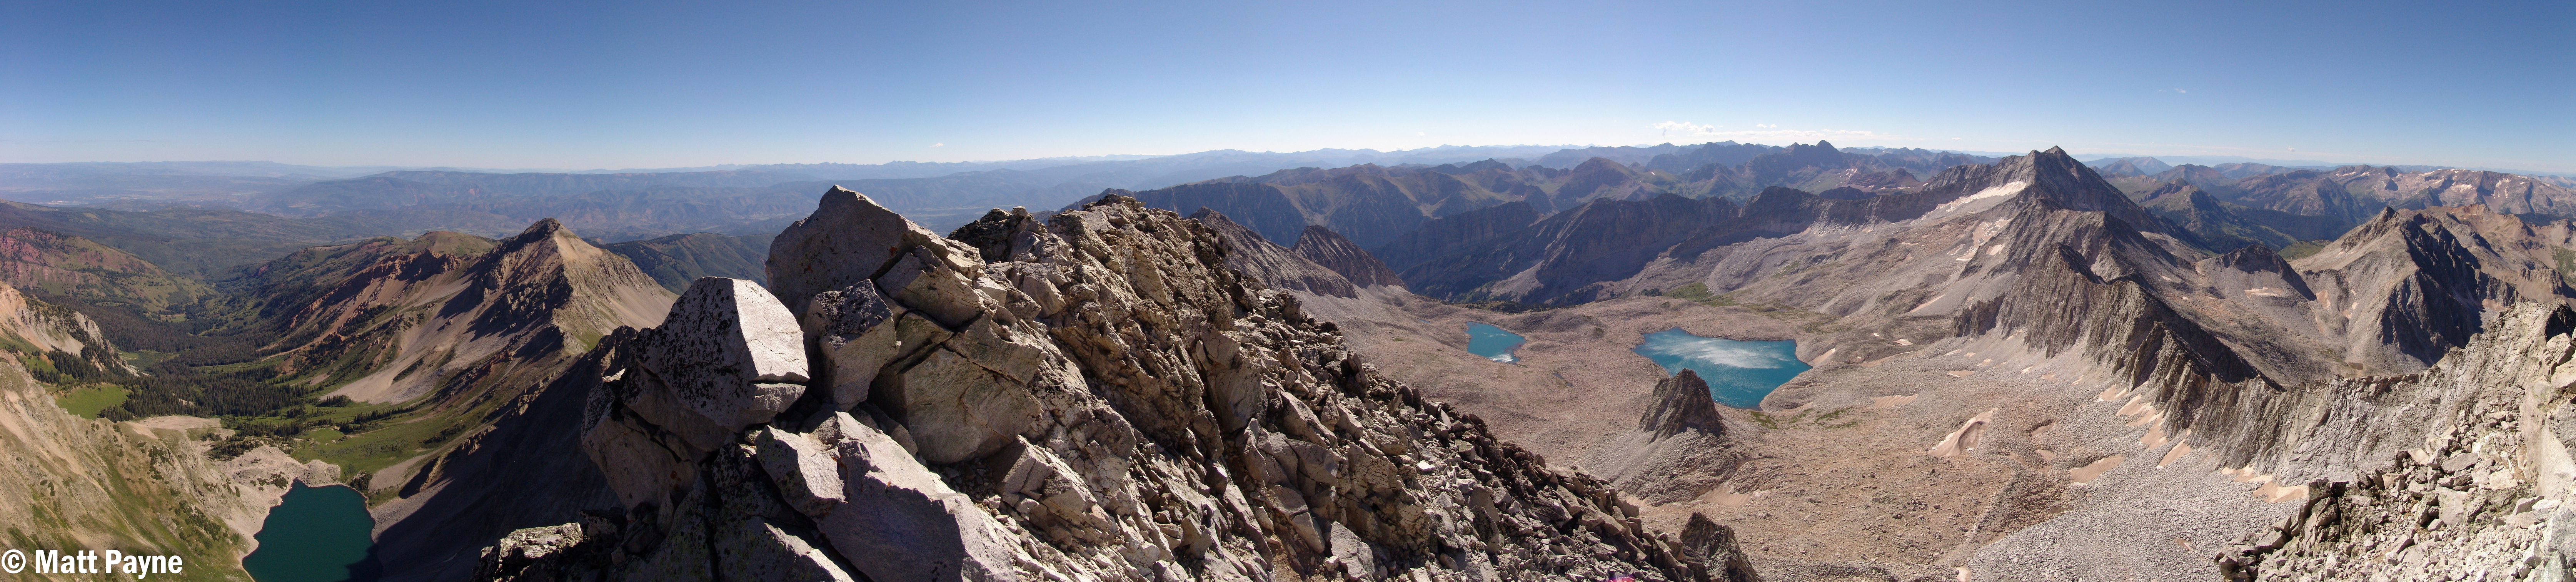
A panoramic view looking down at Capitol Lake, Mount Daly, and across Capitol's ridge to the Pierre Lakes and the rest of the Elk Mountains. Click for high resolution version.
Mike was able to capture some video from the summit as well:
With no threat of weather in any direction, we decided to hang out on the summit for about an hour, enjoying the views. We eventually headed down and chose to follow the standard route. The rock was nasty through this section of down-climbing, and required good concentration, footing tests (make sure the rock does not fall when you step on it), and patience. Most accidents occur on the way down, so we were vigilant and cautious. Travis was able to capture this perspective of the rock and exposure beneath us on the down-climb.
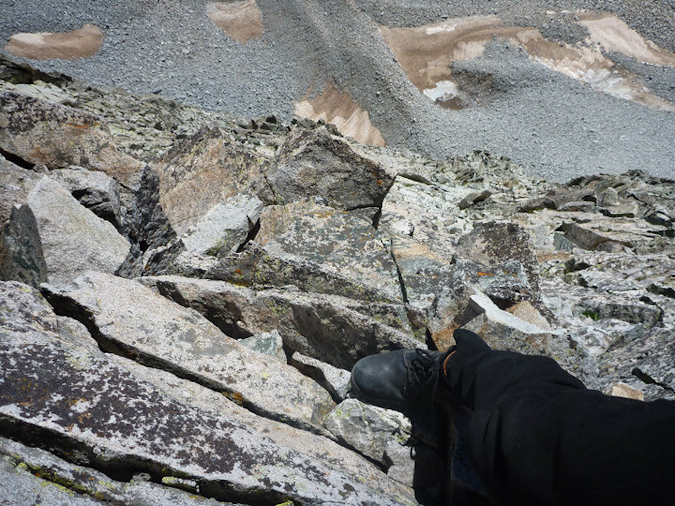
Travis plants his foot firmly on a ledge during the down-climb from the summit of Capitol Peak.
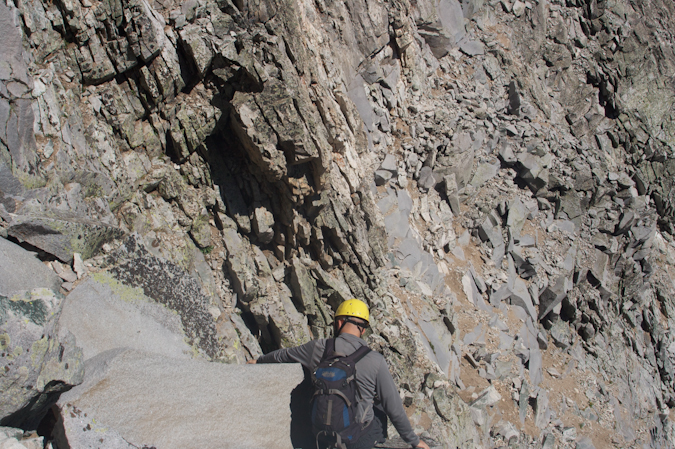
Matt Payne carefully down-climbs from Capitol Peak.
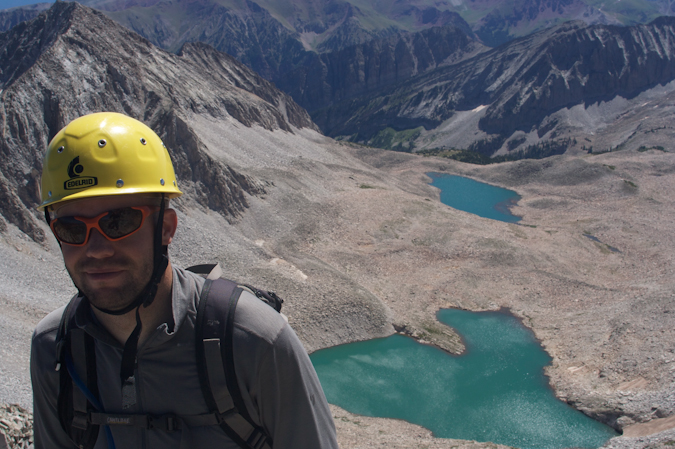
Matt Payne with one of the Pierre Lakes in background.
About halfway back to the Knife Edge, a group of climbers were coming up Capitol below us, without helmets. They asked us if this was the way to go and we responded that it was one of the ways up. It surprised me to see how oblivious they were that we were climbing above them on loose rock. I ordered my group to stop moving until they were in a safe location below us. It really is no wonder that more people do not perish on these mountains. Ironically and sadly enough, we later learned that a 20-year-old hiker died the day before on Maroon Peak from rockfall that had come from above him. Even though he was wearing a helmet, the rock that struck him had enough force to knock him loose from the mountain and caused him to fall to his death. I strongly believe that if people took more caution and paid attention to their surroundings and used some common sense, there would be less deaths. If you need a good climbing helmet, check out this one.
We reached the Knife Edge at approximately 12 PM and crossed it in much the same fashion as before, except this time, I went first. I generously used the 'scoot on your butt' maneuver to get across.
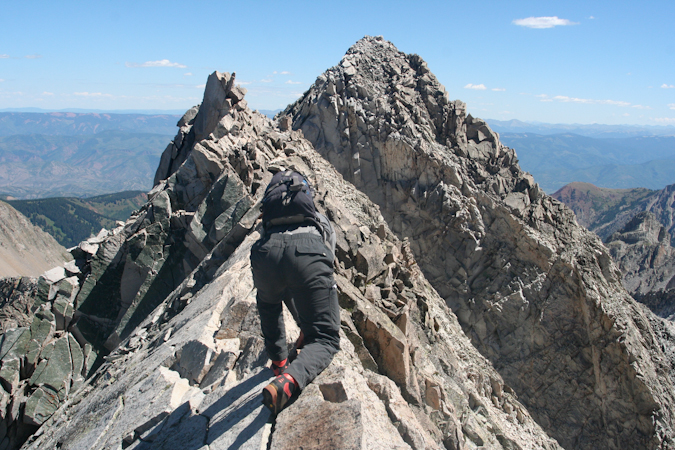
Matt Payne crosses back over the Knife Edge on Capitol Peak, heading towards K2.
Mike captured yet another great shot from the Knife Edge, looking down at Capitol Lake:
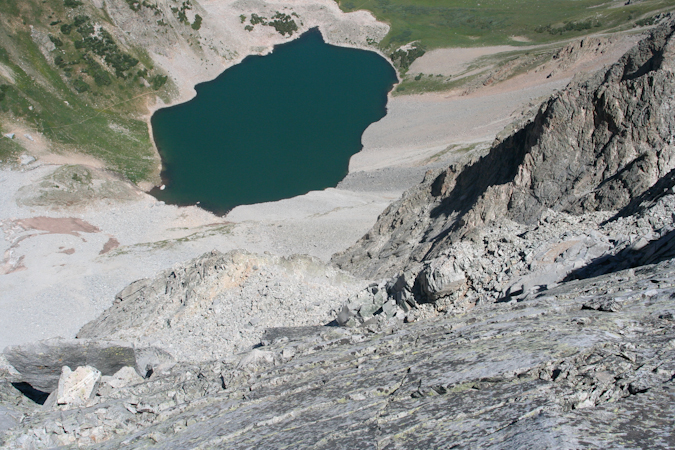
The climb back down from K2 was fairly straight-forward but tiring. We were ready for some pizza at Beau Jo's Pizza, no doubt. We finally reached the snowfield again, and it was much softer this time, with rivers of slush flowing down it. It was somewhat scary, but I tested the footing and it felt great, so we crossed again.
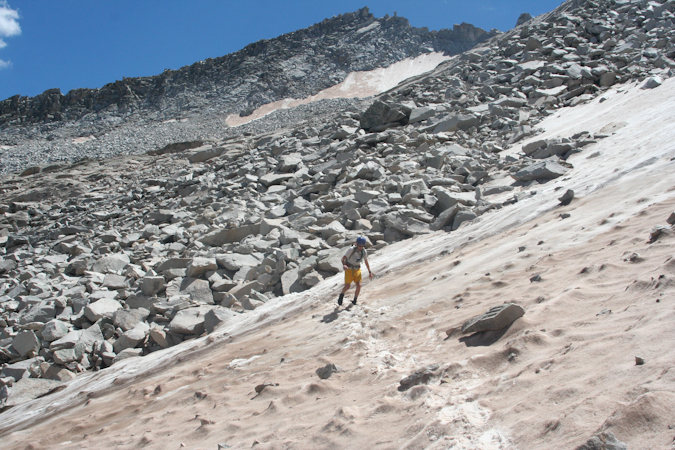
Travis Arment crosses the snowfield beneath K2. Photo by Mike Vetter.
We made great time back to the Daly - Capitol saddle and I sprinted the last stretch to the saddle, anticipating the victorious beer that would be consumed once back to civilization.
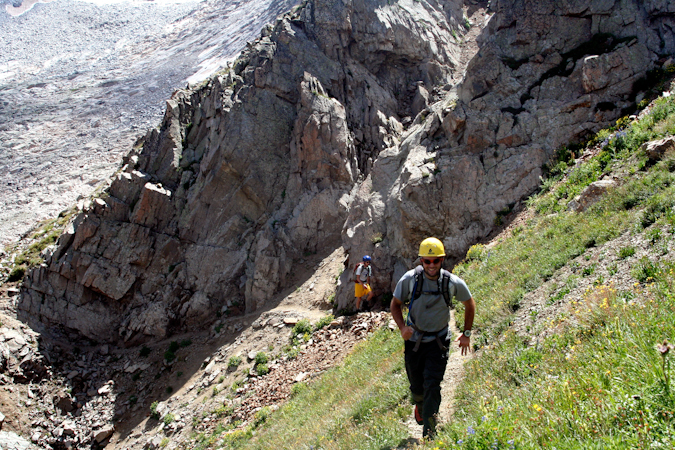
Matt Payne runs the final section on the back side of the ridge between Capitol and Daly. Photo by Mike Vetter.
On the way down the hillside, Mike stopped to take some great shots of the wildflowers found on Capitol's northeast shoulder:
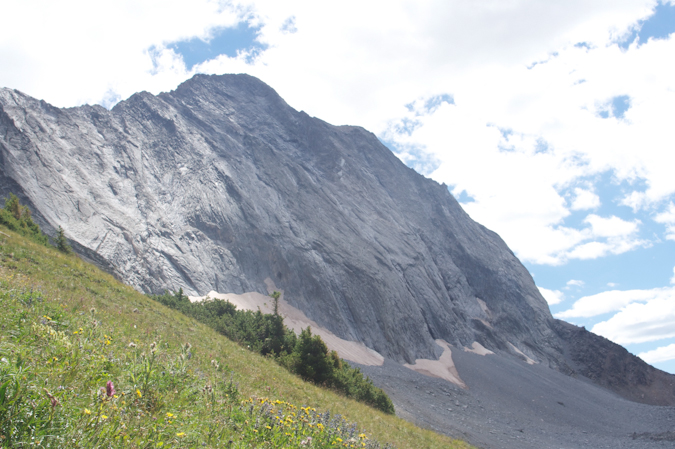
We made it back to camp at 2:15 PM and packed up. We refilled our water and headed out. Travis and I were motivated solely by the prospect of cold beer and fresh pizza.
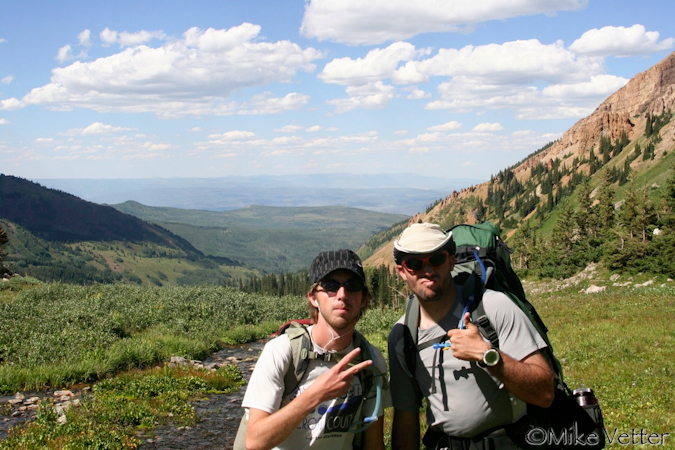
I hope you enjoyed this trip report. We surely enjoyed the trip and I personally can't wait to join Mike and Travis for our next adventure.