Displaying items by tag: Summit
Glossary of Colorado Mountain Climbing Terms
A Glossary of Colorado Climbing and Peakbagging Terms
Inclusion criteria for summits on 100summits.com is somewhat different than other lists on the web. I realize that there is no accepted standard for defining a summit, in fact, Wikipedia suggests that "there is no universally-accepted definition of a mountain. Elevation, volume, relief, steepness, spacing and continuity has been used as criteria for defining a mountain." The Oxford English dictionary defines a mountain as "a natural elevation of the earth surface rising more or less abruptly from the surrounding level and attaining an altitude which, relatively to the adjacent elevation, is impressive or notable." Many sites (Vulgarian Ramblers, ListsofJohn, etc.) use the rule that the summit must have 300' of topographical prominence in order to be considered a mountain. While this metric is very good at distinguishing summits from false summits, it fails to recognize summits that are clearly summit-worthy, or have other features that would lure a person to want to climb or hike to the top of it. Many names of summits are found on the USGS maps. Those summits that are not found on USGS maps are either provided with nicknames given by local mountaineers, or they are designated by the prefix "UN" followed by the elevation of the summit.
Elevation is simply the height of the summit above sea level, in feet or meters. All data shown in the table is in feet; however, the elevation for each summit in meters can be found in the details page of each summit. Elevations are generally shown on each USGS 7.5 minute quadrangle for each summit. When elevations are not shown on the map, they are interpolated by looking at the closest contour line to the summit.
A summit in Colorado is defined as ranked if it rises at least 300' above saddles to higher summits (also known as topographical prominence). Summits in Colorado have been ranked this way for many years, and the 300' rule has been widely accepted by the mountaineering community as a very effective and arbitrary way to rank Colorado's summits. An "S" designation or "Soft Rank" means the summit could qualify as a ranked summit if extrapolated elevations were not used for the summit and/or interpolated elevations were not used to determine the elevation of the Prominence Saddle. When summits have the same elevation, ranking is determined in the following order: (1) Elevation, (2) Prominence, (3) Isolation, and lastly (4) alphabetically. A green checkmark indicates that the summit is ranked, while a red "X" indicates that the summit is not ranked.
The Prominence of a summit is its rise above the highest saddle connecting the summit to higher ground, otherwise known as the Prominence Saddle. In other words, the Prominence of a summit is it's height above the lowest contour line encircling it and no higher summit. Prominence is the elevation of the summit minus the elevation of the Prominence Saddle. Given elevations in a saddle are used, but only if they represent the low point of the saddle. Many climbers rate mountains solely based on its Prominence, rather than its elevation. If you personally feel that Prominence is the most important feature of a summit, you can filter the summit table to show the most prominent peaks in Colorado. On the summit table, Prominence is shown in feet; however, the detailed view of the summit also shows the Promience in meters. Wikipedia.org provides this great diagram, visually explaining Prominence:

Vertical arrows show the Prominence of three peaks on an island. A dotted horizontal line links each peak (except the highest) to its Prominence Saddle.
The Promience Saddle is the low point of the highest connecting ridge to an elevation greater than the summit's maximum elevation. When multiple saddles are present but not on the same connecting ridge, the Prominence Saddle is selected by determining which saddle has the shortest distance to a line parent.
Spire Measure or Omnidirectional relief and steepness (ORS) is an absolutely brilliant concept that was developed jointly by David Metzler and Edward Earl. David Metzler graciously and laboriously provided all of the ORS data for every single summit in the 100summits.com database. ORS is a purely objective summit measure which takes into account how high the peak rises above local terrain, and how steeply. Since it is a local measure it does not take absolute elevation into account, only the relative height of the summit above its surroundings. So for example a lot of the Colorado Fourteeners get low ratings, since many of them are not very steep and rise from high bases. Also, it is an omnidirectional measure, so it averages out how steep a peak is in all directions. Hence something like El Capitan in California gets a pretty decent rating, but not as much as if it were a spire which was sheer in all directions. Hence the old name "spire measure"; while something does not have to look like a spire to get a decent spire measure, the more a peak is shaped like a big, steep pointy spire, the higher its spire measure will be. However ORS measures any landscape feature, not just spires; hence the name ORS. Learn more about the theory behind the ORS measurement.
ORS thus roughly measures the visual "impressiveness" of a summit, since peaks which rise high and steeply above their surroundings tend to be the most visually impressive. ORS also acts as a very rough measure of how difficult a peak is to climb, since it factors in steepness and height. However there are many other factors which determine how impressive a peak looks (a subjective notion, after all) and how hard a peak is to climb. It is important that ORS is not claimed to match any particular person's notion of impressiveness or climbing desirability.
It should also be noted that the ORS data for summits on 100summits.com does not factor in the fact that a summit could very well be a sub-peak of another summit, which can significantly reduce the ORS score of a summit. In fact, David Metzler has created another measurement that factors in the degree of independence a summit has from a larger, more impressive summit that it is adjacent to. This measurement is called Reduced Omnidirectional relief and steepness (RORS). Roughly, this measurement takes the spire measure of the summit in question and subtracts off a piece for each nearby better peak, based on how close together they are.
Lastly, it should also be noted that oftentimes the best ORS point is not a peak (i.e. it has little or no prominence). Hence making a peak list using prominence as a cutoff and then ranking the resulting list using ORS can be misleading, as it can totally miss some of the best features. An example of this is the Black Canyon of the Gunnison. This issue comes up frequently for a fair number of summits, where the best spot to measure ORS is not exactly at the true summit. For example, Longs Peak would score much higher in ORS if the measurement were taken closer to the steepest face as opposed to the actual summit. In those cases the true summit value is an underestimate of the quality of the peak
The Class of a summit refers to its subjective rating on the Yosemite Decimal System (YDS). A summit's Class is a measure of the difficulty of a peak in terms of climbing skills required, without regard to duration of the climb or the duration of the difficulty. The Class listed indicates the easiest ascent possible for the particular summit. By adding the summit as one you have climbed, you can designate your own Class rating based on the route you used to reach the summit. It should also be noted that a summit's Class is based by the hardest move on the route taken. For example, if a summit is very easy except for the summit block, where there is a 5.8 move, the route would be rated 5.8. The specific classes are defined by Wikipedia as follows:
- Class 1: Walking with a low chance of injury.
- Class 2: Simple scrambling, with the possibility of occasional use of the hands. Little potential danger is encountered.
- Class 3: Scrambling with increased exposure. A rope can be carried but is usually not required. Falls are not always fatal.
- Class 4: Simple climbing, with exposure. A rope is often used. Natural protection can be easily found. Falls may well be fatal.
- Class 5: Technical free climbing involving rope, belaying, and other protection hardware for safety. Un-roped falls can result in severe injury or death.
Class 5 is subdivided even further, ranging from 5.0 to 5.13.
In Mountaineering, Freedom of the Hills, author Ed Peters explains the subdivisions of class 5:
"The experienced climber, having accomplished or attempted free climbs of varying degrees of difficulty in the YDS class 5 range, gains an understanding of the level of difficulty involved. To the beginner, however, these ratings are simply a set of numbers, understandably, easy if rated 5.0 and impossible if rated 5.13. To provide a slightly better understanding within the class for the beginner the following tongue-in-cheek description is provided:
- 5.0 to 5.4: There are two hand- and two footholds for every move; the holds become progressively smaller as the number increases.
- 5.5 to 5.6: The two hand- and two footholds are there, obvious to the experienced, but not necessarily so to the beginner.
- 5.7: The move is missing one hand- or foothold.
- 5.8: The move is missing two holds of the four, or missing only one but is very strenuous.
- 5.9: The move has only one reasonable hold which may be for either a foot or a hand.
- 5.10: No hand- or footholds. The choices are to pretend a hold is there, pray a lot, or go home.
- 5.11: After thorough inspection you conclude this move is obviously impossible; however, occasionally someone actually accomplishes it. Since there is nothing for a handhold, grab it with both hands.
- 5.12: The surface is as smooth as glass and vertical. No one has really ever made this move, although a few claim they have.
- 5.13: This is identical to 5.12 except it is located under overhanging rock.
RJ Secor defines the classes bluntly:
- Class 1: you fall, you're stupid.
- Class 2: you fall, you break your arm.
- Class 3: you fall, you break your leg.
- Class 4: you fall, you are almost dead (i.e., you can't breath and move your arms, legs, and head).
- Class 5: you fall, you are dead.
Before one can fully understand Interpolation, it is helpful to understand how topographical maps graphically represent data through the use of contour lines. A contour line is a line that connects points of equal elevation. The contour line traces the outline of the terrain at evenly spaced elevations. These are determined by the contour interval. The contour interval is found below the map scale. In Colorado, the 7.5 minute USGS Quadrangles have 40' contour intervals. That means that every time you go up to another line the elevation increases by 40 feet and every time you go down a line the elevation decreases by 40 feet. Notice how the contour lines define the shape of the mountain. The lines are closer together where it is steeper. The spacing between the lines decreases as the slope of the mountain decreases.
Interpolation is a calculation of the mean of the maximum and minumum possible elevations within a contour interval. For example, a summit without a listed elevation on a 40' contour map with a highest contour of 12400' has elevation possibilities between 12400' and 12440' (12440' would be the next contour if one were present). The mean of these is 12420'. Sometimes field observation (actual in-person visualization) will reveal a higher summit location than maps indicate. In these cases, interpolation may be performed to average the spot elevation and the next higher contour rather than between contours. When a summit does not have an elevation on the USGS map, the summit elevation is calculated by extrapolating above the summit’s highest closed contour by half the contour interval.
Huron Peak and Browns Peak - a Sawatch Throwdown!

Interesting statistics:
Start time: 5:30 AM
Summit time (Huron): 9 AM
Summit time (Browns): 11 AM
Finish time: 1:20 PM
Mileage up: 3.6
Mileage down: 4.2
Total mileage: 7.8
Huron Peak Elevation: 14,003 ft.
Browns Peak Elevation: 13,523 ft.
Total elevation gain: 3,900 ft.
Total photos taken: 219
GPS map of our route (ascent in red, descent in blue):

This trip report begins with an interesting back story. I had a new member join my site in May from South Dakota. This member eventually messaged me on Facebook and asked if he could join me on some of my climbs this year. After learning about my plans to attempt Huron that very weekend, he decided to join me. Mike Vetter drove all the way down from Sioux Falls, South Dakota on Saturday, June 5th to climb with me. Mike is the CEO of DataSync - a successful start-up software company. Our route to reach the trail-head was very simple: we drove west on Highway 24 to Buena Vista and turned left on Chaffee County Road 390 heading west. After driving about 14 miles on a dirt road, we turned left at the old mining town of Winfield and continued west another 2 miles to our campsite near the trail-head. We left my house at about 6:30 PM and reached our campsite near the Huron trail-head at approximately 10 PM.
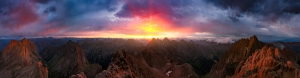
On the way to Buena Vista, we were able to get some great views of the sun setting over the Northern Sangre de Cristo Mountain range:
We set-up our tents in the dark and set our alarms for 4 AM and hit the sack. A few cars drove past during the night, presumably looking for camp spots. Fortunately, the vehicles did not disturb my sleep too badly and I was able to get some quality rest. The alarm sounded at 4 AM and I hurried to get dressed and tear down my tent. As we were getting camp taken down, a skiier passed us, informing us that he was going to ski down Ice Mountain. I'm pretty sure this person was "benners" from 14ers.com. We were able to quickly break down our campsite and cook some oatmeal for breakfast before debarking for Huron's trail-head at 5:30 AM.
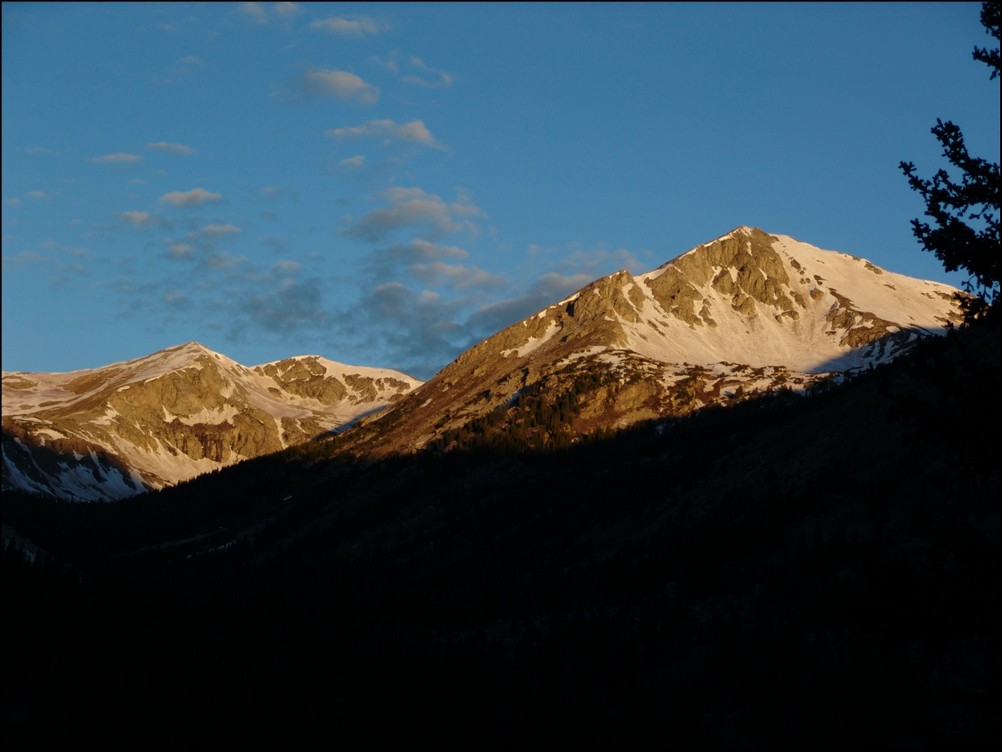
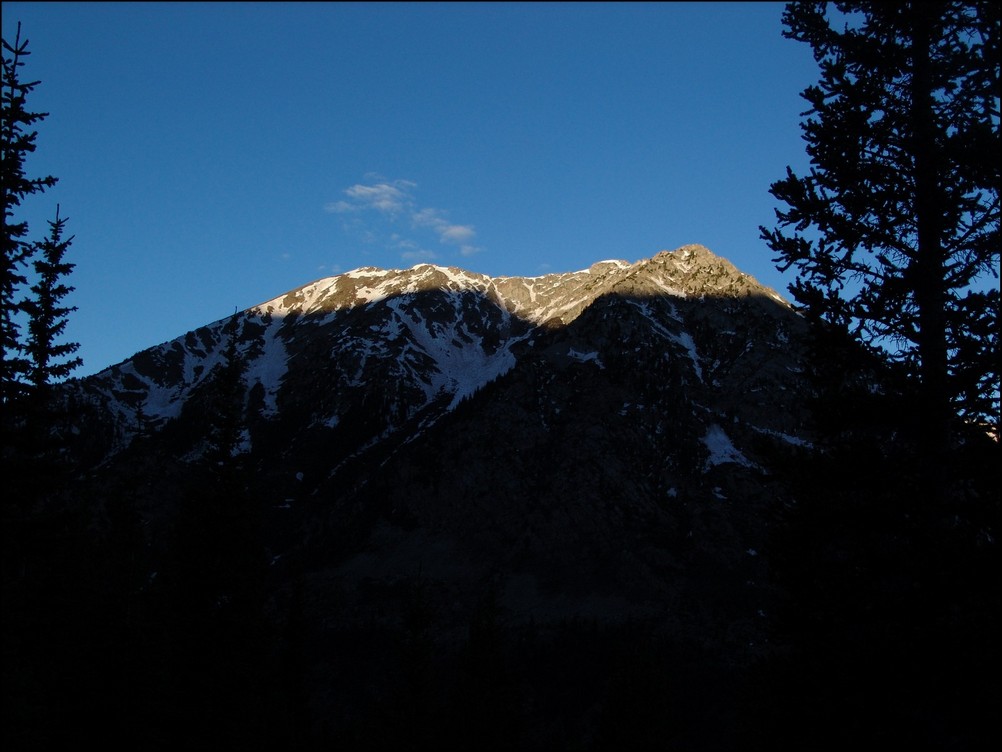
Mike and I were able to make quick work up to the trail-head and soon there-after, the sun broke through to light up the tips of the surrounding peaks in Silver Basin, including Virginia Peak and Granite Mountain:

Silver Basin illuminates a small lake

A closer look at the sunrise

Virginia Peak (right of center)
Virginia Peak
Sunrise hitting Granite Mountain

Sunrise hits Granite Mountain and Virginia Peak
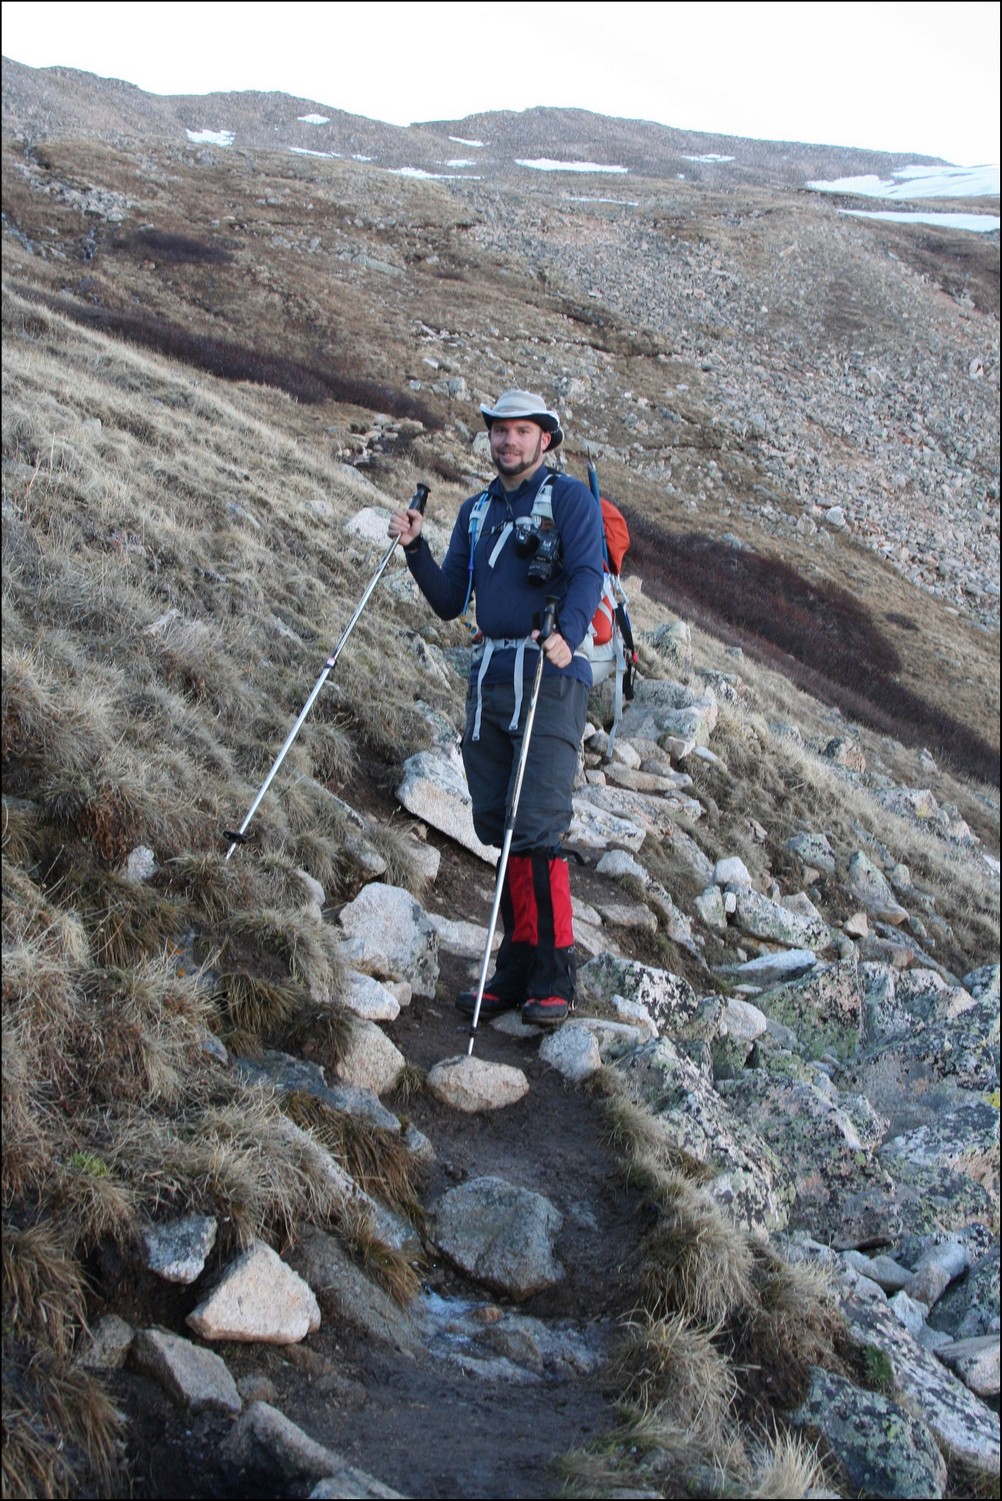
Mike and I were energized by the great views of the valley across from us and made excellent time up the steep trail. Mike kept up with me as we blazed the trail. He did amazing considering he lives at 1,442 ft. and was not acclimated to the high elevation of Colorado yet.
<p
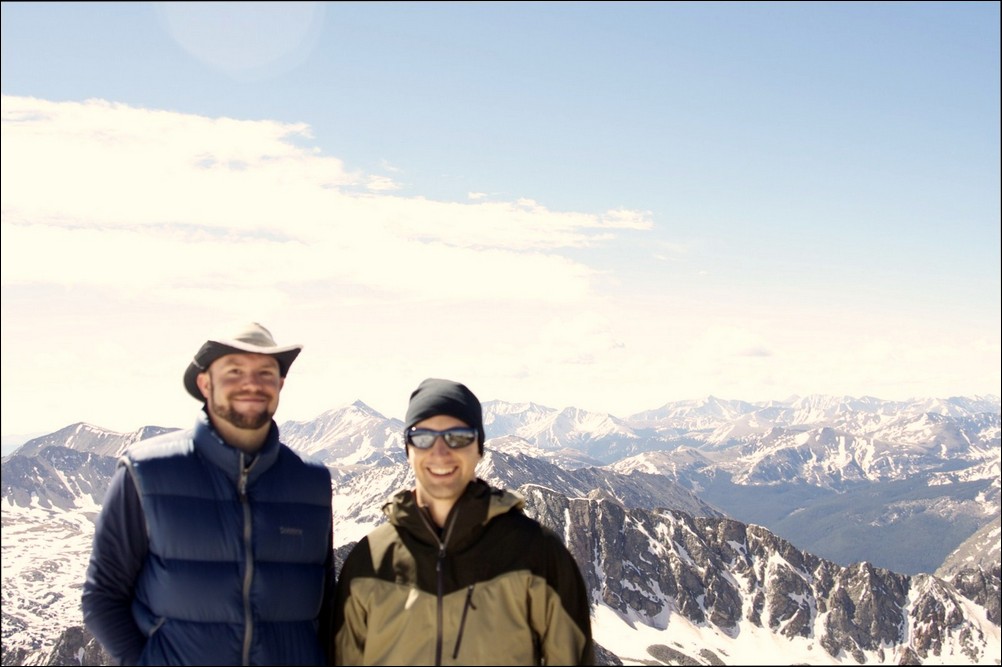
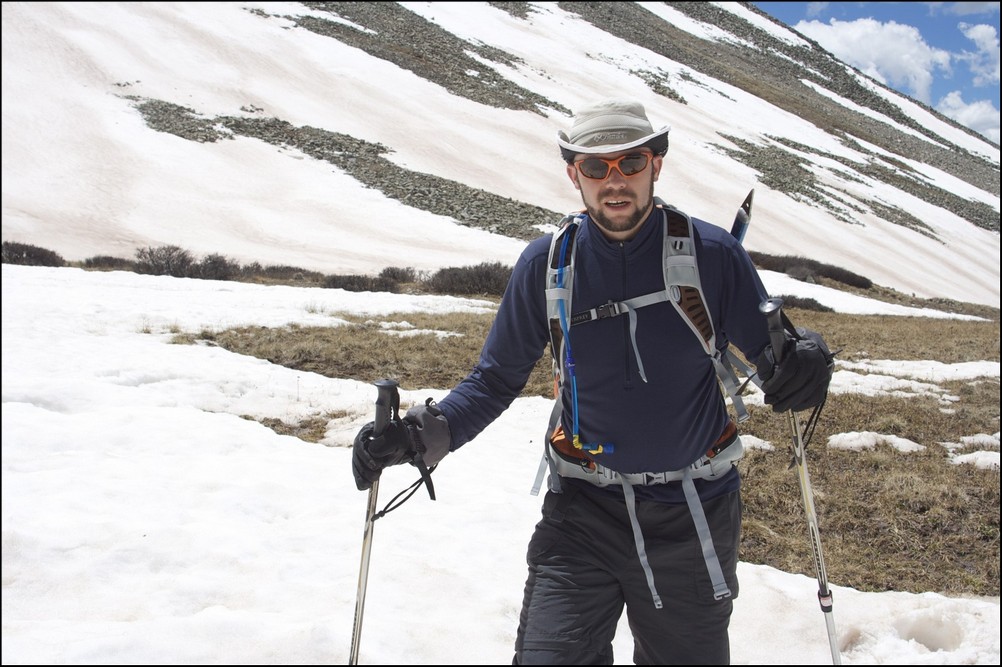
Mike Vetter proves he's got what it takes to climb mountains in Colorado

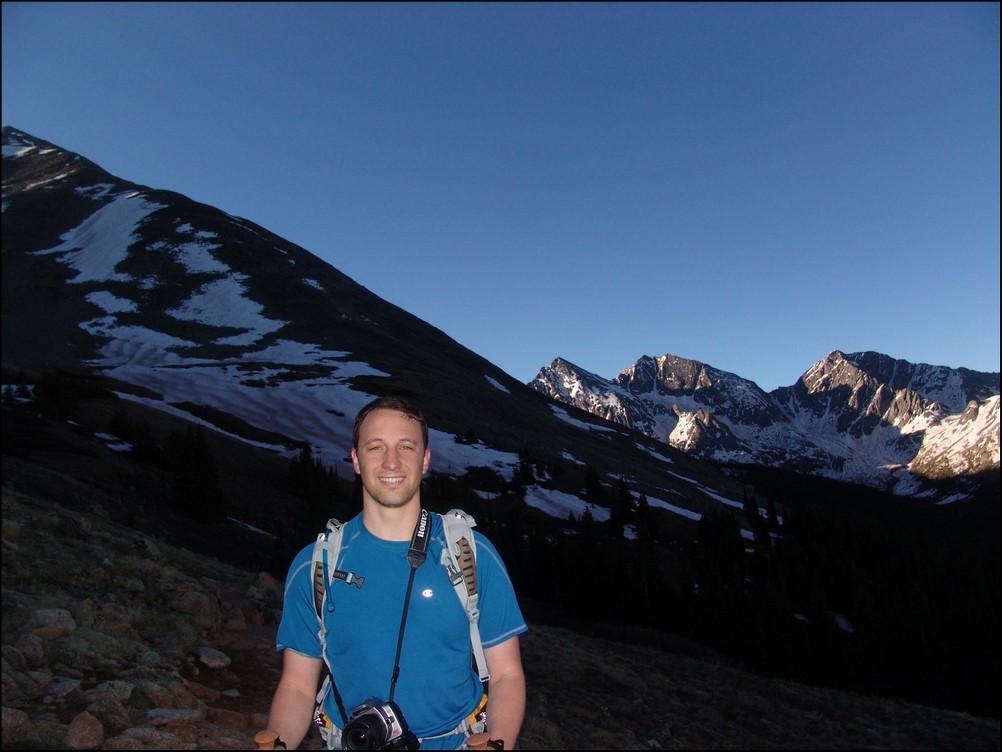
Matt Payne (author) hiking up Huron
An hour and 15 minutes after we started hiking from our camp, the first view of the Three Apostles came into view. The Three Apostles are a group of 13ers located up the valley from Huron, and contain two of the highest 100 in Colorado, Ice Mountain (13,951 ft.) and North Apostle (13,860 ft.). West Apostle is also respectable at 13,568 ft.

The Three Apostles come into view for the first time
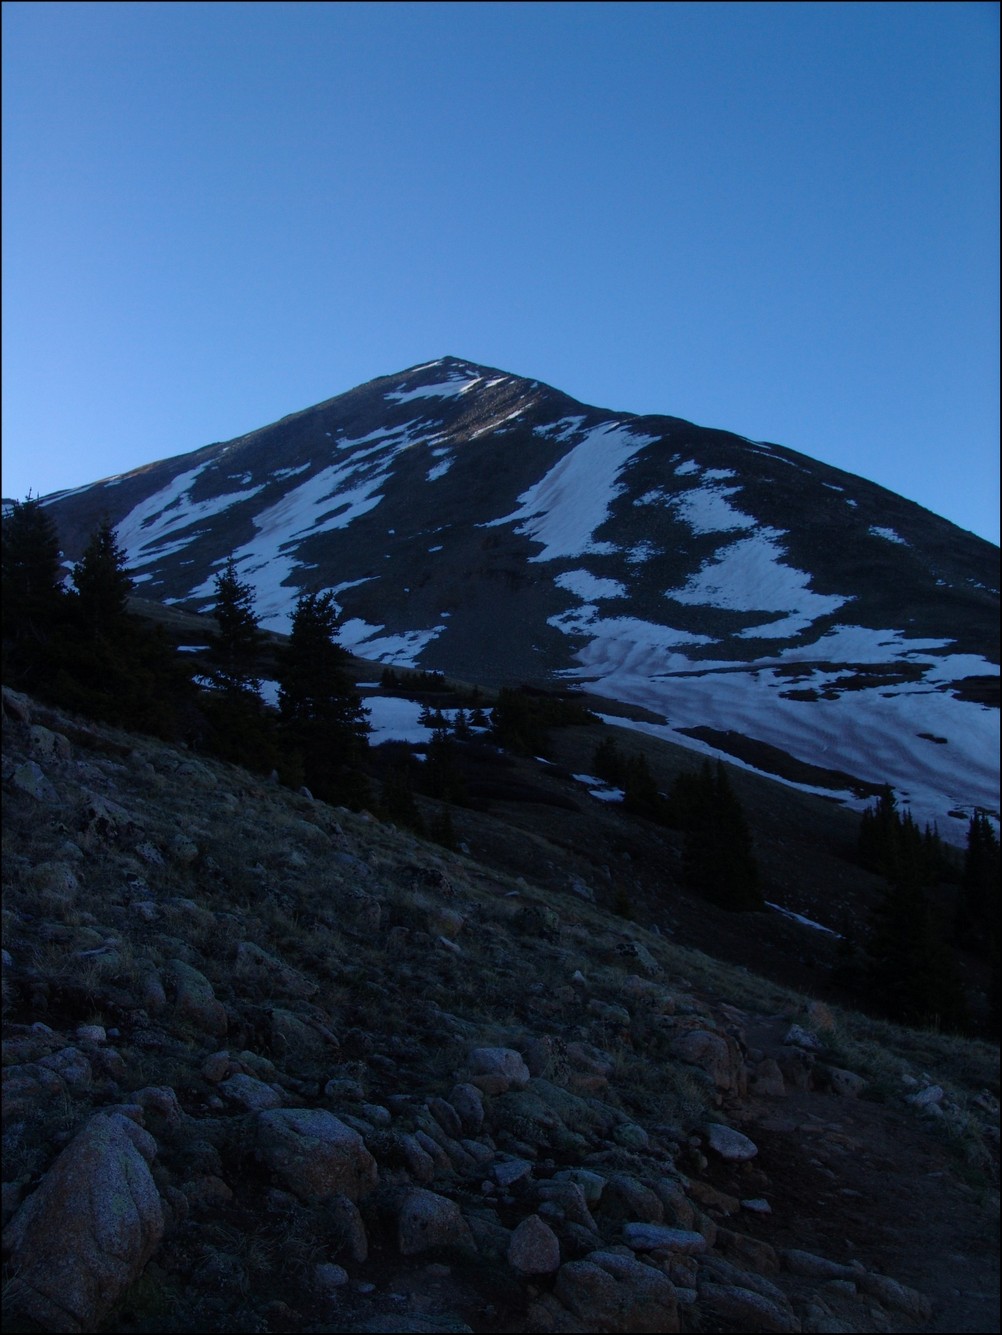
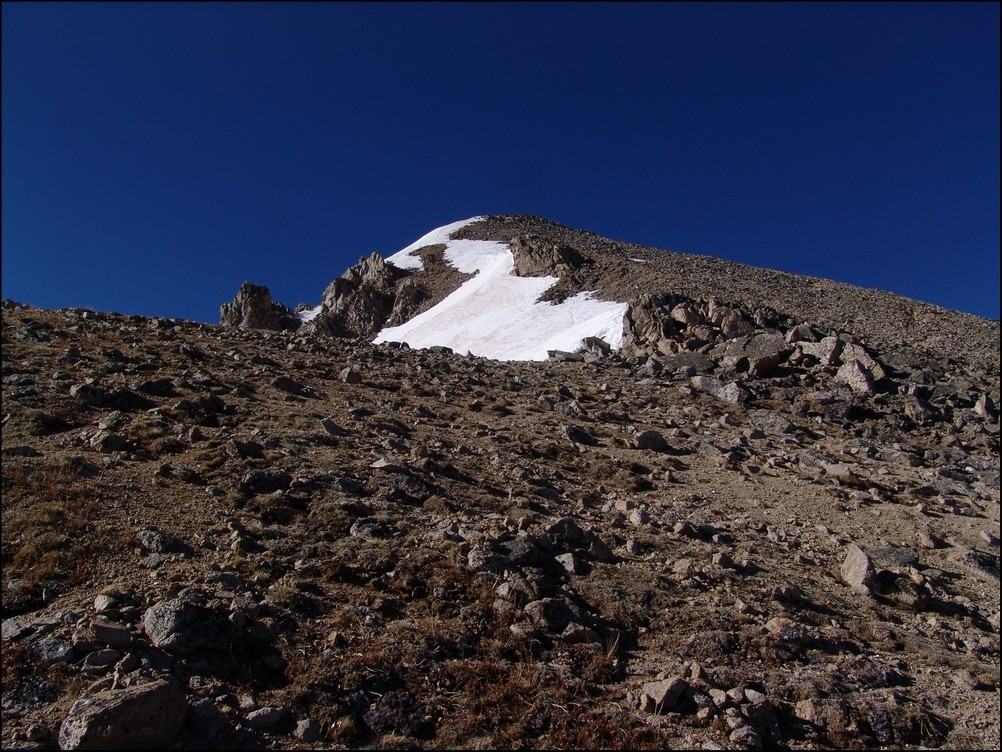
Soon thereafter, one of our objectives for the day came into view as well: Huron. Huron appeared above us like a giant pyramid, as if it were guarding some ancient treasure within its rocky shell.

Huron Peak comes into view for the first time

The moon sits over Huron Peak
Huron Peak in the early light

Huron, the Three Apostles, and Granite Mountain greet the rising sun
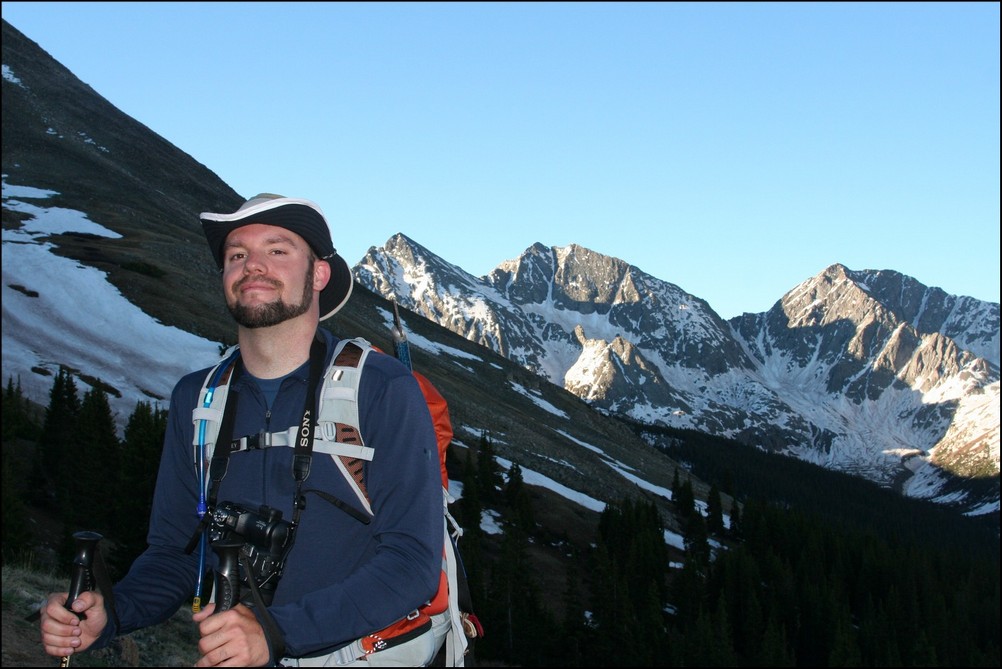
Now that we could see the beginnings of the amazing views, Mike became more and more awestruck by the Colorado Rockies. It was a real pleasure hiking with someone that shared the same level of appreciation for Colorado's awesome peaks. Mike and I exchanged photos of each other.
Mike Vetter looking excited in front of the Three Apostles
Matt Payne with the Three Apostles in the background
As we gained more elevation, views across the valley were getting even better. I noticed a long waterfall snaking down the side of Granite Mountain and decided that I wanted to try to capture a zoomed-in view of that waterfall. I took about 10 photos of the side of the mountain at 200mm and combined them into this photo:

Snow forms a waterfall down the side of Granite Mountain
I also wanted to get a zoomed in shot of the Three Apostles using the same method. Here are the results (click on the photo to see the super-hi-res version):

The Three Apostles in high detail
We continued to climb past treeline and up to Huron's base. I took some opportunities to take multiple photos of the views and stitched some photos together for a panoramic view.

Looking South and West, Huron casts a shadow over Granite Mountain
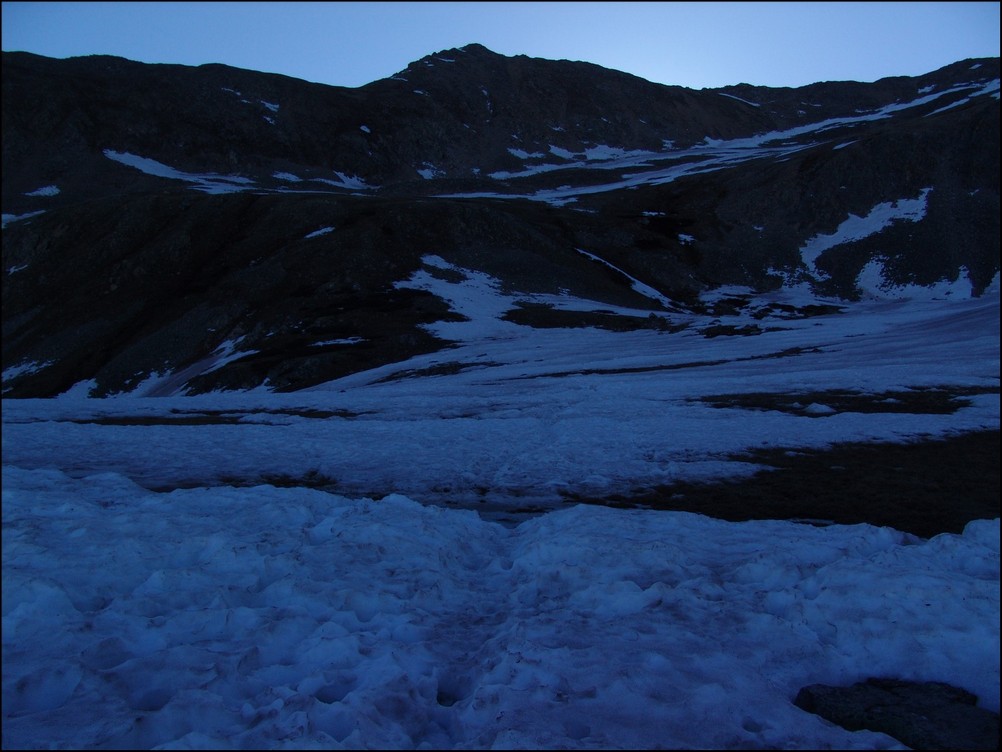
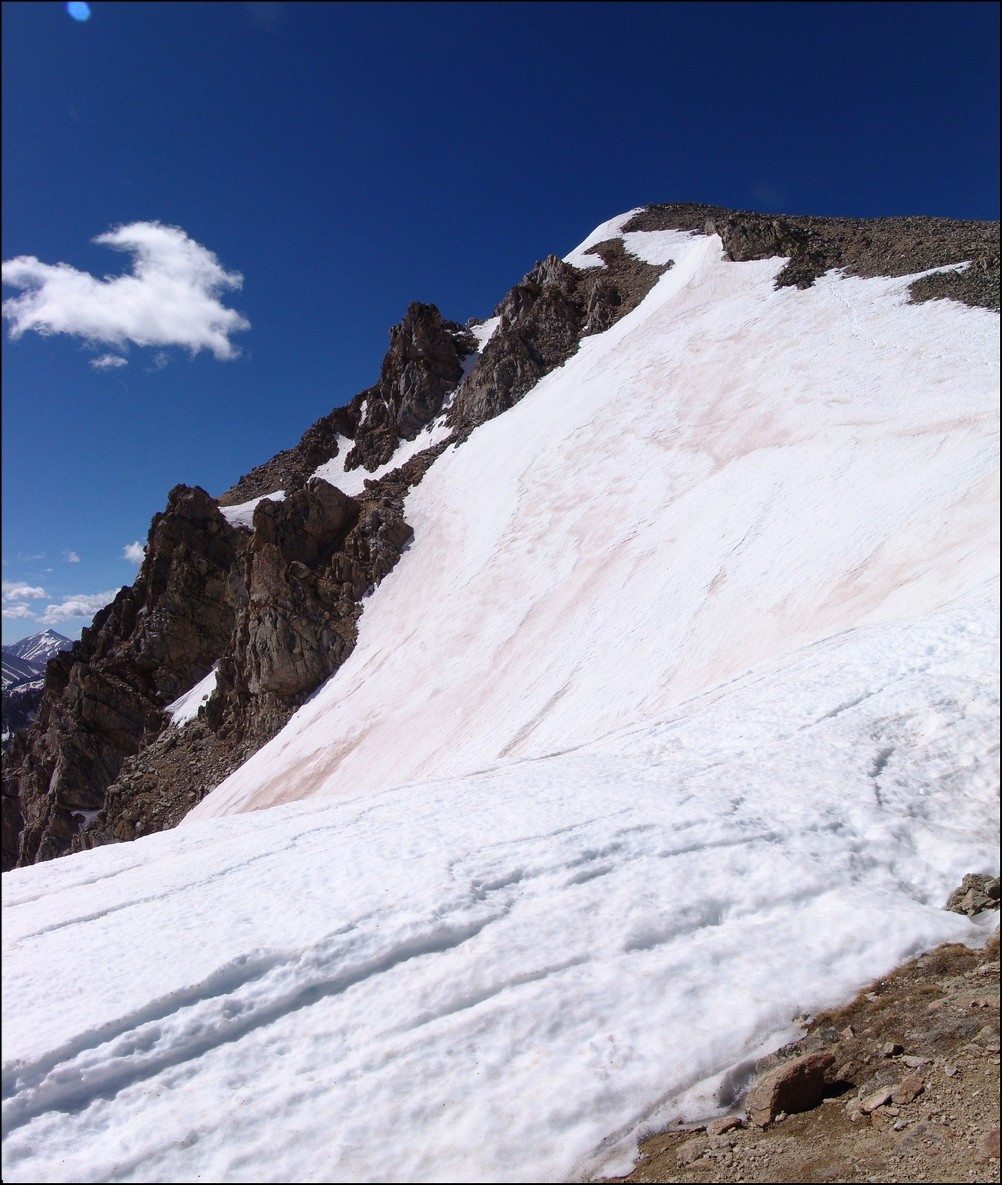
We quickly made our way up into the basin below Huron and were greeted by a giant snowfield. Normally, I welcome the sight of snow; however, the snow we encountered was very soft, with marshy streams and pools of water beneath. It was very much like crossing a field filled with 7-11 Slushies.
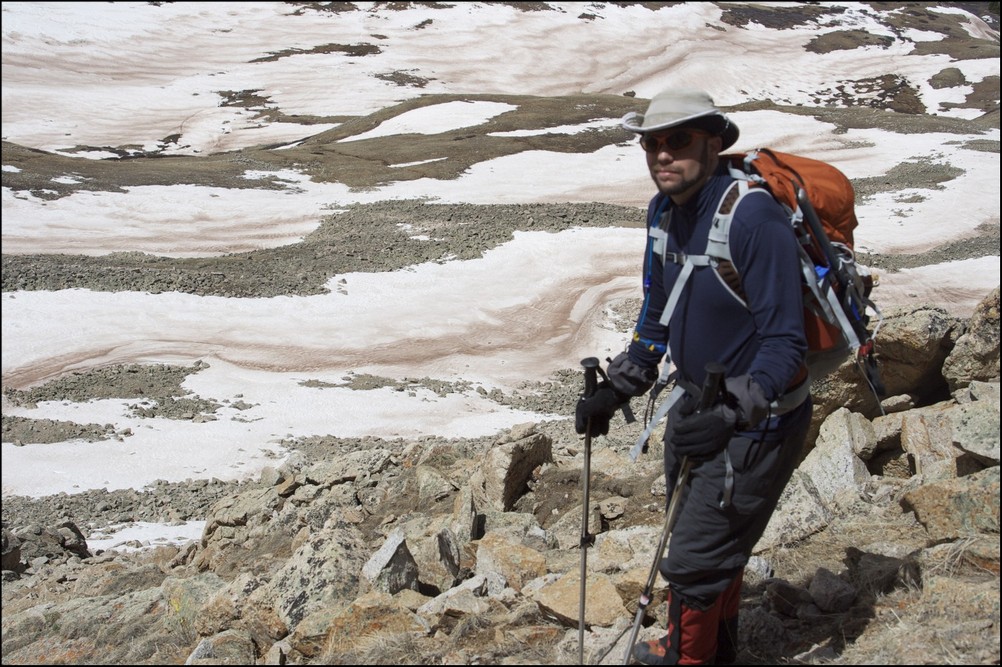
We made it through the slush and continued up the basin beneath Huron. The terrain was solid and only mildly wet from snowmelt. At this point, the sun had crested Browns Peak and began to heat the surrounding area.
Mike Vetter squinting into the sun on our approach of Huron
We continued to climb up towards Huron, following the trail through and around large snow fields. At this point, it was clear that snowshoes or other assistive devices would be fairly useless and I was glad I brought neither. As we gained elevation, the views of Browns Peak as well as the Elk Mountains began to get better and better.

Browns Peak sits to the North of Huron Peak
We made really great time up Huron, despite its relative steepness and other aforementioned challenges (did I mention Mike lives 13,000 ft. lower than Huron). Huron's summit block loomed over us, making us feel pretty small compared to this giant choss pile. The trail up this section of Huron was clearly maintained and the efforts of Colorado Fourteeners Initative to improve the trail were apparent.
Huron Peak's summit block
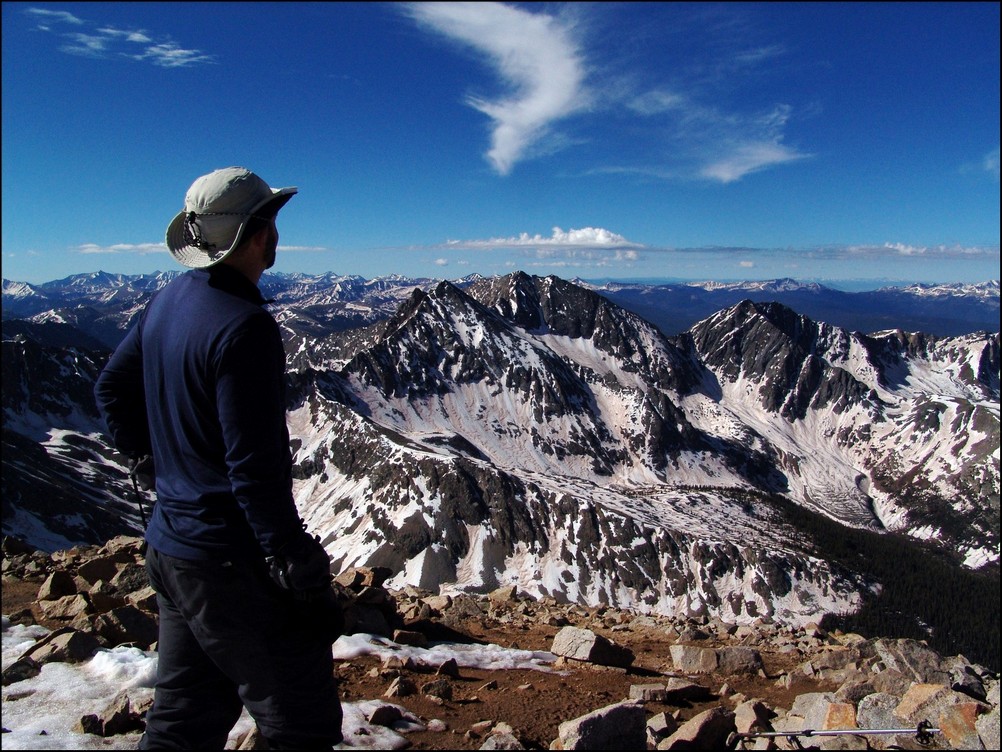
Matt Payne (author) hiking up Huron's Peak
We finally reached the ridge between Browns Peak and Huron Peak and were warmly welcomed by a giant cornice sitting at the top of the ridge.
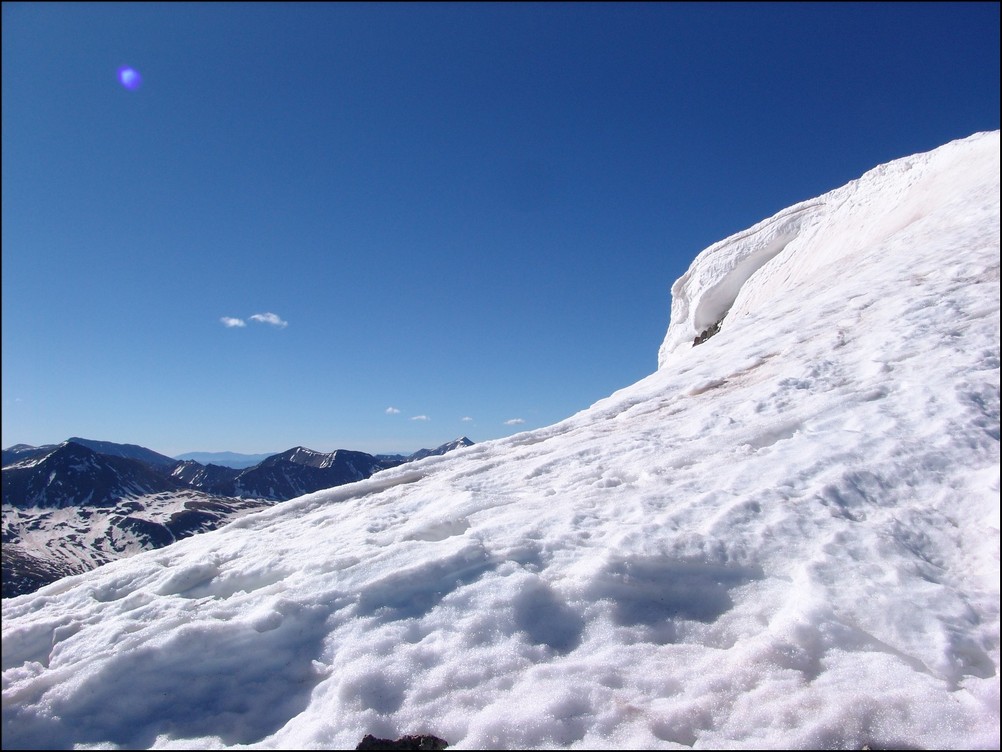
A giant cornice on Huron's ridge
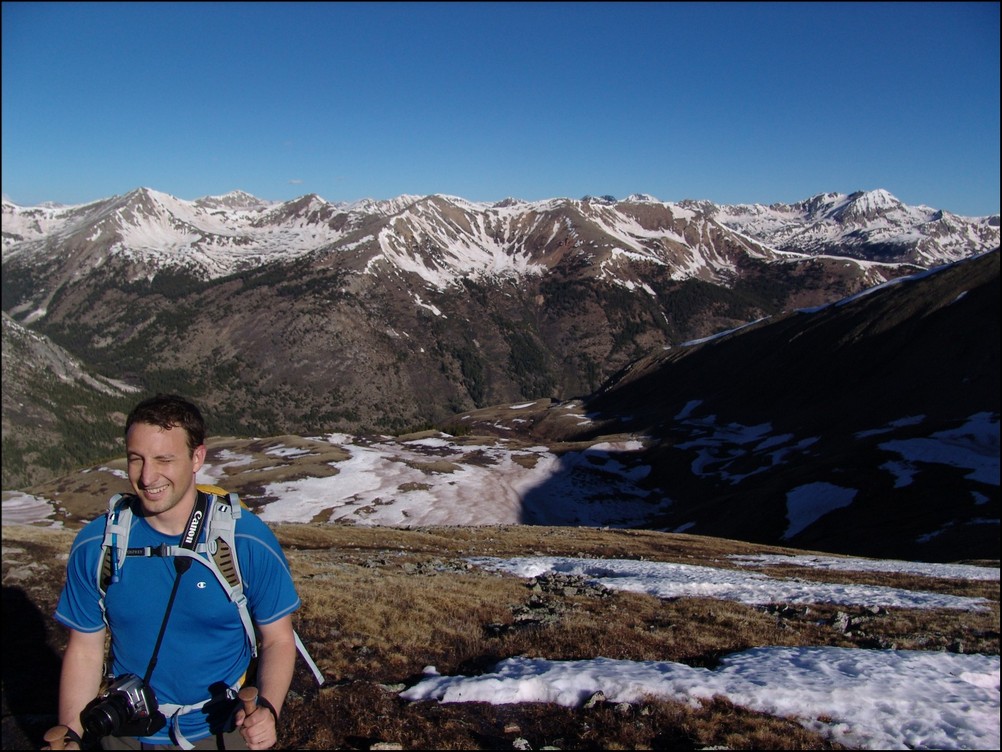
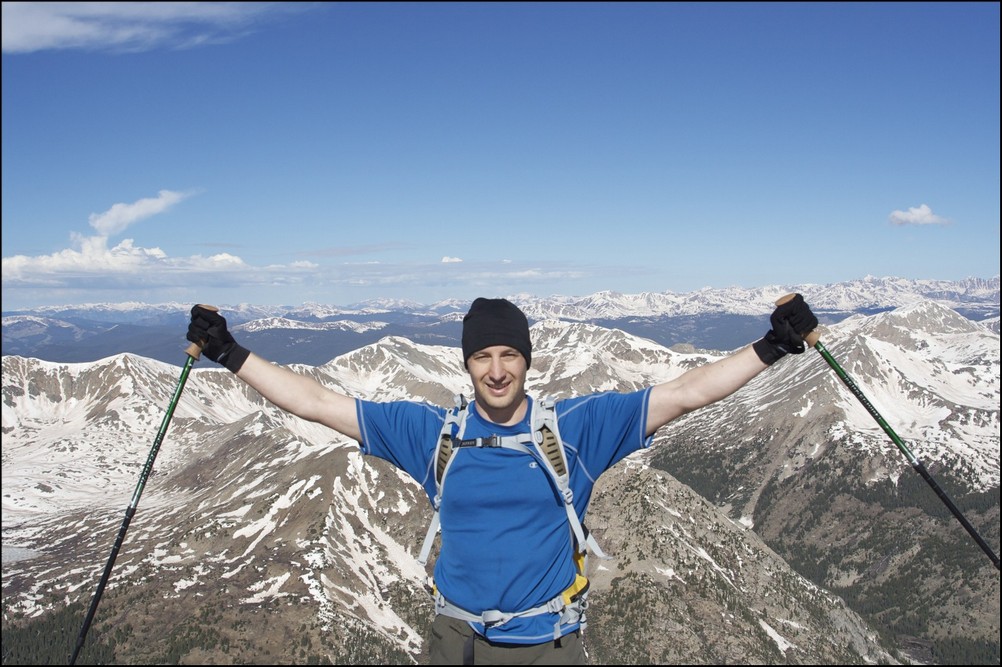
The final push to the top of Huron took exactly 10 more minutes. The views from Huron Peak were absolutely outstanding. Being somewhat more isolated than most of the other 14'ers in the Sawatch Range, Huron Peak offers excellent views of the rest of the Sawatch Range and the Elk Mountains as well. Mike and I were the first to summit that day, and spent an hour on top celebrating, eating, and taking large amounts of photographs.
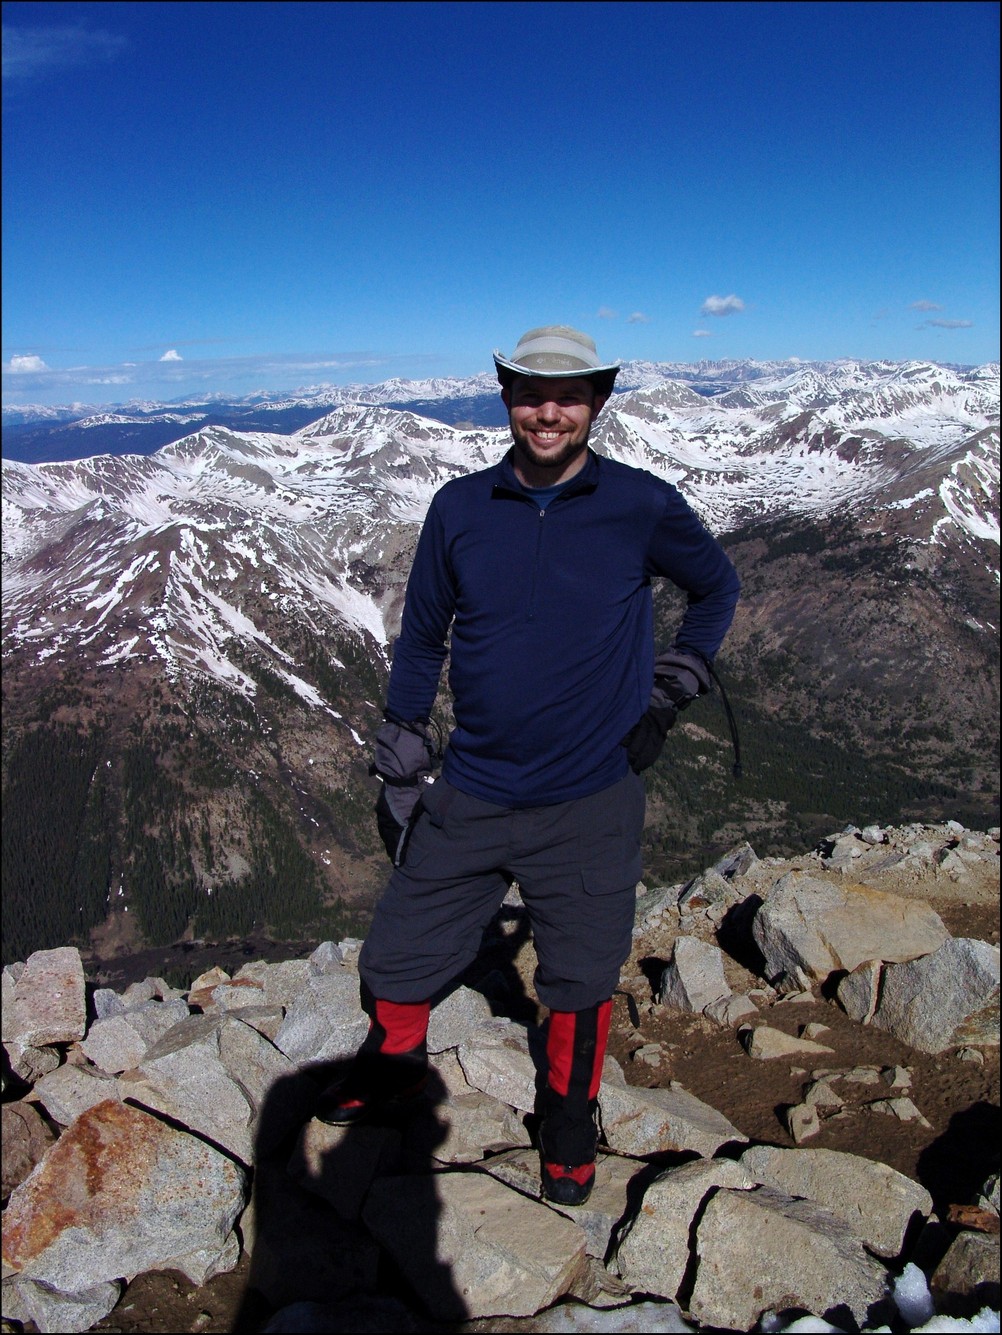
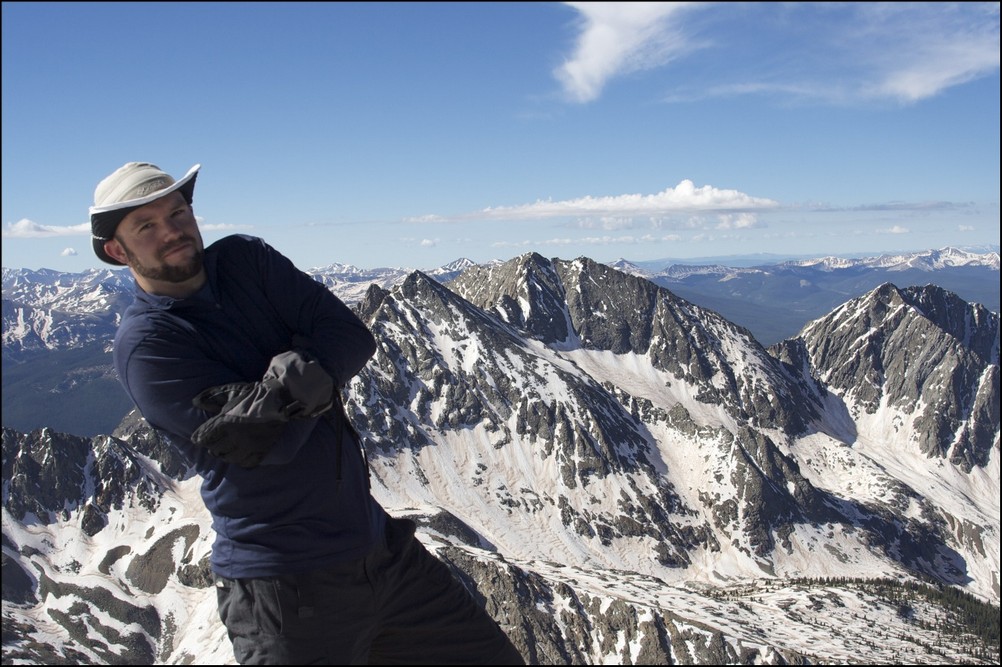
Hero shot of Matt Payne on top of Huron Peak
Matt Payne gazes South towards the Three Apostles

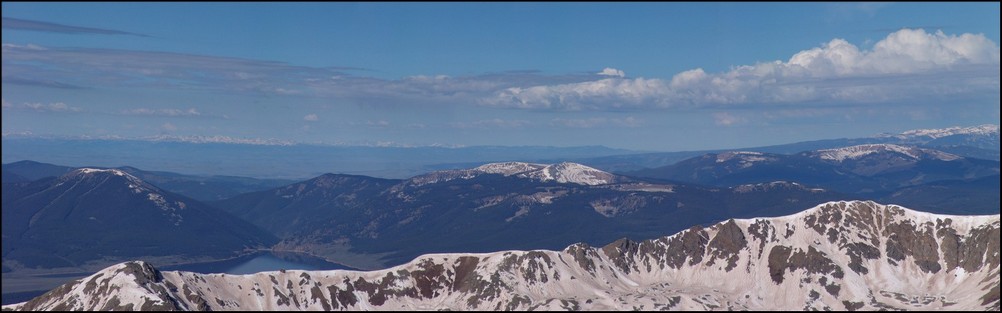
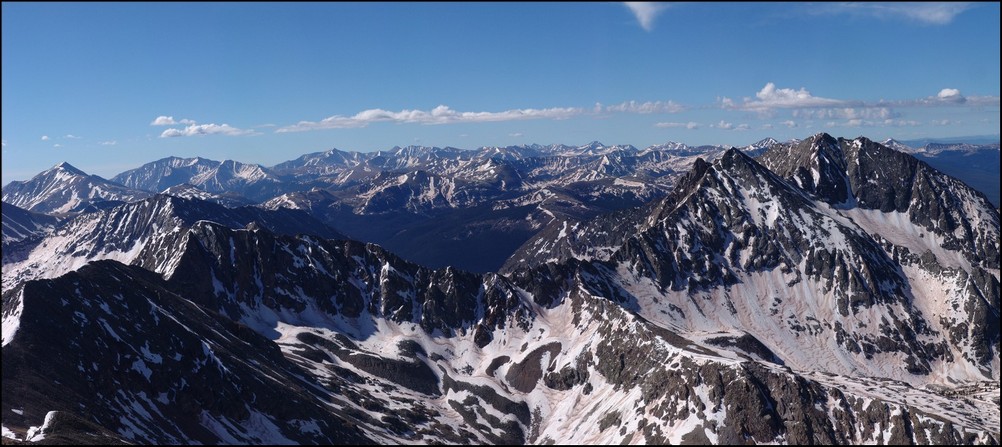
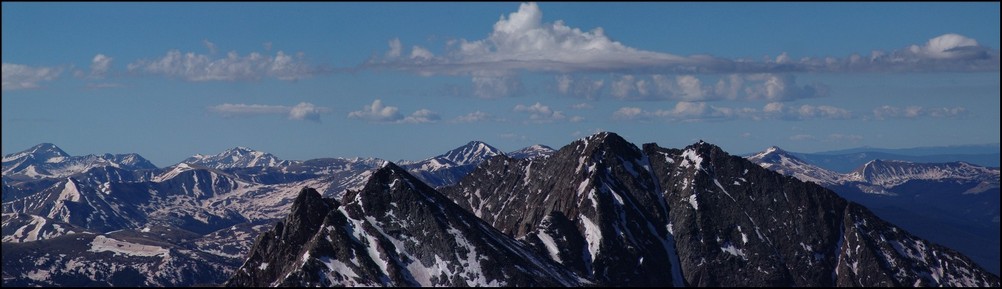
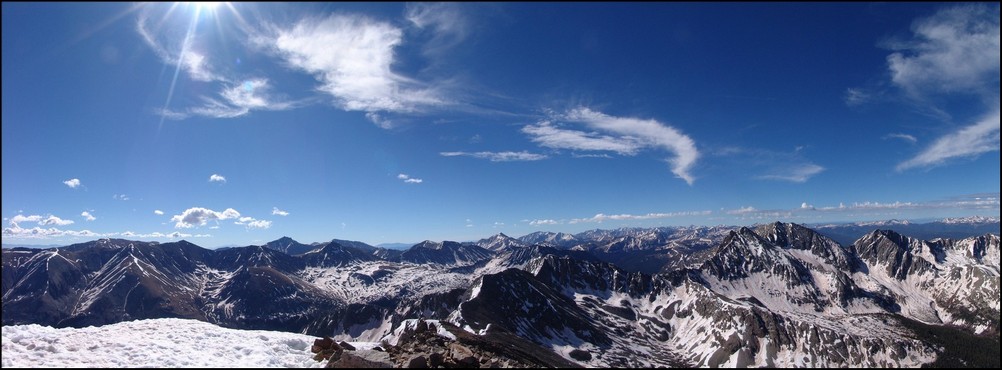
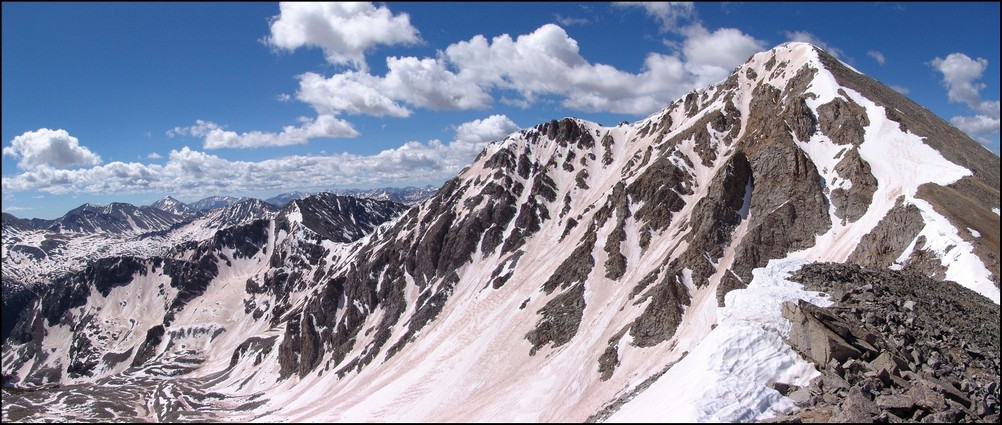
360 Degree View from the top of Huron Peak (click for full resolution version)
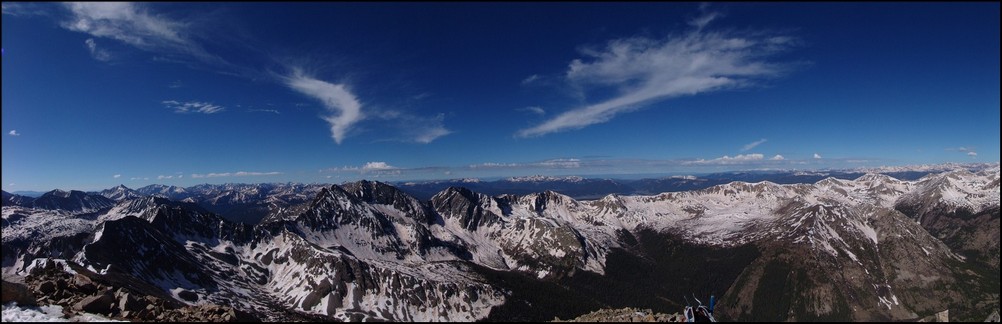
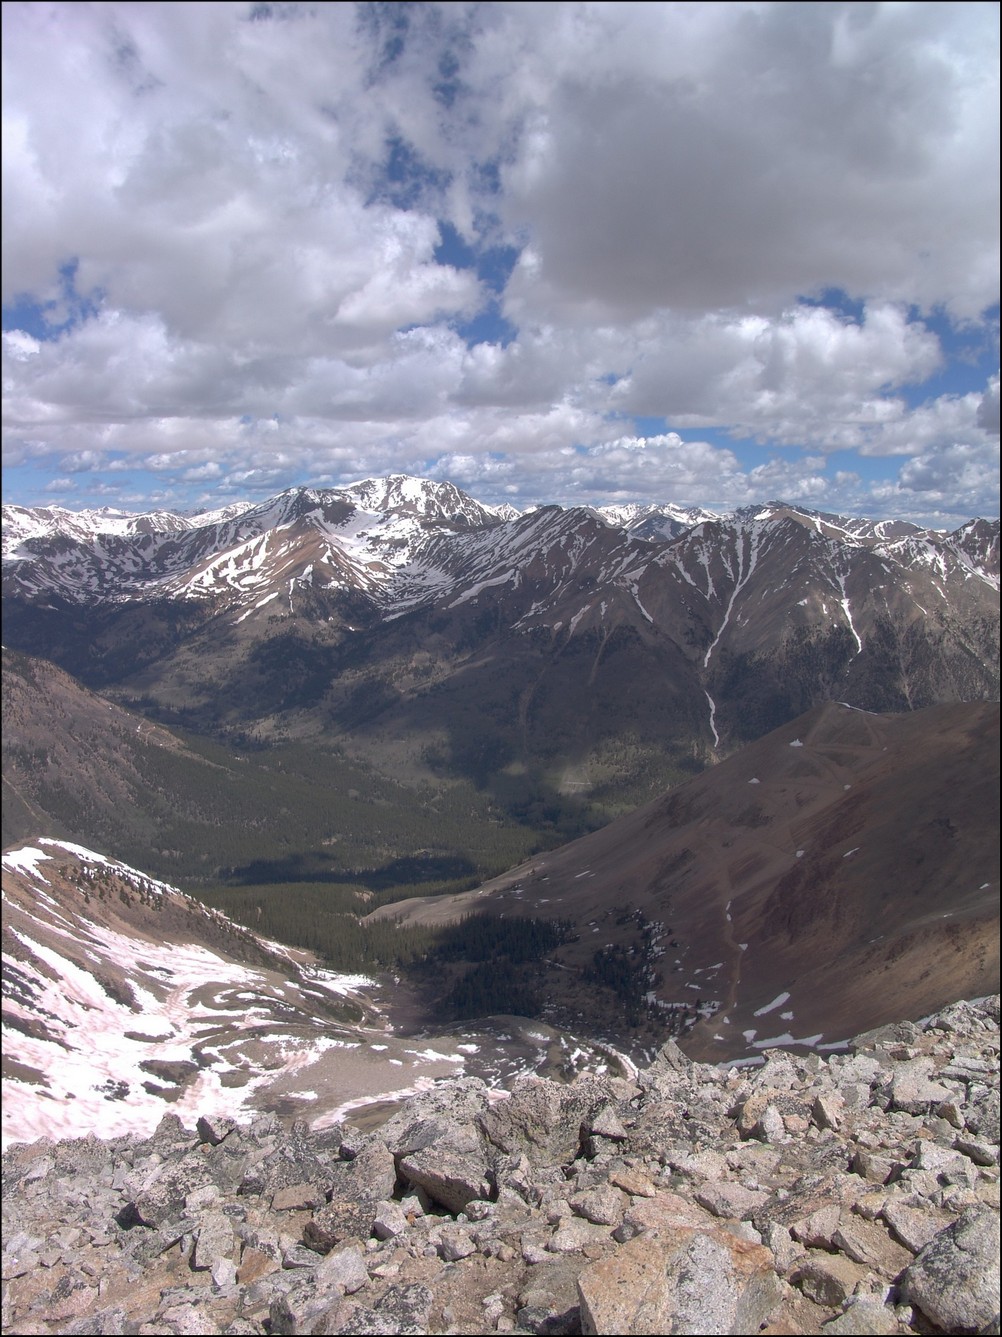
A 180 Degree View from North to South from Hurons Peak. The Three Apostles at center.
Mount Hope (the flat topped mountain) rests right of center. La Plata Peak rests far left.
The Elk Mountains loom in the distance, covered in snow.This photo is zoomed in at 200mm. Pyramid Peak, Maroon Peak, Snowmass Mountain, and Capitol Peak can all be seen from this vantage. Click on the image for the super hi-resoltution version.
Taylor Reservoir can be seen in the distance, reflecting the surrounding mountains (click for full resolution version)
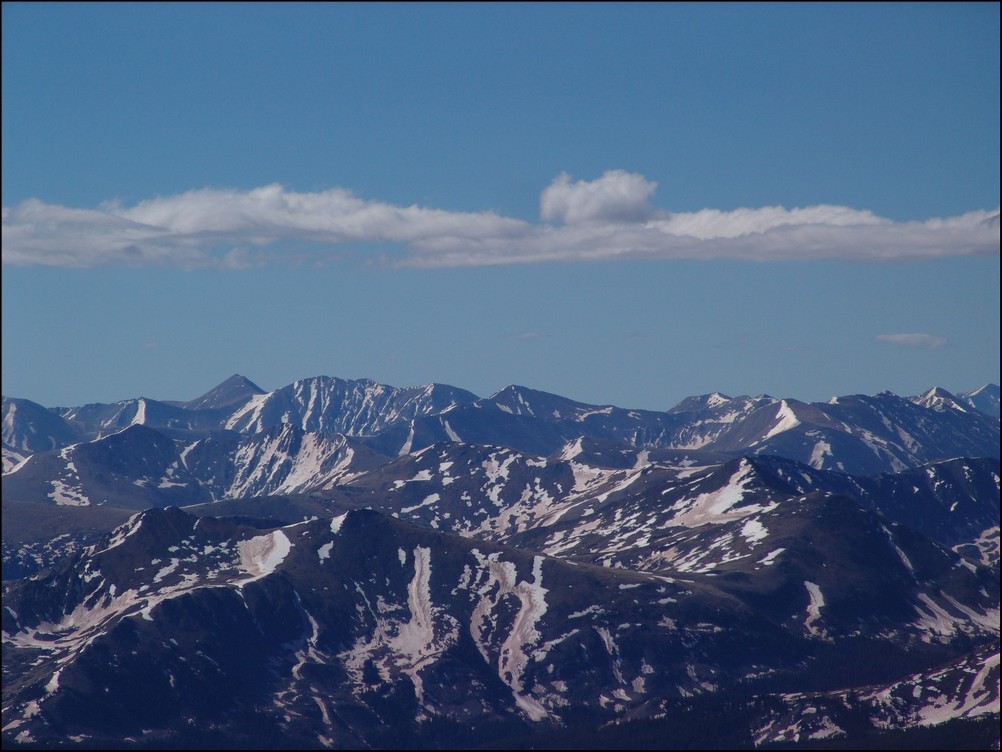
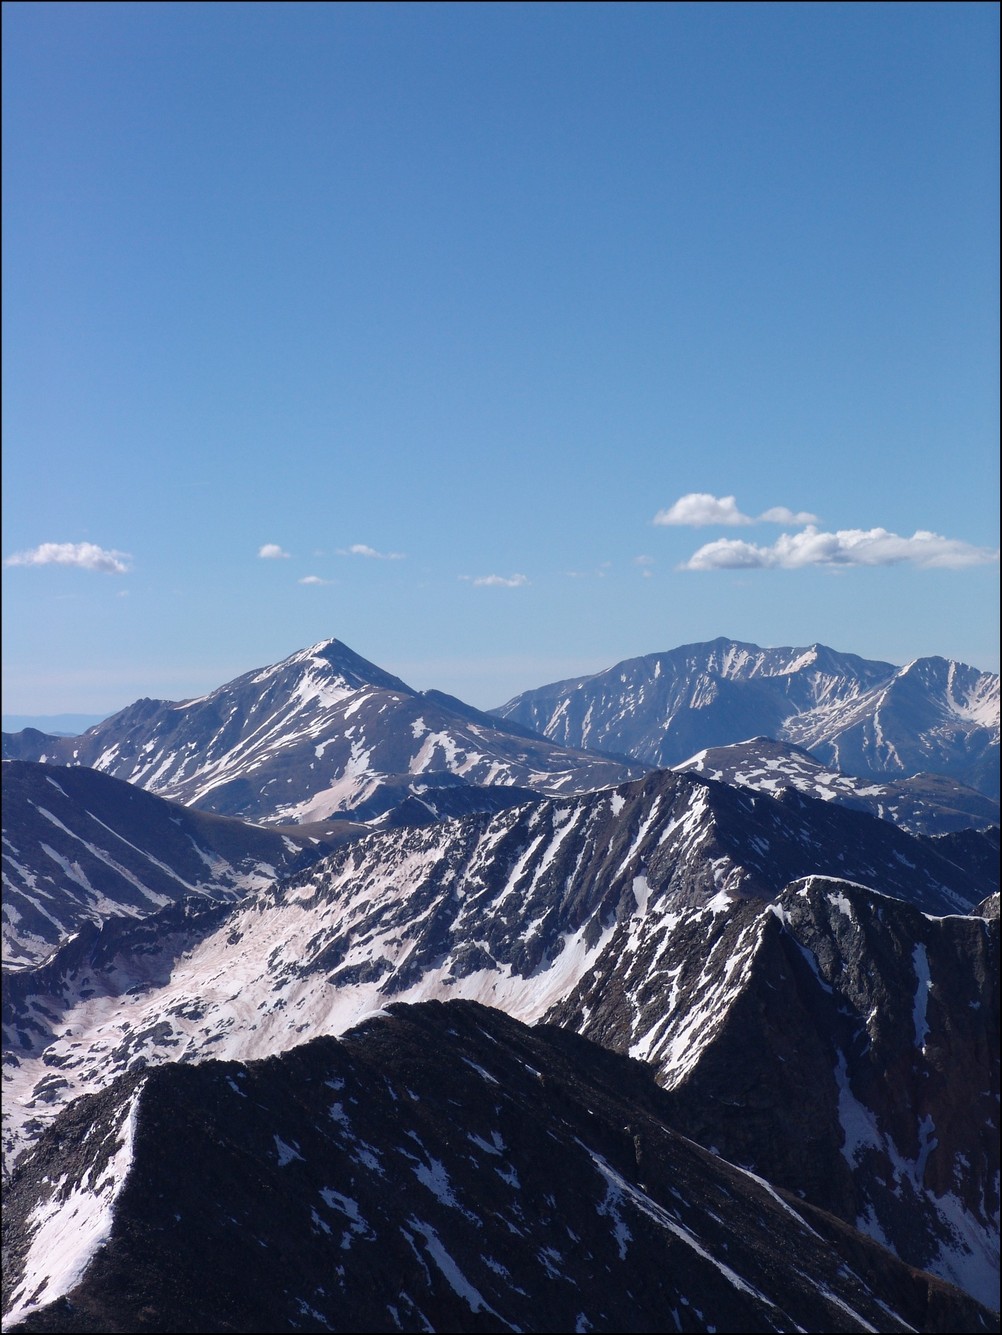
A closer look at the Sawatch Mountains south of Huron. Mount Antero, Mount Shavano, and Tabeguache Peak are all recognizable.

A zoomed in view of the Southern Sawatch mountains
Shavano and Tabeguache (high pointed peak and flat snowed peak respectively)
North Apostle and Ice Mountain zoomed in. If you click on the image you can see the full resolution version (and the climber atop North Apostle. I've confirmed that this climber is "Mad Mike" from 14ers.com
Mount Yale and Mount Princeton seen in the distance

La Plata Peak seen to the North of Huron across the valley

A great view of the Three Apostles from Huron
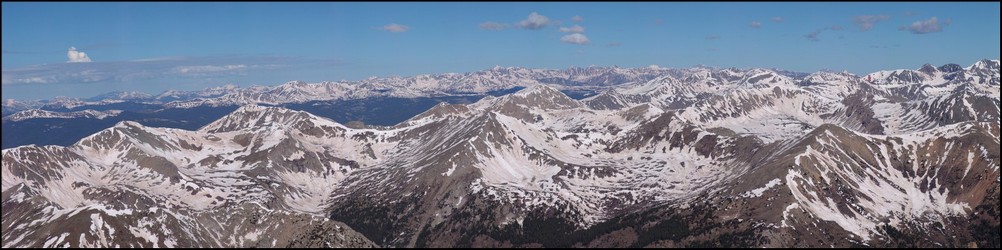
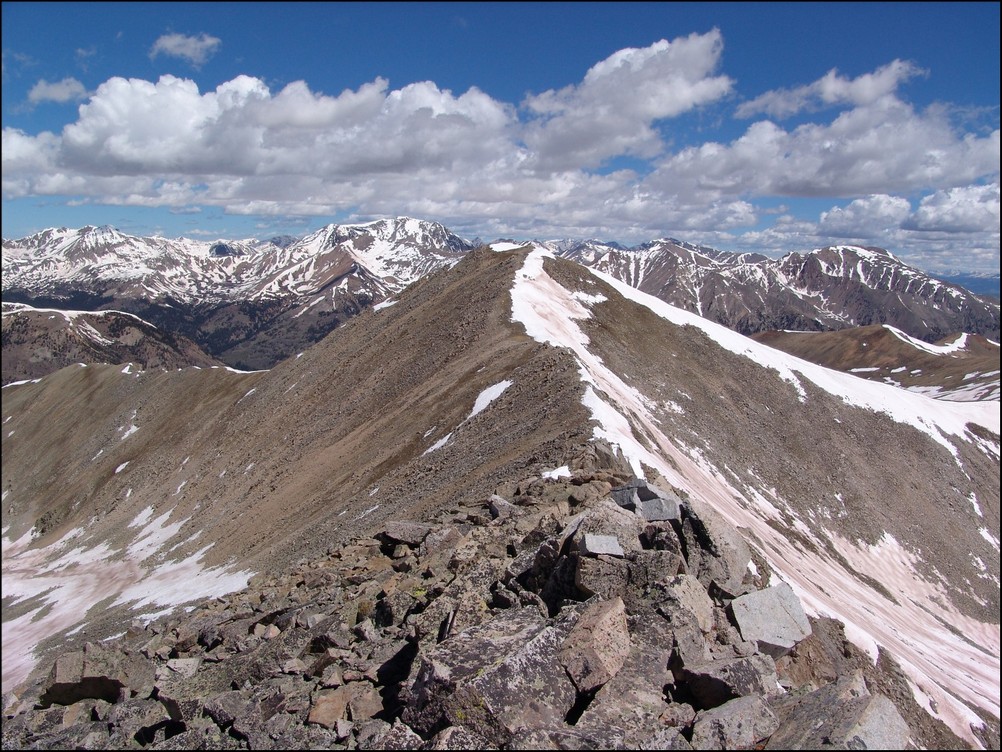
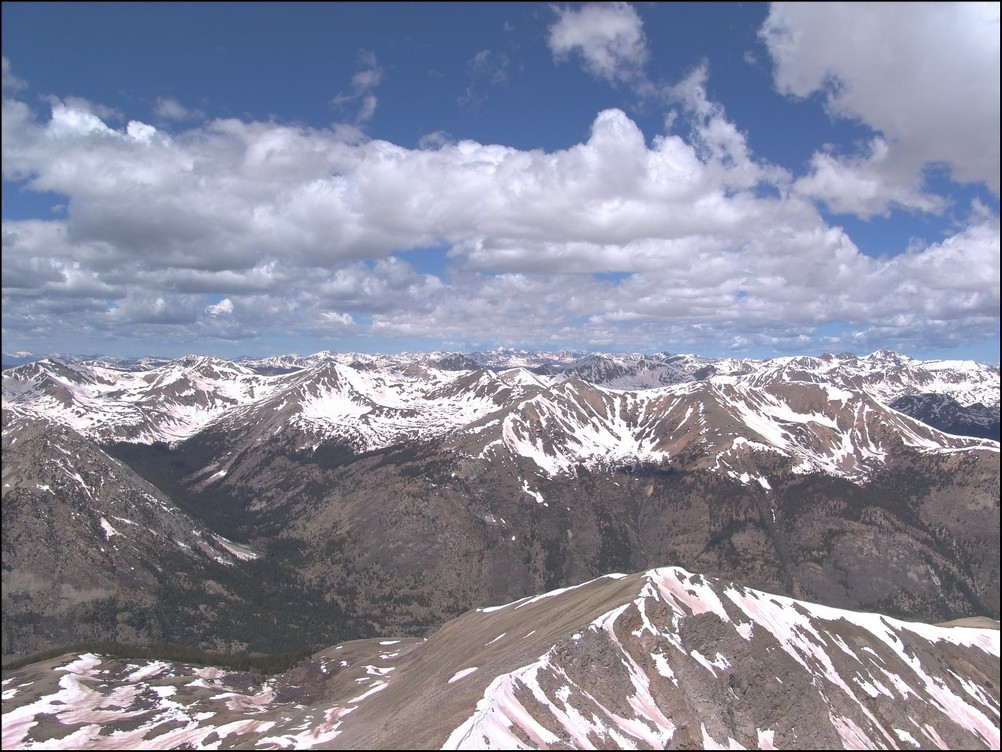
A 90 degree view looking Northeast, North, and Northwest from Huron
A vertically-oriented panoramic view of the Three Apostles
Matt Payne leaning to allow for a better view of the Three Apostles
Matt Payne and Mike Vetter on top of Huron Peak
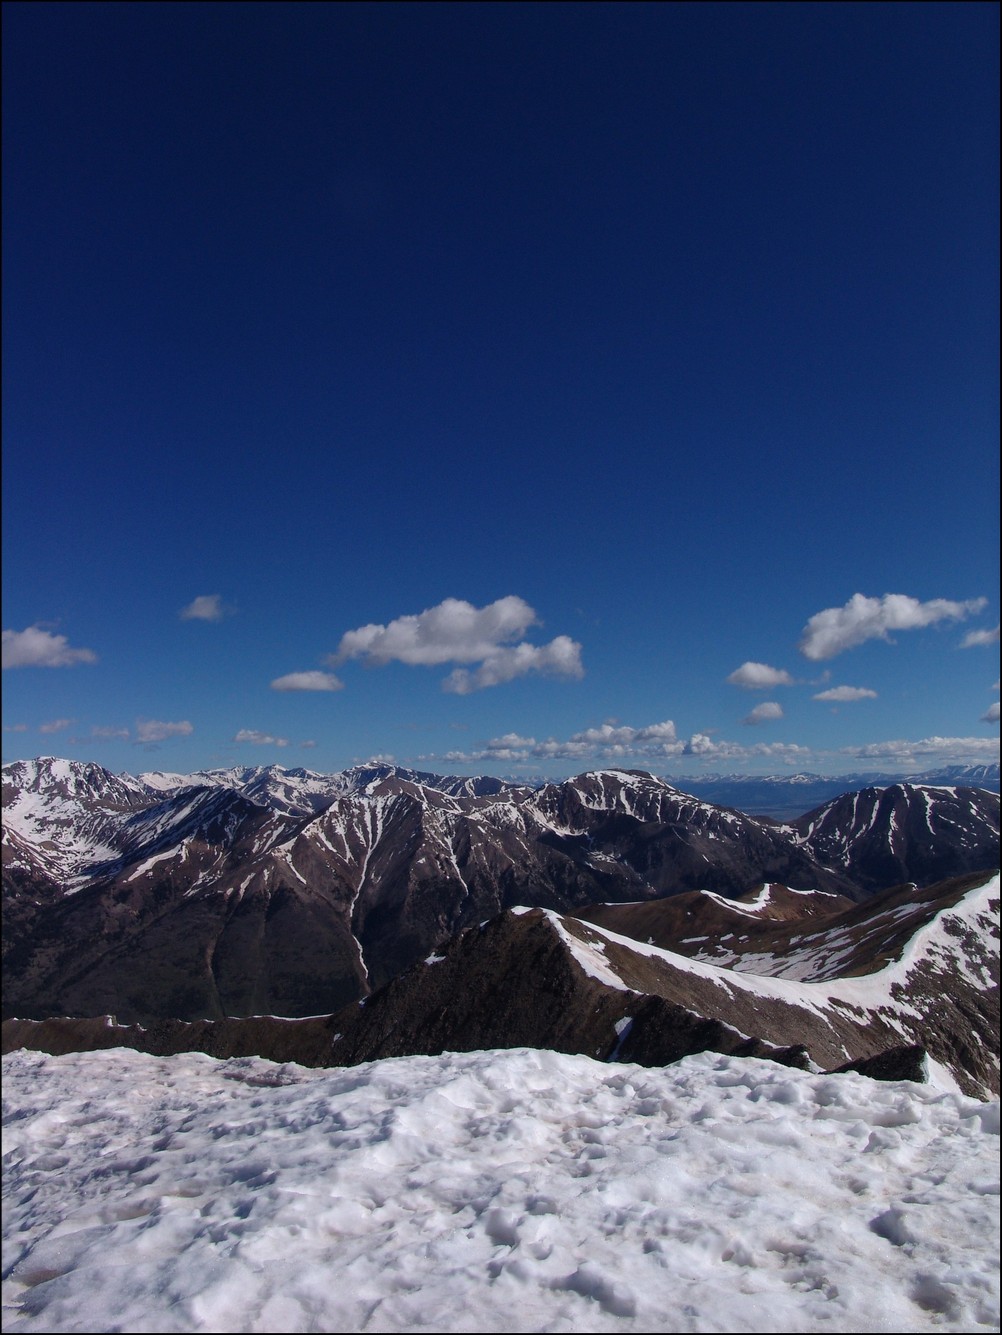
At this point we decided that after an hour of being on the summit we should head down to the ridge and make an attempt on Browns. Once down-climbing to the ridge, we were able to get a view of what we just climbed, decorated with a fair amount of snow still.
Still a lot of snow on Huron's eastern face
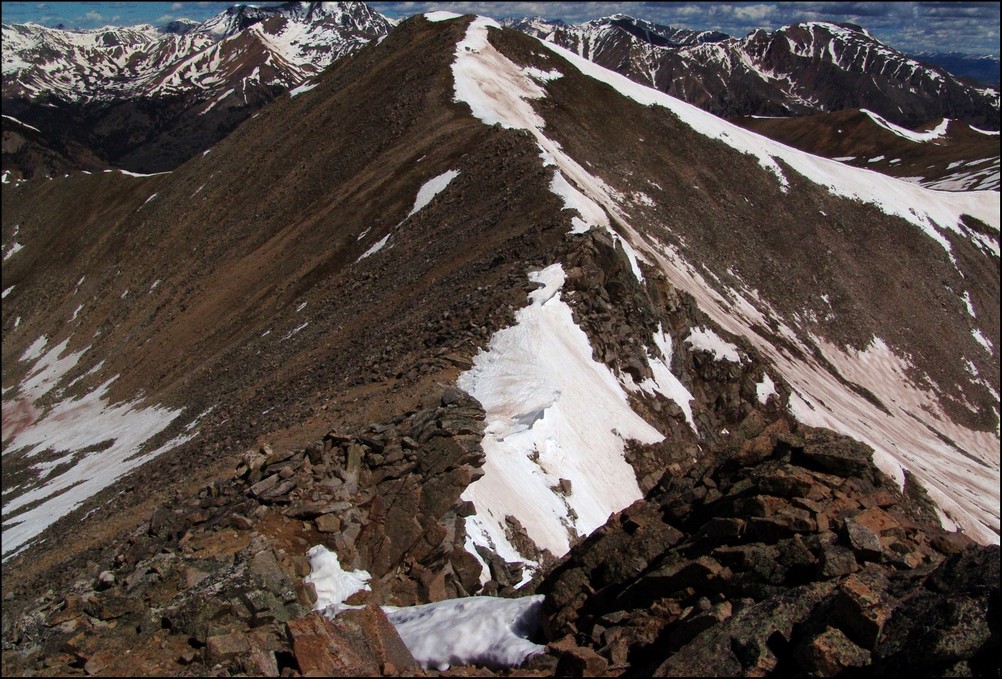
We took a look at our route - a straight ridge scramble to PT 13,518 and then to Browns.
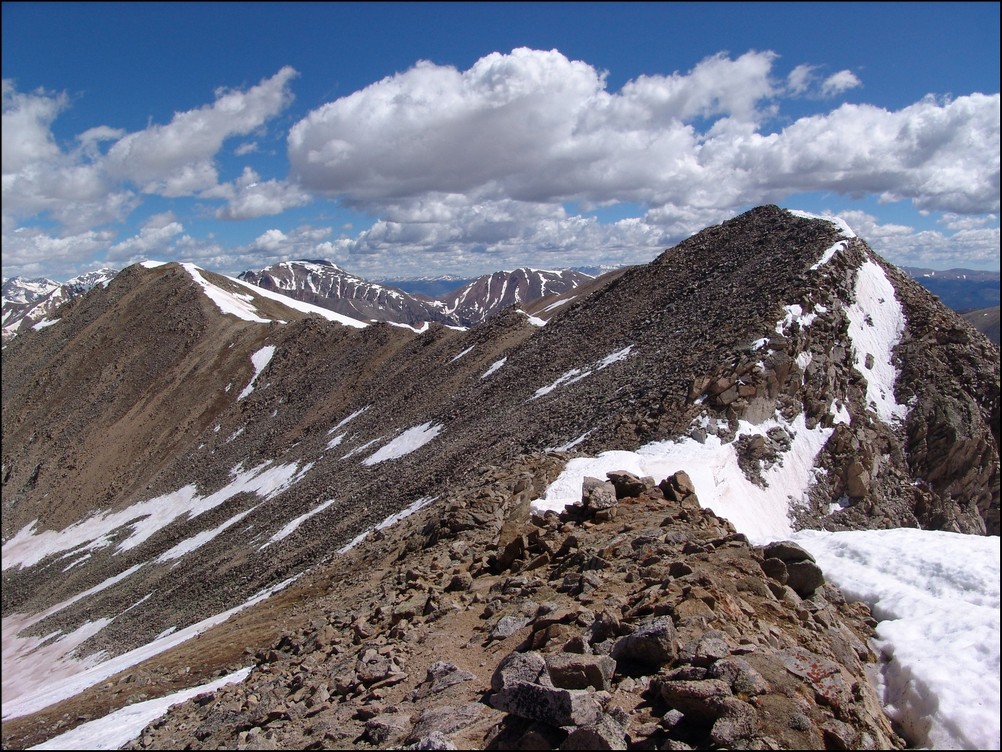
PT 13,518 and Browns were a straight shot from Huron's ridge. Mount Hope seen in the background.
We quickly scrambled up PT 13,518 without any problems and looked back at Huron. The further away we got from Huron, the more we could appreciate just how steep it was.
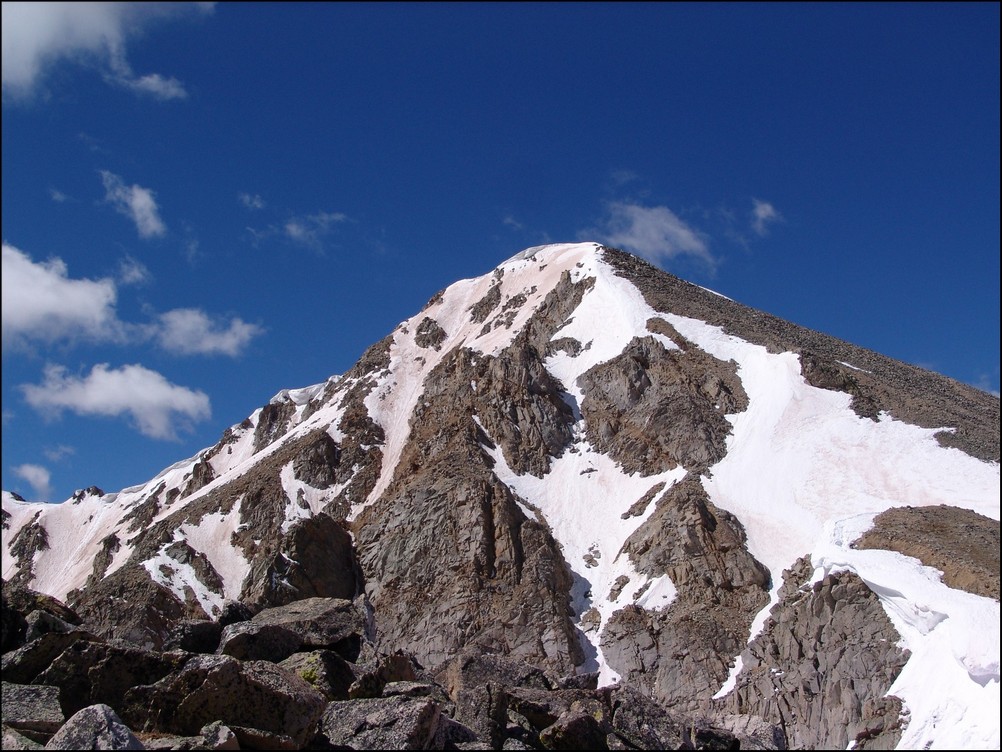
Huron rises high above PT 13,518 to the Northwest
A zoomed in view of Huron from PT 13,518

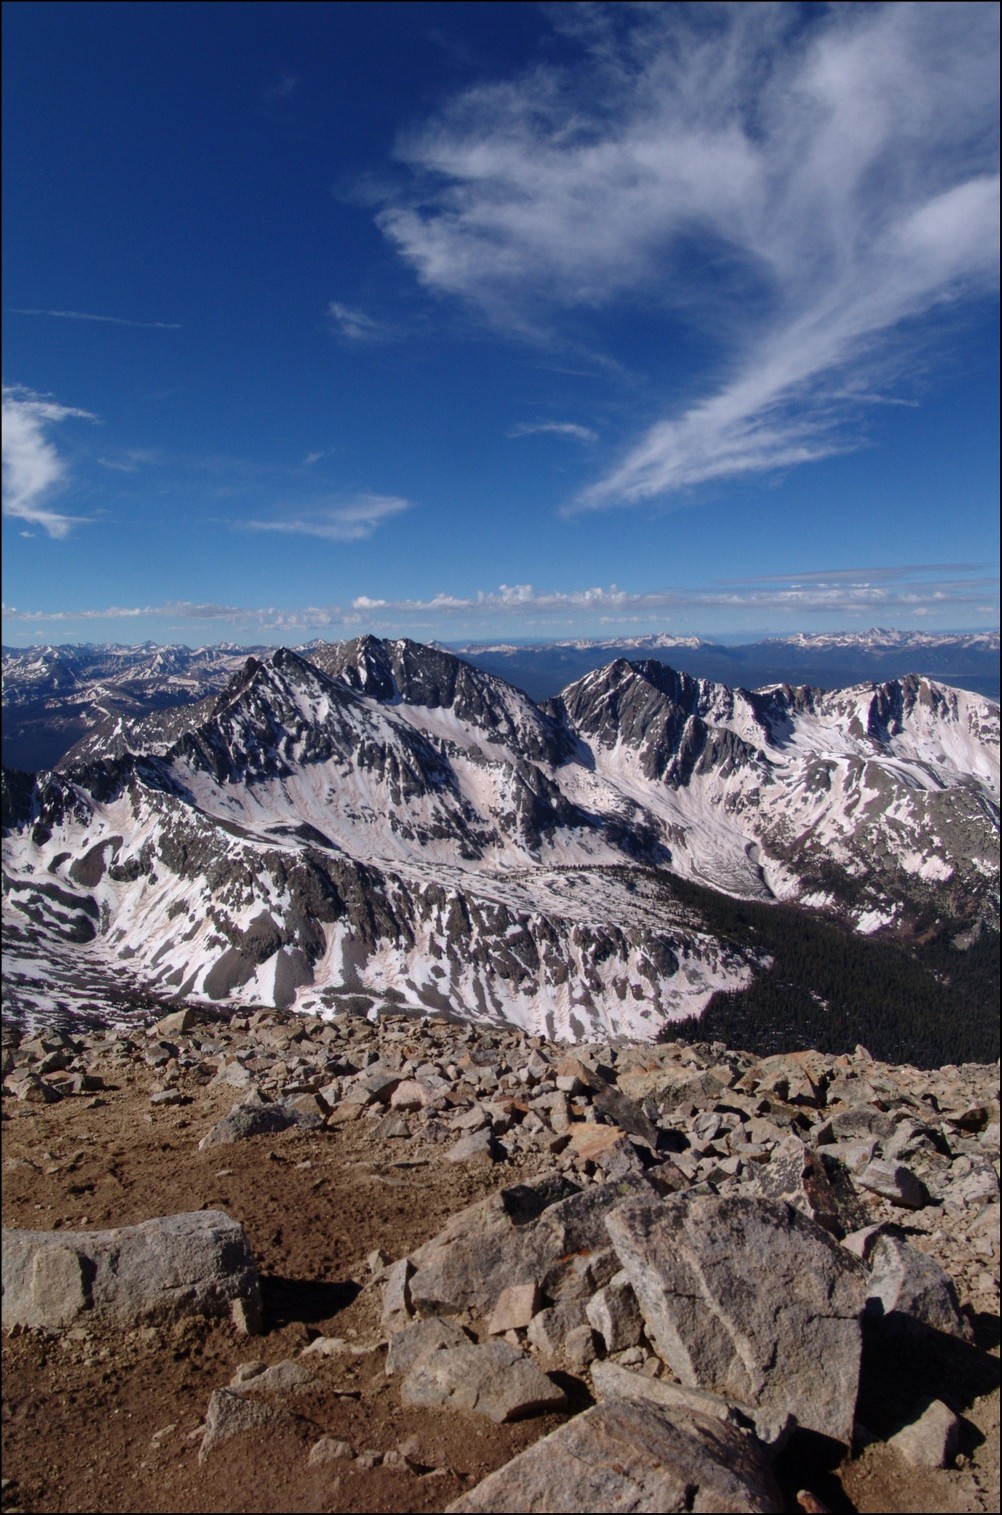
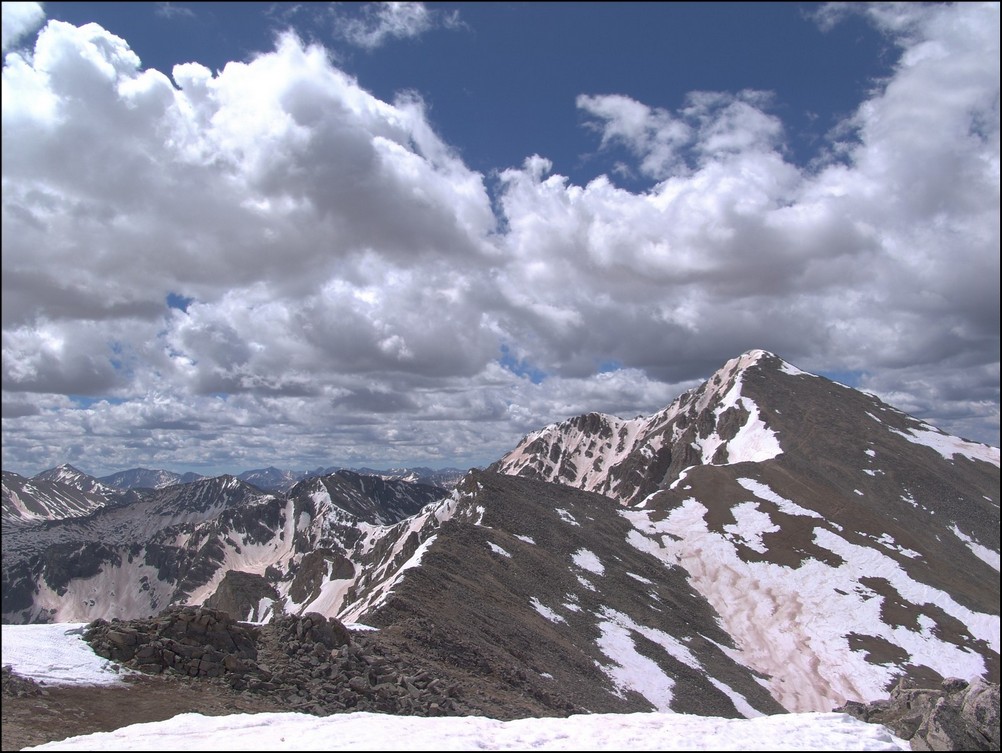
A wider view of Huron and the surrounding terrain
After reaching PT 13,518, we took a look over to our next and final objective: Browns Peak.
Browns Peak looked fairly easy with La Plata Peak behind it
On the way over to Browns, we were able to get a really awesome view of a nasty cornice, which looked more like a frozen tidal wave.
A huge cornice sitting in the saddle between PT 13,518 and Browns
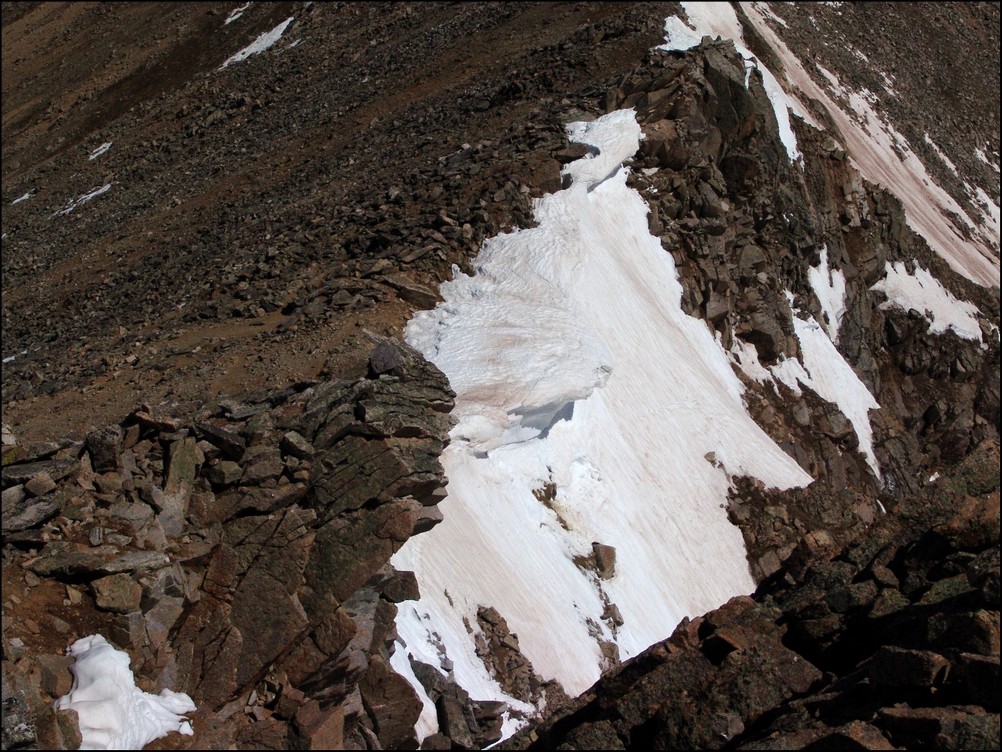
A closer view of the cornice
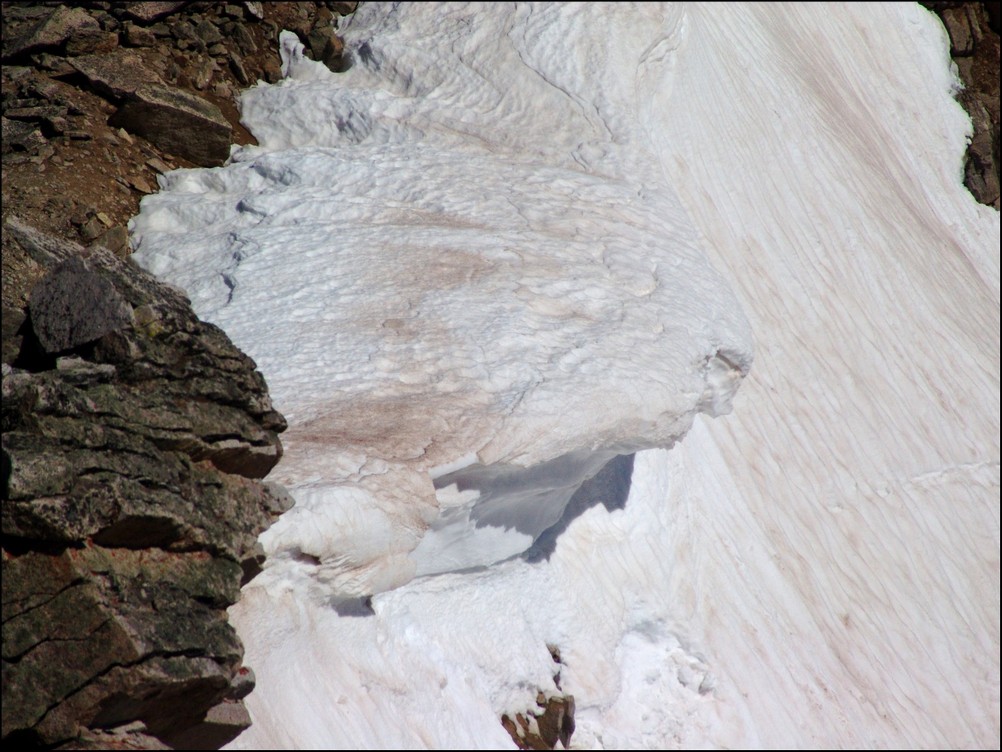
A super-zoomed in view of the cornice
After a bit of mild scrambling, Mike and I reached the summit of Browns in quick order. The clouds were looking to get worse and worse, so we decided that after Browns that we would go ahead and head back down to the trail below us, making our own route down off of Browns and connecting with the Huron trail.
Mike Vetter celebrating on the summit of Browns
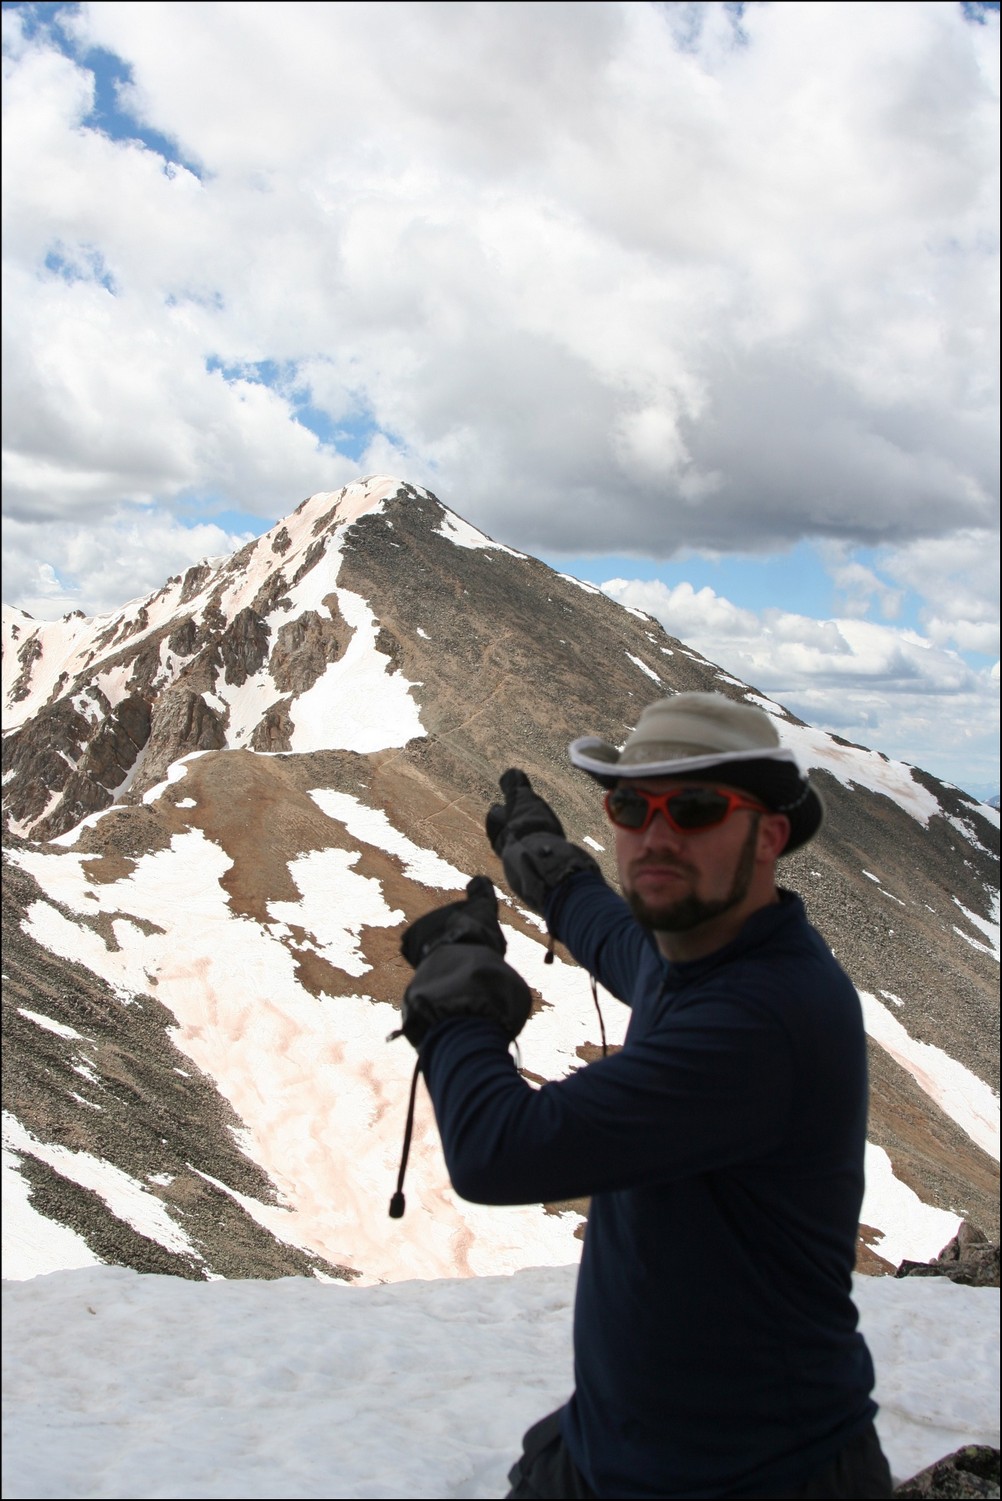
Matt Payne points back to Huron from Browns
We dropped off the north face of Browns just a few hundred feet and went straight down a scree gully. The dirt was quite loose but manageable. Soon after reaching the basin for Huron again, we were greeted by another large snow-field, which presented some pretty awful post-holing up to our wastes. Fortunately, my boots and gaiters kept my feet completely dry!
Matt Payne descending from Browns
After reaching the trail again, we headed back down the way we came and crossed the insane snow-field at the base of Huron. After a days worth of sunlight, the snow-field was quite soft and presented us with some unique and 'wet' hiking challenges.
Matt Payne crossing the slushy on Huron
Once we reached the bottom of the snow-field, the way down was pretty quick to treeline and below to the trailhead and eventually my vehicle.
All-in-all, this was an amazing trip filled with great views. And I must say, I could not have hiked with a better guy. Thanks for driving down and climbing with me Mike!
To complete the trip report, here are three HDR photos I combined. I am new to HDR but I do like how it can enhance the light.
Until next time, enjoy Colorado's summits!