Displaying items by tag: Summits
Shavano's Angel of Death
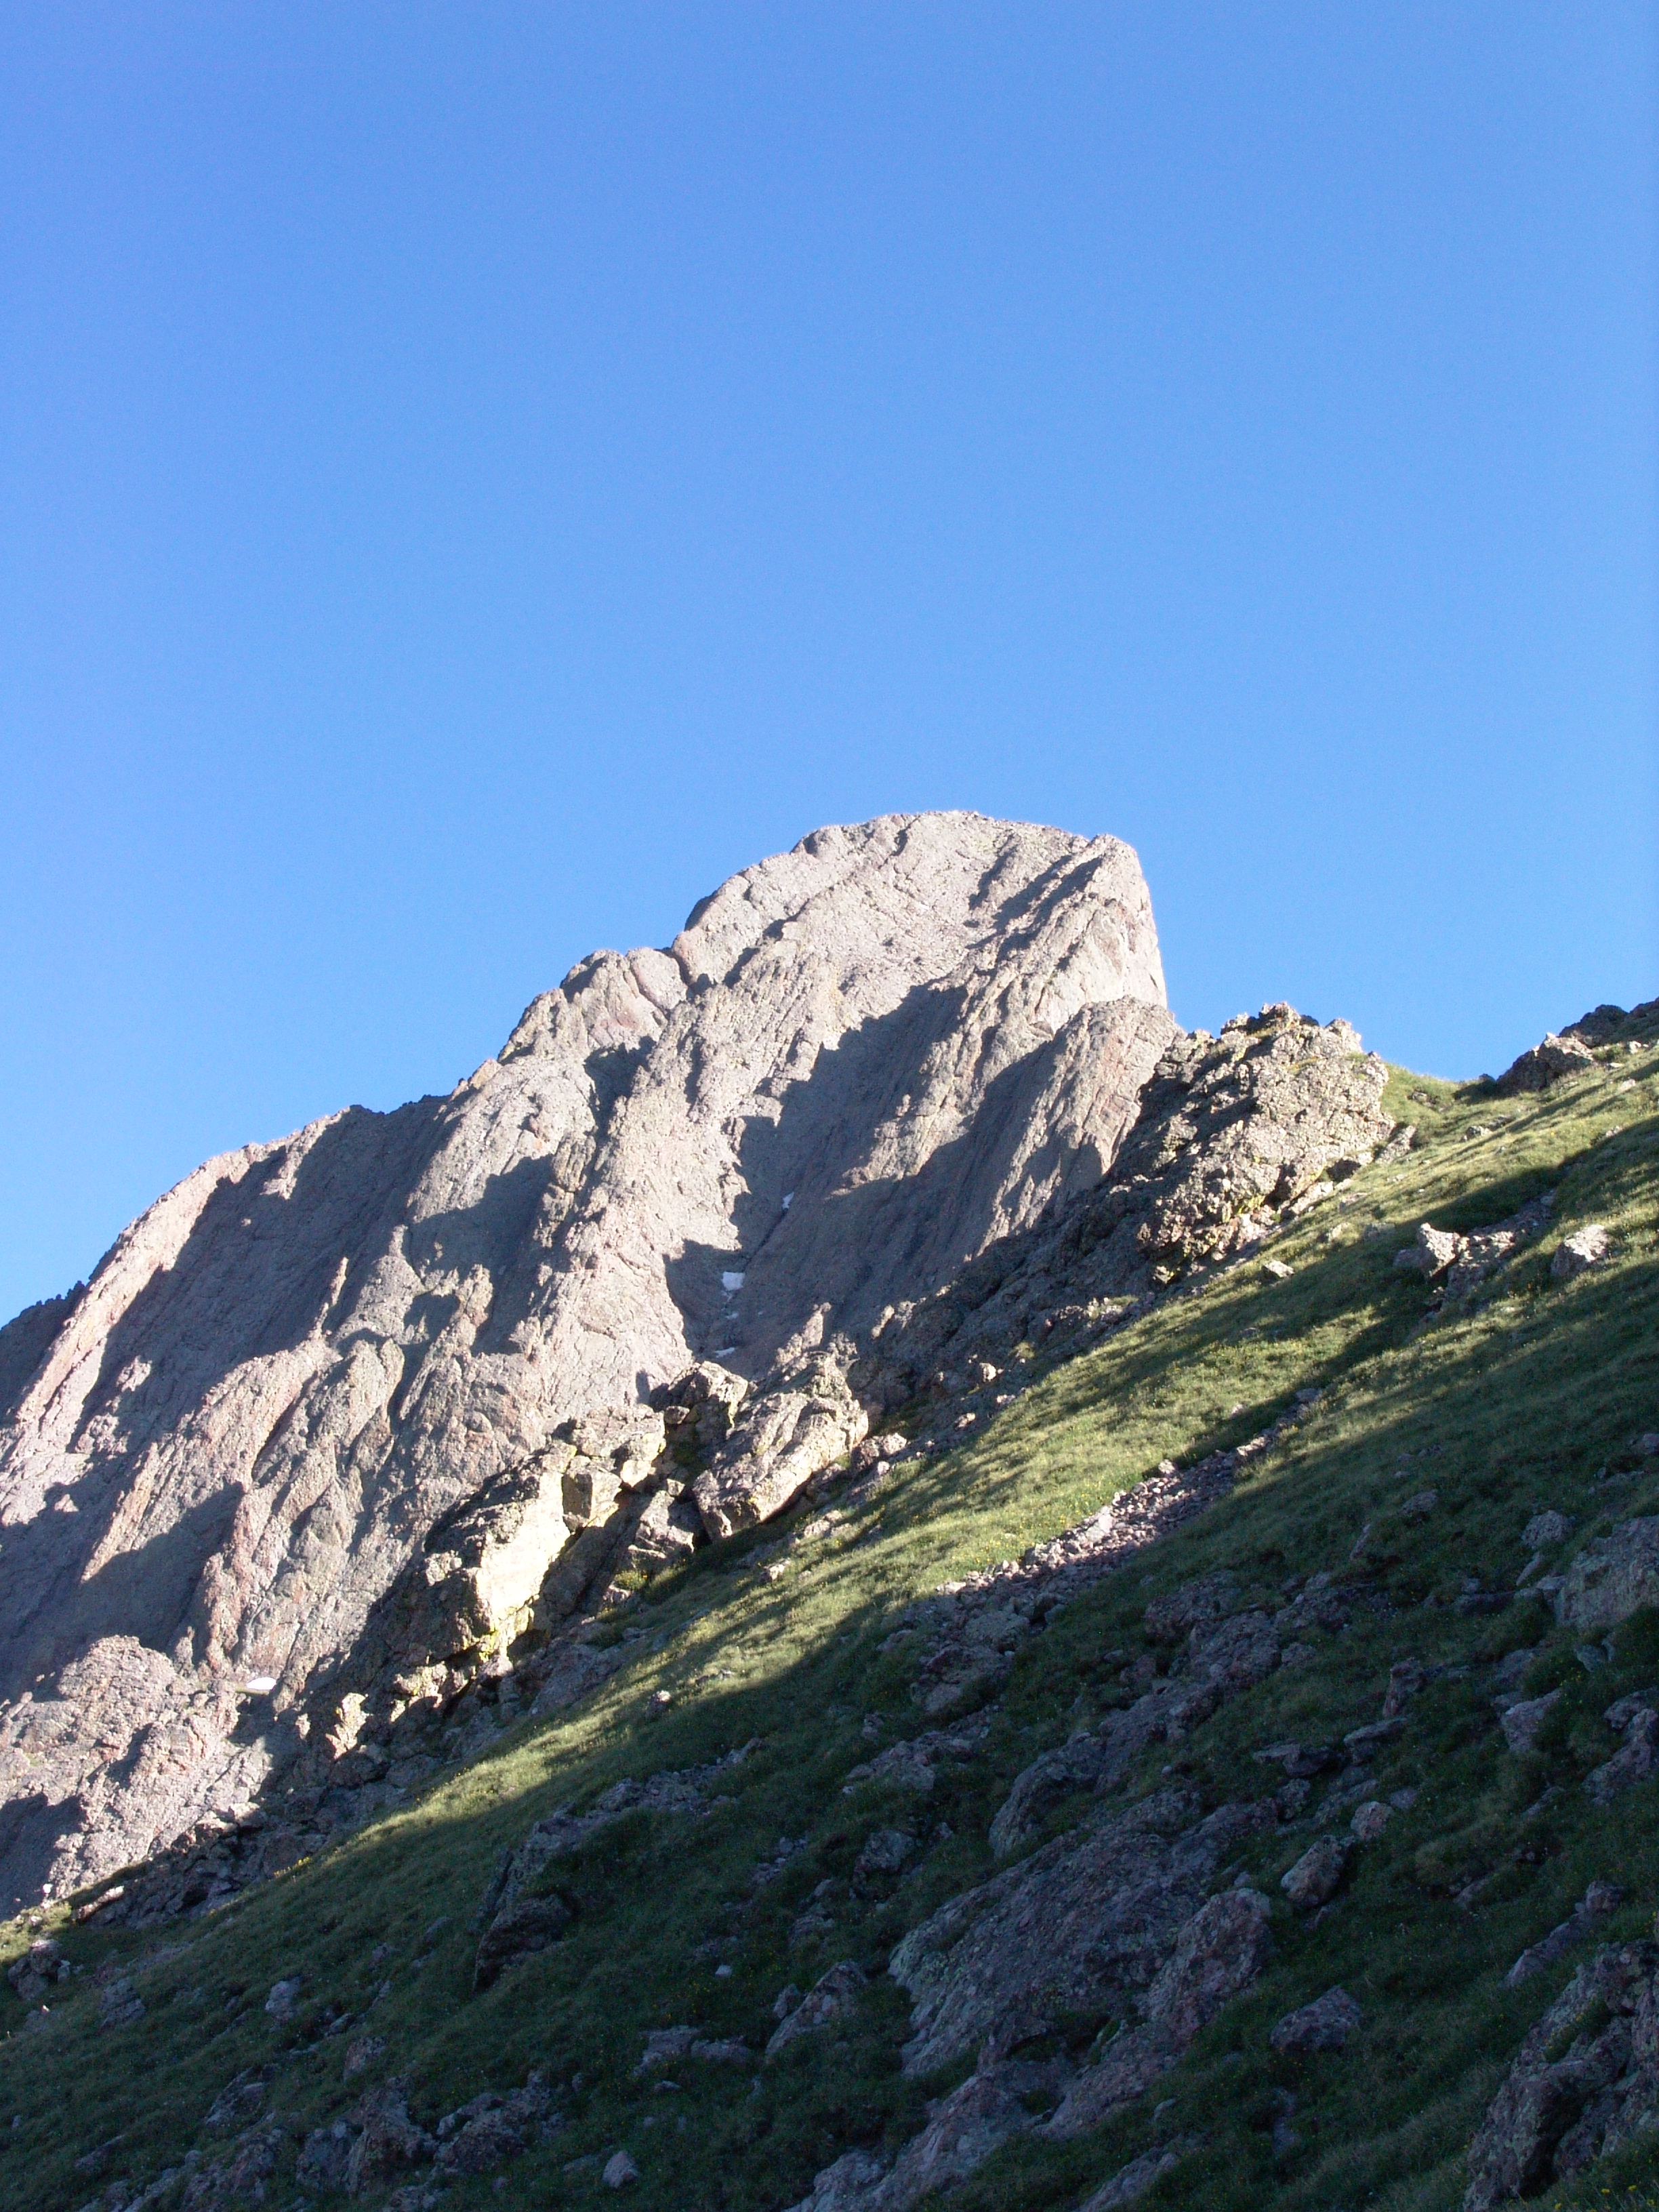
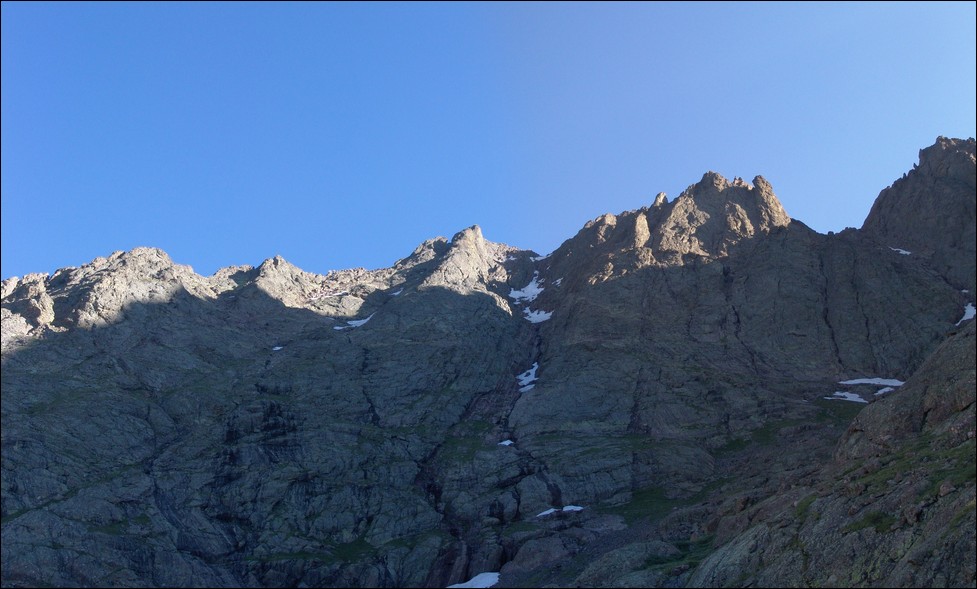
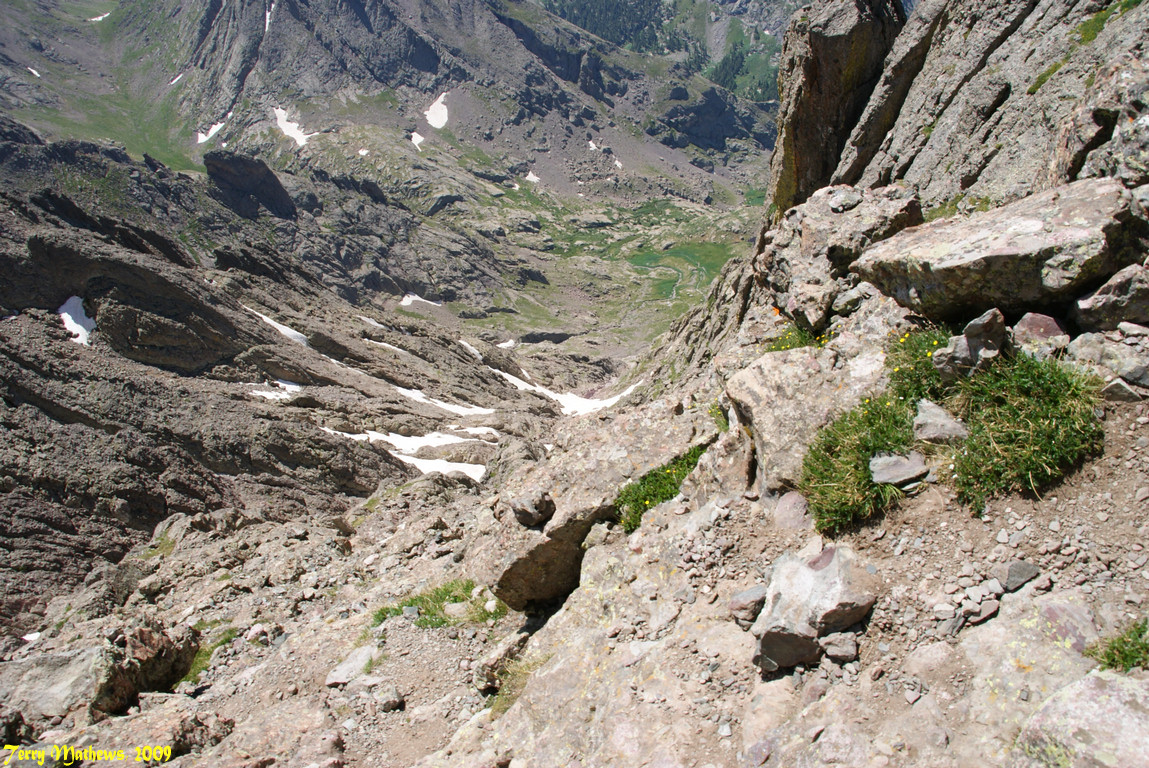
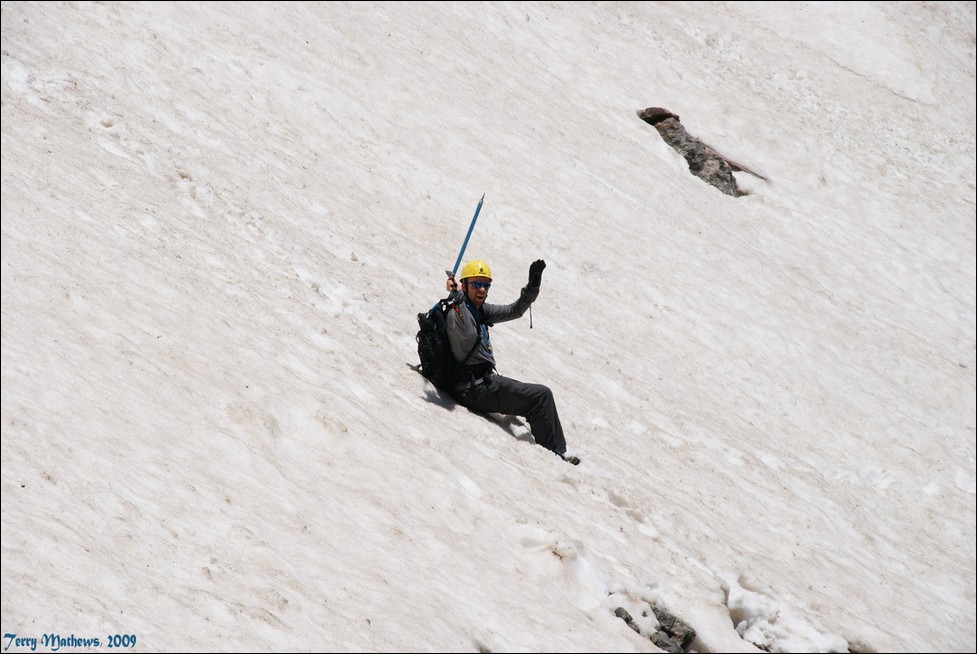
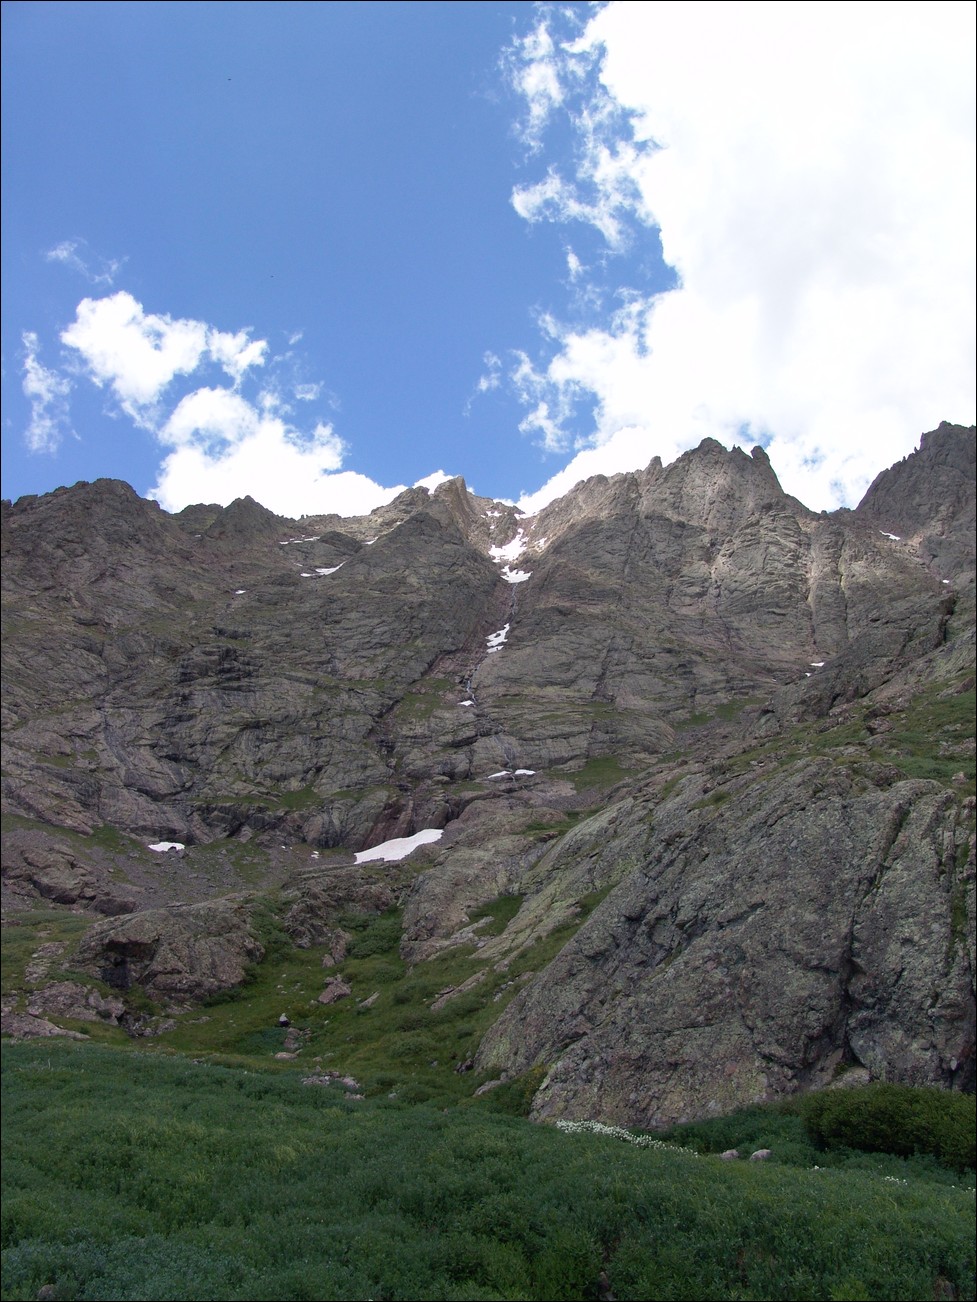
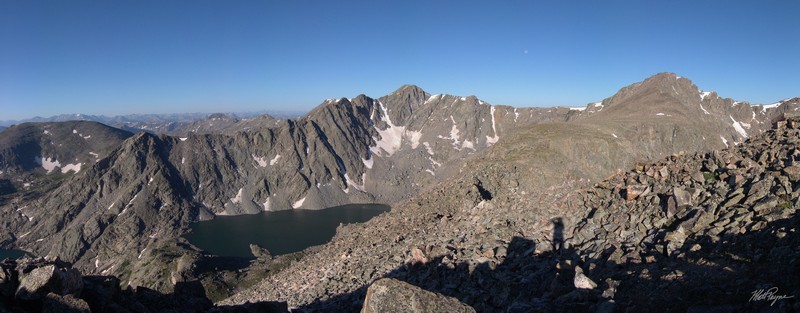
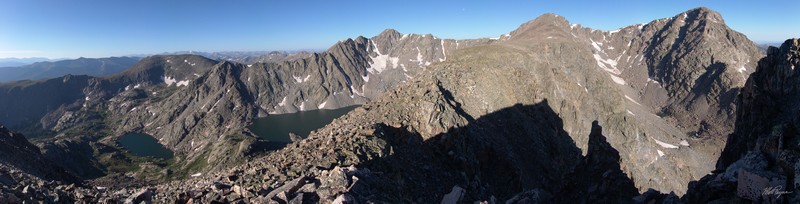
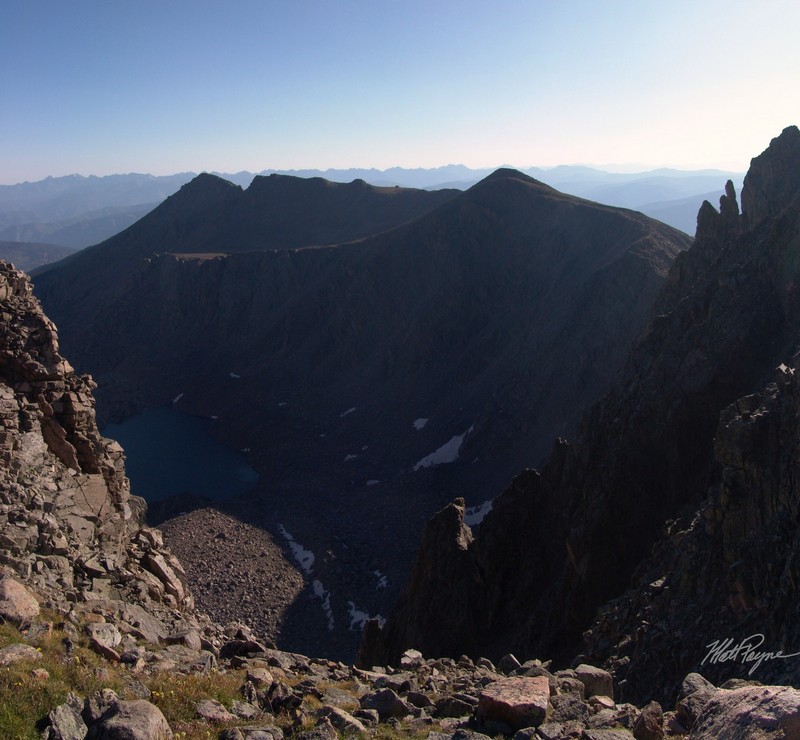
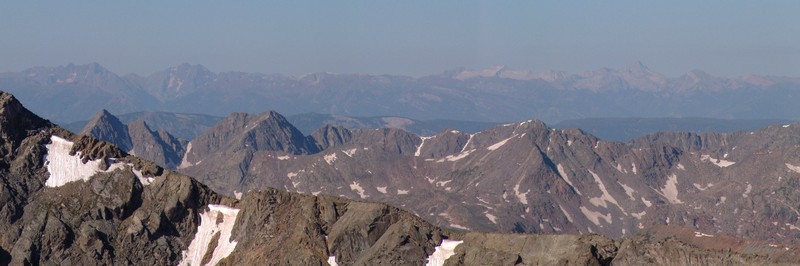
My goal for my first 14'er of 2010 was to summit Mount Shavano (14,229 ft) and then traverse over to Tabeguache Peak (14,155 ft). I had made this attempt last year at the end of May and was able to make it to the top of Shavano but was pushed off the summit by weather, subsequently postponing my summit of Tabeguache. Last year, I climbed the standard route of Shavano, which was a good adventure; however, I wanted to attempt the Angel route this time. Having watched several people ascent via this route last year, I was both intrigued and puzzled as to why someone would put themselves through this much torture. Then after a summer of climbing harder climbs, I figured out why - the challenge and diversity of a new route and the fun of going up a snowfield with an ice axe! Here are two photos from last year's climb, looking down at the Angel route:


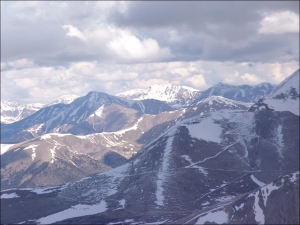
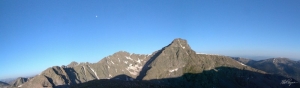
My adventure began by driving from Colorado Springs to the Trailhead on Friday, May 21st, 2010. First, let me apologize, I believe that my camera's sensor needs to be cleaned, as many of my images have a slight smudge that is in the middle near the top. Having created this website since last year, I decided that on my way over that I would get a few photos of the Sawatch and Mosquito/Tenmile range from the top of Wilkerson Pass. Fortunately, the weather did cooperate for a few great photo opportunities: 


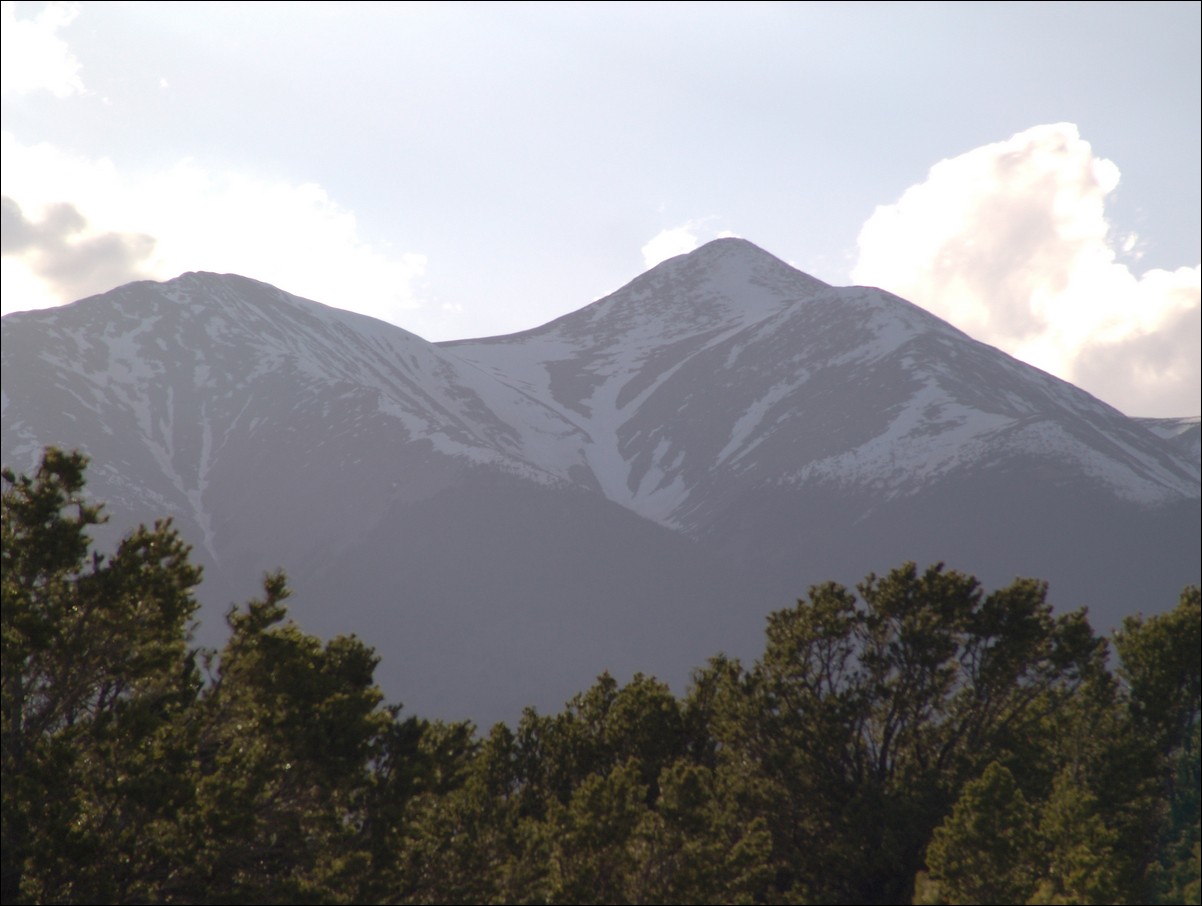
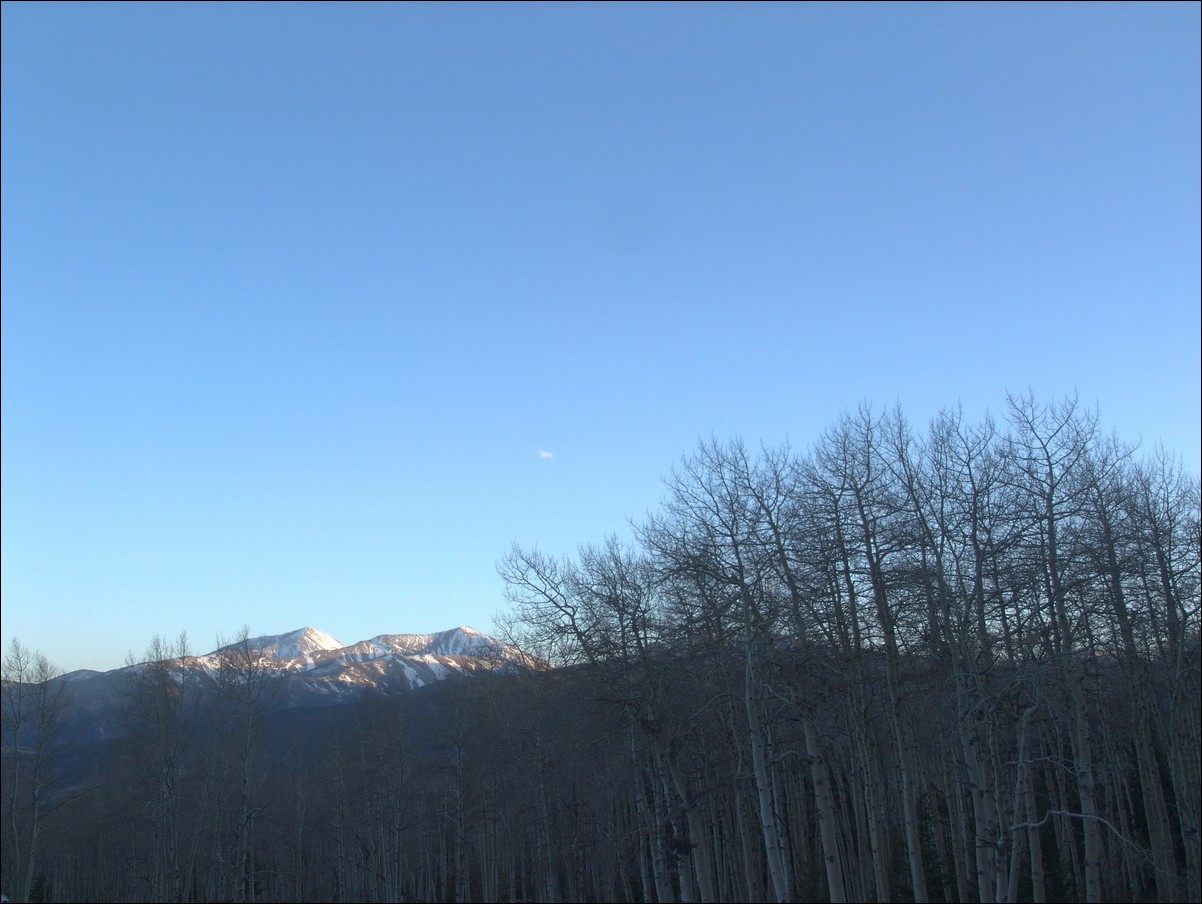
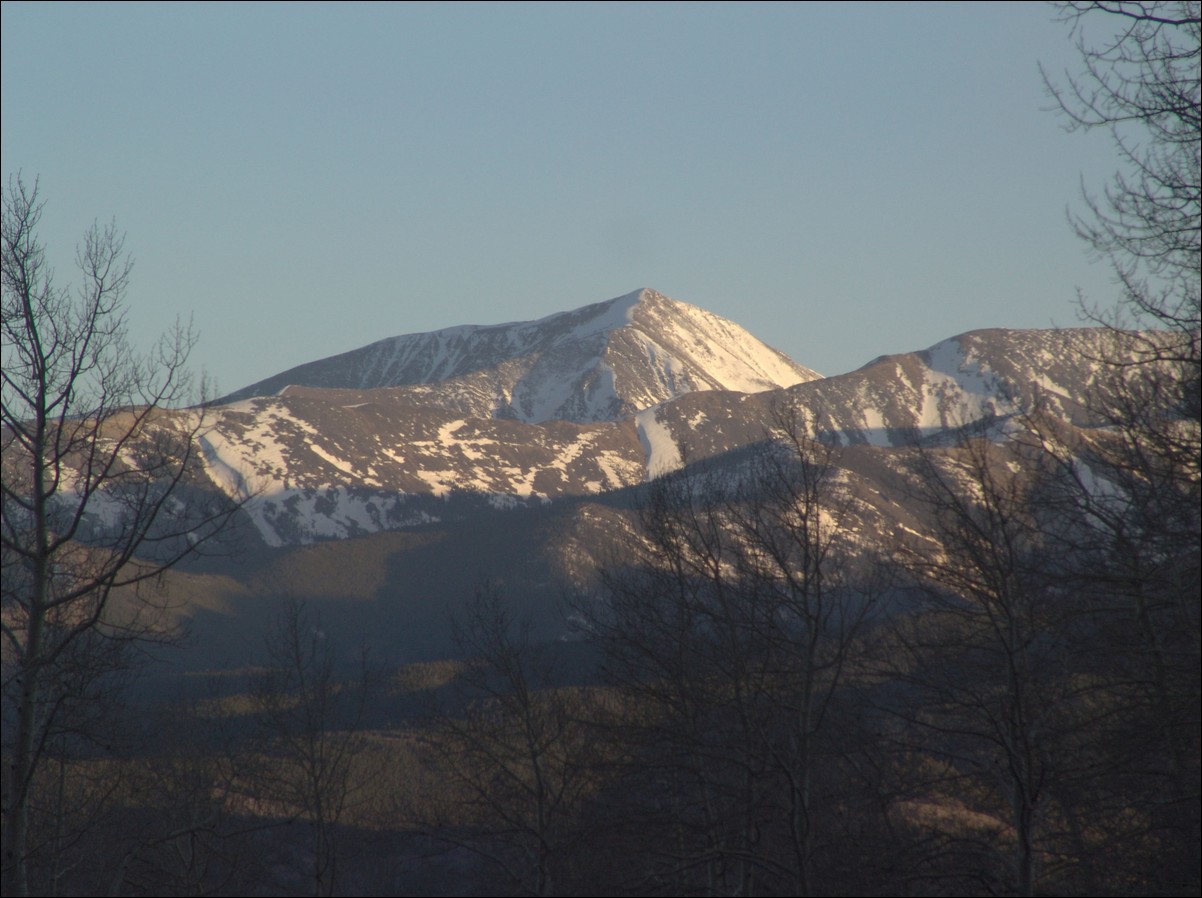
After a quick drive through South Park, I made it to the turn-off for the Trailhead near Salida. Near the beginning of the road, I took the time to take some photos of Shavano. The Angel was looking great!

I even played around a little with some bracketing on my camera for this so-so HDR product:
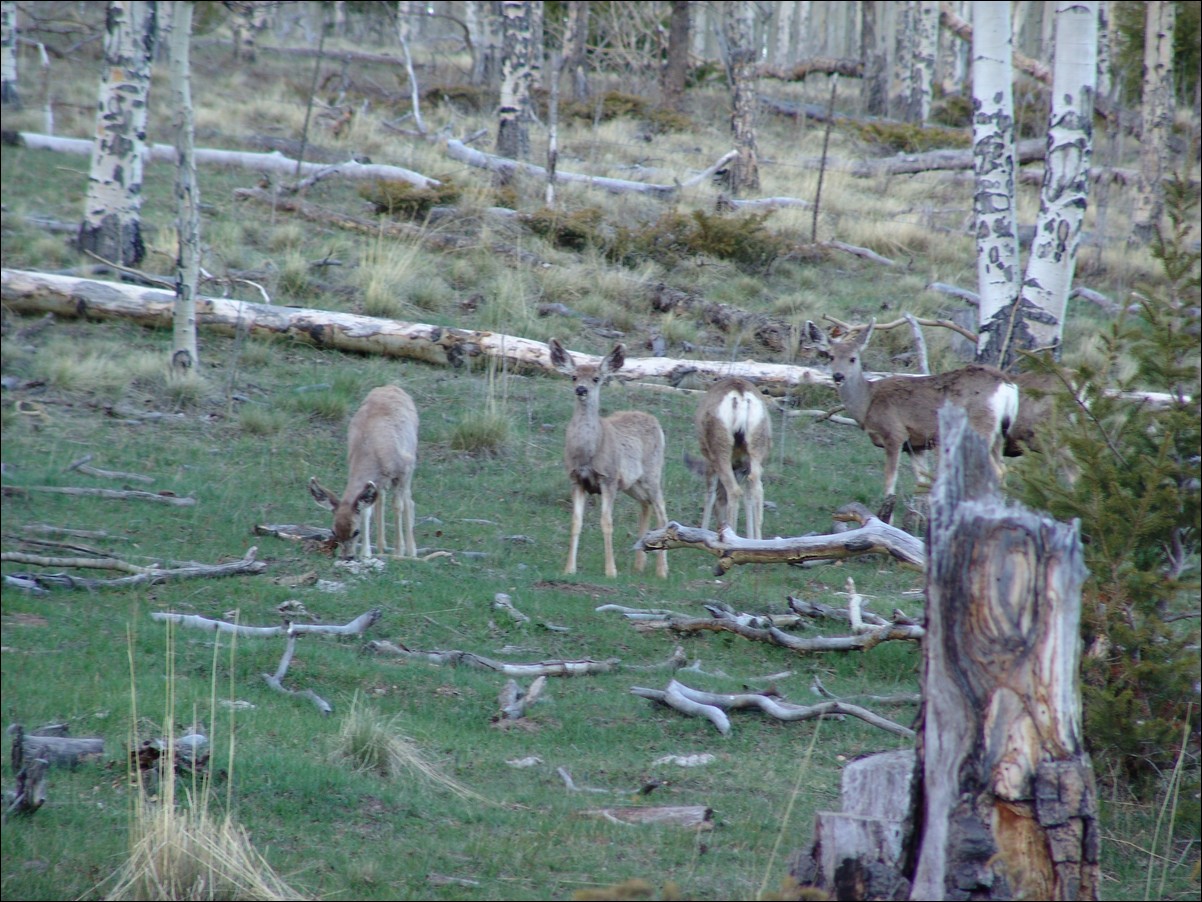
The road was in great shape and it seemed as if there were far less cars this time around. Heck, there were even some deer hanging out!
I decided to drive up the road a-ways to check-out the camping areas. I was pleasantly surprised to find quite a few spots to camp and decided on a spot at the end of a huge meadow. Here is my sad attempt at an HDR photo of that meadow. I really like the way the tree turned out. You can see my vehicle in the far distance on the right:

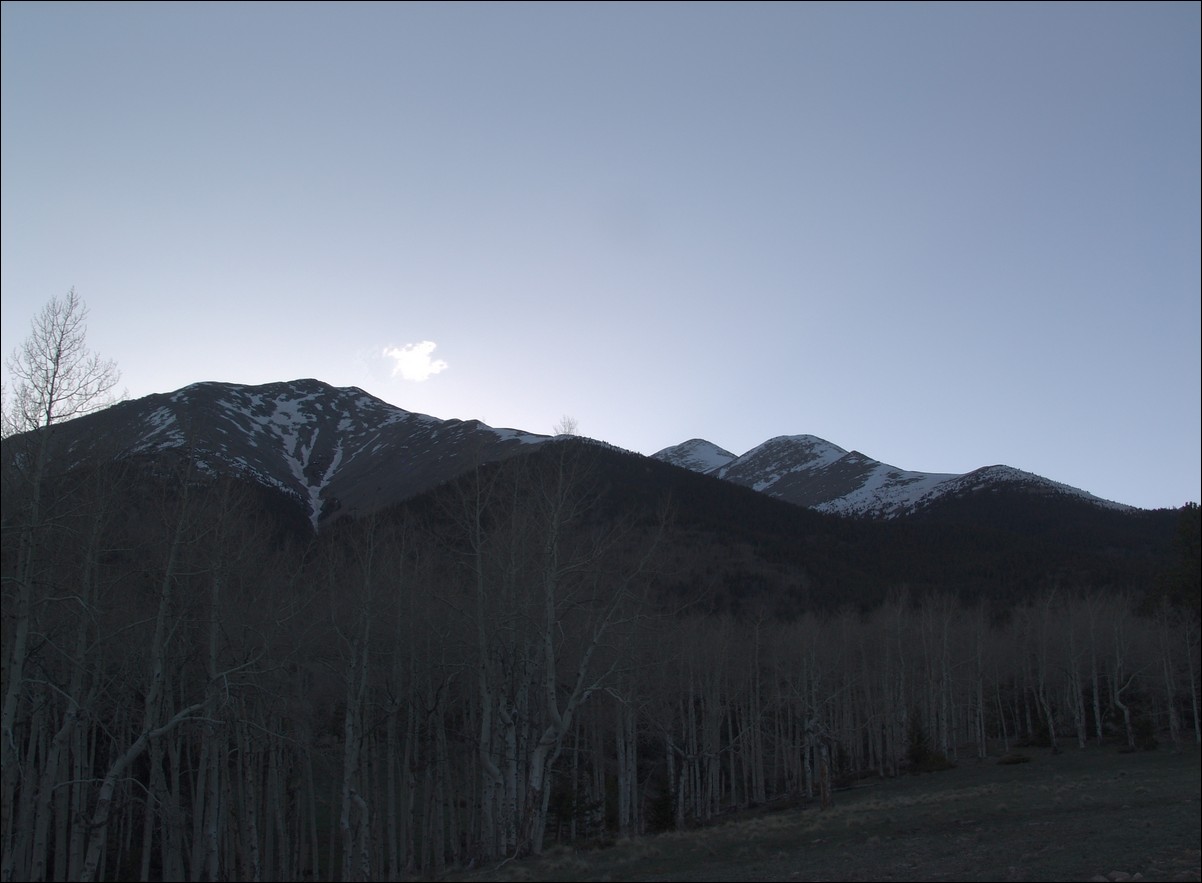
Since I had some time to kill, I decided to take a few photos of the surrounding area. Hunts Peak:

Hunts Peak and surrounding area:
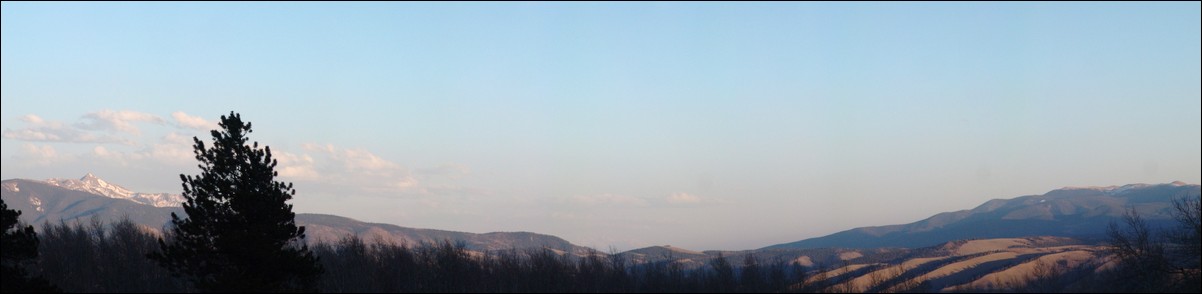
Mount Shavano is the little bump in the middle:
I decided to hit the sack early and sleep with the rainfly off of the tent. This proved to be a great idea because the sky was clear and the stars were bright and numerous! I set the alarm for 4 AM, since I wanted to get up, cook breakfast, and pack my tent before hitting the trail. The alarm sounded and I woke up and fired up some water and ate some pretty decent oatmeal from Costco. I packed up and drove the very short distance back to the trailhead and was on the trail by 5:15 AM. The parking lot was still surprisingly empty except for two other vehicles. I soon was feeling the negative effects of packing so heavily - I had brought my snowshoes, ice axe, trekking poles, crampons, water, lots of food, and warmer clothes. The trail was as steep as I remembered and the snow was showing up on the trail far sooner than my trip last year. Before long, snow drifts blocked the trail in several places. Fortunately, the snow had hardened from the previous day and was passable without the use of snowshoes. I followed the trail until it began to become harder and harder to follow. I made sure to follow other climbers up the valley and towards what I knew was the Angel. Instead of heading North along the standard trail, I kept South and ended up at the start of the large boulder field before the Angel begins. As I climbed to the top of the boulder field, the Angel came into view and I was able to really see the challenge for the day. The Angel route takes you directly up the center of the Angel and then up the right arm or straight up, depending on the snow and your preference.

I kept heading up and soon was greeted by the nasty wind that was forecast for this weekend - up to 60 MPH gusts of wind. Oh joy! As I continued up the boulders and snow fields, I was finally able to reach the base of the Angel, where I decided to put away the trekking poles and get out the ice axe. I use an old Chouinard ice axe that was passed down to me by my dad (Old Climber on this site). The reasoning for the use of an axe while going up the Angel is two-fold: 1) For self-arrest if I were to slip and 2) Aid in climbing. A few skiers and snowboarders were ahead of me, making it somewhat easier to follow their footsteps instead of creating my own steps in the snow.

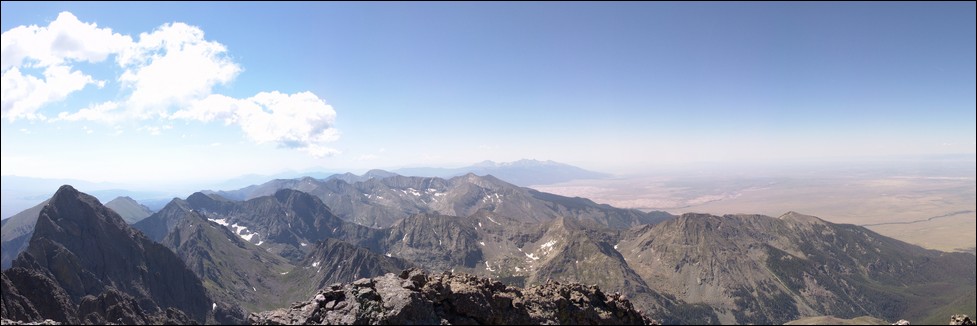
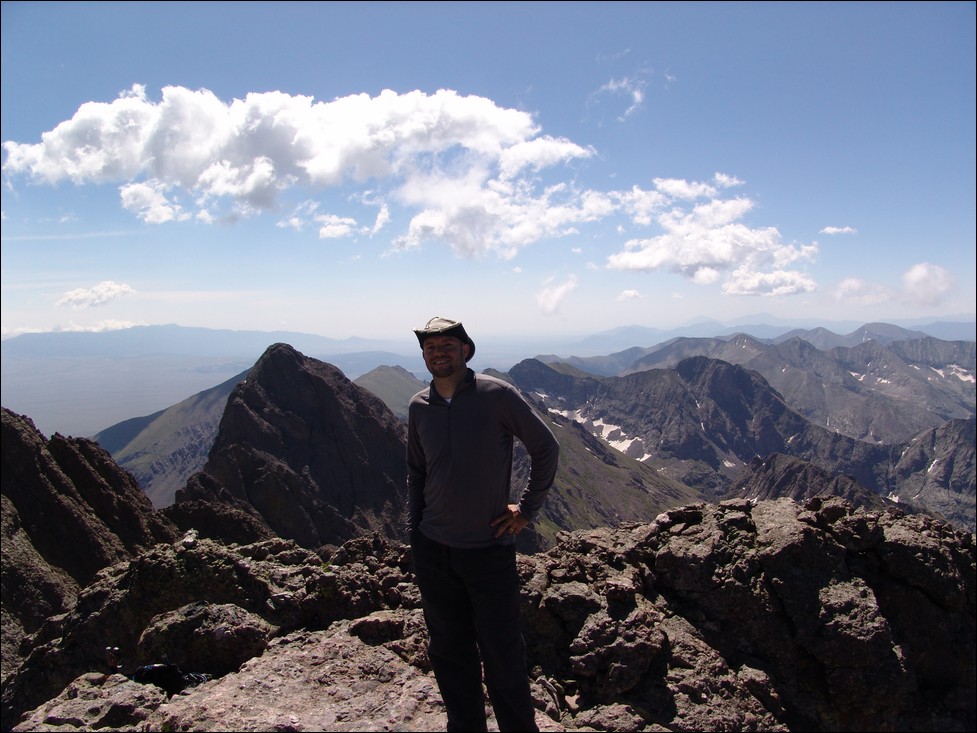
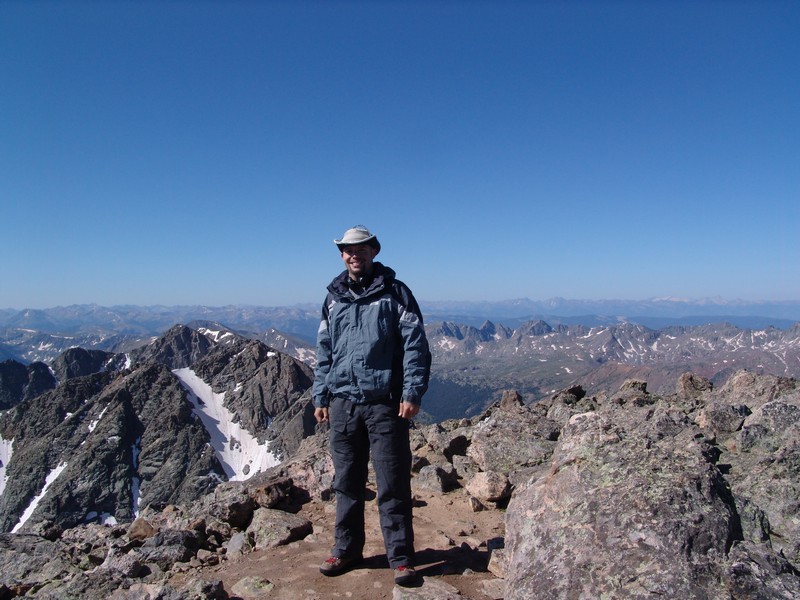
I quickly discovered that crampons were not needed, so that was somewhat of a bummer realizing that I had lugged them up there for no reason. I was beginning to think the same about my snowshoes, but they actually proved quite useful later on. The Angel of Shavano was not a terribly difficult climb, but it was taxxing on my legs and lungs. I was quite aware that this was my first climb of the season. I persevered up the Angel and decided to stay in the middle of the Angel, despite all other groups going to the right or left on the arms of the Angel. What can I say - I'm a rebel. The snow in this part was pretty good and traction was easily gained with my La Sportiva Trango boots. The hardest part of this climb was my lack of stamina and the wind. The wind really took a toll on my strength and took every opportunity to sap me of any will I had to continue past Shavano. After hiking for 6 hours, I finally gained the summit and celebrated with two outstanding gentlemen that had skied up and were planning to ski down. One skier identified himself as 'steventraylor' from 14ers.com. They were both very friendly and it was a pleasure sharing the mighty summit of Shavano with them. I explained to both of them about my website and am hopeful that more and more people can take advantage of this platform to post thier reports and photos. The wind had really caused quite a bit of dust to fill the air around the state, and visibility was not as great as I prefer for photography; however, it was still great getting to see all those white-capped mountains! I was able to get Steven to take this summit shot of me, with Mount Antero and the rest of the mighty Sawatch range behind me:

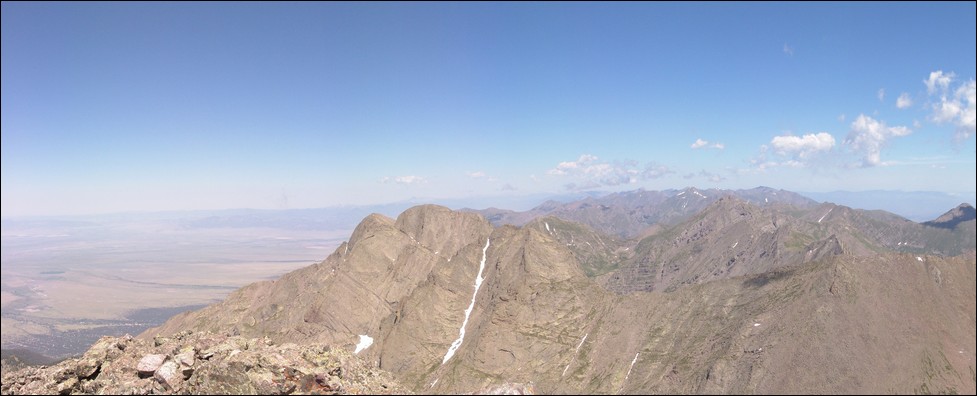
I took a few looks over at Tabeguache and declared that I would not have the energy to make it over. This was quite demoralizing for me since Tabegauche was the whole reason I had done this climb. Tabegauche is now my nemesis and will be conquered in 2011! Here is a shot of Tab:

The Sangres shrouded in dust:

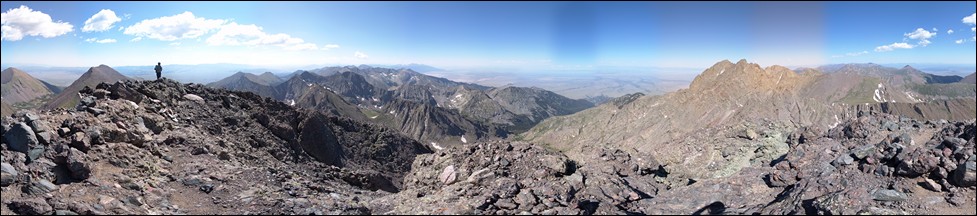
And of course I did some fun pano photos:

Here is a zoomed in look of Antero (far right), with Columbia and Harvard to its left: 
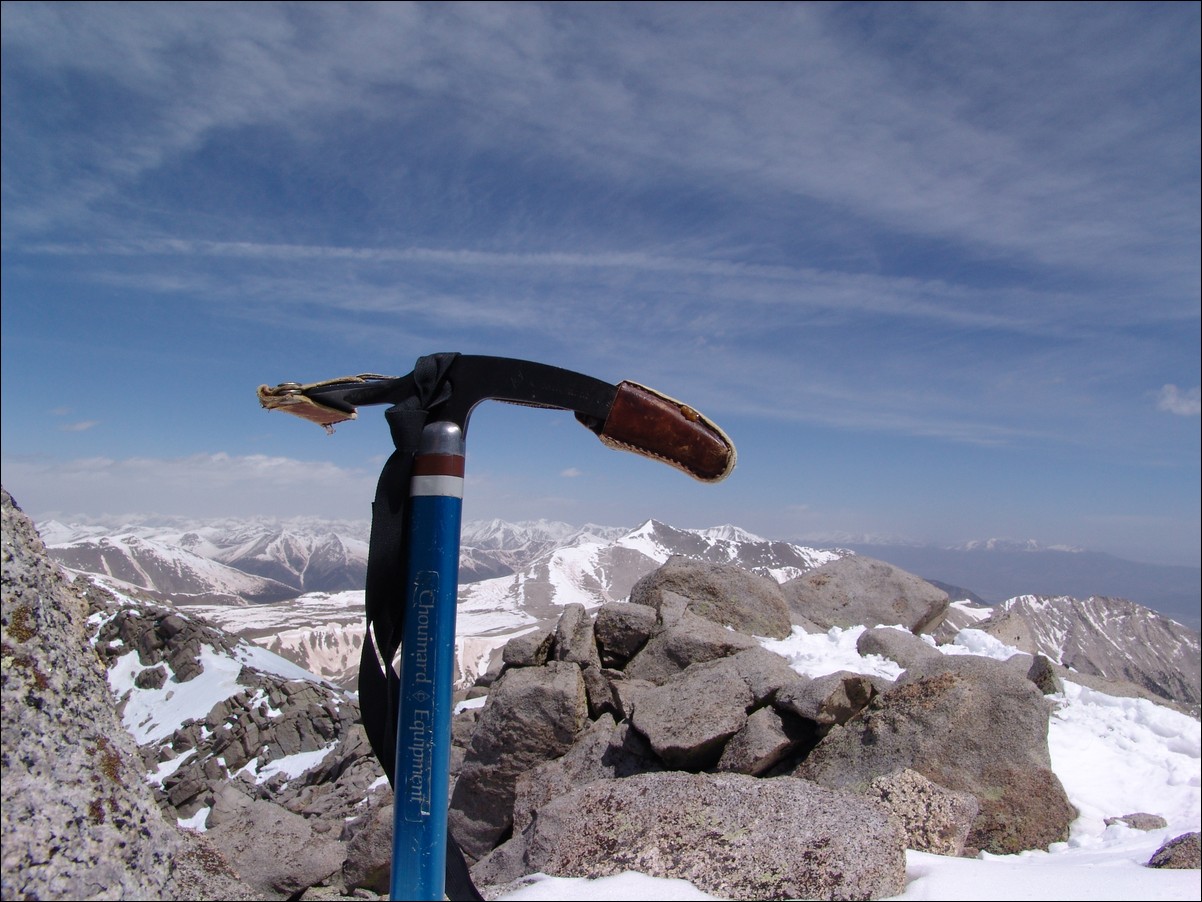
Since I had decided that I was not going to head over to Tabeguache, I spent some time enjoying the views and snacking on some chocolate covered espresso beans. I took a couple more "artsy" photos using my ice axe as a prop:
After about an hour, I decided to bug-out and head down. The descent was pretty straight forward; however, being in boots and not skis, the snow proved slippery and was soft, making for some interesting post-holing. I quickly decided that this was a perfect opportunity to test my skills in glissading. I sat on my butt and ensured that my ice axe was securely attached to my wrist. I placed the axe to my right side like a parking break and used it to control my speed going down. I made a quick detour over to the top of Point 13,617 just to say I was on top of it. The wind over there was outrageous! I was only able to take a few photos from there. The first photo is Shavano and the second is Antero:


I began glissading again, but the snow was more like ice on the North arm of the Angel, so I foolishly decided to scurry over to the standard trail once I crossed it. The trail looked really clear but this proved false. As I continued on the trail for about 200 yards, the snow fields became un-crossable. The snow had covered the snow and was so soft that it was a post-holing nightmare and a safely concern. I decided that I might as well make use of the snowshoes I had carried all this way and put them on. I wore them and used them to safely cross Shavano's shoulder down to some snow-free areas. I took off the snowshoes and went straight down the mountainside and down into the valley near where the Angel route begins. I followed some tracks back down the valley until I was able to meet up with the main trail again. I would highly recommend that if you ascent via the Angel, you also descent the same way. The snow on the trail coming down was very soft and post-holing was common past your knees. It was not enjoyable to say the least. I concluded my adventure and drove back to Colorado Springs, and hope to tackle Mount Huron in two weeks!
Crestone Needle and Peak via Cottonwood Creek
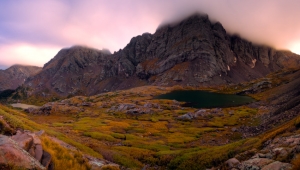
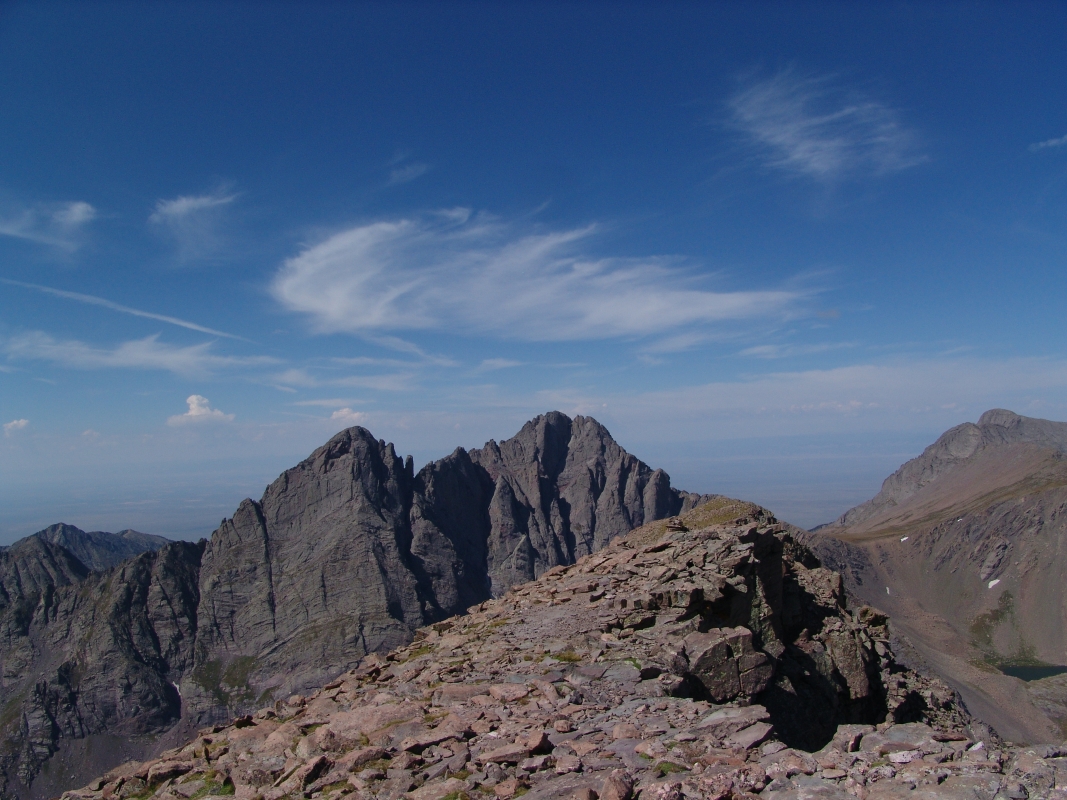
What an adventure! Never in my dreams did I think I would ever conquer the mighty Crestone Needle and Crestone Peak. After seeing them from two years ago, I figured I’d never have the testicular fortitude to attempt them. Here is Crestone Needle and Crestone Peak (right of Crestone Needle) as seen from the summit of Humboldt.
Alas – when I read my friend's itinerary for his mountain climbs back in April 2009, I saw the Crestones and decided it would be the best chance I’d get to give them a shot…
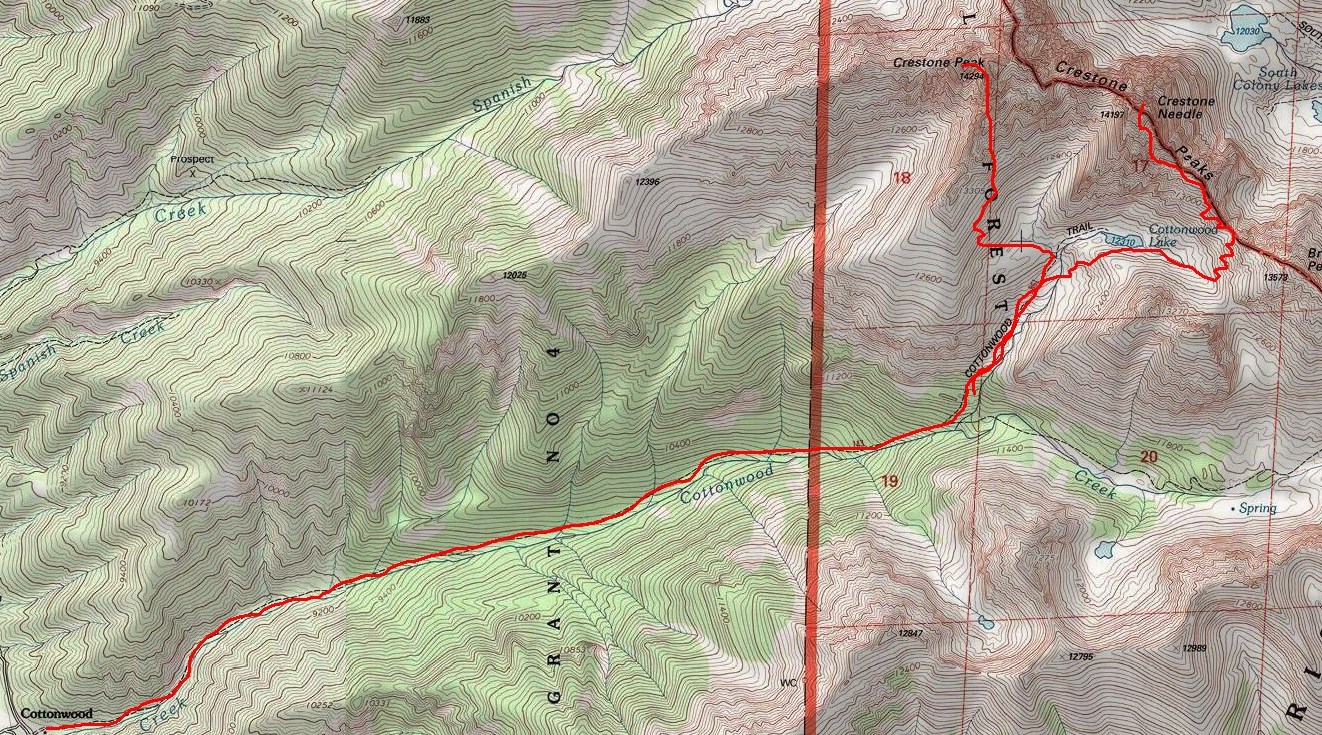
My friend Terry picked me up from my house at 5 AM on Thursday morning. We headed out for the long journey towards Buena Vista and eventually the small town of Crestone. The route Terry chose for these climbs was a rarely traveled backpacking trail from the west side of the mountains, up the Cottonwood Creek drainage.
The trailhead is on private property owned by the Manitou Foundation, a religious organization set-up to provide property easements for the purpose of religious worship and pilgrimage. Earlier this month, Terry was able to obtain written permission from the Manitou Foundation to park on their property and begin up the trail towards Crestone Needle and Crestone Peak. Below is a map of the route we ended up taking on our adventures.
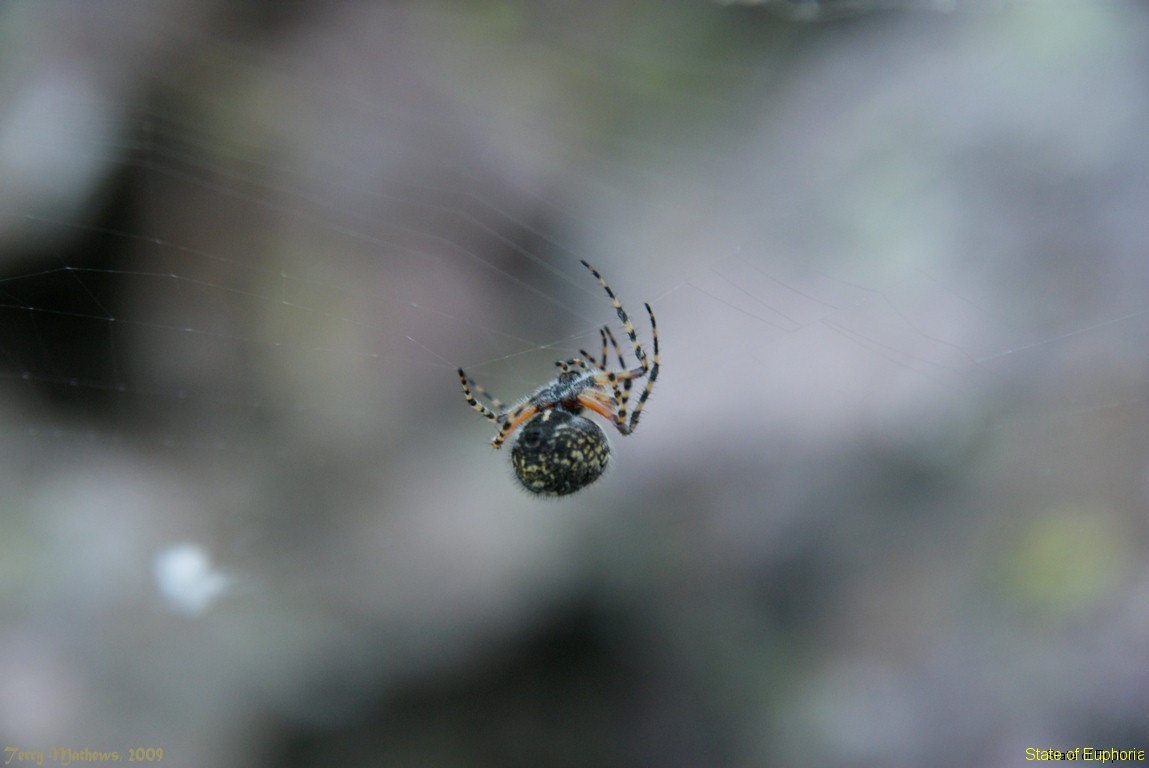
We arrived at the trailhead around 10 AM after driving around the area looking for the proper place to begin our hike. Due to the fact that this trail is off-limits to the general public, trail maintenance has not occurred on the trail for many years. The trail was very primitive and at many points in our day we lost the trail due to having to hike around heavy deadfall (basically a ton of dead trees blocking the trail). In addition to the trail being very faint, the trees in this forest were covered in heavy moss and spider webs. The spider webs were getting all over us and getting in our face, making the hike up quite the annoying yet adventurous journey.
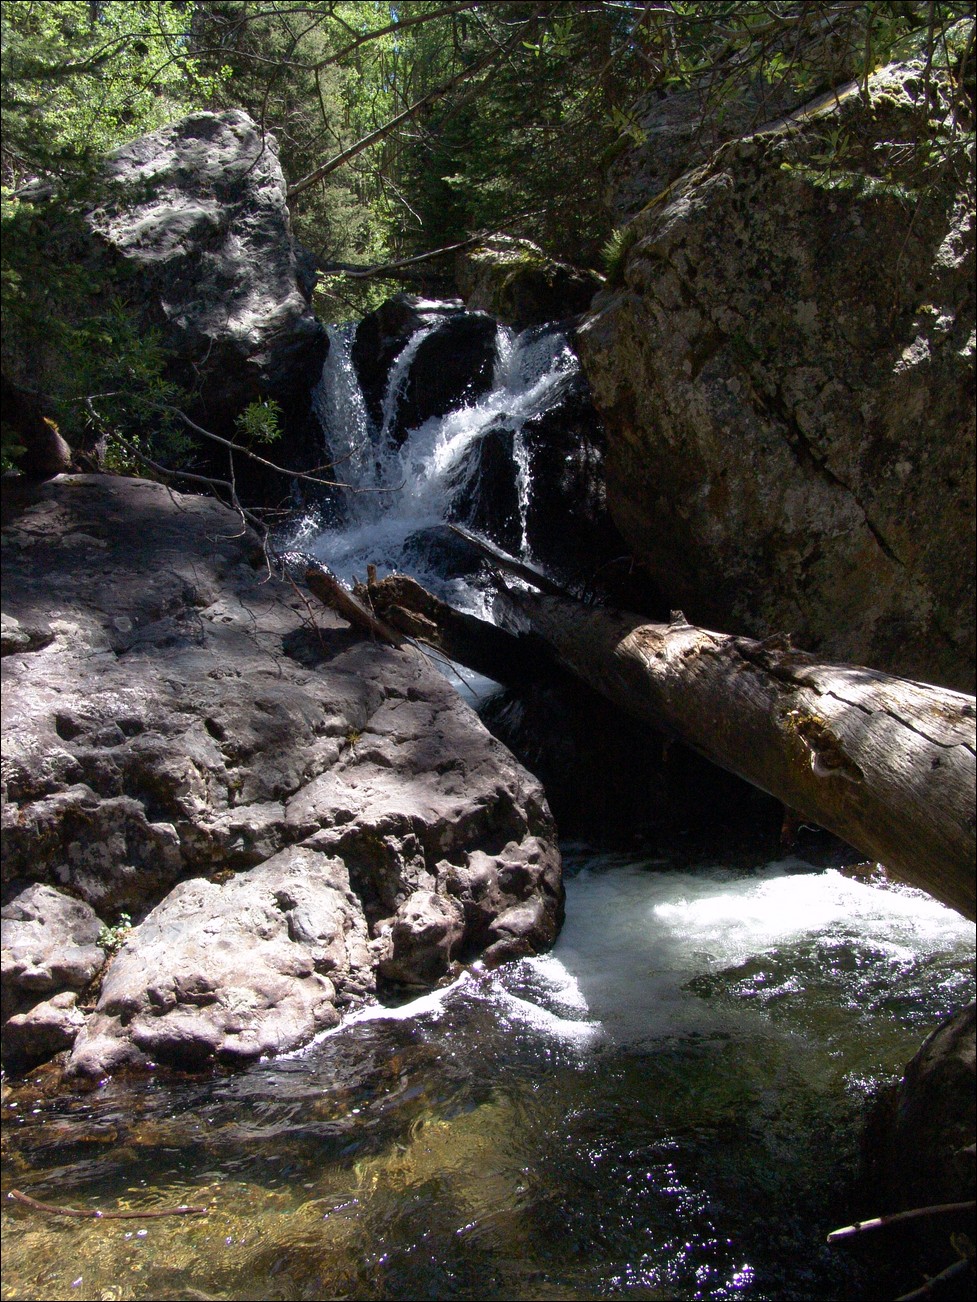
This was quite possibly the most intesnse bushwhacking, insane trail I've been on with a heavy backpack. At many times, the route was not visible at all, and the trail is lost easily. Take caution! The trail led us to a very pristine waterfall, one of many.
We scanned the area constantly for cairns in order to find our way. Unfortunately, a set of cairns led us up a very steep and rocky section that lasted for at least thirty minutes, but allowed for us to avoid some wet slab-like rocks that would have presented their own unique challenge. The rocky section was quite difficult given the fact that I had a 60 pound backpack on.
During our trek up the trail, I kept a close eye on my GPS, which has the TOPO! maps from National Geographic synced up with it. I monitored our position to ensure we were heading the right direction. As we approached a split in the trail that was critical to our route, I became nervous as the GPS showed our direction
heading up the wrong trail on several occasions. This resulted in Terry and I doing some bushwhacking through some heavily wooded areas and up a very steep gully towards our proper destination. Finally, our bushwhacking paid off when we found the proper trail leading up towards Cottonwood Lake
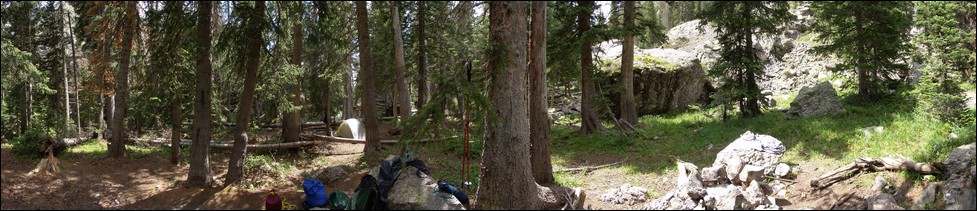
(where we had tentatively planned on making camp). Terry noticed that the trail we had found was the very trail we had left to do the bushwhacking, so it would seem that the trail splitting to the southeast was never revealed to us. After a very short time, we came to a very ideal campsite underneath a waterfall at the base of a large boulder field. At this point we had been hiking for 5 hours and decided we would camp here.
Here’s a nice 360 view of our campsite.
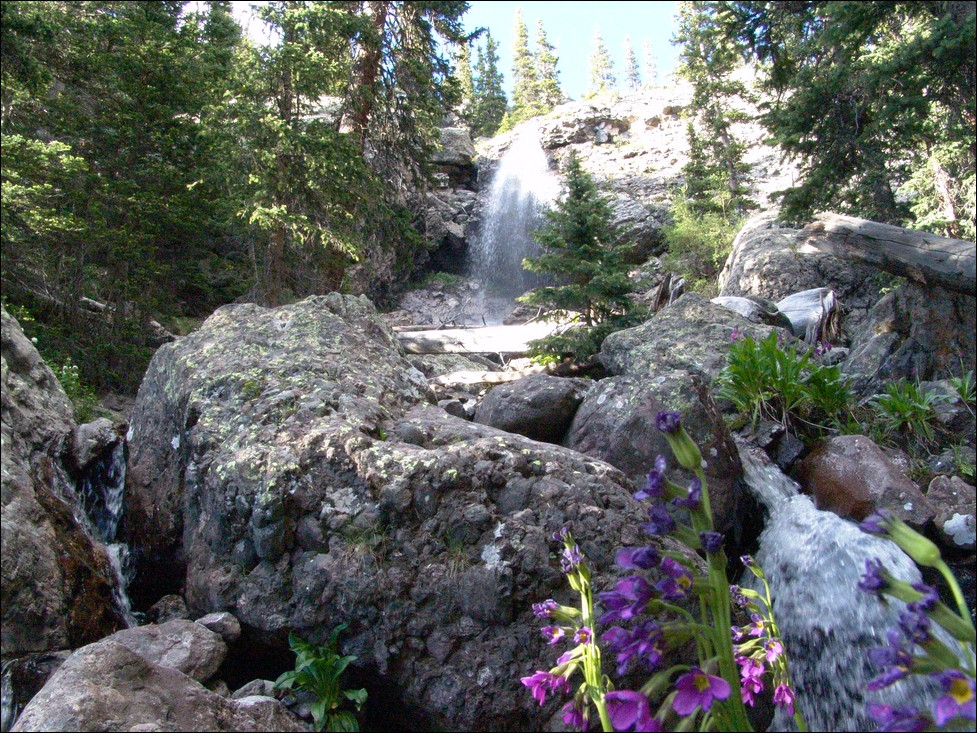
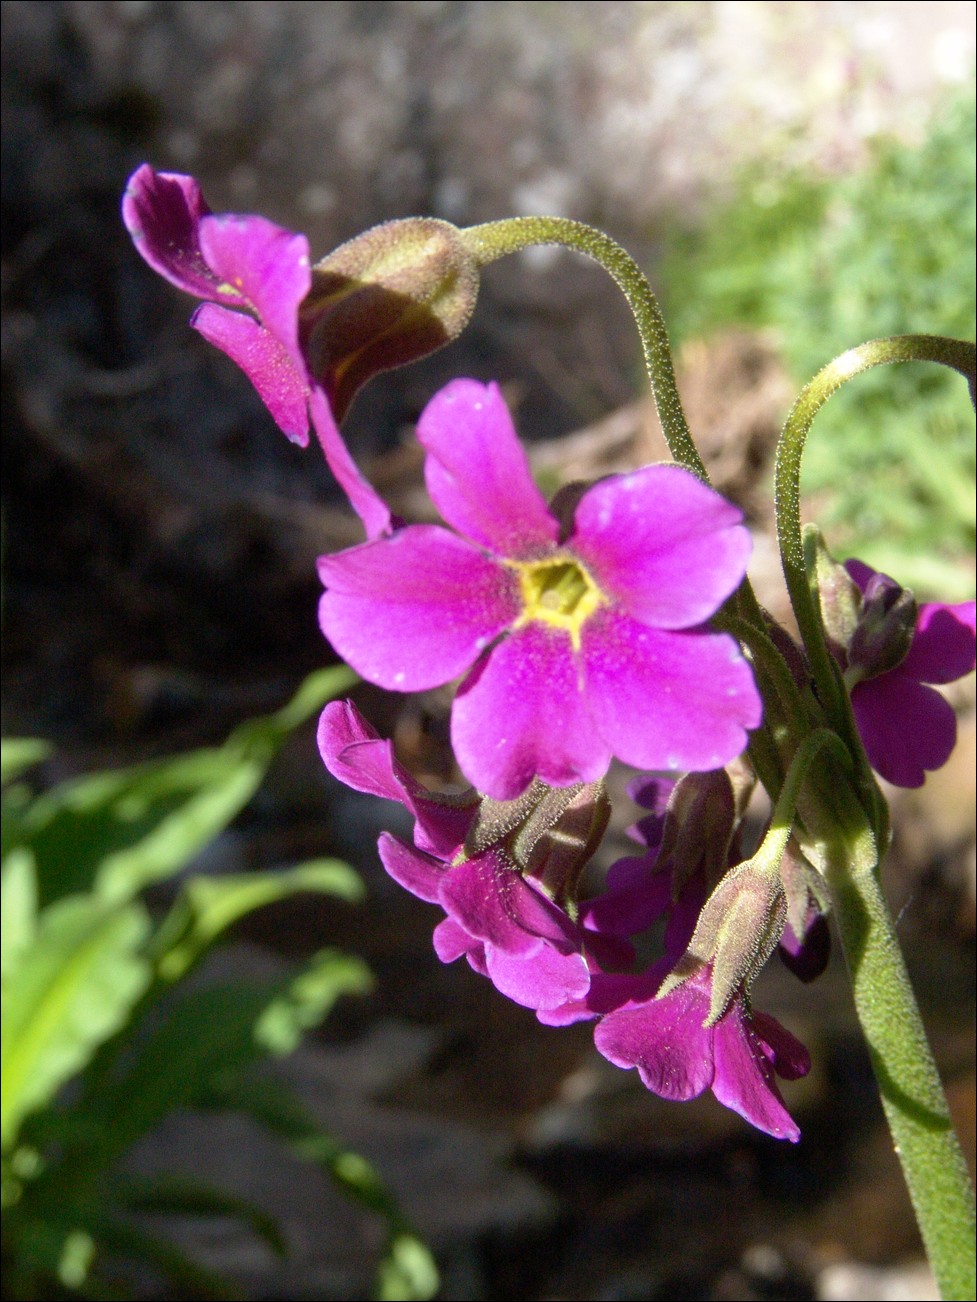
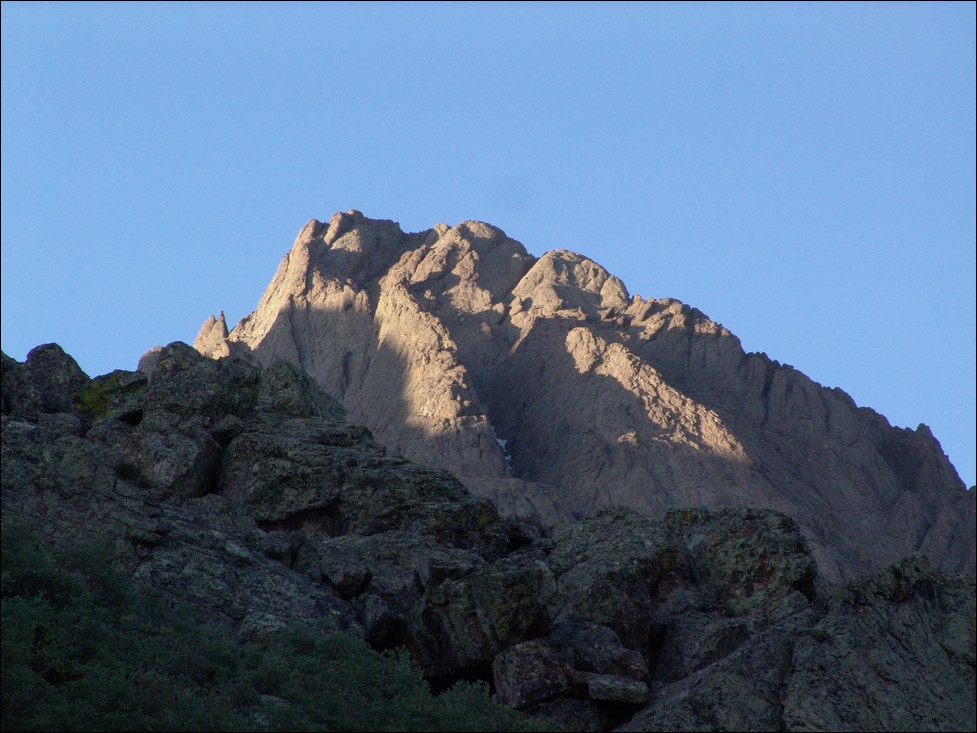
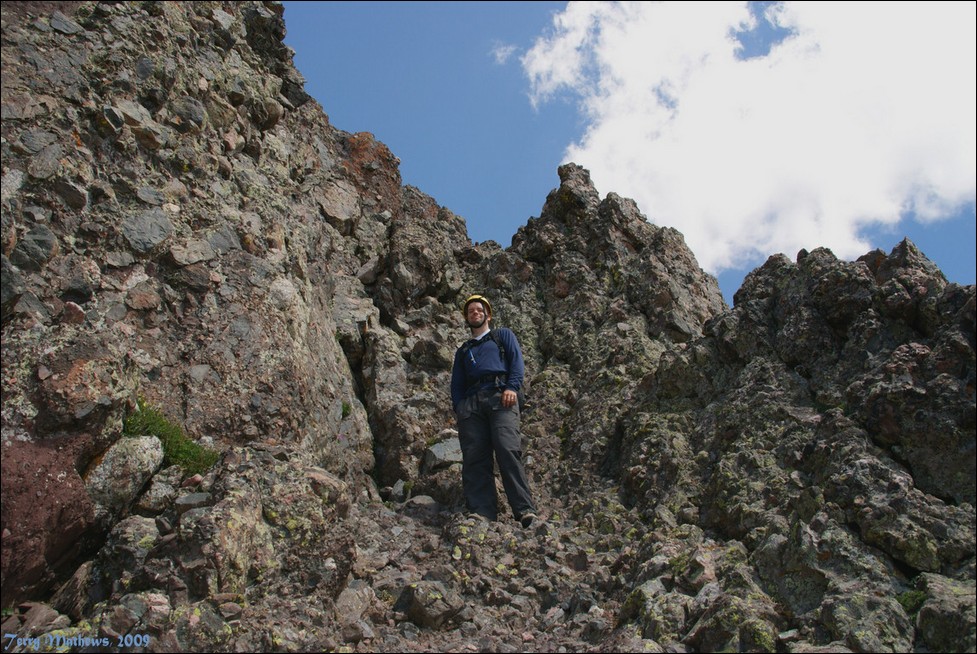
After setting-up camp, eating, and taking in some pretty sweet views of the waterfall right next to our camp (pictured below), I decided to take a quick hike up to see if I could get a sneak peek at Crestone Needle. (pictured below the flower). Seeing Crestone Needle brought some anxiety mixed with excitement to me, and I began thinking about the difficult climb we were about to attempt.
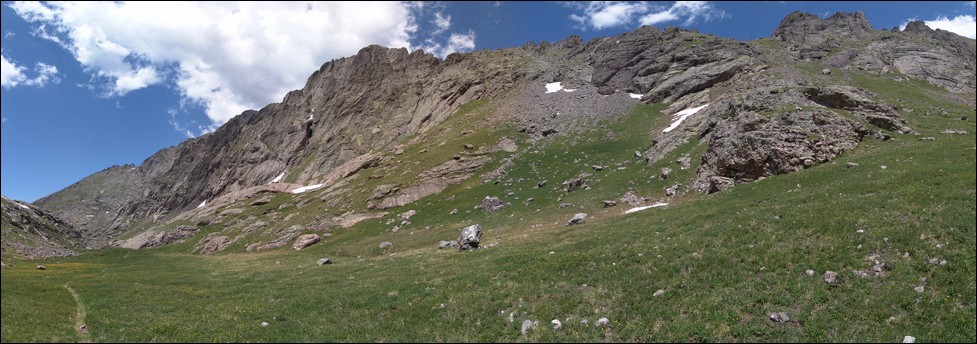
Terry set his alarm for 5 AM, which came way to soon given the level of exhaustion we had reached during our backpack up that crazy trail. We quickly ate breakfast and started up the steep trail above our campsite towards Cottonwood Lake. The trail was once again poorly maintained and poorly marked. We followed some cairns here and there up a large basin full of willows, spiders and steep waterfalls. Terry got a cool photo of one of ths high-altitude spiders we saw:
We decided to head east once we were quite high in the basin below Crestone Peak and Crestone Needle. About 3/4 of the way up the basin my daypack decided it would break, so I was forced to jerry-rig it so that it would still work. The shoulder strap ripped from the hip area, so I tied it to another strap coming up from the hip belt. Whatever works! We reached the top of the basin and realized we were quite high above the lake and that we would need to down climb to the trail leading up to Broken Hand Pass. Unfortunately the photos I took from this vantage point did not come out as intended; however, Terry got a great shot of the vantage we had of Crestone Needle and Crestone Peak:
Once we down climbed to the trail leading up Broken Hand Pass, we were able to get to the far east area of the basin and head up towards Broken Hand Pass. Terry and I felt sorry for the climbers that chose to climb these two mountains from the other side of the pass, as they would be required to climb up it twice for each mountain – ouch!
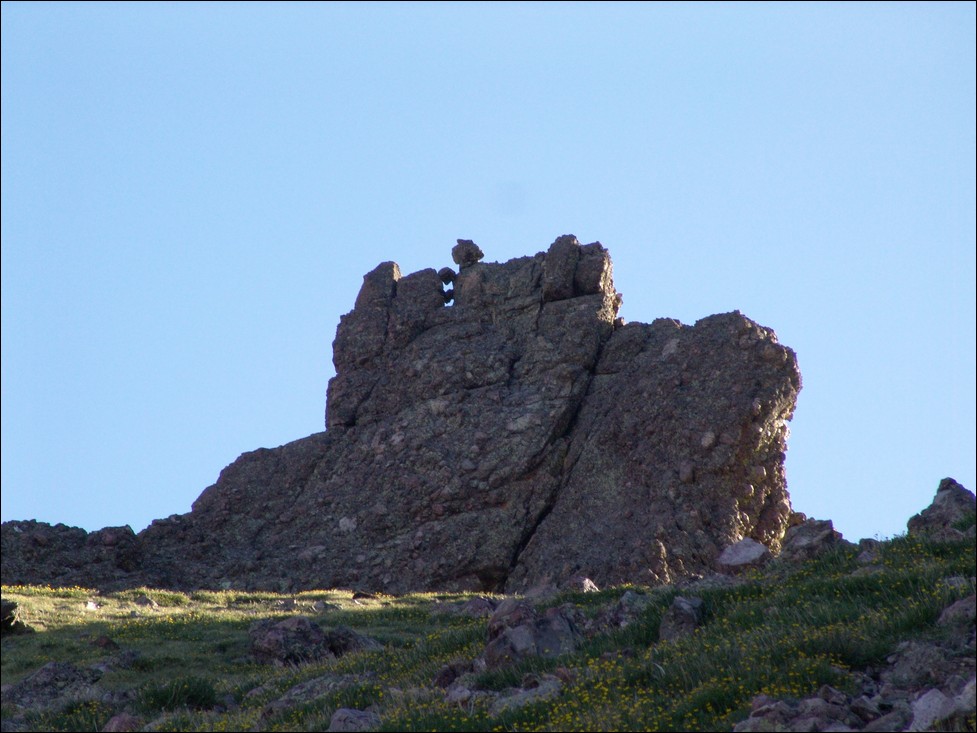
Climbing up Broken Hand Pass, one does not have to stretch their imagination too far to see why it is called Broken Hand Pass, as you can see a view of some rock that looks exactly like a closed fist that is next to what appears to be a second arm that has the hand broken off of it.
At the top of the pass, a large pulley system is set-up, with ropes and an intricate system of PVC pipes. Terry and I did not have much of a clue as to what this was for, but we later found out that day that the Rocky Mountain Field Institute uses the device to hoist large rocks from the top of the pass down the north side of the pass to fix the trail to prevent erosion.
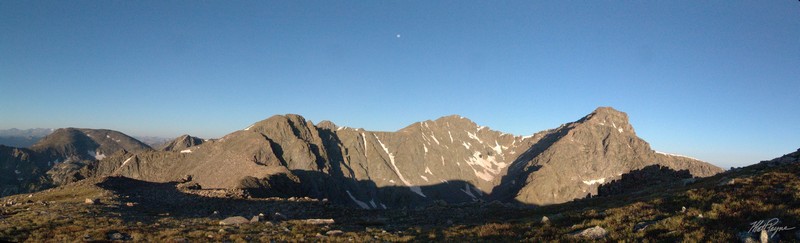
From the top of Broken Hand Pass, we were able to check out the lower South Colony Lake and Humboldt across the way. Here’s a nice panoramic photo of that view:
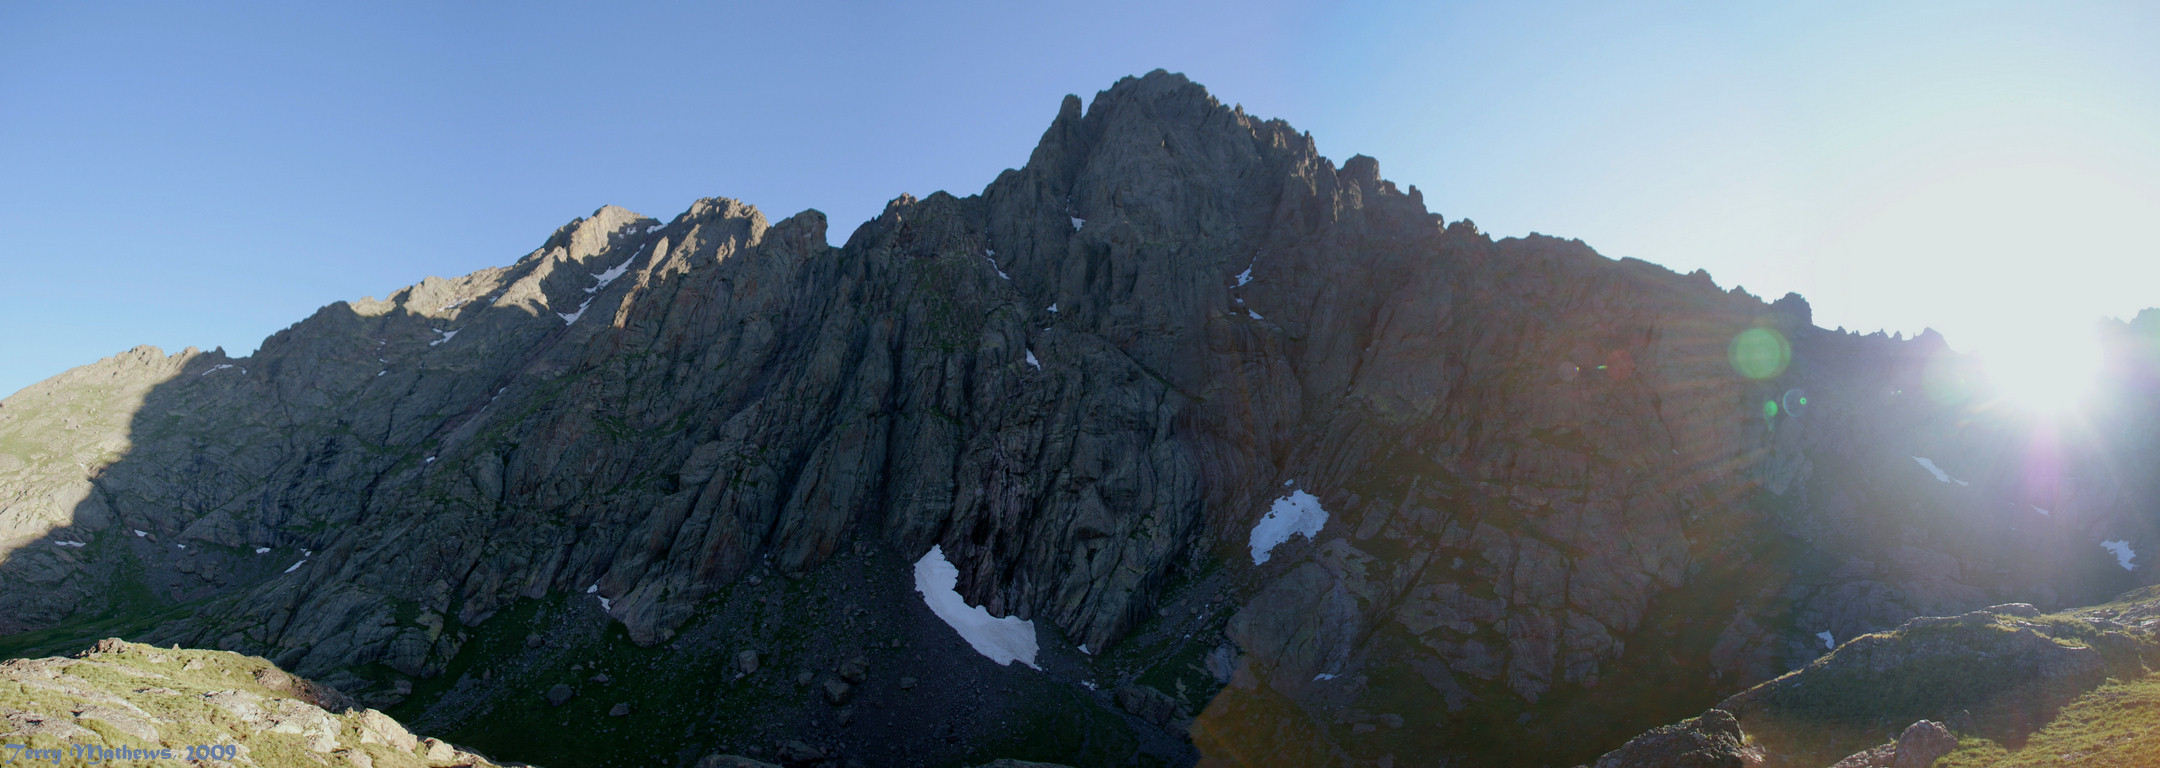
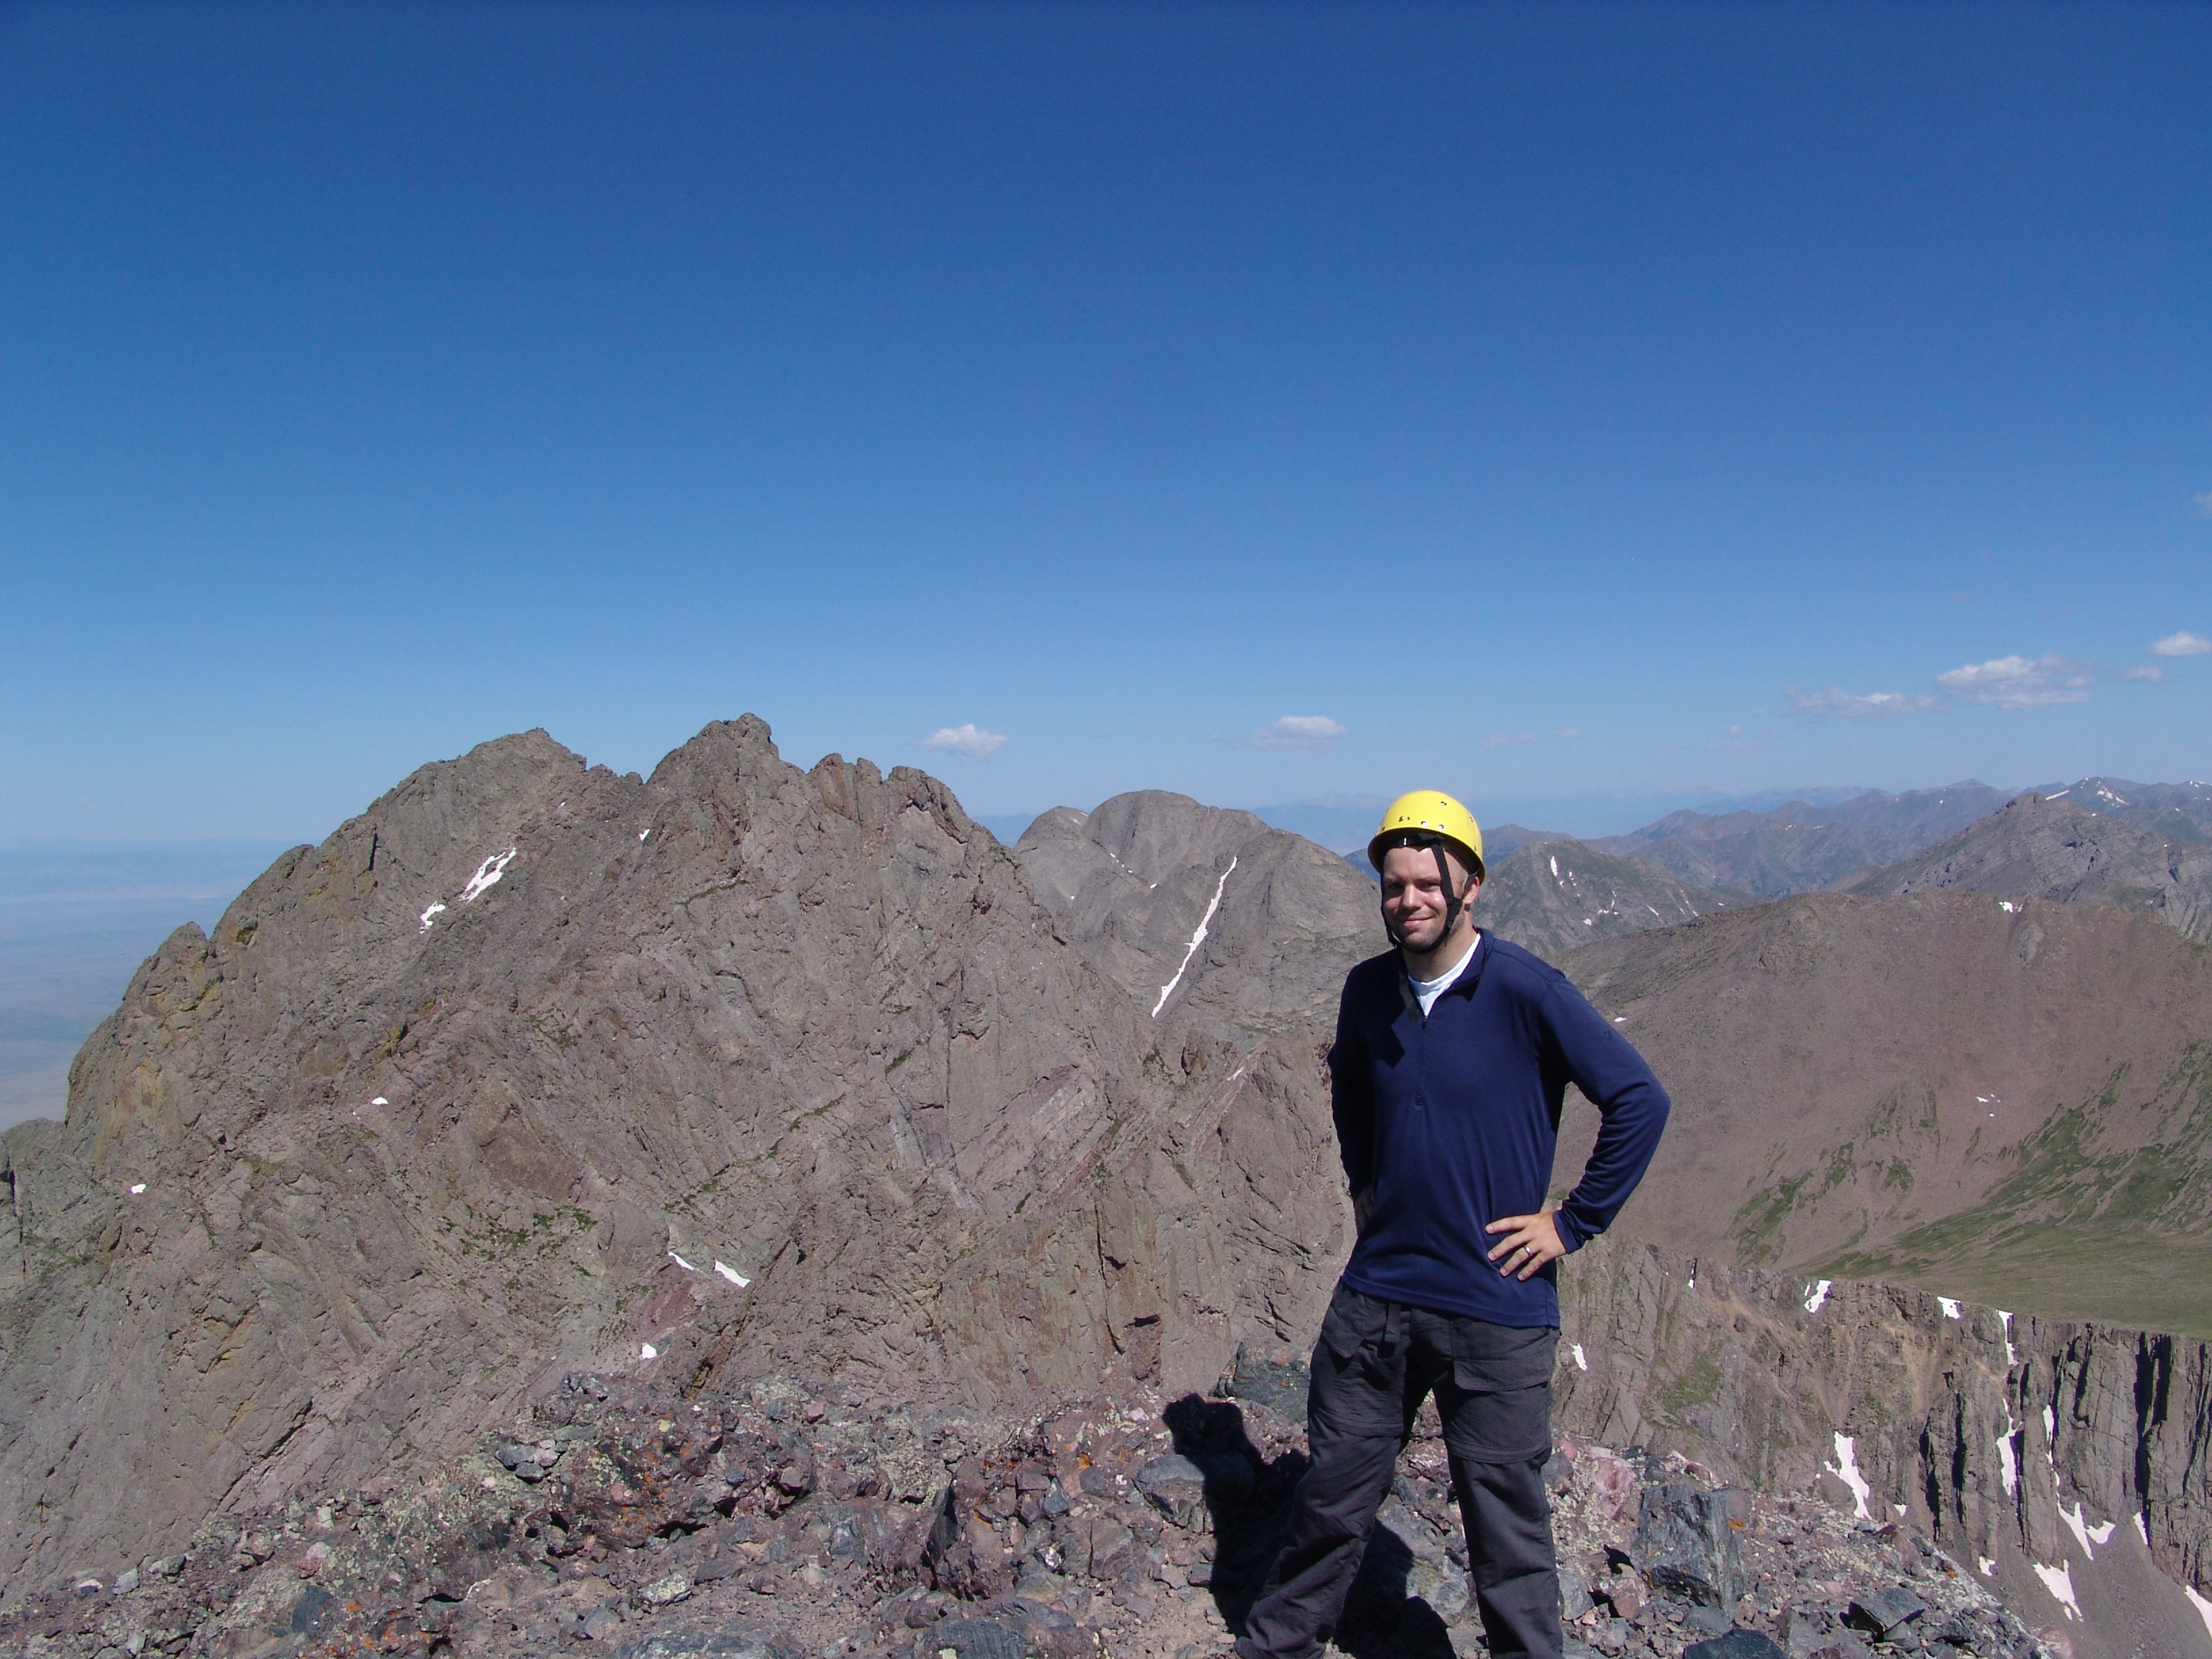
At this point, Terry and I decided it was a good time to don our climbing helmets, a first for me in all of my mountain climbing adventures. From here we could see Crestone Needle looming above us, taunting us with its intimidating rock formations that we would be forced to carefully scale.
You can see two distinct gullies, one directly facing us, and another to its left, obscured by a rib running the length of the Needle. The standard route up the Needle takes you half-way up the east gully and then over the rib to the west gully and up to the summit. It sounds a lot more simple than it really is.
We followed the well-established trail over to the base of the east gully and started up. The rock on Crestone Needle is most impressive, a climber’s dream.
The entire mountain is made up of a mixed conglomerate of granite, quartz, and other rock. The rock had numerous large rocks cemented together making it quite easy to locate hand-holds and foot-holds for climbing. Here is a view up the east gully.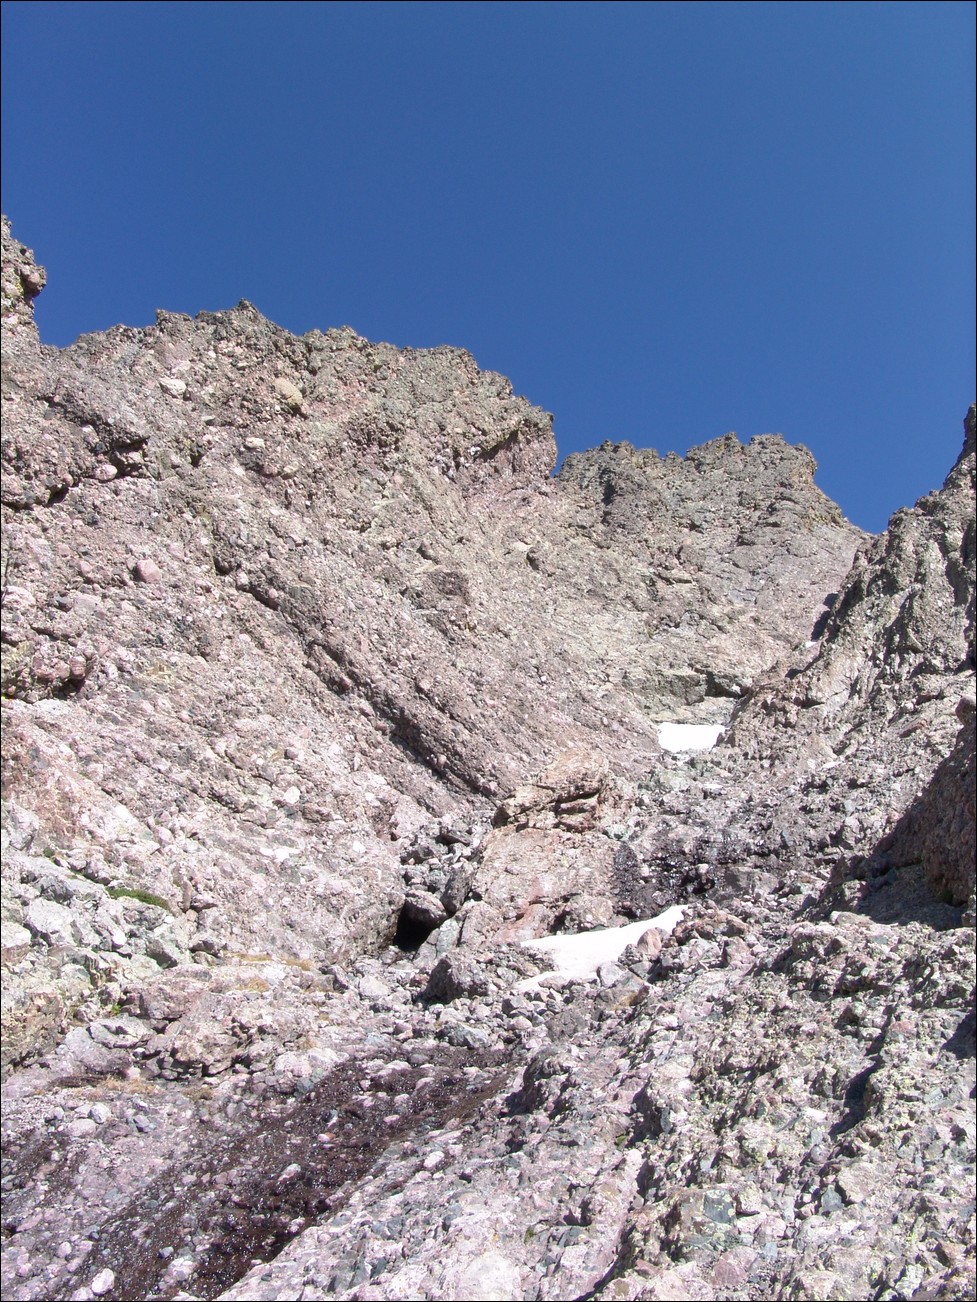
Terry and I were quite pleased with how solid the rock was and how stable the route seemed to be.
The hard part of climb was finally upon us – the transfer from the east gully to the west gully. The east gully takes you to a large dihedral with a large amount of snow at its base. We were forced to cross right at this snow over to the other side of the gully. This required a very unstable move by which we were forced to smear ourselves to the side of the wall, reach up, and push off and up at an angle to the more stable ledge just above the end of the dihedral.
We scrambled up the side of the gully up to a notch leading over to the west gully. Here is a shot of me climbing up the west gully courtesy of Terry. You can tell that this was not a good place to be for someone that is afraid of heights.
I was able to take some nice shots combined into pano of the gully looking down towards the basin we came from to give you a good idea of the steepness of the climb.
After climbing up the west gully for about 600 feet, we reached the summit block of Crestone Needle! I was very eager to gain the summit, so I passed
Terry and celebrated on top.
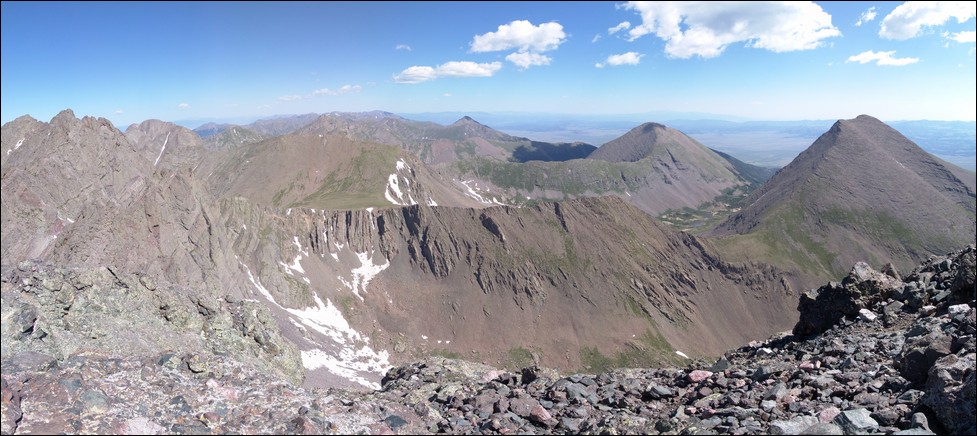
This was probably one of the most invigorating climbs of my life. Here’s a 360 degree panoramic photo from the summit. Apologize for some image quality issues...
I have since figured out how to use my camera... Colony Baldy and Humboldt can be seen on the left to the left of Terry. The southern Sangres can be seen in the distance including Blanca, Little Bear, and Ellingwood Point and of course the Sand Dunes National Park. At right are Crestone Peak with Kit Carson, Challenger Point, and Kat Carson to its right. Finally, Mt. Adams can be viewed at far right.
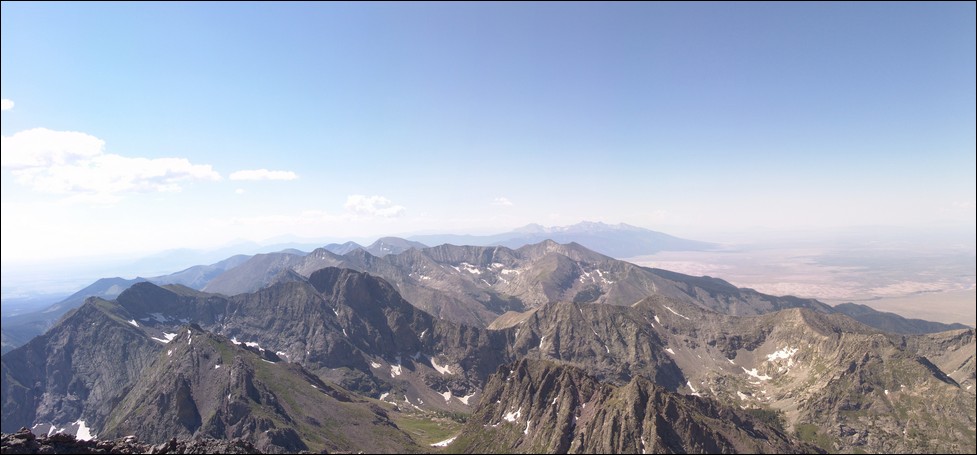
Here’s another pano to the north and northeast showing Crestone Peak, Kit Carson, Challenger Point, Mount Adams, Colony Baldy, and Humboldt.
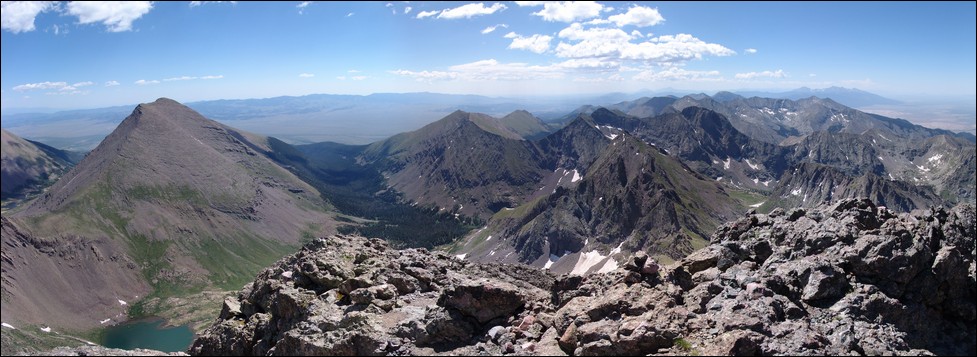
And another view north and northwest of Broken Hand Mountain, Milwaukee Peak, Pico Aislado and of course the Southern Sangres.
And yet another view of the upper South Colony Lake beneath Humboldt and with the Sangres to our south.
Terry was nice enough to take a shot of me on the top, with Crestone Peak behind me.
After spending about 30 minutes on top, we decided to head down. It was pretty cool having the summit of a 14er to ourselves. On the way down,
Terry snapped this shot of me looking up the west gully.
We were able to reach the bottom of the gullies without incident. The rock was super stable and I really can’t say enough good things about how fun this climb is.
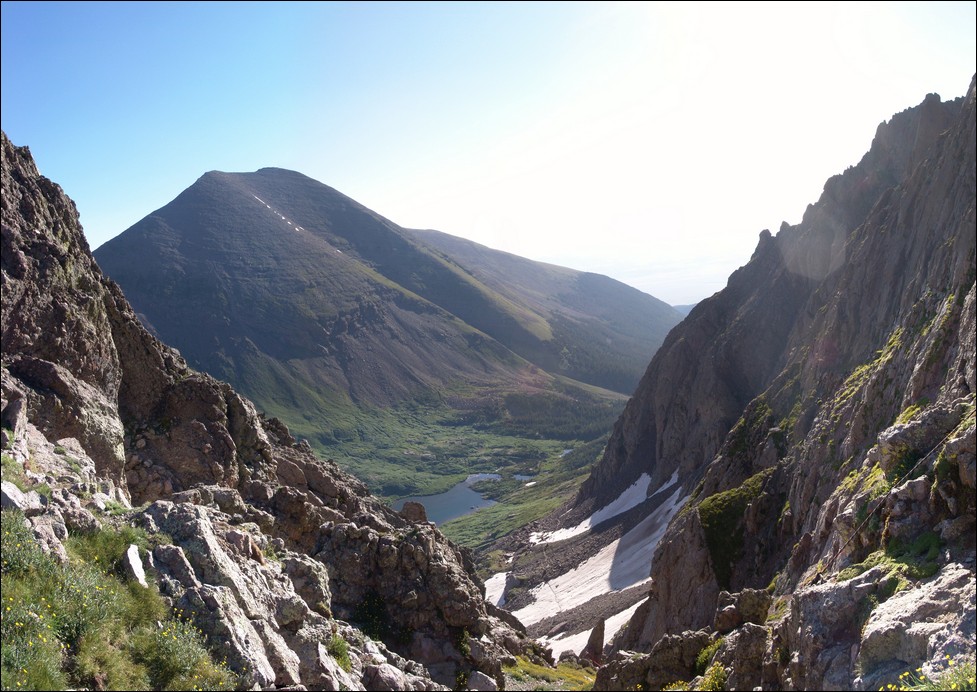
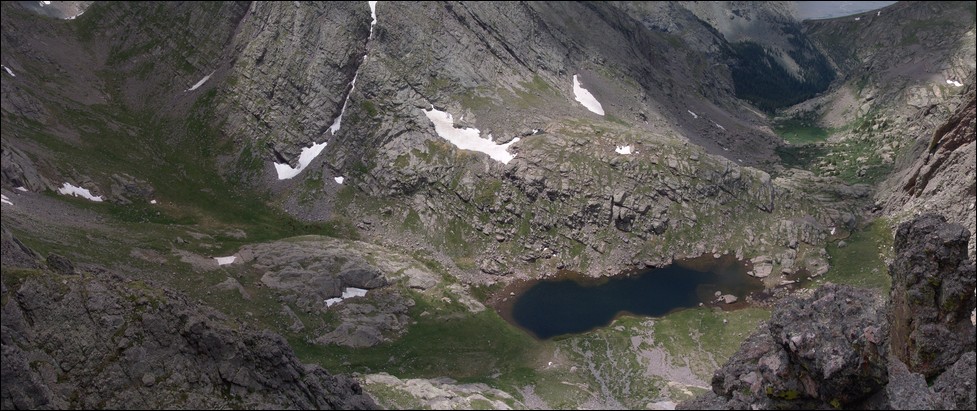
From the start of the gully section, I went over to a spot where I was able to look down upon Cottonwood Lake and the basin we climbed up from.
We climbed up from the basin on the right.
We got back down to Broken Hand Pass, chatted with the Rocky Mountain Field Institute for a bit, and headed down towards the lake. We passed a few people that had been on Crestone Peak and learned that we would indeed need our ice axes for Crestone Peak. Due to how tired we were, we decided that we would have to do Crestone Peak on day 3. We got near the lake and I decided to take some shots for this pano of our surroundings.
On the way back down the basin towards our camp, I decided to build some cairns to ensure we would be able to find the best possible route up the trail again in the morning. We made it back down to our campsite, ate, and went to sleep. We were both really tired and decided to get up an hour later the next day so that the sun would have more time to soften up the snow on Crestone Peak for our ascent.
Day 3 – Crestone Peak. We woke up at 6 AM and headed back up the basin towards Crestone Peak.
We followed my cairns and made great time, reaching the base of Crestone Peak at about 7:30 AM. There was a couple of groups ahead of us in the “red gully,” the standard route up the peak. Due to this, we knew that we would have to be cautious of rock-fall from above during our climb up.
At the base of Crestone Peak, I took some photos for this pano. You can see the red gully running right up the middle of the mountain with snow lining much of the route.
We started up the red gully, which was a tiring and difficult task. Right before we reached the main snowfield near the top, the group above us kicked down a very large boulder and screamed “ROCK!” It spun rapidly towards us down the gully. It passed about 20 feet away from us and Terry yelled below to warn those behind us coming up the gully.
The rocks falling down from above were fairly common, so we were forced to remain very vigilant going up.
We were able to avoid the first two snowfields but the third and largest we decided to go right straight up. We got out our ice axes and began our ascent,
with a group on our heels. Terry kick-stepped up the mountain slowing, driving his axe into the snow in between each step. It was an arduous but very fun process.
I was just totally excited to be using my dad’s ice axe for the first time. At the top of the snowfield, we were about 200 feet from the top of the gully. We made it to the top, avoiding the looser rock in this area in order to prevent us from killing those below us.
The pucker factor was not as high as I thought it would be despite the steepness and exposure, as seen by this shot Terry took:
Once at the saddle at the top, it was a quick scramble to our left to the summit. From the summit, you gain pretty sweet views of Crestone Needle pictured at left of this pano.
You also get some nice views of Kit Carson and Challenger, which would be our goals for next weekend.
And of course the obligatory summit pose:
We spent almost an hour on top, most of which was in the company of several other climbers. We decided to head down as the clouds began to build near us.
We decided to decent the snow, and I wanted to go all the way down the snow, while Terry departed the snow as soon as he was able. I really felt like the snow as soft and that there
was no risk of falling. I felt pretty comfortable about going down the snow, especially with my new best friend – the ice axe. Here’s a picture Terry took of me having a blast going down the snow.
We passed several groups going up and then stopped at the bottom of the red gully and beyond to take a photo of the basin, the peak, and the red gully above.
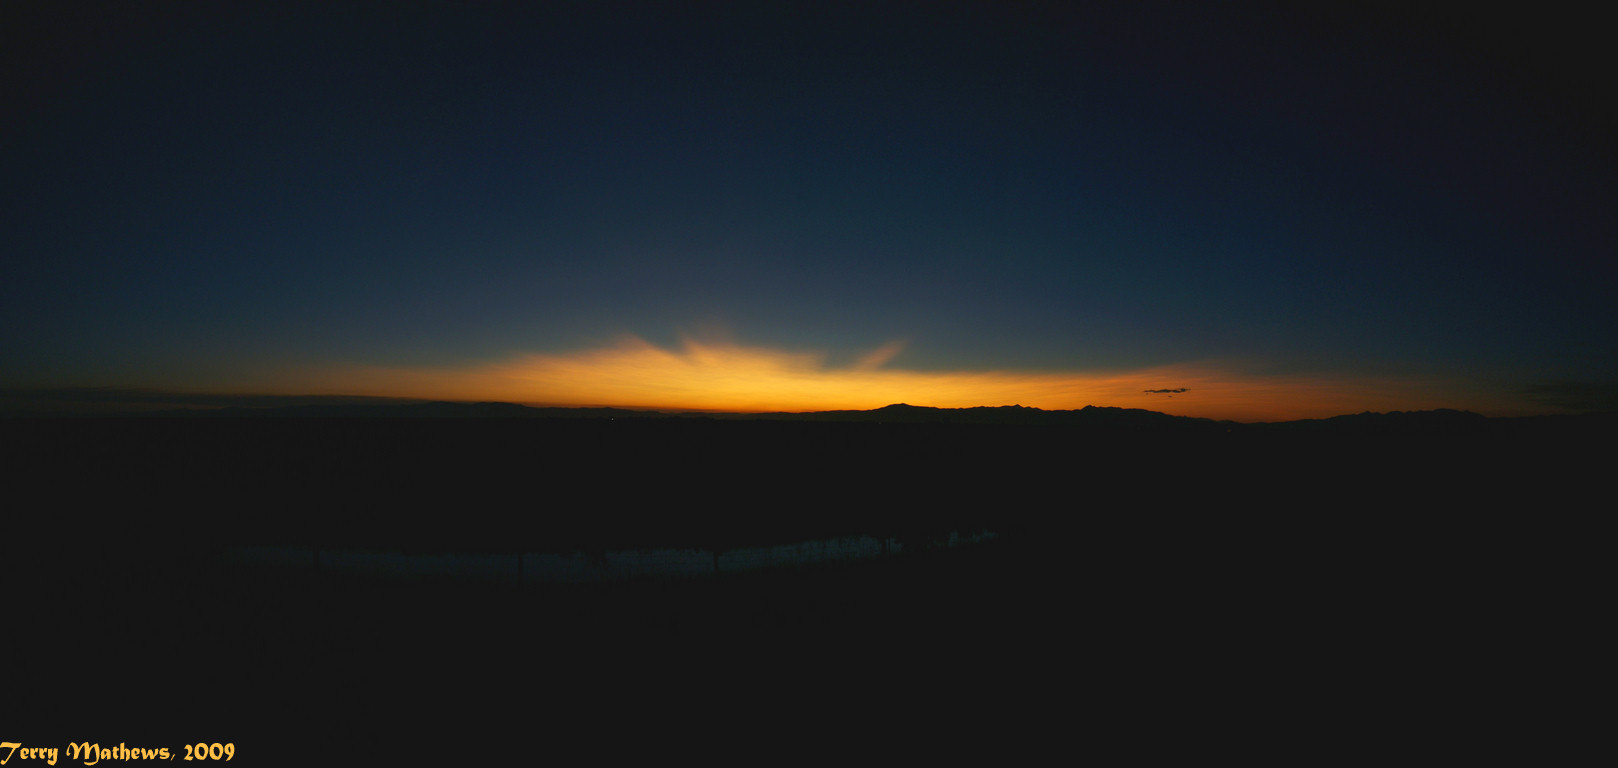
We slogged back down to our campsite and decided to pack-up and head back down the 3.5 miles back to Terry’s truck. It took us 3 hours to reach his vehicle at 8 PM and we left for Colorado Springs. Terry got some awesome shots of the sun setting to our west as we drove off into the sunset.
What a great trip, one I will remember for the rest of my life!
Mount of the Holy Cross at Sunrise
Short story: One of the most scenic and enjoyable hikes I’ve ever had the pleasure of doing.
Long story: On Friday evening I drove via I-25, C-470, and I-70 past Vail to the Tigwon Rd. near Minturn, CO. The total drive time was 3.5 hours.
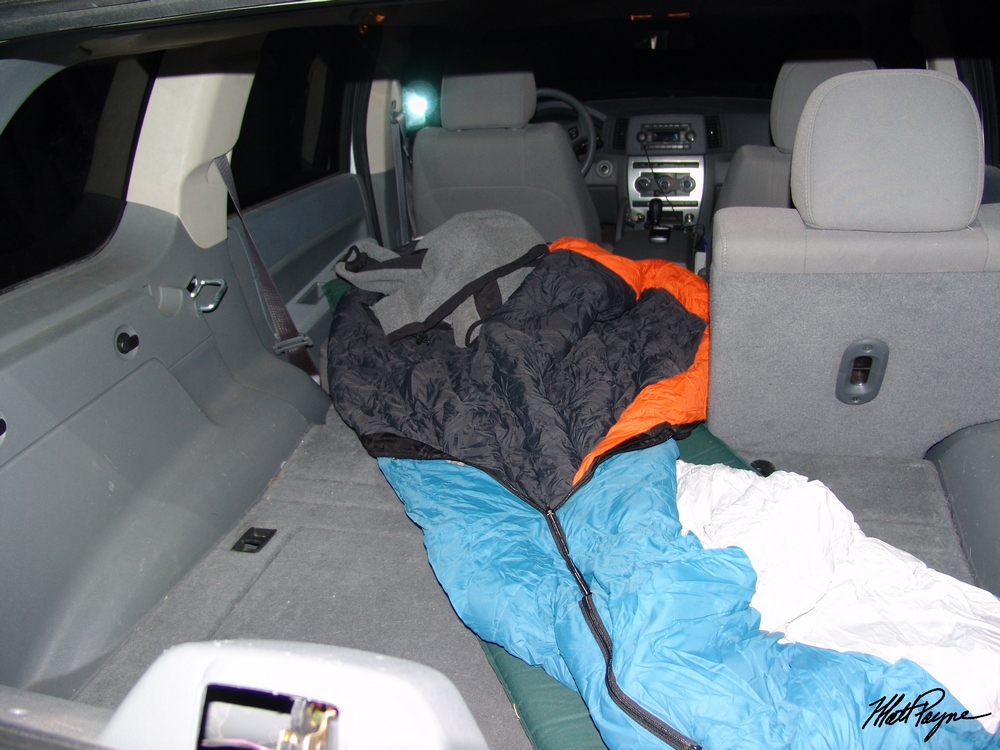
I think I arrived at the trailhead at about 9 PM and prepared my luxurious accommodations:
I’ve been wanting to do Holy Cross for a long time. The famous views of the Cross Couloir are something I’ve been wanting to see since I was a little kid.
Not that I’m religious, but the mountain is probably one of the most recognizable peaks around due to the snow couloir shaped like a cross.
Apparently many people used to do pilgrimages to the Notch Mountain Shelter which was built in 1924 in order to see the famous peak. I chose the Notch Mountain trail and Halo Ridge route for this very reason – it brings you up to 13,000+ feet and keeps you there for 4-5 hours of hiking… sweet! Some more history about Holy Cross:
In the mid nineteenth century, as the high country of Colorado was being explored, reports of a peak with a cross on its side began to circulate. A while later, it became clear that there was a high mountain with a large cross on its side formed out of snow. Finally in the August of 1873, a survey party led by Dr. Ferdinand Hayden, and including the photographer William H. Jackson, ventured into the wilderness above the Eagle River and located Mount of the Holy Cross. On August 24, two parties set off in different directions, the first to attempt to climb Mount of the Holy Cross, and the second, which included Jackson, to climb Notch Mountain and hopefully photograph the cross. Both parties were successful that day; one making the first known ascent of Mount of the Holy Cross, and the other reaching the top of Notch Mountain.
In the decades that followed, the area became a popular destination for religious pilgrimages. In the mid-1920’s a stone cabin was erected on top of the southern ridge of Notch Mountain to accommodate visitors. Due to the popularity of the area, in 1929, the area was declared a national monument by Congress. In 1950, the national monument status was rescinded. – Photo and history credited to summitpost.org and Aaron Johnson.
This weekend promised to be one of the best weekends for climbing – the weather was projected to be totally clear and there was a near-full moon on the calendar. Due to these factors, I wanted to get up super early and try to catch the sunrise from 13,000+ feet – something I’ve not done in over 10 years. So I set my alarm for 3 AM and hit the sack. I woke up at 3 AM and got ready, groggily. It was kind of strange being all by myself in the dark, but I was excited to begin my adventure. Hiking solo was a perk because it meant I could set my clock for whatever time, spend as little or as much time as I needed to get to my destination, and not rely on others for anything. I could also listen to my I-pod, which was kind of fun. The only drawback was that I was doing a lesser-used route by myself and so I would need to be very careful not to get injured. I started at the Fall Creek Trailhead at 3:30 AM and hastily made my way up the side of Notch Mountain.
I counted over 40 switchbacks to the top of the ridge.
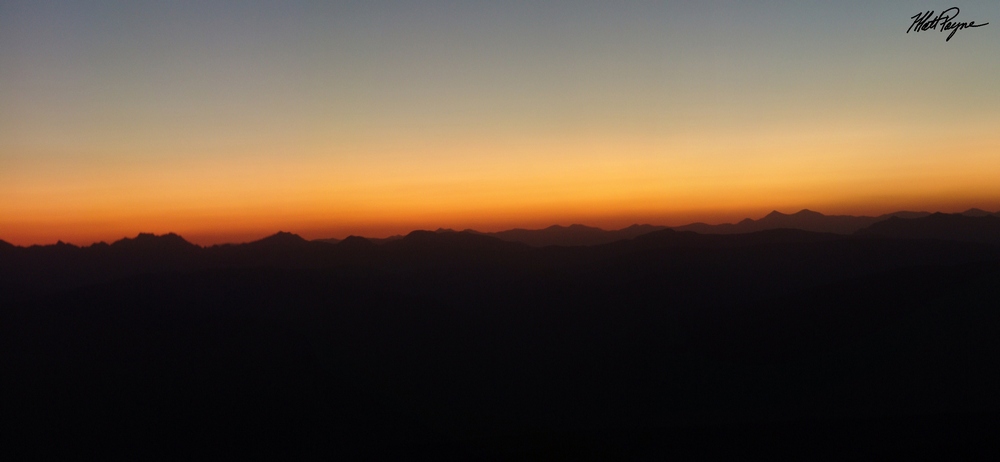
As I neared the top of the Notch Mountain ridge, I could not help but look back behind me to see the light change as the sun started to light up the horizon:
From the trailhead to the shelter was 5.1 miles, and I was able to get to the shelter at 5 AM, which means I made super-good time – 3.4 miles/hr.
with 2,673 ft. of elevation gain. The wind was really cold at 13,077 ft. (elevation of the shelter) so my hands were pretty much frozen – taking pictures
was pretty challenging… The good news was that my legs felt ridiculously strong and I was jamming out to some Solas – which totally reminded me of my friend Rob, who introduced me to that music a very long time ago. Jamming out to Irish music while watching the sunrise was pretty darn awesome. Anyways, here’s the shelter.
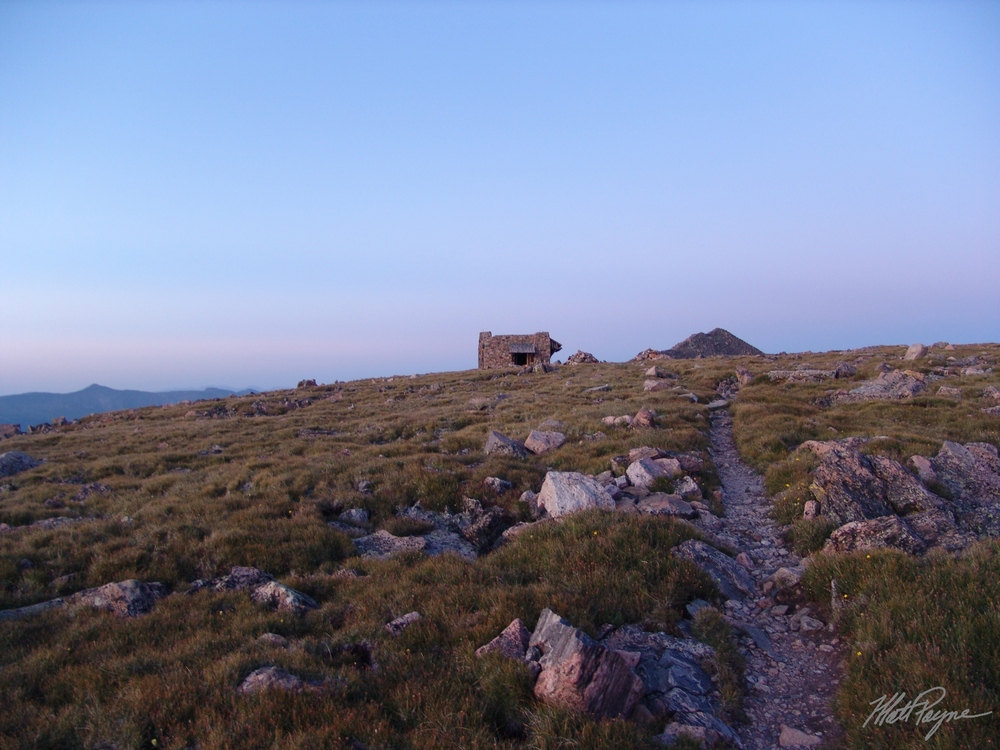
That little bump of a mountain at the end of the trail would be my first challenge of the day – UN 13,248. So the shelter was pretty awesome – it had steel cable attached to it at numerous locations leading to the ground, which acted as lightning protection.
I was pretty impressed with how sturdy it was, given it was built in 1924. Another neat feature of the shelter was that it had windows – windows that were clear enough to see a reflection in. I could not help but take my first photo of the famous Holy Cross:
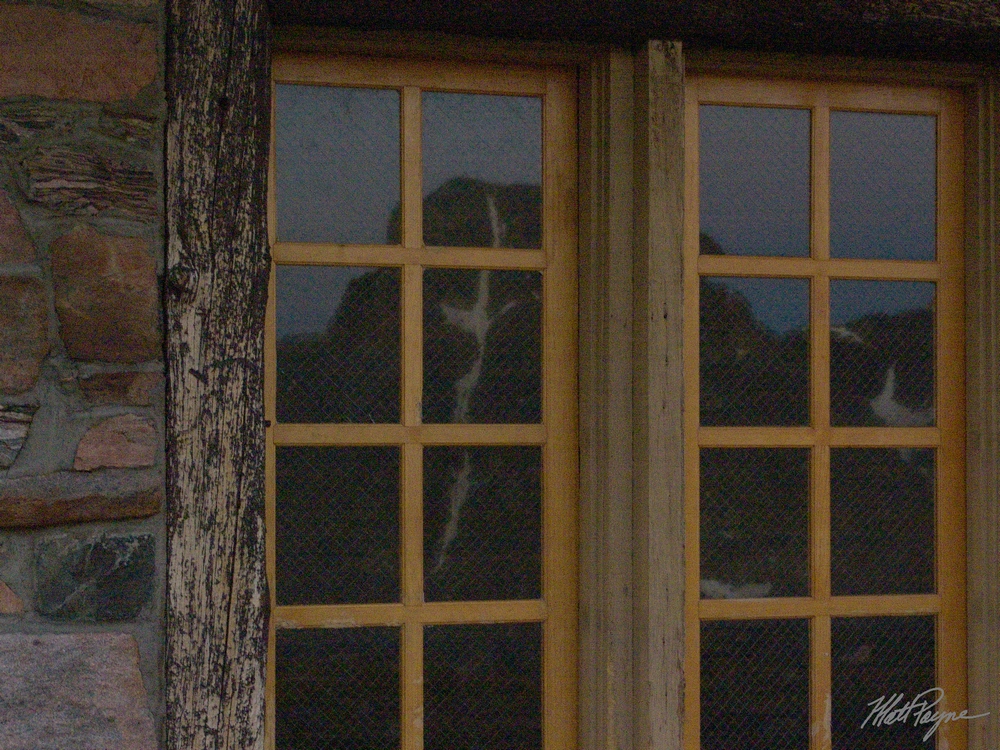
The sun still had not crested the horizon, but the light was still amazing. I decided to get a nice panoramic photo of the shelter and Holy Cross – you can also see the reflection in this one:

And just before sunrise… with the moon above.
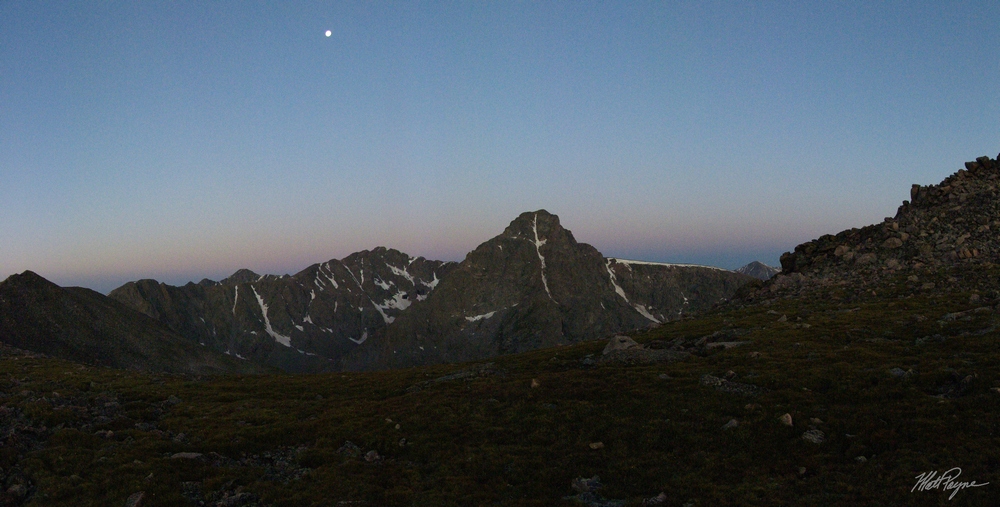
I’ve got to tell you – watching the sunrise over the Gore and Tenmile Ranges was pretty spectacular.
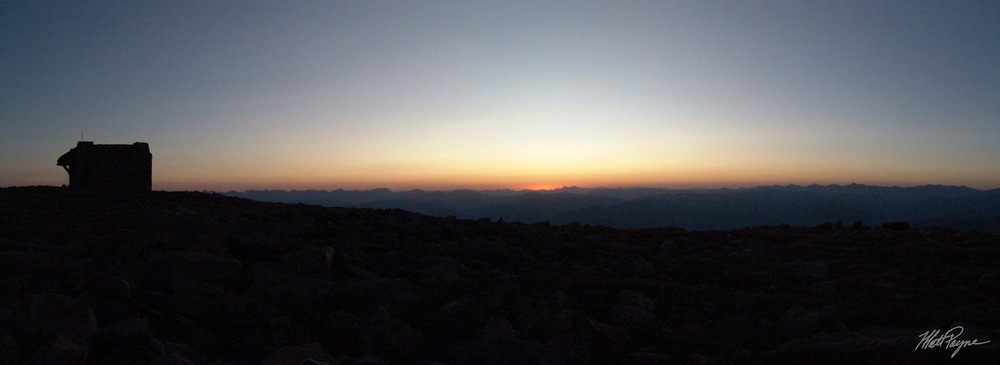
360 degrees of sunrise awesomeness:

Wait for it… wait for it… Woohoo! The sun rises! Amazing stuff.
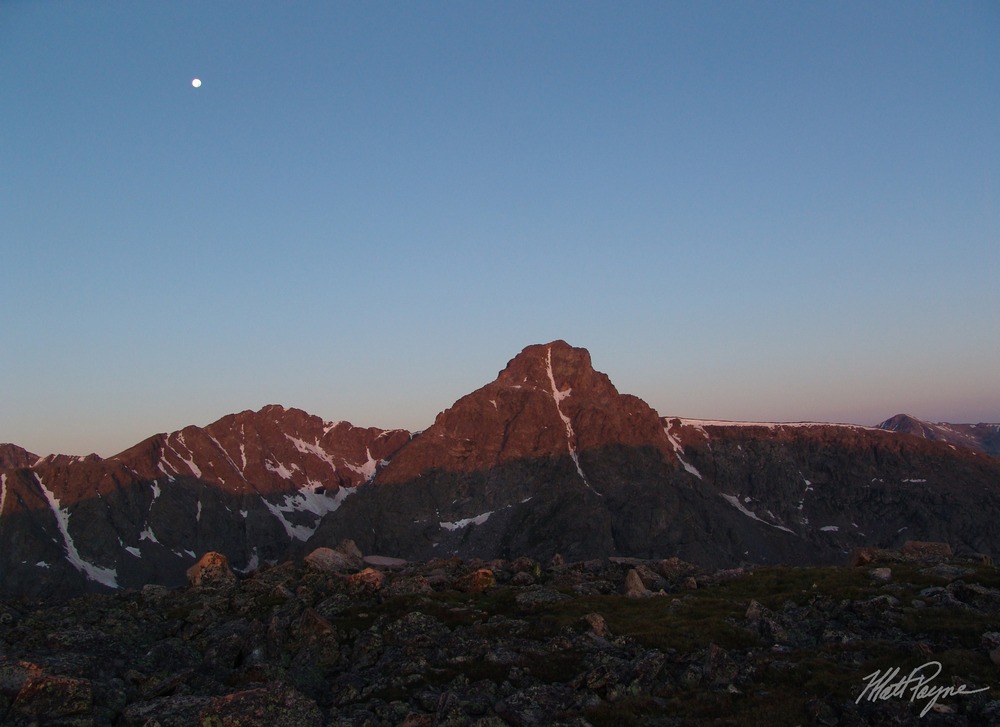
I decided to start hiking towards my first destination but I kept stopping like every few feet taking photos – I was addicted to the insane light I had all around me despite the fact that my hands were frozen. My route would take me all the way up the peak to the left and up and around the ridges to the right of there and finally to the top of Holy Cross. The summit was a good 2 miles away and the route would never drop me below 13,000 feet for the rest of the day.  The lighting on Holy Cross was very impressive – I really liked the red hue the sun was producing.I slowly made my way over towards PT 13,248. I finally made it to the top of PT 13,248 after about an hour of slow scrambling and photography, and took more pictures of my view – my favorite part about this hike was that my perspective was constantly but slowly changing.

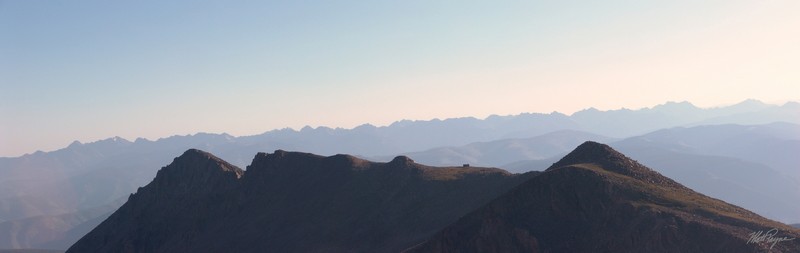
Just on the other side of PT 13,248, I was able to see the rest of my route for the day – the ridge looked very straight-forward but LONG. And long it was…
My next objective was to conquer PT 13,373. The trek over to the base of PT 13,373 was very easy, but the route description states that reaching the top of PT 13,373 is the crux of this route. It was a very steep and rocky boulder-filled summit, with loose rocks and spider-webs everywhere.
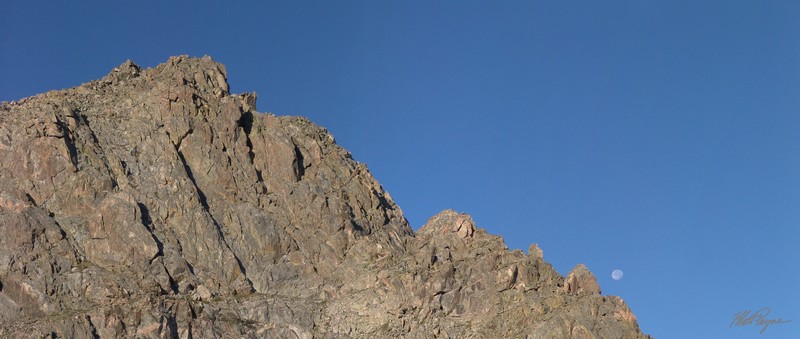
The moon was in sharp contrast with the rock here…
Here’s a closer zoomed in view of the moon and cliff:
After some fun class 2+ climbing up, I reached the top of PT 13,373 and took some time to get a full view of my surroundings – 360 degrees worth:

You can really see how far I have climbed now – the shelter is just a small dot in the distance. This shot shows the route pretty nicely – with where I came from to the right and where I was heading to the left:

Check out how far away the shelter looked, zoomed in:
Well, time to head on over to the next goal – a ranked centennial – Holy Cross Ridge. Apparently my dad climbed Holy Cross via Holy Cross Ridge, and he did it via Tuhare lake, seen in this pano of Holy Cross Ridge (far right):
And here… with Holy Cross in view at far right and lower Tuhare lake at far left:
On the way over to the Holy Cross Ridge, I was able to get some really cool views of both Lake Tuhare on my left (south) and the Bowl of Tears to my right (north). This is one my favorite shots because you can see my shadow and I look super crazy, plus you can see both valleys (Holy Cross Ridge right down the middle):
And just because the view from here was so awesome, here’s another shot… :-)
And a look back at the Bowl of Tears and the Notch Mountain Shelter above it:
After making it across the long boulder field leading to Holy Cross Ridge (which would later prove to be the hardest part of the climb due to numerous false summits), I took one last set of shots of the Tuhare lakes and, much to my excitement, the Maroon Bells, Snowmass Mountain, and Capitol Peak in the far distance.
Man, the Maroon Bells are some of the coolest mountains I’ve ever laid eyes on, and Snowmass and Capitol are just ridiculous looking. Here’s a zoomed in view of them. The ‘Bells’ are left of center, and Snowmass is right of center with Capitol at right of Snowmass looking like a sore thumb sticking up. Truly – seeing the Elk Range pretty much made my summer. As I approached the very top of Holy Cross Ridge, I saw the first living being since the night before: a marmot guarding the boulders:
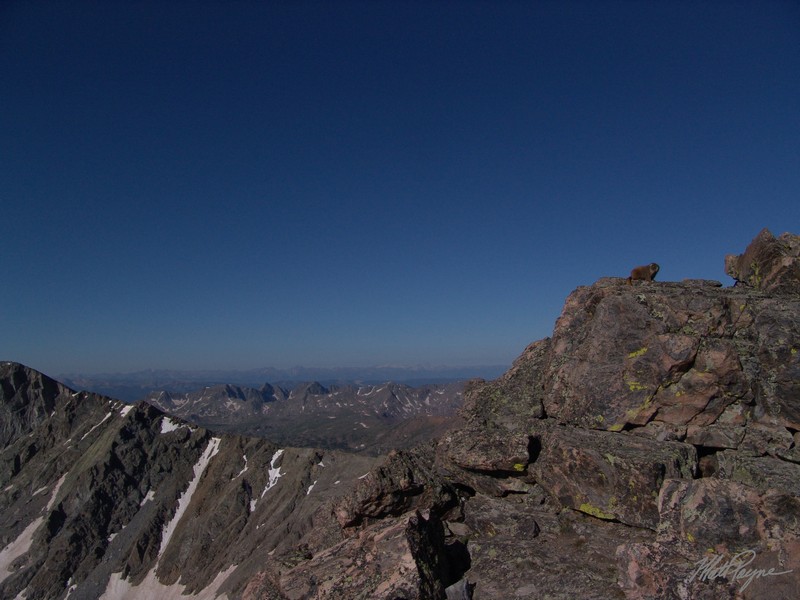
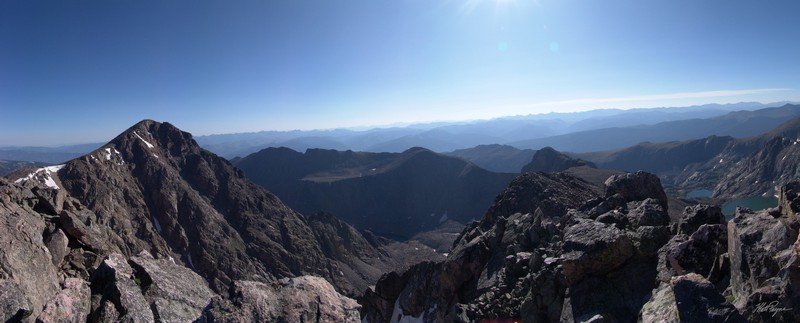
Once I reached the top to Holy Cross Ridge, I basked in the insane view. The valley on the other side (west) of Holy Cross and Holy Cross Ridge was really cool – full of lakes and waterfalls. Here’s a 360 view from the top of the 91st highest mountain in Colorado:

The really cool part of being on the Holy Cross Ridge for me was seeing where I had came from and being so close to my final destination. This pano shows the route, starting at the shelter and ending at Holy Cross:
From Holy Cross Ridge, Mount of the Holy Cross was just one hour away, a quick boulder scramble down and then up. I started down, following the crest of the ridge (no trails) and up Holy Cross. I finally saw people… seeing other people motivated me to move even faster, because I thought they were the first people to hit the summit block for the day, and I wanted to beat them :-)~
I did end up beating them, but there were already others on top – oh well. Most people climb Holy Cross via the Halfmoon Pass trailhead, which is totally beyond me because going that way completely robs you of the spectacular view of the Cross Couloir from the Notch Mountain shelter. I hit the summit at 10:30 AM, which means it took me 7 hours from the trailhead. Anyways, I had a nice young lady take a few shots of me on top and then it was off to take some pano shots!Look at all the people!

From the top of Holy Cross, there is a small point jutting to the east. I took a quick walk over there in order to get some photos of the entire route I was on for the day. Here it is! The 2nd photo shows the actual route I took.

And the route outlined in black:

That photo really shows the length of the day and was a rather proud moment for me. It felt great to be able to accomplish that, thinking back to May for my 1st climb this year, Shavano, and how tired I was just after a few miles. Ha-ha – looking back I realize now how much better I am now at using my camera too! Apparently the more you use it, the better… imagine that! After spending some time on top, I made the decision to return back the way I came. Apparently this route down is 1.5 miles further than the standard route but less overall elevation gain (remember, I had to go back over all three of the 13’ers again to get down).
After a beautiful day of hiking back over the 13’ers, I made it to the shelter at about 2 PM. Here’s a self-timer shot of me from there.
I rested and refueled at the shelter and had a short but pleasant conversation with a family that was also from Colorado Springs who were on a day-hike to the shelter. I started back down the trail (it was nice to be back on a trail after 8 hours of no-trail hiking) towards the trailhead.
After reaching the trailhead at 4 PM, I headed to Buena Vista and stopped in at Panchos for a burrito before the long drive back to Colorado Springs.
Gore Range
The Gore Range is often referenced and revered as one of the most isolated and rugged mountain ranges in Colorado. Broken into two sections, north and south, the Gore Range sits just west of Vail and extends northwest to Steamboat Springs to the west of the Rabbit Ears Range. Several rugged summits above 12,000 ft. and 13,000 ft. call the Gore Range home, yet no summit surpasses the 14,000 ft. mark, making the Gore Range a rarely travelled part of Colorado. Due to the obscure nature of the Gore Range, most summits inside its confines are not officially named; however, Colorado mountaineering legends Robert Ormes and later Gerry Roach have dubbed several of the summits here and the names have remained as local folklore.