Displaying items by tag: Weminuche Wilderness Area
Climbing Jagged Mountain and Knife Point - Sojourn to Sunlight Basin
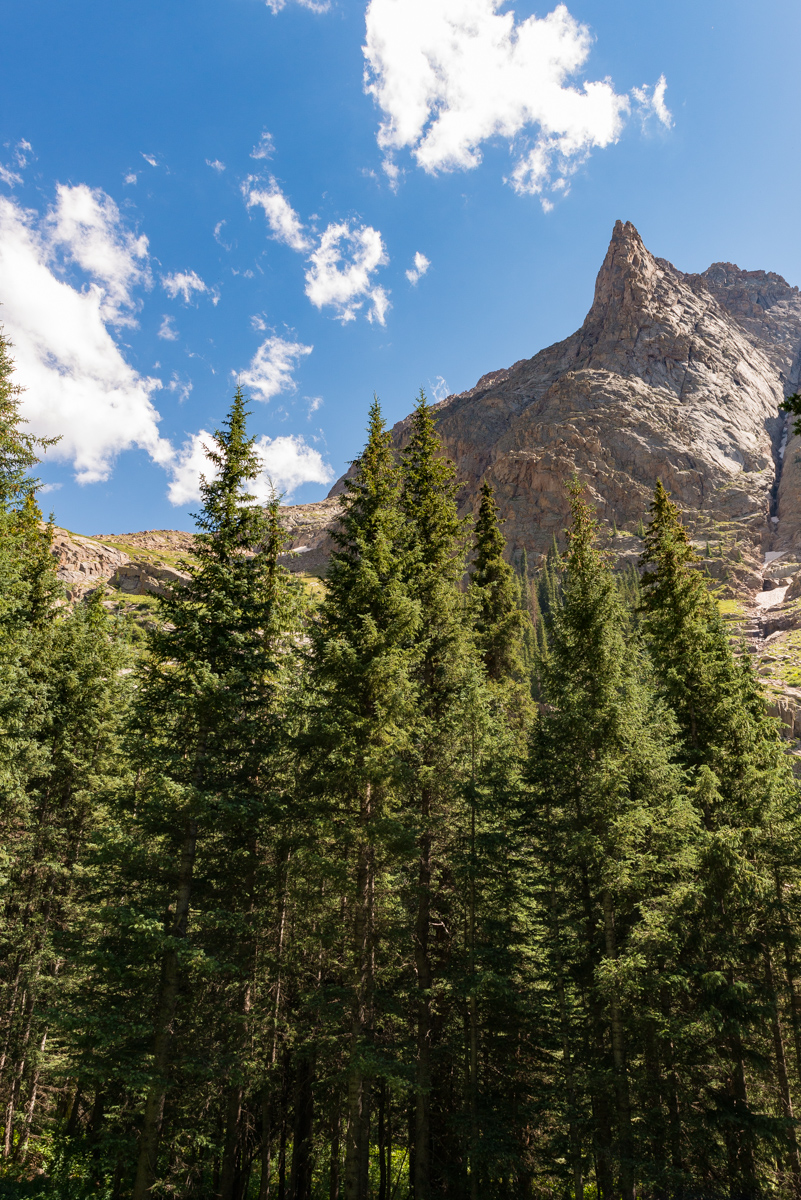
13,824 ft. Jagged Mountain has always provided ample intrigue from every angle I have ever viewed it from. It has always looked virtually unclimbable to me, representing the raw essense of Colorado's Weminuche Wilderness Area - untouched and unseen by most, scaled and appreciated by even fewer. I attempted Jagged Mountain once before in September of 2013, where my climbing partner Jeremy and I found ourselves huddled in a tent for four days during the worst flooding in Colorado's recent history. I last saw the summit of Jagged Mountain from my perch atop 13,835 ft. Turret Peak at sunrise last summer. The sun rose just behind Jagged and I felt even more of an affinity for its summit.
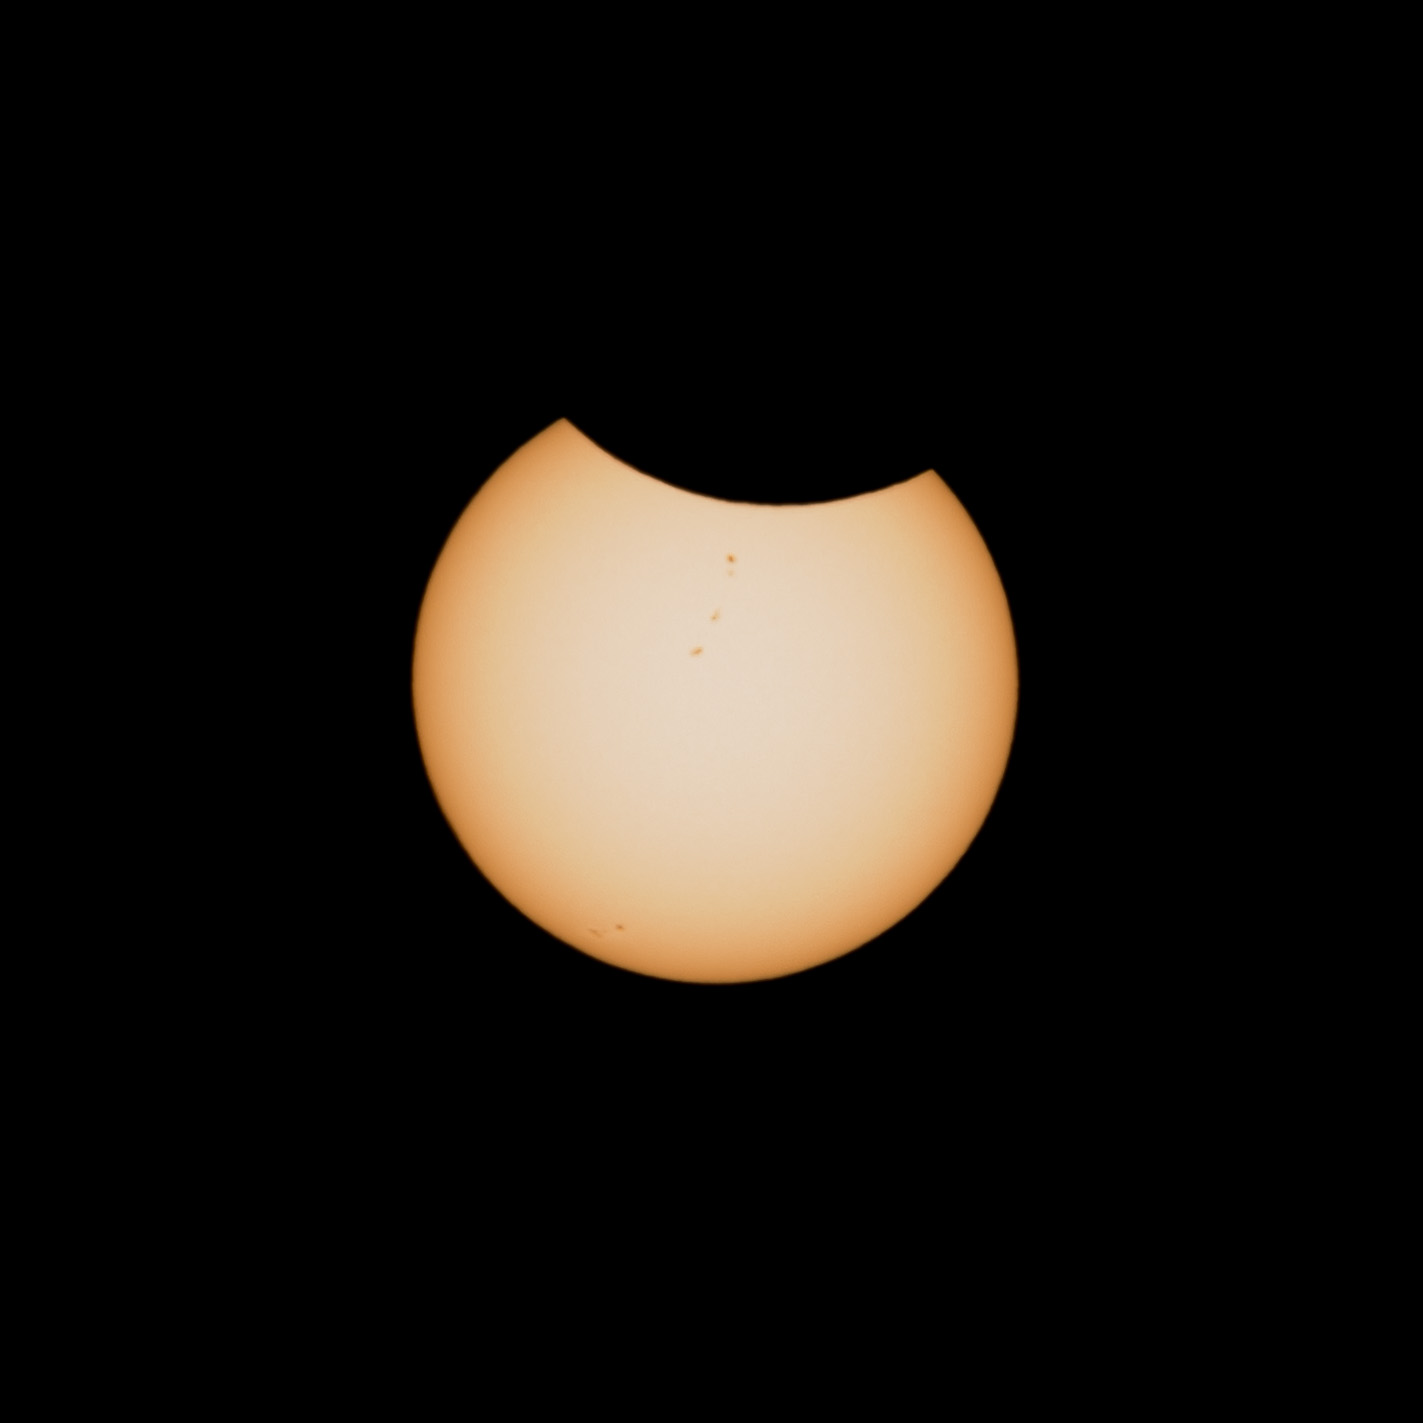
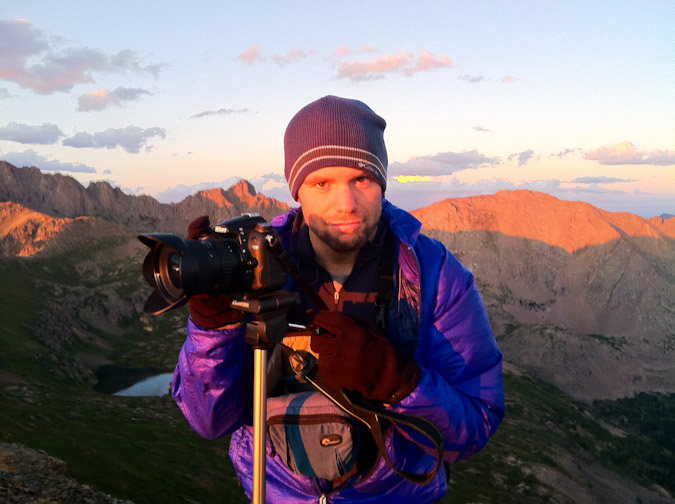
As 2017 unfolded, I saw that the Great American Eclipse would be happening in late August. I penciled in a trip to Wyoming to view the eclipse in totality; however, in July, my friend Natalie Moran posted on Facebook that she was looking for an additional partner for Jagged Mountain and I knew I had to jump on the opportunity to go. Since Jagged requires roped climbing, I only wanted to go with someone with experience on that mountain or with alpine technical climbing. Having climbed Dallas Peak and Teakettle Peak with Natalie in the past, I knew it would be a great trip. The trick of course was finding a way to squeeze in some photographs of the eclipse during this trip. The plan was to meet Natalie and her friend Shawn Poliquin in Silverton on Sunday morning, drive up and over Stony Pass down to Beartown Trailhead, and then backpack up and over Hunchback Pass and then into Sunlight Basin. My pack weighed in at 38.5 pounds, which was pretty good considering I had brought climbing gear, three lenses, and my tripod.
In December, I decided to switch out all of my camera gear for a much lighter experience for backpacking. Previously, I was carrying the Nikon D800 and the holy trinity.
For this particular trip, I decided to bring the following photography equipment:
Camera: Sony A7R2
Tripod: Feisol Tournament 3442 Carbon Fiber Tripod
Ballhead: Photo Clam Pro Gold II
Wide Angle Lens: Zeiss Loxia 21mm f/2.8
Mid-Angle Lens: Zeiss 55mm f/1.8
Telephoto: Sony FE 70-300
Total weight: 8.3 Pounds.
My total weight using my previous Nikon equipment: 14 pounds. I'll take the nearly 6 pounds in weight savings! My legs certainly thanked me considering the round-trip stats for this trip was 30.9 miles!
You can see the full GPS file and stats over on Gaia GPS, which is by far my go-to app for backpacking and mountaineering. It is so insanely useful, I use it on trips like this for many purposes, including planning and route-finding. You can purchase it here and help support the site.
One aspect of this particular trip that made me nervous was the drive to Beartown. I decided to take my wife's stock 2001 Jeep Cherokee through some encouragement from my co-worker and Bi-Centennial finisher, Terri Horvath. She was right, the road was not too bad, and the two creek crossings were manageable in August. I would hate to see them in early July.
Natalie, Shawn, and I arrived at Beartown at around Noon. At the suggestion of my co-worker, Terri, I surrounded my vehicle with mothballs to deter the infamous marmots that love to chew on spark plug wire assemblies.
Natalie and Shawn were planning to stay about 8 or 9 days in the Weminuche, where-as I was only planning a 4 day stay, so my pack was much less crazy than theirs.
DAY 1: The approach to Sunlight Basin.
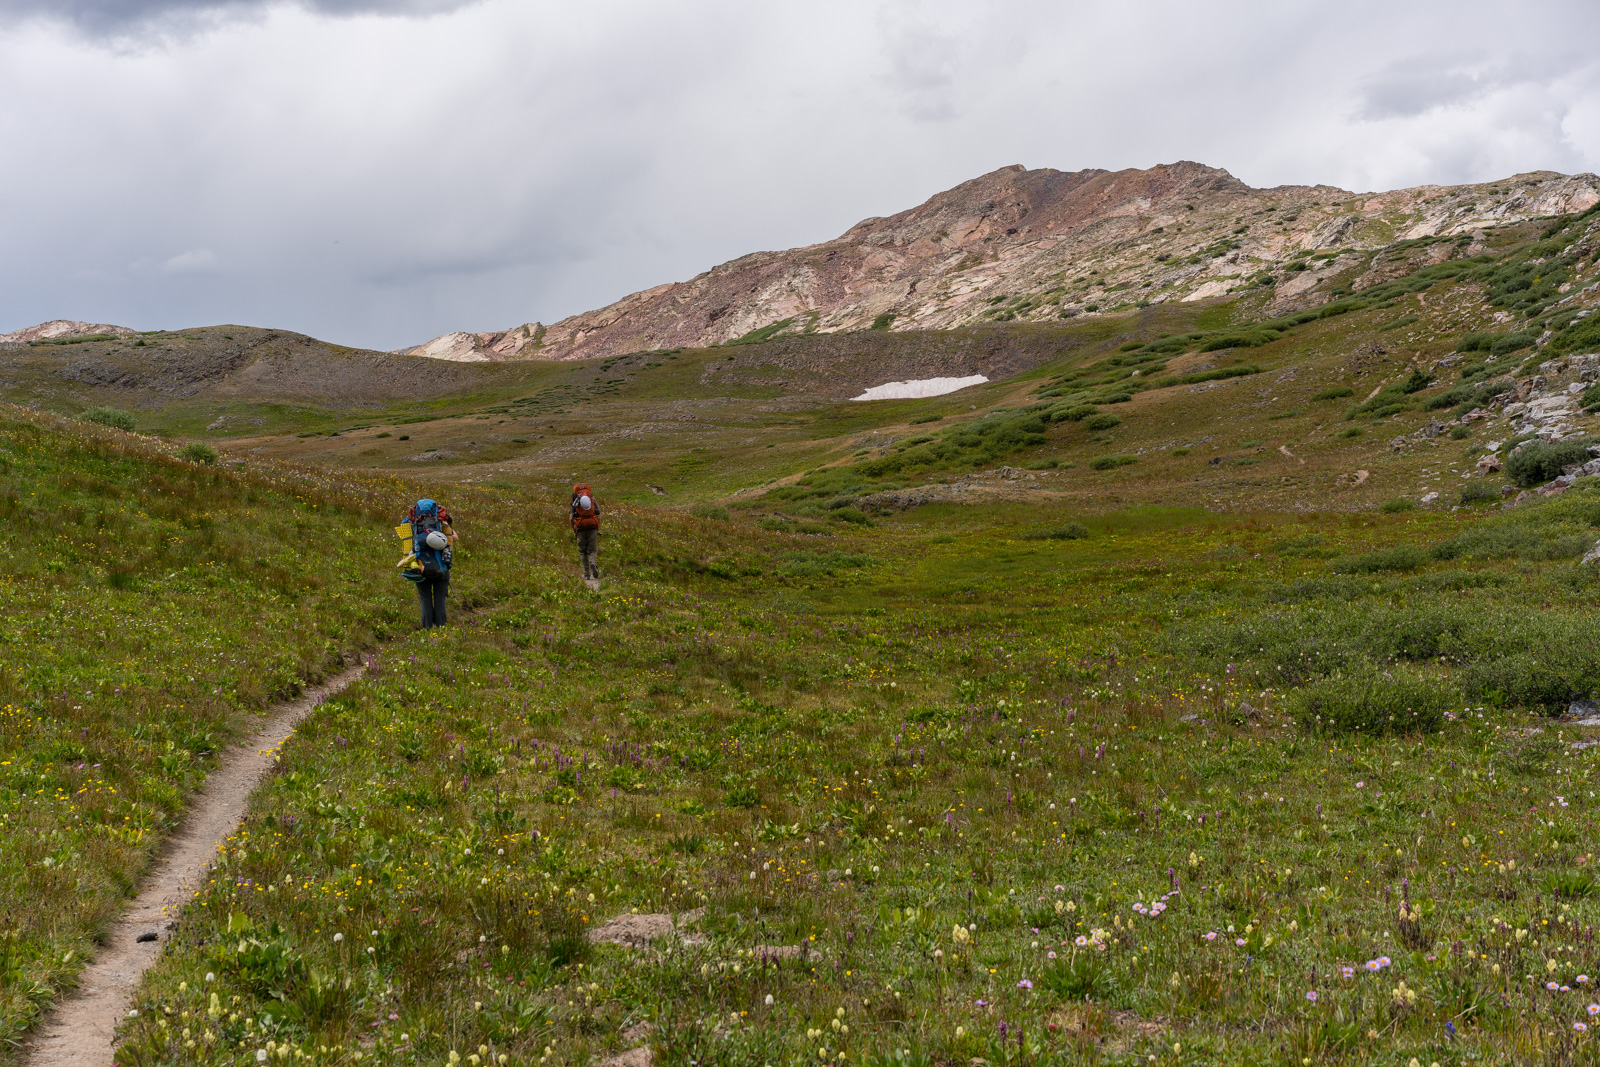
Natalie looked as if she had brought her whole house with her on the way up Hunchback Pass.
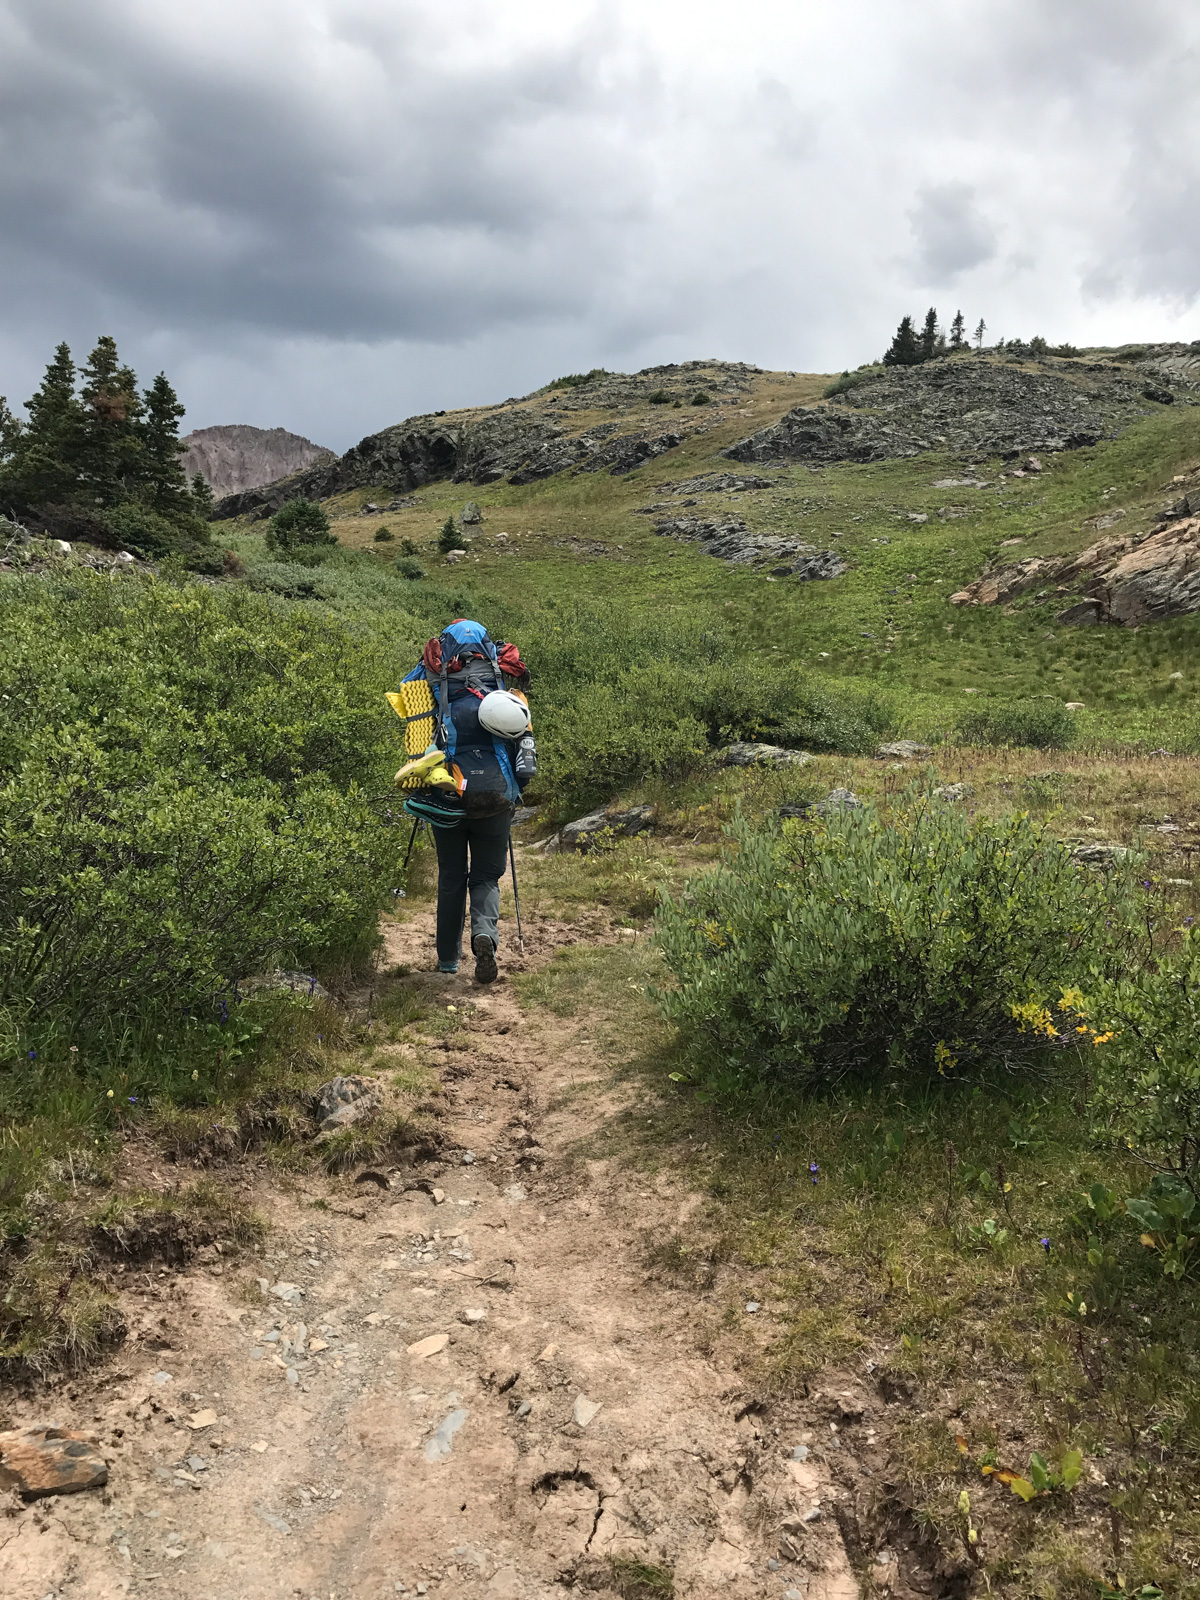
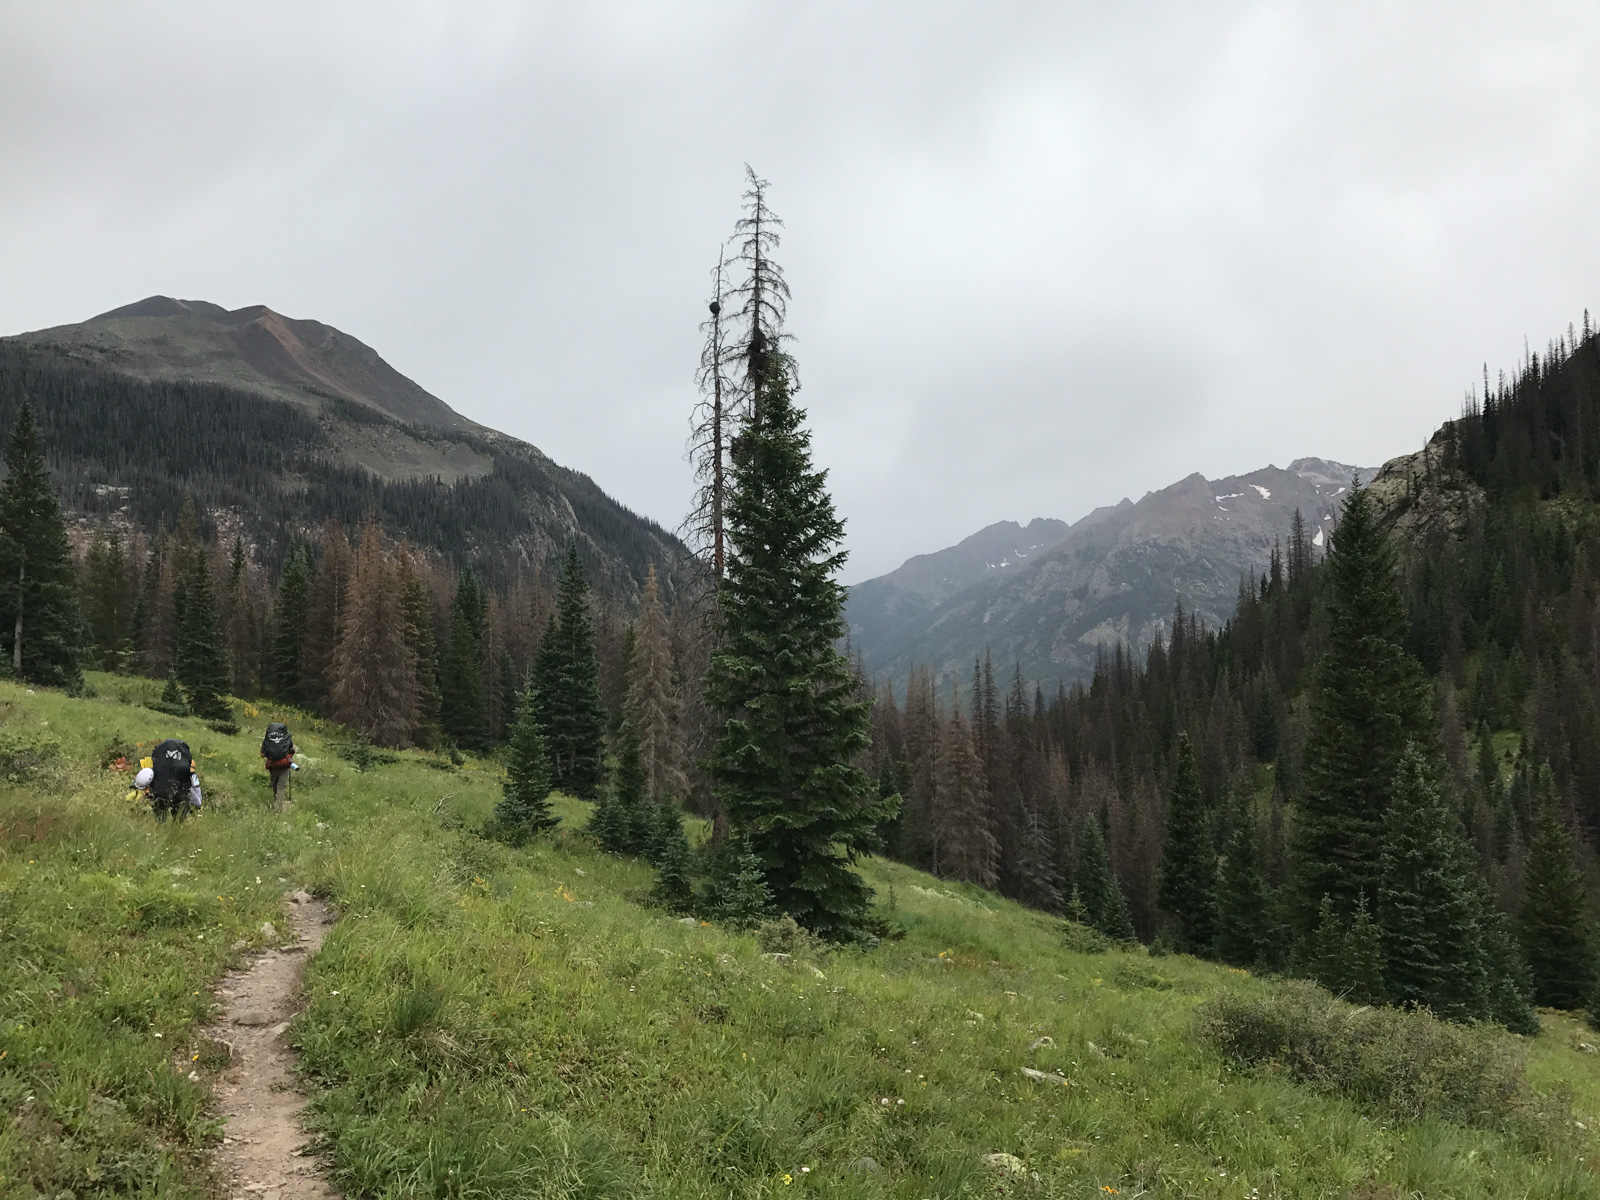
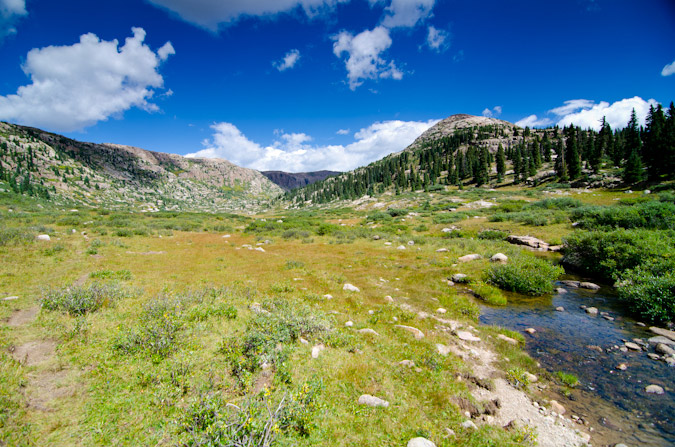
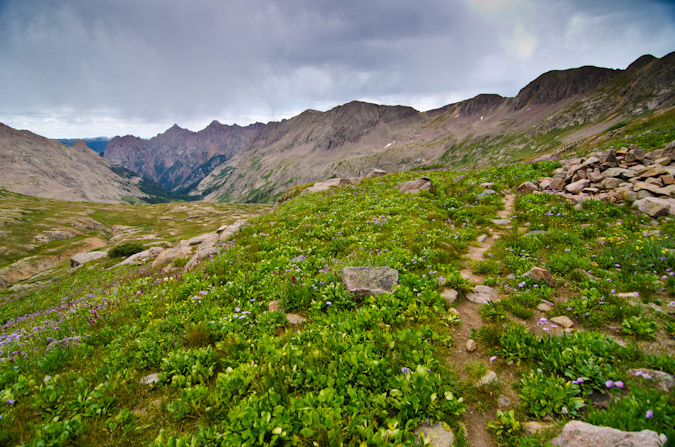
The grind up Hunchback Pass was not too terrible as the views were outstanding. We were also racing some storm clouds and wanted to be down into the trees of Vallecito Creek as quickly as possible.
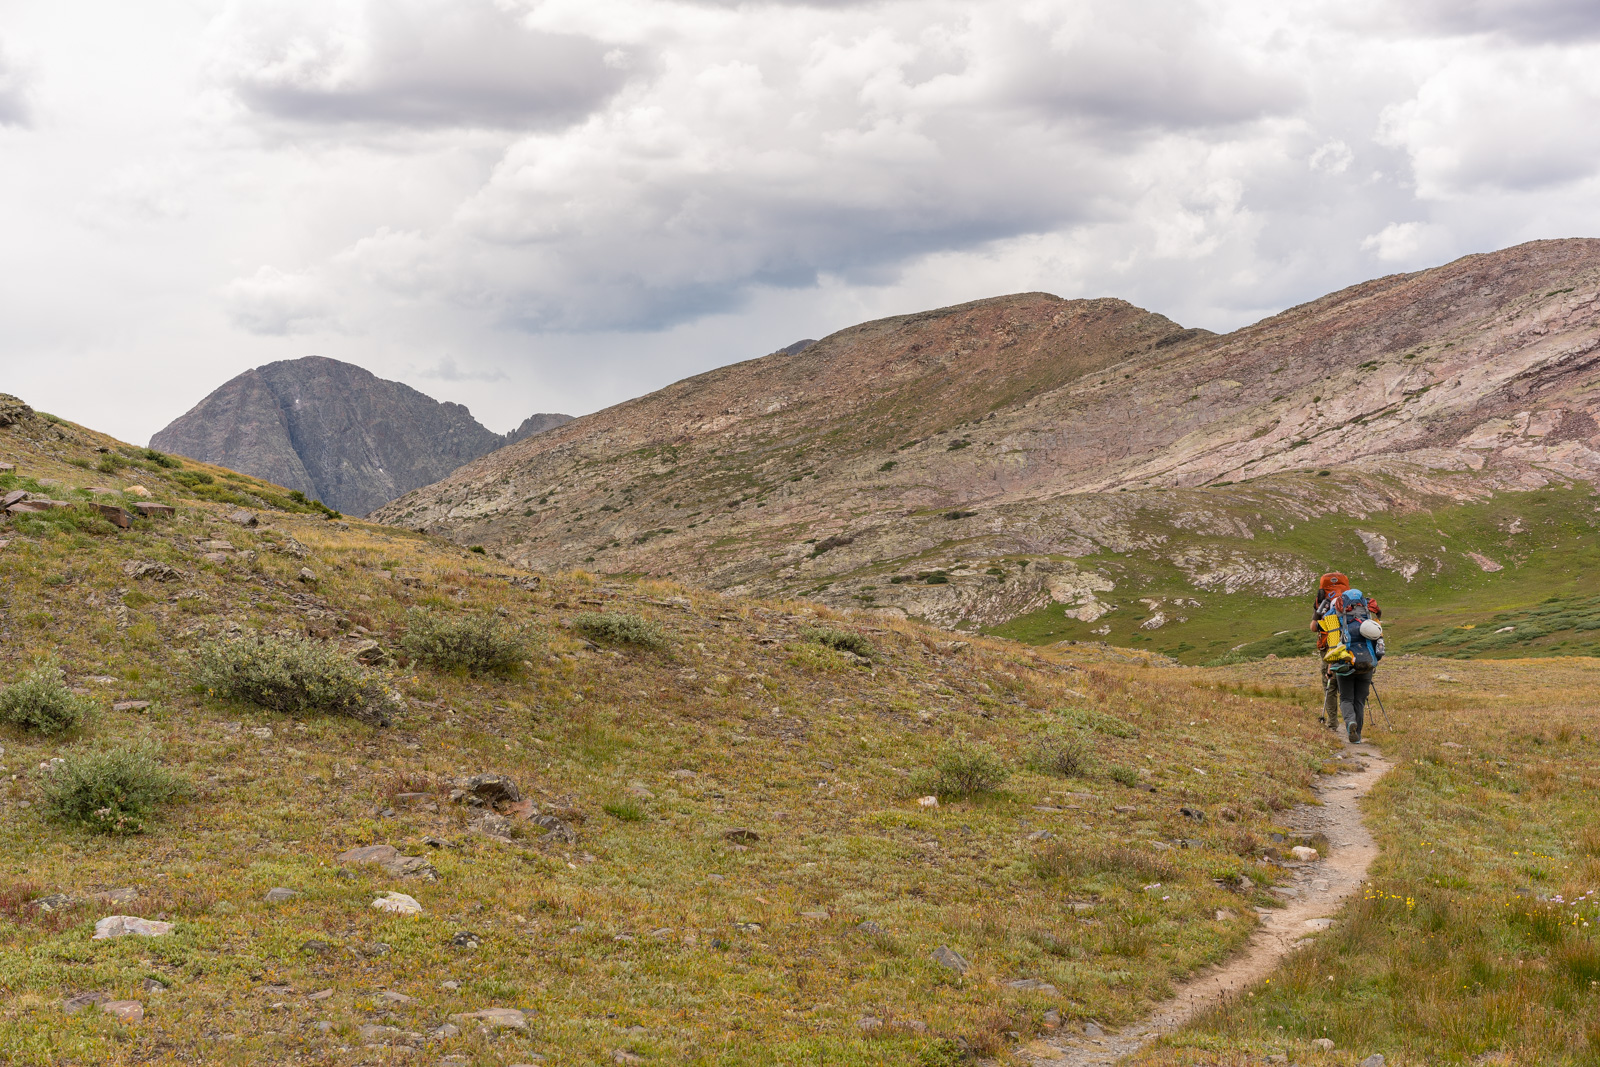
As we wound our way up the switchbacks above treeline, Hunchback Mountain came into view, the last standing peak at the end of the mighty Vallecito Creek basin. I remember climbing Hunchback way back in 2000 when I worked with Colvig Silver Camps - we were taking a group of kids from Highland Mary Lakes all the way to Vallecito Campground. That was the first time I experienced this mighty and amazing area, and I am so thankful I did!
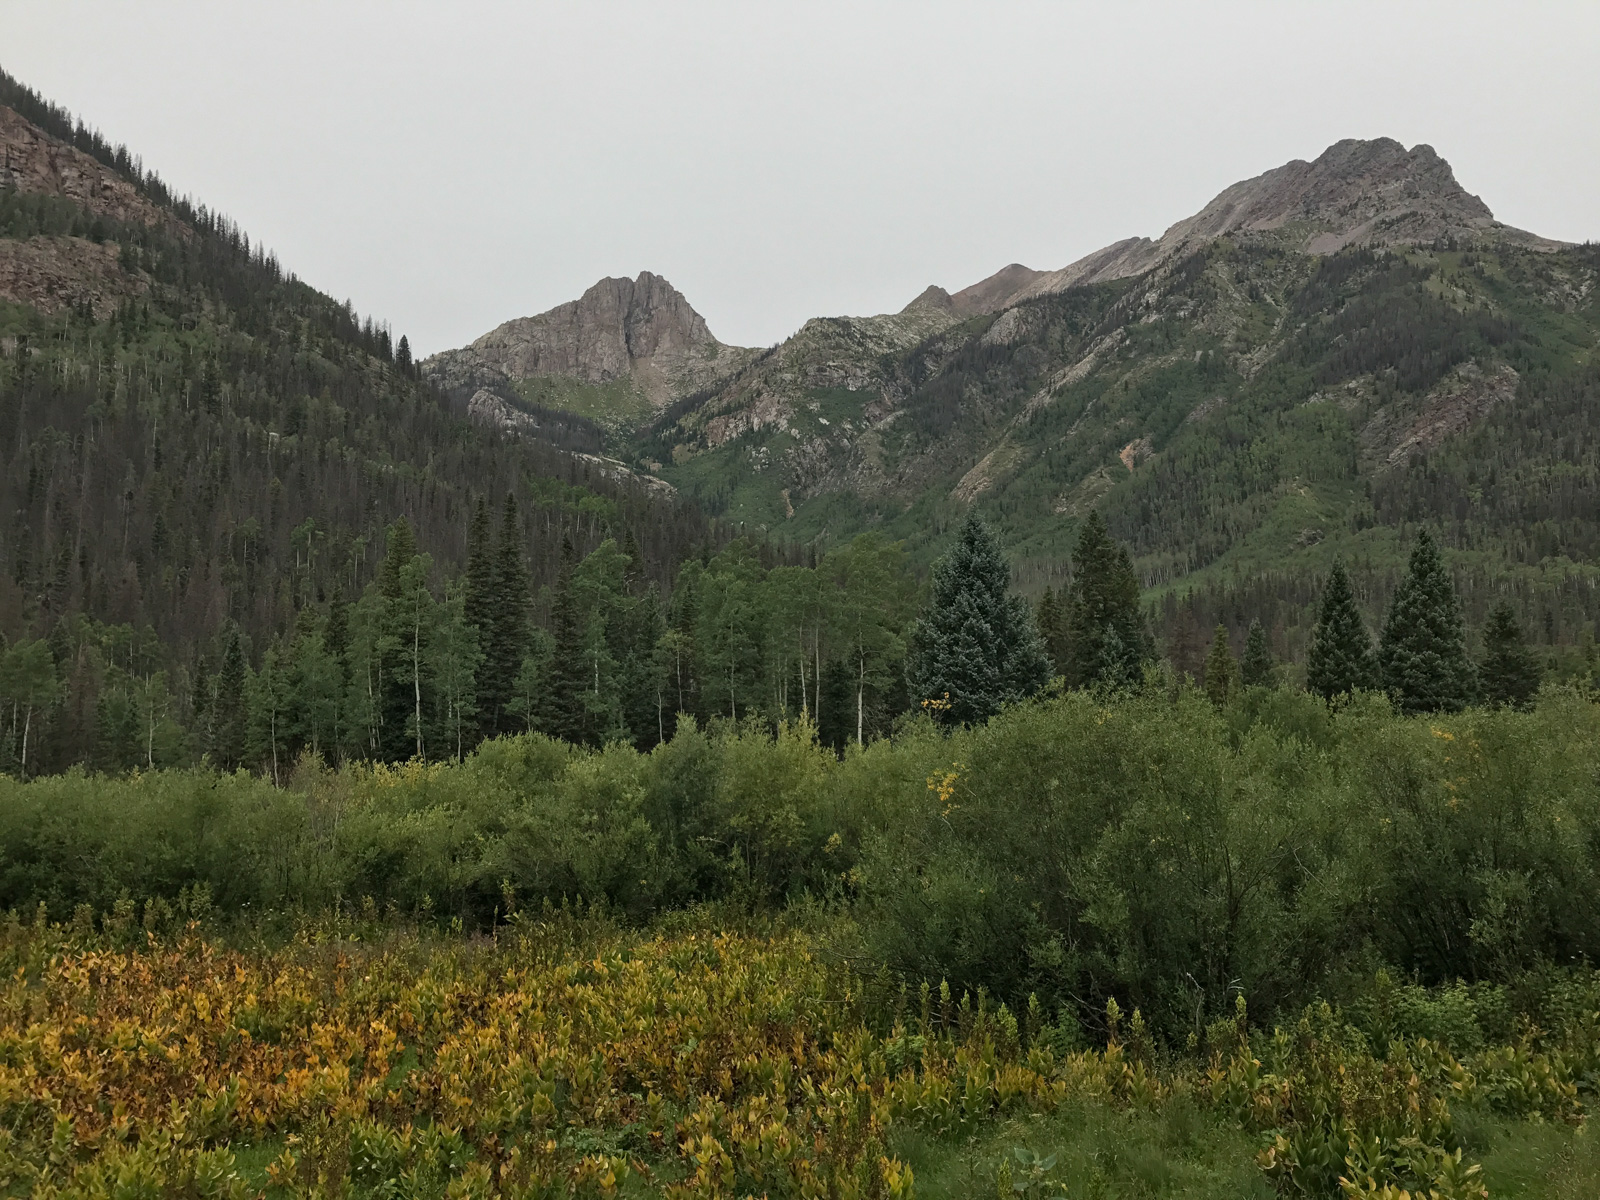
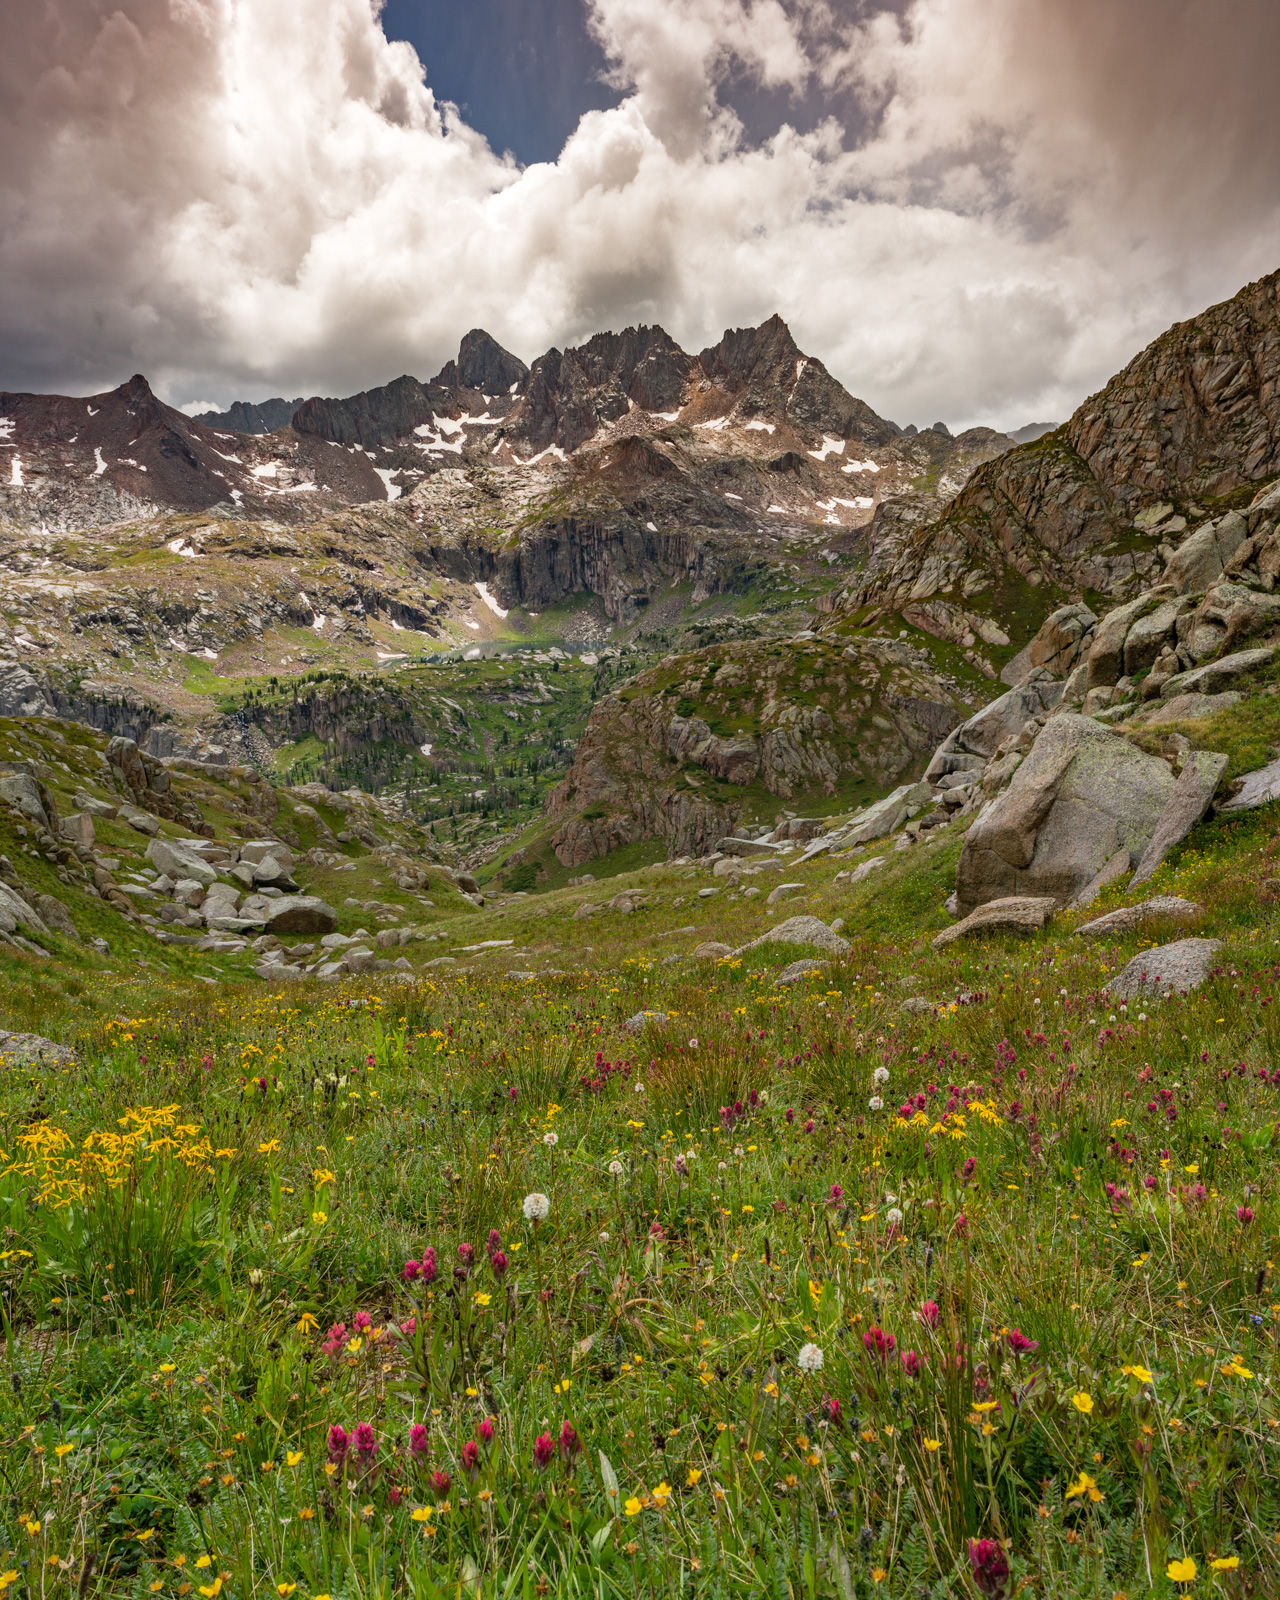
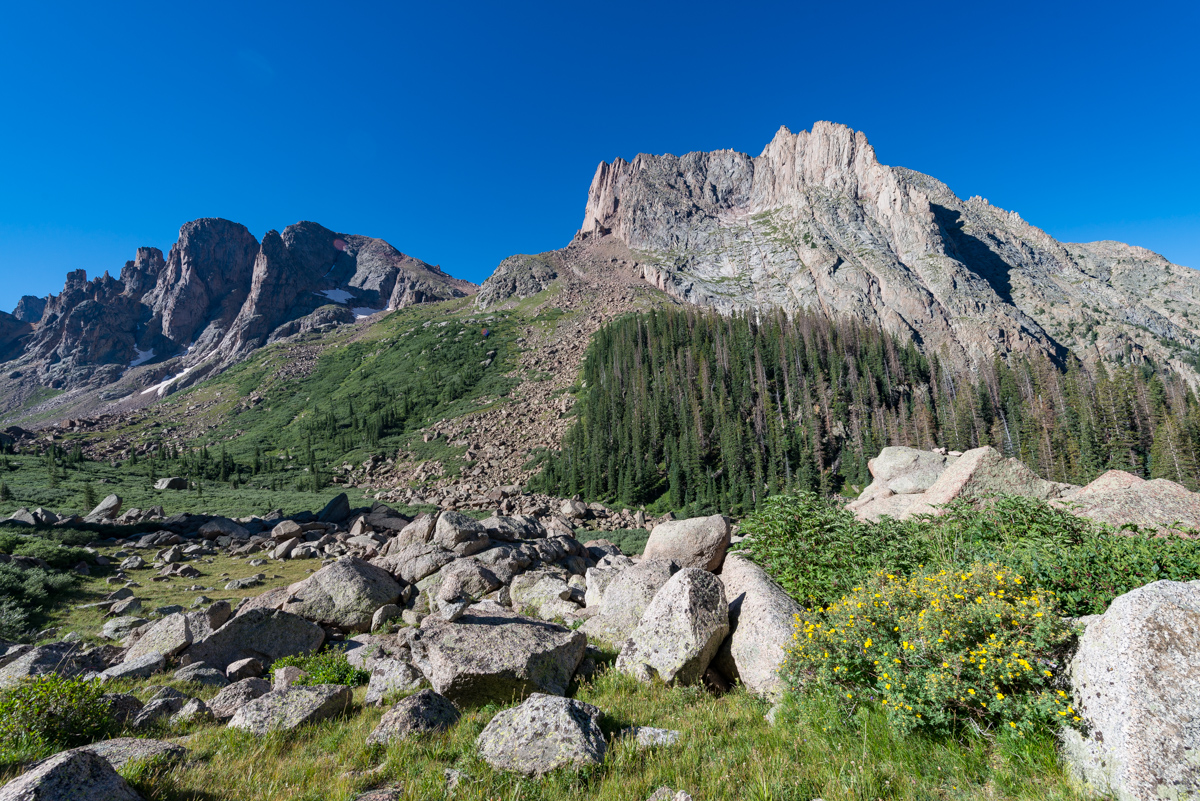
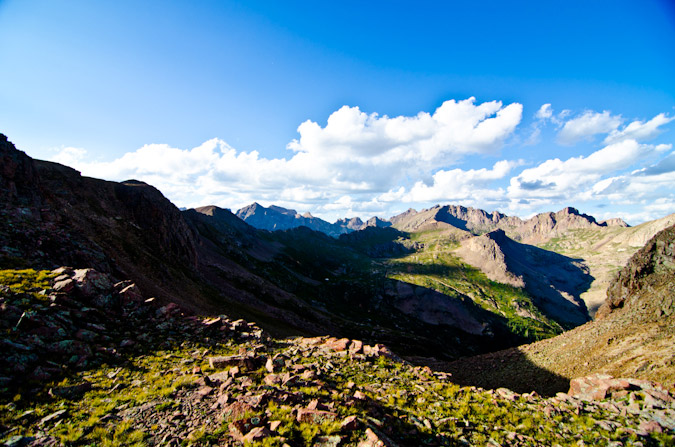
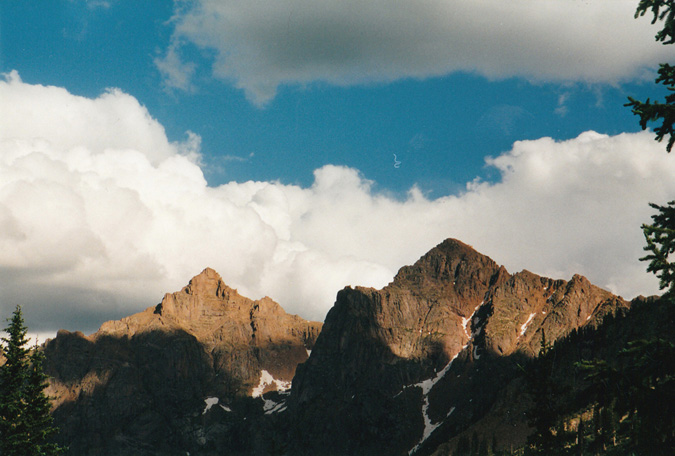
I was excited to see this area again from this vantage point. As we arrived at the summit of Hunchback Pass, the first views of 13,617 ft. "The Guardian" came into view. The Guardian is essentially the last in line and furthest east peak of the mighty Grenadier Range.
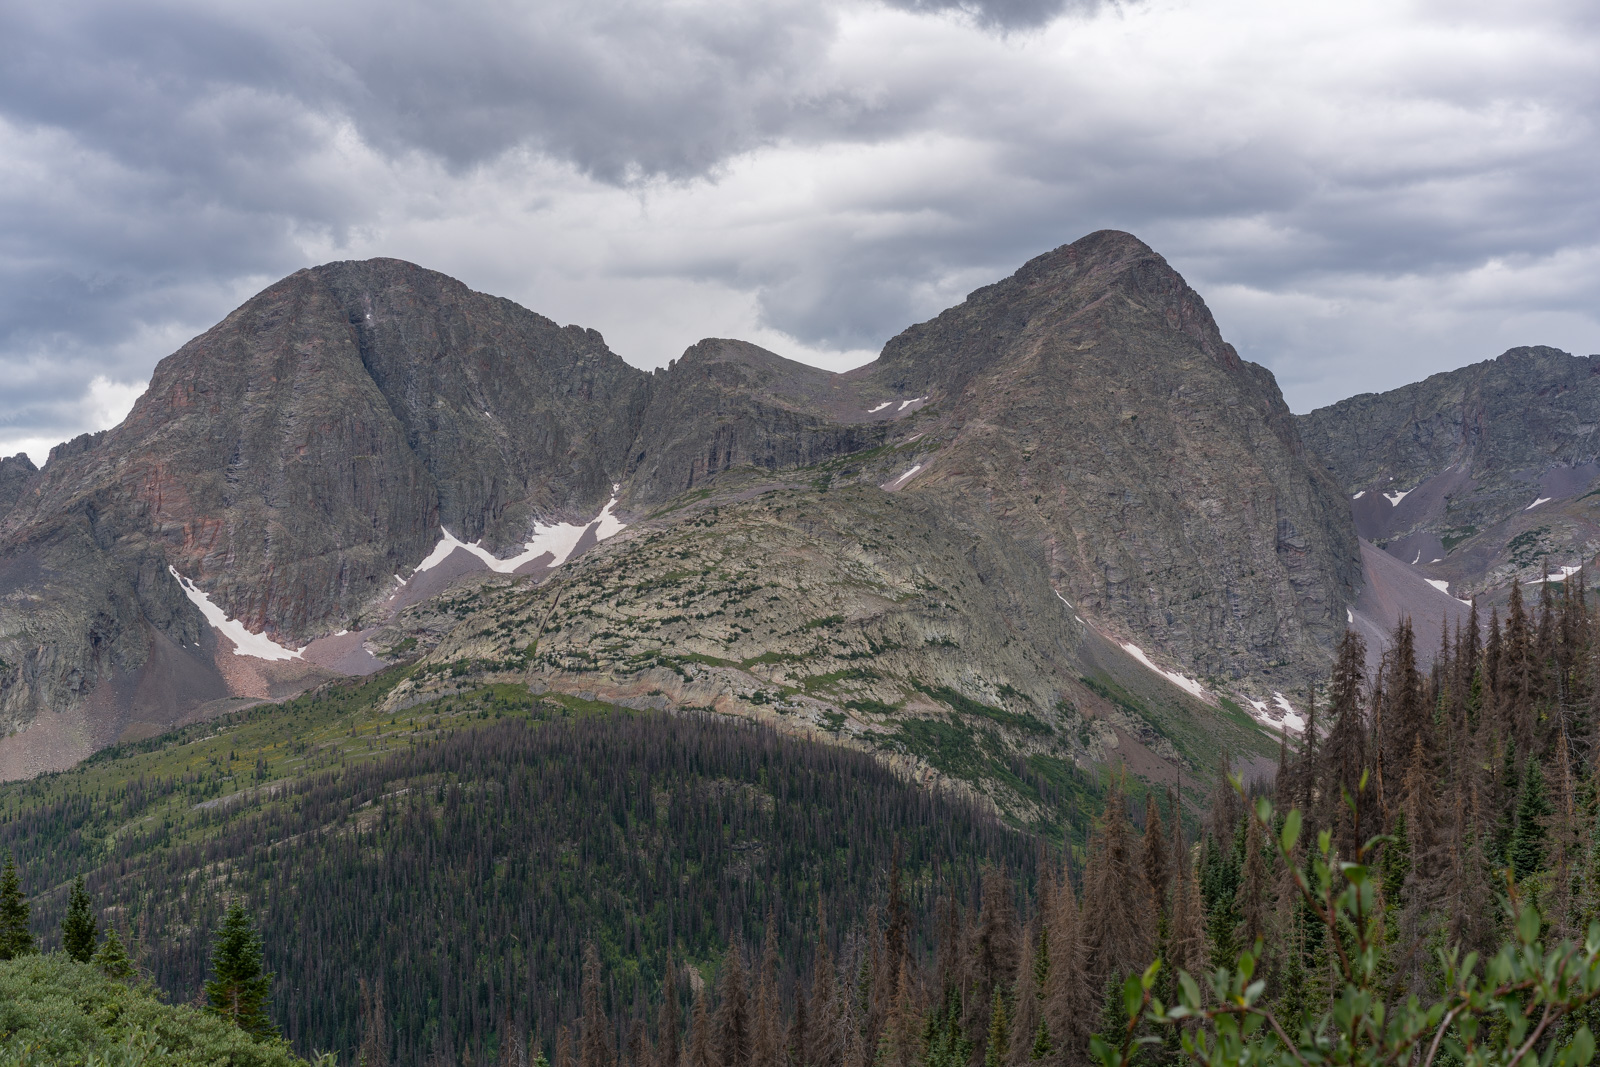
As we rounded the corner, both 13,628 ft. Mount Silex (right) and 13,617 ft. The Guardian (left) came into view. It was magical.
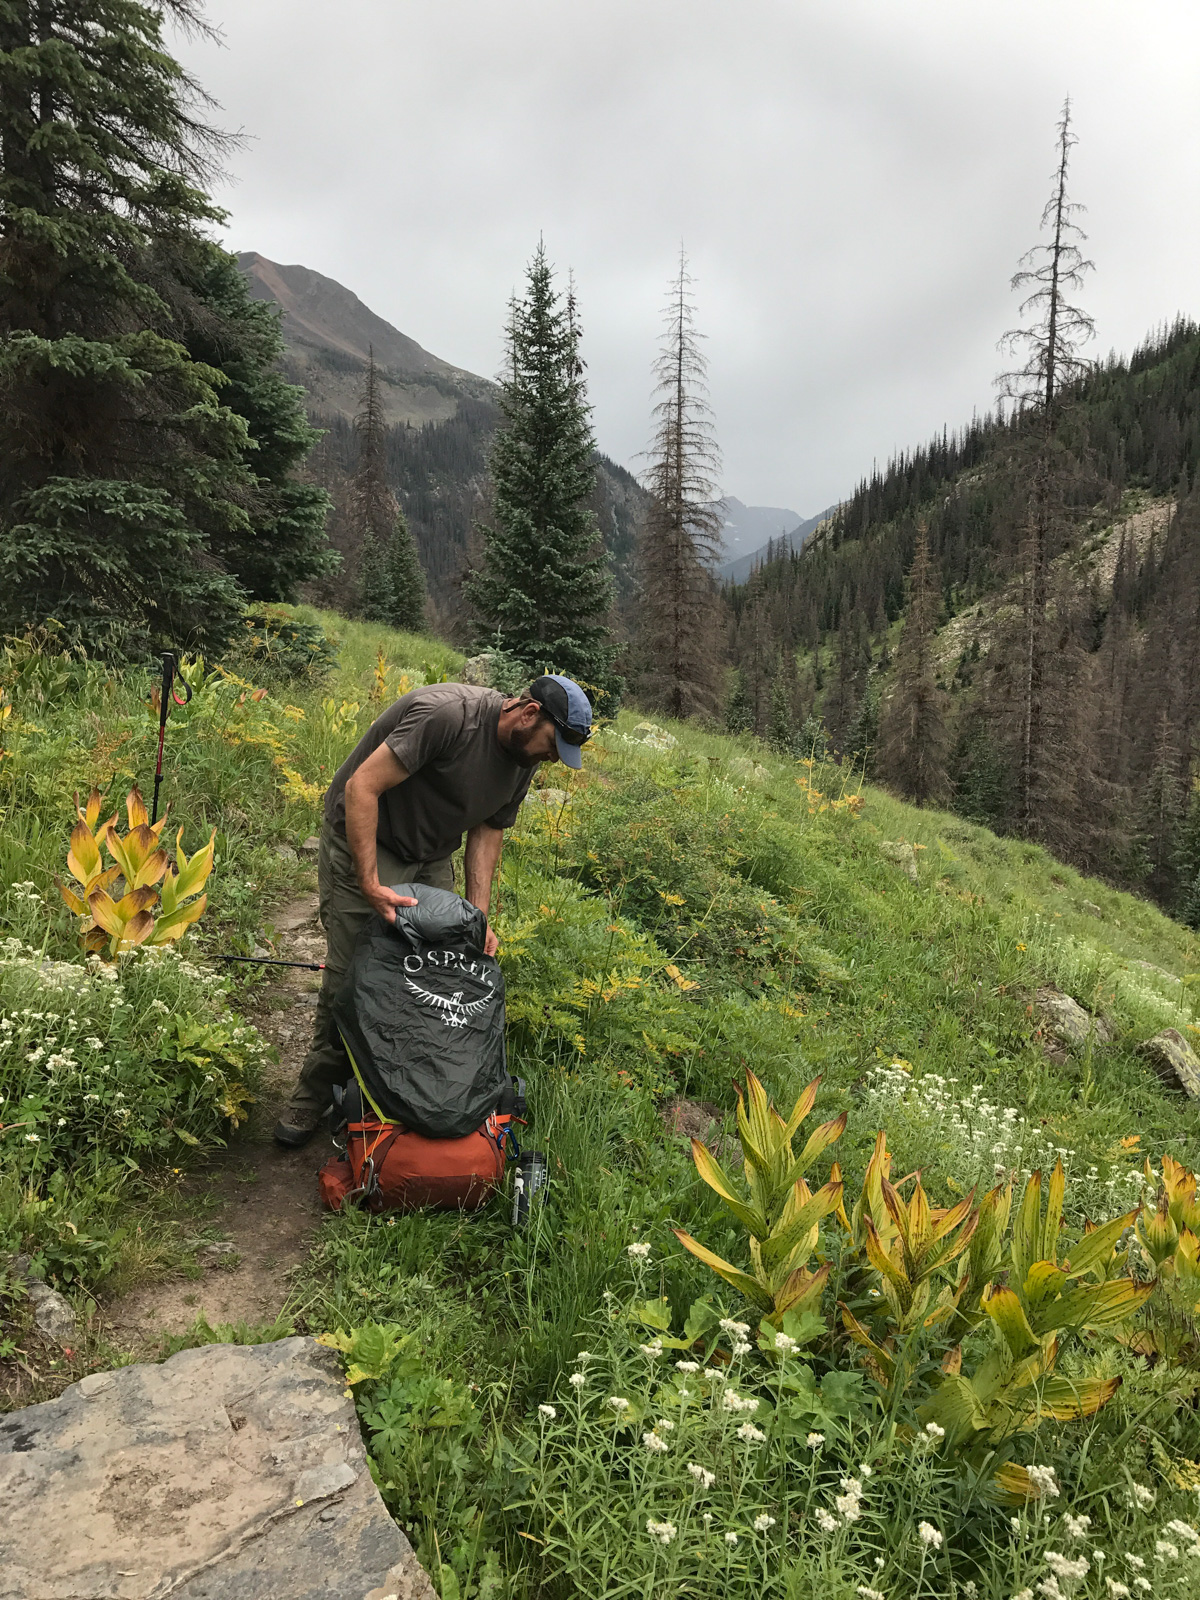
As we descended into Vallecito Basin, the weather looked as though it would bring some rain, so we decided to stop to get some snacks and to put on our rain gear. Shawn was pleasantly surprised to find that he had grabbed the wrong pack cover when he left the house. Surprisingly enough, it worked great!
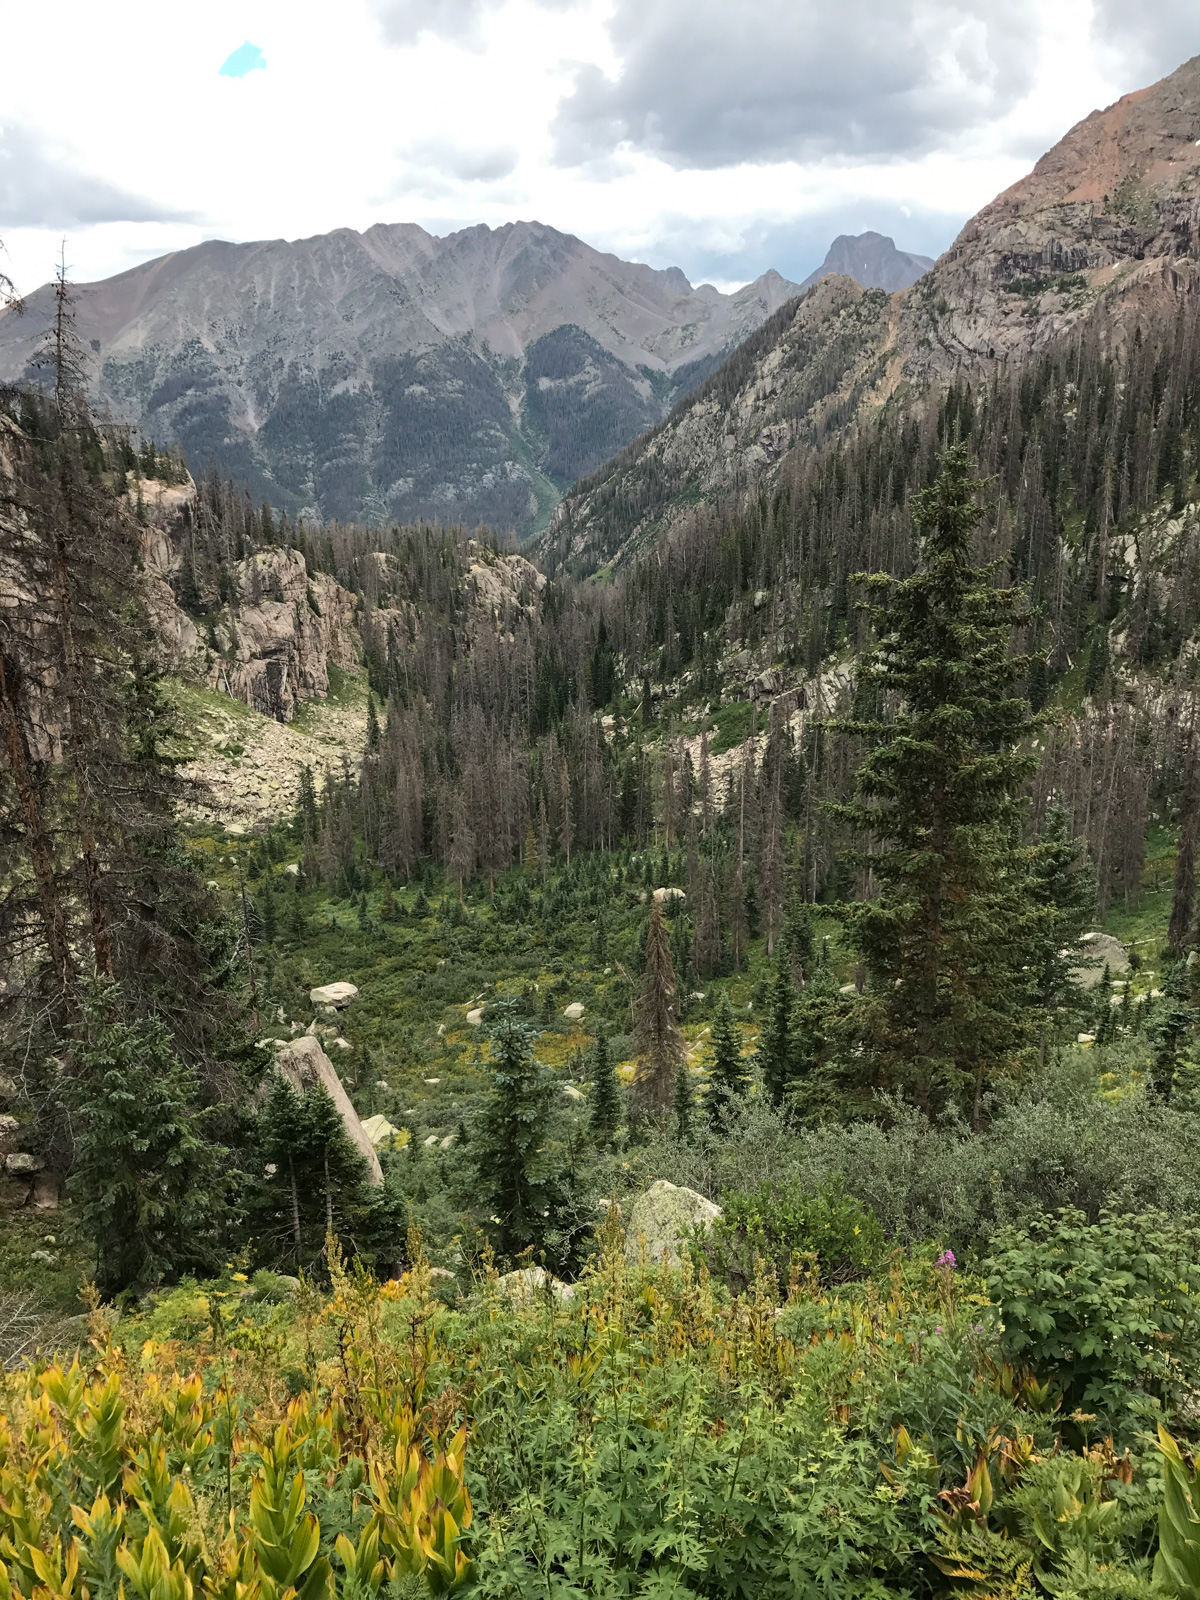
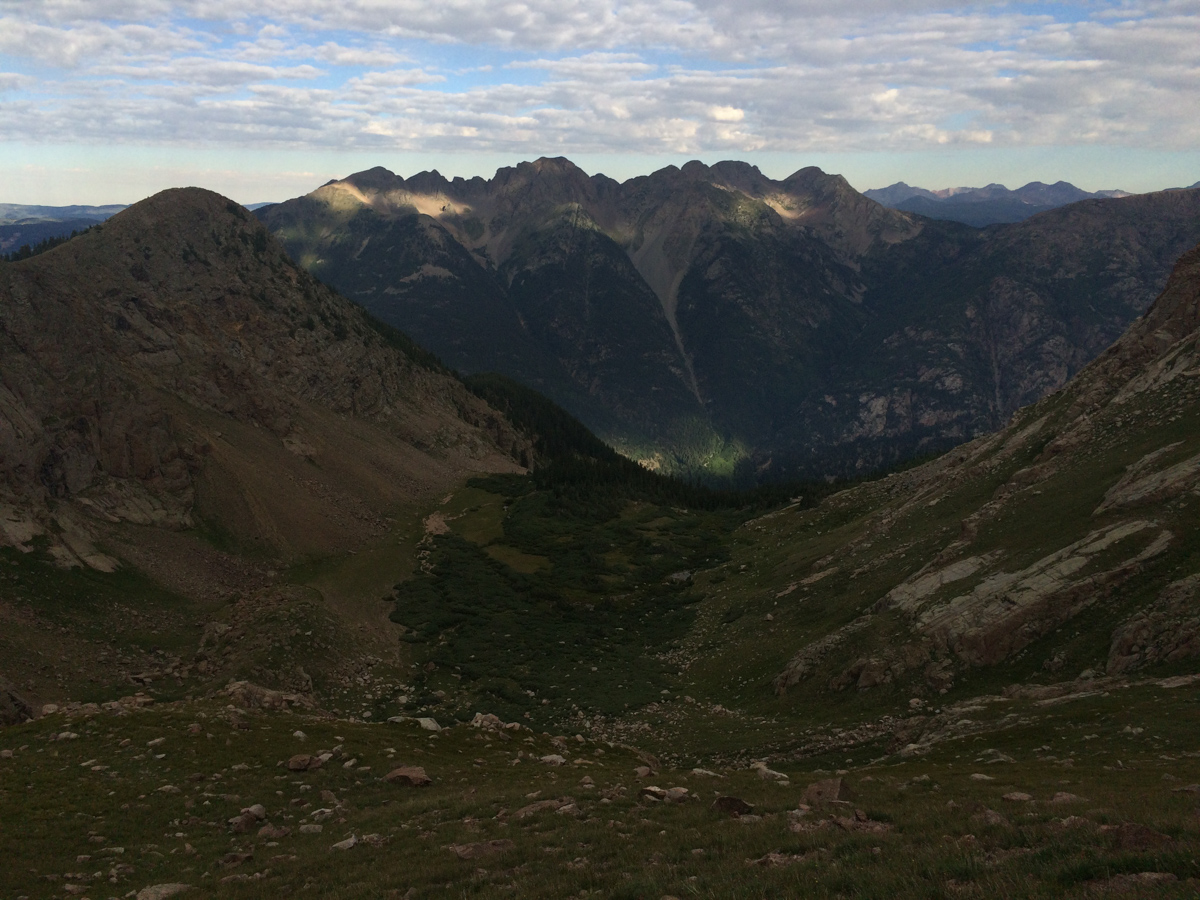
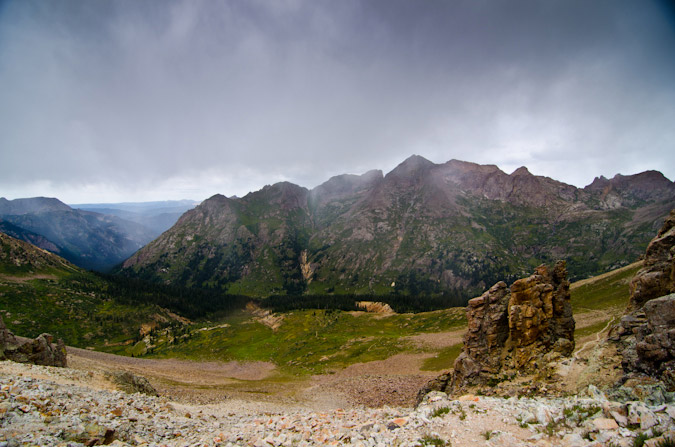
Rain covers on, we continued the gruelling hike down into the basin, with the northern flanks of some of the San Juan's greatest peaks looming in the distance, including Greylock Mountain and Thunder Mountain.
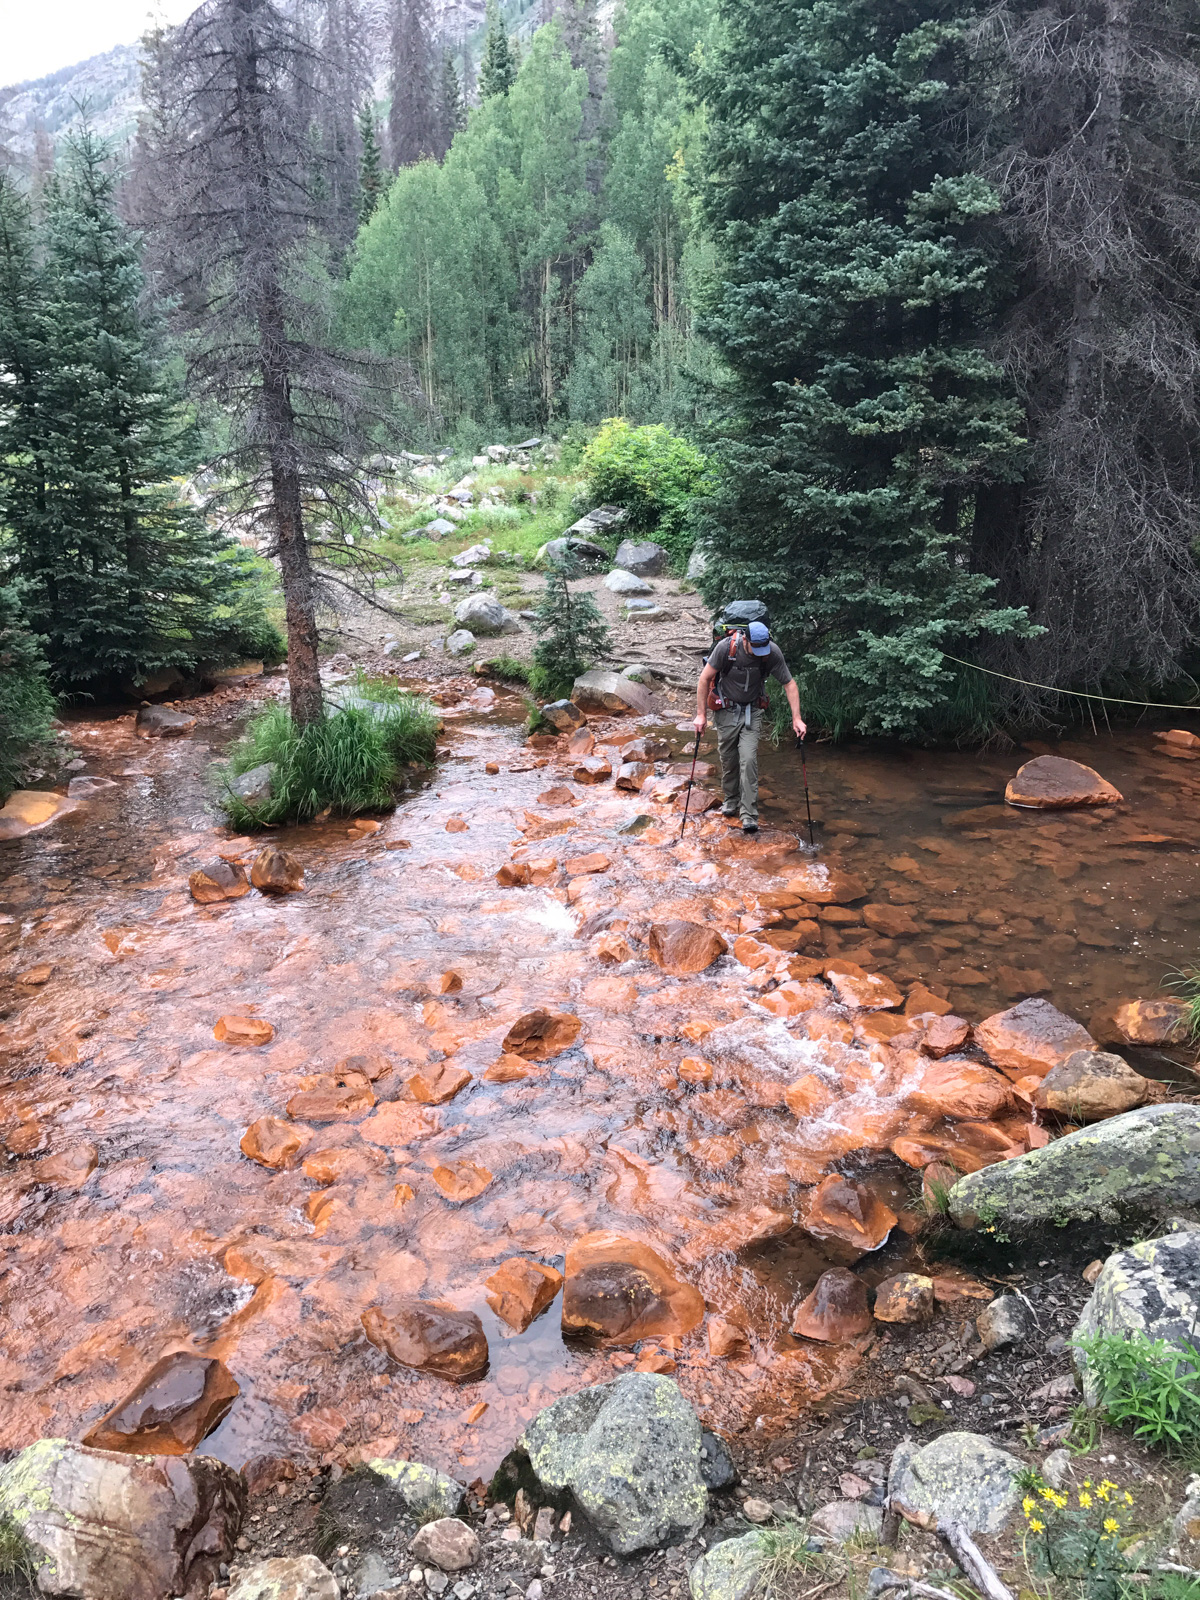
After negotiating several switchbacks into the forest below, we found ourselves at Rock Creek, which is stained an orange color, I presume from mining activity far above. We crossed without any problems.
Before long, we found ourselves walking through thick plants covered in Red Elderberries, mixed in with numerous raspberry plants, which made for tasty snacks (the raspberries, not the poisonous elderberries).

Having a lot of luck with the rain so far, we found ourselves at the turn-off for Sunlight Creek.
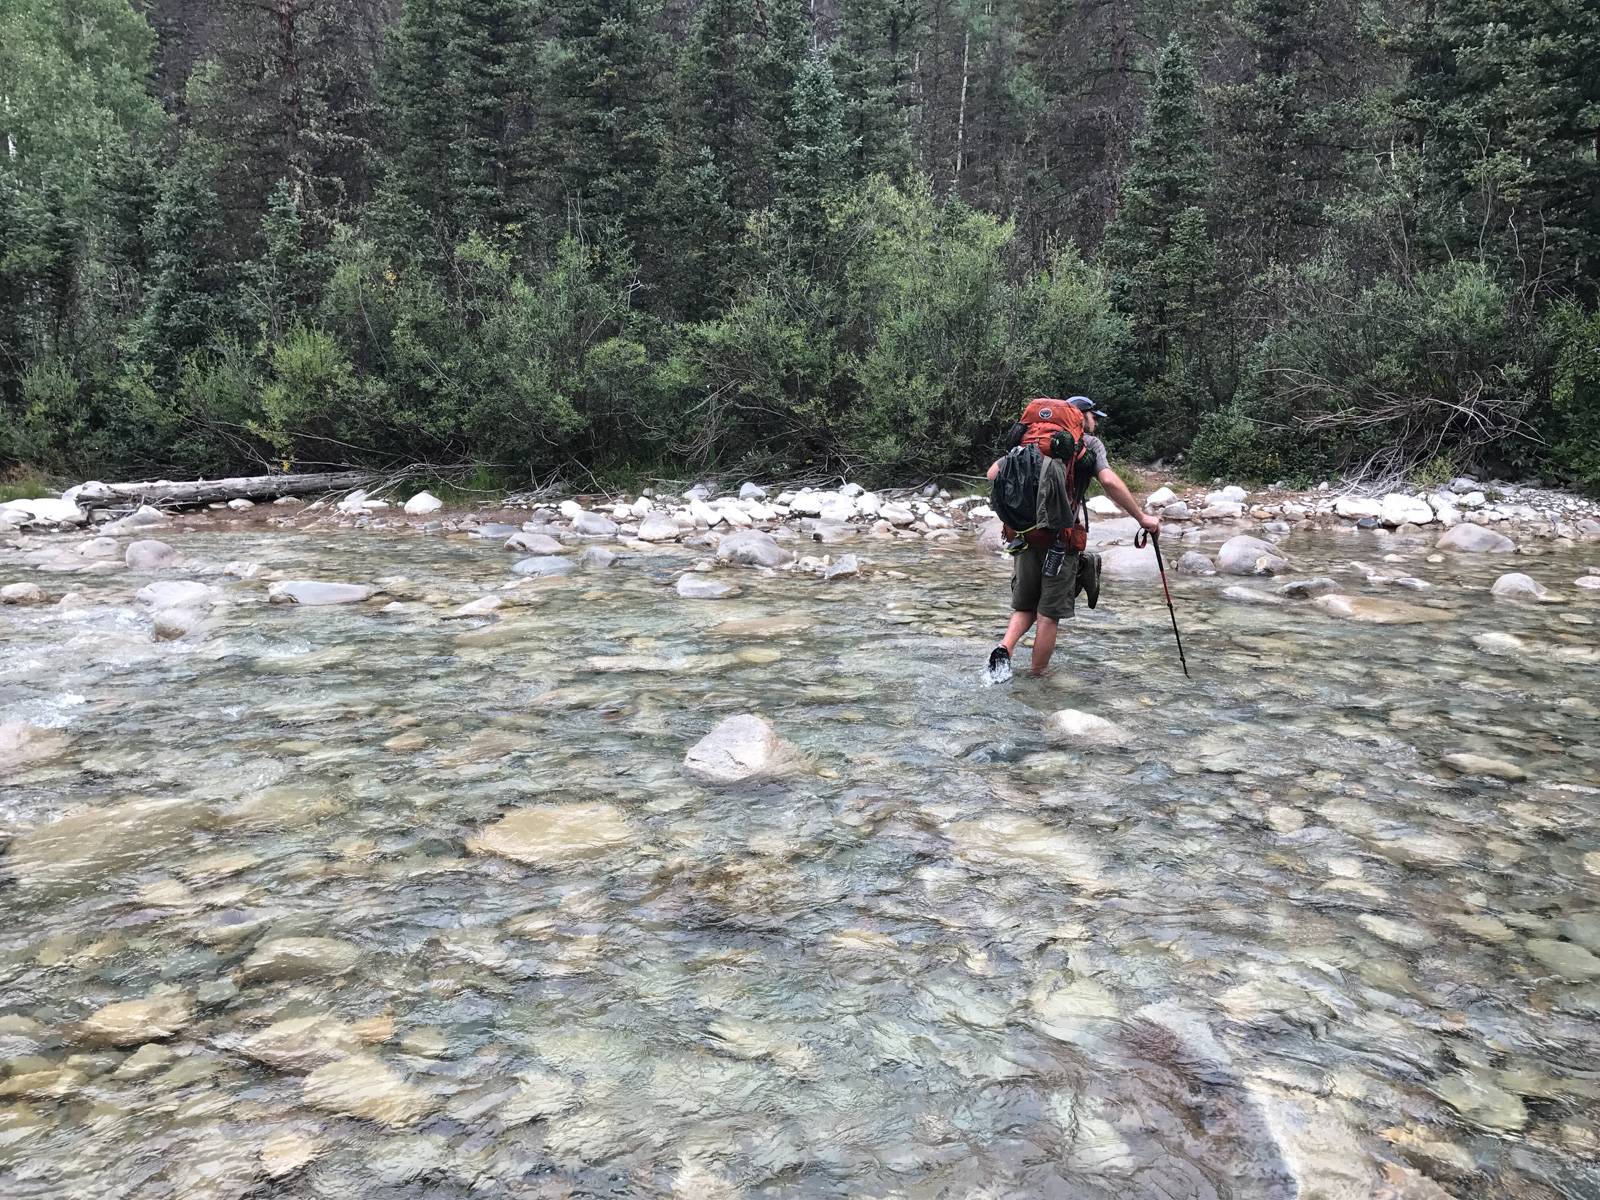
We found ourselves at Vallecito Creek and Shawn and Natalie decided to switch to their water shoes. I opted to keep my mountaineering boots on (I really did not have a choice). I managed to cross without getting my feet wet. Shawn took a nice stroll through the creek.
Shortly after crossing the Vallecito, Shawn and Natalie put back on their normal footwear and we were off to the races. About 5 minutes into the hike, we were forced to cross Sunlight Creek and this time Natalie and Shawn kept their normal footwear on. Both dipped into the water on accident and got wet, so they had to stop and get new socks on. Bummer!

We continued to blaze up the almost hidden trail up Sunlight Creek, which was very dense in spots and really hard to navigate. Do you see a trail?
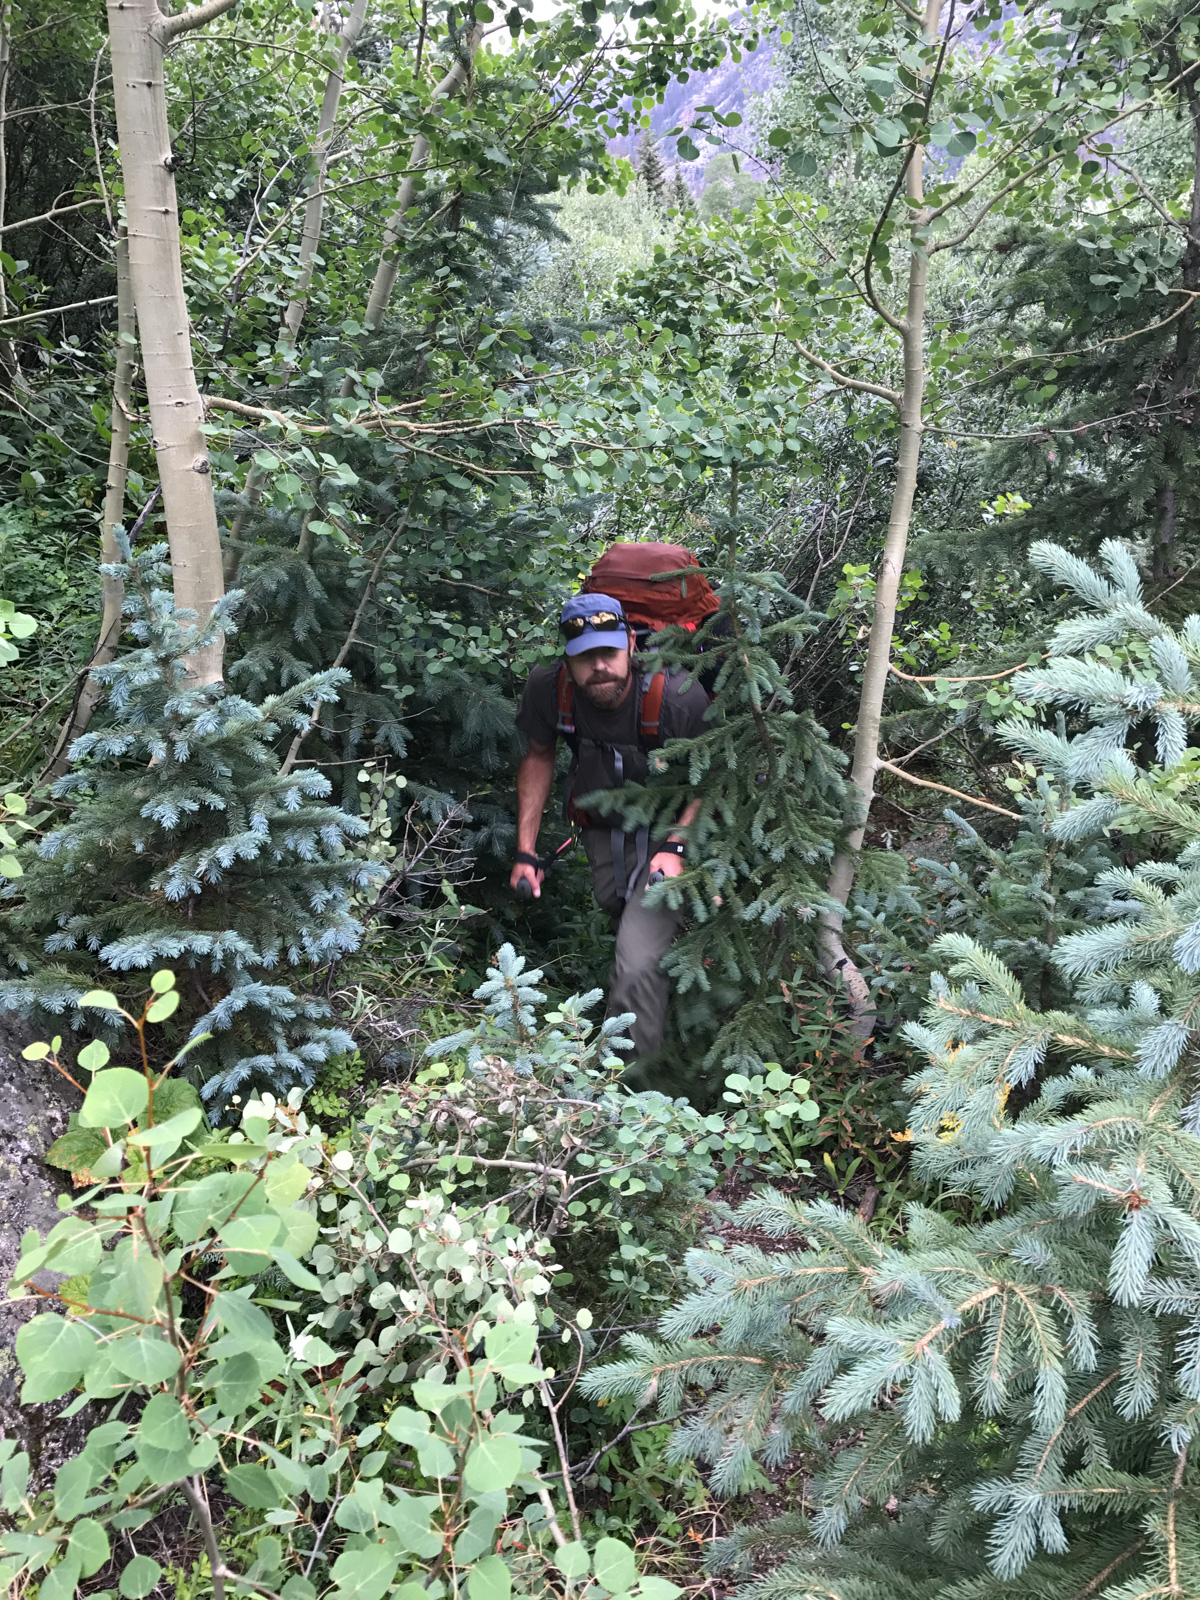
This trail was wicked steep and full of overgrowth, deadfall, and crazy twists and turns. At least the view was good at times!
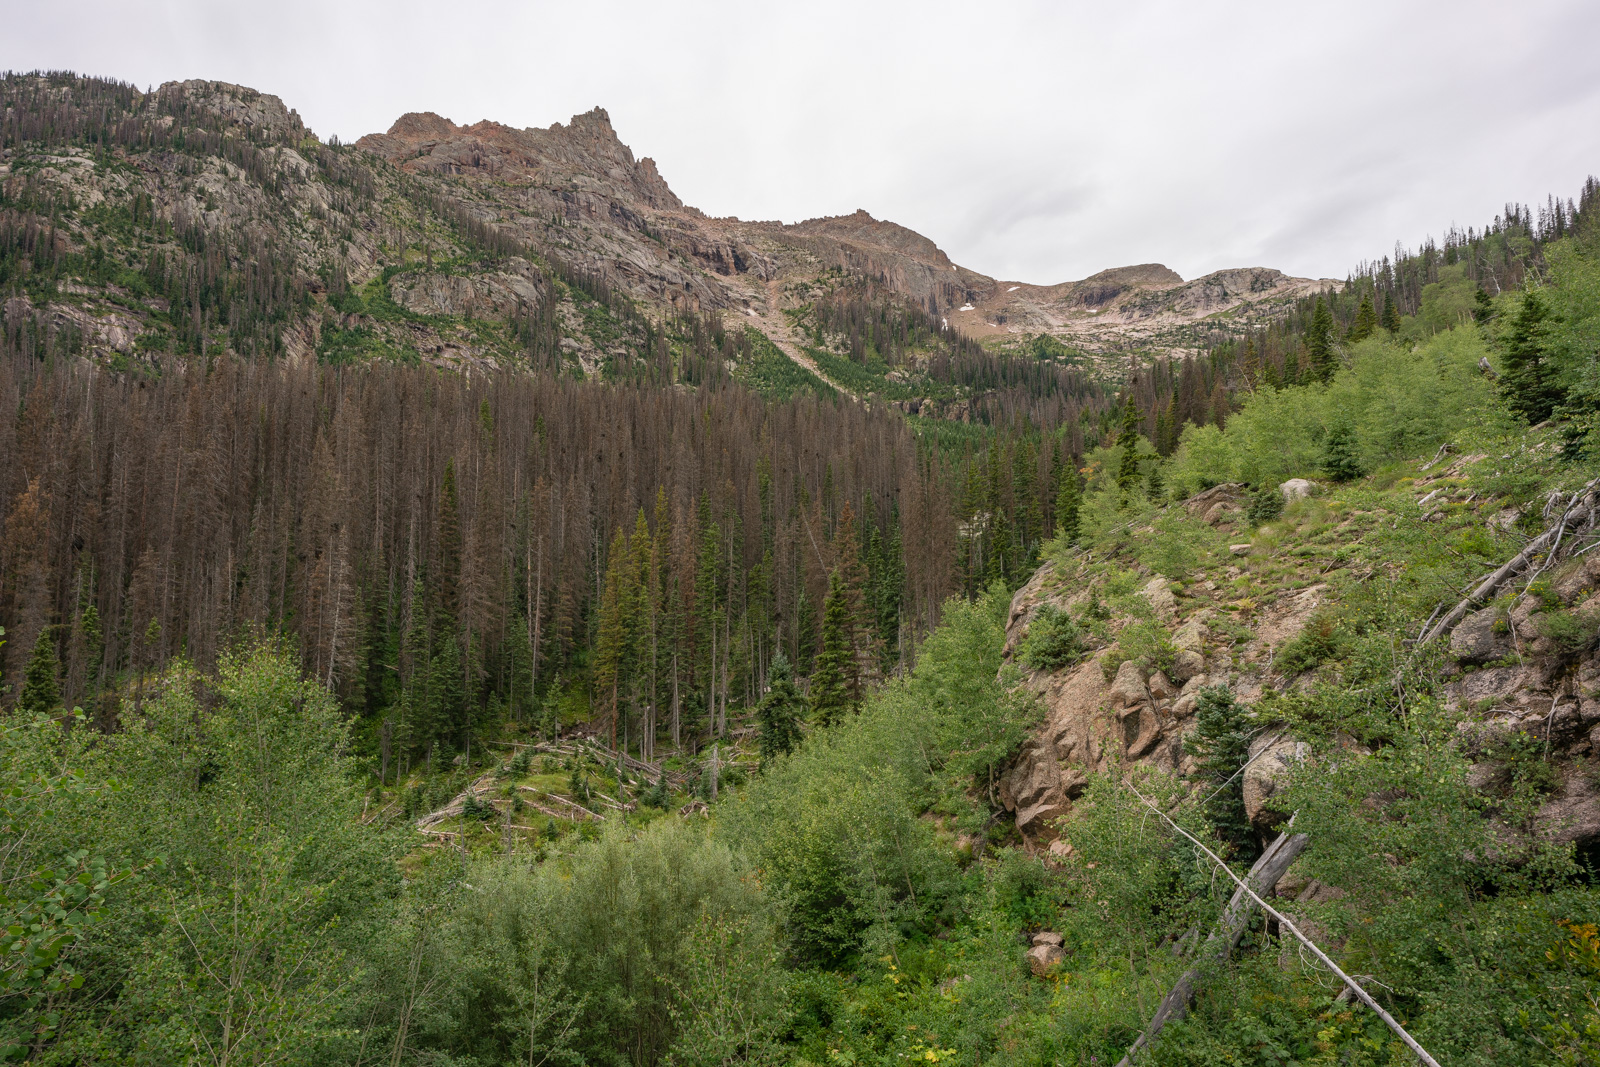
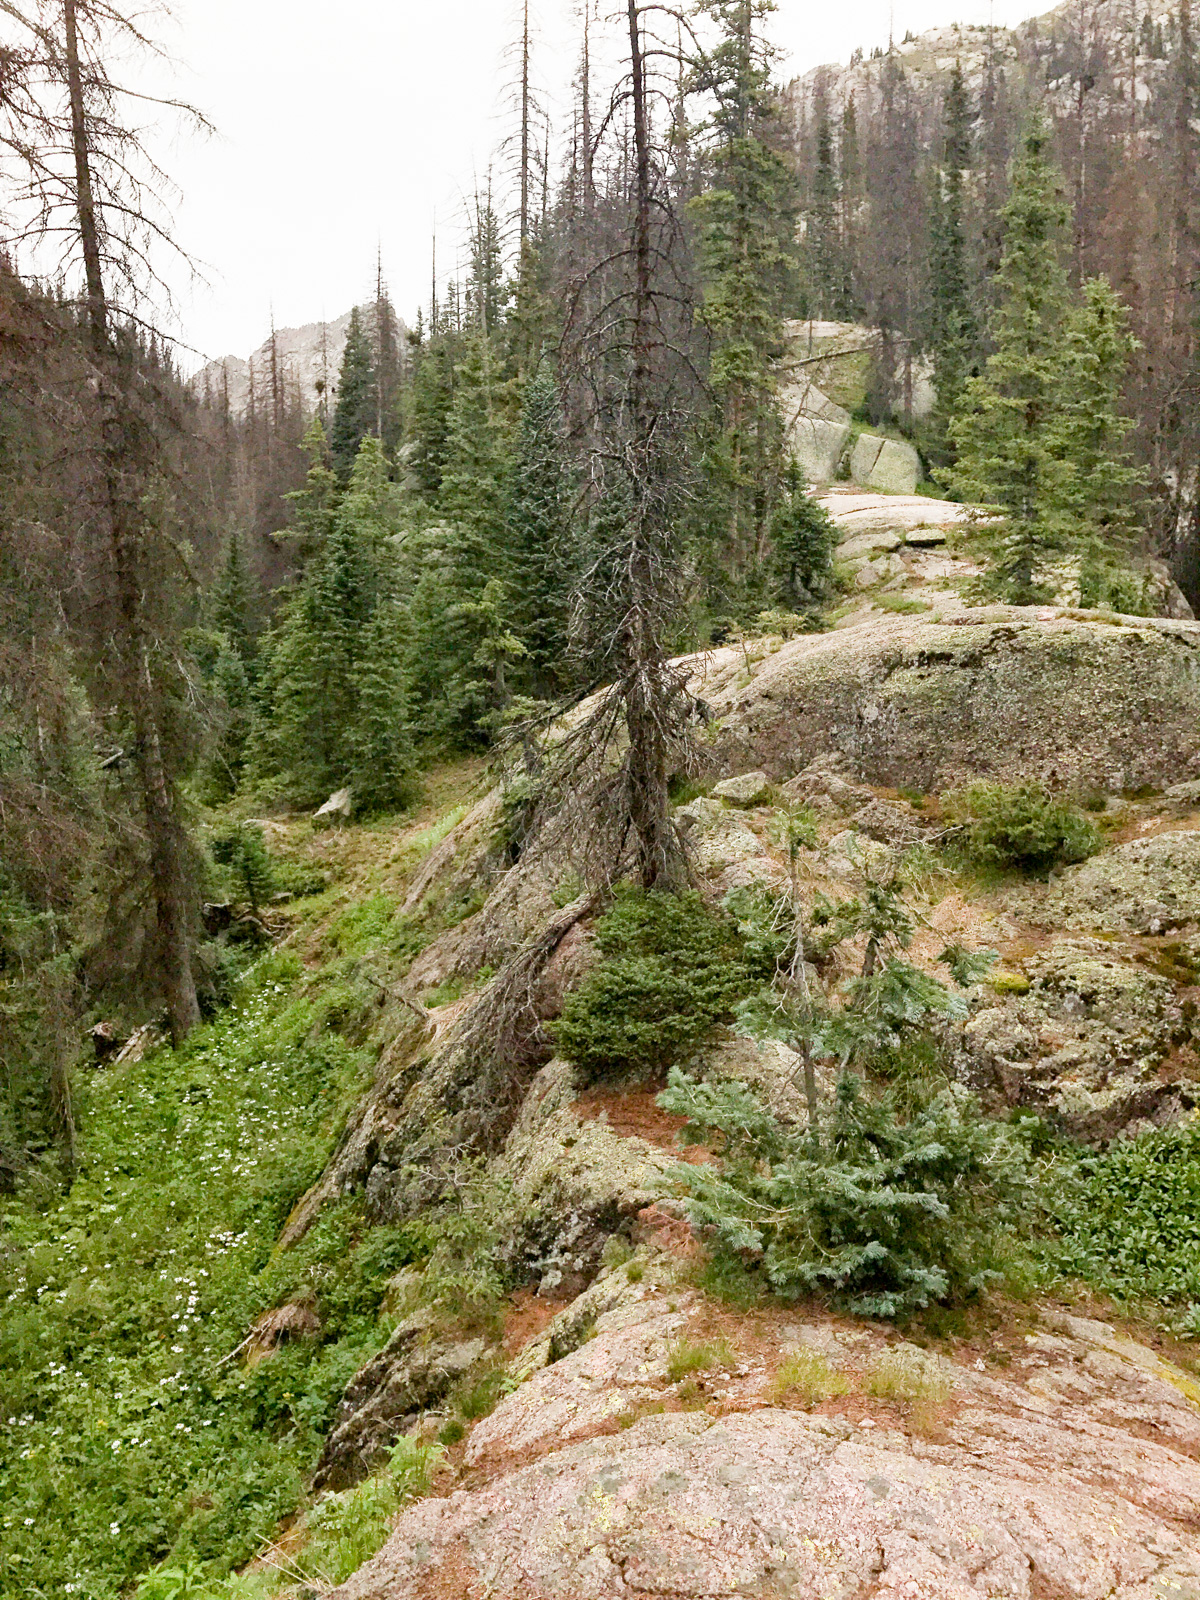
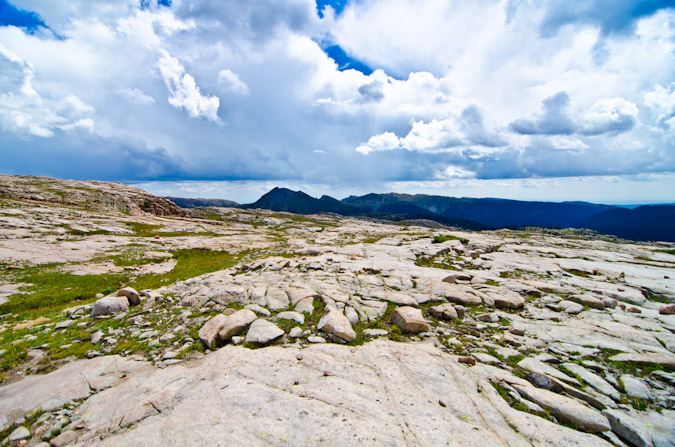
At one point in the trail, before it reaches the creek again, we were tempted to go up to the right; however, the correct right is to go down and cross the creek again and then go right up towards Jagged Mountain. This is the view of the terrain we found when we went too high.
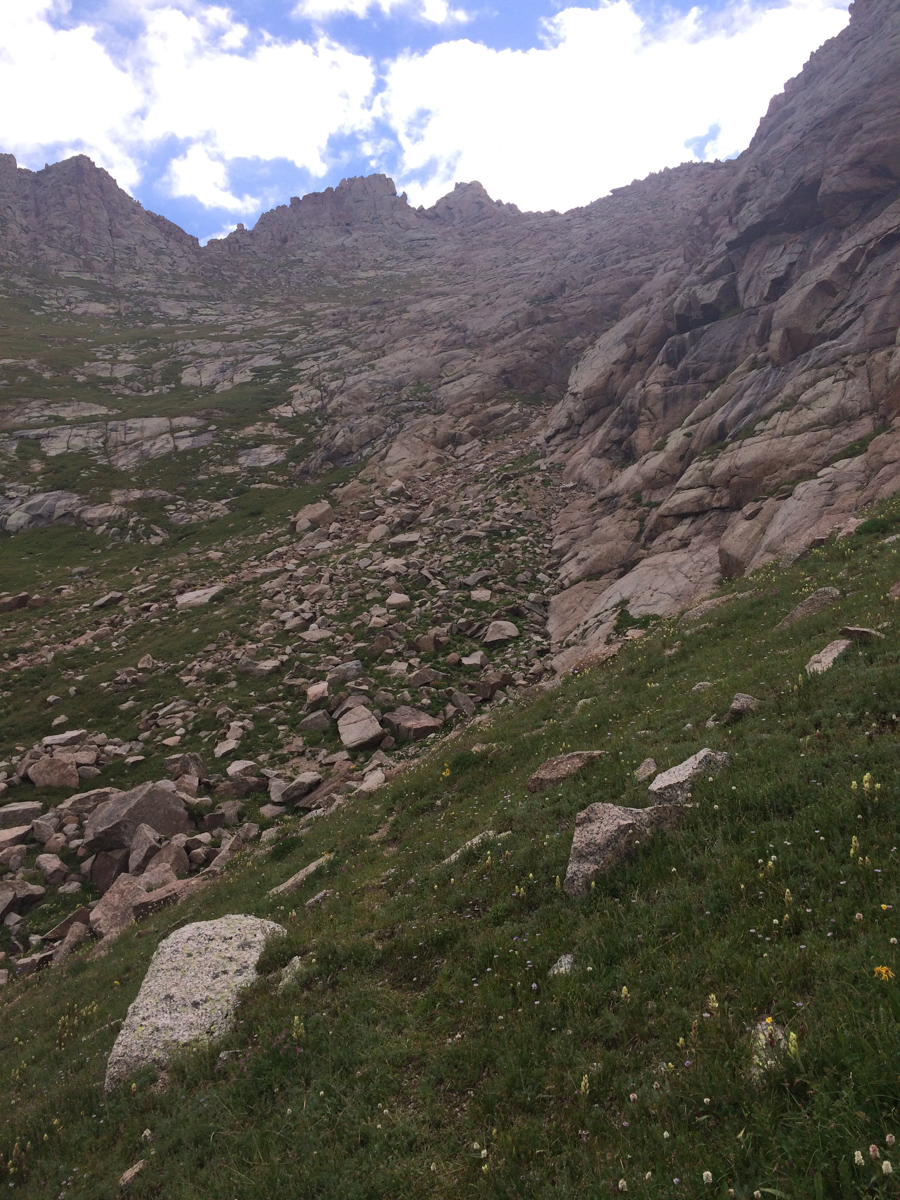
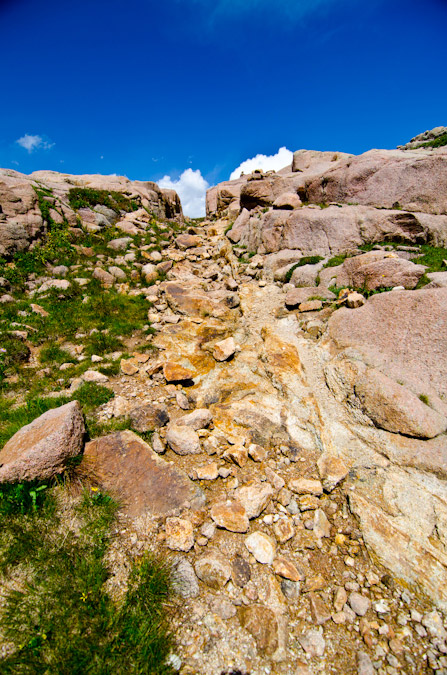
Once across the creek again, the trail was very hard to navigate through logs, wildflowers, and huge boulders. The terrain was steep, steeper than most approaches, and it was relentless.
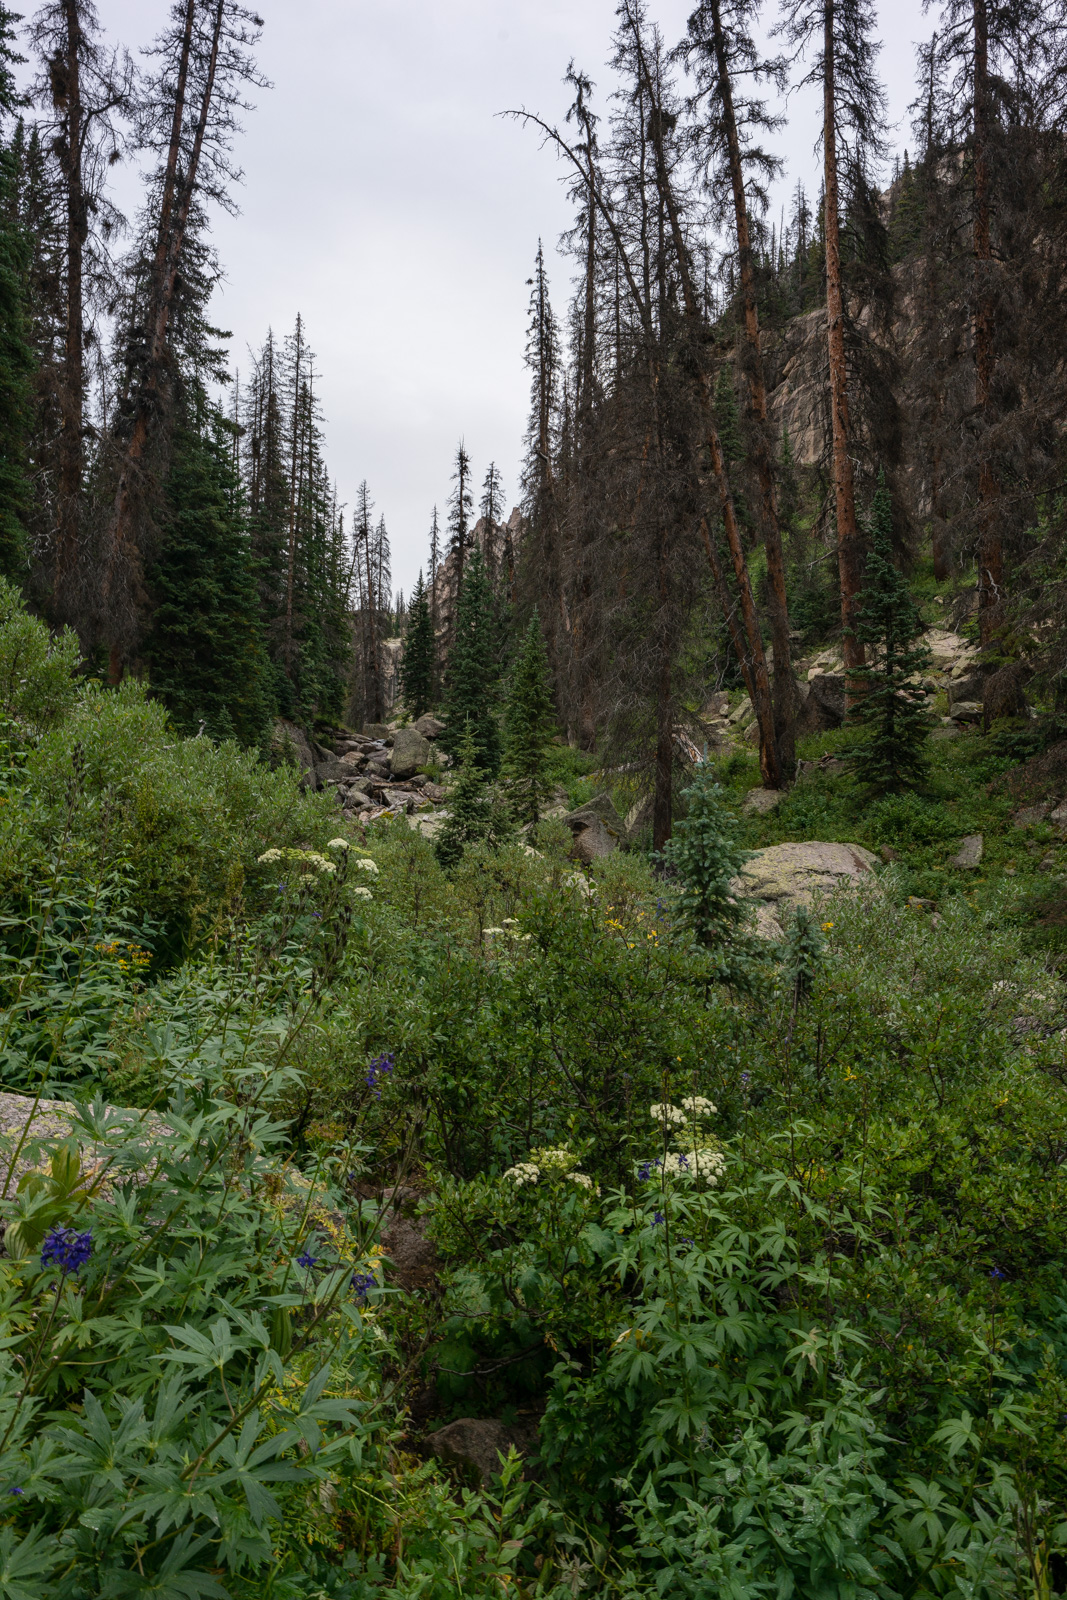
As you can see, the trail was filled with all kinds of fun obstacles, and Natalie was growing weary with her huge pack. We were ready for camp.
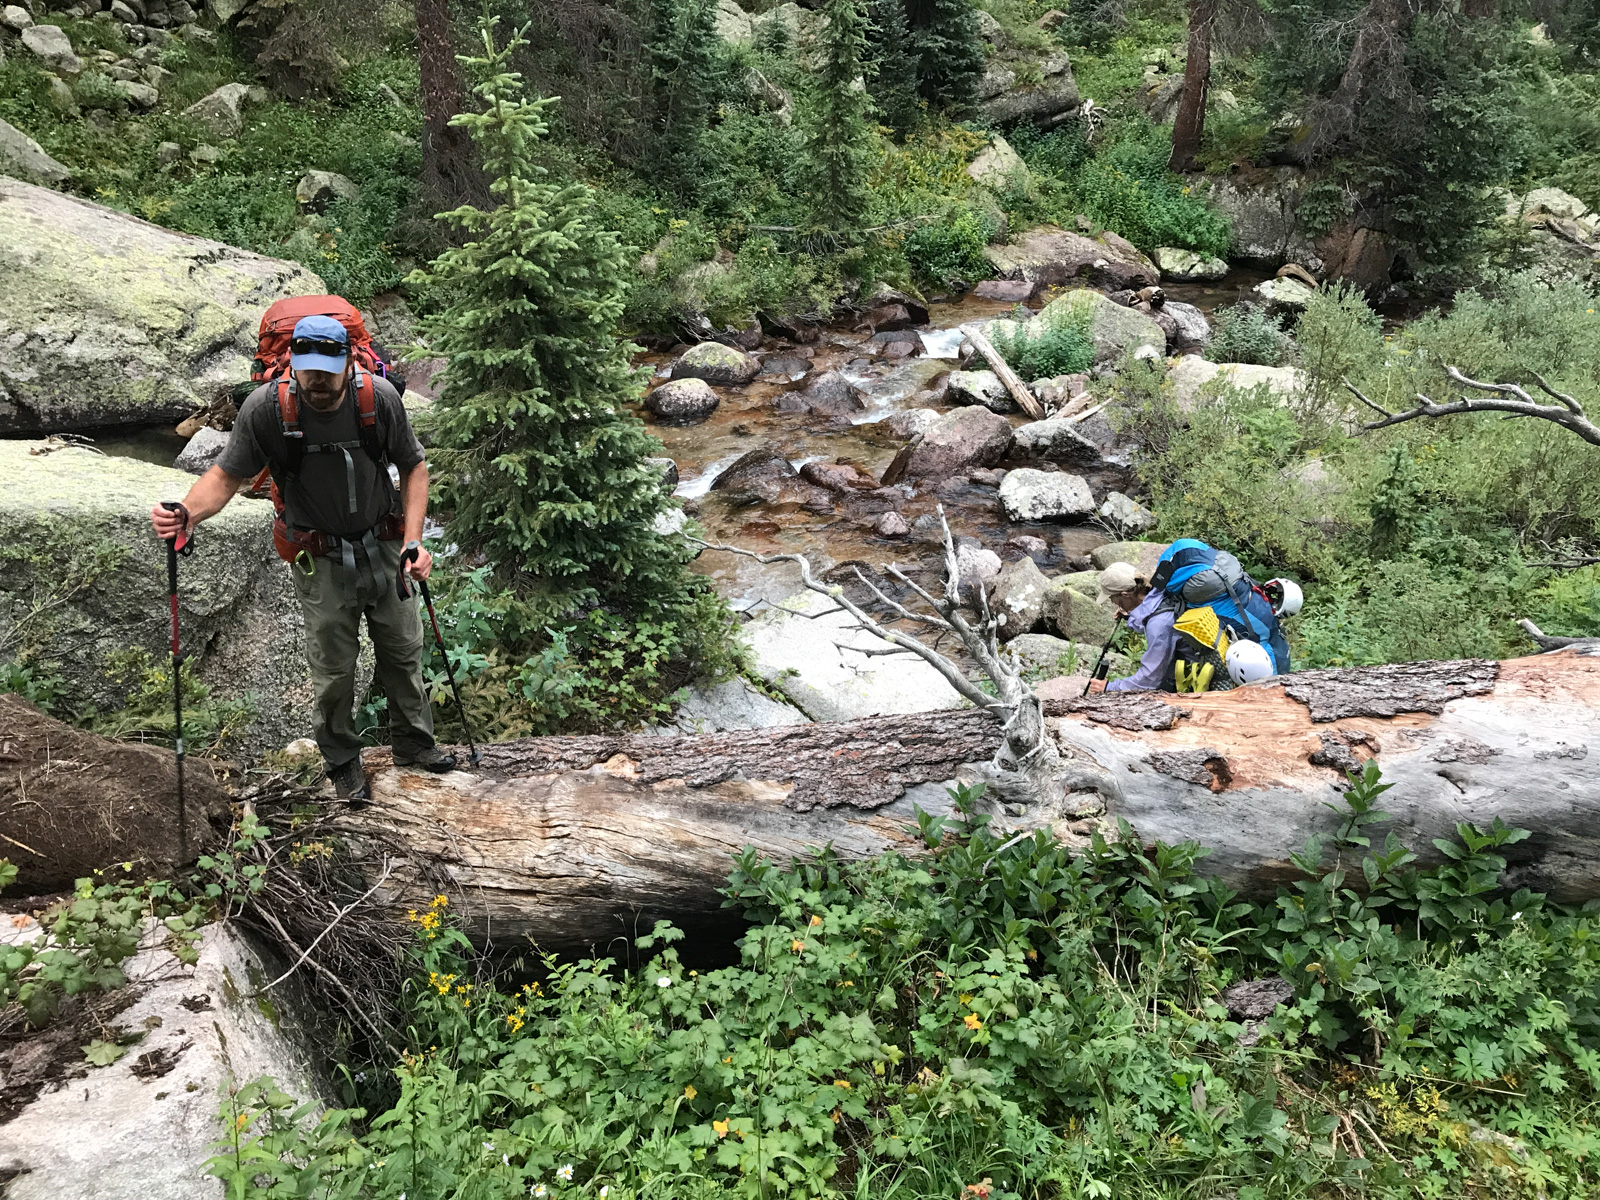
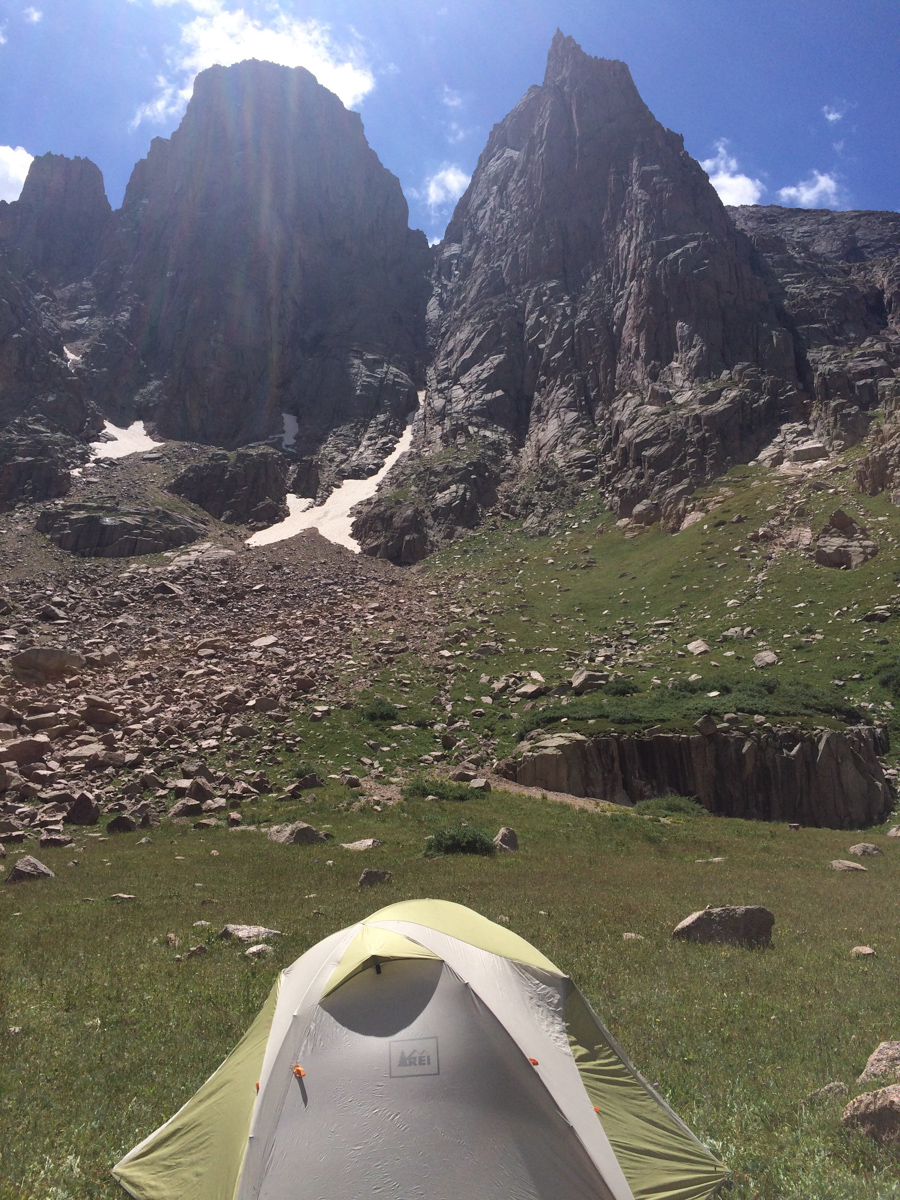
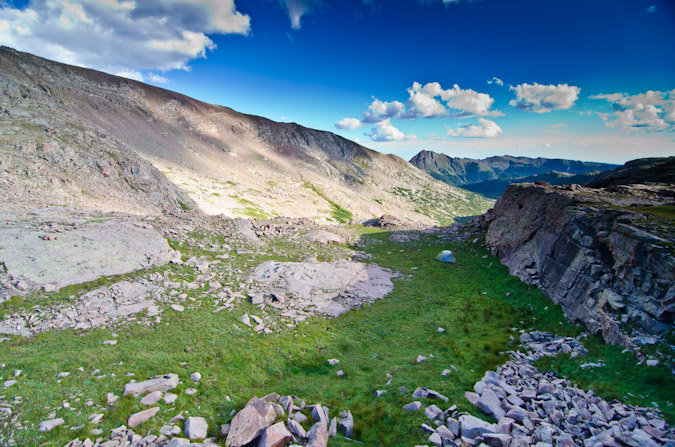
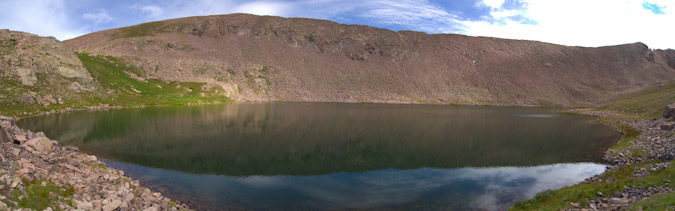
Finally, we found a lovely campsite just across the creek on the right hand side below some large cliffs with a great view of the eastern face of Jagged Mountain. The campsite, if you are looking at a USGS topo map, is located just under the "l" and the "i" in Sunlight Creek at about 11,000 ft. just before the trail begins a sharp climp up to the upper basin.
We set-up our tents, ate dinner, and crashed. The plan was to get up and go up into the upper basin for a warm-up climb of either Knife Point or Peak 10. It rained a little over-night and I was exhausted but ready for the good fight!
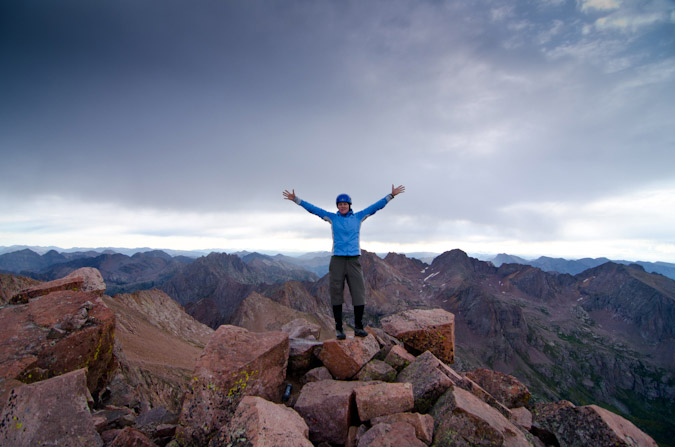
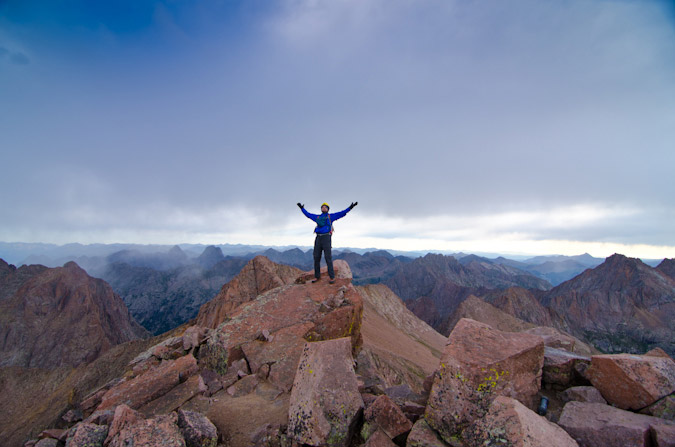
DAY 2: Summit of the impressive 13,265 ft. Knife Point and photographing the Eclipse.
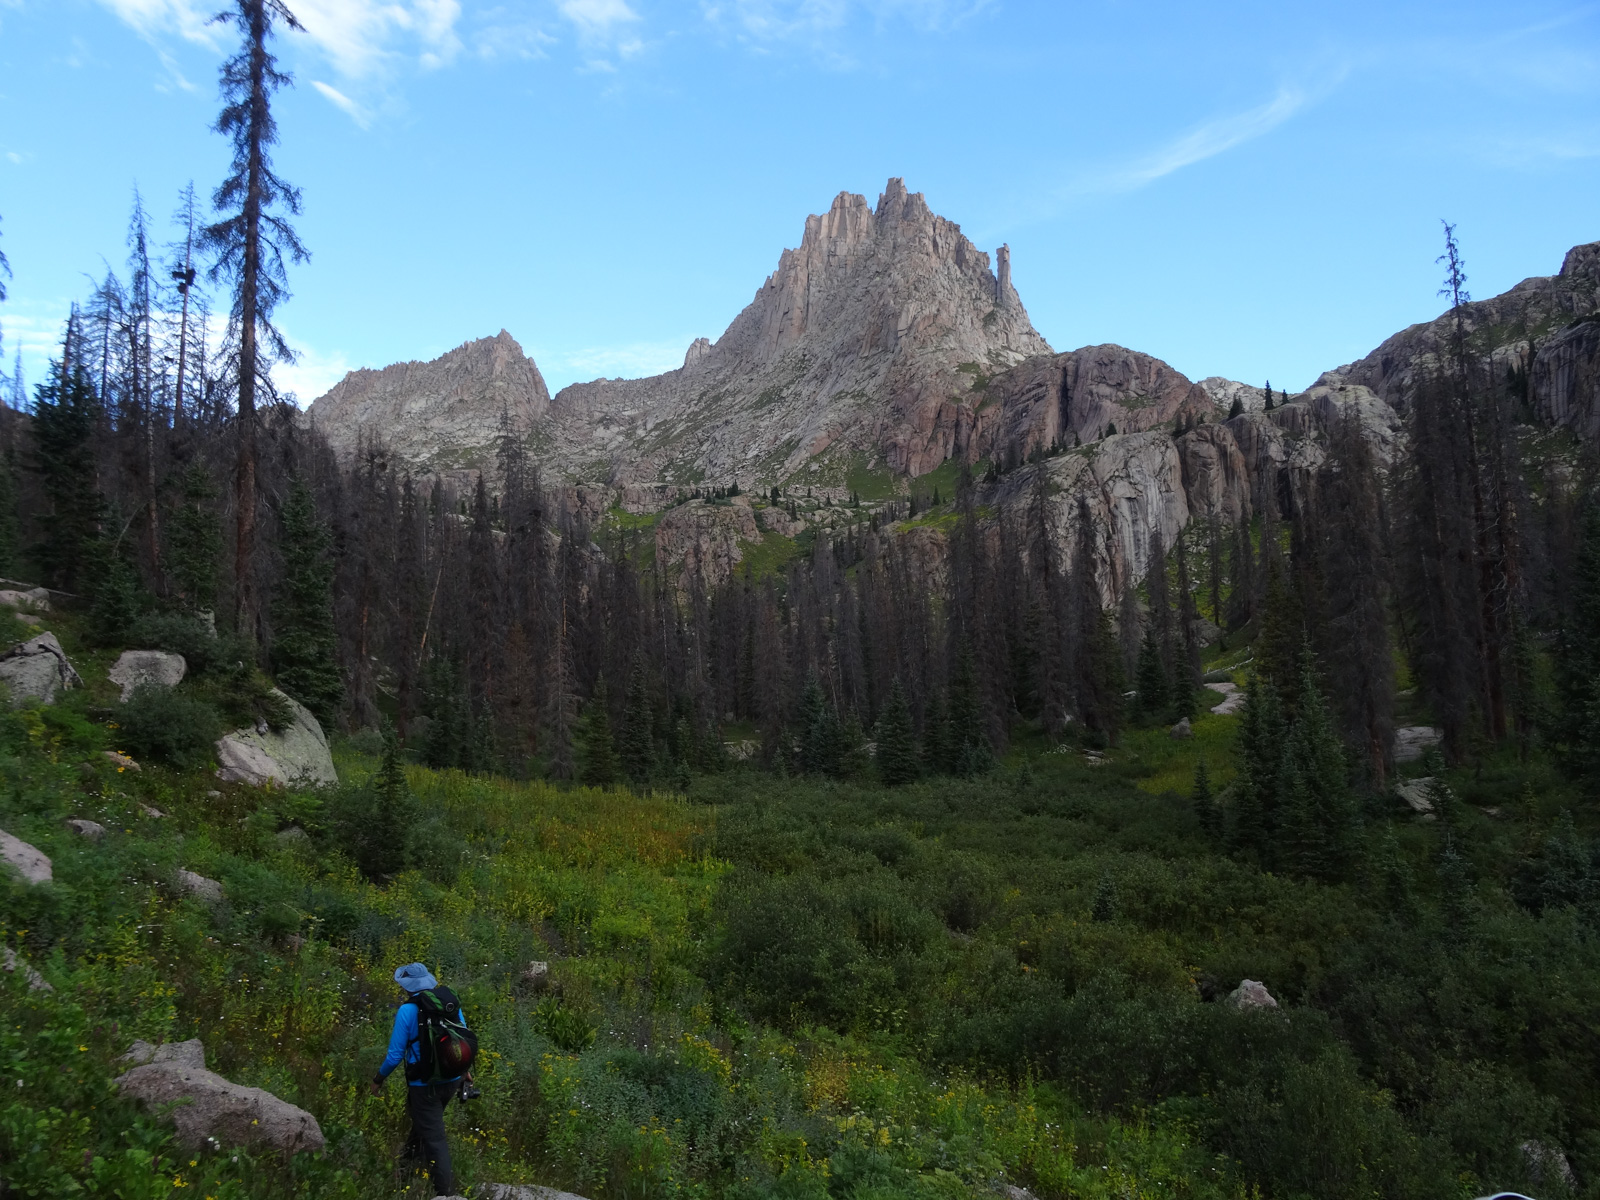
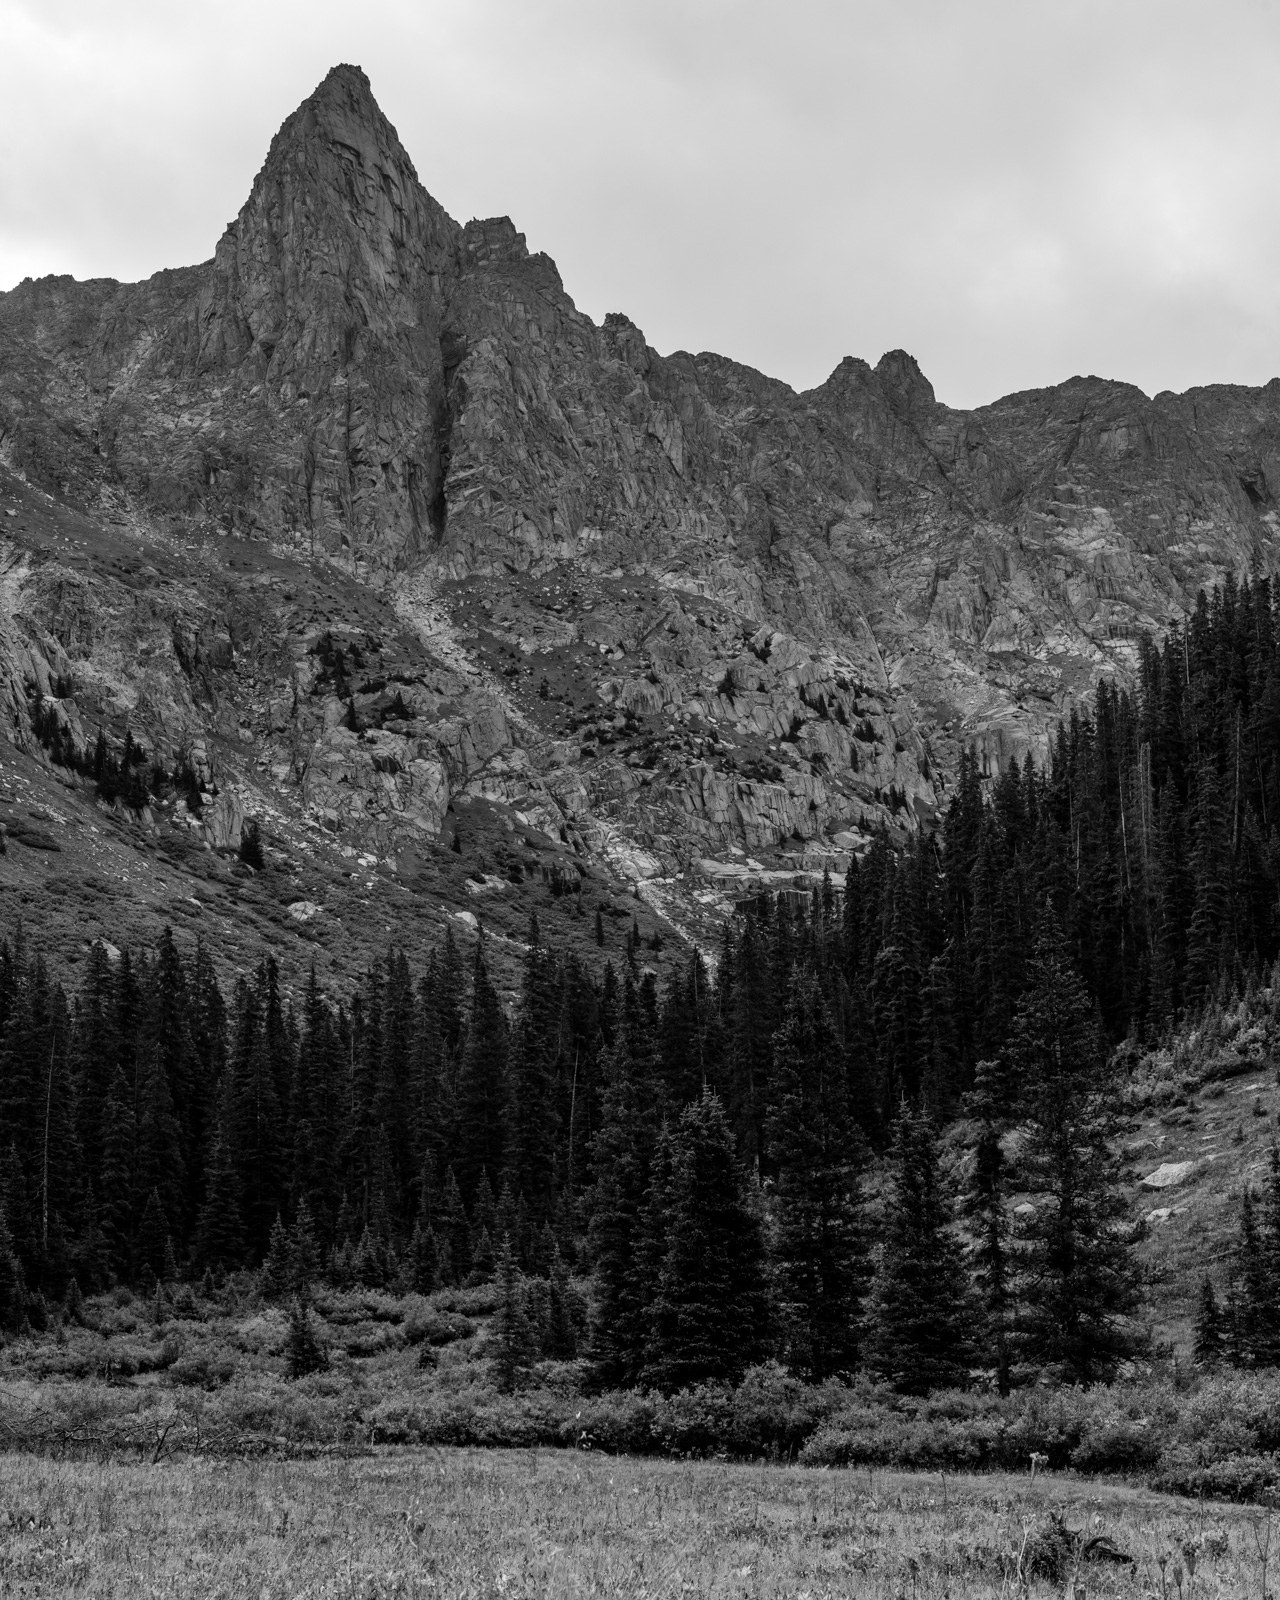
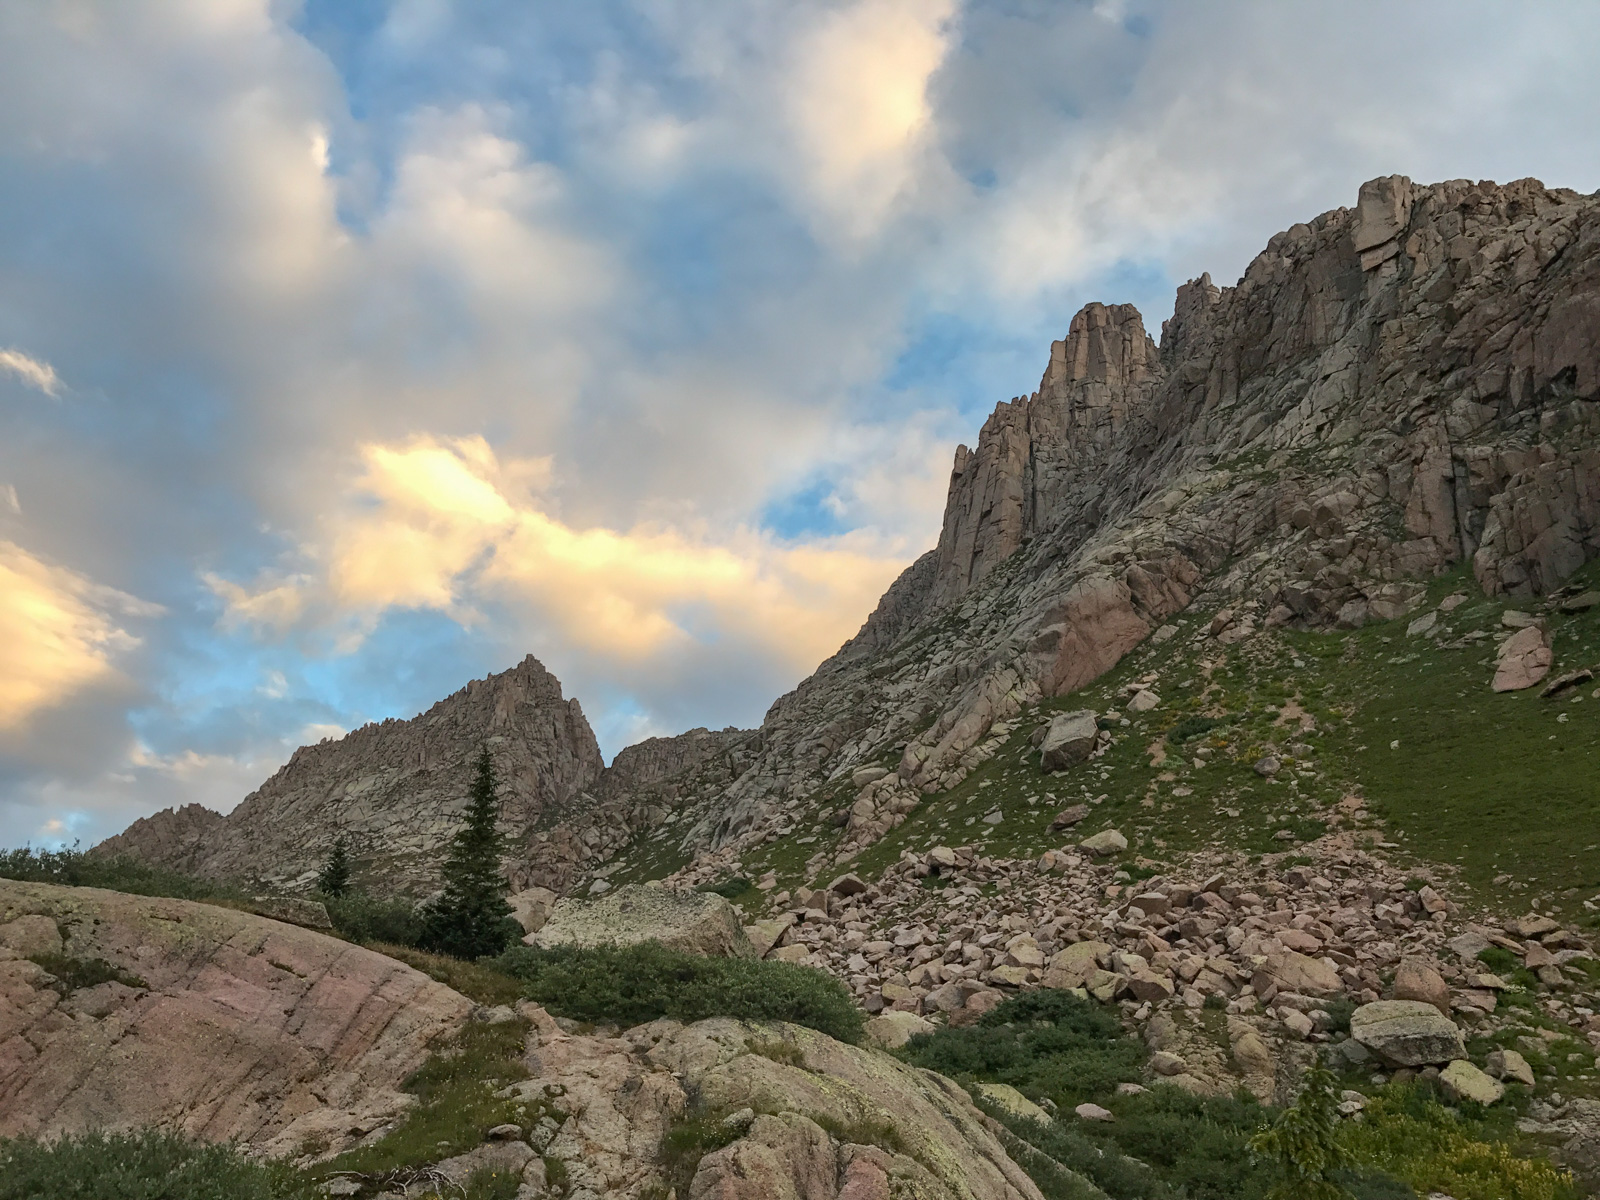
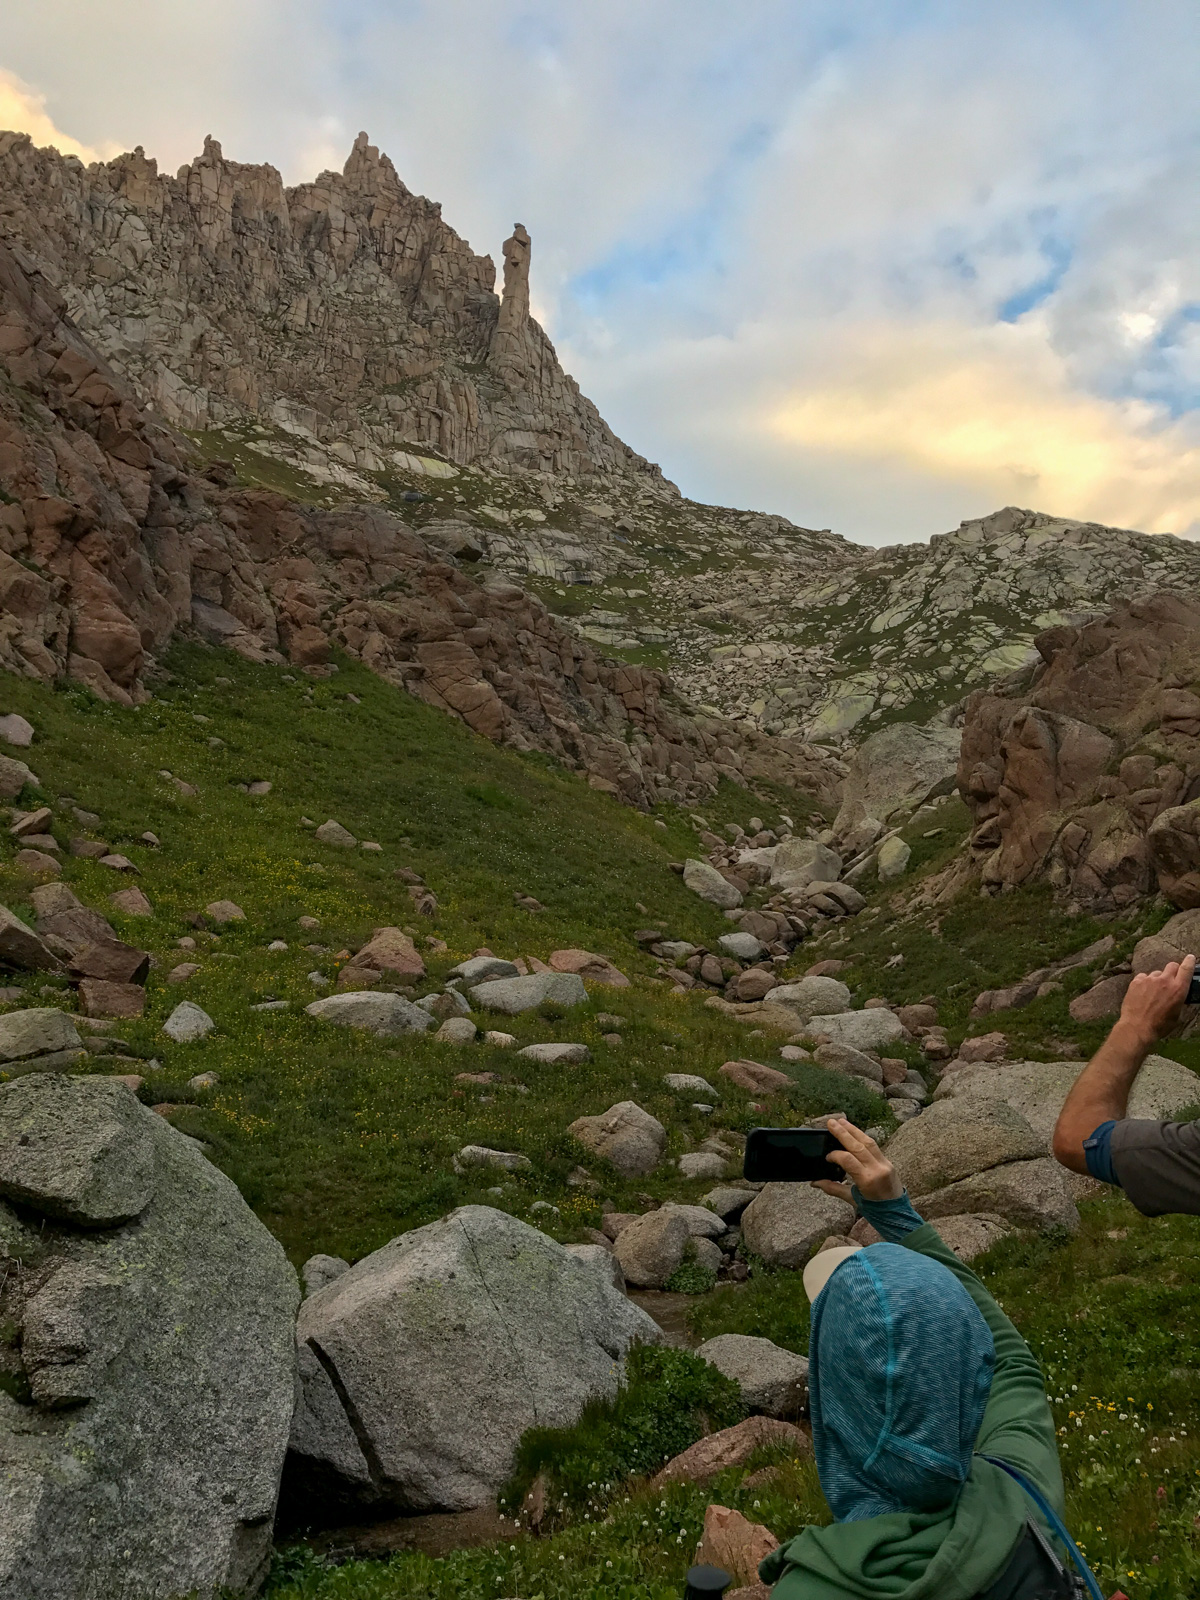
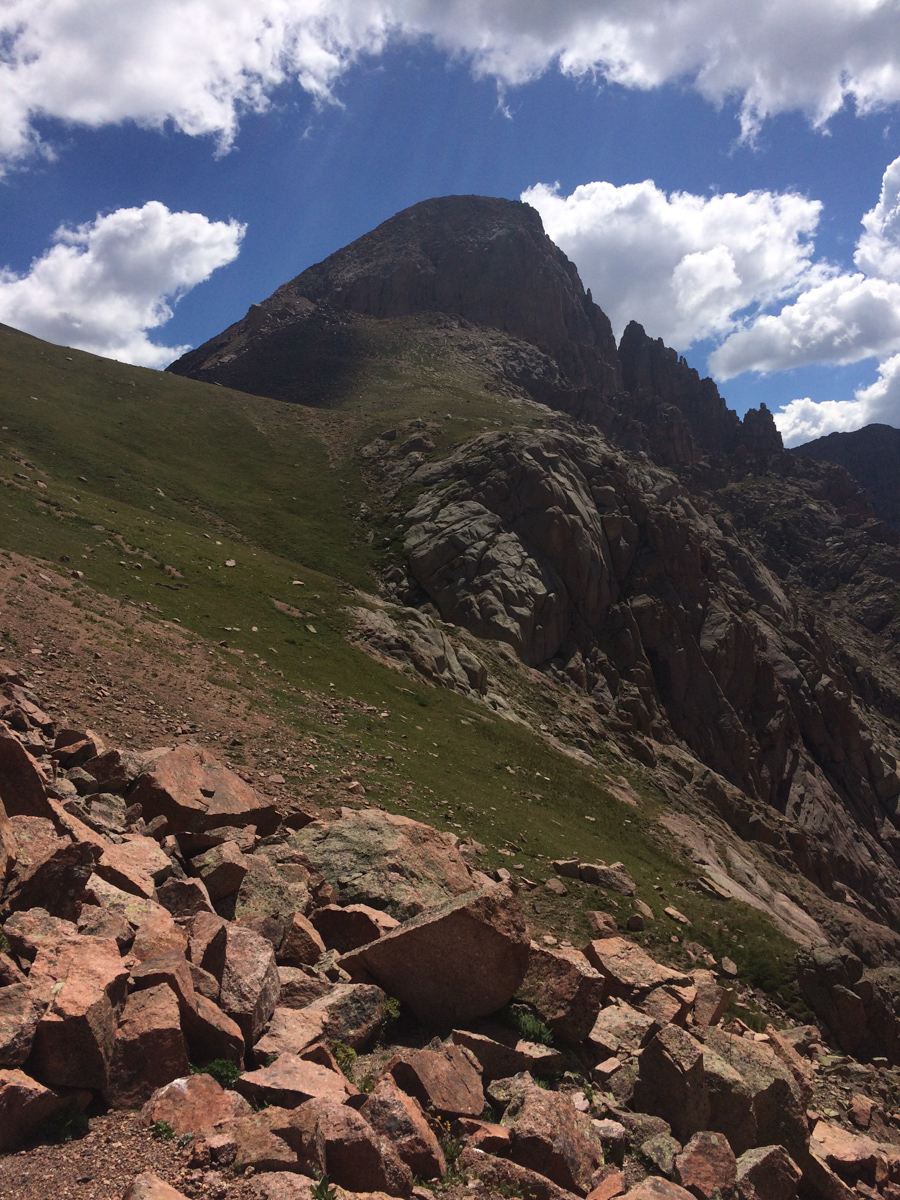
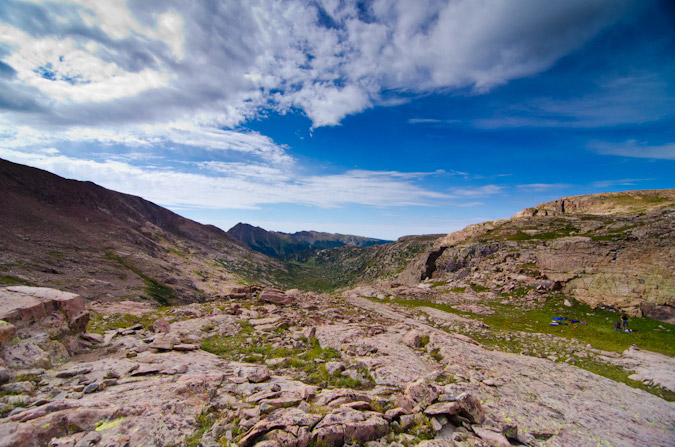
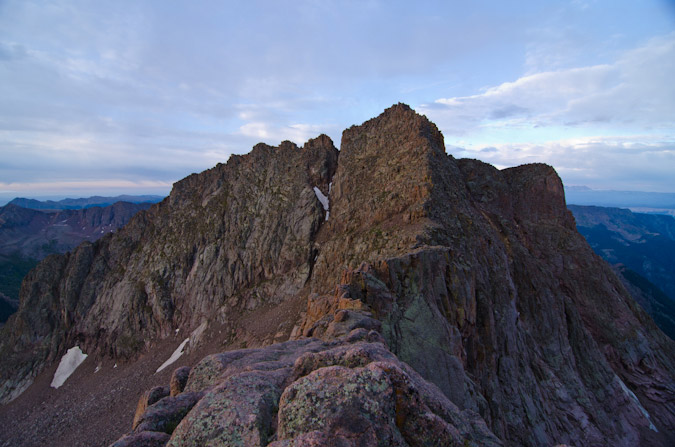
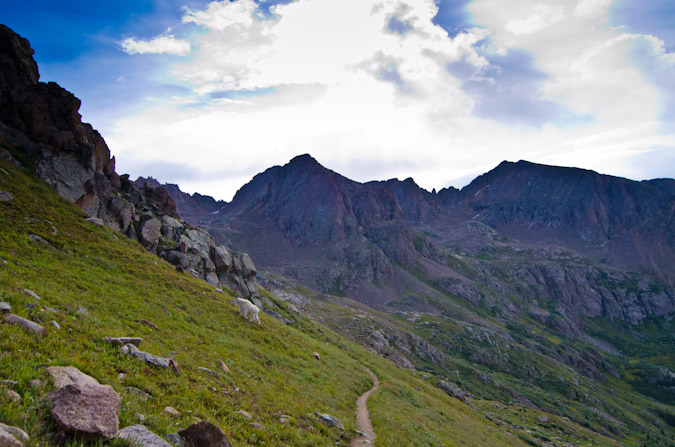
The alarm was set for 5:30 AM (not a terribly early start). We welcomed the easier day, having just killed our legs on our 12 mile approach into the basin. The early light on Jagged looked fantastic.
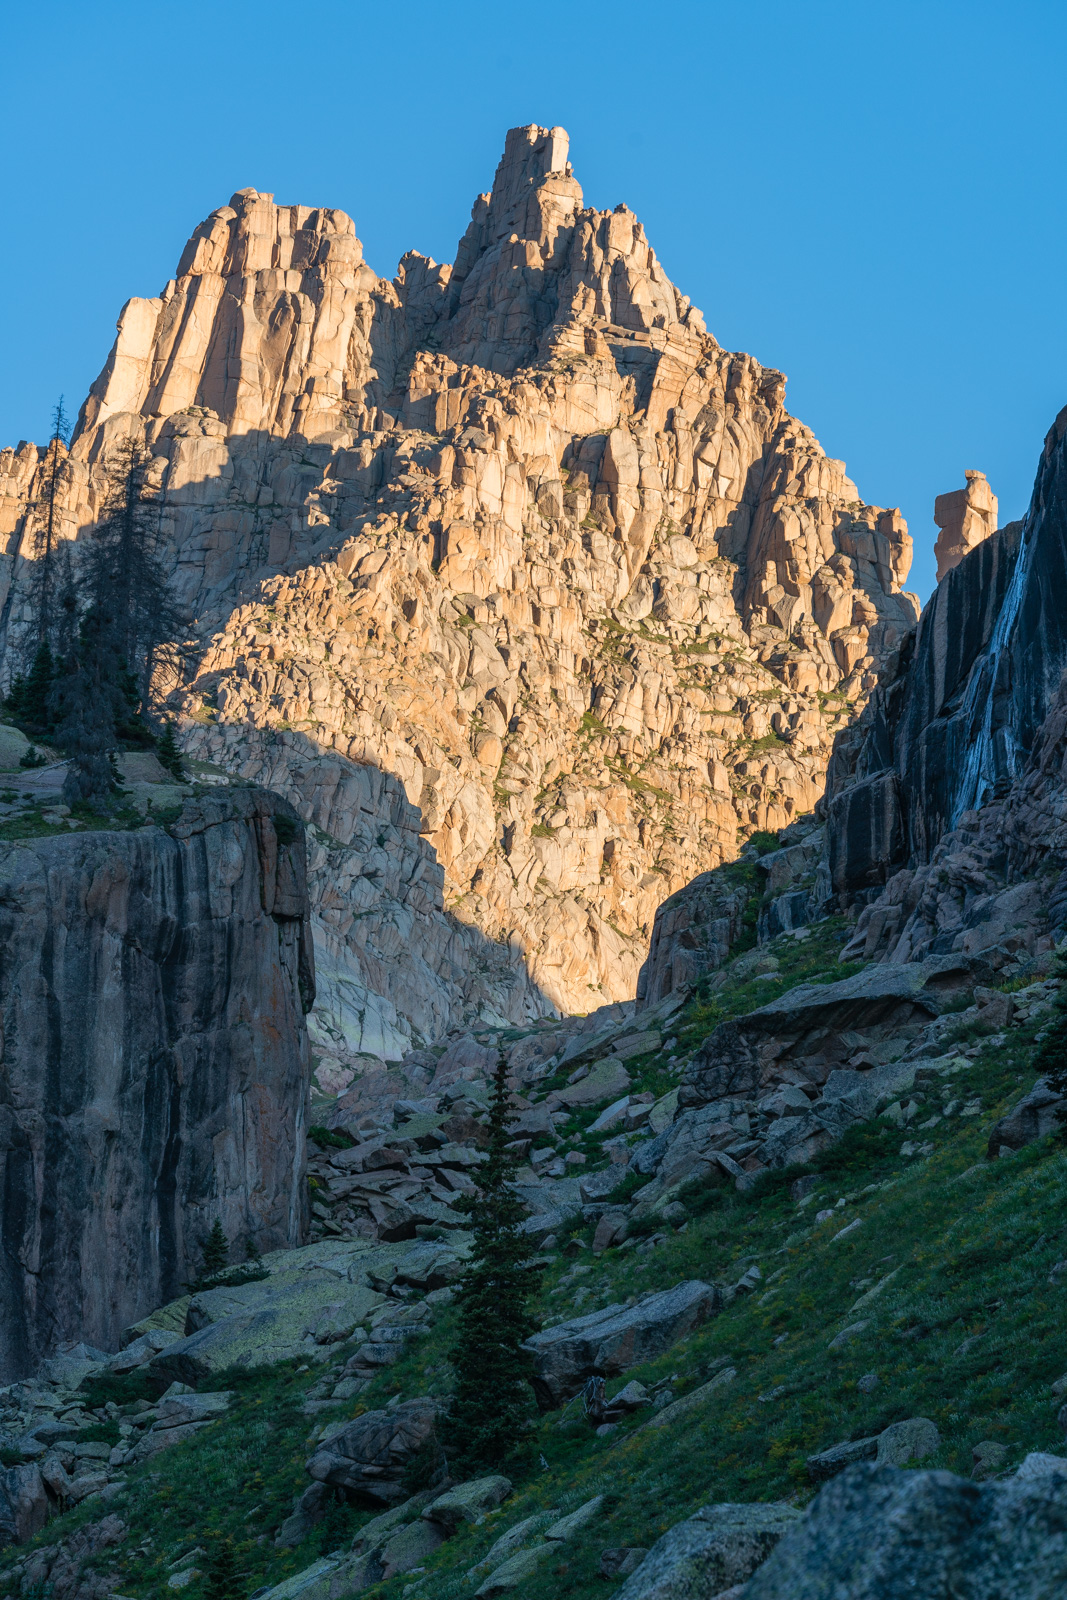
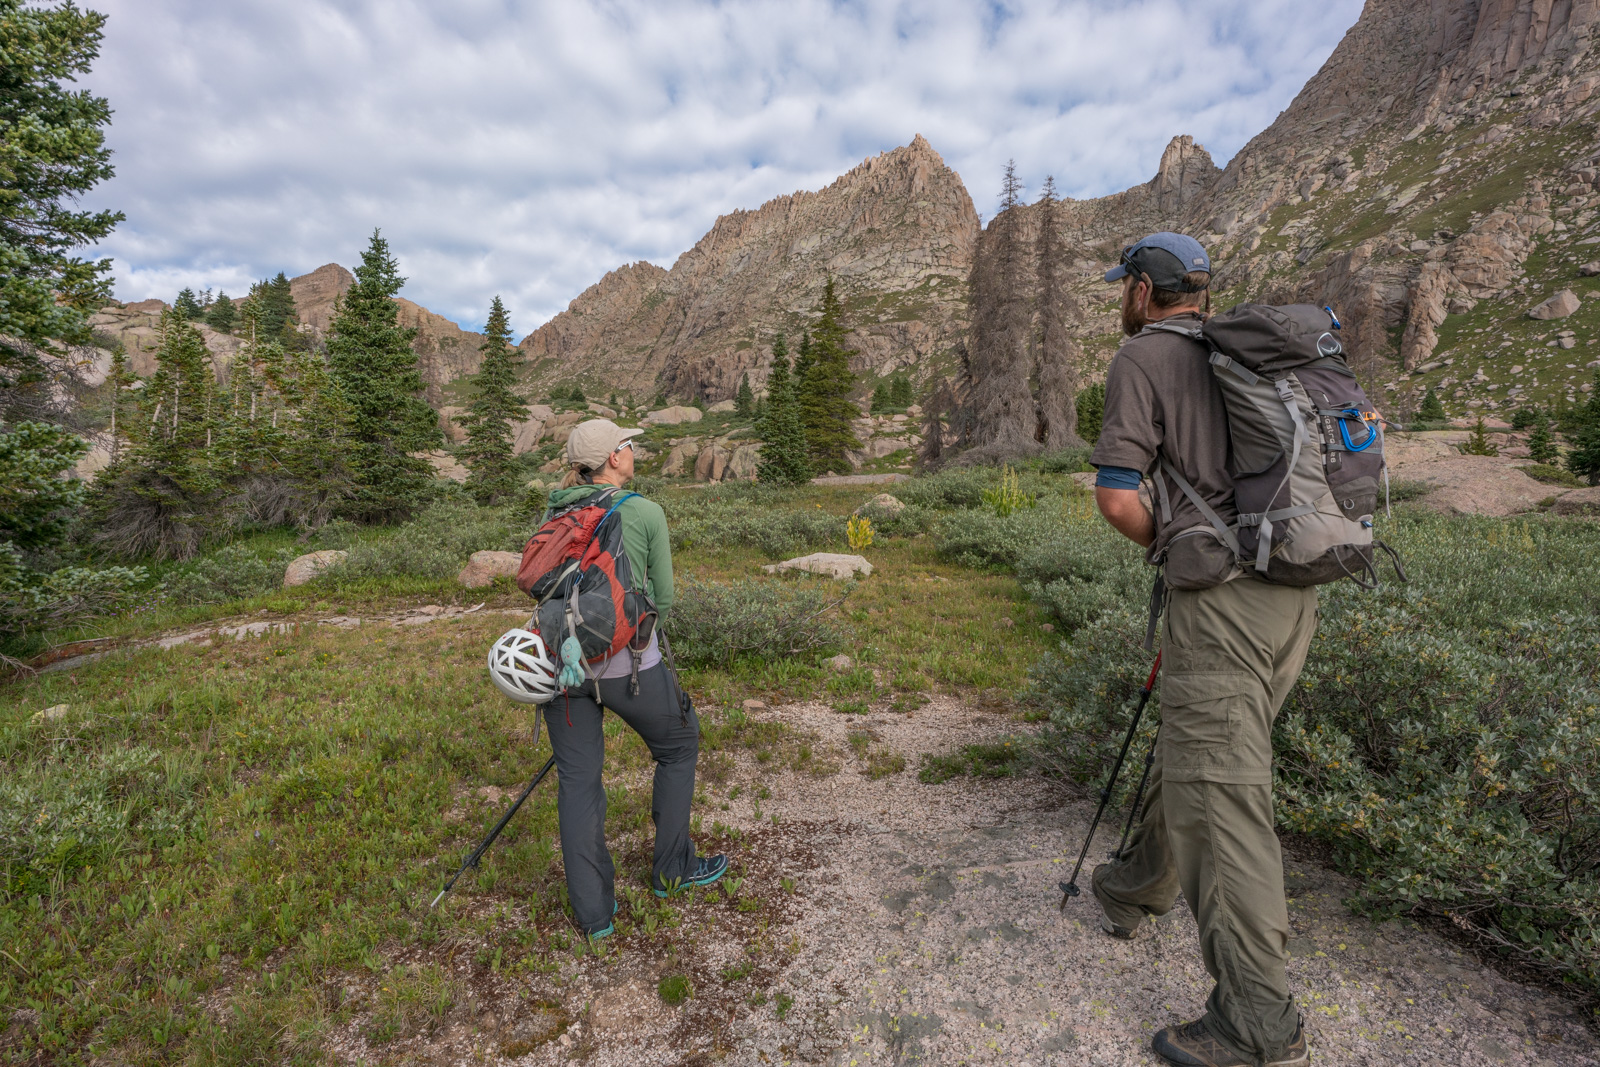
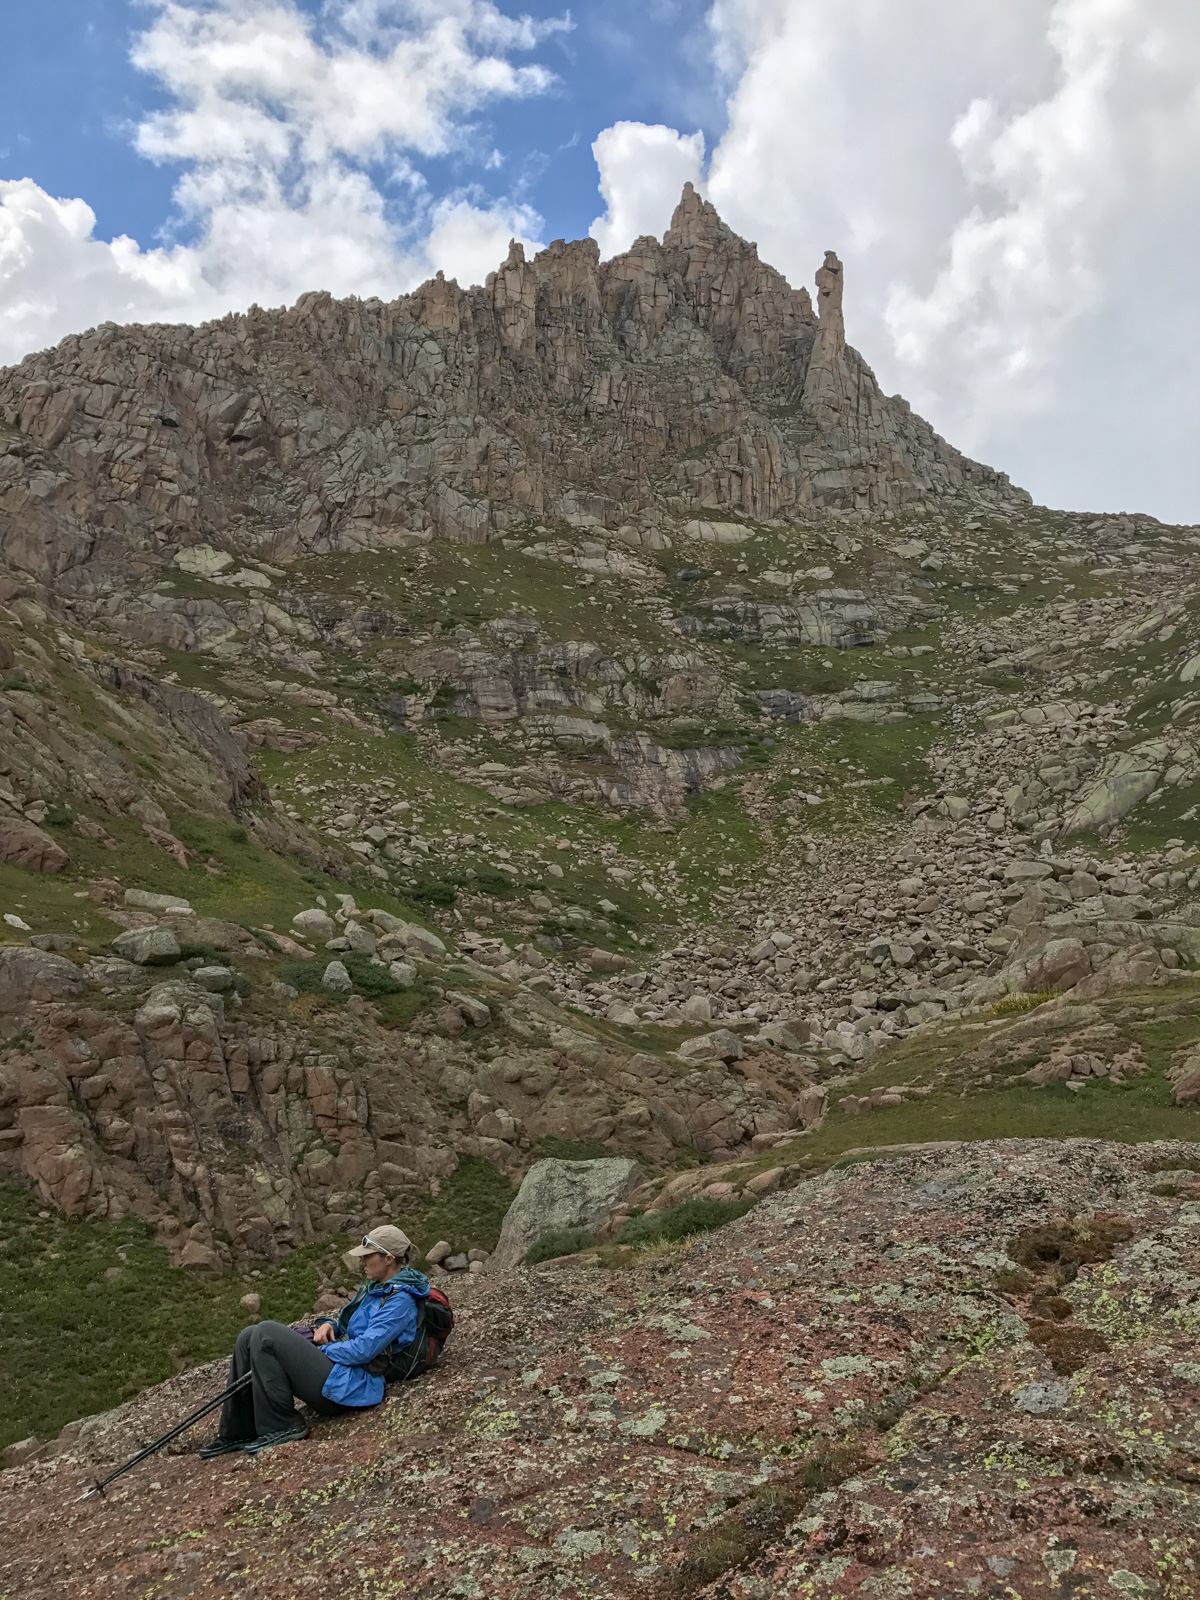
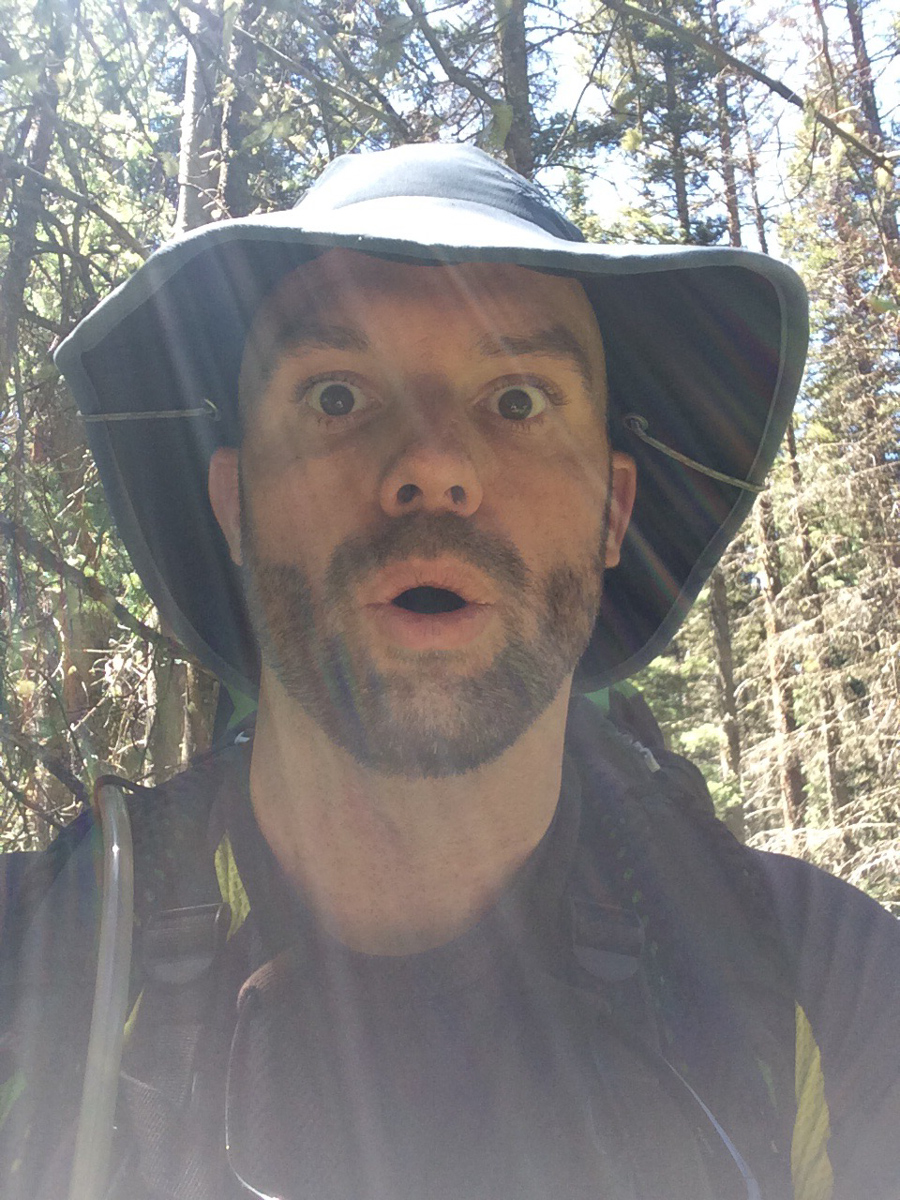
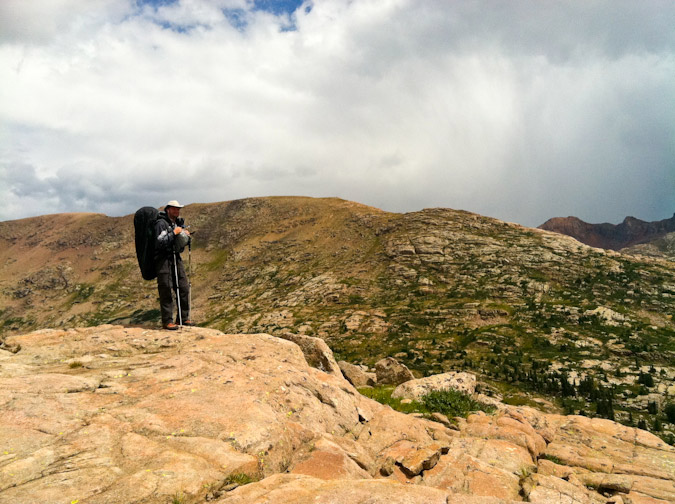
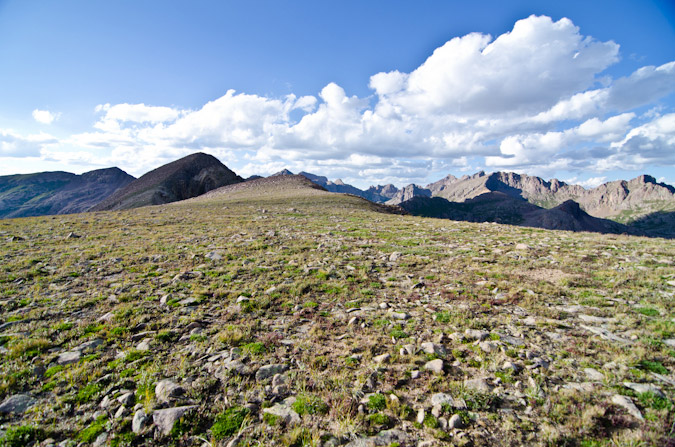
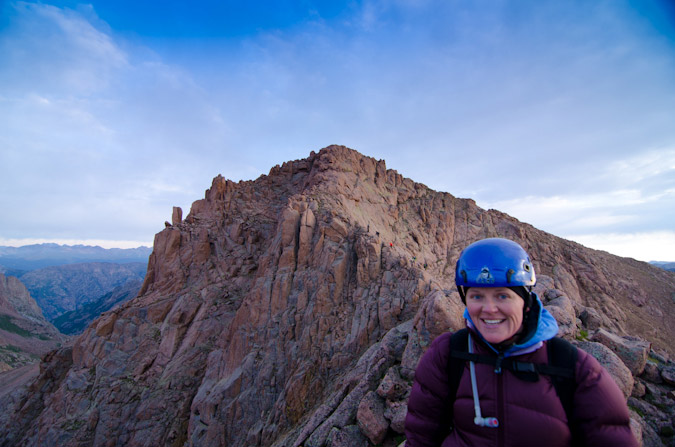
We took our time going up into the upper basin, and appreciated the fantastic views of Jagged Mountain on the way up. Shawn snapped this shot of me hiking in.
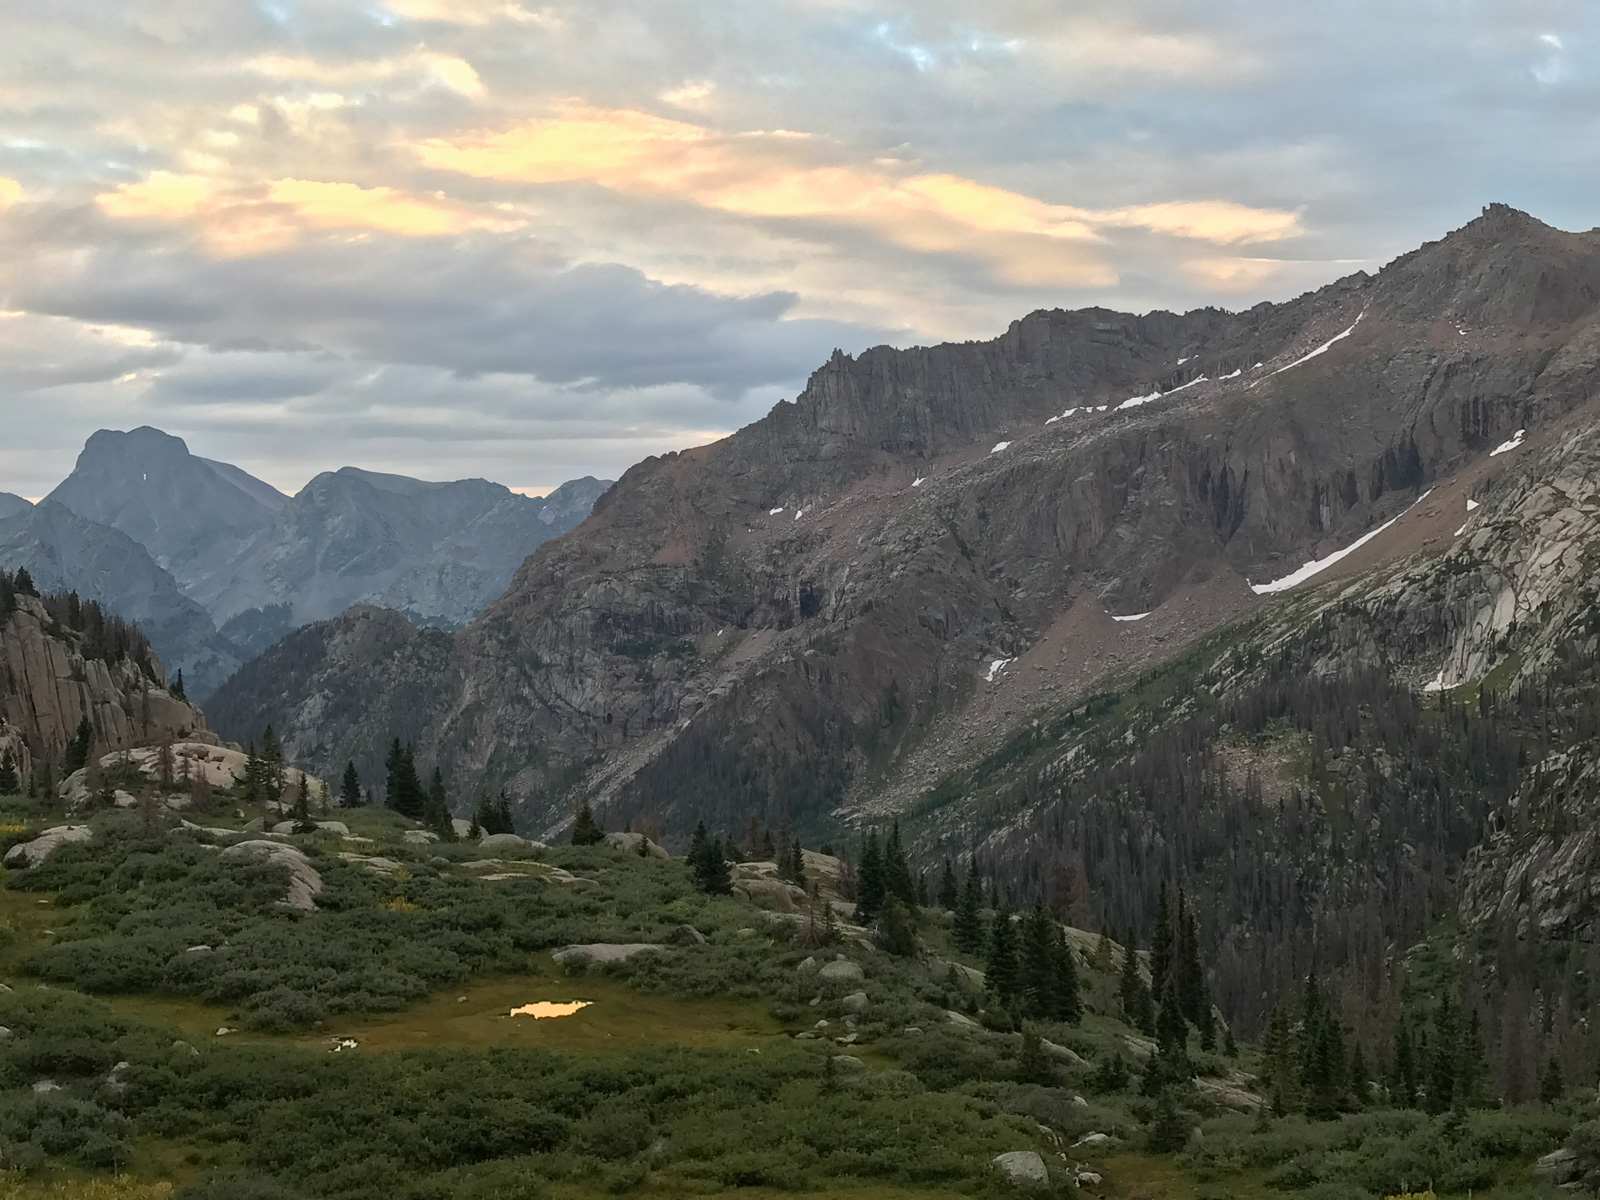
A look back towards the huge cliffs above our campsite showcased some interesting clouds that were forming for the day, which did not bode well for my opportunities to photograph the eclipse.

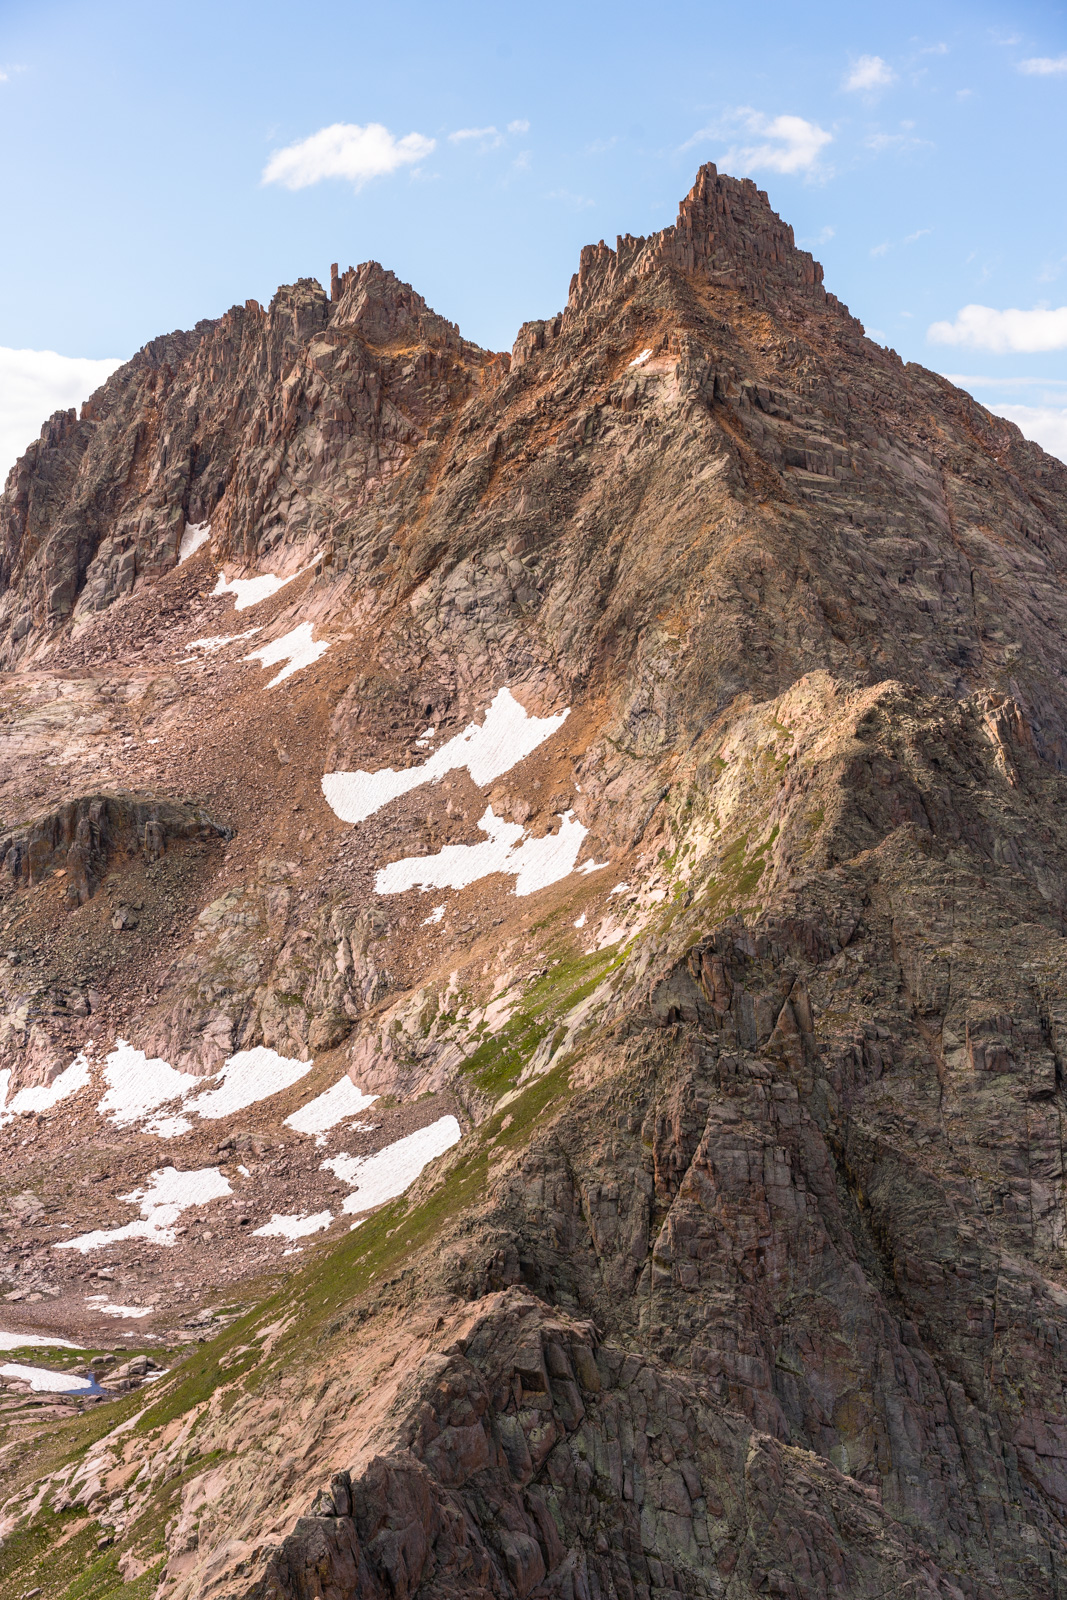
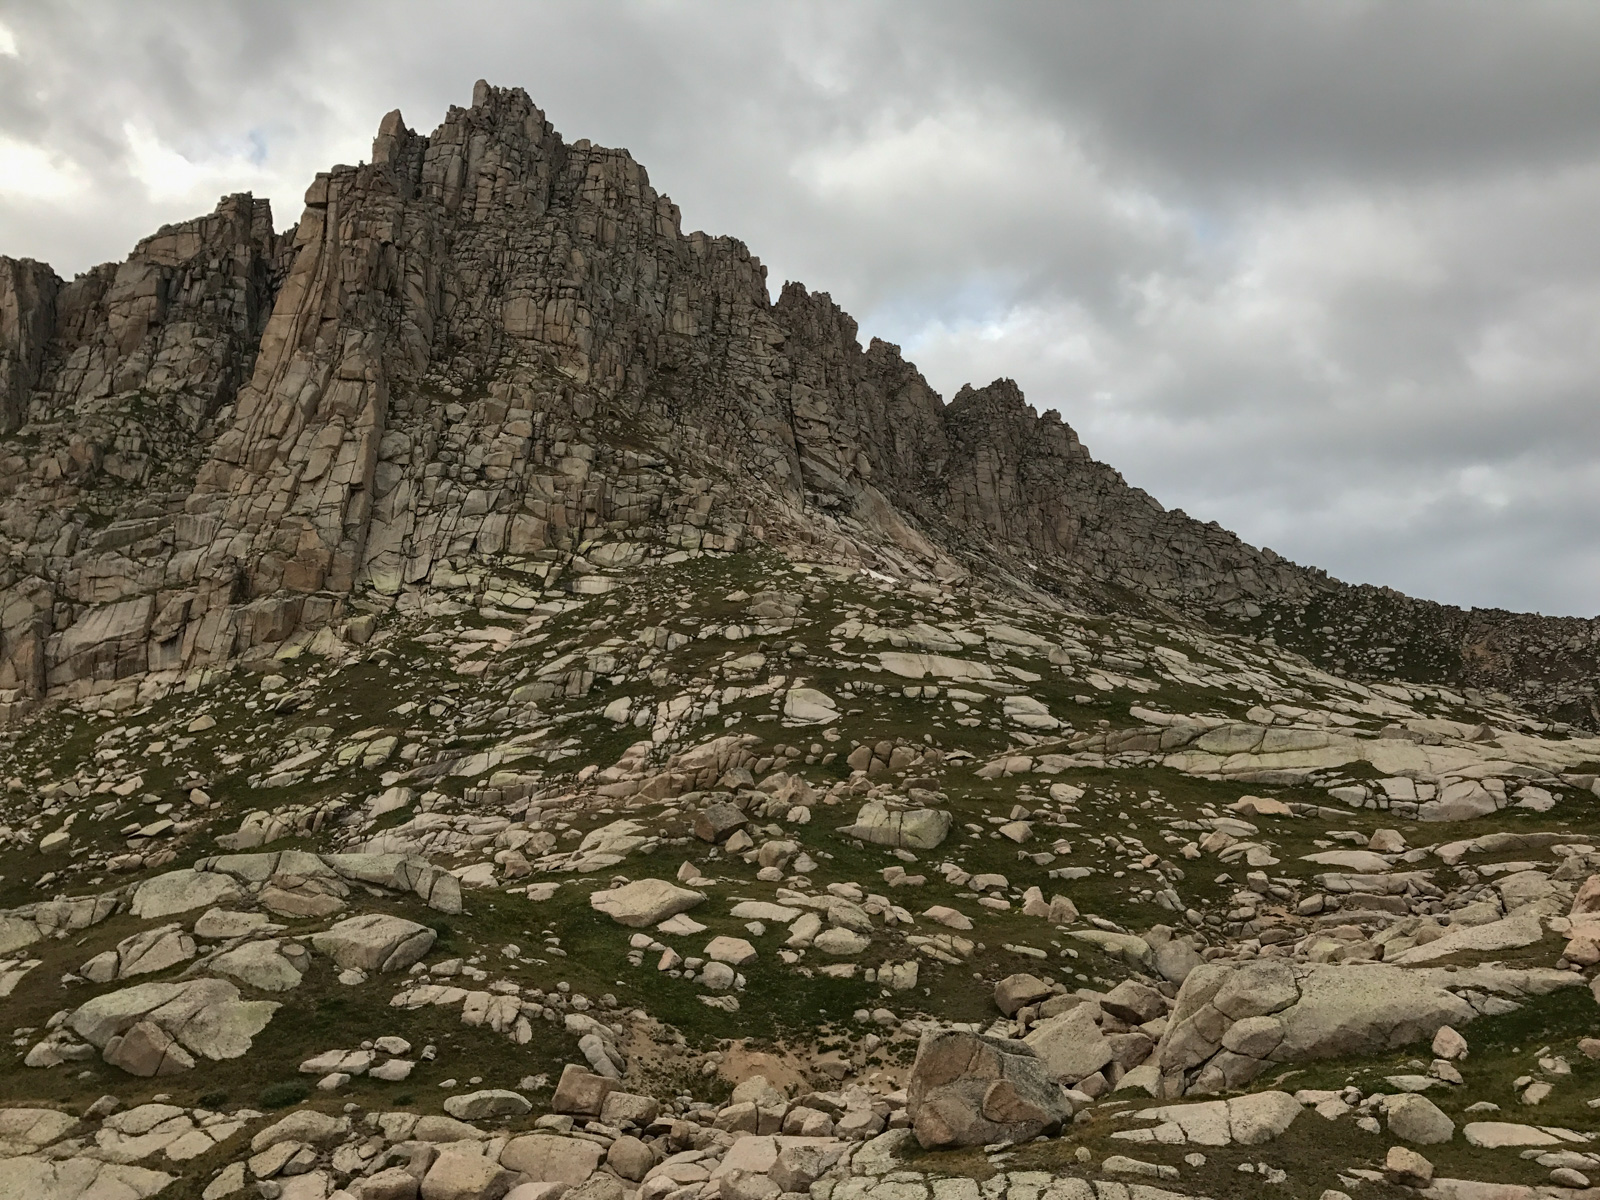
As we climbed up higher, the views of Jagged Mountain only improved.
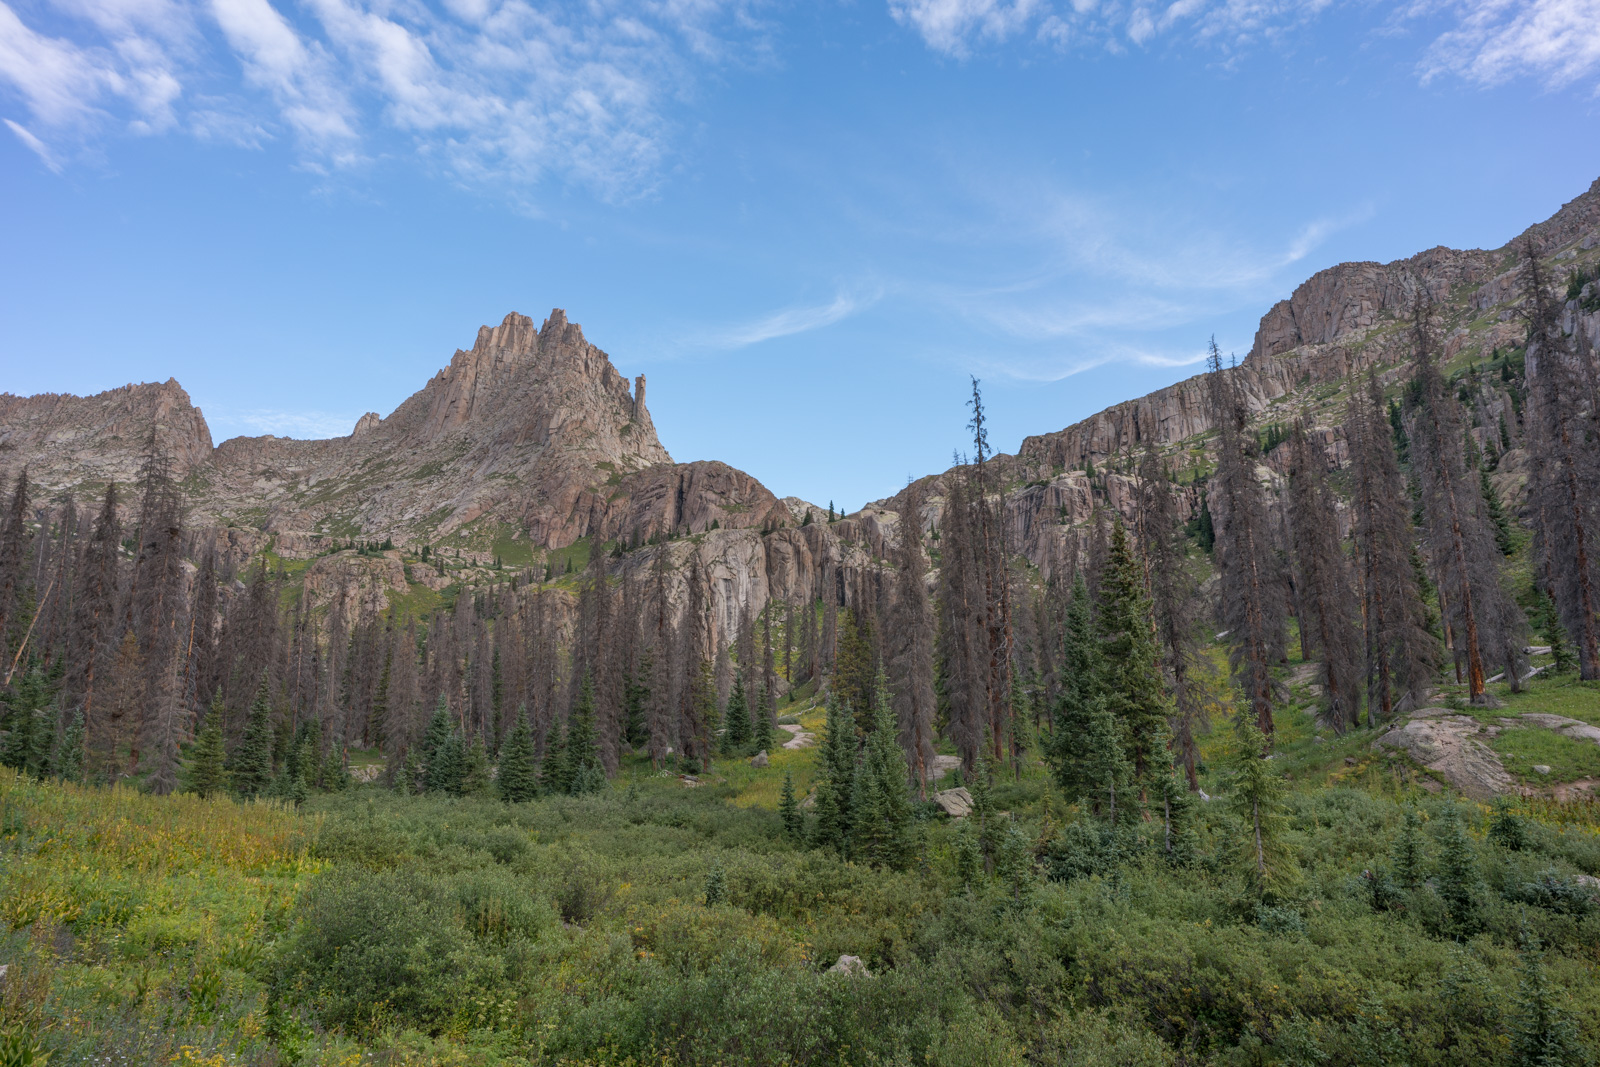
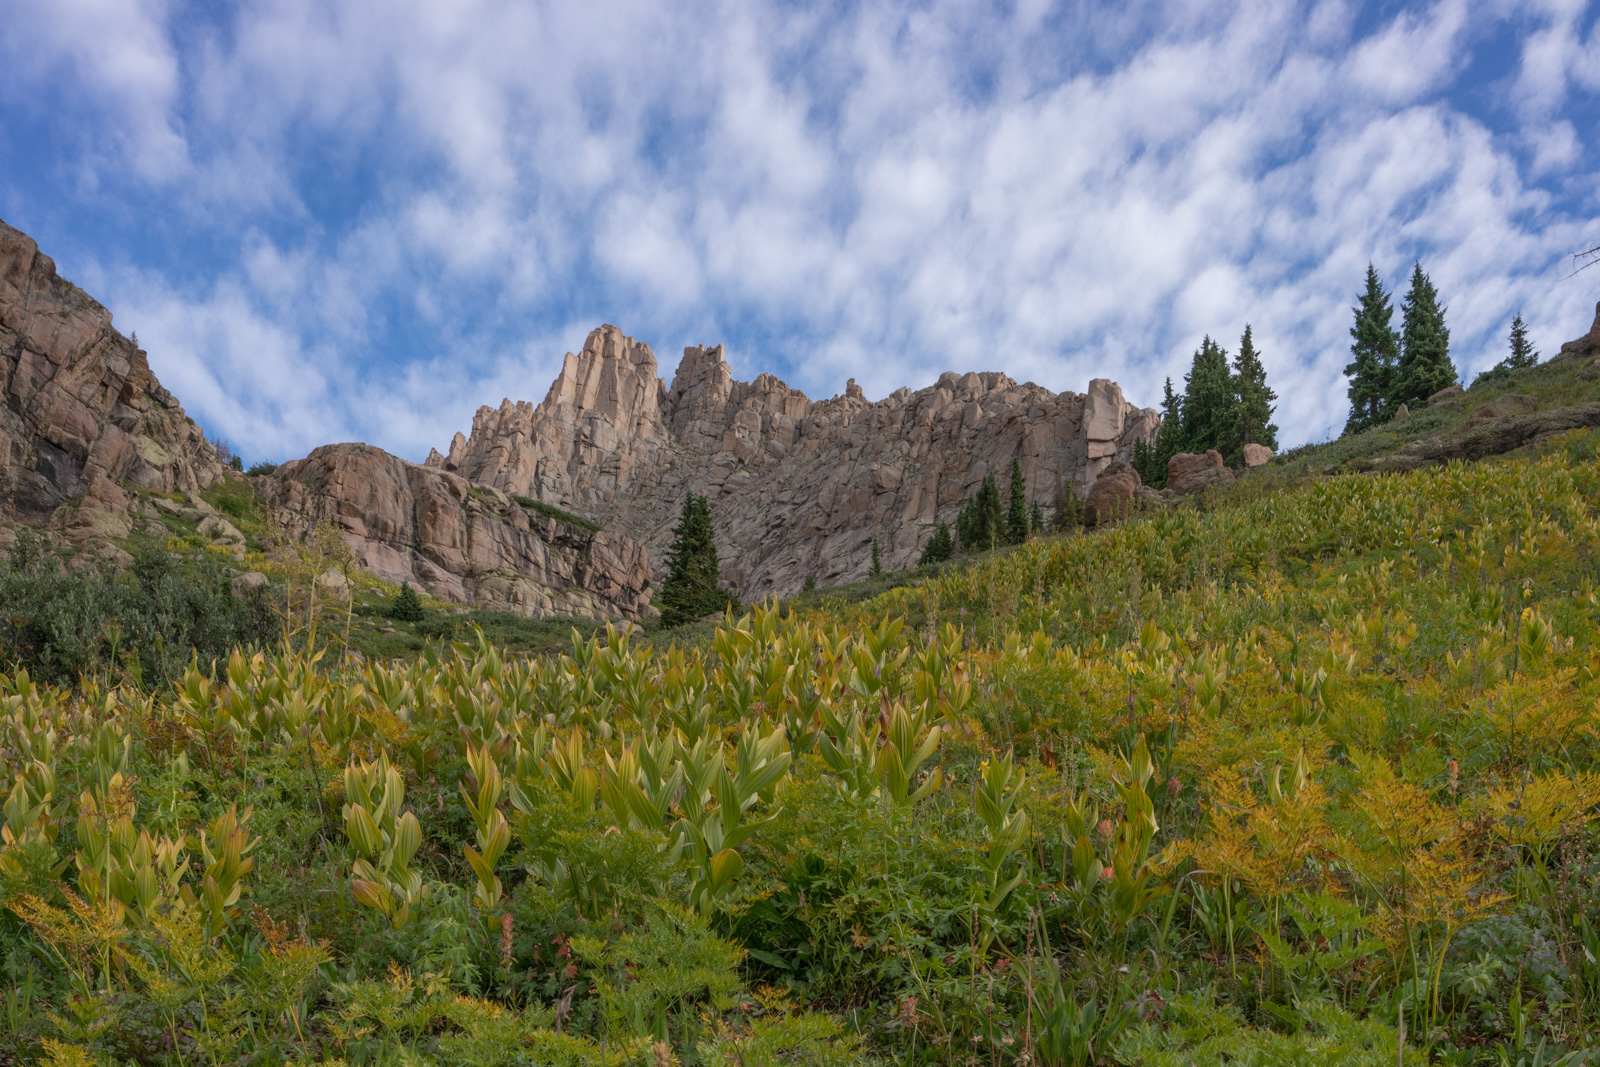
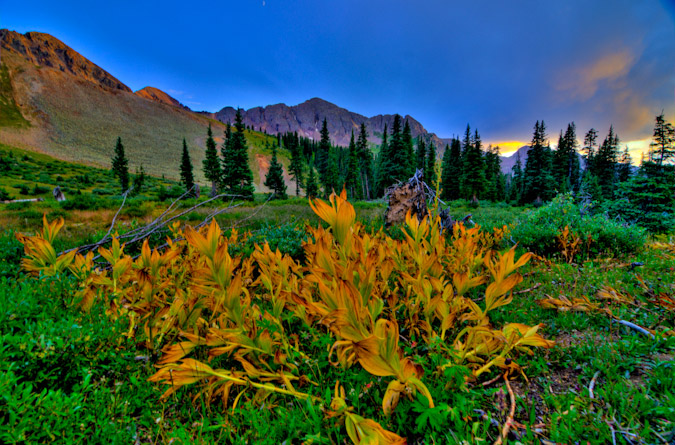
The late summer color of the Corn Lily plants was a nice complement to the high clouds above Jagged.
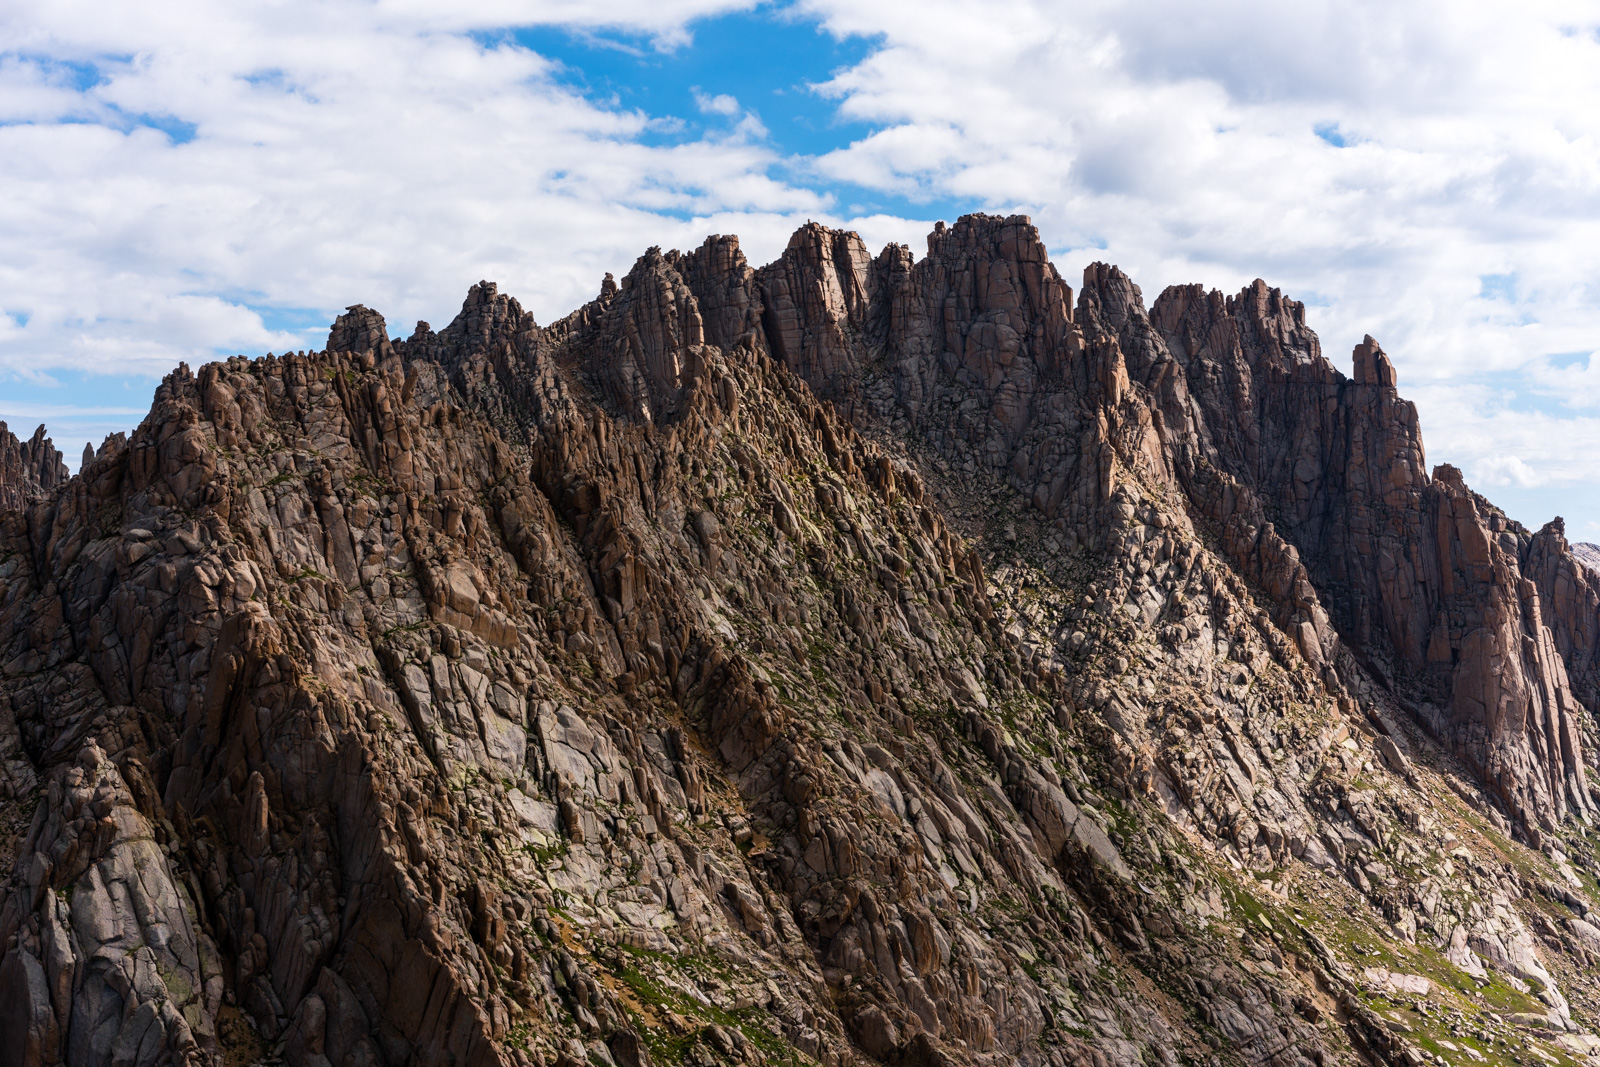
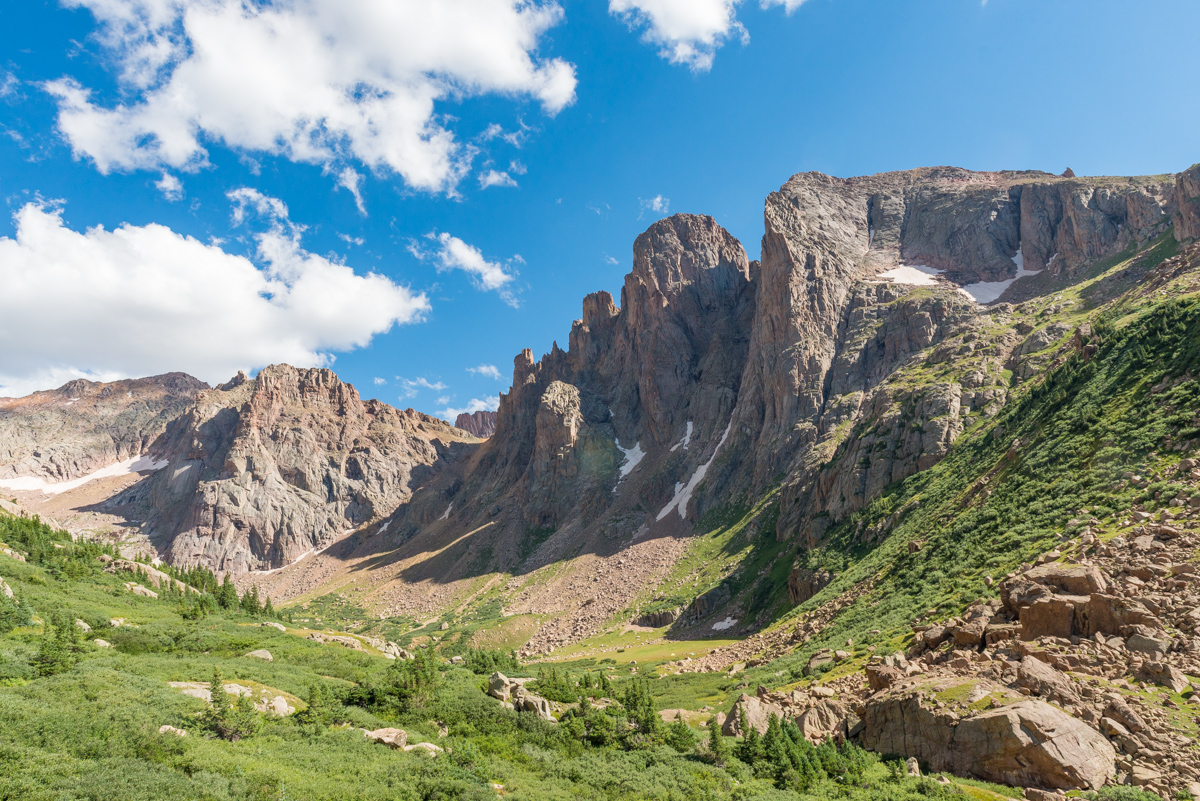
Shawn and Natalie admired Peak 10 as it came into view. I marvelled at how insane it looked. It sounded like Natalie wanted to give it a go.
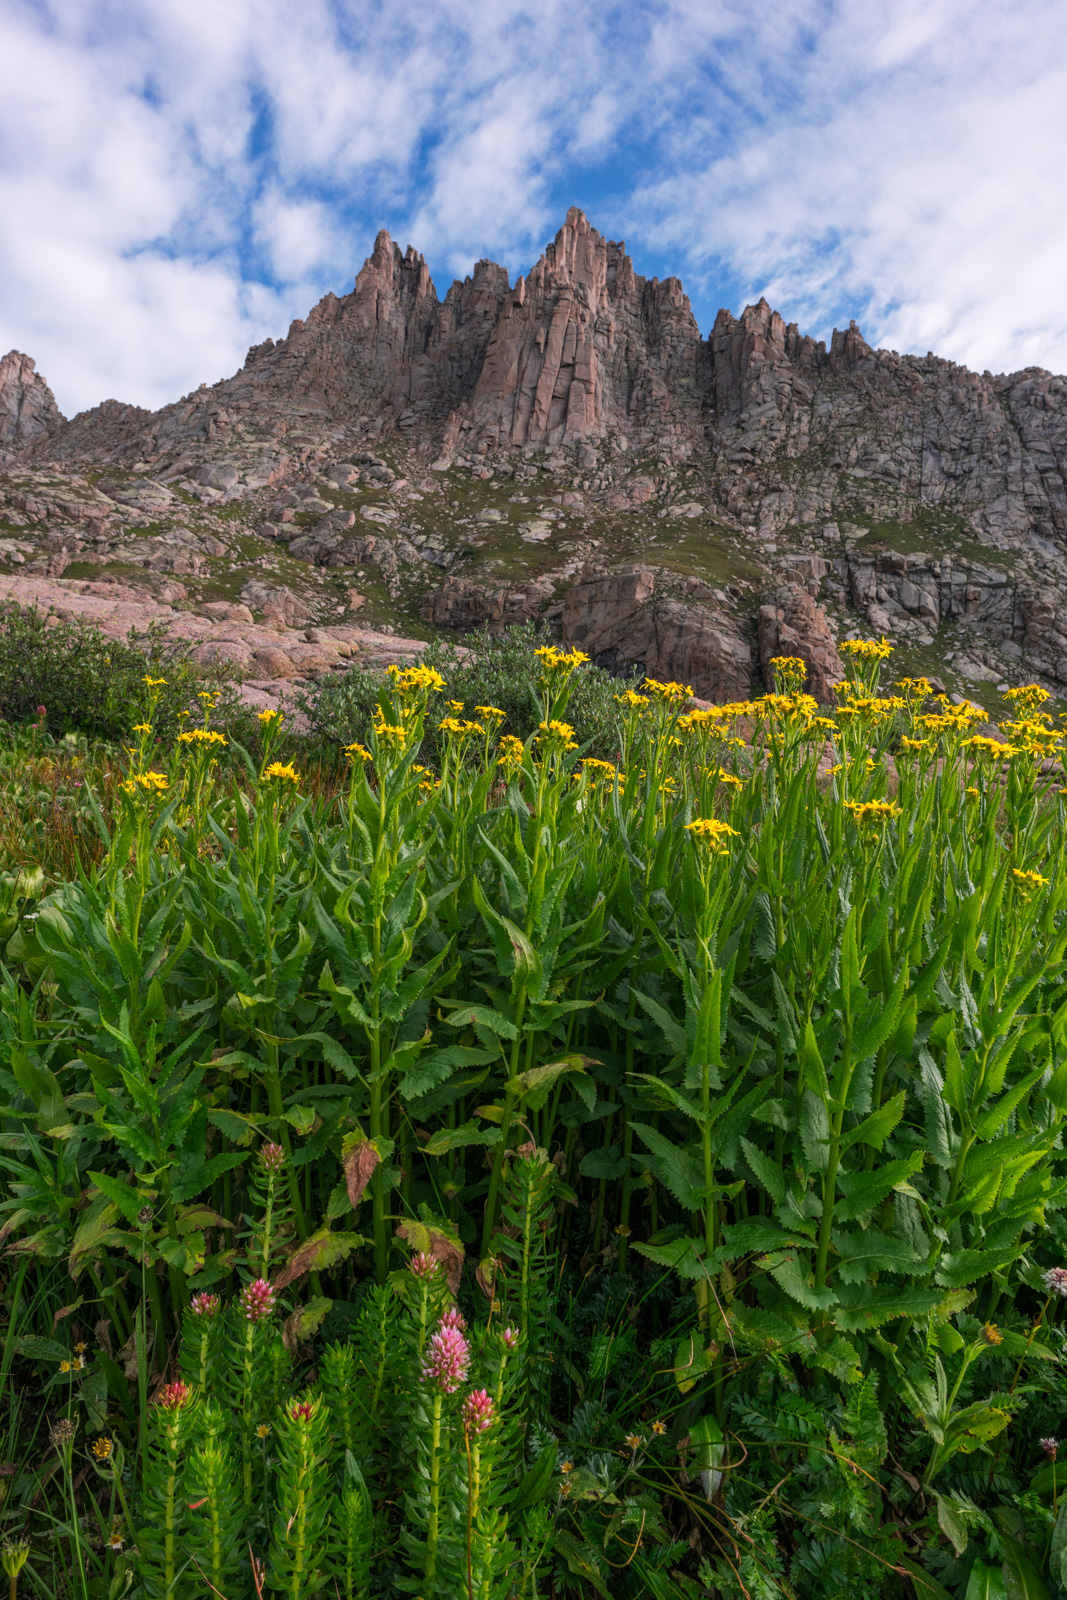
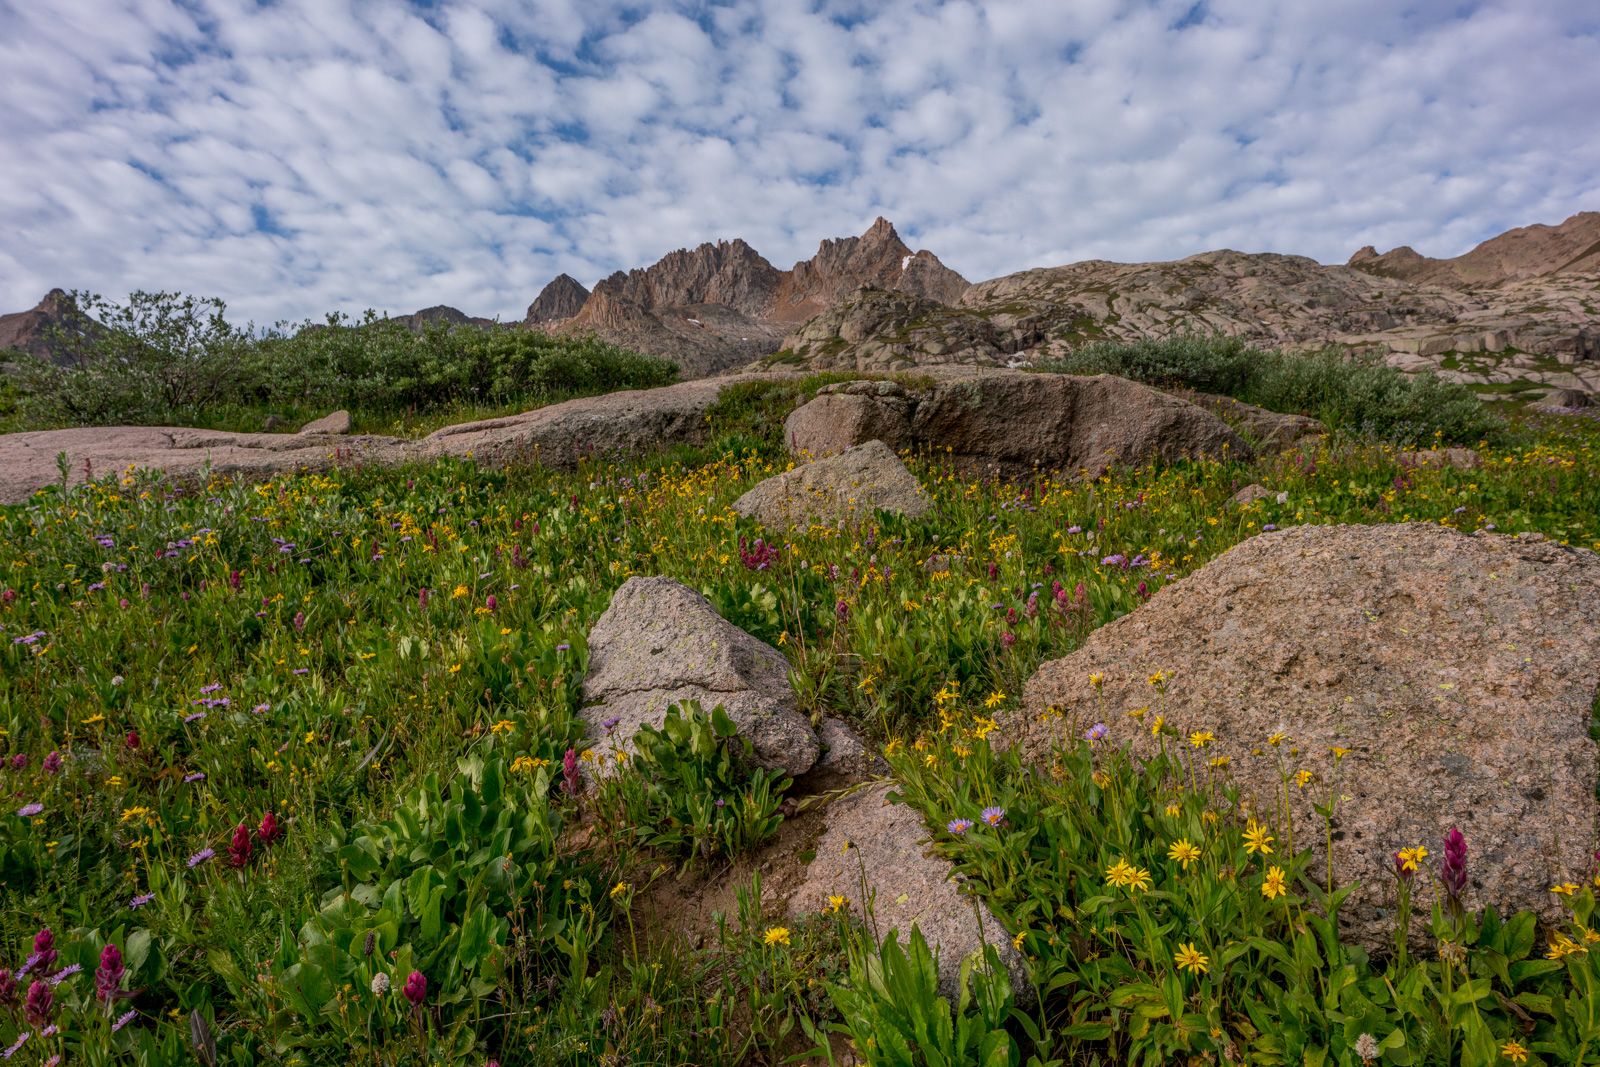
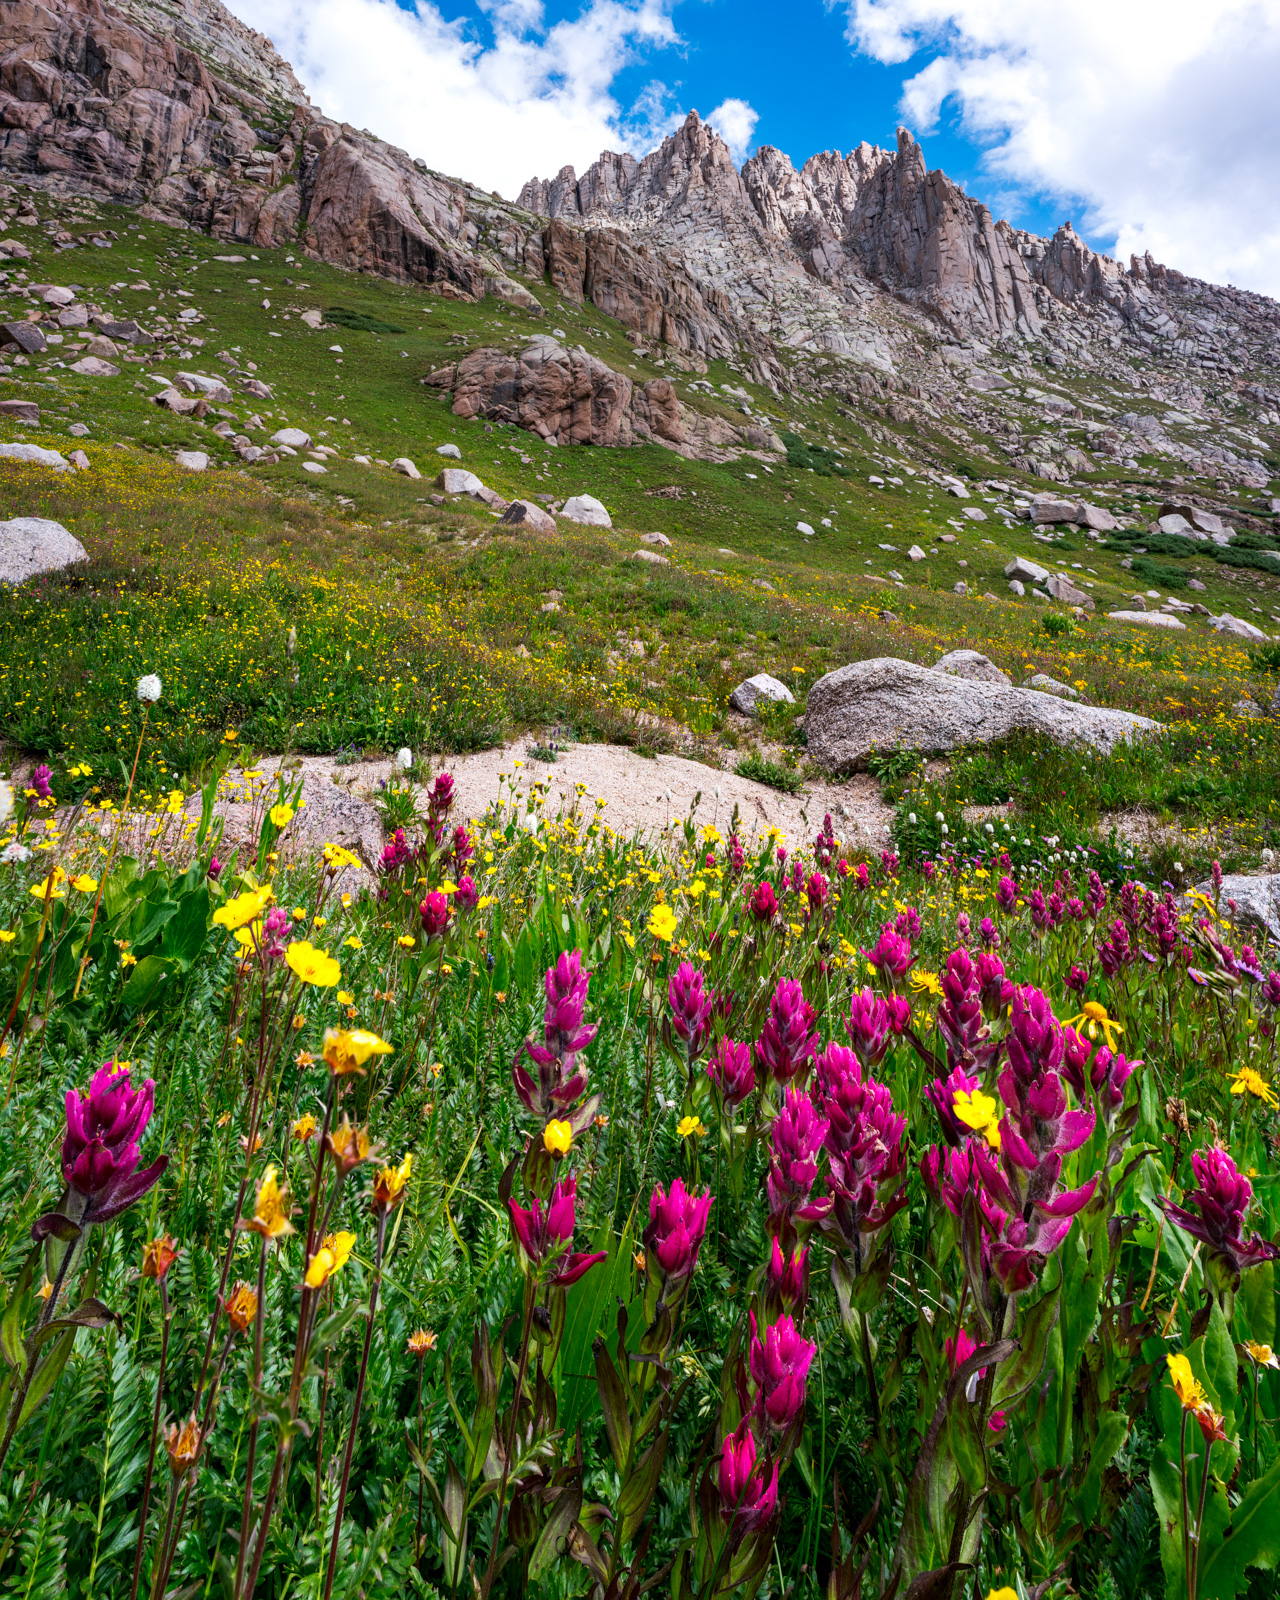
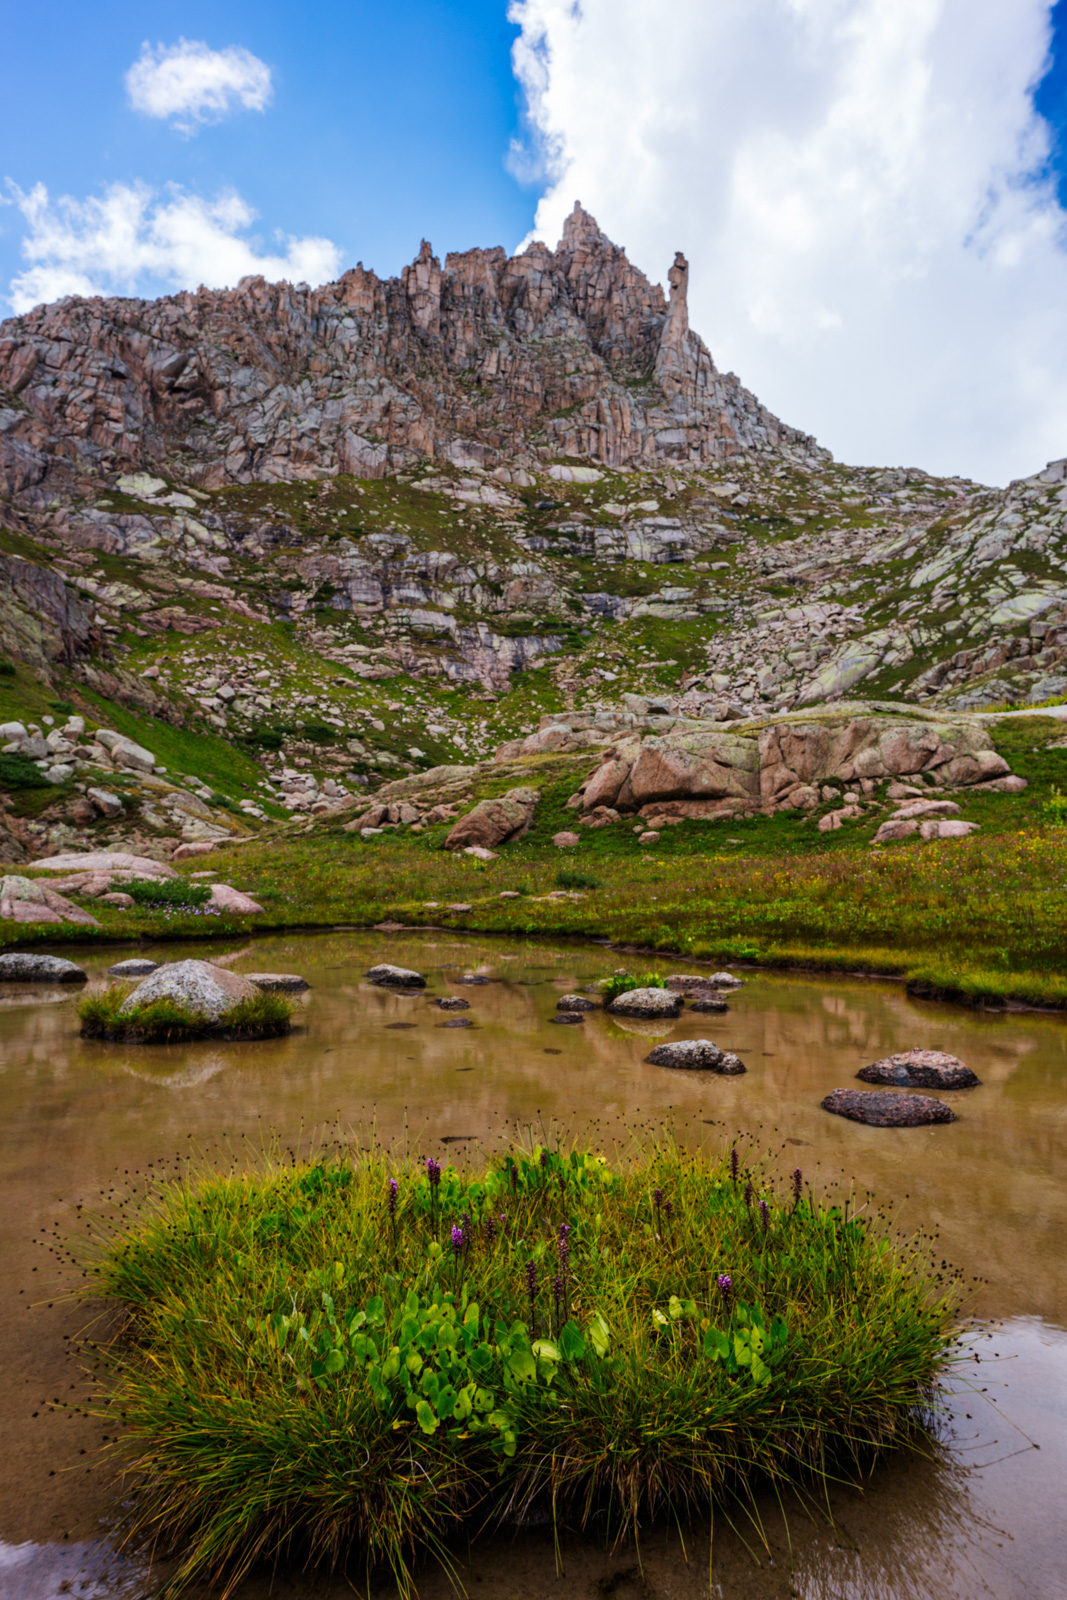
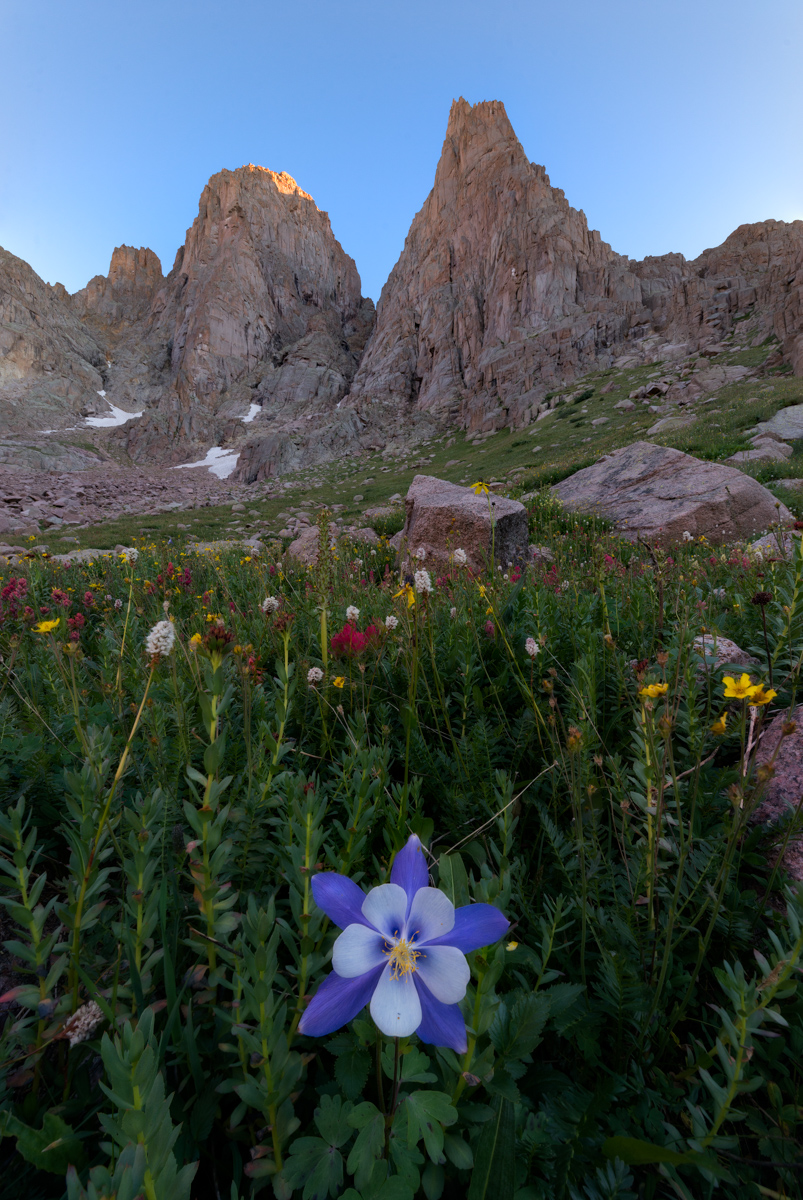
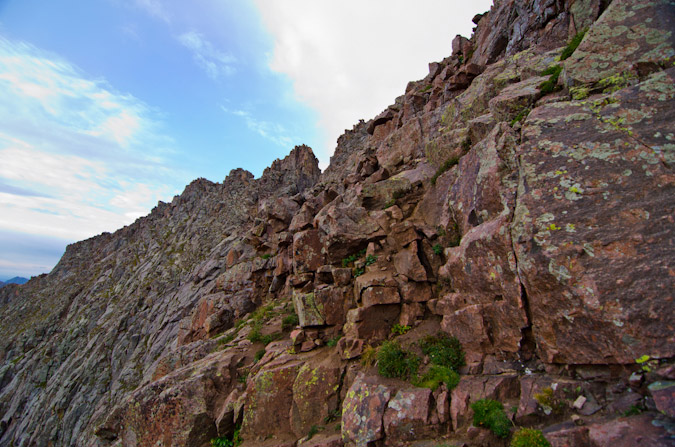
As we climbed up below Jagged, I found the wildflowers quite difficult to avoid pointing my camera at. I loved how these flowers pointed straight up and into Jagged's base.
At this point, we had to make a decision. Natalie had already climbed Knife Point and both Shawn and Natalie were looking for something challenging. I was looking for a good vantage to photograph the eclipse and had always admired Knife Point from afar, so we decided to split ways - I chose Knife Point and Shawn and Natalie chose to do Peak 10. Our plan was to meet back up in the basin below Jagged and then hike back down together, unless weather looked bad, then we would meet at camp. Worked for me.
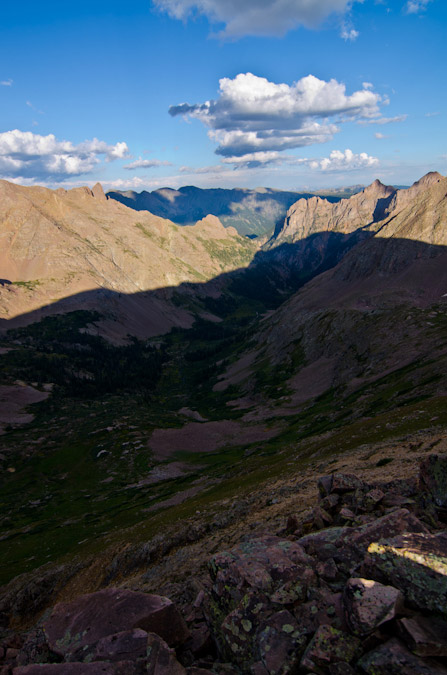
Knife Point really caught my attention in 2013, when I saw it from No Name Basin:
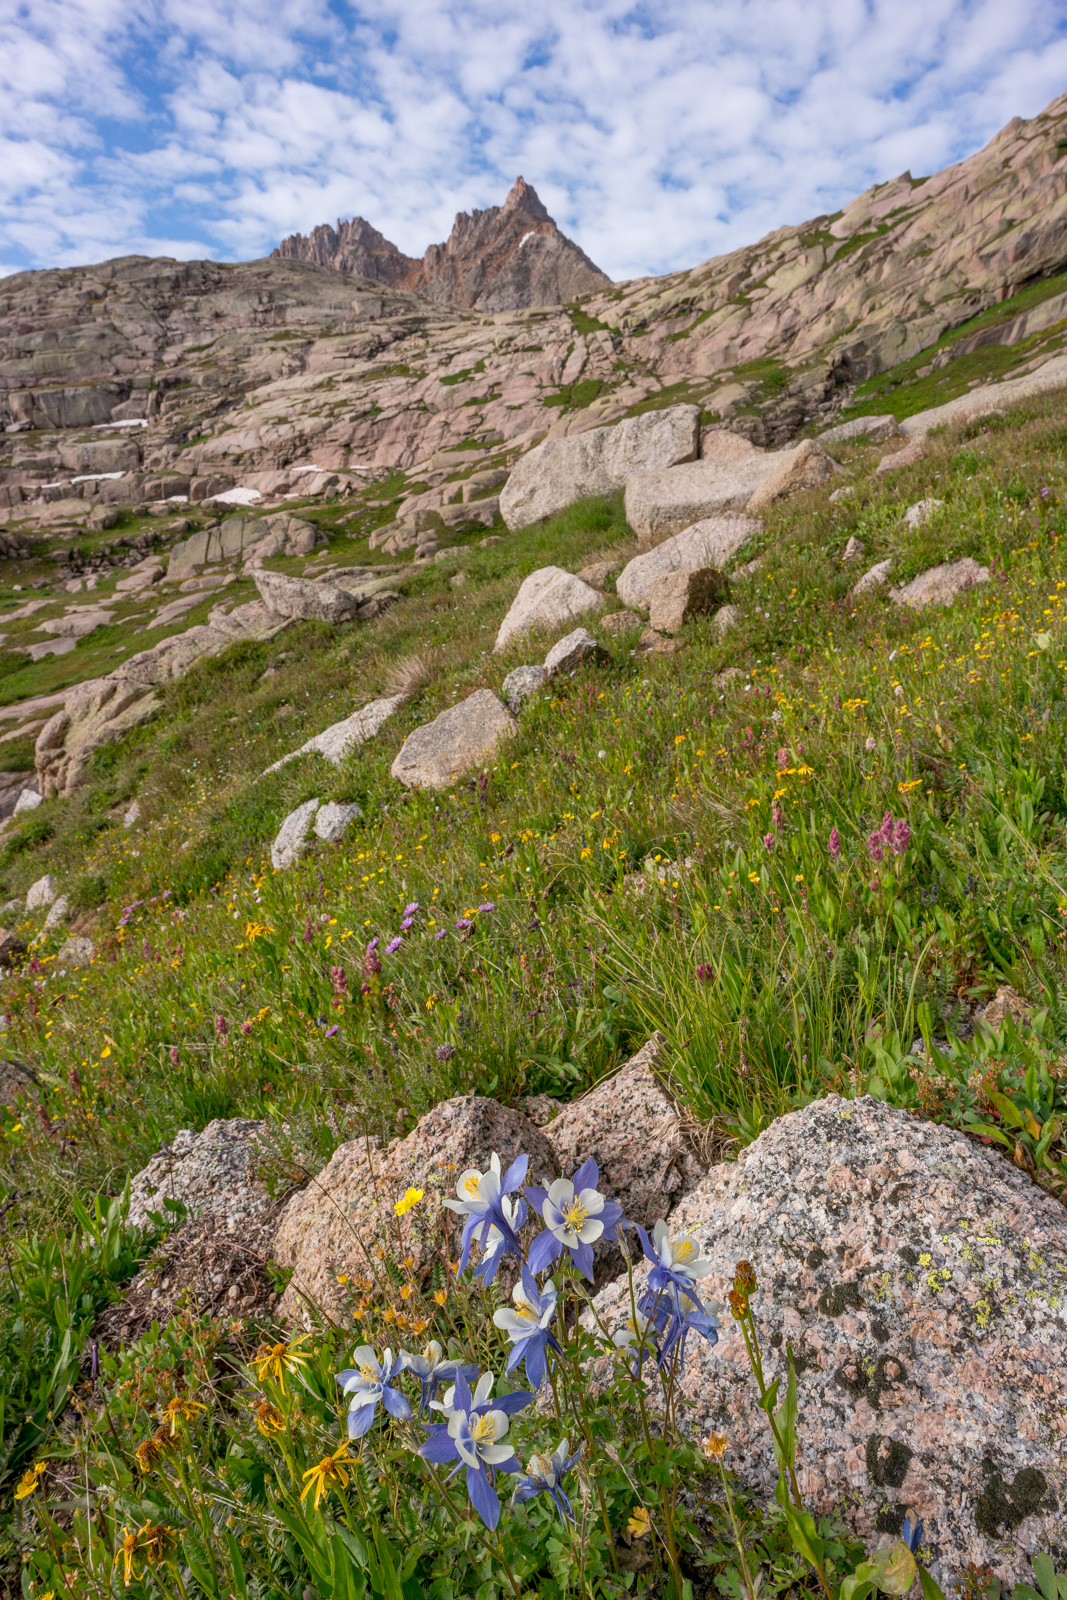
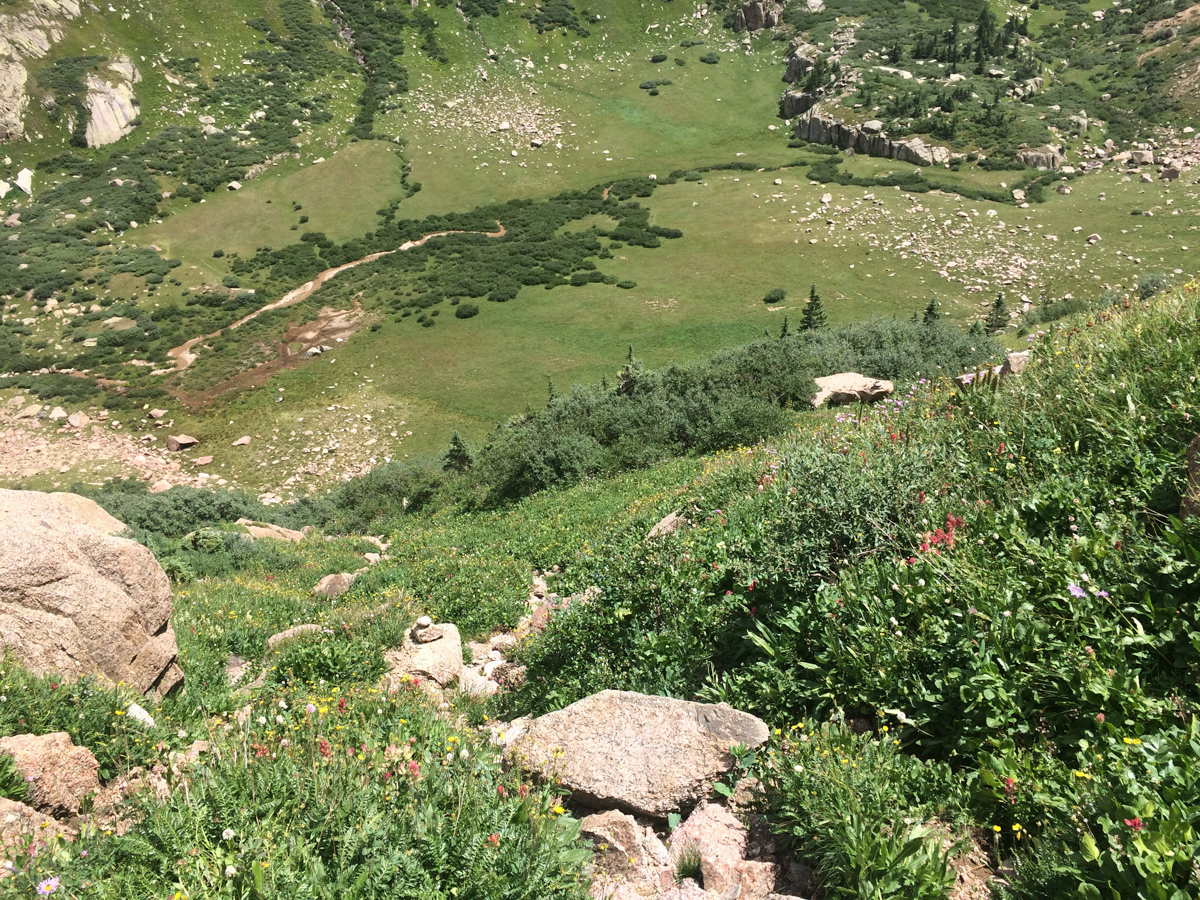
I continued my hike up into the upper basin and was enthralled by the huge variety of wildflowers. 14er Sunlight Peak poked out above it all and looked amazing.
The climb up to the ridge between Peak 10 and Knife Point was very steep, but it was eased by the beautiful flowers I found along the way.
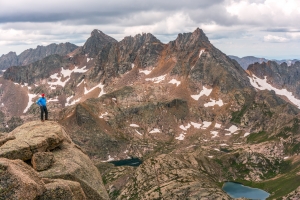
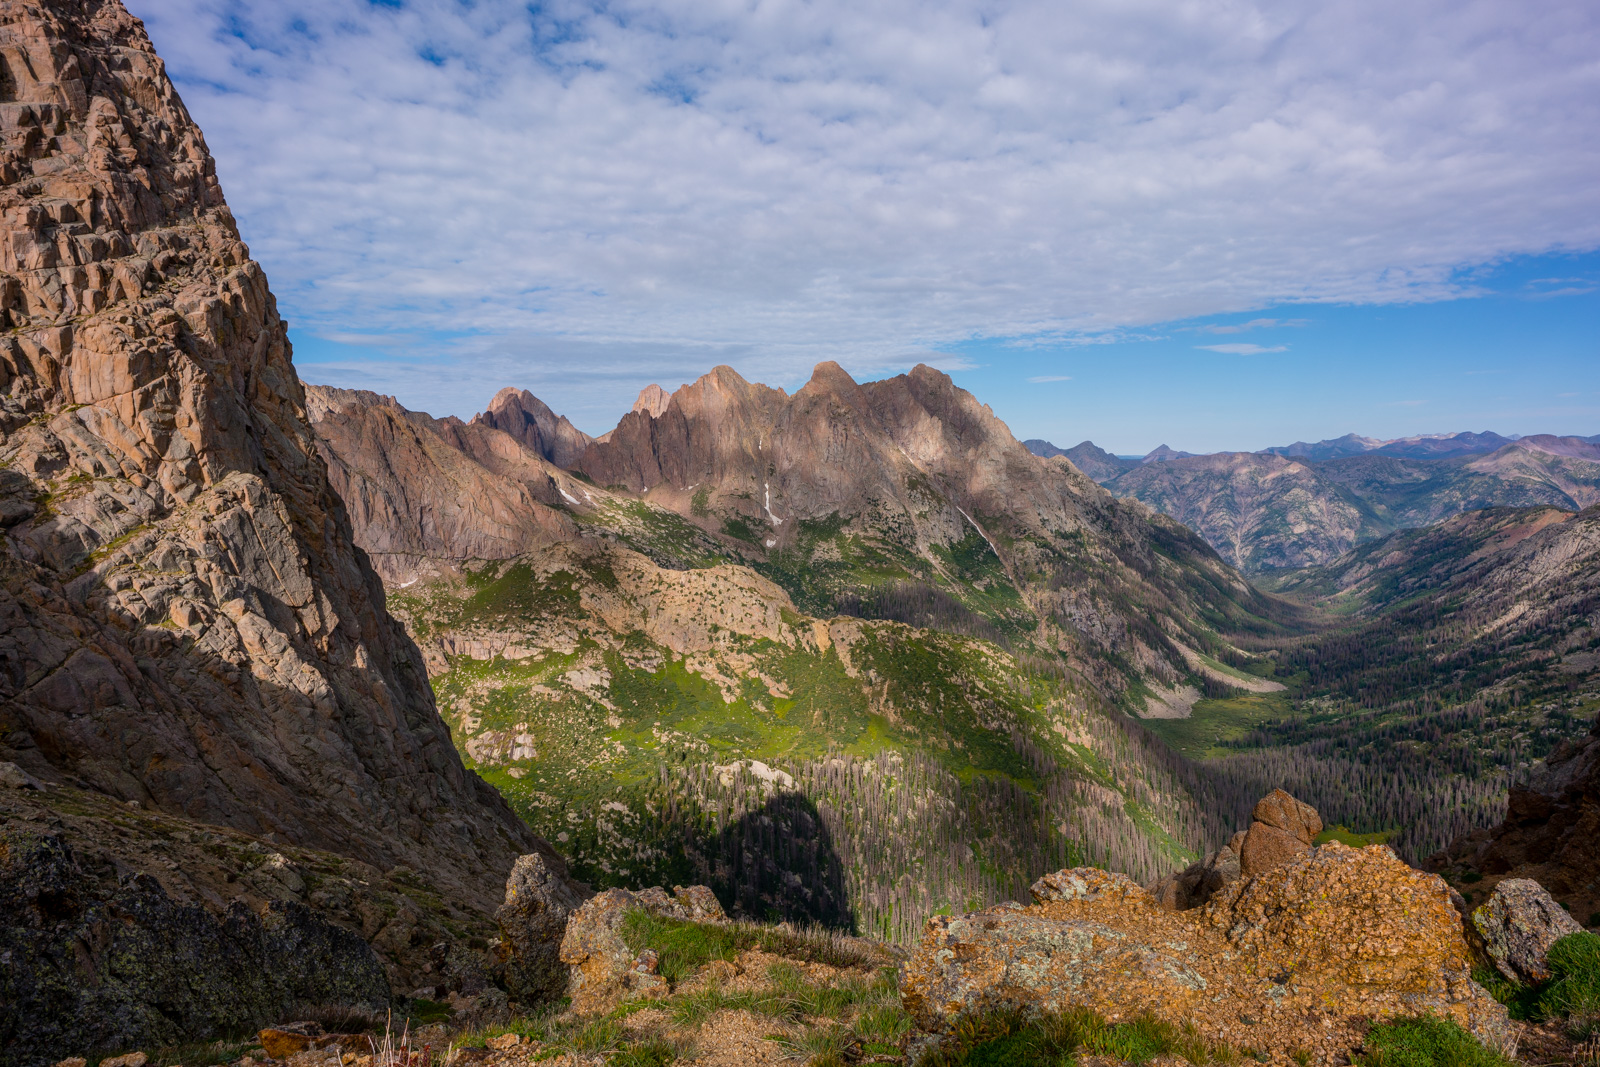
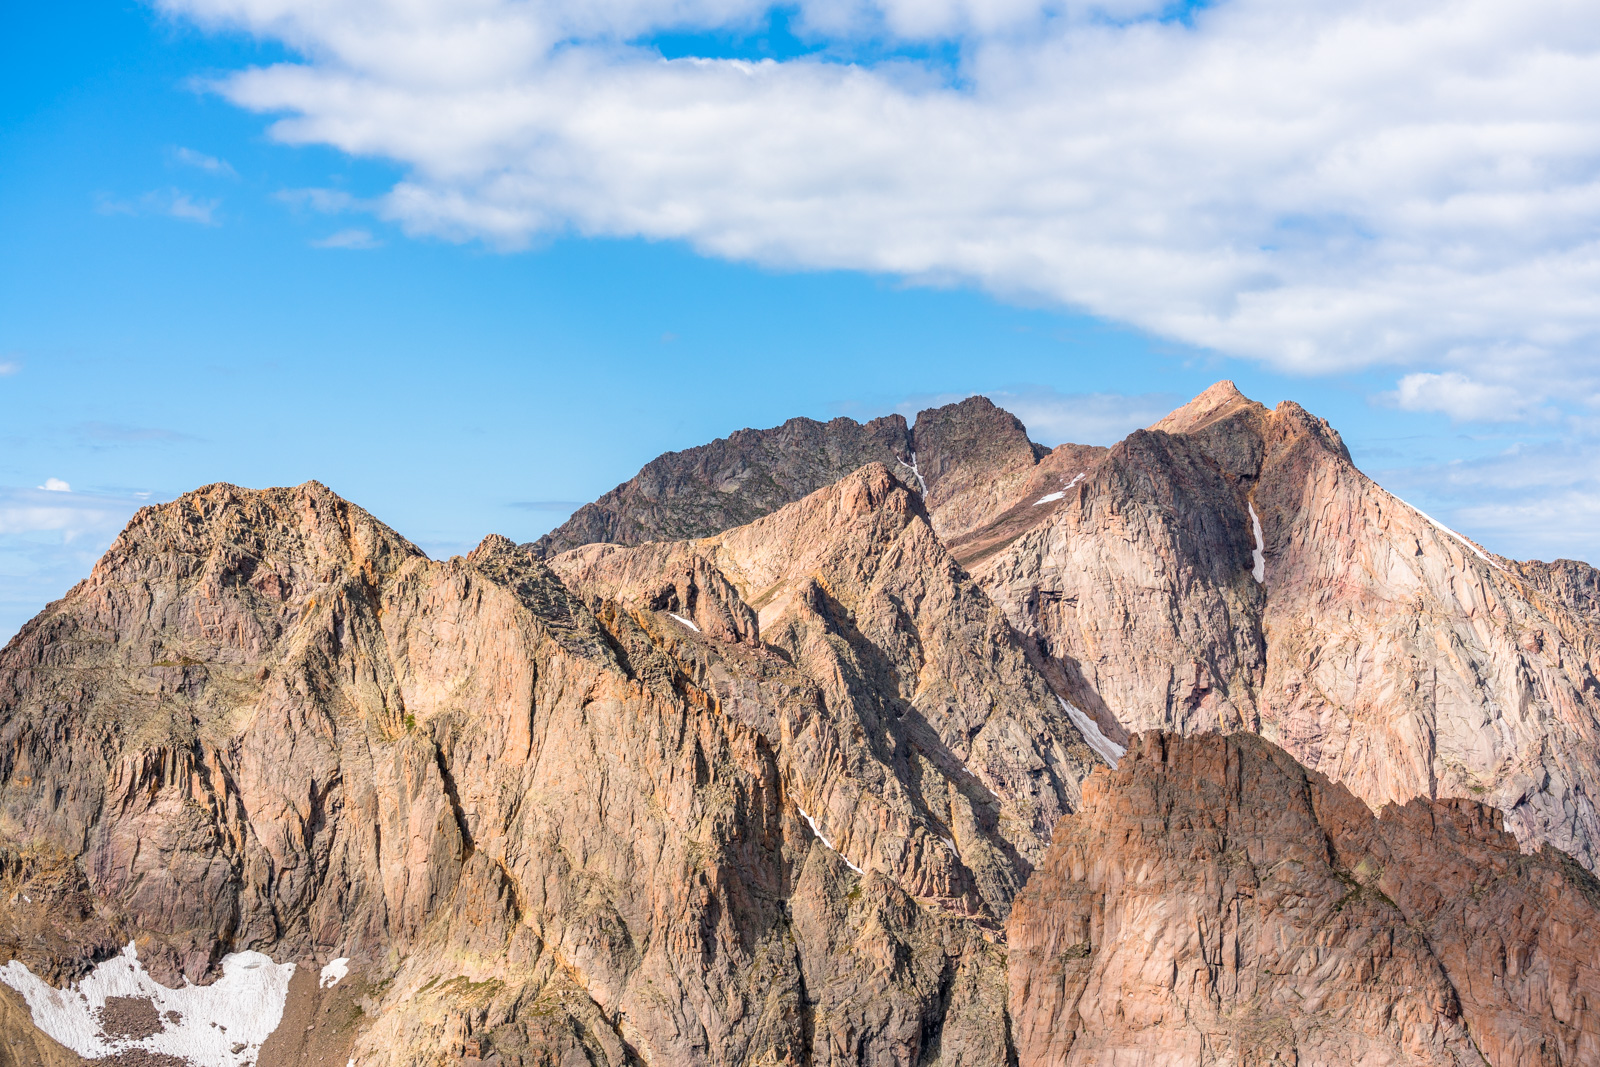
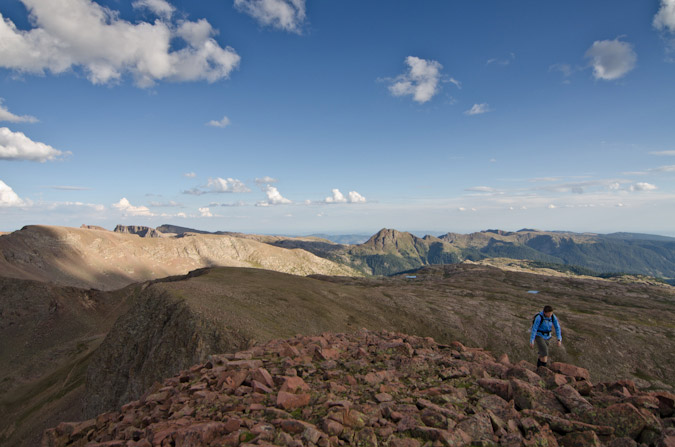
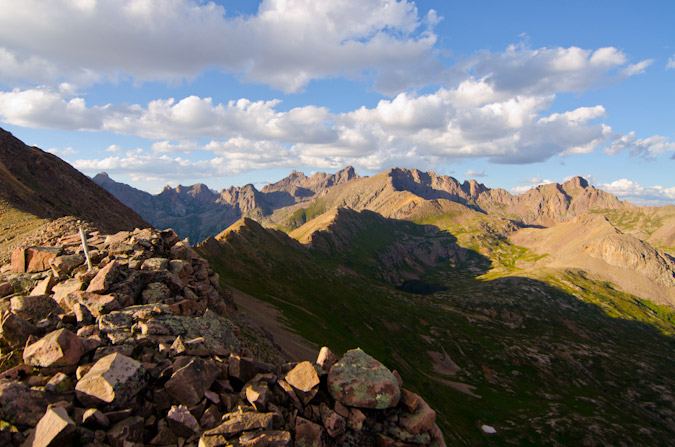
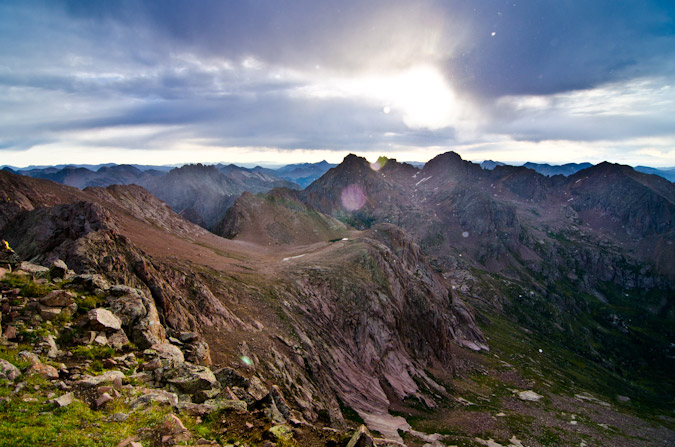
I reached the saddle and the views west towards Pigeon, Monitor, and Animas above No Name basin were great to say the least. I stopped here to take it all in and enjoy a snack.
Unbeknownst to me, Shawn had seen me gain the saddle and snapped some photos of me from Peak 10's flanks.
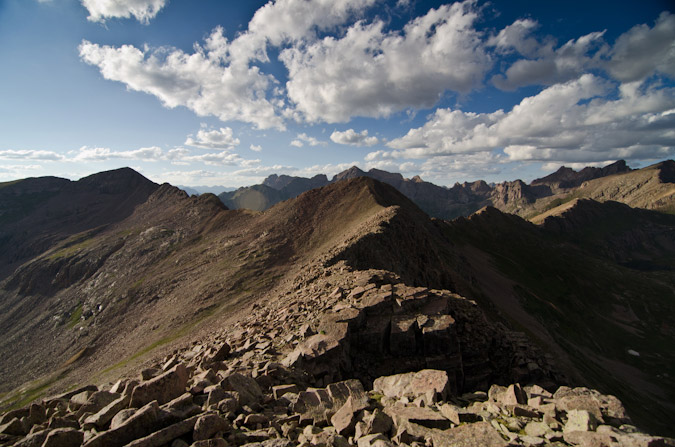
I scrambled up the ridge and took in the route for Knife Point. It looked like staying east and then going up the blocking face would work great.
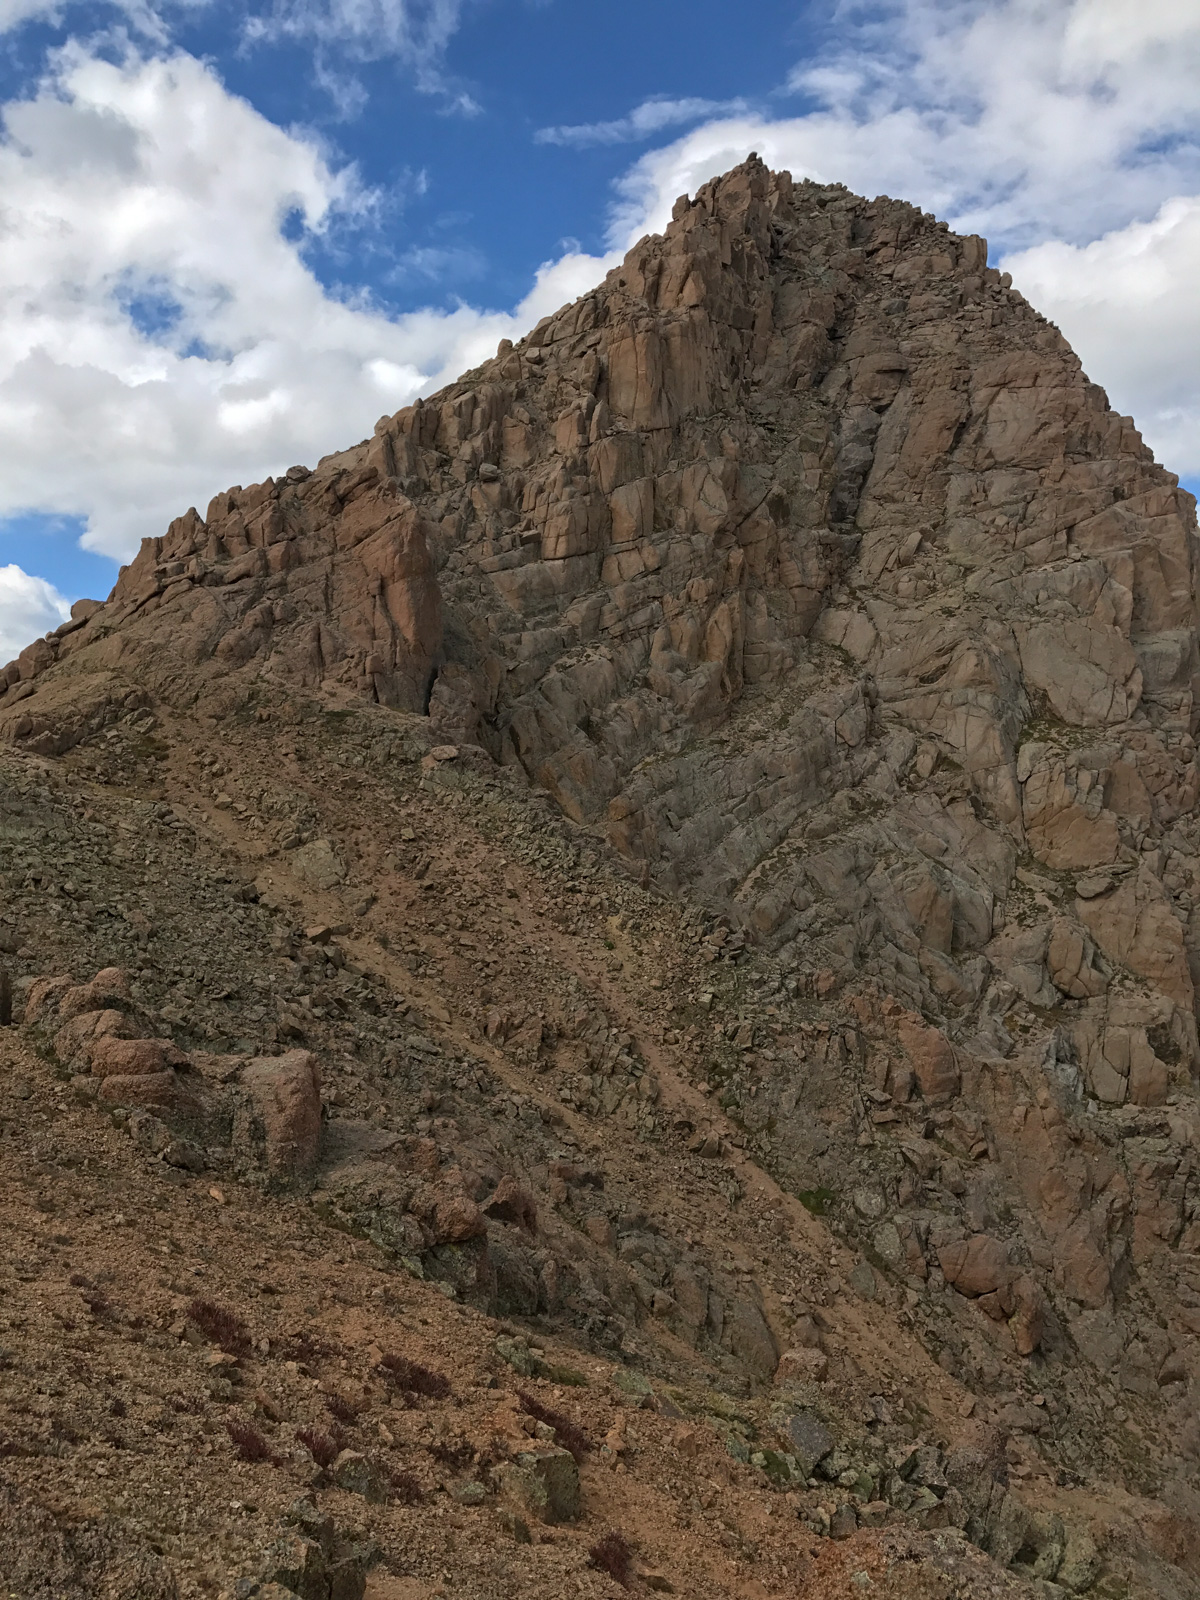
The climb up Knife Point was not terribly difficult. I would rate it class 2 with one or two easy class 3 moves mixed in for fun, which were mostly avoidable with careful route finding. The views of Sunlight Peak on the way were breathtaking!
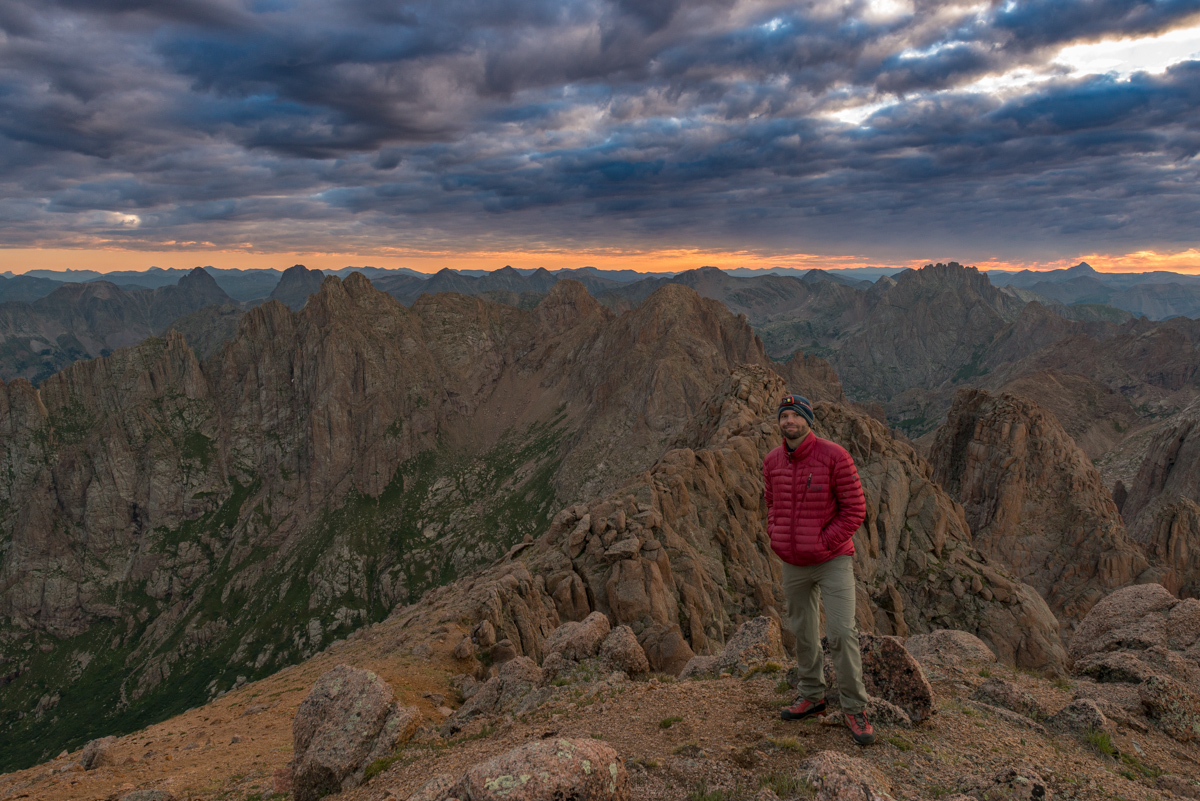
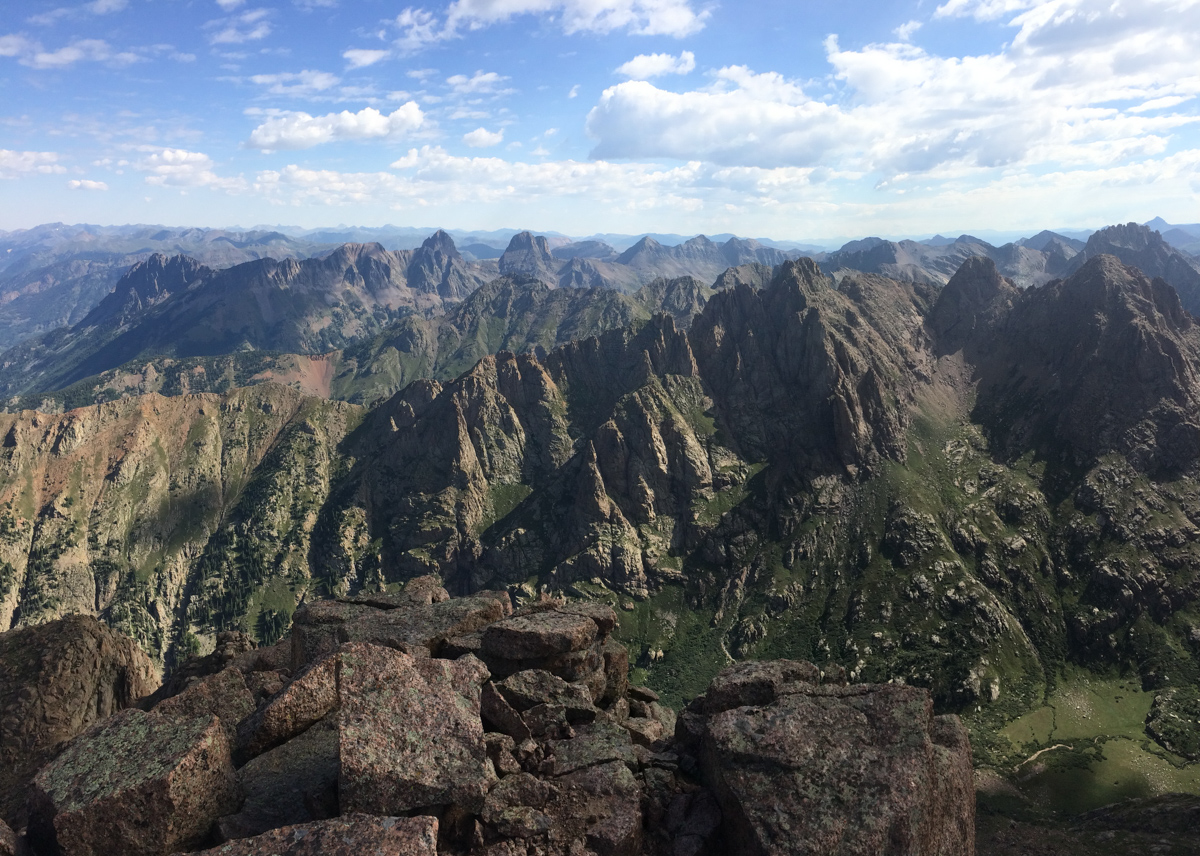
I reached the summit of Knife Point without any problems and enjoyed the amazing views of the Needle Mountains, including Sunlight Peak, Sunlight Spire, Glacier Point, Eolus, North Eolus, Pigeon Peak, Turret Peak, Animas Mountain, and Monitor Peak. What a mighty string of peaks it was to behold!
I set-up my tripod for some more detailed photo work, anticipating the eclypse. Again, unbeknownst to me, Shawn had taken some photos of me from Peak 10, this time of me setting up my tripod and shooting some photos from the summit of Knife Point.
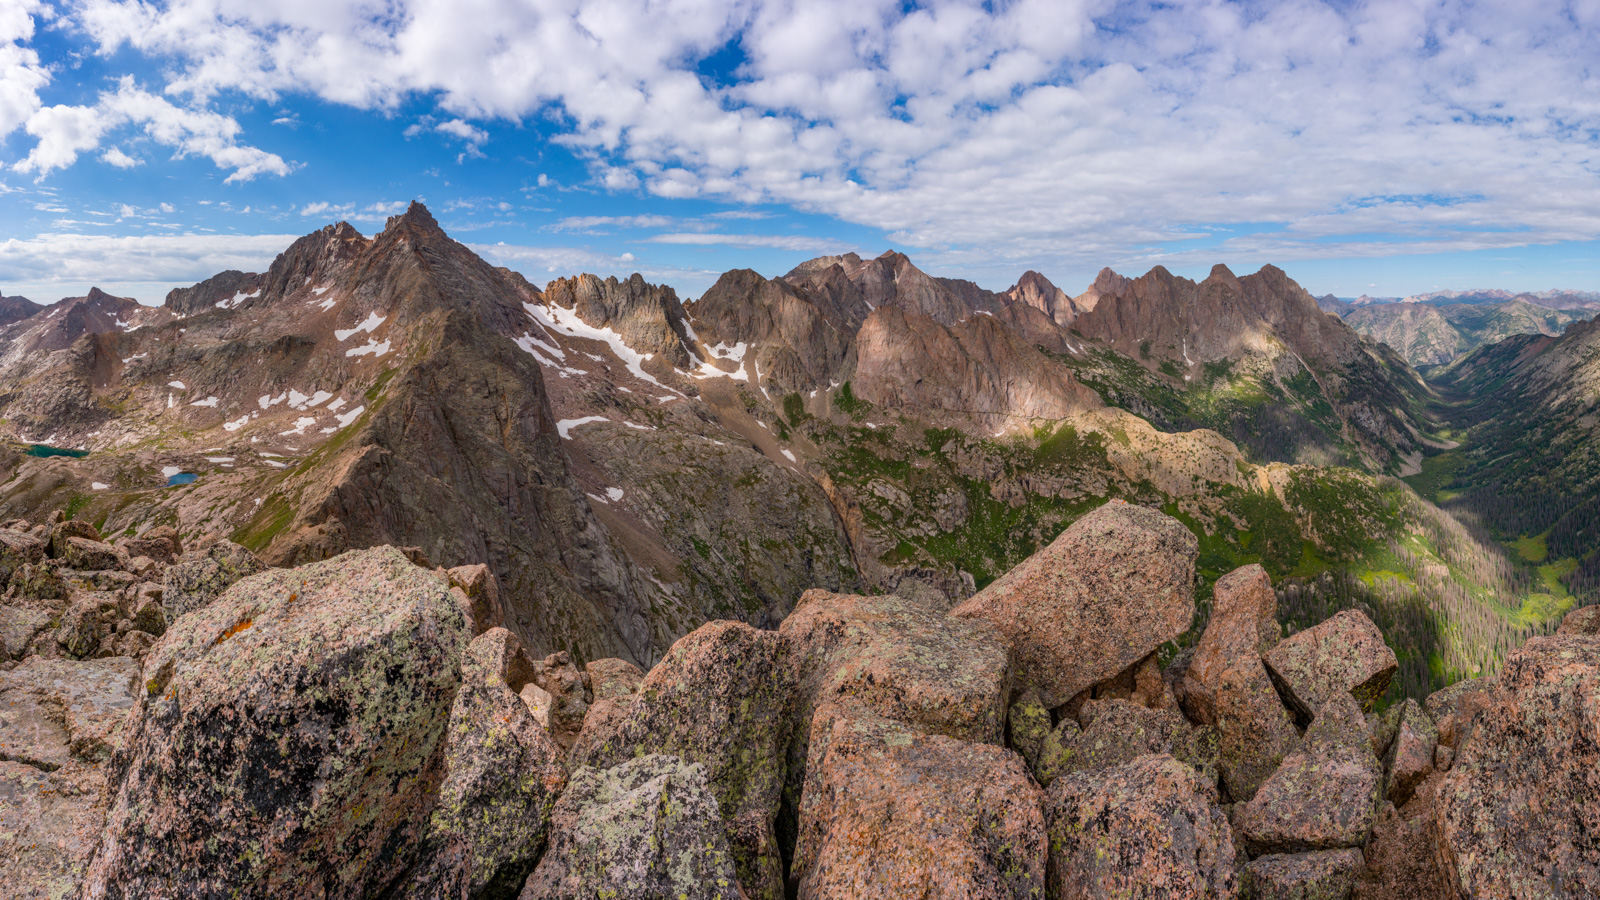
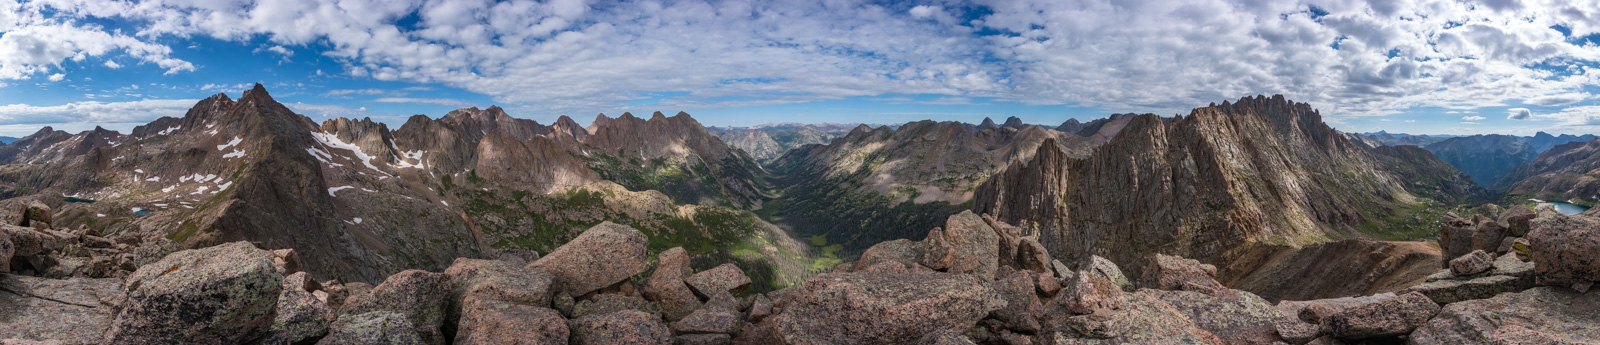
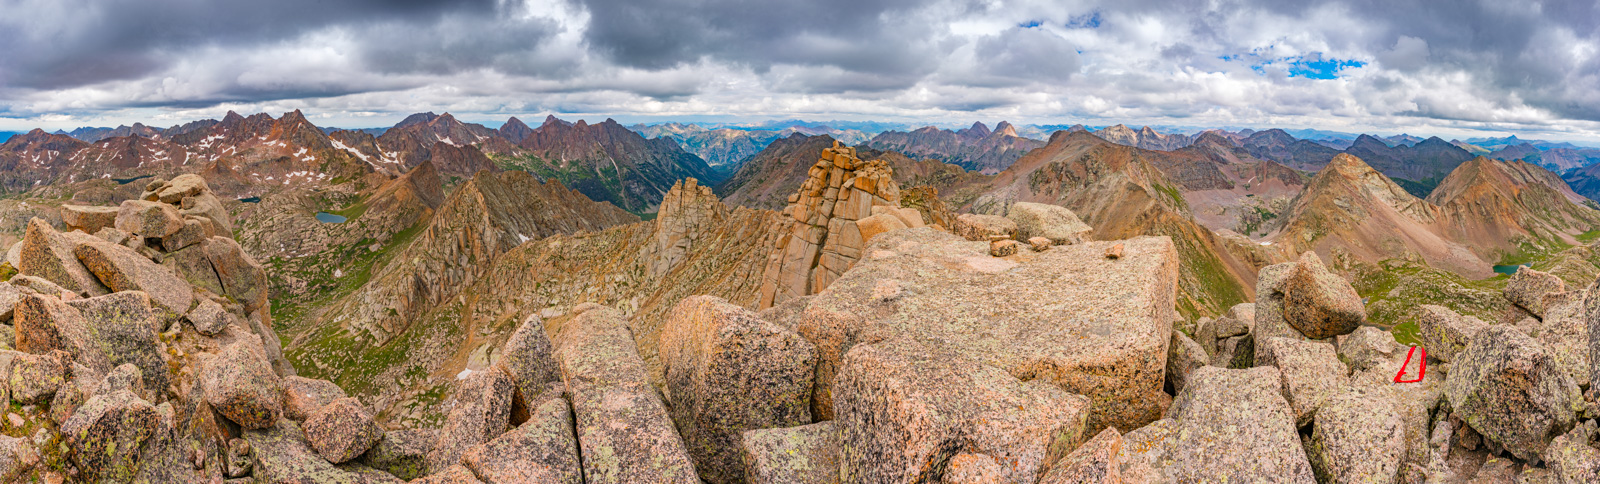
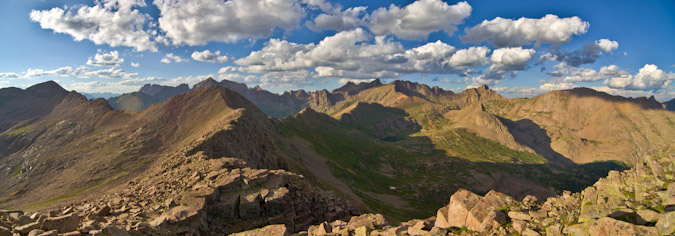
Knife Point might just be one of the more photogenic locations to photograph, as it offers impressive views of some of Colorado's most incredible peaks, including Sunlight, Eolus, and Windom, Pigeon, Turret, Monitor, and Animas, as well as Arrow Peak, Vestal Peak, and of course, Jagged Mountain, as seen in this 250 degree view.
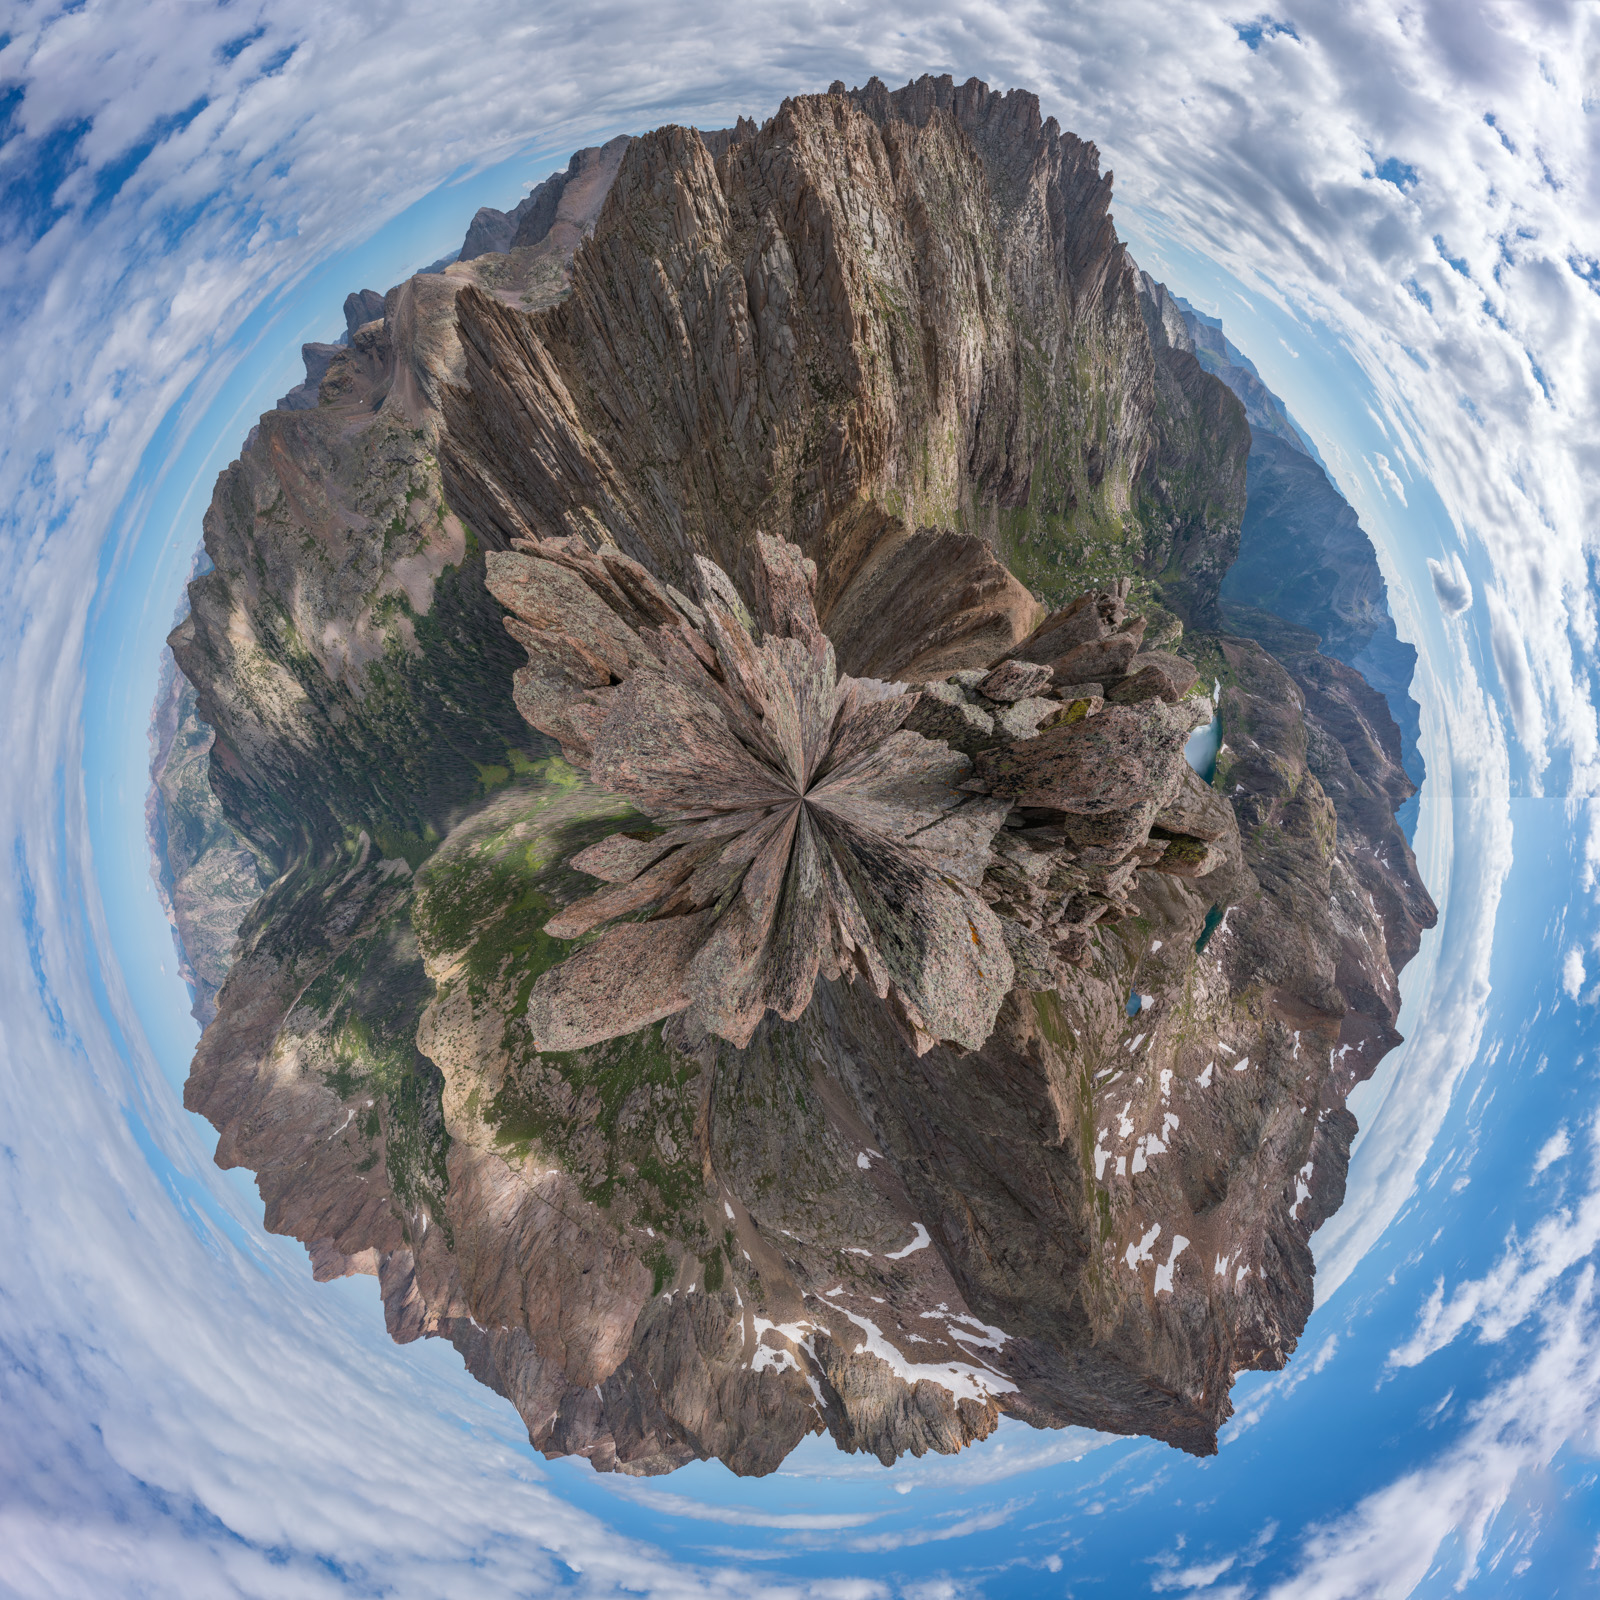
Another fun view of this scene is to take a 360 degree panorama and turn it into a planet. I call this one "Planet Weminuche."
I was thankful that I lugged my heavy telephoto lens up to the top, as I could get a nice and tight zoomed in view of Pigeon Peak, one of my faves.
And of couse a slightly less zoomed in view of the whole group, including Turret Peak, Pigeon Peak, Monitor Peak, and Animas Mountain. So freaking good looking!
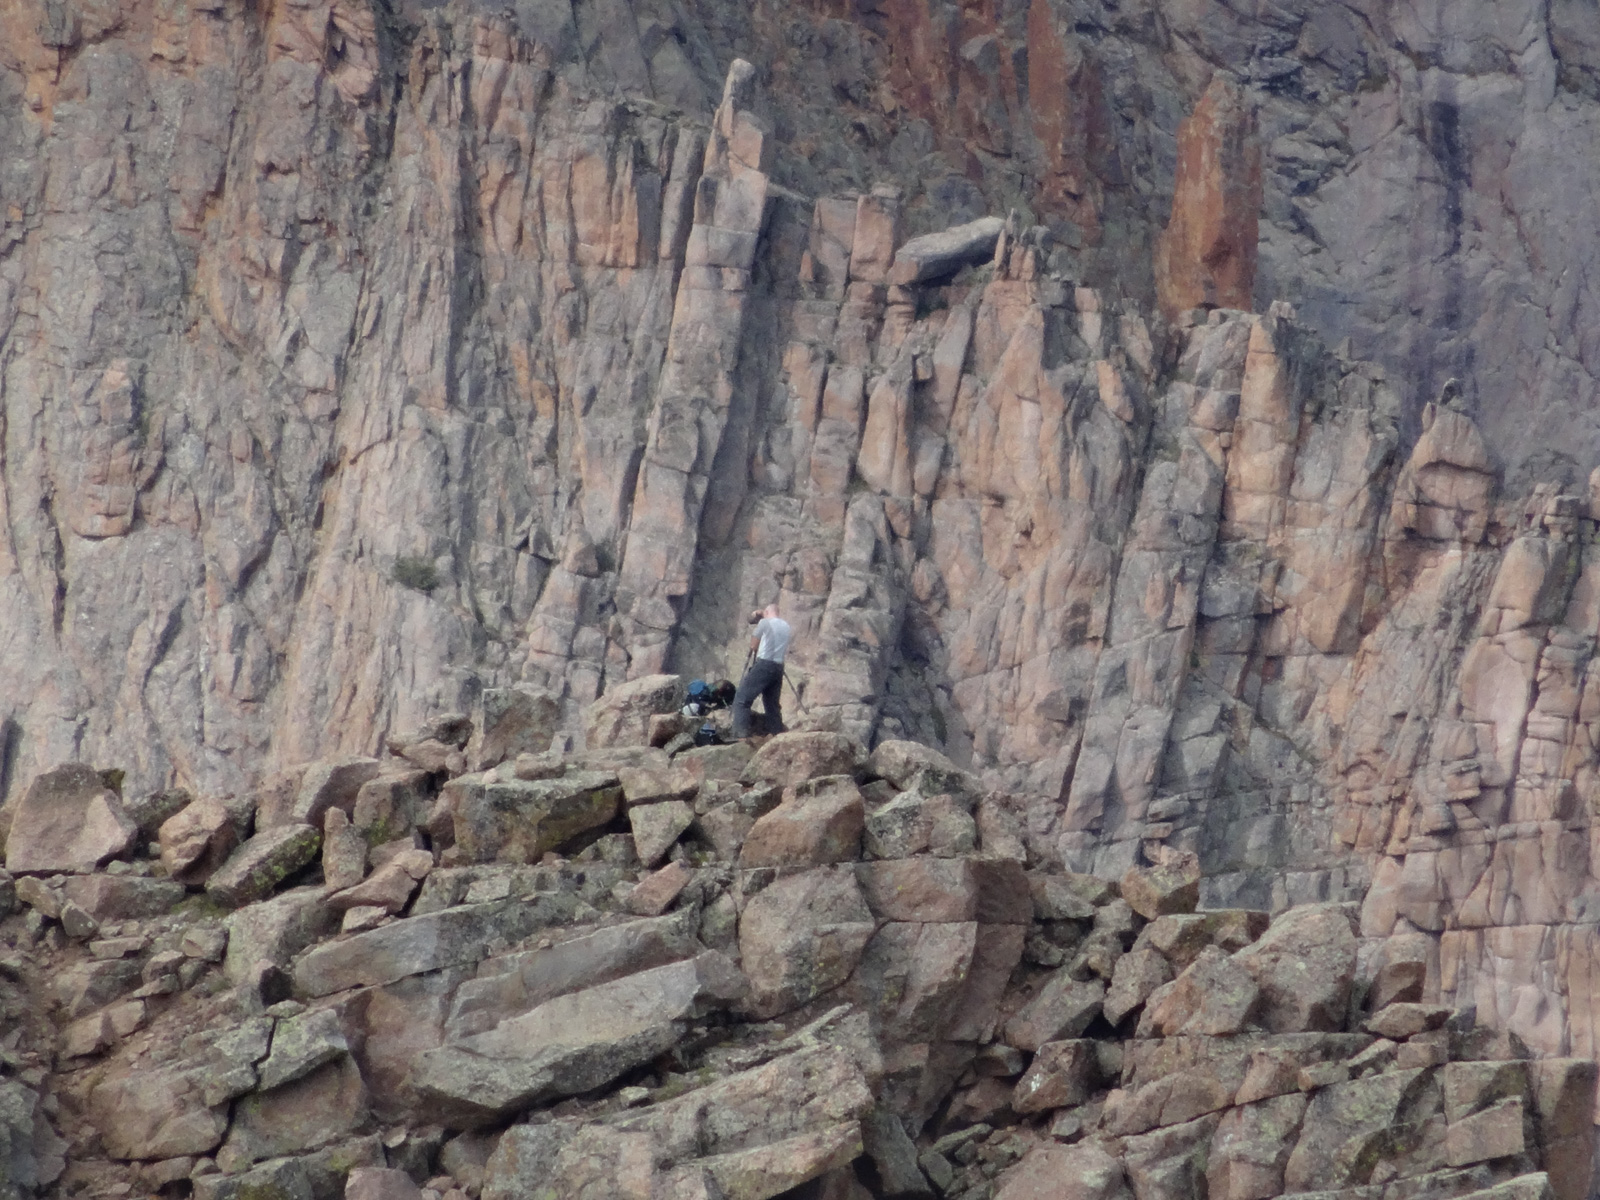
I also really appreciated the tight view of Sunlight and Sunlight Spire. Amazingly, hidden in this photograph is a tiny person I found while exploring the image from home. See the subsequent cropped photo to see if you can spot them.
Zoomed in view of where the person is - it's like Where's Waldo.

I could hear some people celebrating over on Sunlight and probbaly Eolus. Glacier Point, Eolus, and North Eolus looked mighty from this vantage as well.
My gaze kept taking me back over to Arrow and Vestal, which rose high above a small lake between Knife Point and there, with the nasty rock of Peak 10 in the foreground.

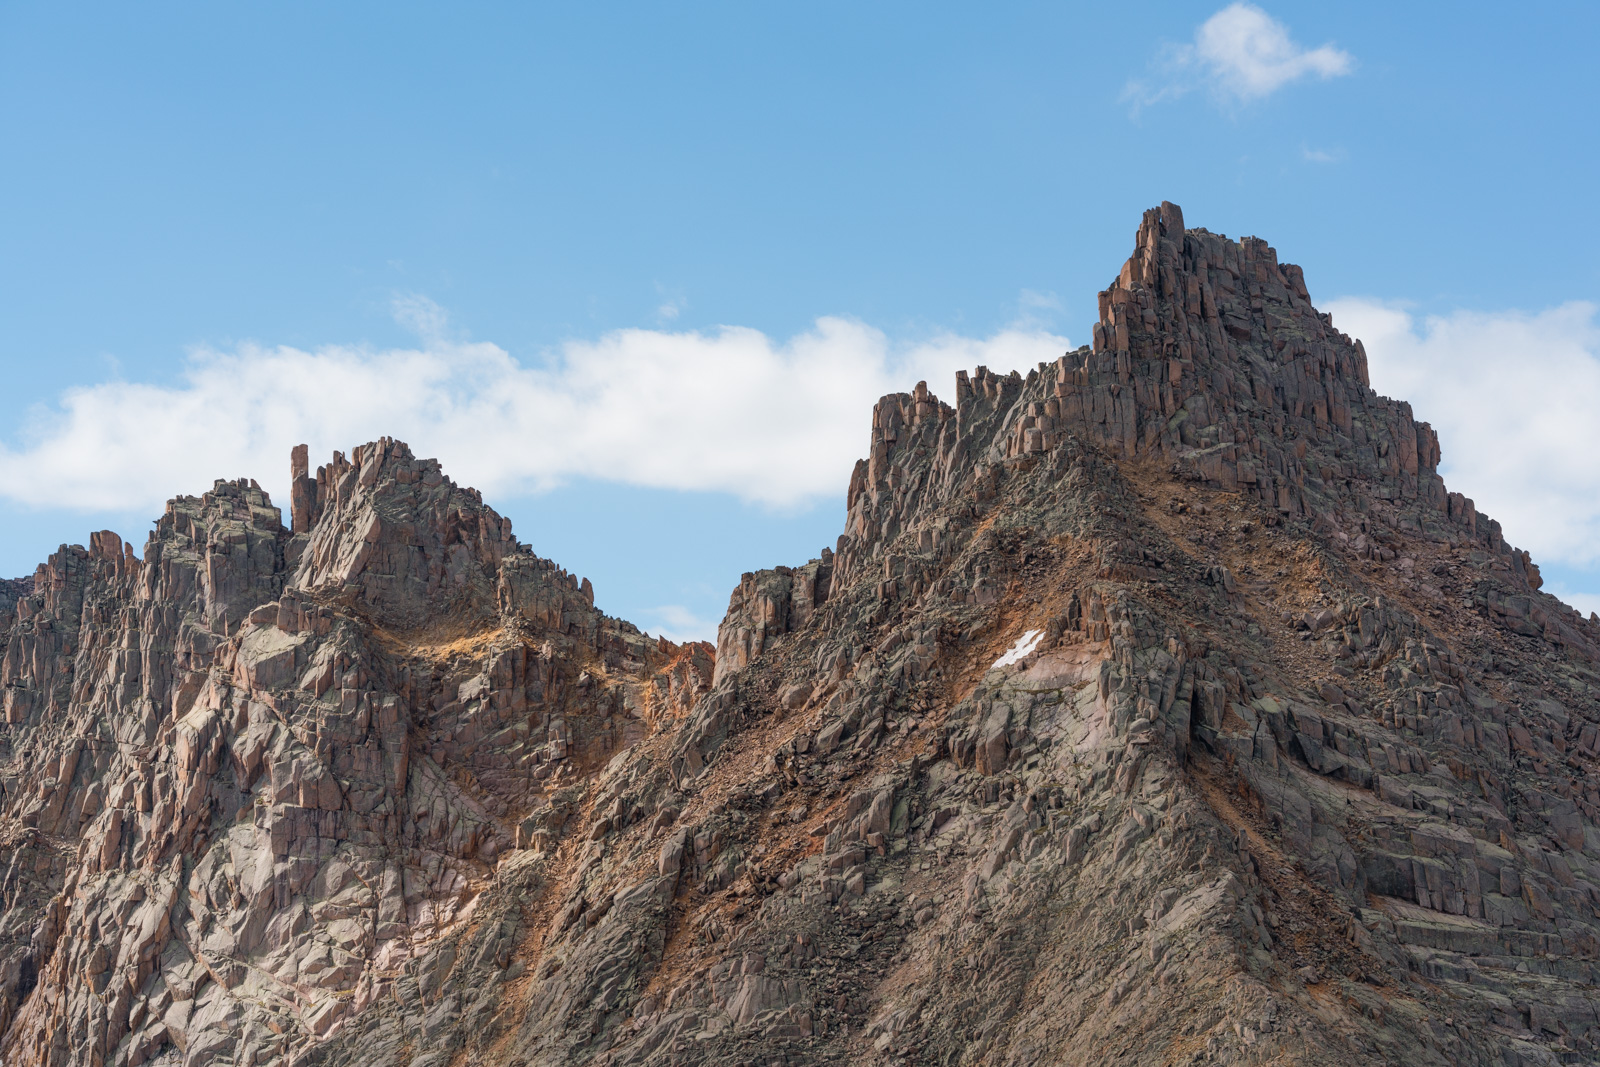
Of course, I could not help but study Jagged Mountain - it was just scary and impressive looking from here.
Just before the eclipse, I got in one more shot of Sunlight by itself. I really loved how the ridge sweeps up from below and terminates at the summit like some impressive mountain god.
Unfortunately, clouds began to really move in and obscure my view of the sun just before the eclipse began. Additionally, the clouds did not appear to be too friendly at all; however, I might just be the only person on earth that can say they photographed a solar eclipse from the top of a 13,000 ft. mountain.
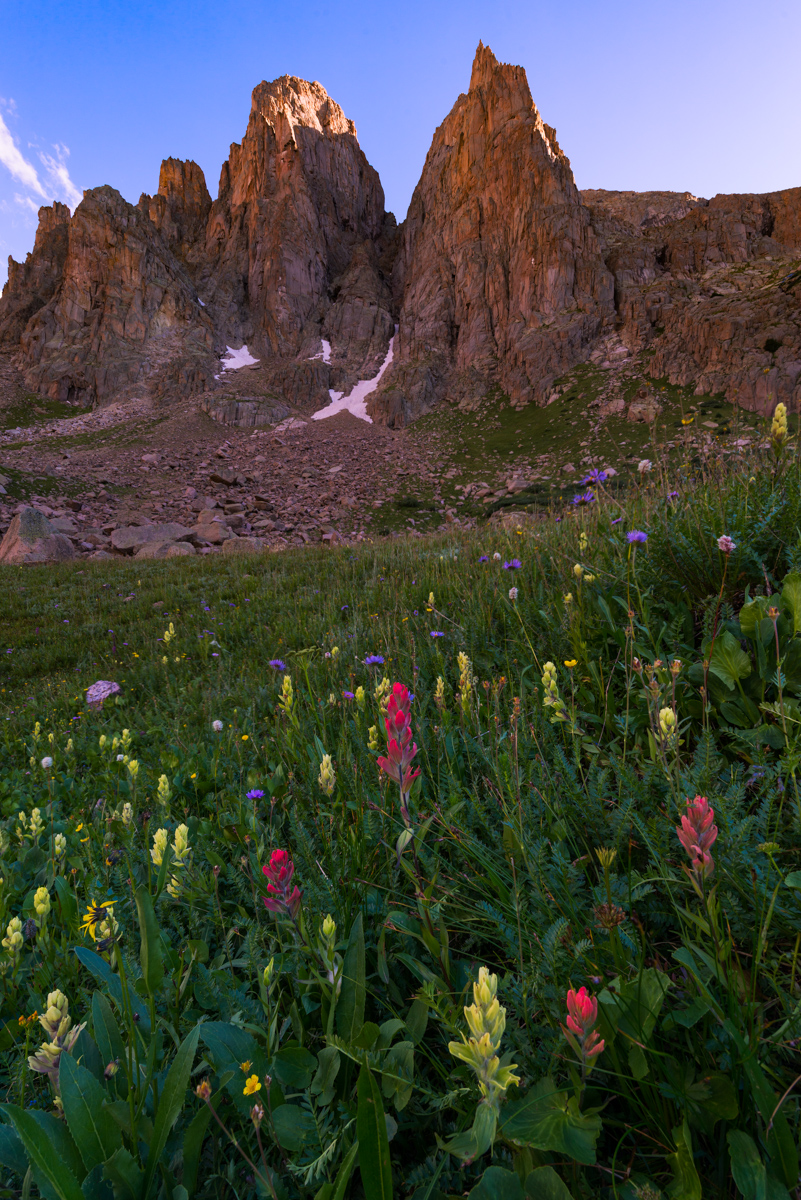
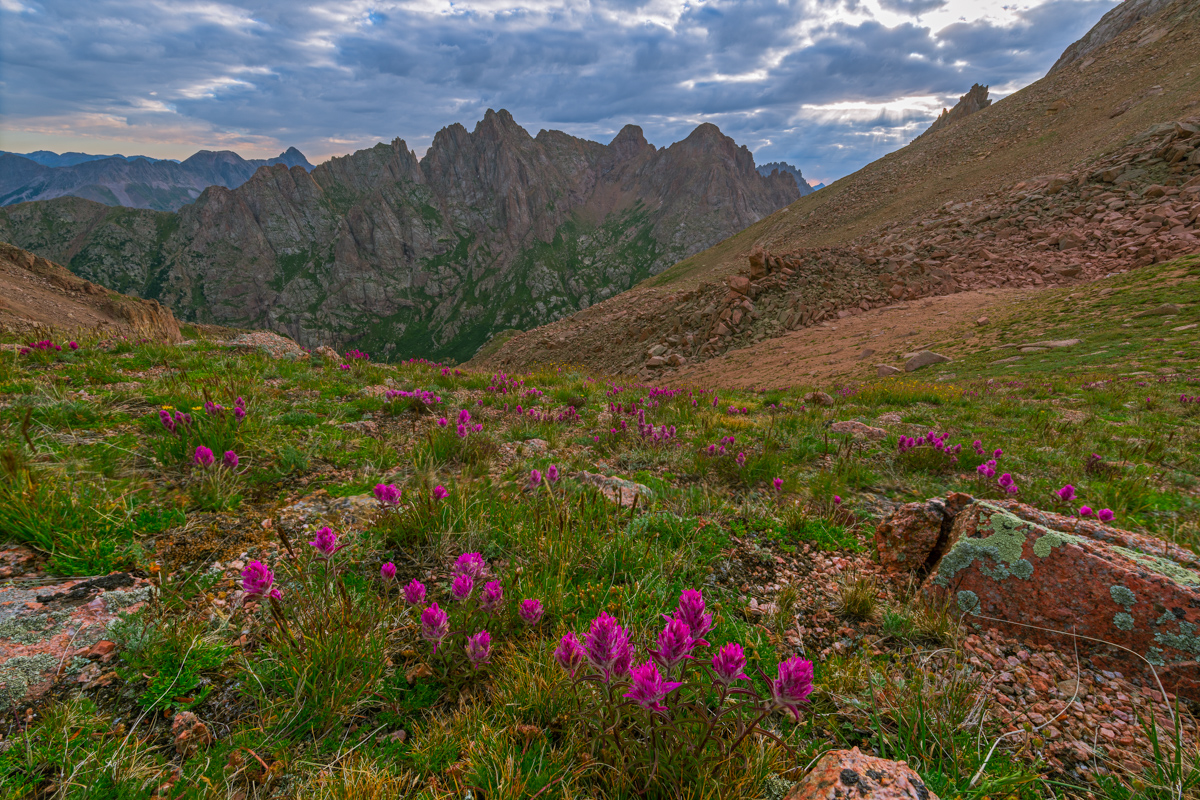
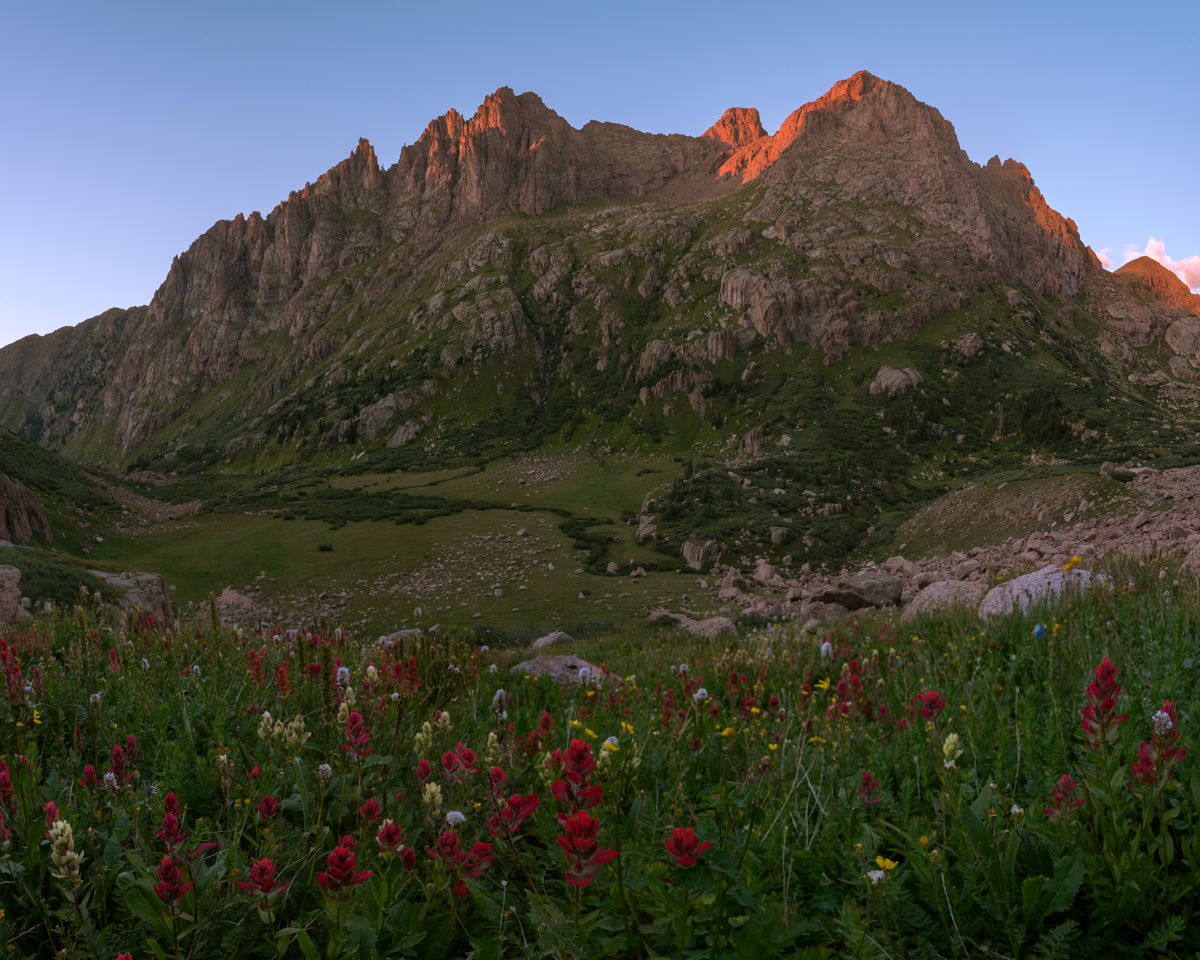
Since the weather looked iffy, I decided to descend back into the basin. I could not make out Natalie or Shawn on Peak 10 with my bare eyes or my telephoto lens, so I took my time on my way down, looking for a nice scene to snap some more shots of Jagged paired with some wildflowers - this time, Rosy Paintbrush, probably my favorite flower.
I waited around for about an hour for Natalie and Shawn. I did not see them or hear them, so I decided to go down. One last look back, I made Shawn out on the ridge between Knife Point and Peak 10! He must have scrambled over from Peak 10 (impressive). I was tired and my feet were sore, so I headed back down.
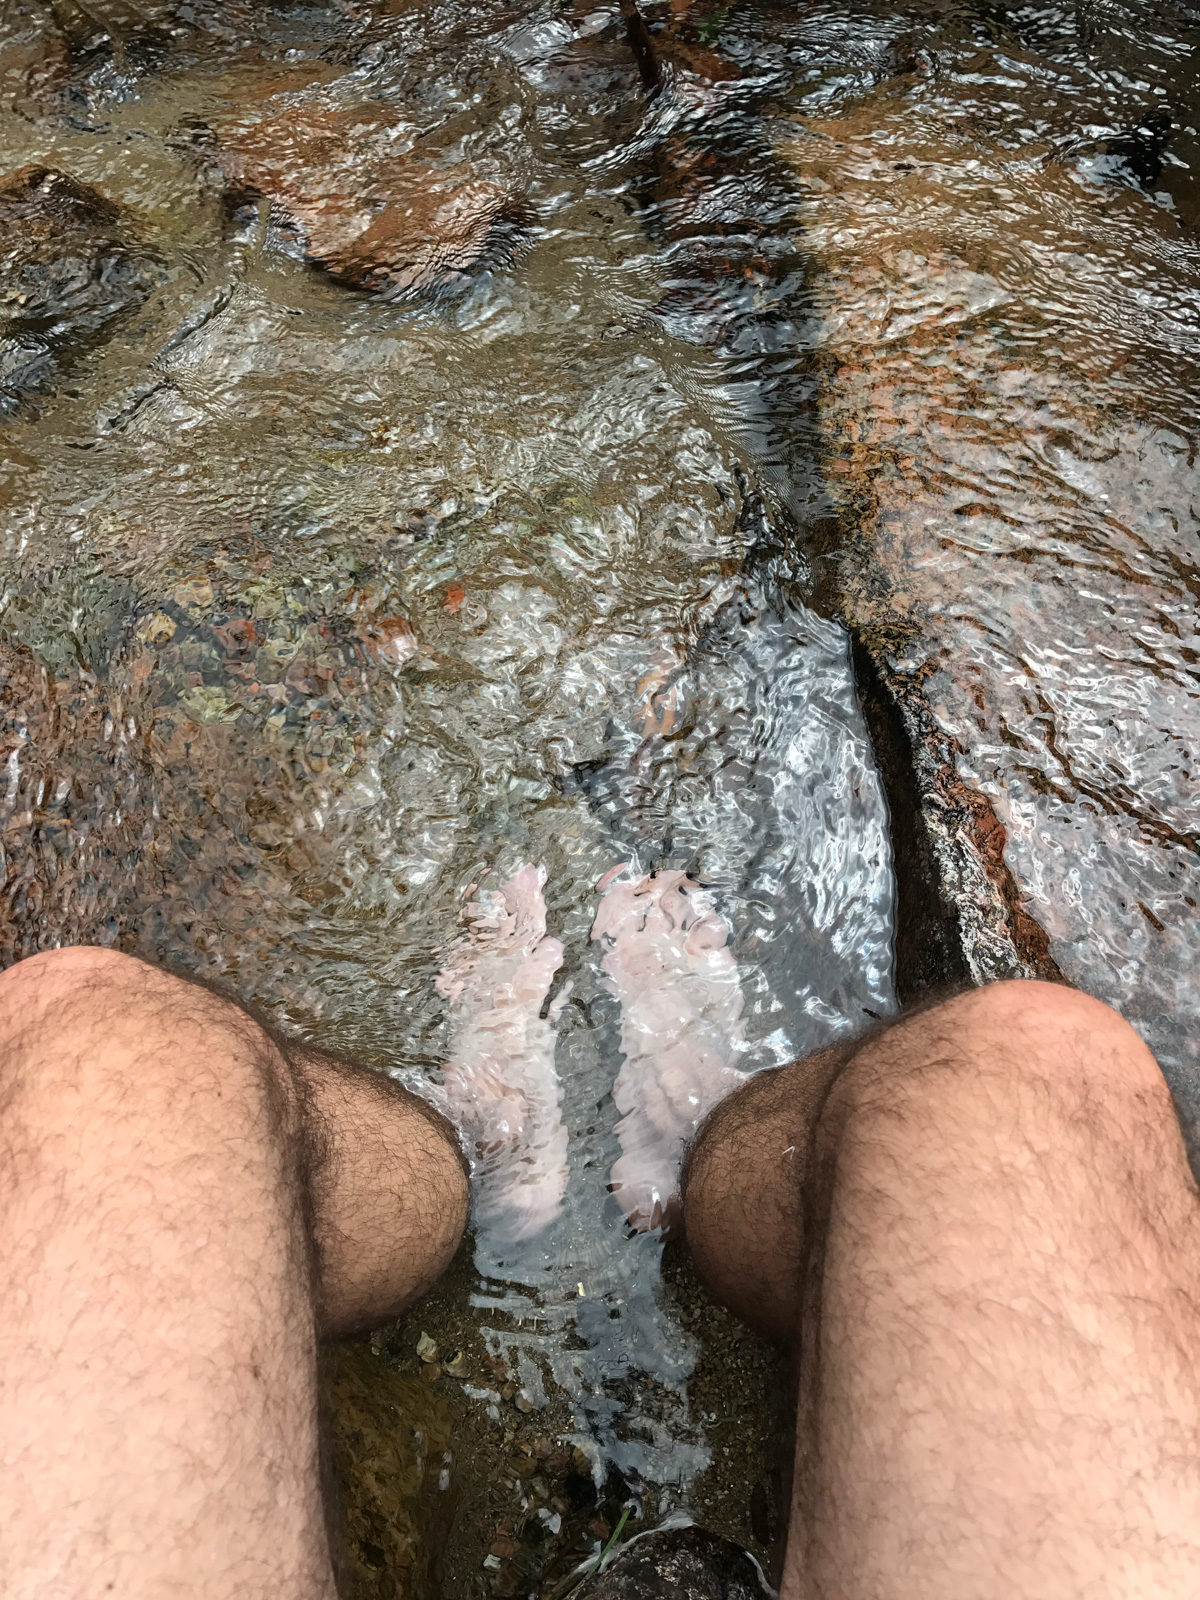
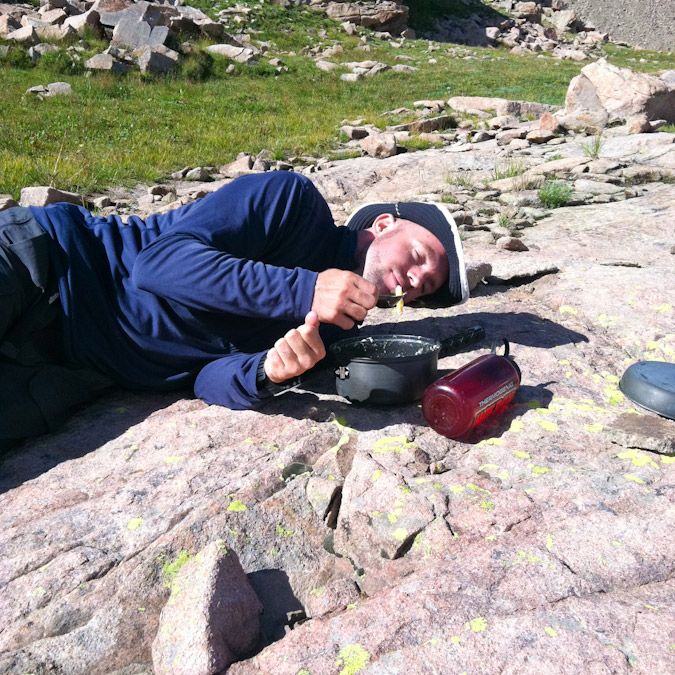
I arrived back at camp and decided to soak my feet in the creek. For some reason, my boots had shrunk since I last wore them and they were really encroaching on my achilles heels. Awww, sweet cold relief!
Natalie and Shawn both came into camp shortly after my arrival and we talked about our climbs. All was well and we made plans for a 4:30 start for Jagged Mountain. My nerves were getting more and more knotted.
DAY 3: 4:30 AM start and climb of Jagged Mountain.
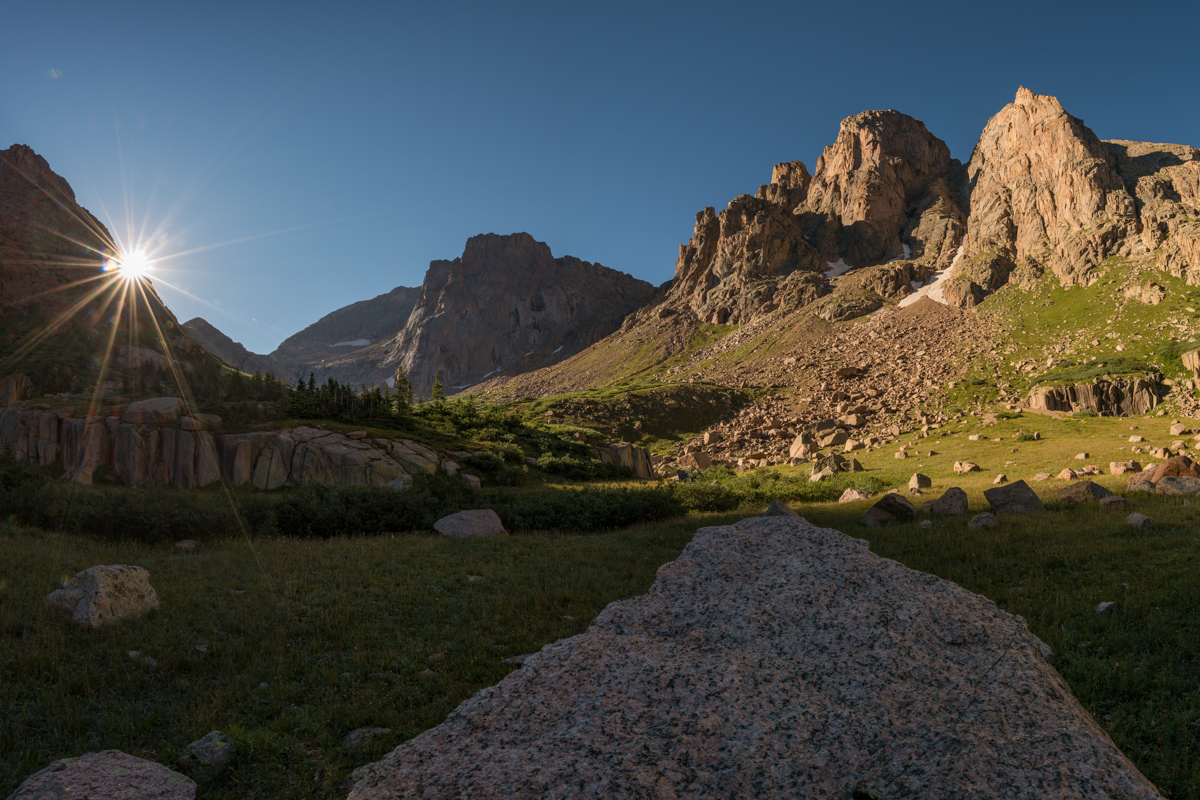
Beep. Beep. Beep. Time to wake up and crush another Centennial. That's what I kept telling myself anyways. Let's do this! We got up, packed up our ropes and harnesses, re-filled water, and were off! We arrived in the upper basin just in time for some nice sunrise light above Sunlight Peak. No tripod today.
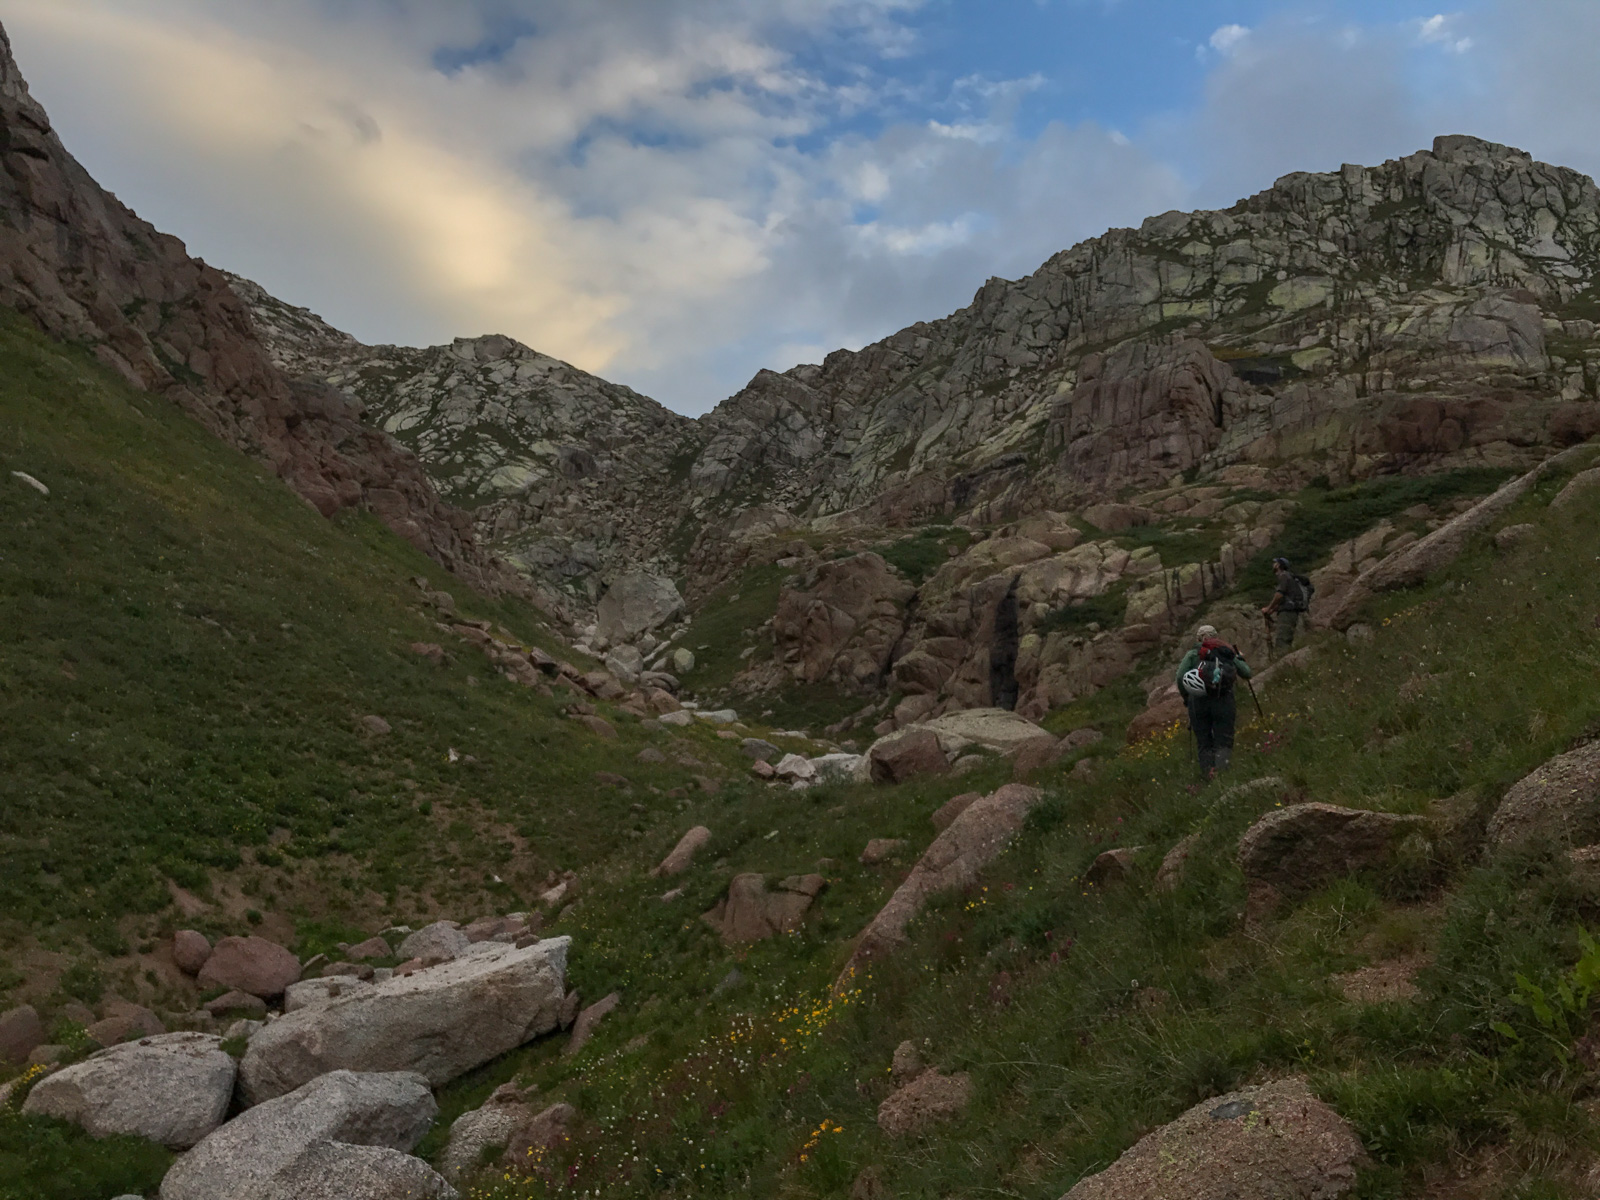
From the upper basin, the plan was to swing around the west face of Jagged and up into the lower basin between Jagged Mountain and Leviathan Peak. We were able to find a nice trail up from Sunlight Creek and made our way up, admiring Peak 10 and Jagged most of the way around the bend.
A nice pink and orange hue eminated from a small tarn below us and between us and Mount Oso in the distance.
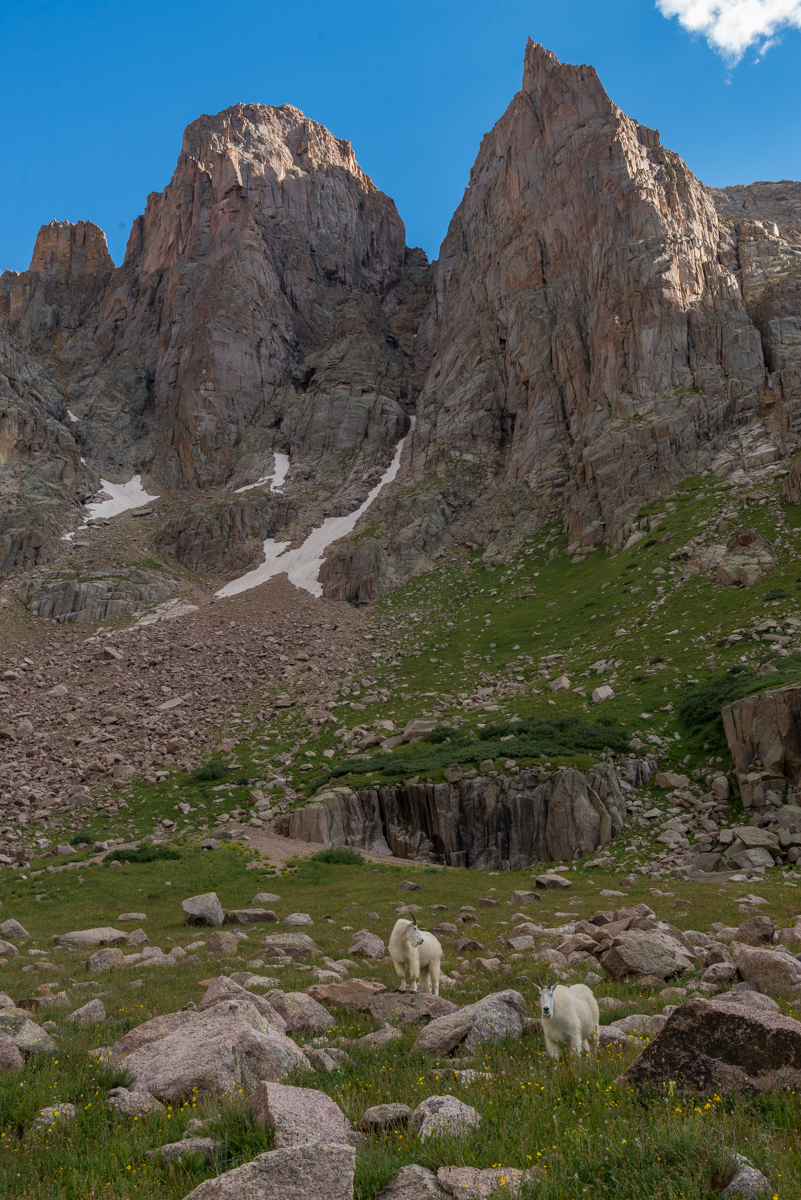
Once around the west face of Jagged, we finally found the beginning of the steep climb up to the basin below Jagged's north face. We each decided on a separate route up from here - Shawn went right and around the huge blocky, grassy slopes. Natalie went left and up where some goats were grazing, and I decided to go pretty much straight up the grassy ledges. I think each of our routes had different advantages.
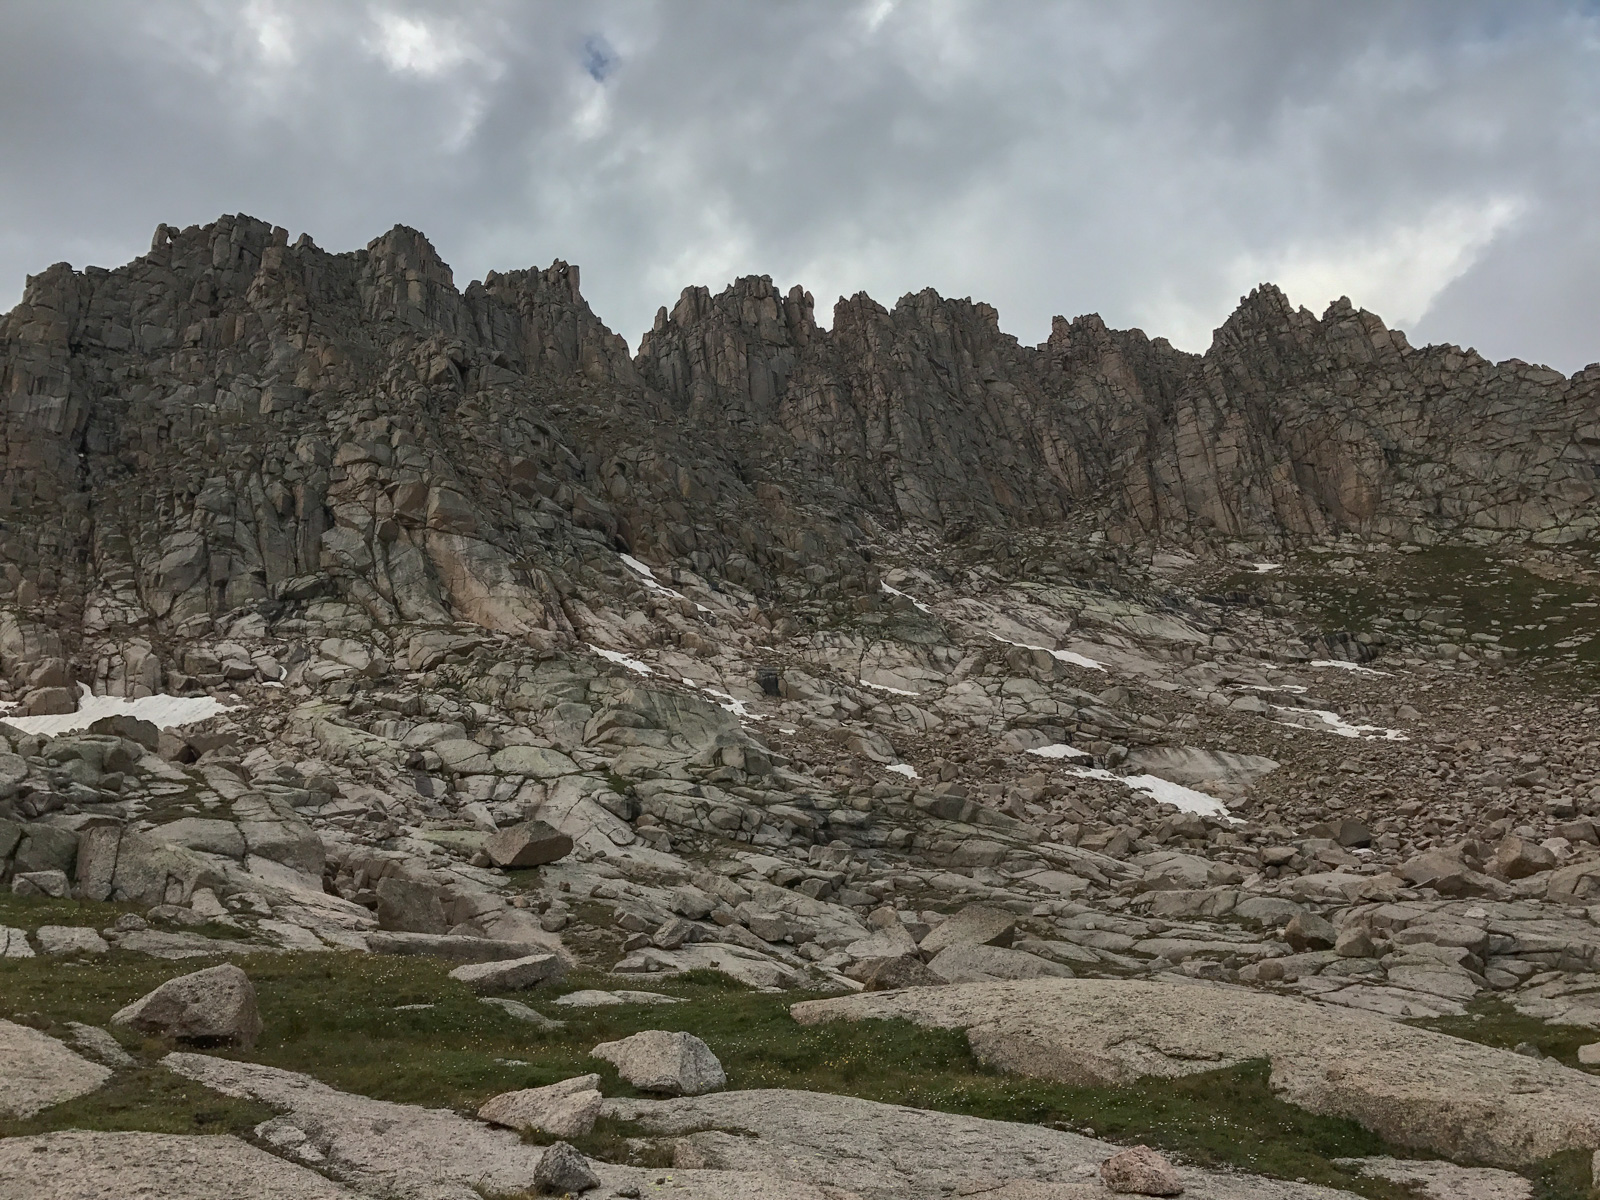
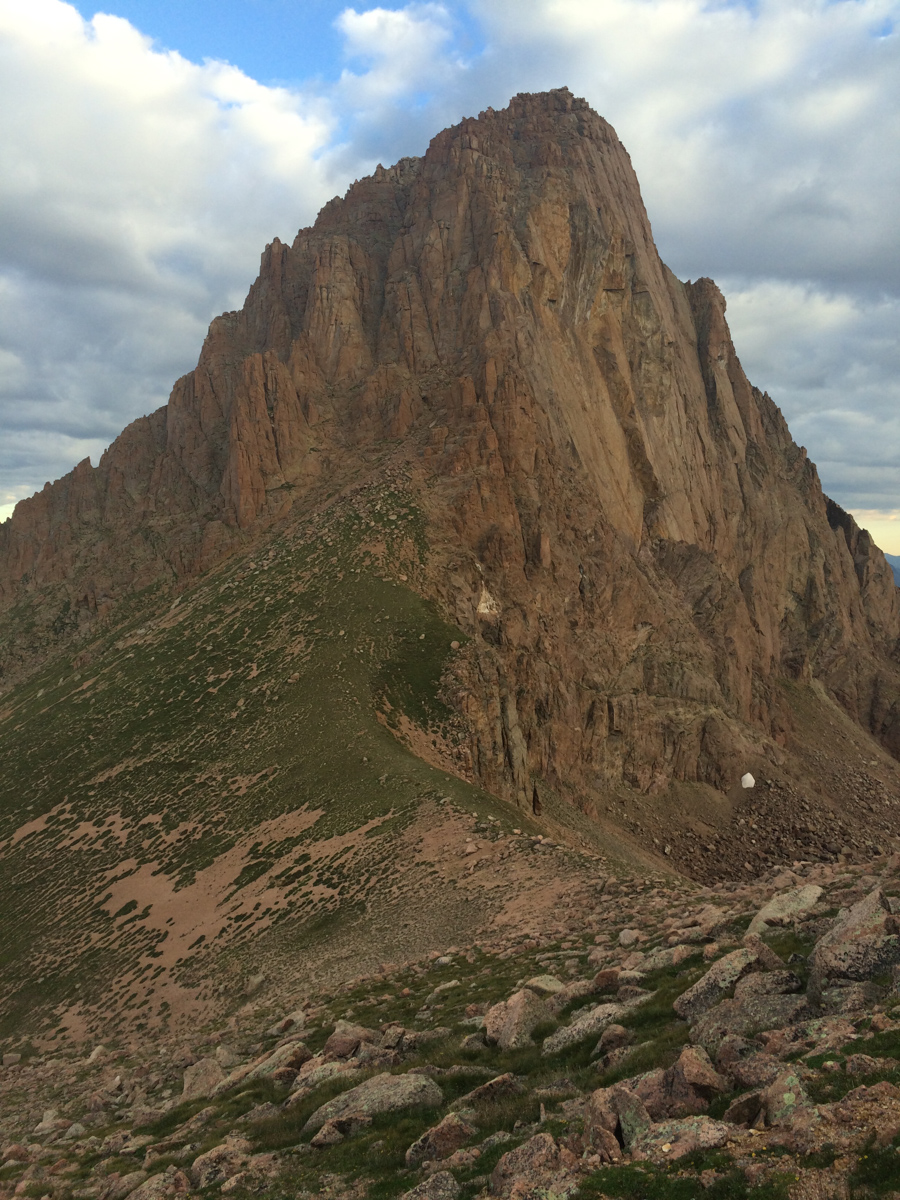
Jagged was impressive from this vantage.
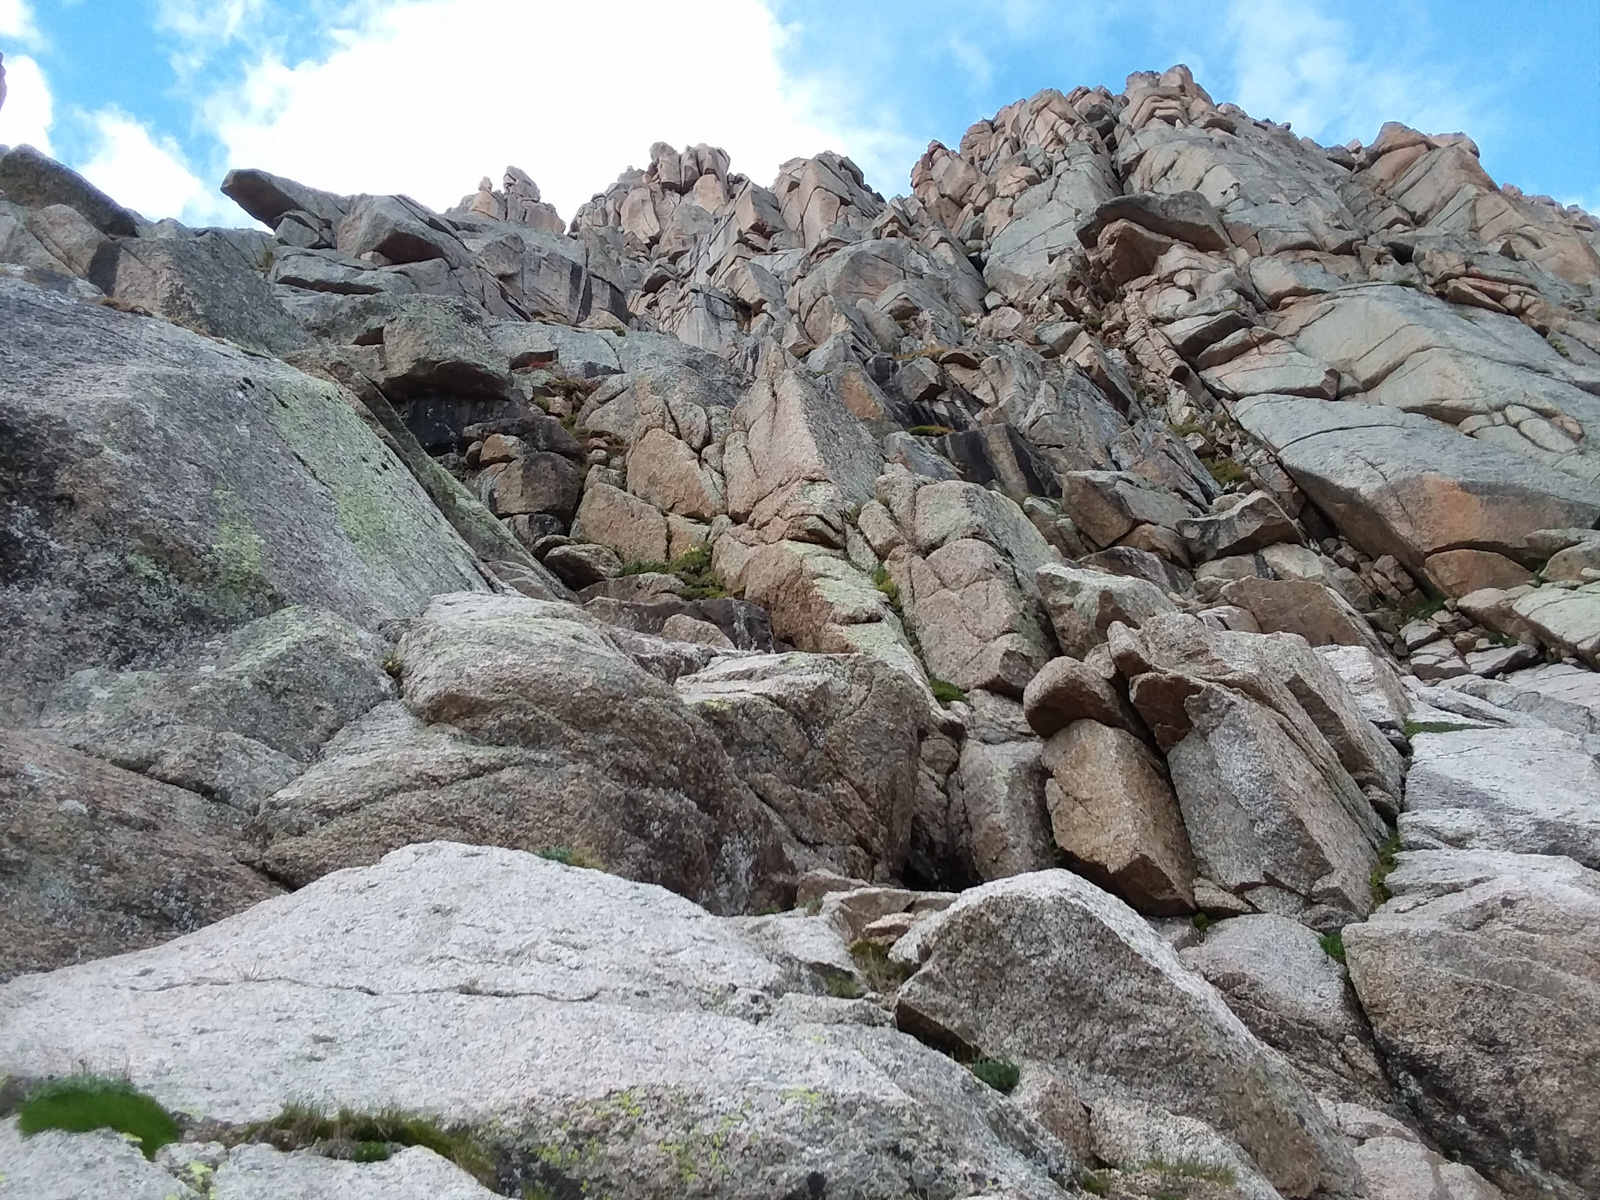
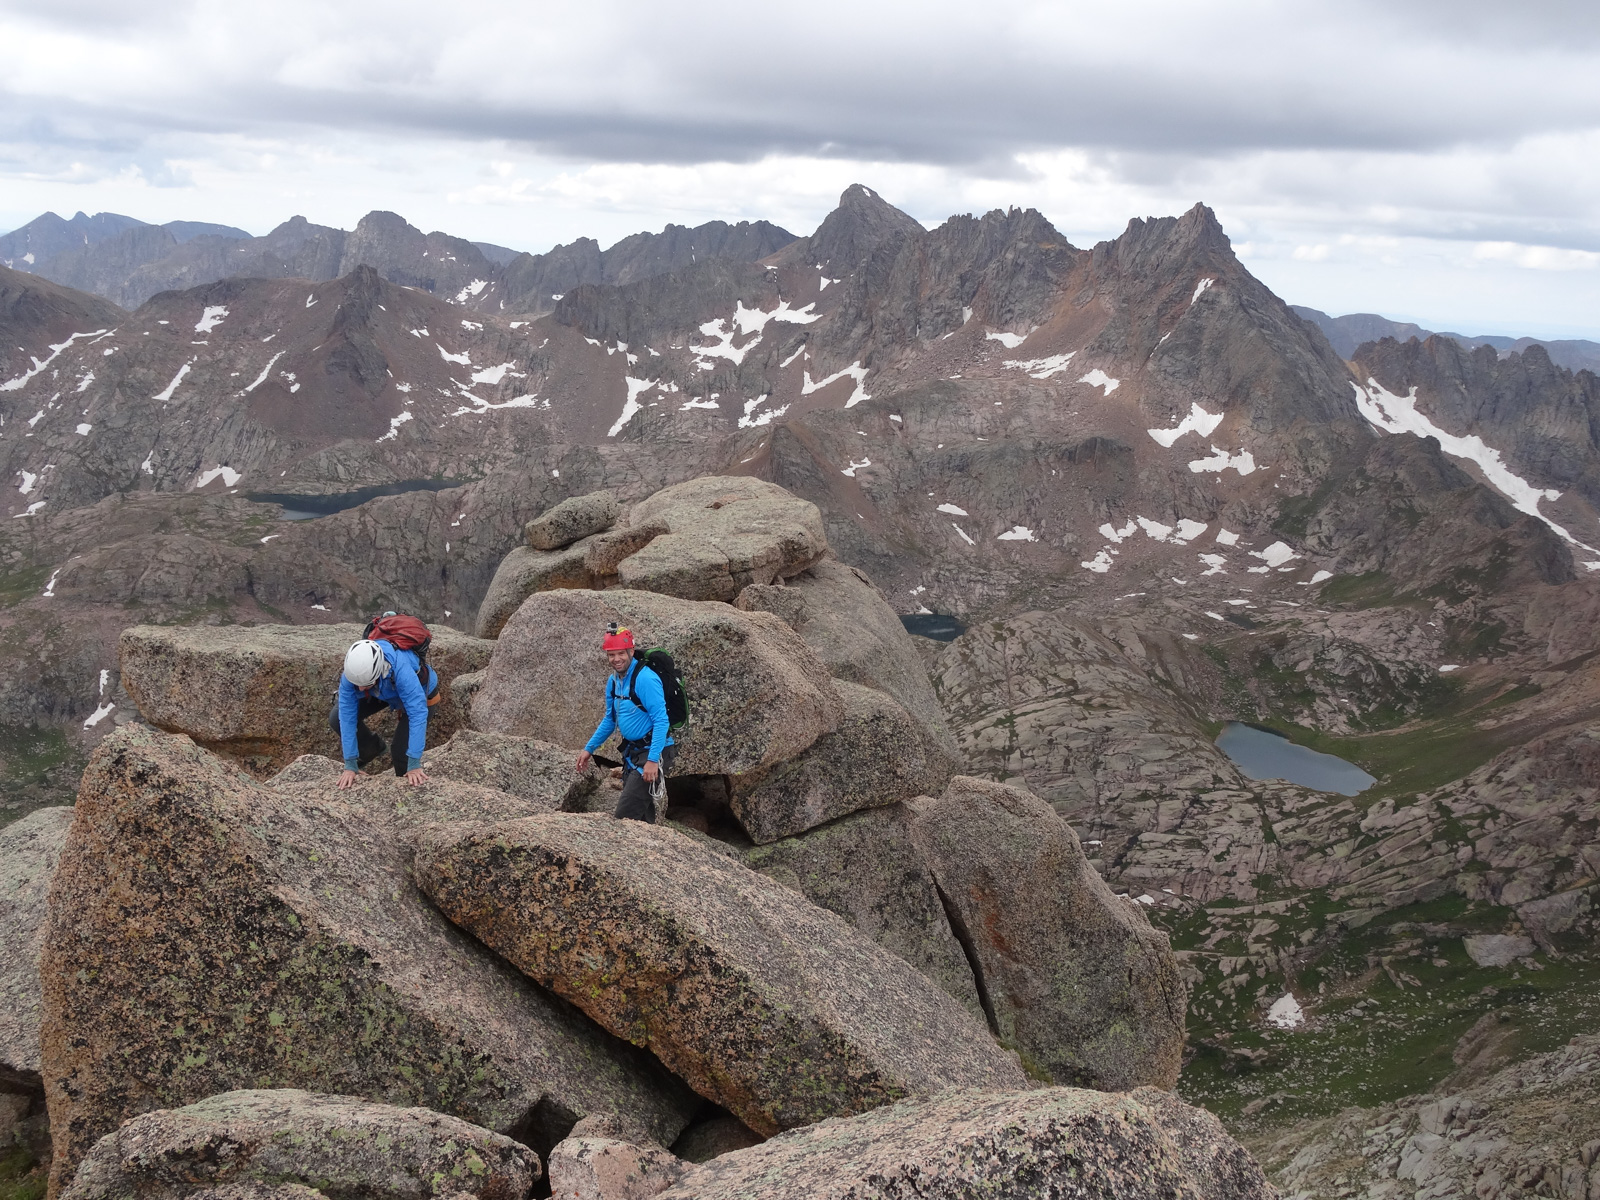
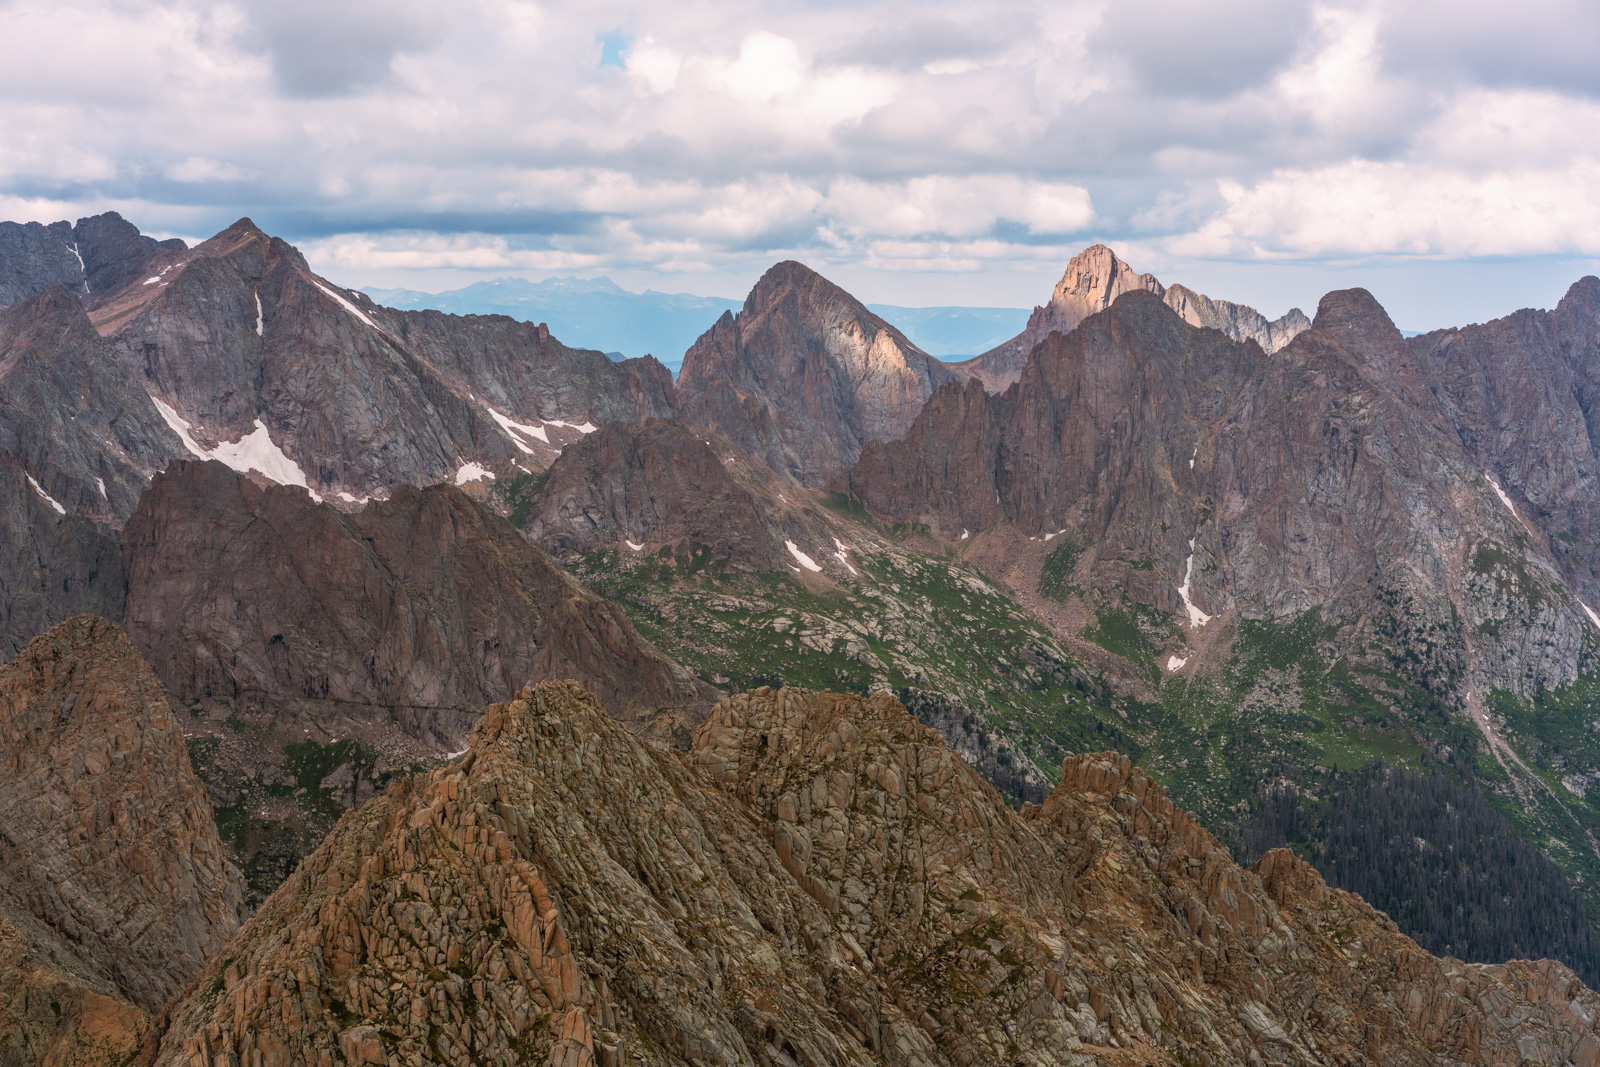
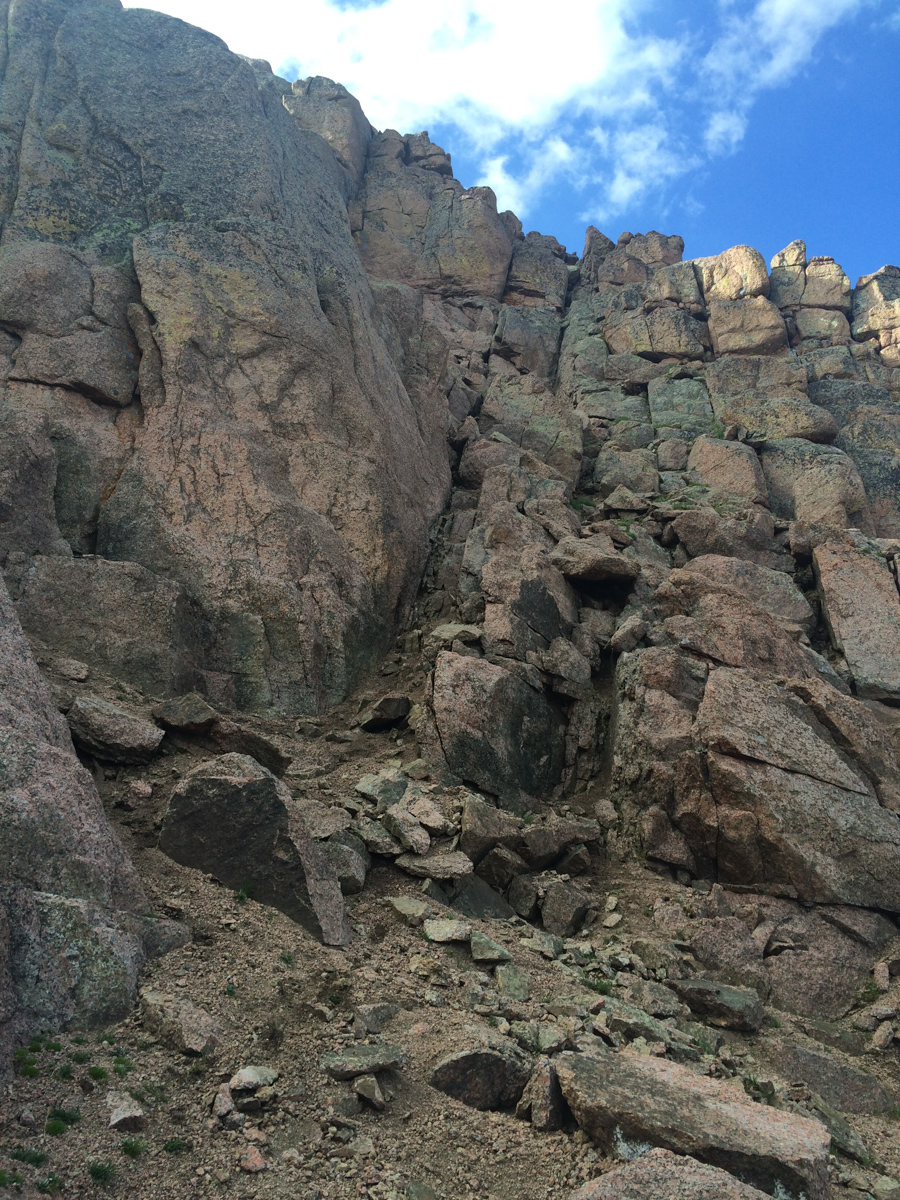
We each reached the area below Jagged's north face at about the same time, which afforded some pretty remarkable views of what lie ahead.
If you had not studied the route before hand, seeing this jumbled mess of rock that was called Jagged would look mighty itimidating.
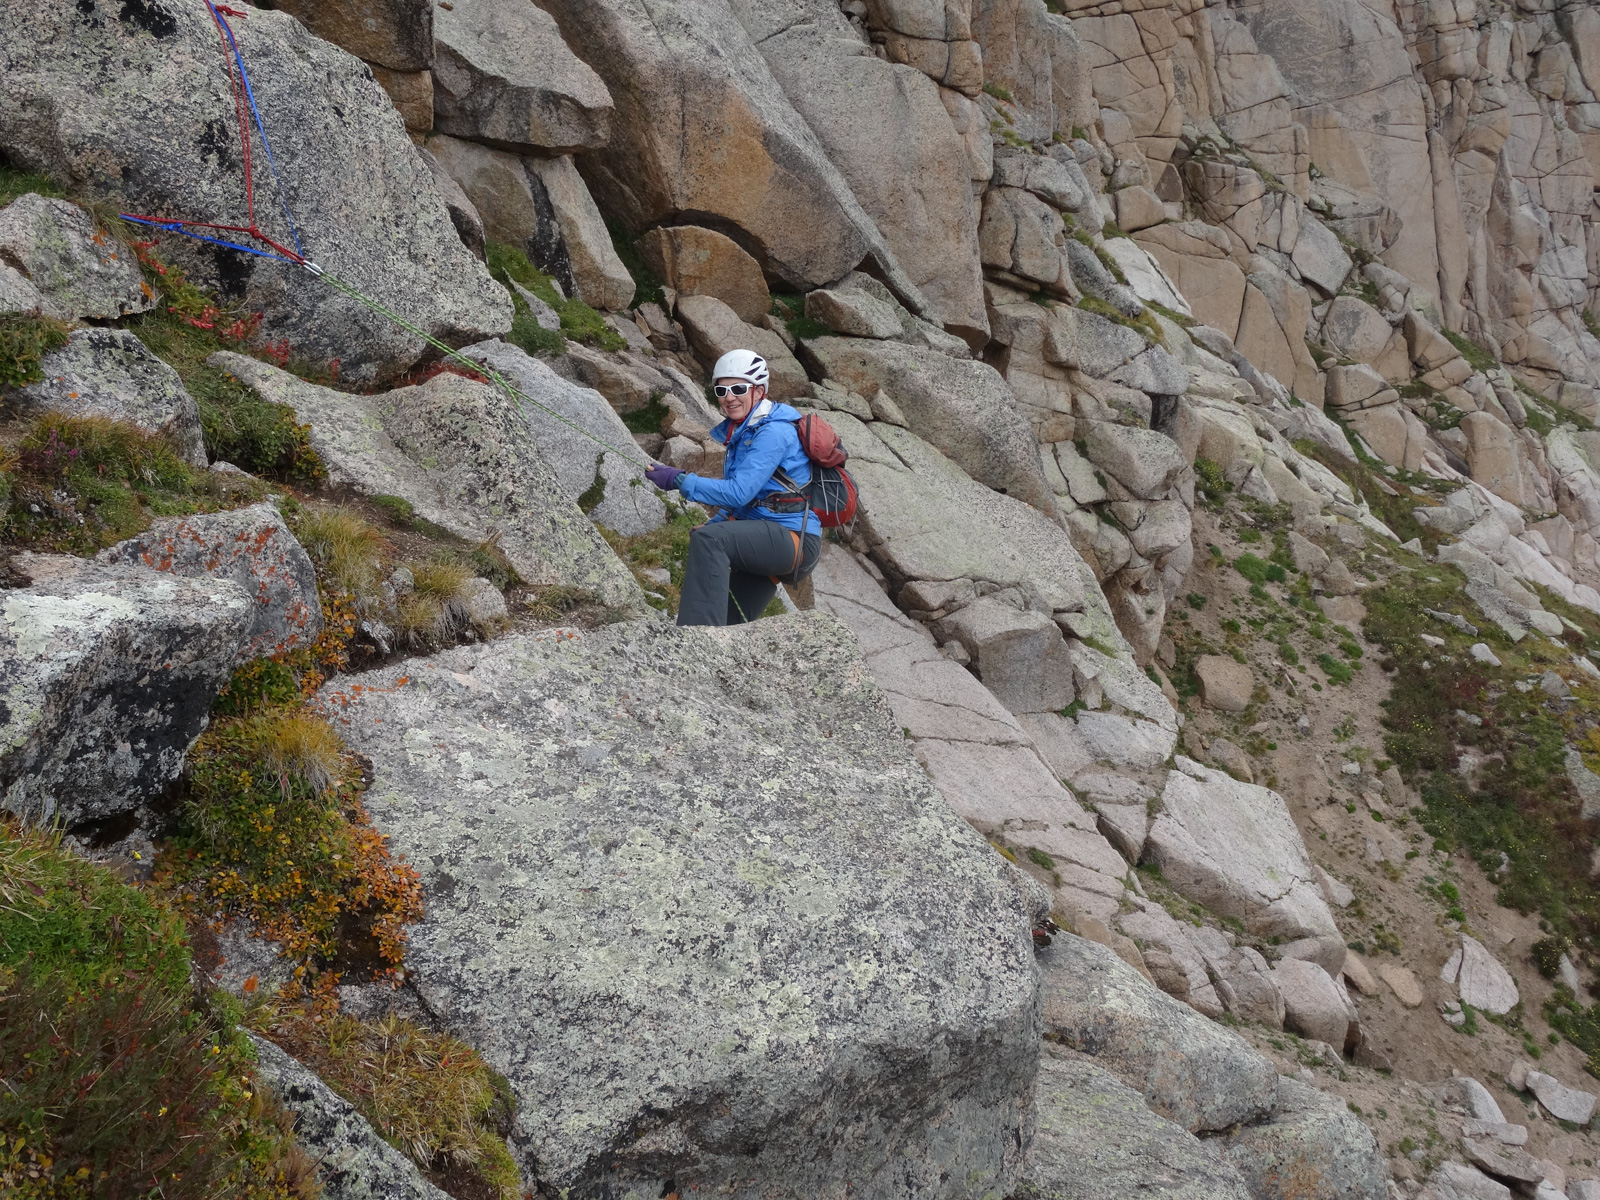
We more or less found the route all the way over from Jagged Pass to our right and followed the grassy slopes to the first crux of the route, which requires rope for the faint of heart (that's me). We geared up here, and Shawn and I realized we had identicle harnesses.
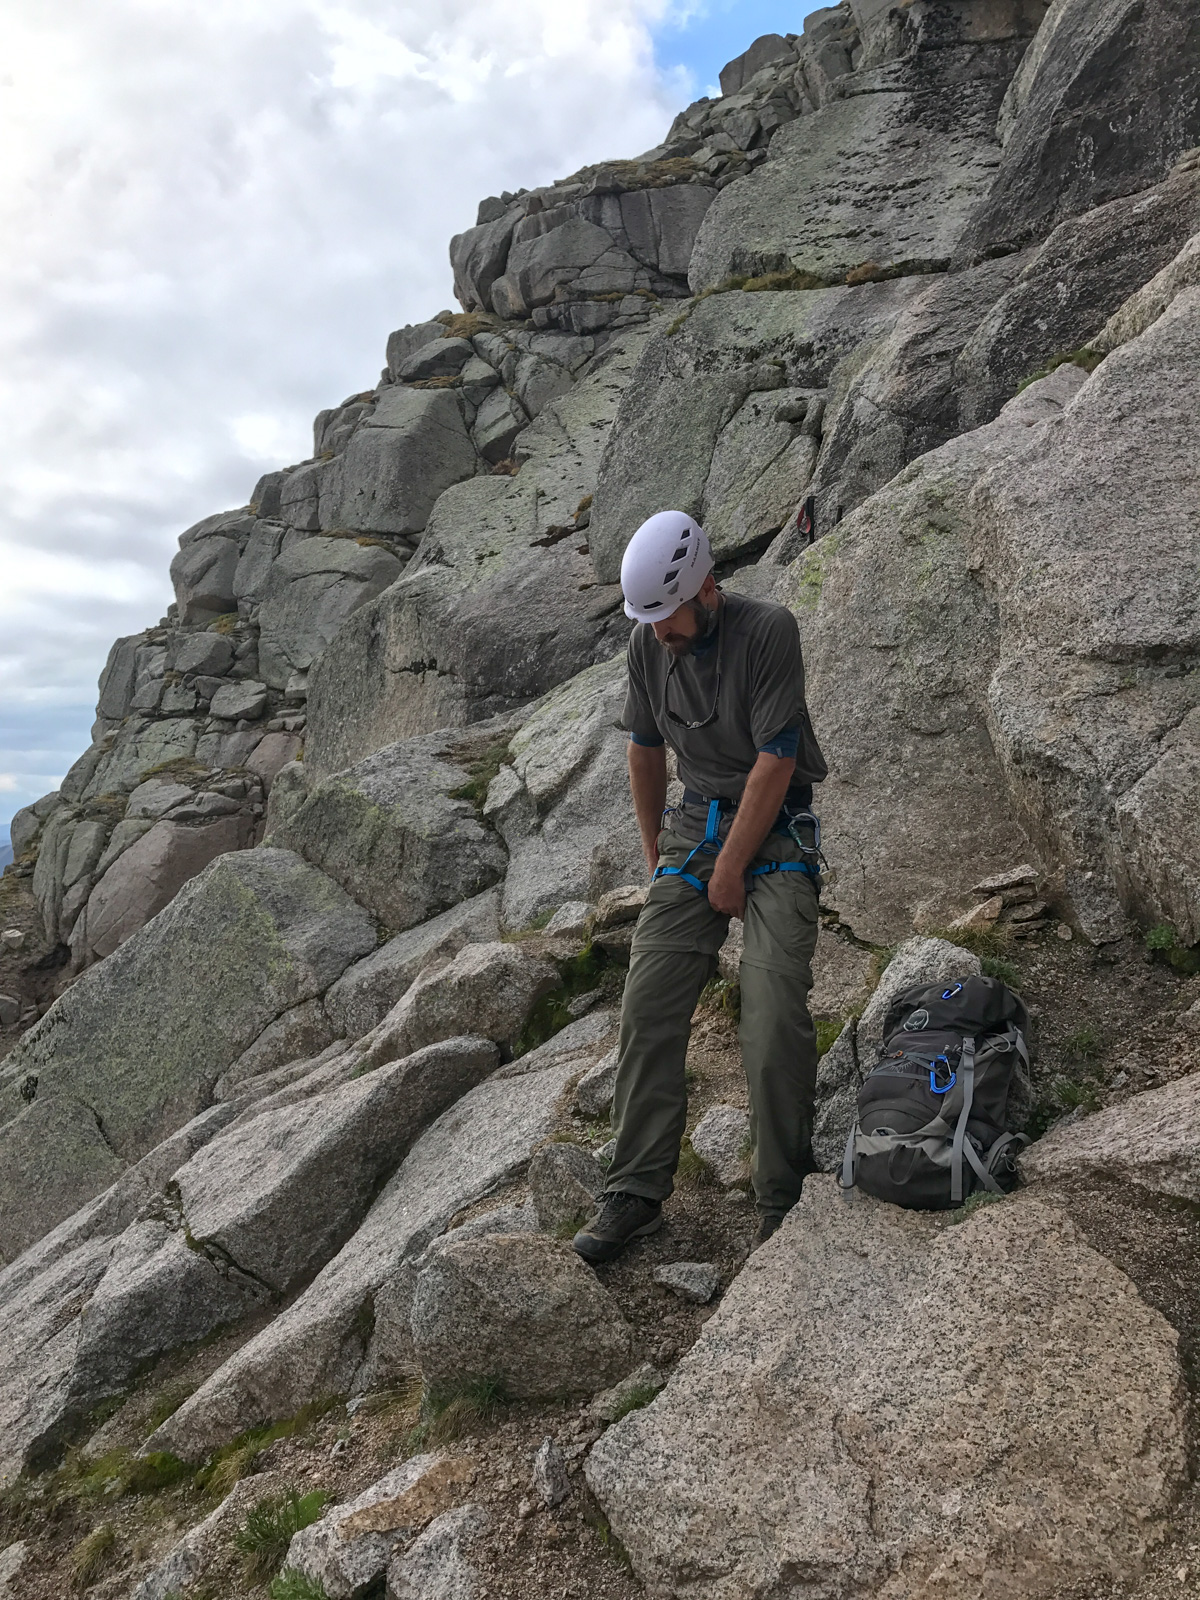
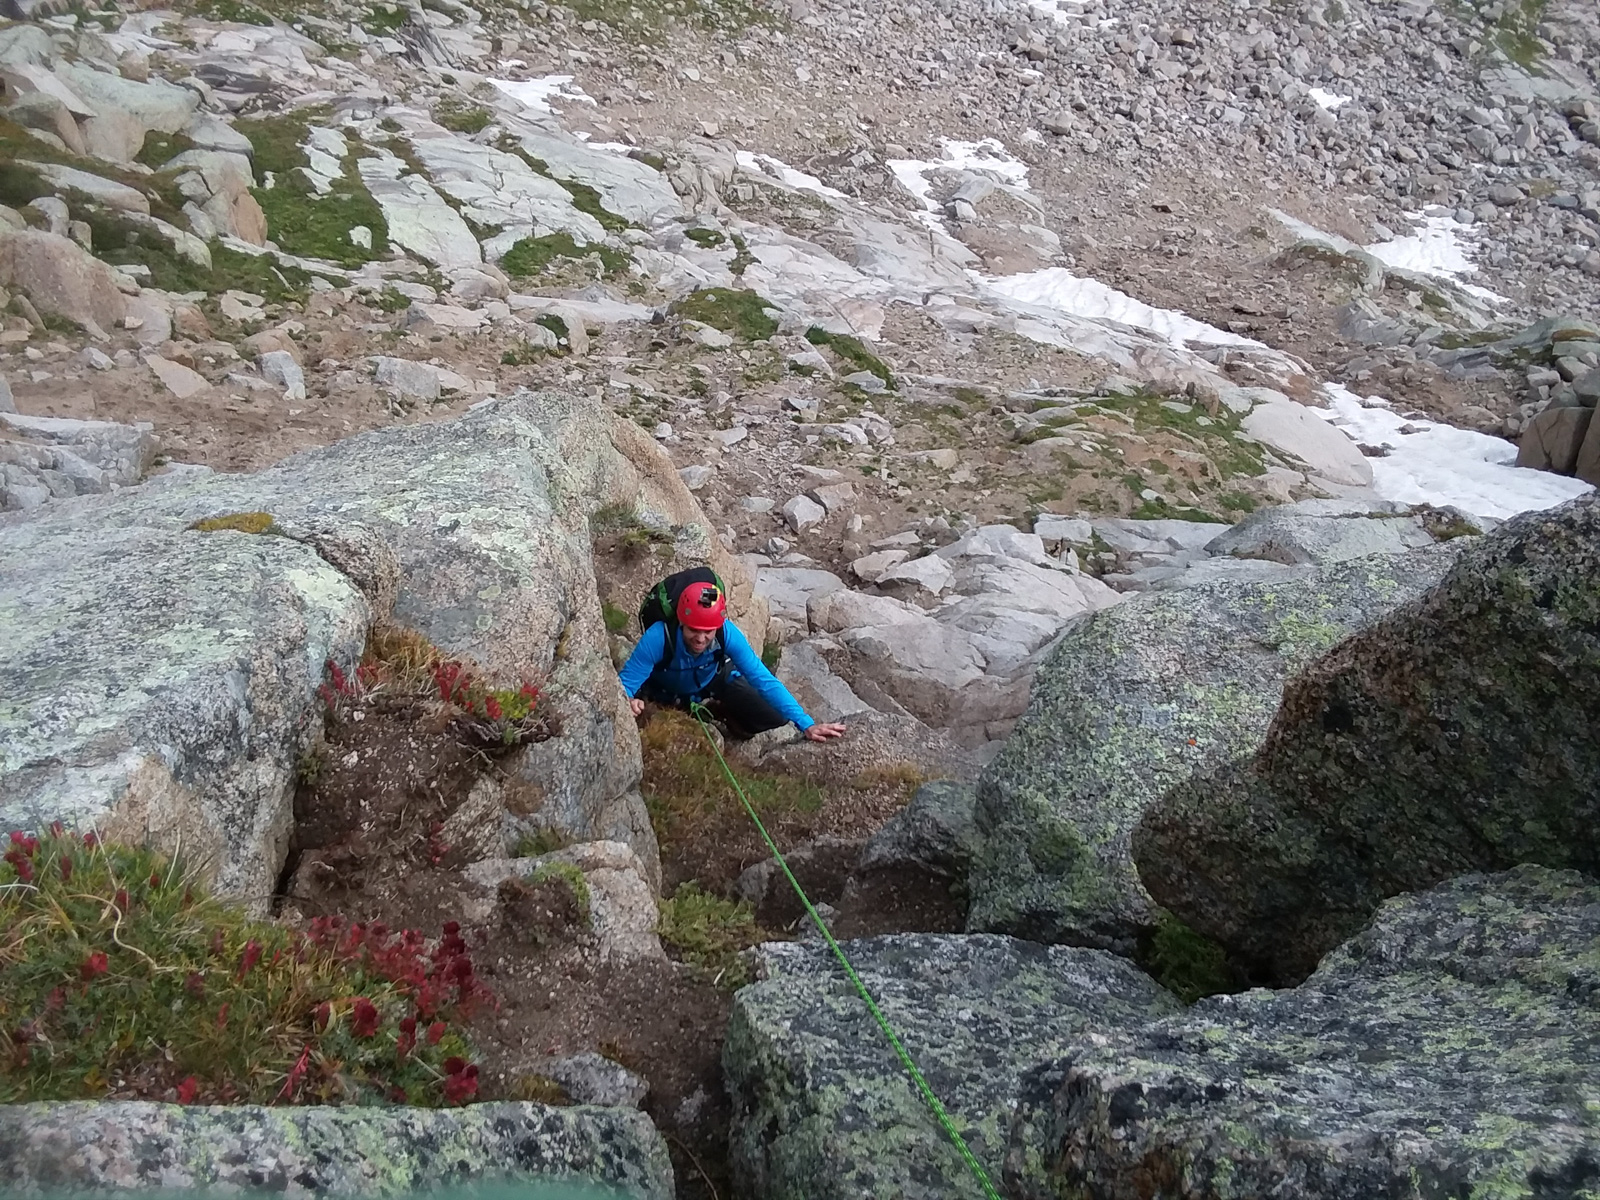
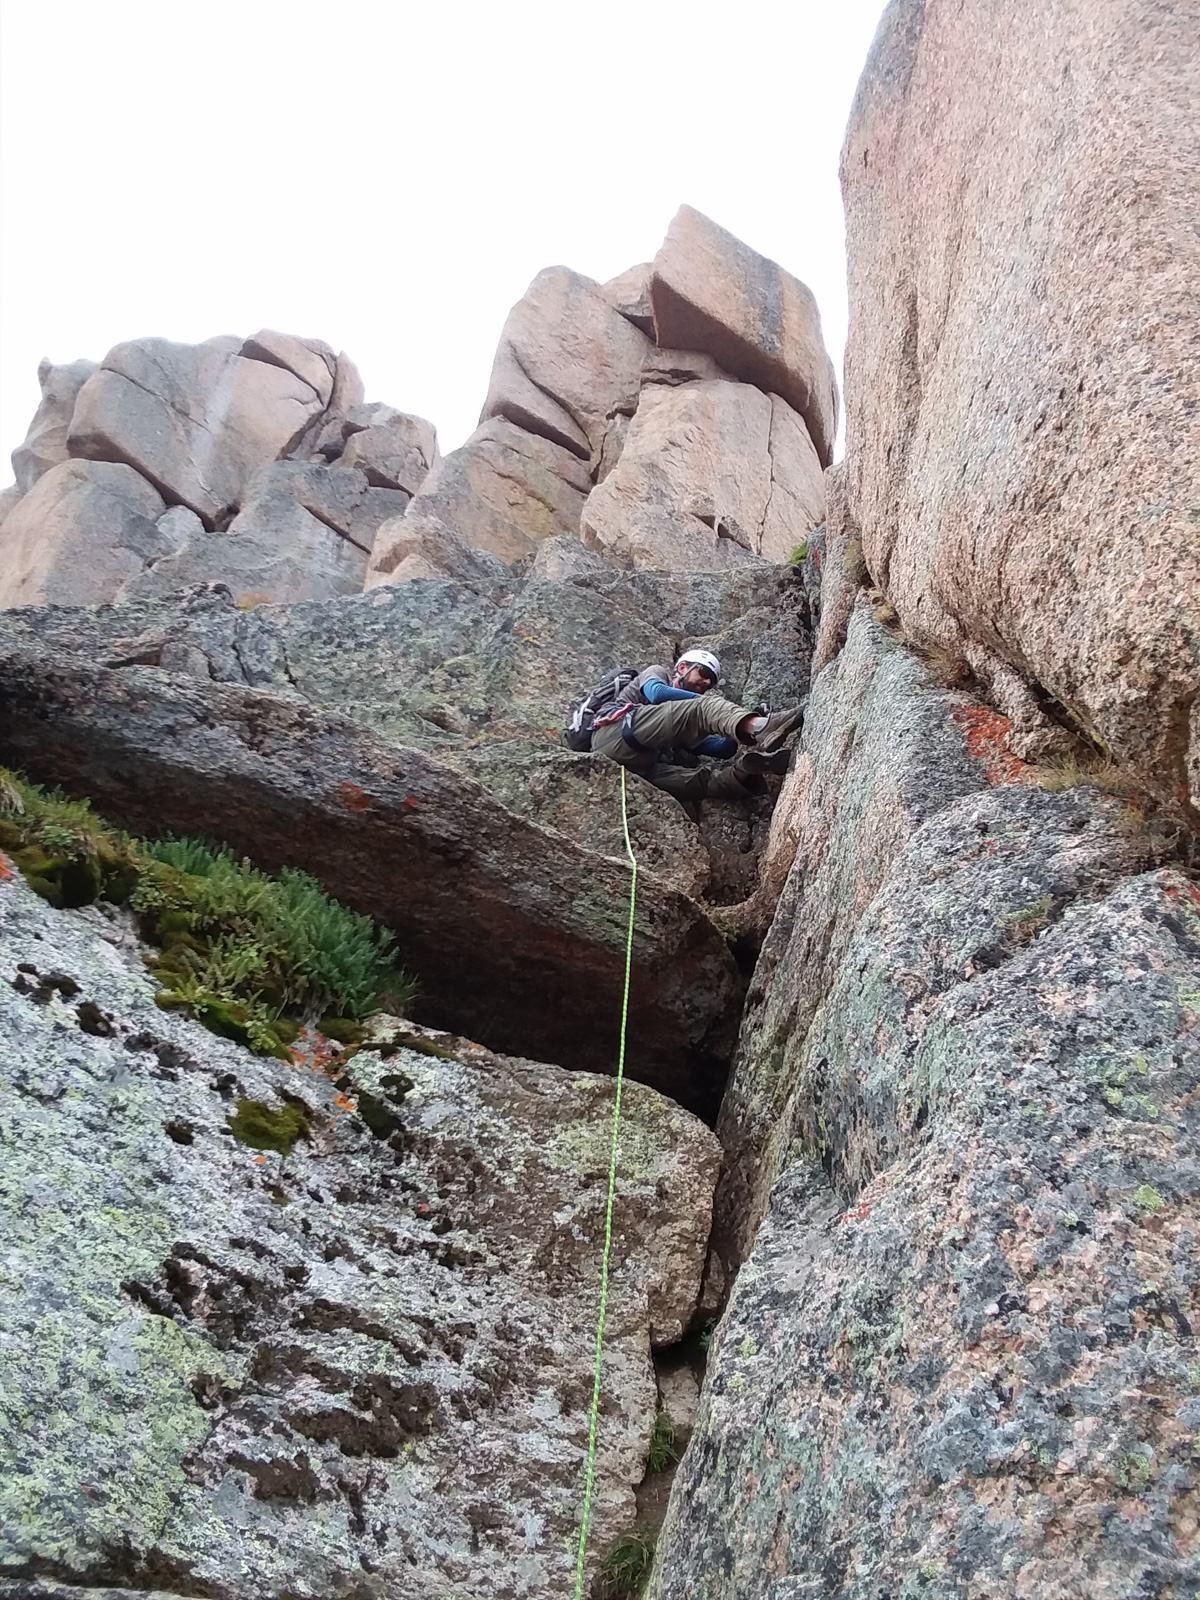
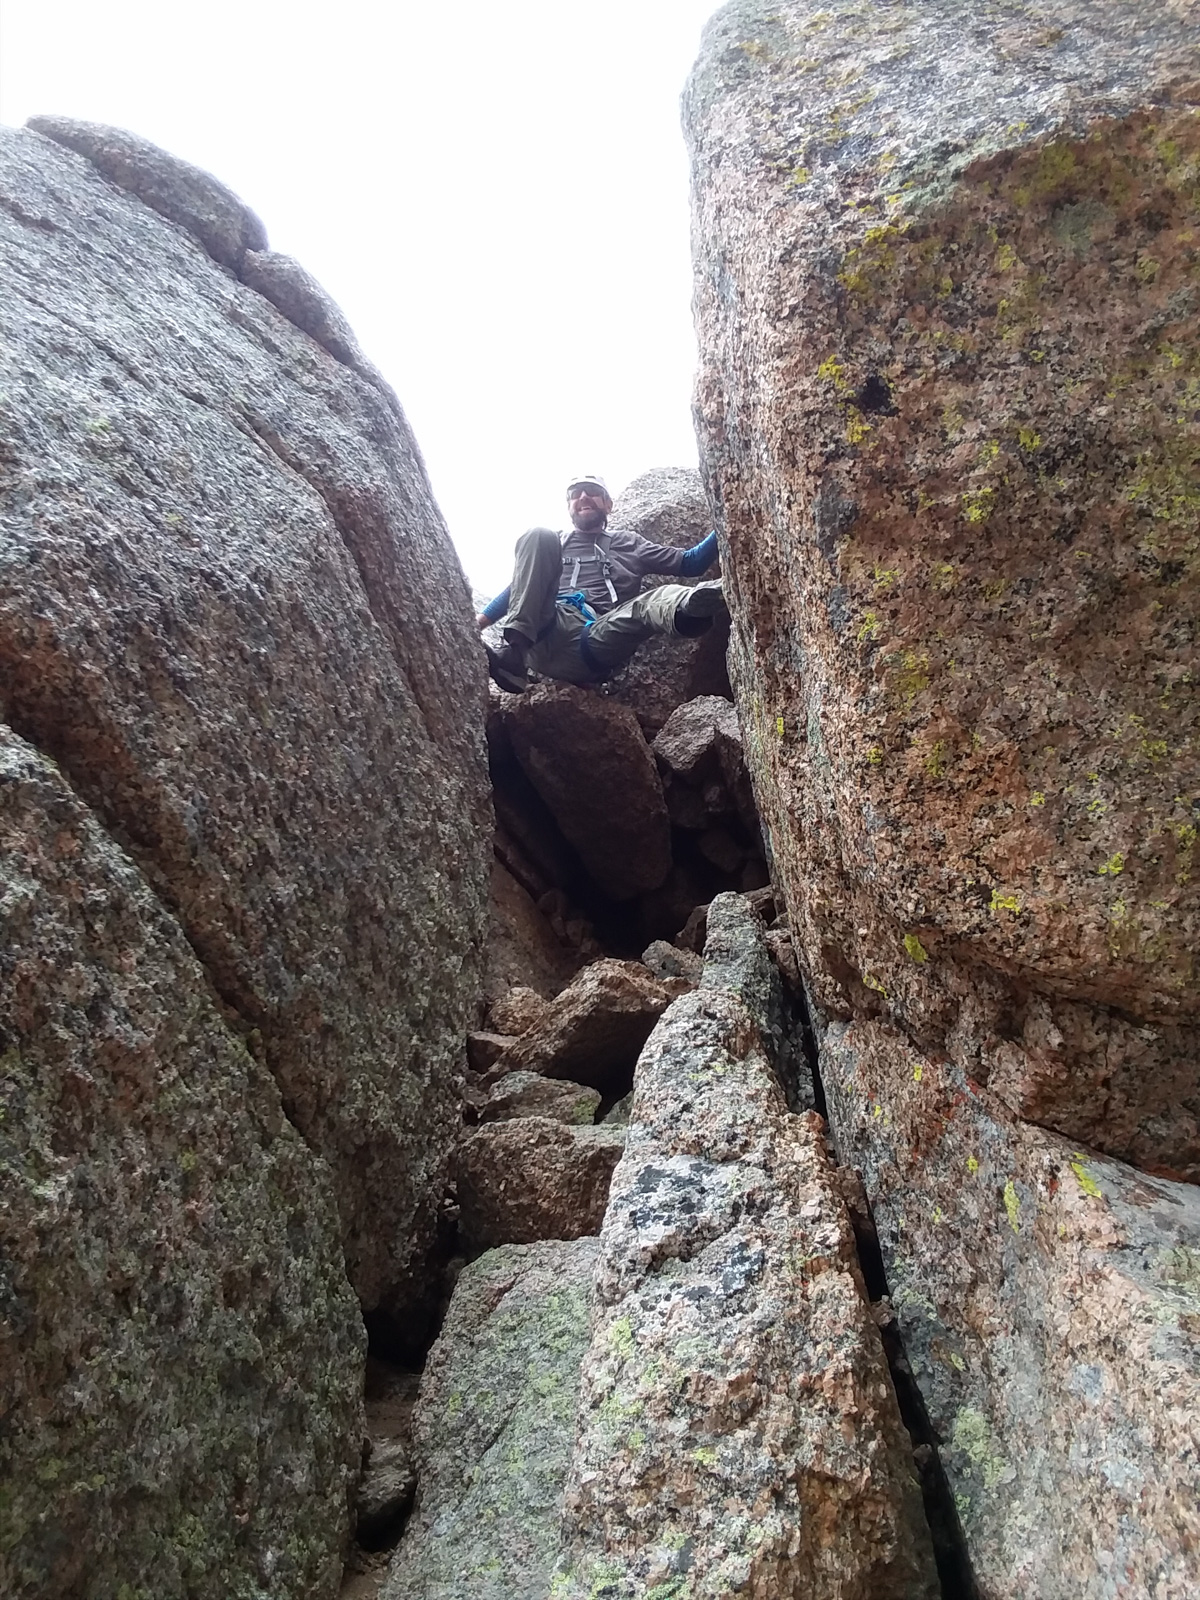
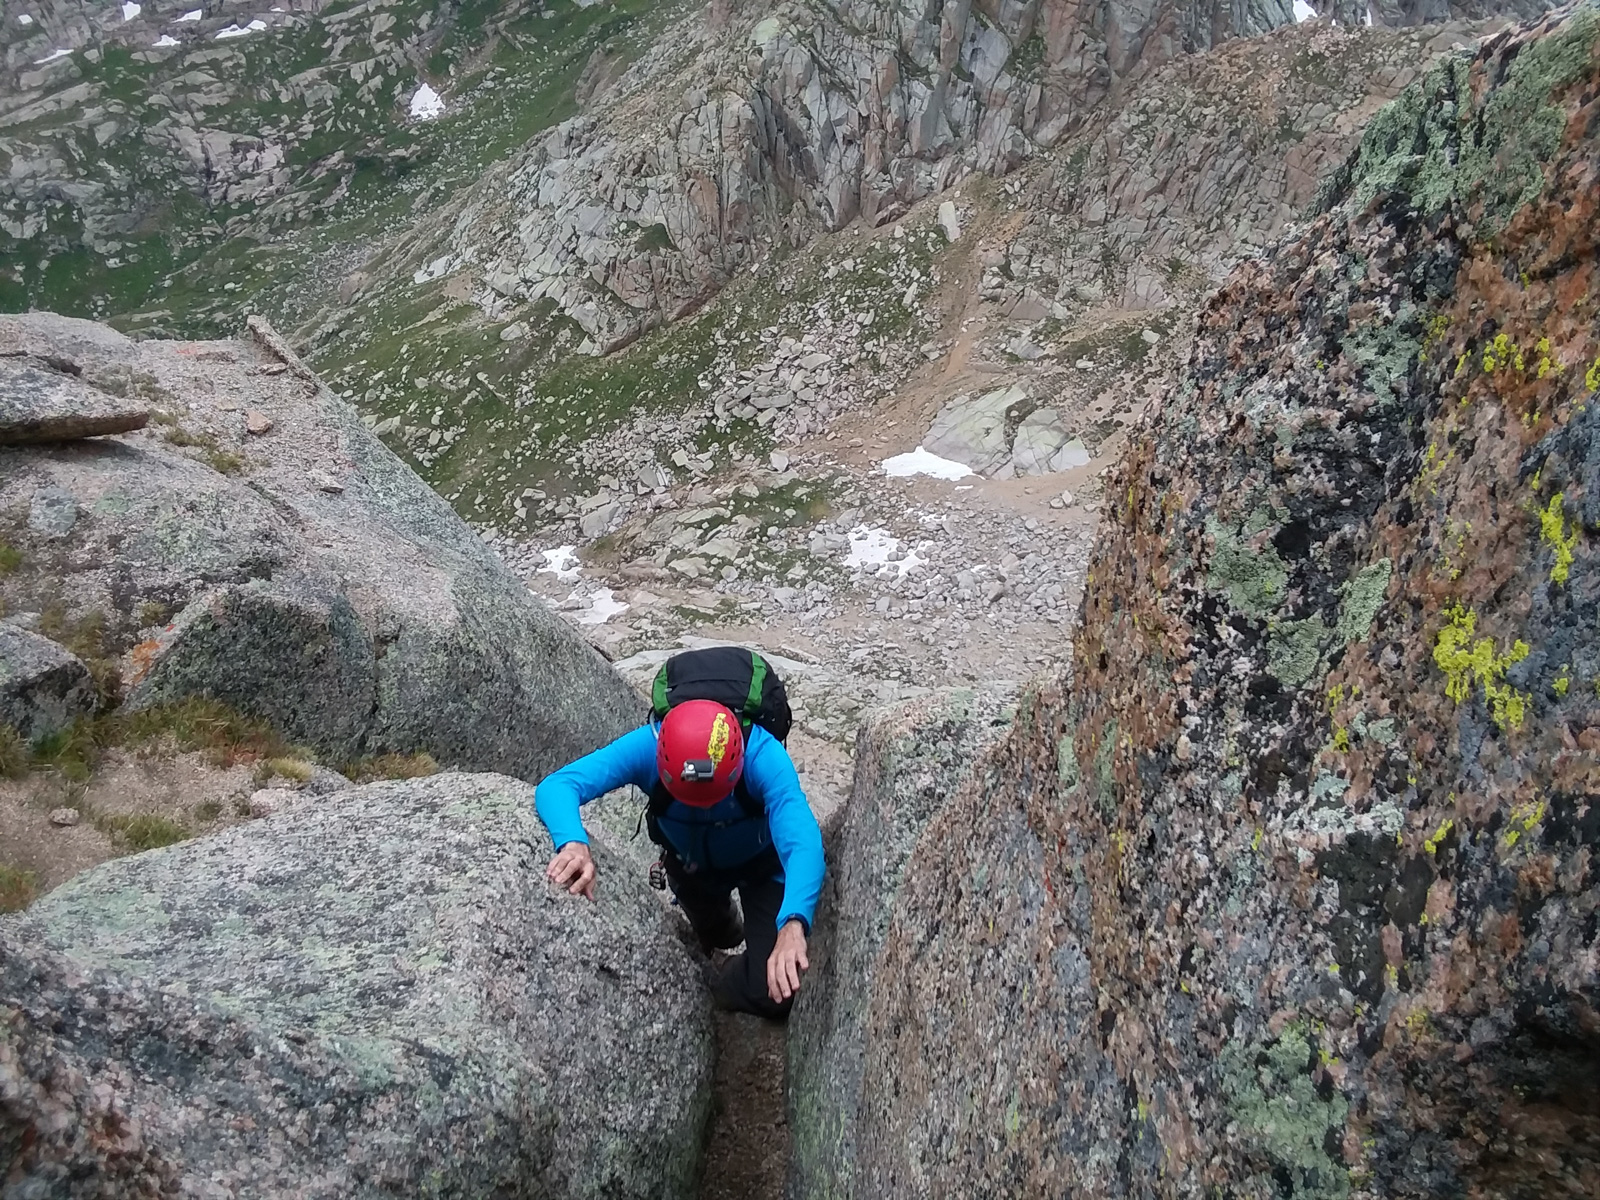
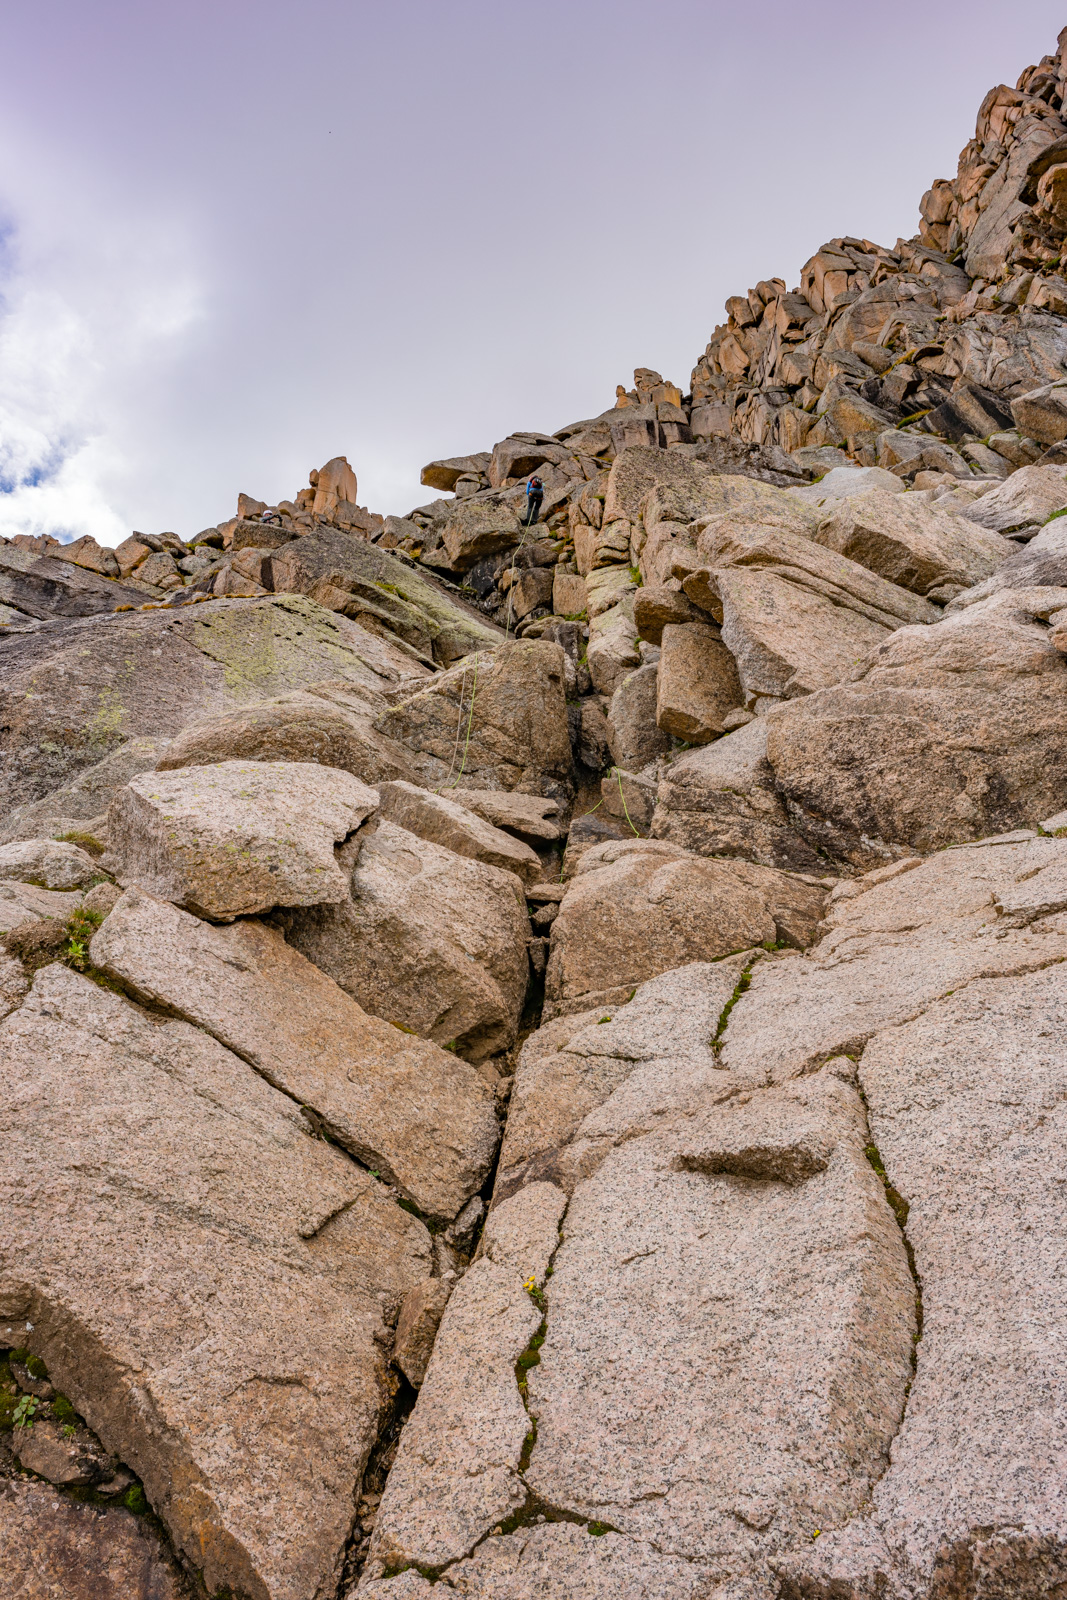
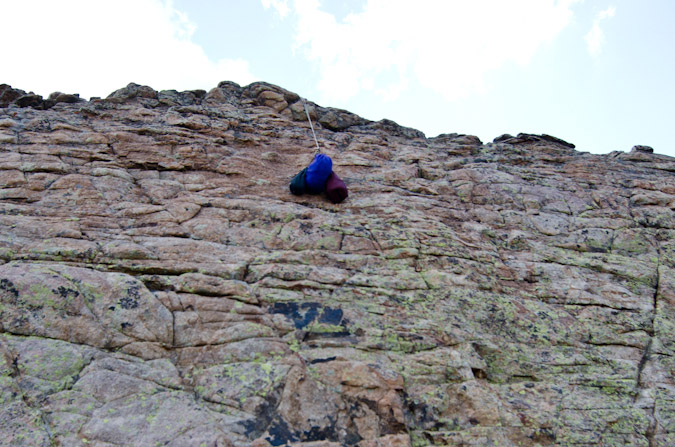
Looking up the first crux, it looked pretty straight forward, but Natalie said there was some moves that would make me appreciate having a rope. She was right. I should say from this point forward, I was mostly focused on getting GoPro footage and climbing, and did not take any photos until nearly the end of the climb. Thank you to both Shawn and Natalie for your images, they helped pull off the trip report!
Shawn went first without rope and around a different way altogether without any issues. Natalie led the rope up and placed a small cam about halfway up and then set-up an anchor to belay me from. Here's a shot from Natalie of me coming up.
Here I started my GoPro footage, which I'll admit is a little like being on a rough boat at sea... but hopefully it gives you an idea of what the climb is like.
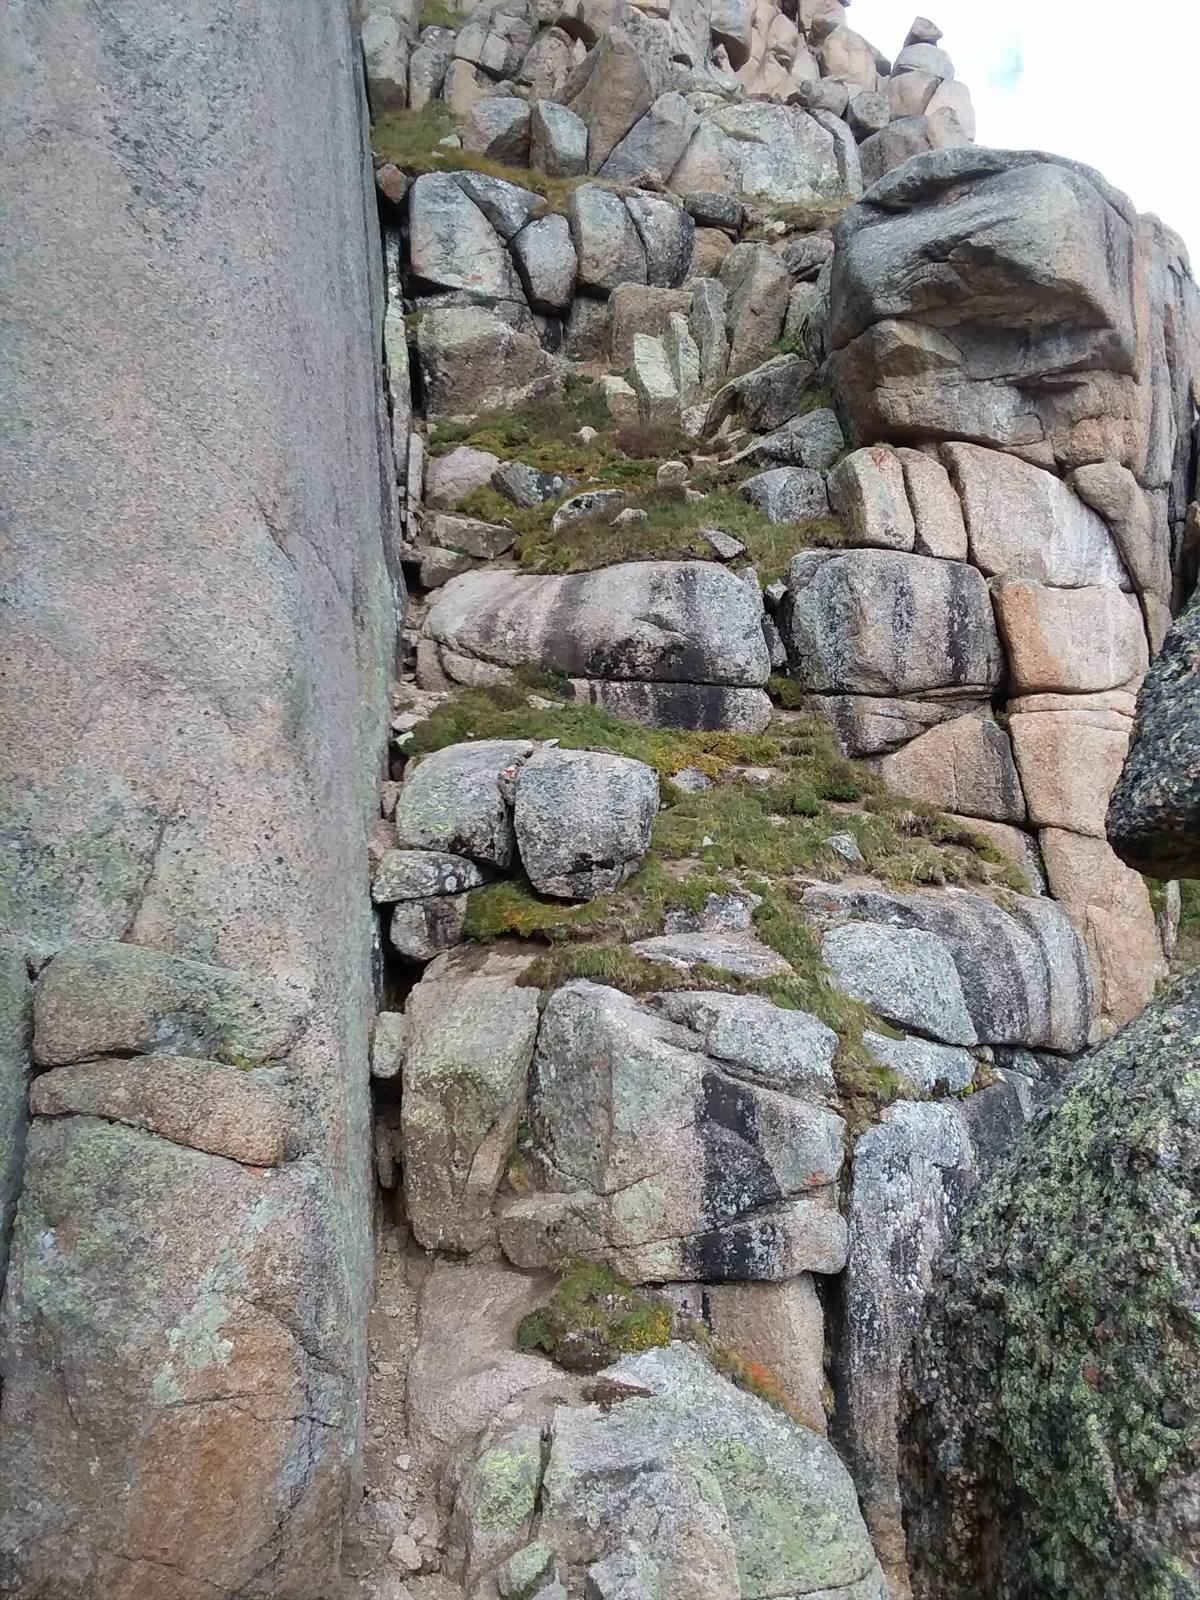
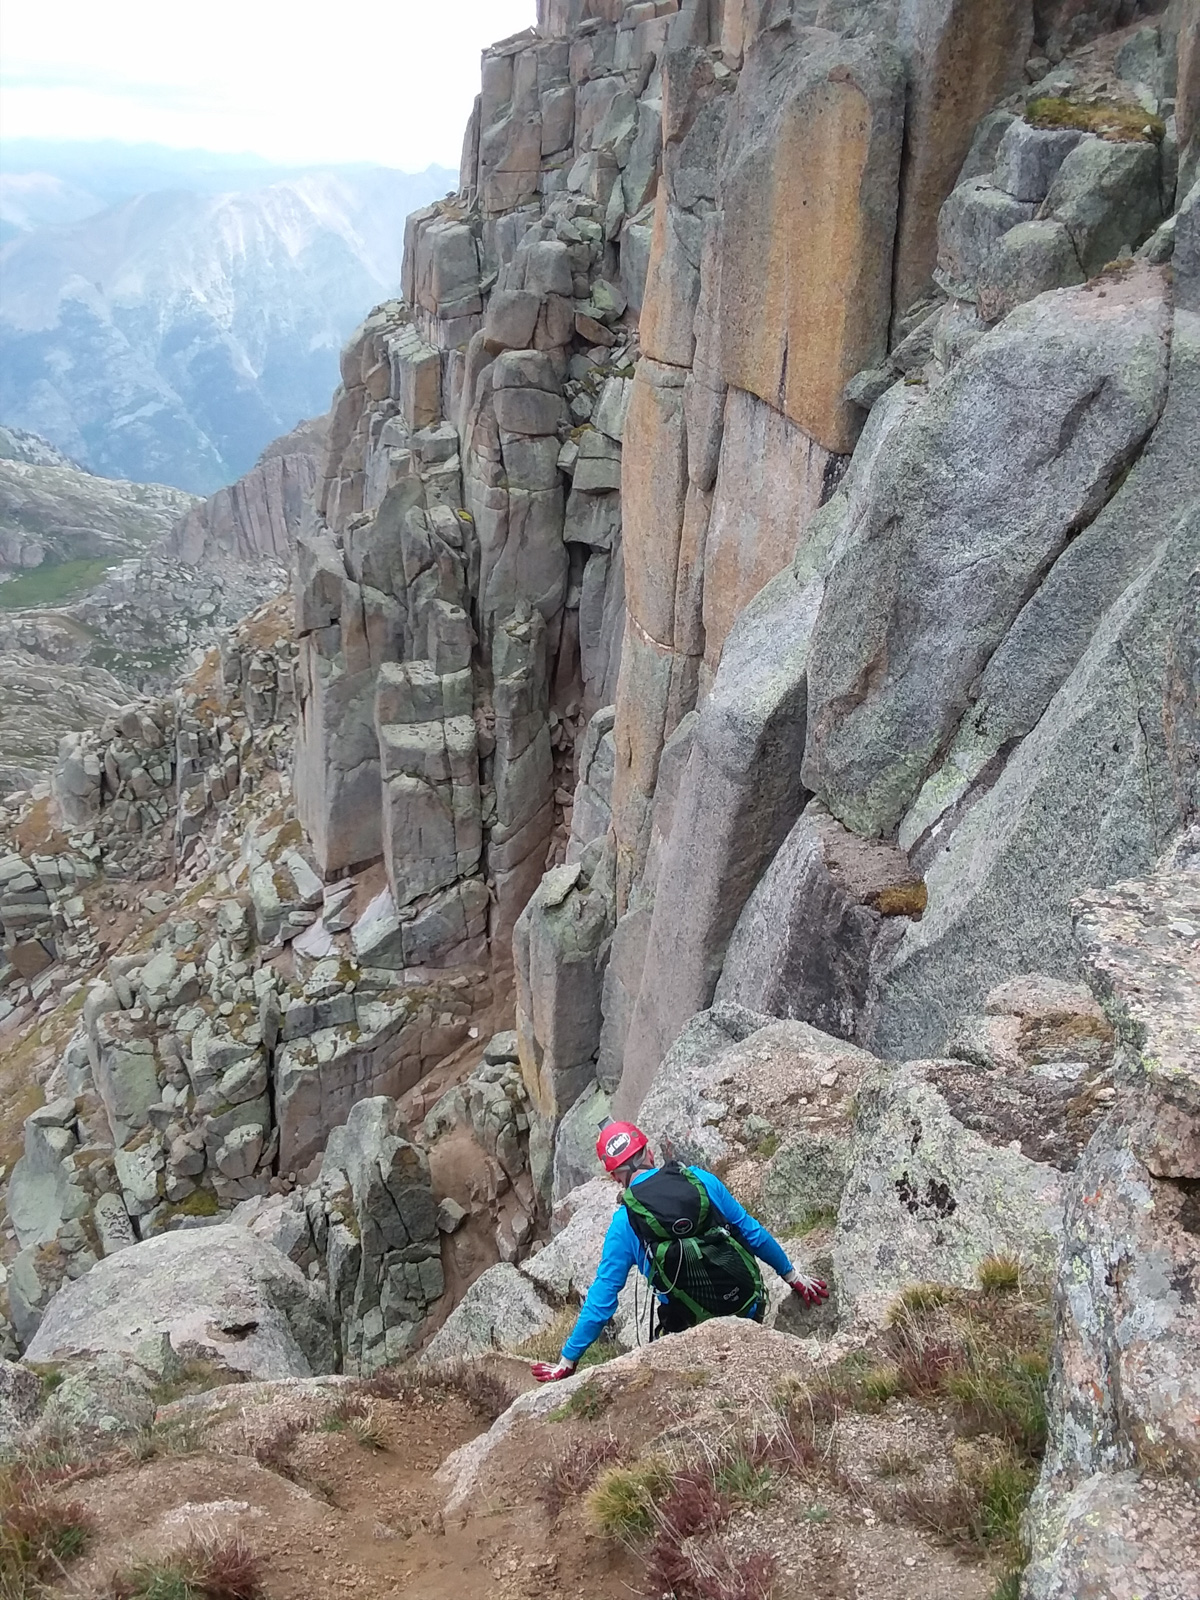
After the first crux, which had some spicy moves to contend with, we quickly made work of the grassy ledges above us, weaving right and up to the next crux, which consisted of a small 7 foot tall boulder (lower left) which we treated as a chimney, and some easy scrambling up above. I was thankful to be on rope here as I slipped on the very first move (which unroped would have been just annoying but potentially dangerous) trying to get up into the wedge.
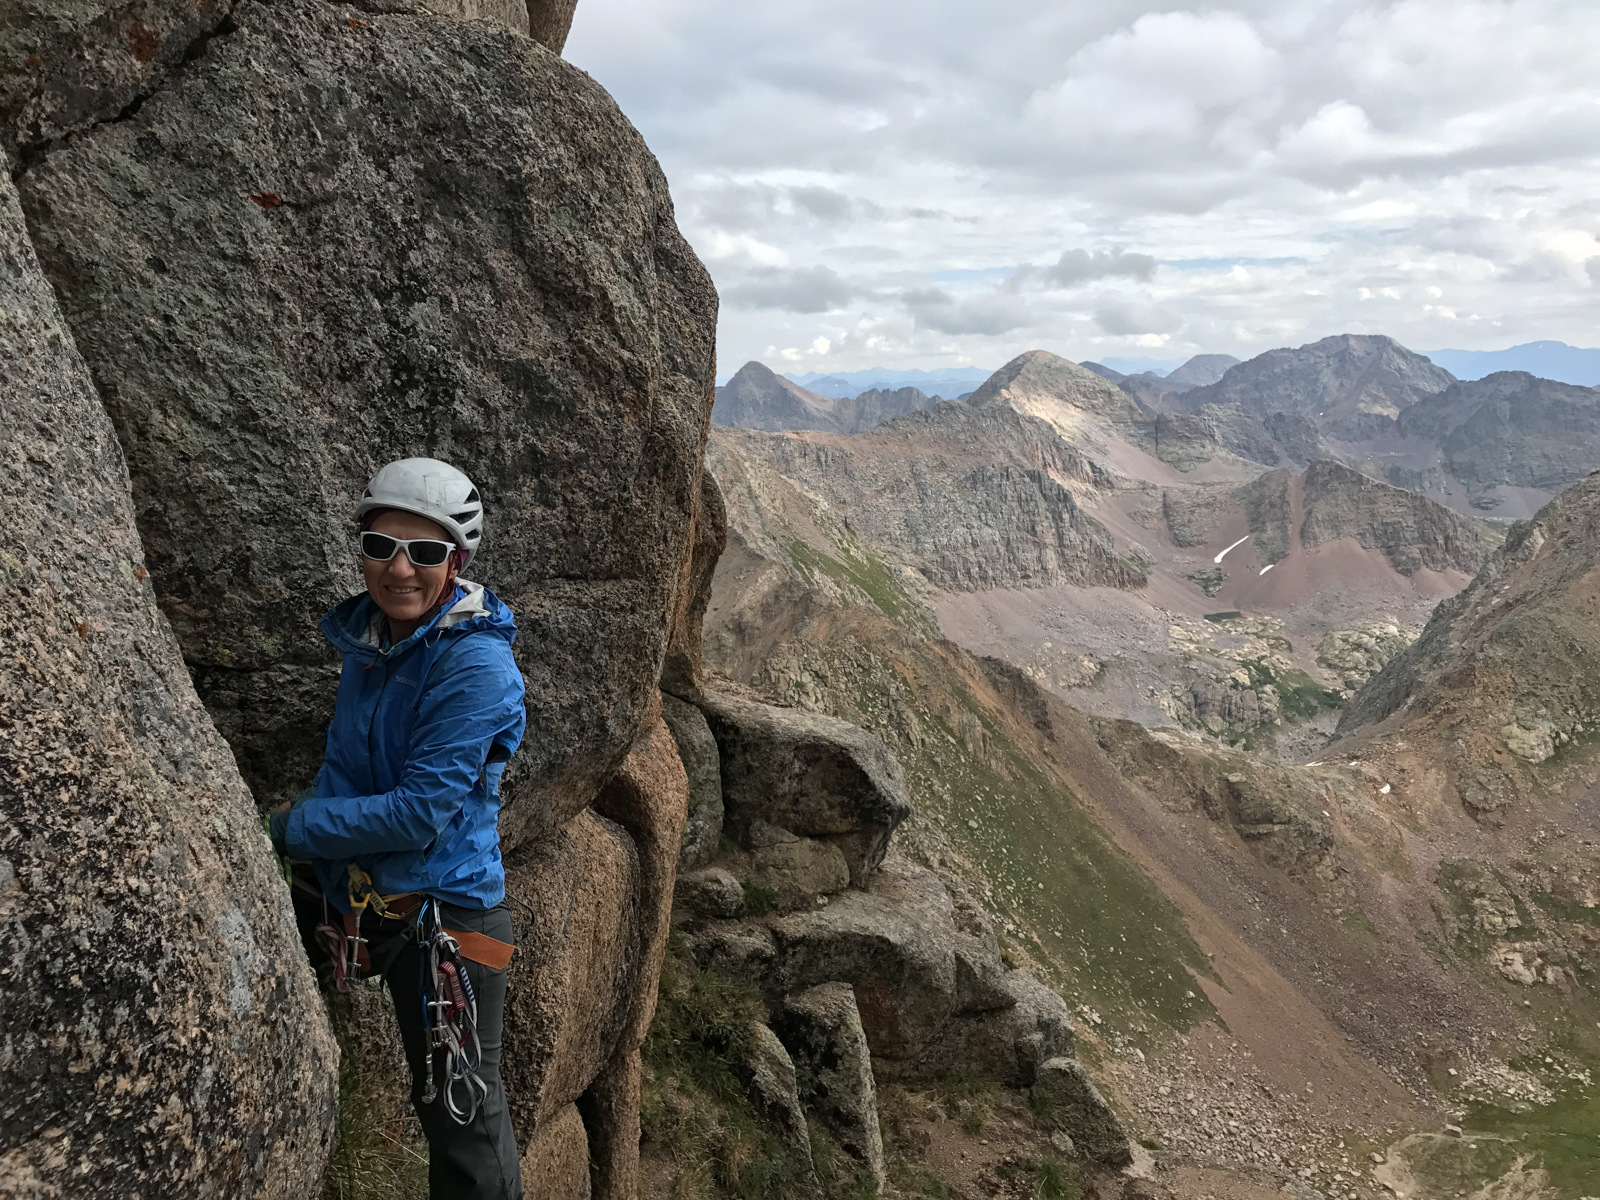
The belay station for the second crux offered a nice view of the exposure we were facing on a consistent basis.
The third crux was the spiciest of all, which Shawn decided to free climb up with our rope. It involved some easy moves down low with a really challenging finish requiring some committed movement above big exposure.
The final move kept me stumped for a minute... as documented by Shawn.
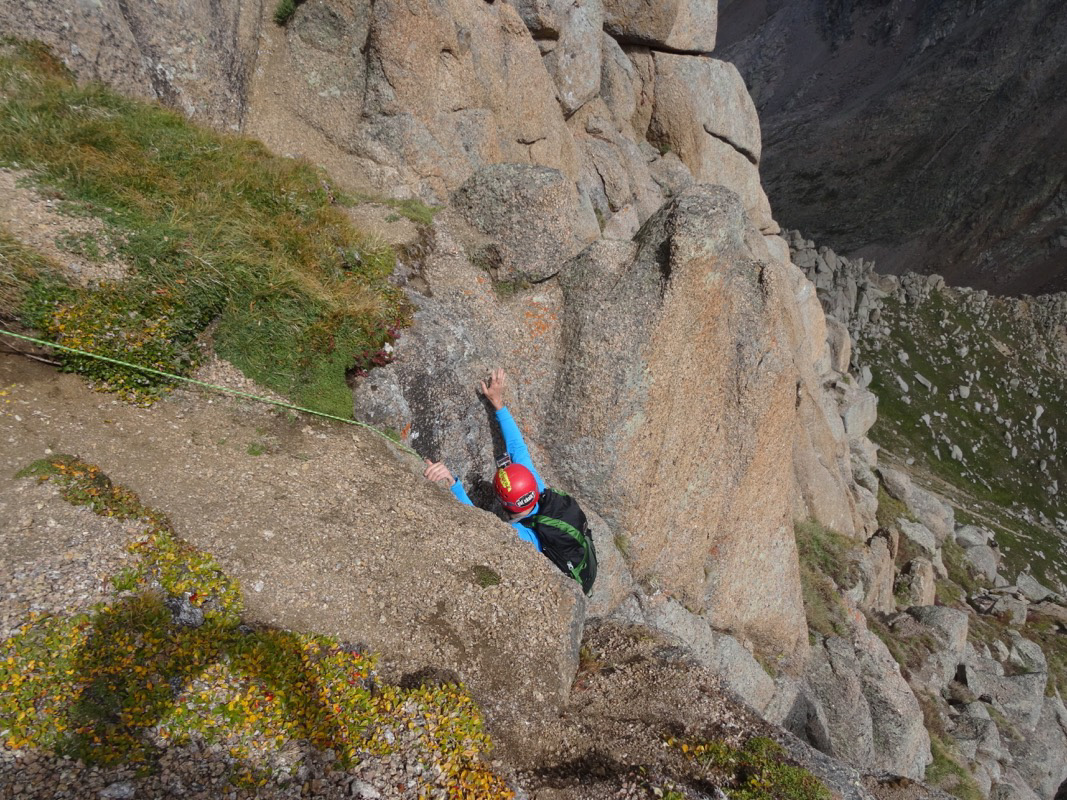
Topping out on the third crux felt great. That last move is quite a tough one in my opinion.
Almost there!
The video section for the third crux is HERE.
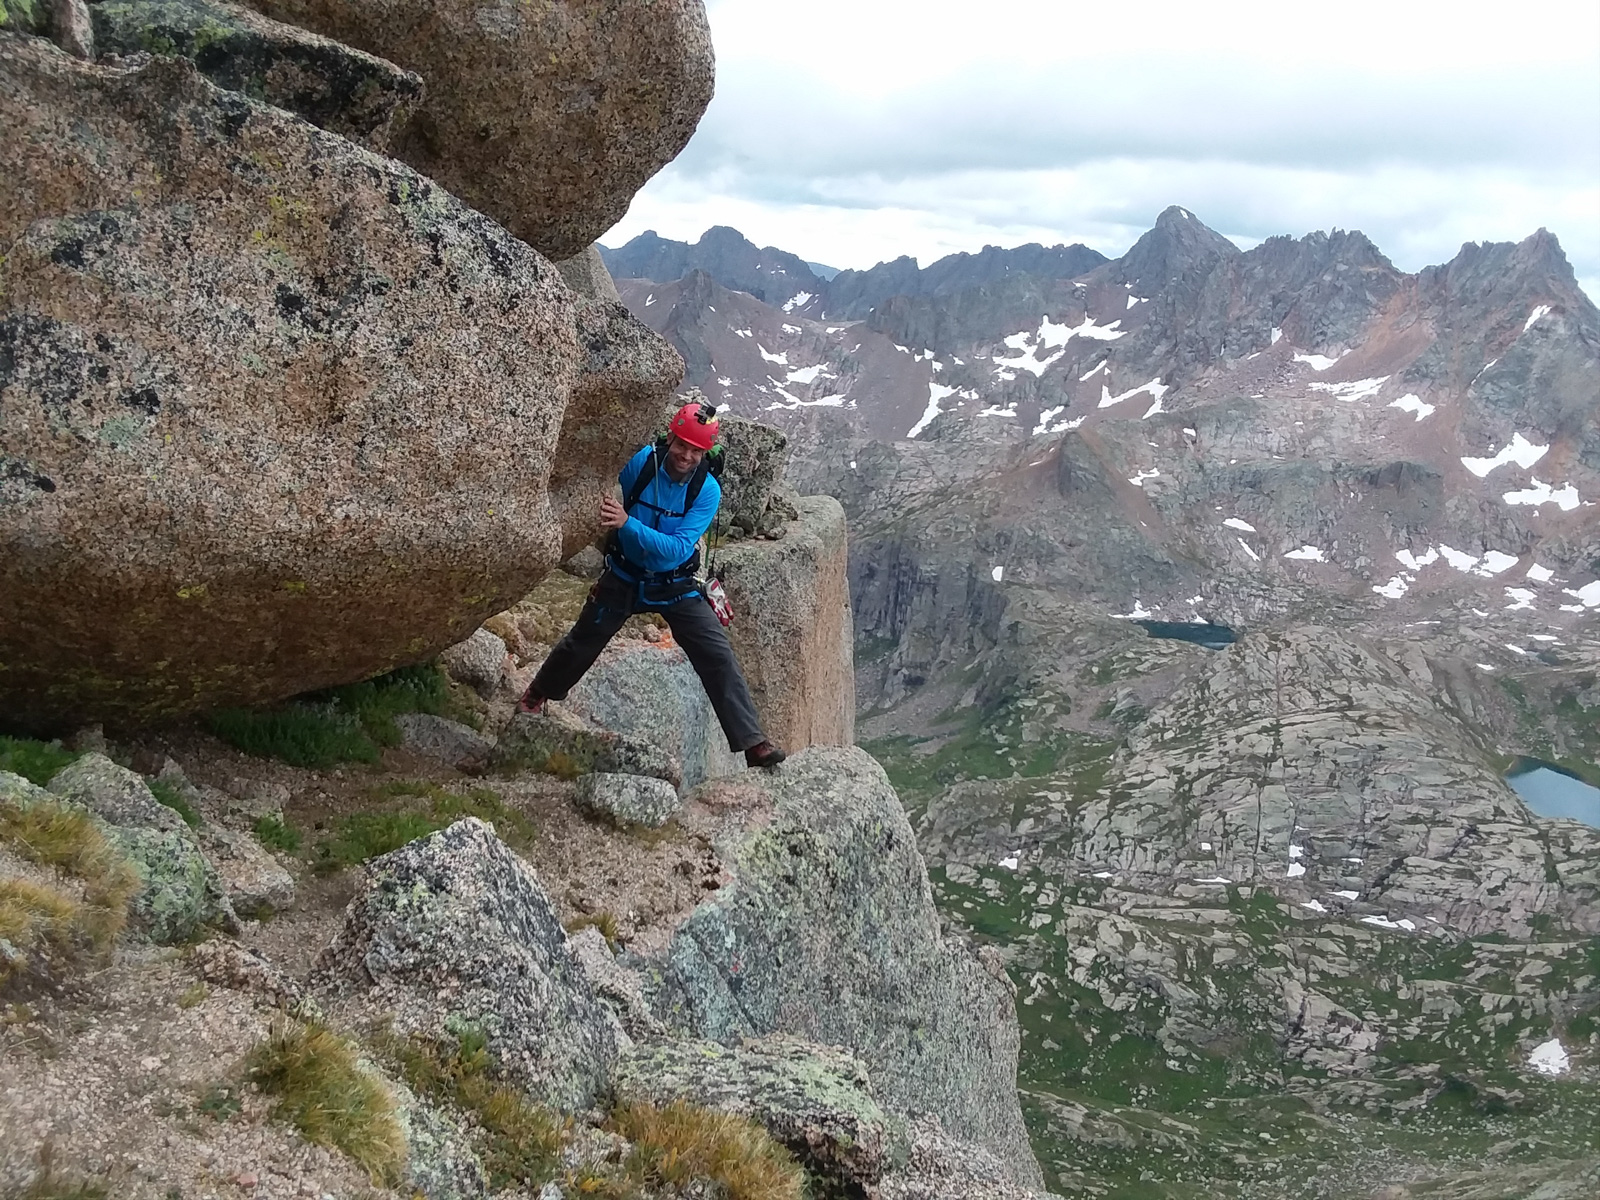
After the third crux, a quick scramble up revealed the notch which took us to the south side of Jagged. The south side was incredibly exposed - one false step and you would fall to your death without question. We all slowly weaved our way up and around the back side, picking our steps carefully. One move in particular leaves you above nothing but air and a strange jutted out boulder that awkwardly prevents you from easily going around the side of the mountain (as seen just in front of me in the photo below).

The backside was awesome... I loved it! Here's video from the notch between the two sides and the chimney.
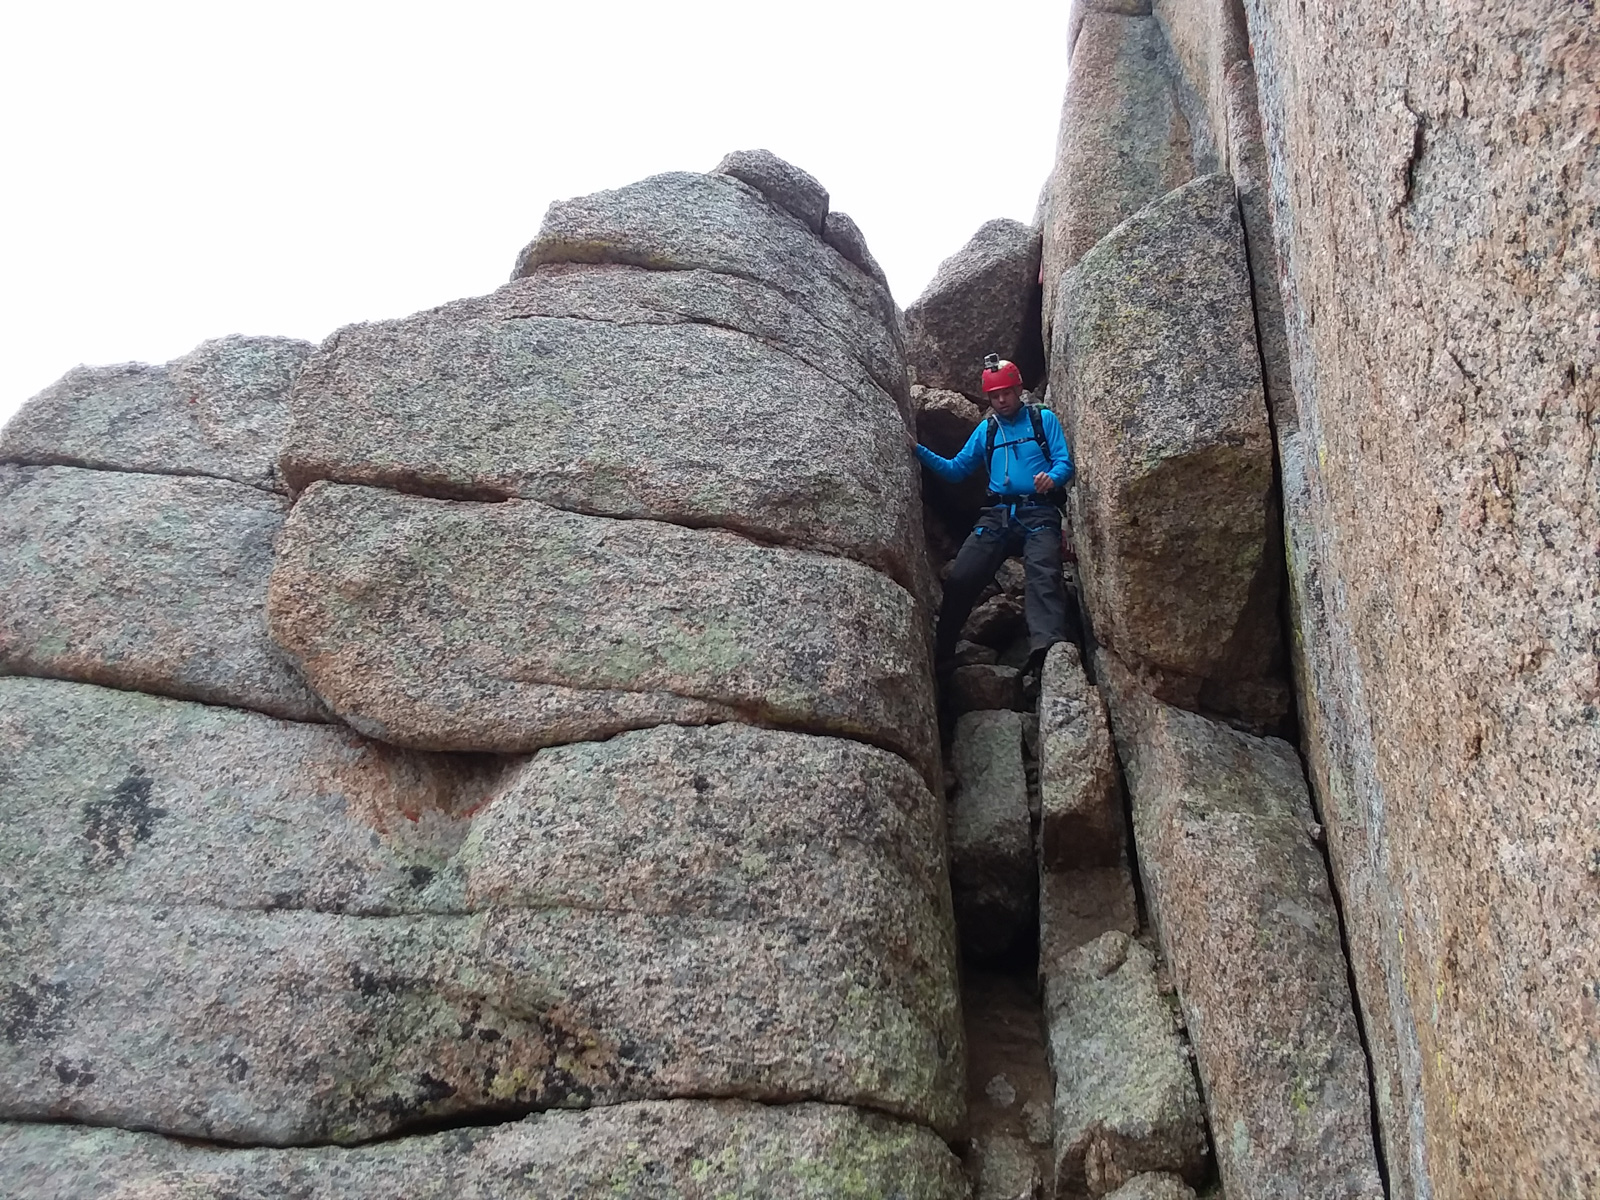
We reached the next crux of our climb, the "class 3" chimney, which I would personally rate at class 4, but I might be generous! Shawn seemed to enjoy it quite a bit!
Natalie and Shawn seemed to enjoy watching me squirm up the chimney, which I found to be quite fun!
Upon reaching the top of the chimney, I was really excited. This mountain was easily one of the hardest but also one of the most fun that I've ever done.
Here is the footage of the chimney climb.
After the chimney, only one small section remained, which required some adept scrambling up and then across a chasm. Even though there was only about four feet between one side and the other, it was a very committed move to get across to the last step as seen below.
Here is footage from the final push to the summit.
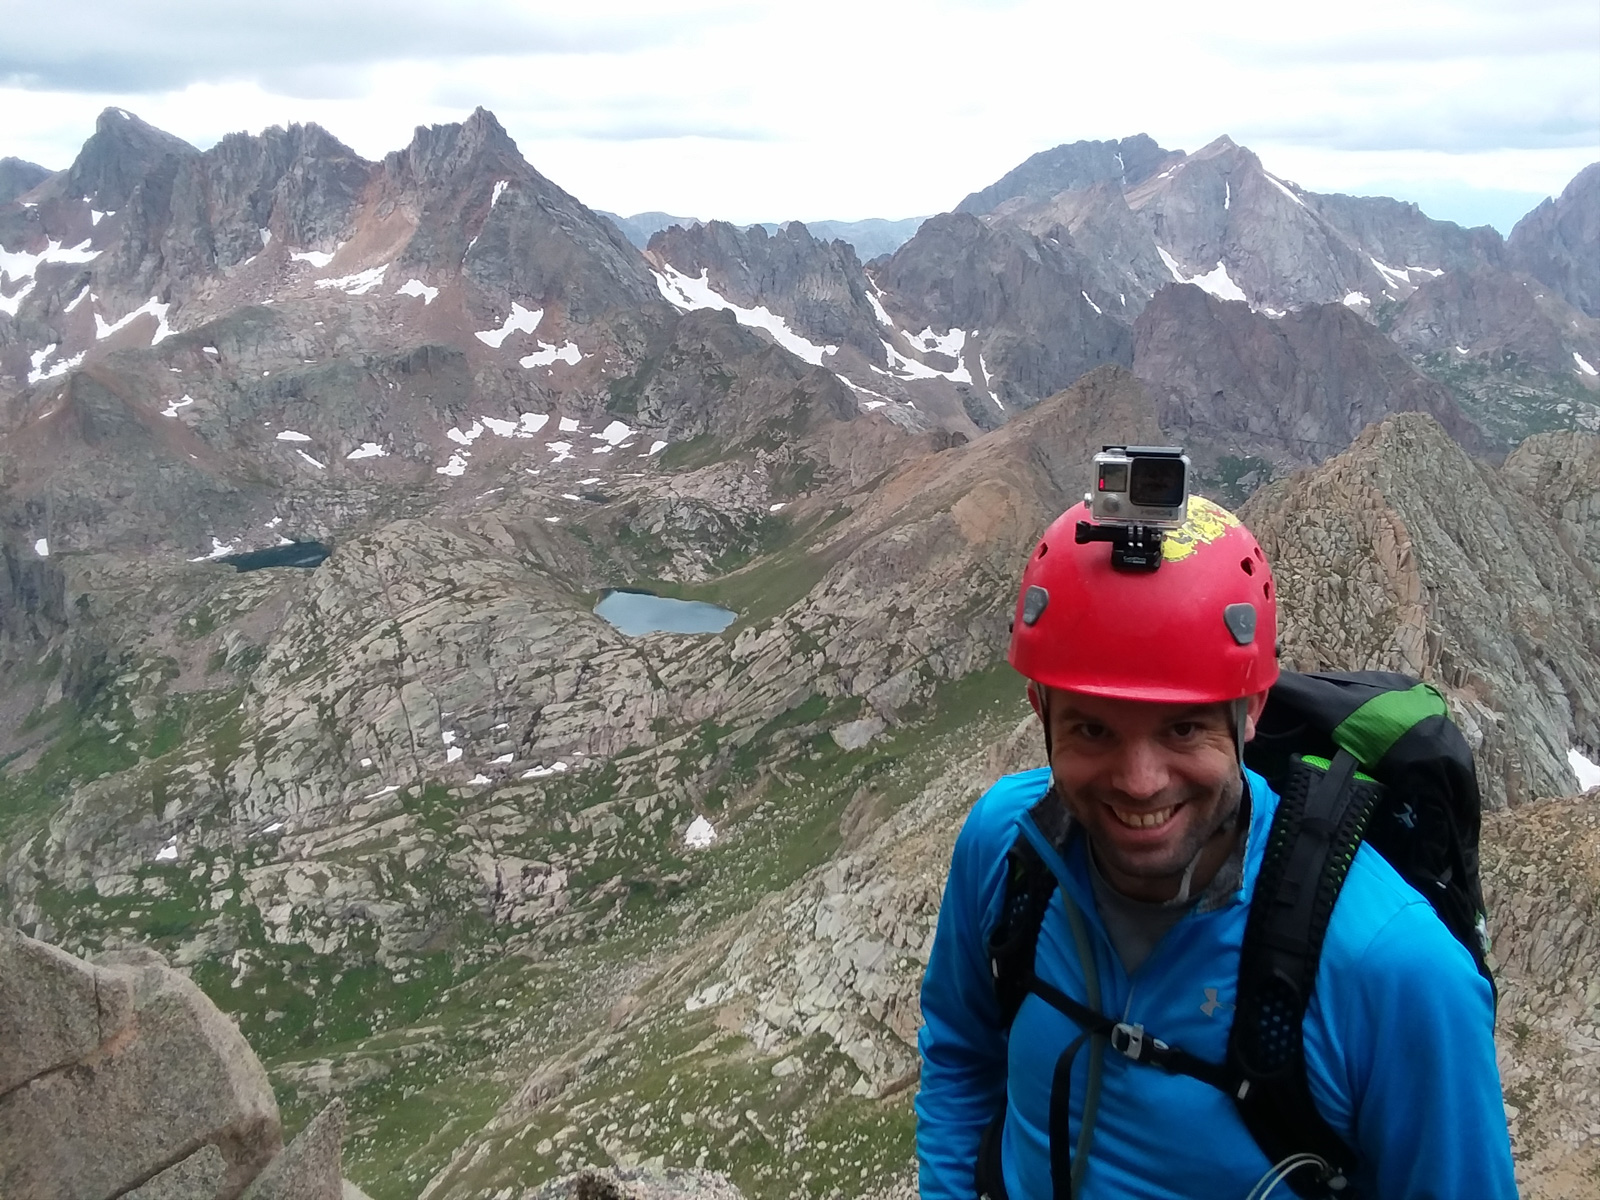
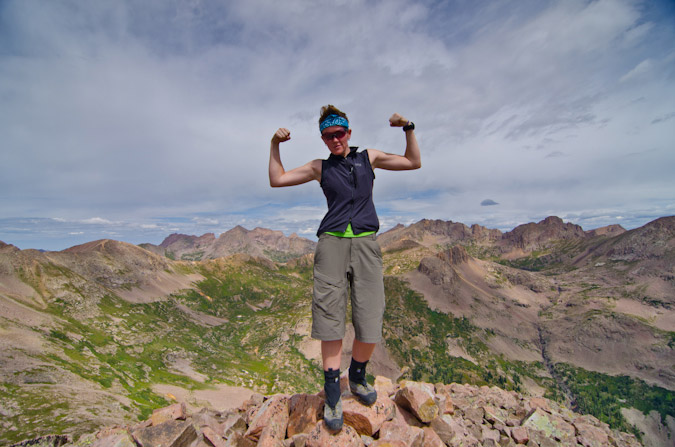
And finally at last - we topped out! Thanks for the photo Shawn! What an exhilarating moment!
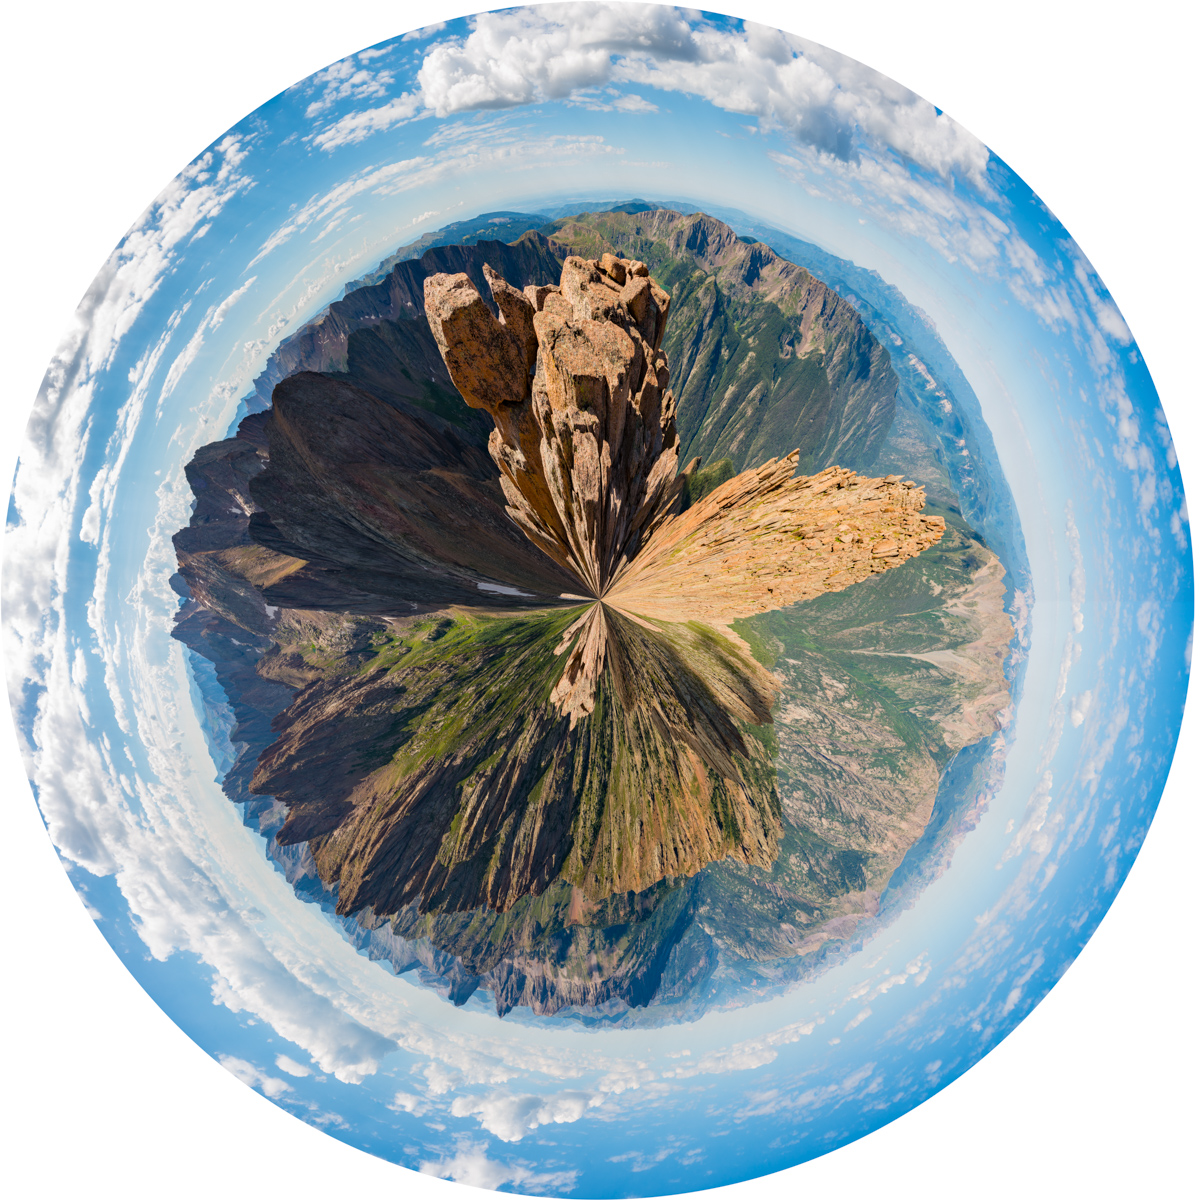
What does a nerdy photographer do when he gets to the top of Jagged Mountain? Take a 360 panorama, of course!
We made a makeshift tripod out of rocks and got a sweet shot of the three of us on top. What a day!

I saw a photo opportunity as well - there was a sweet ledge at the south end of the summit, overlooking Windom, Sunlight Spire, and Sunlight, so I sent Shawn down for a shot of him, and then a shot of me.
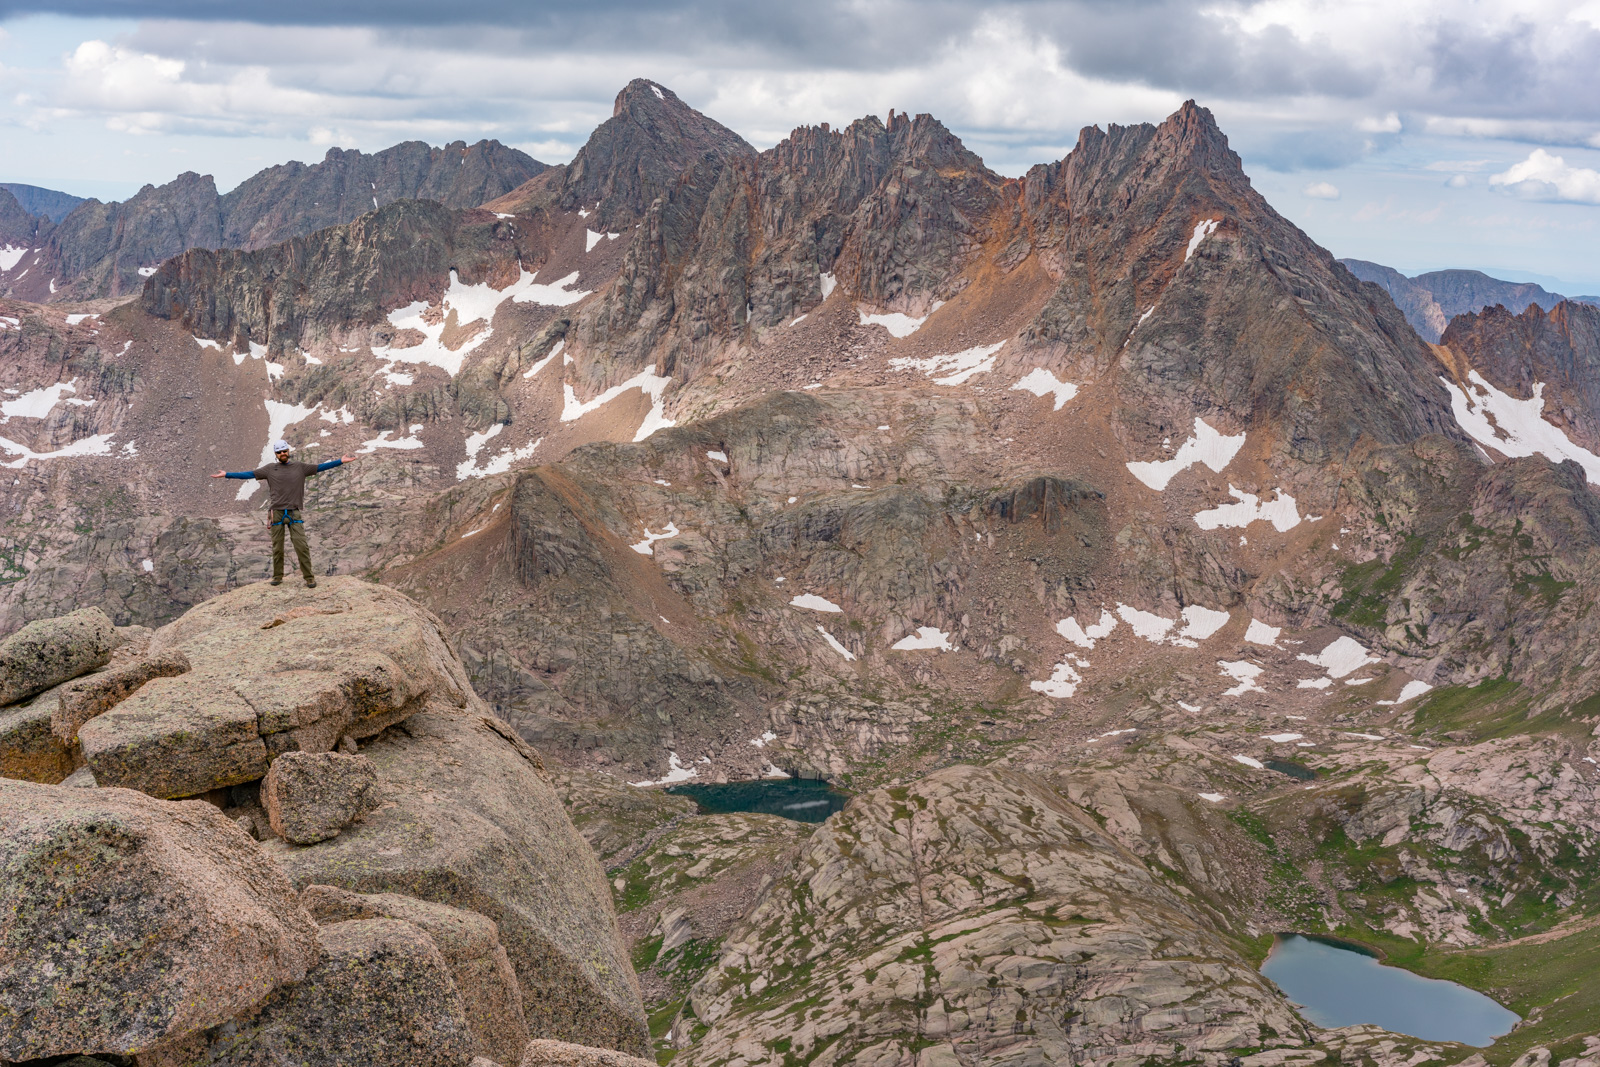
Such an awesome spot!!!

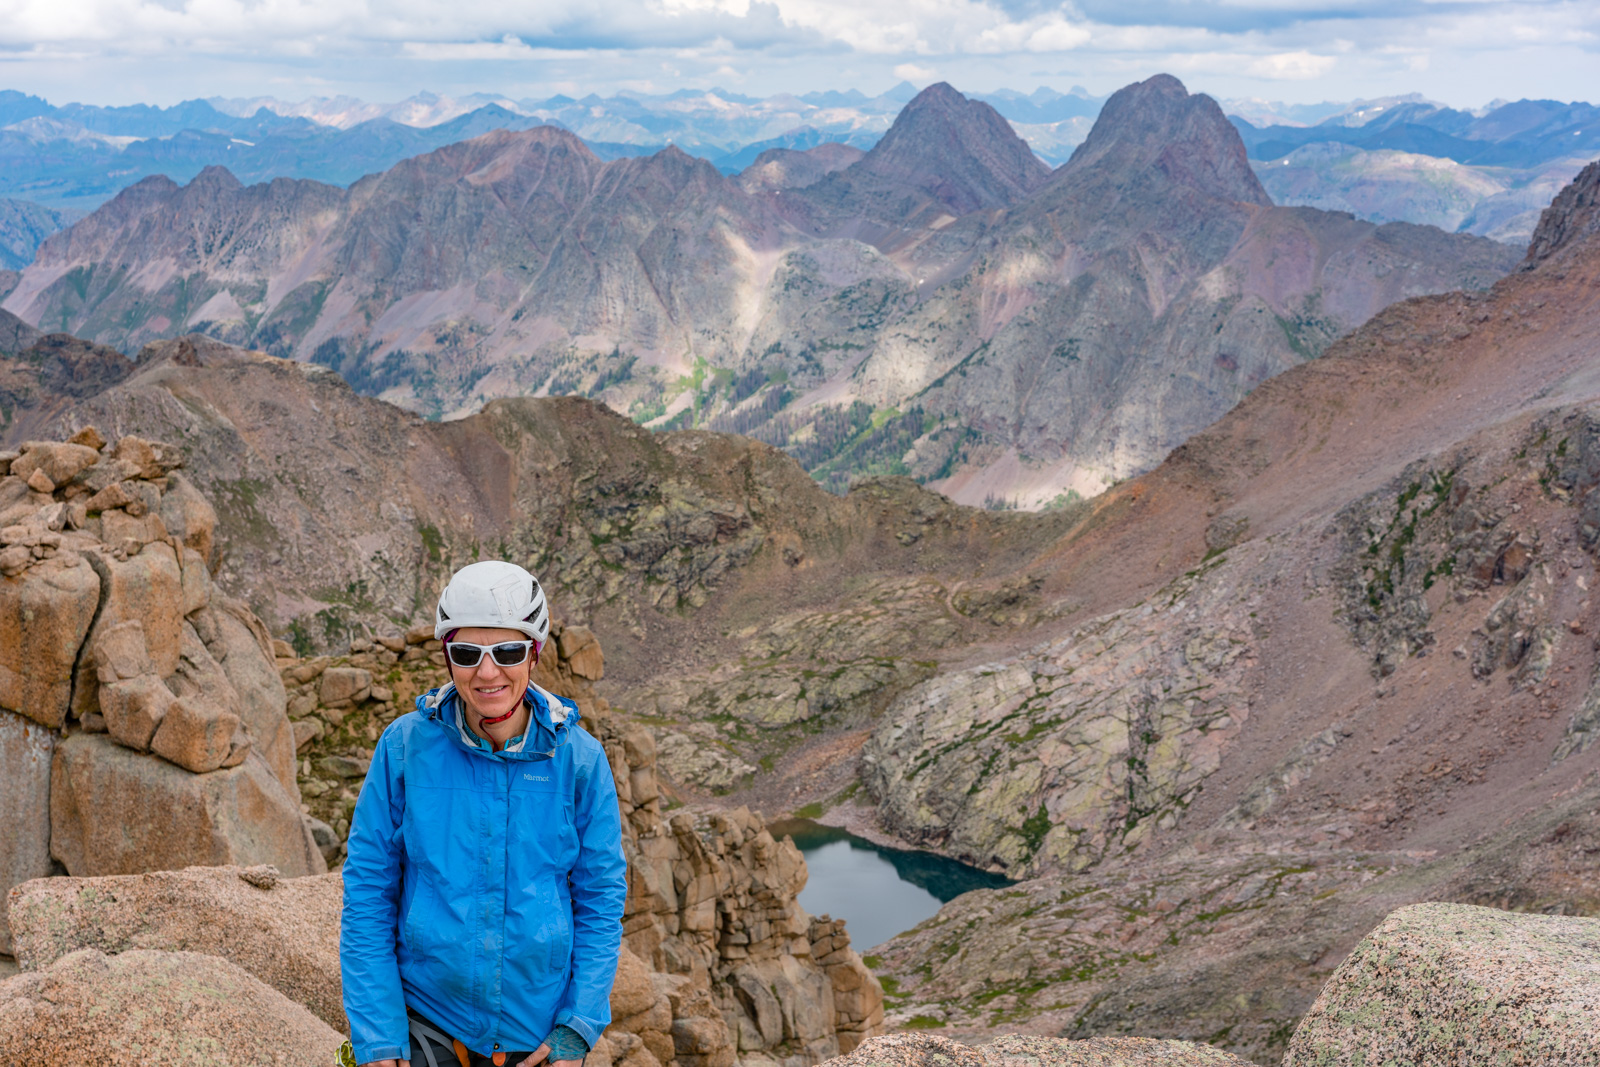
I also wanted to get a shot of Natalie with two of my favorite peaks behind her - Arrow Peak and Vestal Peak.
As we were packing up to head down, the clouds broke and shined light on Pigeon Peak. I got excited and photographed it. So awesome.
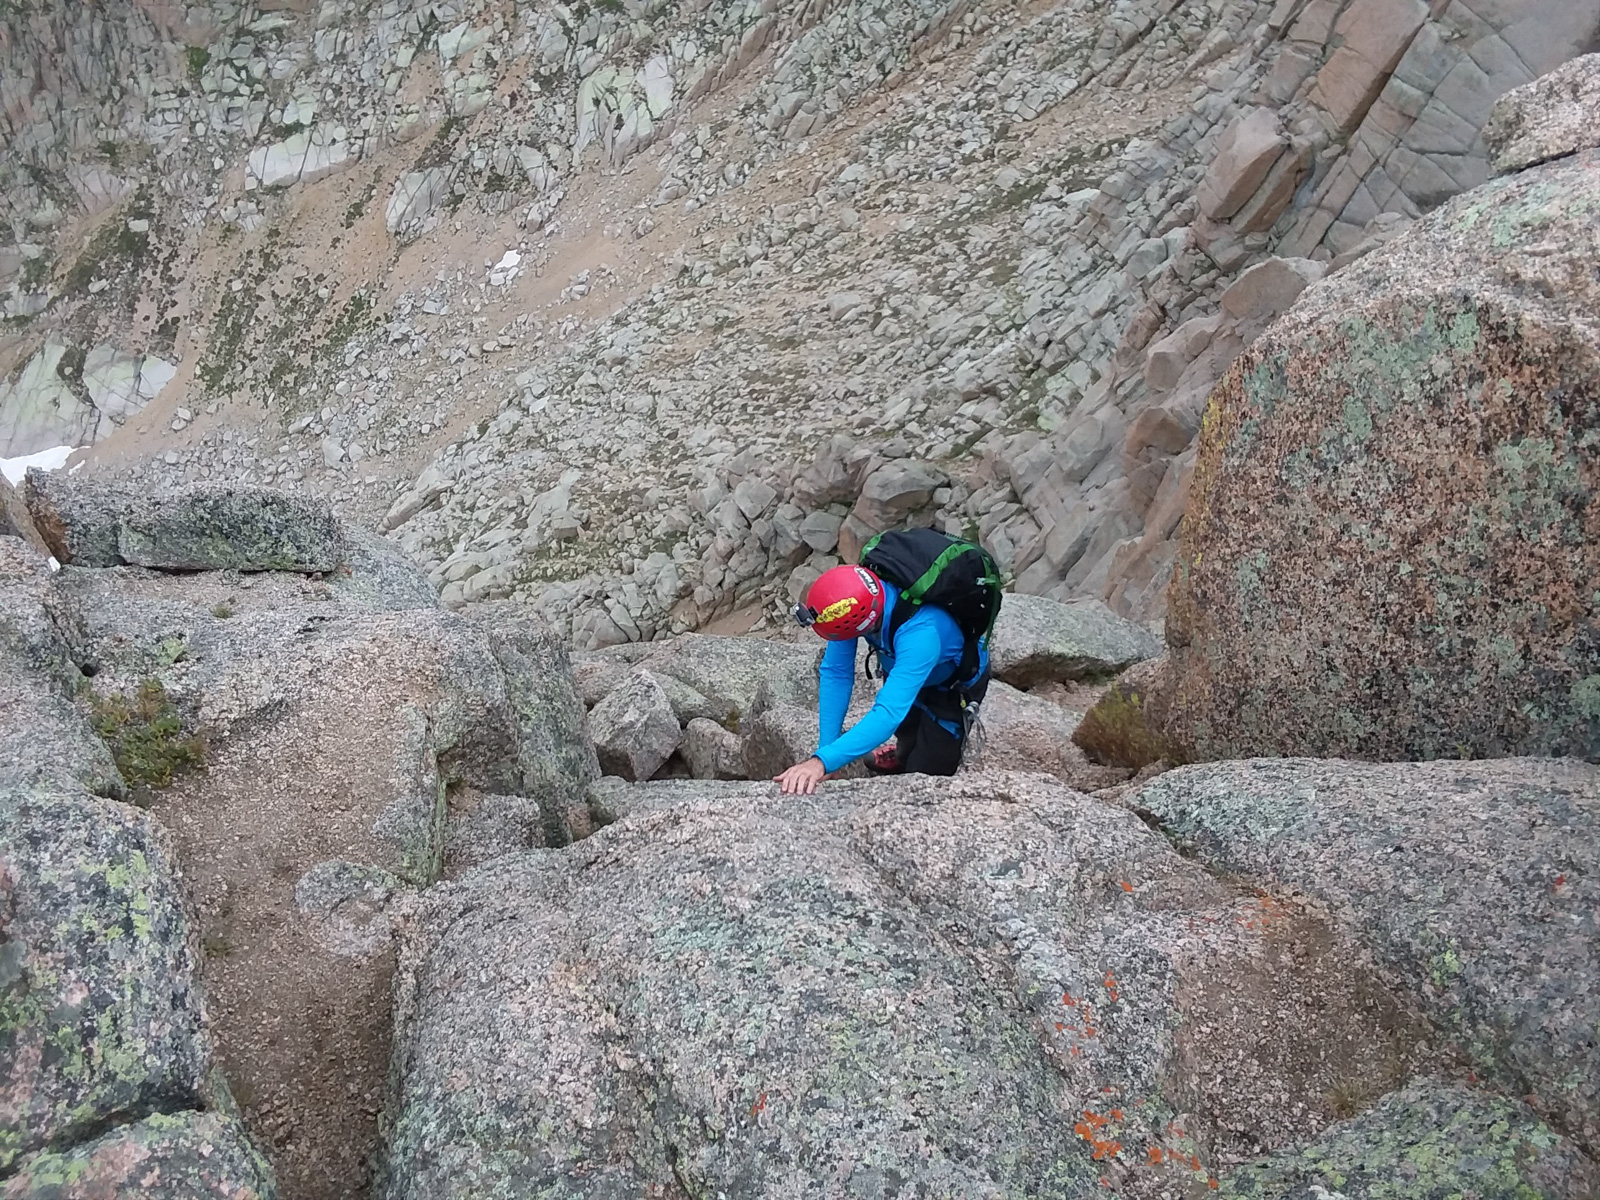
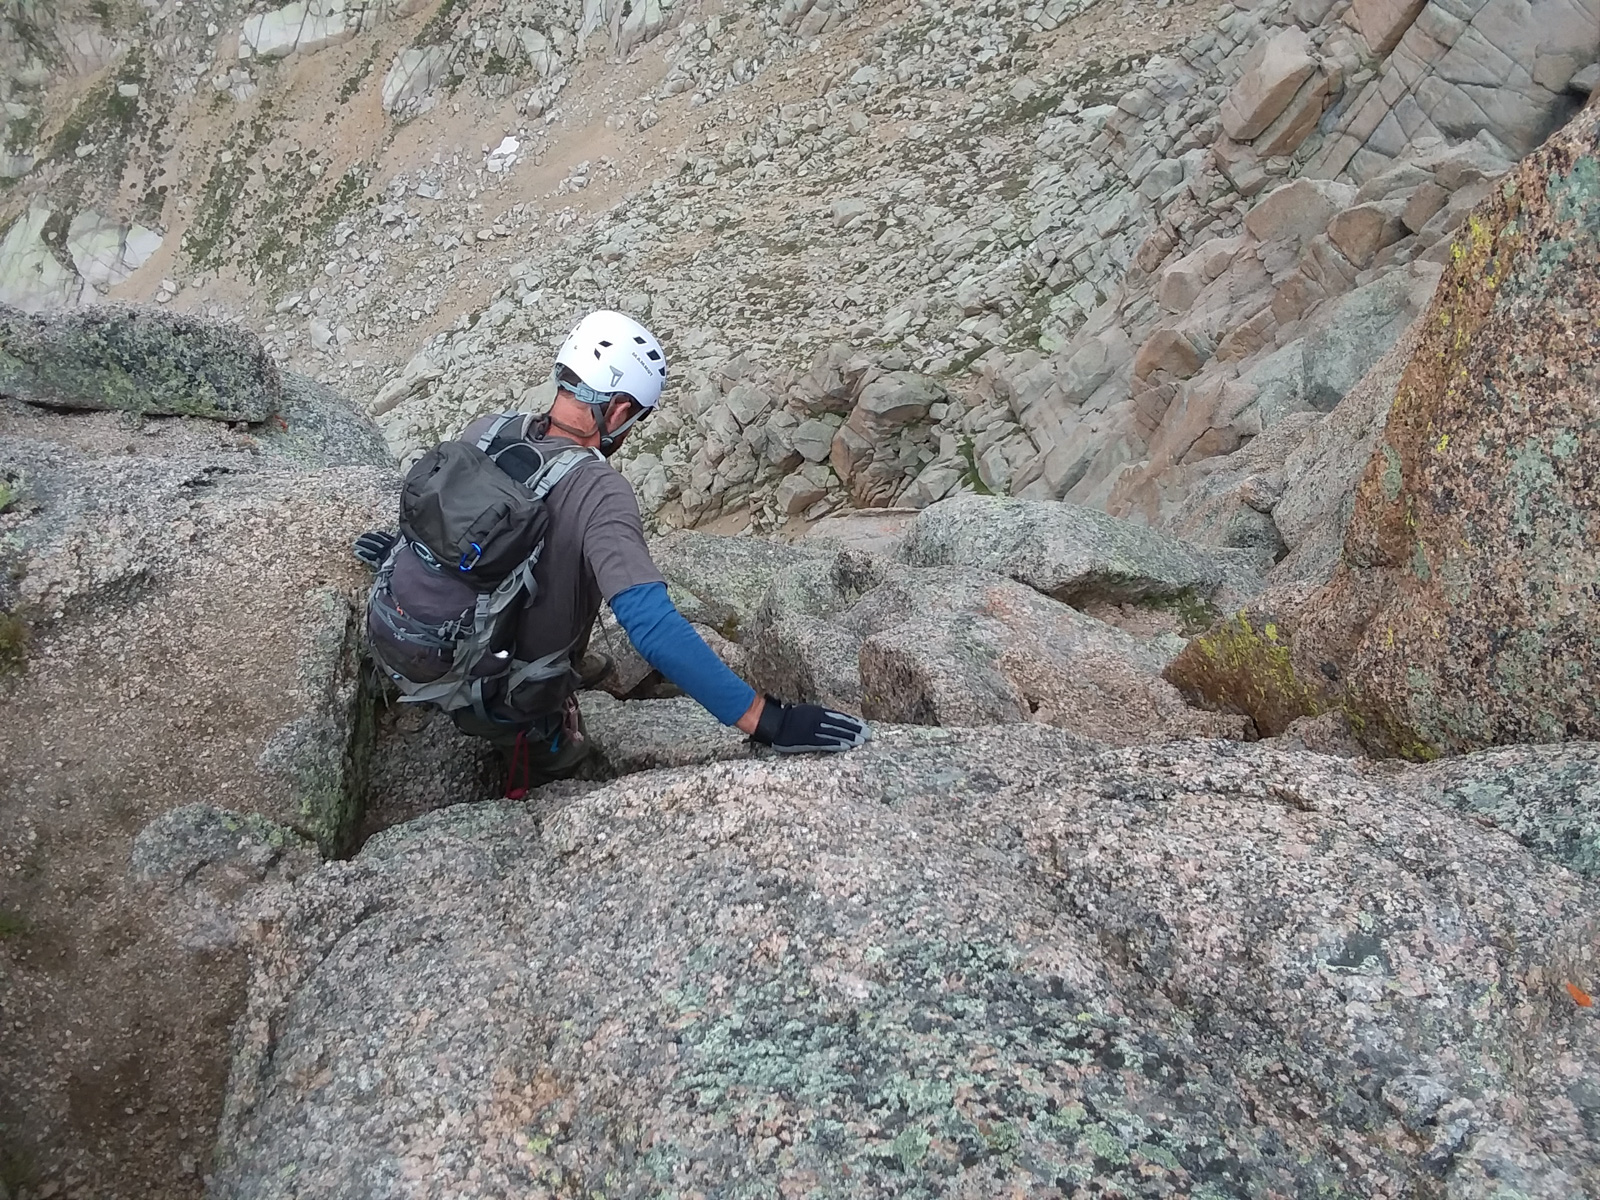
All good things must come to an end, so we decided to head back down before getting stuck in some nasty weather. It looked like it should hold for us for at least an hour or two. Shawn went first. Here's a shot of him negotiating the first tough move back down.
I found downclimbing the chimney to be a lot of fun, using my feet and back as leverage for the first and last section.
The tricky move back around the jutted out boulder was a little easier on the way back for some reason.
Directly after the tough move, there's a way to go up instead of around, so both Natalie and I chose that option instead, finding it to be easier.
Back on the north face, we quickly made our way down to the 3rd crux.
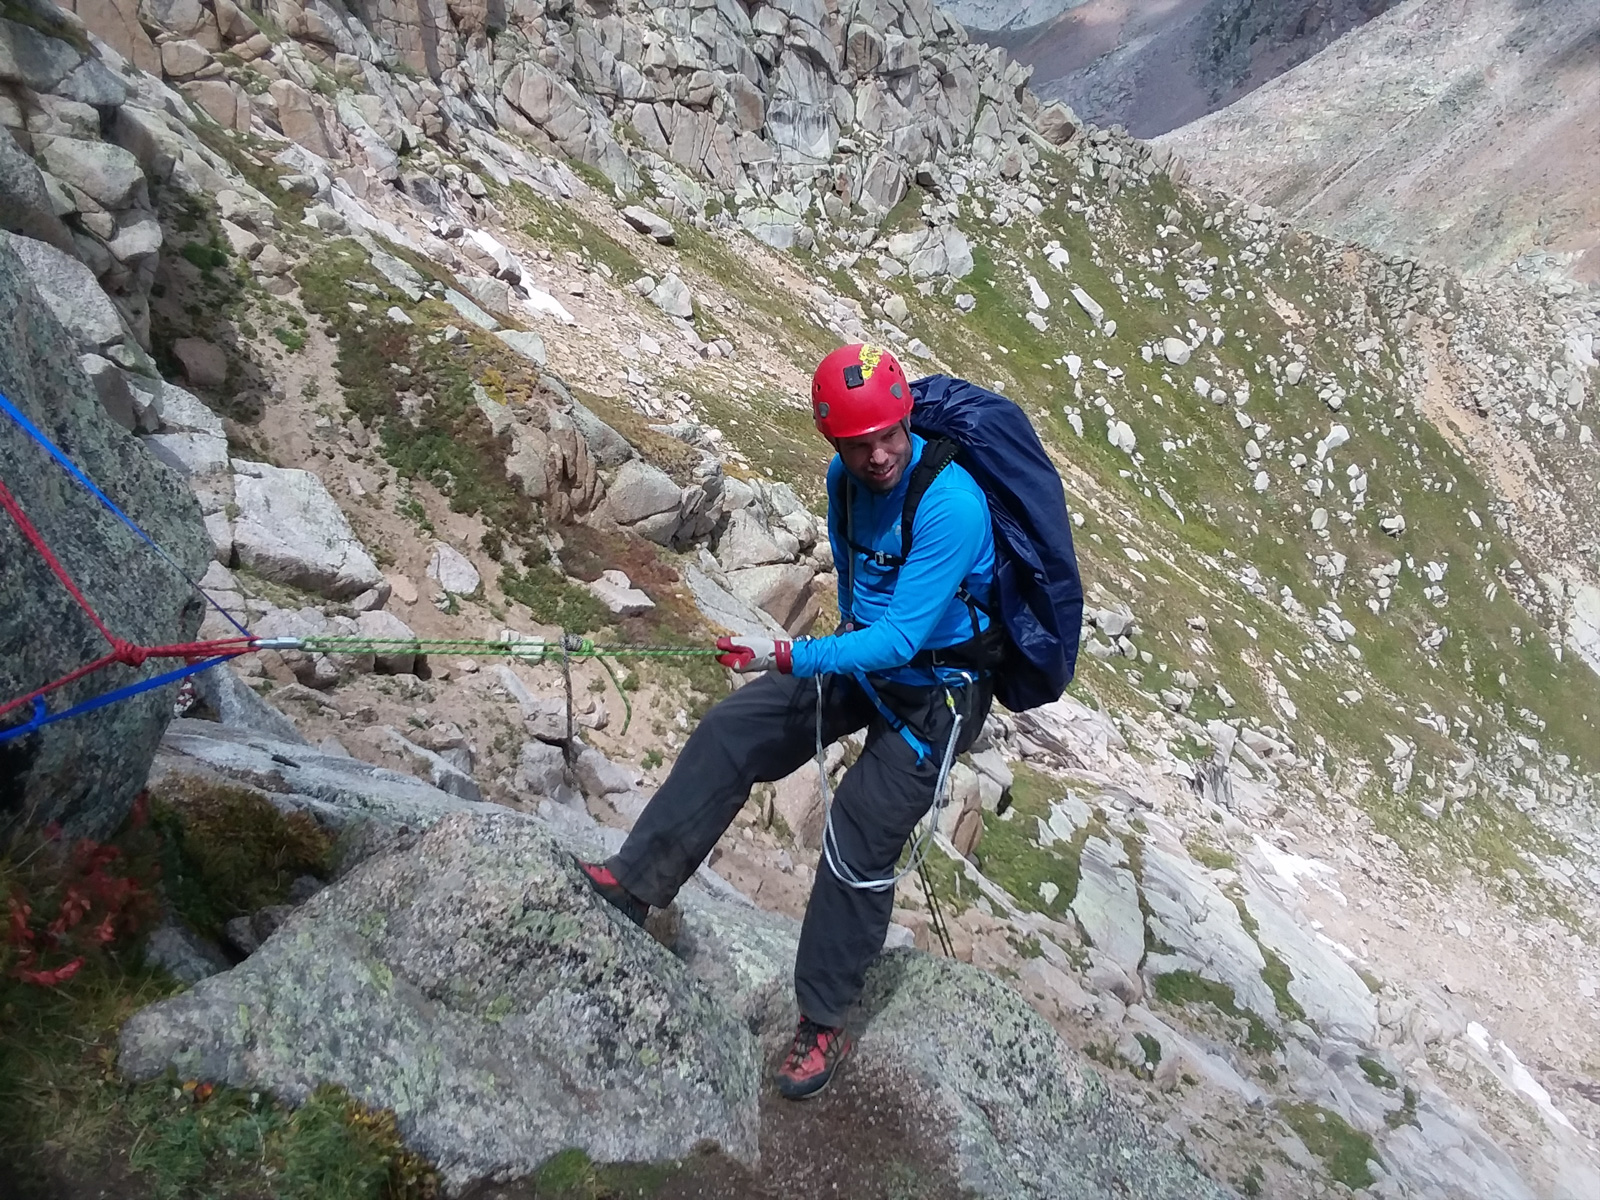
We rapped down without any problem, tying together two 30 meter ropes using a water knot. The next section was quite easy to rappel as well.

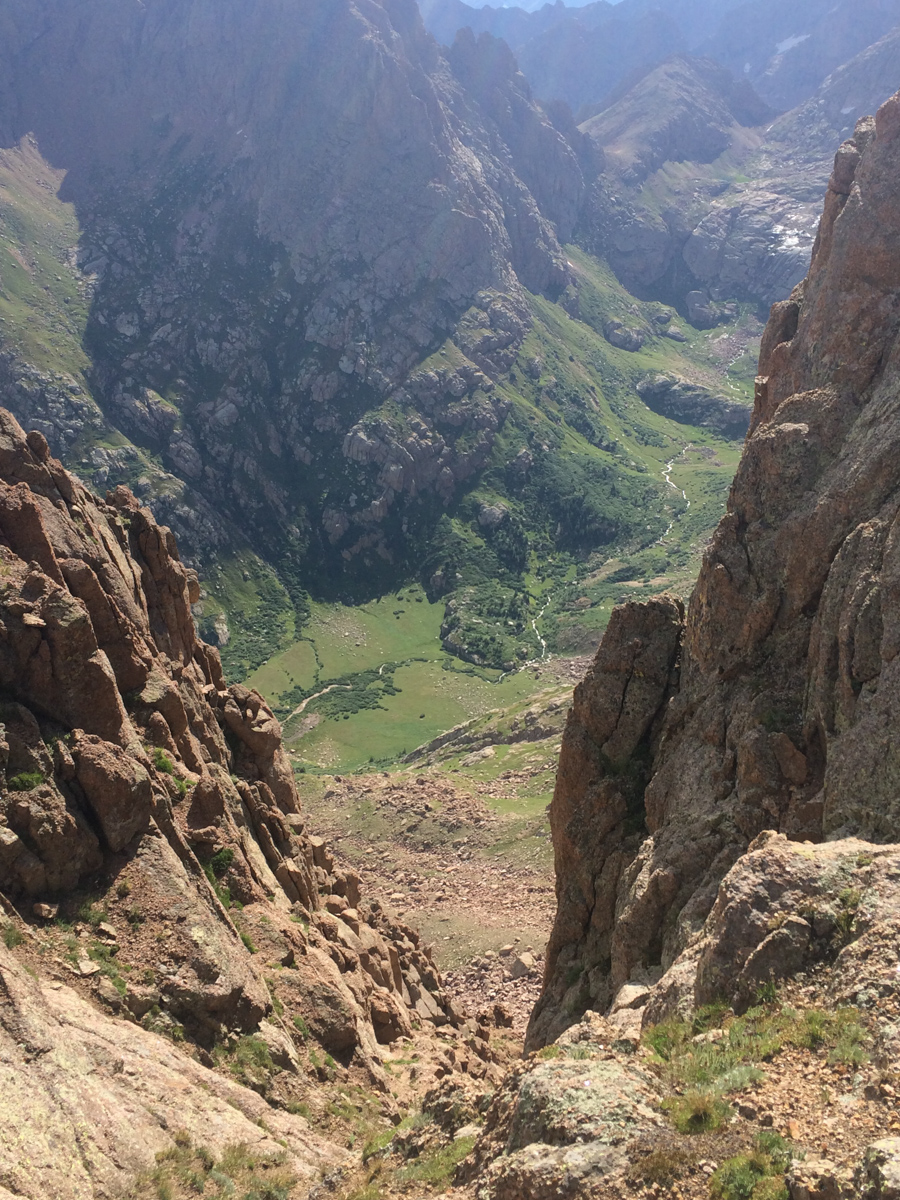
I found the final rappel the hardest, just due to how long it was down the gully. Here we go! Thanks for the shots Shawn!
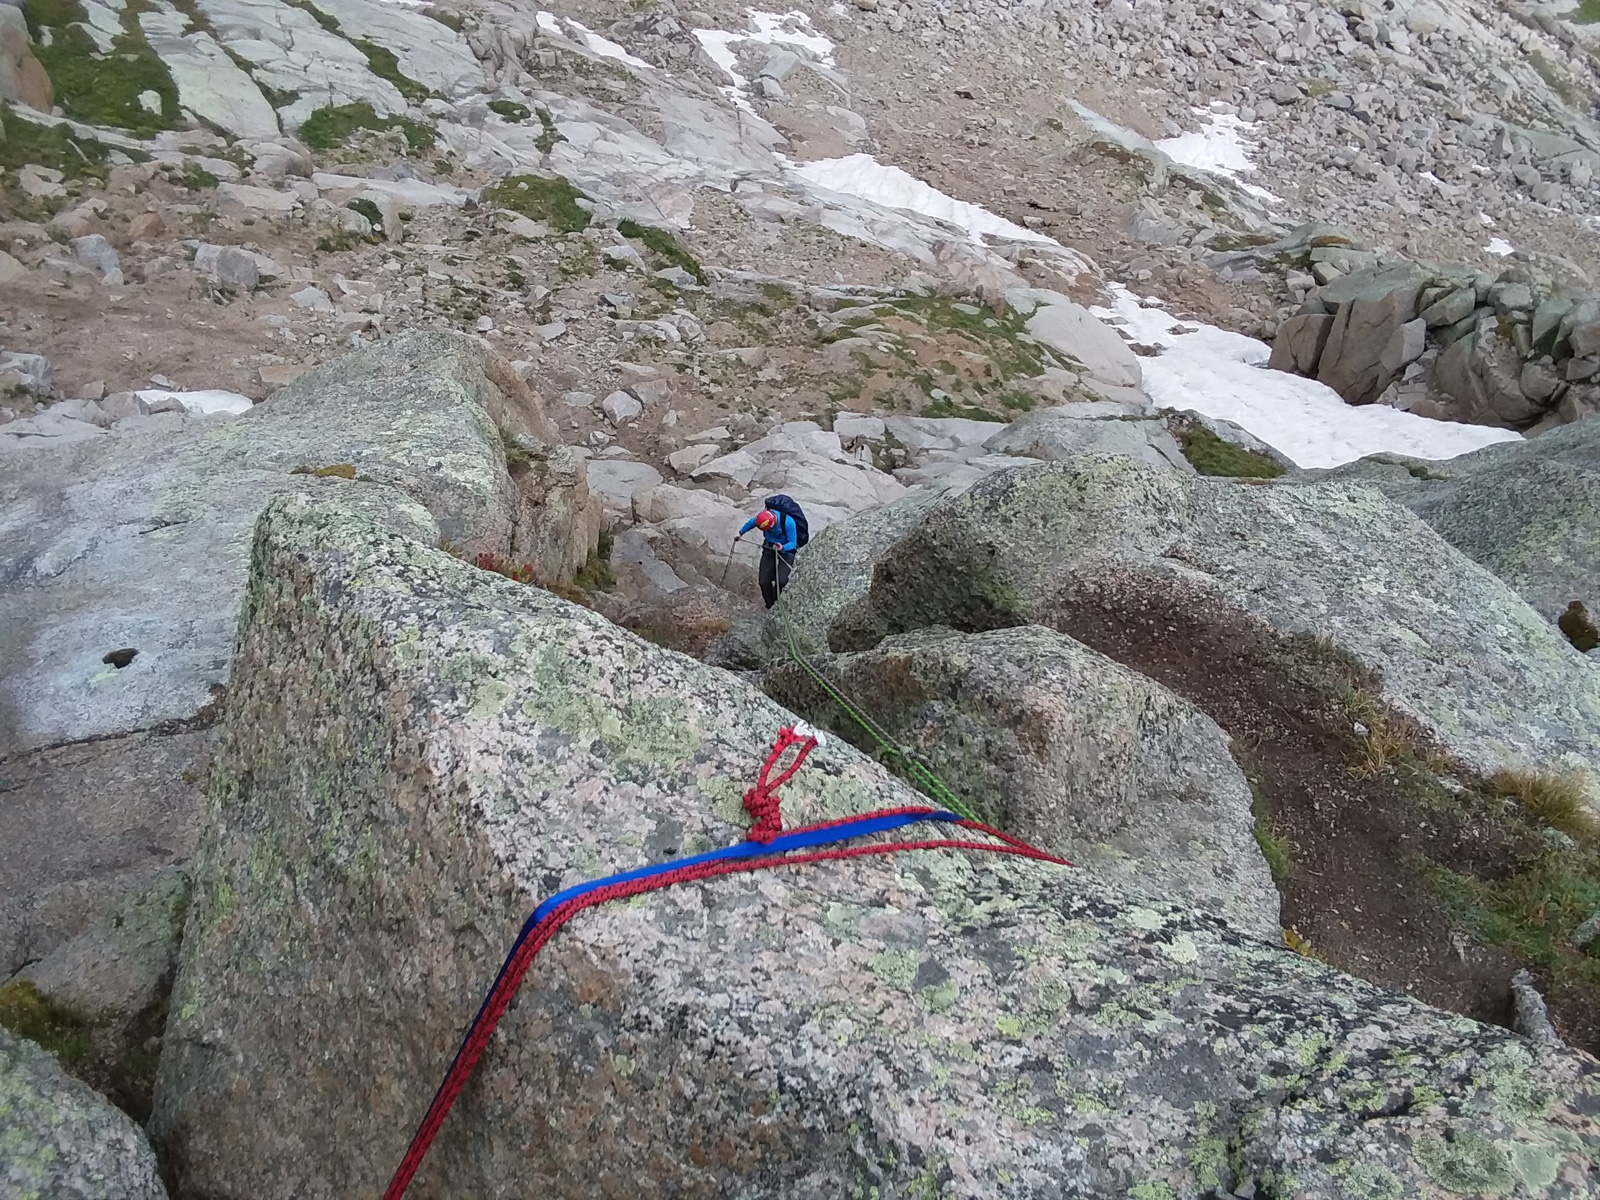
A look back up shows just how long the first crux really is!
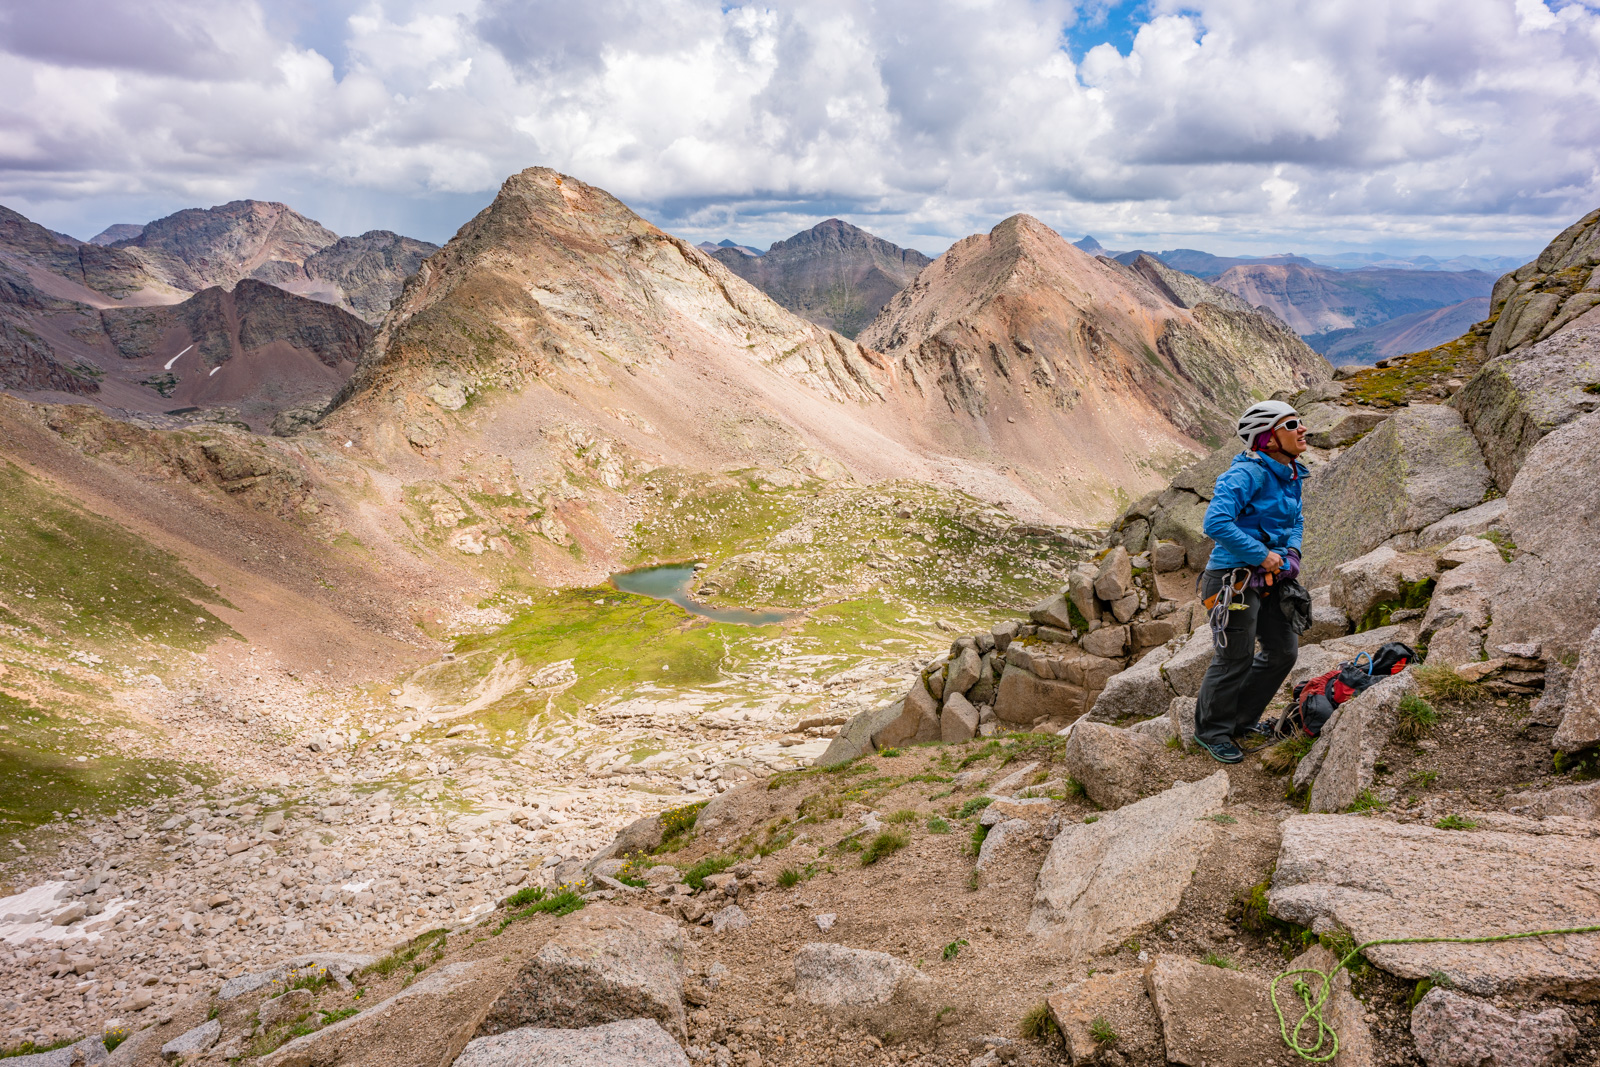
Natalie stopped to appreciate the view as well as Shawn rappelled down last. The views of Leviathan were awesome from here.
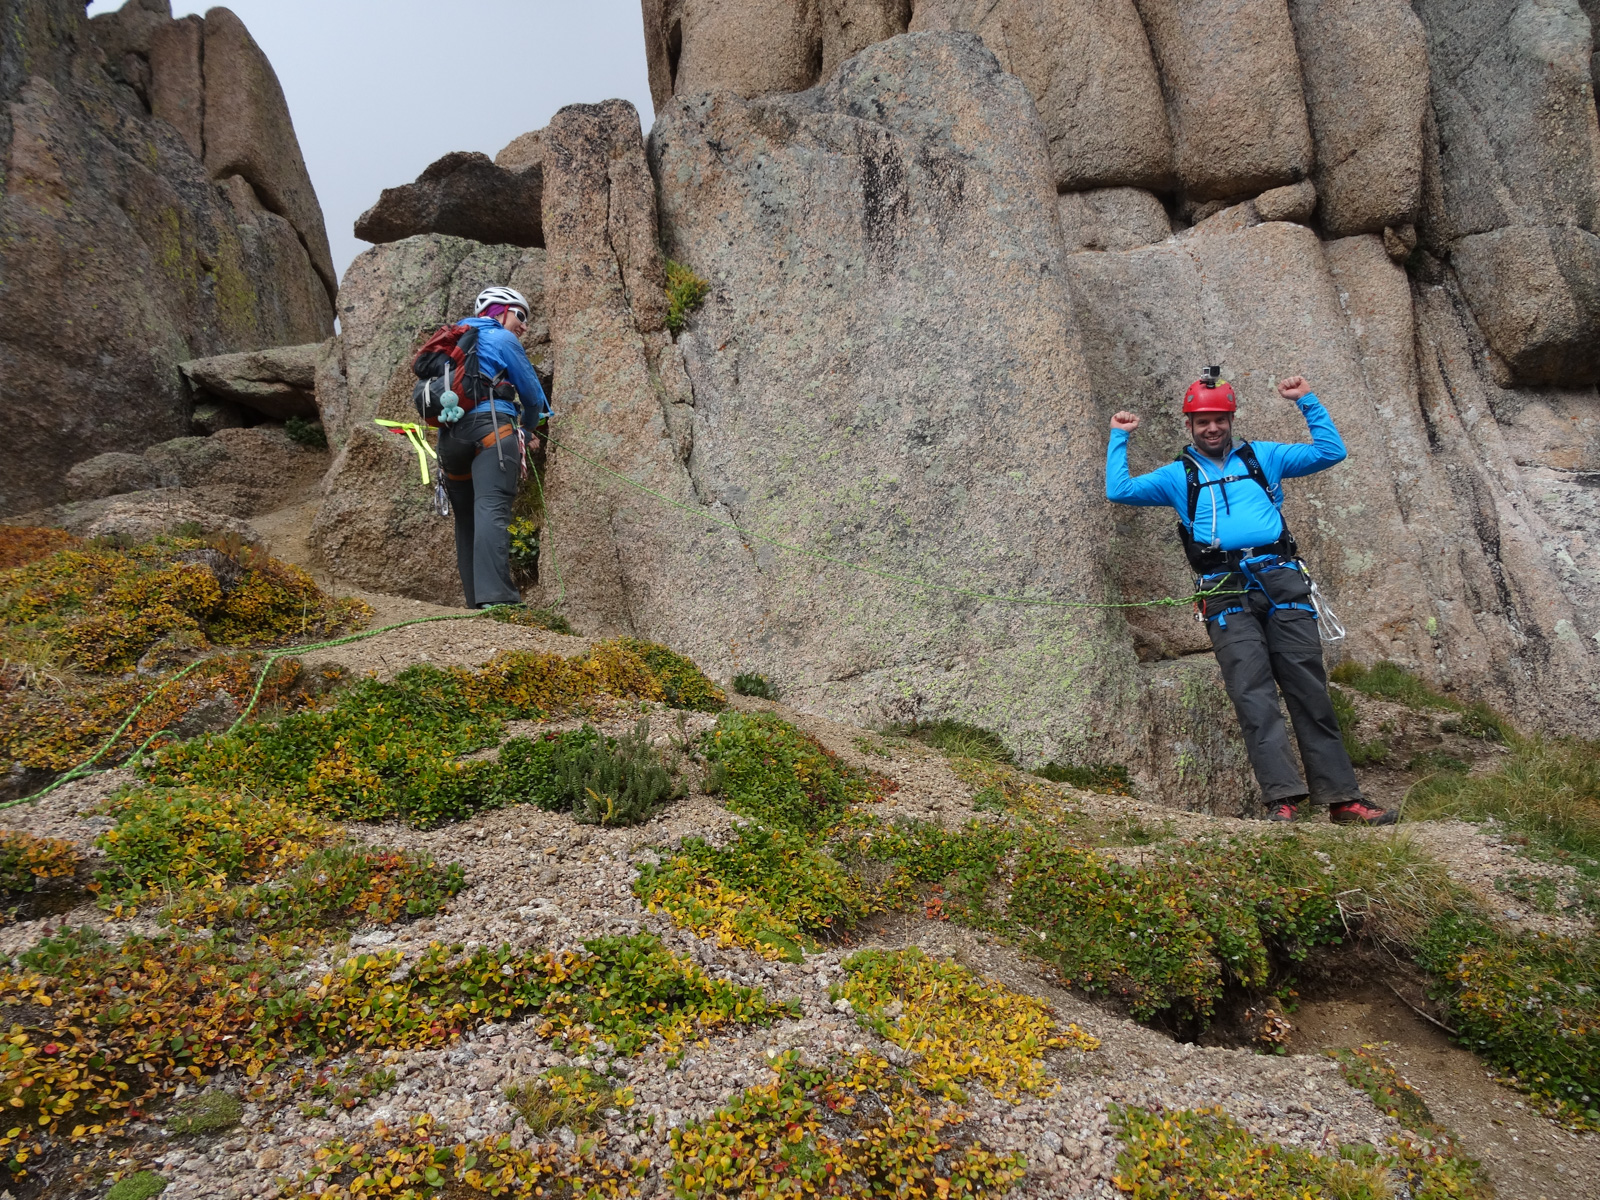
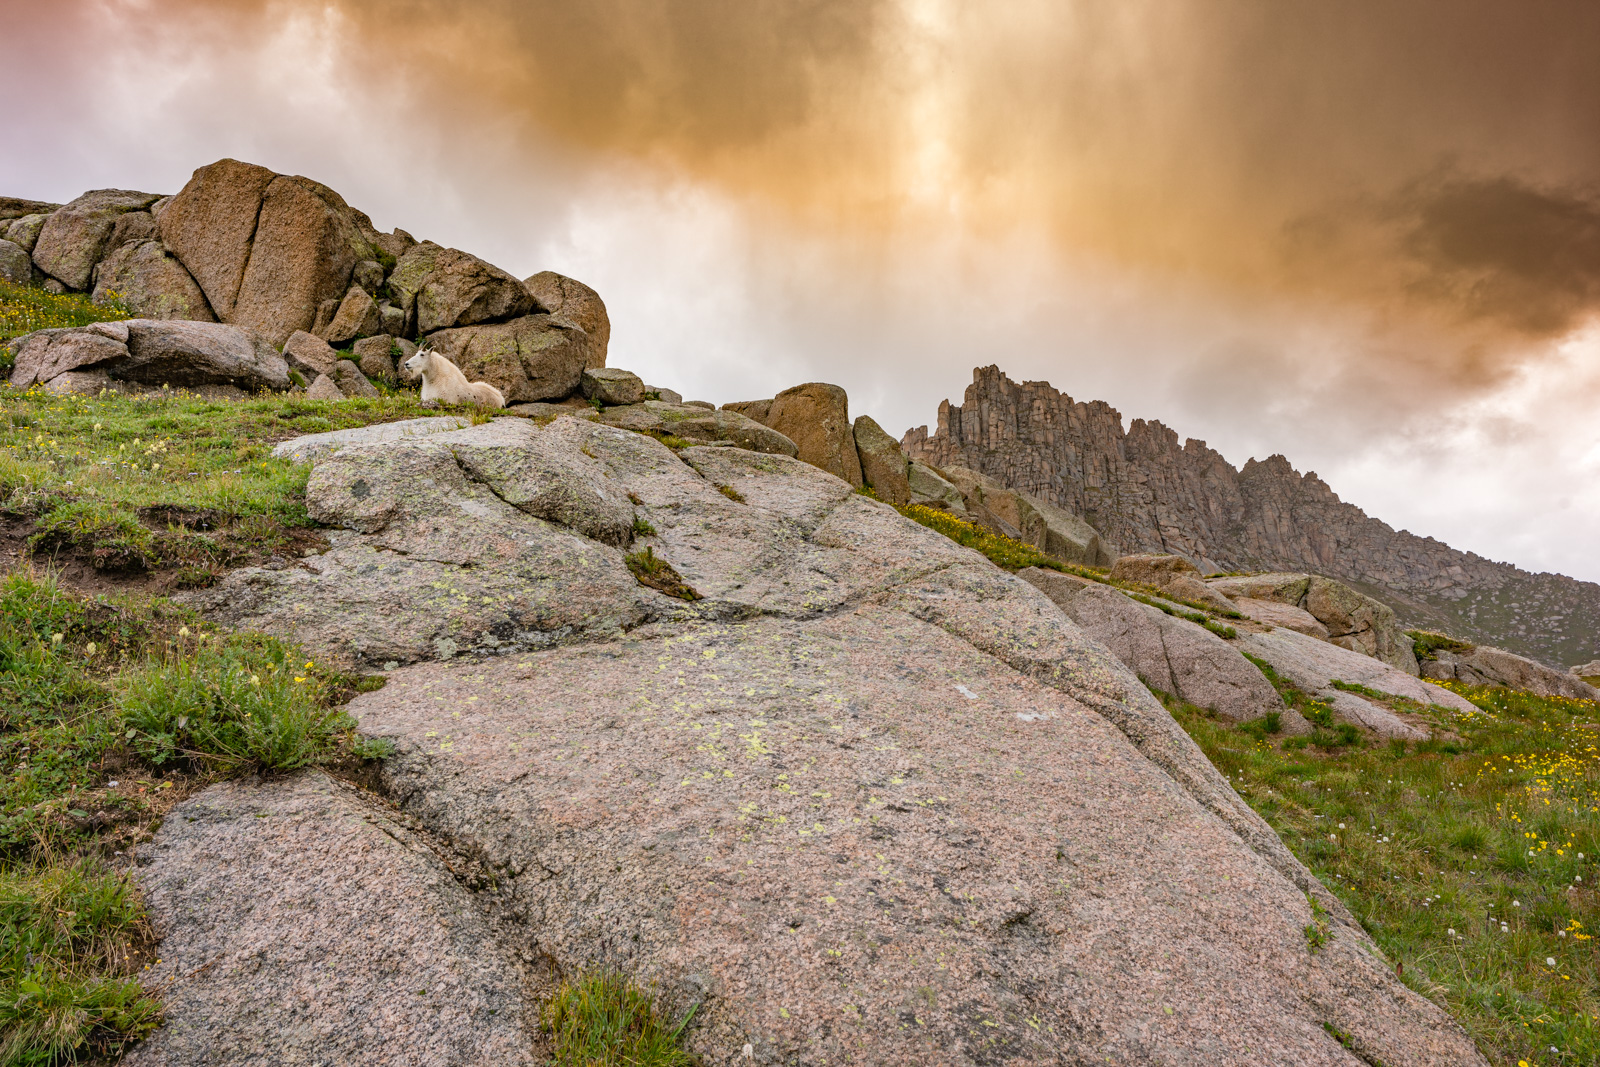
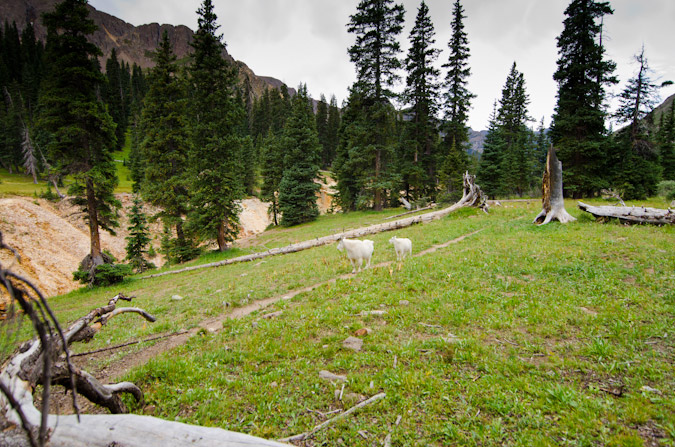
We all made it down safely from the tough sections and got ready for some rain and graupel (you know, that stuff that's like tiny hail). It was good that we avoided a "Graupel rappel." Har har. We all decided to go down the way Shawn came up as it sounded like the most scenic route. It was awesome. We ran into a solo goat while some interesting rain storms passed by.
As we lowered into the basin, the atmospheric clouds added some nice effect to Sunlight and Windom.
It was hard to keep moving with a view like this. Natalie and Shawn forged ahead and are seen bottom left.
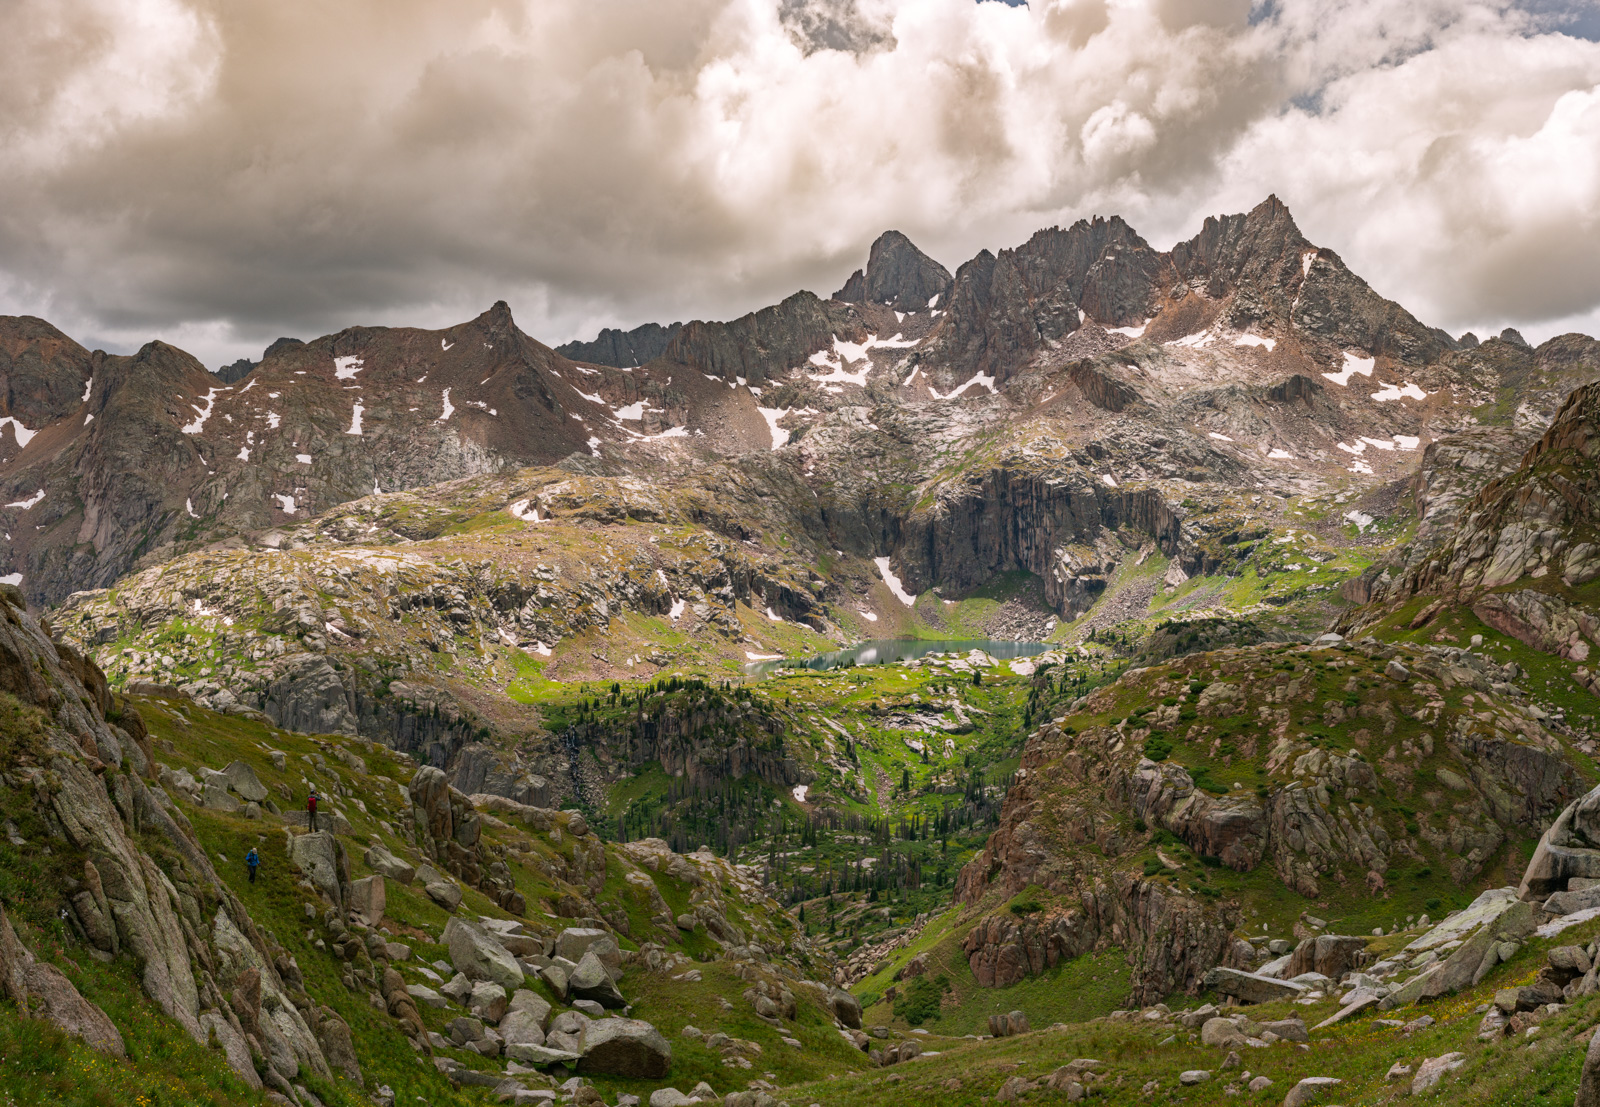
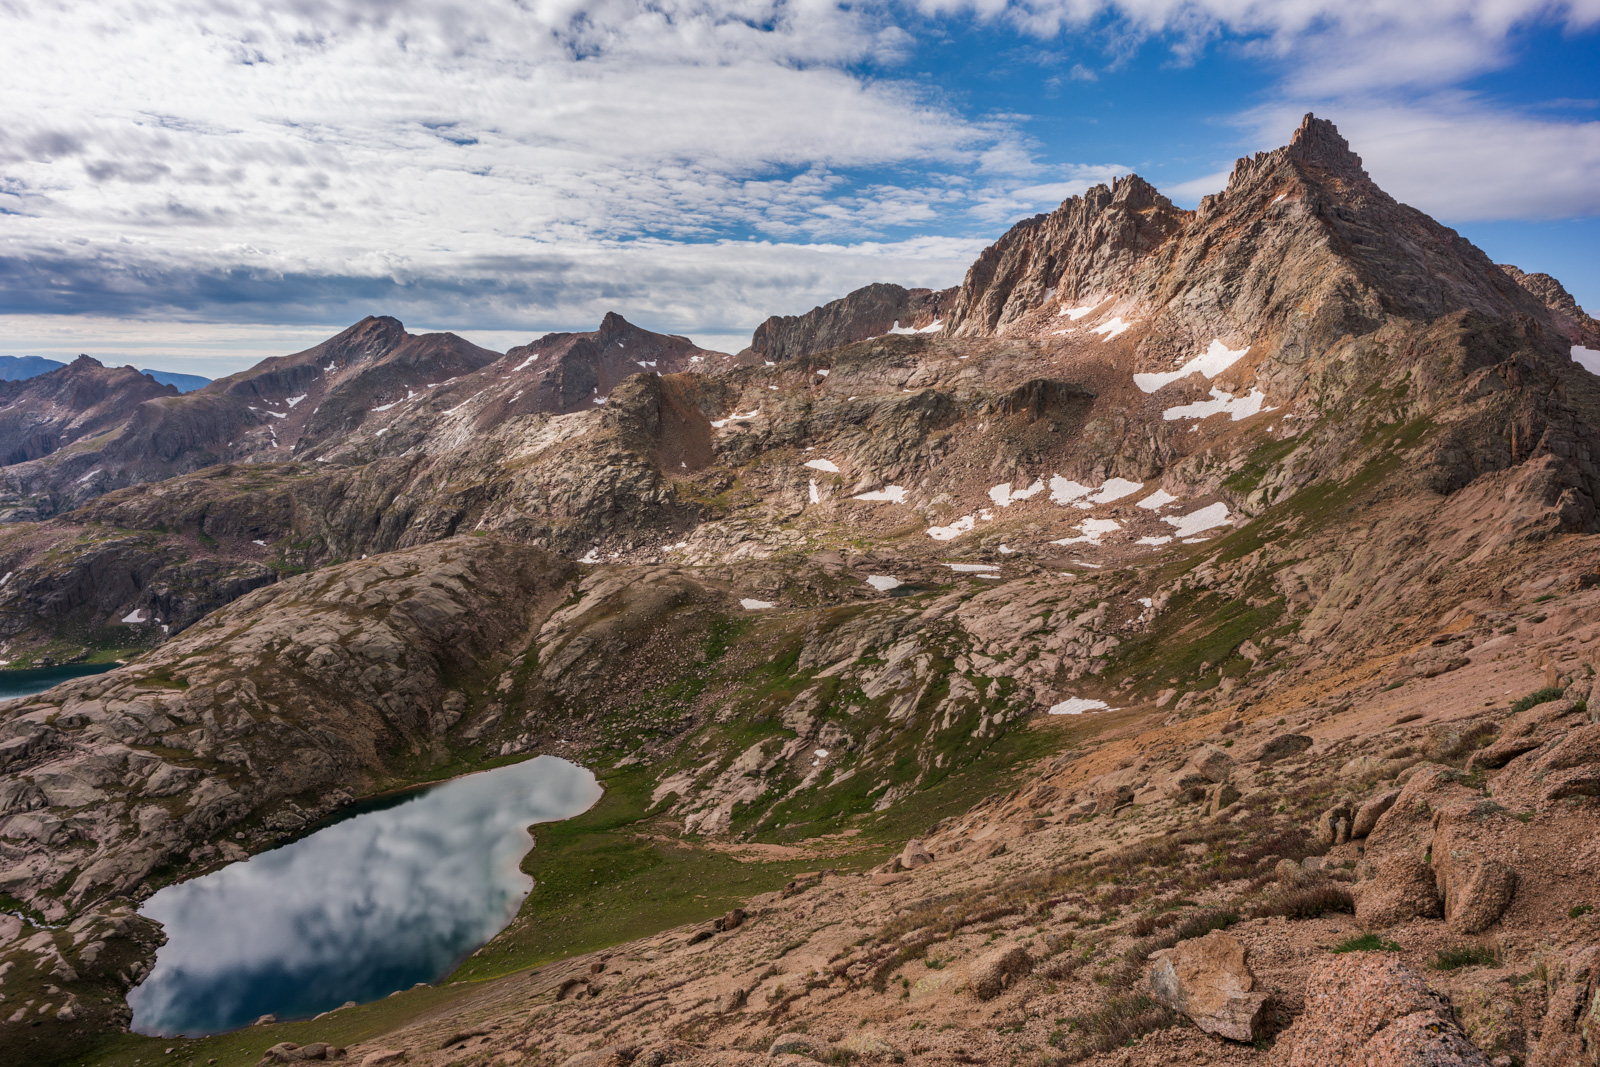
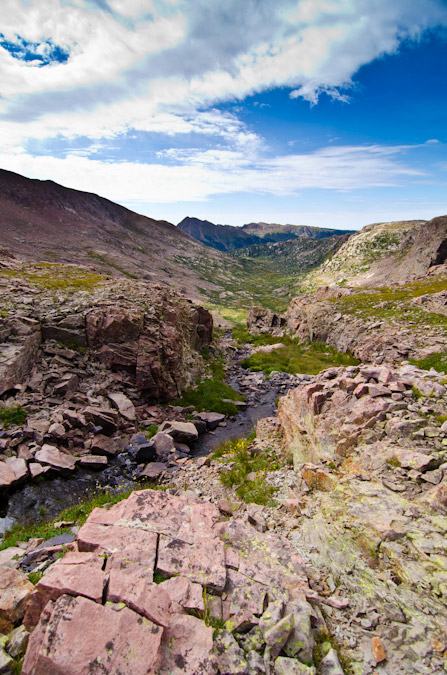
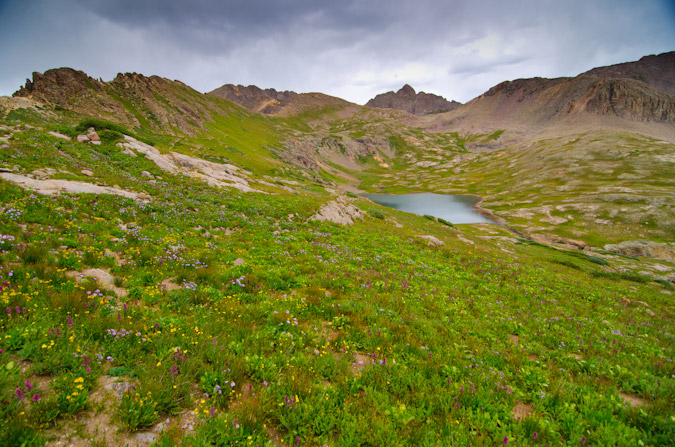
As we got lower, we found this really awesome pond with a killer view of Jagged Mountain. I was pumped.
Natalie stopped to take it all in below Jagged.
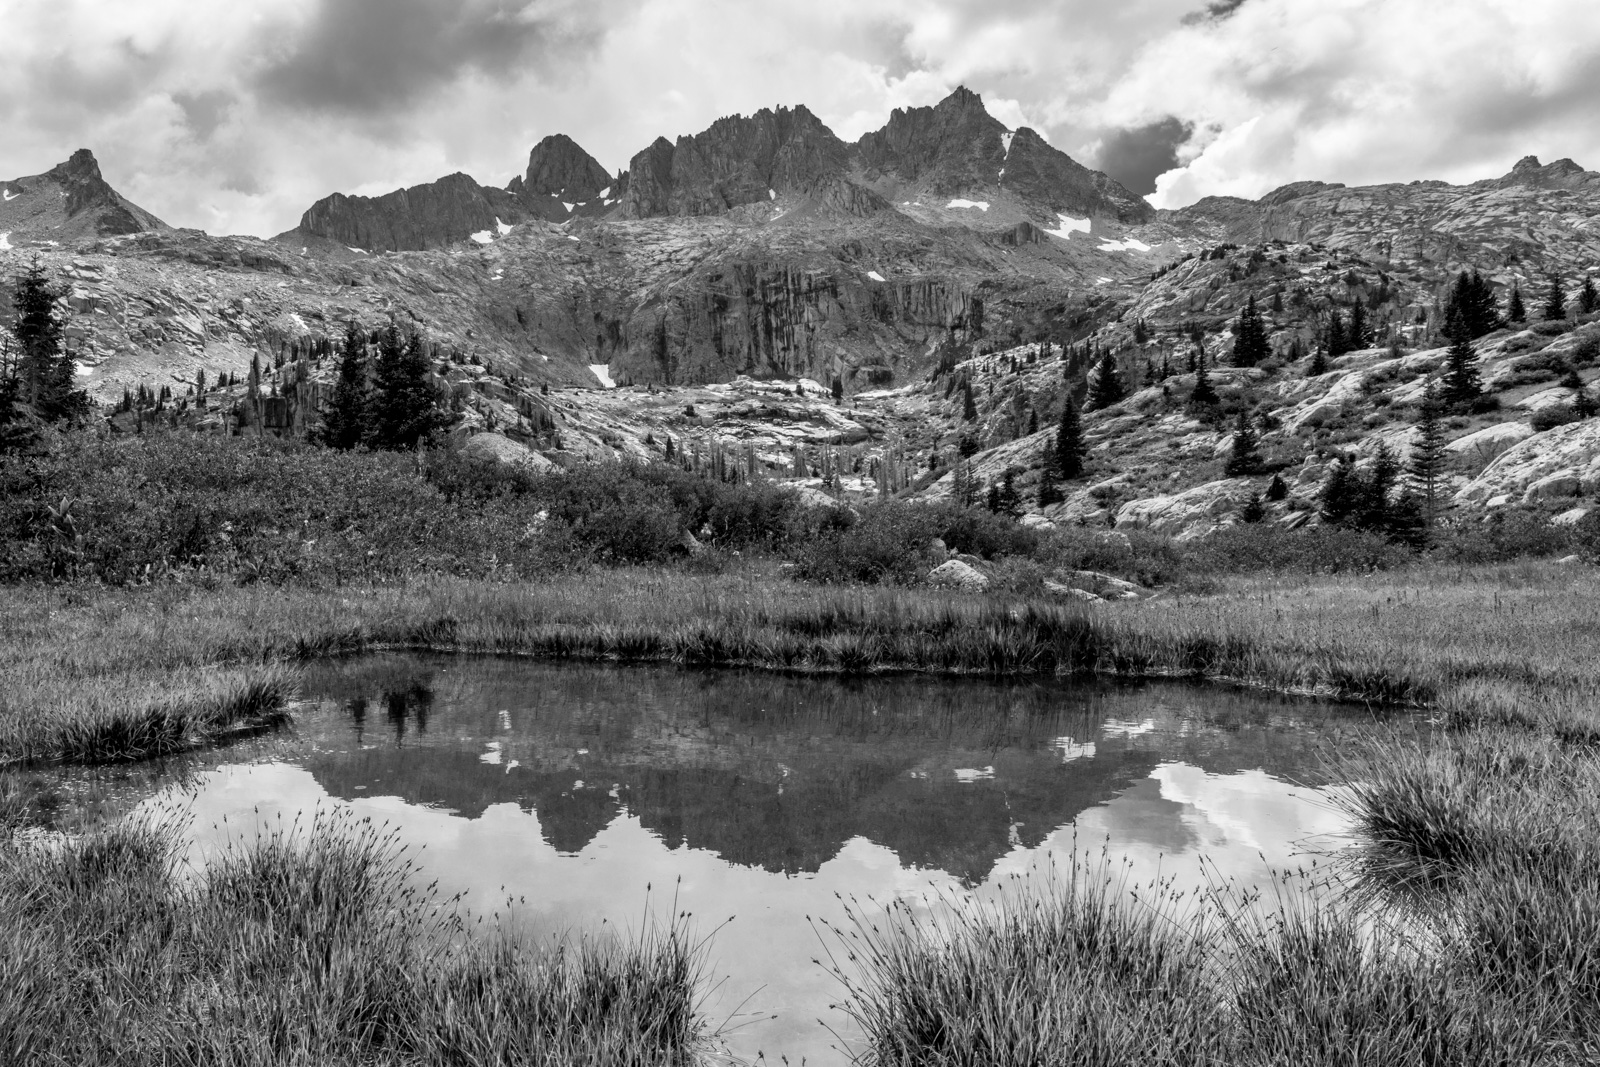
We finally reached the lower sections just before rejoining the main trail and stumbled on a nice little pond which reflected Sunlight nicely.
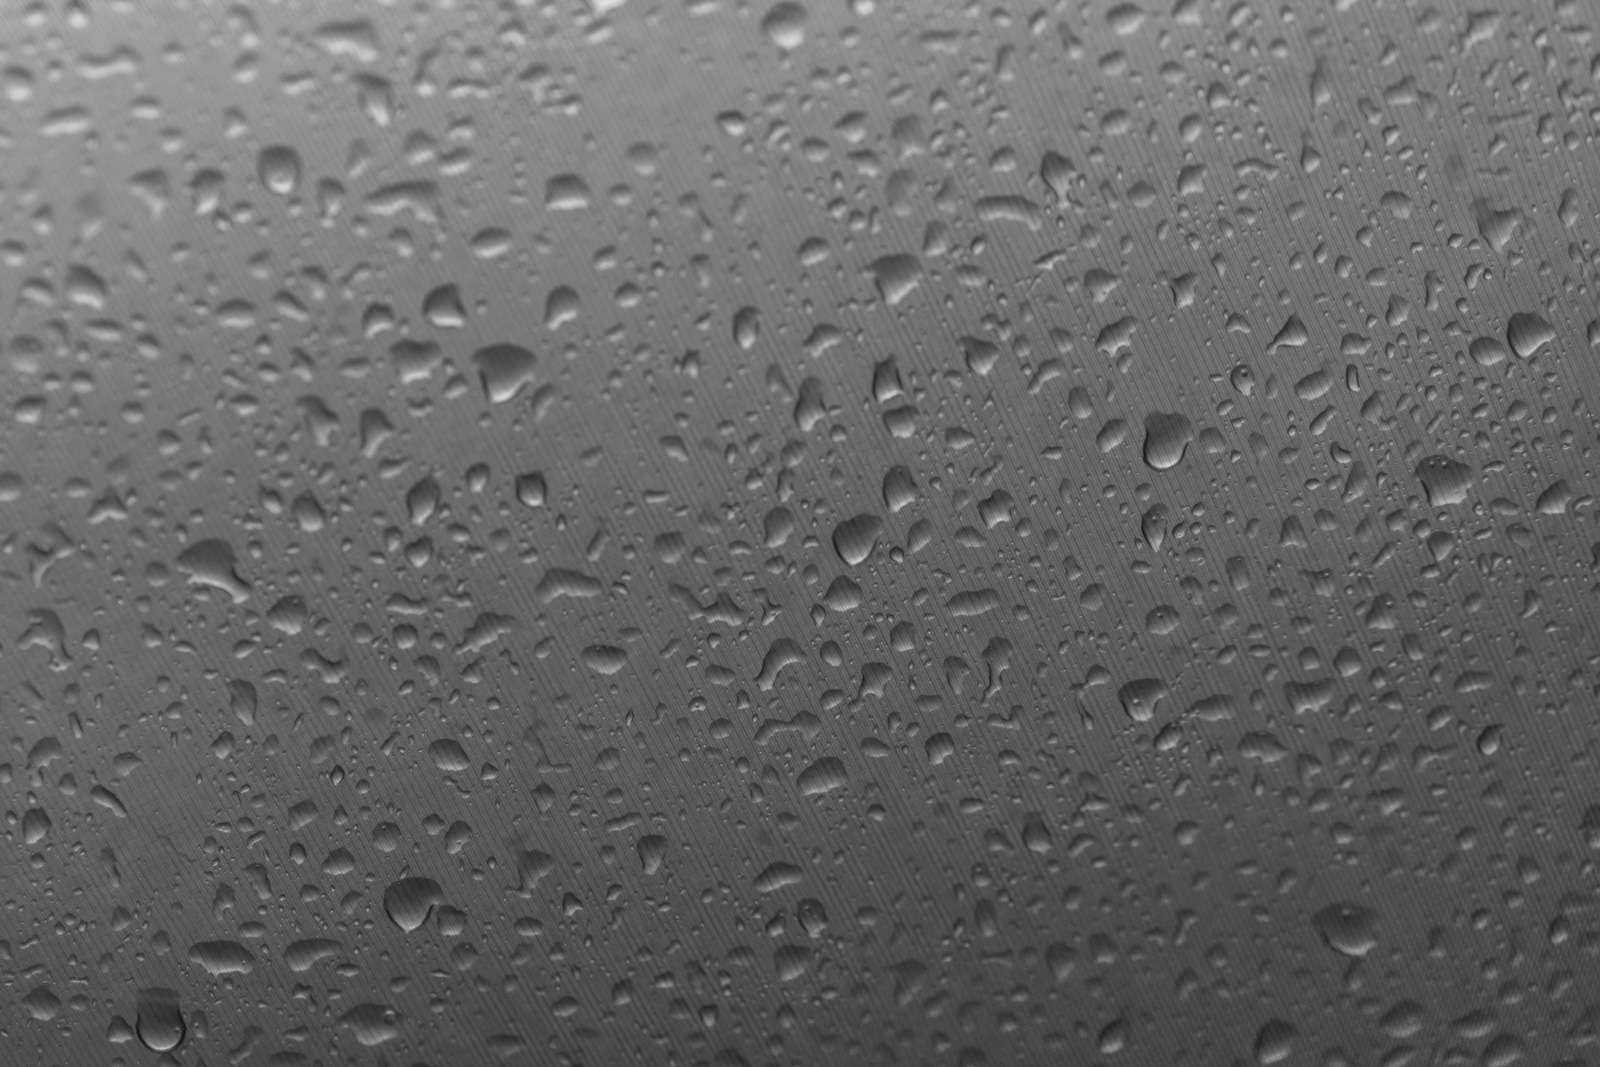
We reached our campsite without any issues. Shortly after, it began to rain... and then hail, for a couple of hours straight. It was a lot of water! I was oddly not that tired and decided to try to read and then take a photo of the water on my tent.
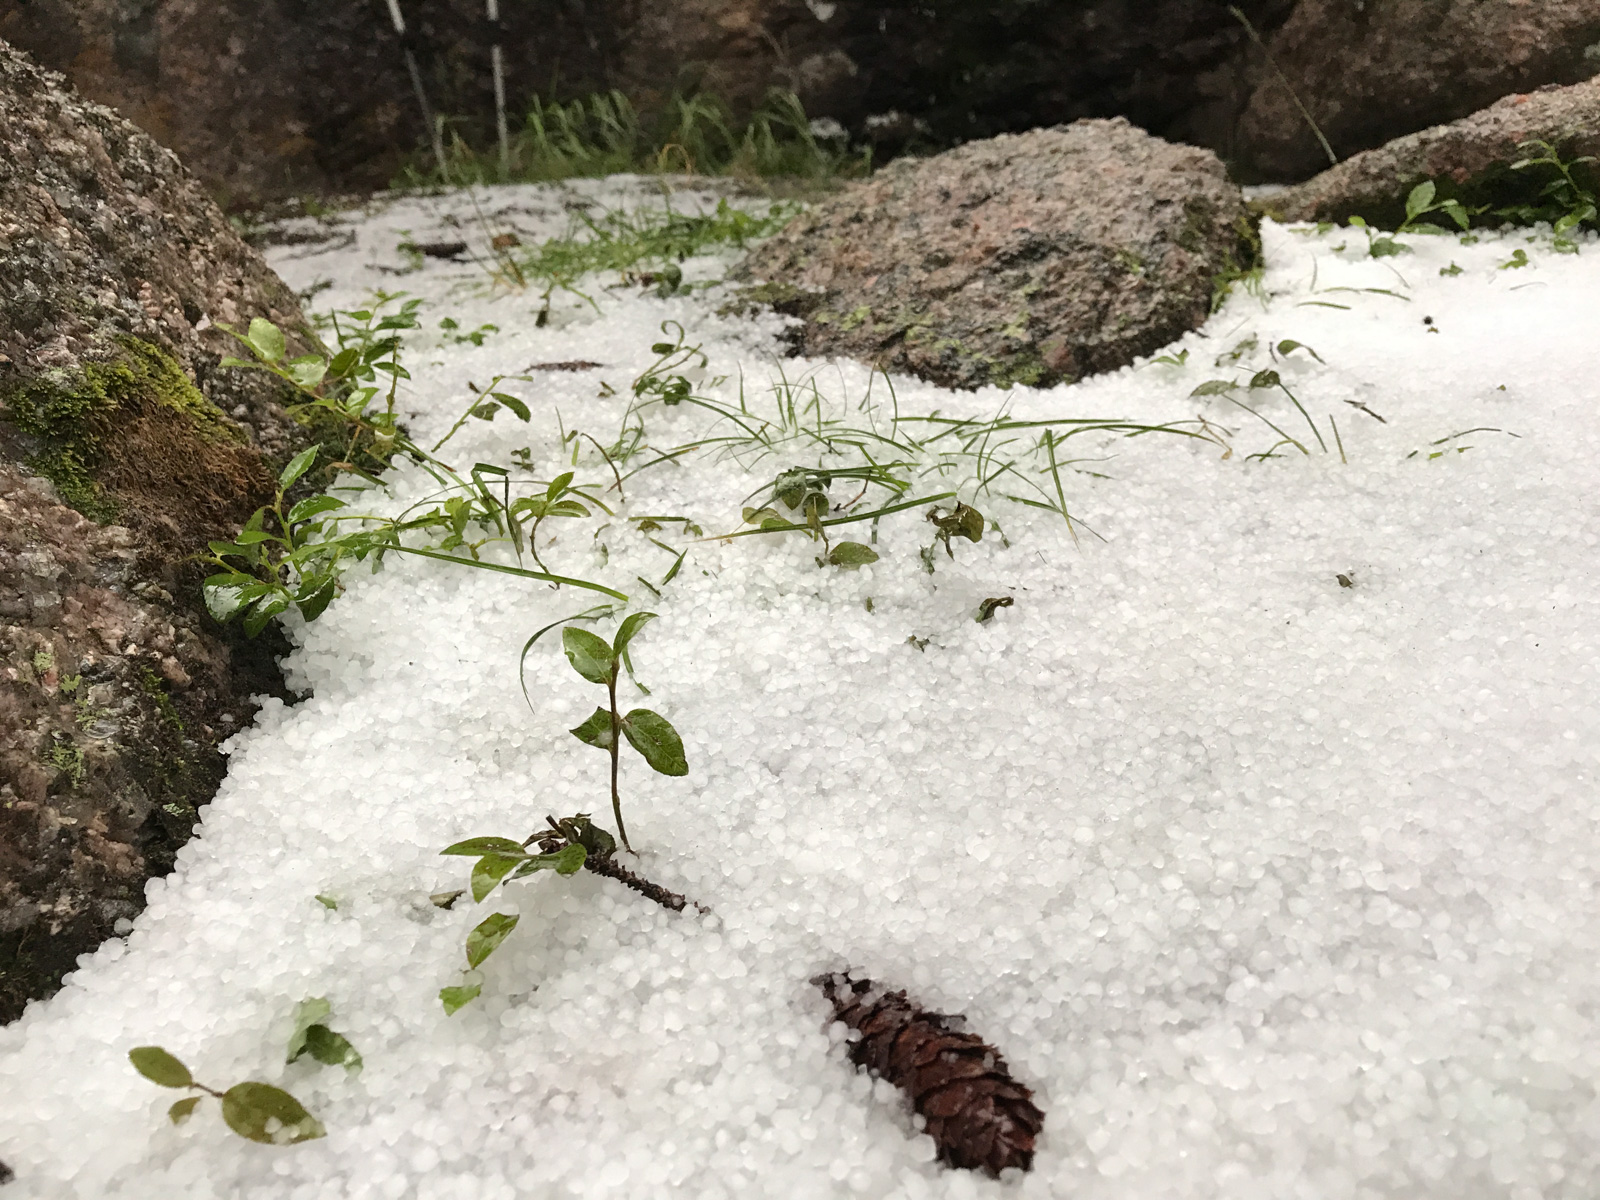
After the storm stopped, I poked my head outside to see the damage. Holy moley! Look at all that ice!
We finally decided to eat dinner and crash, as I was planning on an early hike out the next day, and it would be a tough one for sure.
DAY 4: Hike back over Hunchback Pass to Beartown.
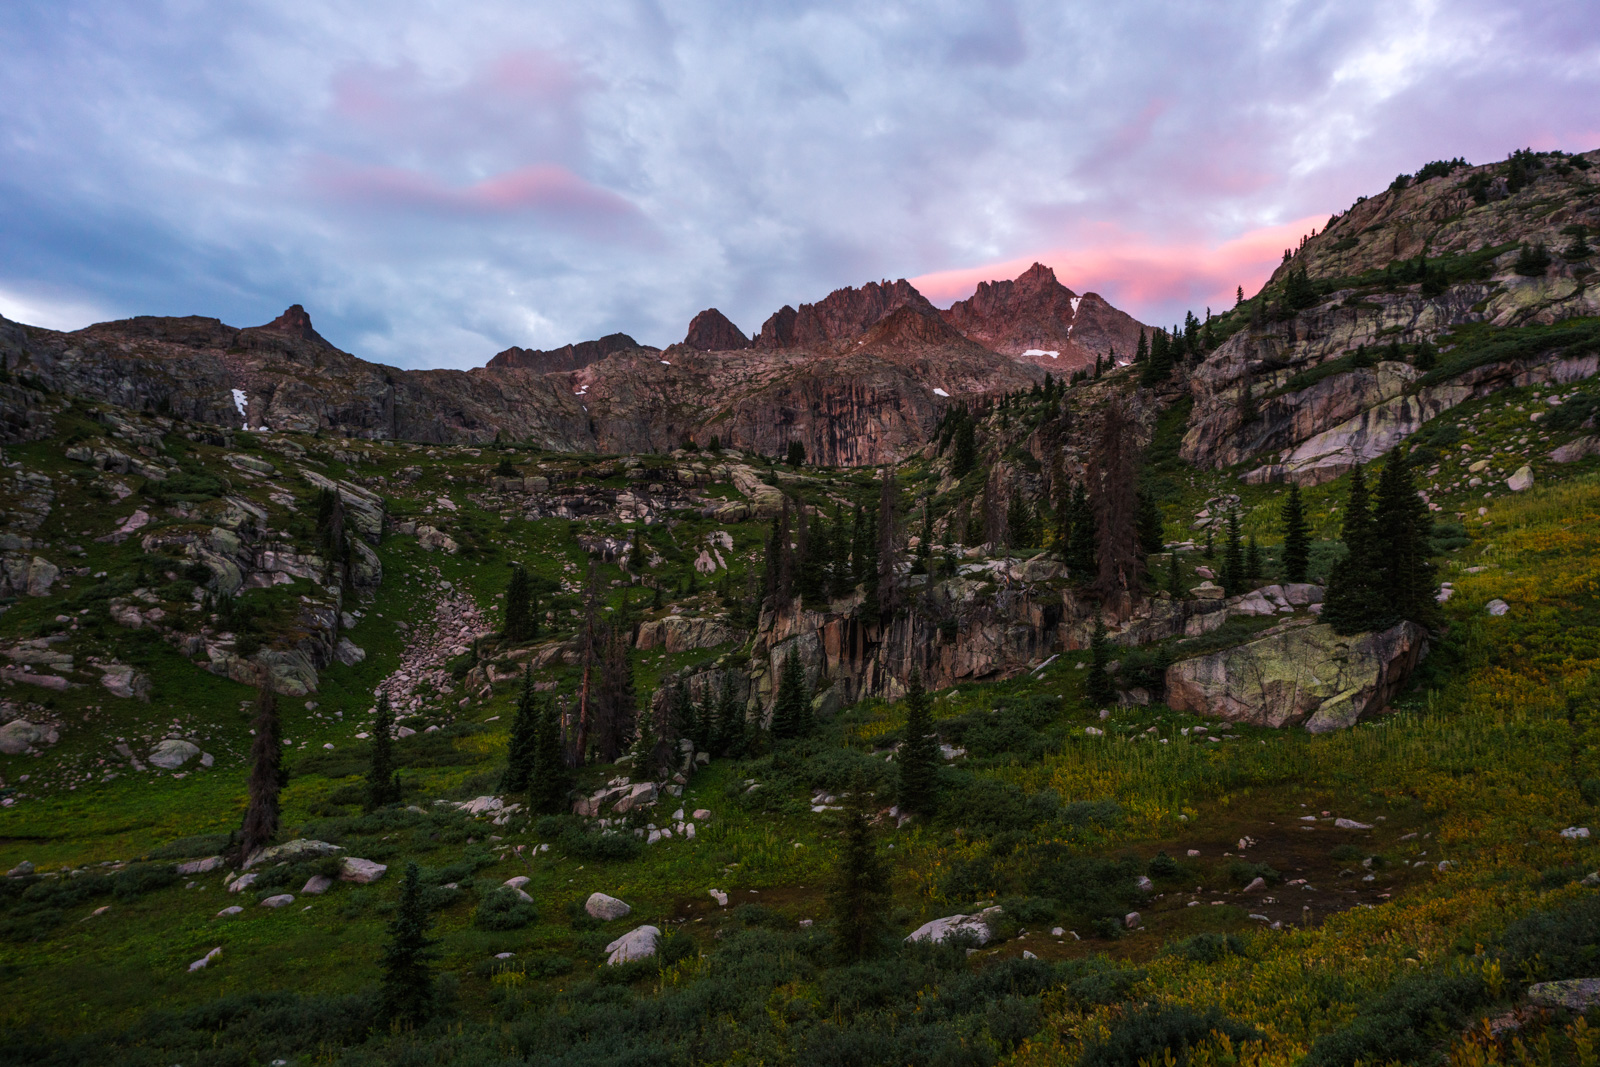
Rise and shine. This would be a tough day. At least it started out well with a parting gift from Jagged Mountain at sunrise!

On the way out, everything, I mean EVERYTHING was wet. The dense vegetation along sunlight creek was almost unbearable. All of my clothes and both feet were soaked. Good times.
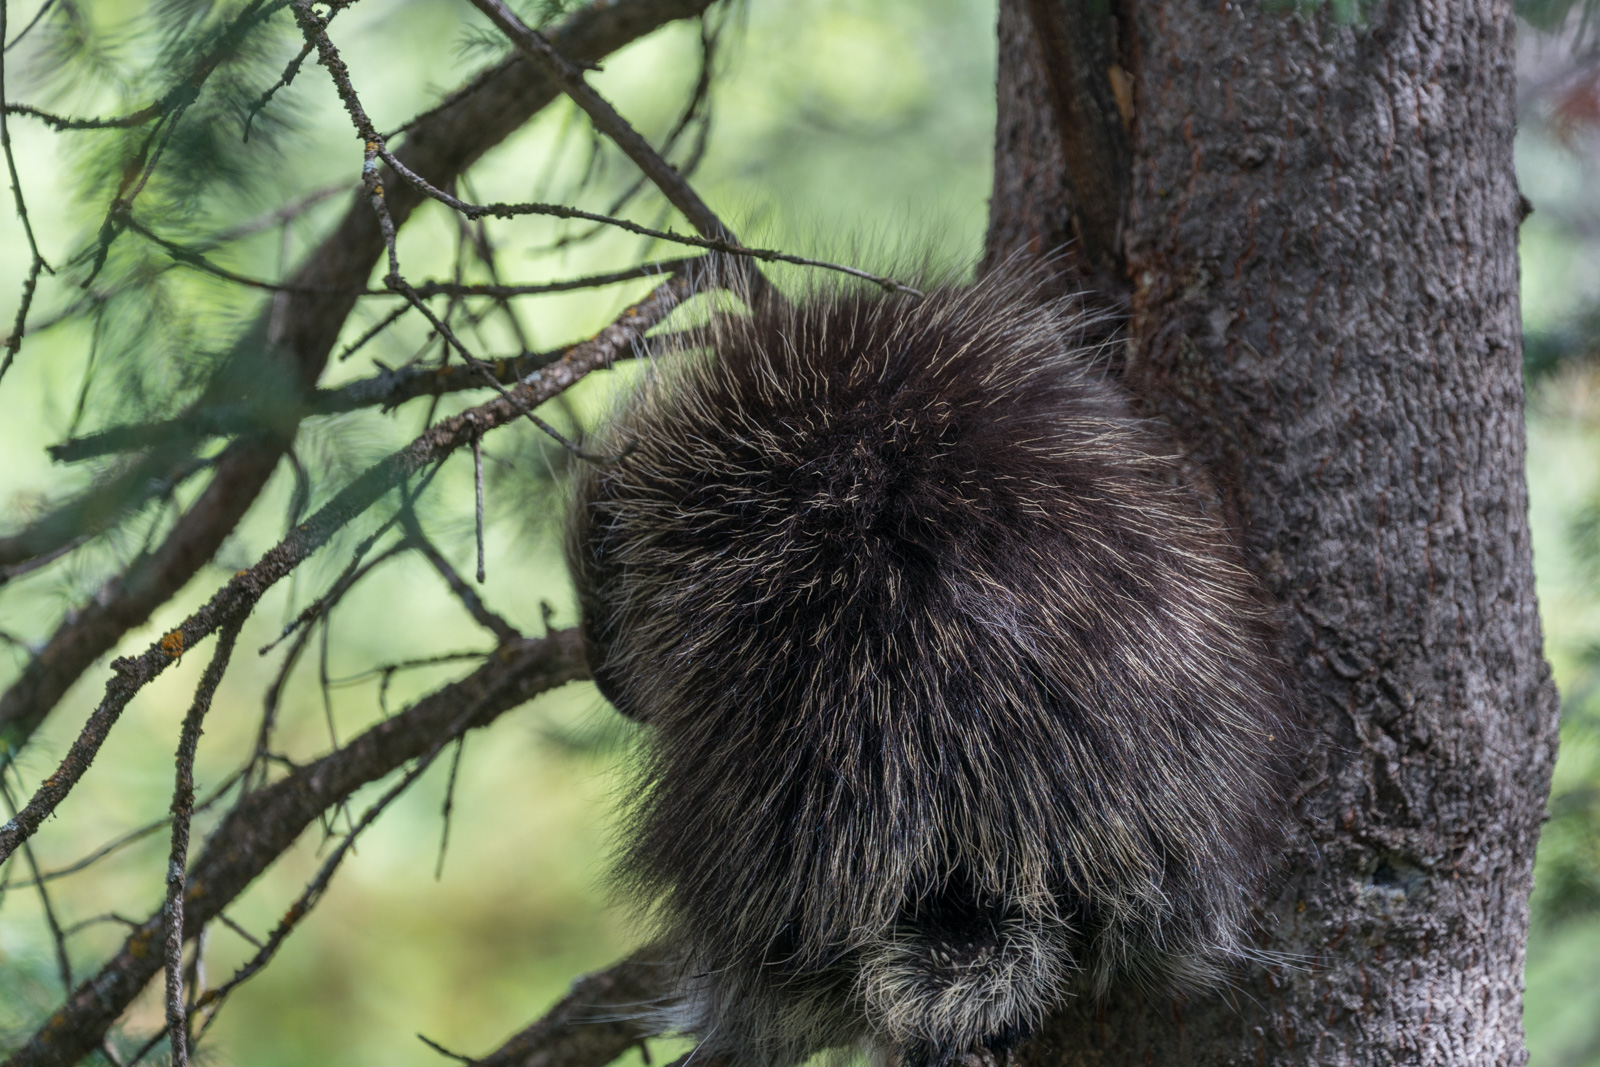
I stopped after Vallecito Creek to change socks and rinse out my boots as well as to put on some dry clothes. I chatted with a nice couple camped there and then departed. I kept my head down for most of the way back but got lucky to catch a porcupine sitting at eye level in a tree right next to the trail. I decided to go around.
It took me about 6 hours to get from camp to my car in Beartown, and I really slowed down at Hunchback Pass - I had just run out of gas. It did not help that my water reservoir was leaking and I had to stop frequently to pump water. After cresting Hunchback Pass, I was welcomed with a nice view of UN 13,308 across the valley. A nice parting gift from the Weminuche, my favorite place on earth.
Thanks again to Natalie and Shawn, you guys were amazing partners! Here's to Natalie, who led us up!
Thanks for reading! I hope you enjoyed this one. Sorry if it was slow to load! Lots of photos!
Climbing Pigeon Peak & Turret Peak via Ruby Basin - a sleepless soul-filling adventure

I first admired Pigeon Peak's utterly impressive east face from the summit of Arrow Peak in 2010 on one of the most epic trips I've been on in my life. Ever since then, I knew that a trip up Pigeon Peak would be in my future. It only took 6 years, but I finally pulled it off. If someone would have told me at the start of the year that I was going to photograph the Perseid Meteor Shower from the saddle between Pigeon Peak and Turret Peak this year I would have just laughed it off. After living in Portland, Oregon for two years, I had developed a bit of a beer gut and lost some of my "mountaineering shape" I had worked on while going after the 14ers from 2008 - 2012. A year ago the idea of pushing myself hard enough to photograph the best meteor shower of the year from 13,000 ft. would have been laughable... but here we are in 2016 and that's exactly what I did. In fact, the details of my trip, in retrospect, are a bit staggering to take in, at least for my old 37-year-old body. The full details show nicely on my GaiaGPS track, which is downloadable. You can purchase GaiaGPS here and help support the site.
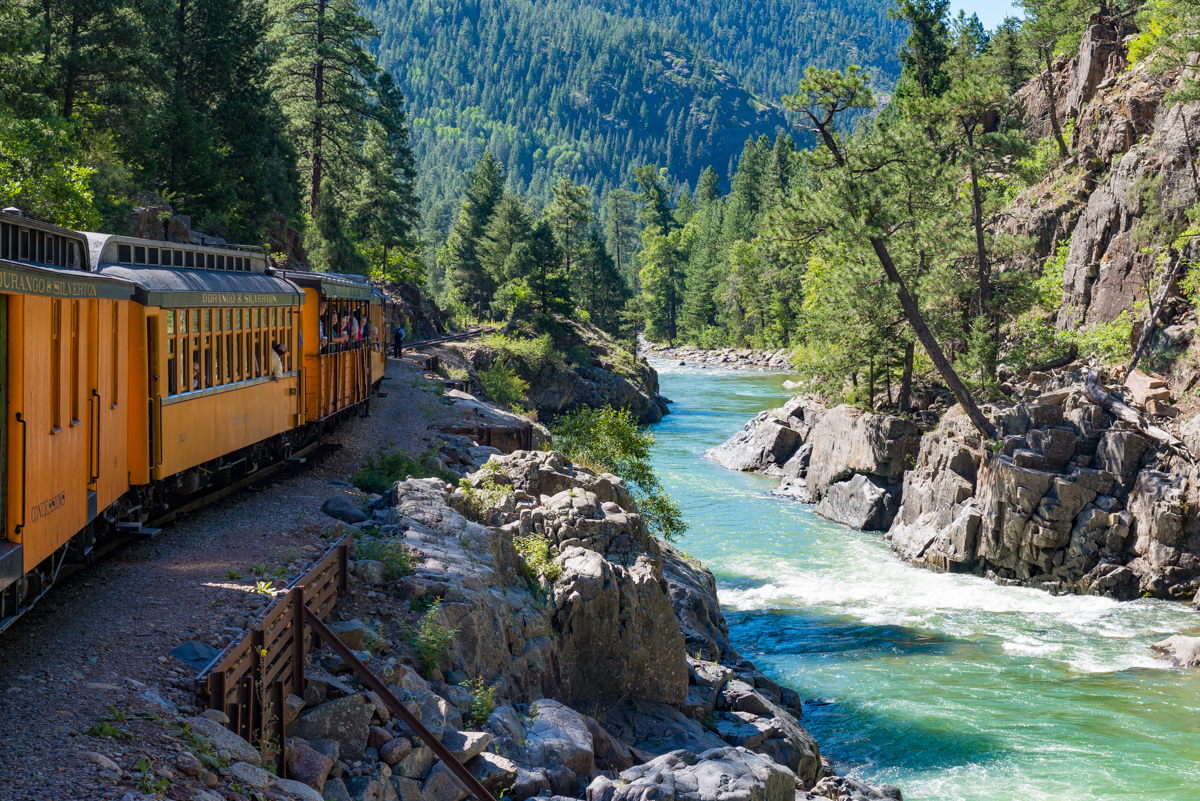
8/12/16 - 8:30 AM - depart Durango on the Durango & Silverton Narrow Gauge train
8/12/16 - 11:30 AM - dropped off at Needleton by the Durango & Silverton Narrow Gauge train
8/12/16 - 3:00 PM - arrived at Ruby Lake
8/12/16 - 5:00 PM - arrived at meadow in upper Ruby Basin below Turret Needles
8/12/16 - 10:30 PM - departed without sleep for the Turret Peak / Pigeon Peak saddle to photograph the Perseid Meteor Shower
8/12/16 - 11:45 PM - arrived at Pigeon / Turret saddle and began photographing Perseid Meteor Shower
8/13/16 - 2:00 AM - moon sets (still no sleep, too cold)
8/13/16 - 4:30 AM - arrived at Turret Peak summit
8/13/16 - 5:21 AM - began photographing sunrise from Turret Peak summit
8/13/16 - 6:15 AM - left Turret Peak summit to head back to saddle
8/13/16 - 6:45 AM - arrived at saddle
8/13/16 - 8:00 AM - arrived at secondary saddle to enter North Pigeon Creek basin and descend down 1,700 ft. to climb Pigeon Peak
8/13/16 - 8:15 AM - arrived at base of Pigeon Peak on northwest side of Pigeon
8/13/16 - 9:40 AM - arrived at summit block of Pigeon and class 4 section
8/13/16 - 10:00 AM - arrived on Pigeon summit
8/13/16 - 11:30 AM - arrived at secondary saddle and began to regain Pigeon / Turret saddle
8/13/16 - 12:55 PM - arrived back at camp in upper Ruby Basin (commence sleep for the first time since 6 AM on 8/12/16 - that's 31 hours of being awake without sleep)
8/13/16 - 7:00 PM - photograph sunset from upper Ruby Basin
8/14/16 - 7:30 AM - photograph sunrise from upper Ruby Basin
8/14/16 - 9:00 AM - leave upper Ruby Basin and hike out
8/14/16 - 10:00 AM - arrive at Ruby Lake
8/14/16 - 12:05 PM - arrive at Needleton and wait for train
The grand total was 9,286 ft. of vertical ascent in 10 hrs, 52 mins of movement with a total of 19.3 miles of distance covered. Not bad!
To some (like Andrew Hamilton) those stats not might seem very impressive, but it felt pretty great to me, especially considering the extra 10 pounds of photography weight I was carrying.
So, from the beginning... where was I? Ah, yes, taking the train from Durango. I had originally planned on going to climb Silex and The Guardian with Natalie Moran from 14ers.com, who I had done Dallas Peak and Teakettle Mountain with me back in 2013; however, I did not think I was going to be able to get the day off of work, so I cancelled... and at the last minute on Thursday night I was able to swing the day off, so I made hasty plans to get Pigeon and Turret under my belt. Knowing that the Perseid Meteor Shower was peaking Thursday and Friday night with the radiant (the part of the sky where the meteors originate) coming out of the north east, I made plans to hike all the way up into Ruby Basin and try for the Pigeon / Turret saddle with a view looking north east towards Animas Mountain and Monitor Peak, all illuminated by the setting moon until 2 AM. These plans were of course made possible by studying maps, reading Roach's 13ers guide, and by using a great app called PhotoPills, which I've written more about HERE.
The trip on the train went without a hitch and the scenery was nice, but nothing compared to what was in store for me soon.
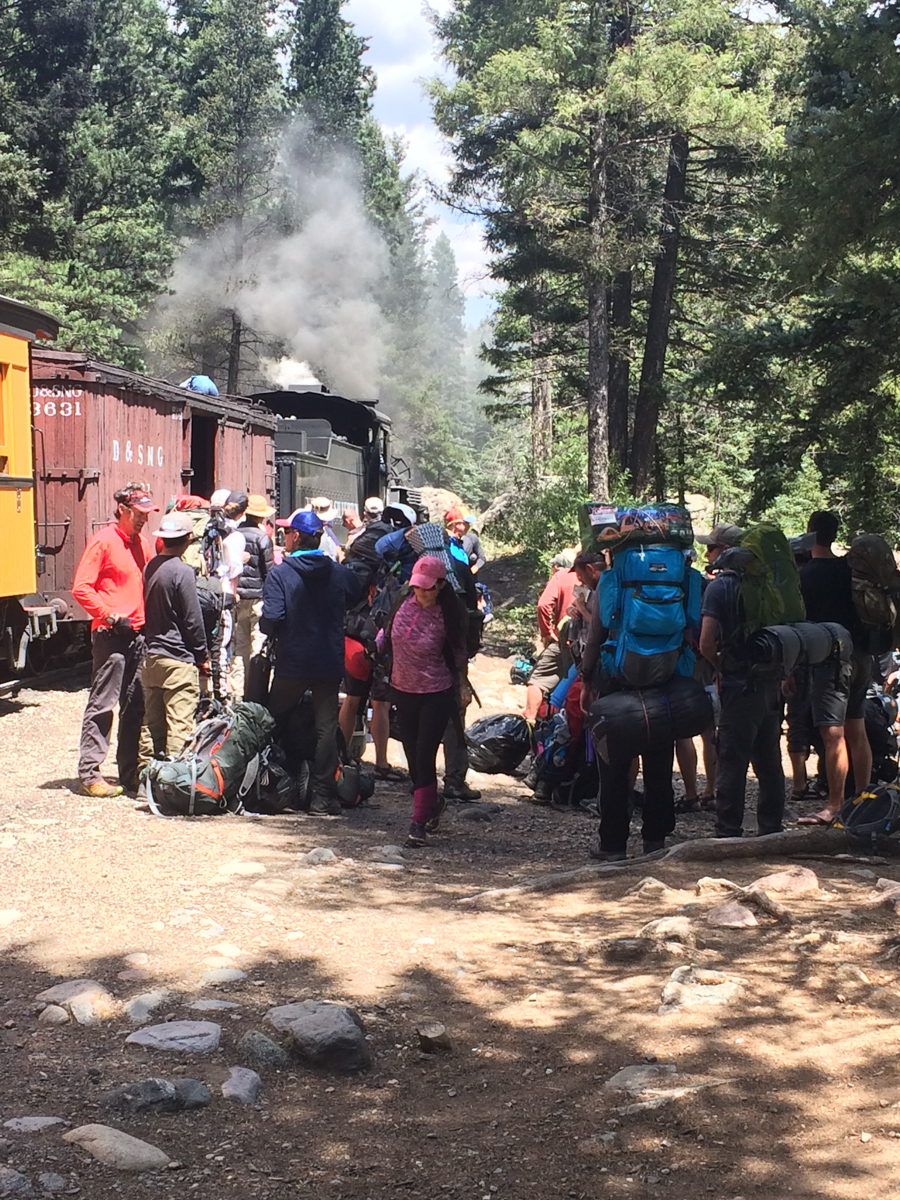
The train stopped at Needleton and at least 40 people got off to begin their backpacking trips in the area. The brakeman responsible for unloading the packs was throwing them off the box car in a rush, much to everyone's dismay. Water bottles, food, stoves, bags, and more went flying out of people's packs. I later found that my water filter was damaged in the ordeal. I was thinking about filing a complaint with the train company becuase this employee clearly did not care about anyone's stuff. I was lucky none of my camera equipment was damaged. I crossed the bridge over the Animas and watched as everyone else headed south towards Chicago Basin, while I went north for Ruby Lake & Ruby Basin. It turned out only two other people from our train went up into Ruby Basin with me, but I would not run into them until my second day. In preparation for this backpack, I read and re-read Roach's descriptions for the approach. It sounded pretty intense: "...this is a very rough approach. A direct ascent up Ruby Creek from the Animas is so difficult it has left several strong people speechless." Wow, those are pretty strong words from Roach, who I have often teased in other trip reports as being vague or non-descript. I took Roach's cautionary words with a grain of salt and went for it. I felt pretty strong and was up to the task, so I began. Luckily, I had my friend Natalie Moran's GPS track downloaded into my phone via GaiaGPS so that I could roughly keep track of the trail. This was particularly helpful right off the bat when trying to locate the turn-off from the Animas River Trail into North Pigeon Creek.

Shortly into this trail, it became steep. Steep and unrelenting. I had pared down my pack weight to 38 pounds, not bad considering all of my camera gear; however, this trail was downright brutal. Roach was not joking. I kept my eyes peeled for a carving of a columbine flower, which was supposed to signify that I was on the right trail up to Ruby Lake; but, I never did find it on the way up. I figured out later what I did wrong though. When I reached the small creek crossing for North Pigeon Creek (the only one), I spotted what I thought was the trail up off to the left on the side of the hill. That is the trail I followed (which eventually petered out and ended up in a bushwhack straight up until I found the right trail). The correct trail was to the right and up from the creek crossing, which I learned on the way back down. At least the views back across the Animas towards West Needle Mountain and the Twilights was great.
In preparation for this trip, I was looking through lots of trip reports and stumbled across a familar name. It was the name of one of my newest co-workers, Terri Horvath, who is a bi-Centennial finisher (she's climbed the highest 200 mountains in Colorado). Terri provided me with some excellent tips which kept me from going even more off course than I already had, including some solid advice in locating the "high trail" that Roach describes in his route descriptions. Right after a very steep step down, I looked to the right to find the proper trail. This trail worked steeply up and down above Ruby Lake and finally dropped me right at the base of the lower lake, with views of Ruby Lake finally realized.
Upon reaching Ruby Lake, I ran into a group of five guys from Denver that were really great to chat with, one of which being a fellow photographer named Jarad Switzer. We commiserated on the gruelling hike into the basin and then I shared my plans to shoot the meteor shower that night which I think left them all thinking I was a little bit crazy. Was I? Probably. I kept a solid pace up to the lake, making it there in 3 hours 30 minutes from Needleton. I continued on. The views of Pigeon began to blow me away. This thing is truly unbelievable!
The trail became really hard to follow after the lake and was really only followable due to some well-placed cairns (thank you to whoever put those there). It weaved left above the cliffs at the headwall of the lake and through some really rugged terrain consisting of many fallen trees and steep hillsides. It reminded me quite a bit of No Name Creek, just one basin north of where I was at. My expression tells the story, I think.
Upon breaking into upper Ruby Basin, the trail flattened out considerably and opened up to some amazing views above. The willow maze in the upper basin was actually not that hard to navigate, having been trampled through enough times to make it easy to find the weaknesses. The meadow in the upper basin below the Turret Needles and Pigeon came into view and I was quite excited until I noticed two other tents. I was hopeful that the people camped there would not mind another person joining them in the meadow. It turns out that the meadow is quite large and it would take quite a few parties worth of tents to fill it up. I arrived at the meadow at 5 PM and was pretty exhausted. I was at the opposite end of the meadow from these other backpackers, who later informed me that they had unsuccessfully attempted the east face of Pigeon earlier in the day which caught my attention. The climber, named Rex (or Max,?) explained that he had climbed Pigeon's east face 20 years prior and that he wanted to see if he could do it again. Impressive! I set up my tent and destroyed my dinner in preparation for a night of photography and sleeplessness. I had hoped to catch some sleep, which was really just a pipe dream. No sleep was obtained. I did get some decent photos around camp though.
The Turret Needles were the most impressive feature of the basin and I decided to camp right below them about 100 feet away from the stream. Knowing that I would not have any trees to hang my food from, I had purchased an Ursack the day before from Backcountry Experience in Durango. The Ursack is designed to withstand the chewing of rodents like marmots and mice, which I anticipated finding lots of at the upper basin. I also employed a technique that I read about in another trip report where I suspended my food sack from the side of a cliff - a technique I also used at Lillie Lake on my Chicago Basin backpacking trip in 2011. At any rate, the wildflowers were still quite prolific in the upper basin, and I was pretty much in heaven as a photographer.
I shot exclusively with my Nikon 14-24 f/2.8 lens, and my Nikon 24-70 f/2.8 lens attached to my Nikon D800, which is getting a bit long in the tooth. Someday I'd love to upgrade to a D810 or maybe something lighter from Fuji or Sony.
I set my alarm for 10:20 PM, but never actually slept. When the alarm went off, I bounced right out of my sleeping bag and out the door. The climber I met in the meadow had indicated that the "best" route up to the saddle was to take a little gully just to the left of where it looked like the obvious trail went. Taking their advice in the dark was pretty daunting - but it did manage to get me up very high quickly above the meadow. I followed cairns in the dark and enjoyed the views behind me of Animas Mountain and Monitor Peak, which were illuminated by the moon. Pigeon cast a long shadow across the peaks and was a constant reminder of just how much more climbing was ahead.
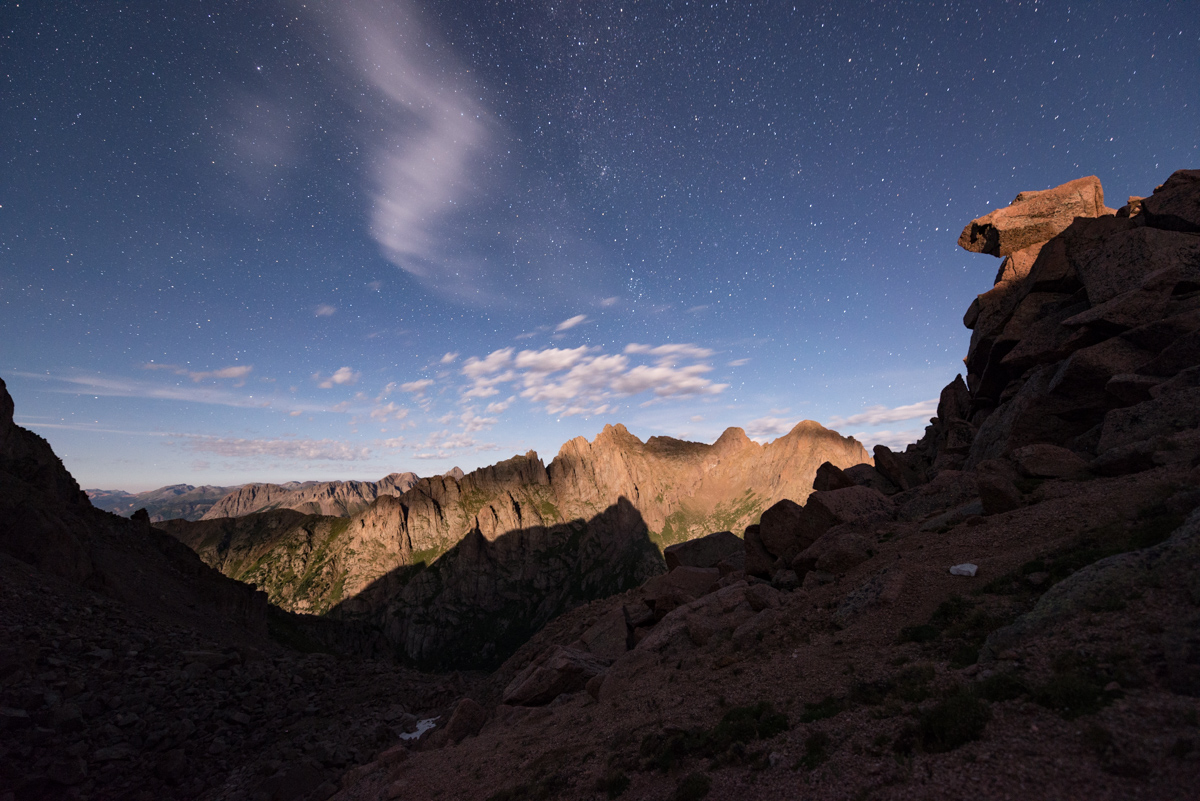
As I climbed into the area just below the saddle, I found myself in a large boulder field which I did not recall being described in any of the route descriptions. I'm not sure if I can explain it or not, but trying to locate cairns within a boulder field in the dark is pretty fun... and by fun what I mean is pretty pointless. Fortunately, I had my phone with GaiaGPS and could keep myself on route for the most part. Above this large boulder field I found the terrain smooth out a bit and I stopped again to get another photograph of the mountains behind me, the scene accentuated by this really awesome rock formation to my right, which was also illuminated by the moon.
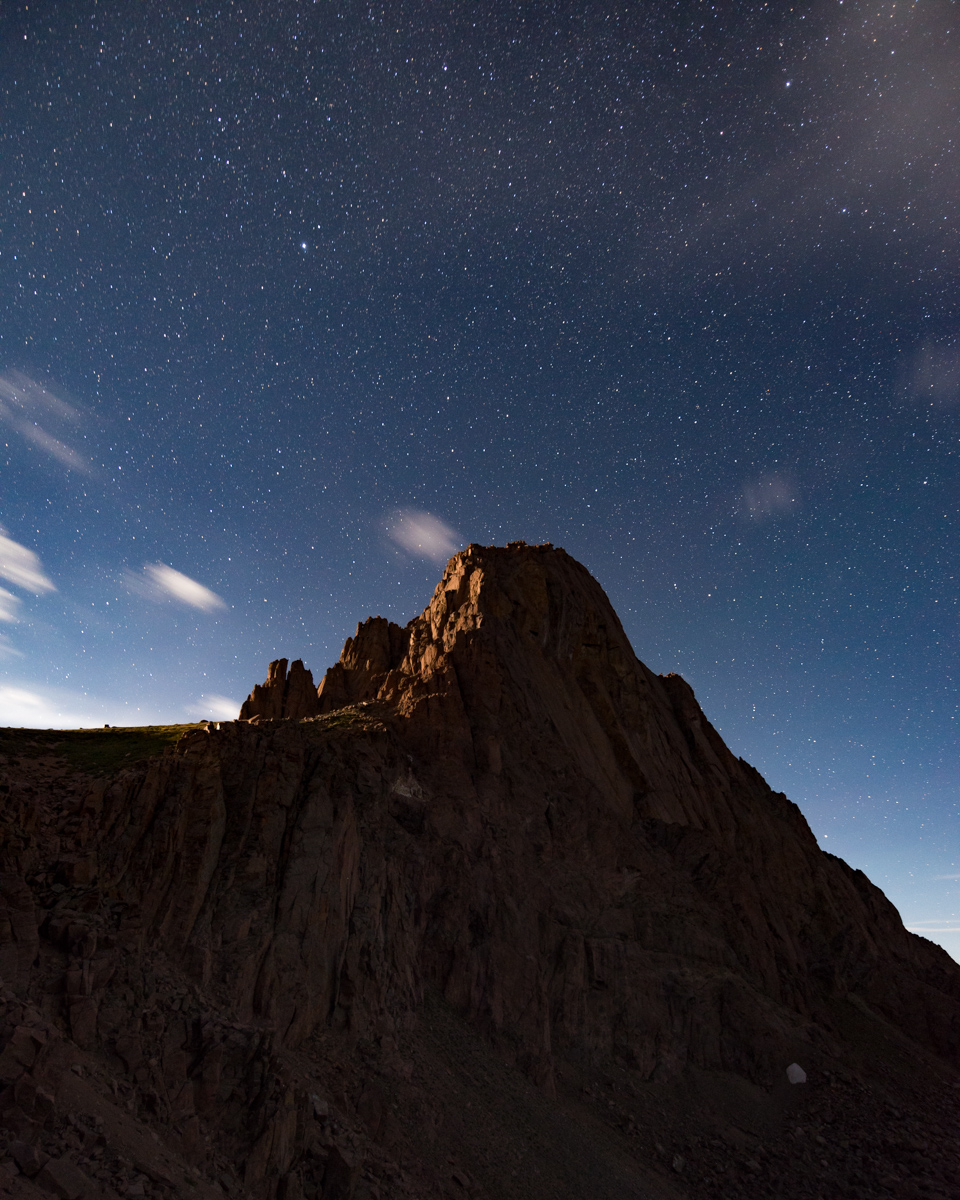
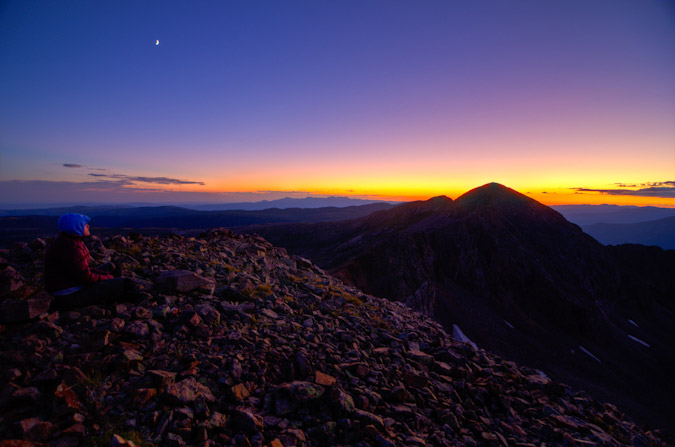
Upon reaching the saddle, I was of course not happy to find that there was some pretty cold breeze blowing over the top of the saddle. I knew that I was going to be in for a rough night of freezing my ass off. But hey, at least Pigeon looked absolutely stunning with the southeast face lit up by the moon.
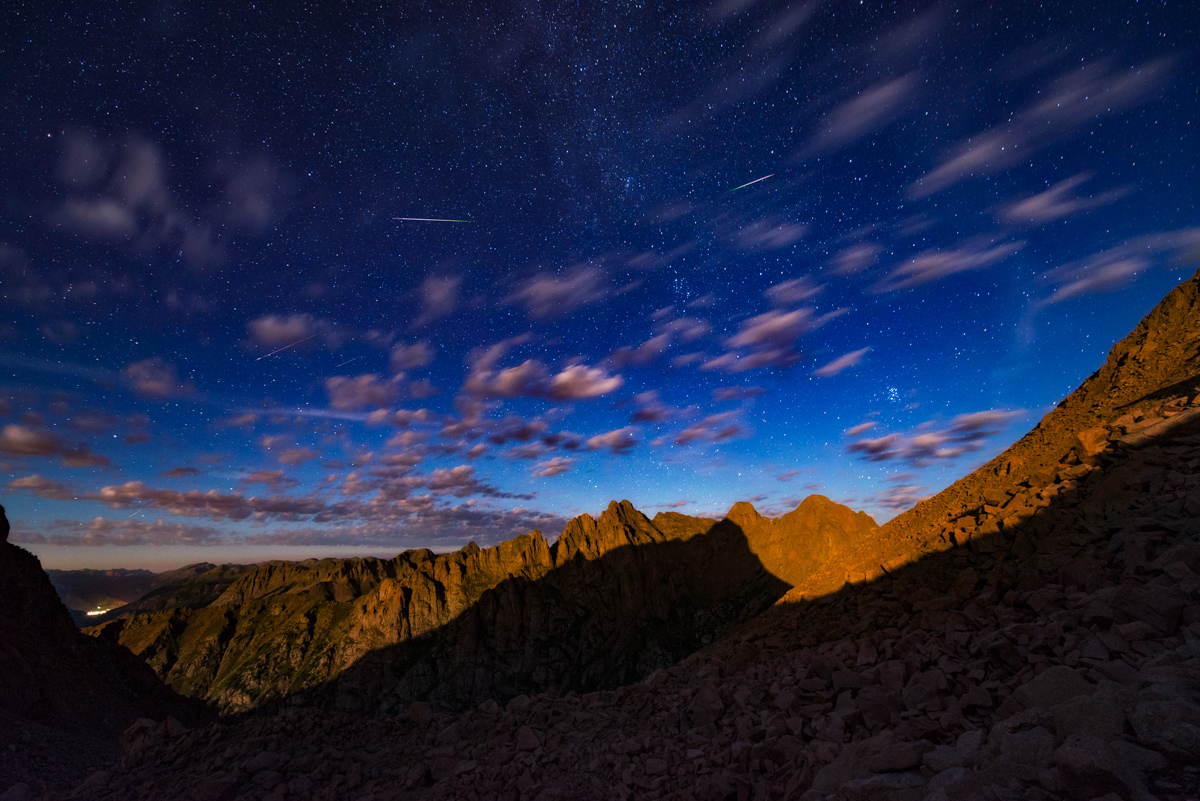
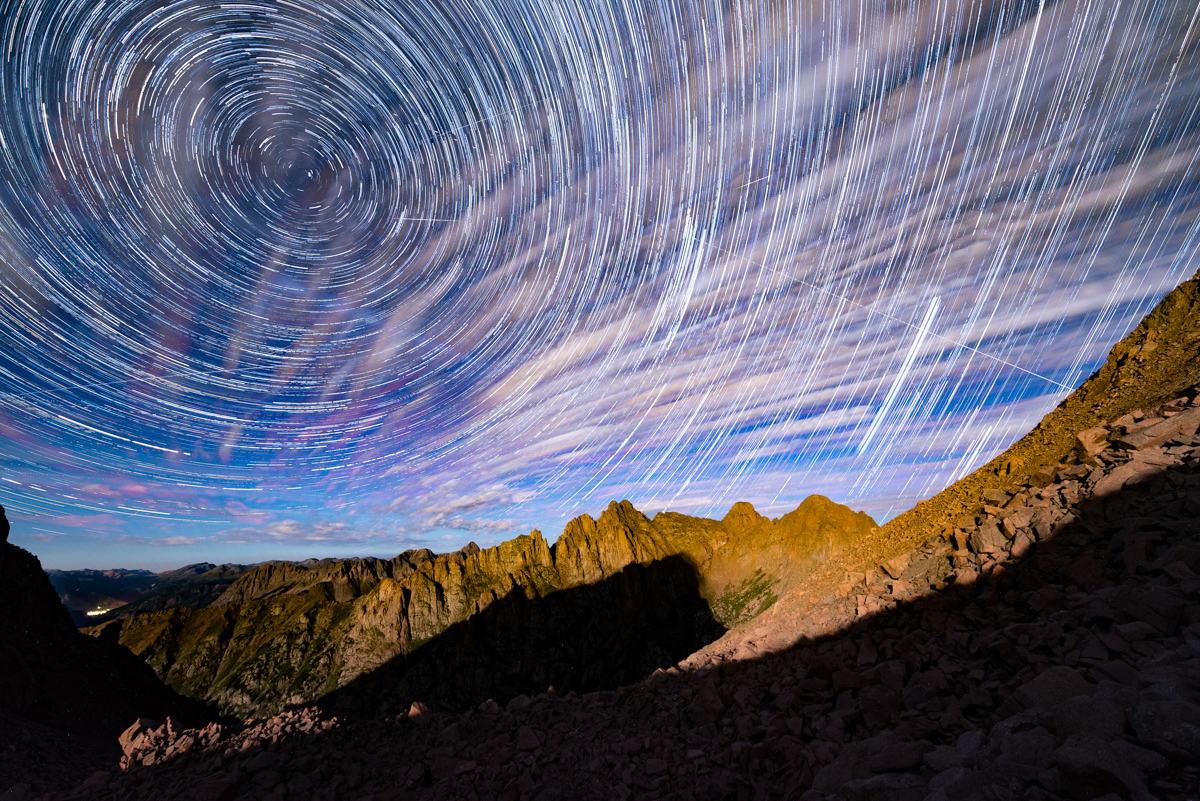
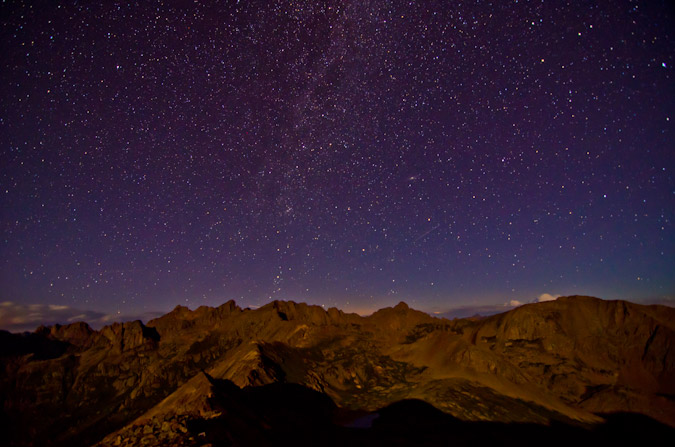
I found a nice spot to set-up my tripod for the night among some larger rocks that would be useful as a bed/chair/rest area in the cold wind. I clearly did not bring up enough warm clothing, because I basically shivered for 3 hours straight at this location, watching meteros streak by. In total, I believe I was able to capture about 15-30 meteors in my frame from 12 AM to 3 AM. The meteors were absolutely amazing to watch from this elevation, and I could even see the town of Silverton down below to the left.
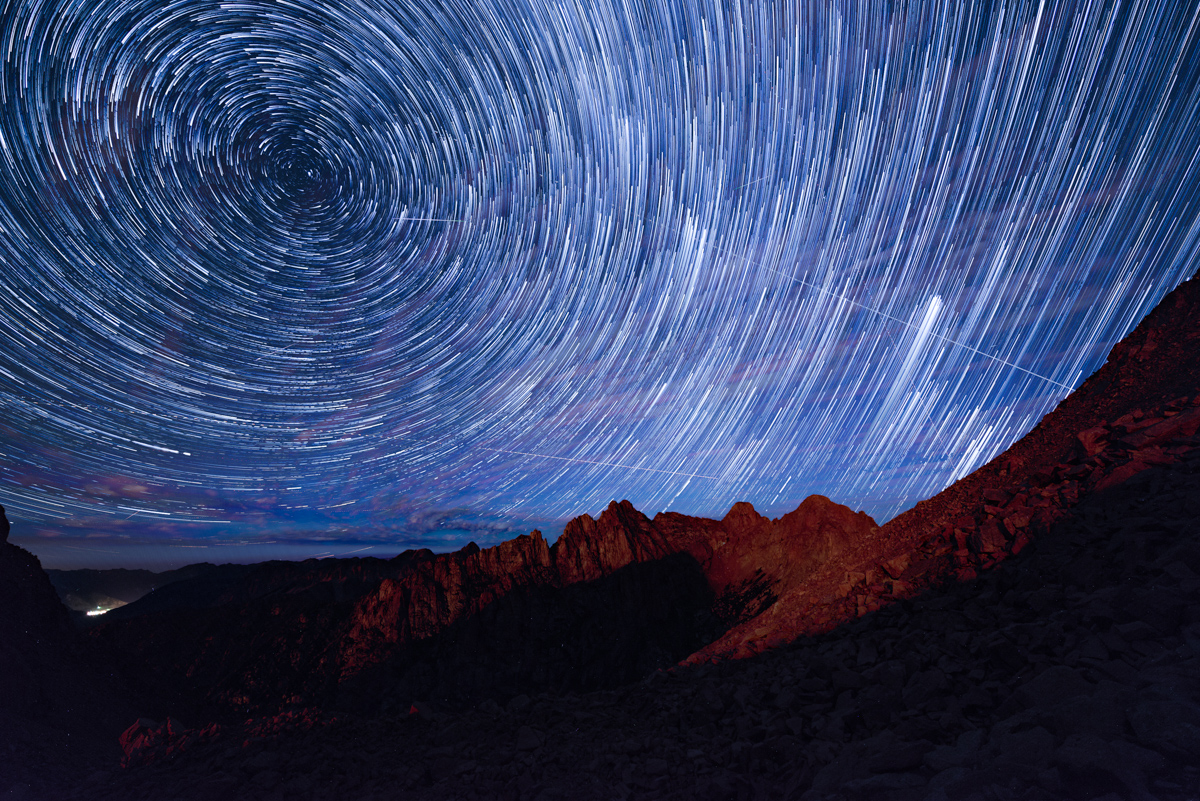
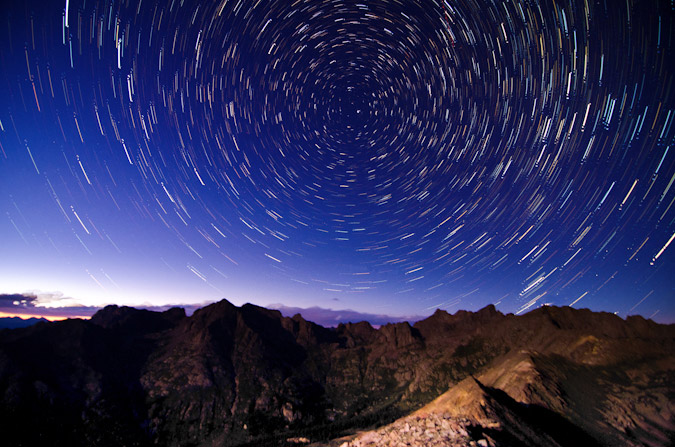
I combined the photos into some star trail sequences which turned out pretty well, and even did some timelapse video, which has music, so be warned!
More star trails!
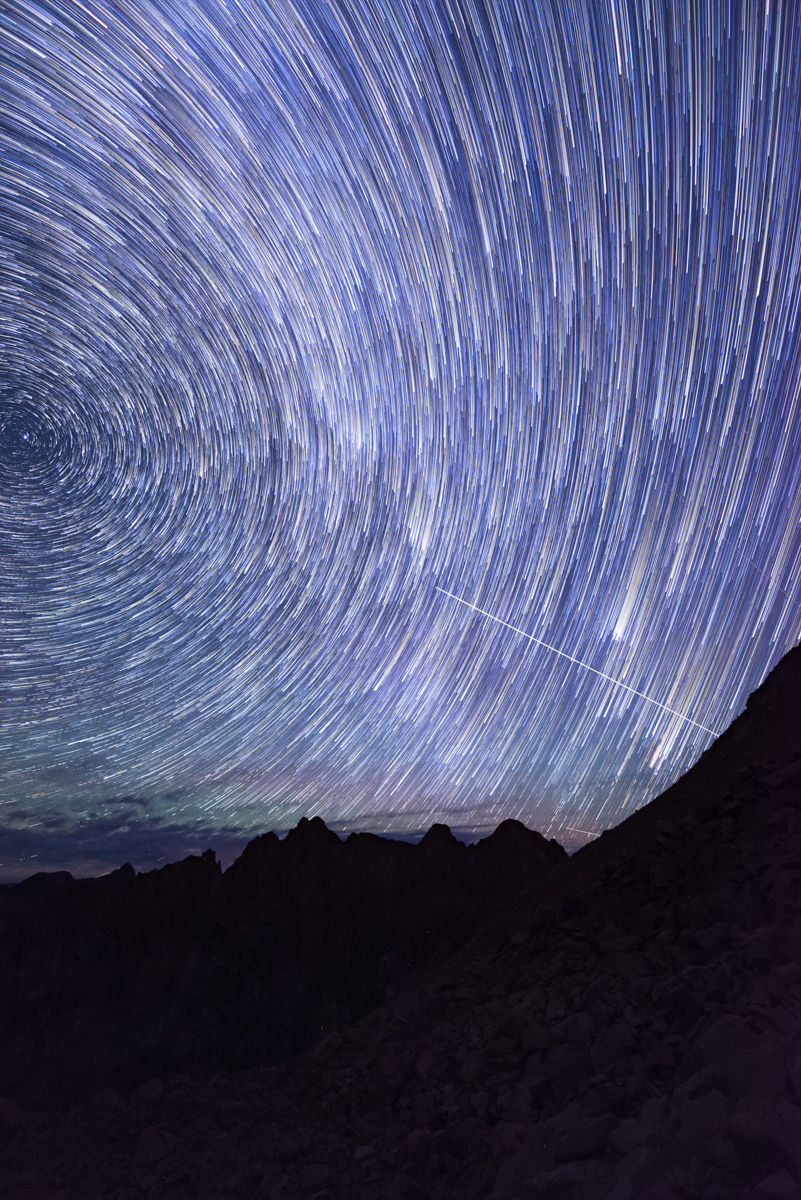
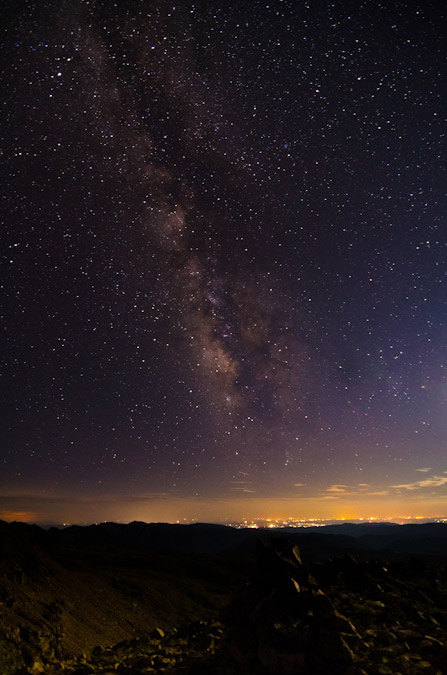
I noticed that a lot of meteors were originating at the apex of the night sky, so I turned my camera to portrait orientation for the last half of my shooting, this time in pitch black. I know I have some more photo editing to do to really highlight my work on the saddle, but this is what I have so far.
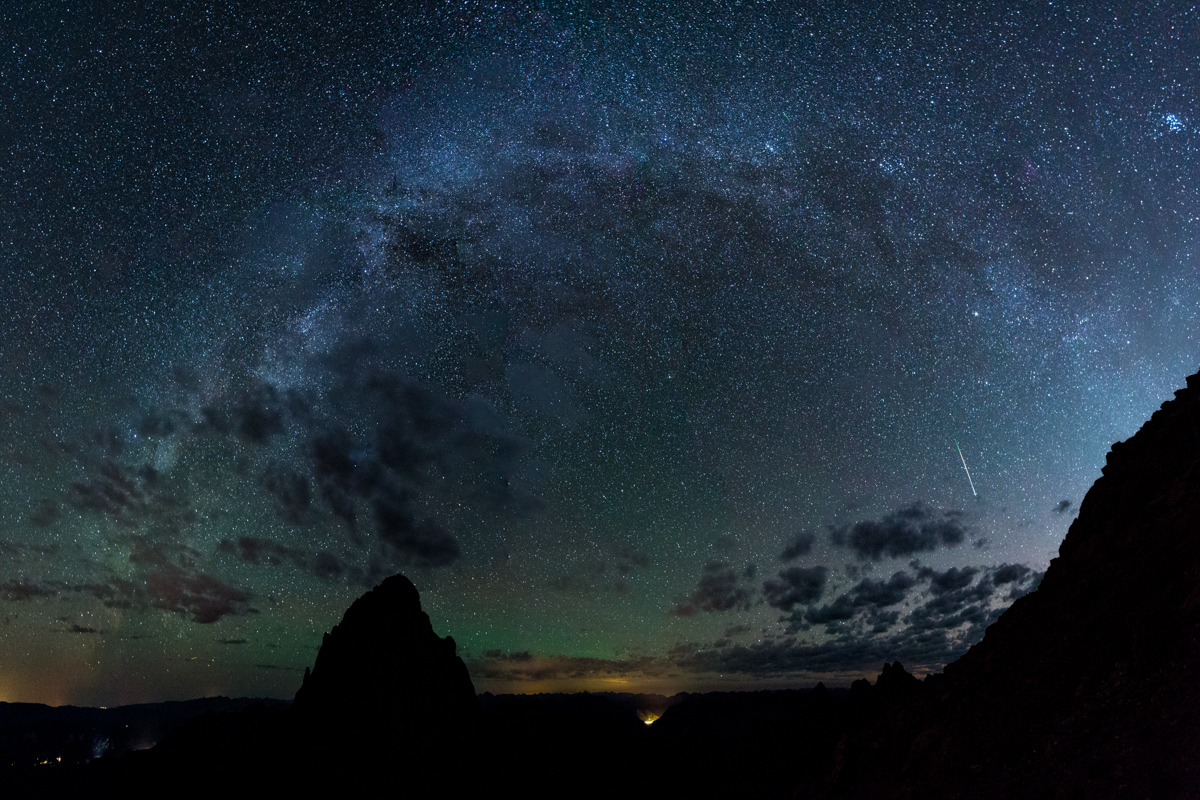
After freezing for a couple of hours I decided it was time to begin my ascent of Turret Peak. I also noted that since the moon had set that I might be able to get a glimpse of the Milky Way Core, which might open up a nice opportunity to photograph the Milky Way arching over Pigeon Peak. I pulled that off just below Turret's summit and even got a meteor in the last frame of the panorama - awesome!
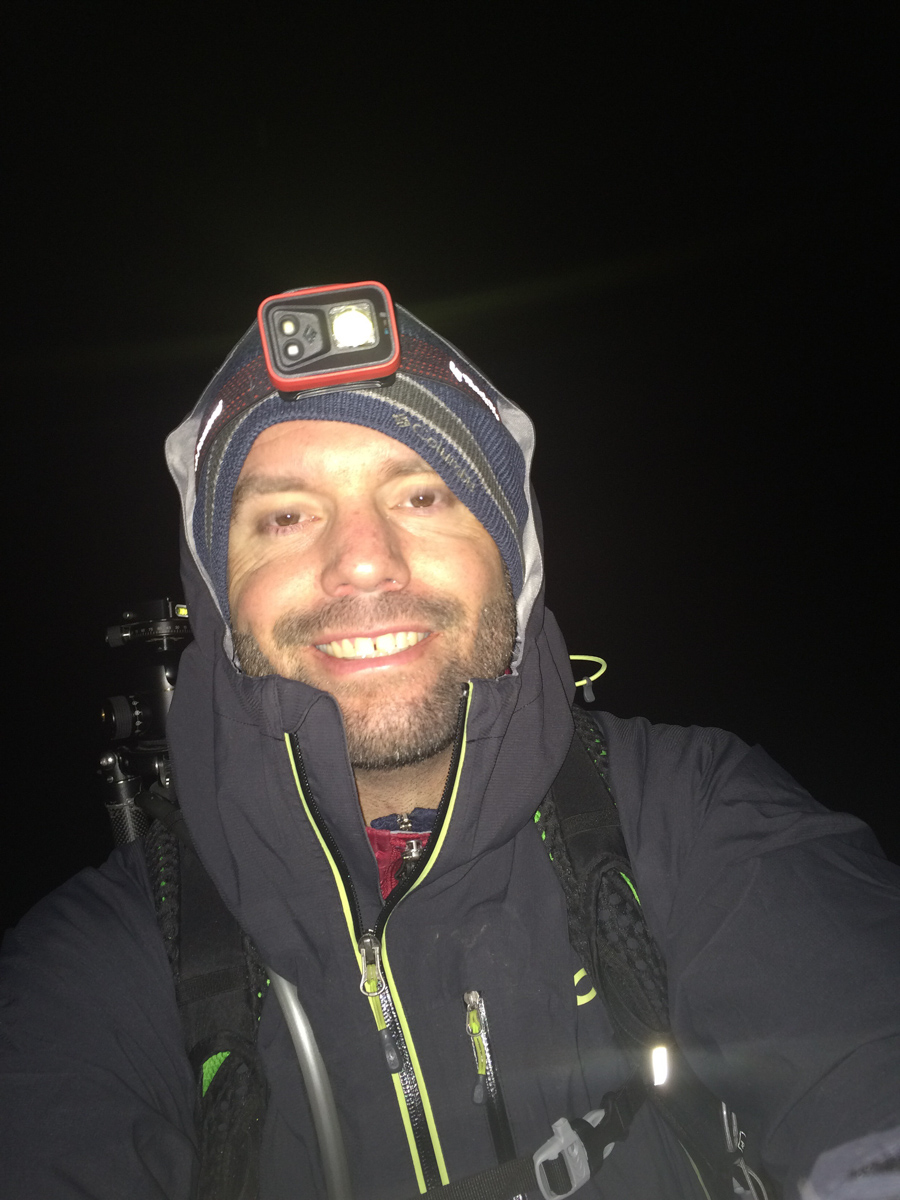
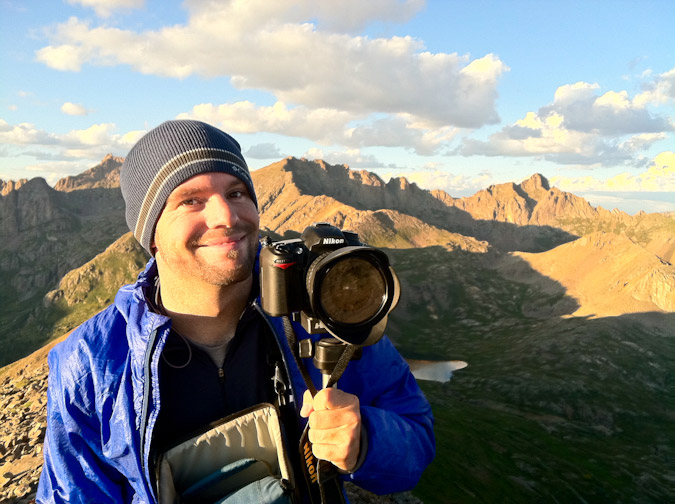
I arrived at the summit of Turret at 4:30 AM and felt completely wiped out. I think this photo says it all.
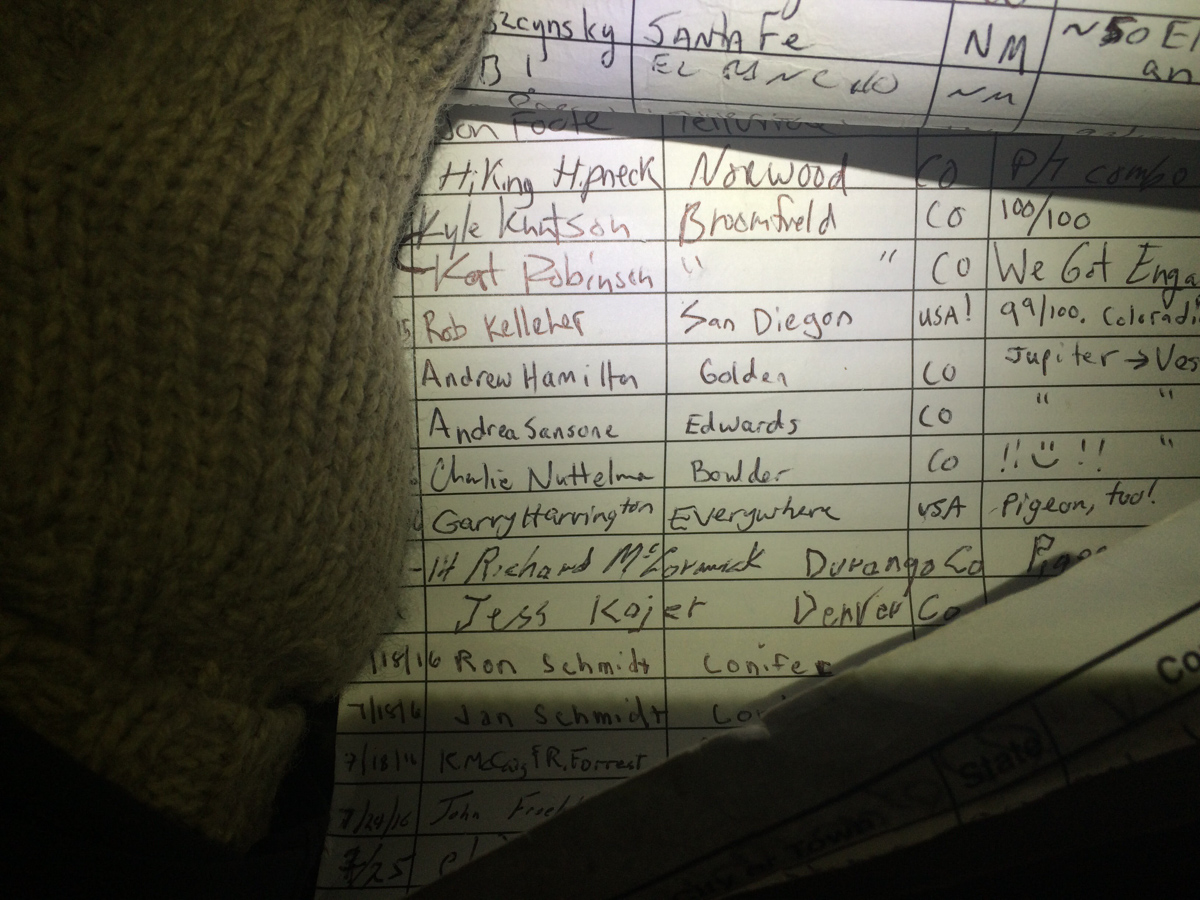
I saw some familar names on the summit register, including Andrew Hamilton from just a few weeks prior. His notes stated "Jupiter ---> Vestal" which I found quite interesting. If I'm reading it correctly, he started on Jupiter and this was just a spot in between his final destination of Vestal. That seemed like madness to me.
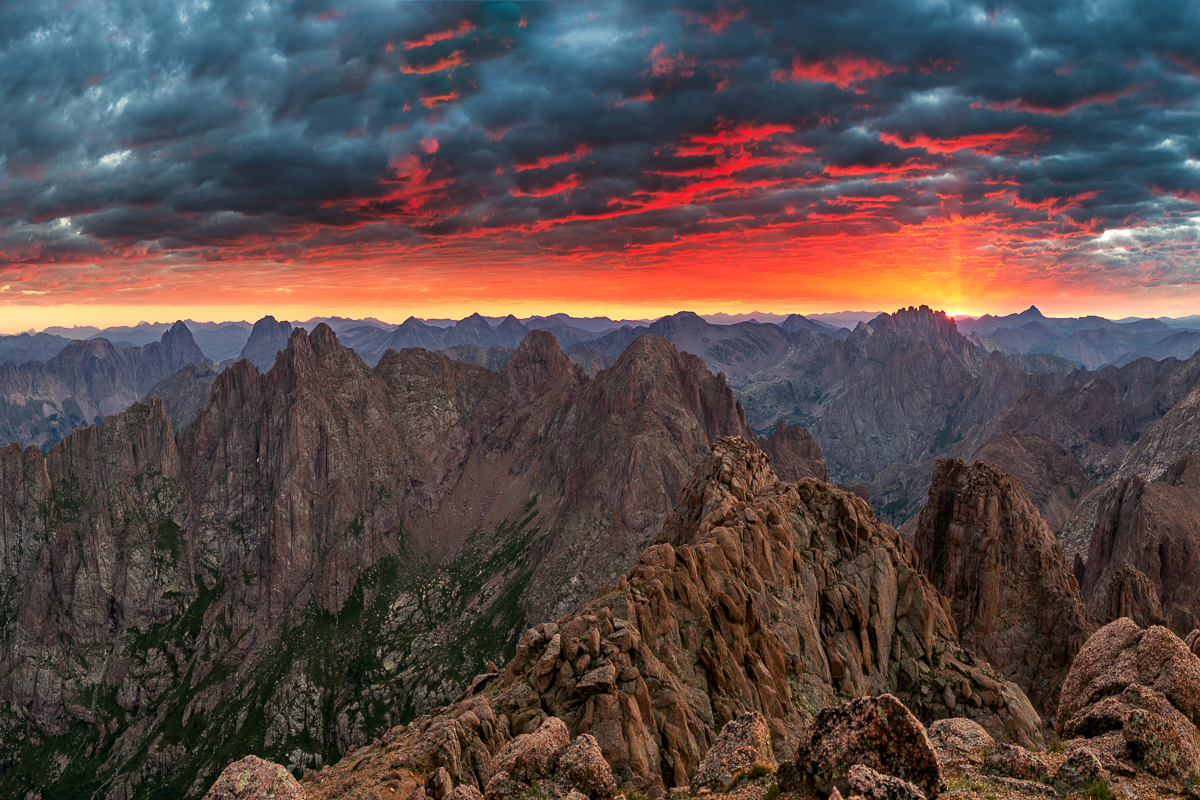
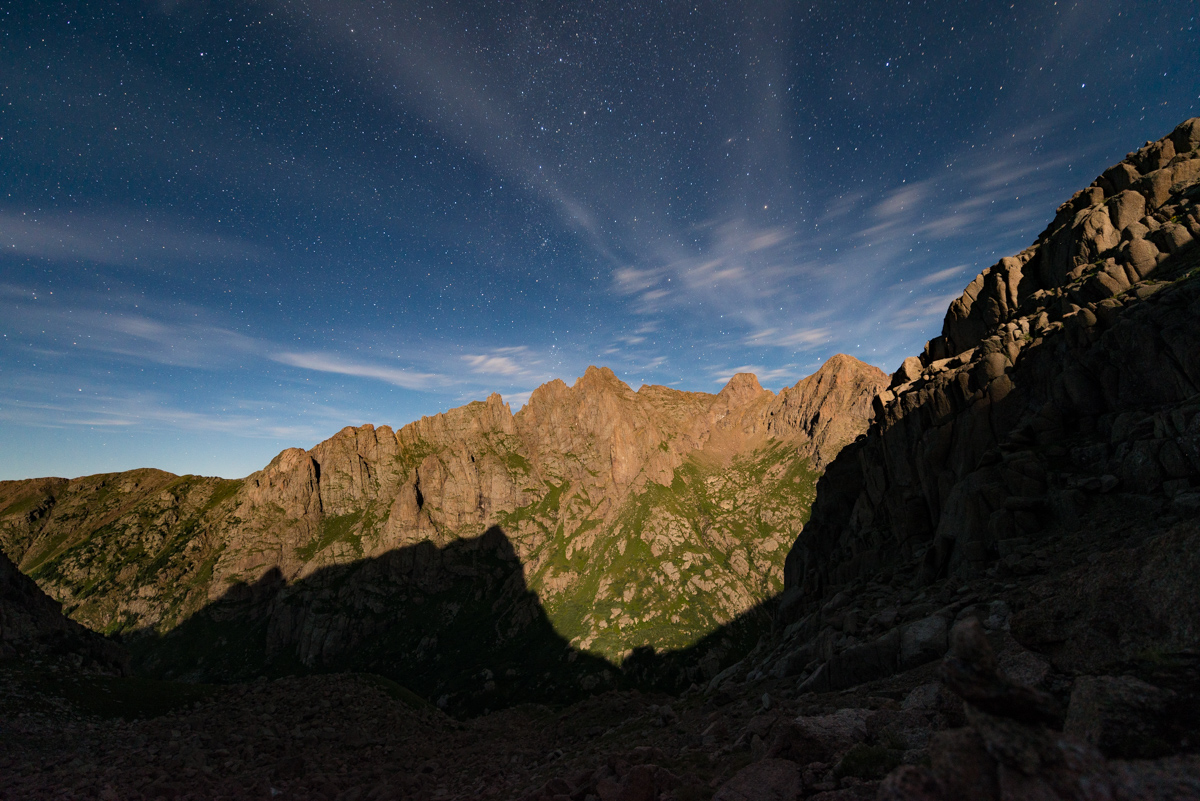
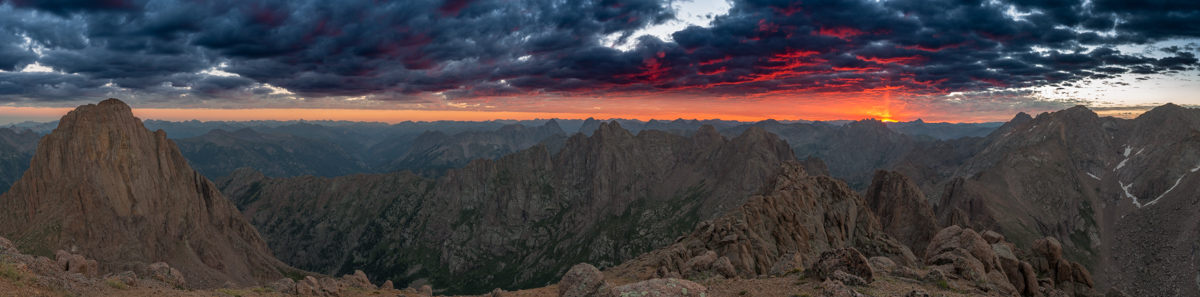
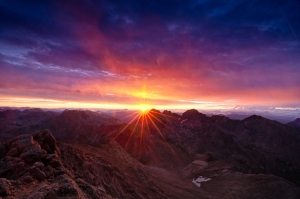
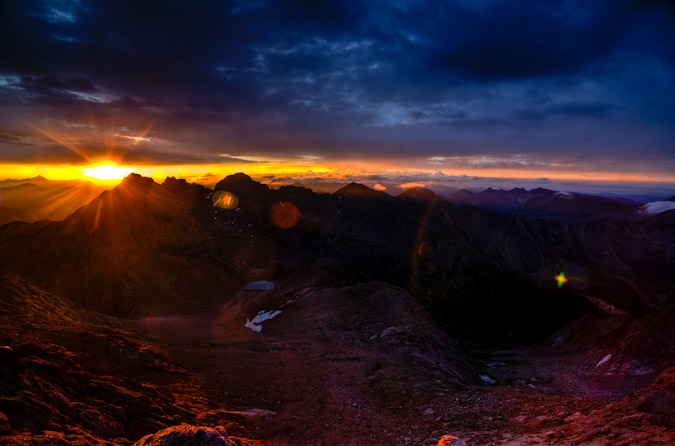
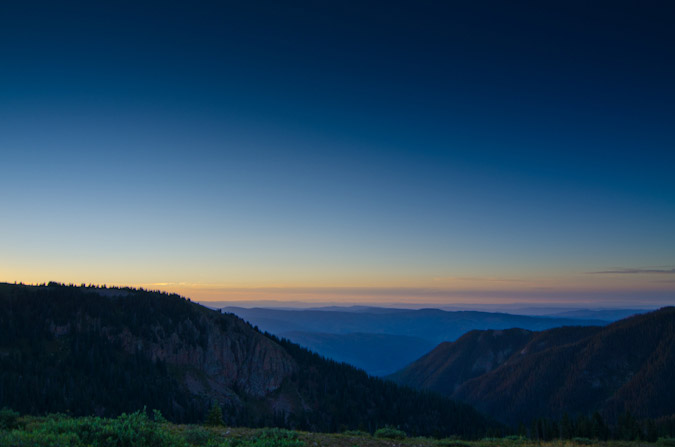
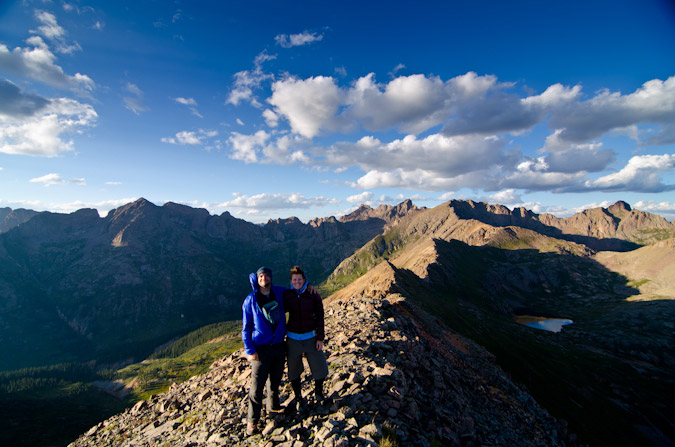
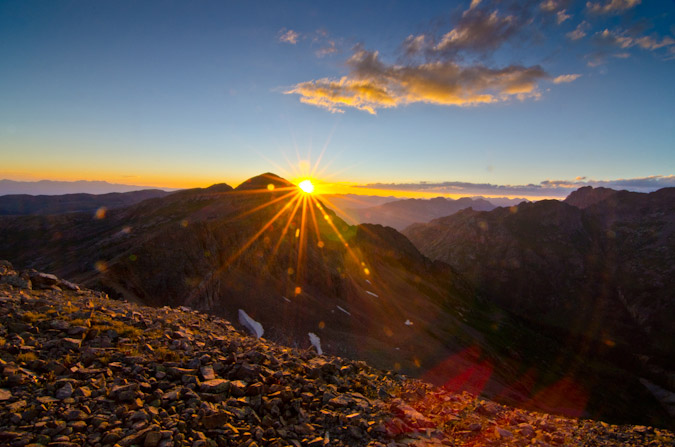
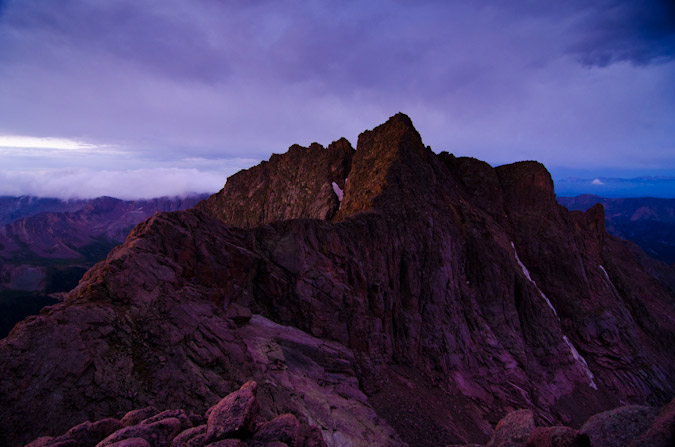
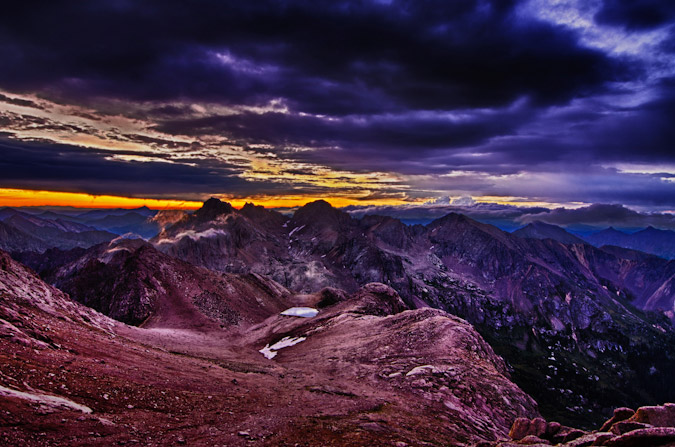
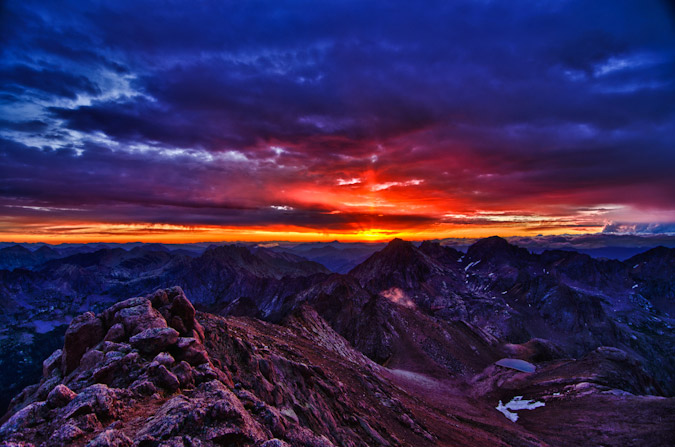
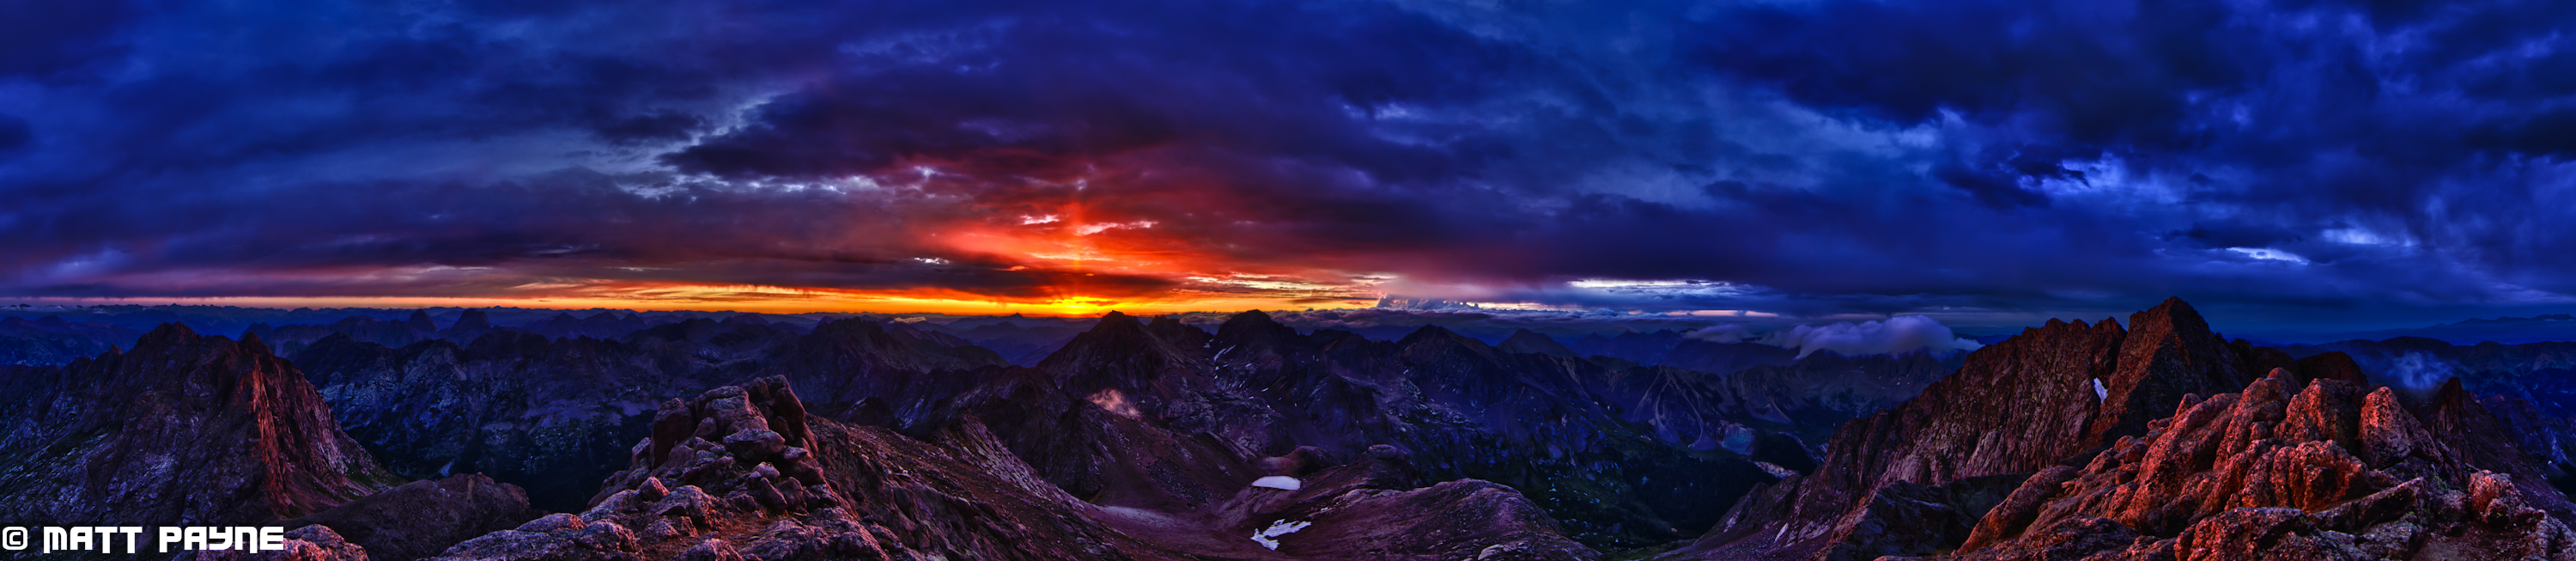
As I sat on Turret pondering life and getting my energy back up, I noted that the horizon behind Jagged Mountain was looking pink. There were a lot of low clouds, which was either going to spell disaster or complete success for photographing sunrise. It turned out to be a totally amazing sunrise to say the least. I would rate it as top three summit sunrises of my life, with the other two being North Eolus in 2011 and Uncompahgre in 2015, both of which I photographed (those links will take you to those photos). This one was pretty special though. The Grenadiers, including Arrow and Vestal as well as the Trinities were all nicely visible, accented by the Needles of Animas and Monitor. The sun was rising just behind Jagged Mountain and Rio Grande Pyramid and made for a really incredible showcase of color. Pinks, reds, oranges, and purples colored the sky and clouds. I am very proud of this one, which is available for sale on my photography website (click on it to follow there). I can't wait to print it up nice and big for display here in Durango.
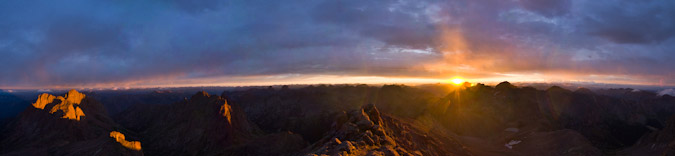
I was also able to get a nice panorama of this scene to include Pigeon Peak at left sweeping all the way over to the right to include North Eolus and Eolus. Unfortunatley, the light, sky, and clouds of about 1/2 of this scene were not very exciting, so I cut those out. Still - an amazing scene to say the least!
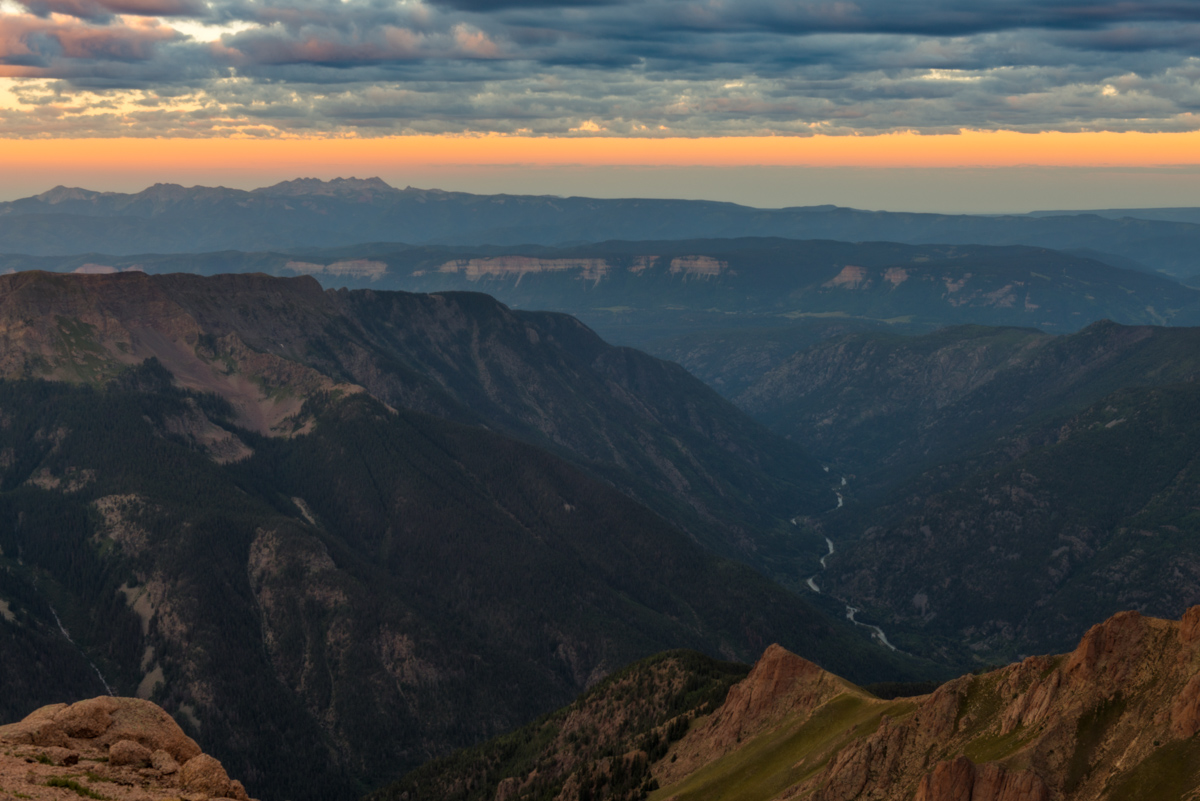
A few minutes later I was packing up to head down to the saddle again and noticed the light across to the La Plata Mountains and the Animas River below was looking quite nice as well, so I shot that.
Then I noticed the clouds above Jagged Mountain looking awfuly amazing, with beams of light come down through them from the sun. I guess I could spend more time up here.

Lastly, I set-up for a quick self-timer shot of myself with some of my favorite peaks behind me. What a morning!
I packed up and set sights on my next objective - Pigeon Peak. I knew that in order to climb Pigeon from here I would have to descend down to the saddle and then down to another notch between Pigeon and a small un-named point southwest of it. After that, I would be forced to drop to 12,200 feet on the west face of Pigeon and all the way back up again to 13,972. I was not sure I could handle it, but the thought of coming this far and not getting Pigeon kept me motivated.
On the way down to the saddle, I enjoyed the light hitting the peaks around me and made a note of the small notch left of Pigeon, which was my next target (as seen just right of the large 'white' rock outcropping and below the illuminated peak in the photo below).

Reaching the saddle again was no problem and the scenery was incredible. The wildflowers at 13,000 ft. absolutely astounded me, in particular, these rosy paintbrush caught my attention.
Pigeon towered above me as a reminder of the pain I would endure if I wanted to summit today. I could see how a confident and equipped climber could take this gully off the ridge, but it was something way outside of my comfort zone and ability.

I descended from the saddle to my left towards the notch and reached it quickly. I undershot (went too high) the notch a little and had to downclimb some sketchy rock to reach the notch, which greeted me with a view west of West Needle and the Twilights. A look down to my next destination was demoralizing to say the least. It looked so steep, and knowing I'd have to come back up it was not a welcoming thought.
I reached the bottom of the descent without any issues and wrapped around the side of Pigeon to find myself at 12,200 feet with another 1,700 feet of gain to go on un-marked terrain. My legs were tired. I was hungry and tired. The clouds were concerning as well. Everything looked OK to my west, but I could no longer see to the east. The climb up the steep grassy dirt was awful. I had to stop about every 30 steps to catch my breath, which was not normal for me, but understandable given how long I'd been out. I was eventually passed by a young man and his dog that had came up from North Pigeon Creek. He flew by in ease. Jealous.
This young man and his dog stirred up some mountain goats while I pontificated my ability to finish, all documented in a quick video on my phone:
Alas, I was able to reach the top of the long gully leading up to a notch that looked back down to the meadow in upper Ruby basin and my campsite, some 2,000 feet below.
I quickly found the class 4 weakness in the summit block, just right of the terminus of the gully at the top of the grassy dirt slopes and made it over there in no time. Navigating the actual class 4 section was another story though. I enjoy exposure more than most; however, I found this move to be quite challenging, especially with all that camera weight on my back. I actually thought about leaving my backpack there but reminded myself of a classic Gerry Roach saying, "never leave your lunch," and kept it on. The class 4 section was only two or three moves deep, but there was a slight overhanging feel to the rock and the holds were a bit awkward for me. I think being alone played a part in making it feel harder than it was as well. A mistake here would have been fatal.
Alas, I reached the summit and enjoyed the view from my 89th Centennial. Only 11 to go! Here's a 360 degree view from Pigeon.

And here's the same photo made into a planet to show a different perspective.
The Grenadiers looked amazing as usual. I still think the view from Arrow Peak looking back towards Pigeon is the best I've had. Unbelievable.
While the clouds did not seem too threatening, I was quickly reminded of just how much more work laid ahead of me before I was safely back in my tent. I still had to safely downclimb Pigeon without dying and then make it down 1,700 feet and back up again to the Pigeon - Turret saddle, and then back down to upper Ruby basin. Yikes. I departed without delay, eating as I climbed down. I serendipitously found an alternative route to the class 4 route by following some cairns to the left of the class 4 section which was quite a relief since I did not really want to go down that way. The class 3 alternative was much easier to downclimb and brought me back to the same general area to allow a safe descent back towards North Pigeon Creek, which went quite quickly following the loose dirt and scree. I re-climbed up to the lower saddle below Pigeon in less time than I thought I would need and found myself gazing back up at Turret. My legs were feeling the burn to say the least!
Upon reaching the saddle between Pigeon and Turret, I ran into two young hikers I had seen on the train the day before. I talked to them for awhile and learned that they had camped at Ruby Lake and were thinking of ascending both Turret and Pigeon. I gave them some tips and it seemed as though they were going to just head up Turret for the day. I was starving and exhausted and told them I was going to go pass out in my tent. I quickly descended down towards the basin without any issues except for the constant feeling of hunger. I could not keep enough food in my system. To make it worse, I had really painful and annoying heartburn, I think caused by drinking Gatorade, but who knows. This later was quite annoying at dinner because I could not eat all of my food - I felt like I wanted to throw it up after every bite despite wanting to devour it. Maybe I was eating too quickly?
Making it back to camp was a great feeling and I had the whole meadow to myself.
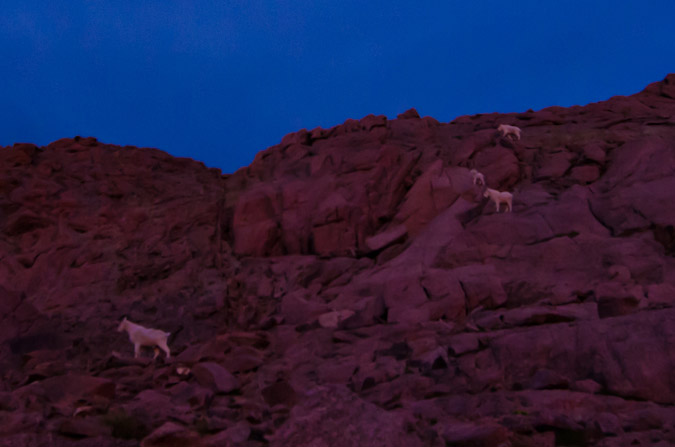
Except for the five goats that joined me later on after I napped for three hours in the nude.
These goats were foraging around my tent pretty much all evening and night so I made the most of the situation and filmed a timelapse of the mountain goats grazing for about an hour long.
After filming the goats and eating dinner, I decided I still had some energy left in me before bed, so I found some flowers to photograph and some spots to shoot for sunset. I was particularly happy with how this photo of a single columbine flower turned out below Turret Needles.
Sunset was pretty remarkable, especially with the assortment of wildflowers at my feet above my campsite, which you can barely see in the middle of the photo.
After photographing sunset, I was ready to turn in for the night. My heartburn kept me up a lot of the night, which was incredibly frustrating given how exhausted I was; however, I did get some pretty solid sleep from about 2 AM until 6 AM, at which point I was woken up by some heavy breathing outside of my tent. I opened it up and found a large mountain goat staring right into my door. I tried to get a photo of him, but he lazily scurried off before I could. I made some coffee (the Starbucks Via Blonde Verdana is pretty amazing), packed up, and photographed sunrise.
I left my campsite at 9 AM. Even though my train was not supposed to pick me up until 3:30 PM, I wanted to get down earlier to try to get on an earlier train. The views down were just as good as going up and Pigeon dominated the scene.
I made it down to Ruby Lake quite quickly and ran into those two climbers from yesterday, named Jacob and Rose. Turned out that Jacob works for the train and Rose attends Fort Lewis College. Really nice kids! I then later learned that one of my employees at work is married to Jacob's cousin. Small town!
Routefinding on the way down was not as hard and I even found the tree with the Columbine carved into it - which is noted nicely on my GaiaGPS track.

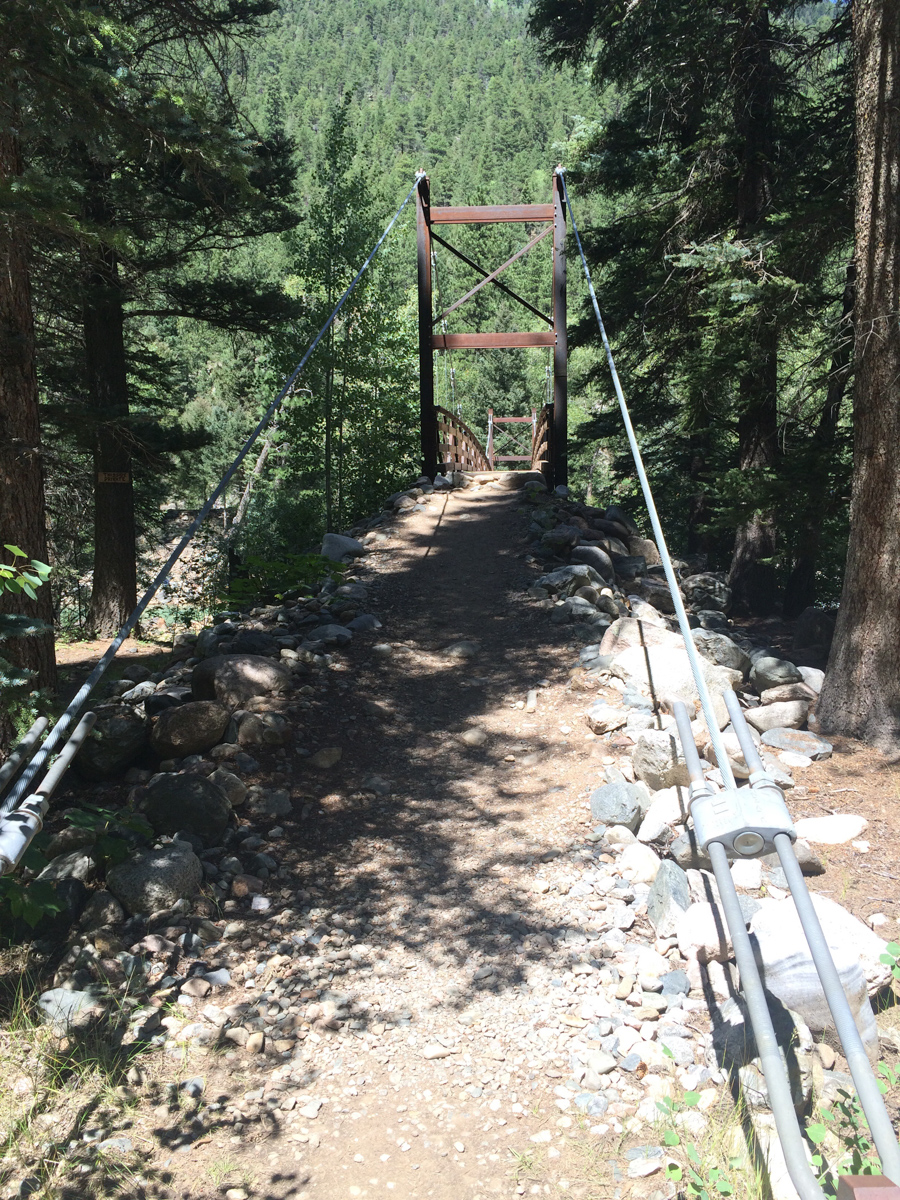
I made it back to the bridge crossing the Animas at 12:05 PM without any problems and found myself among several other people waiting for the train. Apparently the train had derailed in Durango and was an hour and a half late. I wound up waiting there until 4:30 PM while hanging out with two guys from Arkansas, one of which had just moved to Greely, Colorado for work.
Once the train finally arrived heading to Silverton (I did not board this one), it was a mad dash to get on board.
I ended up riding on the train with Jacob and Rose and we had a nice talk about how great it is to live in Durango and how lucky we felt to be this close to such amazing mountains. Life is good.
Sunsets, Sunrises and Mountain Goats - Chicago Basin from Endlich Mesa
Day 1: Backpack from Endlich Mesa to Lillie Lake
Day 2: Climb one 13er, backpacking over Trimble Pass and Columbine Pass
Day 3: Sunrise from North Eolus, summit of Eolus and Sunlight
Day 4: Climb of Windom Peak and pack-out
The Weminuche Wilderness Area and the mountains it contains are quite possibly some of the most incredible places on Earth. My first memory of the area was from 2000, when I led a group of 8th and 9th graders from Highland Mary Lakes to Vallecito Reservoir as part of my employment with Colvig Silver Camps. I remember fondly the views of the Needle and Grenadier sub-ranges and never thought in a million years I'd actually climb them. From many vantage points, the mountains in this area look unclimbable and untouchable. Indeed, the Needle sub-range of mountains which consists of Pigeon Peak, Turret Peak, Monitor Peak, Mount Eolus, Sunlight Peak and Windom Peak were some of the few mountains not explored by the Hayden or Wheeler surveys. According to Rhoda of the Hayden Survey, the weather pattern of the Needle sub-range was quite impressive: "Early in the day we noticed clouds hovering about the quartzite peaks, as we had seen them so often before. They never completely veiled all the peaks in the group, but early each day began to circle about them in a restless sort of way, like so many mighty lions about their lair. To us this apparent restlessness suggested a concsiousness of their terrific destructive power, which only awaited a mandate from the 'God of Storms' to be set in motion. We even now held these peaks in awe, as there seemed to be established somwhere in their midst a regular 'manufactory of storms.'1 Based on this notation, it is no wonder that Mount Eolus is named after the Greek God of Winds. Indeed, the clouds and winds were quite notable this trip, as seen in this preview...
With only five ranked 14ers left to climb, I was eager to finally get into Chicago Basin and climb those restless peaks. The route I chose for this adventure has been in the making for two years now, piecing together various adventures I'd had in the area in the past. In 2001, I hiked from Vallecito Reservoir and to Columbine Pass and climbed Jupiter Peak. In 2000, I did a backpacking trip from the start of Endlich Mesa to City Reservoir. With these two separate trips embedded in my memory, I knew it would be quite an adventure to go from Endlich Mesa to Chicago Basin and back. Adventure indeed.
45 miles round-trip.
16,600 ft. elevation gain.
4 days.
Here's a map of our adventure - please click on it to see the full version (including the rest of the map that you can't see here):
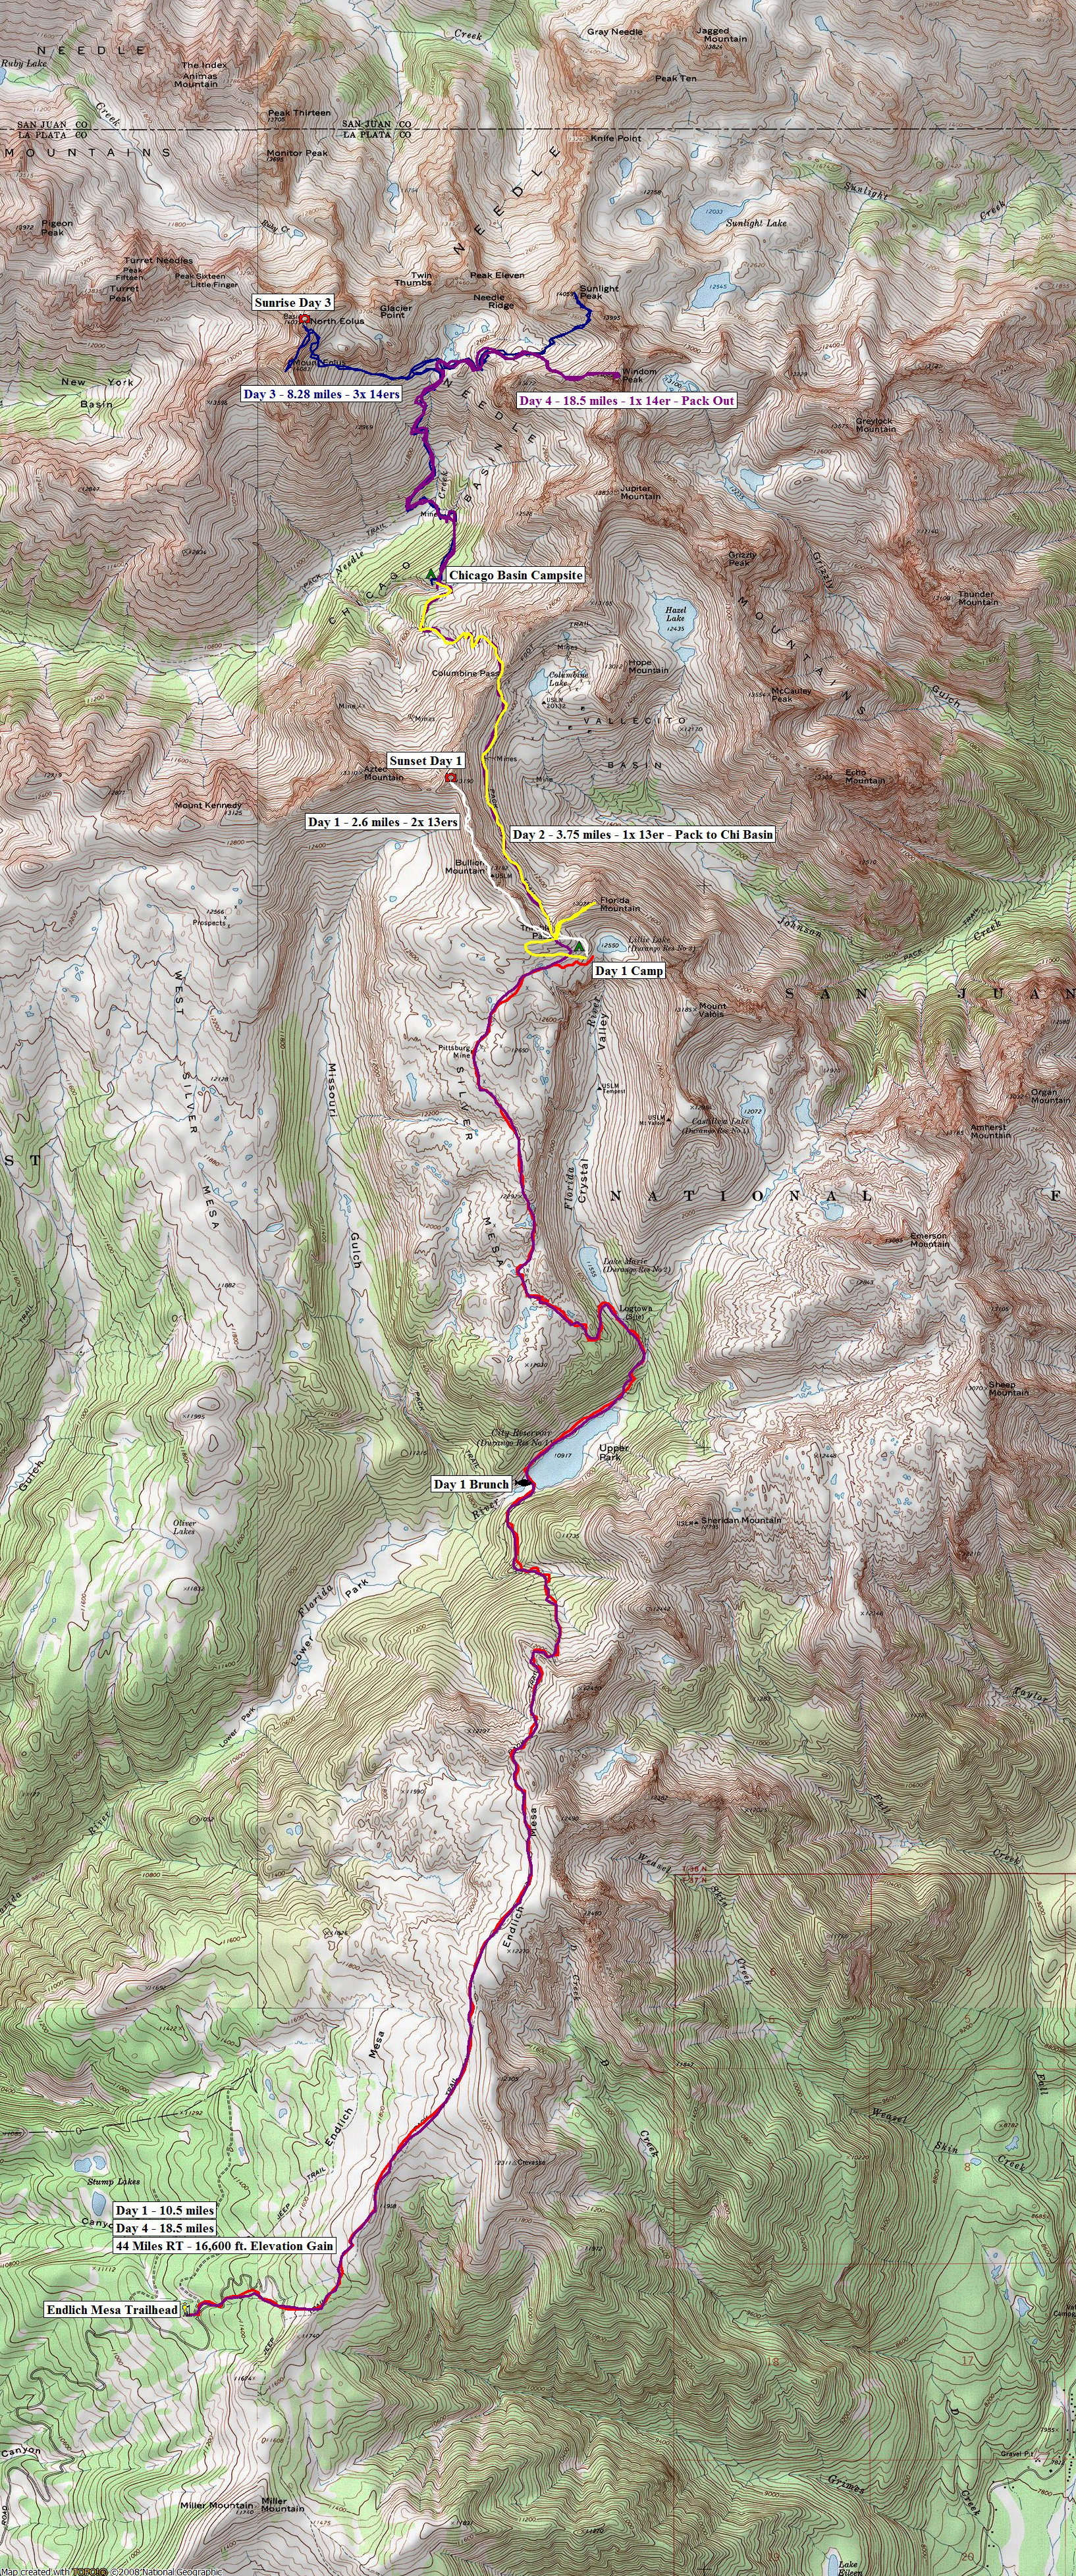
Day 1: Backpack from Endlich Mesa to Lillie Lake; summit two 13ers - 13.1 miles, 4,083 ft. elevation gain.
Two years ago, I had planned to do this trip with my dad. The Chicago Basin 14ers were three of the seven 14ers he had not climbed and I wanted to share those summits with him. Unfortunately, he suffered a freak knee accident this past Christmas and has not been able to hike this year, so I planned the trip with my new friend, Regina. Another set of unfortunate events happened, and I had a last-minute scheduling conflict on the dates Regina and I had chosen for the trip; however, another freak incident happened and I was able to clear some dates on my calendar and go on the trip with another friend, Sarah Musick. I explained the somewhat insane trip plan with Sarah and she bought-in right away, knowing that it would be a monster of an adventure. The plan was to drive to the Endlich Mesa trailhead on Thursday night, backpack as far as possible on Friday, backpack to Chicago Basin on Saturday, climb the 14ers on Sunday and Monday, and backpack all the way out on Tuesday for the drive home. It would be a feat no matter how you looked at it. The only positive to the approach was that we would be starting at 11,250 ft. elevation! All packed and ready to go on Wednesday night, I weighed my pack - 58 pounds! This was going to be painful! Sarah and I had opted to eat well this trip, so the bulk of the weight was in food, but trust me, it paid off later! So - off we went from Colorado Springs for the Endlich Mesa trailhead, which was up a long 9-mile forest service road north and east of Lemon Reservoir near Durango, Colorado. Earlier in the year, I had gotten some great information from Barry Raven from 14ers.com about how to get to the trailead - HERE is the map he shared with me, which I found highly useful in finding the trailhead in the dark.
We slept in Sarah's truck and set our alarm for 5:00 AM, which came after a night of rain. We secured our gear and kissed civilization good-bye. I had pre-prepared some an awesome breakfast for us to cook consisting of bacon, scrambled eggs and hash browns; however, neither of us were remotely hungry, so we opted to pack it in and eat a late breakfast somewhere on the trail. More pack weight! We ascended the Endlich Mesa trail fairly quickly in the early morning and reached the expansive and flat Endlich Mesa in no time at all, with views in all directions.
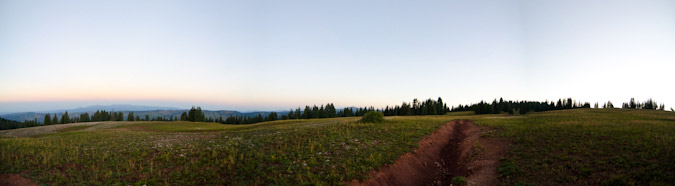
To the east, the mesa dropped off and revealed some pretty country.
Before too much longer, I was filled with glee as the first views of Pigeon Peak's east face were revealed, as well as the mountains of Chicago Basin. How far away they looked!

I was really excited to finally use my new camera lens, the Tokina 11-16 f/2.8 super wide angle. It is the highest-rated and best-reviewed wide angle lens for the Nikon DX format camera on the market. The lens is really hard to get these days because of the earthquake and tsunami that hit Japan. I was able to score one from Craigslist and have been itching to get it into action!
The wide angle view was really awesome and I knew I was going to have a lot of fun on this trip. Just in case, I had packed my 18-105mm lens for other shots. Oy vey! More pack weight! Sarah's pack was pretty heavy too, but she was a real trooper!
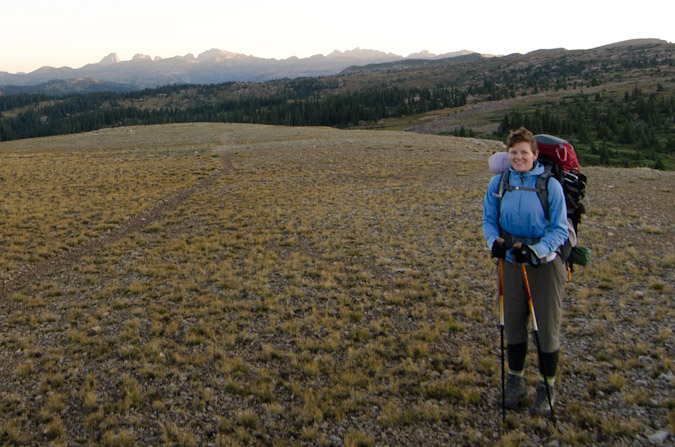
The mountains behind Sarah were indeed the mountains we were aiming for. Wow. Just wow.
We continued up the mesa, which was a very fun approach. It was mostly flat, with a few sections of up-and-down. The views were great the whole way in.
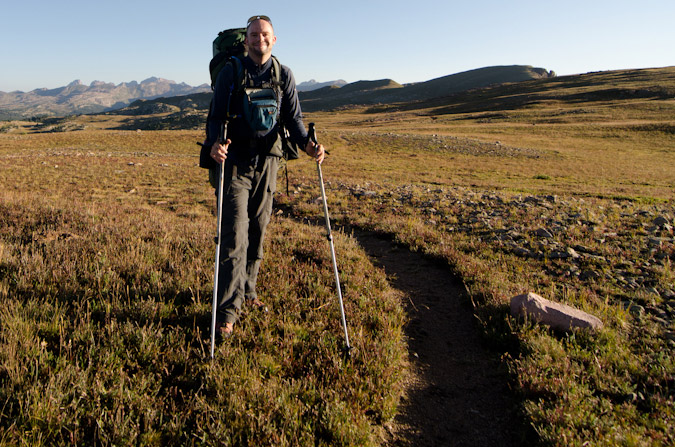
Sarah was able to capture just how geeked-out I looked for the hike...
We continued on and after enjoying some spectacular views from the mesa, headed on down towards City Reservoir, where we planned to cook some breakfast. The hike down to the reservoir was steep, and we both knew it was going to be one hell of a hike back up at the conclusion of the trip.
We stopped at Durango City Reservoir and enjoyed the early morning light on the water.
The Soup Nazi unpacked and prepared breakfast.
No Soup for YOU!
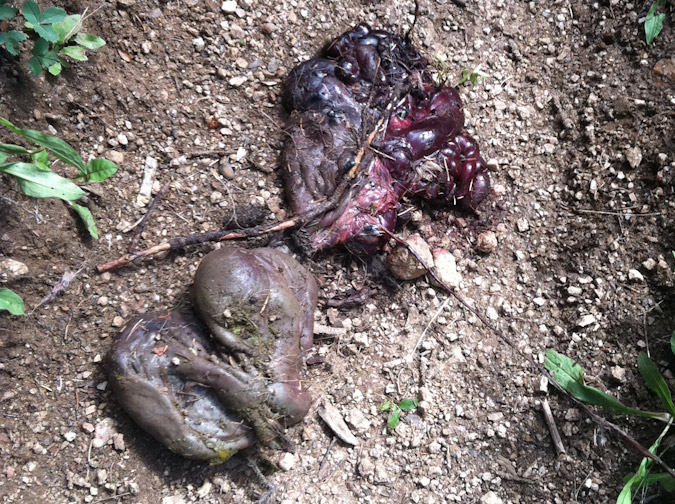
The breakfast was amazing. Two other backpackers passed us on the trail, one of which I later learned was "alwetend" from 14ers.com. These two guys had on packs that weighed at most 30 pounds and looked as though they were in lightweight ascent shoes. Jealousy set-in. We packed up and headed-out. For some reason, we felt like we were both moving much slower than before. It must have been the bacon. The trail heading up towards our second objective for the day, Lake Marie, was pretty steep (with heavy packs on anyways). We passed by the entrails of something on the way, perhaps a deer? Or perhaps someone with a heavy pack on puked their guts out... thanks Sarah for taking a photo!
At 11:30 AM we reached Lake Marie. Above it to the left (west) was Silver Mesa, where we were heading next. Above it to the north was Florida Mountain, which had at its base City Reservoir #2 aka Lillie Lake.
Climbing up to Silver Mesa was pretty straight-forward. The trail was clearly marked and it followed the USGS topo to a tee. Once on the second mesa of the day, we knew we were committed. We knew that our day's fate was sealed and that we needed to find a campsite somewhere between here and Trimble Pass before dark. I had my sights set on Lillie Lake, which was just below Trimble Pass. While exposed to the elements at such a high elevation, it was a great location to aim for due to the presence of water. So we worked our way up the Mesa at a slow pace. Huge cairns marked the way the whole way in.
Storms moved in and we put on our rain gear. Fortunately, it did not rain for long...
We reached a nice stopping place about halfway up Silver Mesa. Lake Marie was seen far below and the summit of Florida Mountain was seen far above. Here's a nice view of that whole scene in a 360 panoramic, with the lake to the left and the summit to the right.

At this point we were both pretty delerious and tired. Everything was funny.
We soldiered on up Silver Mesa further, which provided literally a highway of silver for us to hike on and up through a large notch.
 We stopped again about 3/4 of the way near the Pittsburgh Mine and ate some food. Sarah swears I was meditating in this photo, but I'm pretty sure I was just enjoying the views!
Indeed the views back to the south of Endlich Mesa and Sheridan Mountain were great, and it really put things into perspective in terms of how far we had already hiked. The large map I linked to early in the report really gives you a great idea of this as well.
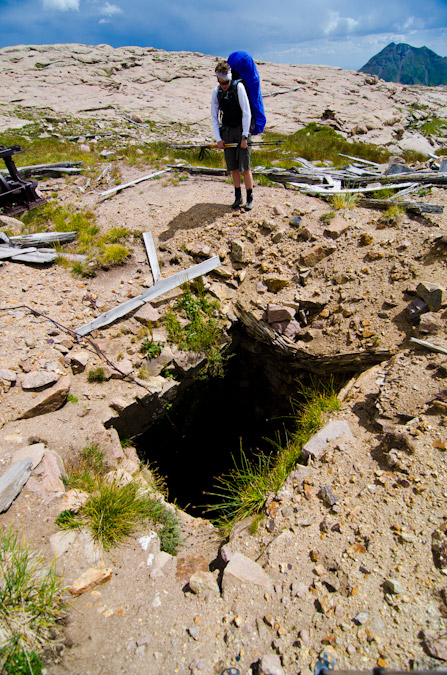
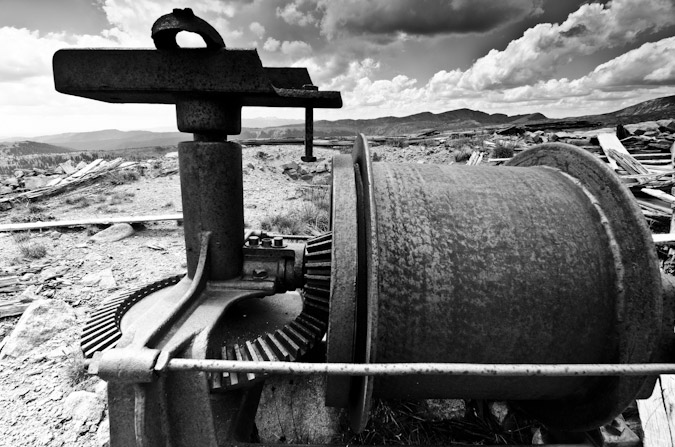
Break time was over and onward we trekked to Pittsburgh Mine, which I had vague recollections of for some reason. I'm not sure if I had visited this place before, but was awfully familiar to me. At any rate, the mine was great. It still had a great deal of equipment and huge holes to look out for. One spot was easily 30-40 feet deep, and Sarah and I marvelled at it for a few minutes.
The whole area looked like a tornado hit it. Maybe it was the God of Wind, ÆOLUS (actual spelling on the Eolus summit marker)!
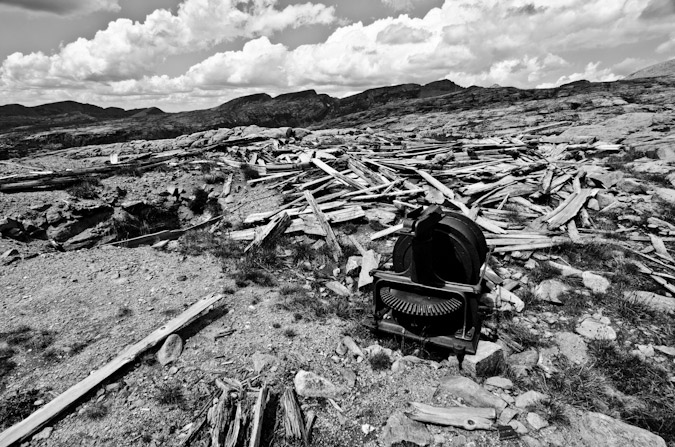
In a way, the scene really made you feel like an old miner.
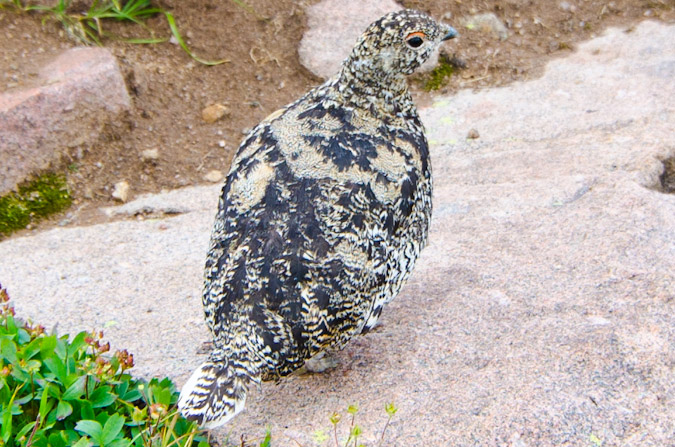
Once past the mine, we were almost to Lillie Lake. We could taste it. Sarah stopped me to ask how much further. I looked at the GPS and told her, "one more mile." This turned out to be the joke of the trip, as it really turned out to be more like two miles since my estimation was as the crow flies. On the way to the lake, I stumbled upon a family (flock?) of Ptarmagin, or snow chicken, which are surprisingly approachable since their only known predator is the golden eagle. This was a rare instance where I did not want the wide angle lens, but it would have to suffice.
We continued on and found several small pools on the way.
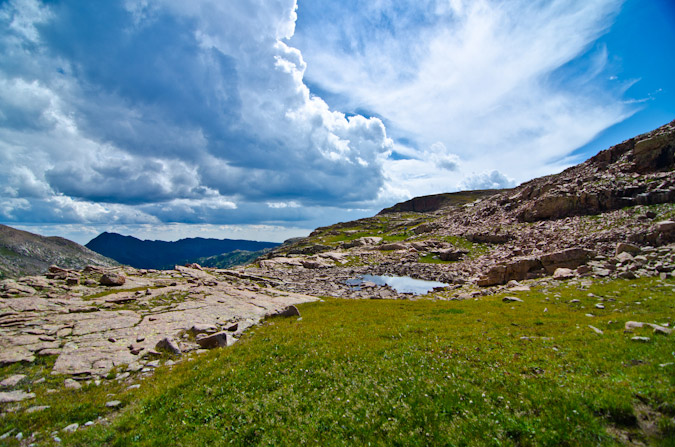
We reached Lillie Lake, a mere 10.5 miles from the start of Endlich Mesa trailhead, and found an amazing campsite just above the lake to the west. The campsite was nestled against a large cliff about 50 ft. high, and surrounded on all sides by ramps of rock except to the south, which led to a cliff overlooking the Marie Lake drainage. We were beat and we were starving!
We cooked up our first dinner of the trip - pasta alfredo. It was so good, but I really struggled to put away my half...
Since there were no trees above tree-line (imagine that), I thought of a great way to hang our food on the 50-ft. rock wall. I had read about this method in a trip report posted on 14ers.com for Pigeon Peak and it worked great! We used a large rock at the top as an anchor and suspended the food bags on the rock wall.
Having refueled and rested, I somehow convinced Sarah that we should climb a 13er and watch the sunset from it. So, away we went with small day-packs, water, a camera and a tripod. We made our own trail above the lake and bushwhacked up to Trimble Pass, where our first close-up views of Chicago Basin were found, with much jubilation.
Our attention was turned to the northwest, to Bullion Mountain's 13,182 ft. summit. This would be our target 13er. Bullion is the slightly steep sloped mountain on the left.
Sarah and I cranked it out on weary legs. The views back south were sobering. We had really come a long ways in one day.
We reached the summit of Bullion Mountain in just 40 minutes and realized we had plenty of time and legs left. I set my sights on un-ranked, un-named point 13,190 to the north, as it would provide superb views of Chicago Basin. The ridge looked like it would go just fine, with maybe one tricky section to navigate across.
The views of Columbine Pass and Columbine Lake were great from Bullion Mountain, as were the Chicago Basin 14ers and the mighty 13ers Jupiter Mountain and Grizzly Peak.
About halfway across to UN 13,190, we stopped to admire the constrasted view of Johnson Creek below and the towering wall that is Organ Mountain and Amherst Mountain to the east. Organ Mountain demanded our attention and respect for the remainder of the trip. Sarah was particularly mesmerized by its impressive stature and was drawn to gaze upon it repeatedly. Organ Mountain is the pointy peak one mountain to the left of the furthest mountain on the right-hand-side of the photo (Amherst Mountain).
Indeed, Organ and Amherst were impressive peaks. Back in 2001, when I had backpacked up Vallecito Creek and Johnson Creek with my parents, I had admired them tremendously from below, and I even recalled taking several photos of them with my crappy 35mm camera at the time. I was able to dig one of those up and scan it.
Sarah and I kept on trucking, and encountered a fun yet challenging section of the ridge that required some class 3 climbing. We easily manuvered that section but wondered how fun that would be in the dark later on. The Chicago Basin 14ers were still looking great in the late day sun.
We slogged up the scree slope to the top of UN 13,190 and celebrated. 10.5 miles of backpacking plus two 13ers was a pretty impressive day.
I promptly set-up my tripod on the summit and began taking some photos. Having a tripod on top of a mountain offers some pretty good advantages, starting with consistency. The ease in which photos are to take using a tripod, especially panoramic photos, is well worth the effort. Additionally, the quality of photos increases a great deal. Here's a 360 panoramic from the summit, with the sun cresting over Aztec Mountain (which I wanted to climb so badly, but we ran out of time and energy):

A tripod also makes it easier to do self-timer shots with groups of people, which we took advantage of! This is a view looking north at Chicago Basin and Columbine Lake. You can really appreciate the wide view afforded by my new lens.
For the photography geeks out there, one of the cool things about this lens is that it has 13 elements in 11 groups, which can make for some really great star-burst effects when stopped-down to f/22. The small aperture makes for a really small hole for the light to pass through, and the result is a diffraction spike, which are also explained HERE. Check out my results:
Sarah got to play witness to all this photography geeking-out and documented it with her super-awesome iPhone camera.
The sun continued to set and the moon began to show itself as well. It was a new moon, and it looked really great in the darkening sky. I captured Sarah witnessing her first sunset from the top of a mountain in HDR. Her words: "one of the five greatest moments of my life."
I was a pretty happy guy too, having witnessed only one other sunset from the summit of a mountain, which was from Arrow Peak last year, as documented in THIS trip report.
I tried my hand at my first HDR panoramic of the trip, which I believe turned out pretty well. Chicago Basin looked awesome.

Having witnessed her first sunset from the top of a mountain, Sarah was elated. I took full advantage of this and convinced her that we should stay on top for another hour or two to watch the stars and the milky way (and for me to photograph them). I was really glad she agreed, and we made sure we were bundled up for what we knew was going to become a cold night on the top. A thunderstorm boomed in the far distance behind Chicago Basin, and lit up the clouds behind it in the dark.
Before this trip, I did a little homework. I read some blogs and watched some videos on shooting stars, specifically the work of Ben Canales, who won the National Geographic Traveler's photography contest. This video of his, was very helpful for me, and I learned two tricks from it. The first trick was the 600/focal length rule, which basically states that when shooting stars in photography, to get a shot without blurry stars from star movement, you can shoot a maximum of x seconds, where x = 600/your focal length. In my case, I was shooting at 11mm, so I could shoot almost a full minute exposure without star blur. The second trick I learned was to take test shots at your highest ISO (in my case 26,600) to look for good shots. Check out his video for more! I wanted to get a good shot of the Milky Way with my new lens. At f/2.8, I could really gather a lot of light and it proved worth the investment.
Lastly, I wanted to get some fun star trails over Chicago Basin, and again this proved quite effective. I only did it for about 30 minutes, so it is not as impressive as it could be; however, we needed to get some rest for the big day ahead of us. For this shot, I found the North Star and centered the shot on it. To locate the North Star (which is stationary in the sky, and appears as a pin-point in star trails), find the big dipper. The two bottom right stars that comprise the Big Dipper form a line that points to the North Star.
I also decided to throw together a really short time-lapse of the sunset with the stars. Someday I'd like to do a full day's worth!
We head back over to Bullion Mountain in the dark and were able to find out campsite without any problems. Its funny how good of a memory your mind has, even in the darkness of night. We crashed and slept in, letting the heat of the morning sun wake us up.
Day 2: Climb one 13er, backpacking over Trimble Pass and Columbine Pass to our campsite in Chicago Basin - 800 ft. elevation gain with 1,750 ft. lost, 3.75 miles.
Having a good night's sleep, we were able to quickly pack-up our stuff and eat some breakfast bars. I took a quick hike up to Lillie Lake for one last view before our departure. It was an awesome place and I was happy to have visited it. Lake Marie sat far below, seemingly waving us goodbye, for now...
One cool fact about Lillie Lake - it is the headwaters for the city of Durango's water supply - the Florida River - and sits beneath a relatively unimpressive 13er, Florida Mountain, which we had our sights set on for the start of the day.
A better view of the area, with our campsite at far right -
We packed up and trudged up to Trimble Pass. We left our packs here and strolled up to the summit of Florida Mountain's 13,076 ft. summit to enjoy views of Chicago Basin and Johnson Creek.

Sarah was especially excited to be on top of her fourth 13er, all with me.
It even had a cute little benchmark on the top, which was fairly unique.
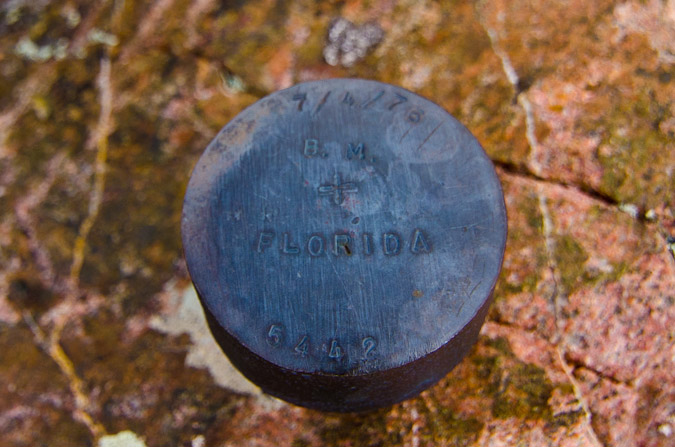
Lillie Lake was especially pretty from this vantage, and was nice to see in actual sunlight...
We returned to our packs and began the arduous journey over to Columbine Pass. This section of the hike was quite pretty. We really loved the views from here and only passed two other hikers the whole way over. Looking back on Trimble Pass - we had already come a long ways...

... but we had a long ways to go yet before the top of Columbine Pass. We'd have to return this way? Yikes.
Organ Mountain still drew our attention and made for quite the scenic backdrop to an otherwise desperate slog under the weight of our monstrous packs.
Amazingly, there were still quite a few wildflowers in this basin, and they provided quite a lovely foreground for Columbine Lake and the Chicago Basin '3' -
The flowers also proved to be quite a nice foreground for Trimble Pass and the rugged Organ Mountain.
At 1:30 PM, just three hours after we left camp, we had arrived at Columbine Pass. We were greeted to Chicago Basin by wind, rain, and thunderstorms, which all quickly subsided. Storm clouds hovered over Eolus and heeded the command of the God of Wind.
The path down from Columbine Pass was a fairly straight-forward one, following a very worn trail on somewhat steep scree and dirt.
We descended into the Basin in quick order. I had tentative plans to find a campsite closer to Columbine Pass rather than going down deep into the basin. My reasoning for this was two fold. For starters, there would certainly be less people up higher near Columbine Pass, and I prefer not to camp near a ton of people. Lastly, this would afford an easier ascent from Chicago Basin on our exit day. Indeed, we located a very clean and impacted site just into the trees and called it our home. As soon as we arrived, two mountain goats, a mom and a baby, arrived to greet us to the neighborhood.
It was at this point that I knew that I did not haul my heavy 18-105mm lens in vain. I swapped lenses and took some closer shots of the goats.
Peculiar animals - they always seemed to gravitate to difficult terrain, even in a huge meadow...
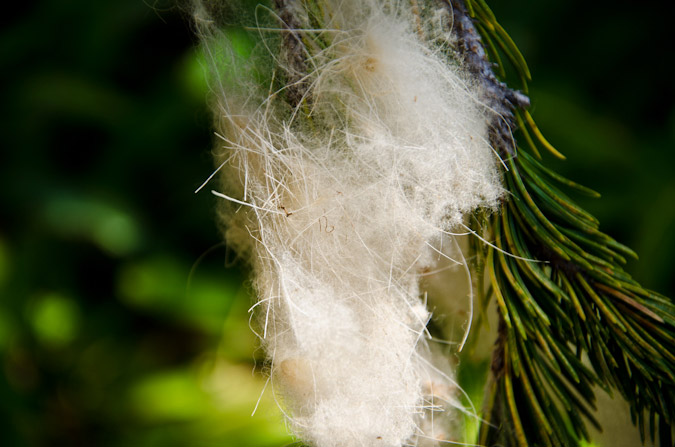
And they always seemed to leave behind some of their fur - must be their welcoming gift to us!
I swapped lenses again as we prepared dinner. Tonight's meal would consist of a wonderful medly of jambalaya and sausage. Hell yes.
We devoured the food and Sarah went in and took a nap. I decided to venture up the valley to see what trouble I could get into with my camera. The sun was setting and I knew it might present some fun opportunities. I found a few good spots and gave it a shot.
Here is Aztec Mountain in HDR:
I followed the stream that entered our campsite up a ways and found a nice view of the sunset over Eolus.
I found the water to be a fun subject to play around with.
... in black and white too...
I went back to camp and found a deer was trying to eat our food, which we had not quite hung yet. I shooed the dear off and hung our food and hit the sack. We wanted to get a sunrise summit and hopefully all four 14ers, so we set the alarm for 3 AM...
Day 3: Sunrise from North Eolus, summit of Eolus and Sunlight - 5,112 ft. elevation gain, 8.7 miles.
The alarm sounded and we rose out of the tent like two zombies. Two long days of backpacking had taken its toll on our bodies. We were both sore and tired, and we knew that today was going to be huge. We also knew it would pay large dividends if we committed to going hard and strong. We raced out of camp in the darkness with our headlamps guiding the way. I knew we were looking for a sign that would point us up another trail to Twin Lakes. We dropped 500 ft. in elevation to the valley floor and crossed the fairly large drainage coming down from Twin Lakes. We ran into a solo hiker that was coming up and he said he was heading to Twin Lakes as well. I was certain we had not passed the turn-off yet, so I asked him if he passed it. He did not really know what I was talking about, nor did he know what Columbine Pass was. I was not terribly sold on his sense of direction, but decided we should follow him for a minute to see if we passed the turn-off by mistake. About 20 seconds in, I decided to look again at my map and sure enough, we had not yet reached the turn-off. I tried to signal him but his head-phones prevented him from hearing us, so we turned back and headed down further and found the turn-off within minutes. Up we went without him towards Twin Lakes. We hiked fast. Blazingly fast, considering the amount of miles and elevation we'd done the past 48 hours. We reached Twin Lakes in the dark at 5:00 AM, which felt great. We knew we needed to turn left and find the trail up to Eolus. This proved difficult, so I just went with my instincts based on what I had read. We found ourselves in the right general area below some cliffs without a trail. Through urging from Sarah, I consulted the GPS and sure enough, we were roughly 50 feet below the trail, and we found it right away. We continued up the steep trail towards Eolus and found the ramp leading up to a flat bench before the saddle between Eolus and North Eolus. The sun was just beginning to light the Earth at this point in time, and it was magical. The low light created great silhouettes of Sunlight and Windom, and the small lake below looked like a sheet of glass.
We continued up towards the saddle and found another herd of goats coming down from above. The baby goats were making an adorable high-pitch sound that could only be encapsulated thusly, "eeeeeeeeeeeeeeeeeeeeeeeeeeeee!"
It was truly a gift to be able to witness these creatures in their true habitat. I know that Chicago Basin trip reports are oft too full of tales of mountain goats, but in this case, I really felt like I witnessed something special, watching these beasts navigate this rugged terrain. I coined a geeky phrase while watching them, which I shared with Sarah - "Wanting to Buy - Mountain Goat skills."
Pushed by the imminent sunrise, we climbed on, and reached the Eolus - North Eolus saddle. The famous Mount Eolus catwalk and Mount Eolus were looking mighty fine in the early light.
Looking up at North Eolus, I knew it would be an incredible vantage point for sunrise, and so we went for it. In true form, we reached the summit just moments before sunrise. I was jubilant and ecstatic, like a kid on Christmas, and I captured some footage on video:
For all of you detractors of HDR photography out there - I decided to showcase both methods (HDR and non-HDR) for this trip report, to please everyone and to demonstrate the difference. You can mouseover / click to see the other version. Here is what greeted us at the summit (mouseover / click to see the non-HDR version).
Slowly but surely, the sun began to poke through the clouds, which were the most insane feature of the scene - absolutely magically dramatic.
This next shot is non-HDR, and one of my favorites from the entire summer.
I was in heaven (probably quite literally). The views of Pigeon, Turret, Monitor, Animas, Arrow, Vestal, Sunlight, Windom and even Rio Grande Pyramid were stunning. Breathtaking. Here's a near-360o panoramic. Click to see a larger version.

The HDR Panoramic version turned out pretty well too, although in this case, I almost prefer the non-HDR version, except for the fact that the clouds look INSANE in HDR (click for a higher resolution version).
I have about 20 versions of these panoramics that I can't set my mind on picking a favorite, so I decided so share a few more...
As we were both getting pretty chilly, we decided to get a quick group photo and head out. Click / Mouseover to see non-HDR version.
We found ourselves back at the catwalk, which was impressive. Sarah and I immediately began reciting the classic Right Said Fred 1992 song, "I'm Too Sexy."
Once we reached the catwalk, I could not help but sing, "I shake my little toosh on the catwalk" and do a little wiggle. After revisiting that video, I can't help but feel a little light in the feet if you know what I mean...
Sarah was kind of nervous for the catwalk, but her smile said otherwise.
Once past the catwalk, we were greeted by some really fun and intricate ledges on the face of Eolus. I had read some about them, but nothing is quite like being there. It kind of reminded me of the final sections of Crestone Peak, only a ton more of it.
One thing was blantantly clear - a mis-step and you would be tumbling to your death. In a moment's notice, the sky became filled with small snow-flakes, adding to the magic of the morning.
At 7:40 AM, we reached the top of Mount Eolus and it was a great feeling. We felt like we had accomplished so much this trip.
It was so awesome to see Arrow and Vestal again after my trip up them last year. Soon after we summited, a solo hiker joined us on top. I mentioned how awesome Arrow and Vestal looked and he asked me what they were. It made me very sad. My reply in my head: "Only the two coolest mountains in Colorado!" He said I was wierd for climbing 13ers before 14ers... sigh. They are seen just left of me in my summit photo.
The views looking down the valley we had just came up were so awesome. In the dark, you can't fully appreciate the scale of your hike, but once above, it becomes really clear that what you accomplished was huge.

After spending about 10 minutes on top, we decided to head down, knowing we still had more mountains to climb before the weather got really bad. The clouds seemed to be holding in our area, but looked crazy in other areas. Time would be of the essence if we were to get all three in one day. On the way down, we passed one older guy with huge calves that provided the absolute best opportunity for laughter for Sarah and I. I should not jest, but when you're tired, almost everything is funny. He was wearing almost no gear, super old-school boots, no helmet... and socks on his hands for gloves - yep. Also on the way down, we saw a large group closely together, coming up. I was almost certain that it was either a guided trip or some sort of vacation group. As we passed them, they were indeed somewhat odd, but very enthusiastic to be up there nonetheless, and that's what matters! They were coming quite slowly and when we passed them, they were studying maps and routes and 14ers.com printouts. They also appeared to be wearing helmets that were fit for people twice their size. At least they had helmets. You can see them as small dots in the photo below.
The way down was fast. Too fast. I felt like I was at cruising speed. My legs felt great, like adamantium.
Naturally, we passed a solo goat on the way down. Those guys were everywhere!
We rounded the corner and the Twin Lakes came into view, including Needle Ridge, Sunlight and Windom. Spectacular!
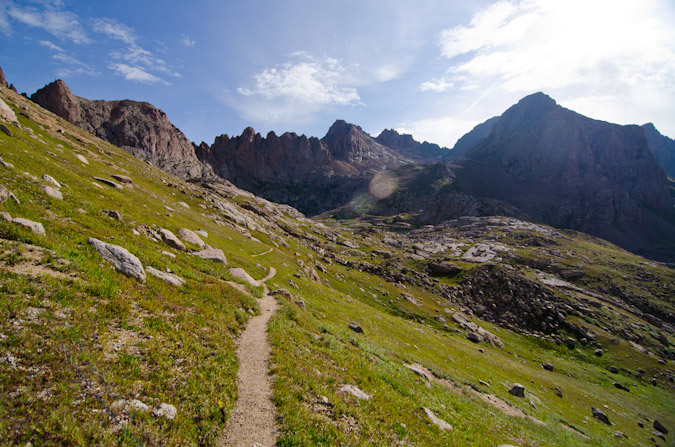
I raced down to the lakes, knowing it was just going to be a feast for my eyes and camera. Right as we reached the lake, a friend of mine, Will, who joined me for my hike of Mt. Wilson last month, met up with us. He was gracious enough to refill my Camelbak bladder with purified water. He was planning to head up Eolus, as he had done Sunlight and Windom the day before. I set-up my tripod at the lake and started shooting photos. Will captured the moment.
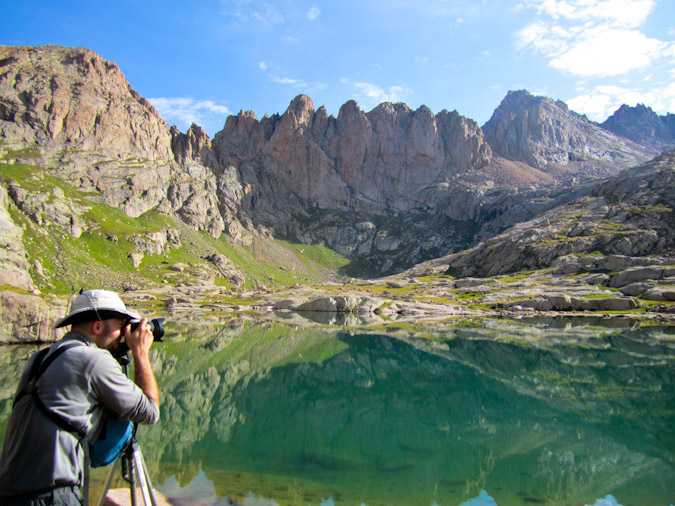
For this particular scene, I decided to do HDR since the sun was in the scene, which made it really tough to get all of the dynamic light into the shot. I would be the first to agree that this shot is totally over the top, but I love it just the same.
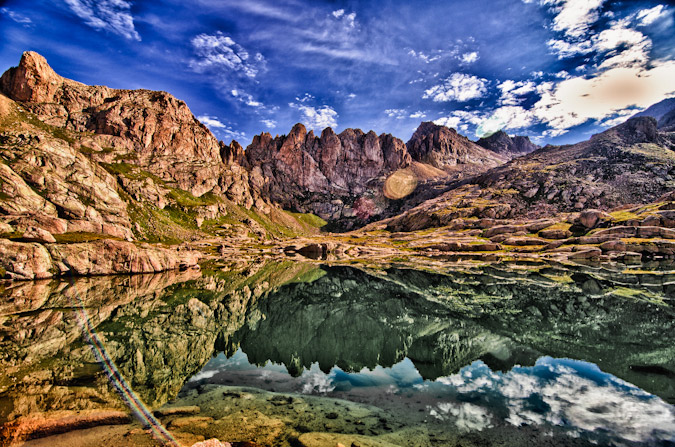
I also decided to get a shot of me at the lake, using the tripod and the self-timer.

Sarah and I refueled by eating some awesome tortillas w/ peanut butter and honey we had made the night before and then set-off for Sunlight. The trail up Sunlight was so awesome. The incredible work of the Colorado 14ers Initiative was obvious here. Huge cairns marked the way. Stone-work that would make a dwarf from Lord of the Rings envious demarcated the trail, paving a highway up the slope of the mountain.
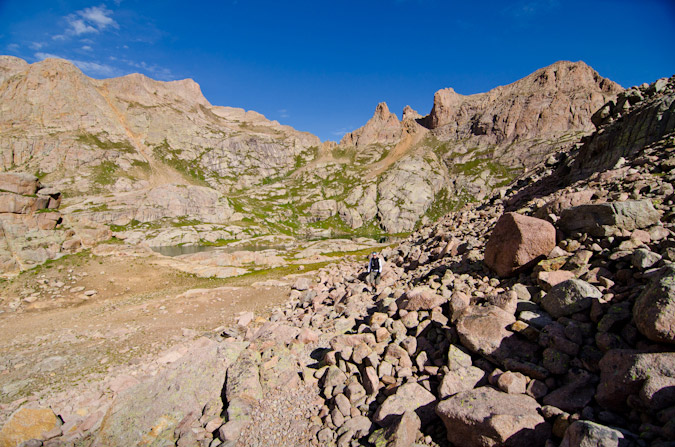
As we climbed, the Twin Lakes were looking as awesome as ever.
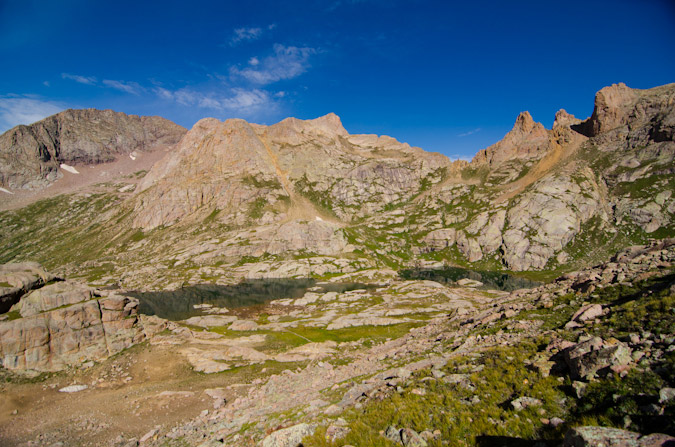
And the cairns were monsterous. Looking back at Eolus was also humbling.
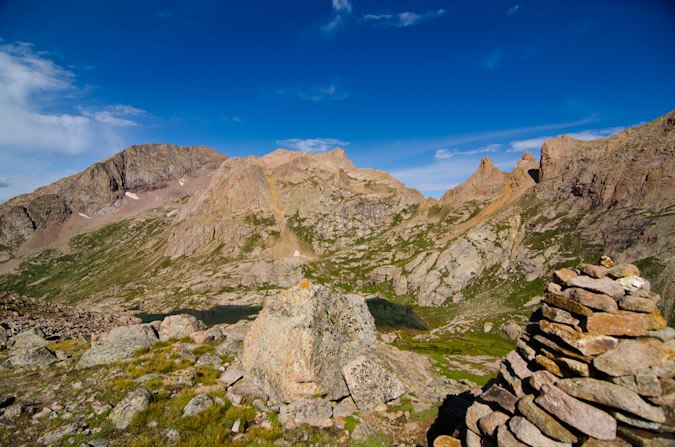
Looking up, we still had a ways to go to reach the Sunlight Peak - Sunlight Spire saddle (top - center).
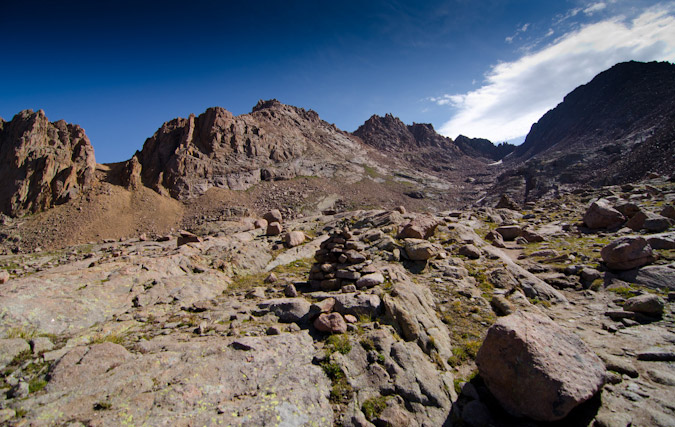
The cairns also provided some good resting areas.
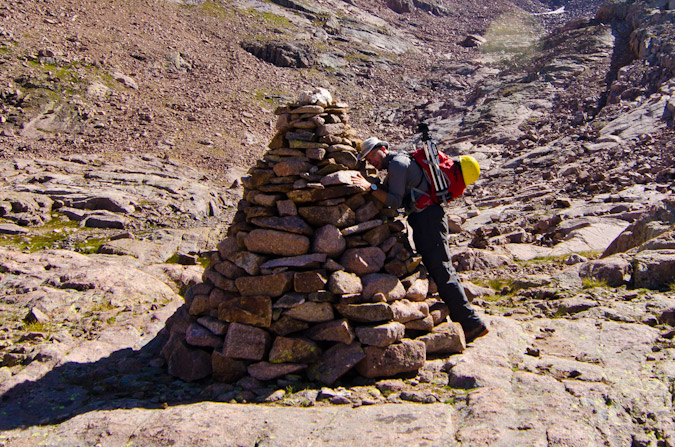
We reached the top of the basin and started climbing up towards Sunlight.
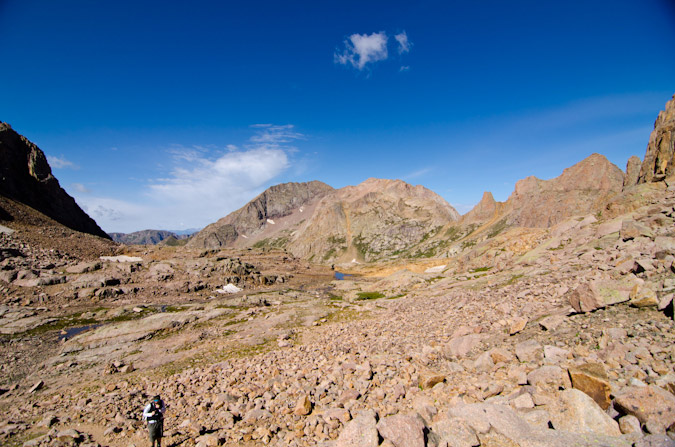
Which became steeper the higher we got, and eventually the paved road provided by CFI ended, and scree began.
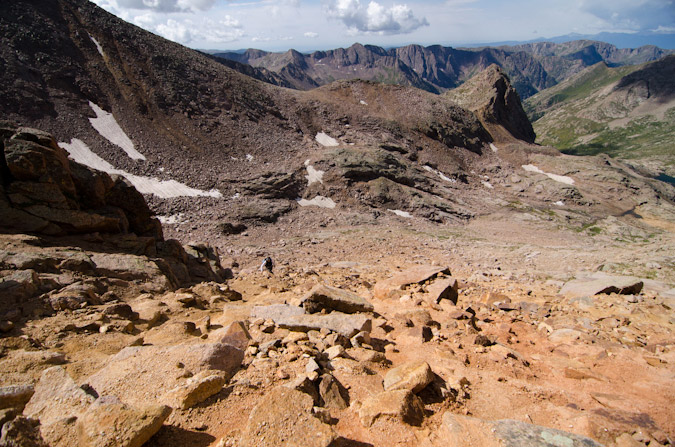
I reached the saddle and admired the views to the north of Jagged Peak, which is one of the last few mountains in the highest 100 I have left to climb.
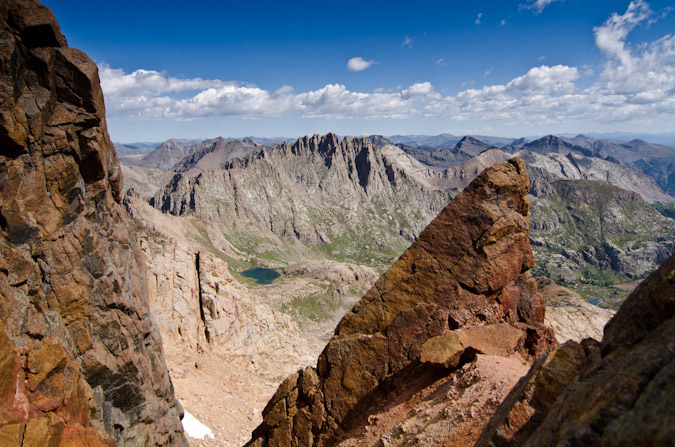
Sunlight was still high above from the saddle, as evidenced by this 360 panoramic photo with Sunlight at center.

At this point, Sarah was feeling light-headed. I knew her stamina was OK but something was going on with her body. I suggested that perhaps she needed more protein, since we had not had much through the day. I pulled out the huge log of summer sausage and we snacked for a bit. Sure enough, within minutes, she felt much better and we were off to the races again. A view back at Windom and the clouds forming above provided motivation.
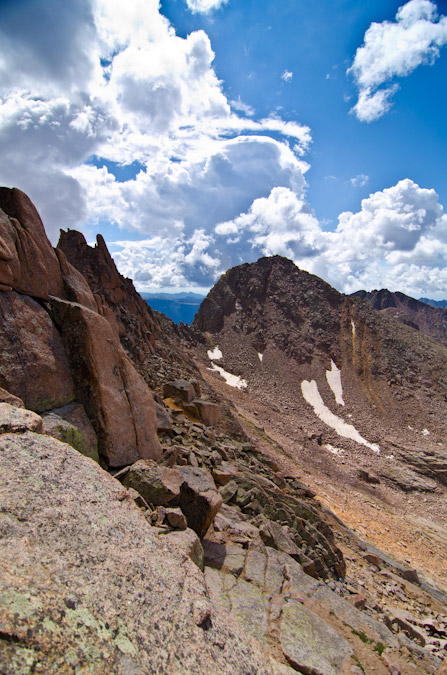
We reached a small gap during the climb, which was quite challenging to say the least, and I loved the window. The views of Rio Grande Pyramid and "The Window" were great! So this photo is called - "The Window through the Window."
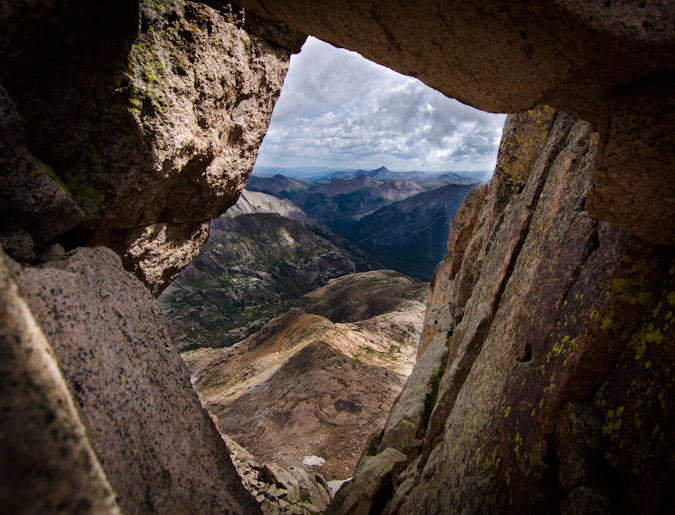
We found ourselves actually using some climbing skills - and head up a small chimney.
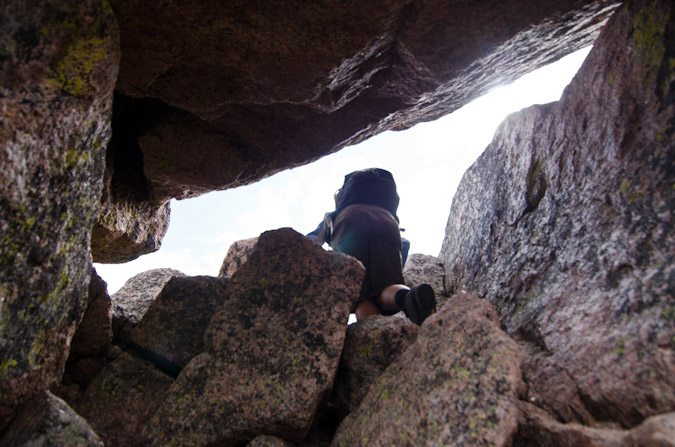
We reached the summit of Sunlight Peak at 11:45 AM, which felt pretty great considering we had been on Mount Eolus just 4 hours prior. The weather was moving in though, and that dampened our spirits. An exciting climb like this should feel amazing when you get to the top, but the thought of being electricuted tends to temper those feelings for a while. I managed to get a few panoramics anyways, which show how nasty the storm moving in looked.
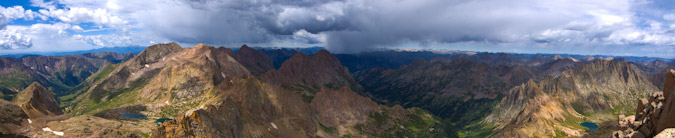
Here's a near 360 pano:

And a quick summit photo by way of Sarah, including Sunlight Spire's incredible summit just left of my camera bag:
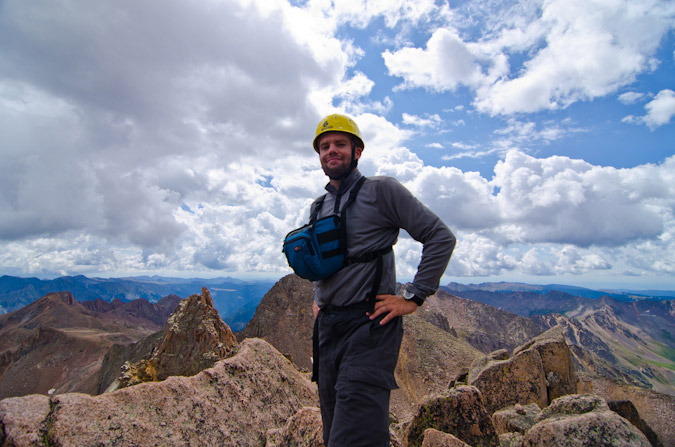
The air filled with graupel, a sign that things were not going to be good - weather-wise. We reached the Sunlight Peak - Sunlight Spire saddle in quick order, passing several people still heading up. Not sure if that is the best idea to head up when the storm is depositing ice on the rocks, but that's just me. Here's my reaction to that!
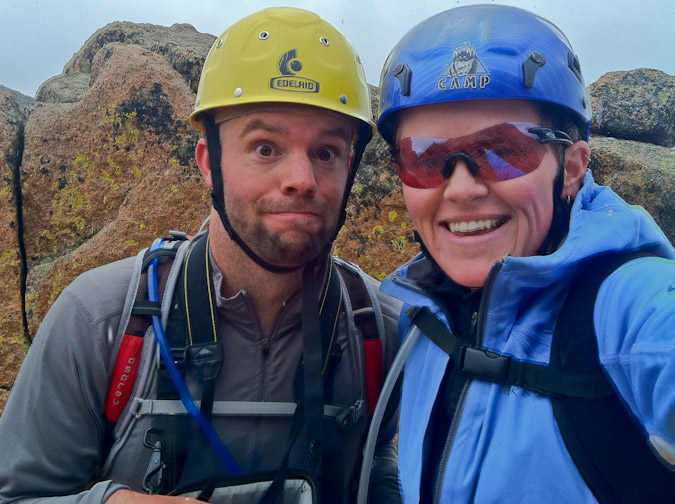
Here comes the weather!

The crazy kids in tennis shoes and cotton hoodies kept going up through the graupel and thunder, but we booked it down to safety and took refuge.
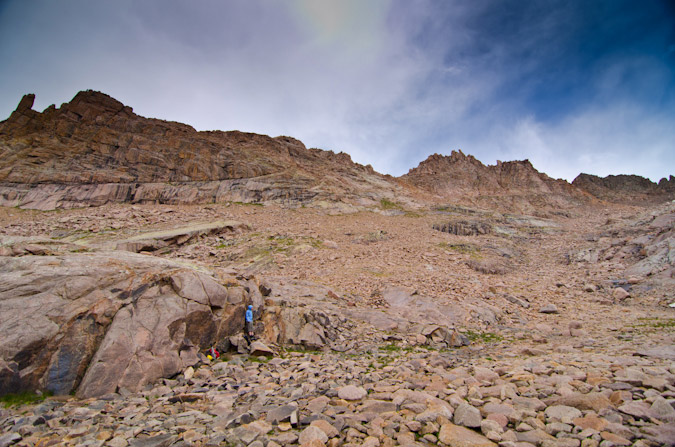
Luckily for our friends in cotton and tennis shoes, the weather let up, dumping only light amounts of rain in the area. The rocks were slick though, and that was a real concern to us, even though Windom was just 1,100 feet up from our safety spot. We sat for awhile, watching the weather, contemplating our next moves. Would we be able to wait out the storm? Would it be safe to go up? We sure did not like the thought up coming up again in the morning on tired legs. We finally agreed that it made the most sense to head down, especially given the fact that it was still slightly raining and the rocks were getting wet and it was still sounding off with thunder. Even on the way down, I stepped on a large wet rock slab that was slightly at an angle and it dropped me on my side like a hit from a middle linebacker. I was fine but it was a good reminder that we had made the right choice to go down. Even still, more and more people kept heading up. Madness.
The views on the way down were still great though, including this wonderful shot of some waterfalls below Twin Lakes.
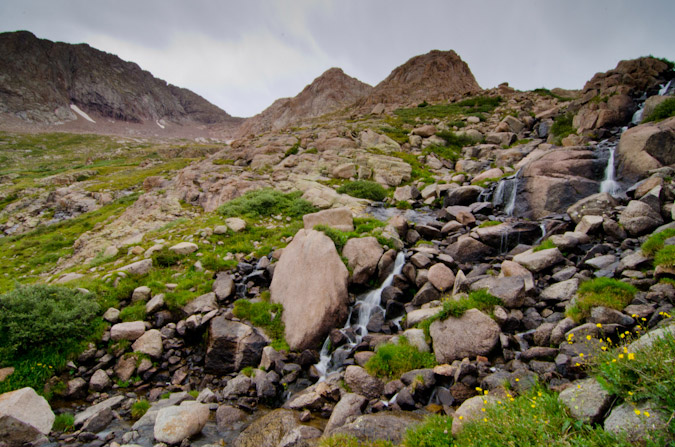
The weather persisted most of the way down into Chicago Basin.
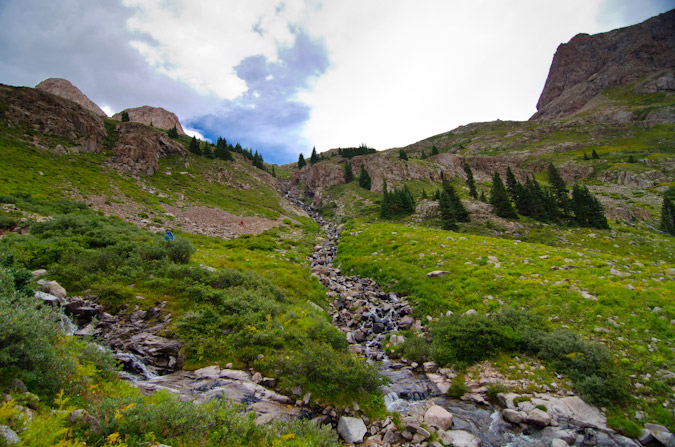
And in true San Juan Mountain form, the weather started to dissipate as we got lower...
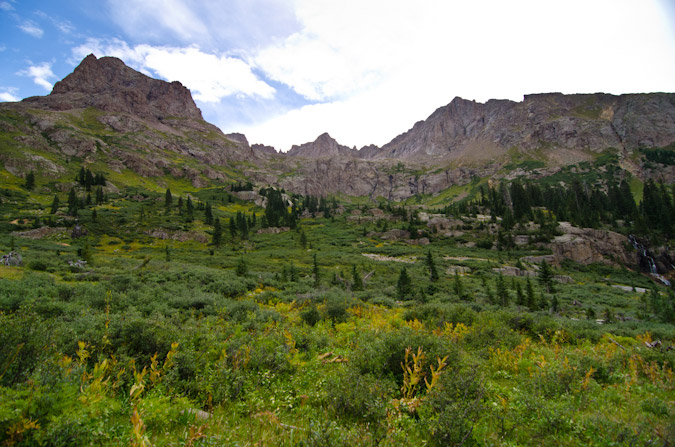
We reached our campsite slightly demoralized, tired, and sore. My knee was starting to really hurt from all of the pounding it had received on the downclimbs, which did not bode well for the climb up and down Windom for the following day. Such is life on a quest for mountain tops. Sarah decided to take a nap and sulk over our defeat, while I decided to eat some food and think about the day's highs and lows and the strategy for the following days. As we were moping, a herd of goats decided to come see what all the whining was about and one of them even decided to piss on our pity parade.
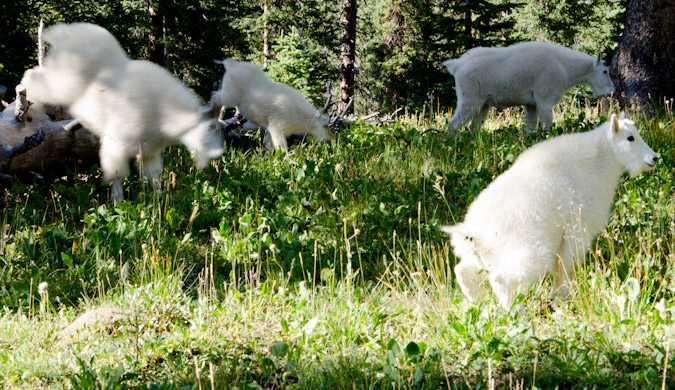
This herd was pretty big - I believe there were 7 of them total, including two babies, a real scruffly looking one, and a bigger grandpa type.
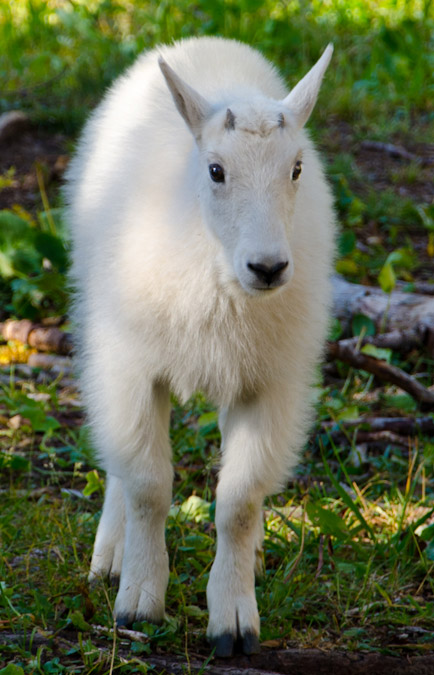
Here's Mr. Scruffly:
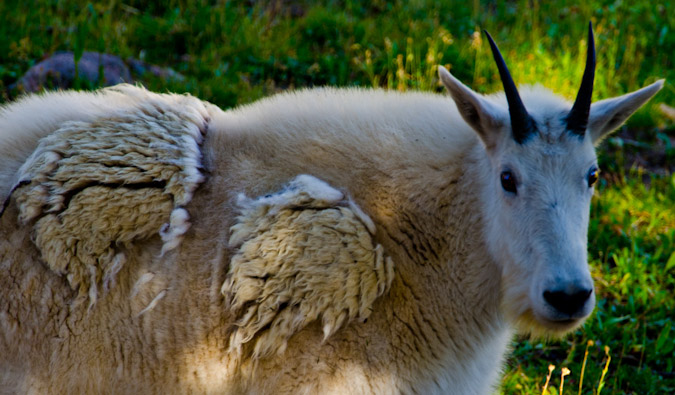
And my favorite goat photo... I was photographing them from near a fallen tree when all the sudden this baby goat decided to jump on the tree and walk towards me - he came all the way down and started nibbling on the tree - it was really cool.
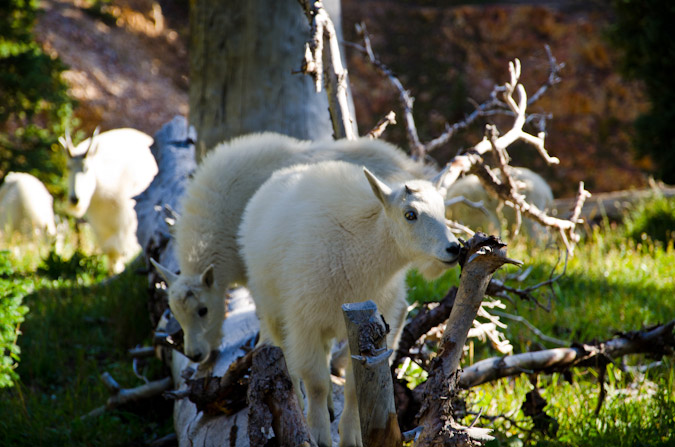
One of them kept a good eye on me. I think he was making sure I was not going to attack them or something. It was funny to watch them interact so closely. Sometimes the babies would go under a female for milk and they would get shoed off. Sometimes one goat would kick another goat out of a grazing spot in a fury. They were hilarious.
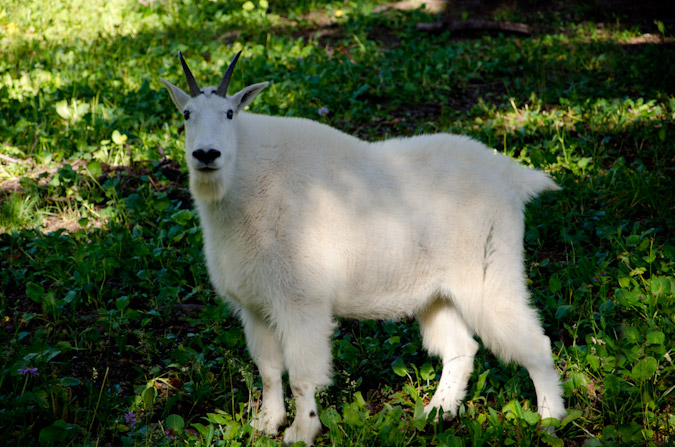
I probably got too excited about the goats, but I've been waiting years to see goats up close again, so it was a real treat.
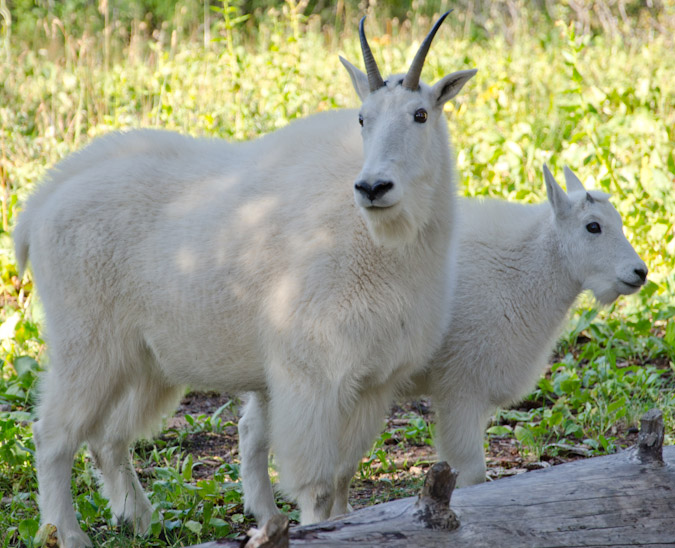
It was really funny how close they got to our campsite! One time, one of them charged another one, and did not see that Sarah was right behind the other goat. When he turned to run, he almost jumped right into Sarah!
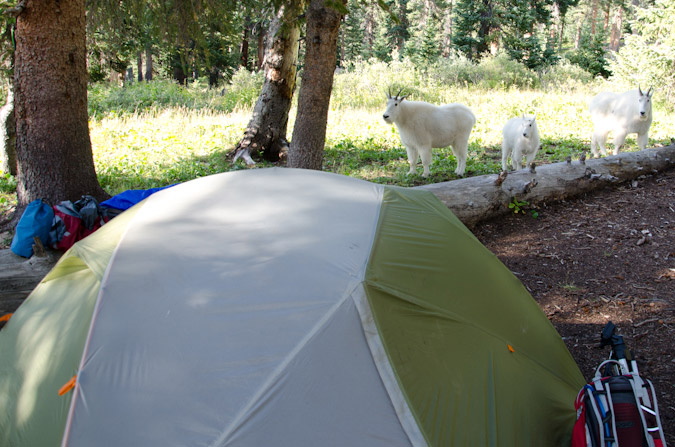
They were really fun to photograph.
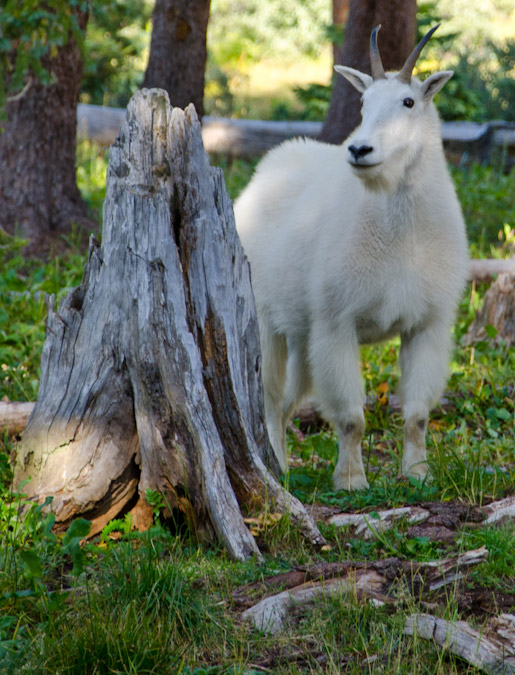
This little guy was playing king of the hill. I think he ended up losing.
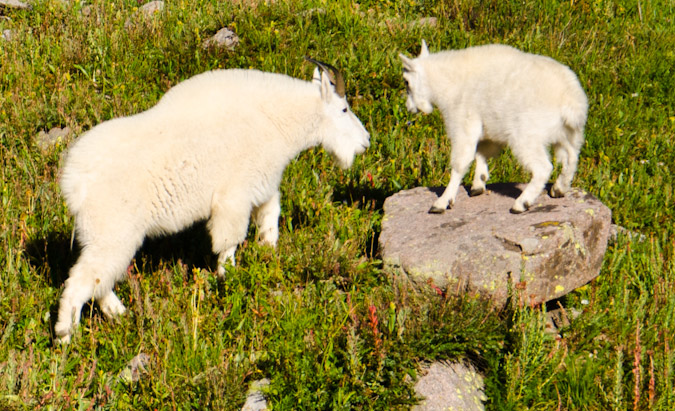
I did some video footage of the goats as well -
After the goats were dispursed from our campsite, we cooked dinner. Our dinner consisted of a glorious mixture of mashed potatoes, country gravy and spam - a tried and true recipe from the annals of the backpacking hall of fame. The alarm was set for 3:30 AM and we crashed hard into the gelatinous wall of sleep that always greets you after a hard day of mountain climbing.
Day 4: Climb of Windom Peak and pack-out - 19 miles, 6,500 ft. elevation gain - 20 hours of hiking...
3:30 AM came all too soon, and I hit snooze twice. So, we did not leave camp until 4:15 AM. The going was slower and we were feeling pain. In fact, I was quickly questioning my physical capability to complete the climb, and we had not even reached Twin Lakes. Halfway up Twin Lakes, I had to stop and take some vitamin-I (Ibuprofen), as the pain my knee was excruciating. The pain quickly faded and we reached the lakes in the darkness of the early morning.
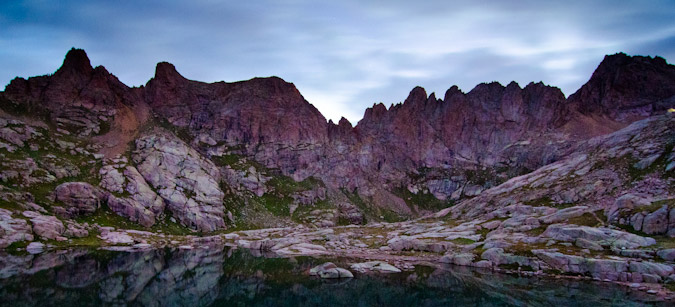
Hiking up to the Windom side of the basin was accomplished in short order, and the stellar light of sunrise kissed the mountains around us.
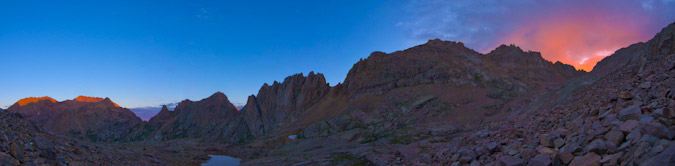
We reached the saddle between Peak 18 and Windom pretty quickly. On the hike down from Eolus, one of the climbers in the cluster of oddly-equipped people told us that Windom was underestimated. We were not quite sure what the heck he meant by that, considering so far both Eolus and Sunlight were both more difficult. There was a trail 3/4 of the way up Windom. We finally did find out what he meant, since the trail gave way to some very fun scrambling on class 3 rock if you wanted it. Many inappropriate jokes were exchanged between Sarah and I regarding the 'underestimation' of Windom and we were off to the races. We both agreed that had we done this climb while wet, it would have been quite dangerous. The views of Sunlight Spire and Sunlight were great. Loved it. Here you can see sun light just hitting Sunlight Spire with Windom's steep class 3 rock on the right.
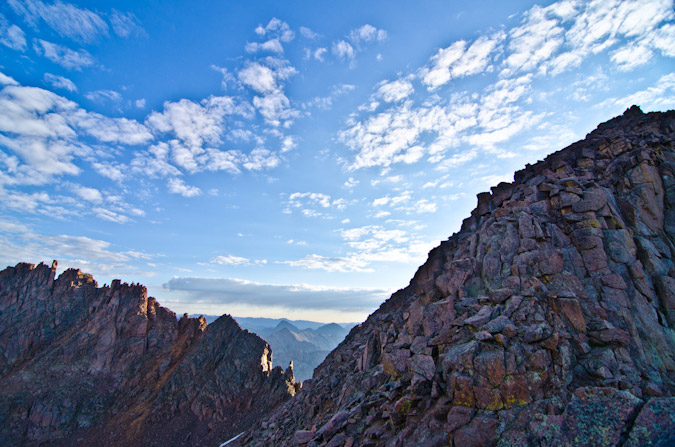
We reached the summit block and the views to the east were insane. The sun had been shrouded by some odd clouds, and light beamed forth like needles cutting through a gray sheet in front of car headlights. Unnamed lake at 13,100 ft. to the east was also a real treat - a sheet of glass suspended in heaven.
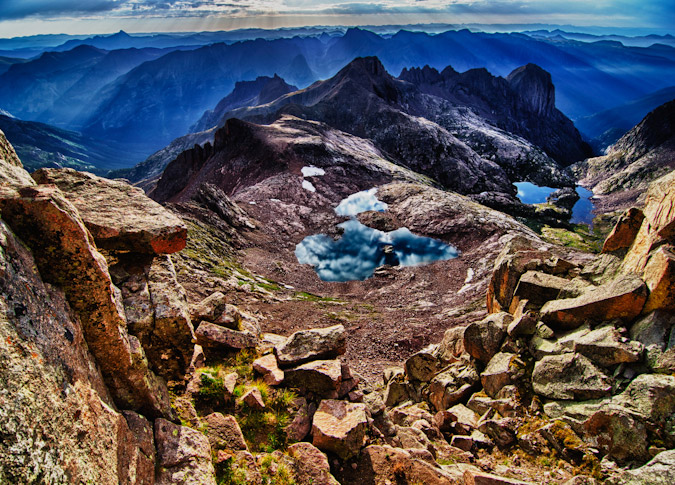
I reached the summit first and just felt complete and total gratification for our efforts. After the demoralizing defeat the day before, this summit was delicious.
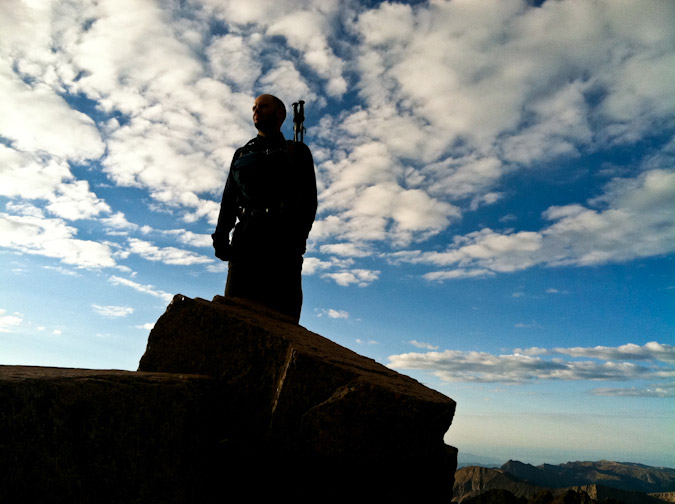
The summit of Windom was curious. It was a series of huge blocks, all seemingly suspended by some unknown force.
It was hard to believe that I had finally made it to Windom's summit. I had first admired this summit back in 2001, when I climbed Jupiter in a cotton t-shirt with my dad. Wow, have I come a long way! Check out that summit shot from 2001!
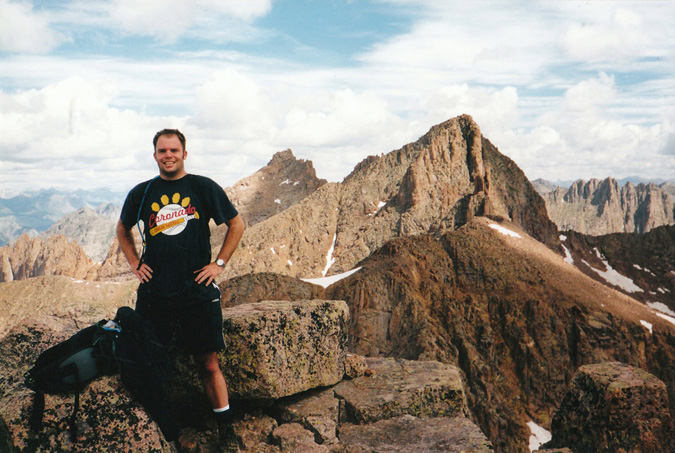
Due to the absolute absurd (meaning awesome) lighting, the opportunity for HDR photography was endless. I opted to just go for it. Sarah was pleased with this summit as well. It was totally under-rated - great challenge, great route and great views.
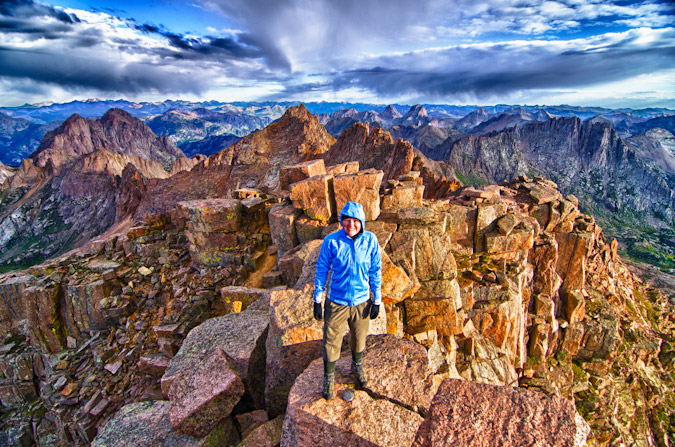
Sarah snapped off three bracketed photos of me on Windom's summit block - and the HDR result was WAY over-the-top, but epic looking either way.
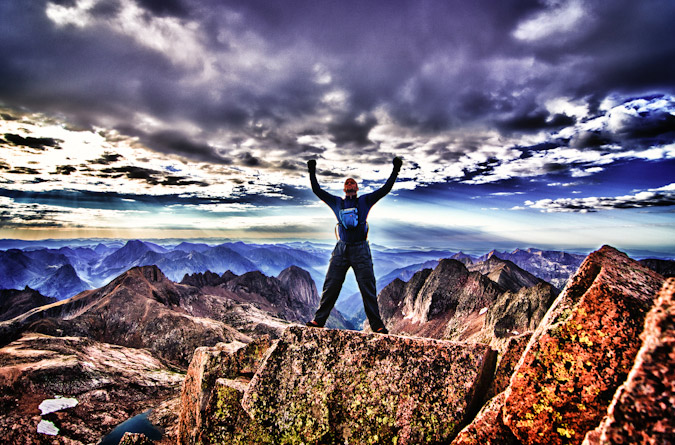
At this point I did some pano work and went for the classic 360 HDR pano. I fell in total love with the results. The way the light just penetrates the low clouds just floored me. The details on Sunlight and Sunlight Spire were magnificent. Thank you Tokina 11-16! Check out the larger verison by clicking on it.

Windom provided such a great view of Arrow and Vestal too...
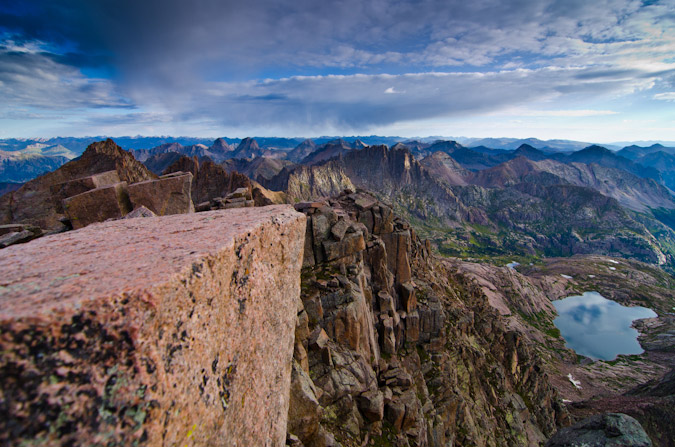
We headed down and enjoyed the views of Eolus all the way down.
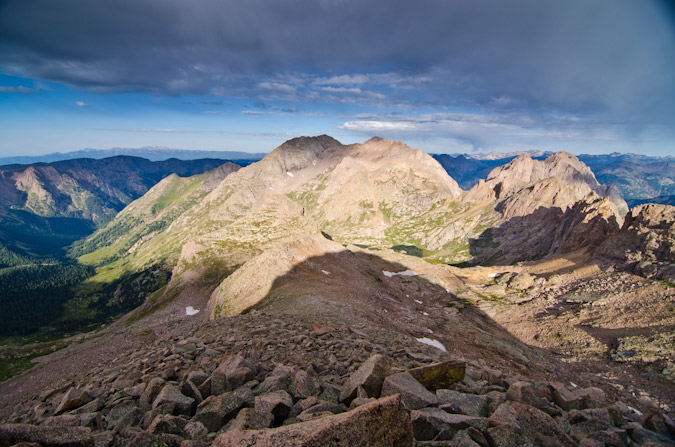
Before we knew it, we had already reached the trail junction for Columbine Pass and headed back to camp. We passed an old mine again but this time stopped to take pictures. Another group had mentioned that the mine was actually pretty cool to explore, but that was not high on our list.
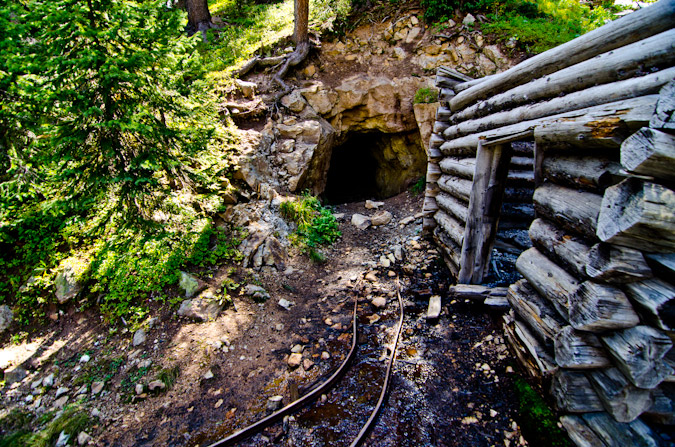
We reached camp at about 11:15 AM and packed up. We set our minds to the idea of getting all the way back to the car today. It was a lofty goal, to be sure, but we felt like we could do it, plus for some reason my legs decided that they were no longer sore. So we departed at 12:00 PM, with rain gear at the ready, and minds determined. Hell or high water, we were going to make it to the car. The climb out of the basin to Columbine Pass was gruelling. It was painful and slow. The weight of our packs and the fatigue of the weekend's work had us moving a consistent snails pace. We reached Columbine Pass and looked back - it felt great to get this far already, but we knew that the day had just begun...
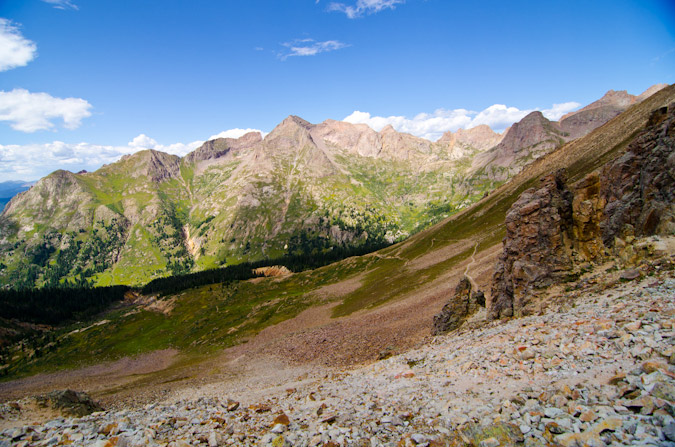
A look over the other side of the pass revealed clear weather and an inviting Columbine Lake. Trimble Pass - here we come! I turned on a podcast of Mike and Tom Eat Snacks - which had me in stitches for most of the hike up to Trimble Pass. Sarah was comforted by the idea that she was hiking with a madman.

The journey from Columbine Pass to Trimble Pass was pleasant, albeit slow and methodical.
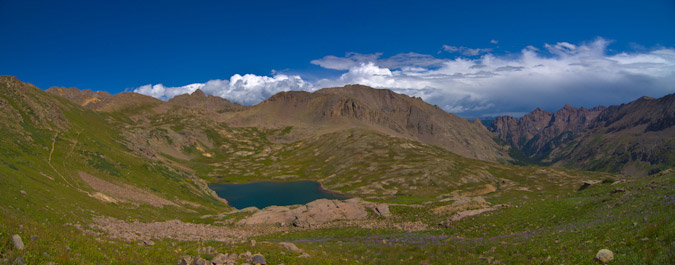
We reached Trimble Pass at 3:30 PM. We were still tired and sore, and required some time to rest, but we soldiered on.
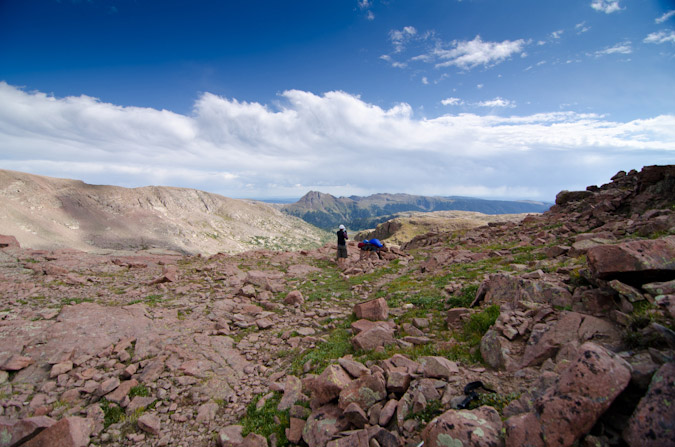
As we downclimbed from Trimble Pass onto Silver Mesa, I took one final parting shot of Chicago Basin... what a great place!
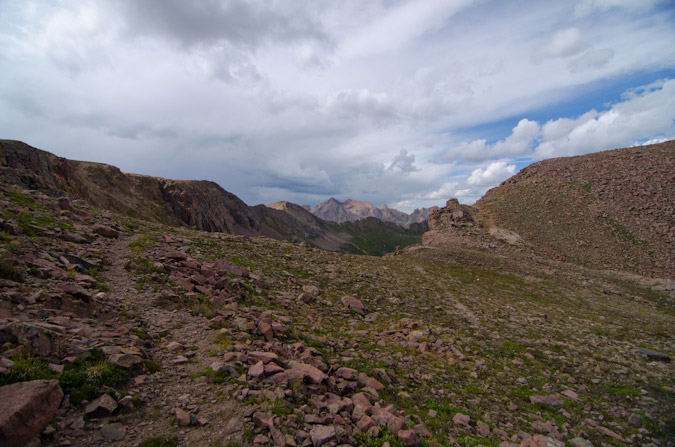
As we marched across Silver Mesa to the beat of our own music or podcast, we could not help but notice a huge storm brewing to the west. It looked as though it was moving our direction, so we kept eyes on it constantly. It was quite a sight either way.
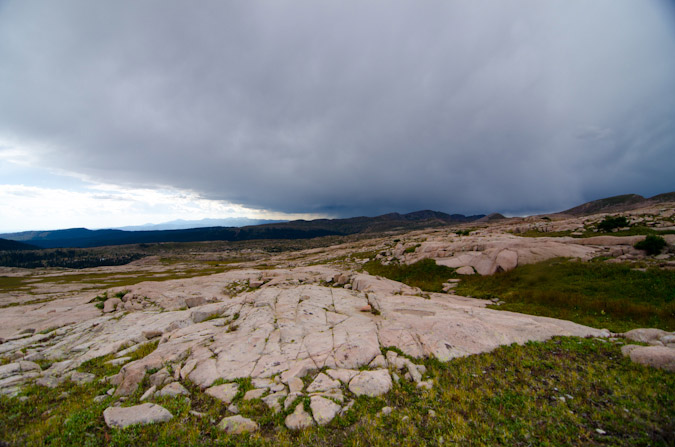
Silver Mesa had so many inviting campsites that tempted us. We kept going.
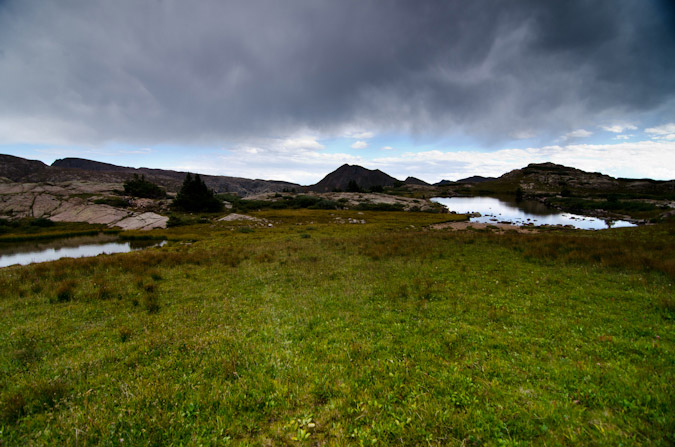
Before we knew it, we were at Lake Marie again. Just below Lake Marie we stumbled across a man from Boulder with four llamas. He was looking for Lake Marie. He had been up the trail and did not see it. I showed him where he was on the map. He thanked me. We were puzzled how one can miss a giant lake, but did not question it a whole lot, as we were focused on a mission. A mission of muscle-pounding and soul-crunching. We reached City Reservoir. It was also teasing us with its ample camping potential...
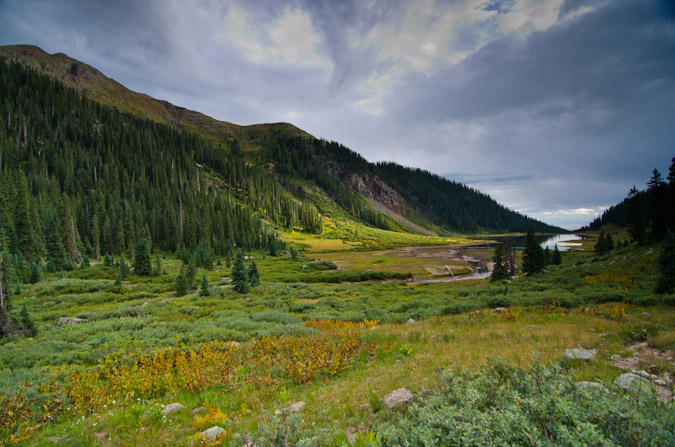
We cruised past City Reservoir and began a maddening climb out of the basin and towards Endlich Mesa. I found an interesting tree trunk to keep my attention off my aching bones.
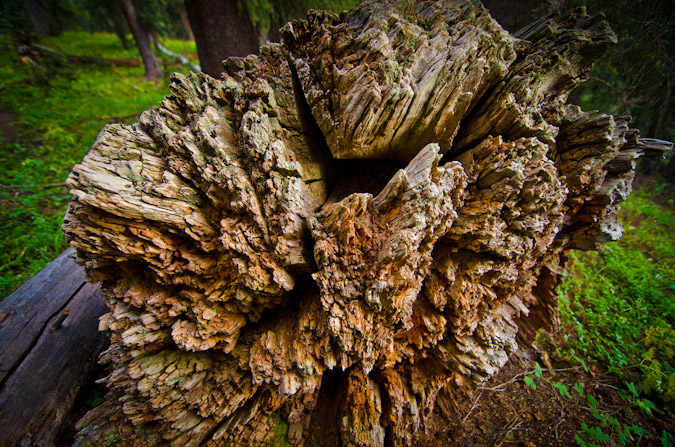
Darkness came quickly. We reached the beginning of Endlich Mesa around 9:00 PM. It was snowing. We were tired. We were hungry. We were quite certainly in foul moods. Sarah wanted food and so did I. I did not want to make camp though, so we got some light food out and ate. I confirmed our location on GPS. Only a few more miles to go. We finally reached the car at 11:30 PM and collapsed into sleeping bags in the truck. It was the best shitty night of sleep I've ever had.
This trip was the most physically demanding thing I've ever done. I pushed my body to its limits. I lost 6 pounds. I think both Sarah and I conquered some inner demons on this trip. It was, in retrospect, one of the greatest trips of my life.
Thanks for reading! I leave you with a playful creation - the world of Chicago Basin!
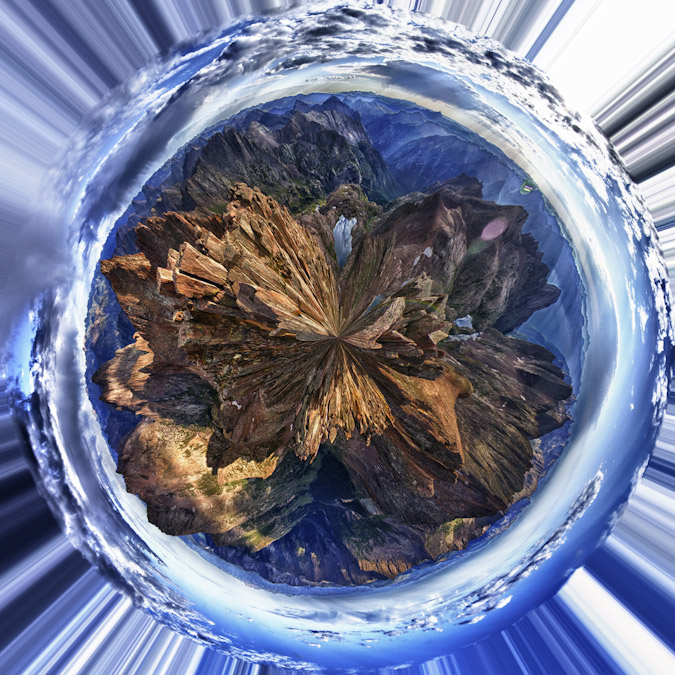
Citations:
1 Rhoda, Summits to Reach, pp 31-32
{fcomment}
Top 5 Stunning Colorado Locations
Colorado is easily one of the most scenic places in the whole world, so creating this set of lists was not an easy task by any stretch of the imagination. Having lived in Colorado my whole life and having visited nearly every mountain range the State has to offer, I wanted to reflect on my absolute favorite locations as well as highlight the places I’ve not yet visited. If you’ve not yet had the opportunity to visit some of these places, I would highly recommend that you do so immediately! Without further ado, here is my list of the top five stunning locations in Colorado that I have visited:
- Vestal Basin. Vestal Basin is a very remote valley located deep within the Weminuche Wilderness Area 32 miles northeast of Durango, Colorado. The surrounding mountains are members of the Grenadier Range, which is a sub-range of the San Juan Mountains. Vestal Basin is home to one of the most aesthetically inspiring mountains in Colorado, Vestal Peak. Vestal Peak towers above the basin in a upwards sloping fashion and contains one of the most classic climbs in all of Colorado up what is known as Wham Ridge. Vestal Peak is easily recognized from all directions by the dramatic and awe-inspiring Wham Ridge. Next door to Vestal Peak lies the also impressive Arrow Peak, which also has similar traits, in that it rises to the sky in a very dramatic fashion. A trip up these two incredible peaks should be on any serious Colorado mountaineer’s bucket list.
- Capitol Lake / Elk Mountains. Capitol Lake sits at the base of Capitol Peak, located deep within the Elk Mountains 13 miles west of Aspen, Colorado. Access to some of Colorado’s most stunning peaks is granted from this location, including the challenging task of summiting Capitol Peak via its famous Knife Edge. Once above tree-line, views of other famous peaks, such as The Maroon Bells and Pyramid Peak are seen to the southeast. The Elk Mountains are a truly magical place to behold.
- Mount Sneffels Wilderness Area. This pristine wilderness area is located 10 miles south of the town of Ridgway, Colorado in the San Juan Mountains. The area is home to the famous Yankee Boy Basin and several incredible mountains within the highest 100 of Colorado, including Mount Sneffels, Teakettle Mountain and Dallas Peak. Dallas Peak is arguably the most difficult mountain to climb out of the highest 100 in Colorado. The rugged terrain and incredible foliage located in this area are something every visitor to Colorado should take time to see. Especially beautiful in the fall, the wilderness area’s aspen trees change to a magical display of deep gold, red and yellow, all with the dramatic and spectacular Mount Sneffels in the background. This area is a must-see for natives and out-of-state visitors alike.
- Colony Lakes / Cottonwood Creek. These two magical lakes rest at the eastern base of Crestone Needle, Crestone Peak and Humboldt Peak in the Sangre de Cristo Range, 13 miles southwest of the town of Westcliffe, Colorado. Cottonwood Creek runs on the western side of Crestone Peak and Crestone Needle and provides remote access to one of the densest, most pristine wilderness Colorado has to offer. Unfortunately, access to Cottonwood Creek is currently problematic due some private property complications at the trailhead near Crestone, Colorado. Hopefully this area will be opened back up someday so that others can fully appreciate the natural wonder and beauty this area has to offer. Access to the Colony Lakes is still available by way of a four-wheel drive road that recently was re-developed by the Forest Service. There is plenty of controversy surrounding this access point as well, due to damage to the ecosystem at the lakes above.
- Highland Mary Lakes. Highland Mary Lakes are some of the most remote lakes in Colorado located quite deep within the Weminuche Wilderness Area in the San Juan Mountains, southeast of Silverton, Colorado. The lakes are located on the Colorado Trail on a stretch of earth that is completely above tree-line for several miles in each direction. It is truly insane to be on such an elevated plateau with some of Colorado most splendid mountain vistas surrounding you. This location is a favorite attraction of mountain goats as well. An amazing 3-5 day backpacking trip can be made by traveling from north to south or south to north from the silverton-side trailhead of these lakes all the way to Vallecito Reservior or vice-versa. The trek is truly magnificent. Be sure to coordinate a car shuttle ahead of time!
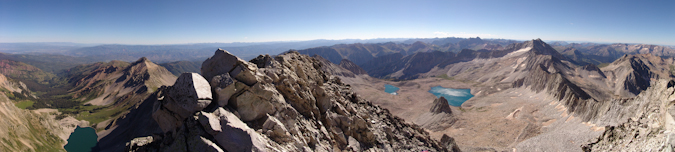
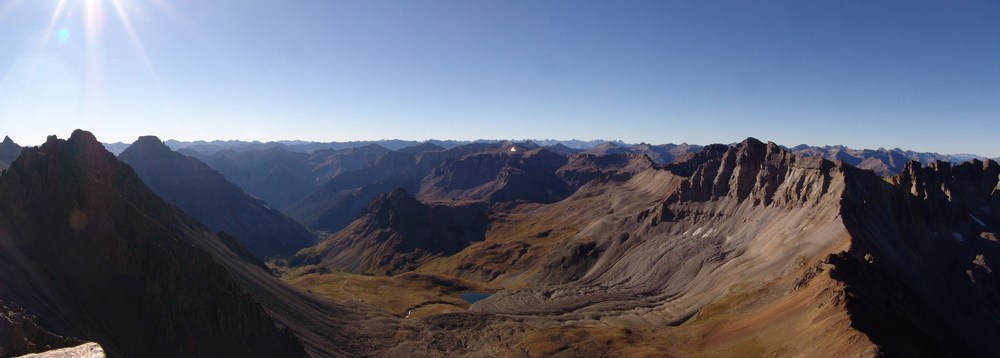
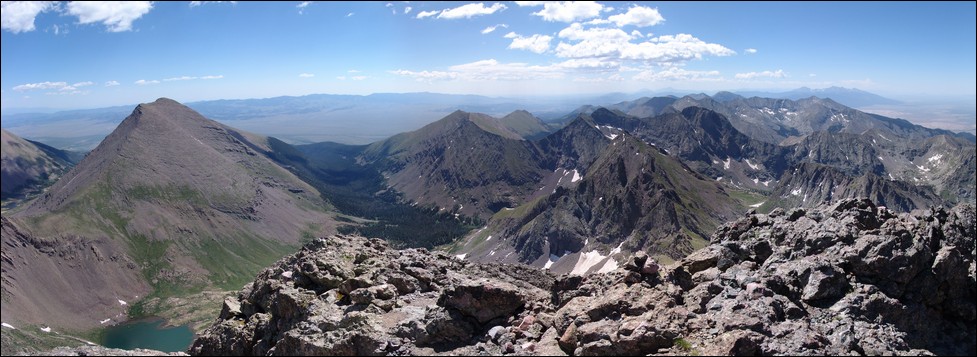
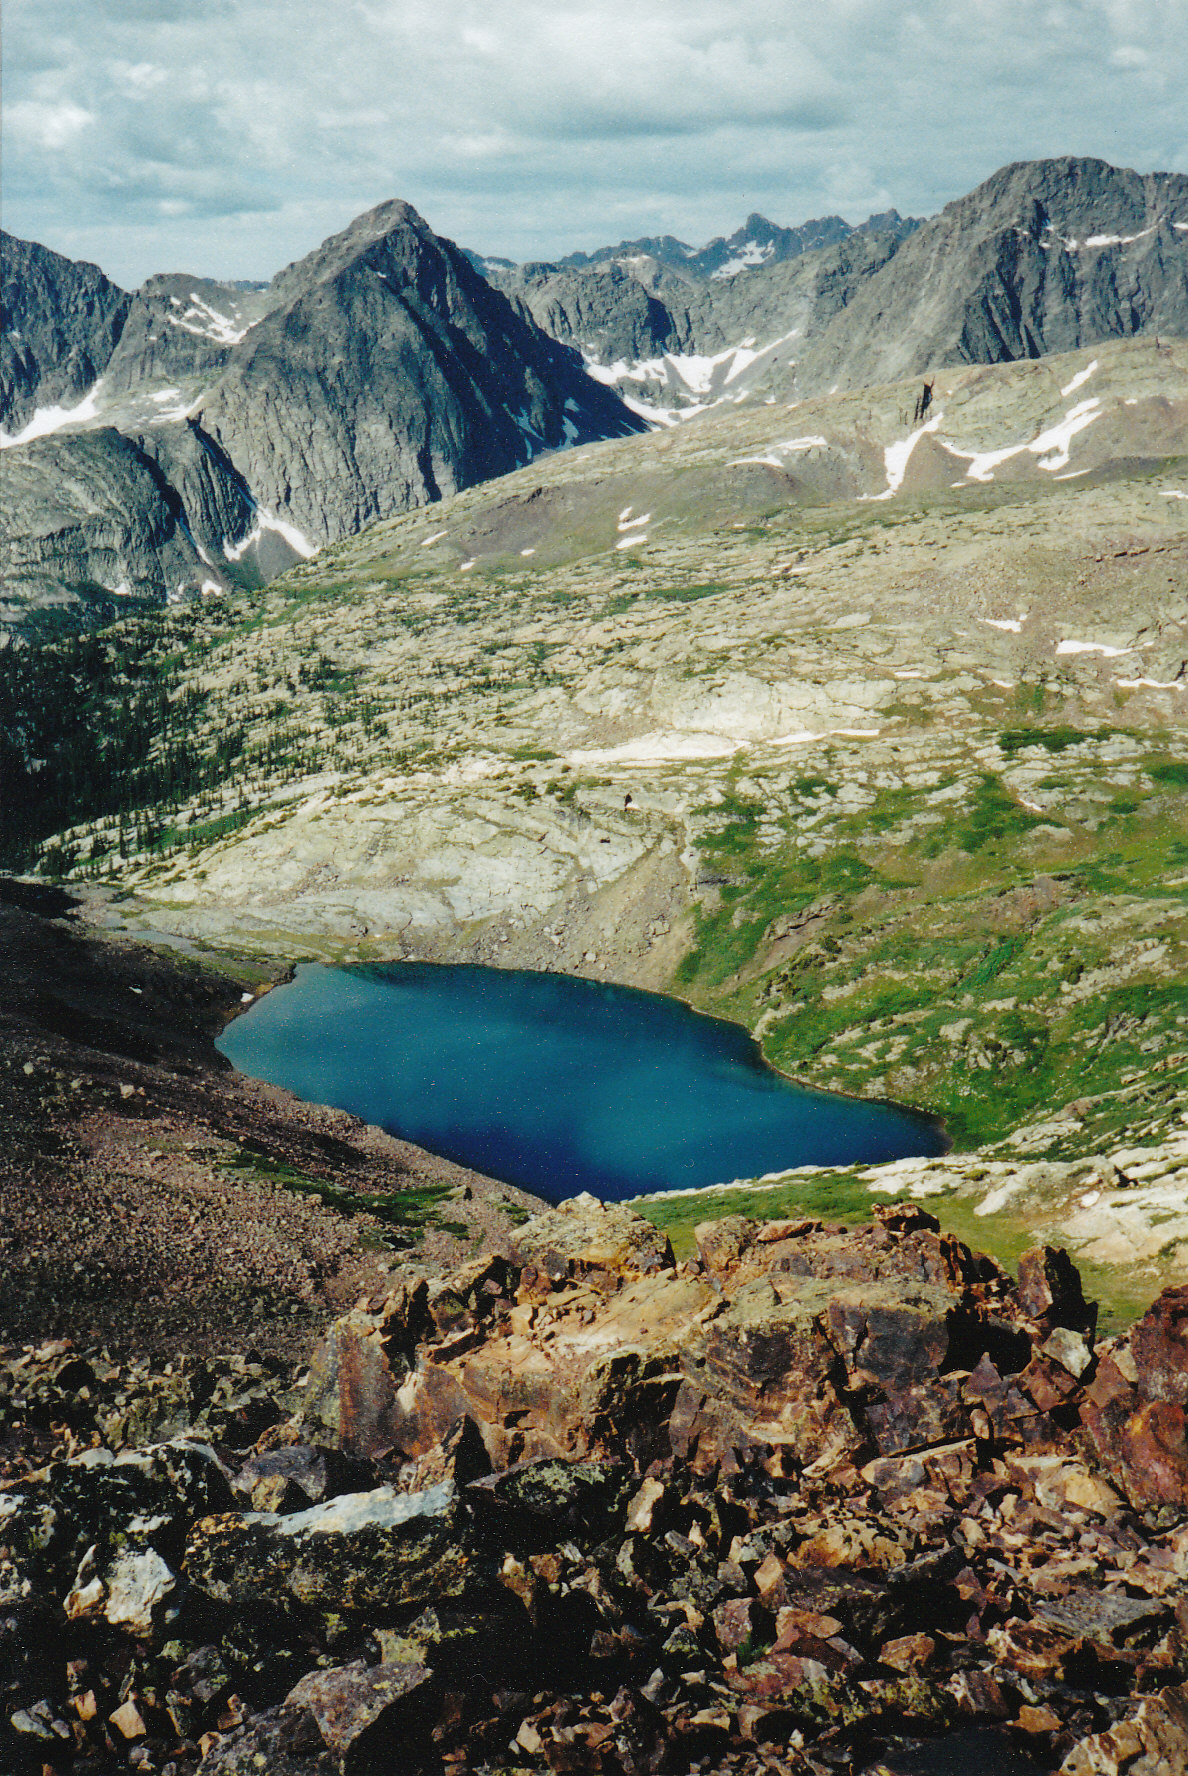
-
The top 5 places in Colorado that I’d like to visit but not had a chance to yet:
- Ice Lake Basin. Ice Lake Basin is a remote area west of Silverton, Colorado. From what I understand, this is one of the most incredible places in Colorado and I cannot wait to see it myself. The basin provides access to some of Colorado’s greatest peaks, including U.S. Grant Peak, Pilot Knob, Vermillion Peak and Fuller Peak.
- Chicago Basin. Chicago Basin is home to three of Colorado’s 14ers, Sunlight Peak, Windom Peak and Eolus Peak. Located deep within the San Juan Mountains’ Needle sub-range, these mountains are quite possibly some of the most photogenic and rugged looking out of any set in the State. While travel to the area is popular due to the access provided for the area’s 14ers, it is still tops on my list of places to visit.
- Indian Peaks Wilderness Area. Indian Peaks Wilderness Area is located northwest of Denver, Colorado, just south of Rocky Mountain National Park. While this area boasts no 14ers and only one peak over 13,500 ft, it is apparently a very pristine mountain range full of incredible hikes and challenging climbs.
- Gore Range. The Gore Range is a relatively unknown area north of Vail, Colorado and obtains some of Colorado’s most glaciated and rugged looking peaks. Many mountains in this range have never been named, mostly because of the remoteness of the area.
- West Elk Wilderness Area. This swath of wilderness is located north of Crested Butte, Colorado is home to some of the most insane images of autumn colors ever imaginable.
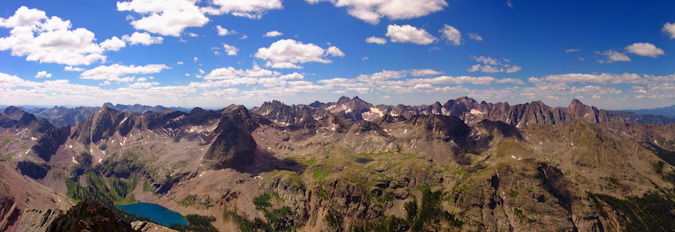
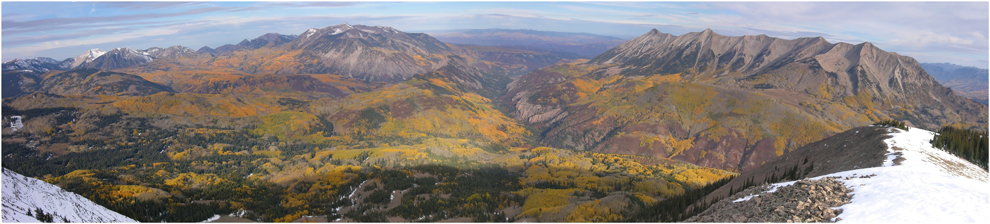
Photo by KAE Photography
What areas not covered have you been to that you’d like to share? Have any places you have yet to visit that you want to? I’d love to hear about your thoughts.
{fcomment}
Rio Grande Pyramid - The Lonely Centennial
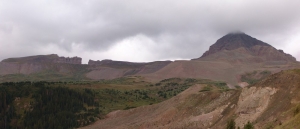
 Rio Grande Pyramid has long been on my "to-do list" for the Centennials (the highest 100 mountains in Colorado). Isolated by over 10 miles from its neighbors in the San Juan Mountains, Rio Grande Pyramid sticks out like a sore thumb by itself to the east of the Needle and Grenadier subranges. I viewed Rio Grande Pyramid from many angles this year, including a great view from Handies, and another wonderful perspective from Vestal and Arrow Peaks.
 Needless to say, I have been eyeing Rio Grande Pyramid a lot this year, and I have known since January that I would be climbing it with my dad at the end of August. Since Rio Grande Pyramid is very isolated, it requires a fairly lengthy backpacking excursion and some planning. My dad (Old Climber on this site) has wanted Rio Grande Pyramid for many, many years, so he jumped all over the chance to attempt to tackle this beast.
The plan was to leave from Colorado Springs after work around 5 or 6 PM on Friday, set-up a quick camp near Rio Grande Reservior, back-pack to Weminuche Pass on Saturday, set-up camp there, climb Rio Grande Pyramid on Sunday, and backpack out on Monday. With the weather forecast for the area being up to 70% chance of precipitation for pretty much the whole weekend, Ray and I were prepared for a wet trip, but hopeful that the weather would cooperate for a summit attempt. Just in case, I packed a book, The Things They Carried by Tim O'Brien, per the recommendation of my wife.
To start off, here are some meaningful statistics for this adventure:
Peak summited:
Rio Grande Pyramid: 13,821 ft. (ranked 97th in Colorado)
Total elevation gain: 4,674 ft.
Total distance hiked: 19.26 miles
Total time hiking: Approx. 14 hours
Total photos taken: 350
Total distance driven: 540 miles
Trip duration: 3 days
The drive to Rio Grande Reservior was uneventful, and finding a place to camp was surprisingly easy. We were aiming for the Thirtymile National Forest Campground, but we balked at the $16 fee, so instead we decided to camp 400 yards away, for free, in a large field by the Rio Grande River. This proved to be a great campsite. We woke up around 7:30 AM, packed up, ate breakfast, and drove to the campground, where the parking lot for the Weminuche Trail is at. At about 8:30 AM, Ray and I were packed and ready to hike, and began our 3-day journey into the remote Weminuche Wilderness Area.

A topographical map of our trip, click to enlarge.
The hike in is a relatively easy backpack, with the exception of mile number 2. The first mile is spent traveling along Rio Grande Reservior along a gentle trail, and then the trail picks up elevation quickly in mile 2 as it climbs and rounds the corner to the south west. After the 2nd mile, the rest of the hike in is very mild, with excellent views of the wide-open and very photogenic Weminuche Creek basin.

The Weminuche Creek.
For our campsite, we were aiming for an area near Weminuche Pass. On the way up, both Ray and I were marvelled by the variety of mushroom that were growing along the trail, certainly evidence that this was been a very wet summer. Little did we know, the mushrooms would be one of the highlights of our trip (for those wondering, we did not ingest any of them).
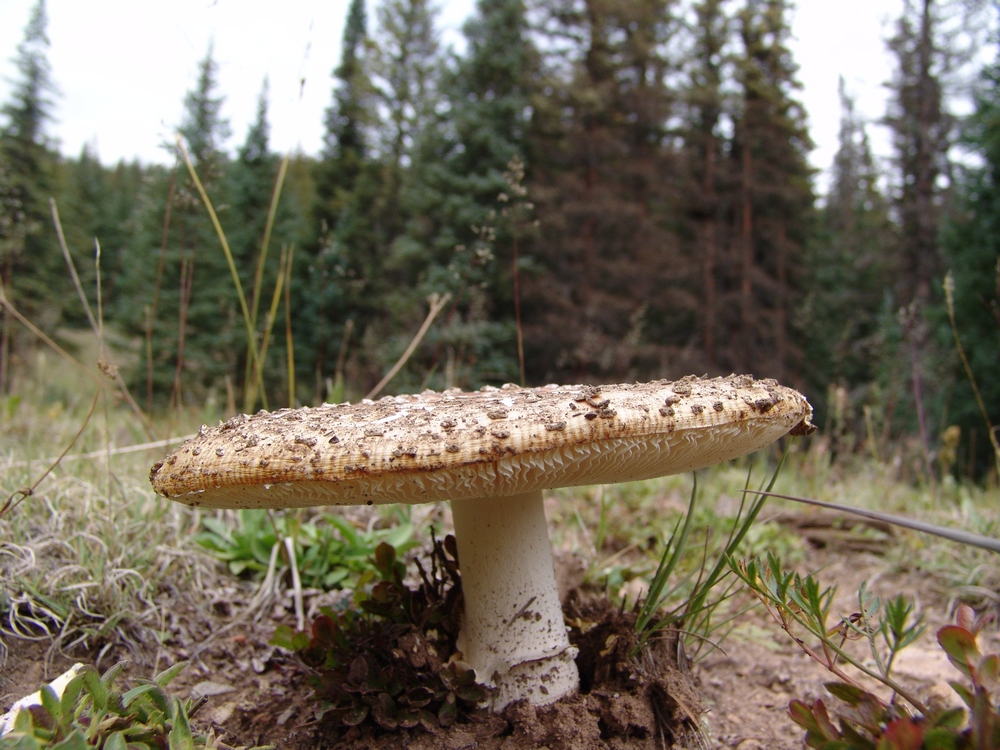
A Fly Agaric mushroom along the trail leading towards Weminuche Pass.
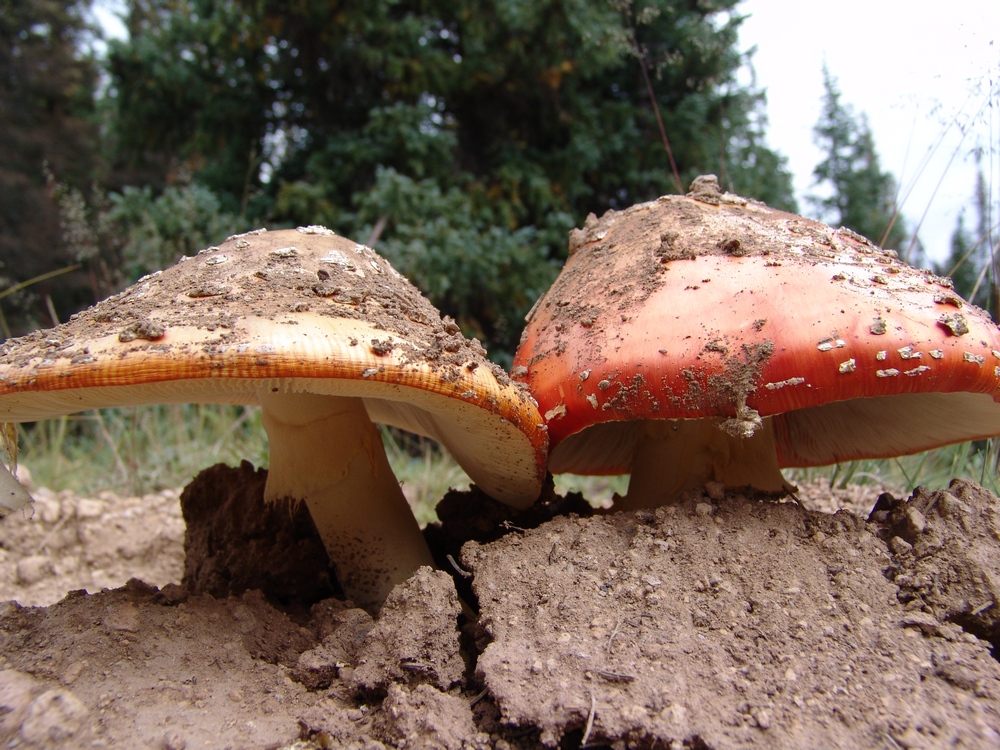
Two Fly Agarics emerge from the hard soil.
A Fly Agaric poking through the dirt.
We finally found Weminuche Pass, which was easy to spot by the two almost useless signs sticking up out of some cairns on each side of the trail. Heed my warning now, the sign on the right is for "Sky Line Trail," which is the route to Rio Grande Pyramid. The sign is poorly marked and at the time pointed in the wrong direction. We've since fixed the sign, so hopefully you'll see it better than we did. We camped directly east (left) of these signs along a small but gorgeous creek that flowed down from the Continental Divide. The area was a very large and impacted campsite, with plenty of great spots for a tent a a nice fire-ring.

The creek near our campsite.
After setting up camp, I decided to go for a walk around the area, and see what kind of mushrooms I could find. Since I know almost nothing about mushroom identification, this was more of an opportunity for me to practice taking macro shots with my camera. I do think that mushrooms make for excellent subjects for photography, and I suspect/hope that some mushroom lovers out there may appreciate this trip report. I've submitted these photos to MushroomExpert.com (which is a very cool site) and hope to find out soon if we can name any of them. If you don't care for photos of mushrooms, you can skip that section by clicking here.
A little brown mushroom (or LBM for short, as Ray would say).
Some funky yellow mushrooms - we saw a lot of these under the pine trees.
Another "LBM."
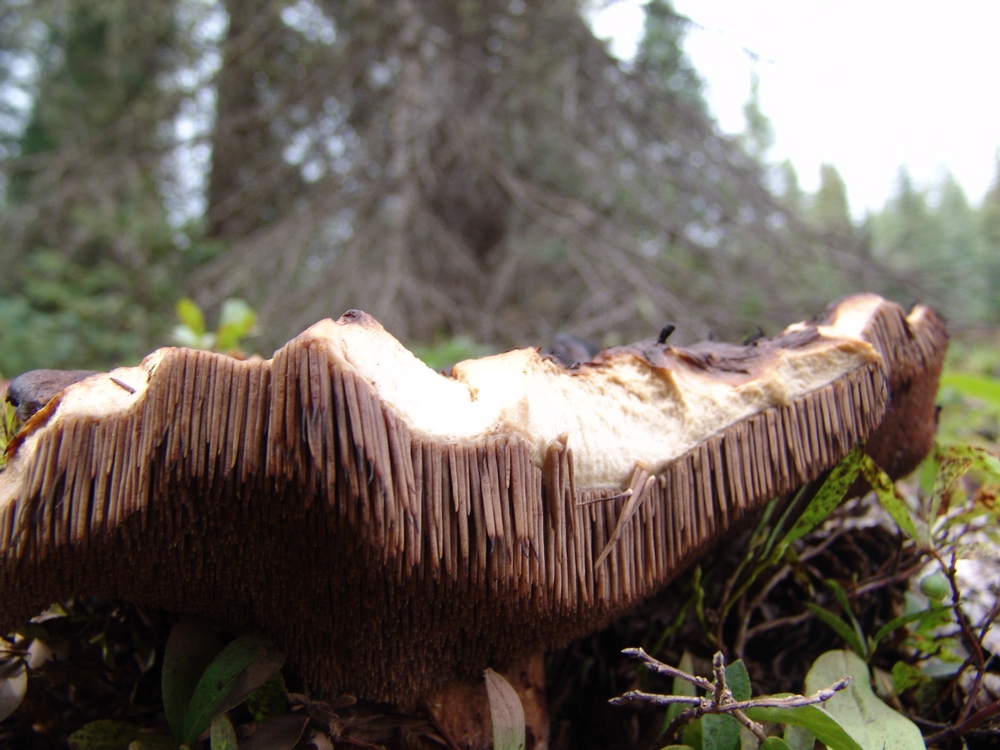
A nasty looking 'shroom - I think it has seen better days...
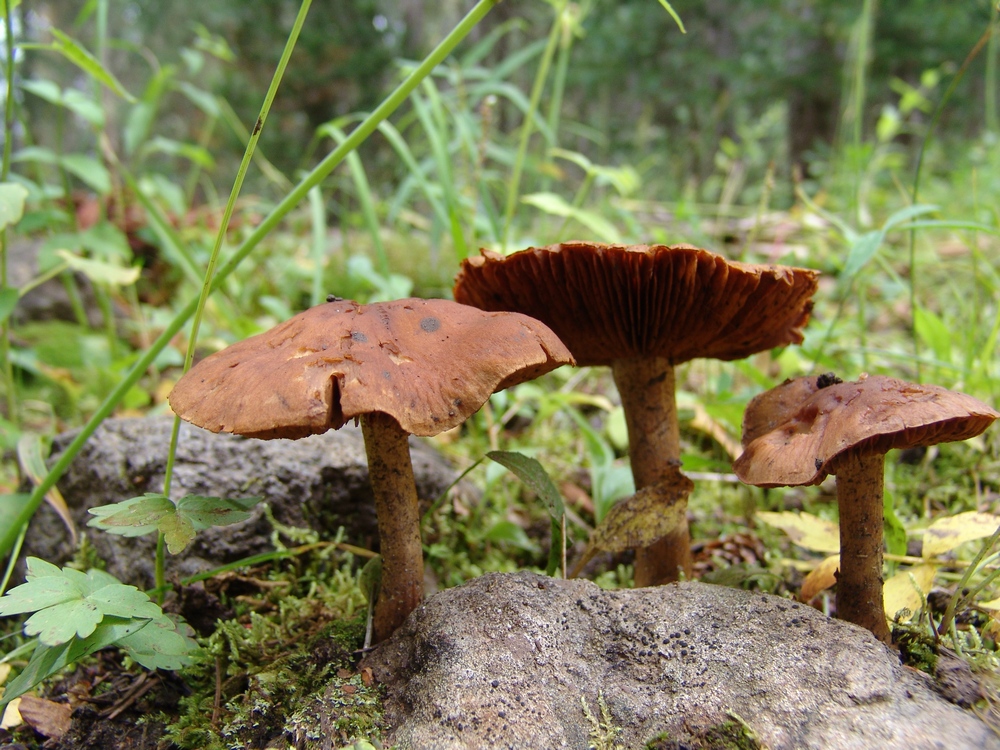
Three "LBM's" emerge from the mossy ground floor of the forest.
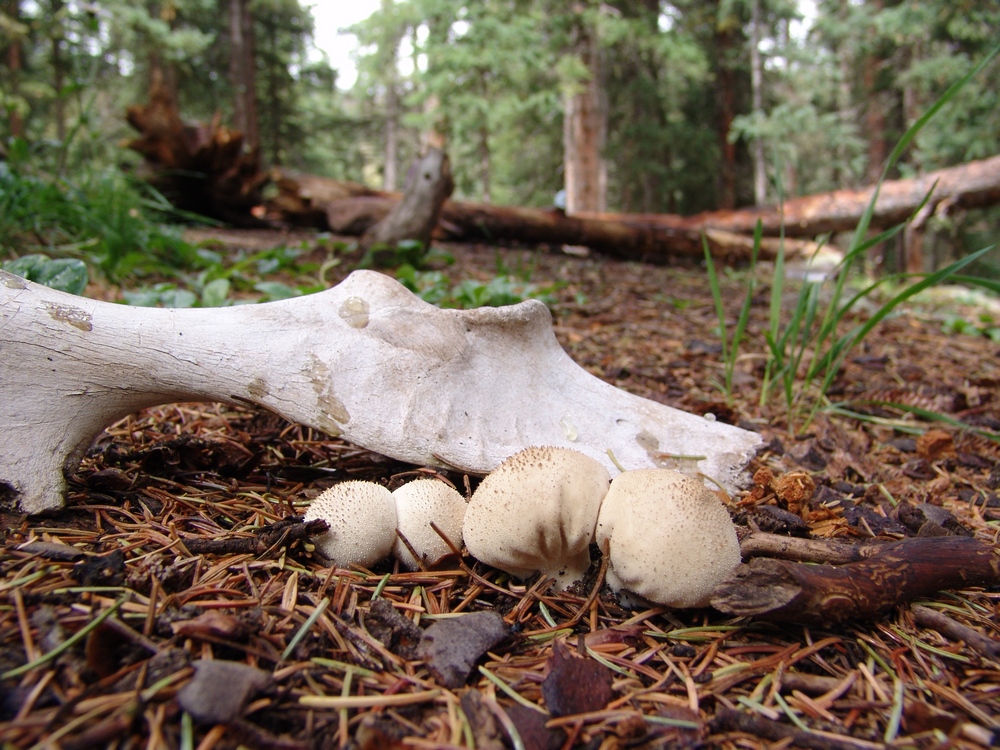
I wonder... did these mushrooms seal the fate of this poor animal?

A King Bolete mushroom near our campsite. It turns out that these are quite edible.

Another view of the King Bolete.

A ring of mushrooms near our campsite.
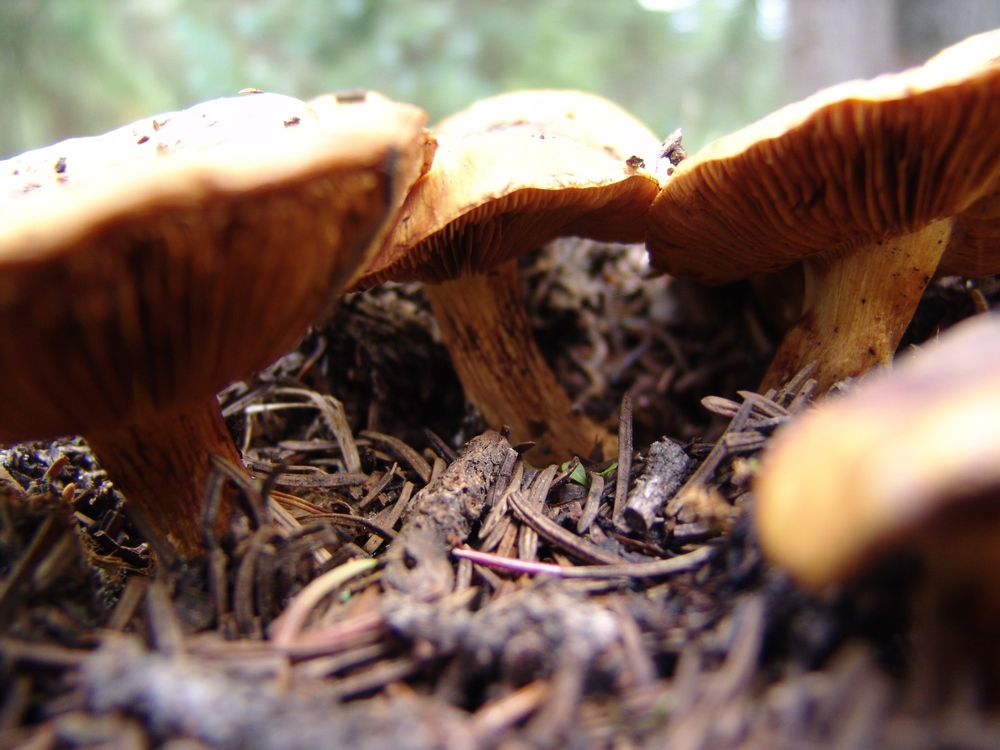
More LBM's.
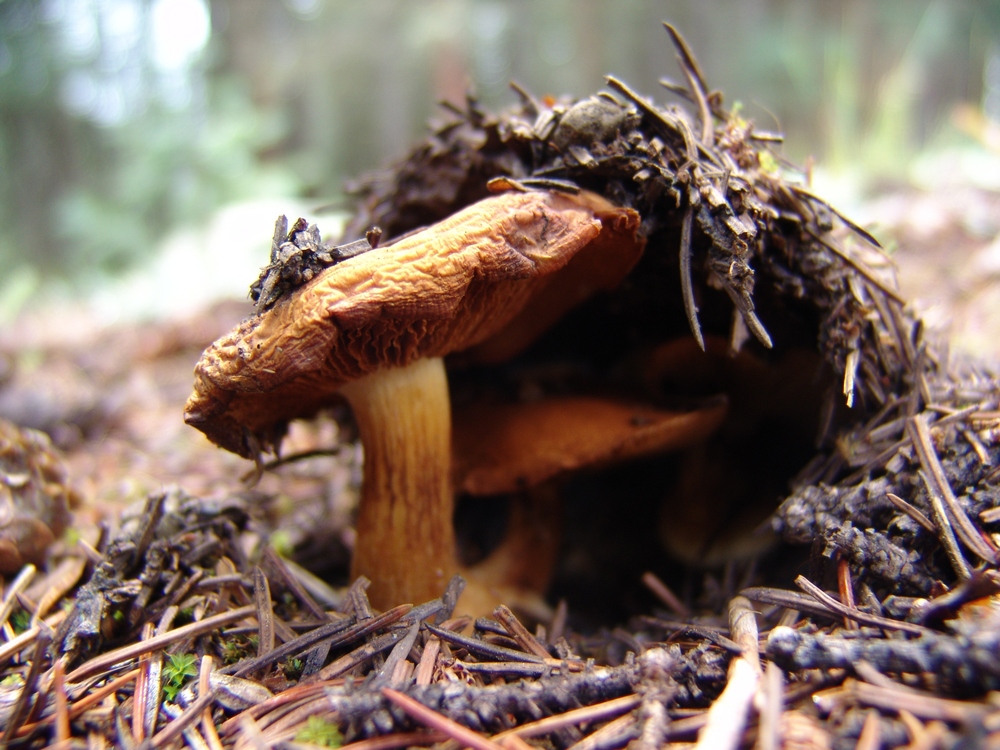
A LBM emerges from the pine needle floor.
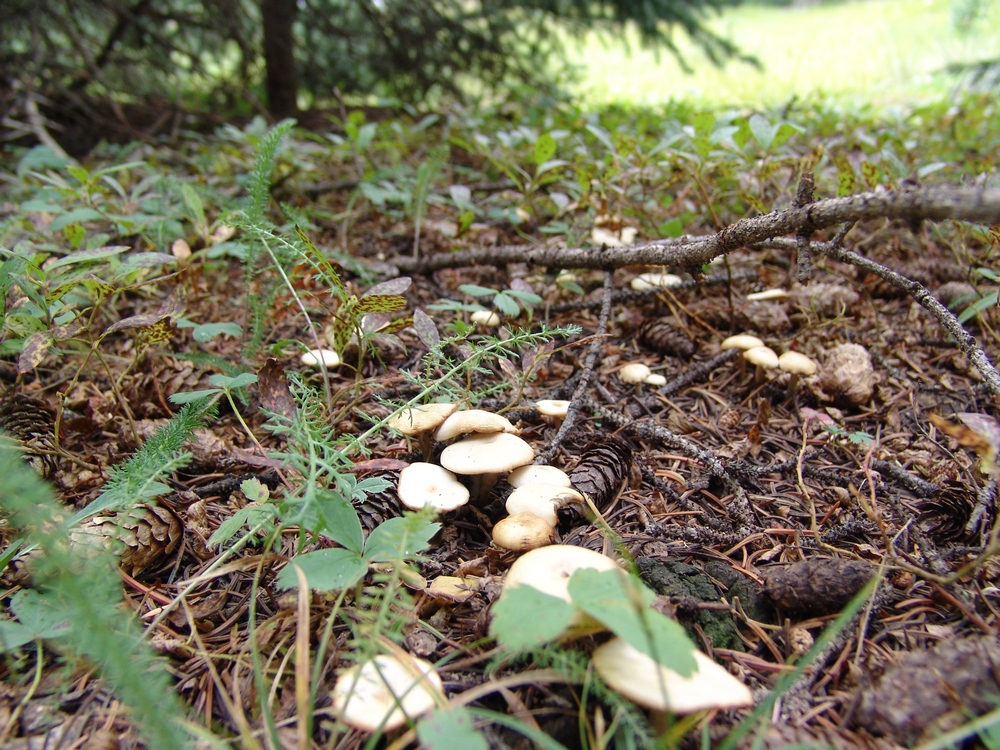
Little white mushrooms were everywhere...
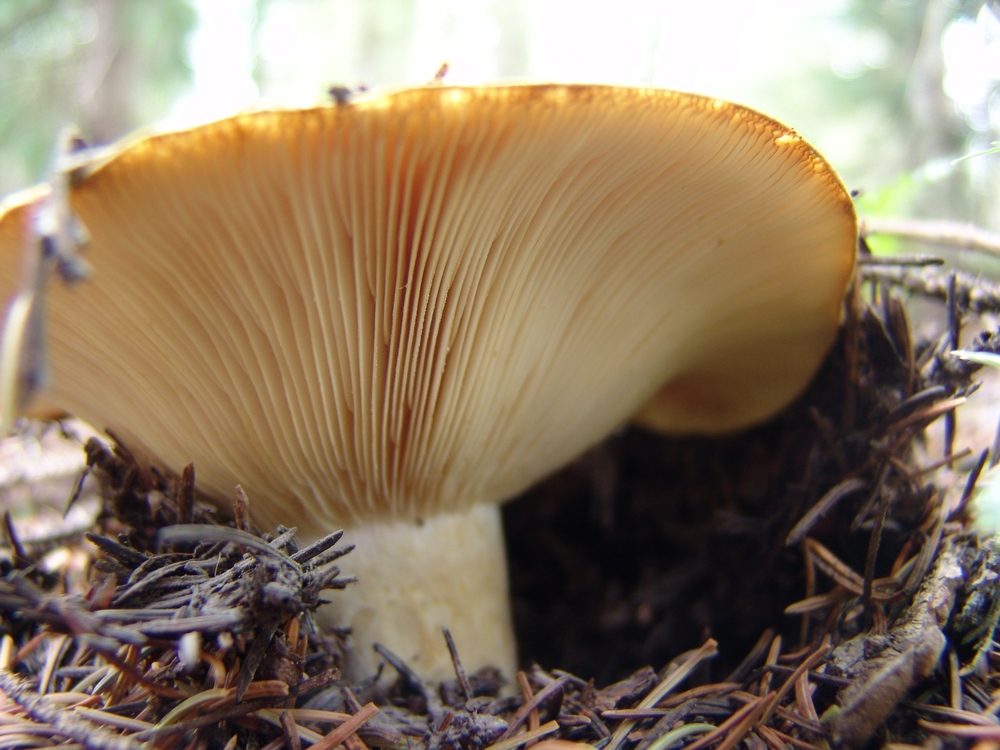
The "gills" of this mushroom made for an interesting subject for a macro shot.
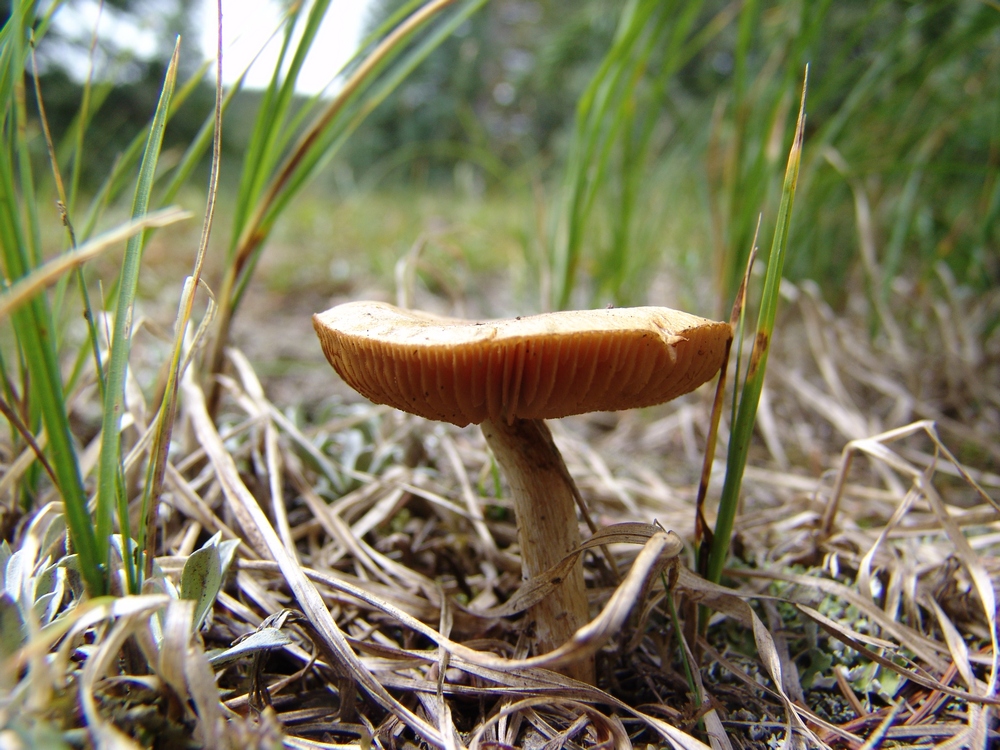
Another LBM rises from the grass.
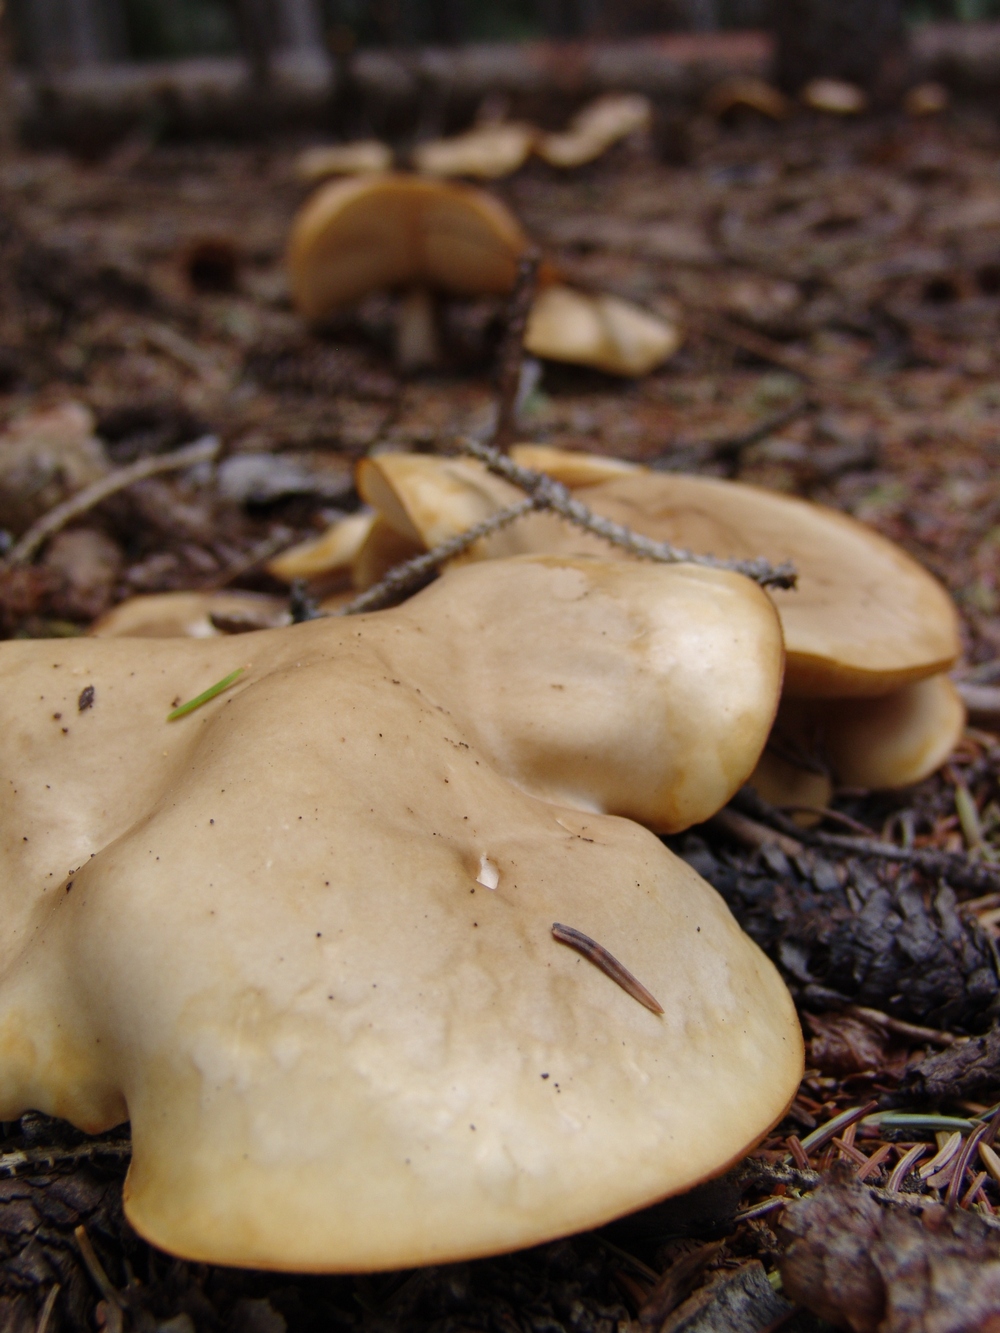
These mushrooms looked like blobs slithering across the forest floor.
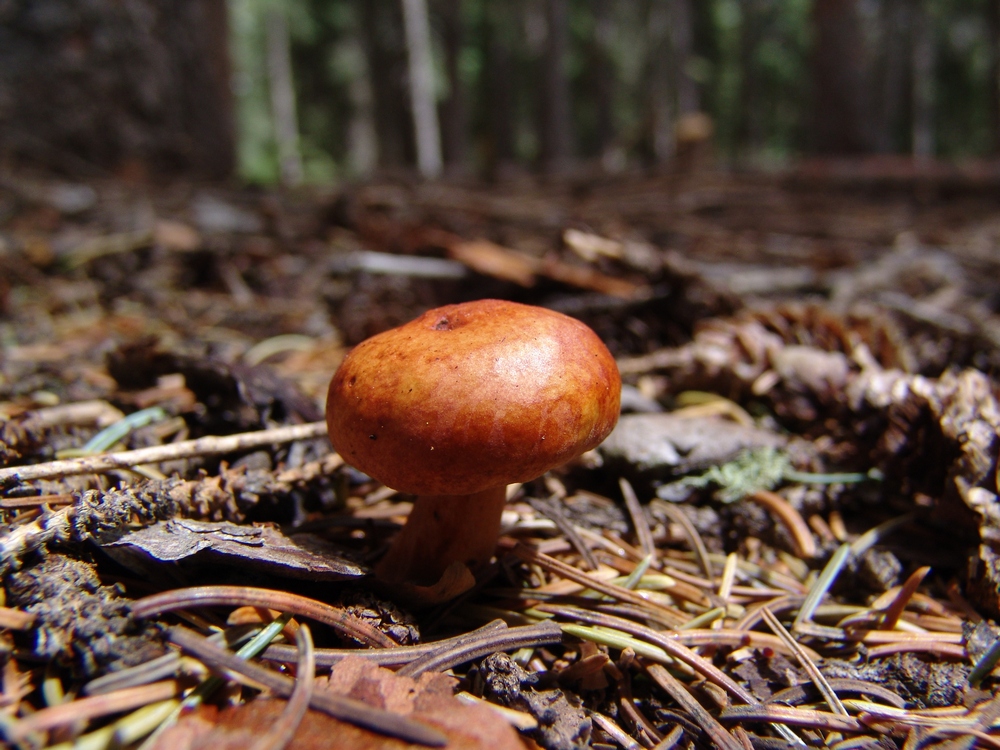
Yet another LBM!
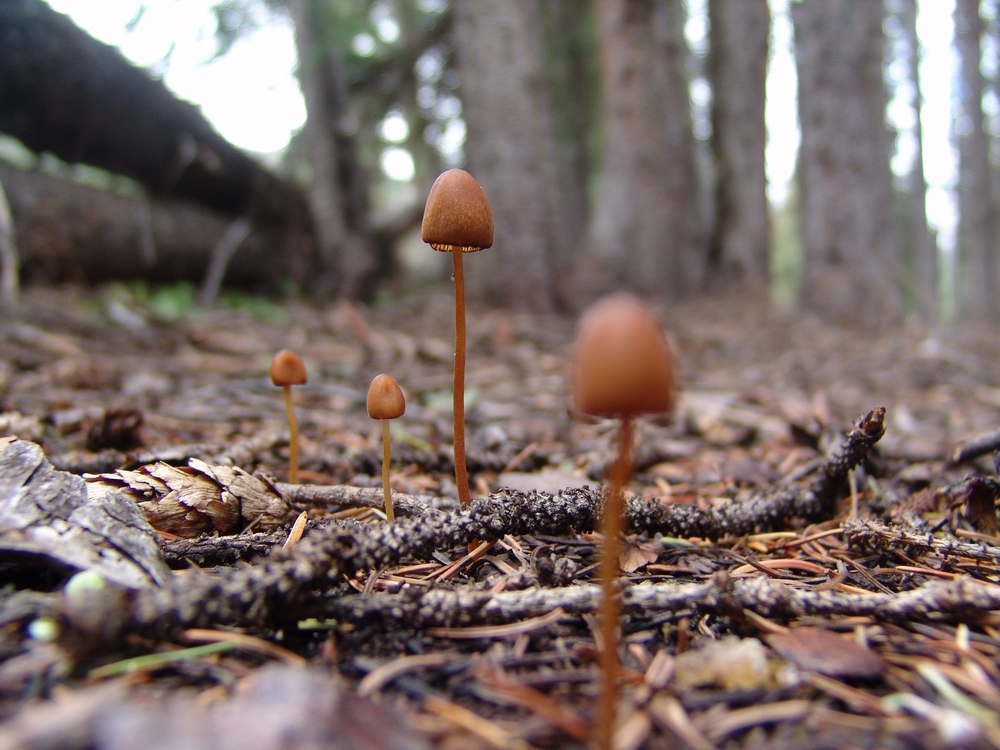
These tiny mushrooms were growing in a very obscure location. I don't have a clue how I spotted them. Pure luck. They were about an inch tall.
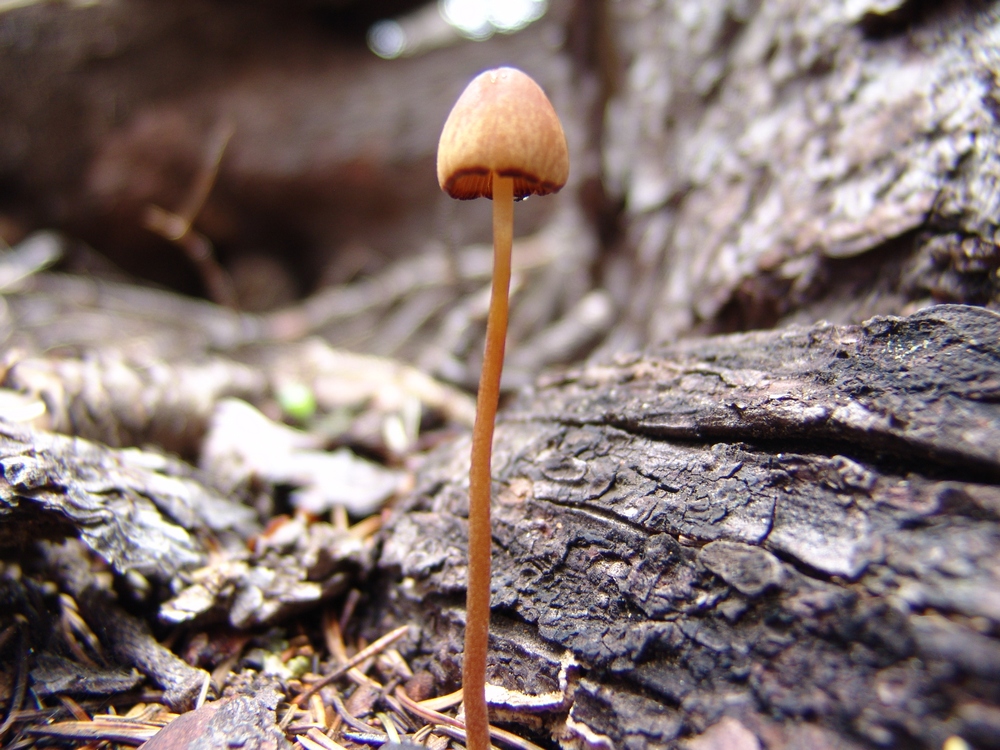
Another tiny little mushroom.

A perfect Fly Agaris specimin near our campiste. Doesn't it look like something out of Super Mario Brothers?

Mario emerges!
A view of the underside of the Fly Agaric.
This mushroom looks like it maybe got a little too much sun. Sunscreen is important in the mountains.
More crispy 'shrooms.
This little mushroom looks like she put on a little too much lipstick...
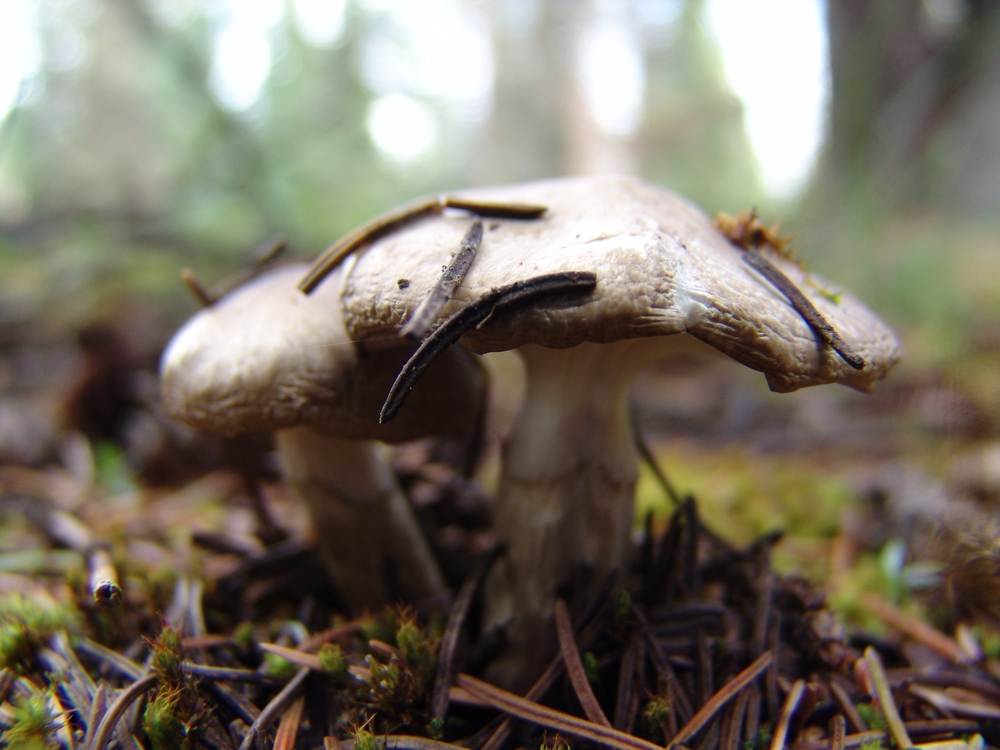
A white mushroom.
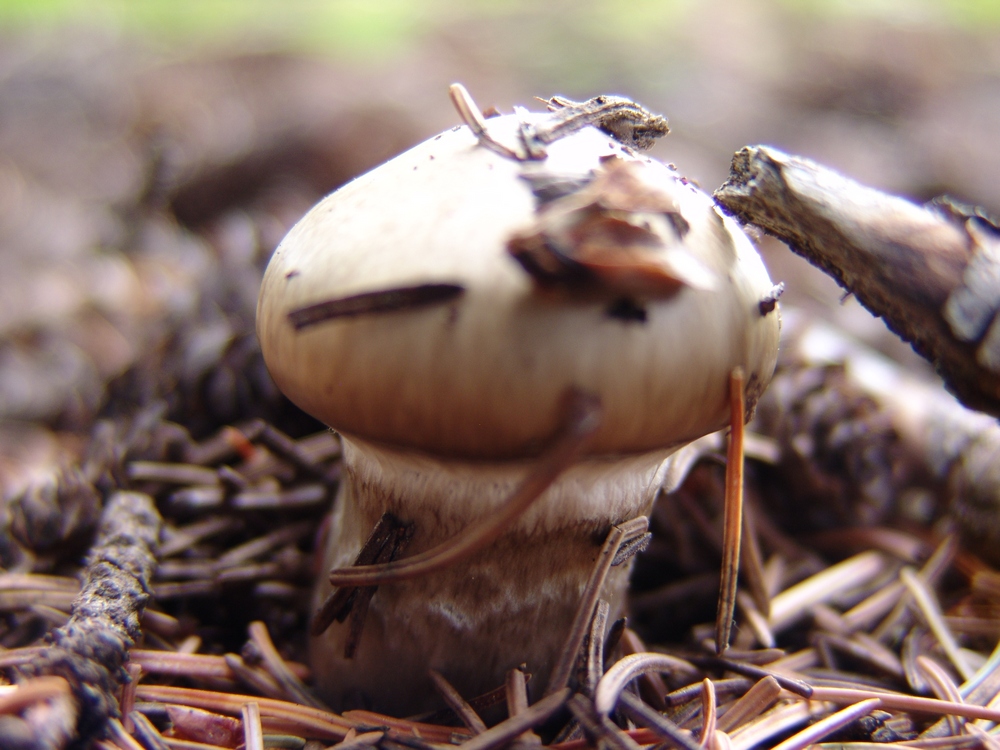
A small button cap mushroom.
After photographing the mushrooms, I took a nap. Sleeping next to the creek was great, and I recuperated from my exhausting search for the perfect mushroom. Ray and I cooked up some mashed potatoes and gravy with StoveTop dressing and chicken breast (we know how to cook when we backpack), and then after dinner I decided to go on another adventure up the valley to see if I could watch the sunset.

A view of the upper Weminuche Creek basin, just past Weminuche Pass.
To the east (left), I saw a small meadow at the base of the hillside pictured above. In that meadow, I saw a deer grazing, so I decided to see if I could stalk the deer and get a good photo of it. I think the deer was aware of my presense for pretty much my entire walk, which about 400 yards total across the basin. As I got closer to the meadow, I found myself looking down upon an awesome series of pristine beaver ponds.
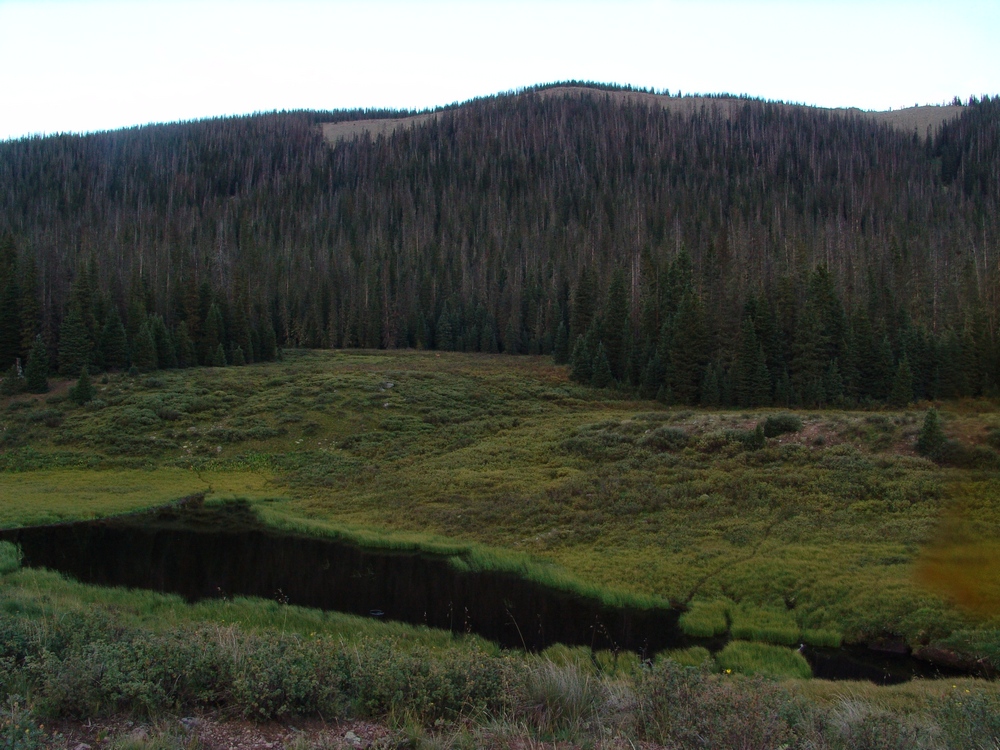
A hidden beaver pond and meadow. The deer can barely be seen in the upper meadow.

Another beaver pond.
The beaver ponds were full of duck and fish, and it was fun watching the ducks swim around with their little families of chicks.
I even took some video of the ducks. If you listen really closely you can hear coyotes howling in the woods nearby.
In the distance I could make out what I believed to be Pole Creek Mountain in the late sun's light.
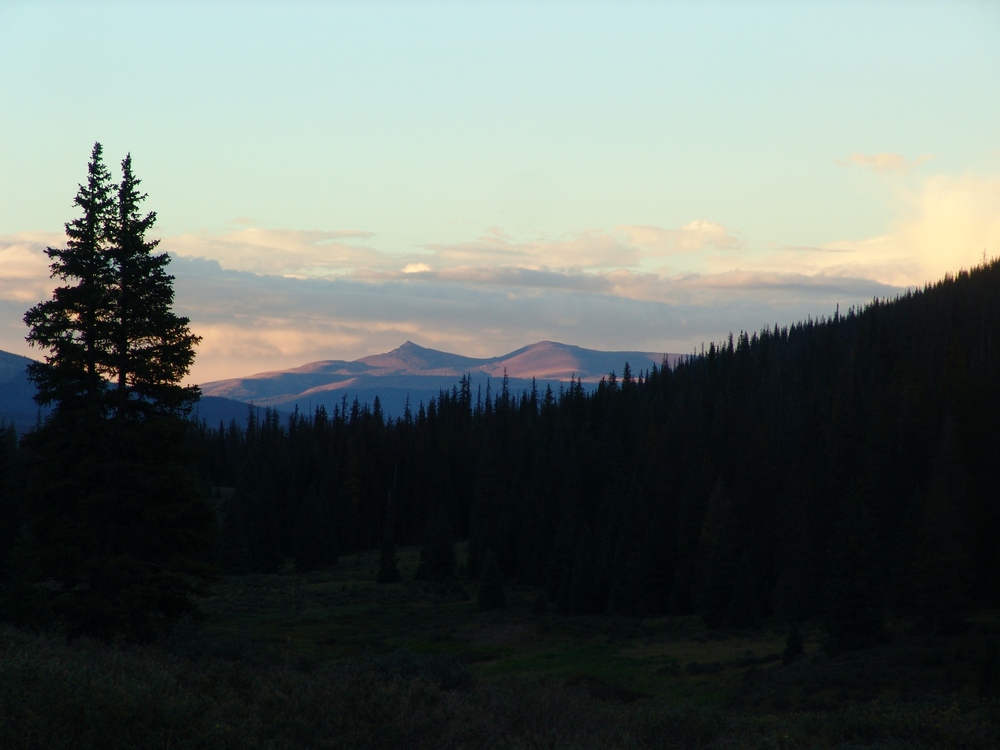
Pole Creek Mountain.
After being spooked at the beaver ponds by continuous coyote howling, I decided to return to camp. We crashed fairly early and set our alarm for 5 AM. The alarm went off and it was really cold outside. We got ready quickly and were on the trail by 6 AM. This is where we made our first mistake. Instead of following the "Sky Line Trail," we followed the Weminuche Trail further south until I realized we were doing something wrong. We backtracked to the Sky Line Trail (which does NOT follow where it shows on the USGS topo map, as seen by my TOPO map of our route) and began the steep upclimb along the Continental Divide. This trail is well established and somewhat steep. The weather was very foggy and winter-like for us, but there was no precipitation, so we continued up. The trail splits at one point, trying to avoid some deadfall; however, we found the best thing to do is to stay on the trail and go over the dead trees. This prevents you from losing a lot of elevation. Eventually, the trail brings you around the bend and Rio Grande Pyramid and The Window come into view.

The Window and Rio Grande Pyramid.
The Window is a very impressive geologic formation along the south ridge of Rio Grande Pyramid, and it does not disappoint. It was truly striking.
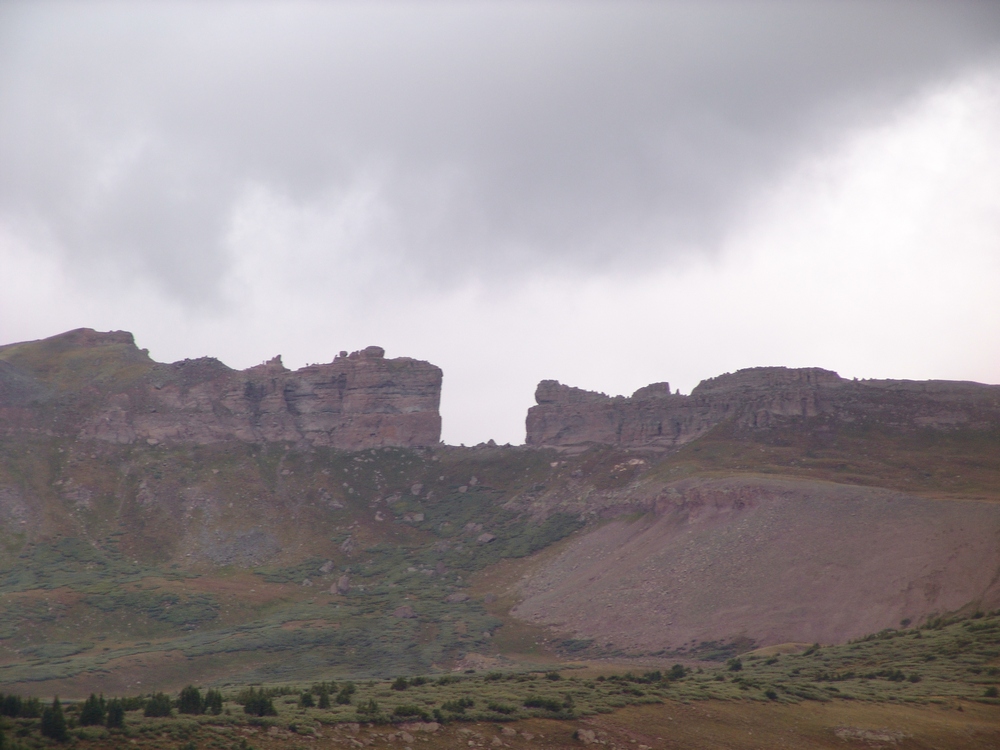
The Window.
The trail flattens out here in the upper basin and eventually brings you to a junction at the base of Rio Grande Pyramid. We took the junction to the right and climbed up a steep trail to the lower plaform of Rio Grande Pyramid. From here, we chose to follow the platform south and then up the gradual southeast slope.
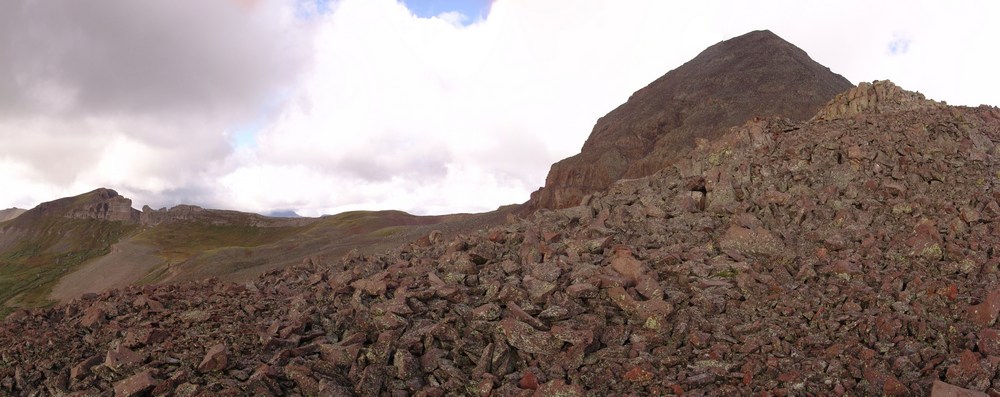
Nearing the summit of Rio Grande Pyramid.
The view back from where we came near UN 12,808 was pretty awesome, with the greens and yellows of the huge basins showing their true colors.
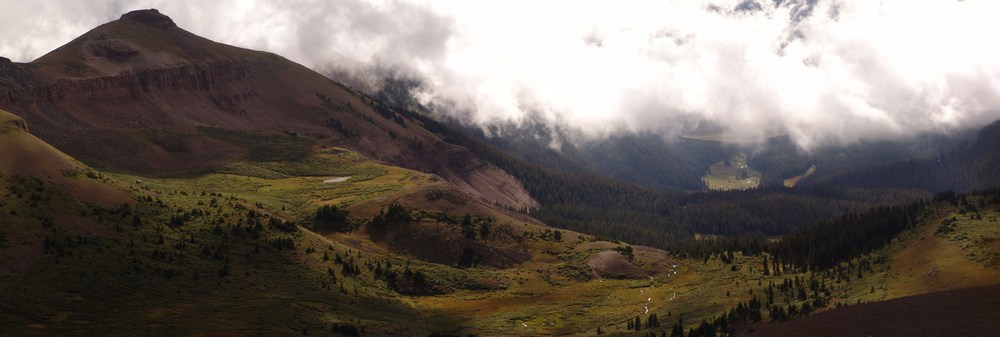
UN 12,808 towers over the valley below.
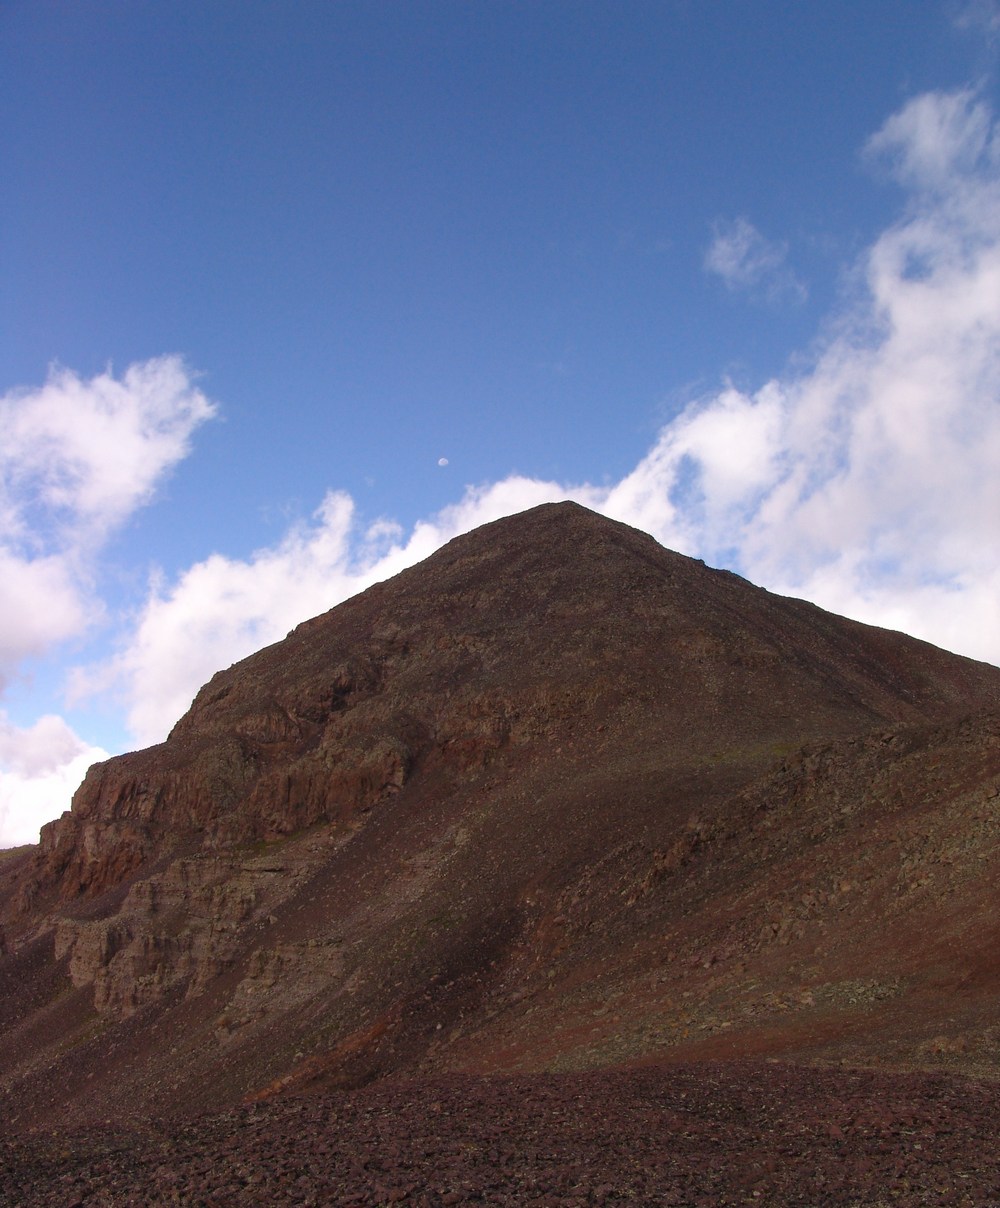
The Moon sets over Rio Grande Pyramid.
I was very intrigued by the volcanic nature of the rock on Rio Grande Pyramid. It was very much like lava rock in many regards, and made for quite easy travel compared to the "dinner plates" in the Elk Mountains or the famously loose rock found elsewhere in the San Juan Mountains.
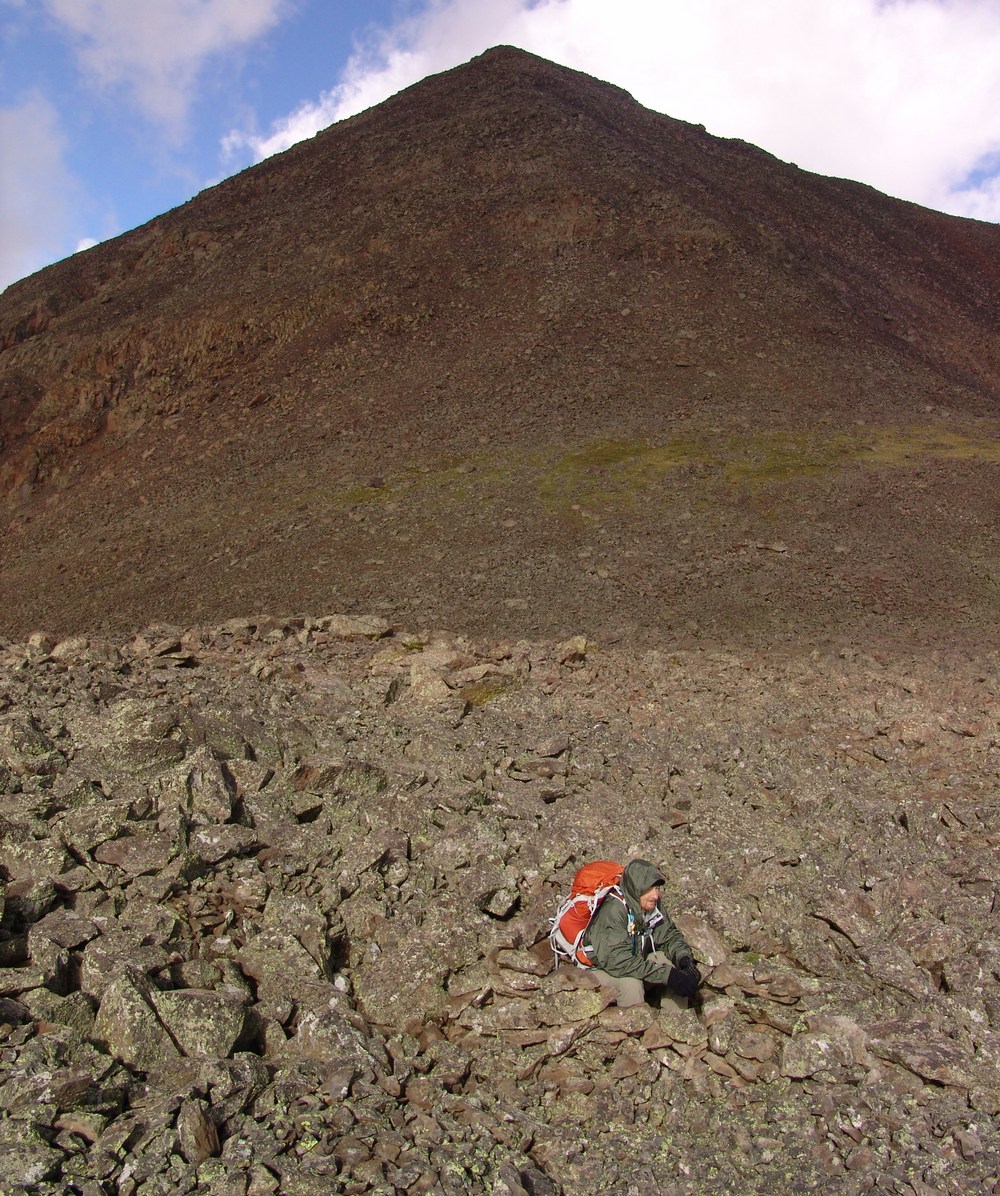
Ray takes shelter in a ring of rocks we found.
From here, it was smooth sailing to the summit. While steep, Rio Grande's final summit block is nothing to be worried about. It is relatively short, and there are even class 3 variations for those seeking out a more challenging ascent. As I crested the summit, I was worried that there would be complete cloud cover in the area and that my view of Vestal Peak and Arrow Peak would be obscured. When I first viewed those two mountains at the top, I was ecstatic. While the weather did indeed obscure much of my view of the Needle Range, the Grenadiers were in plain view.
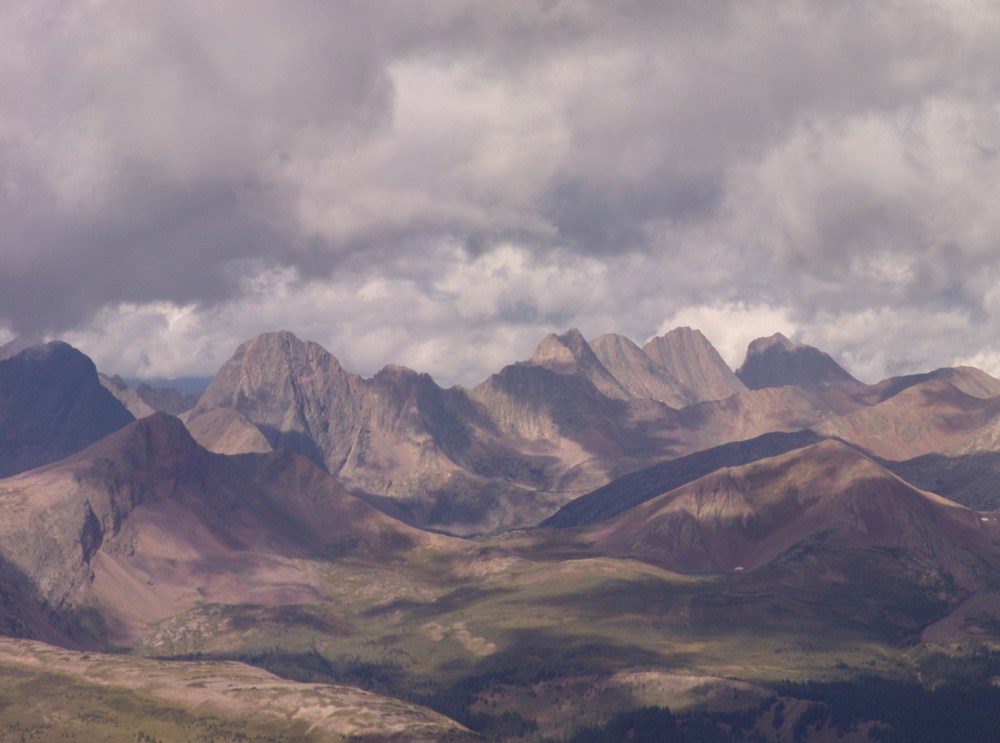
The Grenadier Range.
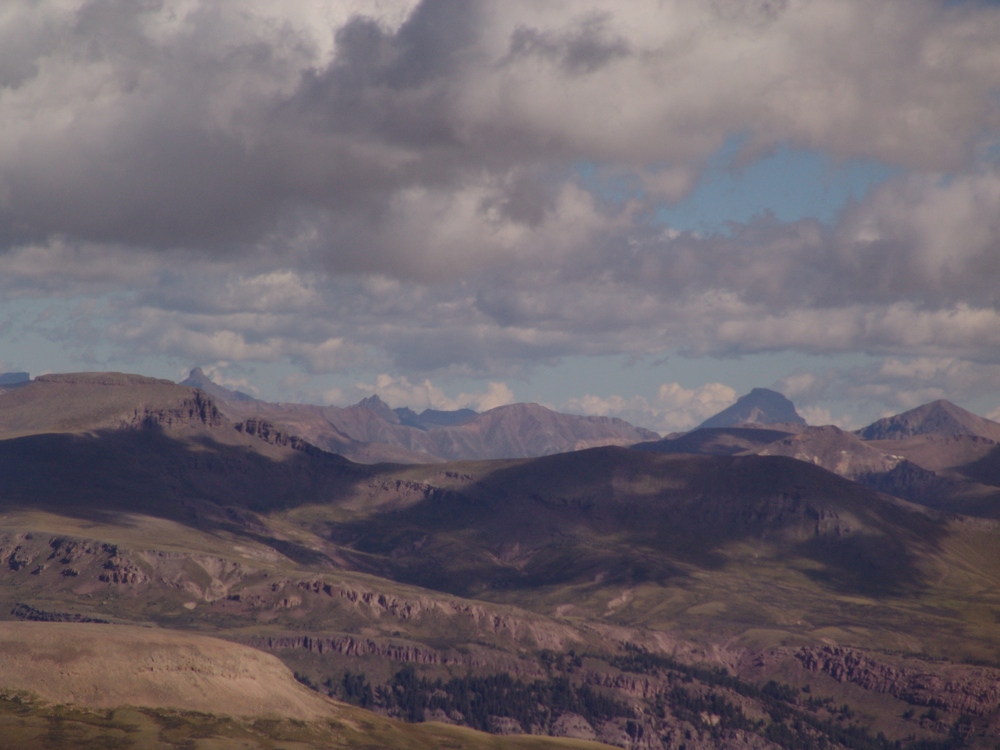
Wetterhorn and Uncompahgre to the north.

A 2800 pano from the summit of Rio Grande Pyramid.
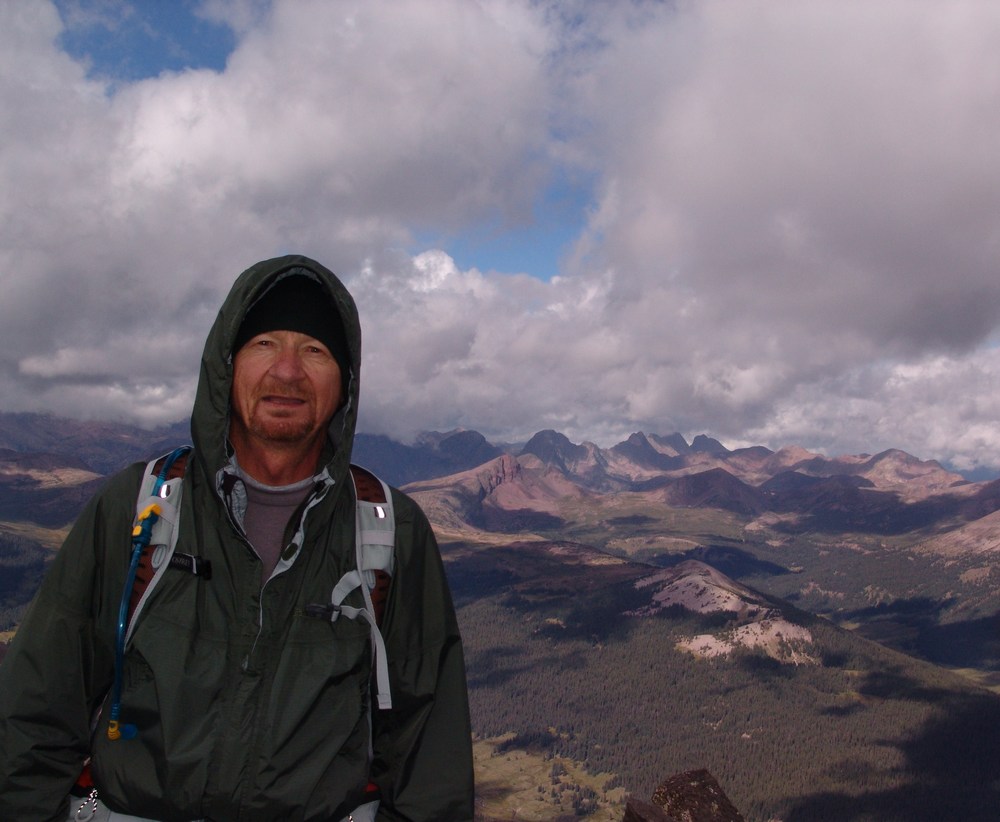
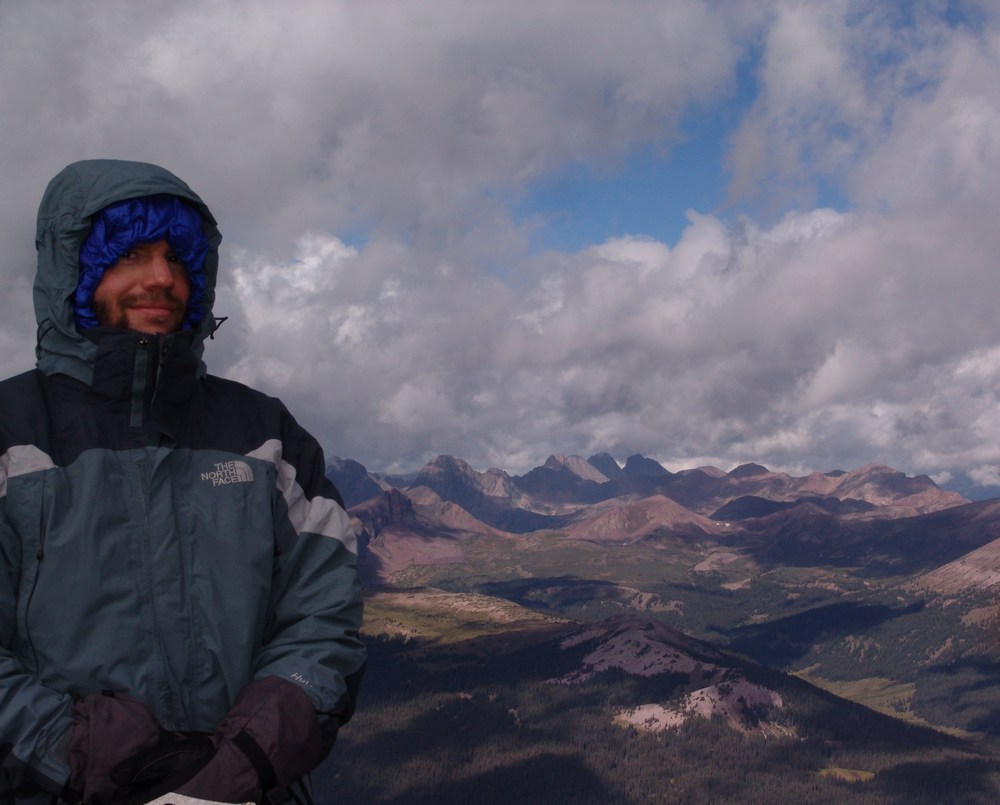
Ray Payne on the summit of Rio Grande Pyramid Matt Payne on the summit of Rio Grande Pyramid
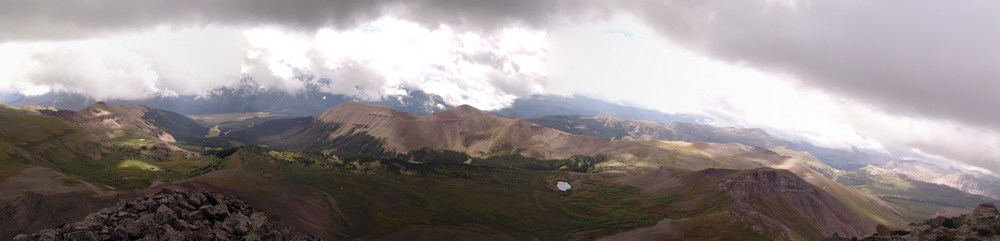
A view east and south. The clouds loomed over us all day long.
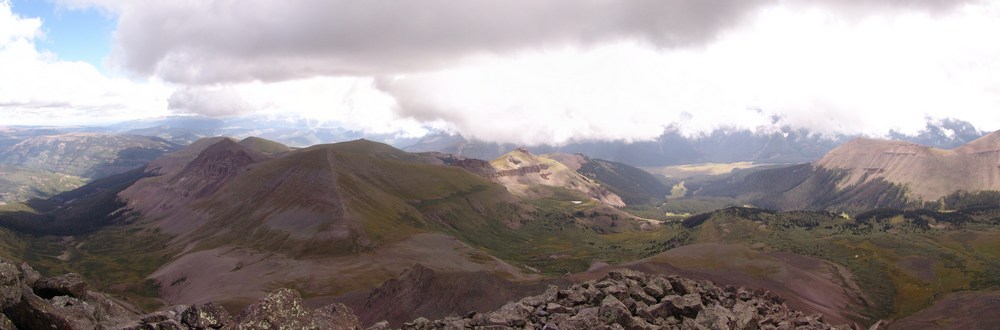
A pano looking east. "Fool's Pyramid" or UN 13,278 left of center.
Since it was really windy and cold on the summit, Ray and I opted to head back down a few yards to eat a snack and refuel for the climb back down and hike back to camp. It began to lightly snow, so we headed on down. The weather began to clear for us on our descent, and better views of Rio Grande Pyramid were had from below.

A super-high resolution pano of Rio Grande Pyramid.

Ray rests on the trail in this wide view pano of Rio Grande Pyramid and the surrounding ridges and valley.
As we hiked down, I was constantly drawn to the deep green and yellow colors of the meadows below.
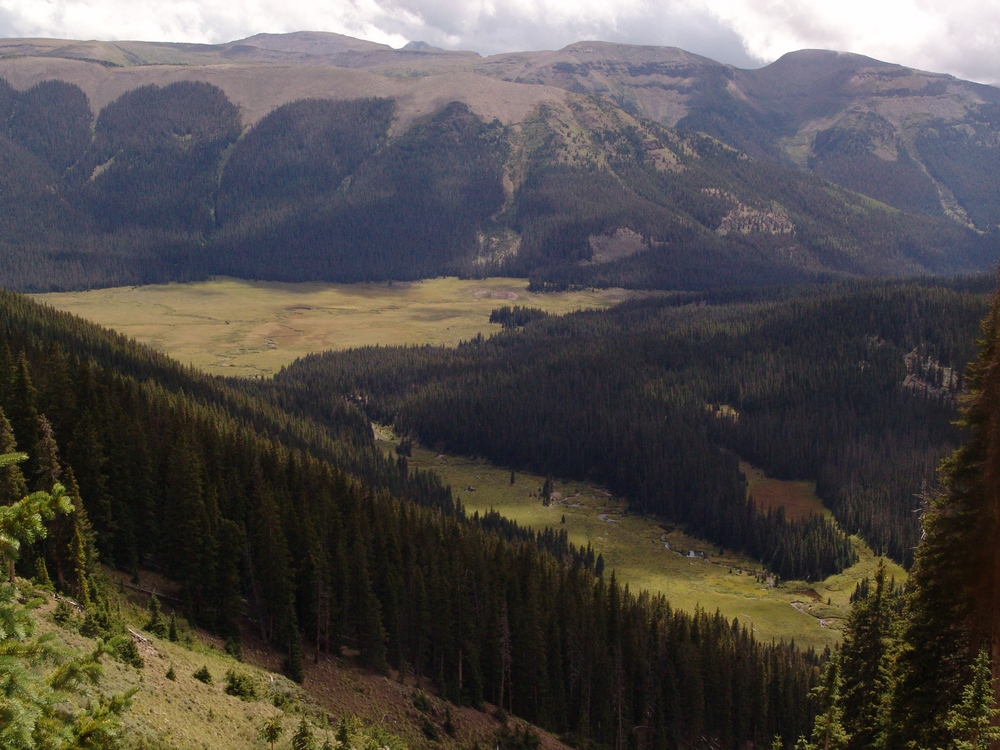
On the way back down, Ray and I took our time looking for mushroom, and we found plenty to take photos of. The mushrooms were honestly one of the highlights of this trip, because both Ray and I are fascinated by mushrooms.
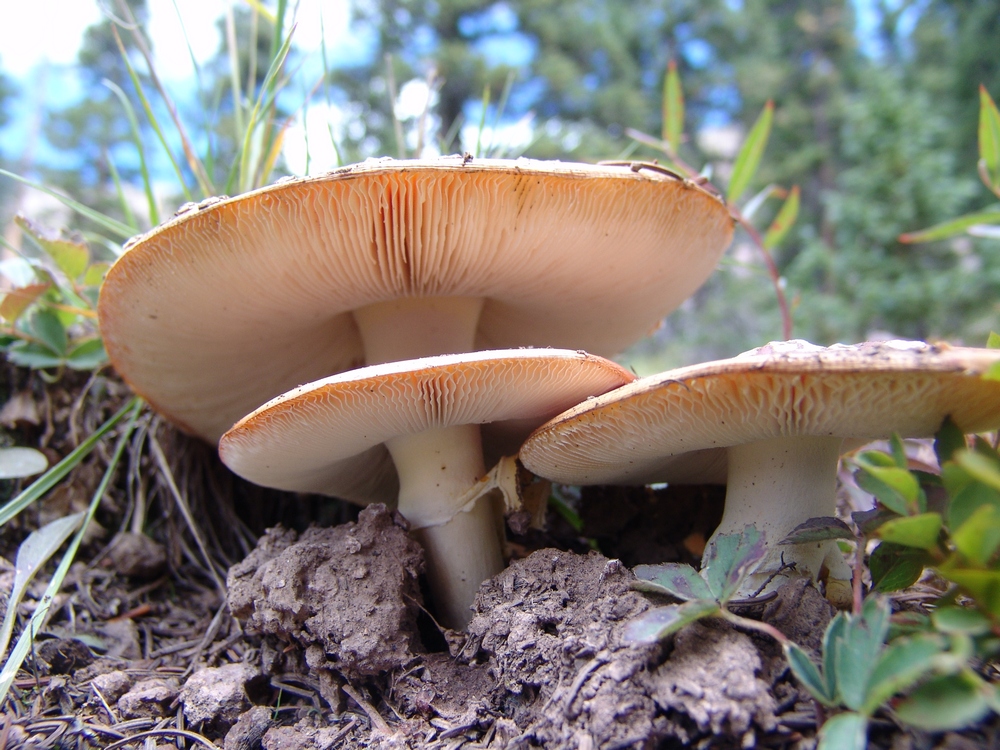
A trio of Fly Agarics.
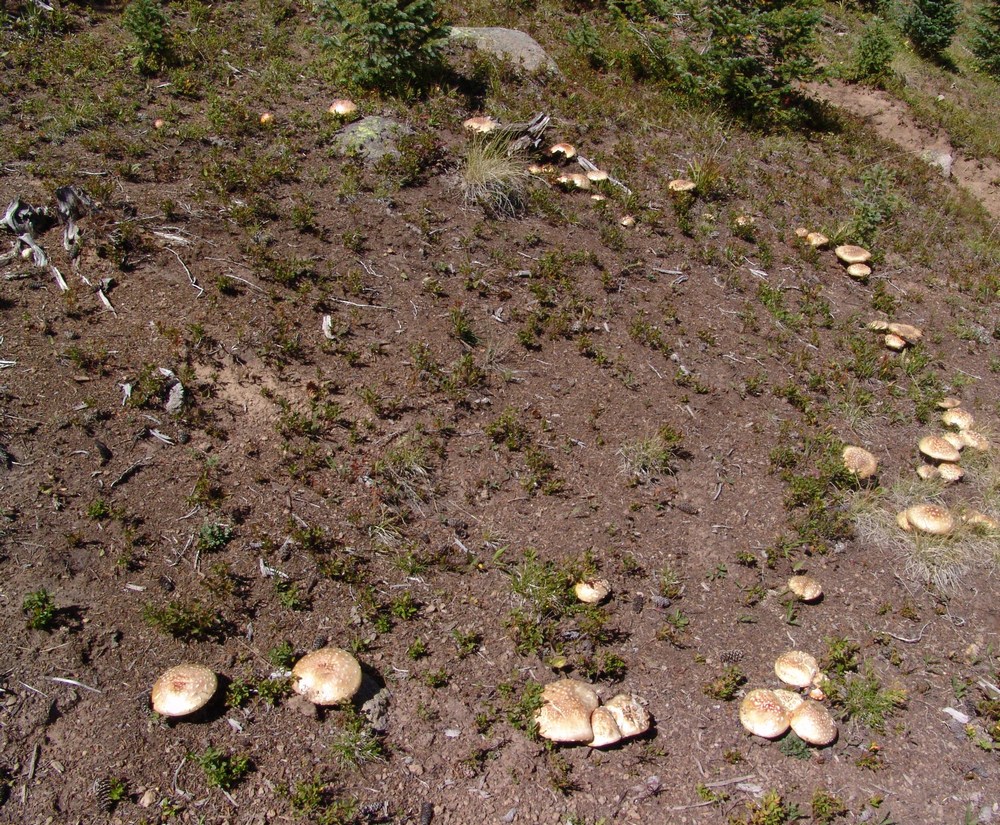
A circle of Agarics.
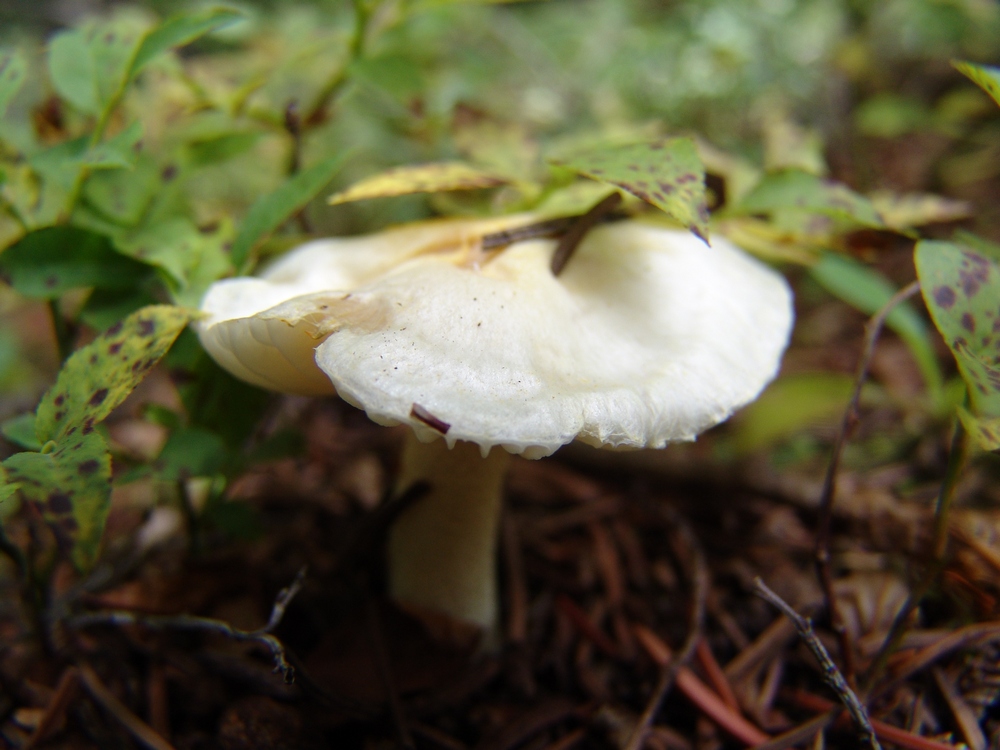
A tiny white mushroom.
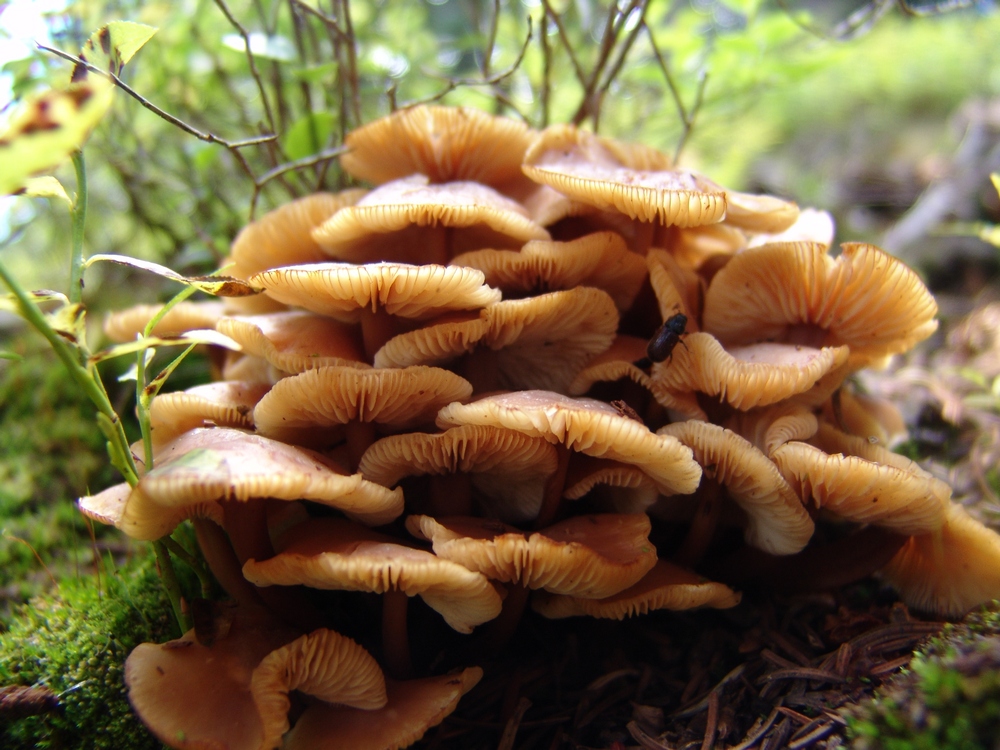
An odd cluster of gooey looking mushrooms.


This one looks like a UFO.
This one grew around the grass...
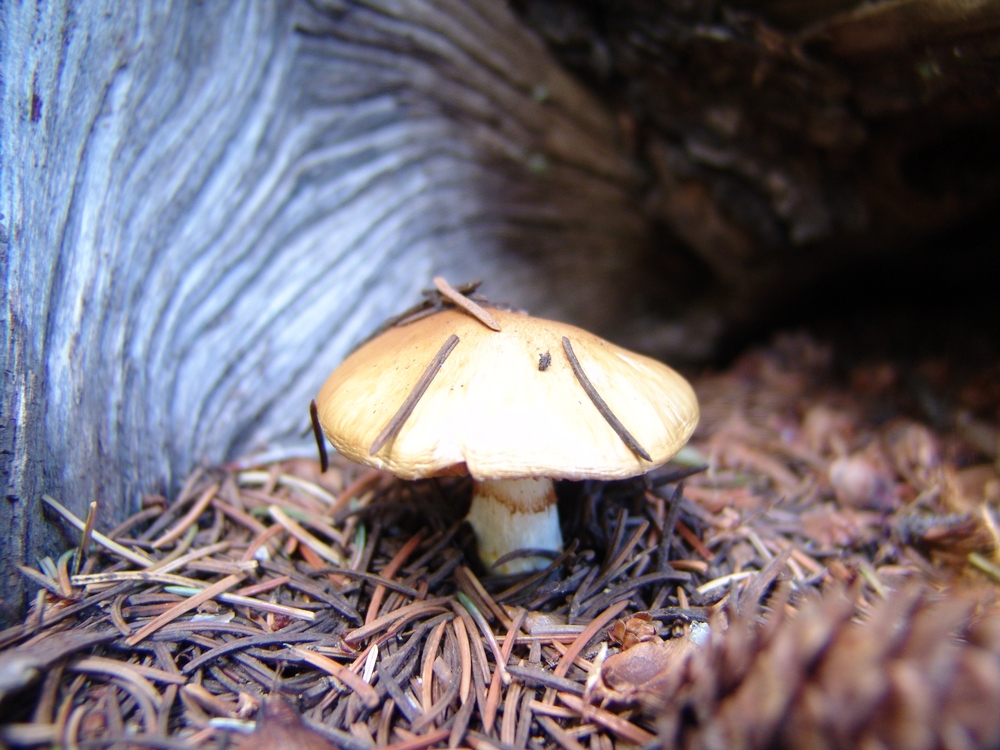
This one had it's own wooden house.
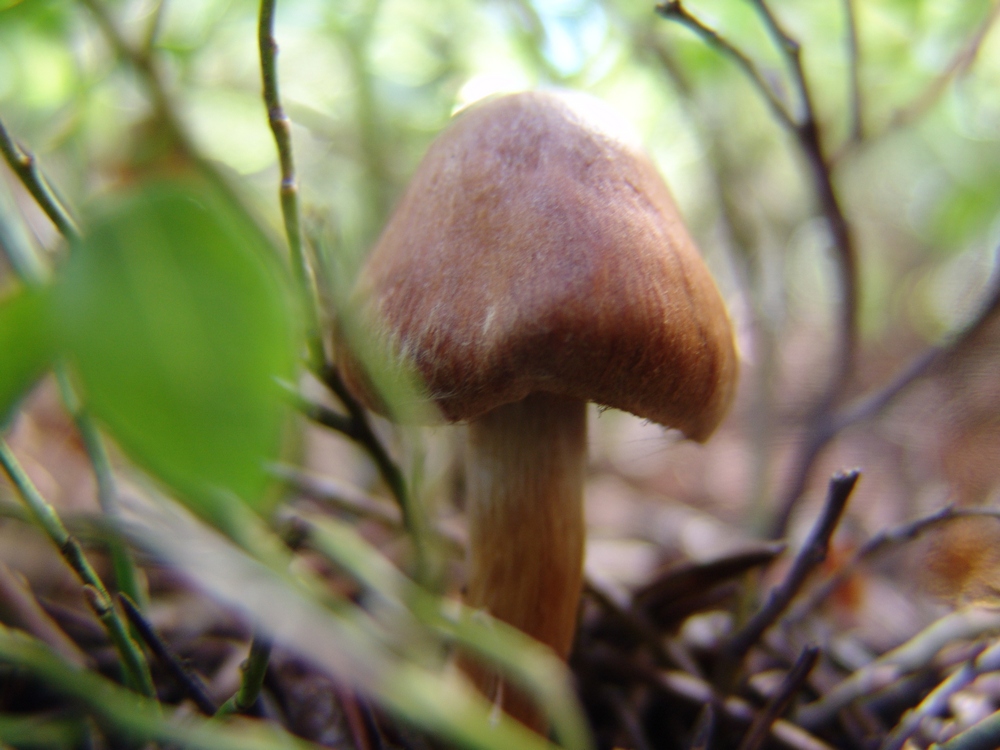
Covered in moss. Or - the Dagobah Mushroom.
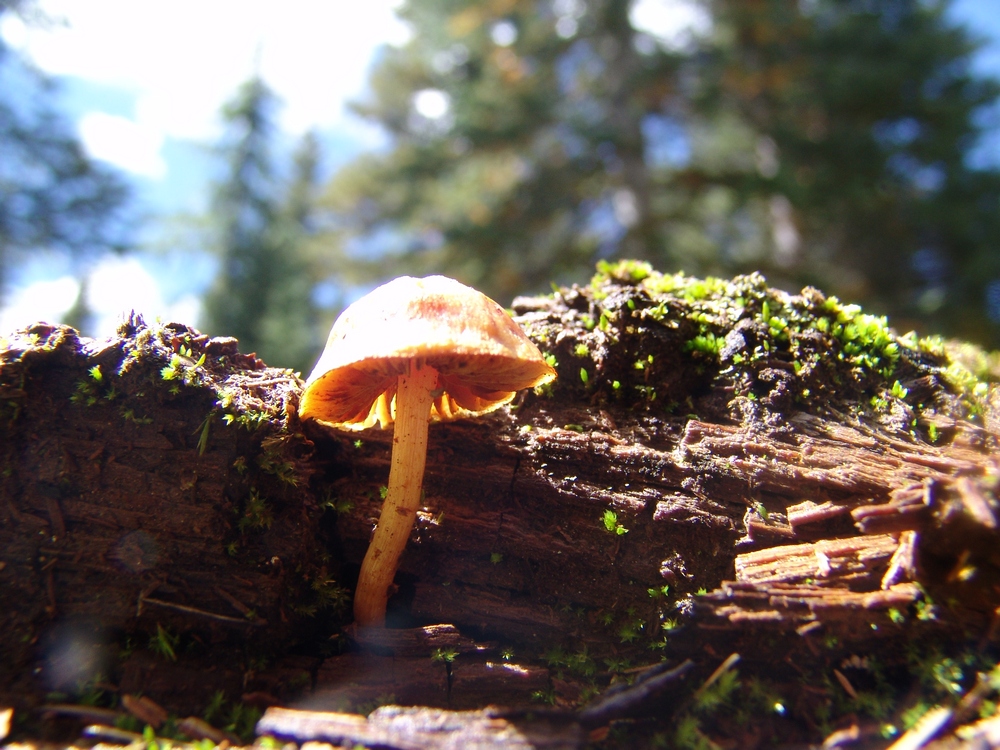
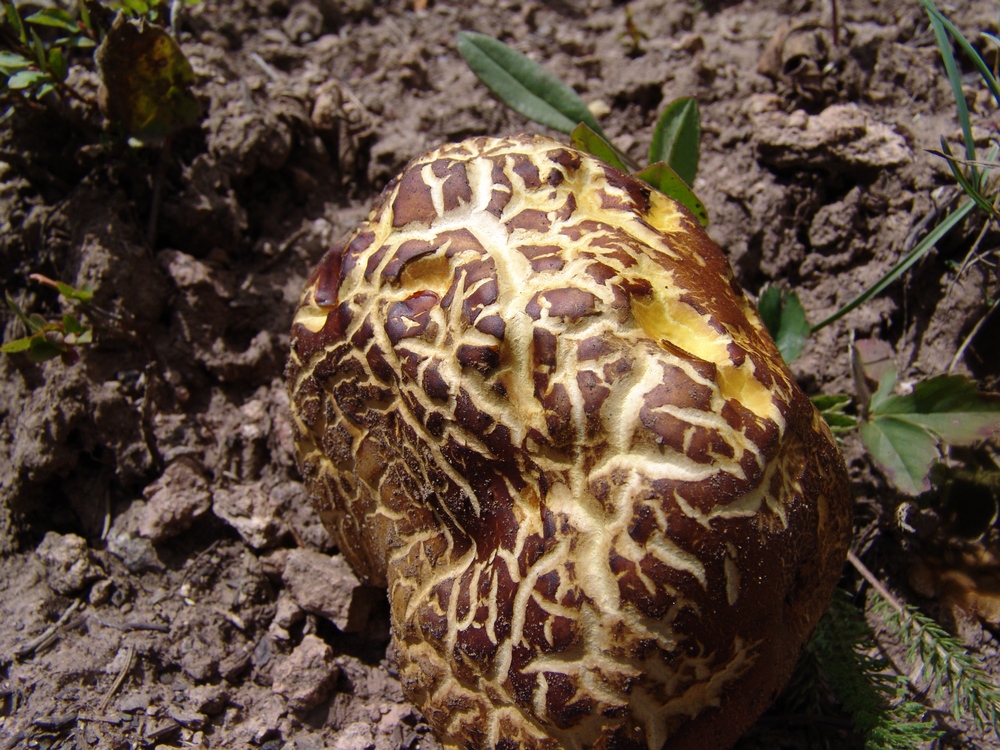
This one caught our eye...
Once back at camp, I decided to get a few more shots of our close-by creek. I think these came out quite well!
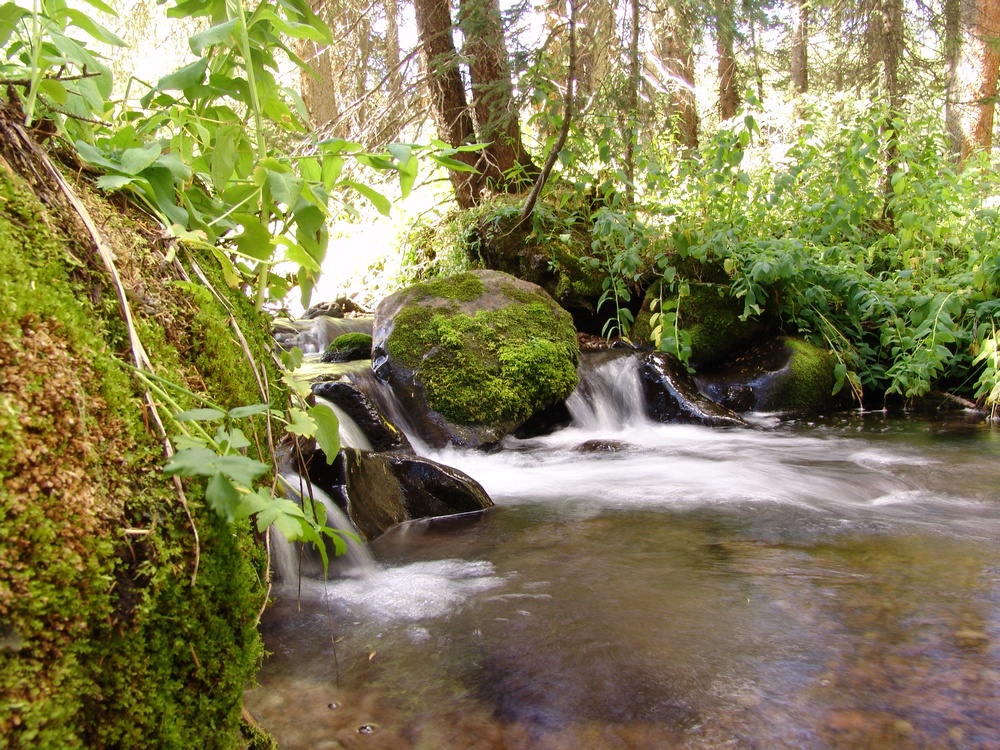
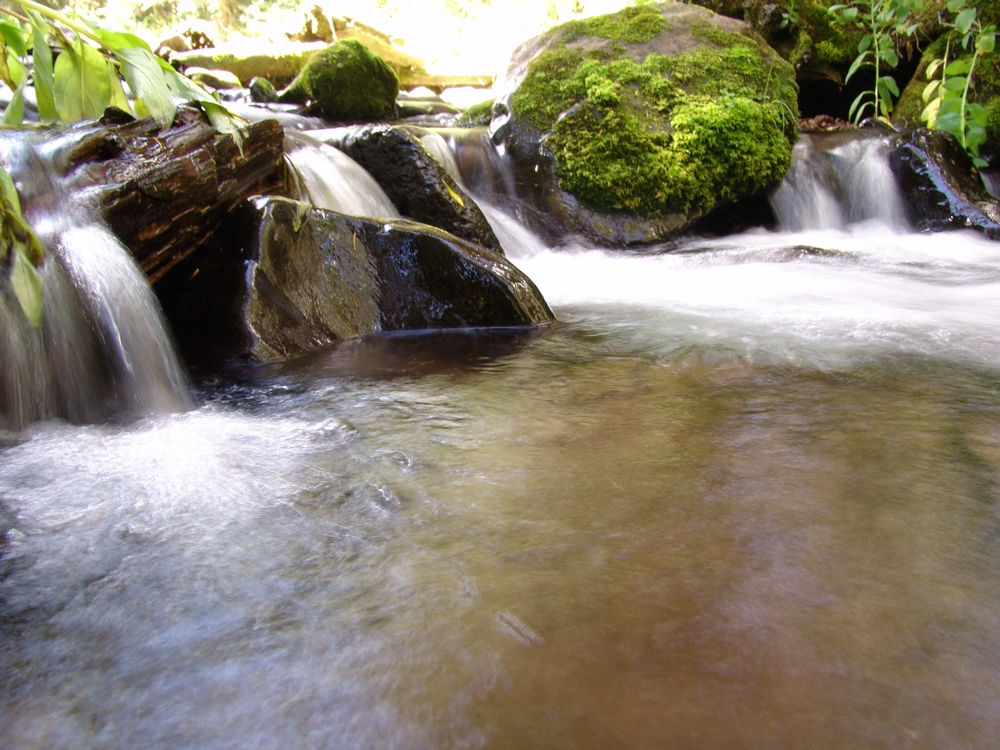
Ray and I cooked up dinner - a fitting meal of tortellini, salmon, alfredo sauce, and 4 kinds of dried mushrooms. A meal fit for kings.
Vestal Peak and Arrow Peak - the Grenadier Range's Finest

There really is only one word that can aptly describe the Grenadier Range: incredible. This sub-range of Colorado's San Juan Mountains rests deep within the Weminuche Wilderness Area and sweeps up from the valley below in a gravity-defying statement of beauty, ruggedness and splendor. Sitting approximately 9 miles south-southeast of Silverton, Colorado, and 32 miles northeast of Durango, Colorado, the Grenadier Range cannot be missed. In fact, I would go as far as to say that this group of mountains should be among the places one should see before they die. Made mostly of quartzite, these mountains are the spine of the San Juan Mountains, and arguably, some of Colorado's most difficult to climb. In fact, Arrow Peak was once considered the hardest major mountain in Colorado to climb until a class 3 route was established on its northeast rib1. Vestal Peak's "Wham Ridge," impressively seen from many vantage points in the San Juan Mountains, is considered by most to be a classic climb in Colorado. Lt. George Marshall of the U.S.G.S. 1876 Wheeler Survey reported on the Grenadier Range:
No where in Colorado can be found such steep slopes, such shapeless crags, such rocky and impassable ravines, such generally detestable characteristics and features as are here seen. The hard metamorphic rocks are shivered along their cleavage planes for hundreds of feet, leaving their odd pinnacles, there the likeness of the shattered outspread wings of some gigantic bird, and again of the grim grinning teeth of death.2
Additionally, from the summit of Mount Sneffels, Rhoda of the U.S.G.S. 1871 Hayden Survey reported:
The group of quartize peaks stood out as boldly as ever about thirty miles to the southeast. In fact, I may state here that we have never yet seen a group from any station (and we have viewed it from all sides) without feeling both deep respect and awe for their terrible ruggedness. The fact already stated, that the storm clouds seem to hover about them before starting on their meandering ways, only served to add to our other feelings of uneasiness.3
Given the incredible fanfare this group of mountains has received over the years by many visitors, I made sure to include it on my summer's climbing itinerary. Scheduling the trip would prove somewhat difficult since I was relying on the 5th class climbing expertise of one of my best friends, Jeremy Park. Jeremy was able to clear his calendar and join me from Seattle, Washington for this amazing backpacking adventure. Jeremy is a highly qualified trad climber who has spent many years climbing difficult routes in the rugged Cascade Mountains of Washington. For more on his adventures, see his profile on CascadeClimbers.com.
To start off, here is a break-down of relevant numbers from the trip:
Peaks summited:
Vestal Peak: 13,864 ft. (ranked 77th in Colorado)
Arrow Peak: 13,803 ft. (ranked 104th in Colorado)
Total elevation gain: 8,782 ft.
Total distance hiked: 25.12 miles
Total time hiking: Approx. 22 hours
Total photos taken: 582
Total wildlife sightings: 2 (marmots, mountain goats)
Total distance driven: 610 miles
Trip duration: 4 days, 16 hours
Day 1:
The rough plan was to leave Colorado Springs on Friday, July 9th, 2010 and return on Wednesday, July 14th, 2010. These plans were altered somewhat; however we did end up leaving at 8 AM from Colorado Springs on Friday and arrived at the Molas Pass trailhead at approximately 3 PM.
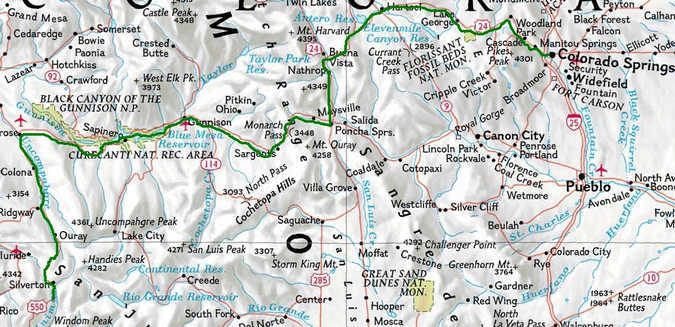
The long drive from Colorado Springs to Molas Pass
After arriving at Molas Pass, I became quite excited to see the Grenadiers for the first time. The range lived up to its name, striking both excitement and awe into me immediately.

The Grenadier Range as seen from Molas Lake.
One of the Grenadiers, Mount Garfield, really rises quite steeply from the valley below, and is rated 33rd on my list of "most impressive summits."
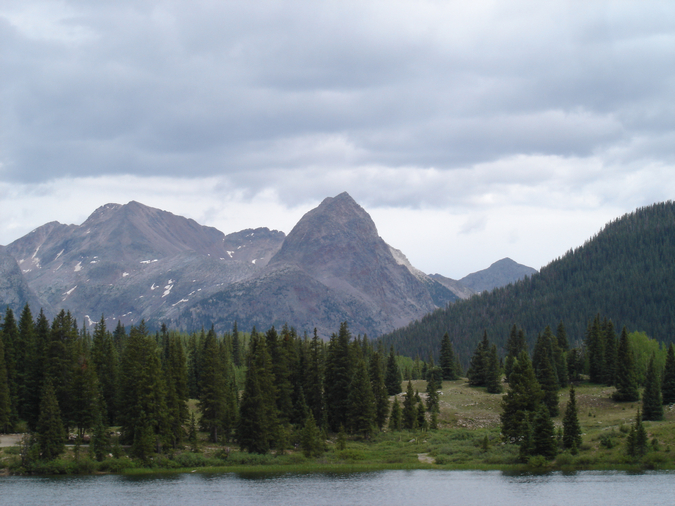
Mount Garfield rises high above (right of center)
Jeremy and I loaded our heavy packs (mine was 65 pounds) onto our backs and began hiking. We started down the Colorado Trail, which leads down 1,700 ft over 2.5 miles and several switchbacks (37 to be exact) to the Animas River and to the Durango & Silverton Railroad. Generally, most people take the train to this point to avoid the downclimb (and later upclimb); however, Jeremy and I chose to hike from Molas Pass to save money and to avoid being tied to the train schedule.

The full route map for the trip. Click to see a larger version.
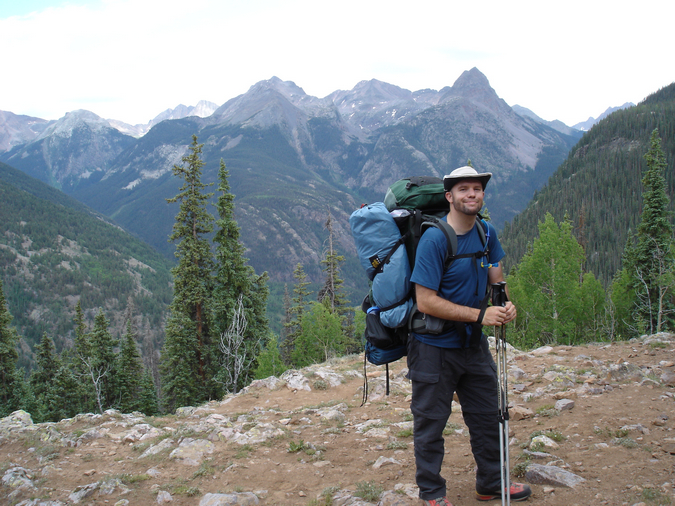
Matt Payne heading down the Colorado Trail.
Before long, the river and railroad tracks became visible. Our route would eventually take us to the bottom, over the river, and up the valley to the left towards the steep looking mountains (the Grenadiers) that are nearly hidden left of center.
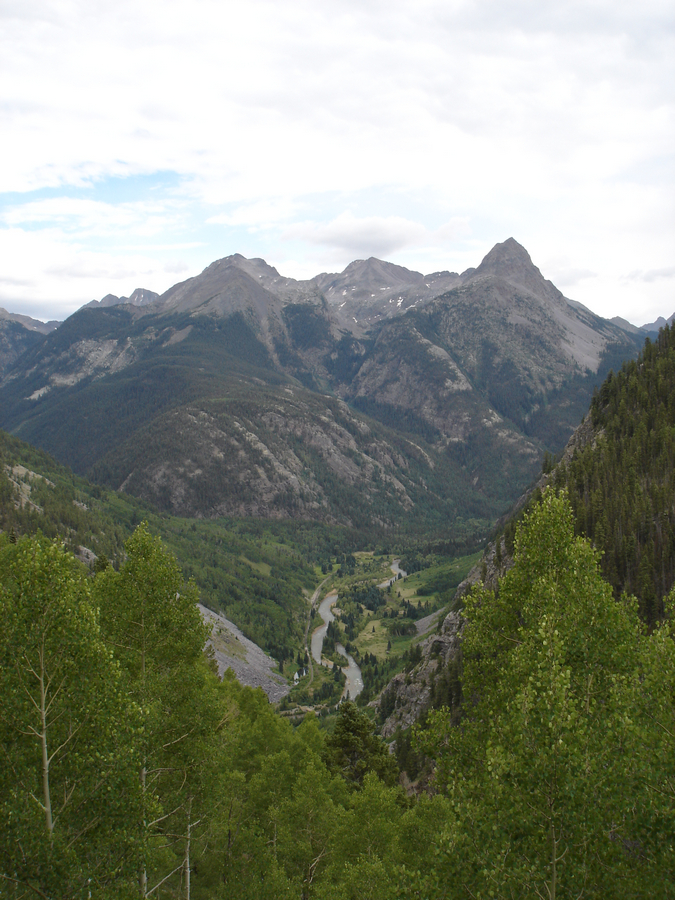
Looking down at the Animas River from the Colorado Trail
Once lower into the valley, Mount Garfield became more and more impressive, towering over the river like a midevil castle's guard.
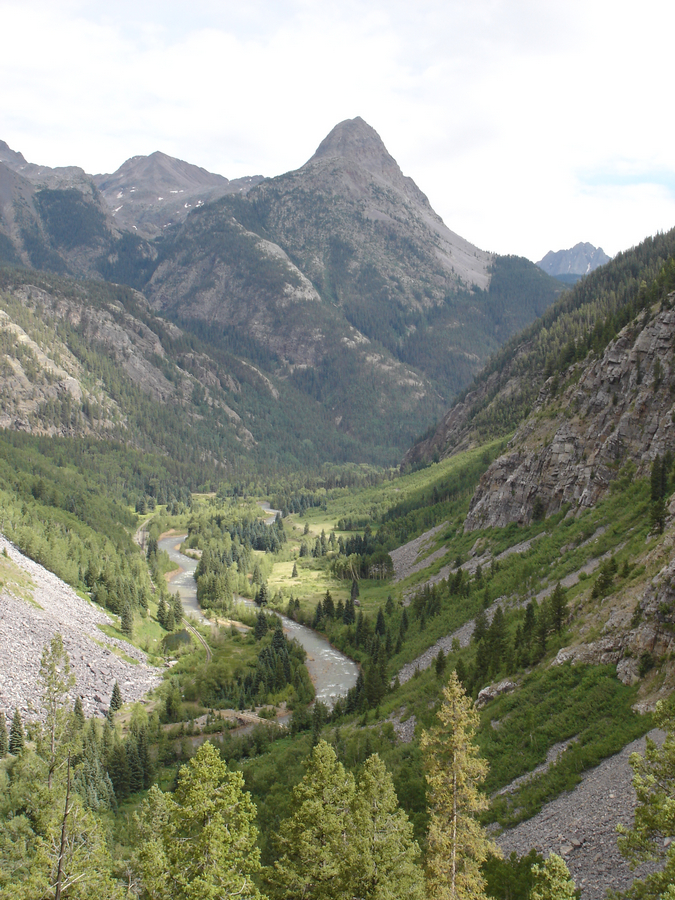
Mount Garfield
Once we crossed the river over a very well-maintained bridge and over the railroad tracks, the trail leading up Elk Creek appeared and started us up into the Elk Park valley. This trail is very well-maintained, and there was even quite a bit of evidence that trail crews had been working on it this summer to fix some washed out sections. The trail is quite steep, but very manageable with a heavy pack. We followed this trail for nearly 2.9 miles until we reached a set of beaver ponds at 10,000 ft., our pre-determined trigger to head up into the Vestal Basin.
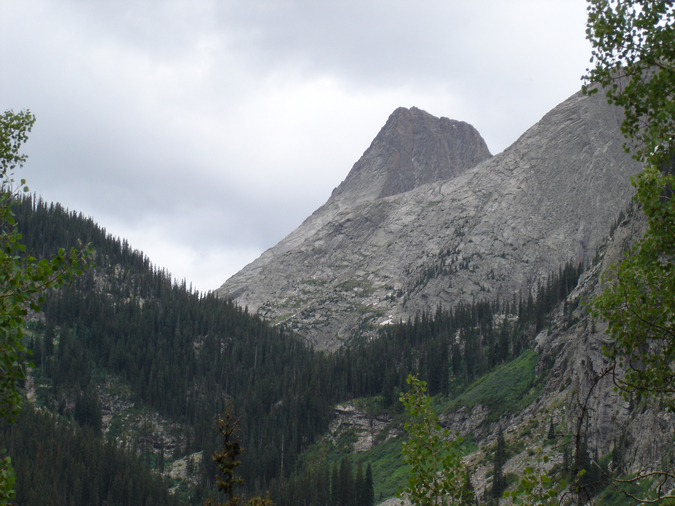
Vestal Peak towers above the Elk Creek valley and Vestal Basin.
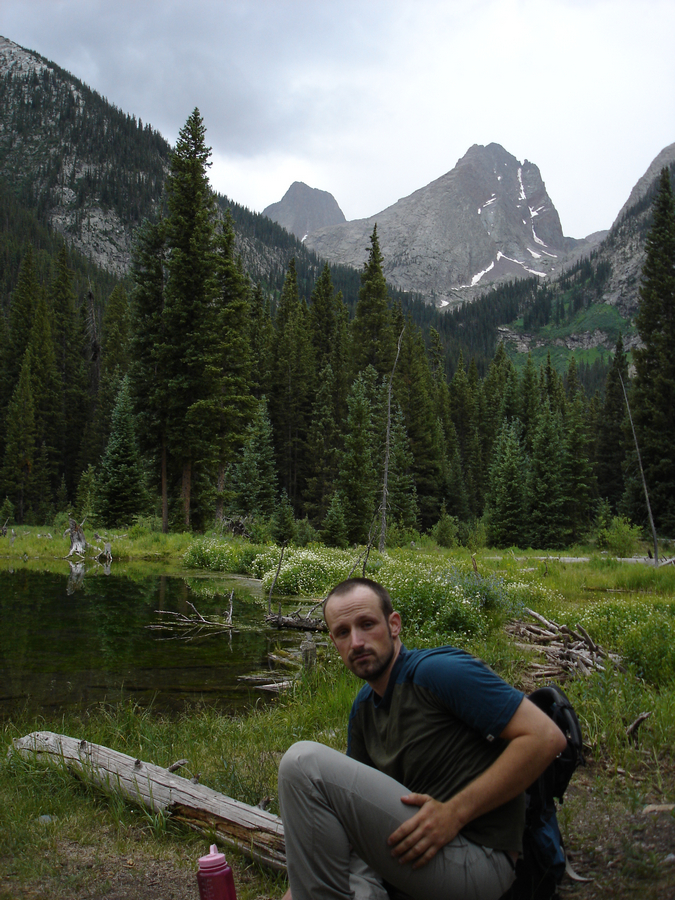
Jeremy looking tired at the beaver ponds with Vestal Basin in the background.
After 3 hours of backpacking, we were determined to make Vestal Basin before nightfall. We headed south up Vestal Basin's trail - an unmaintained, but easy to follow trail which climbs quite steeply up towards Vestal and Arrow Peaks. Did I mention that this trail is steep? The trail gained 600 feet in 3/4 of a mile with large amounts of fallen trees and boulders to navigate around. In several other trip reports I've read, people have mentioned that the trail was difficult to find or follow; however, we did not find this to be the case at all.
After hiking another two hours into the basin for a total of 8.7 miles, our legs finally gave out at 10,620 ft shortly after nightfall. We found a cozy campsite near a small tributary of Vestal Creek and made our first meal of the trip - two packets of Zatarain's ready to serve rice and chicken. This was surprisingly good and filled with sodium (a nice thing to take in after a full day of backpacking). We decided to set the alarm for 4 AM and hit the sack around 11 PM. It was at this point that I realized that my Thermarest pad had somehow sprung a leak from the hike up and that I would be sleeping on hard ground. Yay!
Day 2:
4 AM came and went, and we finally crawled out of the tent around 8 AM. Both us were thankful for the extra rest and tore down camp and hit the trail at about 10 AM, heading for the upper sections of Vestal Basin.
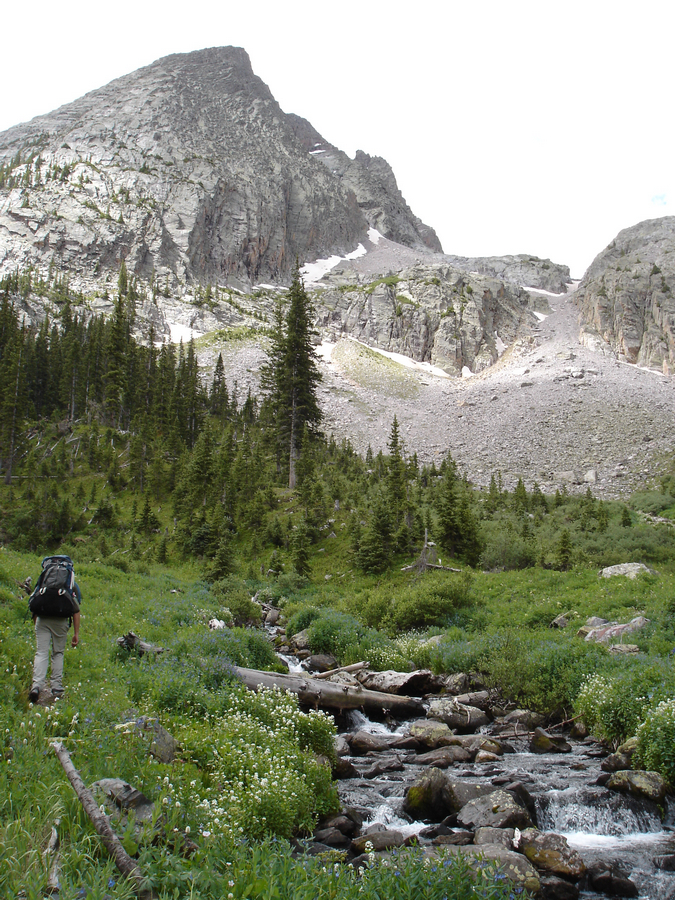
Jeremy hikes up into Vestal Basin along Vestal Creek.
Great views of both Electric Peak and Arrow Peak were had while hiking up into the basin.
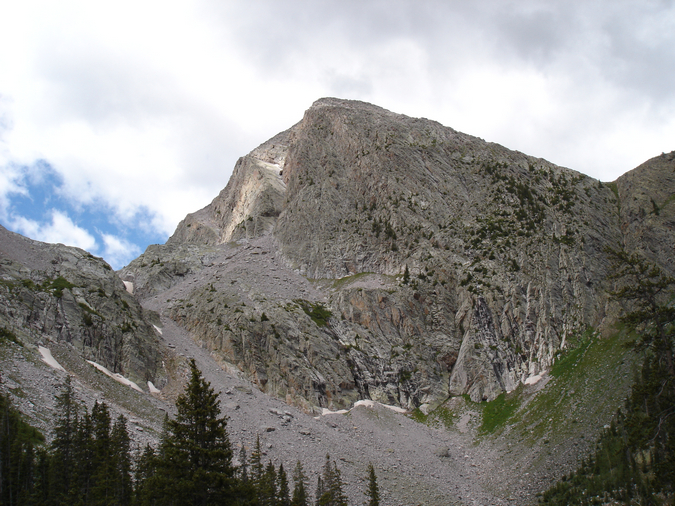
Electric Peak
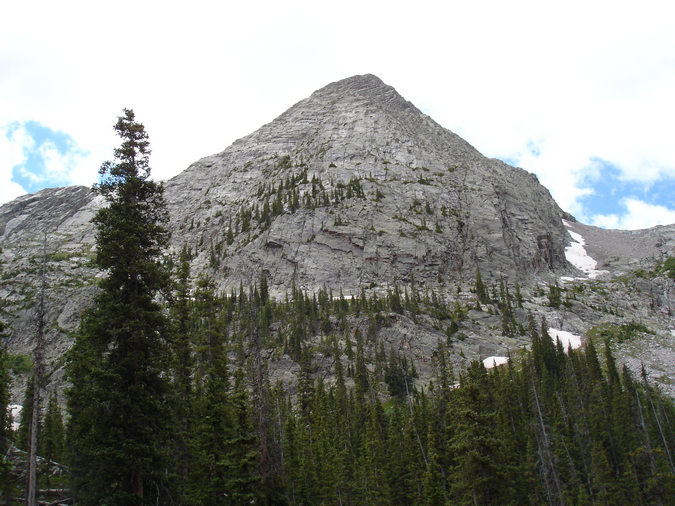
Arrow Peak's steep northeast face, seen from the Vestal Basin trail.
After hiking a little over a mile and gaining 893 ft., we found an ideal campsite at the foot of Vestal and Arrow, at the end of a long clearning and in some trees next to Vestal Creek. Vestal Peak itself could be seen directly from camp, with it's "Wham Ridge" rising above us.

Vestal Peak's Wham Ridge
Since we were planning on climbing Wham Ridge, it was particularly exciting to see it close-up.
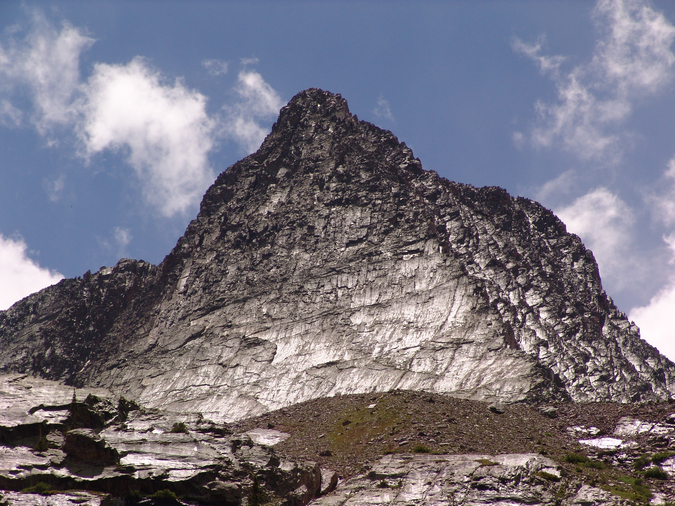
Vestal's Wham Ridge zoomed in from our campsite.
After setting up camp, I repaired my Thermarest using a repair kit that I always carry with my on backpacking trips. For once the extra weight paid off! We set-up camp just in time. Clouds had been forming since we had woken up and as typically happens in the San Juan Mountains, a thunderstorm decided to develop quickly above us around 12 PM. We crawled into our tents and napped through the storm, which subsided around 4 PM. We woke up, ate a few snacks, and finished setting up our campsite. At around 5 PM, after the clouds had completely cleared out, I somewhat jokingly told Jeremy that we should climb Arrow that evening. Jeremy said, "why not," and before we knew it, we were packing our day-packs for an ad hoc summit of one of Colorado's finest summits. We departed camp at 6:15 PM, headlamps and helmets equipped, and headed up a climber's trail right next to our campsite, which went straight up the head-wall of the lower area beneath Vestal and Arrow. This trail was also easy to follow, but ridiculously steep, rising 645 ft. in just .45 miles until it reached a plateau in between Arrow and Vestal. Arrow's classic ramp was easy to spot, and Vestal's Wham Ridge continued to blow my mind.
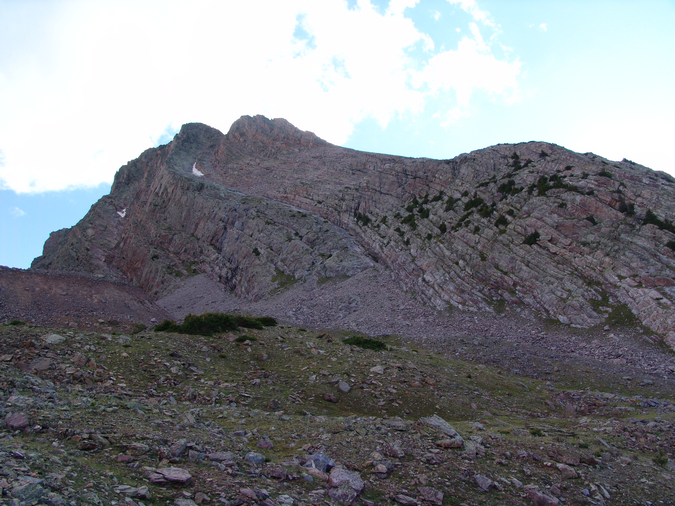
Arrow Peak
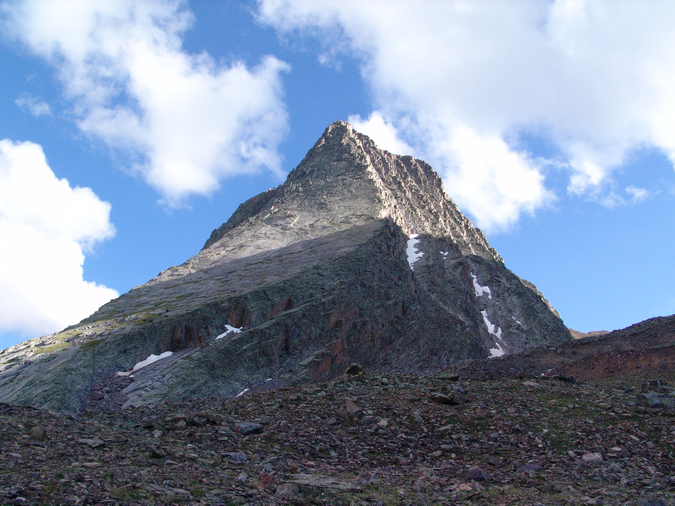
Vestal Peak
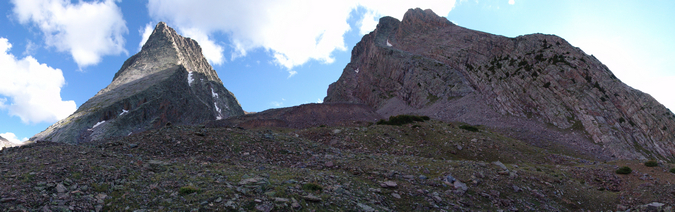
Vestal and Arrow Peaks as seen from the top of the headwall above our campsite.
Additionally, the Trinities were quite prominent just to the left of Vestal.The Trinities are the middle three mountains of the Grenadier Range, composed of West Trinity, Middle Trinity, and East Trinity.
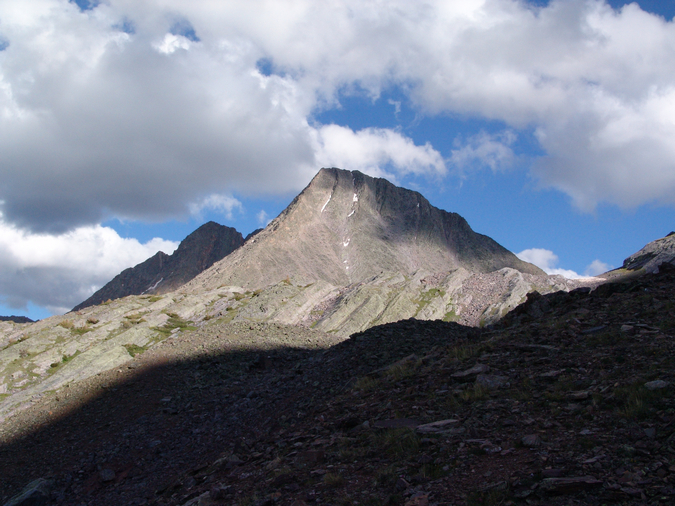
The Trinities as seen from the base of Arrow and Vestal Peaks.
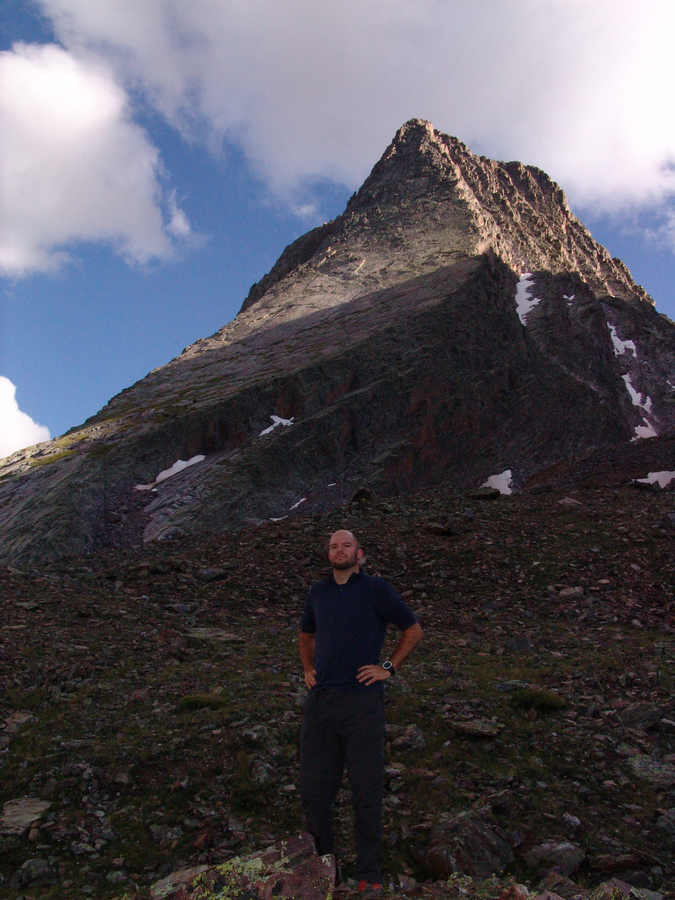
Matt Payne posing with Vestal Peak behind.
We headed up to the base of Arrow and began the climb up Arrow's prominent ramp. The ramp itself was nearly free of snow and consisted of easy class 3 climbing.

The base of Arrow Peak and the start of our route.
As we climbed, I could not help but constantly look left at the impressive nature of Vestal's Wham Ridge, which swept up as if it were carved out with a fine instrument.
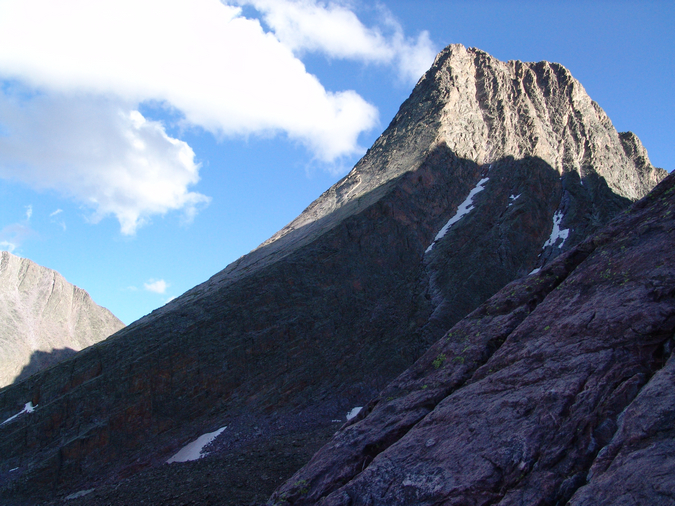
The impressive profile of Vestal Peak's Wham Ridge.
The higher we were able to climb on Arrow, the more and more impressive Vestal became. I simply could not stop myself from gazing over at its sheer beauty, and eventually, Vestal Lake came into view as well.
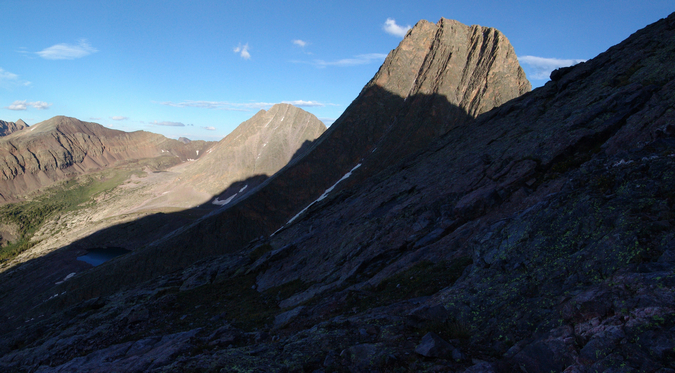
A panoramic photo of Vestal's Wham Ridge.
Jeremy and I reached a junction in our route and made a decision to stay left and continue up a class 4 variation of Arrow. This decision was one of our best of the trip, as Arrow's upper ramp provides some of the most fun, yet least exposed, class 4 climbing I've done to date. For those that do not know, exposure is defined as "the condition of being on high vertical rock with full consciousness that nothing exists between you and the distant ground but thin air4."
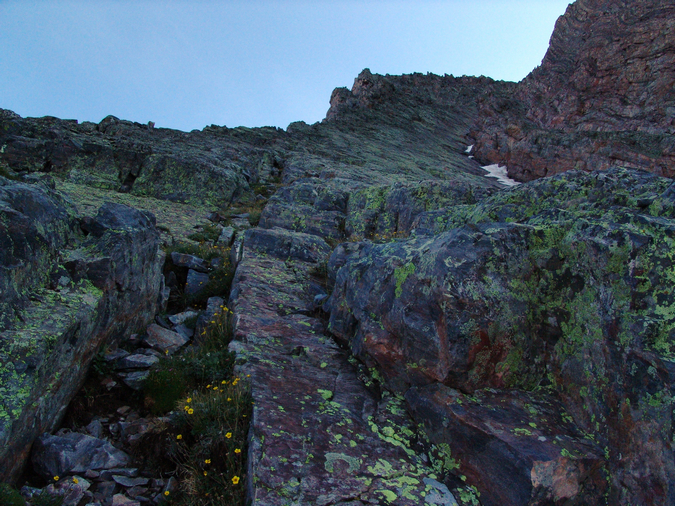
The start of Arrow Peak's class 4 terrain
Following the higher ridge to the left also provided some great views of the Needle Range to the south, and Jagged Mountain, Windom Peak and Sunlight Peak came into view for the first time, Jagged's pinnacles rising up like upside-down stalagtites.

Jagged Mountain (left of center), Windom Peak and Sunlight Peak
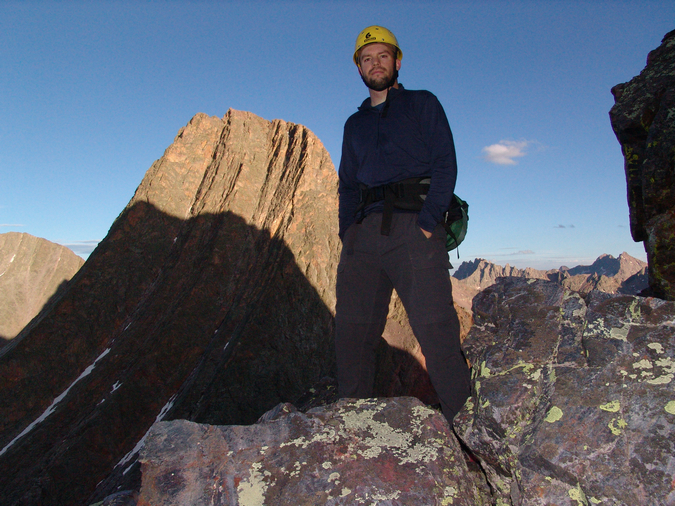
Matt Payne with Vestal's insane Wham Ridge behind him.
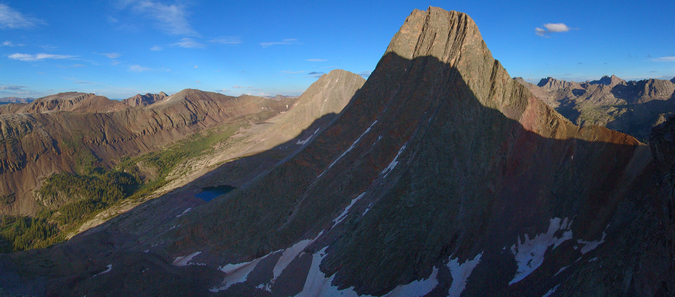
A high resolution panoramic photo of Vestal's Wham Ridge.
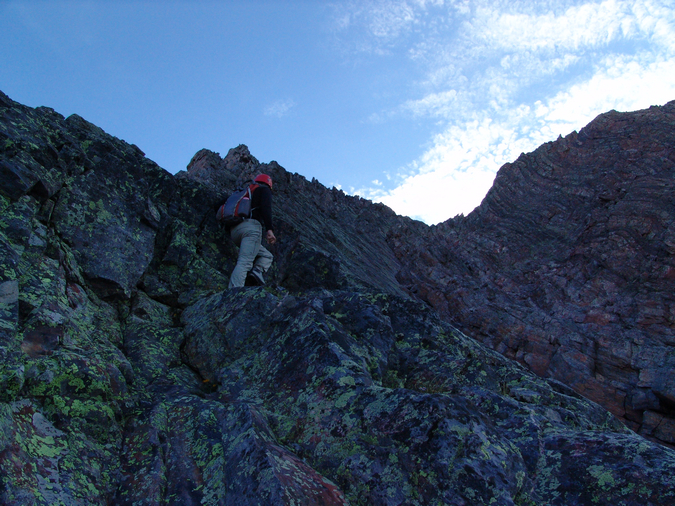
Jeremy Park on Arrow Peak's class 4 ridge, just east of the traditional class 3 route
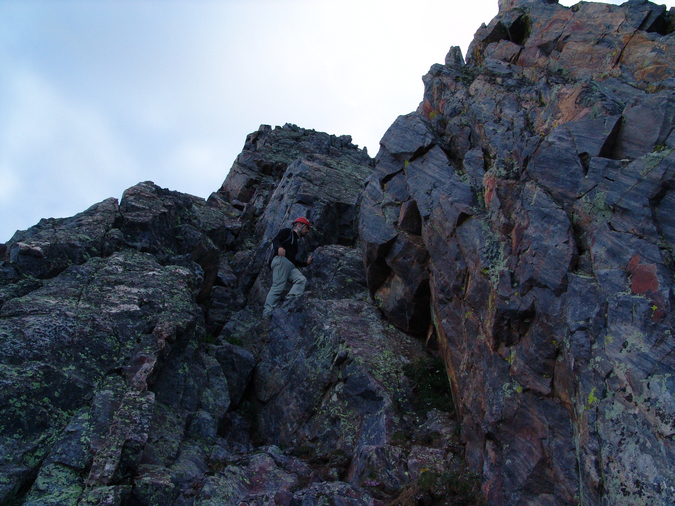
Jeremy Park navigating the class 4 terrain on Arrow
Jeremy took my camera and was able to take some photos of me negotiating some of the class 4 terrain. The climbing was fun, challenging, and quite rewarding. Exposure was minimal, and various holds were quite ubiquitous.
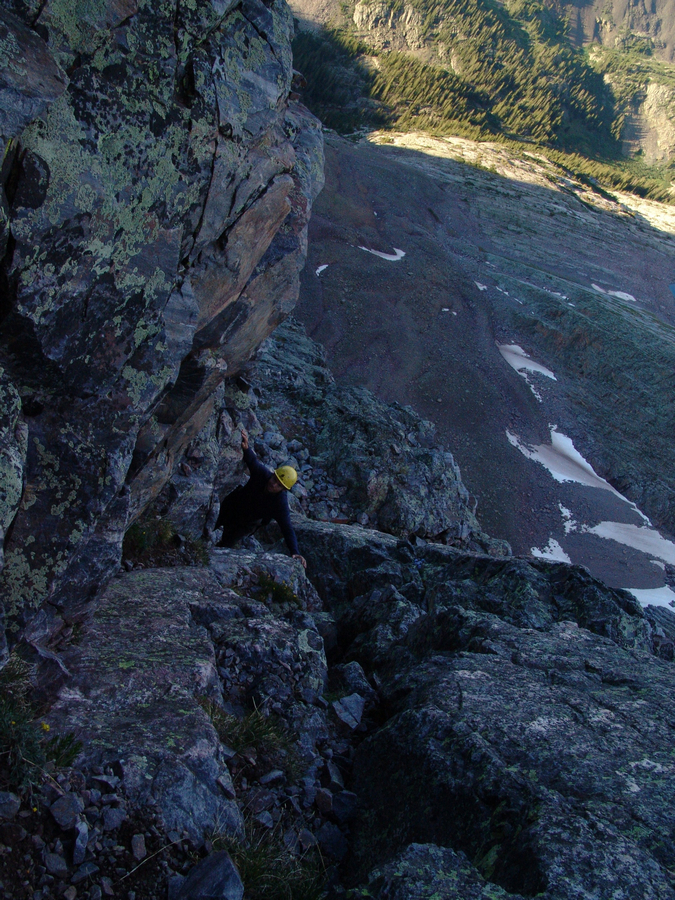

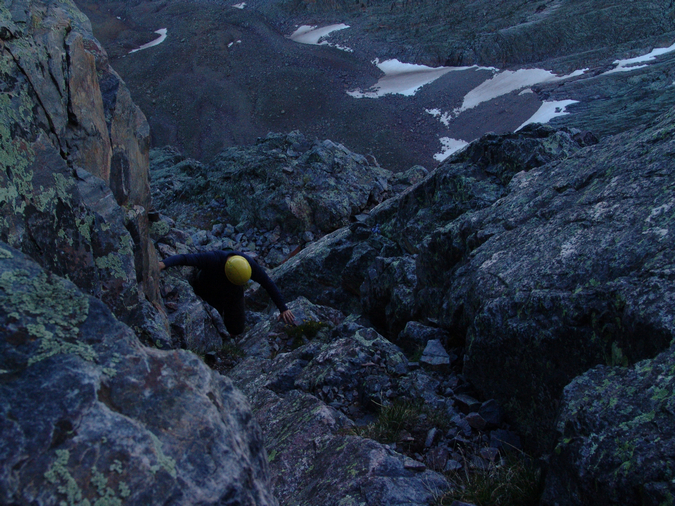
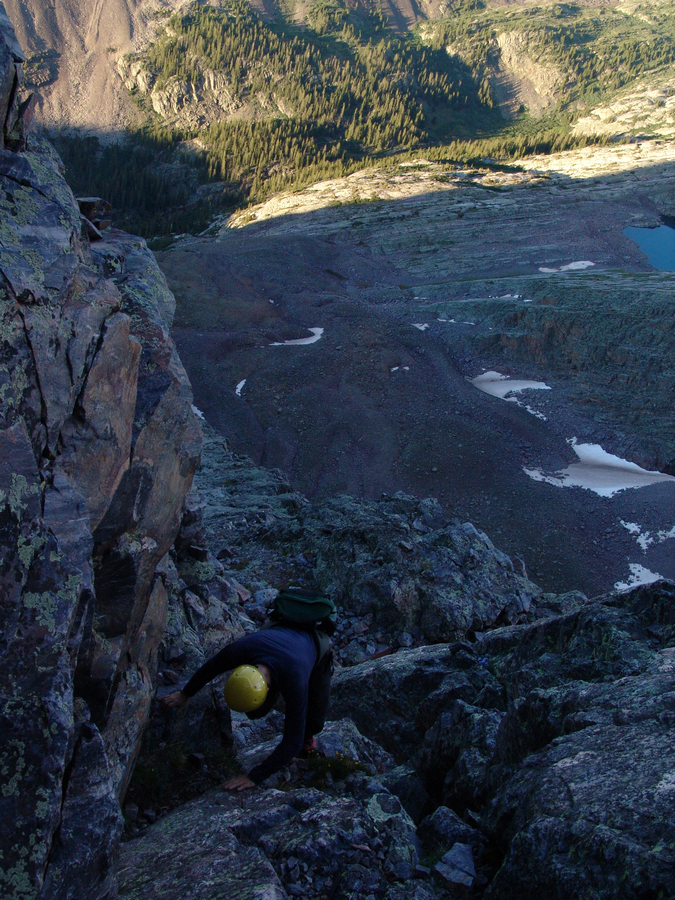
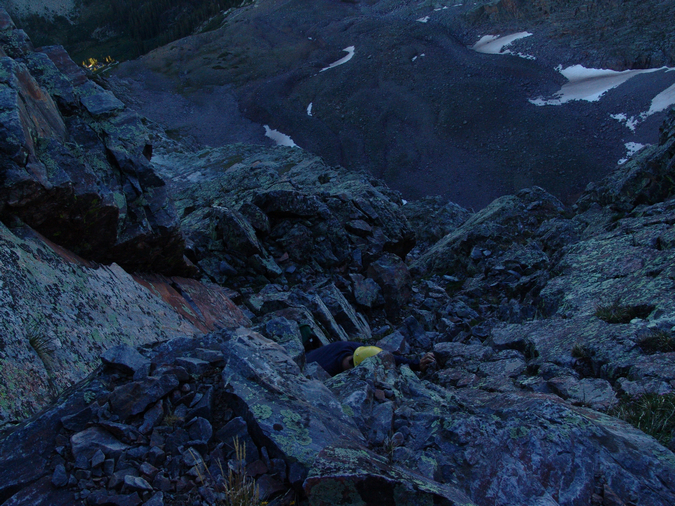
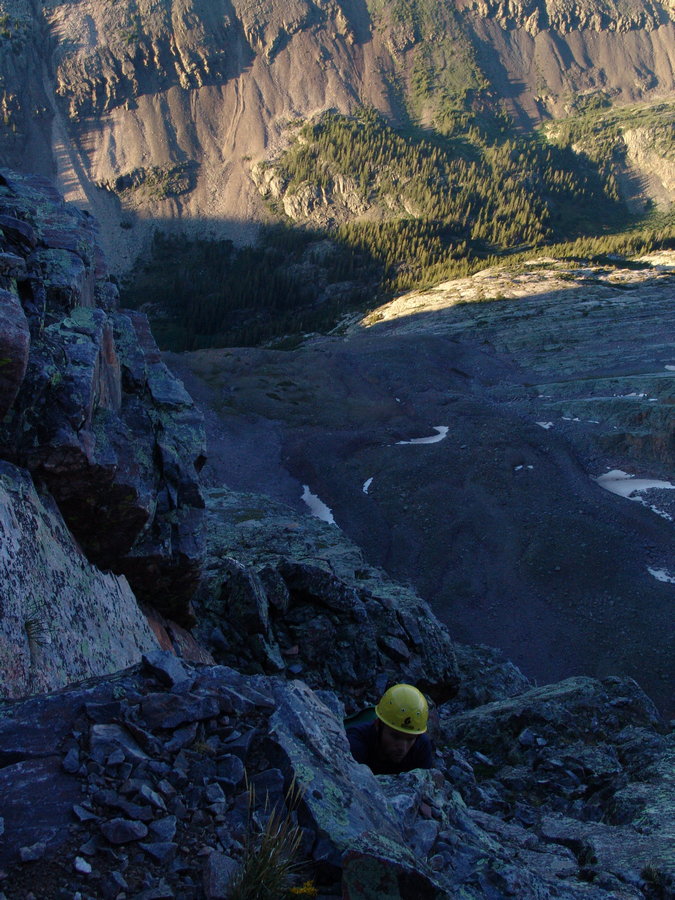
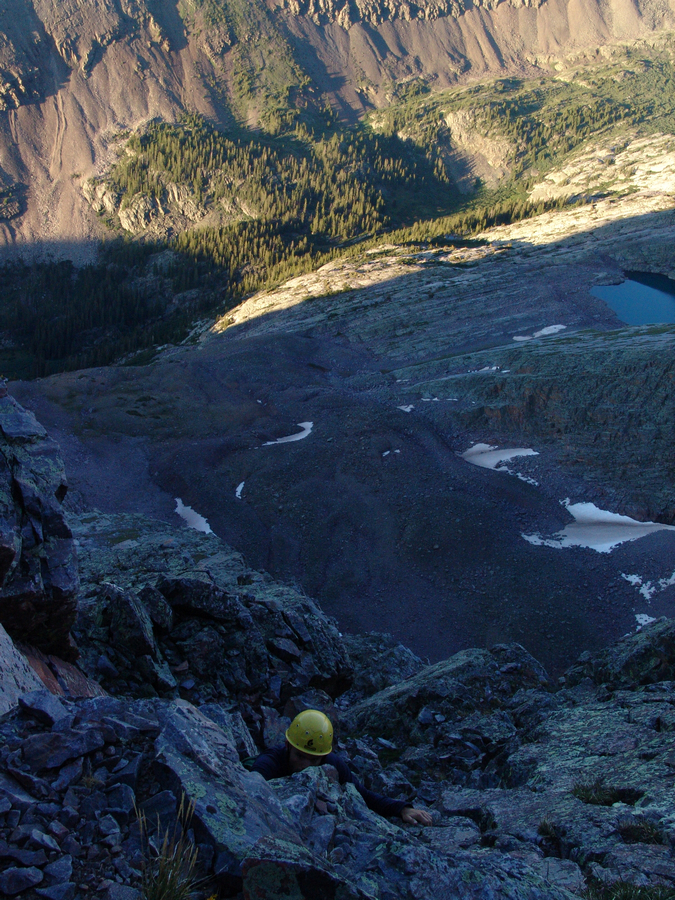
The sun was setting quickly, which was both exciting and troublesome, as we did not look forward to down-climbing Arrow in the dark, but I was really excited to see the sun set from 13,803 ft.

The sun setting on Vestal Basin.
After an exhilirating climb, Jeremy and I topped out on Arrow's summit at 8:15 PM, and enjoyed the sunset from the top. This was one of the most majestic and spiritually fulfilling moments of my life.

A 3600 view from the summit of Arrow Peak, with the sun setting over the San Juan Mountains.
The Needle Mountains across the Tenmile Creek and Noname Creek drainages from us were impressive, each living up to their namesake.
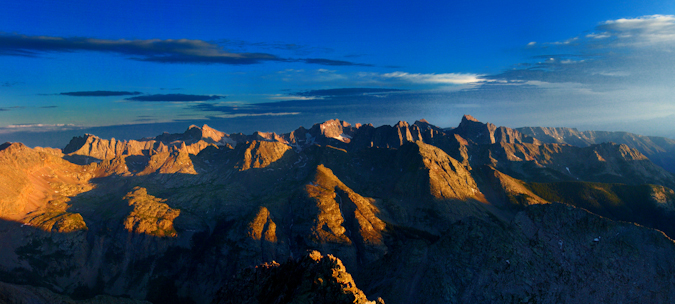
The Needle Mountains - from left to right: Jagged Mountain, Windom Peak, Sunlight Peak, Mount Eolus, Animas Mountain, Turret Peak and Pigeon Peak
Pigeon Peak was quite possibly one of the most impressive mountains I've ever seen, with its east face dropping off like the edge of table.

Pigeon Peak
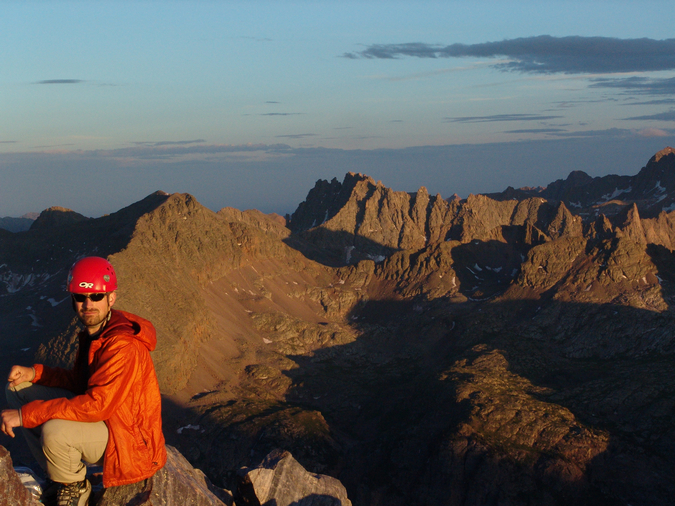
Jeremy with Jagged Mountain directly behind him to the right
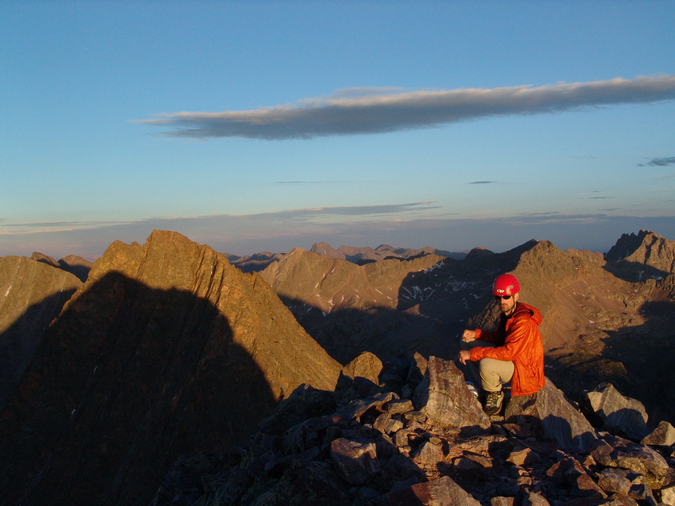
Jeremy with Vestal in Arrow's shadow to the left

A self-timer captures Matt and Jeremy on the summit of Arrow Peak
Rio Grande Pyramid and The Window were looking pretty awesome in the late evening sun as well. Rio Grande Pyramid has really piqued my interest lately since I am going to climb it in August, 2010 with my dad (update - completed - see the Trip Report). It should be pretty amazing to look back towards Arrow and Vestal.

Rio Grande Pyramid and "Window Peak" as seen from Arrow's summit. The Window is the notch on the ridge just right of Rio Grande Pyramid.
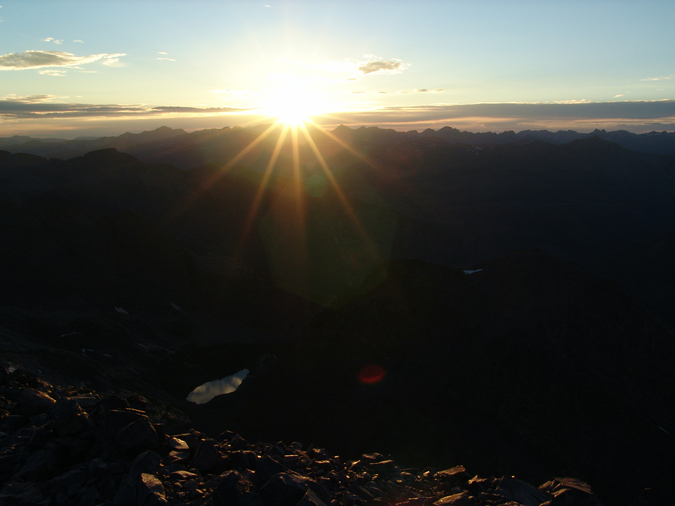
The sun sets behind the San Juan Mountains. Check out that lake below!
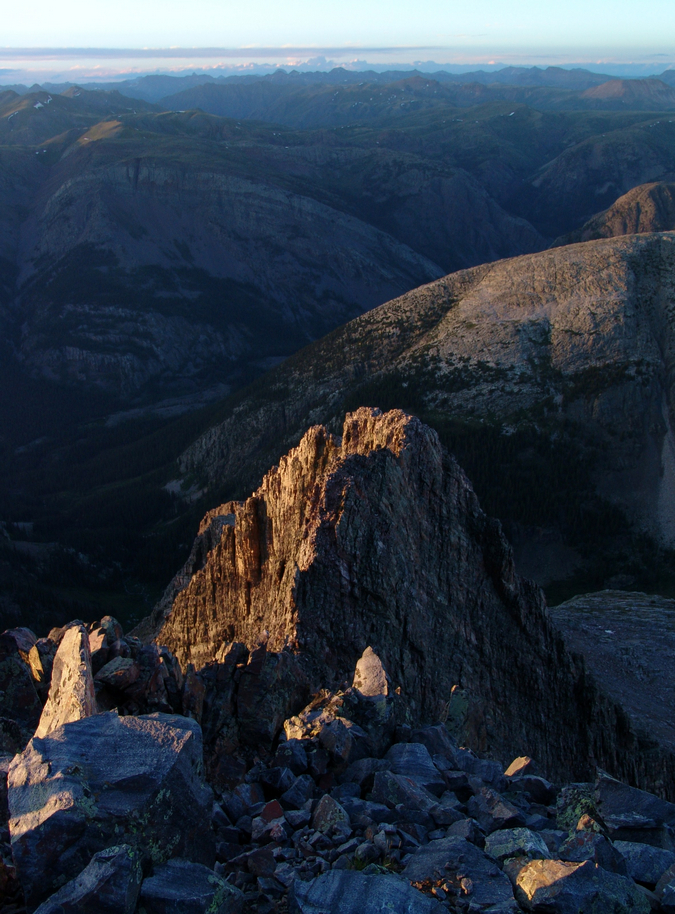
Arrow Peak's north face and an airy fin connecting it with the true summit
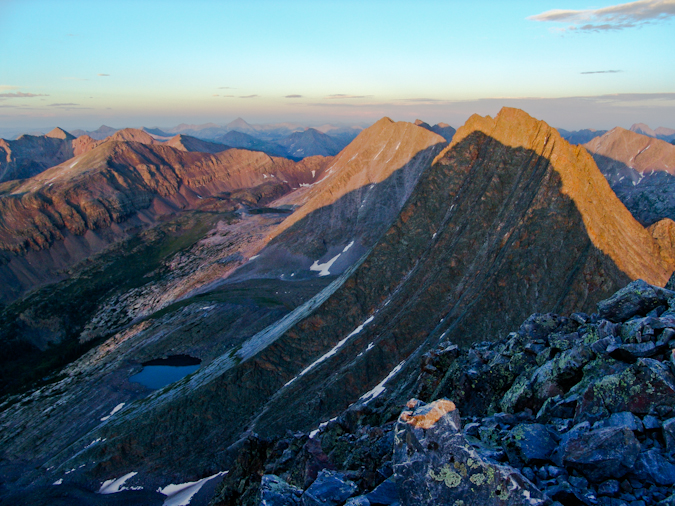
Vestal Peak's Wham Ridge during sunset.
After spending just 20 minutes on the summit to enjoy the sunset, Jeremy and I departed Arrow's amazing summit via the standard class 3 trail, which was marked by several cairns heading down the steep face of Arrow. Before long, we adorned our headlamps and were in complete darkness, but not before we had successfully navigated below the more treacherous sections. The down-climb in the dark provided quite an interesting challenge. The ramp on Arrow was quite solid and easy to climb down, rarely requiring either of us to sit down on steeper sections. We could see other campers much higher in the basin above our camp with their headlamps on, watching us. I thought the climbing down would be difficult in the dark; however, the route on Arrow is so straightforward that I think it could even be up-climbed in near darkness if one were experienced and comfortable. We reached our campsite at approximately 9:15, just 3 hours after we had set-out to climb Arrow.
We cooked our dinner in the dark again, this time creating an amazing medley of re-hydrated black beans, jalapenos, green chilis, velveeta cheese, and tortillas. We planned to climb Vestal's Wham Ridge the next day, so we set the alarm for 5 AM again, and hit the sack at 12 AM, snoozing the night away.
Day 3:
We awoke on day 3 and quickly prepared for what we hoped to be an amazing climb. Having read about Wham Ridge over and over again the past several years, I had mentally hyped up the climb to be an epic adventure. A small group of three climbers headed up the trail shortly before us, which was somewhat concerning to both Jeremy and I as we did not want any rocks to fall down onto us during our ascent. We decided not to deviate from our plans since Jeremy felt confident that if we bumped into the other group we could find a route around them. We left camp and headed up the steep climber's trail again to Vestal's base. I carried the 60 meter rope, a nut key for taking out nuts from the rock, as well as my personal gear, and Jeremy carried the climbing rack (a full compliment of anchors, quickdraws, webbing, camalots, and nuts). The Columbine flowers on the climber's trail were outstanding.
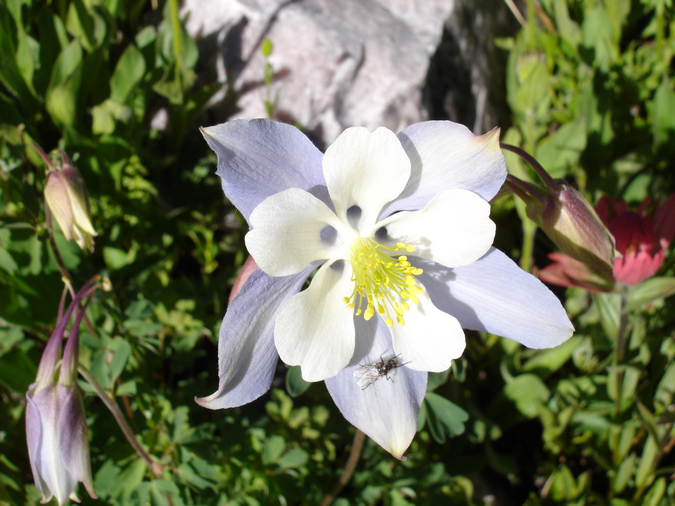
A Columbine flower
We reached the base of Vestal and Arrow again and headed towards the start of Wham Ridge.
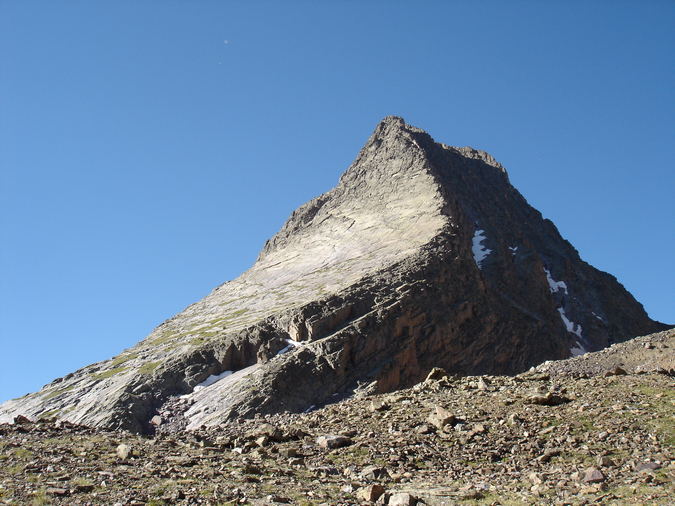
Vestal Peak in the morning sunlight
We stopped at the base of Wham Ridge and put on our climbing harnesses and climbing shoes. We decided that we would stash the rest of our gear under a large rock at this point. Jeremy went to take out the climbing gear from his backpack and opened to find... all of his food. Yes, that's right - his food bag and climbing bag are identical and he mistakenly grabbed his food bag instead of his climbing bag when we left camp. So, Jeremy needed to hike back to camp and then back up to the start of Wham Ridge before we could begin climbing. While we were both upset, I assured Jeremy that it would be fine and that I was not mad at him. He left for camp and I headed over to Vestal Lake to take some photographs.This turned out to be a good mishap as I was able to capture some of the most stunning photos of the trip.
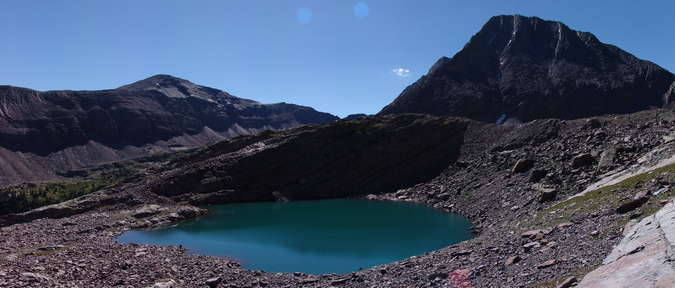
Vestal Lake and West Trinity

Vestal Peak reflected in Vestal Lake
There was a small group of 4 men fishing quite successfully at the lake, and I stopped to talk to one of them. He was from Memphis Tennesee and explained that he had climbed Wham Ridge the day before without rope, and that he had only climbed one mountain prior to this. While this seemed rather dangerous to me, it did instill some confidence in my ability to complete the climb. He also said he saw us downclimbing Arrow the night before and that he was praying for us to make it down safely. Not being a religious person, I thanked him for the warm thoughts and headed off to take more photos.
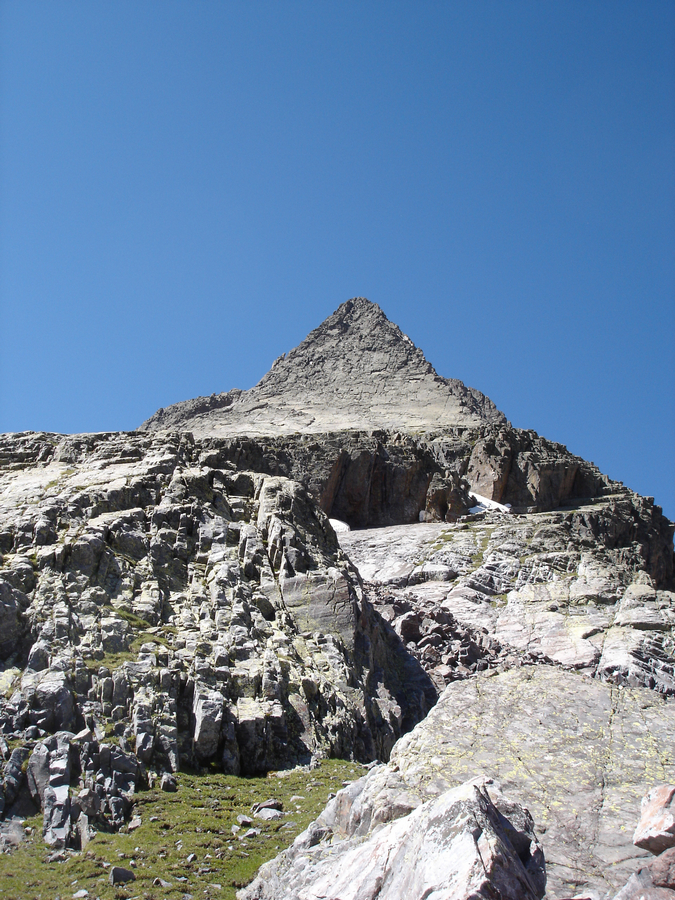
Vestal Peak's Wham Ridge
I headed back to the rendezvous point and waited for Jeremy to return. It was not until 10:30 AM that Jeremy reappeared and reconvened with me. At this point, clouds had already formed and we were questioning if we should continue or not. We decided to keep going and keep an eye on the clouds. With a full compliment of climbing gear, we headed up Wham Ridge in our climbing shoes. I reached the last grassy ramp of Vestal and re-evaluated the weather. Jeremy asked me what I thought and I told him that my gut told me we should bail. We both agreed that heading back would be the best choice - safer to start earlier the next day than to get struck by lightning. I took some parting photos of both Vestal and Arrow and headed back down the steep slopes of Wham Ridge, which proved to be a quite painful experience in climbing shoes.
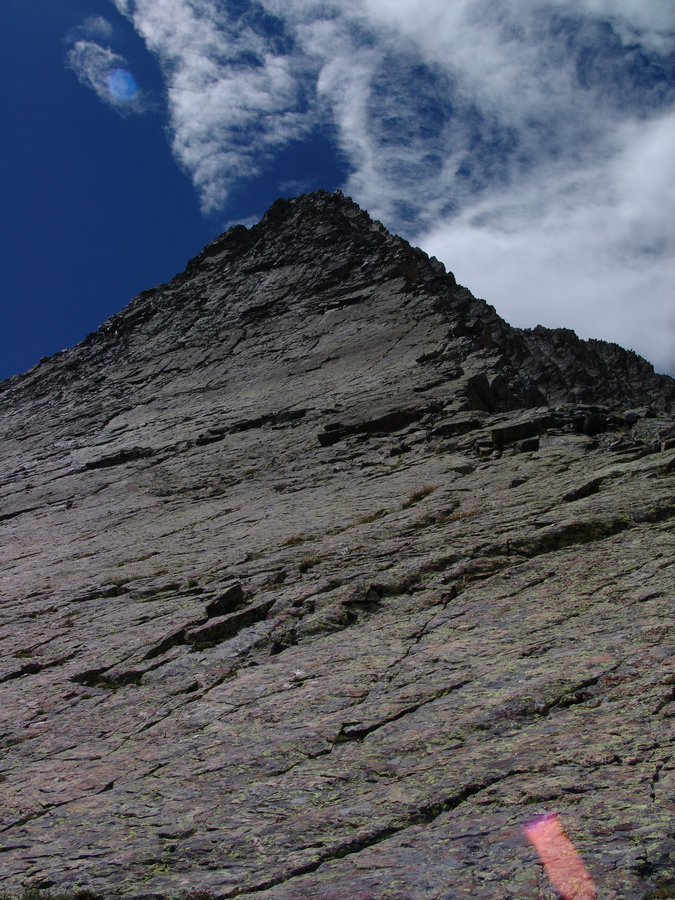
A view of Vestal from the turn-around point
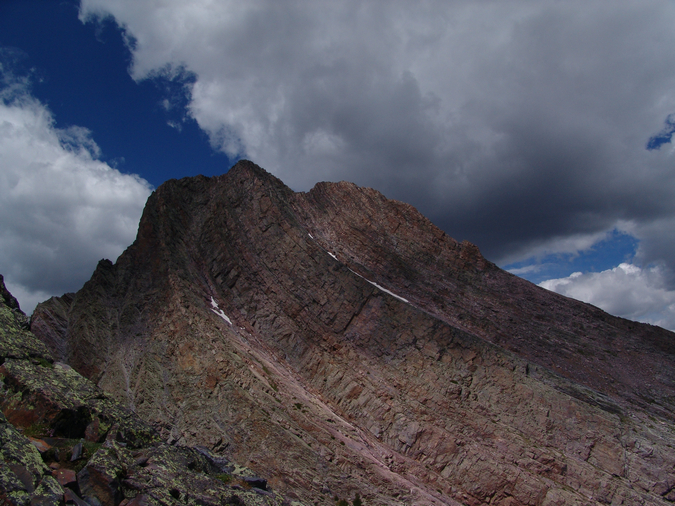
Arrow Peak with stormy weather forming above
The somewhat loose fitting climbing shoes were quite painful on the downclimb, and caused some very painful blisters to appear on 5 of my 10 toes. This did not bode well for my chances of using climbing shoes on the actual climb. Jeremy and I changed back into our mountaineering boots, and stashed all of our climbing gear at the same large rock at the base of Vestal in a waterproof bag for the next day.
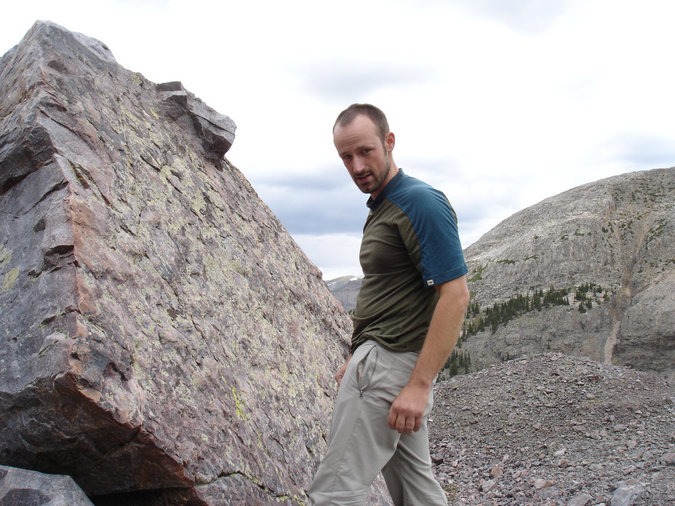
Jeremy stashes our climbing gear under this huge boulder beneath Vestal Peak
We went back down to camp and decided to take a nap. The decision to bail on Vestal proved to be a very good one, as the whole basin was riddled with rain and lightning for three hours. Fortunately, the group ahead of us had safely made it down from Vestal before the storms hit.
We got out up and cooked dinner - this time a carbohydrate-filled meal consisting of re-constituted mashed potatoes, country gravy, Spam, and cheddar cheese. While this sounds horrible - it was amazing! Go Spam! We set our alarms for 3:30 AM and crashed at a much more respectable time of 9 PM.
Day 4:
We woke up and made our way up to the base of Vestal to watch the sunrise from the final grassy ledge before the beginning of the more difficult climbing. Since my feet were completely mangled from the prior day's adventure, I decided to wear my La Sportiva Trango Evo Sport mountaineering boots for the ascent. With heavy socks on, I could barely feel my blisters. Watching the sunrise from the base of Wham Ridge was pretty awesome. The sun lit up the surrounding mountains and made for quite a peaceful start to an incredible climb.
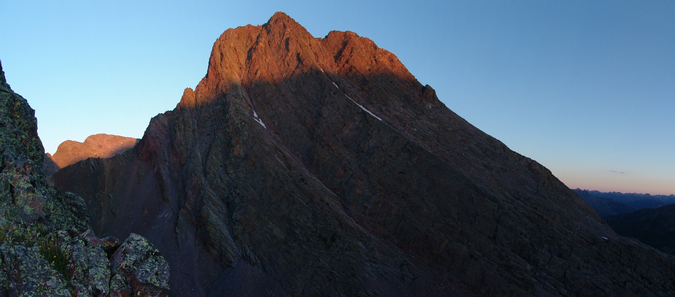
Arrow Peak in alpenglow from the start of Vestal's Wham Ridge.
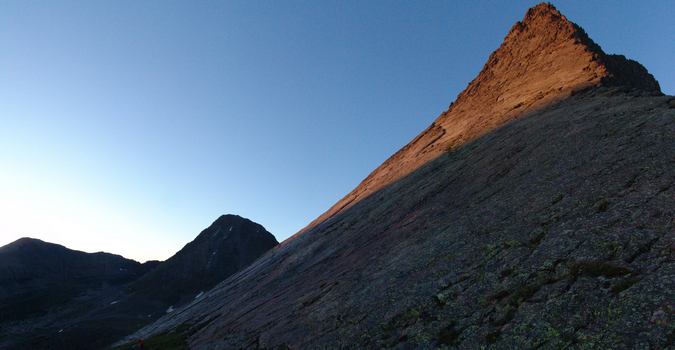
Vestal's Wham Ridge in alpenglow, with Jeremy resting at the base.
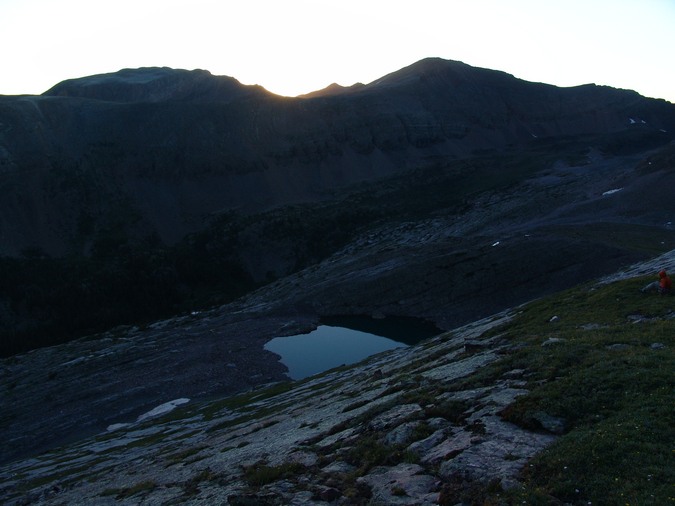
Jeremy watches the sunrise
I even took a short video of the sunrise:
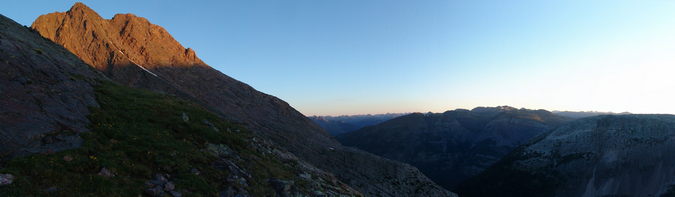
Arrow Peak at sunrise.
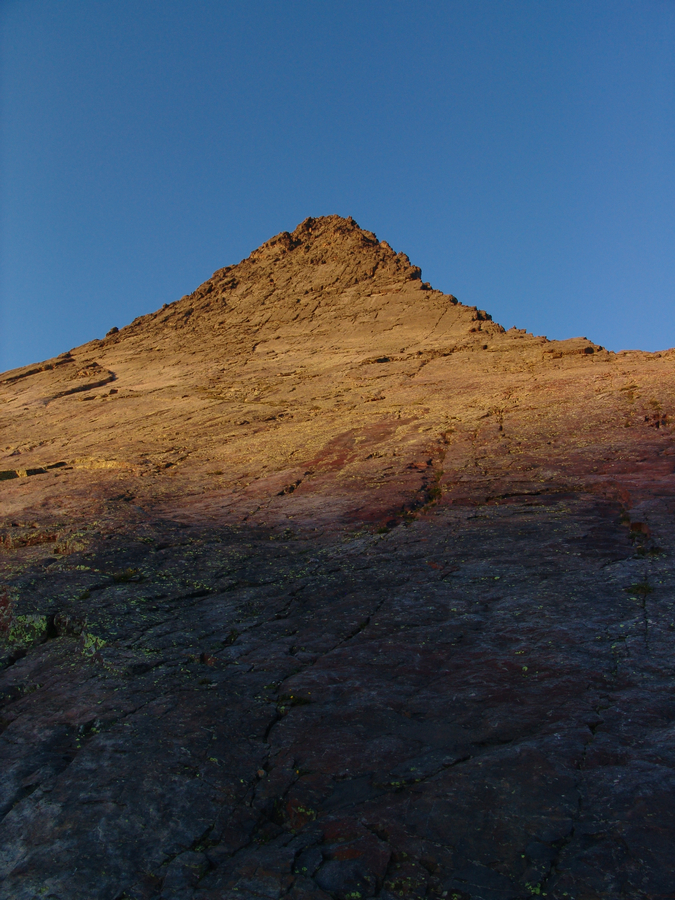
A closer view of Wham Ridge - looks like fun!
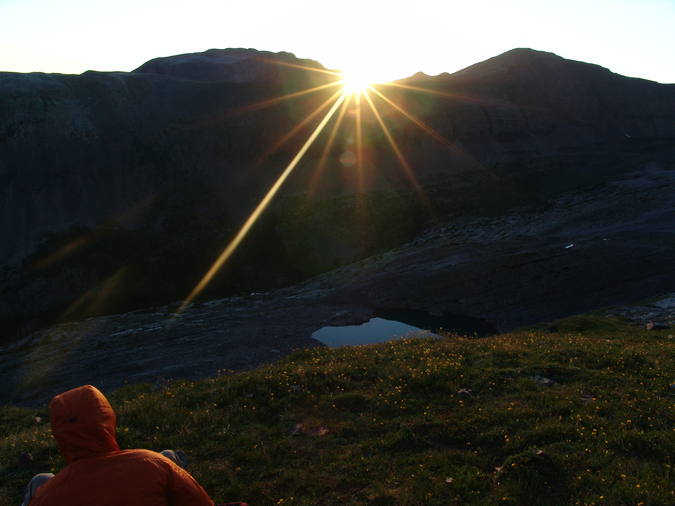
Jeremy watches the sunrise over Vestal Lake
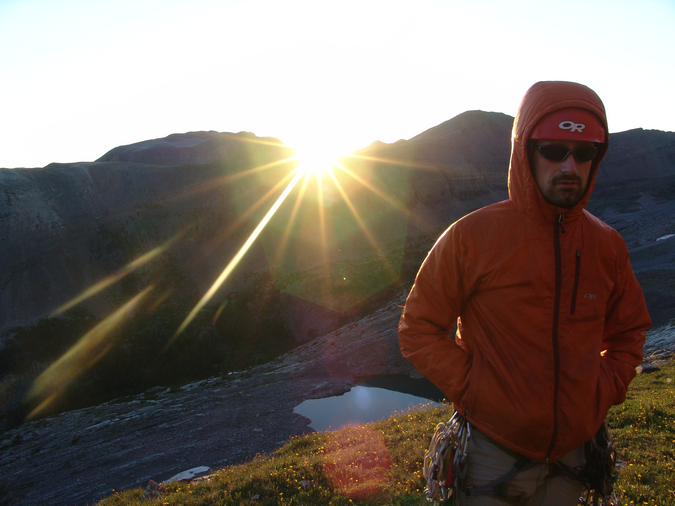
Jeremy warms up
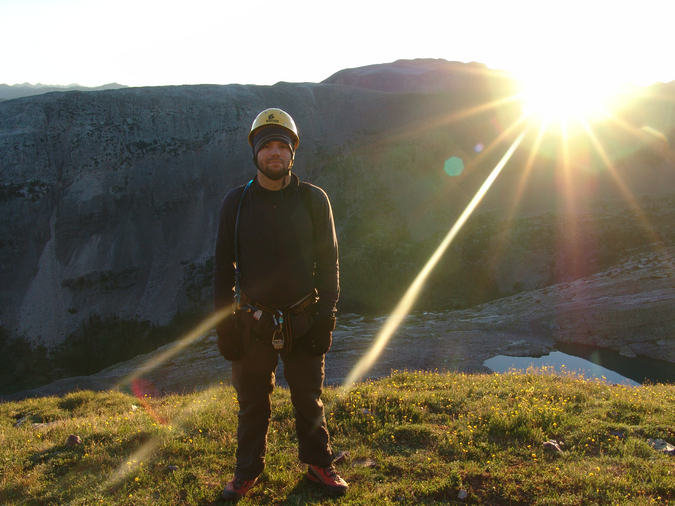
Matt looking cold
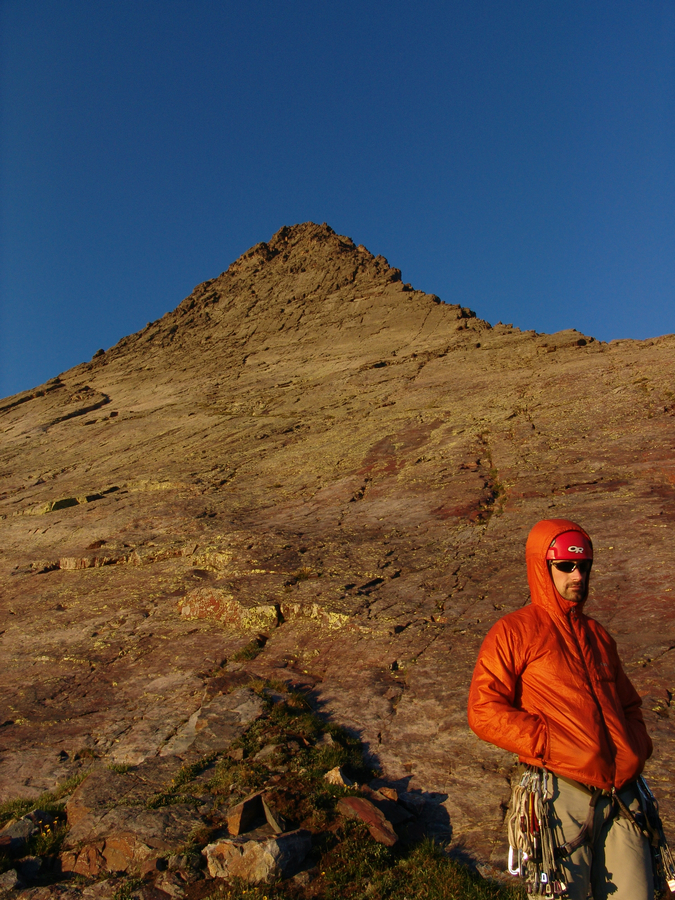
Jeremy poses in front of Wham Ridge
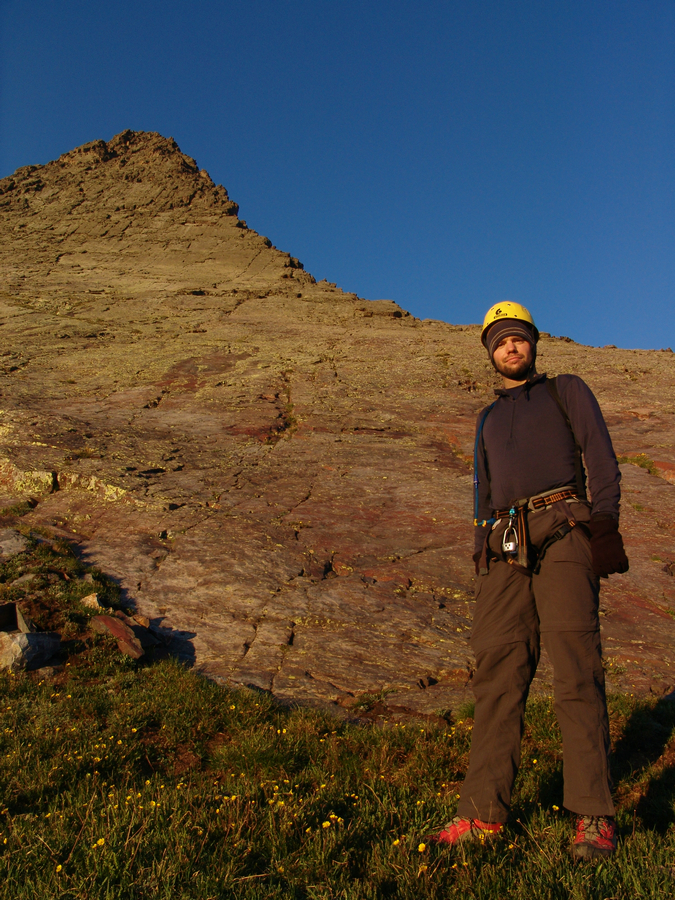
Matt looks ready to begin Wham Ridge
We finally started up Wham Ridge, making our way quickly up the small ledges and cracks. The going was pretty easy and unexposed for awhile, with plenty of great hand and foot holds to be found.
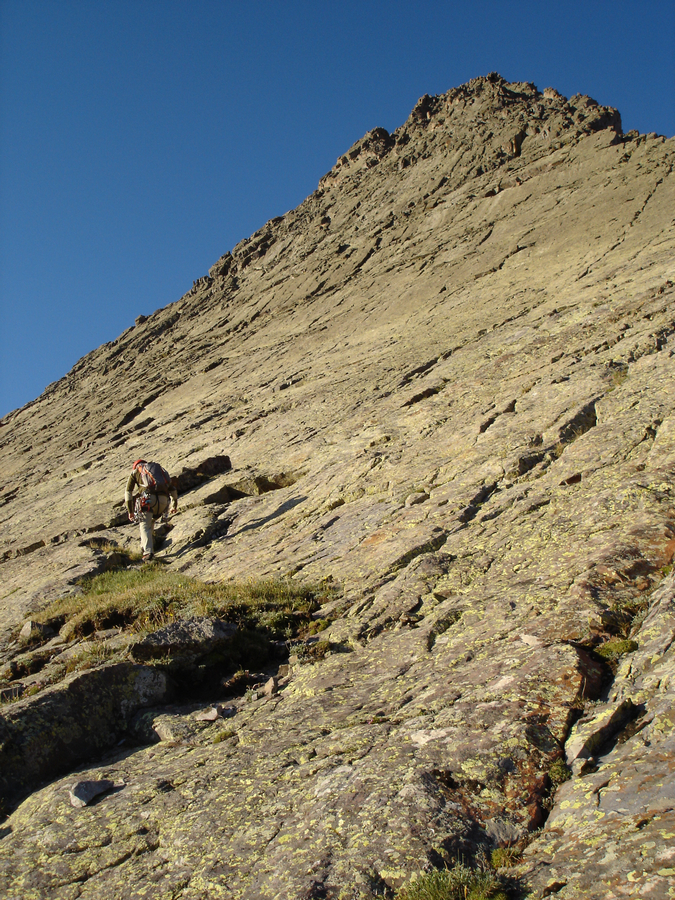
Jeremy heads up the ledges
We continued up into some 4th class sections, with exposure and steepness increasing gradually as we climbed.
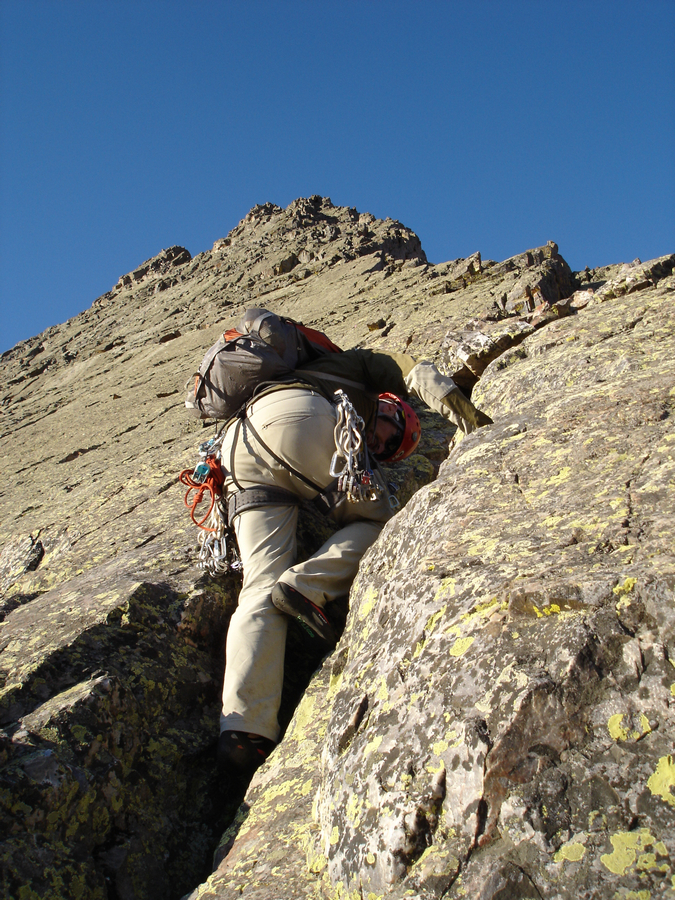
Jeremy climbs the lower Class 4 section of Vestal Peak
Before long, Rio Grande Pyramid and the Window appeared, looking really cool in the early light.
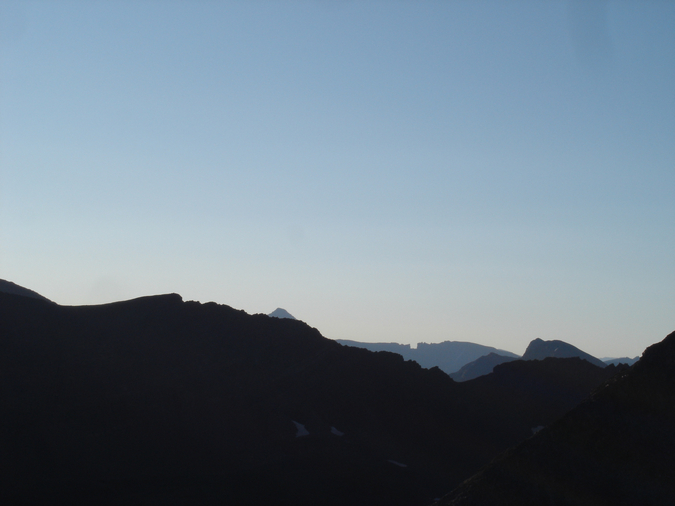
Our first view of the day of Rio Grande Pyramid and The Window
Wham Ridge continued to become more and more steep, decreasing my comfort level of being unroped.
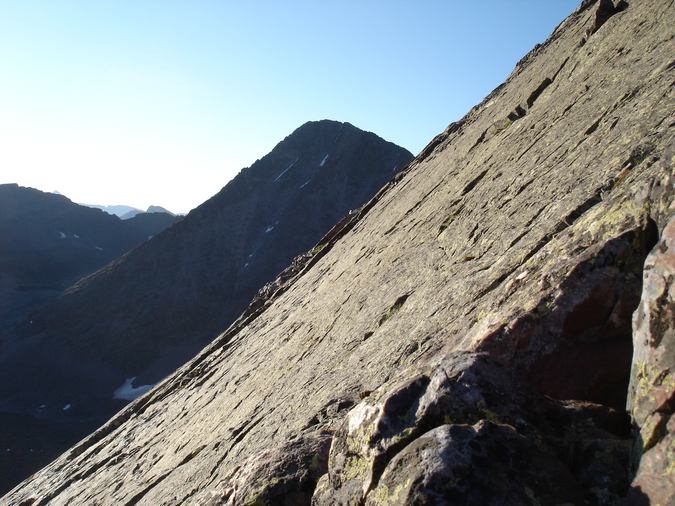
Wham Ridge's profile
We reached a great stopping point with plenty of room at our feet for belaying, and prepped the rope and our gear for 5th class climbing. Let the fun begin! While I did the route in my La Sportiva EVO Mountaineering Boots, Jeremy did Wham Ridge in his Evolv Bandits. According to Jeremy, they were quite comfortable shoes and he felt like he probably could have gone without a rope (being that he is very experienced and the shoes made for great traction).
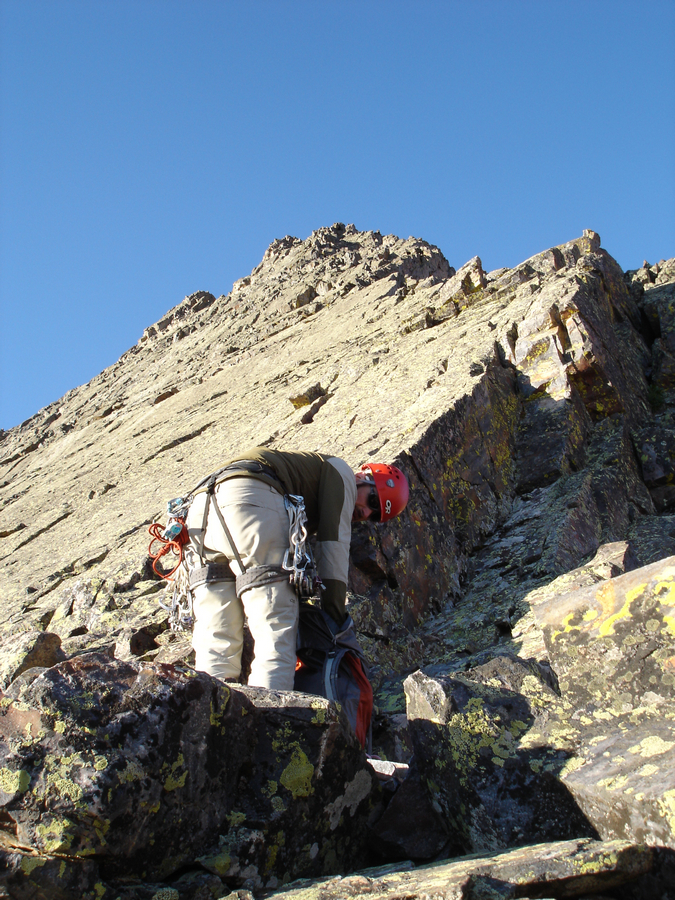
Jeremy prepares for our 1st pitch of Wham Ridge
Jeremy led the first pitch as I belayed from below, only placing two pieces of gear for protection on the way up - a camalot and a nut. Once Jeremy arrived safely at the next obvious stopping point above at about 55 meters up from me, he created an anchor and signaled me to begin climbing.
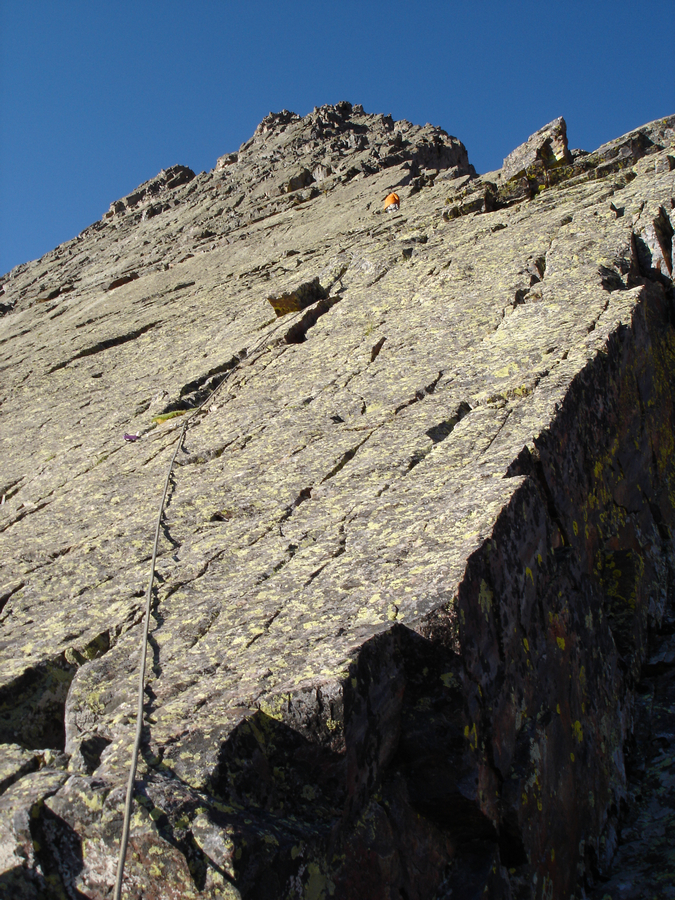
The first pitch
I easily ascended the first pitch, removing Jeremy's protection as I climbed. I reached the anchor and Jeremy prepped for the 2nd pitch. Meanwhile, I decided to take a few photos from this vantage, looking down.
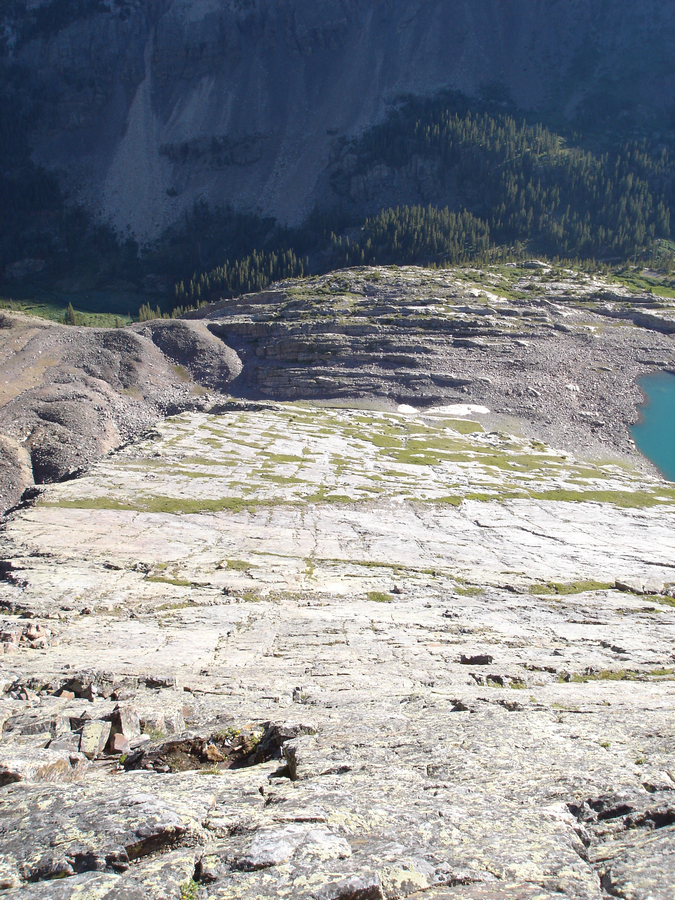
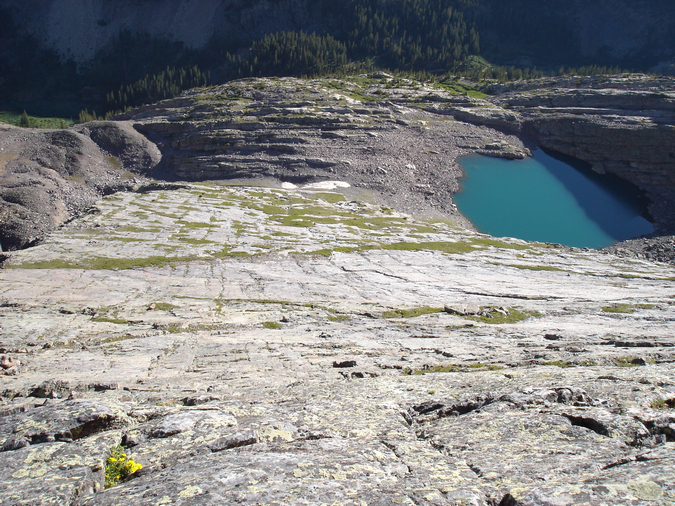
Looking down Wham Ridge
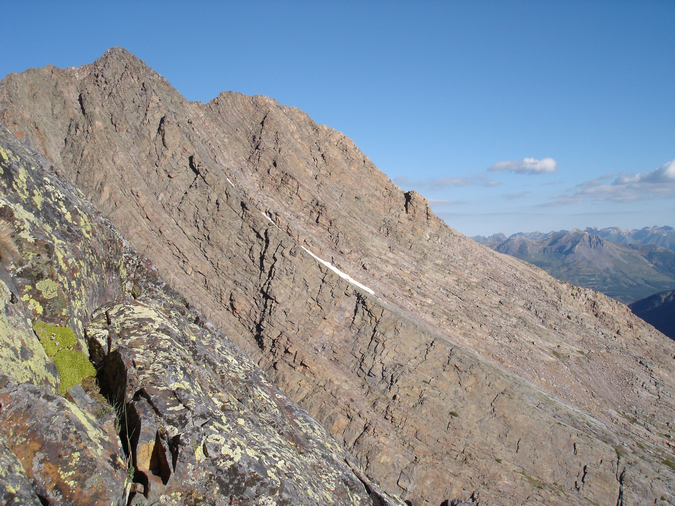
Arrow Peak's profile from about 3/4 up on Vestal's Wham Ridge
We cruised up the 2nd pitch in quick order and set-up for one last pitch, which proved to be quite difficult in one section. I found myself at a point where there were no foot-holds and only one hand-hold - a large inset section holding a rusted cam. Having on mountaineering boots and not climbing shoes made the climb much more difficult than it needed to be, but I welcomed the challenge. The move required me to do a one-armed push-up with my right arm in the inset section and to reach up with my left arm to a hand-hold. Once in this position, I pulled myself up and placed my feet where my right hand was previously at. This was probably the crux of the entire route. It felt much harder than 5.4, but I suspect that was because I was wearing boots.
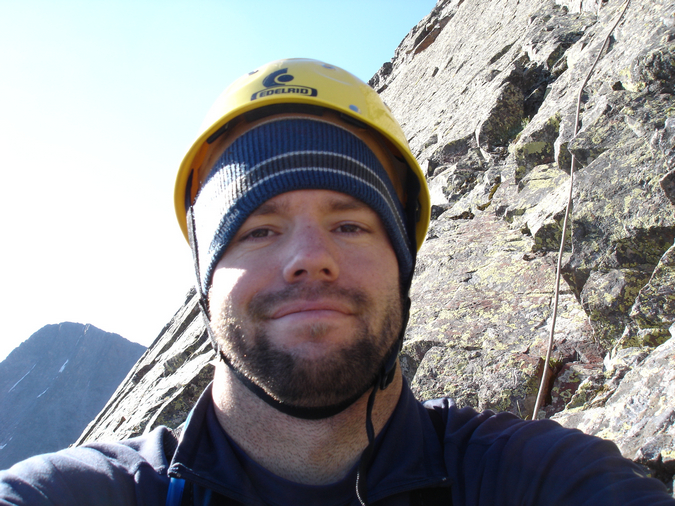
Matt on Wham Ridge
At this point, Jeremy and I both felt comfortable being unroped and headed up the class 4 / low class 5 remainder of the route. There was only one other section that was greatly exposed, which required us to do a really crazy move with about 1,000 ft. of exposure below us. The move was on a completely solid rock, so I felt comfortable enough to make a go at it without rope. This proved to be OK, as the move was totally solid, and fun to say the least.
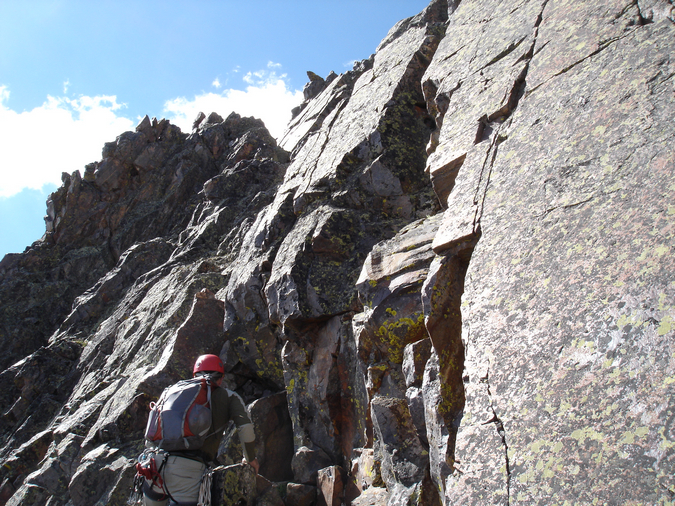
The last section of Wham Ridge proved to be a very fun class 4 and 5 playground.
We finished up to the top of Vestal, and I celebrated. Since I had been dreaming of doing Wham Ridge for quite some time, this moment was especially exciting for me. I thanked Jeremy for leading the climb and began to go crazy with my camera. 
As expected, the views from Vestal were outstanding. The Needle Range and the remainder of the Grenadier Range to the east were quite the sight!
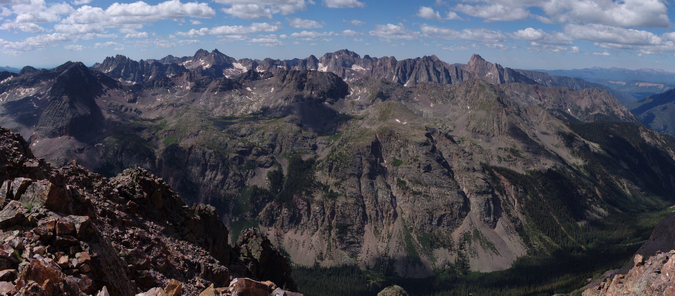
A view of the Needle Range to the south of Vestal Peak.
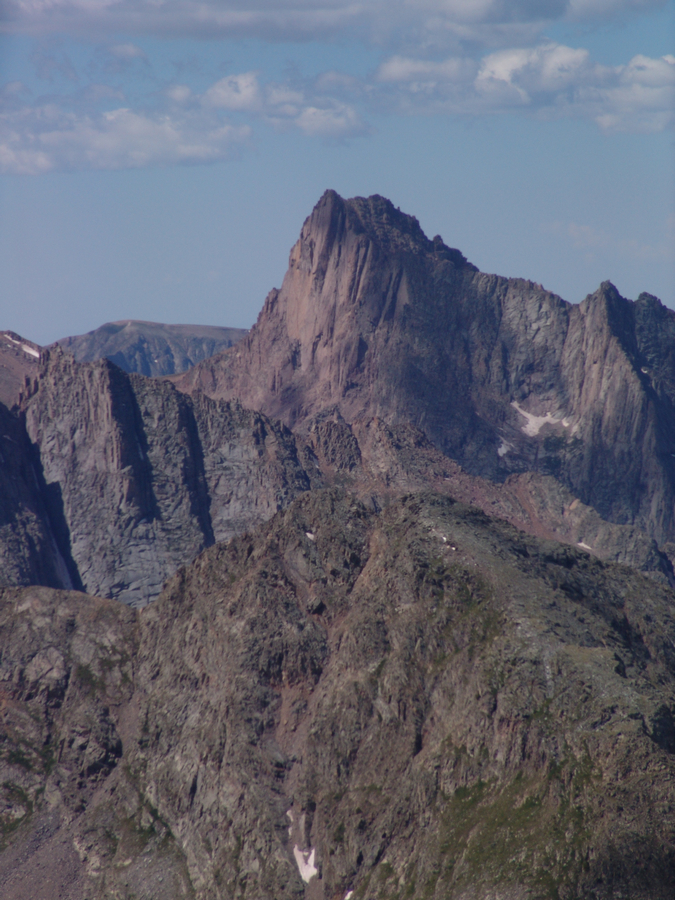
A zoomed in view of Pigeon Peak
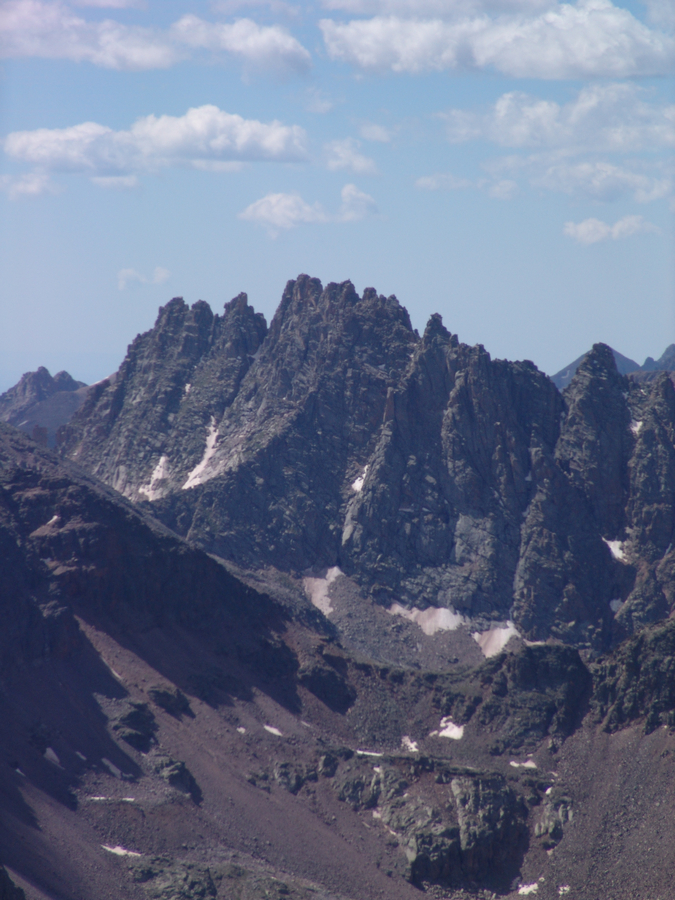
A zoomed in view of Jagged Mountain
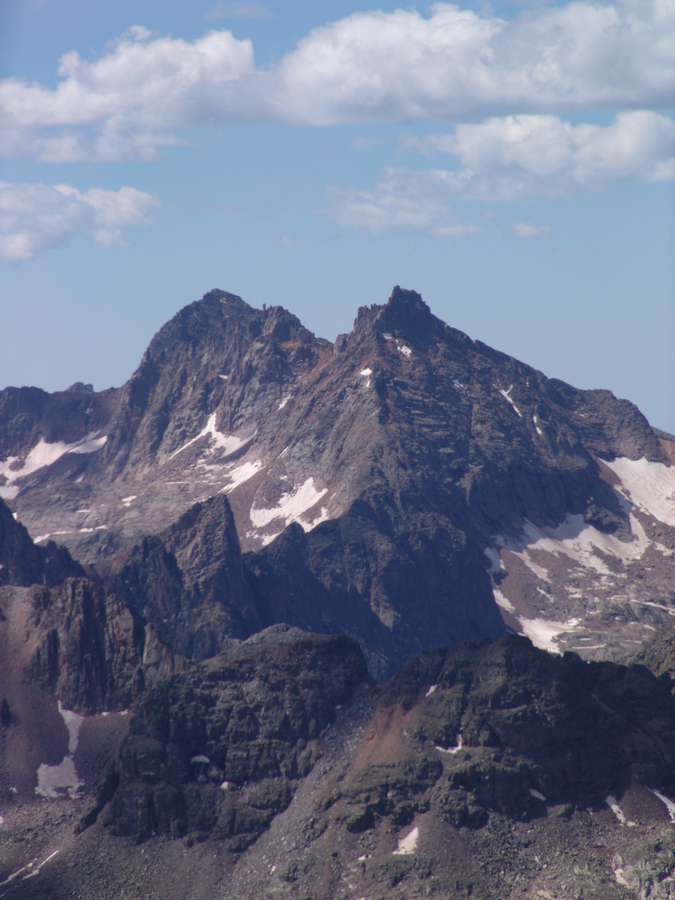
A zoomed in view of Windom, Sunlight, and Sunlight Spire
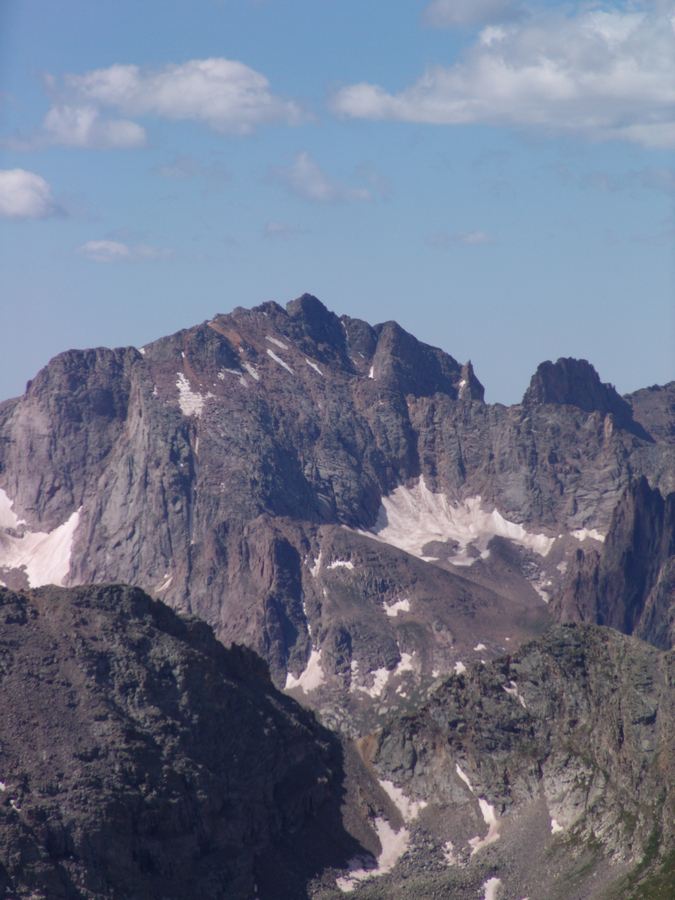
A zoomed in view of Mount Eolus

A zoomed in panoramic of the Needle Range.
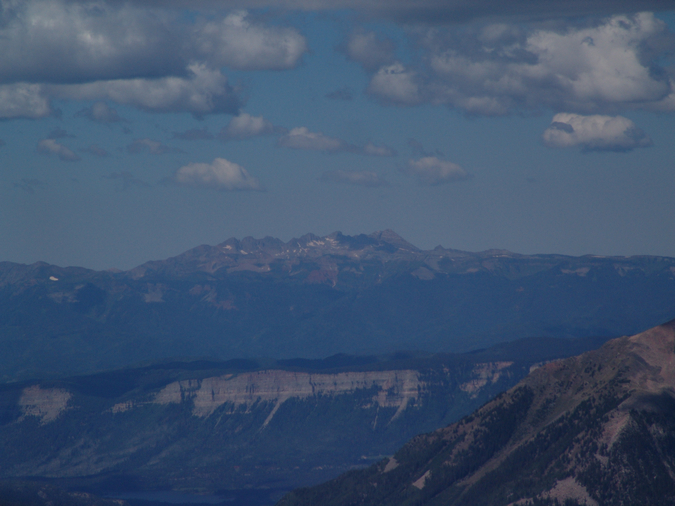
The La Plata Mountains seen in the distance to the southwest, including Hesperus Mountain
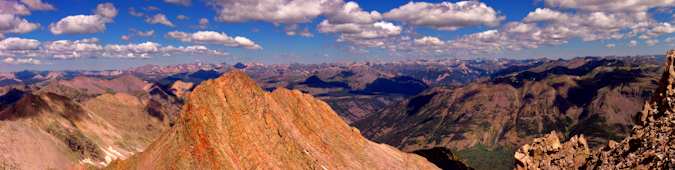
A panoramic photo looking west to north from Vestal Peak.
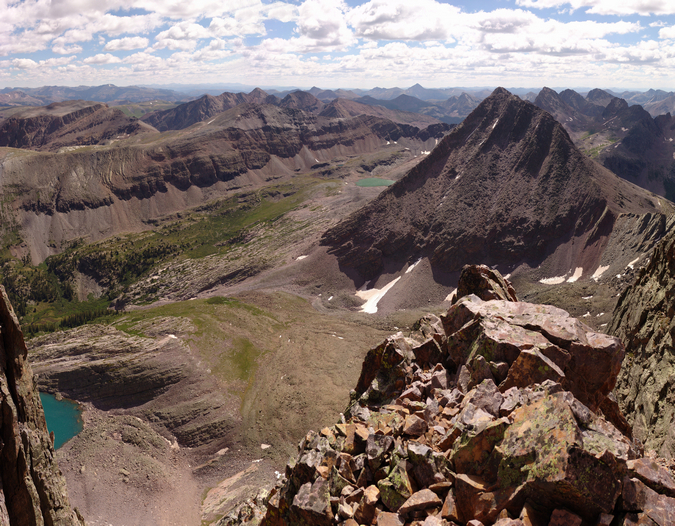
A fully zoomed in panoramic view looking down and east from Vestal Peak, with Vestal Lake below. Seen at far right are the Trinities, Storm King Peak, Mount Silex, and The Guardian.
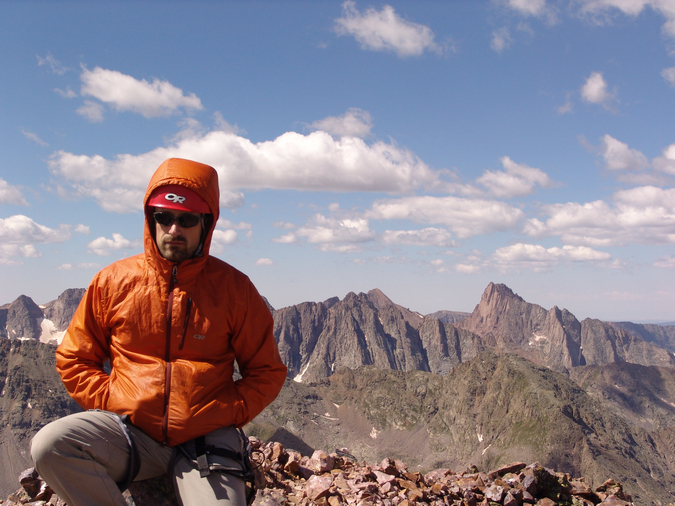
Jeremy sits on the summit of Vestal Peak with Pigeon Peak behind him.
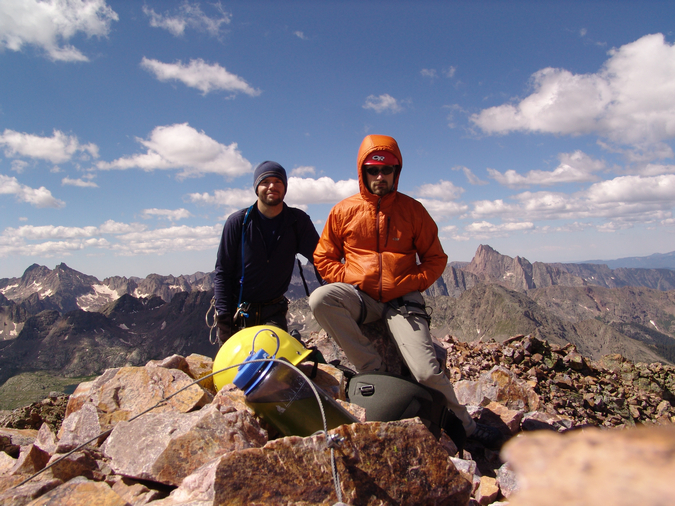
Matt and Jeremy are captured in this self-timer from the summit of Vestal Peak.
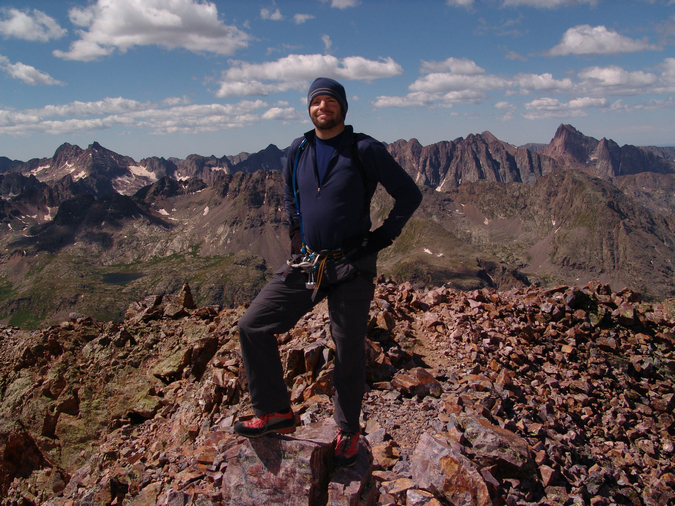
Matt looking proud on the summit of Vestal Peak.
I think I see my house from up here!
A panoramic photo of the Needle Range

A panoramic photo from Vestal Peak, looking north to south - with Basalm Lake between the Grenadiers and the Needle Mountains.
With more sky this time...
After a great time on the summit, we decided to descent via the "class 3" route of Vestal on the south side of the mountain. I put class 3 in quotations marks because this was the worst, chossiest, nastiest, most unpleasant class 3 climbing I've done in my life. The route was unmarked, with no trail, and no cairns until the bottom. We weaved in and out of gullies, unsuccessfully finding one dead-end after another. Finally, as we were nearing desperation, Jeremy found a narrow but climbable gully leading down to a large cairn below. The climbing on the backside of Vestal reminded me of Crestone Needle, except steeper and looser. Not a good combination! We finally reached the saddle between Arrow Peak and Vestal Peak and descended via the "Dues Collector Couloir." I've often wondered why it was called this, and realized it was because it was loose talus and dirt, not the most enjoyable stuff to climb up or down.
Jeremy in the "Dues Collector Coulior"
We reached the end of the coulior and headed towards the end of the base of the mountains where we would down climb back to our campsite.
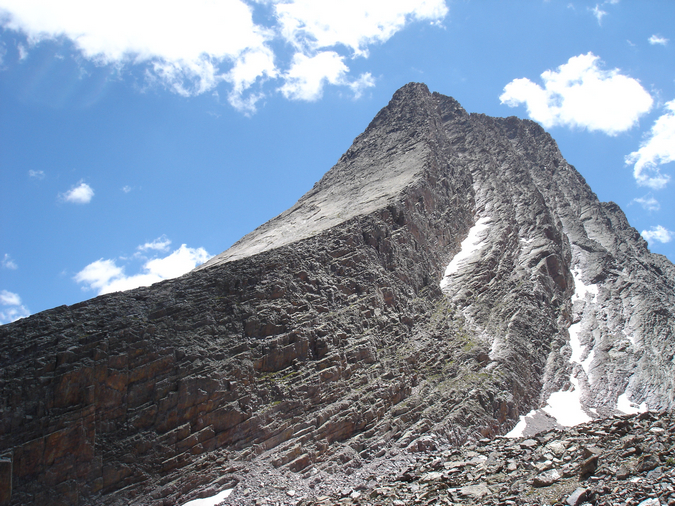
A view of Vestal's Wham Ridge on the way down
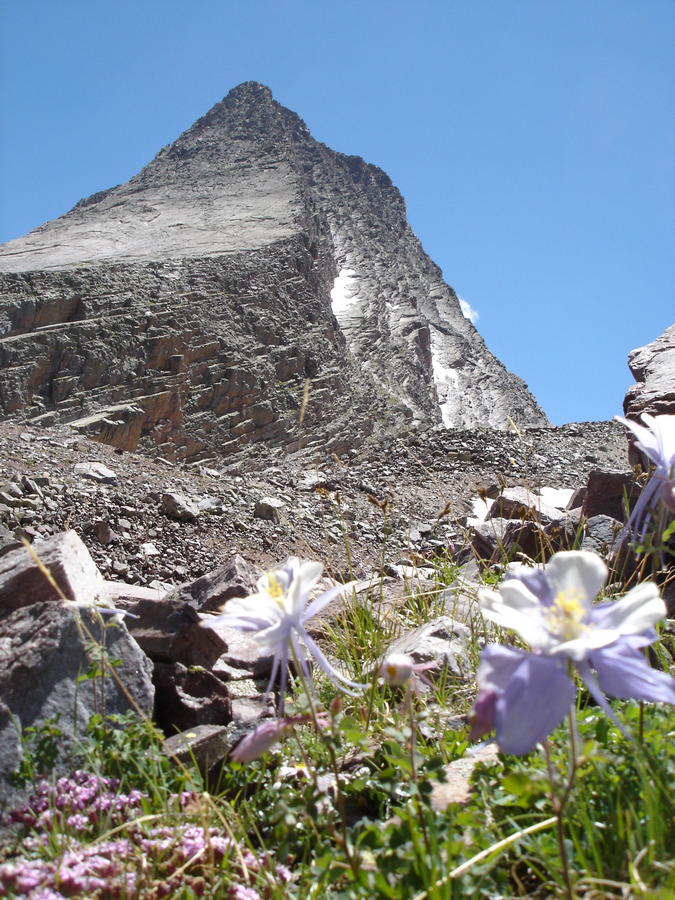
Vestal Peak and some Columbine flowers
We reached our campsite about six hours after we had begun, still high from the amazing climb. We prepped our dinner - this time a hearty meal consisting of tortellini and pasta sauce with chicken. Yum.
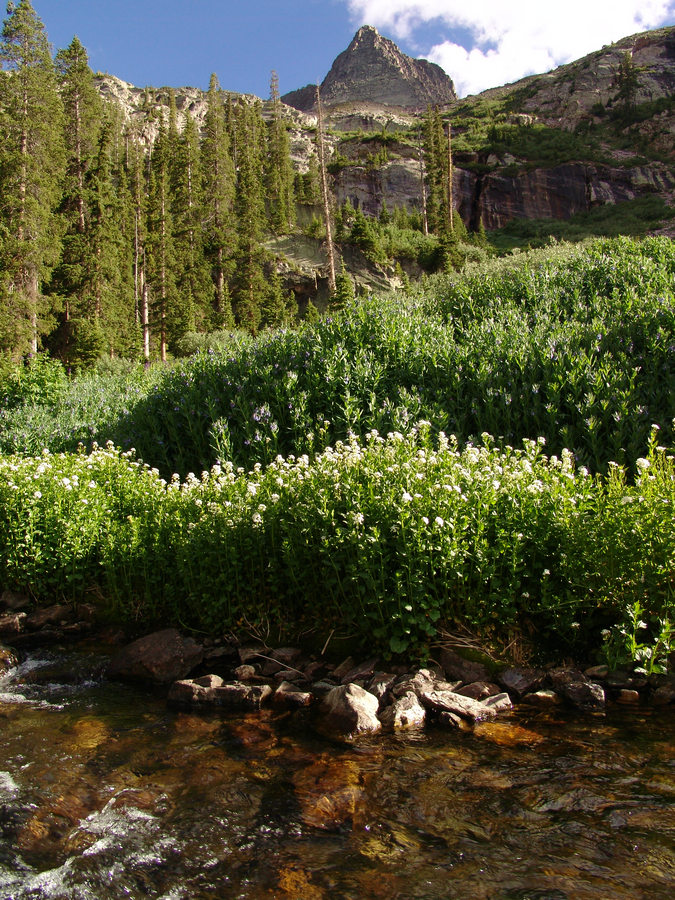
A view of Vestal Peak from Vestal Creek near our campsite. It should be noted that the steep section between us and Vestal (right of center) was the trail up from our campsite.
The flowers were incredible in the afternoon sun, so I took some time to photograph them after dinner.
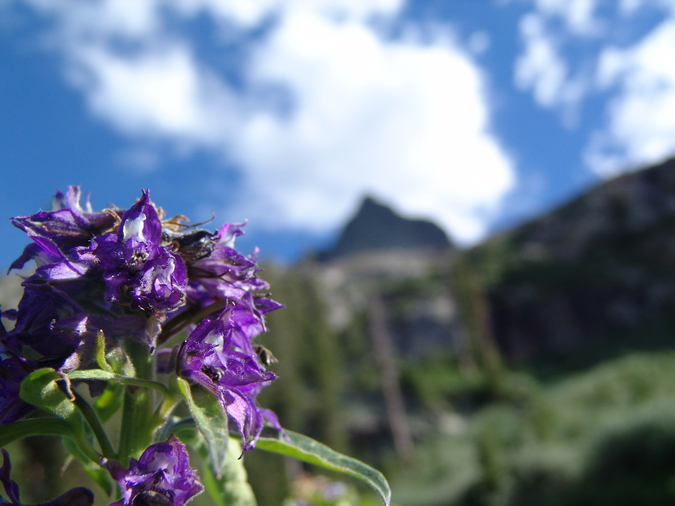
A purple flower in front of Vestal Peak
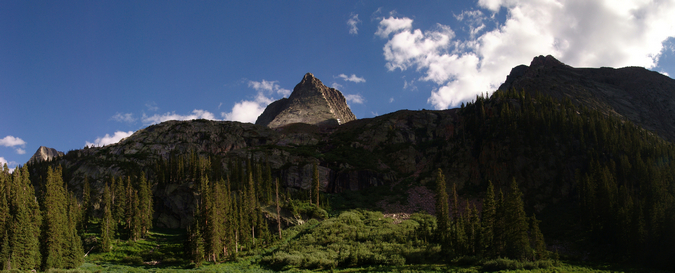
Lower Vestal Basin, where we were camped
We hit the sack around 10 PM, and set the alarm for 5 AM, tentatively planning to do the Trinity Traverse the next morning.
Day 5
We awoke around 6 AM, seeing that the clouds had already formed in the basin. We opted to cancel the Trinity Traverse and head back to the car. We packed up and left camp around 11 AM, making our way back down the steep trail and to the beaver ponds. The view from the beaver pond was incredible as ever.
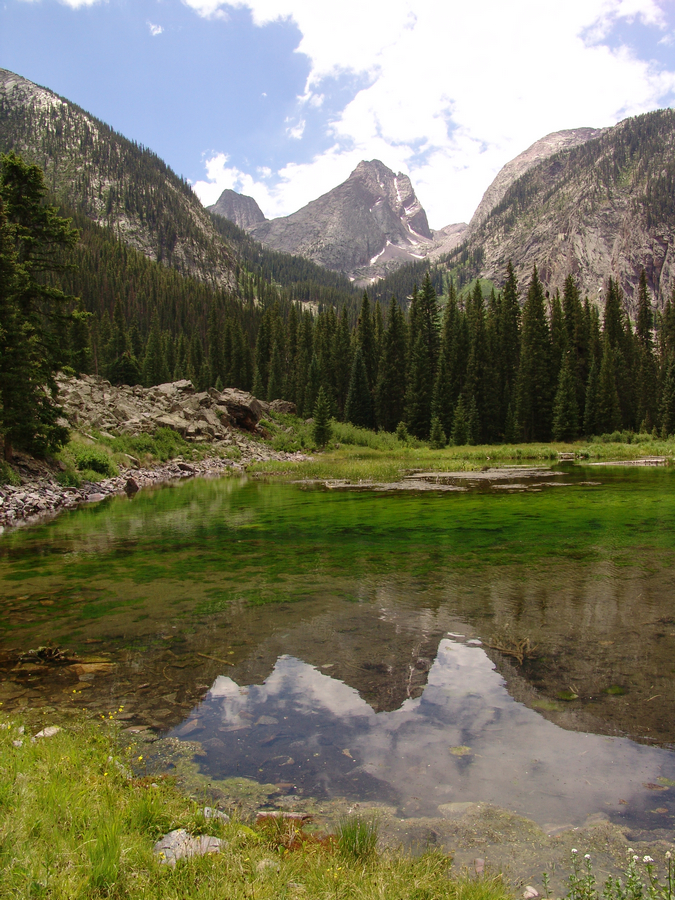
Vestal Peak and Arrow Peak are reflected in a beaver pond
We cruised back down the Colorado Trail, meeting up with the train around 2:30 PM.
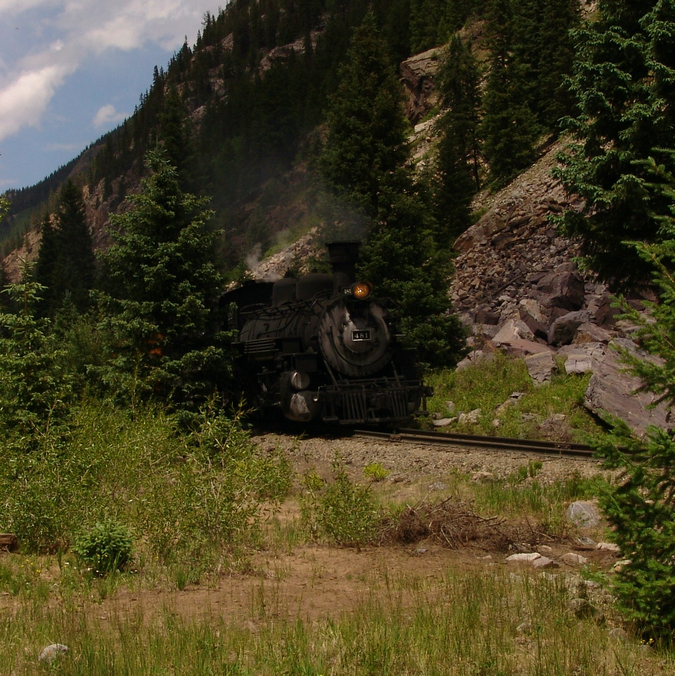
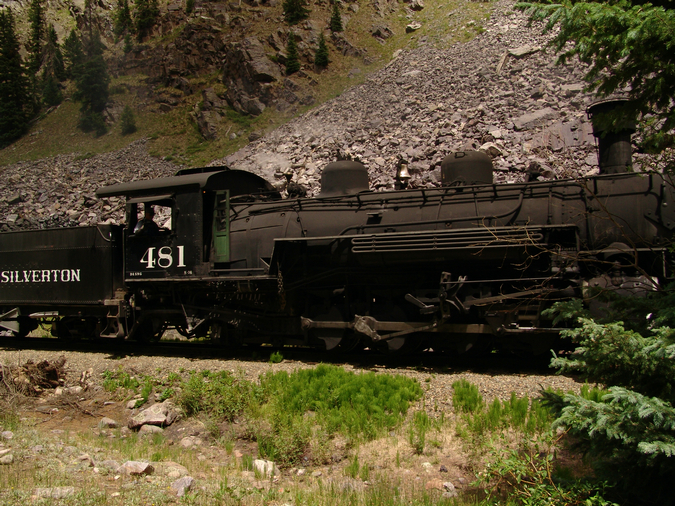
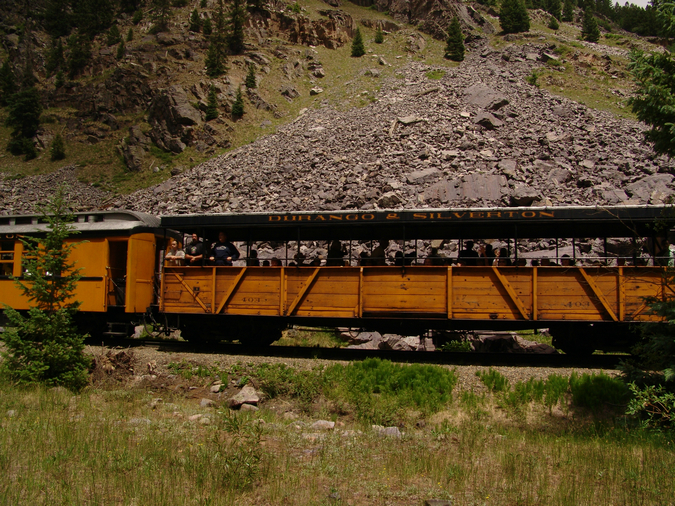
The Durango & Silverton Narrowgauge Railroad
We reluctantly trudged back up the 1,700 feet to our car in a matter of 2 hours and drove into Silverton, where we dined on Elk Burgers and French fries. The drive home was uneventul yet completely satisfying.
Vestal marked the 60th mountain of the highest 100 in Colorado for me. 40 to go!
References:
1. The San Juan Mountains - A Climbing and Hiking Guide. Robert F. Rosebrough
2. Wheeler, Annual Report of the Chief Engineers for 1876, Appendix JJ, p. 101
3. Rhoda, Summits to Reach, p. 75