Displaying items by tag: trip report
Climbing Jagged Mountain and Knife Point - Sojourn to Sunlight Basin
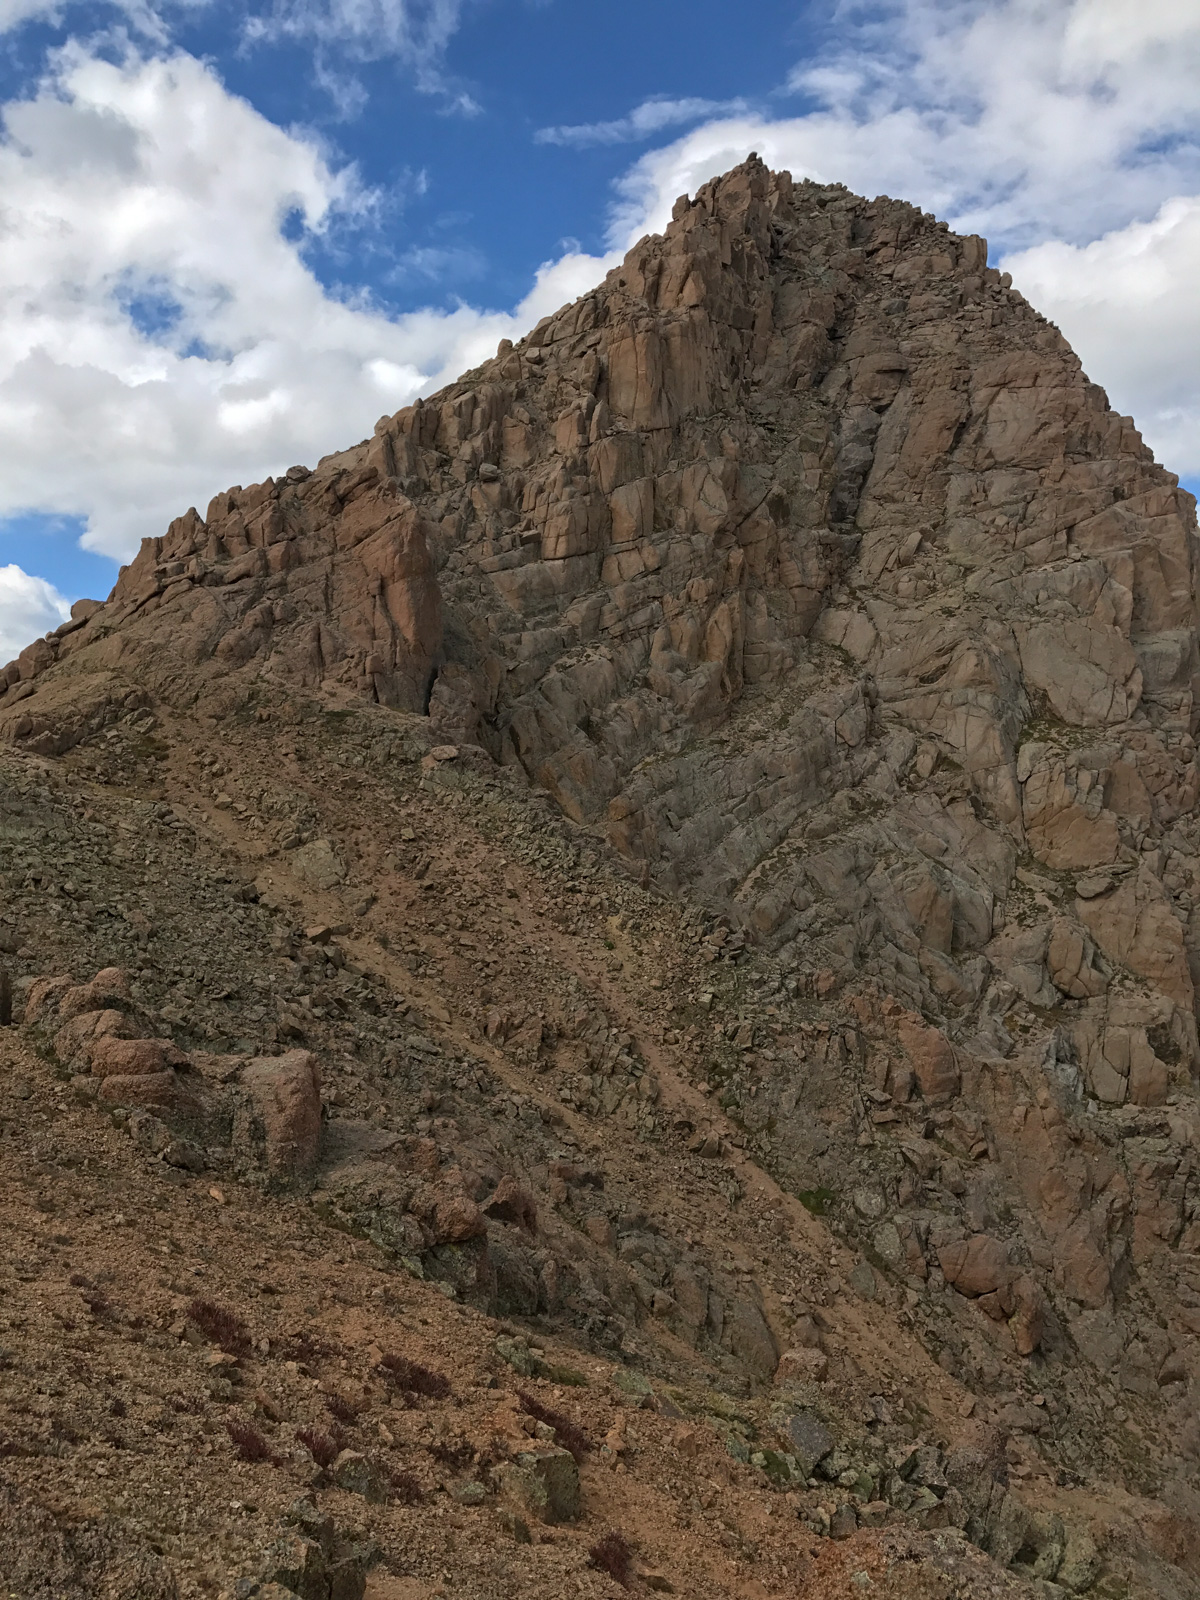
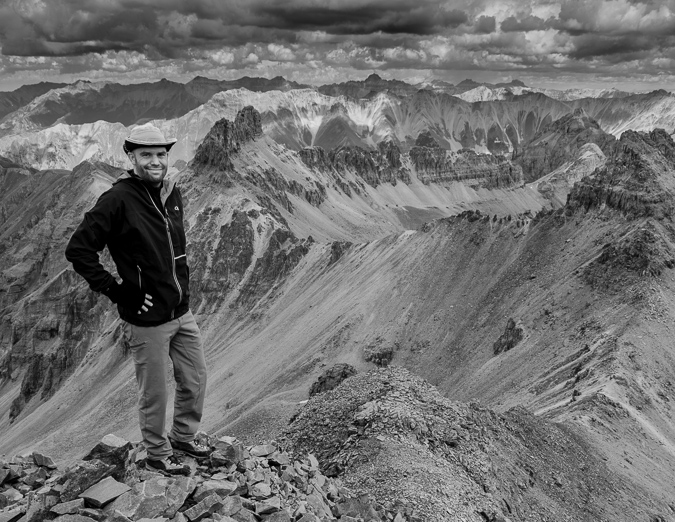
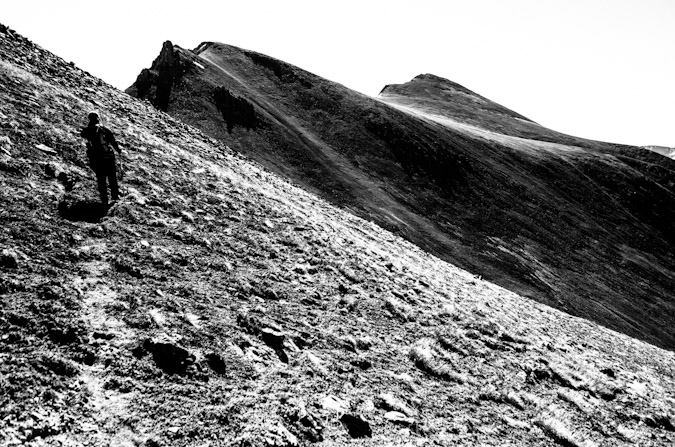
13,824 ft. Jagged Mountain has always provided ample intrigue from every angle I have ever viewed it from. It has always looked virtually unclimbable to me, representing the raw essense of Colorado's Weminuche Wilderness Area - untouched and unseen by most, scaled and appreciated by even fewer. I attempted Jagged Mountain once before in September of 2013, where my climbing partner Jeremy and I found ourselves huddled in a tent for four days during the worst flooding in Colorado's recent history. I last saw the summit of Jagged Mountain from my perch atop 13,835 ft. Turret Peak at sunrise last summer. The sun rose just behind Jagged and I felt even more of an affinity for its summit.
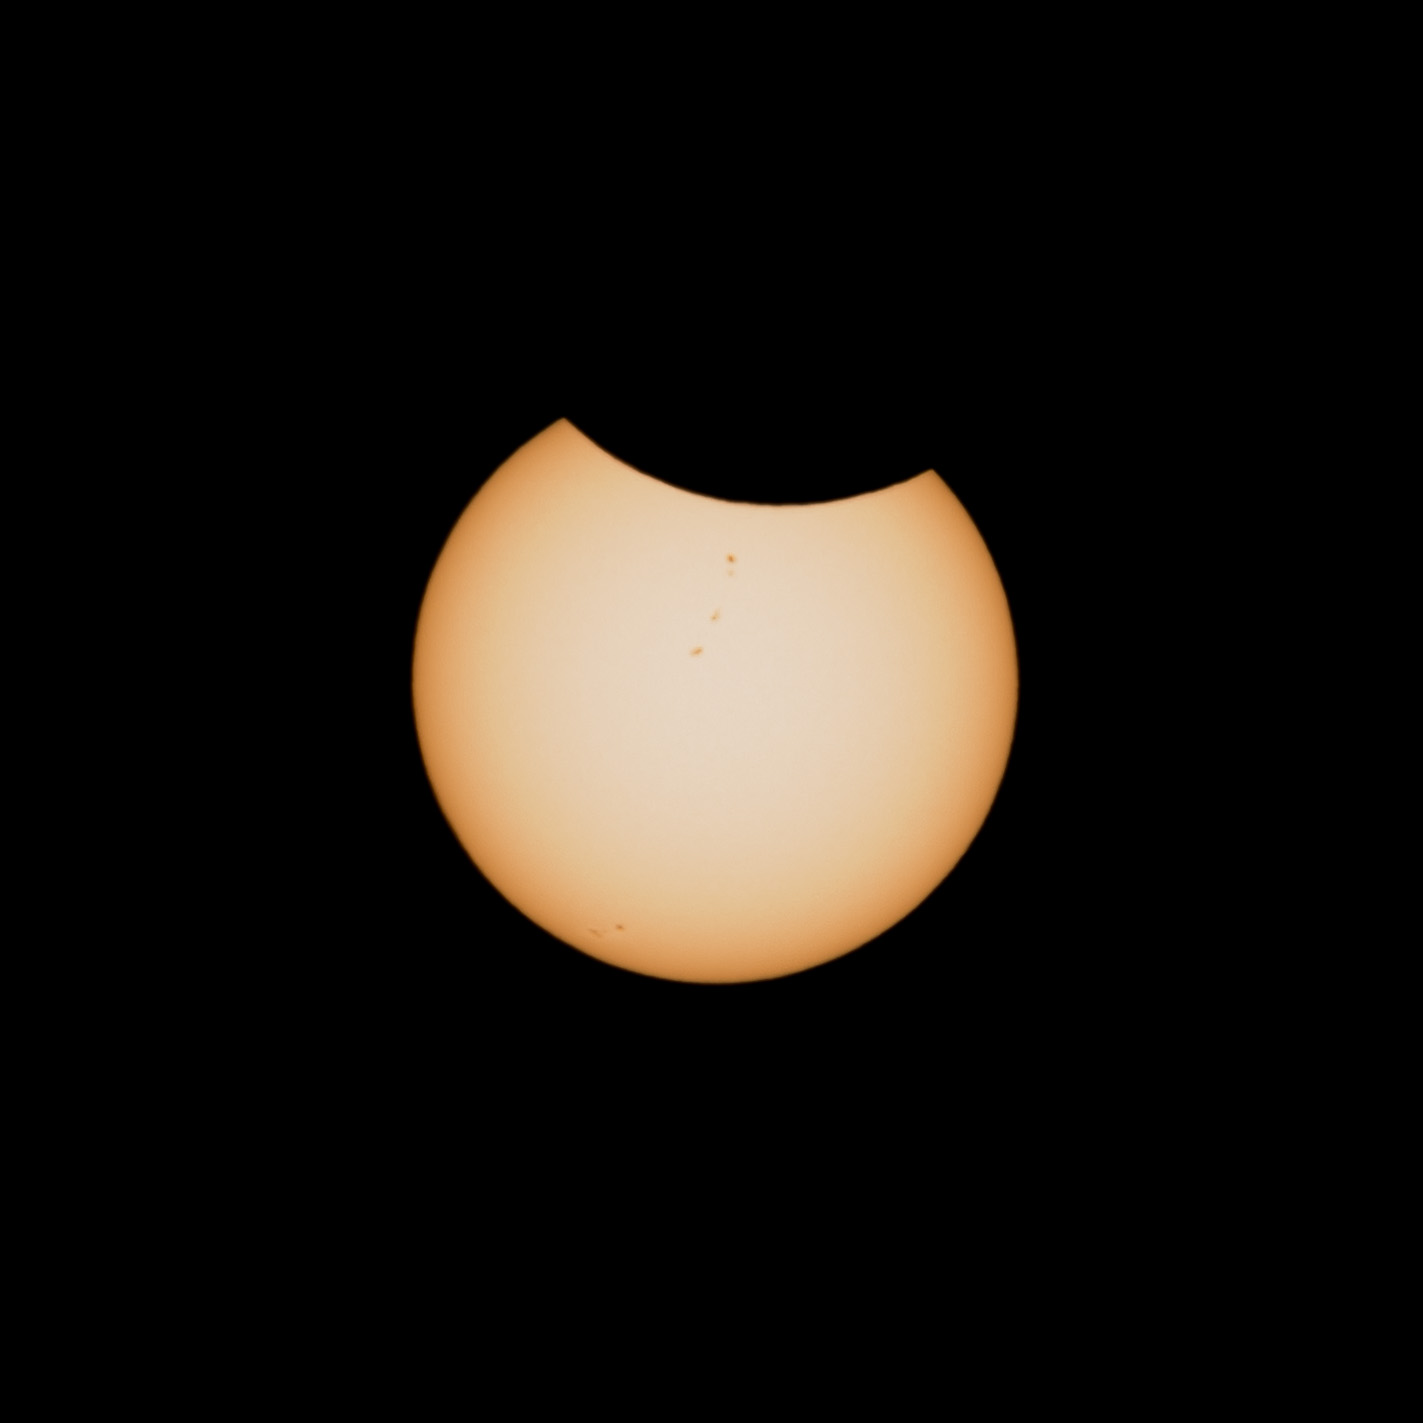
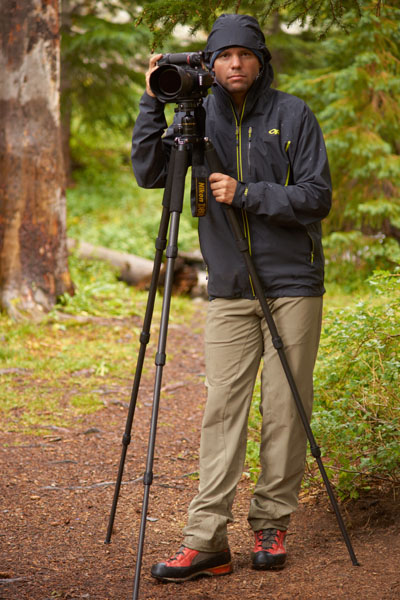
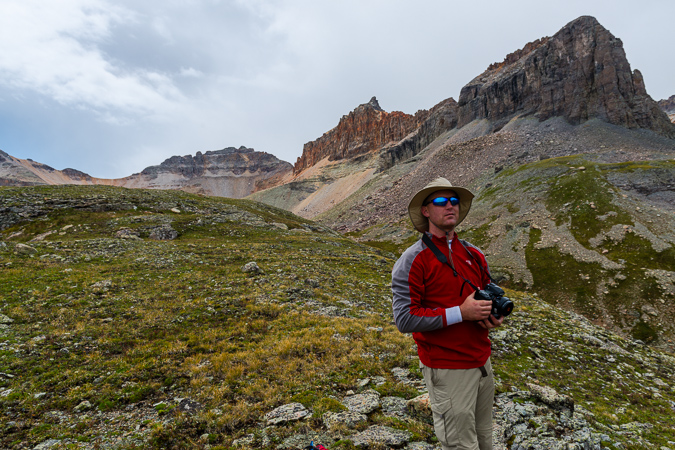
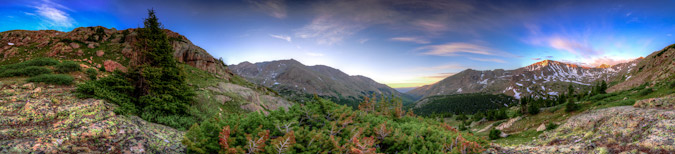
As 2017 unfolded, I saw that the Great American Eclipse would be happening in late August. I penciled in a trip to Wyoming to view the eclipse in totality; however, in July, my friend Natalie Moran posted on Facebook that she was looking for an additional partner for Jagged Mountain and I knew I had to jump on the opportunity to go. Since Jagged requires roped climbing, I only wanted to go with someone with experience on that mountain or with alpine technical climbing. Having climbed Dallas Peak and Teakettle Peak with Natalie in the past, I knew it would be a great trip. The trick of course was finding a way to squeeze in some photographs of the eclipse during this trip. The plan was to meet Natalie and her friend Shawn Poliquin in Silverton on Sunday morning, drive up and over Stony Pass down to Beartown Trailhead, and then backpack up and over Hunchback Pass and then into Sunlight Basin. My pack weighed in at 38.5 pounds, which was pretty good considering I had brought climbing gear, three lenses, and my tripod.
In December, I decided to switch out all of my camera gear for a much lighter experience for backpacking. Previously, I was carrying the Nikon D800 and the holy trinity.
For this particular trip, I decided to bring the following photography equipment:
Camera: Sony A7R2
Tripod: Feisol Tournament 3442 Carbon Fiber Tripod
Ballhead: Photo Clam Pro Gold II
Wide Angle Lens: Zeiss Loxia 21mm f/2.8
Mid-Angle Lens: Zeiss 55mm f/1.8
Telephoto: Sony FE 70-300
Total weight: 8.3 Pounds.
My total weight using my previous Nikon equipment: 14 pounds. I'll take the nearly 6 pounds in weight savings! My legs certainly thanked me considering the round-trip stats for this trip was 30.9 miles!
You can see the full GPS file and stats over on Gaia GPS, which is by far my go-to app for backpacking and mountaineering. It is so insanely useful, I use it on trips like this for many purposes, including planning and route-finding. You can purchase it here and help support the site.
One aspect of this particular trip that made me nervous was the drive to Beartown. I decided to take my wife's stock 2001 Jeep Cherokee through some encouragement from my co-worker and Bi-Centennial finisher, Terri Horvath. She was right, the road was not too bad, and the two creek crossings were manageable in August. I would hate to see them in early July.
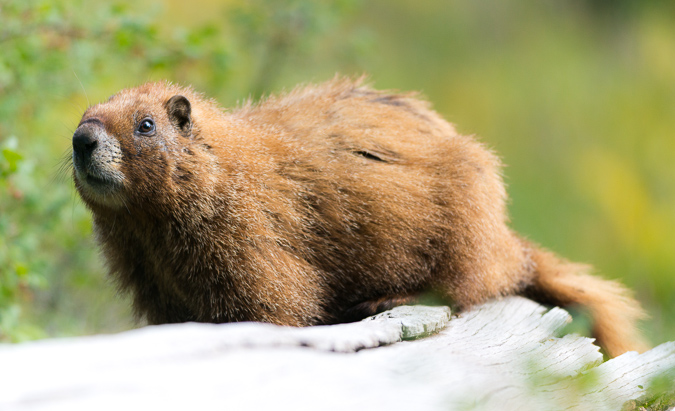
Natalie, Shawn, and I arrived at Beartown at around Noon. At the suggestion of my co-worker, Terri, I surrounded my vehicle with mothballs to deter the infamous marmots that love to chew on spark plug wire assemblies.
Natalie and Shawn were planning to stay about 8 or 9 days in the Weminuche, where-as I was only planning a 4 day stay, so my pack was much less crazy than theirs.
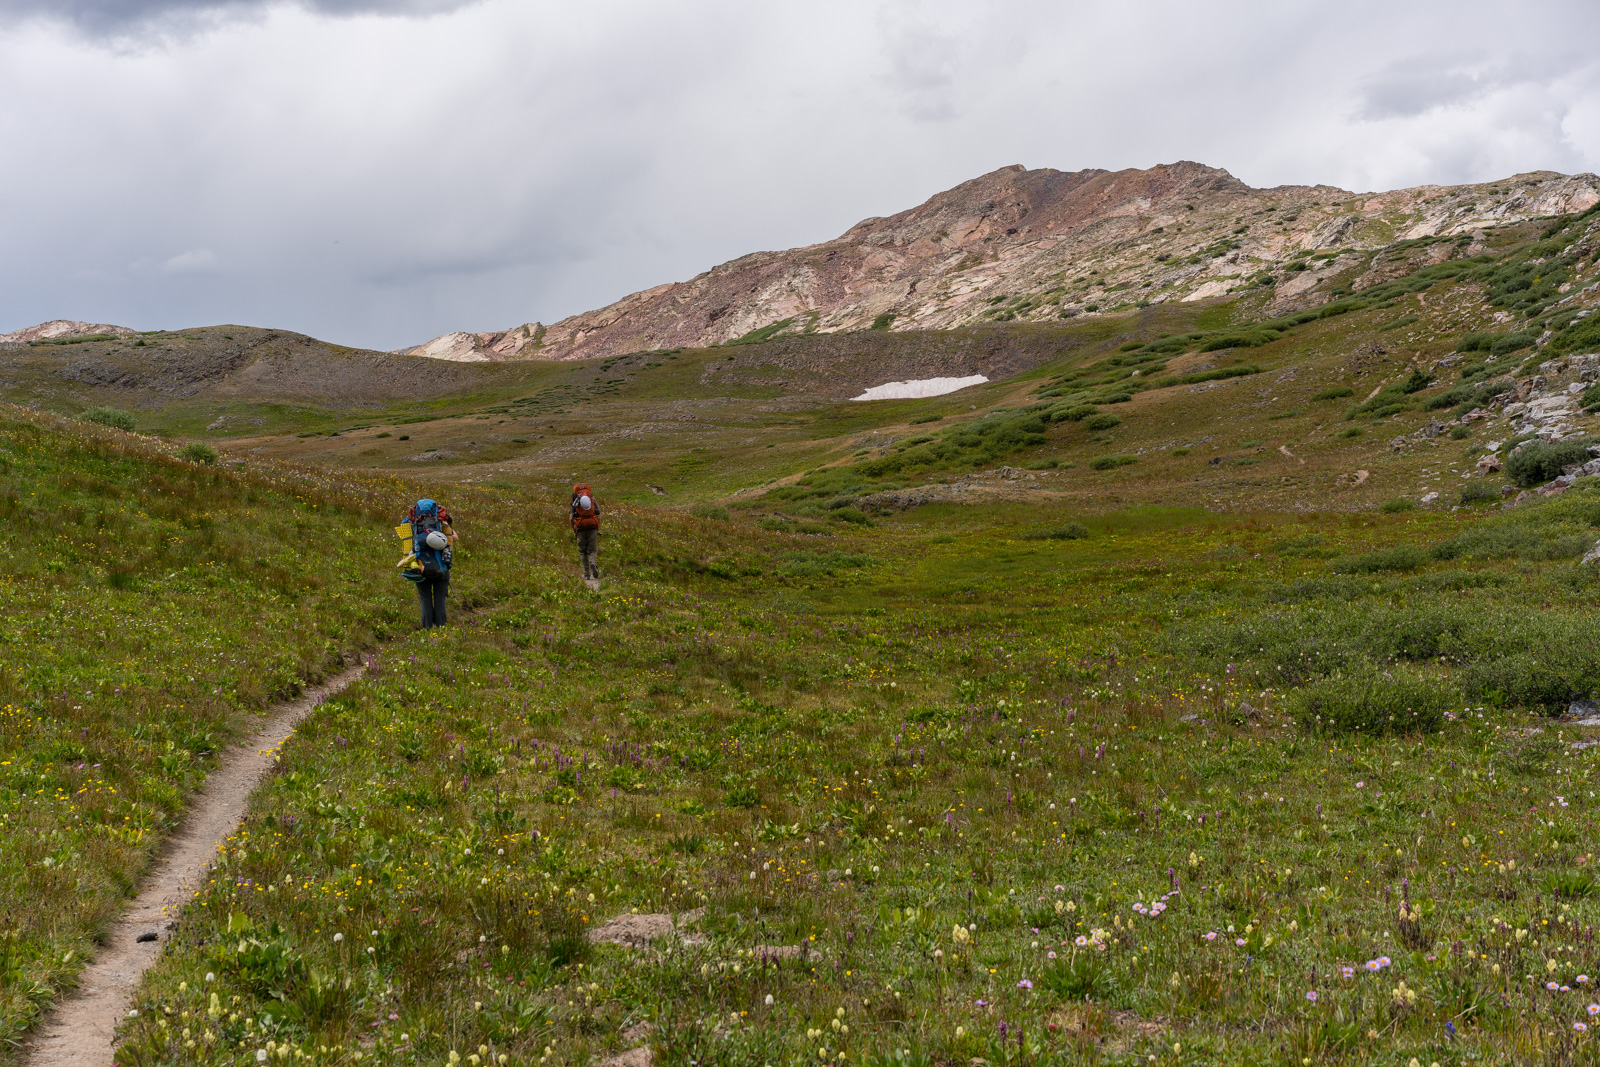
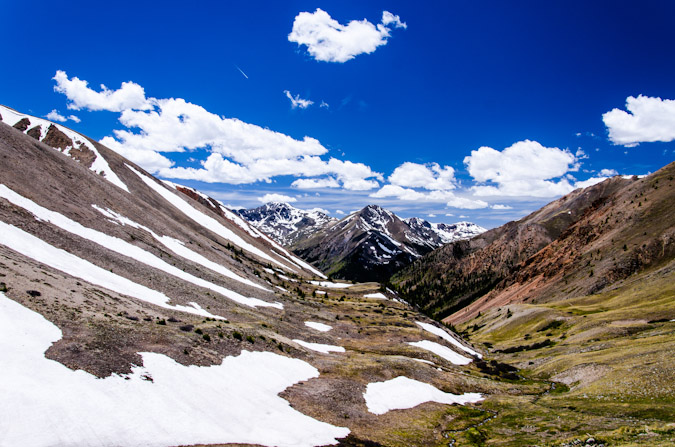
DAY 1: The approach to Sunlight Basin.
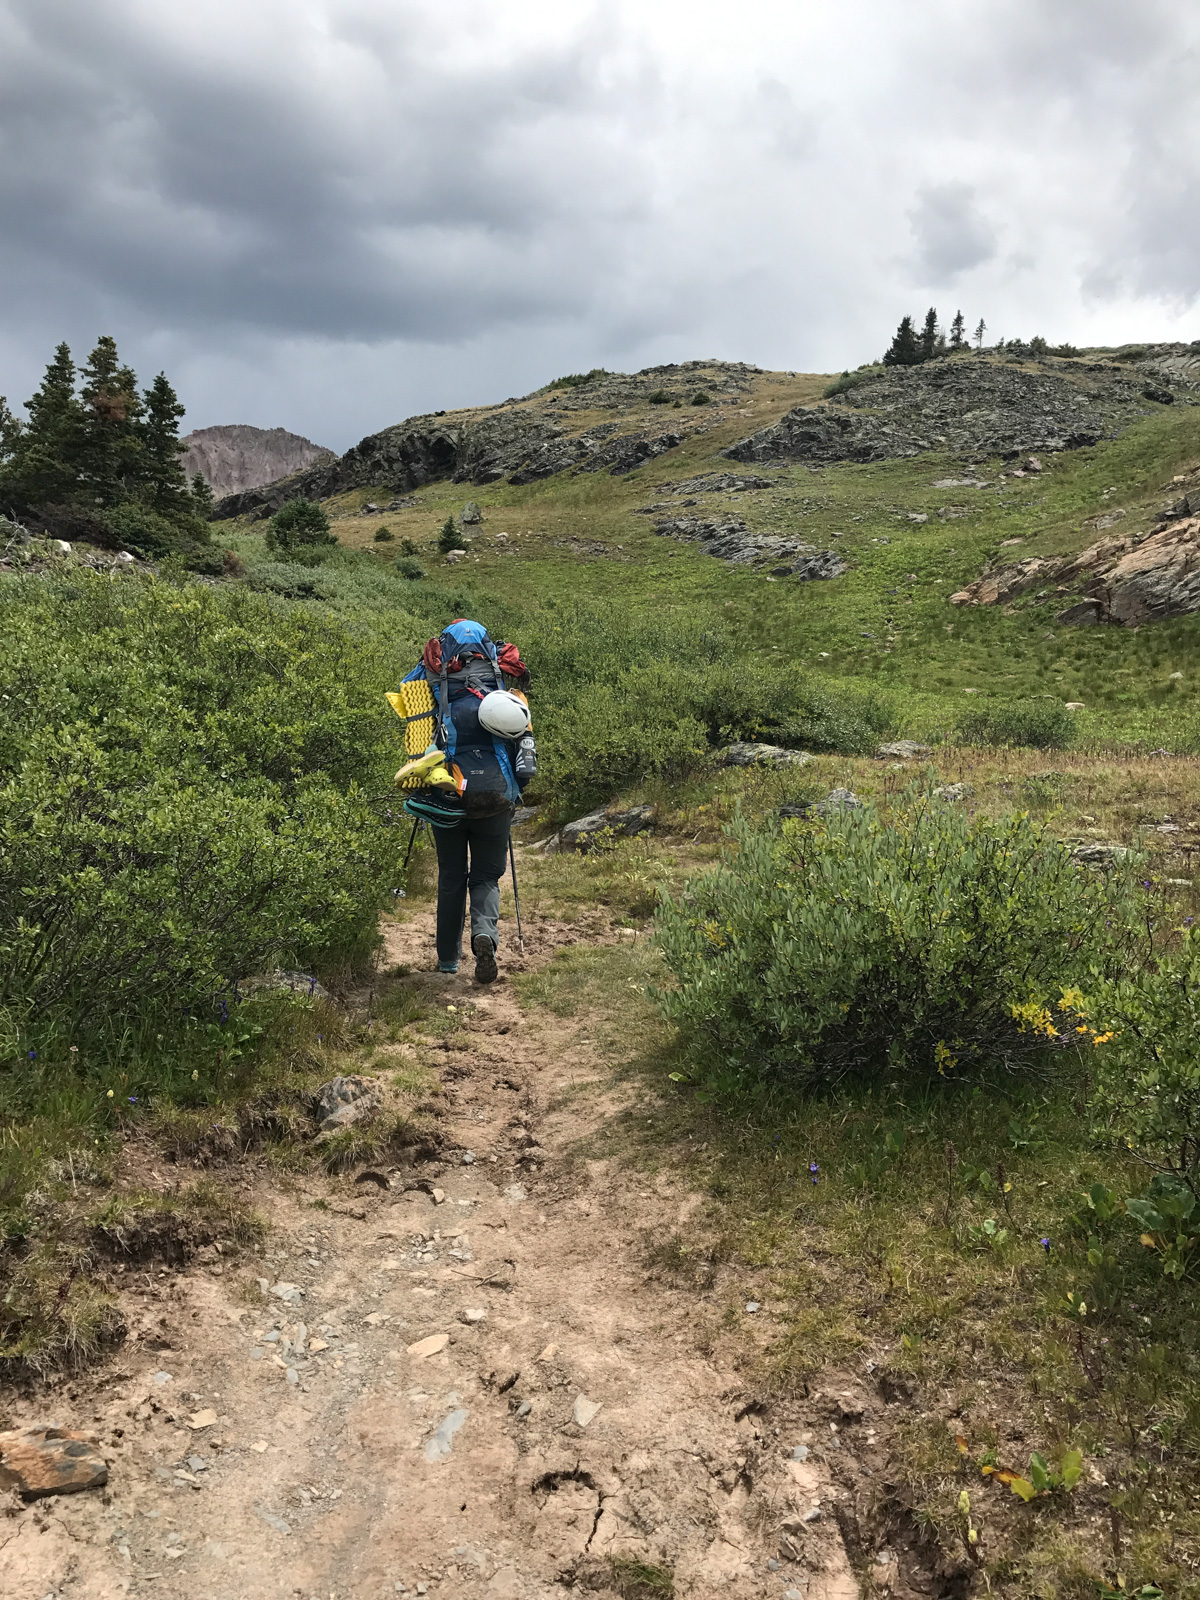
Natalie looked as if she had brought her whole house with her on the way up Hunchback Pass.
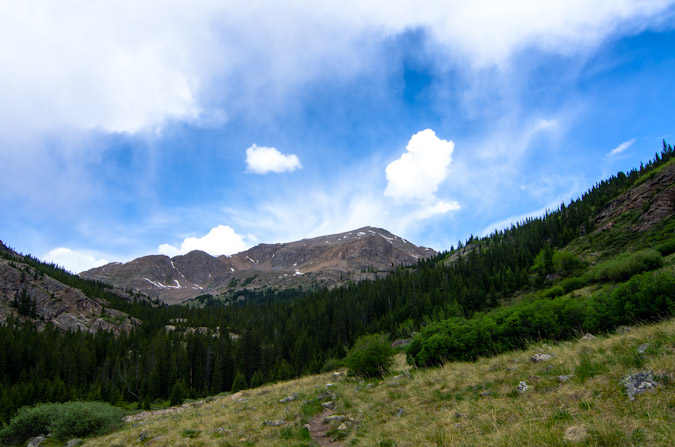
The grind up Hunchback Pass was not too terrible as the views were outstanding. We were also racing some storm clouds and wanted to be down into the trees of Vallecito Creek as quickly as possible.
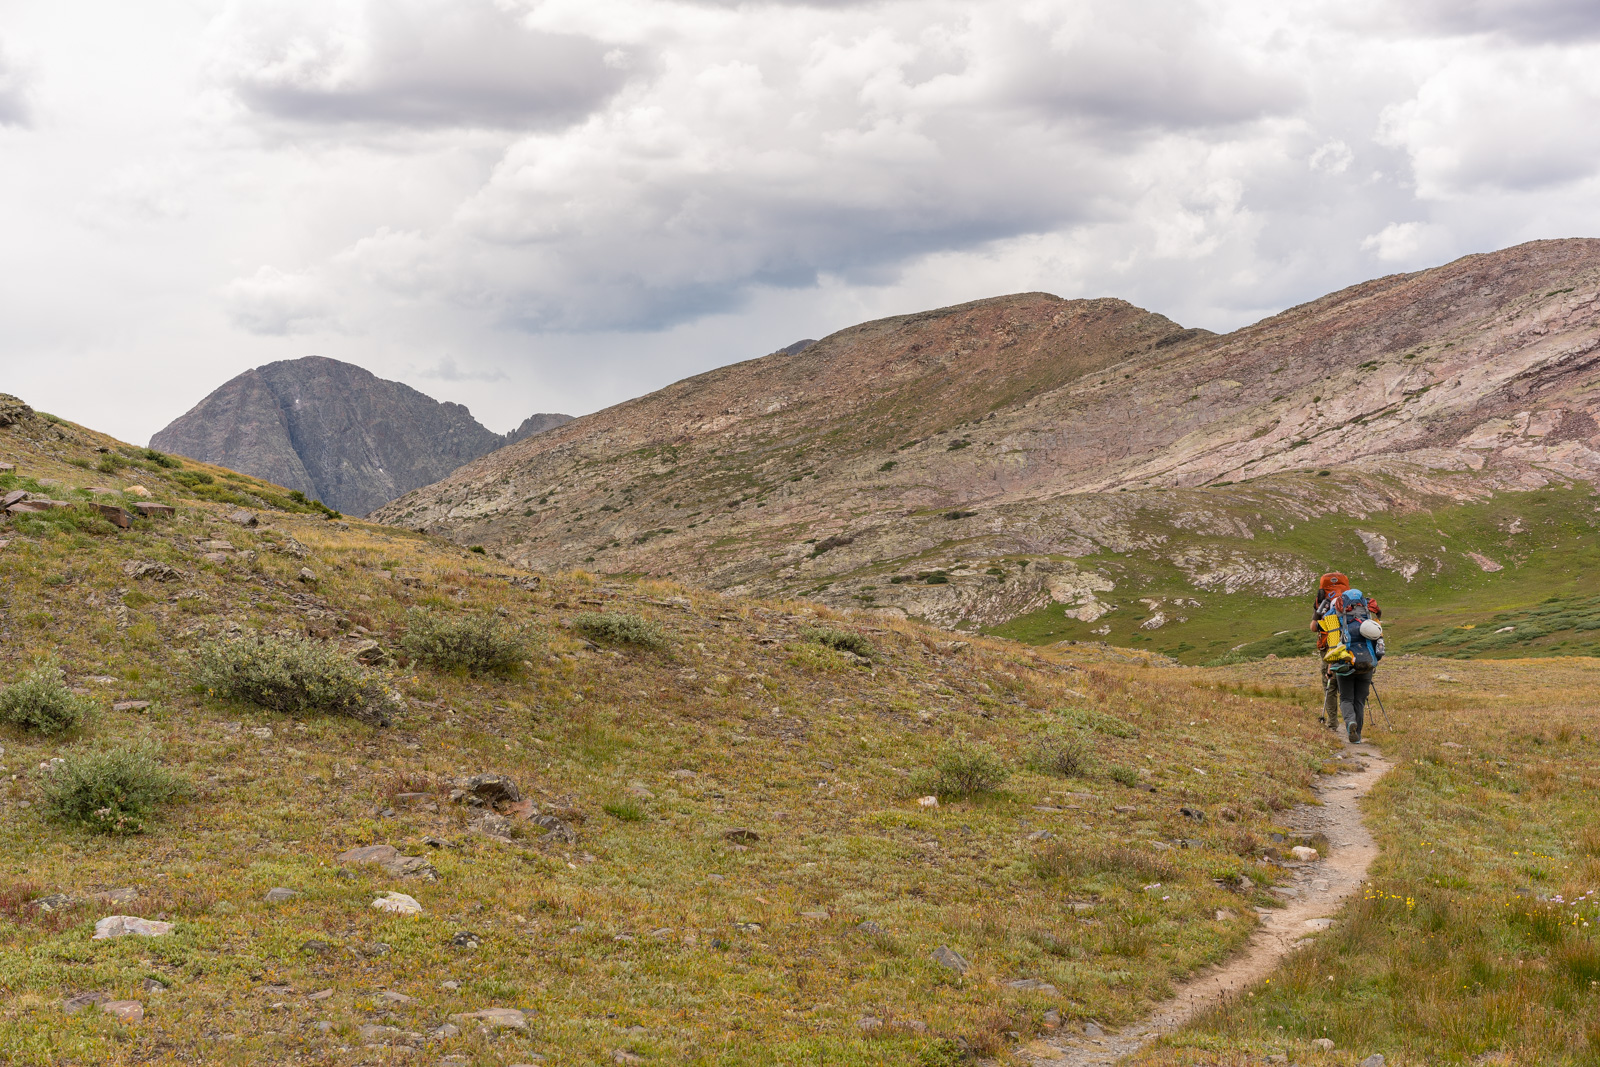
As we wound our way up the switchbacks above treeline, Hunchback Mountain came into view, the last standing peak at the end of the mighty Vallecito Creek basin. I remember climbing Hunchback way back in 2000 when I worked with Colvig Silver Camps - we were taking a group of kids from Highland Mary Lakes all the way to Vallecito Campground. That was the first time I experienced this mighty and amazing area, and I am so thankful I did!
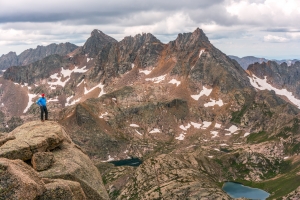
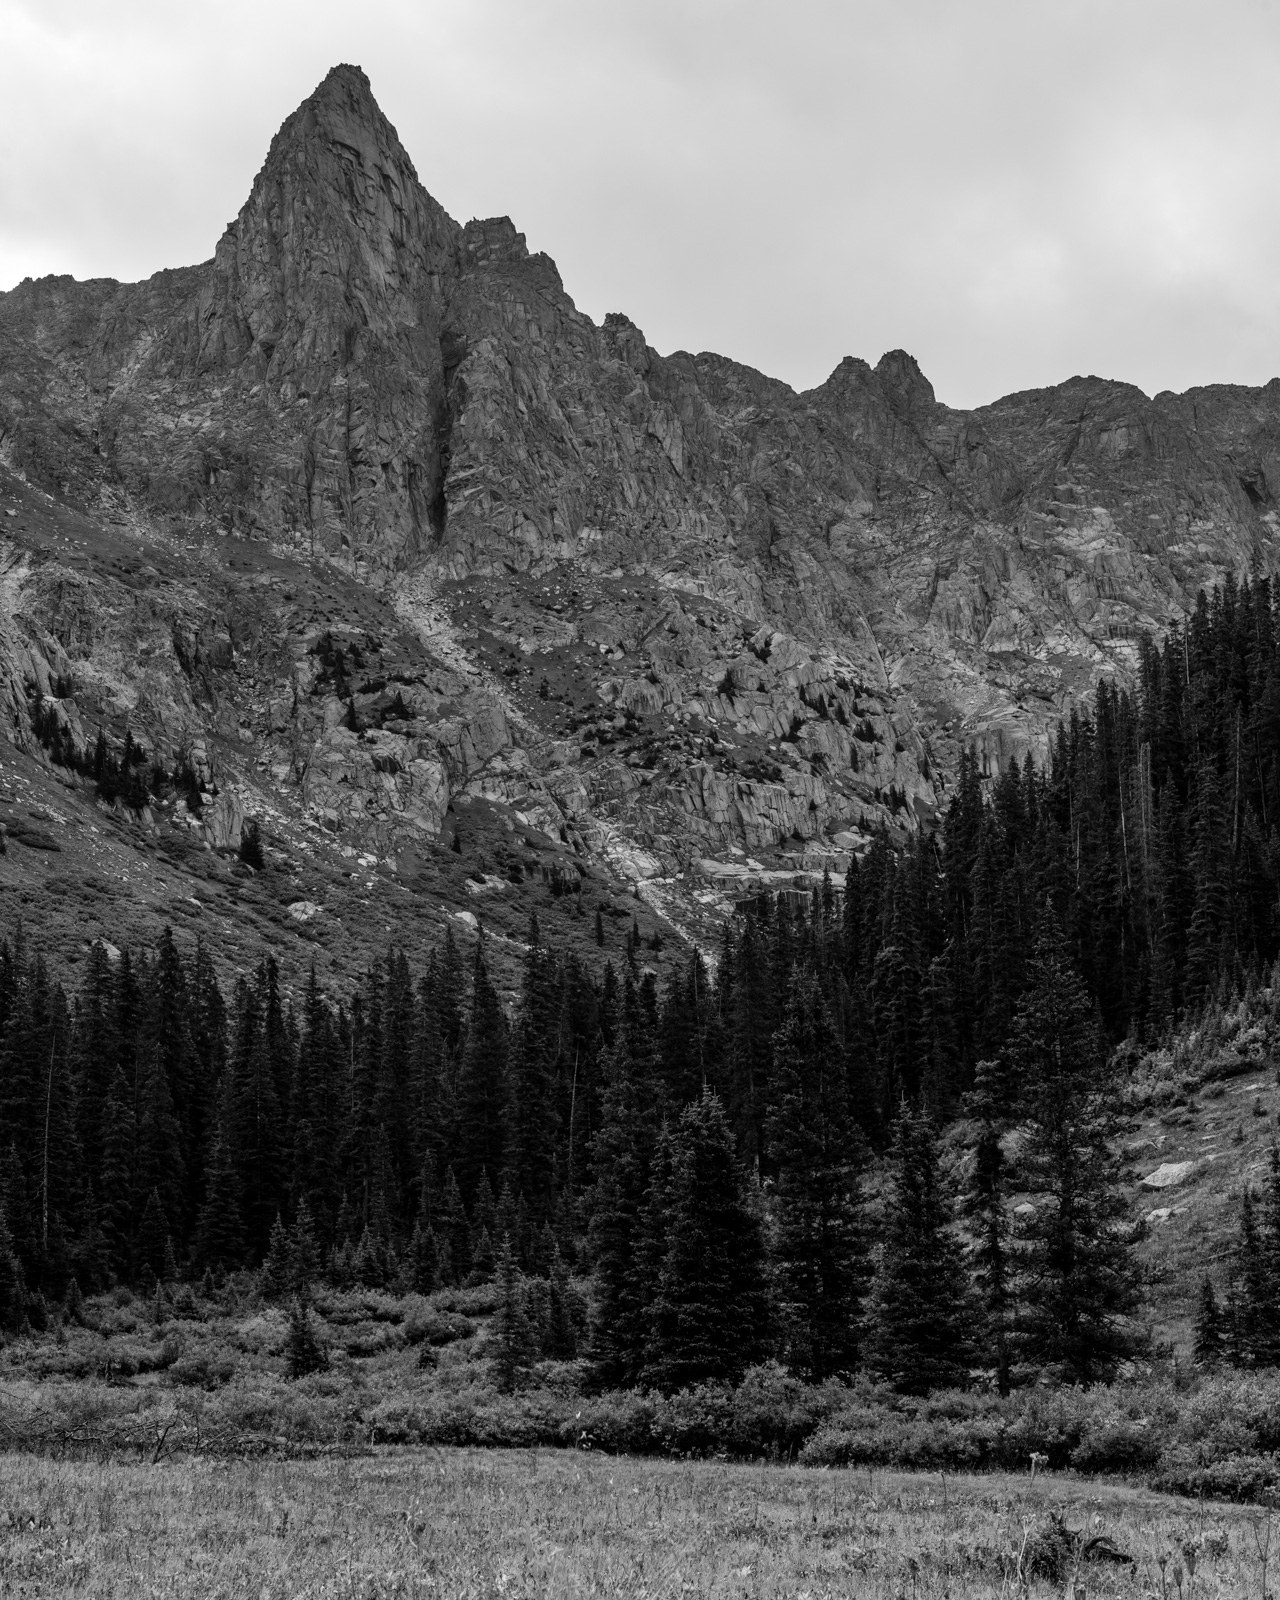
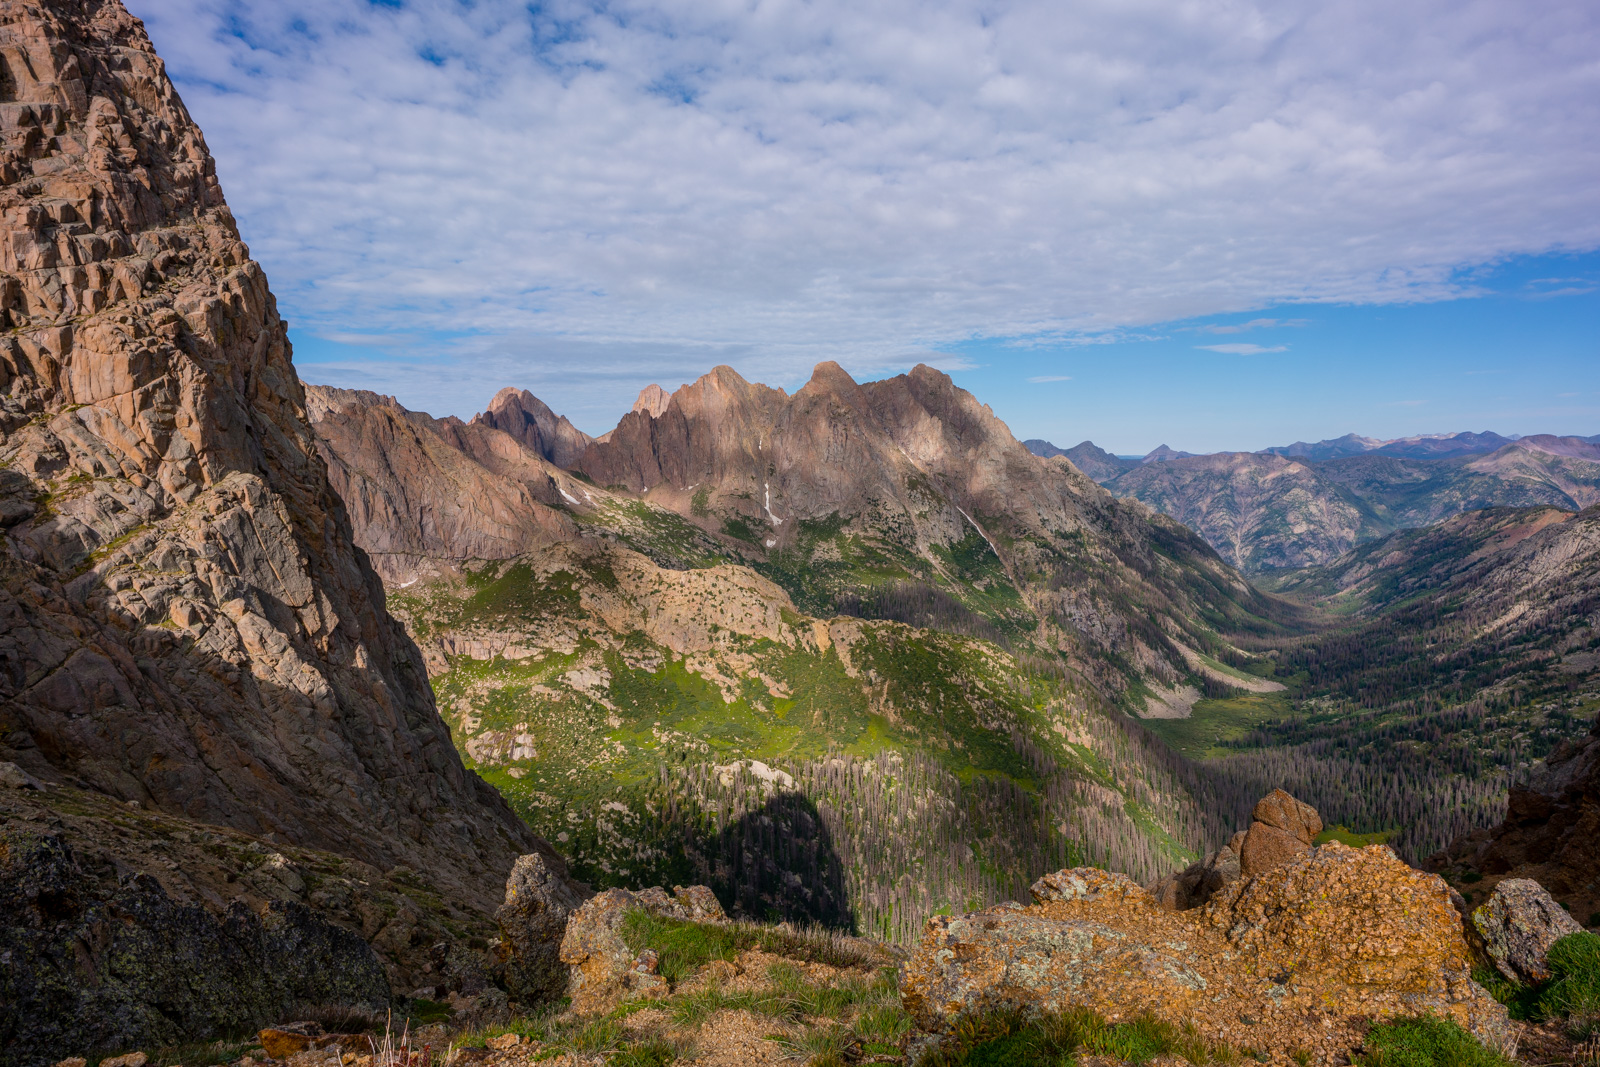
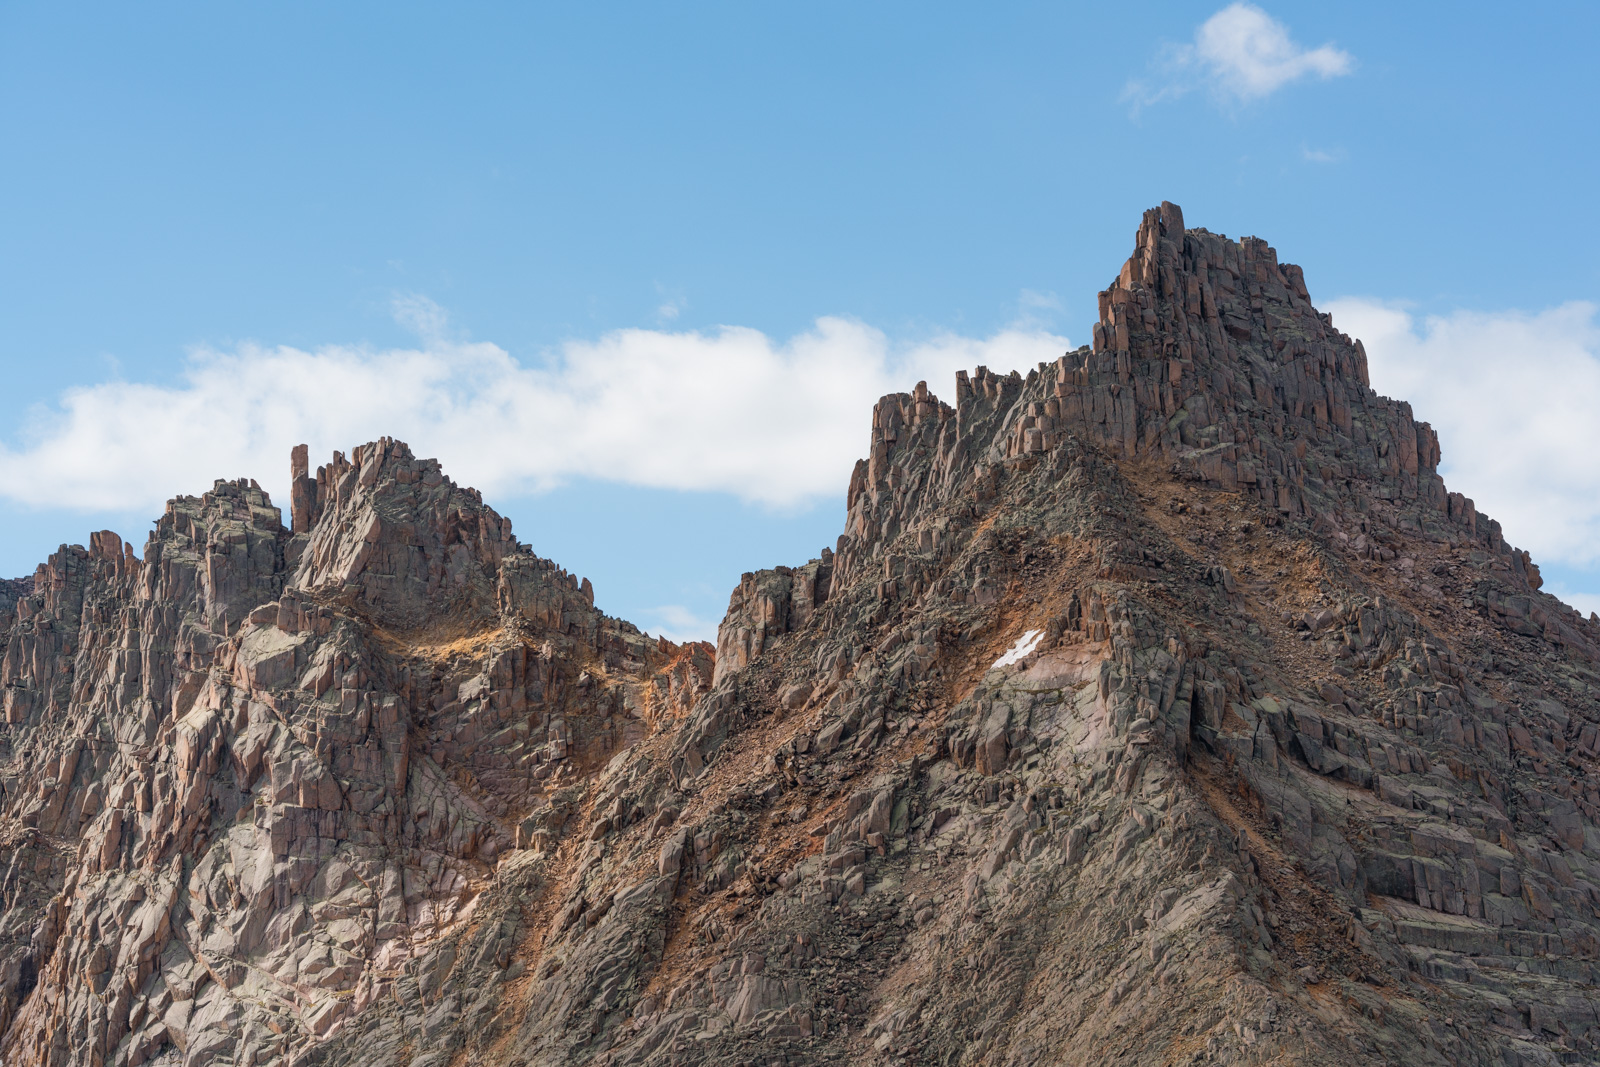
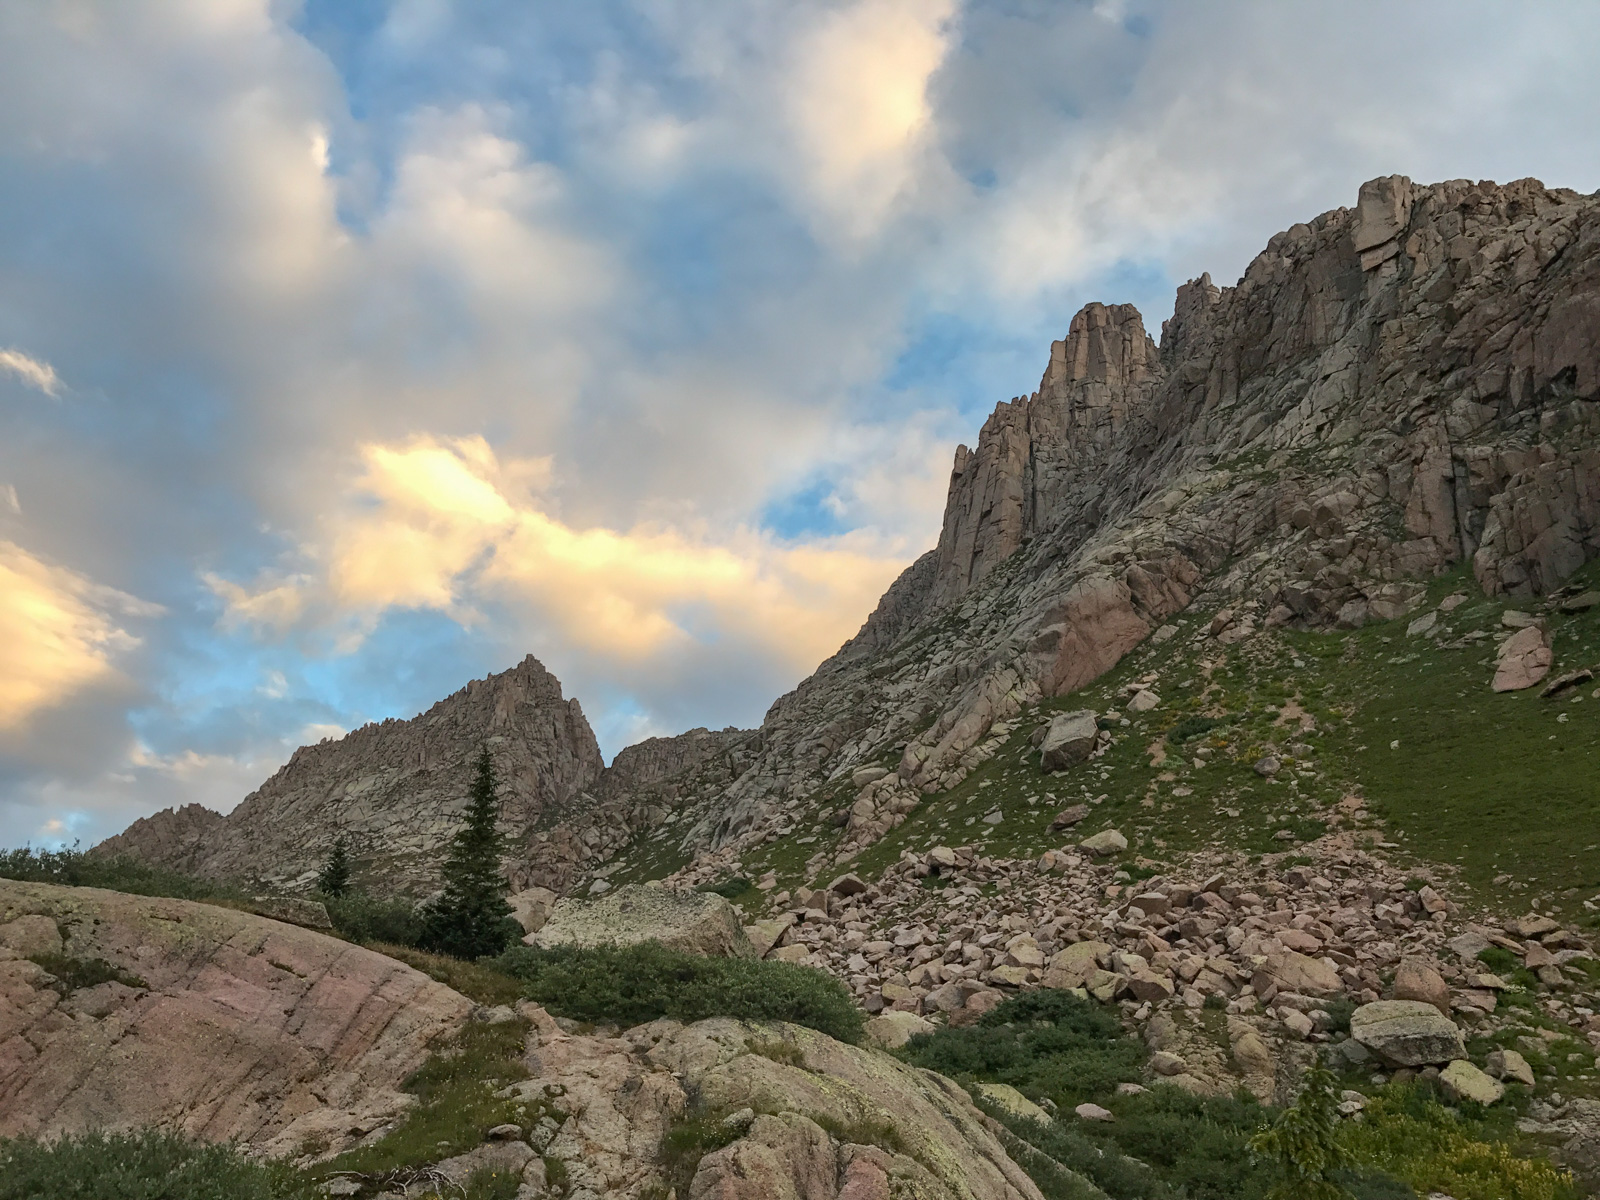
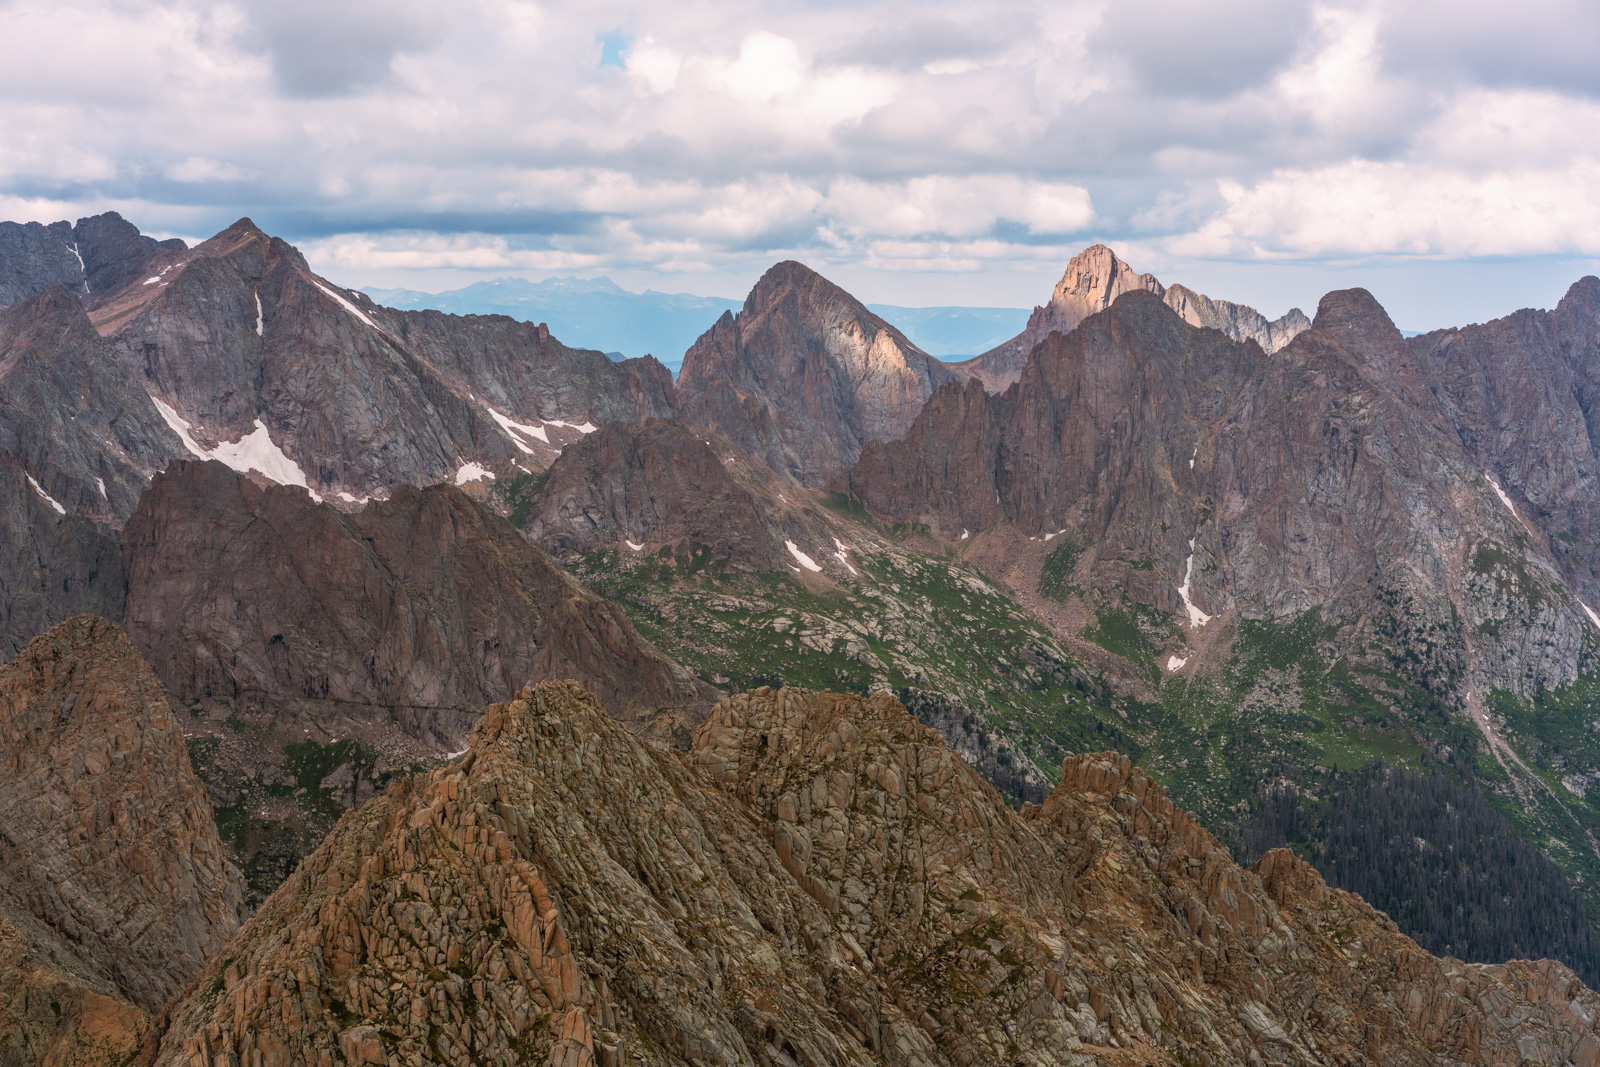
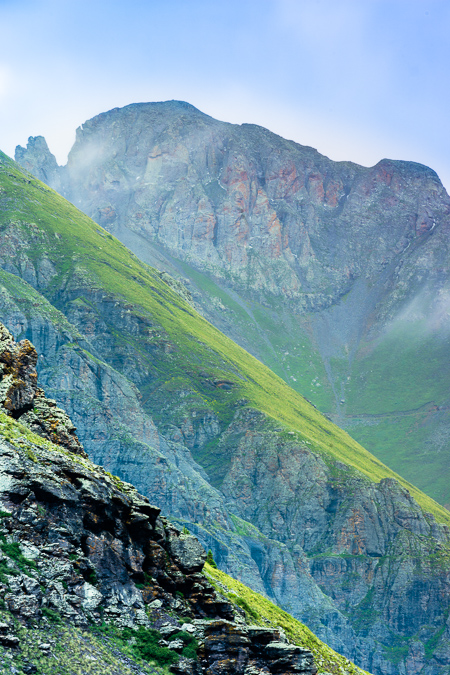
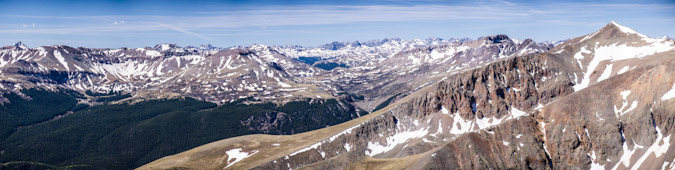
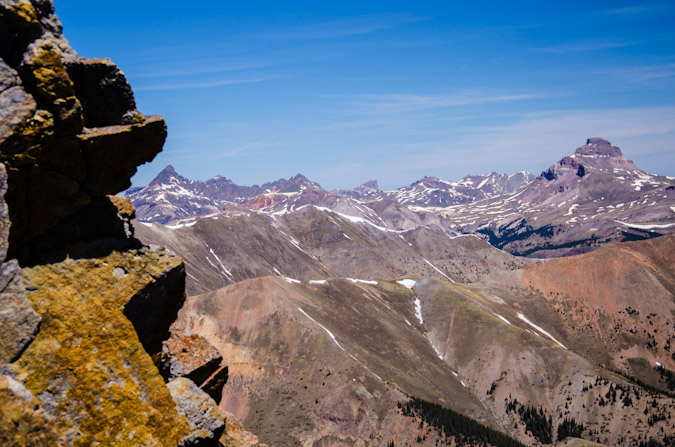
I was excited to see this area again from this vantage point. As we arrived at the summit of Hunchback Pass, the first views of 13,617 ft. "The Guardian" came into view. The Guardian is essentially the last in line and furthest east peak of the mighty Grenadier Range.
As we rounded the corner, both 13,628 ft. Mount Silex (right) and 13,617 ft. The Guardian (left) came into view. It was magical.
As we descended into Vallecito Basin, the weather looked as though it would bring some rain, so we decided to stop to get some snacks and to put on our rain gear. Shawn was pleasantly surprised to find that he had grabbed the wrong pack cover when he left the house. Surprisingly enough, it worked great!
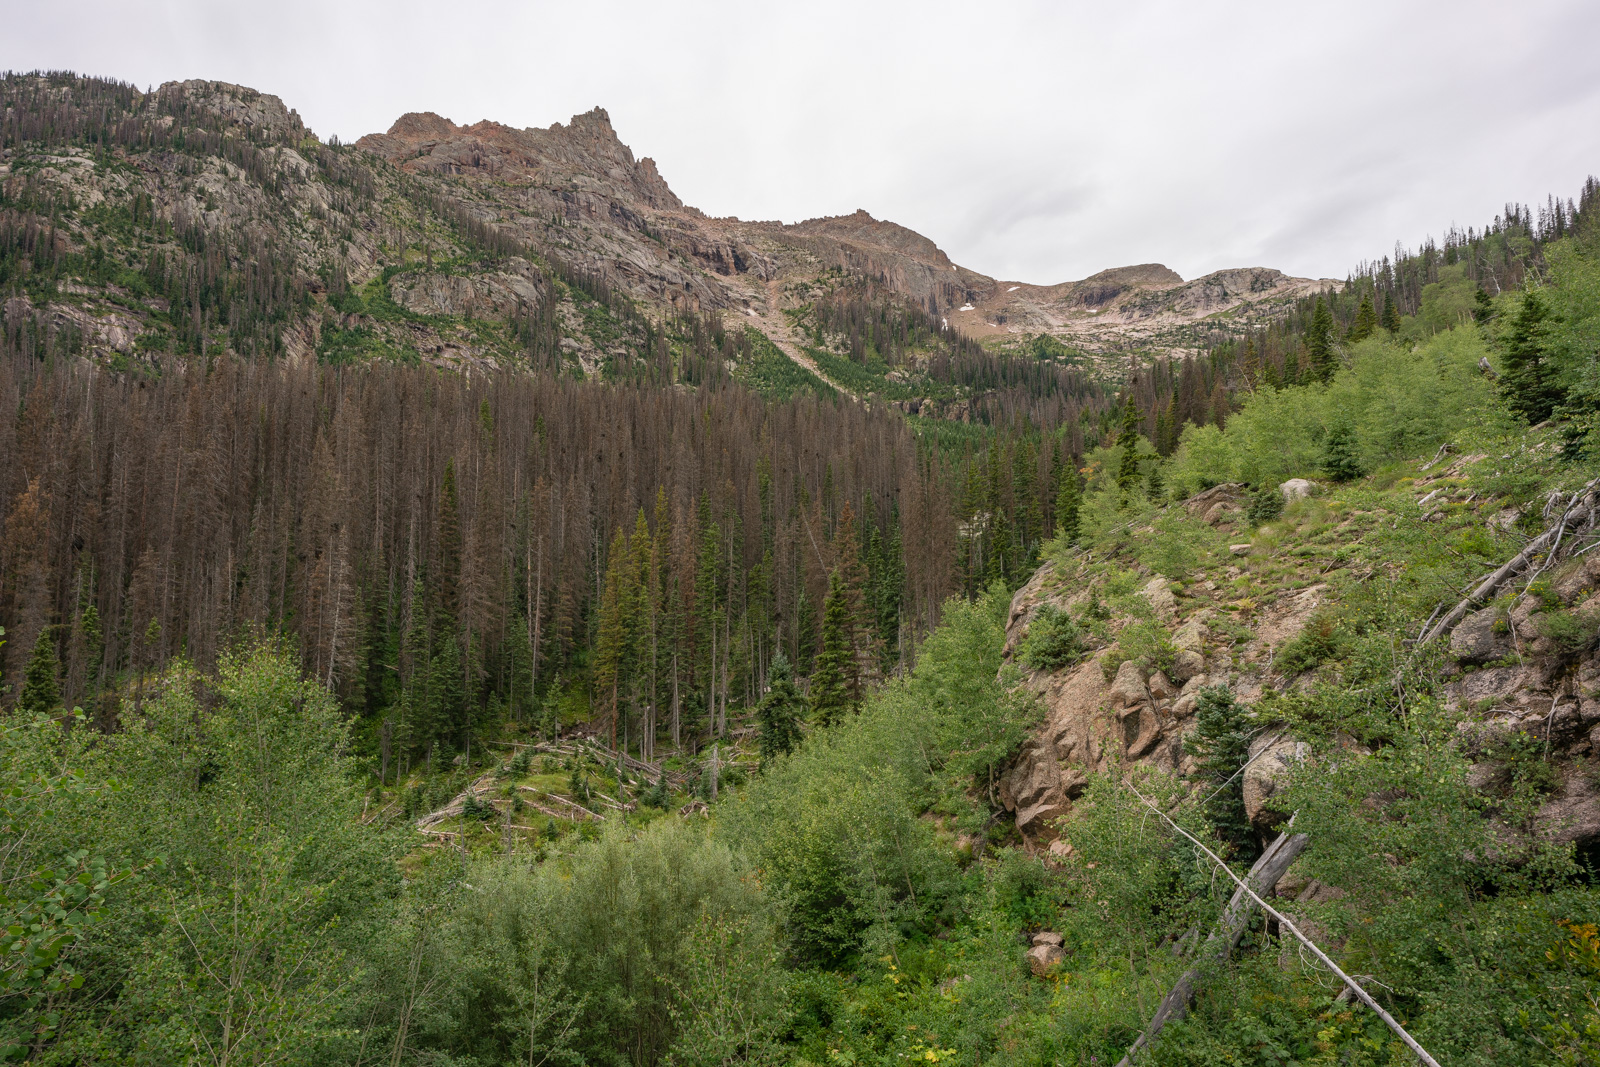
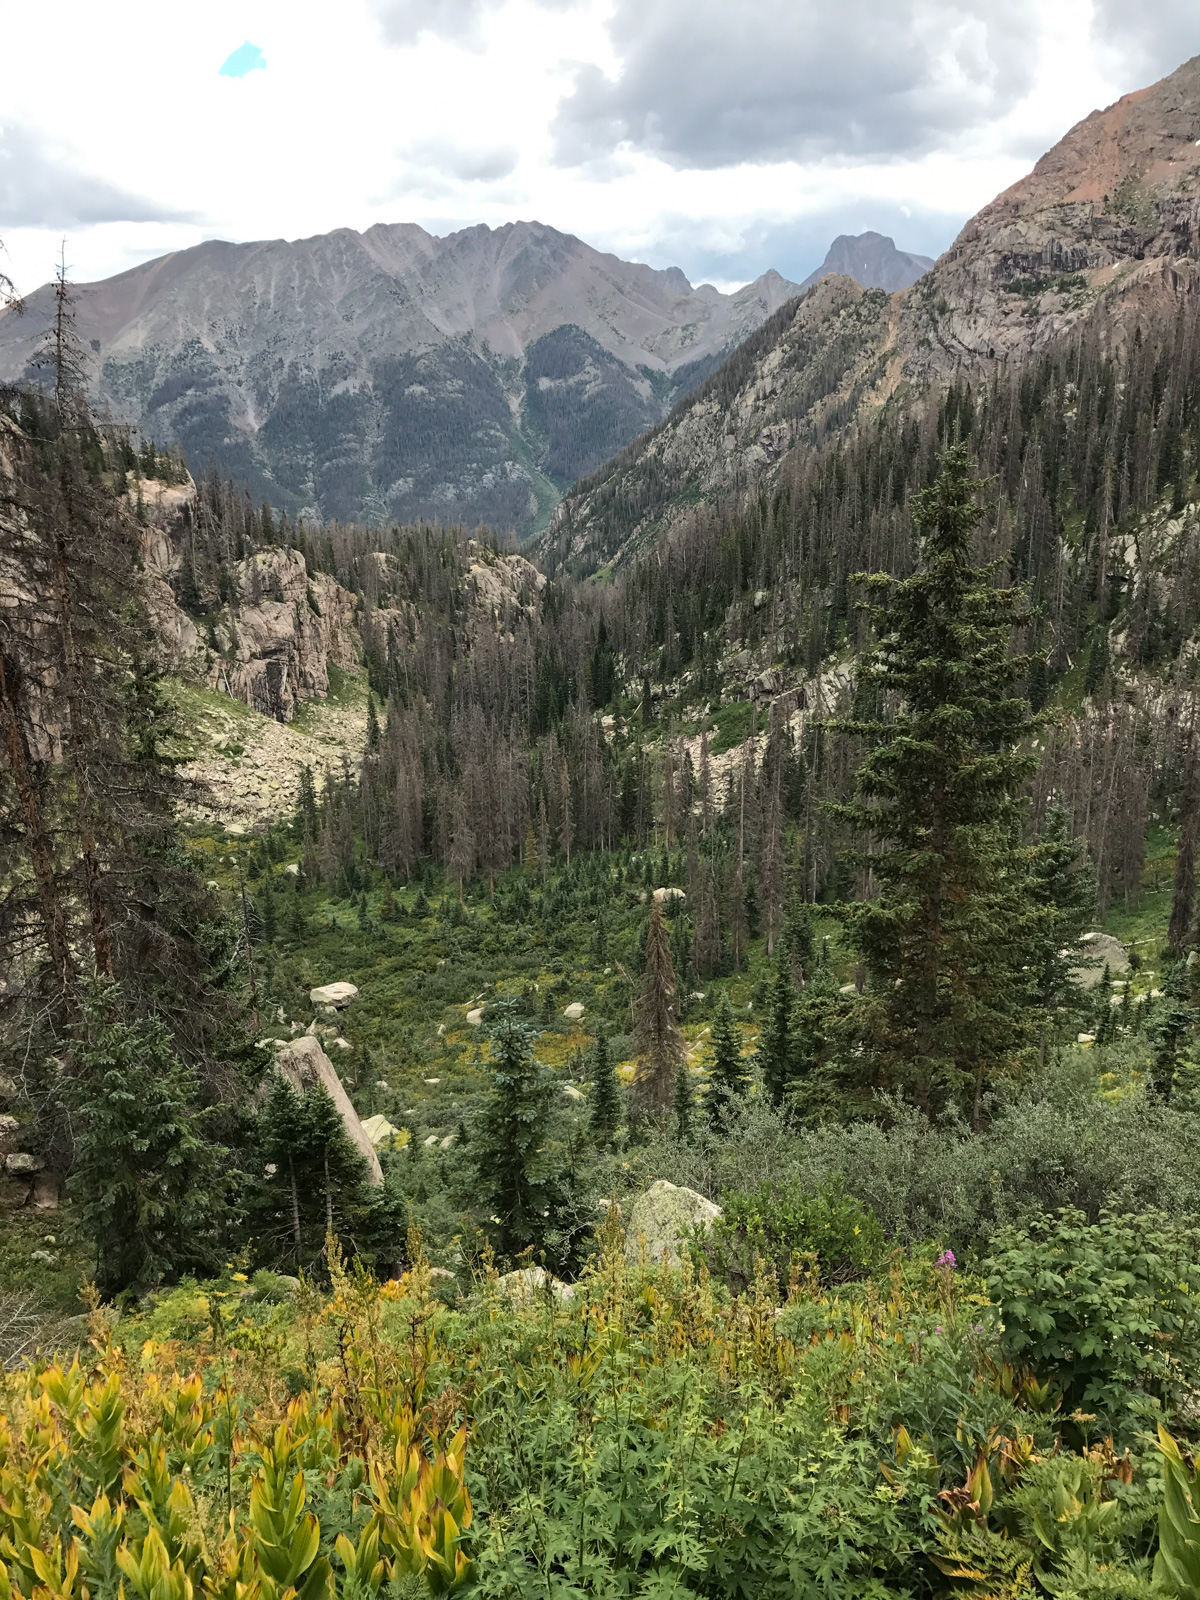
Rain covers on, we continued the gruelling hike down into the basin, with the northern flanks of some of the San Juan's greatest peaks looming in the distance, including Greylock Mountain and Thunder Mountain.
After negotiating several switchbacks into the forest below, we found ourselves at Rock Creek, which is stained an orange color, I presume from mining activity far above. We crossed without any problems.
Before long, we found ourselves walking through thick plants covered in Red Elderberries, mixed in with numerous raspberry plants, which made for tasty snacks (the raspberries, not the poisonous elderberries).

Having a lot of luck with the rain so far, we found ourselves at the turn-off for Sunlight Creek.
We found ourselves at Vallecito Creek and Shawn and Natalie decided to switch to their water shoes. I opted to keep my mountaineering boots on (I really did not have a choice). I managed to cross without getting my feet wet. Shawn took a nice stroll through the creek.
Shortly after crossing the Vallecito, Shawn and Natalie put back on their normal footwear and we were off to the races. About 5 minutes into the hike, we were forced to cross Sunlight Creek and this time Natalie and Shawn kept their normal footwear on. Both dipped into the water on accident and got wet, so they had to stop and get new socks on. Bummer!

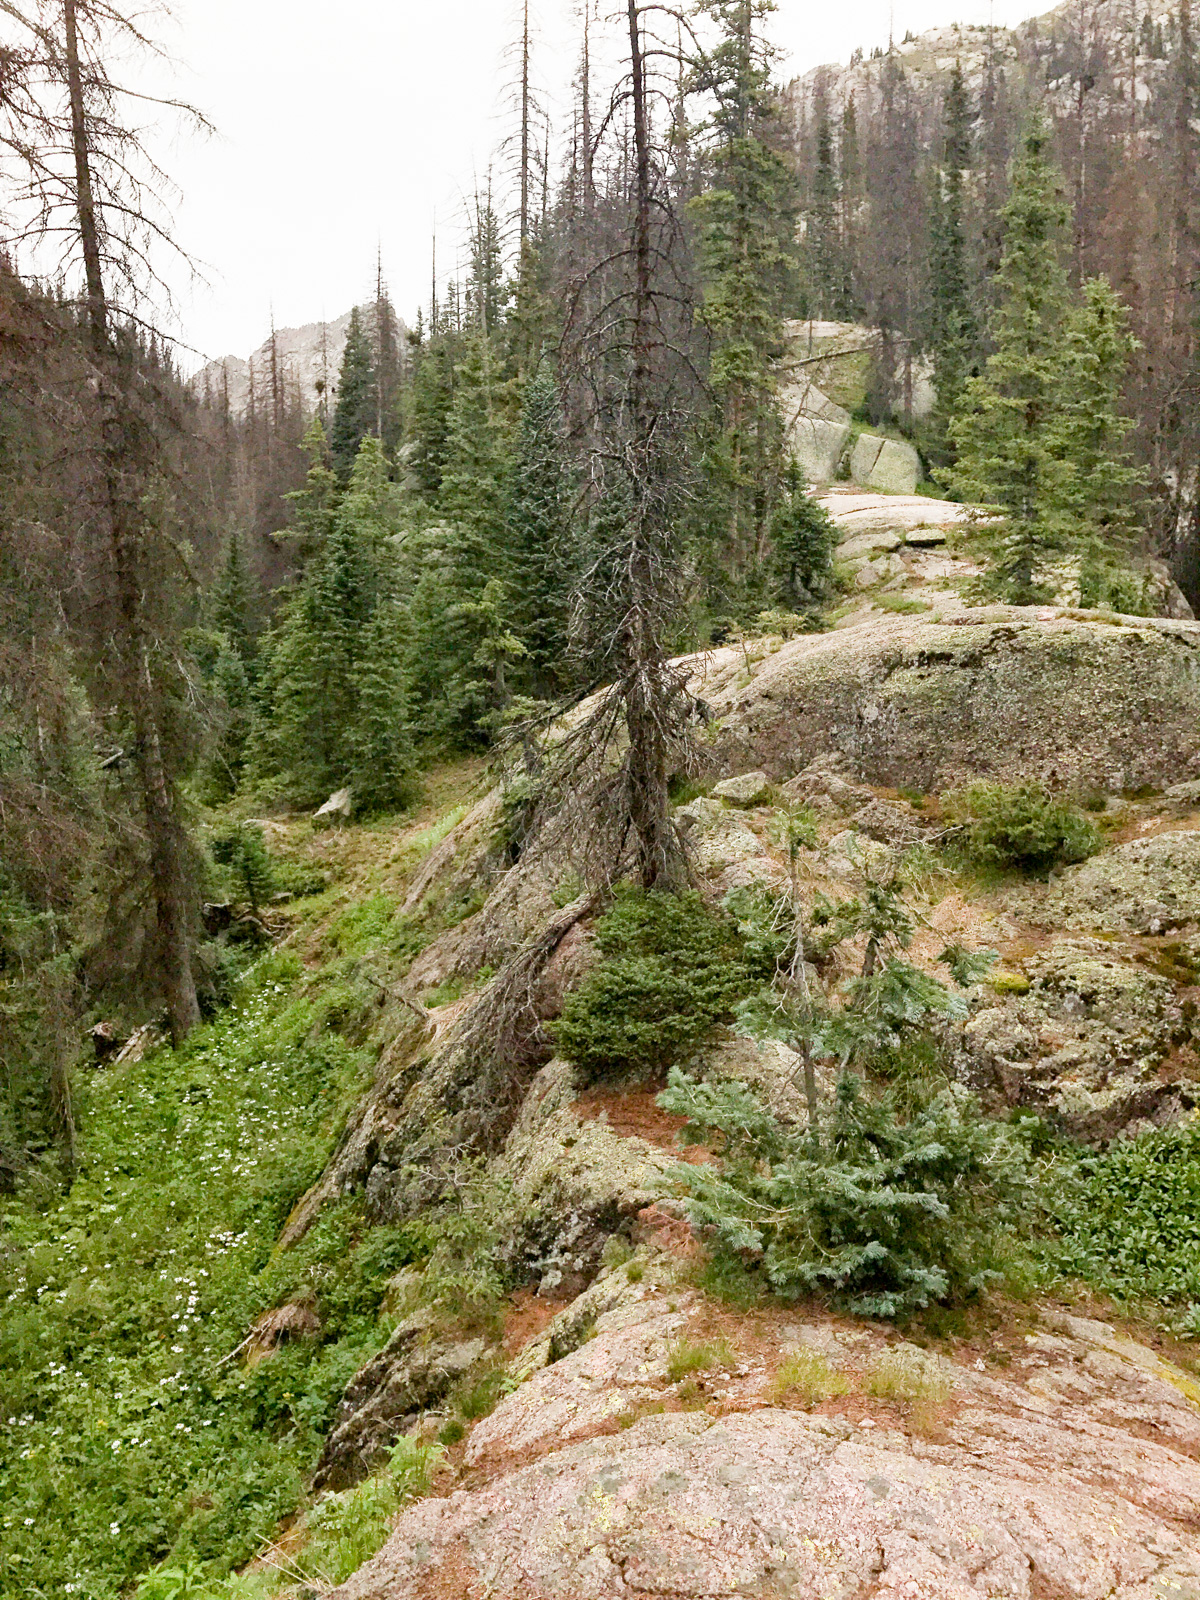
We continued to blaze up the almost hidden trail up Sunlight Creek, which was very dense in spots and really hard to navigate. Do you see a trail?
This trail was wicked steep and full of overgrowth, deadfall, and crazy twists and turns. At least the view was good at times!
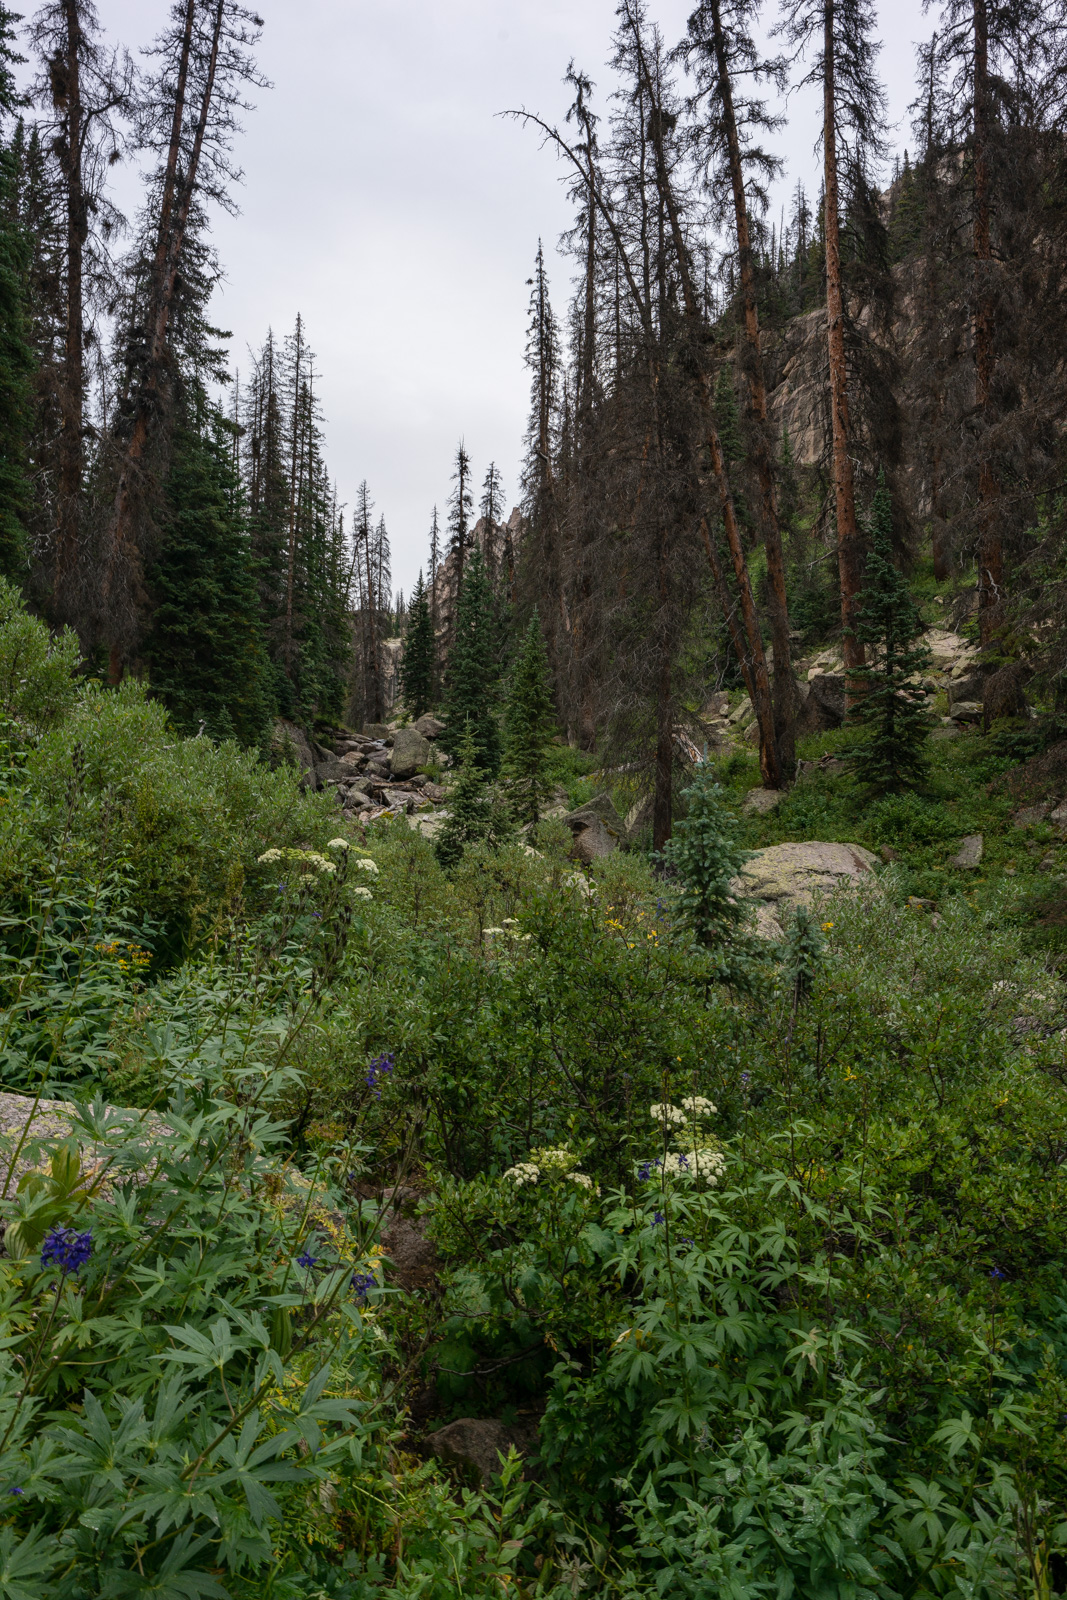
At one point in the trail, before it reaches the creek again, we were tempted to go up to the right; however, the correct right is to go down and cross the creek again and then go right up towards Jagged Mountain. This is the view of the terrain we found when we went too high.
Once across the creek again, the trail was very hard to navigate through logs, wildflowers, and huge boulders. The terrain was steep, steeper than most approaches, and it was relentless.
As you can see, the trail was filled with all kinds of fun obstacles, and Natalie was growing weary with her huge pack. We were ready for camp.
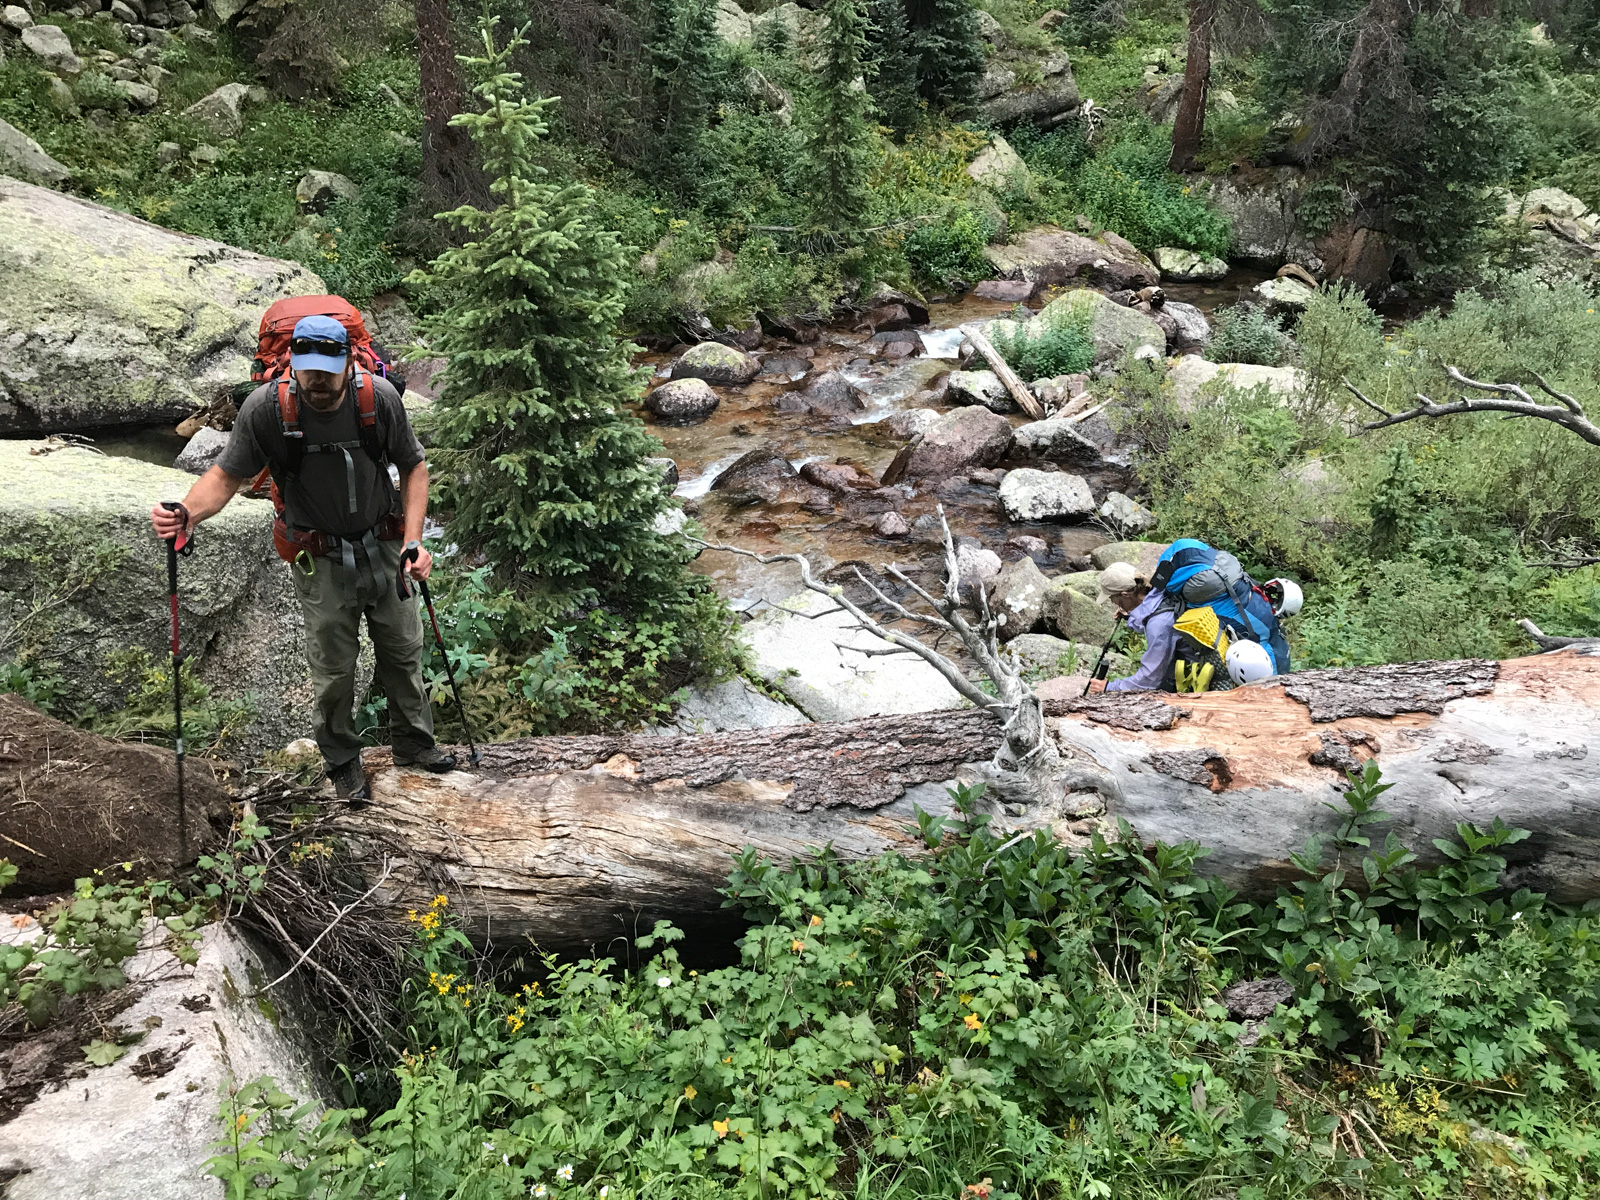
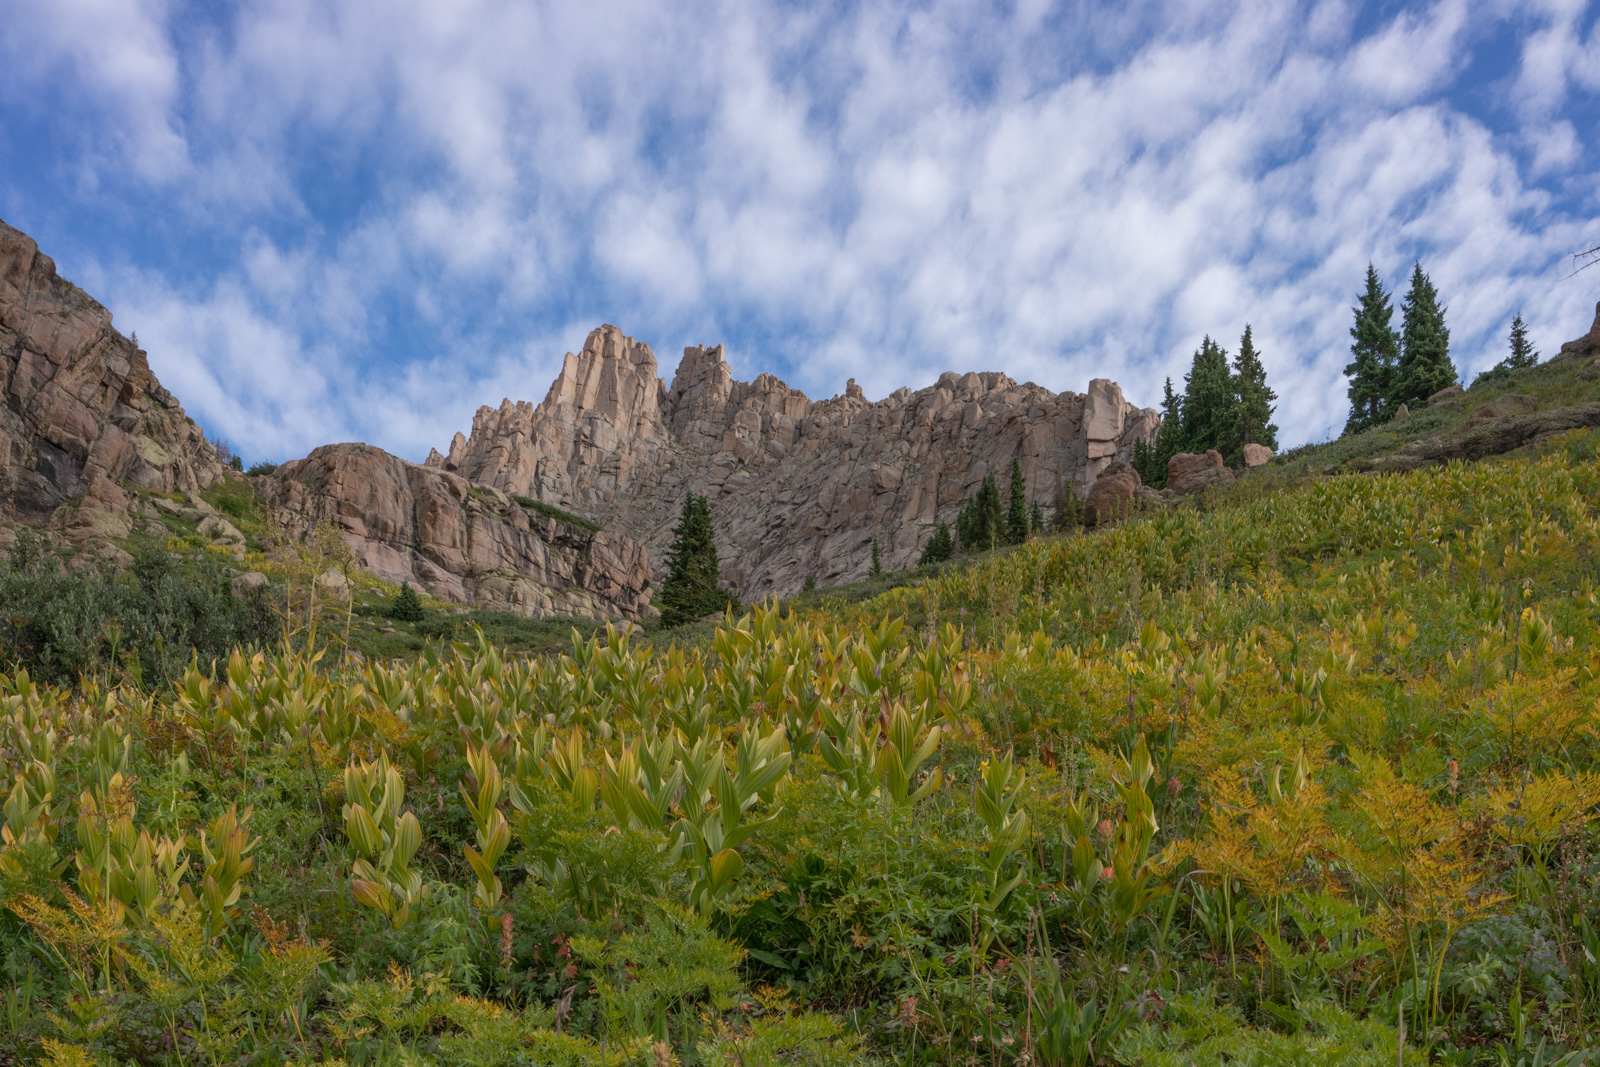
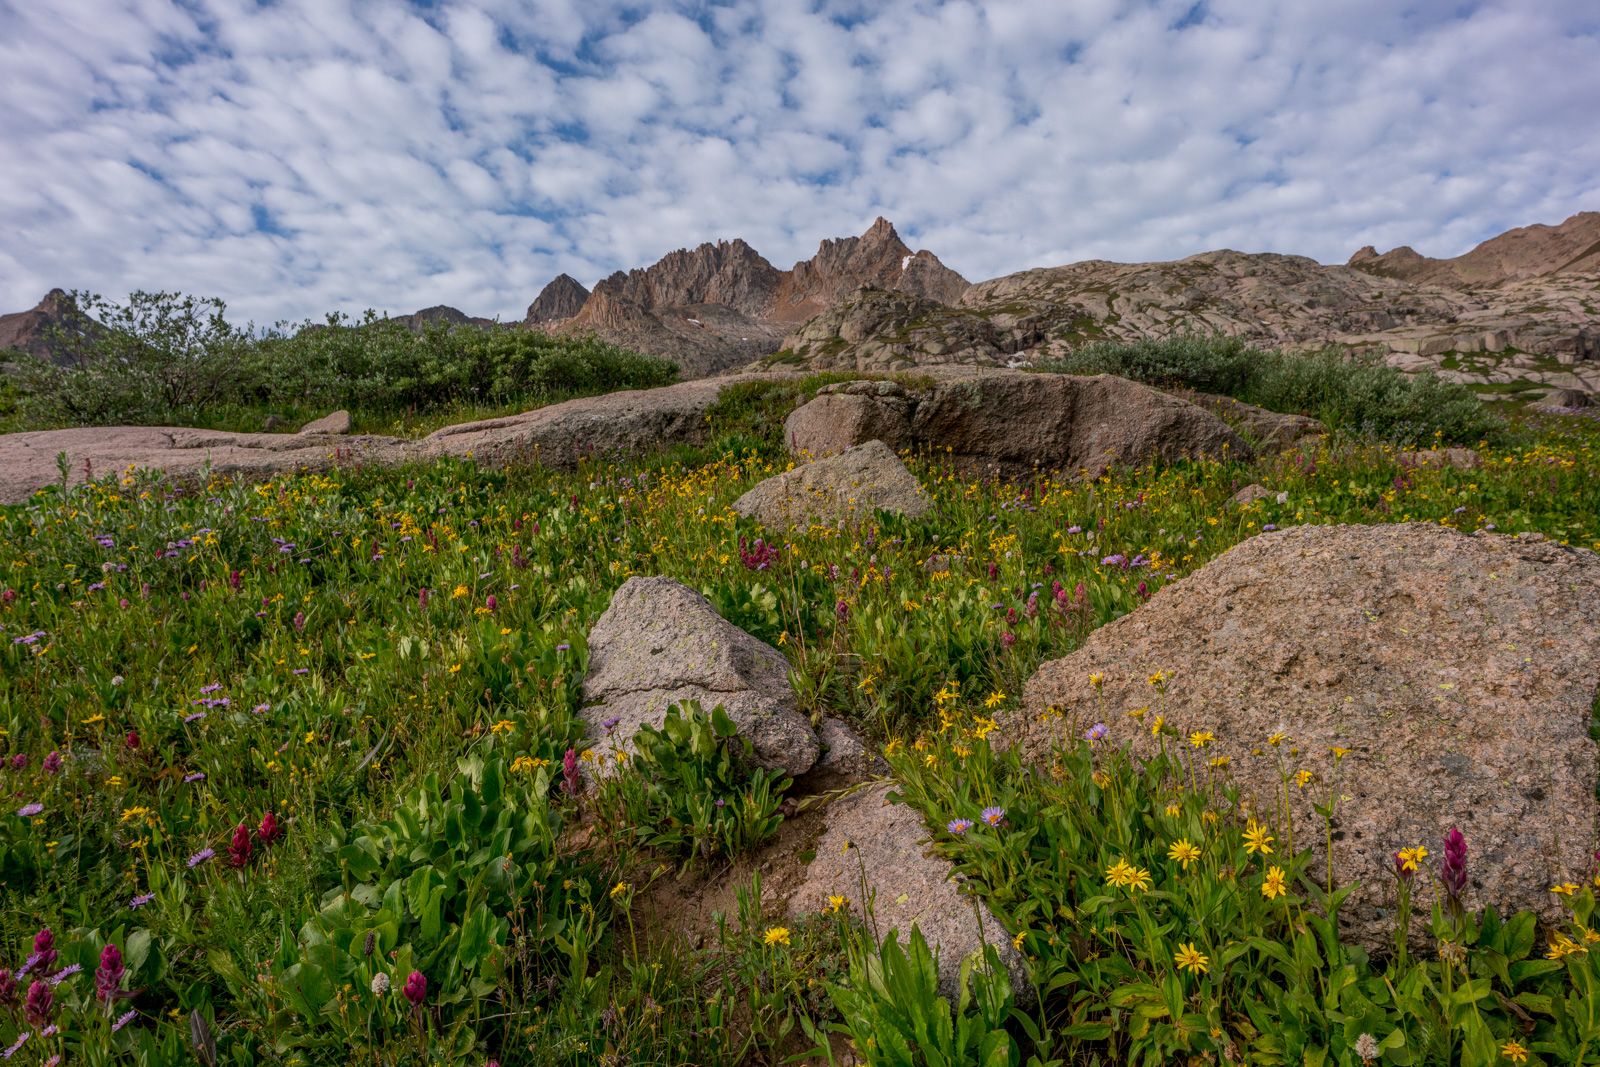
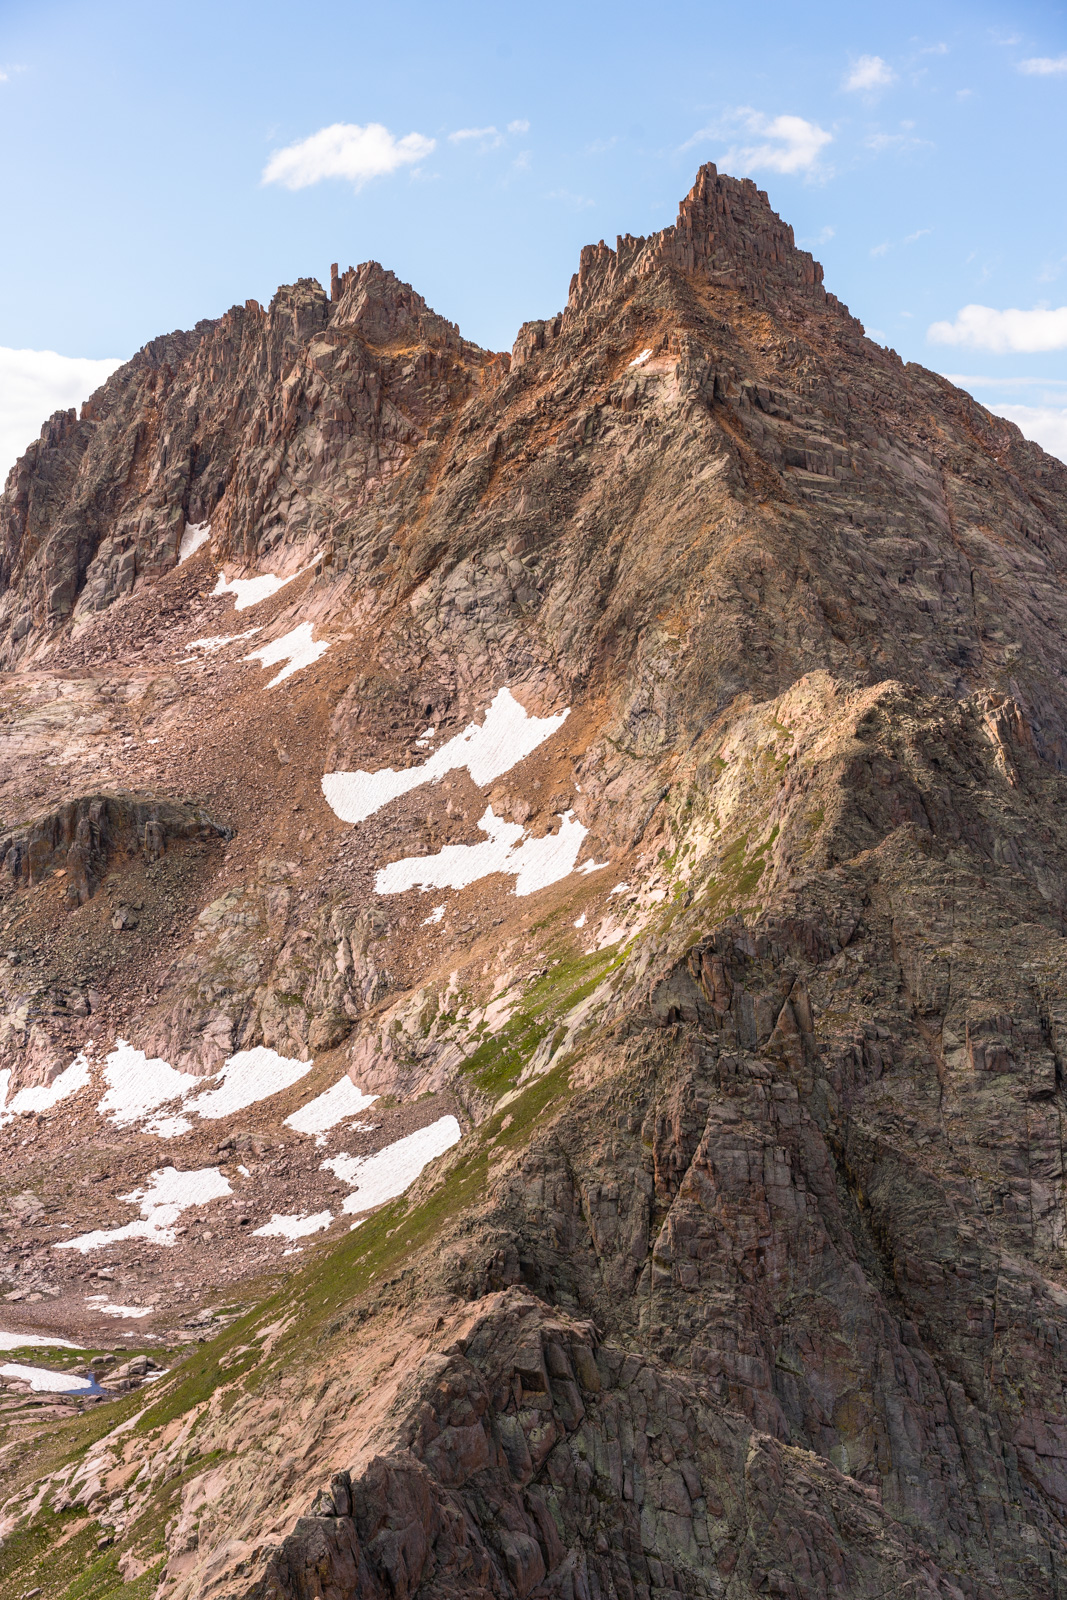
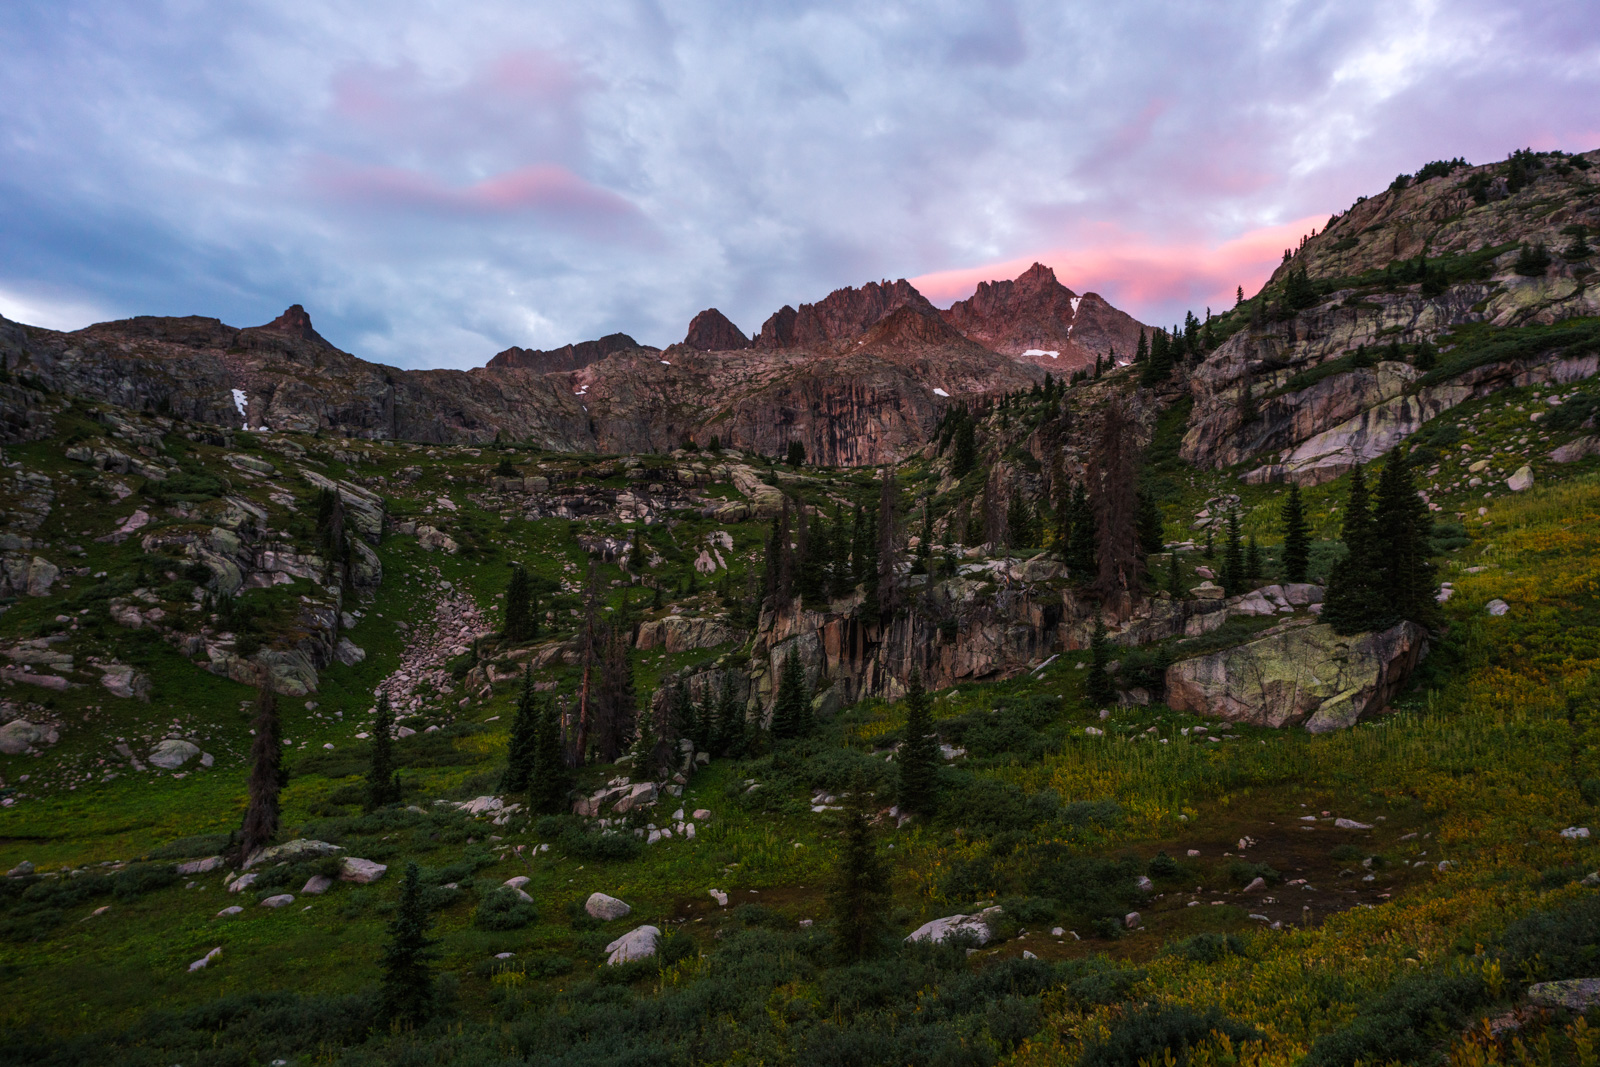
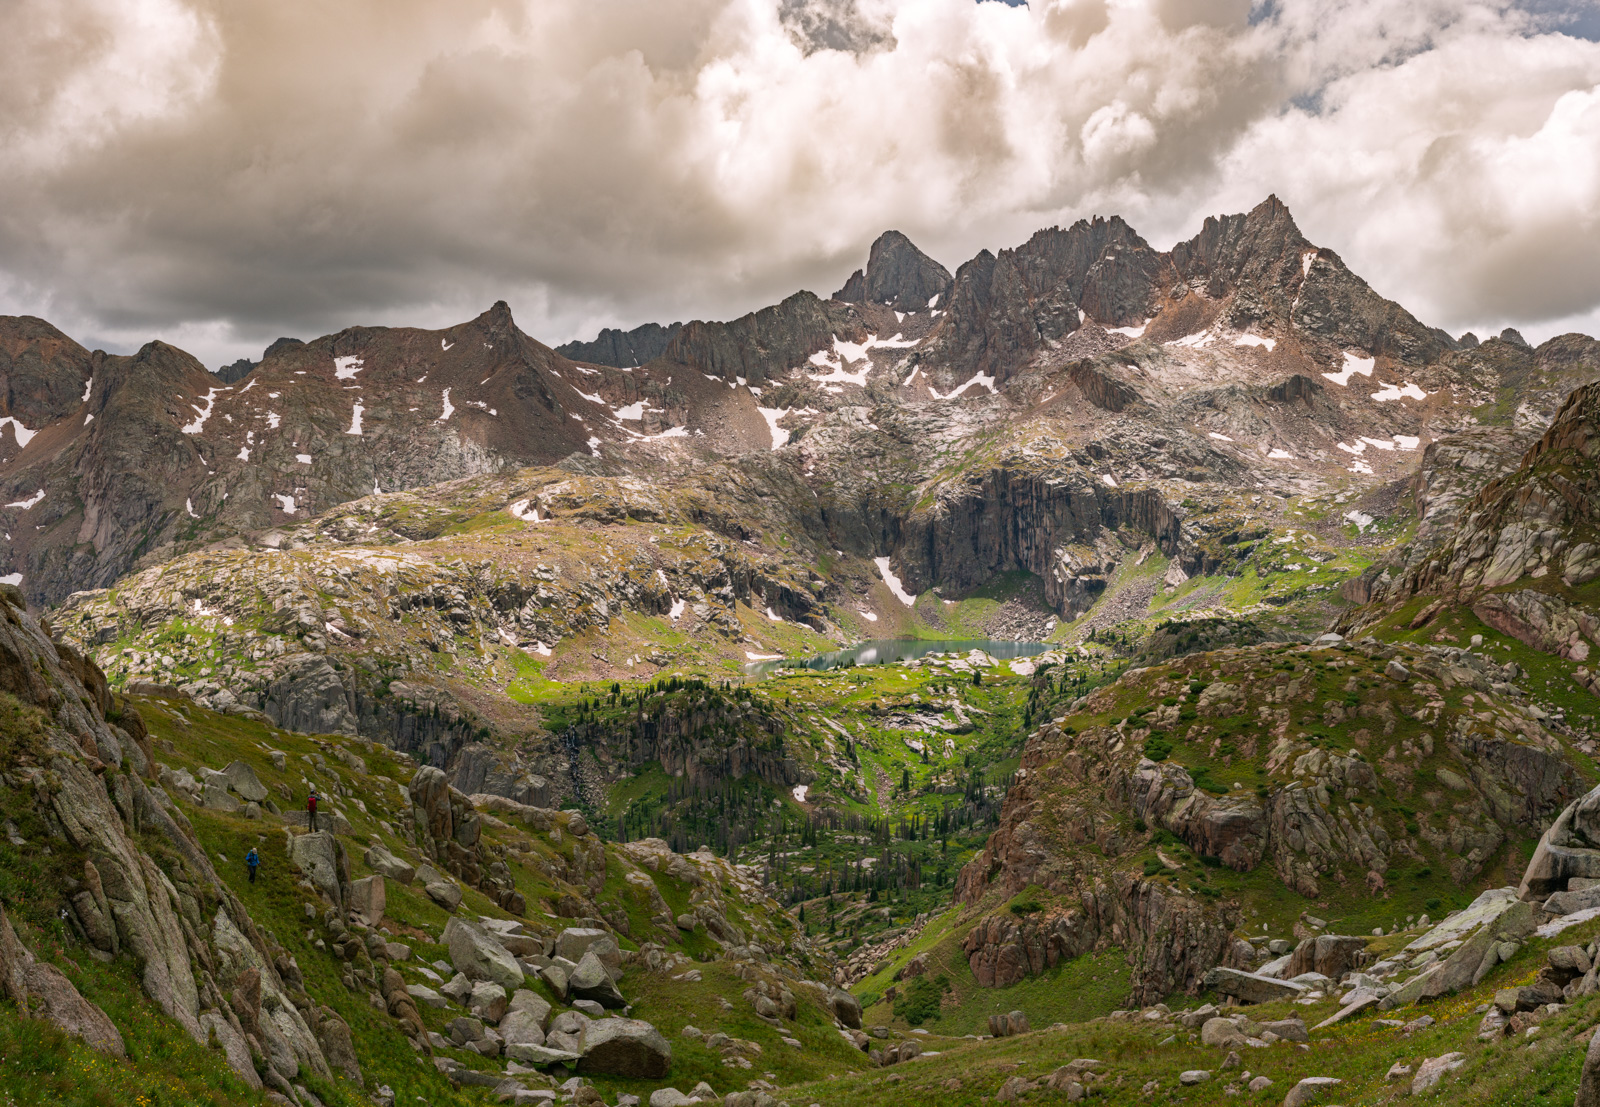
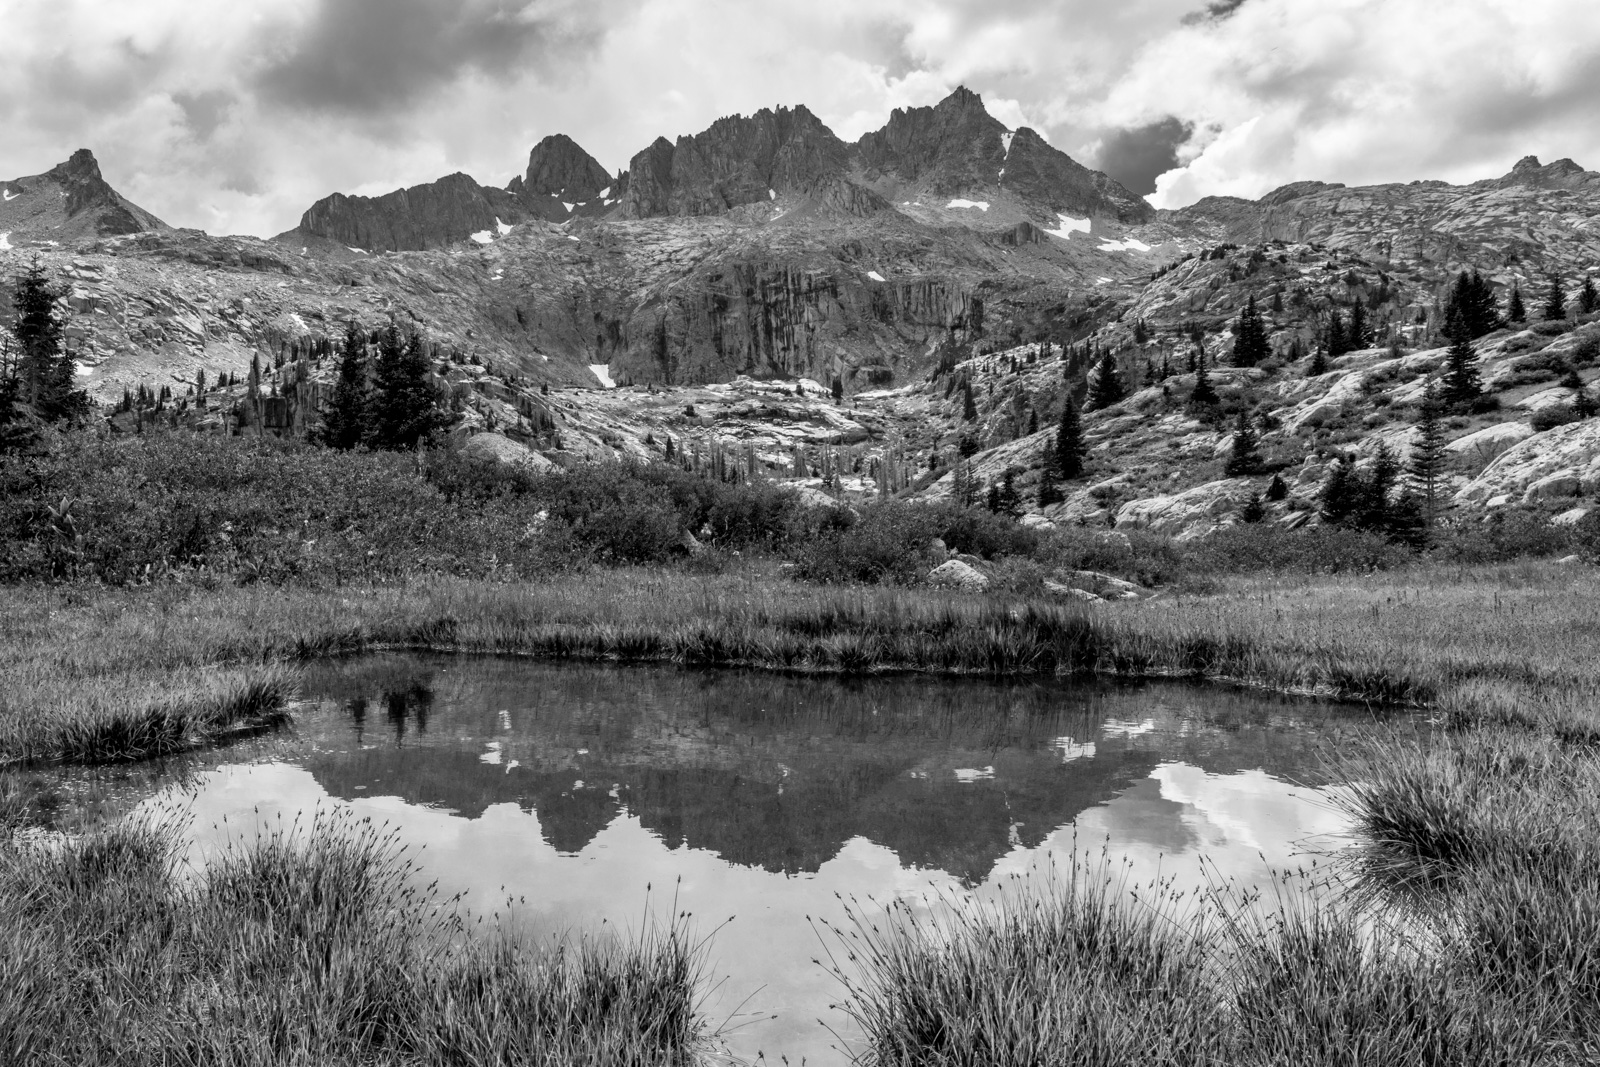
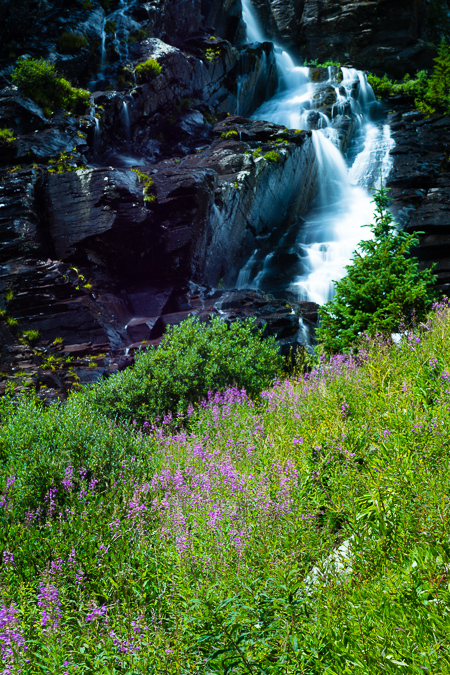
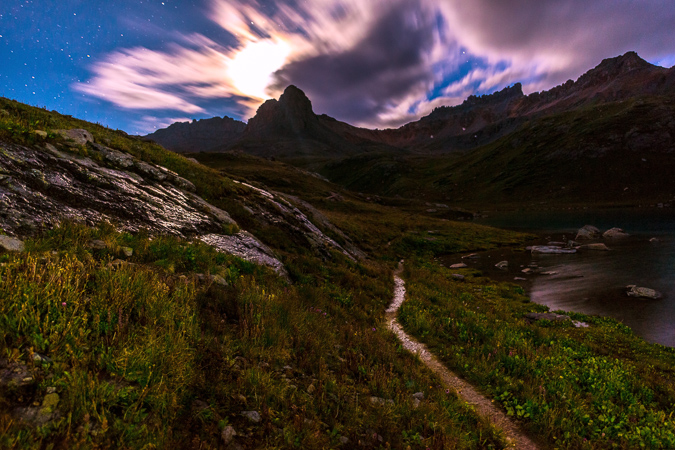
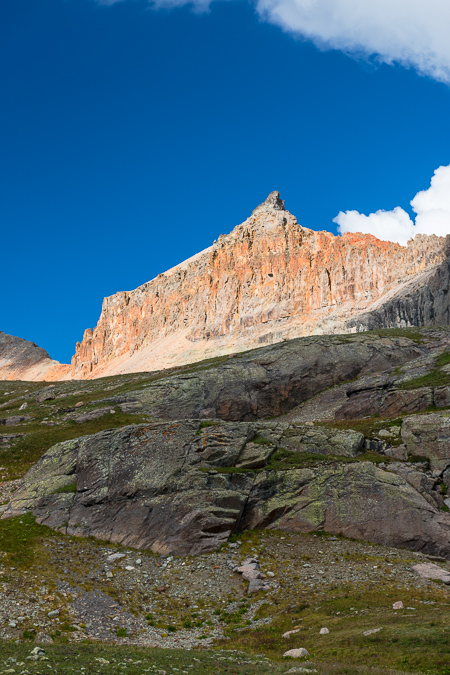
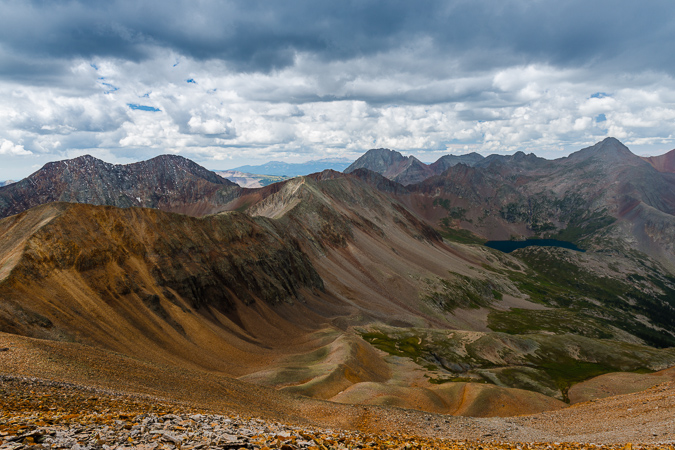
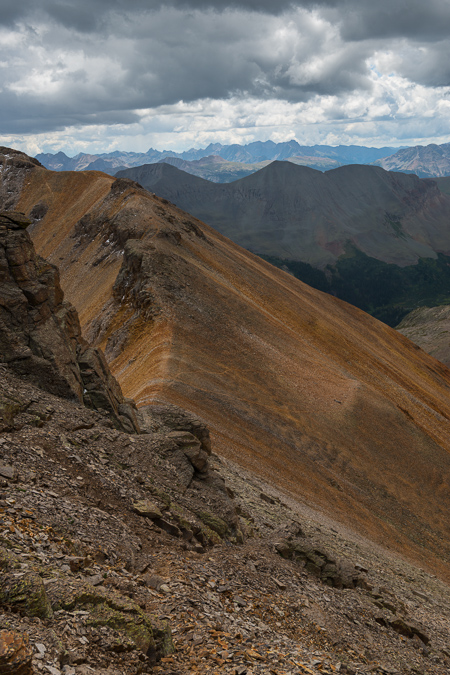
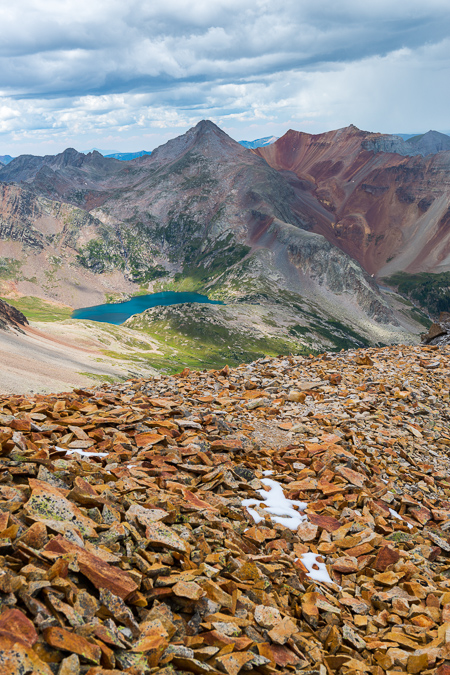
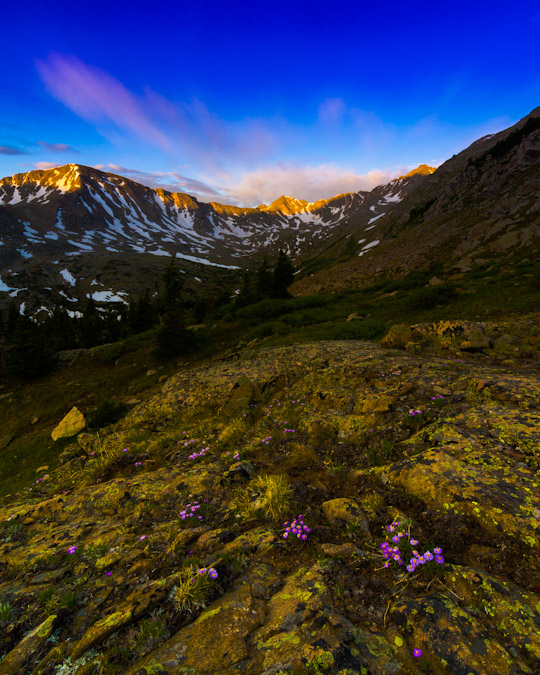
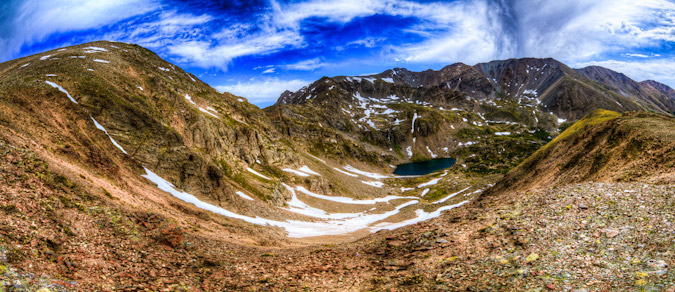
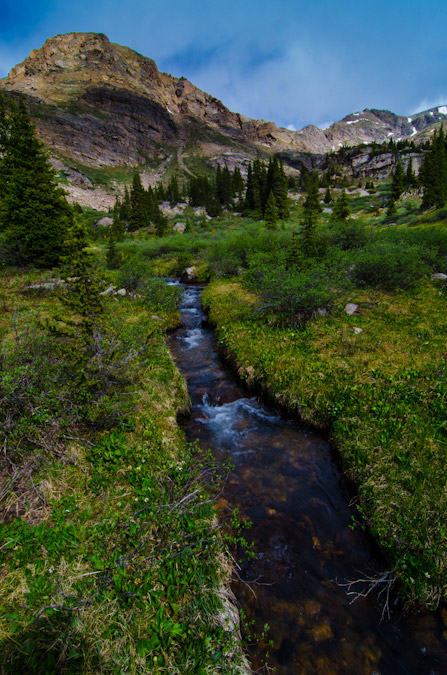
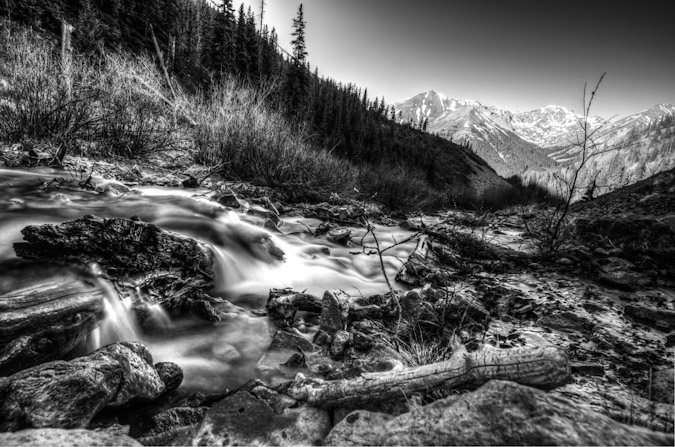
Finally, we found a lovely campsite just across the creek on the right hand side below some large cliffs with a great view of the eastern face of Jagged Mountain. The campsite, if you are looking at a USGS topo map, is located just under the "l" and the "i" in Sunlight Creek at about 11,000 ft. just before the trail begins a sharp climp up to the upper basin.
We set-up our tents, ate dinner, and crashed. The plan was to get up and go up into the upper basin for a warm-up climb of either Knife Point or Peak 10. It rained a little over-night and I was exhausted but ready for the good fight!
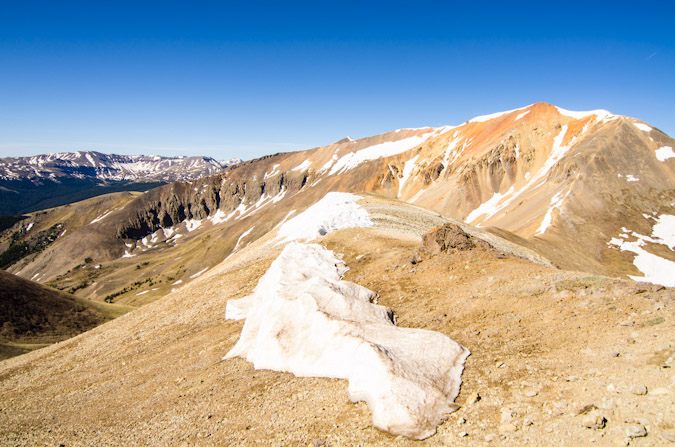
DAY 2: Summit of the impressive 13,265 ft. Knife Point and photographing the Eclipse.
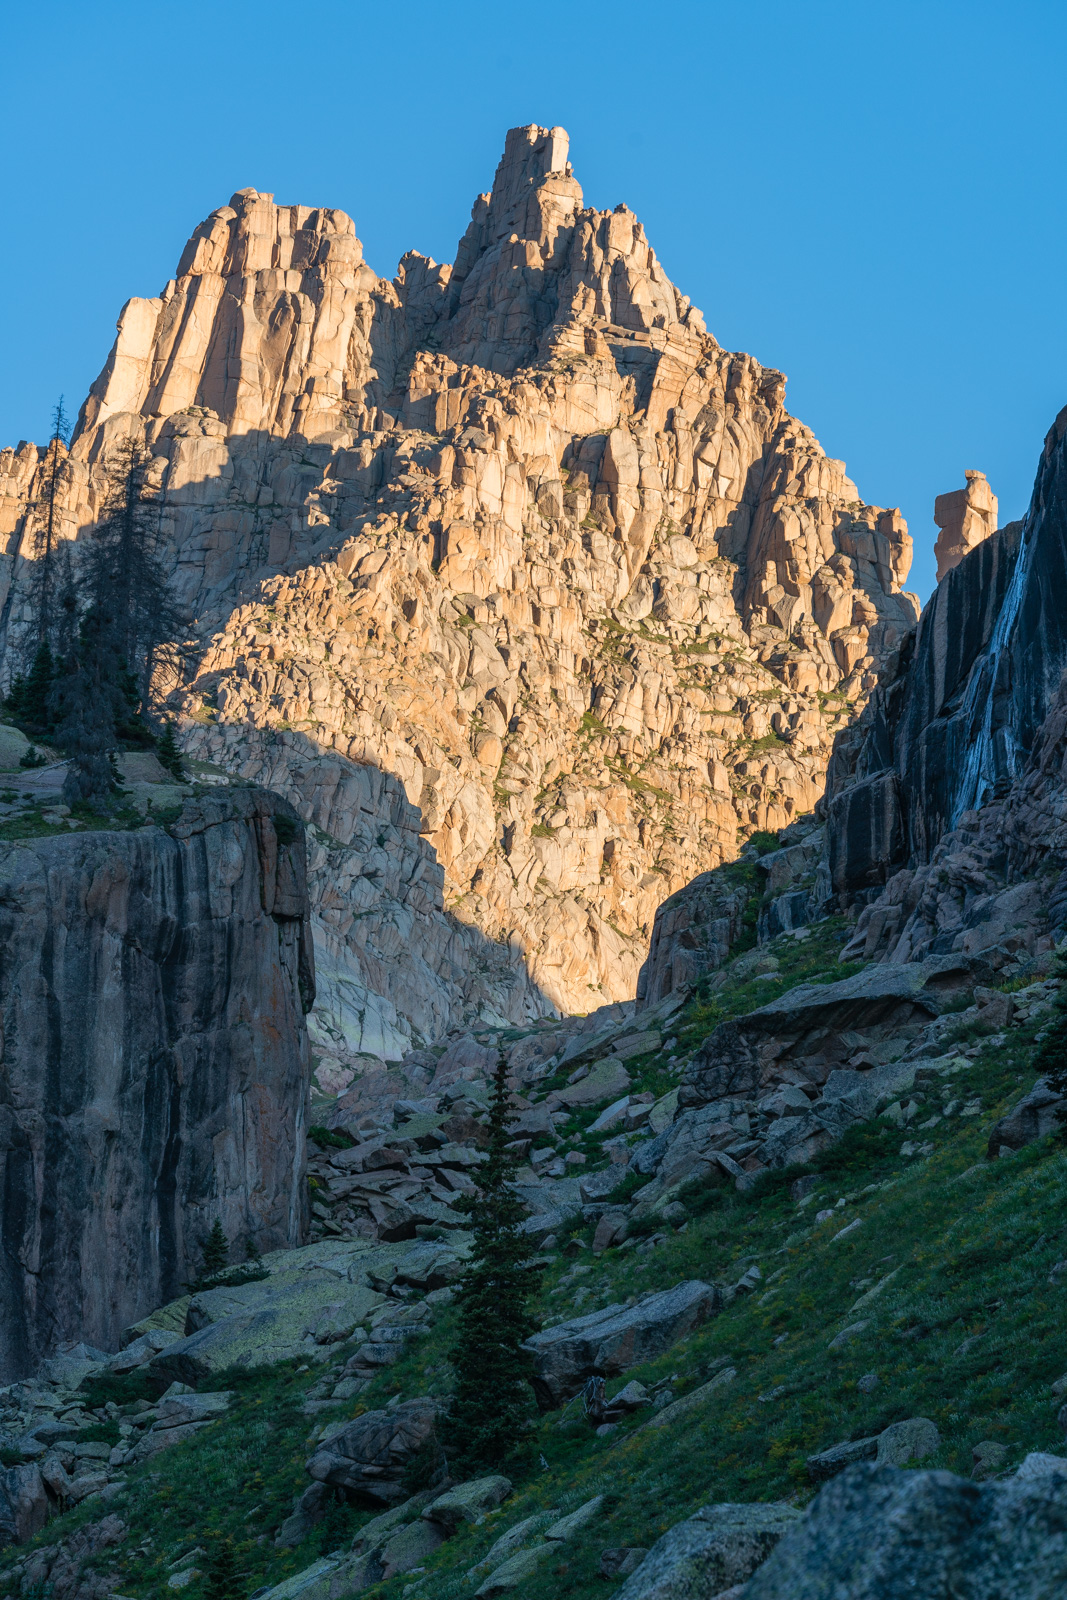
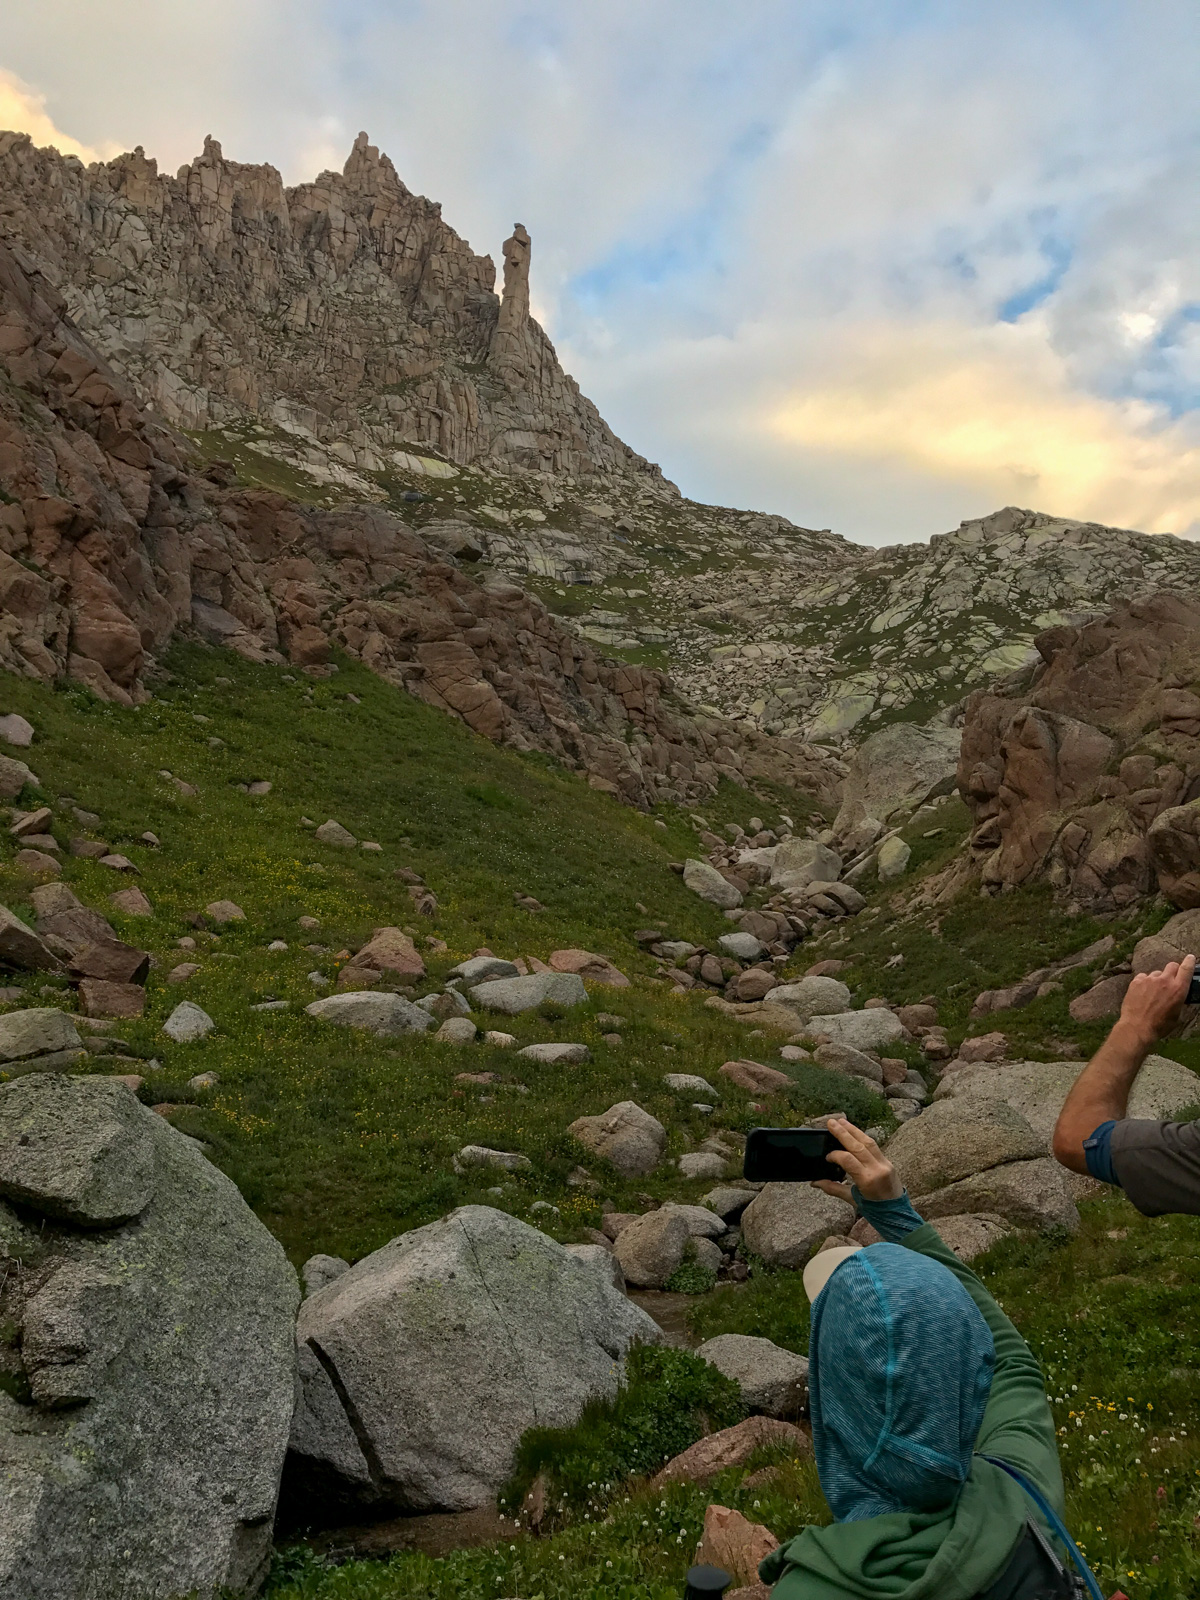
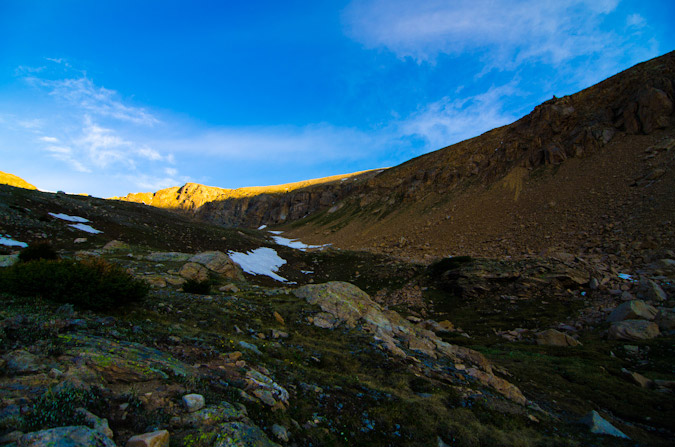
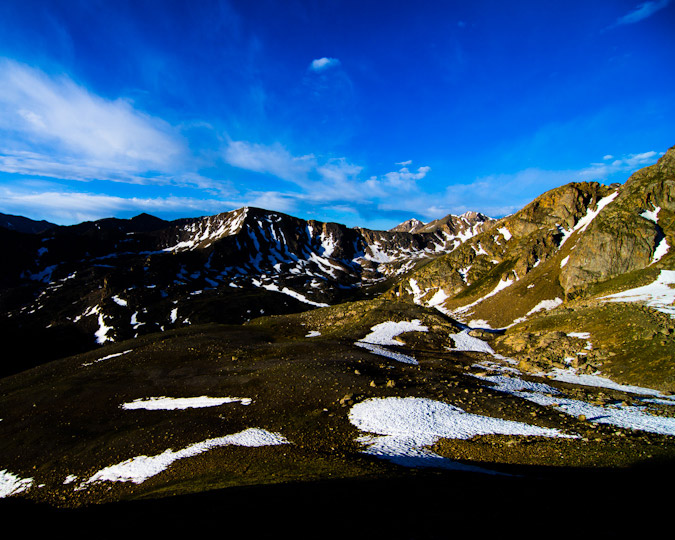
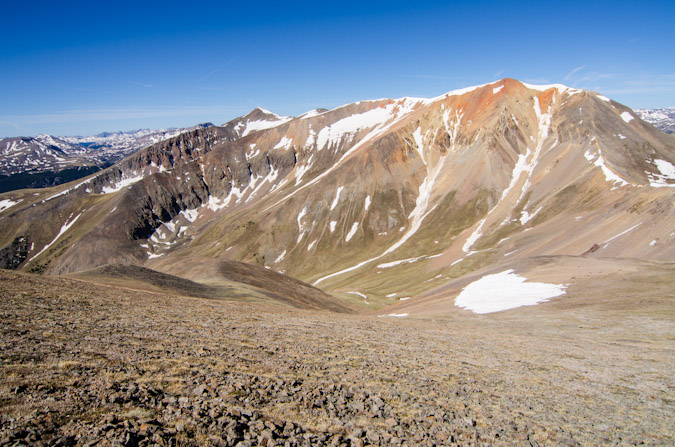
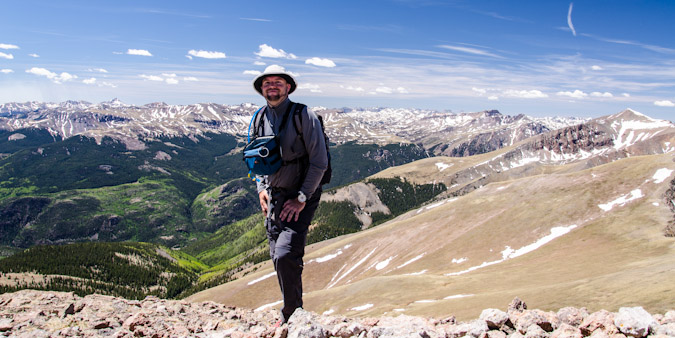
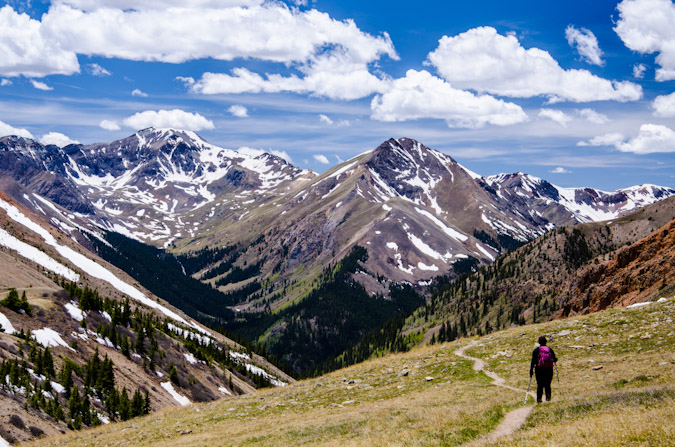
The alarm was set for 5:30 AM (not a terribly early start). We welcomed the easier day, having just killed our legs on our 12 mile approach into the basin. The early light on Jagged looked fantastic.
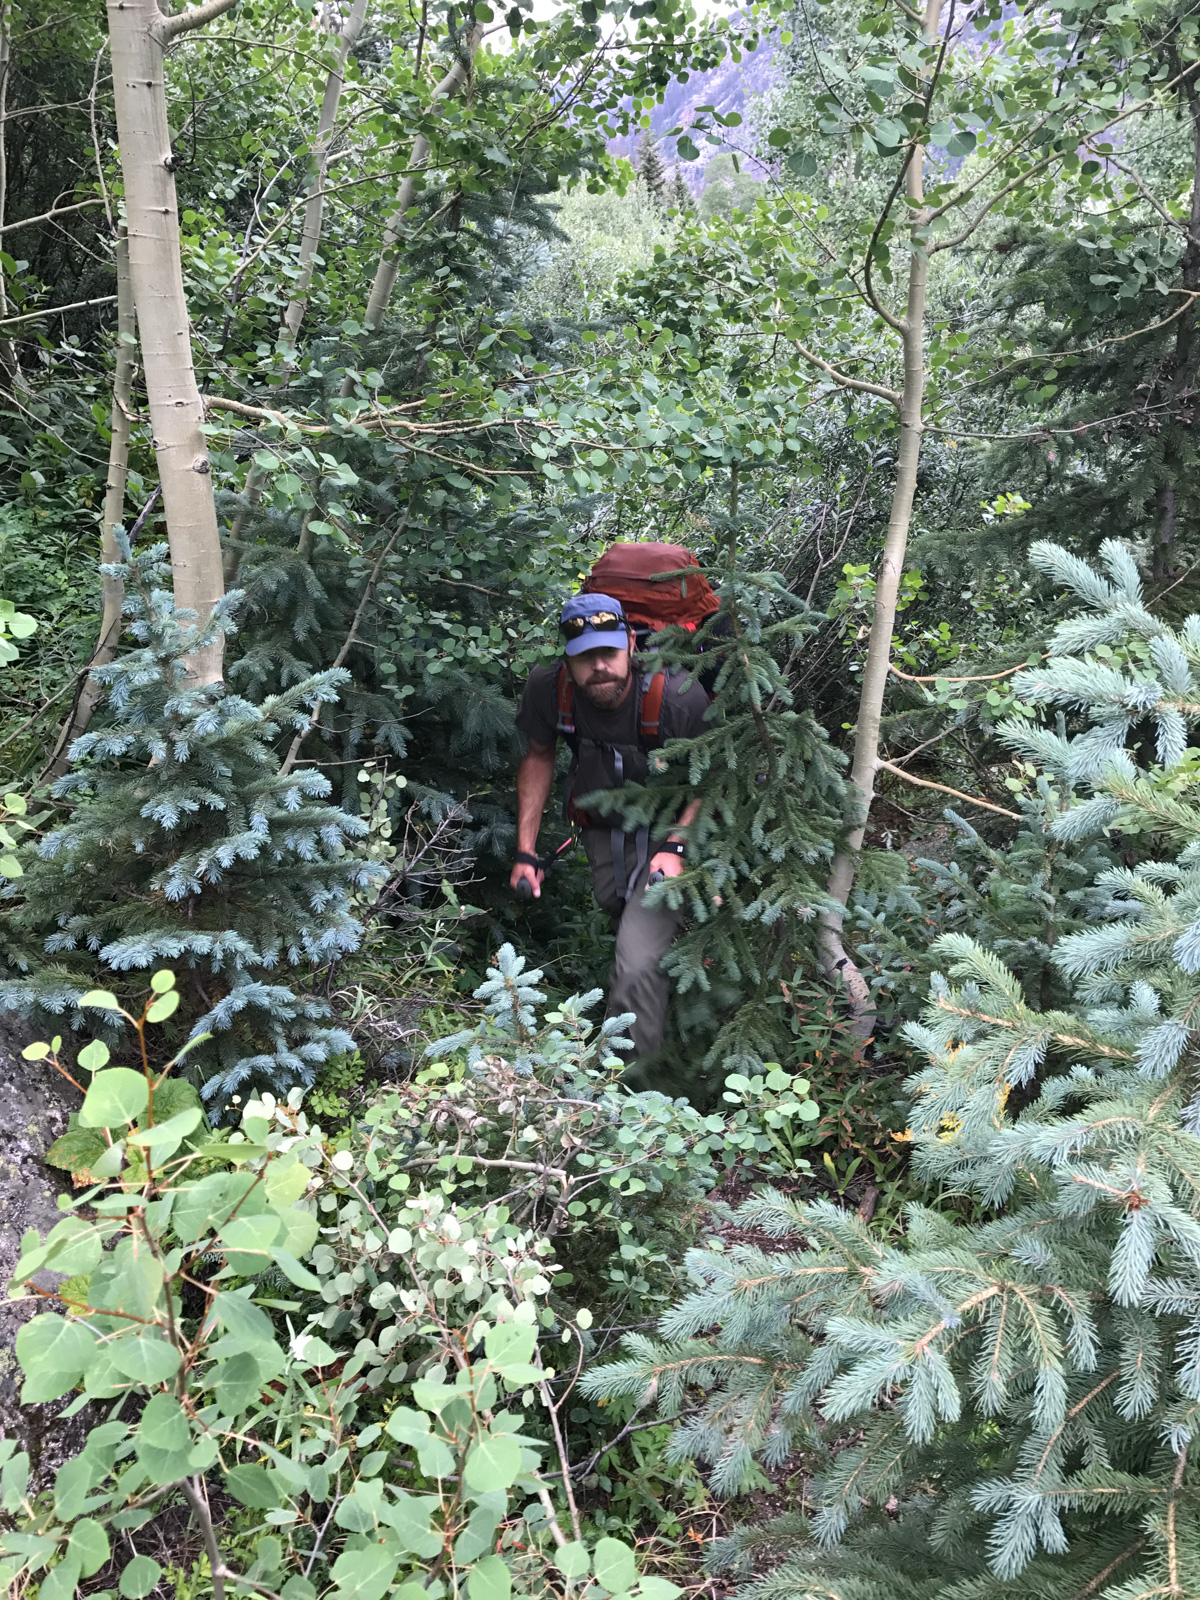
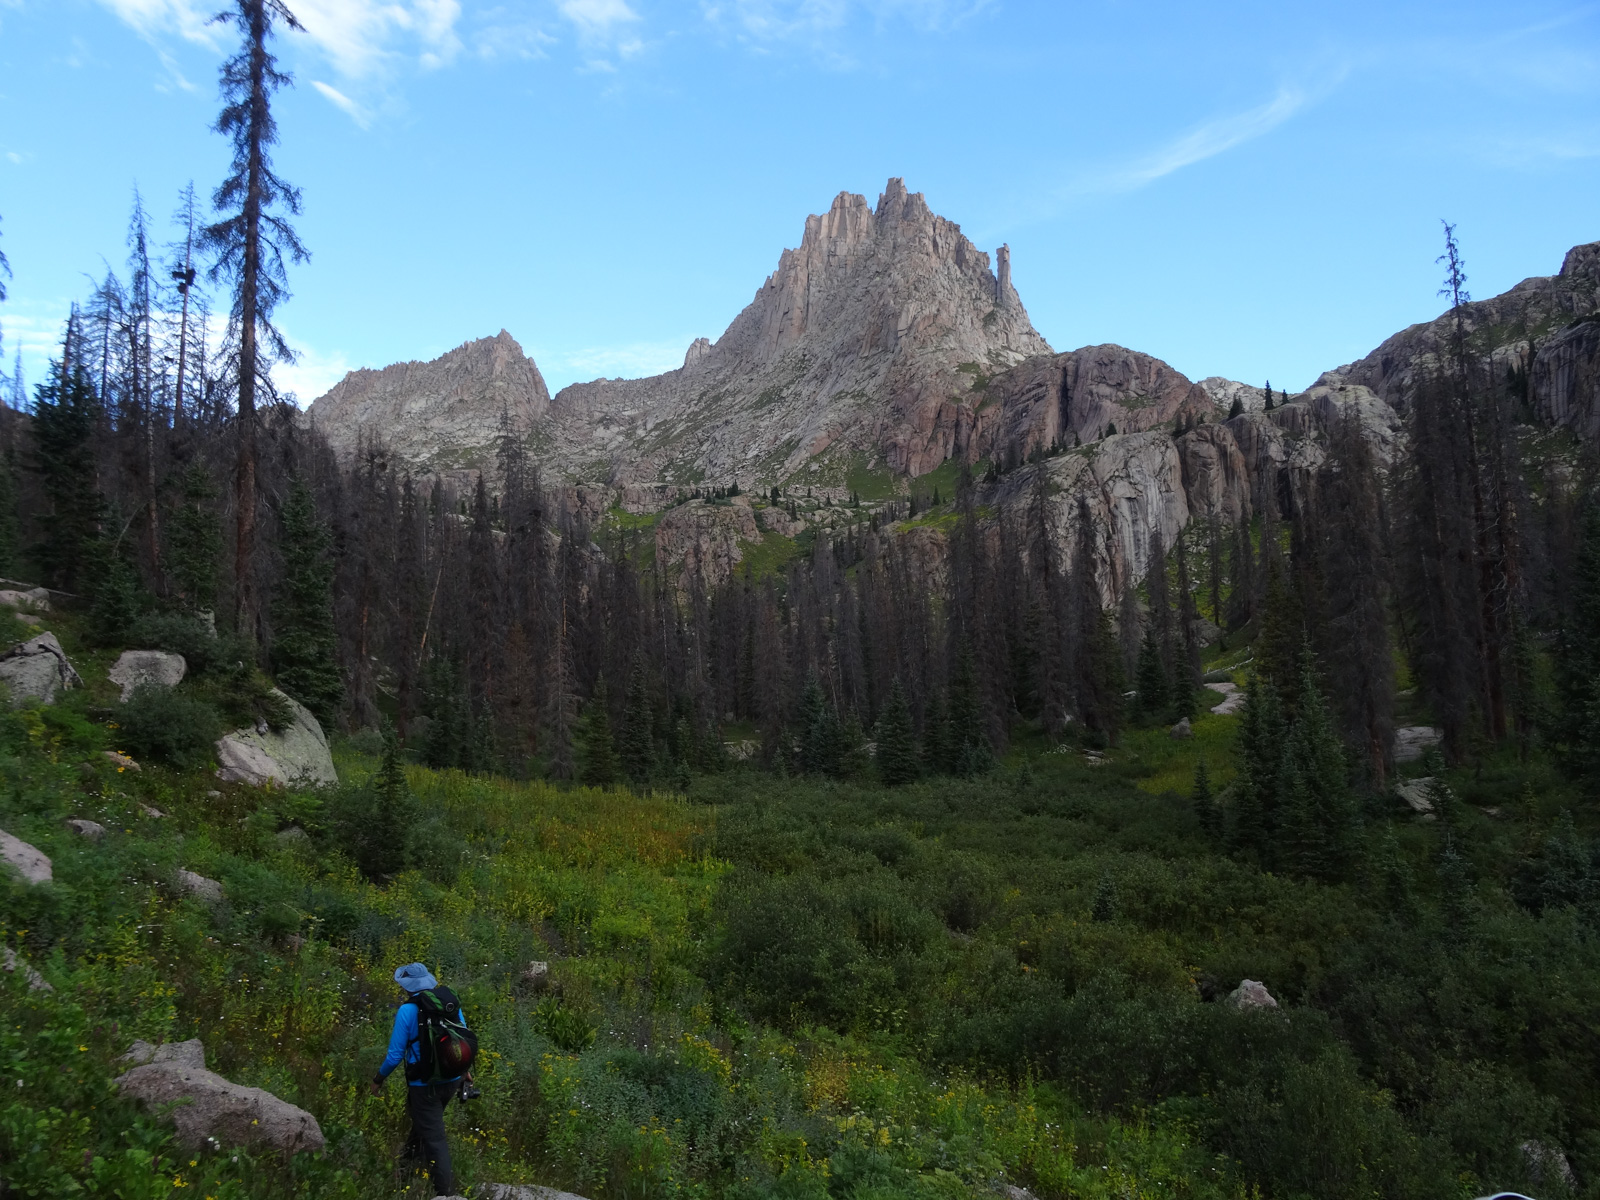
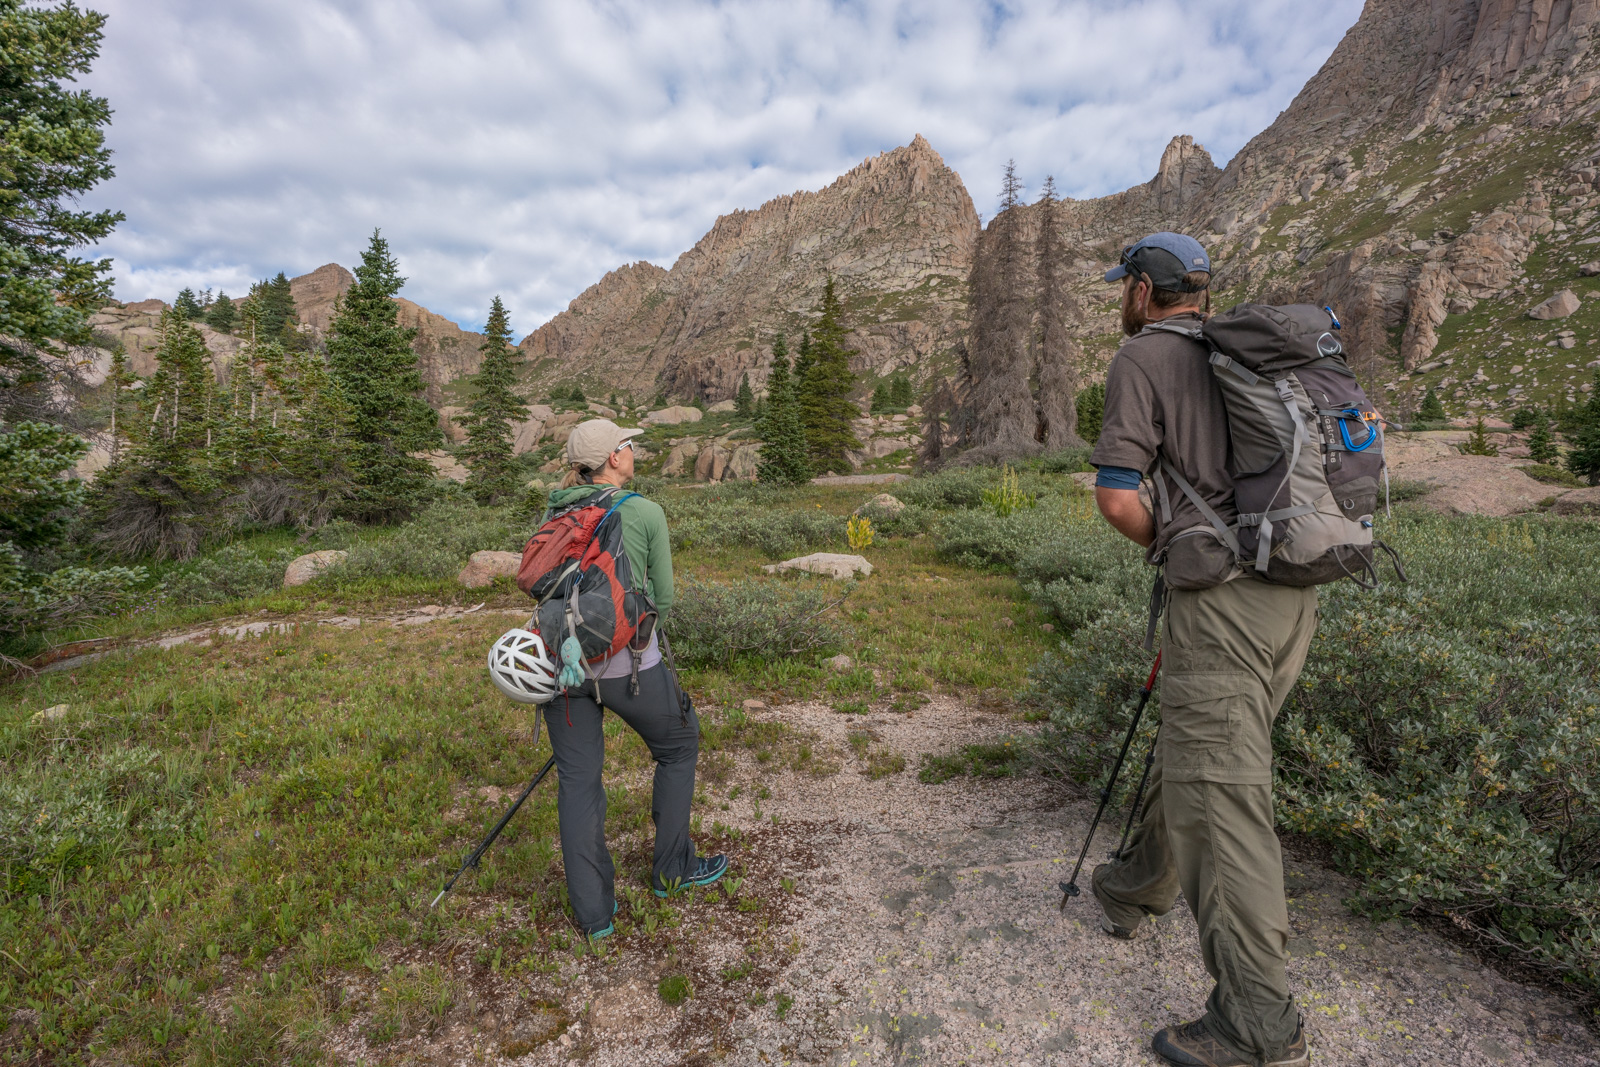
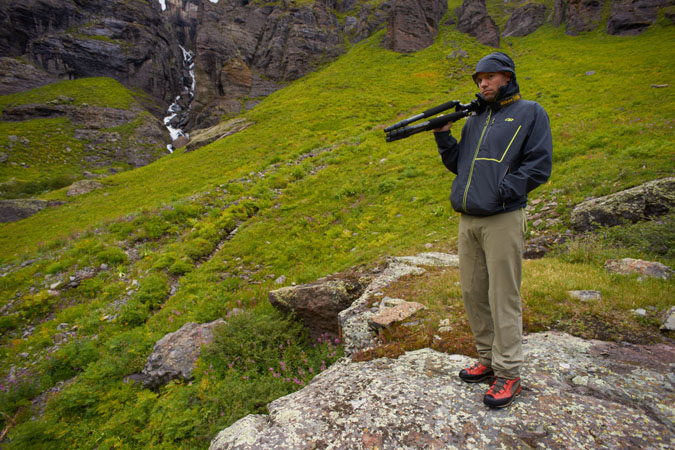
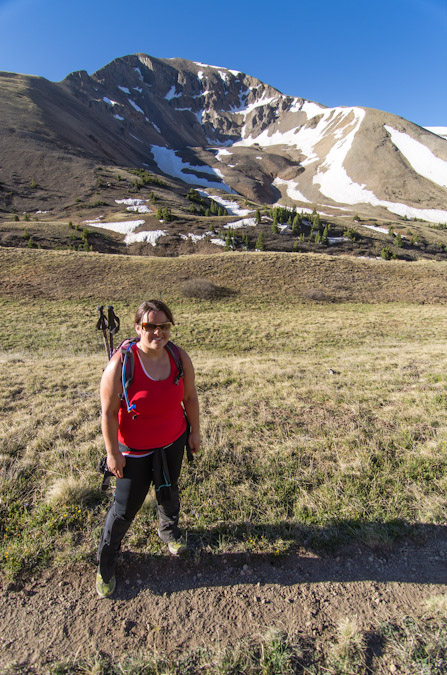
We took our time going up into the upper basin, and appreciated the fantastic views of Jagged Mountain on the way up. Shawn snapped this shot of me hiking in.
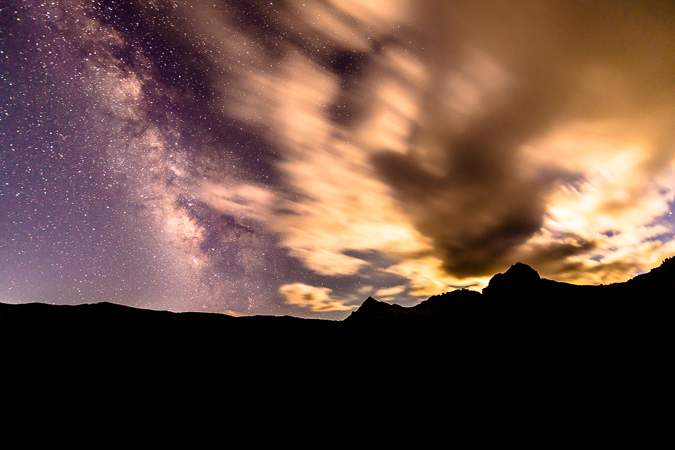
A look back towards the huge cliffs above our campsite showcased some interesting clouds that were forming for the day, which did not bode well for my opportunities to photograph the eclipse.

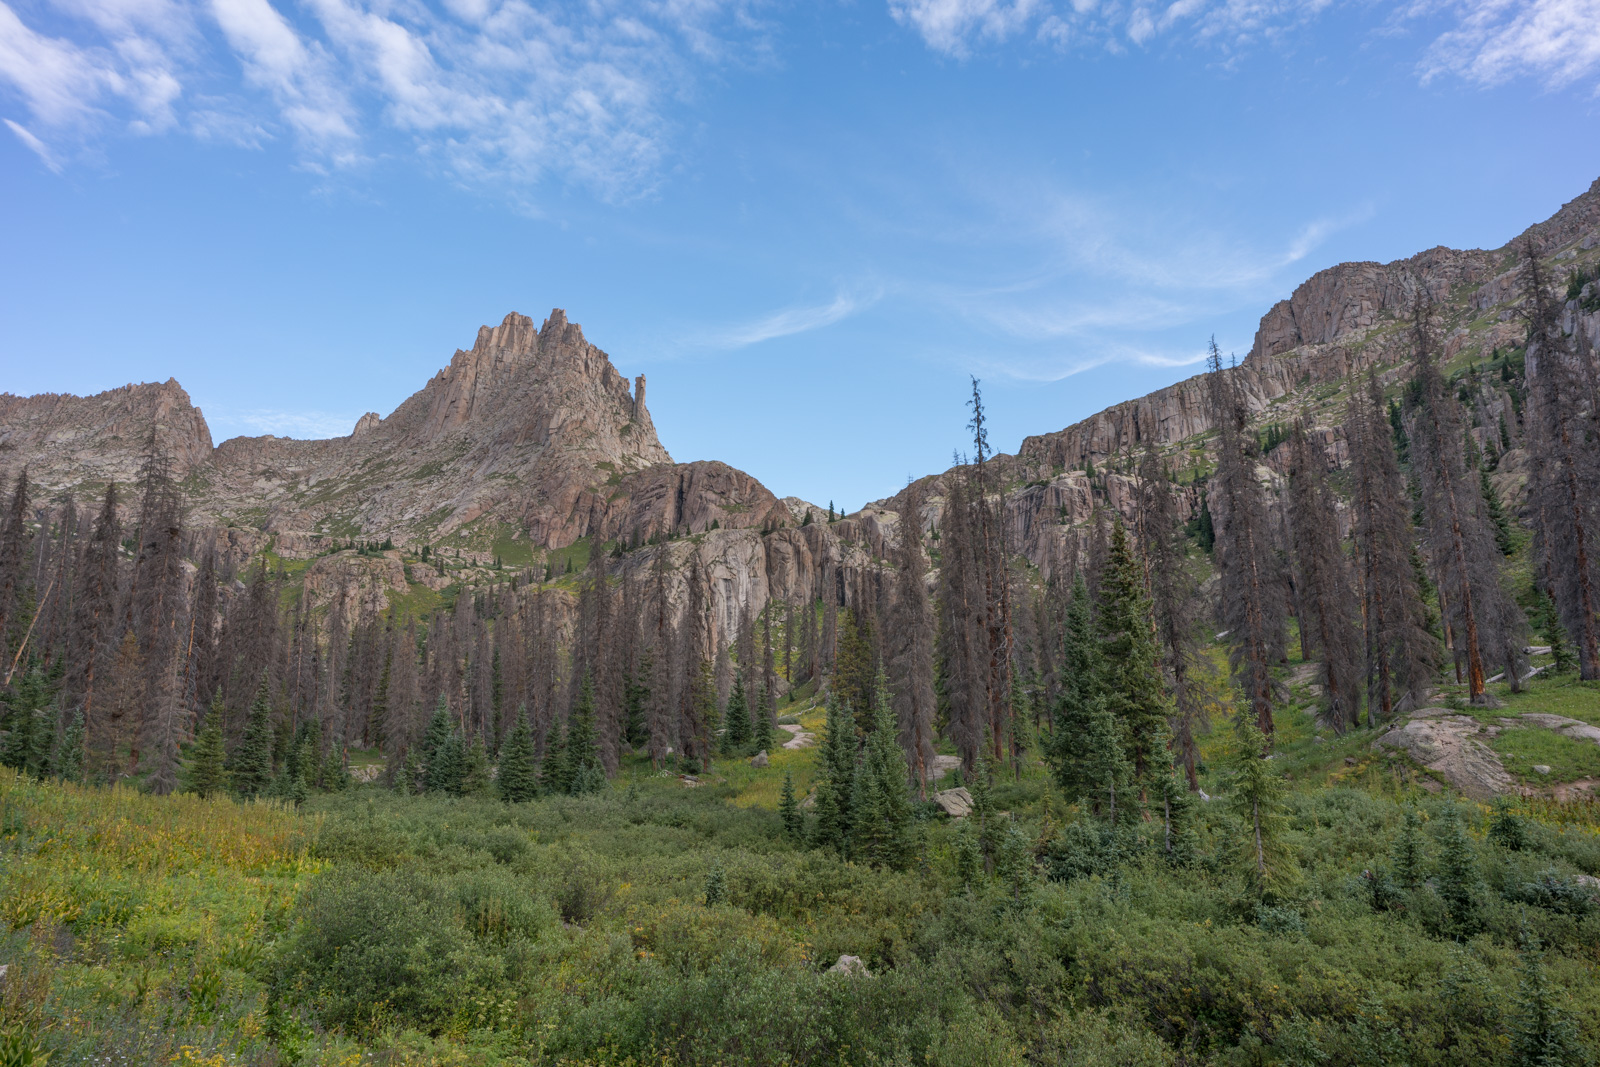
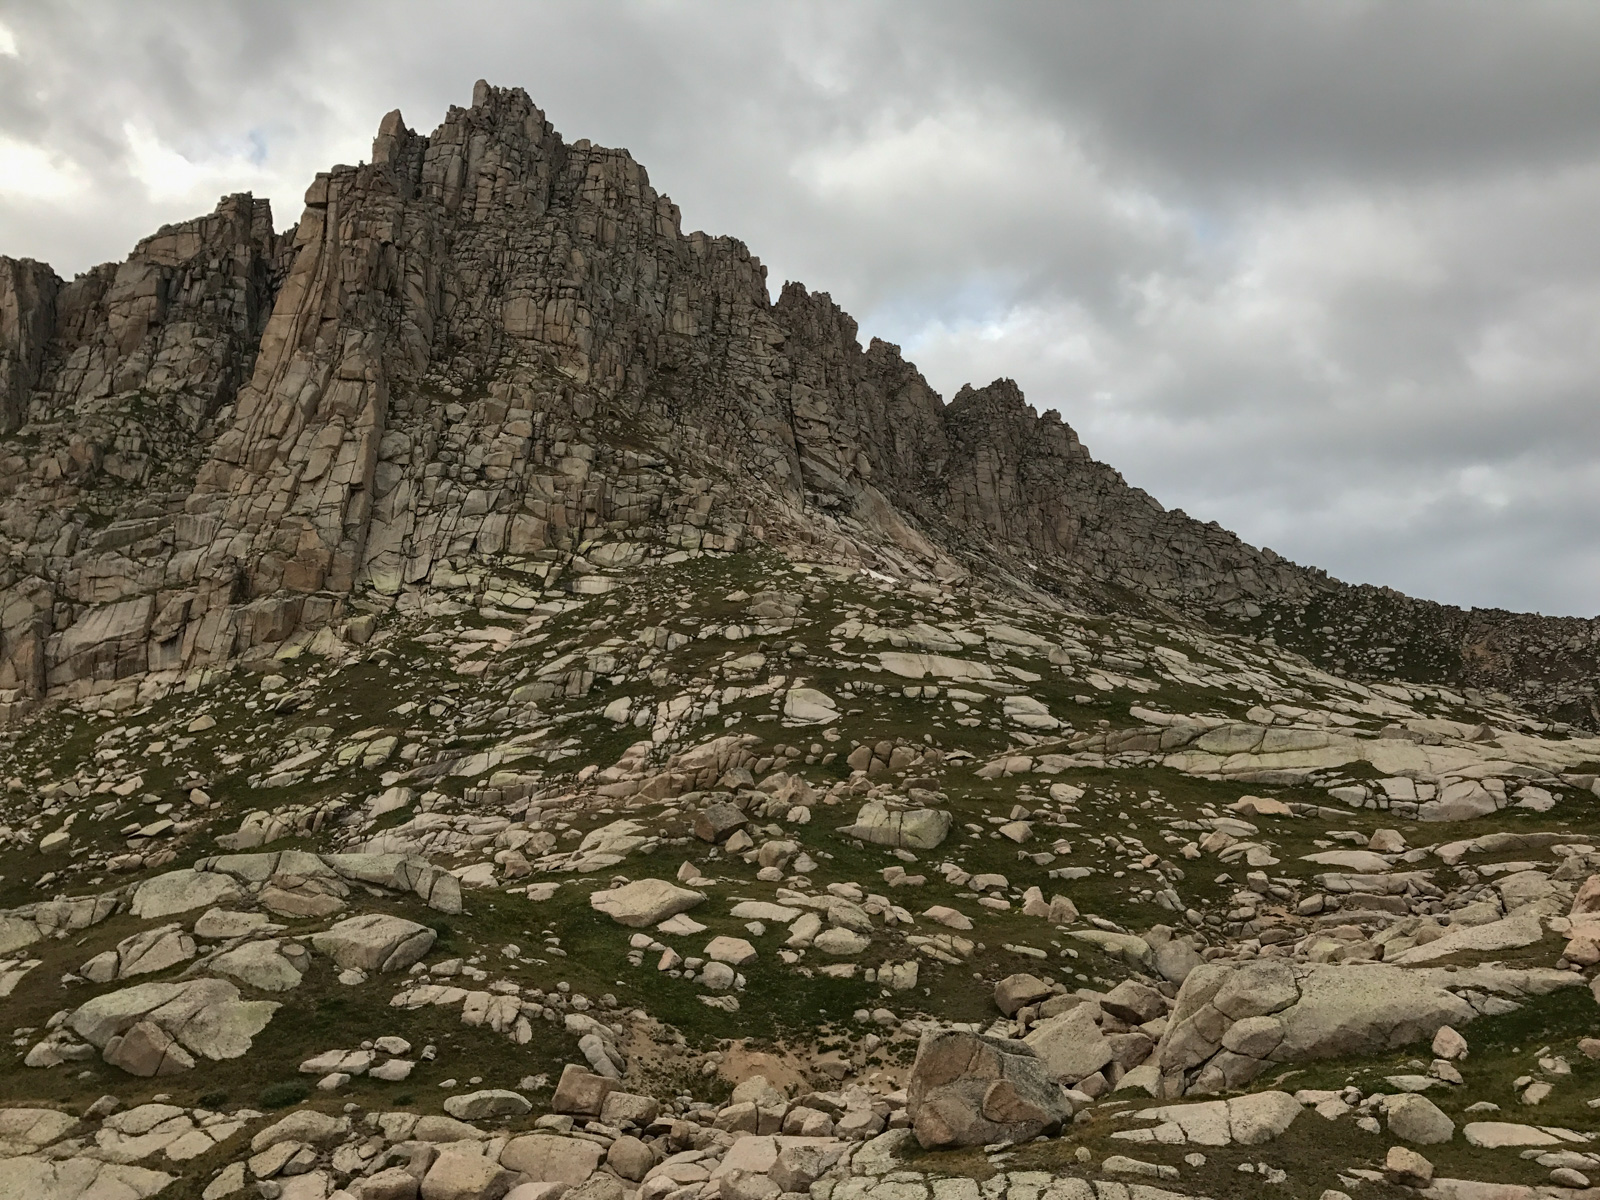
As we climbed up higher, the views of Jagged Mountain only improved.
The late summer color of the Corn Lily plants was a nice complement to the high clouds above Jagged.
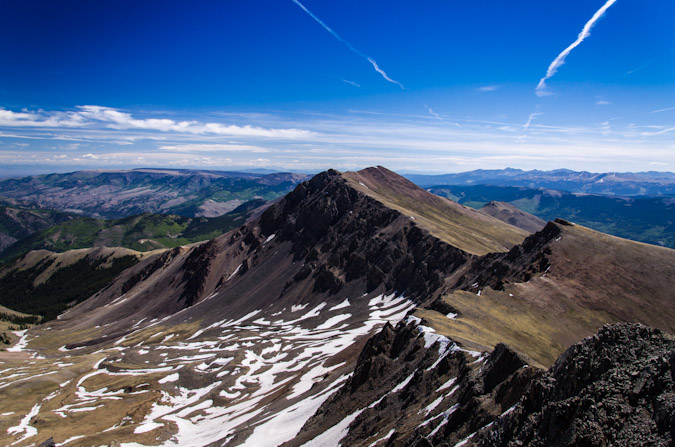
Shawn and Natalie admired Peak 10 as it came into view. I marvelled at how insane it looked. It sounded like Natalie wanted to give it a go.
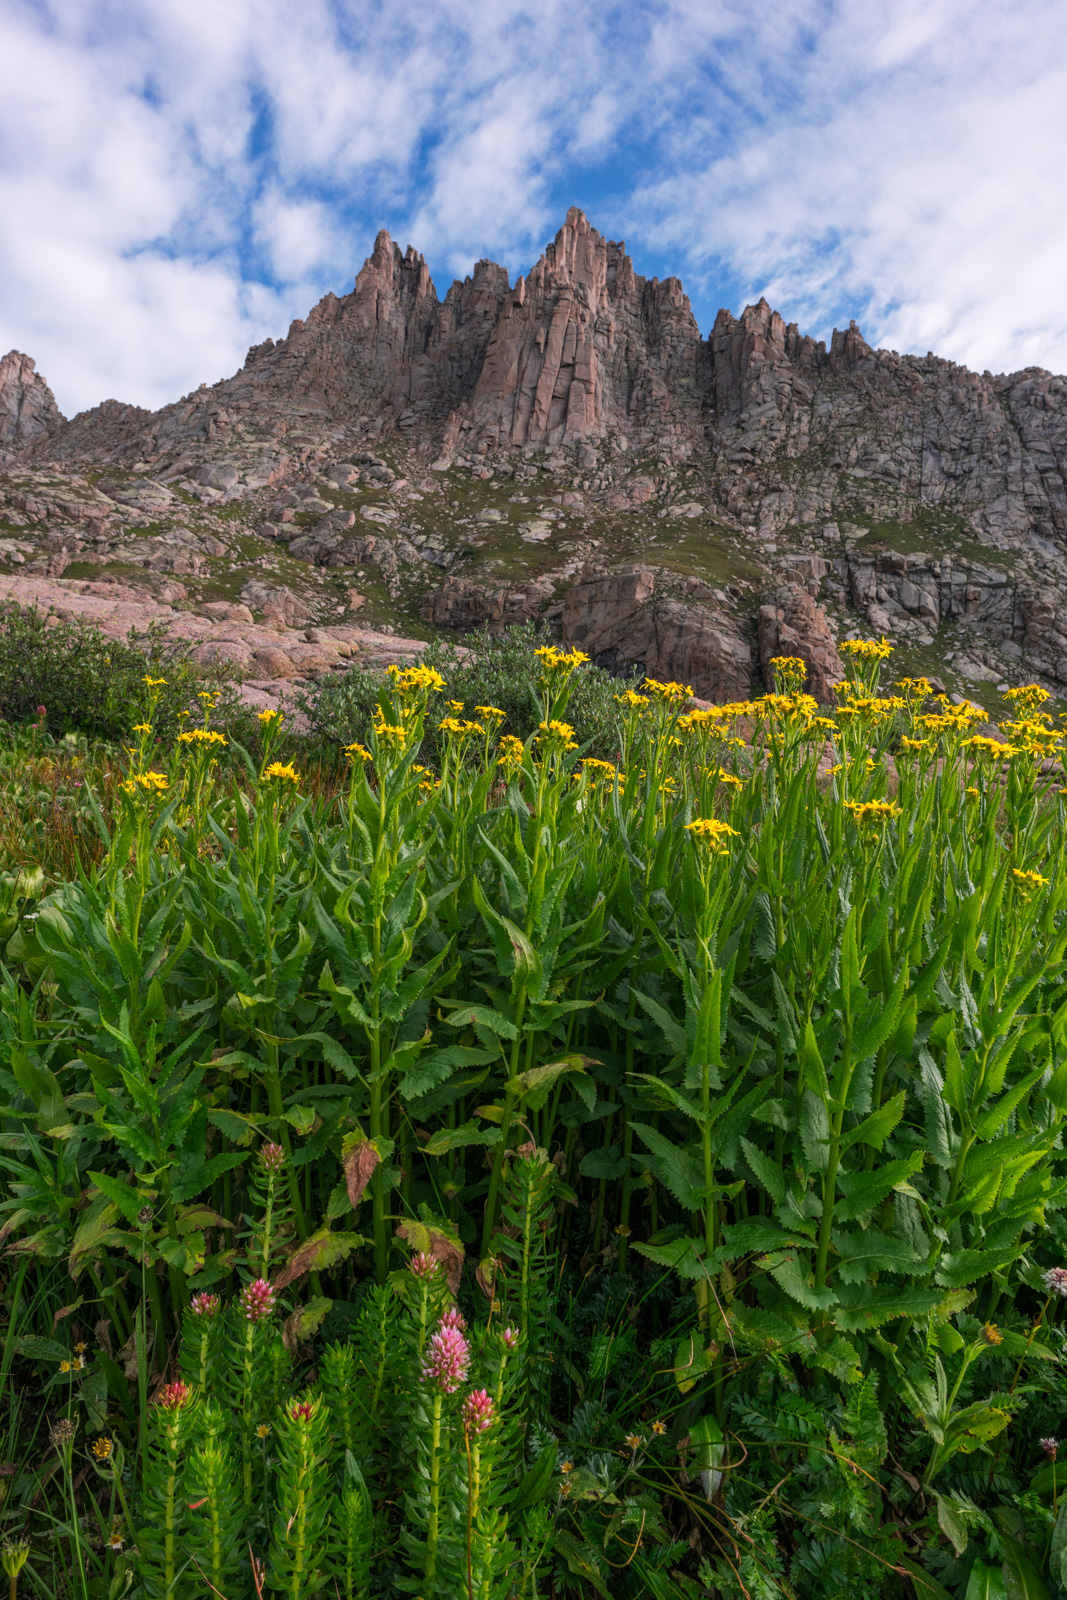
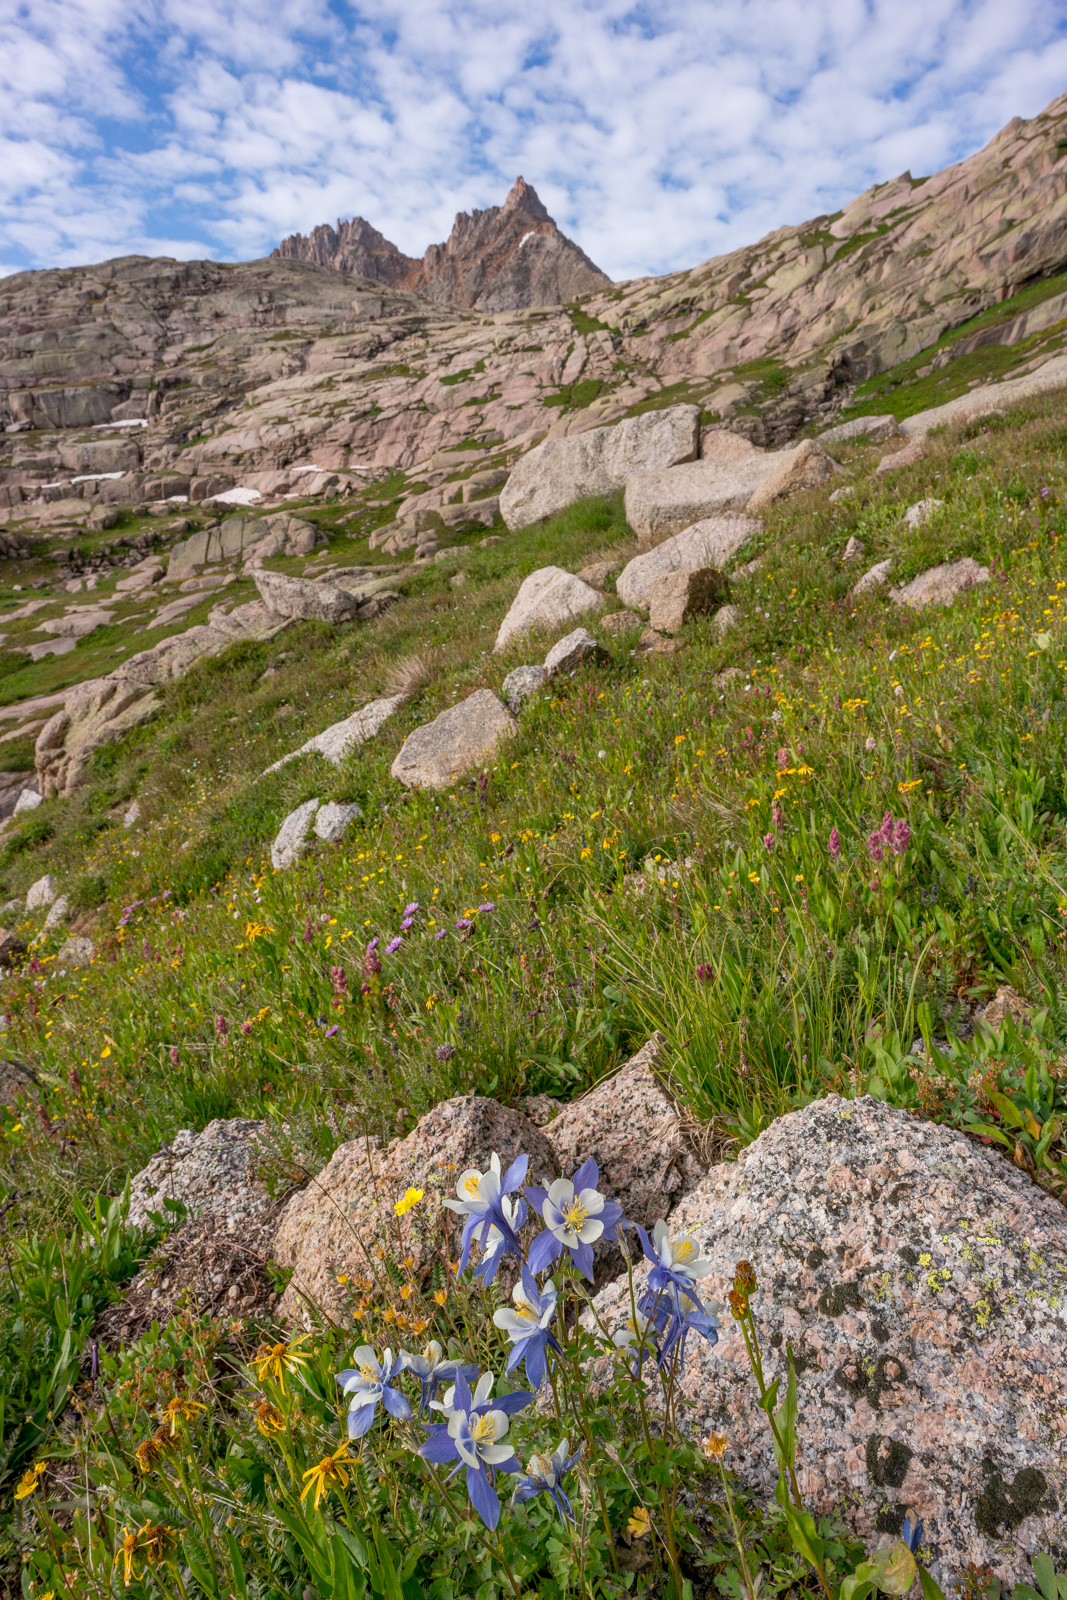
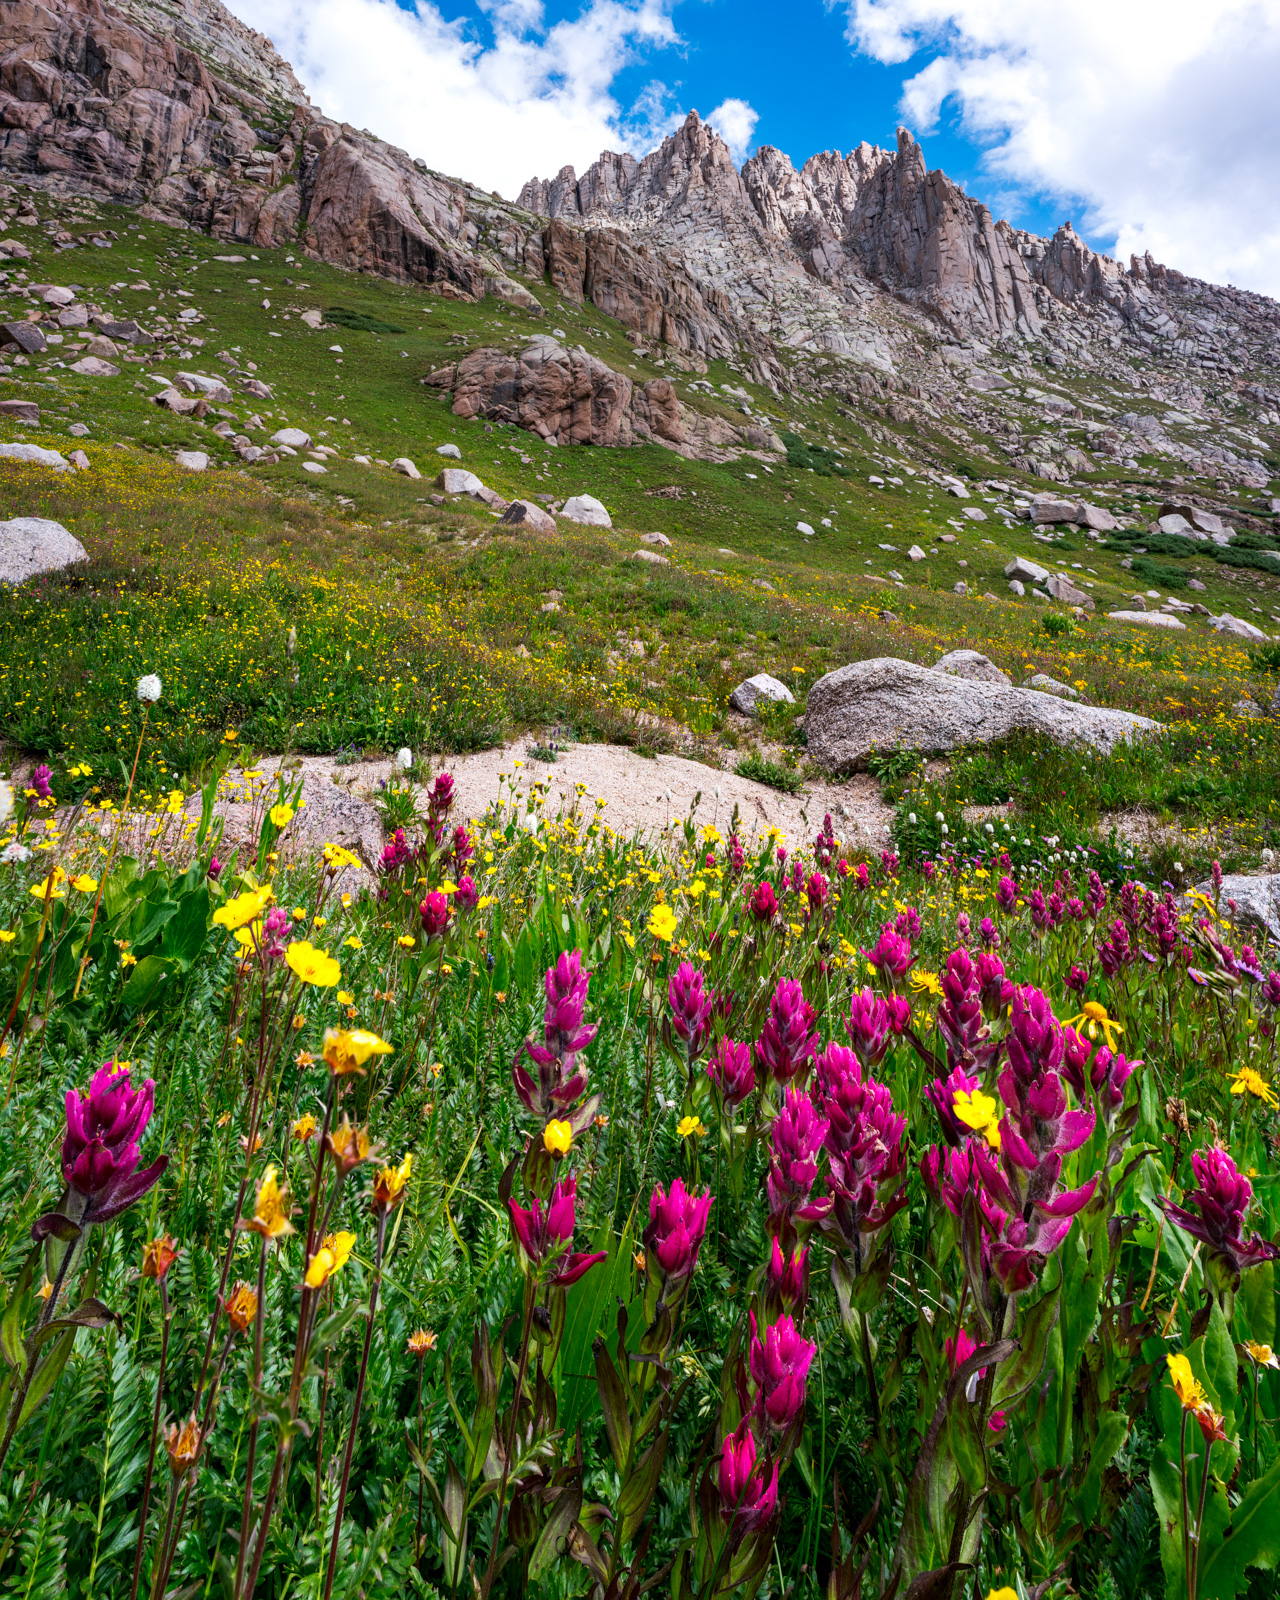
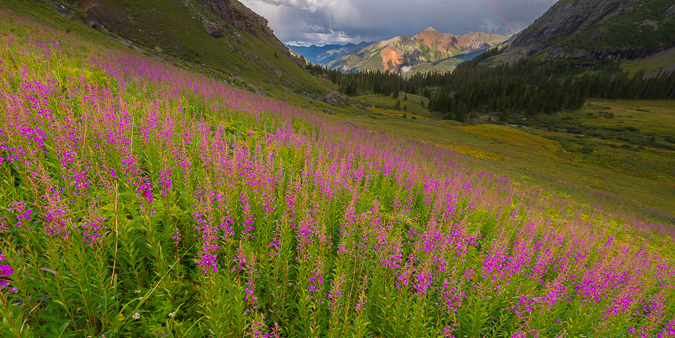
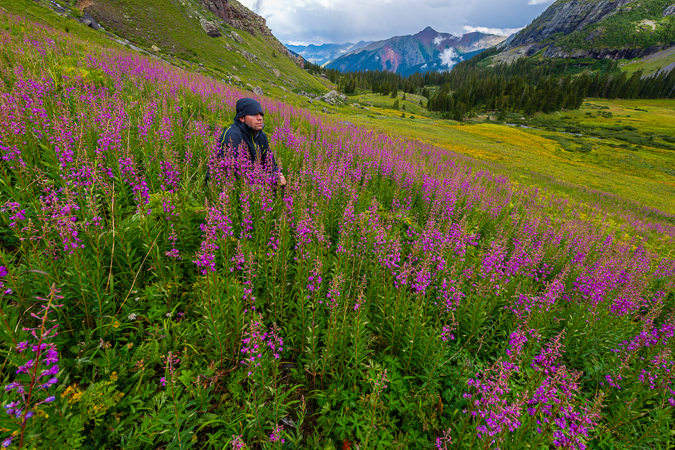
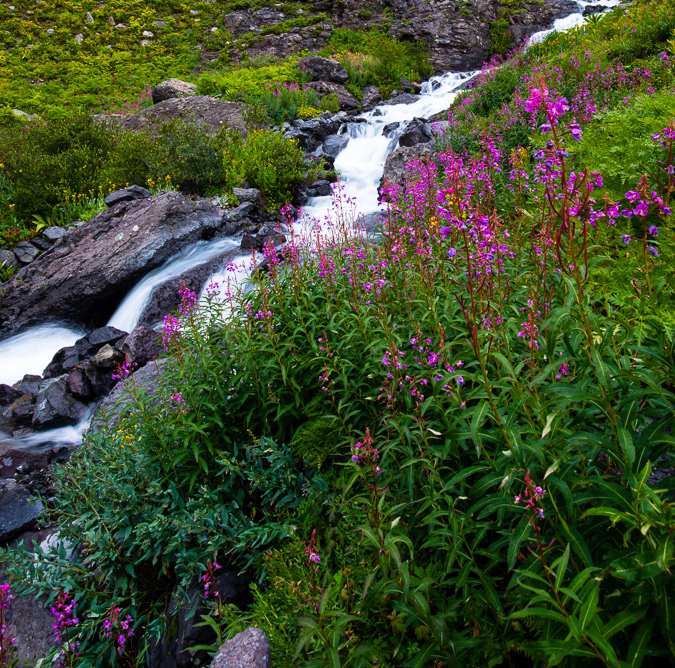
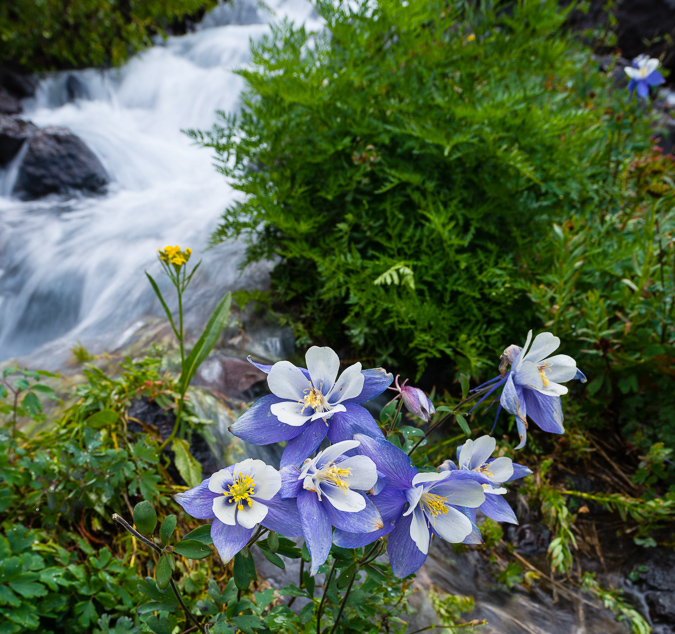
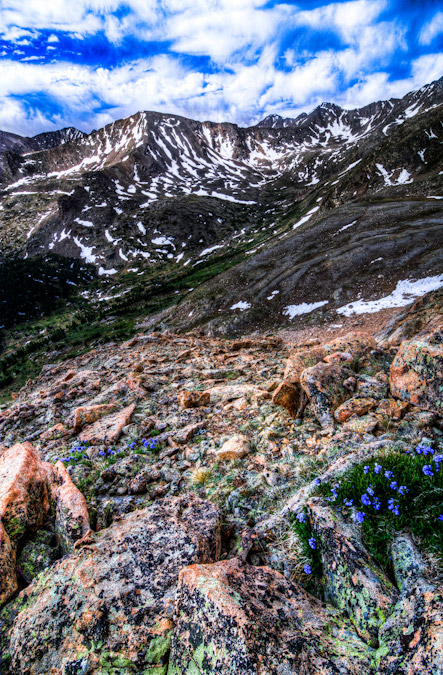
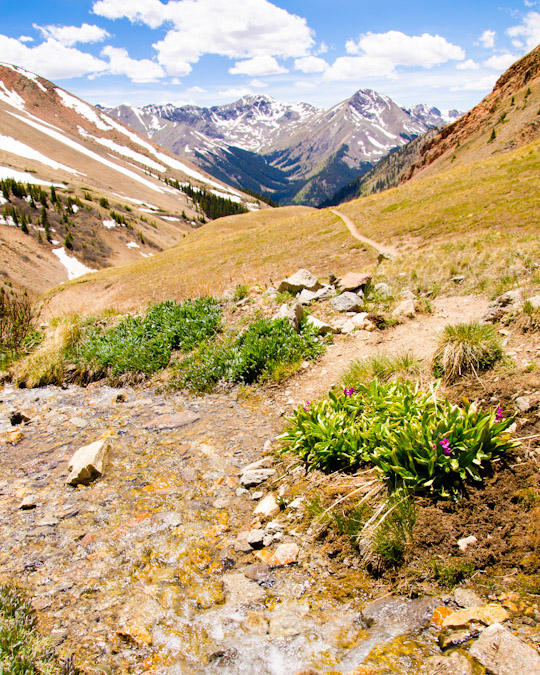
As we climbed up below Jagged, I found the wildflowers quite difficult to avoid pointing my camera at. I loved how these flowers pointed straight up and into Jagged's base.
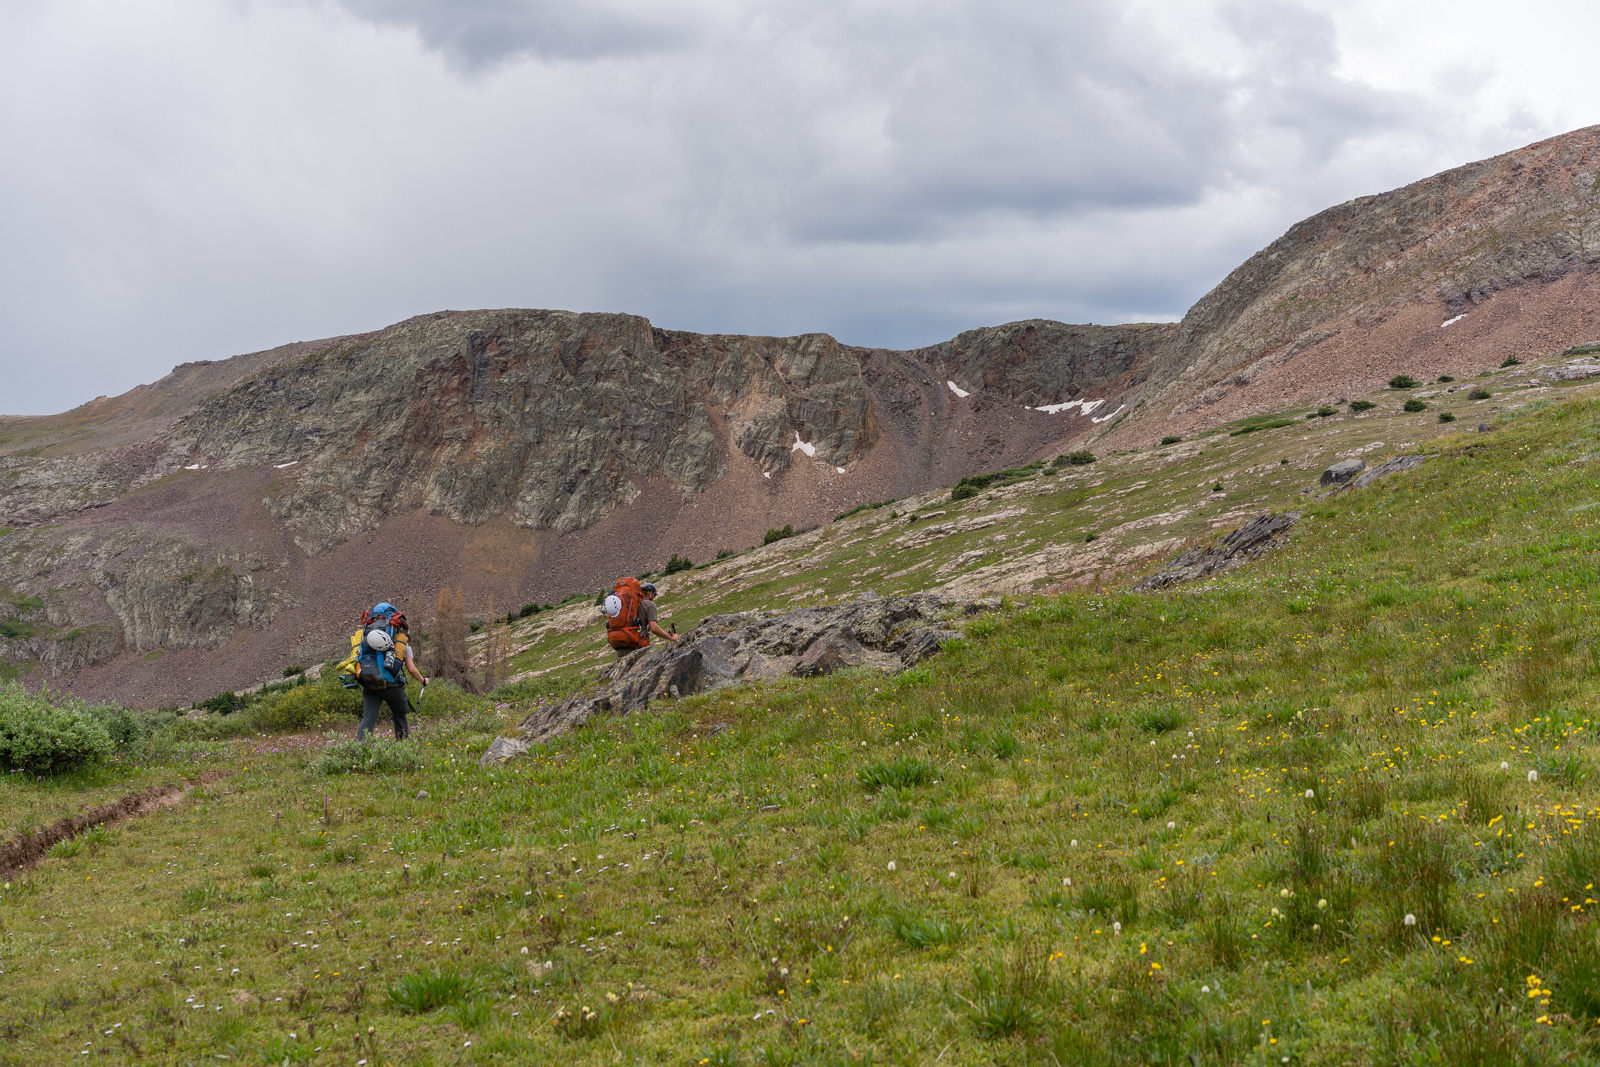
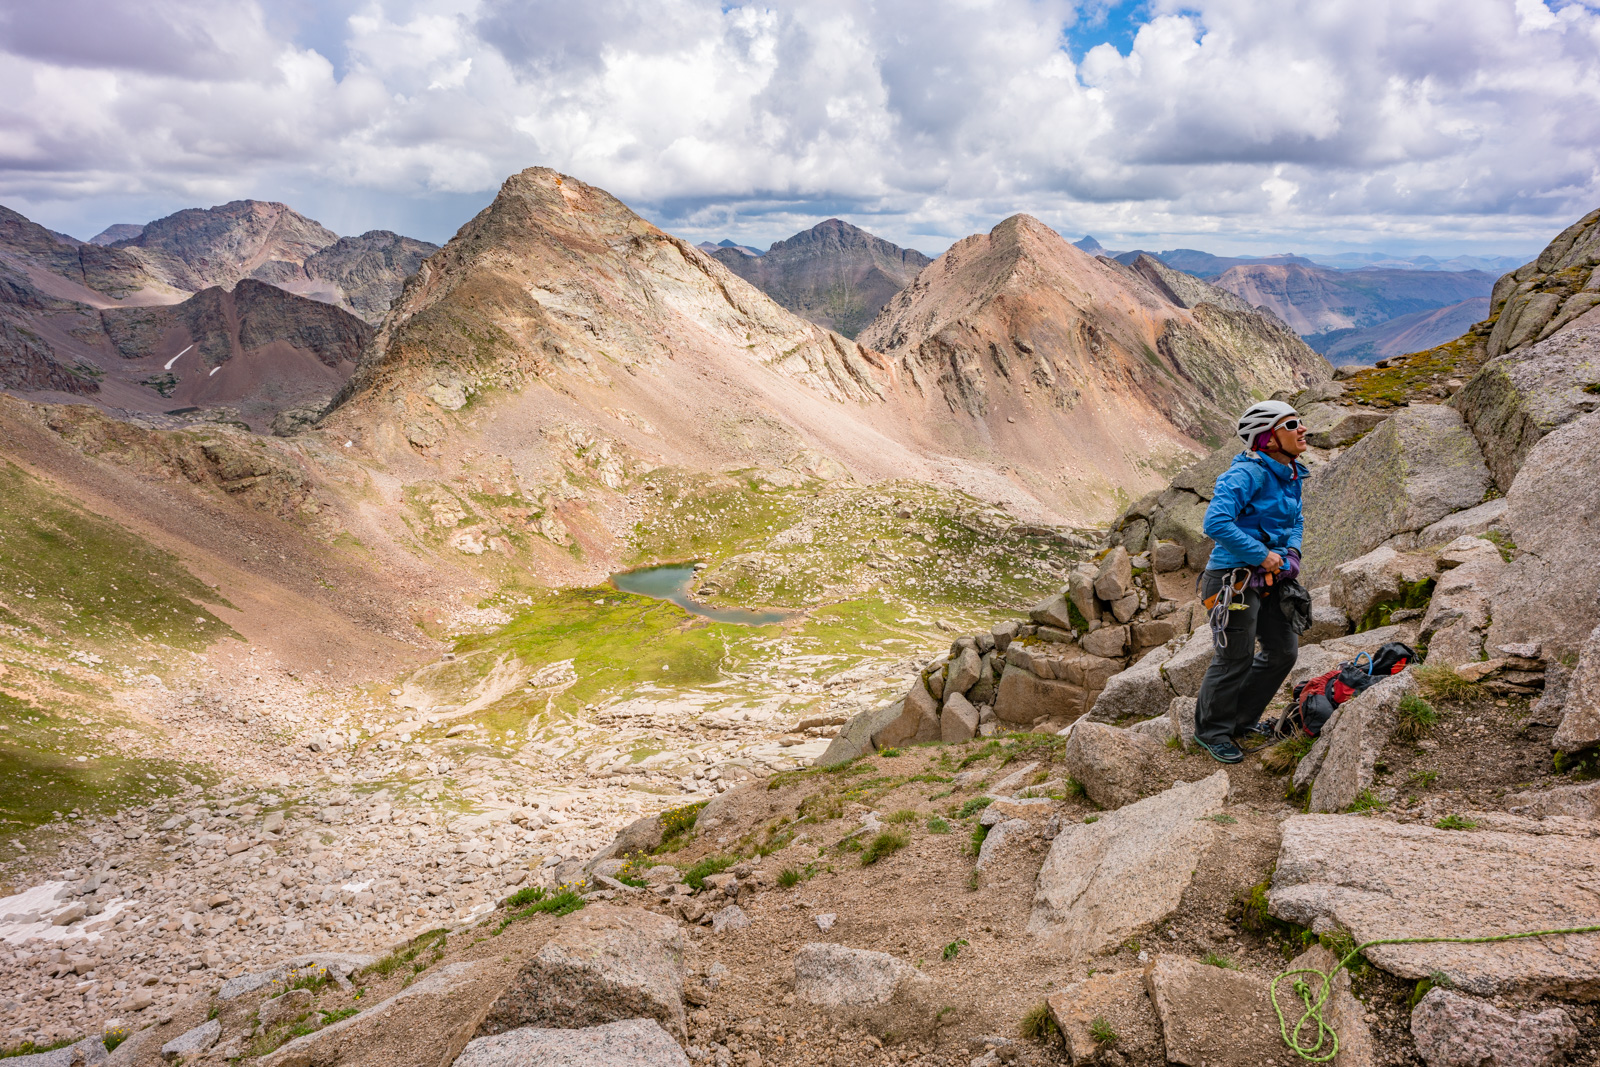
At this point, we had to make a decision. Natalie had already climbed Knife Point and both Shawn and Natalie were looking for something challenging. I was looking for a good vantage to photograph the eclipse and had always admired Knife Point from afar, so we decided to split ways - I chose Knife Point and Shawn and Natalie chose to do Peak 10. Our plan was to meet back up in the basin below Jagged and then hike back down together, unless weather looked bad, then we would meet at camp. Worked for me.
Knife Point really caught my attention in 2013, when I saw it from No Name Basin:
I continued my hike up into the upper basin and was enthralled by the huge variety of wildflowers. 14er Sunlight Peak poked out above it all and looked amazing.
The climb up to the ridge between Peak 10 and Knife Point was very steep, but it was eased by the beautiful flowers I found along the way.
I reached the saddle and the views west towards Pigeon, Monitor, and Animas above No Name basin were great to say the least. I stopped here to take it all in and enjoy a snack.
Unbeknownst to me, Shawn had seen me gain the saddle and snapped some photos of me from Peak 10's flanks.
I scrambled up the ridge and took in the route for Knife Point. It looked like staying east and then going up the blocking face would work great.
The climb up Knife Point was not terribly difficult. I would rate it class 2 with one or two easy class 3 moves mixed in for fun, which were mostly avoidable with careful route finding. The views of Sunlight Peak on the way were breathtaking!
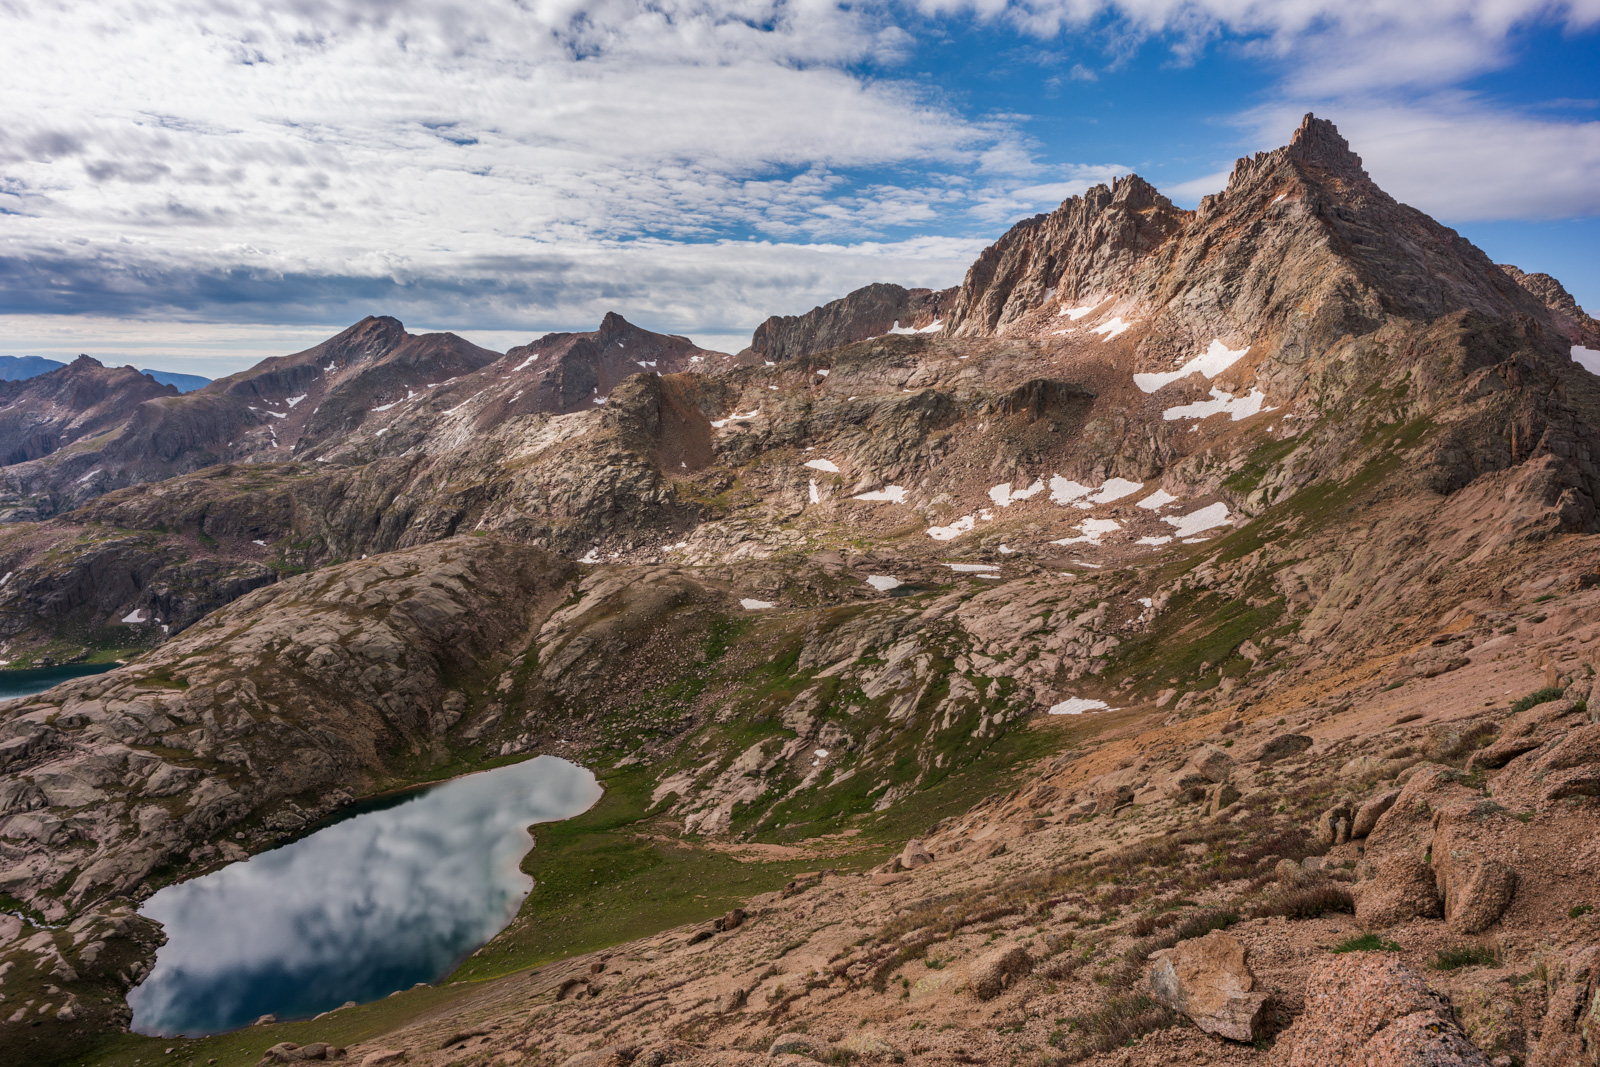
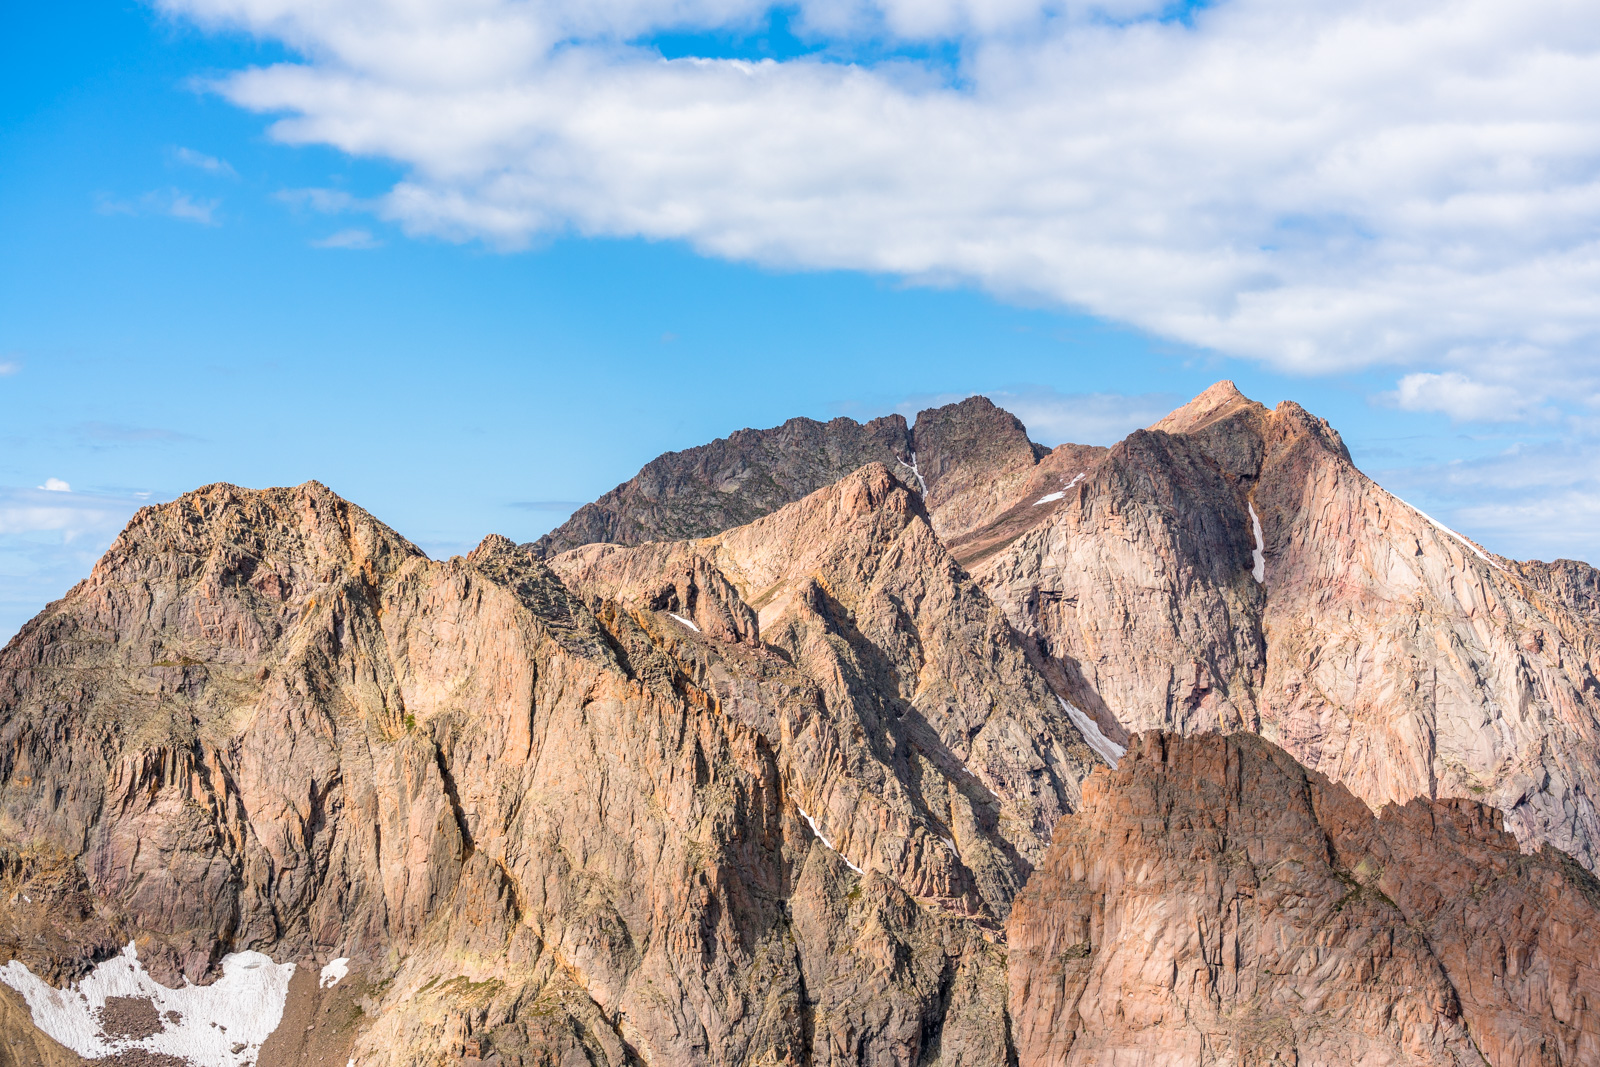
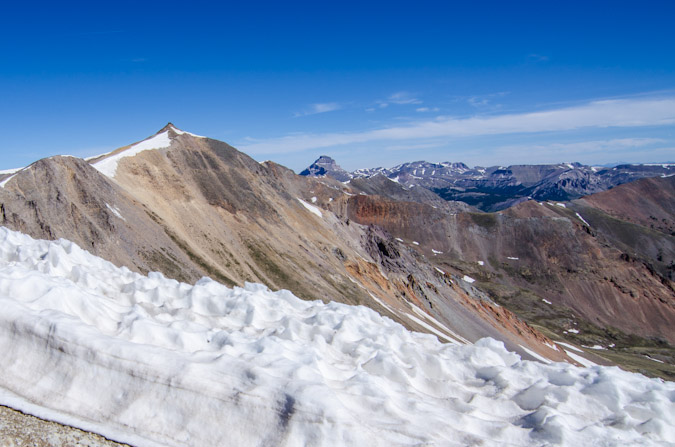
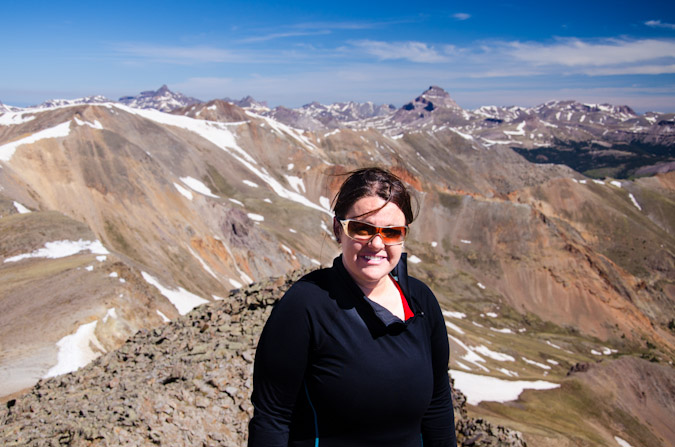
I reached the summit of Knife Point without any problems and enjoyed the amazing views of the Needle Mountains, including Sunlight Peak, Sunlight Spire, Glacier Point, Eolus, North Eolus, Pigeon Peak, Turret Peak, Animas Mountain, and Monitor Peak. What a mighty string of peaks it was to behold!
I set-up my tripod for some more detailed photo work, anticipating the eclypse. Again, unbeknownst to me, Shawn had taken some photos of me from Peak 10, this time of me setting up my tripod and shooting some photos from the summit of Knife Point.
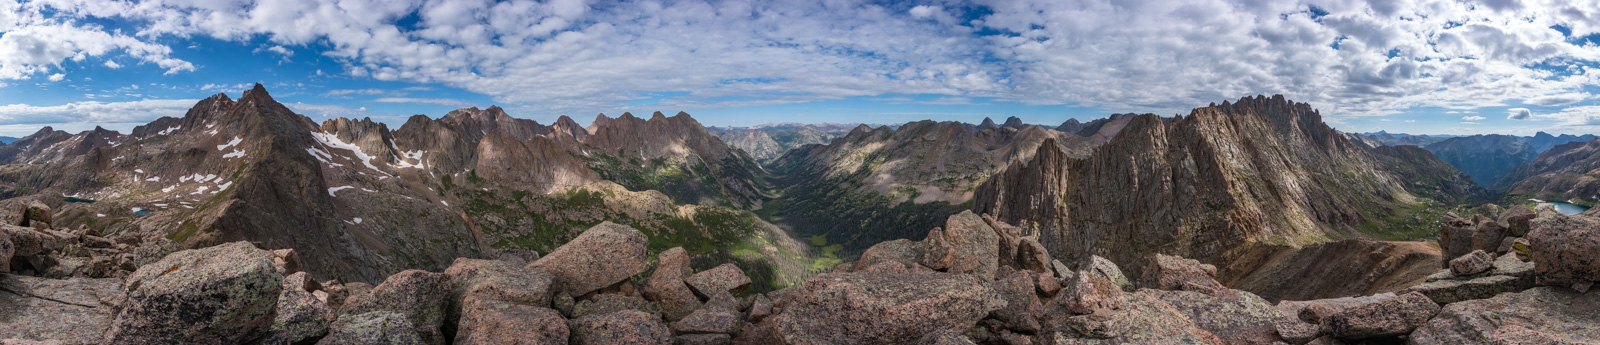
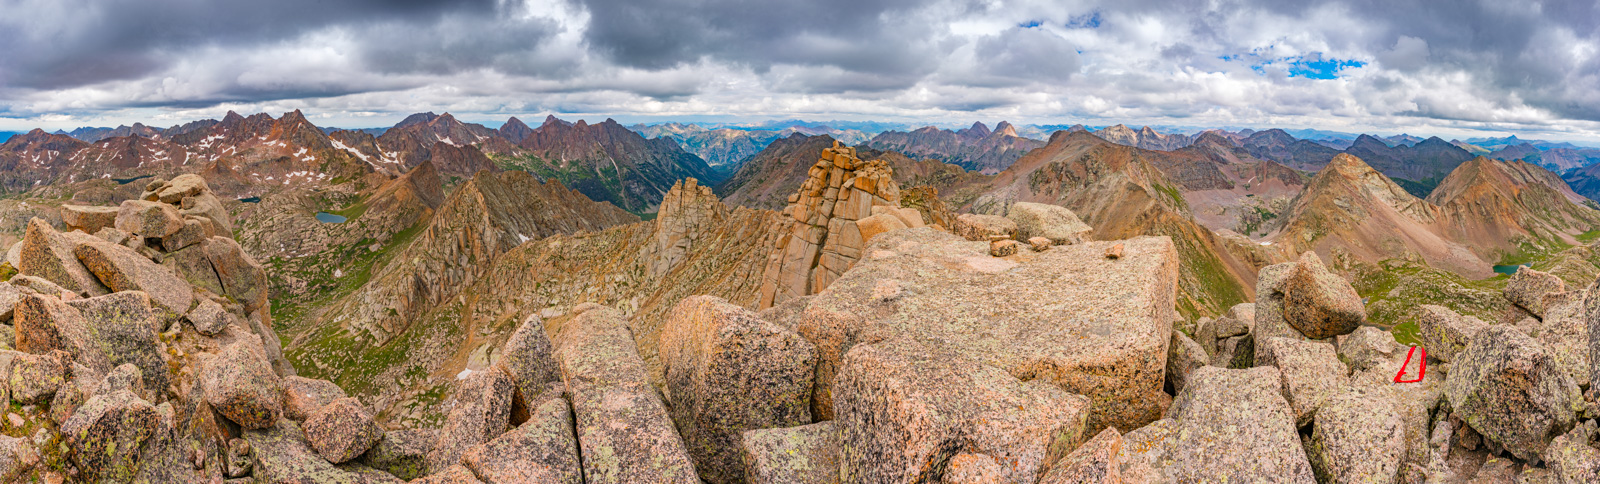
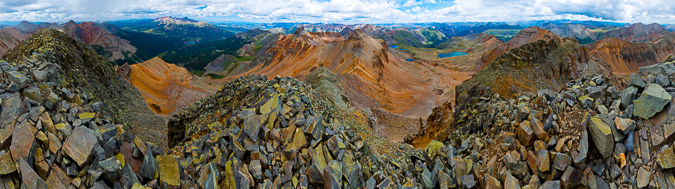
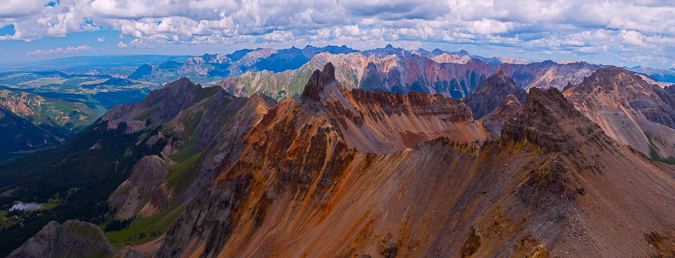
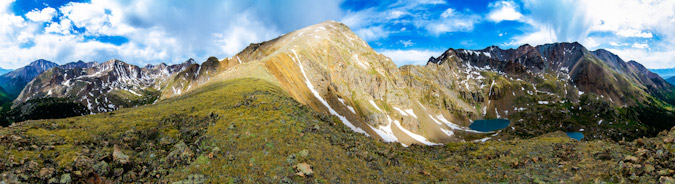
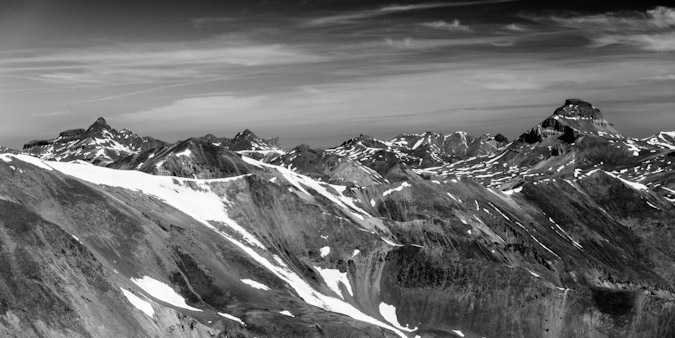
Knife Point might just be one of the more photogenic locations to photograph, as it offers impressive views of some of Colorado's most incredible peaks, including Sunlight, Eolus, and Windom, Pigeon, Turret, Monitor, and Animas, as well as Arrow Peak, Vestal Peak, and of course, Jagged Mountain, as seen in this 250 degree view.
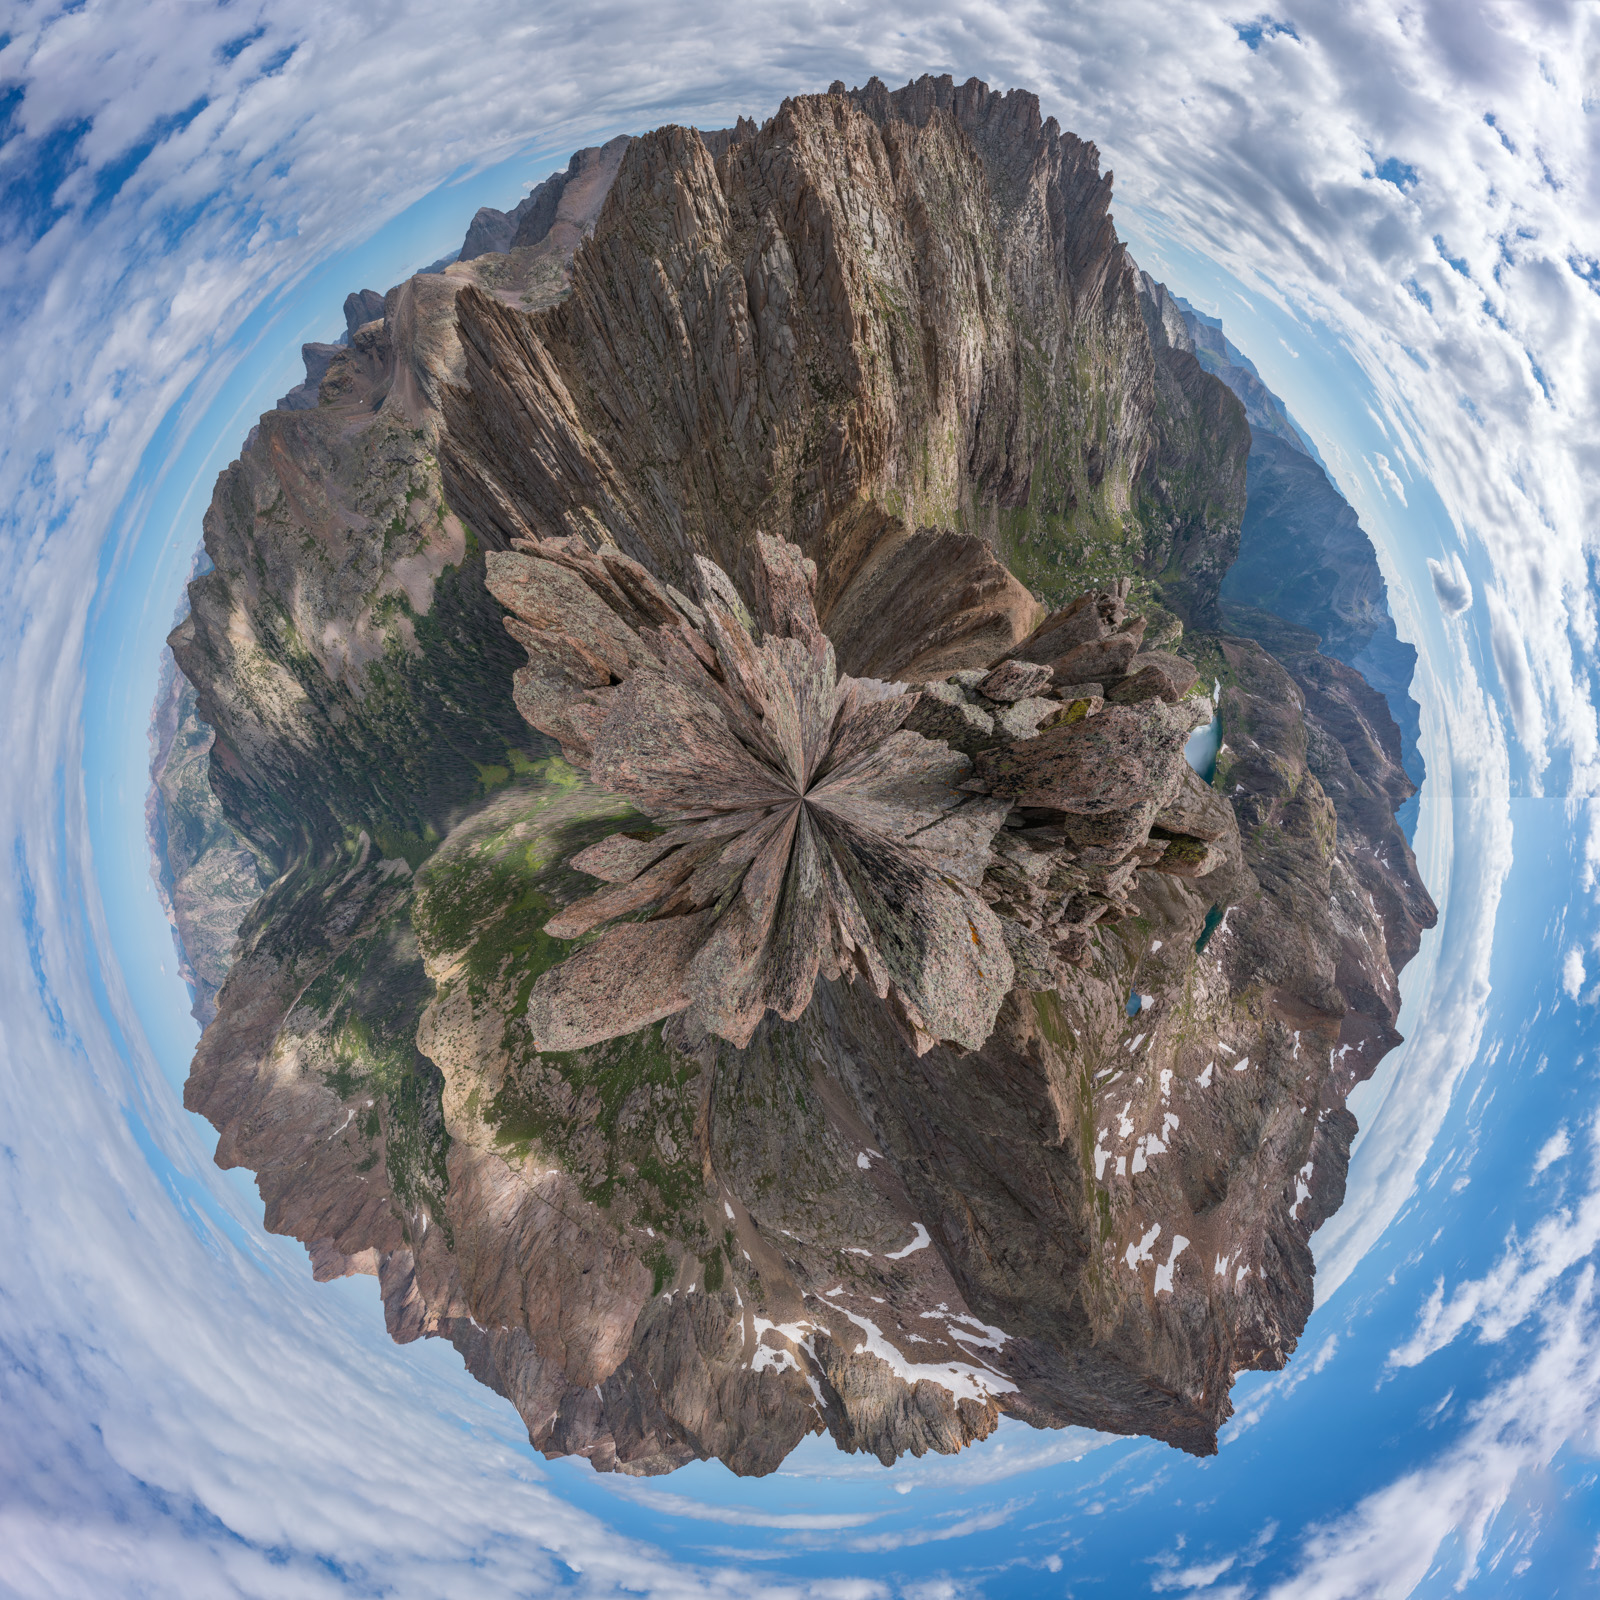
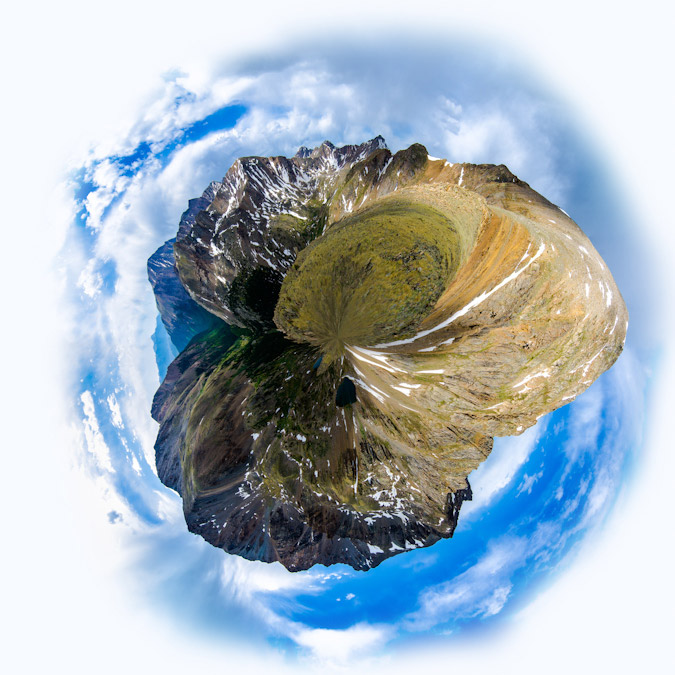
Another fun view of this scene is to take a 360 degree panorama and turn it into a planet. I call this one "Planet Weminuche."
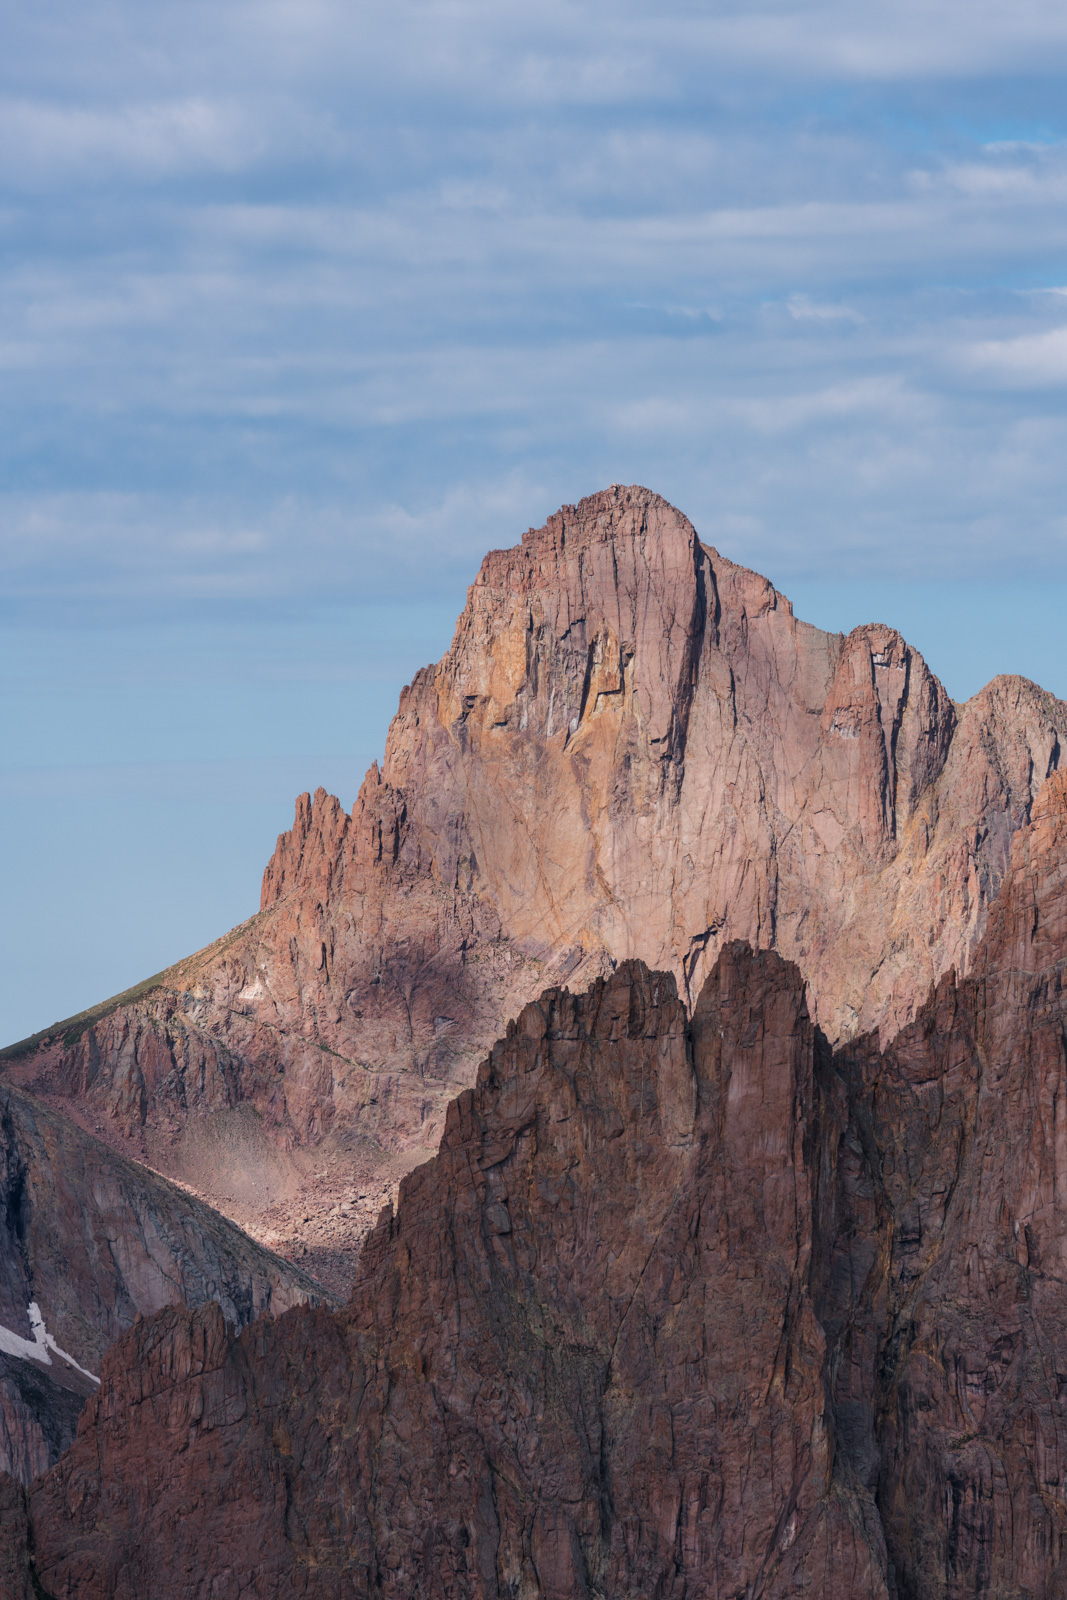
I was thankful that I lugged my heavy telephoto lens up to the top, as I could get a nice and tight zoomed in view of Pigeon Peak, one of my faves.
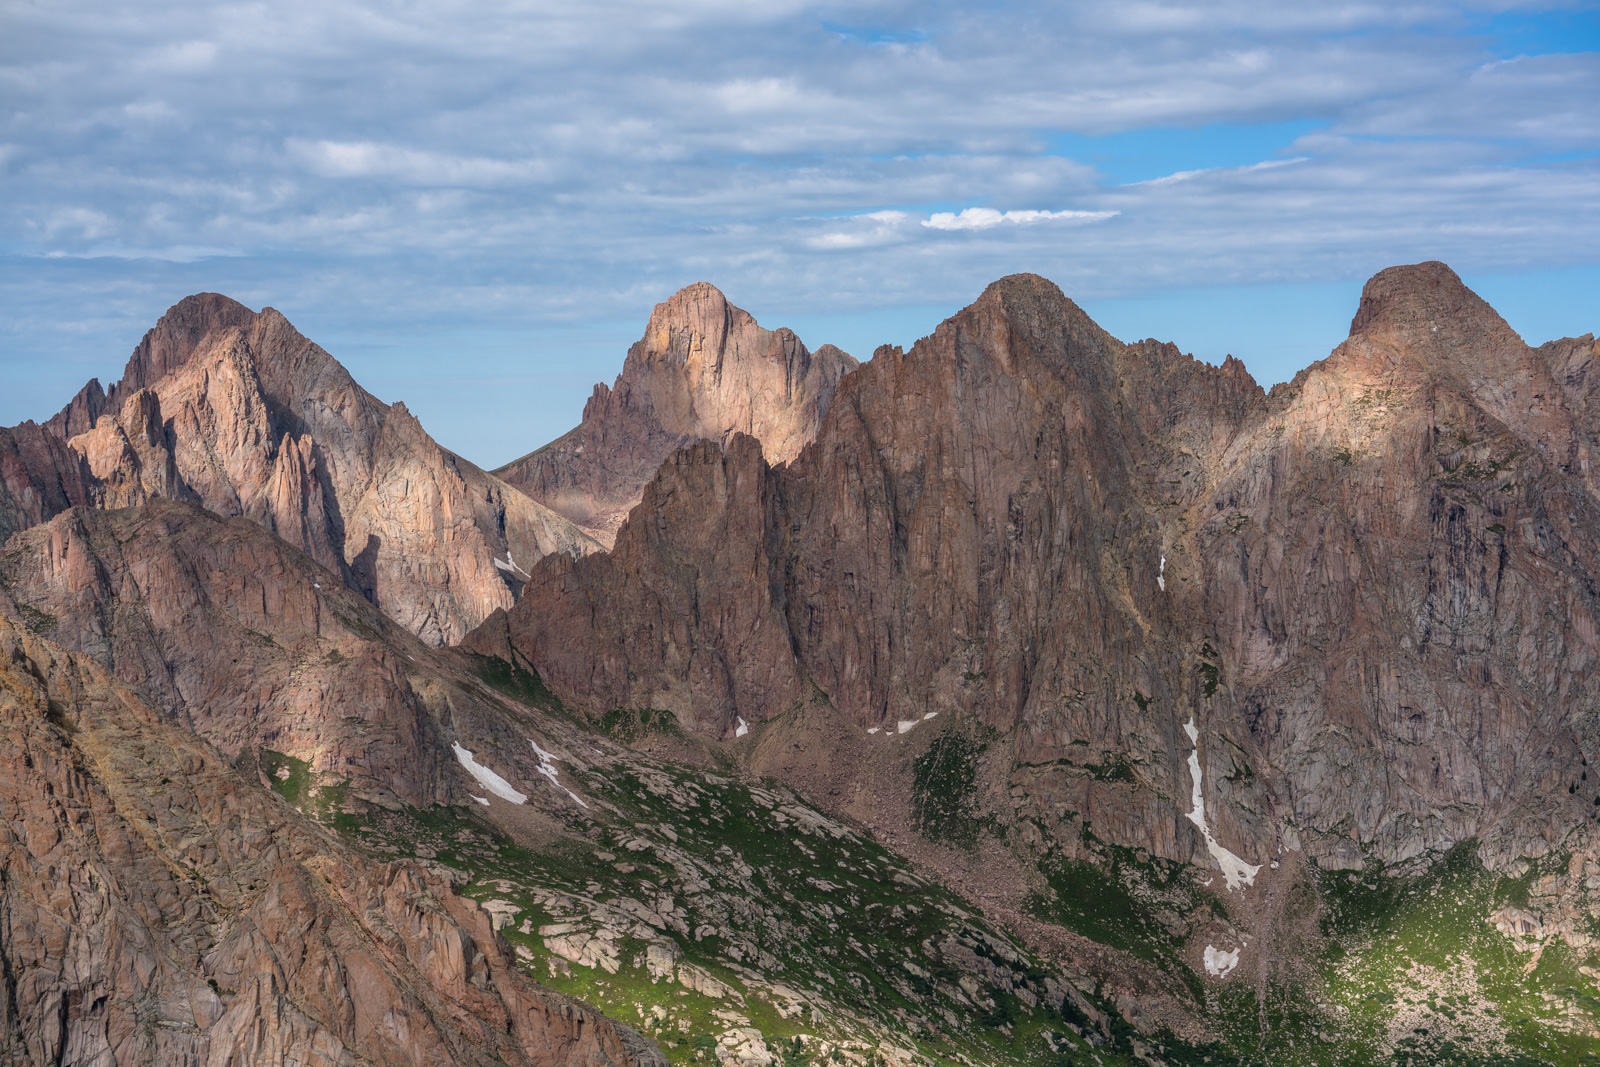
And of couse a slightly less zoomed in view of the whole group, including Turret Peak, Pigeon Peak, Monitor Peak, and Animas Mountain. So freaking good looking!
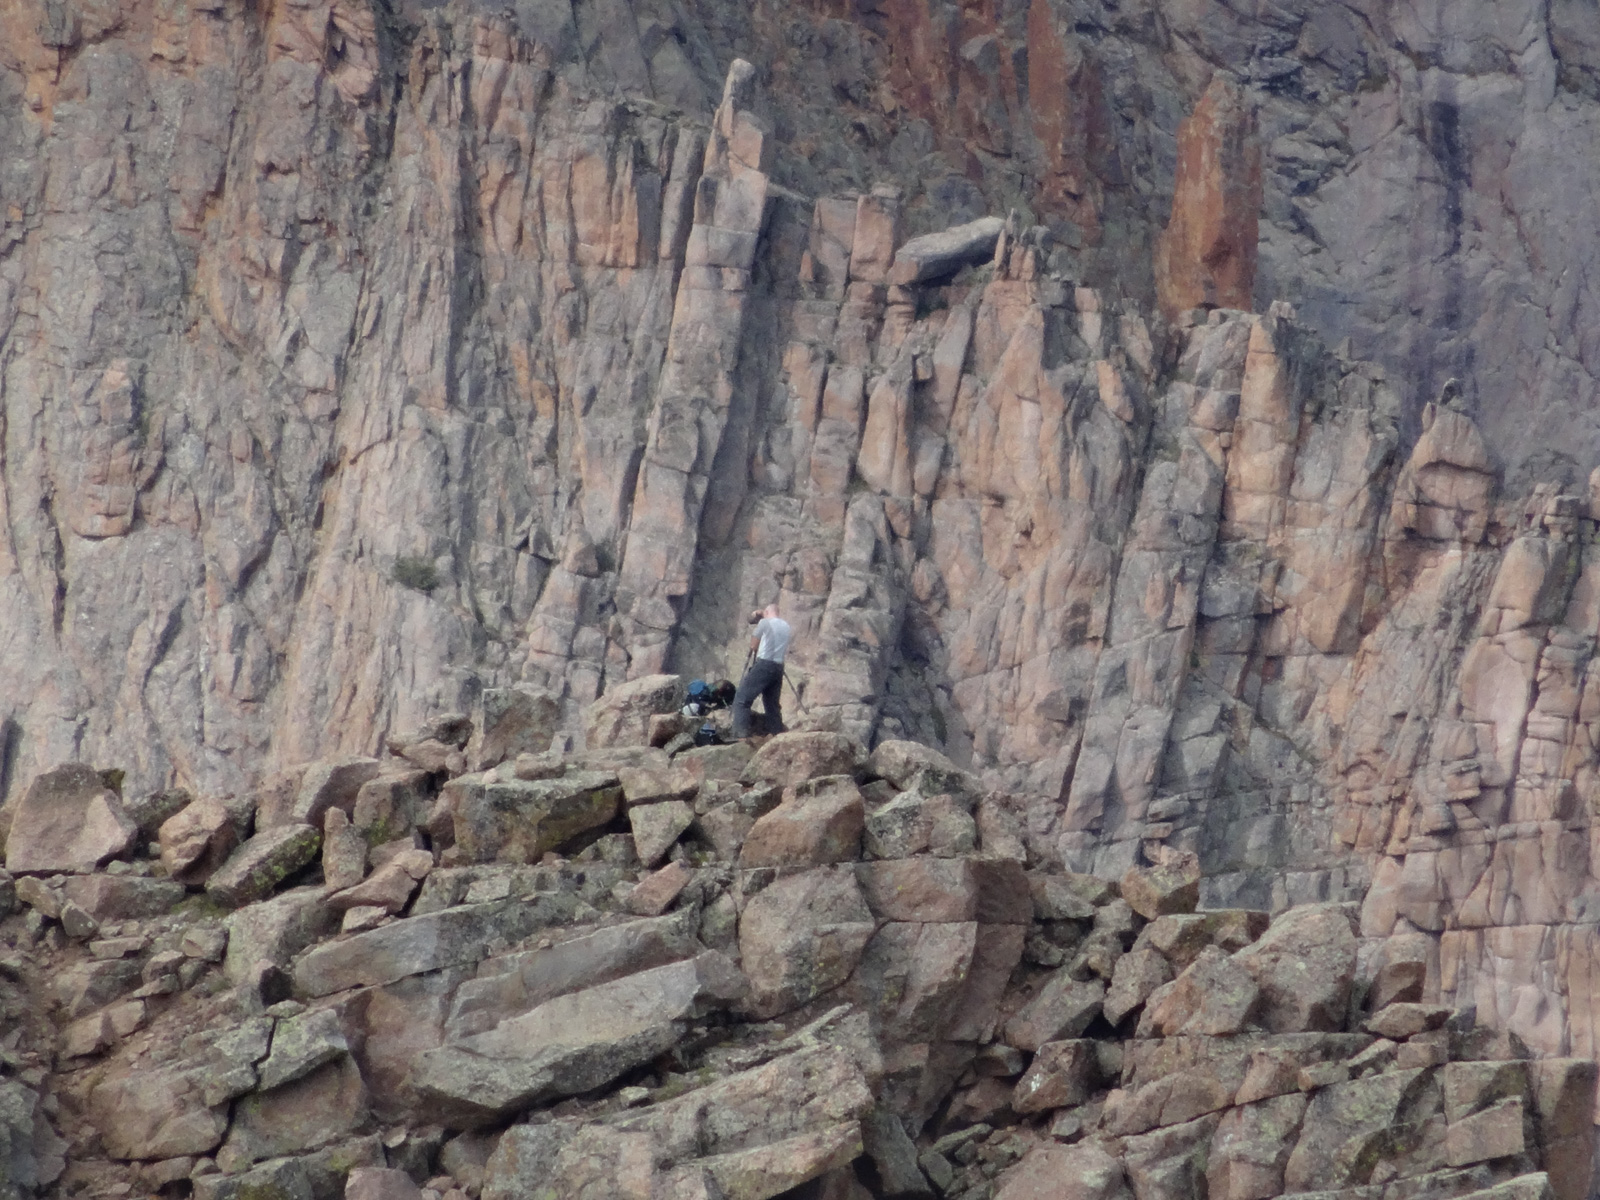
I also really appreciated the tight view of Sunlight and Sunlight Spire. Amazingly, hidden in this photograph is a tiny person I found while exploring the image from home. See the subsequent cropped photo to see if you can spot them.
Zoomed in view of where the person is - it's like Where's Waldo.

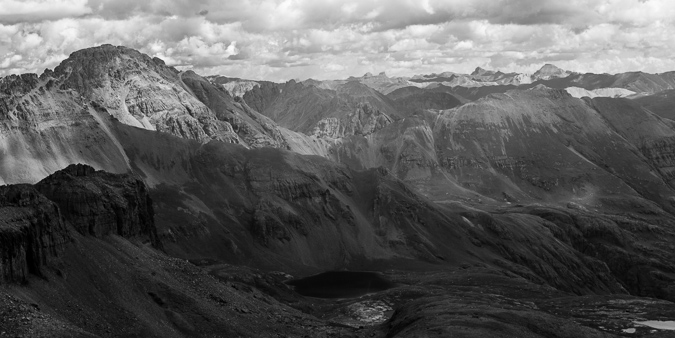
I could hear some people celebrating over on Sunlight and probbaly Eolus. Glacier Point, Eolus, and North Eolus looked mighty from this vantage as well.
My gaze kept taking me back over to Arrow and Vestal, which rose high above a small lake between Knife Point and there, with the nasty rock of Peak 10 in the foreground.

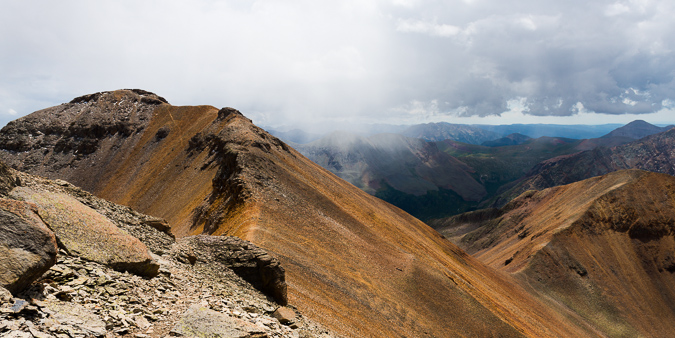
Of course, I could not help but study Jagged Mountain - it was just scary and impressive looking from here.
Just before the eclipse, I got in one more shot of Sunlight by itself. I really loved how the ridge sweeps up from below and terminates at the summit like some impressive mountain god.
Unfortunately, clouds began to really move in and obscure my view of the sun just before the eclipse began. Additionally, the clouds did not appear to be too friendly at all; however, I might just be the only person on earth that can say they photographed a solar eclipse from the top of a 13,000 ft. mountain.
Since the weather looked iffy, I decided to descend back into the basin. I could not make out Natalie or Shawn on Peak 10 with my bare eyes or my telephoto lens, so I took my time on my way down, looking for a nice scene to snap some more shots of Jagged paired with some wildflowers - this time, Rosy Paintbrush, probably my favorite flower.
I waited around for about an hour for Natalie and Shawn. I did not see them or hear them, so I decided to go down. One last look back, I made Shawn out on the ridge between Knife Point and Peak 10! He must have scrambled over from Peak 10 (impressive). I was tired and my feet were sore, so I headed back down.
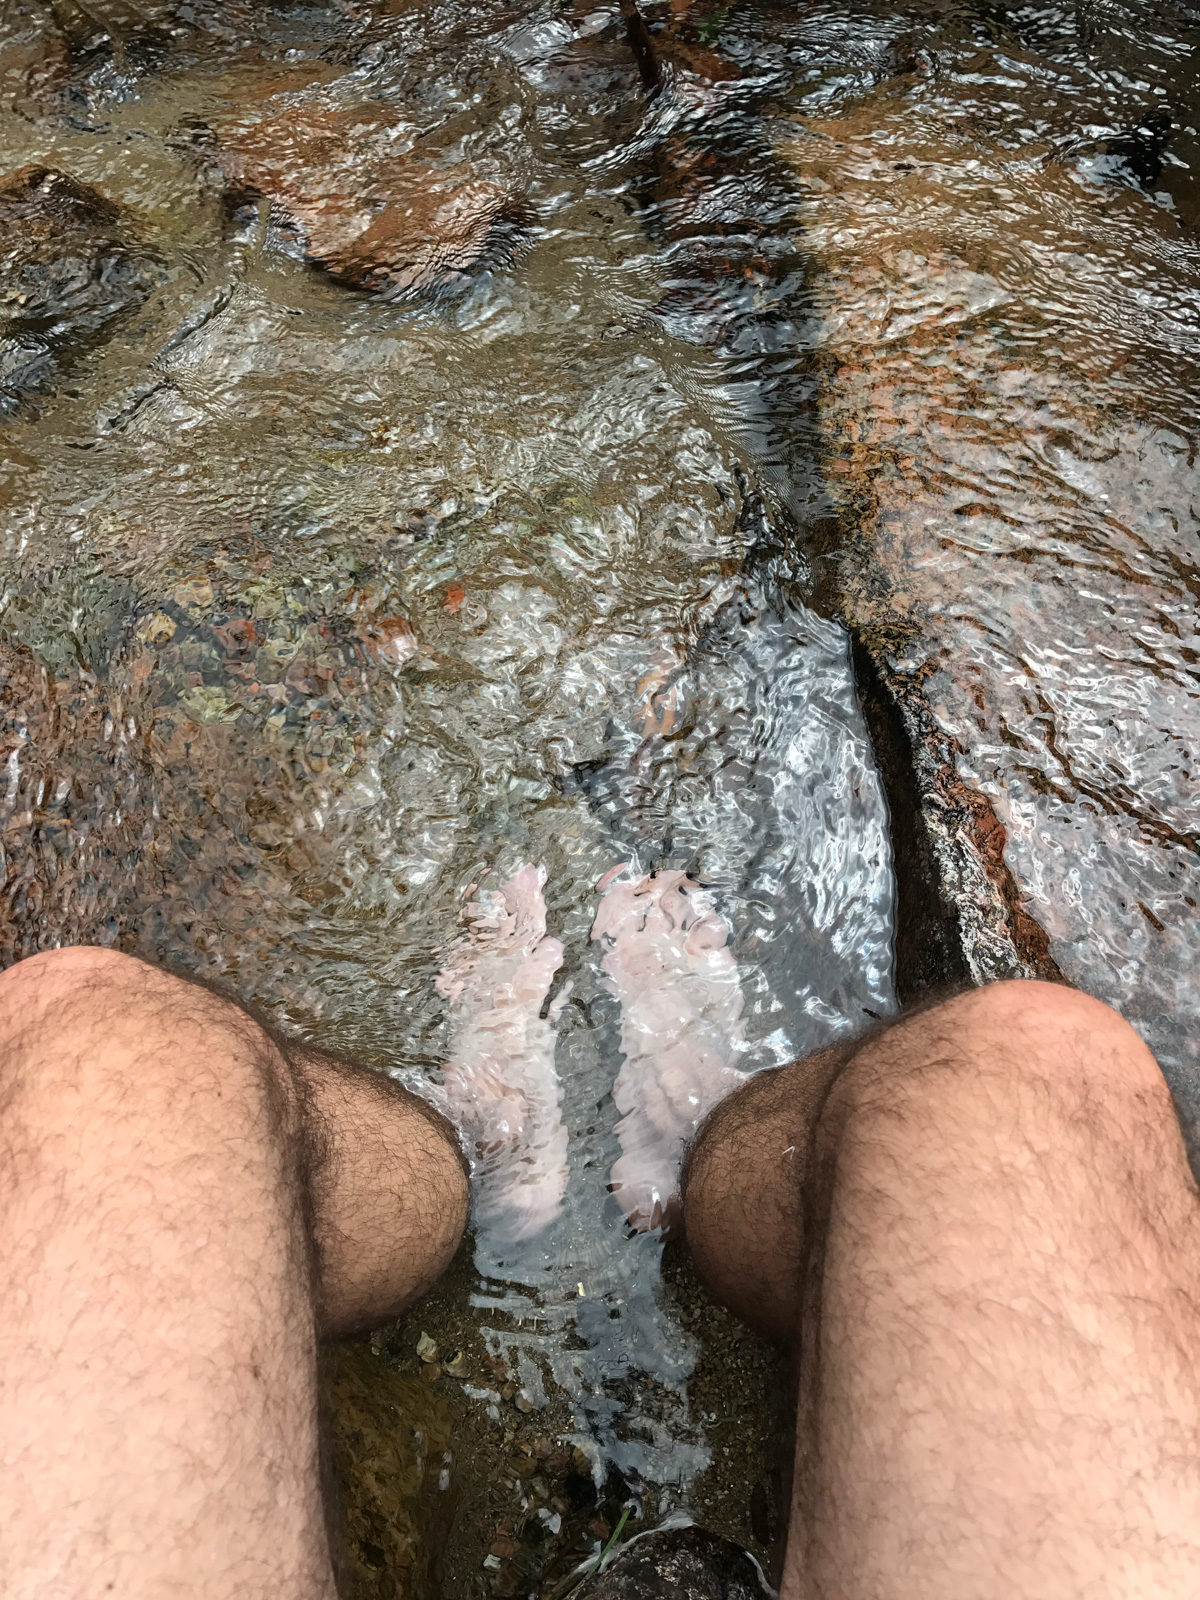
I arrived back at camp and decided to soak my feet in the creek. For some reason, my boots had shrunk since I last wore them and they were really encroaching on my achilles heels. Awww, sweet cold relief!
Natalie and Shawn both came into camp shortly after my arrival and we talked about our climbs. All was well and we made plans for a 4:30 start for Jagged Mountain. My nerves were getting more and more knotted.
DAY 3: 4:30 AM start and climb of Jagged Mountain.
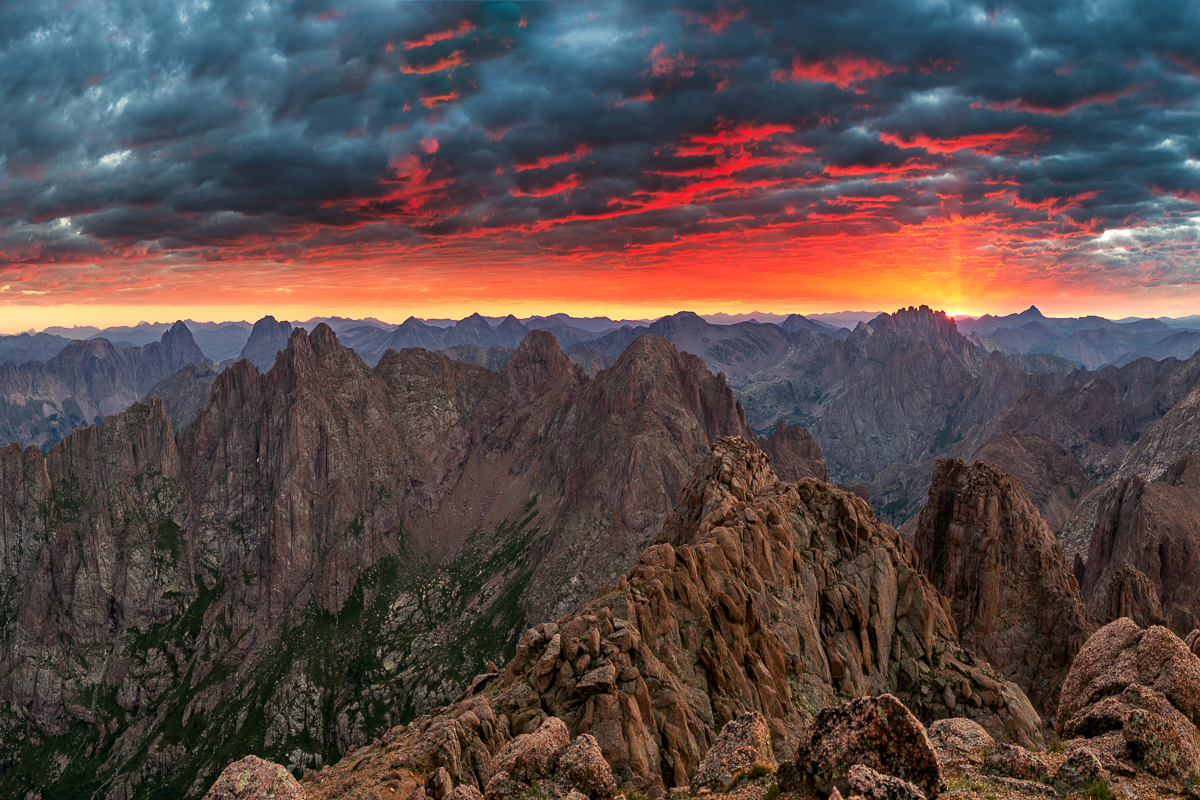
Beep. Beep. Beep. Time to wake up and crush another Centennial. That's what I kept telling myself anyways. Let's do this! We got up, packed up our ropes and harnesses, re-filled water, and were off! We arrived in the upper basin just in time for some nice sunrise light above Sunlight Peak. No tripod today.
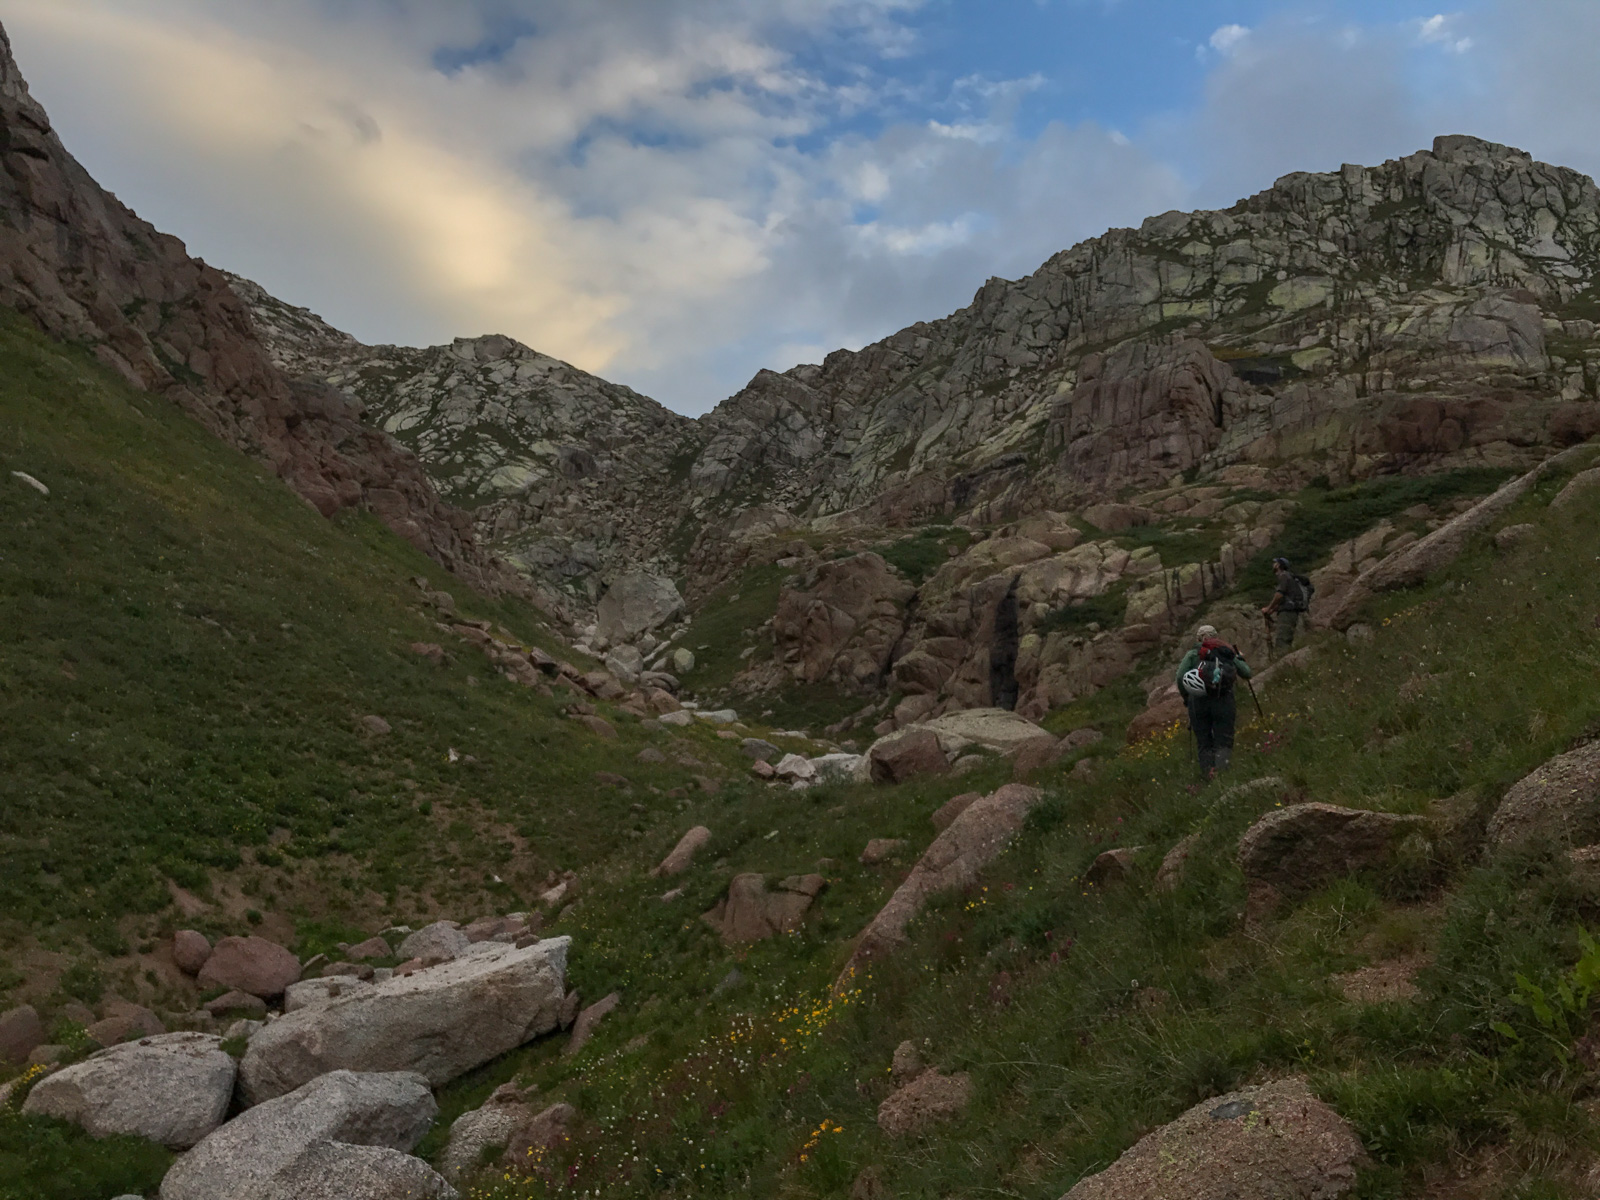
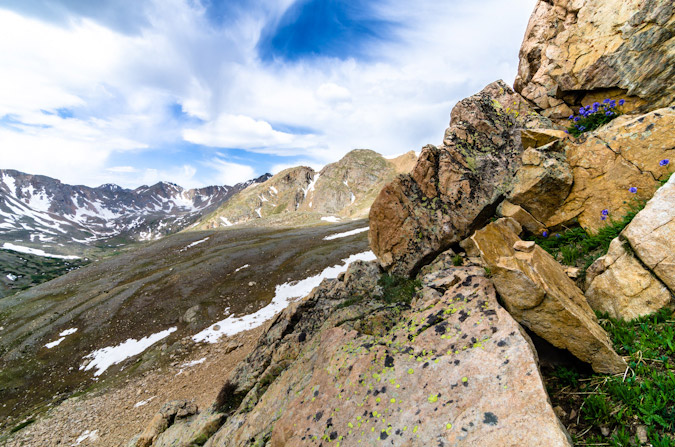
From the upper basin, the plan was to swing around the west face of Jagged and up into the lower basin between Jagged Mountain and Leviathan Peak. We were able to find a nice trail up from Sunlight Creek and made our way up, admiring Peak 10 and Jagged most of the way around the bend.
A nice pink and orange hue eminated from a small tarn below us and between us and Mount Oso in the distance.
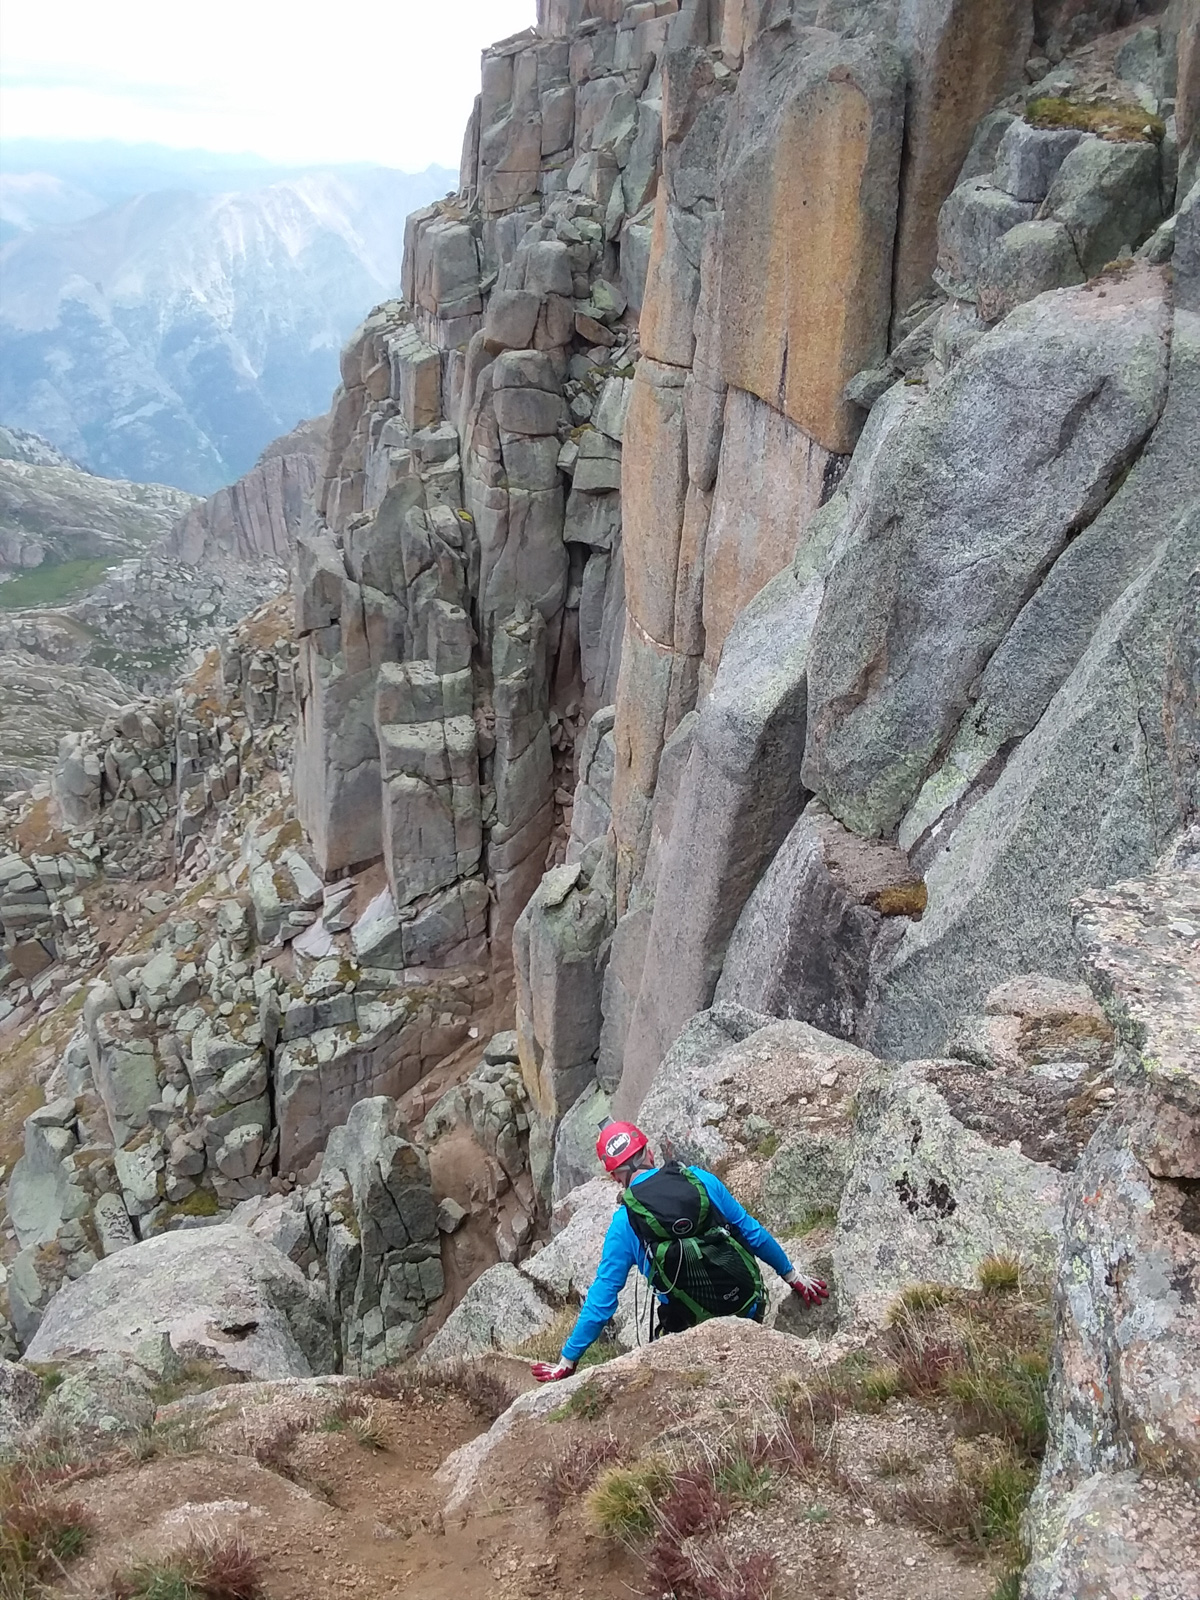
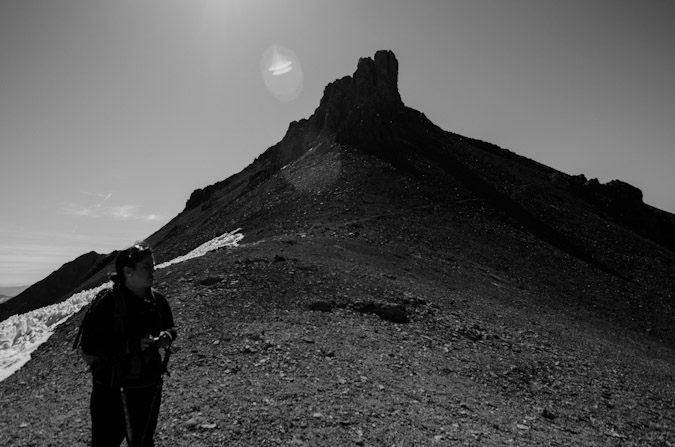
Once around the west face of Jagged, we finally found the beginning of the steep climb up to the basin below Jagged's north face. We each decided on a separate route up from here - Shawn went right and around the huge blocky, grassy slopes. Natalie went left and up where some goats were grazing, and I decided to go pretty much straight up the grassy ledges. I think each of our routes had different advantages.
Jagged was impressive from this vantage.
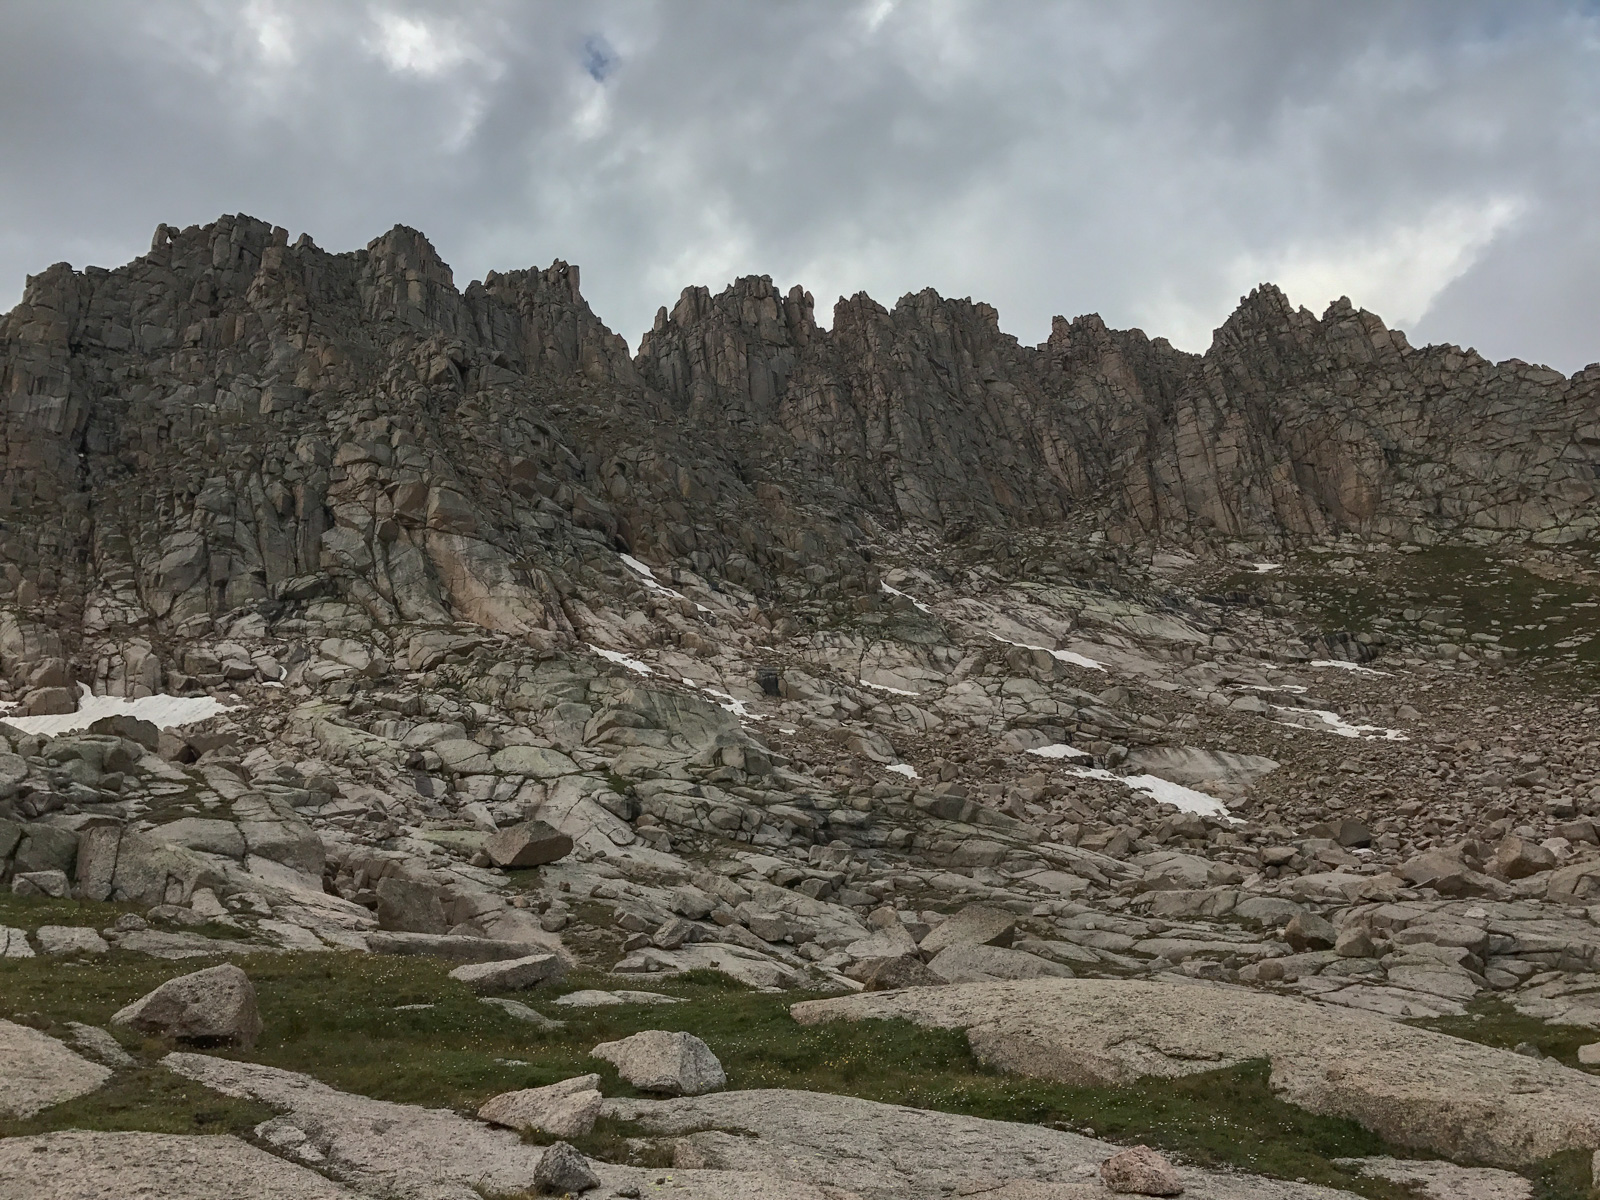
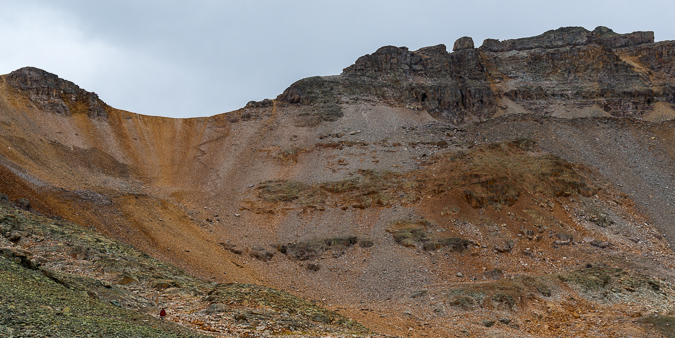
We each reached the area below Jagged's north face at about the same time, which afforded some pretty remarkable views of what lie ahead.
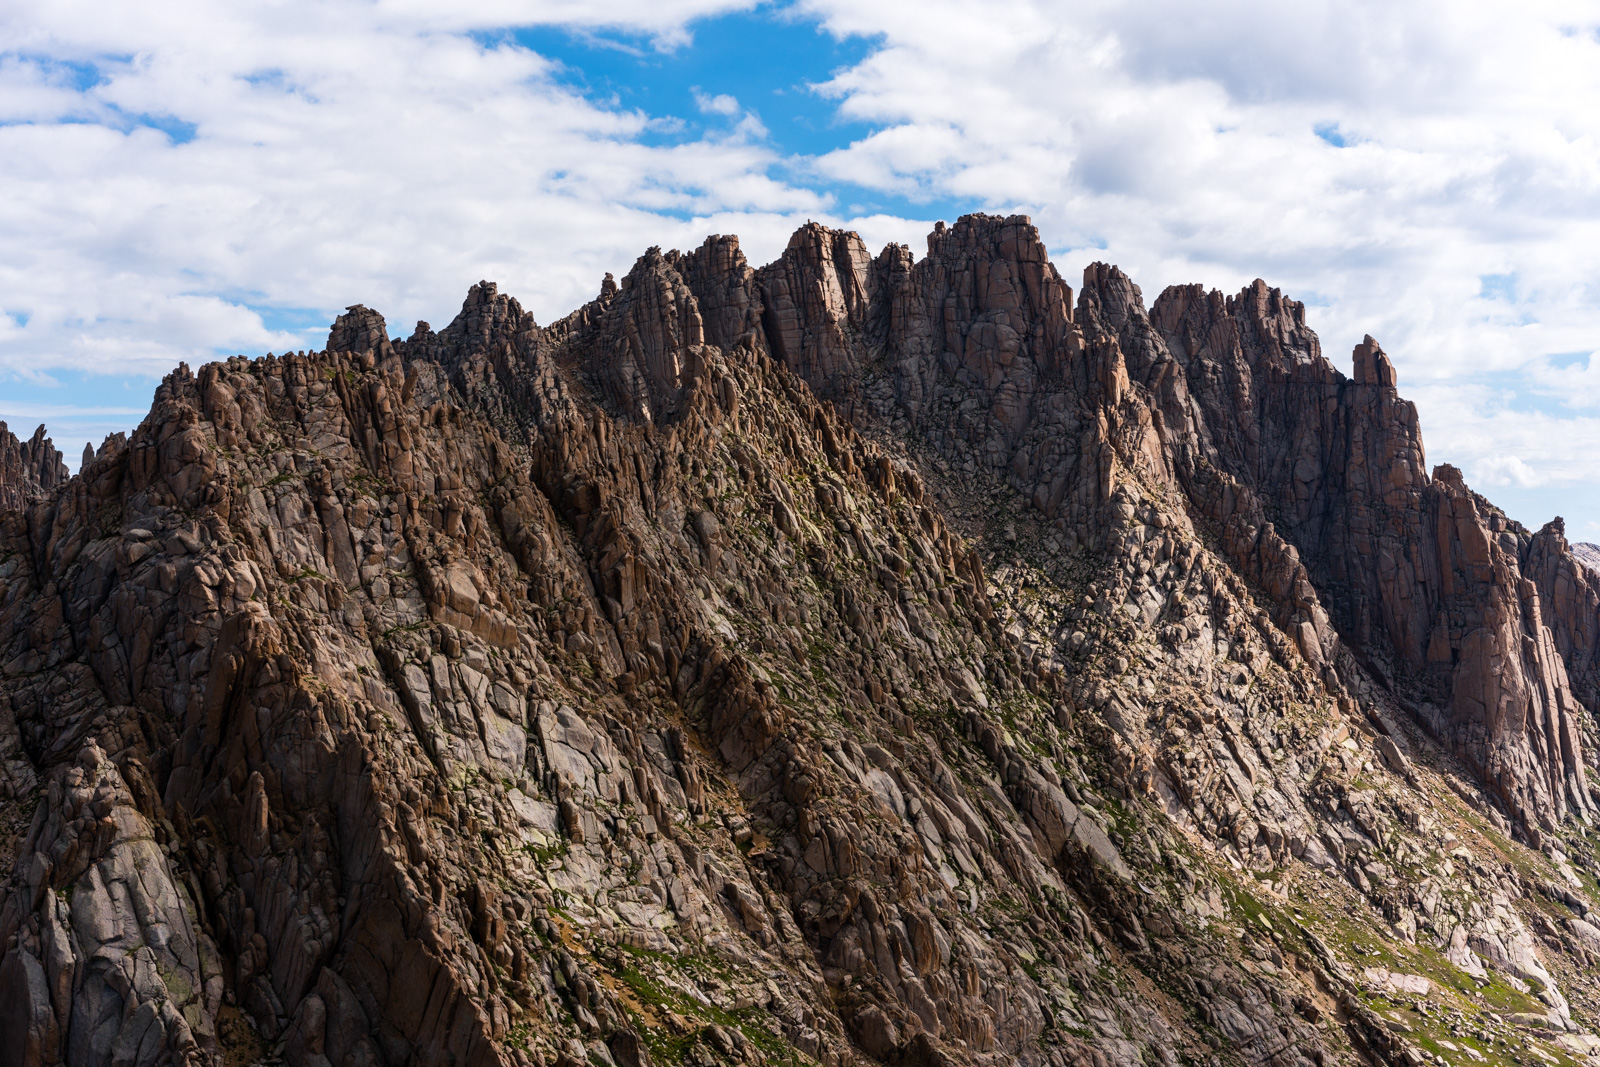
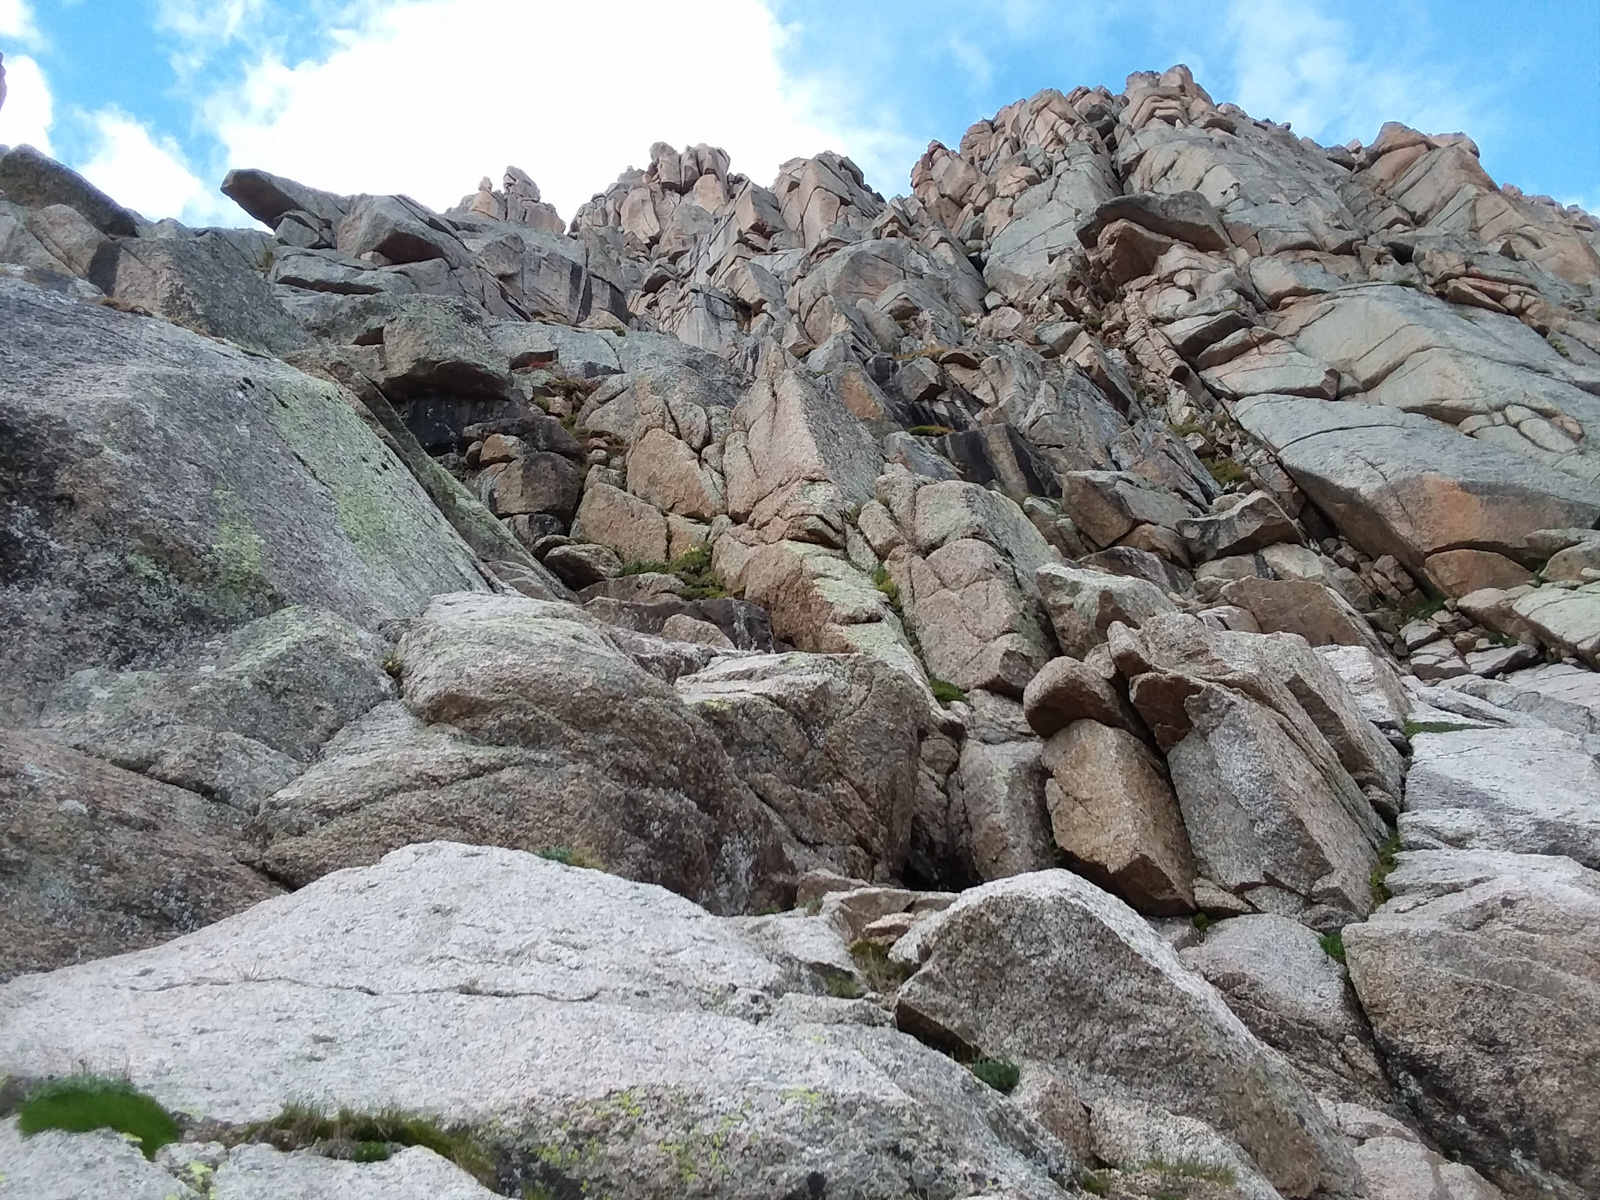
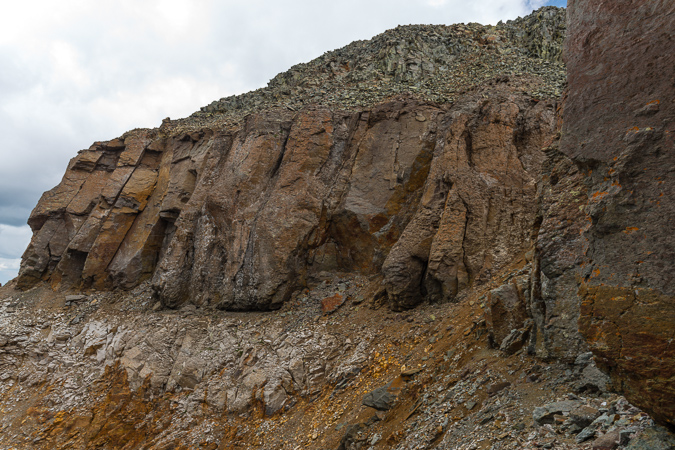
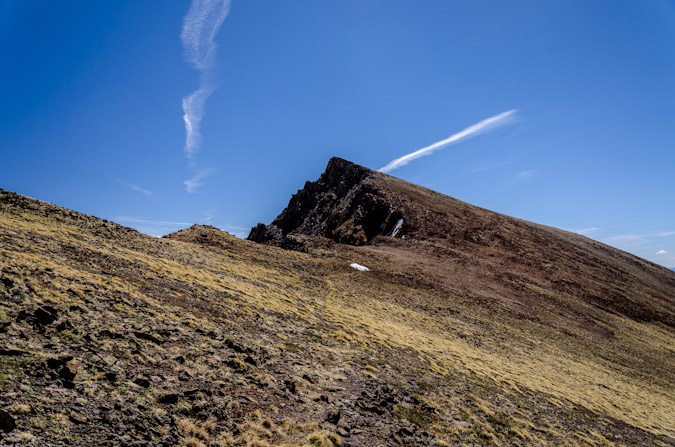
If you had not studied the route before hand, seeing this jumbled mess of rock that was called Jagged would look mighty itimidating.
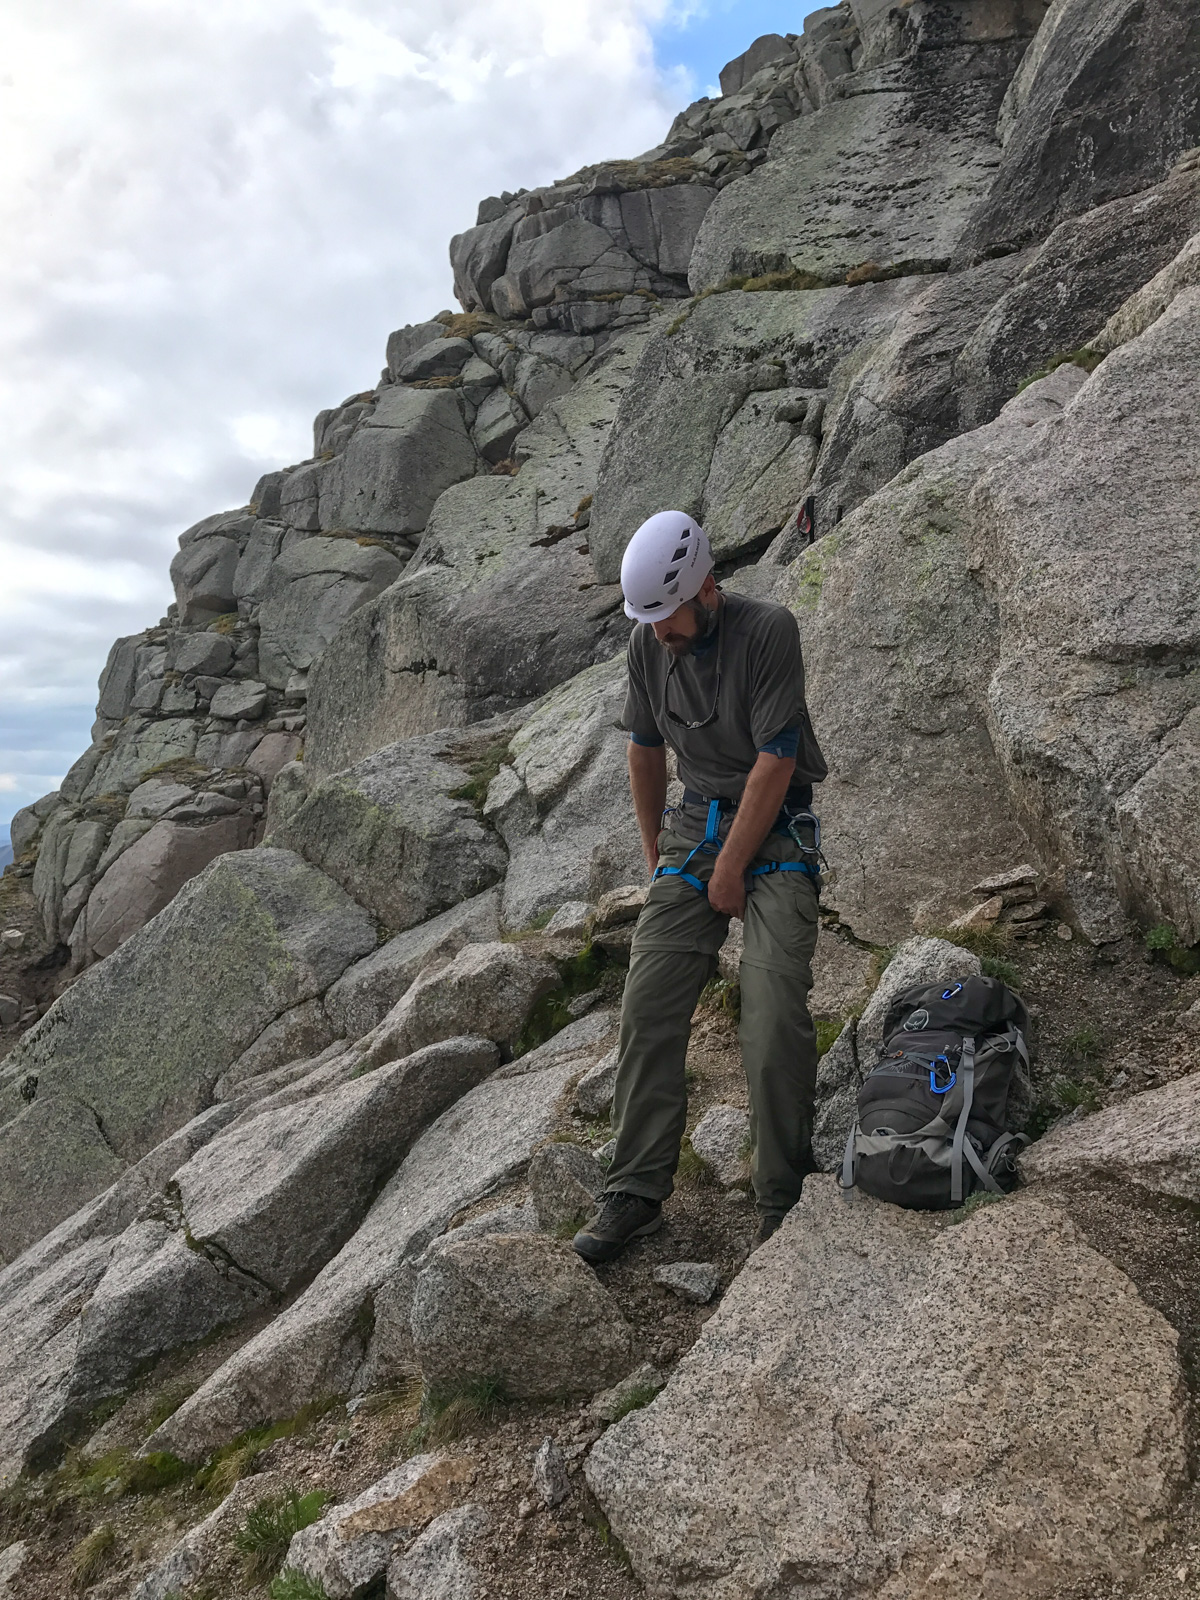
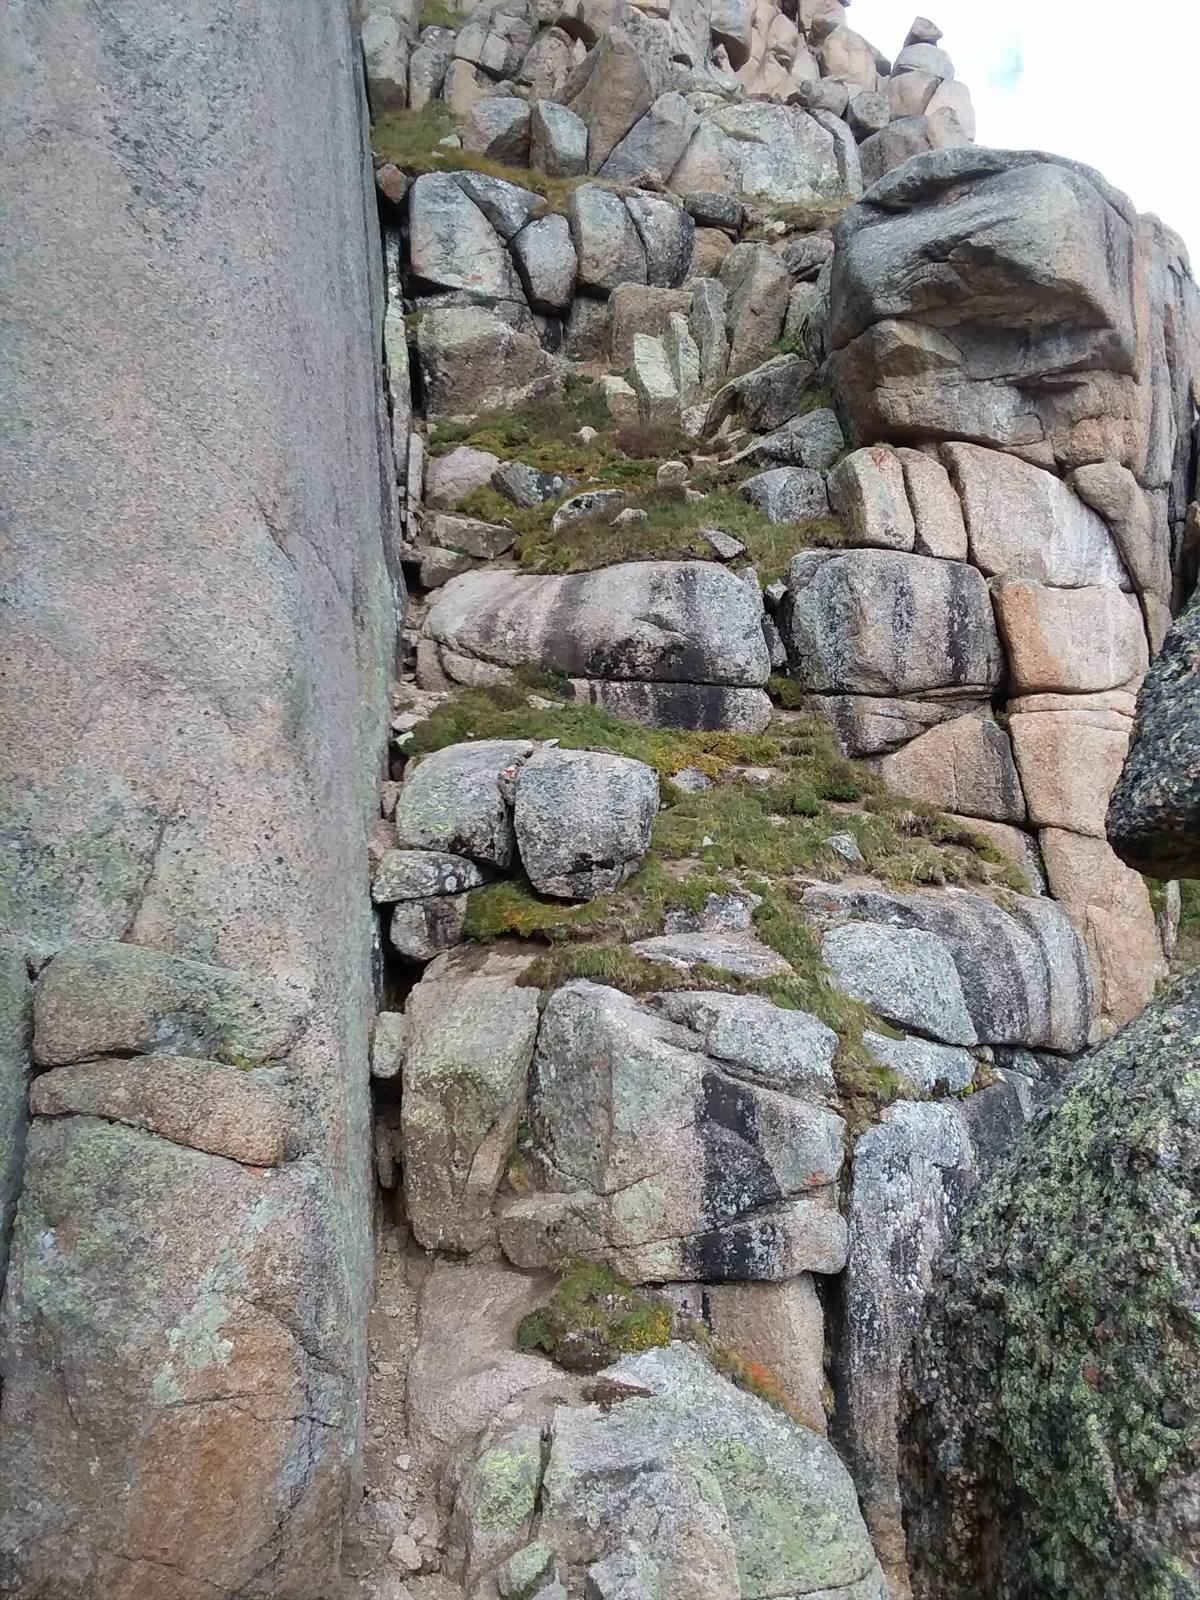
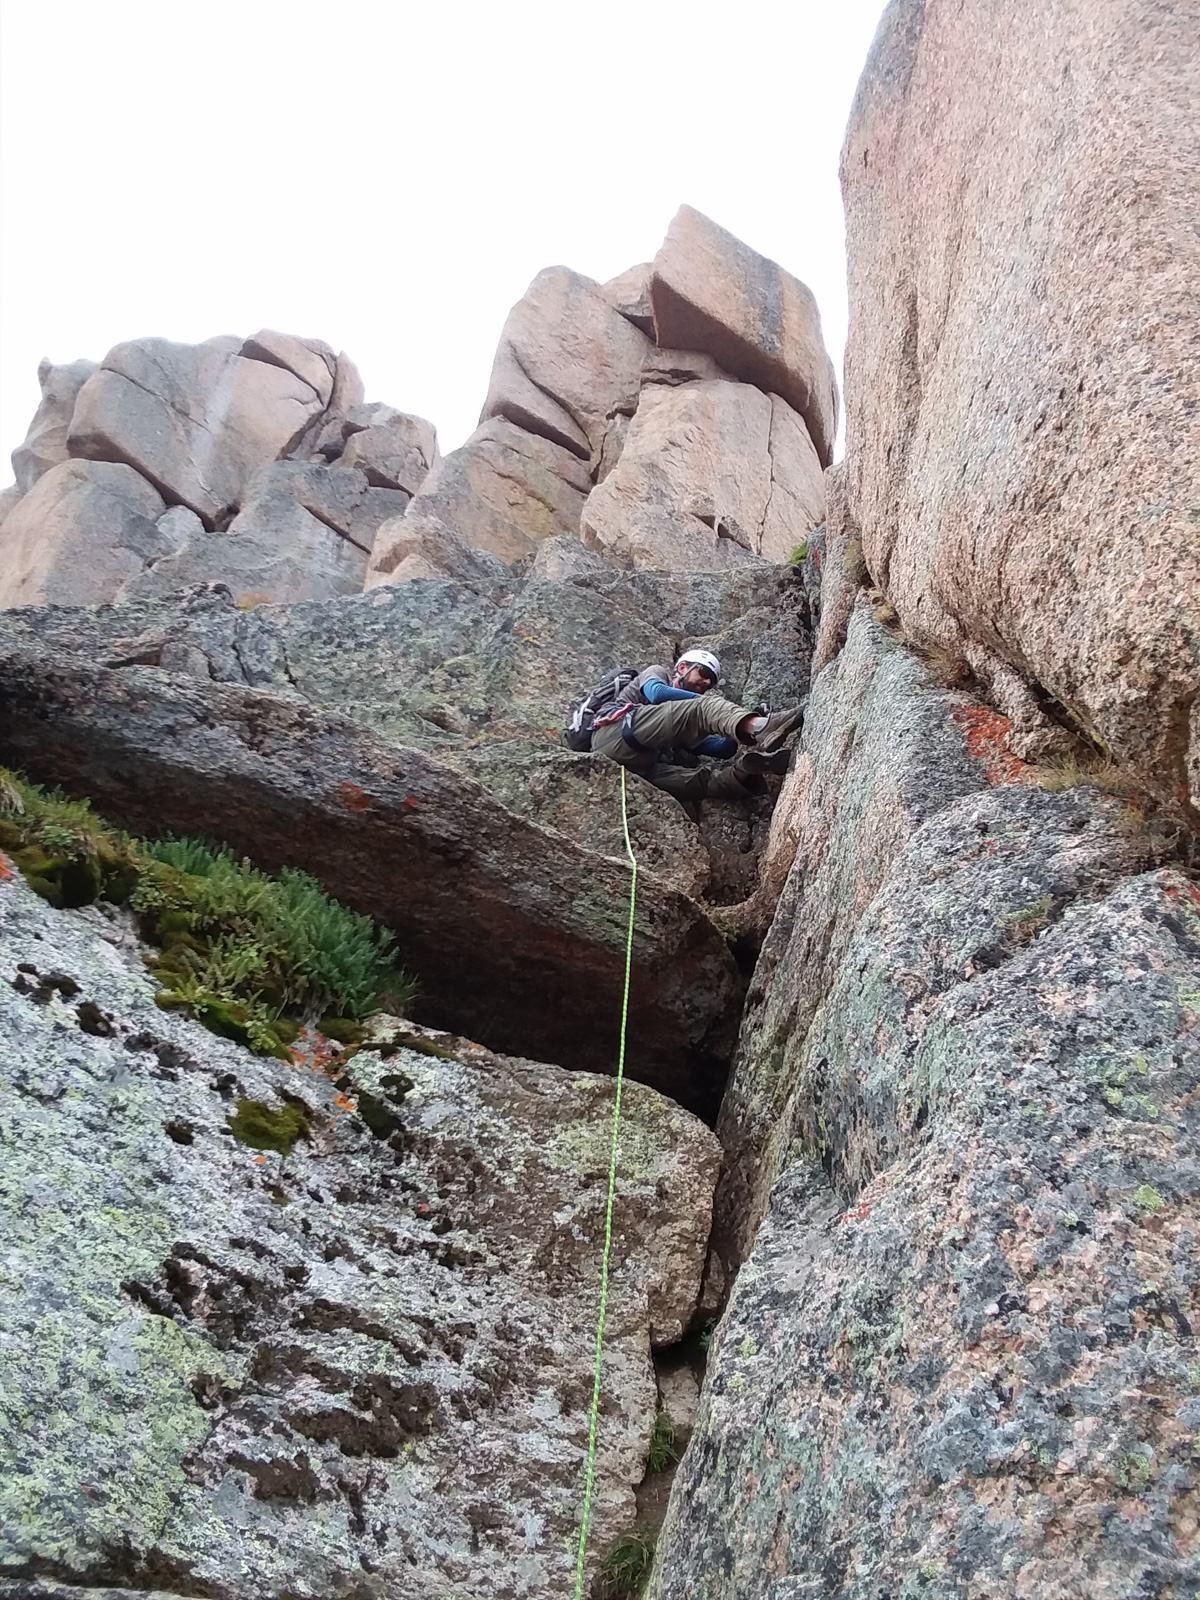
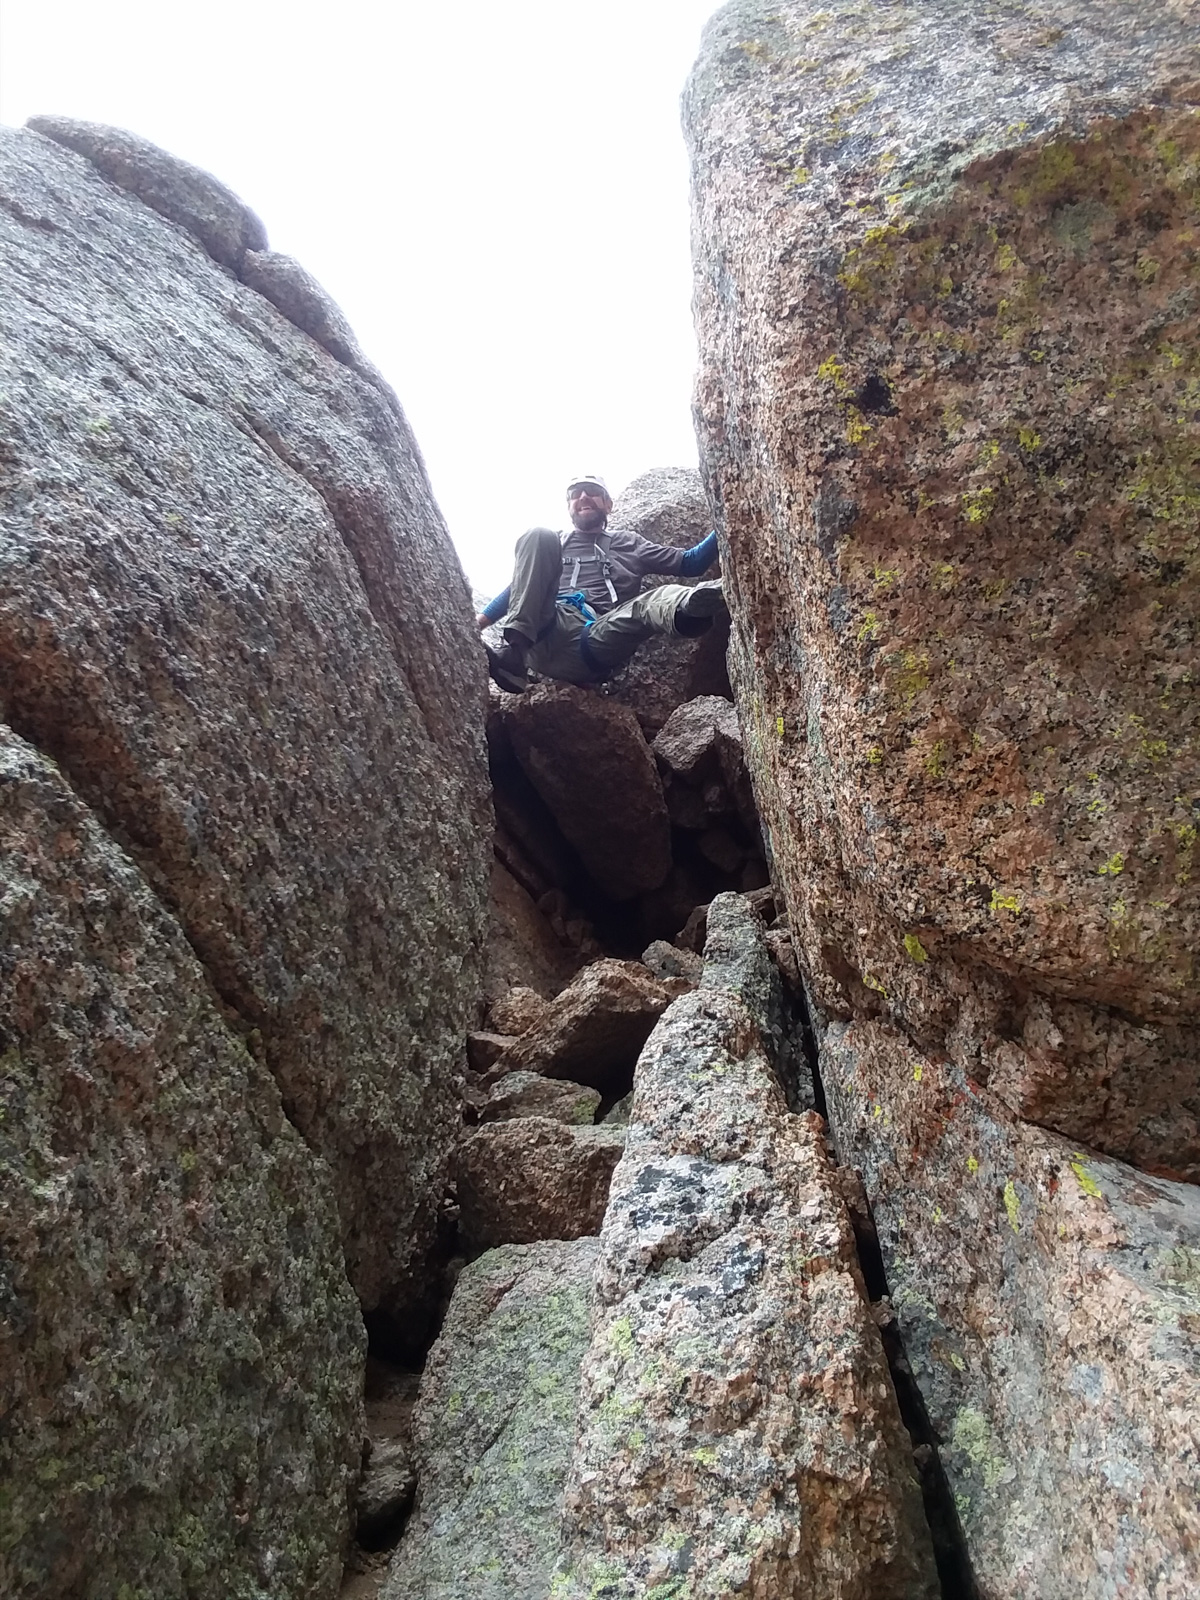
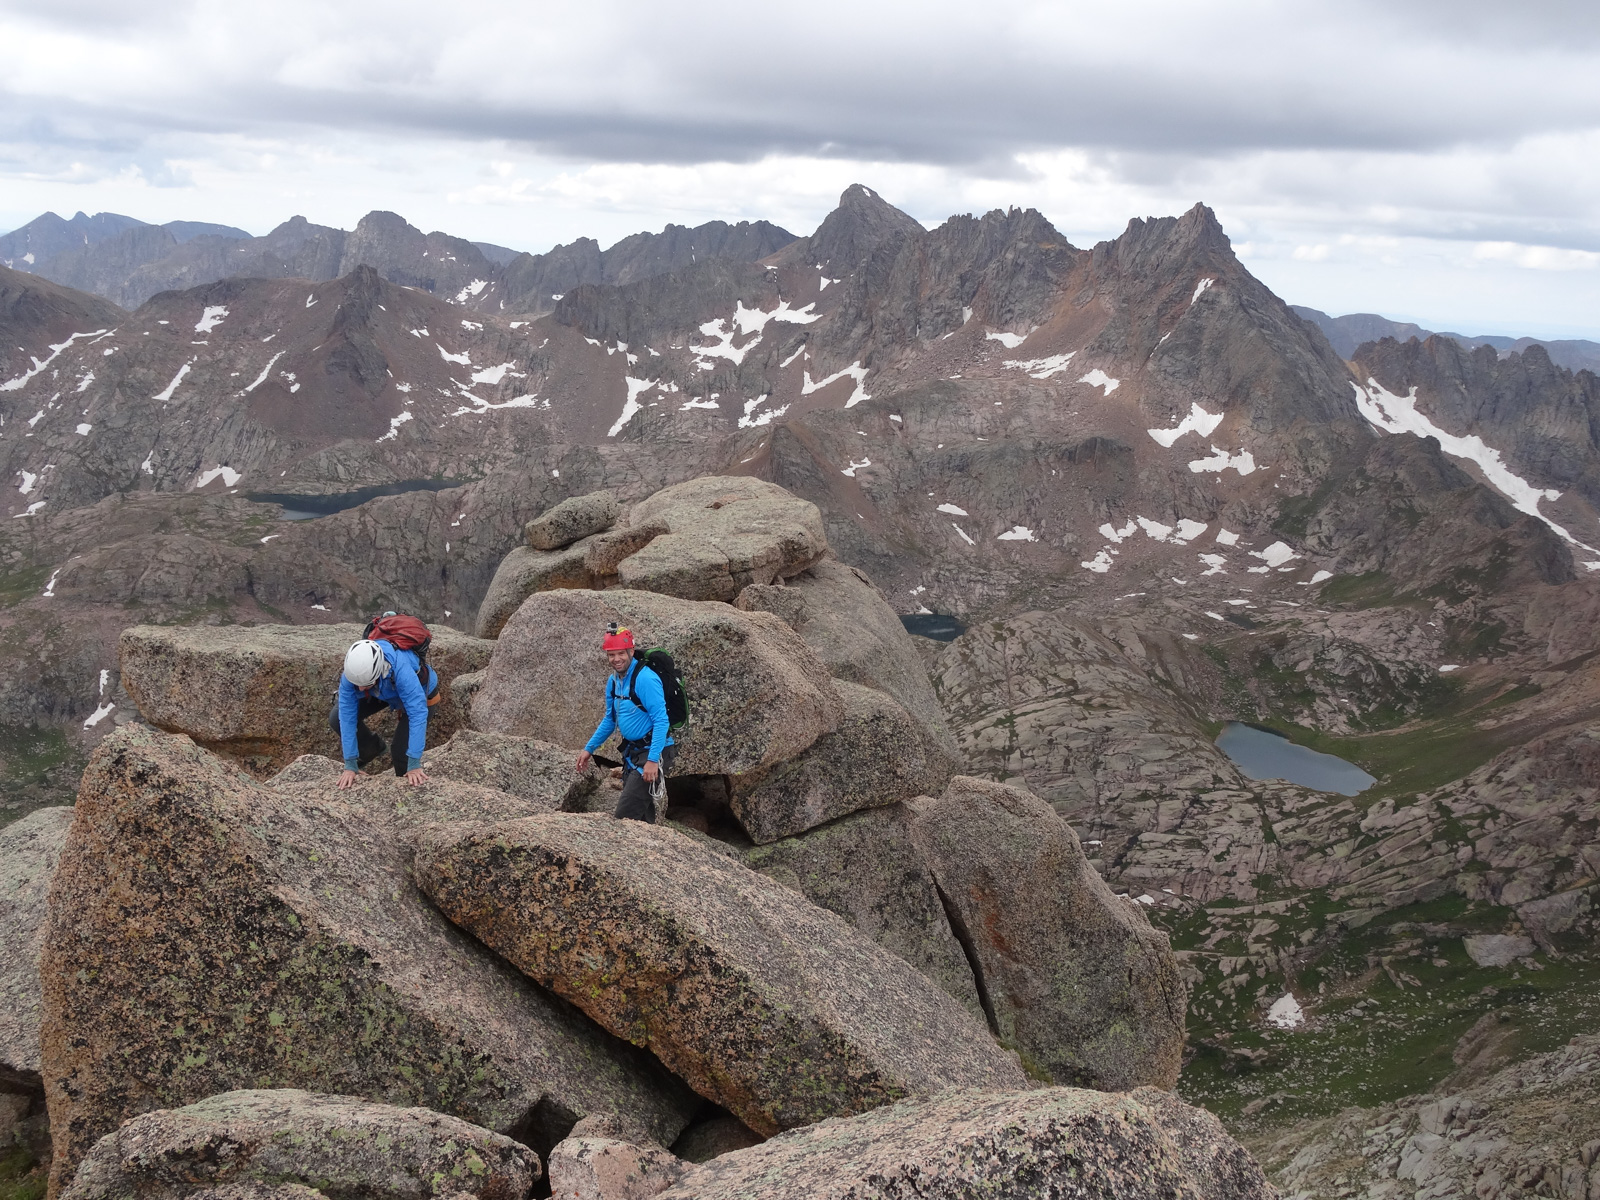
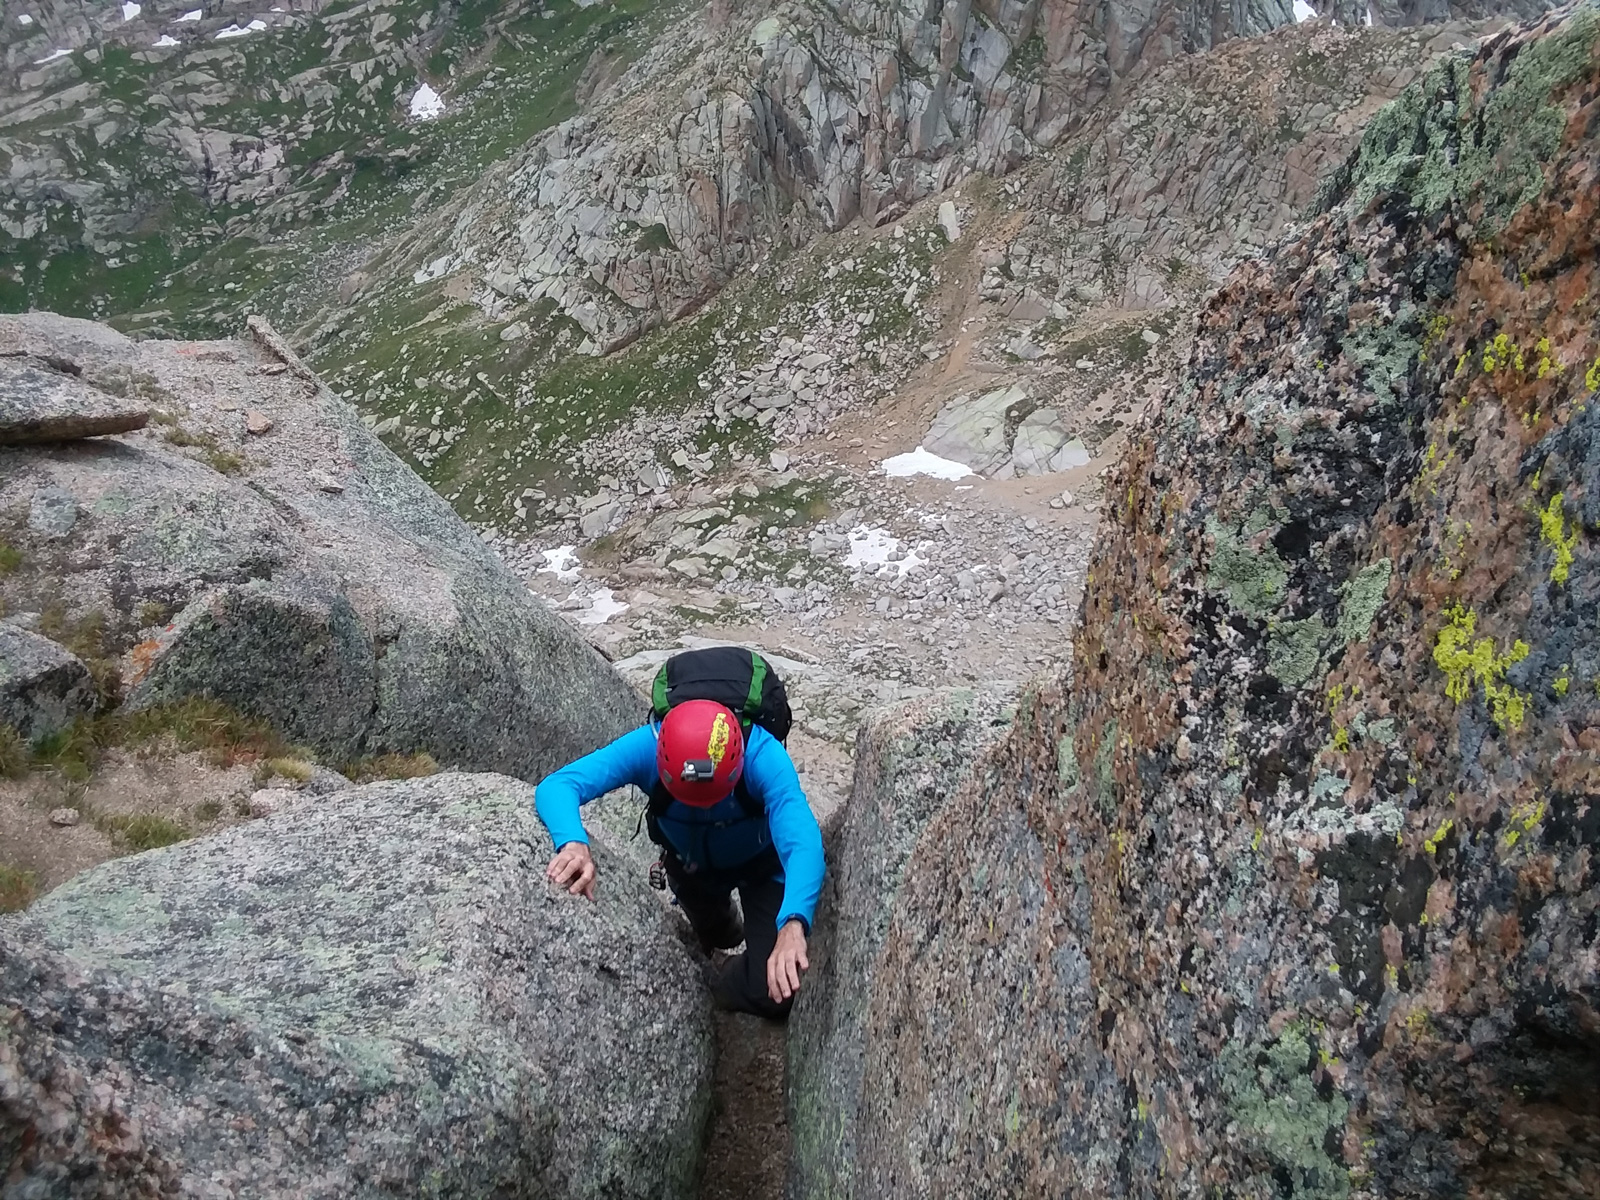
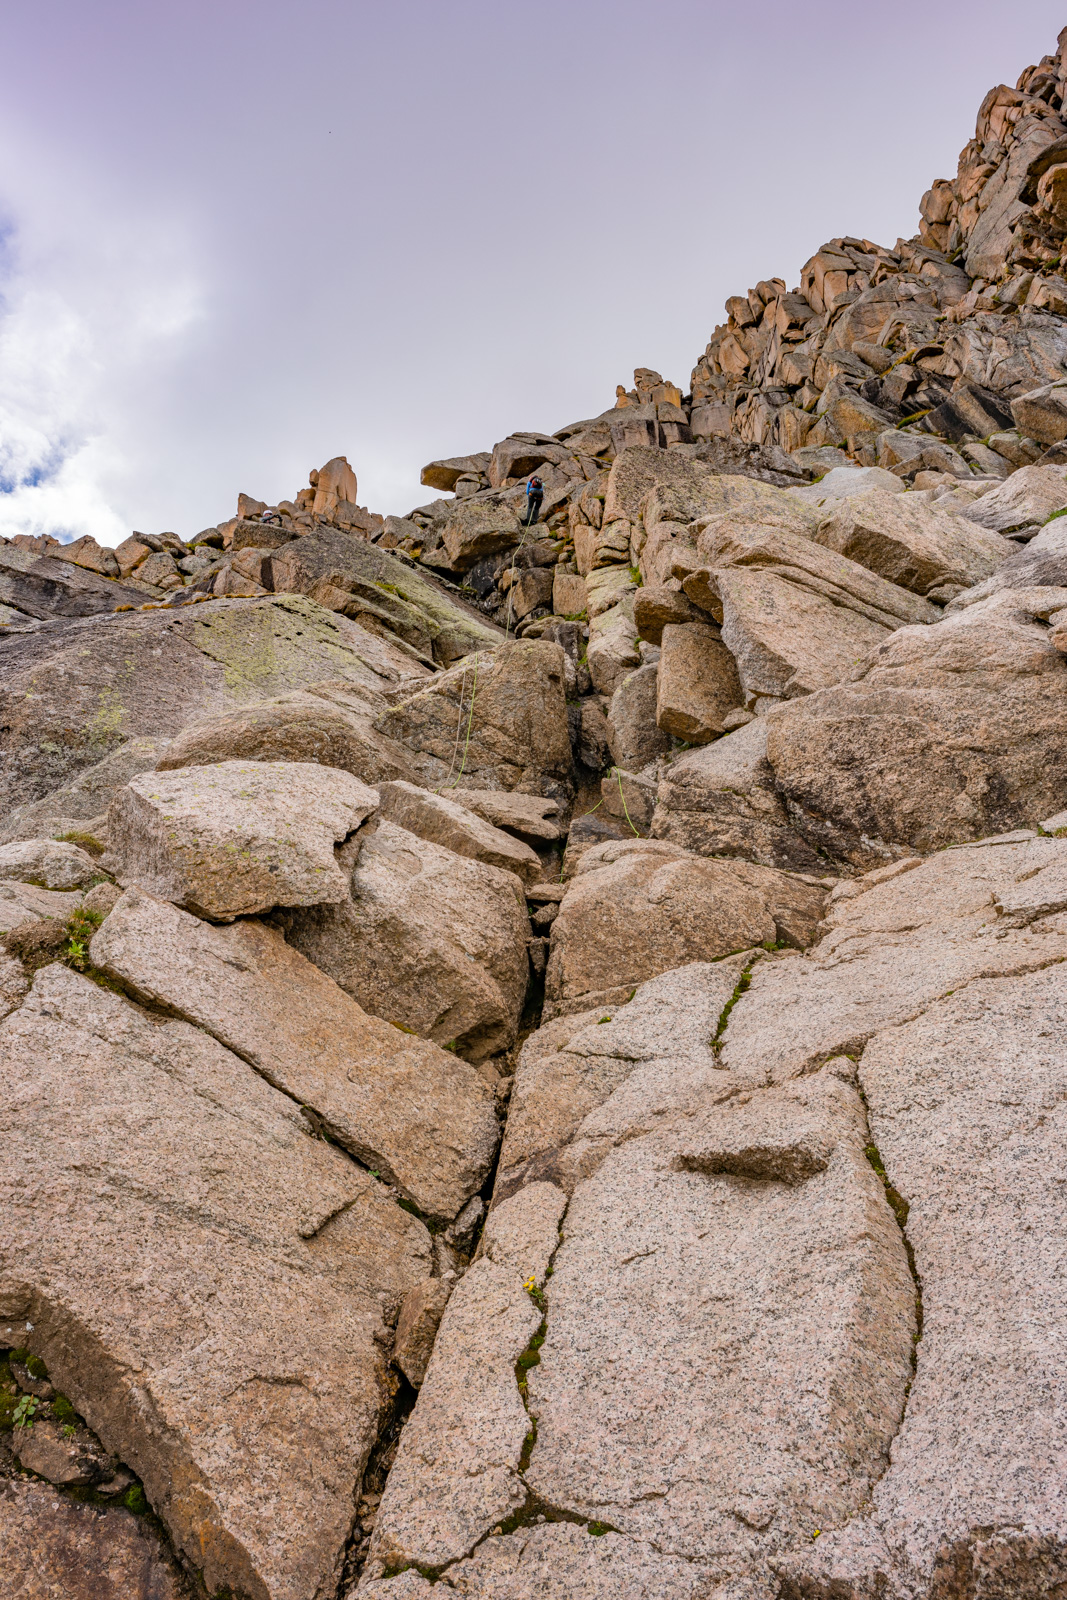
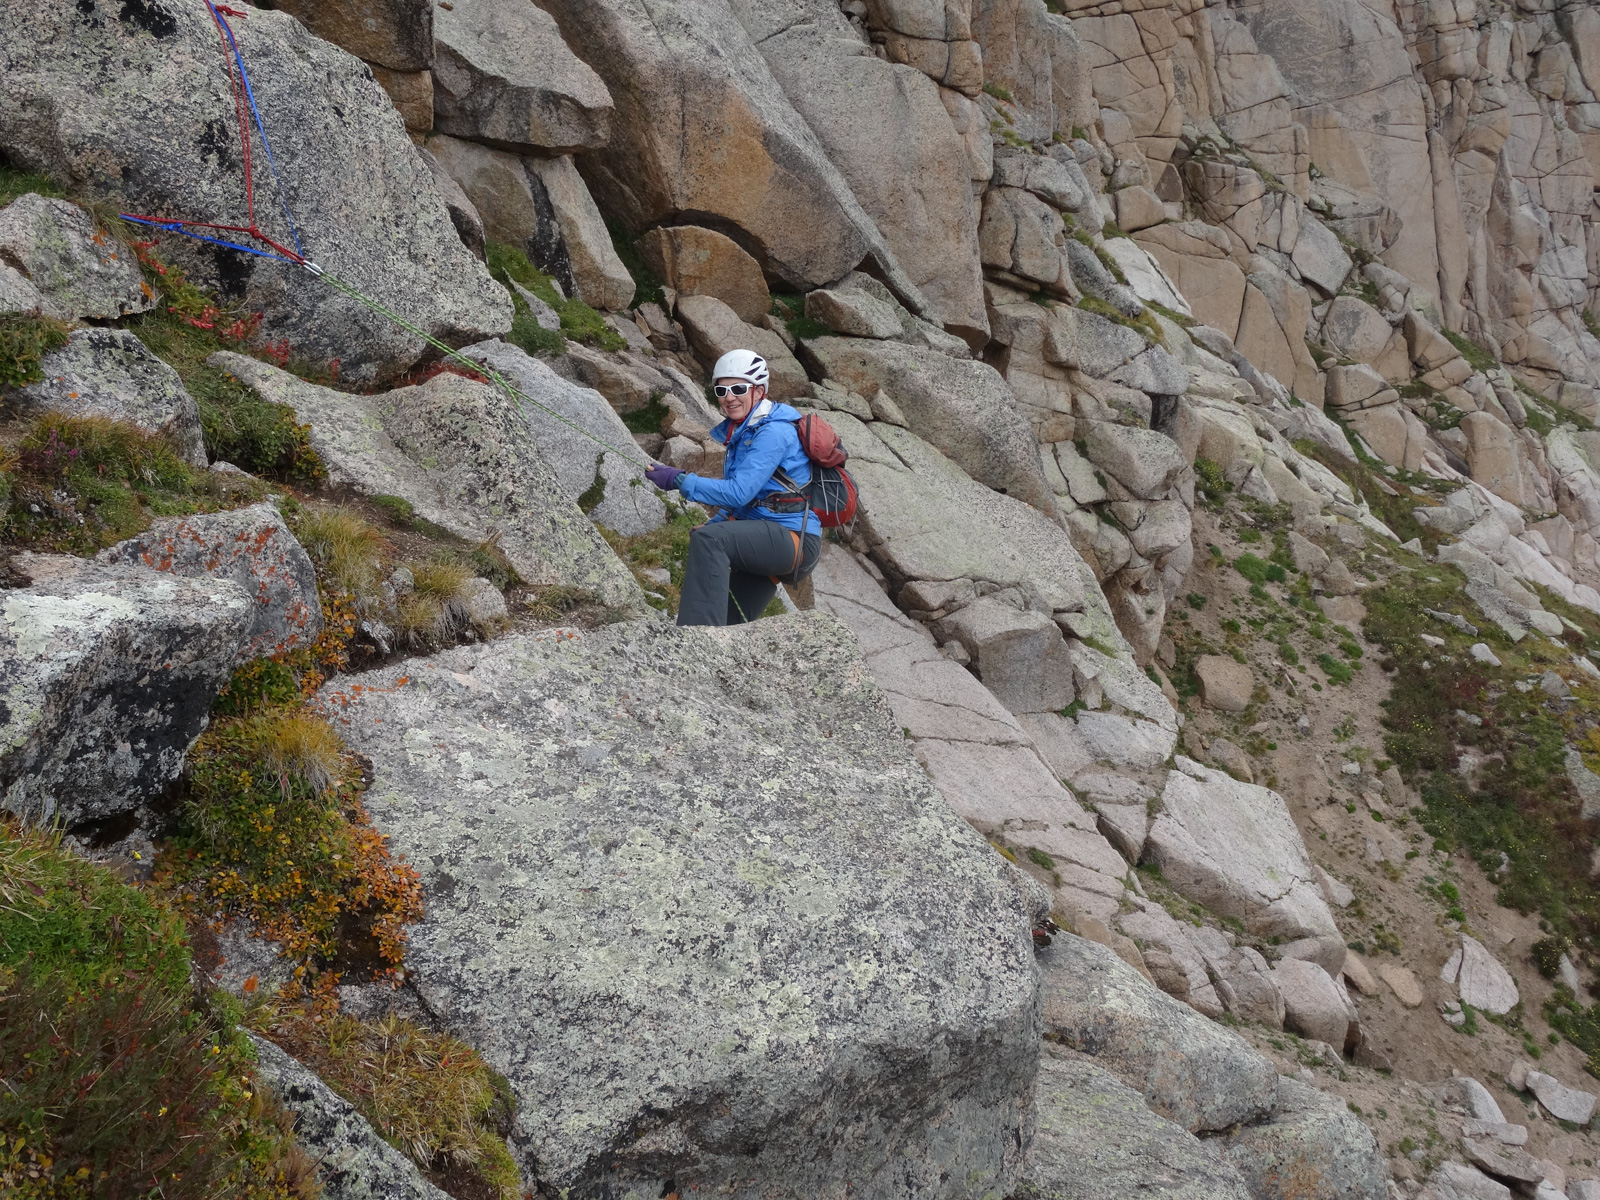
We more or less found the route all the way over from Jagged Pass to our right and followed the grassy slopes to the first crux of the route, which requires rope for the faint of heart (that's me). We geared up here, and Shawn and I realized we had identicle harnesses.
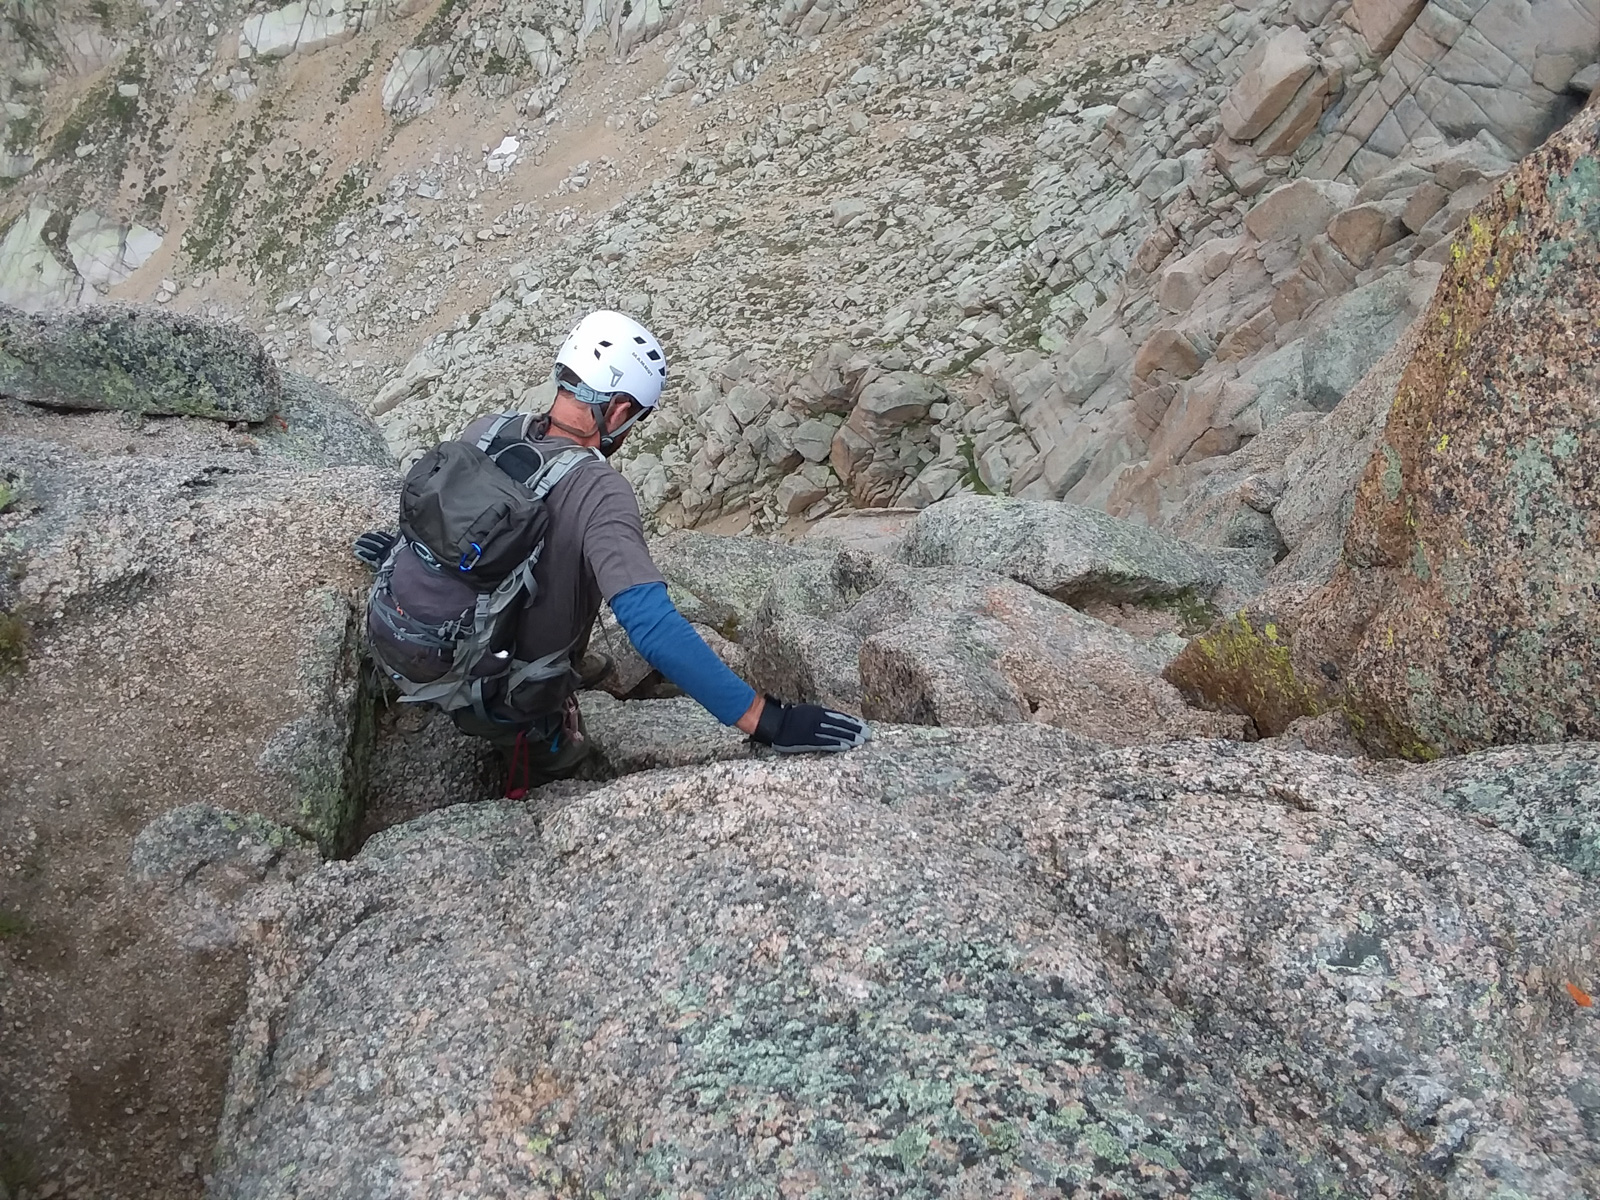
Looking up the first crux, it looked pretty straight forward, but Natalie said there was some moves that would make me appreciate having a rope. She was right. I should say from this point forward, I was mostly focused on getting GoPro footage and climbing, and did not take any photos until nearly the end of the climb. Thank you to both Shawn and Natalie for your images, they helped pull off the trip report!
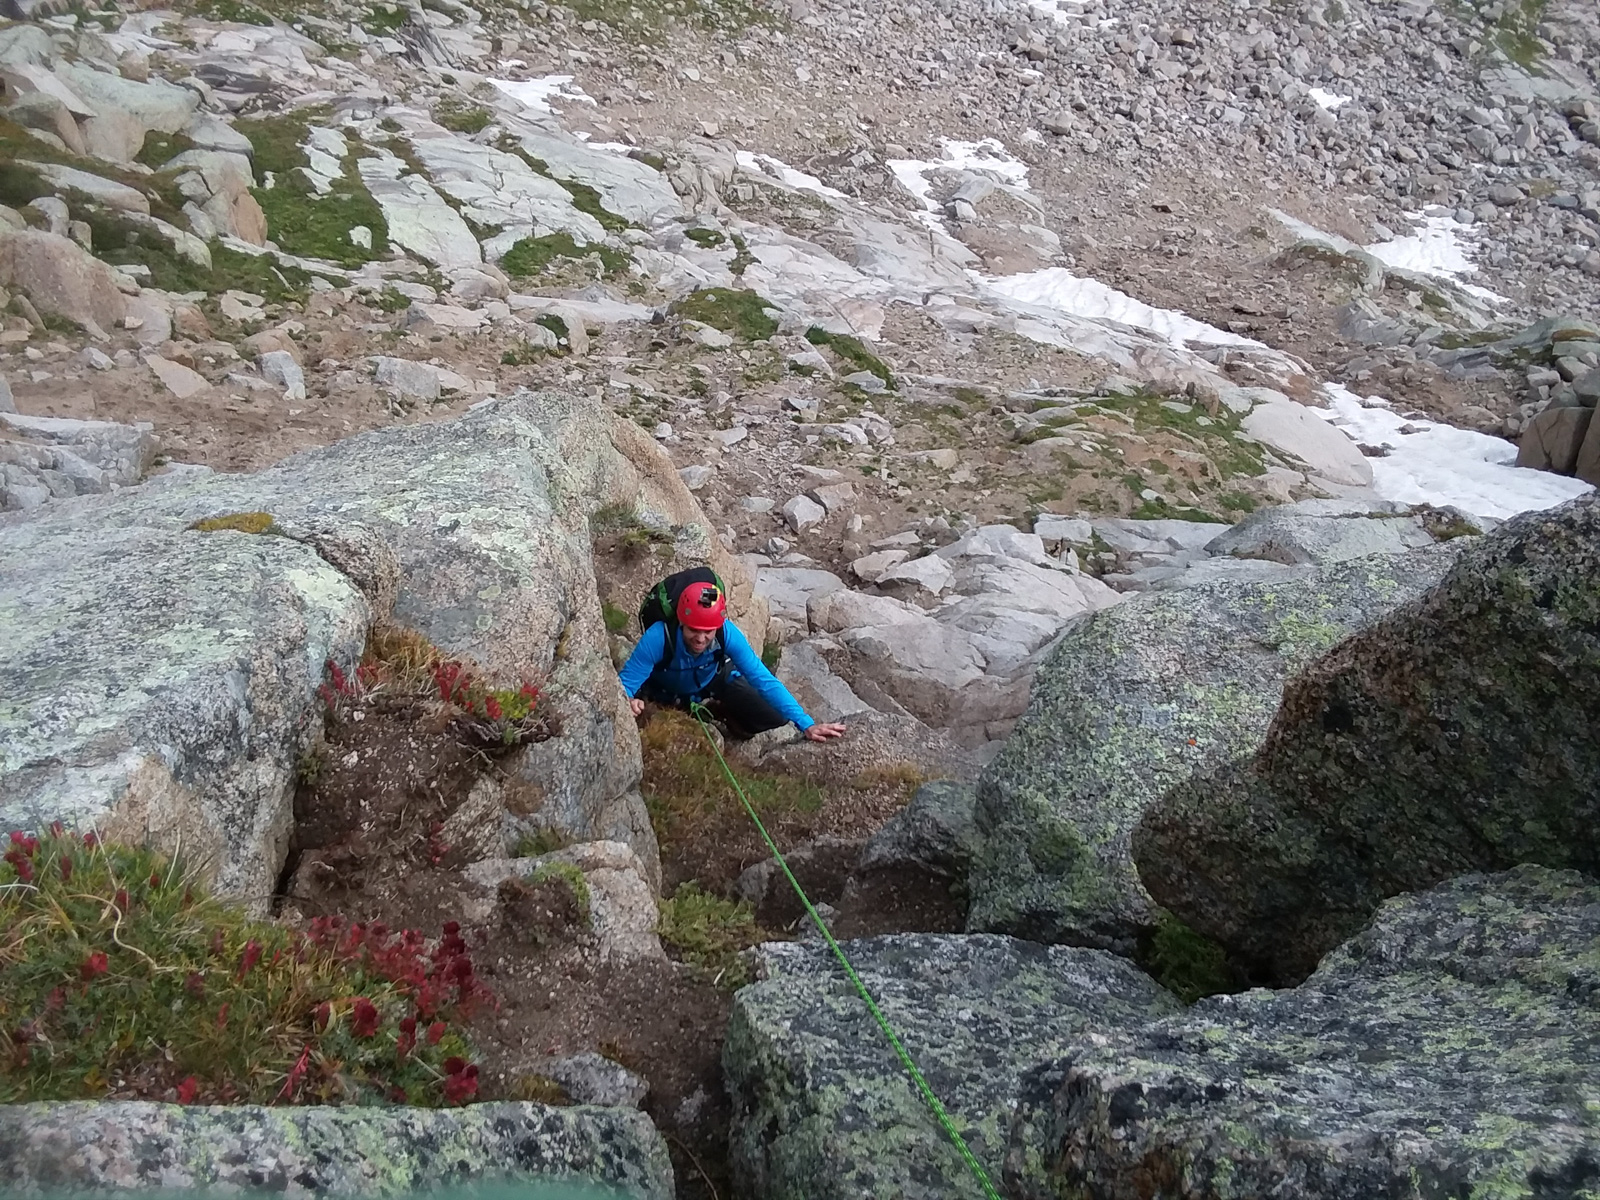
Shawn went first without rope and around a different way altogether without any issues. Natalie led the rope up and placed a small cam about halfway up and then set-up an anchor to belay me from. Here's a shot from Natalie of me coming up.
Here I started my GoPro footage, which I'll admit is a little like being on a rough boat at sea... but hopefully it gives you an idea of what the climb is like.
After the first crux, which had some spicy moves to contend with, we quickly made work of the grassy ledges above us, weaving right and up to the next crux, which consisted of a small 7 foot tall boulder (lower left) which we treated as a chimney, and some easy scrambling up above. I was thankful to be on rope here as I slipped on the very first move (which unroped would have been just annoying but potentially dangerous) trying to get up into the wedge.
The belay station for the second crux offered a nice view of the exposure we were facing on a consistent basis.
The third crux was the spiciest of all, which Shawn decided to free climb up with our rope. It involved some easy moves down low with a really challenging finish requiring some committed movement above big exposure.
The final move kept me stumped for a minute... as documented by Shawn.
Topping out on the third crux felt great. That last move is quite a tough one in my opinion.
Almost there!
The video section for the third crux is HERE.
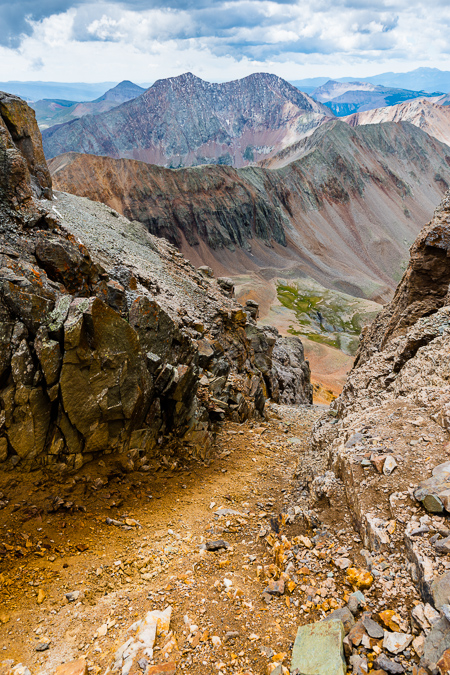
After the third crux, a quick scramble up revealed the notch which took us to the south side of Jagged. The south side was incredibly exposed - one false step and you would fall to your death without question. We all slowly weaved our way up and around the back side, picking our steps carefully. One move in particular leaves you above nothing but air and a strange jutted out boulder that awkwardly prevents you from easily going around the side of the mountain (as seen just in front of me in the photo below).

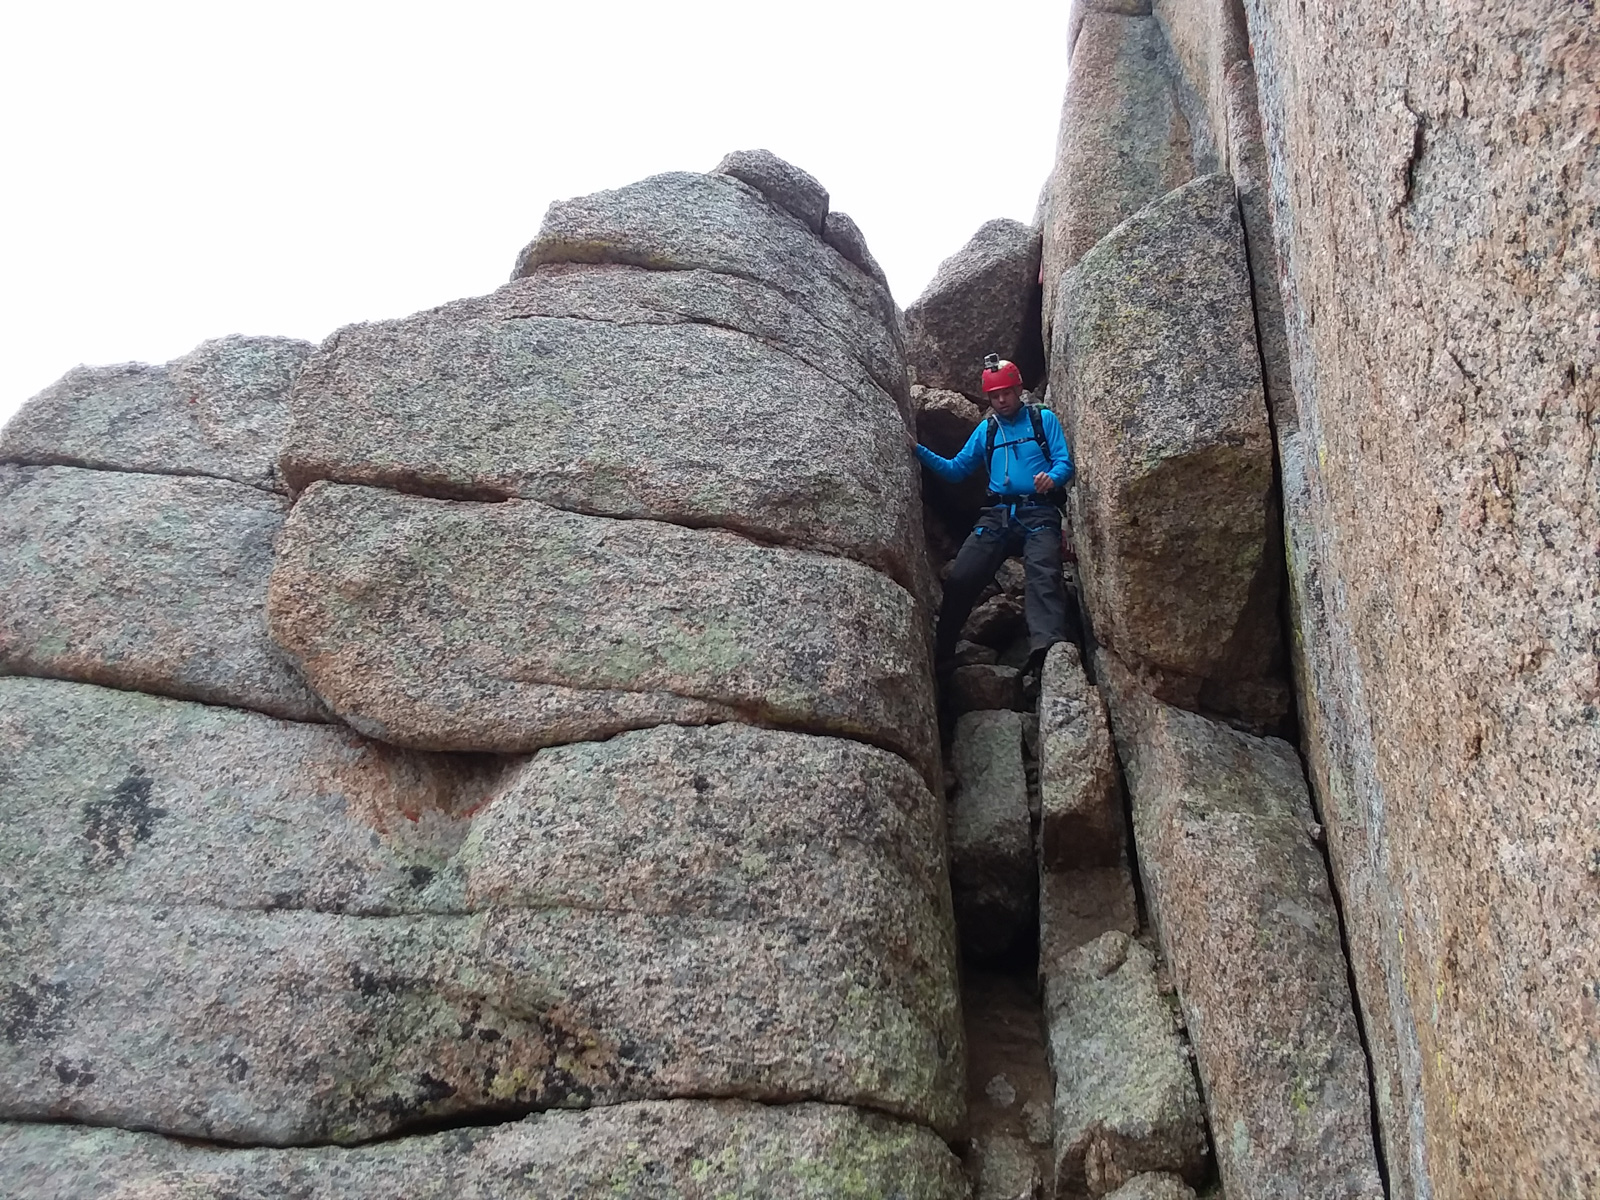
The backside was awesome... I loved it! Here's video from the notch between the two sides and the chimney.
We reached the next crux of our climb, the "class 3" chimney, which I would personally rate at class 4, but I might be generous! Shawn seemed to enjoy it quite a bit!
Natalie and Shawn seemed to enjoy watching me squirm up the chimney, which I found to be quite fun!
Upon reaching the top of the chimney, I was really excited. This mountain was easily one of the hardest but also one of the most fun that I've ever done.
Here is the footage of the chimney climb.
After the chimney, only one small section remained, which required some adept scrambling up and then across a chasm. Even though there was only about four feet between one side and the other, it was a very committed move to get across to the last step as seen below.
Here is footage from the final push to the summit.
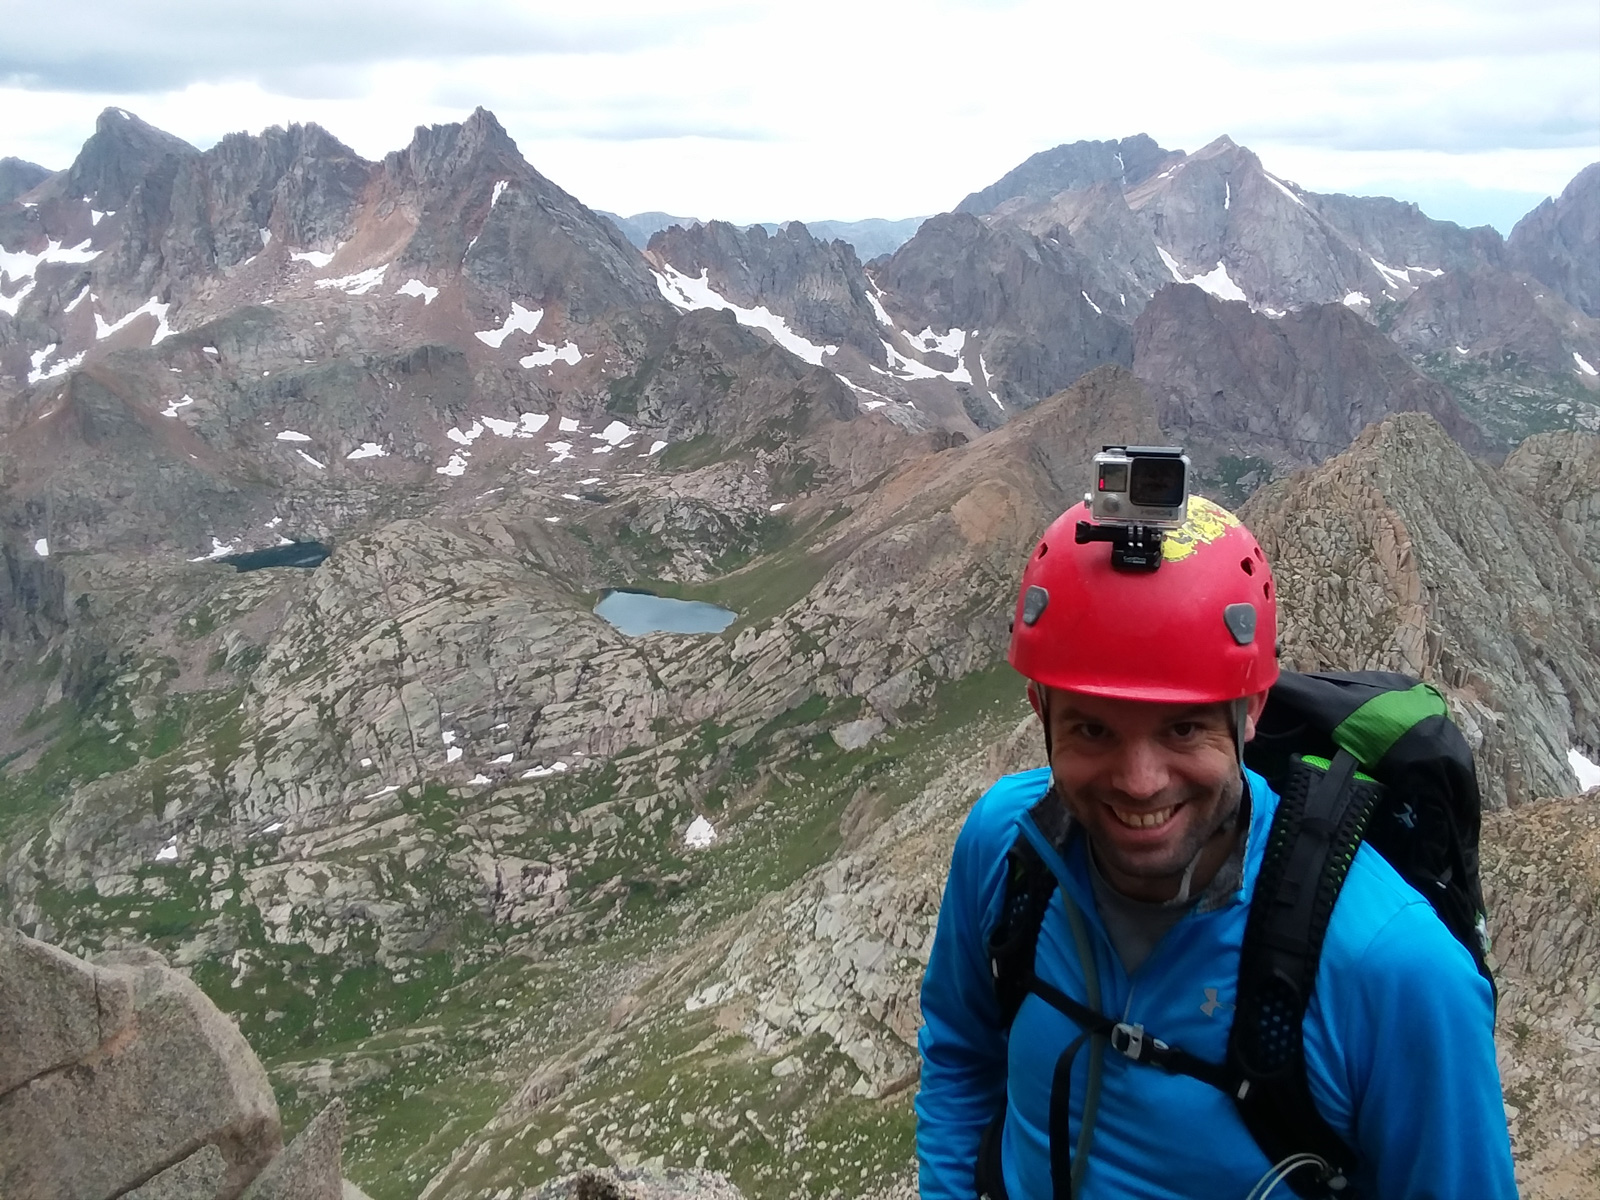
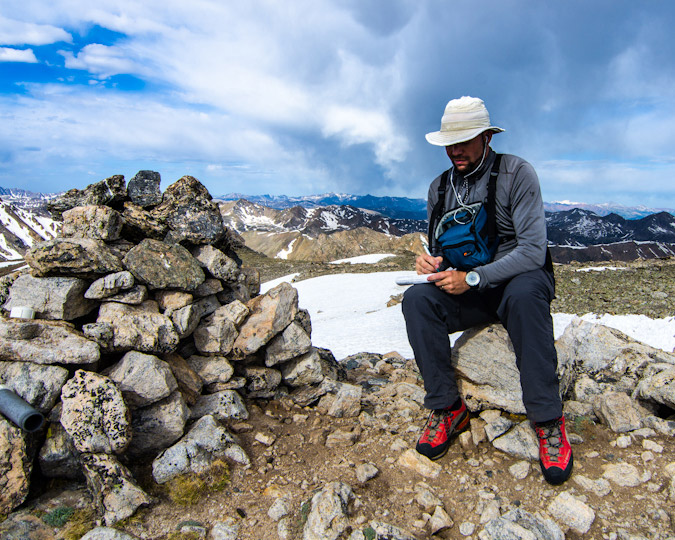
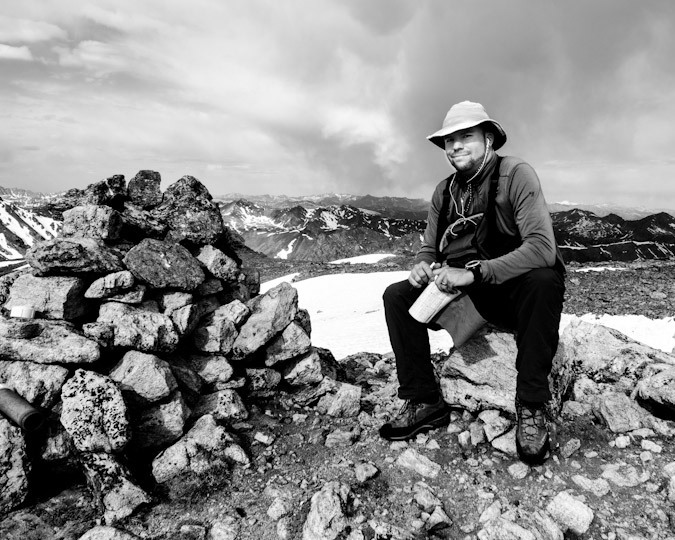
And finally at last - we topped out! Thanks for the photo Shawn! What an exhilarating moment!
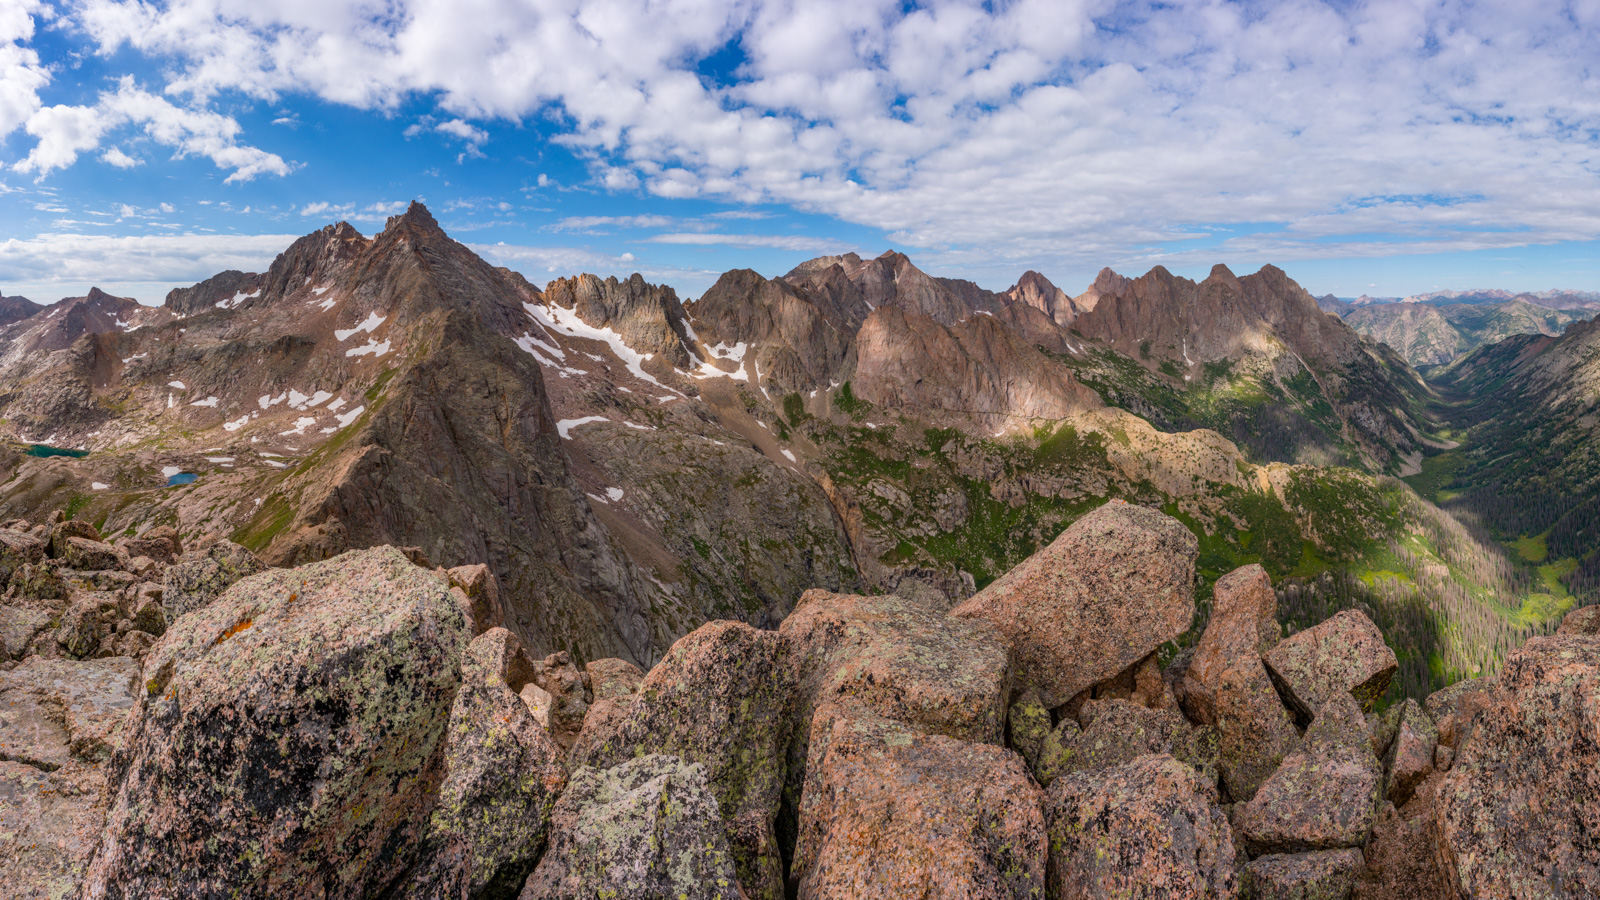
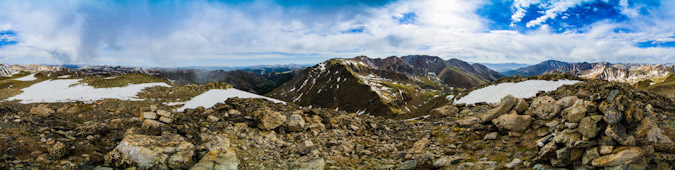
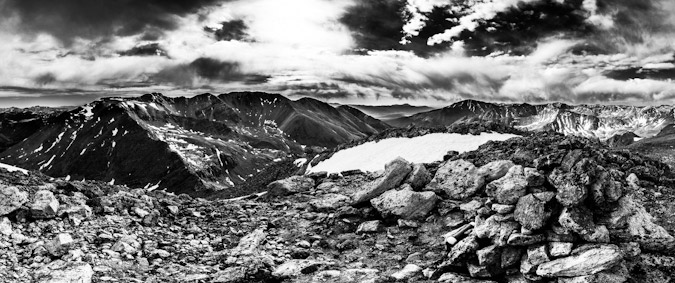
What does a nerdy photographer do when he gets to the top of Jagged Mountain? Take a 360 panorama, of course!
We made a makeshift tripod out of rocks and got a sweet shot of the three of us on top. What a day!

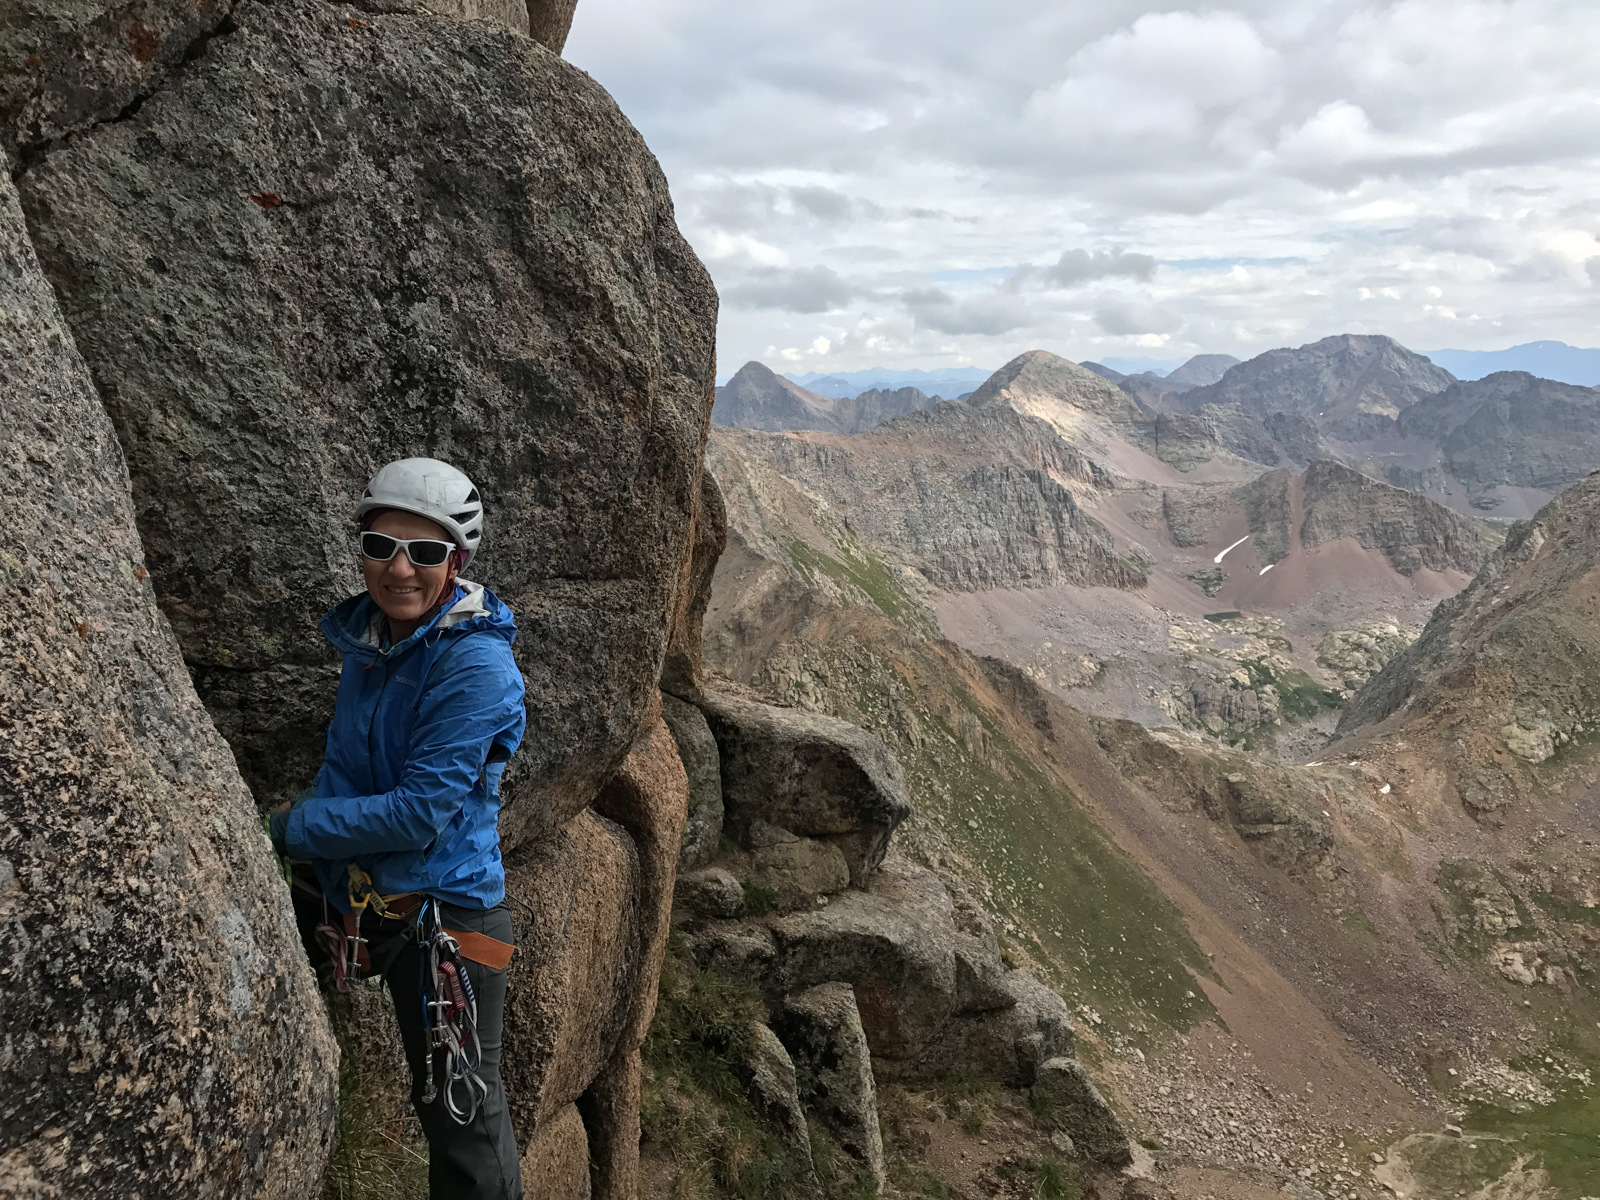
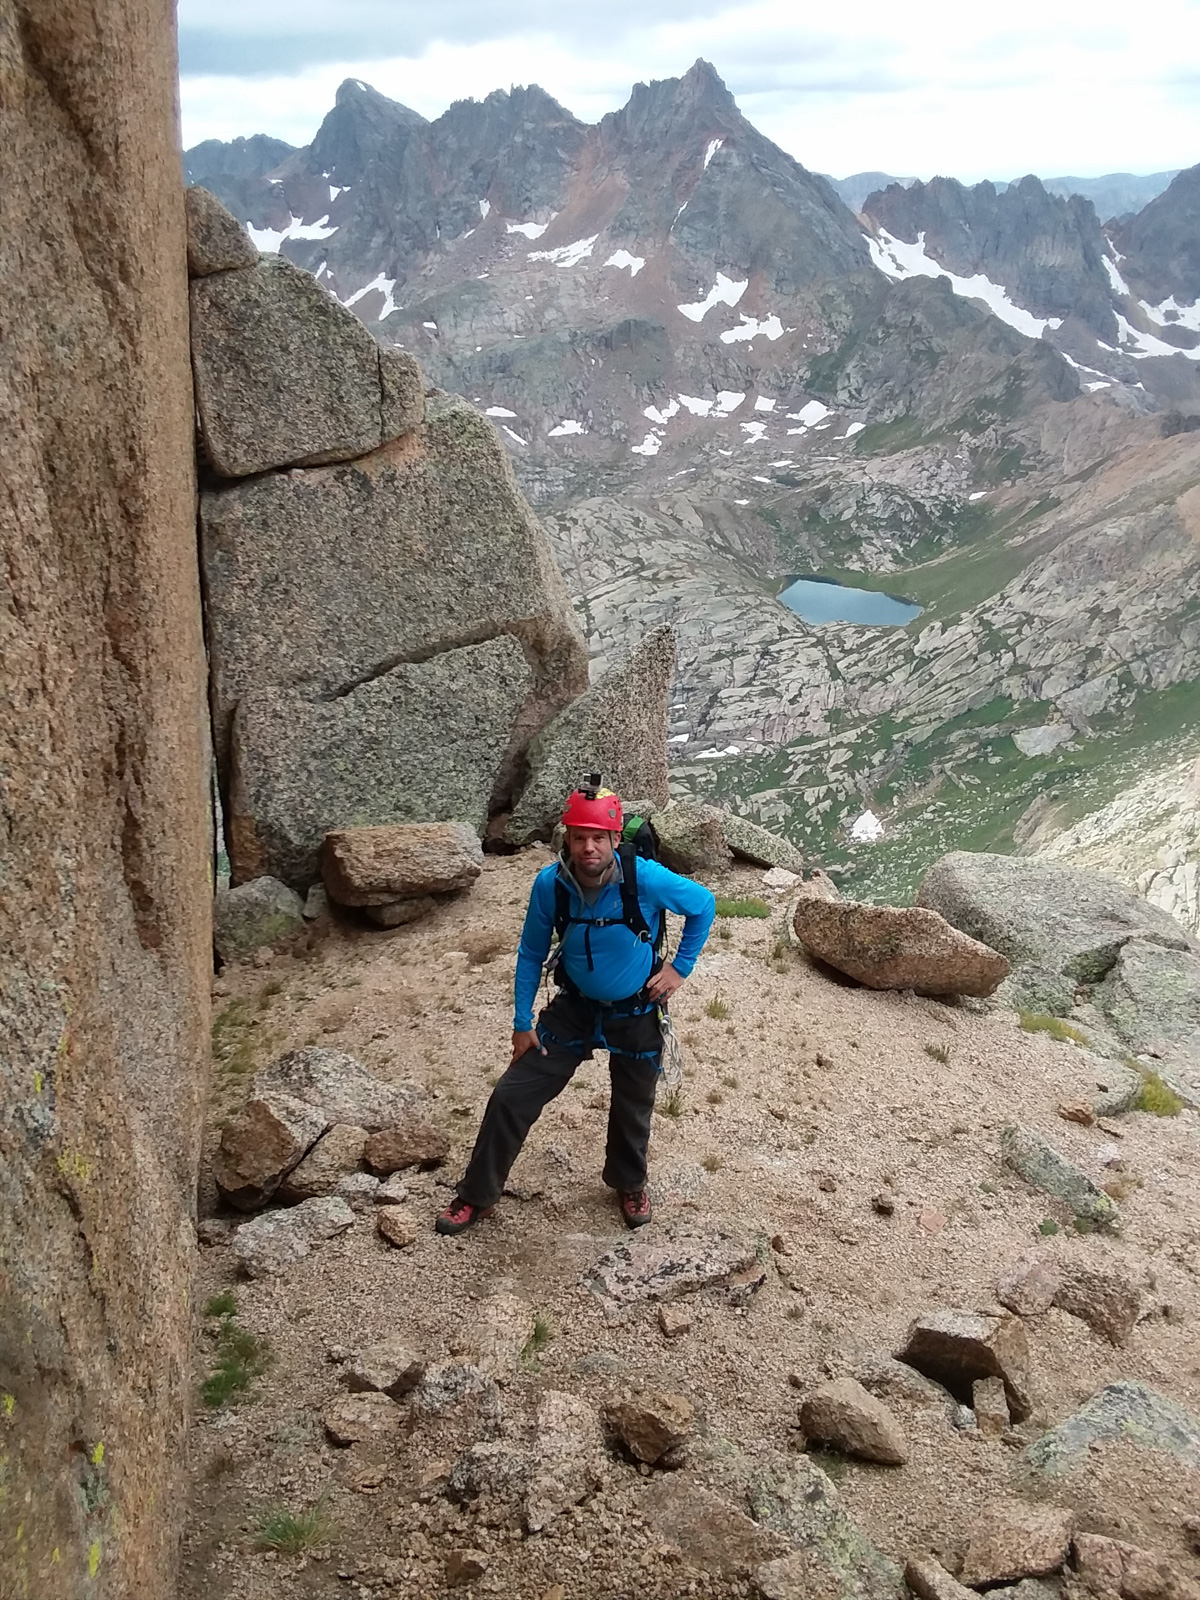
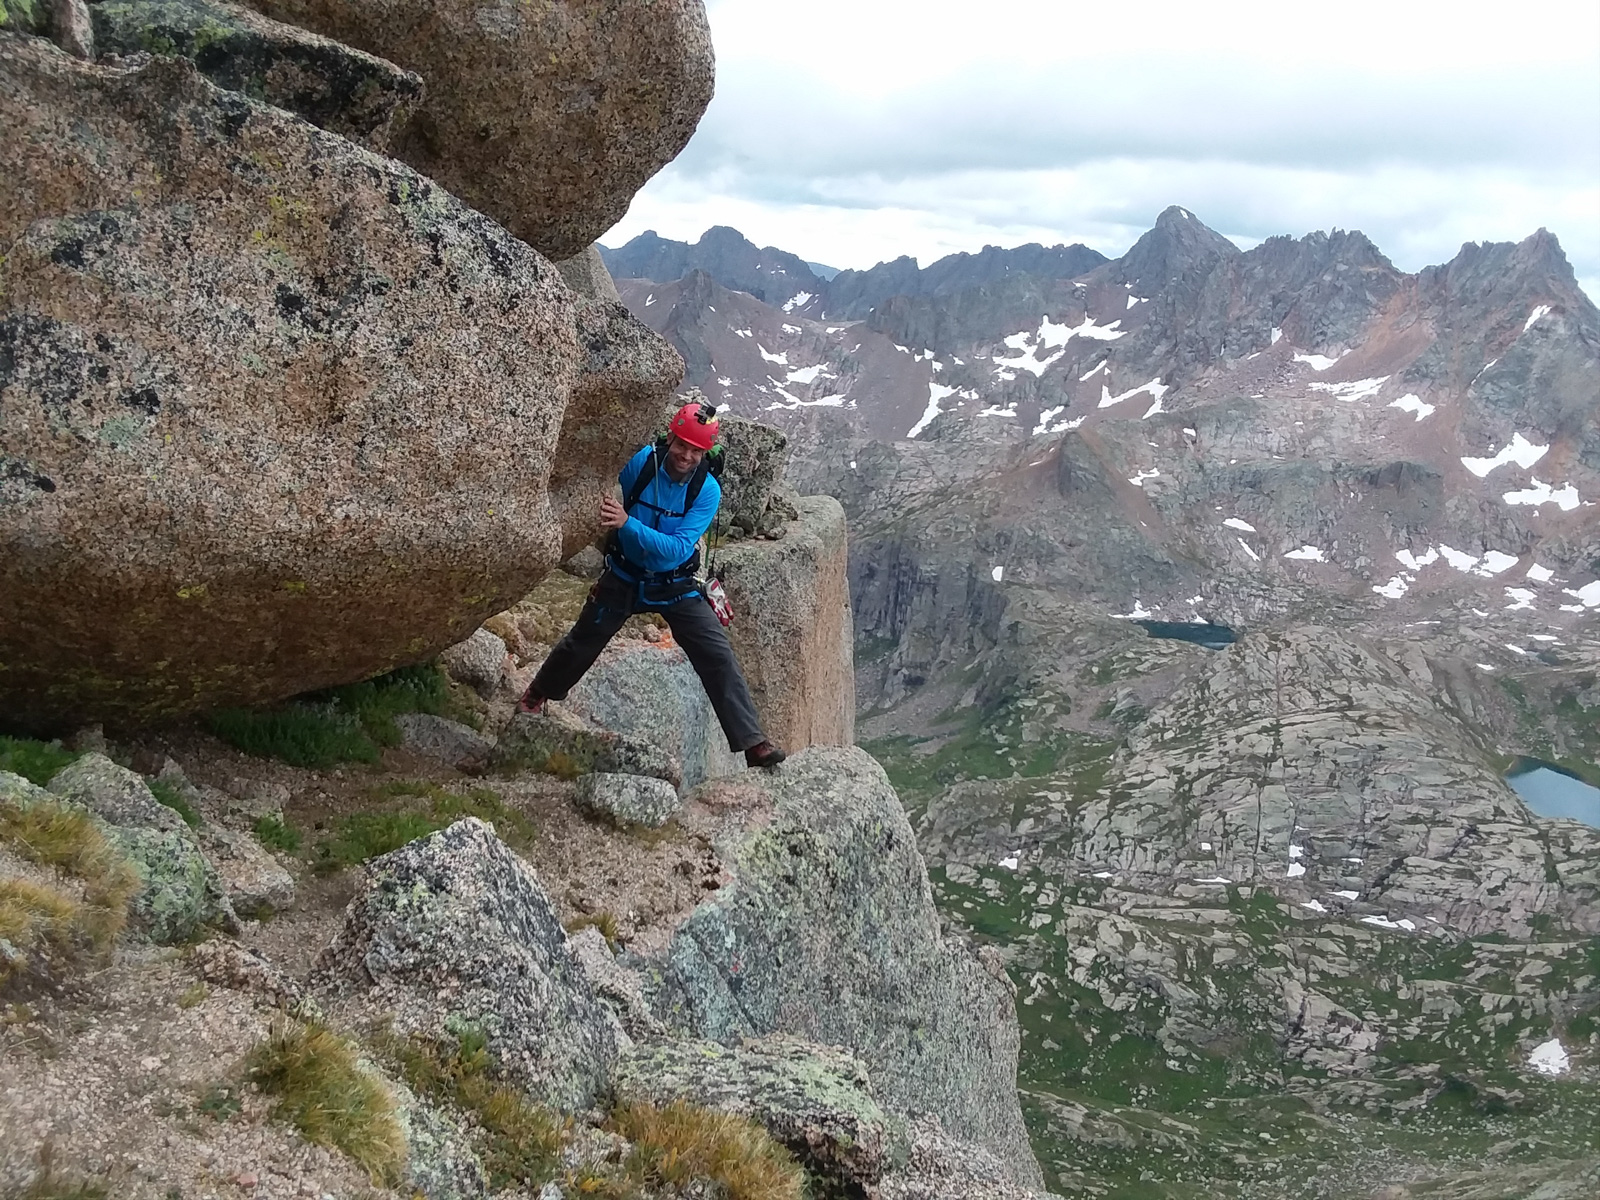
I saw a photo opportunity as well - there was a sweet ledge at the south end of the summit, overlooking Windom, Sunlight Spire, and Sunlight, so I sent Shawn down for a shot of him, and then a shot of me.
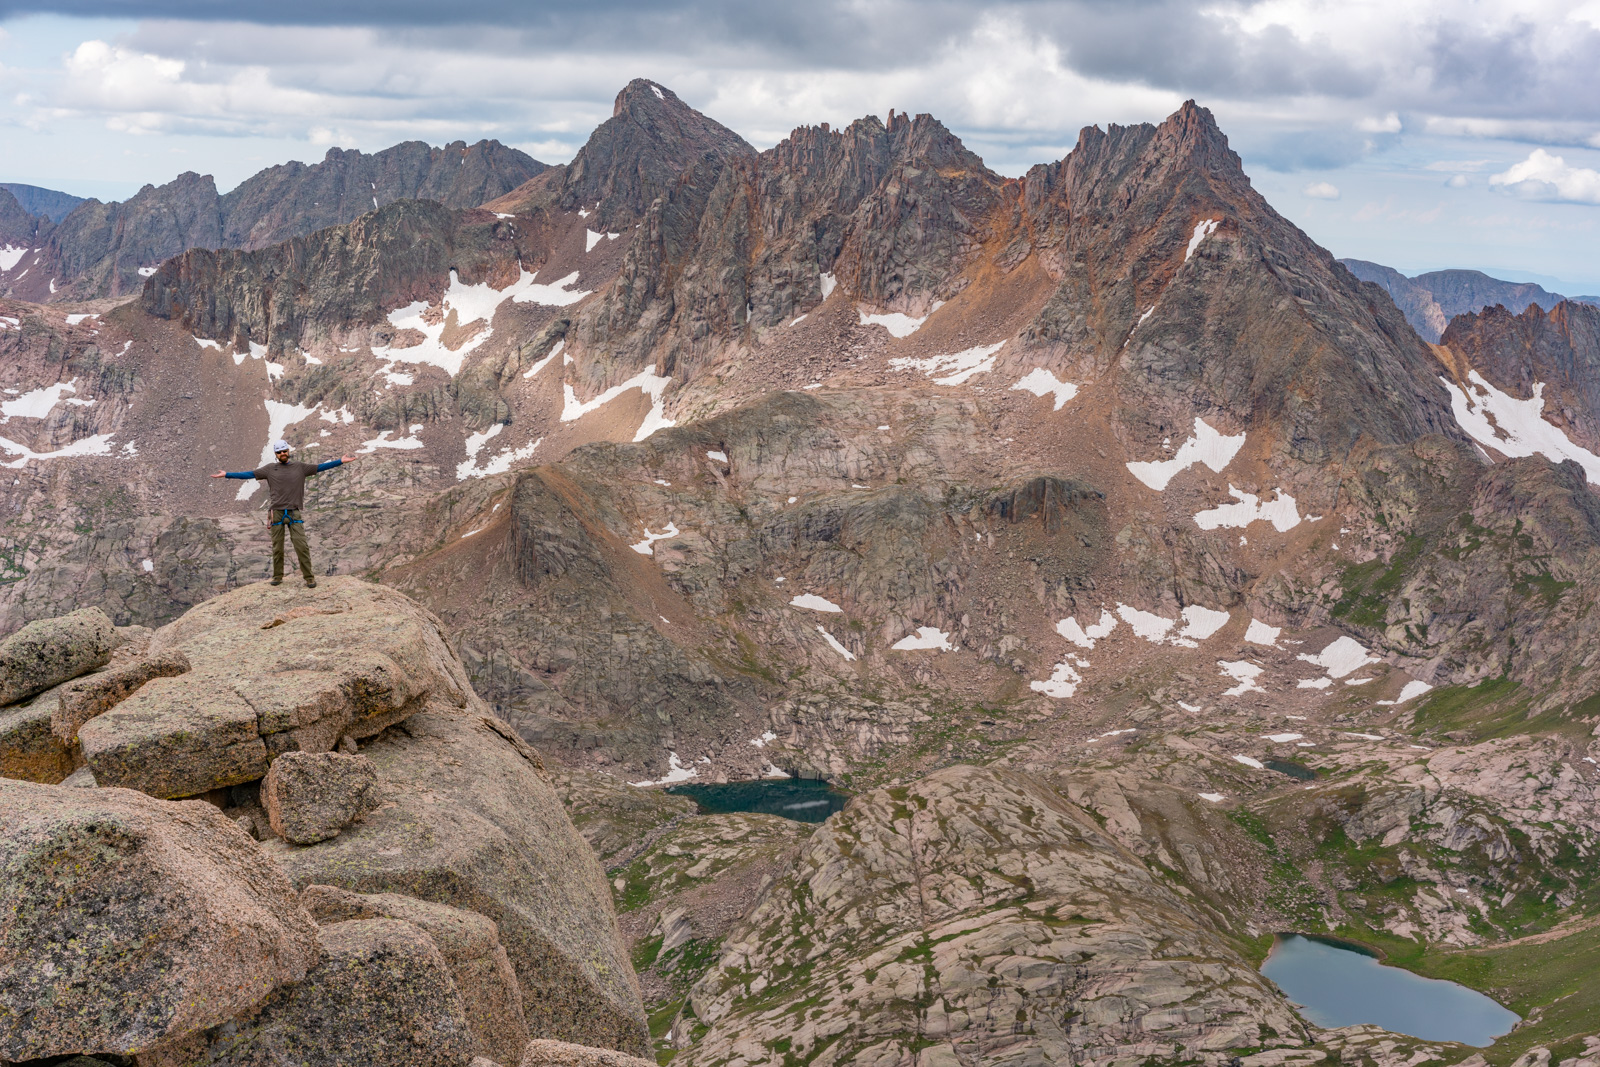
Such an awesome spot!!!

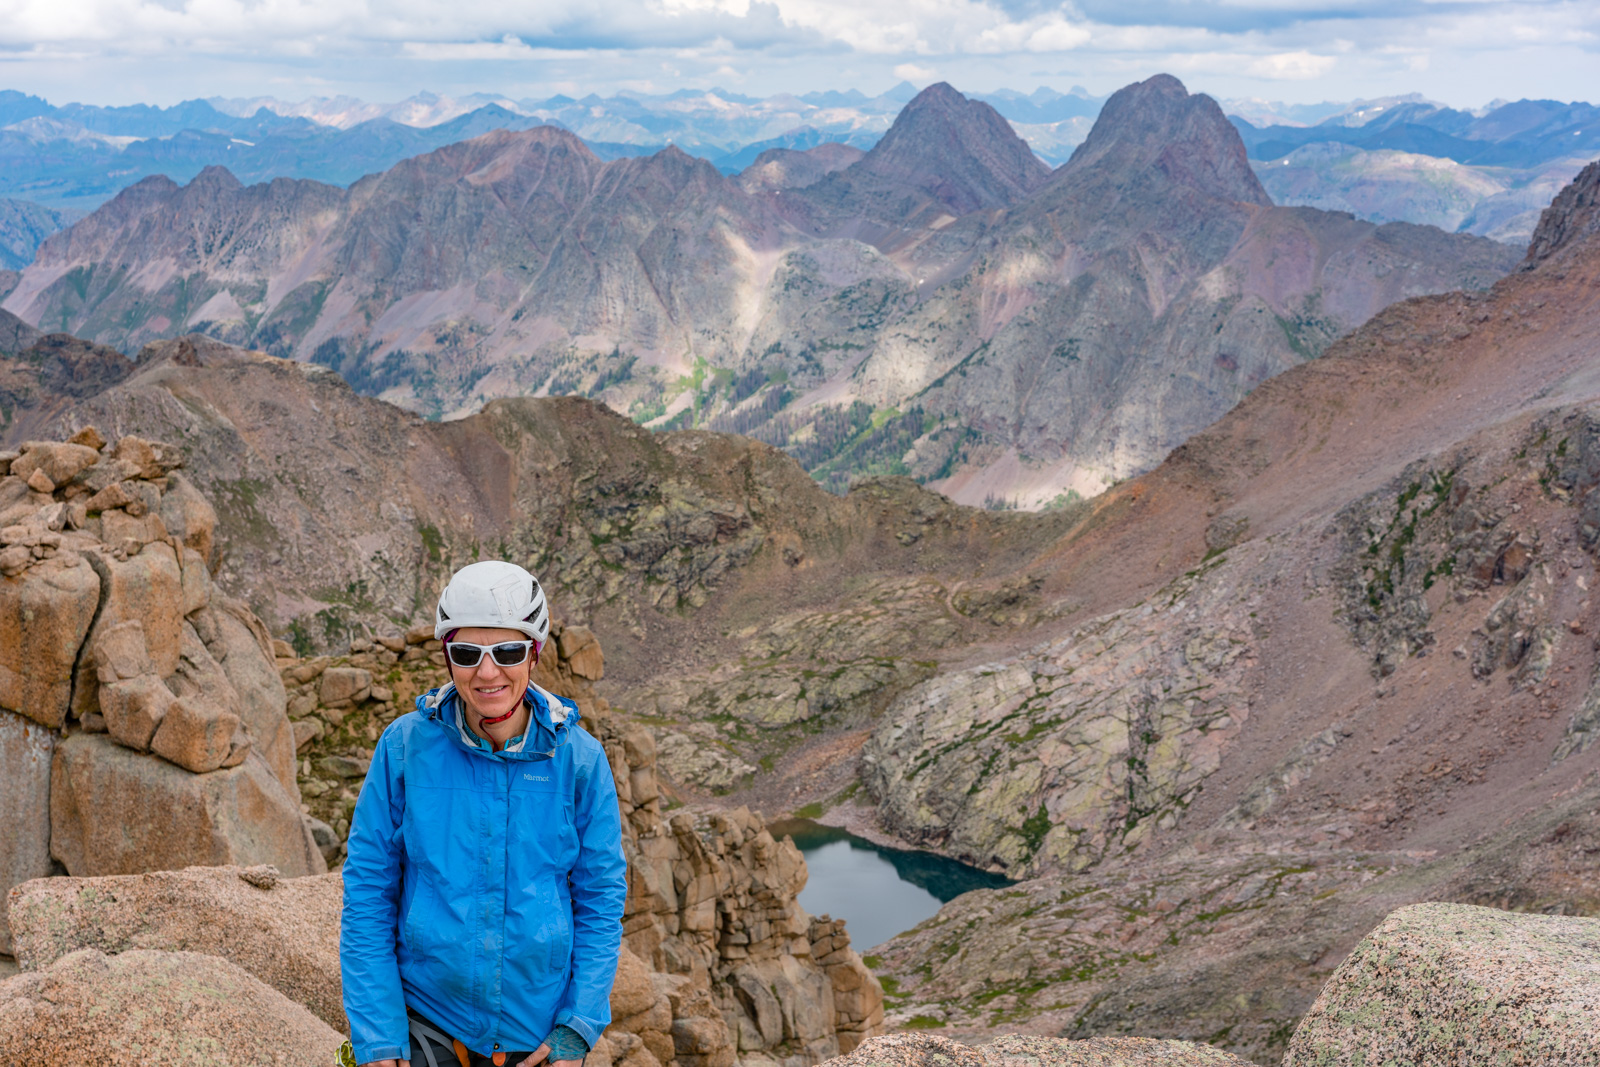
I also wanted to get a shot of Natalie with two of my favorite peaks behind her - Arrow Peak and Vestal Peak.
As we were packing up to head down, the clouds broke and shined light on Pigeon Peak. I got excited and photographed it. So awesome.
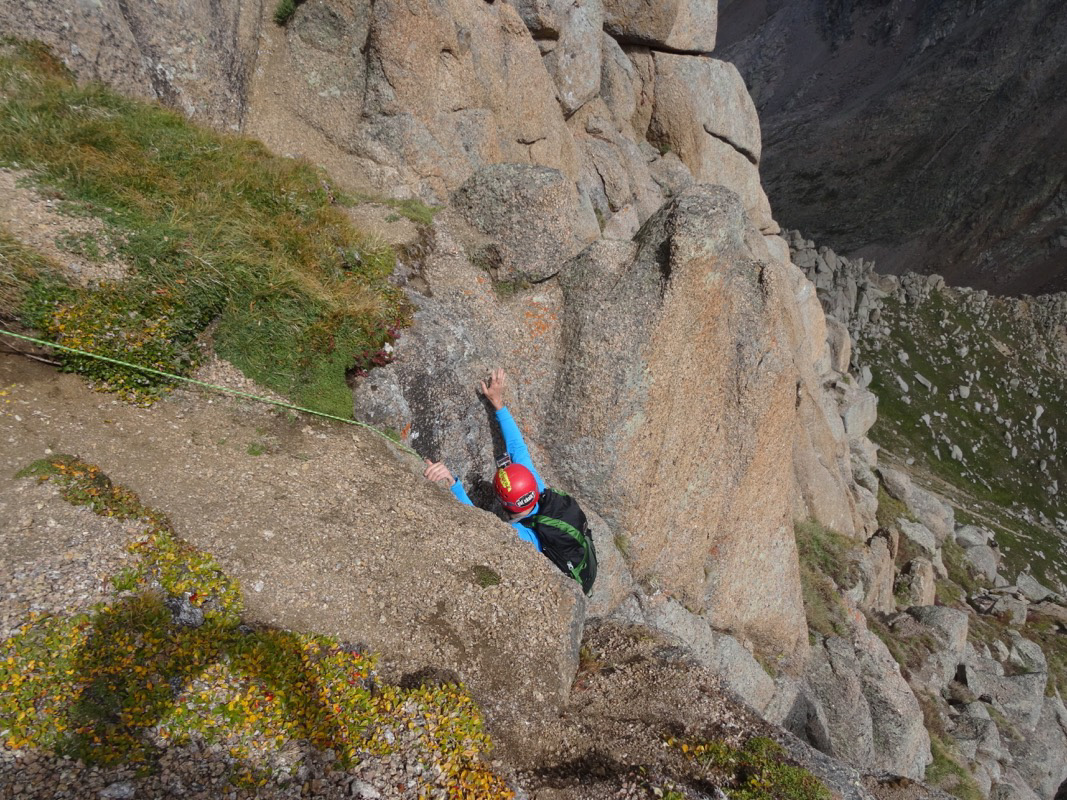
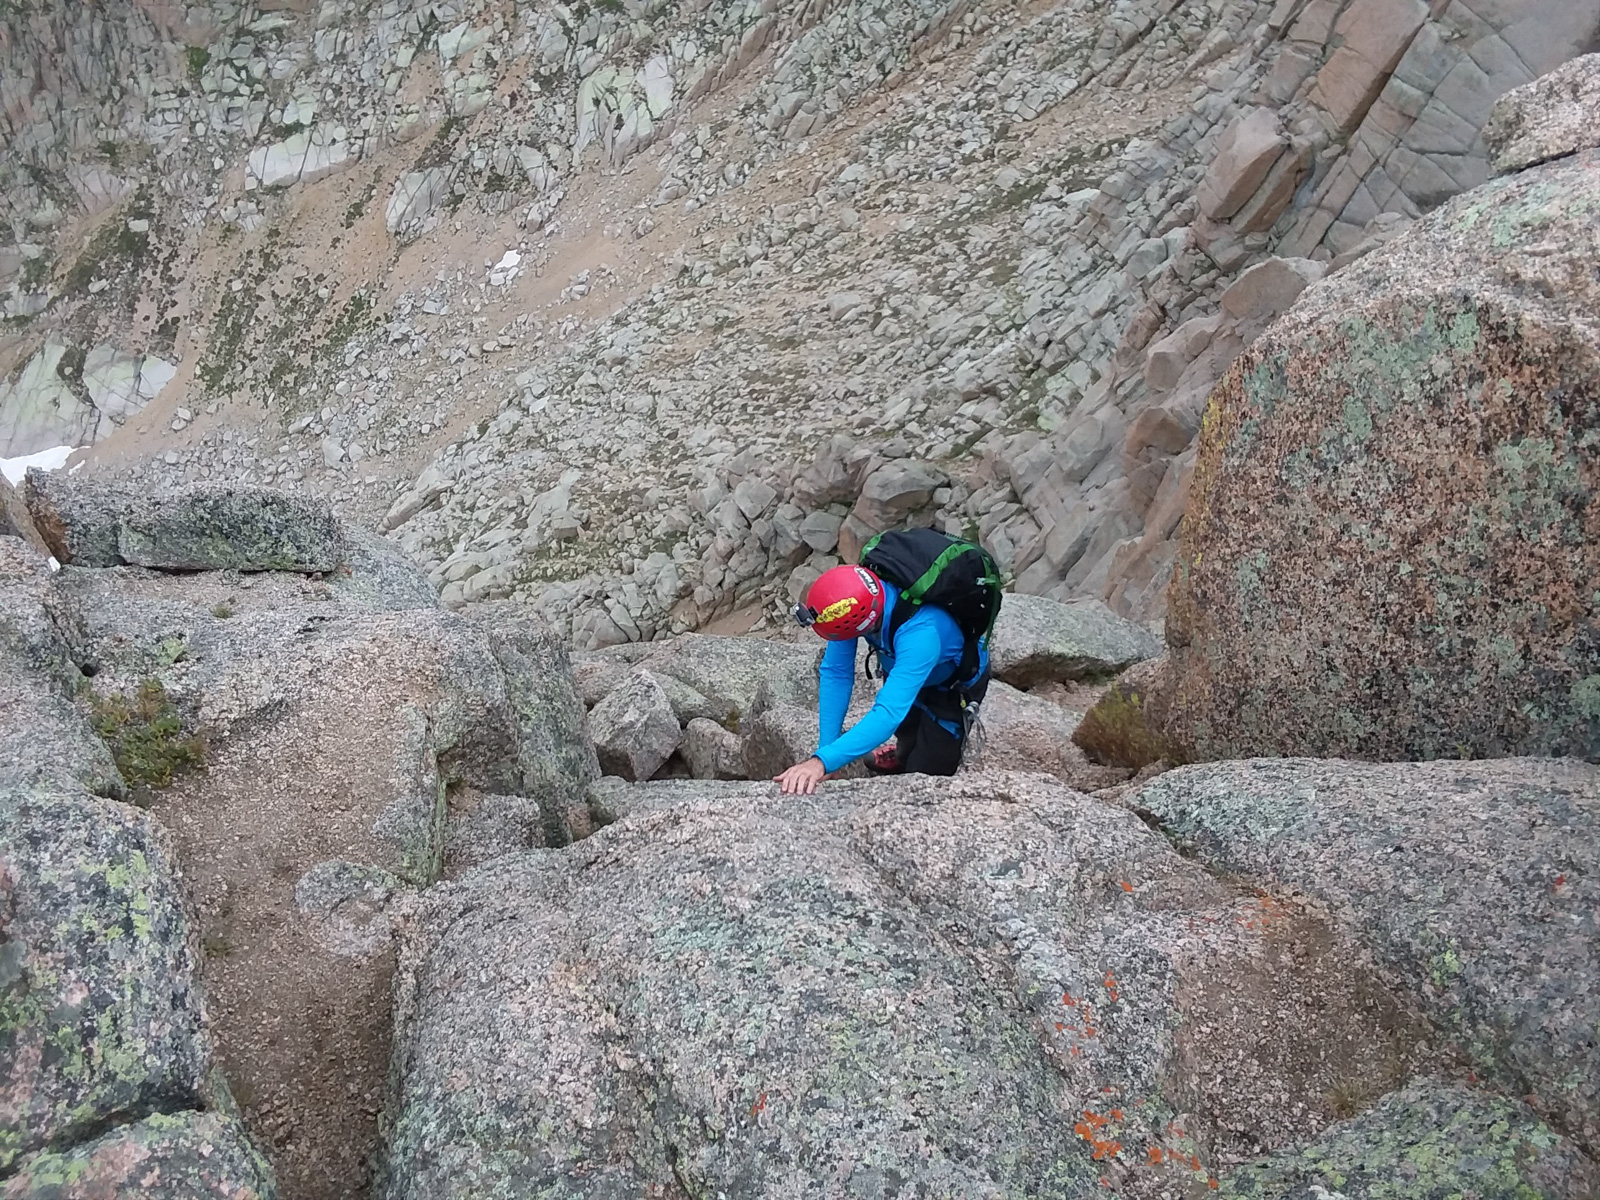
All good things must come to an end, so we decided to head back down before getting stuck in some nasty weather. It looked like it should hold for us for at least an hour or two. Shawn went first. Here's a shot of him negotiating the first tough move back down.
I found downclimbing the chimney to be a lot of fun, using my feet and back as leverage for the first and last section.
The tricky move back around the jutted out boulder was a little easier on the way back for some reason.
Directly after the tough move, there's a way to go up instead of around, so both Natalie and I chose that option instead, finding it to be easier.
Back on the north face, we quickly made our way down to the 3rd crux.
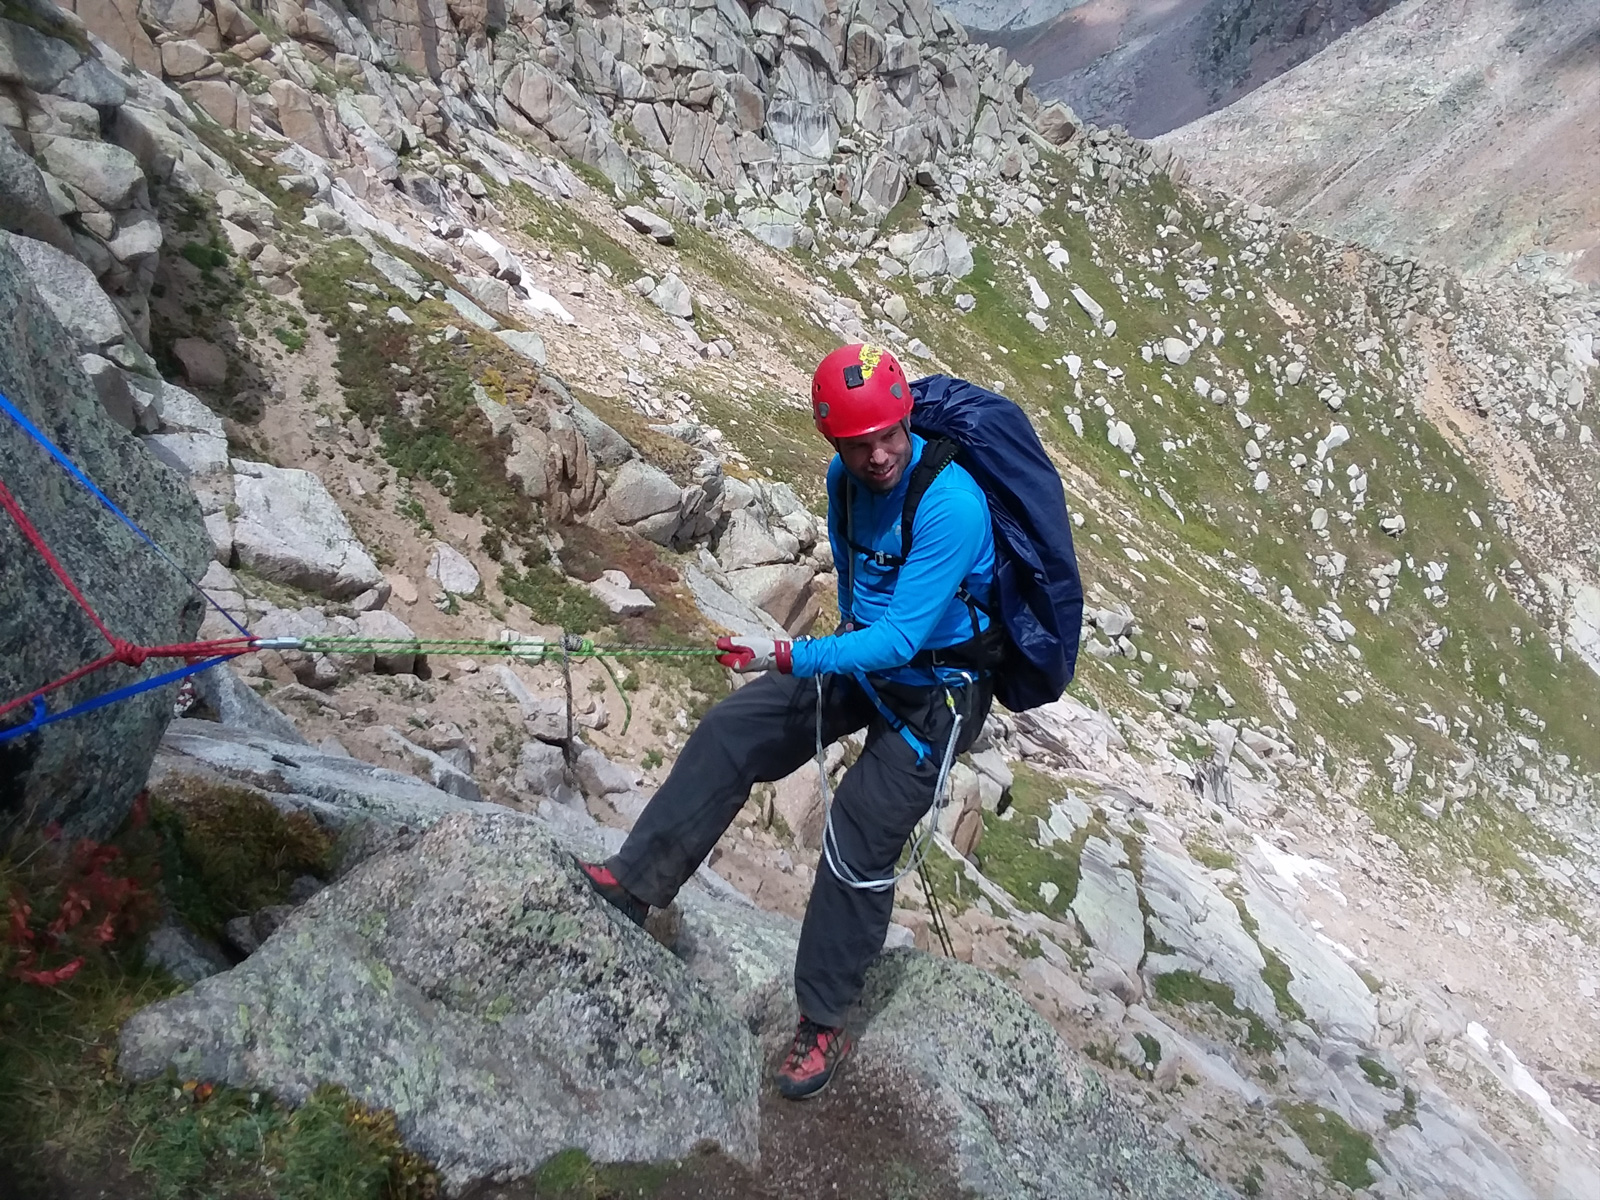
We rapped down without any problem, tying together two 30 meter ropes using a water knot. The next section was quite easy to rappel as well.

I found the final rappel the hardest, just due to how long it was down the gully. Here we go! Thanks for the shots Shawn!
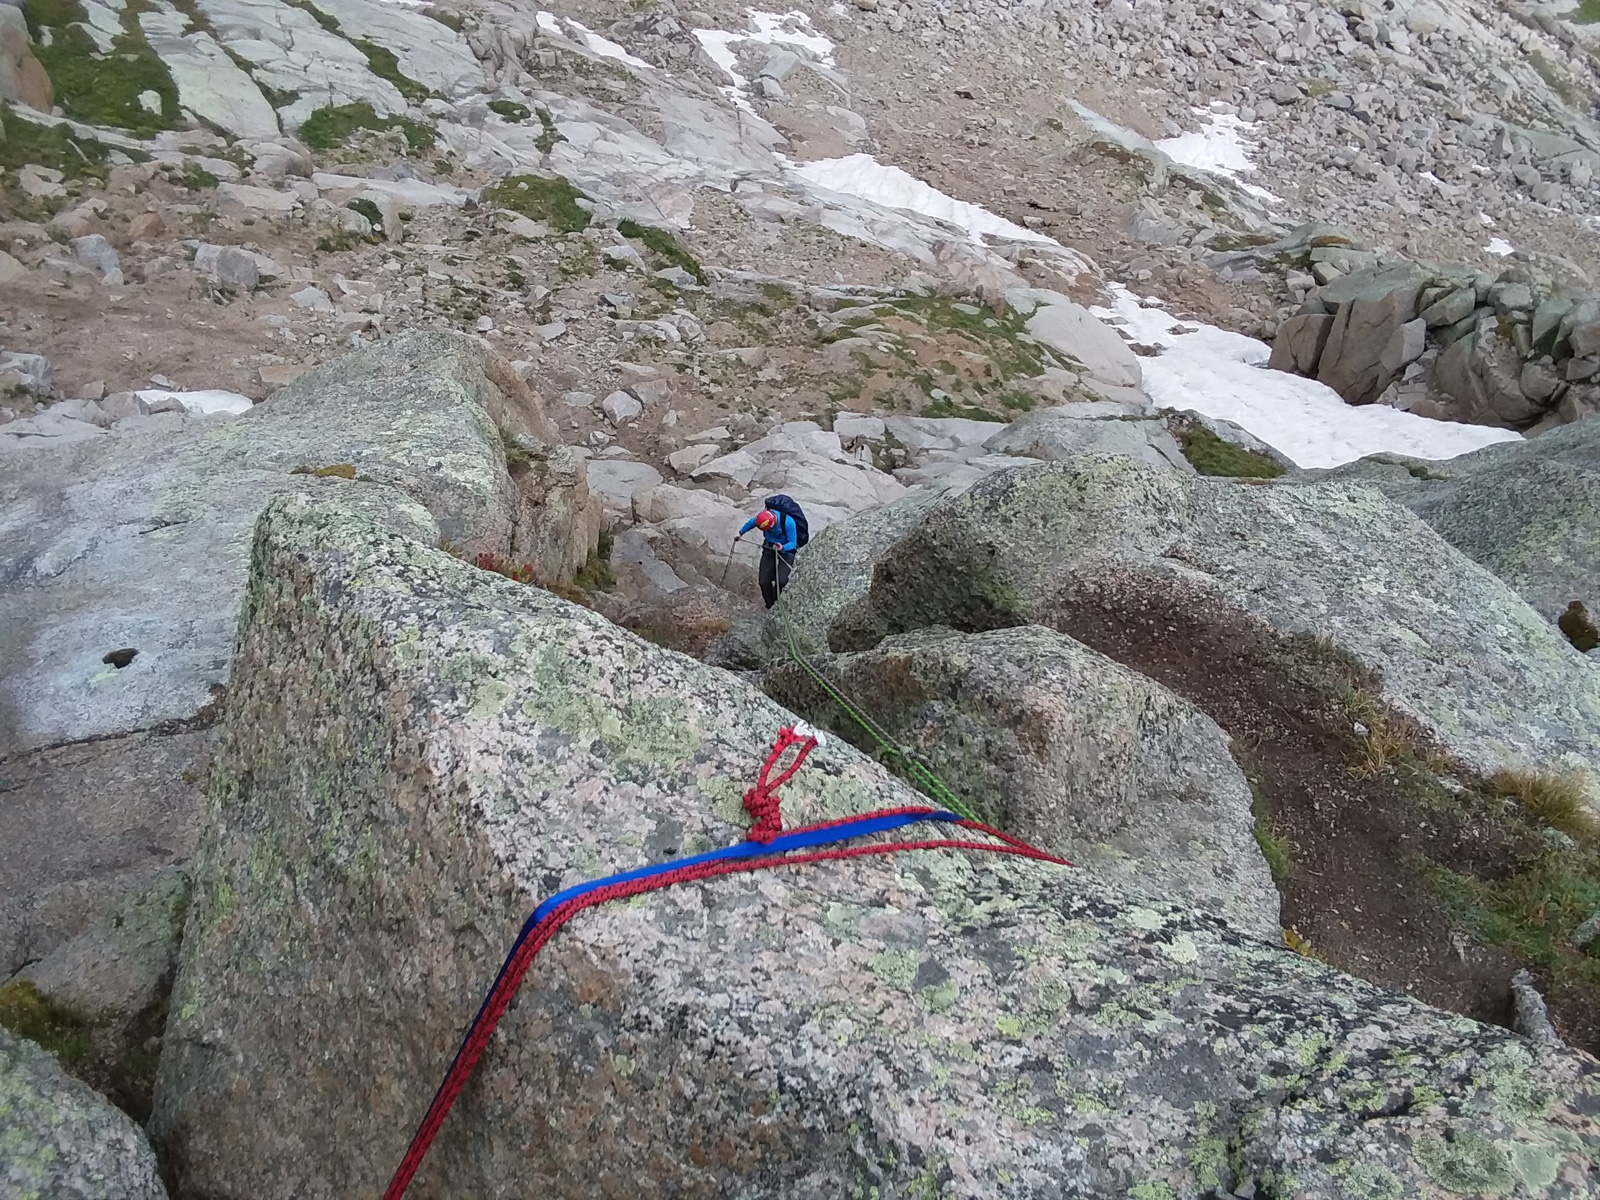
A look back up shows just how long the first crux really is!
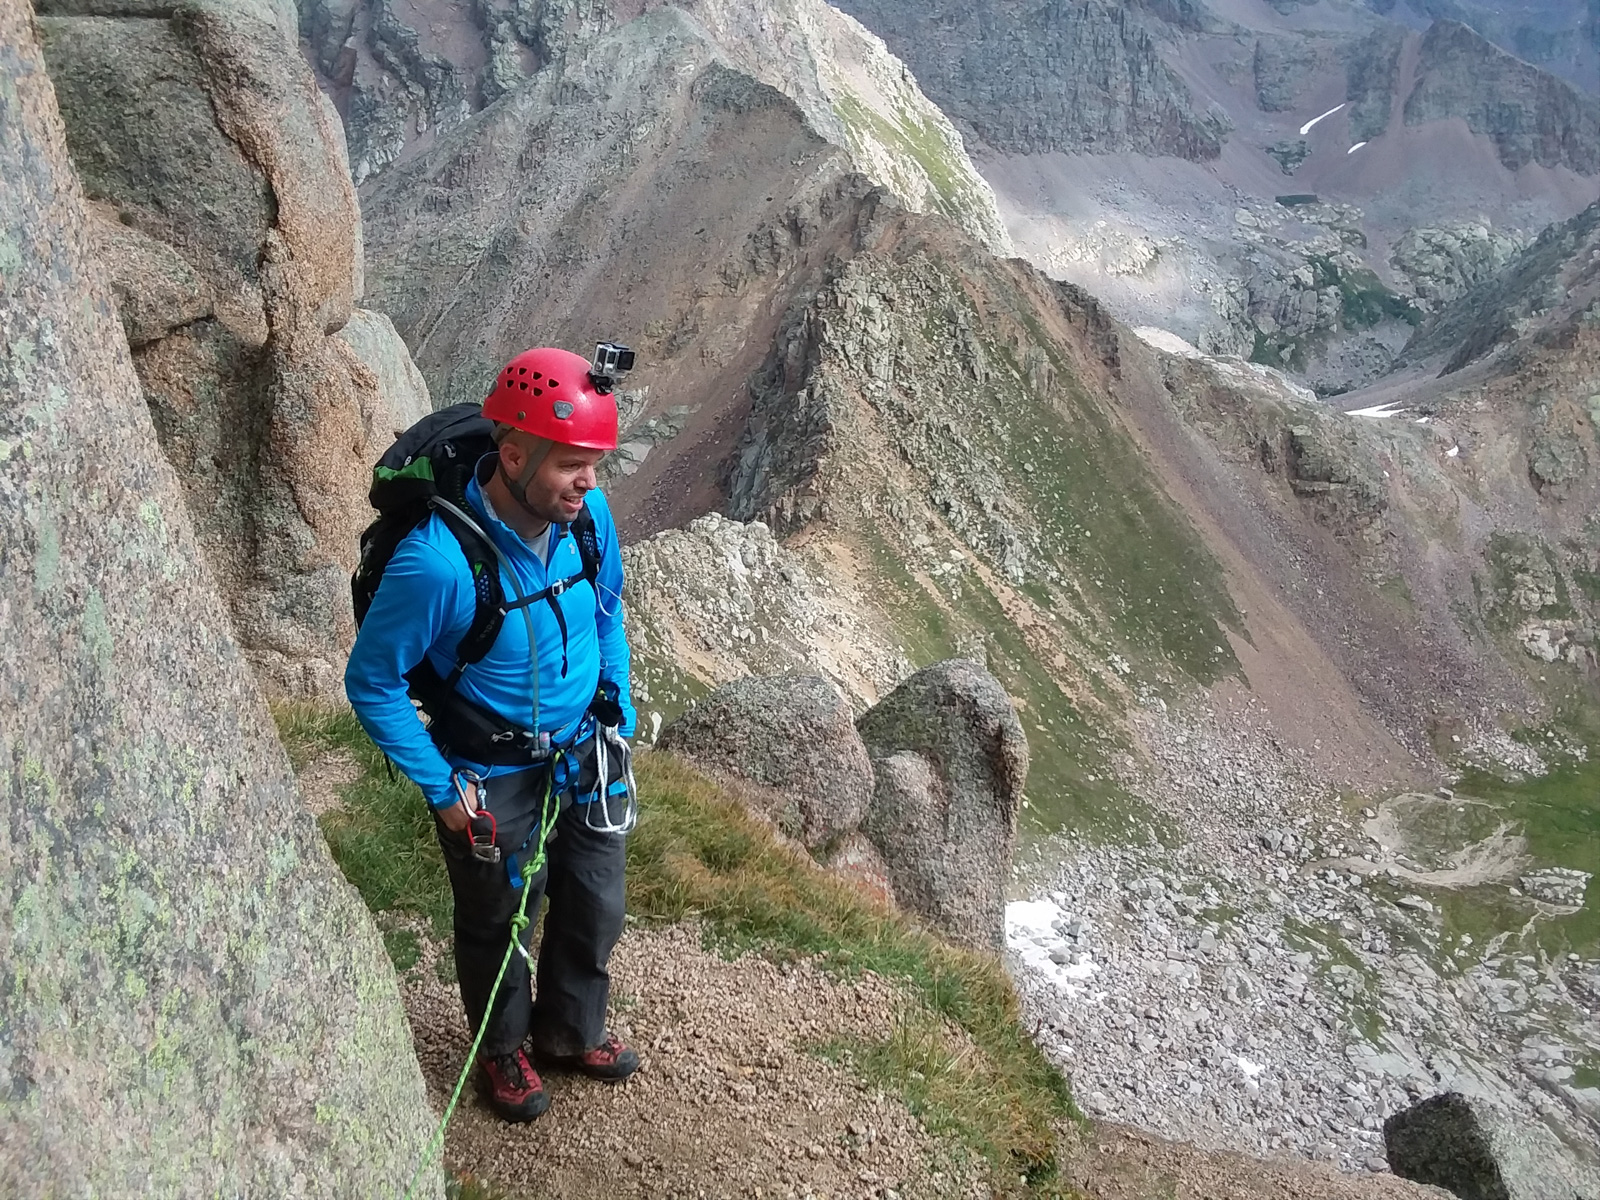
Natalie stopped to appreciate the view as well as Shawn rappelled down last. The views of Leviathan were awesome from here.
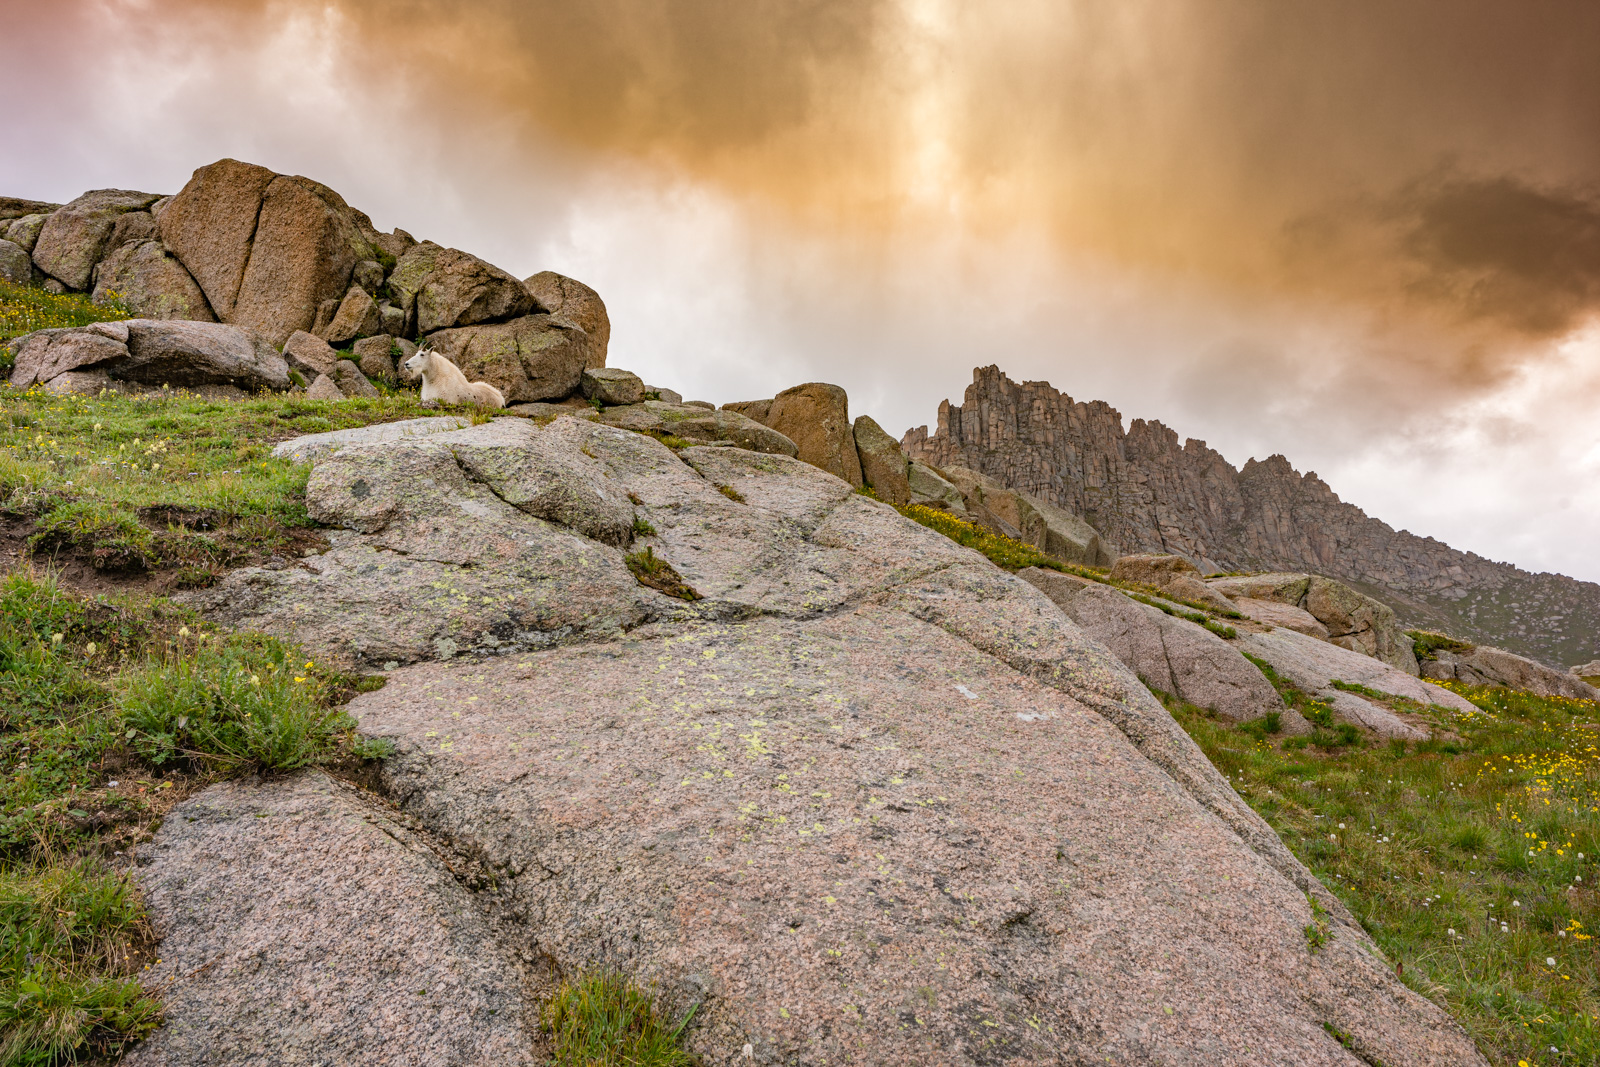
We all made it down safely from the tough sections and got ready for some rain and graupel (you know, that stuff that's like tiny hail). It was good that we avoided a "Graupel rappel." Har har. We all decided to go down the way Shawn came up as it sounded like the most scenic route. It was awesome. We ran into a solo goat while some interesting rain storms passed by.
As we lowered into the basin, the atmospheric clouds added some nice effect to Sunlight and Windom.
It was hard to keep moving with a view like this. Natalie and Shawn forged ahead and are seen bottom left.
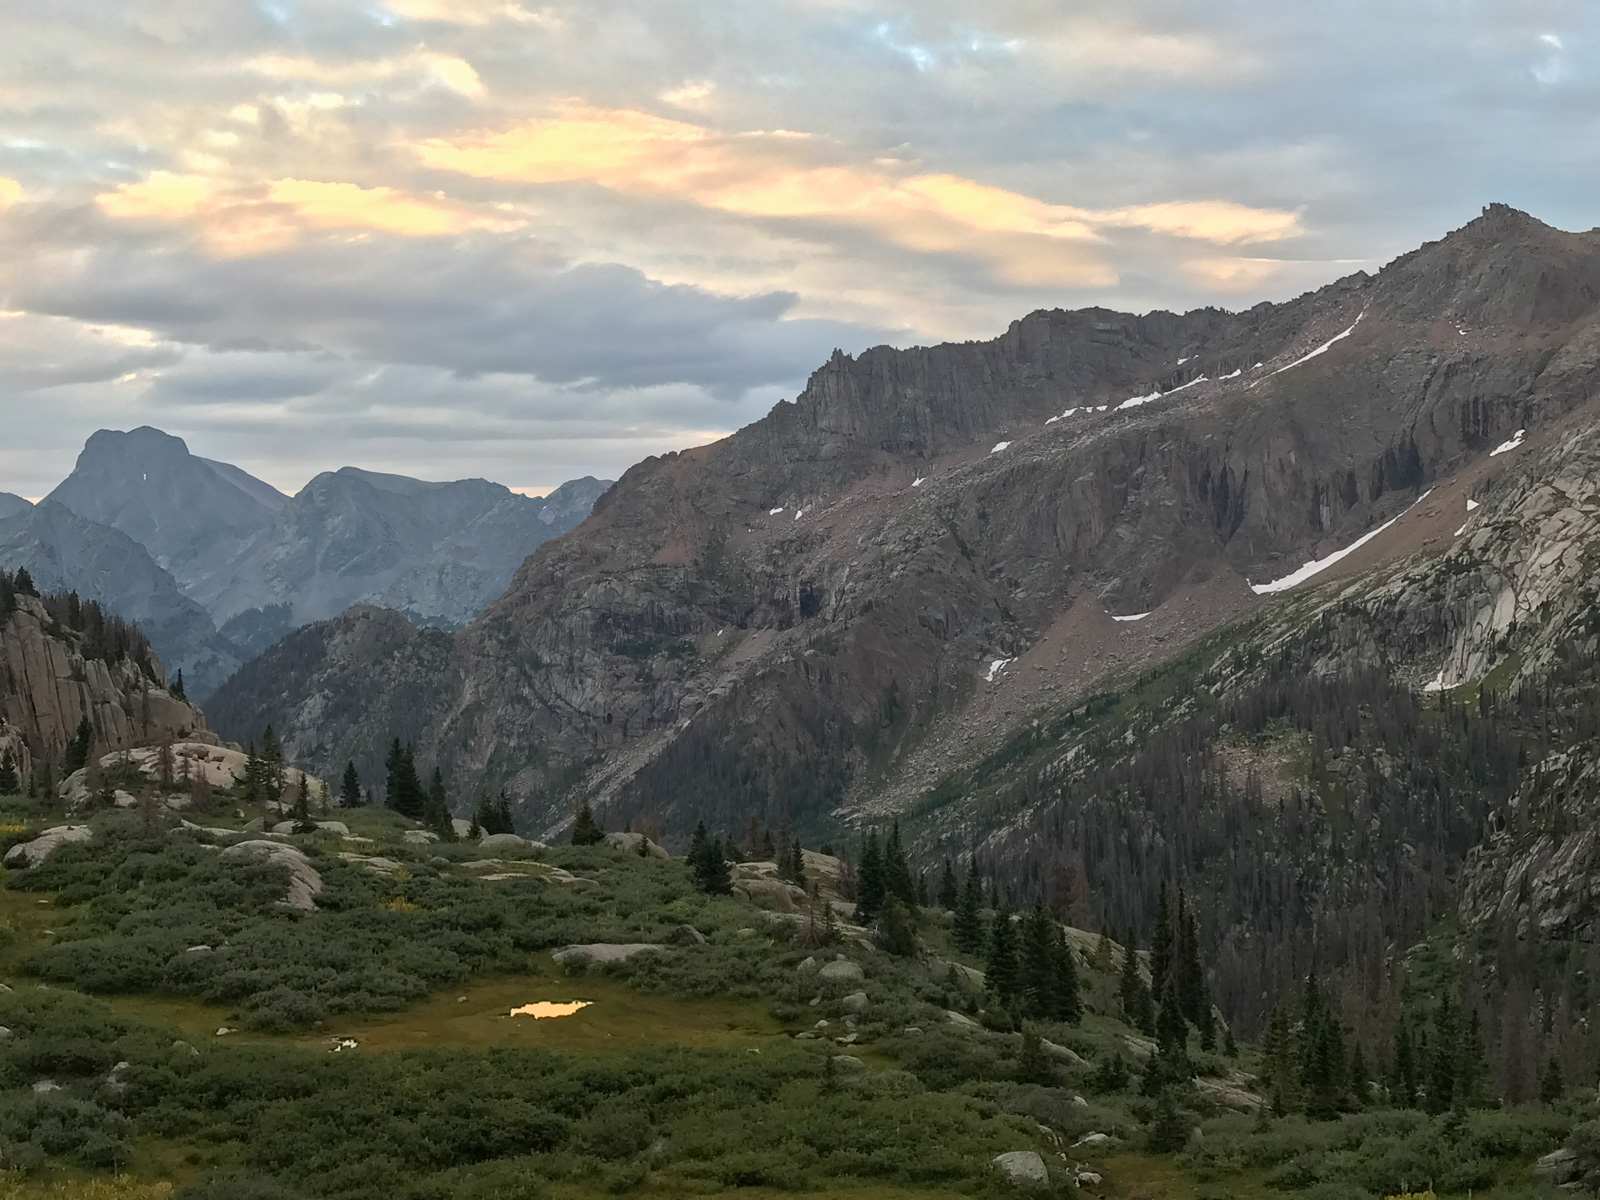
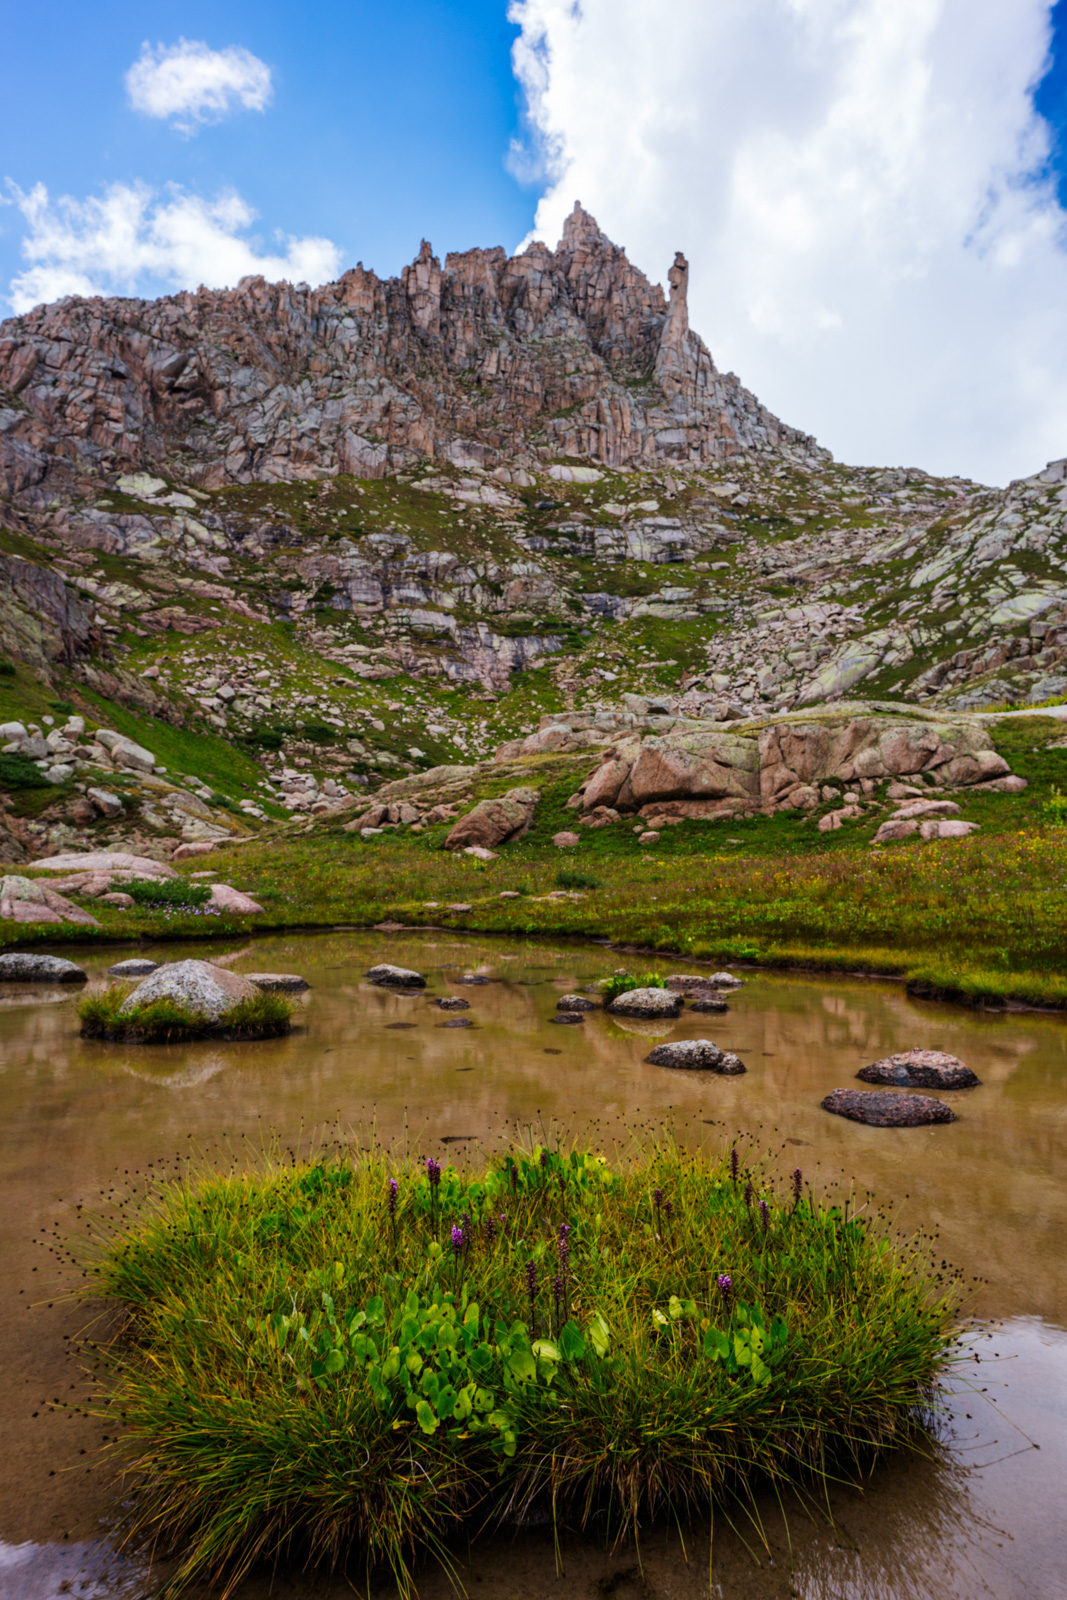
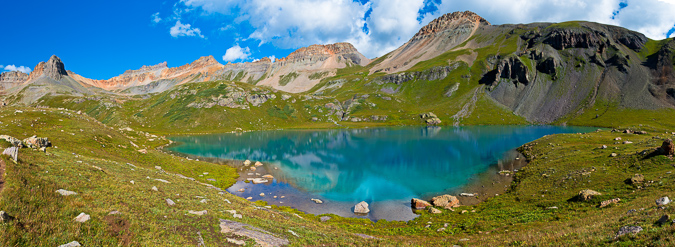
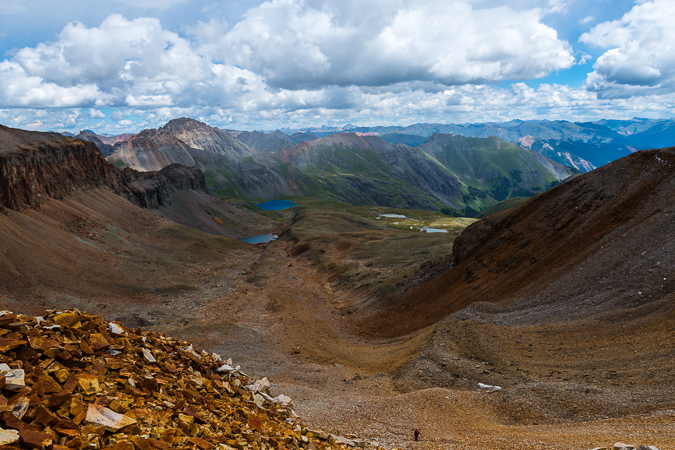
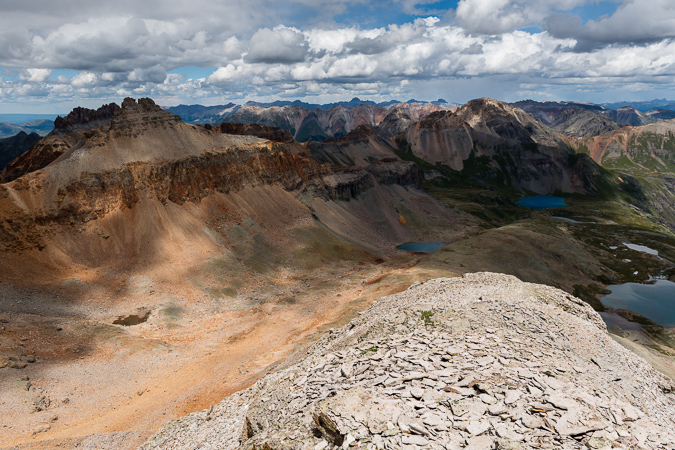
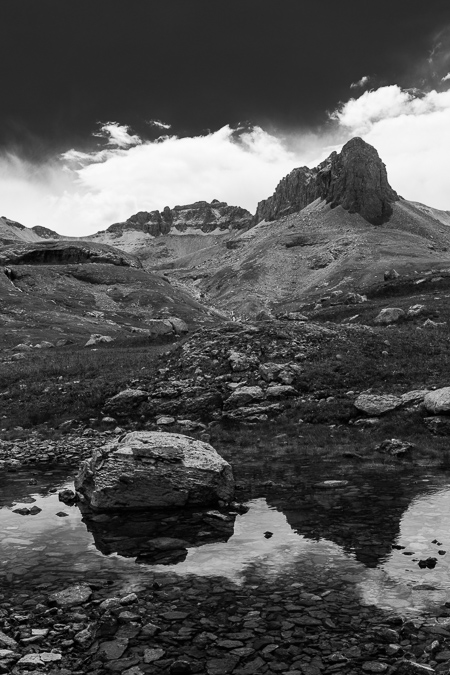
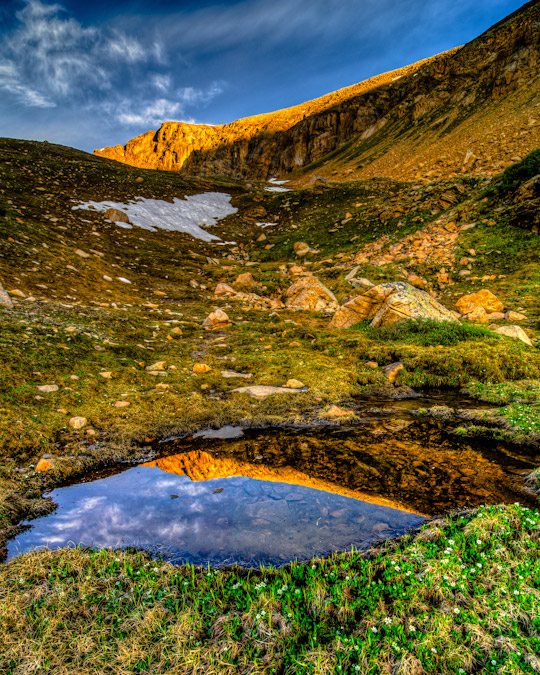
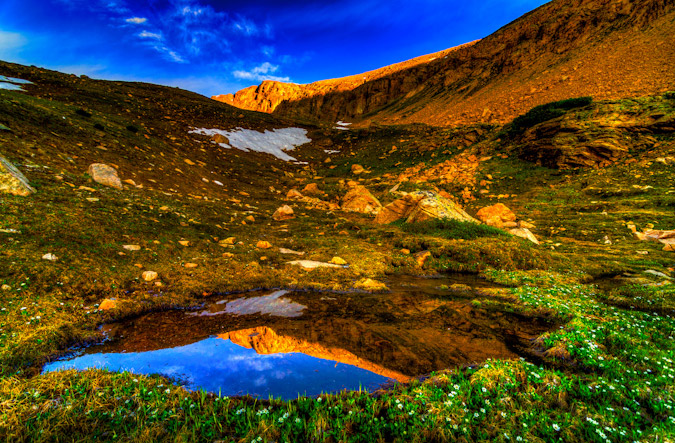
As we got lower, we found this really awesome pond with a killer view of Jagged Mountain. I was pumped.
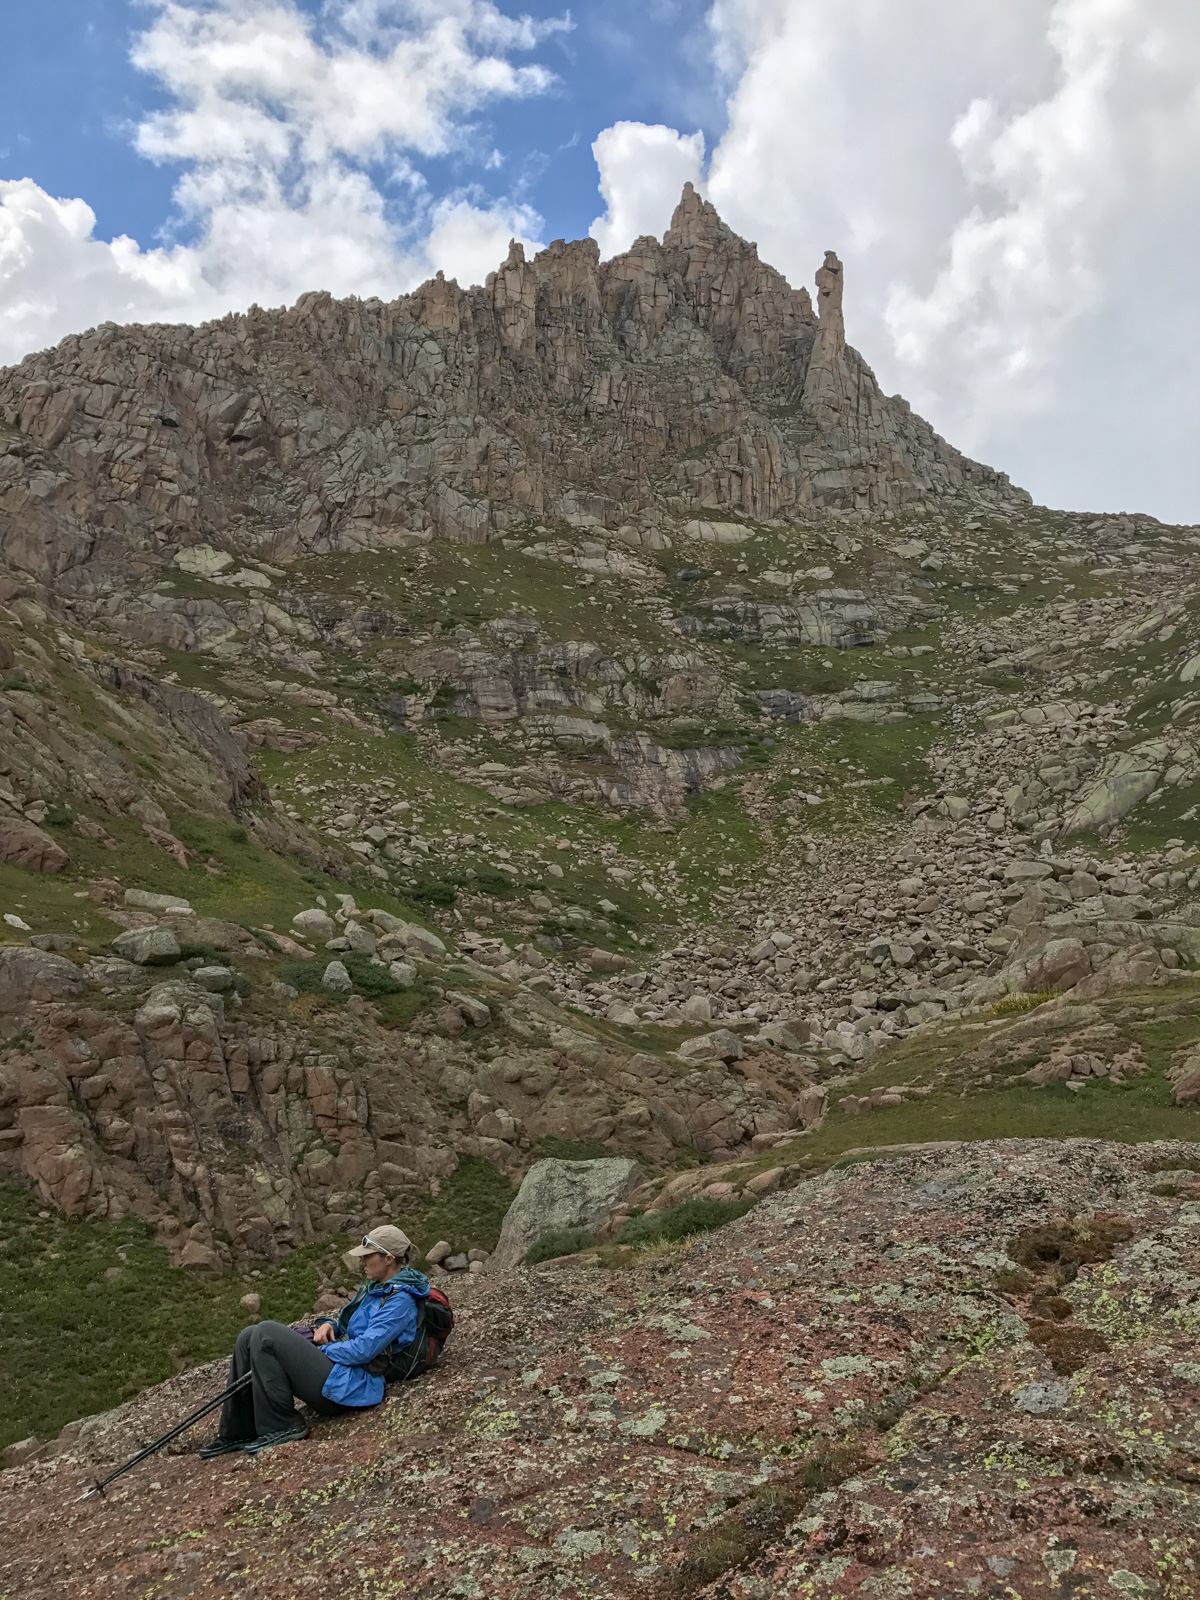
Natalie stopped to take it all in below Jagged.
We finally reached the lower sections just before rejoining the main trail and stumbled on a nice little pond which reflected Sunlight nicely.
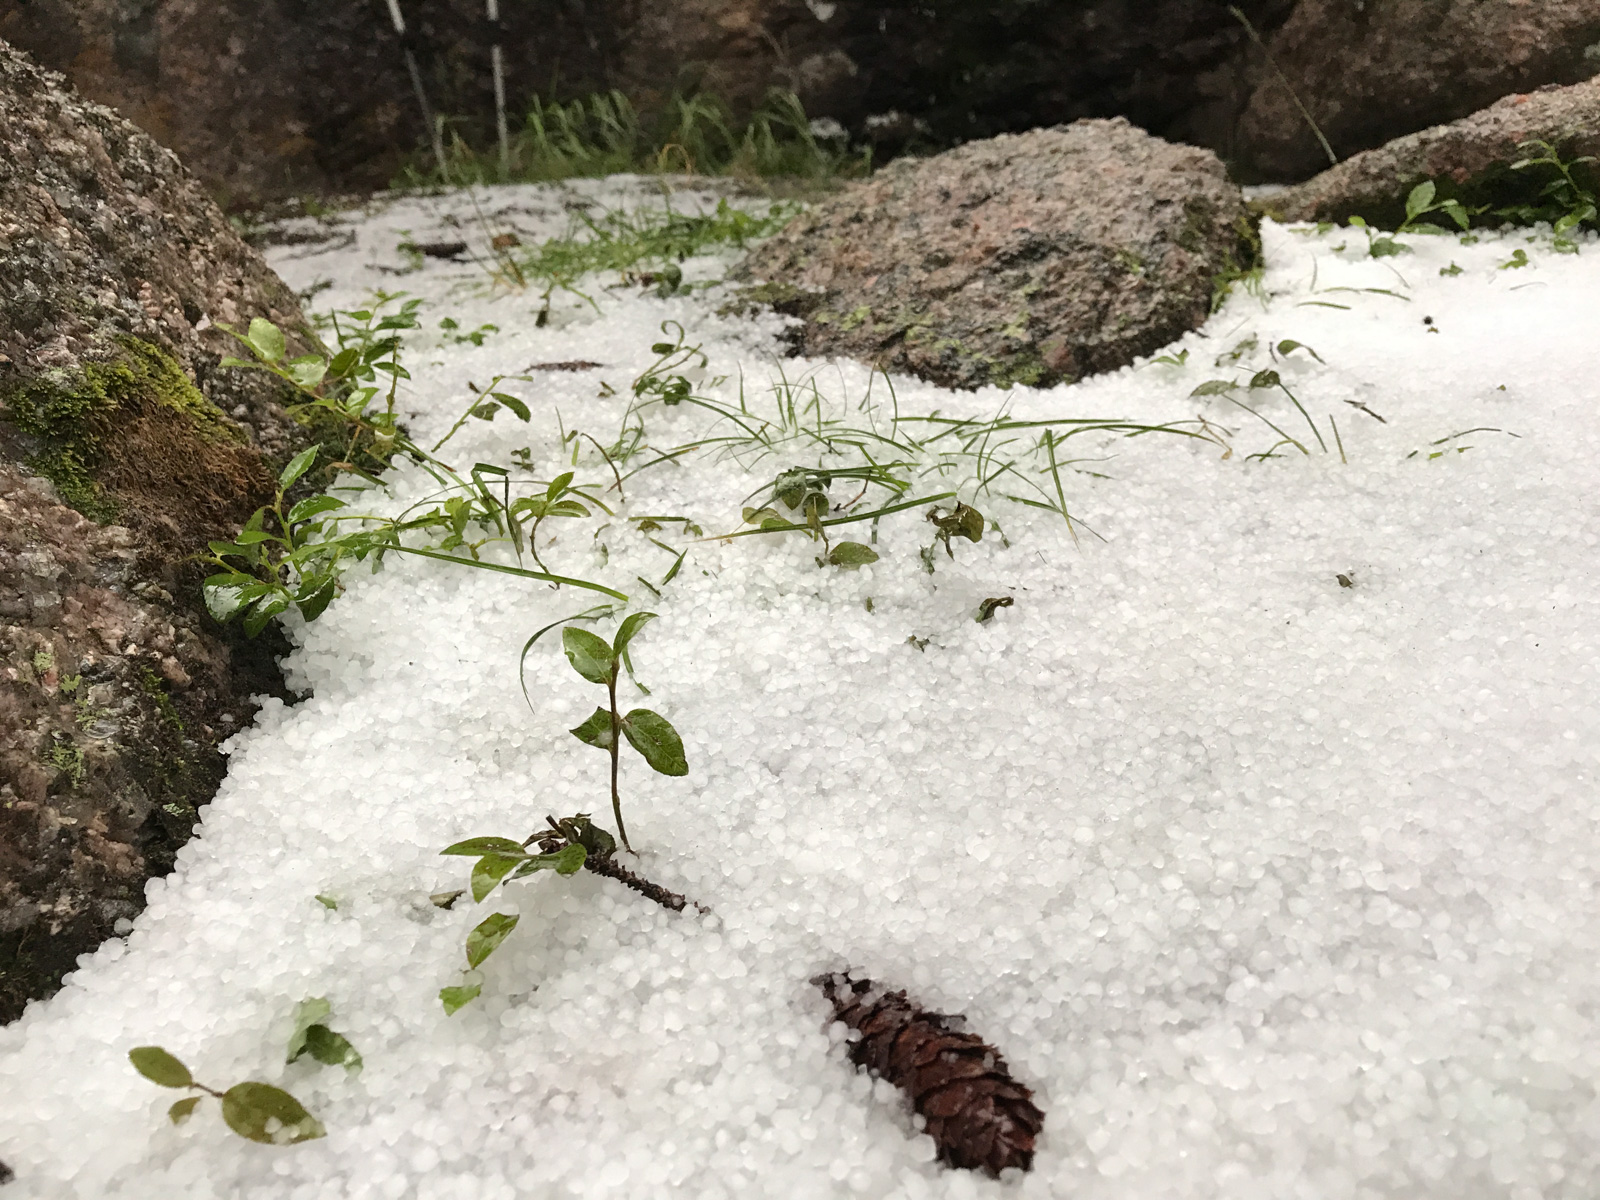
We reached our campsite without any issues. Shortly after, it began to rain... and then hail, for a couple of hours straight. It was a lot of water! I was oddly not that tired and decided to try to read and then take a photo of the water on my tent.
After the storm stopped, I poked my head outside to see the damage. Holy moley! Look at all that ice!
We finally decided to eat dinner and crash, as I was planning on an early hike out the next day, and it would be a tough one for sure.
DAY 4: Hike back over Hunchback Pass to Beartown.
Rise and shine. This would be a tough day. At least it started out well with a parting gift from Jagged Mountain at sunrise!

On the way out, everything, I mean EVERYTHING was wet. The dense vegetation along sunlight creek was almost unbearable. All of my clothes and both feet were soaked. Good times.
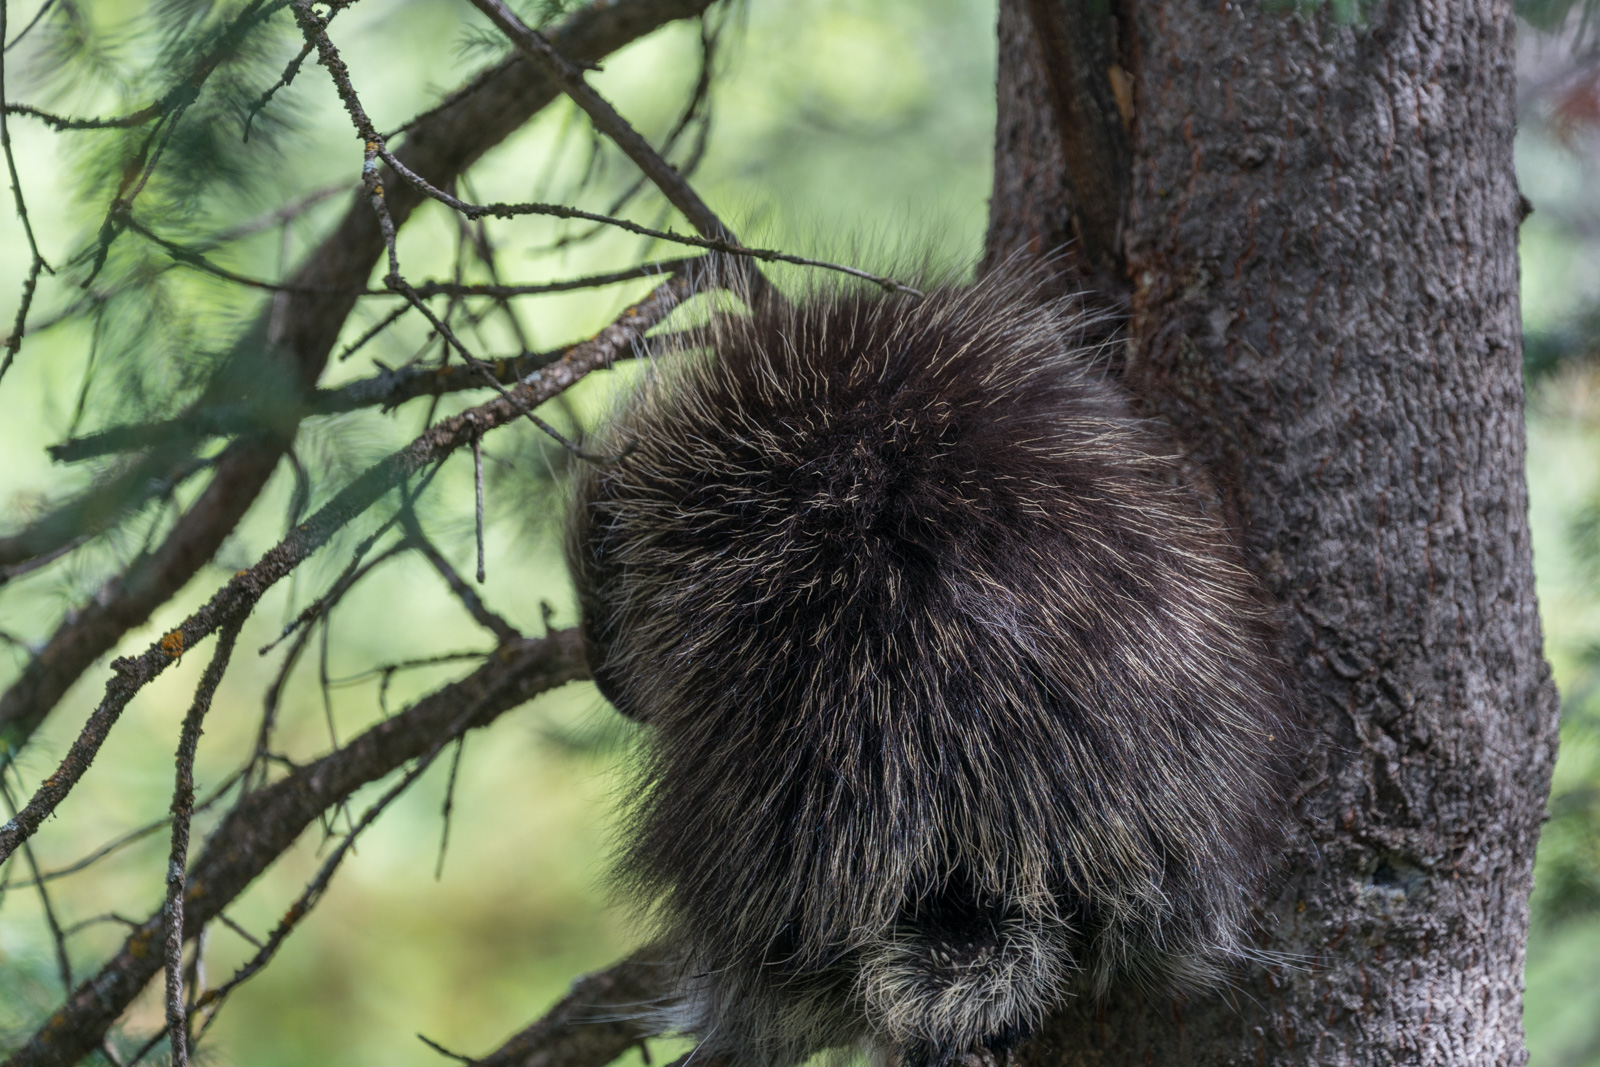
I stopped after Vallecito Creek to change socks and rinse out my boots as well as to put on some dry clothes. I chatted with a nice couple camped there and then departed. I kept my head down for most of the way back but got lucky to catch a porcupine sitting at eye level in a tree right next to the trail. I decided to go around.
It took me about 6 hours to get from camp to my car in Beartown, and I really slowed down at Hunchback Pass - I had just run out of gas. It did not help that my water reservoir was leaking and I had to stop frequently to pump water. After cresting Hunchback Pass, I was welcomed with a nice view of UN 13,308 across the valley. A nice parting gift from the Weminuche, my favorite place on earth.
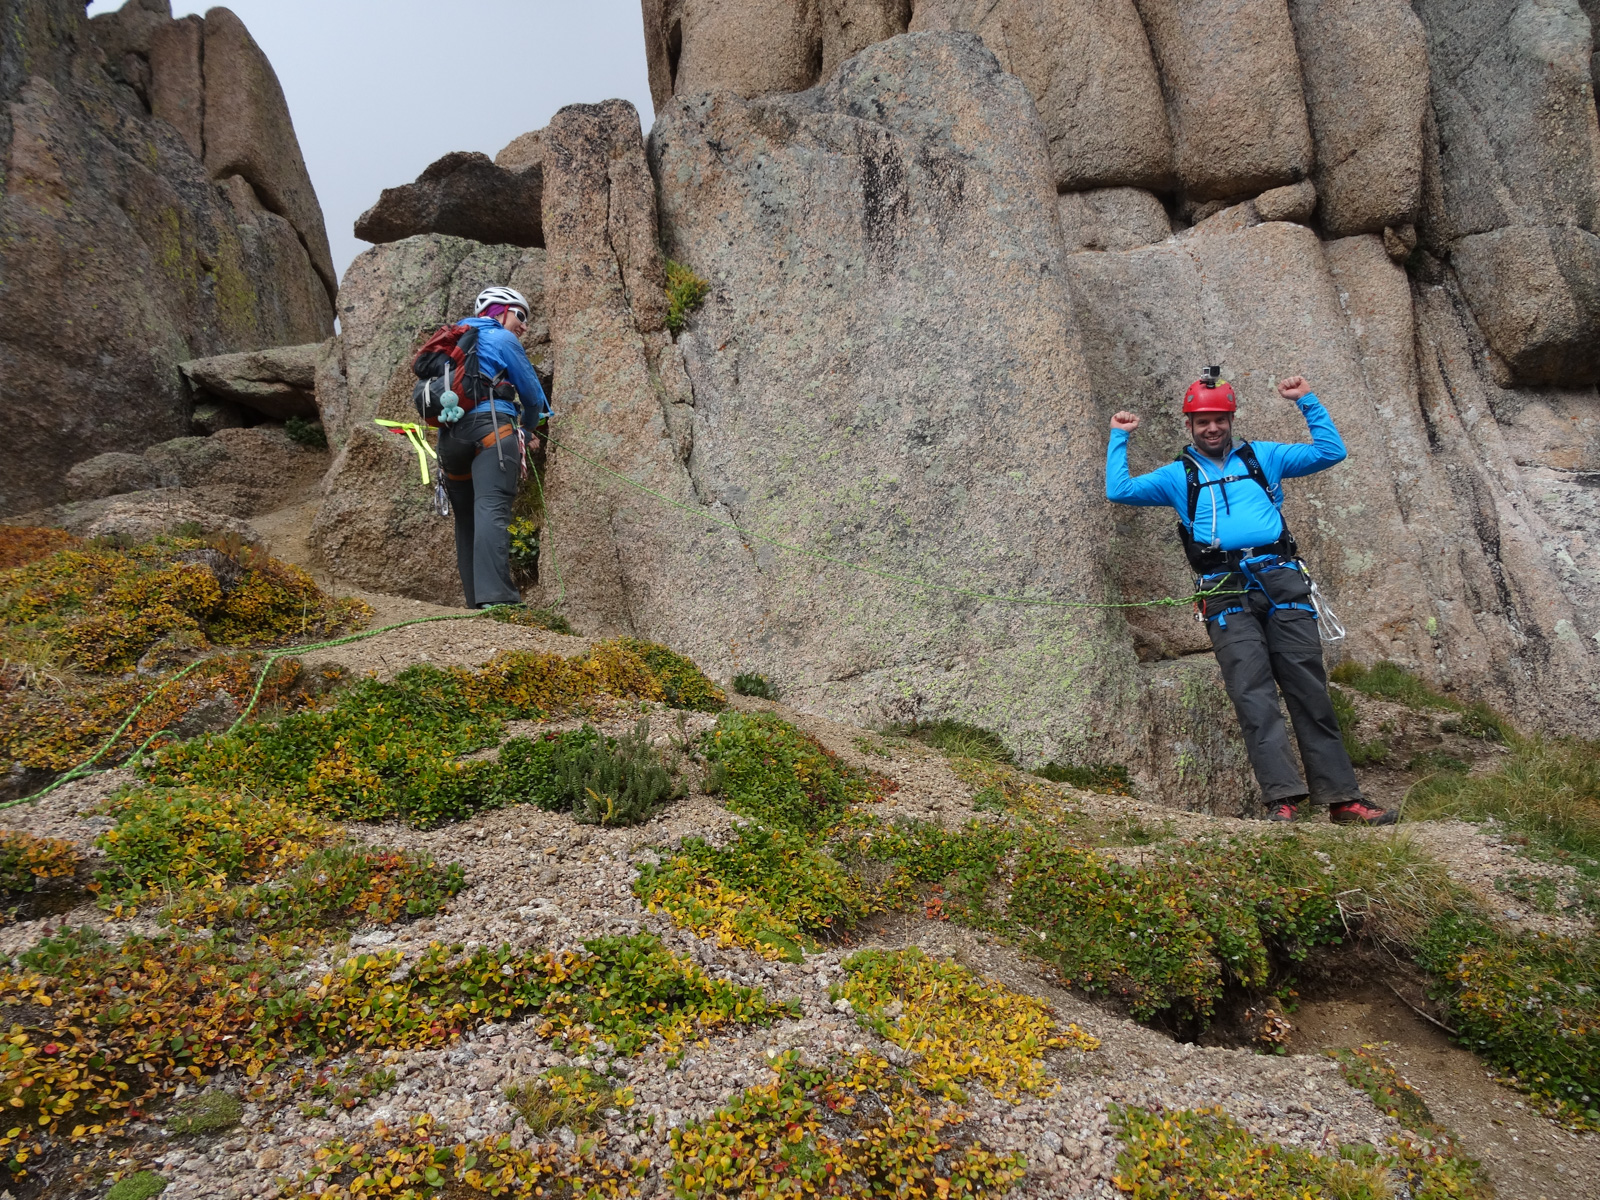
Thanks again to Natalie and Shawn, you guys were amazing partners! Here's to Natalie, who led us up!
Thanks for reading! I hope you enjoyed this one. Sorry if it was slow to load! Lots of photos!
Perseid Meteor Shower at Ice Lake Basin and a climb of Vermillion Peak
When the dates for the 2013 Perseid Meteor Shower were released, I knew I wanted to schedule some time in a very remote location to capitolize on the opportunity to capture as many meteor shower photos as possible. I did a little research and took a look at my remaining Colorado Centennials that were left to climb and enthusiastically declared that the Ice Lake Basin would be the perfect location. I knew that the trip would be amazing for a photographer, but perhaps boring for someone that is not into photography. I reached out to my friend Ryan Fonkert to see if he would be interested in joining me on a tour-de-Ice-Lake-Basin to shoot the Perseids and to climb Vermillion Peak. Without any hesitation he said he would join me.
Photographing meteor showers has only recently been something I've wanted to do, and my first successful foray into that realm of photography was back in December 2012 for the Gemind Meteor Shower, where I was able to come away with this photo:

Ice Lake Basin has long been on my radar as a location to visit. Ideally, I wanted to visit the area during the peak of wildflower season due to the idyllic photograpy opportunities afforded at the upper Ice Lake. Unfortunately, the Perseid Meteor Shower falls in mid-August, so this time would have to mostly be a scouting mission for wildflower-style photos.
Ryan and I carved out a chunk of time on our calendars to coincide with the Perseid Meteor Shower peak; we went with Sunday, August 11th through Wednesday, August 14th, knowing the Perseids would peak on Monday night, but also allowing us some flexibility in case of weather or other uncontrollable variables. We made preparations to spend three nights at 11,000 ft and higher, with weather forecasts showing significant rain and/or snow. Sunday afternoon we gathered at my house and departed for the long journey from Colorado Springs to Silverton via Highway 50. I was particularly excited for this trip for a billion reasons, one main reason being that Ryan and I had a ton of interests and world views in common. We were both atheists, both photography geeks, both vegetarians, and both fairly liberal in our political beliefs (don't hold it against us). It was going to be great to be able to chat about all of those awesome topics while camped in one of Colorado's premeir backpacking destinations.
We stopped in Montrose for dinner and wound up at Denny's. How sad for two vegetarians. I'm going to have to do more research before the next time I pass through Montrose needing food. The waitress looked at me really oddly when I asked her to withhold the giant sausage that came with my breakfast skillet, but the food was decent enough and the high sodium would probably be a benefit for the hike in. Since both Ryan and I were mostly heading in to do major photography work, our packs were insanely heavy. I was carrying a similar load as to what I had taken up Grizzly Peak a few months prior, with the additon of a couple more lenses and some large filters for my Nikon 14-24 lens.
Ryan and I were able to reach the turn-off for the South Mineral Creek Trailhead, located just two miles north of Silverton on Highway 550 at around 9 PM. We opted for the short-cut along the Clear Lake Road as described in Roach, which shaves off about a mile and a half total for the hike in and out of the Ice Lake Basin. We loaded up our packs (mine was just over 60 pounds) and head out. We were immediately greeted by the loud and insane waterfall described in Roach, which was highly enjoyable to cross beneath in the dark with 60 pounds on my back.
Here is a full list of photography equipment that I brought on this trip and the approximate weight of each item. I purchased a new tripod and ballhead for this trip alone, because my other tripod, while solid, was quite heavy. The new tripod and ballhead weighed less than half as the old setup, which helped some on weight, no doubt.
| Item | Weight (lbs) |
| Feisol Tournament CT-3442 Tripod w/ Photo Clam Pro Gold II Easy PQR Ballhead | 3.3 |
| Nikon D800 DSLR w/ Kirk L-Bracket | 2.8 |
| Nikon 14-24 f/2.8 Lens | 2.0 |
| Nikon 24-70 f/2.8 Lens | 2.0 |
| Nikon 50mm f/1.4 D Lens | 0.5 |
| Nikon 105mm f/2.8 D Micro Lens | 1.5 |
| Fotodiox Wonderpano Filter Kit w/ 5-stop ND filter & 6x8 grad ND for Nikon 14-24 lens | 2.0 |
| Nikon 300mm f/4 D Lens | 3.0 |
| 1.4x Teleconverter | 0.5 |
| Total | 17.6 |
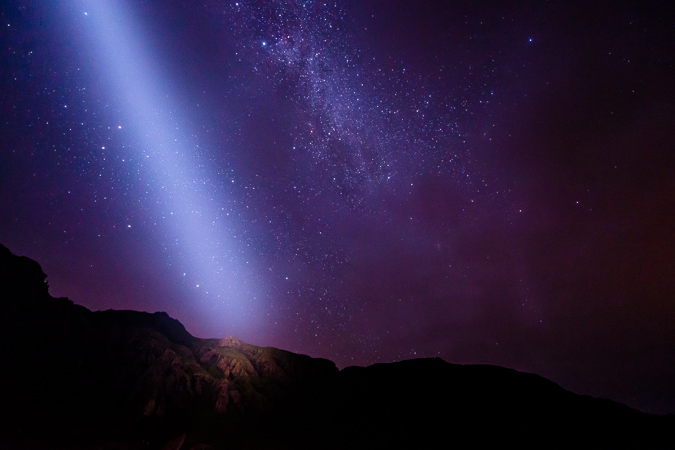
The skies were quite clear on the hike in and we were thinkng we would be afforded some great opportunities to capture some meteor photos on the very first night; however, mother nature had other thoughts in mind. The hike in was quite uneventful until we reached what we believed was the lower Ice Lake Basin. I took out my very bright Brinkman light, which I use for light painting of distant foregrounds for astrophotography. The light was able to show us the area and we headed towards the very upper section of the lower basin. After some wandering in the dark, we stumbled upon an amazing campsite right next to the creek and a huge waterfall nestled at the very edge of the basin. The campsite was equipped with a ready-made bear-bag tree and someone had even salvaged some old mining equipment to form a nice metal bench next to the fire-ring, which we never did use. We setup our camp in the dark quickly so that we could venture out to photograph some meteors; however, by the time we finished setting-up, clouds had already moved into the basin, obscuring our view of the stars above. I was able to get one kind of cool photo of the night skies the first night while utilizing the Brinkman light to illuminate a distant mountain-top to our north east.
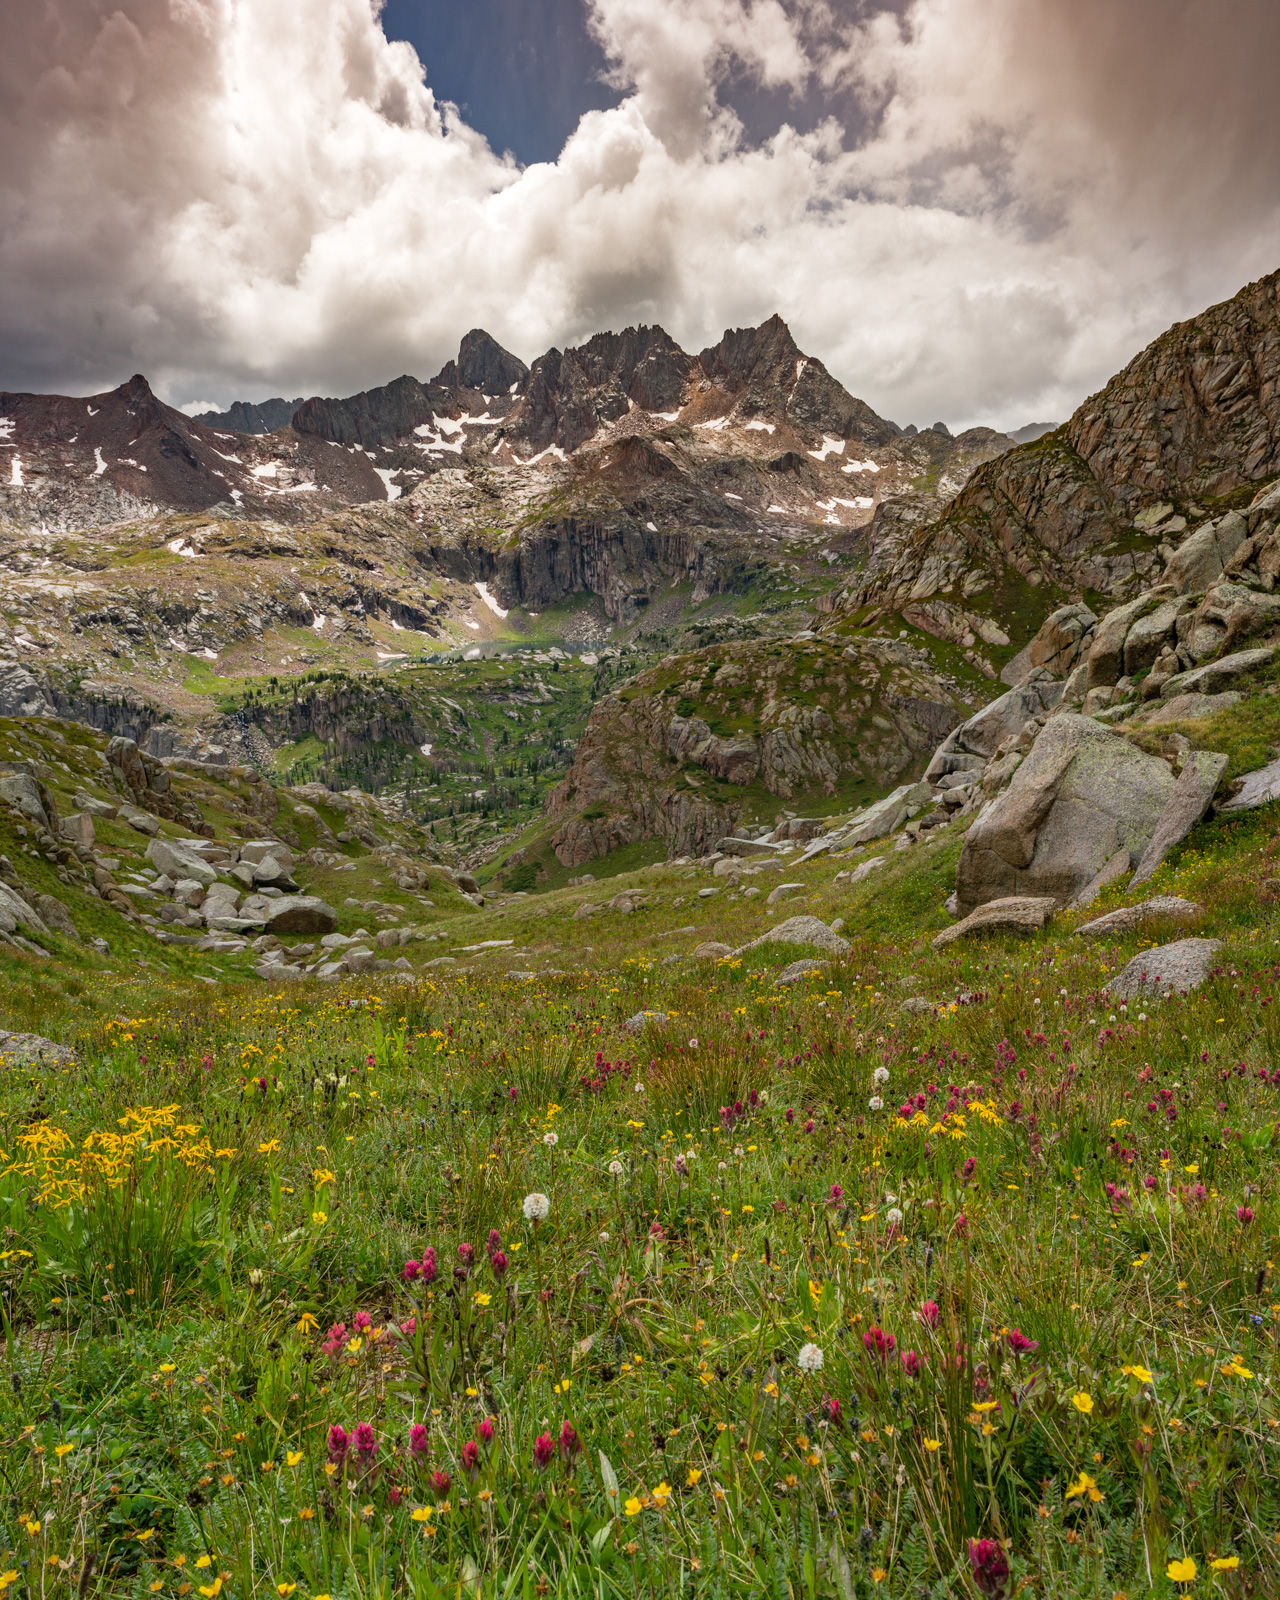
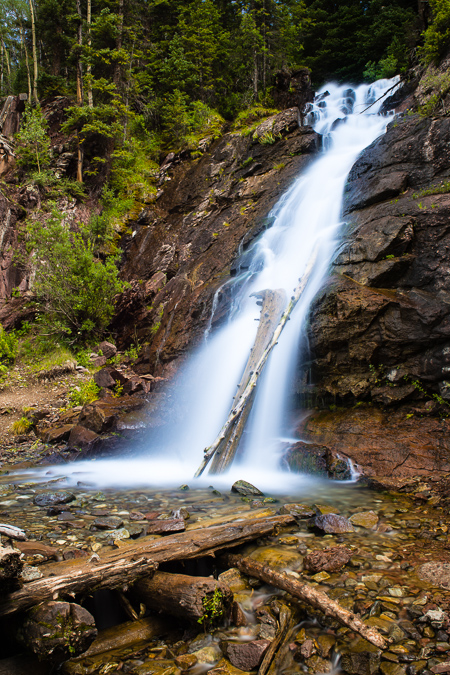
After a failed attempt of photographing the night sky, we decided to hit the sack and see what the next day would bring. We awoke pretty early and the sky was already filling with dark clouds. Sure enough, the sound of thunder came early, around 9 AM and we were more or less stuck to our camp area for the duration of the day. Not that we were complaining though, Ice Lake Basin is a pretty great place to be "stuck" for the day. We had pockets of sunshine and decent weather, so we kept going out around the basin for short photography hikes and then back to camp when weather became nasty. This yielded both Ryan and I many opportunities to capture some great images, especially of the ubiquitous waterfalls that were in the lower basin. It was one of the most awesome places I had ever camped, and I am eager to return, no question.
 As I mentioned before, our campsite was nestled against the headwall of the upper basin and was directly below a huge series of waterfalls that terminated in a huge field of wildflowers. It was really quite the scene and kept our minds off of the occasional thunder we would hear above. I took advantage of my 9-stop ND filter for taking photos of the waterfall and enjoyed the challenge of the changing light. There were endless opportunities to take photos of the waterfalls and I think I could have probably spent an entire day looking for a better composition or angle. I know Ryan came away with some real stunners too.
Ryan ventured off across the basin to photograph his own waterfalls while I tended to the huge one behind our campsite.
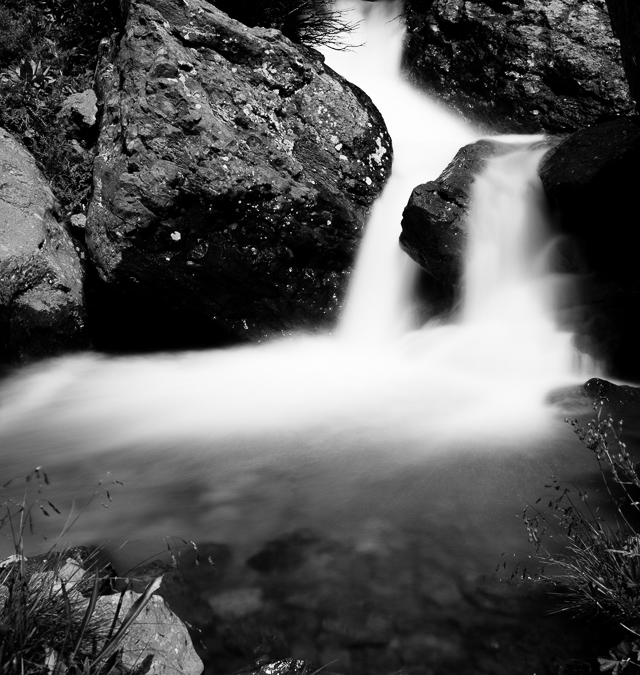
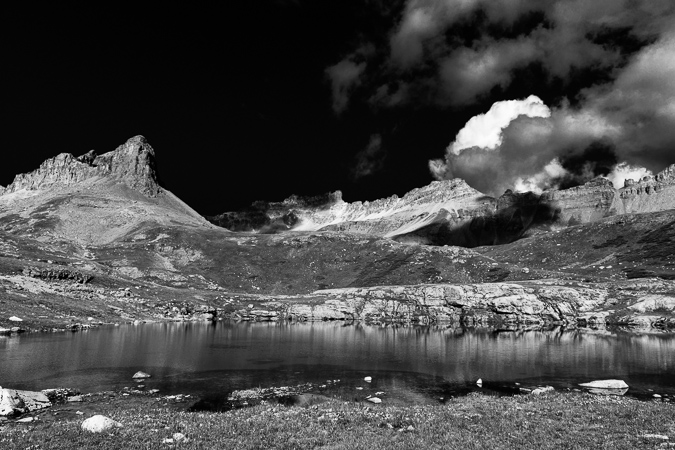
I tried a variety of spots near our campsite and ventured quite closely to the incredible series of waterfalls that came from the upper basin just above us to the west. I don't generally processing in black and white a lot, so I decided to shoot for black and white instead of color for the waterfalls, focusing more on the available light vs. the colors in the area. It proved to be a great way to study the subject and yielded some fairly good results I think. I loved the textures and lines that intertwined between both the rocks and the moving water and really loved how the ND filter treated the scene with a silky smooth aura.
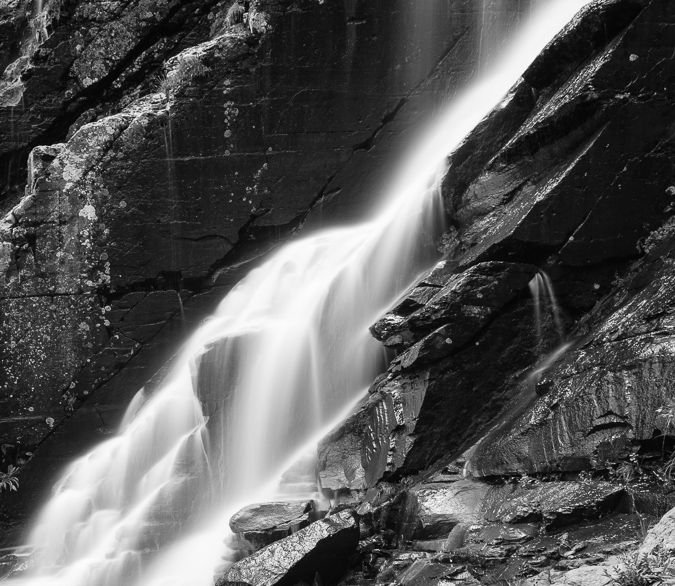
Black and White waterfalls taken with a 9-stop ND filter - a study in light and texture.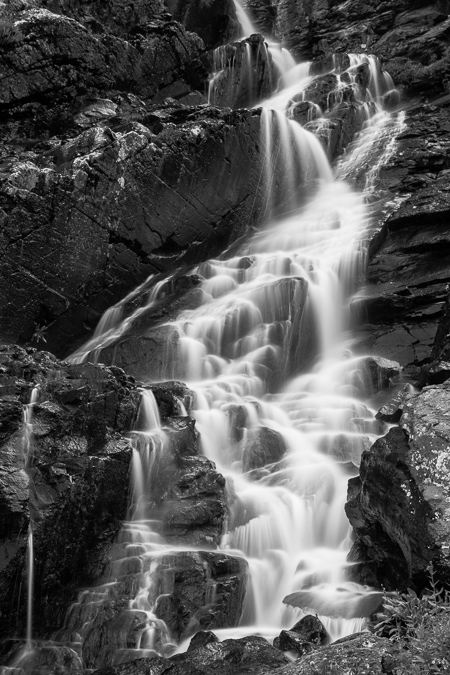
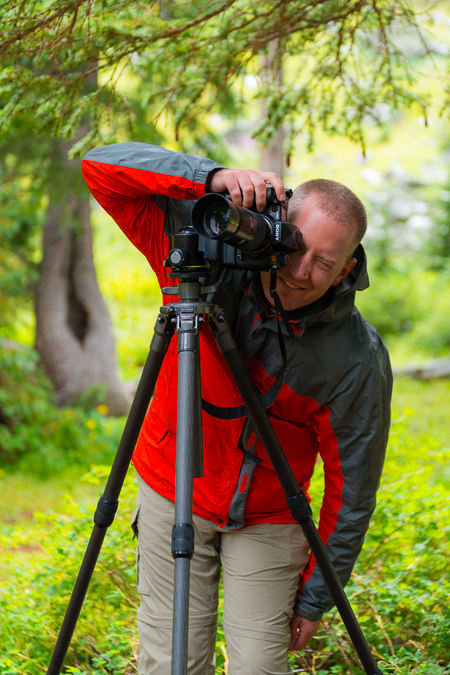
Ryan and I had a lot of time to kill due to the less-than-stellar weather in the basin, so we took turns taking shots of each other. Here's Ryan sporting his Sony and Minolta equipment and myself rocking the Nikon gear on the new tripod.
 |
 |
The "on again-off again" weather was both annoying and awesome. On one hand, it kept us close to camp, but on the other hand, it kept bringing in some interesting light and photography subjects to keep us busy. The heavy moisture in the air had created a lot of cool fog-like features in the valley below. Water vapor would rise up from the valley and up into the mountains across the valley from us. As we watched the weather continually change, the temperature kept fluctuating as well, keeping us on our toes and in and out of various layers. It also gave us some opportunity to widdle down on the over-abundance of food we both brought into the valley with us.
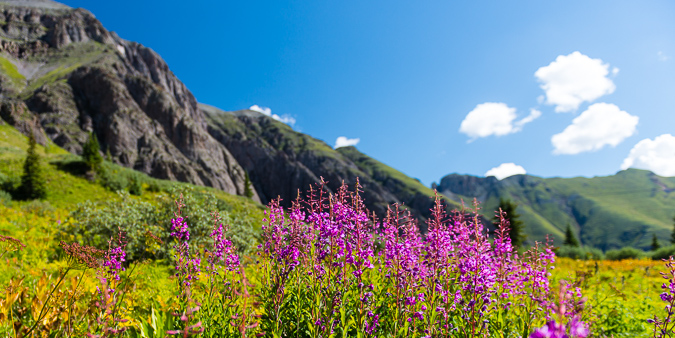
Even though the peak of wildflower season had passed, I was quite impressed with the quanitity and quality of wildflowers in the lower basin. I spotted all kinds of amazing flowers, including the Indian Paintbrush, Rocky Mountain Columbine, Mountain Bluebells, Parry's Primrose, Rose Crown, and more. I felt pretty happy to have brought the 105mm macro lens as I'd always wanted to get a nice macro shot of an Indian Paintbrush, so I ventured off to find the best one near our campsite. I found a few good subjects close-by and captured a few decent shots of one.

As the light shifted and the day progressed, I kept my eyes on a huge field of purple wildflowers up the hill from us. The sun shifted perfectly and I ran up to get some photos there. I was even lucky enough to get a rainbow in the photo, which was a huge bonus, no doubt. The field also looked out into the distance at one of the more impressive peaks of the area - Sultan Mountain.
As the storms passed over, I grabbed a self-photo from the wildflower field. What a peaceful place.
At this point, Ryan joined up with me from the area he was photographing from near the huge string of skinnier waterfalls across the basin from our campsite. He told me I could probably get some awesome shots over there with my ND filter, so I headed that direction, but not before he fired off a hero shot of me carrying my gear.
I headed on over to the fast-moving waterfall system up the hill from us and found some amazing scenery there - wildflowers galore with a raging waterfall, including more of those purple flowers and some Columbine as well.
I had to climb onto a really precarious island with cliffs and waterfalls on each side to get this shot of these magnificent Columbine.
I headed on back down towards camp and noticed the light continue to improve through sunset. I decided this would be the perfect opportunity to finally get to use my Fotodiox Wonderpana Filter system for the Nikon 14-24. As you may or may not know, the Nikon 14-24 is probably the best full-frame wide angle lens you can get, but it has one major flaw - it is unable to take filters since the lens hood is built into the lens. To compensate for this, you have to get elaborate and complicated filter systems if you want to use filters on this amazing lens. Filters are pretty important for certain applications like the highly dynamic light at sunrise or sunset, where the sky is very bright but the foreground is dark. To adjust for this, you use what are called graduated neutral density filters which basically are dark on top and clear at the bottom, allowing you to expose for the foreground and still get a perfect exposure on the brighter sky. This worked out pefectly for this sunset shot I took from the stream.
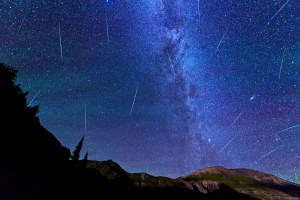
After getting some dinner and packing some of our things away, we kept a close eye on the clouds above, knowing that this second night would be the peak of the meteor shower. The clouds began to clear out, so we decided to head up into the upper basin and find a good spot to get shots of the Perseids. The hike up to Ice Lake from our campsite was pretty easy and finding the lake was no problem at all, even in the dark. As we set-up for our photos, we began to get nervous as the clouds began to return and we could see lightning in the distance to our north and west. Not good! Either way, I wanted a few shots from this area at night, so I set-up my tripod and got a few photos. The moon had not quite set yet but was behind some clouds, which made for a wicked silhouette of Golden Horn.
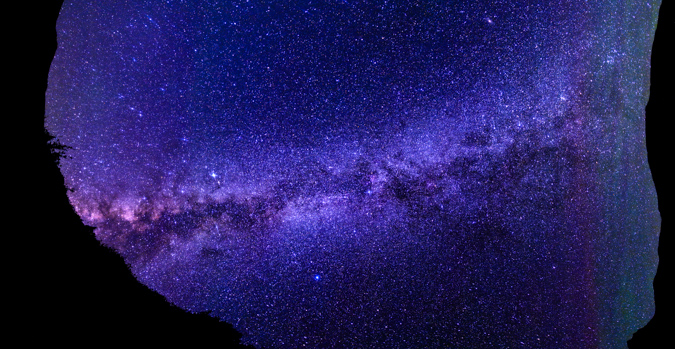
Additionally, the Milky Way made a brief appearance as well with the moon lighting up the passing clouds above.
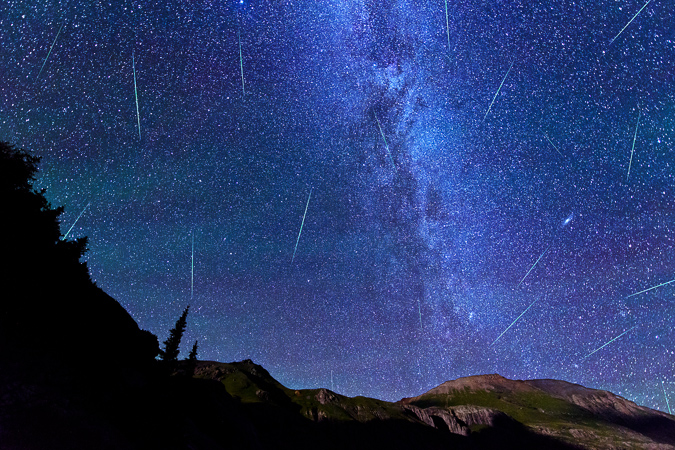
Having seen some lightning and not really knowing how our luck would last, we decided to make the safe decision and head back down towards our campsite, which was very frustrating. I was hoping to setup at the shores of the lake for my meteor shower photos, so I was a bit disappointed; however, about halfway back down from the upper basin we noticed that the clouds had decided to dissipate, so we found a safe and acceptable spot with a nice clear view to the north and east where the Perseid Meteor Shower was radiating from. We setup our tripods and started the fun of doing a long series over several hours to capture as many meteors as possible. The moon was still high enough to light up the foreground too, so it made for a fairly decent spot to get the meteors from. I was quite pleased with my results, netting 19 meteors in total.
After freezing our butts off for a couple hours, we began to pack up our things, but not before I attempted a vertical panorama from horizon to horizon of the Milky Way. Before I was able to get this shot, I noticed that my lens was covered in condensation, which was a real bummer. I wondered how long it had been this way. I went into my camera to see and only a few shots were ruined. The temperature change from having the camera in my chest pack during the hike up and the very cold night must have caused the condensation - lesson learned!
We head back down to our campsite without incident (other than some super cold toes) and went to sleep, prepared to attempt Vermillion Peak in the morning.
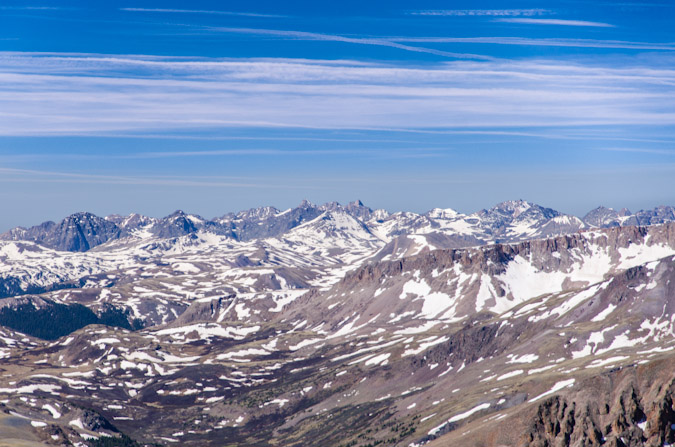
We got up a little later in the morning than I'm normally used to for summit attempts, but we were up really late taking photos of the meteor shower. It is always a challenge for me to balance my desires for mountaineering and my desires for photography. While they make quite a synergistic pair, they also sometimes compete with each other, mostly because of the time factor. We made it up to Ice Lake and were blown away at the beauty of this magnificent lake. I've never seen a bluer lake in all of my life.
I already knew I wanted to come back to the lake another time of year and get sunrise photos with wildflowers. It was just the most insane spot!
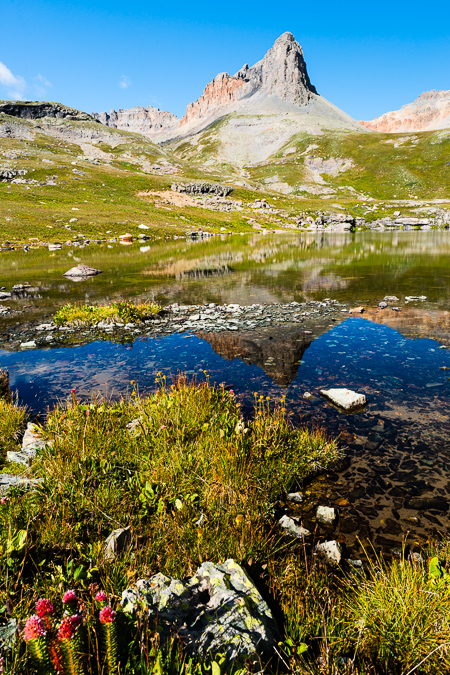
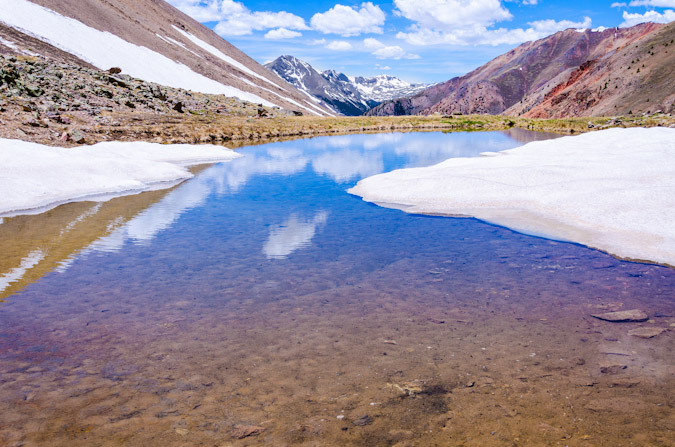
We found another small lake on our way up towards Vermillion and it was surrounded by wildflowers, including this nice Rose Crown as seen in the bottom left corner. Golden Horn made a nice reflection in the lake, and we could finally begin to make out Vermillion behind it.
The trail ascended up into the upper basin towards Fuller Lake and the views back down at Ice Lake were intense. I was still blown away by the blue hues in the lake.
Climbing further up the trail provided some great views of Golden Horn, which demanded a great deal of respect. The naming of Golden Horn was quite apt, as the sides of it were quite golden indeed.
 |
 |
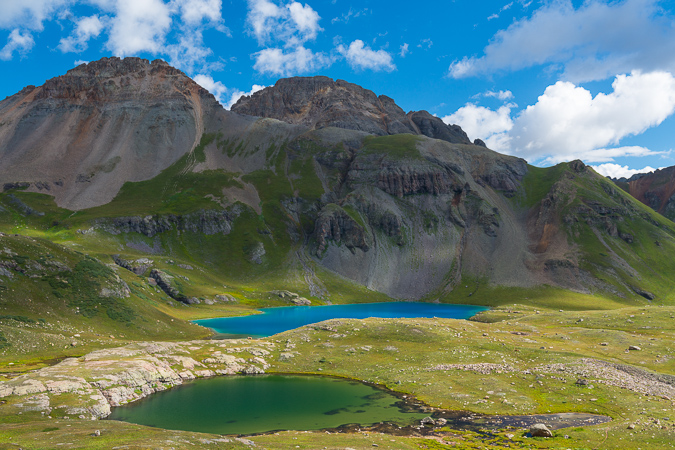
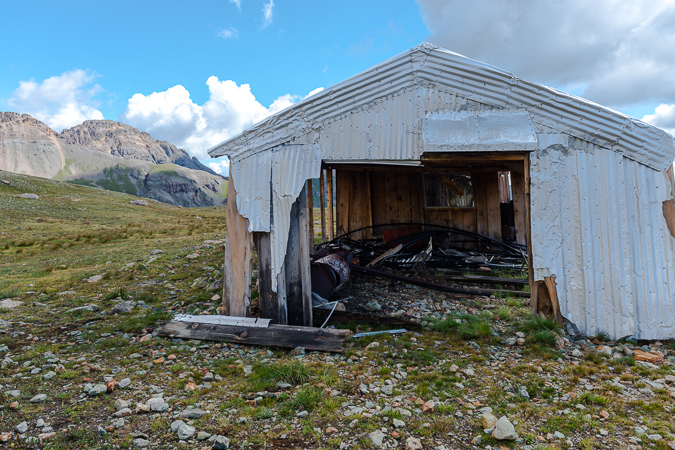
As we got further up the basin, we found yet another pond with Fuller Peak (left) and Vermillion (right) towering above. In addition, there was a really interesting building up there, or at least the remains of one. We speculated as to what the purpose of the building was, settling on the thought that it was probably used up into the middle of the last century for miners.
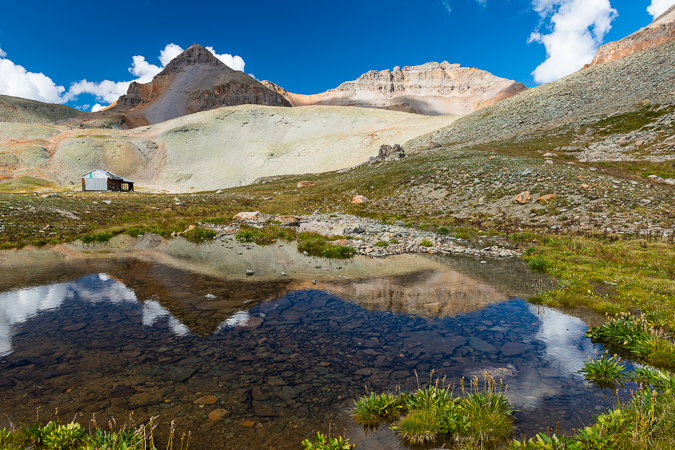
The building was in pretty good condition, with an intact roof and even some old bed springs still inside.
A look back over at Golden Horn revealed that weather seemed to be moving in, but it still seemed pretty spotty. We noted the weather and kept moving up the basin, weaving up a short boulder field above the structure to find a nicely worn trail with numerous cairns.
We could make out the nicely worn trail heading up to the saddle between Fuller and Vermillion, and kept heading in that direction.
The trail brought us up a nice rocky bench towards Vermillion and was a very pleasant hike up. The clouds continued to hold, so we kept on trucking. A look back at Ryan showed I was keeping a pretty good pace. Ryan indicated to me to keep going at my own speed, so I did.
We reached a small stone fortress near the end of the trail and stopped to put on some rain gear as light graupel had begun to come down. The weather still seemed OK but I must admit I was getting a bit nervous. We continued up and lost the trail at the base of Fuller, so we began to weave across a large loose boulder field, which proved to be a huge pain in the butt to cross.

Once we were able to get through the loose and physically rigorous boulder/scree fest, we found ourselves looking down and across at the proper trail. Oh well! We made our way across the boulders to the trail without any issues.
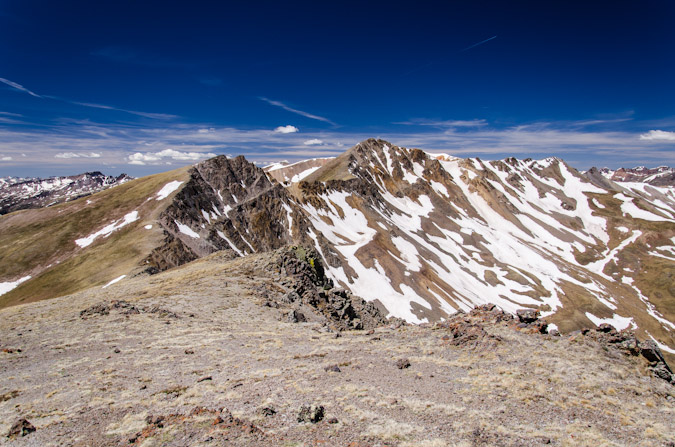
I was able to quickly make it up the saddle - my legs were feeling really great despite the lack of recent climbing I had done this year. From the saddle, I could easily make out a lot of mountains in the area, including the famous Wilsons, the distant Grenadiers and a really awesome looking peak to the south west that was covered in small bits of snow from the recent storms.
A look over at Fuller proved it was not a very long distance from the saddle, and I made tentative plans to come back and grab that peak if time and weather permitted after Vermillion. Looking back down at Ice Lake revealed Ryan's position about a quarter of the way up the trail to the saddle and all of the lakes we had passed throughout the day's journey. What an amazing view it was.
In the distance to the east I could now make out Uncompahgre and Wetterhorn, which is always a nice treat!
From the saddle, the trail leads up the back side of Vermillion. The trail is very well-worn and easy to follow. The rock on the back side was also very interesting.
A look back down towards the saddle showed just how worn and accessible the trail really was. It was also awesome seeing the Grenadiers in the distance above the ridge.
I reached an obvious end to the trail which had wrapped around the back side of Vermillion on a series of ledges and realized that it was time to head up a steep gully and onto the upper section to the summit, which was all fairly obvious to me at this point.
Once I reached the top of the golden gully, I looked back and down towards the awesome snow-covered mountain, which I later realized was one of the many mountains in Colorado named Grizzly.
You could also make out Engineer Mountain beyond Grizzly to the south. I was able to reach the summit without any issues and was amazed at all of the green rocks on the summit. I guess it is pretty obvious why the mountain was named Vermillon.
I posed for a few self-portraits using my tripod while I watched the weather nervously. The view of Golden Horn, Pilot Knob (just to my right), Sneffels (in the distance) and other notable San Juan giants was pretty killer from Vermillion.
I snapped off one more set of panoramas.
A look to the west caught my attention. Out of nowhere a giant storm had developed, with what appeared to be significant precipitation. I hastily packed my things and head back down towards the saddle. I ran into Ryan about halfway back to the saddle, where he had decided to give-up due to fatigue. The storm passed us to the south, fortunately, as seen below.
I reached the saddle fairly quickly and told Ryan I was going to head up and get Fuller really quickly. I made short order of Fully, ascending in just 10 minutes. From there, I was able to survey the basin again, with some interesting views back down towards Ice Lake and back at Vermillion.
On my way back down to the saddle, I was momentarily pleased with the bright colors and contrast between the red rocks on Fuller and the green vegetation below at Lake Hope, which rested at the foot of San Miguel Peak to the west.
I rejoined Ryan at the saddle and we made it back over below the rock shelter that sat beneath Fuller in no time at all.
A look back at Vermillion showed Ryan and the scope of the peak we had just came down from.
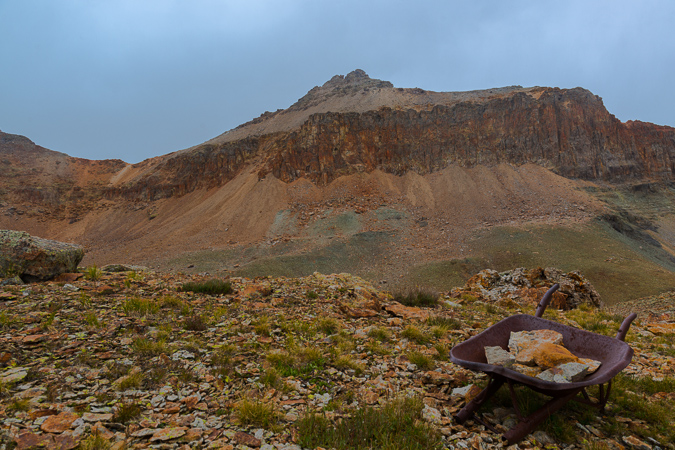
Ryan and I were amazed at just how much old mining equipment was just left up there. We saw lots of large tubing strewn about the mountain and even this handy wheelbarrow that looked to be quite old.
Coming down the basin was not a problem and the weather cooperated to our surprise and glee. Ryan and I took frequent stops to take photos of the area.
On the way down I found a very small pond with a large boulder in it that made for a nice landscape scene with Vermillion and Golden Horn reflected in the pool.
Once back down at Ice Lake itself, we stopped for some quick photos. I found some Rose Crowns and did a little focus stacking to get both the flowers and the distant peaks in focus.
You can really see how this basin would be incredible when the flowers are at their peak. I also found some interesting rocks on the shore to photograph from, and Ryan was able to get a photo of me perched on one of the rocks preparing for a shot.
And here's the shot I was composing.
Once we finished up at the lake we head back down the trail towards camp. We found a great vantage point where we could see Sultan Mountain and the lower Ice Lake.
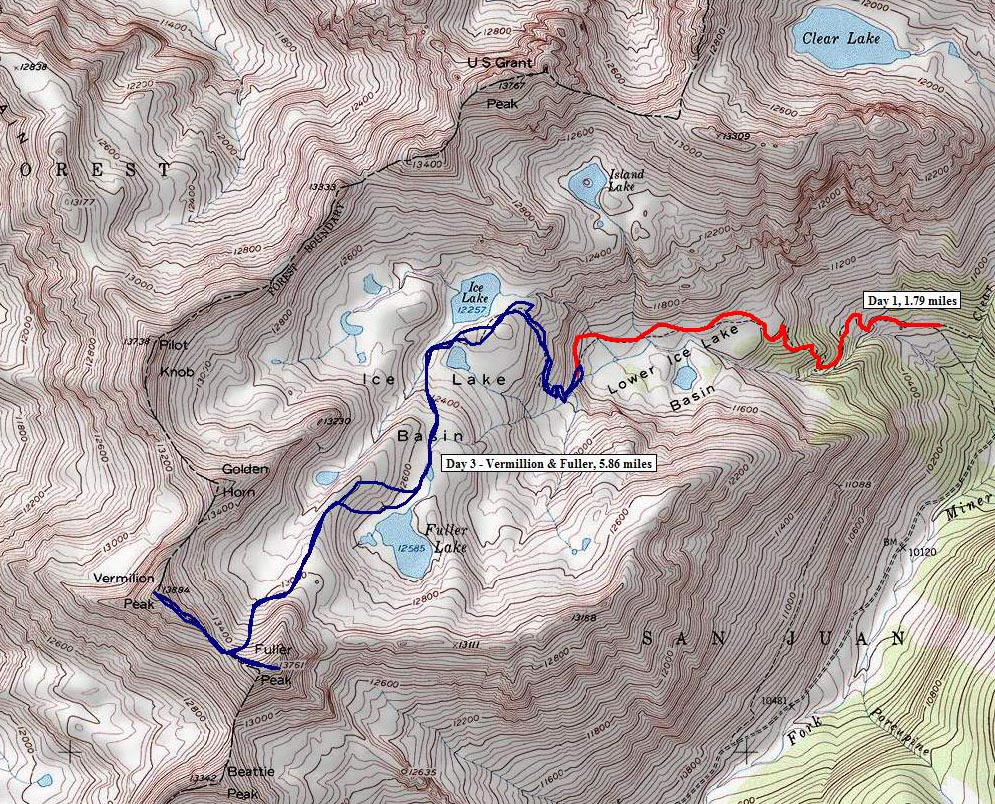
Here is a map of where we were at and what routes we took on the various days.
As sunset arrived in the lower basin where we were camped, I could not help but notice the great light. Sure enough, the sunset hit the clouds just right and made for a nice light show.
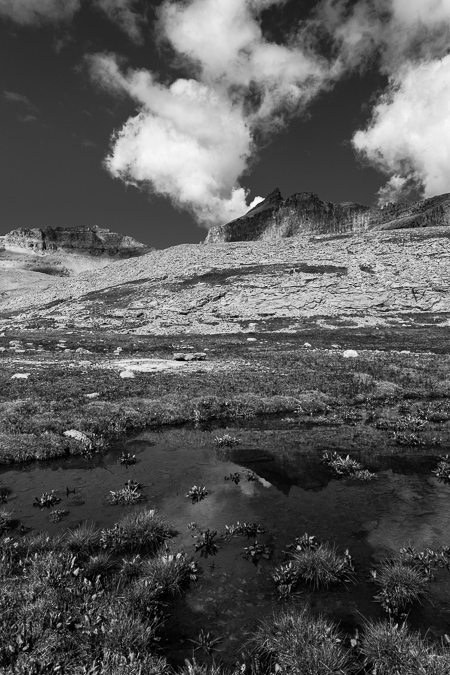
 Having one more night in the basin was quite the blessing. The night sky was quite clear on this last night and it made for some great star viewing. I decided to put together a few different star trails, this first one taken looking almost straight up at the sky. The stars form small looking meteors using a special processing technique.
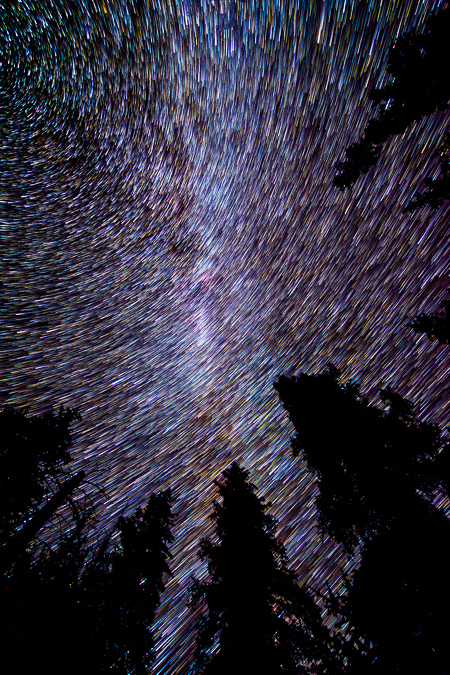
I really enjoy doing star trails with trees in the foreground. I love how the stars weave in and out of the trees.
The following morning was pretty calm as we packed up. There were several marmots out and about that we could photograph while we packed and it made for a nice break between tasks.
We hiked out and ran into a couple that were camped across from us in the basin. It turned out that the woman knew one of my friends that I reguarly climb with - such a small world. It was nice talking with you Becky!
Almost back to the car and we ran into that awesome waterfall again. I had to stop and get a parting shot of it using the 9-stop ND filter.
On the drive out we noticed some really cool cliff bands in the basin as well, so we had to stop to get photos of that too. It is amazing where nature will allow trees to grow.
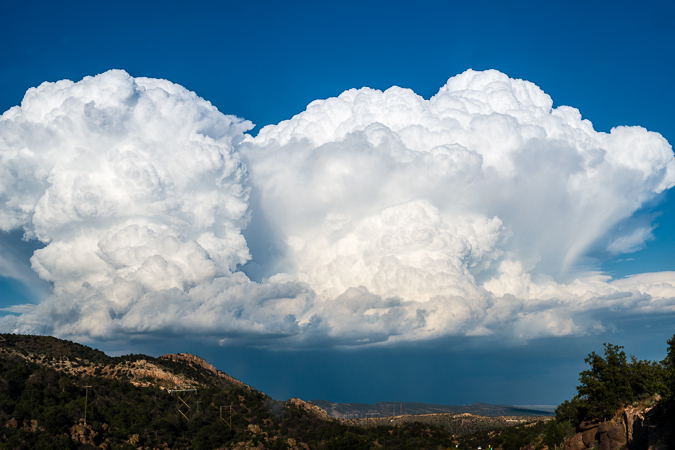
We stopped in Silverton for lunch and found a very nice restaurant called the Teller House. We were served some very tasty vegeterian burritos from their friendly staff, who filled our Odell Cutthroat Porter frequently. On the drive home, we bumped into a massive storm cell that was east of Canon City. It was one of the most impressive storm clouds I'd seen in awhile. We also learned that Manitou Springs had severe flooding while we were gone, due to the Waldo Canyon Burn Scar. What a memorable summer it had become.
Lastly, I put together a short time-lapse video from the lower Ice Lake Basin. The first two sequences were created in-camera on my Nikon D800 and the Milky Way sequence was built using iMovie and still images. My friend Nicole Buetti allowed me to use her music for my video. Stay tuned for more time-lapse movies featuring Nicole's amazing music later this year! To hear more of her music, go check out her website!
Mount Oklahoma - A Centennial 13er that is more than just "OK"
Mount Oklahoma is often forgotten by many, including myself, for a variety of reasons. There's nothing very remarkable about the look or feel of Oklahoma or the route to climb it. As Gerry Roach explains in his guidebook for 13ers, Mount Oklahoma is dwarfed by its neighbor to the east, Mount Massive, which is the 2nd highest mountain in Colorado. Despite this fact, Mount Oklahoma is more than OK - it offers solitude, unique views of mountains in all directions, and a fresh perspective on the art of "peakbagging."
Mount Oklahoma is not a mighty mountain, nor is it meek - rather, it is fairly average in stature for the Northern Sawatch Range - rising 13,845 ft. in a valley full of giants. Indeed, Mt. Elbert (14,433 ft.), Colorado's highest mountain, towers over Oklahoma to the south and east. Other higher Centennial peaks also adorn the skies nearby, including French Mountain (13,940 ft.), Casco Peak (13,908 ft.) and of course the Mount Massive massif (14,421 ft.) right next door.
Knowing that Mount Oklahoma is a fairly straight-forward and relatively safe climb, lacking anything harder than class 2 and with one of the easier levels of access for a 13er, I opted to head-out to climb it solo. While this is something I generally discourage, I felt the risk was manageable, plus my wife knew where I was going to be. Indeed, it did turn out that I did not run into a single other soul during the whole hike until well on the way back to the Jeep on the Mount Massive leg of the trail. So there it was, I left my house in Colorado Springs at about 6:30 PM on Friday evening and found myself at the North Halfmoon Creek Trailhead at 9:15 PM. There was an abundance of people up in the valley camping. Despite campsites being quite ubiquitous in the valley, I was left with no other option but to park at the trailhead and find a flat and comfy campsite within the trees. I set-up my sleeping pad and sleeping bag only and went to sleep right away.
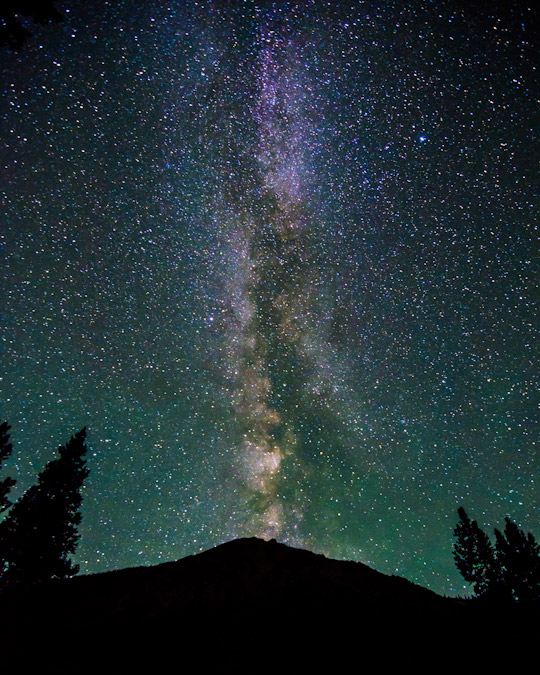
The alarm sounded promptly at 3:30 AM and I rose quickly to get a start for the day, as I knew my wife wanted me home relatively early so that we could go to my parent's house for a father's day dinner that night. The first thing I did was take a shot of the Milky Way above the trees and above the 13,221 ft. northern sub-peak of Mount Elbert.
Click on the photo to see a larger version or to purchase a print.
I had been on this trail once before in 2009, having been here in the cold month of October to climb Mount Massive. What I remembered of this trail was that it was very straight and easy to follow below tree-line before the turn-off for Mount Massive, so I was very confident that I could make my way in the darkness with the aid of a headlamp. Adorned with my Ipod and my favorite Celtic tunes, including Solas and Altan, I began my journey in the dark.
I also decided to bring my Gitzo tripod - which is basically an older, heavier version of THIS one, with an Arca Swiss monoball affixed so that I could get some sweet sunrise shots and summit shots along the way. While this adds a great deal of weight to my pack, the effort is worthwhile and increases the types of shots I can get significantly. I've fallen in love with this tripod and monoball combination since acquiring them both on the cheap a few months ago on Craigslist. They are hands-down the highest quality photography gear in the business. I highly recommend both for anyone looking to upgrade.
The plan was to follow the route as described by Roach, which is close to what actually happened - here is the map of my route - click on it to see a larger version.
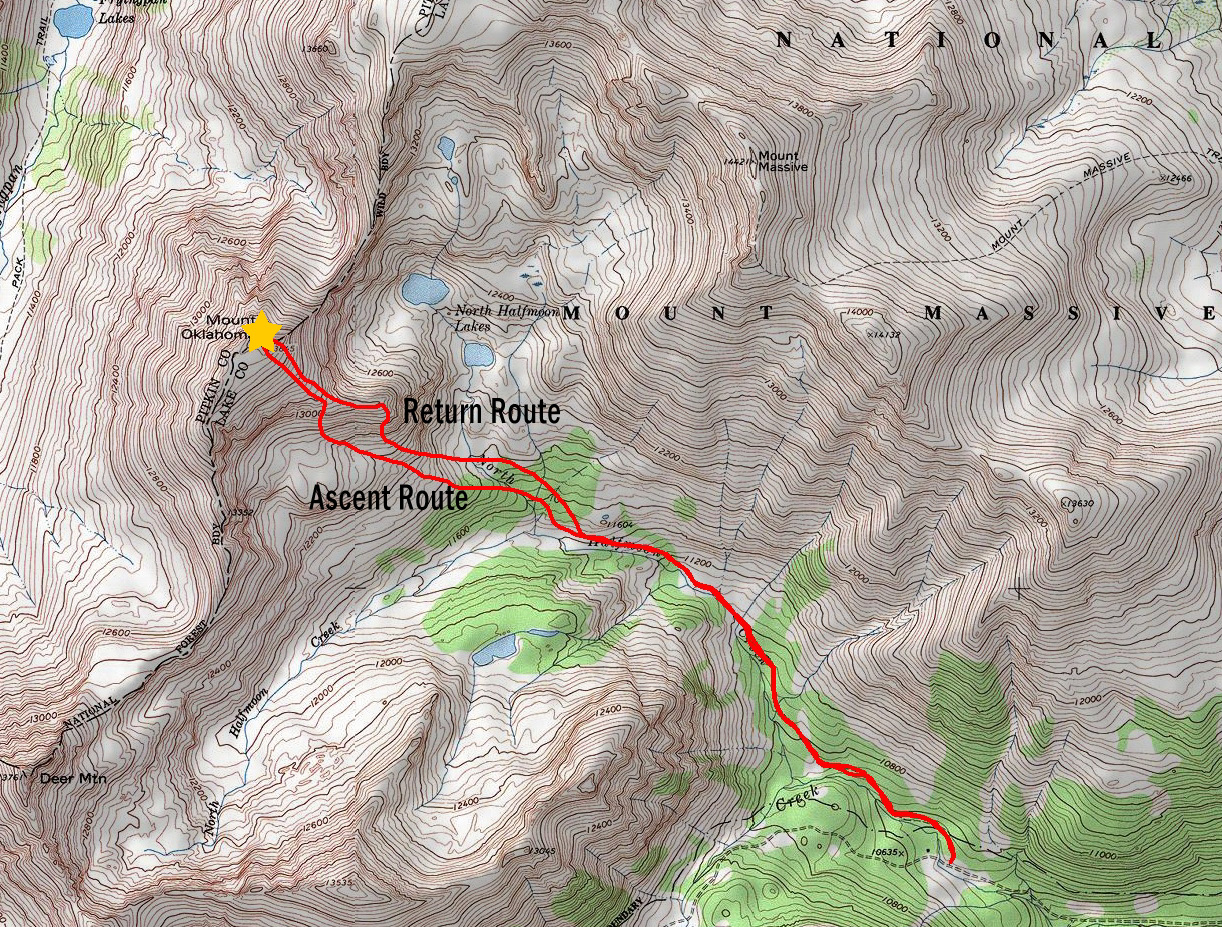
I found the trail very easy to follow, even in the darkness, minus one section where the trail meets up with a very large rock formation and crosses it. I just kept my eye out for the trail and ensured I was on track at all times. The route description for Mount Oklahoma is pretty straight-forward according to Roach. After passing the Mount Massive trail junction, continue west-northwest until the trail begins to gain elevation and head north, at which point you are to leave the trail and continue west. That's just what I did, but it was somewhat sketchy in the dark - bushwhacking through trees and logs is a great time. I quickly reached the two large stream crossings described by Roach - they were quite fast streams on a steep incline - I was very careful to cross, finding dry-ish rocks in narrow passage-ways. At this point - I began up a steep hillside per Roach's description for going up a tree-filled ridge to the northwest. Before I knew it, I had reached treeline and could make out my surroundings.
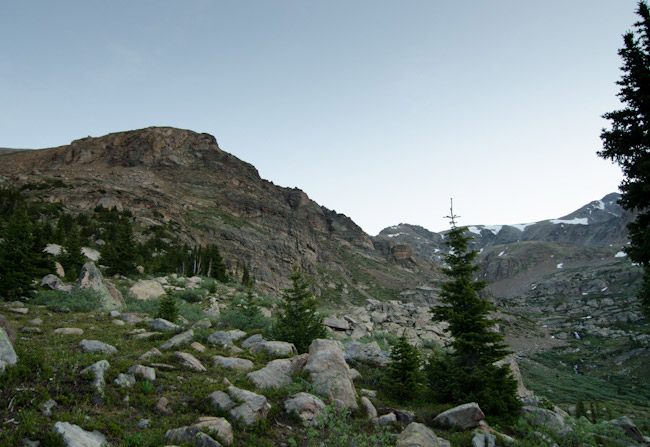
I encountered a deer at this point, which quickly ran off into the trees below. I could also make out a series of waterfalls in the Halfmoon Lakes basin below Mount Massive to my right - this was quite impressive and I made a mental note to return to those lakes someday - they seem to hold quite a bit of promise. I also was revelling in the fact that I was hiking solo in the Mount Massive Wilderness Area, off-route, while listening to great tunes and taking pictures of fantastic vistas. I really do love Colorado! Mount Oklahoma was clear as day above me, and the route seemed quite obvious from this point - go up.
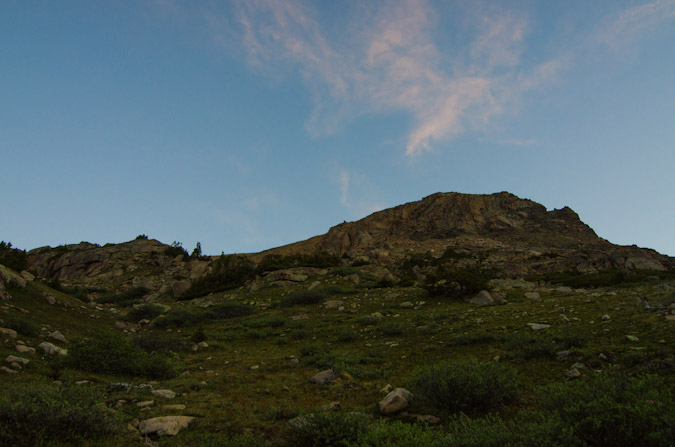
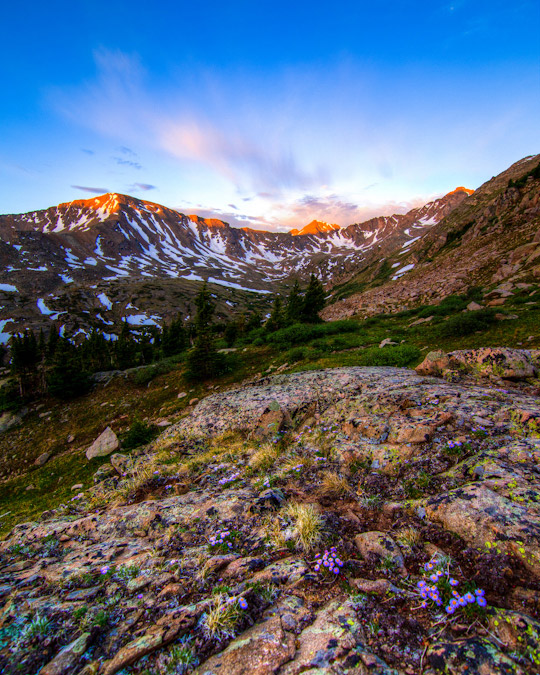
Before long, I found myself high above most of the trees just in time to witness the first light kiss the tops of Deer Mountain and UN 13,535 to the south and west. Moments like this made hauling the tripod up worth the effort.

I left my pack and wandered up a little way and found an area covered with really cool looking flowers. Turns out the flowers are known as Alpine Primrose - a really quite lovely looking purple and pink flower. I took quite a few shots from this spot and processed each a little differently.
Another version from the same vantage point...
I was even able to put together an 360 degree HDR panorama, which I've not tried in a few months. I was not overly impressed with the results of this one, but I'll share it anyways.
Having filled my soul with a dose of alpine sunrise, I was ready to continue on up the mountain. I followed what seemed to be a slight trail or drainage up the mountain and was aiming for an area to upclimb a grassy screefield.
At this point I stumbled upon a small pond at the base of a small snowfield below Mount Oklahoma. It made for a very interesting reflection in the water with the sun just hitting the tops of the southern ridge of Oklahoma.
I played with a few versions of this shot, and I think I liked the HDR horizontal version the best. I know HDR is a technique with many detractors; however, I like to play with it - it keeps me entertained and thinking.
At this point, I found the grassy screefield, and it was mighty steep. I was not sure if this was the right way to go, but it looked like the easiest way up to the ridge. I plowed ahead slowly, reaching the ridge after several long minutes of gruelling climbing up this nasty section. Once up, the views were splendid.
I continued to plow ahead slowly on the obvious route up Oklahoma to the north and west. As I climbed, the views improved dramatically.
It was at this point that I began to feel sick to my stomach just like I did back in 2009 when I climbed Harvard and Columbia. I was beginning to wonder if my lack of food intake or the water I was drinking were to blame. Perhaps I did not clean out my camelbak adequately? Perhaps I was eating too dense a food (Larabars) for my stomach to handle? Or, perhaps I was just suffering from a mild case of Acute Mountain Sickness? Who knows? All I knew was that I was moving far slower than I wanted to and making progress quite sluggishly. I worked my way slowly up the boulderfield until my eye was caught by some blooming flowers which happened to be quite near the summit. I took off my pack and prepared my tripod for some photos of some flowers. Also, I could finally make out the Elk Mountains to the west, including Snowmass, Maroon Bells, Cathedral and Castle - they were all quite impressive to be sure. I fixated on small field containing a variety of colorful wildflowers and took some shots.
After taking my fair share of photos in this patch of flowers, I decided to move upwards. It took about 4 more minutes from here to reach the summit, which was a relief given my stomach issues, which had actually subsided significantly since I stopped to photograph the flowers. On the summit, I noticed that clouds were hitting the Elks with some light showers and that those clouds were headed this way. I had no intention of getting stuck in a storm, so my lofty goal to traverse to North Massive was out of the question. I set-up my tripod and set the timer so I could get a few shots of myself signing the summit register for Centennial #76 - only 24 more mountains to go!
The register was quite intact and filled with many familiar names. I was happy to add mine to the list.
At this point I used the tripod to take some photos to later be used in my 360 degree summit panorama.
I also toyed with a black and white shot from here, framing Mount Massive on the left part of the shot.
After a quick phone call to the wife to let her know I made it safely, I took an assessment of the weather. The storms rolling in over the Elk Mountains to the west did not give me a good feeling, so I decided to pack-up and head down. I decided this time to see about the small ridge that rolls down to the east of Oklahoma. Instead of going back down the grassy talus, I went down the long ridge.
Once down, I found a great spot at the end of the ridge to take a sweet pano from - Mount Oklahoma at center with Mount Massive at right with a small storm over it.
At this point, I saw a ton of cairns leading down the mountain towards the cliffs Roach warned to avoid in his guidebook. I decided to take the challenge and see where the breadcrumbs could lead me. Sure enough, they led me down the mountain's steep slopes, but it was not a terrible route, albeit harder than my ascent route (loose rock, etc).
Small storms were hitting the areas peaks, and it started snowing a little bit, but nothing too scary.
On the way down the steep terrain, I ran into some really nice flowers in a very strange spot amongst the rocks. Nature never ceases to surprise me...
Once down the nasty part, I was back on the grassy ledges near treeline. I decided to angle my decent more northeasterly so I could hit the trail coming down from Halfmoon Lakes sooner. This turned into a pleasant bushwhack into the forest, where I stumbled upon a small stream leading down from the lakes.
I found the trail again with no issues and found myself flying down the trail at a rapid pace. I reached the turn-off for Mount Massive in short order and took one last look back at Mount Oklahoma.
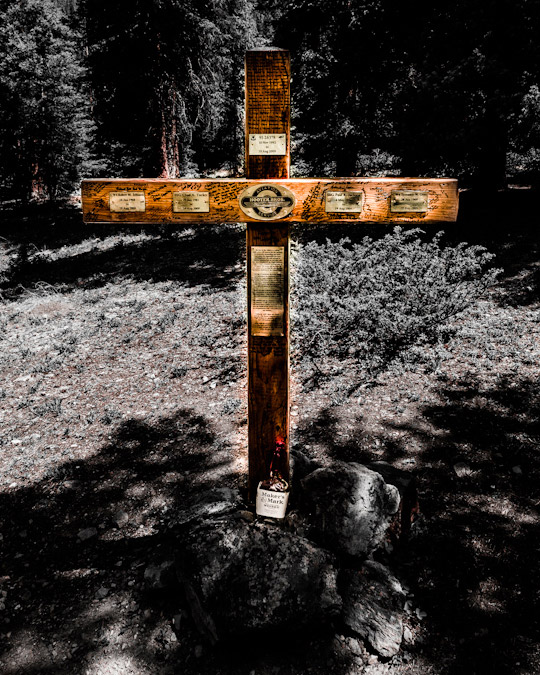
I was also pleased to see the large monument cross at the trailhead that was placed after the Blackhawk Helicopter crash in 2009 on Mount Massive.
In closing, I highly recommend Mount Oklahoma as a hike that gets you away from the crowds on 14ers and still allows for wonderful views and a decent work-out. I am certainly not usually a fan of the Sawatch Range; however, the northern Sawatch Range really separates itself vis-a-vis grand views of the Elk Mountains and a seemingly more rugged feeling than the Southern Sawatch Range. I'll leave this trip report with a creative rendition of my 360 pano from the ridge - Planet Oklahoma. I wrote a tutorial on how to make these if anyone is interested.
{fcomment}
Drinking in the Milky Way and Crushing Centennials - UN 13,832 and UN 13,811
UN 13,832 and UN 13,811 (UN = Unnamed) have been on my radar for quite a few years now. My dad and I were hoping to tackle them both back in 2009 but weather steered us elsewhere. I've also eyed them as a potentially fantastic winter climb from the Williams Creek TH, but have not had the ability to string together the time to pull that off either. So, when I figured I had the opportunity to take a vacation day and do some climbing, I quickly picked out these two gems. I coached my son's first t-ball game and then afterwards drove to Lake City for an estimated 1 AM arrival at the trailhead. I planned to meet my friend Regina there (she was coming down from Denver via Highway 285) and get a few hours of sleep before we set off to climb early Friday, June 1st.
Interestingly enough, UN 13,832 and UN 13,811 are the only two mountains of the highest hundred peaks in Colorado (Centennials) with neither an official nor unofficial name. These two fantastic thirteeners (ranked #90 & #99 respectively) are located just east of the 14ers Redcloud and Sunshine near Lake City, Colorado. If you're like me, you are wondering why these two mountains in the highest 100 are unnamed. These unnamed mountains are located within a large section of BLM (Bureau of Land Management) land, specifically, BLM's Redcloud Wilderness Study Area. According to Summitpost, "in 2004, these two mountains were "protected" from being named when the USGS turned down a proposal to christen them after two of Colorado's mountaineering pioneers, Carl Blaurock and Bill Ervin. Apparently the policy is to not approve new names of mountains within wilderness or wilderness study lands, and a competing Blaurock/Ervin naming proposal was selected for a pair of peaks in the central Sawatch Range."
With all that being said, I needed something to do to keep me awake on my drive down to Lake City... so I focused on trying to think of clever names for these two mountains. With the close proximity to Sunshine and Redcloud, I figured it might be fitting to name UN 13,832 something to do with the moon. The sun shines, then it sets... the clouds get red (Redcloud), then the moon rises. How about "Moonrise" for UN 13,832 and "Not Last" for UN 13,811 (since it's ranked #99 / 100)? Let's see if they stick anywhere.
Speaking of the moon, on the way down to Lake City, I decided that it would be pretty awesome to stop near Lake San Cristobal and get a shot of the stars and moon, so that's just what I did. I stopped right off the road heading towards the trailhead and took a 5-shot vertical pano (my camera was vertically orientated vs. horizontally oriented) of the Milky Way, moon, and Lake San Cristobal. I think it worked fabulously! Please click to see a larger version or to purchase on my photography website.
With the shot I had envisioned complete, I continued on up the road towards the trailhead. I finally reached my destination at around 12:45 AM and decided it was suitable to sleep under the stars in my sleeping bag, so I set out to do just that. Shorly after I settled in, Regina arrived and set-up her gear to do the same. I took the time to take one last set of photos (why not). This one turned out even more magical, I think. It is 7 veritical shots as a panoramic of the Milky Way over "Sundog," the 13,432 ft. mountain connected to Sunshine Peak's north ridge. The moon had just set and allowed for a great scene. I was actually inspired by another photographer's (David Kingham) photo from last month and wanted to give this a shot. Click on it to see a larger version on my photography website.

We crashed at 1:45 AM and decided to set the alarm for 5:45 AM, which came all-too quickly. There was one other hiker at the TH that started before us (and did wake me a few times by starting his car), so solitude was looking to be guaranteed. I promptly threw down some coffee soymilk (which was surprisingly good and filling) and we departed! I knew from the get-go that I wanted to do what Roach calls "Point Fever," which is to say, combining UN 13,832, UN 13,632 and UN 13,811. The route is a long but easy 12.8 miles and gains 4,727 ft. in elevation. A nice leg burner. [Colorado's Thirteeners - Roach & Roach, pg. 222]
Here is a map of the route we took from the Silver Creek TH (click for larger version):

So, that's just what we set-out to accomplish. The semi-early start granted us a nice view of Handies Peak and Whitecross Mountain across the valley. It was really great seeing them from this side since my climb of them with my dad in 2010 on Father's Day.
As we climbed on the trail, we stumbled upon an open area with boulders. I was immediately struck with a rush of nostalgia, remembering vividly coming through that part of the trail and seeing a marmot during my climb of Redcloud and Sunshine in 1987 at the age of 9. Crazy!
Before long, we were gaining altitude and came across a nice stream. It seemed the perfect spot to test out my 9-stop ND filter, so I put it on my Tokina 11-16 lens and did a very long exposure. I liked how it turned out.
As we gained elevation, parts of Redcloud came into view to our right. It was immediately taken aback by how little snow was left. It was truly remarkable. Indeed, Colorado's state-wide snowpack levels are at 2% of normal. Very dry.
Regina was setting a nice pace for us and the weather was holding up quite nicely. I had no worries about my chances of summiting both 13ers.
Before we knew it, we found ourselves gaining the ridge between UN 13,832 and Redcloud. We had also caught up from the guy that left before us that morning.
Gaining the saddle was no problem, and the views were great from there. As expected, the other hiker turned up to climb Redcloud. Solitude was guaranteed at this point. Here's a 360 degree view from the saddle, with Redcloud at far right and UN 13,832 just under the sun.

The hike from here was just long and gentle - easy class 1 / 2 stuff. Here's a view of UN 13,832 as we approached from the ridge.
Looking back at Redcloud, with Sunshine barely peaking up over the ridge.
And finally, Uncompahgre Peak came into view for us!
Heading up towards the next saddle made for easy and fun trail / ridge walking.
I was impressed by how far apart Sunshine was from Redcloud - much further than I remember.
We finally topped out on UN 13,832 at around 10:30 AM. Regina was loving the view of Wetterhorn and Uncompahgre, no doubt.
Also awesome was the view of the Grenadiers and the Needles. Eolus, Sunlight, Windom, Silex, Guardian and others all stuck out quite prominantly. This perspective really shows you how far part Eolus is from Sunlight. Pretty amazing.
I also did not mind the great view of Wetterhorn from here. Such a cool looking mountain!
Regina decided she was not going to continue over to UN 13,811, so I fired off a few more shots, including the below panoramas, and headed off for UN 13,811. Regina was going to wait for me below the saddle of Redcloud and UN 13,832.

The San Juans are truly great.
UN 13,811 was still quite a ways off, as seen from this next shot.
I began my hike over and was constantly drawn to the view of Wetterhorn and Uncompahgre. I just loved those two mountains.
UN 13,632 was one obstacle in the path to UN 13,811, so I needed to go up and over it as well.
All while still enjoying my view...
Within about an hour, I finally made it over to UN 13,811 to complete my 75th Centennial. Pretty impressive and almost there!
I snapped off a few shots for a panorama from 13,811 also , still in shock over how little snow was truly left.

The view back over to 13,832 was sobering to say the least. I was starting to feel a little tired in the legs, so I was not really looking forward to the hike back. I did however, really enjoy the surprising view of 13,832 from here.
I headed back over to UN 13,832, which was quite the demoralizing slog. I reached the saddle of Redcloud and UN 13,832 in quick order and met up with Regina at a small tarn below Redcloud Peak. THe view of Whitecross was very cool from there.
And of course Handies and Whitecross were our guides for the duration.
Regina led the way while I snapped off this super great shot of her hiking out. I think this was one of my favorites from the hike.
We crossed over a small stream that had some wildflowers growing at it. I thought it was a nice looking scene to stop and enjoy.
Before long, we had reached treeline again and Handies was all that we could make out above the trees.
The remainder of the hike went without incident. I will say that these two mountains are pretty fun. The hike is very long, but affords welcoming views of very recognizable 14ers and 13ers in the area. Solitude is almost a given, since most people in the area are there to tackle the more famous 14ers Redcloud and Sunshine. I think you will also enjoy the hike if you choose to take it.
We stopped in Gunnison on our way home for some much needed sustanance at our favorite Mexican food place on Main St. Until next time... I hope you enjoyed this trip report!
{fcomment}
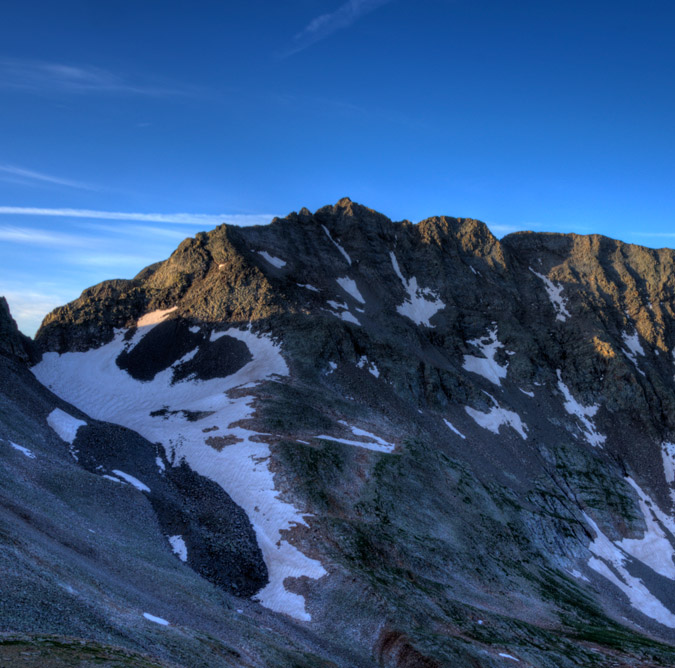
The Rock of Ages - Mt. Wilson and New Friends

Mount Wilson's claim to fame as one of Colorado's most dangerous 14ers is certainly well deserved. As Colorado's 16th highest mountain, Mount Wilson rises to an impressive 14,246 ft. above sea level and the boasts the State's 9th most amount of prominence with 4,024 ft. The monarch of the San Miguel sub-range of the San Juan Mountains, Mount Wilson is a formidable mountain, without question. The history surrounding this mountain is quite intriguing as well. The first ascent of Mount Wilson is somewhat contested, but it is generally agreed that the first group to ascend it was the Hayden Survey on September 13, 1874, which included A.D. Wilson, after which the mountain was named. Additionally, Franklin Rhoda, a member of the team, later wrote in the survey notes about Mount Wilson: "Only one peak of which we had any dread remained to be ascended, and that was Mt. Wilson. From various circumstances, we have reason to believe that this was higher than any station we had yet made, and from its rugged appearance we dreaded its ascent not a little." Rhoda later reported that, "Mt. Wilson was by far the most dangerous climb of the summer."
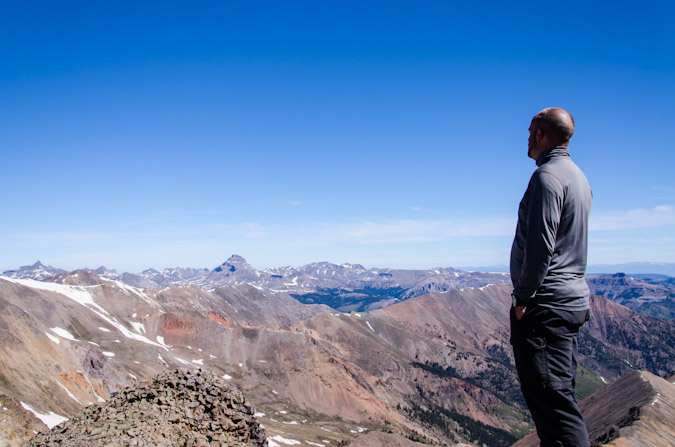
I personally had hoped to climb Mt. Wilson back in July; however, that climb was cancelled mid-trip due to my climbing partner not feeling capable of the climb, which is totally understandable given the loose and dangerous nature of the San Miguels. With Wilson Peak already in the bag, I really wanted to return to the basin for a shot at Mt. Wilson, El Diente and Gladstone Peak. Here's a view of Mt. Wilson from the Rock of Ages Saddle:
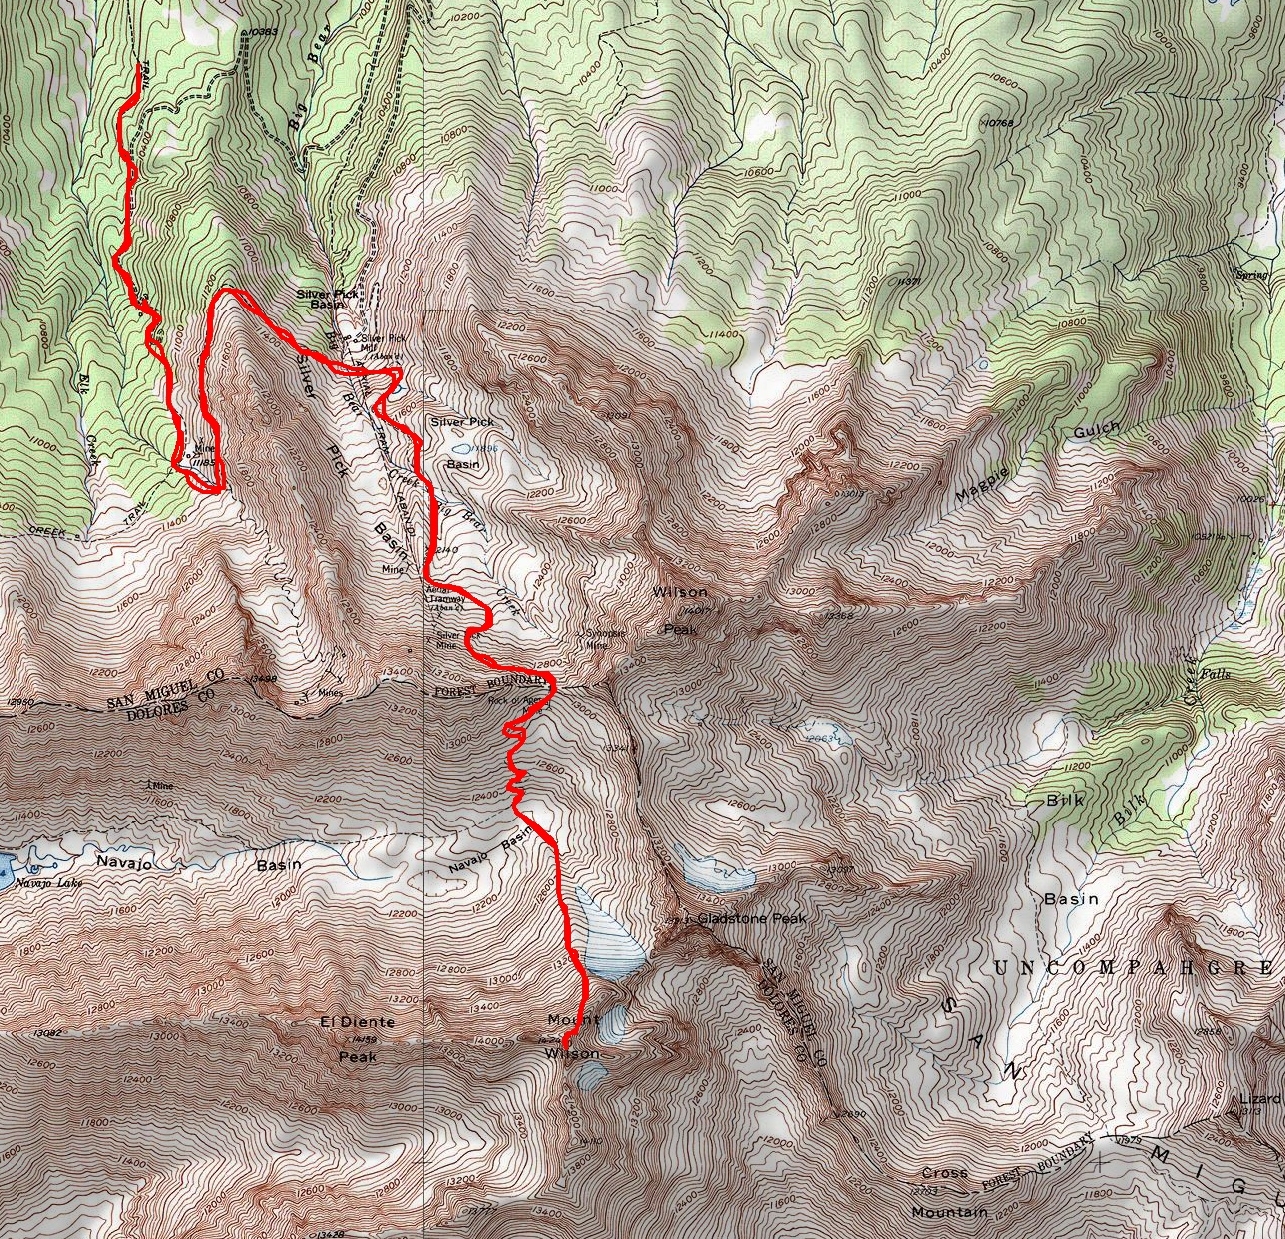
With a little less than a week left before my hike was scheduled, I was still without a partner. I scrambled to locate one on 14ers.com, but did not have much success. I finally did reach a guy named Will, who wanted to set-up a car shuttle, but it still meant that I would be driving out there alone, which was not something I wanted to do given the unreliable nature of my Jeep. I searched further on Facebook and found that one of my Facebook friends, Kara Bauman, was also planning a trip to the Wilsons. I communicated with her and we quickly made plans to join up. Her group was leaving from Denver on Friday afternoon and I could join them if I could get to Denver. I made it work - and before I knew it - I found myself at the Ken Caryl Park and Ride in Denver at 1 PM on Friday 8/12/11. Our group was comprised of Kara Bauman, Alli Kolega, Tom Shaar and me. The group all assembled and loaded our stuff into Tom Shaar's killer SUV and we departed on our 6 hour journey to the Wilsons. On the way over, we all discussed possible options on which order to climb the mountains and where from. We all conceded that the best day for weather was Saturday, so that made the most sense for an attempt on Mt. Wilson, since it was a longer approach. We would see about the traverse to El Diente from there, and then they would do Wilson Peak on Sunday while I would do Gladstone Peak. We also decided to make Silver Pick Basin our headquarters for the weekend since the trailhead had recently re-opened at a new location after several years of closure due to property issues. In total, our climb took us about 10 hours and we covered 12.7 miles and gained 6,775 vertical feet. Our route up Mt. Wilson and the elevation profile can be seen below (click on each for a larger version).

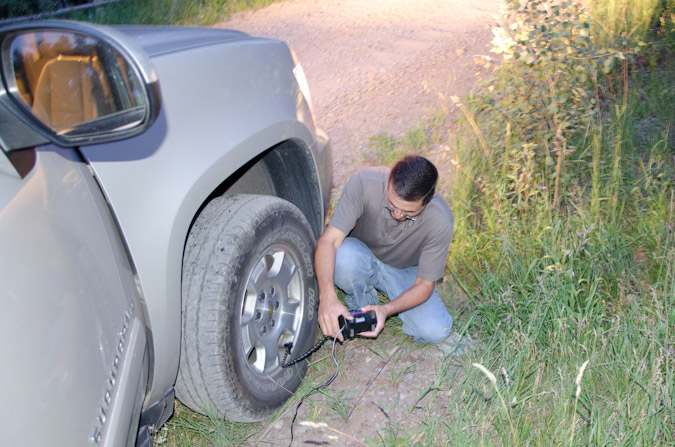
On the way up Silver Pick Basin road, Alli was telling a story about someone she had heard about on 14ers.com that had been threatened with a gun. Before she could finish the story, I spoke up - "that was me!" Indeed - she was referring to my horrendous situation from 2009 where I encountered some quite disrepectful gun-toting young men. I had just finished telling the story about how the young men had a flat tire when Tom stopped me and said, "I think we have a problem - the tire pressure is dropping." It was crazy timing considering I was telling the story about the guys with the flat tire. Sure enough, Tom's tire had a hole in it. Fortunately, he had a Slime Portable Flat Tire Repair Kit, which enabled him to fix the tire quickly so we could at least reach the trailhead. He also had a portable air compressor, which turned out to be quite awesome!
While Tom did all the heavy lifting, Alli and Kara (left and right respectively) were busy updating the world on our woes via Facebook. 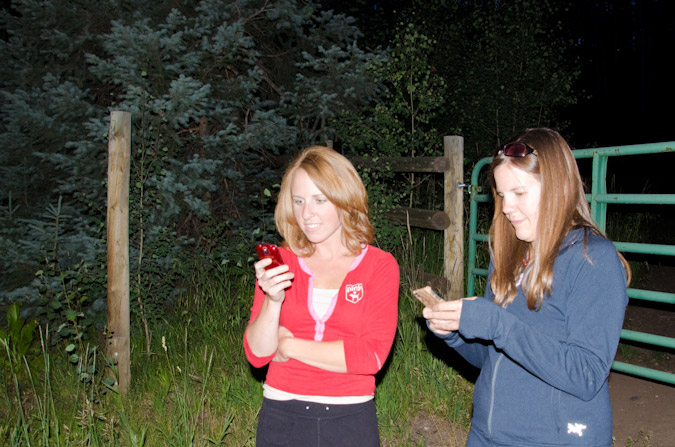
Since the basin had just re-opened the week before, we had anticipated that the trailhead would be busy. Indeed the area had quite a few people in it, and subsequently, all of the good campsites were taken. Tom and Alli ended up sleeping in the car, while Kara and I put up our tents in a field nearby. We decided to set our alarms for 3:30 AM for a 4:00 AM start and hit the sack. The next morning, we started up the trail, guided mostly by the numerous signs that were on the trail. We did find ourselves second guessing the trail at one point on the way up, which I will point out later in the report. It was at that point that we met up with a solo hiker, who turned out to be Will from 14ers.com who I had talked to earlier in the week. He decided to join us for the day and we did not regret it - he was a great companion! We wrapped around the long ridge to the west of Silver Pick Basin and entered the basin proper. The road and trail were very nice and well maintained. We also enjoyed the sunrise over Wilson Peak.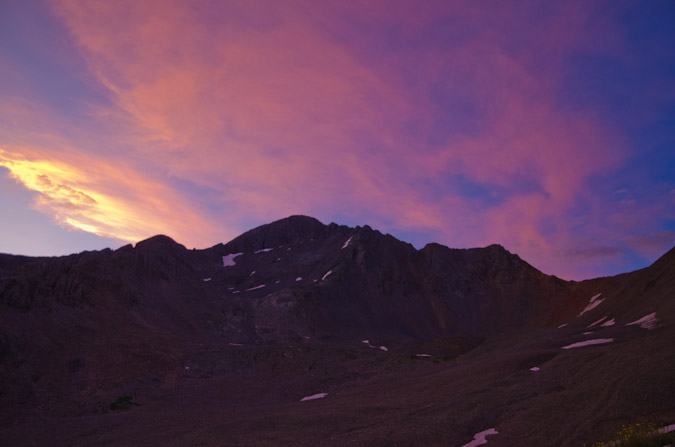
The clouds over Wilson Peak were great!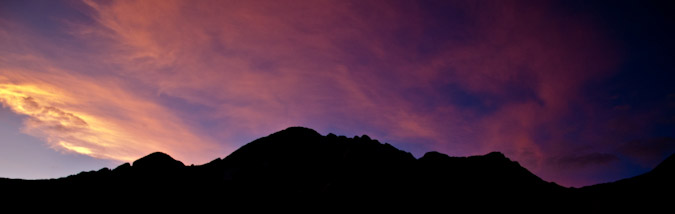
Kara and I stayed near the back of the pack, talking about life, religion and all other important topics that we could think of. I think I was putting her to sleep with my stories...
We finally reached the stone building which is a remnant of the old Silver Pick Mine, and enjoyed the views of Wilson Peak from there. 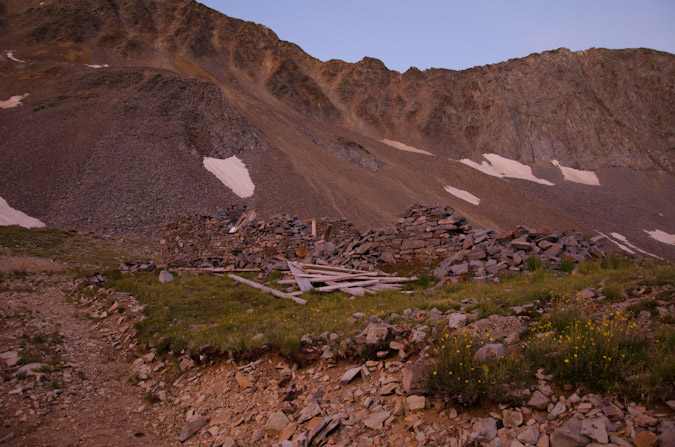
Wilson Peak had some great clouds above it and made for an interesting subject to experiment with HDR.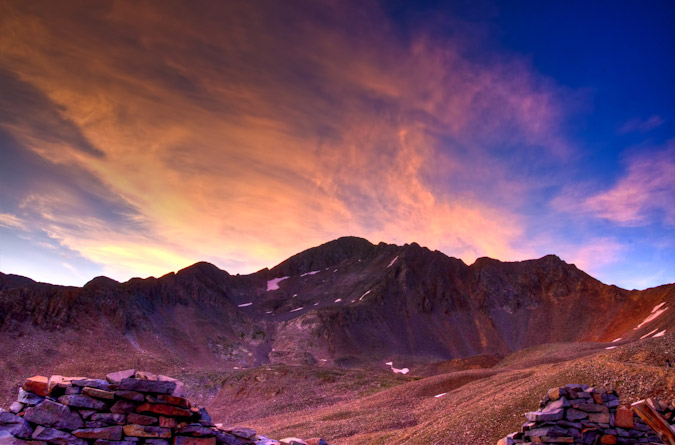
The trail winded up the side of the mountain at a very manageable rate and soon we found the stone building well behind us.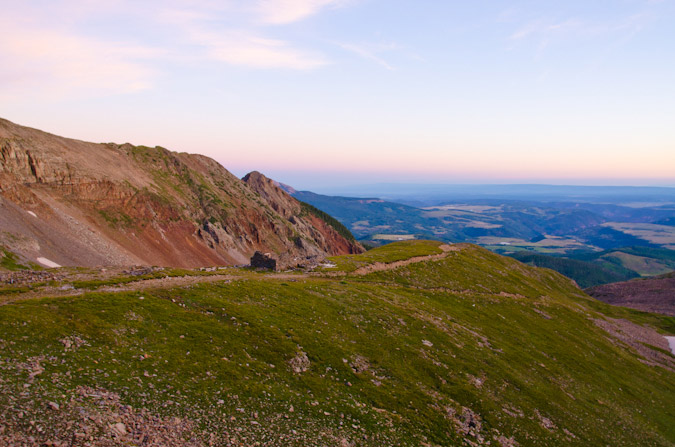
I found myself taking the lead up the trail with Will and we were soon joined by two solo hikers who both had a dog, one of which was a Chihuahua that was on its first 14er climb. The Chihuahua passed Kara on the trail, which was a humerous but sore subject for Kara for the remainder of the hike. We later joked that the dog had gotten to her psychologically and that it was haunting her the whole day. How do you let a small dog on its first hike pass you on the trail? Just kidding of course Kara!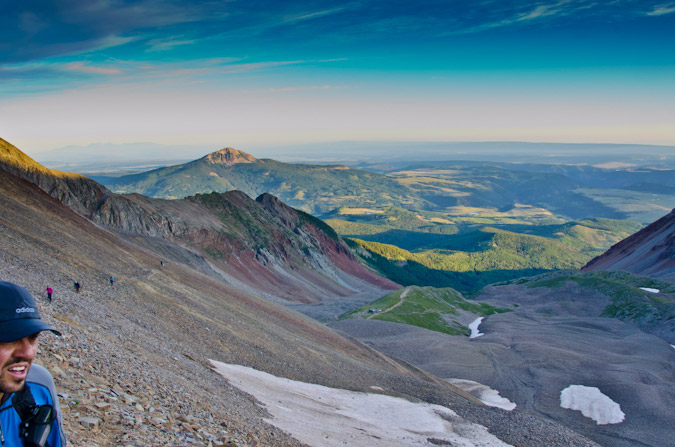
Wilson Peak and the Rock of Ages Saddle neared and Will was getting pretty excited!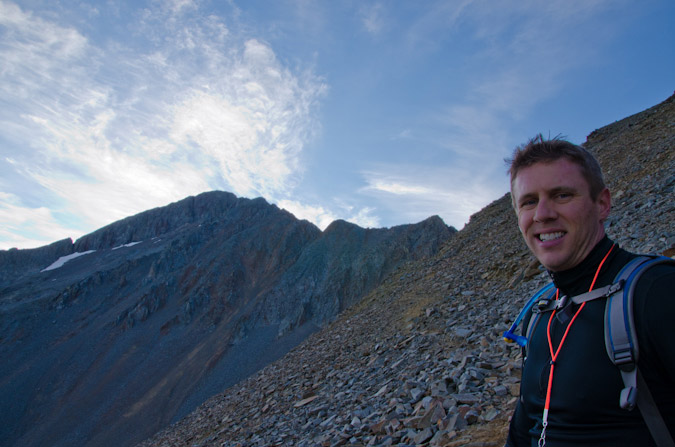
So excited that he took off and made it up first!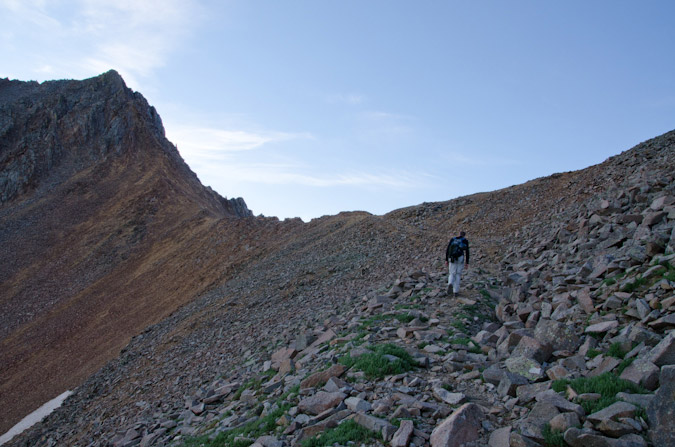
Tom and I kept on trucking...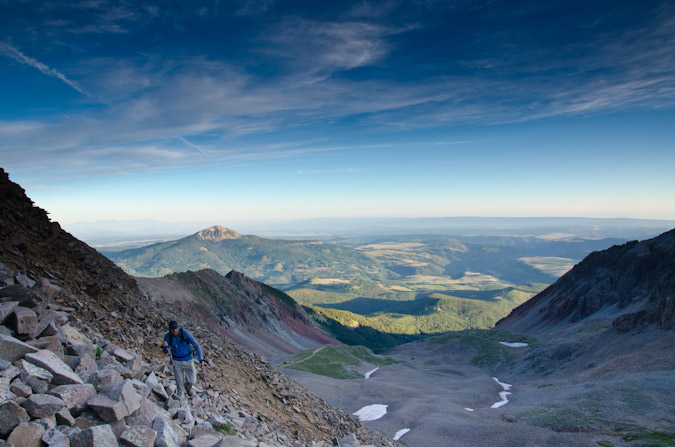
The sunrise had finally fully illuminated the valley below and made for quite the sight! Will reached the saddle first and was trying to decide on what to do - Wilson Peak was right there, but he knew he couldn't pass up an opportunity to climb Mt. Wilson with some experienced climbers, so he stuck with us. Both Tom and I are very close to completing the 14ers, and would prove good leaders on the class 3 and 4 terrain ahead.
The approach from Silver Pick Basin proved longer than advertised, and before we knew it, we had already hiked 4 miles just to reach the Rock of Ages Saddle at 13,000 ft. The thought of descending down into Navajo Basin to 12,400 ft. and back up Mt. Wilson was not exactly enticing, but we knew it was the best thing to do given the weather forecast for the weekend.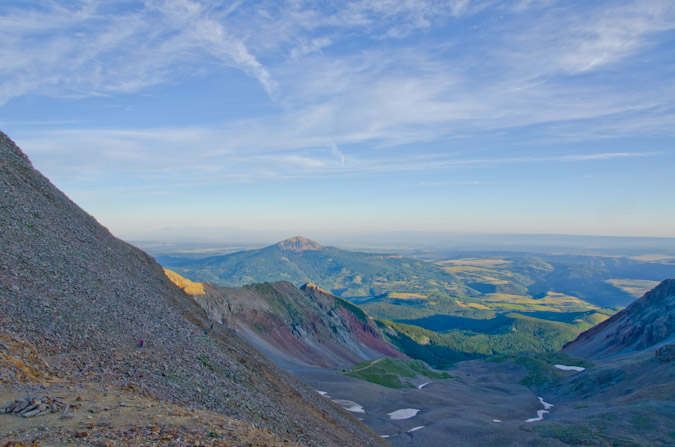
Eventually, both Alli and Kara caught up with us and we stopped to eat some food and take in the views. 
The sunrise was lighting up Navajo Basin and the surrounding mountains, including Gladstone Peak (center), Mt. Wilson (right of center) and El Diente (right).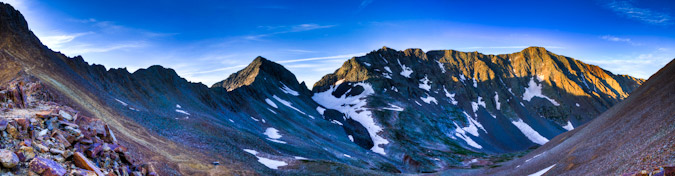
We headed on down into the basin and I stopped to get a few photos of Mt. Wilson from below.
Here you can see a view from the base of Navajo Basin - mouse-over to see our route up Mount Wilson.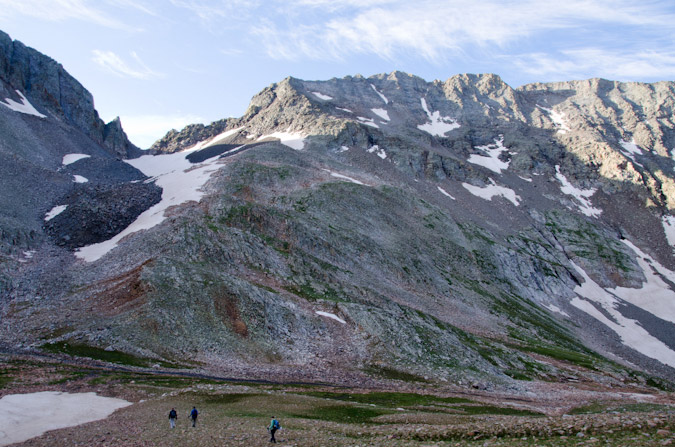
We found the most amazing wildflower field at the base of Mt. Wilson, and I stopped to get some photos of it, including this panorama.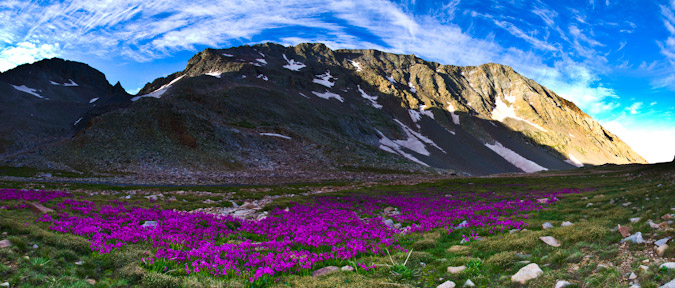
We all started up Mt. Wilson eagerly. It felt like it was right there! I stuck behind with Kara, listening to her stories about life. I also wanted to make sure that someone stayed with her since she was not feeling her best on that day. 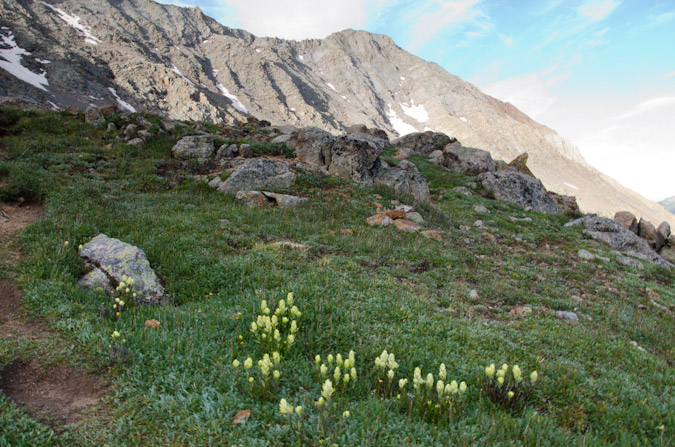
Before we knew it, we found ourselves looking back at the Rock of Ages saddle and Wilson Peak to its right. The climbing up the initial half of Mt. Wilson was quite easy, nothing more than a simple hike. 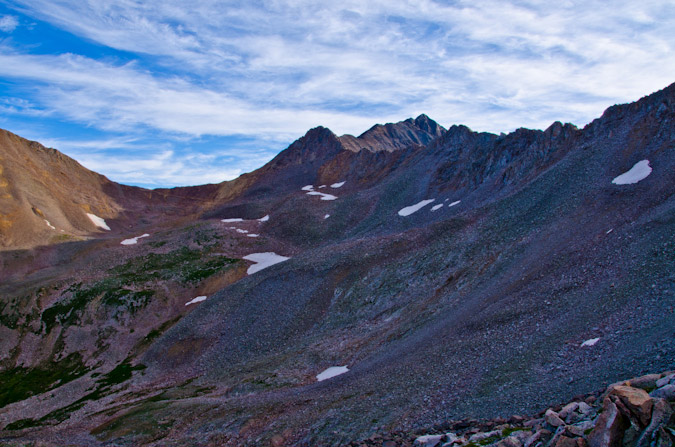
At the end of the easy terrain, we all stopped to rest and prepare for the meat of the climb.
Gladstone Peak loomed over us to the left, blocking the sunlight for the first half of the climb. Eventually, the sun did rise above it, and I found myself drawn to the view of the sun and Gladstone repeatedly.
I decided it would also be a good opportunity to test out some sun-framed HDR photography. The lens flares in the below photo initially bothered me, but after processing the image, I feel like they add value.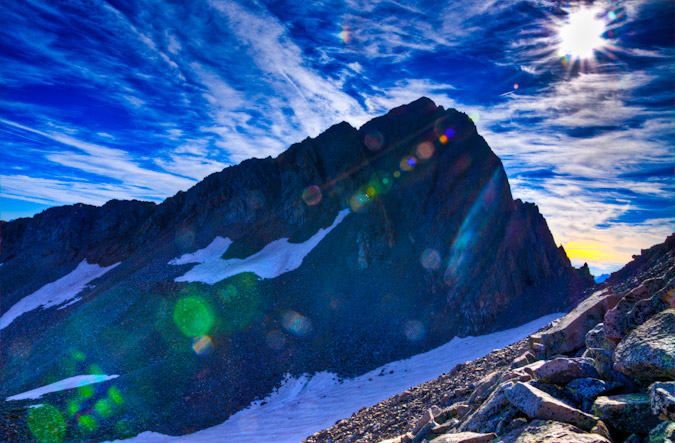
The climbing got more difficult and we reached the class 3 section. We all put on our helmets and started up the more difficult terrain. I found it to be much easier than advertised and the rock responded quite well to my intuitively-placed hands and feet. The rock was solid where I expected it to be solid, and loose where I expected it to be loose. Eventually we found ourselves at the base of a giant gully leading up, and I stuck behind with Kara to make sure she made it up safely.
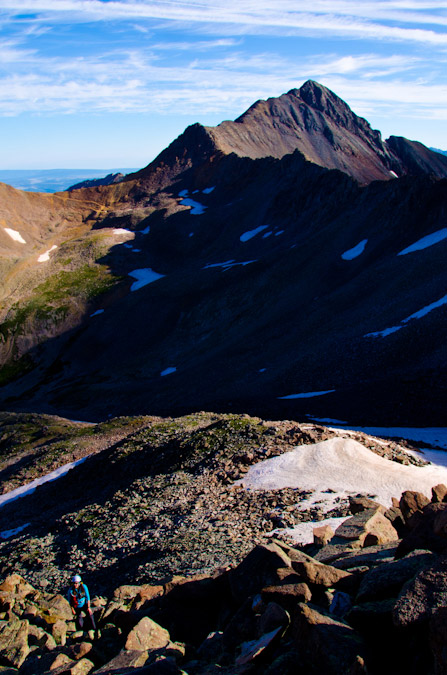 |
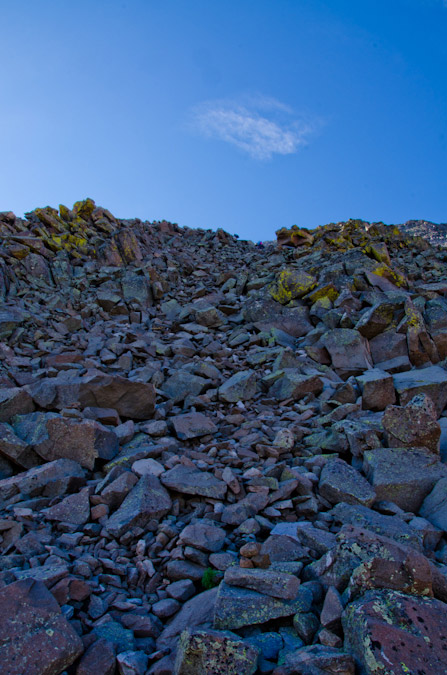 |
The entire route was littered with well-marked cairns that were also adorned with flourescent surveyors tape, making them easy to locate. I know that this is a controversial practice; however, I think everyone in the group found them to be helpful given the terrain we found ourselves in. The views of El Diente and Navajo Lake were quite superb.
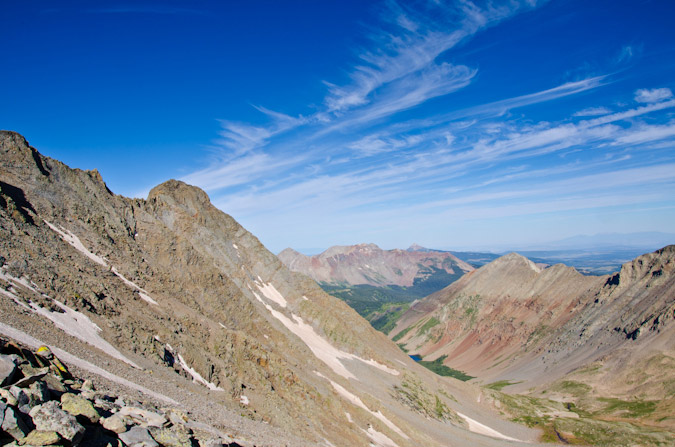
Once we reached the top of the gully, we knew we needed to start traversing across Mt. Wilson. The cairns pointed the way and we followed. 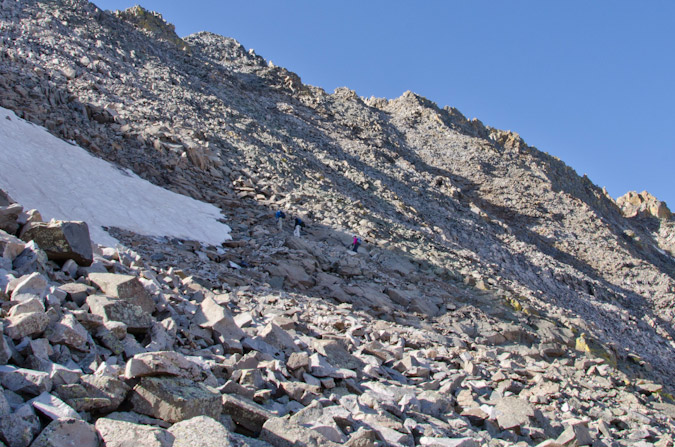
From here the terrain continued to increase in difficulty. The rock was looser and less stable in general. We picked our steps carefully. A look back towards Wilson Peak revealed that we were gaining elevation quickly.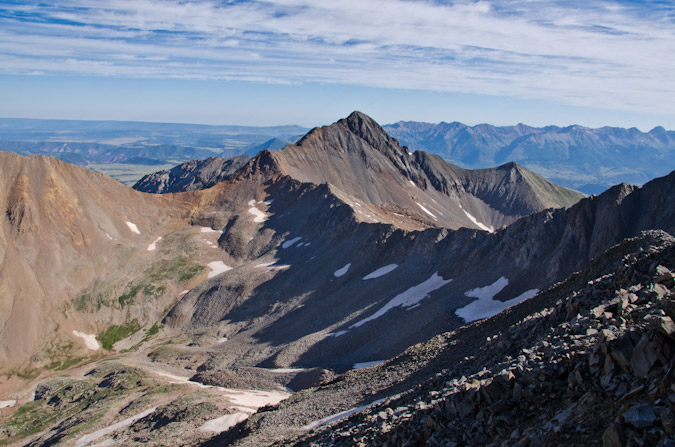
We finally reached the top of another loose gully and the route became obvious but less stable. The rock was getting better but the higher we climbed, the greater the consequences of a loose rock breaking free. The rocks were bigger and the terrain was steeper.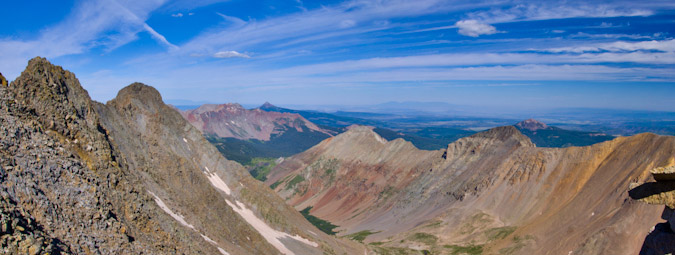
Kara was a real champ on this section.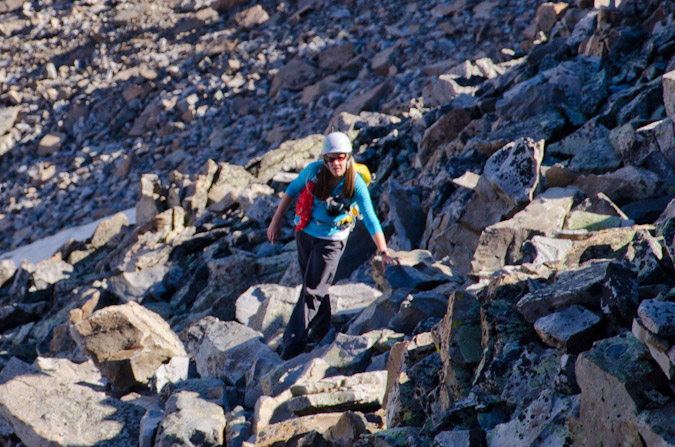
Finally, we reached the ridgeline and could get views to our east. Tom had made it up to the summit by now.
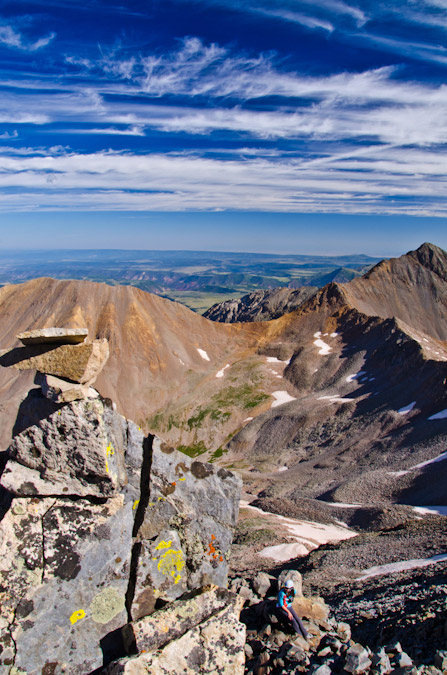 |
 |
The route was getting more and more challenging and I was loving it. Kara was keeping her own as well and I think she was having fun on the interesting class 3 rock. By now, Tom had made it up and Will was photographing the journey.
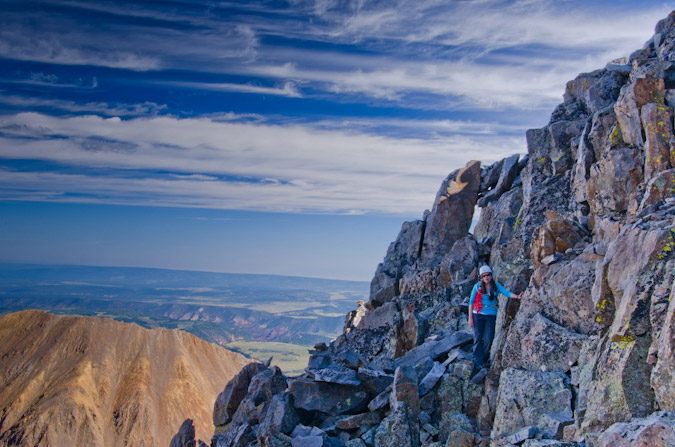
Tom topped out just before Will.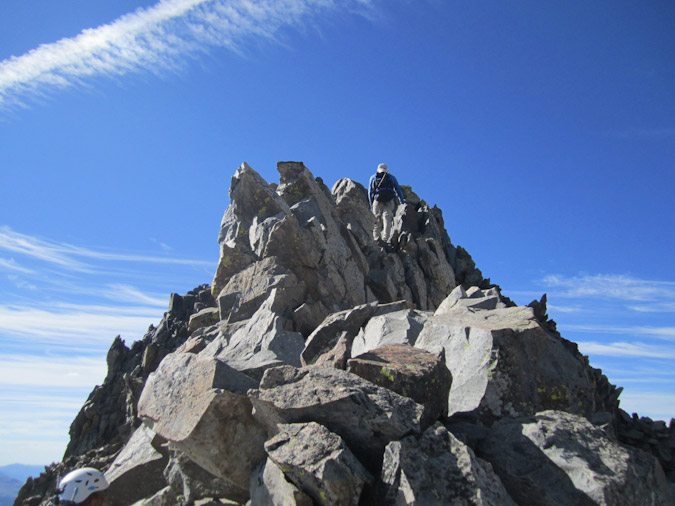
Tom contemplates the route on the crazy summit block of Wilson...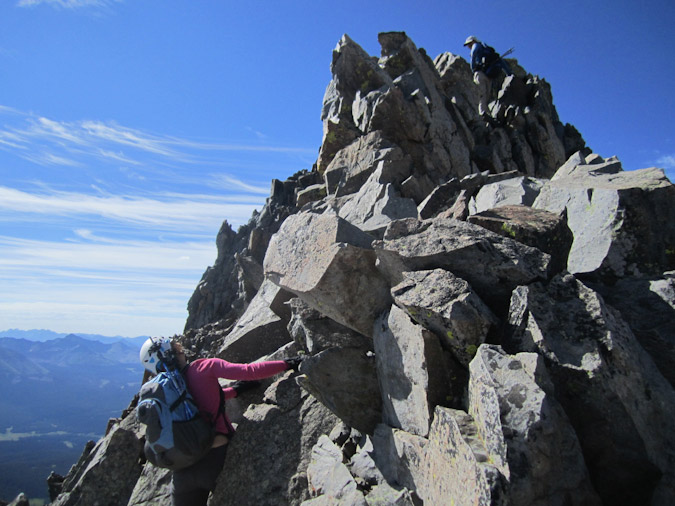
And Tom makes it up! As you can see, the terrain at the summit of Mt. Wilson is crazy and exposed. While it was very solid, I found the terrain to be the most exposed out of any section of any mountain I've done to date. The rocks were totally solid, but they looked like they could slab off at any moment. Someday in the future, someone is going to have the whole summit block slip off and it won't be pretty.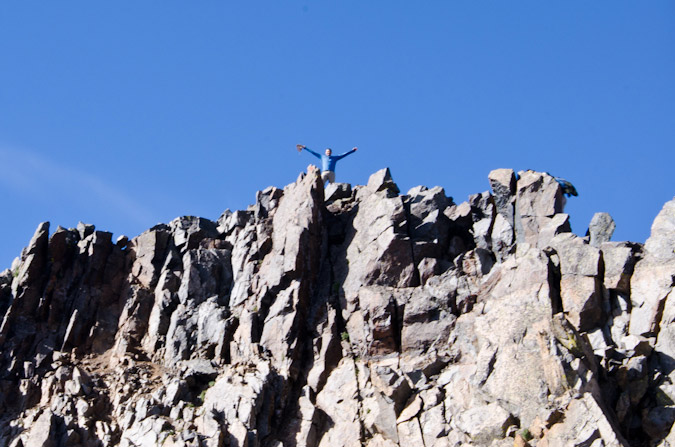
I finally reached the summit block and was totally shocked with the difficult nature of it. I had read about it, but that never really does it justice. There were two moves in particular that would end in death if not executed properly.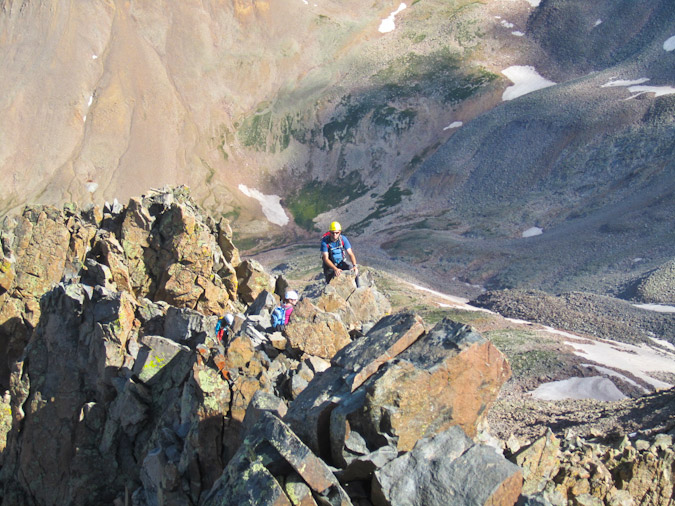
Alli captured me doing one of them...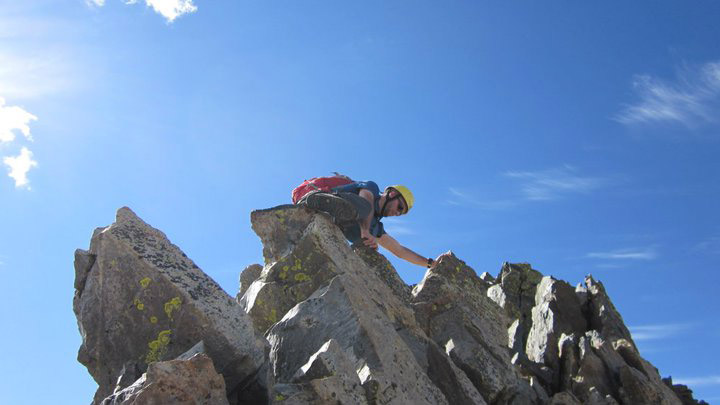
Here's the view down from there - very exposed! The rock was no wider than a person at the most.
Once I reached the top, Tom, Will and I celebrated and took photos. The summit shots did not turn out great, but we were somewhat rushed because Tom wanted to get off the mountain and head for Wilson Peak before the weather got bad.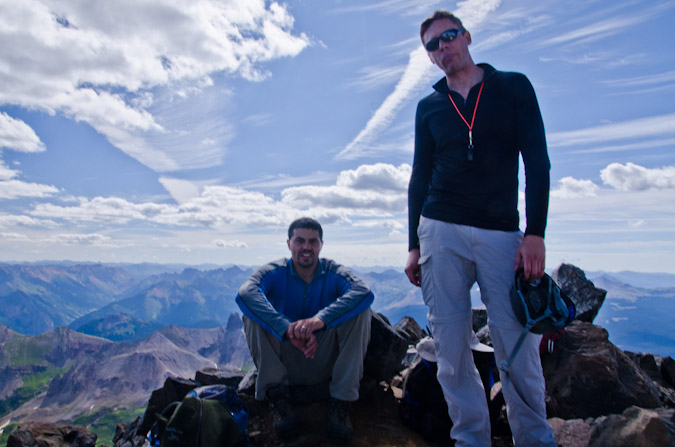
Tom and Will on Mt. Wilson.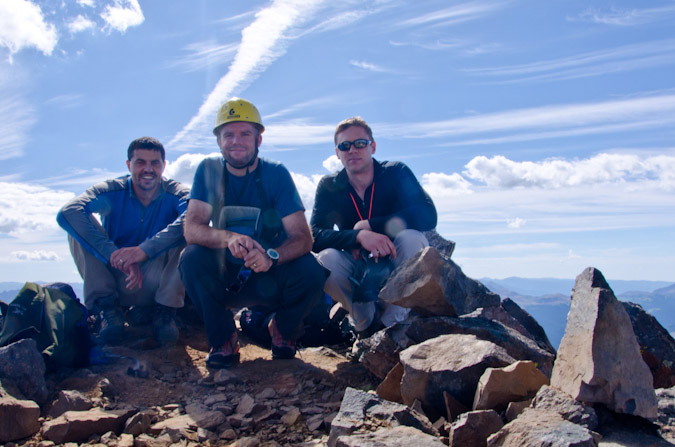
Tom, Matt and Will.
I took one look at El Diente and the weather conditions and said - "No thanks." It looked crazy from there. I know that looks are always deceiving, but I had no interest in soloing the traverse over to El Diente that day. Take a look for yourself: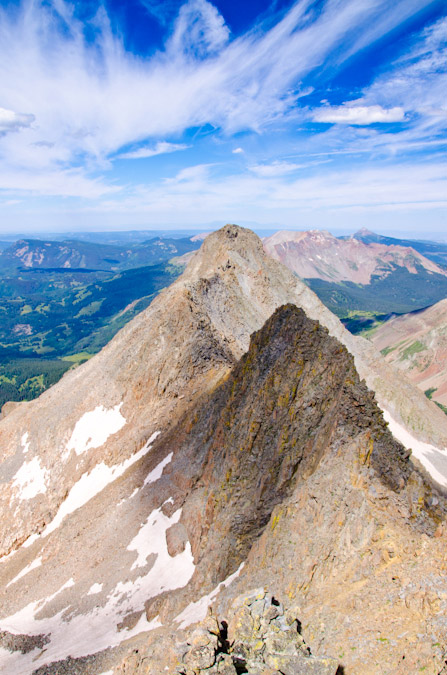
I did get time to shoot off some shots and capture a 360 from the top. Click to see a larger version.
And I played around with an HDR panoramic of Wilson Peak, Sneffels, Wetterhorn, Uncompahgre, Lizard Head and the Ice Lake Basin peaks.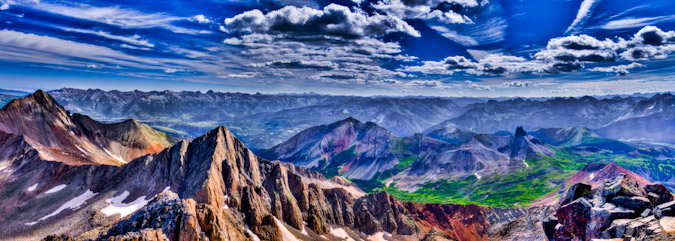
Tom and Will started down before me, and it made for a good dose of perspective on the downclimb.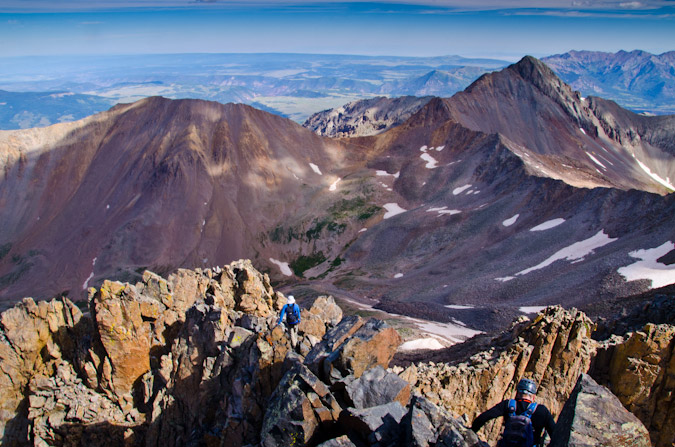
Will graciously stopped and photographed me coming down off the top. It was wild stuff! It definately had my heart pumping!
Will and I stayed in the back with Kara, while Tom and Alli went ahead. 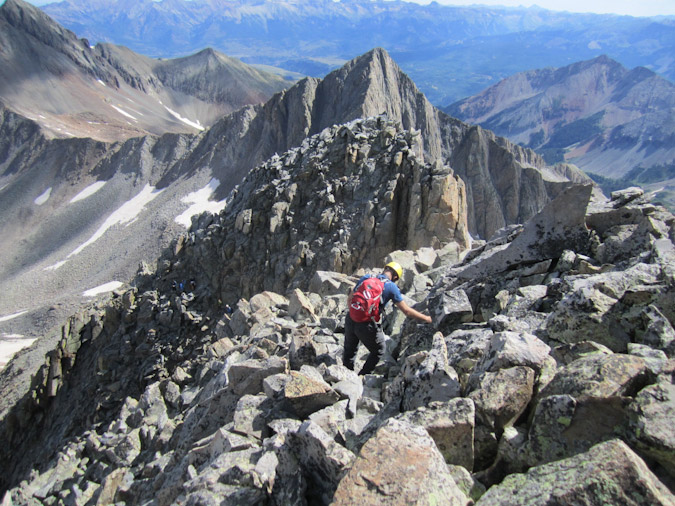
Then the craziest thing happened. We ran into a group of 4 young men coming up. None of them had helmets. One of them had a backpack and water. 3 of the 4 were wearing tennis shoes and one of them had a brace or cast on his arm, essentially rendering him one-armed. My only response to that was: "Fascinating." Since I don't liken myself as the 14ers police, I just said hello and kept on going. Now, I could be off here, and you might say I'm a bit of a safety freak and that I need to lighten up... I could not help but wonder though - what the hell were they thinking? Water? Helmets? Broken arm? Wow. Mouseover to see what he must have been thinking.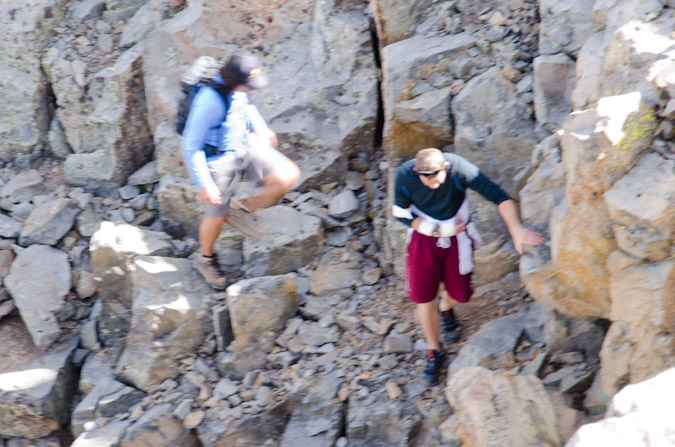
"Dude! Water is for pansies!"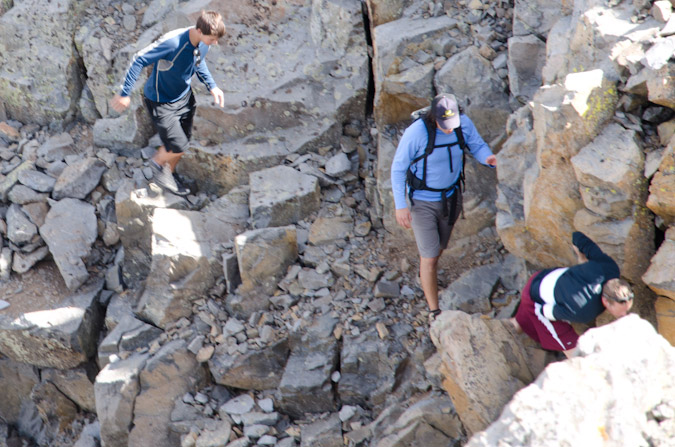
We took our time coming down, probably too long; however, Kara was good company and we wanted to make sure we did it safely. I kept my eyes on the sky and kept contemplating a hike over to start Gladstone; however, I abandoned the idea at the first sight of bad weather. Even though the weather did hold for the rest of the day, I feel like I made the right choice. We reached that awesome field of flowers again and I went crazy with the camera.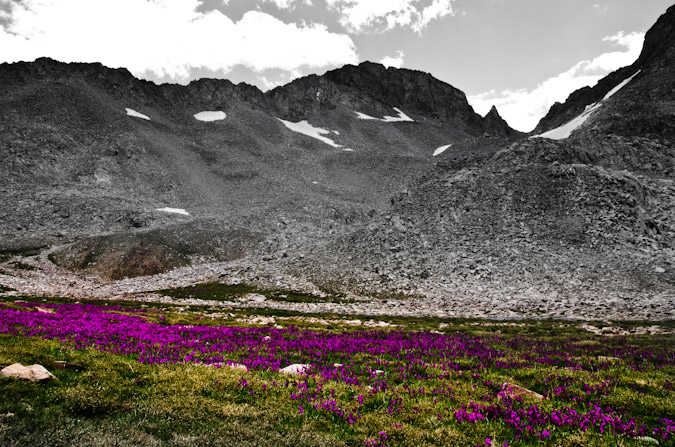
Wildflowers and Gladstone Peak.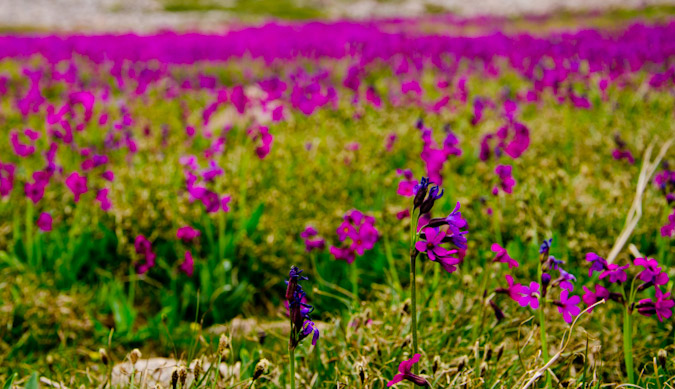
The flowers made for a nice subject for some depth of field (DoF) work. Maybe someday I'll get a real lens that makes the bokeh look creamier. I found a really neat pond with some odd plants growing in it that were exuding bubbles. They also made for an interesting subject. With the thought of Gladstone out of my mind, I focused in on looking for interesting things to photograph on the way back down. I also wanted to find things with interesting texture and depth of field.
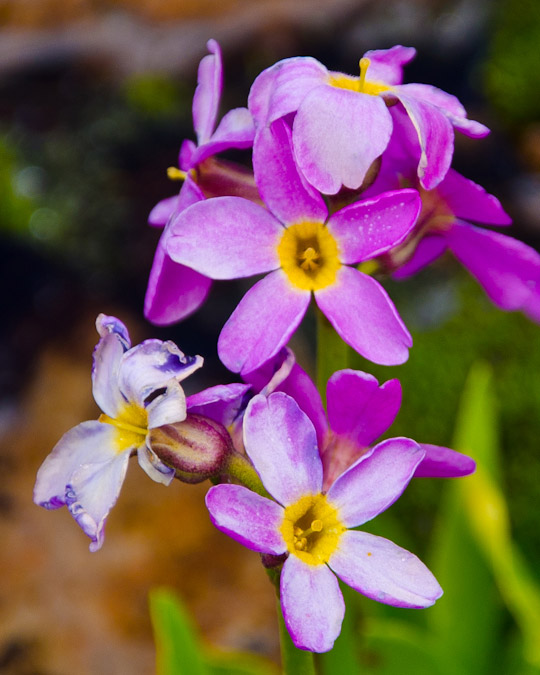 |
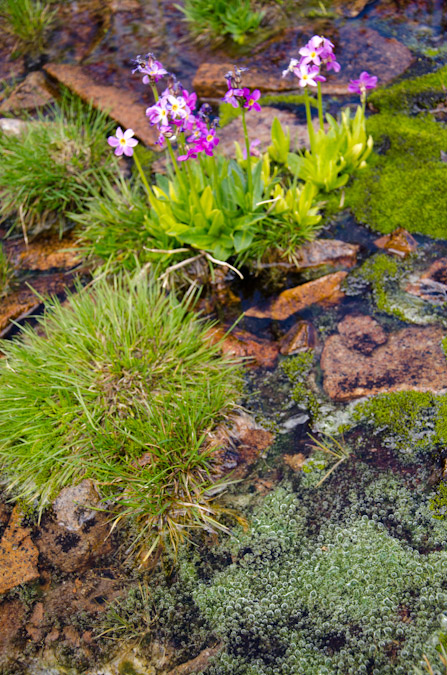 |
We finally reached the Rock of Ages mine again and the ever-so-popular mining cart that always makes for great photo opportunities.
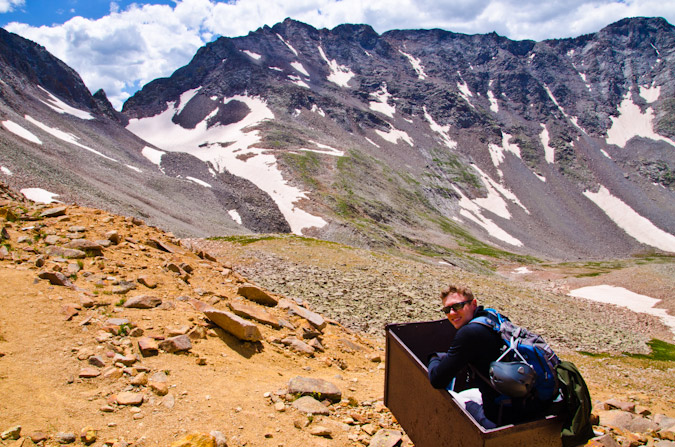
Will jams out on the mining cart.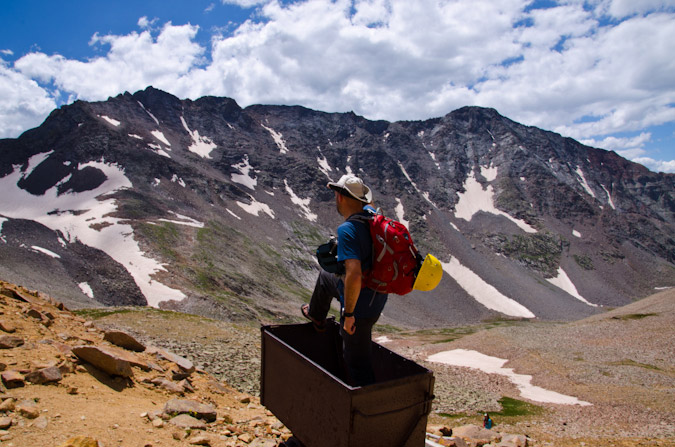
My best captain salute for Mt. Wilson.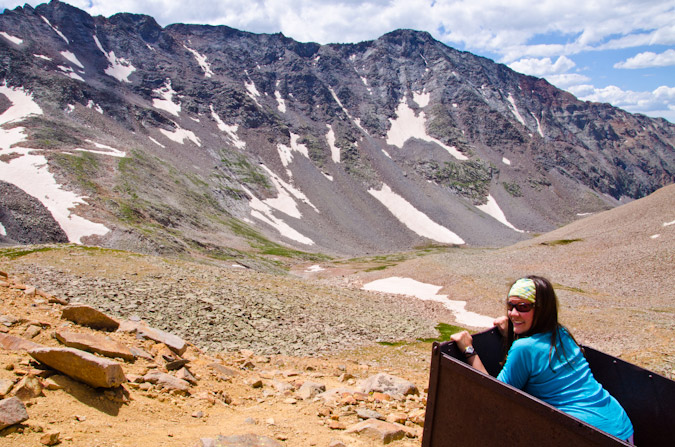
Kara, riding the cart to victory!
We made up to the saddle again, where Tom and Alli were waiting for us. We all decided to head back down, despite the fact that the weather was holding. I was good with this decision since we had another day yet to climb.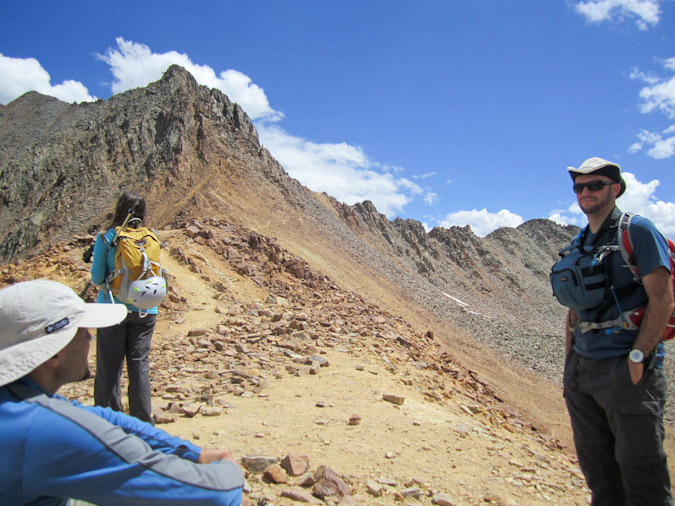
One thing I love about getting out on these hikes and climbs is that it lets me play around with different subjects for photography. In this case, I chose the old mining building and a barbed wire to focus on for a small depth of field. I can't wait for the day when I can get myself a nice 50mm prime lens to really make these kinds of photos pop.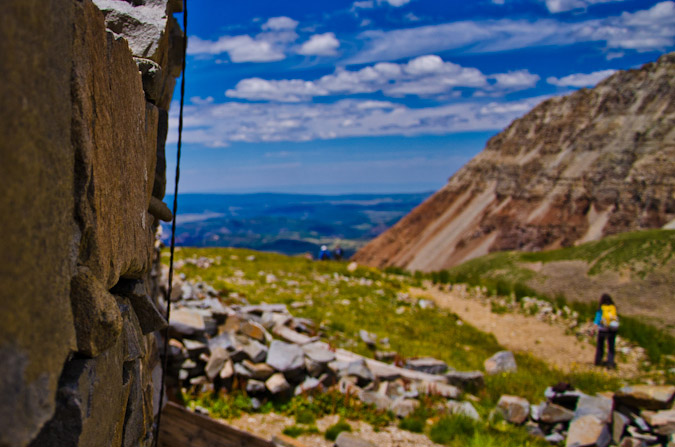
I also looked for things with interesting textures.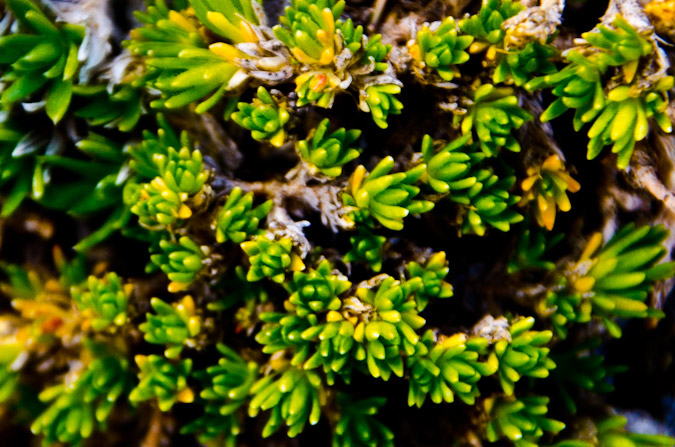
And of course the wildflowers were great too.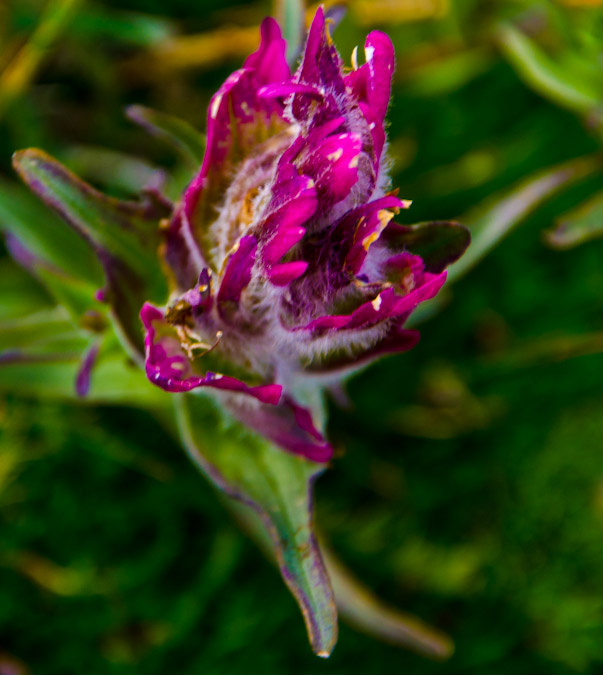 One cool thing about this area is the large amount of old mining equipment left behind. I felt like they made good subjects for black and white photos. The below left image is one of my favorites. It combines a few concepts that I wanted to demonstrate - lines and depth of field. I hope that you like them!
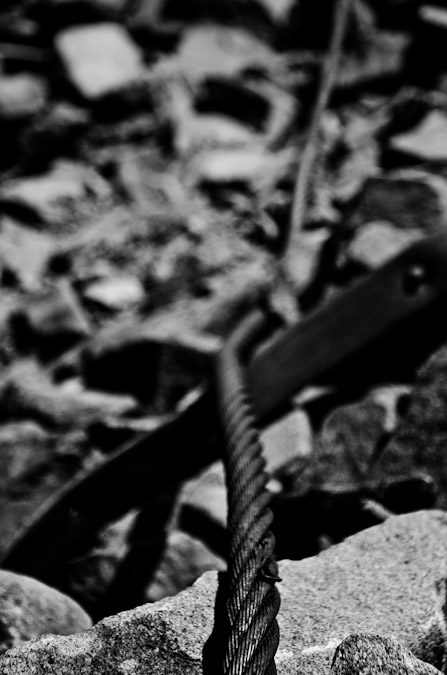 |
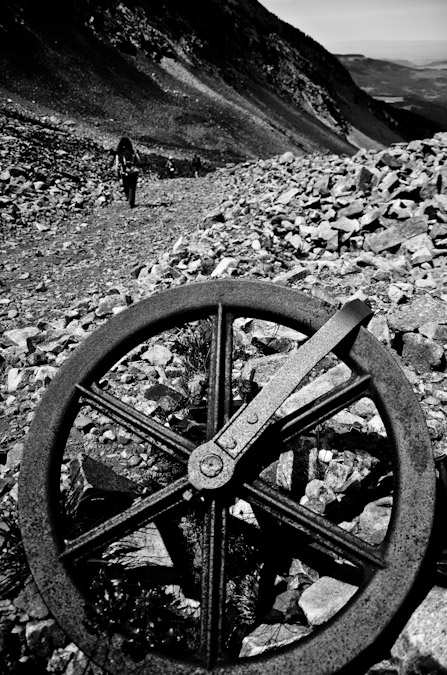 |
We finally wrapped back around to the other side of the long ridge that separates the new Rock of Ages trail from the Rock of Ages basin.
The clouds above were pretty neat.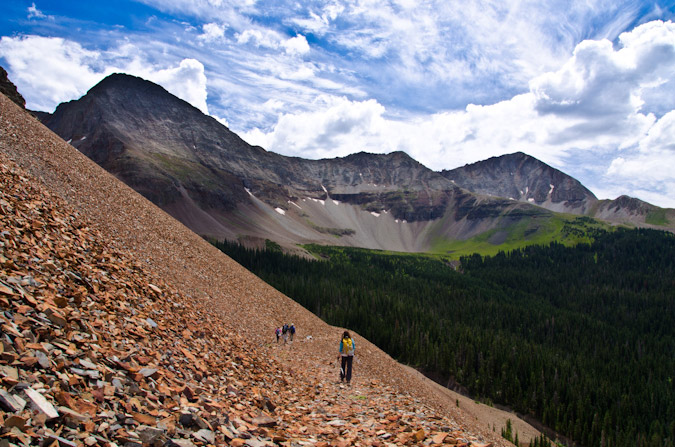
As mentioned at the beginning of the report, we did encounter one area that confused us on the way up because we felt like we were going the wrong way (which we weren't). This rock in the trail led me to think that maybe we should turn-off on a less-worn trail here, but that proved to lead to nowhere. I wanted to point the rock out to anyone else doing this route so that you know to keep on going straight when you find this rock.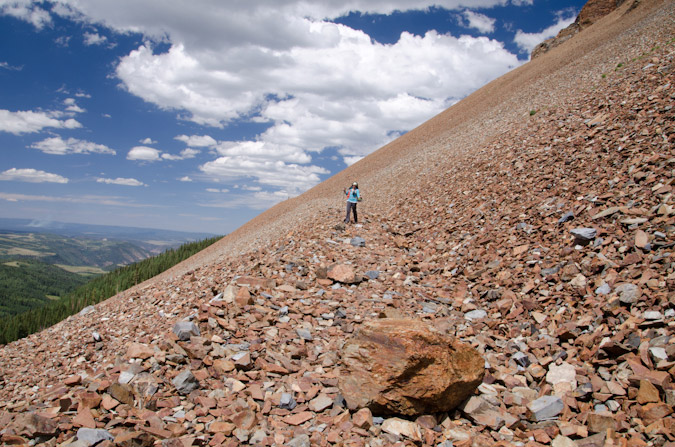
Also of interest, I noticed that the fire I saw last month was still happening in the same general area as before, so that led me to think that maybe there were some controlled fires going on in the area.
I took this photo to not only shot off the fire, but to also demonstrate the difference between using a polarizing filter and not. I took the below photo without the filter, and if you mouse-over it, you can see the same photo only with a filter, with all the same settings in camera. The filter really brings out the blues and adds some punch to the clouds. Check it out!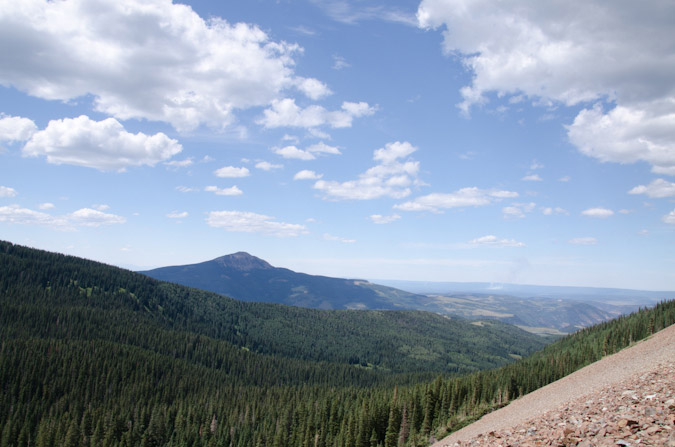
We reached our campsite and cooked dinner. We all decided to get up early the next day to finish our weekend of climbing. I opted to set my alarm for 1 AM because I wanted to reach the Rock of Ages saddle and then the Gladstone-Wilson saddle for star trails and sunrise. When my alarm went off at 1 AM, I got dressed and ready to go. I got out of my tent and looked up - the sky was full of clouds! Nooooo! I set the alarm for 3 AM and when I woke up again, it was raining. Eventually, we all agreed to cancel the Sunday climbs and head back to Denver. Tom's tire was still holding up, so we headed on out. Wetterhorn poked into view on the drive over Dallas Divide. 
Sneffels was looking really awesome with the nasty weather in the area.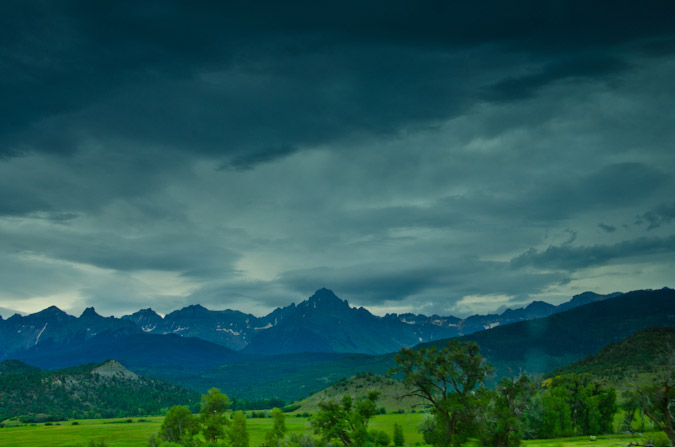
Shortly before reaching Ridgway, Tom's air pressure went down again and he replaced the hole with another repair kit. 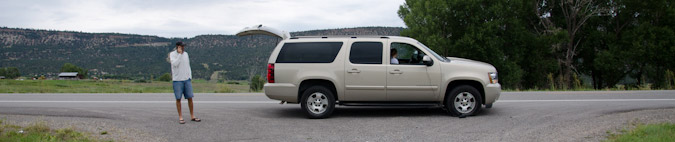
We once again found ourselves waiting for the air pressure to increase, so I took some photos of our group. Alli was in high spirits.
But Kara, our Lisa Loeb lookalike contest winner, was less than happy.
And then, the most amazing thing happened. While the tire was airing up, I noticed a beam of light hitting the mountains to the east. 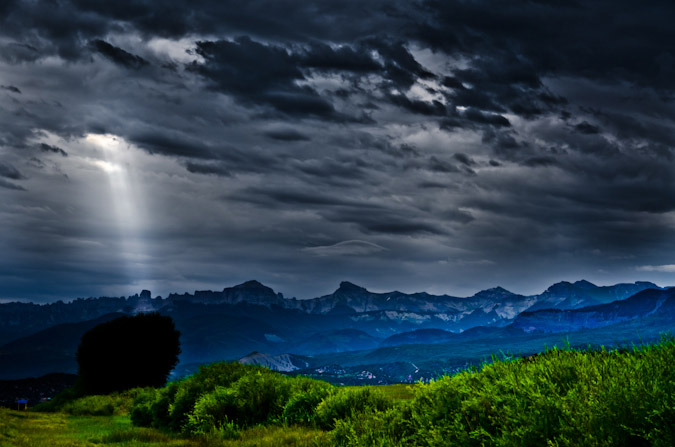
It was a good sign!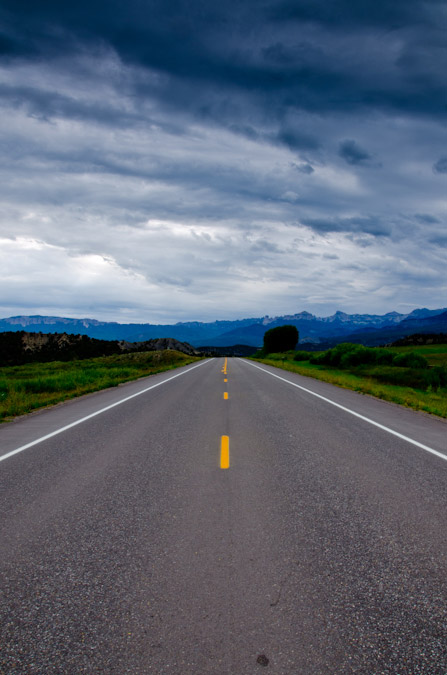
But alas, shortly after Ridgway, the tire failed again and we decided to replace it with the spare. Fortunately, the views of Sneffels and the thought of breakfast kept our spirits high!
We stopped just by County Rd. 4 for the tire swap. 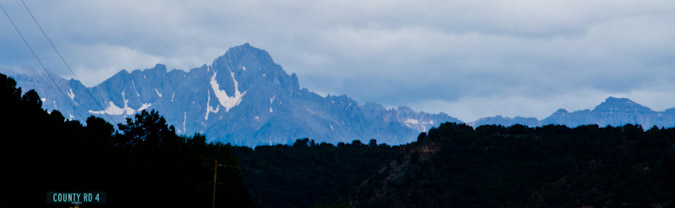
After switching out tires, we headed to Montrose and ate a glorious breakfast at Starvin' Arvins. The drive to Denver was uneventful.
It was a great weekend depsite some of our set-backs. I met some new people who were all really great. I hope to hike with all of them again!
At the time of this report after climbing Mt. Wilson, I am left with five of the ranked fifty-three 14ers: Mount Eolus, Windom Peak, Sunlight Peak, Maroon Peak and Pyramid Peak. I am on-track to finishing the 14ers this year, which is an amazing feeling!
Thanks for reading! Just a reminder - this site costs me time and money to maintain - if you find it useful, please consider supporting the site by remembering to use the affiliate links, especially if you purchase photography related gear from Adorama.
References:
"The San Juan Mountains: A Climbing and Hiking Guide" - Robert F. Rosebrough. 1986. Cordillera Press.
{fcomment}
California Peak - a Sangre de Cristo warm-up
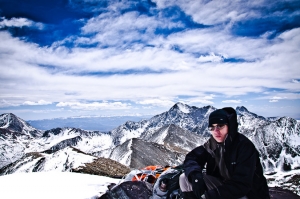
California Peak has long eluded me. Being one of the highest 100 mountains in Colorado (a Centennial), it has been in my sights for awhile. California Peak rises to 13,849 ft. and is ranked 84th highest in Colorado based on my list of the highest 100 mountains in Colorado. Over the past two years, I've set eyes on it numerous times, first from the summit of Lindsey, Iron Nipple and "Huerfano," and later from the summits of Ellingwood Point and Blanca Peak, all close neighbors of California Peak. I had hoped to climb it back in 2009 with my wife, but those plans were foiled by some hoodlums shooting guns at me and my family. I also wanted to climb it in 2010, but those plans were foiled by a seriously bad weather outlook that forced me to stay home. So, a few weeks ago, my long-time hiking partner, Ethan Beute and I made plans to climb California Peak. Our plans to climb it two weeks ago were completely thwarted by forecasted 100 MPH winds and again the following weekend due to snow. Alas, this weekend came and we pulled the trigger, with highs forecasted in the 40's for California Peak and wind gusts of up to 40 MPH. Not knowing how much snow was on the trail itself, we both packed our MSR Lightning Ascent snowshoes and a great deal of winter gear. We both also brought our Outdoor Research gaiters, expecting to encounter a fair depth of snow. I scoured the internet for trip reports for California Peak in April and found none, so we really had no idea how much snow would be on the trail or the road. I met Ethan at his house at 3:45 AM and we left for the beautiful yet dangerous Huerfano Valley. We were not sure what the road would be like, so we were very concerned with how far we could get his vehicle, given the last report stated the road had significant snow drifts fairly far from the trailhead. At 6 AM, we were able to make it to within about 2 miles from the trailhead just as the first views of Blanca Peak came into view.
Ethan snapped a great photo of California Peak and Blanca Peak (right to left respectively):
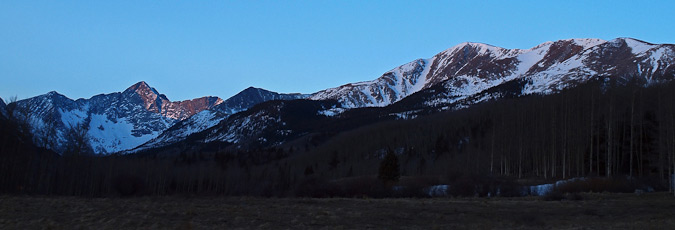
I was very pleased with this starting point and start time. I was also very pleased by the apparent lack of snow on the road and in the trees, as well as the relatively warm temperature. After evaluating the snow levels from afar, we opted to bring our snowshoes because we were unsure if we would need them or not, and since the MSR Lightning Ascents only weigh 3 pounds, it was a sacrifice we were both willing to make to ensure peace of mind. After properly securing our gear and donning our hiking boots, we were off to the races.
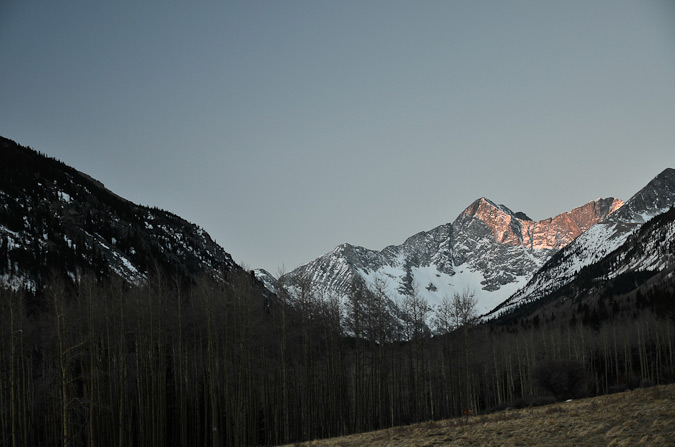
One thing you should know about both Ethan and I is that our first passion is hiking but a close second for both of us is photography. Last year, Ethan purchased a very nice Olympus camera on a deal that was too good to pass-up. I became increasingly jealous of the great images he'd been producing, so I set my sights on upgrading my old Sony DSC-F828 that I purchased in 2001. I was able to purchase a Nikon D7000 a couple of months ago and so I was really excited to finally put it to the test on a proper mountain ascent. Given our mutual love for photography, Ethan and I tend to take several breaks on our climbs to capture some photos along the way, and this trip was no different. In retrospect, I feel that I have a lot to learn about my new camera even though I felt really good about all of the settings after familiarizing myself with its features for the past couple of months. Many of my photos from this trip were blurry, under or over-exposed, and just plain not what I expected. I need a ton more practice!
Right away after setting off on the trail, Ethan and I were greeted by the sunrise kissing the top of Blanca Peak, one of the most magnificent mountains in Colorado. The vantage of Blanca Peak from the Huerfano Valley is one to behold, and I can't produce a much higher recommendation for a scenic location.
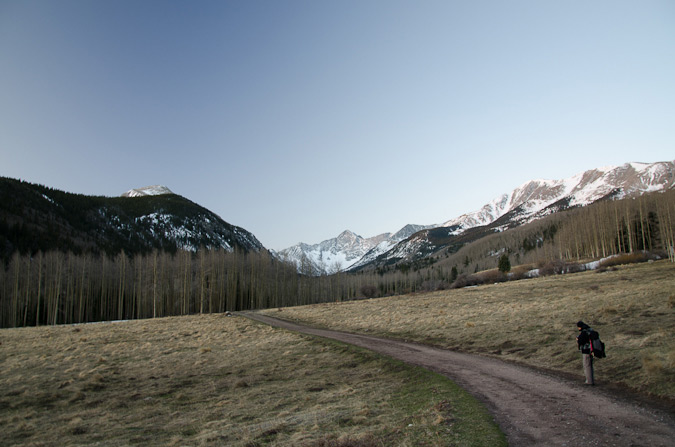
The road was almost completely clear of snow, minus a few large drifts that were in the shadows of trees. A large dead aspen tree had fallen to block the road about 1/8 of a mile from where we parked, so we were glad we parked where we did. Someone's going to have some fun with a chainsaw to get that tree out of the way.

The standard route for California Peak takes you from the road up the Zapata Trail that weaves through the trees and intersects with a high meadow.
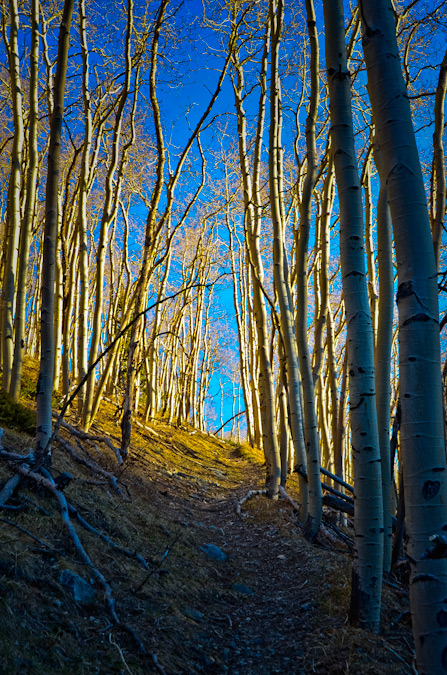
From there, the trail heads even higher on the eastern slopes of California Peak until dropping you onto a gentle ridge at 11,800 ft. From here, the idea is to follow the very long south ridge of California Peak all the way to the top, a ridge walk consisting of about 2,000 ft. in elevation gain over three miles. Our plan was to stick to the standard route as much as possible, taking detours when the trail was lost. As it turned out, the trail was quite visible for most of the hike, until we lost it just after the meadow. From here, we opted to head where we thought the trail went and then straight up a steep gully towards the ridge.
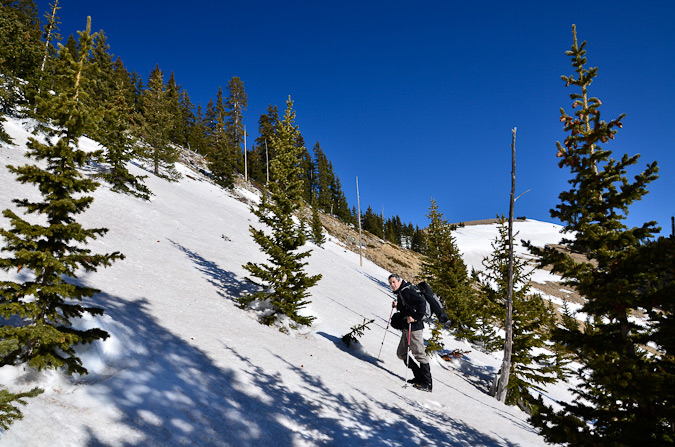
This gully ended up intersecting the actual trail eventually, and so we re-gained the trail and followed it to just below the ridge, where we trodded up a steep snow slop and over a small cornice to reach the ridge and the crazy wind that accompanied it.
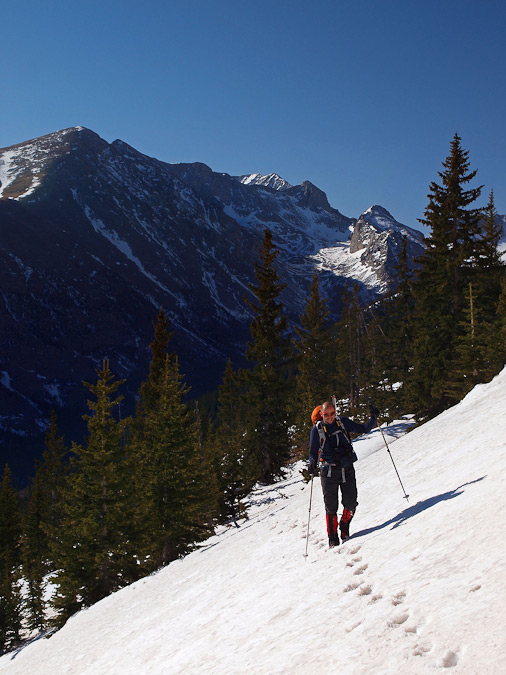
Here is an outline of the route we took for California Peak (click for higher resolution):

The trail offers some pretty nice views of the Huerfano Valley below, including a nice vantage of the Iron Nipple.
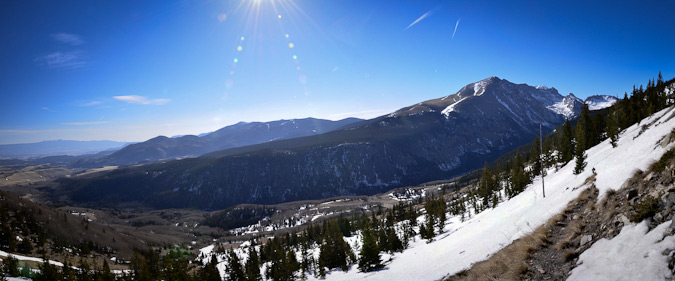
The wind on the ridge was pretty intense. It was not gusty, rather a constant ripping wind that had a biting chill to it. The wind was blowing across the ridge from the west, which explained the relatively little amount of snow on the ridge minus the drifted cornices on the very eastern edges of the ridge.
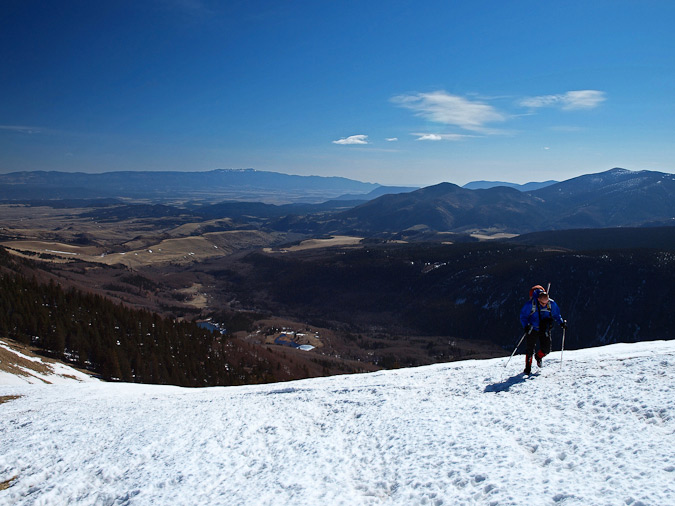
Ethan and I began hiking up the gentle ridge towards what we thought was the summit of Unnamed 13,476. Once we crested it, we realized it was merely one of several false summits leading up to California Peak. While these false summits were constantly demoralizing us, we were pleased and surprised by the breathtaking views of Crestone Peak, Crestone Needle, Mount Herard and the Great Sand Dunes National Park to the north.
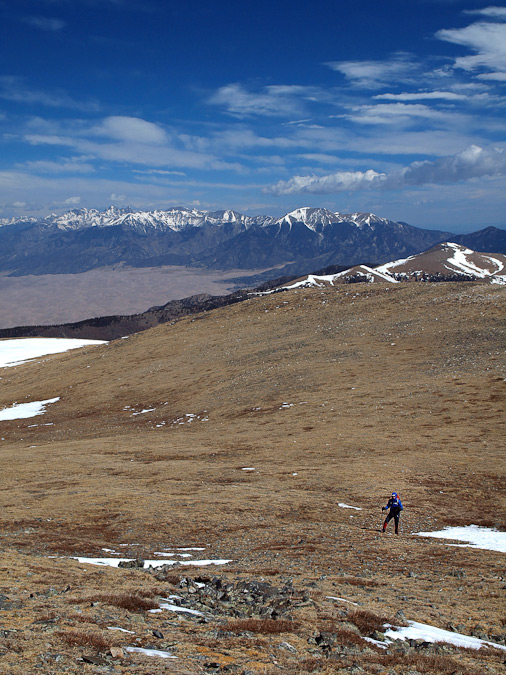
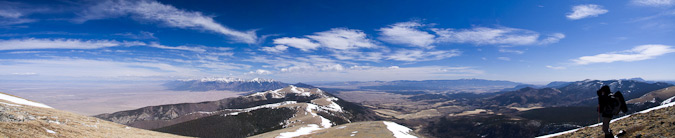
We reached the summit of another false summit and realized that California Peak was a long ways off yet. This ridge was quite a long approach indeed!
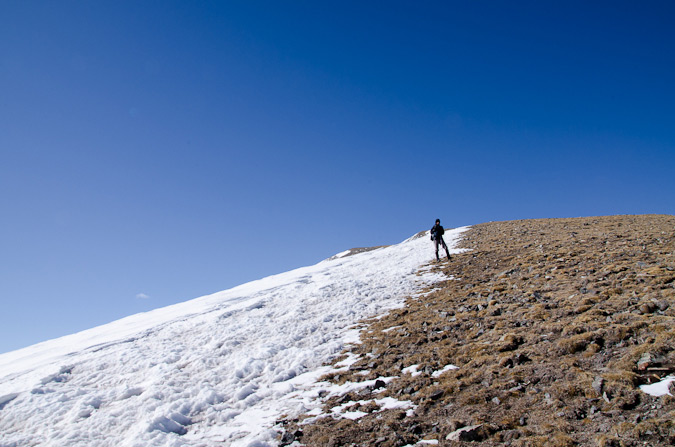
Once we reached the summit of Unnamed 13,476, we needed to stop because Ethan's hands had gone numb. This was surprising to both of us because he was wearing his brand new Marmot Windstopper gloves. Apparently they did not stop the mighty wind of the Sangre de Cristo Mountains. I went into my first aid kit and produced two Hand Warmer kits, one of which I had looted from a geocache find near Mount Shavano in 2009. The kits seemed to help Ethan, so we continued on up towards the next false summit.
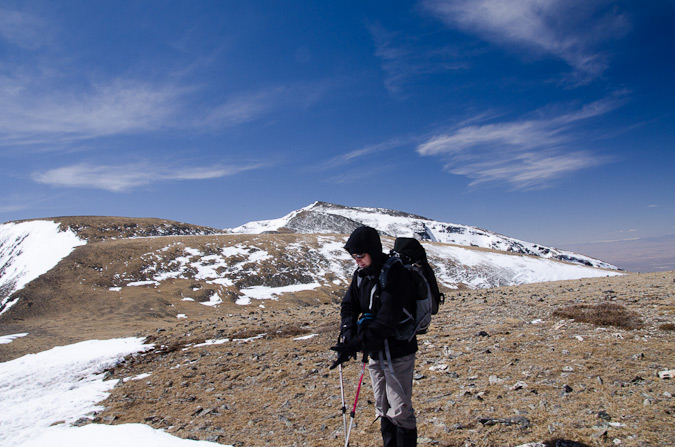
The summit block of California Peak was fairly steep, although nothing too crazy, and we were able to boulder hop our way through the shallow snow and to the summit by noon. Needless to say, the views of Blanca Peak, Ellingwood Point, Mount Lindsey, Iron Nipple and "Huerfano Peak" were outstanding.
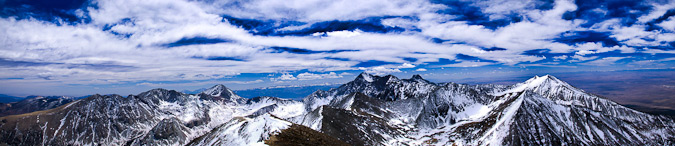
It had appeared that no one else had signed the summit register since October, so it was cool being the first to sign it in 2011. We took several picutres and refueled for the descent. Despite the strong and chilly winds, the summit was great. It was awesome to be on my first top 100 mountain of 2011.
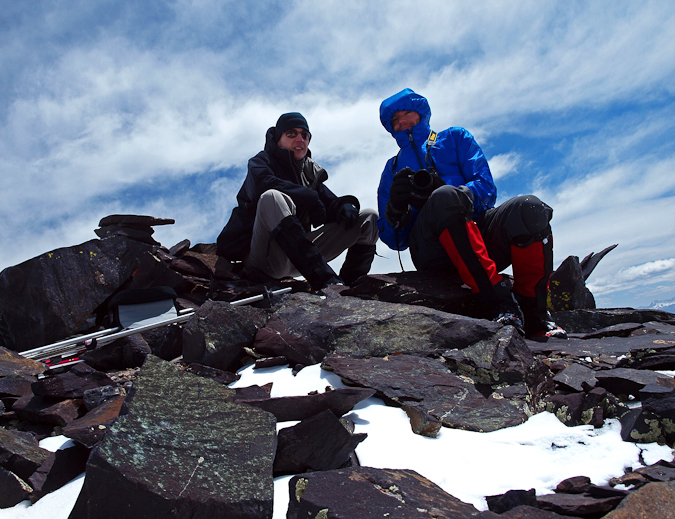

It was also really great to make the realization that I had just completed my 60th highest 100 summit of my life.
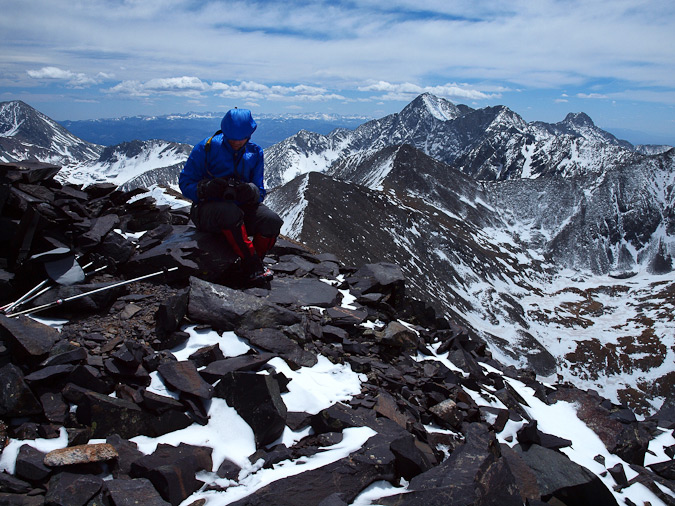
If all goes according to plan, by the end of 2011, I'll have only 15 of the highest 100 left to climb. My life-long dream is coming closer to completion. After soaking in the amazing views from the summit of California Peak, Ethan and I headed back down the ridge, but not before taking a 360 degree panoramic photo set:

Click HERE to view an interactive version of this photo (SMALLER FILE - 1.8 MB).
Click HERE to view an interactive version of this photo (LARGER FILE - 27.1 MB).
I was able to take two more sets of parting shots before we left the ridge, and I was quite pleased with the way in which they both turned out (one is the first photo in this trip report and the other is below).
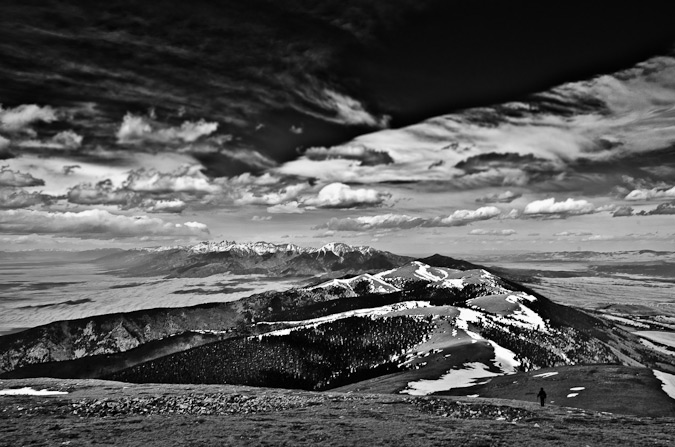
We found our trail in the snow without too much trouble and made quick time back to the road, and eventually, Ethan's car. Here is my favorite shot of Ethan's from the trip:
Here are some fun statistics from our hike:
Miles hiked: 11.5 round-trip
Total time: 10 hours
Total photos taken: 190 (far less than usual, despite having the new camera - shooting photos in the wind sucks)
I hope you enjoyed this adventure or that the information was useful for your planned hike of California Peak. As always, you can follow me on Twitter and Facebook. Please also remember, if you're planning on making any camera-related or outdoor-related purchases, use the links found HERE to support this site.
I look forward to your comments or questions regarding the hike or the methods used in any of the photos!
Six 13ers in the Sawatch: Fall Colors Galore!
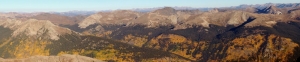
Earlier this year I had made plans to climb Mount Wilson, Wilson Peak, and El Diente with my dad; however, plans quickly changed through the summer as Ray painfully realized that he did not have the flexibility, strength, nor desire to conquer those mountains. We decided instead to take a camping trip with my son, Quinn, up to the southern Sawatch range and I would figure out alternative climbing options later.
Being that one of the best months to climb mountains in Colorado is September, I wanted to get in as much hiking time as possible to soak in the fall colors. I chose the far southern Sawatch range to begin my quest for great fall color photos and hoped to conquer my personal nemesis, Tabeguache Peak, as a bonus. Due to it's location, Tabeguache is generally climbed in conjunction with Mount Shavano - which I've already climbed twice in two years due to my quest for Tabegauche's summit. For this trip, I'd planned to hit Tabeguache from the north, while bagging Grizzly Mountain, Cyclone Mountain, and Carbonate Mountain; however, upon further inspection of the TOPO map for the area (St. Elmo Quadrangle), I discovered that there were several other 13ers right near where we were planning to camp, all of which were connected by long ridges, and that it would be a shame not to climb them while we were in the area. My plans quickly changed and I added Boulder Mountain and Mount Mamma to my itinerary.
Trip Statistics:
Summits reached:
Boulder Mountain: 13,528 ft. (ranked 236 in Colorado)
Mount Mamma: 13,646 ft.(ranked 173 in Colorado)
Grizzly Mountain: 13,708 ft. (ranked 142 in Colorado)
"Lo Carb": 13,591 ft. (unranked)
Cyclone Mountain: 13,596 ft. (ranked 192 in Colorado)
Carbonate Mountain: 13,663 ft. (ranked 165 in Colorado)
Total elevation gain: 4,883 ft.
Total prominence in feet: 2,723 ft.
Total distance hiked: 11.41 miles
Total time hiking: 10 hours, 30 minutes
Total photos taken: 592
Total wildlife sightings: 1 (Mountain Goat)

Collegiate Peaks - located in the Sawatch Range, including Mount Antero left of center, Mount Princeton at center and Mount Yale at far right.
On Saturday, September 18, 2010, my dad, my son, and I loaded into my Jeep Grand Cherokee and headed for Baldwin Gulch. To get there, we traveled to Highway 285 via Highway 24 and drove south from Buena Vista / Johnson's Corner to Chaffee County Road 162, heading west towards Mount Princeton & St. Elmo. After 12.5 miles, we took a left (south) on Chaffee County Road 277 (Mount Antero / Baldwin Gulch Road).

The aspen changing colors in Baldwin Gulch.
This is a 4WD road and put my Jeep to the test. In fact, when I purchased this Jeep earlier this year, I had this road in mind as a good barometer for how much clearance etc. I wanted to have. The road is fairly rough in spots, and I knew that after the road splits towards Baldwin Lake, it becomes even rougher. Sure enough, after passing the turn-off for County Road 278 at Baldwin Creek and staying right, the road became fairly crazy. If you don't have good clearance, this would be a great place to stop.
We found a great campsite roughly 4.3 miles up the road (1.7 miles from the Baldwin Creek turn-off) near a large boulder field near the smaller lakes below the main Baldwin Lake. We set-up camp and enjoyed the cool yet pleasant fall weather. Speaking of weather, the forecast for the weekend was ideal for hiking - no rain, no storms, no wind. I took a small hike around the area to enjoy the fall colors. I was very impressed by the golds, yellows, reds, and browns of the vegetation - it certainly made for quite the view, and complimented the diverse colors of the mined rock on the mountainsides.

Antero Peak is reflected with vibrant blue colors.

Cronin Peak and lower Baldwin Lake.

Cronin Peak and lower Baldwin Lake.
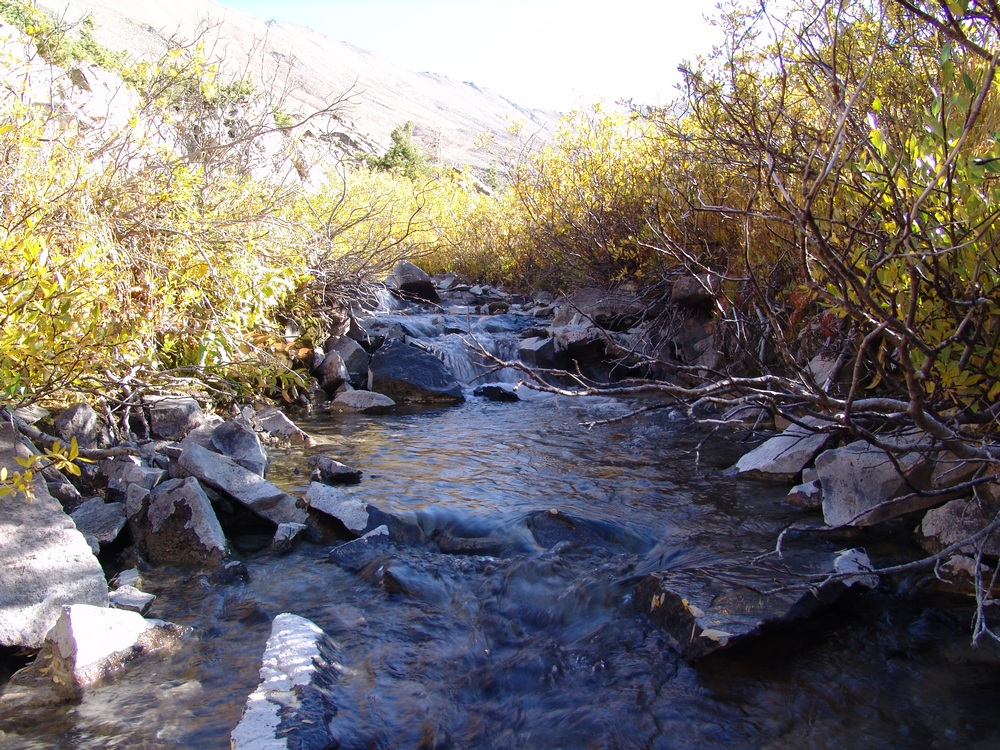
Baldwin Creek.
The moon was nearly full and much to my surprise, there were great views of the moon rising above Cronin Peak in the early evening.

Cronin Peak with the moon rising above it, reflected in the water.

Cronin Peak with the moon rising above it, reflected in the water (lighter this time).
After enjoying a large campfire and roasting marshmellows with my son, we all went to bed. I set my alarm for 4 AM so that I would have a full day for my planned epic hike:

The route map for Boulder Mountain, Mount Mamma, Grizzly Mountain, "Lo Carb," Cyclone Mountain and Carbonate Mountain.

Elevation profile for Boulder Mountain, Mount Mamma, Grizzly Mountain, "Lo Carb," Cyclone Mountain and Carbonate Mountain.The first 1/2 mile was pure bushwhacking scree hell.
I left camp at 4:30 AM and bushwhacked straight up the side of the ridge of Boulder Mountain. I stumbled across an abandoned mine on the way up and found this part of the hike to be the worst part of the day. As you can see above, the first 1/2 mile of the hike was absolutely brutal - I gained 1,400 ft in the first 1/2 mile on loose scree, boulders and talus. It was the kind of rock where you took one step forward and then slid backwards half a step. It took me only an hour to reach the ridge, where I was greeted by strong, cold wind and pure darkness. The stars were amazing though, and the sun was just beginning to provide the first glimpse of light on the eastern horizon, left of Antero. Looking north, I could see the vague outlines of Boulder Mountain, which seemed to be pretty far away in the darkness. Through the cold wind, I pushed my way up the summit ridge of Boulder Mountain, and reached the summit at 6 AM, a mere 1.5 hours after I began my adventure. The summit had a very awesome looking cairn at the top, which provided nice contrast with the light of the rising sun.

If you've never experienced the sunrise from the top of a mountain before, it should be on your bucket list. This marks the third time I've been able to witness the sunrise from 13,000 ft+ and it never gets old. The sunrise provided excellent outlines of Mount Antero, Mount White, Tabeguache Peak, and Mount Shavano to my east. Additionally, as the sunrise continued to increase the amount of light, it became clear that there were incredible views of gold and red aspen across the valley along the ridgeline for Mount Princeton to the north. It was quite stunning to see all of the colors emerge from the darkness as the sun rose above the horizon.

The sunrise illuminates the sky, revealing Mount Princeton (left) and Mount Antero (right).

The sunrises behind Mount Antero.

The changing aspen are visible from the summit of Boulder Mountain.
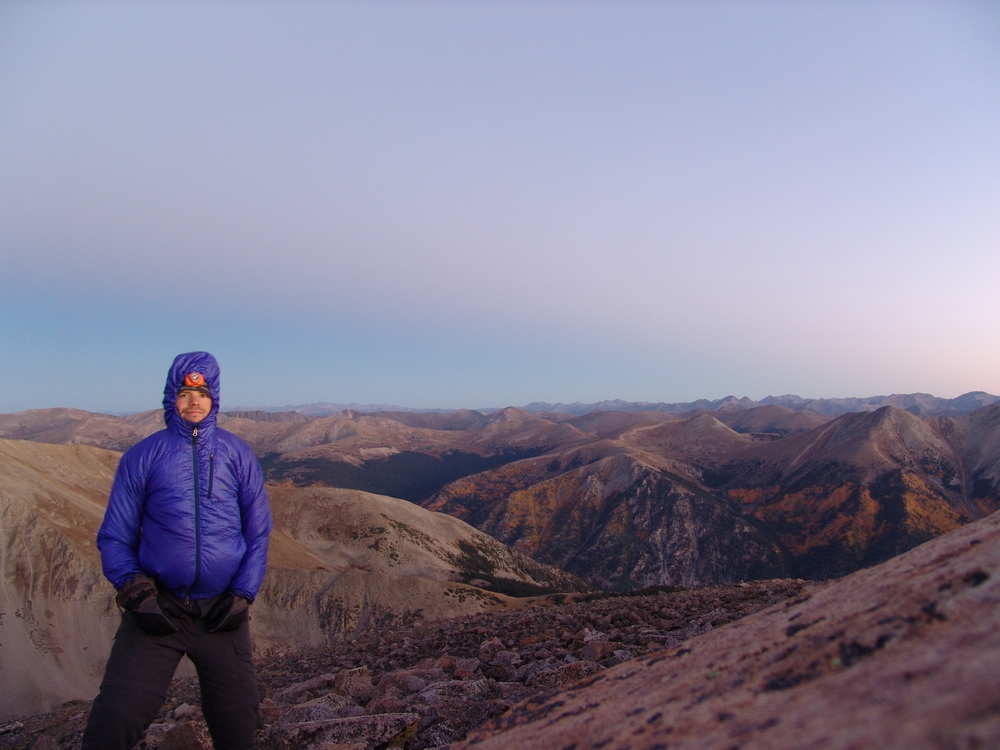
Matt Payne on the summit of Boulder Mountain - it was really windy!

Aspen change colors on the slopes of Mount Princeton and it's neighbors.
After enjoying the sunrise, I started to head back down the ridge of Boulder Mountain to the south. As I traveled along the ridge, the sunrise lit up skyline to my right (west) across the slopes of Mount Mamma and to the north, illuminating groves of aspen trees. It was nothing short of spectacular.
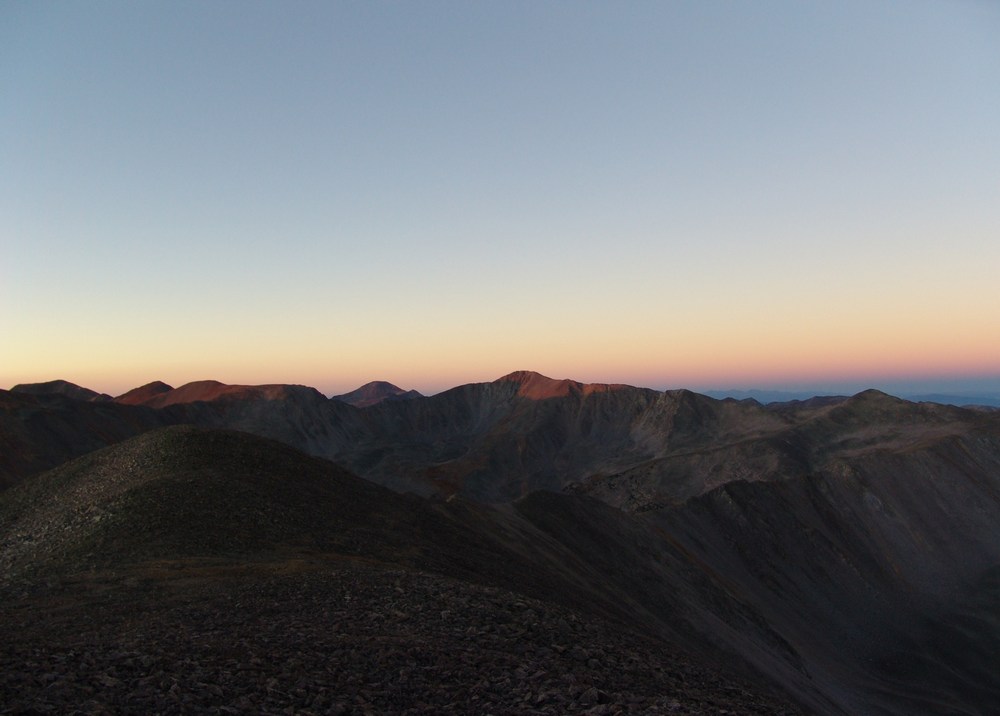
Grizzly Mountain in the far distance...
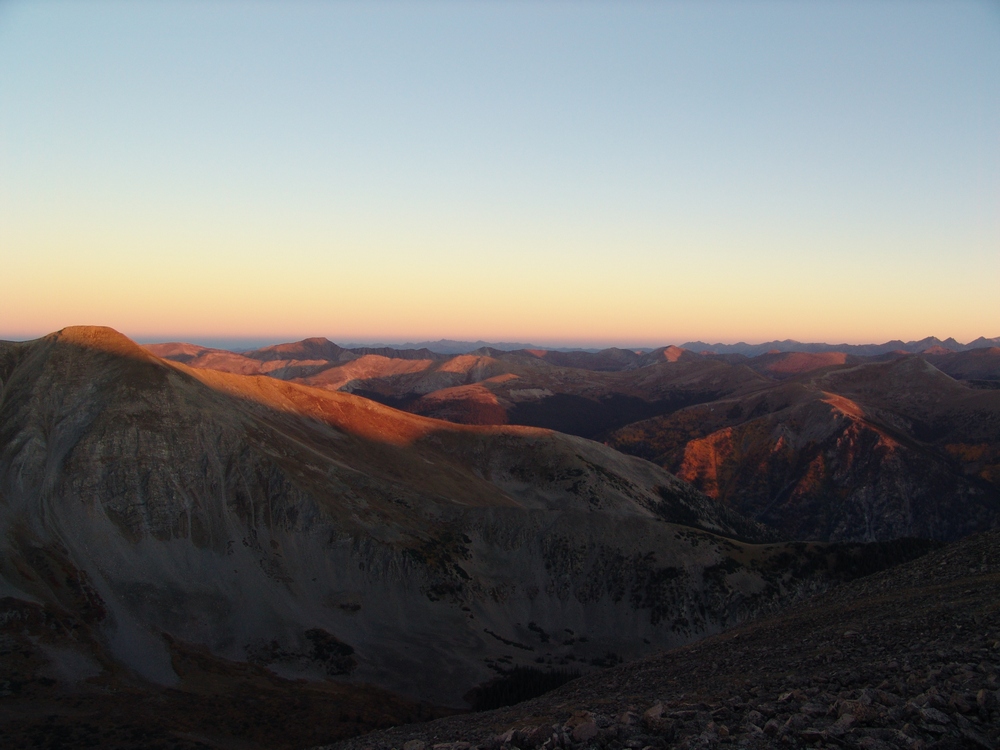
Mount Mamma is lit up by alpenglow.

Aspen are further revealed by the rising sun across from Mount Mamma's north ridge.
As I approached the ridge between Mount Mamma and Boulder Mountain, the full length of my next summit revealed itself in quite an overwhelming way. The distance between the two peaks seemed quite vast; however, I was so entranced by the surrounding views that any doubts I had about going onwards were destroyed.

At center - Cronin Peak. In the far distance just right and behind Cronin were the final two mountains I would end up climbing - Cyclone and Carbonate. The ridge to Mount Mamma is quite long from Boulder Mountain.
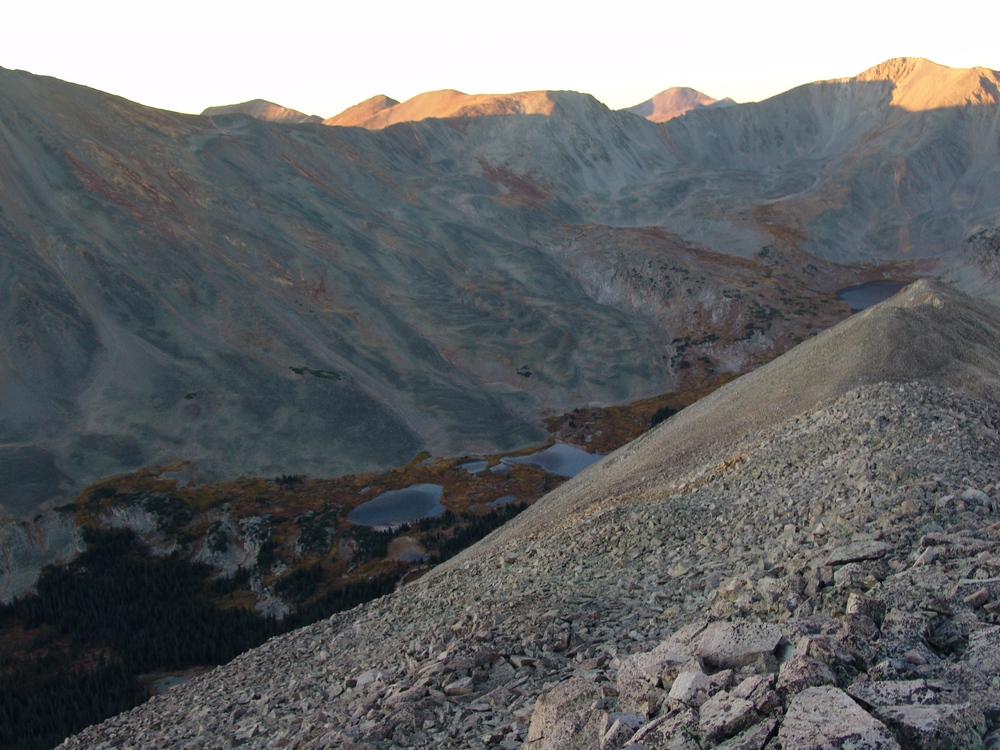
The lower Baldwin Lakes were right below me on the saddle between Mamma and Boulder.
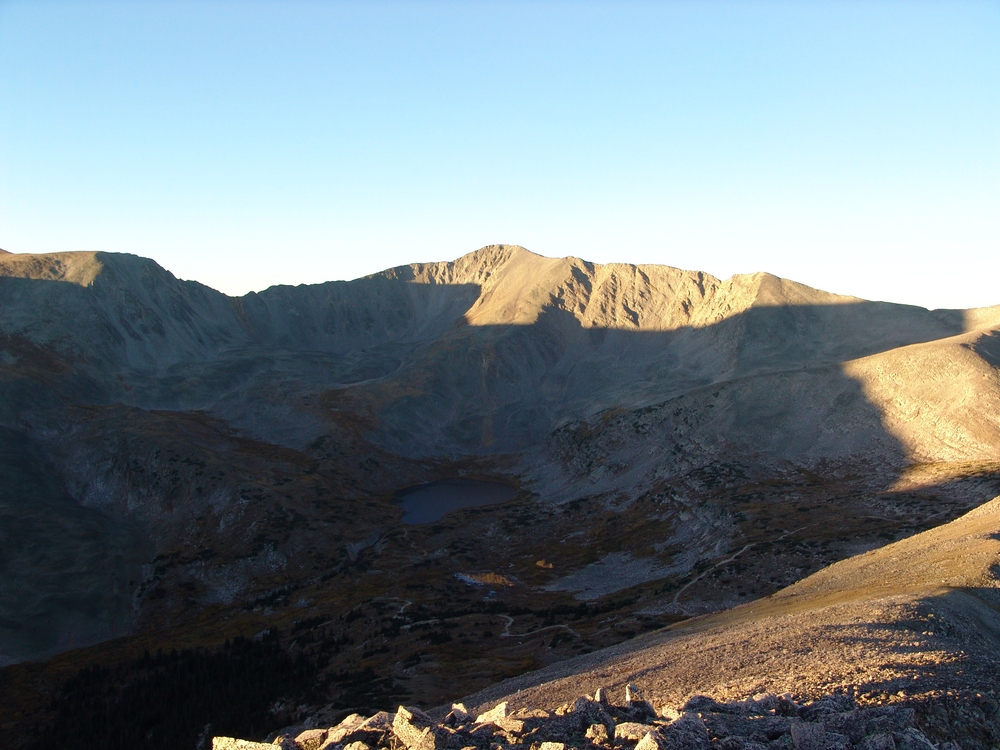
Baldwin Lake pools reflect parts of "Lo Carb" to the South from the saddle between Mount Mamma and Boulder Mountain.
About halfway across to Mamma, it still felt like I had a long way to go...
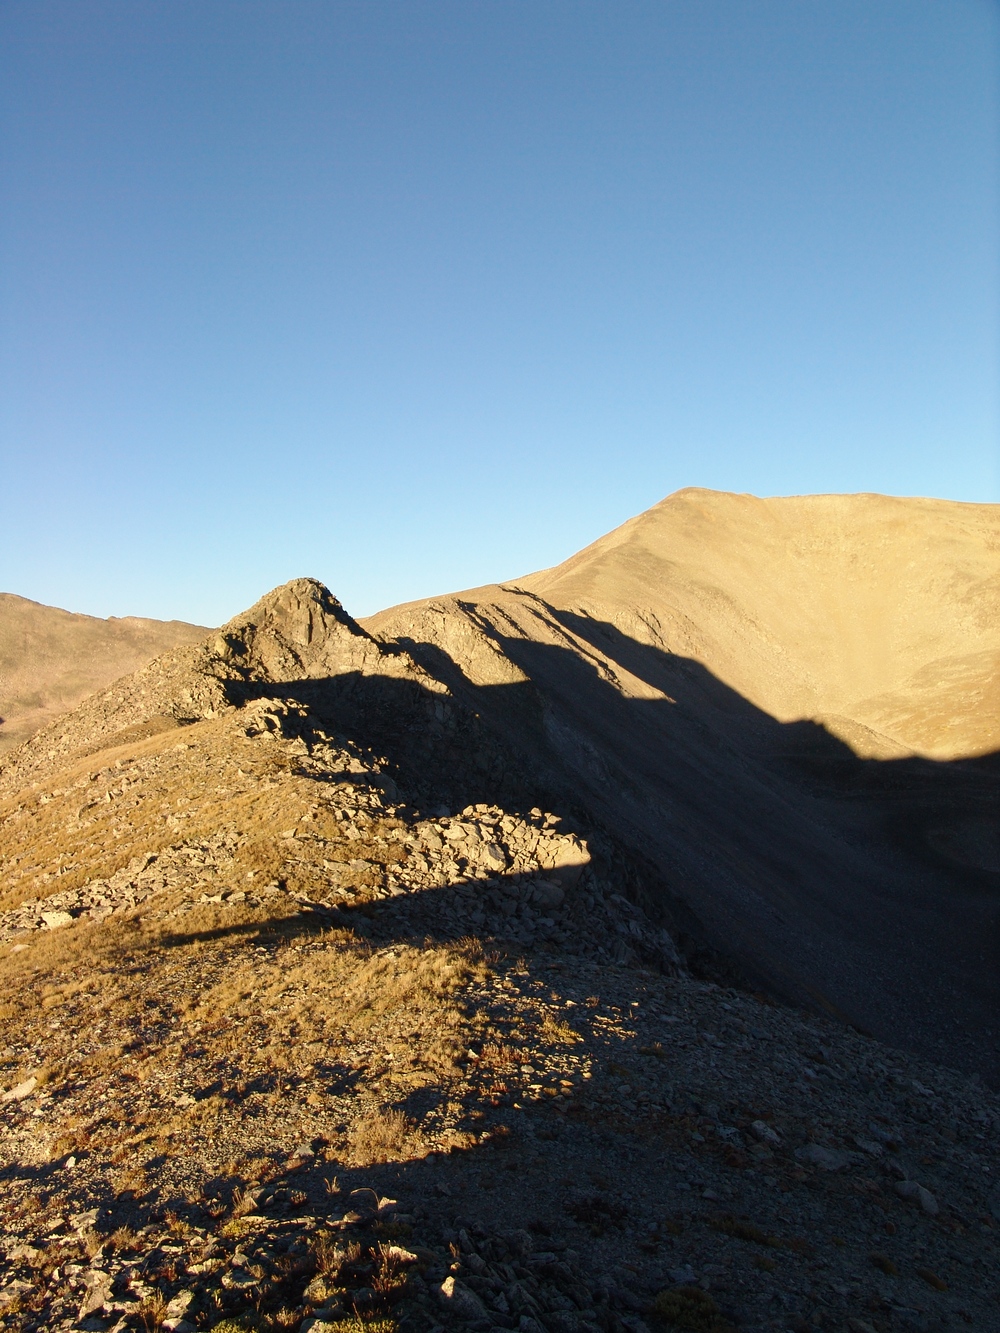
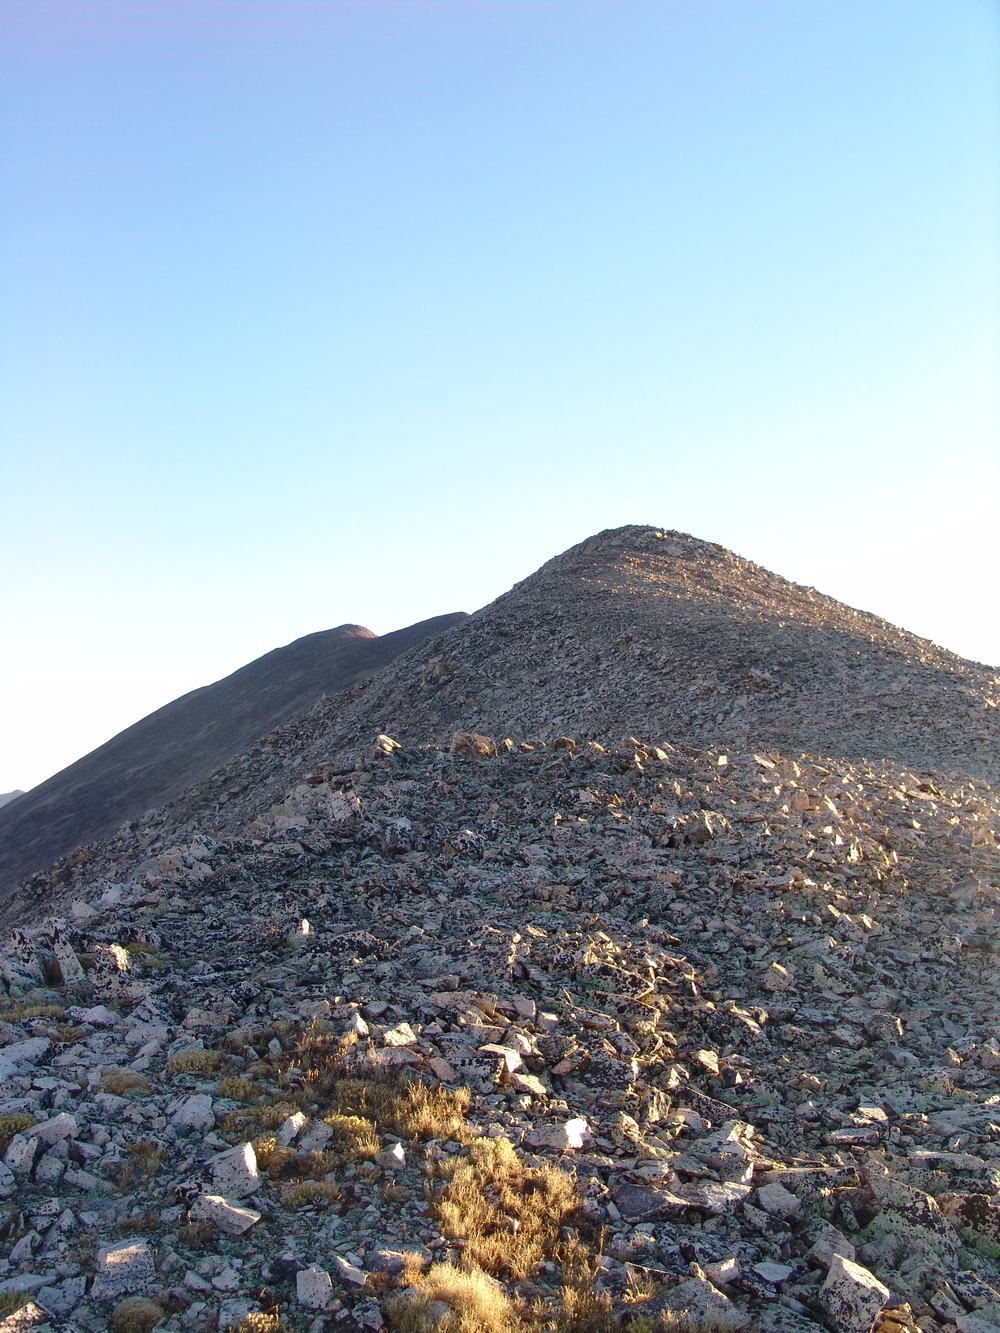
Mount Mamma was quite a long haul from Boulder Mountain...
At 7:30 AM I finally reached the summit of Mount Mamma, just three short hours from the start of my trip. My legs were feeling extra spicy!
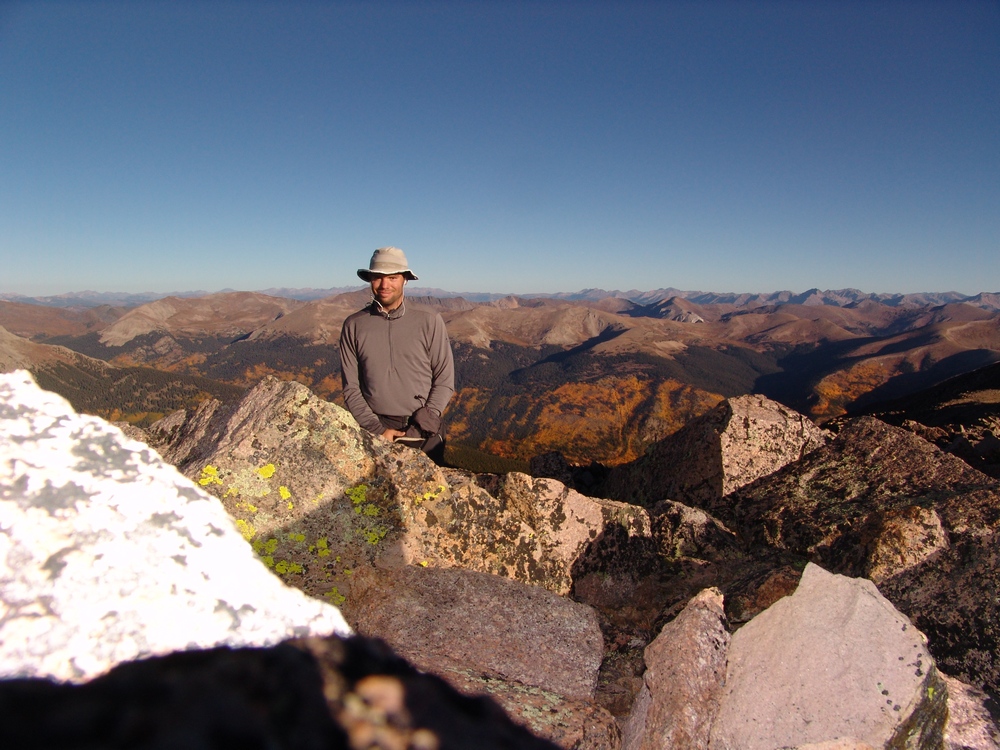
Matt Payne on the summit of Mount Mamma - with insane aspen in the background.

A panoramic landscape looking south to north from the summit of Mount Mamma.

Mount Princeton seen at far right among changing aspen, as seen from the summit of Mount Mamma.

A 360 degree panoramic landscape from the summit of Mount Mamma.

Huge groves of aspen are seen to the north and west of Mount Mamma.

A zoomed-in panoramic landscape of aspen trees west and north of Mount Mamma.

A panoramic photo looking west from Mount Mamma.
After taking some time to rest on Mount Mamma, I peered over to my next objective: Grizzly Mountain. Grizzly Mountain would be the highest mountain for me to summit this day, and it was not easy.
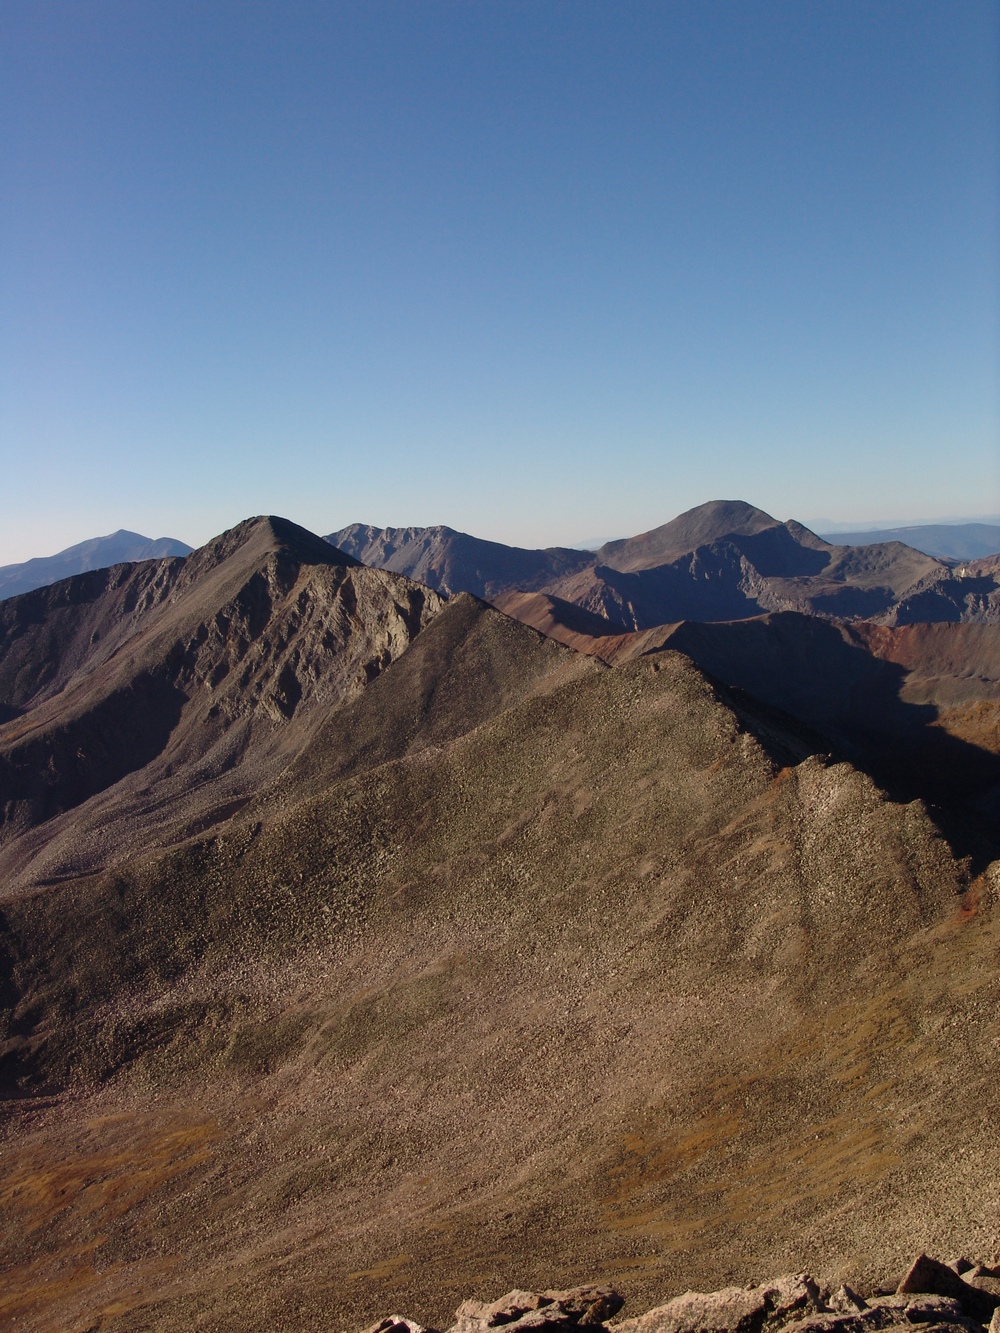
The terrain on the ridge from Mount Mamma to Grizzly Mountain is steep and rugged, without a trail. The rocks were looser and slightly more dangerous on this section of the route, so I was careful to choose my foot placements.
After another hour of hiking, I reached the saddle between Mamma and Grizzly and took time to appreciate the sheer northern face of Grizzly that stood before me. At this point, the ridge became quite narrow, and it was quite fun having nothing but sheer drop to my left and incredible views of Grizzly Gulch to my right. Grizzly Gulch contains Grizzly Lake and some of the most photogenic and pristine looking wetlands I've seen.
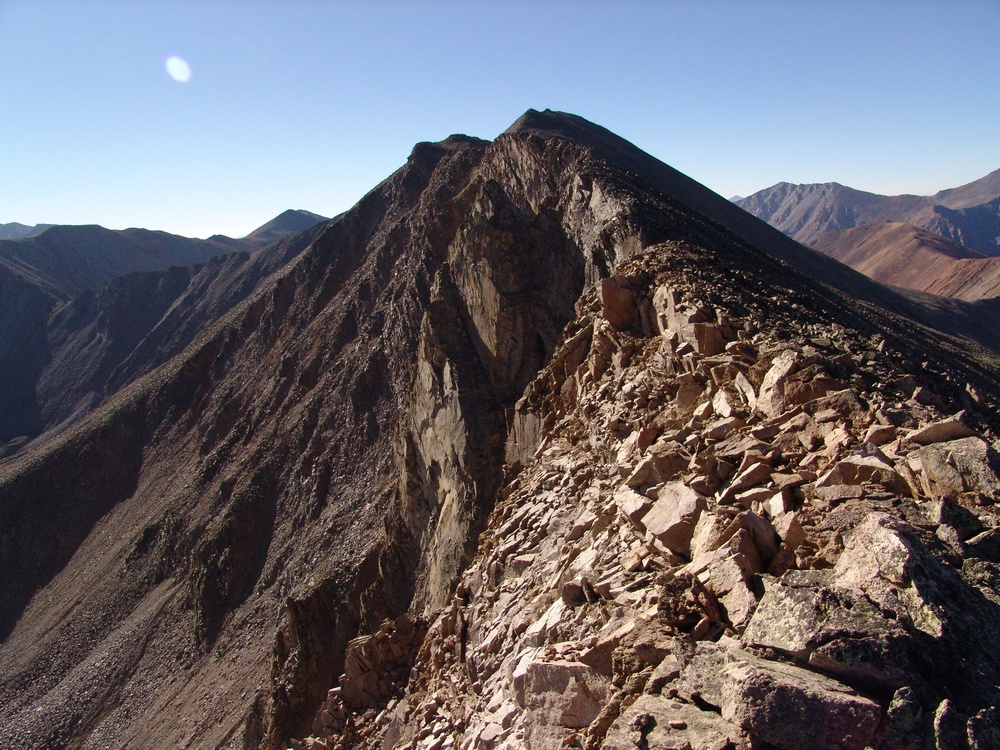
Grizzly Mountain's north face is quite impressive.
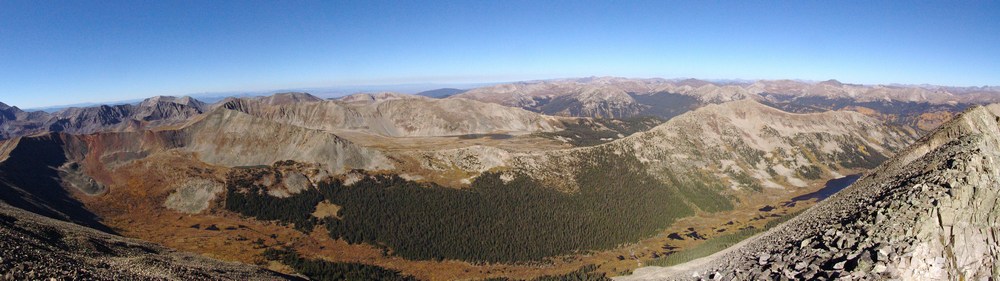
Grizzly Gulch seen from the saddle of Grizzly Mountain and Mount Mamma.
As I approached the summit of Grizzly Mountain, I could really gain some perspective on the hike I had completed so far. It was certainly impressive seeing the distance I had traveled thus far:
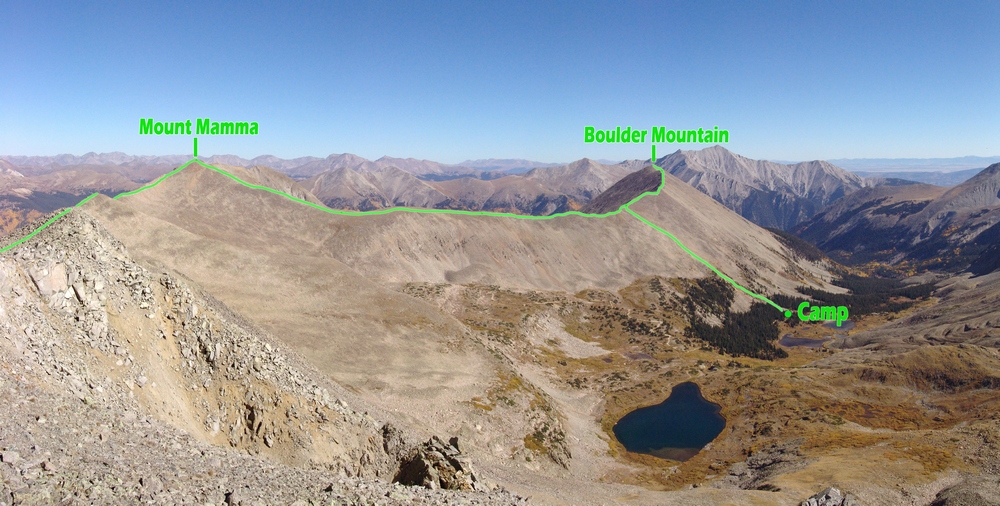
Additionally, I was able to get a great view of the entire route for the day, from start to finish. I had traveled a great distance already, but could see that I had a long way to go yet...

A view of Baldwin Gulch, including Baldwin Lake, Boulder Mountain, Mount Mamma, Cronin Peak, Antero Peak, Mount White, Cyclone Peak and Carbonate Peak.
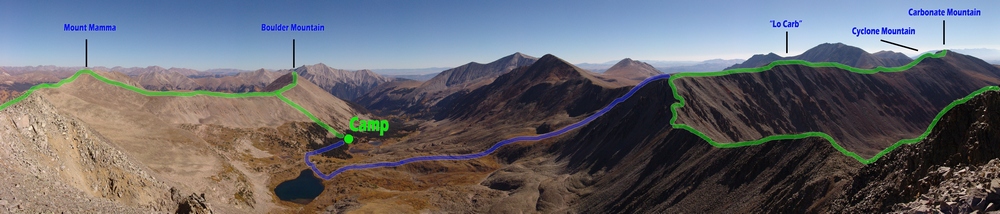
The entire route as seen from Grizzly Mountain.
I finally reached the summit of Grizzly Mountain at 10 AM and dove into my pack for some much needed food. The views from Grizzly were great, but I could see that I still had quite a lot of ground to cover if I were to complete my goals.
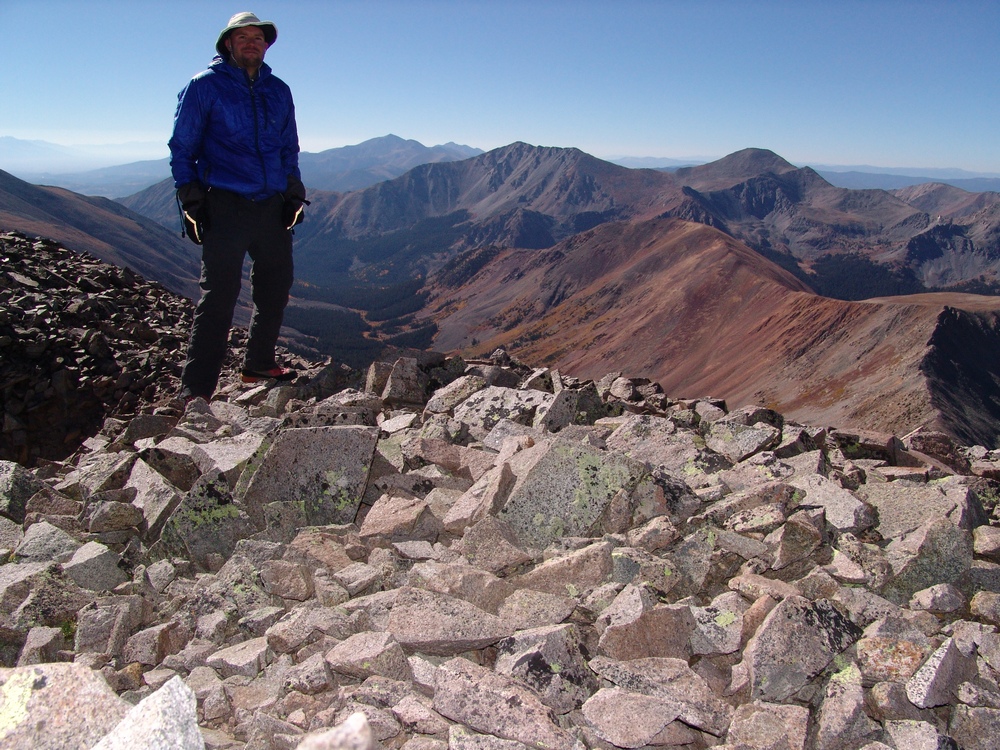
Matt Payne on the summit of Grizzly Mountain, with Cyclone Creek Basin in the background.
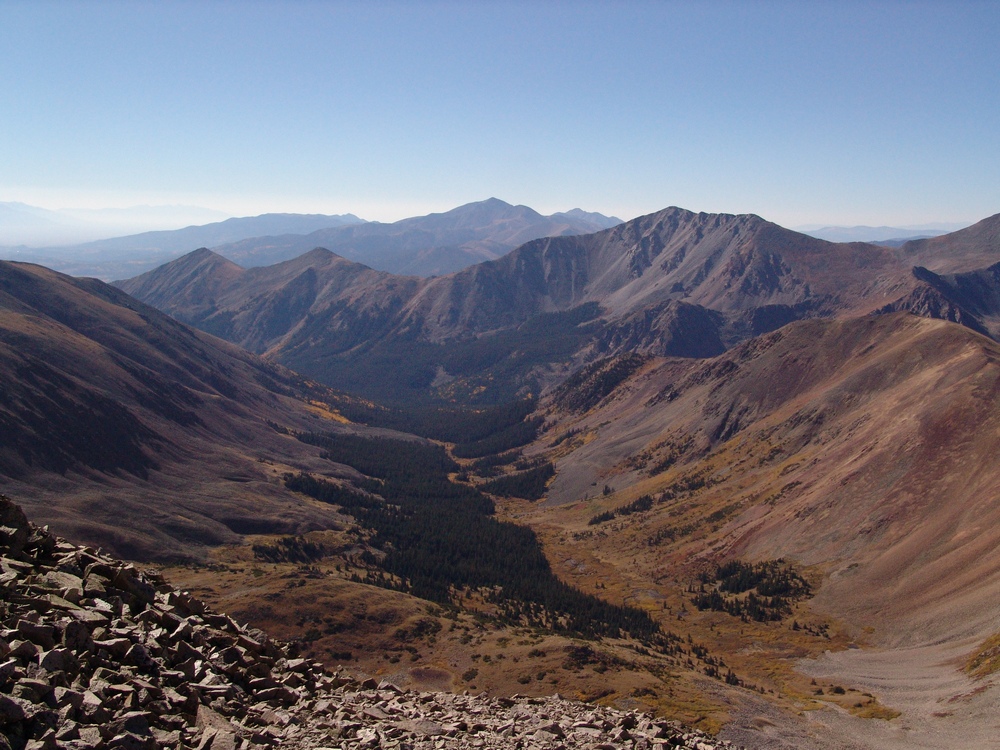
Cyclone Creek Basin, south of Grizzly Mountain. Taylor Mountain in the foreground with Mount Ouray in the distance.
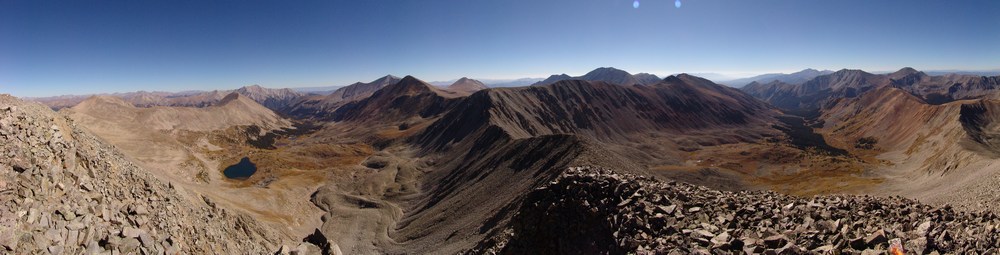
A 360 degree pano from the summit of Grizzly Mountain.
Knowing that I had a long day in front of me still, I departed Grizzly Mountain's summit promptly and made my way over towards saddle of "Lo Carb" and Grizzly. From afar, the terrain between Grizzly and "Lo Carb" seemed rather intimidating, and I was a little concerned with what I would find once I began climbing to the top of ridge at the end of the ridge-line.
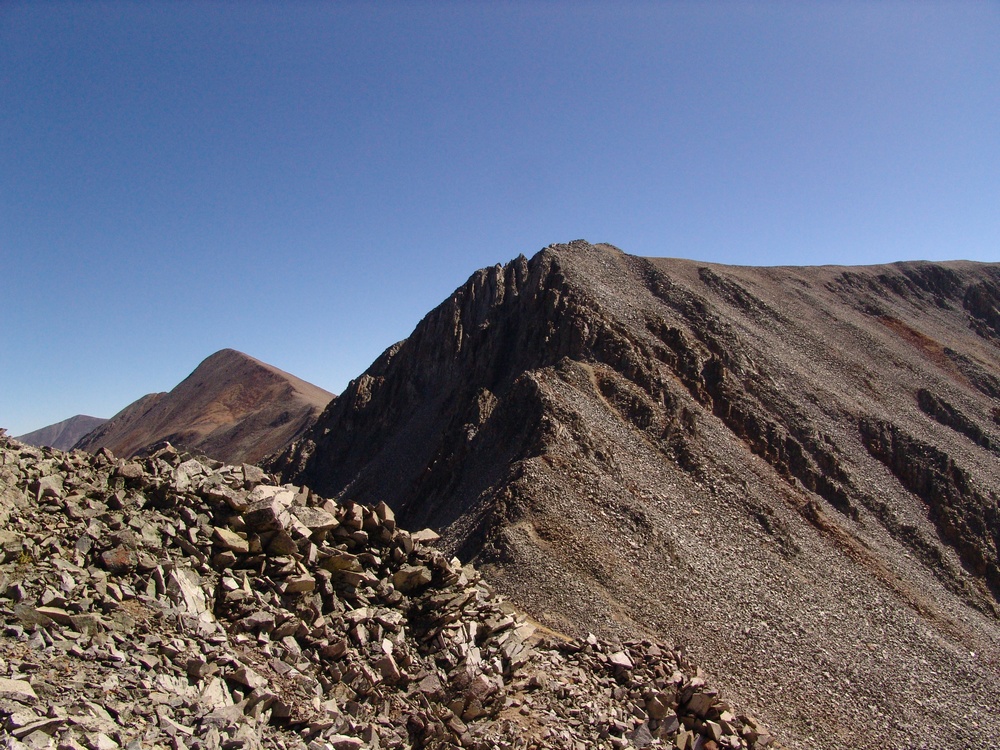
Steeper terrain greeted me at the saddle between Grizzly Mountain and "Lo Carb."
The terrain indeed proved to be challenging, but quite fun. I would rate the tough section of this climb low Class 4 or high Class 3.

At this point, Boulder Mountain seemed like a completely different trip - it was so far away!
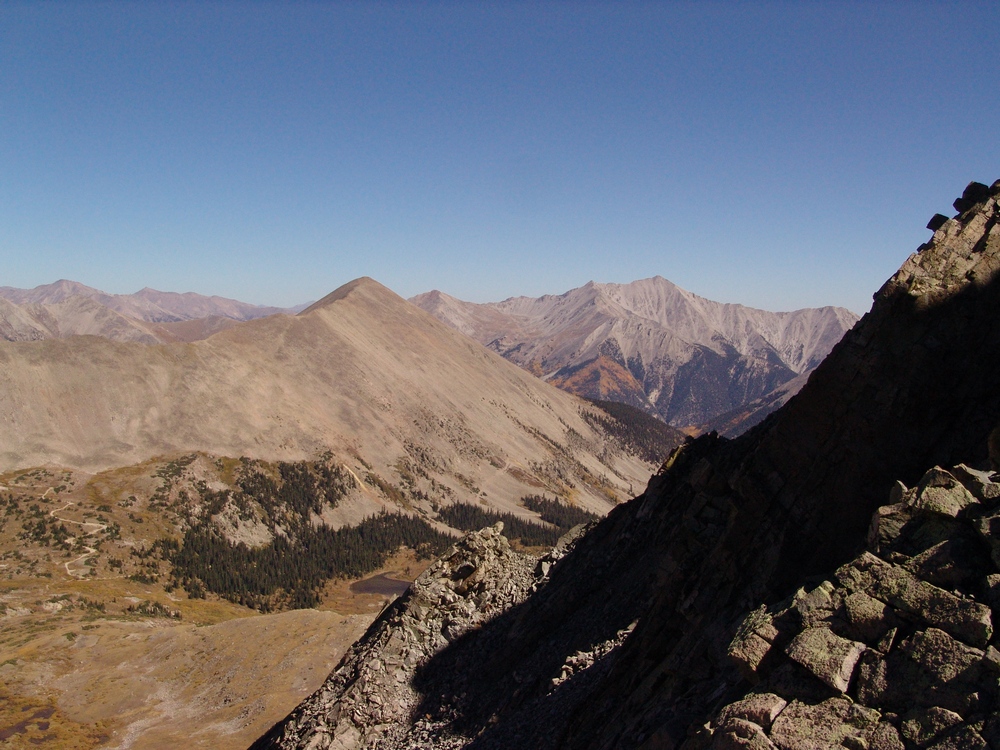
After reaching the false summit of "Lo Carb," which is basically the high point between Lo Carb and Cronin Peak, I was able to get a full grasp of the distance I had traveled. It continued to amaze me.

Grizzly Mountain (left), Mount Mamma (center), Boulder Mountain (right of center) and Cronin Peak (far right).
I began the long hike towards Lo Carb, Cyclone Mountain and Carbonate Mountain. Tabeguache was still a long way away, which pretty much sealed the deal for me - I would be coming back for Tab a 3rd time!
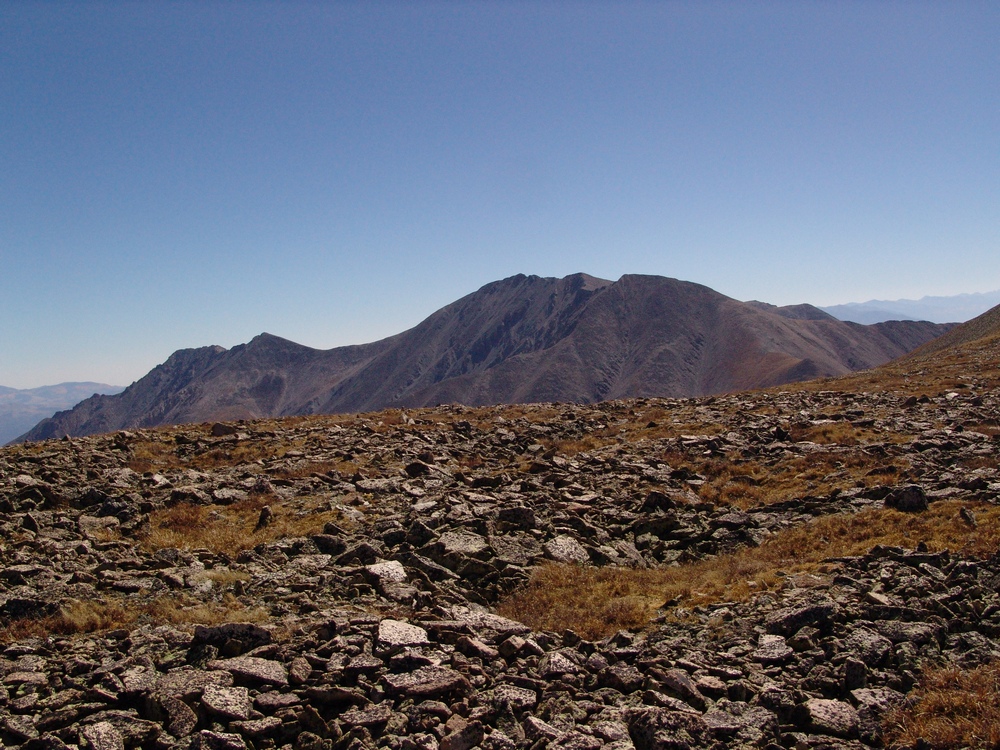
I don't know what came over me at this juncture of the trip, but I just remember being overcome with positive feelings and I remember saying to myself, "Man - THIS is so awesome!" I think the combination of solitude, great weather, awesome views, and the sustained time above 13,000 ft. had something to do with it.
Cyclone and Carbonate are really gentle peaks nestled at the top of Brown's Creek Basin, which divides Mount Antero and Mount White from Tabeguache Peak.
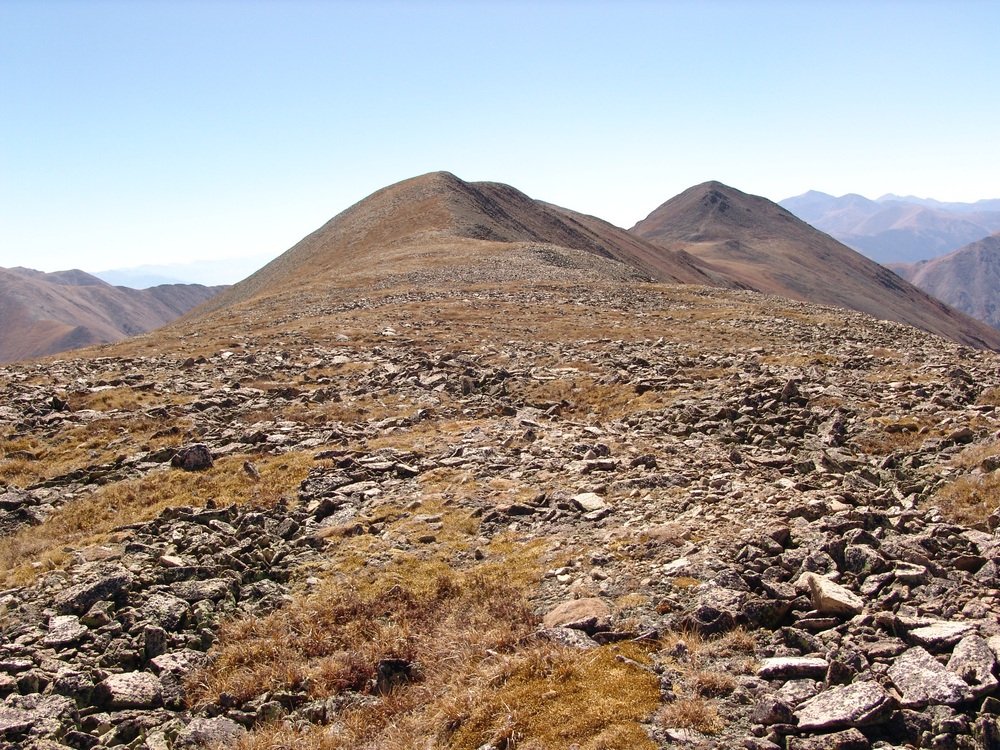
Cyclone Mountain and Carbonate Mountain.
One detraction from the view was the large network of roads that connects Mount White and Mount Antero. As many know, these mountains are rather famous for gemstone mining, so a lot of people probably make a living from these roads' existence. With that being said, it seems like there are too many roads up there and it is an eyesore for sure.

Mount Princeton, Cronin Peak, Mount Antero, Mount White and Tabeguache Peak as seen from the saddle of "Lo Carb" and Cyclone Mountain.
Reaching the summit of Cyclone was somewhat of a treat because the summit register there had listings from all the way back to 1349. Of particular note, I saw an entry there from the famed Bob Martin, of Martin and Garratt - Colorado's High Thirteeners, which is one of my favorite mountain books. One more note about Bob Martin - he's probably climbed every mountain in Colorado over 10,000 ft., not an easy task to complete! In fact, at the date of this report, he's climbed 2,563 mountains in Colorado... as compared to my 91 (at the date of this report) and some people think I'm obsessed! :-) My take on it - impressive dedication!
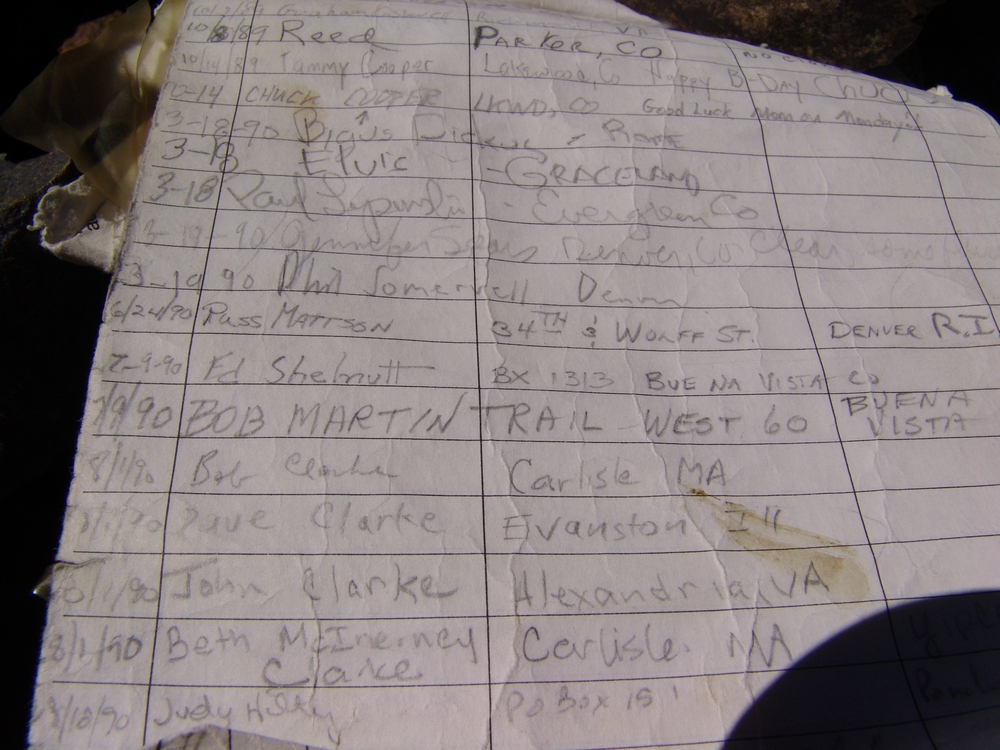
Bob Martin sighting...
From the top of Cyclone, I was able to get a really nice zoom-in pano of Cyclone Gulch and the mountains across the valley. In case you're wondering what that means - I take several photos where I've zoomed-in as far as I can with my camera, and I've combined them. The result is that you are able to see a great deal of detail in the photo. Individual trees can be made out easily. Of course to see this, you need to see the full resolution version of the photo. Let me know if you'd like to!
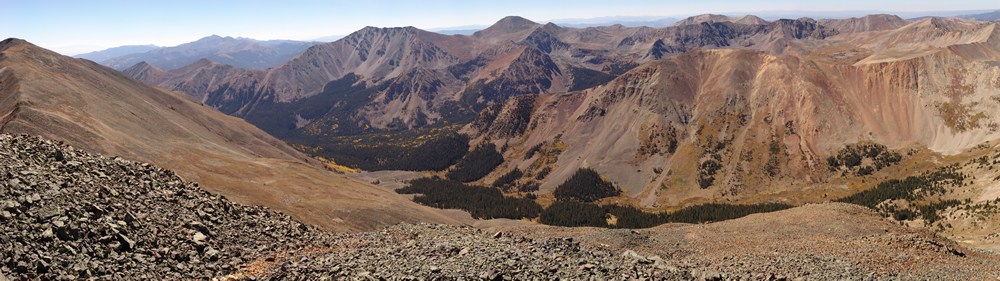
Cyclone Gulch seen at high resolution. Carbonate Mountain at far left with Taylor Mountain and Mount Aetna in the valley over above the groves of changing aspen trees.
At this stage, my legs were definitely getting tired. I strolled on over to the summit of Carbonate Mountain, and after seeing the huge drop in elevation between Carbonate and Tabeguache, I made an official declaration that Tab would just have to wait for another day.
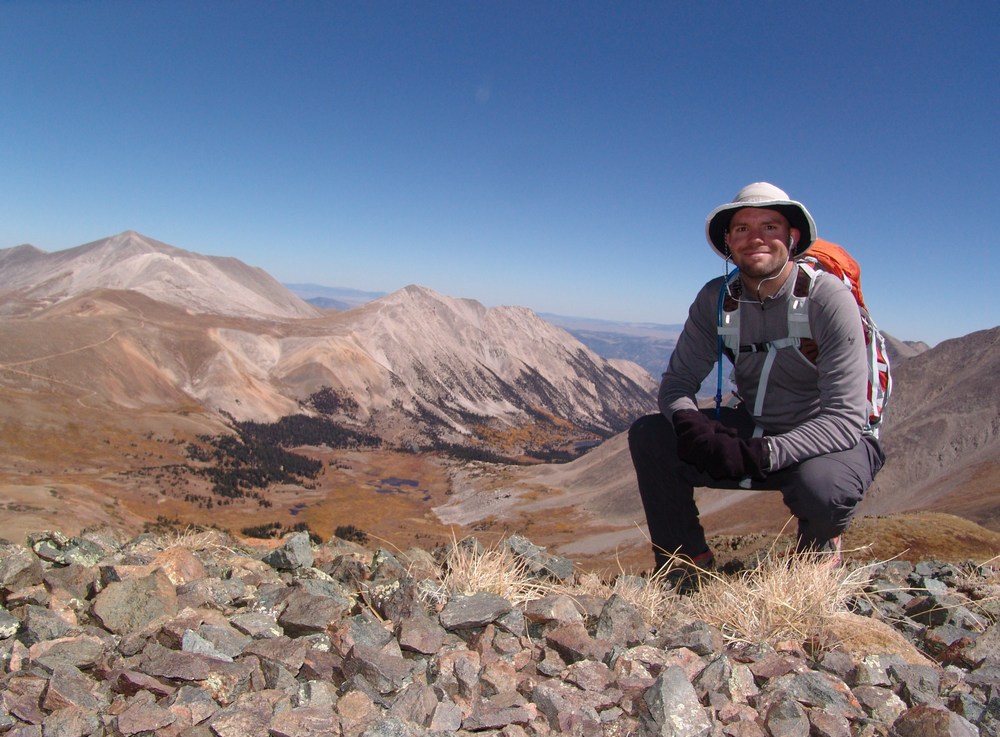
Matt Payne on the summit of Carbonate Mountain.
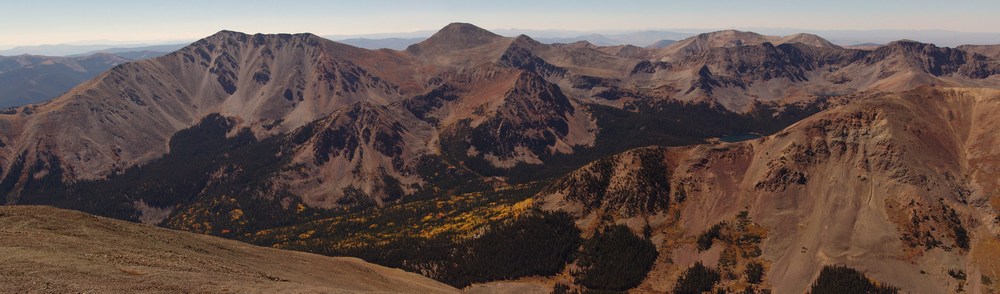
Taylor Mountain and Mount Aetna rise above a forest of colorful aspen tree and North Fork Reservoir.
While it was somewhat of a hazy day, I could still see aspen changing in every valley that I could see with the naked eye.

Having summited 6 mountains in one day, 5 of which being ranked 13ers, I felt that my day was a huge success and that I was ready to return to camp for some awesome burgers. I made my way back over Cyclone Mountain and Lo Carb, down to the saddle between Lo Carb and Cronin, and down to Baldwin Lake.
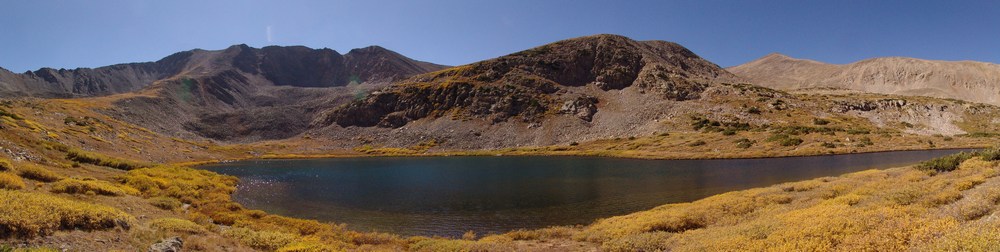
Baldwin Lake.
Once I reached our campsite, it was only 3 PM. Quinn was happy to see me, and many burgers were happily consumed!
"Welcome back dad!"
Rio Grande Pyramid - The Lonely Centennial
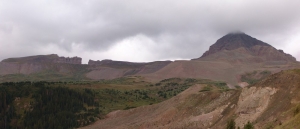
 Rio Grande Pyramid has long been on my "to-do list" for the Centennials (the highest 100 mountains in Colorado). Isolated by over 10 miles from its neighbors in the San Juan Mountains, Rio Grande Pyramid sticks out like a sore thumb by itself to the east of the Needle and Grenadier subranges. I viewed Rio Grande Pyramid from many angles this year, including a great view from Handies, and another wonderful perspective from Vestal and Arrow Peaks.
 Needless to say, I have been eyeing Rio Grande Pyramid a lot this year, and I have known since January that I would be climbing it with my dad at the end of August. Since Rio Grande Pyramid is very isolated, it requires a fairly lengthy backpacking excursion and some planning. My dad (Old Climber on this site) has wanted Rio Grande Pyramid for many, many years, so he jumped all over the chance to attempt to tackle this beast.
The plan was to leave from Colorado Springs after work around 5 or 6 PM on Friday, set-up a quick camp near Rio Grande Reservior, back-pack to Weminuche Pass on Saturday, set-up camp there, climb Rio Grande Pyramid on Sunday, and backpack out on Monday. With the weather forecast for the area being up to 70% chance of precipitation for pretty much the whole weekend, Ray and I were prepared for a wet trip, but hopeful that the weather would cooperate for a summit attempt. Just in case, I packed a book, The Things They Carried by Tim O'Brien, per the recommendation of my wife.
To start off, here are some meaningful statistics for this adventure:
Peak summited:
Rio Grande Pyramid: 13,821 ft. (ranked 97th in Colorado)
Total elevation gain: 4,674 ft.
Total distance hiked: 19.26 miles
Total time hiking: Approx. 14 hours
Total photos taken: 350
Total distance driven: 540 miles
Trip duration: 3 days
The drive to Rio Grande Reservior was uneventful, and finding a place to camp was surprisingly easy. We were aiming for the Thirtymile National Forest Campground, but we balked at the $16 fee, so instead we decided to camp 400 yards away, for free, in a large field by the Rio Grande River. This proved to be a great campsite. We woke up around 7:30 AM, packed up, ate breakfast, and drove to the campground, where the parking lot for the Weminuche Trail is at. At about 8:30 AM, Ray and I were packed and ready to hike, and began our 3-day journey into the remote Weminuche Wilderness Area.

A topographical map of our trip, click to enlarge.
The hike in is a relatively easy backpack, with the exception of mile number 2. The first mile is spent traveling along Rio Grande Reservior along a gentle trail, and then the trail picks up elevation quickly in mile 2 as it climbs and rounds the corner to the south west. After the 2nd mile, the rest of the hike in is very mild, with excellent views of the wide-open and very photogenic Weminuche Creek basin.

The Weminuche Creek.
For our campsite, we were aiming for an area near Weminuche Pass. On the way up, both Ray and I were marvelled by the variety of mushroom that were growing along the trail, certainly evidence that this was been a very wet summer. Little did we know, the mushrooms would be one of the highlights of our trip (for those wondering, we did not ingest any of them).
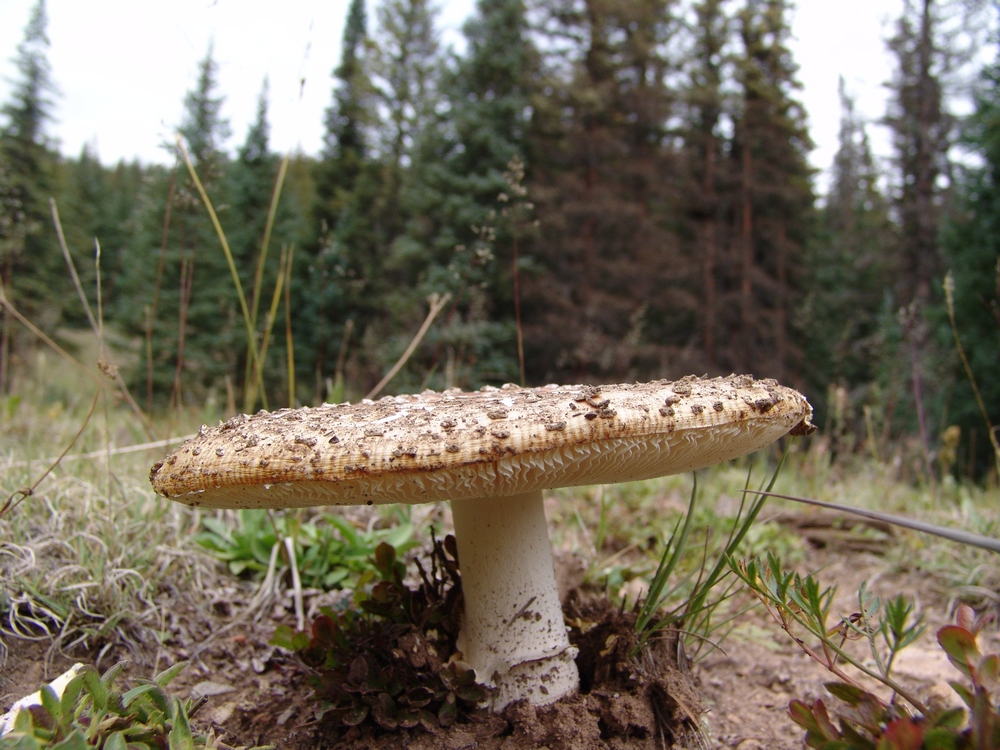
A Fly Agaric mushroom along the trail leading towards Weminuche Pass.
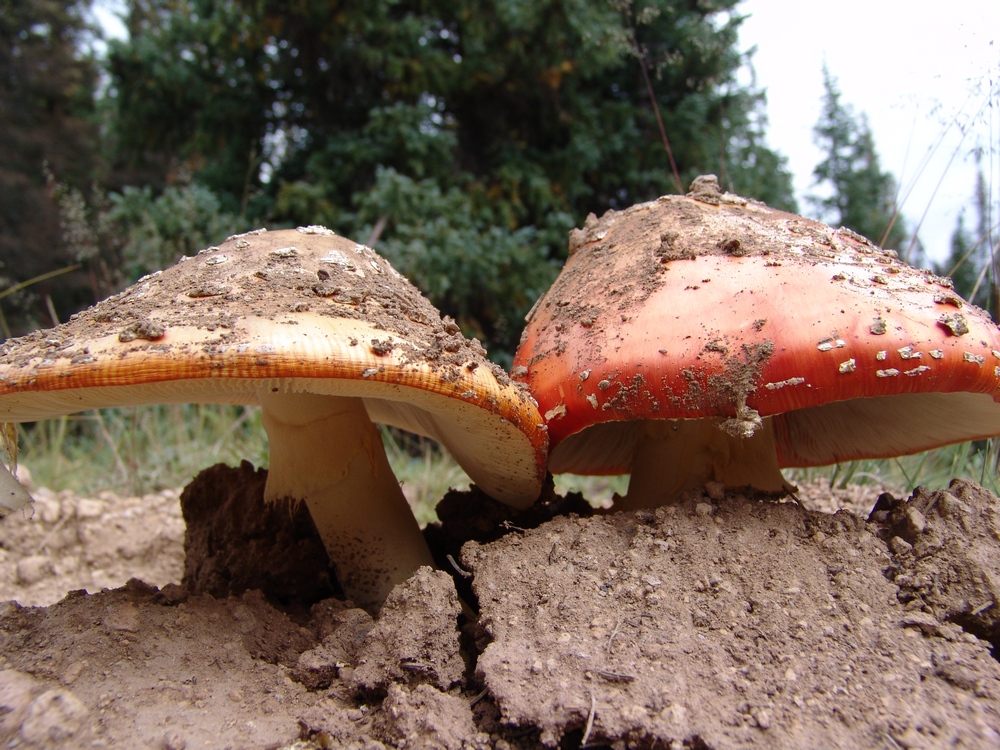
Two Fly Agarics emerge from the hard soil.
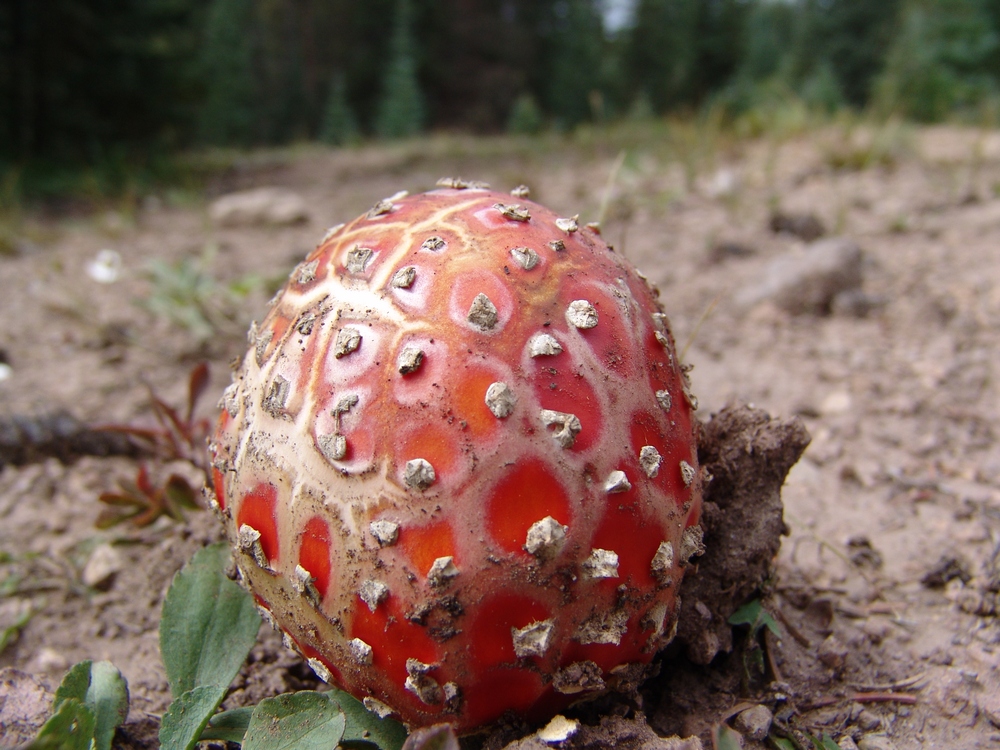
A Fly Agaric poking through the dirt.
We finally found Weminuche Pass, which was easy to spot by the two almost useless signs sticking up out of some cairns on each side of the trail. Heed my warning now, the sign on the right is for "Sky Line Trail," which is the route to Rio Grande Pyramid. The sign is poorly marked and at the time pointed in the wrong direction. We've since fixed the sign, so hopefully you'll see it better than we did. We camped directly east (left) of these signs along a small but gorgeous creek that flowed down from the Continental Divide. The area was a very large and impacted campsite, with plenty of great spots for a tent a a nice fire-ring.

The creek near our campsite.
After setting up camp, I decided to go for a walk around the area, and see what kind of mushrooms I could find. Since I know almost nothing about mushroom identification, this was more of an opportunity for me to practice taking macro shots with my camera. I do think that mushrooms make for excellent subjects for photography, and I suspect/hope that some mushroom lovers out there may appreciate this trip report. I've submitted these photos to MushroomExpert.com (which is a very cool site) and hope to find out soon if we can name any of them. If you don't care for photos of mushrooms, you can skip that section by clicking here.
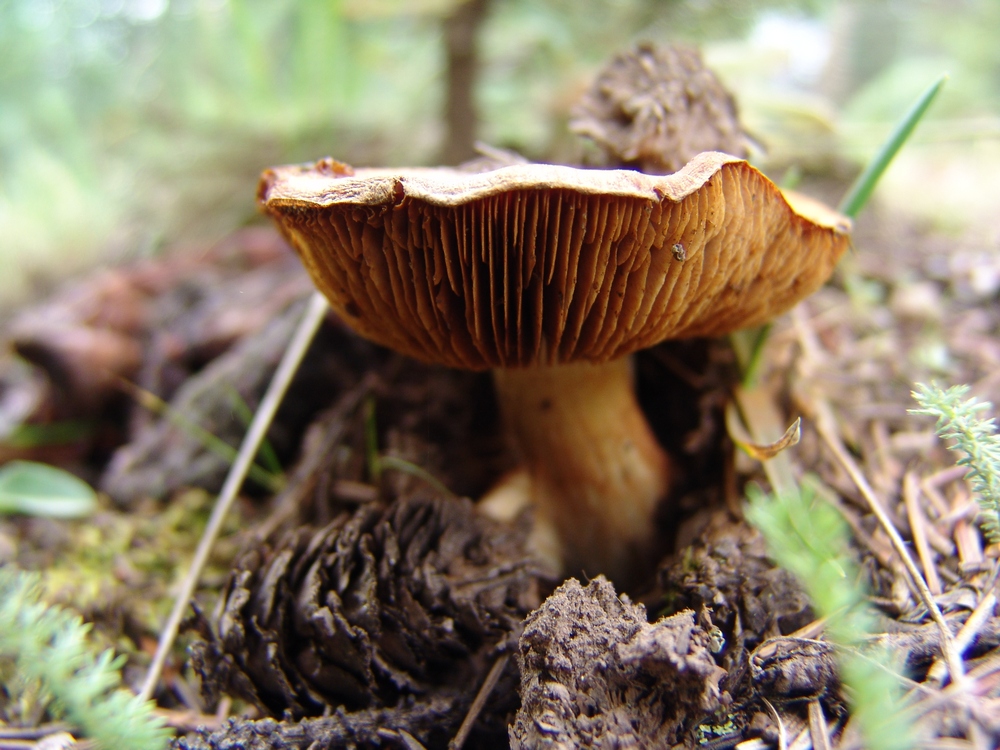
A little brown mushroom (or LBM for short, as Ray would say).
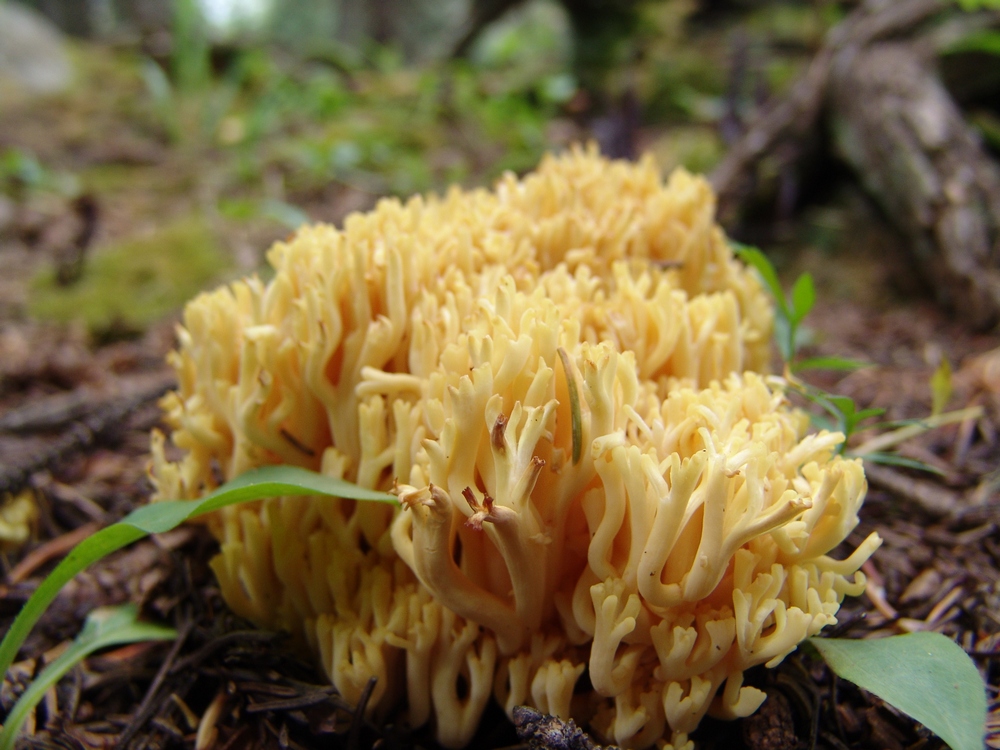
Some funky yellow mushrooms - we saw a lot of these under the pine trees.
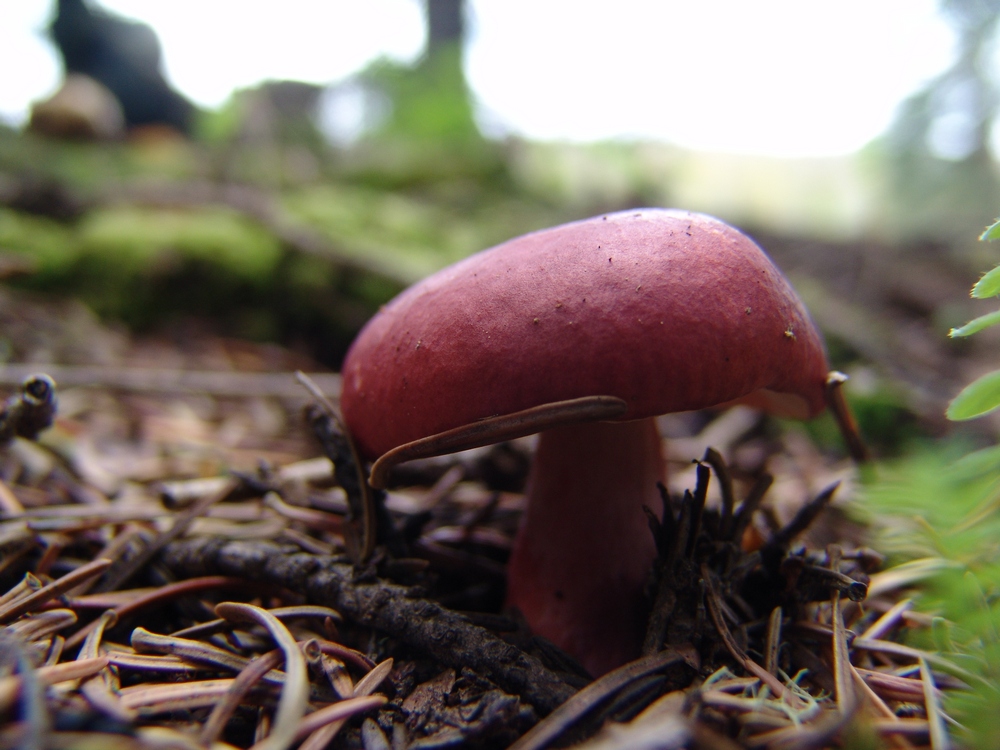
Another "LBM."
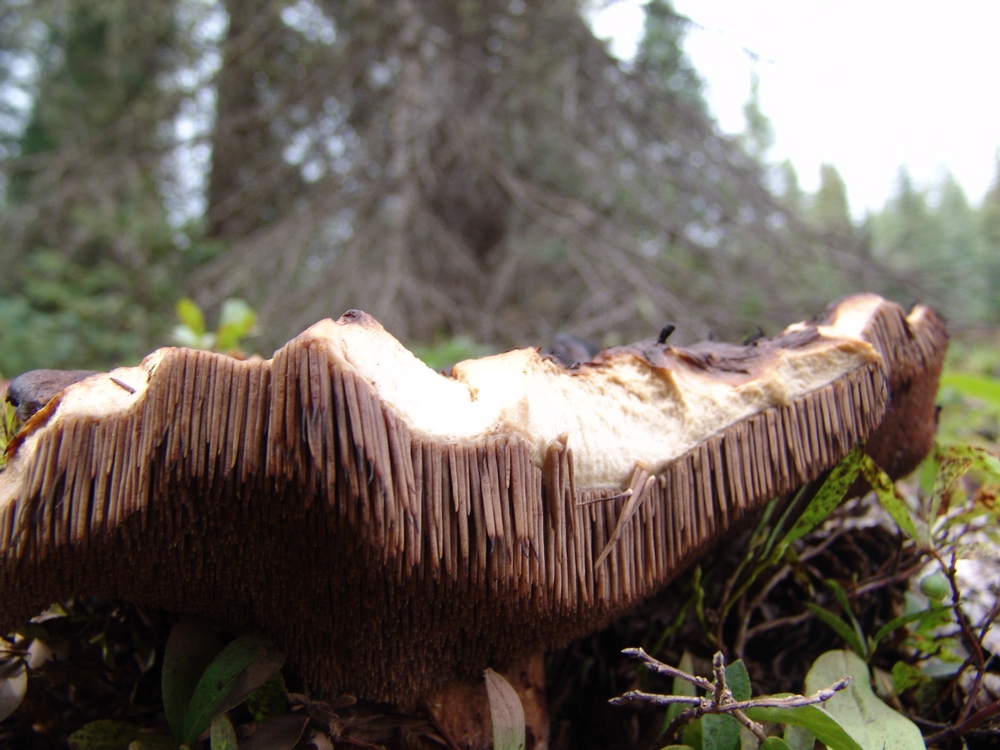
A nasty looking 'shroom - I think it has seen better days...
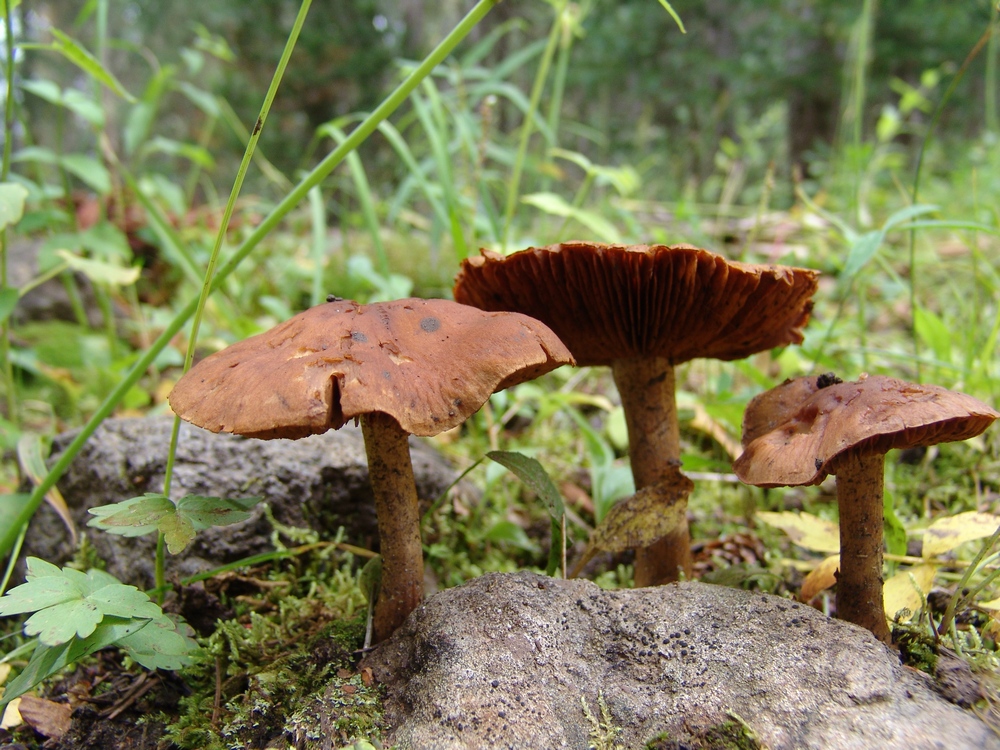
Three "LBM's" emerge from the mossy ground floor of the forest.
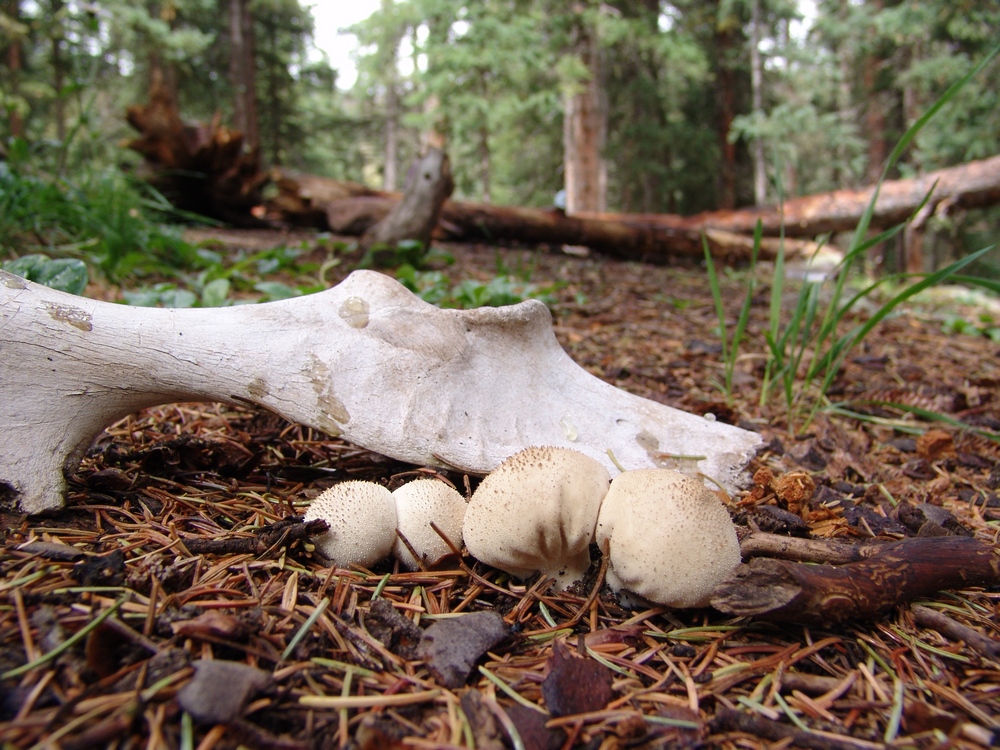
I wonder... did these mushrooms seal the fate of this poor animal?

A King Bolete mushroom near our campsite. It turns out that these are quite edible.

Another view of the King Bolete.

A ring of mushrooms near our campsite.
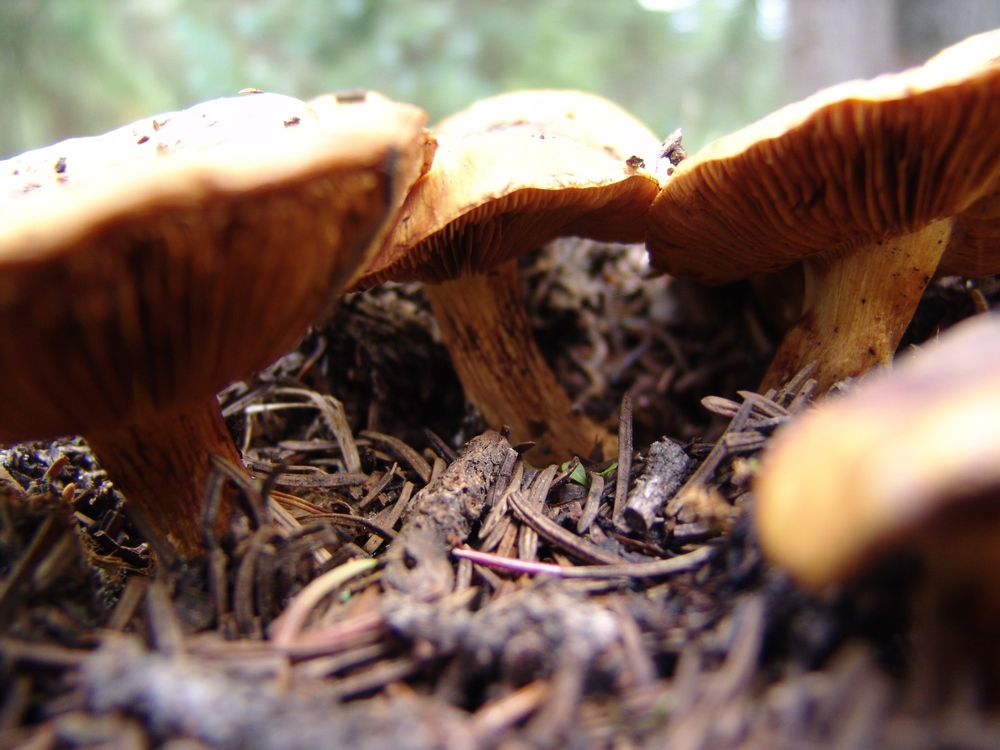
More LBM's.
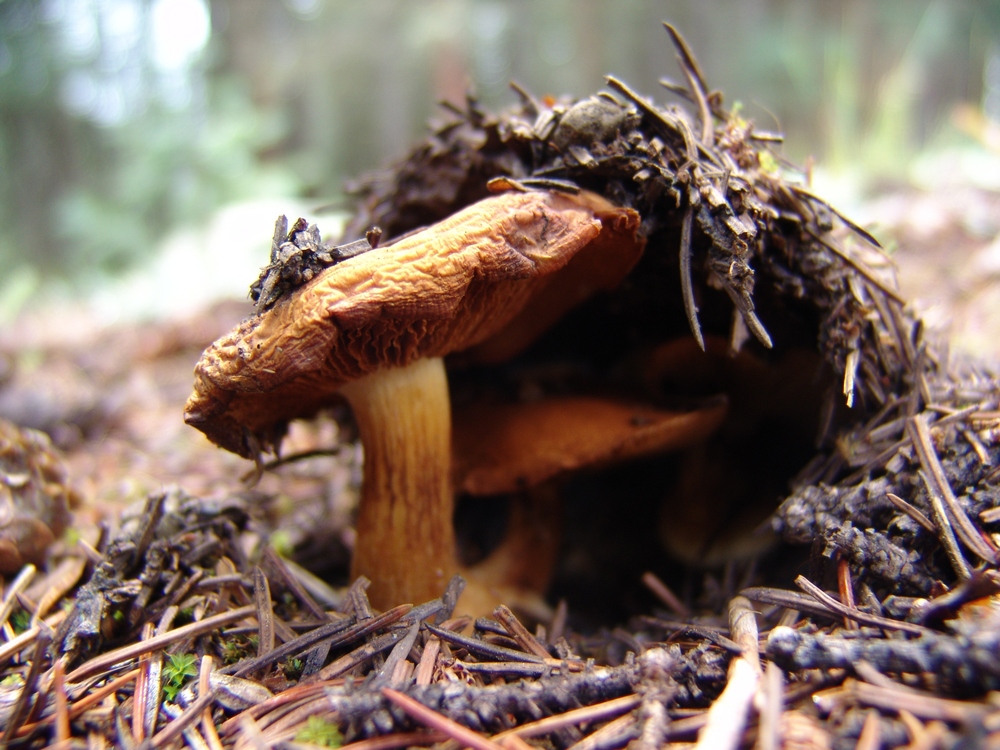
A LBM emerges from the pine needle floor.
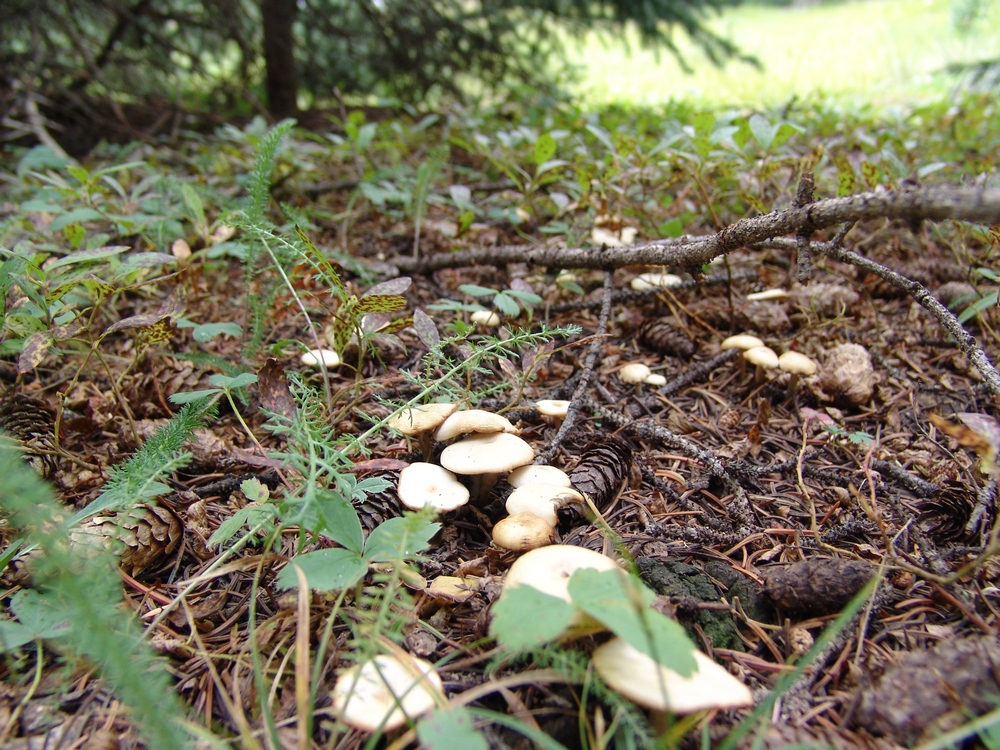
Little white mushrooms were everywhere...
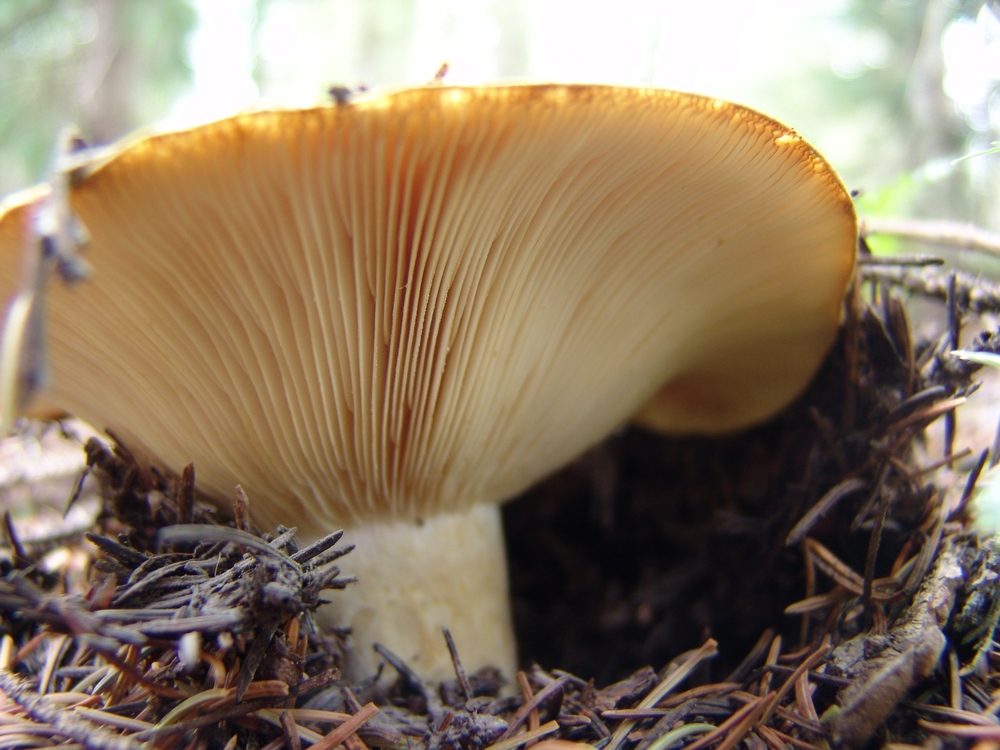
The "gills" of this mushroom made for an interesting subject for a macro shot.
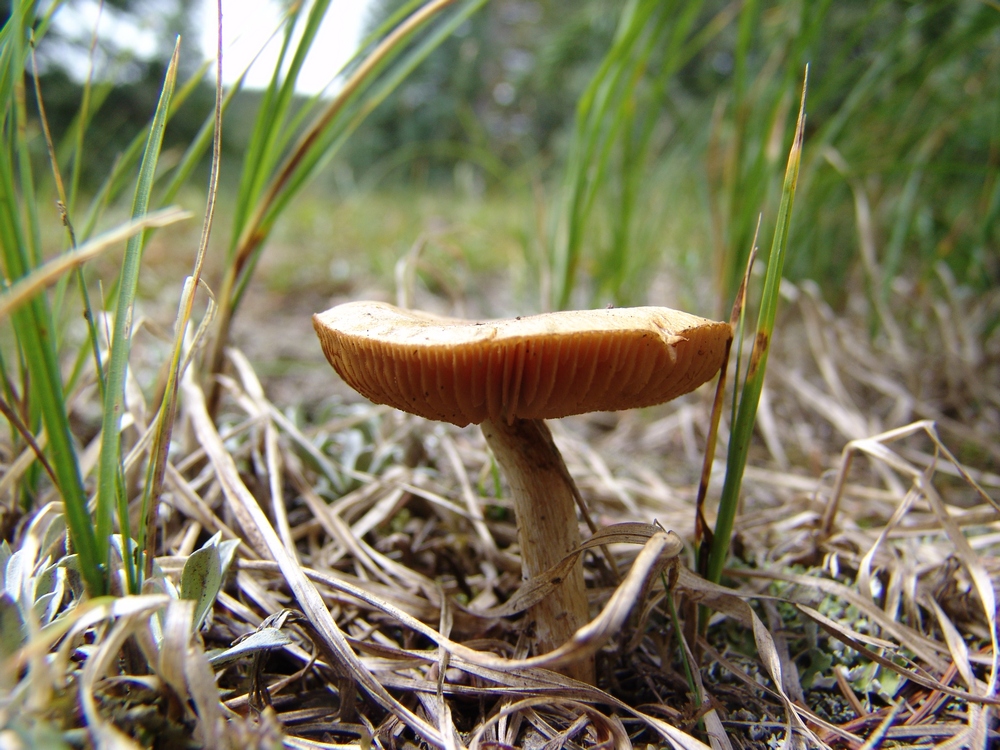
Another LBM rises from the grass.
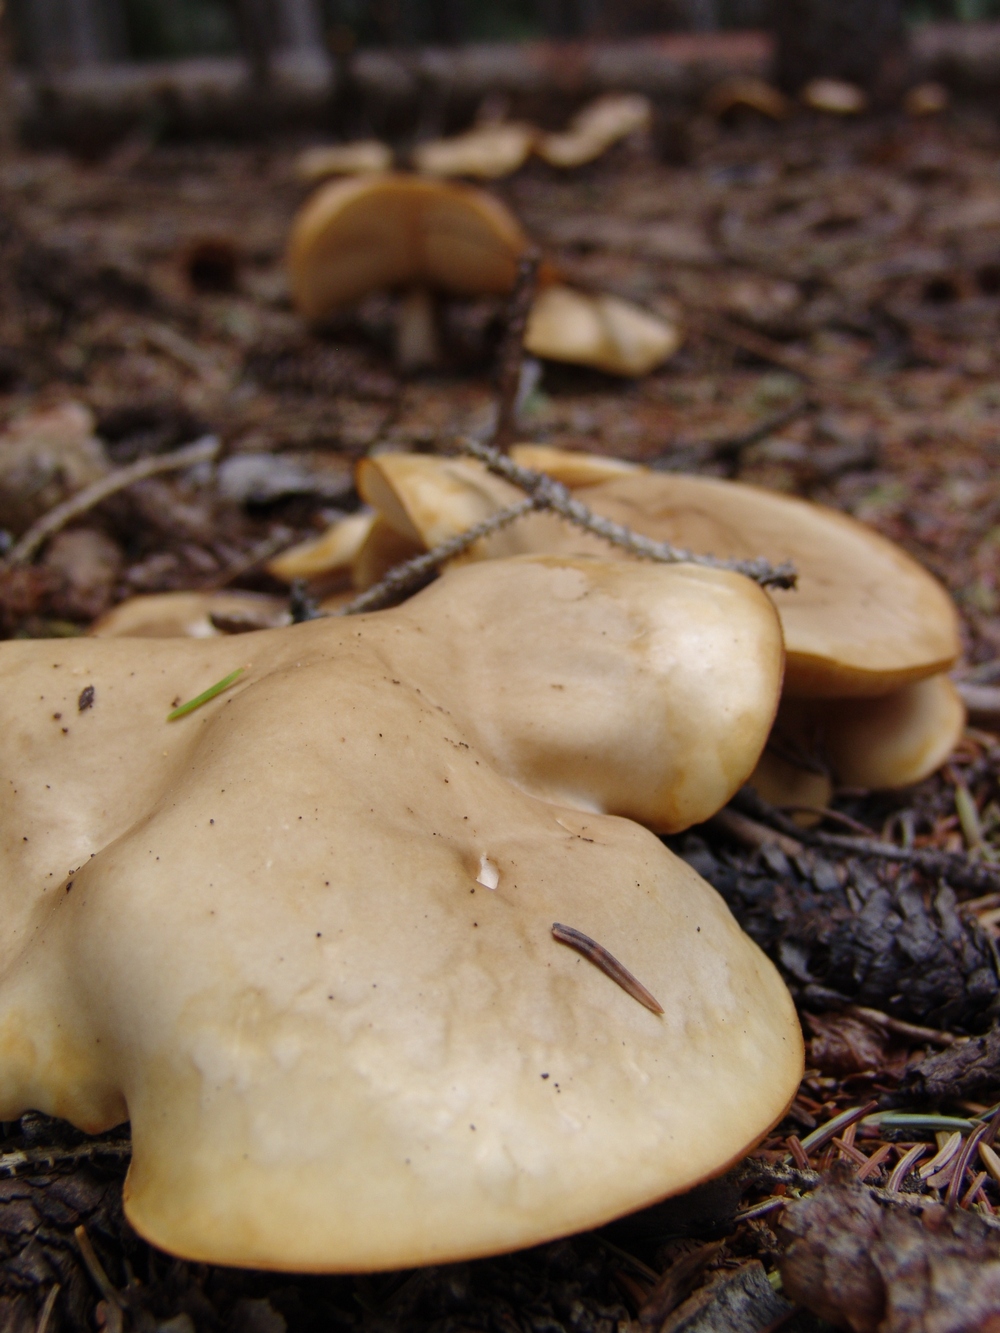
These mushrooms looked like blobs slithering across the forest floor.
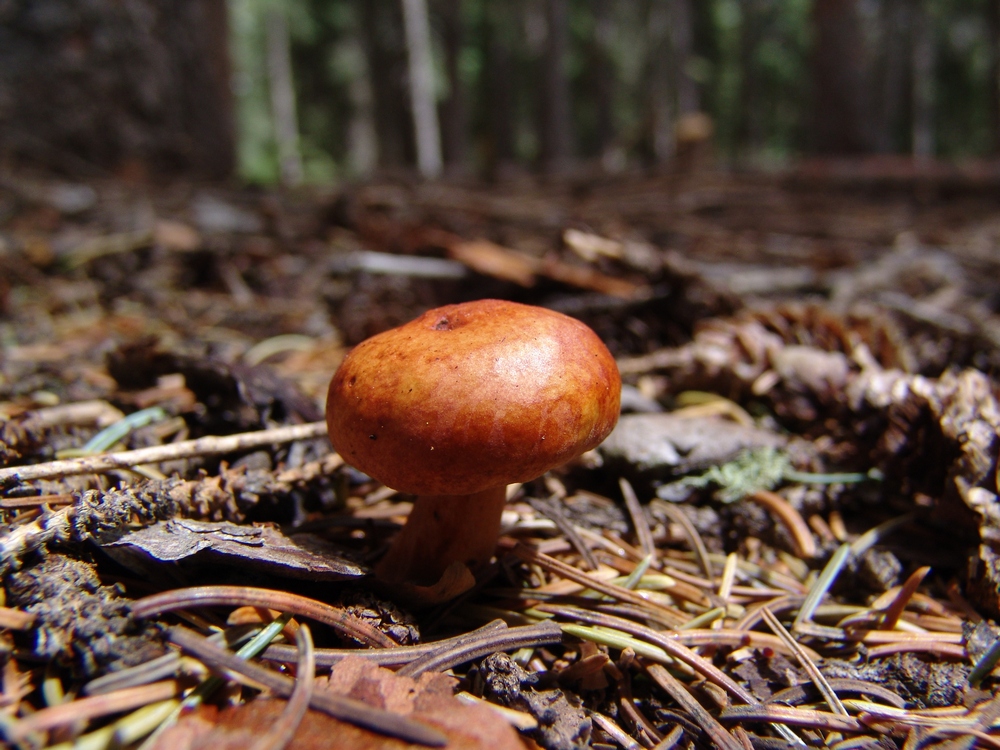
Yet another LBM!
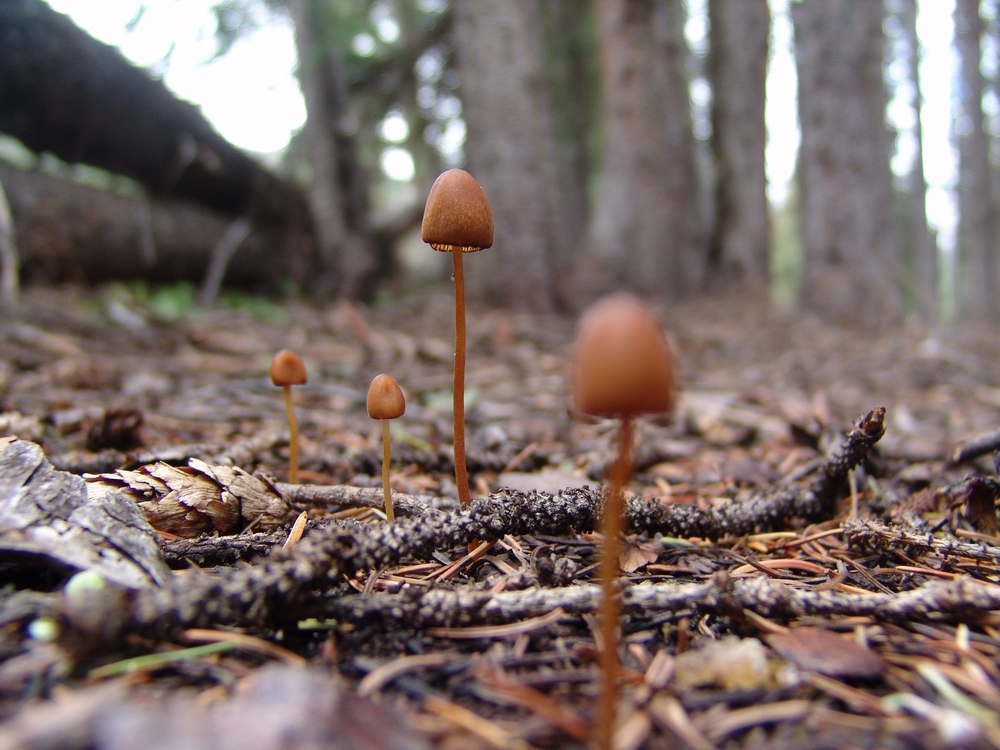
These tiny mushrooms were growing in a very obscure location. I don't have a clue how I spotted them. Pure luck. They were about an inch tall.
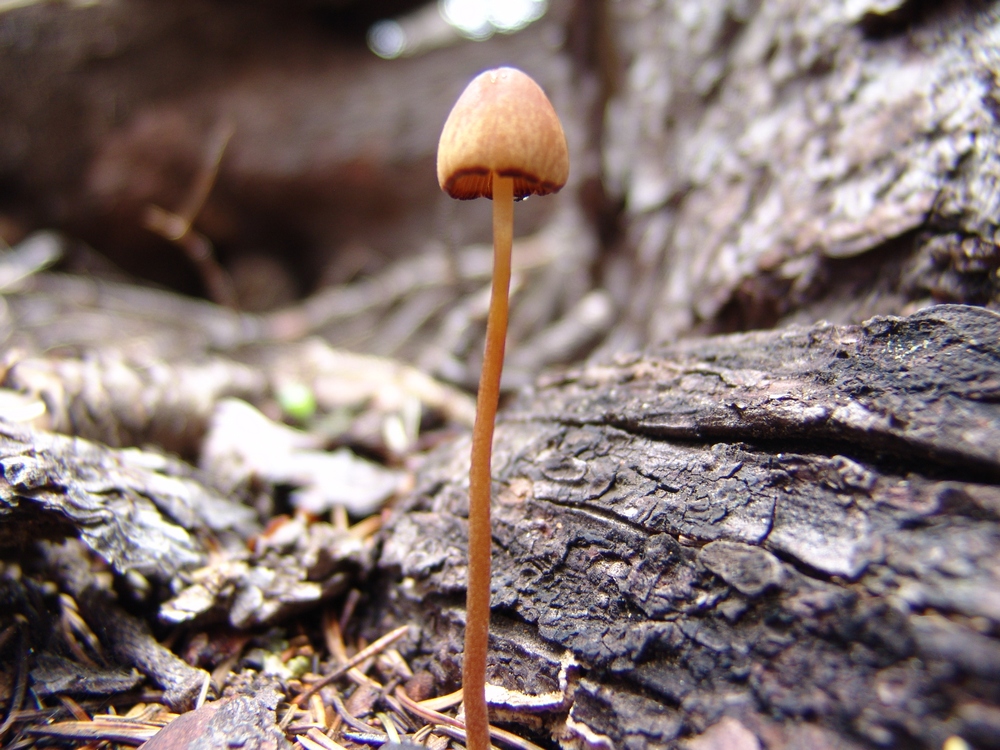
Another tiny little mushroom.

A perfect Fly Agaris specimin near our campiste. Doesn't it look like something out of Super Mario Brothers?

Mario emerges!
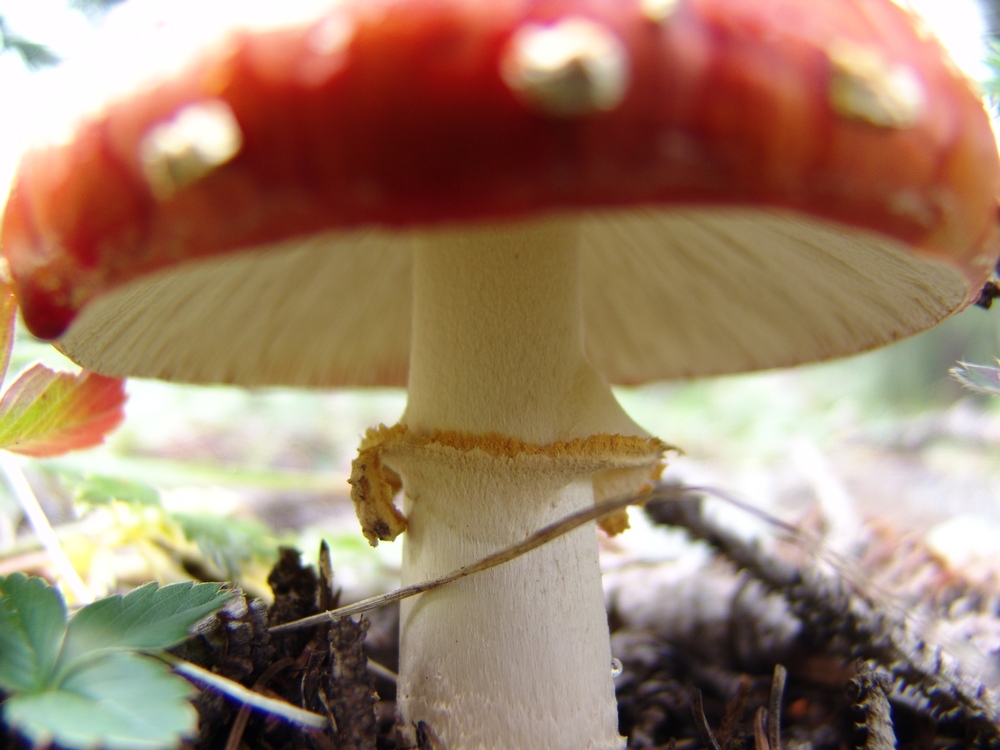
A view of the underside of the Fly Agaric.
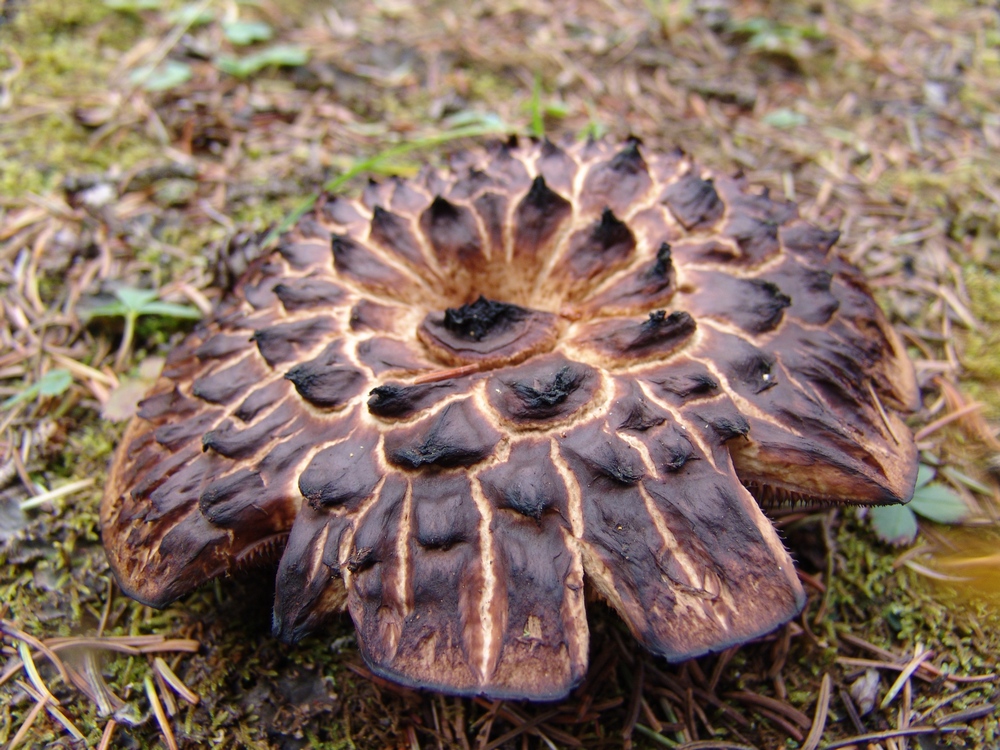
This mushroom looks like it maybe got a little too much sun. Sunscreen is important in the mountains.
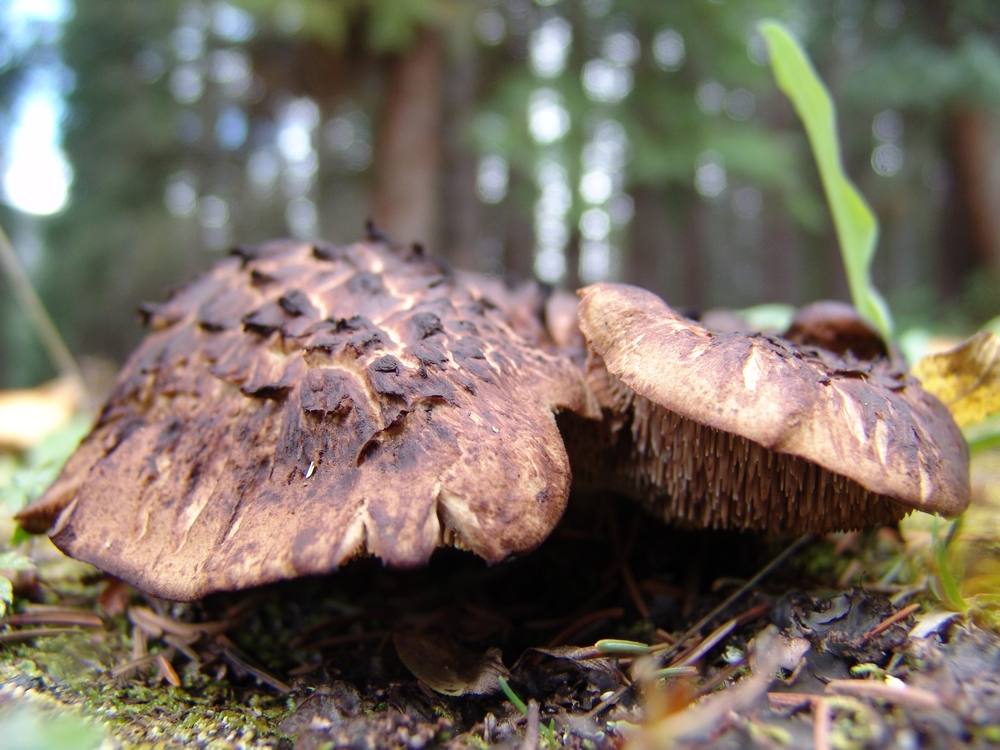
More crispy 'shrooms.
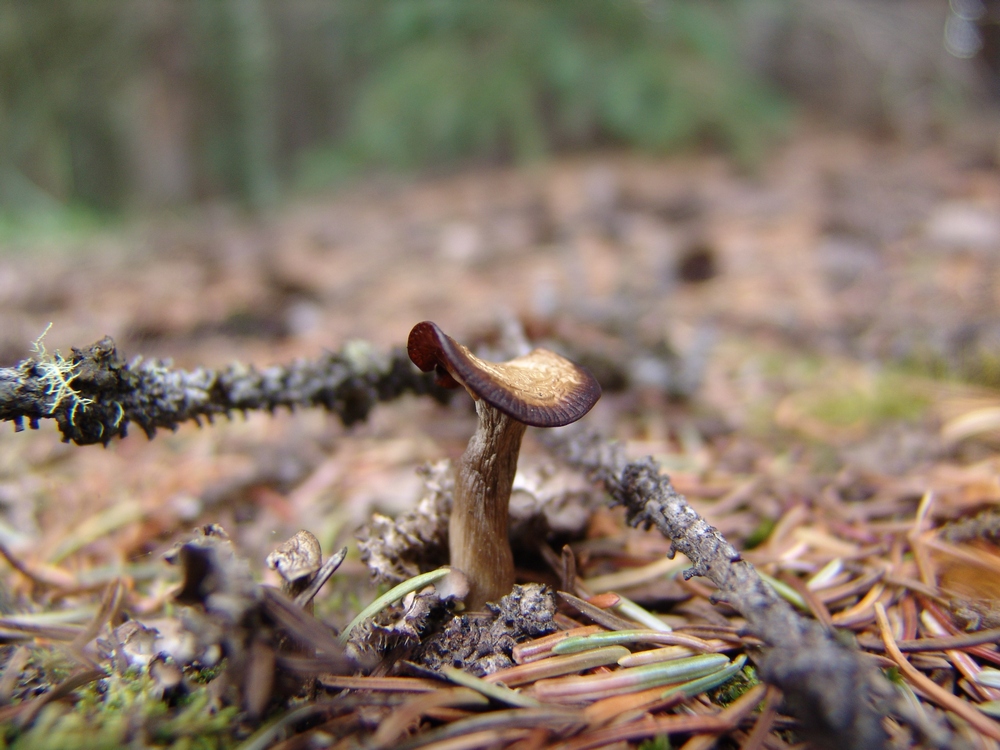
This little mushroom looks like she put on a little too much lipstick...
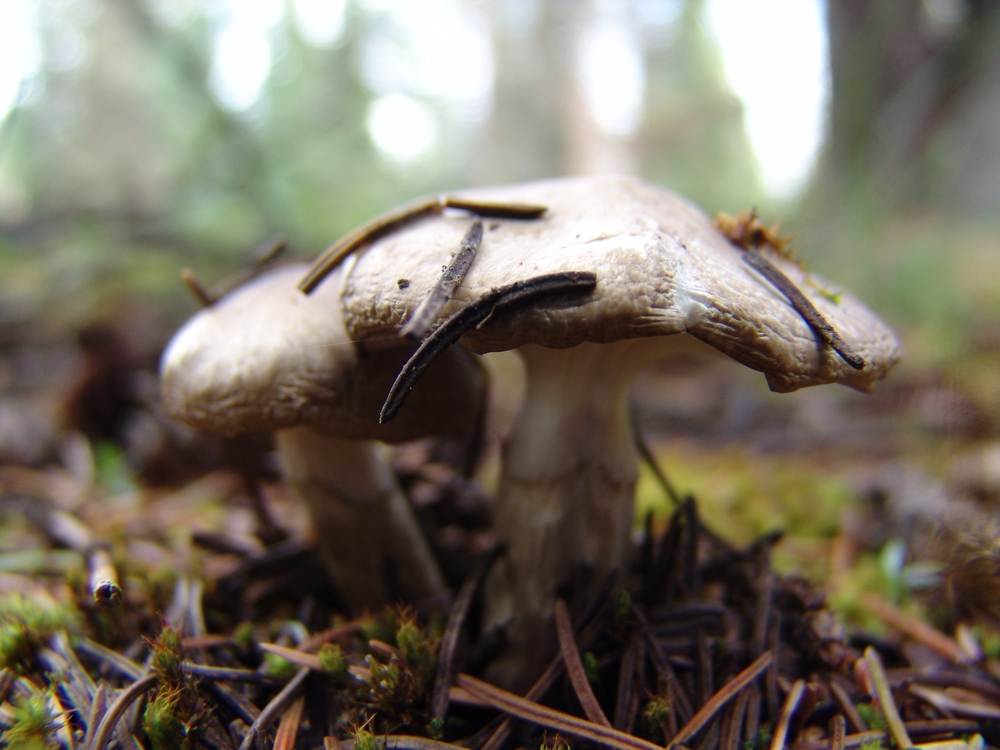
A white mushroom.
A small button cap mushroom.
After photographing the mushrooms, I took a nap. Sleeping next to the creek was great, and I recuperated from my exhausting search for the perfect mushroom. Ray and I cooked up some mashed potatoes and gravy with StoveTop dressing and chicken breast (we know how to cook when we backpack), and then after dinner I decided to go on another adventure up the valley to see if I could watch the sunset.

A view of the upper Weminuche Creek basin, just past Weminuche Pass.
To the east (left), I saw a small meadow at the base of the hillside pictured above. In that meadow, I saw a deer grazing, so I decided to see if I could stalk the deer and get a good photo of it. I think the deer was aware of my presense for pretty much my entire walk, which about 400 yards total across the basin. As I got closer to the meadow, I found myself looking down upon an awesome series of pristine beaver ponds.
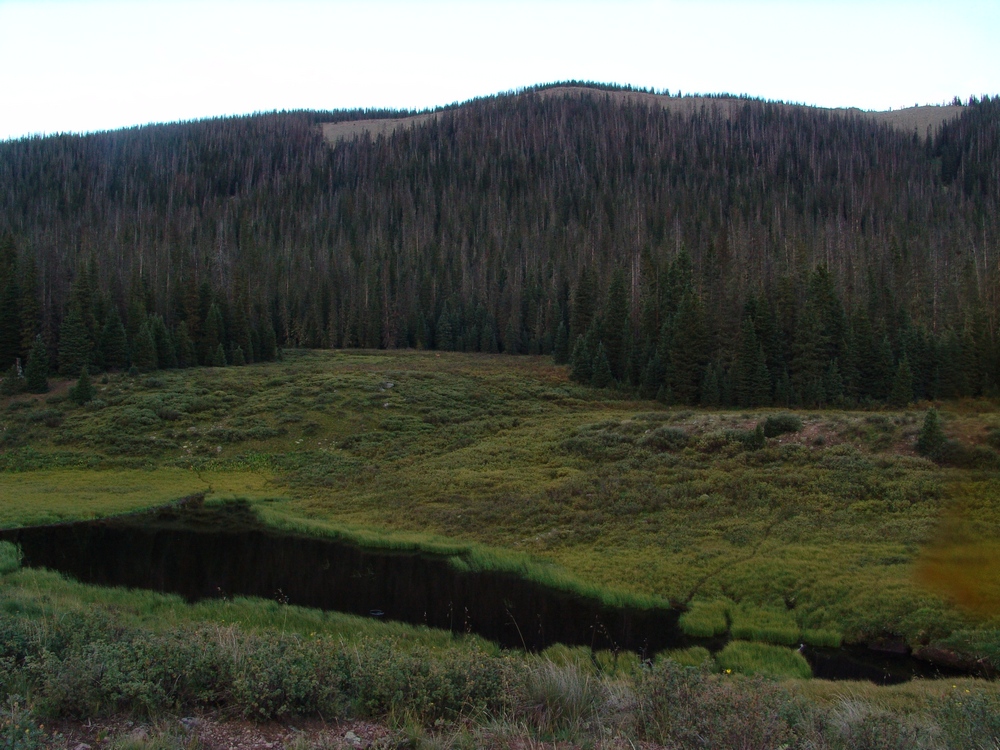
A hidden beaver pond and meadow. The deer can barely be seen in the upper meadow.

Another beaver pond.
The beaver ponds were full of duck and fish, and it was fun watching the ducks swim around with their little families of chicks.
I even took some video of the ducks. If you listen really closely you can hear coyotes howling in the woods nearby.
In the distance I could make out what I believed to be Pole Creek Mountain in the late sun's light.
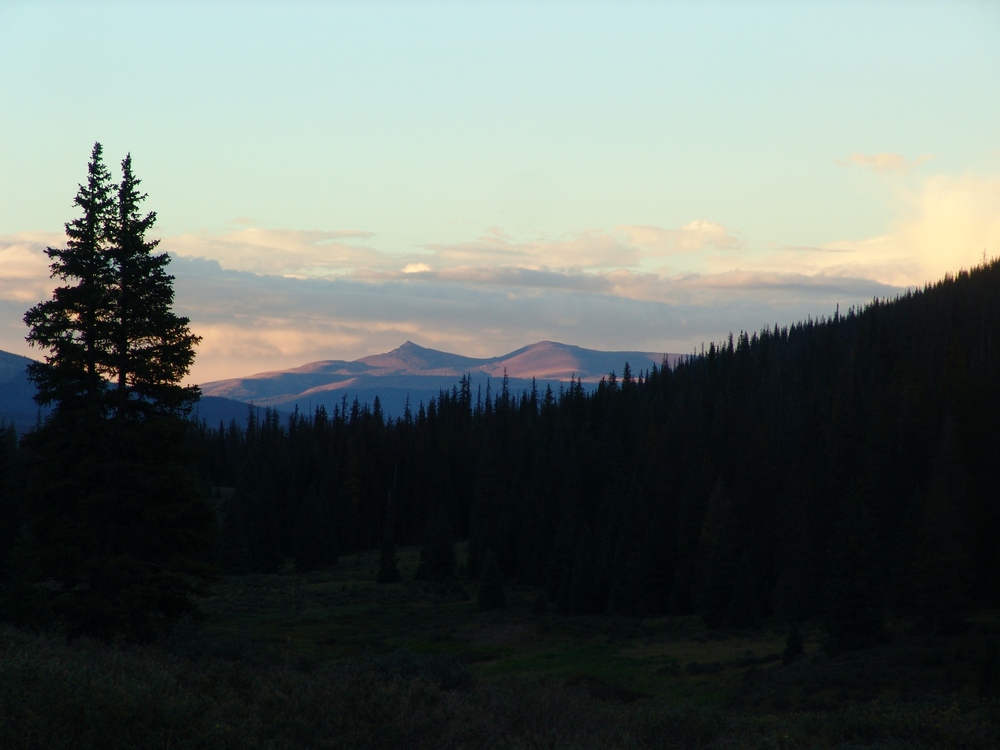
Pole Creek Mountain.
After being spooked at the beaver ponds by continuous coyote howling, I decided to return to camp. We crashed fairly early and set our alarm for 5 AM. The alarm went off and it was really cold outside. We got ready quickly and were on the trail by 6 AM. This is where we made our first mistake. Instead of following the "Sky Line Trail," we followed the Weminuche Trail further south until I realized we were doing something wrong. We backtracked to the Sky Line Trail (which does NOT follow where it shows on the USGS topo map, as seen by my TOPO map of our route) and began the steep upclimb along the Continental Divide. This trail is well established and somewhat steep. The weather was very foggy and winter-like for us, but there was no precipitation, so we continued up. The trail splits at one point, trying to avoid some deadfall; however, we found the best thing to do is to stay on the trail and go over the dead trees. This prevents you from losing a lot of elevation. Eventually, the trail brings you around the bend and Rio Grande Pyramid and The Window come into view.

The Window and Rio Grande Pyramid.
The Window is a very impressive geologic formation along the south ridge of Rio Grande Pyramid, and it does not disappoint. It was truly striking.
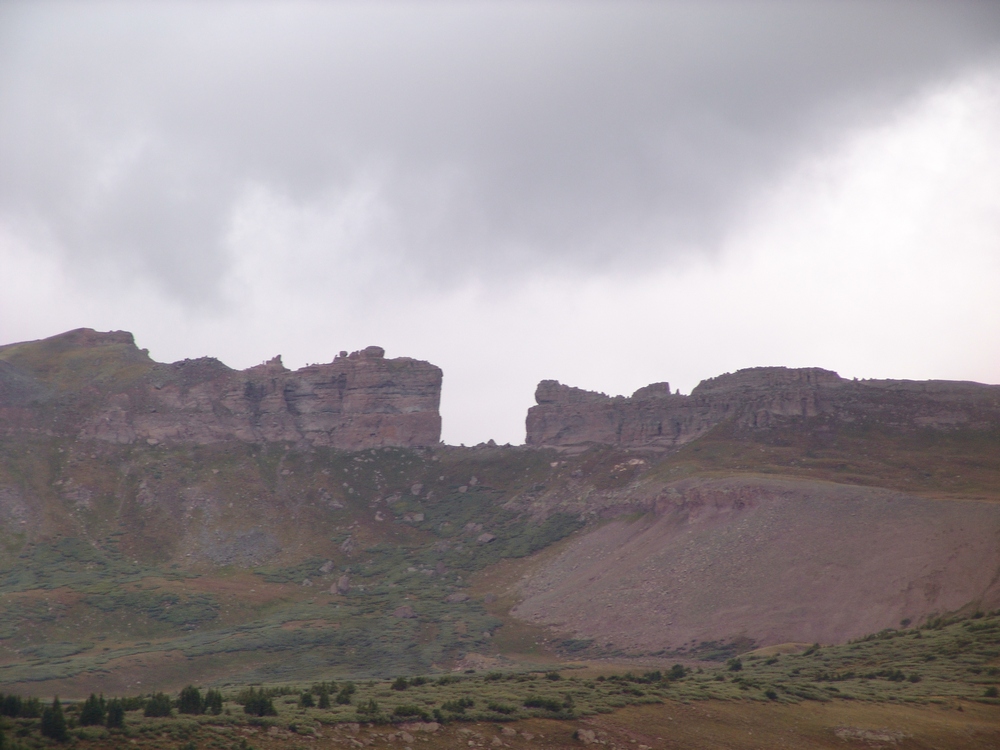
The Window.
The trail flattens out here in the upper basin and eventually brings you to a junction at the base of Rio Grande Pyramid. We took the junction to the right and climbed up a steep trail to the lower plaform of Rio Grande Pyramid. From here, we chose to follow the platform south and then up the gradual southeast slope.
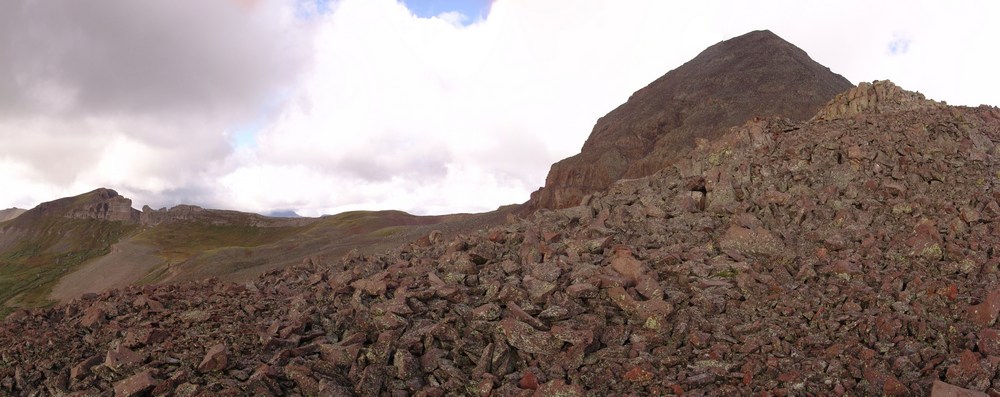
Nearing the summit of Rio Grande Pyramid.
The view back from where we came near UN 12,808 was pretty awesome, with the greens and yellows of the huge basins showing their true colors.
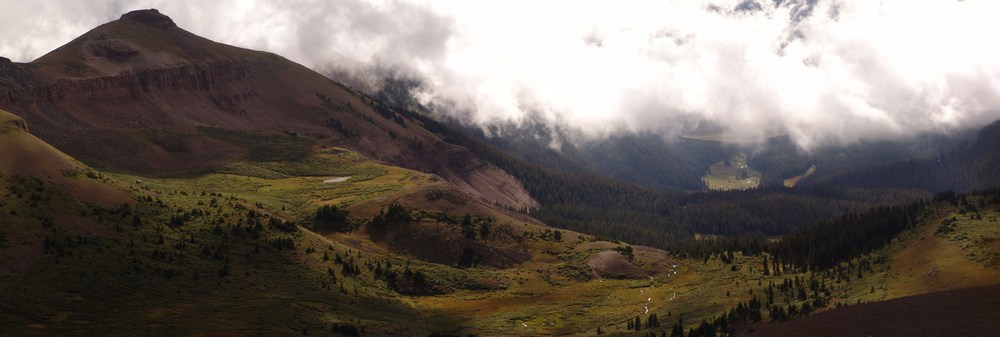
UN 12,808 towers over the valley below.
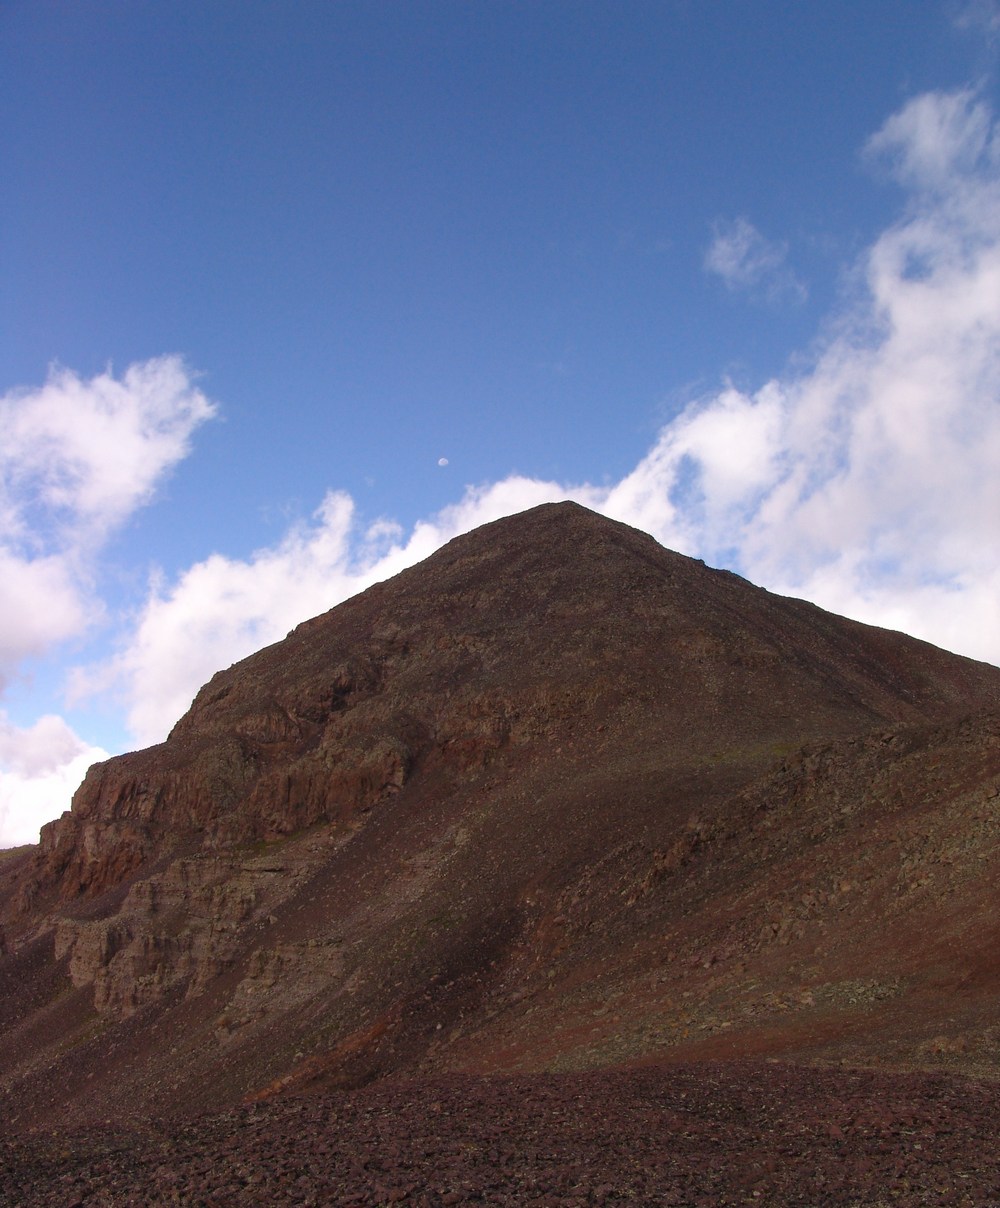
The Moon sets over Rio Grande Pyramid.
I was very intrigued by the volcanic nature of the rock on Rio Grande Pyramid. It was very much like lava rock in many regards, and made for quite easy travel compared to the "dinner plates" in the Elk Mountains or the famously loose rock found elsewhere in the San Juan Mountains.
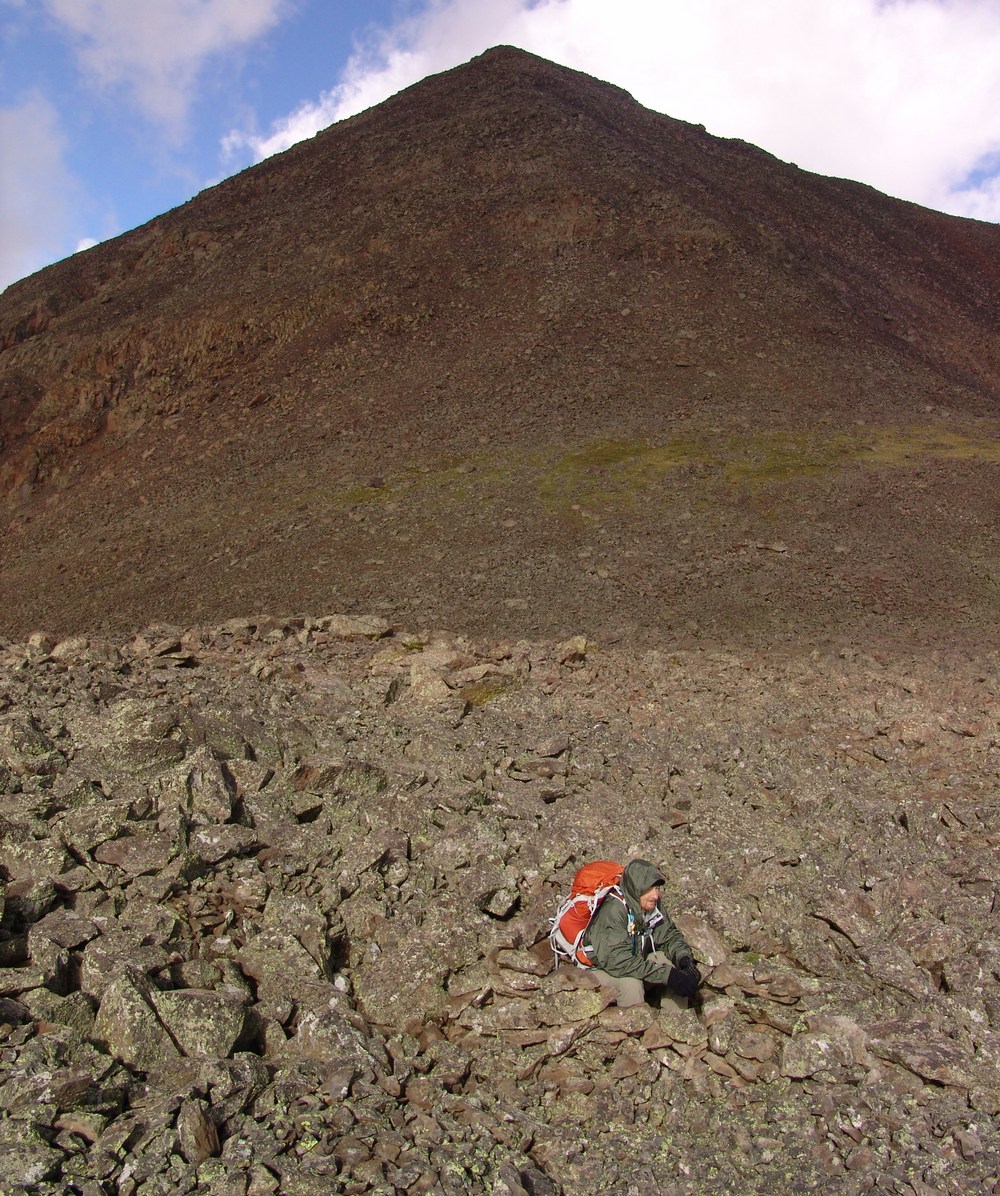
Ray takes shelter in a ring of rocks we found.
From here, it was smooth sailing to the summit. While steep, Rio Grande's final summit block is nothing to be worried about. It is relatively short, and there are even class 3 variations for those seeking out a more challenging ascent. As I crested the summit, I was worried that there would be complete cloud cover in the area and that my view of Vestal Peak and Arrow Peak would be obscured. When I first viewed those two mountains at the top, I was ecstatic. While the weather did indeed obscure much of my view of the Needle Range, the Grenadiers were in plain view.
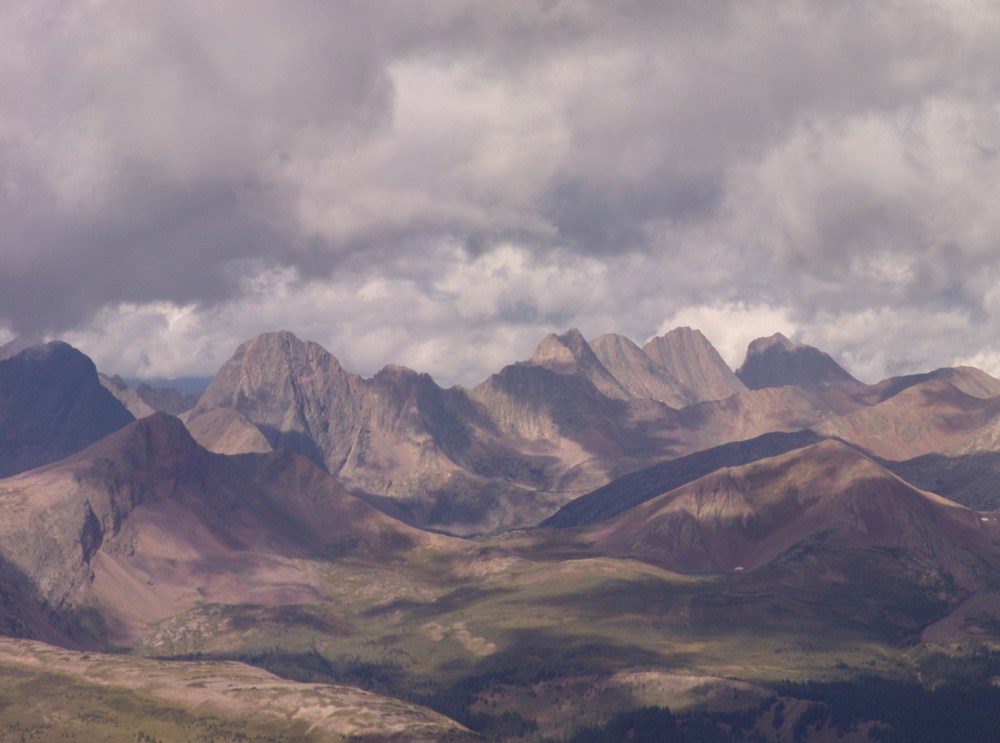
The Grenadier Range.
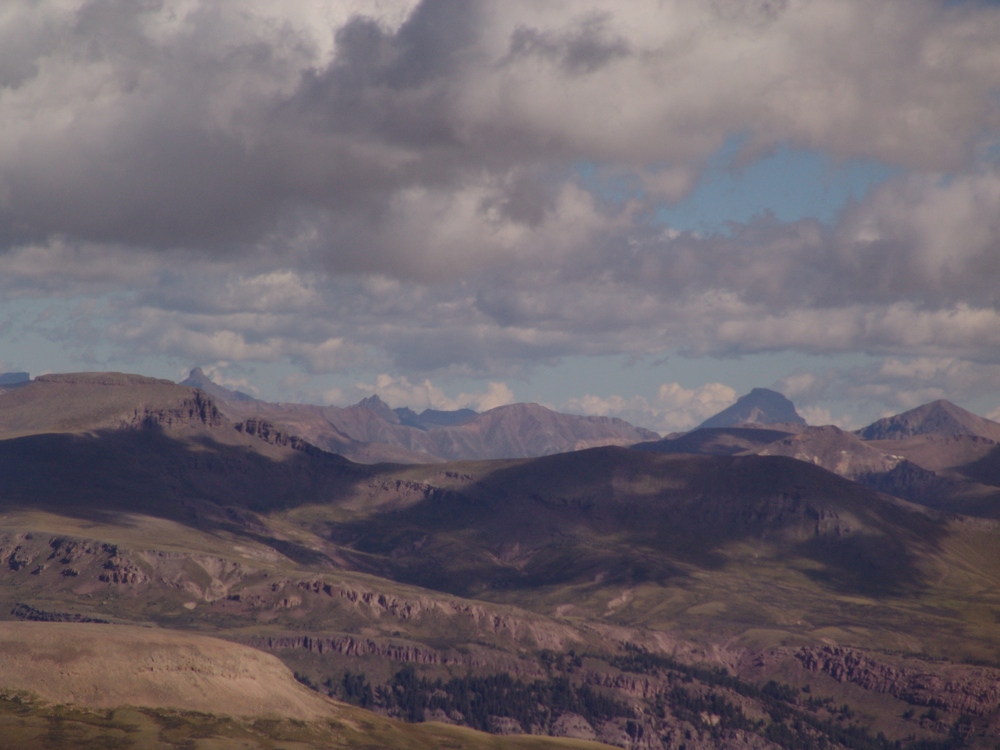
Wetterhorn and Uncompahgre to the north.

A 2800 pano from the summit of Rio Grande Pyramid.
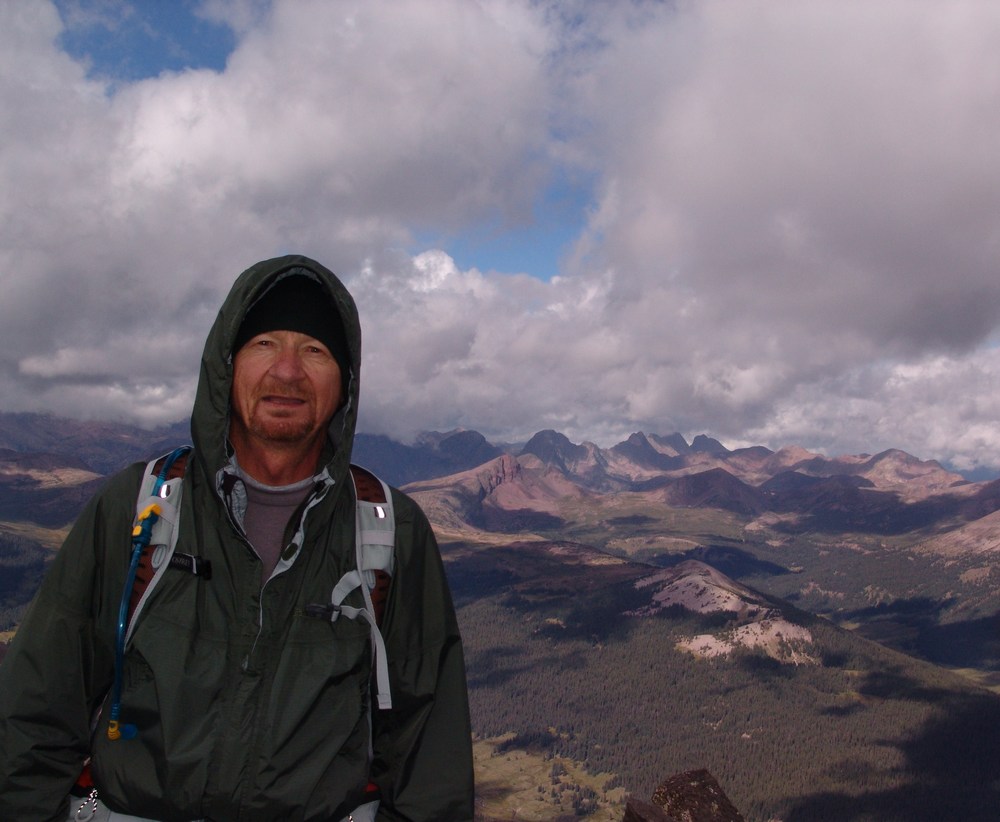
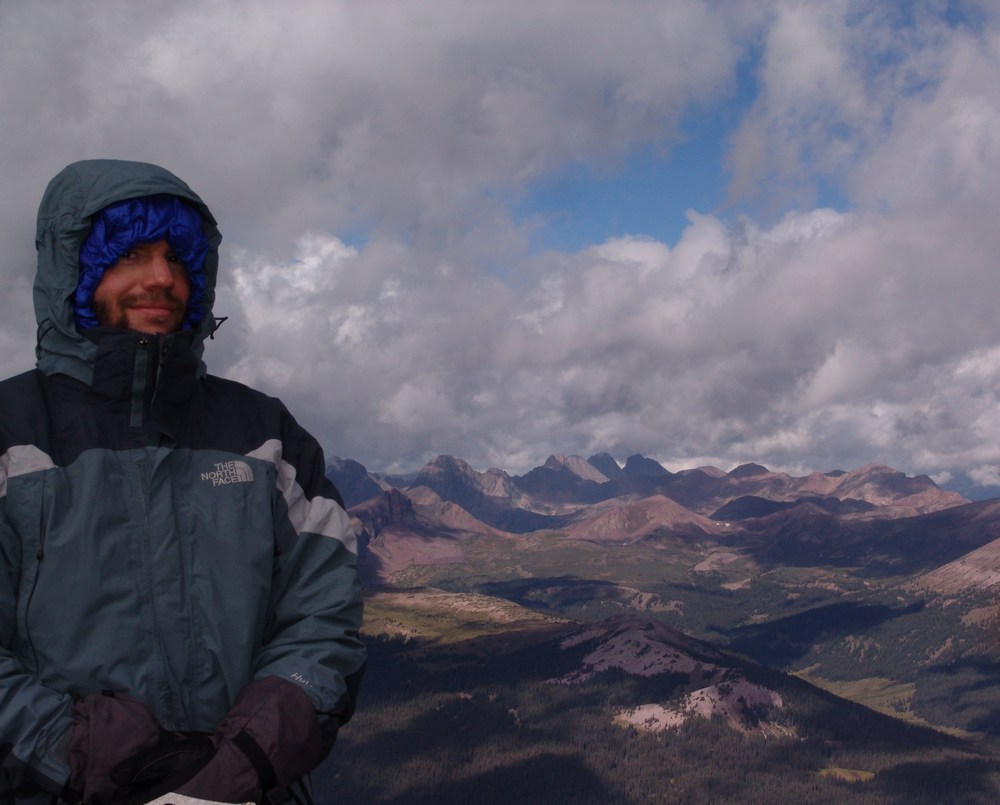
Ray Payne on the summit of Rio Grande Pyramid Matt Payne on the summit of Rio Grande Pyramid
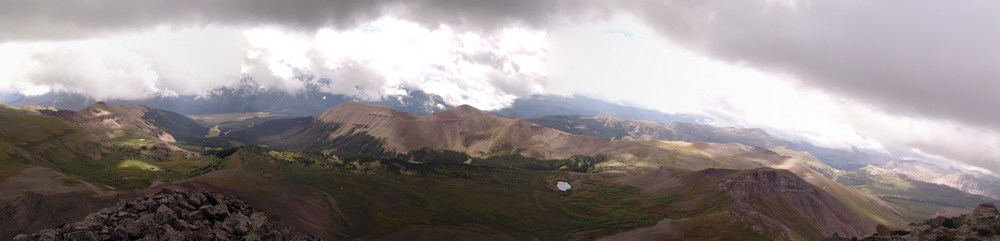
A view east and south. The clouds loomed over us all day long.
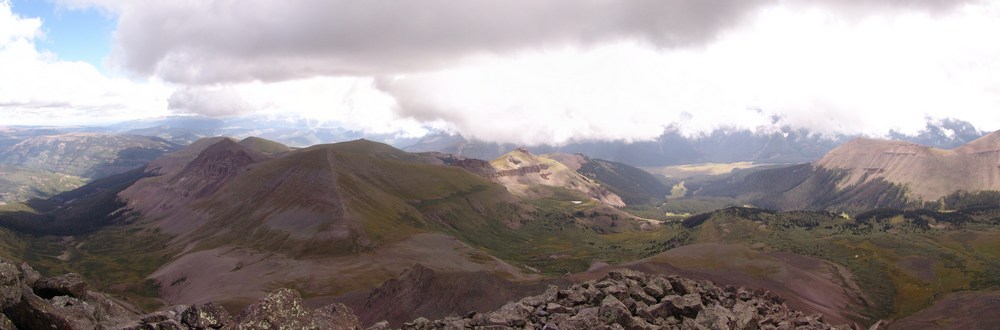
A pano looking east. "Fool's Pyramid" or UN 13,278 left of center.
Since it was really windy and cold on the summit, Ray and I opted to head back down a few yards to eat a snack and refuel for the climb back down and hike back to camp. It began to lightly snow, so we headed on down. The weather began to clear for us on our descent, and better views of Rio Grande Pyramid were had from below.

A super-high resolution pano of Rio Grande Pyramid.

Ray rests on the trail in this wide view pano of Rio Grande Pyramid and the surrounding ridges and valley.
As we hiked down, I was constantly drawn to the deep green and yellow colors of the meadows below.
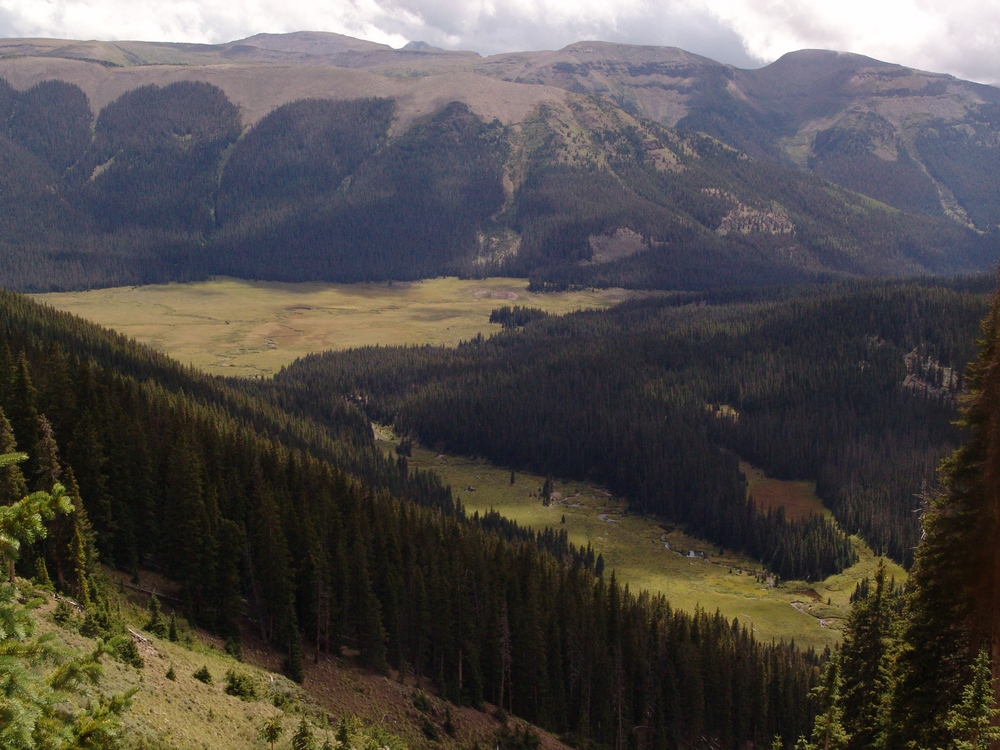
On the way back down, Ray and I took our time looking for mushroom, and we found plenty to take photos of. The mushrooms were honestly one of the highlights of this trip, because both Ray and I are fascinated by mushrooms.
A trio of Fly Agarics.
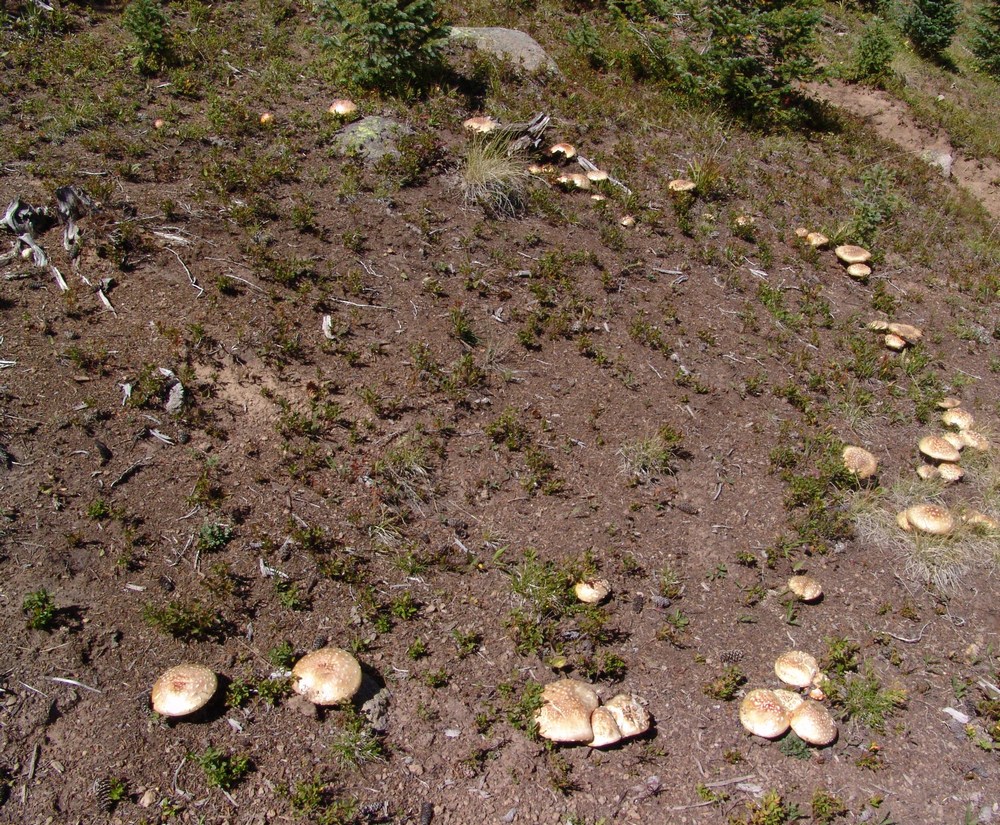
A circle of Agarics.
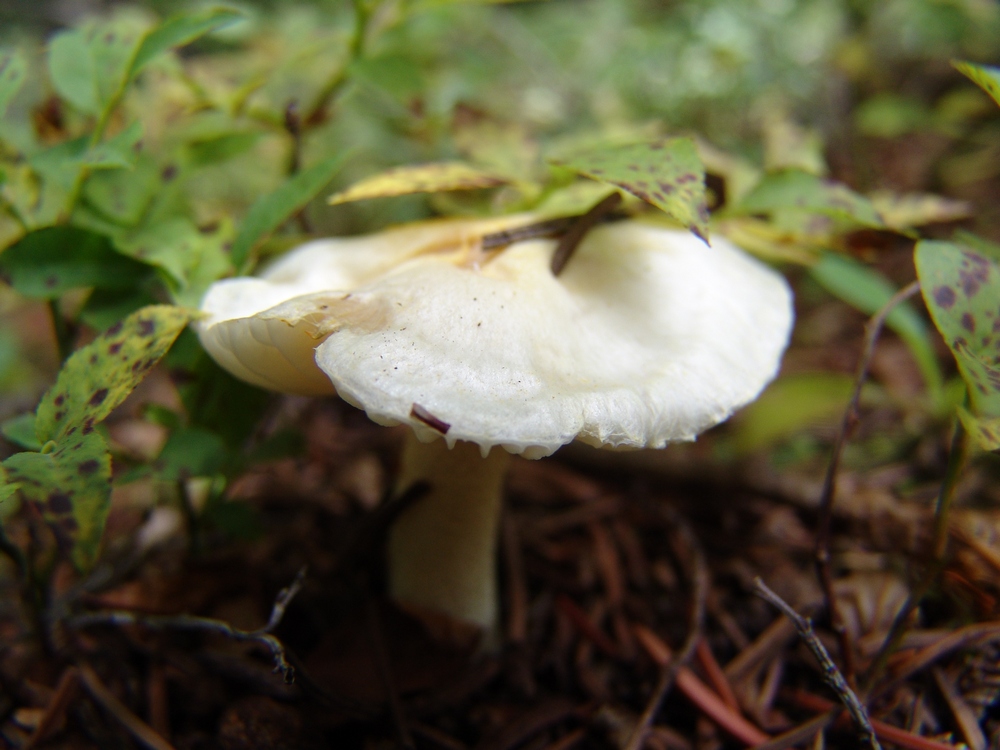
A tiny white mushroom.
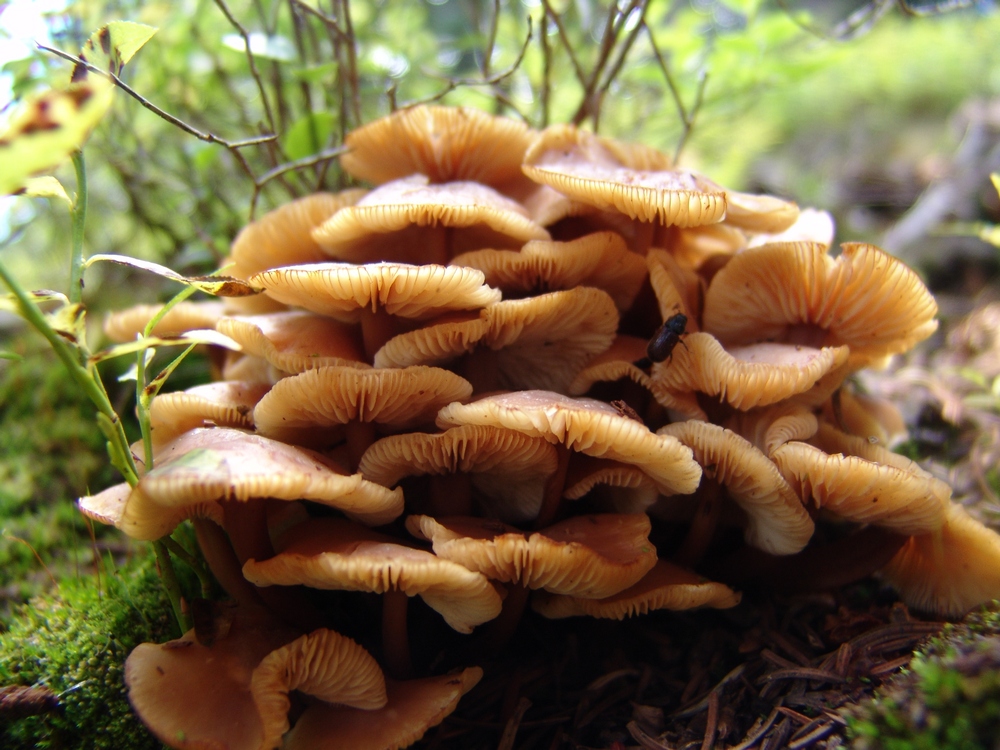
An odd cluster of gooey looking mushrooms.

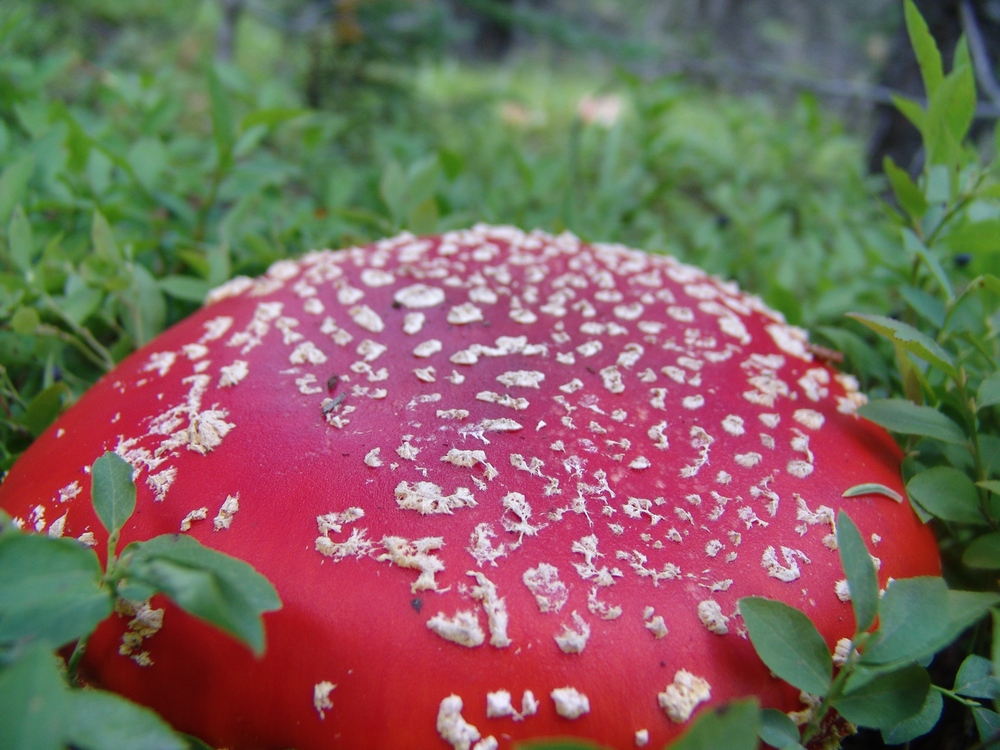

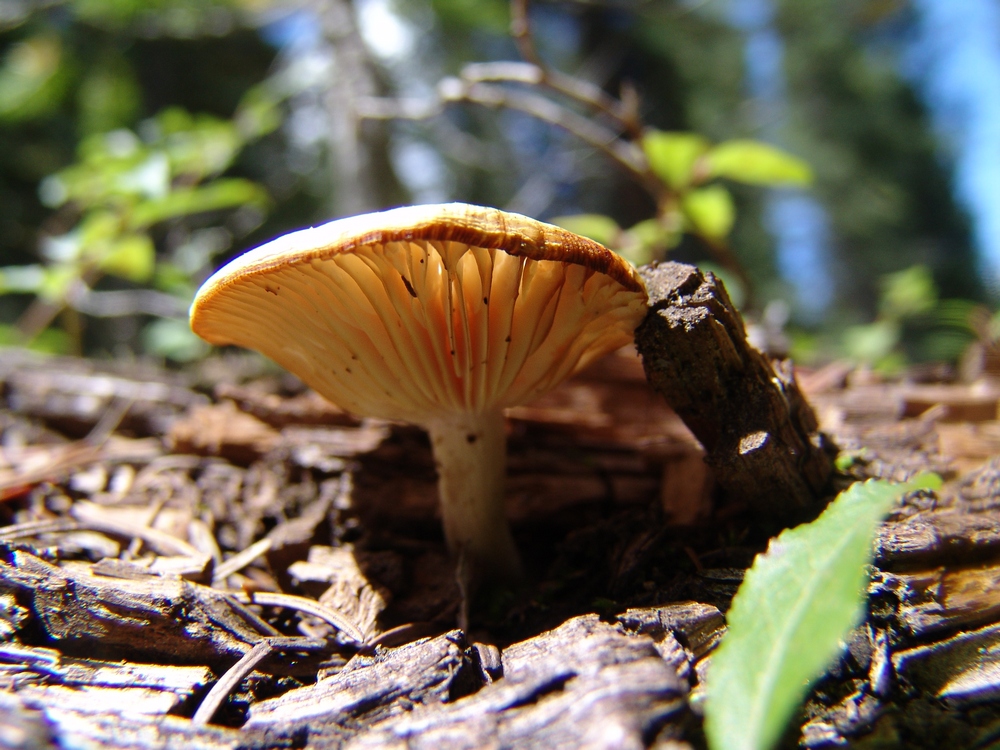
This one looks like a UFO.
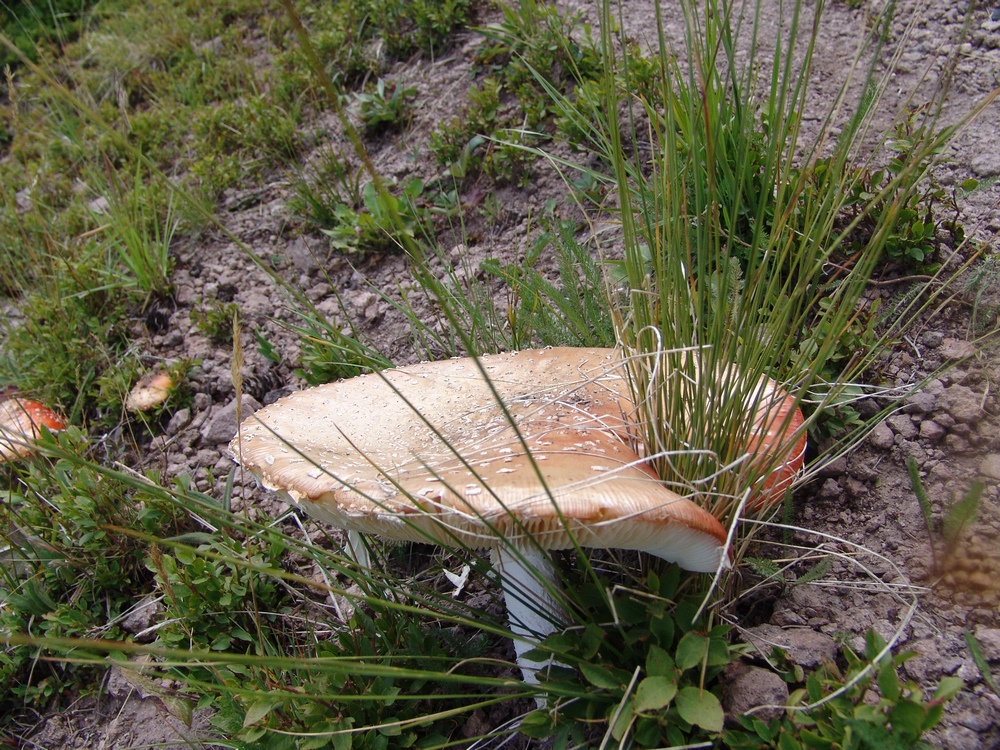
This one grew around the grass...
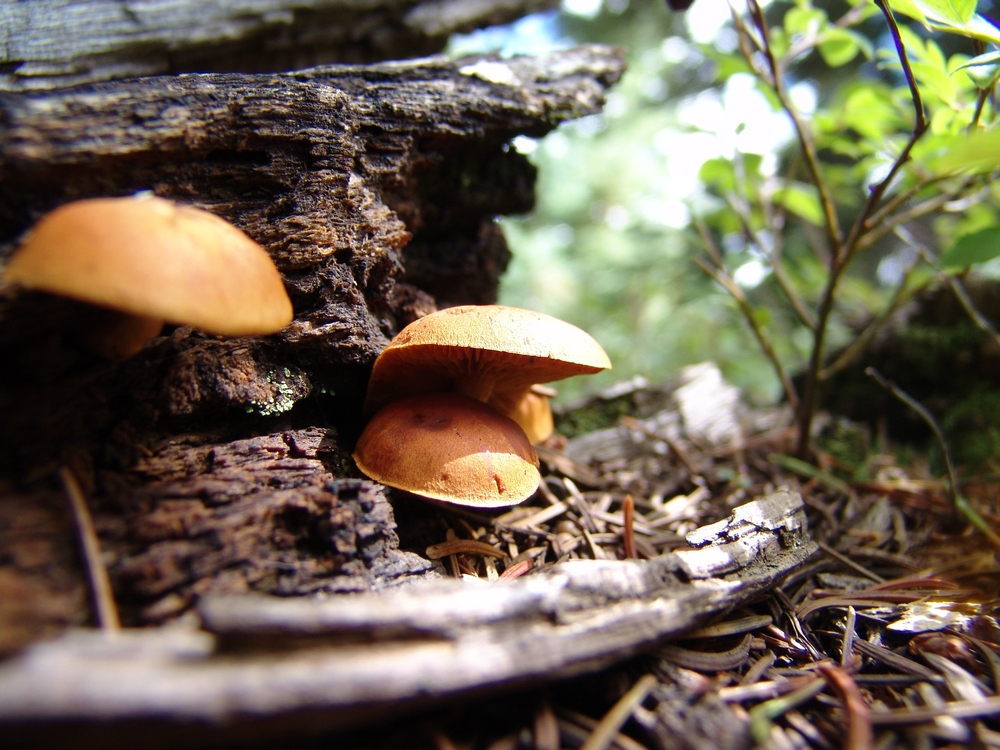
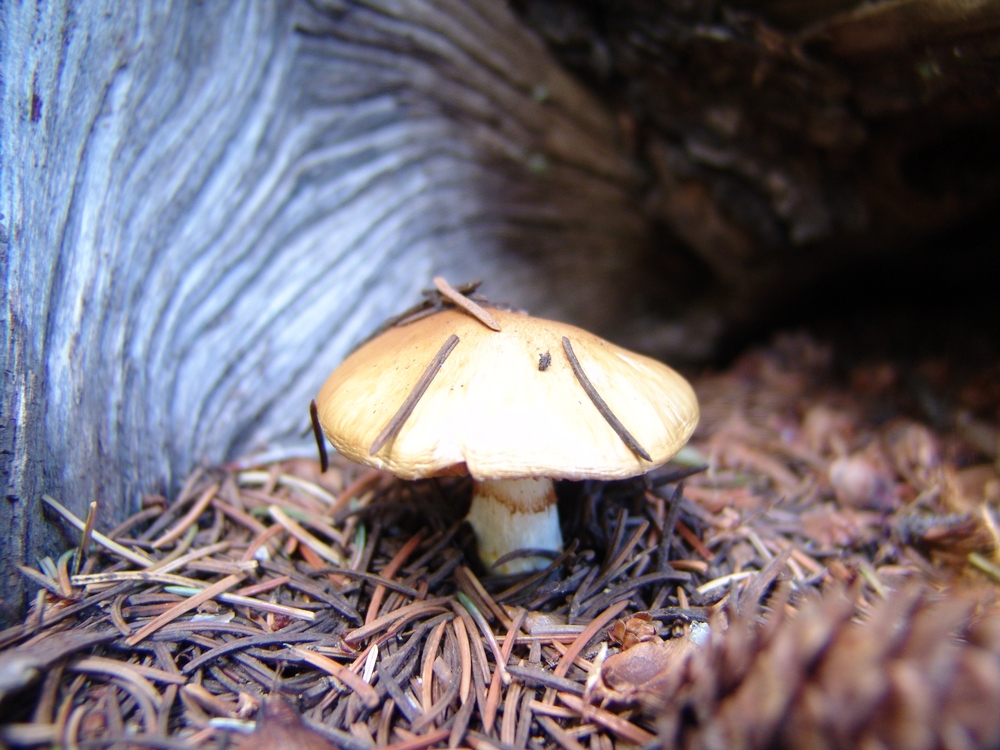
This one had it's own wooden house.
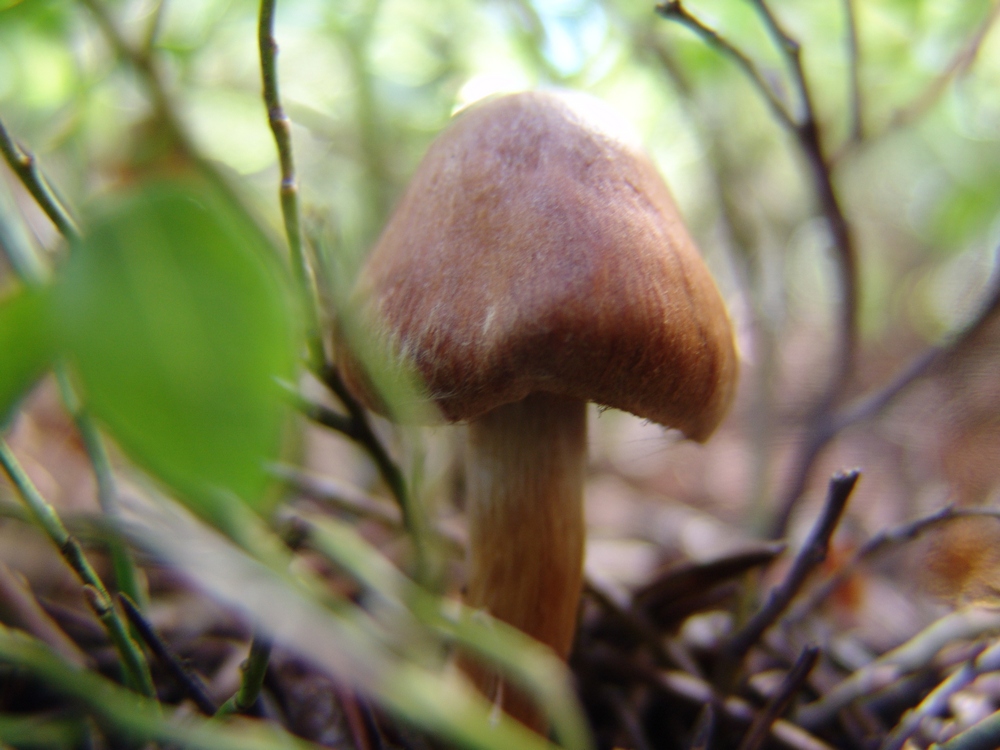
Covered in moss. Or - the Dagobah Mushroom.
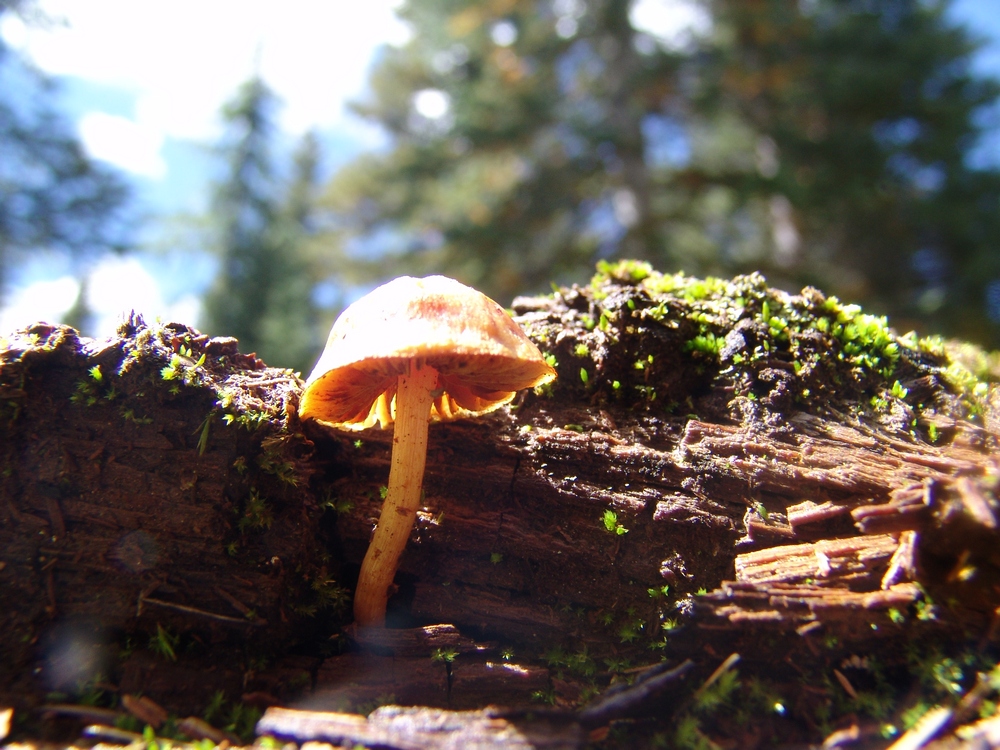
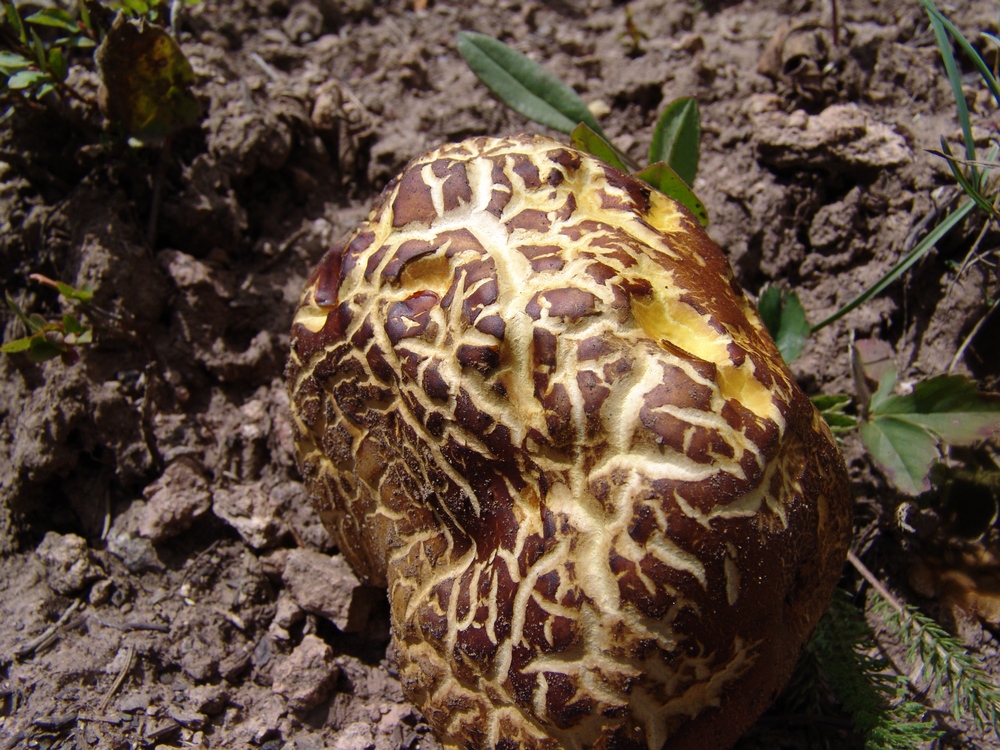
This one caught our eye...
Once back at camp, I decided to get a few more shots of our close-by creek. I think these came out quite well!
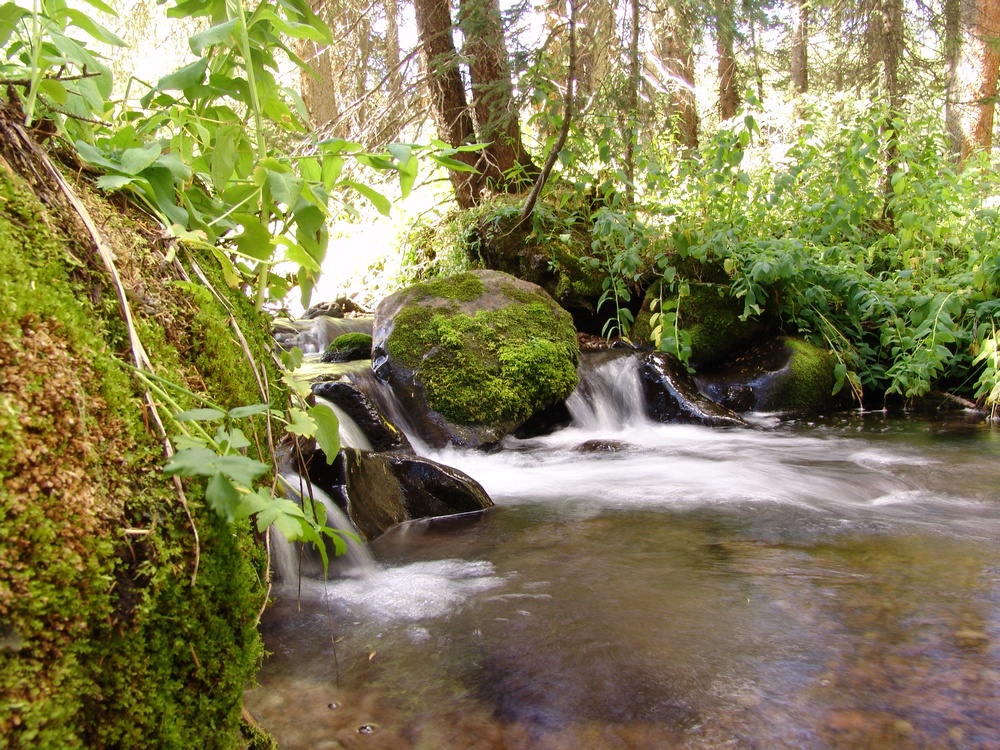
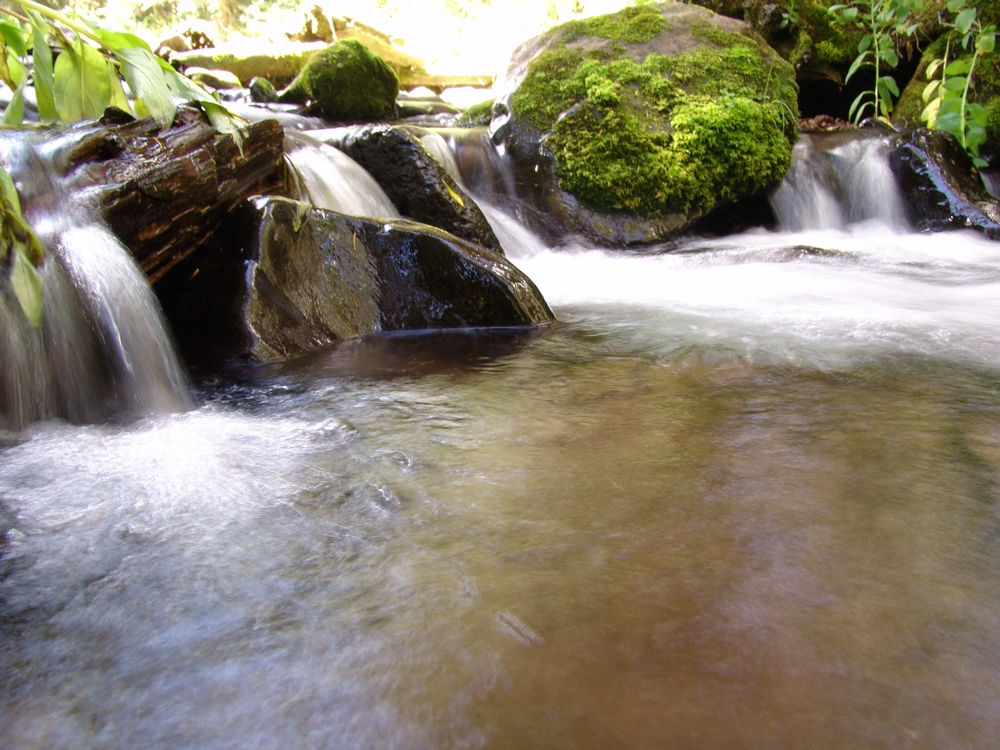
Ray and I cooked up dinner - a fitting meal of tortellini, salmon, alfredo sauce, and 4 kinds of dried mushrooms. A meal fit for kings.
Missouri Mountain, Iowa Peak and Emerald Peak: The Sawatch Triple-Crown
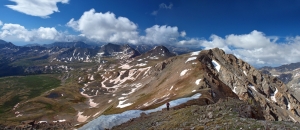
The Sawatch Range of Colorado is known for its long, gentle giants such as Mount Elbert, Mount Massive, etc. It would also seem that most visitors to this area of the state are solely interested in climbing only the 14ers, due to the popular sport it has become to summit all of the 14ers in Colorado. I must admit that I have been caught up in this craze myself; however, one of my favorite climbing past-times is to spend time tackling some of the lesser-known 13ers, and that is just what Ethan Buete and I did this past weekend.
To start off, here is a break-down of relevant numbers from the trip:
Missouri Mountain: 14,067 ft (ranked 36th in Colorado)
Iowa Peak: 13,831 ft (soft-ranked)
Emerald Peak: 13,904 ft (ranked 71st in Colorado)
Total elevation gain: 5,612 ft.
Total distance hiked: 13.44 miles
Total time hiking: 10 hours, 10 minutes
Total photos taken: 554
Total wildlife sightings: 2 (marmot and beaver)
Total distance driven: 124 miles
Trip duration: 27 hours
Ethan and left his house at 5:30 PM on Friday evening and stopped in Buena Vista at the Eddyline Brewery for dinner. The selection of food was superb - Eddyline supports local agriculture and the green movement - a definite bonus. I ordered the "Mount Princeton Calzone," which seemed quite fitting. After chowing down at the brewery, Ethan and I departed for Chafee County Road 390, just a few minutes North of Buena Vista, and headed up past Clear Creek Reservoir to find a camp-site next to a beaver pond along-side the road. Upon arrival, we were greeted by a friendly and noisy beaver as we began un-packing. We quickly set-up camp, set our alarm for 4 AM, and drifted into the always welcome pre-summit slumber.
We woke up at 4 AM and made some quick oatmeal and broke-down our campsite. Shortly afterwards, we departed for the Missouri Gulch trailhead and began hiking at 5:15 AM.
This particular trailhead provides access for several fourteen-thousand foot mountains, including Mount Belford, Mount Oxford and Missouri Mountain. We were hopeful that most other hikers would be aiming for the ever-popular Belford-Oxford combo and that we would be provided with some solitutude. Our goal was to climb the standard route of Missouri and then follow the ridge over to Iowa Peak and then Emerald Peak. We were not sure on our route quite yet, but figured we would have it solidified upon getting a full view of the area from each peak. Our eventual route took us up Missouri, over to Iowa, up Emerald, down into the Missouri Basin, and finally over Elkhead Pass back to the trailead.

A topographical map with our route shown in purple. We began and ended near Vicksburg at the Missouri Gulch trailhead.
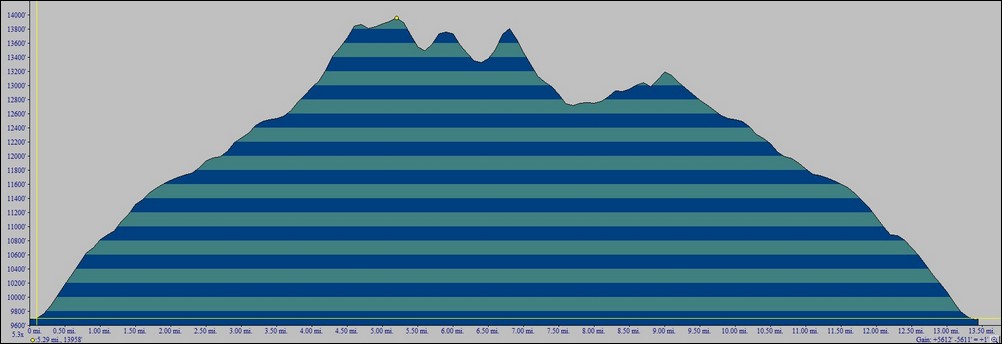
A vertical profile of our chosen route up Missouri, Iowa and Emerald.
The trail going up Missouri Gulch starts out very steep and does not relent until after treeline. Ethan and I made excellent progress up the trail and only stopped a few times before reaching treeline shortly before the sun began to rise.
The sun rises below over the Clear Creek valley.

Matt Payne hikes quickly up Missouri Gulch
Shortly after reaching treeline, some favorable campsites appear near some old mining cabins alongside the Missouri Gulch drainage. It is at this point that you can begin to see Mount Belford above and to the east. Ethan and I both stopped to take some pictures of Mount Belford and the surrounding area.

Matt Payne stops to take a few photos of the Missouri Gulch and Mount Belford.

Mount Belford is illuminated by sunlight near Missouri Gulch
After hiking a short was further up into the basin, our first views of our first objective for the day, Missouri Mountain, became available.
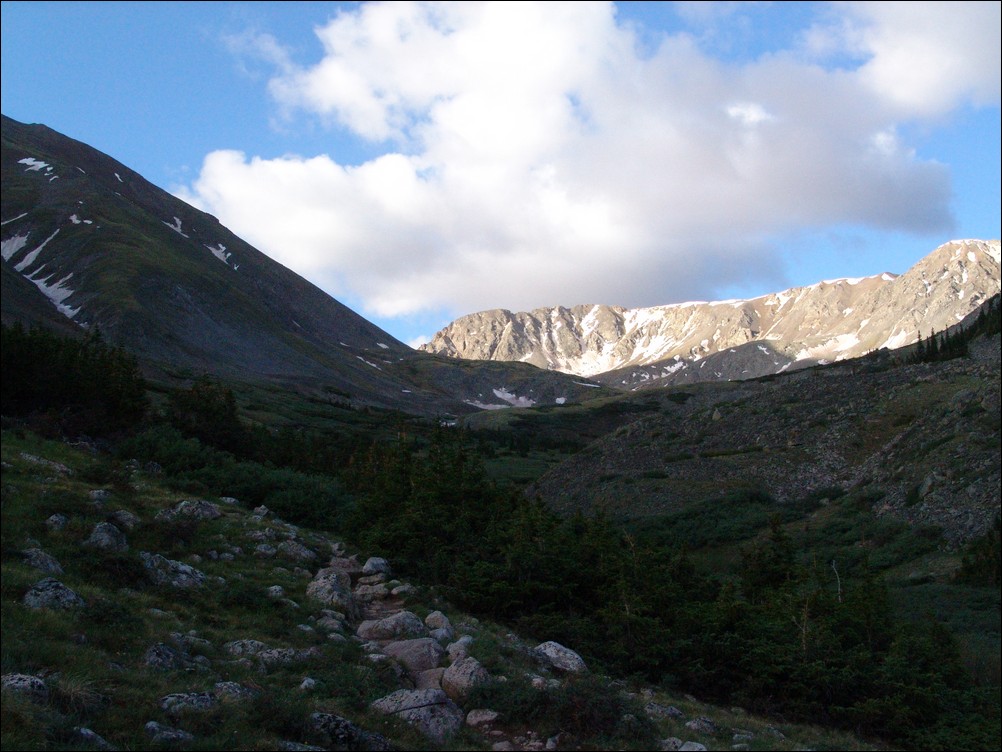
Missouri Mountain appears before us, basked in early sunlight.
At this point, we were closer to Mount Belford. Ethan explained to me that when he climbed it, he climbed up Elkhead Pass, where most other hikers chose to go straight up a muddy slope on the northwest slopes, making for a terrible climb. It appeared that others were attempting to do just that on this day as well.

Mount Belford with hikers on the northeast slope.

Climbers are seen going up the gentle northeast slope of Mount Belford.
As we climbed higher, Missouri became more and more impressive. The light also afforded somewhat better views of the mountain, and afforded us with some photo opportunities.
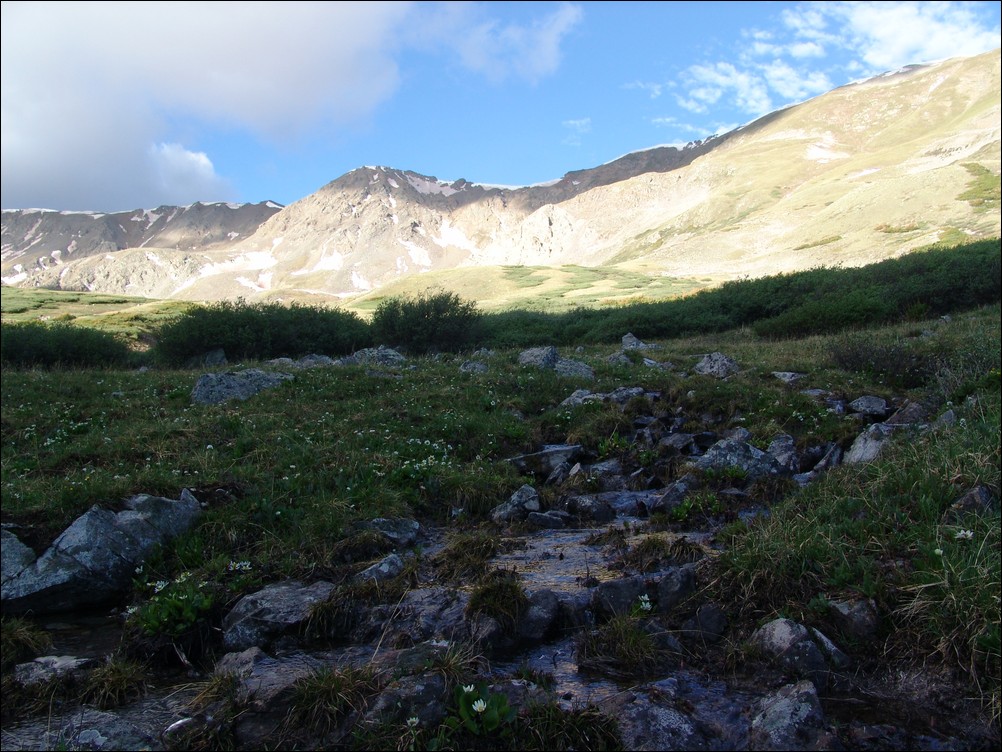
Missouri Mountain with a small water flow with alpine flowers
At this point, were were passed by a group of 4 hikers heading up Missouri. I hate to judge people that I don't know, but I could not help but wonder about this group. It was a friendly but fairly odd group, all wearing cotton sweat-shirts (cotton is often considered a very poor choice for any article of clothing worn during high-altitude hikes due to its inability to quickly dry). One gentleman was wearing flip-flops and playing music out of a small radio in his backpack. I was both perplexed and annoyed - I really don't want to hear your music when I'm hiking, and I won't feel pity if Search and Rescue are called because you obtained frostbite on your toes. We later learned it was his first 14er and he had switched into ascent shoes, which made me feel a little better.
Ethan and I continued up the trail and kept our eye on Missouri, hoping to catch a view of the trial heading up to the ridge.
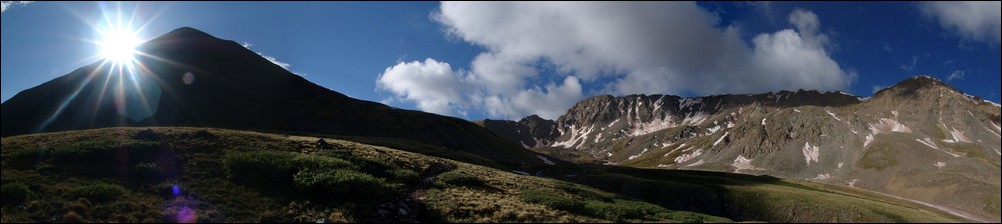
The sun rises over Mount Belford with Missouri to its immediate right.
The extra light from the sun also revealed to us that there were many types of wildflowers in bloom, much to our surprise. The basin was covered in whites, purples, yellows, and blues.
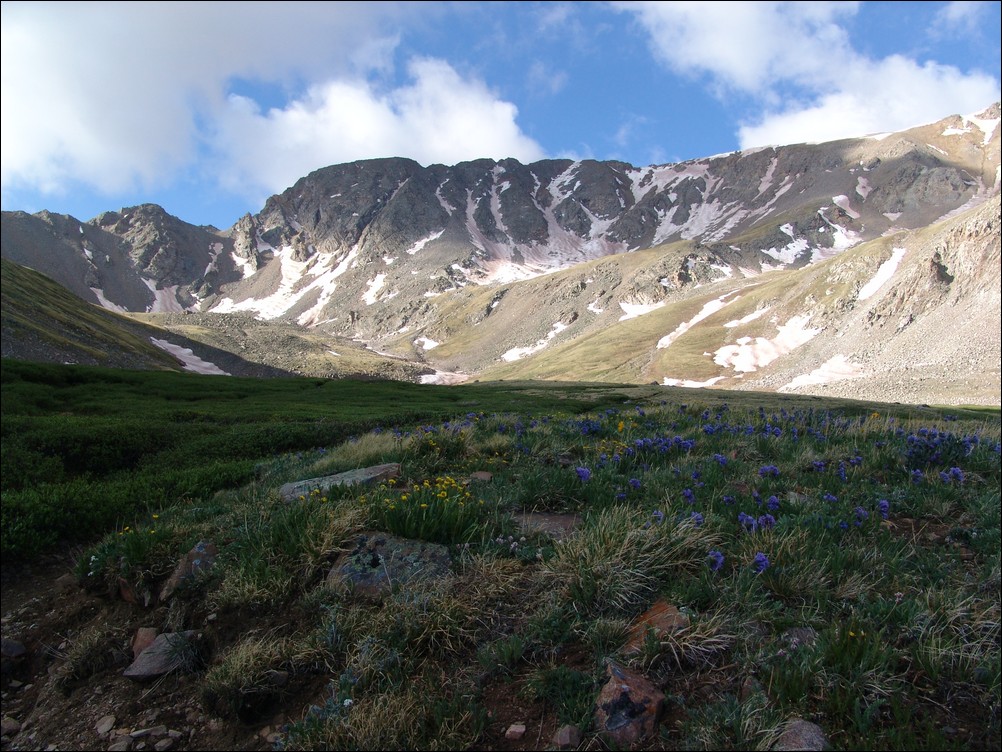
Wildflowers cover the Missouri Gulch basin in late June.
The trail heading up towards Missouri was in great condition, often weaving through thick tundra grasses and around willow bushes.
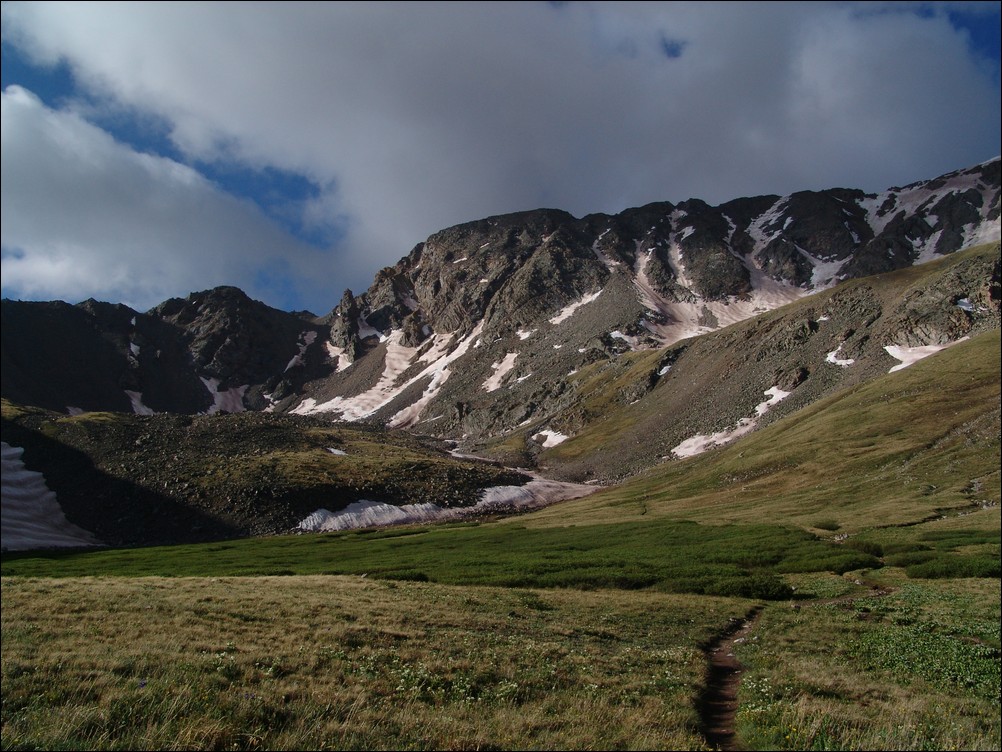
Shortly before reaching the base of Missouri Mountain, the trail hits an intersection. Heading left takes you up Elkhead Pass and heading right takes you up the standard trail for Missouri Mountain. Ethan and I refueled with nuts/fruit/powerbars and began our ascent up the relatively steep trail for Missouri.
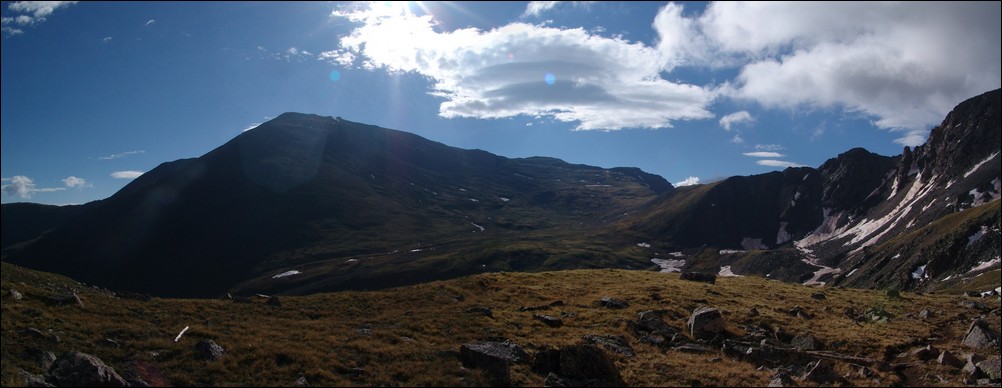
Elkhead Pass can be seen to the right of Mount Belford (left of center).
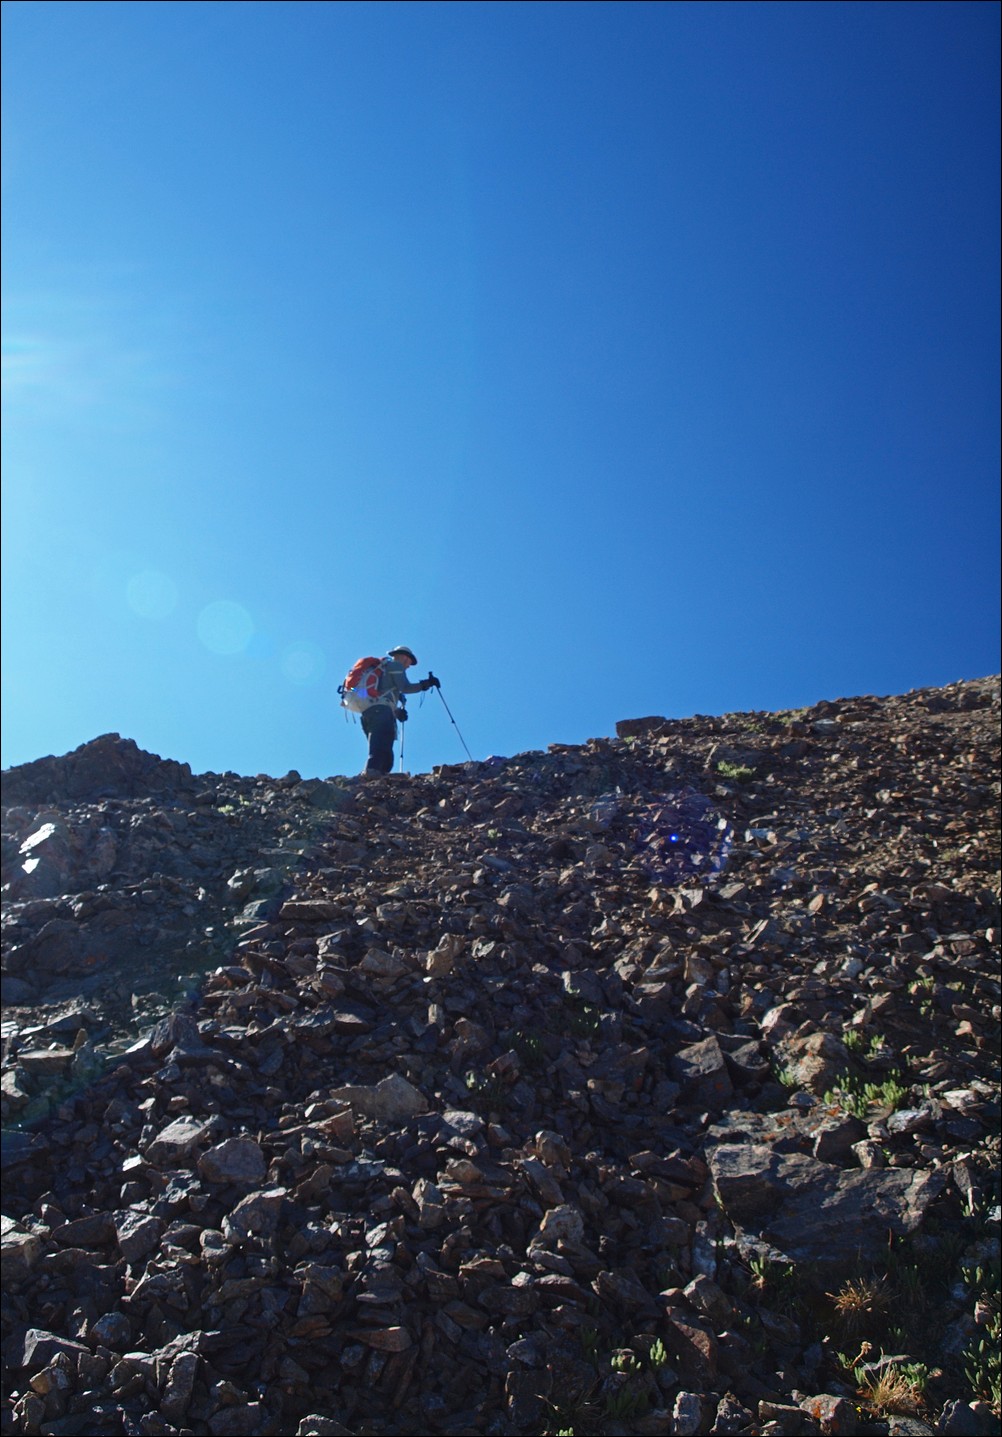
At this point, Ethan and I kicked it into high gear, heading up the rocky, but well-maintained trail up Missouri's long sweeping north ridge. The trail takes you up very quickly, and before we knew it, we were cresting the ridge.
After reaching the ridge, awesome views of Huron Peak, La Plata Peak, and the Three Apostles, including Ice Mountain and North Apostle were revealed.
This was particularly exicting for me since I had just been on top of Huron Peak just a few short weeks previous to this trip.
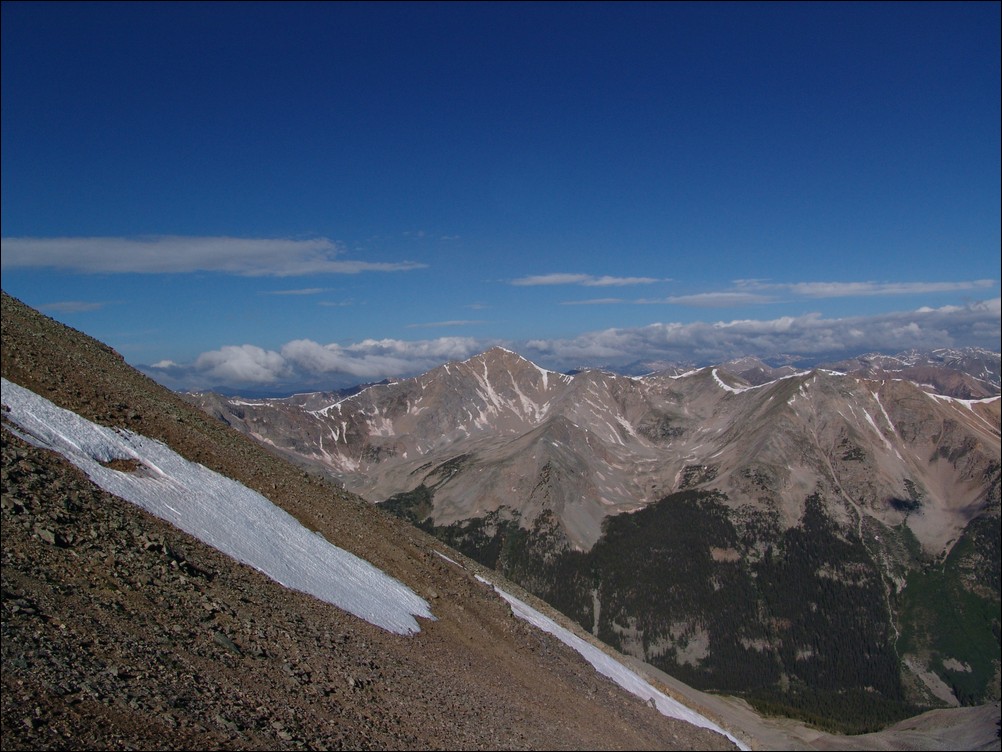
Huron Peak comes into view upon gaining the north ridge of Missouri Mountain.

Huron Peak - zoomed in

Ethan Buete looks over towards La Plata Peak (ranked 5th highest in Colorado).

Missouri's Ridge is revealed.
After taking a lot of photos, Ethan and I headed up and along the long ridge towards Missouri. The second and third objectives for the day finally appeared as well, with Emerald peaking over the top of Iowa.

Iowa Peak mostly obscures the view of Emerald Peak to the south of Missouri Mountain.

From the ridge of Missouri, views of Emerald Peak, Iowa Peak, the Three Apostles, Huron Peak, and La Plata Peak (among many others) can be seen in great detail (click to see the full resolution version).
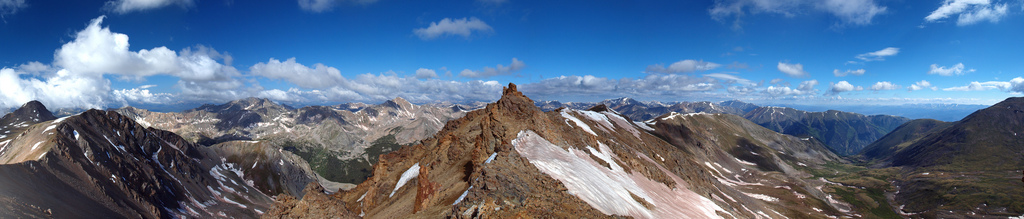
Ethan's photo of Missouri's Ridge with Emerald and Iowa in view (left) and Missouri's Ridge behind us (right)
The ridge to Missouri was nothing harder than class 2 the whole way, and was quite simple to navigate. I've read reports of people calling the ridge class 3, and I can assure you, it is not even close to class 3 unless you stay high at the jagged rocks (seen above). Those rocks are easily navigated around though...
After 3 hours of hiking, we reached the summit of Missouri Mountain at 9:15 AM. Naturally, the flip-flop guy had his music playing on top and he was enjoying a beer. Ethan and I exchanged summit photos, took some 360o panoramic shots, ate some food, and quickly departed, knowing our day had really just begun. Later in the day, I was able to capture a nice view of the route we took up Missouri from the Missouri Gulch.

The route up Missouri Mountain.
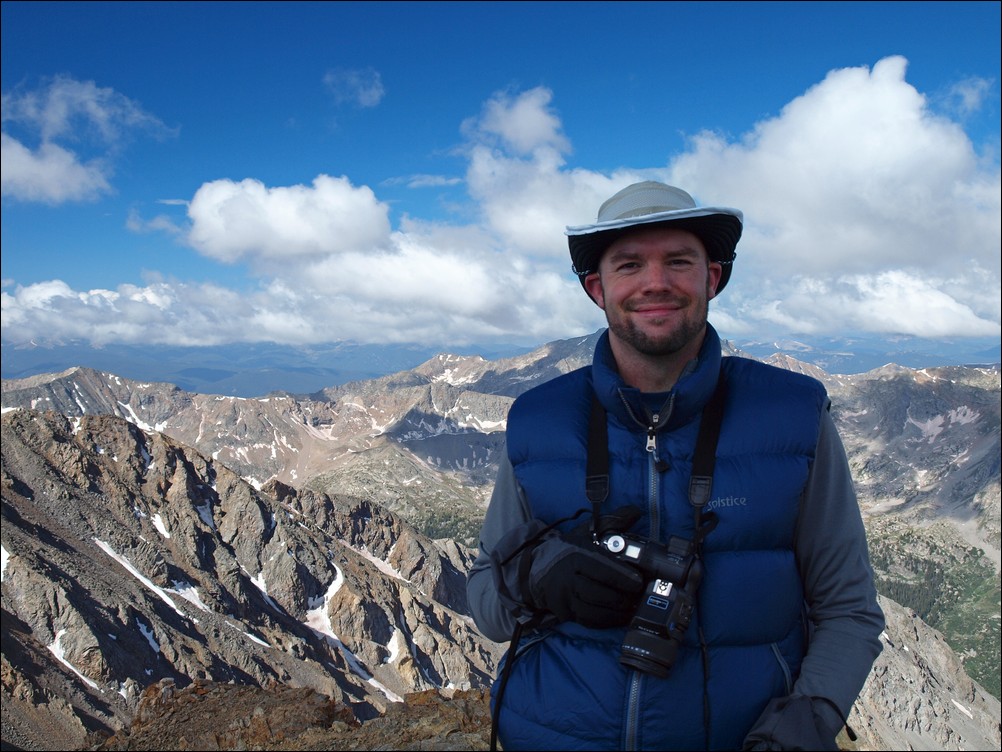
Matt Payne on the summit of Missouri Mountain, his 38th 14er climb (37 total 14ers).
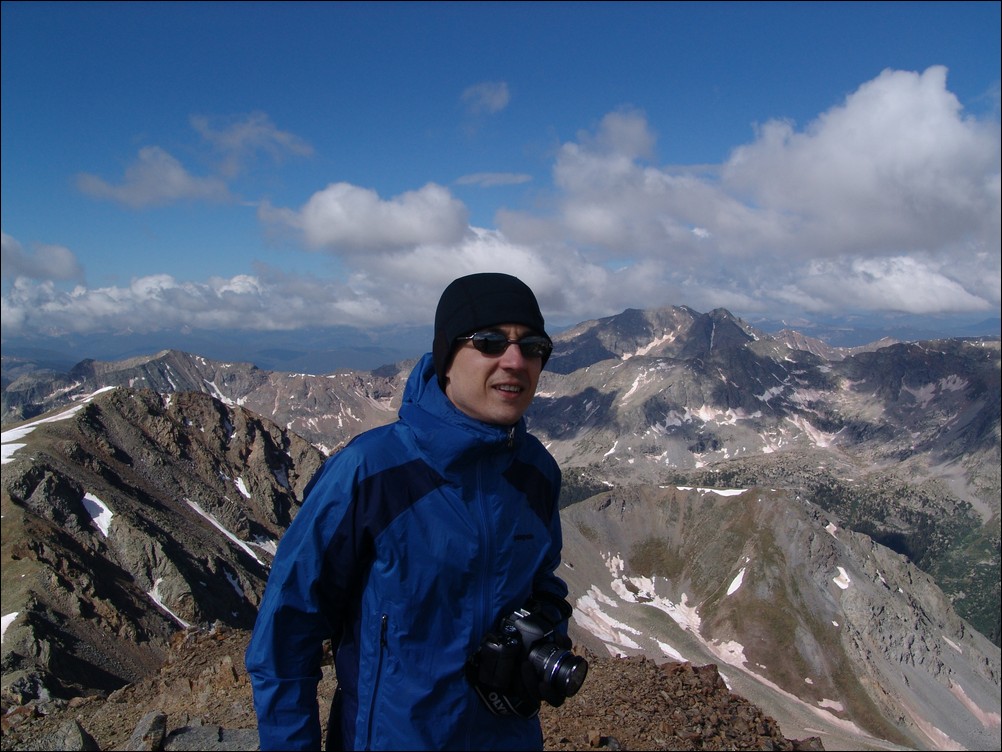
Ethan Beute on the summit of Missouri Mountain. Ethan was unsure of how many 14ers he has climbed, as he is not keeping track. 
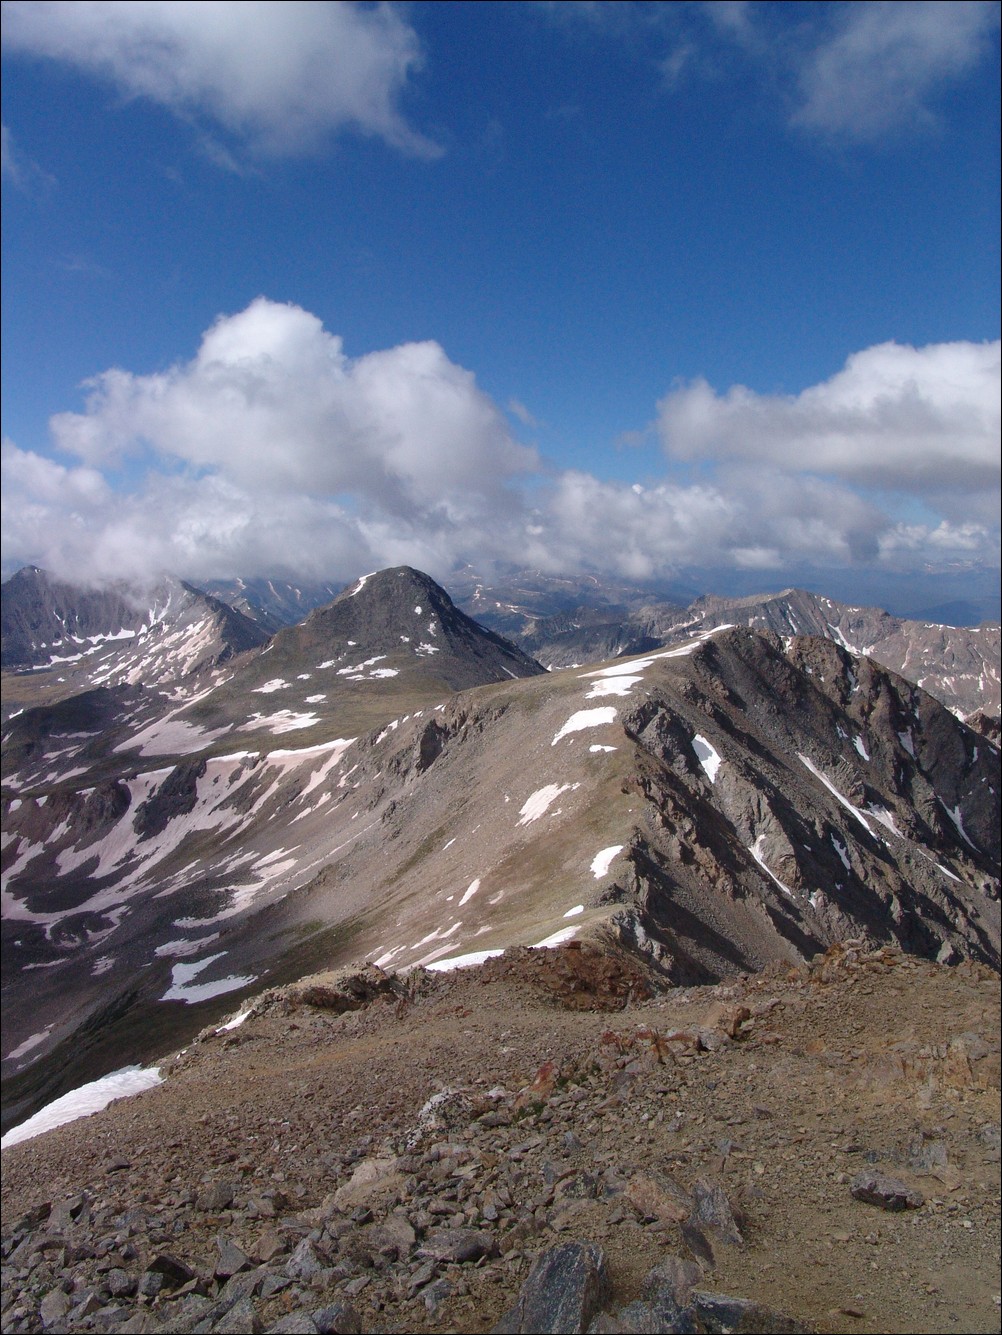
Iowa Peak (closest) and Emerald Peak (left and behind Iowa) drew our gaze.

Mount Harvard (left) rises high above the Missouri Basin (middle), with Emerald Peak and Iowa Peak sitting above pristine alpine lakes.

A zoomed in view of Emerald Peak from Missouri Mountain
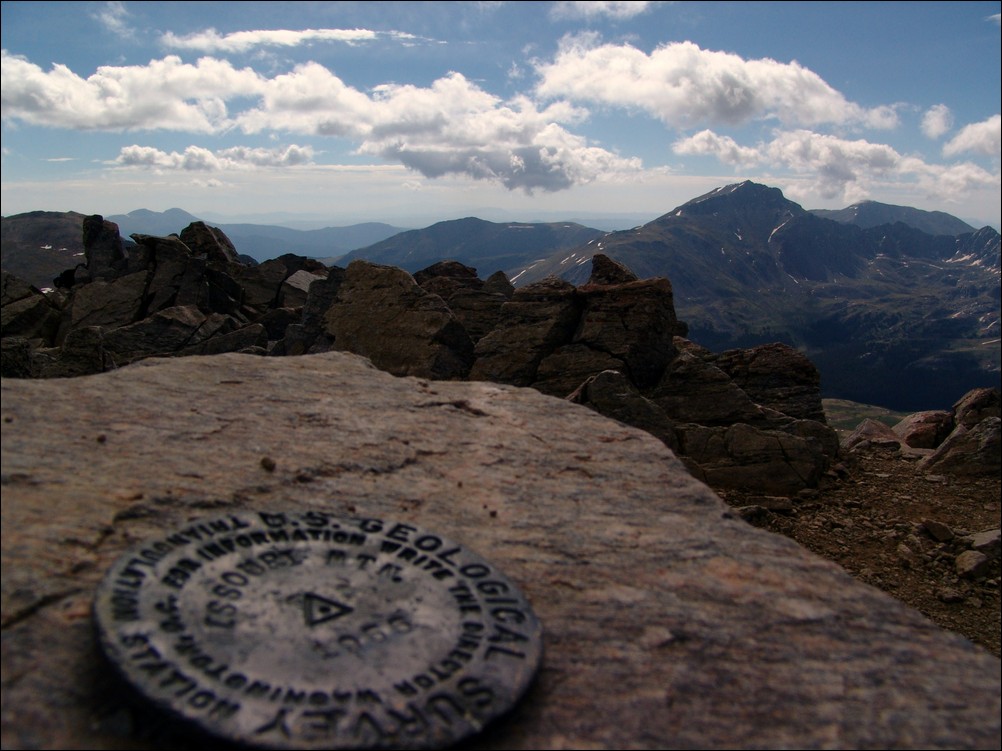
The USGS marker for Missouri Mountain with Mount Harvard in the background.
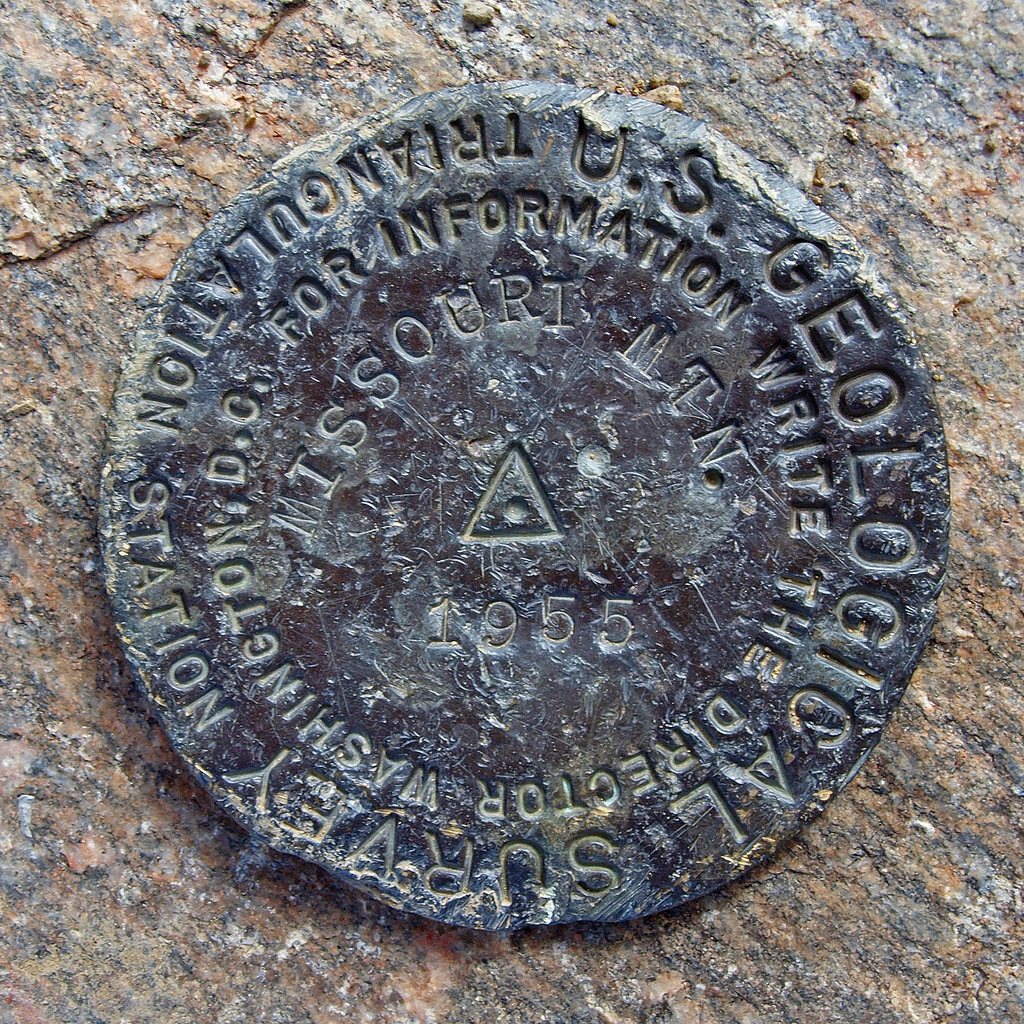
Ethan Buete captured this great macro shot of the Missouri Mountain USGS marker.
Ethan and I decided to pack up and head on over to Iowa Peak, leaving the summit of Missouri Mountain.

Matt Payne descends towards Iowa Peak - photo by Ethan Buete
The climb down to the ridge and up Iowa was fairly straight forward on a primitive trail.
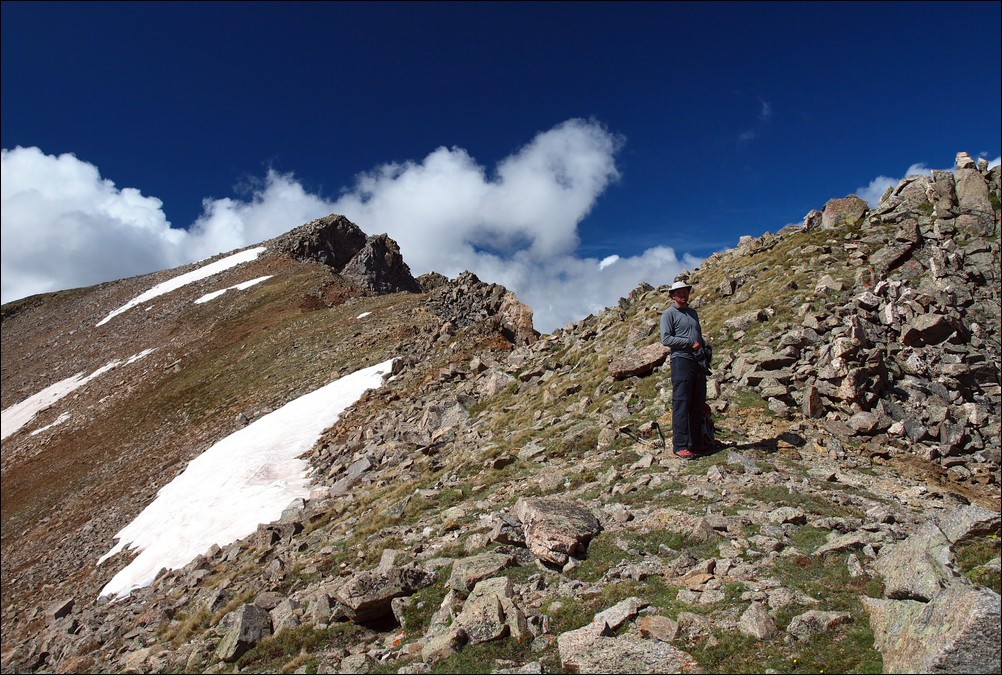
Matt Payne halfway up Iowa Peak.

A look back at Missouri Mountain from near the top of Iowa Peak.
It took us about 30 minutes to reach the top of Iowa Peak, where we stopped to take more photos and re-hydrate.
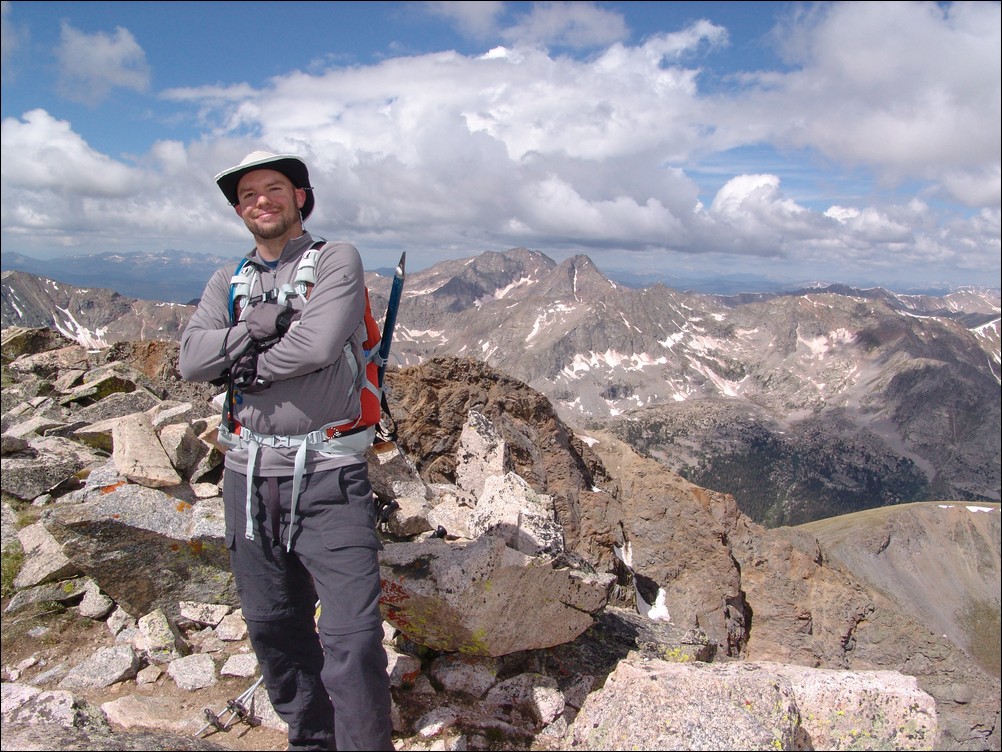
Matt Payne on top of Iowa Peak.

Ice Mountain and North Apostle sit above the valley just below Iowa Peak.

180o view from the summit of Iowa Peak. Looking left to right - Missouri Mountain, Buffalo Peaks (in far distance), Mount Harvard (center), Mount Yale, Emerald Peak (above near snow).

Huron Peak rises high above Clohesy Lake as seen from the summit of Iowa Peak.
After a few minutes on top of Iowa Peak, we made an assessment on the weather. The cloud patterns had not changed since leaving Missouri Mountain and we were fairly confident that the weather would hold long enough to summit Emerald and make it down. So, we headed on down to the saddle between Iowa and Emerald.

Emerald Peak and its grassy slopes.

Ethan made it down to the saddle first, and promptly began photographing the area. He was able to capture some amazing photos, including the next one - one of my favorites from the trip. I love the images Ethan produced from this trip. The colors are astounding. I believe that Ethan uses the Olympus E-30 DSLR with a circular polarizer. I wrote a quick follow-up article about the use of circular polarizers here.
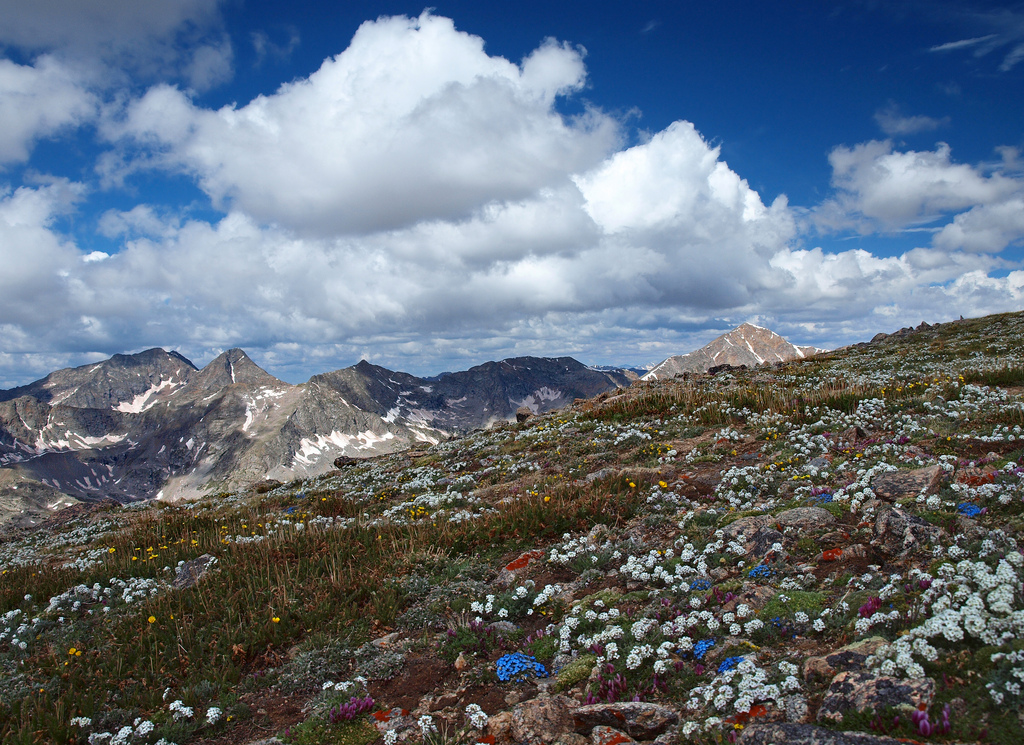
Wildflowers in bloom - photo by Ethan Buete.
After reaching the saddle, we began hiking up Emerald's steep face. It was a fairly straight-forward climb requiring a few breaks on the way up.
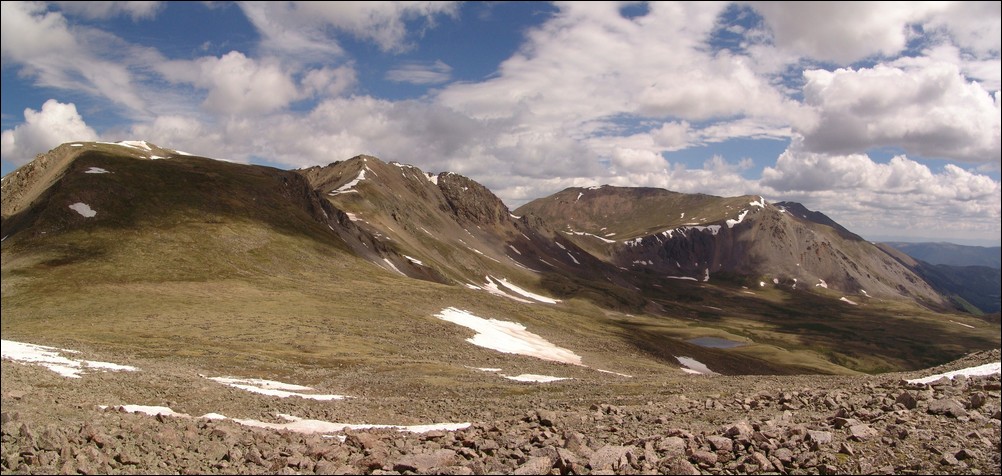
A look back at Iowa Peak and Missouri Peak from the base of Emerald Peak.
After reaching the summit of Emerald Peak at 10:30 AM, Ethan and I both agreed that the views from Emerald were the best of all three summits. Unabated views of Yale and Harvard and the surrounding basins made for a great resting spot. We probably spent about an hour on top, enjoying the views and taking photos while eating. I chowed down on some Reeses Peanut Butter Cups, which made for an even better experience 
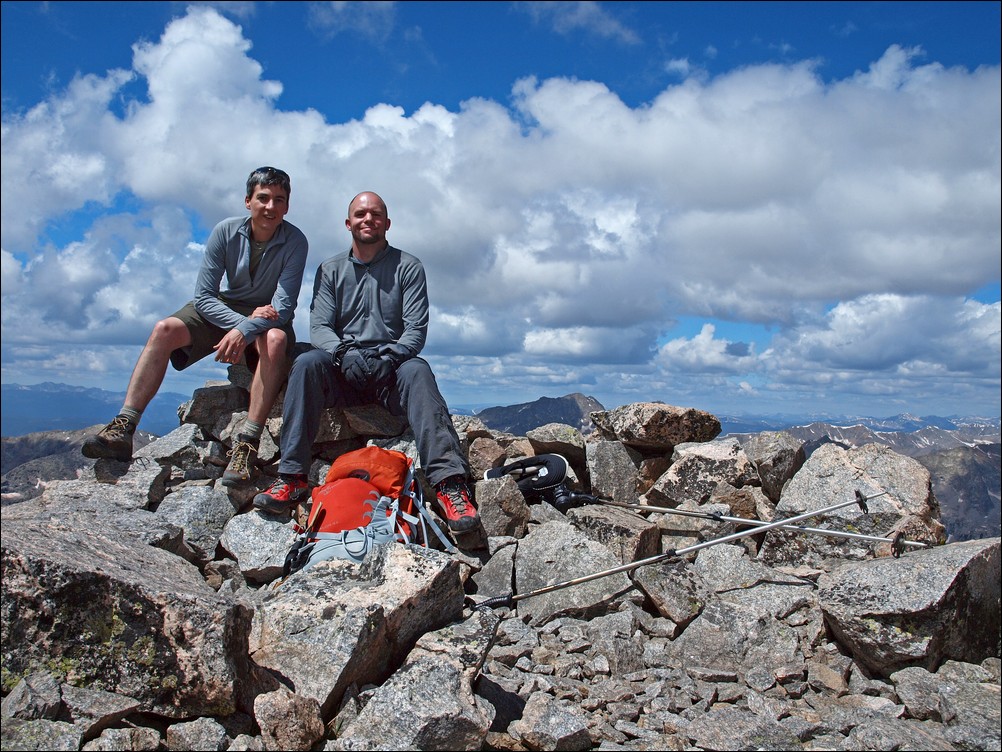
Matt and Ethan enjoy the views from Emerald Peak.
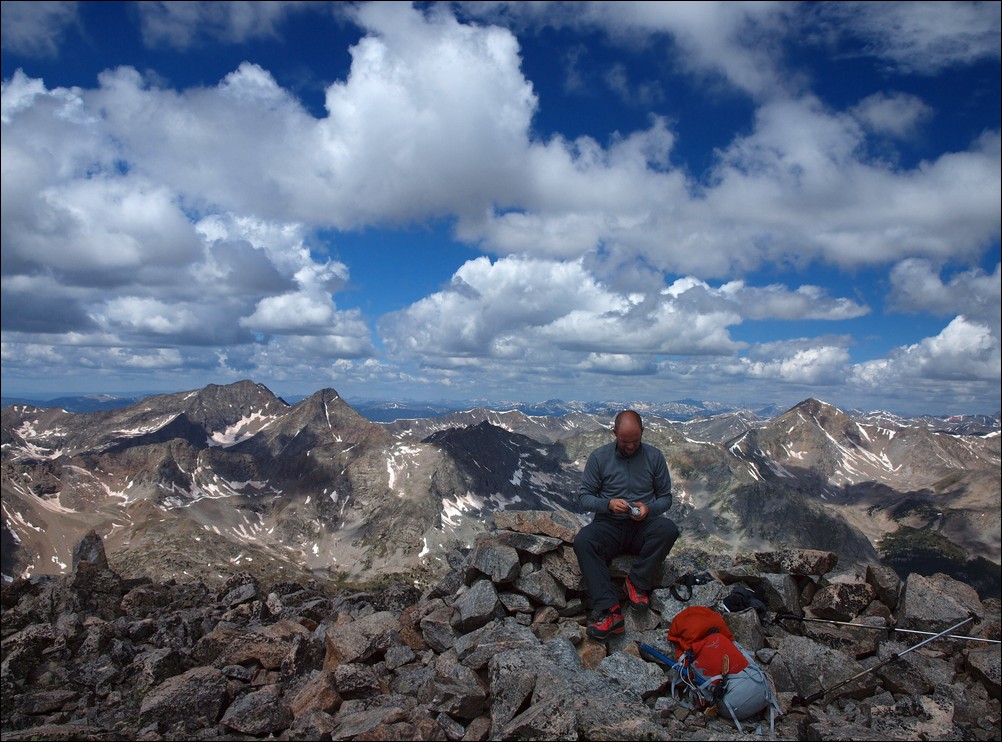
Matt Payne signs the summit register of Emerald Peak, one of the 100 highest mountains in Colorado.
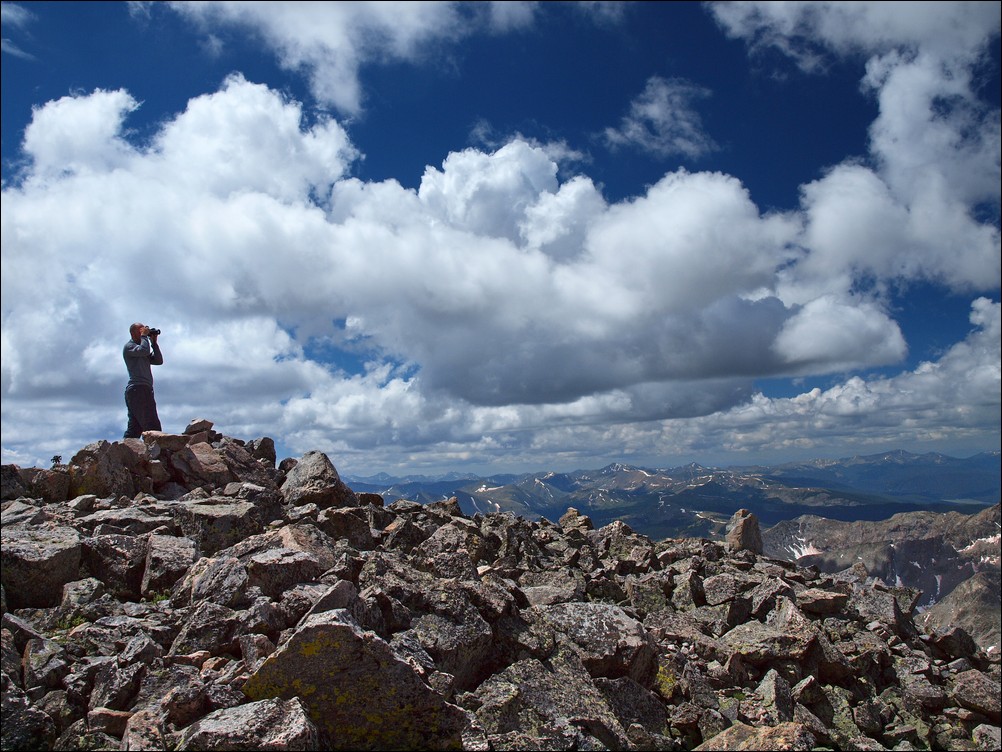
Matt Payne scouts for more Reeses Peanut Butter Cups.

Views from Emerald Peak, west-to-east (left to right).

Ethan Buete gazes west from the summit of Emerald Peak, with La Plata Peak behind him.
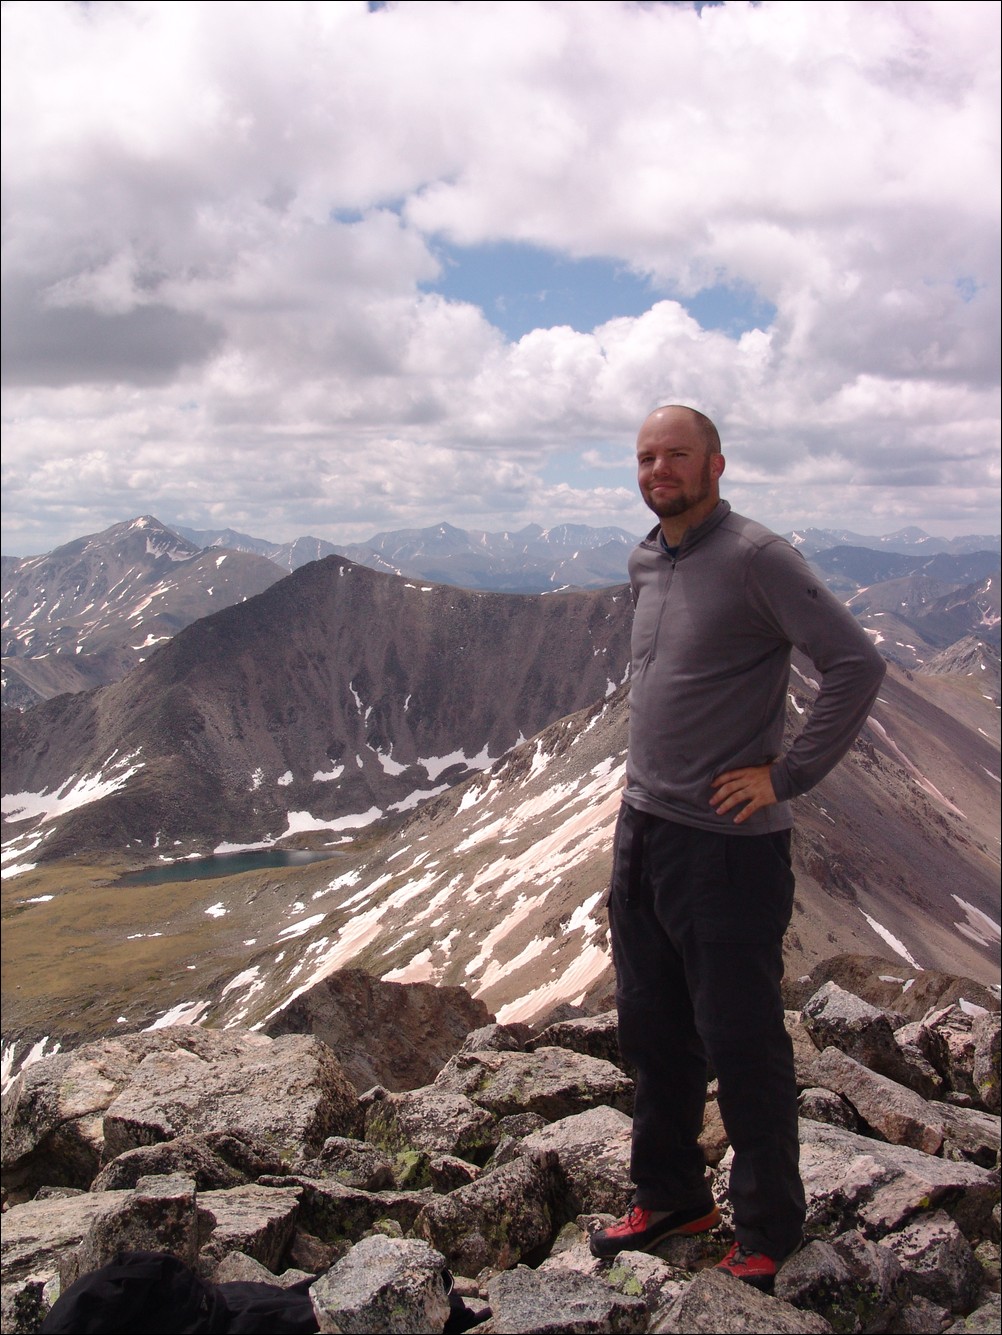
Matt Payne on the summit of Emerald Peak, with Mount Yale in the distance (far left).
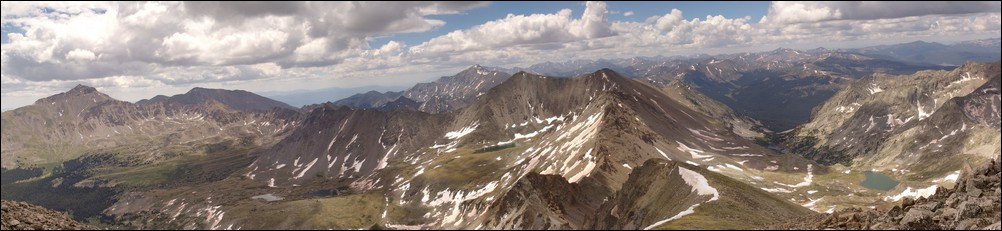
Views from Emerald Peak, looking east-to-north (left to right).
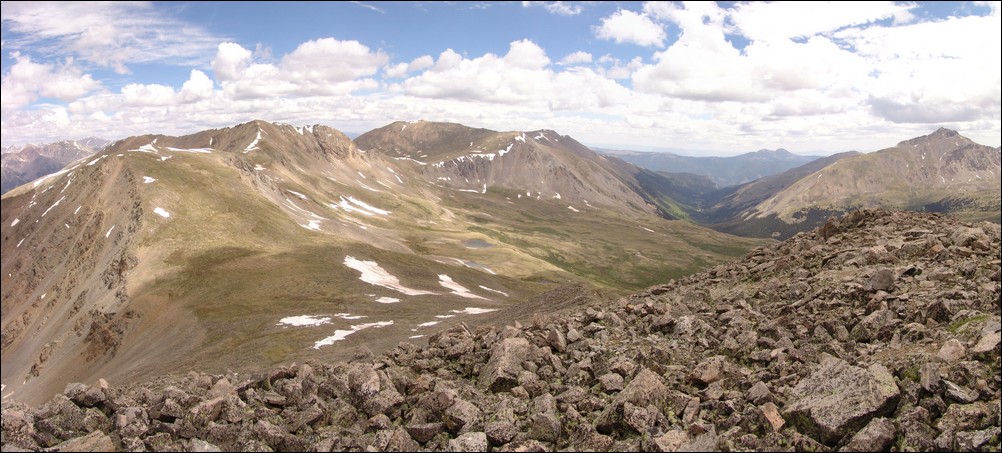
A view back at Iowa Peak and Missouri Mountain, with Mount Belford to it's right. Mount Harvard to the far right.
Ethan and I planned our route back to the trailhead from the summit. We decided that we would drop off of the east face of Emerald Peak and to the lakes below us. From there, we would aim for Elkhead Pass and head back down Missouri Gulch.
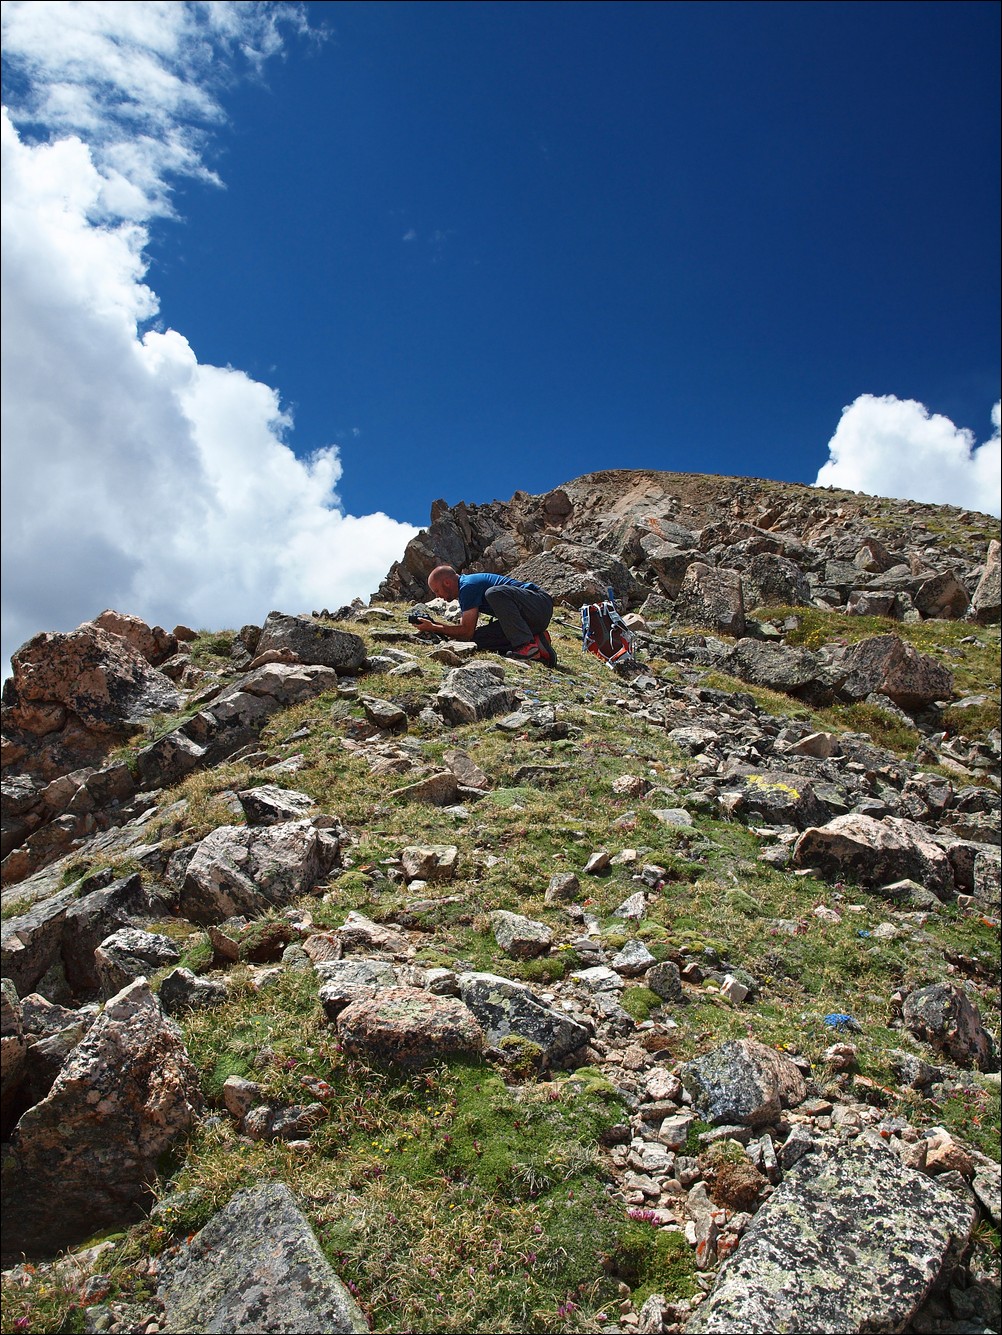
Matt Payne shooting some photos of flowers on Emerald Peak's east ridge.
And here is what I was photographing...
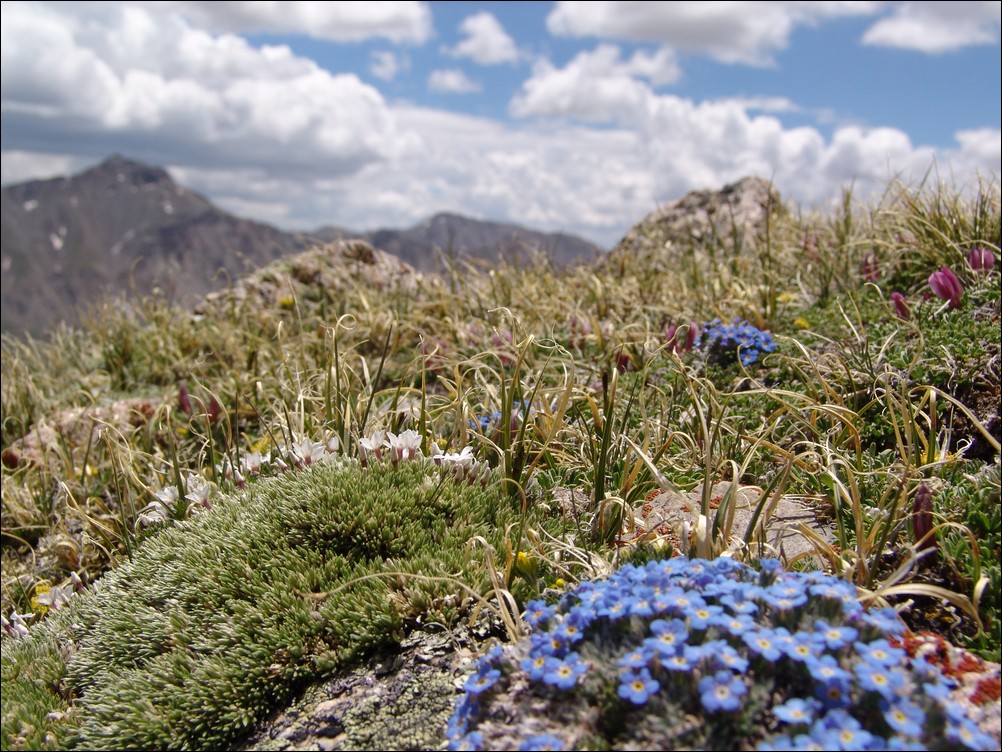
Wildflowers growing on Emerald Peak with Mount Harvard blurry in the distance.
We continued down the ridge from Emerald and through a small snow field. The snow was solid and we were able to walk right on the top of it. No need for the ice axe after-all!
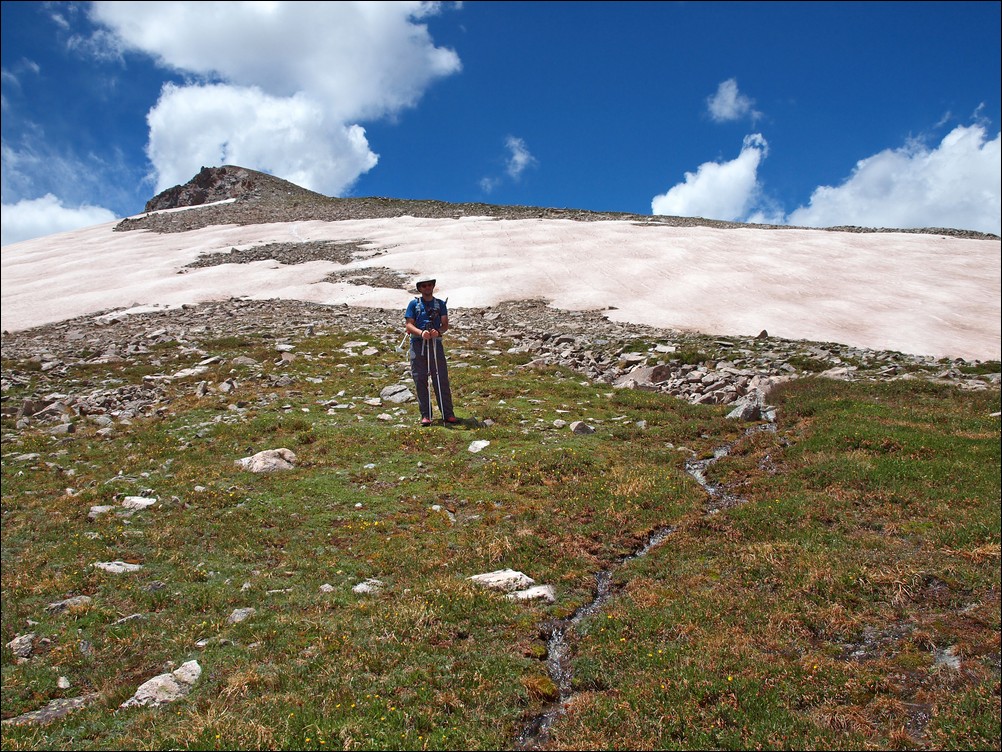
Still plenty of snow melt on Emerald Peak's east ridge in June.
At this point, the hike became incredible. The lower lakes came into better view, and the alpine surroundings continued to amaze both of us. One of the lakes in particular had an island of snow still sitting in it, making for a very bright blue hue around it. It was fascinating and gorgeous.
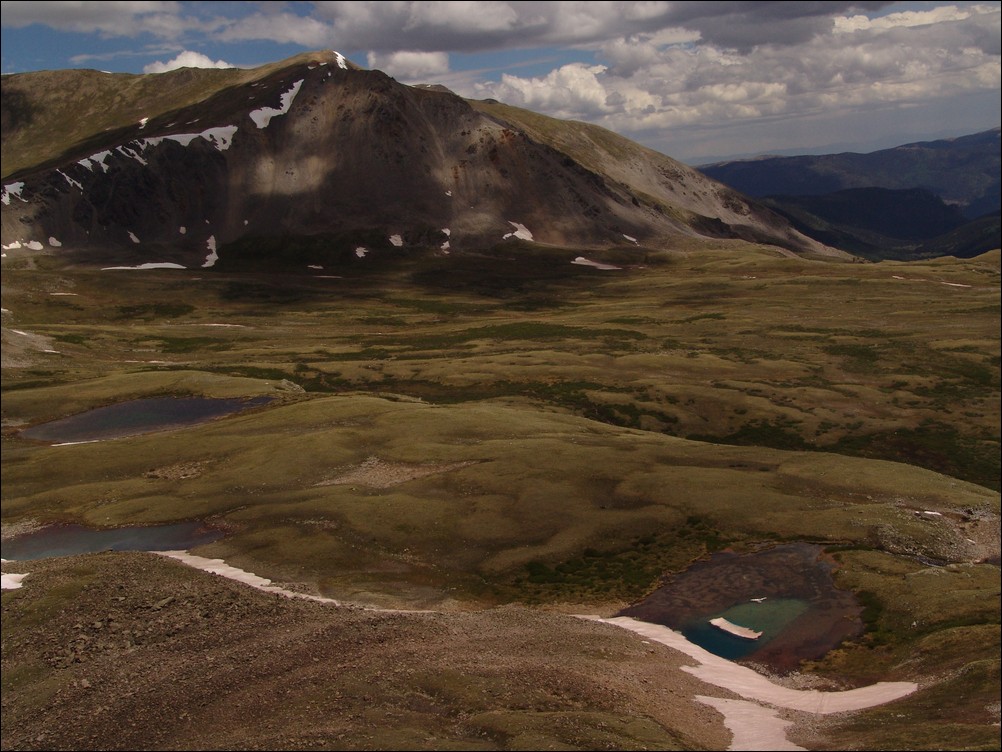
Lakes sit at the base of Emerald Peak.
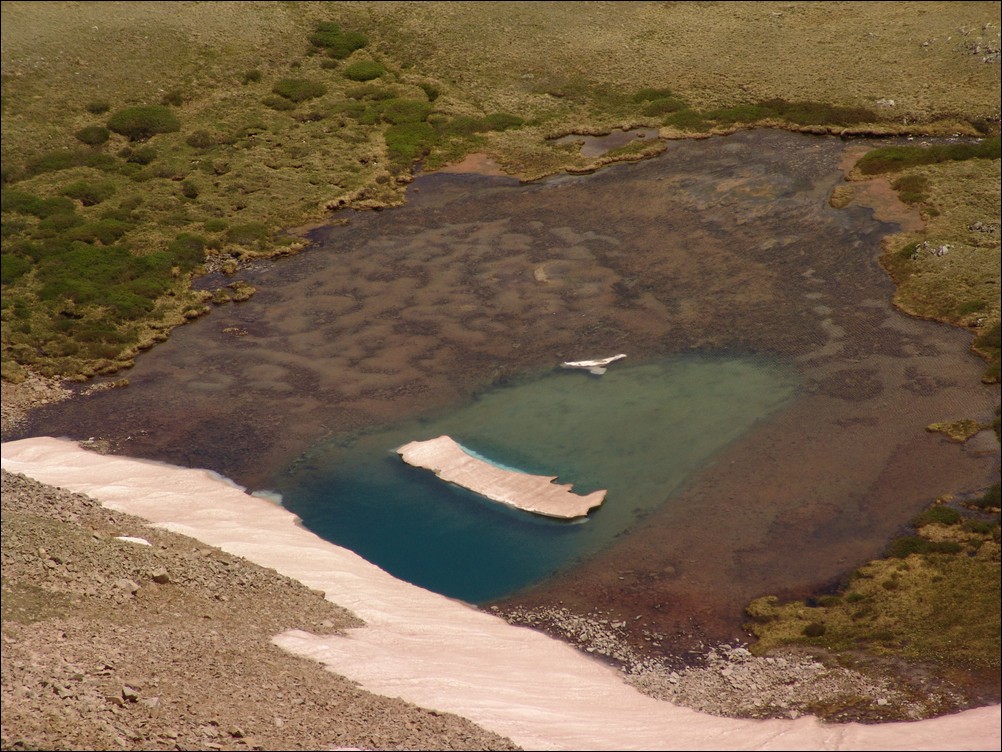
A zoomed in view of the odd and gorgeous blue lake.
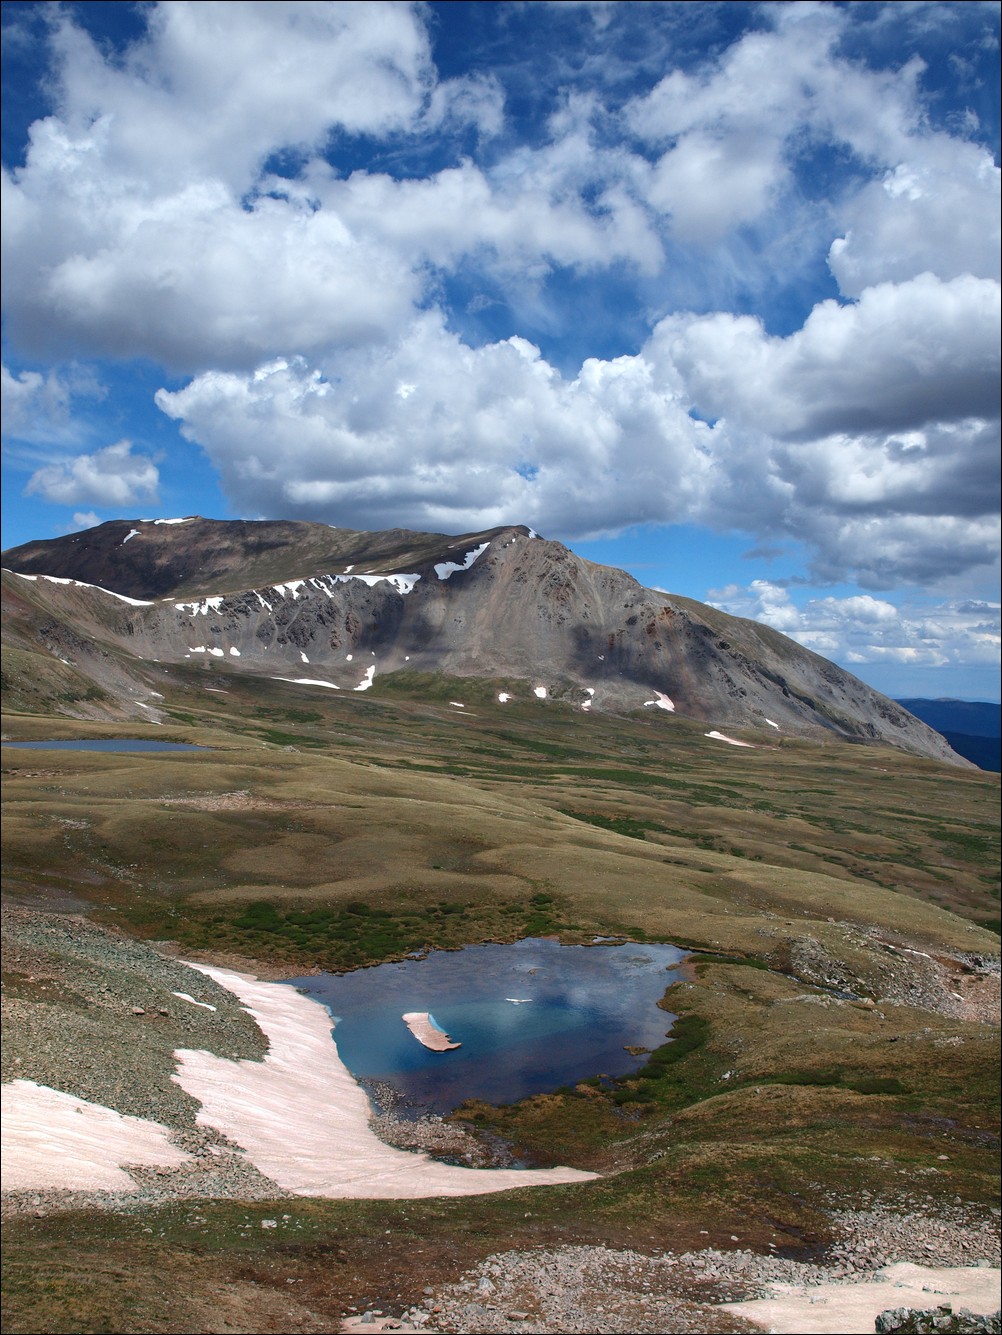
Ethan captures the blue slight better than I through the use of a circular polarizer.

Ethan Buete captured this great photo of some small lakes.
We were able to connect with an old game trail and head down to the lakes.
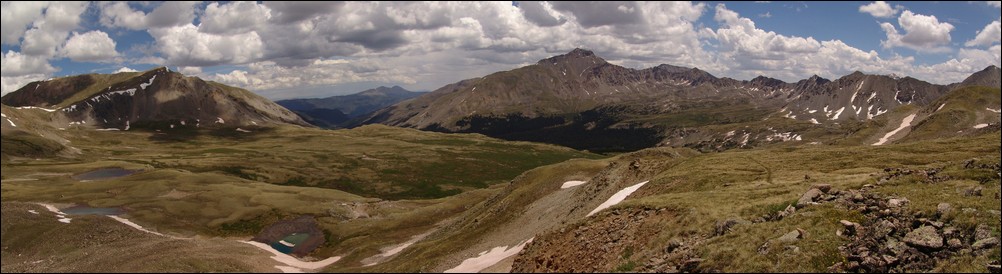
The Missouri Basin.
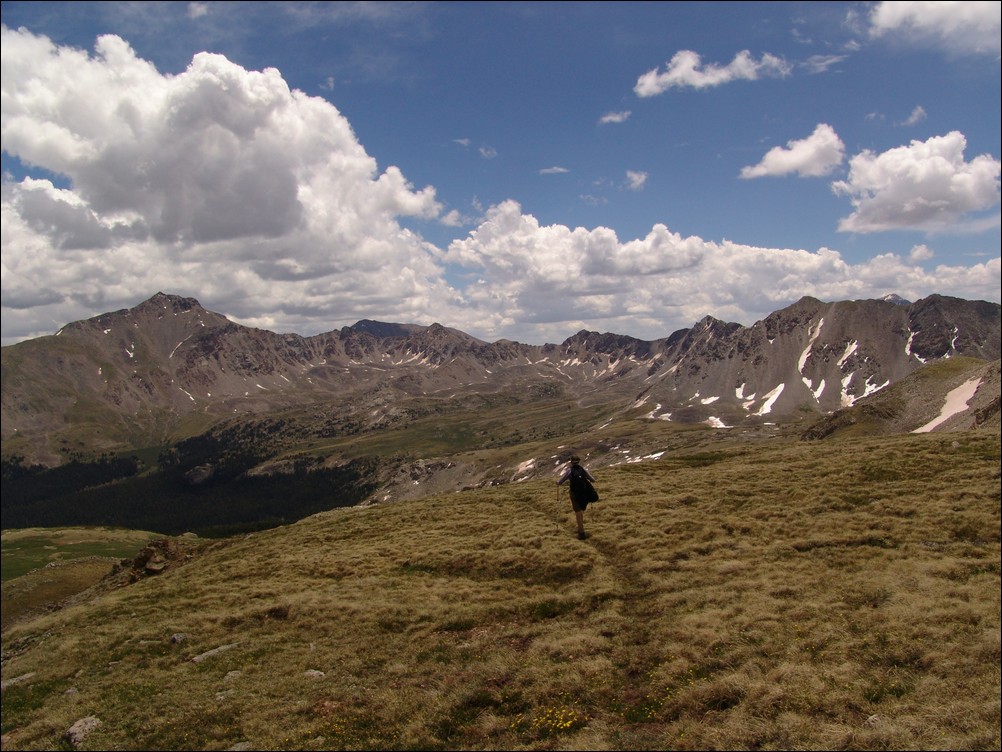
Ethan hikes towards Mount Harvard.
Ethan and I were continually impressed with the views of Mount Harvard from this area - a much more impressive view than you get when you actually climb it.
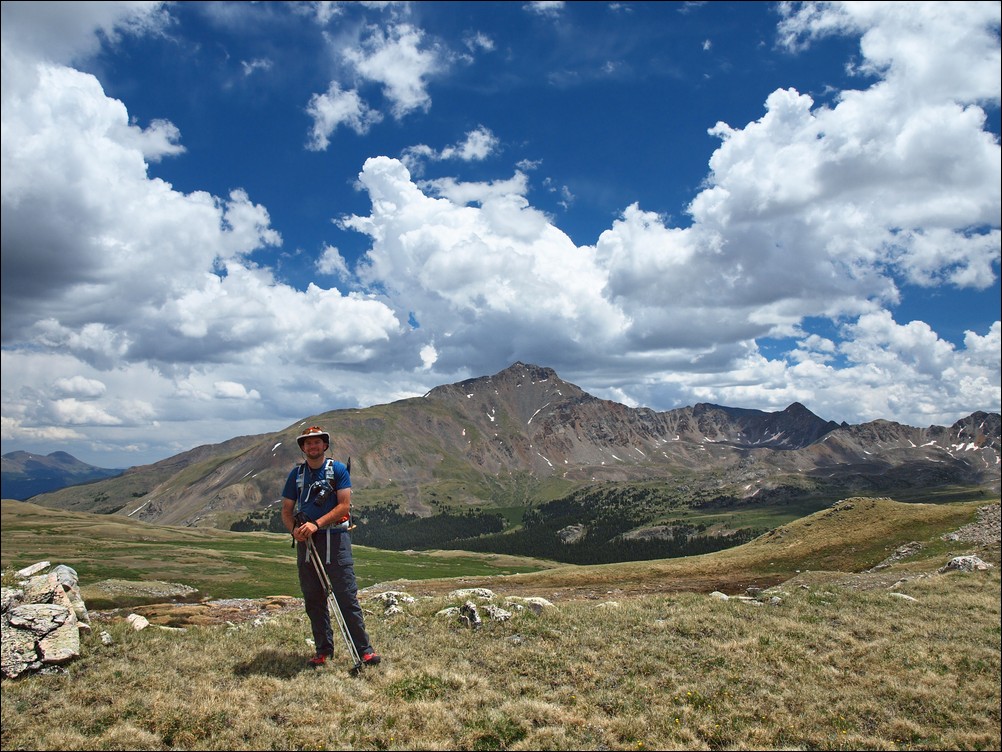
Mount Harvard towers above Matt Payne
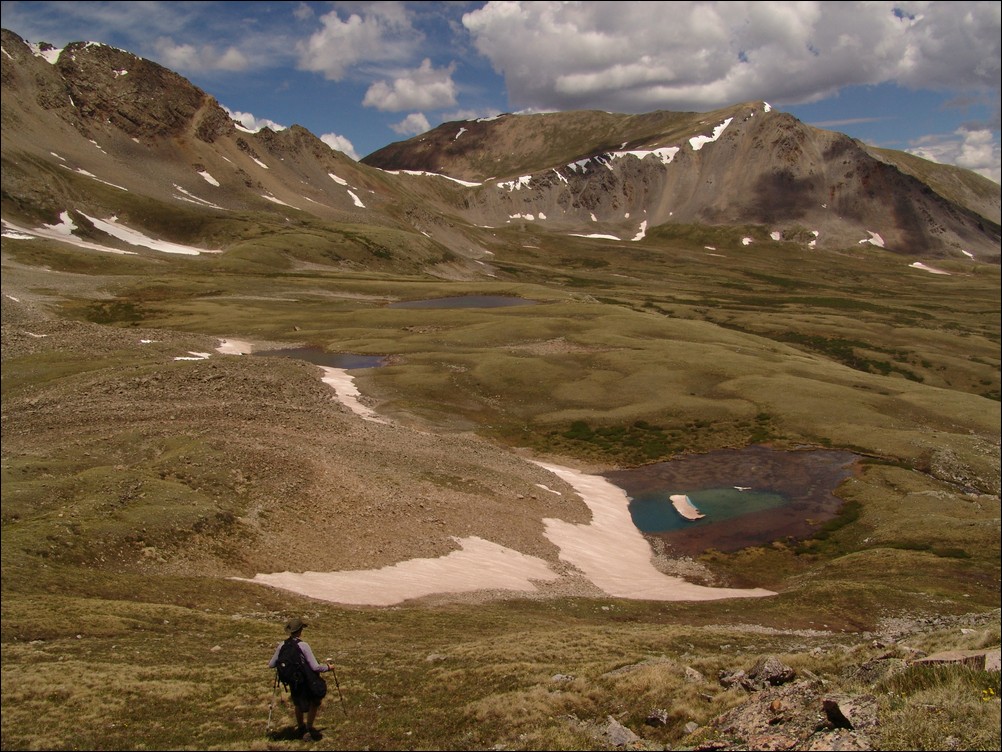
Ethan descends down into the basin towards the awesome blue lake.
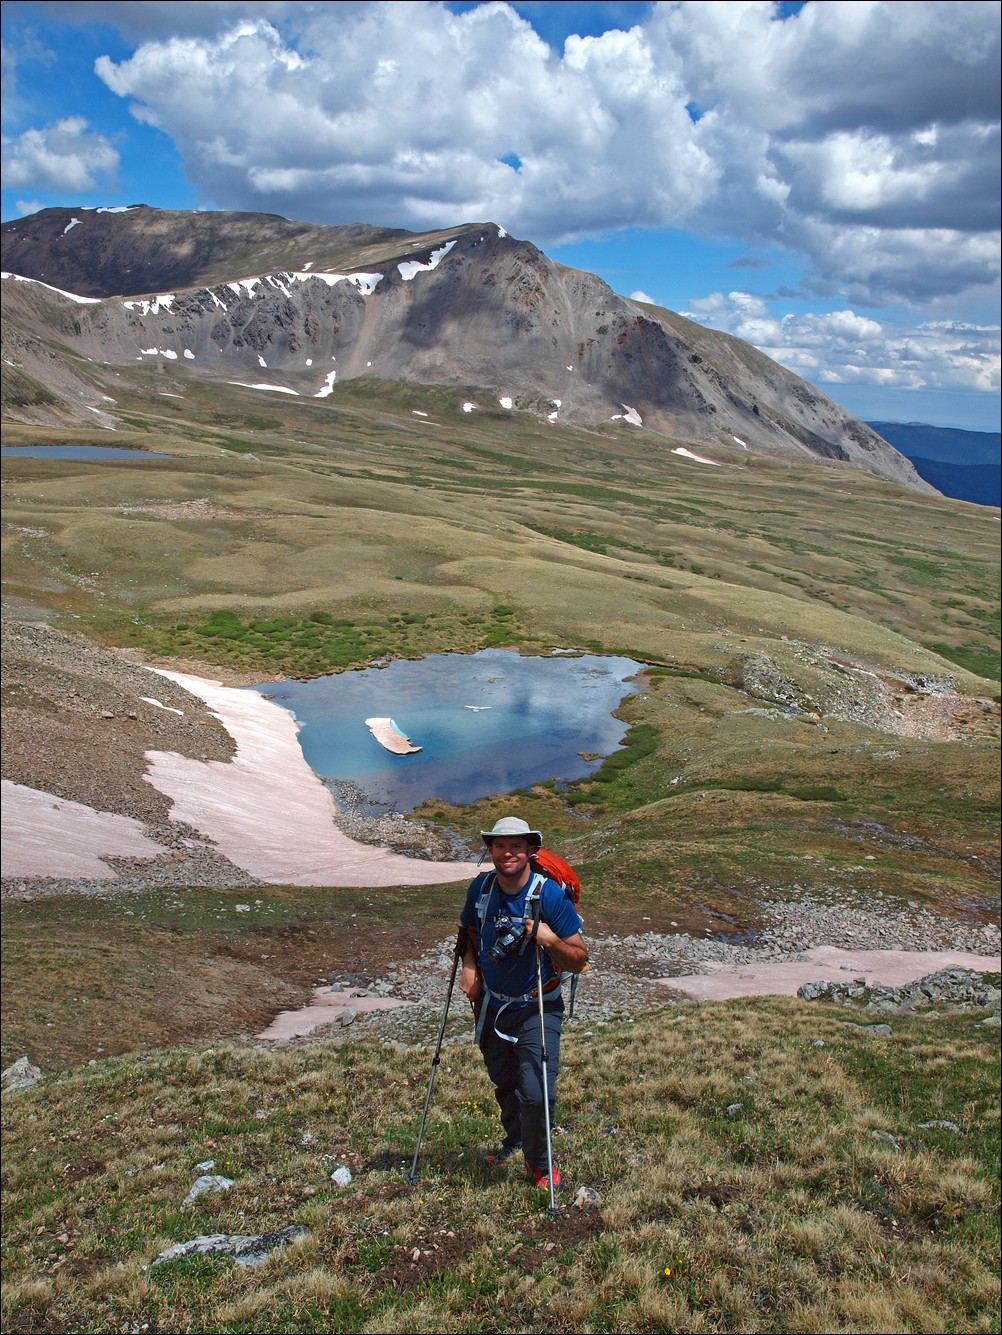
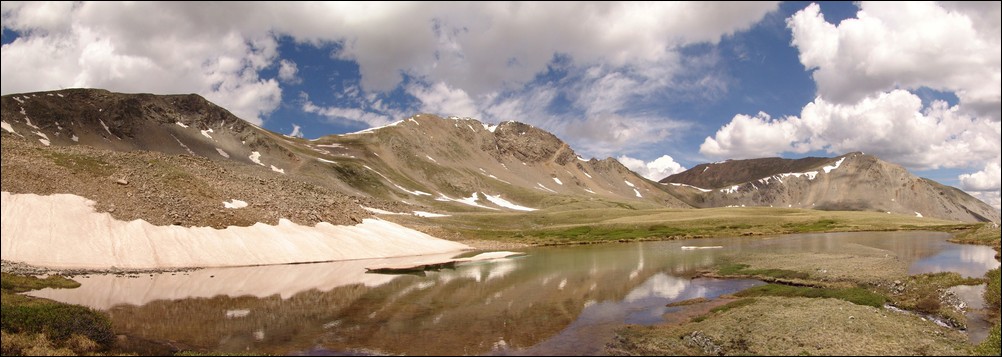
A panoramic photo of the first of three lakes found in the Missouri Basin, with Missouri Mountain at center.
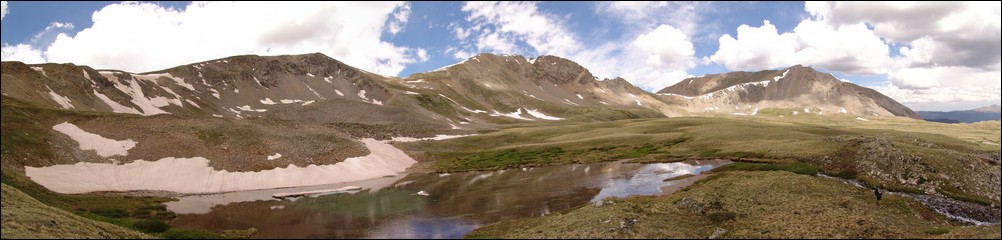
Ethan Buete checks out the snow melt coming out of the 1st of three lakes at the base of Emerald Peak.
We made our way across the long basin and found the 2nd of three lakes. This lake had some snow that had begun calving from the rock face, much like a glacier would.
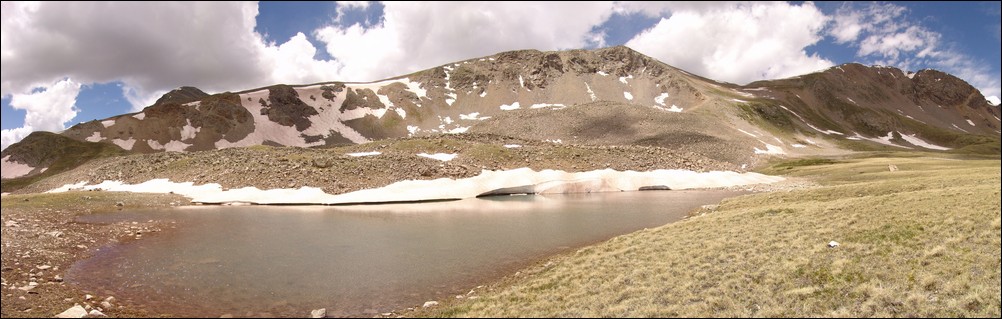
A glacier-like calving on the 2nd of 3 lakes below Emerald and Iowa Peaks.

The water was quite still for this panoramic shot of a small lake below Missouri Mountain, Iowa Peak and Emerald Peak (right to left).
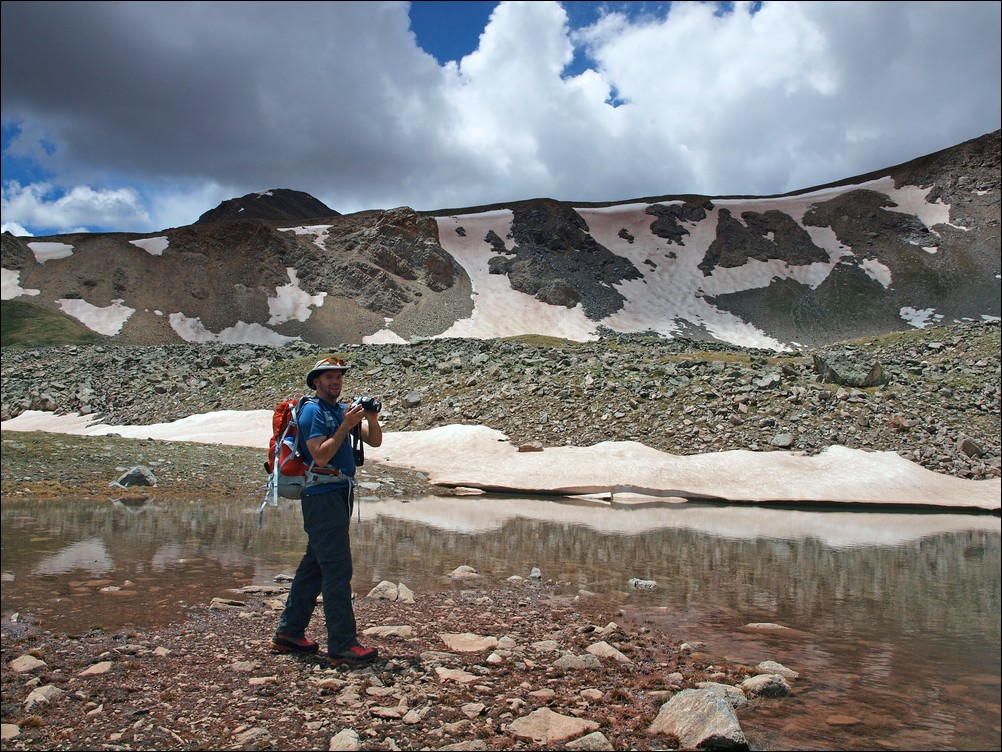
Ethan catches me in action at the 2nd of 3 lakes.
We headed on over to the 3rd lake, finding it to be the best of three due to its larger size and excellent views below Mount Harvard.
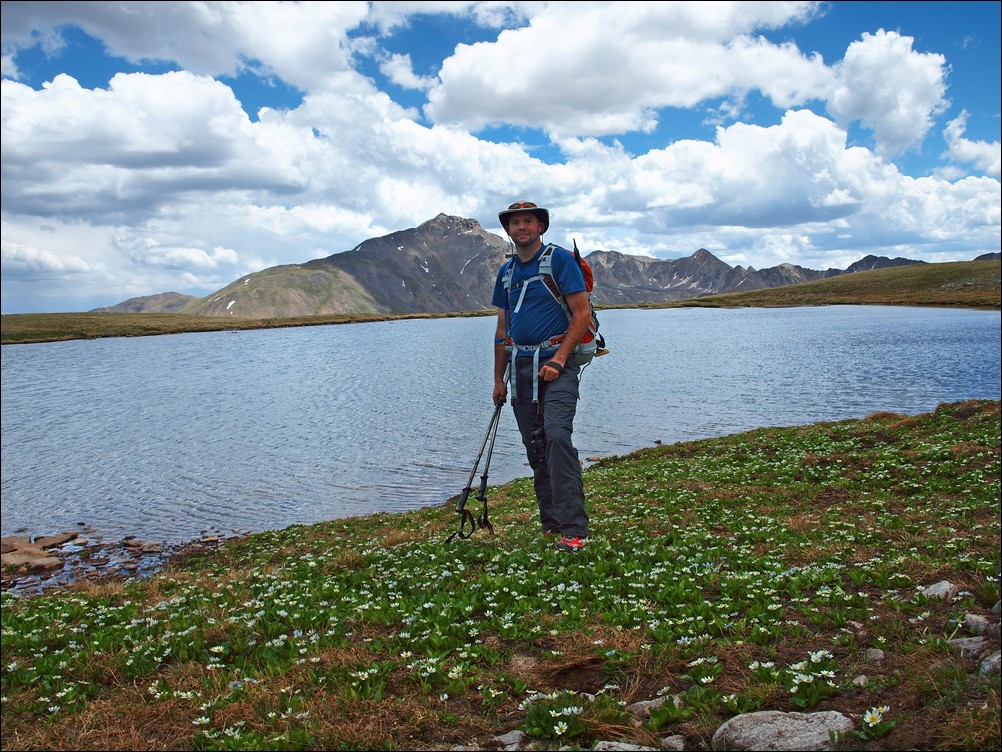
Matt Payne in front of a large apline lake and Mount Harvard.
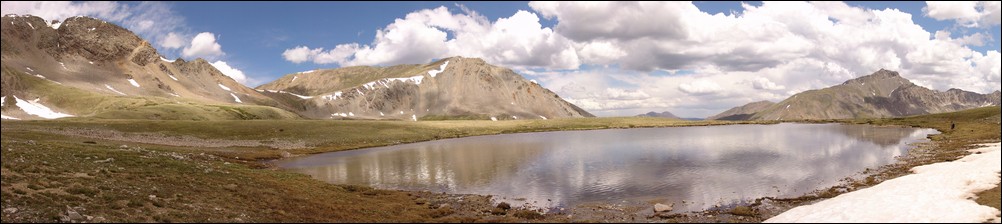
Ethan Buete next to a large lake with Mount Harvard in the background.
The sheer size of the Missouri Basin makes it a wonderful place to hike. With alpine vistas in every direction, it was tough for Ethan and I to leave. However, with weather looming on the horizon, we decided to head towards Elkhead Pass. Once reaching the end of the basin, looking back at Emerald left a great feeling in us. We had traveled a great distance today, and it was hard to believe just how far away Emerald looked already.

Matt Payne boogies on out of the Missouri Basin
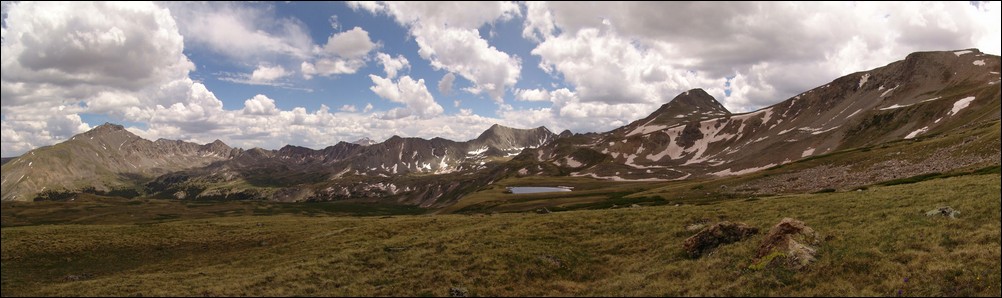
A look back across the Missouri Basin. Mount Harvard sits as the basin's monarch to the far left with Emerald Peak and Iowa Peak resting at the far right.
After hiking more or less straight across the back-side of Missouri Mountain, we were able to connect back up with the trail leading up Elkhead Pass.
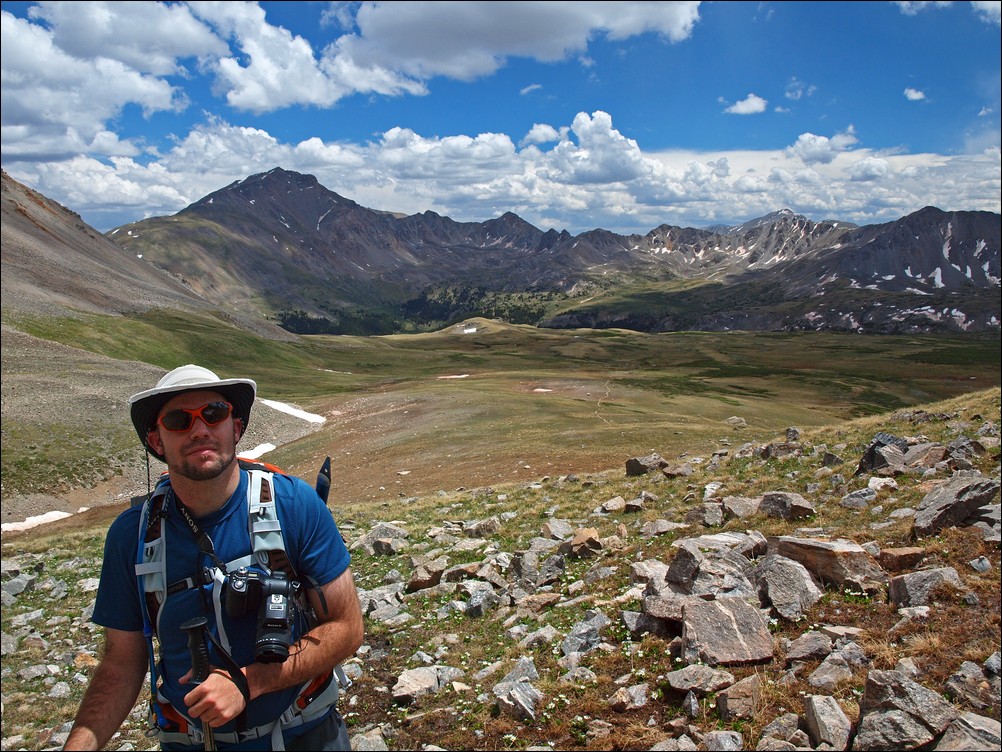
Matt Payne with Mount Harvard behind him.
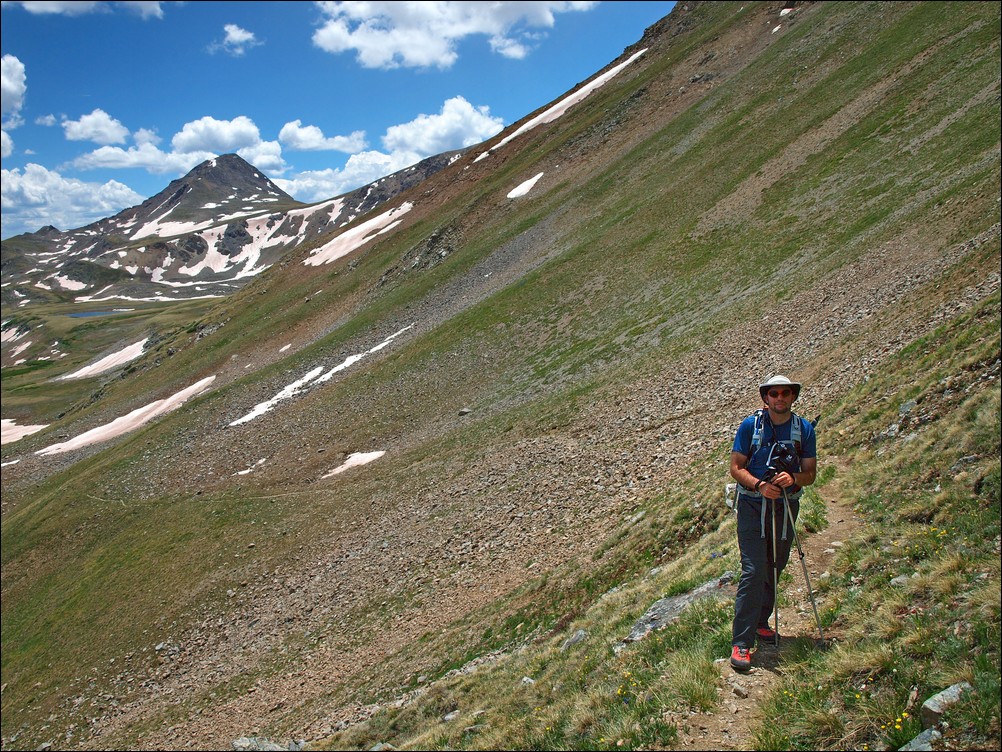
Matt Payne on the Elkhead Pass trail with Emerald Peak at far left.
Near the top of Elkhead Pass, I noticed a giant waterfall below Emerald Peak, so I took several fully zoomed in photos of the basin and waterfall and composed them into one giant zoomed in view of the basin.
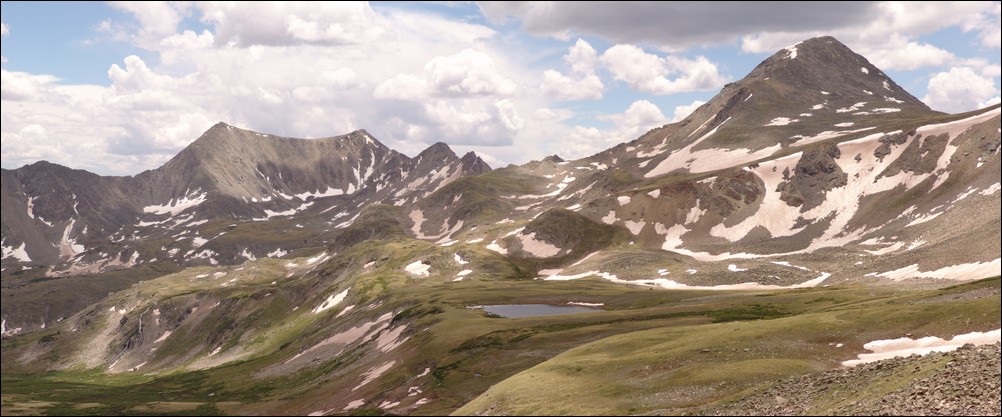
A super-zoomed in view of the Missouri Basin, with a giant waterfall flowing at far left. Emerald Peak sits above the basin at far right.Click on the photo to see the full resolution version.
A short while later, Ethan and I managed to reach the top of Elkhead Pass and see down into Missouri Gulch where the whole day began.
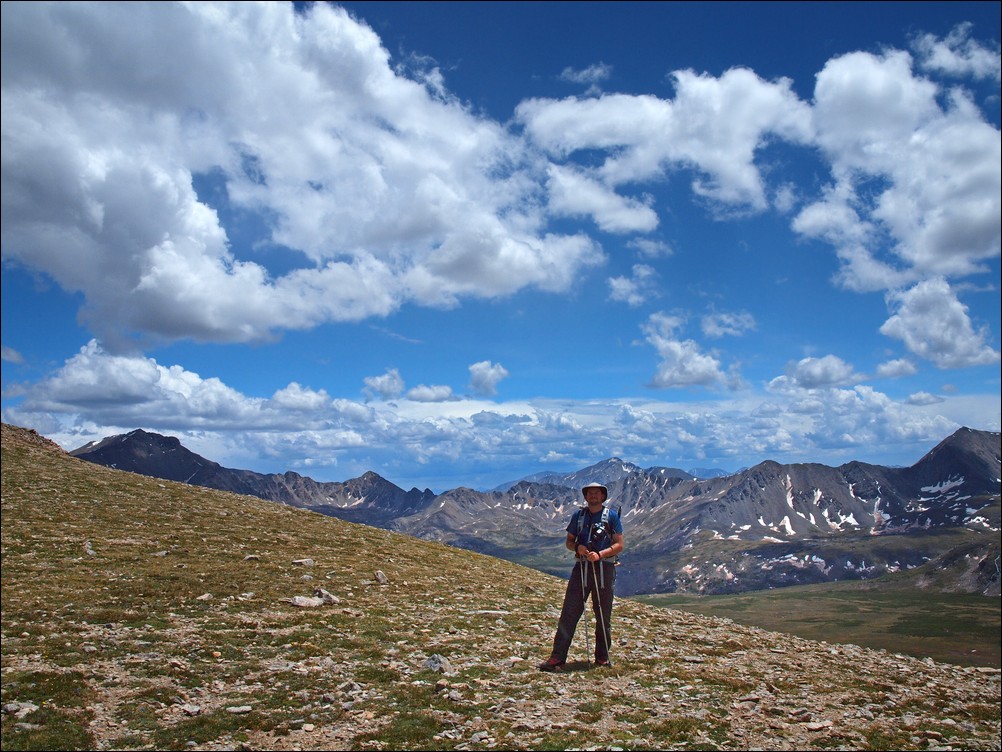
Matt Payne at the summit of Elkhead Pass.
It was nice to hike downhill again and see the valley in the middle of the day with more light. We were also lucky to see the entire route up Missouri from slightly below the pass, as well as views of Missouri's class 4 northeast face.

Missouri Mountain's class 4 northeast face (far left).

A zoomed in view of Missouri Mountain's class 4 northeast face.
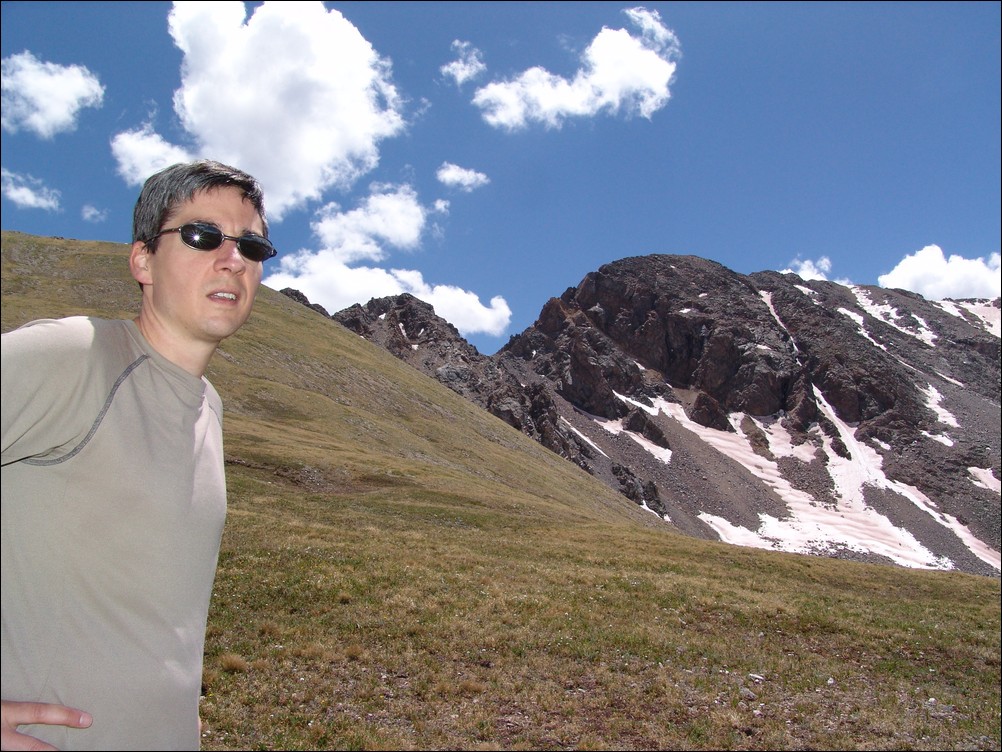
Ethan poses in front of Missouri Mountain.
We headed on down the pass and noticed a large waterfall coming down Missouri as well.
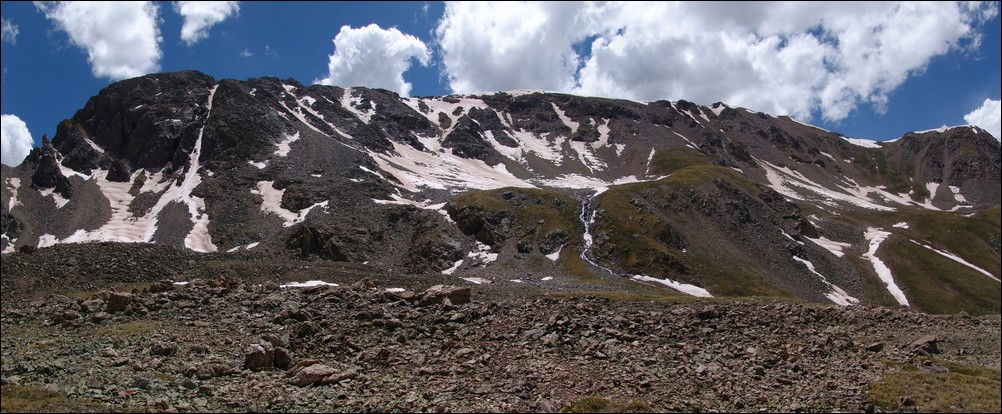
A large watefall flows down the face of Missouri Mountain's ridge.
After a short time, we reached the trail turn-off for going back up Missouri Mountain. We had made a full circle at 1:30 PM, a full six hours after we first encountered this split in the trail.

The trail forks - heading back up Missouri Mountain or down to the start of Missouri Gulch.
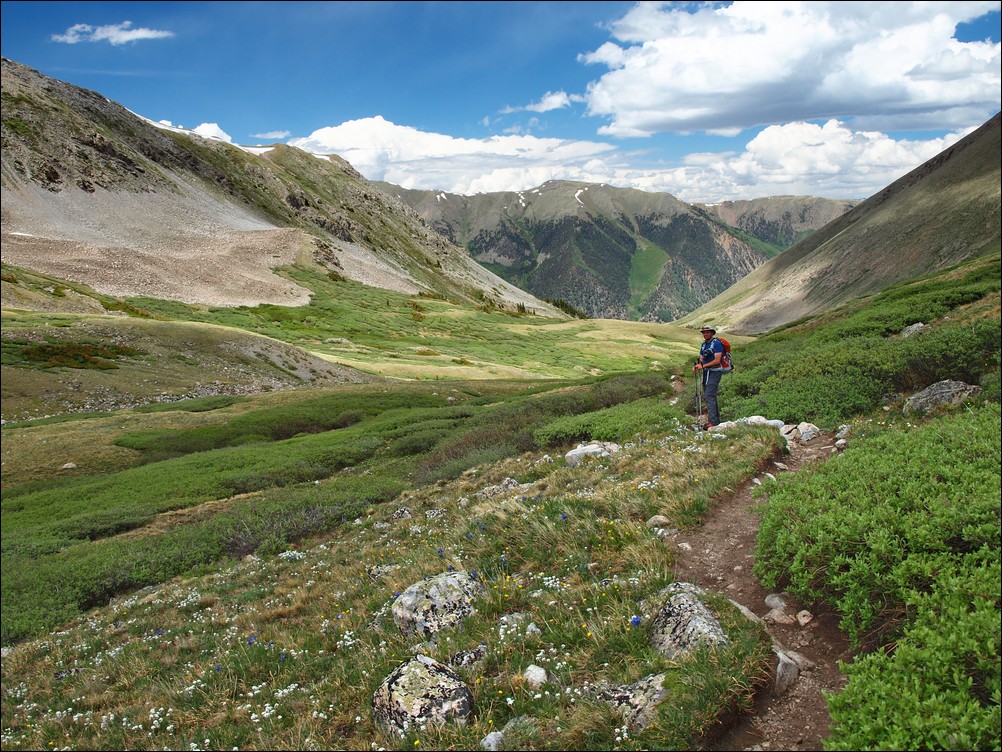
Matt Payne hikes down the Missouri Gulch trail.
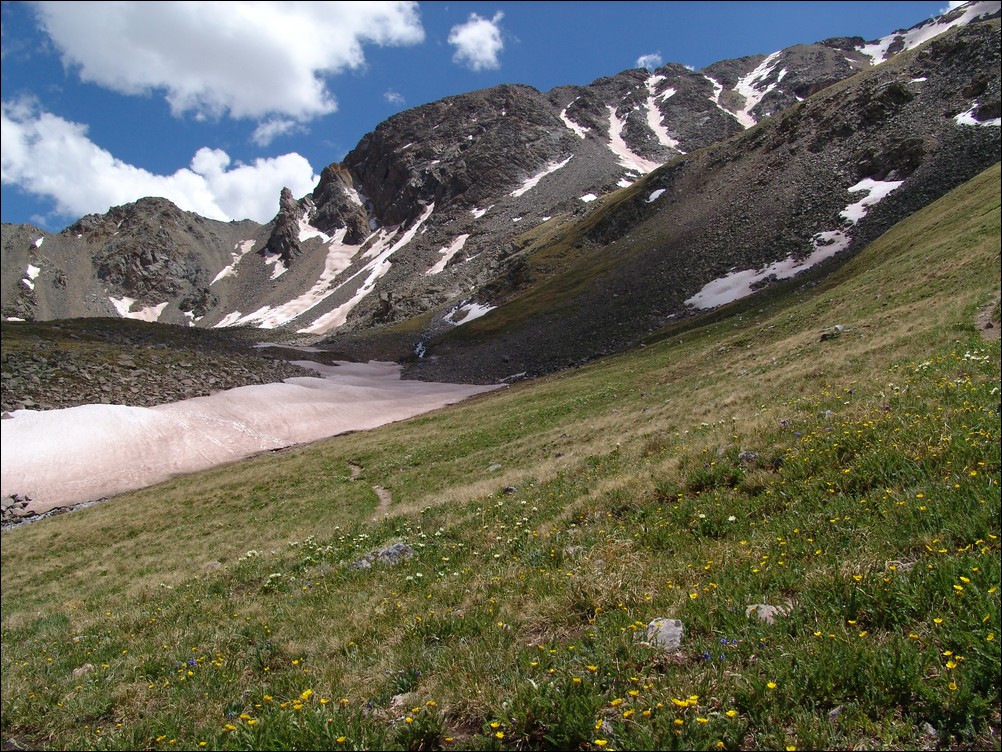
A look back at Missouri Mountain and the Elkhead Pass trail.
Ethan and I made excellent progress down the trail and made it back to a large stream crossing. Ethan took this time to train me on photographing water flows.

Water flows down Missouri Gulch.
Ethan and I made excellent time back down the trail and to the trailhead. We made a quick stop at a small gravesite in the Vicksburg cemetary. The grave marker reads: "Vicksburg Cemetary. William Huffman, Born 1884. Died of Pnemonia. One Month Old.Father was a miner and mother ran a boarding house in Vicksburg."

We crossed Clear Creek over the bridge and made it to Ethan's car. All in all a very successful and aesthetically pleasing trip.
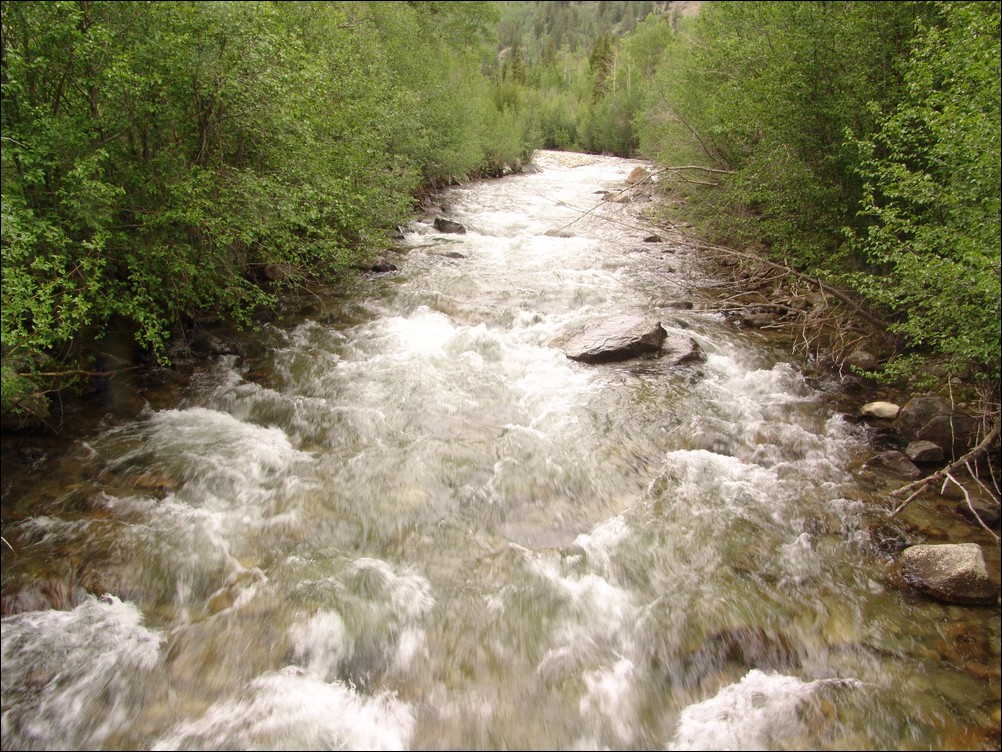
Clear Creek was still running fast near the end of June.
I hope you enjoyed this trip report. If you are interested in any of the photos, please contact me. If one of the photos belongs to Ethan Beute, I will forward your message to him.
Stay safe!