Displaying items by tag: Nikon D7000
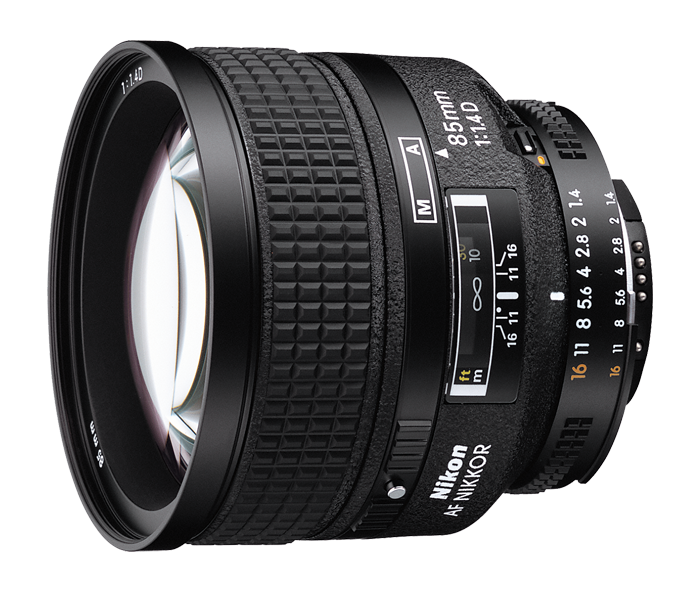
Review of the Nikkor 85mm f1.4 AF-D - Extreme Depth of Field
Introduction:
I've longed to obtain a good portrait lens for awhile now, and after months of research and testing, I settled on the Nikkor 85mm f/1.4 AF-D. The Nikkor 85mm f1.4 AF-D lens has long been regarded as one of Nikon's best lenses for many reasons. The lens produces incredibly creamy bokeh (the aesthetic quality of the blur in out-of-focus objects in a photograph) and separates the subject with extreme clarity and definition. This is partially because the lens sports a rounded diaphragm with 9 blades. This lens is an absolute champion for portraiture and creative photography as well as landscape photography. This lens offers an incredibly fast 1.4 aperture, which provides great low light capability. It is sharp at every aperture, except, perhaps in the corners at f/1.4.
Technical Specifications:
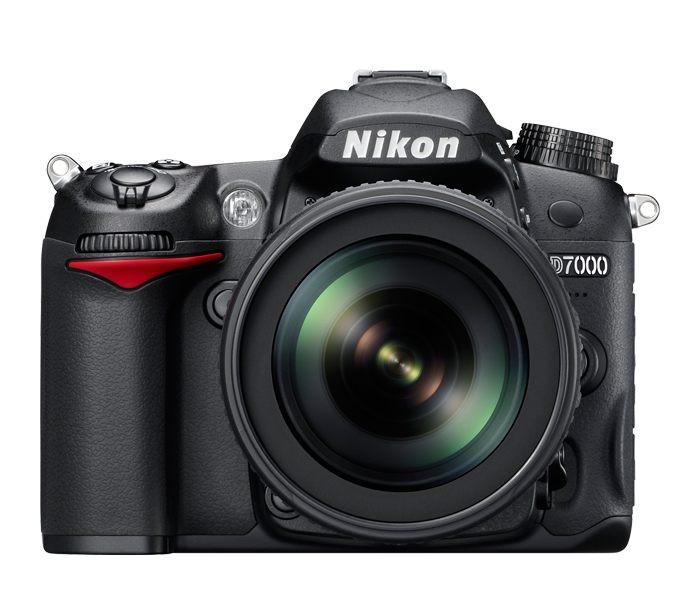
The technical details of this lens are impressive - extremely fast maximum f/1.4 aperture with stops at every aperture (smallest aperture is f/16); 77mm filter size (great news since most professional lenses take this filter size); a minimum focal distance of 2.8 feet (.85 meters). For an FX body, the horizontal angle of view is 24°, for a DX body, 16°. While this is an autofocus lens, it is not an AF-S lens, meaning that it won't autofocus on the low-end DSLR bodies. Nikon lenses with integrated autofocus-motor are designated AF-S (this lens is AF-D). They are needed for new cameras with lack of an autofocus motor. Today these are the Nikon D40, D40X, D60, D3000, D3100, D5000, D5100 and the Nikon 1 series with FT1 adapter. Fortunately for me, the autofocus works wonderfully on the Nikon D7000, which is arguably the best non-FX camera body made by any camera company. For those of you with one of the above Nikon bodies, do not fret - Nikon has recently updated this lens, enhancing the autofocus by adding a silent wave motor, and modernized the look and feel. The newer version is titled, “85mm f/1.4G AF-S”. Unfortunately, that lens costs nearly twice as much.
Build and Feel:
The build of this lens is quite impressive as well. You may notice that newer Nikon lenses feel plastic-like and cheap. Not this lens, which entered the market in 1995 and had its final production run in 2010. The lens is very solid and feels great.
My Experience on a DX Camera Body:
Many reviews suggest that DX users should not bother with this lens due to the crop-factor of an FX sensor. While I won't disagree that it seems to be a good idea to go with the 50mm f/1.4 lens instead, I opted for the 85mm f/1.4 because I had used it before and because it is often regarded as one of the best lenses you can purchase. I also want to think about the future of my photography; therefore, lenses are an investment. You could spend $500 on glass that you won't be able to use on your next camera body, or you can invest $1000 on glass that you can. The choice is yours. Personally, I find the lens to be a perfect fit for my Nikon D7000, albeit, a tad long. Certainly, the lens has forced me to re-think the way I shoot, and that is enough for me (also - good luck getting similar bokeh results on a 50mm f/1.4).
Performance:
This lens performs wonderfully at almost every f-stop. Even at f 1.4 images are crisp and sharp, with minor loss in sharpness in the corners. By f2.8, images are perfectly sharp, even at the corners. In fact, this lens peforms even better than the newer G lens in this regard. I've uploaded a few sample shots I've taken with the lens, so you too can see the results:


Depth of Field:
The depth of field results from this lens are pretty remarkable. In order to understand depth of field, one needs to understand how f-stops and aperture work. It is somewhat counter-intuitive, so let me explain:
The main purpose of a camera lens is to collect light (crazy, I know). The aperture of a lens is the diameter of the lens opening and is usually controlled by an iris, or, in photography, a diaphragm. The larger the diameter of the aperture, the more light reaches the image sensor.Aperture is expressed as f-stop, e.g. f2.8 or f/2.8.
- The lower the number (f-stop), the bigger the opening of the lens (aperture)
- The higher the number, the smaller the opening of the lens
- Larger opening = more light = shallower depth of field
- Smaller opening = less light = larger depth of field
- Less light = need for a longer exposure (shutter speed)
- More light = need for a smaller exposure
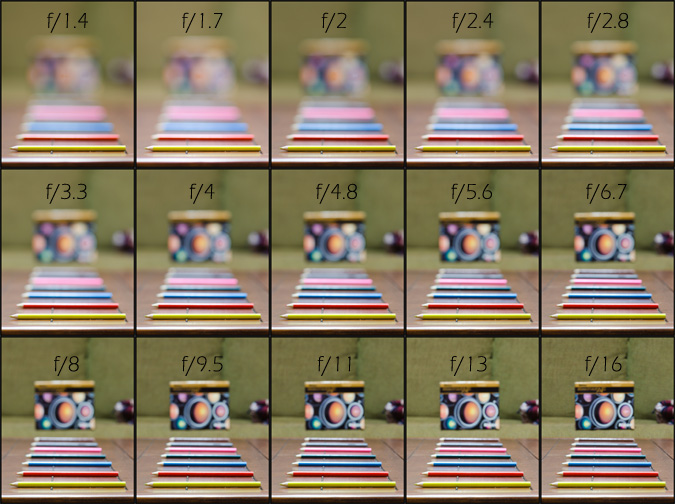
To demonstrate the Nikkor 85mm f1.4 AF-D's capabilities at various f-stops, and to better demonstrate and explain depth of field, I took sample images using a tripod at every f-stop. My camera was set in aperture-priority mode, meaning, I chose the aperture (opening) and the camera adjusted the shutter speed to get the same exposure for each photo. I set-up two demonstrations, the first with a colored pencil as the focal point, and the second as the lens box as the focal point. Please feel free to click on each image inside the box sample to see a larger version of the shot.
Here is the sample set with the yellow colored pencil as the object in focus:
And here is the sample set with the box in focus:
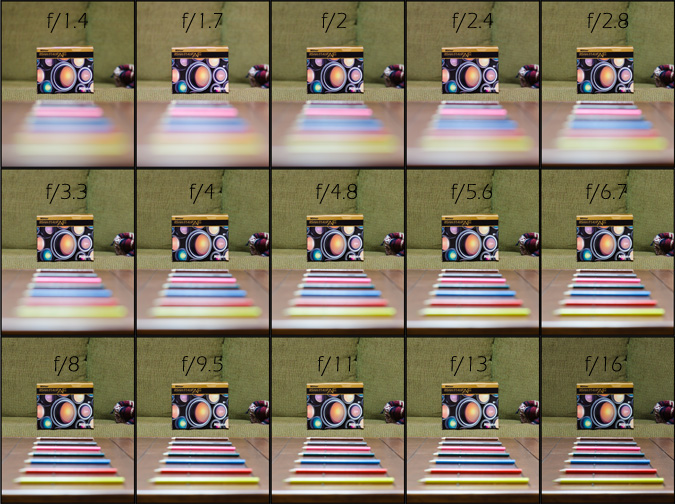
As you can see, this lens performs quite well at all f-stops. I also hope that this demonstration was useful for anyone looking to purchase the lens or understand how f-stops and aperture translates into various depths of field.
Conclusion:
This is an absolutely dreamy lens that produces amazing results for portrait photography. This lens produces incredble bokeh and offers wonderful control for focus in both manual and auto-focus modes given the proper body pairing. The lens is quickly becoming one of my go-to lenses for most day-to-day applications. My only concern with this lens on an DX body would be focal distance. Indeed, I am hopeful that sometime within the next few years I will be able to purchase an FX body to take full advantage of this incredible lens.
If you are in the market for a new copy of this lens or any other photography equipment, please consider supporting this site by using this link to the lens on Adorama. Thanks for reading!
{fcomment}
Fun with High Dynamic Range (HDR)
One of the things I have become really excited about is taking High Dynamic Range (HDR) photos with my new Nikon D7000. Since I knew almost nothing about how to do this, other than the fact that I needed to take some bracketed photos at various exposure levels, I decided to check out a book from the Pikes Peak Library District, entitled, High Dynamic Range Photography for Dummies. This is a really great book for beginners, and I strongly recommend it if you are new to this method of photography.
I wanted to keep my first HDR project as simple as possible, so I set my camera on my dining room table, which has a very colorful tablecloth on it. I also set out the lid to a tupperware container that had just been covering my lunch. The sun was bright outside, but the light in that part of the house was mixed - some bright light was let in through the curtains, but there were tons of shadows as well - a seemingly perfect scenario for HDR work.
In the book, it explained that I needed to use my camera's built in auto exposure bracketing for the best results. Fortuntely, my new camera has this setting, which makes HDR work a lot faster. I set my exposure levels to -2, 0 and +2 exposure values (EV) for the auto-bracketing. If you're not familiar with bracketing, it is the practice by which you take three or more photos of the same subject (preferably with a tripod for best results), at a different exposure value for each photo taken. In this case, I did 3 photos to simplify the process, but one could use up to 9 or more photos if there is a large amount of dynamic range in the scene you are photographing. Dynamic range is basically the range of light the camera is seeing with its sensor. Most digital camera sensors can only fit so much light data onto their sensors, so if you are shooting a scene with lots of bright lights and shadows, high dynamic range is your solution to capture the full range of light. Once the photos with varying exposure values are taken, they are then combined using a process called tone-mapping, which maps all that light information onto a smaller amount of data. That is why it is called tone-mapping. I won't go into all of the specifics, but I hope that is enough for you to get a grasp of the concept.
So, here are the three photos I took, one under-exposed (-2 EV), one properly exposed (0 EV), and one over-exposed (+2 EV), labled 1, 2 and 3 respectively.
Example 1: -2 EV

Example 2: 0 EV

Example 3: +2 EV

I shot all three photos in "RAW" mode. If you're not familiar with the difference between RAW and JPG, read this awesome article by the Digital Photography School. Using a program called Capture NX2, which is designed to handle the RAW .NEF files from my Nikon D7000, I applied some extra sharpness and color saturation to each photo (+20 sharpness and +40 saturation). I then converted each photo to a 16 bit .TIFF file. .TIFF files are great for working in HDR because they retain the full quality of the image, whereas .JPG files are compressed and lose some of the image quality.
Once converted into TIFF files, I open up Photomatix Pro, software designed specifically for working with HDR images. In this great program, you can do amazing things with bracketed images, and there are literally thousands of different combinations of settings that can be used to tweak the image into something you like. The main settings that you will work with are Strength and Smoothness. These two settings control a great deal of how the final image turns out. I won't go into depth here on the various settings in Photomatix since I am still learning, but I wanted to highlight those two settings as being very important. The best way to use this program is to play with each setting and see what kind of effect it has on your photos.
With the three images loaded, I set the Strength to 100 and the Smoothness very high (I don't recall the exact number). I reduced Chromatic Abberations and hit process - away to the races!
The final product is something that I feel looks great. You can mouse over the image to see what the original image at 0 EV looked like vs. the HDR version.

I really like the look of HDR photos, and I am excited to play more with this on my hikes this summer to produce some great images. If you have expertise in working with HDR, I'd love for you to comment or Register on the site and add your own article on how your HDR workflow differs from mine.
If you enjoyed this article, remember, you can always stay up-to-date on new articles and trip reports by following 100summits on Facebook and Twitter.
The Power of a Circular Polarizer
After obtaining my brand-spanking-new Nikon D7000 this month, I knew the first accessories to get would be a circular polarizer and the Nikon MC-DC2 remote release. In order to take star trail photos, I knew I'd need to use my new handy-dandy bulb setting and a cable release for ultra long exposures of 1-2 hours.