Displaying items by tag: Colorado
Blanca Peak and Ellingwood Point - Introduction to the Sangres
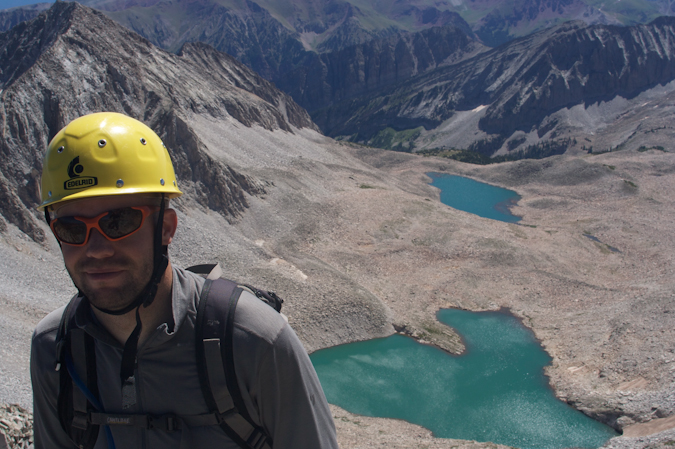
Blanca Peak has always mystified me. It is one of the most prominent mountains in Colorado - it towers over the San Luis Valley and the Great Sand Dunes National Park. It is easily one of the most impressive looking mountains in the State, from almost any angle. With that being said, it was quite exciting to finally get to climb it along with its neighbor, Ellingwood Point.
Here are some meaningful statistics from this adventure:
Blanca Peak - 14,345 ft. (ranked 4th highest in Colorado)
Ellingwood Point - 14,042 ft. (ranked 42nd highest in Colorado)
Total mileage: Approximately 10 miles
Elevation gain: 4,600 ft.
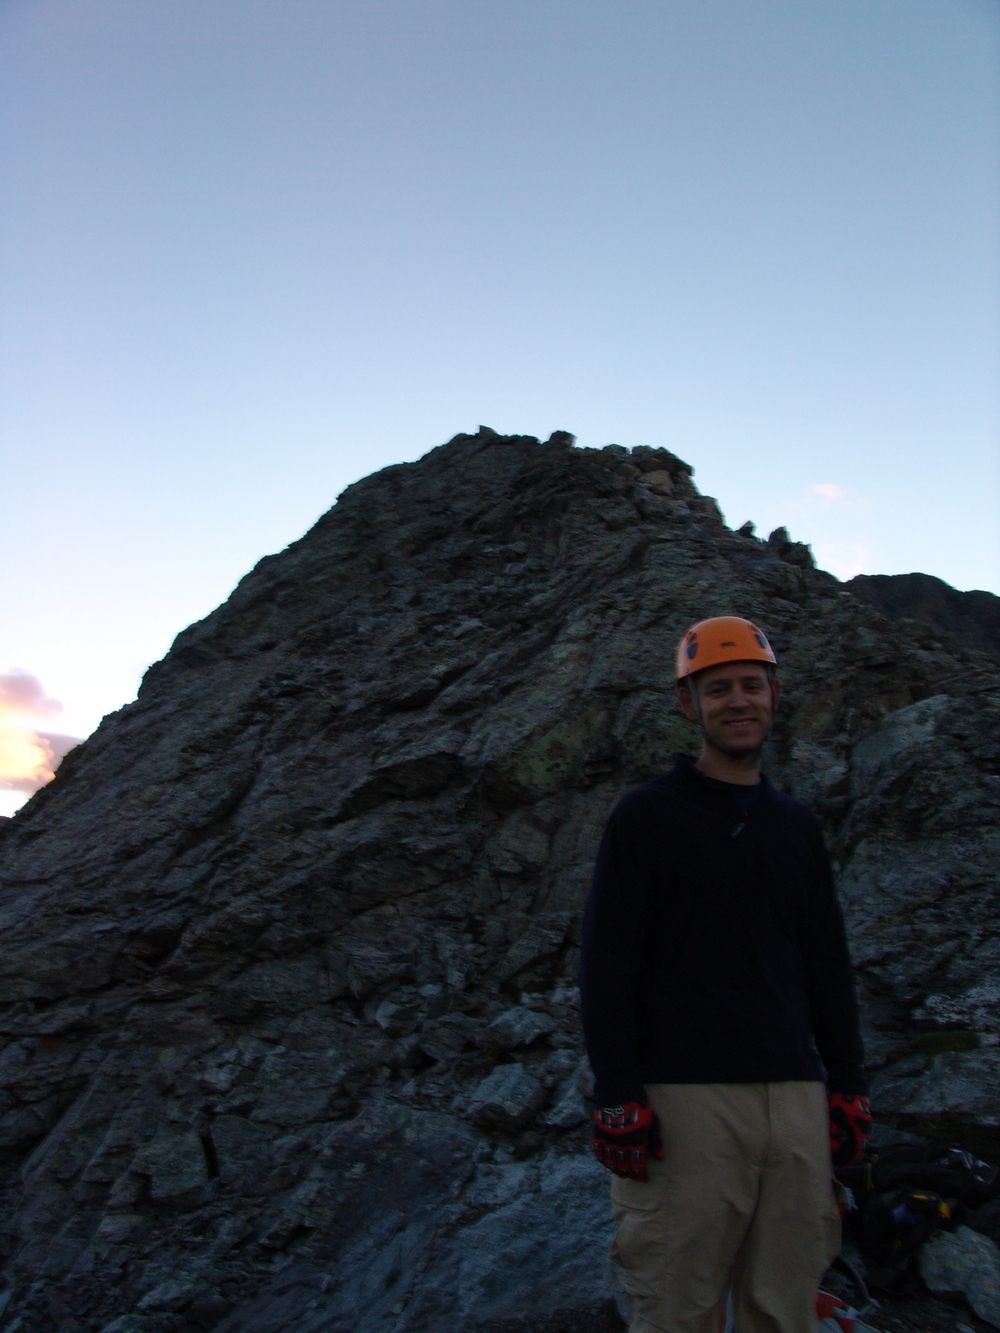
My friend Terry and I started our epic July climbs with a bang by heading down to the Sangres to tackle some of the most impressive mountains in the State. To accomplish this - we would need to backpack up a fairly long road to reach some high mountain lakes.
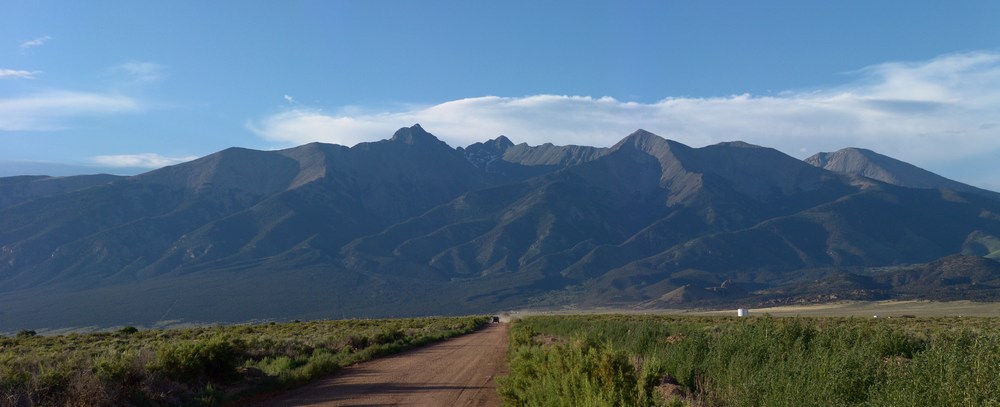
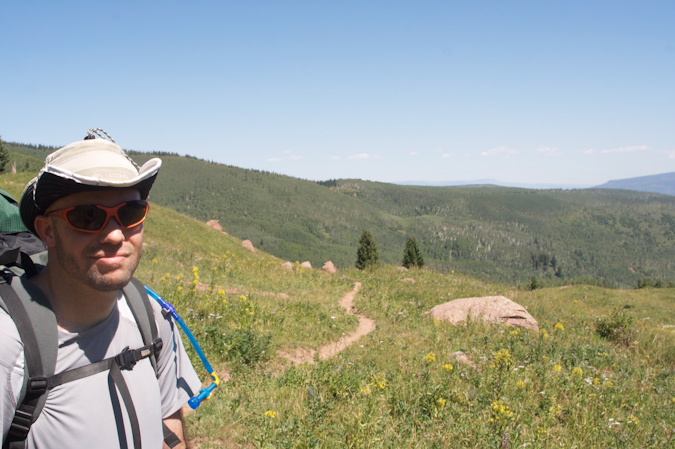
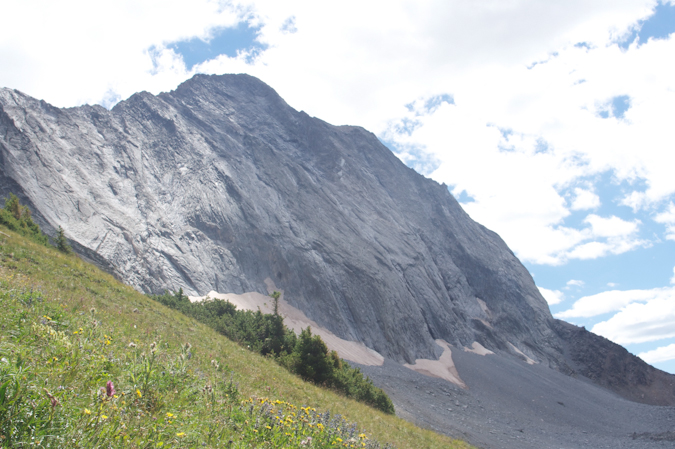
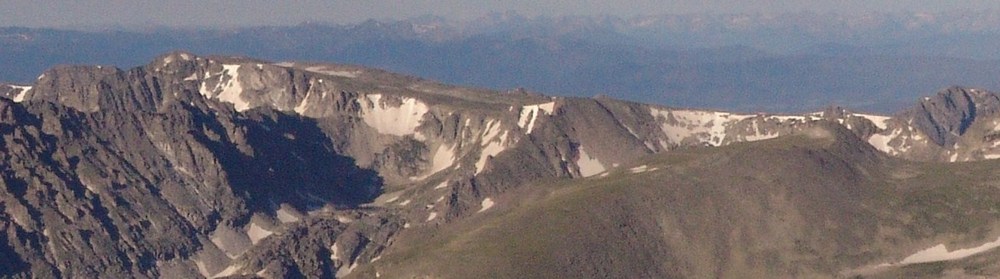
Terry picked me up at my house on Friday morning at about 7AM and we started the drive down to Walsenburg. Once we reached Walsenburg, we headed west over La Veta Pass and then through the towns of Fort Garland and Blanca. From Blanca, some pretty awesome views of the Blanca massif can be seen. Blanca is the highest one in the middle towards the back and Little Bear is the pointy one on the left.
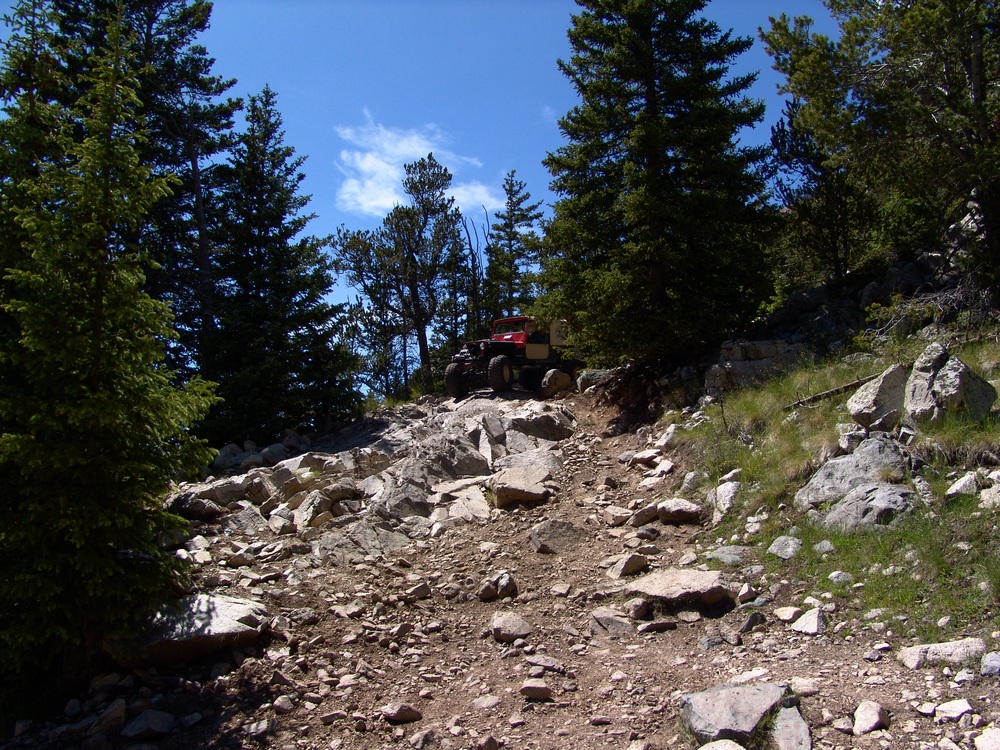
Next we headed north towards the Great Sand Dunes and turned up towards Lake Como. The Lake Como road is one of the premier 4-wheeling roads in the State, as evidenced by the three Rubicons at the start of the road. We started up the road in Terry's Blazer and encountered what I believe to be some of the most intense off-roading I've ever seen. Terry was a total champ! He was able to maneuver up the crazy road over some impressive and daunting obstacles and got us to a large camping area at about 10,000 ft. Turns out Terry damaged his engine mounts in the process. Here is a nice article on the road we were driving on.
In 2010, I went up the same road with my friend David, and there are more photos of that adventure in my Little Bear report.
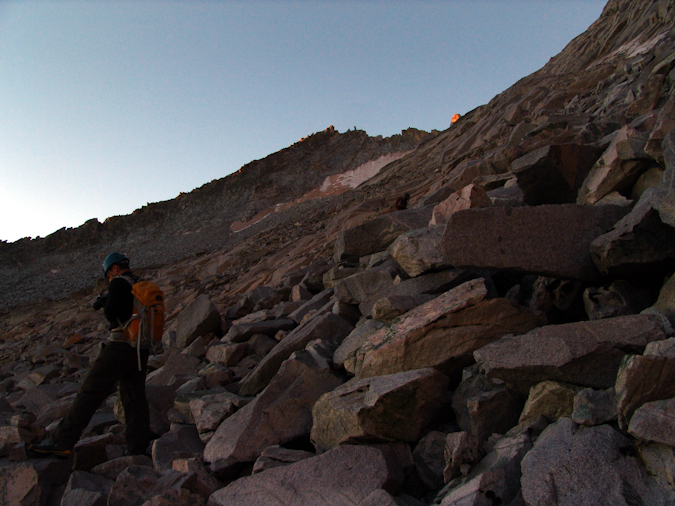
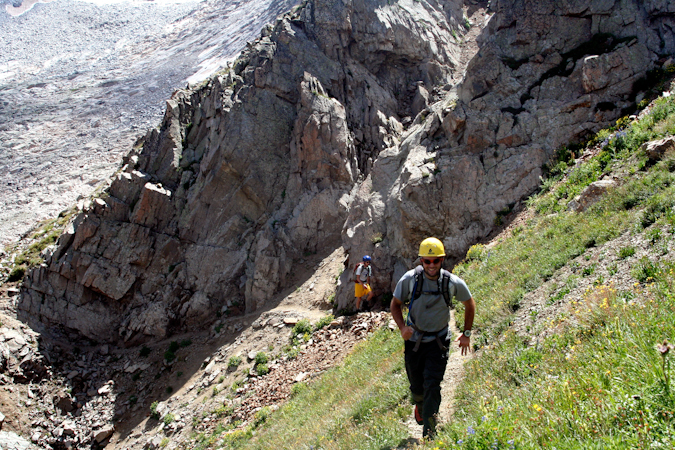
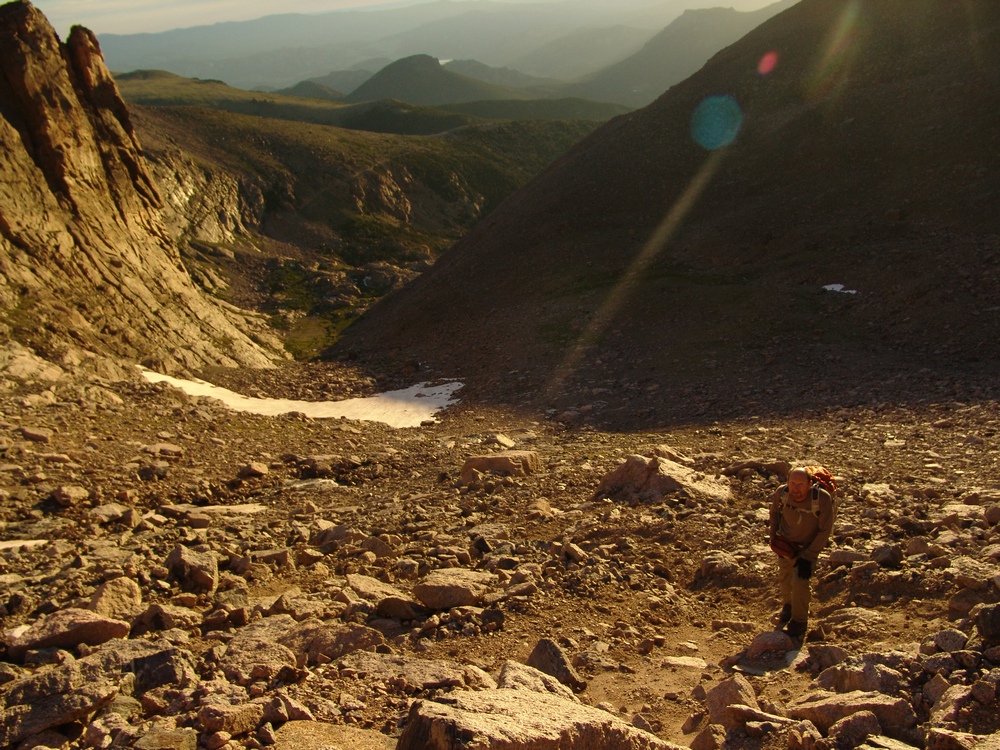
The road is full of obstacles called "Jaws" which we stopped just short of. We got out of the vehicle and started our backpacking adventure. My pack weighed in at 55 lbs and Terry's weighed 40 lbs. I guess I carried heavier food!?
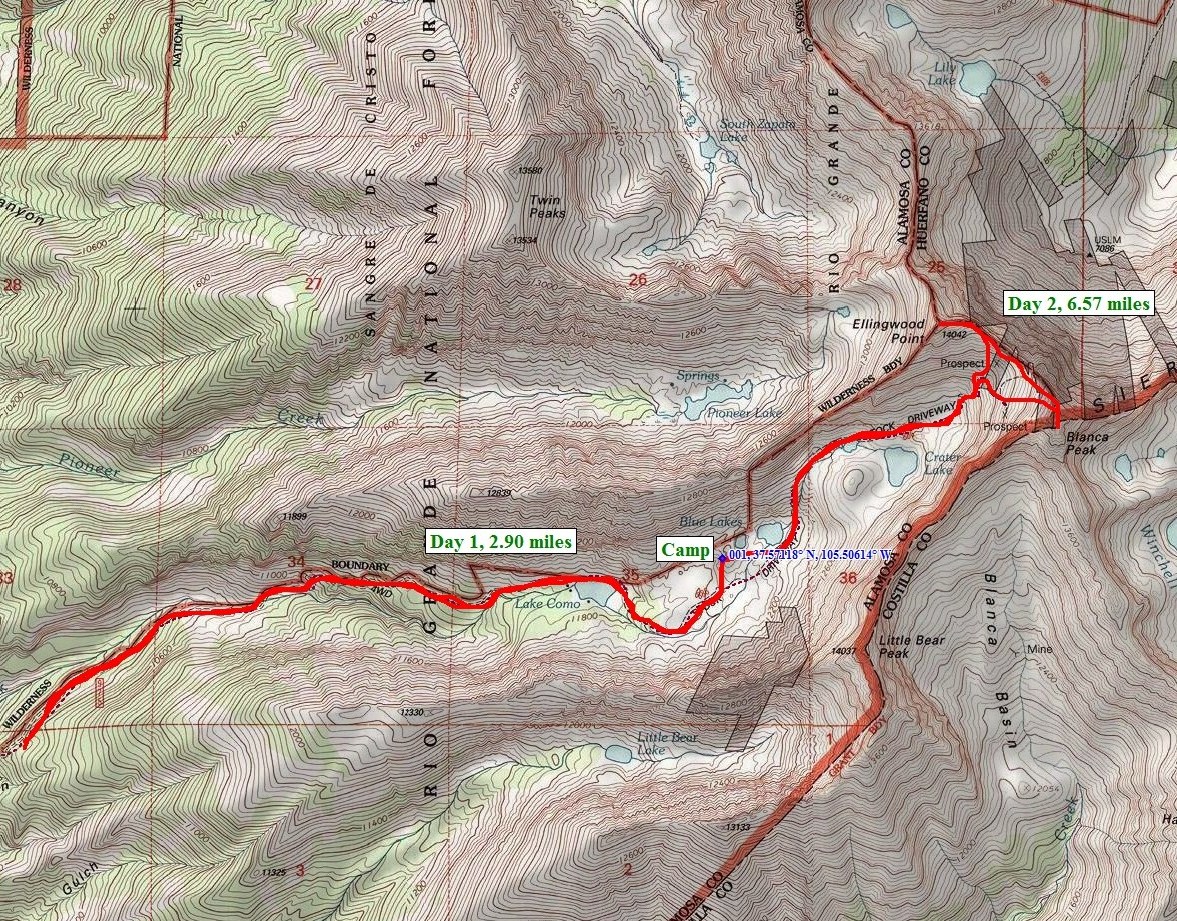
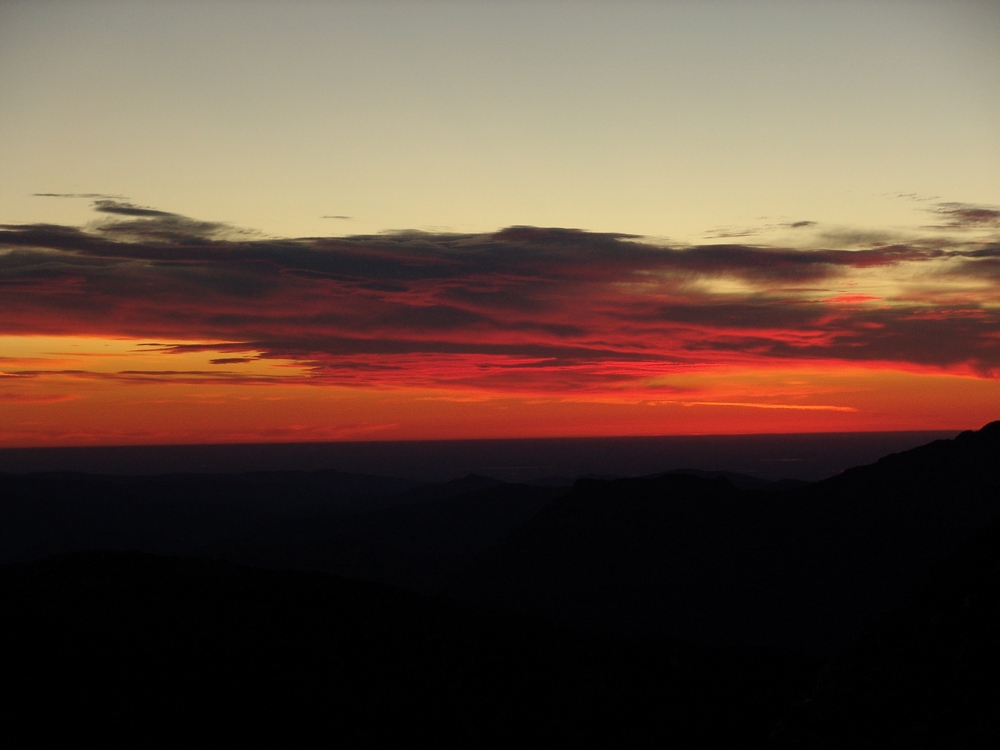
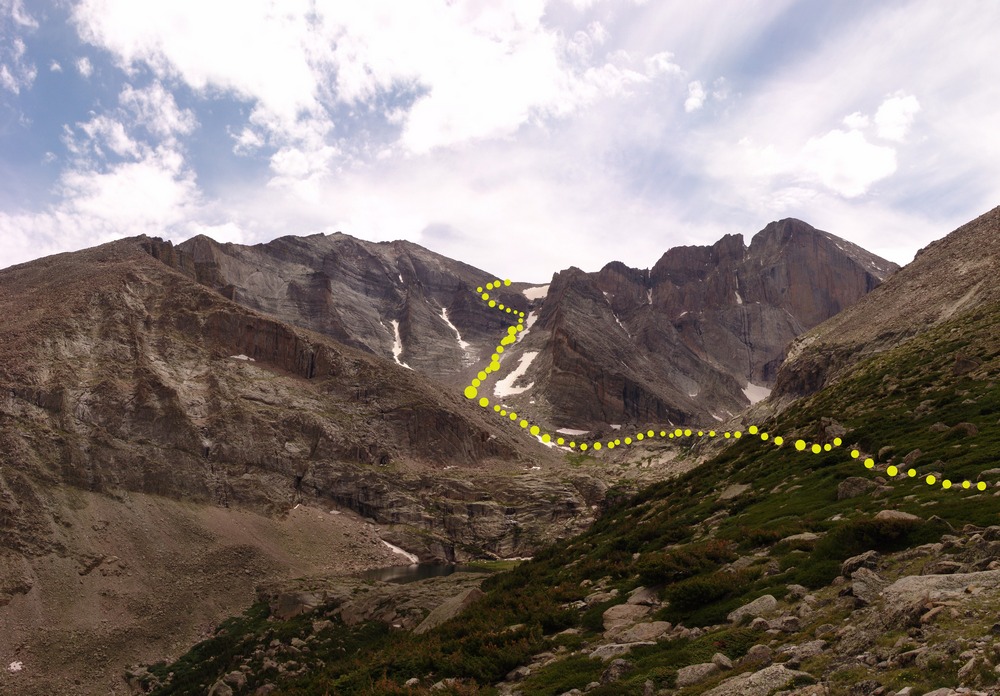
Here is the overall route we took up the valley and eventually up to the top of the peaks:
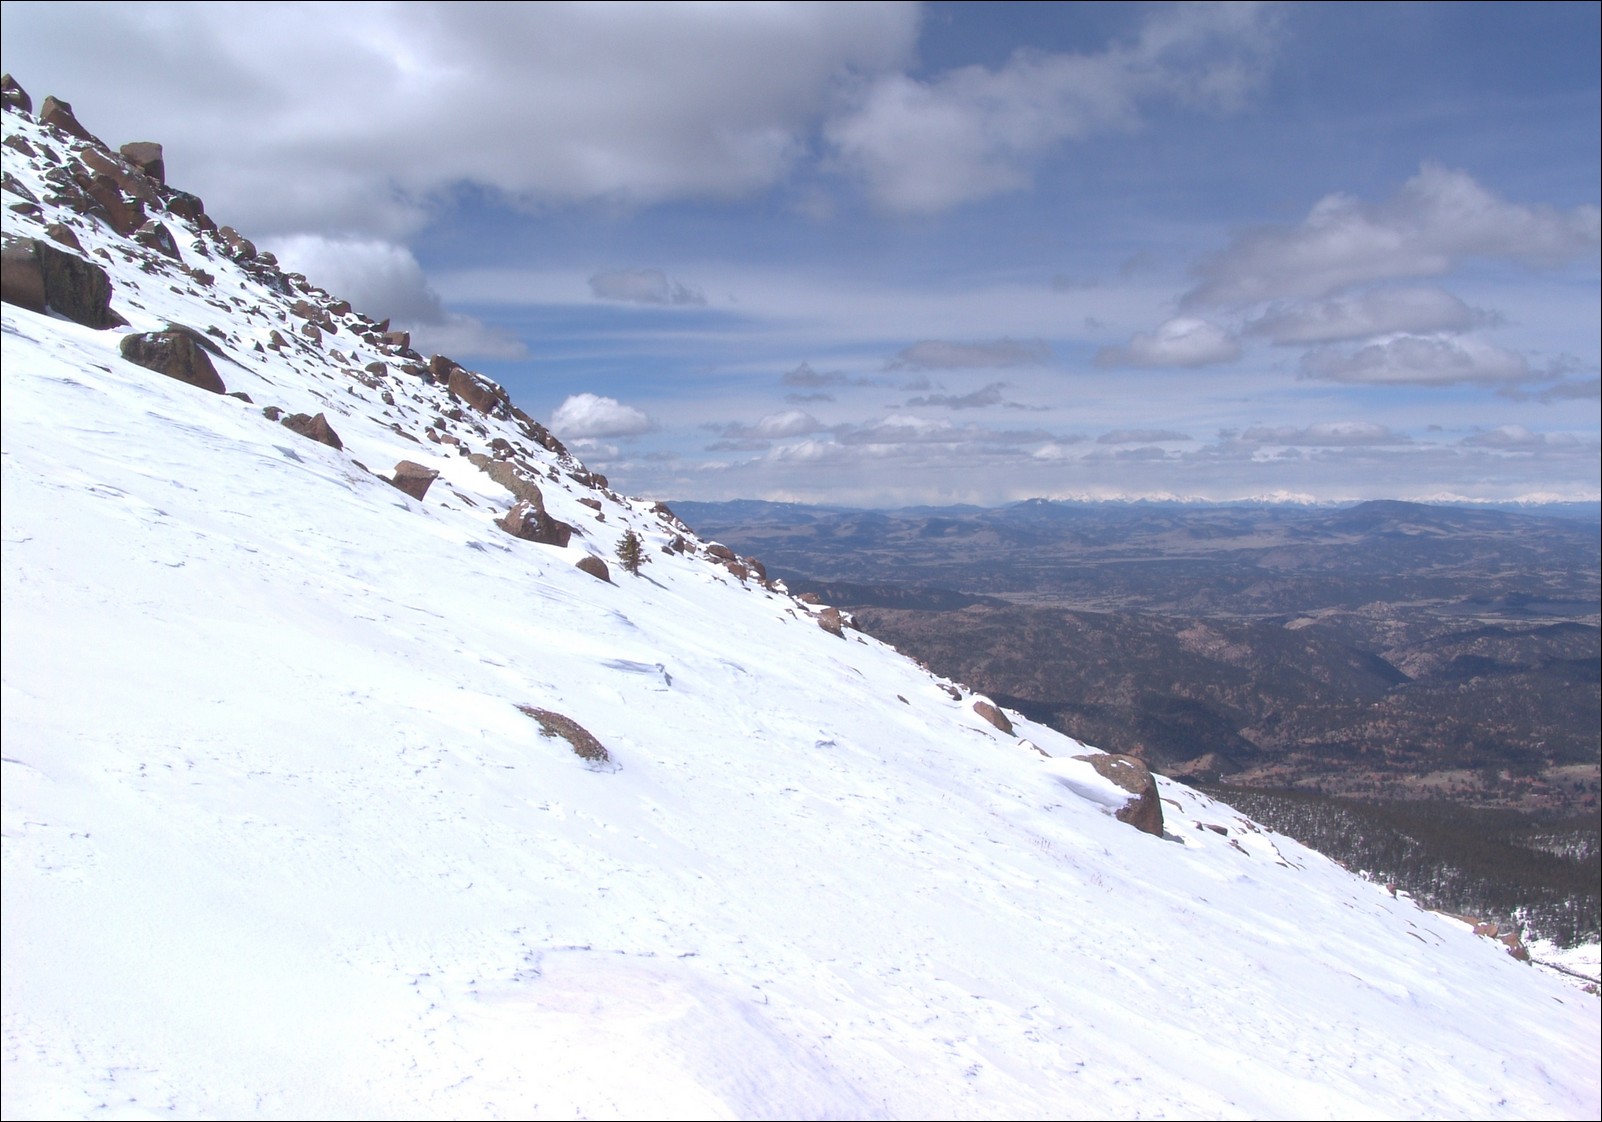
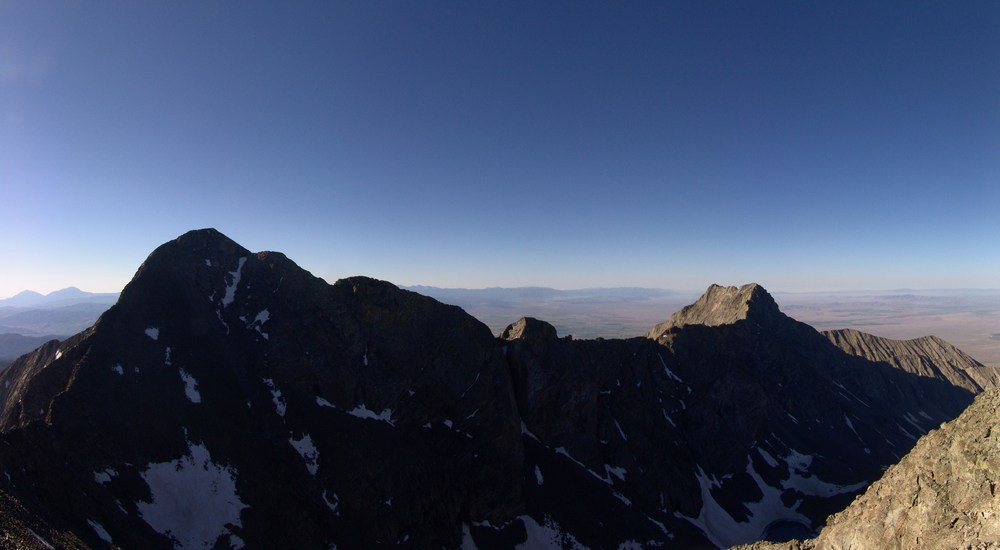
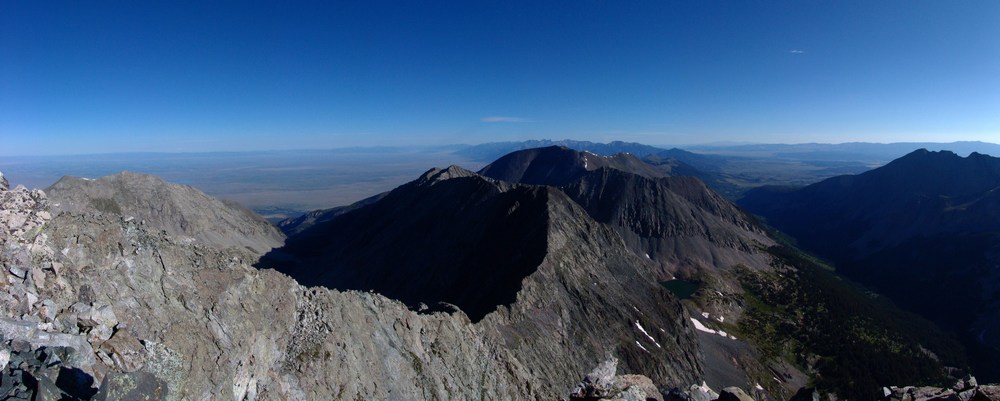
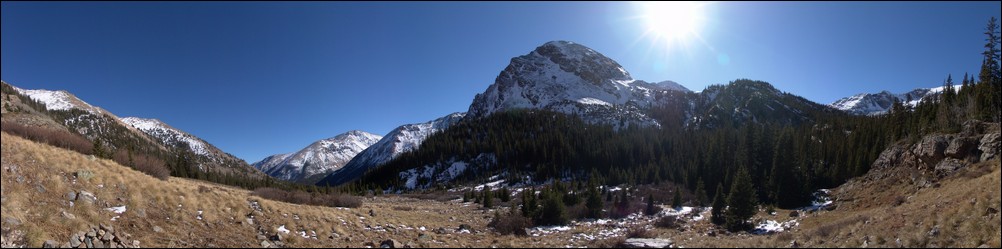
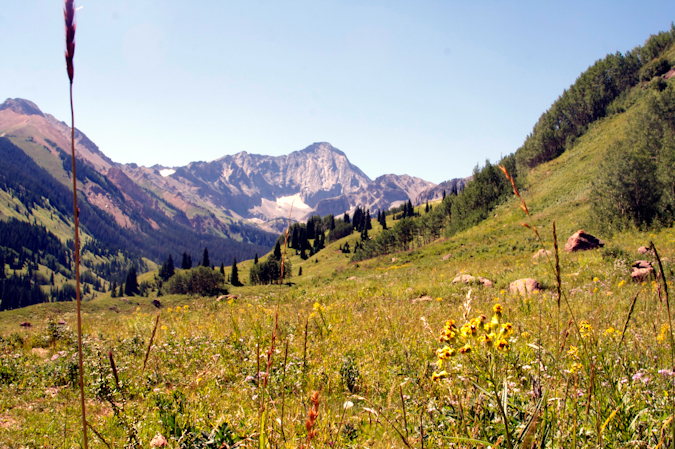
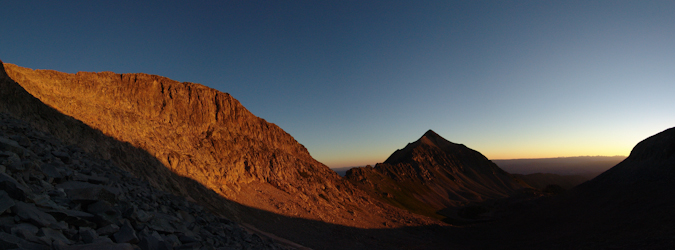
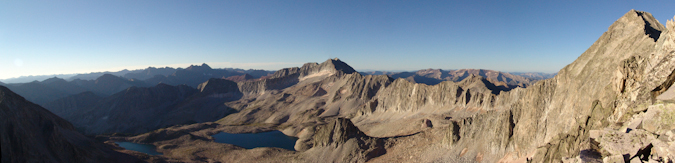
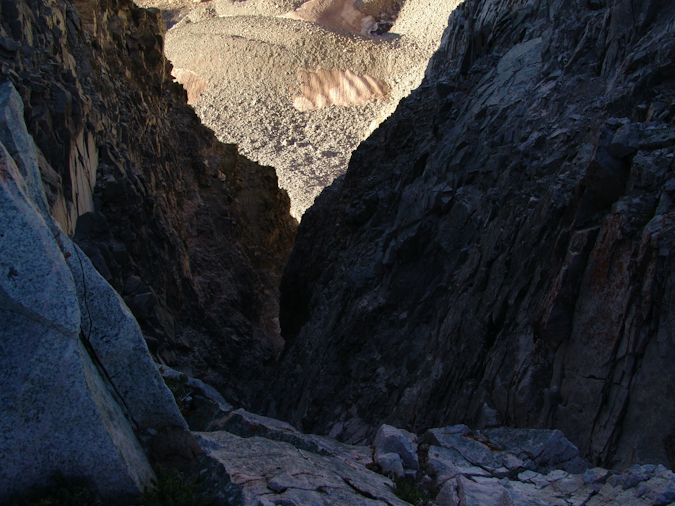
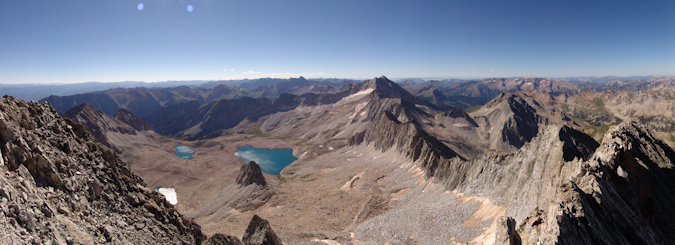
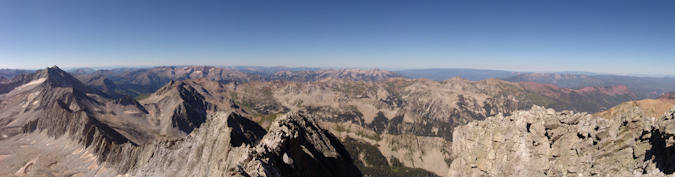
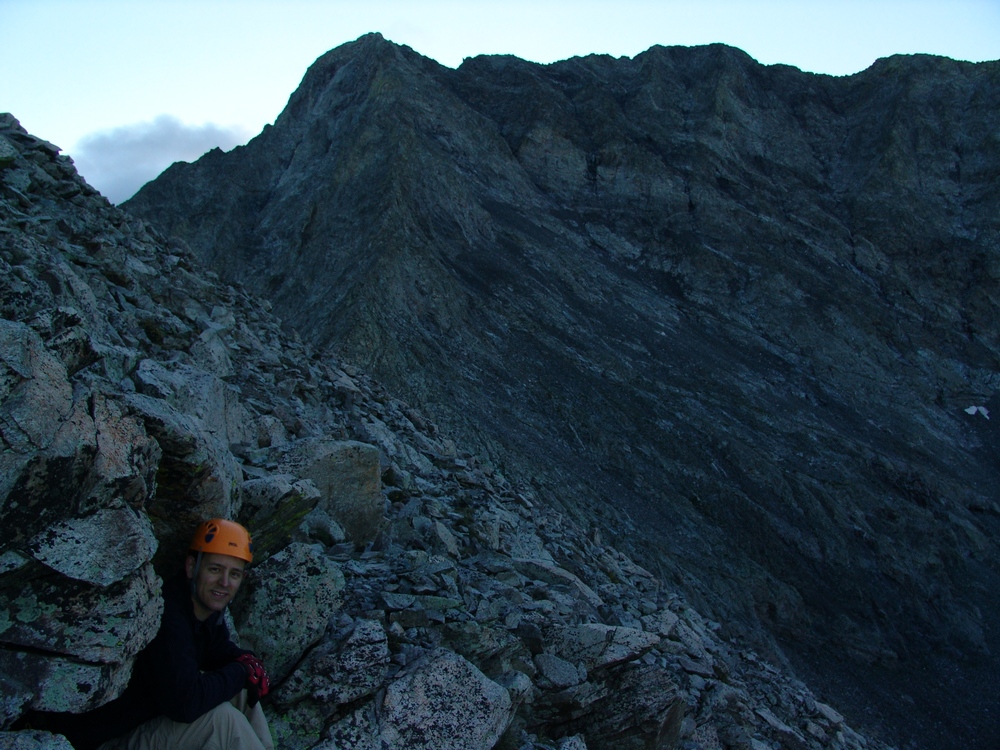
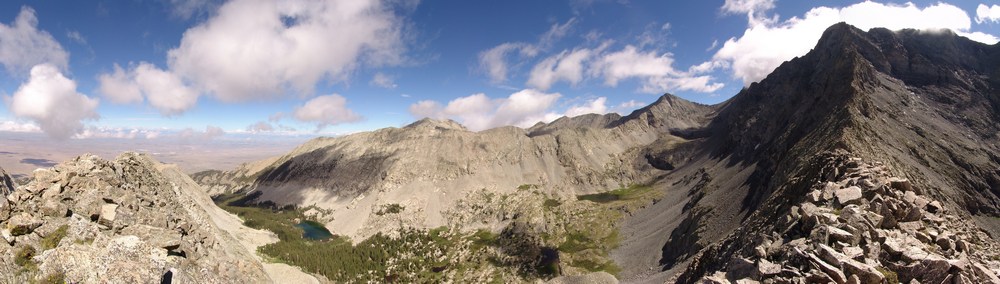
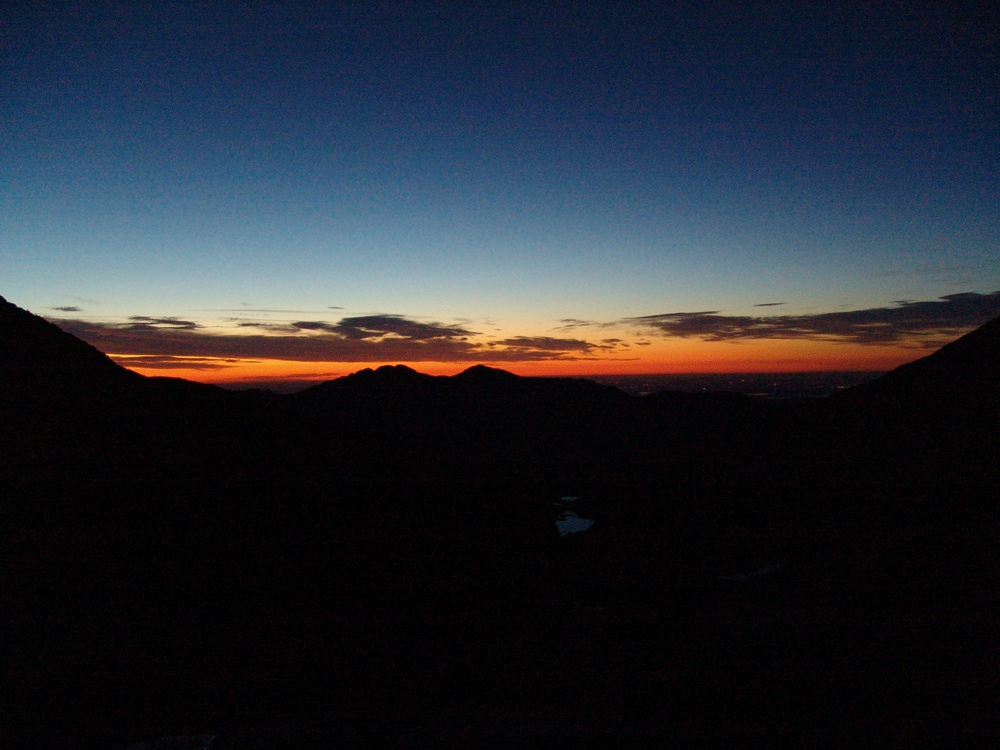
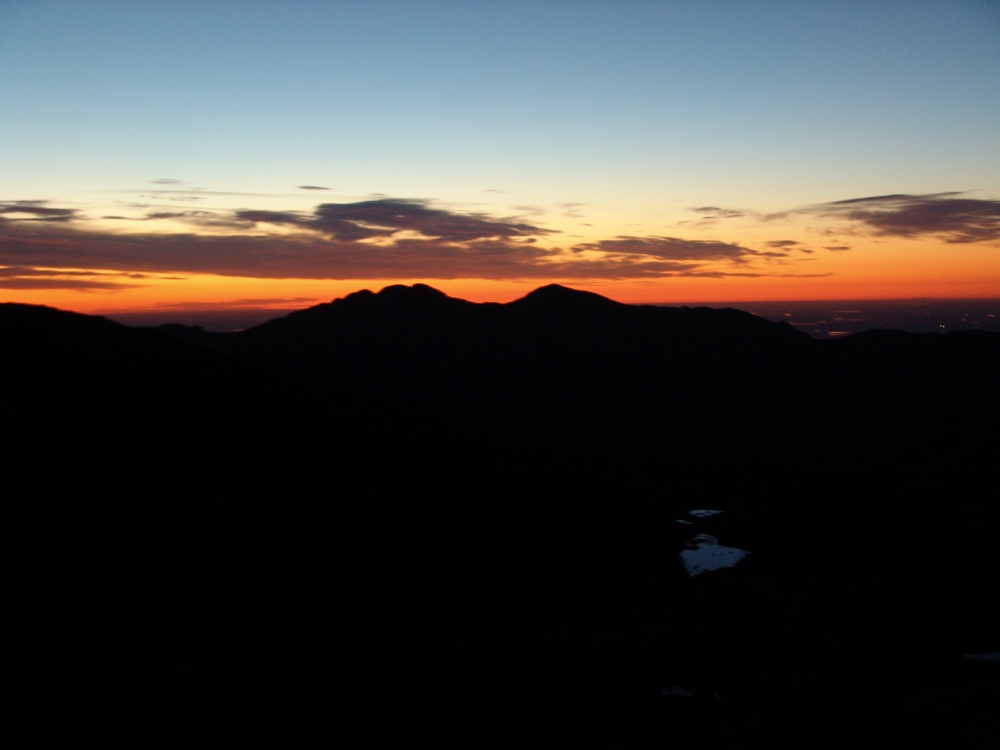
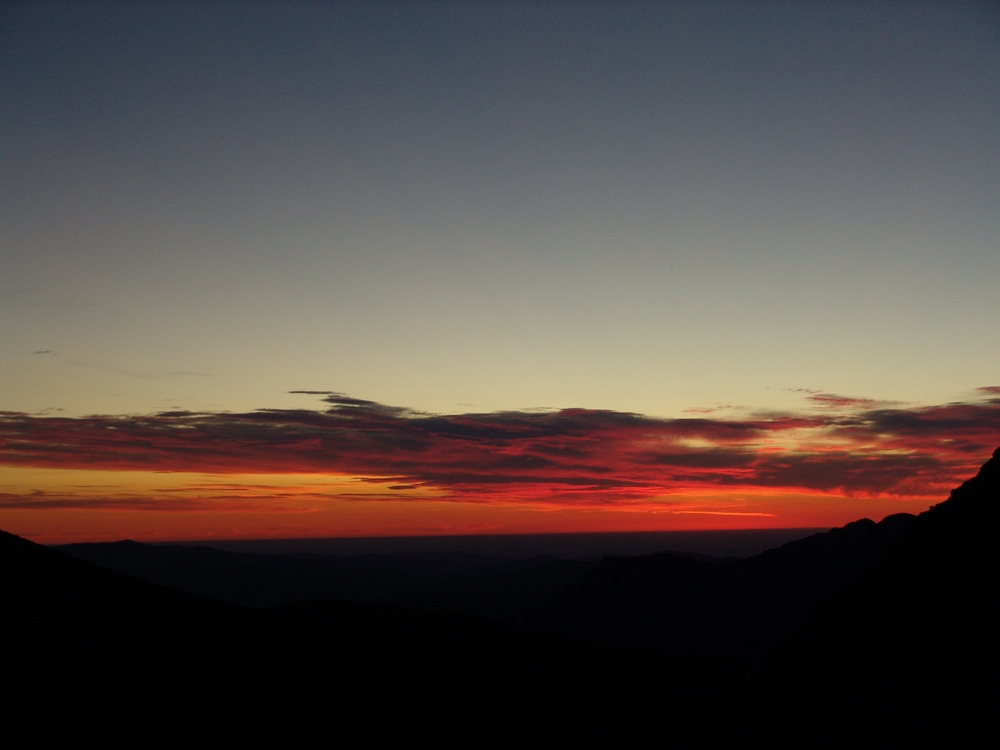
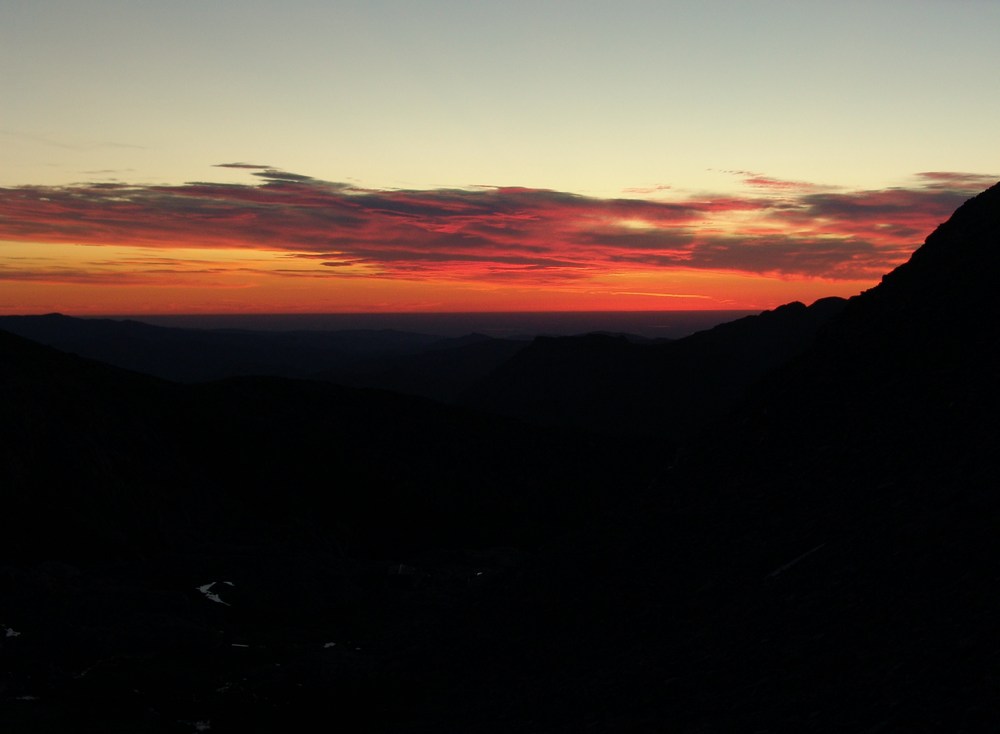
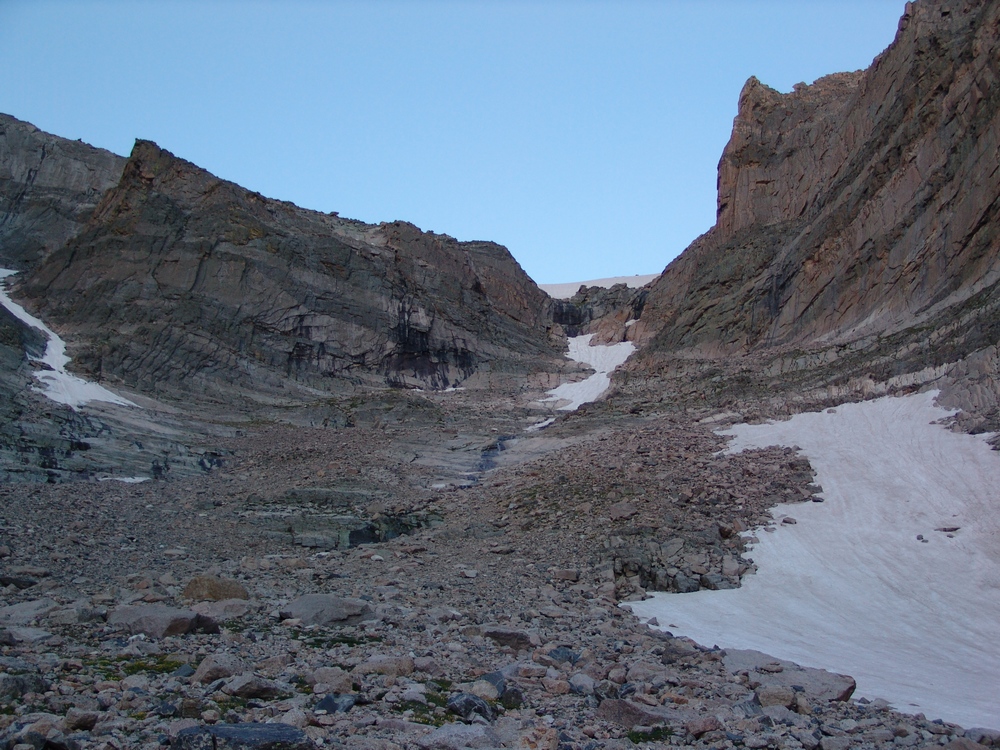
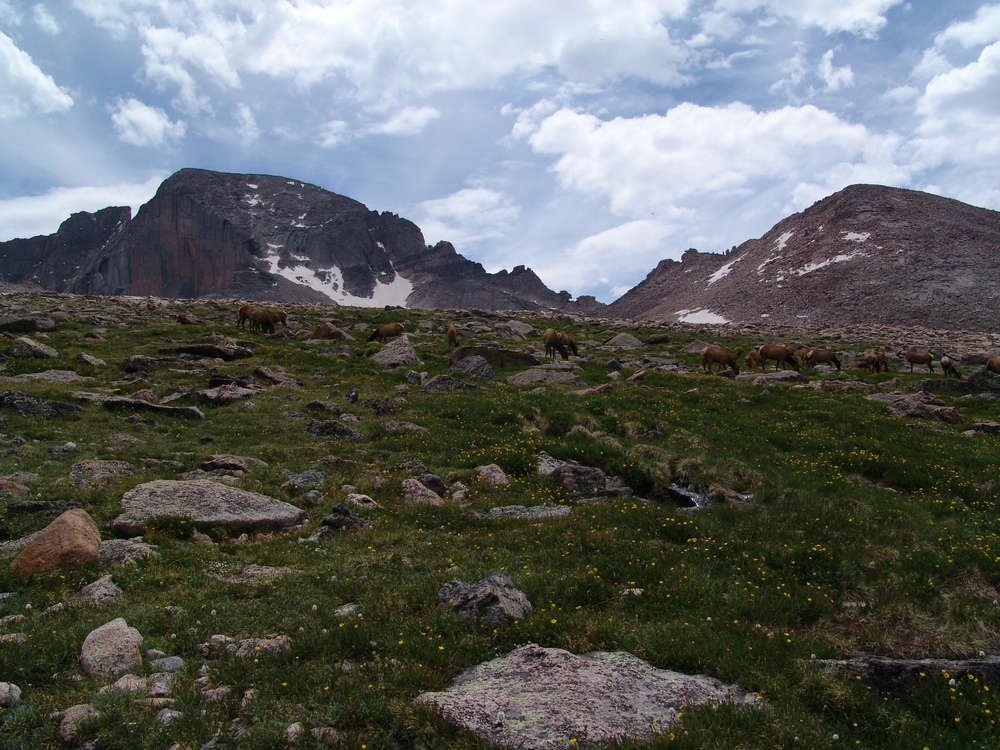
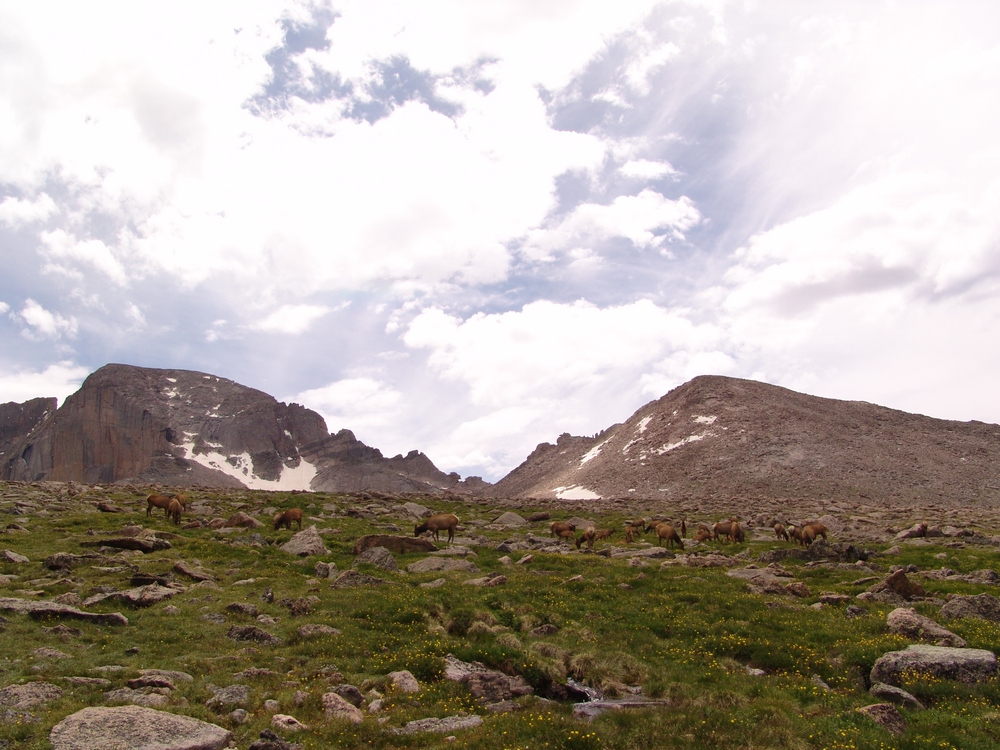
The hike took us up past the infamous "Jaws" obstacles and eventually we landed at Lake Como. We passed Lake Como and continued up the valley towards Little Bear Peak, Ellingwood Point, and Blanca Peak. We finally stopped above tree-line at 12,200 feet to set-up our camp-site. Here is a nice panoramic photo of the view from our campsite:
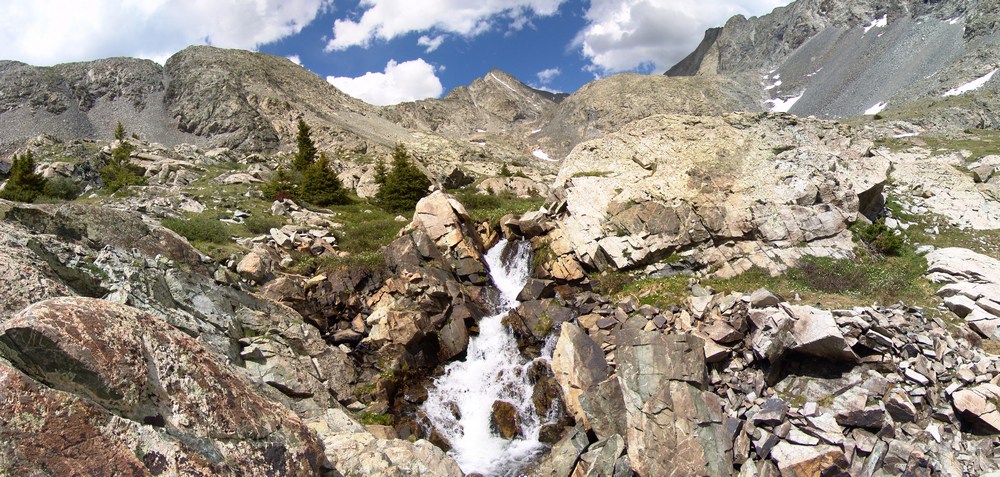
We were camped right next to a mini-waterfall that looked right up at Ellingwood Point. After we unpacked and got settled in, we decided to take a short hike further up the trail to one of the Blue Lakes. On the way there, I saw a small bird scurry past me. My first thought was, that bird can't fly! Then my second thought was, that's a baby bird! Sure enough, there were several small baby birds right in the area that were standing very still.
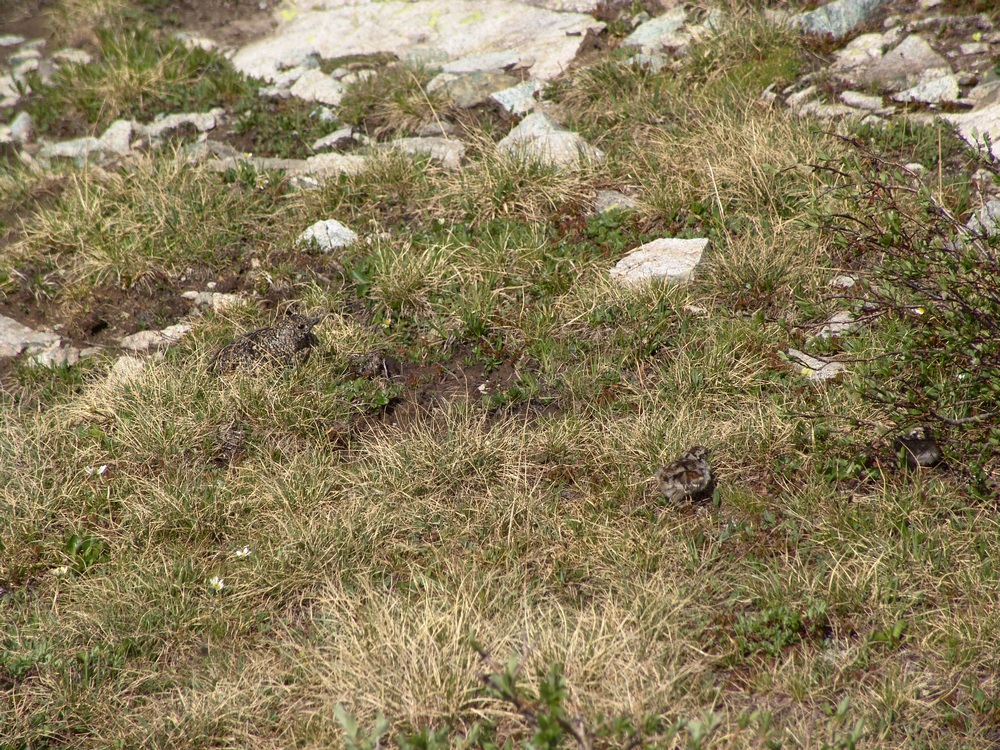
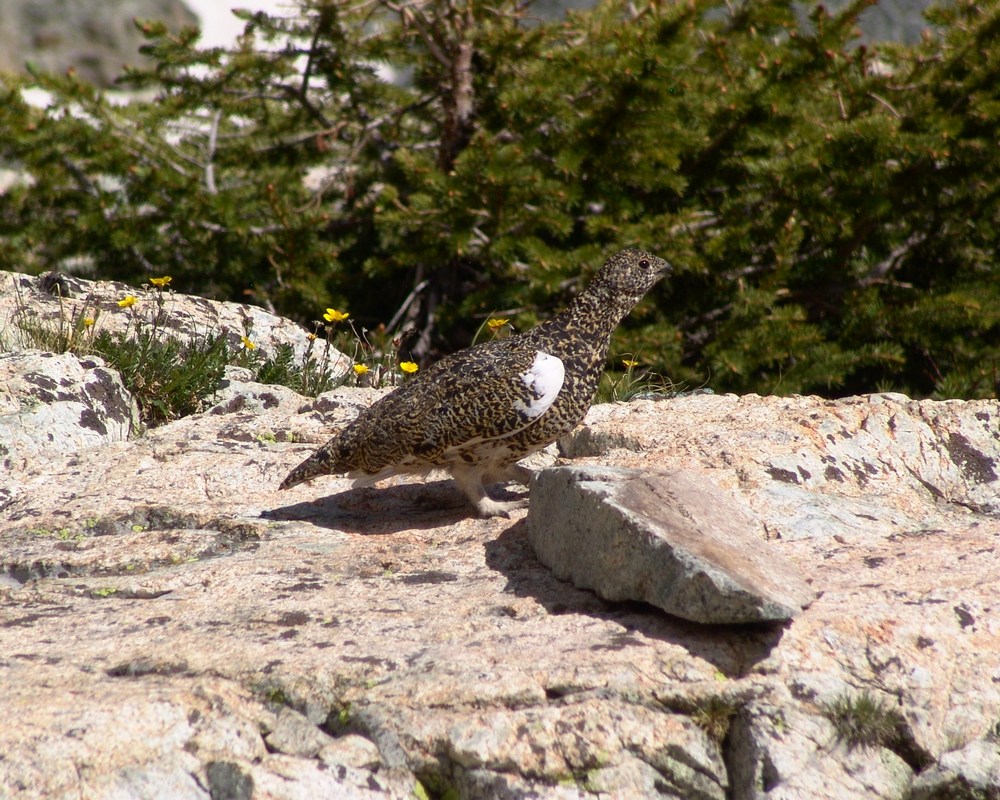
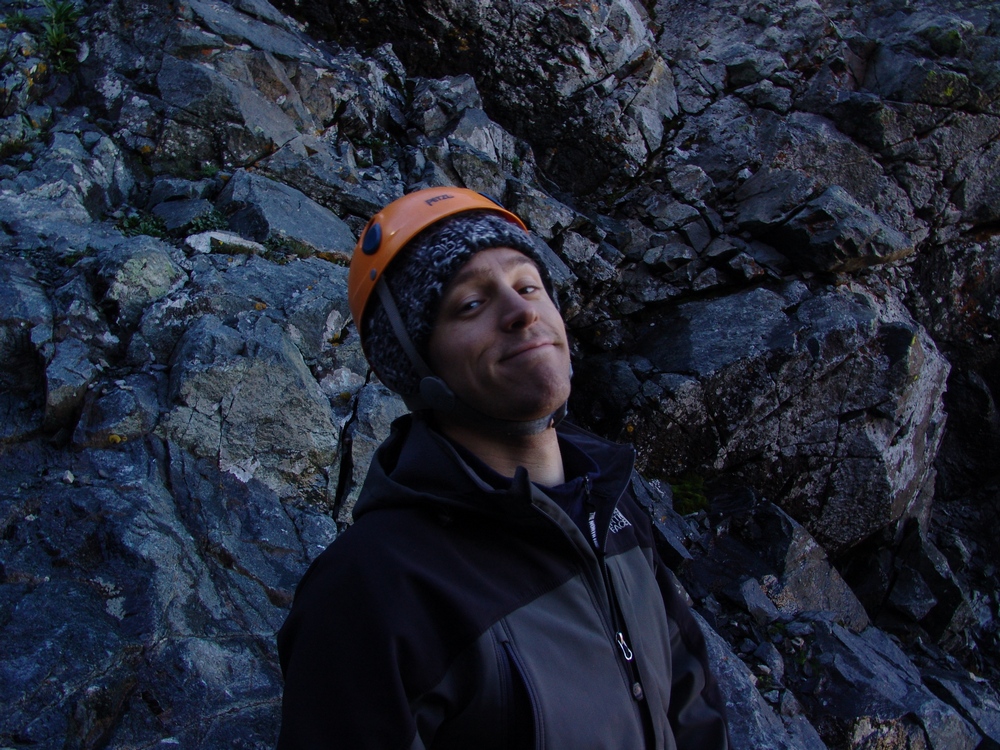
Then I spotted the mama bird - a full-grown Ptarmagin hiding in the brush:
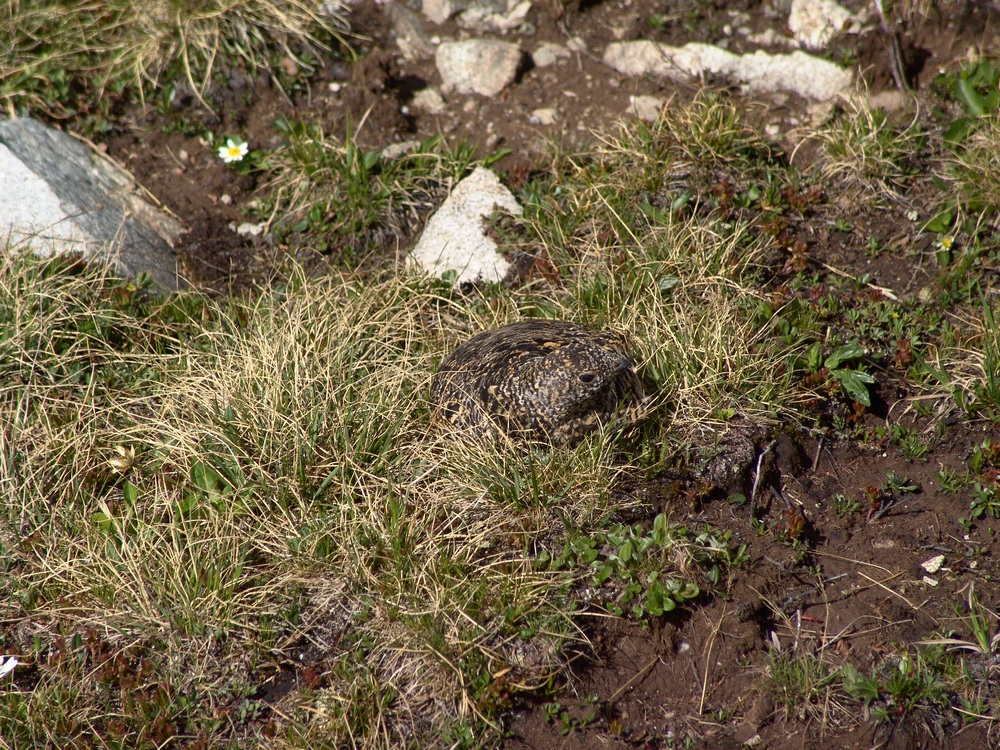
She got up and started running around me like a crazy lady (can't blame her - I was invading her space and she was protecting her chicks) and I took one more picture of her and continued up to the lake.
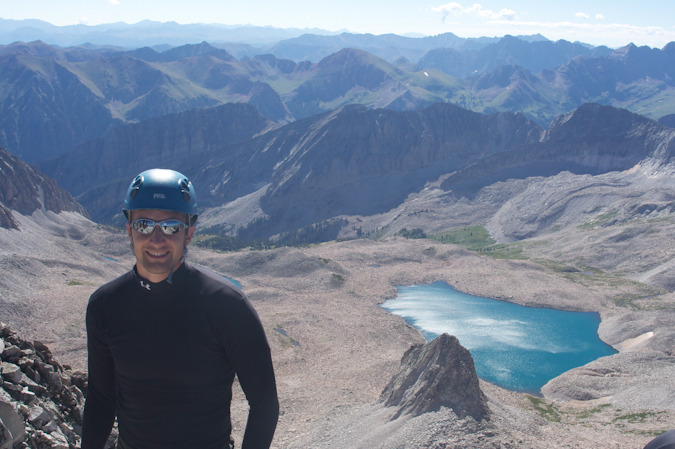
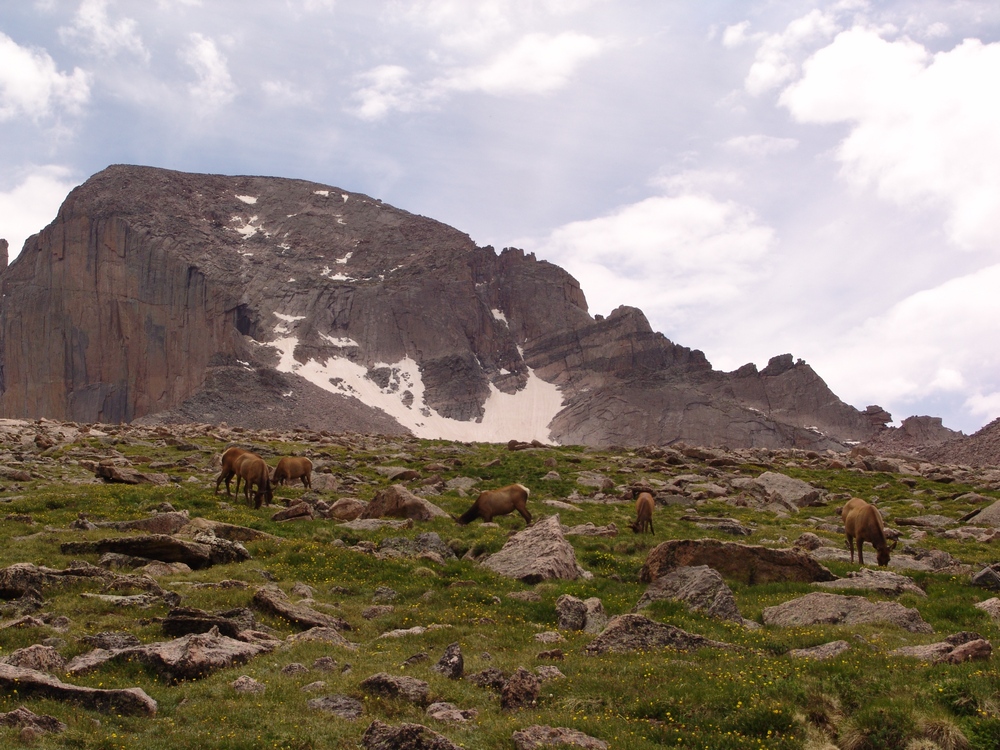
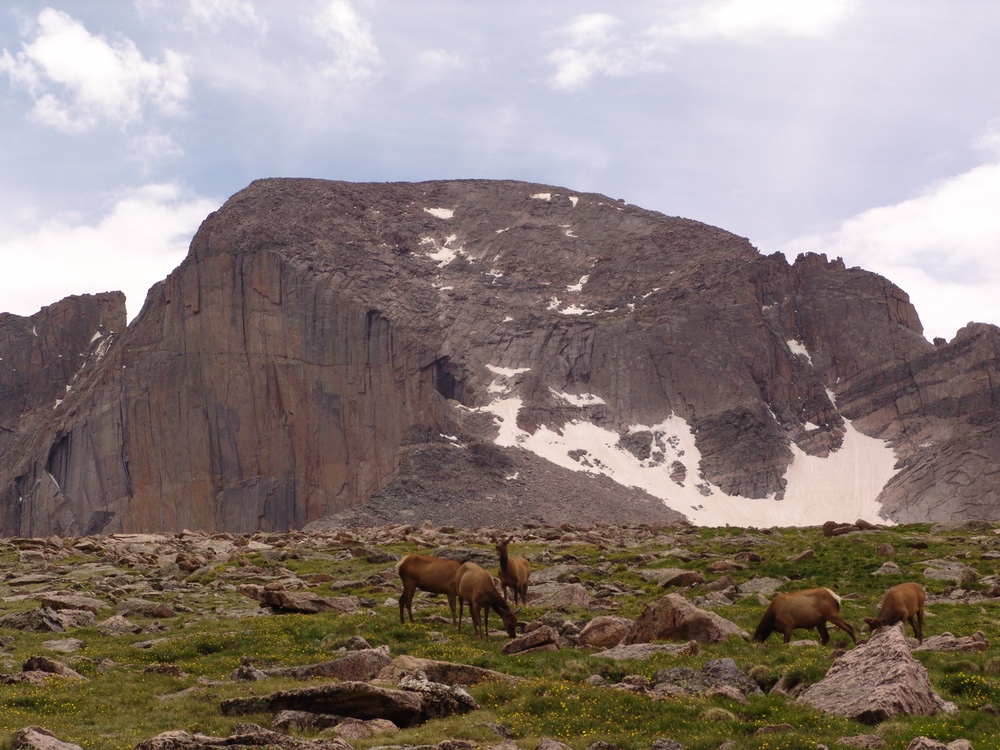
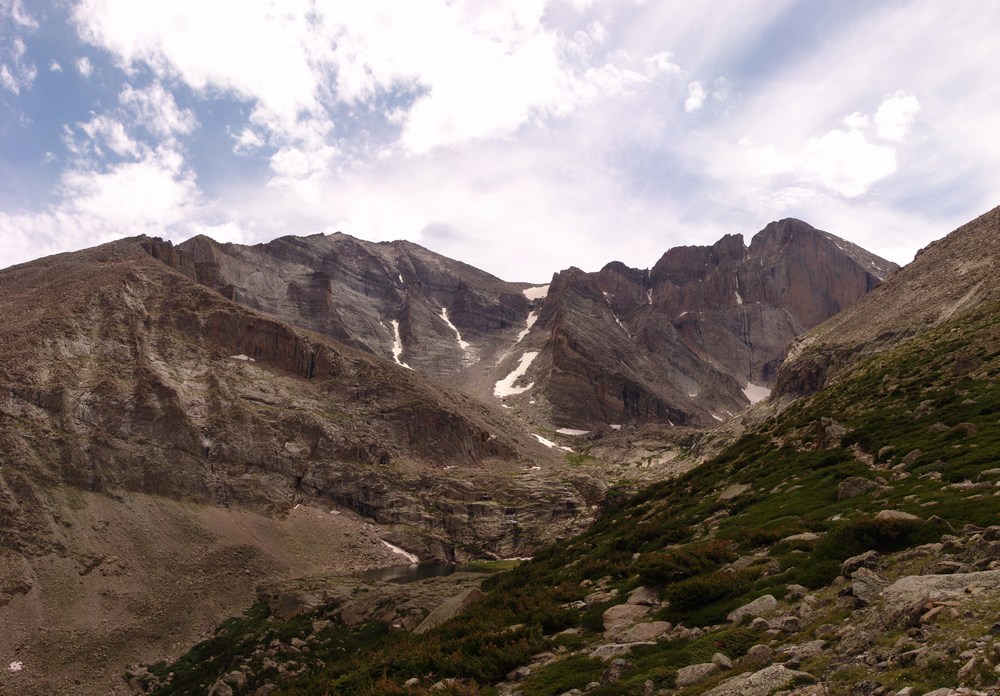
At the lake, we were able to get more awesome views of Ellingwood Point (left of center) and the waterfall at the base of the headwall for the Blanca / Ellingwood Point saddle.
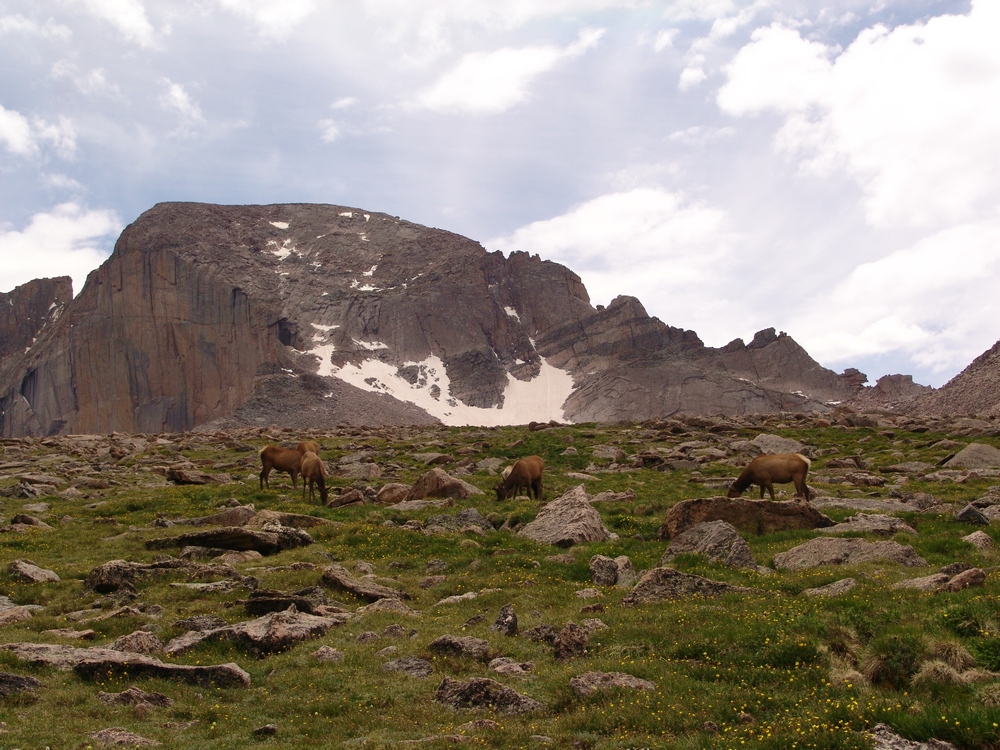
From the lake you could see all the way up and down the valley, including nice views of Little Bear.
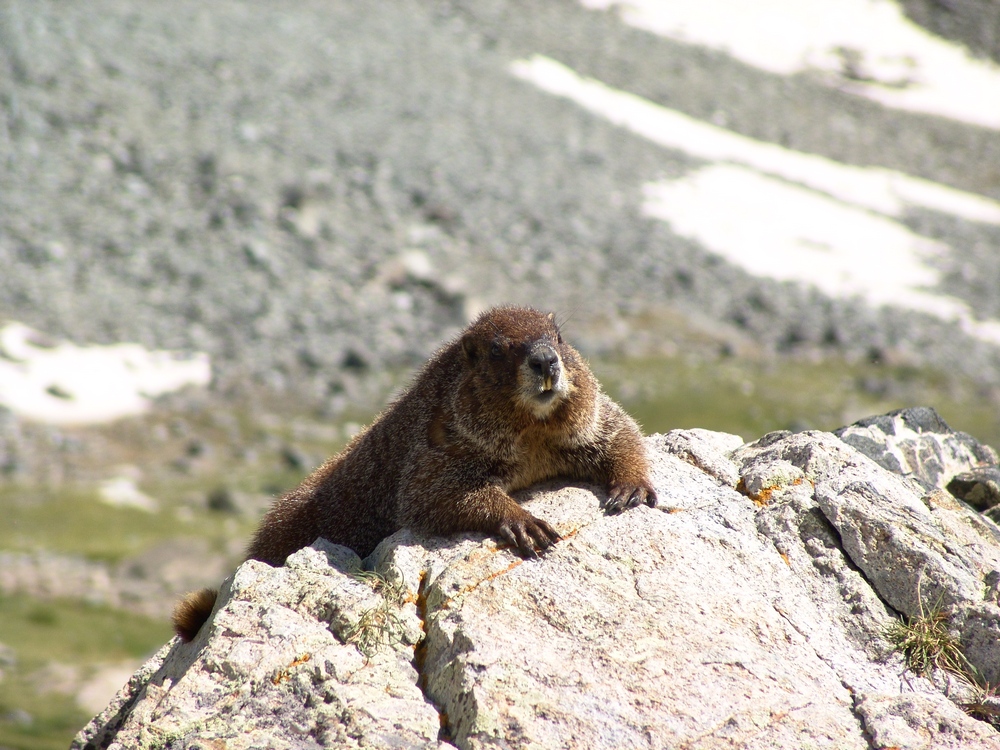
On the way back to our camp-site, we encountered a very friendly Marmot hanging out on a rock. This whole area was full of marmots and we were very careful to hang our food bags in a tree to prevent Marmots from eating our food.
When we returned to camp, we both set-off to prepare dinner. Terry boiled some water for his freeze-dried meal and I opened up a can of tomatoes, chicken, and green chilies. I got out my pre-chopped onion and sauteed everything together and made some yummy burritos. My pack may have weighed a lot, but I got to eat well, so it was worth it.
We saw that rain was on the way so we prepared our area for rain and got into Terry's tent. The rain was fairly heavy and lightning was off-and-on the rest of the evening. I was particularly uncomfortable being so high during a lightning storm, but we survived... We set the alarm for 4:30 AM and went to sleep.
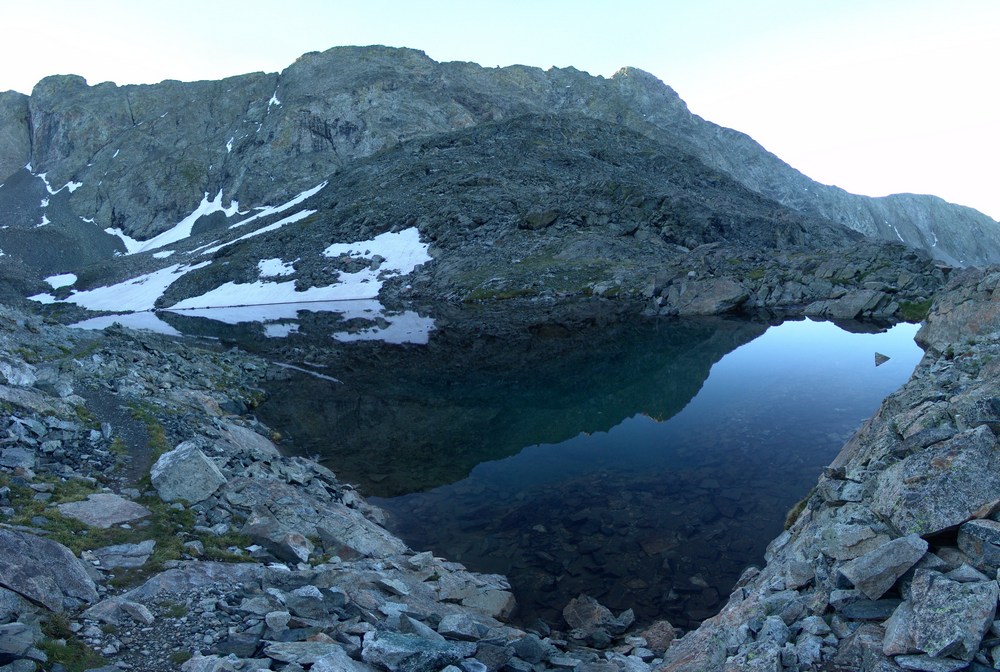
At about 1AM I woke up to the loud sound of rocks falling. I think a goat knocked down some rocks in the valley, which sounded like fireworks in the middle of the night. At 4:30 we both got up and prepared for the climb. I ate some breakfast bars and Terry boiled more water for another freeze-dried meal. In the process he melted some plastic on his stove on accident. Fortunately, it appeared that his stove was still functional. We started up the trail around 5:30 AM as the sun was just beginning to light up the valley. Shortly after we began, we reached one of the upper lakes. The lake was pretty cool because it was reflecting the light that had just started to shine on Little Bear - right of center.
The lakes were really calm and provided some nice views.

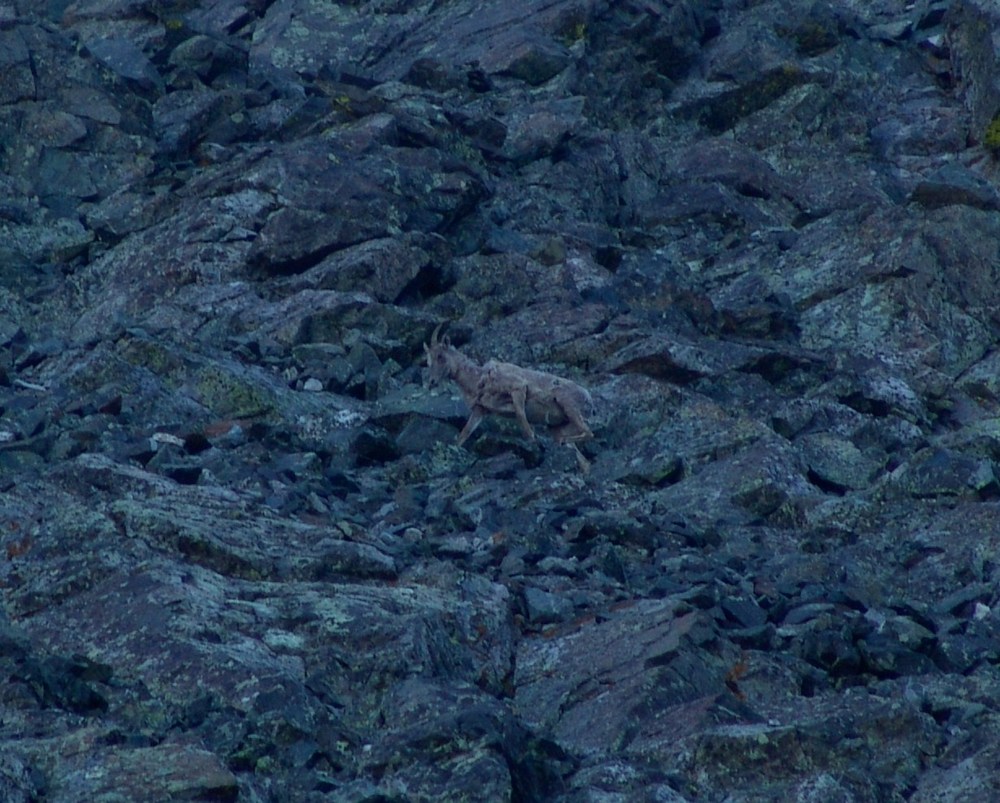
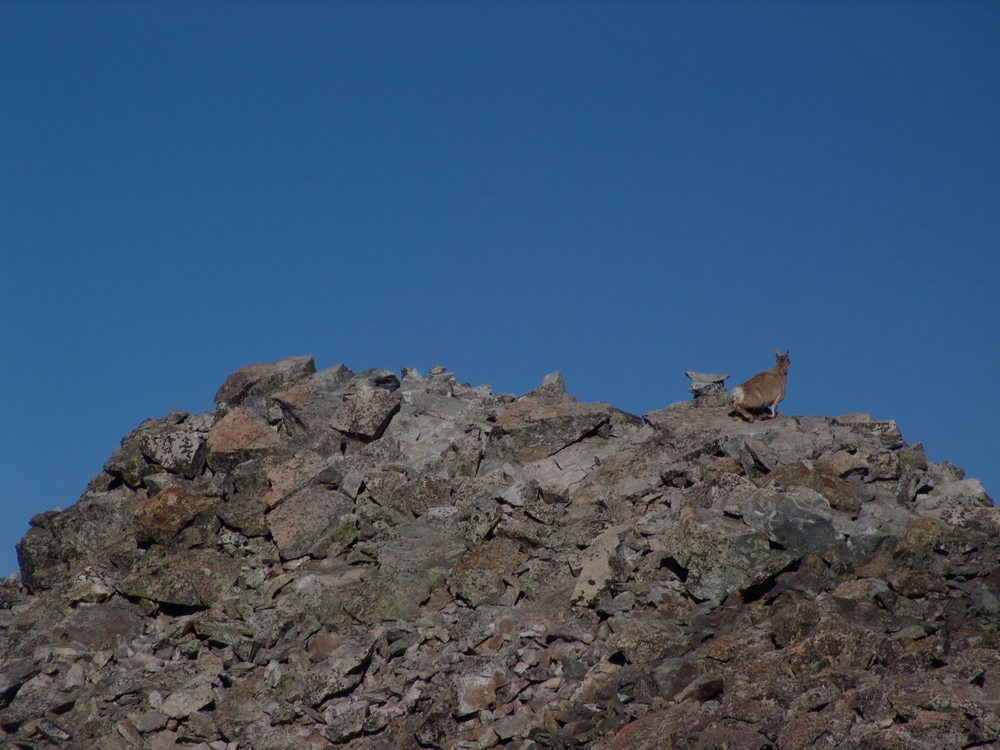
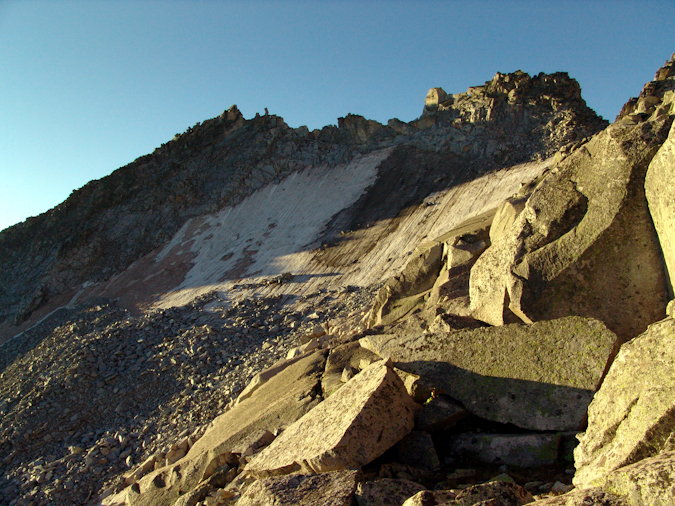
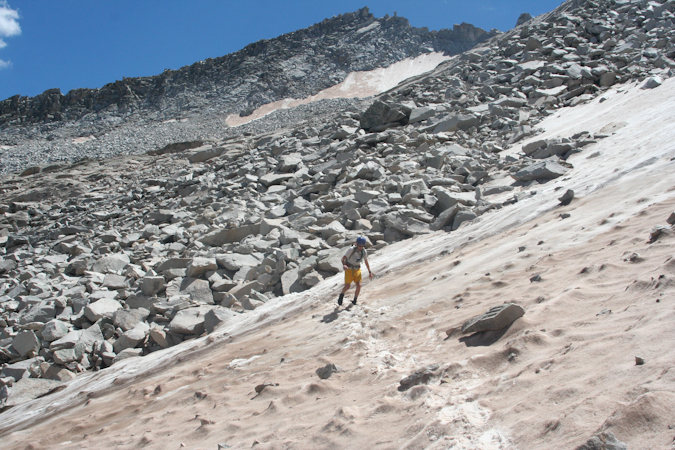
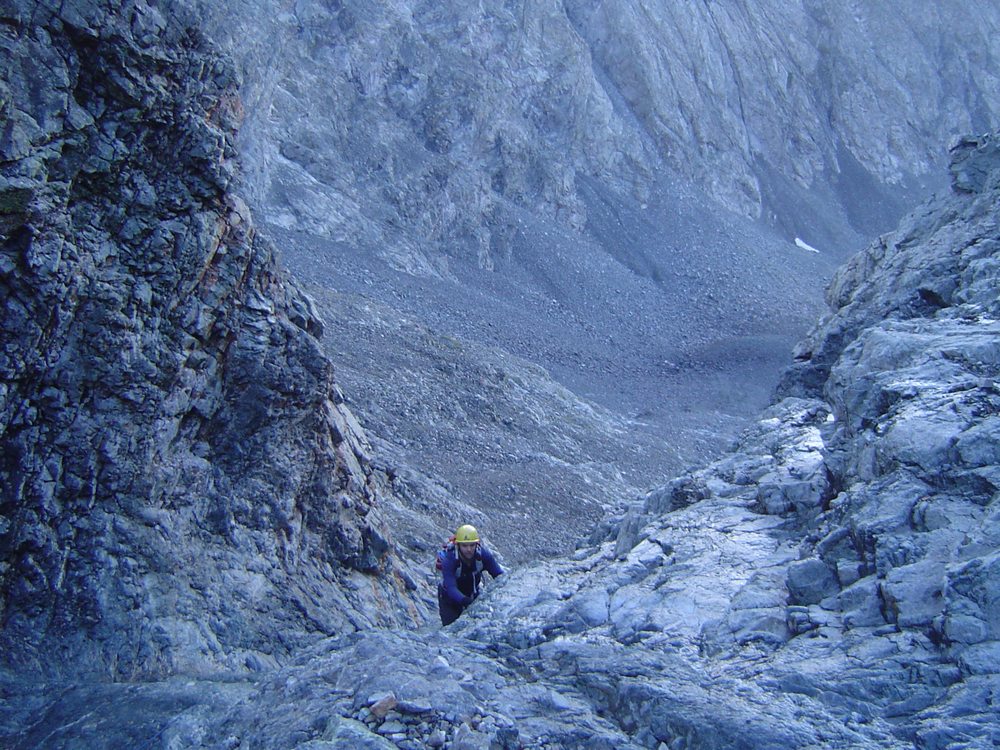
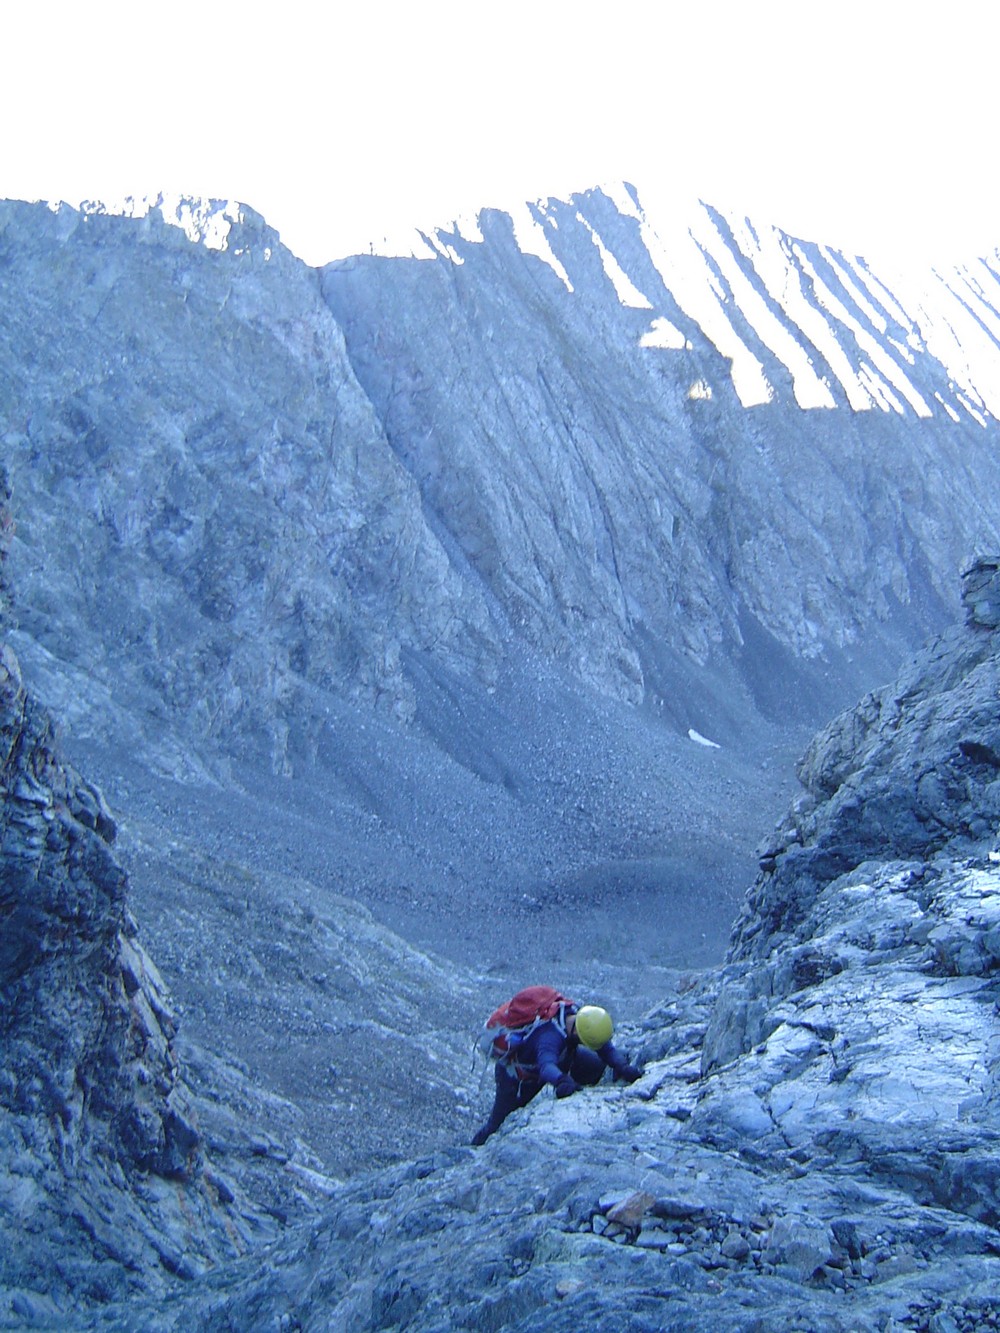
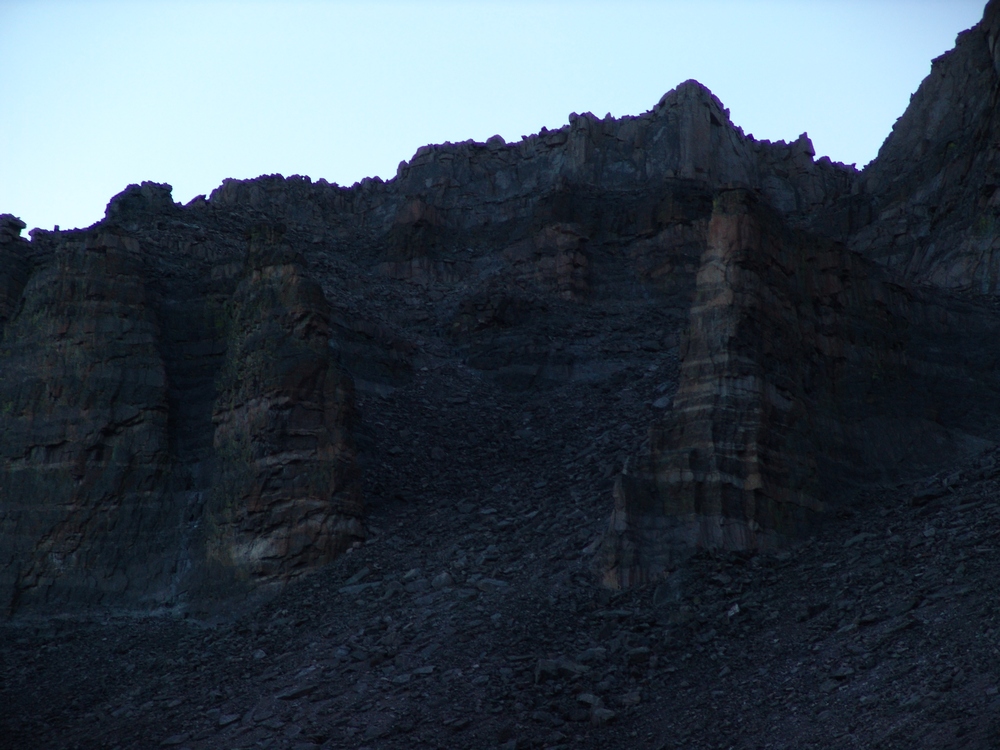
We continued up the trail and began the steel climb up snow fields and boulders. We followed cairns towards the saddle between Ellingwood Point and Blanca and heard the sound of rocks falling above us. A pair of Mountain Goats were doing the traverse from Blanca to Ellingwood above us!
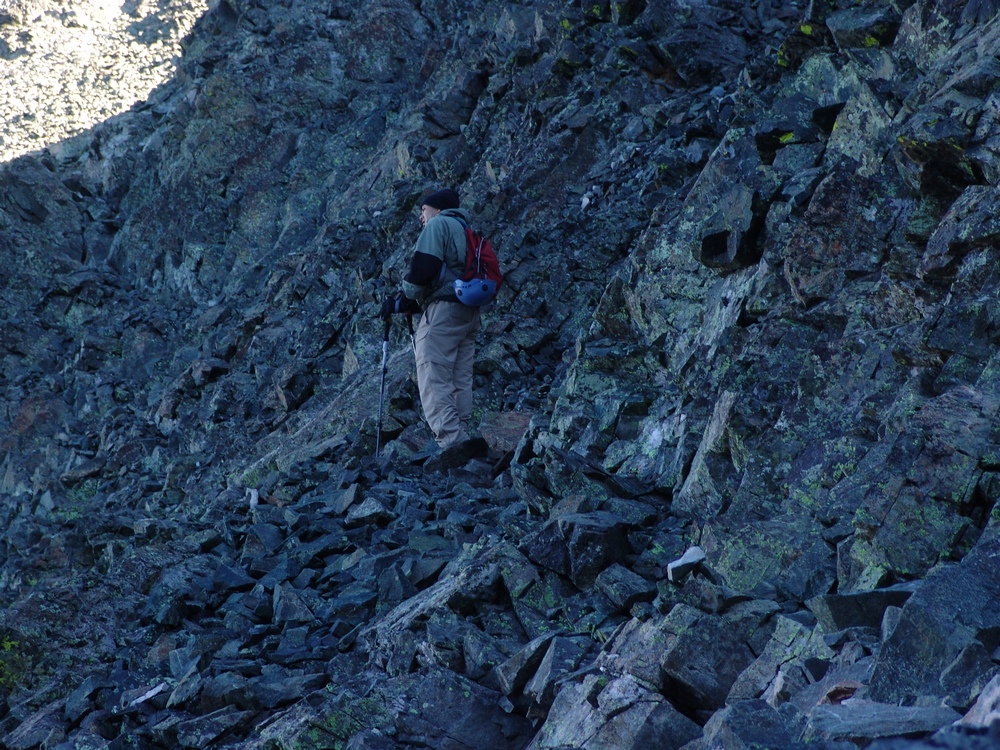
Terry finally reached the trail connecting Blanca and Ellingwood just below the saddle and he led us up towards Ellingwood.
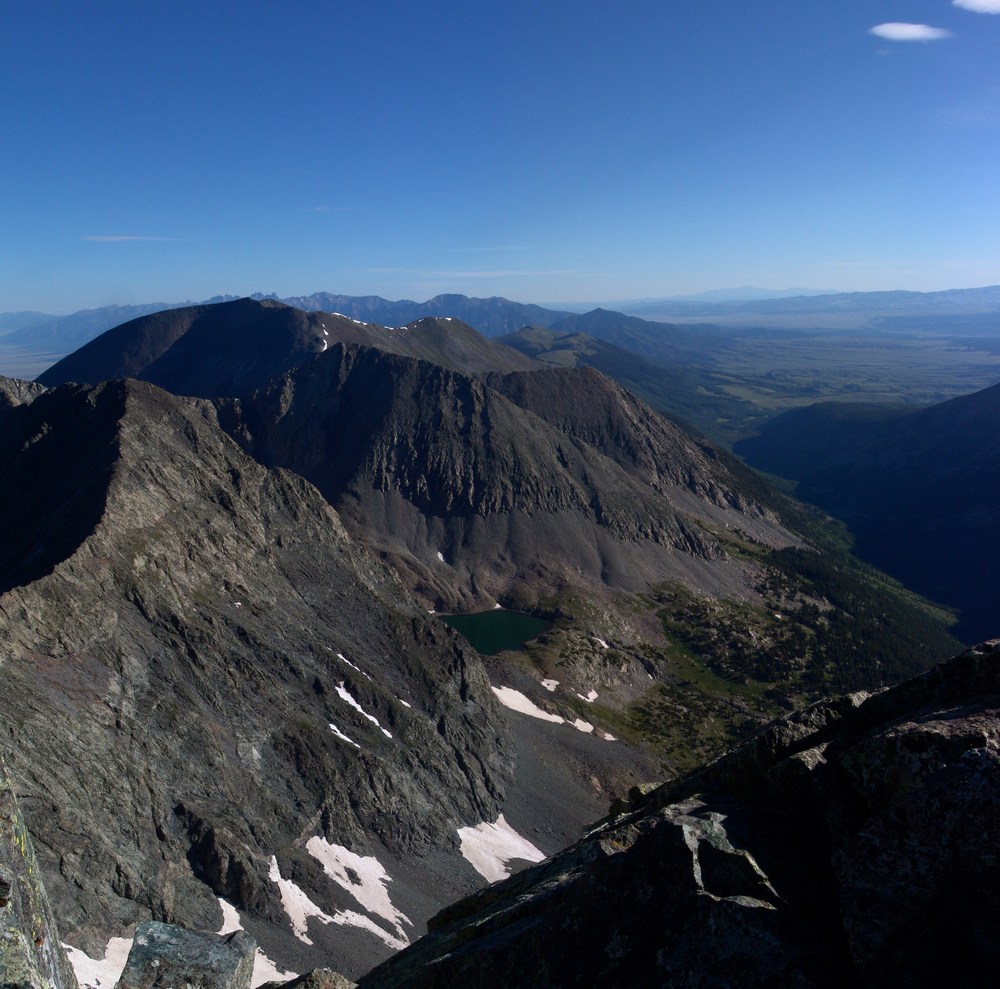
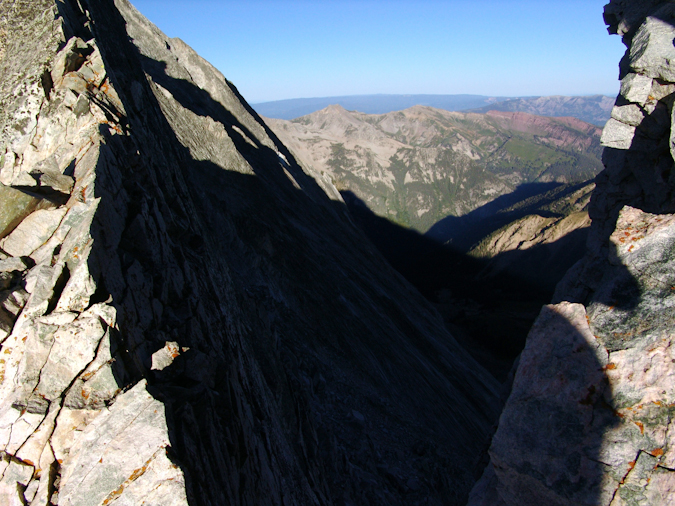
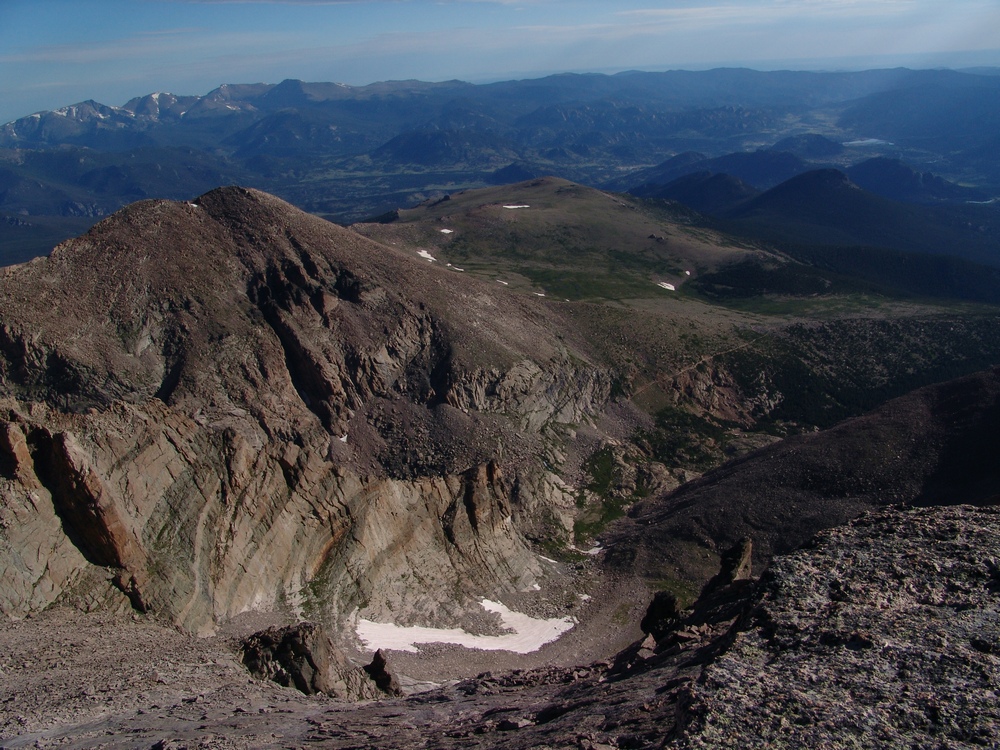
Finally we reached the saddle between Blanca and Ellingwood and were afforded the first very impressive views of the morning. We could begin to make out Crestone Needle (the pointy mountain peaking through left of center).
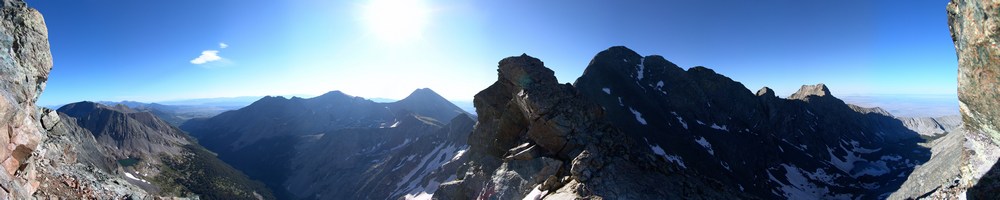
I also took a 300 degree pano from here, which turned out really nicely. On the right you can see the Lake Como valley from where we came from, and on the left you can see the Huerfano River valley and Mount Lindsey, which I climbed last weekend.
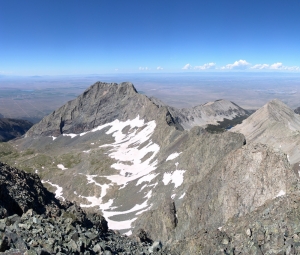
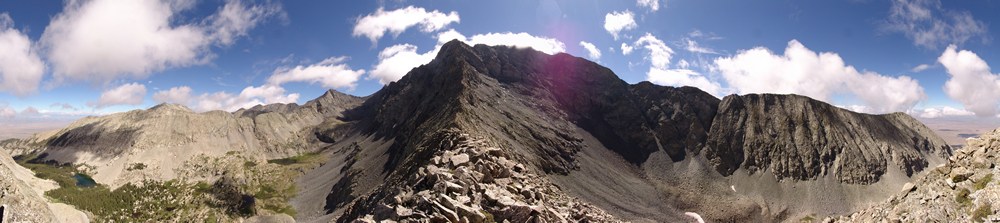
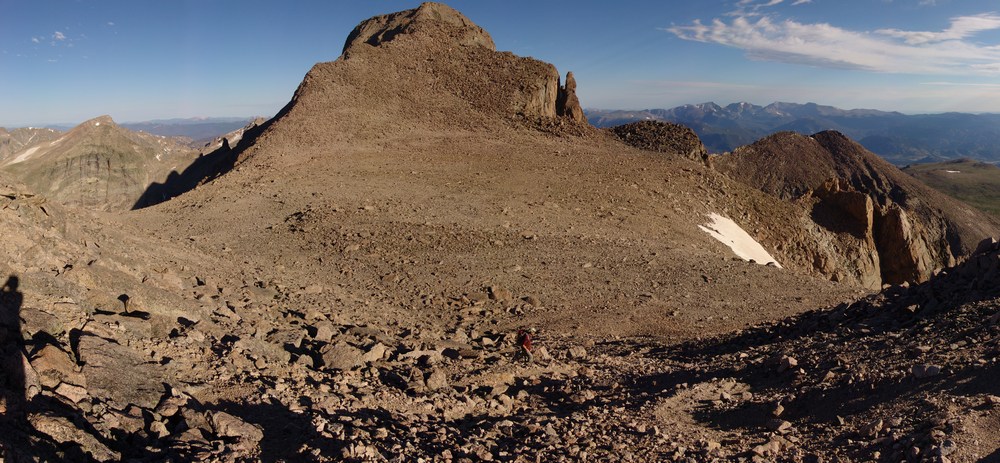
We continued up Ellingwood Point and kept looking back behind us in awe of the sheer size of Blanca Peak. It really is impressive. Here's some panos of Blanca and Little Bear, across the valley from us:
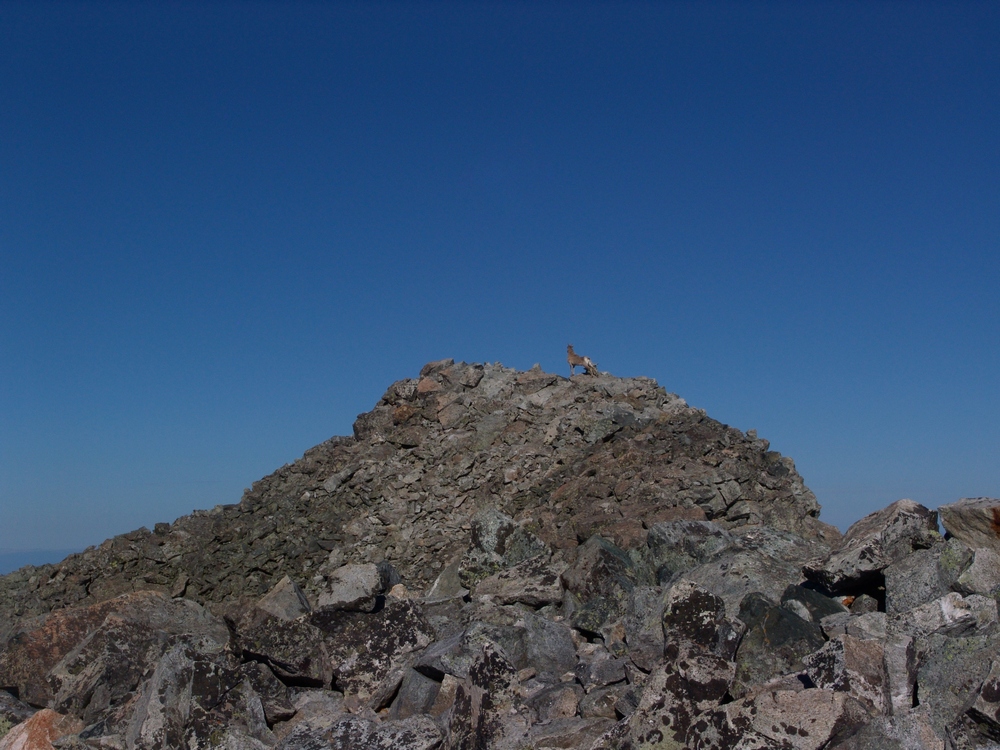
While I was taken by all of the views and therefore occupied by photo-taking, Terry was making great progress towards the top of Ellingwood. He couldn't see it, but unfortunately he was not the first to summit Ellingwood today. The goats were!
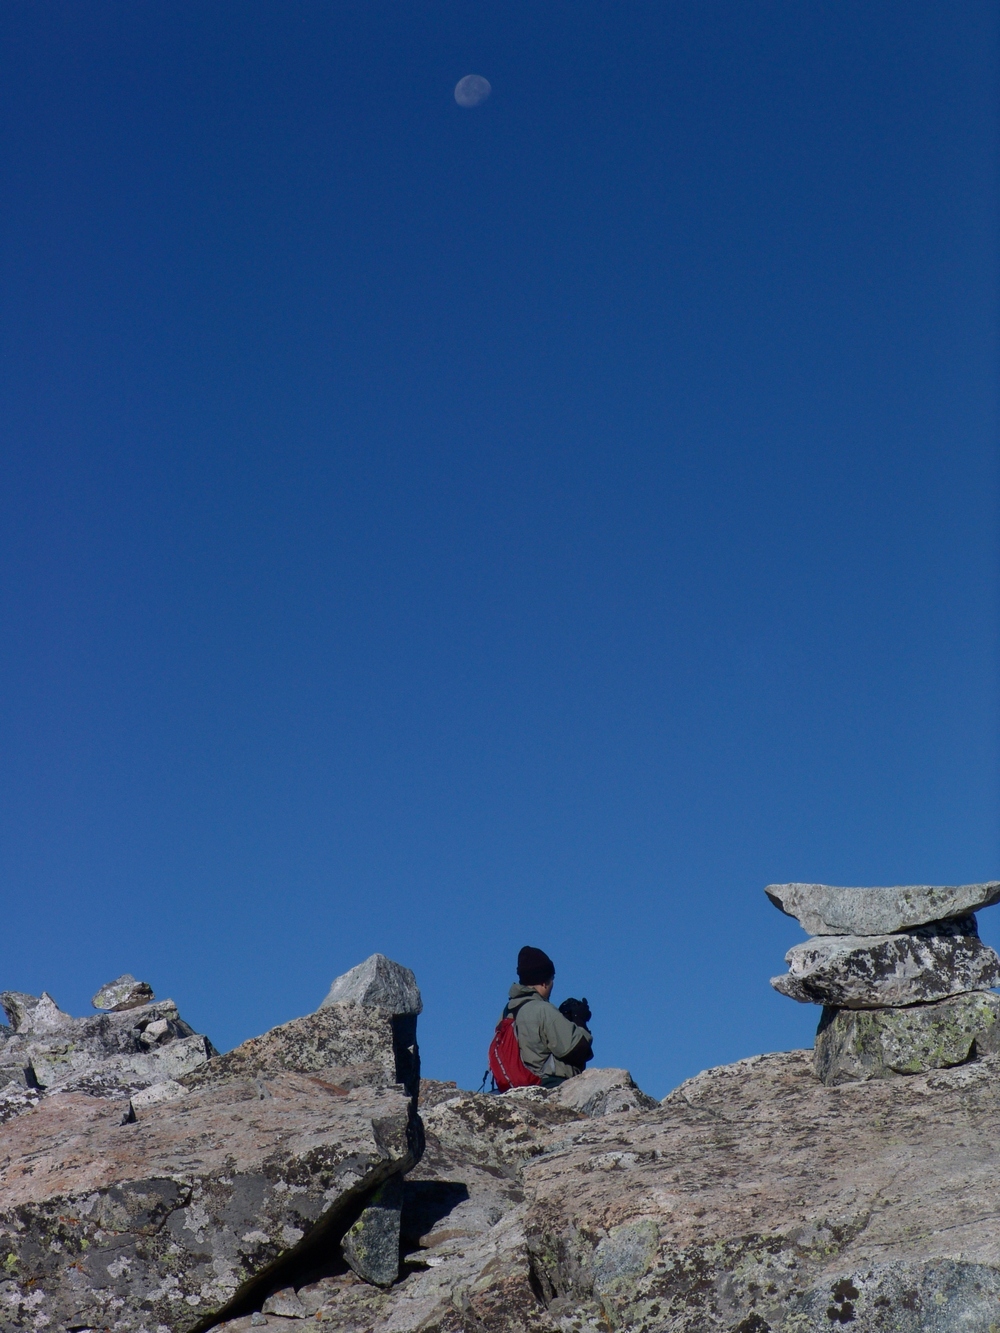
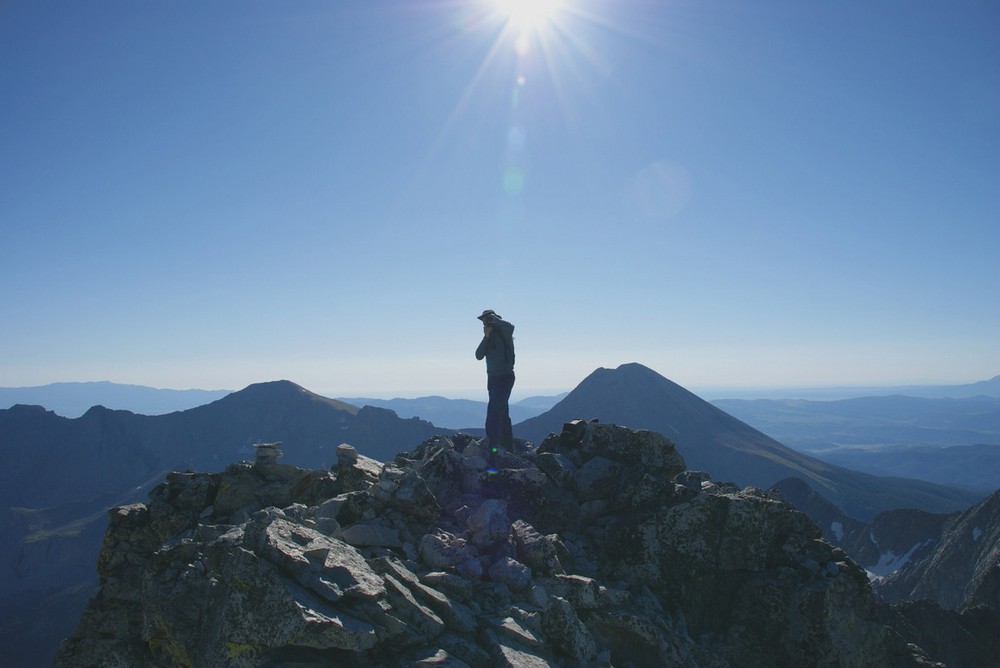
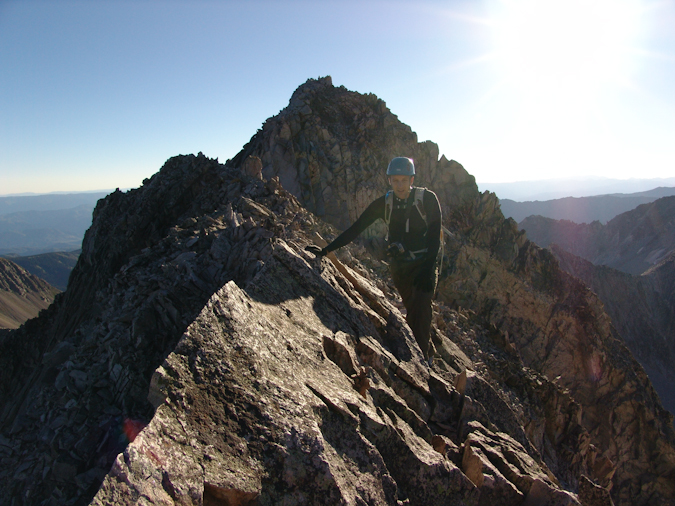
As Terry approached the summit, the goats left and Terry was afforded solitude once more on Ellingwood. Here's Terry with the moon above him as he took in the views from atop Ellingwood:
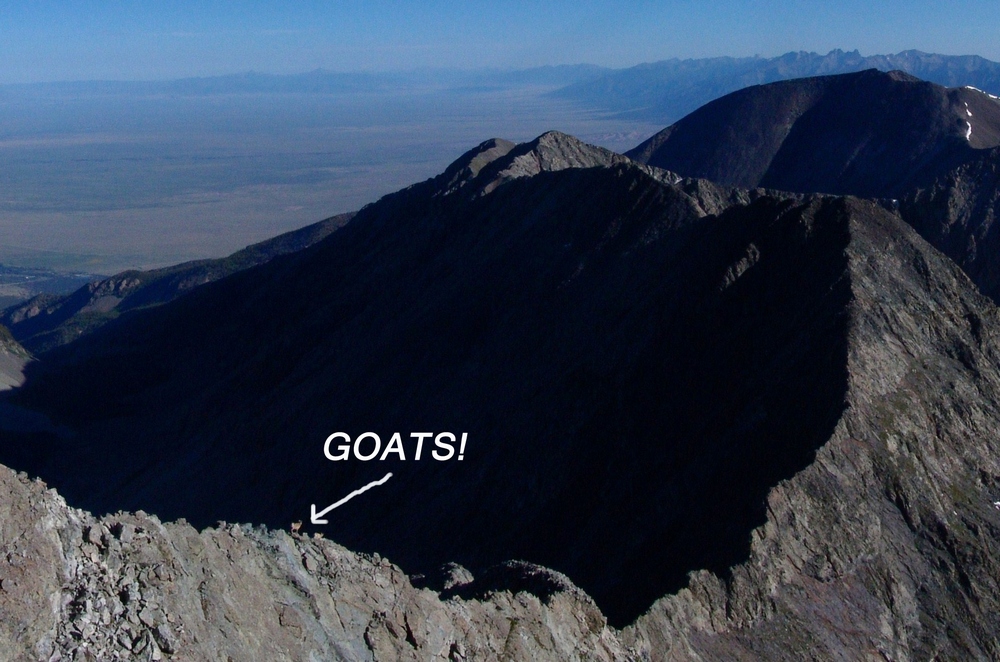
As I reached the false summit of Ellingwood, I looked to my right (north) and saw an impressive ridge connecting Ellingwood to California Peak. If you look closely at this pano, you can see something really cool...
... goats!
Here's a zoomed in view of the Goats! They were doing the traverse down the spiny ridge. It was really amazing seeing wildlife this high.
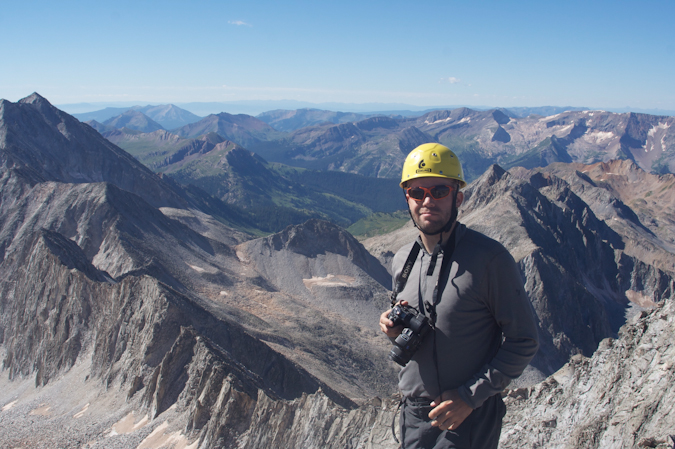
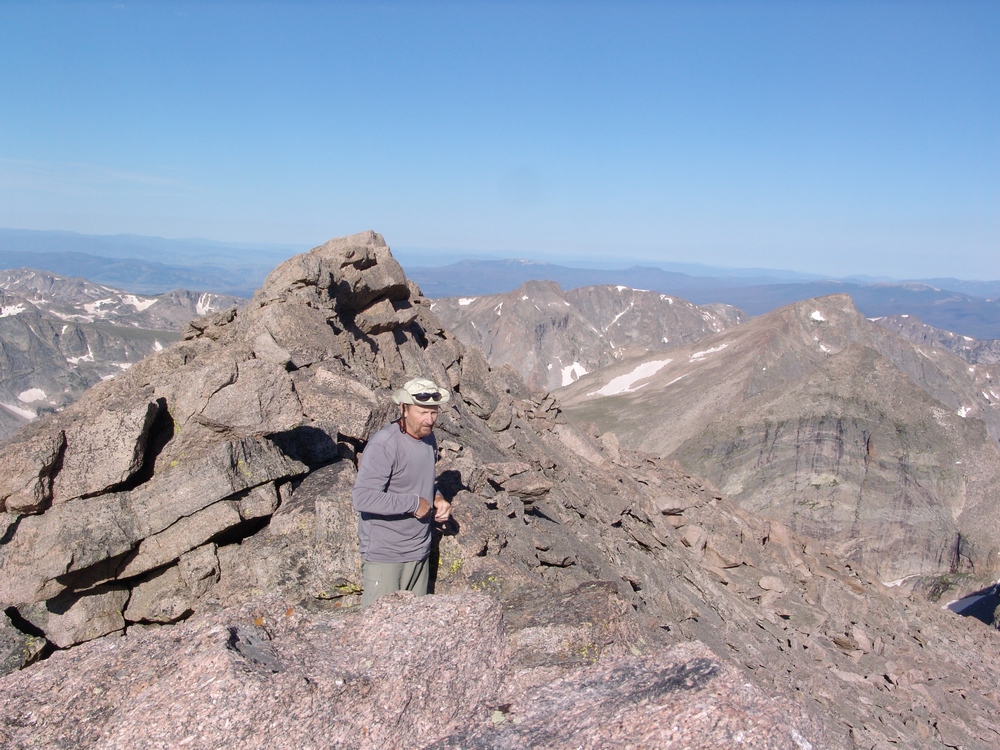
I finally reached the summit and Terry was already taking pictures. He took this one of me as I was also taking photos:
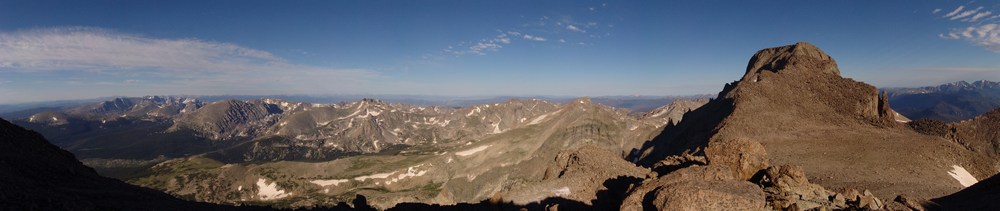
Here's a 360 pano from Ellingwood. Under the sun is Lindsey, and left of Terry is Little Bear and finally Blanca:

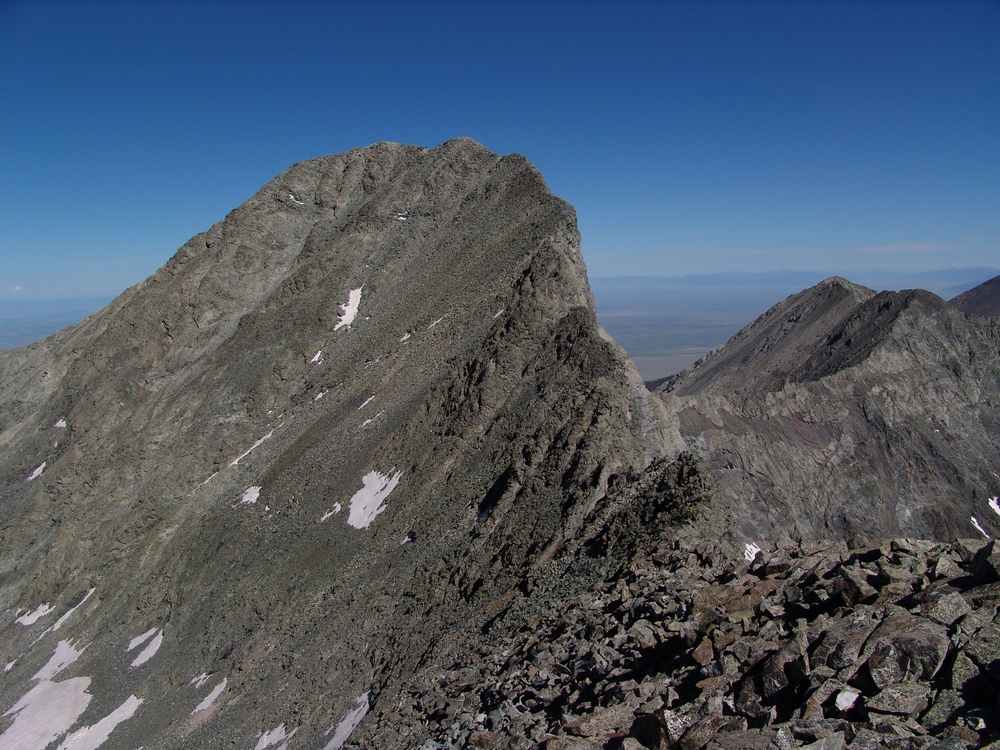
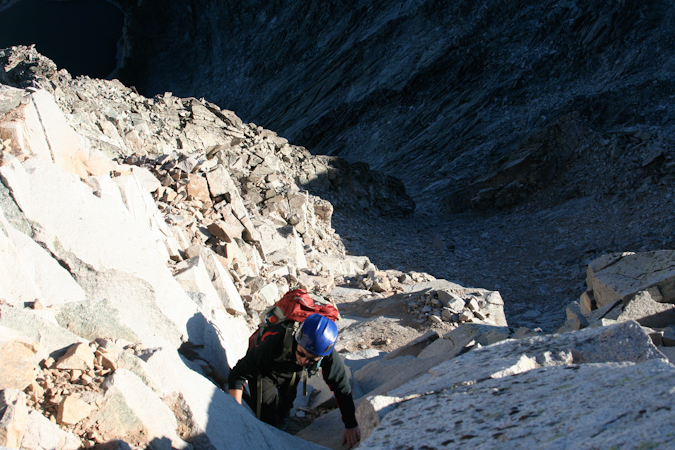
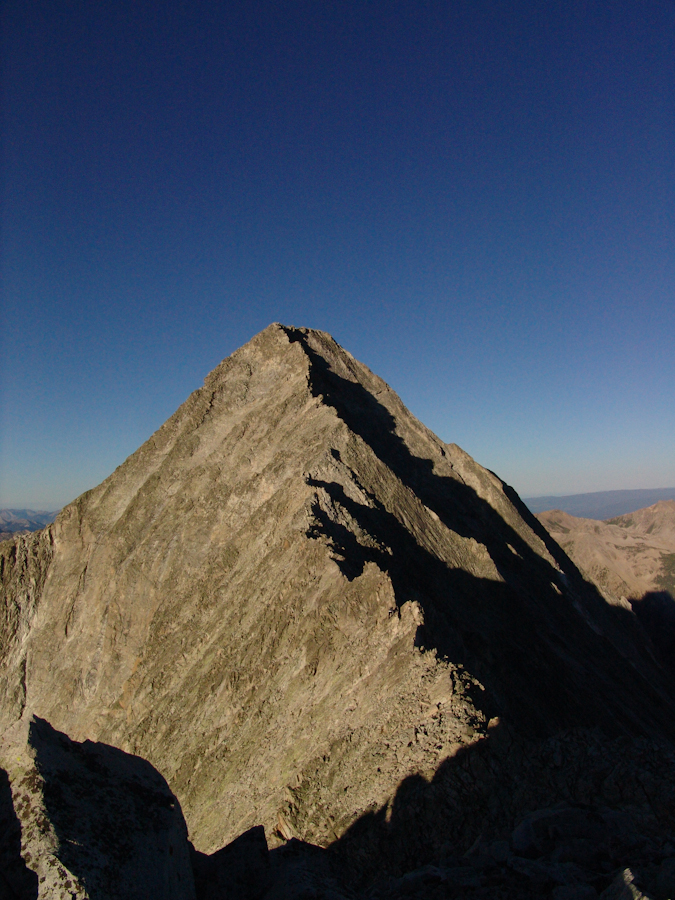
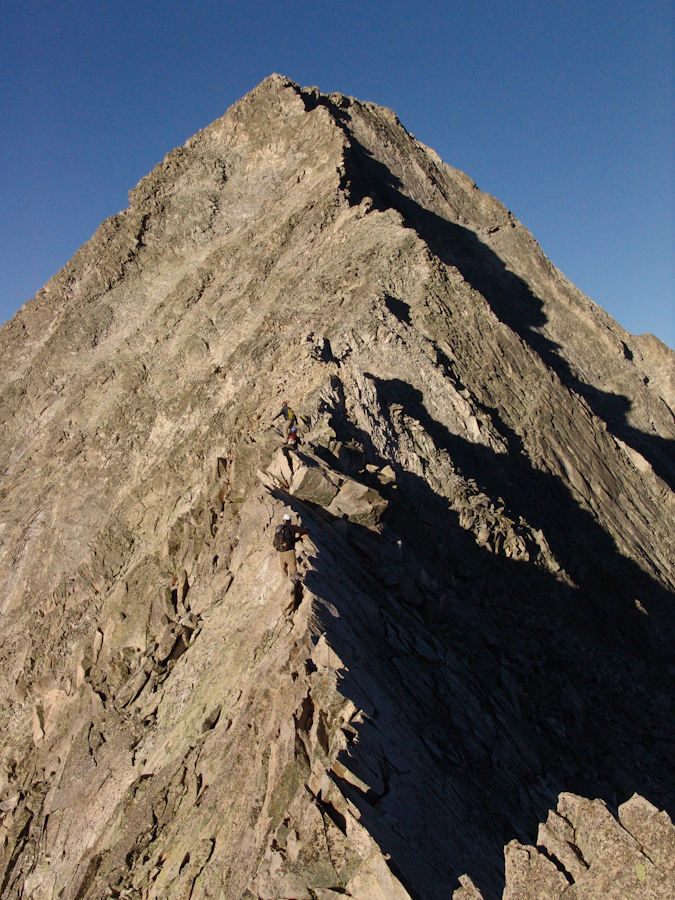
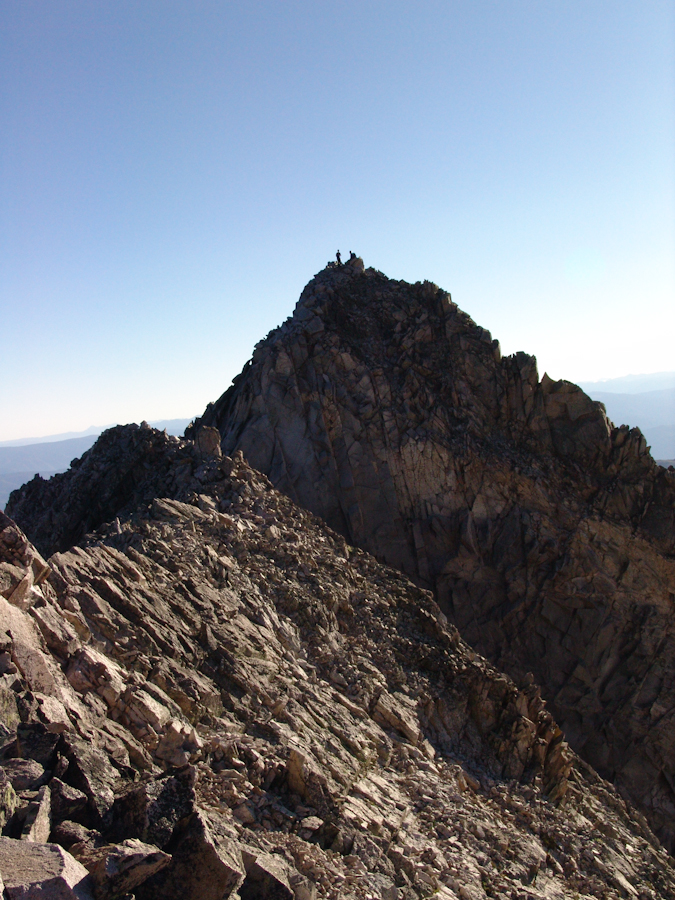
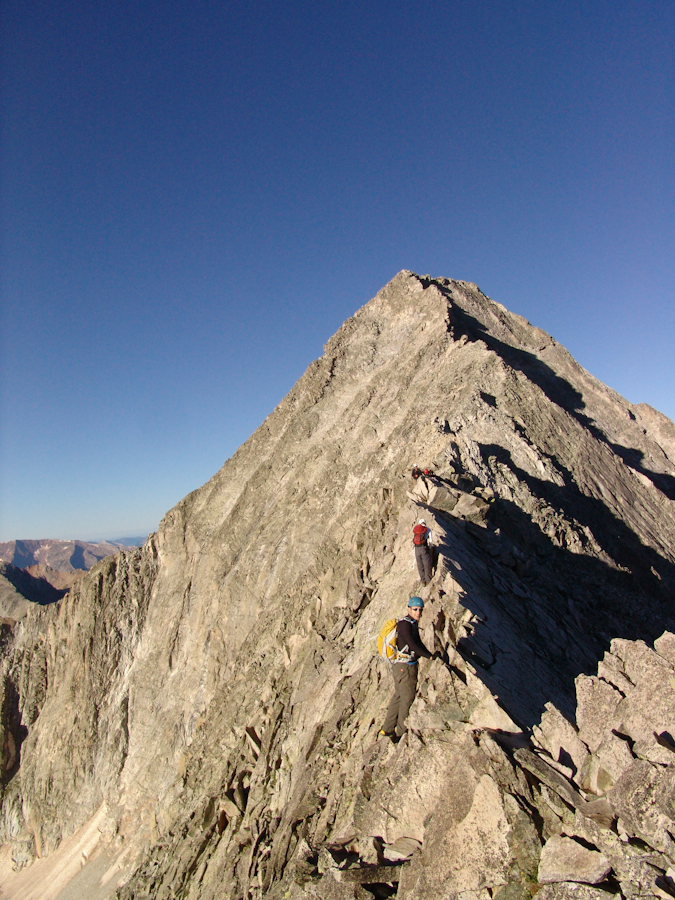
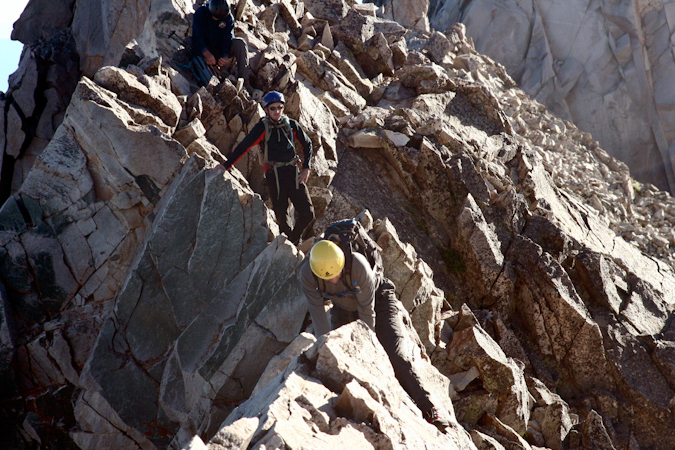
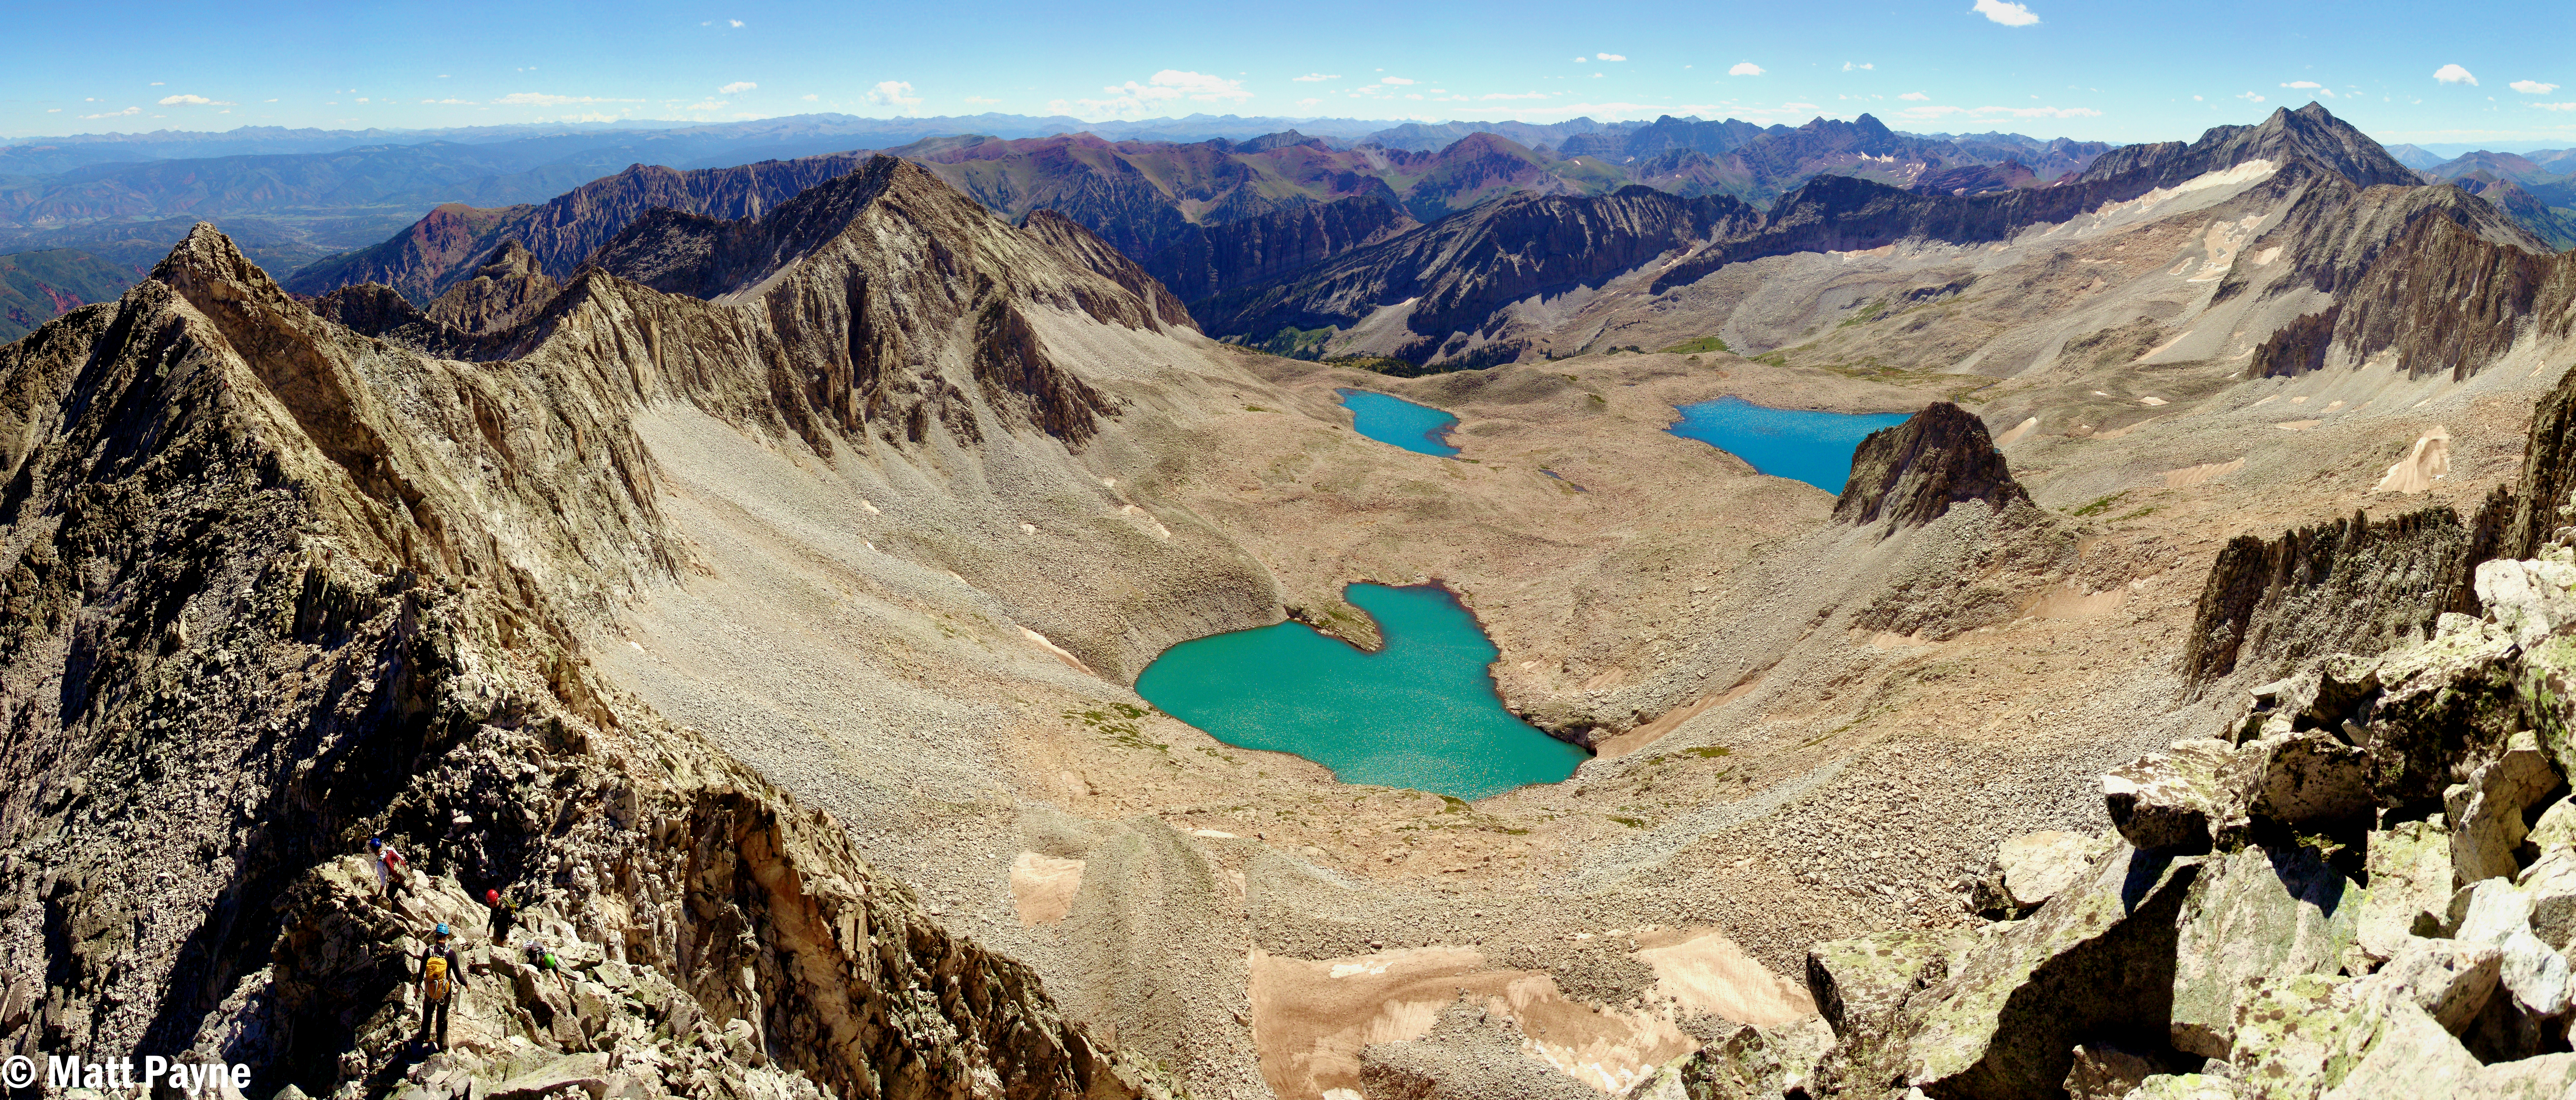
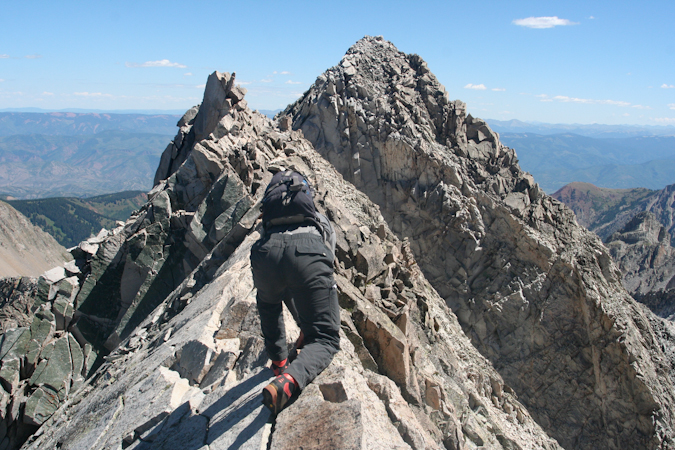
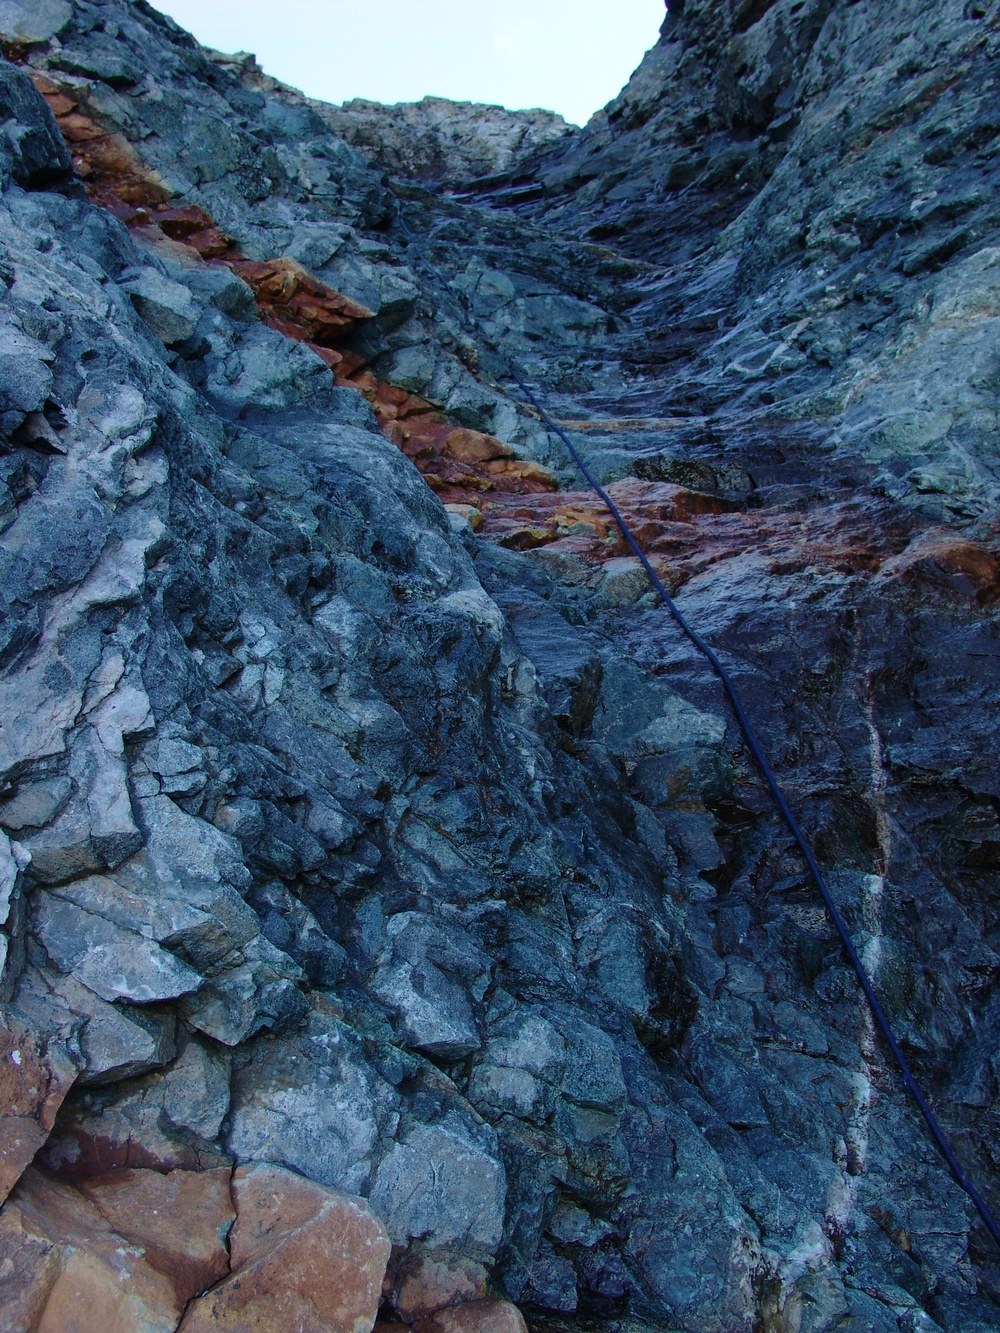
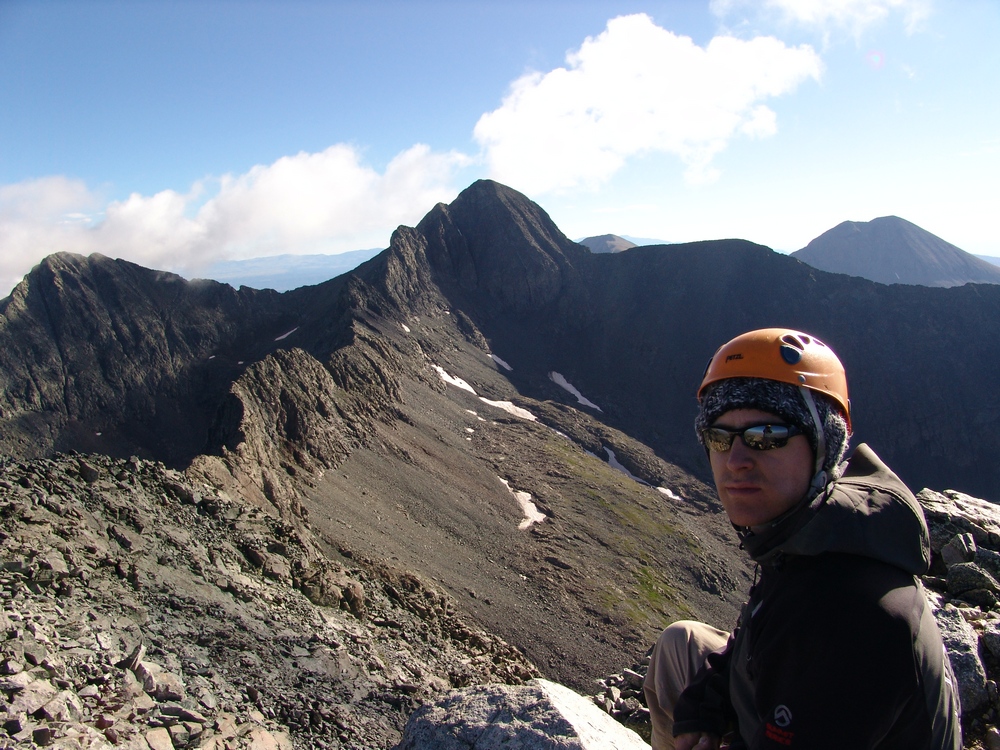
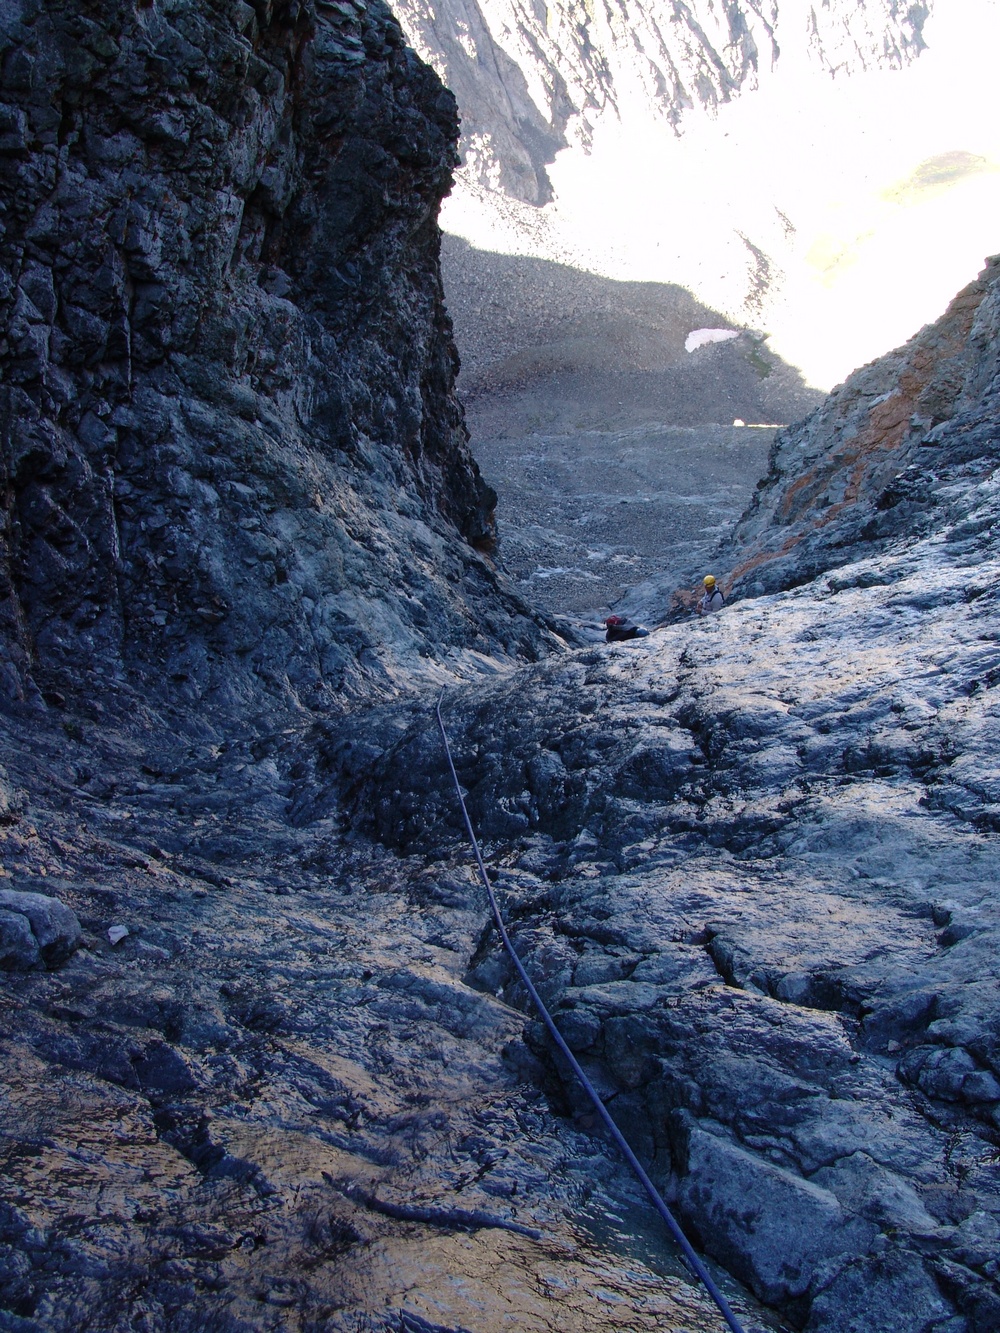
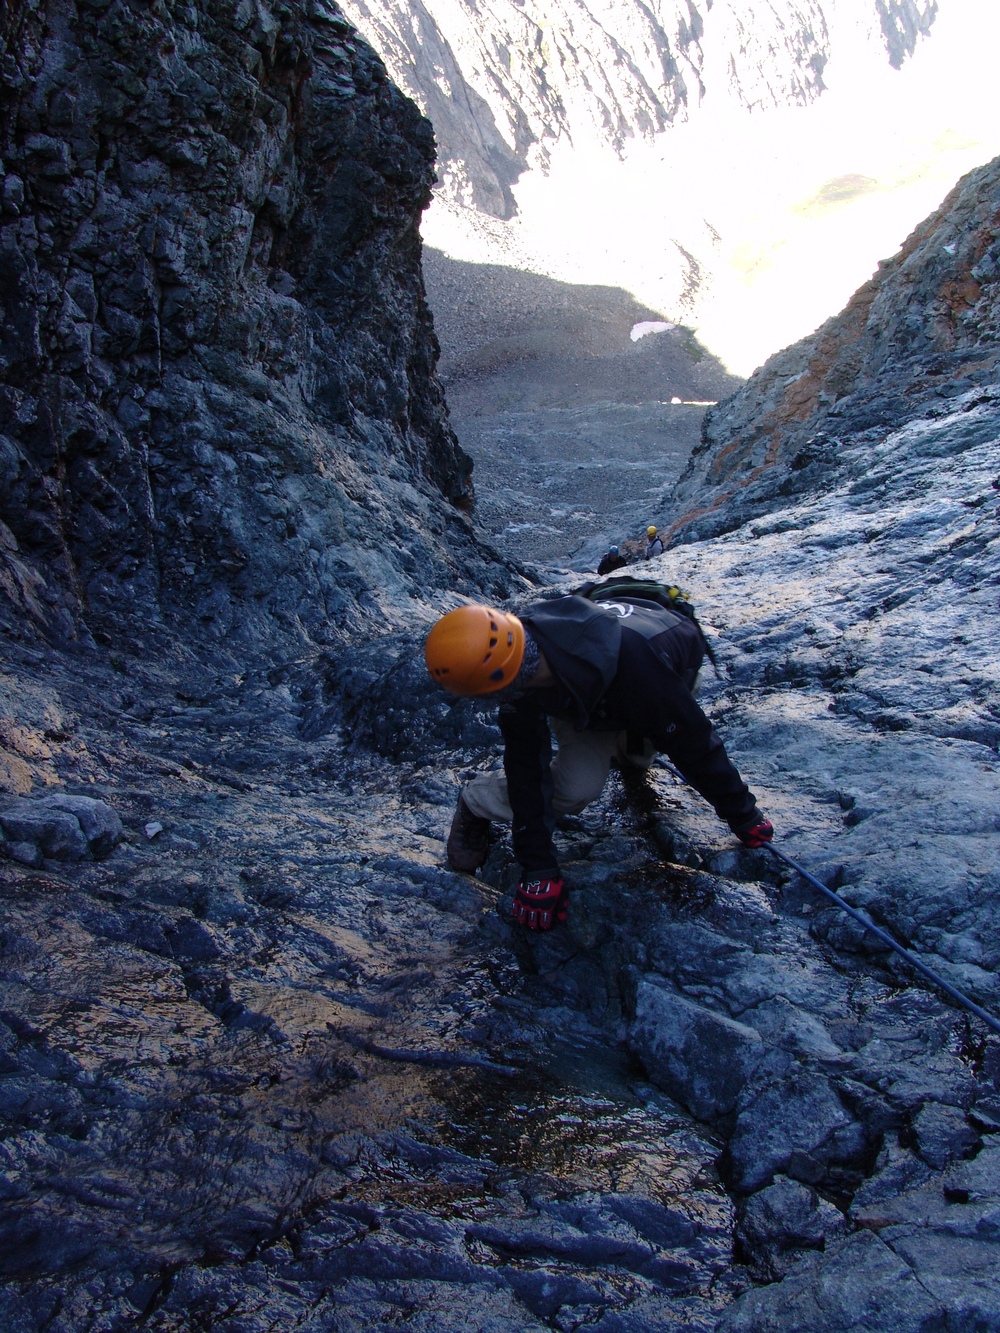
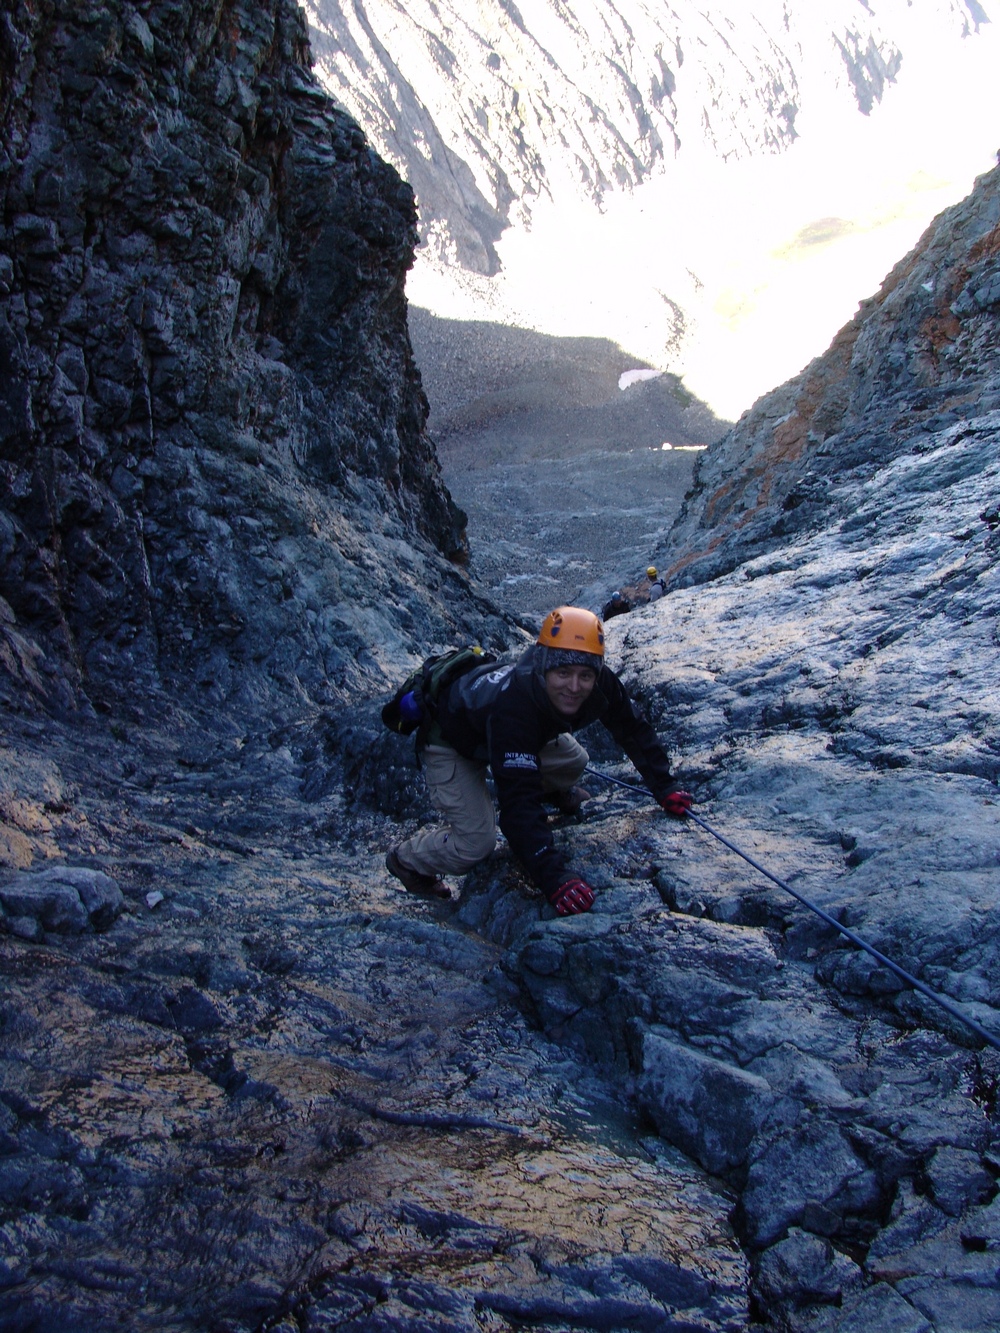
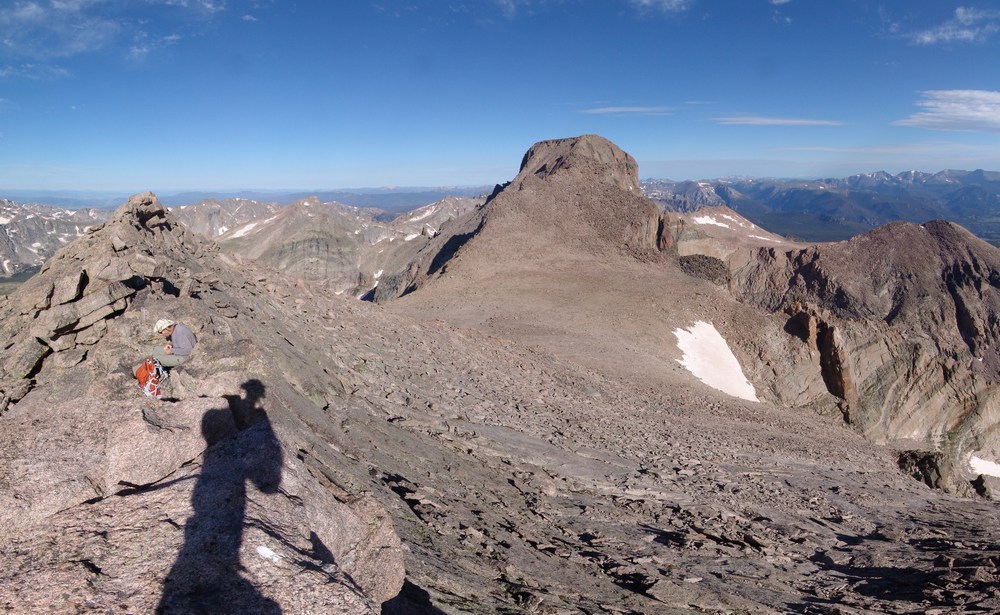
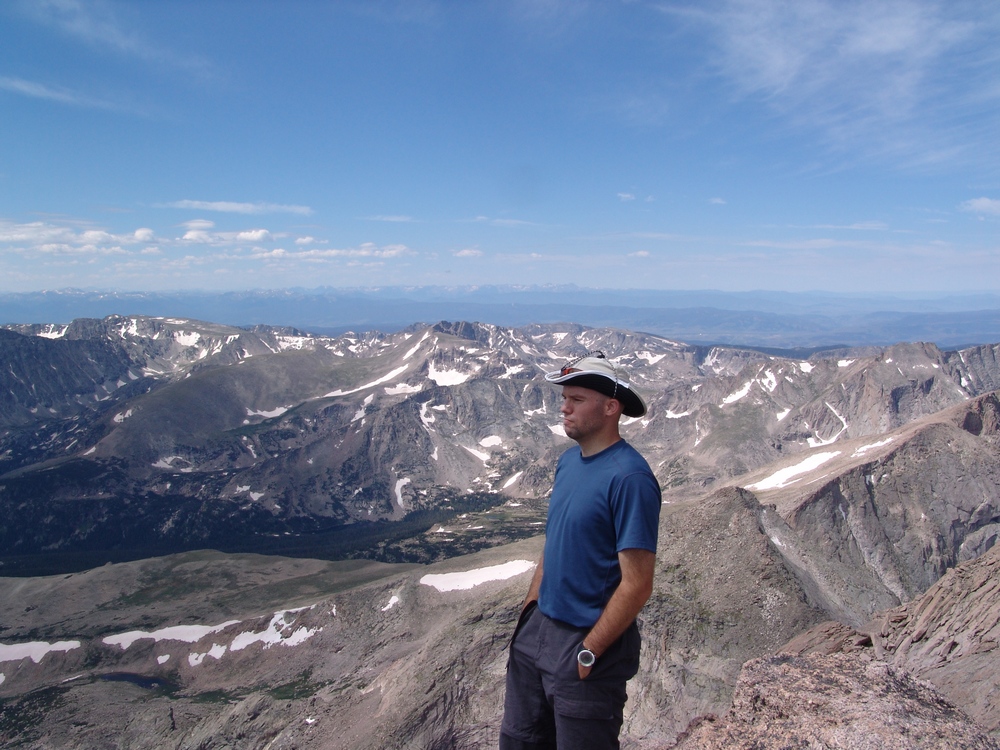
Terry and I stayed on top for about 20 minutes, watching groups of people summit Blanca and Little Bear across the valley. We refueled and began the traverse over to Blanca. This was a fairly sketchy route, perhaps because we stayed pretty high on the airy ridge. To our east was a sheer drop-off of at least 1,000 feet. The route required some careful footholds, ledge-walking, and even an icy couloir. Terry went down the icy couloir first, acting like Spiderman on the edge. I decided to around the ice and then right through it, using my hand to pick up ice and snow and throwing it out of my way. We started up Blanca and passed one gentleman coming over from Blanca. Looking back at Ellingwood, you can see the route we took, basically right down the ridge and up again towards Blanca.
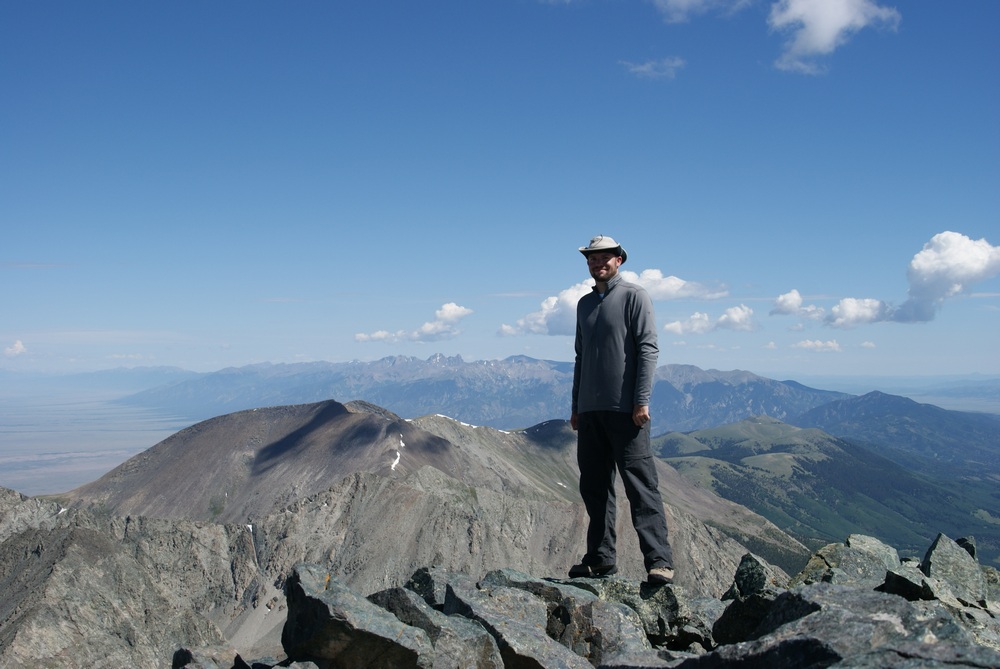
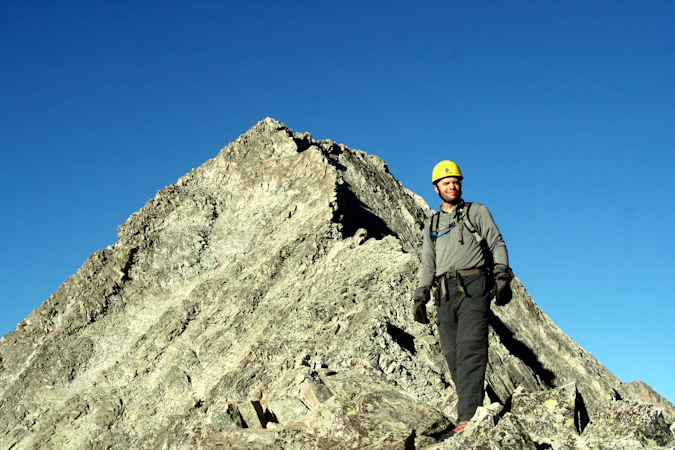
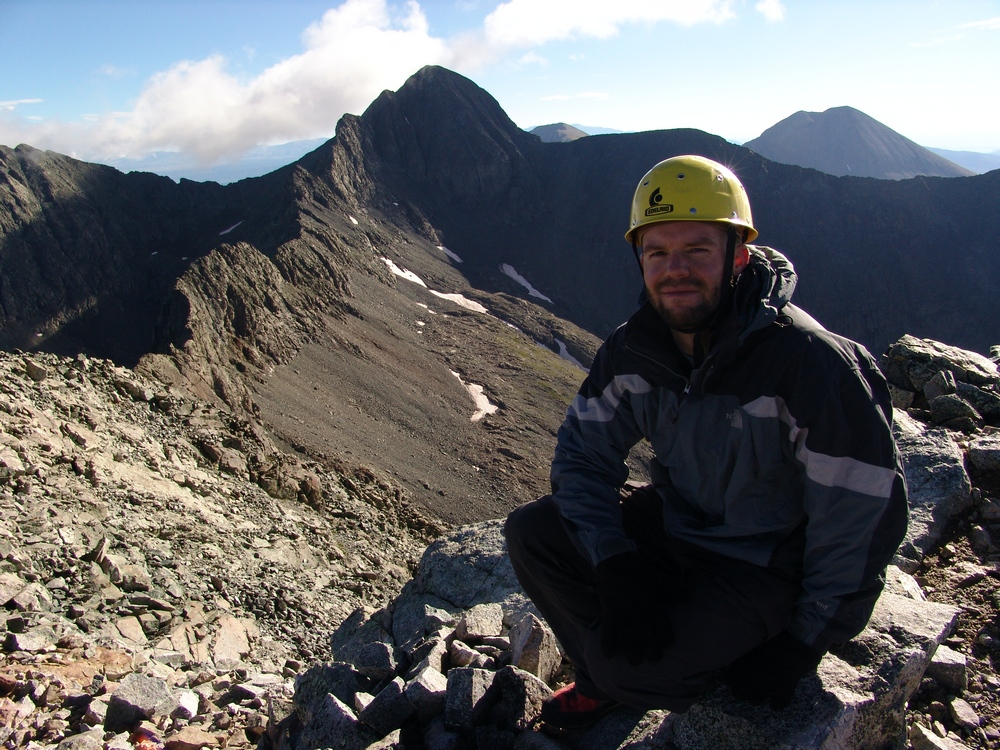
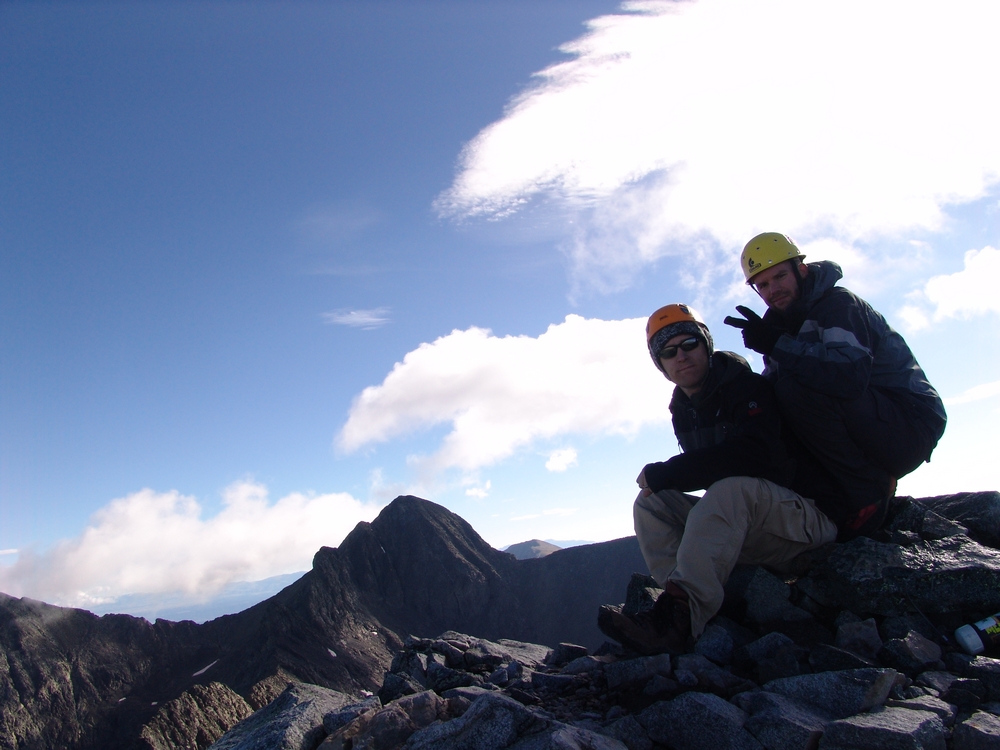
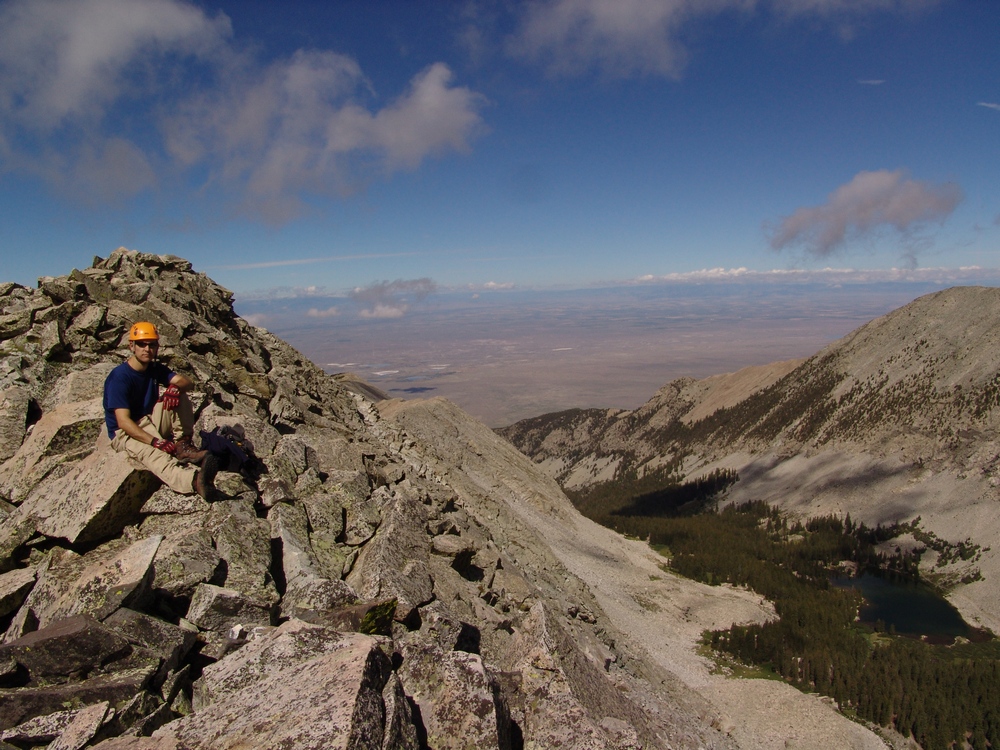
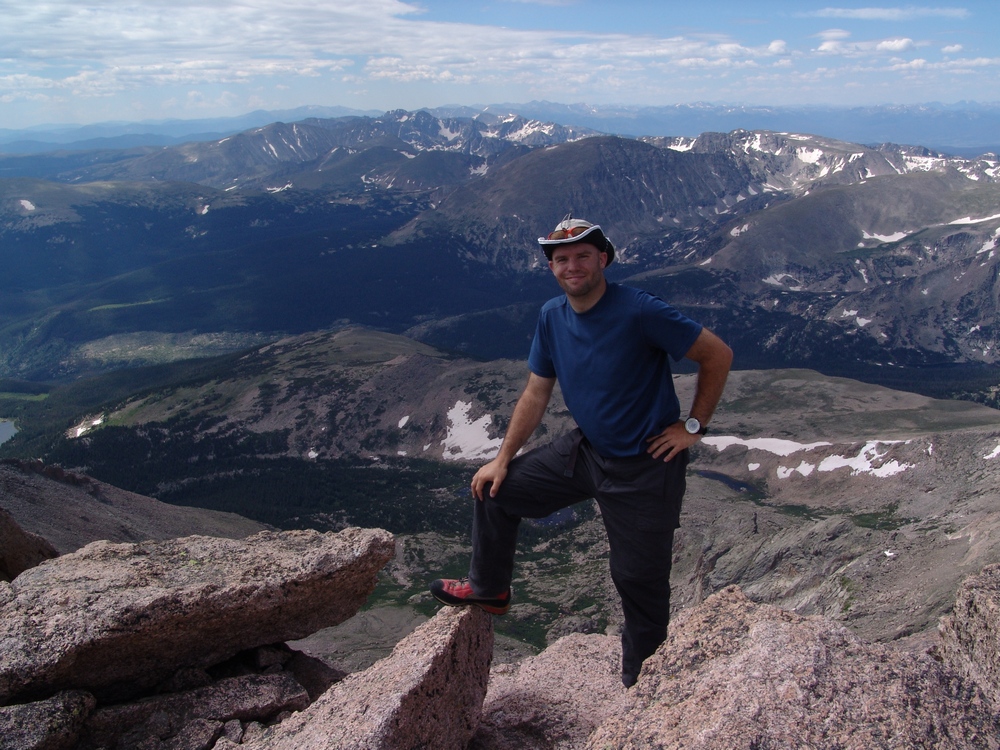
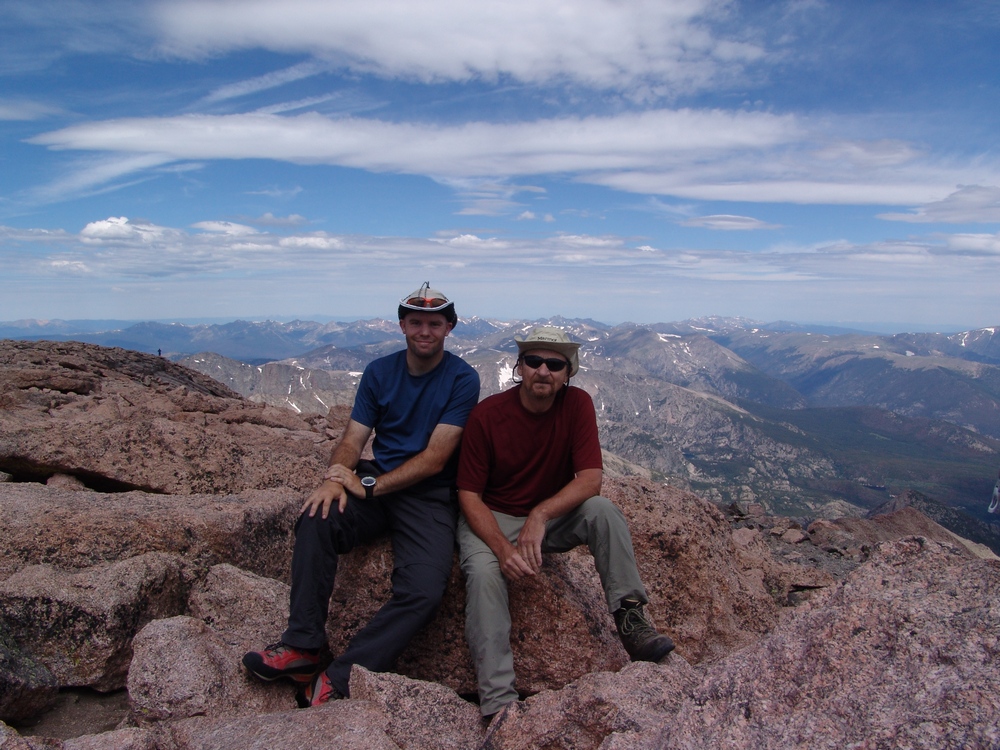
The scramble up Blanca was fairly straightforward class 2+ climbing and I eventually reached the summit. Terry summited about 10 minutes later and we both began to take pictures like crazy. The weather was absolutely perfect - no wind. Terry took my summit shots, and then we both started walking around the summit block in search of great photos.
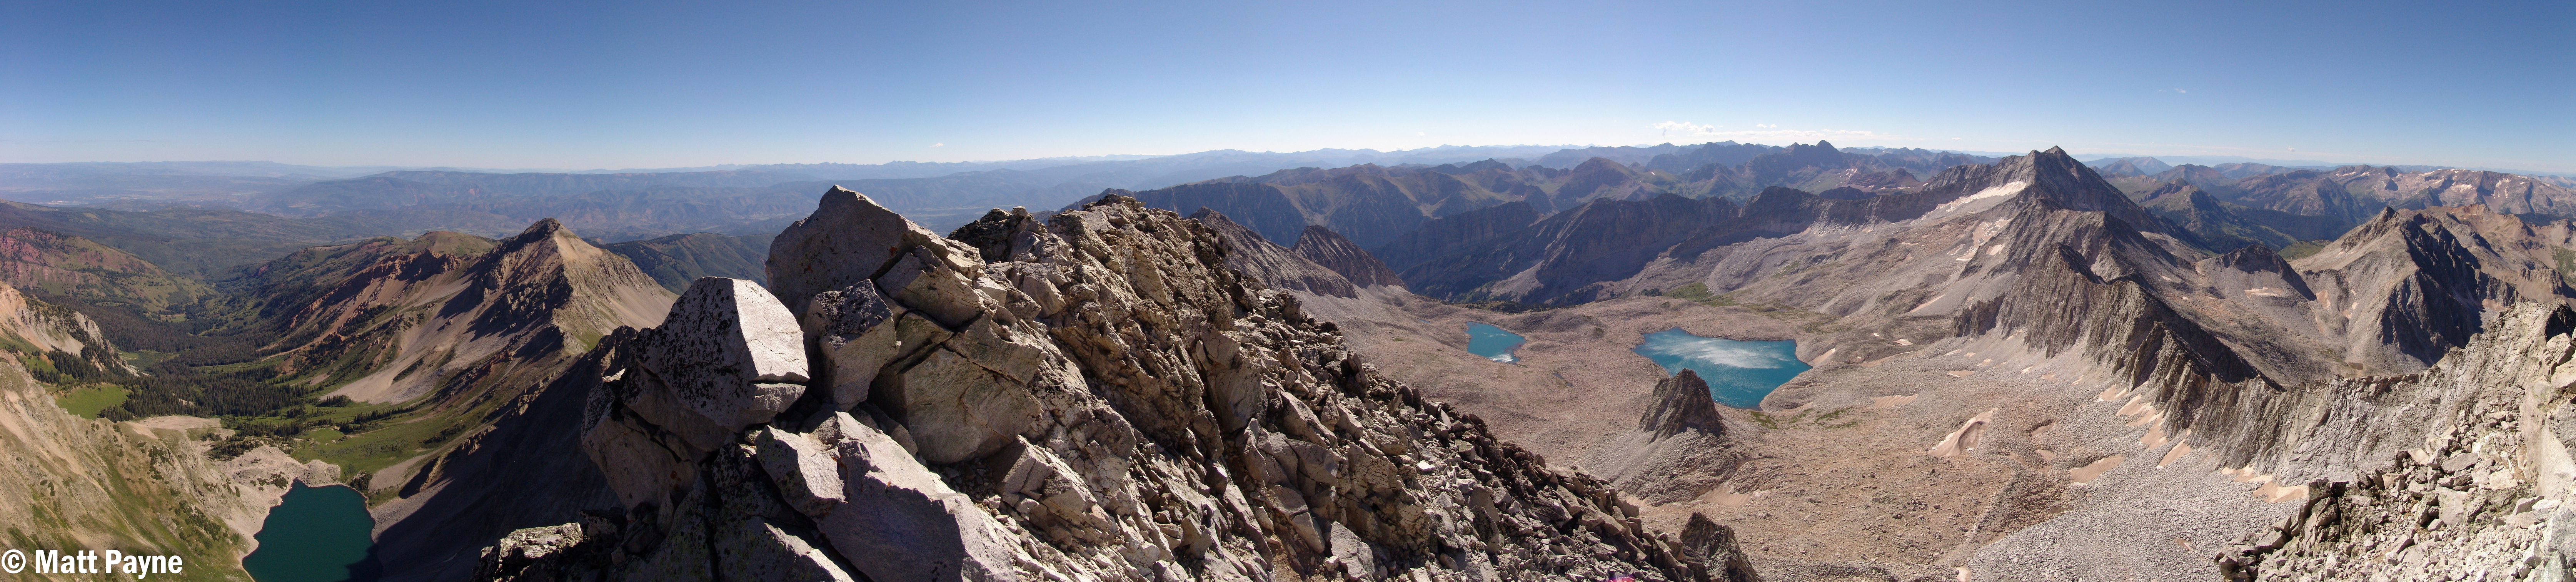
I took my normal 360 pano...

...and then took some higher detail panos of Lindsey Peak and the Winchell lakes to our Southeast.
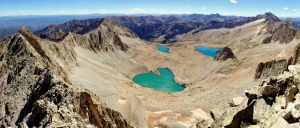
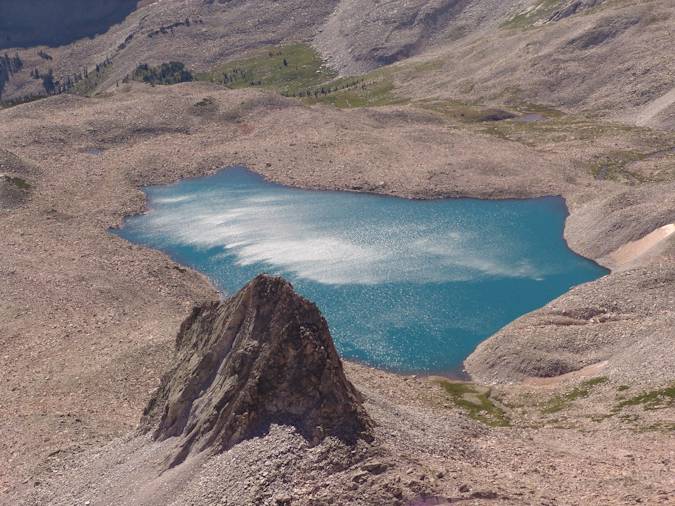
Here's a zoomed in view of one of the Winchell lakes: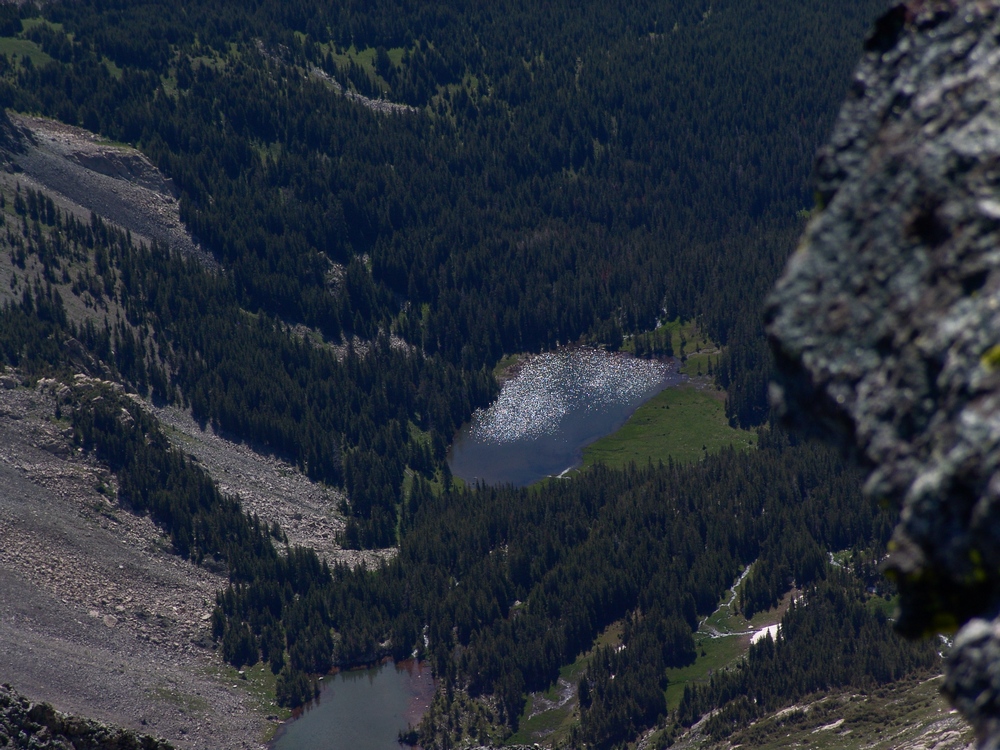
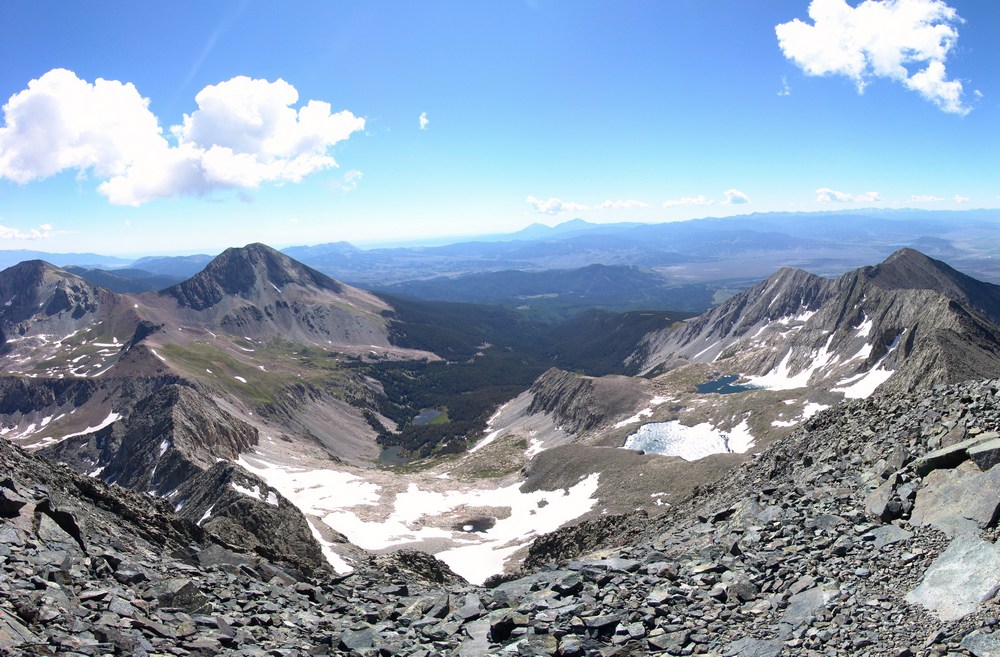
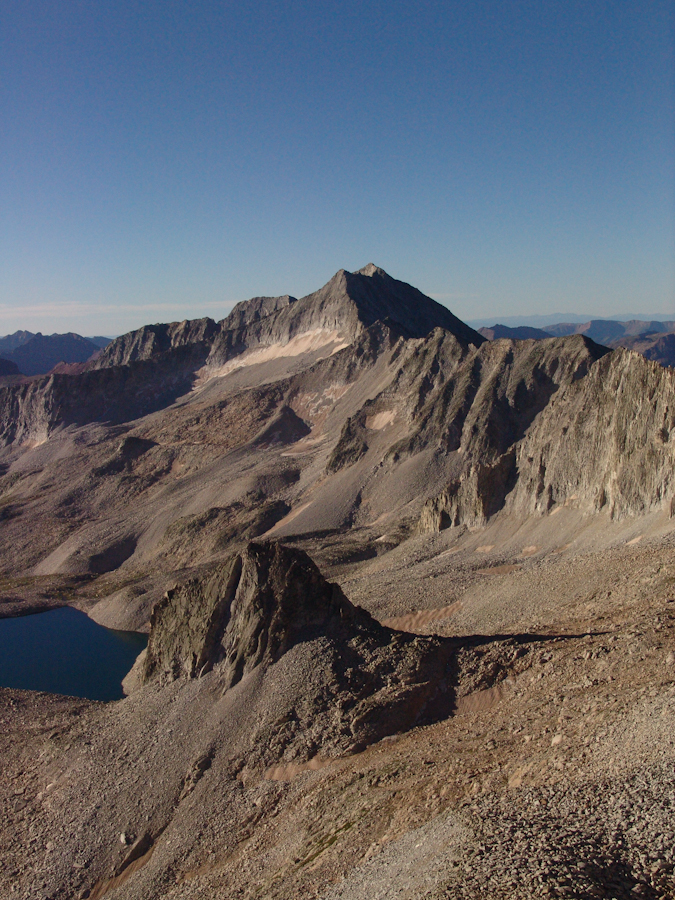
Then I took a very detailed set of photos of Little Bear and the traverse from Little Bear to Blanca - one of the hardest traverses in the State. You can also see Lake Como in the valley to the right of Little Bear.

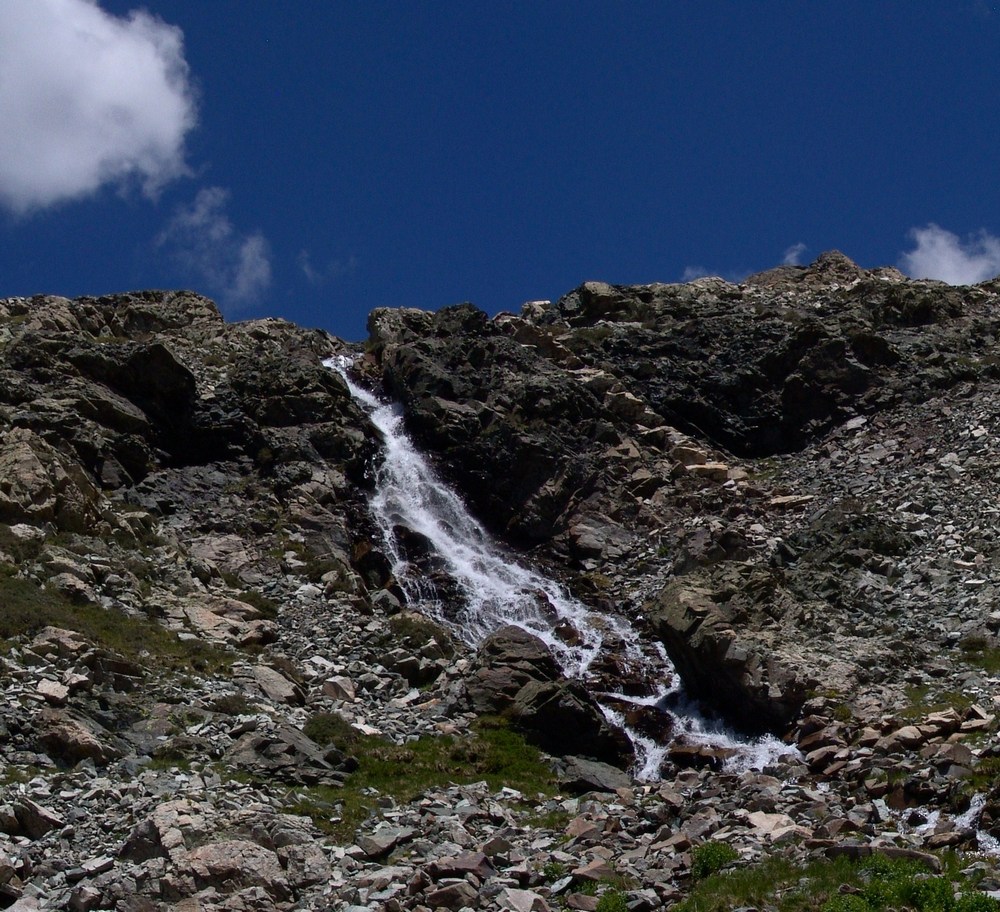
After hanging out on the summit for awhile, we decided to head back down, which turned out to be fairly uneventful except for the awesome views. We eventually got back down to the waterfall, which I had to take a picture of!
When we got back to camp, we both decided it would make sense to just pack-out today, so we packed up our camp and headed back down towards Terry's vehicle. At Como Lake, we encounted a large group of 4-wheelers, one of which we followed down most of the trail to watch him go over the Jaws obstacles. His Willy's Jeep made the Jaws look more like baby teeth:
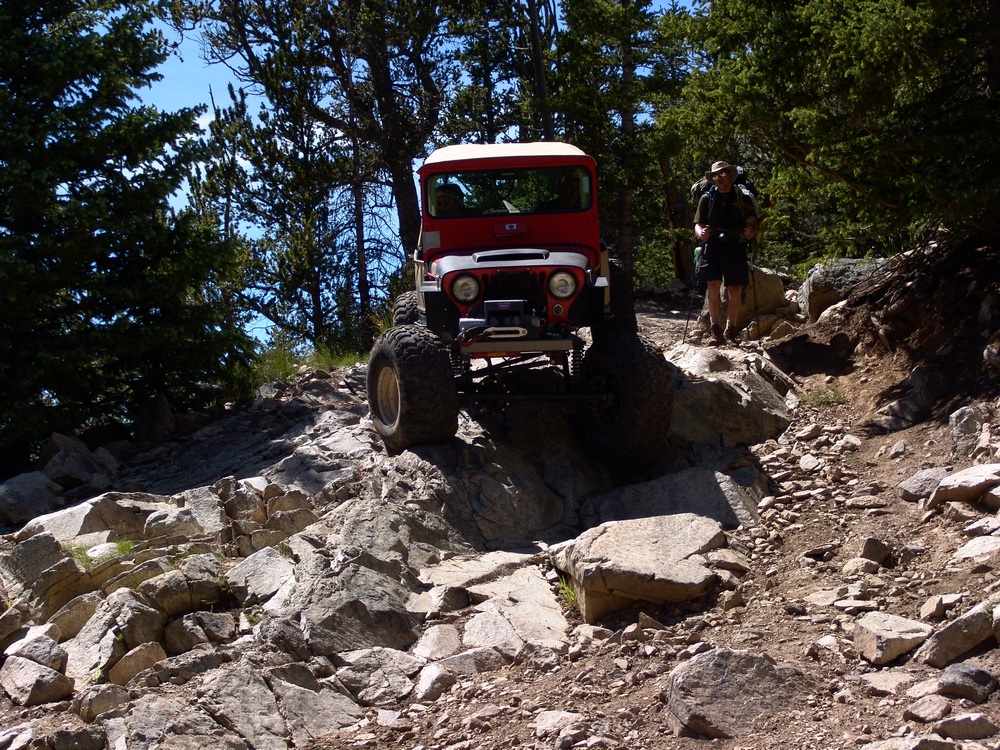
The hike back down to the car was fairly uneventful after seeing the Willys.
We then drove into Blanca to have some good food to prepare us for the drive home.
Mount Massive - A Frozen Wonderland
Some fun information about this great hike:
Mt. Massive - 14,421 ft. - 2nd highest in Colorado; third highest mountain in the contiguous U.S.
8 miles round-trip via Southwest slopes route
3,950 ft. elevation gain
More snow than I expected...
I thought that my climbing season had ended after being snowed on in mid-September on Grays and Torreys; however, I got the itch to climb again this weekend. Serendipitously, a fellow climber from Colorado Springs, Rob, posted on 14'ers.com that he was going to Mt. Massive on Saturday and that anyone from Colorado Springs was welcome to join him. I jumped all over the opportunity and we made plans to meet at 4:15 AM on the west-side of town to car pool. Rob had his friend Brad with him and we departed for Mt. Massive at around 4:30 AM.

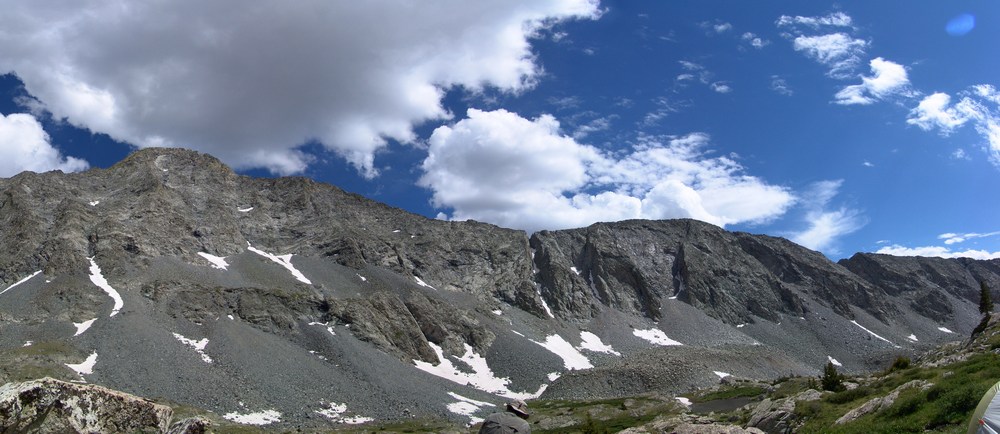
Our route took us directly up the snowy south face of Massive.
On the way over we had good conversation, shared stories about our climbs and got to know each other. We arrived at the turn-off for Mt. Massive at 6:45 and met up with two other climbers from Denver. We reached the trail-head and began hiking at 7:40 AM. Right at the trail-head lies a memorial to the soldiers that died in a helicopter crash earlier this year on Mt. Massive. Here are some photos of the Memorial, notice a section of the helicopter is seen as well:

A memorial cross for the victims of the Blackhawk Helicopter crash on Mount Massive, 2009.

The forecast for the day was clear skies and a high of 60, and wow the weatherman did not disappoint! We swiftly hiked up the valley and reached the turn-off for Mt. Massive. Our view back down the valley was stunning:

The trail was covered in snow, making for a quite interesting hike. As we gained elevation, the trail became less and less apparent and eventually we just started hiking straight up towards Massive.
Looking back towards Elbert, you can see our footprints through the snow...

None of really expected to see so much snow, but it made for a very challenging hike. The snow was up to 3 ft. in depth in some spots, and it was quite slippery due to the 30-40 degree slopes were climbing on. We stopped several times to rest on the way up, and about halfway up I was able to take some shots, combined here into a smaller panoramic photo:

After approximately three hours, we were able to reach the saddle, which joined us with the standard route. By now I was pretty tired, partially due to the extra effort required by the snow, and partly due to the fact that I had not had much to eat. I made sure at this point to eat some snacks, and we headed back up. We found ourselves climbing up some pretty deep snow, as evidenced by this shot, looking up the ridge towards the summit, taken on our way back down:

After trudging through the snow, we were able to reach the summit at 12:40 PM, a full 5 hours after we started. The snow really took a lot out of us! I was just really glad I brought my gators and had tons of warm clothing... Here is my obligatory summit pose, with the Elk range behind me:
And of course my traditional 360 degree pano:

Before we left from the summit, I took some zoomed in shots of the Elk range, including the Maroon Bells. This stitched pano is one of my favorites from this 2009's shots:

We headed back down and had a good time rumbling down the snowy slopes. I took one last set of the valley, combined into a pano here:
All in all, I would highly recommend this route for Mount Massive. Even in October, the route is solid, and I could see this being feasible even through November or later.
Capitol Peak: On The 'Edge'
Capitol Peak carries a mystique among hikers and climbers in Colorado. First climbed in 1909 by Percy Hagerman and Harold Clark, Capitol Peak is often revered as the most difficult 14er in Colorado. Capitol Peak towers above treeline in the Elk Mountains of Colorado, a crumbling mass of granite, shaped into a rugged pyramid with spiny ridges. While I have a great respect for Capitol Peak, I felt that I had personally prepared myself for the climb through graduation along the difficulty continuum of climbs in Colorado. Having summited several of Colorado's harder Centennials (highest 100 mountains), including Crestone Needle, Crestone Peak, Vestal Peak and Little Bear Peak, I felt that I had the skills and mental toughness to complete Capitol. Capitol is well-known for its "Knife Edge," a 150 ft. narrow and jagged section found on the main route of Capitol Peak. The Knife Edge is very exposed on both sides, making it a mental challenge for many climbers. Many personal friends and family members as well as reports on the internet had built up Capitol's Knife Edge's difficulty in my mind; infact, YouTube is full of videos of people climbing the Knife Edge, some recklessly crossing it like a tightrope. I was hopeful that it was more hype than people it made it out to be...
Here are some meaningful metrics from this amazing trip:
Peaks summited:
Capitol Peak: 14,130 ft. (ranked 29th in Colorado)
"K2": 13,664 ft. (unranked)
Total elevation gain: 5,300 ft.
Total distance hiked: 17 miles
Total time hiking: Approx. 14 hours
Total photos taken: 356
Total distance driven: 520 miles
Trip duration: 1 day, 19 hours

K2 (far left) and Capitol Peak (far right) seen in this dramatic panoramic. Click for high resolution version (15 mb).
That being said, Capitol Peak was not without other dangers. Many climbers have perished on Capitol over the years, oddly enough, very few of the deaths have occurred on the Knife Edge. In 2009, James Flowers, the United States Paraolympic Swim Coach, perished on the Northeast side of "K2," a sub-peak of Capitol Peak, as reported by the Aspen Times. Needless to say, great caution, respect, and preparation would be required if I were to successfully climb Capitol. First on my list for preparation was to find capable partners. This is often difficult in the mountaineering community, since many climbers inflate their abilities or do not disclose their limitations to potential partners.
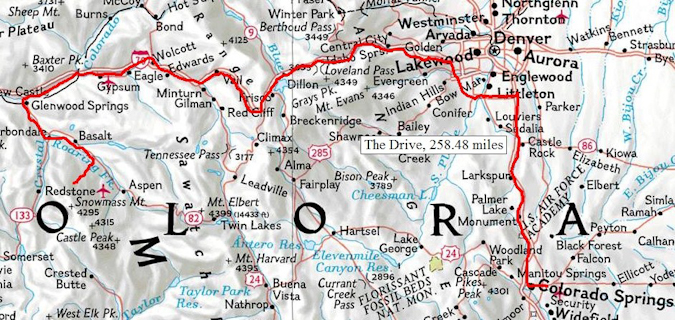
Earlier this summer, I climbed Huron Peak with Mike Vetter, a Sioux Falls, South Dakota resident and an up-and-coming star in the IT realm and CEO of DataSync. Mike and I made plans to climb again this year and we set our sights on Capitol Peak. Mike invited his friend, Travis Arment, an avid marathon runner. Neither Mike nor Travis had extensive experience climbing class 4 peaks; however, having hiked with Mike in the past, and knowing that Mike was a comfortable and avid rock climber, I knew I could trust him to make solid decisions and that they would both be personally responsible enough to turn-around if the climb became too difficult. We all exchanged plans via Facebook, ensured we all had the proper gear and knowledge, and established ground rules for the climb in case something unexpected happened. Travis and Mike flew in to Denver on Friday, August 13th. I picked them both up from Castle Rock, where Travis' aunt lives, on Saturday morning and we departed for Capitol. The total drive from Colorado Springs was approximately 260 miles and took roughly 5 hours.
We arrived at the trailhead for Capitol at about 10:00 AM and were hiking by 10:30 AM. As usual, my pack was the heaviest and largest, weighing in at just over 50 lbs.
Mike's pack was medium-sized and Travis literally backpacked with a daypack. We made sure to give Travis a hard time for having the smallest pack, and Mike was quick to point out that he was carrying half of Travis' stuff. Travis was a great sport about it and agreed to share his tasty snacks on the hike up.
There are two trails for Capitol Peak - the standard trail and the "ditch trail." We chose the ditch trail due to its lack of elevation loss and gain at the start of the hike. The ditch trail is aptly named, following an irrigation ditch along the side of a ridge line which wraps around towards Capitol Peak. The irrigation ditch is used to provide water for cattle, which are known to graze this part of the Elk Mountains in large numbers.

The topo map of our route. Want to make your own maps like this? Check out the TOPO! program from National Geographic!

Capitol Peak seen from the trailhead.

Matt Payne and Travis Arment on the Capitol Peak Ditch Trail - photo by Mike Vetter
After about a mile and a half of hiking on the trail, it leaves the ditch and heads uphill, gaining half of the ridge to the west. Before we knew it, the trail meandered into a great opening, revealing Capitol Peak. Capitol Peak remained in view for much of the remainder of the hike up to Capitol Lake.
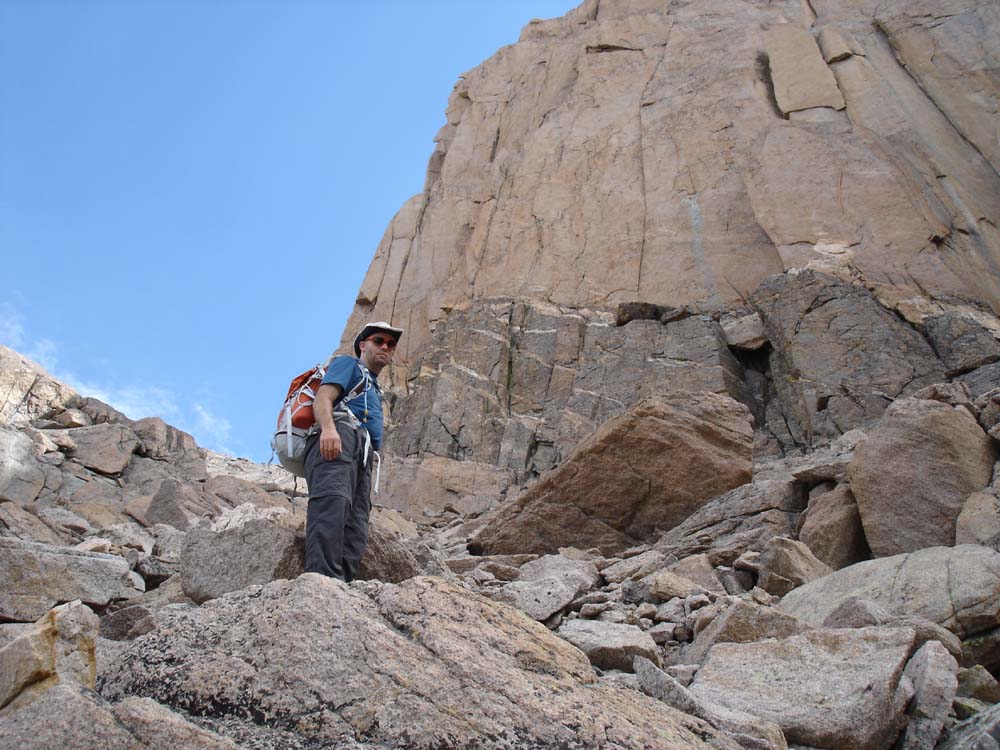
Matt Payne on the trail
Capitol Peak, about 1/3 of the way up to Capitol Lake from the trailhead.
On the way up the trail, we passed many raspberry plants, sometimes stopping to grab a snack to help fuel our ascent.
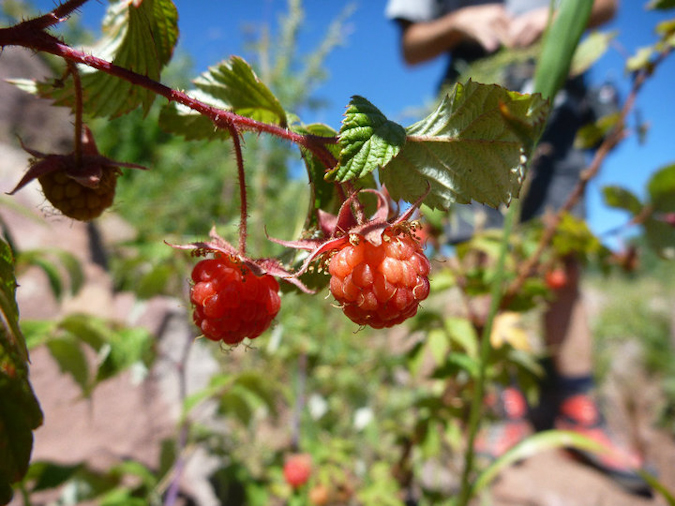
Wild Raspberries - photo by Travis Arment
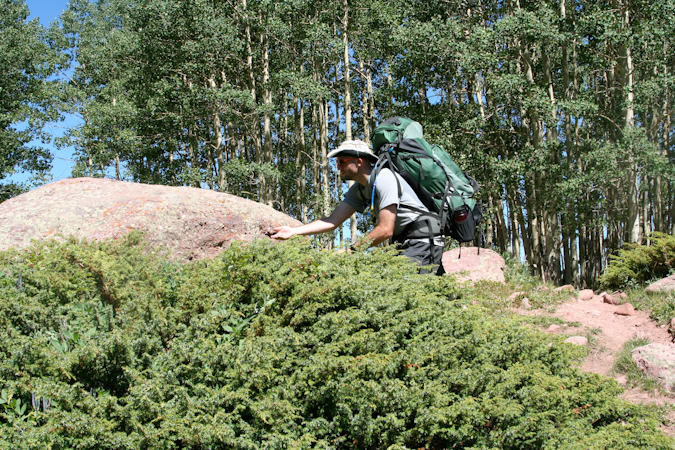
Matt Payne braves the spiky bush to score some berries.
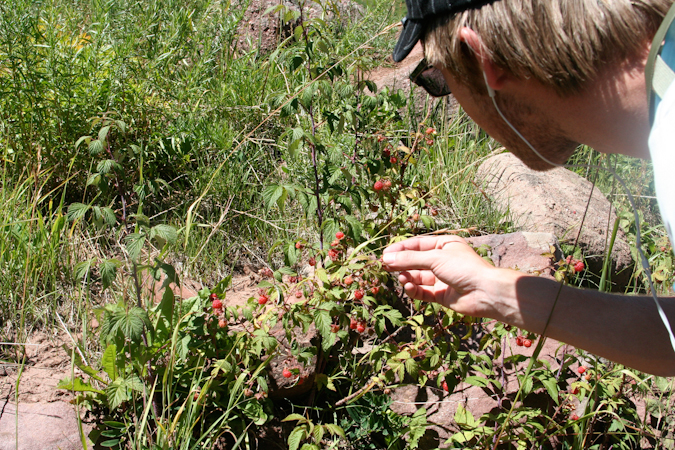
Travis Arment reaches in to score some berries.
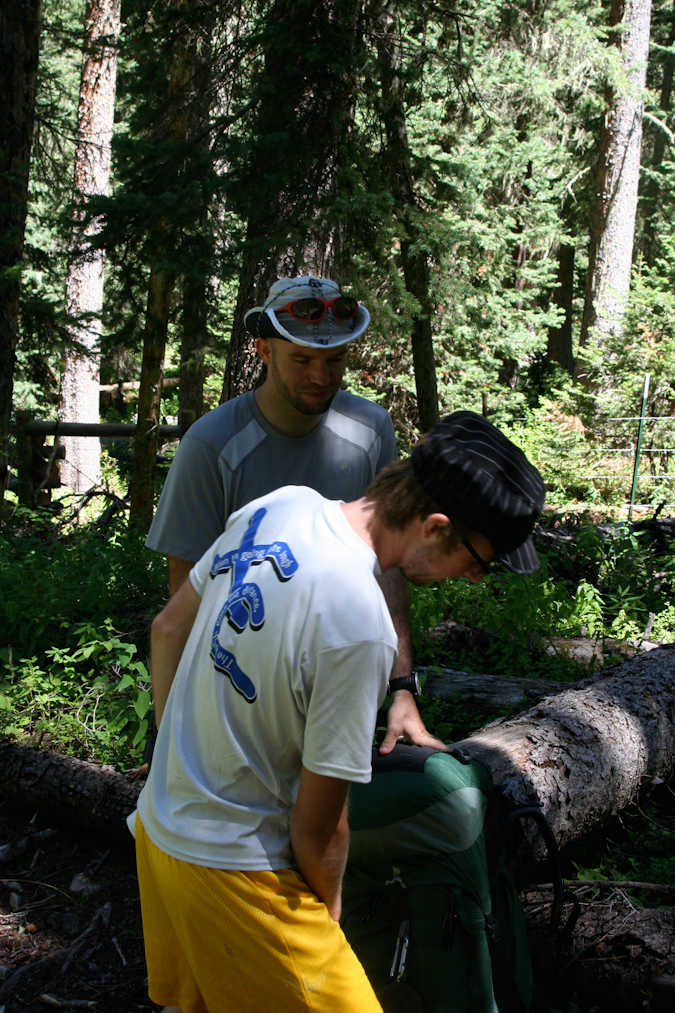
Eventually, the trail reaches the Capitol Lake basin and intersects two side trails leading to two campsite areas, each split into four campsites (#1 through #4 and #5 through #9). We found ourselves camped at site #6, a quaint spot in the trees up on a hill.
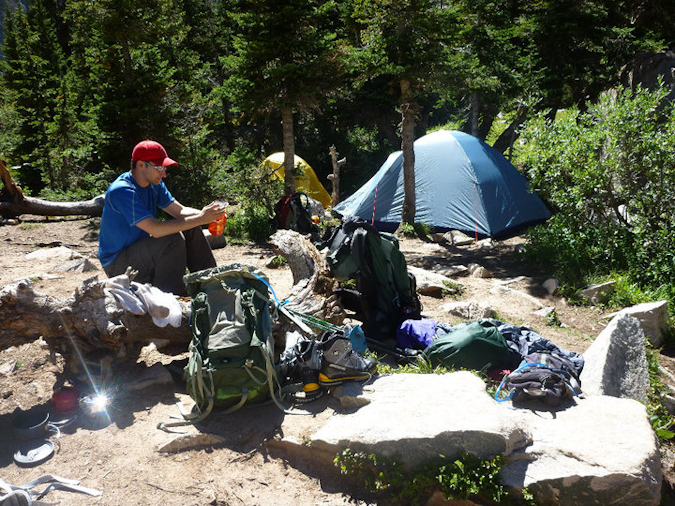
Mike Vetter unpacks at our campsite.
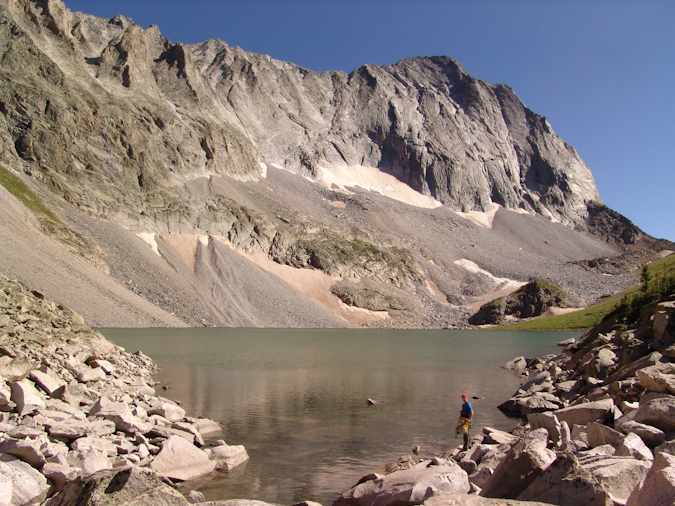
After we got situated at our campsite, we took a small nap. The hike up to Capitol Lake was pretty exhausting for all of us. After our short nap, we took a walk down to the lake with our cameras and took pictures. The lake rests right below Capitol itself and was a great area to relax and take in the afternoon sun.

Capitol Lake sits beneath Capitol Peak in this 1800 panoramic photo taken above the shore.
Mike went down to the lake to fill up his water bottles, using his steri-pen to sterilize the water. Unfortunately, the steri-pen bested Mike's weary intellect and he gave up on the endeavour, conceding that my Ketadyn Hiker Pro filter would later suffice. Mike and I went down to the stream near our campsite before cooking dinner and refilled all of our water. The area surrounding Capitol Lake is really quite gorgeous, with Capitol looming over the whole area like some kind of ancient protector of its treasure.
Mike Vetter filling his water up at Capitol Lake.
I pulled out my food for the night - a custom-made soup with dehydrated vegetables and pasta with chicken. Mike and Travis were somewhat jealous of this fancy treat at first; however, the meal was about the saltiest thing I've ever ate. Mike and Travis cleaned up on their Knorr Pasta side meals and we all hit the sack at around 8 PM, with the alarm set for 4 AM.
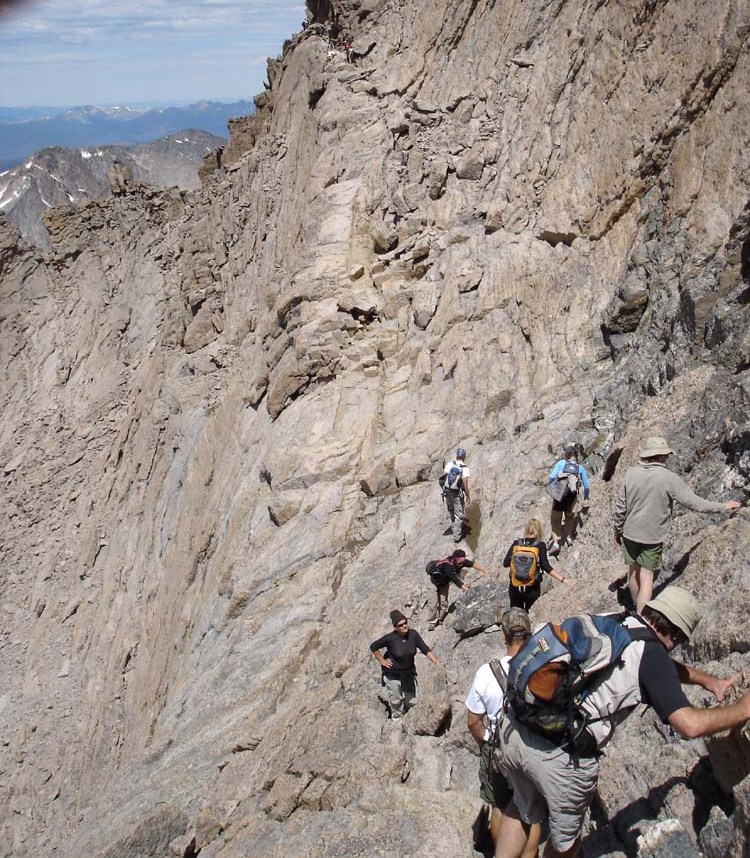
4 AM came all too soon, despite the long night of sleep we all enjoyed. I scarfed down some homemade zuchinni bread that my wife made for me and we all grabbed our backpacks and headed for Capitol. The trail for Capitol happened to be the same trail used by our campsite, which perpendicularly intersects the Capitol Lake trail just below Capitol Lake. We made our way up the switchbacks in quick order, passing several groups. Being that it was quite early in the morning, we could see all the other hikers in the area ascending beneath us and above us. We counted about 15 to 20 other headlamps heading up.
Travis Arment (left) and Matt Payne (right) excited to be on the trail to Capitol Peak.
We reached the Mount Daly - Capitol Peak saddle about 30 minutes into the hike and enjoyed some pretty awe-inspiring sunrise views from there, which Mike documented on video:
Sunrise
Sunrise... again
Clouds rest in the light of sunrise to the east.

We continued up and over the ridge and descended a well traveled gully to reach the beginning of a very long stretch of boulders to the north and east of K2. The trail here mostly consisted of cairns and boulders, making for fun travel in the early light.
Mike Vetter hikes up the immense boulder field.
Out of nowhere, as if we were not expecting it, the sun blasted alpenglow onto the mountains surrounding us.

Mount Daly basked in alpenglow in the early morning.
Mount Daly in Alpenglow.
The trail eventually lead us to a snowfield, which was mostly ice. I had been warned by the snowfield by a fellow hiker, Terry Mathews. We tested our footing on the snow and ice and decided to cross it, cautiously. There were great footsteps already kicked into the snow, and the relief was not terribly steep at this point. We all made it across quite easily and continued up the boulders. We saw a large snowfield at the top of the basin on the K2 - Clark Peak saddle's face and knew that we needed to turn right before then to reach K2. We decided to head up a very solid class 4 section.
A snow and ice field adorns the face of the saddle between K2 and Clark Peak.
Travis up-climbing the solid Class 4 terrain leading to the base of K2.
 Once reaching the top of the ridge between K2 and Clark Peak, we realized that we still had quite a ways to go before reaching K2. The terrain became much flatter and we were able to get to the top of K2 in short order. Many parties opt to skip K2, arguing that the approach is more difficult; however, we did not want to miss out on the views from K2's summit.
To reach the top of K2, we broke off from the main trail just after it winds itself to the right of K2 and climbed a steep but solid dihedral to the summit. Capitol Peak looked ominous from K2, dwarfing it's surroundings.
Capitol Peak, Snowmass Mountain, and the Maroon Bells come into view from the summit of K2.
The down-climb from K2 was trickier than expected, and it forced us to backtrack a little bit to meet back up with the proper trail which winds around the side of K2. The terrain here is steep, loose, and slightly exposed.
Matt Payne downclimbing from K2.
Downclimbing K2 to reach the K2 - Capitol saddle.
I had read some reports of people dying near K2 in the past, and had always wondered how this was possible. Undoubtedly, there did not seem to be any obvious threats to one's life until we reach the backside of K2 and saw the impressive cliffs surrounding K2 and Capitol Peak. One false move and a climber could find themselves in a world of hurt.
A huge cliff greets climbers reaching the base of K2. Don't slip here...
The remainder of the climb was amazing. Capitol's ridge is a spine of crumbling boulders and jagged knives, a real tribute to the harsh and remote wilderness that the Elk Mountains call home.
Mike with K2 in background.
At this point we knew we were quickly approaching the fabled Knife Edge. The North Face of Capitol Peak shot up like an angry beast from the pits of hell. Ok - maybe not that freakish, but it was sincerely one of the more impressive rock faces I've seen. Either side of Capitol presented thousands of feet of exposure and immediately reminded you of the need for caution and careful routefinding. A fall anywhere from here on would almost certainly be fatal.
Capitol Peak's North Face - not a good place to fall.
Fortunately, the views from this part of the climb were unreal. The sun slowly rose above, providing light for the most incredible vistas of the Elk Mountains.
Snowmass Mountain, Capitol Peak's closest 14er neighbor.
We traversed across small ledges and quirky chimneys and found ourselves with what must have been the Knife Edge. K2's previously daunting surroundings now felt much easier.
Nearing Capitol Peak's Knife Edge
Looking behind: K2 and climbers reaching it's summit.
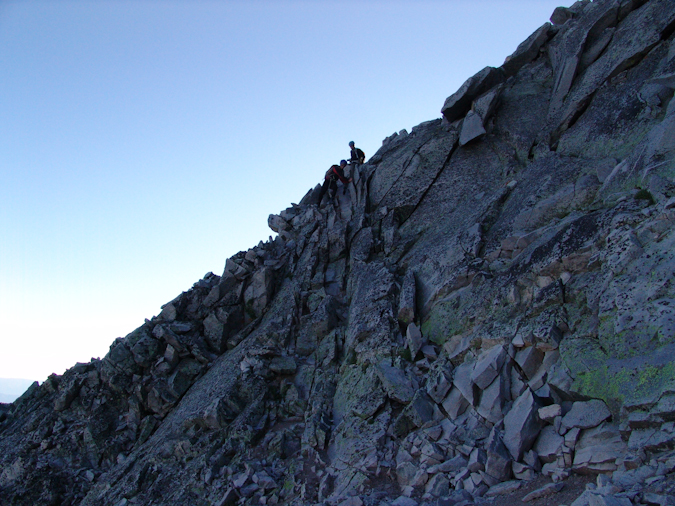
We finally reached the Knife Edge, gathered our wits about us, and gave it a go. The plan was for Mike to go first, and then to take video with his camera of us crossing. We watched the group before us, and they mostly employed a mix between the 'scoot on your ass' method and the 'hang from one side like monkey bars' method for crossing. We figured to follow suit, as both strategies seemed to appeal in their own ways.

Mike Vetter ready to cross the Knife Edge.
Mike made it across without a hitch and took this revealing photo while crossing, looking down one of the sides. It goes to show how freaky and exposed it really was.
I crossed second, making sure I had perfectly solid holds on the rock as I crossed. I employed a mix between scooting and hanging from a side and made it across fairly quickly. The technical nature of the crossing is not terribly difficult or physically demanding; however, the mental requirement to cross was great, knowing that one mistake meant death. Needless to say, don't get yourself too hyped up for the Knife Edge. It is dangerous but the risk is quite manageable with caution, careful movements and mental toughness. I did find myself breathing heavily at the end, mostly from the excitement of the whole thing.
Matt Payne starts the Knife Edge - photo by Mike Vetter.
Mike compiled some video of our crossings of the Knife Edge and placed them on YouTube:
After the Knife Edge, the going got much easier, mostly a Class 3 / 4 scramble across a fun boulder ridge. We reached somewhat of an impasse about 3/4 to the summit, having to choose to either continue straight ahead and around the left side of Capitol per the standard route's description, or to head straight up to the ridge, ascending Class 5.2 / 5.3 terrain. Being the adventurers we are, we chose the latter and went straight up. The route was solid, challenging, and enjoyable, with minimal exposure and many places to rest. All in all, I would recommend taking the upper ridge route if you feel comfortable with light Class 5 climbing and steeper terrain. Never did any of us feel unsafe on this section; although, Travis did mention later that it was somewhat spooky for him. Fortunately, Travis is an excellent athlete and managed to power himself up the steep section without any problems. We were very cognizant of the rockfall potential, taking special caution not to pull rocks down on people below us.
Once reaching the ridge again, we stopped to rest and recoup our strength for the final summit push.
Matt Payne with Capitol's summit block. Almost there.
From here, the summit push was quite fun, with Class 4 and low Class 5 moves required. We were quite pleased with our choice to go the high route, enjoying both the challenge and the solidness of the route. We watched several climbers take the lower route, a looser, chossier, and less enjoyable section of the mountain.
Mike and I took some video footage of this section:
We reached the summit at 10:15 AM as one of the first groups up. The views were outstanding and the company was superb. A group from Ft. Collins joined us on the summit, and conversation quickly went to skiing Capitol Peak. Being probably the hardest 14er to ski, theorized on the possible ski routes and I swapped stories and names of climbers we both knew of that had either skied it or attempted to, referencing Brian Kalet and Jordan White of 14ers.com fame.
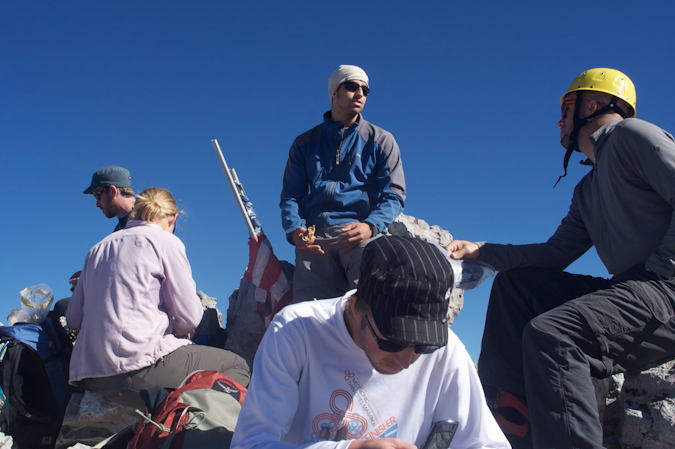
The summit party. Travis tinkers with his cell phone while Matt converses with fellow climbers.
After refueling with Resees Peanut Butter Cups and Raisins, I went on a photo frenzy.

A 3600 view from the summit of Capitol Peak. Click for high resolution view.
A panormaic view of the Pierre Lakes, Snowmass Mountain, and the rest of the awesome Elk Mountains.
A panoramic photo looking north and west from Capitol Peak. The Snowmass - Capitol ridge strikes me as being quite impressive.
A massive panoramic photo of the Snowmass Basin, K2, Maroon Bells, and Snowmass Mountain. Click for high resolution version (26 meg file). How many climbers can you count?

A zoomed in panoramic photo of the Maroon Bells and Pyramid Peak. Click for full resolution version.

A super zoomed in view of the Maroon Bells.
A zoomed in view of one of the Pierre Lakes.
Mike Vetter on the summit of Capitol Peak.
Matt Payne on the summit of Capitol Peak.
A panoramic view looking down at Capitol Lake, Mount Daly, and across Capitol's ridge to the Pierre Lakes and the rest of the Elk Mountains. Click for high resolution version.
Mike was able to capture some video from the summit as well:
With no threat of weather in any direction, we decided to hang out on the summit for about an hour, enjoying the views. We eventually headed down and chose to follow the standard route. The rock was nasty through this section of down-climbing, and required good concentration, footing tests (make sure the rock does not fall when you step on it), and patience. Most accidents occur on the way down, so we were vigilant and cautious. Travis was able to capture this perspective of the rock and exposure beneath us on the down-climb.
Travis plants his foot firmly on a ledge during the down-climb from the summit of Capitol Peak.
Matt Payne carefully down-climbs from Capitol Peak.
Matt Payne with one of the Pierre Lakes in background.
About halfway back to the Knife Edge, a group of climbers were coming up Capitol below us, without helmets. They asked us if this was the way to go and we responded that it was one of the ways up. It surprised me to see how oblivious they were that we were climbing above them on loose rock. I ordered my group to stop moving until they were in a safe location below us. It really is no wonder that more people do not perish on these mountains. Ironically and sadly enough, we later learned that a 20-year-old hiker died the day before on Maroon Peak from rockfall that had come from above him. Even though he was wearing a helmet, the rock that struck him had enough force to knock him loose from the mountain and caused him to fall to his death. I strongly believe that if people took more caution and paid attention to their surroundings and used some common sense, there would be less deaths. If you need a good climbing helmet, check out this one.
We reached the Knife Edge at approximately 12 PM and crossed it in much the same fashion as before, except this time, I went first. I generously used the 'scoot on your butt' maneuver to get across.
Matt Payne crosses back over the Knife Edge on Capitol Peak, heading towards K2.
Mike captured yet another great shot from the Knife Edge, looking down at Capitol Lake:
The climb back down from K2 was fairly straight-forward but tiring. We were ready for some pizza at Beau Jo's Pizza, no doubt. We finally reached the snowfield again, and it was much softer this time, with rivers of slush flowing down it. It was somewhat scary, but I tested the footing and it felt great, so we crossed again.
Travis Arment crosses the snowfield beneath K2. Photo by Mike Vetter.
We made great time back to the Daly - Capitol saddle and I sprinted the last stretch to the saddle, anticipating the victorious beer that would be consumed once back to civilization.
Matt Payne runs the final section on the back side of the ridge between Capitol and Daly. Photo by Mike Vetter.
On the way down the hillside, Mike stopped to take some great shots of the wildflowers found on Capitol's northeast shoulder:
We made it back to camp at 2:15 PM and packed up. We refilled our water and headed out. Travis and I were motivated solely by the prospect of cold beer and fresh pizza.
I hope you enjoyed this trip report. We surely enjoyed the trip and I personally can't wait to join Mike and Travis for our next adventure.
Little Bear Peak: A Slippery Proposition
What an action-packed trip this was! From off-roading one of Colorado's most difficult 4x4 trails to witnessing a full-scale Search and Rescue operation! As if climbing one of Colorado's most challenging 14ers wasn't enough!
To start off, here is a break-down of relevant numbers from this adventure up Little Bear Peak:
Peak summited:
Little Bear Peak: 14,037 ft. (ranked 44th in Colorado)
Total elevation gain: 2,360 ft.
Total distance hiked: 2.54 miles
Total time hiking: Approx. 5 hours
Photos taken: 252
Search and Rescue operations witnessed: 1
Little Bear Peak sits impressively next to Blanca Peak in the Sangre de Cristo Mountains of Colorado and is considered one of the most dangerous and perilous mountains in Colorado due to a section near the top called the Hourglass and the Bowling Alley. In fact, just this year, a climber named Kevin Hayne perished on Little Bear from falling at the Hourglass section. A full report of those events can be found here. For a semi-comprehensive (not regularly updated) list of all accidents on Little Bear, check out John Kirk's site.
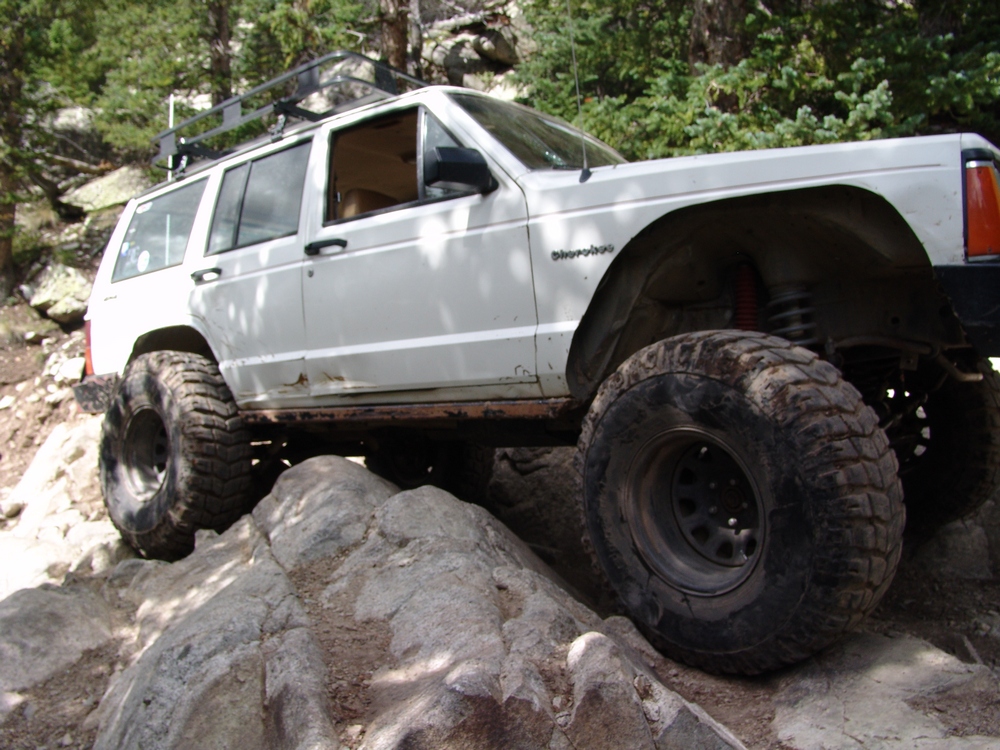
Having backpacked the long, steep road from the base of Blanca Peak last year to climb Blanca Peak and Ellingwood Point, I was not looking forward to another slog up the road to climb Little Bear. Fortunately, my college roommate and great friend, David Deramo, was back in the state from his long 2 year stay in Japan. Dave owns one of the most awesome Jeep Cherokees I've ever seen. Dave purchased the Jeep when we were in college in 1999 and has put work into it each year since. It went from a stock 1989 Jeep to an awesome rock-crawling machine over the course of many years. Dave has put a lot of work and time into his Jeep, and I was eager to see what it could do. Dave agreed early in the year to drive up the road with me and attempt to climb Little Bear.
Dave drove down from his home in Winter Park with his Jeep on a borrowed trailer, towed by a borrowed Ford half-ton pickup on Friday, August 6th and stayed the night at my place in Colorado Springs. We woke up at a reasonable time and made the drive over La Veta pass and met up with his friend from Durango, Lance. Lance owns 4x4 & More in Durango, Colorado and specializes in custom 4x4 jobs. His own Jeep, another older Jeep Cherokee, does not look like it belongs on the insane Blanca Peak trail; however, Lance keeps his Jeep looking stock but has some nasty tricks up his sleeve, including air suspension that adjusts using switches in his cab. Lance knows his stuff!
When we arrived at the start of the road and began unloading Dave's Jeep from the trailer, a couple of Search and Rescue (SAR) team-members began to assemble. Apparently someone had an accident on Ellingwood Point earlier in the day. Learning about a SAR mission did not do much to instill confidence in me for our trip up Little Bear.
The drive up the road was fun. Dave's Jeep really performed well. He runs a 5.5 inch lift with 35" ProComp XTerrain tires with ARB lockers and tons of other upgrades. For those not familiar with the road, it is truly one of the most insane roads I've seen. The road itself consists of really rocky terrain with several rock crawling obstacles known as Jaws 1, 2, and 3. Dave made Jaws 1 look like a bump in the road.

Jaws 1.
Jaws 2 is somewhat scarier, due to its off-camber feel and the considerable risk for tumbling off the side of the mountain. Dave needed a couple of attempts, but also made Jaws 2 look pretty easy. Lance's seemingly unfit Jeep also did great over Jaws 2, much to my surprise. Lance's Jeep is such a sleeper - it looks completely incapable of doing these obstacles, but the tricks he can pull make him just able to make it over the problems.

Lance makes it over Jaws 2 in his stock-looking Jeep Cherokee. Lance is a total off-roading master.

Dave heads up Jaws 2.
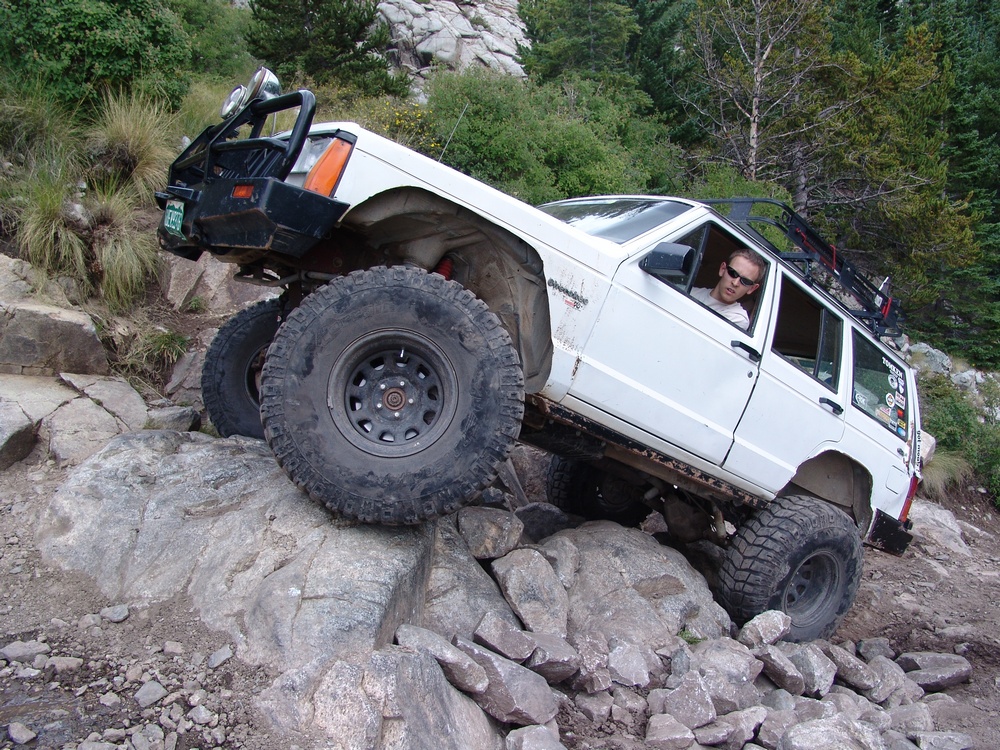
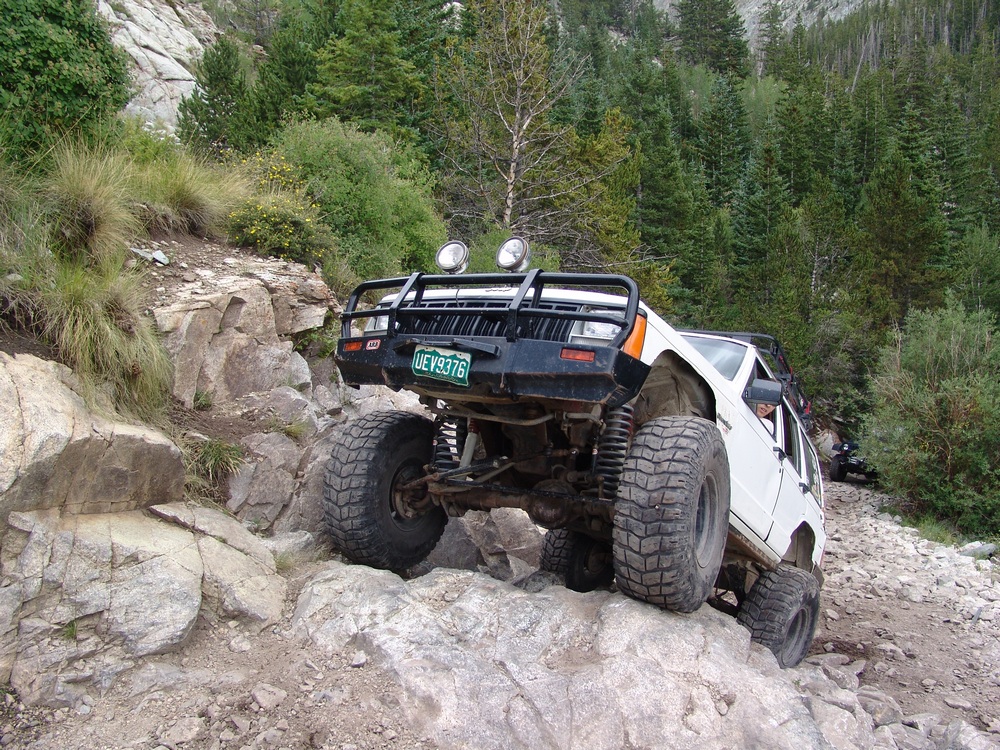
Jaws 3 is a little different than the other two obstacles, having a trickier line than the other two. Most consider Jaws 3 to be the hardest obstacle.
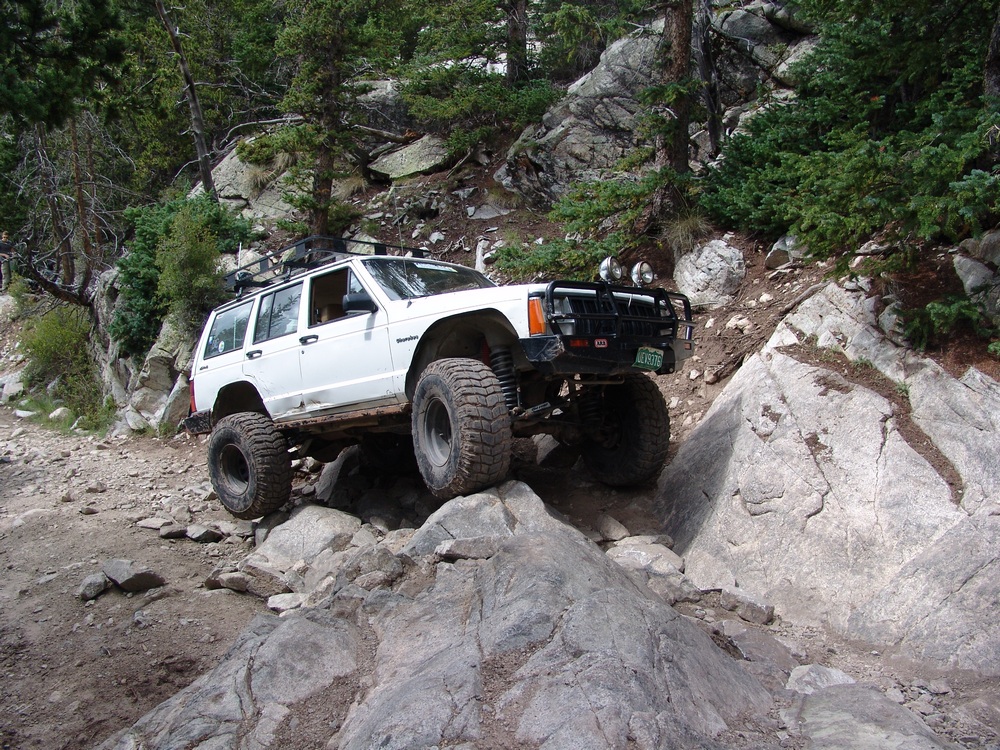
Once over Jaws 3, we were at Lake Como. Lake Como had many 4x4 vehicles parked at it and many campers lined its shores. We aimed for the south-eastern shore to look for camping and enjoyed the views of Little Bear Peak.

A spotlight shines on Little Bear Peak
We found a great campsite at the far end of the lake and unpacked our gear and made camp. A couple of guys in a Jeep Rubicon also joined us at our camp site. They were also planning on climbing Little Bear Peak, so it was a natural fit. Once our camp was made, we all drove up the road to see if we could complete the final obstacle. It was no problem for our group and we easily made it to the end of the road past Blue Lake. As soon as we arrived, the weather turned nasty, with hail and rain pounding the area. A couple of SAR team members, George and Stefan, approached Dave and I and asked us if we could give them a ride down to Lake Como. George and Stefan were really friendly guys and conveyed the SAR situation to us. A woman with Epilepsy had suffered a seizure and later dislocated her shoulder from a fall. Her injuries were severe enough to merit SAR extraction due to her pain. The entire story can be found on the link above or in the trip report posted by someone involved. It really is a fascinating tale that many mountaineers can learn from.
Here are the lessons I personally learned from the SAR incident: 1) Be sure to find out if your hiking partner(s) have a medical condition. If they do, learn about how it afflicts them and how to treat it. Additionally, make sure your group agrees on the rules of engagement - how you will handle an emergency. These are important things to consider before hiking with others, especially strangers. 2) If you have a medical condition - please disclose it to your fellow hikers before they agree to hike with you. Fully disclosing this to your partners is only fair and offers them the opportunity to learn more and to decide if they want to take on the risk of accompanying you on the hike. If your medical condition worsens while climbing, please turn-around and head back to camp before the situation worsens and SAR is called.

Blue Lake before the storm
Blue Lake during the storm
Blue Lake after the storm
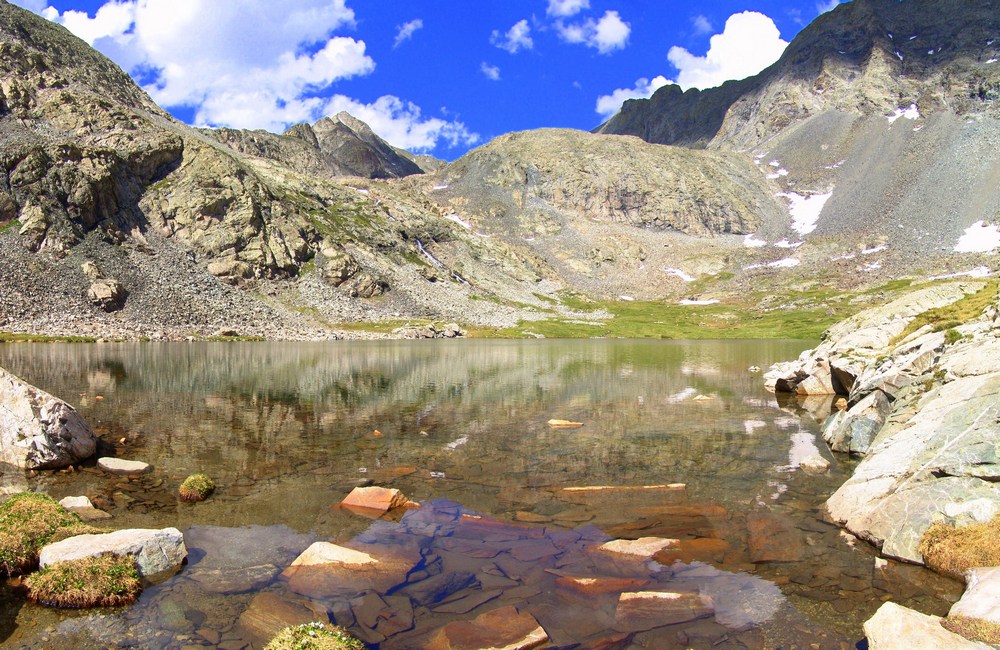
The waterfall seen above Blue Lake, just before the headwall of Blanca Peak.
Dave and I returned to camp and ate dinner. Our group spent some time around a camp-fire, exchanging stories with some hikers that had came down from helping the SAR team. Dave and I eventually crashed and set the alarm for 4 AM. Given that there was a lot of lightning and rain that night, we wanted to get an early start on Little Bear.
We woke up at 4:30 after mashing the snooze button a few times and set away for the Little Bear turn-off at the top of the hill above Lake Como. We scrambled the boulders and made our way up the very steep gully leading to Little Bear's ridge. Caution should be taken in this gully, as the rock is loose. We made quick work of the gully and stopped to take some photos.
Looking west towards Alamosa.

The steep gully leading to Little Bear's ridge.

Ellingwood Point at sunrise
Dave at the top of the gully.
We made our way across the mountainside, just below the ridge towards Little Bear. The trail is faint but well-marked by cairns and is easy terrain. We reached about the half-way mark from the gully and Little Bear and gained our first great views of Little Bear.
Dave takes shelter with Little Bear's impressive face behind him.
Dave's Cave.
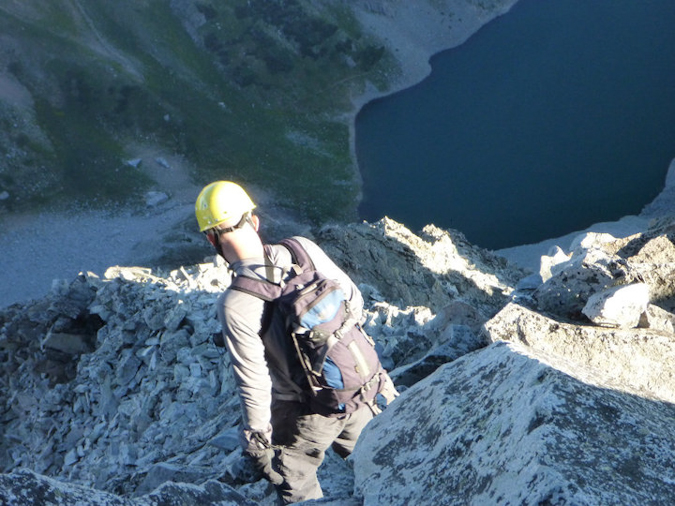
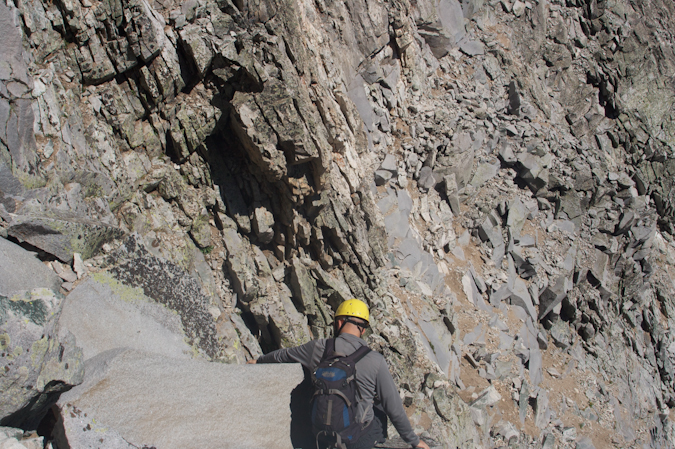
We quickly made our way to the base of Little Bear and were greeted by the famous Hourglass. The Hourglass is the deadliest section of this climb, for obvious reasons. Water runs down the center of this narrow and steep gully, forcing climbers higher to the left in order to get past the start of the gully. The whole section above the Hourglass is referred to as "The Bowling Alley," since rocks kicked down from above are all funnelled inwards, creating a dangerous situation for those climbing up. Since we wanted to avoid rockfall from above, we were glad we got up early and were the first to reach the Hourglass. Since it had rained a lot the night before, the rocks everywhere in the Hourglass were wet. We were able to find some patches of dry rock and slowly and meticulously made our way up the gully.
The Hourglass.
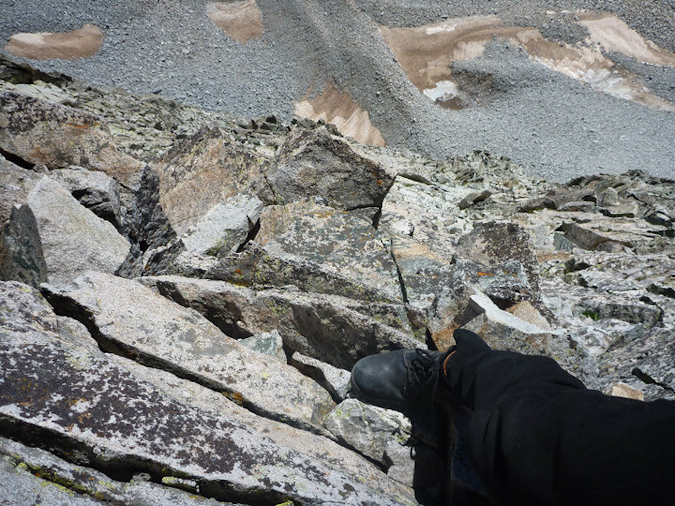
Matt Payne ascends the Hourglass. Note the steepness and wetness of the rock. Handhold and foothold selection was paramount to success.
A fall here would have been fatal. Take caution!
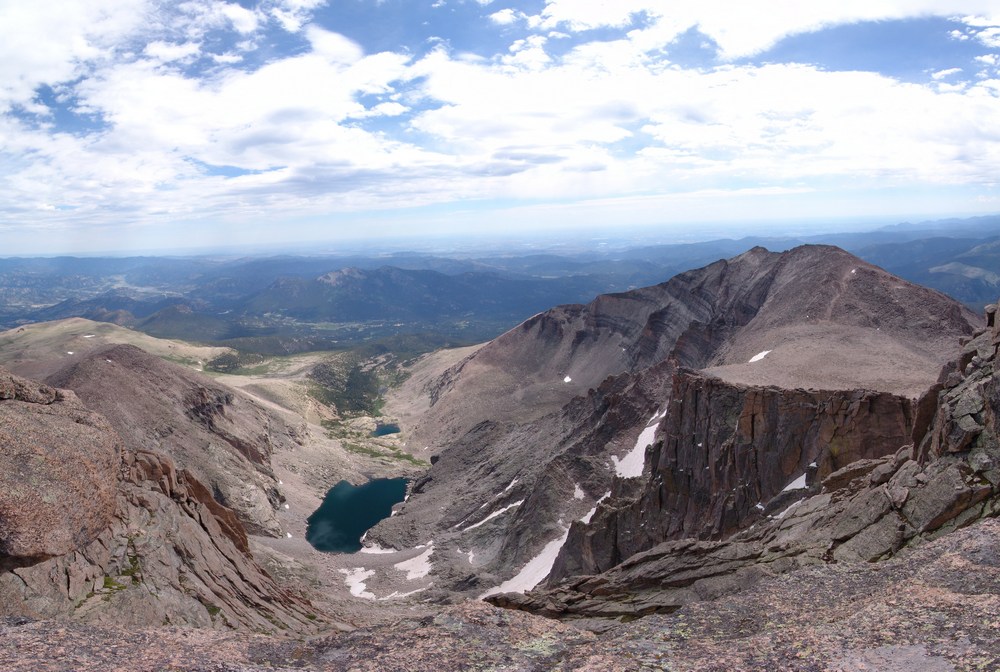
The first 10 - 20 feet of the Hourglass are scary. Holds are minimal and the rock is wet. Extra special caution should be taken here and only those comfortable climbing class 4 and class 5 terrain should continue. If you're afraid of heights, this is not for you. Routefinding in the Hourglass was fairly difficult. The rocks were all wet and dirt was loose, making our climb upwards a slow and calculated process. We were eventually able to find some cairns to the left of the Hourglass and make our way up to the summit. The summit itself provided insane views of Blanca Peak, Ellingwood Point, the Spanish Peaks, Mount Lindsey, and the rest of the Sangre de Cristo Mountains.

Dave tops out on Little Bear's summit.

A great view of the connecting ridge between Little Bear and Blanca Peak. The traverse between Blanca and Little Bear is considered one of the most difficult in the State of Colorado.

A 3600 panoramic photo from the summit of Little Bear Peak - click on photo for full resolution version.
We also got to witness the SAR extraction of the injured climber.

Flight for Life rescues an injured climber.
Dave on the summit of Little Bear.
Matt Payne on the summit of Little Bear.
Matt and Dave on the summit - using a self-timer.
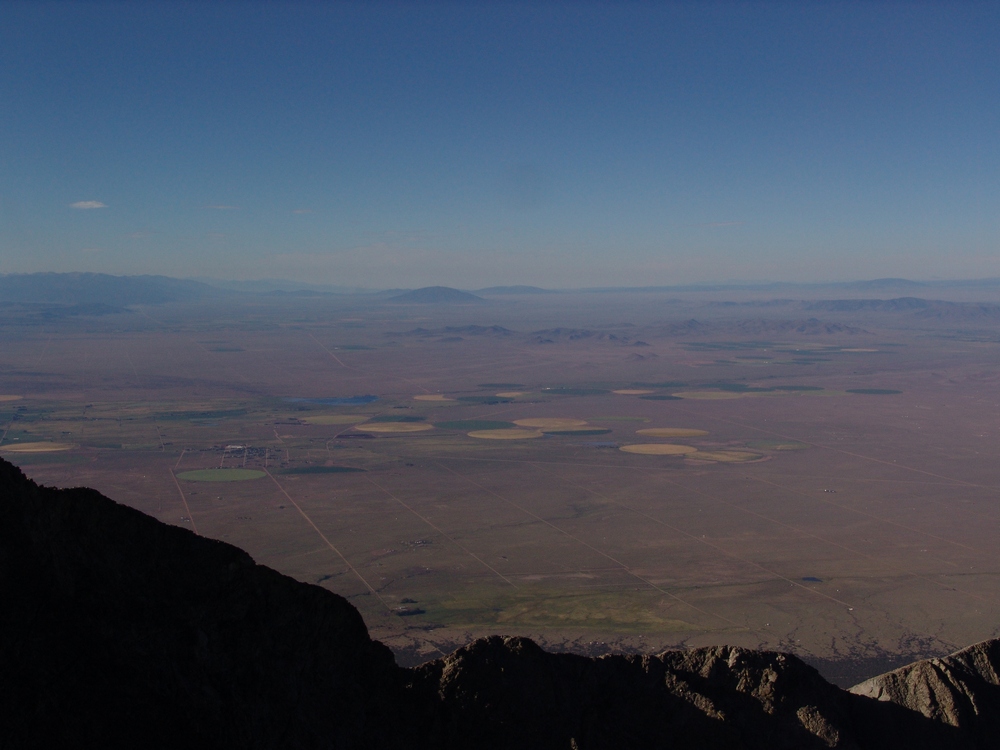
One of the neat things you can see from the summit of Little Bear is the crop circles down in the San Luis Valley.

Clouds roll over Ellingwood Point and Blanca Peak.
A group of two climbers joined us on top for a short time and we all agreed to down climb together, as to avoid rockfall.
The wind was quite chilly on the summit, so we departed after spending no more than 30 minutes on top. The four of us made our way down to the start of the roped section of the Hourglass. I was concerned with how this was going to work, given the steepness and wetness of the rock here. Our plan was to use the rope as a handhold and slowly descend while facing the rock, one at a time. The process turned out to be quite the success, as none of us slipped or had difficulty making our way down the roped and scary section.
Looking up at the fixed rope in the Hourglass
Dave is ready to downclimb the Hourglass.
Looking down the Hourglass and the wet terrain.
Dave starts down the Hourglass.
After successfully making it down through the Hourglass, the four of us headed back over below the ridge of Little Bear. We all decided to go up and over the ridge instead of below, which enabled us to get some great views of Lake Como and the surrounding area, including Ellingwood Point.

Ellingwood Point sits at the top of the Lake Como basin.

Dave with Little Bear in the background.
Dave and Lake Como.
Little Bear and the Lake Como basin.
Little Bear splits two valleys.

Matt on the Little Bear ridge.
We made it back safely to our campsite and quickly packed up and drove down. Dave's Jeep once again performed quite well over the obstacles going down.
Overall, I would rate Little Bear as one of the most difficult 14ers. The exposure and risk at the Hourglass, coupled with the rockfall potential, make Little Bear very dangerous and not for the beginner climber. I would highly recommend climbing helmets and would even advocate the use of rope and a harness with belay devices for the down-climb. If you're in need of a good climbing helmet, this one from Backcountry.com looks go be a nice buy.
Update on the injured climber we saw on Ellingwood Point: I posted what we had witnessed and discussed with the SAR team on a thread on 14ers.com, which erupted into a lively discussion about hiking with people that have pre-existing medical conditions. The consensus from that discussion was that it is very much the responsibility of someone with a pre-existing medical condition to disclose that condition to their fellow hikers before embarking on a hike, especially if that medical condition may place you or your partners in serious danger, such as what happened in this case. Unfortunately, Elisabeth did not respond well to that discussion on 14ers.com and basically called the whole forum a bunch of expletives. Later on, she sent me a private message requesting that I delete that thread because of the stress it had caused her and because she was unable to obtain employment because of the content of the thread. She claimed that she was being singled out becuase of her condition; however, my guess is that employers saw how immature her response to the whole situation was and did not want to hire someone with such a way of interacting with others. Anyways, I refused to delete the thread and she threatened to sue me for libel and slander because I had implied that her injury was a direct result of her pre-existing medical condition (which of course is not what I had typed at all). I had suggested that it was possible that her epilepsy could cause her to be weaker physically and that would cause you to have a higher probability of falling and hurting yourself. Anyways, I eventually had Bill at 14ers.com delete the thread but I still have the discussion saved as a .pdf if anyone is interested in reading it. Bottom line, I believe a lot can be learned from the mistakes of others, and we should embrace the opportunity to learn at all times.
Colorado Lightning - A Primer for Hikers and Climbers
The purpose of this article is to further educate the climbing community on lightning hazards. Hopefully, with a better, more complete understanding of the hazardous thunderstorm-prone weather in our favorite mountains, there will be a reduction in the number of deaths each year.
This article is re-posted with the permission of the original author, Casey Dorn from Wynnewood, PA. Casey is an aspiring meteorologist with 2 backyard weather stations that he built himself. He is well versed in Physics and Chemistry and has studied/researched them along with meteorology for about 6 years. His personal specialties are in severe weather and large scale snow storms.

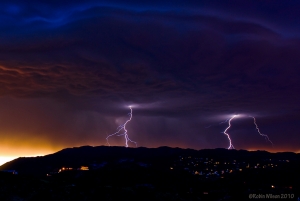
Photo by Robin Wilson
As mountain climbers we all should know that being above treeline (or outdoors AT ALL in some situations) is BAD whenever a current or imminent threat for CTG lighting exists. To really drive this point home: THAT INCLUDES PLACES BELOW TREELINE AS WELL! Large, tall wood objects that point at the sky and catch fire do not serve as good protectors against powerful, tall object seeking, fire ingniting things! But, alas...most of us don’t climb with an emergency house in our backpack so it may be a better idea to learn more about mountain weather in the hope that it will save your life in the future. As you climb, you'll here a plethora of supposed "protections" from strikes while at altitude, but, to be brutally honest here, we need to have a discussion about meteorology and physics for a moment to examine whether or not you would win against a battle with lightning.
A discussion on mountain thunderstorms (the "why us" discussion).
We get thunderstorms in the mountains (especially in the rockies) due to two factors
1) Location
2) Elevation
On the first point, the rockies are situated in what I like to call a "mixing pot" of weather systems. We've got warm moist air coming up from the south, and cold, dry air from the west. Thunderstorms (compared to large scale rain/snow storms dependent on large scale weather systems), require mesoscale instability. In other words, thunderstorms form via convection. To demonstrate this, pretend you've got a pot of water on your stove. As the water heats up..it rises to the top of the pot where it cools, spreads out, and falls back down to be re-heated. Thats great and all, but we need MORE to get a thunderstorm.
If our pot was completely smooth on the inside, you'd be able to heat the water well above its boiling point without seeing any bubbles. The water becomes "super heated". Now, if you then dropped a pebble into that water, you'd see a sudden explosion in which all of that water turned to steam at once. In short: we need a "trigger" in the atmosphere to cause what is known as "explosive development" in clouds. Its just like your pot of water...in the morning it simmers and creates cumulus clouds. But, in the morning, the atmosphere can sometimes have what is known as an "inversion", where COOL air is above WARM air. Sometime during late morning, this inversion is impacted by the convective energy rising from the ground, and we get a sudden "trigger". Suddenly, we can get warm moist air to rise ABOVE the point of condensation (dew point), creating towering cumulus clouds that rise very high in our atmosphere. These clouds are then sheared by high altitude winds, we get an anvil, and poof...thunderstorm.
Now, in all of this...we've answered a few important points:
1) The reason thunderstorm development occurs so quickly is because its a small scale "mesoscale" feature that develops suddenly due to a "trigger".
2) We see cumulus clouds in the morning but don't see thunderstorms (generally) until the afternoon because of inversions found in our atmosphere.
3) The rockies are situated in a region which contains all the right ingredients for thunderstorm development.
4) IF YOU SEE EVEN ONE MODERATELY TALL CUMULUS CLOUD BY ABOUT 8:40 AM OR SO, EXPECT AFTERNOON THUNDERSTOMRS!!!!!!
Short expansion on #4: Since the sun doesn’t really get a good chance to heat things up until about 9:00am during the summer, clouds forming before that point indicate significant moisture and heat already exists in our atmosphere. All you need is a trigger.
---
Elevation...mountains making the weather just that much worse.
I’m going to discuss this point from the perspective of a climber who has just climbed to the summit of Mt. Elbert.
Its 11:30am, and a thunderstorm has formed about 20 miles to my west. I’m not very concerned. Dry air mass thunderstorms (a typical, non front associated, joe schmo storm that doesn’t last very long) don’t normally last more than an hour. This is because the storm is not “tilted”. As the warm air rises, it forms an updraft that draws in warm, moist air..which rises...and draws in more warm, moist air (etc...). Now, once the developing storm reaches a certain height, it spreads out (from the convection discussion). For a short time, the updraft will continue...even as rain (and graupel) begin to fall from the storm. But, soon, the downdraft (comprised of cool, rain filled air) chokes off the updraft of warm, moist air and the thunderstorm weakens, and dies. Now, I could transition this into a discussion on directional wind shear and how winds that change direction as a function of altitude would remedy this problem...but that isn’t quite so common in the Rockies (that deals more with severe thunderstorms in the plains).
Armed with this knowledge, I sit back and watch the thunderstorm rumble towards me, high altitude winds PUSHING IT FROM WEST TO EAST. But, as the storm approaches...it doesn’t dissipate like I thought it would. It chugs itself up the mountain and STRENGTHENS! In fact, I’ve ignored a very critical fact that is unique to the mountains.
The mountain is a roadblock in the path of the thunderstorm. It won’t go around it because the prevailing winds generally travel from west to east, so its forced upwards.
Now, as the storm complex is elevated, it begins to rise and reform. The storm will first grow more frayed, but in their place, new clouds will form into “turrets”, vibrant and dangerous.
The mountain forces the clouds to rise, initially causing them to grow colder. As temperatures drop, the air can hold less moisture, hence we see heavy rain and cloud shrinkage. But, the clouds also get a boost from the mountains. By the afternoon, the rock is warm, and thermal pockets are scattered like land mines throughout the rockies. Thermals are regions of rising air, and thunderstorms passing through get a “boost” from them, renewing the updraft and extending the life of the storm. As a side note, this process can also form stand alone storms that form directly above the mountains.
In addition, the storm will become stronger...or at least will appear to do so, as graupel (small hail) makes its way to the ground, pelting me as I hightail it off the mountain.
It is also at this point that I begin to notice a tingling sensation on my body. Not good....
As it turns out, these small ice pellets (graupel) have the effect of charge separation.
Ice particles form in clouds well below 32 degrees F. The reason is basically the same as the “boiling pot of water” idea I discussed earlier. Ice freezes ONTO A SURFACE. This could be dust, rock, hair, a hillbilly dancing in a circle...whatever! The important thing is that our conventional “ice cube” is filled with impurities upon which water has frozen into ice. In thunderstorm cloud tops at 30-60 K + feet....we don’t see that many of those things. So, at about 5 degrees F, tiny ice particles about 15 micrometers large begin to form. These act as nuclei for the water, which now quickly freezes onto the surface of the particle. These particles will grow larger and larger until the updraft is unable to keep them aloft, at which time they begin to fall through the cloud. As this happens, they induce charge separation. You see, as the particles bounce around up in the clouds, they collide with each other and with smaller ice particles. The graupel gets a negative charge, while the ice crystals get a positive charge. Since the ice particles are smaller, the updraft holds them aloft and forms into the anvil, while the larger graupel falls towards the ground.
Now, as the grapuel falls, it encounters ice particles that have formed much lower down in the cloud, and at these altitudes, the charge idea is reversed, collisions create a positive charge on grapuel and negative charge on the smaller ice particles, mainly due to the warmer temperatures found lower in the cloud. Now at the bottom of the cloud, the grapuel has a positive charge.

A storm builds over Arrow Peak as seen from Vestal Peak - photo by Matt Payne
Cross section of the storm at this point:
Top: positive
Middle: negative
Bottom: positive
Important to note! Because of the pattern I’ve just described, you’ll see intracloud lightning 1st because the storm doesn’t need to be as well developed to discharge between itself. The storm will discharge between opposite polarities, so top-middle or middle-bottom. This can occur even if the storm is only producing virga (precip not reaching the ground).
As the storm begins to produce observable precipitation (IE reaches the ground), you’ll [generally] begin to see CTG (Cloud to Ground lightning). CTG lightning will start under the shower curtain (area of precip reaching the ground), and gradually radiate outwards to approx 11 miles outside of the curtain. You ARE NOT safe within that radius.
Meanwhile, back on Elbert, I’m crouching down as I’ve begun to feel buzzing in my body and my hair is beginning to stand on end. My hair is standing up because the ground is positively charged. As the positive charge on the ground and negative charge in the middle of the cloud reach a maximum voltage difference, they start to reach towards each other...literally. The positive charge goes upwards (in the process passing through my body and making my hair stand up as it tries to repel itself), while the negative charge heads downwards in what is known as a “leader stroke”. When they meet, negative charge travels along the path of the leader stroke which has ionized the air (making it able to conduct a charge), and the negative charge in the cloud (electrons), transfer to the ground. The energy release is this process is so powerful that photons (light particles) are emitted and we see a flash of lightning, and the heat (hotter than the surface of the sun) causes air to expand rapidly around the bolt creating thunder.
It is for this reason that hair standing on end is a good indicator that something in my immediate area is about to be struck by lightning (which may or may not include me).
Some lightning math....you against lightning, who wins?
Lightning lasts for a very short time, but it is more than enough to kill me as I crouch down on Elbert.
Lets look at the math...
Lightning is DC (direct current)...equation for instant power (IE we divide by seconds)
P=IV Where “P” is power in Watts (joules/sec), “I” is current through measured in amperes, V is the potential difference, measured in volts.
Numbers: 5,000-20,000 amps of current goes through your body.
About 500,000,000 volts, (peak-instant).
About .2 seconds total for the entire electrical sequence, made up of many discharges (flashes) of about 1 millisecond.
Power: billions of volts.
Heat: 54,000 degrees F.
Ouch...
All things considered, this data quite frankly shows that lightning striking you directly...will kill you. It really doesn’t matter if you crouch down, stand up, do the Macarena, offer your soul to a squirrel...you’re toast, really, seriously! To those that quote the “80-90% survival rate”, the majority are NOT direct strikes. In truth, there are rare cases in which a person survives a direct strike..but really, do you want to test that theory out on a 14er? I don’t.
TO LESSEN THE EFFECTS OF A NON DIRECT STRIKE
(Note that I’m not guaranteeing this will work, it should, but if it doesn’t...I don’t want to get a subpoena...(etc)).
1) Take your backpack off, throw metal poles away (etc...). The correct position in a lightning crouch is difficult already, and with a backpack you risk imperfect technique...not good when your life depends on it...and METAL poles, metal this, metal that...self explanatory...lose it!
2) Crouch down at least 50 feet from other members of your group, heels together, toes apart. You should be up in releve? (fancy term for being on the ball of the foot/tip toes). DO NOT PUT THE ENTIRE FOOT ON THE GROUND. You want to have as little of your body touching the ground as possible!!! You want your heels touching so that current running through the ground enters one foot, then goes directly to the other foot and exits, instead of going all the way through the body (remember...we’re not trying to prevent direct strikes here but rather residual current...a true direct strike will certainly kill you).
3) In releve and crouched, push your knees out to the side as far as they can go (like doing a butterfly stretch, but standing).
3) Cover your ears with your hands but keep your elbows out to the sides. It is best to keep your elbows from resting on your knees just in case current running through your feet makes its way up the legs...i.e., to your brain if elbow connects to knee. If you get tired of holding the pose though, resting on the knees would be better than dropping out of the crouch.
4) Crouch your head down towards your chest..again, another reason to have legs turned out...knees+possible electricity+head=really bad.
Remember that this crouch WILL NOT protect you against a direct strike, nor is it a fail safe for any type of strike direct or otherwise. There is NO magic cure against lightning, because we are made of water and easily damaged organs...while lightning is 54,000 degrees and contains enough electricity to power a moderately sized city for a month. Perhaps the best solution may be to get off the mountain sooner....
And through all this, I haven't even mentioned the wonderful time you'll have trying to descend from one of these mountains after a downpour...even if you DON'T get struck...
Through this article, I hope that I have helped explain at least one weather awareness fact that wasn’t already known. I just couldn’t stand reading the posts of some forums that felt that the precautions were stupid/chances were low (etc...). People DO die from lightning strikes, especially in the mountains. Indeed, we don’t have that many of them out here in the Rockies...but it isn’t for lack of storms (as many of us can attest). Its because we always find members of our climbing groups that do the right thing and make sure we head down when weather threatens. But as of late, I feel that some (myself included) have gotten so used to the lack of weather related deaths on peaks that we’ve begun to take risks with our lives that we all know are extremely foolhardy. I’m being generic here, and I’m sure that most of us remain strong followers of the 12:00pm rule...but hey, when you're only 100 ft from the summit...
This year, we’ve already heard of an above-normal number of deaths in the mountains. This is my opinion mind you...but perhaps we can avoid at least some of the deaths by becoming more educated about the risks involved with our endeavors.
For more on mountaineering safety, please read this 100summits.com article.
Longs Peak and Mount Meeker via "The Loft"

I have to admit, when I put together my climbing schedule for this summer, one of the mountains I was least looking forward to climbing was Longs Peak. Renowned for a very long approach and a trail full of people, Longs Peak is the closest 14er to Denver, Ft. Collins, Greeley and Boulder. Longs can be seen from the I-25 corridor running from south Denver, all the way north to the Wyoming border. It is an impressive and memorable looking mountain, with it's east face holding one of the most popular and famous alpine climbing routes, The Diamond.
To start off, here is a break-down of relevant numbers from this memorable trip:
Peaks summited:
Longs Peak: 14,255 ft. (ranked 15th in Colorado)
Mount Meeker: 13,911 ft. (ranked 68th in Colorado)
Total elevation gain: 6,385 ft.
Total distance hiked: 16.52 miles
Total time hiking: Approx. 12.5 hours
Total wildlife sightings: 1 (Elk Herd)
The Diamond.
For this particular trip, I invited my dad, Ray Payne, to join me. He had climbed Longs before, but had previously missed out on summiting Mount Meeker, one of Colorado's highest 100 summits. Ray was eager to join me so we made plans to stay the night in a small hotel near the trail-head for Friday night. Our reservations were made months in advance by my mom, since she knew the area was quite popular (thanks mom). Ray and I chose "The Loft" route since it is less popular and more challenging than the standard "Keyhole" route, and because it grants instant access to Mount Meeker. This turned out to be a great choice.

A topographical map showing our route
Ray and I drove to the Meeker Park Lodge from Colorado Springs after work on Friday evening. Ray and I set our alarm for 2:00 AM and went to bed as early as we could. The Lodge itself is a quaint, rather rustic building with a "touristy" feel. The room itself was pretty basic and lacked many amenities; however, this was perfect for our needs. We needed a bed close to the trailhead. Mission accomplished.
The alarm went off all too early at 2 AM and we quickly woke up and ate some quick breakfast. We departed for the trailhead, a mere 3 minute drive from the Lodge. We began hiking at 3:11 AM. The parking lot was completely full already, much to my surprise. There were many groups assembled, preparing for the hike up Longs. I was not very happy about the amount of people; however, this turned out to not matter much shortly into the hike.
My legs felt amazing, and I blazed the trail at a very impressive pace. Ray, a 60-year-old hiking veteran, kept up the pace with me, requiring very few breaks on the way up. We passed several groups of people on our way up to the turn-off for Chasm Lake, which took only one and a half hours to reach. I remember stopping a few times and noticing that my breathing was completely normal, as if I was just walking down the street. I guess the week I spent just a few days prior in the Weminuche Wilderness Area had paid dividends to my altitude acclimation and leg endurance.
The turn-off for Chasm Lake is easy enough to spot in the dark. We went south and everyone else went north towards the Keyhole. Freedom at last.
We reached the base of the "Ships Prow," and got to experience one of the finest sunrises I've seen. The photos I took do not do it justice at all.


The "Ships Prow" on Longs Peak's eastern face.
Just after heading left of the Ships Prow, the start of the Loft route begins. The route takes you below and to the right of the "Black Gate," and follows a gully up towards snow run-off at the base of a quite steep section. After reaching the head of the steep section, the route heads straight up the steep area through fun and blocky class 3 terrain. Exposure here was minimal but persistent. Once reaching the top of this section, the trail heads south along a ledge up to a boulder field. From here, the trail weaves through boulders and places you directly in the Loft.
The Black Gate.
A view of the Loft route. Once just left of the narrowest section of snow, the route heads up and left onto a ledge, leading to the boulder field above.
A look back at Ray hiking up the Loft route.
Once in the Loft, the views of both Longs and Meeker were pleasant. Longs looked impressive from the slopes of Meeker.
Longs Peak from the slopes of Mount Meeker. Click to see high resolution version.
The hike up Meeker was fairly easy and straight forward. On the way up, I was able to finally catch view of the Mummy Range. It was really neat for me to make out the "Mummy." Can you spot it?
A panoramic view of the Mummy Range and Longs Peak. Click to view high resolution version.
A zoomed in view of the Mummy. Picture in your mind a Pharaoh encased in a mummy tomb on his back. Do you see it?
Once I reached the summit block of Meeker, I decided to get onto the summit proper, which required a fun little move to hop up onto the boulder at the top. The views were pretty good from Meeker, and it was fun to watch the crowds begin to amass on Longs. We had the summit of Meeker to ourselves. Additionally, I found someone's time capsule near the summit, which was kind of cool. I put it back where I found it and ensured it was sealed properly.

A 360 degree view from the summit of Meeker.
Ray enjoying the summit of Meeker.
Looking down at the Loft route below us.
A pano of The Loft.
Matt Payne on the summit of Mount Meeker.
After enjoying some solitude on Meeker, we decided to head back down to the Loft and over to the down-climb for Keplinger's Couloir. Ray had read some trip reports of the Loft where people had missed the turn-off for the down-climb into the couloir, so we were cautious to stay low once at the western end of the Loft. We found several cairns leading down and around the backside to Keplinger's Couloir. The route itself was steep but manageable. Once at the base of the cliffs on the western side of the Loft, we headed back up the backside of Longs towards the "Homestretch." The Homestretch is the name given to the last section of the standard route of Longs - a narrow and steep section leading to the summit.
Matt in Keplinger's Couloir on the back-side of Longs Peak.
Once at the top of the coulior and on the other side of "The Notch," the route heads left towards the Homestetch. The route meets up with the Homestretch, and consequently, a huge crowd of people. This is where the trip got fun and interesting. Not so much for the rock climbing and scrambling, but for the people watching. I'll get to that more later on.
The Homestretch itself was a breeze in my La Sportiva Trango Evo Sport boots, the Vibram soles gripped the rock, allowing me to remain vertical on my feet the entire way up. I highly recommend these boots for mountaineering such as Longs Peak. If you're interested in obtaining a pair, check out this link from Backcountry.com. I passed 20-30 people that were on all-fours in tennis shoes, struggling to ascend the Homestretch. There are too many deaths and evacuations from Longs Peak each year - and a lot of it is because far too many people attempt Longs Peak unprepared. Longs Peak is the deadliest mountain in Colorado in terms of the number of fatalities each year, mostly because of the sheer number of people that attempt it. Let me be clear here - Longs Peak is probably not a good mountain for the novice hiker or climber. The standard route climbs through some relatively technical sections with moderate exposure. If you're afraid of heights, Longs Peak is not for you. Additionally, the standard route is over 14 miles long, making it a challenge for even intermediate hikers, let alone beginners. If you really want to prepare yourself for a climb like Longs - please read my Mountaineering Safety article.
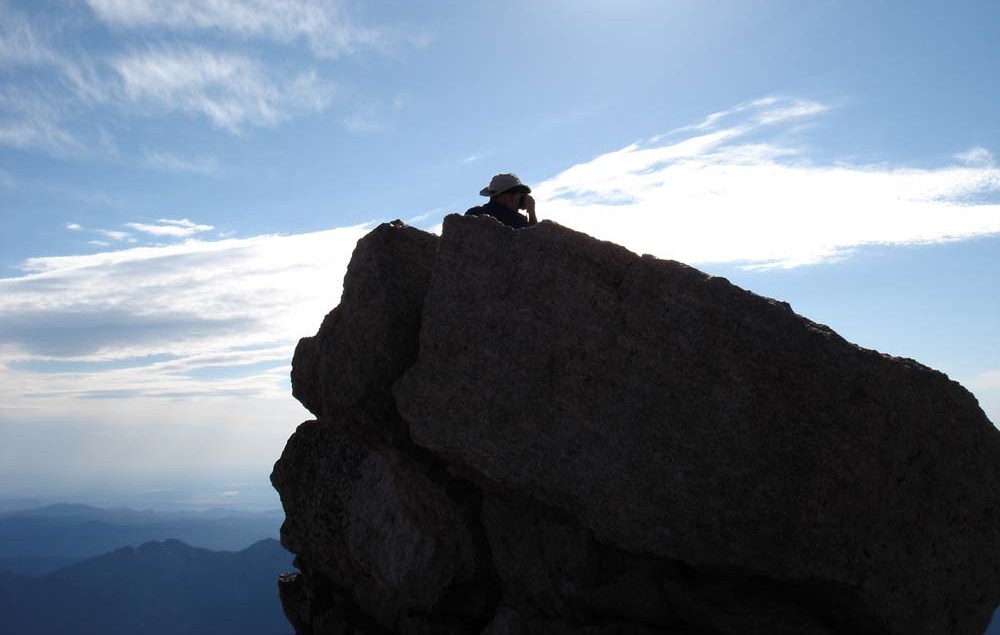
I reached the summit of Longs in quick order at 11 AM sharp - a mere 7 hours from the start of the trail. There were probably over 100 people on the summit.

A 360 degree pano from the summit of Longs Peak.
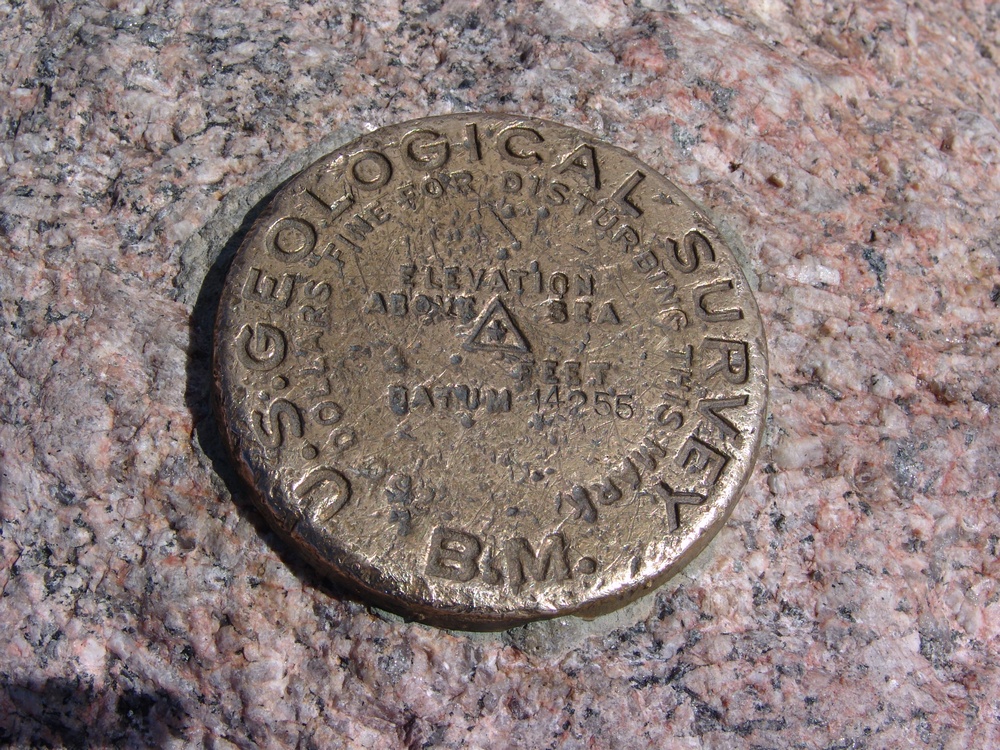
The USGS benchmark on the summit of Longs Peak.
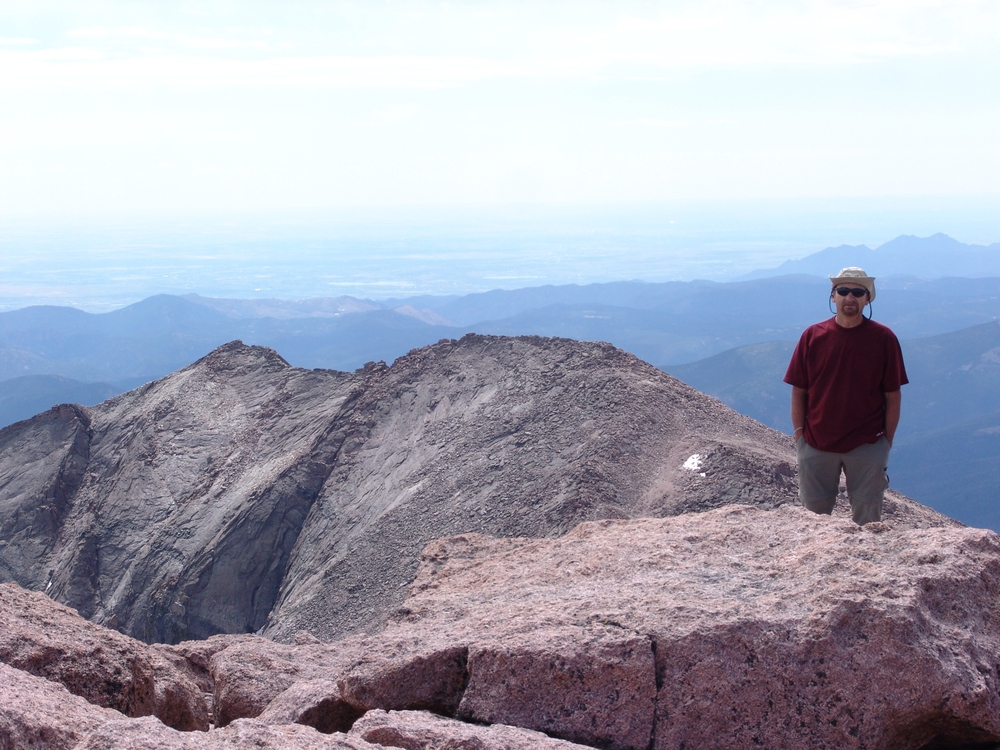
Ray Payne on Longs Peak with Mount Meeker in the background.
Matt Payne on the summit of Longs Peak
Matt Payne on the summit of Longs Peak.
The Homestretch - look at the people!

Mummy Range.
Chasm Lake
Matt and Ray Payne on the summit of Longs Peak
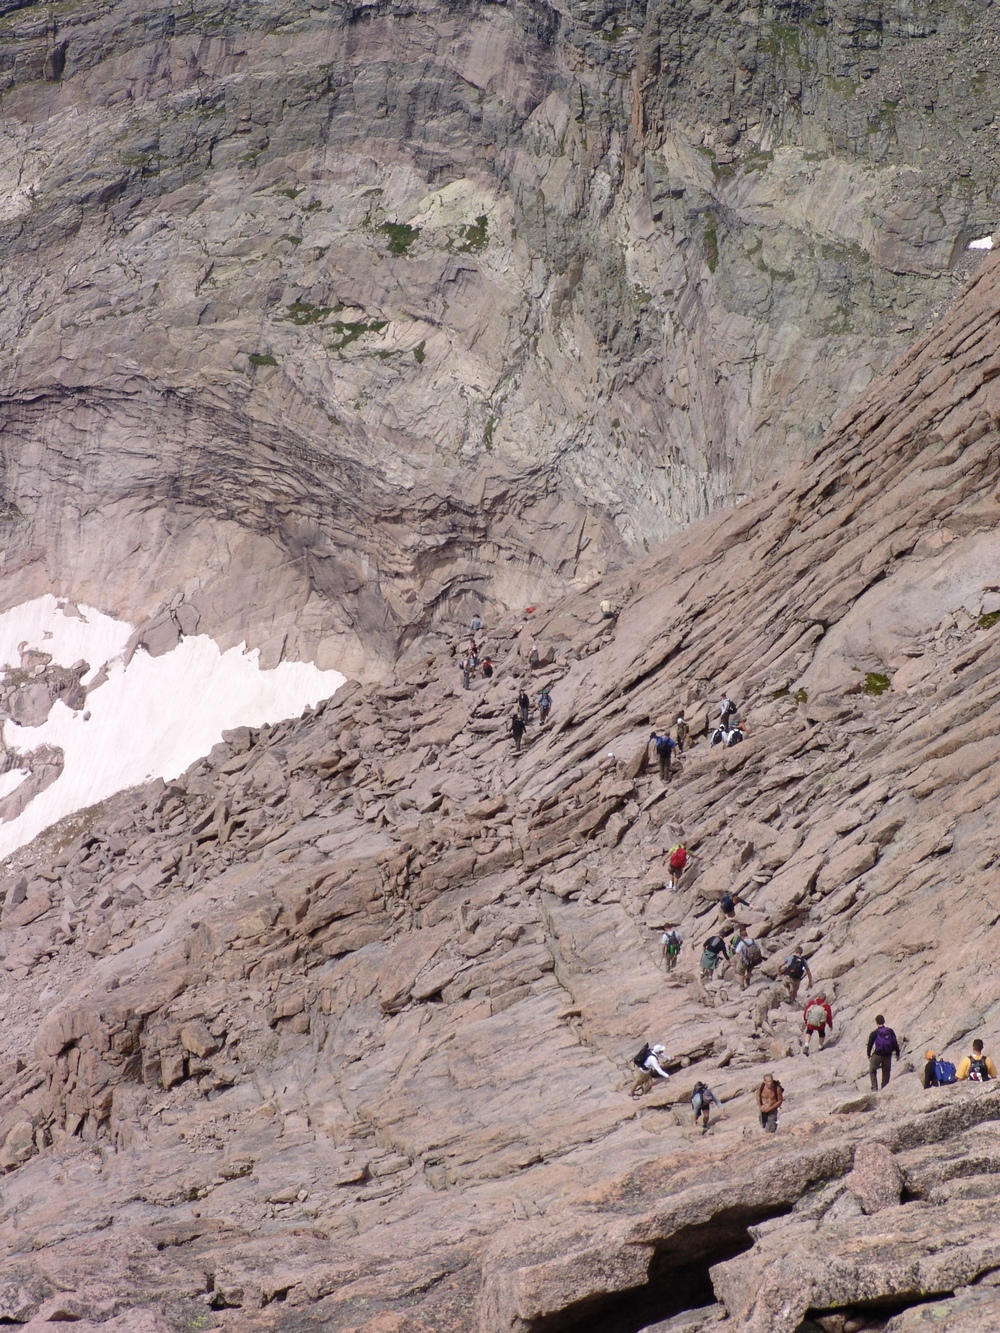
After hanging out on the summit and refueling with food, Ray and I headed back down the Homestretch. The plan was to take the standard Keyhole route back to the trailhead. This proved to be a good option but frustrating, due to the large amount of people - it was definately a traffic jam! The Homestretch itself went quickly - I bounded down the slopes at a fast pace. After spending the previous week on Vestal's Wham Ridge, Longs Peak's terrain was simple in comparison. After finishing up the Homestretch, the route turns north to a section called "The Narrows." The Narrows are appropriately named. This was a very narrow section, with a great deal of exposure below. I think a lot of people that attempt Longs do not know what to expect for this section - and let me tell you - if you're not used to a little exposure - this may not be a good mountain for you.
A view of The Narrows.
I suppose all of the caution and concern was not all for naught for these hikers - I finally came across a section beneath what is known as The Trough. This section was narrow as well, and steep on all sides. There was a huge pool of dried blood on the trail at the base of a sharp rock, with splatter marks all over the place. I later learned from a Park Ranger that a man had died at this location just the day before. Indeed, this poor hiker, Jeffrey R. Rosinski, perished, quite possibly due to going off-route, or just plain bad luck. I had the opportunity to speak with his father-in-law via email and the family is holding up well after the incident. Jeffrey's father-in-law indicated to me in our correspondence that he had been training on Mount Washington in New Hampshire. My thoughts and condolences go out to the family for this tragic loss.
I reached the Keyhole roughly 45 minutes after leaving the summit of Longs Peak. The Keyhole is very appropriately named as well...
The Keyhole on Longs Peak
I waited for Ray here and once he arrived, we quickly hiked down the well-marked and used trail down the mountain. We passed through the Boulder Field, where permanent camping sites are located for backpackers.
A view of Longs Peak's Diamond, the Boulder Field, and the Keyhole.
Shortly after making our way down passed the Boulder Field, we encounted a large herd of 20 to 30 elk grazing on the tundra.
Seeing the elk was a real treat!
We quickly hiked down the easy trail and reached the turn-off for Chasm Lake once again, making full circle. The view of The Loft and The Diamond from this vantage point were great in the daytime hours.
The Loft route
Final thoughts:
- The entire Homestretch section all the way to the Keyhole is marked every 20 to 30 yards with huge yellow and red bullseye paintings on the rocks, showing people where to go. While this is great for the beginner hiker or tourist, it does detract somewhat from the quality of the hike.
- Longs Peak is not a good hike for beginner hikers or tourists. I recommend Mount Sherman for a first 14er.
- The Loft route is a great alternative for those looking to bag Mount Meeker or gain solitude.
Vestal Peak and Arrow Peak - the Grenadier Range's Finest

There really is only one word that can aptly describe the Grenadier Range: incredible. This sub-range of Colorado's San Juan Mountains rests deep within the Weminuche Wilderness Area and sweeps up from the valley below in a gravity-defying statement of beauty, ruggedness and splendor. Sitting approximately 9 miles south-southeast of Silverton, Colorado, and 32 miles northeast of Durango, Colorado, the Grenadier Range cannot be missed. In fact, I would go as far as to say that this group of mountains should be among the places one should see before they die. Made mostly of quartzite, these mountains are the spine of the San Juan Mountains, and arguably, some of Colorado's most difficult to climb. In fact, Arrow Peak was once considered the hardest major mountain in Colorado to climb until a class 3 route was established on its northeast rib1. Vestal Peak's "Wham Ridge," impressively seen from many vantage points in the San Juan Mountains, is considered by most to be a classic climb in Colorado. Lt. George Marshall of the U.S.G.S. 1876 Wheeler Survey reported on the Grenadier Range:
No where in Colorado can be found such steep slopes, such shapeless crags, such rocky and impassable ravines, such generally detestable characteristics and features as are here seen. The hard metamorphic rocks are shivered along their cleavage planes for hundreds of feet, leaving their odd pinnacles, there the likeness of the shattered outspread wings of some gigantic bird, and again of the grim grinning teeth of death.2
Additionally, from the summit of Mount Sneffels, Rhoda of the U.S.G.S. 1871 Hayden Survey reported:
The group of quartize peaks stood out as boldly as ever about thirty miles to the southeast. In fact, I may state here that we have never yet seen a group from any station (and we have viewed it from all sides) without feeling both deep respect and awe for their terrible ruggedness. The fact already stated, that the storm clouds seem to hover about them before starting on their meandering ways, only served to add to our other feelings of uneasiness.3
Given the incredible fanfare this group of mountains has received over the years by many visitors, I made sure to include it on my summer's climbing itinerary. Scheduling the trip would prove somewhat difficult since I was relying on the 5th class climbing expertise of one of my best friends, Jeremy Park. Jeremy was able to clear his calendar and join me from Seattle, Washington for this amazing backpacking adventure. Jeremy is a highly qualified trad climber who has spent many years climbing difficult routes in the rugged Cascade Mountains of Washington. For more on his adventures, see his profile on CascadeClimbers.com.
To start off, here is a break-down of relevant numbers from the trip:
Peaks summited:
Vestal Peak: 13,864 ft. (ranked 77th in Colorado)
Arrow Peak: 13,803 ft. (ranked 104th in Colorado)
Total elevation gain: 8,782 ft.
Total distance hiked: 25.12 miles
Total time hiking: Approx. 22 hours
Total photos taken: 582
Total wildlife sightings: 2 (marmots, mountain goats)
Total distance driven: 610 miles
Trip duration: 4 days, 16 hours
Day 1:
The rough plan was to leave Colorado Springs on Friday, July 9th, 2010 and return on Wednesday, July 14th, 2010. These plans were altered somewhat; however we did end up leaving at 8 AM from Colorado Springs on Friday and arrived at the Molas Pass trailhead at approximately 3 PM.
The long drive from Colorado Springs to Molas Pass
After arriving at Molas Pass, I became quite excited to see the Grenadiers for the first time. The range lived up to its name, striking both excitement and awe into me immediately.

The Grenadier Range as seen from Molas Lake.
One of the Grenadiers, Mount Garfield, really rises quite steeply from the valley below, and is rated 33rd on my list of "most impressive summits."
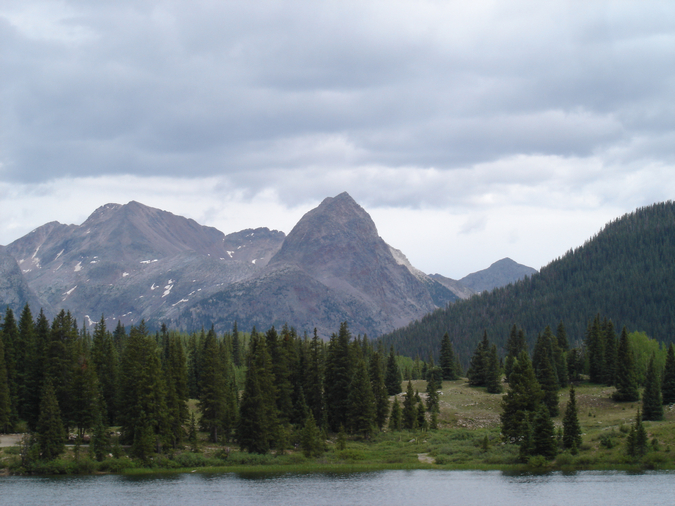
Mount Garfield rises high above (right of center)
Jeremy and I loaded our heavy packs (mine was 65 pounds) onto our backs and began hiking. We started down the Colorado Trail, which leads down 1,700 ft over 2.5 miles and several switchbacks (37 to be exact) to the Animas River and to the Durango & Silverton Railroad. Generally, most people take the train to this point to avoid the downclimb (and later upclimb); however, Jeremy and I chose to hike from Molas Pass to save money and to avoid being tied to the train schedule.

The full route map for the trip. Click to see a larger version.
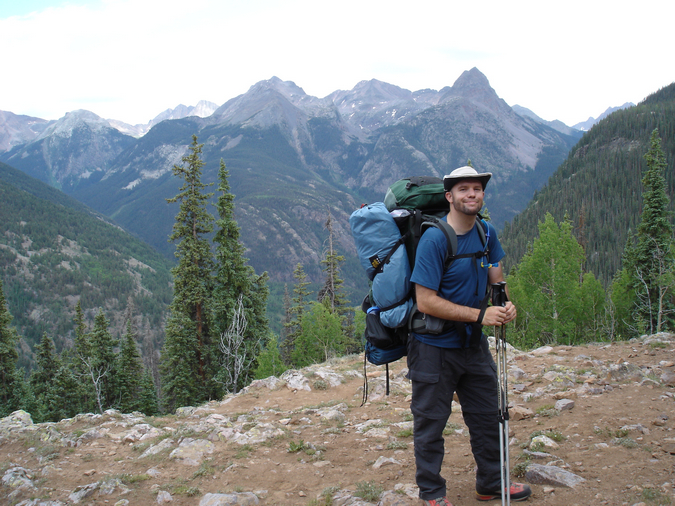
Matt Payne heading down the Colorado Trail.
Before long, the river and railroad tracks became visible. Our route would eventually take us to the bottom, over the river, and up the valley to the left towards the steep looking mountains (the Grenadiers) that are nearly hidden left of center.
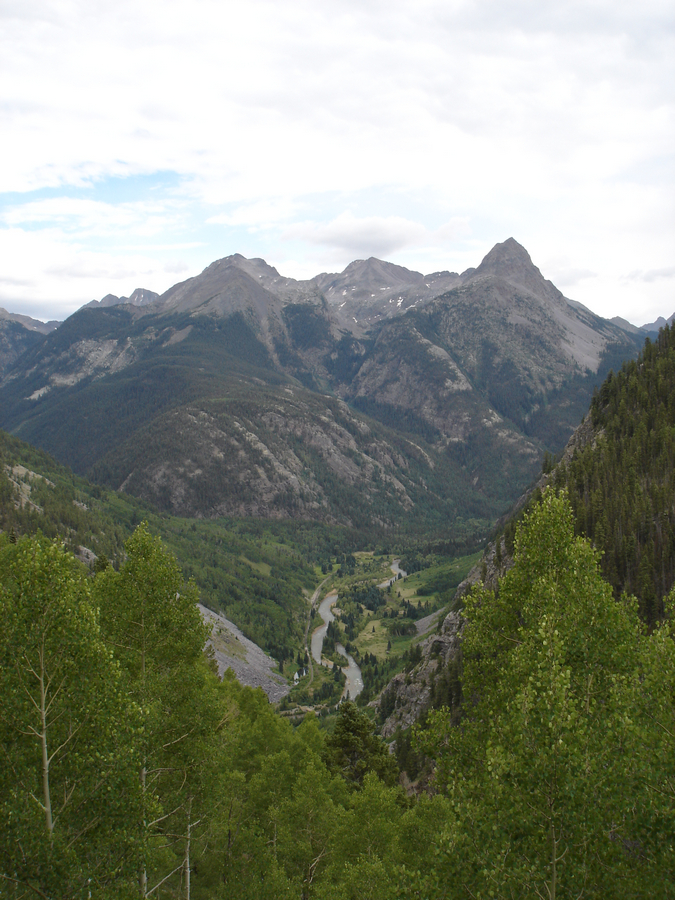
Looking down at the Animas River from the Colorado Trail
Once lower into the valley, Mount Garfield became more and more impressive, towering over the river like a midevil castle's guard.
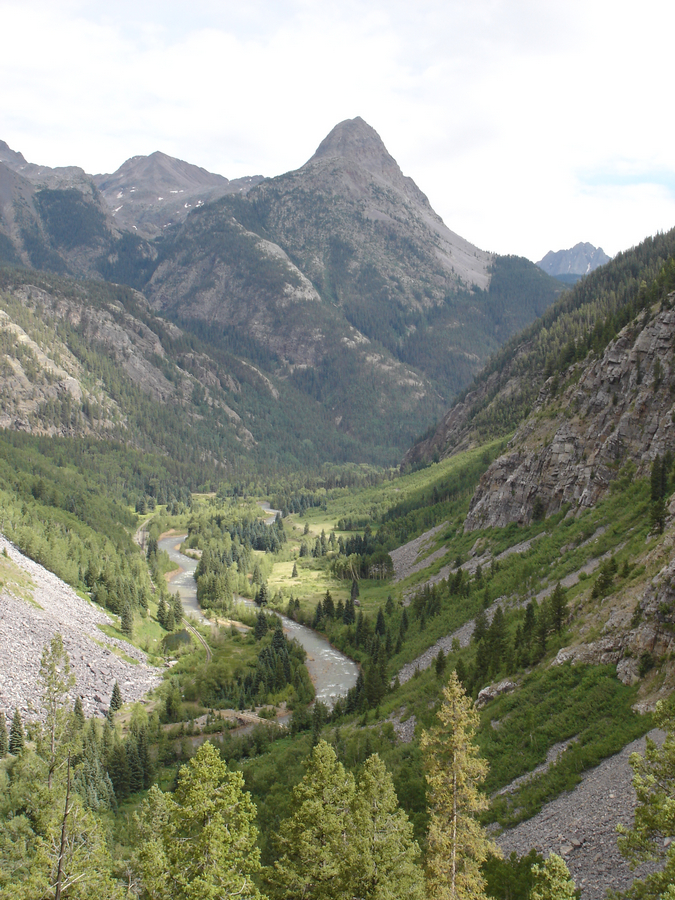
Mount Garfield
Once we crossed the river over a very well-maintained bridge and over the railroad tracks, the trail leading up Elk Creek appeared and started us up into the Elk Park valley. This trail is very well-maintained, and there was even quite a bit of evidence that trail crews had been working on it this summer to fix some washed out sections. The trail is quite steep, but very manageable with a heavy pack. We followed this trail for nearly 2.9 miles until we reached a set of beaver ponds at 10,000 ft., our pre-determined trigger to head up into the Vestal Basin.
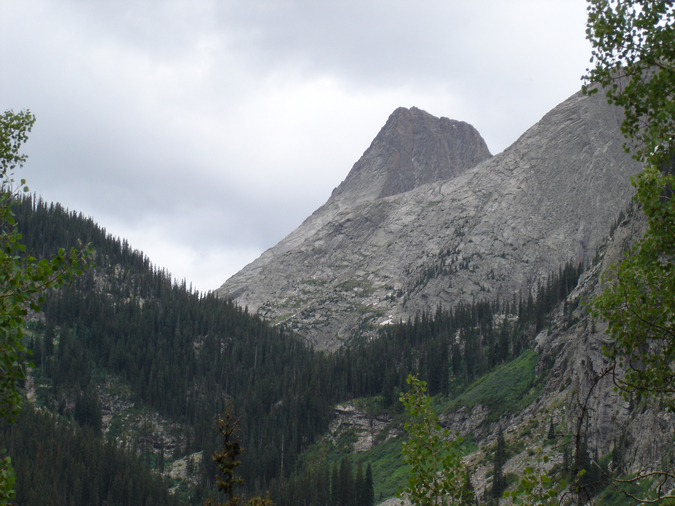
Vestal Peak towers above the Elk Creek valley and Vestal Basin.
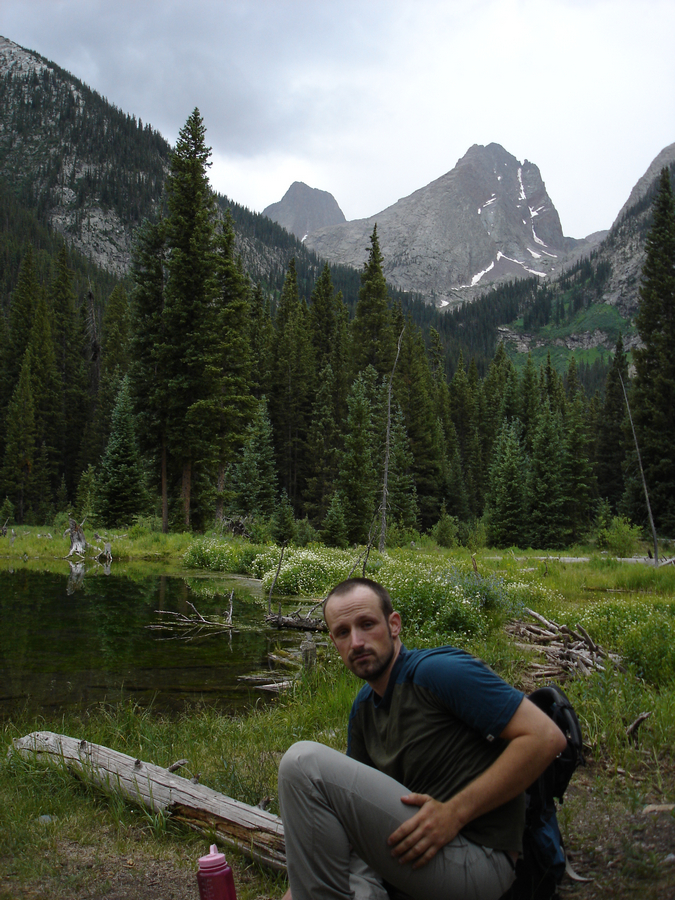
Jeremy looking tired at the beaver ponds with Vestal Basin in the background.
After 3 hours of backpacking, we were determined to make Vestal Basin before nightfall. We headed south up Vestal Basin's trail - an unmaintained, but easy to follow trail which climbs quite steeply up towards Vestal and Arrow Peaks. Did I mention that this trail is steep? The trail gained 600 feet in 3/4 of a mile with large amounts of fallen trees and boulders to navigate around. In several other trip reports I've read, people have mentioned that the trail was difficult to find or follow; however, we did not find this to be the case at all.
After hiking another two hours into the basin for a total of 8.7 miles, our legs finally gave out at 10,620 ft shortly after nightfall. We found a cozy campsite near a small tributary of Vestal Creek and made our first meal of the trip - two packets of Zatarain's ready to serve rice and chicken. This was surprisingly good and filled with sodium (a nice thing to take in after a full day of backpacking). We decided to set the alarm for 4 AM and hit the sack around 11 PM. It was at this point that I realized that my Thermarest pad had somehow sprung a leak from the hike up and that I would be sleeping on hard ground. Yay!
Day 2:
4 AM came and went, and we finally crawled out of the tent around 8 AM. Both us were thankful for the extra rest and tore down camp and hit the trail at about 10 AM, heading for the upper sections of Vestal Basin.
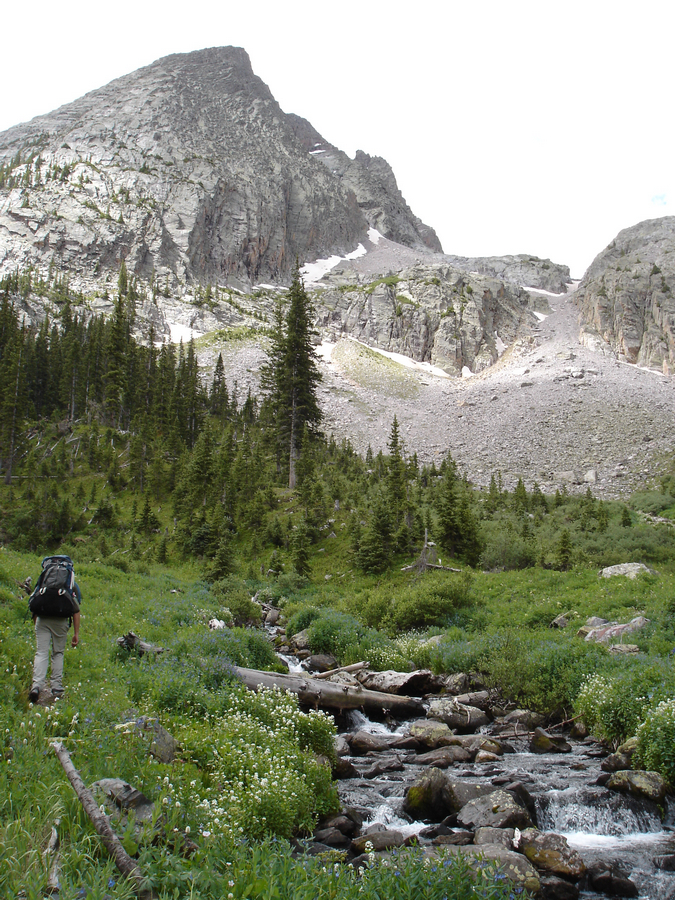
Jeremy hikes up into Vestal Basin along Vestal Creek.
Great views of both Electric Peak and Arrow Peak were had while hiking up into the basin.
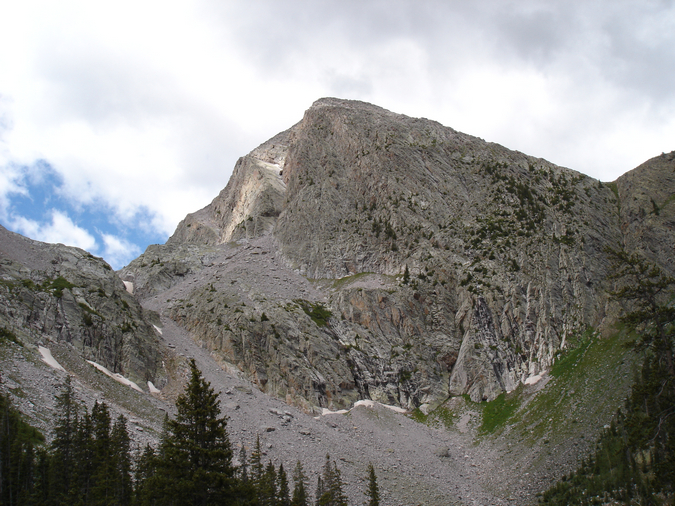
Electric Peak
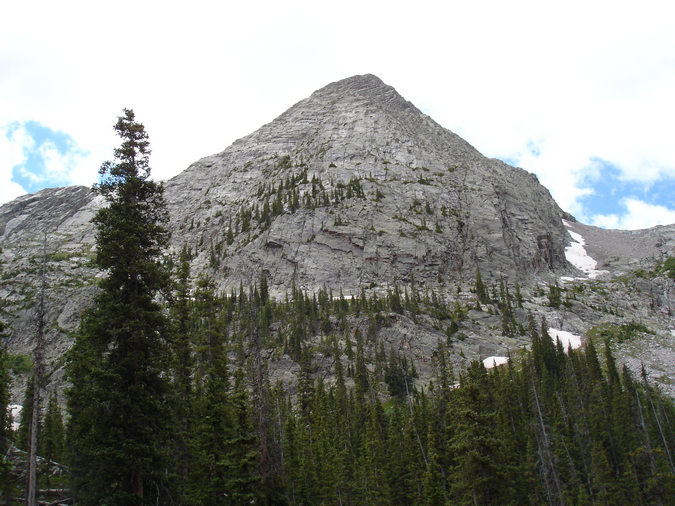
Arrow Peak's steep northeast face, seen from the Vestal Basin trail.
After hiking a little over a mile and gaining 893 ft., we found an ideal campsite at the foot of Vestal and Arrow, at the end of a long clearning and in some trees next to Vestal Creek. Vestal Peak itself could be seen directly from camp, with it's "Wham Ridge" rising above us.

Vestal Peak's Wham Ridge
Since we were planning on climbing Wham Ridge, it was particularly exciting to see it close-up.
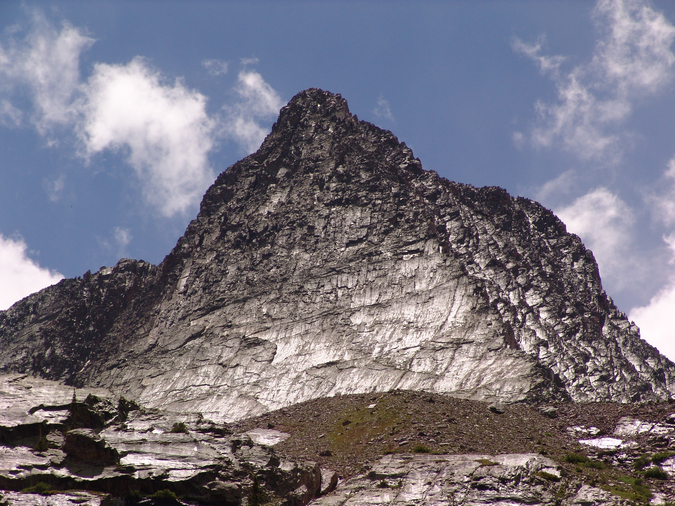
Vestal's Wham Ridge zoomed in from our campsite.
After setting up camp, I repaired my Thermarest using a repair kit that I always carry with my on backpacking trips. For once the extra weight paid off! We set-up camp just in time. Clouds had been forming since we had woken up and as typically happens in the San Juan Mountains, a thunderstorm decided to develop quickly above us around 12 PM. We crawled into our tents and napped through the storm, which subsided around 4 PM. We woke up, ate a few snacks, and finished setting up our campsite. At around 5 PM, after the clouds had completely cleared out, I somewhat jokingly told Jeremy that we should climb Arrow that evening. Jeremy said, "why not," and before we knew it, we were packing our day-packs for an ad hoc summit of one of Colorado's finest summits. We departed camp at 6:15 PM, headlamps and helmets equipped, and headed up a climber's trail right next to our campsite, which went straight up the head-wall of the lower area beneath Vestal and Arrow. This trail was also easy to follow, but ridiculously steep, rising 645 ft. in just .45 miles until it reached a plateau in between Arrow and Vestal. Arrow's classic ramp was easy to spot, and Vestal's Wham Ridge continued to blow my mind.
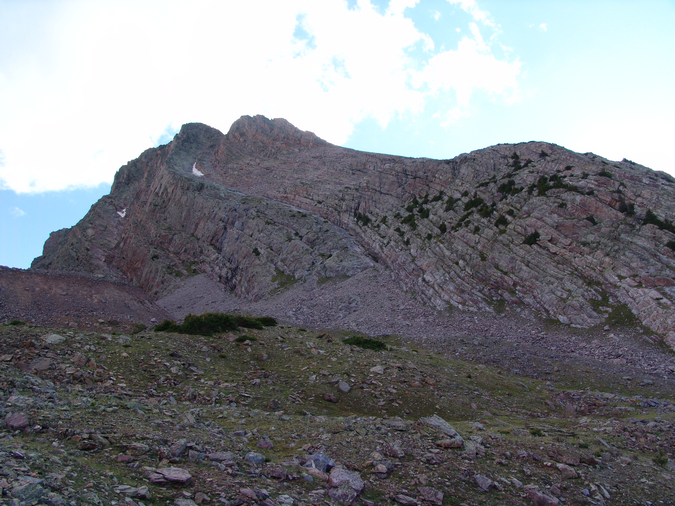
Arrow Peak
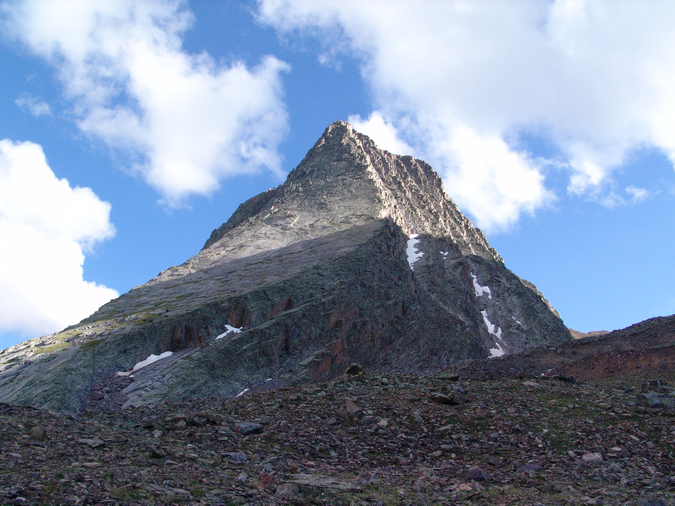
Vestal Peak
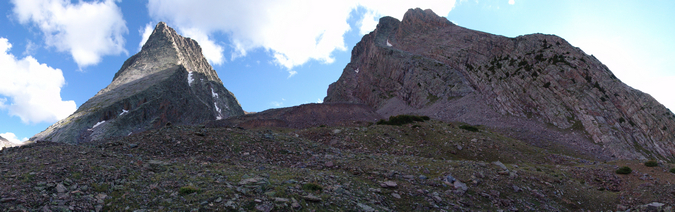
Vestal and Arrow Peaks as seen from the top of the headwall above our campsite.
Additionally, the Trinities were quite prominent just to the left of Vestal.The Trinities are the middle three mountains of the Grenadier Range, composed of West Trinity, Middle Trinity, and East Trinity.
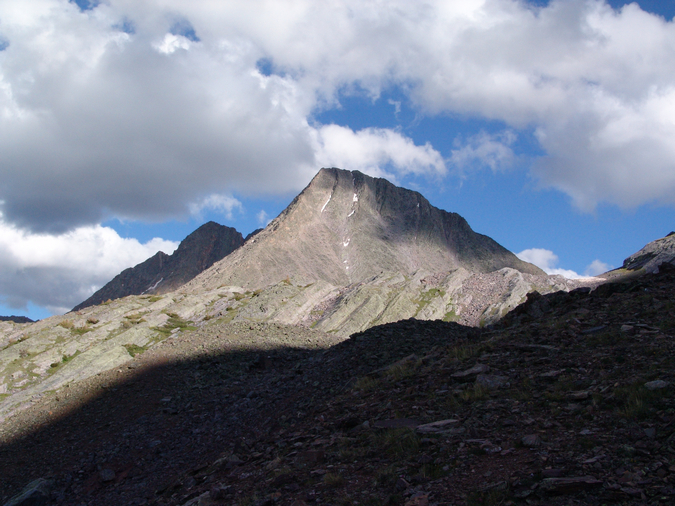
The Trinities as seen from the base of Arrow and Vestal Peaks.
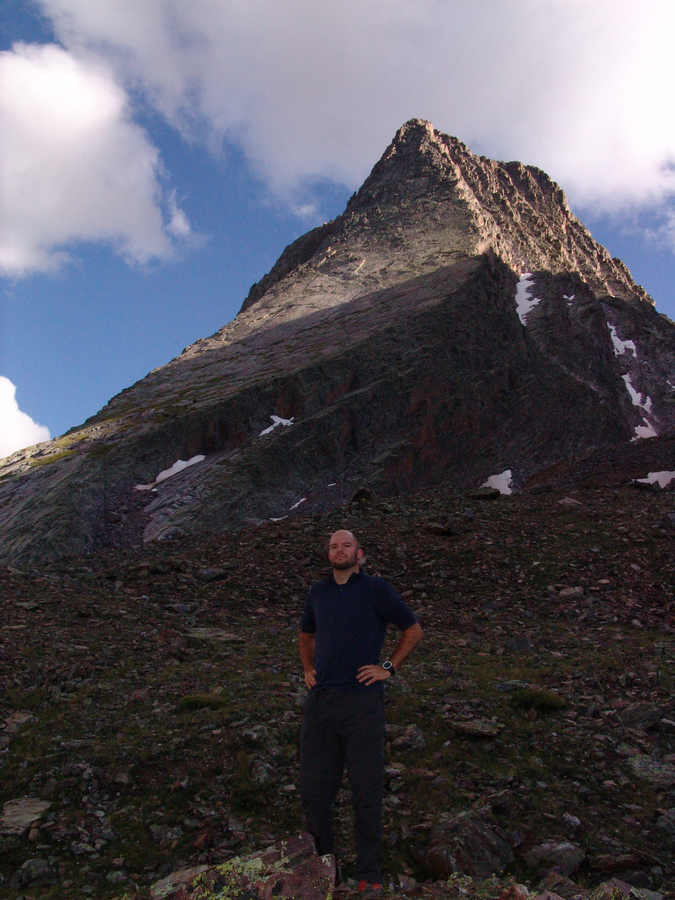
Matt Payne posing with Vestal Peak behind.
We headed up to the base of Arrow and began the climb up Arrow's prominent ramp. The ramp itself was nearly free of snow and consisted of easy class 3 climbing.

The base of Arrow Peak and the start of our route.
As we climbed, I could not help but constantly look left at the impressive nature of Vestal's Wham Ridge, which swept up as if it were carved out with a fine instrument.
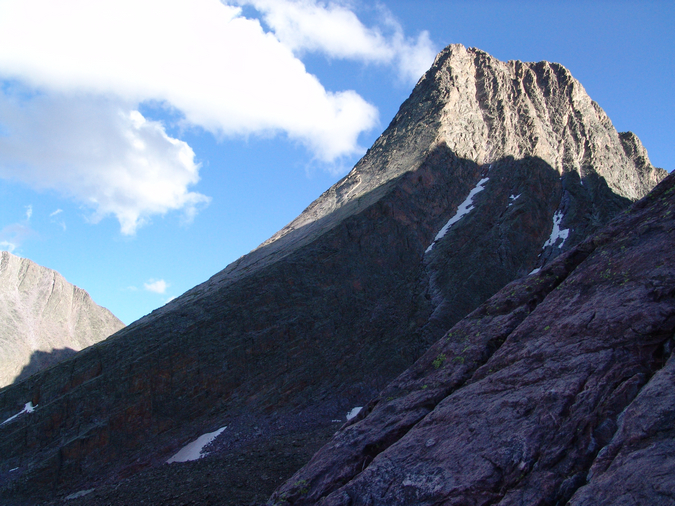
The impressive profile of Vestal Peak's Wham Ridge.
The higher we were able to climb on Arrow, the more and more impressive Vestal became. I simply could not stop myself from gazing over at its sheer beauty, and eventually, Vestal Lake came into view as well.
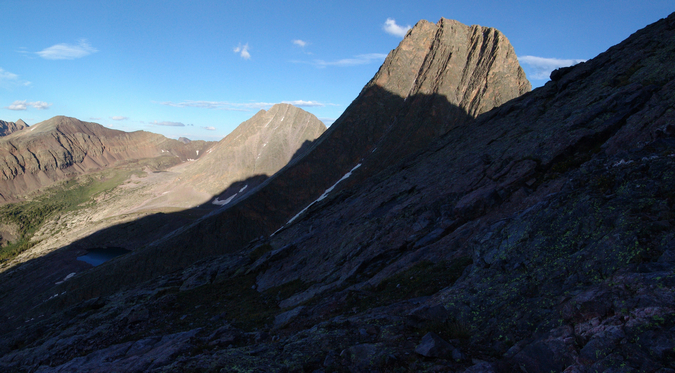
A panoramic photo of Vestal's Wham Ridge.
Jeremy and I reached a junction in our route and made a decision to stay left and continue up a class 4 variation of Arrow. This decision was one of our best of the trip, as Arrow's upper ramp provides some of the most fun, yet least exposed, class 4 climbing I've done to date. For those that do not know, exposure is defined as "the condition of being on high vertical rock with full consciousness that nothing exists between you and the distant ground but thin air4."
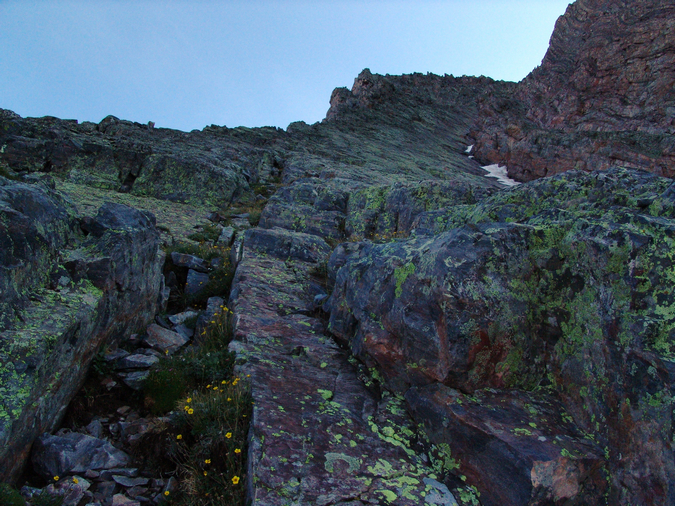
The start of Arrow Peak's class 4 terrain
Following the higher ridge to the left also provided some great views of the Needle Range to the south, and Jagged Mountain, Windom Peak and Sunlight Peak came into view for the first time, Jagged's pinnacles rising up like upside-down stalagtites.

Jagged Mountain (left of center), Windom Peak and Sunlight Peak
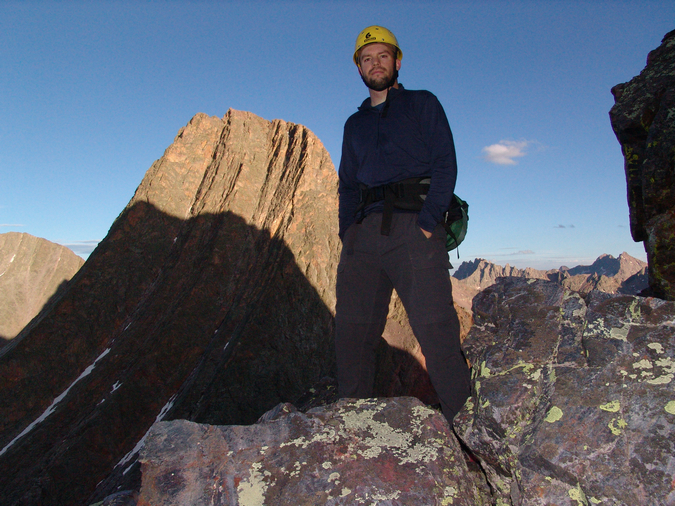
Matt Payne with Vestal's insane Wham Ridge behind him.
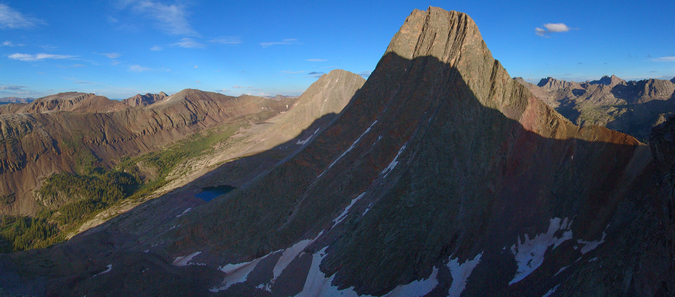
A high resolution panoramic photo of Vestal's Wham Ridge.
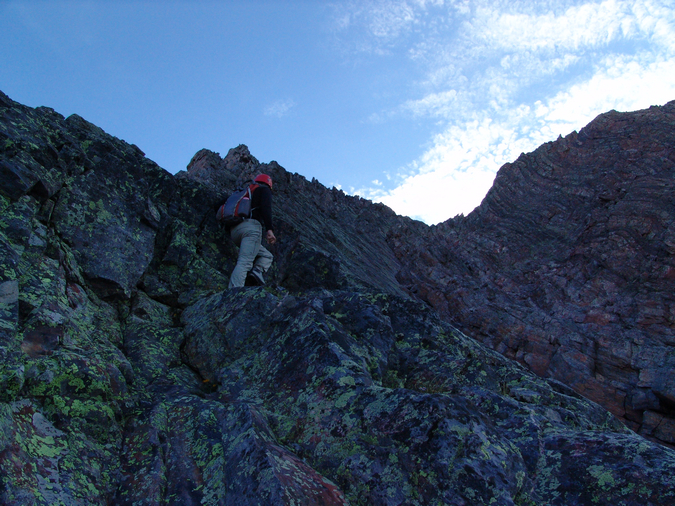
Jeremy Park on Arrow Peak's class 4 ridge, just east of the traditional class 3 route
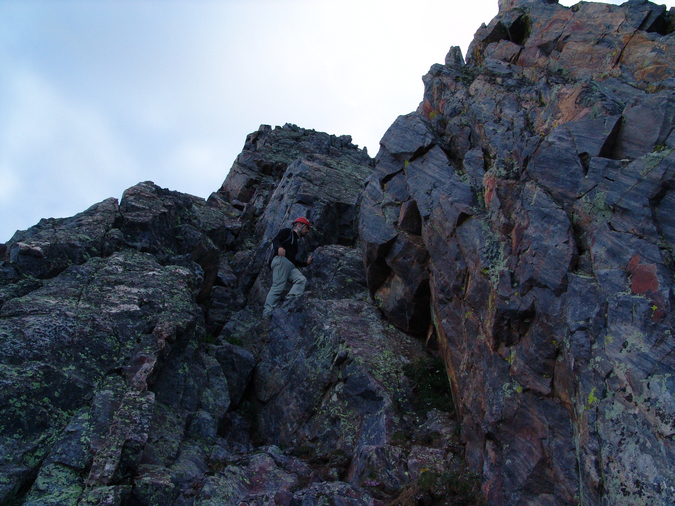
Jeremy Park navigating the class 4 terrain on Arrow
Jeremy took my camera and was able to take some photos of me negotiating some of the class 4 terrain. The climbing was fun, challenging, and quite rewarding. Exposure was minimal, and various holds were quite ubiquitous.
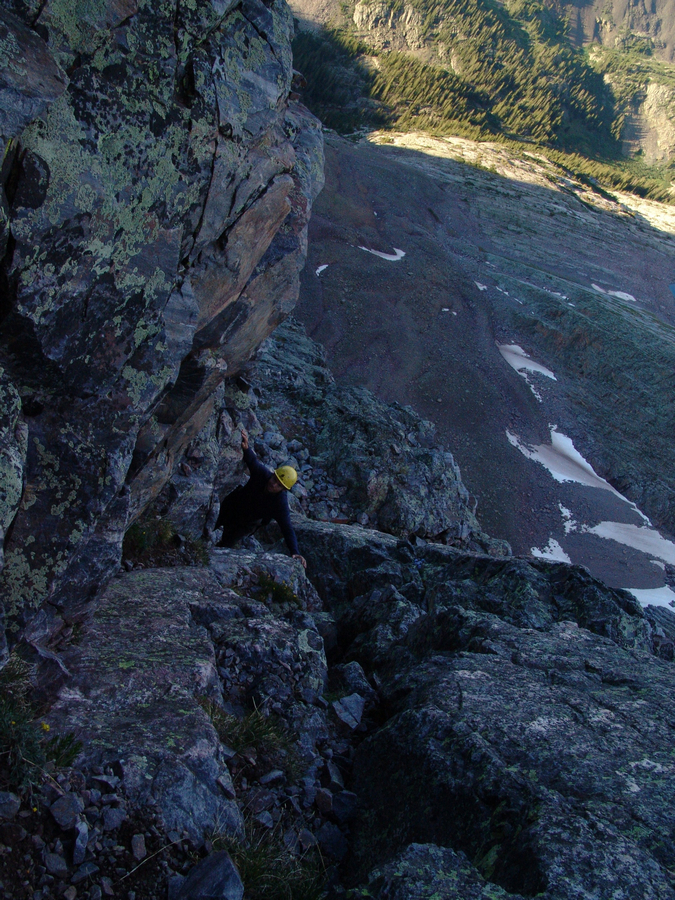

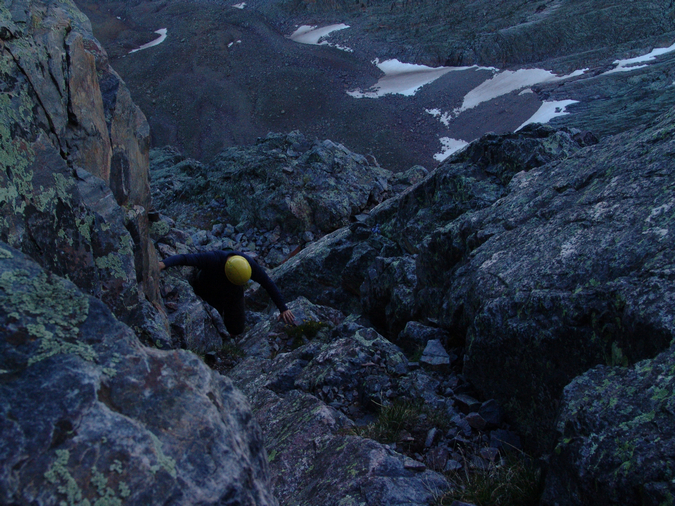
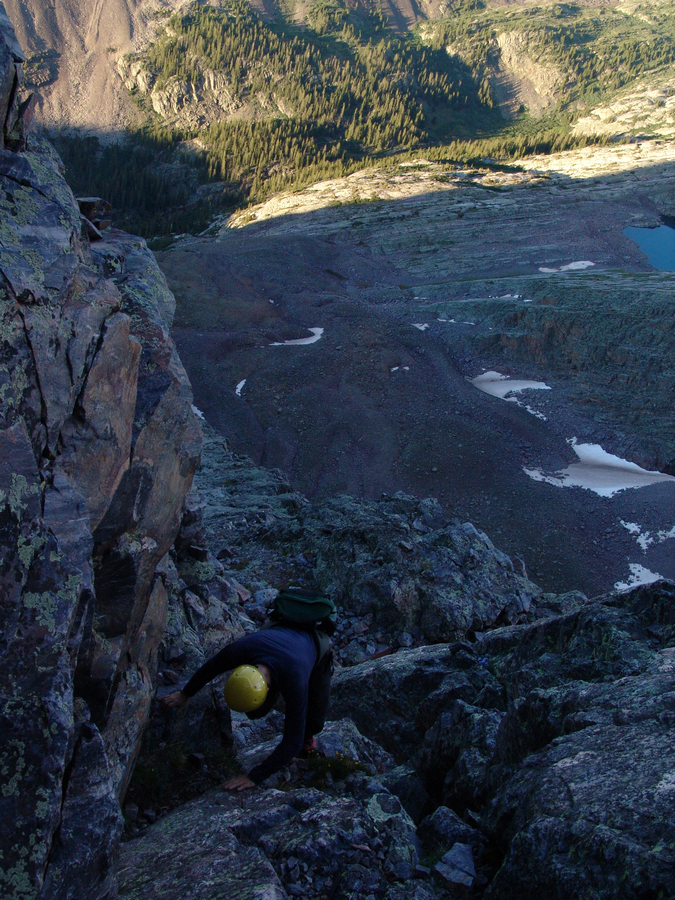
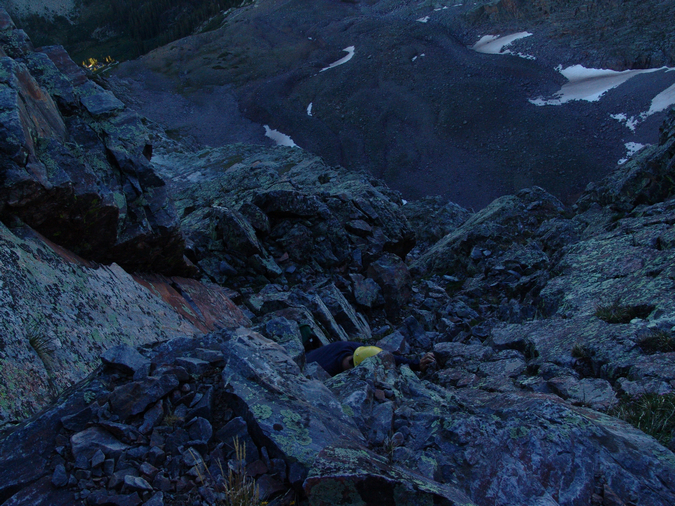
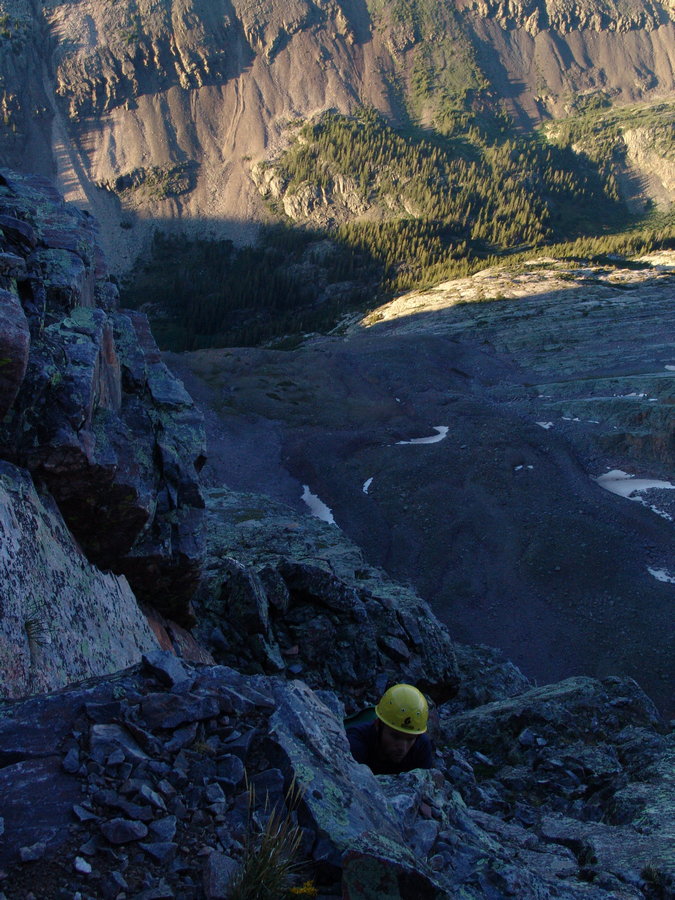
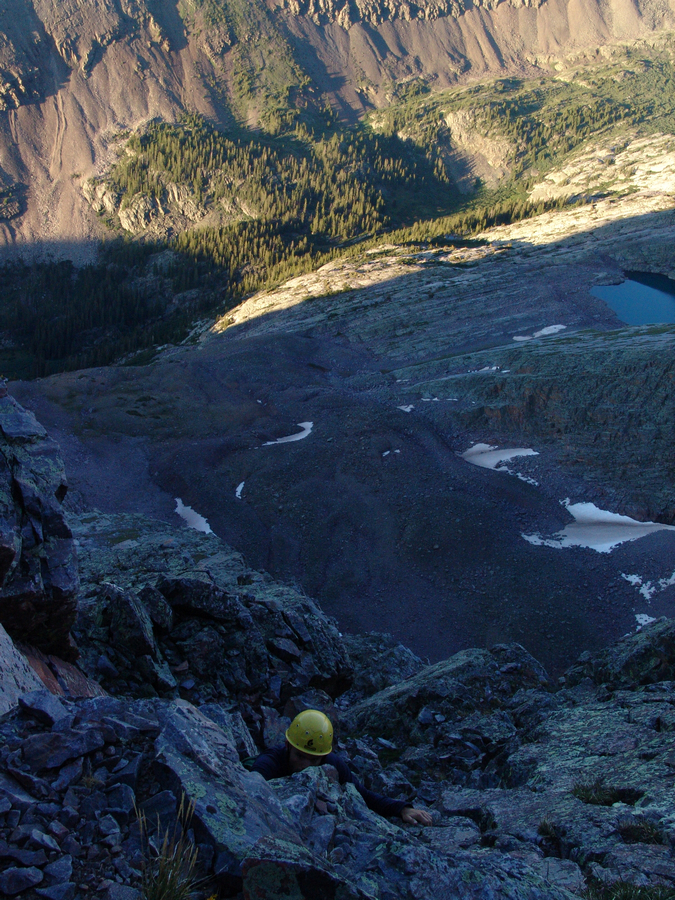
The sun was setting quickly, which was both exciting and troublesome, as we did not look forward to down-climbing Arrow in the dark, but I was really excited to see the sun set from 13,803 ft.

The sun setting on Vestal Basin.
After an exhilirating climb, Jeremy and I topped out on Arrow's summit at 8:15 PM, and enjoyed the sunset from the top. This was one of the most majestic and spiritually fulfilling moments of my life.

A 3600 view from the summit of Arrow Peak, with the sun setting over the San Juan Mountains.
The Needle Mountains across the Tenmile Creek and Noname Creek drainages from us were impressive, each living up to their namesake.
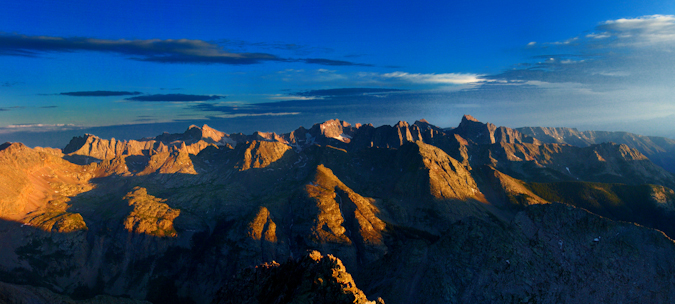
The Needle Mountains - from left to right: Jagged Mountain, Windom Peak, Sunlight Peak, Mount Eolus, Animas Mountain, Turret Peak and Pigeon Peak
Pigeon Peak was quite possibly one of the most impressive mountains I've ever seen, with its east face dropping off like the edge of table.

Pigeon Peak
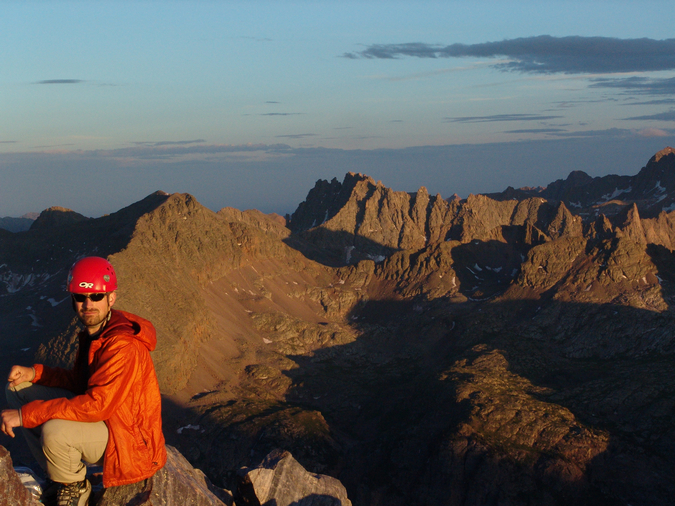
Jeremy with Jagged Mountain directly behind him to the right
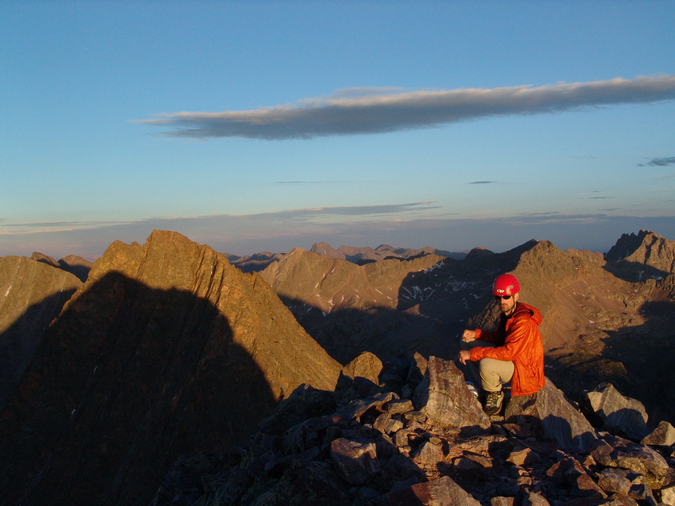
Jeremy with Vestal in Arrow's shadow to the left

A self-timer captures Matt and Jeremy on the summit of Arrow Peak
Rio Grande Pyramid and The Window were looking pretty awesome in the late evening sun as well. Rio Grande Pyramid has really piqued my interest lately since I am going to climb it in August, 2010 with my dad (update - completed - see the Trip Report). It should be pretty amazing to look back towards Arrow and Vestal.

Rio Grande Pyramid and "Window Peak" as seen from Arrow's summit. The Window is the notch on the ridge just right of Rio Grande Pyramid.
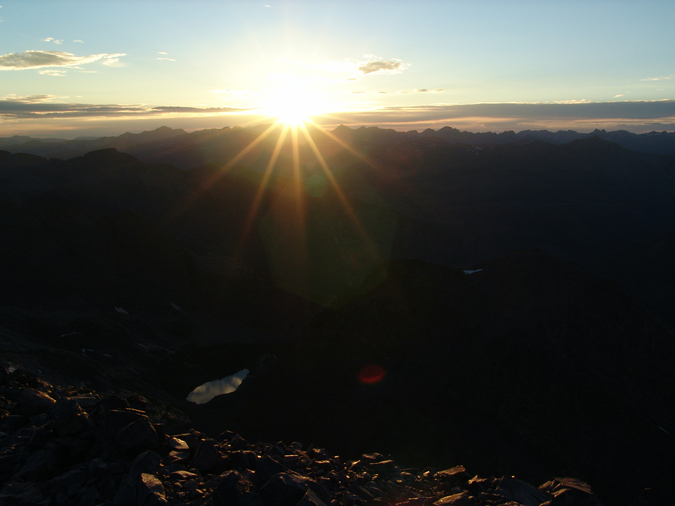
The sun sets behind the San Juan Mountains. Check out that lake below!
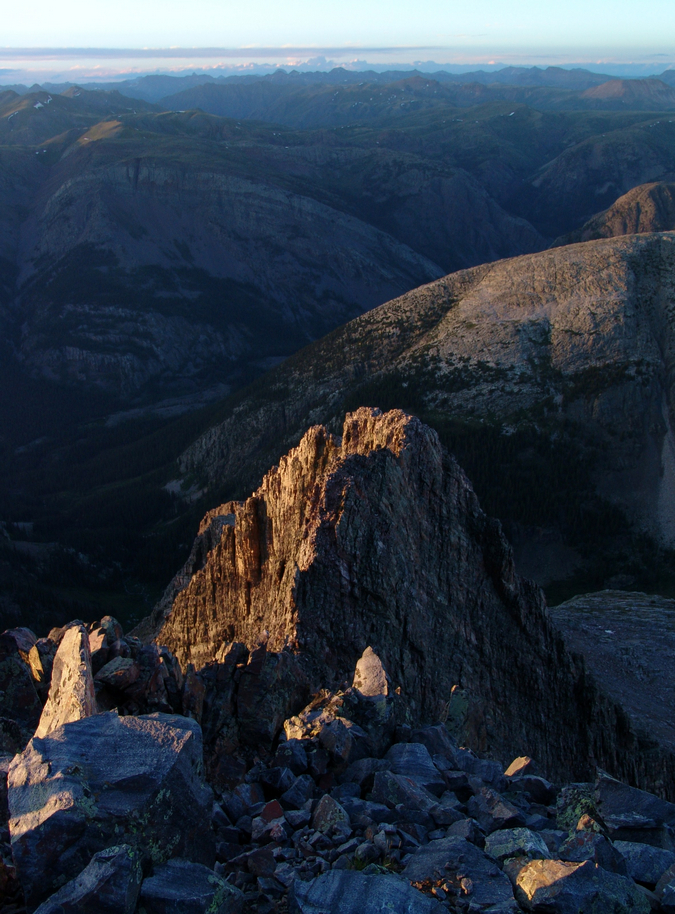
Arrow Peak's north face and an airy fin connecting it with the true summit
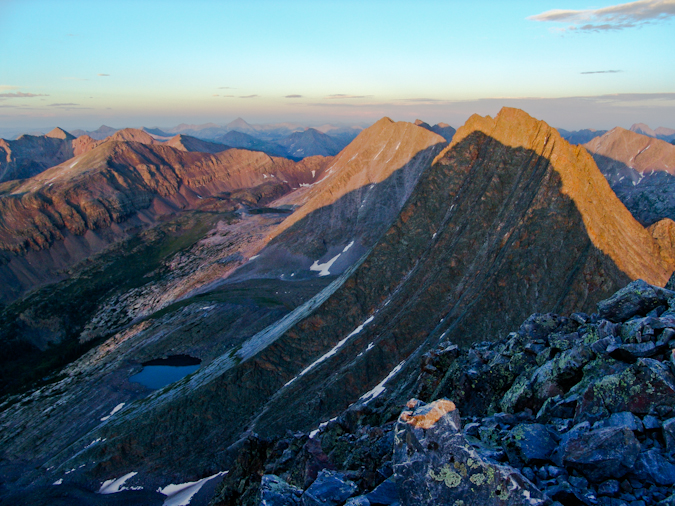
Vestal Peak's Wham Ridge during sunset.
After spending just 20 minutes on the summit to enjoy the sunset, Jeremy and I departed Arrow's amazing summit via the standard class 3 trail, which was marked by several cairns heading down the steep face of Arrow. Before long, we adorned our headlamps and were in complete darkness, but not before we had successfully navigated below the more treacherous sections. The down-climb in the dark provided quite an interesting challenge. The ramp on Arrow was quite solid and easy to climb down, rarely requiring either of us to sit down on steeper sections. We could see other campers much higher in the basin above our camp with their headlamps on, watching us. I thought the climbing down would be difficult in the dark; however, the route on Arrow is so straightforward that I think it could even be up-climbed in near darkness if one were experienced and comfortable. We reached our campsite at approximately 9:15, just 3 hours after we had set-out to climb Arrow.
We cooked our dinner in the dark again, this time creating an amazing medley of re-hydrated black beans, jalapenos, green chilis, velveeta cheese, and tortillas. We planned to climb Vestal's Wham Ridge the next day, so we set the alarm for 5 AM again, and hit the sack at 12 AM, snoozing the night away.
Day 3:
We awoke on day 3 and quickly prepared for what we hoped to be an amazing climb. Having read about Wham Ridge over and over again the past several years, I had mentally hyped up the climb to be an epic adventure. A small group of three climbers headed up the trail shortly before us, which was somewhat concerning to both Jeremy and I as we did not want any rocks to fall down onto us during our ascent. We decided not to deviate from our plans since Jeremy felt confident that if we bumped into the other group we could find a route around them. We left camp and headed up the steep climber's trail again to Vestal's base. I carried the 60 meter rope, a nut key for taking out nuts from the rock, as well as my personal gear, and Jeremy carried the climbing rack (a full compliment of anchors, quickdraws, webbing, camalots, and nuts). The Columbine flowers on the climber's trail were outstanding.
A Columbine flower
We reached the base of Vestal and Arrow again and headed towards the start of Wham Ridge.
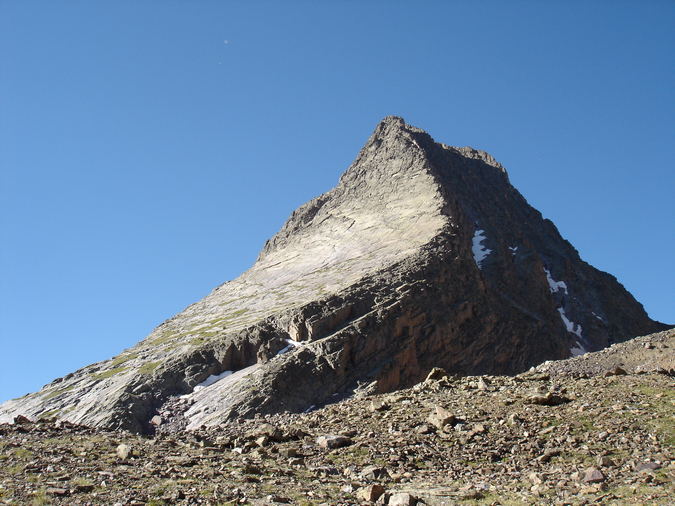
Vestal Peak in the morning sunlight
We stopped at the base of Wham Ridge and put on our climbing harnesses and climbing shoes. We decided that we would stash the rest of our gear under a large rock at this point. Jeremy went to take out the climbing gear from his backpack and opened to find... all of his food. Yes, that's right - his food bag and climbing bag are identical and he mistakenly grabbed his food bag instead of his climbing bag when we left camp. So, Jeremy needed to hike back to camp and then back up to the start of Wham Ridge before we could begin climbing. While we were both upset, I assured Jeremy that it would be fine and that I was not mad at him. He left for camp and I headed over to Vestal Lake to take some photographs.This turned out to be a good mishap as I was able to capture some of the most stunning photos of the trip.
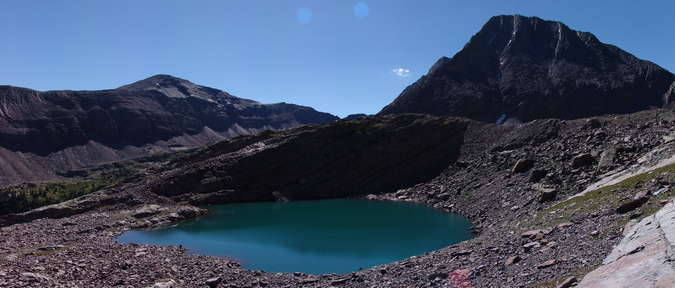
Vestal Lake and West Trinity

Vestal Peak reflected in Vestal Lake
There was a small group of 4 men fishing quite successfully at the lake, and I stopped to talk to one of them. He was from Memphis Tennesee and explained that he had climbed Wham Ridge the day before without rope, and that he had only climbed one mountain prior to this. While this seemed rather dangerous to me, it did instill some confidence in my ability to complete the climb. He also said he saw us downclimbing Arrow the night before and that he was praying for us to make it down safely. Not being a religious person, I thanked him for the warm thoughts and headed off to take more photos.
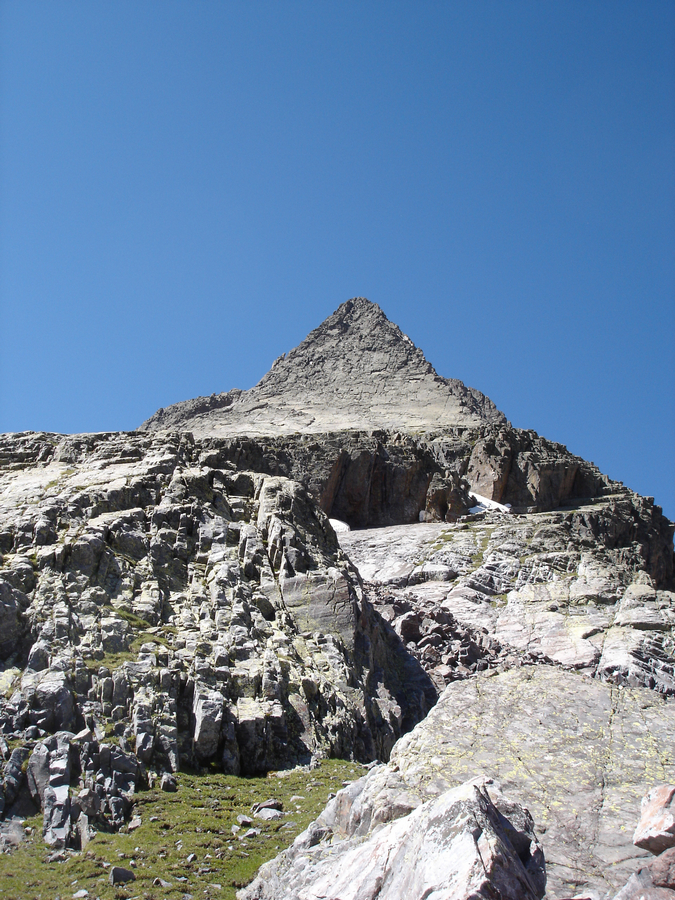
Vestal Peak's Wham Ridge
I headed back to the rendezvous point and waited for Jeremy to return. It was not until 10:30 AM that Jeremy reappeared and reconvened with me. At this point, clouds had already formed and we were questioning if we should continue or not. We decided to keep going and keep an eye on the clouds. With a full compliment of climbing gear, we headed up Wham Ridge in our climbing shoes. I reached the last grassy ramp of Vestal and re-evaluated the weather. Jeremy asked me what I thought and I told him that my gut told me we should bail. We both agreed that heading back would be the best choice - safer to start earlier the next day than to get struck by lightning. I took some parting photos of both Vestal and Arrow and headed back down the steep slopes of Wham Ridge, which proved to be a quite painful experience in climbing shoes.
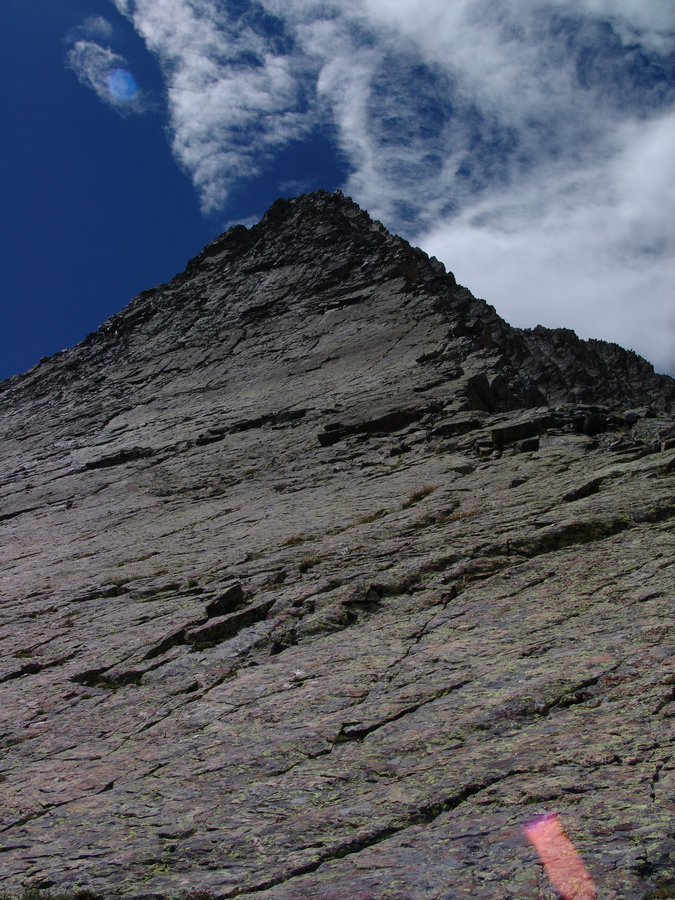
A view of Vestal from the turn-around point
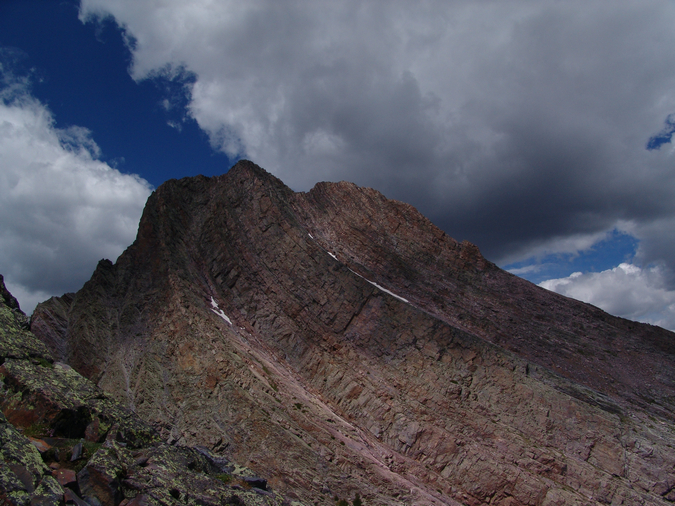
Arrow Peak with stormy weather forming above
The somewhat loose fitting climbing shoes were quite painful on the downclimb, and caused some very painful blisters to appear on 5 of my 10 toes. This did not bode well for my chances of using climbing shoes on the actual climb. Jeremy and I changed back into our mountaineering boots, and stashed all of our climbing gear at the same large rock at the base of Vestal in a waterproof bag for the next day.
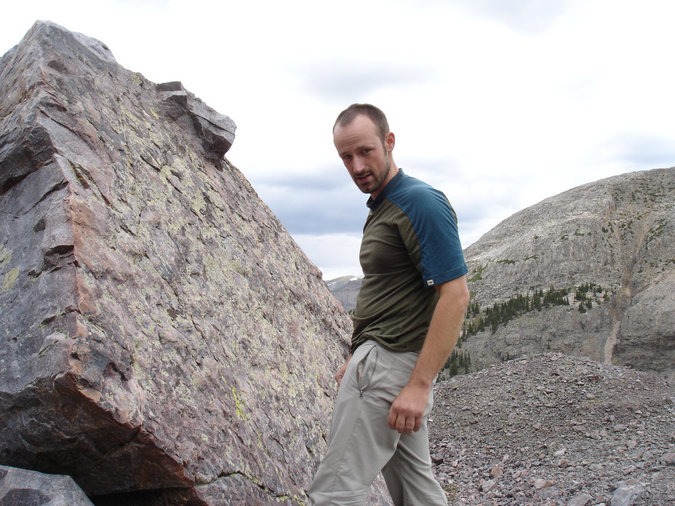
Jeremy stashes our climbing gear under this huge boulder beneath Vestal Peak
We went back down to camp and decided to take a nap. The decision to bail on Vestal proved to be a very good one, as the whole basin was riddled with rain and lightning for three hours. Fortunately, the group ahead of us had safely made it down from Vestal before the storms hit.
We got out up and cooked dinner - this time a carbohydrate-filled meal consisting of re-constituted mashed potatoes, country gravy, Spam, and cheddar cheese. While this sounds horrible - it was amazing! Go Spam! We set our alarms for 3:30 AM and crashed at a much more respectable time of 9 PM.
Day 4:
We woke up and made our way up to the base of Vestal to watch the sunrise from the final grassy ledge before the beginning of the more difficult climbing. Since my feet were completely mangled from the prior day's adventure, I decided to wear my La Sportiva Trango Evo Sport mountaineering boots for the ascent. With heavy socks on, I could barely feel my blisters. Watching the sunrise from the base of Wham Ridge was pretty awesome. The sun lit up the surrounding mountains and made for quite a peaceful start to an incredible climb.
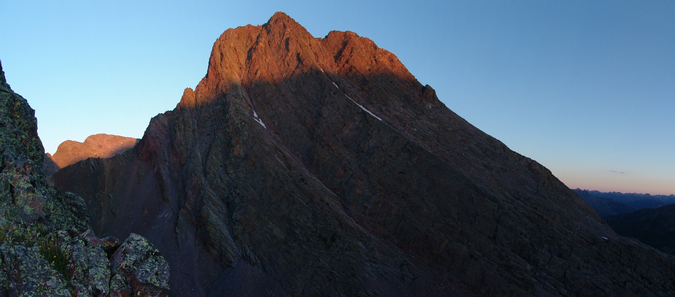
Arrow Peak in alpenglow from the start of Vestal's Wham Ridge.
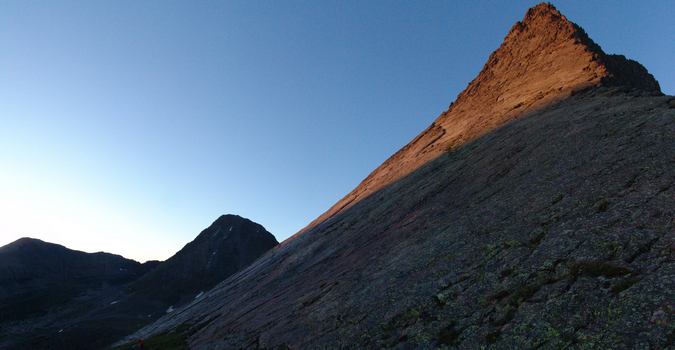
Vestal's Wham Ridge in alpenglow, with Jeremy resting at the base.
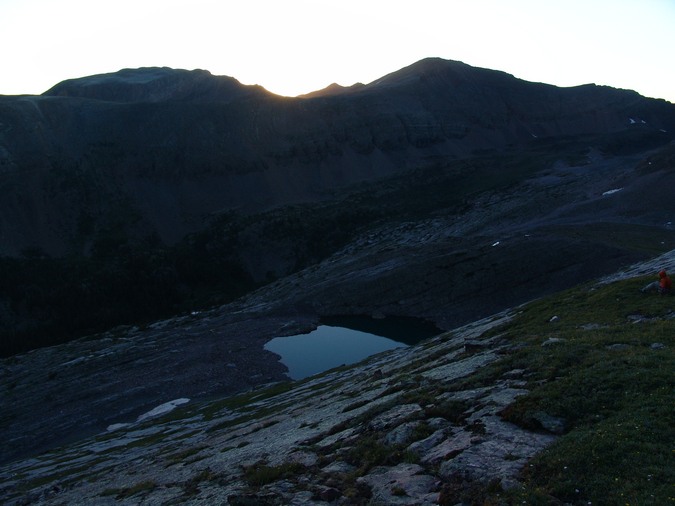
Jeremy watches the sunrise
I even took a short video of the sunrise:
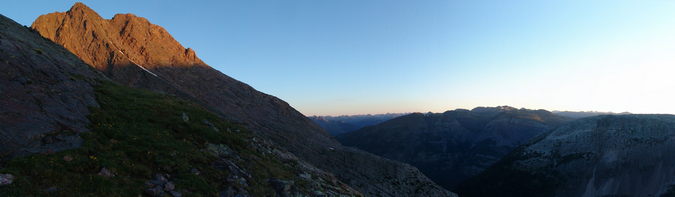
Arrow Peak at sunrise.
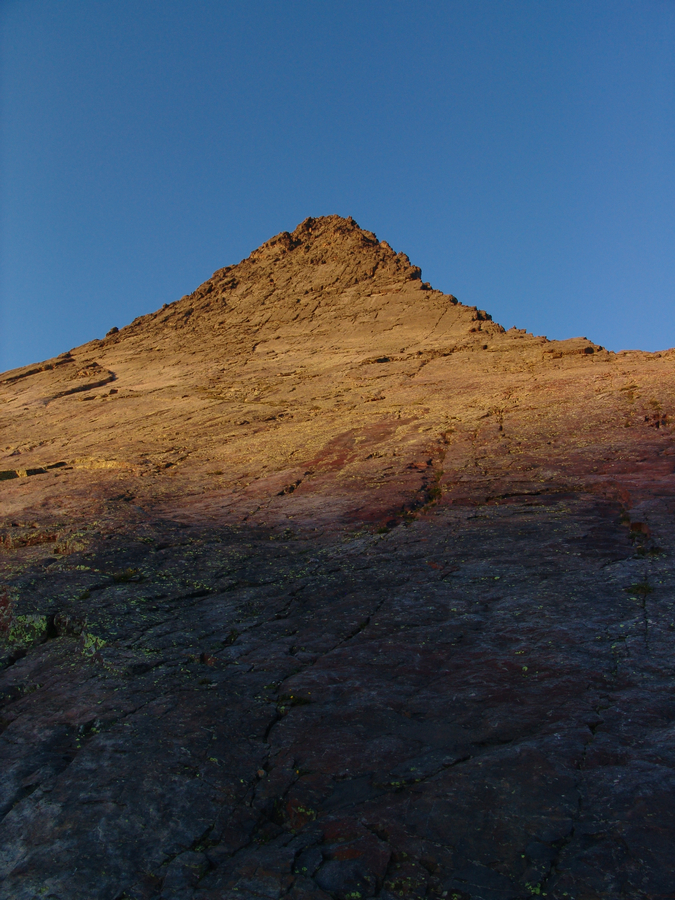
A closer view of Wham Ridge - looks like fun!
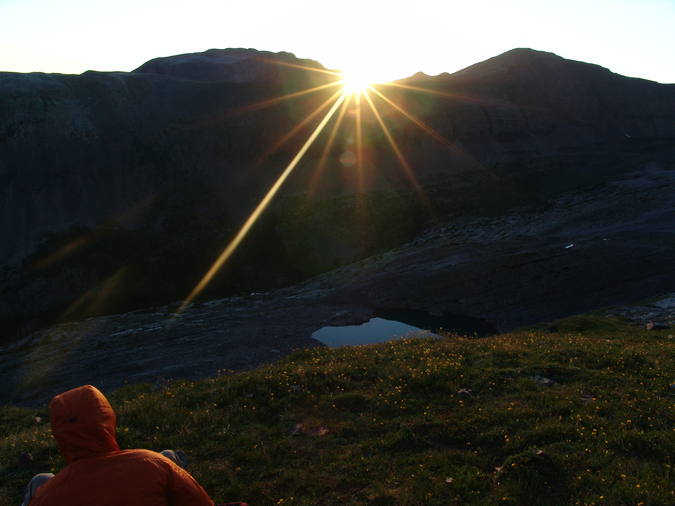
Jeremy watches the sunrise over Vestal Lake
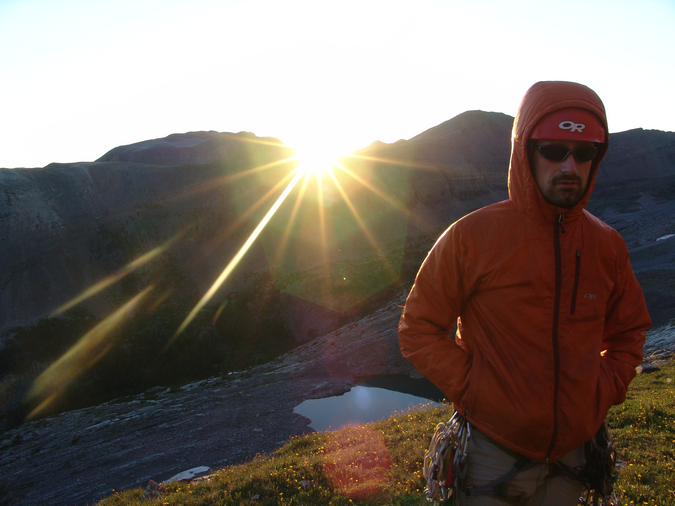
Jeremy warms up
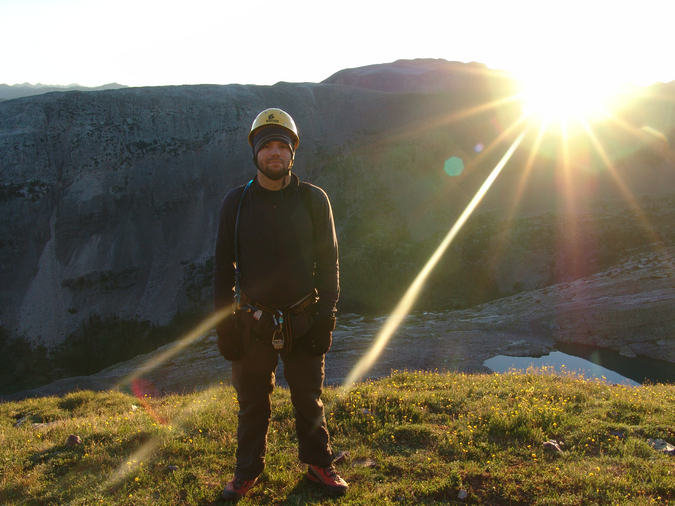
Matt looking cold
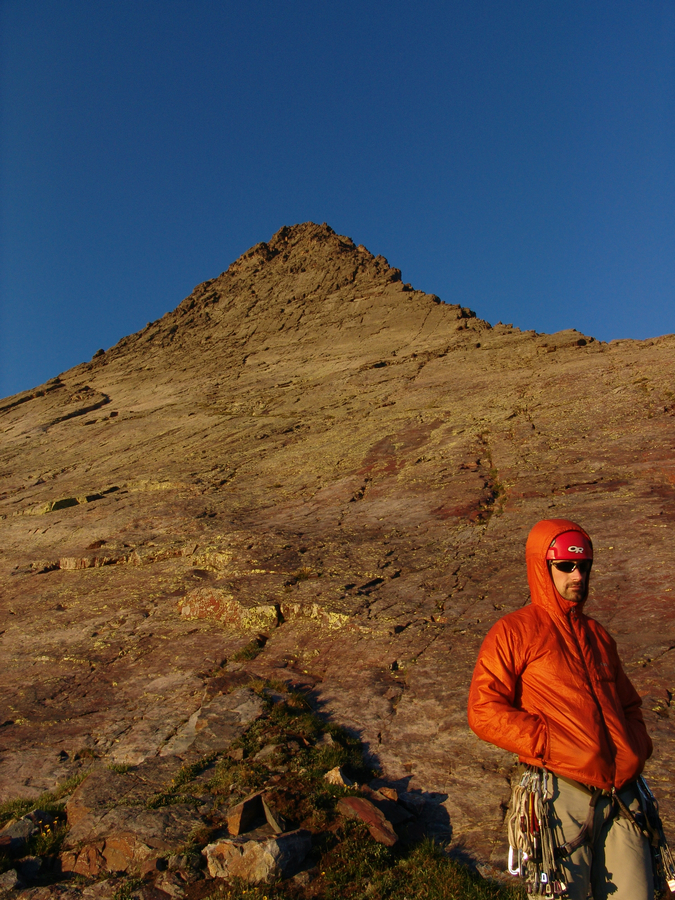
Jeremy poses in front of Wham Ridge
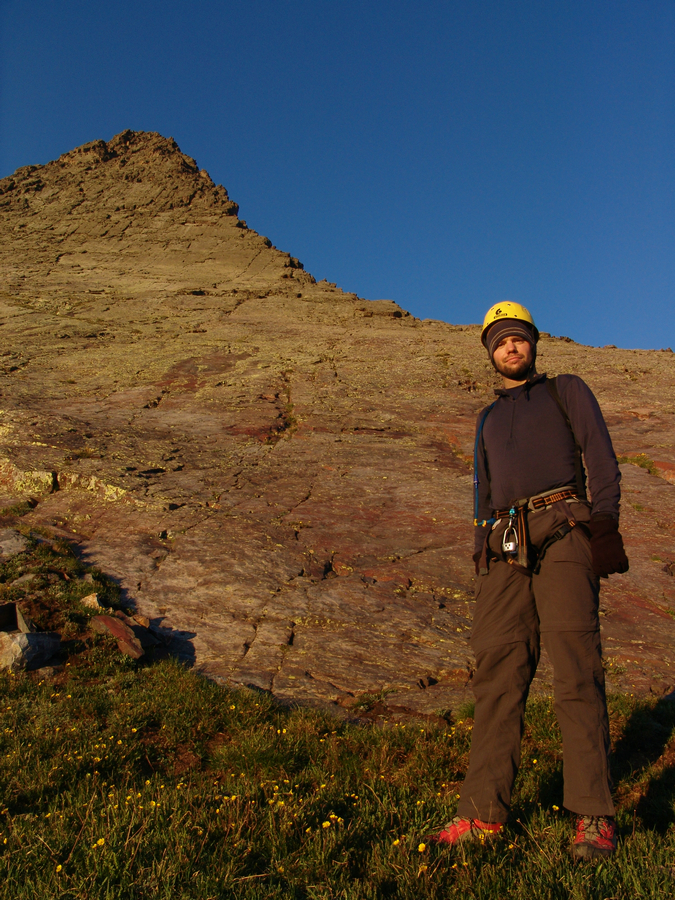
Matt looks ready to begin Wham Ridge
We finally started up Wham Ridge, making our way quickly up the small ledges and cracks. The going was pretty easy and unexposed for awhile, with plenty of great hand and foot holds to be found.
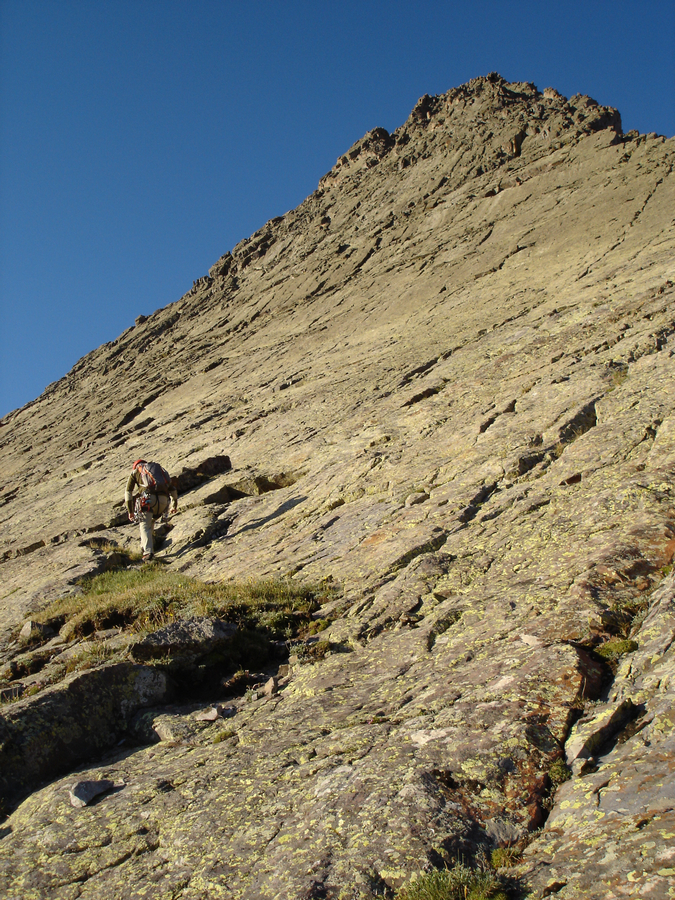
Jeremy heads up the ledges
We continued up into some 4th class sections, with exposure and steepness increasing gradually as we climbed.
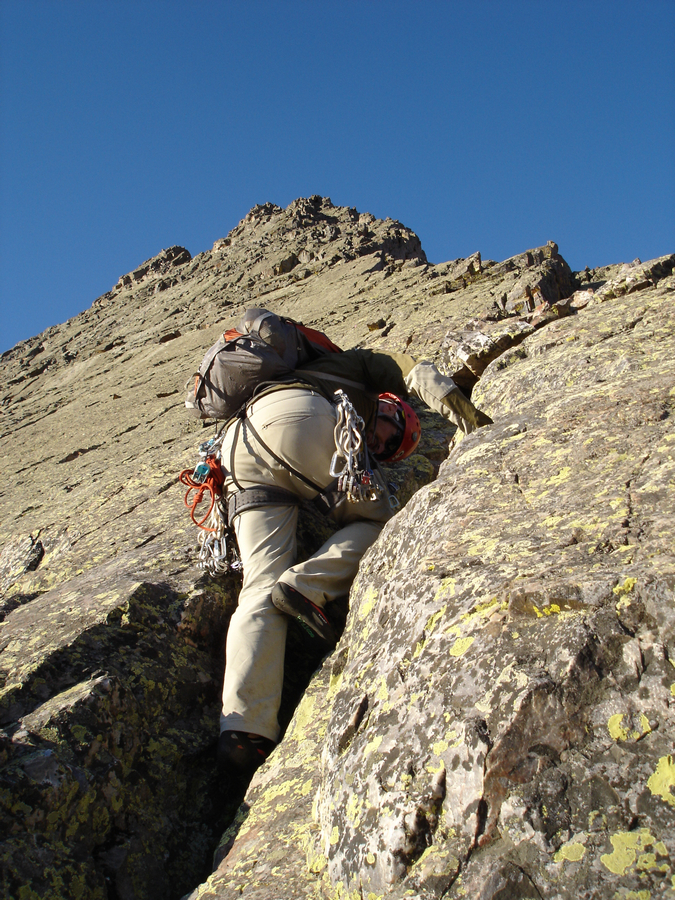
Jeremy climbs the lower Class 4 section of Vestal Peak
Before long, Rio Grande Pyramid and the Window appeared, looking really cool in the early light.
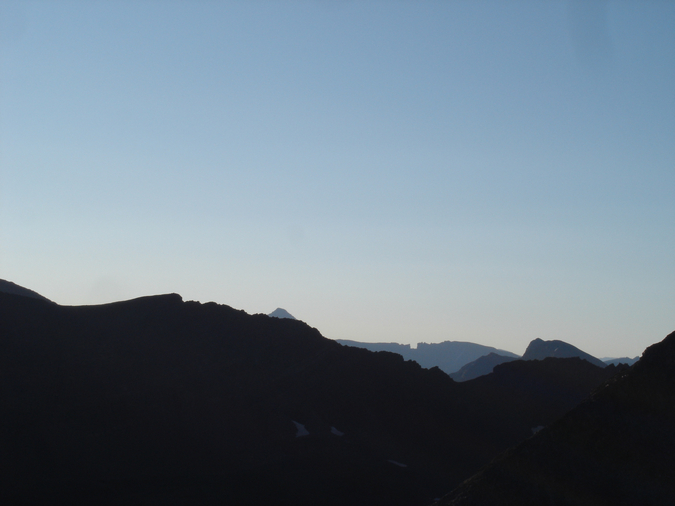
Our first view of the day of Rio Grande Pyramid and The Window
Wham Ridge continued to become more and more steep, decreasing my comfort level of being unroped.
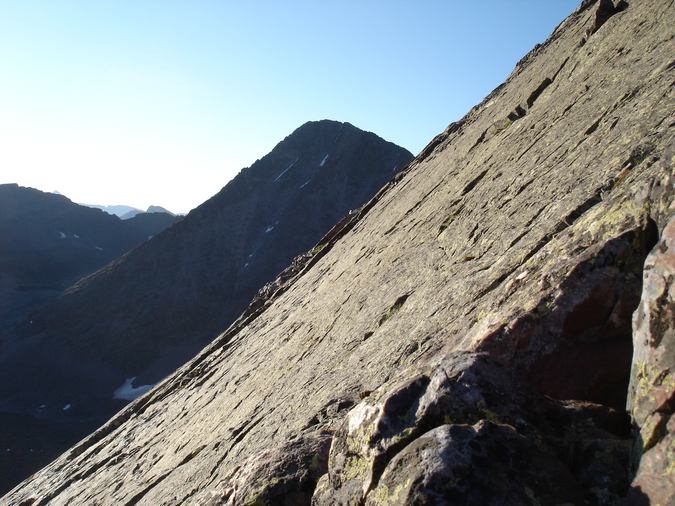
Wham Ridge's profile
We reached a great stopping point with plenty of room at our feet for belaying, and prepped the rope and our gear for 5th class climbing. Let the fun begin! While I did the route in my La Sportiva EVO Mountaineering Boots, Jeremy did Wham Ridge in his Evolv Bandits. According to Jeremy, they were quite comfortable shoes and he felt like he probably could have gone without a rope (being that he is very experienced and the shoes made for great traction).
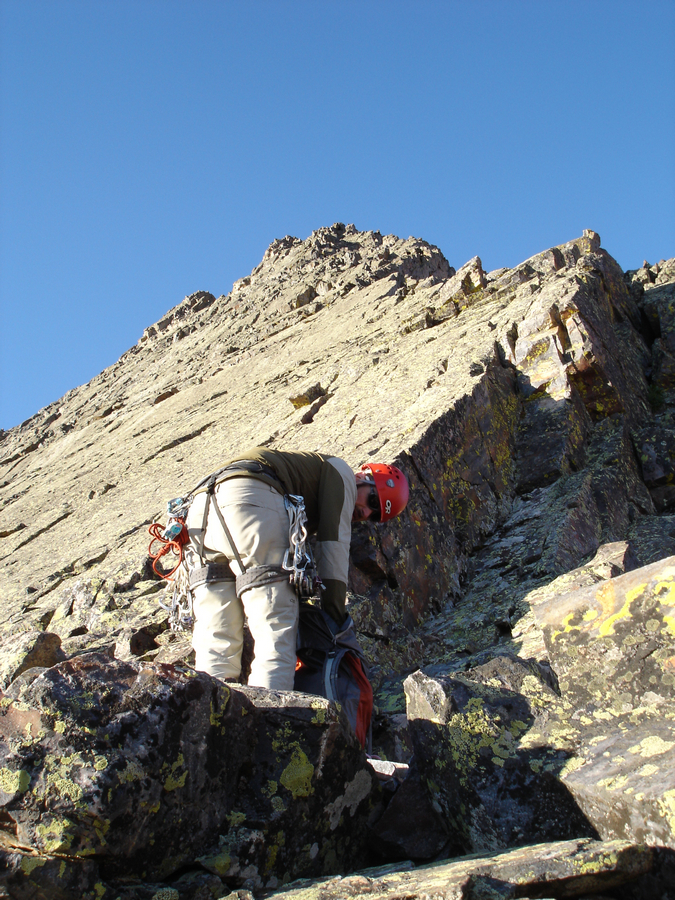
Jeremy prepares for our 1st pitch of Wham Ridge
Jeremy led the first pitch as I belayed from below, only placing two pieces of gear for protection on the way up - a camalot and a nut. Once Jeremy arrived safely at the next obvious stopping point above at about 55 meters up from me, he created an anchor and signaled me to begin climbing.
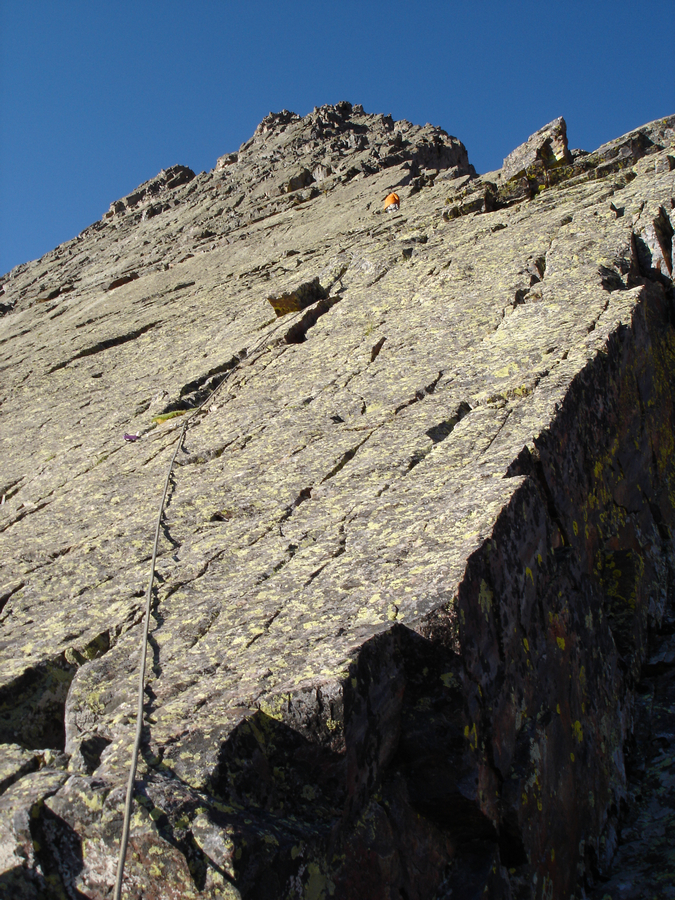
The first pitch
I easily ascended the first pitch, removing Jeremy's protection as I climbed. I reached the anchor and Jeremy prepped for the 2nd pitch. Meanwhile, I decided to take a few photos from this vantage, looking down.
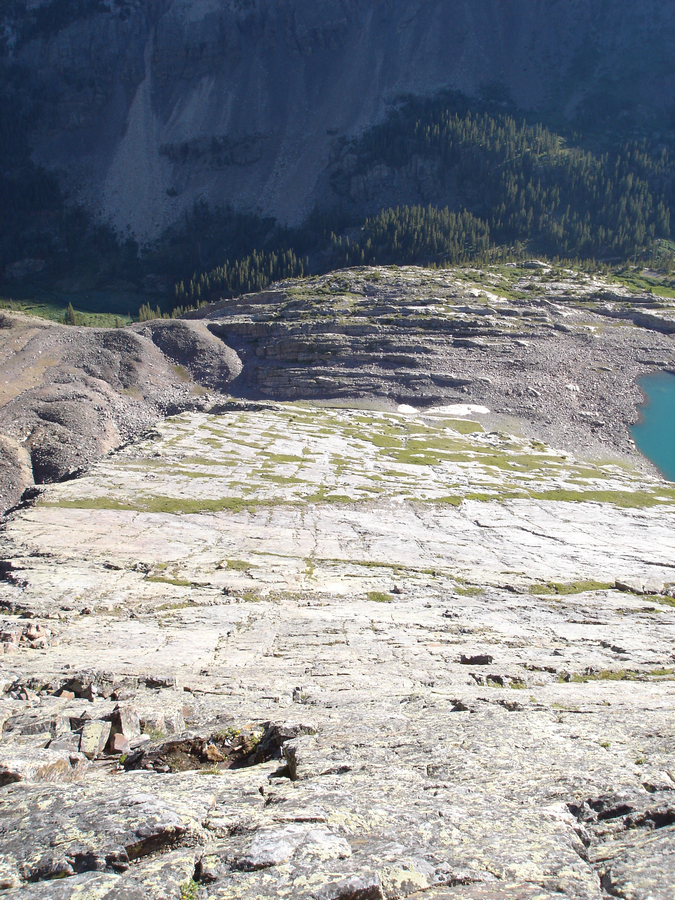
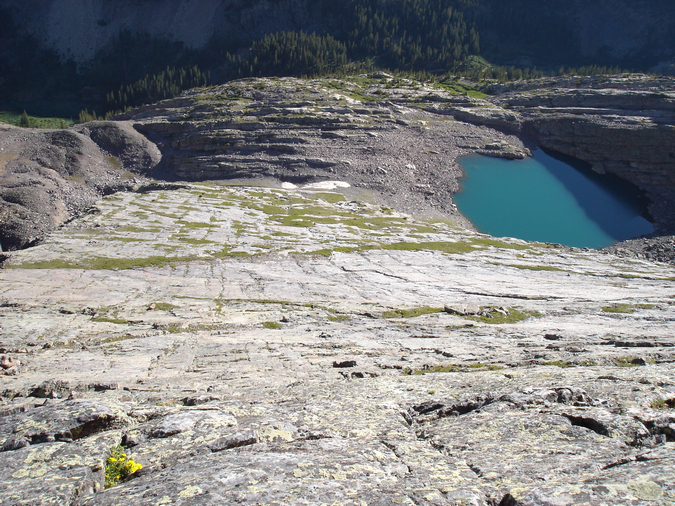
Looking down Wham Ridge
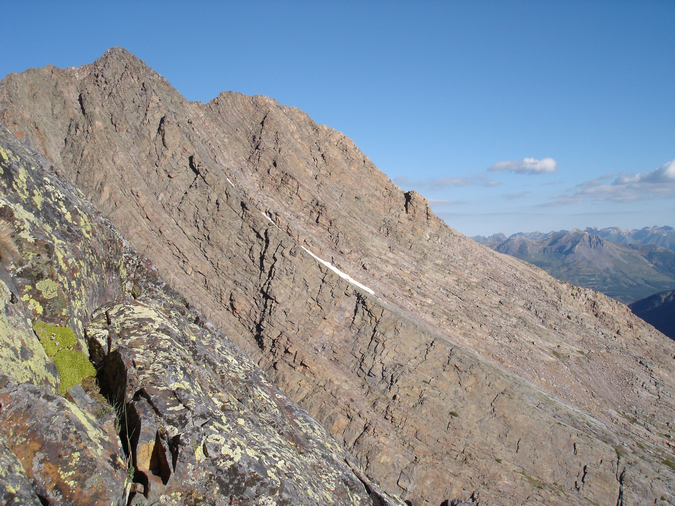
Arrow Peak's profile from about 3/4 up on Vestal's Wham Ridge
We cruised up the 2nd pitch in quick order and set-up for one last pitch, which proved to be quite difficult in one section. I found myself at a point where there were no foot-holds and only one hand-hold - a large inset section holding a rusted cam. Having on mountaineering boots and not climbing shoes made the climb much more difficult than it needed to be, but I welcomed the challenge. The move required me to do a one-armed push-up with my right arm in the inset section and to reach up with my left arm to a hand-hold. Once in this position, I pulled myself up and placed my feet where my right hand was previously at. This was probably the crux of the entire route. It felt much harder than 5.4, but I suspect that was because I was wearing boots.
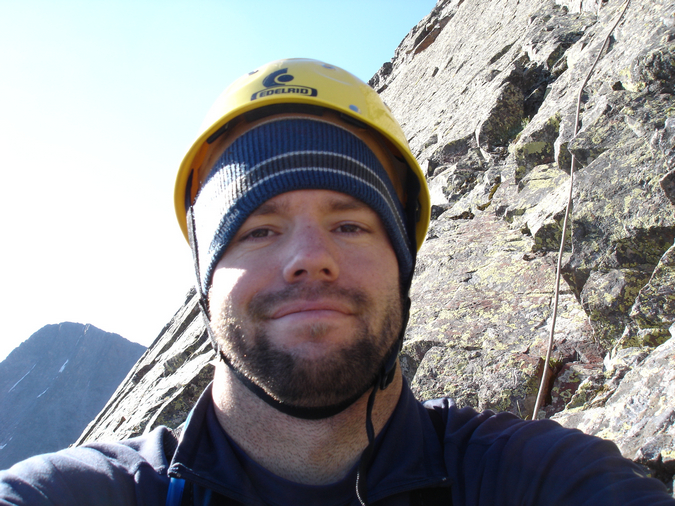
Matt on Wham Ridge
At this point, Jeremy and I both felt comfortable being unroped and headed up the class 4 / low class 5 remainder of the route. There was only one other section that was greatly exposed, which required us to do a really crazy move with about 1,000 ft. of exposure below us. The move was on a completely solid rock, so I felt comfortable enough to make a go at it without rope. This proved to be OK, as the move was totally solid, and fun to say the least.
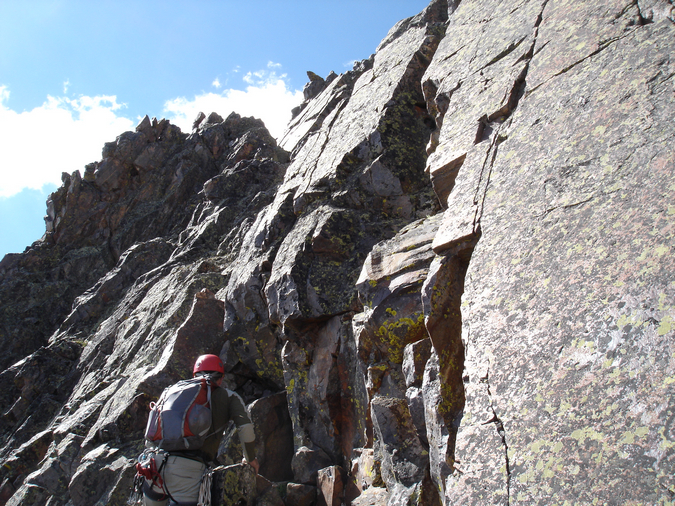
The last section of Wham Ridge proved to be a very fun class 4 and 5 playground.
We finished up to the top of Vestal, and I celebrated. Since I had been dreaming of doing Wham Ridge for quite some time, this moment was especially exciting for me. I thanked Jeremy for leading the climb and began to go crazy with my camera. 
As expected, the views from Vestal were outstanding. The Needle Range and the remainder of the Grenadier Range to the east were quite the sight!
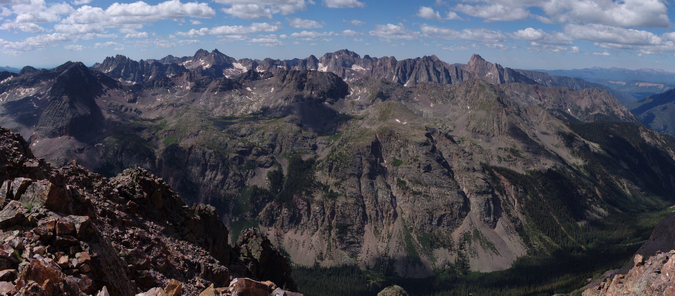
A view of the Needle Range to the south of Vestal Peak.
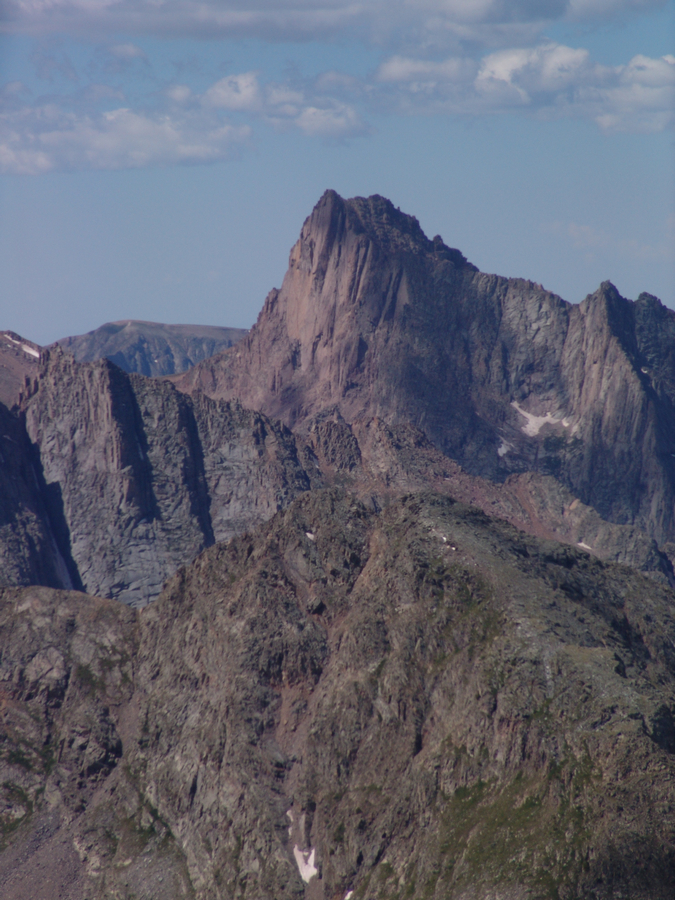
A zoomed in view of Pigeon Peak
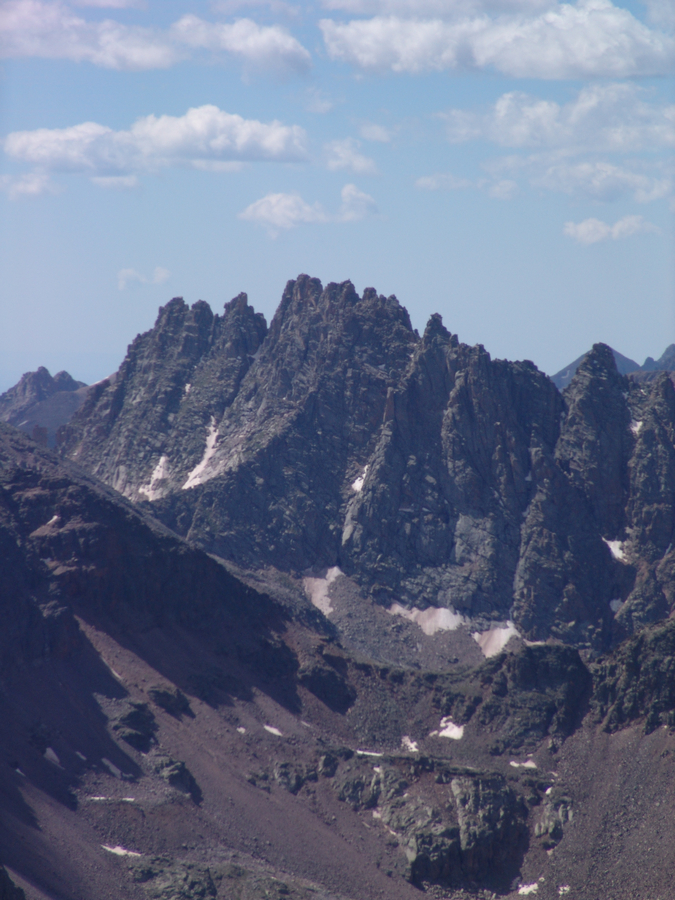
A zoomed in view of Jagged Mountain
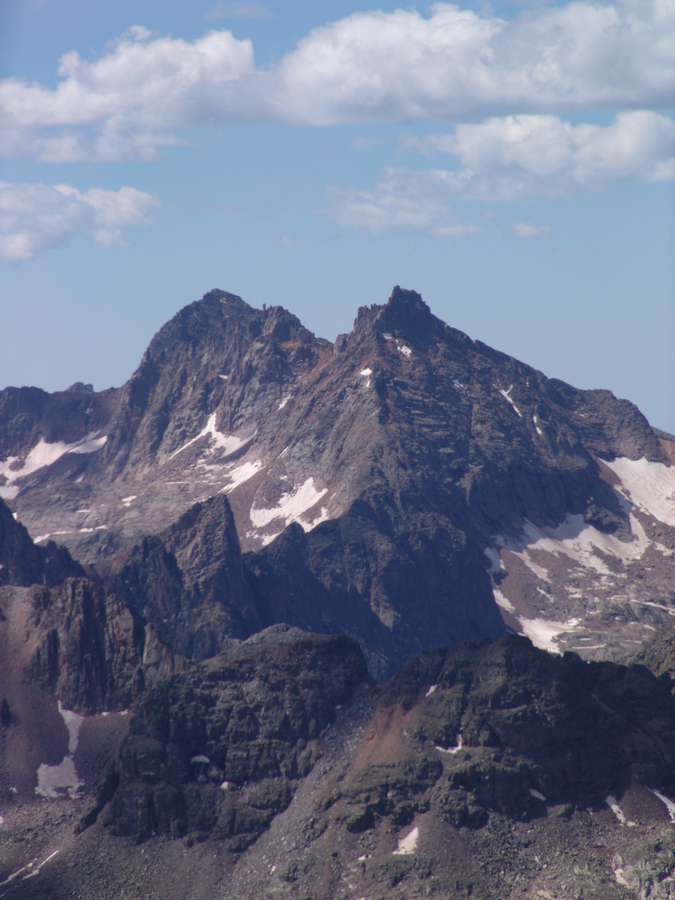
A zoomed in view of Windom, Sunlight, and Sunlight Spire
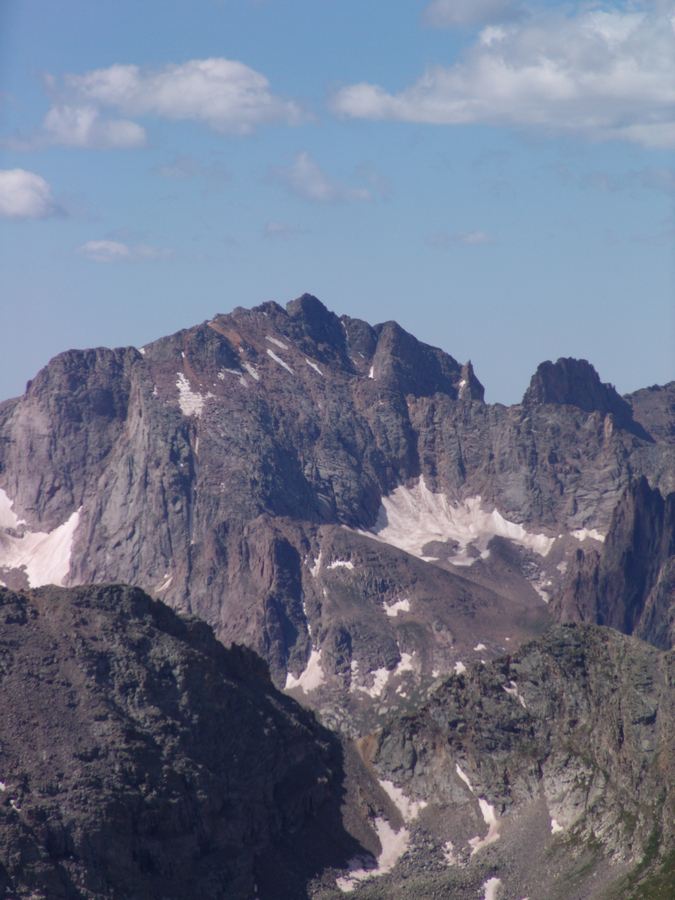
A zoomed in view of Mount Eolus

A zoomed in panoramic of the Needle Range.
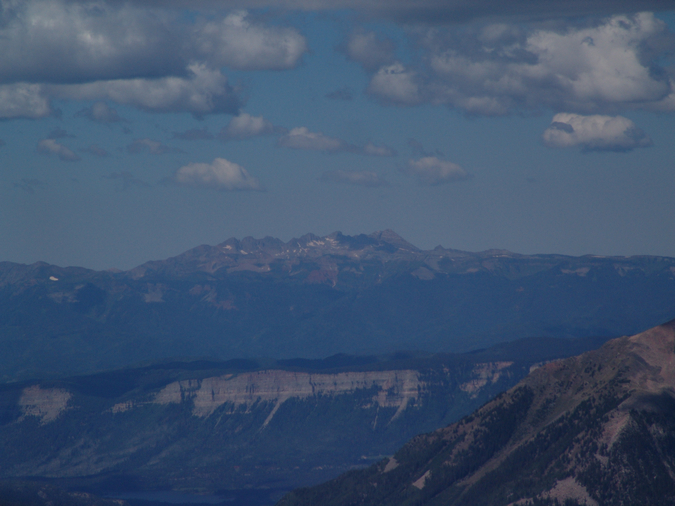
The La Plata Mountains seen in the distance to the southwest, including Hesperus Mountain
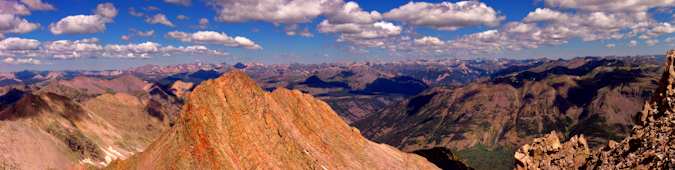
A panoramic photo looking west to north from Vestal Peak.
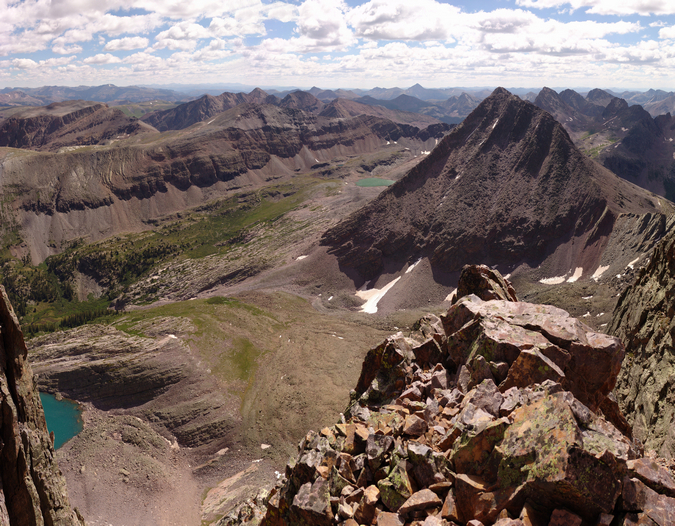
A fully zoomed in panoramic view looking down and east from Vestal Peak, with Vestal Lake below. Seen at far right are the Trinities, Storm King Peak, Mount Silex, and The Guardian.
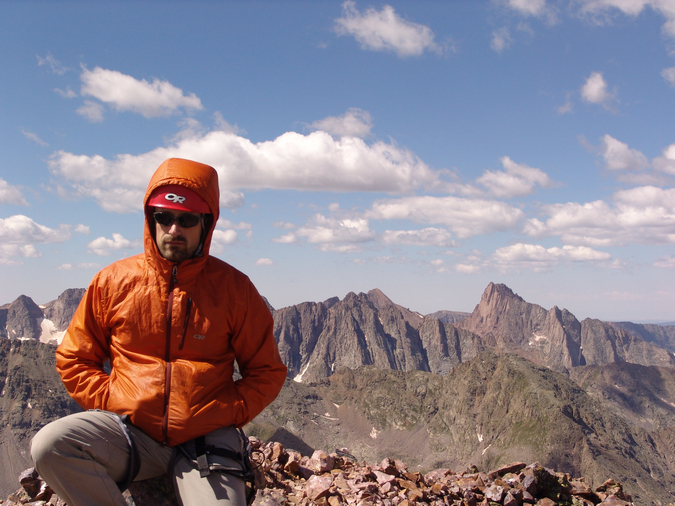
Jeremy sits on the summit of Vestal Peak with Pigeon Peak behind him.
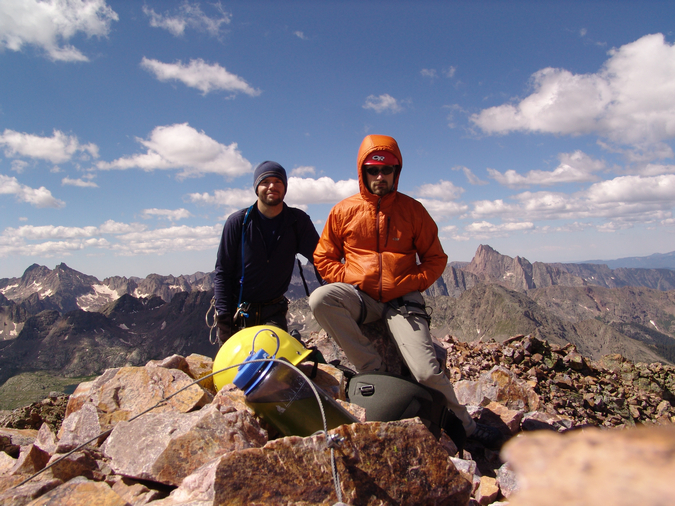
Matt and Jeremy are captured in this self-timer from the summit of Vestal Peak.
Matt looking proud on the summit of Vestal Peak.
I think I see my house from up here!
A panoramic photo of the Needle Range

A panoramic photo from Vestal Peak, looking north to south - with Basalm Lake between the Grenadiers and the Needle Mountains.
With more sky this time...
After a great time on the summit, we decided to descent via the "class 3" route of Vestal on the south side of the mountain. I put class 3 in quotations marks because this was the worst, chossiest, nastiest, most unpleasant class 3 climbing I've done in my life. The route was unmarked, with no trail, and no cairns until the bottom. We weaved in and out of gullies, unsuccessfully finding one dead-end after another. Finally, as we were nearing desperation, Jeremy found a narrow but climbable gully leading down to a large cairn below. The climbing on the backside of Vestal reminded me of Crestone Needle, except steeper and looser. Not a good combination! We finally reached the saddle between Arrow Peak and Vestal Peak and descended via the "Dues Collector Couloir." I've often wondered why it was called this, and realized it was because it was loose talus and dirt, not the most enjoyable stuff to climb up or down.
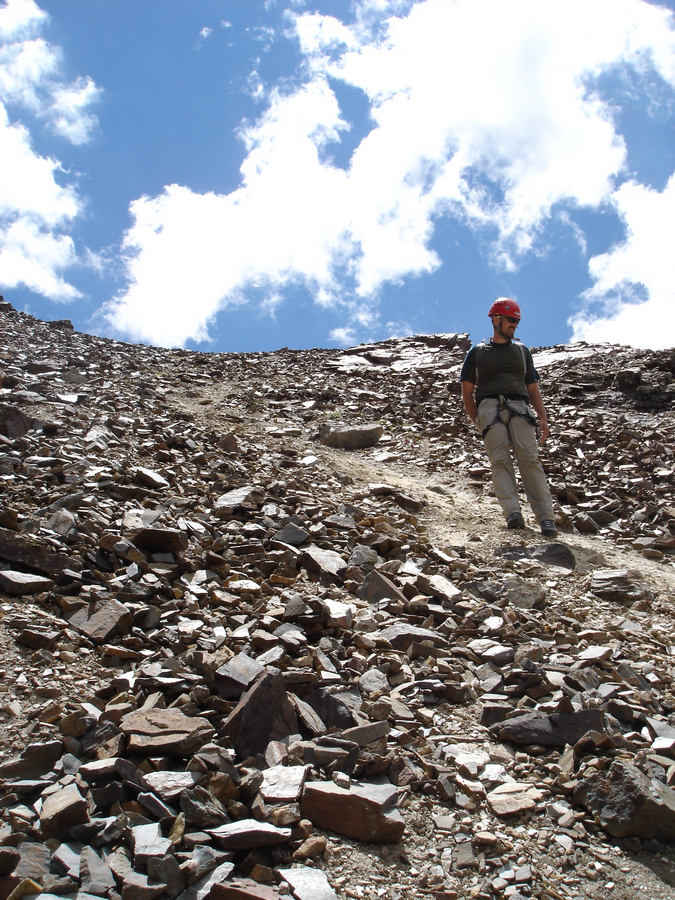
Jeremy in the "Dues Collector Coulior"
We reached the end of the coulior and headed towards the end of the base of the mountains where we would down climb back to our campsite.
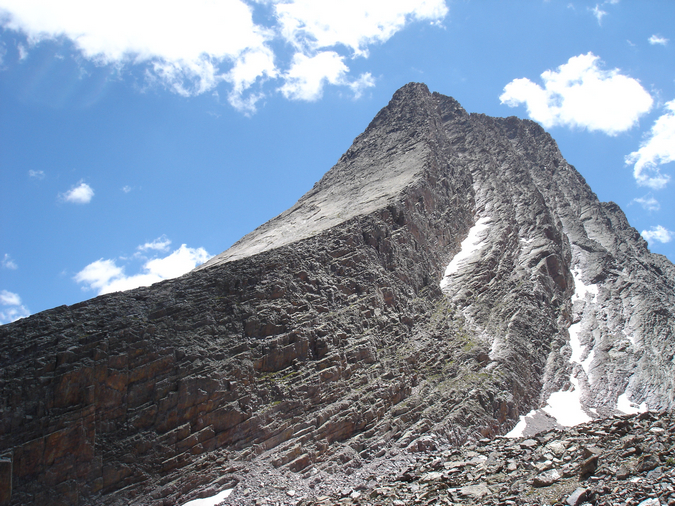
A view of Vestal's Wham Ridge on the way down
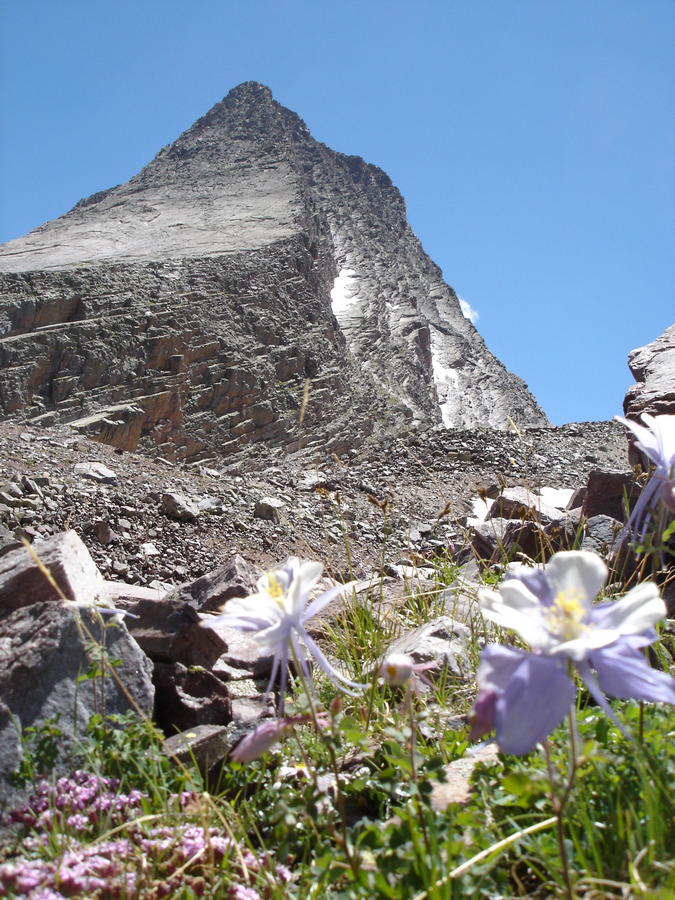
Vestal Peak and some Columbine flowers
We reached our campsite about six hours after we had begun, still high from the amazing climb. We prepped our dinner - this time a hearty meal consisting of tortellini and pasta sauce with chicken. Yum.
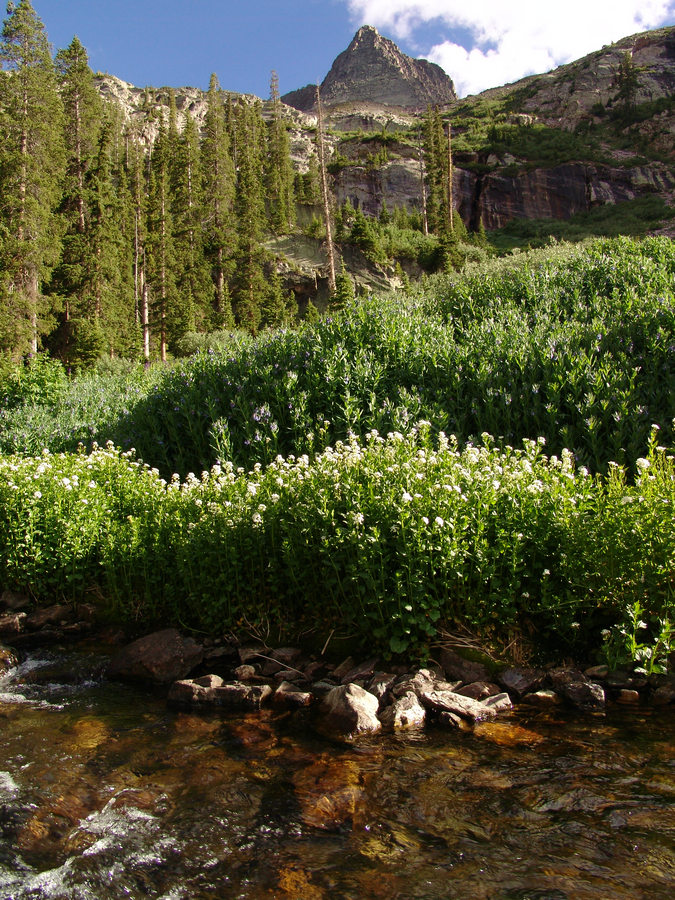
A view of Vestal Peak from Vestal Creek near our campsite. It should be noted that the steep section between us and Vestal (right of center) was the trail up from our campsite.
The flowers were incredible in the afternoon sun, so I took some time to photograph them after dinner.
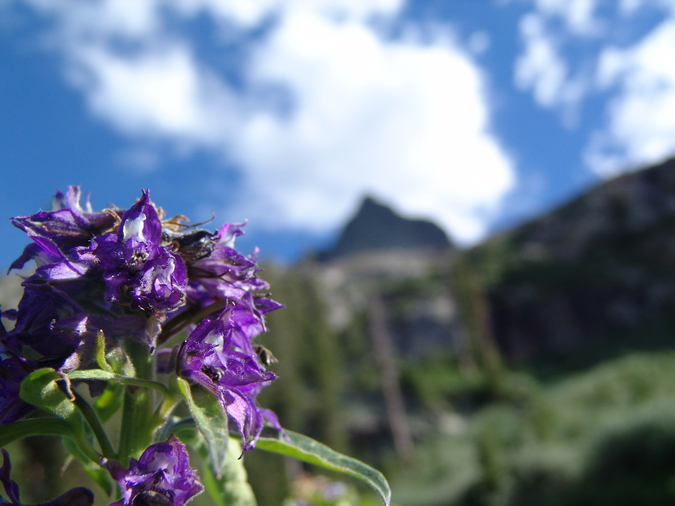
A purple flower in front of Vestal Peak
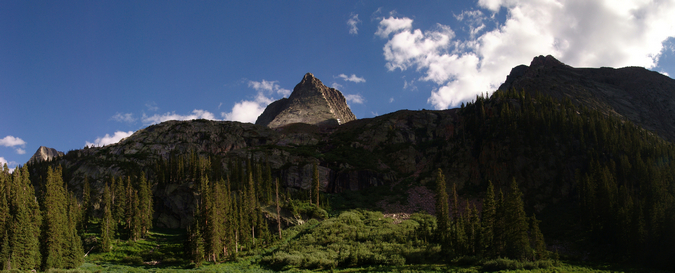
Lower Vestal Basin, where we were camped
We hit the sack around 10 PM, and set the alarm for 5 AM, tentatively planning to do the Trinity Traverse the next morning.
Day 5
We awoke around 6 AM, seeing that the clouds had already formed in the basin. We opted to cancel the Trinity Traverse and head back to the car. We packed up and left camp around 11 AM, making our way back down the steep trail and to the beaver ponds. The view from the beaver pond was incredible as ever.
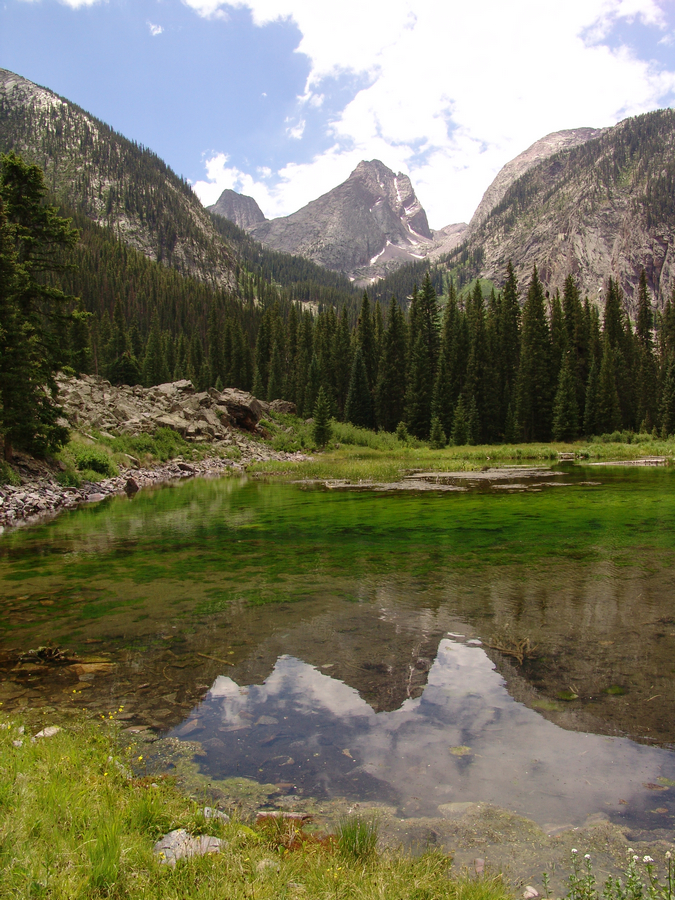
Vestal Peak and Arrow Peak are reflected in a beaver pond
We cruised back down the Colorado Trail, meeting up with the train around 2:30 PM.
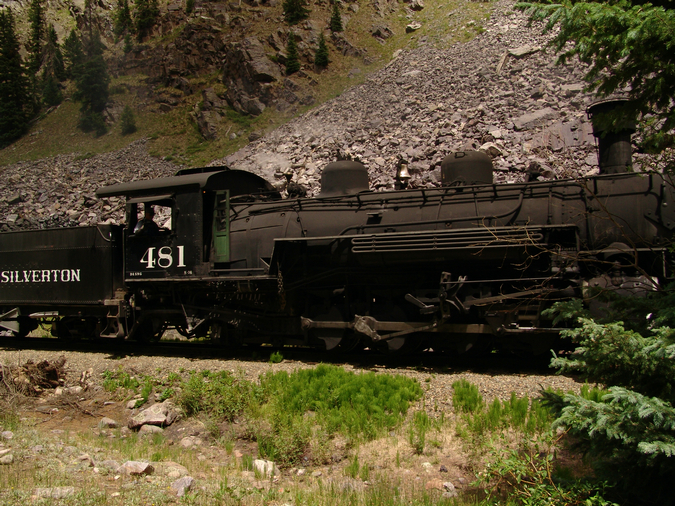
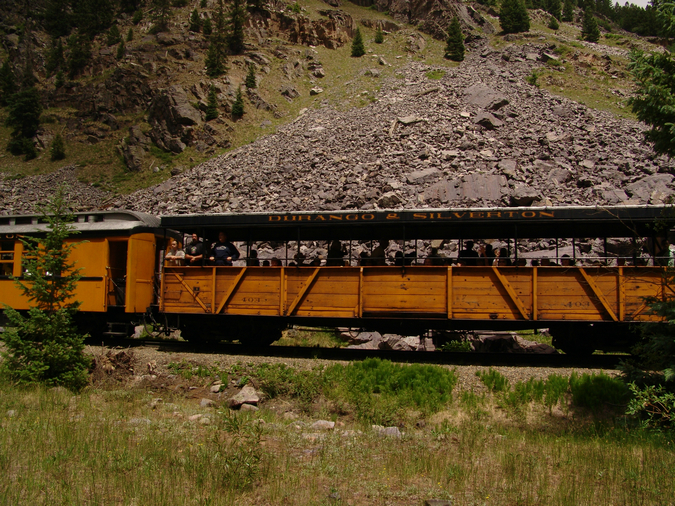
The Durango & Silverton Narrowgauge Railroad
We reluctantly trudged back up the 1,700 feet to our car in a matter of 2 hours and drove into Silverton, where we dined on Elk Burgers and French fries. The drive home was uneventul yet completely satisfying.
Vestal marked the 60th mountain of the highest 100 in Colorado for me. 40 to go!
References:
1. The San Juan Mountains - A Climbing and Hiking Guide. Robert F. Rosebrough
2. Wheeler, Annual Report of the Chief Engineers for 1876, Appendix JJ, p. 101
3. Rhoda, Summits to Reach, p. 75
Huron Peak and Browns Peak - a Sawatch Throwdown!

Interesting statistics:
Start time: 5:30 AM
Summit time (Huron): 9 AM
Summit time (Browns): 11 AM
Finish time: 1:20 PM
Mileage up: 3.6
Mileage down: 4.2
Total mileage: 7.8
Huron Peak Elevation: 14,003 ft.
Browns Peak Elevation: 13,523 ft.
Total elevation gain: 3,900 ft.
Total photos taken: 219
GPS map of our route (ascent in red, descent in blue):

This trip report begins with an interesting back story. I had a new member join my site in May from South Dakota. This member eventually messaged me on Facebook and asked if he could join me on some of my climbs this year. After learning about my plans to attempt Huron that very weekend, he decided to join me. Mike Vetter drove all the way down from Sioux Falls, South Dakota on Saturday, June 5th to climb with me. Mike is the CEO of DataSync - a successful start-up software company. Our route to reach the trail-head was very simple: we drove west on Highway 24 to Buena Vista and turned left on Chaffee County Road 390 heading west. After driving about 14 miles on a dirt road, we turned left at the old mining town of Winfield and continued west another 2 miles to our campsite near the trail-head. We left my house at about 6:30 PM and reached our campsite near the Huron trail-head at approximately 10 PM.
On the way to Buena Vista, we were able to get some great views of the sun setting over the Northern Sangre de Cristo Mountain range:
We set-up our tents in the dark and set our alarms for 4 AM and hit the sack. A few cars drove past during the night, presumably looking for camp spots. Fortunately, the vehicles did not disturb my sleep too badly and I was able to get some quality rest. The alarm sounded at 4 AM and I hurried to get dressed and tear down my tent. As we were getting camp taken down, a skiier passed us, informing us that he was going to ski down Ice Mountain. I'm pretty sure this person was "benners" from 14ers.com. We were able to quickly break down our campsite and cook some oatmeal for breakfast before debarking for Huron's trail-head at 5:30 AM.
Mike and I were able to make quick work up to the trail-head and soon there-after, the sun broke through to light up the tips of the surrounding peaks in Silver Basin, including Virginia Peak and Granite Mountain:

Silver Basin illuminates a small lake

A closer look at the sunrise

Virginia Peak (right of center)
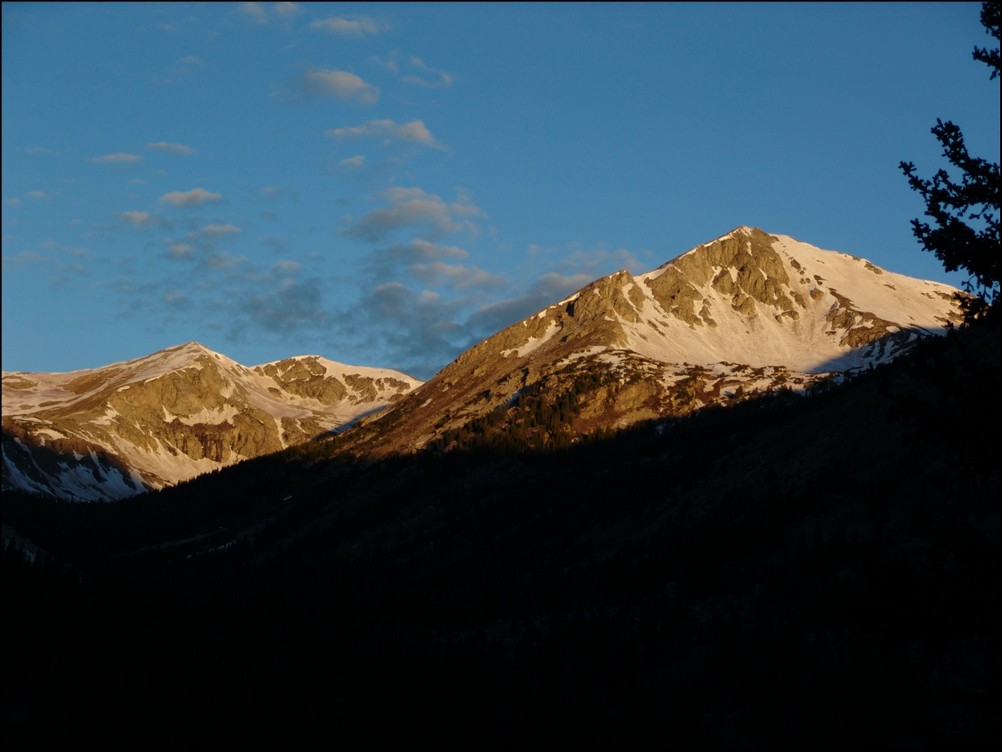
Virginia Peak
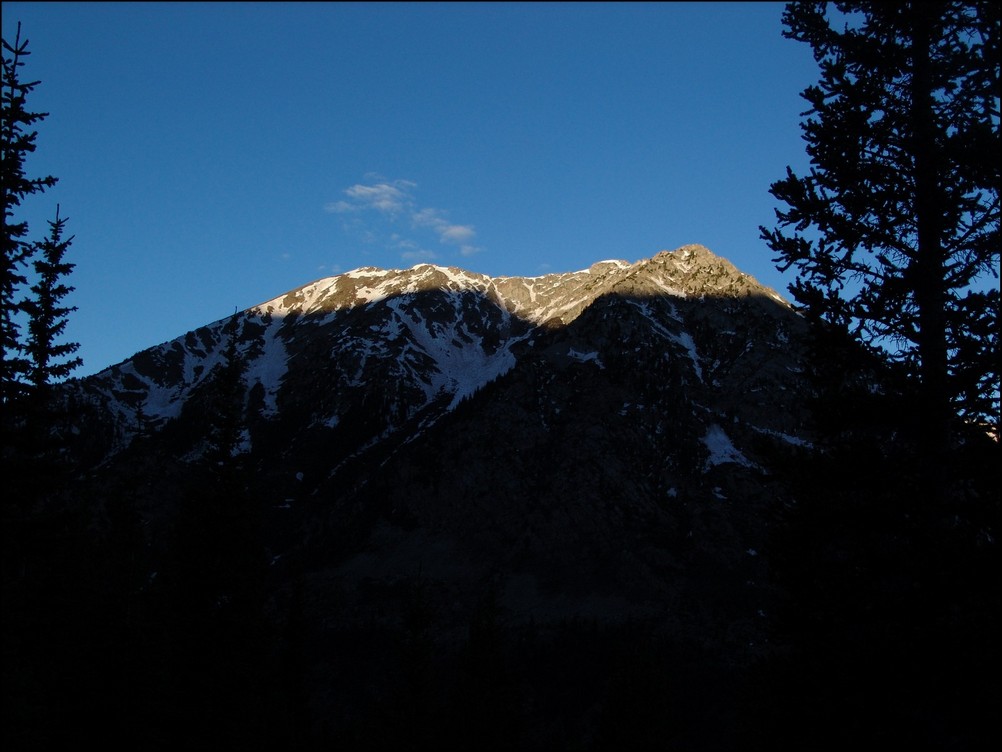
Sunrise hitting Granite Mountain

Sunrise hits Granite Mountain and Virginia Peak
Mike and I were energized by the great views of the valley across from us and made excellent time up the steep trail. Mike kept up with me as we blazed the trail. He did amazing considering he lives at 1,442 ft. and was not acclimated to the high elevation of Colorado yet.
<p
Mike Vetter proves he's got what it takes to climb mountains in Colorado

Matt Payne (author) hiking up Huron
An hour and 15 minutes after we started hiking from our camp, the first view of the Three Apostles came into view. The Three Apostles are a group of 13ers located up the valley from Huron, and contain two of the highest 100 in Colorado, Ice Mountain (13,951 ft.) and North Apostle (13,860 ft.). West Apostle is also respectable at 13,568 ft.

The Three Apostles come into view for the first time
Soon thereafter, one of our objectives for the day came into view as well: Huron. Huron appeared above us like a giant pyramid, as if it were guarding some ancient treasure within its rocky shell.

Huron Peak comes into view for the first time

The moon sits over Huron Peak
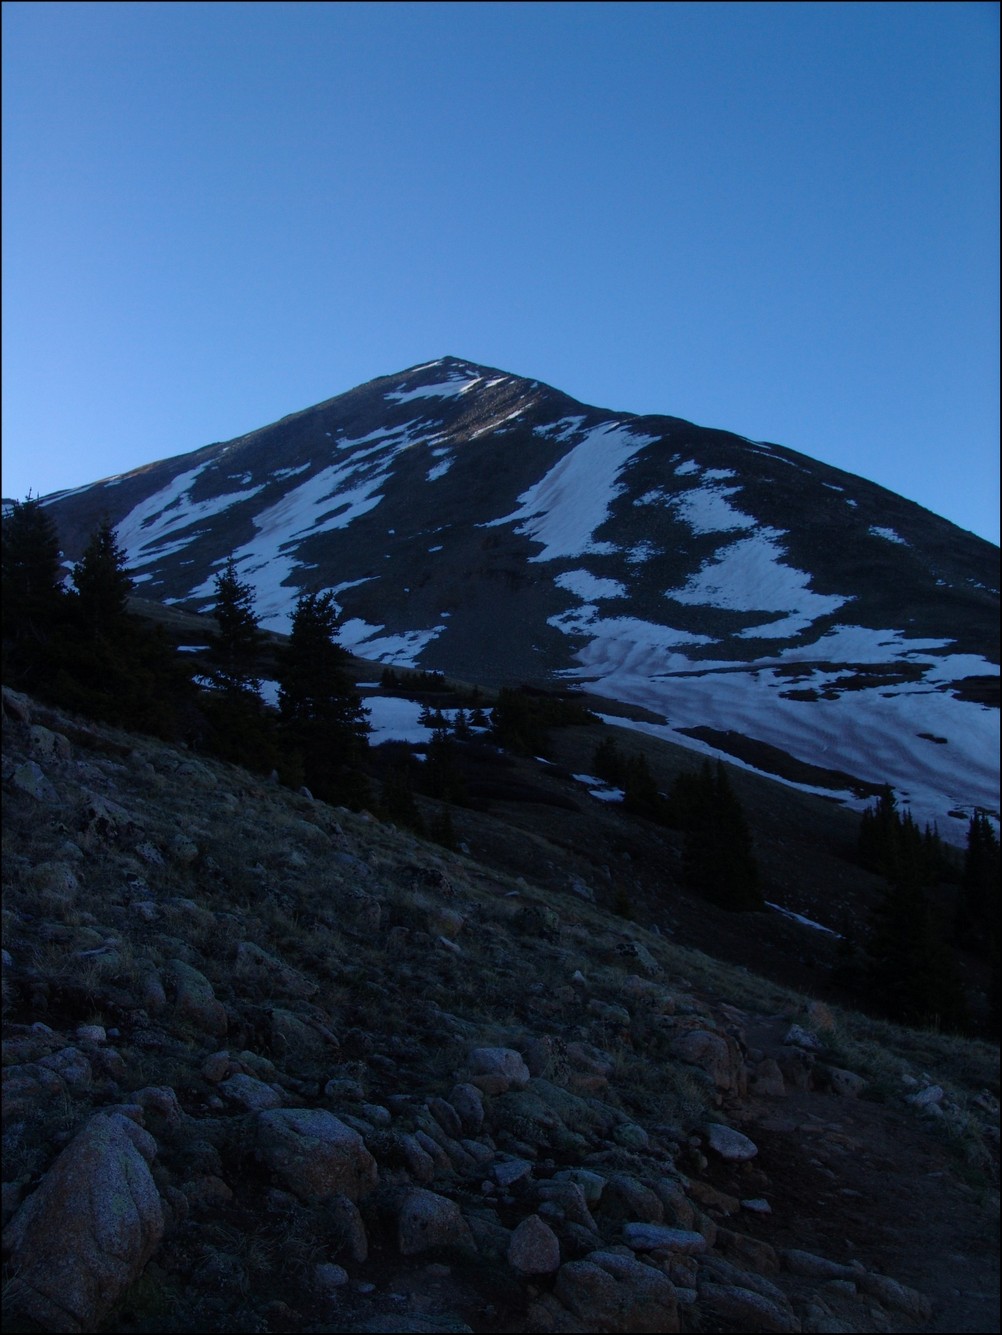
Huron Peak in the early light

Huron, the Three Apostles, and Granite Mountain greet the rising sun
Now that we could see the beginnings of the amazing views, Mike became more and more awestruck by the Colorado Rockies. It was a real pleasure hiking with someone that shared the same level of appreciation for Colorado's awesome peaks. Mike and I exchanged photos of each other.
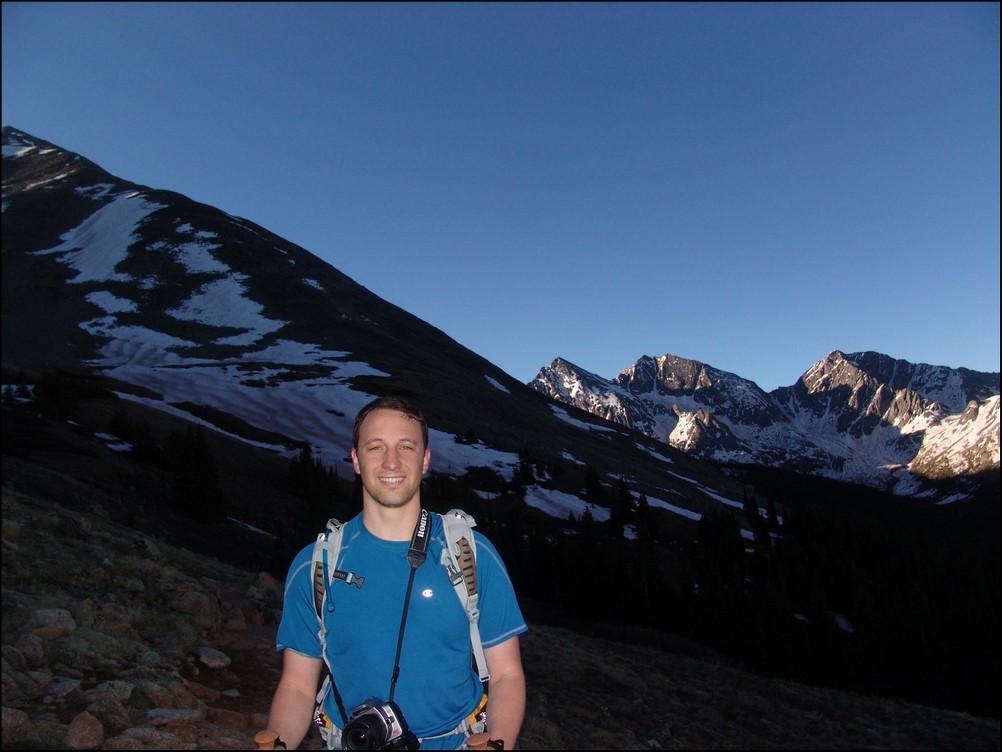
Mike Vetter looking excited in front of the Three Apostles
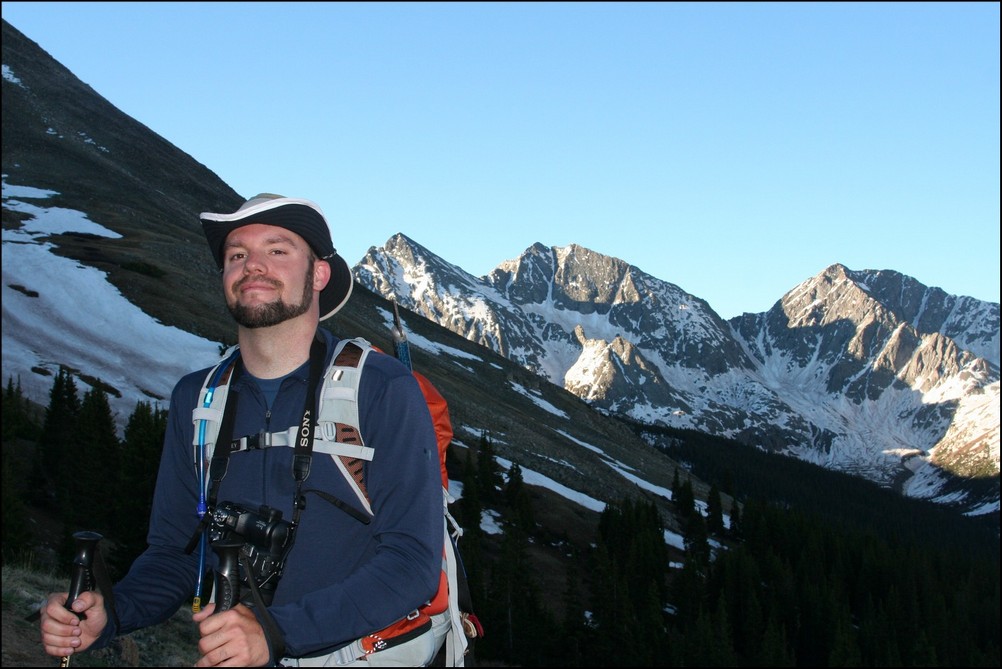
Matt Payne with the Three Apostles in the background
As we gained more elevation, views across the valley were getting even better. I noticed a long waterfall snaking down the side of Granite Mountain and decided that I wanted to try to capture a zoomed-in view of that waterfall. I took about 10 photos of the side of the mountain at 200mm and combined them into this photo:

Snow forms a waterfall down the side of Granite Mountain
I also wanted to get a zoomed in shot of the Three Apostles using the same method. Here are the results (click on the photo to see the super-hi-res version):

The Three Apostles in high detail
We continued to climb past treeline and up to Huron's base. I took some opportunities to take multiple photos of the views and stitched some photos together for a panoramic view.

Looking South and West, Huron casts a shadow over Granite Mountain
We quickly made our way up into the basin below Huron and were greeted by a giant snowfield. Normally, I welcome the sight of snow; however, the snow we encountered was very soft, with marshy streams and pools of water beneath. It was very much like crossing a field filled with 7-11 Slushies.
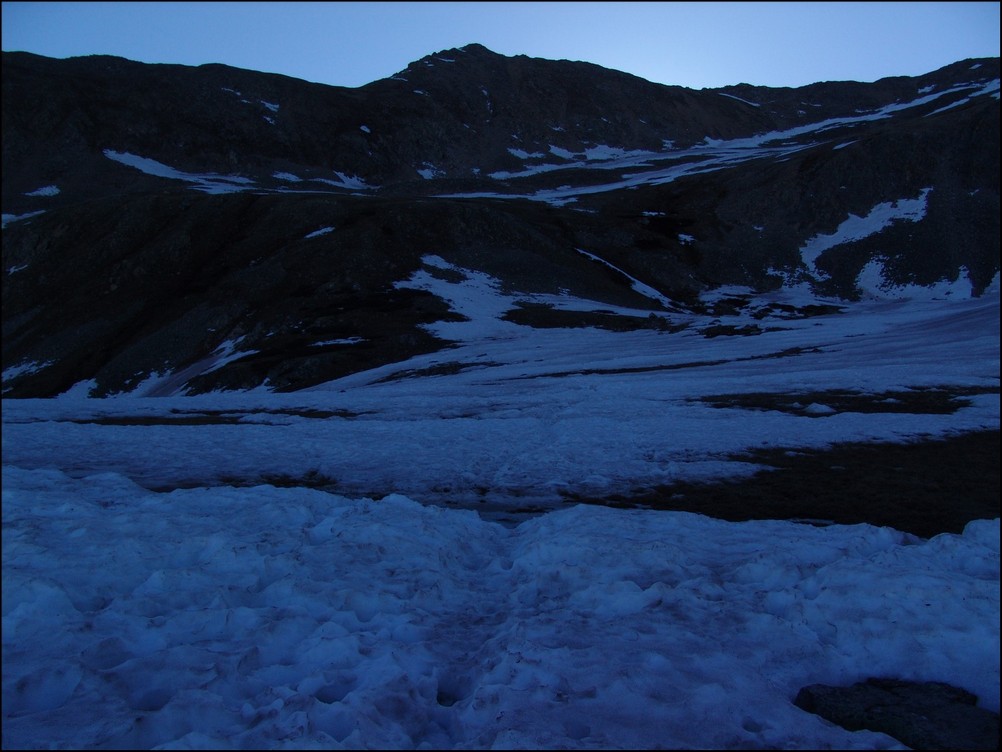
We made it through the slush and continued up the basin beneath Huron. The terrain was solid and only mildly wet from snowmelt. At this point, the sun had crested Browns Peak and began to heat the surrounding area.
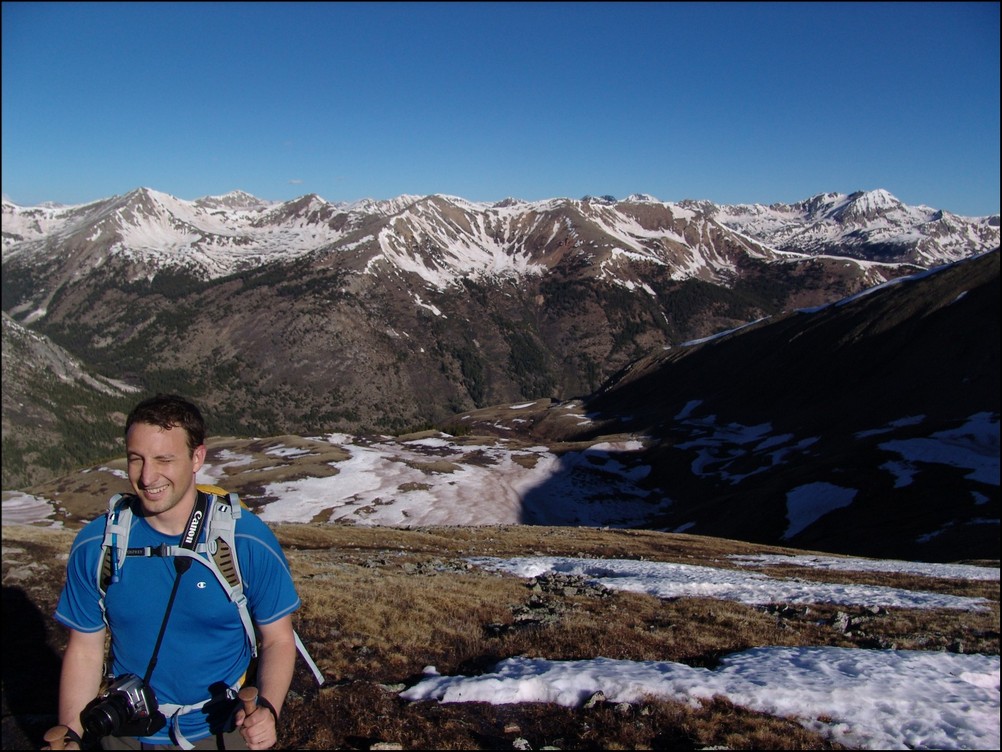
Mike Vetter squinting into the sun on our approach of Huron
We continued to climb up towards Huron, following the trail through and around large snow fields. At this point, it was clear that snowshoes or other assistive devices would be fairly useless and I was glad I brought neither. As we gained elevation, the views of Browns Peak as well as the Elk Mountains began to get better and better.

Browns Peak sits to the North of Huron Peak
We made really great time up Huron, despite its relative steepness and other aforementioned challenges (did I mention Mike lives 13,000 ft. lower than Huron). Huron's summit block loomed over us, making us feel pretty small compared to this giant choss pile. The trail up this section of Huron was clearly maintained and the efforts of Colorado Fourteeners Initative to improve the trail were apparent.
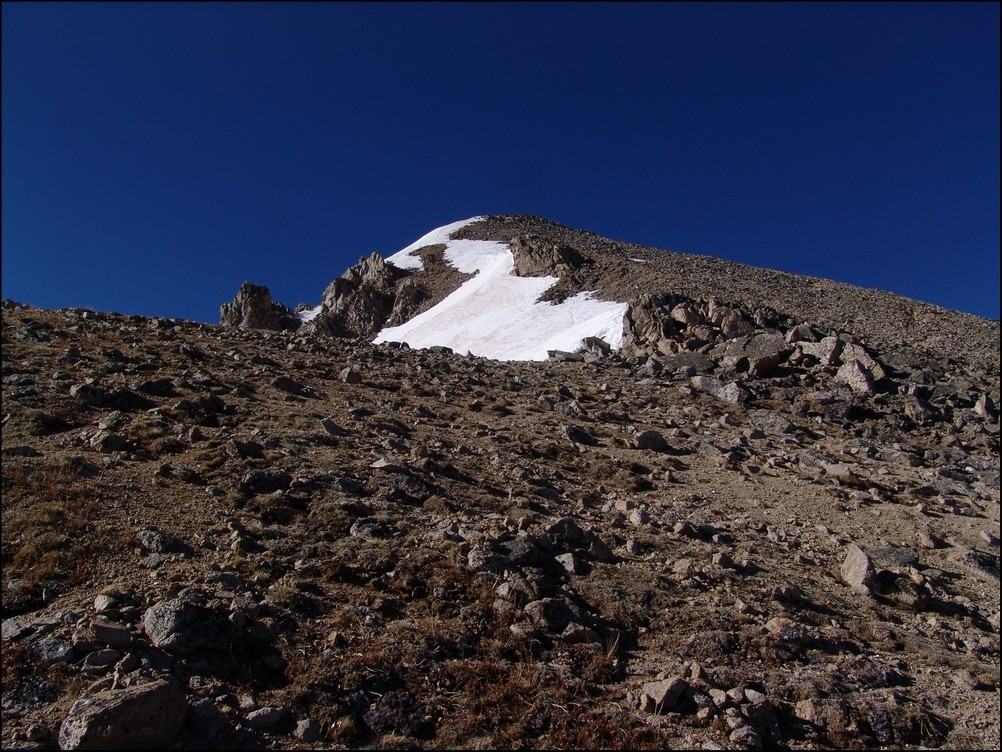
Huron Peak's summit block
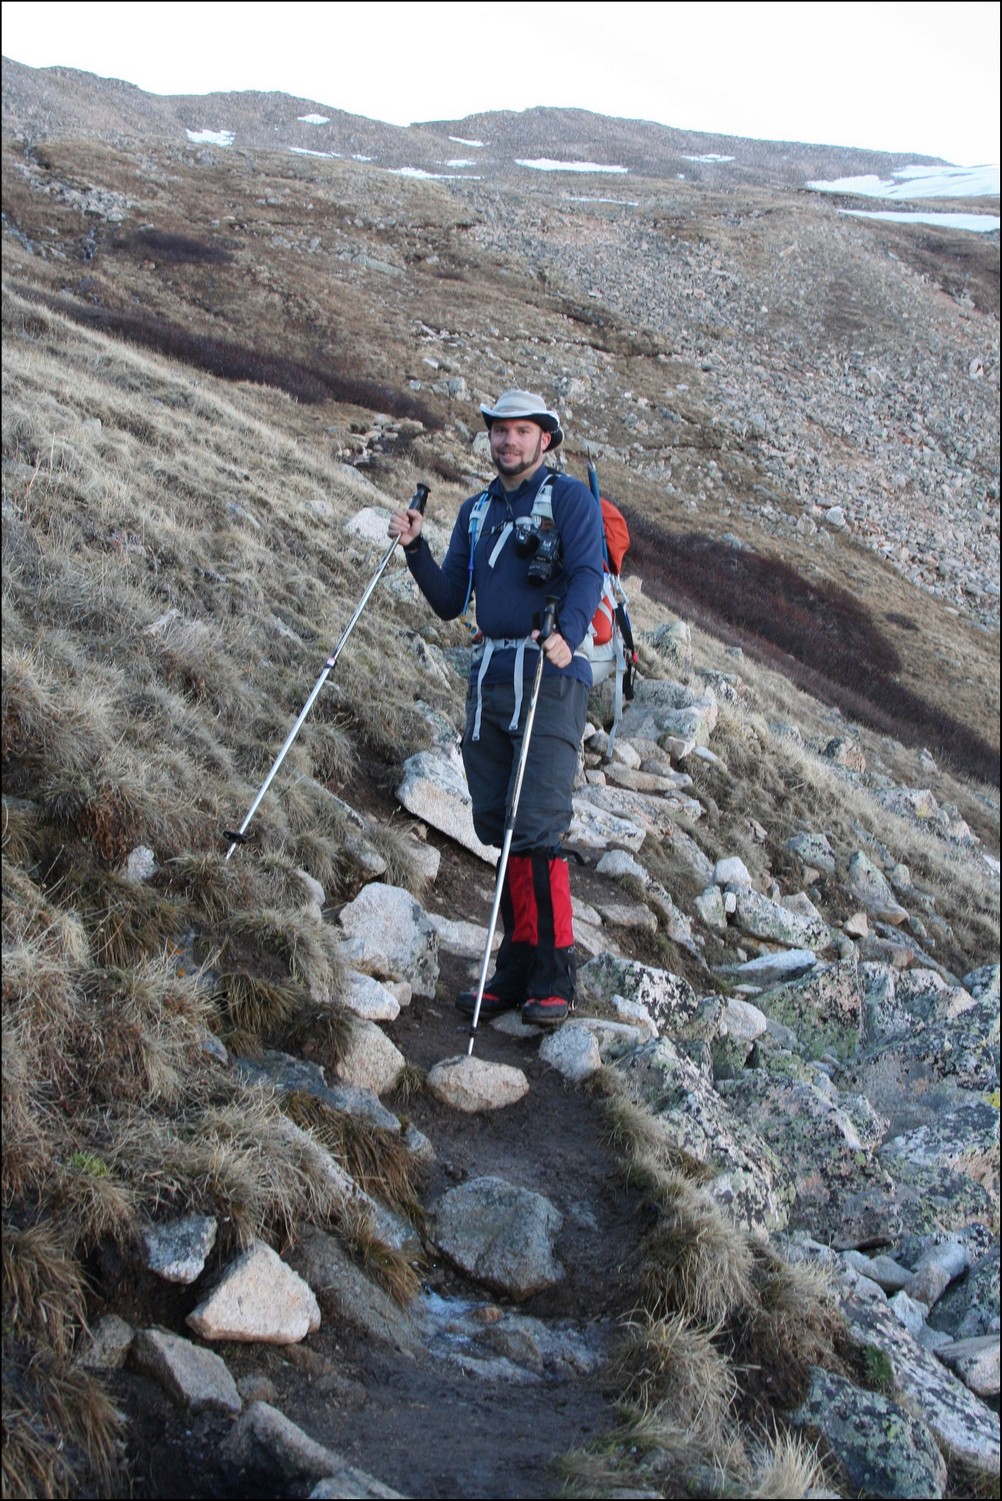
Matt Payne (author) hiking up Huron's Peak
We finally reached the ridge between Browns Peak and Huron Peak and were warmly welcomed by a giant cornice sitting at the top of the ridge.
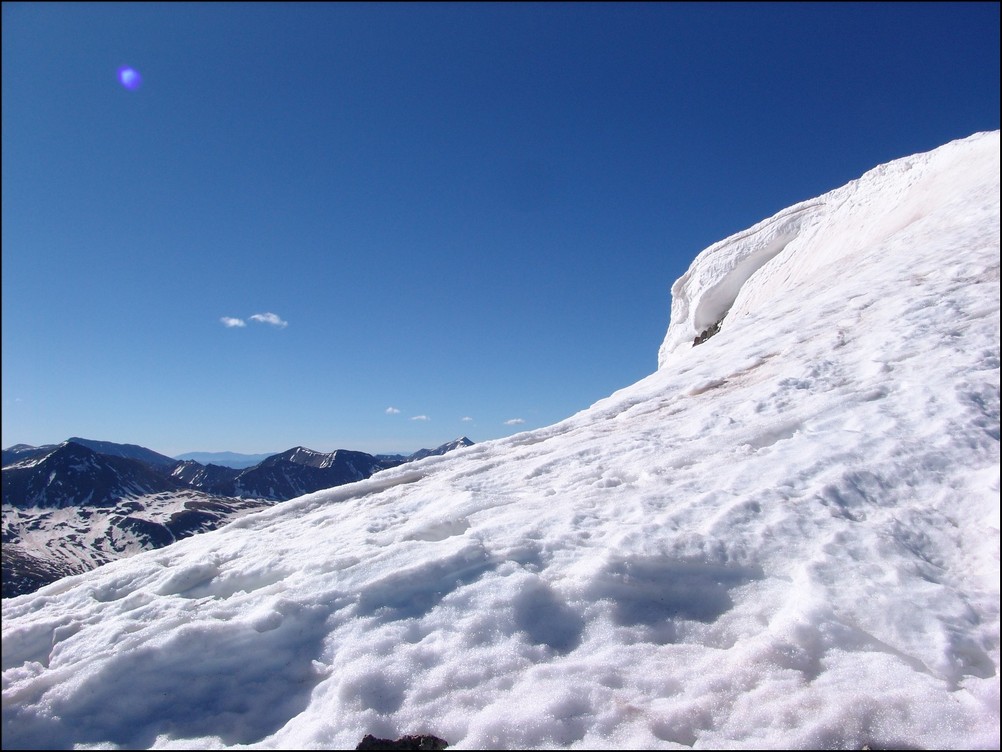
A giant cornice on Huron's ridge
The final push to the top of Huron took exactly 10 more minutes. The views from Huron Peak were absolutely outstanding. Being somewhat more isolated than most of the other 14'ers in the Sawatch Range, Huron Peak offers excellent views of the rest of the Sawatch Range and the Elk Mountains as well. Mike and I were the first to summit that day, and spent an hour on top celebrating, eating, and taking large amounts of photographs.
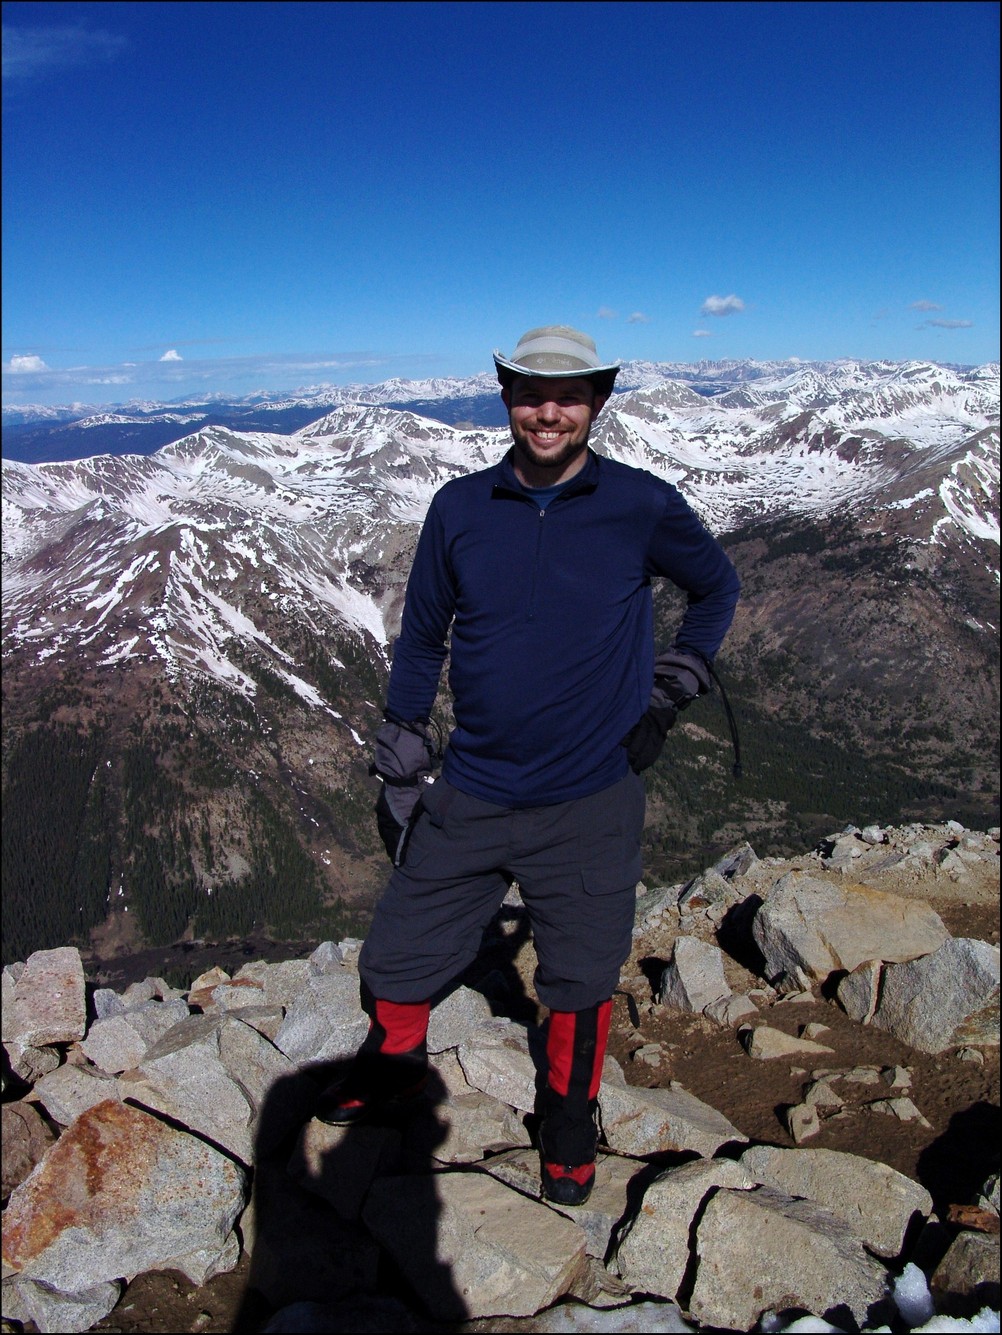
Hero shot of Matt Payne on top of Huron Peak
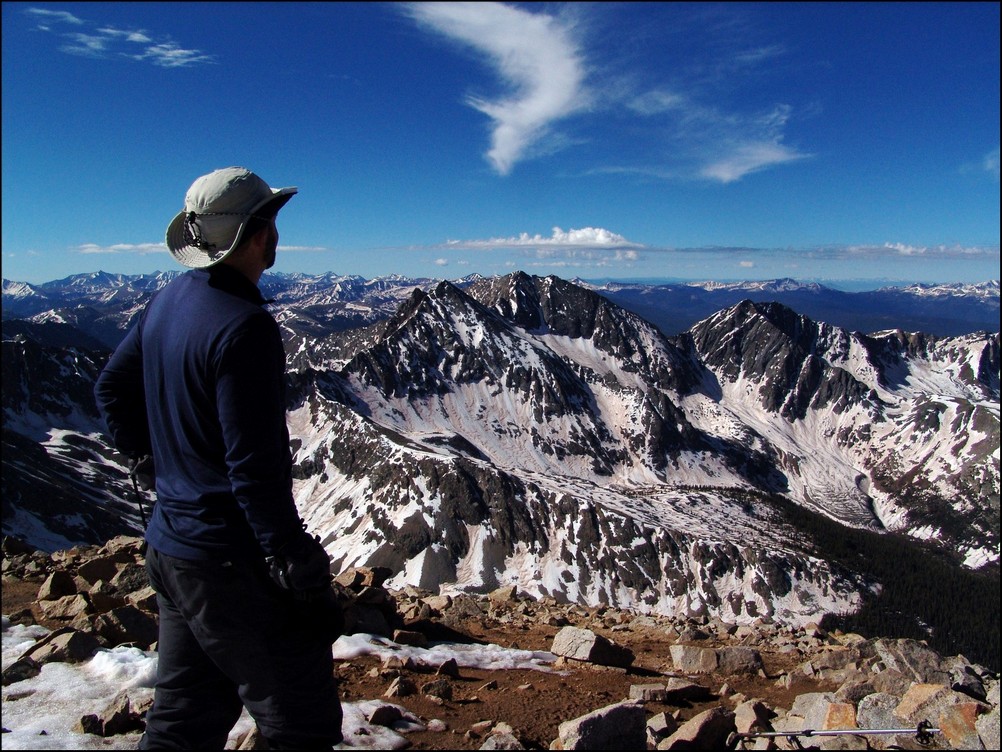
Matt Payne gazes South towards the Three Apostles

360 Degree View from the top of Huron Peak (click for full resolution version)
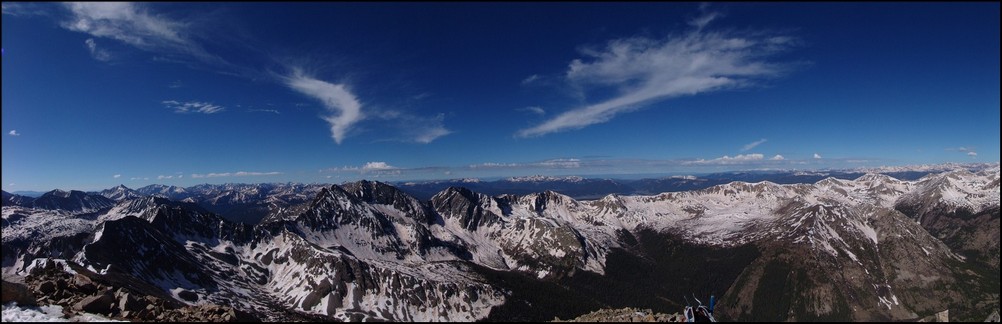
A 180 Degree View from North to South from Hurons Peak. The Three Apostles at center.
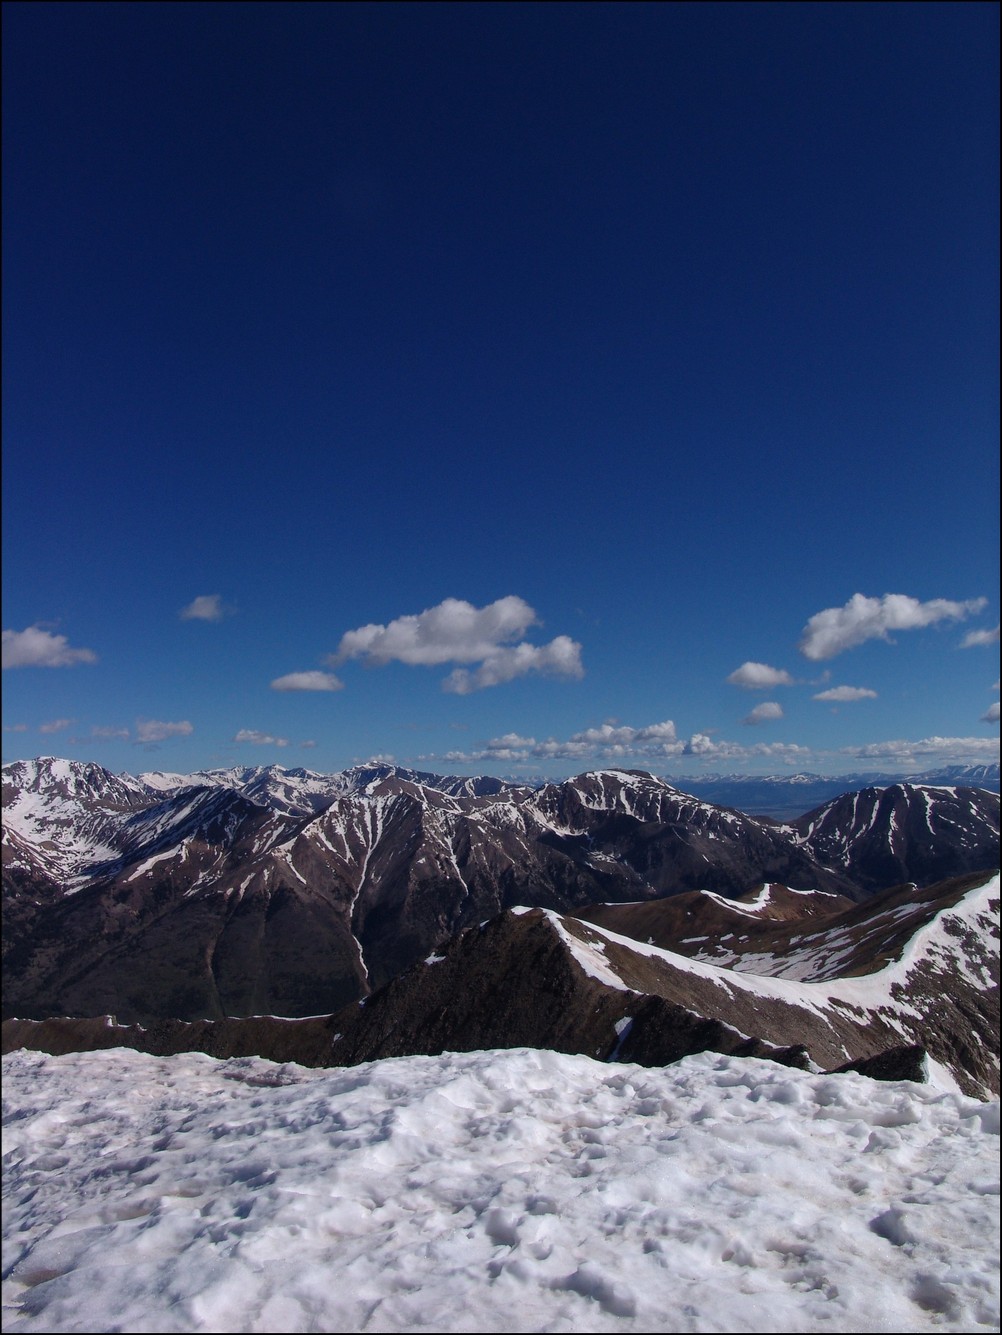
Mount Hope (the flat topped mountain) rests right of center. La Plata Peak rests far left.
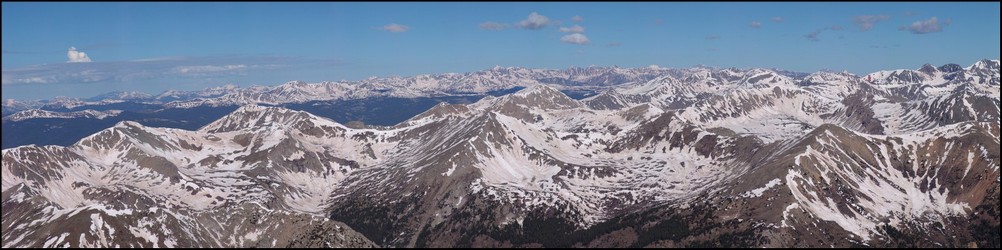
The Elk Mountains loom in the distance, covered in snow.This photo is zoomed in at 200mm. Pyramid Peak, Maroon Peak, Snowmass Mountain, and Capitol Peak can all be seen from this vantage. Click on the image for the super hi-resoltution version.
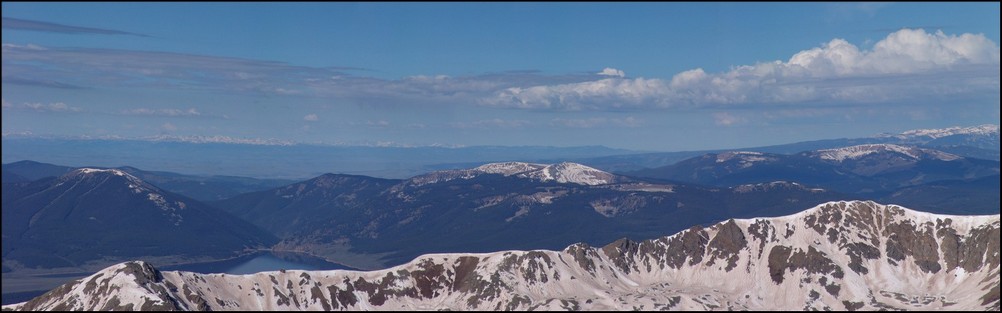
Taylor Reservoir can be seen in the distance, reflecting the surrounding mountains (click for full resolution version)
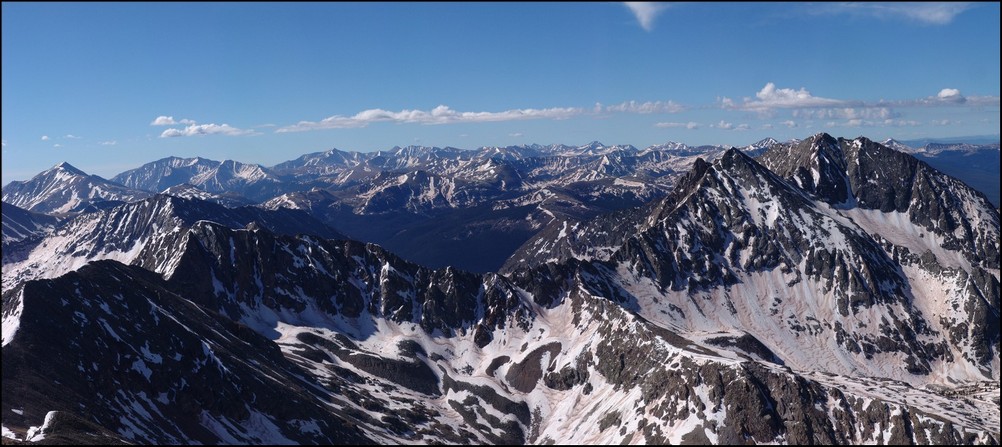
A closer look at the Sawatch Mountains south of Huron. Mount Antero, Mount Shavano, and Tabeguache Peak are all recognizable.

A zoomed in view of the Southern Sawatch mountains
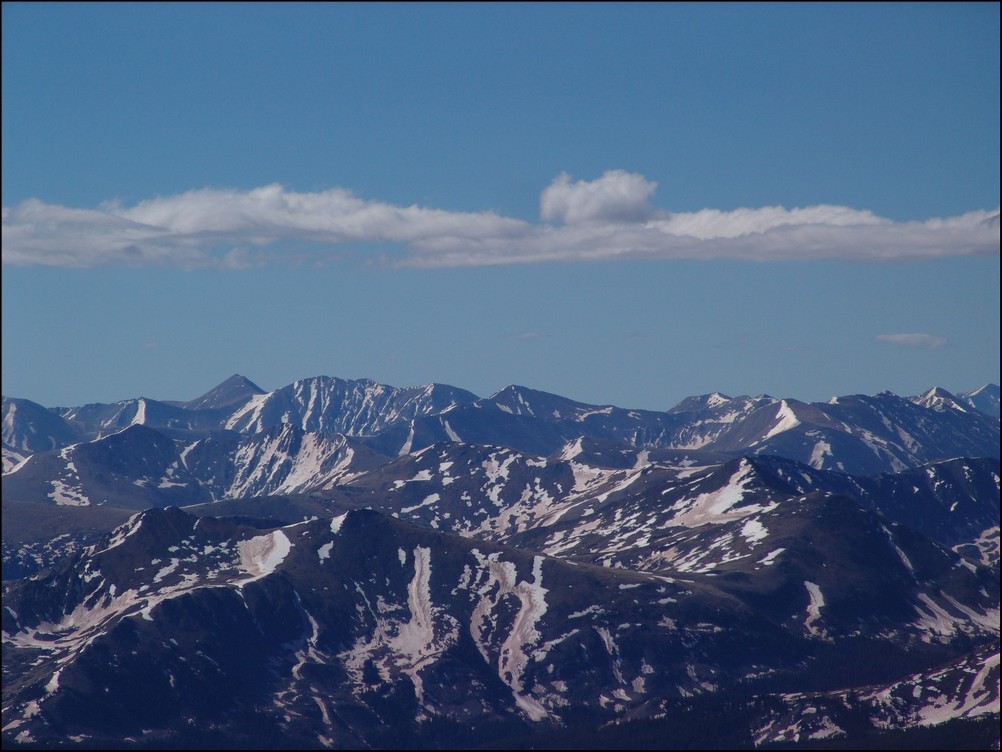
Shavano and Tabeguache (high pointed peak and flat snowed peak respectively)
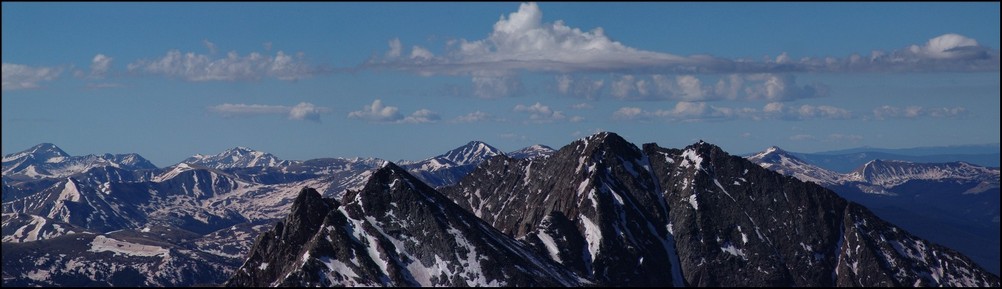
North Apostle and Ice Mountain zoomed in. If you click on the image you can see the full resolution version (and the climber atop North Apostle. I've confirmed that this climber is "Mad Mike" from 14ers.com
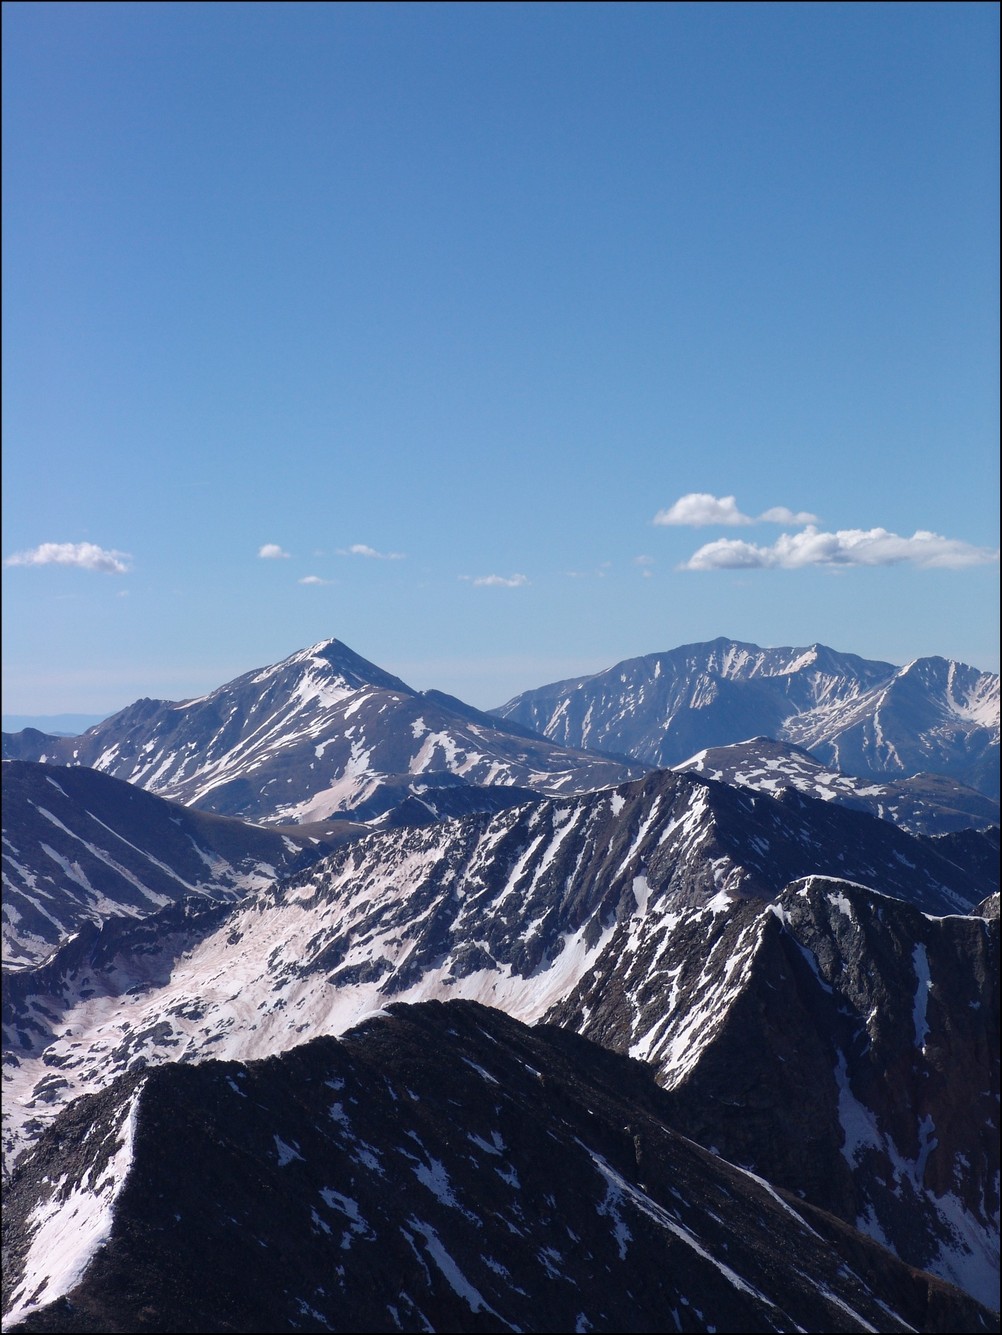
Mount Yale and Mount Princeton seen in the distance

La Plata Peak seen to the North of Huron across the valley

A great view of the Three Apostles from Huron
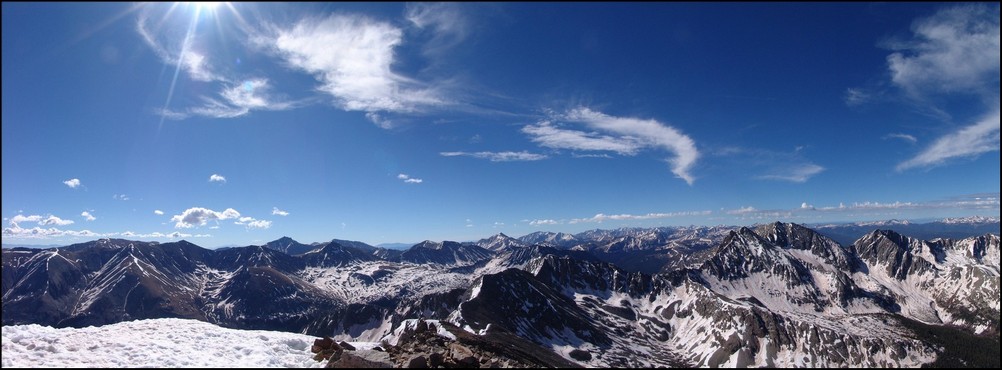
A 90 degree view looking Northeast, North, and Northwest from Huron
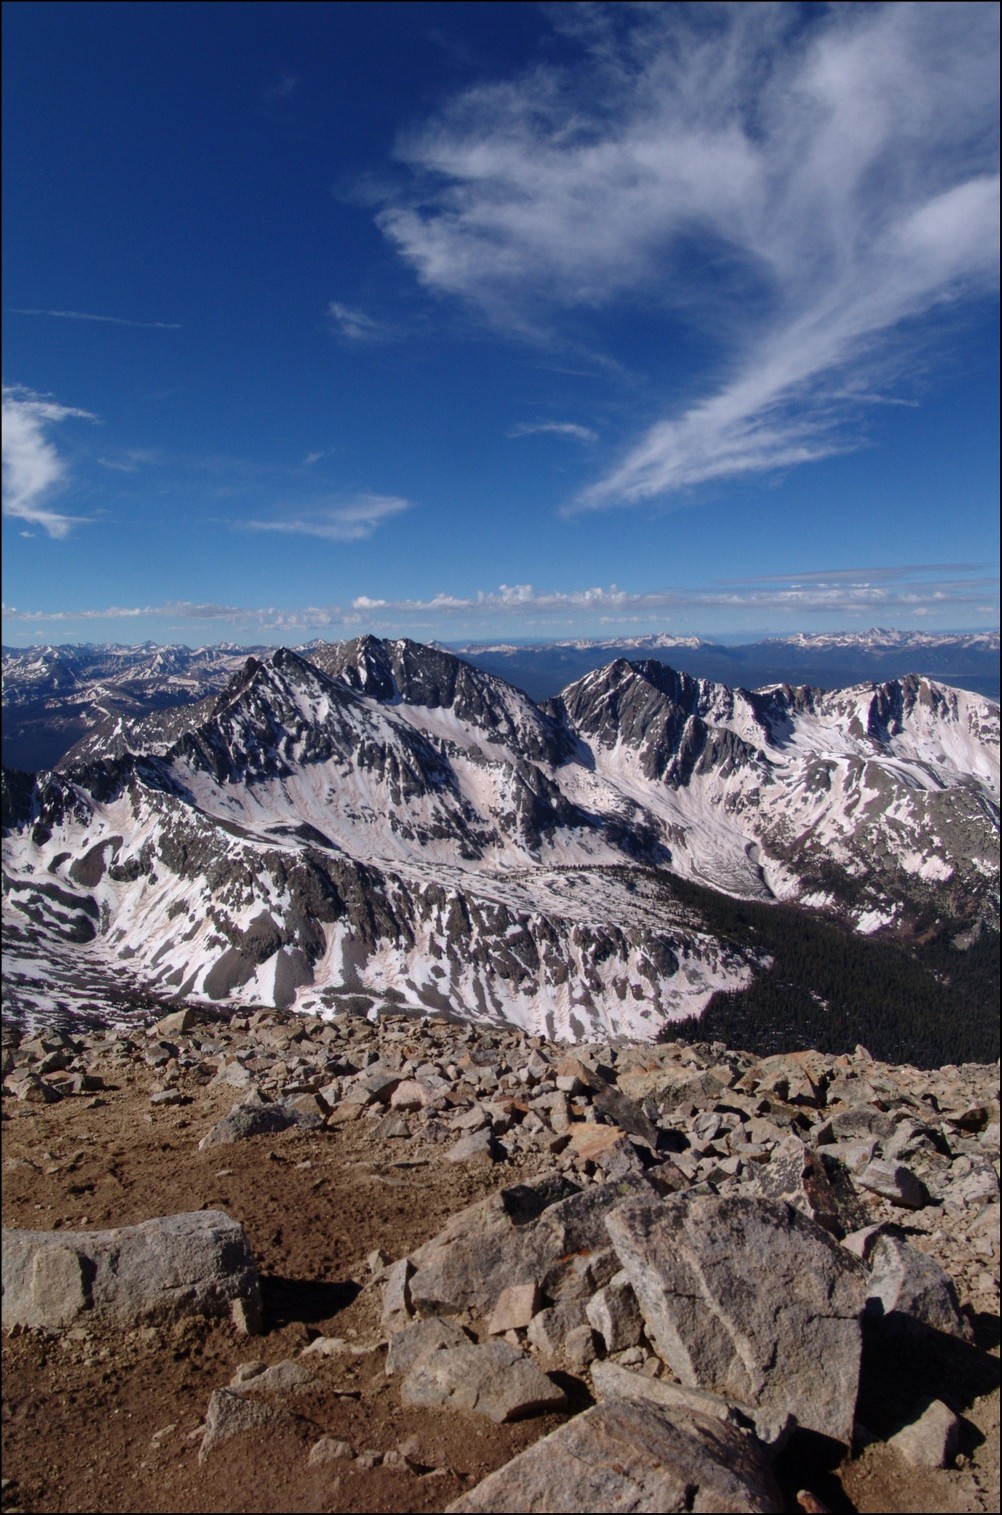
A vertically-oriented panoramic view of the Three Apostles
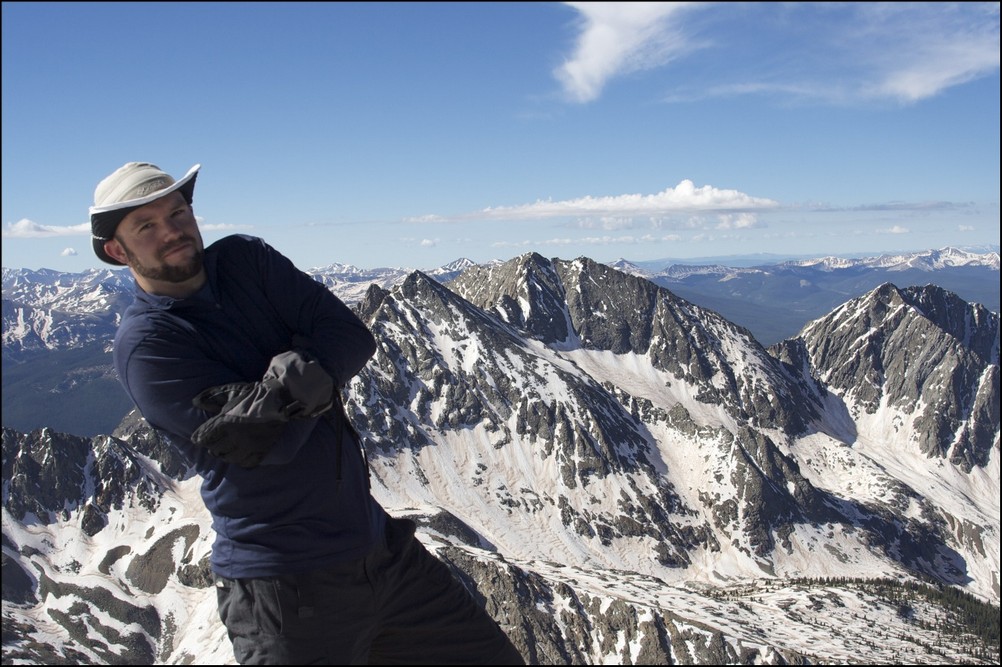
Matt Payne leaning to allow for a better view of the Three Apostles
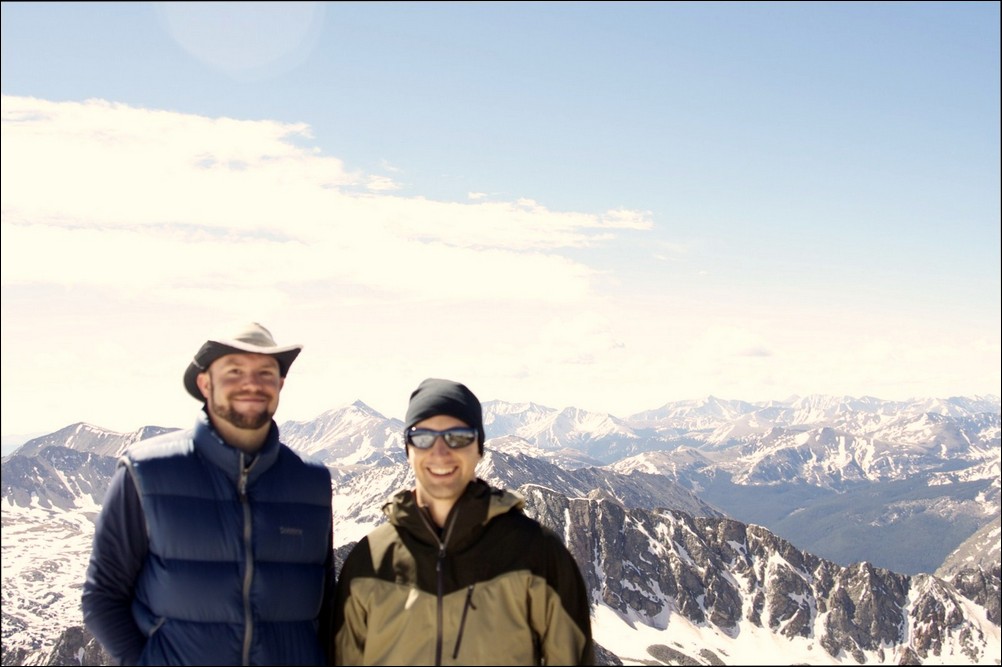
Matt Payne and Mike Vetter on top of Huron Peak
At this point we decided that after an hour of being on the summit we should head down to the ridge and make an attempt on Browns. Once down-climbing to the ridge, we were able to get a view of what we just climbed, decorated with a fair amount of snow still.
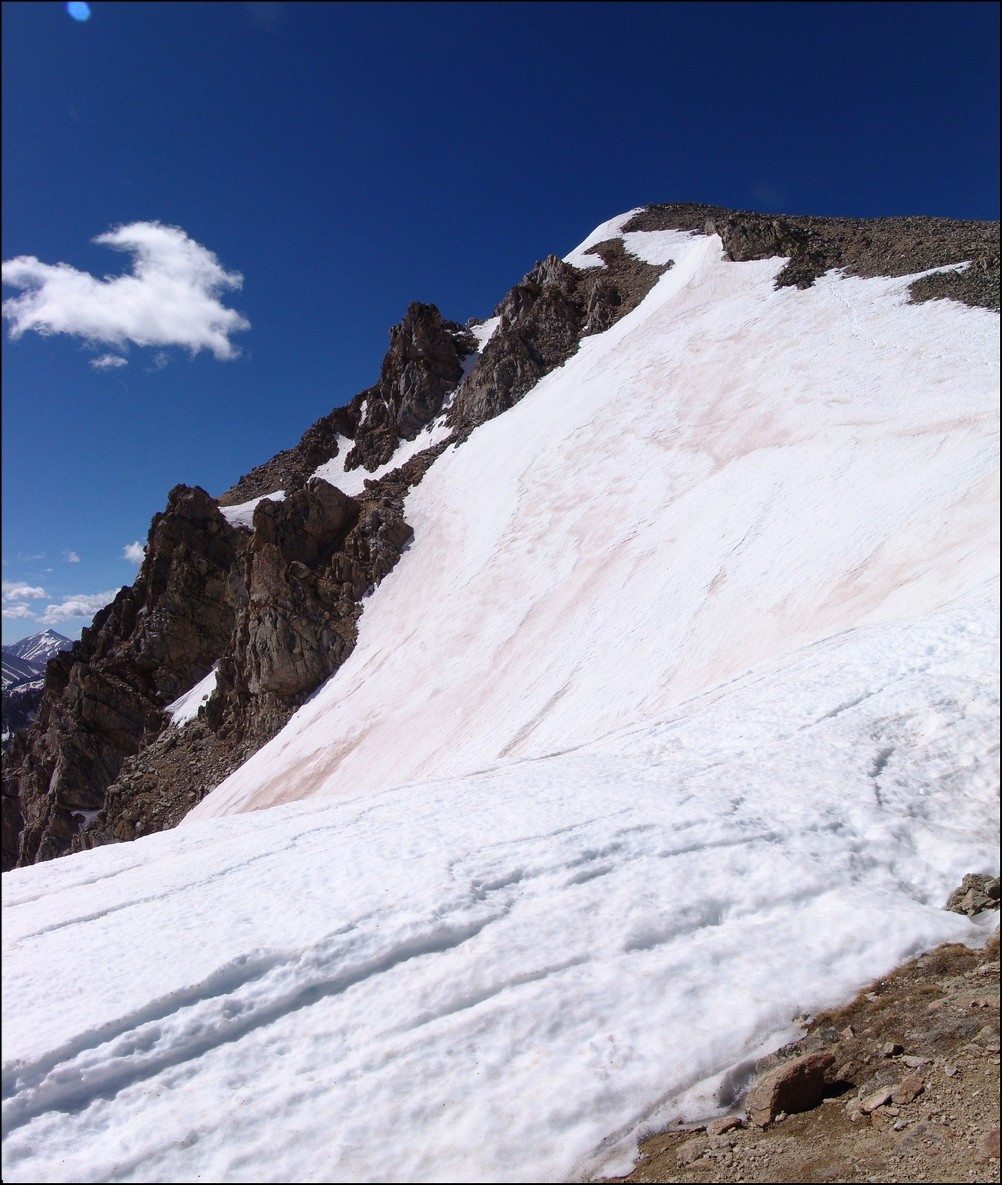
Still a lot of snow on Huron's eastern face
We took a look at our route - a straight ridge scramble to PT 13,518 and then to Browns.
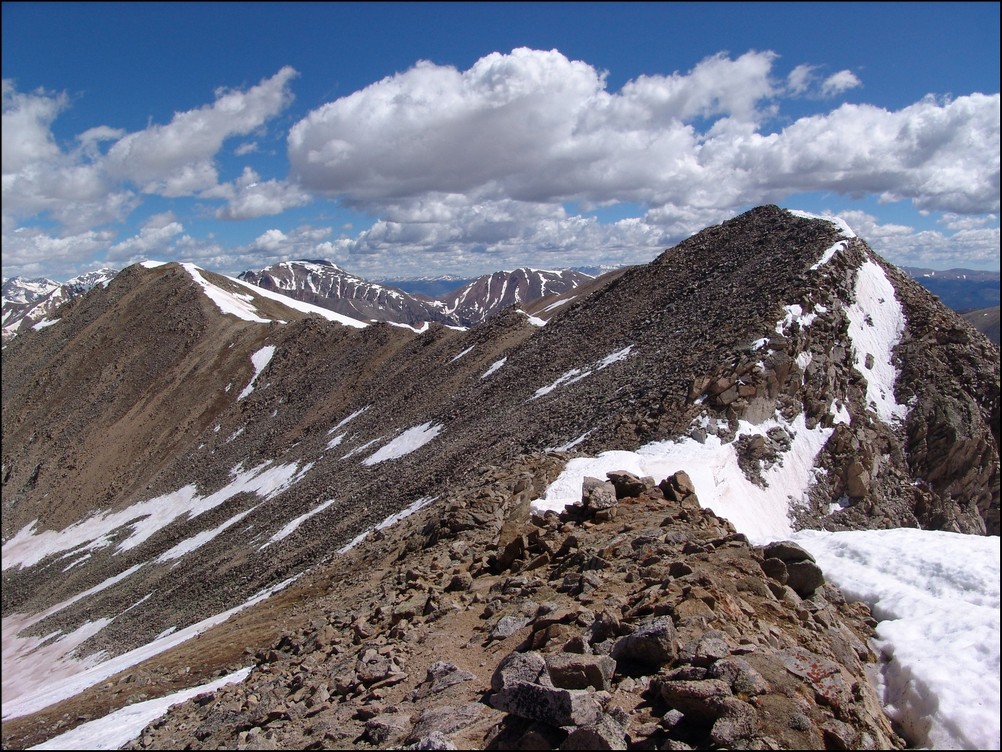
PT 13,518 and Browns were a straight shot from Huron's ridge. Mount Hope seen in the background.
We quickly scrambled up PT 13,518 without any problems and looked back at Huron. The further away we got from Huron, the more we could appreciate just how steep it was.
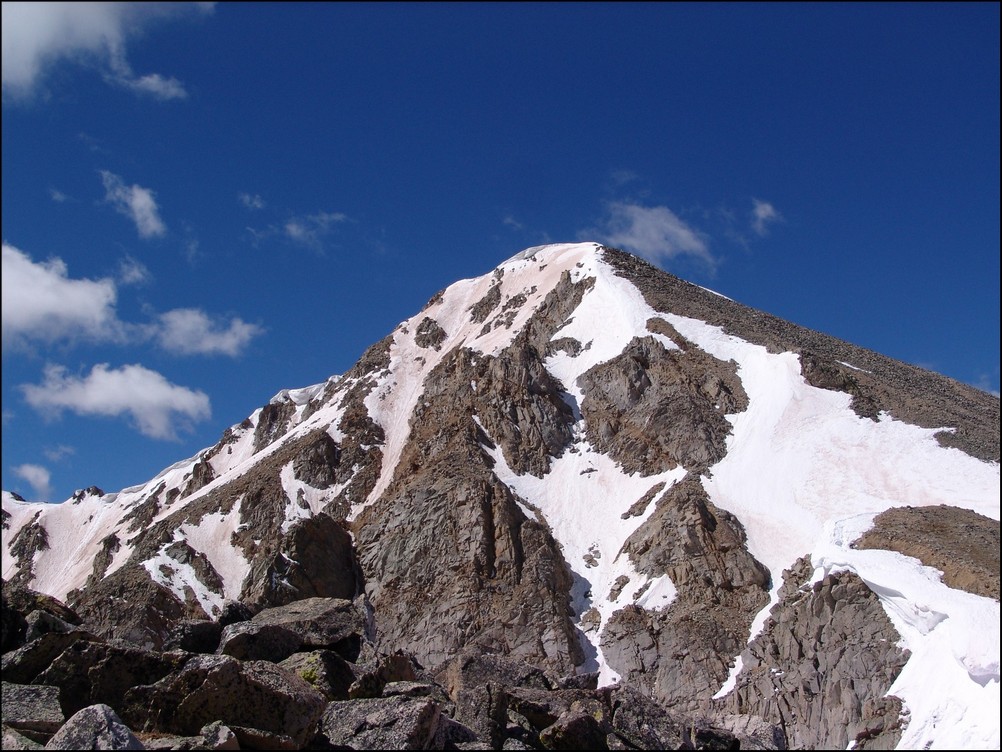
Huron rises high above PT 13,518 to the Northwest
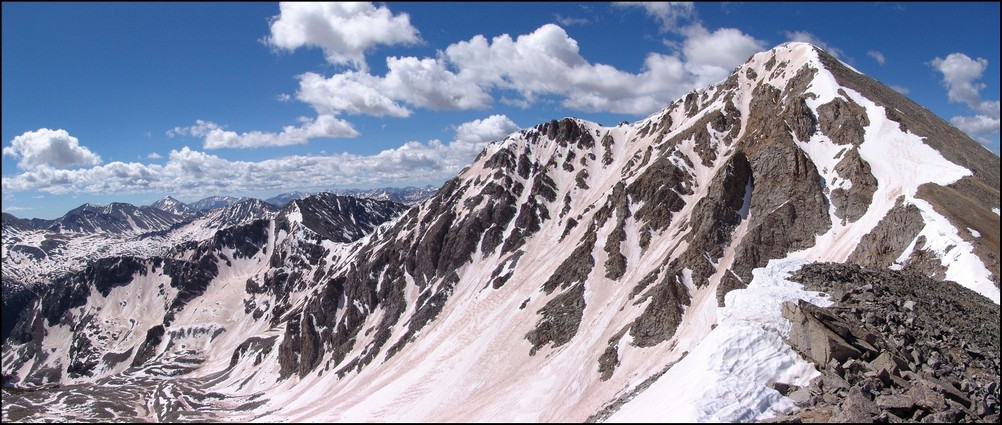
A zoomed in view of Huron from PT 13,518

A wider view of Huron and the surrounding terrain
After reaching PT 13,518, we took a look over to our next and final objective: Browns Peak.
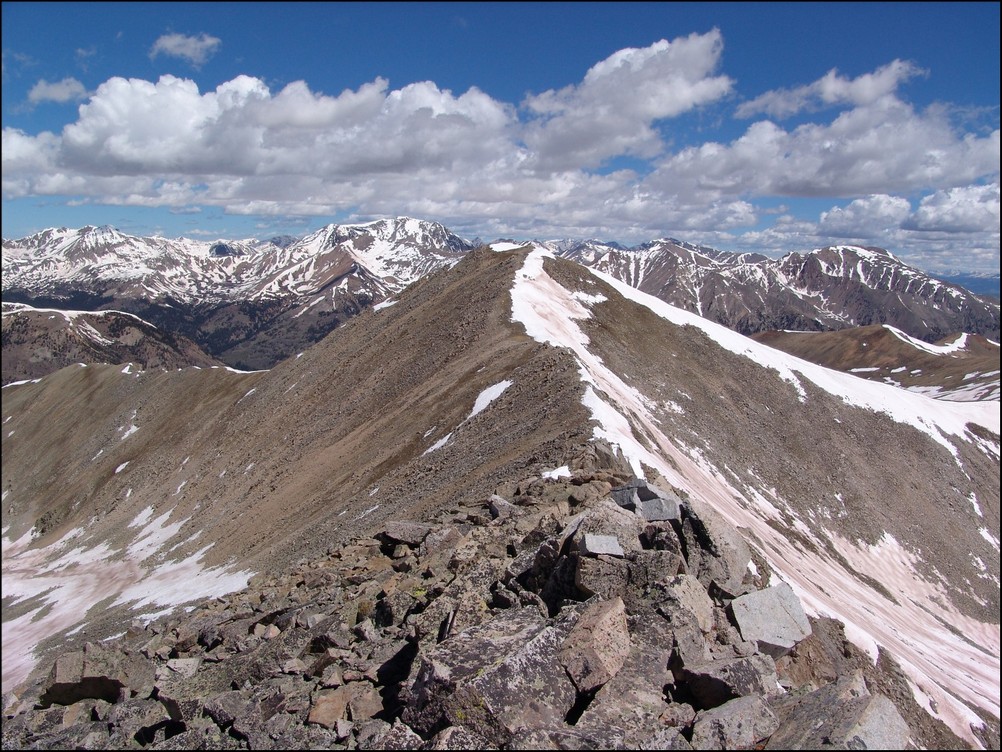
Browns Peak looked fairly easy with La Plata Peak behind it
On the way over to Browns, we were able to get a really awesome view of a nasty cornice, which looked more like a frozen tidal wave.
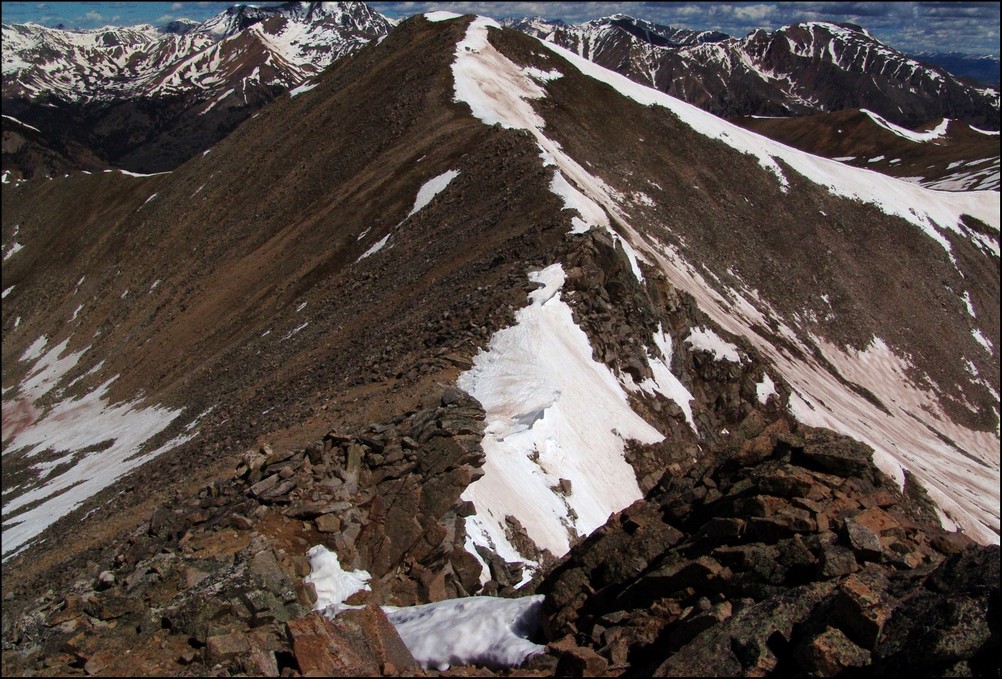
A huge cornice sitting in the saddle between PT 13,518 and Browns
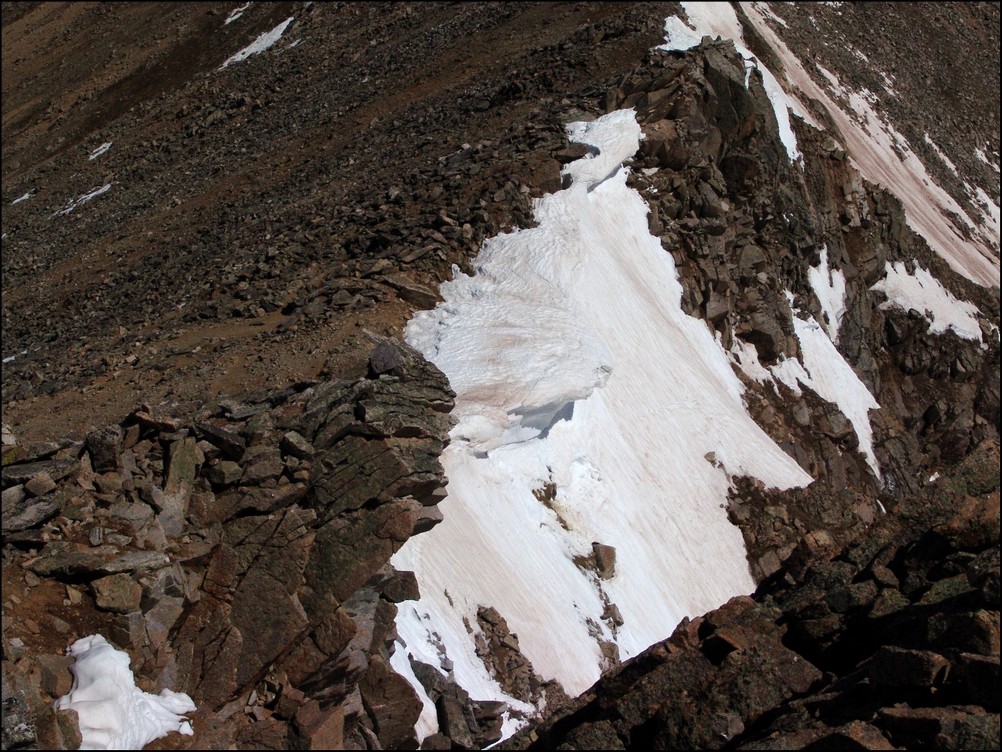
A closer view of the cornice
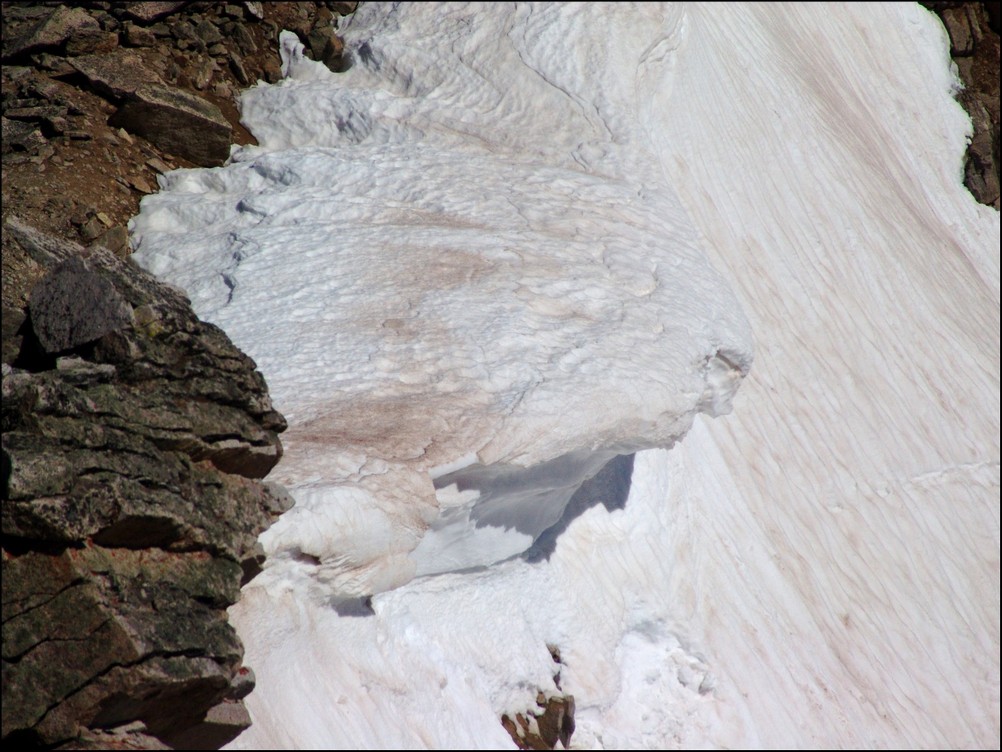
A super-zoomed in view of the cornice
After a bit of mild scrambling, Mike and I reached the summit of Browns in quick order. The clouds were looking to get worse and worse, so we decided that after Browns that we would go ahead and head back down to the trail below us, making our own route down off of Browns and connecting with the Huron trail.
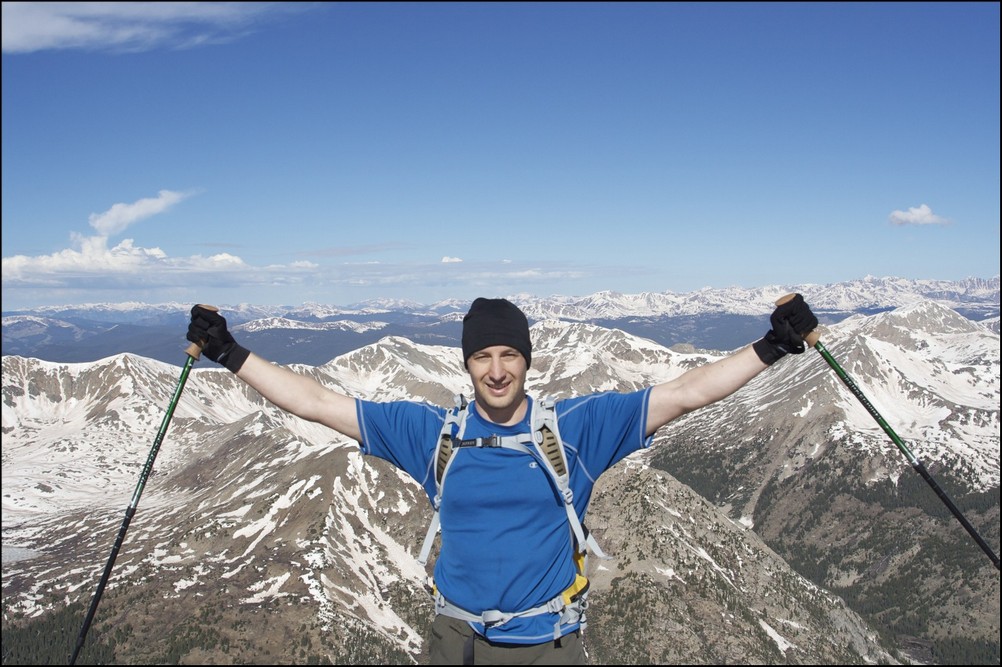
Mike Vetter celebrating on the summit of Browns
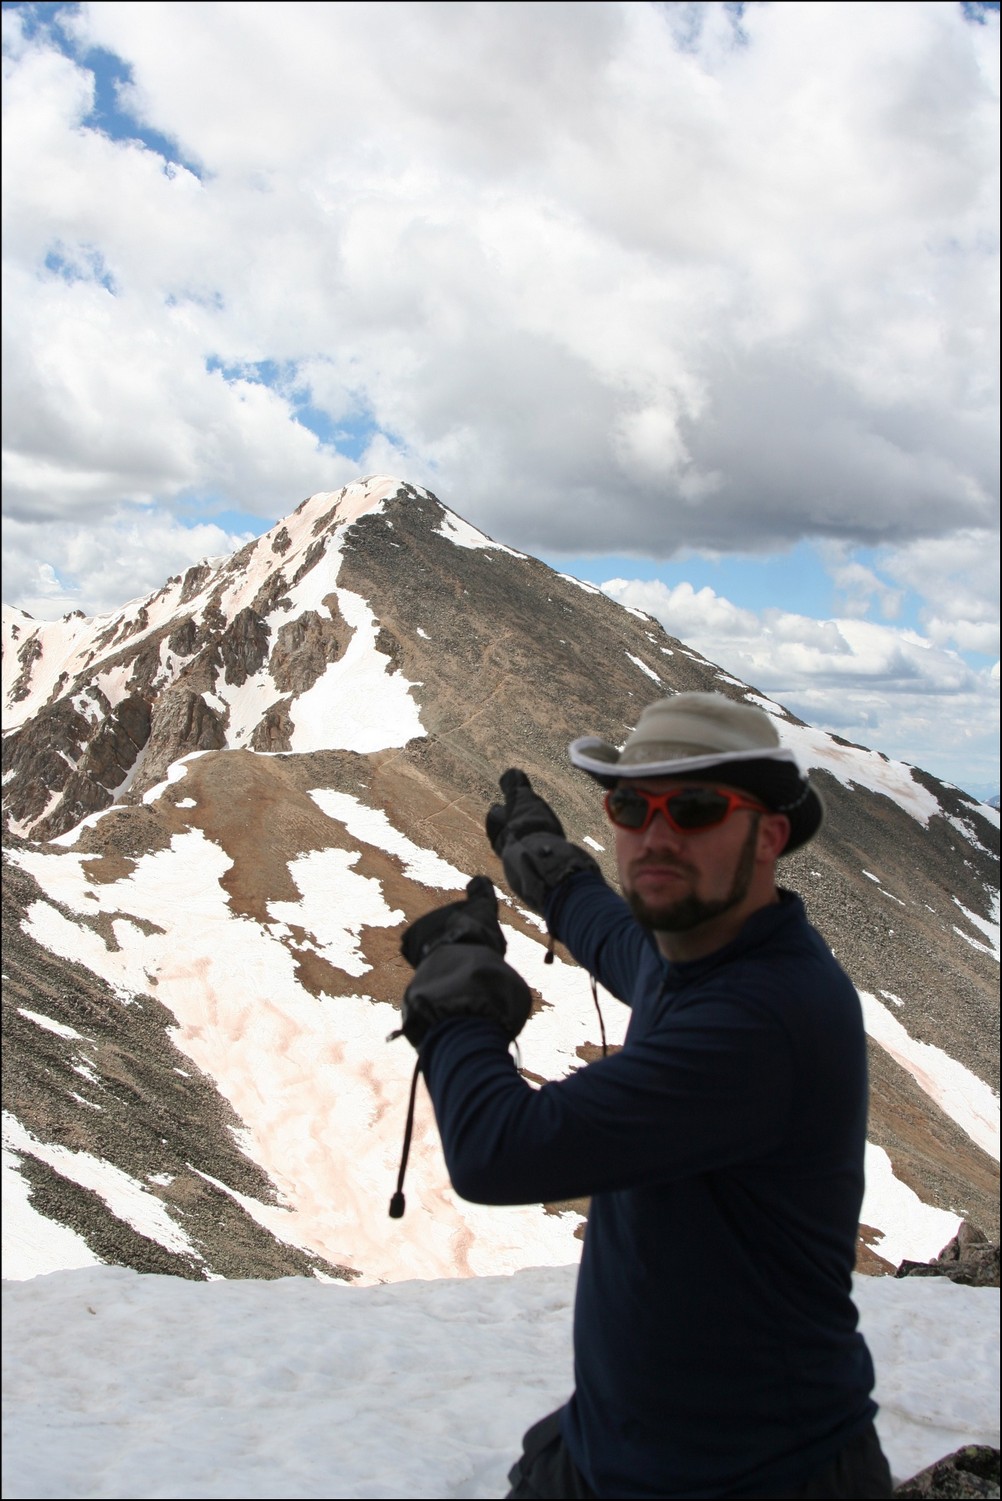
Matt Payne points back to Huron from Browns
We dropped off the north face of Browns just a few hundred feet and went straight down a scree gully. The dirt was quite loose but manageable. Soon after reaching the basin for Huron again, we were greeted by another large snow-field, which presented some pretty awful post-holing up to our wastes. Fortunately, my boots and gaiters kept my feet completely dry!
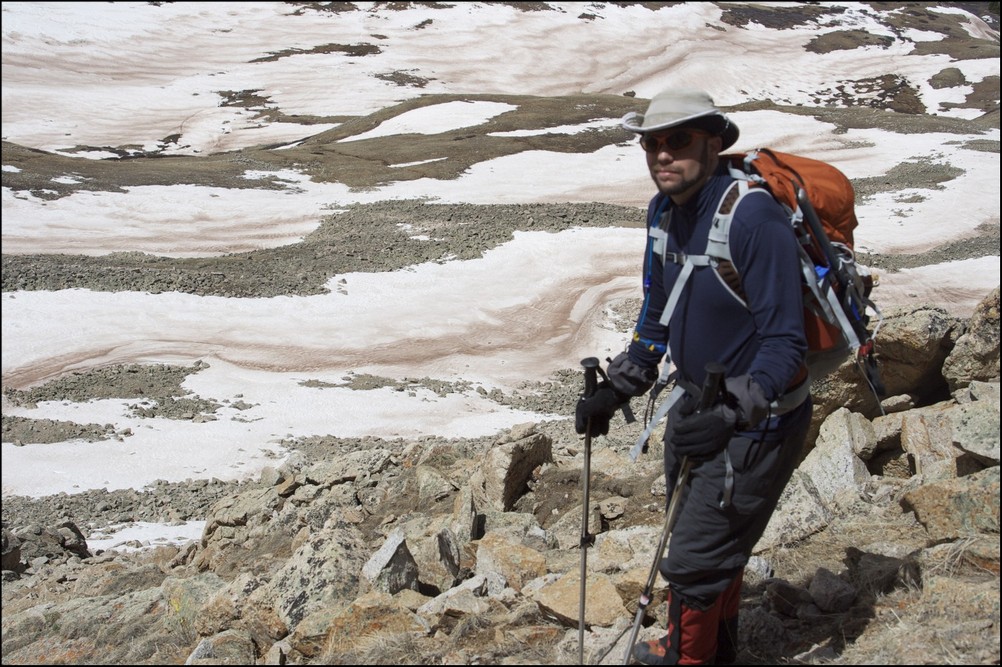
Matt Payne descending from Browns
After reaching the trail again, we headed back down the way we came and crossed the insane snow-field at the base of Huron. After a days worth of sunlight, the snow-field was quite soft and presented us with some unique and 'wet' hiking challenges.
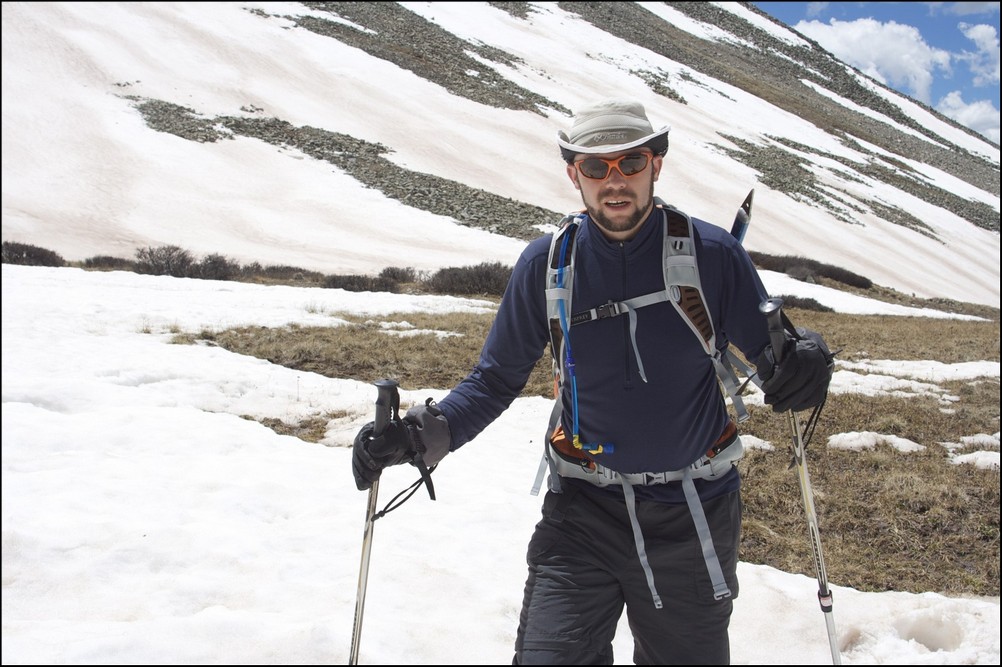
Matt Payne crossing the slushy on Huron
Once we reached the bottom of the snow-field, the way down was pretty quick to treeline and below to the trailhead and eventually my vehicle.
All-in-all, this was an amazing trip filled with great views. And I must say, I could not have hiked with a better guy. Thanks for driving down and climbing with me Mike!
To complete the trip report, here are three HDR photos I combined. I am new to HDR but I do like how it can enhance the light.
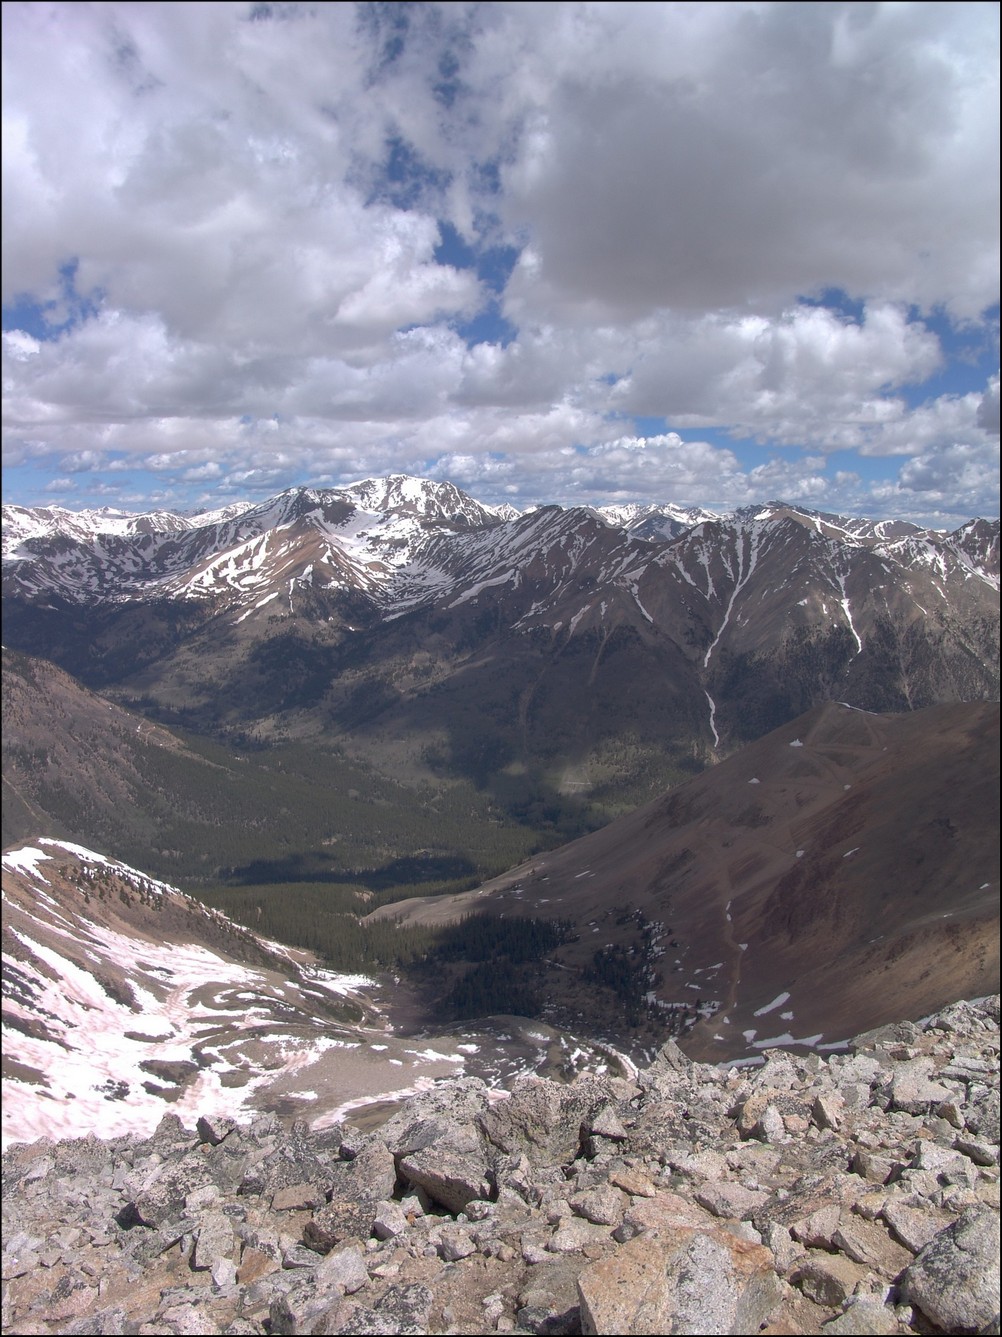
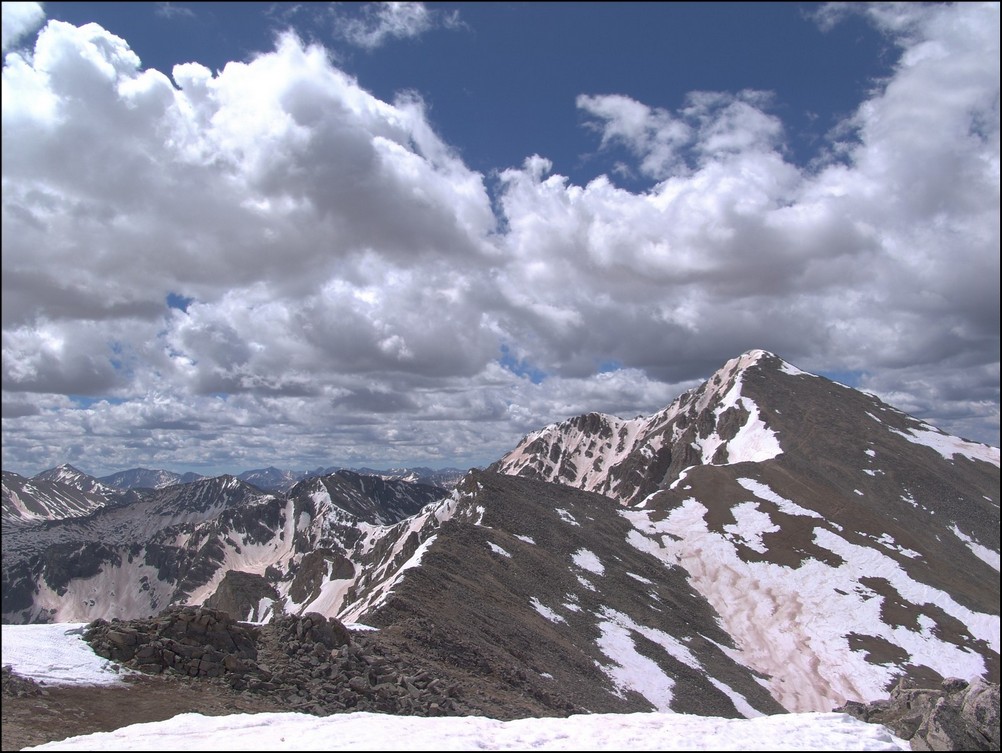
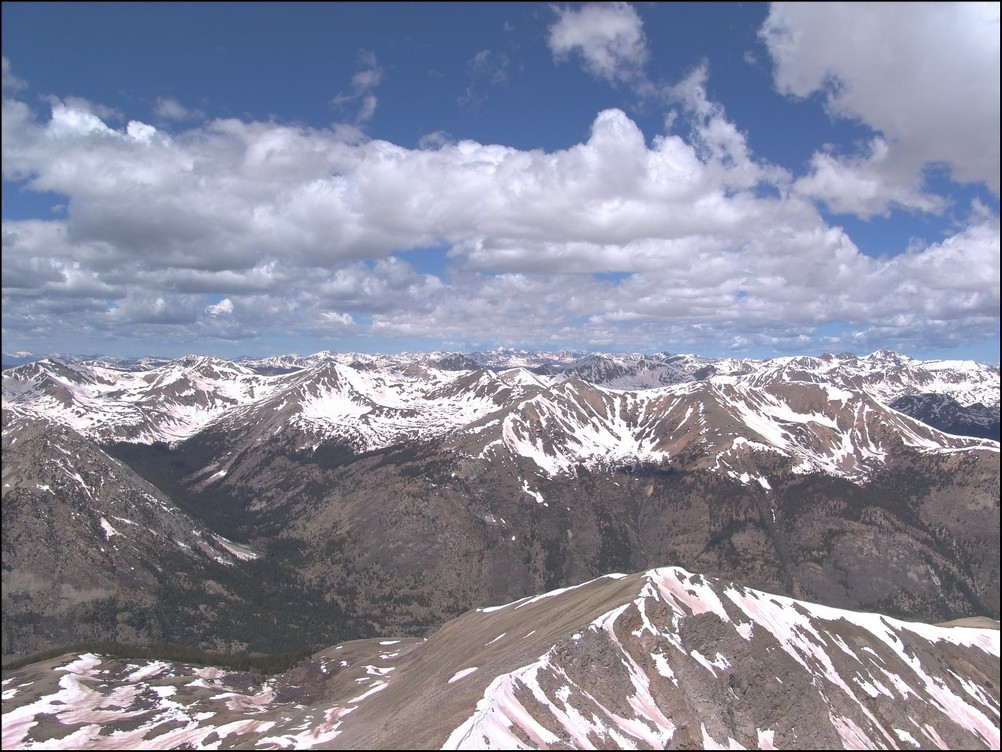
Until next time, enjoy Colorado's summits!
Shavano's Angel of Death
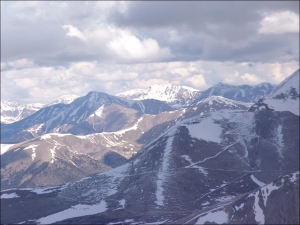
My goal for my first 14'er of 2010 was to summit Mount Shavano (14,229 ft) and then traverse over to Tabeguache Peak (14,155 ft). I had made this attempt last year at the end of May and was able to make it to the top of Shavano but was pushed off the summit by weather, subsequently postponing my summit of Tabeguache. Last year, I climbed the standard route of Shavano, which was a good adventure; however, I wanted to attempt the Angel route this time. Having watched several people ascent via this route last year, I was both intrigued and puzzled as to why someone would put themselves through this much torture. Then after a summer of climbing harder climbs, I figured out why - the challenge and diversity of a new route and the fun of going up a snowfield with an ice axe! Here are two photos from last year's climb, looking down at the Angel route:


My adventure began by driving from Colorado Springs to the Trailhead on Friday, May 21st, 2010. First, let me apologize, I believe that my camera's sensor needs to be cleaned, as many of my images have a slight smudge that is in the middle near the top. Having created this website since last year, I decided that on my way over that I would get a few photos of the Sawatch and Mosquito/Tenmile range from the top of Wilkerson Pass. Fortunately, the weather did cooperate for a few great photo opportunities: 


After a quick drive through South Park, I made it to the turn-off for the Trailhead near Salida. Near the beginning of the road, I took the time to take some photos of Shavano. The Angel was looking great!

I even played around a little with some bracketing on my camera for this so-so HDR product:
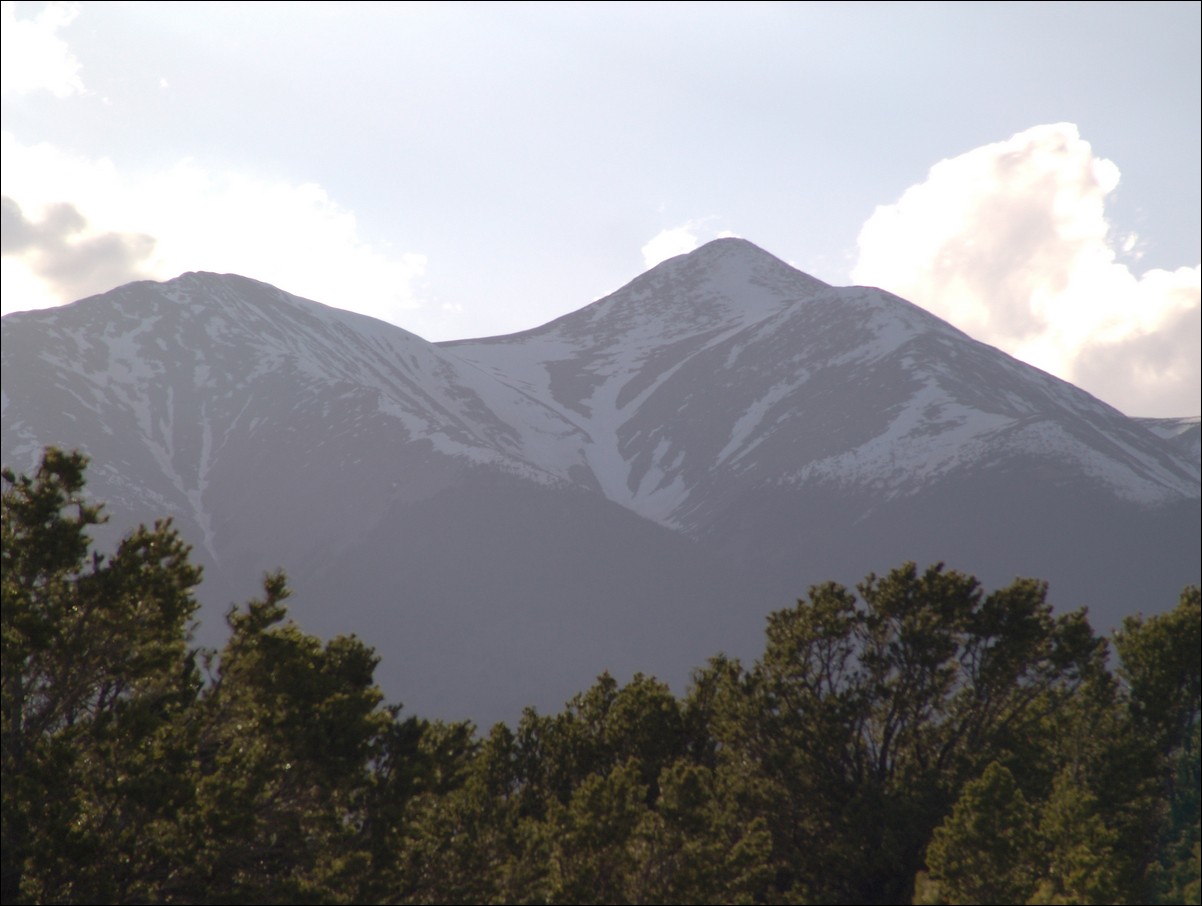
The road was in great shape and it seemed as if there were far less cars this time around. Heck, there were even some deer hanging out!
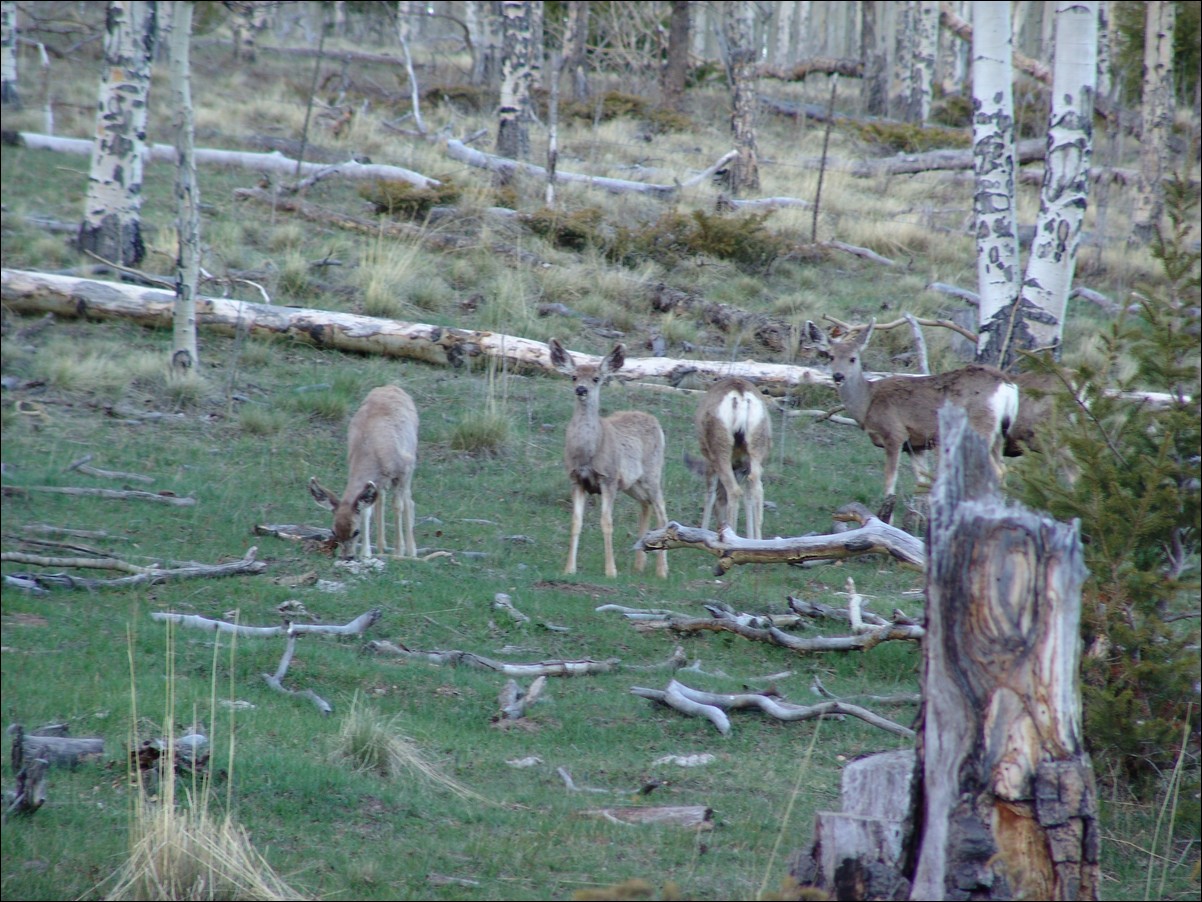
I decided to drive up the road a-ways to check-out the camping areas. I was pleasantly surprised to find quite a few spots to camp and decided on a spot at the end of a huge meadow. Here is my sad attempt at an HDR photo of that meadow. I really like the way the tree turned out. You can see my vehicle in the far distance on the right:

Since I had some time to kill, I decided to take a few photos of the surrounding area. Hunts Peak:

Hunts Peak and surrounding area:
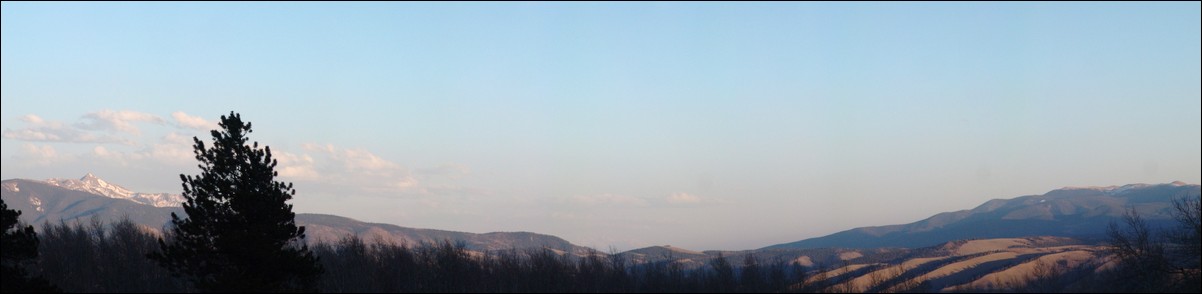
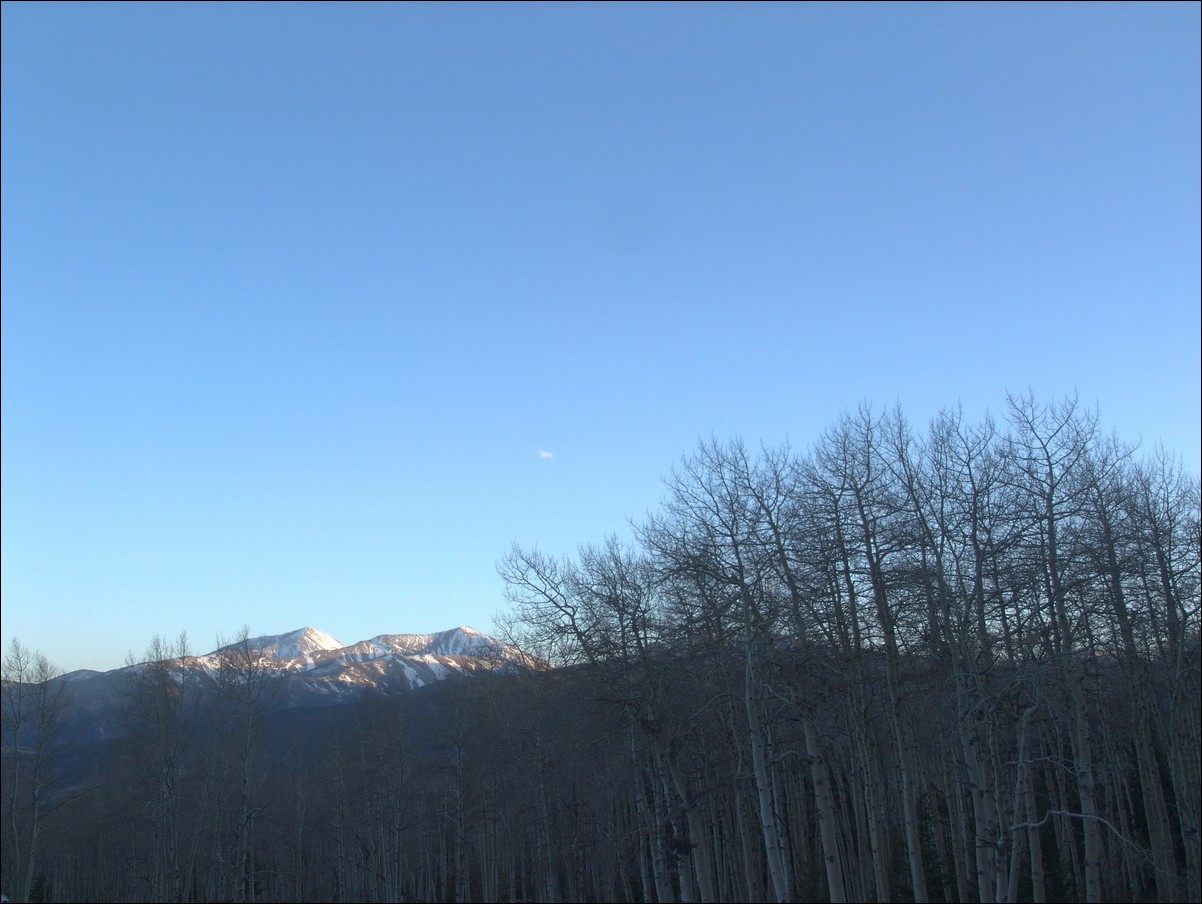
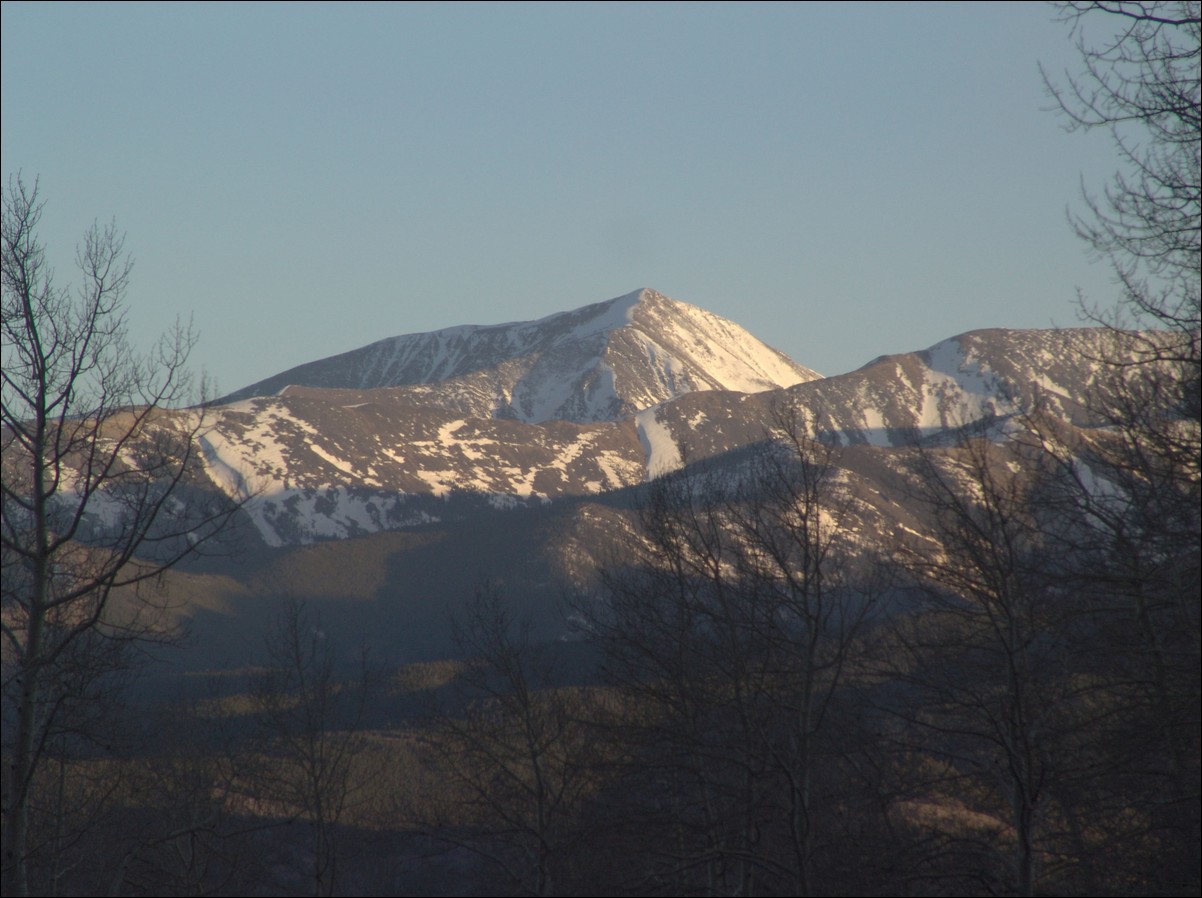
Mount Shavano is the little bump in the middle:
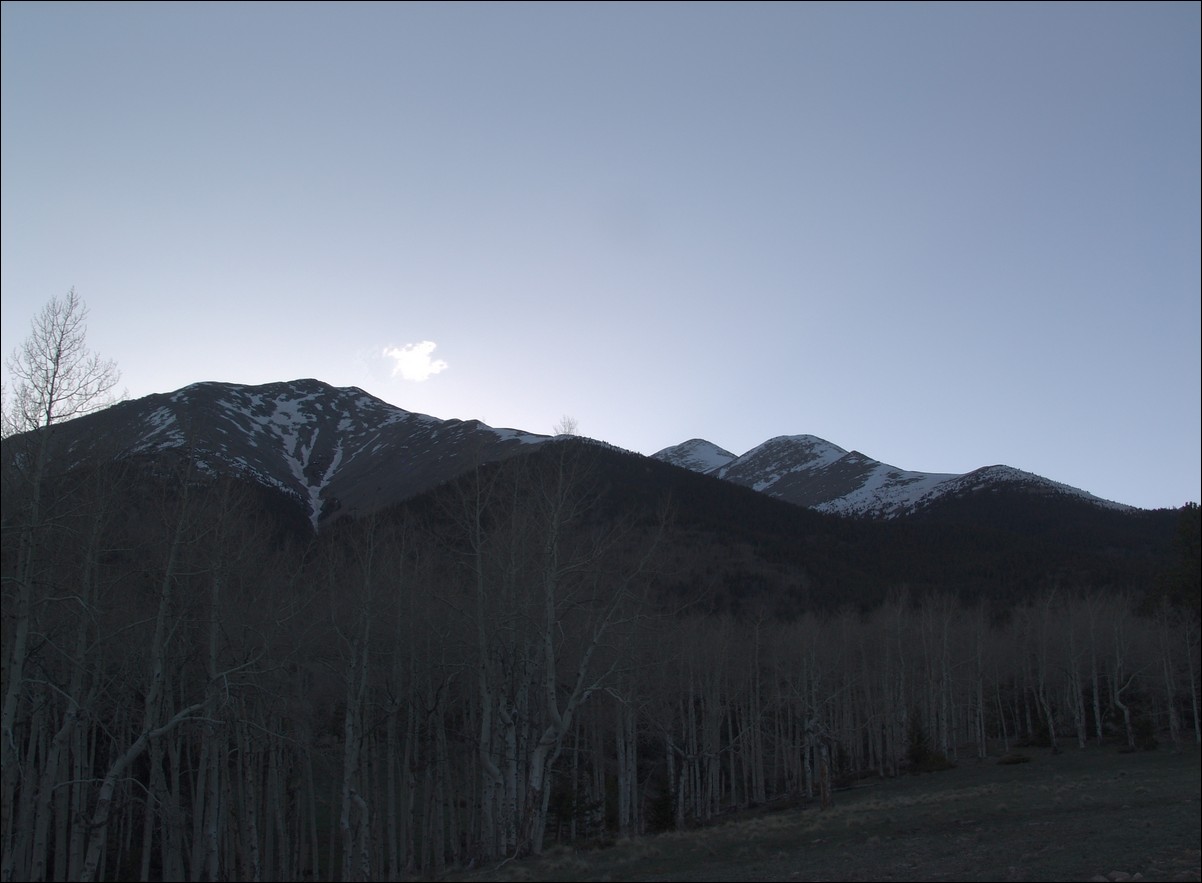
I decided to hit the sack early and sleep with the rainfly off of the tent. This proved to be a great idea because the sky was clear and the stars were bright and numerous! I set the alarm for 4 AM, since I wanted to get up, cook breakfast, and pack my tent before hitting the trail. The alarm sounded and I woke up and fired up some water and ate some pretty decent oatmeal from Costco. I packed up and drove the very short distance back to the trailhead and was on the trail by 5:15 AM. The parking lot was still surprisingly empty except for two other vehicles. I soon was feeling the negative effects of packing so heavily - I had brought my snowshoes, ice axe, trekking poles, crampons, water, lots of food, and warmer clothes. The trail was as steep as I remembered and the snow was showing up on the trail far sooner than my trip last year. Before long, snow drifts blocked the trail in several places. Fortunately, the snow had hardened from the previous day and was passable without the use of snowshoes. I followed the trail until it began to become harder and harder to follow. I made sure to follow other climbers up the valley and towards what I knew was the Angel. Instead of heading North along the standard trail, I kept South and ended up at the start of the large boulder field before the Angel begins. As I climbed to the top of the boulder field, the Angel came into view and I was able to really see the challenge for the day. The Angel route takes you directly up the center of the Angel and then up the right arm or straight up, depending on the snow and your preference.

I kept heading up and soon was greeted by the nasty wind that was forecast for this weekend - up to 60 MPH gusts of wind. Oh joy! As I continued up the boulders and snow fields, I was finally able to reach the base of the Angel, where I decided to put away the trekking poles and get out the ice axe. I use an old Chouinard ice axe that was passed down to me by my dad (Old Climber on this site). The reasoning for the use of an axe while going up the Angel is two-fold: 1) For self-arrest if I were to slip and 2) Aid in climbing. A few skiers and snowboarders were ahead of me, making it somewhat easier to follow their footsteps instead of creating my own steps in the snow.

I quickly discovered that crampons were not needed, so that was somewhat of a bummer realizing that I had lugged them up there for no reason. I was beginning to think the same about my snowshoes, but they actually proved quite useful later on. The Angel of Shavano was not a terribly difficult climb, but it was taxxing on my legs and lungs. I was quite aware that this was my first climb of the season. I persevered up the Angel and decided to stay in the middle of the Angel, despite all other groups going to the right or left on the arms of the Angel. What can I say - I'm a rebel. The snow in this part was pretty good and traction was easily gained with my La Sportiva Trango boots. The hardest part of this climb was my lack of stamina and the wind. The wind really took a toll on my strength and took every opportunity to sap me of any will I had to continue past Shavano. After hiking for 6 hours, I finally gained the summit and celebrated with two outstanding gentlemen that had skied up and were planning to ski down. One skier identified himself as 'steventraylor' from 14ers.com. They were both very friendly and it was a pleasure sharing the mighty summit of Shavano with them. I explained to both of them about my website and am hopeful that more and more people can take advantage of this platform to post thier reports and photos. The wind had really caused quite a bit of dust to fill the air around the state, and visibility was not as great as I prefer for photography; however, it was still great getting to see all those white-capped mountains! I was able to get Steven to take this summit shot of me, with Mount Antero and the rest of the mighty Sawatch range behind me:

I took a few looks over at Tabeguache and declared that I would not have the energy to make it over. This was quite demoralizing for me since Tabegauche was the whole reason I had done this climb. Tabegauche is now my nemesis and will be conquered in 2011! Here is a shot of Tab:

The Sangres shrouded in dust:

And of course I did some fun pano photos:

Here is a zoomed in look of Antero (far right), with Columbia and Harvard to its left: 
Since I had decided that I was not going to head over to Tabeguache, I spent some time enjoying the views and snacking on some chocolate covered espresso beans. I took a couple more "artsy" photos using my ice axe as a prop:
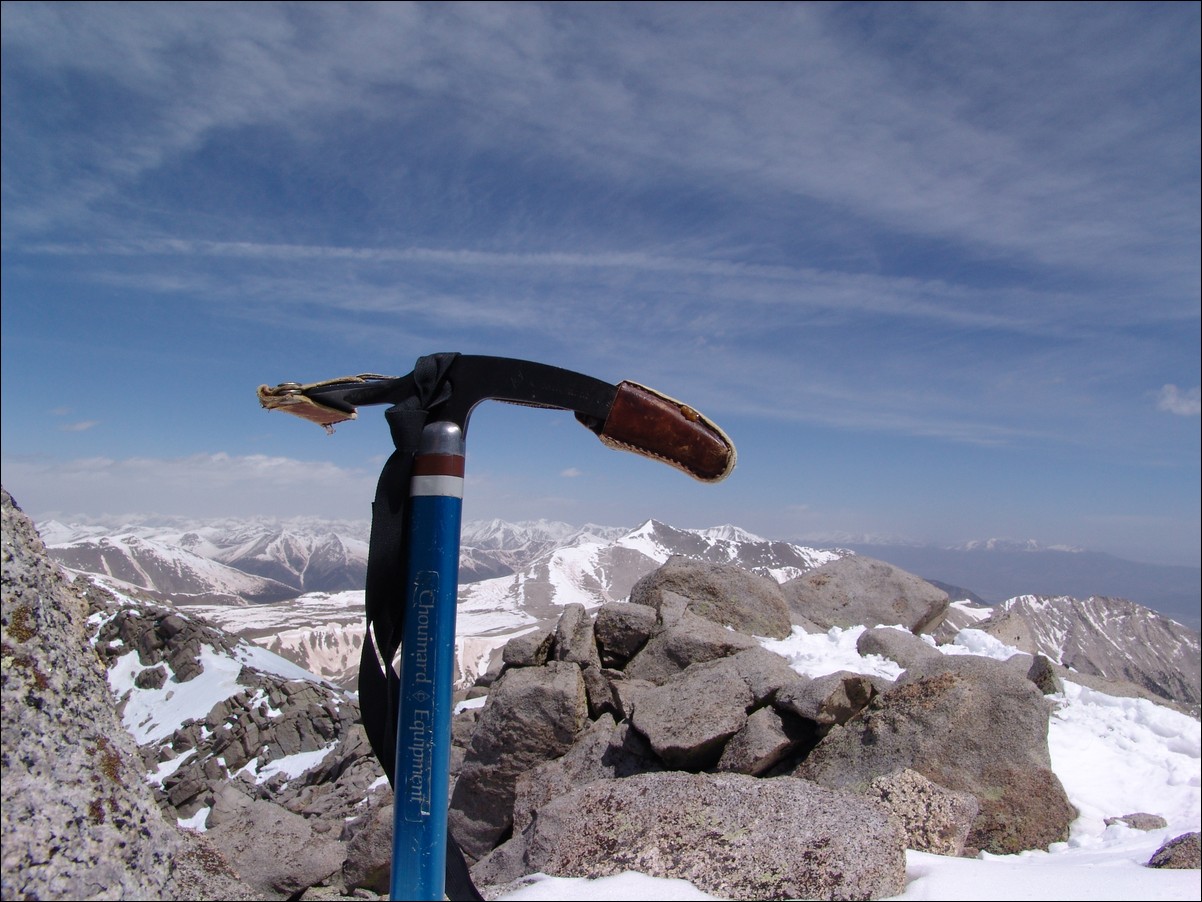
After about an hour, I decided to bug-out and head down. The descent was pretty straight forward; however, being in boots and not skis, the snow proved slippery and was soft, making for some interesting post-holing. I quickly decided that this was a perfect opportunity to test my skills in glissading. I sat on my butt and ensured that my ice axe was securely attached to my wrist. I placed the axe to my right side like a parking break and used it to control my speed going down. I made a quick detour over to the top of Point 13,617 just to say I was on top of it. The wind over there was outrageous! I was only able to take a few photos from there. The first photo is Shavano and the second is Antero:


I began glissading again, but the snow was more like ice on the North arm of the Angel, so I foolishly decided to scurry over to the standard trail once I crossed it. The trail looked really clear but this proved false. As I continued on the trail for about 200 yards, the snow fields became un-crossable. The snow had covered the snow and was so soft that it was a post-holing nightmare and a safely concern. I decided that I might as well make use of the snowshoes I had carried all this way and put them on. I wore them and used them to safely cross Shavano's shoulder down to some snow-free areas. I took off the snowshoes and went straight down the mountainside and down into the valley near where the Angel route begins. I followed some tracks back down the valley until I was able to meet up with the main trail again. I would highly recommend that if you ascent via the Angel, you also descent the same way. The snow on the trail coming down was very soft and post-holing was common past your knees. It was not enjoyable to say the least. I concluded my adventure and drove back to Colorado Springs, and hope to tackle Mount Huron in two weeks!
Sentinel Point - Pikes Peak's western guardian
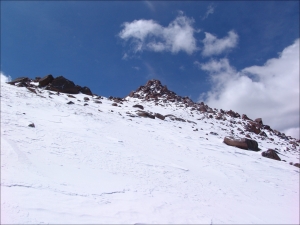
Sentinel Point is a fairly unknown mountain on the west side of Pikes Peak. One can access the mountain by driving to Divide on Highway 24 and heading South on Highway 67 just past the old tunnel. The "Horsethief Park" trailhead, which provides access to both Sentinel Point and Pancake Rocks can be found roughly halfway between Divide and Cripple Creek. Having just purchased new snowshoes, my friend Ethan decided that he wanted to test them out. We departed Colorado Springs around 6:30 AM and began hiking around 7:45 AM. The trail begins fairly easy and we did not put on our snowshoes until we crossed the creek onto trail 704C to head North into Horsethief Park.
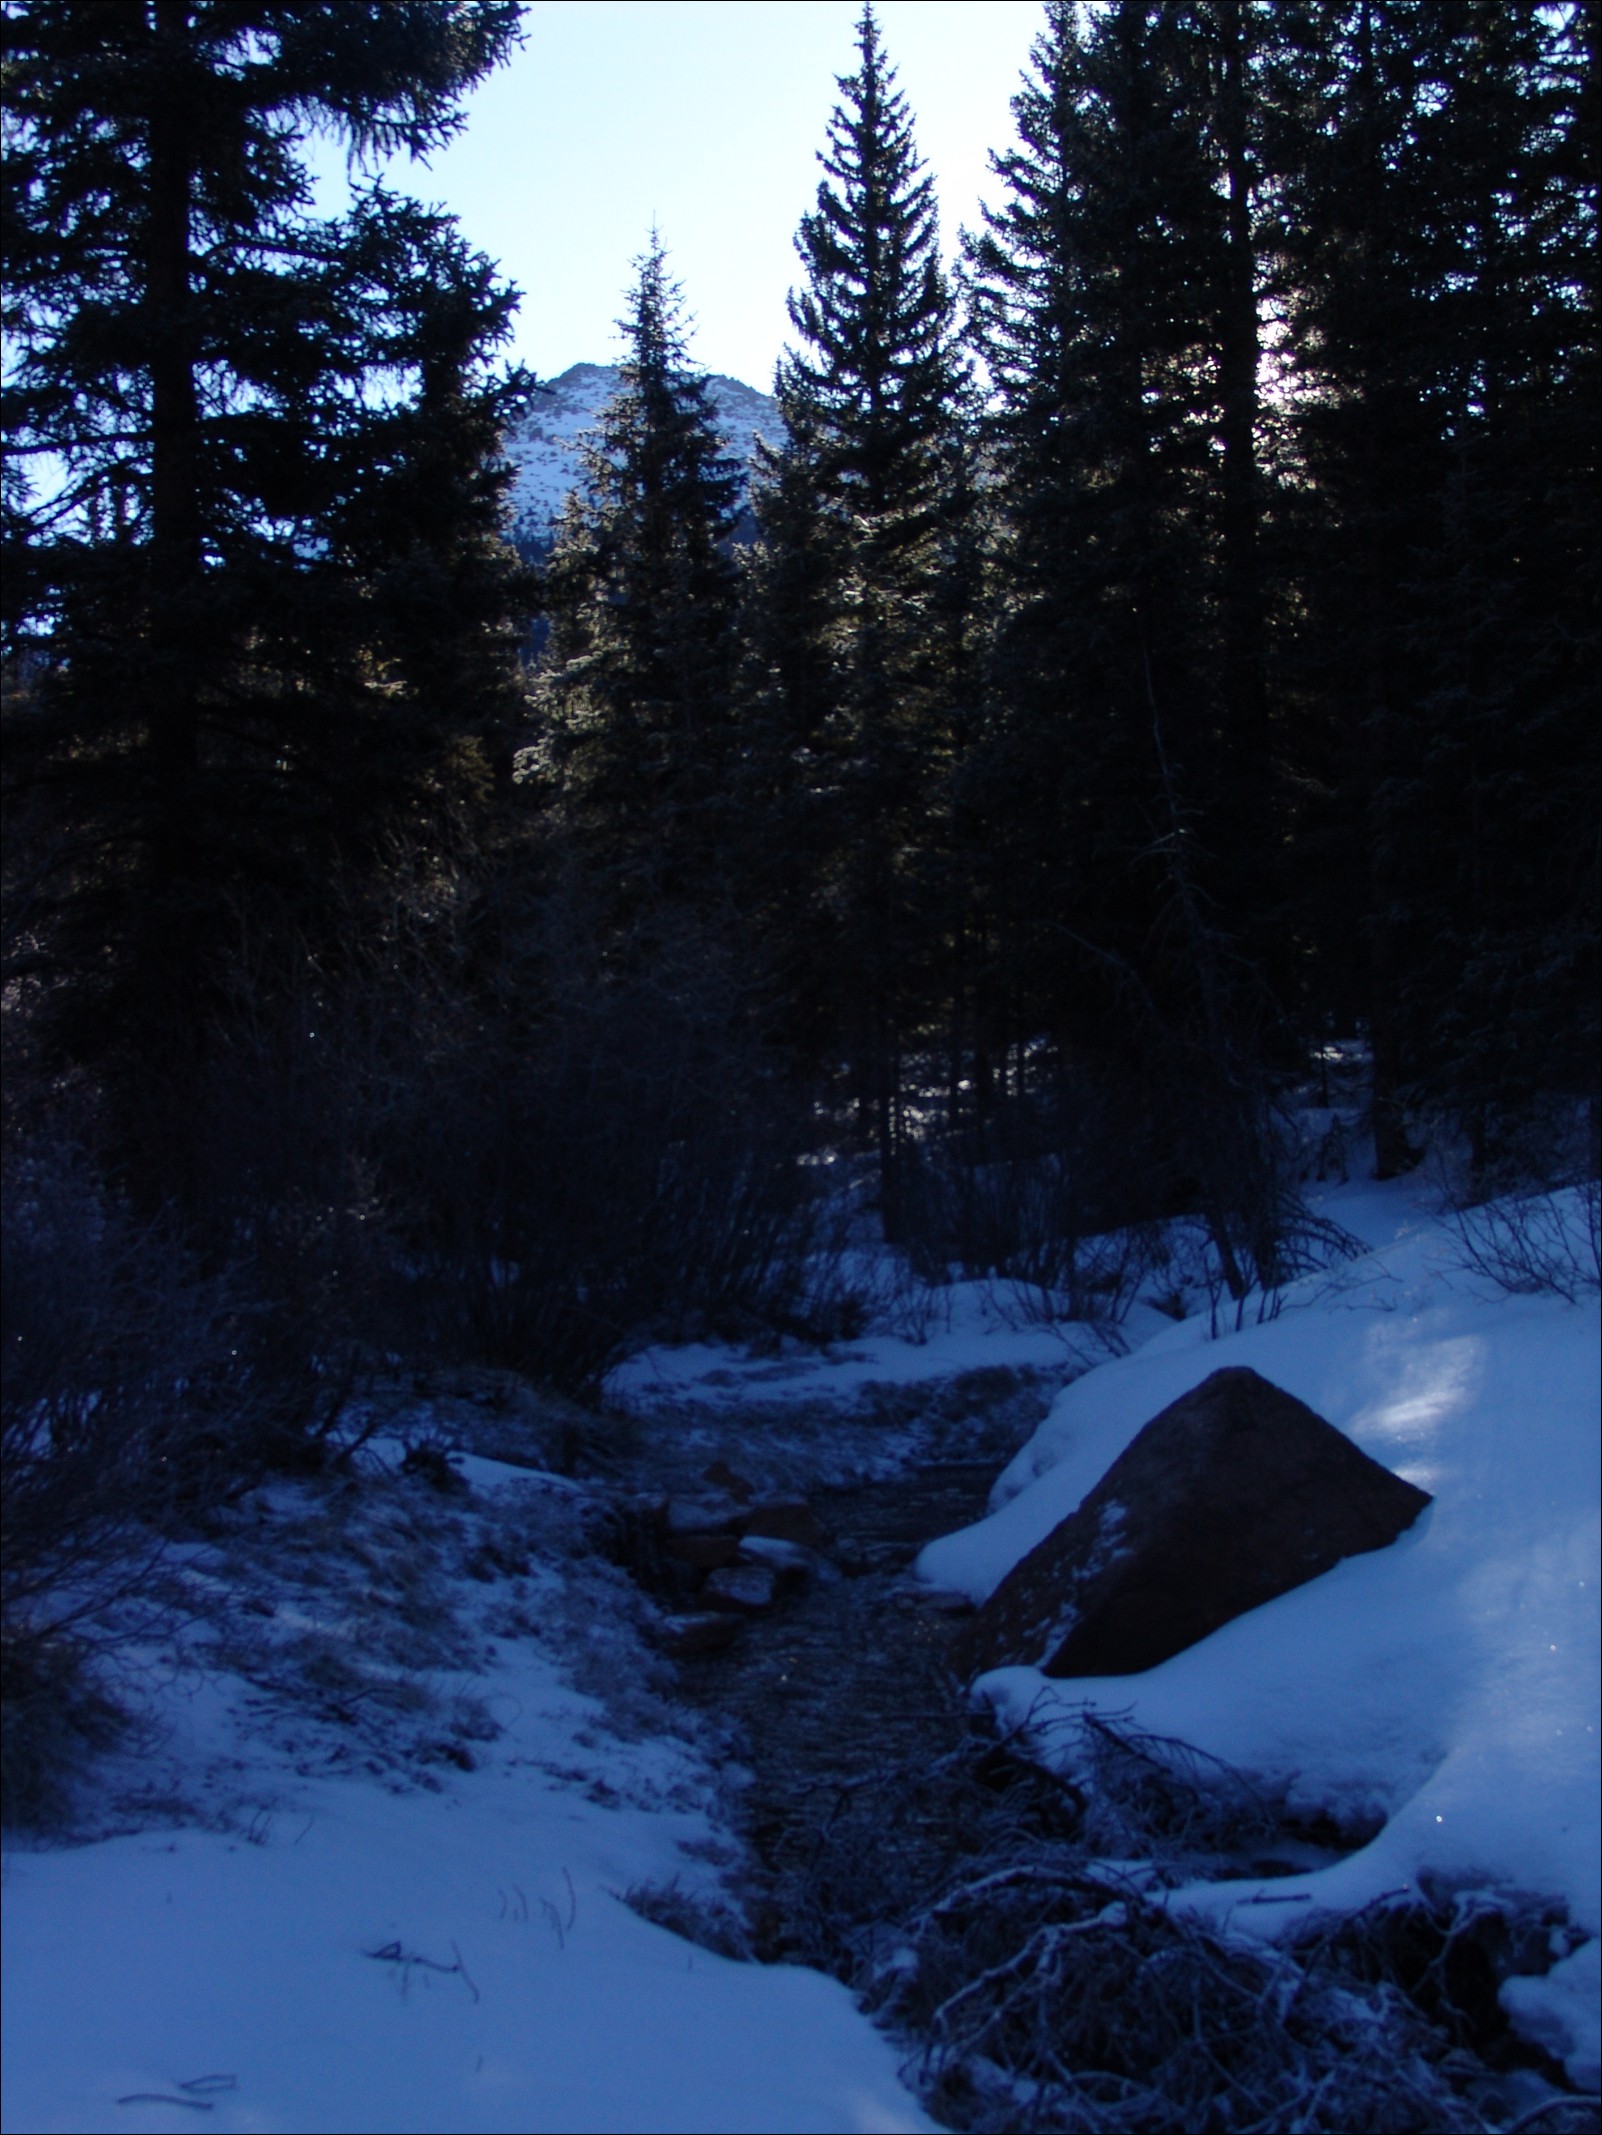
After crossing the stream, the trail brought us right up into Horsethief Park and provided us with some great views of some frozen over beaver ponds.
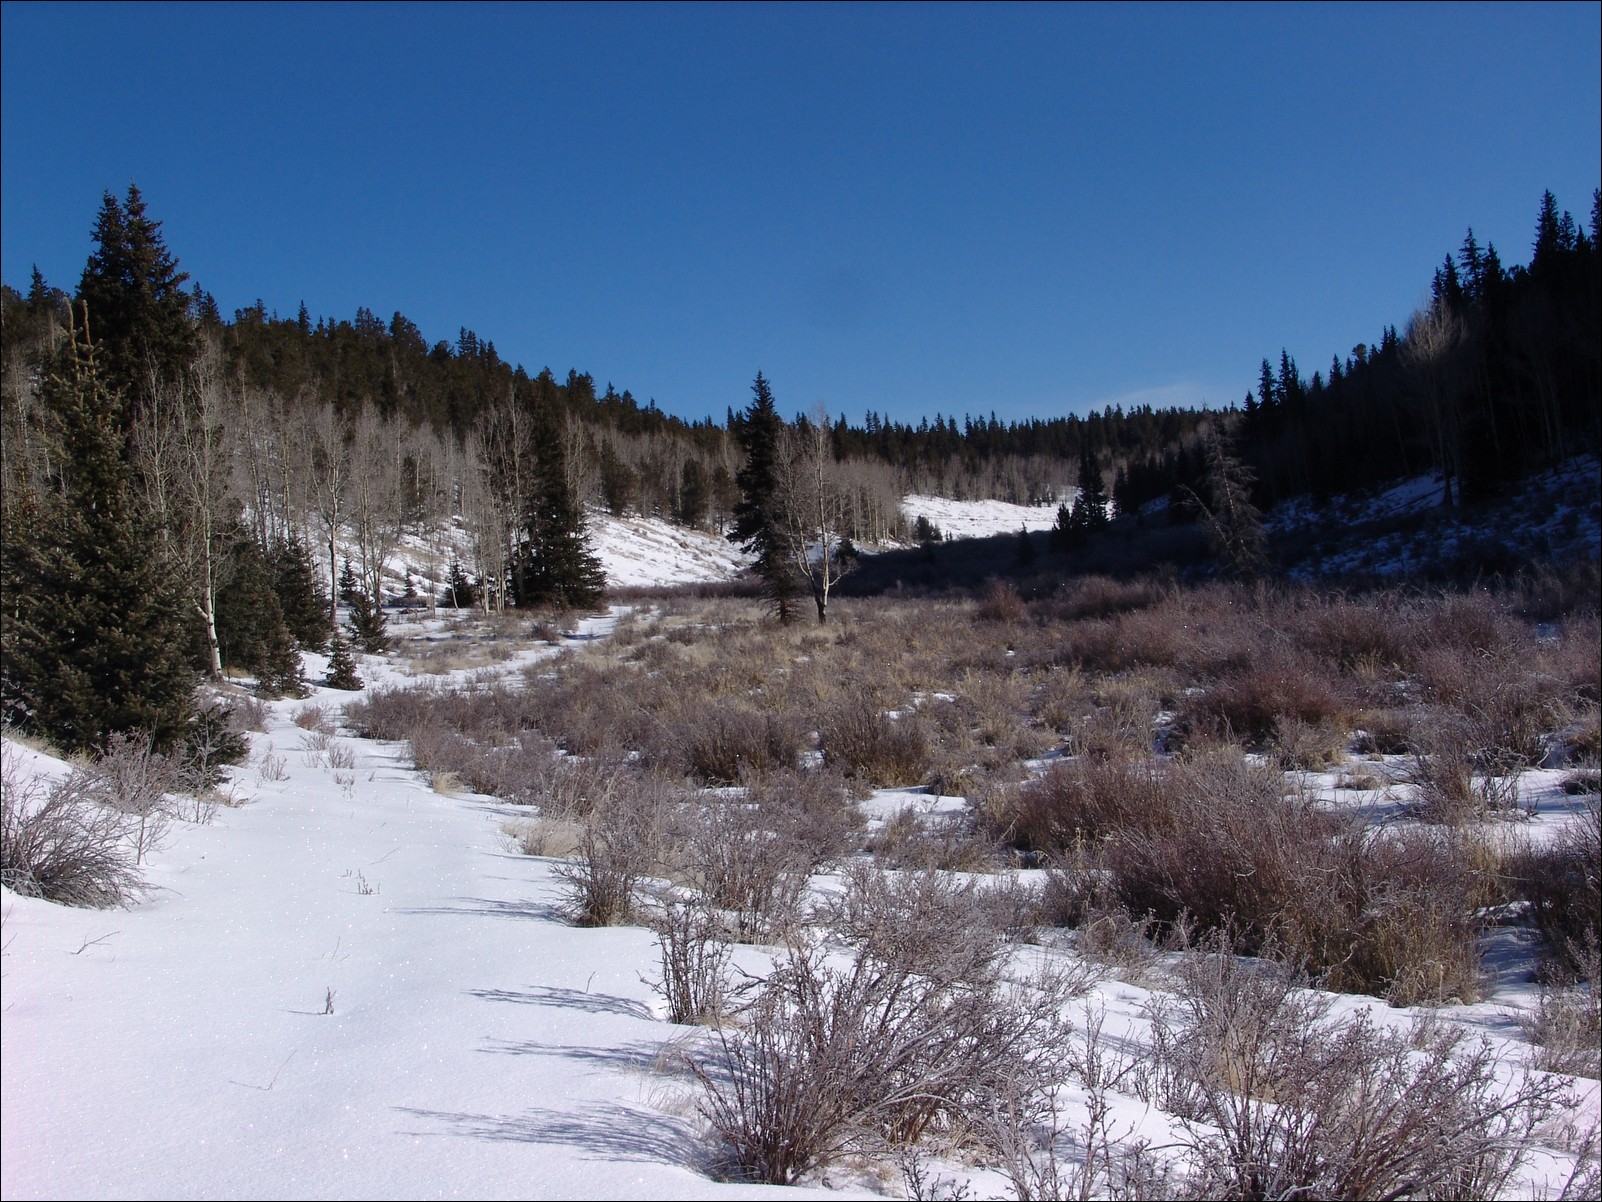
The views of Sentinel Point were great all day, and as we ventured up into Horsethief Park, the mountain seemed to keep an eye on our progress, measuring our worthiness.
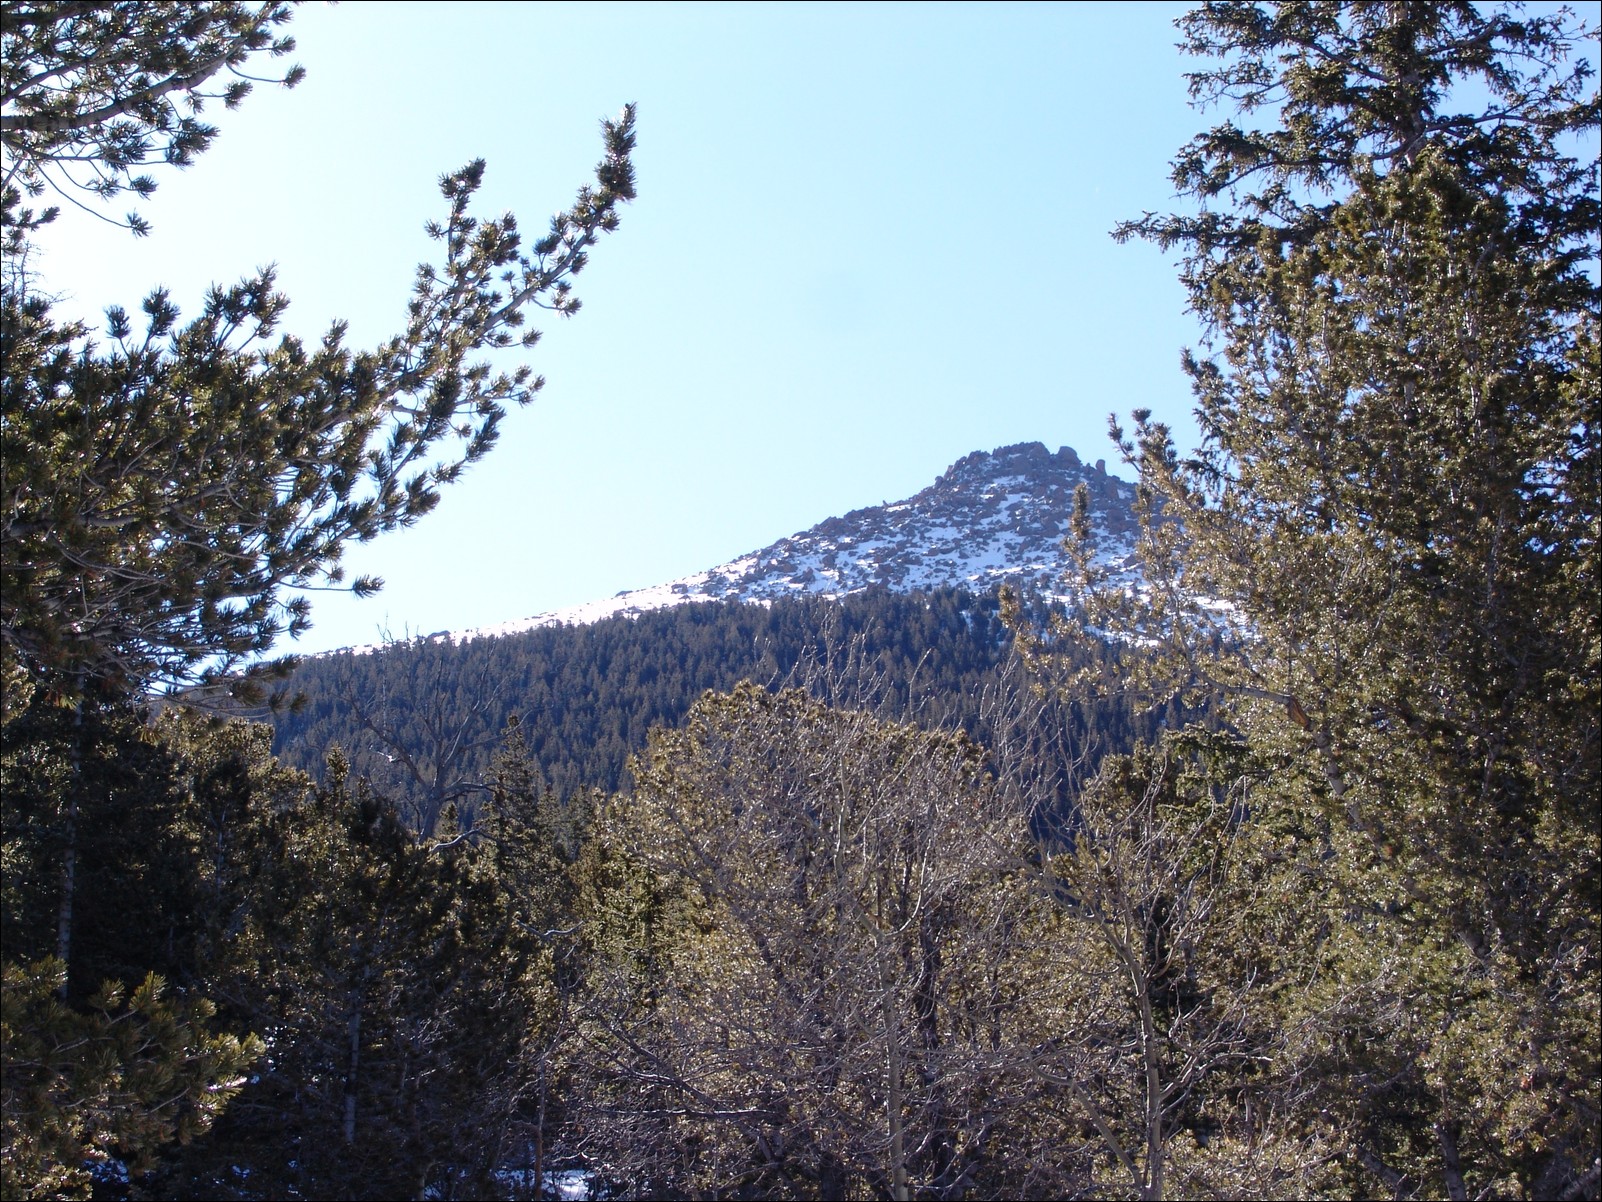
Sentinel Point was very close!

Once in Horsethief Park, the trail splits and we stayed to the right and began bushwhacking up the steep slope of Sentinel Point.
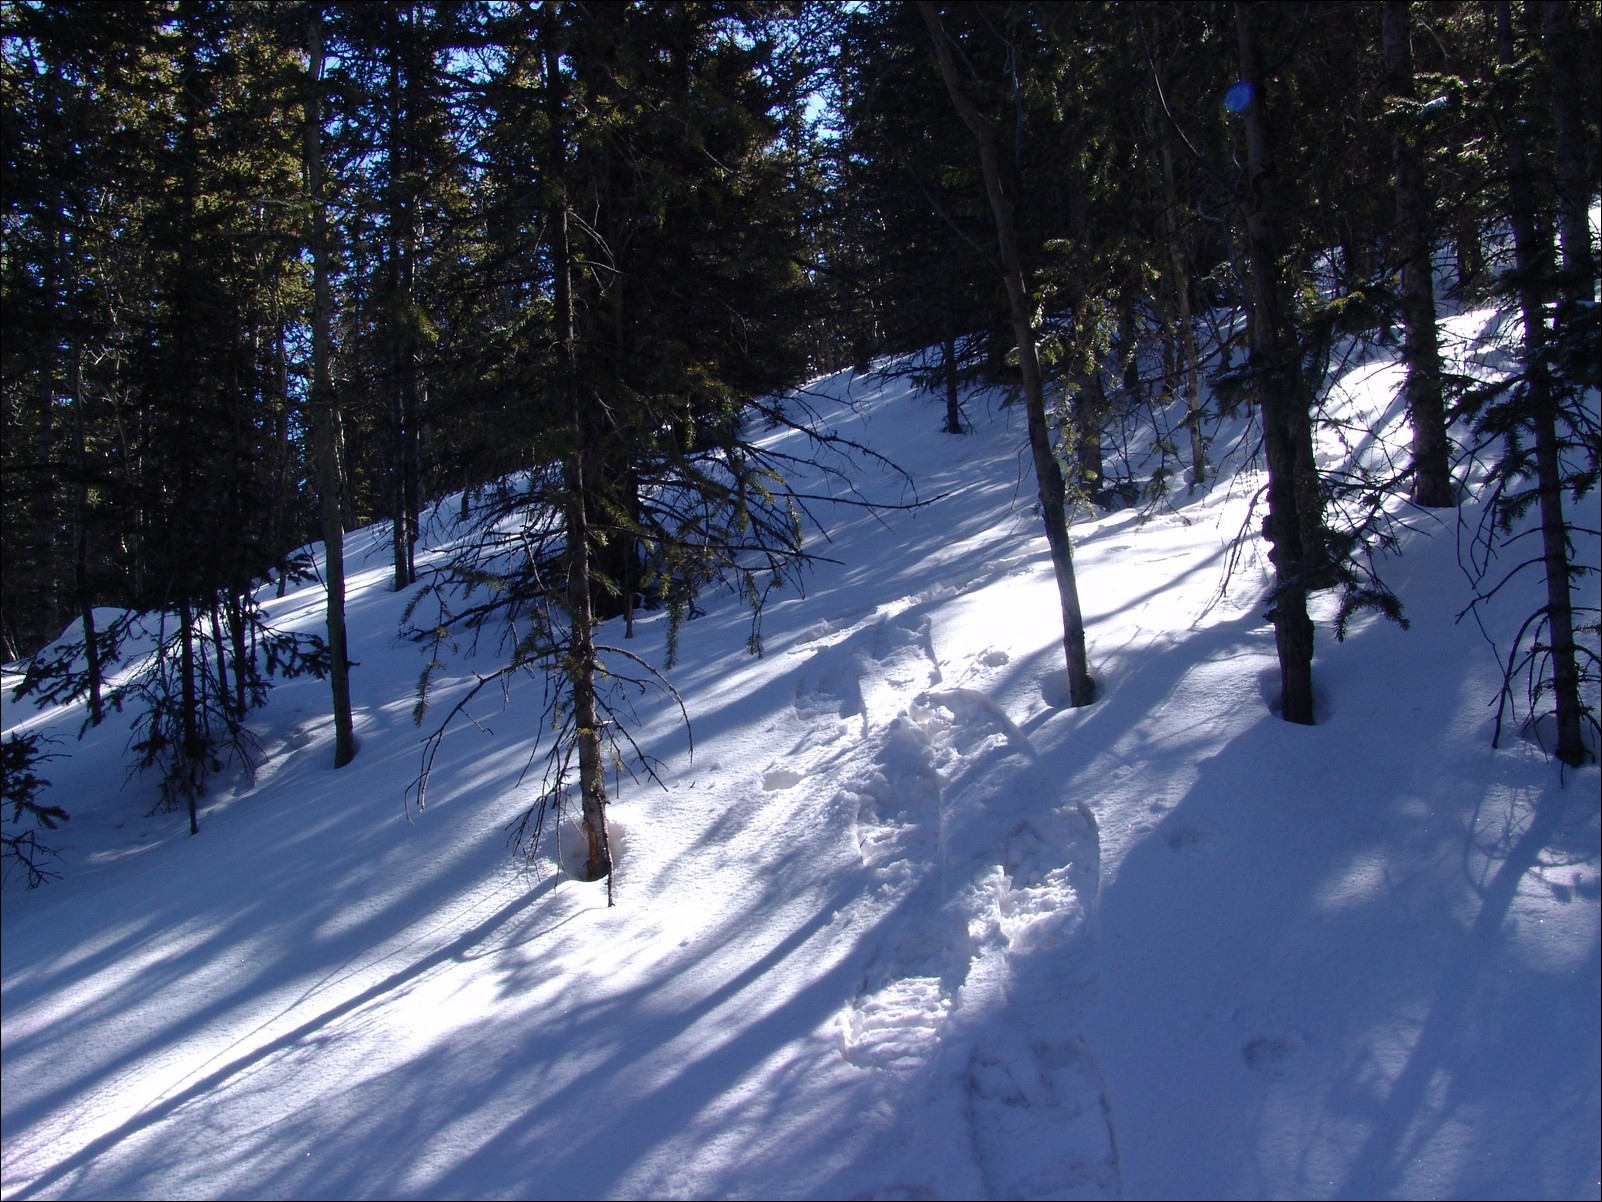
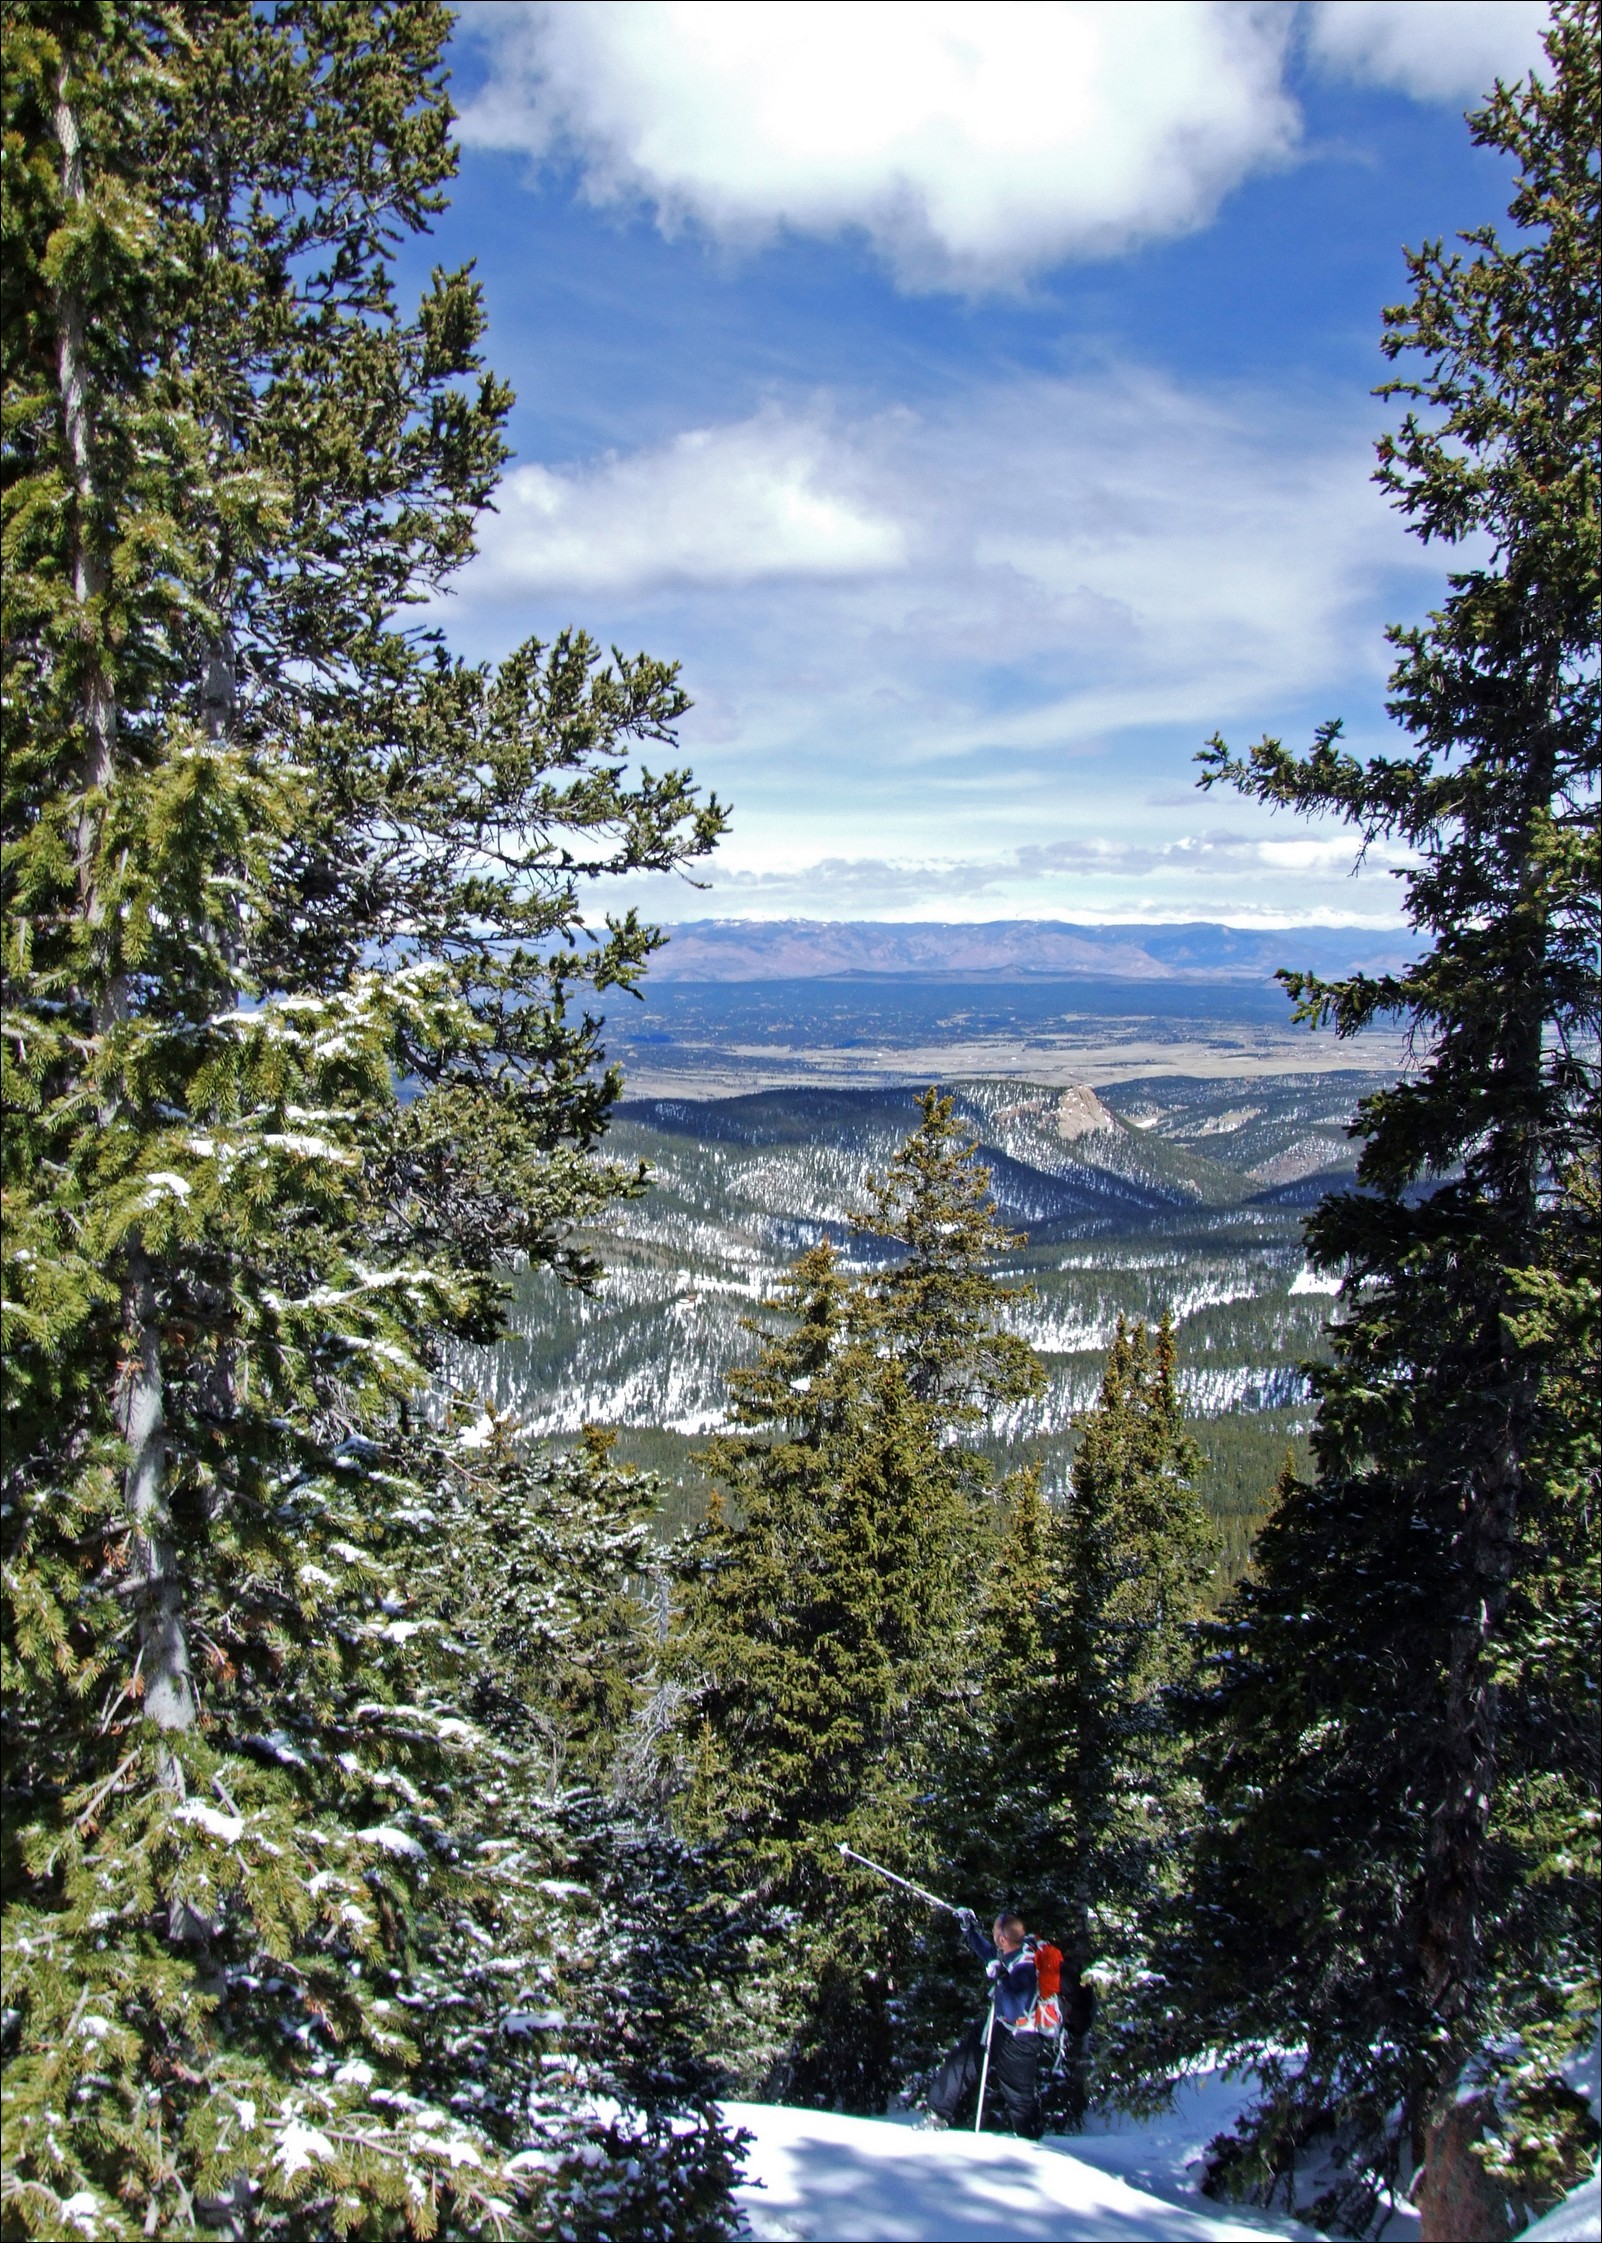
In retrospect, it would have been prudent to stay to the North side of the mountain; however, the very steep and powdery west slope of Sentinal proved to be a great test for our snowshoes and our endurance! Once at tree-line, the terrain leveled out and we were able to make our way to the ridge-line and up to Sentinal Point proper. The views on this hike were outstanding, including some very uncommon viewpoints of Pikes Peak and Almagre Mountain. 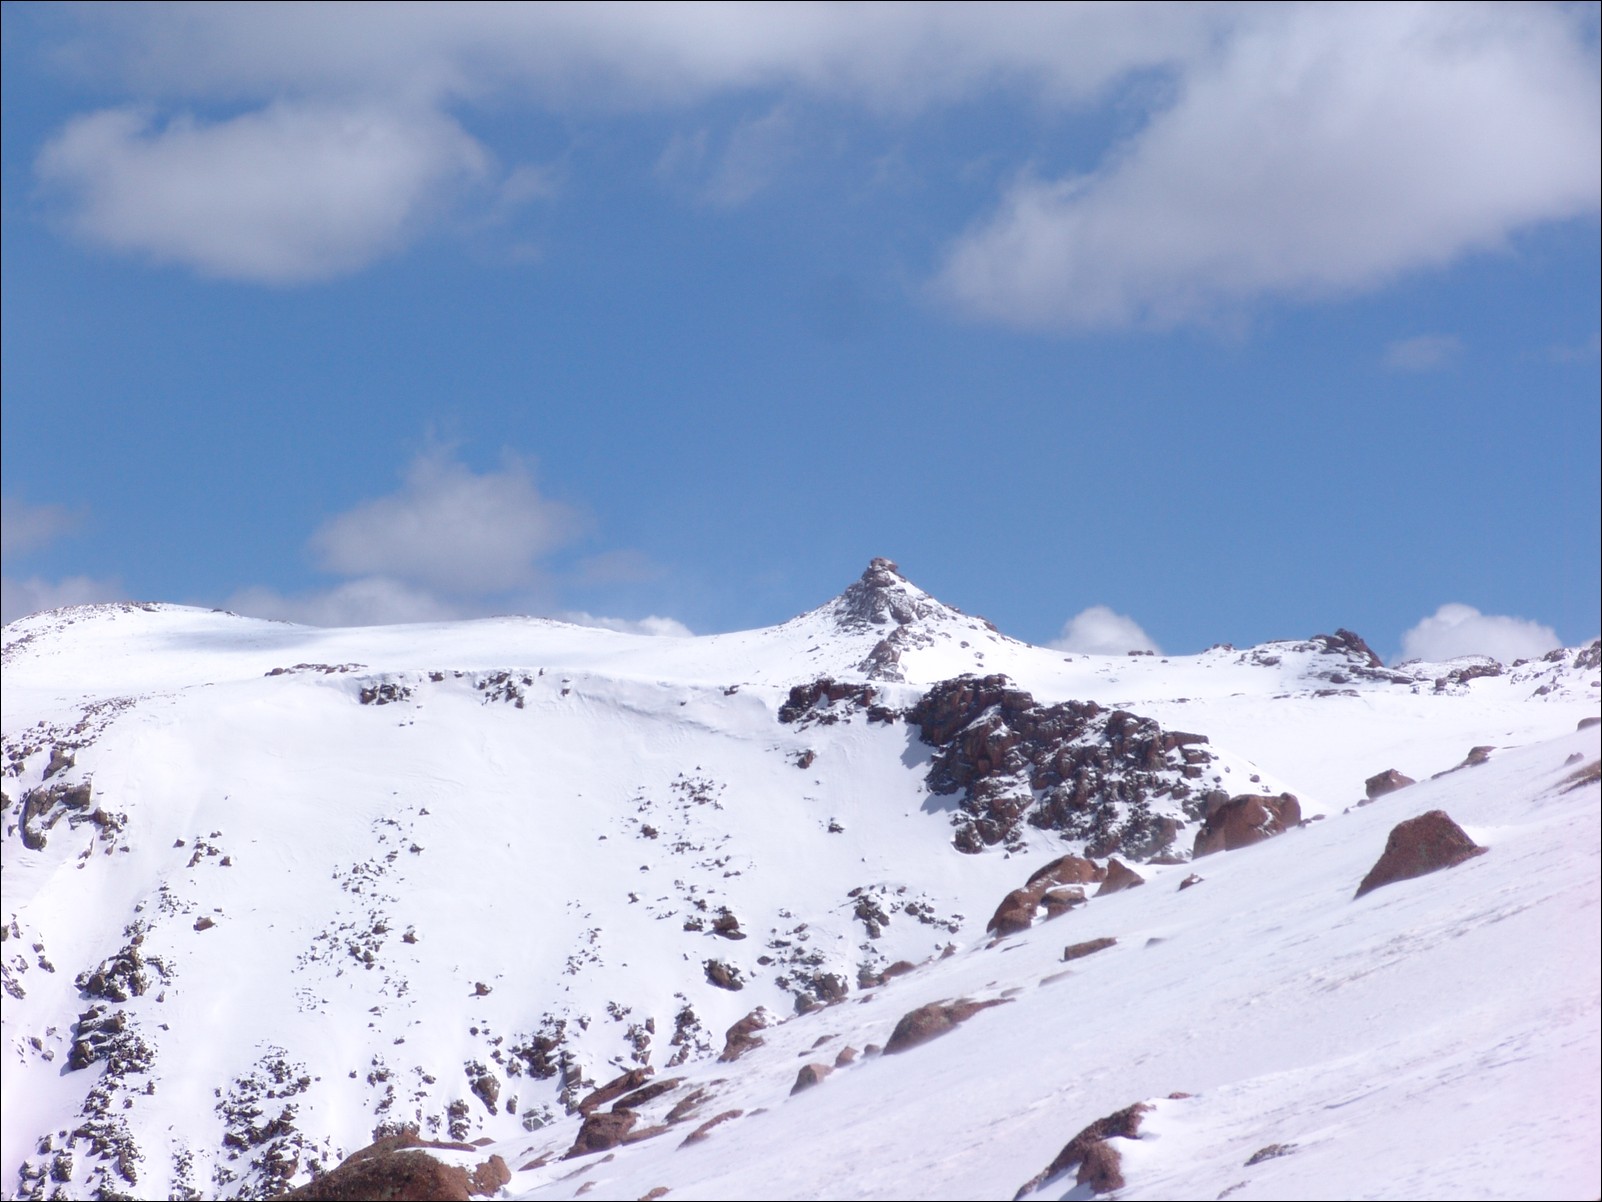
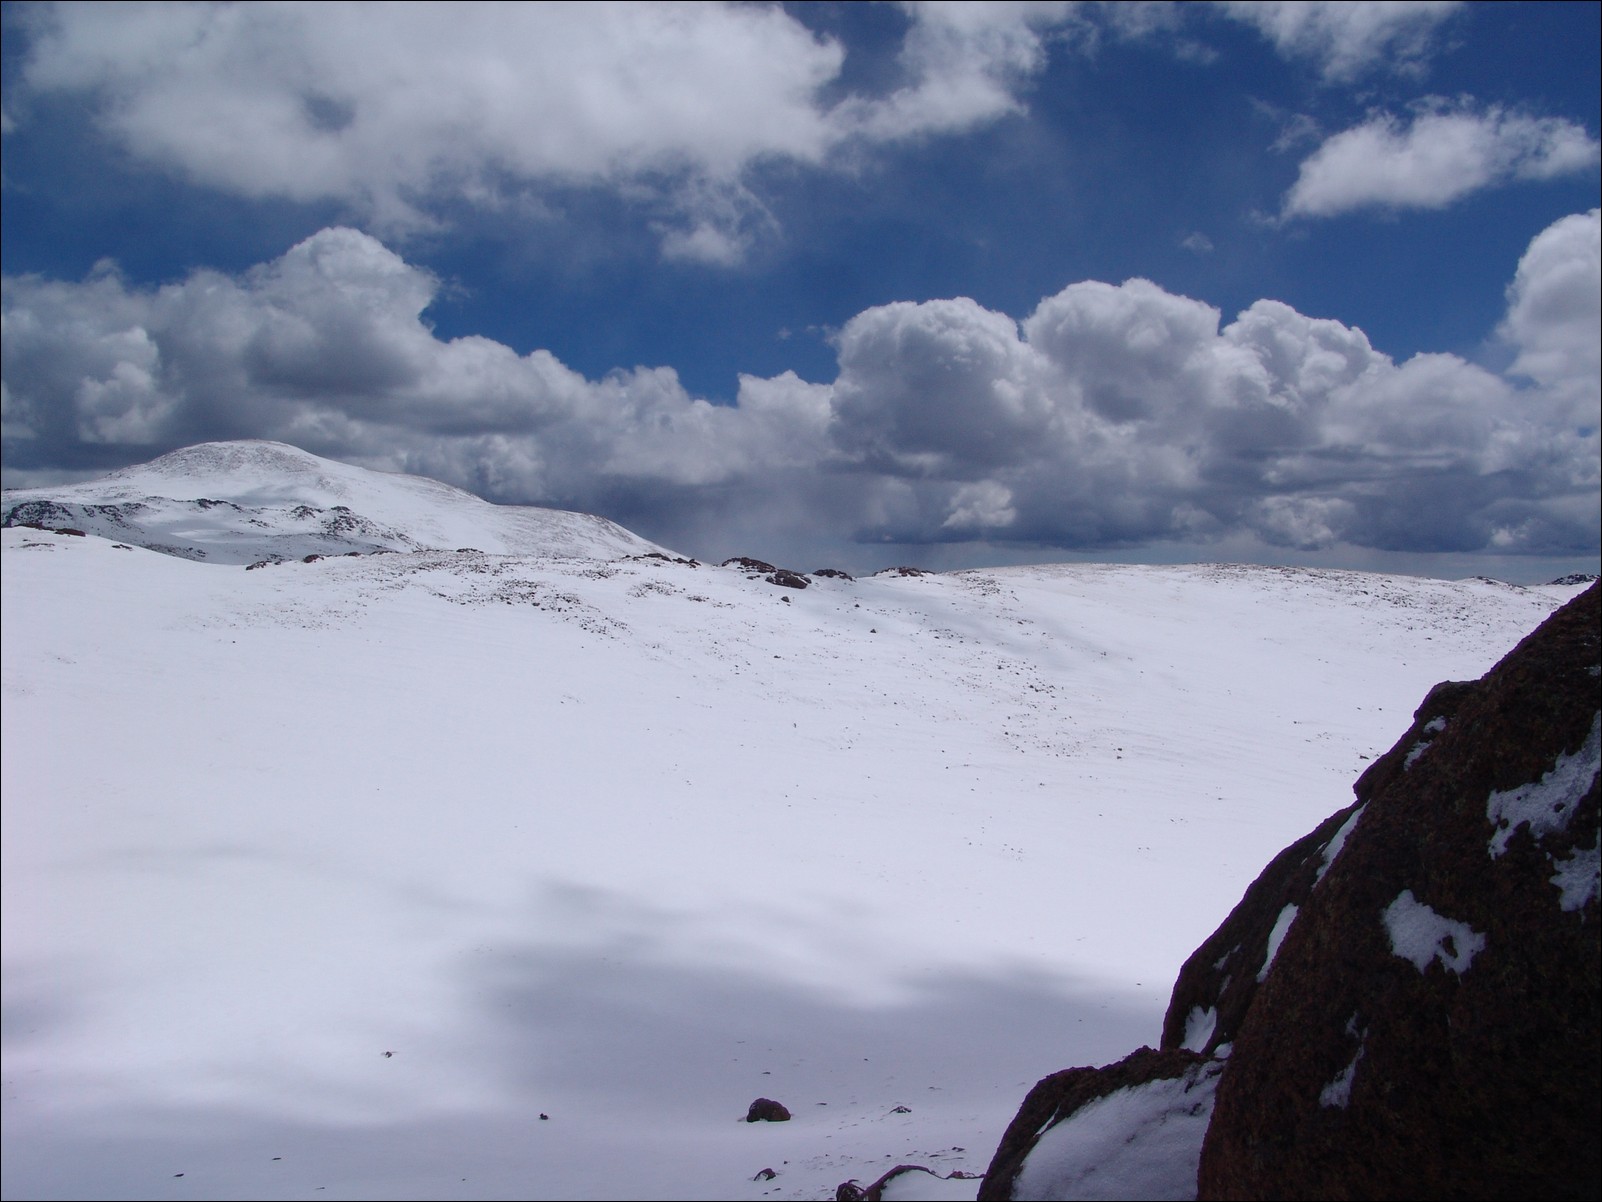

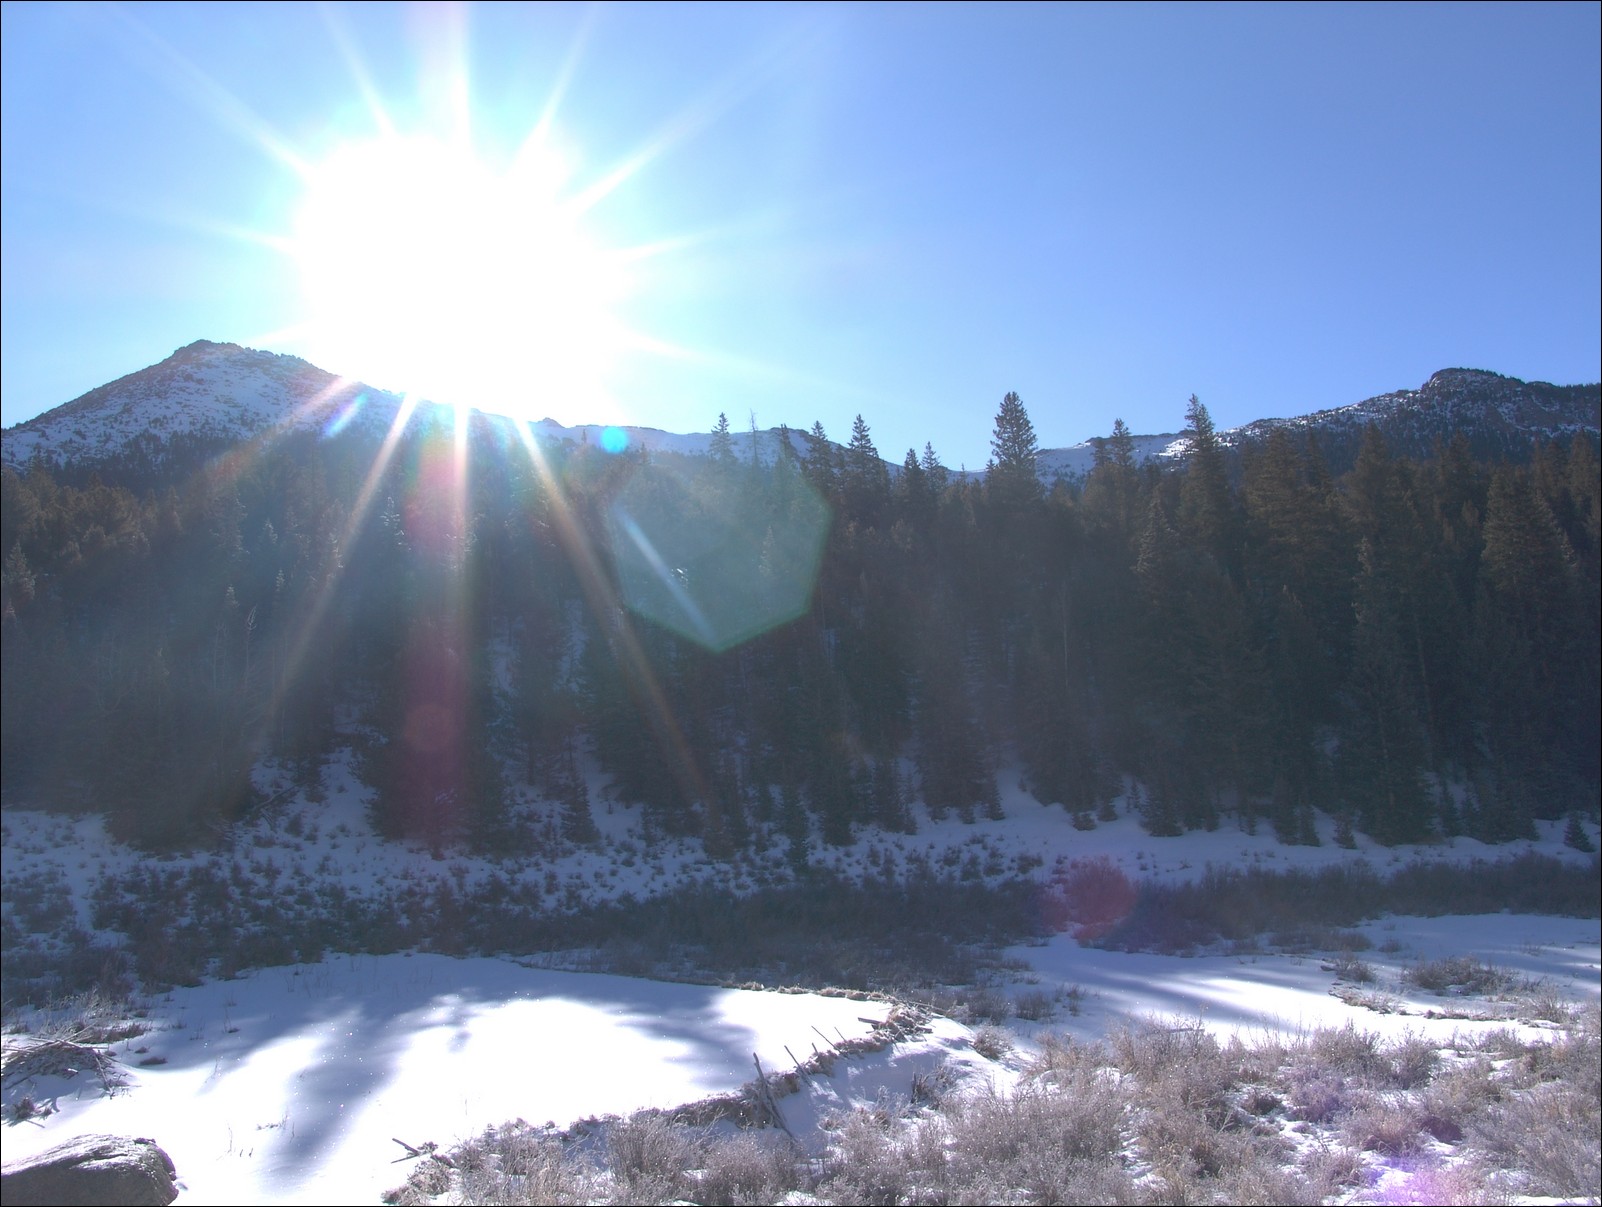
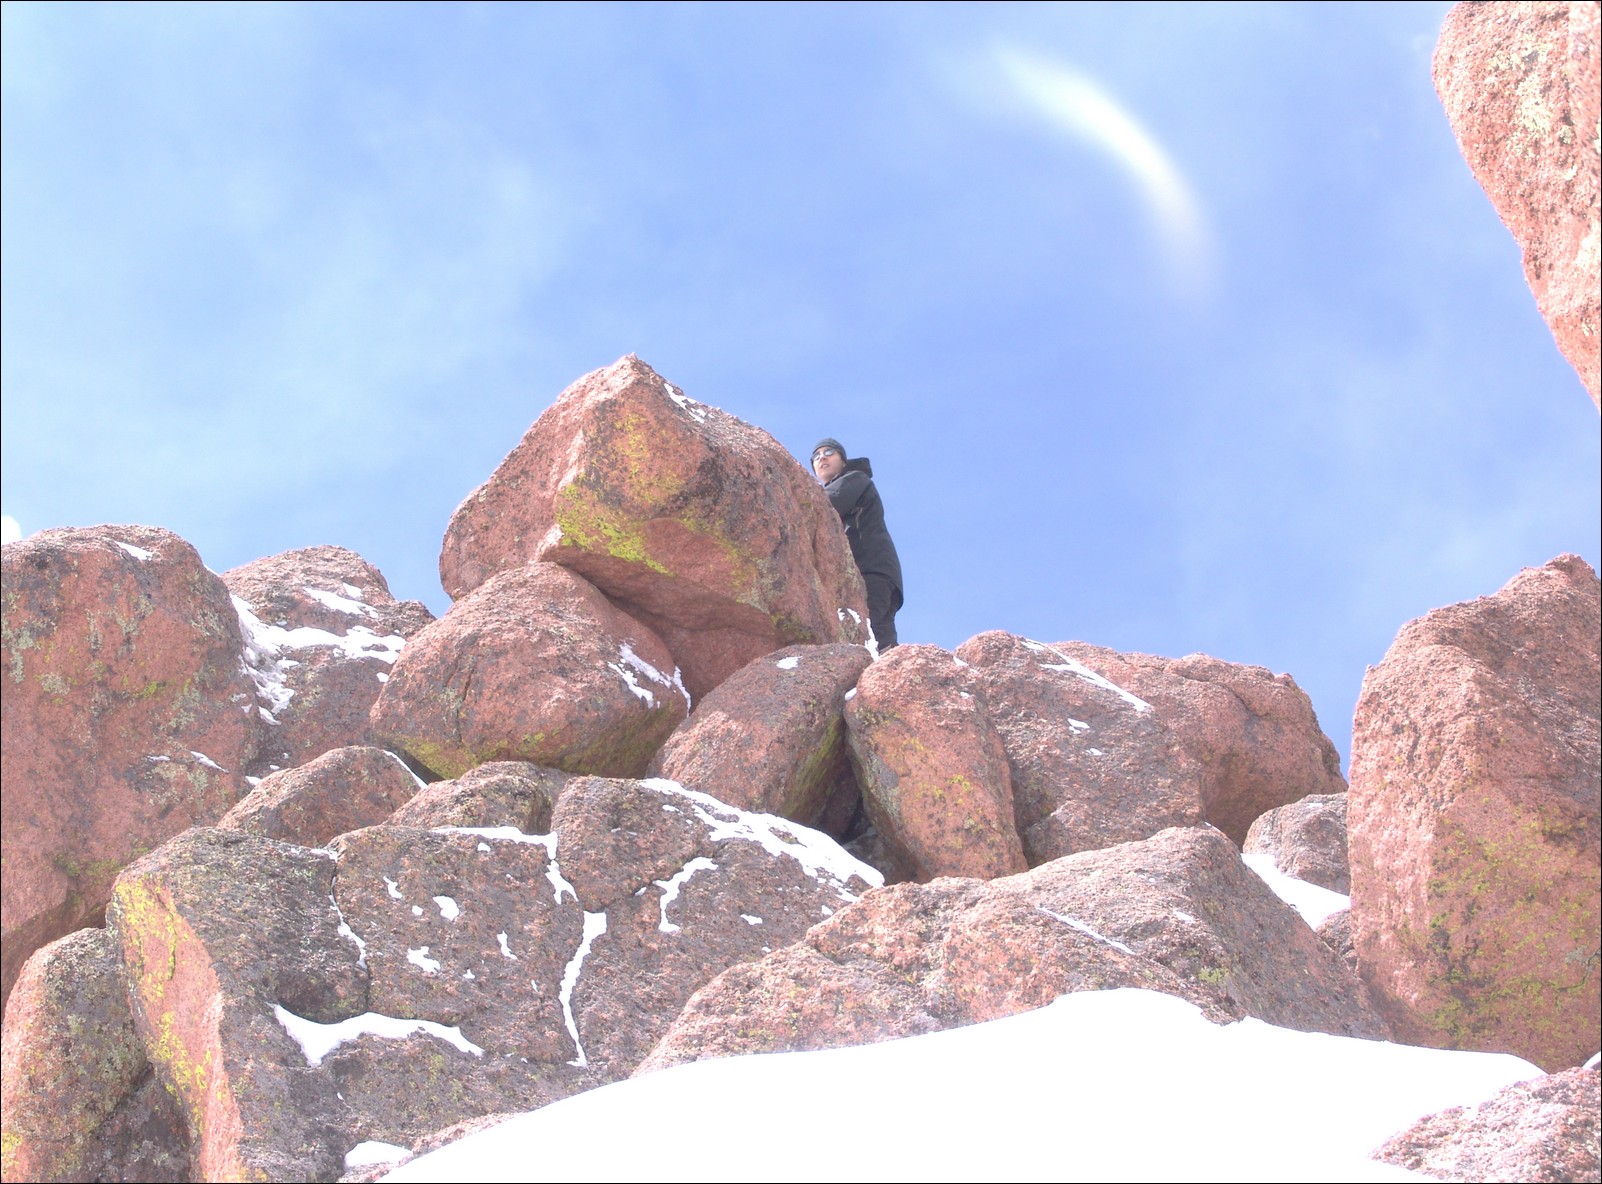
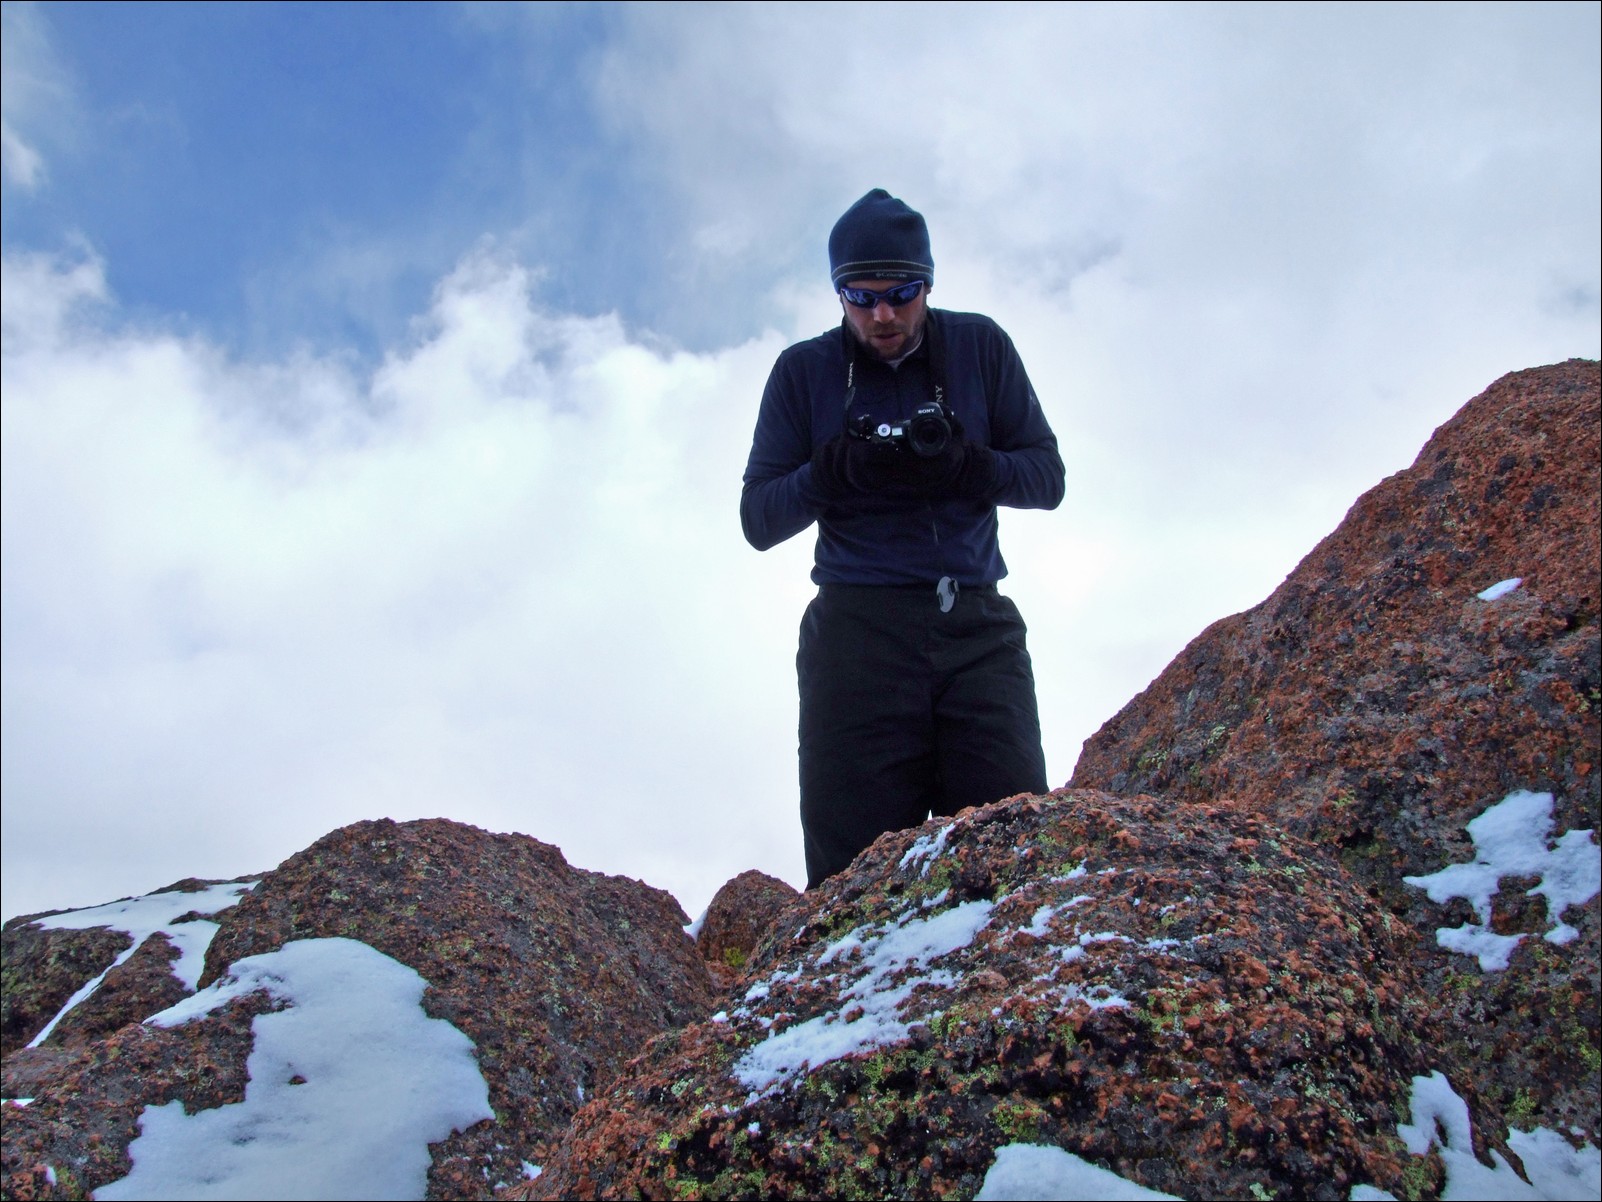
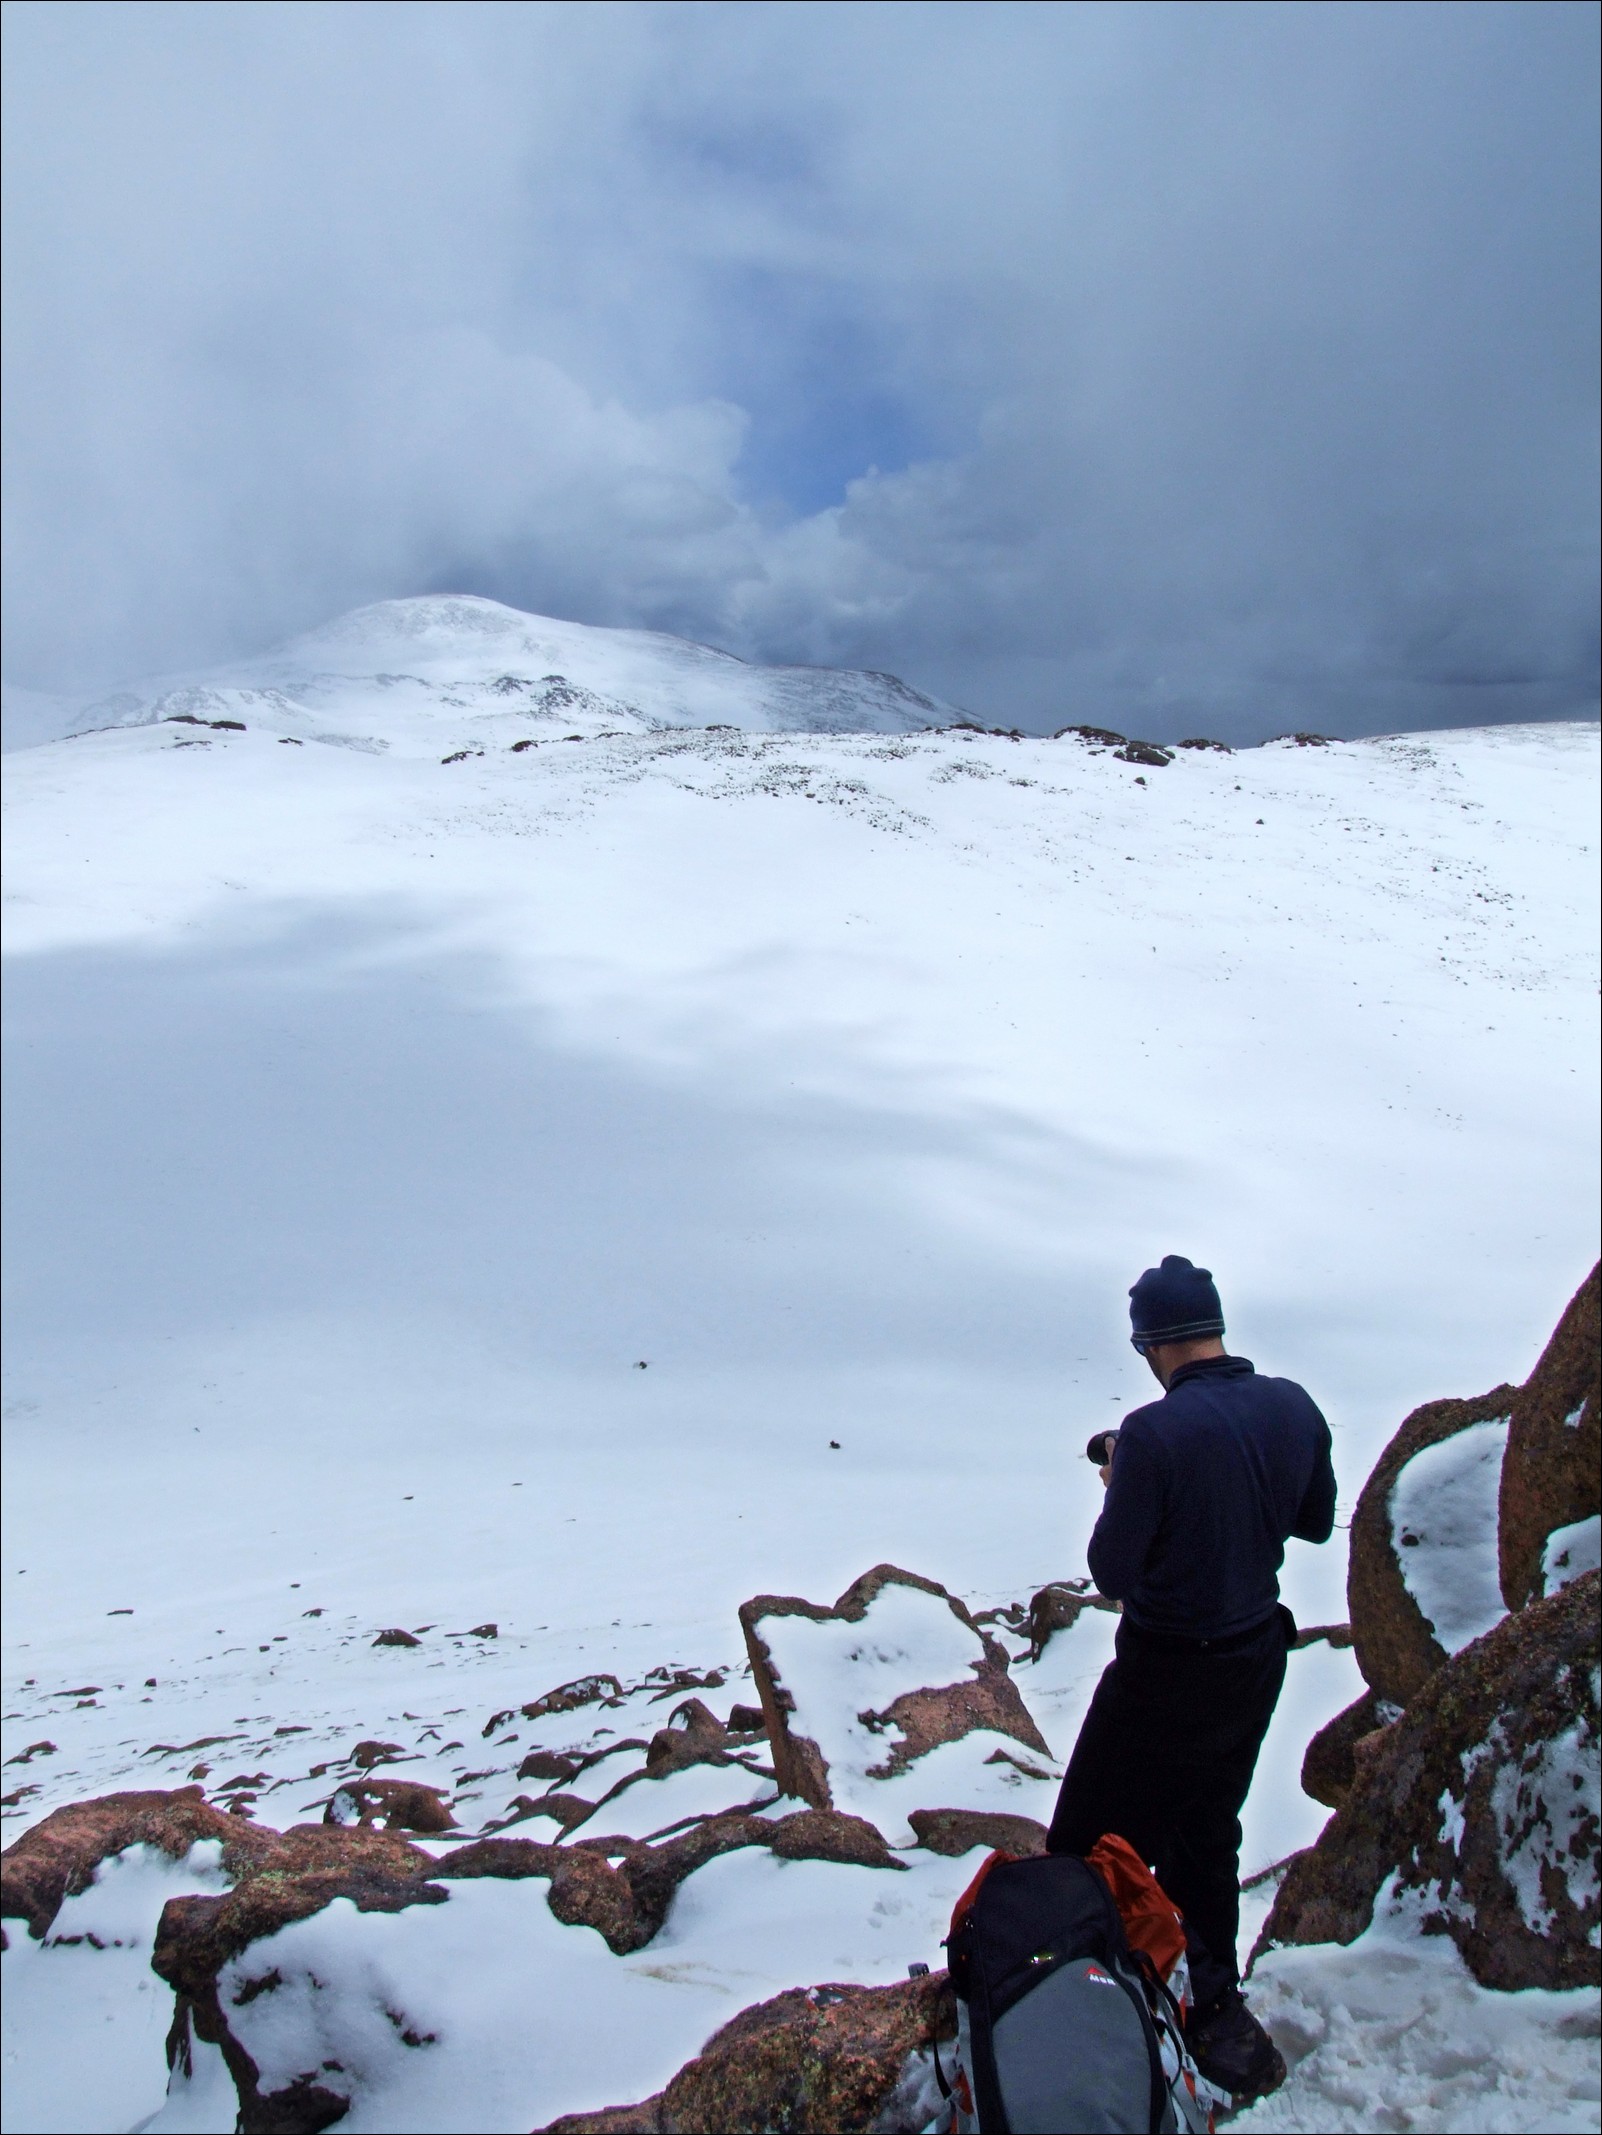
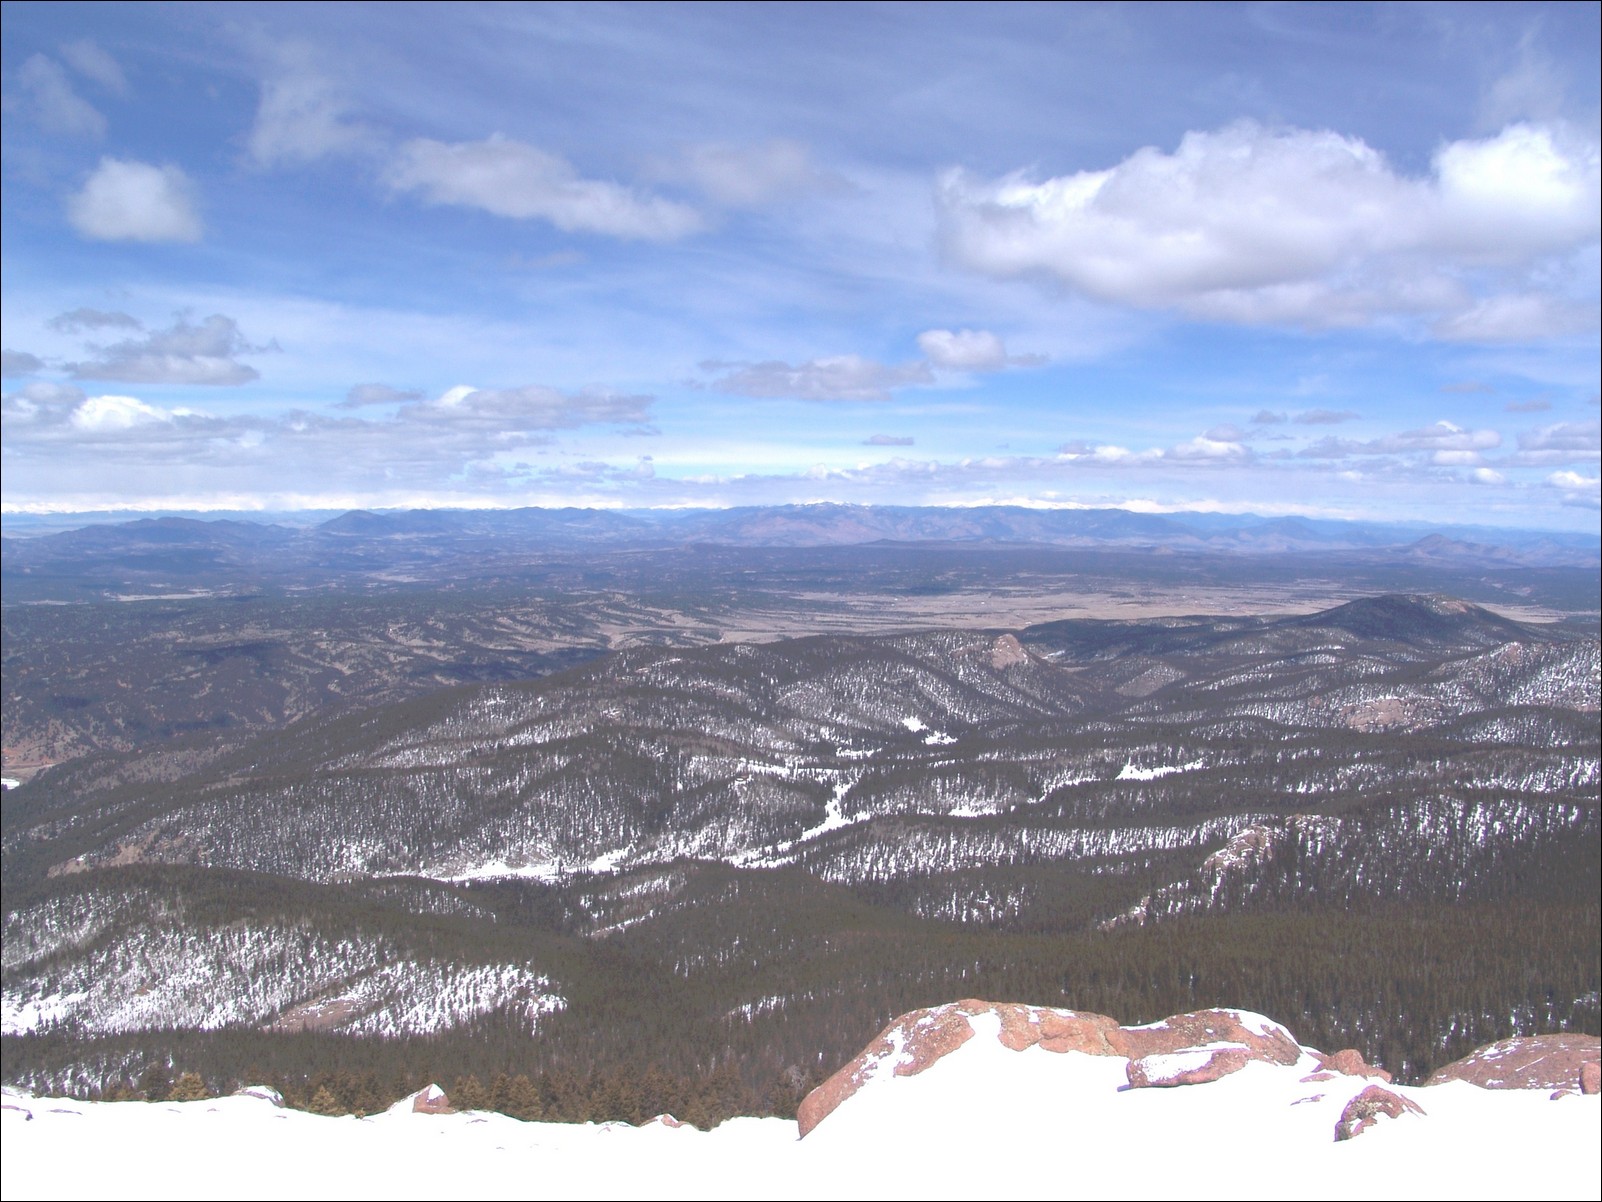
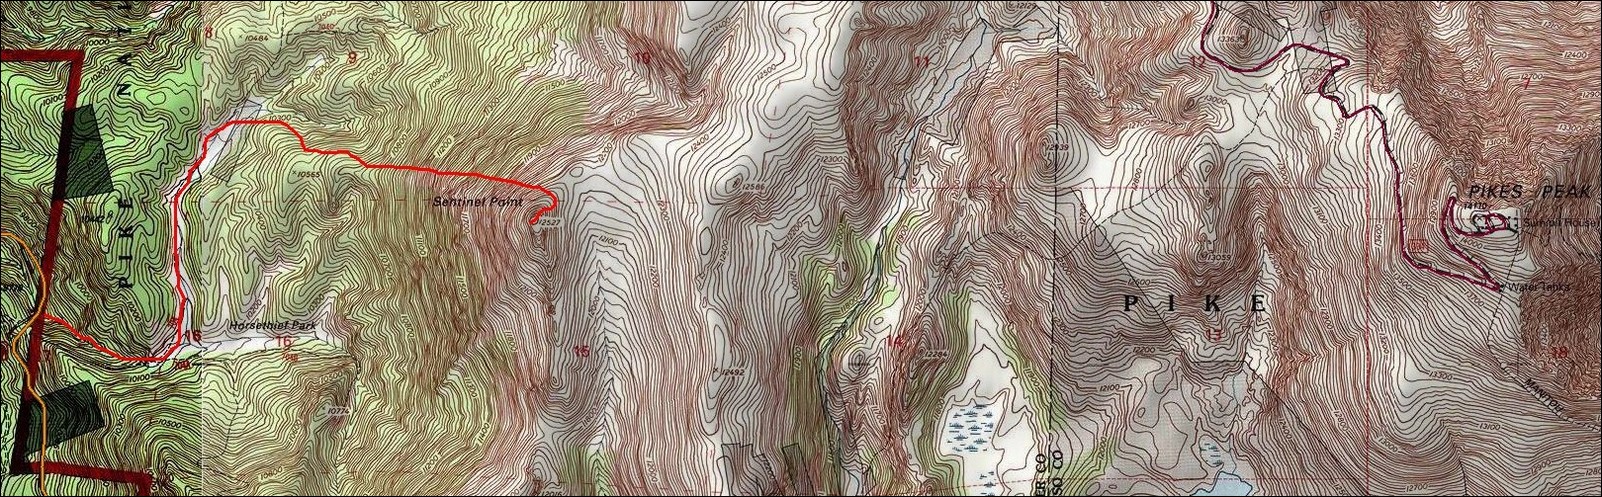
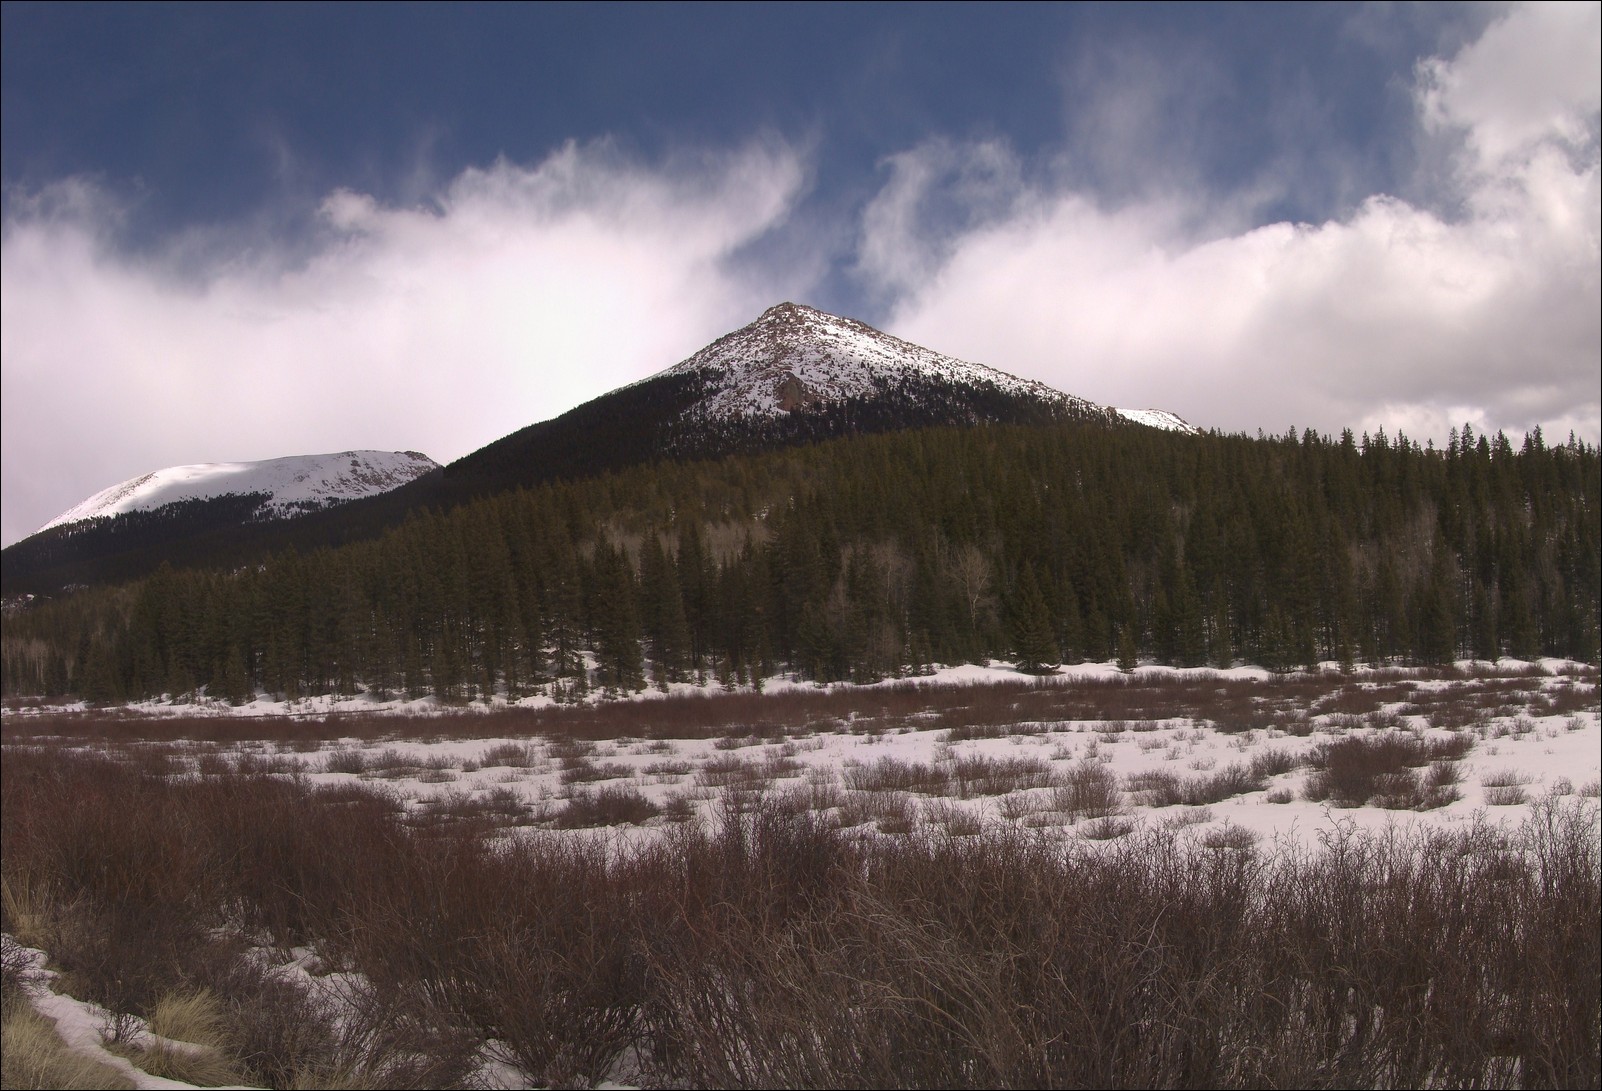
I highly recommend this as a quick day-hike all year round.