Displaying items by tag: photography
Exploring Almagre Mountain - Sunrise on Pikes Peak and the Waldo Canyon Fire
Originally, my friend Ethan and I had made plans to climb the Three Apostles - three great 13ers over near Leadville; however, the Waldo Canyon Fire started the weekend prior and by Tuesday had burned out of control - 346 homes were burned to the ground in Mountain Shadows and Highway 24 was closed. The main access to the mountains was Highway 24, so we were pretty much stuck on the Front Range. Additionally, the whole week had been an emotional rollercoaster for everyone - my parents evacuated their house and stayed with us for a couple of nights. Ethan covered the fire quite a bit with video and social media throughout the week (by the way, if you have a chance, you really should check out his incredible blog post about social media, traditional media and the Waldo Canyon Fire - a fabulous read). The Waldo Canyon Fire had presented Ethan and I another opportunity - to hike a closer-to-home peak with the hopes of getting a birds-eye-view of the fire's extent.
So - we set off early on Sunday morning to do just that - I picked Ethan up at 3:30 AM from his house and we head up Gold Camp Road to tackle Almagre Mountain - a 12,367 ft. gently-sloped peak just South of Pikes Peak. Indeed, most Colorado Springs residents will recognize Almagre as a very plain looking set of mountains above tree-line to the left (south) of Pikes Peak. I'd always wanted to climb Almagre, and Ethan had already done it twice, so it seemed a great fit for our objectives.
We opted for the western approach from near the gate that Colorado Springs Utilities (CSU) has erected to keep people out of the city's water supply, which seemed to us to be quite low. To reach this spot, we drove quite a ways up Gold Camp Road, about 2/3 of the way to Cripple Creek, and turned right on Forest Road 376 to the CSU dead-end.
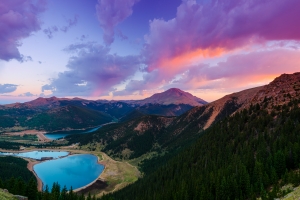
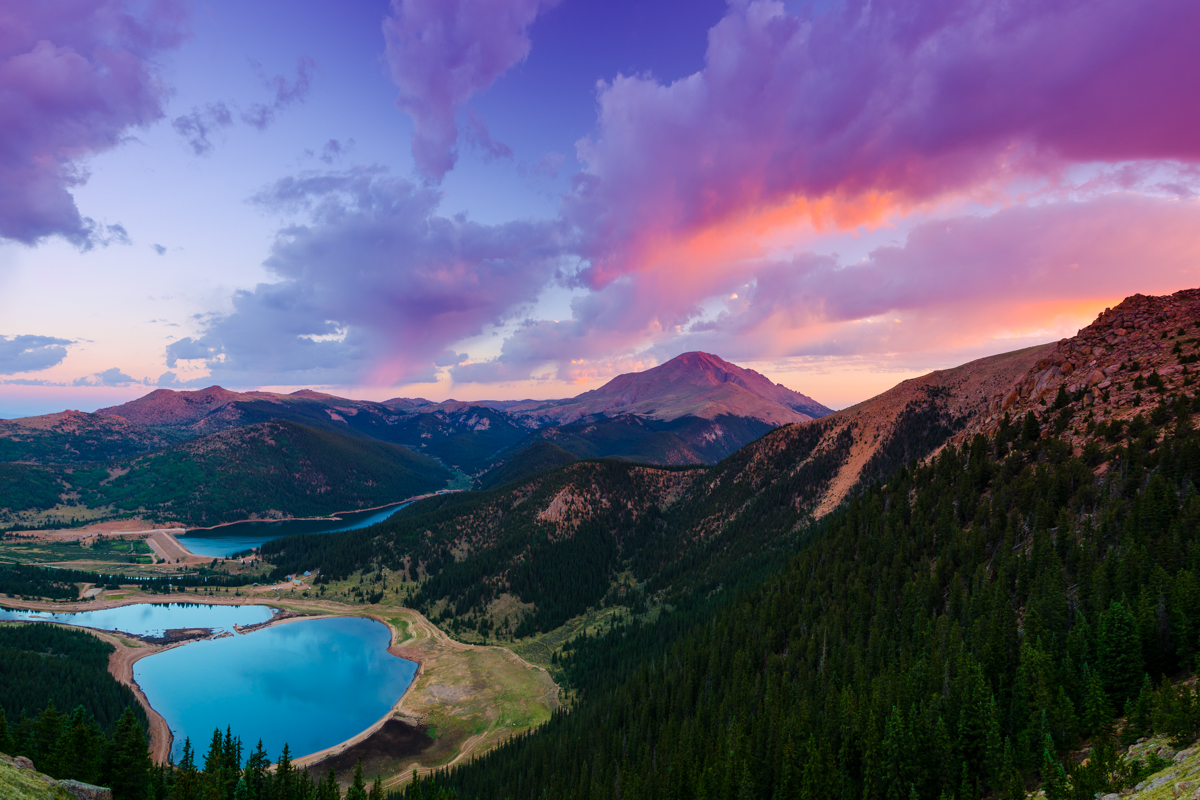
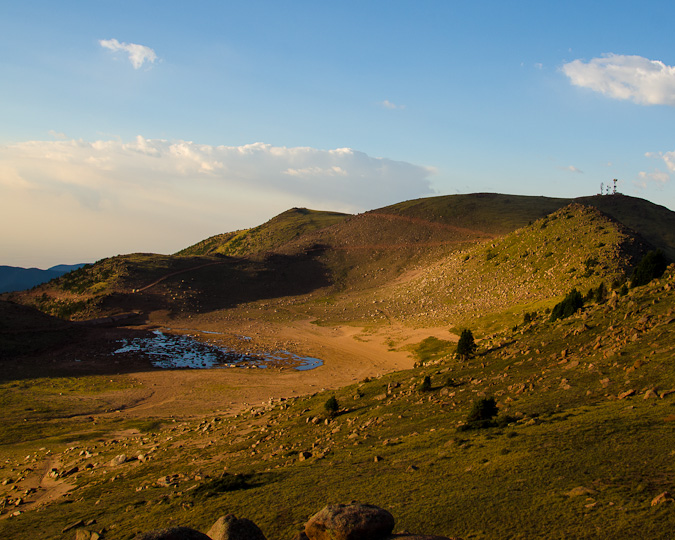
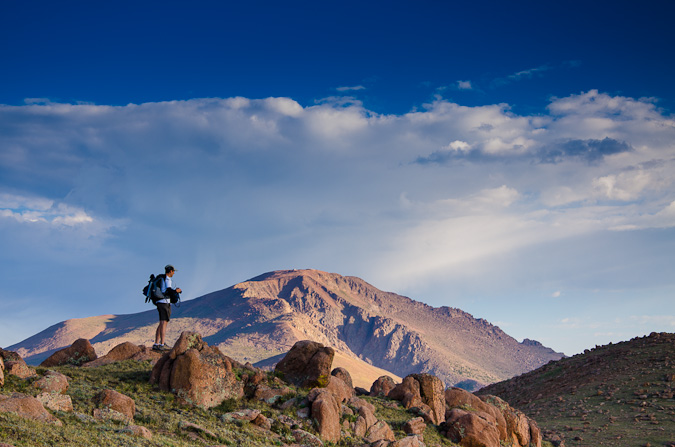
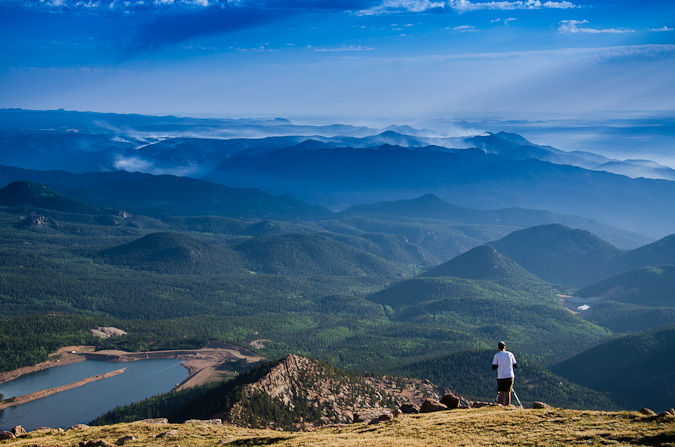
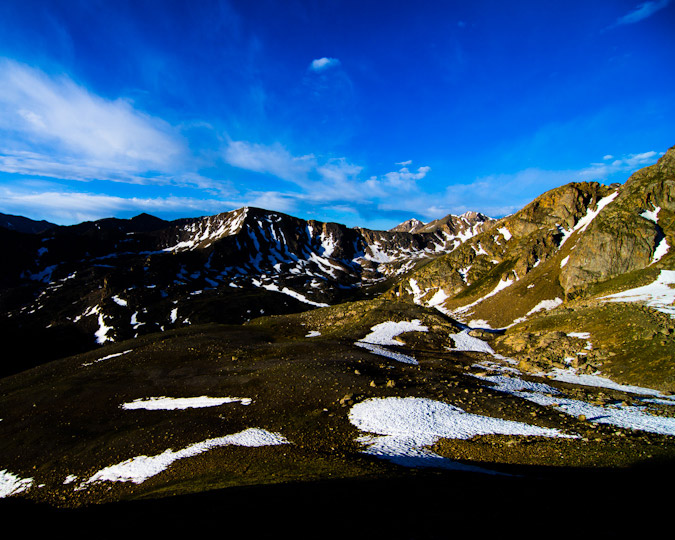
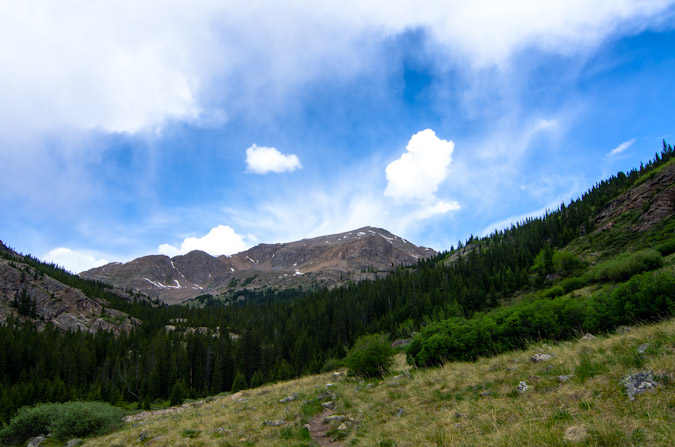
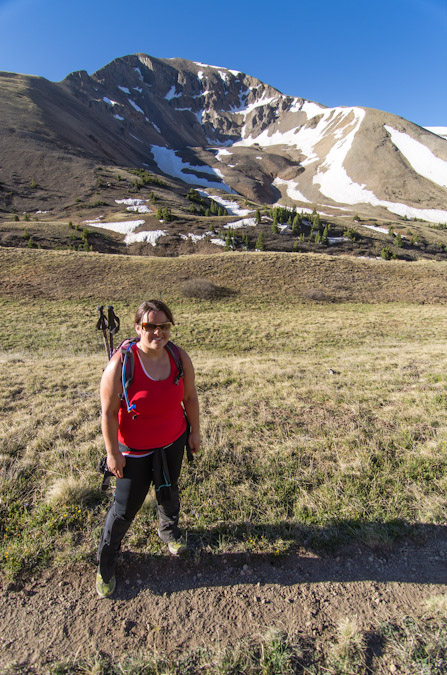
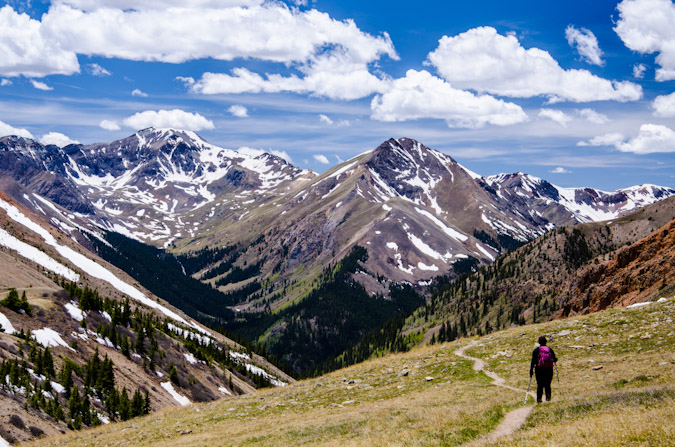
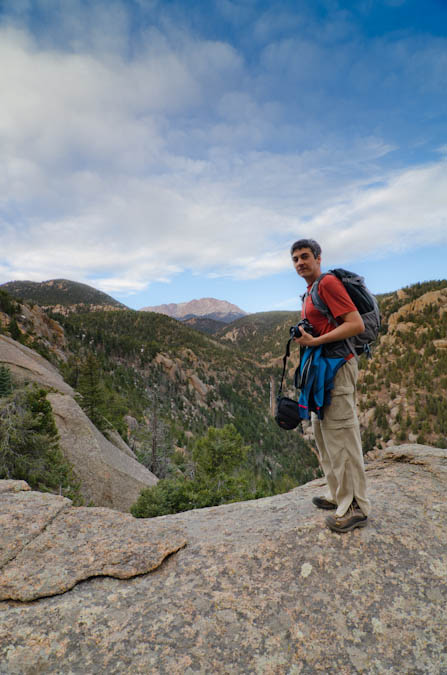
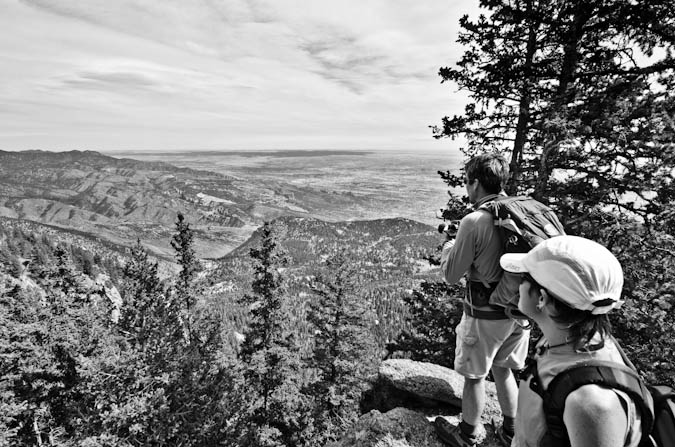
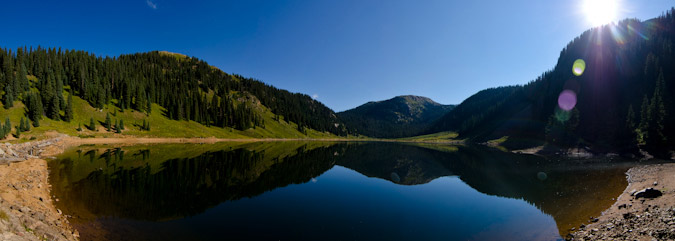
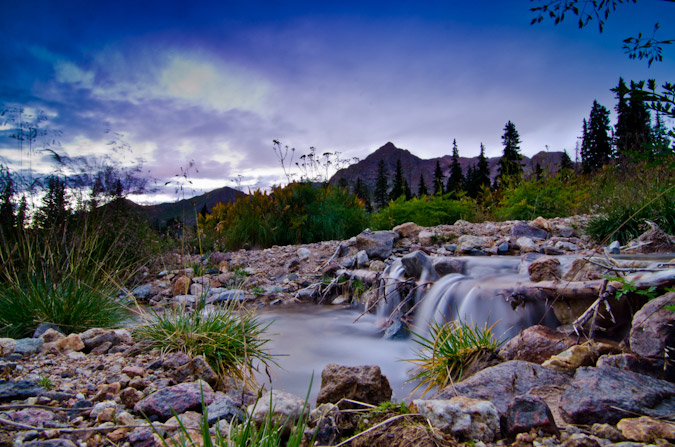
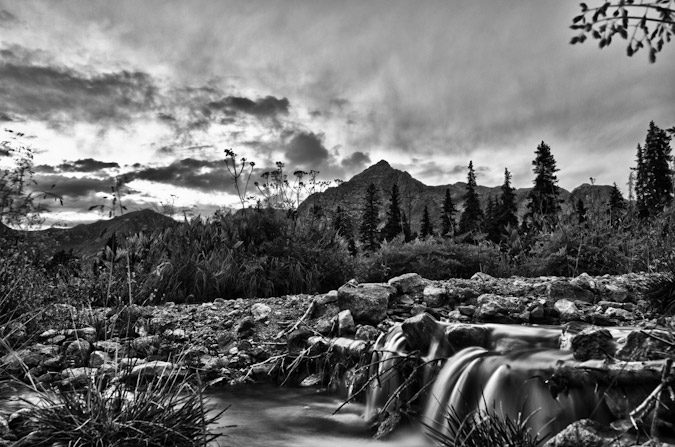
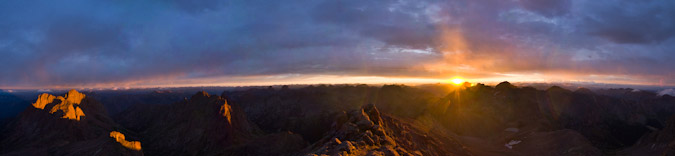
We arrived at the gate at approximately 4:15 AM and began in a wild rush up the steep 4WD road by foot towards McReynolds Reservoir. The air was quite cold this early and this high up, a stark contrast to the record-setting 100+ degree heat we had been experiencing in the scorched and dry urban setting of Colorado Springs. Eventually, the road leveled off and opened up into a large meadow, giving us a clue to begin to head west on a very faint trail, which crossed the CSU fence-line and connected to a more solid trail leading up towards Almagre Mountain. After a couple of miles of fairly steep climbing, we reached a great stopping point, giving us a wonderful vantage of Pikes Peak and the various reservoirs below - Mason Reservoir and McReynolds Reservoir - also known as the Seven Lakes area.
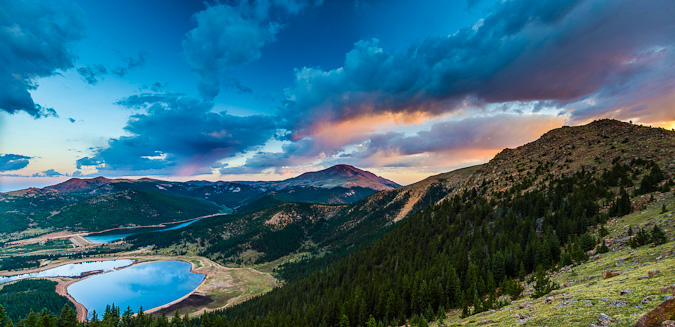
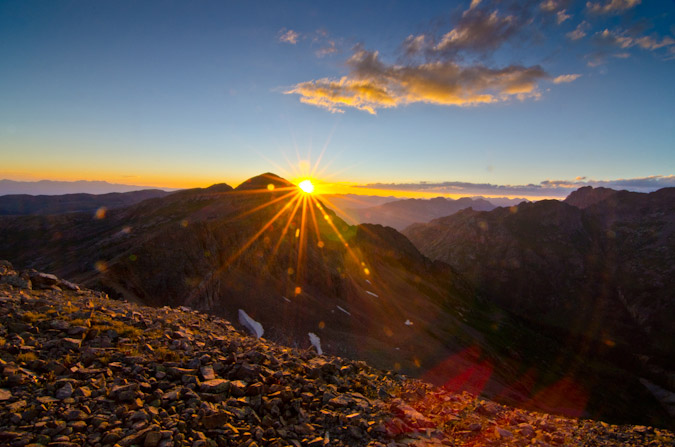
We stopped here to take in the great light hitting Pikes Peak, and I took advantage to take many photos from here as the sun continued to change the colors of the clouds and Pikes Peak.
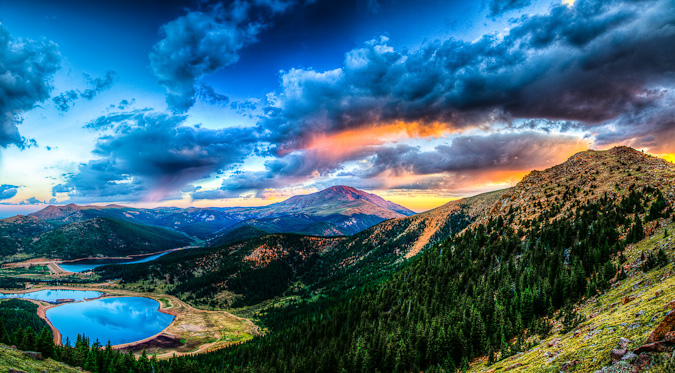
The lighting was fantastic, and it was such a rare view of Pikes Peak, I really loved it. This particular shot is also available on my photography website for sale.
Eventually, Ethan and I packed up our tripods and continued up to the ridge for Almagre Mountain. Once on the ridge, we could see Stratton Reservoir, which looked more like Stratton pond. Additonally, we made lots of jokes about the "Weather Control Satellite" on top of Almagre Mountain South (which is really a microwave repeater). This was based on a very funny press conference earlier that week about the Waldo Canyon Fire where someone in the crowd actually seriously suggested that the government just use its weather control satellites to create rain to put out the fire. For more on the weather control satellite joke, check out this hilarious post.
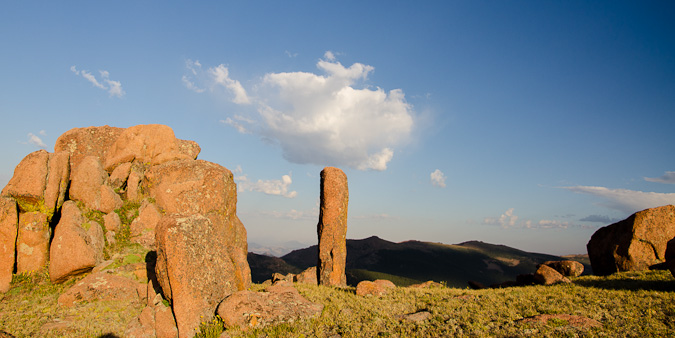
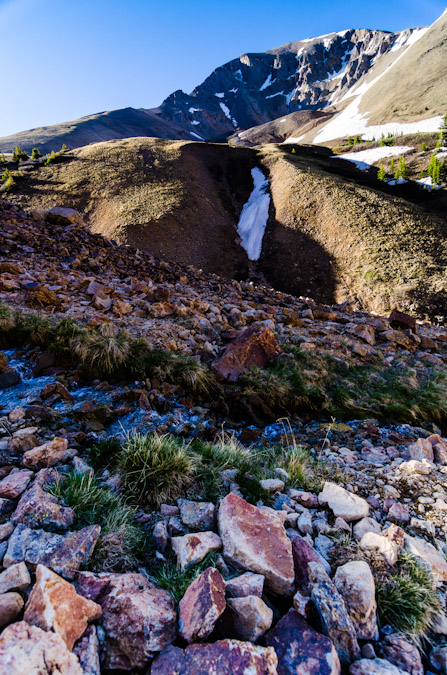
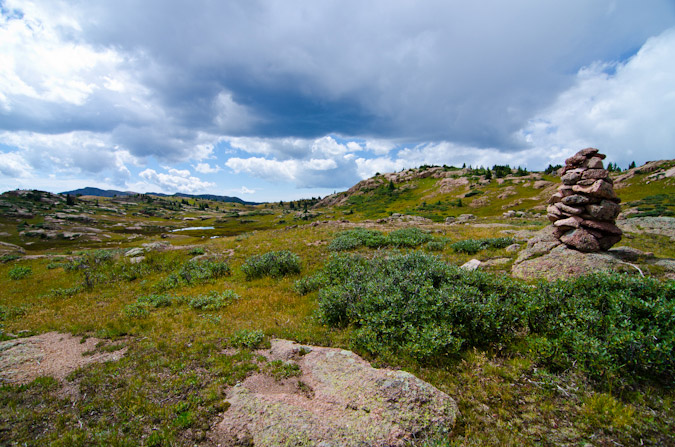
The terrain on the ridge was classic Pikes Peak granite - much of the same material found in the Lost Creek Wilderness Area.
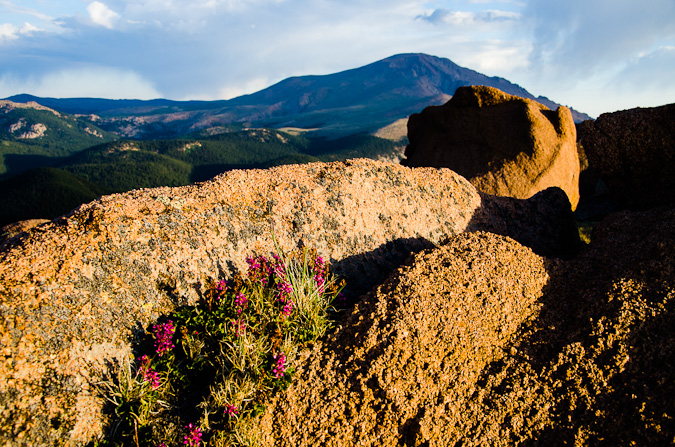
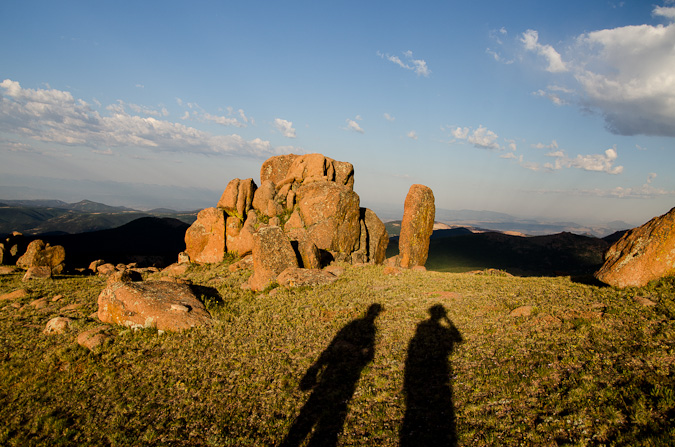
There were funky rock outcroppings all over the place. Nature sure does have a great sense of humor!
Ethan and I were both really loving the light and the color - somewhat tainted by the smoke from the huge fire that raged on to the north of us.
Ethan and I made several stops on the way up to take shots of the lakes and of Pikes Peak.
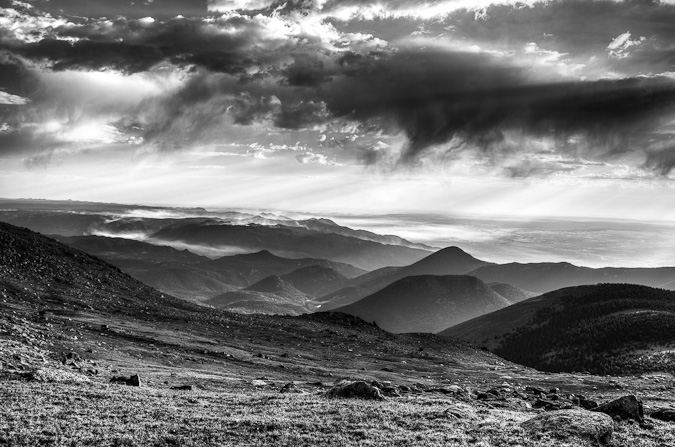
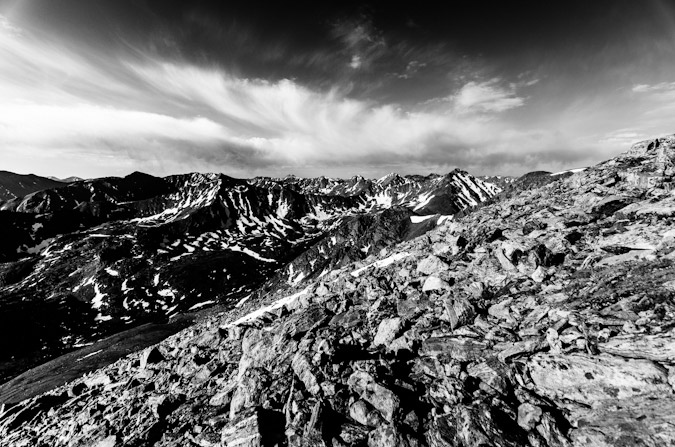
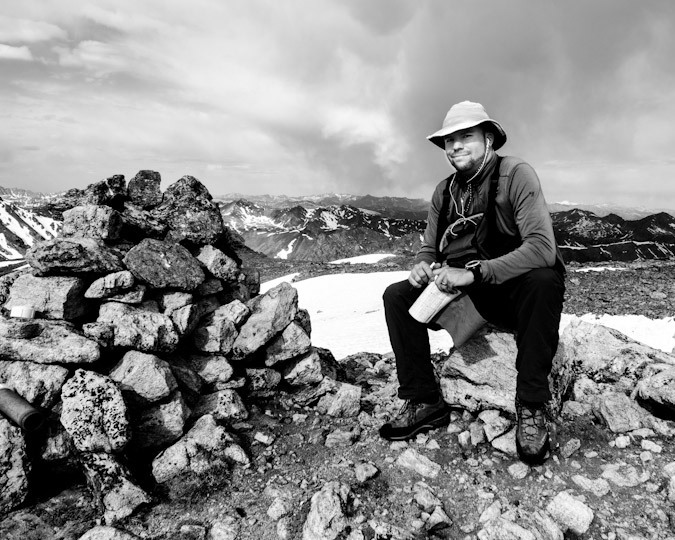
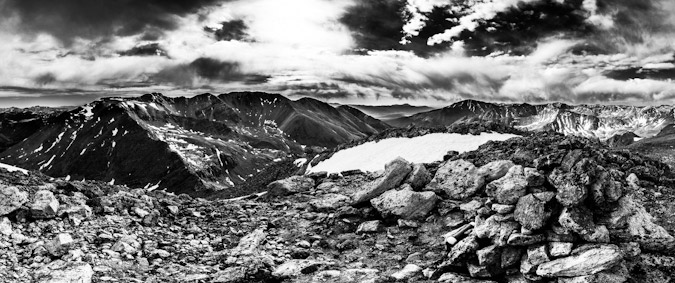
Before long, we had reached the summit without any problems. We had a great viewpoint of the fire burn area and the current burning zone. The smoke had settled into the valleys below us and made for quite the fantastic scene.
We both set-up tripods to take some time-lapse photos and video.
I was able to put together a 300 shot time-lapse video out of still images over a two-hour period from the summit. While it was pretty borning up there, I could not complain about the view.
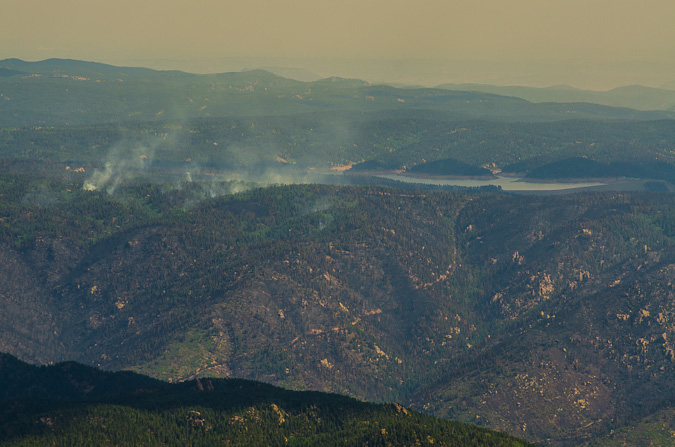
I was able to get some pretty great zoomed-in shots of Rampart Range Reservoir about Highway 24, where the fire was most active at this point. A zoomed in view shows quite a bit of destruction in that area, but as bad Ias I had thought would / could happen.
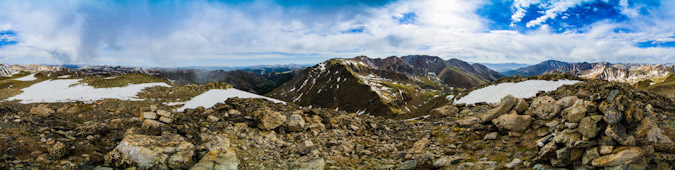
The 360 degree view was fantastic as well - with Pikes Peak anchoring the center of this peice.

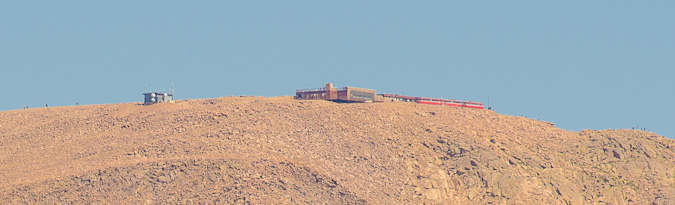
I was even able to get a super zoomed in view of the Pikea Peak summit, where I could make out people and the Cog Railway.
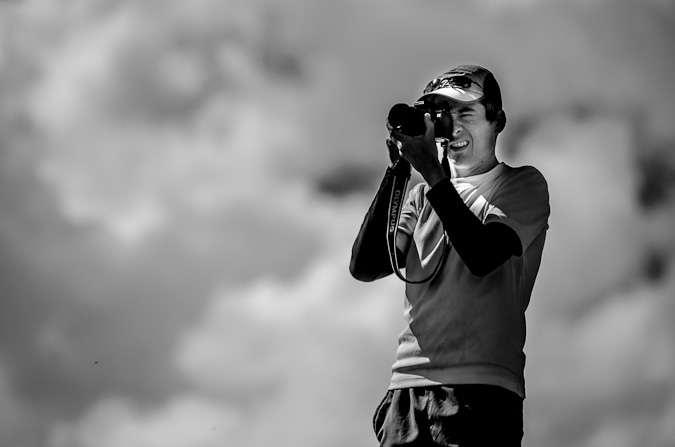
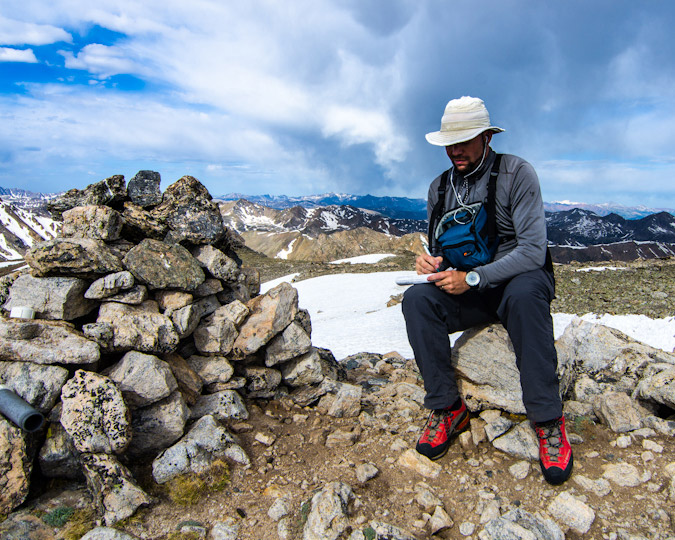
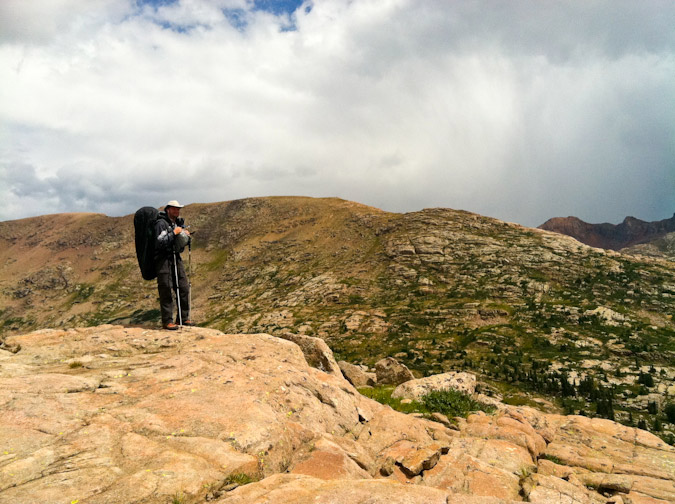
We both decided that after spending two hours on the summit that it was time to head-out. So we did just that. Right beforehand I was able to get a sweet shot of Ethan way up on the summit taking shots.
On the way back, I was able to get a better shot of Stratton Reservoir (with Mount Rosa in the background), now reduced to almost nothing.
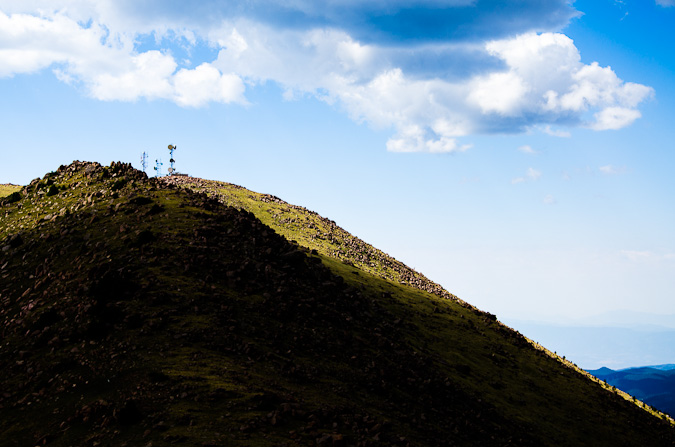
And of course, our down-climb would not be complete without another shot of the Weather Control Satellite...
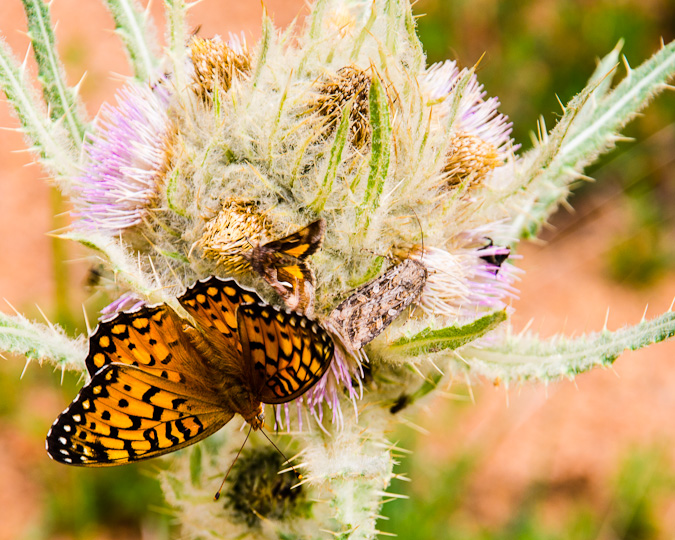
The hike back down to the car was quite uneventful. We noticed there were a lot of butterflys out and so we were able to follow one to this huge thistle plant, where countless other insects were hanging out, drinking nector from these hearty flowers.
All in all, I would rate Almagre Mountain as very easy - a mountain for all ages and skill levels. The rare views of Pikes Peak alone were worth the drive and hike for me.
{fcomment}
Mount Oklahoma - A Centennial 13er that is more than just "OK"
Mount Oklahoma is often forgotten by many, including myself, for a variety of reasons. There's nothing very remarkable about the look or feel of Oklahoma or the route to climb it. As Gerry Roach explains in his guidebook for 13ers, Mount Oklahoma is dwarfed by its neighbor to the east, Mount Massive, which is the 2nd highest mountain in Colorado. Despite this fact, Mount Oklahoma is more than OK - it offers solitude, unique views of mountains in all directions, and a fresh perspective on the art of "peakbagging."
Mount Oklahoma is not a mighty mountain, nor is it meek - rather, it is fairly average in stature for the Northern Sawatch Range - rising 13,845 ft. in a valley full of giants. Indeed, Mt. Elbert (14,433 ft.), Colorado's highest mountain, towers over Oklahoma to the south and east. Other higher Centennial peaks also adorn the skies nearby, including French Mountain (13,940 ft.), Casco Peak (13,908 ft.) and of course the Mount Massive massif (14,421 ft.) right next door.
Knowing that Mount Oklahoma is a fairly straight-forward and relatively safe climb, lacking anything harder than class 2 and with one of the easier levels of access for a 13er, I opted to head-out to climb it solo. While this is something I generally discourage, I felt the risk was manageable, plus my wife knew where I was going to be. Indeed, it did turn out that I did not run into a single other soul during the whole hike until well on the way back to the Jeep on the Mount Massive leg of the trail. So there it was, I left my house in Colorado Springs at about 6:30 PM on Friday evening and found myself at the North Halfmoon Creek Trailhead at 9:15 PM. There was an abundance of people up in the valley camping. Despite campsites being quite ubiquitous in the valley, I was left with no other option but to park at the trailhead and find a flat and comfy campsite within the trees. I set-up my sleeping pad and sleeping bag only and went to sleep right away.
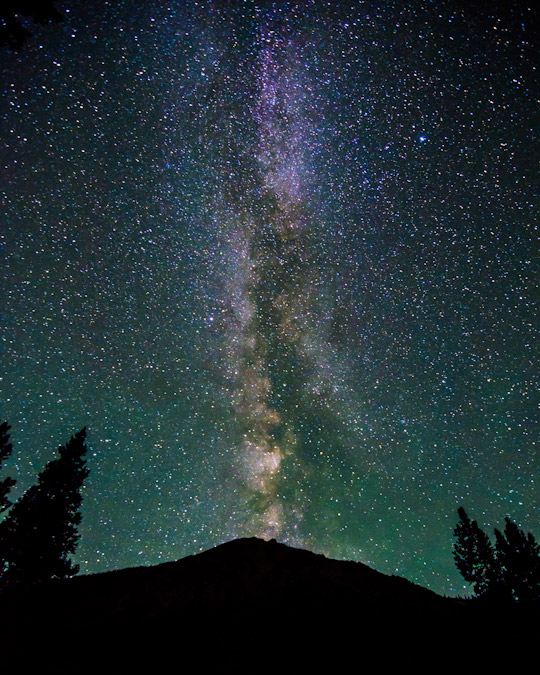
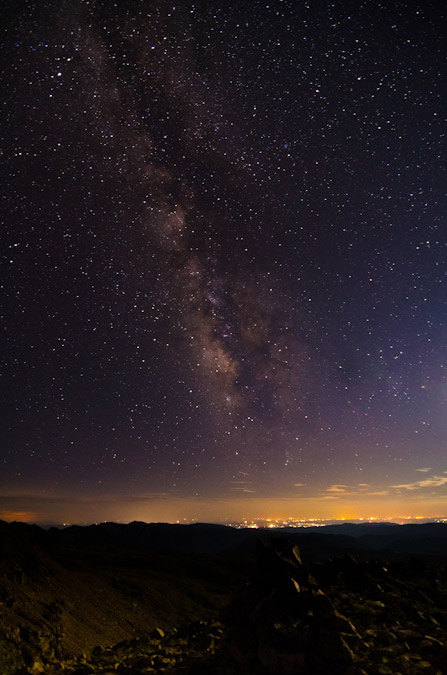
The alarm sounded promptly at 3:30 AM and I rose quickly to get a start for the day, as I knew my wife wanted me home relatively early so that we could go to my parent's house for a father's day dinner that night. The first thing I did was take a shot of the Milky Way above the trees and above the 13,221 ft. northern sub-peak of Mount Elbert.
Click on the photo to see a larger version or to purchase a print.
I had been on this trail once before in 2009, having been here in the cold month of October to climb Mount Massive. What I remembered of this trail was that it was very straight and easy to follow below tree-line before the turn-off for Mount Massive, so I was very confident that I could make my way in the darkness with the aid of a headlamp. Adorned with my Ipod and my favorite Celtic tunes, including Solas and Altan, I began my journey in the dark.
I also decided to bring my Gitzo tripod - which is basically an older, heavier version of THIS one, with an Arca Swiss monoball affixed so that I could get some sweet sunrise shots and summit shots along the way. While this adds a great deal of weight to my pack, the effort is worthwhile and increases the types of shots I can get significantly. I've fallen in love with this tripod and monoball combination since acquiring them both on the cheap a few months ago on Craigslist. They are hands-down the highest quality photography gear in the business. I highly recommend both for anyone looking to upgrade.
The plan was to follow the route as described by Roach, which is close to what actually happened - here is the map of my route - click on it to see a larger version.
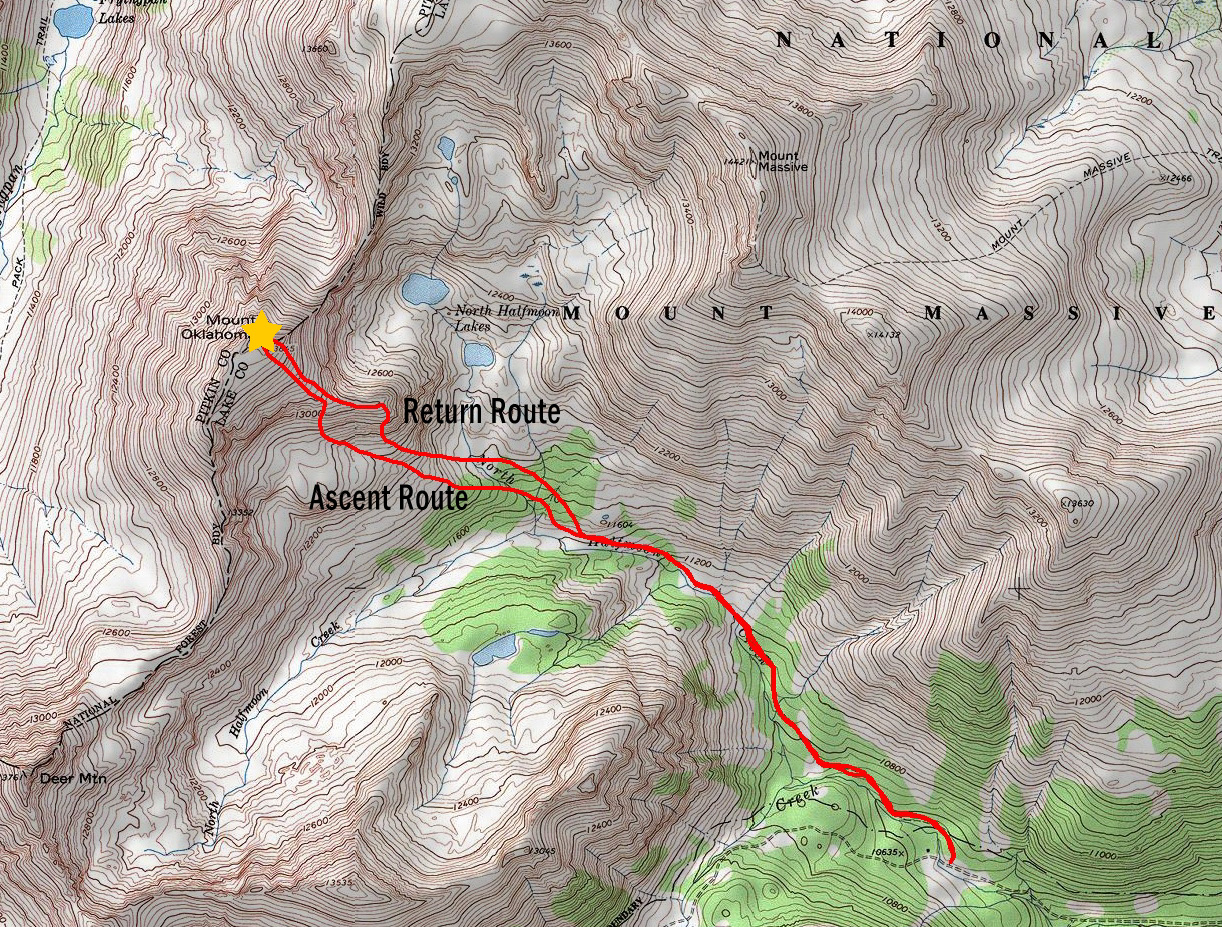
I found the trail very easy to follow, even in the darkness, minus one section where the trail meets up with a very large rock formation and crosses it. I just kept my eye out for the trail and ensured I was on track at all times. The route description for Mount Oklahoma is pretty straight-forward according to Roach. After passing the Mount Massive trail junction, continue west-northwest until the trail begins to gain elevation and head north, at which point you are to leave the trail and continue west. That's just what I did, but it was somewhat sketchy in the dark - bushwhacking through trees and logs is a great time. I quickly reached the two large stream crossings described by Roach - they were quite fast streams on a steep incline - I was very careful to cross, finding dry-ish rocks in narrow passage-ways. At this point - I began up a steep hillside per Roach's description for going up a tree-filled ridge to the northwest. Before I knew it, I had reached treeline and could make out my surroundings.
I encountered a deer at this point, which quickly ran off into the trees below. I could also make out a series of waterfalls in the Halfmoon Lakes basin below Mount Massive to my right - this was quite impressive and I made a mental note to return to those lakes someday - they seem to hold quite a bit of promise. I also was revelling in the fact that I was hiking solo in the Mount Massive Wilderness Area, off-route, while listening to great tunes and taking pictures of fantastic vistas. I really do love Colorado! Mount Oklahoma was clear as day above me, and the route seemed quite obvious from this point - go up.
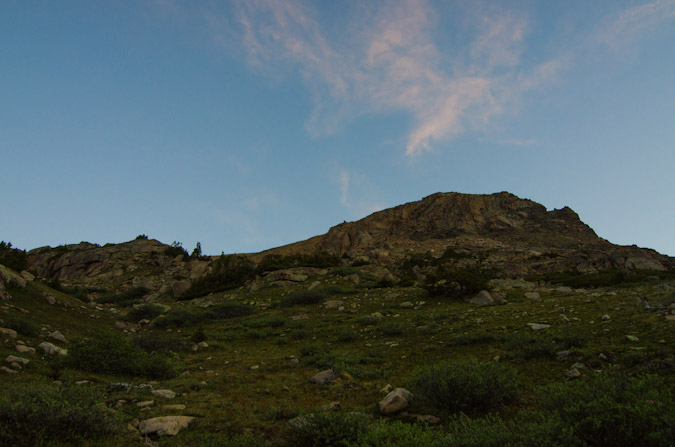
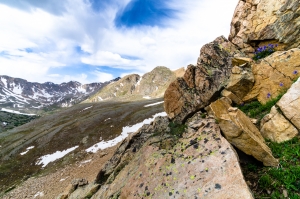
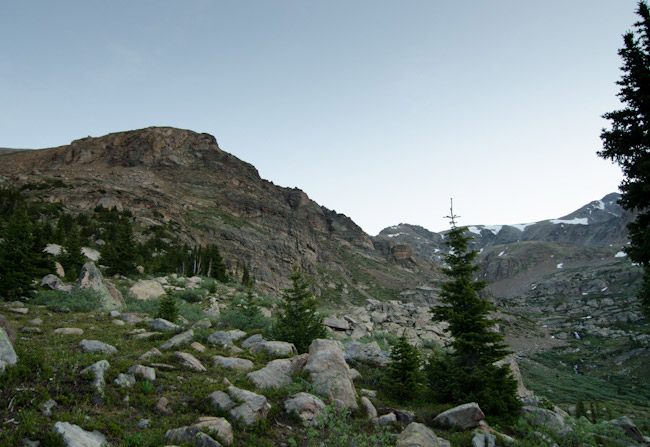
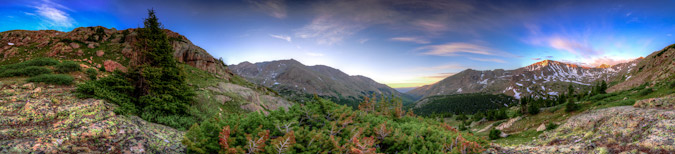
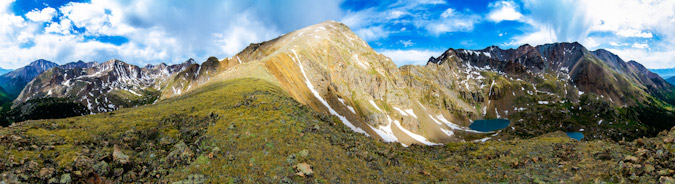
Before long, I found myself high above most of the trees just in time to witness the first light kiss the tops of Deer Mountain and UN 13,535 to the south and west. Moments like this made hauling the tripod up worth the effort.

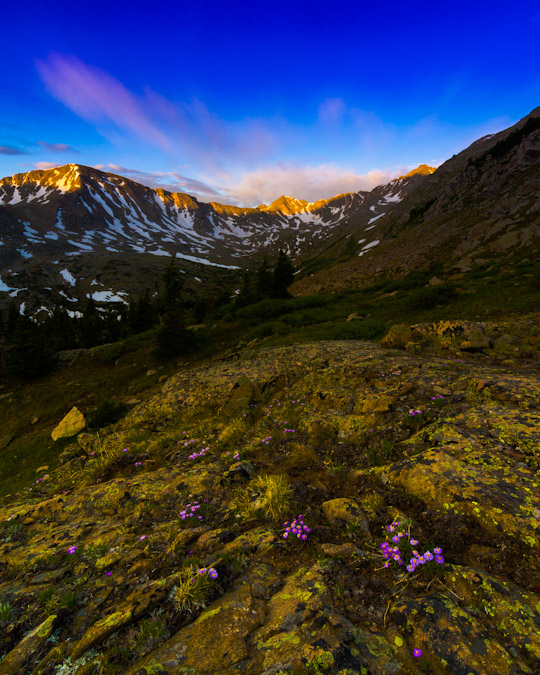
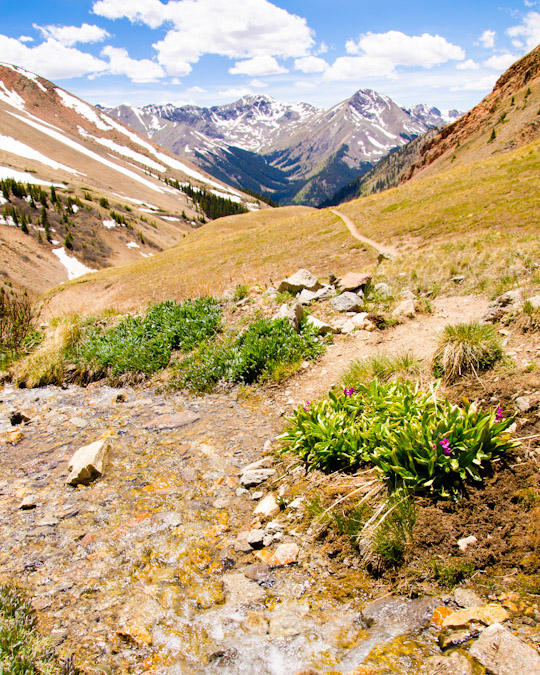
I left my pack and wandered up a little way and found an area covered with really cool looking flowers. Turns out the flowers are known as Alpine Primrose - a really quite lovely looking purple and pink flower. I took quite a few shots from this spot and processed each a little differently.
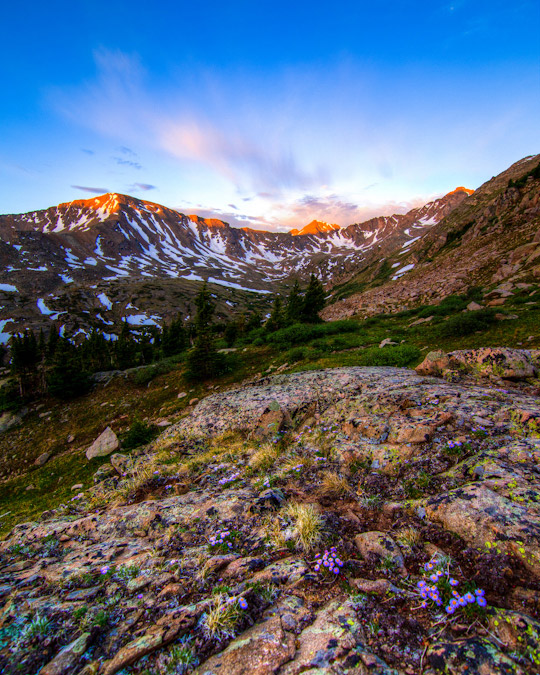
Another version from the same vantage point...
I was even able to put together an 360 degree HDR panorama, which I've not tried in a few months. I was not overly impressed with the results of this one, but I'll share it anyways.
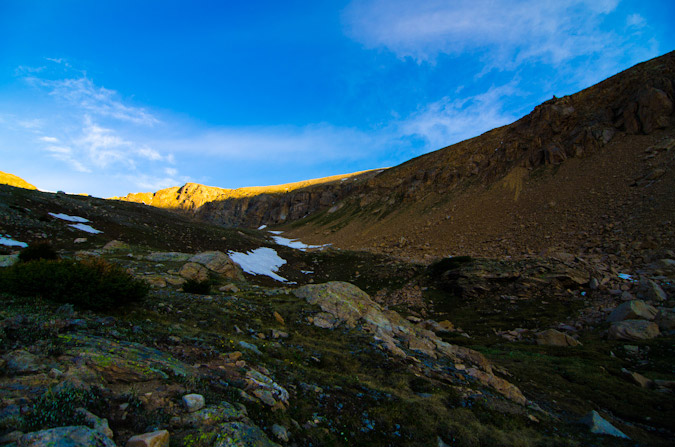
Having filled my soul with a dose of alpine sunrise, I was ready to continue on up the mountain. I followed what seemed to be a slight trail or drainage up the mountain and was aiming for an area to upclimb a grassy screefield.
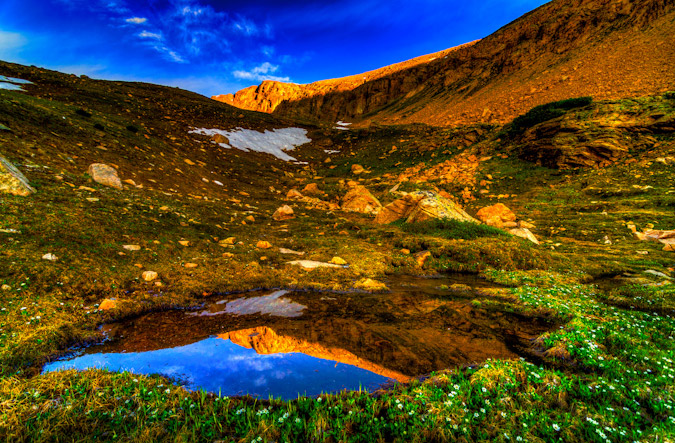
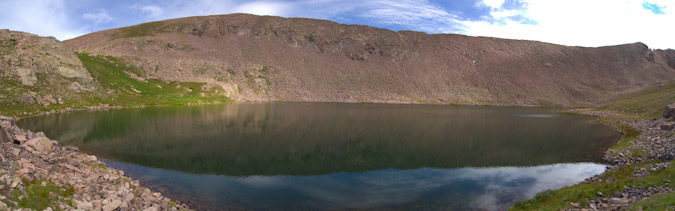
At this point I stumbled upon a small pond at the base of a small snowfield below Mount Oklahoma. It made for a very interesting reflection in the water with the sun just hitting the tops of the southern ridge of Oklahoma.
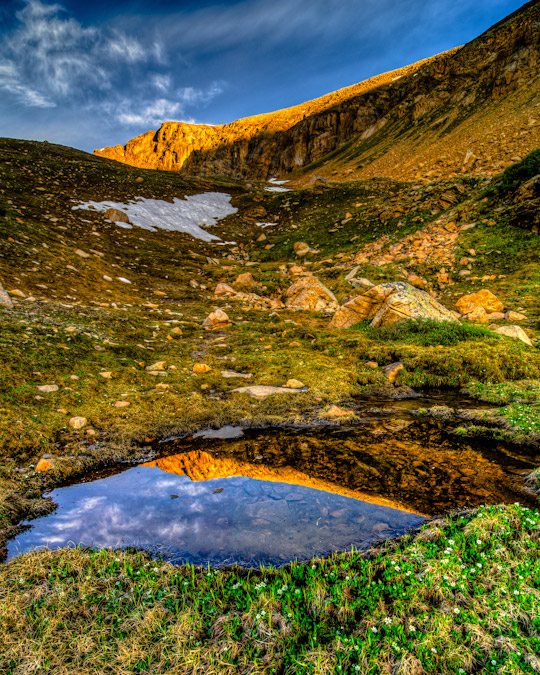
I played with a few versions of this shot, and I think I liked the HDR horizontal version the best. I know HDR is a technique with many detractors; however, I like to play with it - it keeps me entertained and thinking.
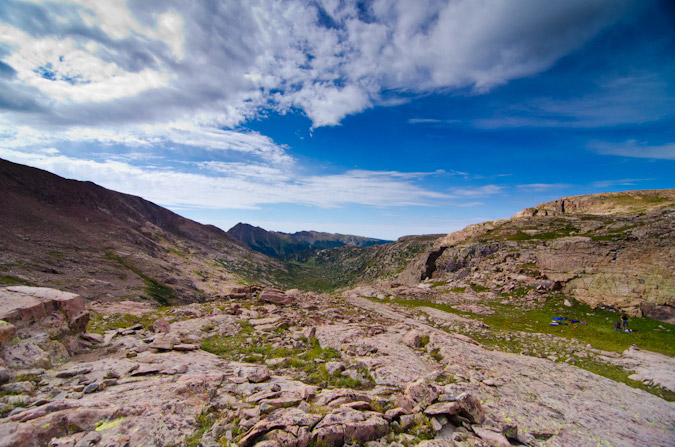
At this point, I found the grassy screefield, and it was mighty steep. I was not sure if this was the right way to go, but it looked like the easiest way up to the ridge. I plowed ahead slowly, reaching the ridge after several long minutes of gruelling climbing up this nasty section. Once up, the views were splendid.
I continued to plow ahead slowly on the obvious route up Oklahoma to the north and west. As I climbed, the views improved dramatically.
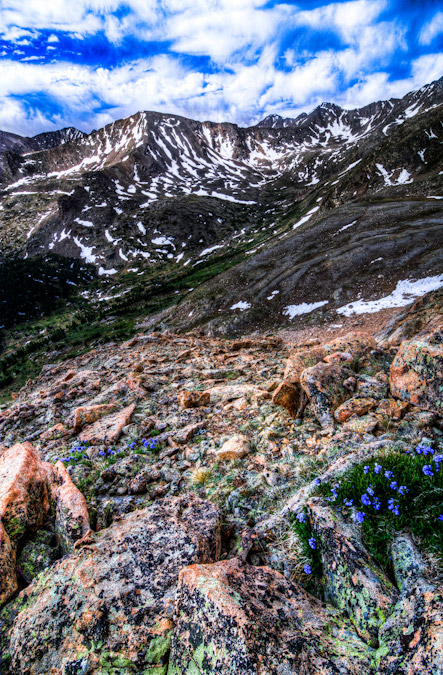
It was at this point that I began to feel sick to my stomach just like I did back in 2009 when I climbed Harvard and Columbia. I was beginning to wonder if my lack of food intake or the water I was drinking were to blame. Perhaps I did not clean out my camelbak adequately? Perhaps I was eating too dense a food (Larabars) for my stomach to handle? Or, perhaps I was just suffering from a mild case of Acute Mountain Sickness? Who knows? All I knew was that I was moving far slower than I wanted to and making progress quite sluggishly. I worked my way slowly up the boulderfield until my eye was caught by some blooming flowers which happened to be quite near the summit. I took off my pack and prepared my tripod for some photos of some flowers. Also, I could finally make out the Elk Mountains to the west, including Snowmass, Maroon Bells, Cathedral and Castle - they were all quite impressive to be sure. I fixated on small field containing a variety of colorful wildflowers and took some shots.
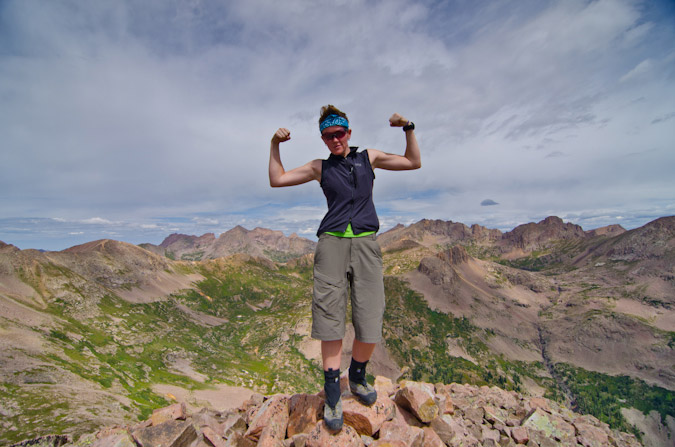
After taking my fair share of photos in this patch of flowers, I decided to move upwards. It took about 4 more minutes from here to reach the summit, which was a relief given my stomach issues, which had actually subsided significantly since I stopped to photograph the flowers. On the summit, I noticed that clouds were hitting the Elks with some light showers and that those clouds were headed this way. I had no intention of getting stuck in a storm, so my lofty goal to traverse to North Massive was out of the question. I set-up my tripod and set the timer so I could get a few shots of myself signing the summit register for Centennial #76 - only 24 more mountains to go!
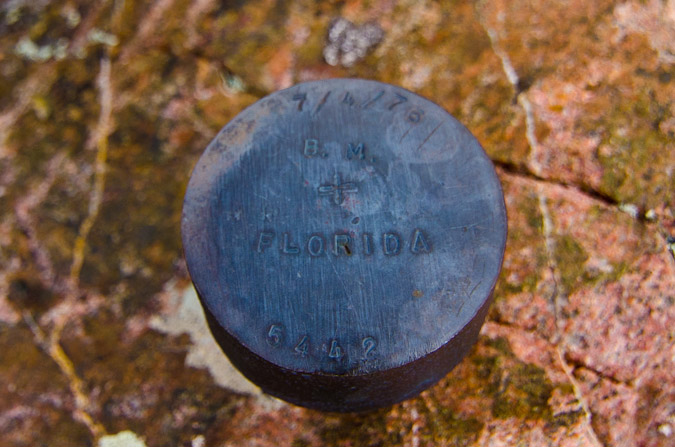
The register was quite intact and filled with many familiar names. I was happy to add mine to the list.
At this point I used the tripod to take some photos to later be used in my 360 degree summit panorama.
I also toyed with a black and white shot from here, framing Mount Massive on the left part of the shot.
After a quick phone call to the wife to let her know I made it safely, I took an assessment of the weather. The storms rolling in over the Elk Mountains to the west did not give me a good feeling, so I decided to pack-up and head down. I decided this time to see about the small ridge that rolls down to the east of Oklahoma. Instead of going back down the grassy talus, I went down the long ridge.
Once down, I found a great spot at the end of the ridge to take a sweet pano from - Mount Oklahoma at center with Mount Massive at right with a small storm over it.
At this point, I saw a ton of cairns leading down the mountain towards the cliffs Roach warned to avoid in his guidebook. I decided to take the challenge and see where the breadcrumbs could lead me. Sure enough, they led me down the mountain's steep slopes, but it was not a terrible route, albeit harder than my ascent route (loose rock, etc).
Small storms were hitting the areas peaks, and it started snowing a little bit, but nothing too scary.
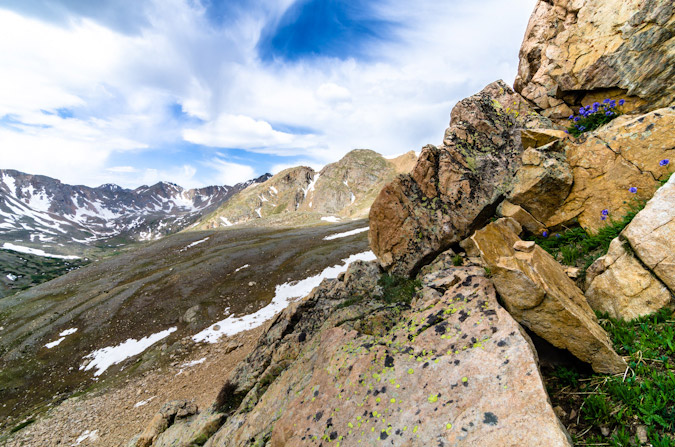
On the way down the steep terrain, I ran into some really nice flowers in a very strange spot amongst the rocks. Nature never ceases to surprise me...
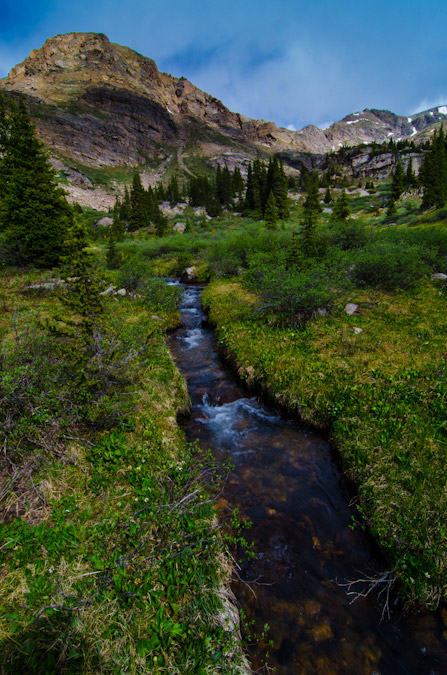
Once down the nasty part, I was back on the grassy ledges near treeline. I decided to angle my decent more northeasterly so I could hit the trail coming down from Halfmoon Lakes sooner. This turned into a pleasant bushwhack into the forest, where I stumbled upon a small stream leading down from the lakes.
I found the trail again with no issues and found myself flying down the trail at a rapid pace. I reached the turn-off for Mount Massive in short order and took one last look back at Mount Oklahoma.
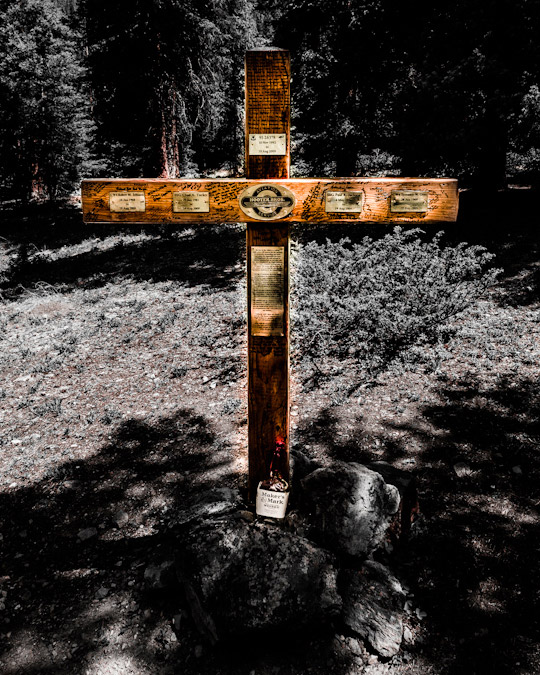
I was also pleased to see the large monument cross at the trailhead that was placed after the Blackhawk Helicopter crash in 2009 on Mount Massive.
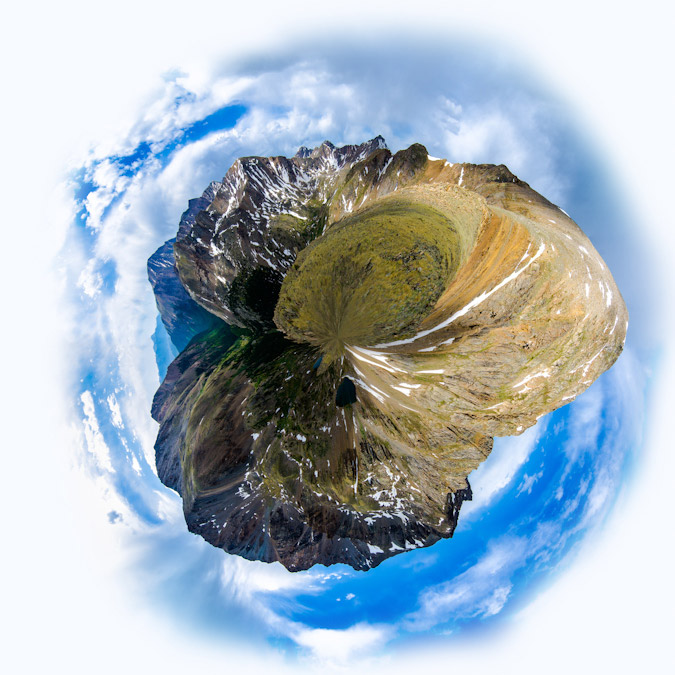
In closing, I highly recommend Mount Oklahoma as a hike that gets you away from the crowds on 14ers and still allows for wonderful views and a decent work-out. I am certainly not usually a fan of the Sawatch Range; however, the northern Sawatch Range really separates itself vis-a-vis grand views of the Elk Mountains and a seemingly more rugged feeling than the Southern Sawatch Range. I'll leave this trip report with a creative rendition of my 360 pano from the ridge - Planet Oklahoma. I wrote a tutorial on how to make these if anyone is interested.
{fcomment}
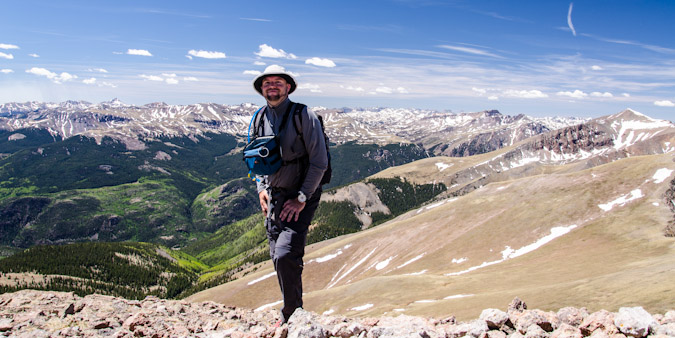
Drinking in the Milky Way and Crushing Centennials - UN 13,832 and UN 13,811
UN 13,832 and UN 13,811 (UN = Unnamed) have been on my radar for quite a few years now. My dad and I were hoping to tackle them both back in 2009 but weather steered us elsewhere. I've also eyed them as a potentially fantastic winter climb from the Williams Creek TH, but have not had the ability to string together the time to pull that off either. So, when I figured I had the opportunity to take a vacation day and do some climbing, I quickly picked out these two gems. I coached my son's first t-ball game and then afterwards drove to Lake City for an estimated 1 AM arrival at the trailhead. I planned to meet my friend Regina there (she was coming down from Denver via Highway 285) and get a few hours of sleep before we set off to climb early Friday, June 1st.
Interestingly enough, UN 13,832 and UN 13,811 are the only two mountains of the highest hundred peaks in Colorado (Centennials) with neither an official nor unofficial name. These two fantastic thirteeners (ranked #90 & #99 respectively) are located just east of the 14ers Redcloud and Sunshine near Lake City, Colorado. If you're like me, you are wondering why these two mountains in the highest 100 are unnamed. These unnamed mountains are located within a large section of BLM (Bureau of Land Management) land, specifically, BLM's Redcloud Wilderness Study Area. According to Summitpost, "in 2004, these two mountains were "protected" from being named when the USGS turned down a proposal to christen them after two of Colorado's mountaineering pioneers, Carl Blaurock and Bill Ervin. Apparently the policy is to not approve new names of mountains within wilderness or wilderness study lands, and a competing Blaurock/Ervin naming proposal was selected for a pair of peaks in the central Sawatch Range."
With all that being said, I needed something to do to keep me awake on my drive down to Lake City... so I focused on trying to think of clever names for these two mountains. With the close proximity to Sunshine and Redcloud, I figured it might be fitting to name UN 13,832 something to do with the moon. The sun shines, then it sets... the clouds get red (Redcloud), then the moon rises. How about "Moonrise" for UN 13,832 and "Not Last" for UN 13,811 (since it's ranked #99 / 100)? Let's see if they stick anywhere.
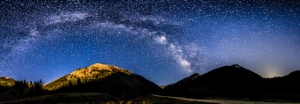
Speaking of the moon, on the way down to Lake City, I decided that it would be pretty awesome to stop near Lake San Cristobal and get a shot of the stars and moon, so that's just what I did. I stopped right off the road heading towards the trailhead and took a 5-shot vertical pano (my camera was vertically orientated vs. horizontally oriented) of the Milky Way, moon, and Lake San Cristobal. I think it worked fabulously! Please click to see a larger version or to purchase on my photography website.
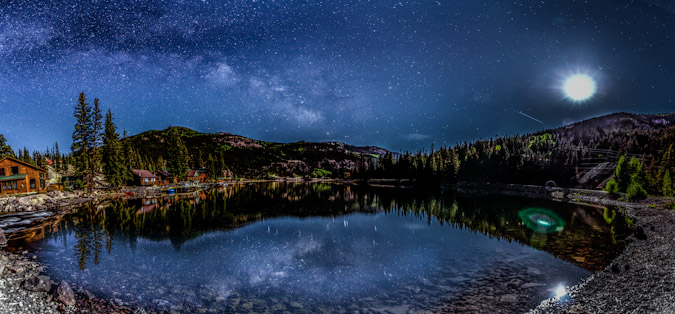
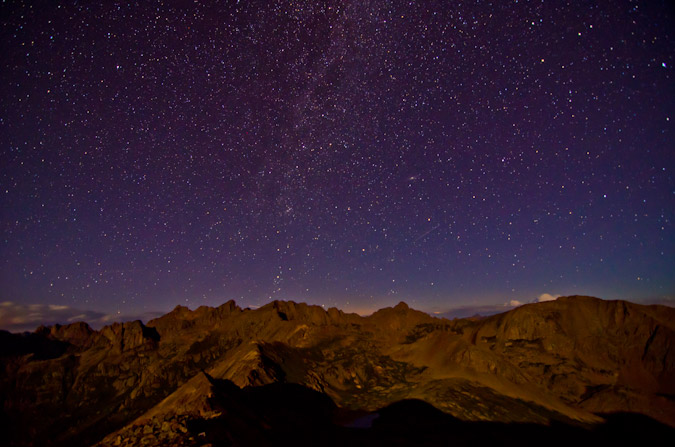
With the shot I had envisioned complete, I continued on up the road towards the trailhead. I finally reached my destination at around 12:45 AM and decided it was suitable to sleep under the stars in my sleeping bag, so I set out to do just that. Shorly after I settled in, Regina arrived and set-up her gear to do the same. I took the time to take one last set of photos (why not). This one turned out even more magical, I think. It is 7 veritical shots as a panoramic of the Milky Way over "Sundog," the 13,432 ft. mountain connected to Sunshine Peak's north ridge. The moon had just set and allowed for a great scene. I was actually inspired by another photographer's (David Kingham) photo from last month and wanted to give this a shot. Click on it to see a larger version on my photography website.

We crashed at 1:45 AM and decided to set the alarm for 5:45 AM, which came all-too quickly. There was one other hiker at the TH that started before us (and did wake me a few times by starting his car), so solitude was looking to be guaranteed. I promptly threw down some coffee soymilk (which was surprisingly good and filling) and we departed! I knew from the get-go that I wanted to do what Roach calls "Point Fever," which is to say, combining UN 13,832, UN 13,632 and UN 13,811. The route is a long but easy 12.8 miles and gains 4,727 ft. in elevation. A nice leg burner. [Colorado's Thirteeners - Roach & Roach, pg. 222]
Here is a map of the route we took from the Silver Creek TH (click for larger version):

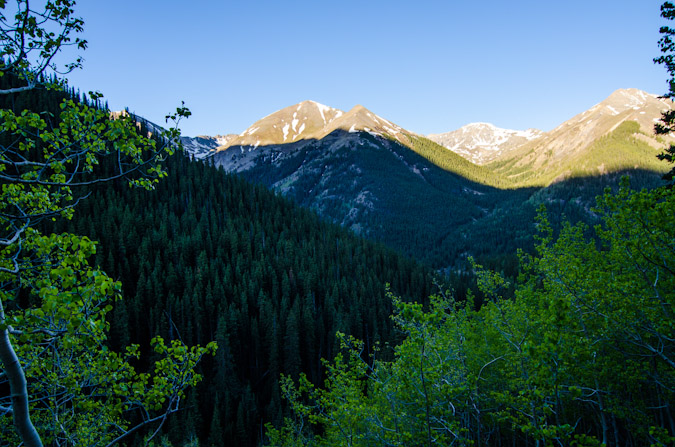
So, that's just what we set-out to accomplish. The semi-early start granted us a nice view of Handies Peak and Whitecross Mountain across the valley. It was really great seeing them from this side since my climb of them with my dad in 2010 on Father's Day.
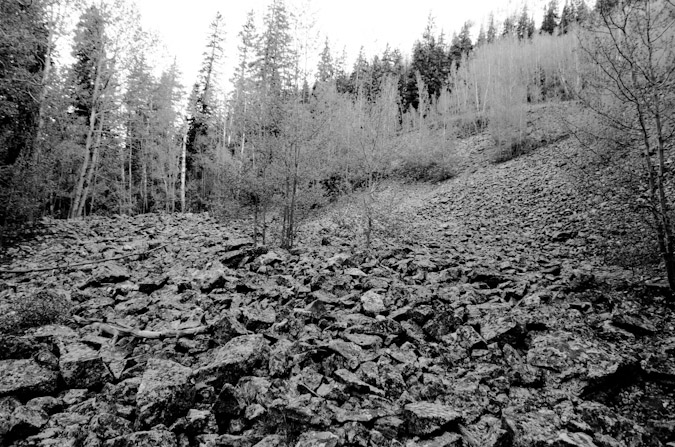
As we climbed on the trail, we stumbled upon an open area with boulders. I was immediately struck with a rush of nostalgia, remembering vividly coming through that part of the trail and seeing a marmot during my climb of Redcloud and Sunshine in 1987 at the age of 9. Crazy!
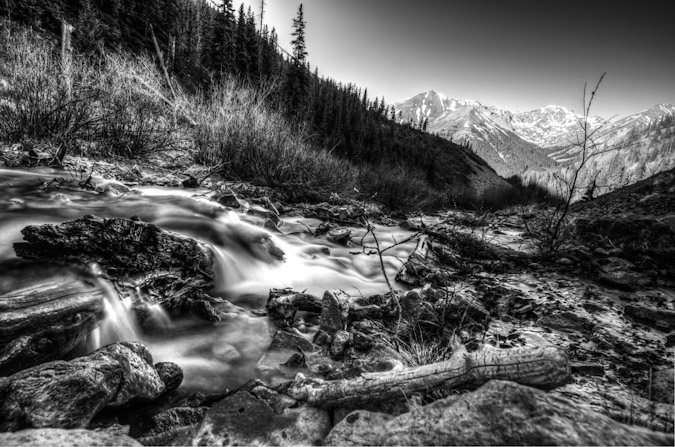
Before long, we were gaining altitude and came across a nice stream. It seemed the perfect spot to test out my 9-stop ND filter, so I put it on my Tokina 11-16 lens and did a very long exposure. I liked how it turned out.
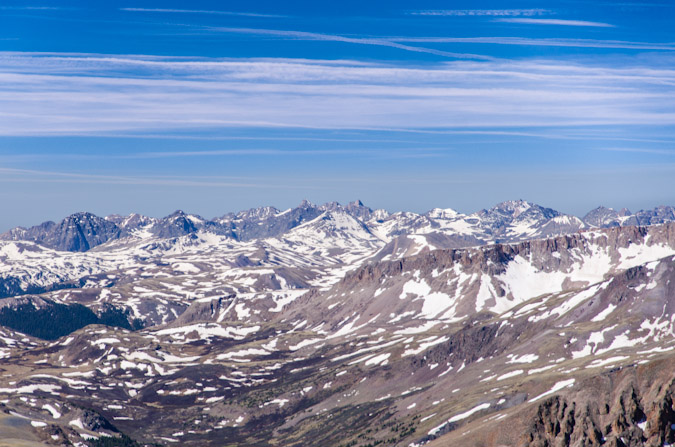
As we gained elevation, parts of Redcloud came into view to our right. It was immediately taken aback by how little snow was left. It was truly remarkable. Indeed, Colorado's state-wide snowpack levels are at 2% of normal. Very dry.
Regina was setting a nice pace for us and the weather was holding up quite nicely. I had no worries about my chances of summiting both 13ers.
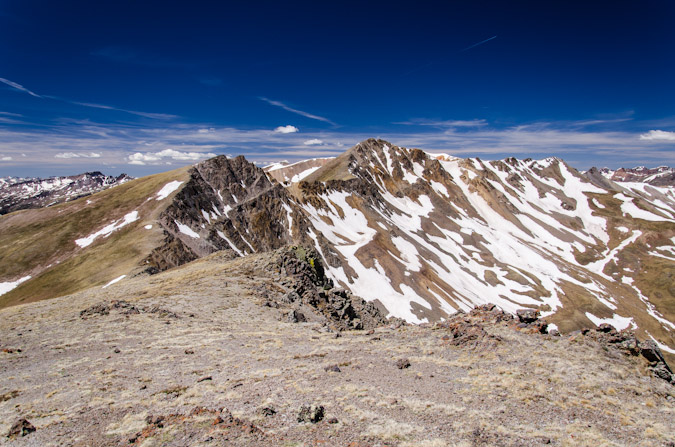
Before we knew it, we found ourselves gaining the ridge between UN 13,832 and Redcloud. We had also caught up from the guy that left before us that morning.
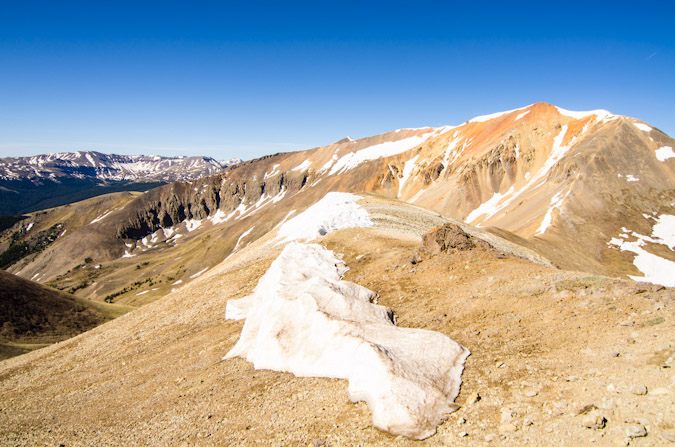
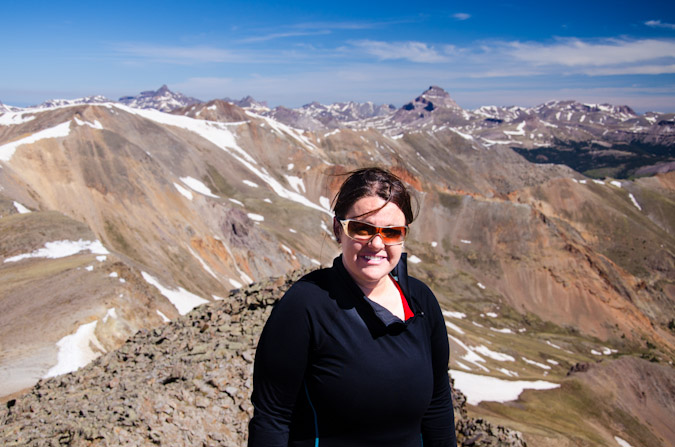
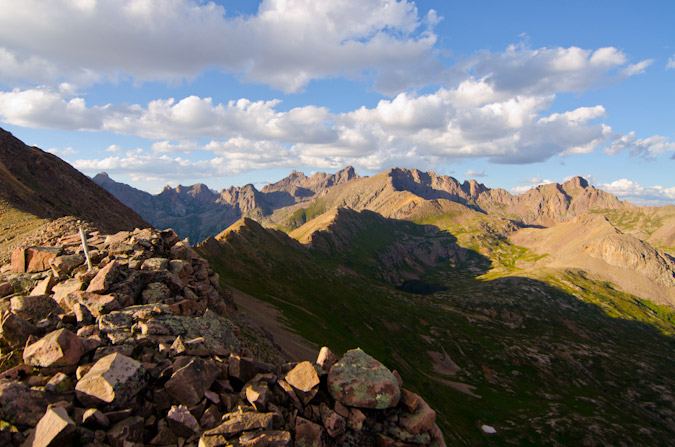
Gaining the saddle was no problem, and the views were great from there. As expected, the other hiker turned up to climb Redcloud. Solitude was guaranteed at this point. Here's a 360 degree view from the saddle, with Redcloud at far right and UN 13,832 just under the sun.

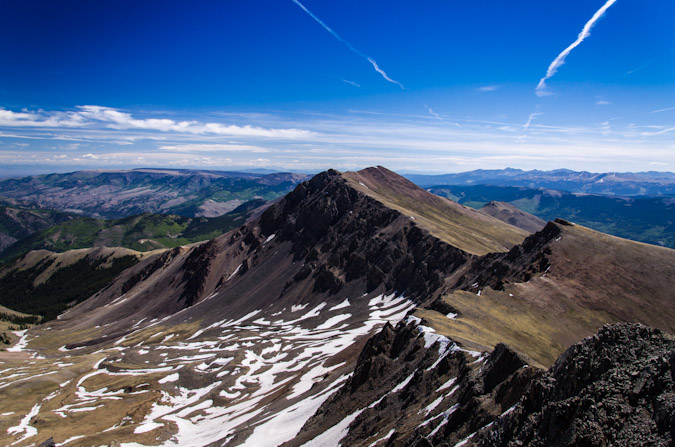
The hike from here was just long and gentle - easy class 1 / 2 stuff. Here's a view of UN 13,832 as we approached from the ridge.
Looking back at Redcloud, with Sunshine barely peaking up over the ridge.
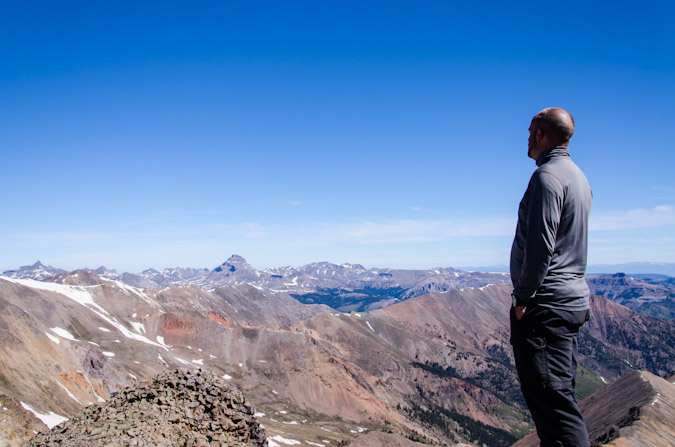
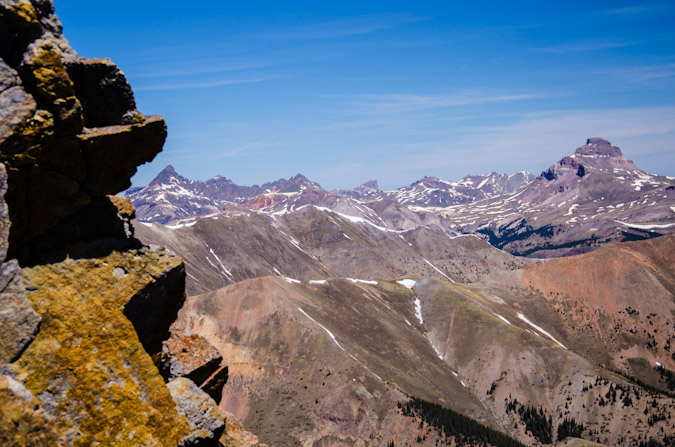
And finally, Uncompahgre Peak came into view for us!
Heading up towards the next saddle made for easy and fun trail / ridge walking.
I was impressed by how far apart Sunshine was from Redcloud - much further than I remember.
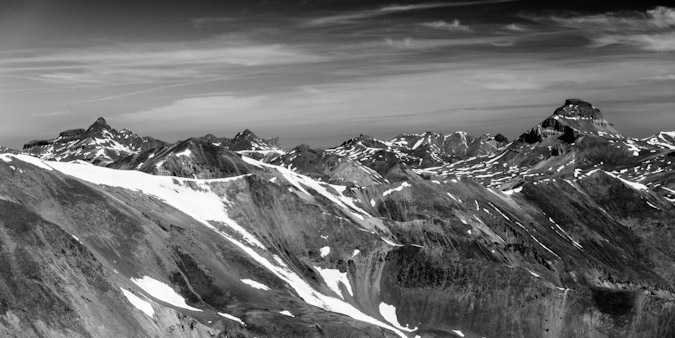
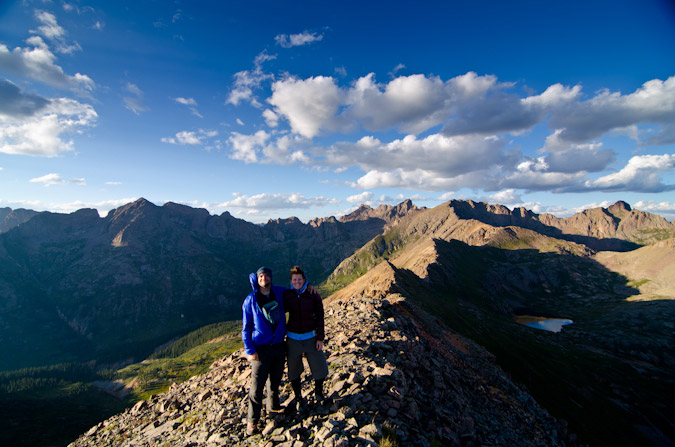
We finally topped out on UN 13,832 at around 10:30 AM. Regina was loving the view of Wetterhorn and Uncompahgre, no doubt.
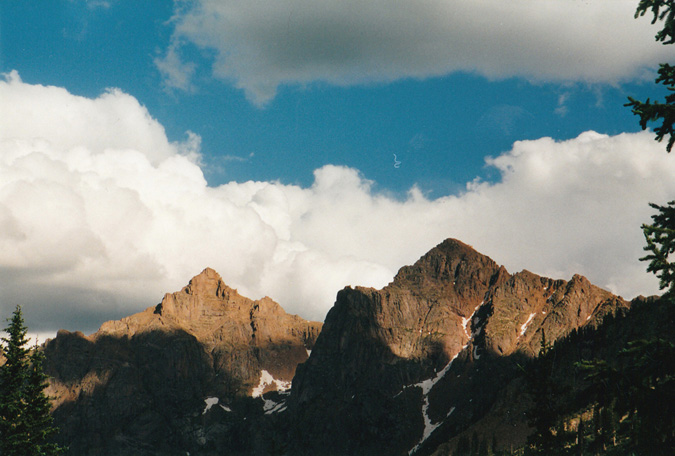
Also awesome was the view of the Grenadiers and the Needles. Eolus, Sunlight, Windom, Silex, Guardian and others all stuck out quite prominantly. This perspective really shows you how far part Eolus is from Sunlight. Pretty amazing.
I also did not mind the great view of Wetterhorn from here. Such a cool looking mountain!
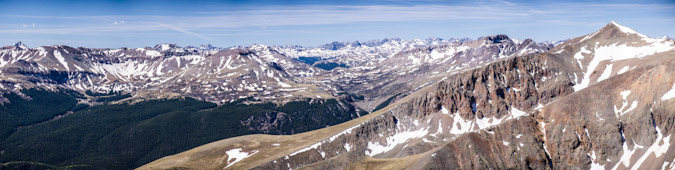
Regina decided she was not going to continue over to UN 13,811, so I fired off a few more shots, including the below panoramas, and headed off for UN 13,811. Regina was going to wait for me below the saddle of Redcloud and UN 13,832.

The San Juans are truly great.
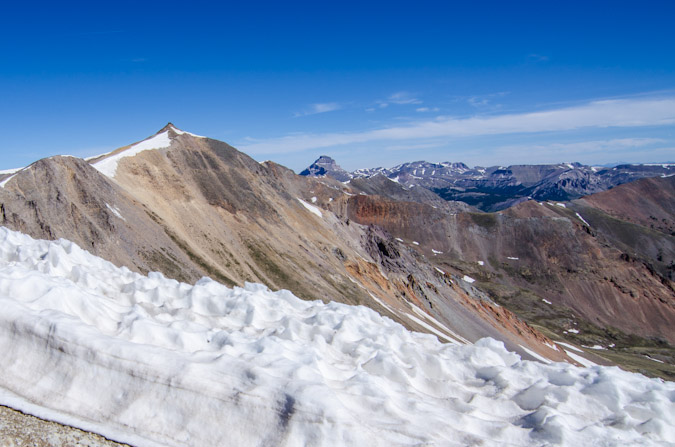
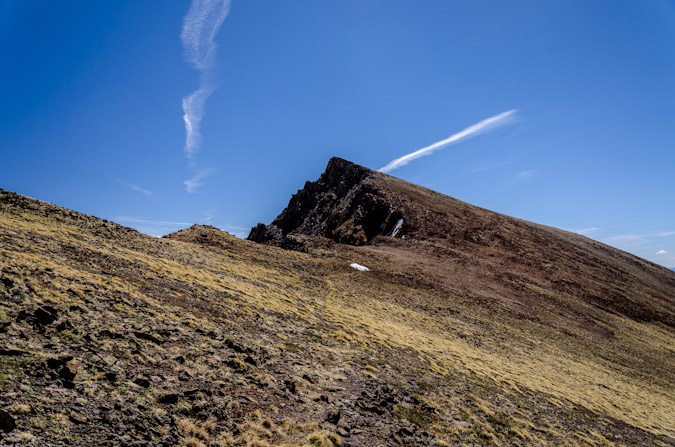
UN 13,811 was still quite a ways off, as seen from this next shot.
I began my hike over and was constantly drawn to the view of Wetterhorn and Uncompahgre. I just loved those two mountains.
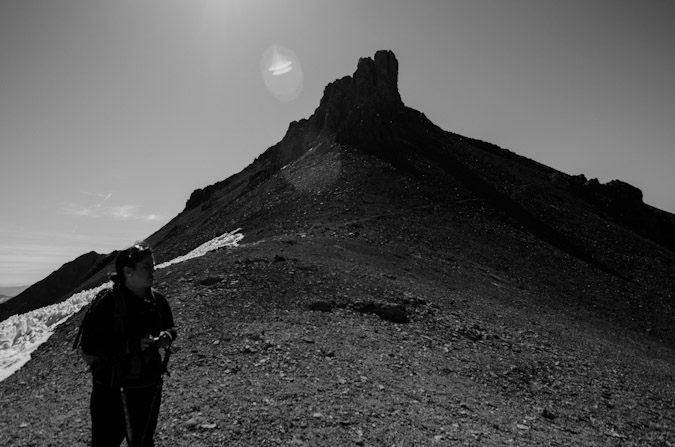
UN 13,632 was one obstacle in the path to UN 13,811, so I needed to go up and over it as well.
All while still enjoying my view...
Within about an hour, I finally made it over to UN 13,811 to complete my 75th Centennial. Pretty impressive and almost there!
I snapped off a few shots for a panorama from 13,811 also , still in shock over how little snow was truly left.

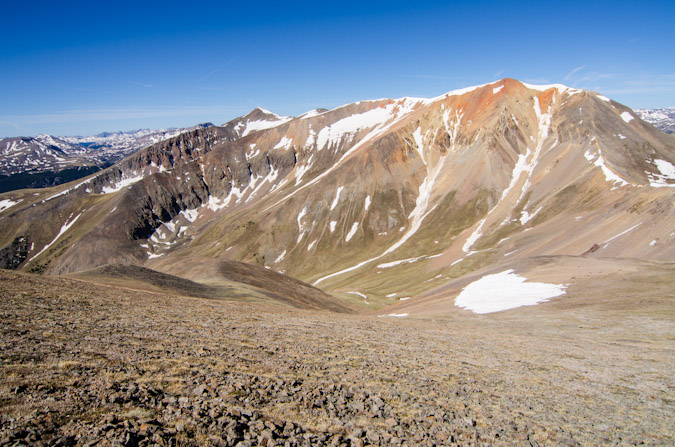
The view back over to 13,832 was sobering to say the least. I was starting to feel a little tired in the legs, so I was not really looking forward to the hike back. I did however, really enjoy the surprising view of 13,832 from here.
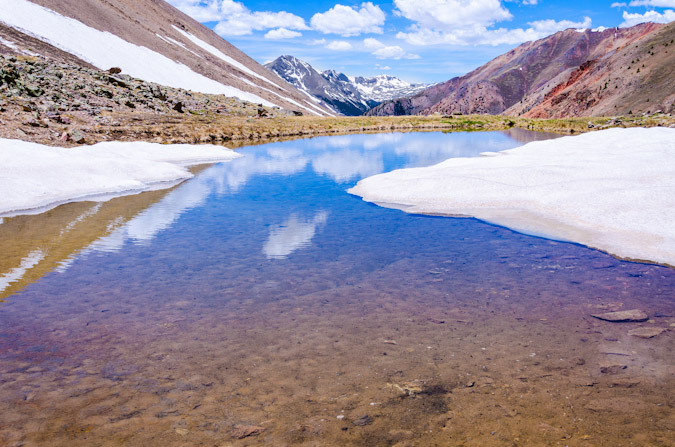
I headed back over to UN 13,832, which was quite the demoralizing slog. I reached the saddle of Redcloud and UN 13,832 in quick order and met up with Regina at a small tarn below Redcloud Peak. THe view of Whitecross was very cool from there.
And of course Handies and Whitecross were our guides for the duration.
Regina led the way while I snapped off this super great shot of her hiking out. I think this was one of my favorites from the hike.
We crossed over a small stream that had some wildflowers growing at it. I thought it was a nice looking scene to stop and enjoy.
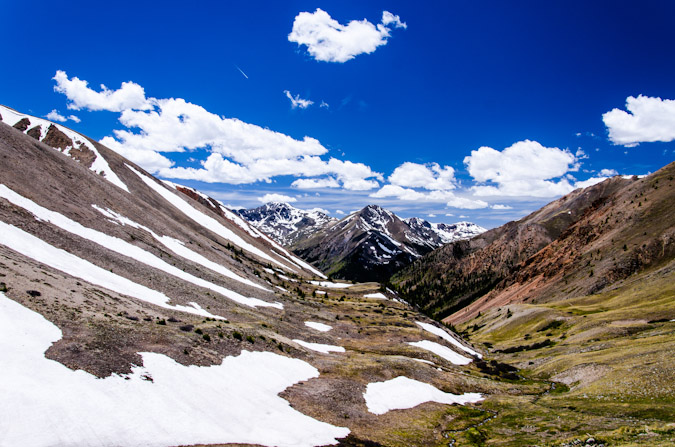
Before long, we had reached treeline again and Handies was all that we could make out above the trees.
The remainder of the hike went without incident. I will say that these two mountains are pretty fun. The hike is very long, but affords welcoming views of very recognizable 14ers and 13ers in the area. Solitude is almost a given, since most people in the area are there to tackle the more famous 14ers Redcloud and Sunshine. I think you will also enjoy the hike if you choose to take it.
We stopped in Gunnison on our way home for some much needed sustanance at our favorite Mexican food place on Main St. Until next time... I hope you enjoyed this trip report!
{fcomment}
Review of the Nikkor 85mm f1.4 AF-D - Extreme Depth of Field
Introduction:
I've longed to obtain a good portrait lens for awhile now, and after months of research and testing, I settled on the Nikkor 85mm f/1.4 AF-D. The Nikkor 85mm f1.4 AF-D lens has long been regarded as one of Nikon's best lenses for many reasons. The lens produces incredibly creamy bokeh (the aesthetic quality of the blur in out-of-focus objects in a photograph) and separates the subject with extreme clarity and definition. This is partially because the lens sports a rounded diaphragm with 9 blades. This lens is an absolute champion for portraiture and creative photography as well as landscape photography. This lens offers an incredibly fast 1.4 aperture, which provides great low light capability. It is sharp at every aperture, except, perhaps in the corners at f/1.4.

Technical Specifications:
The technical details of this lens are impressive - extremely fast maximum f/1.4 aperture with stops at every aperture (smallest aperture is f/16); 77mm filter size (great news since most professional lenses take this filter size); a minimum focal distance of 2.8 feet (.85 meters). For an FX body, the horizontal angle of view is 24°, for a DX body, 16°. While this is an autofocus lens, it is not an AF-S lens, meaning that it won't autofocus on the low-end DSLR bodies. Nikon lenses with integrated autofocus-motor are designated AF-S (this lens is AF-D). They are needed for new cameras with lack of an autofocus motor. Today these are the Nikon D40, D40X, D60, D3000, D3100, D5000, D5100 and the Nikon 1 series with FT1 adapter. Fortunately for me, the autofocus works wonderfully on the Nikon D7000, which is arguably the best non-FX camera body made by any camera company. For those of you with one of the above Nikon bodies, do not fret - Nikon has recently updated this lens, enhancing the autofocus by adding a silent wave motor, and modernized the look and feel. The newer version is titled, “85mm f/1.4G AF-S”. Unfortunately, that lens costs nearly twice as much.
Build and Feel:
The build of this lens is quite impressive as well. You may notice that newer Nikon lenses feel plastic-like and cheap. Not this lens, which entered the market in 1995 and had its final production run in 2010. The lens is very solid and feels great.
My Experience on a DX Camera Body:

Many reviews suggest that DX users should not bother with this lens due to the crop-factor of an FX sensor. While I won't disagree that it seems to be a good idea to go with the 50mm f/1.4 lens instead, I opted for the 85mm f/1.4 because I had used it before and because it is often regarded as one of the best lenses you can purchase. I also want to think about the future of my photography; therefore, lenses are an investment. You could spend $500 on glass that you won't be able to use on your next camera body, or you can invest $1000 on glass that you can. The choice is yours. Personally, I find the lens to be a perfect fit for my Nikon D7000, albeit, a tad long. Certainly, the lens has forced me to re-think the way I shoot, and that is enough for me (also - good luck getting similar bokeh results on a 50mm f/1.4).
Performance:
This lens performs wonderfully at almost every f-stop. Even at f 1.4 images are crisp and sharp, with minor loss in sharpness in the corners. By f2.8, images are perfectly sharp, even at the corners. In fact, this lens peforms even better than the newer G lens in this regard. I've uploaded a few sample shots I've taken with the lens, so you too can see the results:


Depth of Field:
The depth of field results from this lens are pretty remarkable. In order to understand depth of field, one needs to understand how f-stops and aperture work. It is somewhat counter-intuitive, so let me explain:
The main purpose of a camera lens is to collect light (crazy, I know). The aperture of a lens is the diameter of the lens opening and is usually controlled by an iris, or, in photography, a diaphragm. The larger the diameter of the aperture, the more light reaches the image sensor.Aperture is expressed as f-stop, e.g. f2.8 or f/2.8.
- The lower the number (f-stop), the bigger the opening of the lens (aperture)
- The higher the number, the smaller the opening of the lens
- Larger opening = more light = shallower depth of field
- Smaller opening = less light = larger depth of field
- Less light = need for a longer exposure (shutter speed)
- More light = need for a smaller exposure
To demonstrate the Nikkor 85mm f1.4 AF-D's capabilities at various f-stops, and to better demonstrate and explain depth of field, I took sample images using a tripod at every f-stop. My camera was set in aperture-priority mode, meaning, I chose the aperture (opening) and the camera adjusted the shutter speed to get the same exposure for each photo. I set-up two demonstrations, the first with a colored pencil as the focal point, and the second as the lens box as the focal point. Please feel free to click on each image inside the box sample to see a larger version of the shot.
Here is the sample set with the yellow colored pencil as the object in focus:

And here is the sample set with the box in focus:

As you can see, this lens performs quite well at all f-stops. I also hope that this demonstration was useful for anyone looking to purchase the lens or understand how f-stops and aperture translates into various depths of field.
Conclusion:
This is an absolutely dreamy lens that produces amazing results for portrait photography. This lens produces incredble bokeh and offers wonderful control for focus in both manual and auto-focus modes given the proper body pairing. The lens is quickly becoming one of my go-to lenses for most day-to-day applications. My only concern with this lens on an DX body would be focal distance. Indeed, I am hopeful that sometime within the next few years I will be able to purchase an FX body to take full advantage of this incredible lens.
If you are in the market for a new copy of this lens or any other photography equipment, please consider supporting this site by using this link to the lens on Adorama. Thanks for reading!
{fcomment}
Adventures on Cameron Cone - Views of Pikes Peak and Beyond

This Spring has been quite dry and I've been feeling the itch to get out and get up a summit. I mulled the idea of heading up to do Lackawanna (a high 13er near Independence Pass); however, I knew my time was limited and that I would need to stay closer to home. So, I put out a feeler to my climbing partner Ethan Beute to see if he would be interested in doing something easy close to home. We both settled on Cameron Cone, the easily recognized point often seen in front of Pikes Peak in many photos of Pikes from Colorado Springs. I'd had my radar on Cameron Cone forever it had seemed, so it was a great choice in that regard. At the last minute, I also invited one of my other hiking partners, Sarah Musick, and plans were in motion to meet at Ethan's at 5 AM and hit the Cone. Since both Ethan and I are avid photographers, we opted for the early start in the hopes of getting some decent shots of sunrise from the trail somewhere.
Cameron Cone is named after a famous soldier and newspaper publisher, Robert Alexander Cameron. When originally dedicated, the summit was called Cameron's Cone. The Cone towers 10,707 feet above the city of Colorado Springs and is the fourth highest ranked summit in El Paso County and 1,935th highest in the State of Colorado. For a whole listing of summits in El Paso County, check out this link.
There are several routes to reach the summit of Cameron Cone; however, we chose one of the more rigorous routes to gain the summit. Instead of driving to Crystal Park, as some would suggest, we opted for the long route from Barr Trail. Here is a map of our route, feel free to click on it to see a slightly larger version. All in all the hike was 7.0 miles and 4,175 ft. of elevation gain - a nice work out for sure!

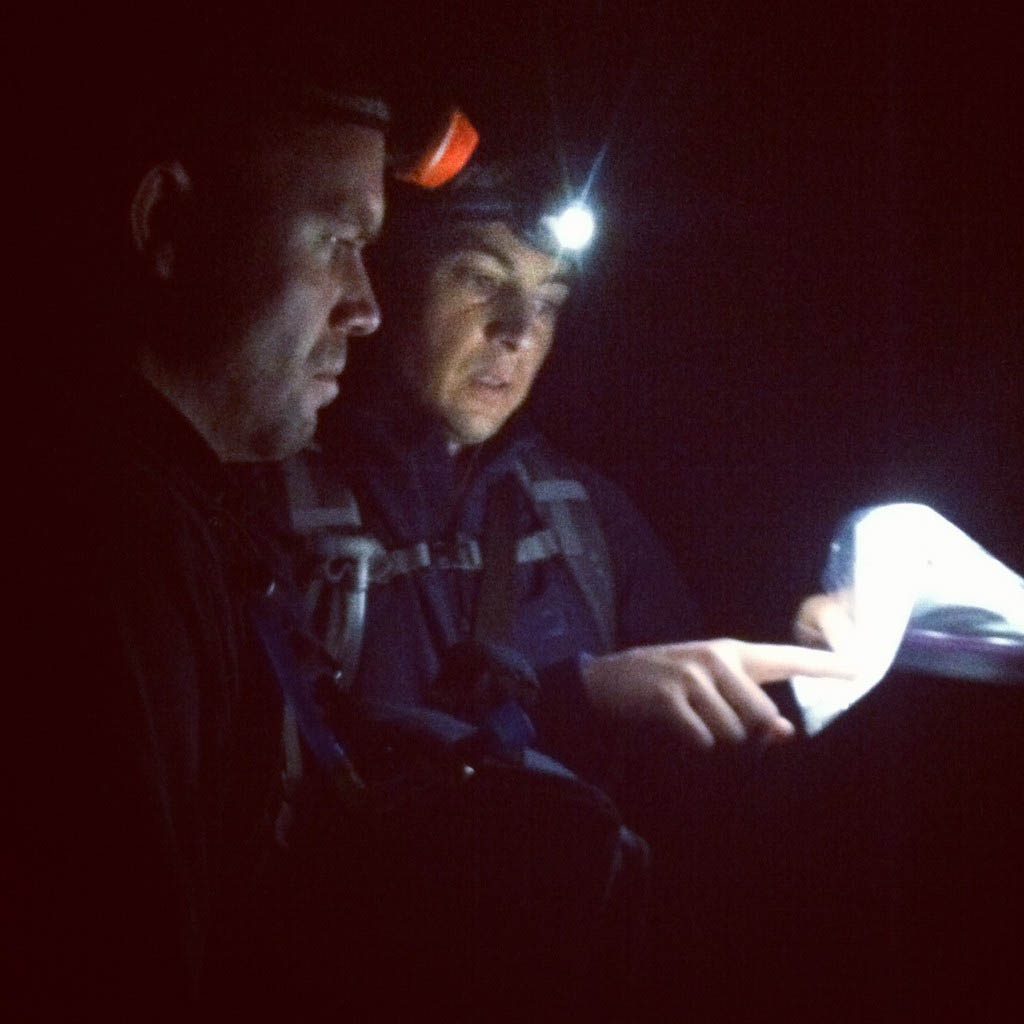
We decided to park on Ruxton Ave. in Manitou Springs and walk the road to where it ends. We then chose to cut left just after the chain link fence to the left of the Barr Trail and then walk the Cog Railway about a hundred feet. From there, we went straight up the hillside to the south until we reached the Englemann Trail. We found this guide to be very useful for the trip, as you can see from this photo of Ethan and I taken by Sarah.
We found the route to be fairly straight-forward once on the trail; however, we did lose the trail in one spot lower in the Englemann canyon. A simple up-climb and we were able to re-locate the trail. I would mention that I did bring my GPS with me and I had entered the coordinates from the Summitpost route description into my GPS as waypoints which proved useful.
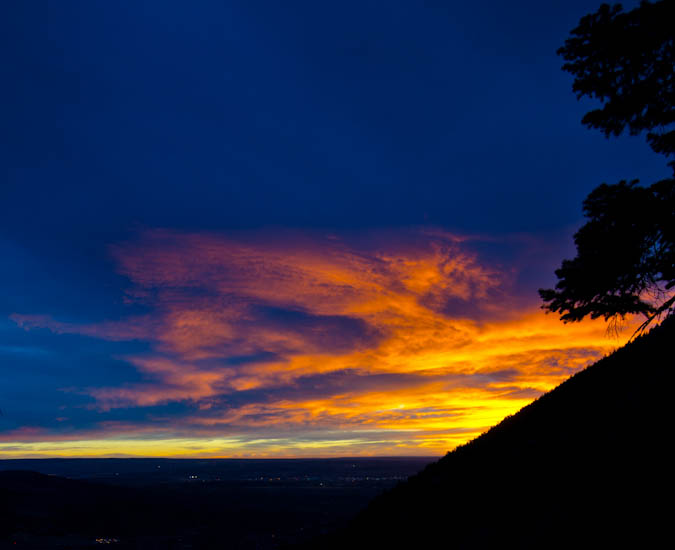
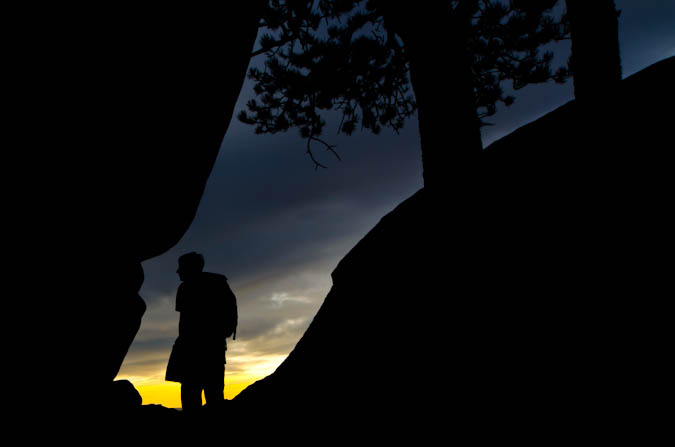
Before we knew it, the sun had begun to rise and we found a suitable place to stop. I set-up my new Gitzo carbon-fiber tripod and took a ton of shots with my Tokina 11-16 lens. I love this tripod! It was somewhat heavy, but well worth the haul. I was not terribly impressed with my sunrise photos, mostly because I think we were too low and some of the view was obscured by Eagle Mountain to the south and east. Nonetheless, here's a few of my shots.
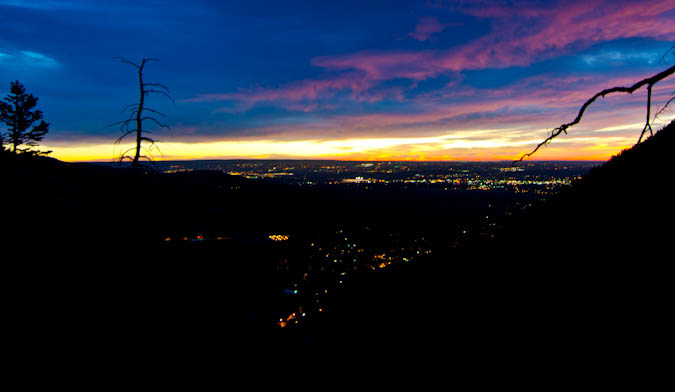
The city lights made for a very cool view.
I also had a little bit of fun doing a very short time-lapse video of sunrise using my intervalometer on my Nikon D7000.
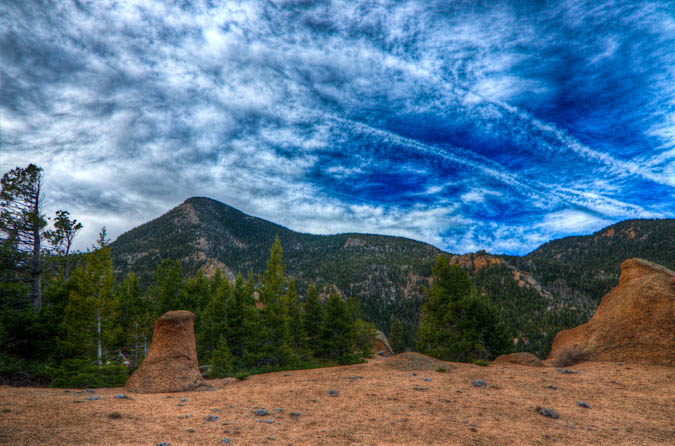
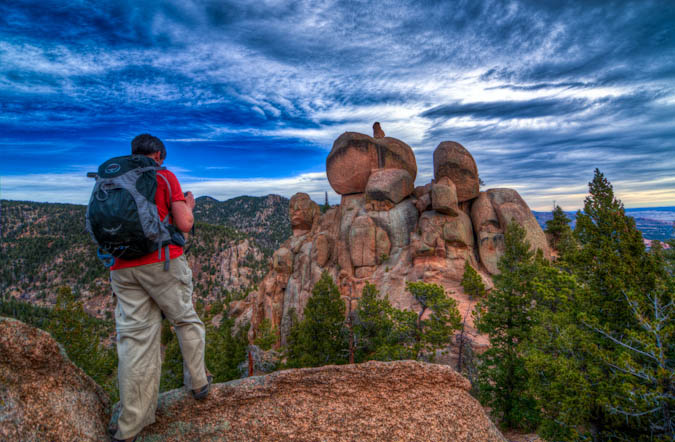
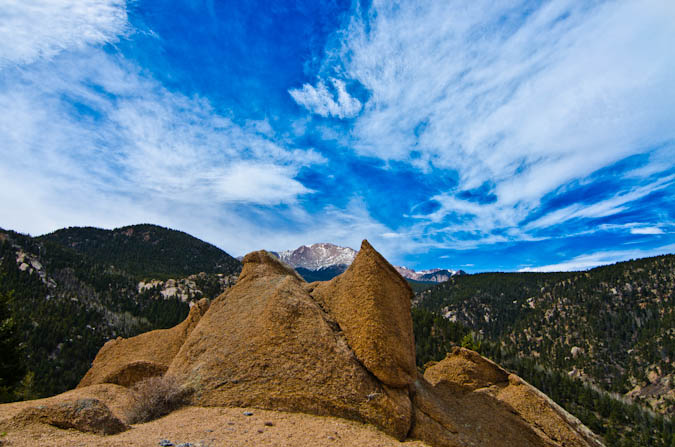
After stopping to take some shots of the sunrise, we continued on up the trail. The trail was fairly steep and kept our heart-rates going. Soon, the trail went around this huge rock feature and then dumped us out with a huge view of Pikes Peak and the Cog Railroad, which was pretty impressive.
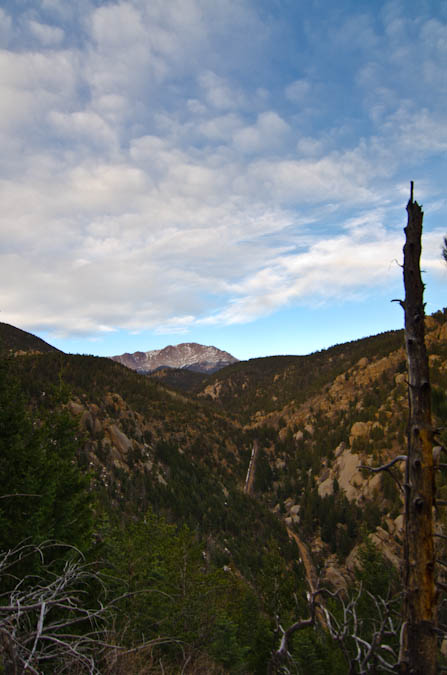
The rock near the trail was very classic Pikes Peak Granite, with features very similar to those of outcroppings found in Lost Creek Wilderness Area. A truly fun playground, as Sarah was able to demonstrate.
Ethan and I both enjoyed the view of Pikes Peak from this location.
The terrain was like a playground of sorts, with all kind of really cool features.
We took a few more pictures and then we were on our way up to the next section of the trail.
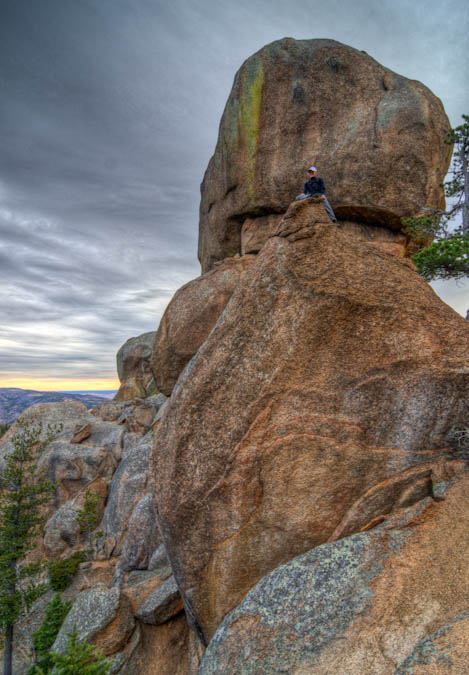
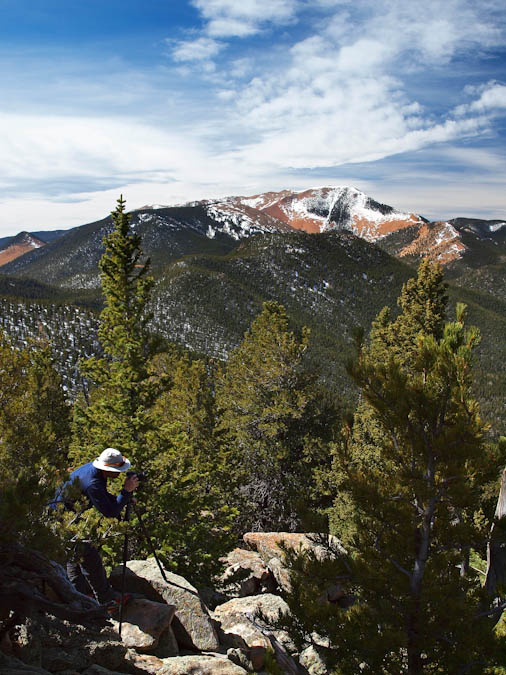
Soon, the trail opened-up again and dumped us out onto a very flat area which was the middle section of the hike. From here, we could see Cameron Cone finally - it seemed a lot futher away than I think we were anticipating. We could also see the Magog Ridge and Magog Rock. For the rest of the hike we all jokingly coined the phrase "Oh-my-Gog."
We went around the huge Magog Rock, which was one of the cooler features I'd seen. It had this smaller rock perched above it which made us all wonder how the heck something like that could even happen.
Ethan took many opportunities to take photos of it as well.
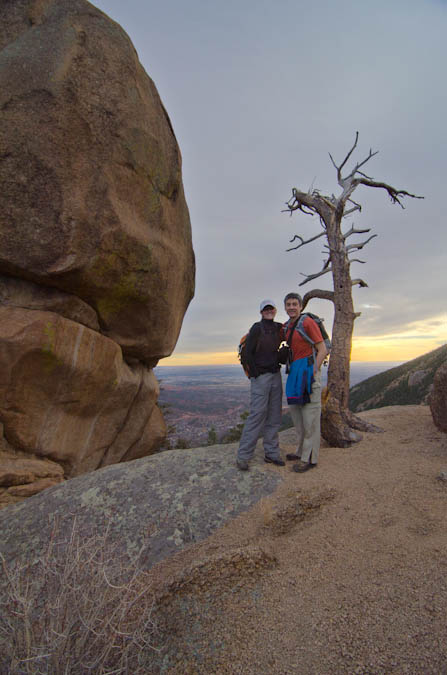
We followed a small road for a ways and then found the trail leading up to Cameron Cone, as advertised. Indeed, the trail was faint and sometimes hard to follow. We did find that there were small ribbons tied to trees at various intervals to help mark the way. We lost the trail a couple of times and found ourselves bushwacking through some steep and nasty terrain. Finally, we reached the ridge to the south of Cameron Cone and then ascended to the summit. It was pretty steep and I could understand if people turned back on this climb. It is much harder than it looks, for sure. Once we reached the top, we all enjoyed the view of Colorado Springs to the east and the unique view of Pikes Peak to the west. I busted out my tripod and set it up for some HDR work. Ethan caught me in the act, with Almagre in the background.
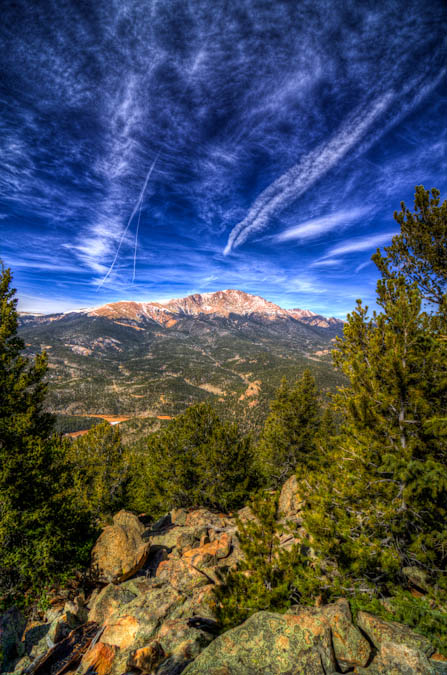
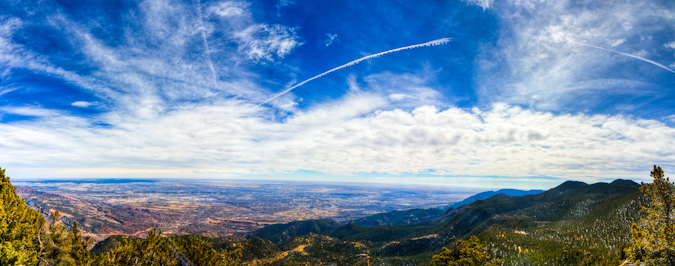
The sky was pretty cool for photography and some jet contrails added to the interest level.
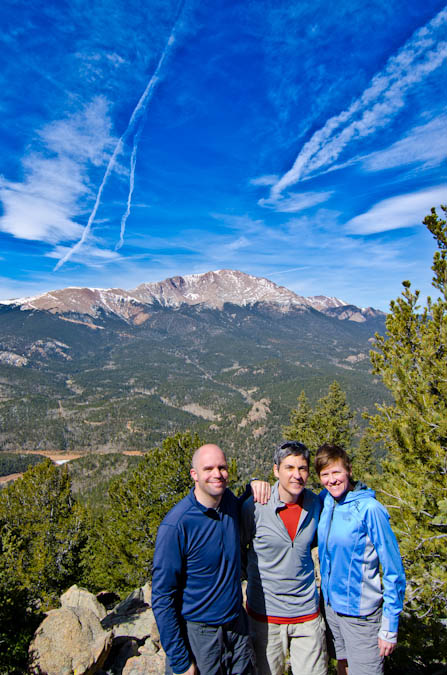
One other nice advantage to bringing a tripod is that it makes for easy group photos.
On the other side of the summit, the views of Colorado Springs, Waldo Canyon, Williams Canyon, Garden of the Gods and Colorado Springs were pretty impressive.
From here, I took a quick panoramic photo of the Colorado Springs area, looking northeast, east and southeast.
We spent about an hour on the summit and then head back down. The rest of the trip was pretty uneventful, albeit full of great conversation with some really great friends. I left with one parting shot of Pikes Peak.
Overall, Cameron Cone is a great hike! It is tougher than it looks and demands some respect when climbed from Barr Trail. Also, good route-finding skills are also required.
The views of Pikes Peak on this trip are totally worth the hike and are quite unique. You won't be disappointed if you choose this mountain that is off the beaten path.
{fcomment}
Colorado's Best Landscape Photographers
We've updated this list as of 9/5/2014 to include new ratings and photographers. Updated 1/16/16 to remove non-Colorado photographers. Updated 9/20/17. Updated again 4/6/21. Updated and revised by new author on 12/30/22.
Colorado is an amazing place for photography.
The variety of scenes available to shoot are quite diverse and one could spend a lifetime shooting photos here and still not get a full collection of shots. The State has a huge variety of photographic subjects including color, culture, mountain vistas, desert scenery, forests, 14ers, lakes, cities and National Parks.
Last month, we set out to try to identify what we felt were the best photographers from Colorado that also shoot photos of Colorado scenes. We posed the question on Google Plus and received quite a few responses. We went through all of the responses and narrowed down the options to the top 14 photographers and have listed them here in the order that we feel they belong.
We made our choices based on three sets of criteria:
- How likely would we be to purchase a print from this artist?
- Based on their featured photos, what is the subjective technical difficulty in obtaining those shots?
- How likely would we attempt to emulate the shots that they obtained?
Here are the photographers and links to their website, in order:
1. Matt Payne
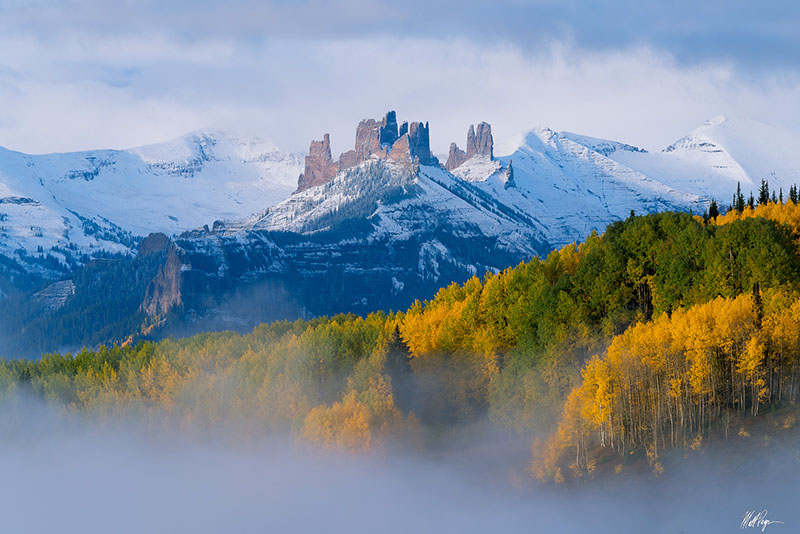
Foggy Fortress by Matt Payne.
Matt Payne has been an avid Colorado nature and landscape photographer since 2010. In 2012, he completed his goal of climbing all 53 mountains over 14,000 ft. in Colorado (known as the 14ers) and in 2018, he completed his goal of climbing the highest 100 mountains in Colorado (known as the Centennials). In 2022, he co-authored Climbing Colorado's San Juans, a climbing guidebook published by Colorado Mountain Press. Matt's work has improved significantly over the years and his dedication to photographing some of the most remote locations in Colorado is quite impressive.
2. Kane Englebert

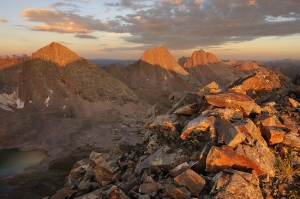
Vestal Peak Sunrise by Kane Englebert.
Since 2008, when we began seriously taking photos while climbing Colorado's mountains, we envied and admired the work of Kane Englebert. His style, vision, and subject matter were all things we found quite incredible. Ever since, we have always strived to try to vision our own work after his. Kane sets the bar quite high for quality, realism, scenes, subjects and composition. He also happens to be a really friendly guy, willing to take time to give new photographers tips and compliments, as evidenced by his comments on a 14ers.com trip report of ours from long ago. Kane is just an all-around great landscape photographer and thus earns the number 2 spot on our list of the best landscape photographers of Colorado.
3. Jack Brauer
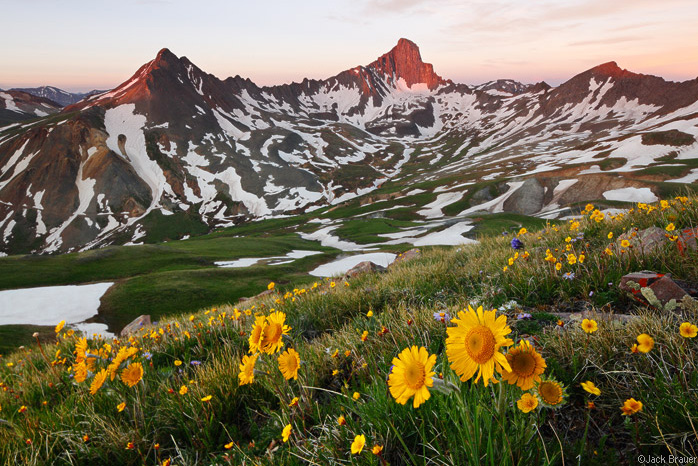
Wetterhorn Peak Wildflowers by Jack Brauer.
Jack Brauer's photos embody our own personal style of photography, which is - get up early, find an awesome mountain, climb it, and let the magic happen. The quality of photos that Jack takes are quite difficult to match in terms of composition, light and difficulty in achieving. For example, Jack has a photo on his site of Capitol Peak at sunrise. Just getting there by sunrise is a feat of its own. We think you'll agree that his photos are quite impressive. You can also check out Jack's blog, which is pretty incredible as well.
4. Jennifer Renwick
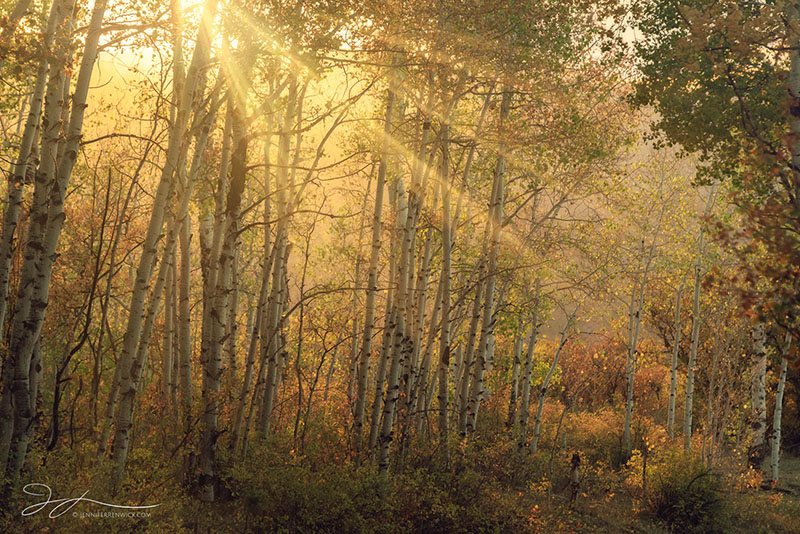
A Walk Through Autumn by Jennifer Renwick.
Jennifer Renwick is a Colorado landscape photographer who lives part-time in Denver, Colorado and travels the country in an RV with her partner David Kingham. Her landscape photography from Death Valley is especially incredible; however, she has some fantastic images from Colorado as well that will surely impress you.
5. Sarah Marino
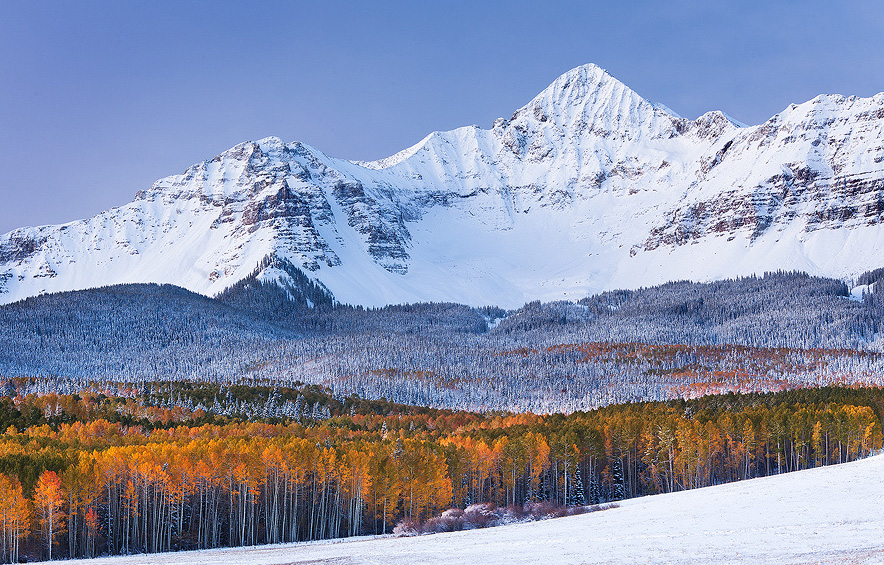
Wilson Peak - by Sarah Marino.
Sarah Marino is a very impressive artist specializing in the Colorado West. Her work is quite astounding. It is clear through the expression of her work that she has a real connection to the natural world and has an immense amount of creative vision and talent. Indeed, her work is marvelous and we envy her ability to capture some of Colorado's more incredible areas. Especially impressive though, is Sarah's work in the desert of the West. Check out her site and be ready to stay awhile!
6. Ron Coscorossa

Purple Dawn - a classic Colorado mountain and wildflower scene from Ron Coscorossa.
Ron Coscorossa is the partner of Sarah Marino. They live in Ridgway, Colorado and specialize in small scenes in nature. We have always appreciated Ron's subtle processing style and his incredible use of patterns and shapes to create incredible landscape photographs.
7. Todd Caudle
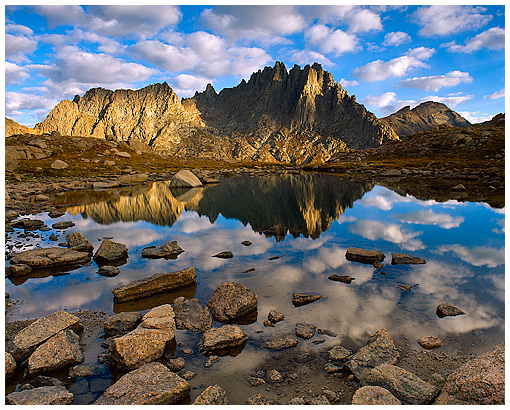
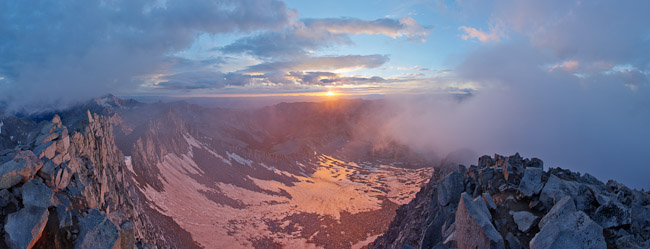
Jagged Mountain Reflection - by Todd Caudle.
Todd Caudle is best known for his work on the annual Colorado Mountain Club calendar. His work is quite excellent and worth checking out. He often takes very unique shots of Colorado's 14ers, and I greatly appreciate that. Getting to some of the spots he takes shots from requires quite a bit of effort, and the reward is obvious in his work.
8. Erik Stensland
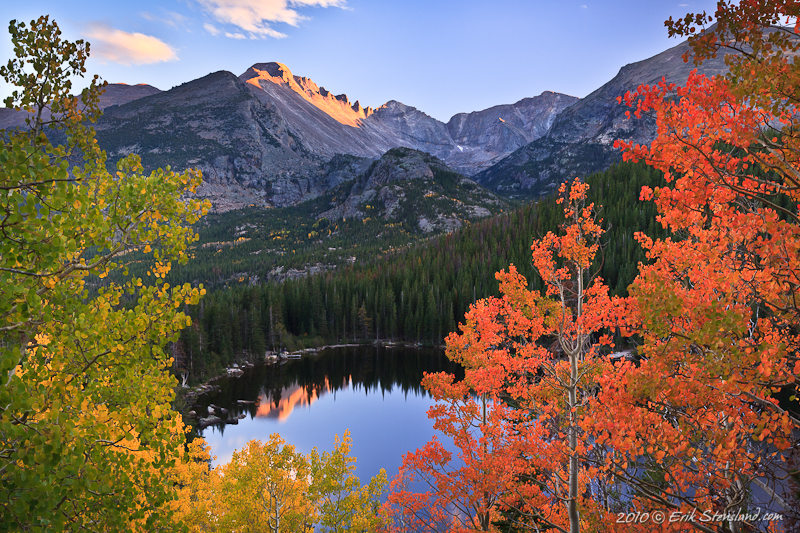
Bear Finally - by Erik Stensland.
Erik's gallery is focused on Rocky Mountain National Park, which I think is a superb idea. The park is full of amazing features and locations, so what a great place to get a full gallery of! Erik's shots should be greatly appreciated by photographers and collector's alike. The locations he is shooting from and the conditions he strives to photograph are rare in nature. Additionally, Erik blends the intelligent use of fancy equipment (filters) with the natural beauty of the Park, and that is a really refreshing thing to see.
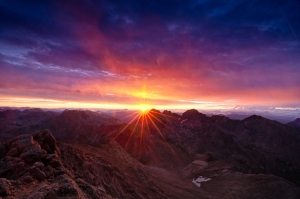
9. Glenn Randall
Sunrise from the Summit of Snowmass Mountain - by Glenn Randall.
Glenn Randall is a well-known landscape photographer based out of Boulder, Colorado. The first time we checked out his work on his website, we knew we found a real gem of a site. Glenn has a whole section dedicated to getting photos from the top of 14ers at sunrise. This is one of our personal passions as well, and we know from personal experience that it is no small feat to execute these shots the way in which Glenn has. You should really check out his work, it is quite splendid indeed!
10. Brent Doerzman
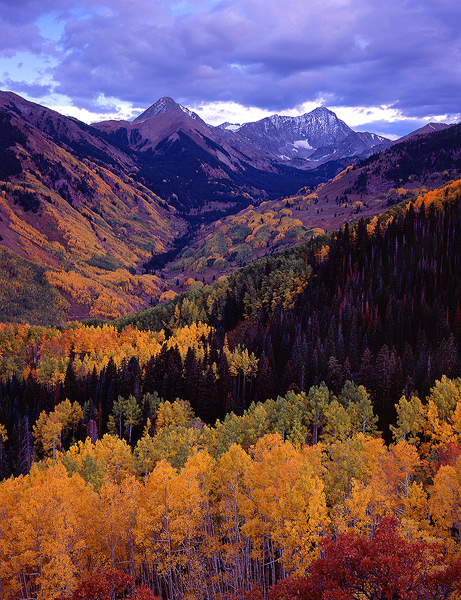
Capitol Peak - by Brent Doerzman.
At first we could not find much information on the web about Brent Doerzman; however, when it was recommended to us that we should check out his work, we were immediately impressed by the large collection of autumn photos taken from various locations across Colorado. Brent clearly has a gift for finding wonderfully scenic locations and capturing the best images possible from amazing viewpoints. Brent's website is laid out much like a collection of trips, and each trip we've gone to view seems like it has several great shots in it. Notably, most of his work was created on 4x5 film! Check out his work, you won't be disappointed.
11. Scott Bacon
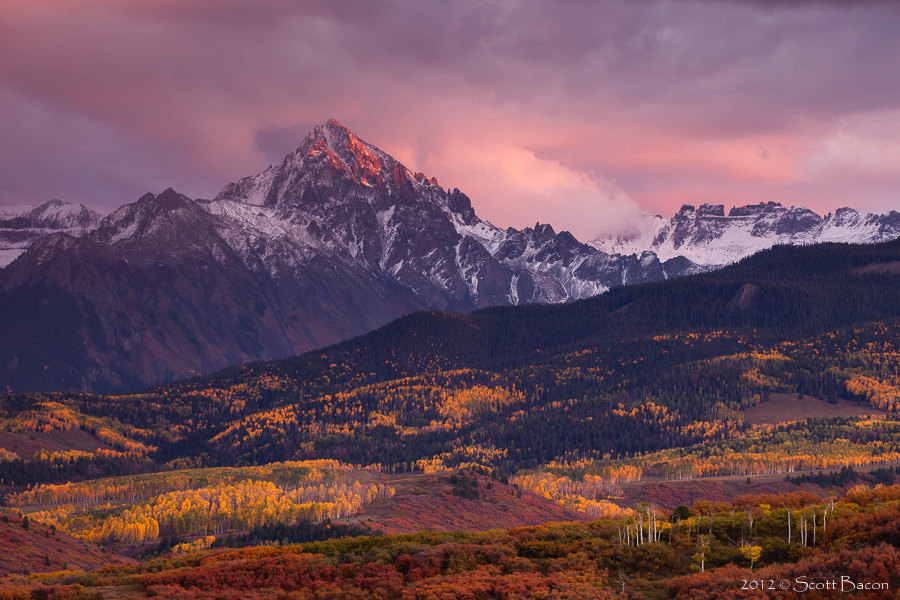
Mount Sneffels Wilderness - by Scott Bacon.
Scott Bacon is actually a full-time software engineer; however, his photographs of Colorado are quite stunning and worth checking out. Scott's techniques are very classic and his execution is nearly flawless. He visits and shoots locations that are vintage Colorado and is able to capture moments at those locations that are breathtaking. Take a look at his gallery and you will also be impressed by his work.
12. Mike Berenson
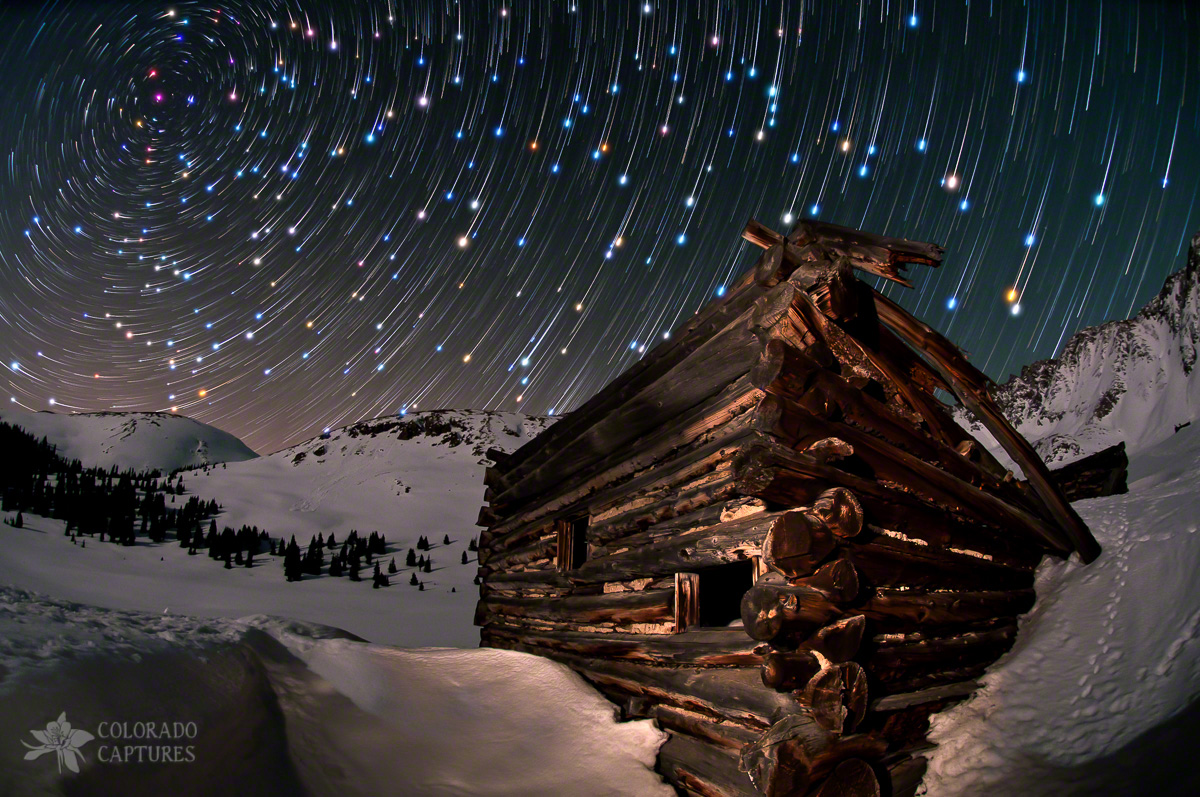
Wonders Of The Night by Mike Berenson.
It is no secret that one of our obsessions is night photography - and there are few better at Colorado night photography than Mike Berenson. We had the pleasure to meet Mike when both of us had work showing in the Denver Photo Art Gallery. Mike is not only a class act but also one of the most generous and forthcoming guys when it comes to photography knowledge. If you have the opportunity to take one of his night photography workshops, don't hesitate! His work and knowledge is nearly unparalleled. Mike's night photography shooting and post-processing techniques are constantly pushing the boundaries and the results are proof that he takes a great deal of pride in his work.
13. Grant Collier
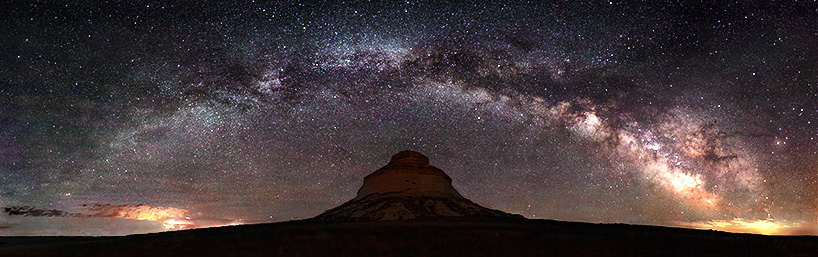
Milky Way over Pawnee Buttes - by Grant Collier.
We are a huge fan of Grant's work, especially his night-time shots, including the above panoramic image of the Milky Way. Taking such photographs requires timely execution and a great deal of forethought to pull of the shot. Grant resides in Lakewood, Colorado and his work has been featured on CNN.com, NBC, CBS, WB2, UPN, The Special Reserve Collection, America's Scenic Drives, the Mammoth Book series, the Cube Book series, the Denver Post, and the cover of the Rocky Mountain News.
14. Nate Zeman

Glow - Chimney Rock by Nate Zeman.
We had personally never heard of Nate Zeman before inquiring on Google Plus about Colorado Photographers. When he was recommended, we went to his site and was quite impressed by the high quality of photography that we found there. Nate's work reminds me a lot of Kane Englebert's and I was most intrigued by his fall photo collection. Nate's work is quite outstanding. The scenes he captures are from vantages that most people will never see, which is why we picked him for this list.
That concludes our listing of the best landscape photographers of Colorado.
Sunsets, Sunrises and Mountain Goats - Chicago Basin from Endlich Mesa
Day 1: Backpack from Endlich Mesa to Lillie Lake
Day 2: Climb one 13er, backpacking over Trimble Pass and Columbine Pass
Day 3: Sunrise from North Eolus, summit of Eolus and Sunlight
Day 4: Climb of Windom Peak and pack-out
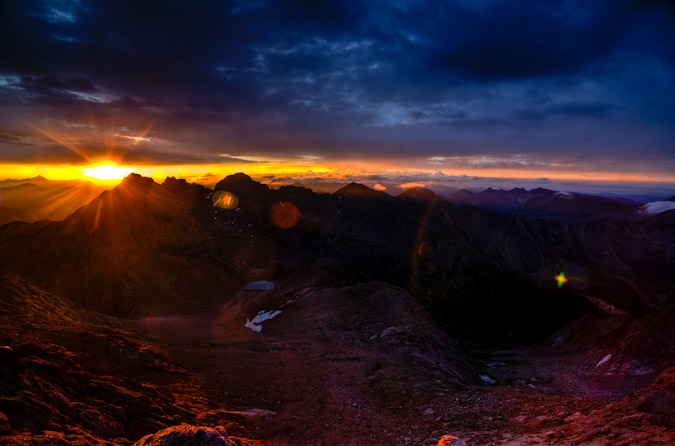
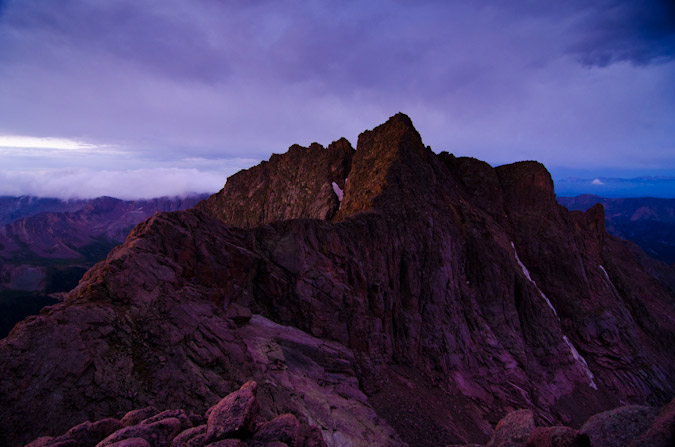
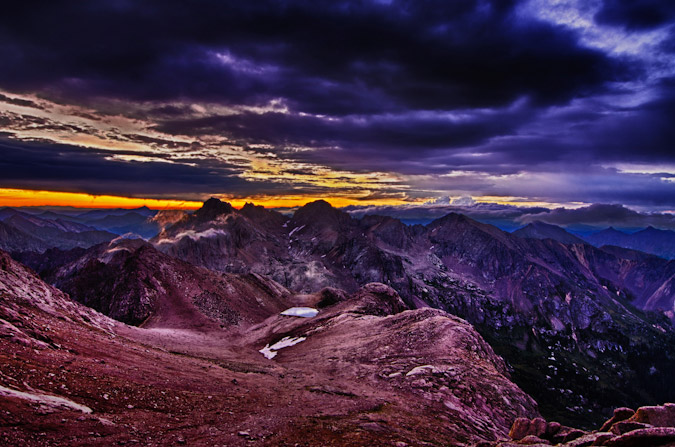
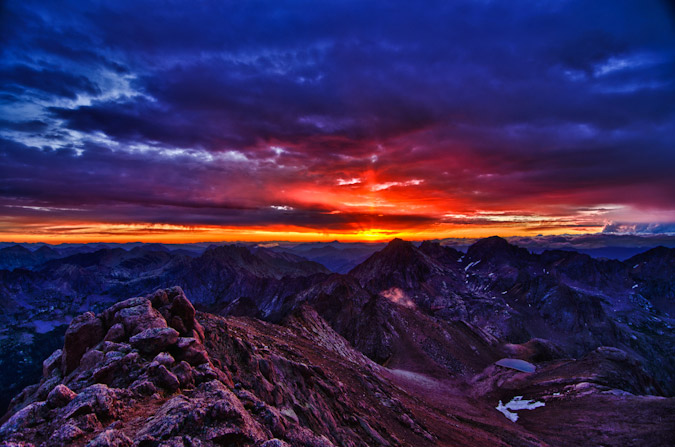
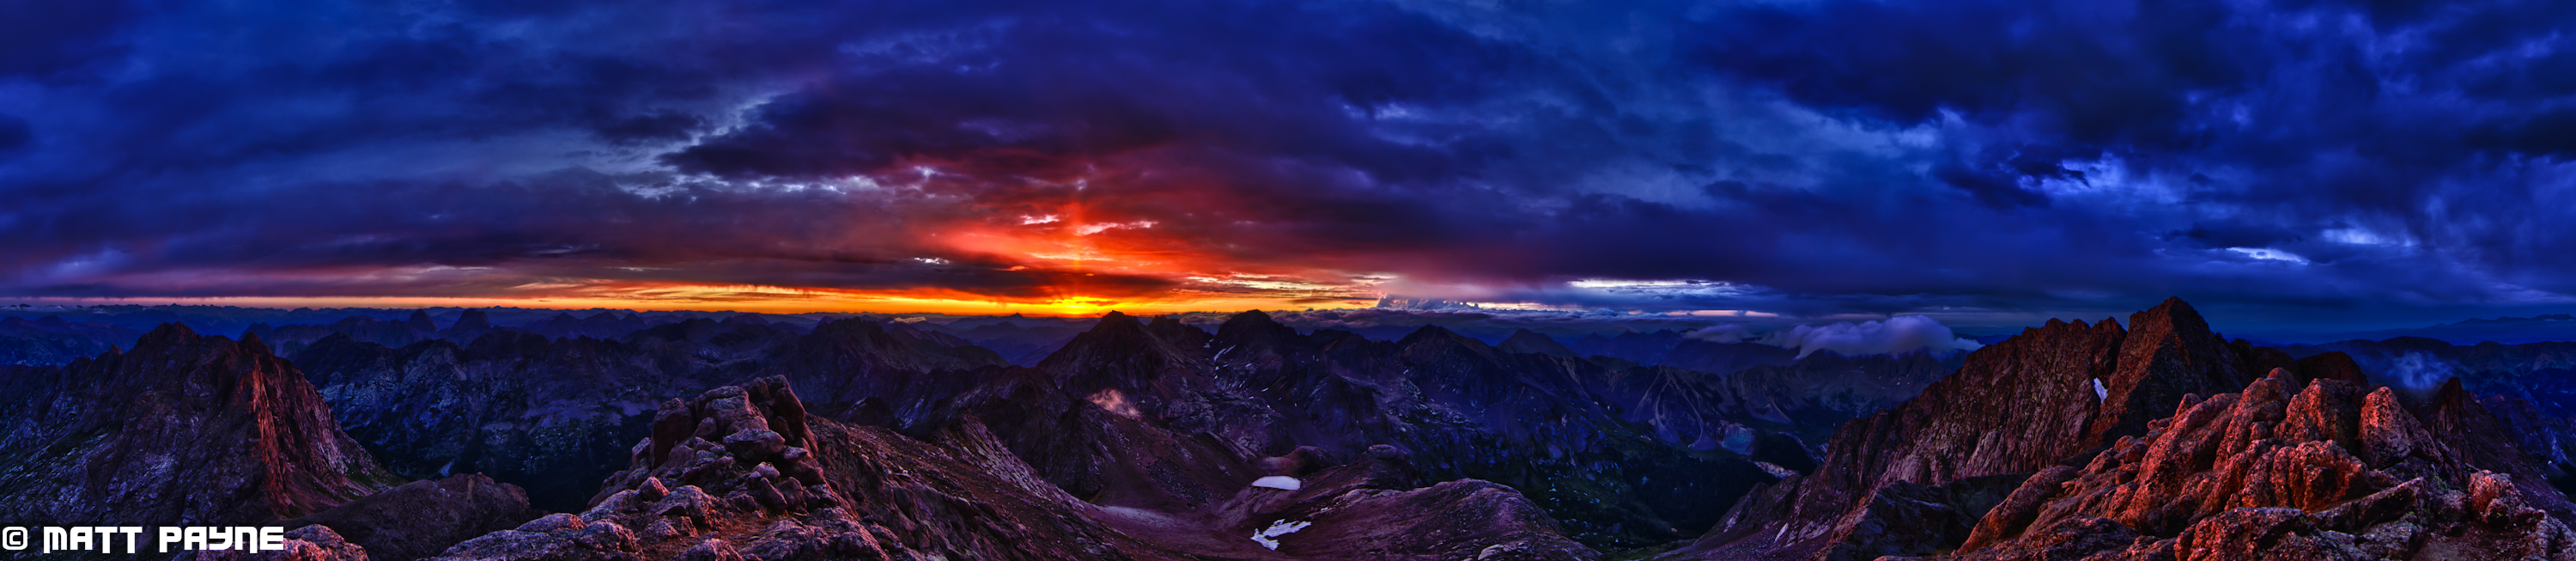
The Weminuche Wilderness Area and the mountains it contains are quite possibly some of the most incredible places on Earth. My first memory of the area was from 2000, when I led a group of 8th and 9th graders from Highland Mary Lakes to Vallecito Reservoir as part of my employment with Colvig Silver Camps. I remember fondly the views of the Needle and Grenadier sub-ranges and never thought in a million years I'd actually climb them. From many vantage points, the mountains in this area look unclimbable and untouchable. Indeed, the Needle sub-range of mountains which consists of Pigeon Peak, Turret Peak, Monitor Peak, Mount Eolus, Sunlight Peak and Windom Peak were some of the few mountains not explored by the Hayden or Wheeler surveys. According to Rhoda of the Hayden Survey, the weather pattern of the Needle sub-range was quite impressive: "Early in the day we noticed clouds hovering about the quartzite peaks, as we had seen them so often before. They never completely veiled all the peaks in the group, but early each day began to circle about them in a restless sort of way, like so many mighty lions about their lair. To us this apparent restlessness suggested a concsiousness of their terrific destructive power, which only awaited a mandate from the 'God of Storms' to be set in motion. We even now held these peaks in awe, as there seemed to be established somwhere in their midst a regular 'manufactory of storms.'1 Based on this notation, it is no wonder that Mount Eolus is named after the Greek God of Winds. Indeed, the clouds and winds were quite notable this trip, as seen in this preview...
With only five ranked 14ers left to climb, I was eager to finally get into Chicago Basin and climb those restless peaks. The route I chose for this adventure has been in the making for two years now, piecing together various adventures I'd had in the area in the past. In 2001, I hiked from Vallecito Reservoir and to Columbine Pass and climbed Jupiter Peak. In 2000, I did a backpacking trip from the start of Endlich Mesa to City Reservoir. With these two separate trips embedded in my memory, I knew it would be quite an adventure to go from Endlich Mesa to Chicago Basin and back. Adventure indeed.
45 miles round-trip.
16,600 ft. elevation gain.
4 days.
Here's a map of our adventure - please click on it to see the full version (including the rest of the map that you can't see here):
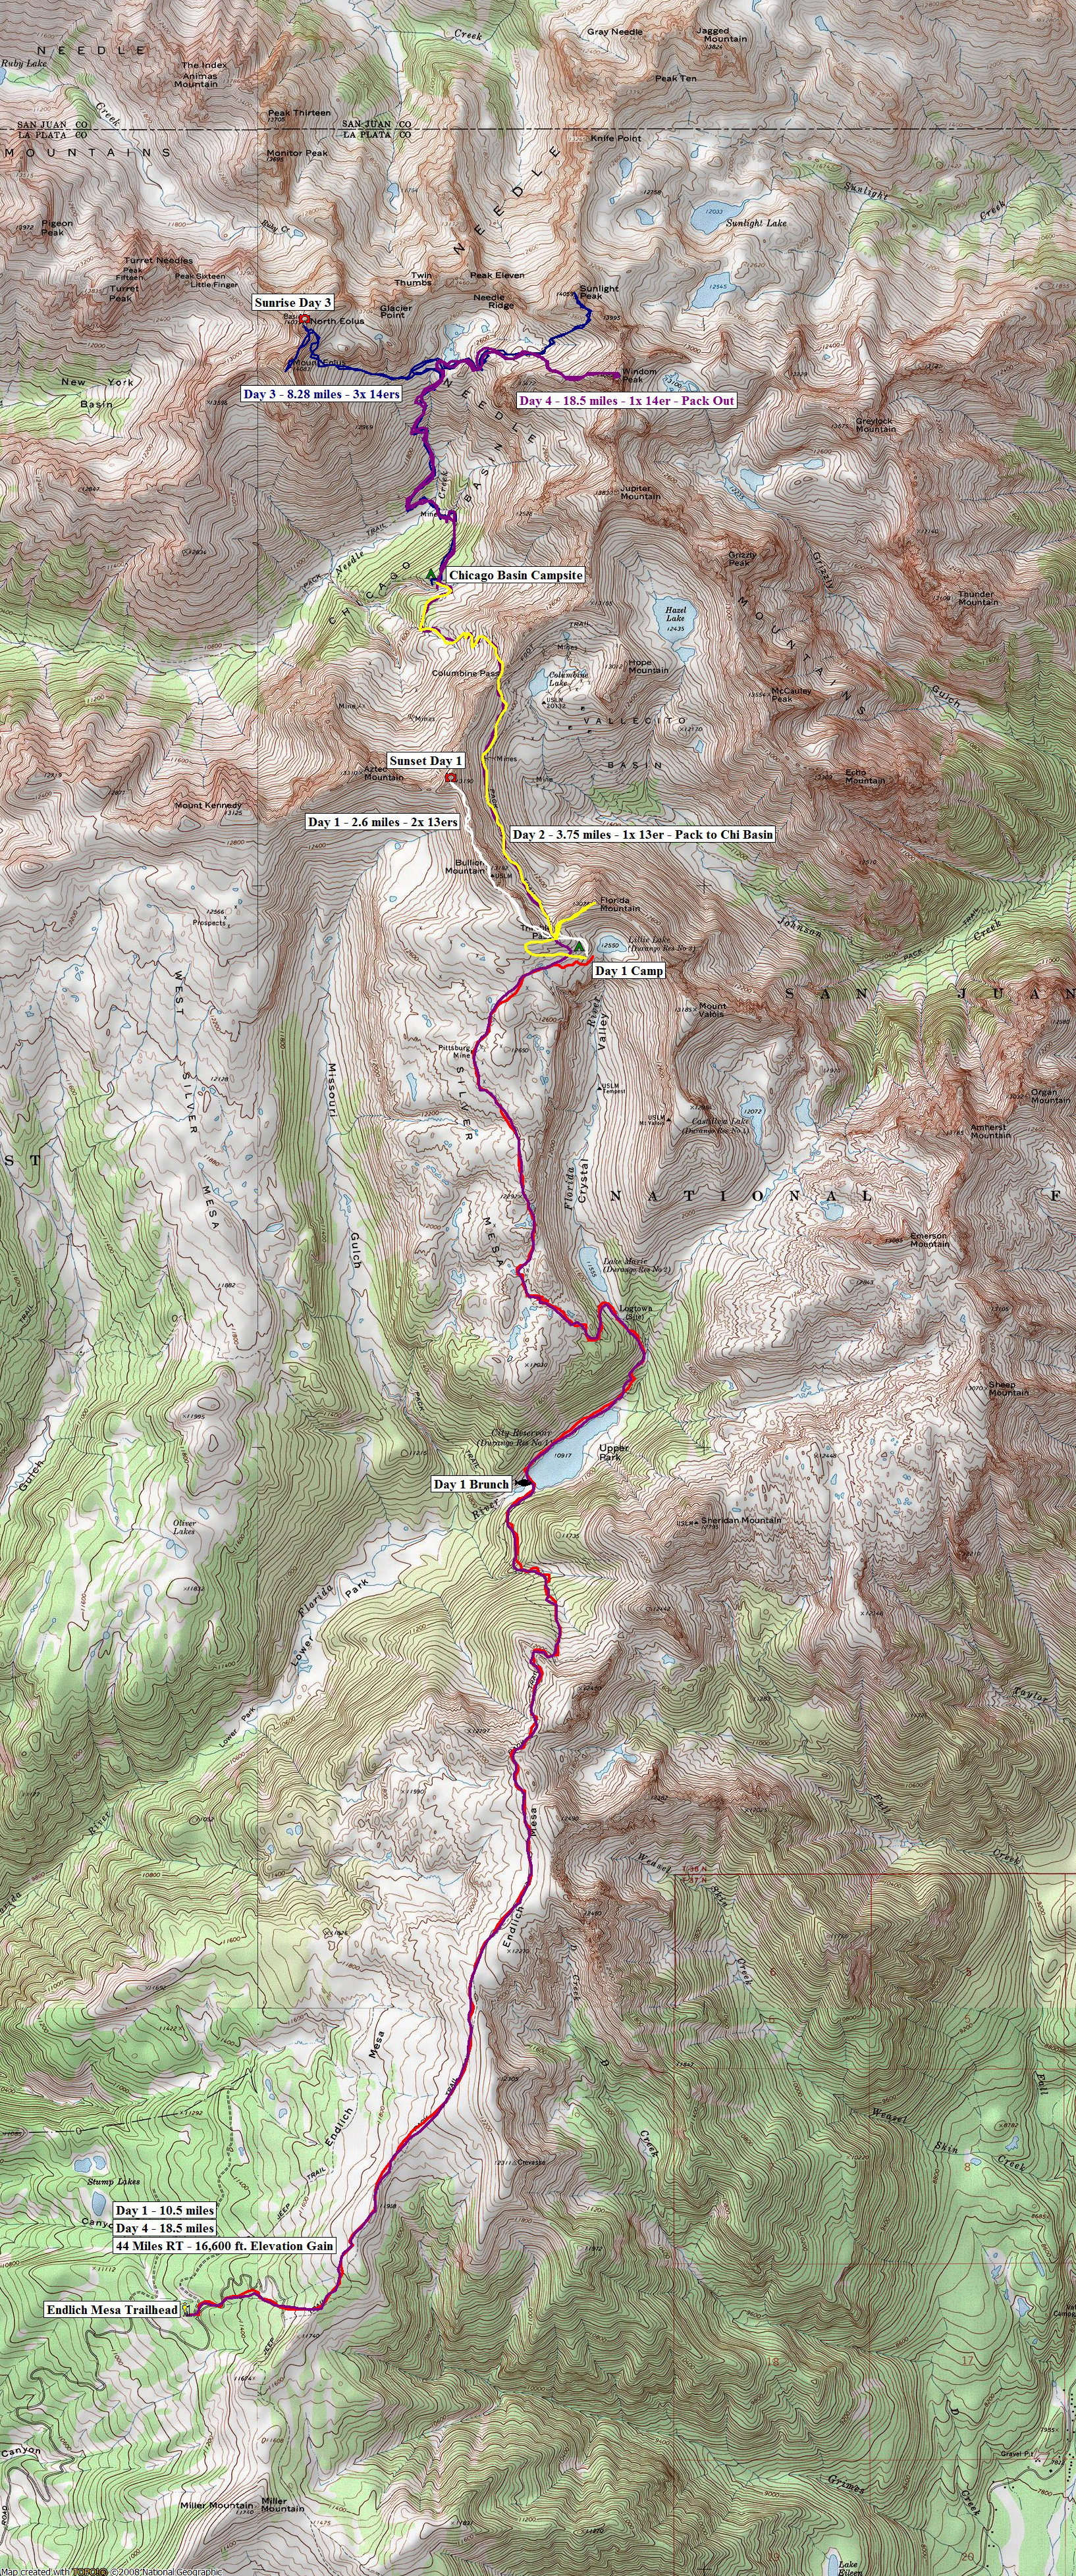
Day 1: Backpack from Endlich Mesa to Lillie Lake; summit two 13ers - 13.1 miles, 4,083 ft. elevation gain.
Two years ago, I had planned to do this trip with my dad. The Chicago Basin 14ers were three of the seven 14ers he had not climbed and I wanted to share those summits with him. Unfortunately, he suffered a freak knee accident this past Christmas and has not been able to hike this year, so I planned the trip with my new friend, Regina. Another set of unfortunate events happened, and I had a last-minute scheduling conflict on the dates Regina and I had chosen for the trip; however, another freak incident happened and I was able to clear some dates on my calendar and go on the trip with another friend, Sarah Musick. I explained the somewhat insane trip plan with Sarah and she bought-in right away, knowing that it would be a monster of an adventure. The plan was to drive to the Endlich Mesa trailhead on Thursday night, backpack as far as possible on Friday, backpack to Chicago Basin on Saturday, climb the 14ers on Sunday and Monday, and backpack all the way out on Tuesday for the drive home. It would be a feat no matter how you looked at it. The only positive to the approach was that we would be starting at 11,250 ft. elevation! All packed and ready to go on Wednesday night, I weighed my pack - 58 pounds! This was going to be painful! Sarah and I had opted to eat well this trip, so the bulk of the weight was in food, but trust me, it paid off later! So - off we went from Colorado Springs for the Endlich Mesa trailhead, which was up a long 9-mile forest service road north and east of Lemon Reservoir near Durango, Colorado. Earlier in the year, I had gotten some great information from Barry Raven from 14ers.com about how to get to the trailead - HERE is the map he shared with me, which I found highly useful in finding the trailhead in the dark.
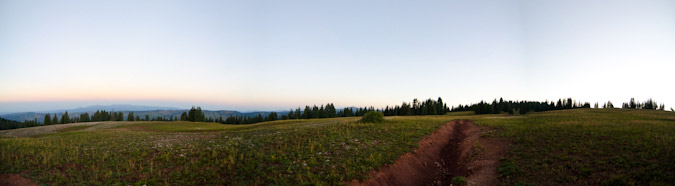
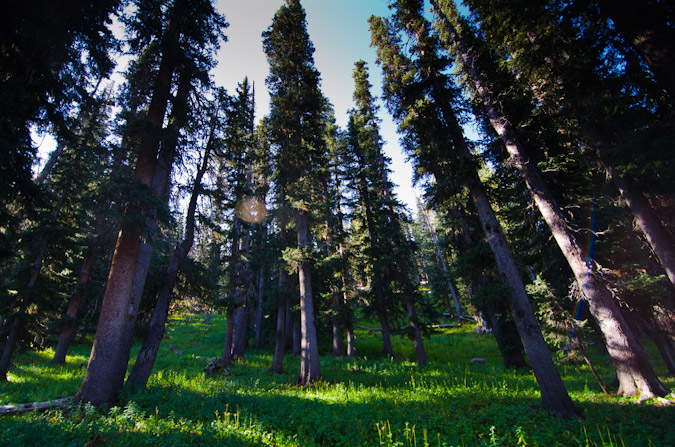
We slept in Sarah's truck and set our alarm for 5:00 AM, which came after a night of rain. We secured our gear and kissed civilization good-bye. I had pre-prepared some an awesome breakfast for us to cook consisting of bacon, scrambled eggs and hash browns; however, neither of us were remotely hungry, so we opted to pack it in and eat a late breakfast somewhere on the trail. More pack weight! We ascended the Endlich Mesa trail fairly quickly in the early morning and reached the expansive and flat Endlich Mesa in no time at all, with views in all directions.
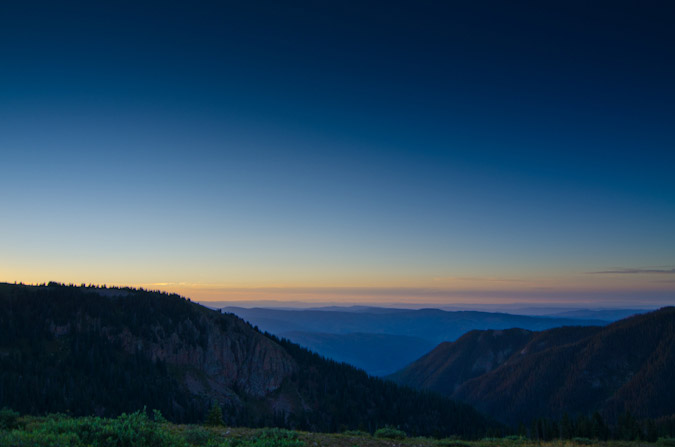
To the east, the mesa dropped off and revealed some pretty country.
Before too much longer, I was filled with glee as the first views of Pigeon Peak's east face were revealed, as well as the mountains of Chicago Basin. How far away they looked!

I was really excited to finally use my new camera lens, the Tokina 11-16 f/2.8 super wide angle. It is the highest-rated and best-reviewed wide angle lens for the Nikon DX format camera on the market. The lens is really hard to get these days because of the earthquake and tsunami that hit Japan. I was able to score one from Craigslist and have been itching to get it into action!
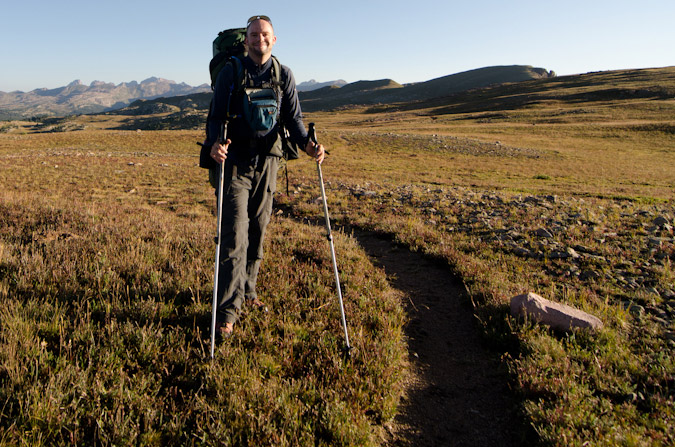
The wide angle view was really awesome and I knew I was going to have a lot of fun on this trip. Just in case, I had packed my 18-105mm lens for other shots. Oy vey! More pack weight! Sarah's pack was pretty heavy too, but she was a real trooper!
The mountains behind Sarah were indeed the mountains we were aiming for. Wow. Just wow.
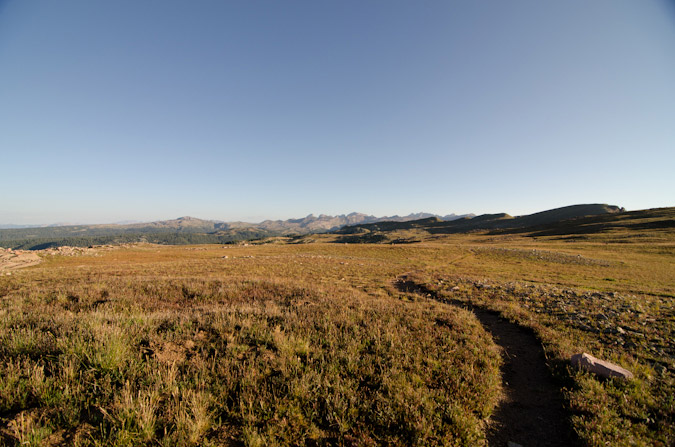
We continued up the mesa, which was a very fun approach. It was mostly flat, with a few sections of up-and-down. The views were great the whole way in.
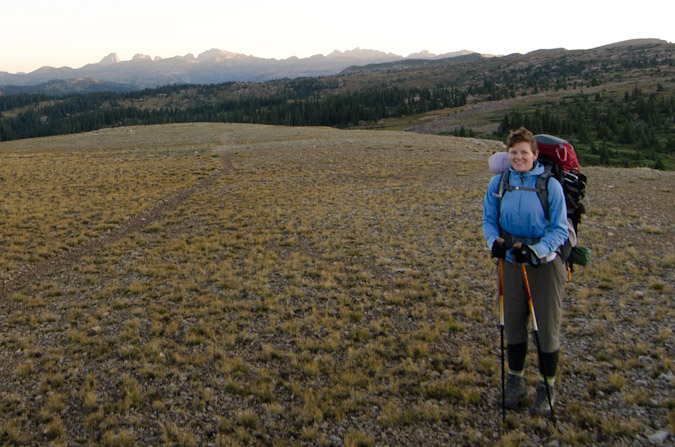
Sarah was able to capture just how geeked-out I looked for the hike...
We continued on and after enjoying some spectacular views from the mesa, headed on down towards City Reservoir, where we planned to cook some breakfast. The hike down to the reservoir was steep, and we both knew it was going to be one hell of a hike back up at the conclusion of the trip.
We stopped at Durango City Reservoir and enjoyed the early morning light on the water.
The Soup Nazi unpacked and prepared breakfast.
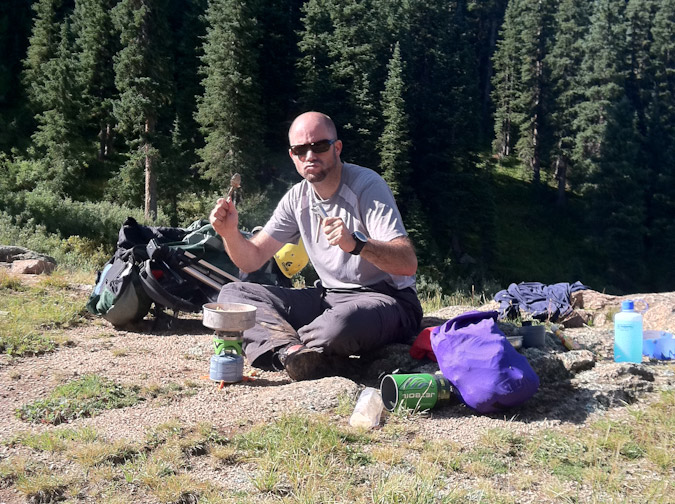
No Soup for YOU!
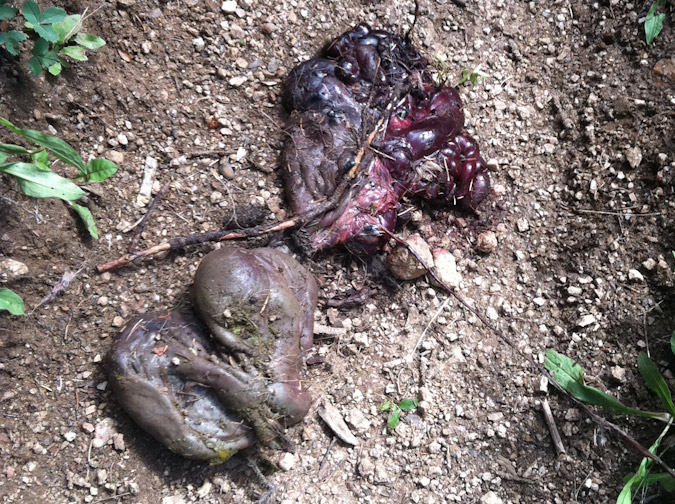
The breakfast was amazing. Two other backpackers passed us on the trail, one of which I later learned was "alwetend" from 14ers.com. These two guys had on packs that weighed at most 30 pounds and looked as though they were in lightweight ascent shoes. Jealousy set-in. We packed up and headed-out. For some reason, we felt like we were both moving much slower than before. It must have been the bacon. The trail heading up towards our second objective for the day, Lake Marie, was pretty steep (with heavy packs on anyways). We passed by the entrails of something on the way, perhaps a deer? Or perhaps someone with a heavy pack on puked their guts out... thanks Sarah for taking a photo!
At 11:30 AM we reached Lake Marie. Above it to the left (west) was Silver Mesa, where we were heading next. Above it to the north was Florida Mountain, which had at its base City Reservoir #2 aka Lillie Lake.
Climbing up to Silver Mesa was pretty straight-forward. The trail was clearly marked and it followed the USGS topo to a tee. Once on the second mesa of the day, we knew we were committed. We knew that our day's fate was sealed and that we needed to find a campsite somewhere between here and Trimble Pass before dark. I had my sights set on Lillie Lake, which was just below Trimble Pass. While exposed to the elements at such a high elevation, it was a great location to aim for due to the presence of water. So we worked our way up the Mesa at a slow pace. Huge cairns marked the way the whole way in.
Storms moved in and we put on our rain gear. Fortunately, it did not rain for long...
We reached a nice stopping place about halfway up Silver Mesa. Lake Marie was seen far below and the summit of Florida Mountain was seen far above. Here's a nice view of that whole scene in a 360 panoramic, with the lake to the left and the summit to the right.

At this point we were both pretty delerious and tired. Everything was funny.
We soldiered on up Silver Mesa further, which provided literally a highway of silver for us to hike on and up through a large notch.
 We stopped again about 3/4 of the way near the Pittsburgh Mine and ate some food. Sarah swears I was meditating in this photo, but I'm pretty sure I was just enjoying the views!
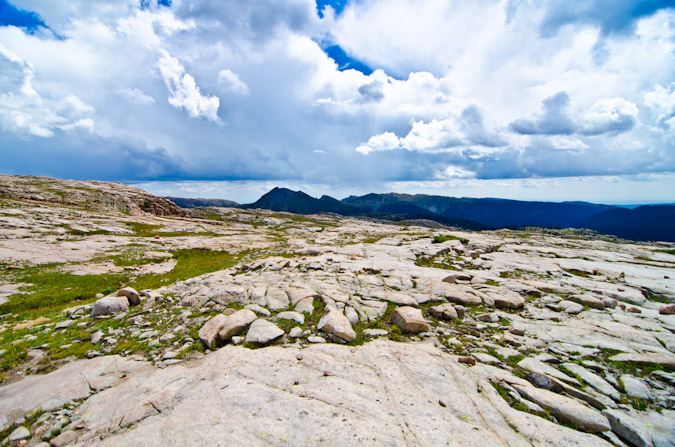
Indeed the views back to the south of Endlich Mesa and Sheridan Mountain were great, and it really put things into perspective in terms of how far we had already hiked. The large map I linked to early in the report really gives you a great idea of this as well.
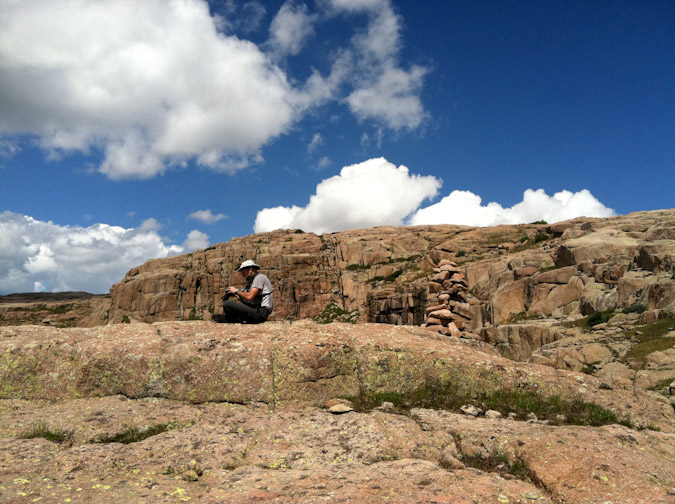
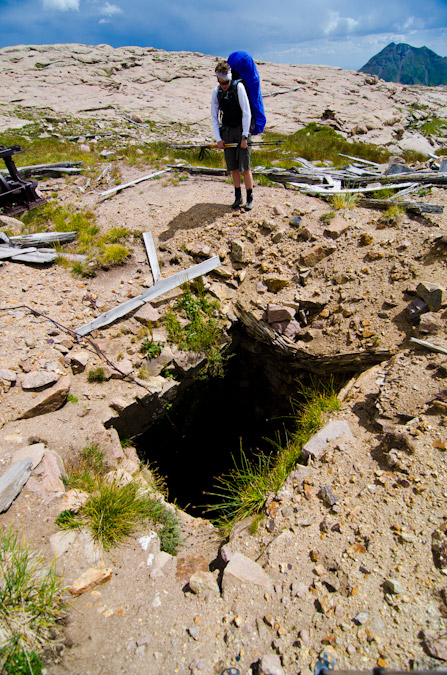
Break time was over and onward we trekked to Pittsburgh Mine, which I had vague recollections of for some reason. I'm not sure if I had visited this place before, but was awfully familiar to me. At any rate, the mine was great. It still had a great deal of equipment and huge holes to look out for. One spot was easily 30-40 feet deep, and Sarah and I marvelled at it for a few minutes.
The whole area looked like a tornado hit it. Maybe it was the God of Wind, ÆOLUS (actual spelling on the Eolus summit marker)!
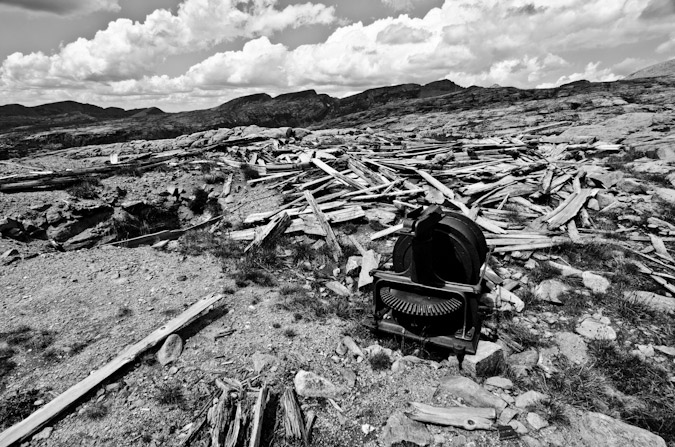
In a way, the scene really made you feel like an old miner.
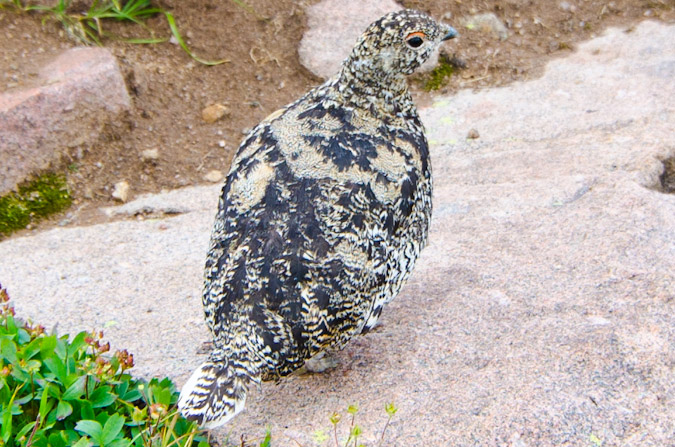
Once past the mine, we were almost to Lillie Lake. We could taste it. Sarah stopped me to ask how much further. I looked at the GPS and told her, "one more mile." This turned out to be the joke of the trip, as it really turned out to be more like two miles since my estimation was as the crow flies. On the way to the lake, I stumbled upon a family (flock?) of Ptarmagin, or snow chicken, which are surprisingly approachable since their only known predator is the golden eagle. This was a rare instance where I did not want the wide angle lens, but it would have to suffice.
We continued on and found several small pools on the way.
We reached Lillie Lake, a mere 10.5 miles from the start of Endlich Mesa trailhead, and found an amazing campsite just above the lake to the west. The campsite was nestled against a large cliff about 50 ft. high, and surrounded on all sides by ramps of rock except to the south, which led to a cliff overlooking the Marie Lake drainage. We were beat and we were starving!
We cooked up our first dinner of the trip - pasta alfredo. It was so good, but I really struggled to put away my half...
Since there were no trees above tree-line (imagine that), I thought of a great way to hang our food on the 50-ft. rock wall. I had read about this method in a trip report posted on 14ers.com for Pigeon Peak and it worked great! We used a large rock at the top as an anchor and suspended the food bags on the rock wall.
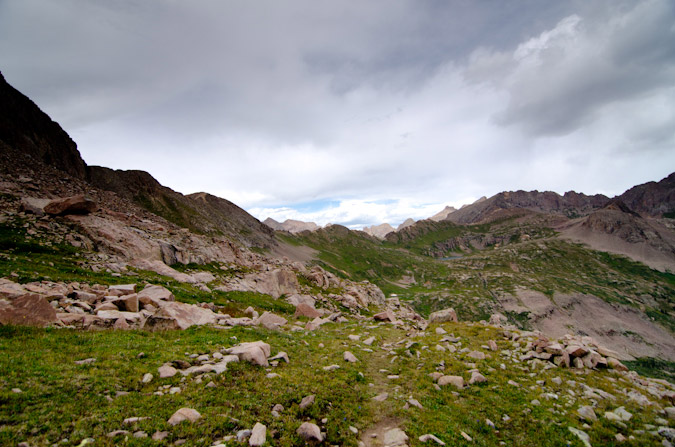
Having refueled and rested, I somehow convinced Sarah that we should climb a 13er and watch the sunset from it. So, away we went with small day-packs, water, a camera and a tripod. We made our own trail above the lake and bushwhacked up to Trimble Pass, where our first close-up views of Chicago Basin were found, with much jubilation.
Our attention was turned to the northwest, to Bullion Mountain's 13,182 ft. summit. This would be our target 13er. Bullion is the slightly steep sloped mountain on the left.
Sarah and I cranked it out on weary legs. The views back south were sobering. We had really come a long ways in one day.
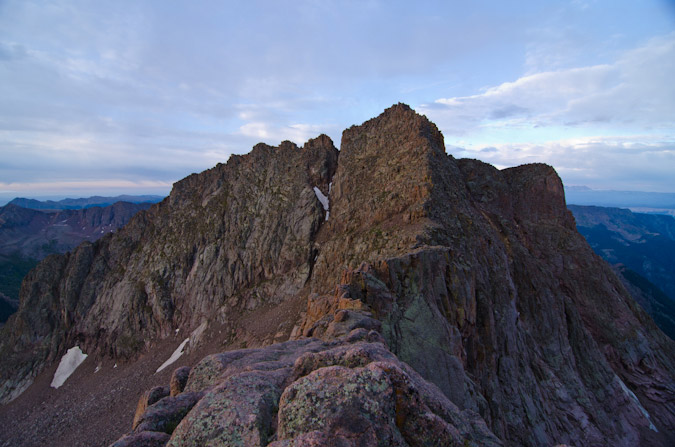
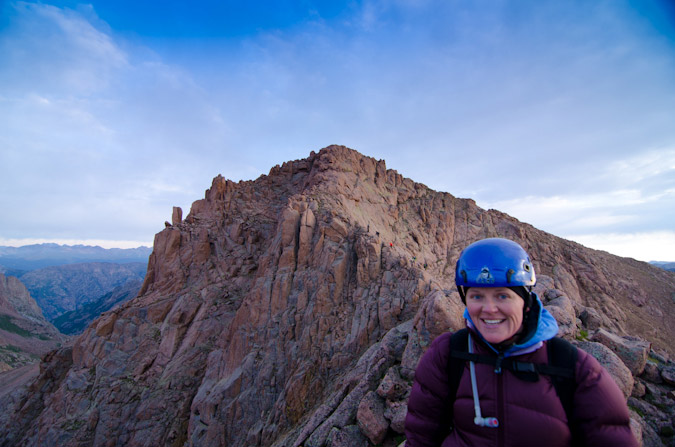
We reached the summit of Bullion Mountain in just 40 minutes and realized we had plenty of time and legs left. I set my sights on un-ranked, un-named point 13,190 to the north, as it would provide superb views of Chicago Basin. The ridge looked like it would go just fine, with maybe one tricky section to navigate across.
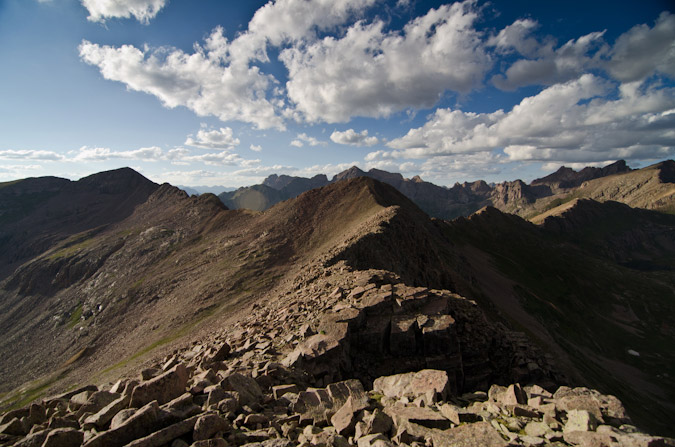
The views of Columbine Pass and Columbine Lake were great from Bullion Mountain, as were the Chicago Basin 14ers and the mighty 13ers Jupiter Mountain and Grizzly Peak.
About halfway across to UN 13,190, we stopped to admire the constrasted view of Johnson Creek below and the towering wall that is Organ Mountain and Amherst Mountain to the east. Organ Mountain demanded our attention and respect for the remainder of the trip. Sarah was particularly mesmerized by its impressive stature and was drawn to gaze upon it repeatedly. Organ Mountain is the pointy peak one mountain to the left of the furthest mountain on the right-hand-side of the photo (Amherst Mountain).
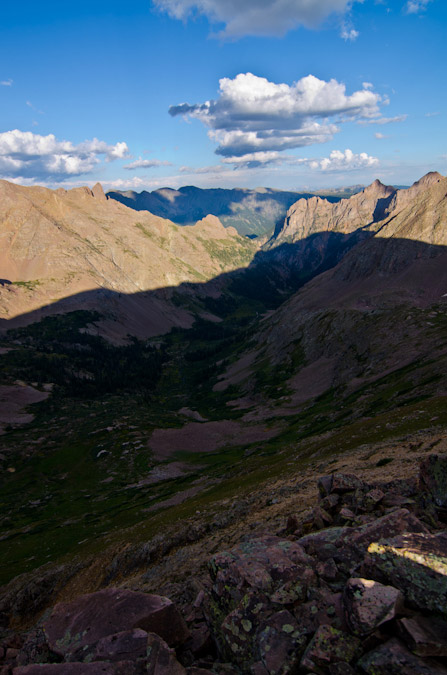
Indeed, Organ and Amherst were impressive peaks. Back in 2001, when I had backpacked up Vallecito Creek and Johnson Creek with my parents, I had admired them tremendously from below, and I even recalled taking several photos of them with my crappy 35mm camera at the time. I was able to dig one of those up and scan it.
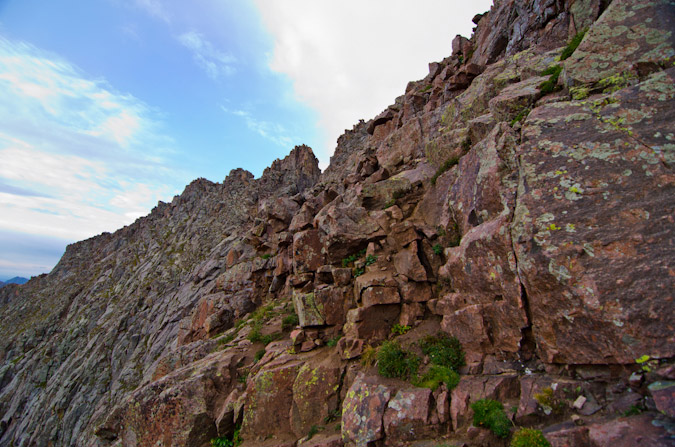
Sarah and I kept on trucking, and encountered a fun yet challenging section of the ridge that required some class 3 climbing. We easily manuvered that section but wondered how fun that would be in the dark later on. The Chicago Basin 14ers were still looking great in the late day sun.
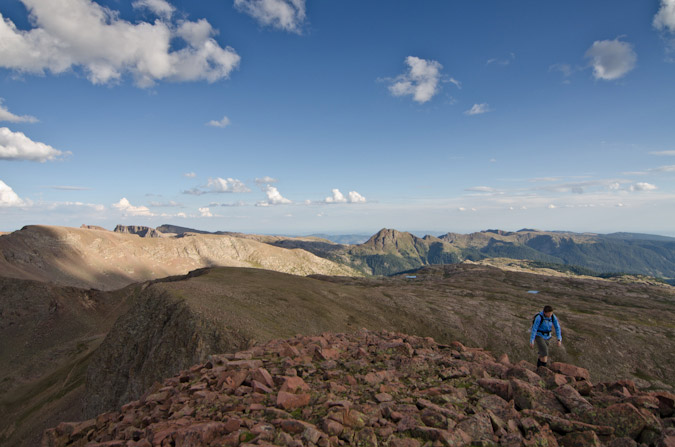
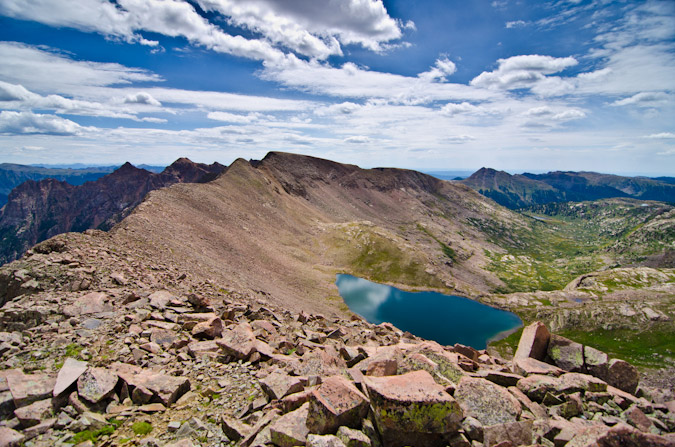
We slogged up the scree slope to the top of UN 13,190 and celebrated. 10.5 miles of backpacking plus two 13ers was a pretty impressive day.
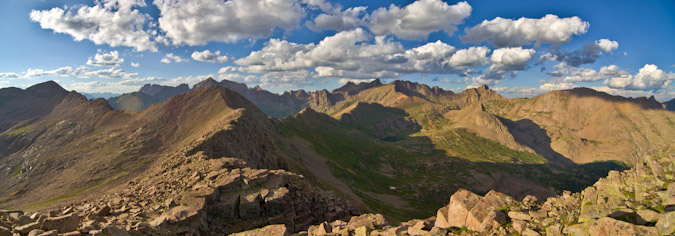
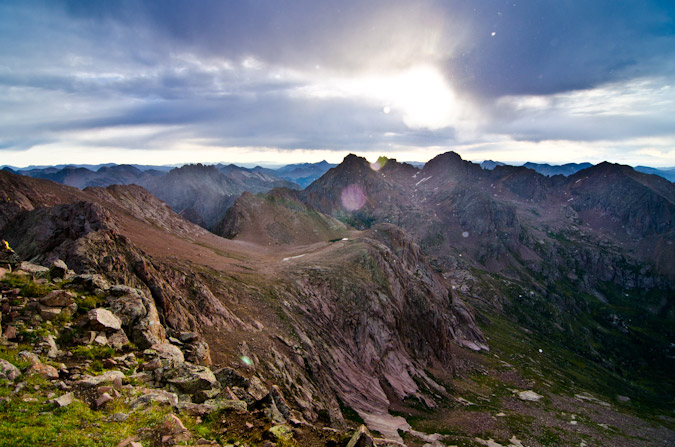
I promptly set-up my tripod on the summit and began taking some photos. Having a tripod on top of a mountain offers some pretty good advantages, starting with consistency. The ease in which photos are to take using a tripod, especially panoramic photos, is well worth the effort. Additionally, the quality of photos increases a great deal. Here's a 360 panoramic from the summit, with the sun cresting over Aztec Mountain (which I wanted to climb so badly, but we ran out of time and energy):

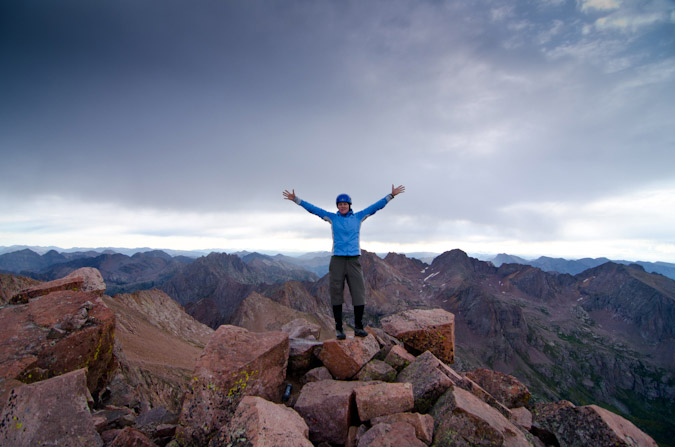
A tripod also makes it easier to do self-timer shots with groups of people, which we took advantage of! This is a view looking north at Chicago Basin and Columbine Lake. You can really appreciate the wide view afforded by my new lens.
For the photography geeks out there, one of the cool things about this lens is that it has 13 elements in 11 groups, which can make for some really great star-burst effects when stopped-down to f/22. The small aperture makes for a really small hole for the light to pass through, and the result is a diffraction spike, which are also explained HERE. Check out my results:
Sarah got to play witness to all this photography geeking-out and documented it with her super-awesome iPhone camera.
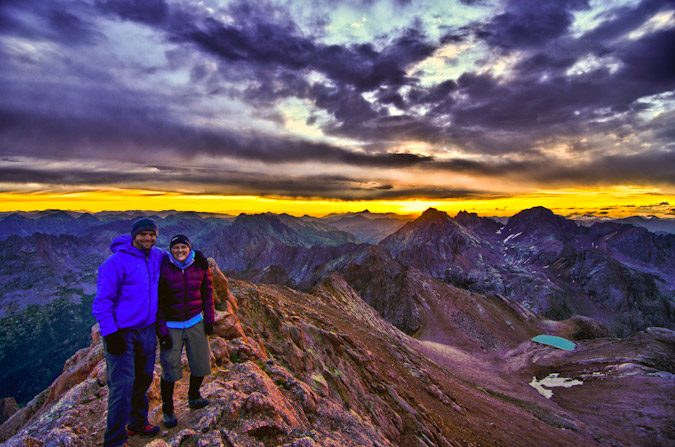
The sun continued to set and the moon began to show itself as well. It was a new moon, and it looked really great in the darkening sky. I captured Sarah witnessing her first sunset from the top of a mountain in HDR. Her words: "one of the five greatest moments of my life."
I was a pretty happy guy too, having witnessed only one other sunset from the summit of a mountain, which was from Arrow Peak last year, as documented in THIS trip report.
I tried my hand at my first HDR panoramic of the trip, which I believe turned out pretty well. Chicago Basin looked awesome.

Having witnessed her first sunset from the top of a mountain, Sarah was elated. I took full advantage of this and convinced her that we should stay on top for another hour or two to watch the stars and the milky way (and for me to photograph them). I was really glad she agreed, and we made sure we were bundled up for what we knew was going to become a cold night on the top. A thunderstorm boomed in the far distance behind Chicago Basin, and lit up the clouds behind it in the dark.
Before this trip, I did a little homework. I read some blogs and watched some videos on shooting stars, specifically the work of Ben Canales, who won the National Geographic Traveler's photography contest. This video of his, was very helpful for me, and I learned two tricks from it. The first trick was the 600/focal length rule, which basically states that when shooting stars in photography, to get a shot without blurry stars from star movement, you can shoot a maximum of x seconds, where x = 600/your focal length. In my case, I was shooting at 11mm, so I could shoot almost a full minute exposure without star blur. The second trick I learned was to take test shots at your highest ISO (in my case 26,600) to look for good shots. Check out his video for more! I wanted to get a good shot of the Milky Way with my new lens. At f/2.8, I could really gather a lot of light and it proved worth the investment.
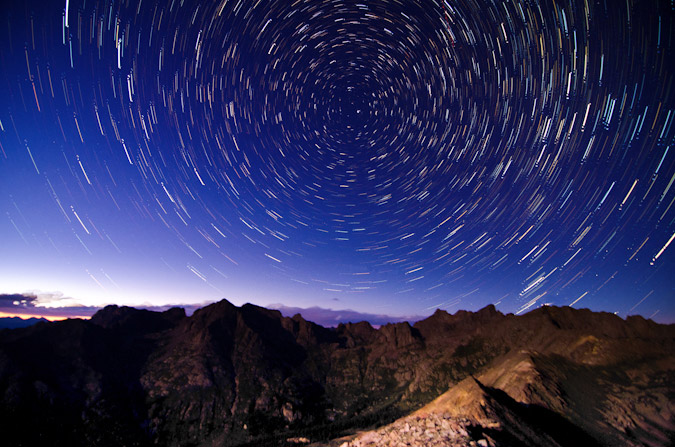
Lastly, I wanted to get some fun star trails over Chicago Basin, and again this proved quite effective. I only did it for about 30 minutes, so it is not as impressive as it could be; however, we needed to get some rest for the big day ahead of us. For this shot, I found the North Star and centered the shot on it. To locate the North Star (which is stationary in the sky, and appears as a pin-point in star trails), find the big dipper. The two bottom right stars that comprise the Big Dipper form a line that points to the North Star.
I also decided to throw together a really short time-lapse of the sunset with the stars. Someday I'd like to do a full day's worth!
We head back over to Bullion Mountain in the dark and were able to find out campsite without any problems. Its funny how good of a memory your mind has, even in the darkness of night. We crashed and slept in, letting the heat of the morning sun wake us up.
Day 2: Climb one 13er, backpacking over Trimble Pass and Columbine Pass to our campsite in Chicago Basin - 800 ft. elevation gain with 1,750 ft. lost, 3.75 miles.
Having a good night's sleep, we were able to quickly pack-up our stuff and eat some breakfast bars. I took a quick hike up to Lillie Lake for one last view before our departure. It was an awesome place and I was happy to have visited it. Lake Marie sat far below, seemingly waving us goodbye, for now...
One cool fact about Lillie Lake - it is the headwaters for the city of Durango's water supply - the Florida River - and sits beneath a relatively unimpressive 13er, Florida Mountain, which we had our sights set on for the start of the day.
A better view of the area, with our campsite at far right -
We packed up and trudged up to Trimble Pass. We left our packs here and strolled up to the summit of Florida Mountain's 13,076 ft. summit to enjoy views of Chicago Basin and Johnson Creek.

Sarah was especially excited to be on top of her fourth 13er, all with me.
It even had a cute little benchmark on the top, which was fairly unique.
Lillie Lake was especially pretty from this vantage, and was nice to see in actual sunlight...
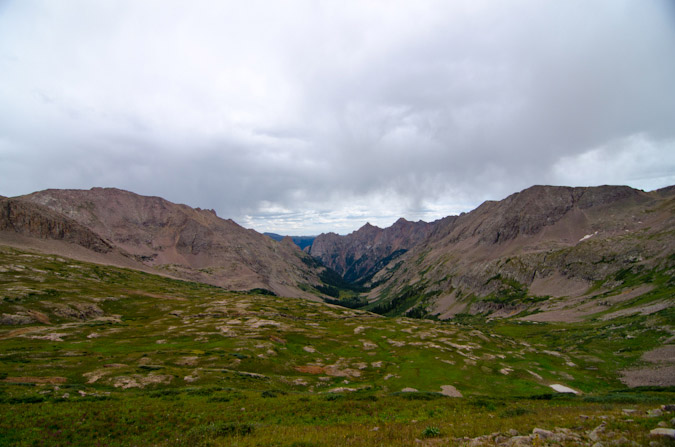
We returned to our packs and began the arduous journey over to Columbine Pass. This section of the hike was quite pretty. We really loved the views from here and only passed two other hikers the whole way over. Looking back on Trimble Pass - we had already come a long ways...

... but we had a long ways to go yet before the top of Columbine Pass. We'd have to return this way? Yikes.
Organ Mountain still drew our attention and made for quite the scenic backdrop to an otherwise desperate slog under the weight of our monstrous packs.
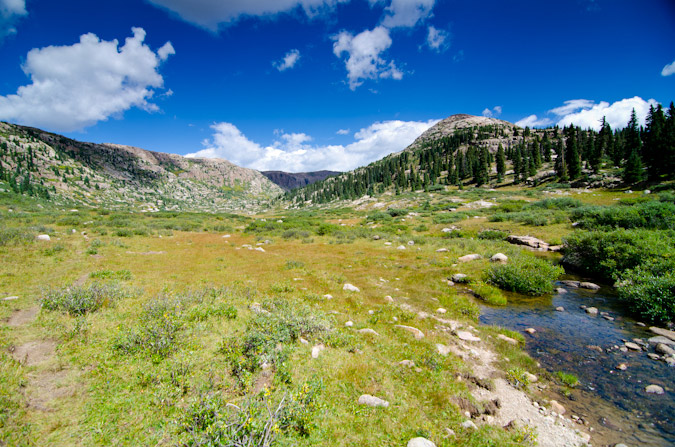
Amazingly, there were still quite a few wildflowers in this basin, and they provided quite a lovely foreground for Columbine Lake and the Chicago Basin '3' -
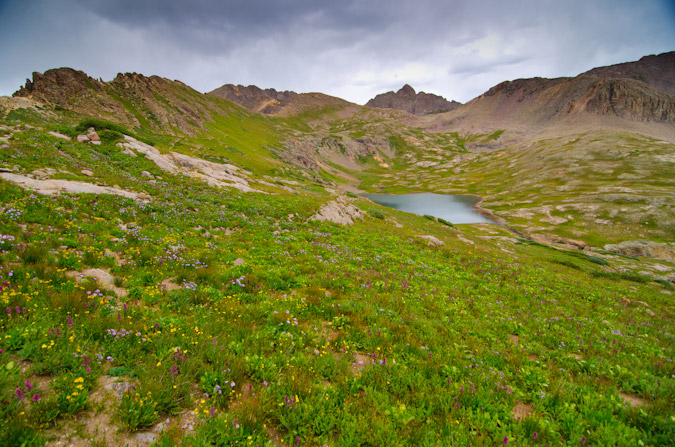
The flowers also proved to be quite a nice foreground for Trimble Pass and the rugged Organ Mountain.
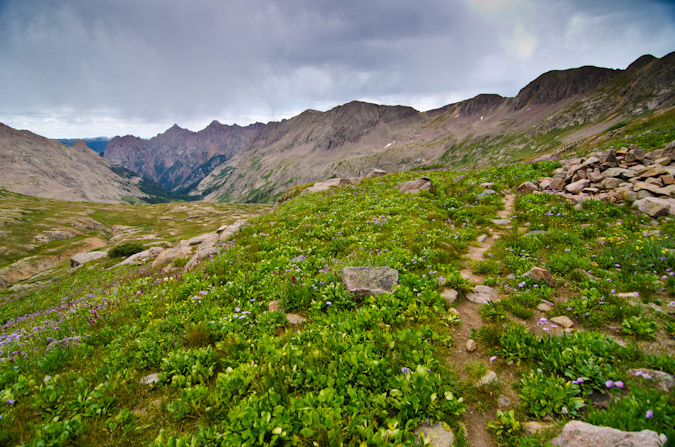
At 1:30 PM, just three hours after we left camp, we had arrived at Columbine Pass. We were greeted to Chicago Basin by wind, rain, and thunderstorms, which all quickly subsided. Storm clouds hovered over Eolus and heeded the command of the God of Wind.
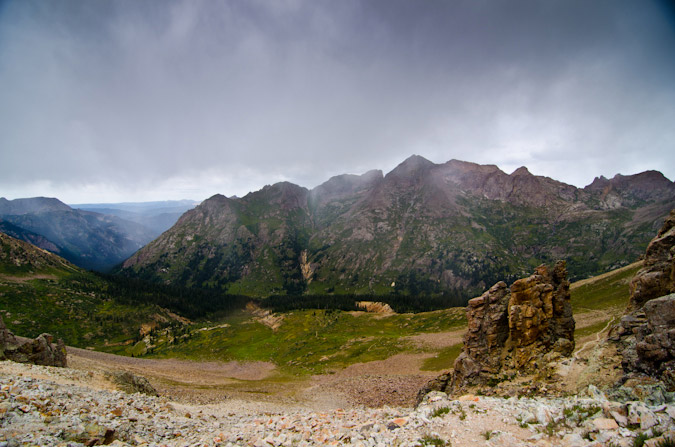
The path down from Columbine Pass was a fairly straight-forward one, following a very worn trail on somewhat steep scree and dirt.
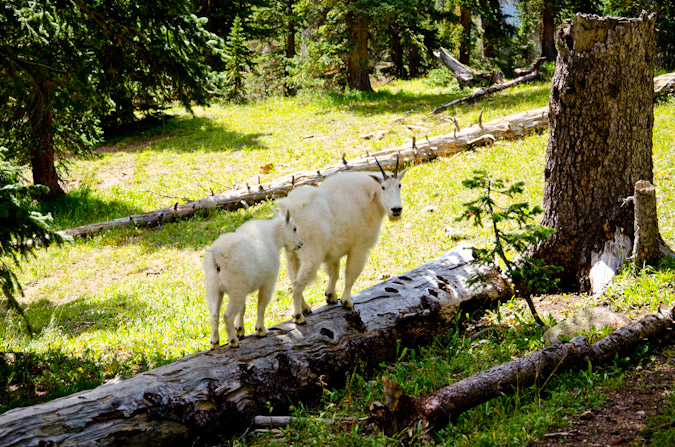
We descended into the Basin in quick order. I had tentative plans to find a campsite closer to Columbine Pass rather than going down deep into the basin. My reasoning for this was two fold. For starters, there would certainly be less people up higher near Columbine Pass, and I prefer not to camp near a ton of people. Lastly, this would afford an easier ascent from Chicago Basin on our exit day. Indeed, we located a very clean and impacted site just into the trees and called it our home. As soon as we arrived, two mountain goats, a mom and a baby, arrived to greet us to the neighborhood.
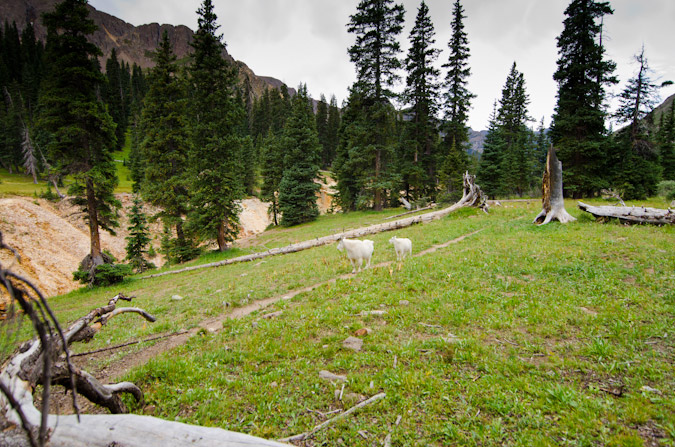
It was at this point that I knew that I did not haul my heavy 18-105mm lens in vain. I swapped lenses and took some closer shots of the goats.
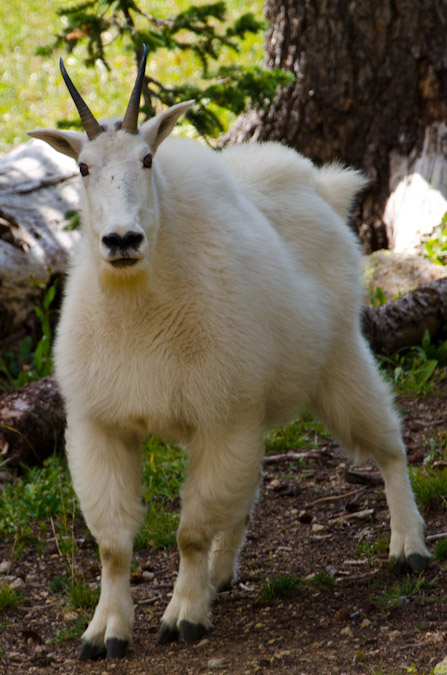
Peculiar animals - they always seemed to gravitate to difficult terrain, even in a huge meadow...
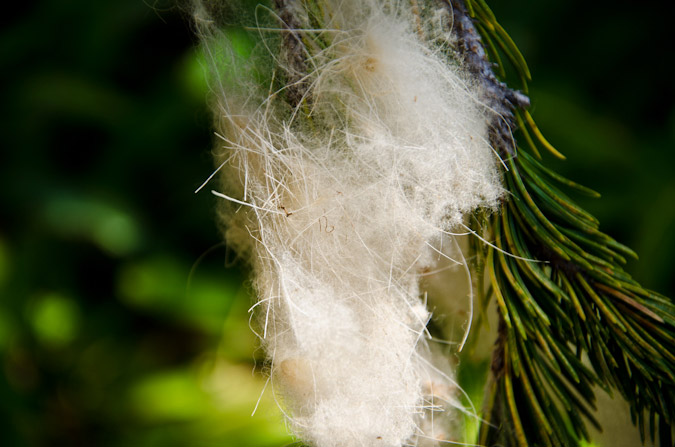
And they always seemed to leave behind some of their fur - must be their welcoming gift to us!
I swapped lenses again as we prepared dinner. Tonight's meal would consist of a wonderful medly of jambalaya and sausage. Hell yes.
We devoured the food and Sarah went in and took a nap. I decided to venture up the valley to see what trouble I could get into with my camera. The sun was setting and I knew it might present some fun opportunities. I found a few good spots and gave it a shot.
Here is Aztec Mountain in HDR:
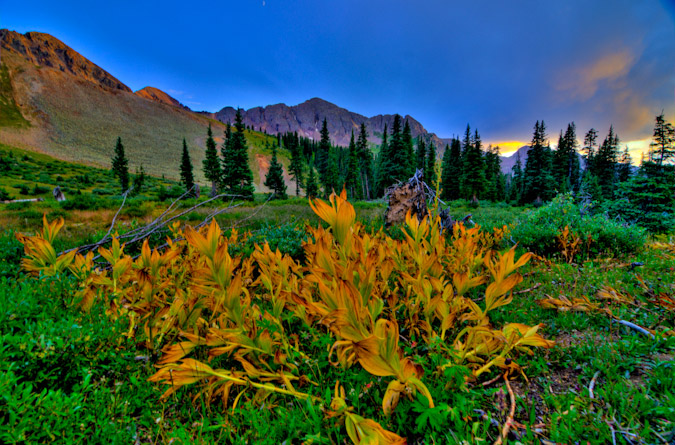
I followed the stream that entered our campsite up a ways and found a nice view of the sunset over Eolus.
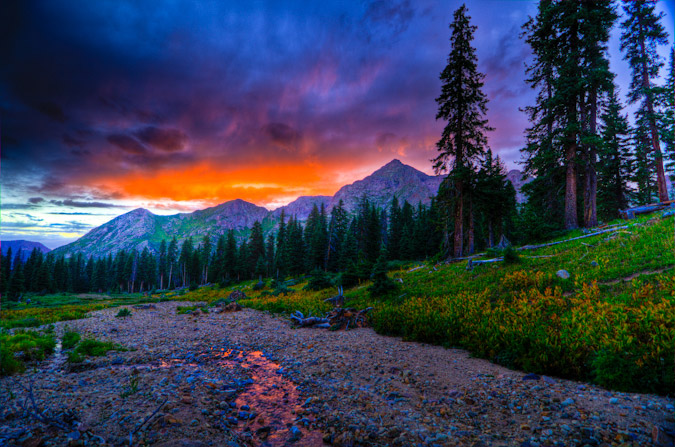
I found the water to be a fun subject to play around with.
... in black and white too...
I went back to camp and found a deer was trying to eat our food, which we had not quite hung yet. I shooed the dear off and hung our food and hit the sack. We wanted to get a sunrise summit and hopefully all four 14ers, so we set the alarm for 3 AM...
Day 3: Sunrise from North Eolus, summit of Eolus and Sunlight - 5,112 ft. elevation gain, 8.7 miles.
The alarm sounded and we rose out of the tent like two zombies. Two long days of backpacking had taken its toll on our bodies. We were both sore and tired, and we knew that today was going to be huge. We also knew it would pay large dividends if we committed to going hard and strong. We raced out of camp in the darkness with our headlamps guiding the way. I knew we were looking for a sign that would point us up another trail to Twin Lakes. We dropped 500 ft. in elevation to the valley floor and crossed the fairly large drainage coming down from Twin Lakes. We ran into a solo hiker that was coming up and he said he was heading to Twin Lakes as well. I was certain we had not passed the turn-off yet, so I asked him if he passed it. He did not really know what I was talking about, nor did he know what Columbine Pass was. I was not terribly sold on his sense of direction, but decided we should follow him for a minute to see if we passed the turn-off by mistake. About 20 seconds in, I decided to look again at my map and sure enough, we had not yet reached the turn-off. I tried to signal him but his head-phones prevented him from hearing us, so we turned back and headed down further and found the turn-off within minutes. Up we went without him towards Twin Lakes. We hiked fast. Blazingly fast, considering the amount of miles and elevation we'd done the past 48 hours. We reached Twin Lakes in the dark at 5:00 AM, which felt great. We knew we needed to turn left and find the trail up to Eolus. This proved difficult, so I just went with my instincts based on what I had read. We found ourselves in the right general area below some cliffs without a trail. Through urging from Sarah, I consulted the GPS and sure enough, we were roughly 50 feet below the trail, and we found it right away. We continued up the steep trail towards Eolus and found the ramp leading up to a flat bench before the saddle between Eolus and North Eolus. The sun was just beginning to light the Earth at this point in time, and it was magical. The low light created great silhouettes of Sunlight and Windom, and the small lake below looked like a sheet of glass.
We continued up towards the saddle and found another herd of goats coming down from above. The baby goats were making an adorable high-pitch sound that could only be encapsulated thusly, "eeeeeeeeeeeeeeeeeeeeeeeeeeeee!"
It was truly a gift to be able to witness these creatures in their true habitat. I know that Chicago Basin trip reports are oft too full of tales of mountain goats, but in this case, I really felt like I witnessed something special, watching these beasts navigate this rugged terrain. I coined a geeky phrase while watching them, which I shared with Sarah - "Wanting to Buy - Mountain Goat skills."
Pushed by the imminent sunrise, we climbed on, and reached the Eolus - North Eolus saddle. The famous Mount Eolus catwalk and Mount Eolus were looking mighty fine in the early light.
Looking up at North Eolus, I knew it would be an incredible vantage point for sunrise, and so we went for it. In true form, we reached the summit just moments before sunrise. I was jubilant and ecstatic, like a kid on Christmas, and I captured some footage on video:
For all of you detractors of HDR photography out there - I decided to showcase both methods (HDR and non-HDR) for this trip report, to please everyone and to demonstrate the difference. You can mouseover / click to see the other version. Here is what greeted us at the summit (mouseover / click to see the non-HDR version).
Slowly but surely, the sun began to poke through the clouds, which were the most insane feature of the scene - absolutely magically dramatic.
This next shot is non-HDR, and one of my favorites from the entire summer.
I was in heaven (probably quite literally). The views of Pigeon, Turret, Monitor, Animas, Arrow, Vestal, Sunlight, Windom and even Rio Grande Pyramid were stunning. Breathtaking. Here's a near-360o panoramic. Click to see a larger version.

The HDR Panoramic version turned out pretty well too, although in this case, I almost prefer the non-HDR version, except for the fact that the clouds look INSANE in HDR (click for a higher resolution version).
I have about 20 versions of these panoramics that I can't set my mind on picking a favorite, so I decided so share a few more...
As we were both getting pretty chilly, we decided to get a quick group photo and head out. Click / Mouseover to see non-HDR version.
We found ourselves back at the catwalk, which was impressive. Sarah and I immediately began reciting the classic Right Said Fred 1992 song, "I'm Too Sexy."
Once we reached the catwalk, I could not help but sing, "I shake my little toosh on the catwalk" and do a little wiggle. After revisiting that video, I can't help but feel a little light in the feet if you know what I mean...
Sarah was kind of nervous for the catwalk, but her smile said otherwise.
Once past the catwalk, we were greeted by some really fun and intricate ledges on the face of Eolus. I had read some about them, but nothing is quite like being there. It kind of reminded me of the final sections of Crestone Peak, only a ton more of it.
One thing was blantantly clear - a mis-step and you would be tumbling to your death. In a moment's notice, the sky became filled with small snow-flakes, adding to the magic of the morning.
At 7:40 AM, we reached the top of Mount Eolus and it was a great feeling. We felt like we had accomplished so much this trip.
It was so awesome to see Arrow and Vestal again after my trip up them last year. Soon after we summited, a solo hiker joined us on top. I mentioned how awesome Arrow and Vestal looked and he asked me what they were. It made me very sad. My reply in my head: "Only the two coolest mountains in Colorado!" He said I was wierd for climbing 13ers before 14ers... sigh. They are seen just left of me in my summit photo.
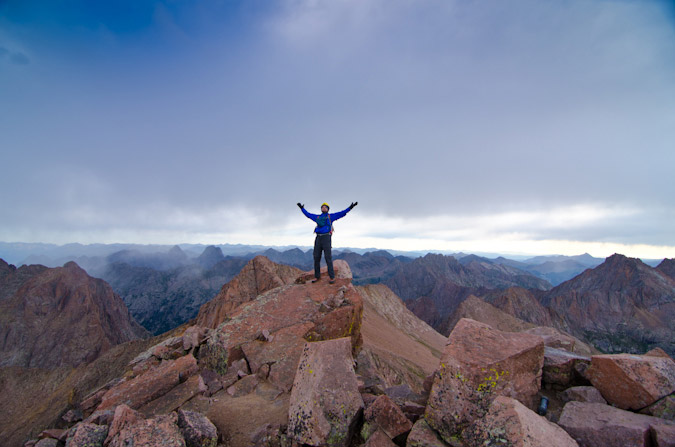
The views looking down the valley we had just came up were so awesome. In the dark, you can't fully appreciate the scale of your hike, but once above, it becomes really clear that what you accomplished was huge.

After spending about 10 minutes on top, we decided to head down, knowing we still had more mountains to climb before the weather got really bad. The clouds seemed to be holding in our area, but looked crazy in other areas. Time would be of the essence if we were to get all three in one day. On the way down, we passed one older guy with huge calves that provided the absolute best opportunity for laughter for Sarah and I. I should not jest, but when you're tired, almost everything is funny. He was wearing almost no gear, super old-school boots, no helmet... and socks on his hands for gloves - yep. Also on the way down, we saw a large group closely together, coming up. I was almost certain that it was either a guided trip or some sort of vacation group. As we passed them, they were indeed somewhat odd, but very enthusiastic to be up there nonetheless, and that's what matters! They were coming quite slowly and when we passed them, they were studying maps and routes and 14ers.com printouts. They also appeared to be wearing helmets that were fit for people twice their size. At least they had helmets. You can see them as small dots in the photo below.
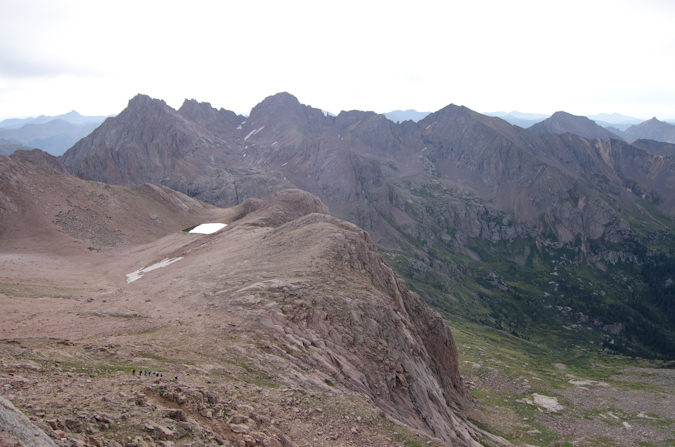
The way down was fast. Too fast. I felt like I was at cruising speed. My legs felt great, like adamantium.
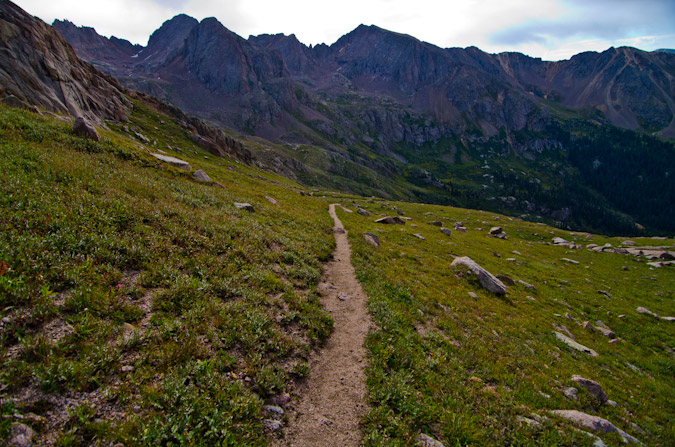
Naturally, we passed a solo goat on the way down. Those guys were everywhere!
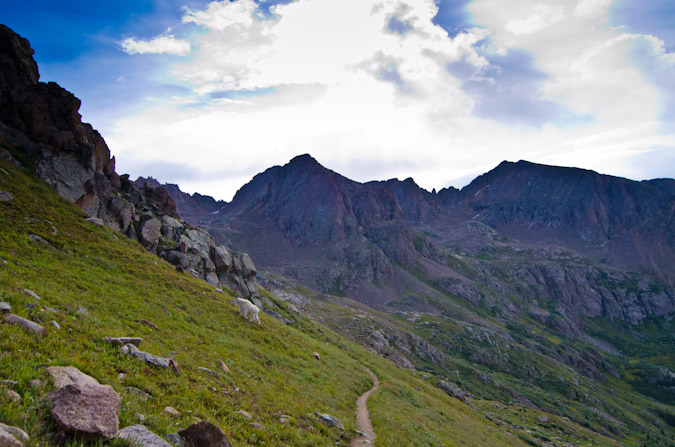
We rounded the corner and the Twin Lakes came into view, including Needle Ridge, Sunlight and Windom. Spectacular!
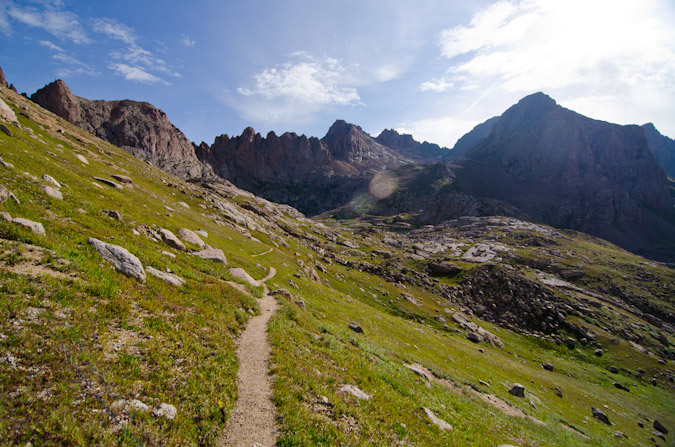
I raced down to the lakes, knowing it was just going to be a feast for my eyes and camera. Right as we reached the lake, a friend of mine, Will, who joined me for my hike of Mt. Wilson last month, met up with us. He was gracious enough to refill my Camelbak bladder with purified water. He was planning to head up Eolus, as he had done Sunlight and Windom the day before. I set-up my tripod at the lake and started shooting photos. Will captured the moment.
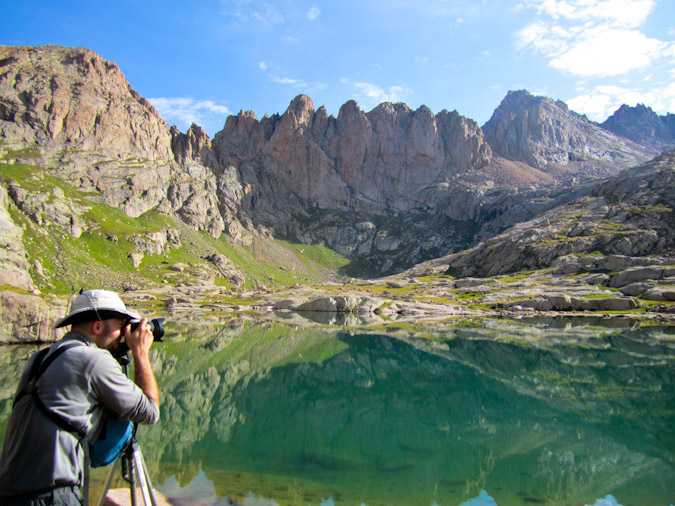
For this particular scene, I decided to do HDR since the sun was in the scene, which made it really tough to get all of the dynamic light into the shot. I would be the first to agree that this shot is totally over the top, but I love it just the same.
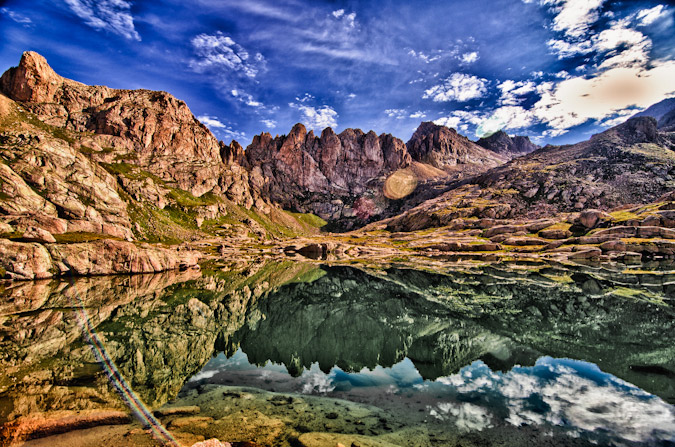
I also decided to get a shot of me at the lake, using the tripod and the self-timer.

Sarah and I refueled by eating some awesome tortillas w/ peanut butter and honey we had made the night before and then set-off for Sunlight. The trail up Sunlight was so awesome. The incredible work of the Colorado 14ers Initiative was obvious here. Huge cairns marked the way. Stone-work that would make a dwarf from Lord of the Rings envious demarcated the trail, paving a highway up the slope of the mountain.
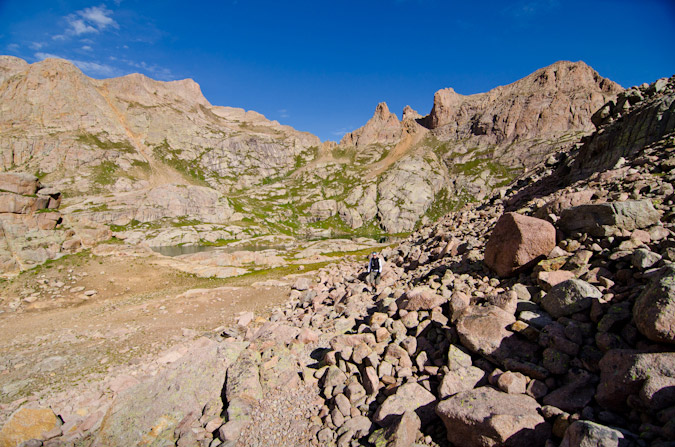
As we climbed, the Twin Lakes were looking as awesome as ever.
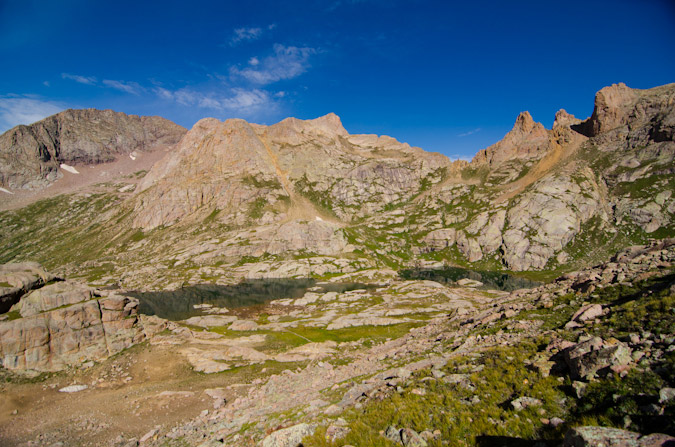
And the cairns were monsterous. Looking back at Eolus was also humbling.
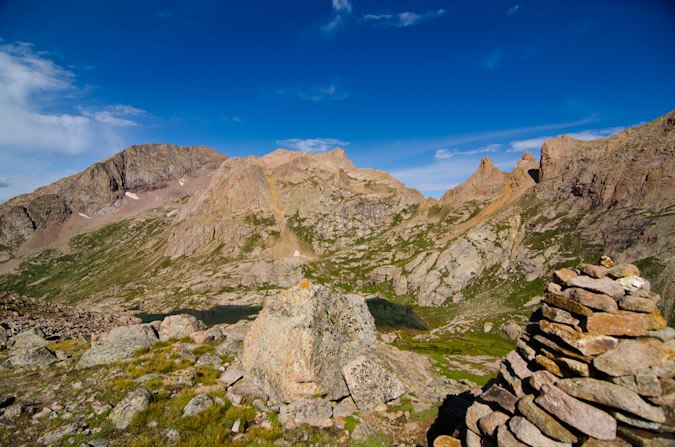
Looking up, we still had a ways to go to reach the Sunlight Peak - Sunlight Spire saddle (top - center).
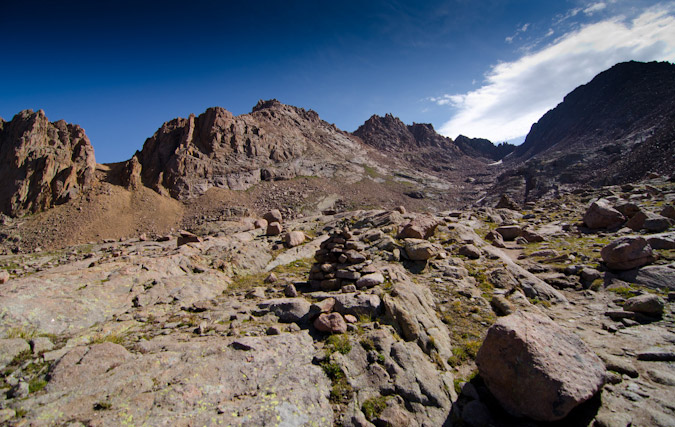
The cairns also provided some good resting areas.
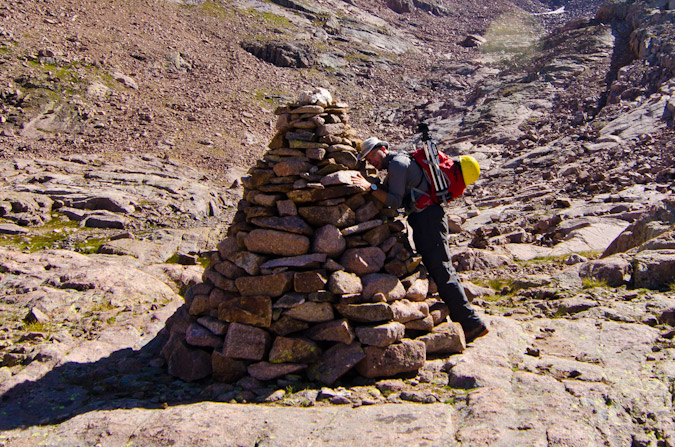
We reached the top of the basin and started climbing up towards Sunlight.
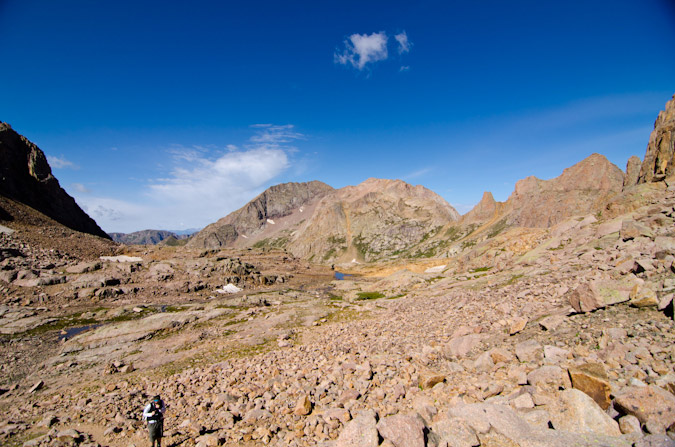
Which became steeper the higher we got, and eventually the paved road provided by CFI ended, and scree began.
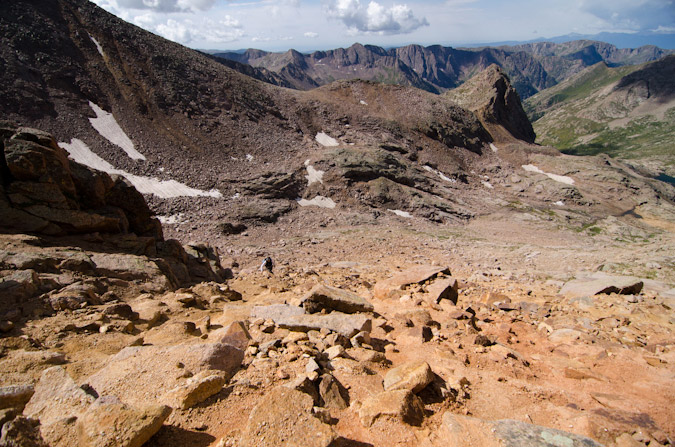
I reached the saddle and admired the views to the north of Jagged Peak, which is one of the last few mountains in the highest 100 I have left to climb.
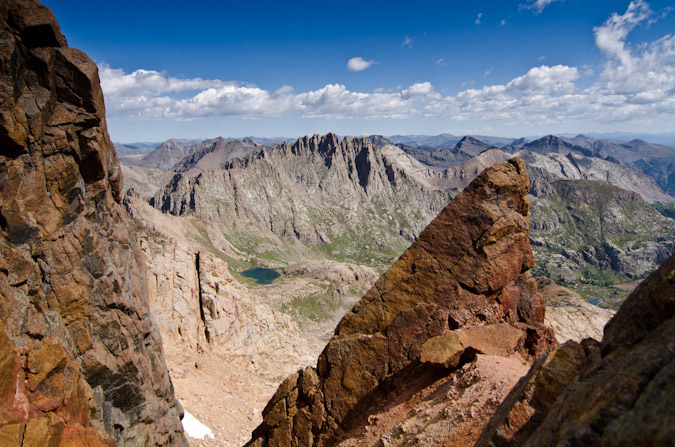
Sunlight was still high above from the saddle, as evidenced by this 360 panoramic photo with Sunlight at center.

At this point, Sarah was feeling light-headed. I knew her stamina was OK but something was going on with her body. I suggested that perhaps she needed more protein, since we had not had much through the day. I pulled out the huge log of summer sausage and we snacked for a bit. Sure enough, within minutes, she felt much better and we were off to the races again. A view back at Windom and the clouds forming above provided motivation.
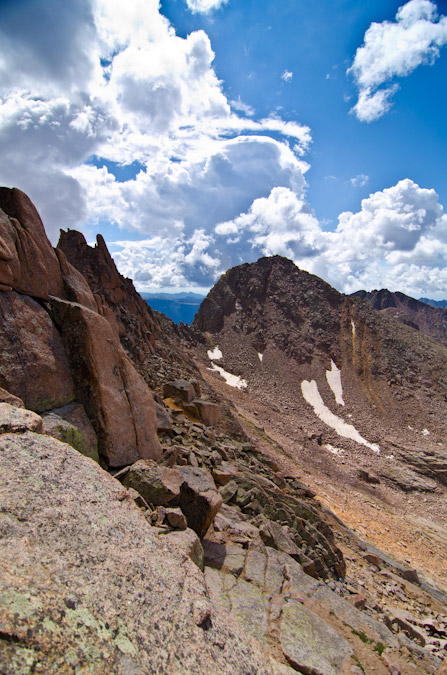
We reached a small gap during the climb, which was quite challenging to say the least, and I loved the window. The views of Rio Grande Pyramid and "The Window" were great! So this photo is called - "The Window through the Window."
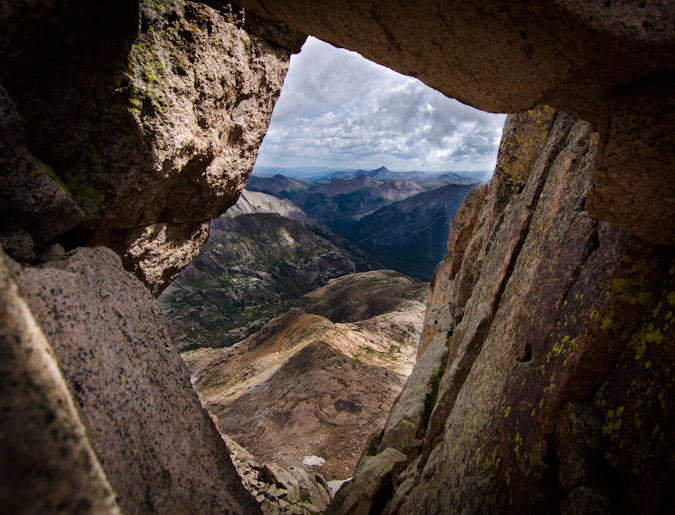
We found ourselves actually using some climbing skills - and head up a small chimney.
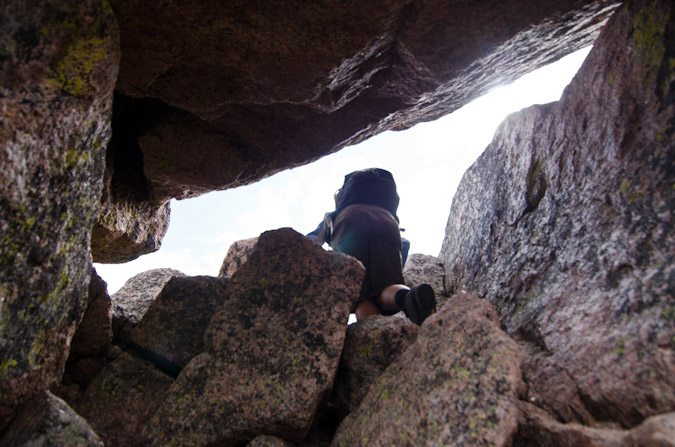
We reached the summit of Sunlight Peak at 11:45 AM, which felt pretty great considering we had been on Mount Eolus just 4 hours prior. The weather was moving in though, and that dampened our spirits. An exciting climb like this should feel amazing when you get to the top, but the thought of being electricuted tends to temper those feelings for a while. I managed to get a few panoramics anyways, which show how nasty the storm moving in looked.
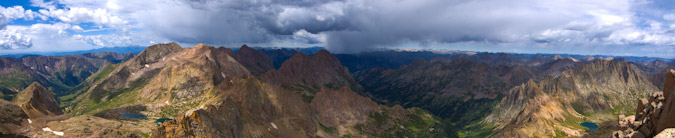
Here's a near 360 pano:

And a quick summit photo by way of Sarah, including Sunlight Spire's incredible summit just left of my camera bag:
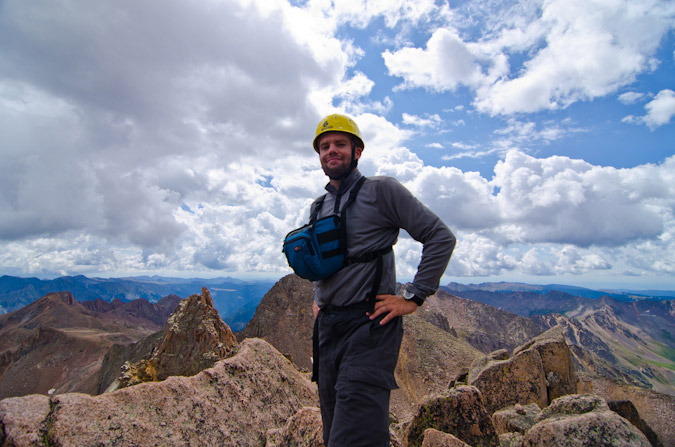
The air filled with graupel, a sign that things were not going to be good - weather-wise. We reached the Sunlight Peak - Sunlight Spire saddle in quick order, passing several people still heading up. Not sure if that is the best idea to head up when the storm is depositing ice on the rocks, but that's just me. Here's my reaction to that!
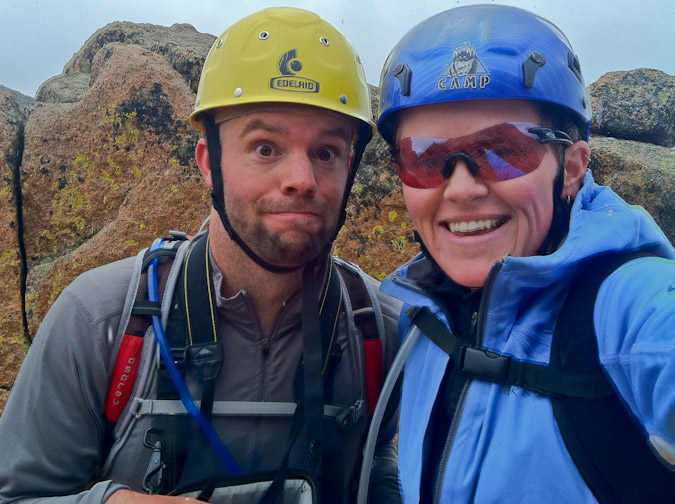
Here comes the weather!

The crazy kids in tennis shoes and cotton hoodies kept going up through the graupel and thunder, but we booked it down to safety and took refuge.
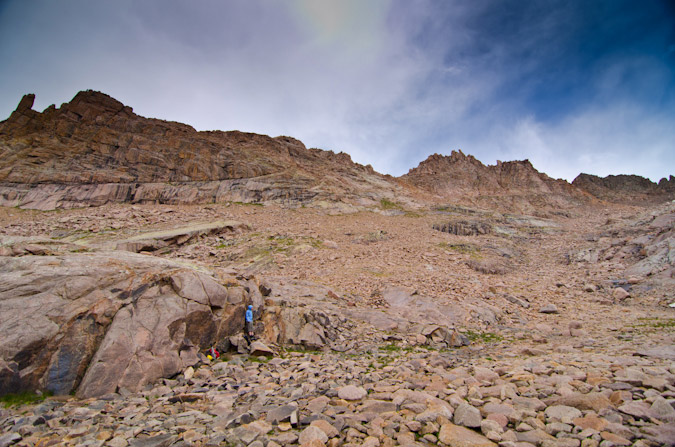
Luckily for our friends in cotton and tennis shoes, the weather let up, dumping only light amounts of rain in the area. The rocks were slick though, and that was a real concern to us, even though Windom was just 1,100 feet up from our safety spot. We sat for awhile, watching the weather, contemplating our next moves. Would we be able to wait out the storm? Would it be safe to go up? We sure did not like the thought up coming up again in the morning on tired legs. We finally agreed that it made the most sense to head down, especially given the fact that it was still slightly raining and the rocks were getting wet and it was still sounding off with thunder. Even on the way down, I stepped on a large wet rock slab that was slightly at an angle and it dropped me on my side like a hit from a middle linebacker. I was fine but it was a good reminder that we had made the right choice to go down. Even still, more and more people kept heading up. Madness.
The views on the way down were still great though, including this wonderful shot of some waterfalls below Twin Lakes.
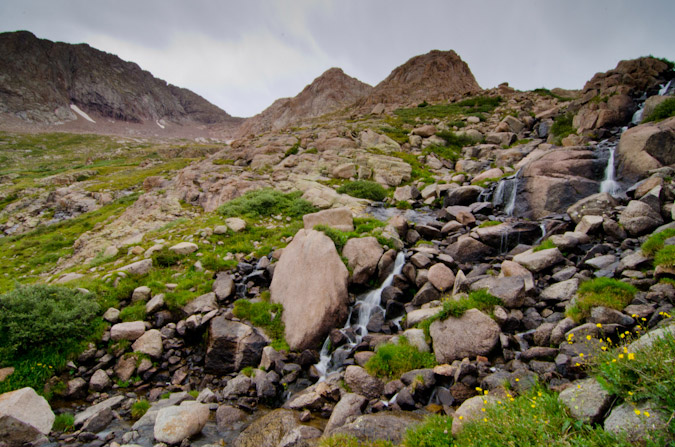
The weather persisted most of the way down into Chicago Basin.
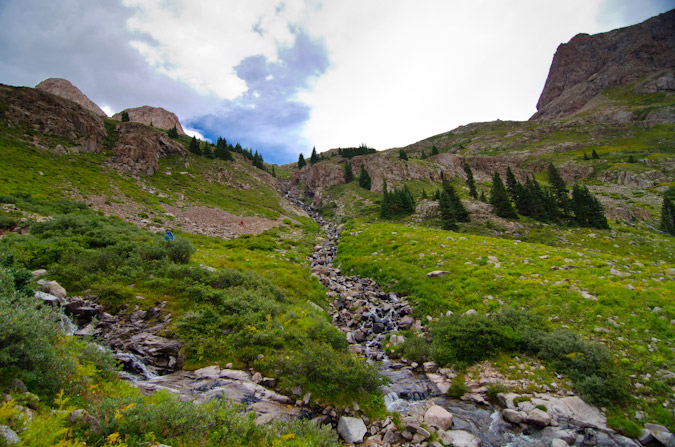
And in true San Juan Mountain form, the weather started to dissipate as we got lower...
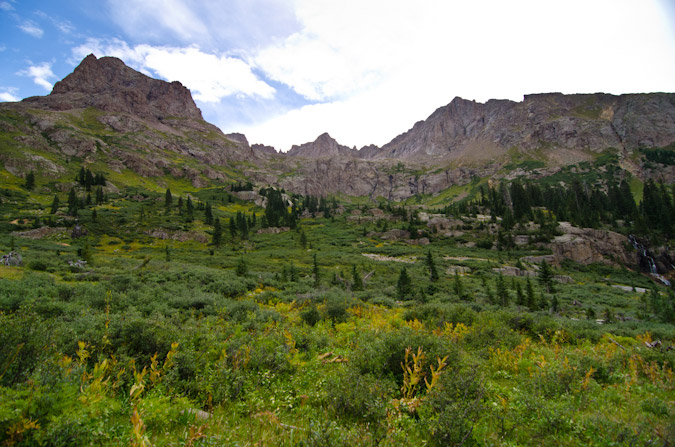
We reached our campsite slightly demoralized, tired, and sore. My knee was starting to really hurt from all of the pounding it had received on the downclimbs, which did not bode well for the climb up and down Windom for the following day. Such is life on a quest for mountain tops. Sarah decided to take a nap and sulk over our defeat, while I decided to eat some food and think about the day's highs and lows and the strategy for the following days. As we were moping, a herd of goats decided to come see what all the whining was about and one of them even decided to piss on our pity parade.
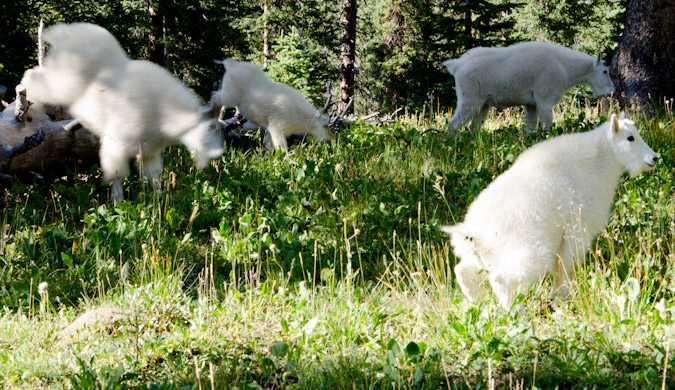
This herd was pretty big - I believe there were 7 of them total, including two babies, a real scruffly looking one, and a bigger grandpa type.
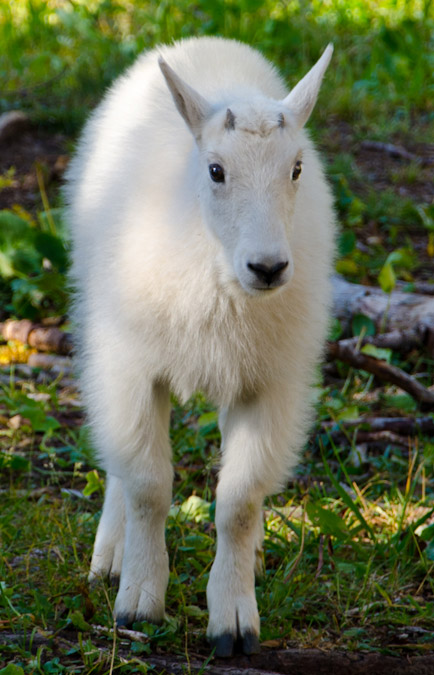
Here's Mr. Scruffly:
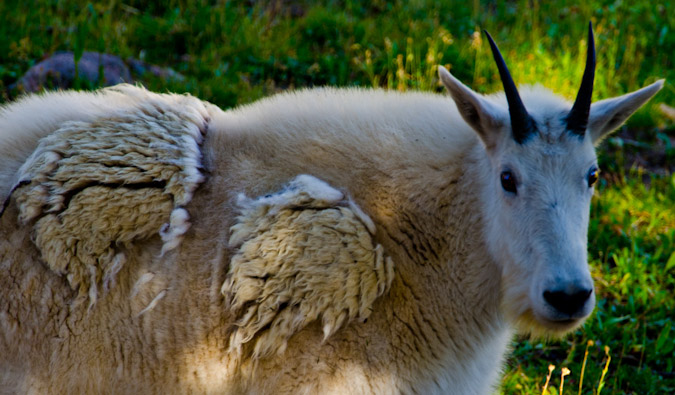
And my favorite goat photo... I was photographing them from near a fallen tree when all the sudden this baby goat decided to jump on the tree and walk towards me - he came all the way down and started nibbling on the tree - it was really cool.
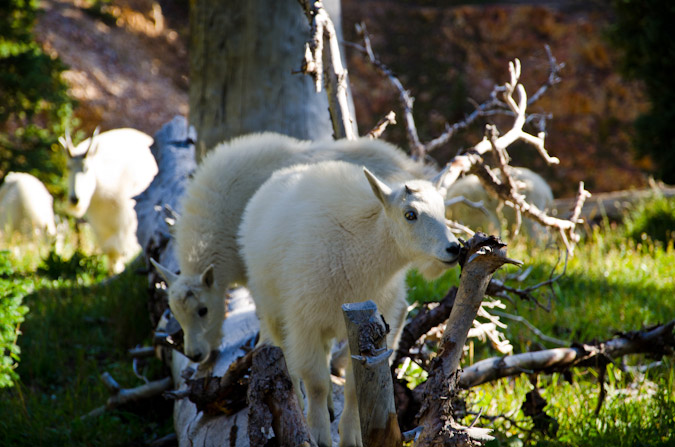
One of them kept a good eye on me. I think he was making sure I was not going to attack them or something. It was funny to watch them interact so closely. Sometimes the babies would go under a female for milk and they would get shoed off. Sometimes one goat would kick another goat out of a grazing spot in a fury. They were hilarious.
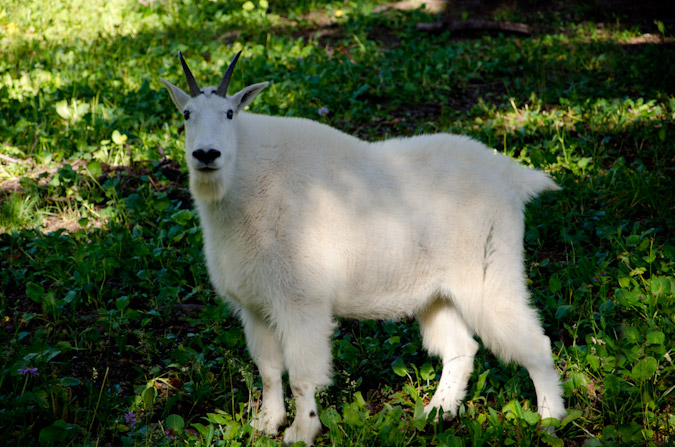
I probably got too excited about the goats, but I've been waiting years to see goats up close again, so it was a real treat.
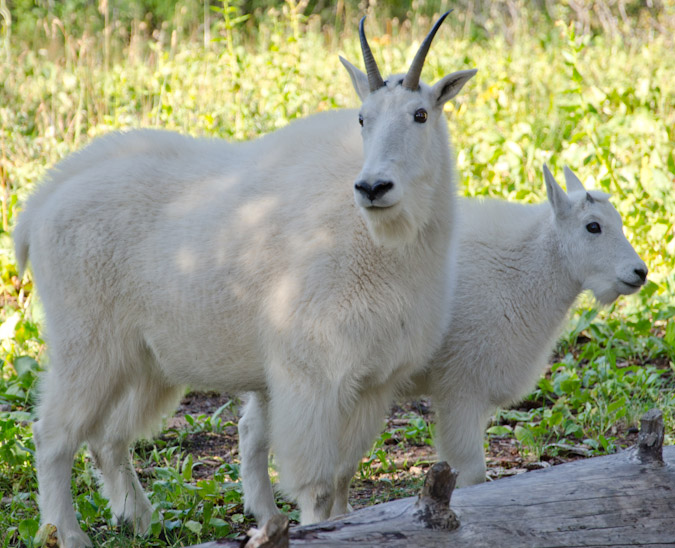
It was really funny how close they got to our campsite! One time, one of them charged another one, and did not see that Sarah was right behind the other goat. When he turned to run, he almost jumped right into Sarah!
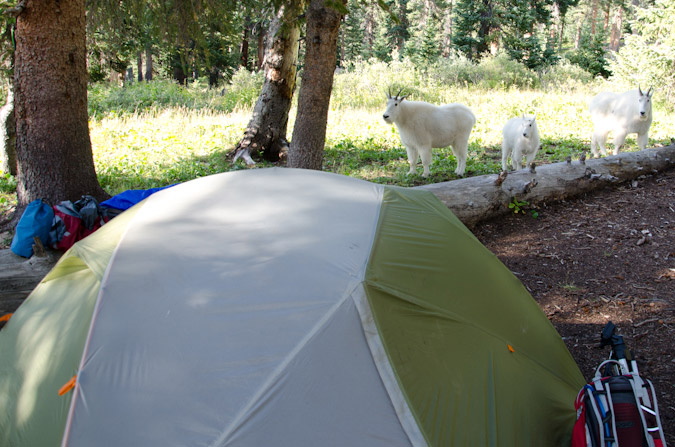
They were really fun to photograph.
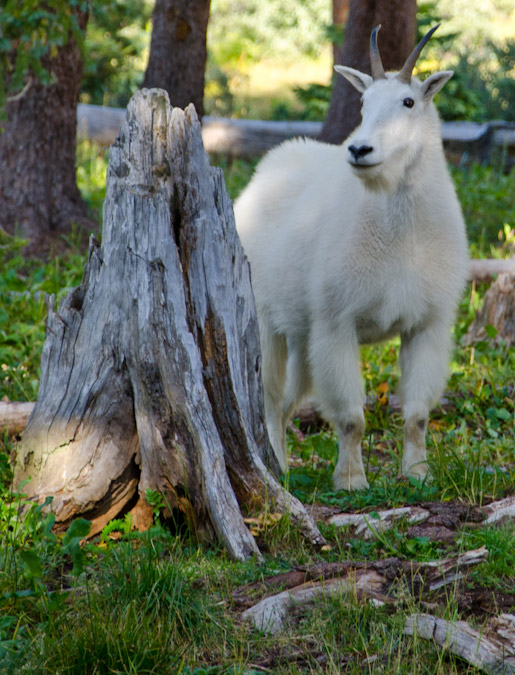
This little guy was playing king of the hill. I think he ended up losing.
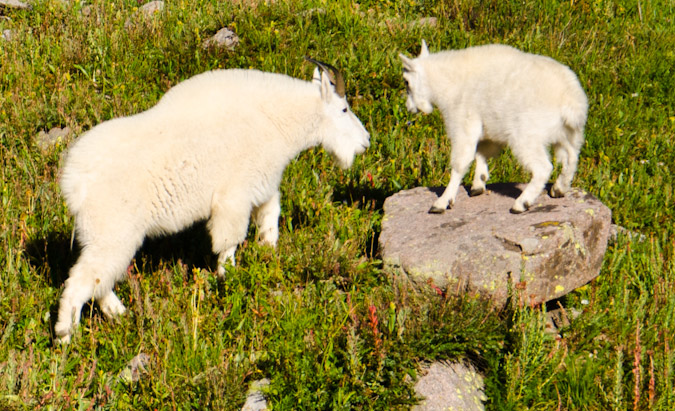
I did some video footage of the goats as well -
After the goats were dispursed from our campsite, we cooked dinner. Our dinner consisted of a glorious mixture of mashed potatoes, country gravy and spam - a tried and true recipe from the annals of the backpacking hall of fame. The alarm was set for 3:30 AM and we crashed hard into the gelatinous wall of sleep that always greets you after a hard day of mountain climbing.
Day 4: Climb of Windom Peak and pack-out - 19 miles, 6,500 ft. elevation gain - 20 hours of hiking...
3:30 AM came all too soon, and I hit snooze twice. So, we did not leave camp until 4:15 AM. The going was slower and we were feeling pain. In fact, I was quickly questioning my physical capability to complete the climb, and we had not even reached Twin Lakes. Halfway up Twin Lakes, I had to stop and take some vitamin-I (Ibuprofen), as the pain my knee was excruciating. The pain quickly faded and we reached the lakes in the darkness of the early morning.
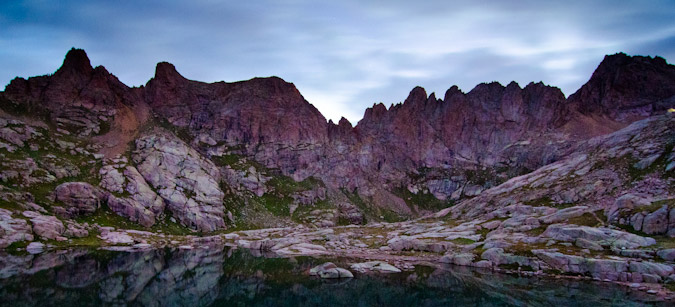
Hiking up to the Windom side of the basin was accomplished in short order, and the stellar light of sunrise kissed the mountains around us.
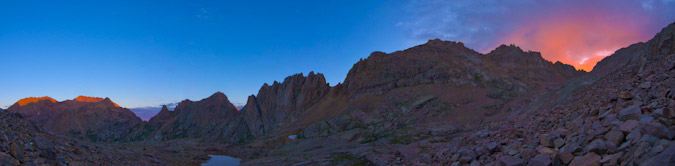
We reached the saddle between Peak 18 and Windom pretty quickly. On the hike down from Eolus, one of the climbers in the cluster of oddly-equipped people told us that Windom was underestimated. We were not quite sure what the heck he meant by that, considering so far both Eolus and Sunlight were both more difficult. There was a trail 3/4 of the way up Windom. We finally did find out what he meant, since the trail gave way to some very fun scrambling on class 3 rock if you wanted it. Many inappropriate jokes were exchanged between Sarah and I regarding the 'underestimation' of Windom and we were off to the races. We both agreed that had we done this climb while wet, it would have been quite dangerous. The views of Sunlight Spire and Sunlight were great. Loved it. Here you can see sun light just hitting Sunlight Spire with Windom's steep class 3 rock on the right.
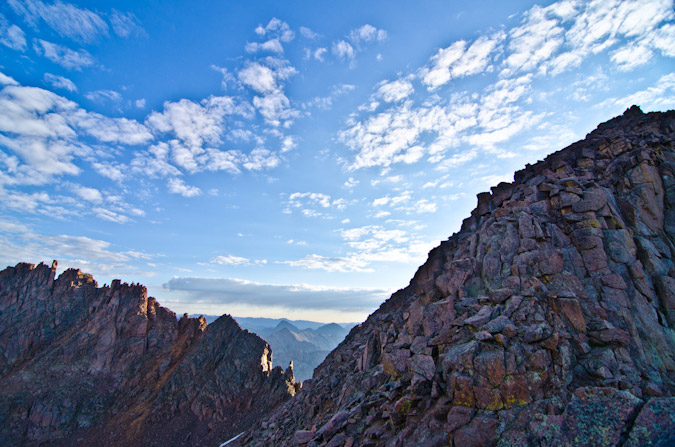
We reached the summit block and the views to the east were insane. The sun had been shrouded by some odd clouds, and light beamed forth like needles cutting through a gray sheet in front of car headlights. Unnamed lake at 13,100 ft. to the east was also a real treat - a sheet of glass suspended in heaven.
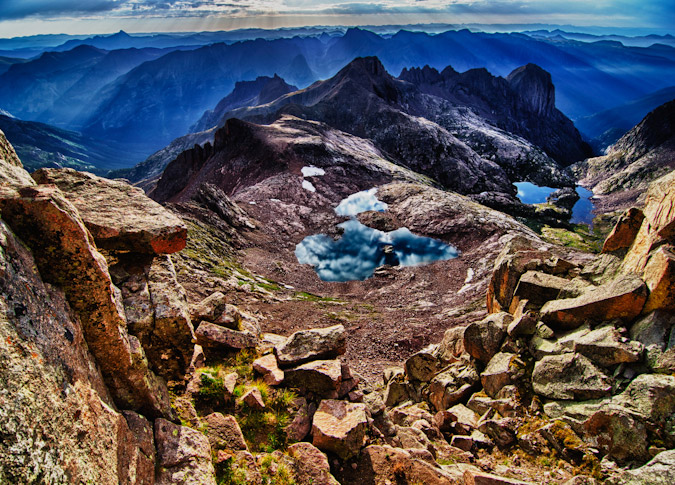
I reached the summit first and just felt complete and total gratification for our efforts. After the demoralizing defeat the day before, this summit was delicious.
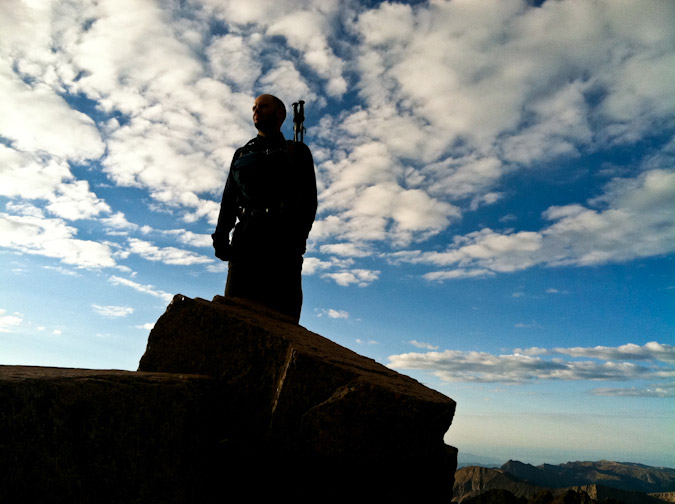
The summit of Windom was curious. It was a series of huge blocks, all seemingly suspended by some unknown force.
It was hard to believe that I had finally made it to Windom's summit. I had first admired this summit back in 2001, when I climbed Jupiter in a cotton t-shirt with my dad. Wow, have I come a long way! Check out that summit shot from 2001!
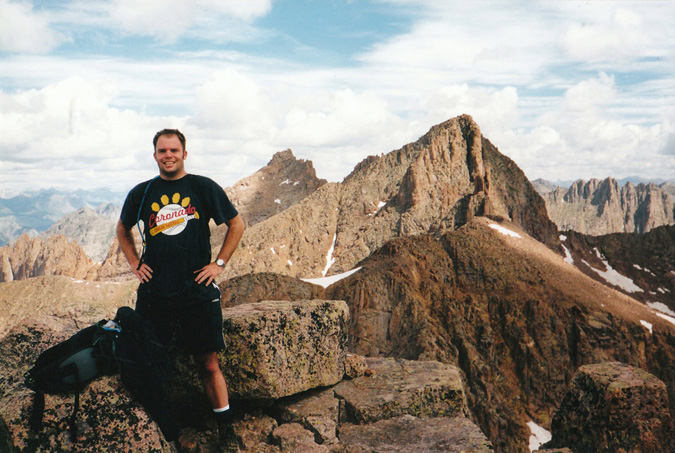
Due to the absolute absurd (meaning awesome) lighting, the opportunity for HDR photography was endless. I opted to just go for it. Sarah was pleased with this summit as well. It was totally under-rated - great challenge, great route and great views.
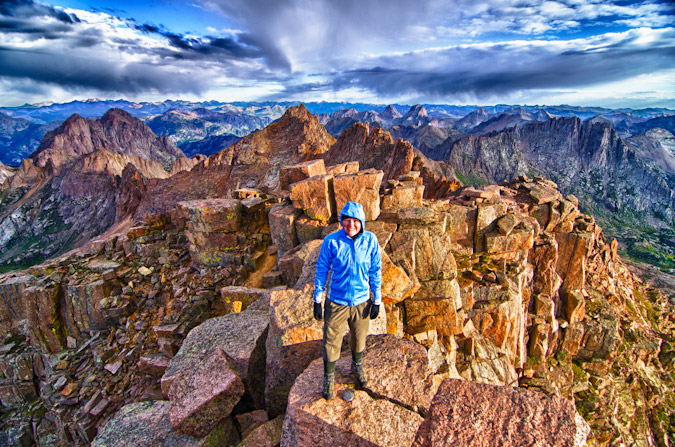
Sarah snapped off three bracketed photos of me on Windom's summit block - and the HDR result was WAY over-the-top, but epic looking either way.
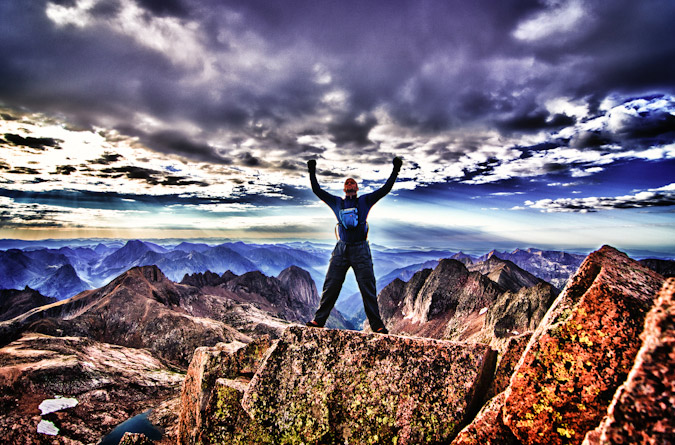
At this point I did some pano work and went for the classic 360 HDR pano. I fell in total love with the results. The way the light just penetrates the low clouds just floored me. The details on Sunlight and Sunlight Spire were magnificent. Thank you Tokina 11-16! Check out the larger verison by clicking on it.

Windom provided such a great view of Arrow and Vestal too...
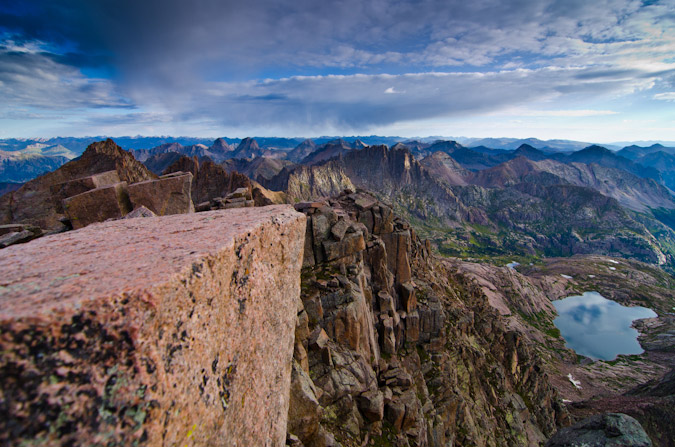
We headed down and enjoyed the views of Eolus all the way down.
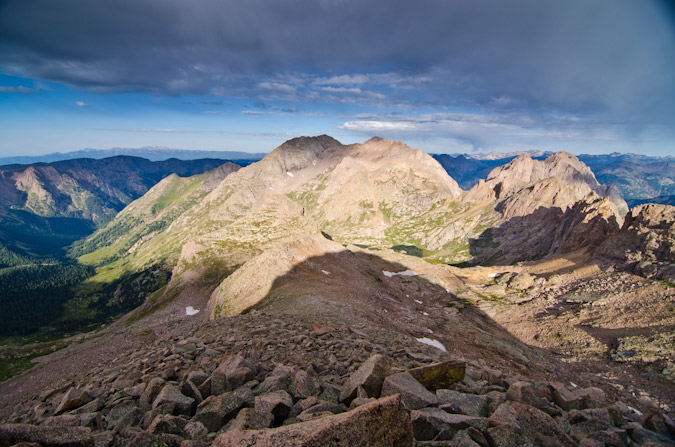
Before we knew it, we had already reached the trail junction for Columbine Pass and headed back to camp. We passed an old mine again but this time stopped to take pictures. Another group had mentioned that the mine was actually pretty cool to explore, but that was not high on our list.
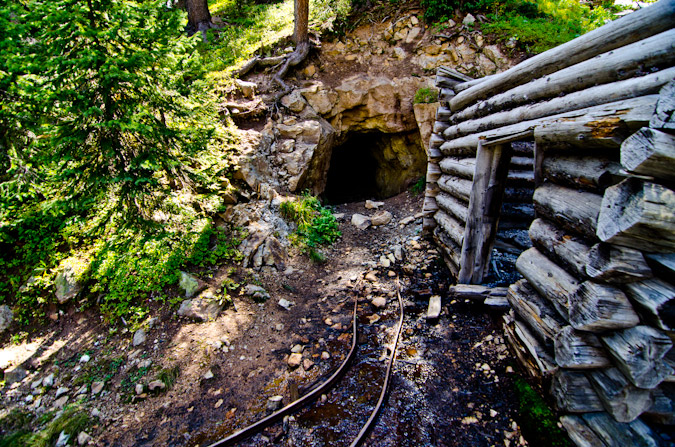
We reached camp at about 11:15 AM and packed up. We set our minds to the idea of getting all the way back to the car today. It was a lofty goal, to be sure, but we felt like we could do it, plus for some reason my legs decided that they were no longer sore. So we departed at 12:00 PM, with rain gear at the ready, and minds determined. Hell or high water, we were going to make it to the car. The climb out of the basin to Columbine Pass was gruelling. It was painful and slow. The weight of our packs and the fatigue of the weekend's work had us moving a consistent snails pace. We reached Columbine Pass and looked back - it felt great to get this far already, but we knew that the day had just begun...
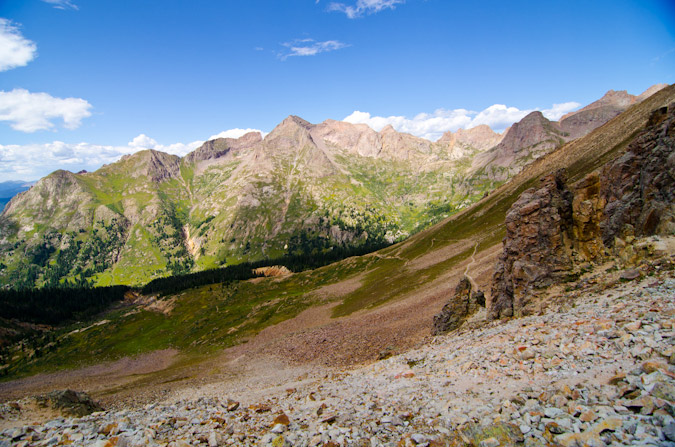
A look over the other side of the pass revealed clear weather and an inviting Columbine Lake. Trimble Pass - here we come! I turned on a podcast of Mike and Tom Eat Snacks - which had me in stitches for most of the hike up to Trimble Pass. Sarah was comforted by the idea that she was hiking with a madman.

The journey from Columbine Pass to Trimble Pass was pleasant, albeit slow and methodical.
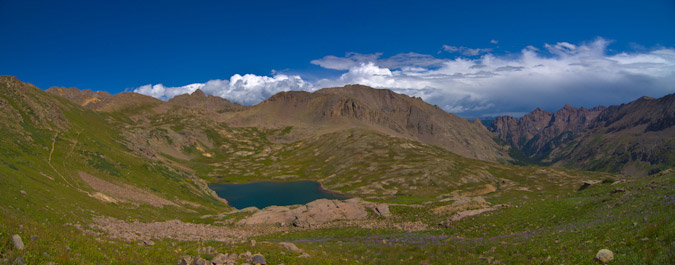
We reached Trimble Pass at 3:30 PM. We were still tired and sore, and required some time to rest, but we soldiered on.
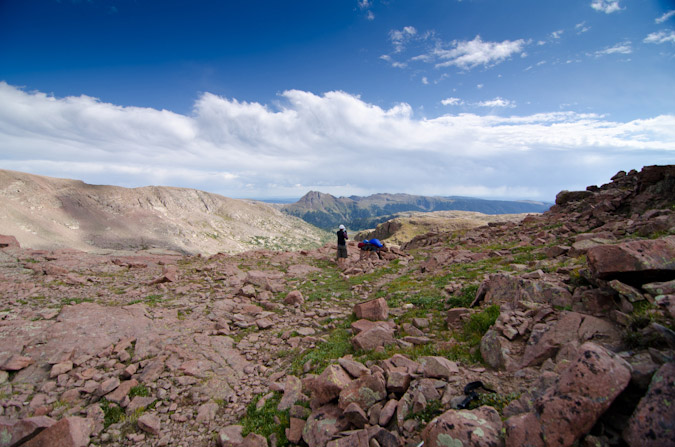
As we downclimbed from Trimble Pass onto Silver Mesa, I took one final parting shot of Chicago Basin... what a great place!
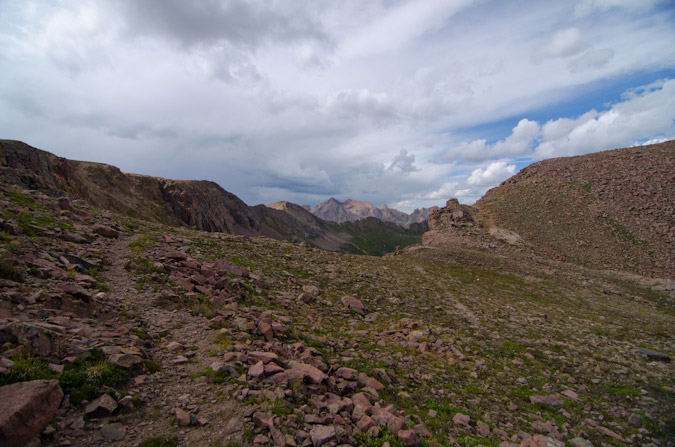
As we marched across Silver Mesa to the beat of our own music or podcast, we could not help but notice a huge storm brewing to the west. It looked as though it was moving our direction, so we kept eyes on it constantly. It was quite a sight either way.
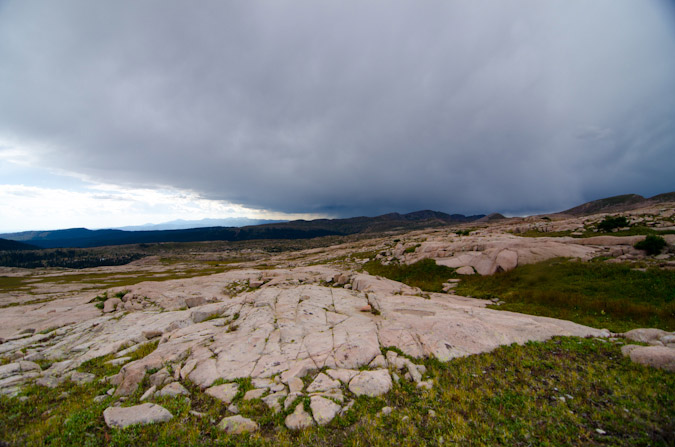
Silver Mesa had so many inviting campsites that tempted us. We kept going.
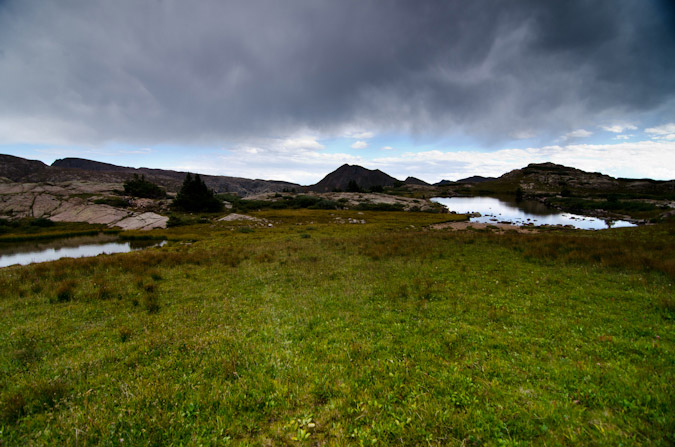
Before we knew it, we were at Lake Marie again. Just below Lake Marie we stumbled across a man from Boulder with four llamas. He was looking for Lake Marie. He had been up the trail and did not see it. I showed him where he was on the map. He thanked me. We were puzzled how one can miss a giant lake, but did not question it a whole lot, as we were focused on a mission. A mission of muscle-pounding and soul-crunching. We reached City Reservoir. It was also teasing us with its ample camping potential...
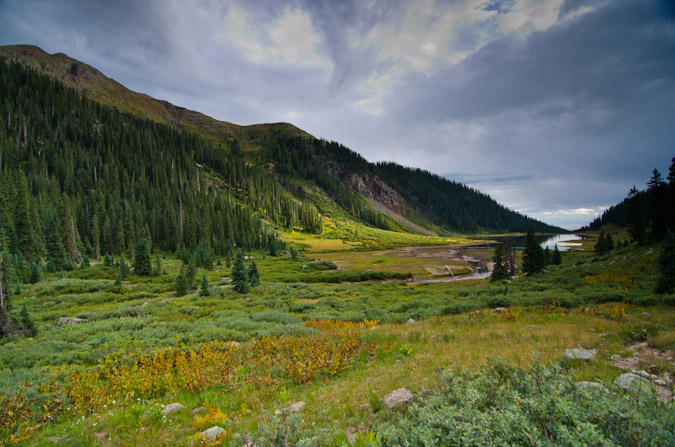
We cruised past City Reservoir and began a maddening climb out of the basin and towards Endlich Mesa. I found an interesting tree trunk to keep my attention off my aching bones.
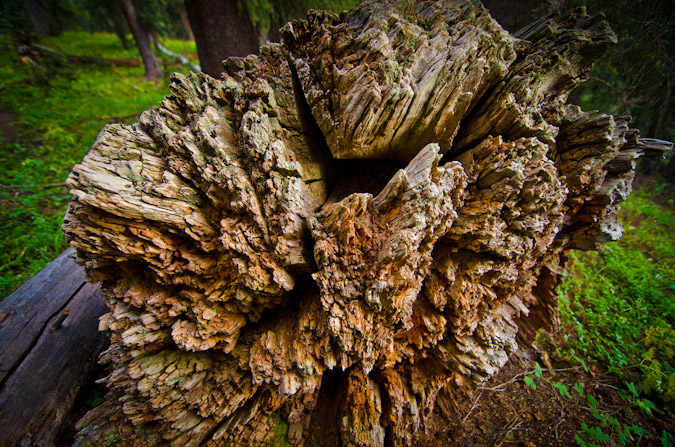
Darkness came quickly. We reached the beginning of Endlich Mesa around 9:00 PM. It was snowing. We were tired. We were hungry. We were quite certainly in foul moods. Sarah wanted food and so did I. I did not want to make camp though, so we got some light food out and ate. I confirmed our location on GPS. Only a few more miles to go. We finally reached the car at 11:30 PM and collapsed into sleeping bags in the truck. It was the best shitty night of sleep I've ever had.
This trip was the most physically demanding thing I've ever done. I pushed my body to its limits. I lost 6 pounds. I think both Sarah and I conquered some inner demons on this trip. It was, in retrospect, one of the greatest trips of my life.
Thanks for reading! I leave you with a playful creation - the world of Chicago Basin!
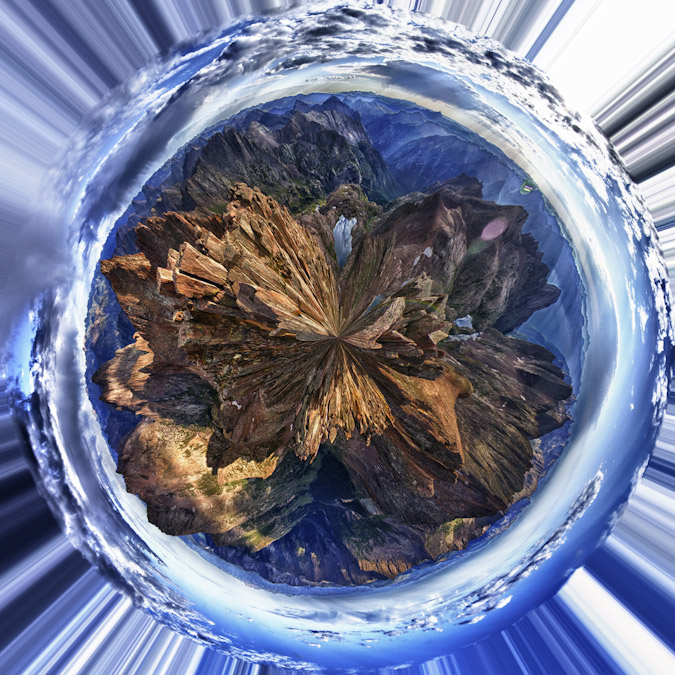
Citations:
1 Rhoda, Summits to Reach, pp 31-32
{fcomment}
The Rock of Ages - Mt. Wilson and New Friends

Mount Wilson's claim to fame as one of Colorado's most dangerous 14ers is certainly well deserved. As Colorado's 16th highest mountain, Mount Wilson rises to an impressive 14,246 ft. above sea level and the boasts the State's 9th most amount of prominence with 4,024 ft. The monarch of the San Miguel sub-range of the San Juan Mountains, Mount Wilson is a formidable mountain, without question. The history surrounding this mountain is quite intriguing as well. The first ascent of Mount Wilson is somewhat contested, but it is generally agreed that the first group to ascend it was the Hayden Survey on September 13, 1874, which included A.D. Wilson, after which the mountain was named. Additionally, Franklin Rhoda, a member of the team, later wrote in the survey notes about Mount Wilson: "Only one peak of which we had any dread remained to be ascended, and that was Mt. Wilson. From various circumstances, we have reason to believe that this was higher than any station we had yet made, and from its rugged appearance we dreaded its ascent not a little." Rhoda later reported that, "Mt. Wilson was by far the most dangerous climb of the summer."
I personally had hoped to climb Mt. Wilson back in July; however, that climb was cancelled mid-trip due to my climbing partner not feeling capable of the climb, which is totally understandable given the loose and dangerous nature of the San Miguels. With Wilson Peak already in the bag, I really wanted to return to the basin for a shot at Mt. Wilson, El Diente and Gladstone Peak. Here's a view of Mt. Wilson from the Rock of Ages Saddle:
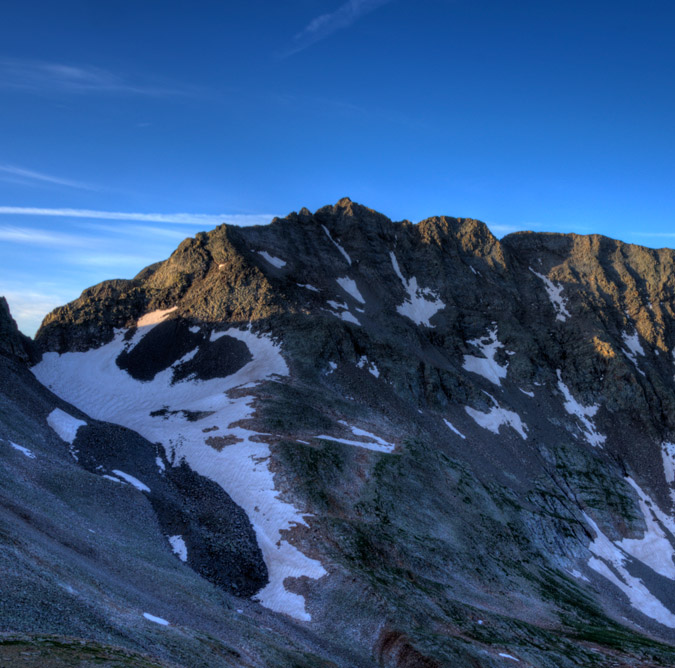
With a little less than a week left before my hike was scheduled, I was still without a partner. I scrambled to locate one on 14ers.com, but did not have much success. I finally did reach a guy named Will, who wanted to set-up a car shuttle, but it still meant that I would be driving out there alone, which was not something I wanted to do given the unreliable nature of my Jeep. I searched further on Facebook and found that one of my Facebook friends, Kara Bauman, was also planning a trip to the Wilsons. I communicated with her and we quickly made plans to join up. Her group was leaving from Denver on Friday afternoon and I could join them if I could get to Denver. I made it work - and before I knew it - I found myself at the Ken Caryl Park and Ride in Denver at 1 PM on Friday 8/12/11. Our group was comprised of Kara Bauman, Alli Kolega, Tom Shaar and me. The group all assembled and loaded our stuff into Tom Shaar's killer SUV and we departed on our 6 hour journey to the Wilsons. On the way over, we all discussed possible options on which order to climb the mountains and where from. We all conceded that the best day for weather was Saturday, so that made the most sense for an attempt on Mt. Wilson, since it was a longer approach. We would see about the traverse to El Diente from there, and then they would do Wilson Peak on Sunday while I would do Gladstone Peak. We also decided to make Silver Pick Basin our headquarters for the weekend since the trailhead had recently re-opened at a new location after several years of closure due to property issues. In total, our climb took us about 10 hours and we covered 12.7 miles and gained 6,775 vertical feet. Our route up Mt. Wilson and the elevation profile can be seen below (click on each for a larger version).
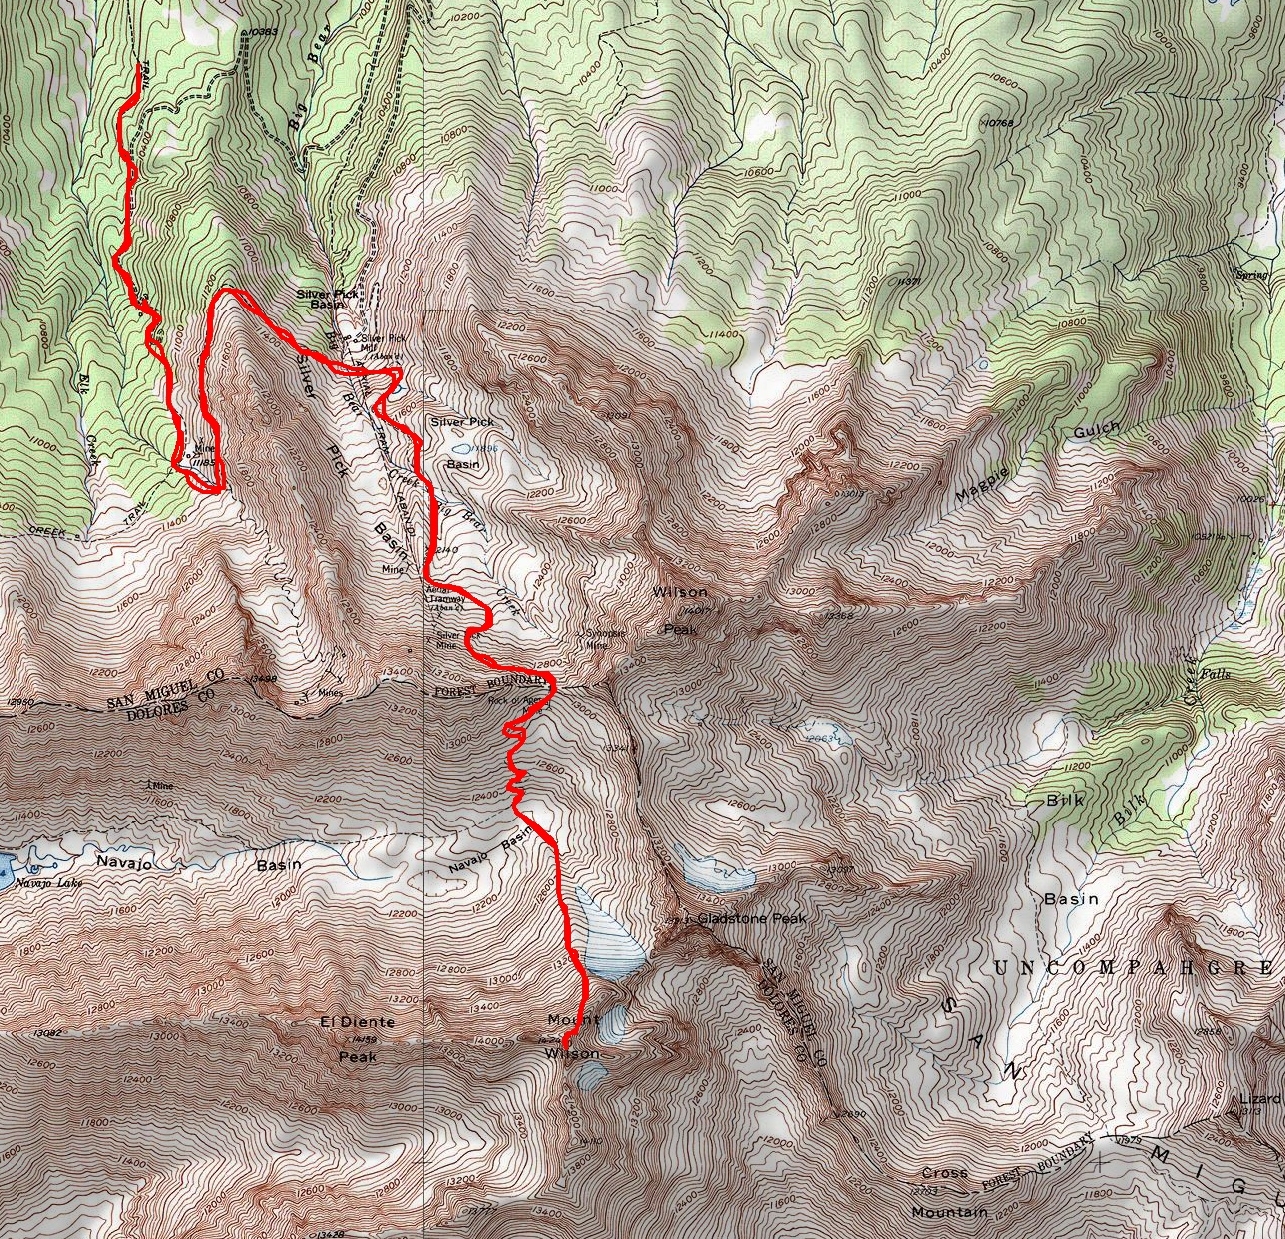

On the way up Silver Pick Basin road, Alli was telling a story about someone she had heard about on 14ers.com that had been threatened with a gun. Before she could finish the story, I spoke up - "that was me!" Indeed - she was referring to my horrendous situation from 2009 where I encountered some quite disrepectful gun-toting young men. I had just finished telling the story about how the young men had a flat tire when Tom stopped me and said, "I think we have a problem - the tire pressure is dropping." It was crazy timing considering I was telling the story about the guys with the flat tire. Sure enough, Tom's tire had a hole in it. Fortunately, he had a Slime Portable Flat Tire Repair Kit, which enabled him to fix the tire quickly so we could at least reach the trailhead. He also had a portable air compressor, which turned out to be quite awesome!
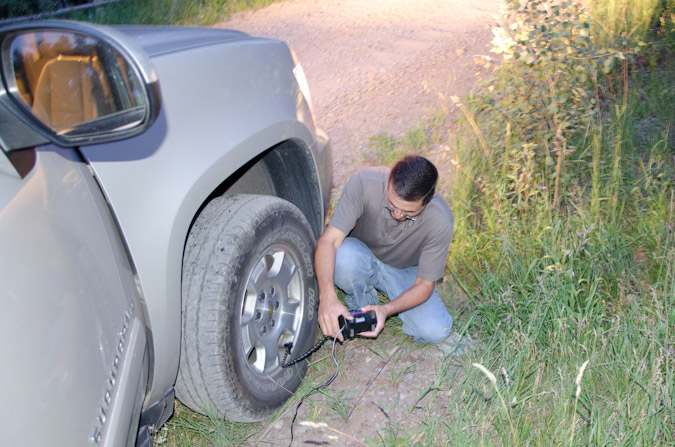
While Tom did all the heavy lifting, Alli and Kara (left and right respectively) were busy updating the world on our woes via Facebook. 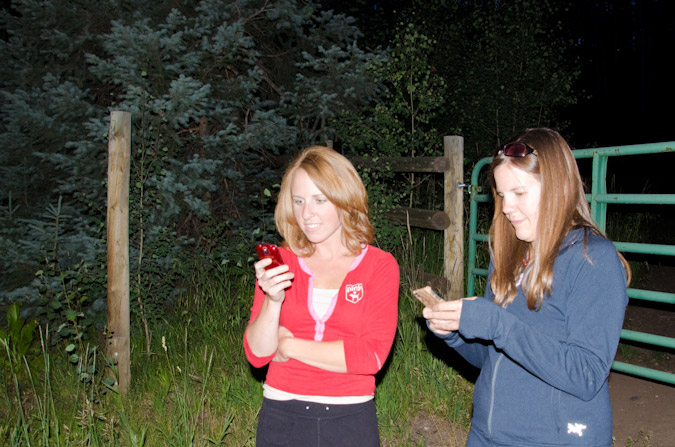
Since the basin had just re-opened the week before, we had anticipated that the trailhead would be busy. Indeed the area had quite a few people in it, and subsequently, all of the good campsites were taken. Tom and Alli ended up sleeping in the car, while Kara and I put up our tents in a field nearby. We decided to set our alarms for 3:30 AM for a 4:00 AM start and hit the sack. The next morning, we started up the trail, guided mostly by the numerous signs that were on the trail. We did find ourselves second guessing the trail at one point on the way up, which I will point out later in the report. It was at that point that we met up with a solo hiker, who turned out to be Will from 14ers.com who I had talked to earlier in the week. He decided to join us for the day and we did not regret it - he was a great companion! We wrapped around the long ridge to the west of Silver Pick Basin and entered the basin proper. The road and trail were very nice and well maintained. We also enjoyed the sunrise over Wilson Peak.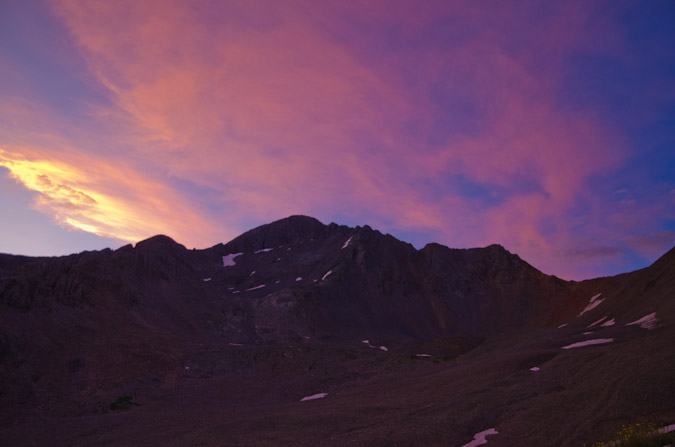
The clouds over Wilson Peak were great!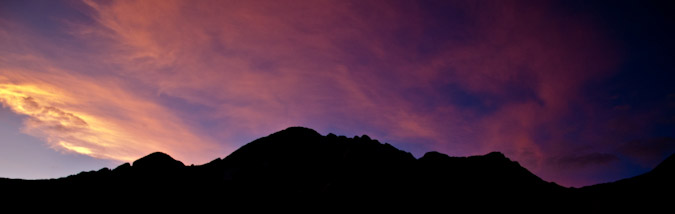
Kara and I stayed near the back of the pack, talking about life, religion and all other important topics that we could think of. I think I was putting her to sleep with my stories...
We finally reached the stone building which is a remnant of the old Silver Pick Mine, and enjoyed the views of Wilson Peak from there. 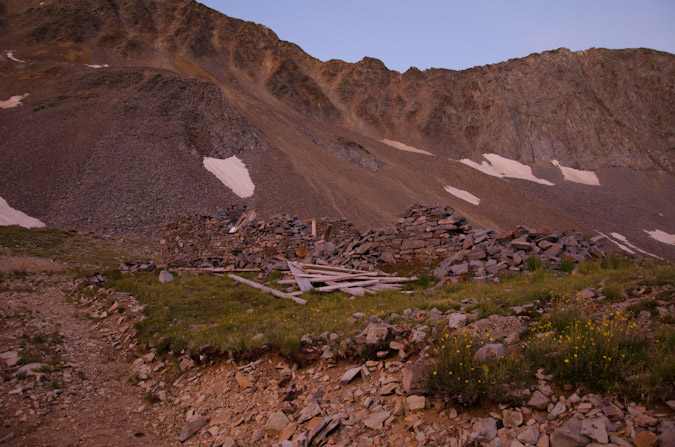
Wilson Peak had some great clouds above it and made for an interesting subject to experiment with HDR.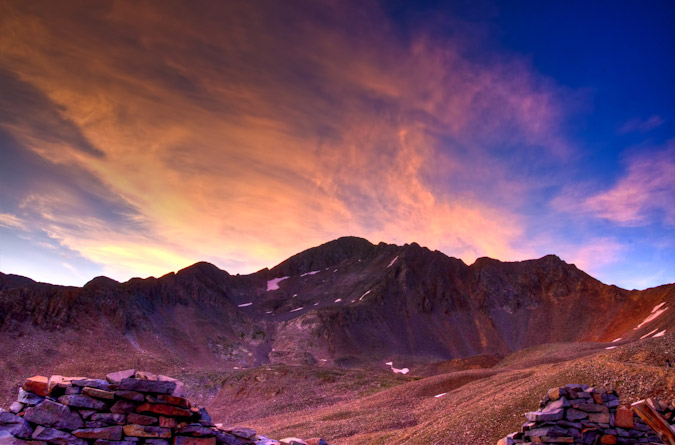
The trail winded up the side of the mountain at a very manageable rate and soon we found the stone building well behind us.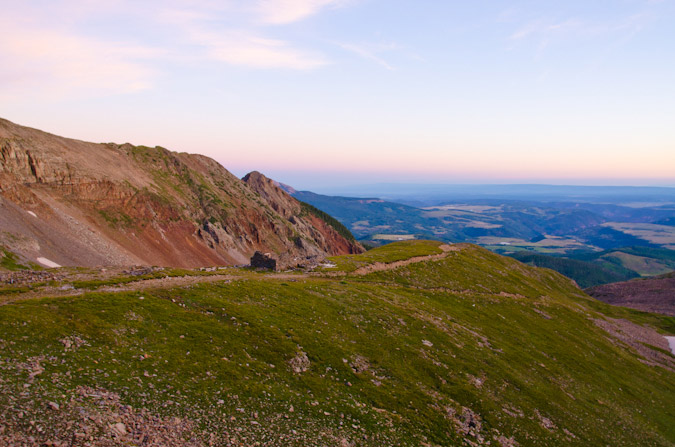
I found myself taking the lead up the trail with Will and we were soon joined by two solo hikers who both had a dog, one of which was a Chihuahua that was on its first 14er climb. The Chihuahua passed Kara on the trail, which was a humerous but sore subject for Kara for the remainder of the hike. We later joked that the dog had gotten to her psychologically and that it was haunting her the whole day. How do you let a small dog on its first hike pass you on the trail? Just kidding of course Kara!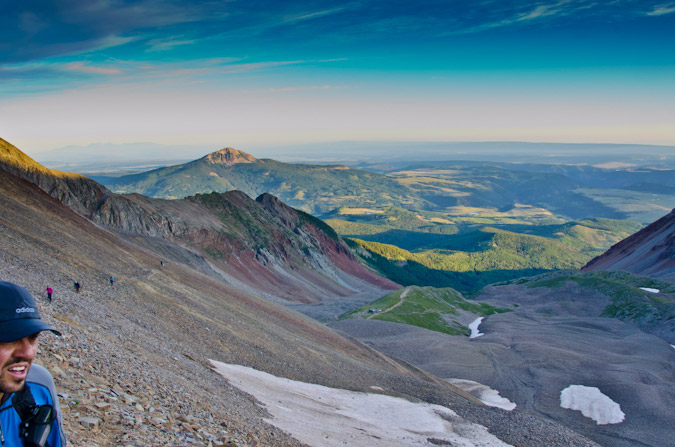
Wilson Peak and the Rock of Ages Saddle neared and Will was getting pretty excited!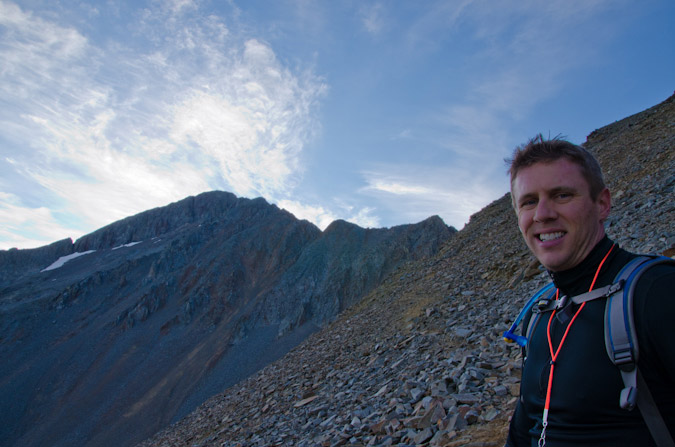
So excited that he took off and made it up first!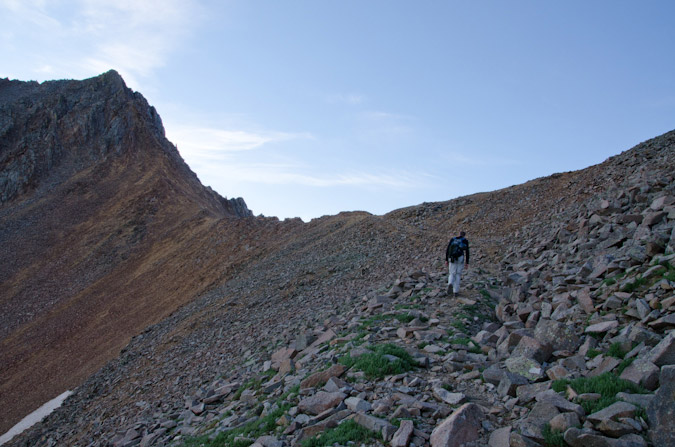
Tom and I kept on trucking...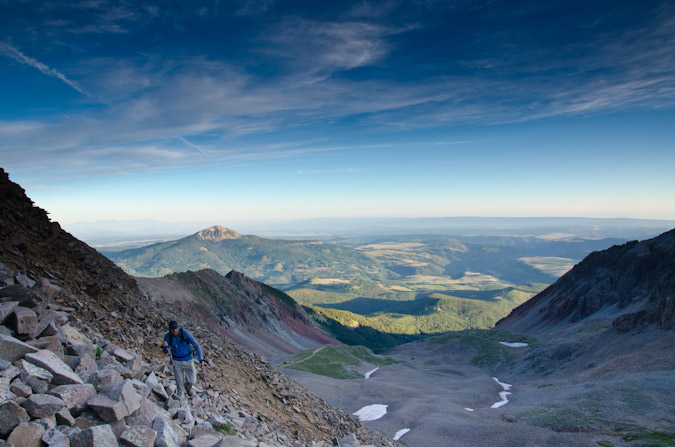
The sunrise had finally fully illuminated the valley below and made for quite the sight! Will reached the saddle first and was trying to decide on what to do - Wilson Peak was right there, but he knew he couldn't pass up an opportunity to climb Mt. Wilson with some experienced climbers, so he stuck with us. Both Tom and I are very close to completing the 14ers, and would prove good leaders on the class 3 and 4 terrain ahead.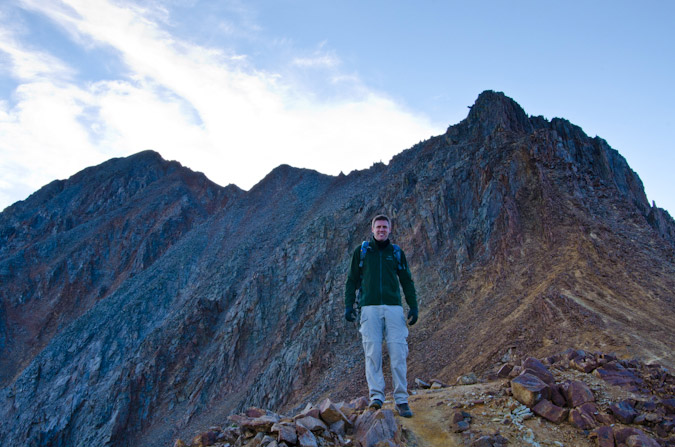
The approach from Silver Pick Basin proved longer than advertised, and before we knew it, we had already hiked 4 miles just to reach the Rock of Ages Saddle at 13,000 ft. The thought of descending down into Navajo Basin to 12,400 ft. and back up Mt. Wilson was not exactly enticing, but we knew it was the best thing to do given the weather forecast for the weekend.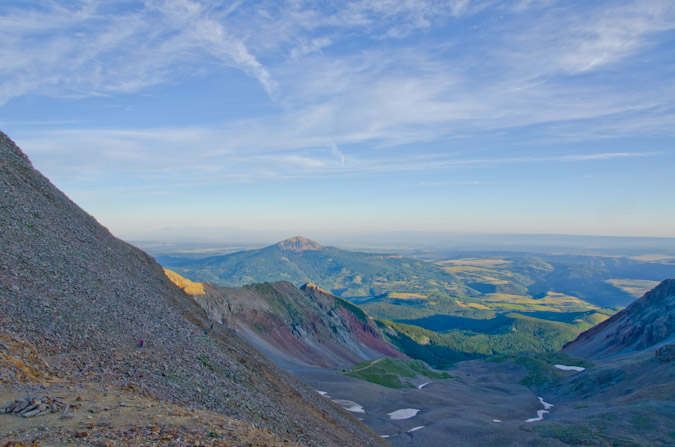
Eventually, both Alli and Kara caught up with us and we stopped to eat some food and take in the views. 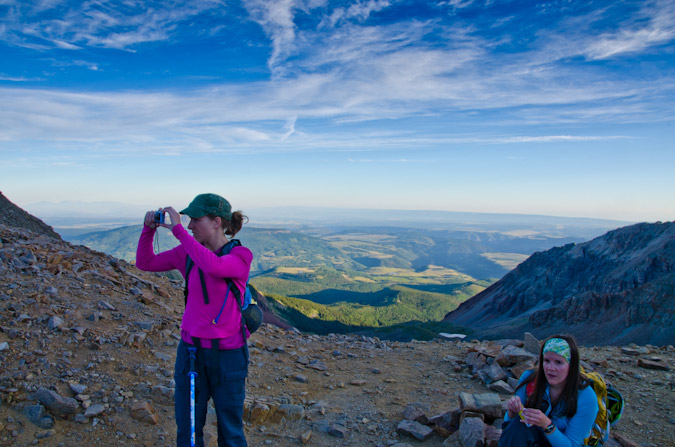
The sunrise was lighting up Navajo Basin and the surrounding mountains, including Gladstone Peak (center), Mt. Wilson (right of center) and El Diente (right).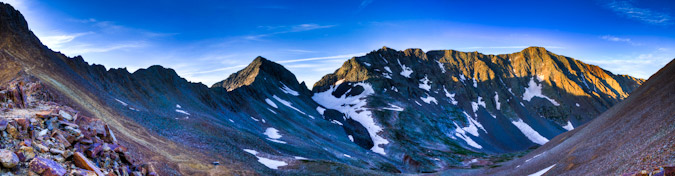
We headed on down into the basin and I stopped to get a few photos of Mt. Wilson from below.
Here you can see a view from the base of Navajo Basin - mouse-over to see our route up Mount Wilson.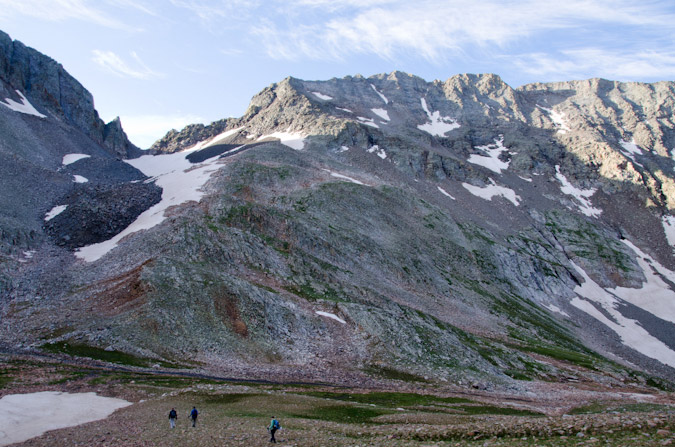
We found the most amazing wildflower field at the base of Mt. Wilson, and I stopped to get some photos of it, including this panorama.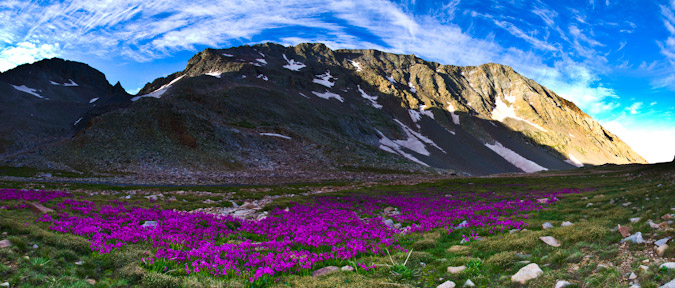
We all started up Mt. Wilson eagerly. It felt like it was right there! I stuck behind with Kara, listening to her stories about life. I also wanted to make sure that someone stayed with her since she was not feeling her best on that day. 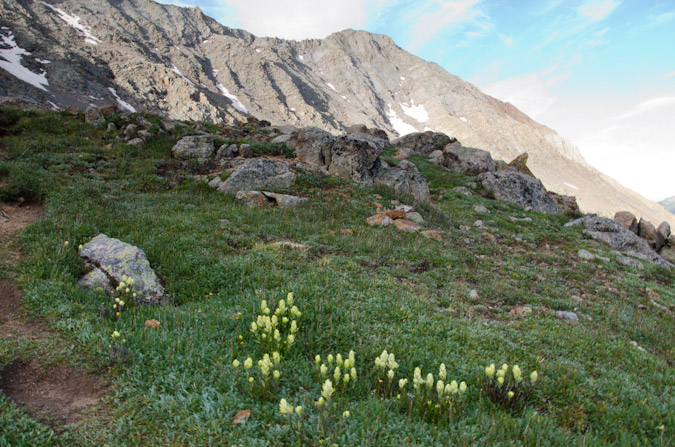
Before we knew it, we found ourselves looking back at the Rock of Ages saddle and Wilson Peak to its right. The climbing up the initial half of Mt. Wilson was quite easy, nothing more than a simple hike. 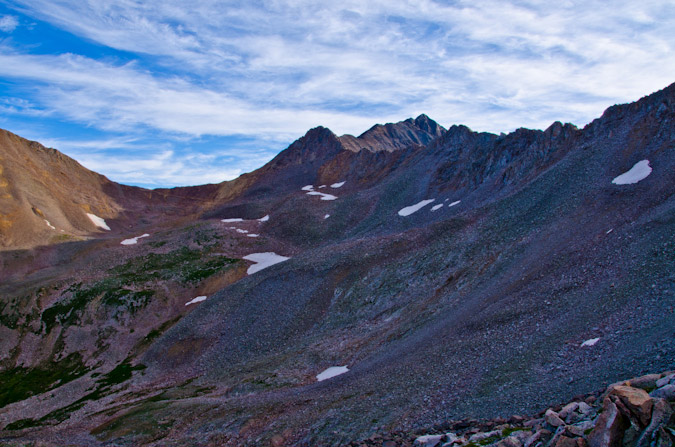
At the end of the easy terrain, we all stopped to rest and prepare for the meat of the climb.
Gladstone Peak loomed over us to the left, blocking the sunlight for the first half of the climb. Eventually, the sun did rise above it, and I found myself drawn to the view of the sun and Gladstone repeatedly.
I decided it would also be a good opportunity to test out some sun-framed HDR photography. The lens flares in the below photo initially bothered me, but after processing the image, I feel like they add value.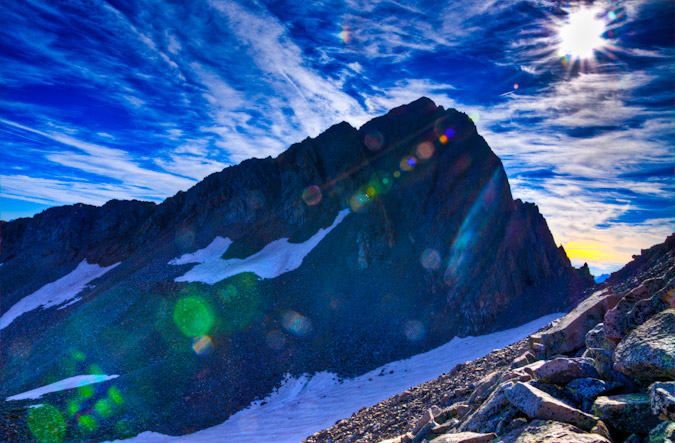
The climbing got more difficult and we reached the class 3 section. We all put on our helmets and started up the more difficult terrain. I found it to be much easier than advertised and the rock responded quite well to my intuitively-placed hands and feet. The rock was solid where I expected it to be solid, and loose where I expected it to be loose. Eventually we found ourselves at the base of a giant gully leading up, and I stuck behind with Kara to make sure she made it up safely.
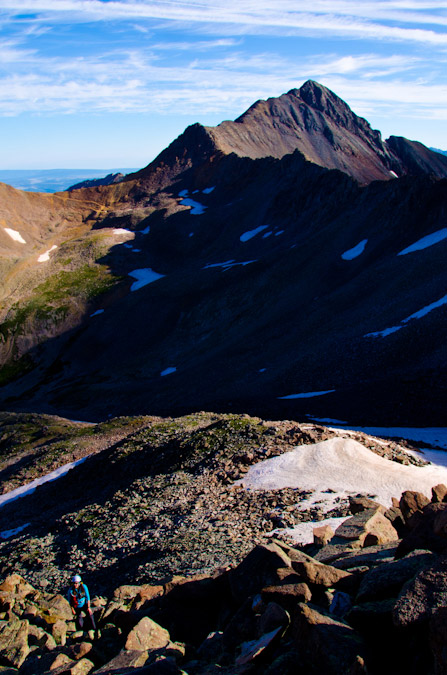 |
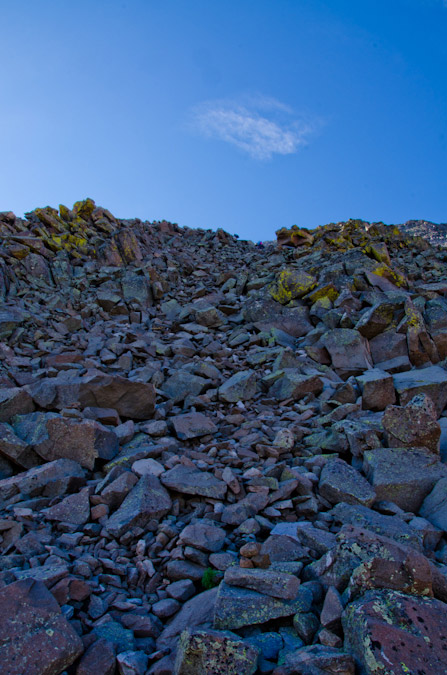 |
The entire route was littered with well-marked cairns that were also adorned with flourescent surveyors tape, making them easy to locate. I know that this is a controversial practice; however, I think everyone in the group found them to be helpful given the terrain we found ourselves in. The views of El Diente and Navajo Lake were quite superb.
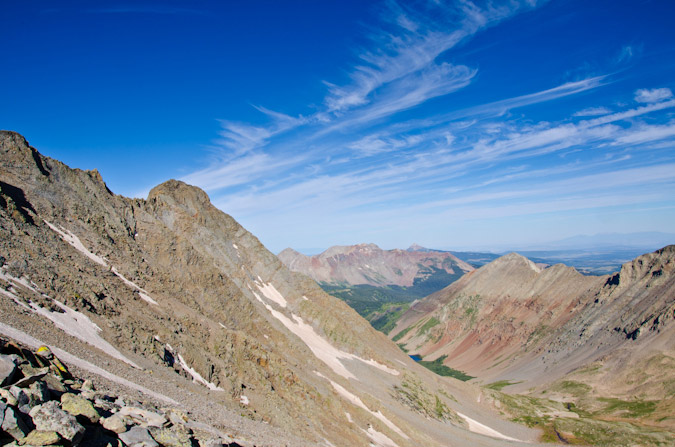
Once we reached the top of the gully, we knew we needed to start traversing across Mt. Wilson. The cairns pointed the way and we followed. 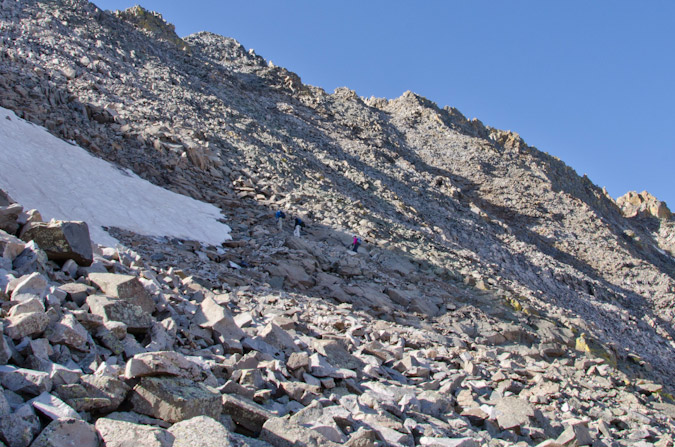
From here the terrain continued to increase in difficulty. The rock was looser and less stable in general. We picked our steps carefully. A look back towards Wilson Peak revealed that we were gaining elevation quickly.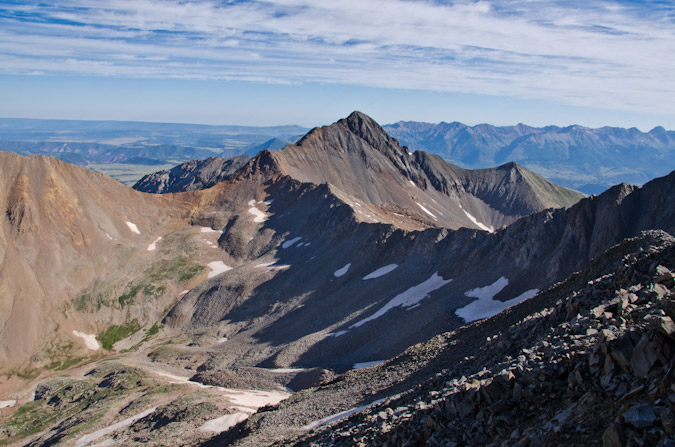
We finally reached the top of another loose gully and the route became obvious but less stable. The rock was getting better but the higher we climbed, the greater the consequences of a loose rock breaking free. The rocks were bigger and the terrain was steeper.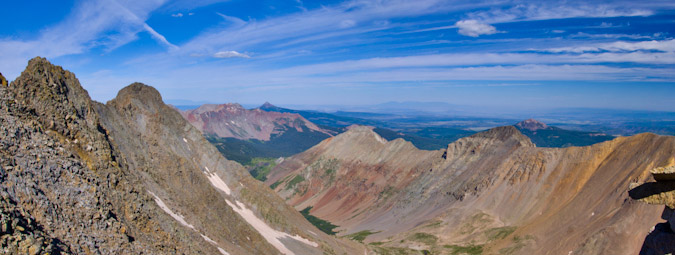
Kara was a real champ on this section.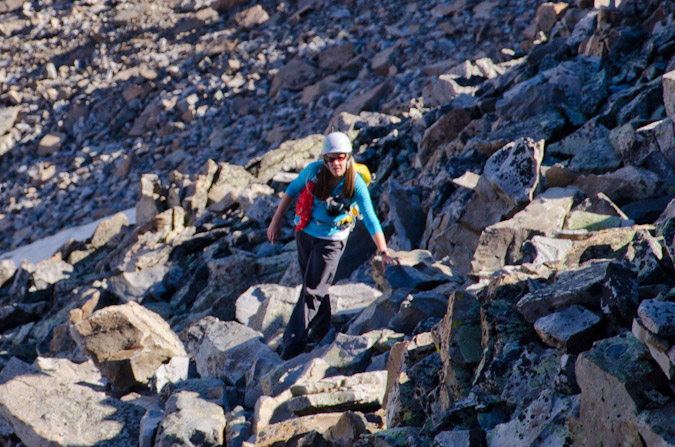
Finally, we reached the ridgeline and could get views to our east. Tom had made it up to the summit by now.
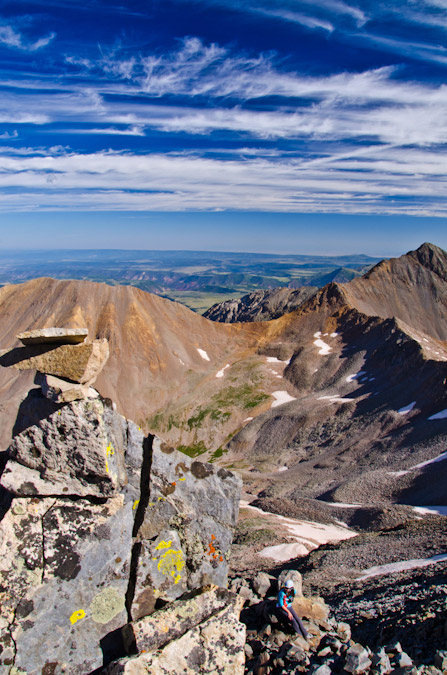 |
 |
The route was getting more and more challenging and I was loving it. Kara was keeping her own as well and I think she was having fun on the interesting class 3 rock. By now, Tom had made it up and Will was photographing the journey.
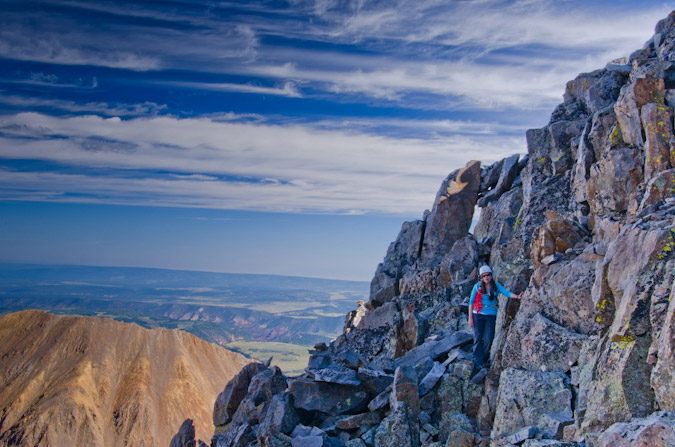
Tom topped out just before Will.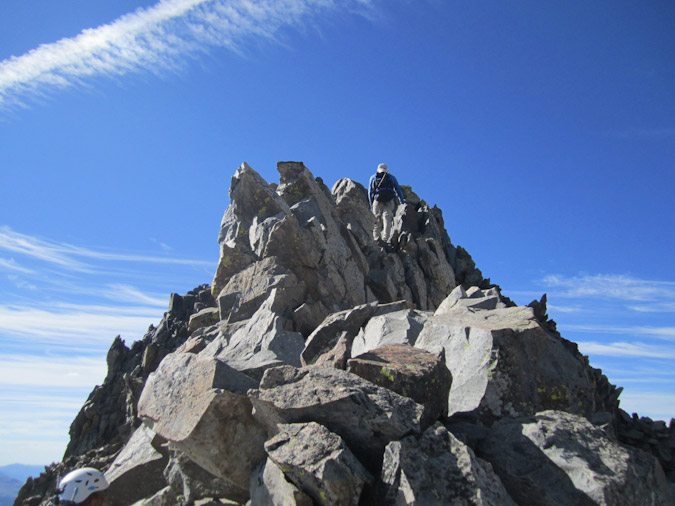
Tom contemplates the route on the crazy summit block of Wilson...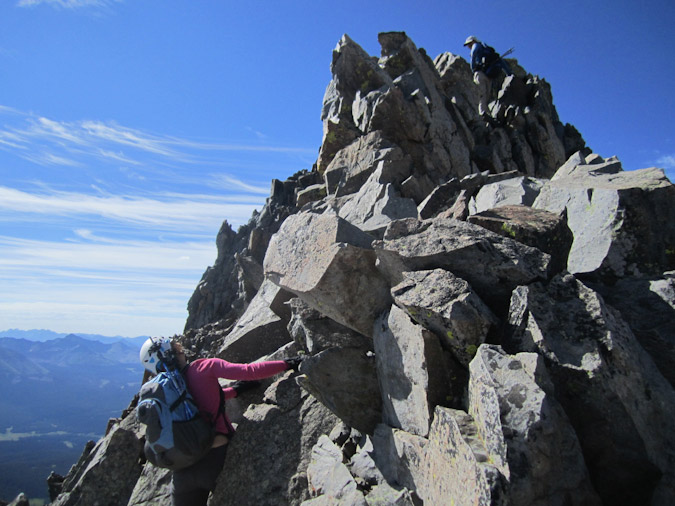
And Tom makes it up! As you can see, the terrain at the summit of Mt. Wilson is crazy and exposed. While it was very solid, I found the terrain to be the most exposed out of any section of any mountain I've done to date. The rocks were totally solid, but they looked like they could slab off at any moment. Someday in the future, someone is going to have the whole summit block slip off and it won't be pretty.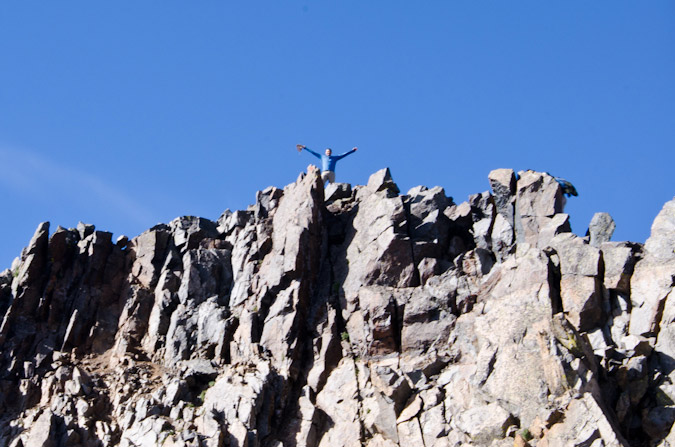
I finally reached the summit block and was totally shocked with the difficult nature of it. I had read about it, but that never really does it justice. There were two moves in particular that would end in death if not executed properly.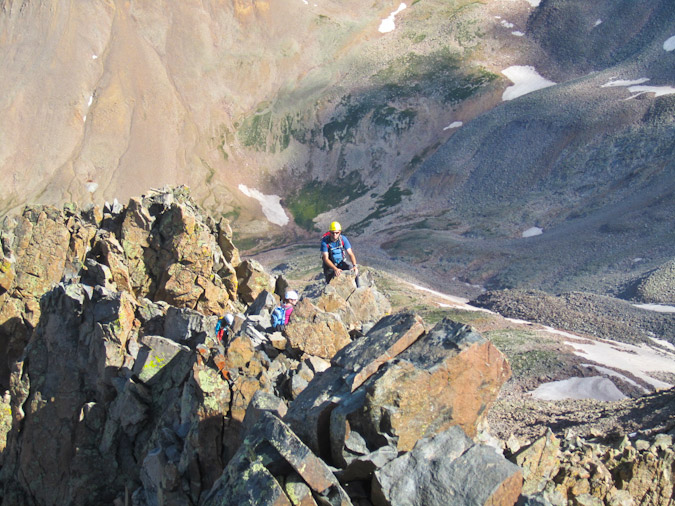
Alli captured me doing one of them...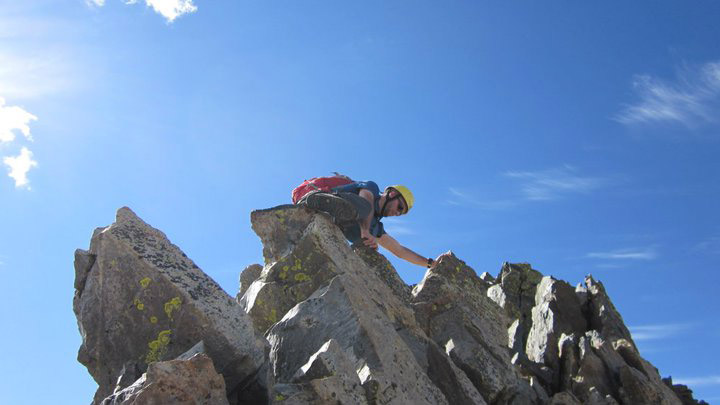
Here's the view down from there - very exposed! The rock was no wider than a person at the most.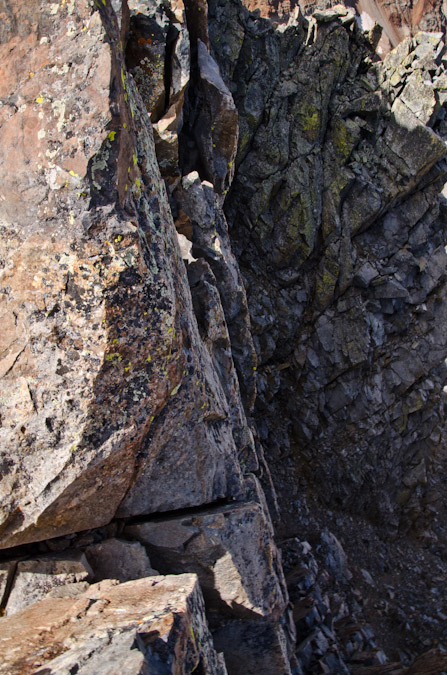
Once I reached the top, Tom, Will and I celebrated and took photos. The summit shots did not turn out great, but we were somewhat rushed because Tom wanted to get off the mountain and head for Wilson Peak before the weather got bad.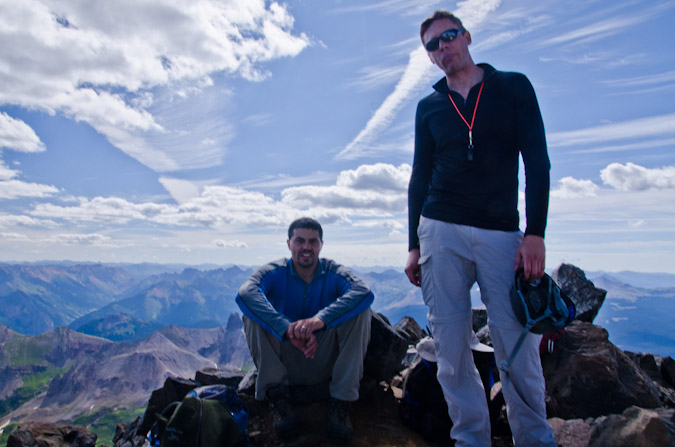
Tom and Will on Mt. Wilson.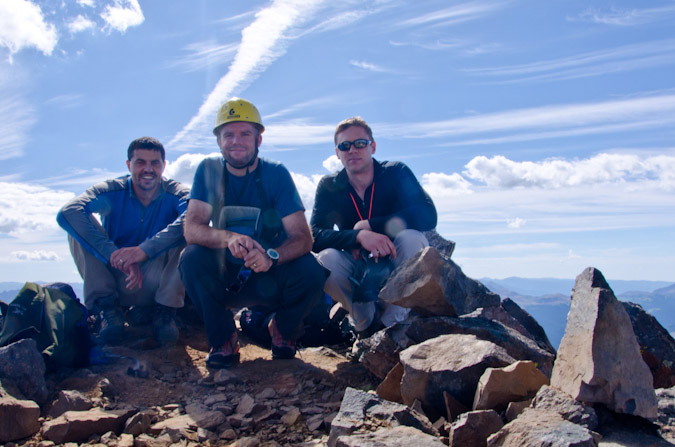
Tom, Matt and Will.
I took one look at El Diente and the weather conditions and said - "No thanks." It looked crazy from there. I know that looks are always deceiving, but I had no interest in soloing the traverse over to El Diente that day. Take a look for yourself: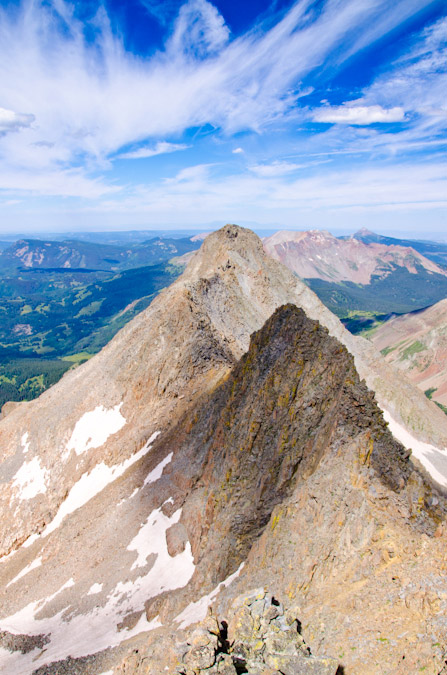
I did get time to shoot off some shots and capture a 360 from the top. Click to see a larger version.
And I played around with an HDR panoramic of Wilson Peak, Sneffels, Wetterhorn, Uncompahgre, Lizard Head and the Ice Lake Basin peaks.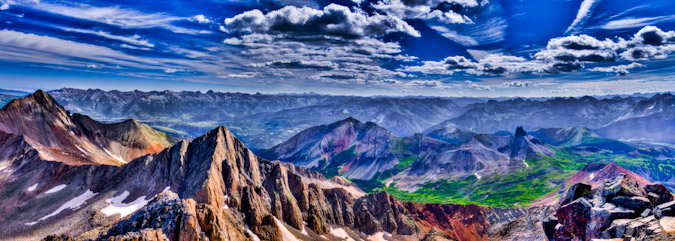
Tom and Will started down before me, and it made for a good dose of perspective on the downclimb.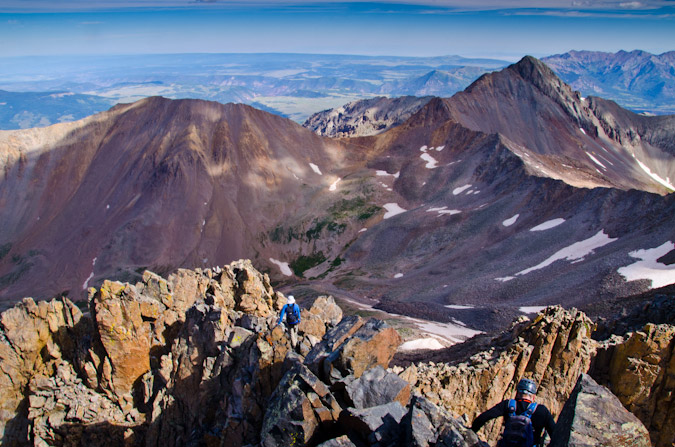
Will graciously stopped and photographed me coming down off the top. It was wild stuff! It definately had my heart pumping!
Will and I stayed in the back with Kara, while Tom and Alli went ahead. 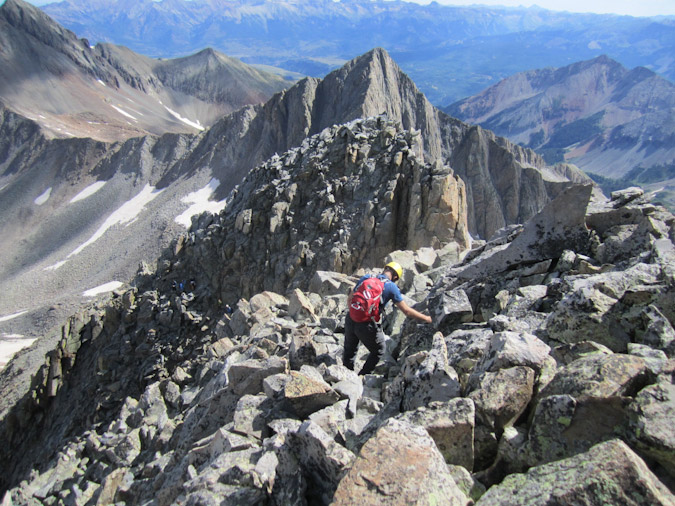
Then the craziest thing happened. We ran into a group of 4 young men coming up. None of them had helmets. One of them had a backpack and water. 3 of the 4 were wearing tennis shoes and one of them had a brace or cast on his arm, essentially rendering him one-armed. My only response to that was: "Fascinating." Since I don't liken myself as the 14ers police, I just said hello and kept on going. Now, I could be off here, and you might say I'm a bit of a safety freak and that I need to lighten up... I could not help but wonder though - what the hell were they thinking? Water? Helmets? Broken arm? Wow. Mouseover to see what he must have been thinking.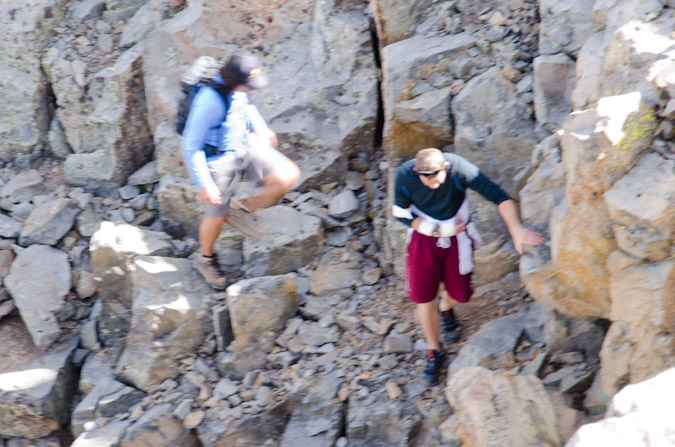
"Dude! Water is for pansies!"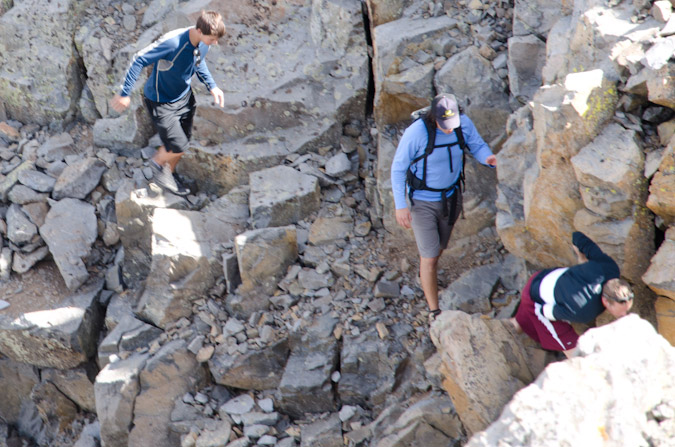
We took our time coming down, probably too long; however, Kara was good company and we wanted to make sure we did it safely. I kept my eyes on the sky and kept contemplating a hike over to start Gladstone; however, I abandoned the idea at the first sight of bad weather. Even though the weather did hold for the rest of the day, I feel like I made the right choice. We reached that awesome field of flowers again and I went crazy with the camera.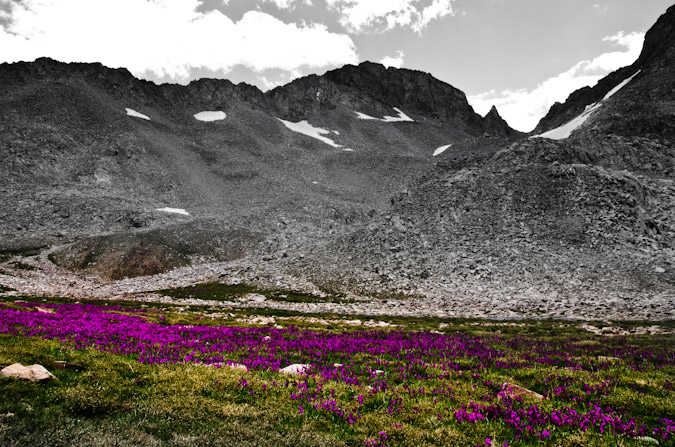
Wildflowers and Gladstone Peak.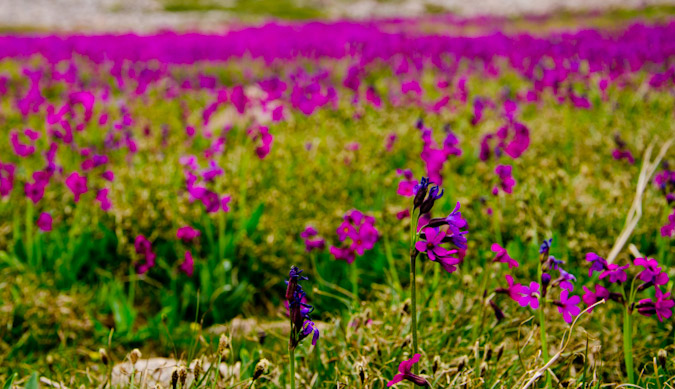
The flowers made for a nice subject for some depth of field (DoF) work. Maybe someday I'll get a real lens that makes the bokeh look creamier. I found a really neat pond with some odd plants growing in it that were exuding bubbles. They also made for an interesting subject. With the thought of Gladstone out of my mind, I focused in on looking for interesting things to photograph on the way back down. I also wanted to find things with interesting texture and depth of field.
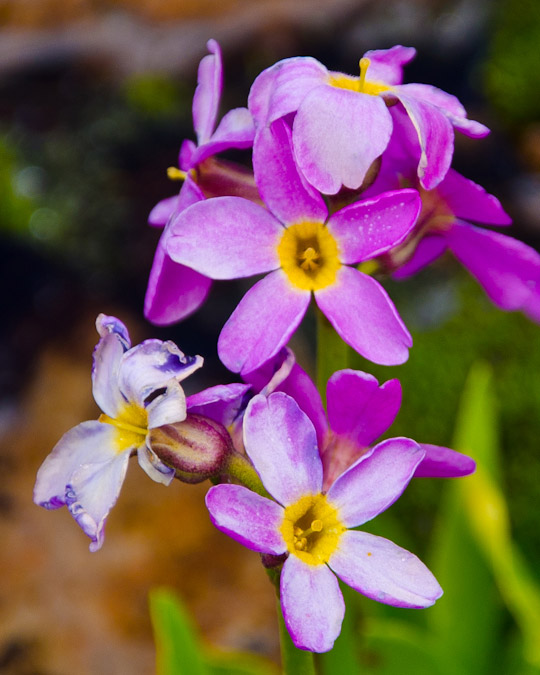 |
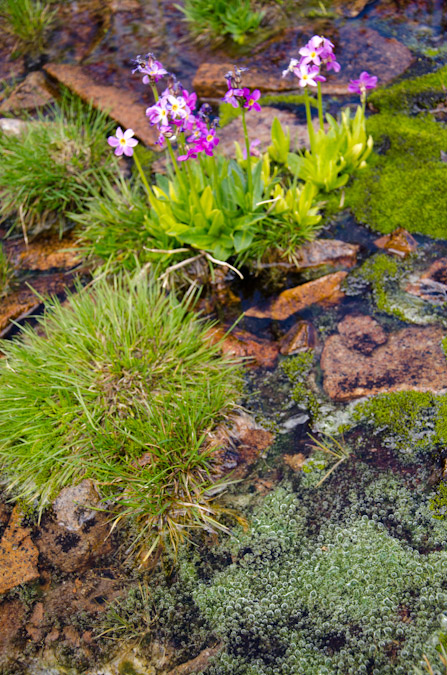 |
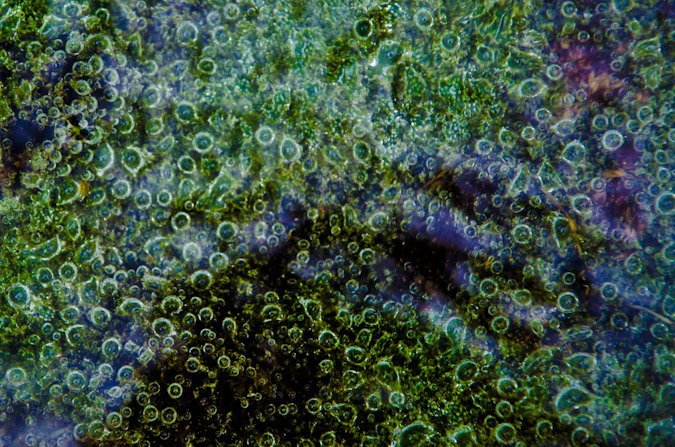
We finally reached the Rock of Ages mine again and the ever-so-popular mining cart that always makes for great photo opportunities.
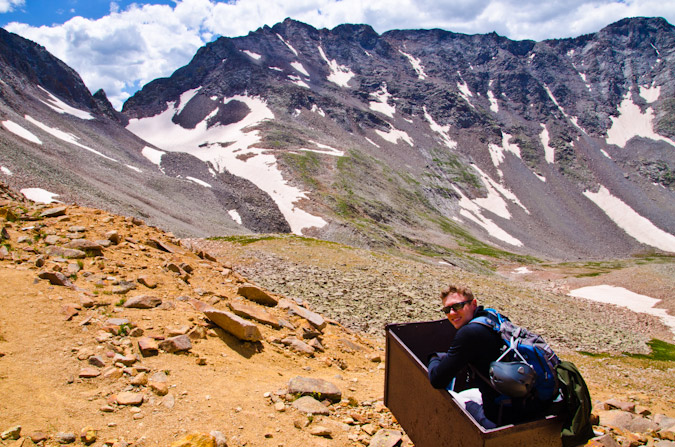
Will jams out on the mining cart.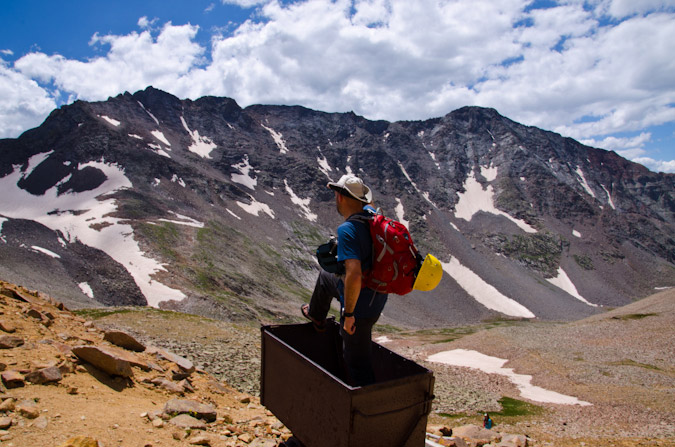
My best captain salute for Mt. Wilson.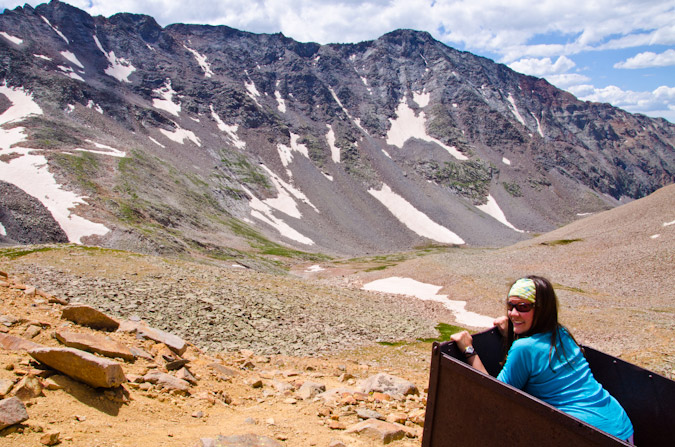
Kara, riding the cart to victory!
We made up to the saddle again, where Tom and Alli were waiting for us. We all decided to head back down, despite the fact that the weather was holding. I was good with this decision since we had another day yet to climb.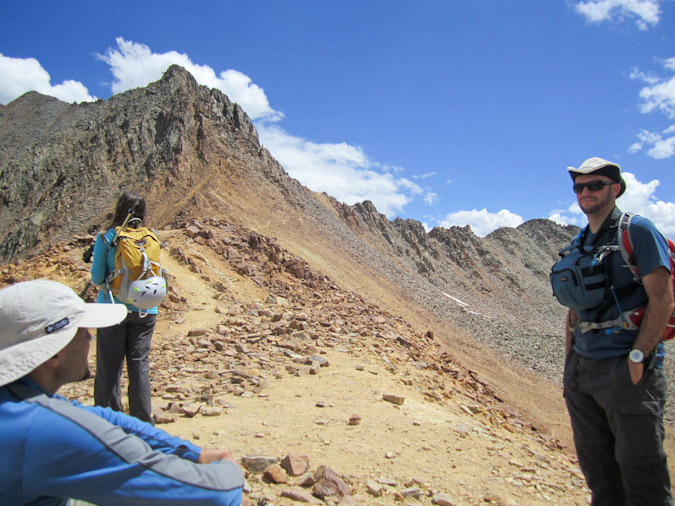
One thing I love about getting out on these hikes and climbs is that it lets me play around with different subjects for photography. In this case, I chose the old mining building and a barbed wire to focus on for a small depth of field. I can't wait for the day when I can get myself a nice 50mm prime lens to really make these kinds of photos pop.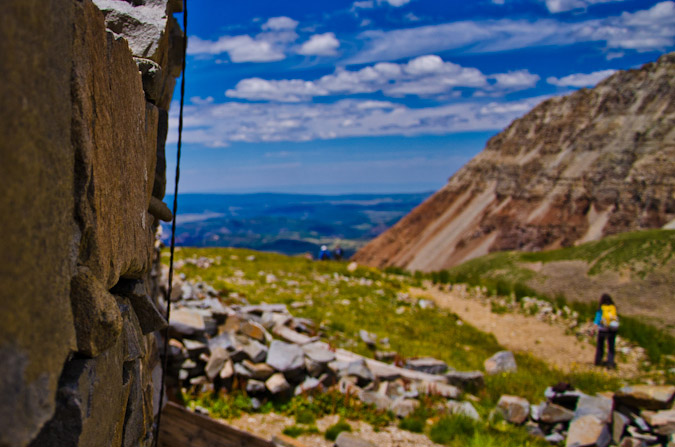
I also looked for things with interesting textures.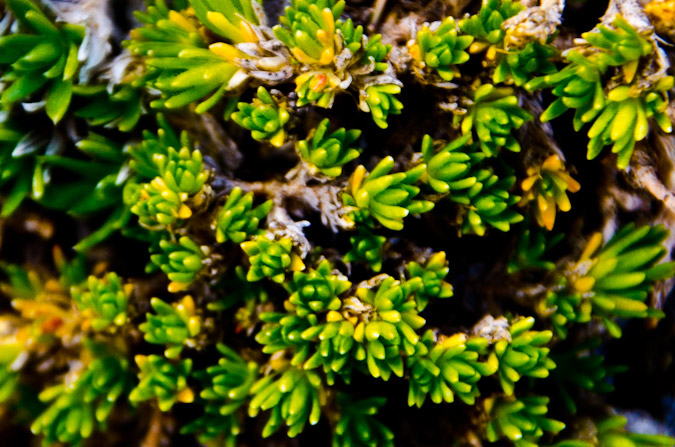
And of course the wildflowers were great too.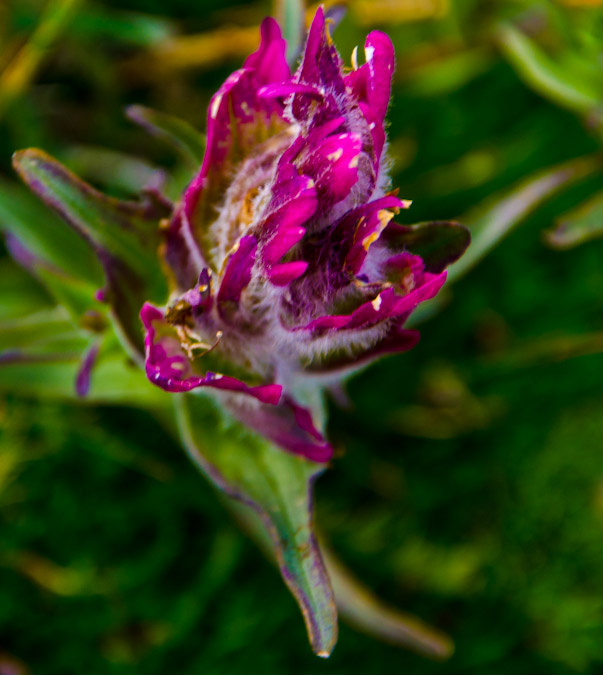 One cool thing about this area is the large amount of old mining equipment left behind. I felt like they made good subjects for black and white photos. The below left image is one of my favorites. It combines a few concepts that I wanted to demonstrate - lines and depth of field. I hope that you like them!
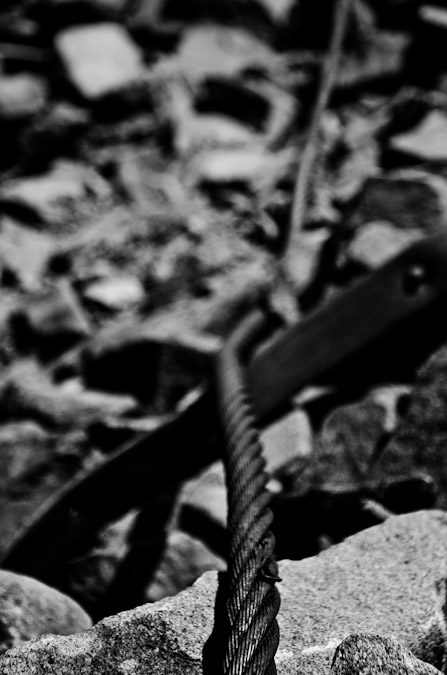 |
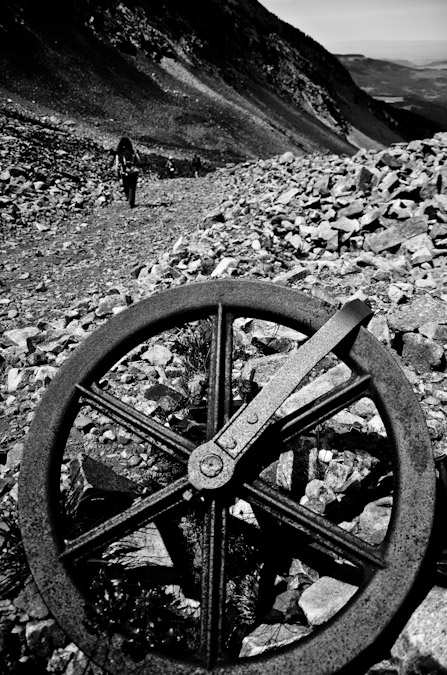 |
We finally wrapped back around to the other side of the long ridge that separates the new Rock of Ages trail from the Rock of Ages basin.
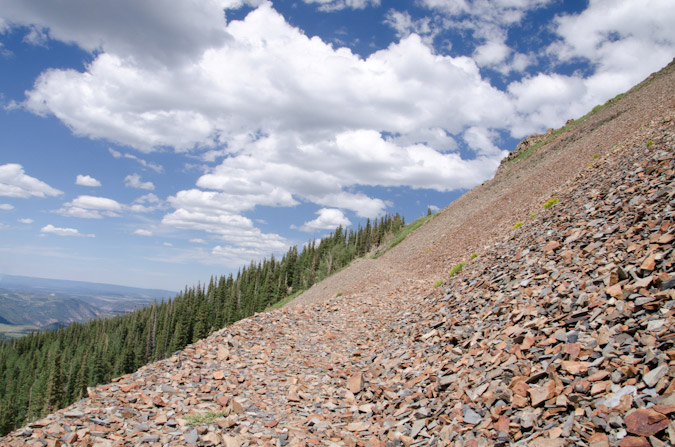
The clouds above were pretty neat.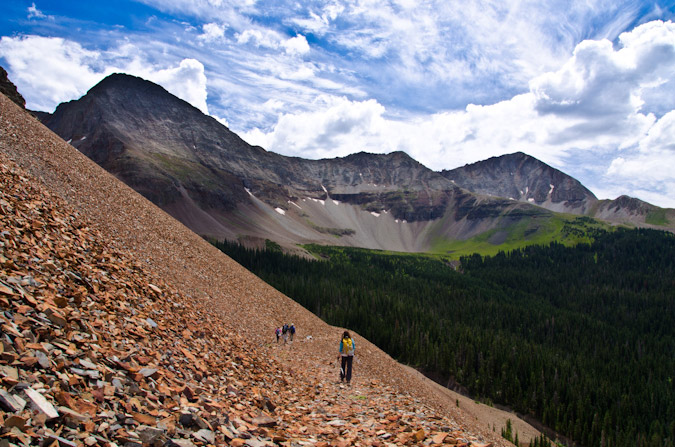
As mentioned at the beginning of the report, we did encounter one area that confused us on the way up because we felt like we were going the wrong way (which we weren't). This rock in the trail led me to think that maybe we should turn-off on a less-worn trail here, but that proved to lead to nowhere. I wanted to point the rock out to anyone else doing this route so that you know to keep on going straight when you find this rock.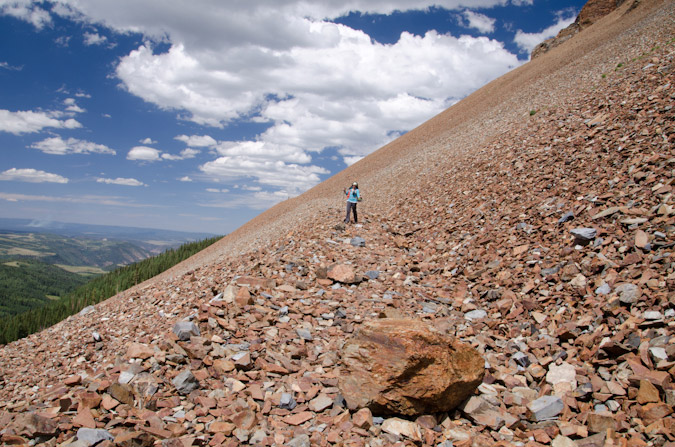
Also of interest, I noticed that the fire I saw last month was still happening in the same general area as before, so that led me to think that maybe there were some controlled fires going on in the area.
I took this photo to not only shot off the fire, but to also demonstrate the difference between using a polarizing filter and not. I took the below photo without the filter, and if you mouse-over it, you can see the same photo only with a filter, with all the same settings in camera. The filter really brings out the blues and adds some punch to the clouds. Check it out!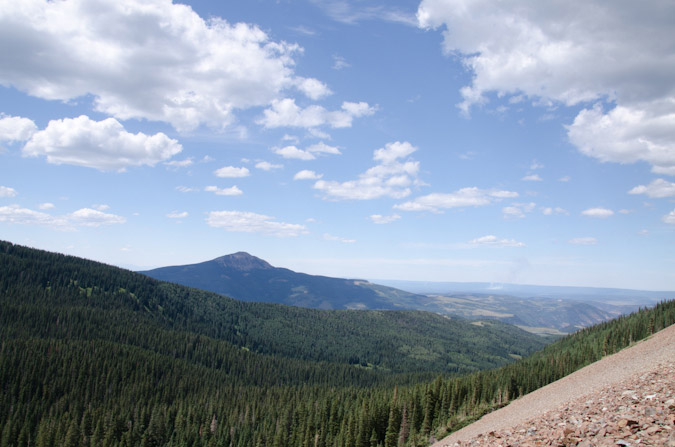
We reached our campsite and cooked dinner. We all decided to get up early the next day to finish our weekend of climbing. I opted to set my alarm for 1 AM because I wanted to reach the Rock of Ages saddle and then the Gladstone-Wilson saddle for star trails and sunrise. When my alarm went off at 1 AM, I got dressed and ready to go. I got out of my tent and looked up - the sky was full of clouds! Nooooo! I set the alarm for 3 AM and when I woke up again, it was raining. Eventually, we all agreed to cancel the Sunday climbs and head back to Denver. Tom's tire was still holding up, so we headed on out. Wetterhorn poked into view on the drive over Dallas Divide. 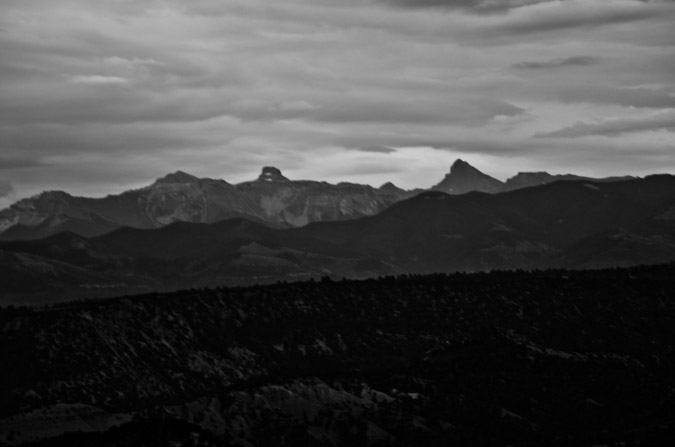
Sneffels was looking really awesome with the nasty weather in the area.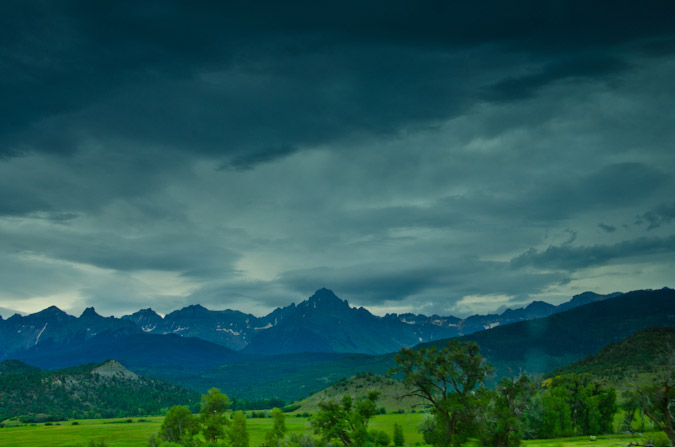
Shortly before reaching Ridgway, Tom's air pressure went down again and he replaced the hole with another repair kit. 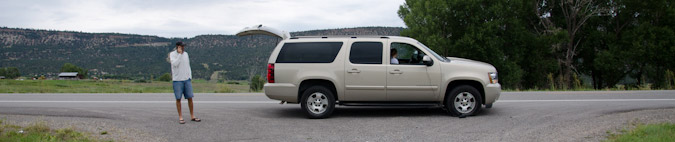
We once again found ourselves waiting for the air pressure to increase, so I took some photos of our group. Alli was in high spirits.
But Kara, our Lisa Loeb lookalike contest winner, was less than happy.
And then, the most amazing thing happened. While the tire was airing up, I noticed a beam of light hitting the mountains to the east. 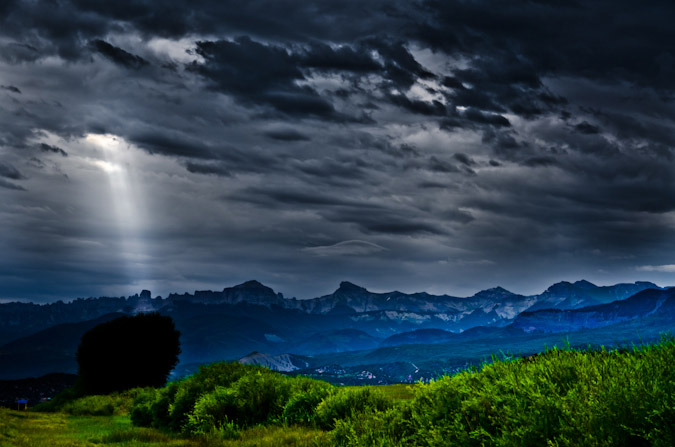
It was a good sign!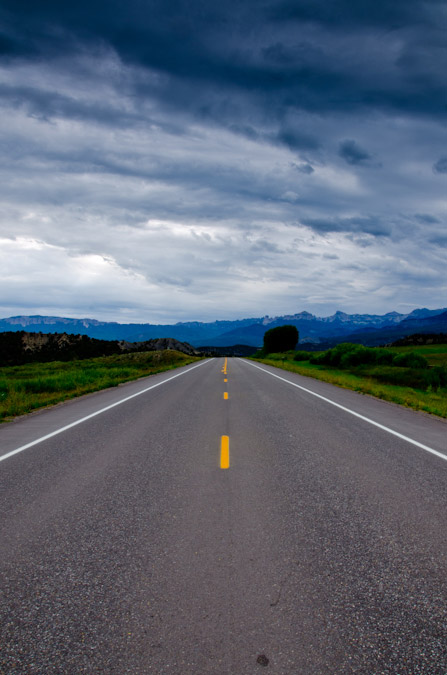
But alas, shortly after Ridgway, the tire failed again and we decided to replace it with the spare. Fortunately, the views of Sneffels and the thought of breakfast kept our spirits high!
We stopped just by County Rd. 4 for the tire swap. 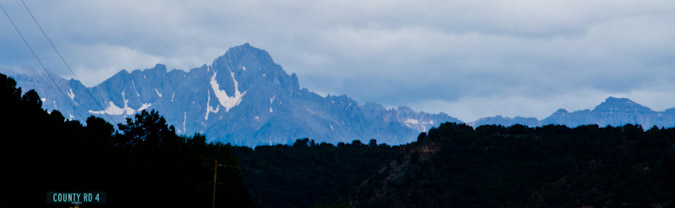
After switching out tires, we headed to Montrose and ate a glorious breakfast at Starvin' Arvins. The drive to Denver was uneventful.
It was a great weekend depsite some of our set-backs. I met some new people who were all really great. I hope to hike with all of them again!
At the time of this report after climbing Mt. Wilson, I am left with five of the ranked fifty-three 14ers: Mount Eolus, Windom Peak, Sunlight Peak, Maroon Peak and Pyramid Peak. I am on-track to finishing the 14ers this year, which is an amazing feeling!
Thanks for reading! Just a reminder - this site costs me time and money to maintain - if you find it useful, please consider supporting the site by remembering to use the affiliate links, especially if you purchase photography related gear from Adorama.
References:
"The San Juan Mountains: A Climbing and Hiking Guide" - Robert F. Rosebrough. 1986. Cordillera Press.
{fcomment}
Snowmass Mountain and Hagerman Peak - Magic in the Elk Mountains

Day 1: Drive to Lead King Basin and Backpack to Geneva Lake ~ 1,400 ft. elevation gain ~ 3 miles
Day 2: Snowmass Mountain via the West Ridge Route ~3,000 ft. elevation gain ~ 6 miles
Day 3: Hagerman Peak via the standard route (south ridge) ~3,000 ft. elevation gain ~ 6 miles
Snowmass Mountain and Hagerman Peak have sustained my attention for quite a few years. Ever since I first recall setting eyes on Snowmass Mountain from the summit of La Plata in 2005, I was in awe. The massive snow field that sits in the bowl that is Snowmass Mountain is simply breathtaking and totally recognizable from the summit of many mountains in Colorado. Here are a few examples of how easy Snowmass Mountain is to recognize, from various shots I’ve taken over the past few years of Snowmass Mountain from various summits:
From Huron Peak - June 2010:
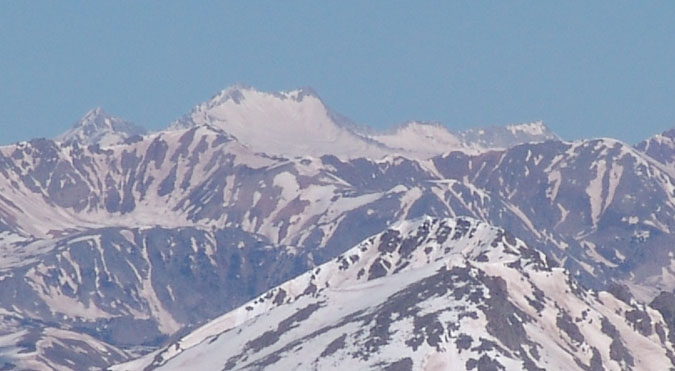
From La Plata Peak - July 2005:
From Mount Massive - October 2009:
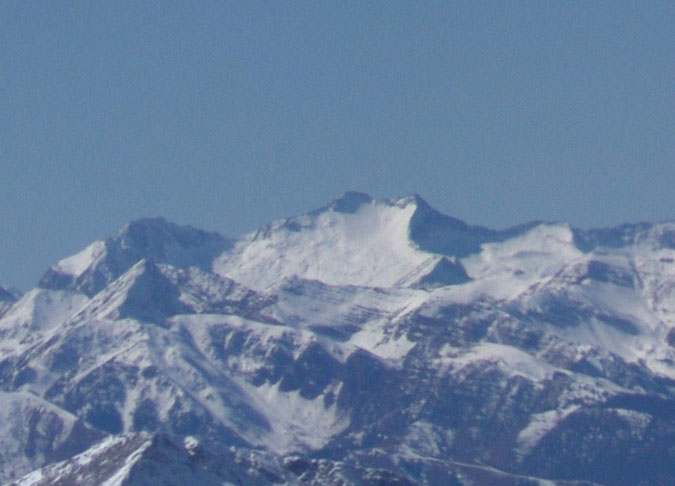
From Mount Elbert - August 2009:
Snowmass Mountain and Hagerman Peak have a very storied history and are deserving of a few paragraphs to paint those details:
Snowmass is the 31st highest mountain in Colorado and rises to 14,092 ft. and is the 4th highest in the Elk Mountains. Snowmass was named originally by the Hayden Survey of 1873 and was simply called “Snow Mass” because of the huge snow field beneath the summit. The Ute Indians called it “Cold Woman” because it was often believed to be the source of bad weather. Some pioneers called it White House Peak, but that name did not stick. 1 Interestingly enough, there is a restaurant in Carbondale that we ate at on the way home called White House Pizza – which was delicious by the way - I wonder if it is named after this historical fact.
Hagerman Peak is the 88th highest mountain in Colorado and rises to 13,841 ft. and is the 8th highest in the Elk Mountains. Hagerman Peak is named after the legendary Aspen, Colorado businessman and mountaineer Percy Hagerman, who was the first person to climb Maroon Peak in 1908 and the first person to climb Hagerman Peak as well. From Hagerman’s Book, “Notes on Mountaineering in the Elk Mountains of Colorado, 1908-1910,” Hagerman describes the area around Snowmass Mountain and Hagerman Peak: “These peaks are among the finest in the Rockies for a number of reasons. They have big streams and fine large lakes; they are rugged, steep and forbidding in appearance; some of them are richly colored; and finally, the upper stretches have not been scarred with mining claims.”2
Hagerman Peak is rarely climbed due to its remote location and difficulty (and because it is not a 14er). In fact, we saw only a handful of names on the summit register dating back to 2009 – many of which I did recognize (props to Ryan Kowalski for picking Hagerman as his 99th Centennial to climb – he eventually finished on Pikes Peak of all mountains).
Enough with the history – let’s get on with the trip report, starting with a TOPO map of our journey (click for a larger version):
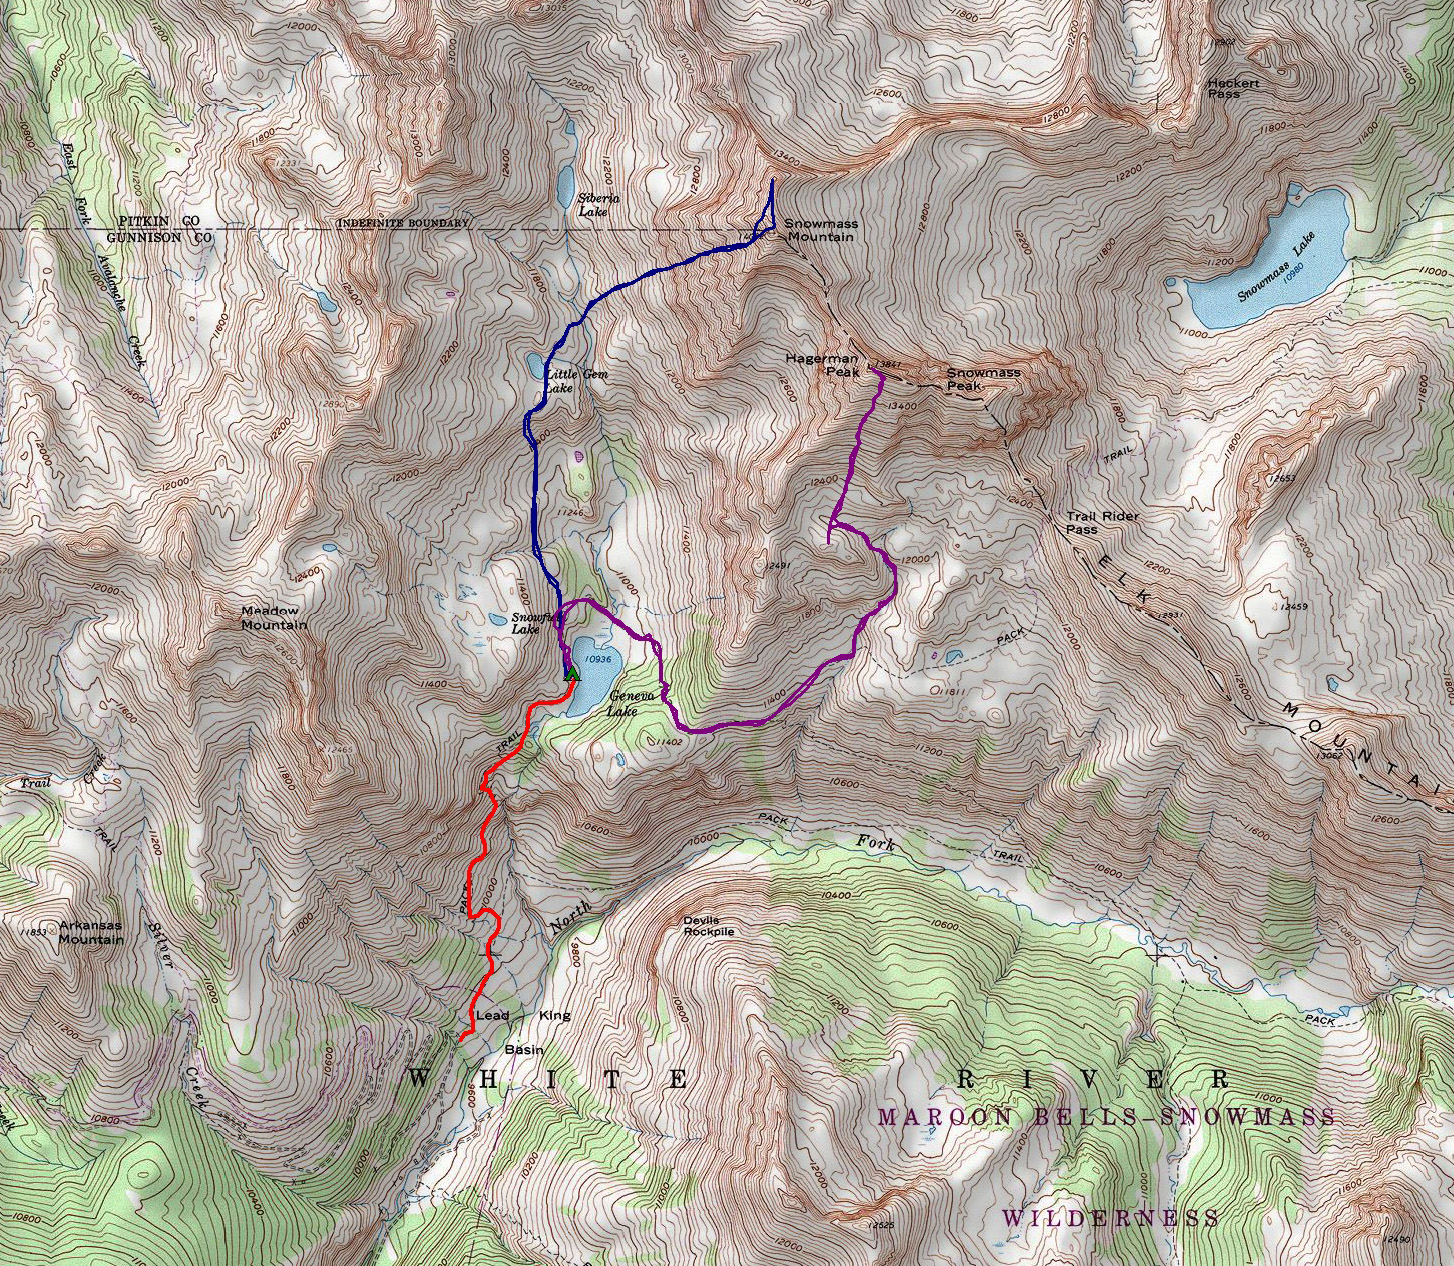
Day 1: Drive to Lead King Basin and Backpack up to Geneva Lake
I was desperate. Desperate for the mountains, desperate for a climb, desperate for a climbing partner. After my miserable failure on Snowmass in June, I really wanted to get vengeance. If I were to finish the 14ers this year, that meant knocking out either Snowmass Mountain or Wilson and El Diente. Due to the insane rain that the Telluride area has received as of late, and thanks to a stern warning from a friend from 14ers.com, Jim (dancesatmoonrise) about the nasty conditions of the Wilsons after a lot of rain, I opted not to head down to the Wilsons. Instead, I contacted another friend, Ryan (monster5) to see how the conditions on Snowmass’ west ridge route were. Ryan was involved in a rescue attempt the prior weekend on Snowmass for 25-year-old Sean Wylam, another 14ers.com member. Sean eventually succumbed to his injuries and died, which was a real blow to the 14er climbing community. The thought of Sean’s death on Snowmass did damper my enthusiasm to climb it; however, I was determined not to let that stop me. Additionally, I chose another, more technically challenging route, but one that did not involve the use of crampons or snow. Lastly, I knew that this route would also give me good access to Hagerman Peak, which is another mountain in the highest 100. Bonus! I searched all week long for a partner. I knew that one of my regular partners, Regina, would not be up for the challenge (too technical), and I knew my other go-to partner, Ethan, would not be able to do a multi-day trip. Another friend, Micah (mountainmicah83) was already occupied for the weekend as well.
Enter Sarah Musick, friend, musician (no joke - that is really her last name – check her out on YouTube), ball-smasher (ask me later about that one) and last-minute climbing partner hero of the year! Here's Sarah on YouTube:
Sarah was able to get the green light at the final hour to join me on my trip to Snowmass – and I was totally excited! I really was not sure if I would be able to go without a partner because my wife might have just taken my car keys away if I didn’t have a partner lined up. After watching Sarah perform at Stargazers Theatre on Thursday night, I was able to pack for the trip. I had Friday off of work and was ready to rock. I picked Sarah up at her house at 10 AM and we departed for Carbondale. We stopped in at a burger joint in Carbondale and headed for Marble. The drive up from Marble was interesting. I was definitely glad that I had my lifted Jeep Grand Cherokee. I would rate the road a 6/10 on the difficulty scale for off-roading, as it did provide some rocky sections and a pretty formidable creek crossing. I think most stock SUVs could handle the road with caution. We found what we thought was the trailhead, but were not sure since it said “Silver Creek Trail.” We confirmed that it was not the right trail and kept going up the road another 2 miles up. All-in-all, the road into Lead King Basin is a good 15 miles of off-road adventure. I have never seen an area so full of wildflowers in my entire life! Wildflowers were everywhere, and the Lead King Basin offered spectacular views in almost every direction, all filled with flowers. Especially amazing were the views of Snowmass Mountain and Hagerman Peak. A huge waterfall crashes down from the Geneva Lake Basin into the Lead King Basin beneath the mountains.
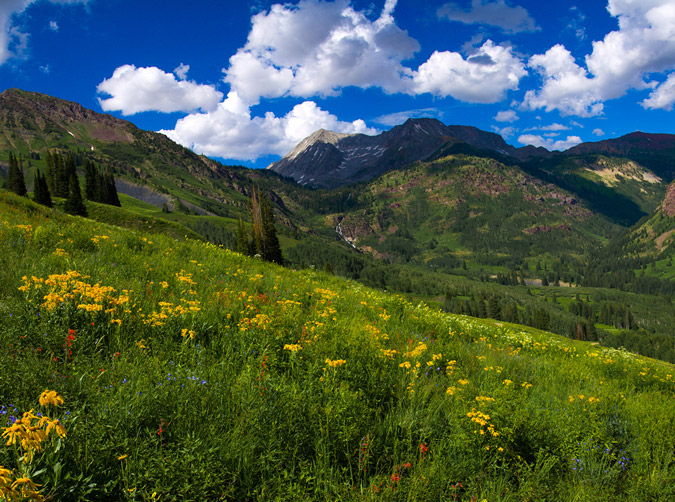
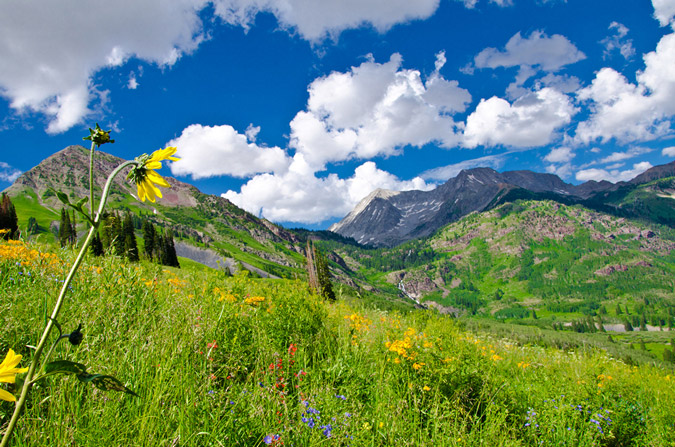
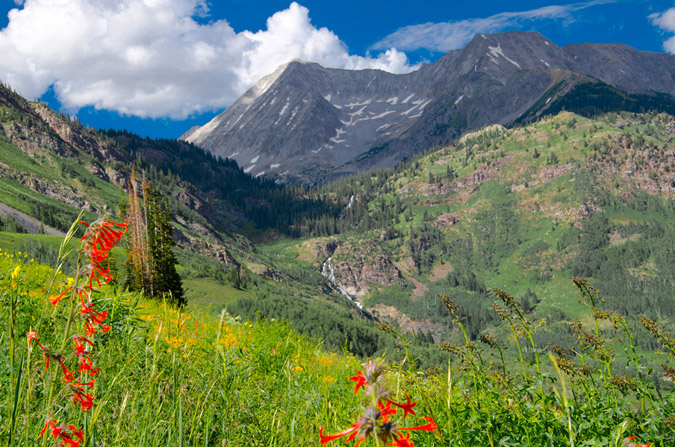
Wildflowers galore in Lead King Basin with Snowmass Mountain (left) and Hagerman Peak (right) in the background. Our route for Snowmass Mountain would take us right up that steep left side.
My Jeep’s temp gauges were all going into the red and I was perplexed. Well, it turned out that I had burned / leaked all of my coolant. No big deal, I had extra in the back. We parked at the real trailhead, which was totally obvious and labeled as the Geneva Lake trail. We headed up the trail at about 5 PM.
Some of the wildflowers that we saw on the trail were actually taller than me! The Wilderness Designation for this area is completely appropriate, that was obvious.
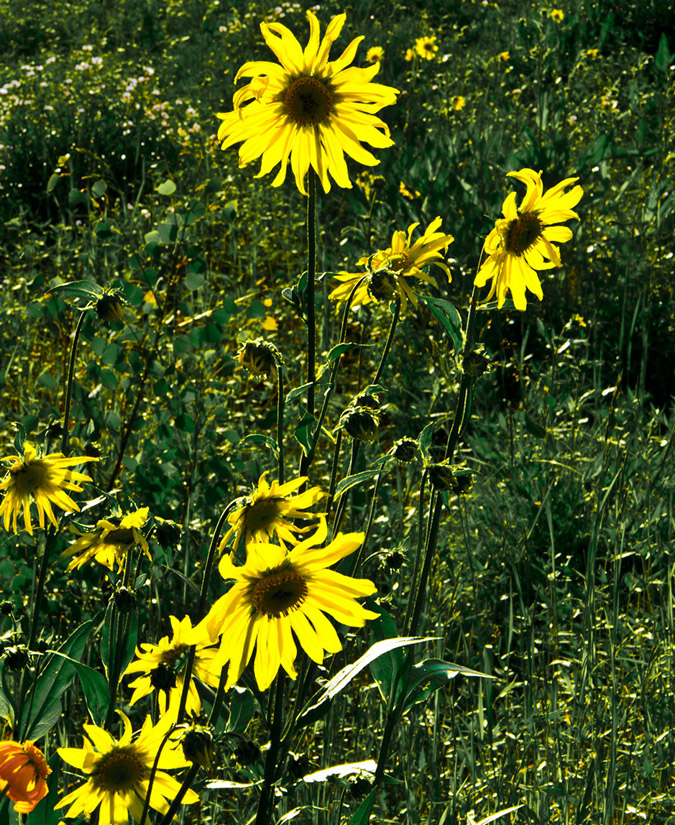
Along the way, there was an incredible opportunity to take photos of the wildflowers. We found ourselves standing smack dab in the middle of a field the size of three football fields, all filled with huge wildflowers. It was incredible. I was thankful that I had packed in my tripod (thanks for the advice Kane Englebert).
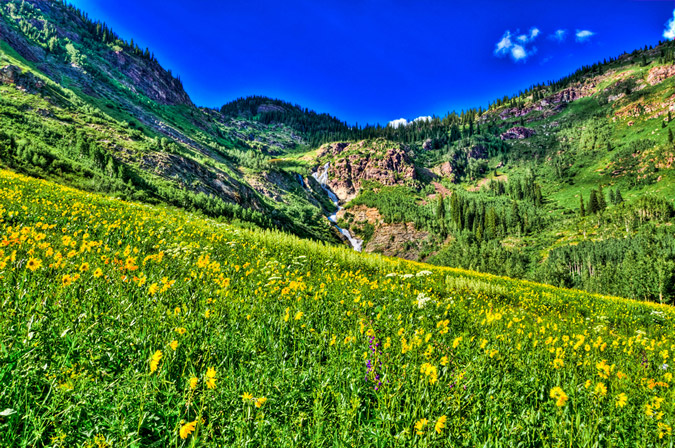
I brought the tripod for a couple of reasons. The first reason was that HDR photos are much better with a tripod since the tripod reduces and prevents movement of the camera, making the HDR photos easier to combine. The second reason is to do better panoramic photos.
The use of the tripod for this field of wildflowers proved great and I put together an HDR version and a non-HDR version for you to see the difference. By mousing over the photo, you can see the HDR version. You can really see how the HDR processing allows for a richer texture and you can see how the dynamic range of the darks and shadows are brought forward.
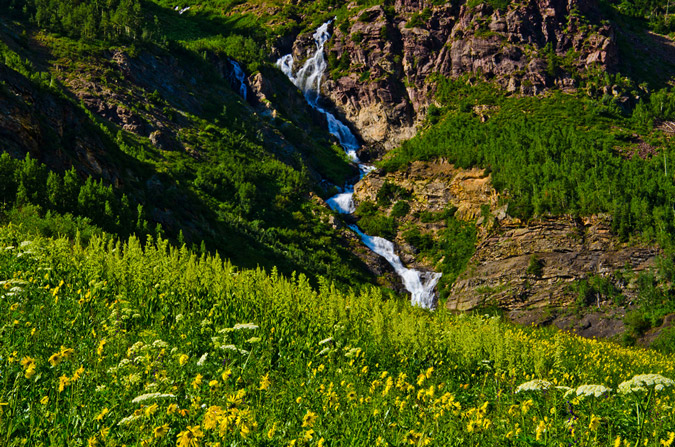
What was even more exciting was that the Maroon Bells peak through on the way up the trail to Geneva Lake as well. Thanks to the rift caused by the Fravert Basin, views of Maroon Peak were spectacular from the trail.
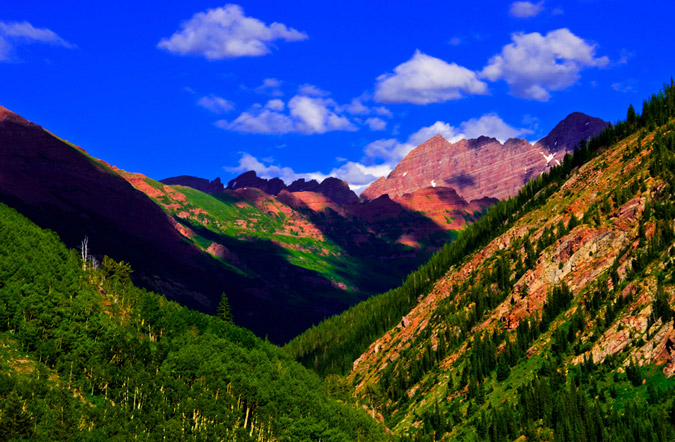
The wildflowers continued as we climbed up towards Geneva Lake. It was madness, truly.
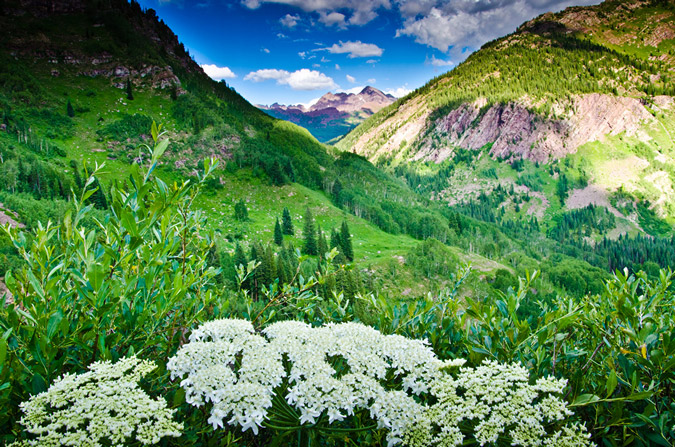
This was the first time I had seen the Maroon Bells this close up with a decent camera and I was not going to let the opportunity go to waste!
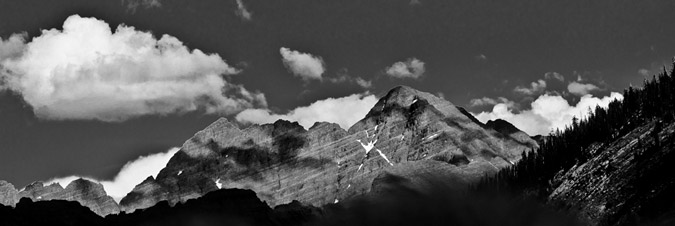
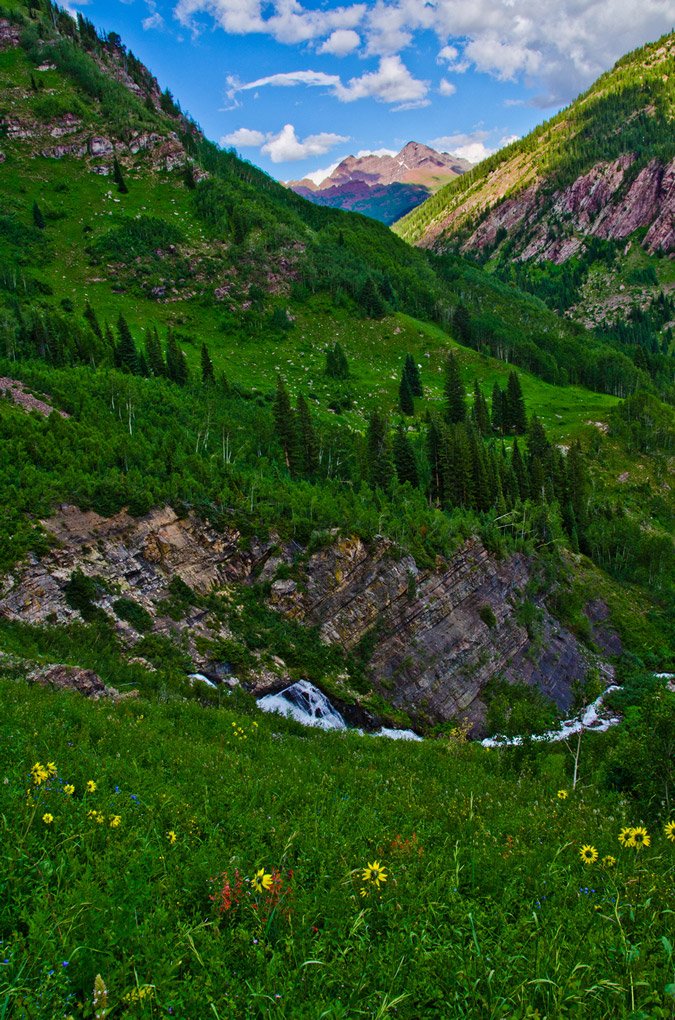
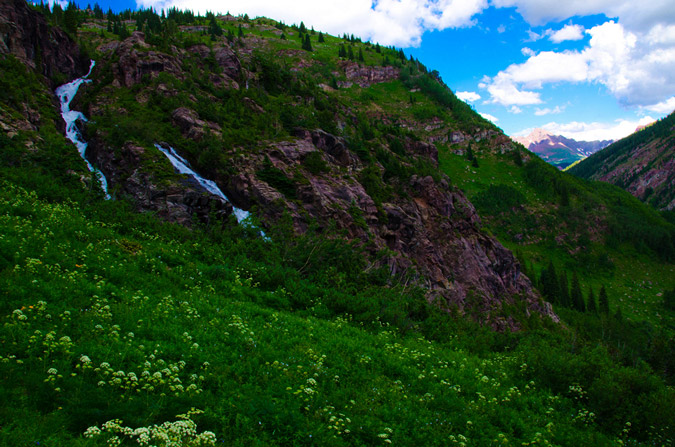
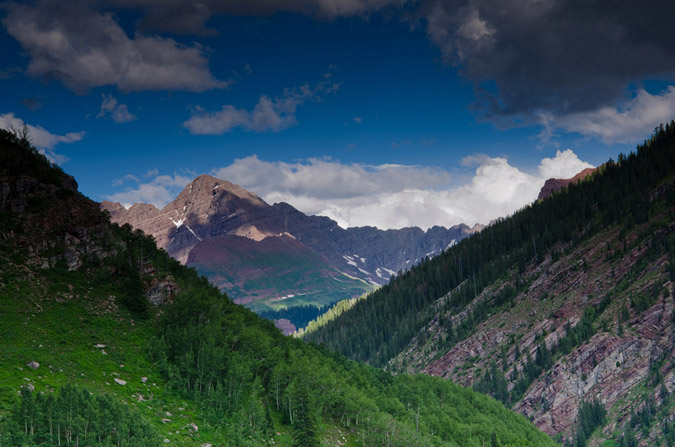
We reached Geneva Lake in quick order (about 2 hours) and found one of the six designated campsites near the lake. We opted to camp in site #2 even though we later found site #4 and #5 to be the superior sites. Site #2 sat on a large hill above the lake’s western shores and was right off of the trail. It was highly impacted, and offered several trails down to the lake for water fetching purposes. We found it to be quite a nice site. Camping at sites that are not designated for camping is prohibited at the lake; however, we noticed that it really did not deter others throughout the weekend from making sites of their own. Tisk Tisk!
After we got all set-up, I decided to go check out the lake and stumbled upon a huge waterfall near the mouth of the lake’s south shores. The waterfall was really rushing quickly and difficult to get down to, but I managed to get my tripod and camera into place for some fun shots of the water.
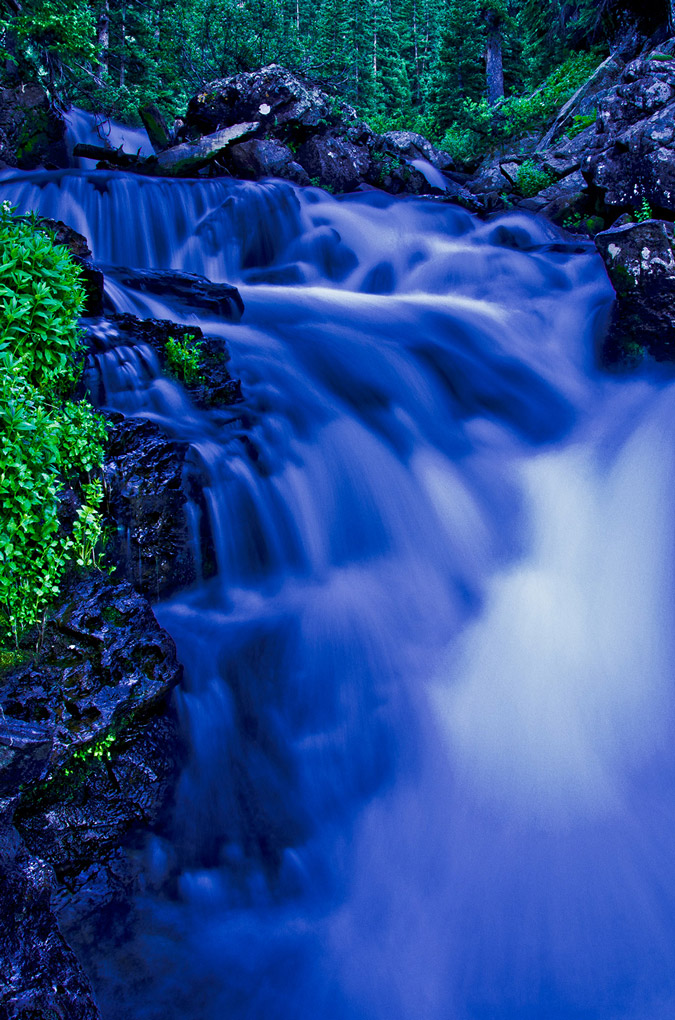
Next, my attention was on getting set-up for the sunset and for star trails photography, which I was pretty excited for. I set-up my tripod on the shores of the Geneva Lake and went to work.
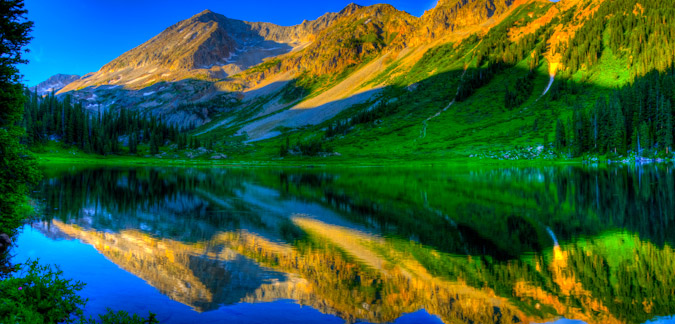
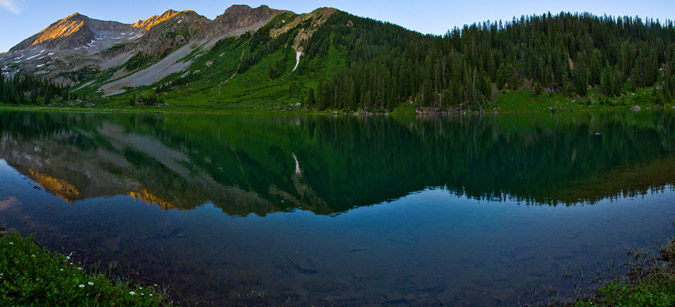
I was so busy checking out the lake that I almost missed an opportunity to catch the last of the sun's light on some clouds over the lake. I think if I were to take this shot 3 minutes earlier, the clouds would have been even more vibrant. Oh well!
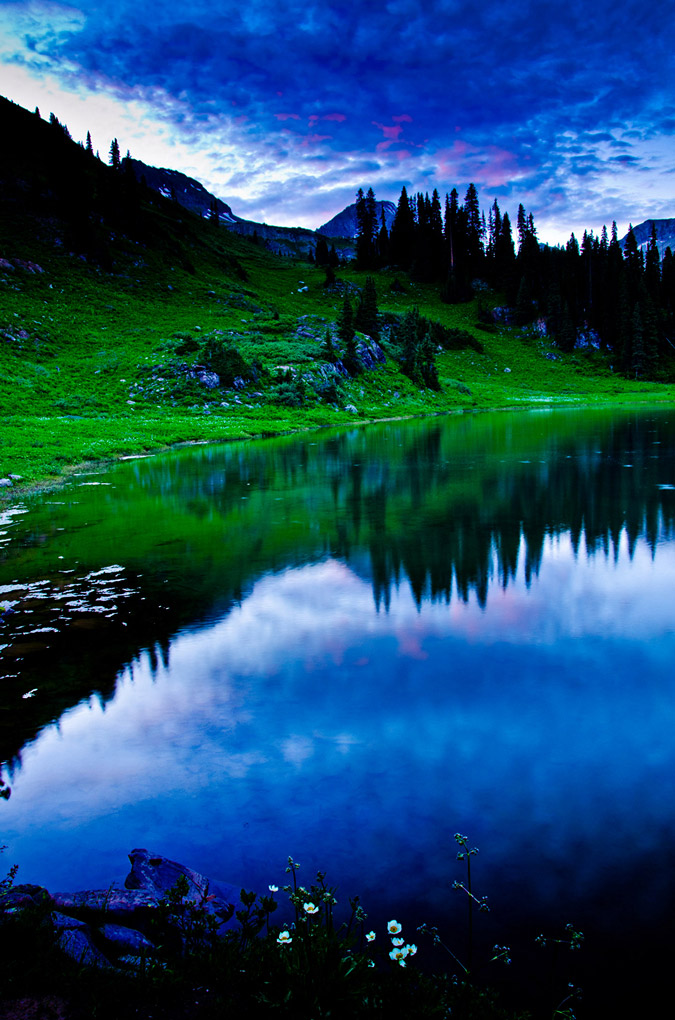
For this trip's star trails photo, I decided to do something a little different based on some techniques I've been reading about. Instead of just doing the night sky, I wanted the scene to be a bit more interesting this time. I decided to start the process earlier and take it deeper into the night, so I set-up before the sunlight had totally faded and started - ending after an hour and a half of photos. I opted for an f-stop of 5.6 instead of 3.5 (to allow for a slightly better depth of field) and I stuck with 30 second exposures. All-in-all, this photo is a compilation of 115 photos. The North Star is just out of frame on the top-left.
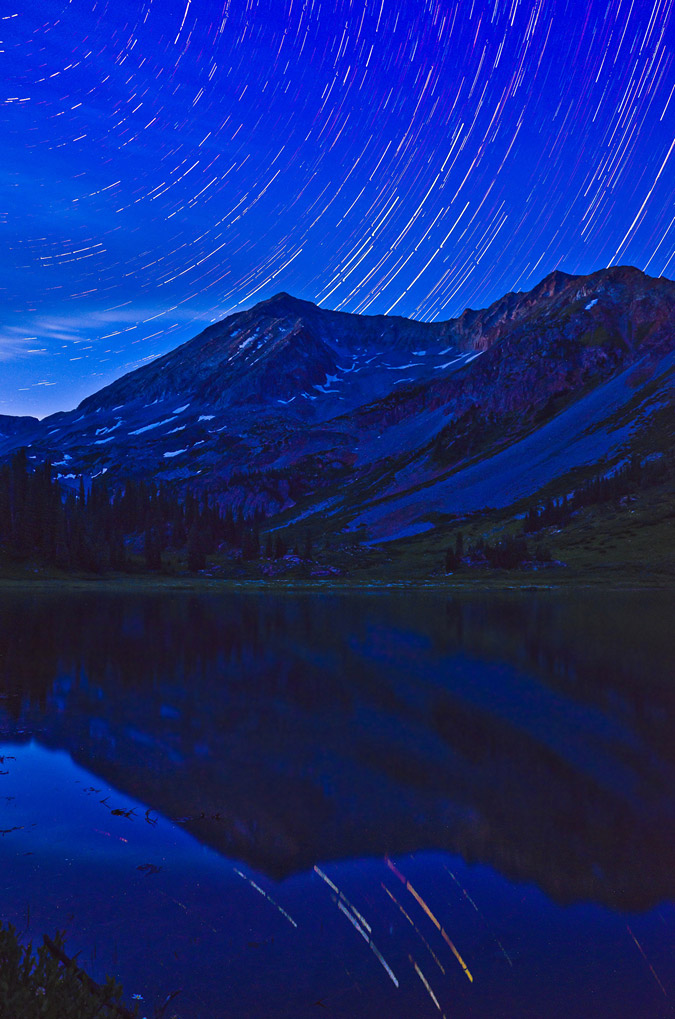
I really loved how the stars reflected in the lake too!
After nearly falling asleep while sitting next to my tripod in the dark, I decided it was time to hit the sack. Knowing that we were entering dangerous and unknown territory to ascend Snowmass Mountain's west ridge, we opted for a slightly later start, but not too late so we could be down before storms. Before our 3:30 AM and 4:00 start came, we were both awakened by a really pissed off coyote across the lake from us. That guy was howling and barking for a good 30 minutes and would have startled anyone, I don't care what you say!
Day 2: Snowmass Mountain via the West Ridge Route
Hiking in the dark is always interesting, especially when you don't know where you're going. We had the description from 14ers.com in print and on my Android phone 14ers.com app (thanks Bill), and headlamps with fresh batteries. We were able to find our way pretty easily though, and before we knew it we were heading up the insanely steep slopes of Snowmass' west ridge. The trail to this point had been very easy to follow except for a few spots and the route finding had begun since there was no trail after we crossed over creek that feeds Geneva Lake coming down from Siberia Lake. It was all scree, boulders and dirt from here on out. I made a quip to Sarah: "Welcome to the next three hours of your life!" We both laughed and continued up to a flatter section that was clearly perfect for a tripod. Since the sunlight was getting a bit better, I decided it was prime time to set-up for some HDR panoramic photography. The clouds and sky were an orange-pink-purple color to the south and west over the Raggeds Wilderness Area and Treasure Mountain. Additionally, Little Gem Lake was barely in view, which we had passed on the way up. Lastly, "Siberia Peak," a quite prominent and impressive mountain connected via a ridge with Capitol Peak was in the right 1/3 of the frame. Hauling a tripod up the side of a mountain is a pain in the butt, no question about it; however, the rewards are well worth it. Click on the photo for a much larger version.
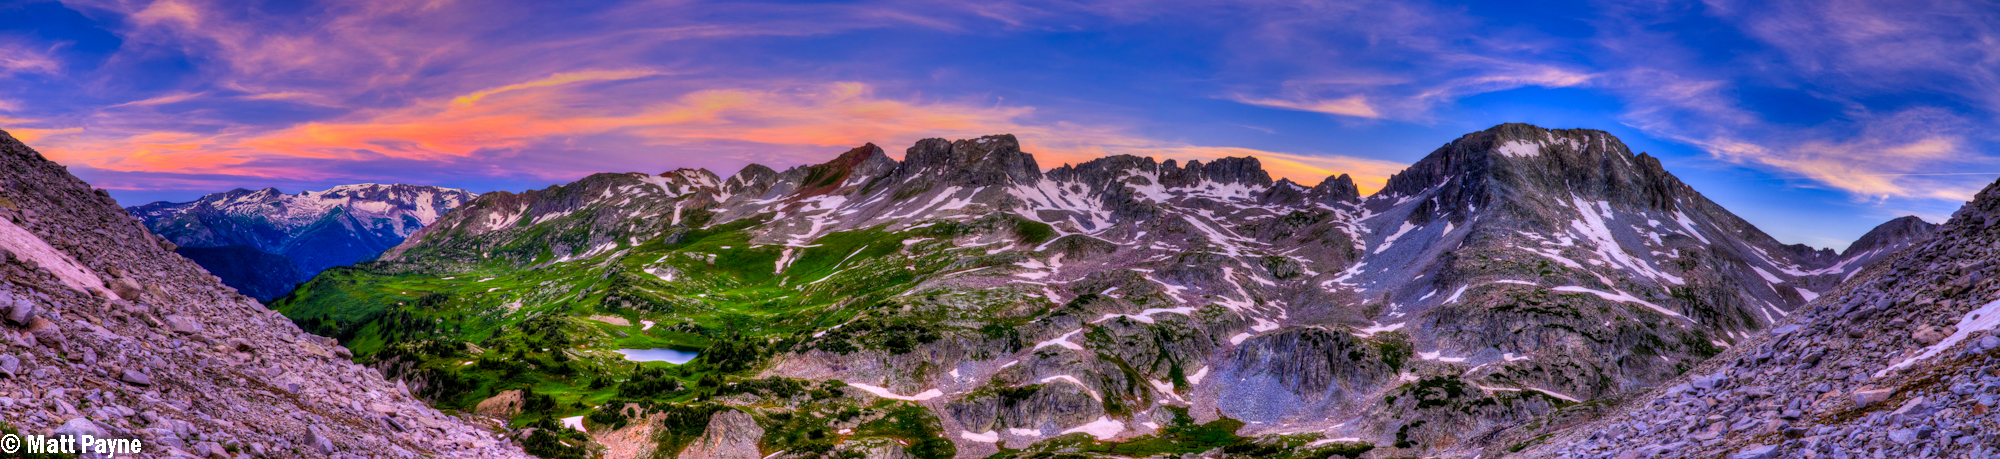
We hung out in the cold for a bit longer, allowing the sun to just paint the tops of "Siberia Peak." You can really see the difference between HDR and non-HDR in the below photo (non-HDR) and the above photo (HDR).

I packed away my tripod and woke Sarah up and defrosted her (just kidding on both accounts). We headed up the side of Snowmass and located the obviously correct gully that was full of vegetation at its base. The climbing from here on out was quite enjoyable, despite what I had read about the route. You could choose between loose dirt and scree (great for coming down, not so much going up) or huge boulders and class 3/4 scrambling. We opted for the fun scrambling and it was one of the most fun routes I've been on. Sarah was loving the terrain too, which was a relief since you never know if a new climbing partner will like this sort of climbing or not. It takes a different breed to enjoy scrambling on steep boulders.
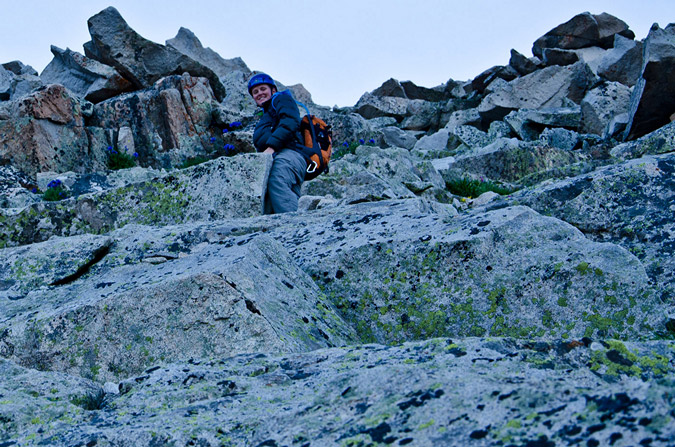
Sarah and I also have another thing in common - we both love taking pictures of wildflowers. She recently just gave her partner one of the coolest birthday presents there is - a bunch of framed photos of wildflowers that her partner had taken on 14er hikes.
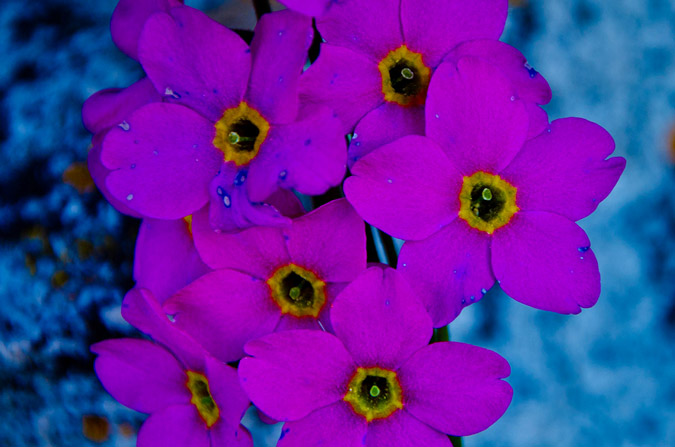
As we climbed, the views became progressively better. Finally, Geneva Lake came into view for the first time and Sarah and I stopped to admire it, as seen in the below panoramic which includes Geneva Lake, Little Gem Lake and Sarah. Sarah (and anyone else) - click to see a much bigger version!
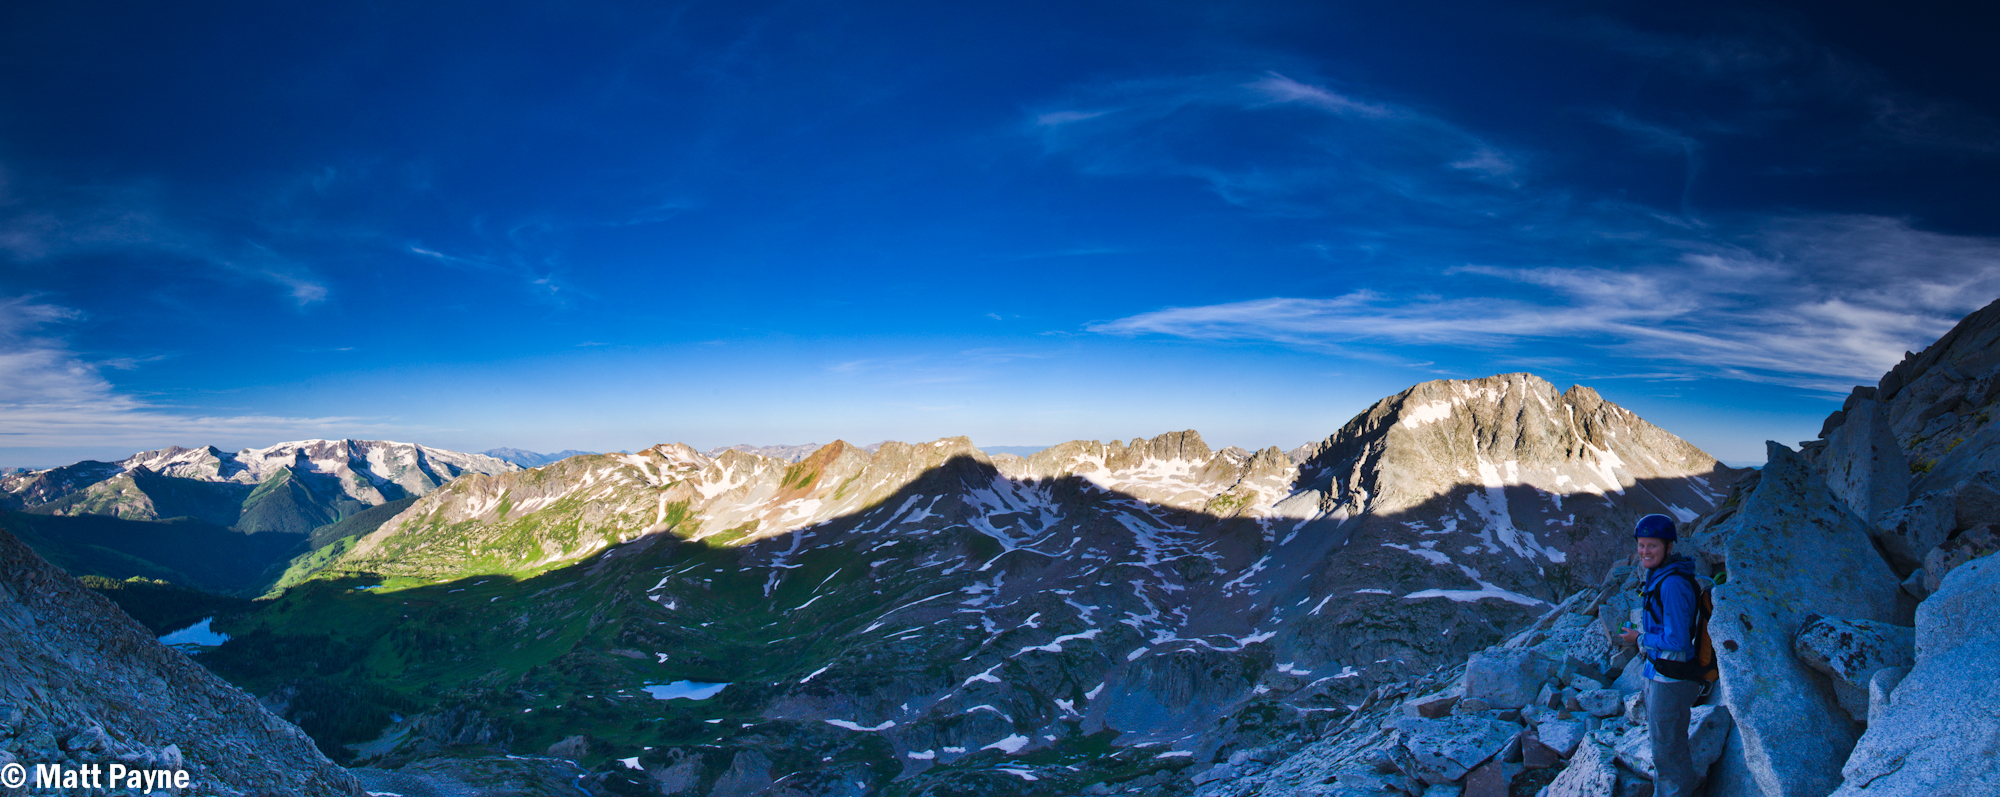
We were both just loving the scrambling!
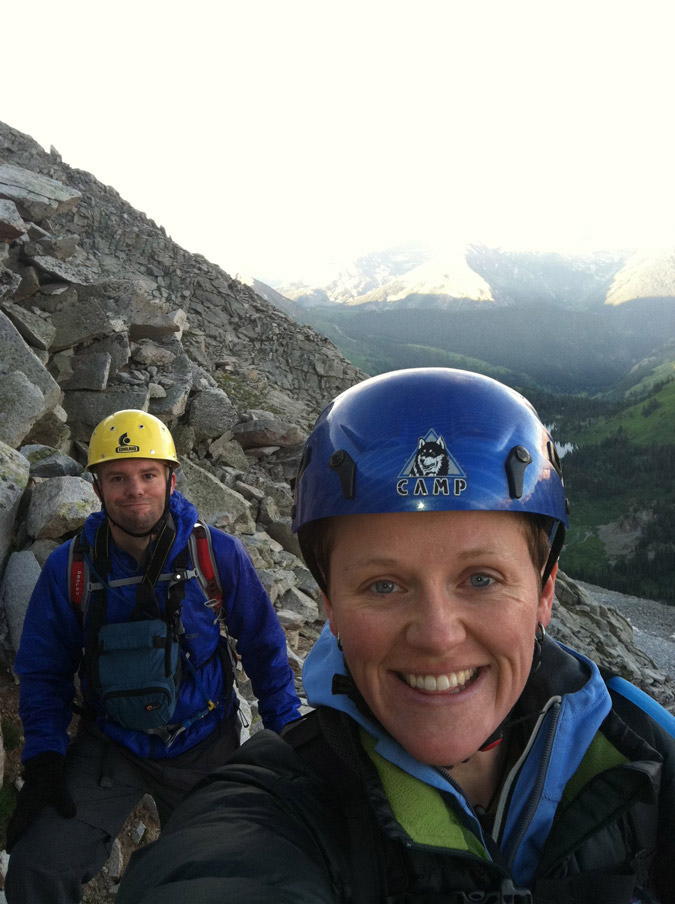
We kept climbing up, opting to stay close to the tops of the higher ridge that was on the left side of the gully. Sarah was able to document my climb up.
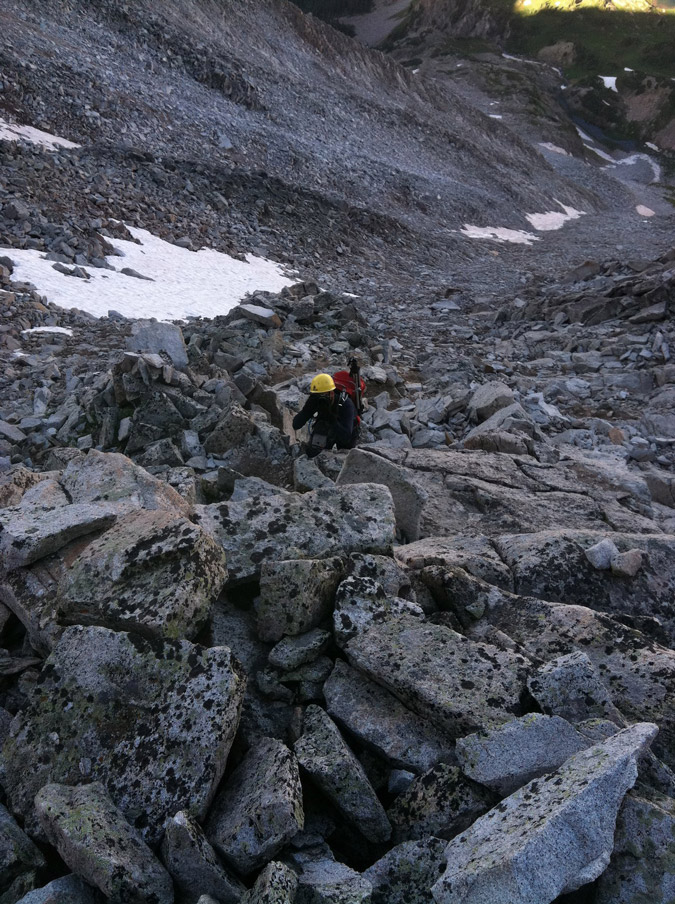 |
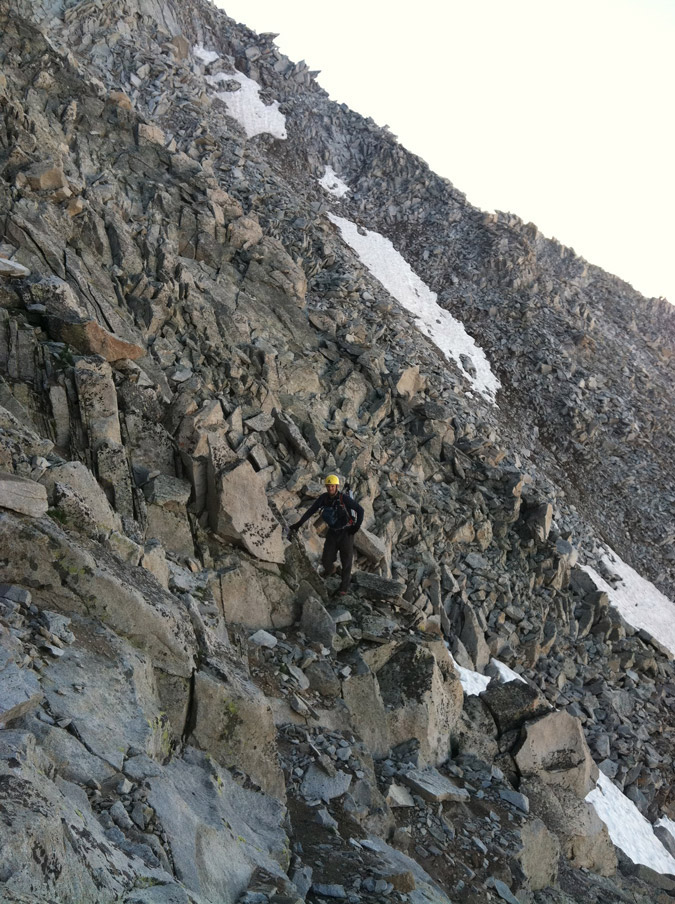 |
And of course, I was able to photograph her photographing me - man we are nerds!
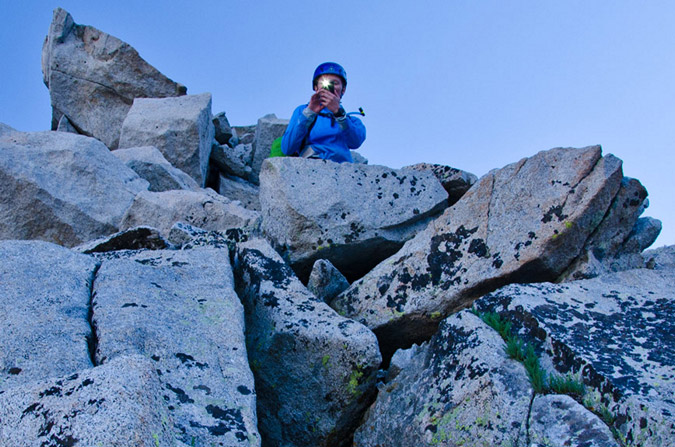
The rock was more solid than advertised, but we were very careful to test every hold and every step. Every once in awhile we were surprised by a loose rock or two, but so far, nothing had really warranted the dangerous warnings that I had read about on numerous sites and trip reports.
Staying near the ridge's top proved to be a great strategy because it offered us some really early views of the magnificent Capitol Peak, which I climbed last year and subsequently won a copy of Gerry Roach's 14ers guidebook through contest put on by his publisher for the efforts I put into my trip report. Not to digress, but I am really glad that people read, enjoy and use these reports, considering the fact that a report such as this one takes me roughly 16 hours of work between photo editing and writing.
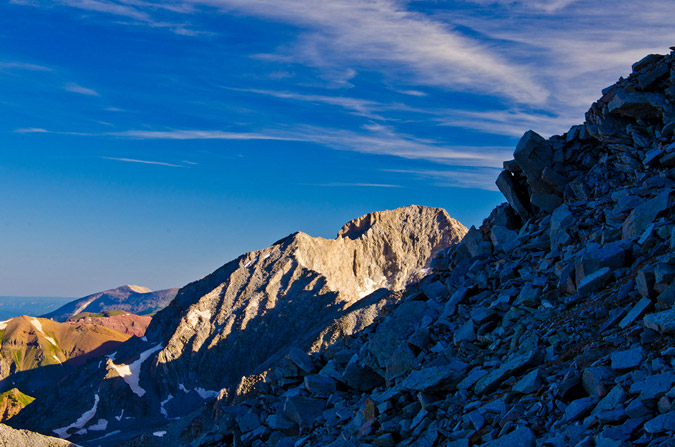
Both Sarah and I were excited to see Capitol Peak... maybe me more than her - what do you think?
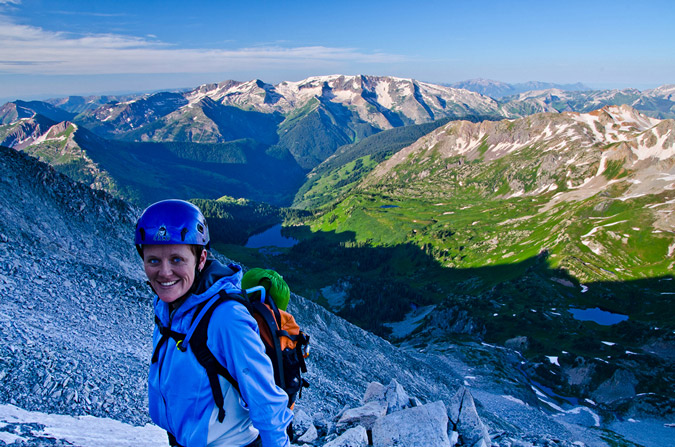
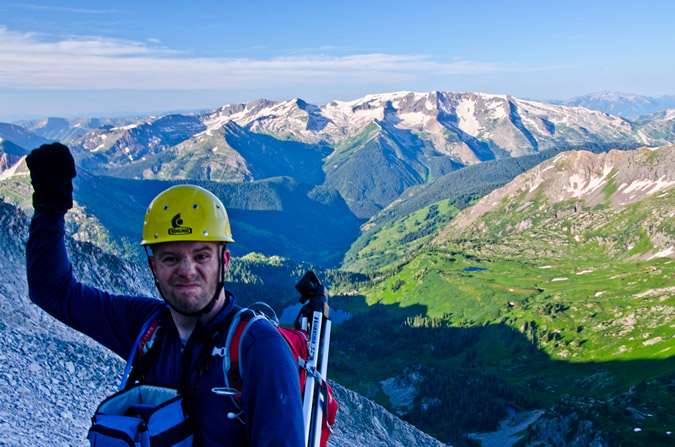
Pierre Lakes came into view as well, sitting below Capitol Peak.
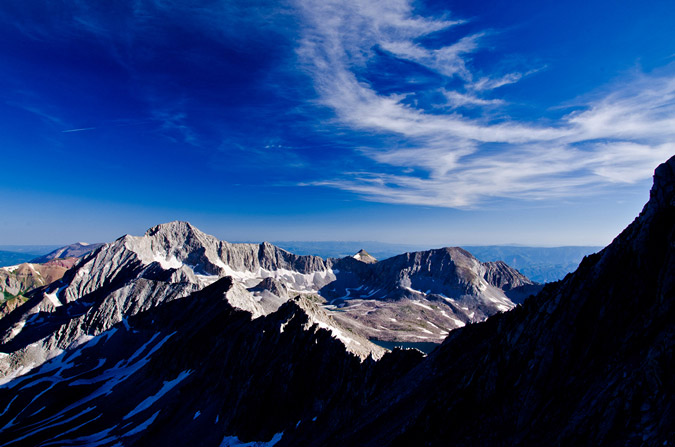
Sarah caught me gazing at Capitol:
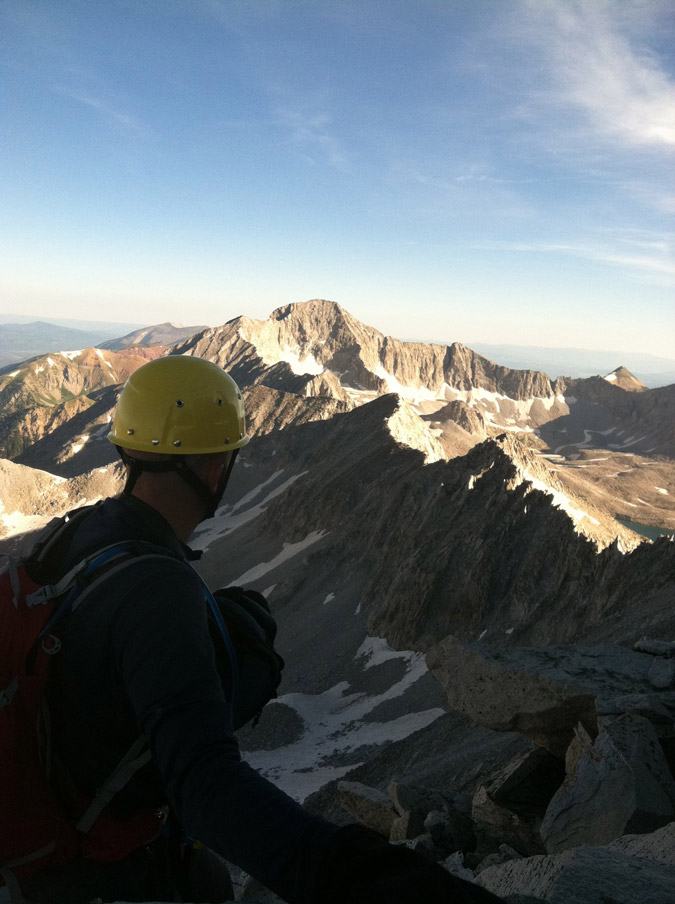
I felt this was also a great time to stop for a minute to get a really awesome panoramic. The basin below had really opened up quite a bit and the contrast from the low sun had made for some nice photo conditions. Click on the photo for a much larger version!
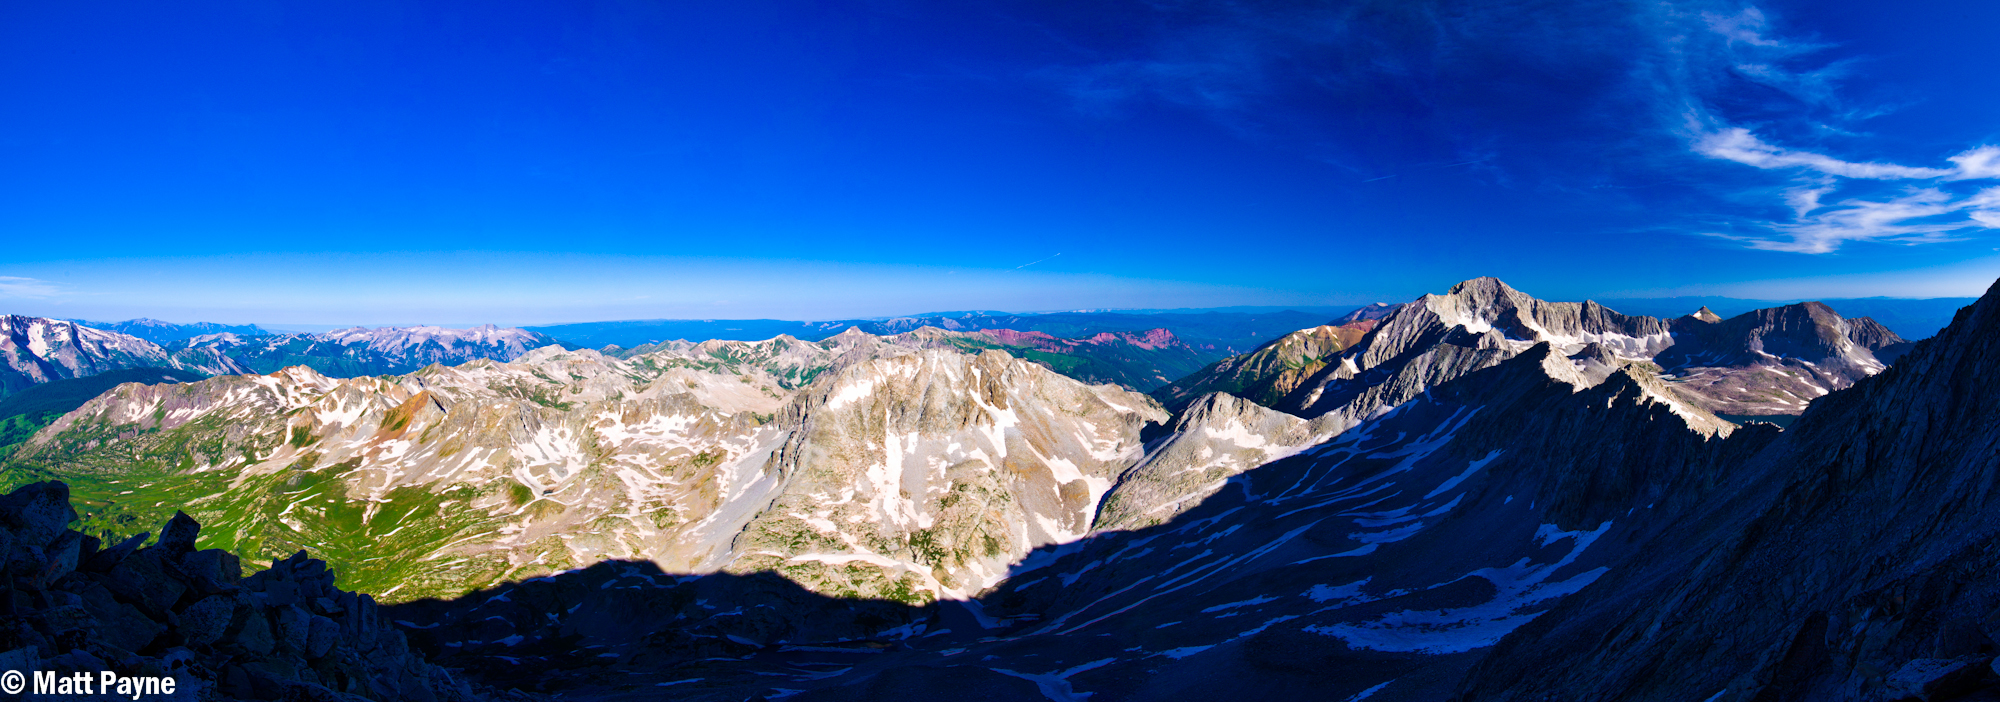
Continuing up the ridge line felt like the best way to go, despite the fact that we often ran into some obstacles that were challenging. Someone else must have agreed since we found a really groovy cairn up there too.
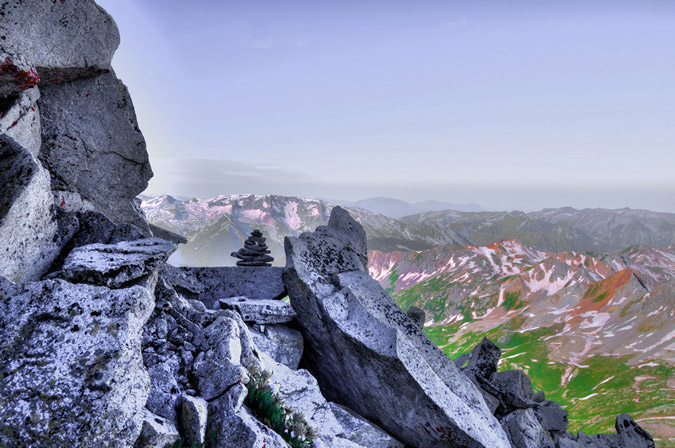
We finally crested the ridge and the first views of North Snowmass came into view. North Snowmass is one of two points that makes up Snowmass Mountain and is not ranked, but is 20 ft. above 14,000 ft. and has a whopping 40 ft. of prominence.
Sarah and I decided that on our way back we would for sure venture over to it, but for now we would concentrate on getting to the real summit of Snowmass Mountain. Here's a view of North Snowmass from the top of the ridge with Capitol Peak rising in a quite intimidating fashion to the north of the connecting ridge between North Snowmass and Capitol Peak.
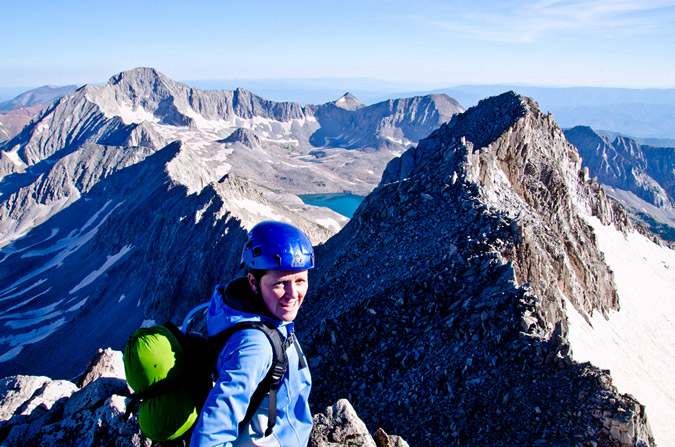
From here, we opted to stay high on the ridge, which I affectionately nicknamed "Exposure-Palooza" after the famous rock band tour of the same namesake. The exposure from this ridge was fabulous. I was totally loving it despite Sarah telling me I was out of my mind. It was perfect exposure - totally manageable on one side (west) and totally freakishly nuts on the other (east). Sarah was a trooper though and kept up with me through the exposure-filled ridge scramble.
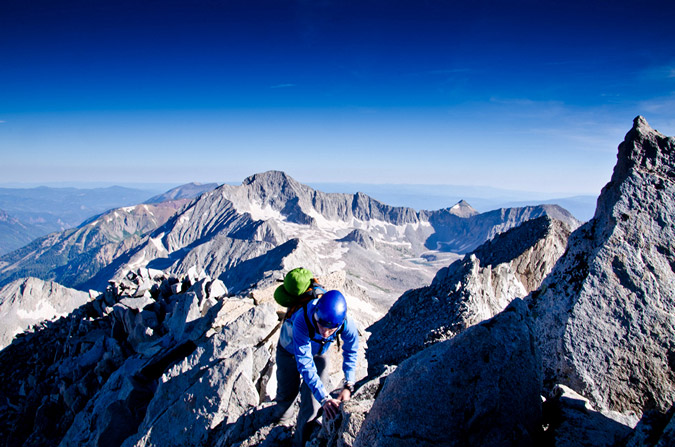
I think the exposure had grown on Sarah too, and before long I caught her flirting with it.
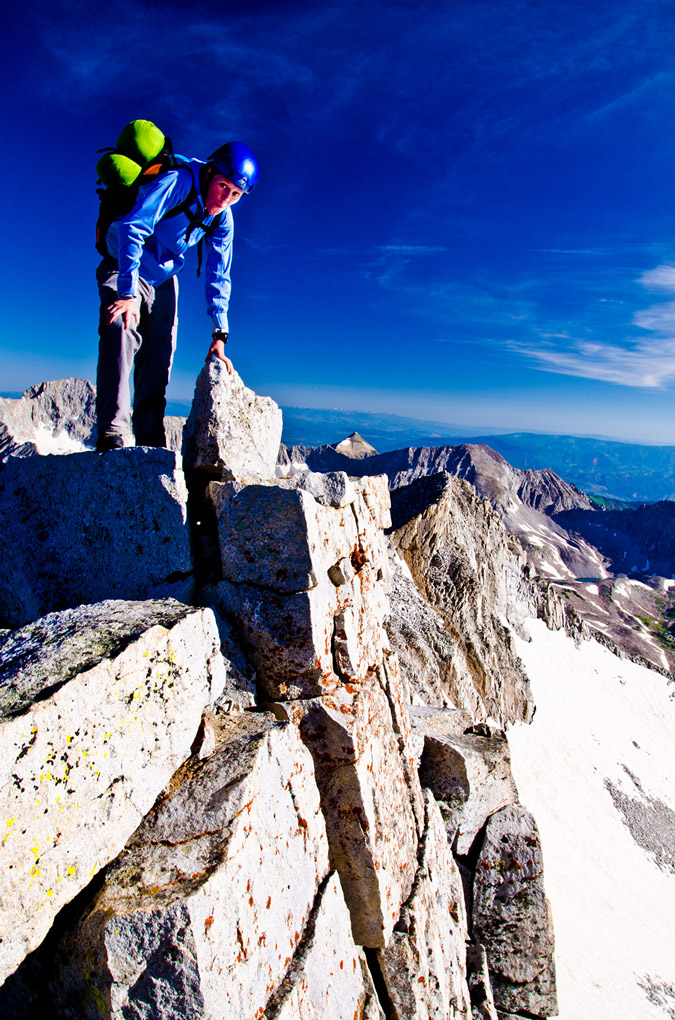
We reached the summit just shy of 9 AM, which meant we had made excellent time. There was still no sign of storms and we had the summit to ourselves. We could see some people below starting to make their way up, so I knew my time was limited to get a panoramic photo with my tripod. I set the tripod up right on the summit block, with one of the legs about 6 inches away from the greatly exposed face. This made for some adventurous maneuvering around the tripod as I shot. Sarah thought for sure I would step off the side and die. I'll admit, it was a bit surreal operating a tripod on the summit of Snowmass!
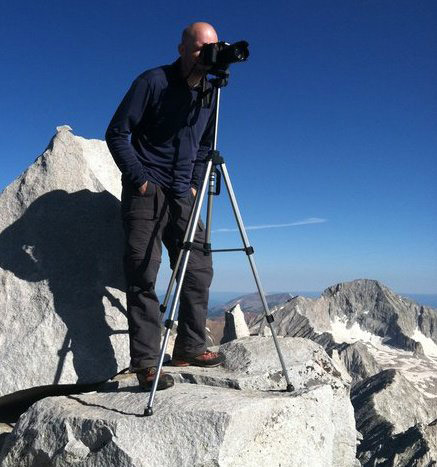
I tried to do some HDR work, but I don't think the lighting was best for it, so I opted to post-process a non-HDR version and an HDR version.

260 Degree Panoramic from Snowmass Mountain - at left - Capitol Peak - center - Snowmass Lake - right - Hagerman Peak
 360 Degree HDR Panoramic from Snowmass Mountain
This was Sarah's 15th 14er and she was pretty excited. As for me - it was #48. Another advantage of having a tripod on the summit - it makes for great summit portrait shots! Hooray for self-timers and tripods!
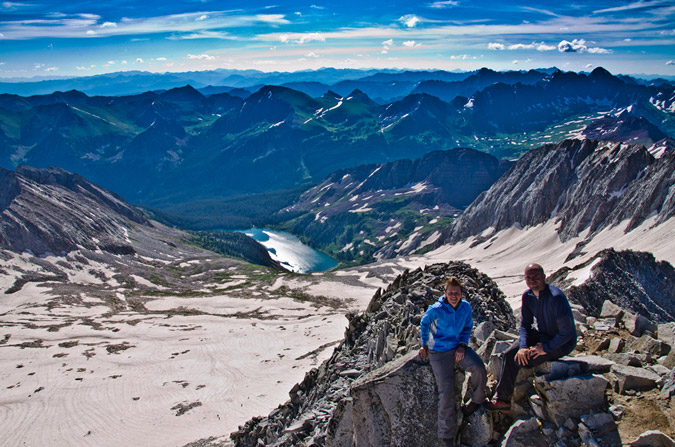
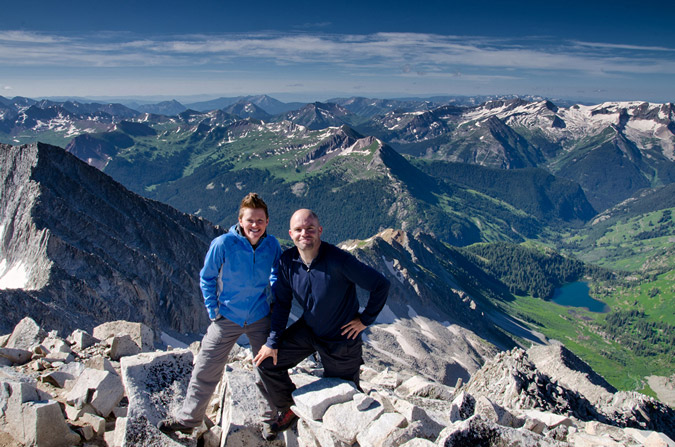
Eventually another climber (a 14ers.com member but I can't recall his user name) joined us on the summit from the standard route and took notice of the crazy guy behind the camera on a tripod. It was a pretty funny conversation:
Me: "How's it going!?"
Him: "Great man, you?"
Me: "Could not be better!"
Him: "What's your name?"
Me: "Matt."
Him: "Matt Payne?"
Me: "Yep!"
Him: "Oh cool - I love your pictures!"
Me: "Awesome - thanks man!"
He must have figured that I was the only person crazy enough to take a tripod up Snowmass Mountain. Haha. Either way, it was quite flattering and I really thought it was awesome that he knew who I was.
He reported to us that he wore only microspikes up the huge snowfield and that it was a challenge but doable. He had wished he had crampons but it seems they are not necessary at this time. Good to know for other climbers doing the standard route. He departed after only a few minutes and Sarah and I watched as another climber came up the snowfield, except this time, this climber went all the way up the basin and ascended North Snowmass via a very steep and sketchy rock face.
My attention was kept by the powerful Maroon Bells to the east of us, and so I decided to try my hand at a zoomed-in panoramic at 105mm. You can also click on the photo to view a larger version of it on Flickr in a new window - feel free to comment!
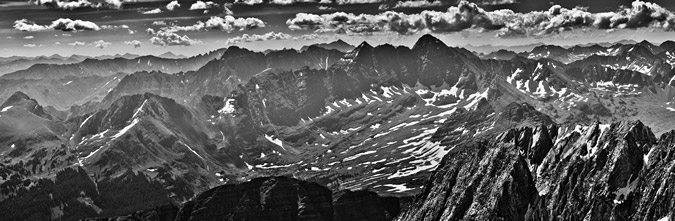
Sarah and I figured we had spent enough time on top - so I took some shots of the USGS marker. The second one has some split toning applied to it in Adobe Lightroom.
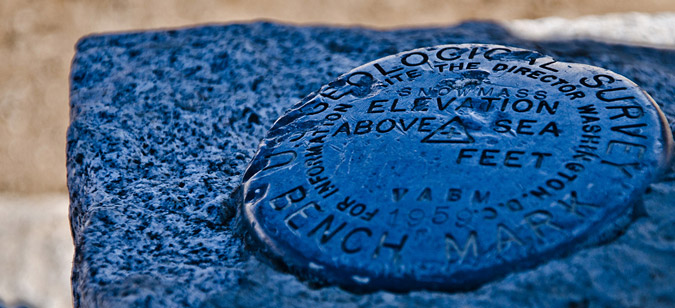
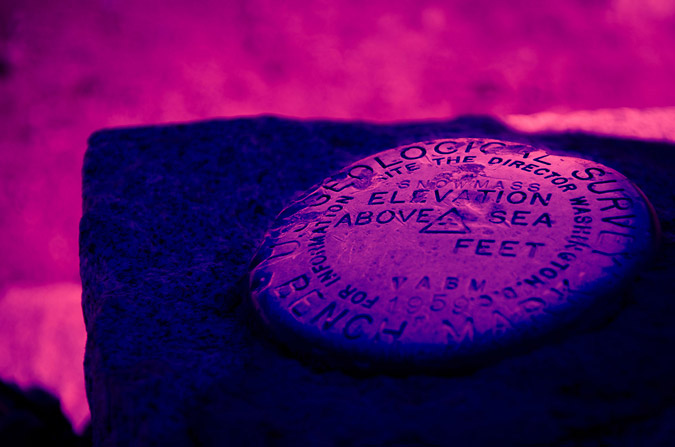
Sarah packed up and re-attached her helmet to her dome. She asked me one last time if we should do the traverse to Hagerman Peak from here. I explained that I had read several reports of that traverse and that it did not sound like something we would want to do. Take a look for yourself, or read lordhelmut's trip report.
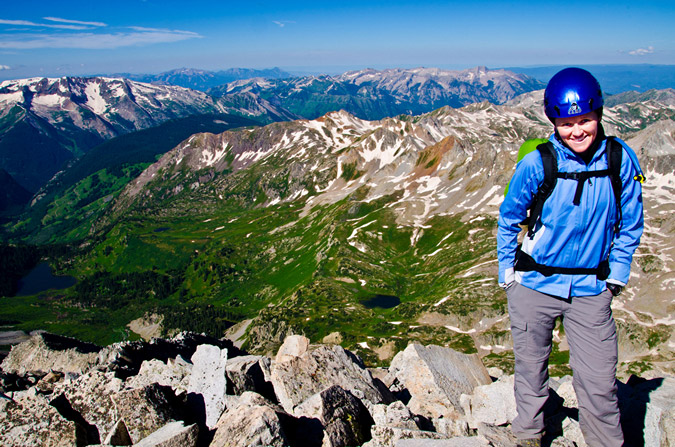
I thought that the exposure was just as fun on the way down as it was on the way up. Sarah agreed.
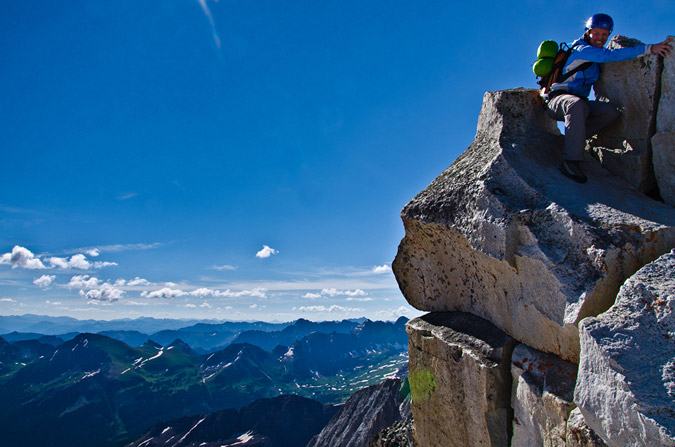
Sarah and I reached the joining saddle between the down-climb back to camp and the traverse over to North Snowmass. The terrain below looked loose and nasty. We took our time and staggered it so that I would go down 20 feet and then step to a side, let her know she could come down while I stayed put, and then repeat until down to the saddle. The reason for this strategy is to prevent rockfall injury. It worked wonderfully.
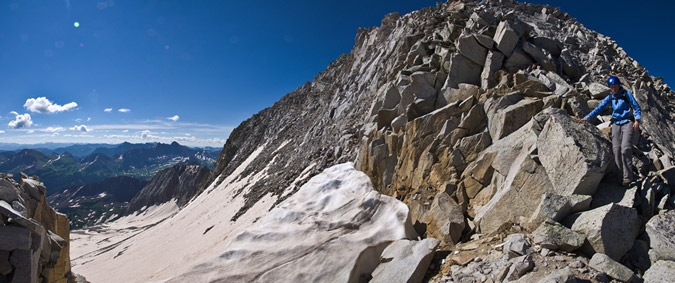
On the way over to North Snowmass I had to perform some last minute heroics to prevent the mountain from falling down. Good thing I drank some gatorade!
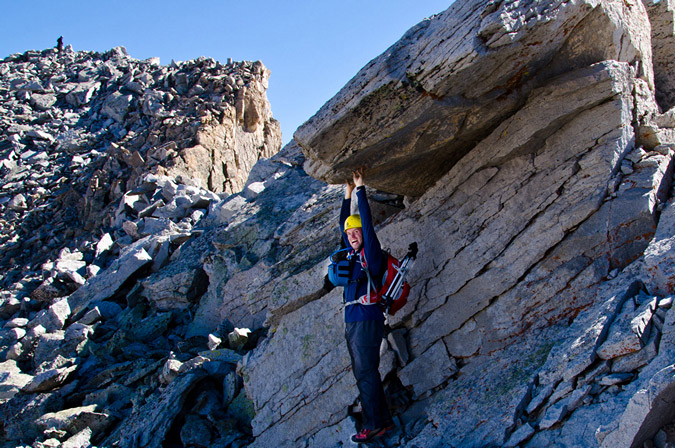
We were able to join the solo hiker that had gone up to North Snowmass via the standard route just as another climber hit the summit of Snowmass Mountain.
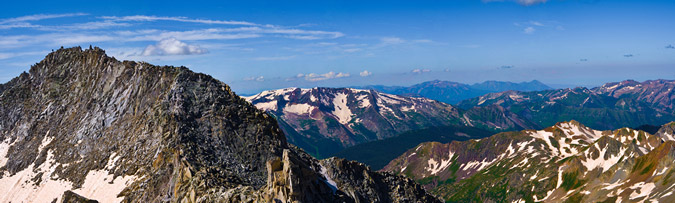
Let me know if that is you on top of Snowmass and I can show you a larger version!
The reason I wanted to head over to North Snowmass was because I knew the views of Capitol Peak and the Pierre Lakes basin would be great - and I was totally right about that concept, no question!
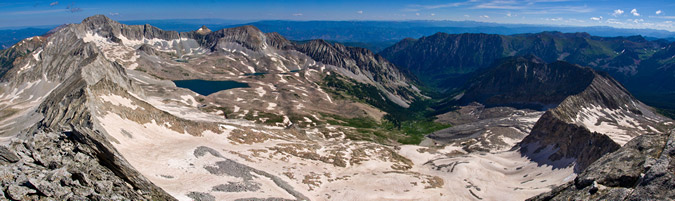
Sarah was really in love with this place and commented that it was easily the most gorgeous 14er she'd been on to date. The connecting ridge between Snowmass and Capitol was quite intimidating. I know of only a handful of people that have successfully completed that traverse, and I am certain that each of them is either certifiably insane or... as Samuel Jackson would say, "One Bad Mutha $%^&*#."

Even without the tripod set-up, I was able to get a decent panoramic from North Snowmass, which included both Snowmass Mountain and Capitol Peak.

The last order of affairs was to get a really good glimpse of the valleys below, which Sarah caught me in the act of doing.
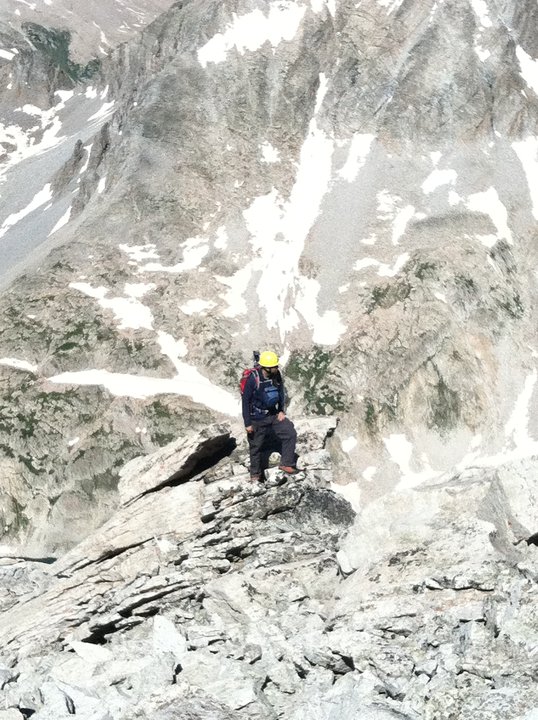
We decided to head back to the ridge for our downclimb. Now - this is where I made a critical error in judgement and should be critisized repeatedly, especially given my propensity to evaluate mountaineering accidents. Let me be clear - I was an idiot. A moron. A completely foolish jack-ass. There, I said it. Now you don't need to. If I had not made it out alive, I would fully expect someone to write an entire article about how stupid I was and how ironic the death was given my mountaineering safety articles. It really goes to show that even the most experienced people can make errors and find themselves in a bad place. There's no question in my mind that no one is immune to it. When Sarah and I head back towards the saddle between North Snowmass and Snowmass, I decided it would be a fine and dandy idea to take a short-cut to re-join the ridge for our descent. Instead of going back up the ridge we came down, I thought we could get away with going around the side and to the ridge. I figured that if we encountered anything too crazy that we could turn around and go back the way we came. From my vantage point, it looked totally doable to just skirt around the side. If you look at the photo below you can see what I saw - the ridge where we needed to head down from and the ledgy system that connected us to it.
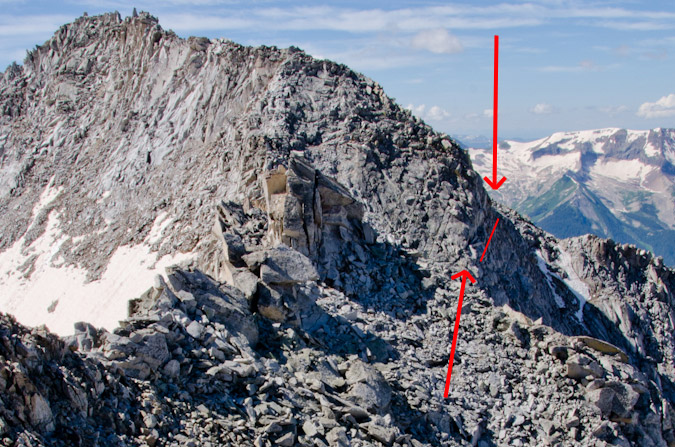
What we found was something totally inviting yet progressively challenging. It was kind of like each time you passed an obstacle it got easier for a moment and then you found another slightly harder obstacle until you were up against an almost impossible one that was slightly more psychologically reasonable than turning around. I am not sure if that makes sense or not, but it did to me at the time. What we found ourselves in was a mess - a real pickle. The rock was loose. Insanely loose. Dangerously loose. And it was exposed with class 5 sections. Each foothold and handhold was tested by both of us with great diligence - which is probably what saved our lives. Eventually, I found myself perched on a ledge with nothing but veritcal rock above and below me, with a huge boulder between me and the next part of the ledge. The only reasonable foothold was a large protruding boulder below me that looked to be held in place by air and spiderwebs. I knew it would not hold, but I also knew I had no where else to go. So I asked Sarah what it looked like from her point of view. "It looks like it is going to go at any second." Crap. I triple tested all of my holds again and put a small amount of weight on it with my right foot. Sure enough - the huge rock went crashing down the mountain. I still get chills even thinking about it. I could feel the mountain shake each time it bounced below me. Not a good feeling. Too late to turn back. In what felt like a move out of a Spiderman movie, I crouched backwards while holding solid holds with my hands and found myself on the other side of the boulder obstacle in a move that must have looked like a circus act to Sarah. My heart racing, I stopped to take it all in and relax for a bit. What the hell were we doing? Why was I risking my life for a short-cut? So stupid. I kept saying it out loud too. "Sorry Sarah. I'm stupid. Sorry. Ahhhhh why am I so dumb!?" I think Sarah was regretting this climb now. I didn't blame her. The terrain we found ourselves in was rugged and surreal, sure - but wow - death defiance was not what I signed up for this week. Sarah smartly resigned to down-climbing below my spot and up a gully nearby, where she rejoined me at another crux. A small triangular rock was wedged vertically into the ledge, held in by only a half inch of rock. It was the only handhold between me and death. Footholds were scarce too - a small patch of dirt and rock about half a foot in diameter terminating in air. After this move, the route was clear to the ridge. I tested everything over and over again like Howard Hughes washing his hands. When your life is at risk a little OCD goes a long way. I nailed the move and breathed deep sigh of relief. Sarah watched me and gave it a go. Before she could even get to the crux, she stepped on some rocks and sent about 20 large rocks crashing down - with quite real psychological demoralizing impact. Sarah was freaked out. I talked her through getting to a safe place. Fortunately, her OCD rock-testing was on par with mine. She decided (smartly) again to down-climb for a safer area and eventually we were able to re-join each other on the ridge. Some short-cut. Lesson learned. Short-cuts are stupid, especially in the Elk Mountains! Here's some views of what we found ourselves in.
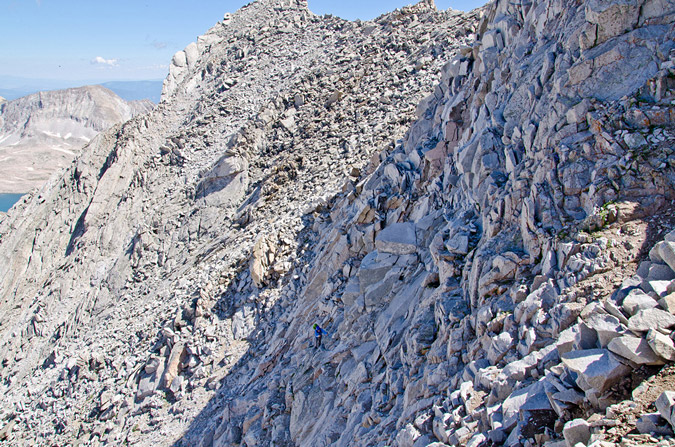
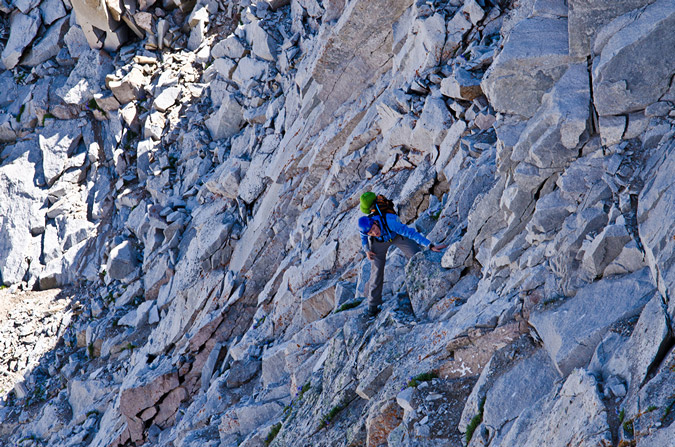
It was really irresponsible of me to put Sarah's life into this sort of danger and for that I will always feel bad.
After we rejoined on the ridge, we talked about the adventure we just had and how stupid it was. We were both pretty shaken. We were overly careful after this point and it slowed our descent a bit, but that was OK by both of us. Finally, we were able to reach the vegetation at the bottom of the 2000 ft. gully and enjoy more solid ground.
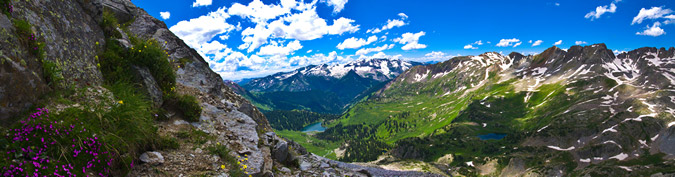
The wonderfully gorgeous flowers almost calmed my nerves, almost.

It was an impressive mountain to downclimb. Looking back, you really gained a sense of accomplishment at how far we had gone and how steep the mountain really was.
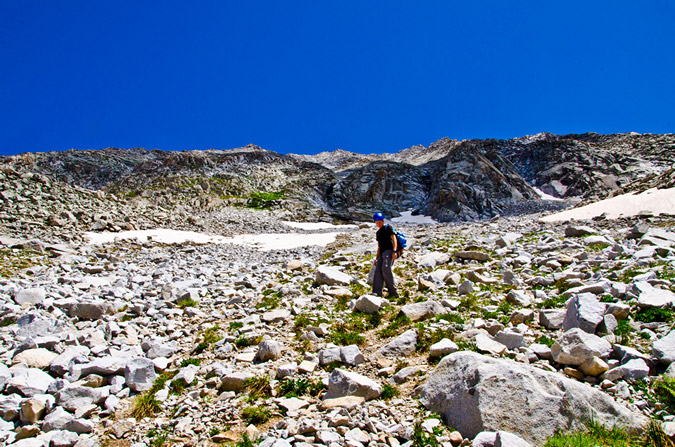
We ran into one other guy heading up as we were coming down. I was not quite sure what he was going to accomplish since storm clouds had already began to form in the area, but he seemed quite determined and I felt I had no place preaching to him about safety after the complete debacle I had just escaped (turns out he came walking by our campsite a few hours later stating he was turned around by weather - I was glad he made it down safely).
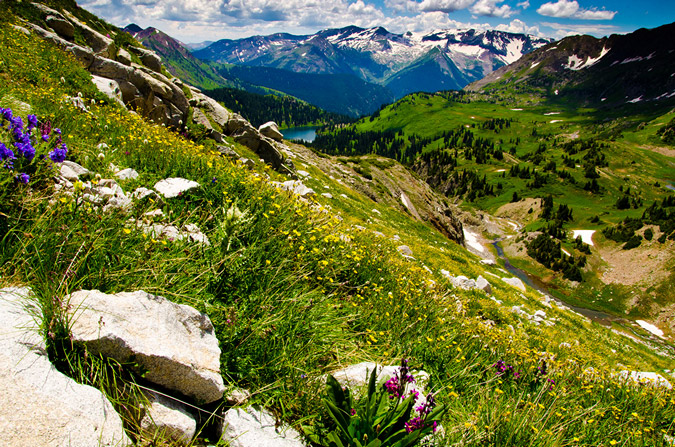
At this point I was just happy to be alive and enjoying the multitude of incredible wildflowers.
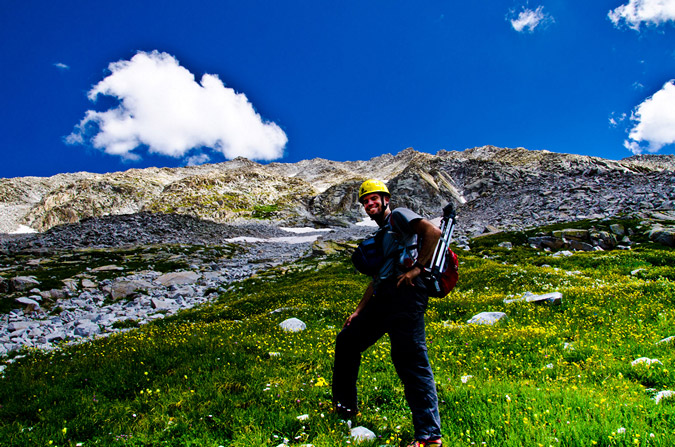

Speaking of wildflowers - I had never seen so many Columbine flowers. They were everywhere!
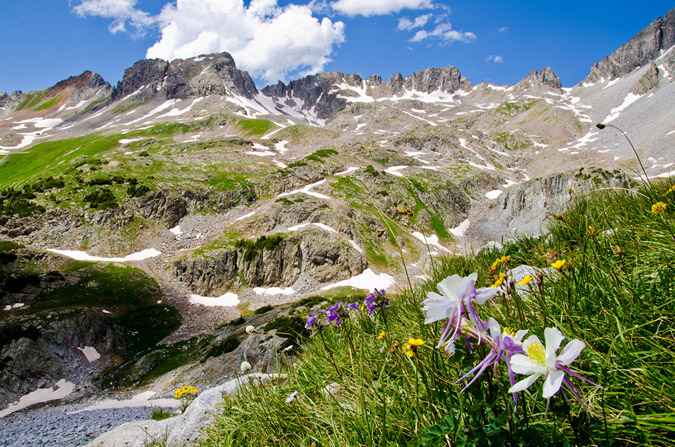
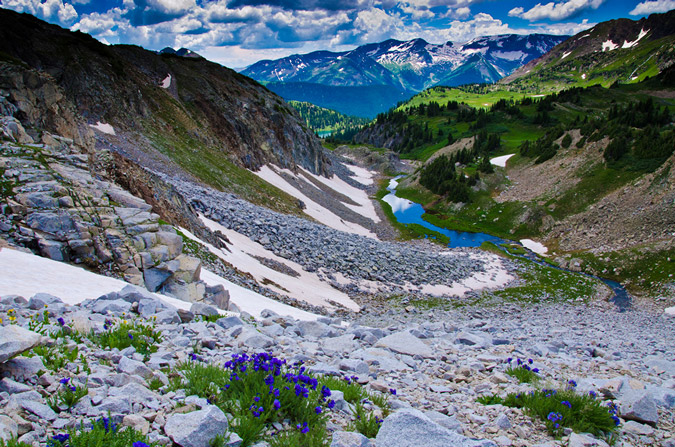
I stopped for one last look back up Snowmass Mountain. The gully with all of the green at the base was the one we went up.
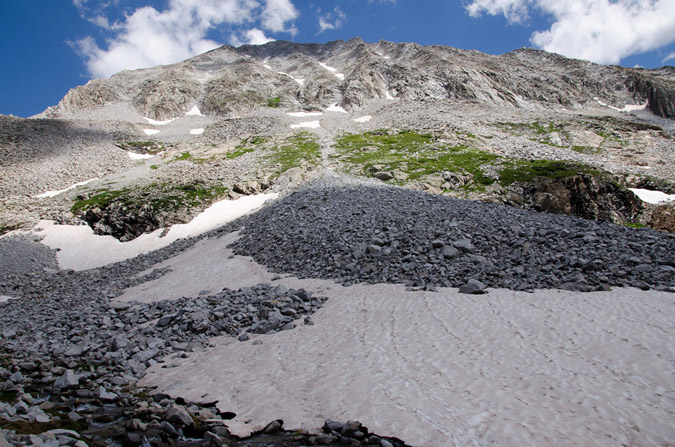
We reached Little Gem Lake in no time at all and enjoyed the views from there.

Below Little Gem Lake was a really nice mountain creek draining out - it was surrounded by flowers, making for a really nice scene!
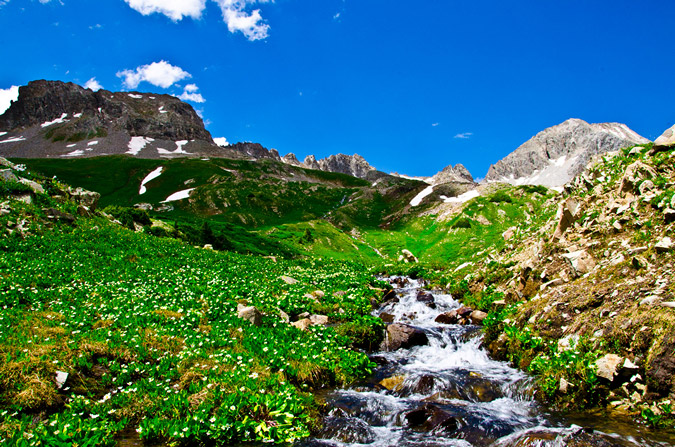
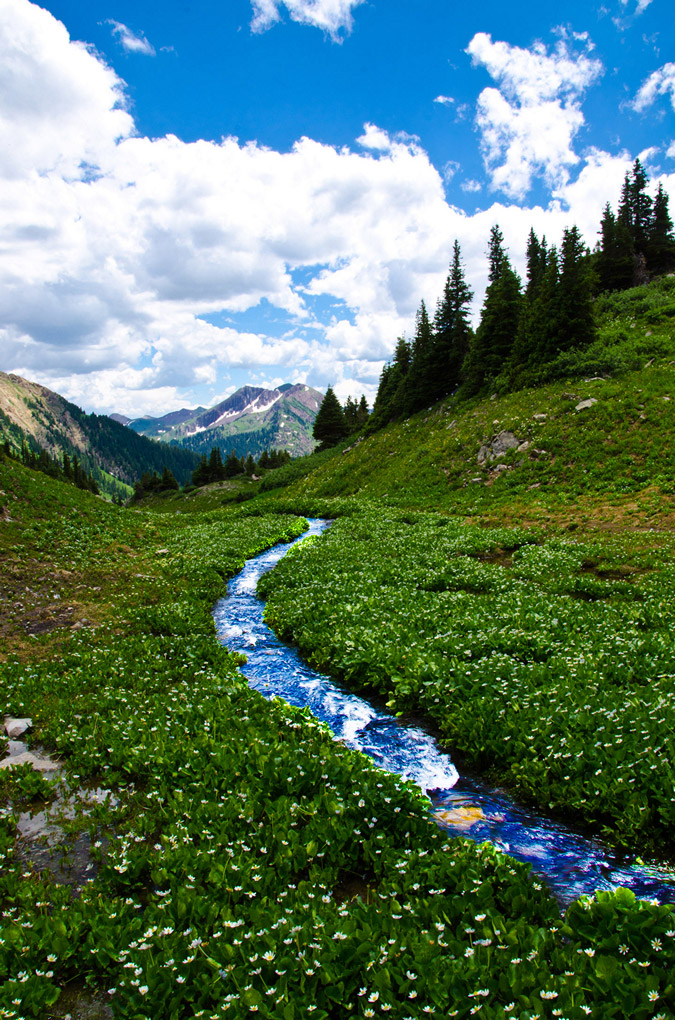
I could not help myself from stopping several times on the way back to Geneva Lake to take photos of the wildflowers and waterfalls that were everywhere. What a magical place!
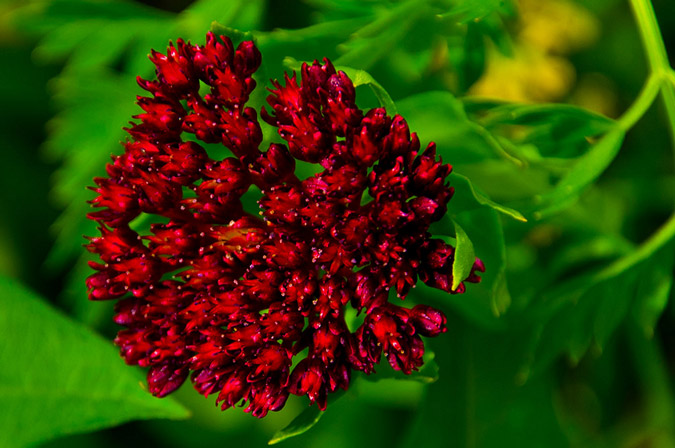
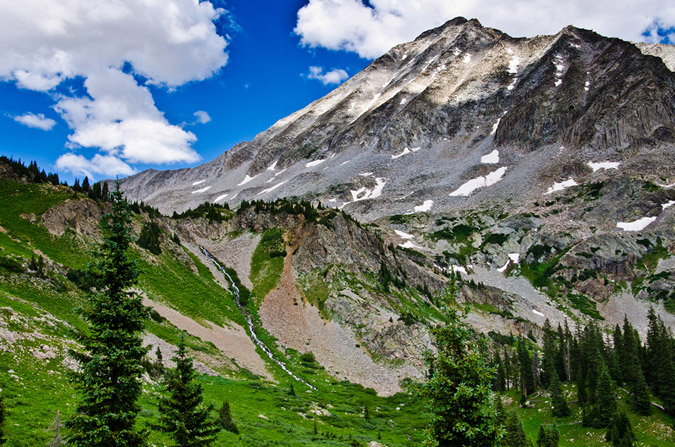
The ubiquitous columbine flowers made for great backgrounds and bokeh subjects for other flowers in the area, which I accentuated in this desaturated photo. A lot of people ask me what bokeh is. According to Wikipedia, bokeh is is the blur, or the aesthetic quality of the blur, in out-of-focus areas of an image, or "the way the lens renders out-of-focus points of light." Differences in lens aberrations and aperture shape cause some lens designs to blur the image in a way that is pleasing to the eye (or not pleasing to the eye). Further research on the origin of this word took me to this article, where the author goes on to explain that, "it is a Japanese word meaning, roughly, "fuzzy," and it is used to describe old people with cobwebs in their heads among several other things — including the out-of-focus areas of photographs, which, I'm told, might more specifically be referred to as "boke-aji." So, long story short, the correct pronounciation is: BOW (as in bows and arrows) KUH (like Cuss). They even did a YouTube Video on it...
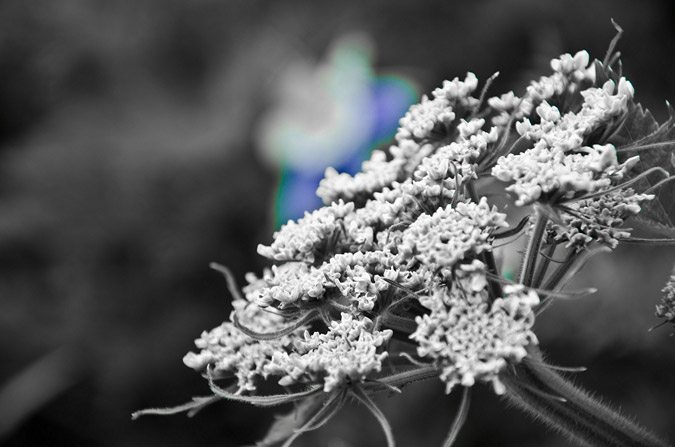
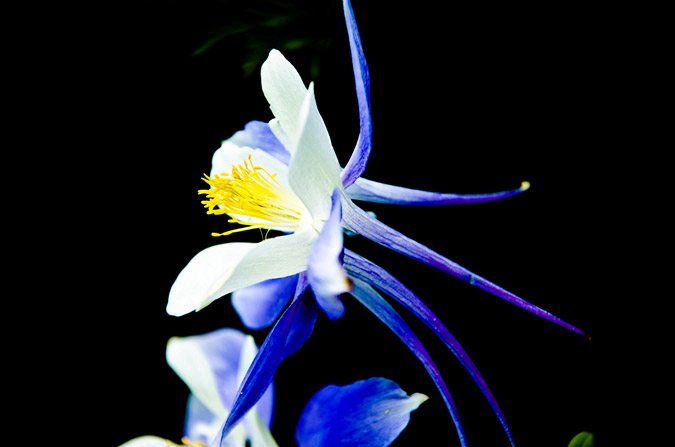
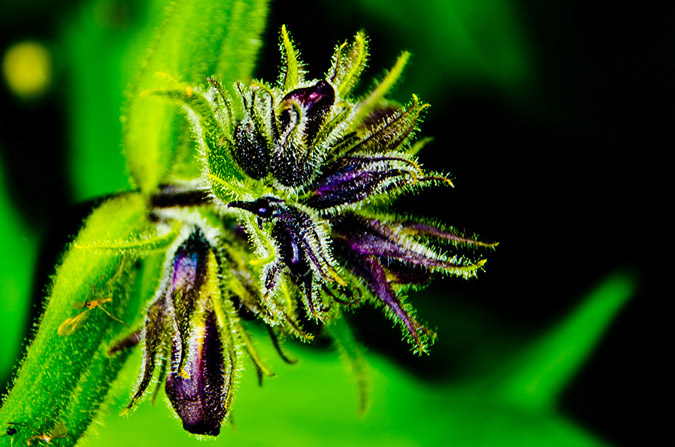

We finally reached our campsite at about 2:30 PM and cooked some delicious food. By now, other groups had made their way into the basin and a family of four had made camp just above us in a site out of view from our campsite. Sarah and I were pretty tired, so we took a nap while a thunderstorm rolled through the area. I've always loved sleeping in a tent during the rain.
Here's an elevation profile of our long day up Snowmass Mountain. Feel free to click on it for a larger version.

For day three, we decided it would be best for a 2:30 wake-up and a 3:00 start in hopes of catching the sunrise at some point for photography purposes.
Day 3: Hagerman Peak via the standard route (south ridge)
2:30 AM came pretty quickly and when it did, I asked Sarah if she wanted me to hit snooze. Hilarious half-awake banter ensued:
Me: "Want me to hit snooze?"
Sarah: "I don't want to ruin your sunrise."
Me: "That sounds like a tragic country song."
Sarah: (laughter)
Me: (singing voice and fluctuating notes) "Don't wanna ruin your sunrise."
Sarah: "It could be a song about a one-night-stand - leaving before the other person wakes up."
Both: (heavy laughter)
We opted not to hit snooze and embarked on another darkness-filled adventure. I had copied the notes from Gerry Roach's Colorado Thirteeeners guidebook as a reference, which proved quite handy despite the fact that we were in complete darkness all the way to the base of Hagerman. Despite our success in reaching the base of Hagerman, it did not come without some really tough route finding. For starters, the route was quite confusing and after the turn-off from the Trail Rider Pass trail, there was no trail. We found the creek drainage Roach describes in the route easily but were somewhat astounded and questioned the route when we found ourselves walking IN the creek since it was quite a narrow drainage (photos of the route during the daytime can be found later in this report). Additionally, the route went straight up the side of a hill through steep willow trees. Trails are for the weak, I suppose. Fortunately the willow trees were sturdy and we could use them to aid our climbing. Next, we found ourselves on top of a small 12,000 ft. mountain thinking it was the ridge after following the directions in the route description, only to realize it was opposite our current location. All was well though. We found what we thought was a gully Roach describes in the route, which turned out to be a much harder gully to the west of the actual gully. According to Roach, the gully was supposed to lead us to a "commodious grassy bench" but we had no idea what the hell a commodious grassy bench looked like, so that was not much help. Turns out, by the way - that commodious means spacious. Who knew!? We found ourselves on the south ridge pretty quickly. Unfortunately, because of the poor quality of the route and our misdirection, we did not reach the top in time for sunrise; however, we were able to make it to about 12,500 ft. and in view of the Maroon Bells and Pyramid Peak. There were some clouds hovering around Maroon Peak and it made for a very dramatic morning at first.
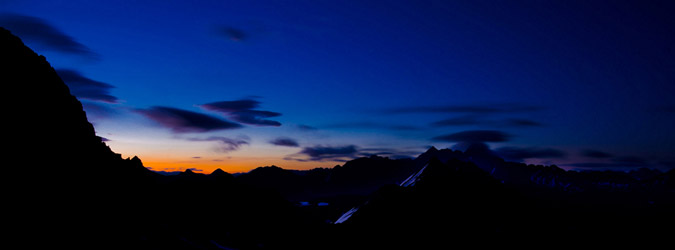
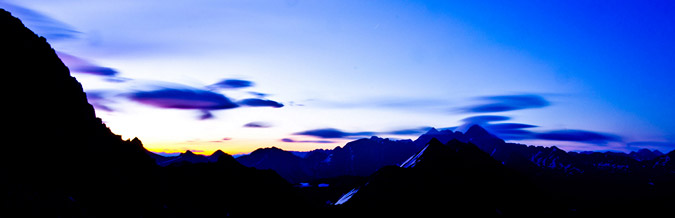
We were in pretty good position for sunrise and it was decent lighting for an HDR panoramic attempt. I feel like it turned out pretty well. The HDR process brings out all of the dynamic range of each bracketed photo, and in this case, it made for a graduated sunrise effect, ranging from pink to orange to purple. Quite stunning. Click on the photo to see a larger version.

Once the photo session was over, Sarah and I packed up and headed up Hagerman's south ridge, which we found to be pretty straight-forward and enjoyable. It was quite similar to Snowmass the day before - offering a choice between dirt and scree or boulders. We once again opted to up-climb the boulders and later down-climb the dirt and scree.
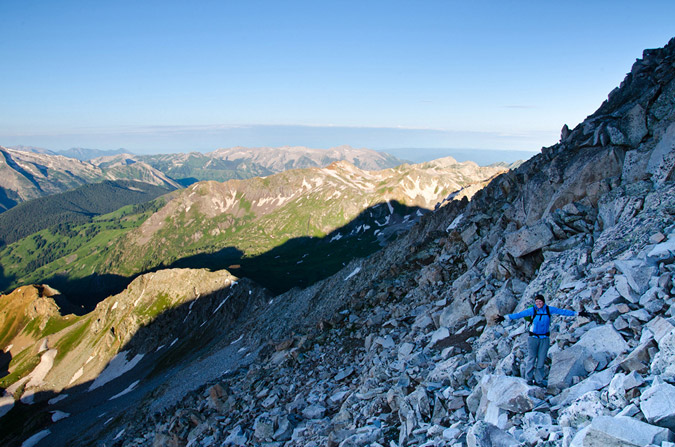
We reached the saddle between Hagerman Peak and Snowmass Peak (not to be confused with Snowmass Mountain - Snowmass Peak is an un-ranked 13er to the southwest of Hagerman, named only due to its dramatic view from Snowmass Lake) and enjoyed the amazing views below, as seen in the below panoramic from the saddle (click on the photo to see a larger version).

We stopped short of the summit for a bit to take it all in. What an amazing weekend we had had.
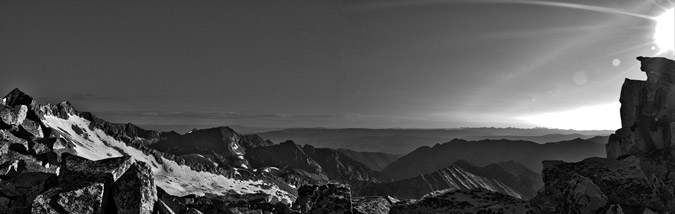
We reached the summit of Hagerman in no time at all from here after scrambling over a very small false summit. We could see a group of climbers below, heading up Snowmass Mountain from Snowmass Lake. I was pretty sure that this was the group that had talked to me earlier in the week about joining them, including Kara Bauman.
Sarah was pretty excited to reach the summit of her first 13er!
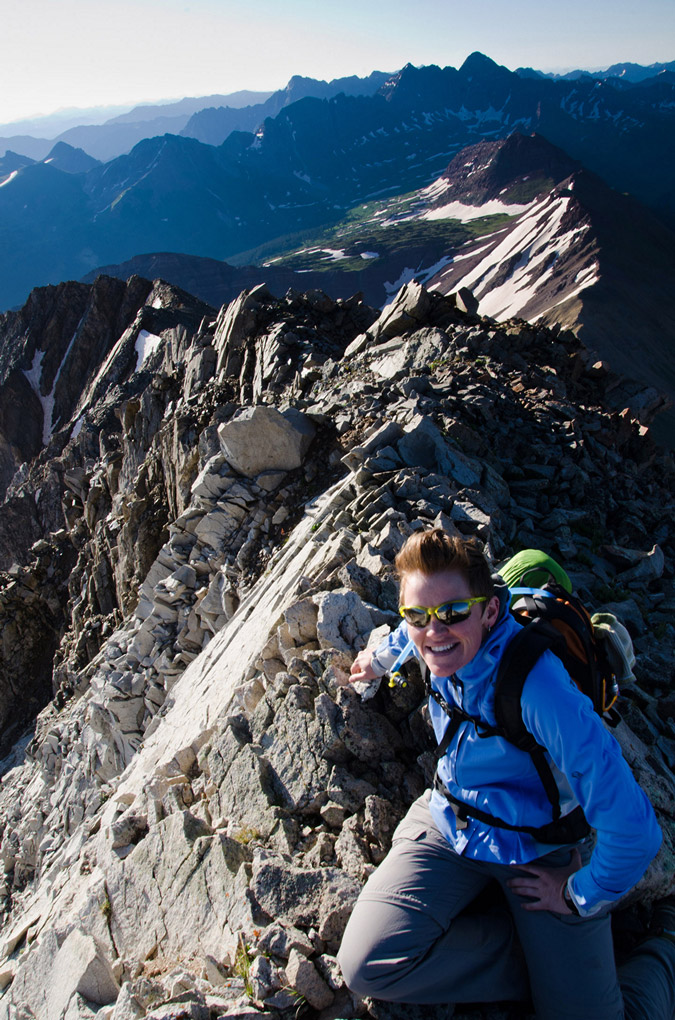
Once again, I was blessed with the powers of the tripod to ease my summit panoramic photography. Click on the photo to see a larger version.

If you'd like to see a very large version of this photo in flash with the ability to zoom in and out and move around, check out this page, but be warned - it is 22 megs!
We set-up for a summit portrait with Snowmass Mountain behind us.

After a few more minutes on the summit, we decided to head down the same way we came up.
The downclimb was quite a bit easier due to the slightly wet dirt and scree, which made for quite an enjoyable boot ski down.
During the downclimb we finally properly identified the commodious bench, which quickly became the subject of many jokes. The "commode" as it was referred as from now on served its purpose well.
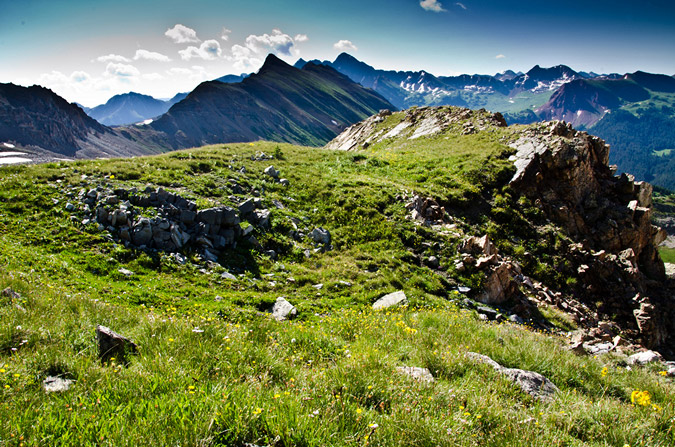
The commodious grassy bench offered one other benefit as being a great place for photography of the Maroon Bells.
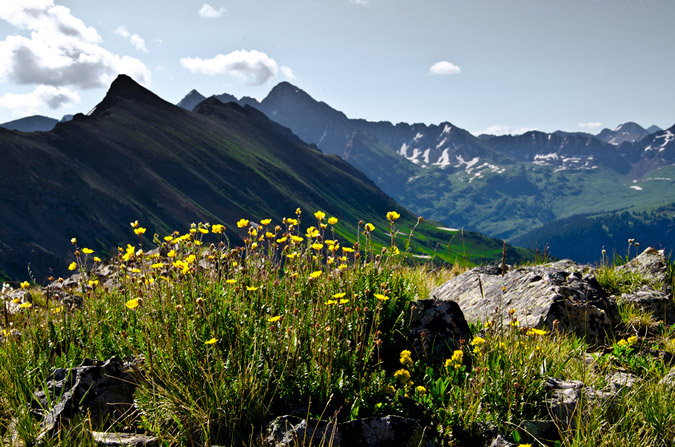
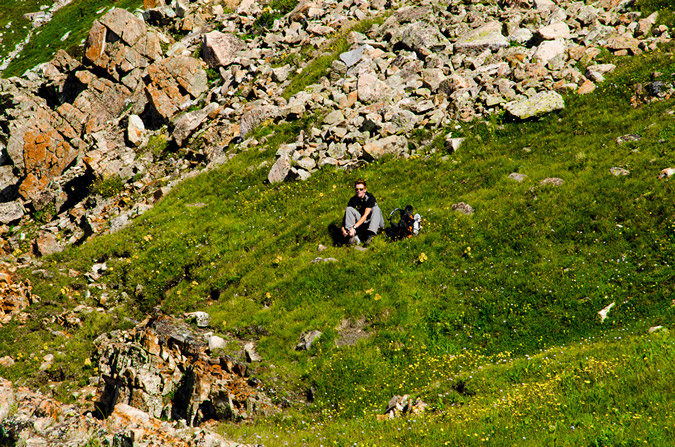
Directly next to the grassy bench was the gully we were supposed to take up earlier in the dark. Here's what the gully looks like if you are wanting to know.
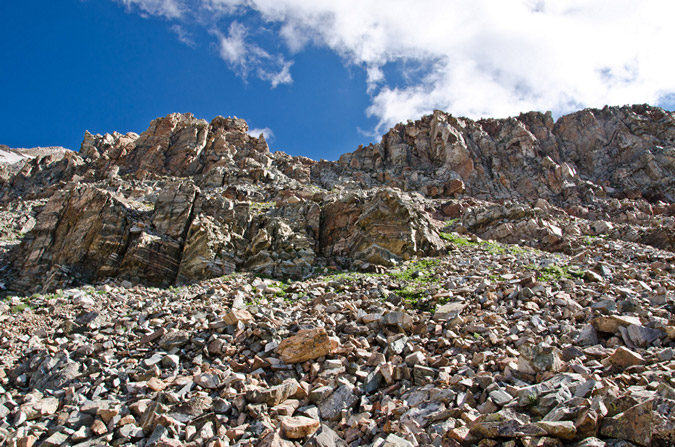
We followed some rocky ledges (as described in Roach's book down and the rest of the route was fairly easy to follow back down the drainage.
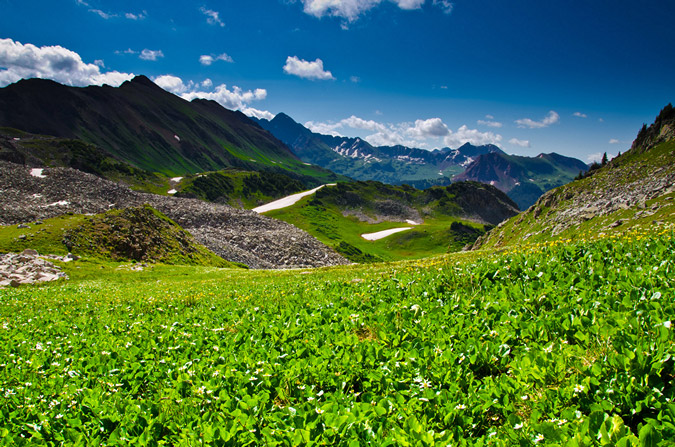
Here are some photos showing the route down, obviously in reverse order if you were coming up. Hopefully these can serve as a better guide to you than Roach's book did for us.
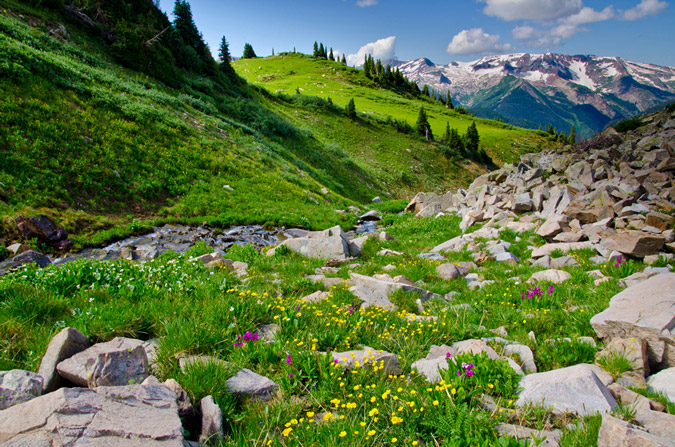
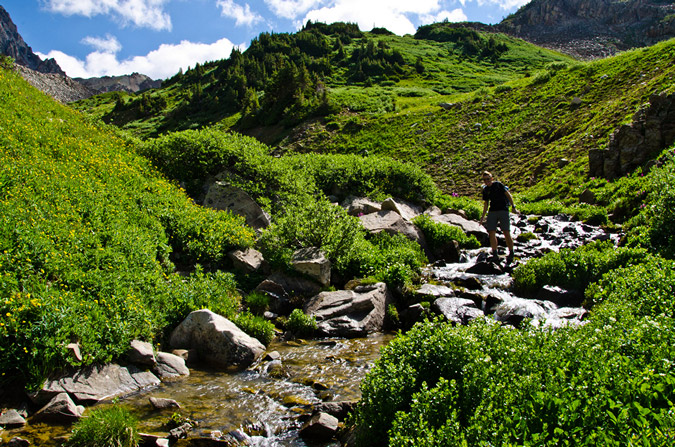
The "trail" for Hagerman going up a "narrow drainage."
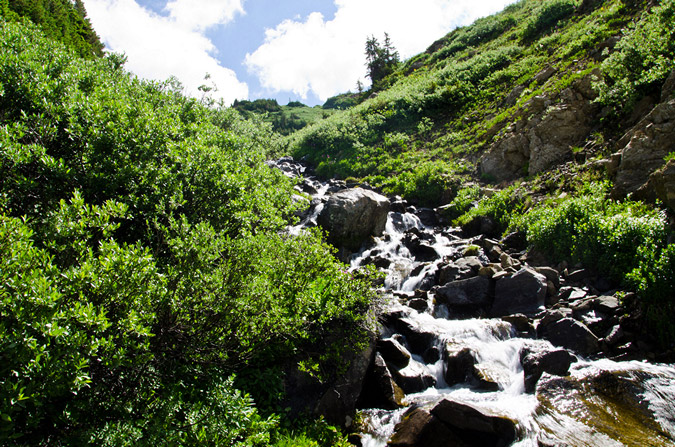
The willows you must upclimb for the standard route of Hagerman Peak.
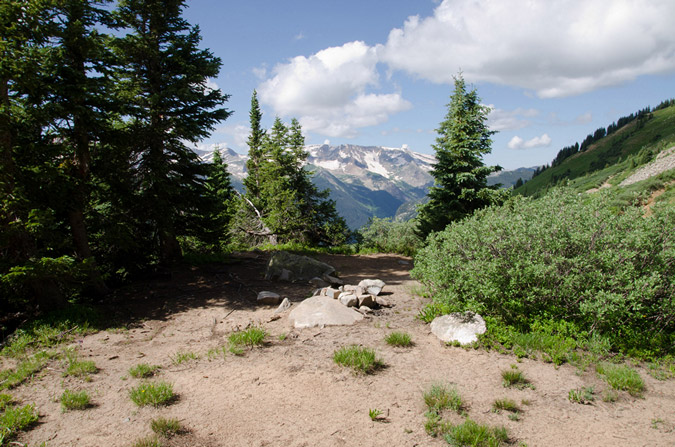
The "excellent campsite" on Hagerman's standard route
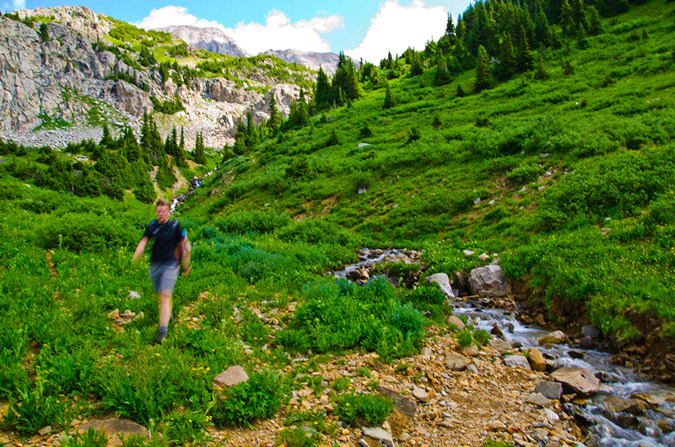
This is where you turn off to go up the creek and faint trail for Hagerman's standard route.
The hike back to Geneva Lake was pleasant and the views along the way were great. Here's another vantage of the Fravert Basin.
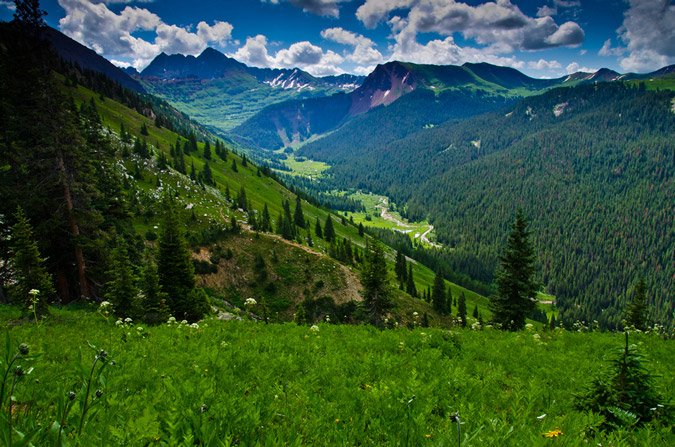
And a sweet view of Siberia Peak from a clearing on the trail.
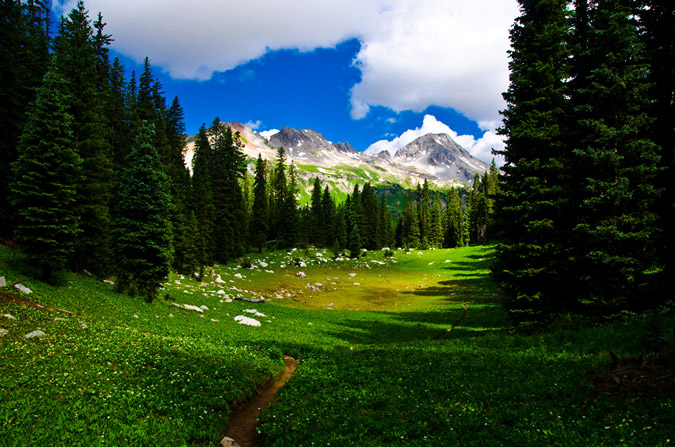
And back at Geneva Lake!
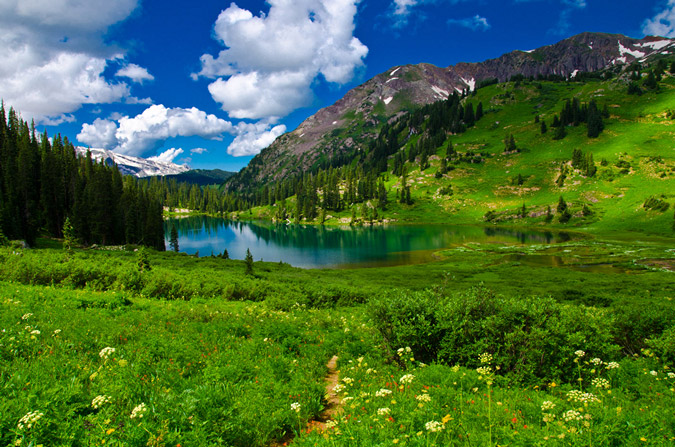
After reaching our campsite, we quickly tore down camp and packed out, making it back to the car just shy of noon - making for a great weekend of climbing!
These two mountains will forever hold a special place in my memory and my heart - if you've never been to Geneva Lake and the Lead King Basin - you really should! It is a magical place.
Here is an elevation profile of Hagerman Peak and then one of the entire trip - feel free to click on each to see a larger version.


Thanks for reading! Just a reminder - this site costs me time and money to maintain - if you find it useful, please consider supporting the site by remembering to use the affiliate links, especially if you purchase photography related gear from Adorama. Thanks!
References:
- http://www.tosv.com/uploads/FileUpload/mtnnames.pdf - Snowmass and its peaks: the name game. Catherine Lutz.
- Notes on Mountaineering in the Elk Mountains of Colorado, 1908-1910. Percy Hagerman.
{fcomment}
Culebra Peak and Red Mountain - Finishing the Sangre de Cristos

Quite a few people save Culebra Peak (ranked 41st – 14,047 ft.) as their last 14er; however, I wanted to just get it out of the way sooner rather than later. If you’re wondering why I am talking about this mountain as if it is like a trip to the dentist – there’s a reason – it costs $100 to climb it and another $50 if you want to do Red Mountain (ranked 70th – 13,908 ft.). The Culebra sub-range of the Sangre de Cristo Mountains has been embroiled in controversy for years. In fact, the New York Times once called it “the hottest environmental dispute in the Rockies.” Imagine – 77,500 acres of pristine alpine terrain with elk and timber in huge supply, including one of Colorado’s coveted 14ers – all owned by one person. The land used to be called the Taylor Ranch and was renamed the Cielo Vista (heavenly view) Ranch by the newest (and present) owners, Bobby Hill and Richard Welch. The story goes back to 1843, when a long series of events carved the land up into parcels, which were shrouded in controversy due to non-traditional land use rights built into the deeds of the land. Essentially, descendents of the original Mexicans that occupied the land before the Mexican-American War of 1846 – a conflict caused by the annexation of Texas – claimed that they had communal rights to the land to include logging and livestock grazing. The land was purchased by Jack Taylor in 1960 for $500,000 with the provision in the deed that the land was subject to the claims of the local people; however, Jack Taylor had no intention of honoring that issue, and many lawsuits ensued. Additionally, Jack Taylor was known to beat trespassers and arsonists that frequented his property due to the controversy.
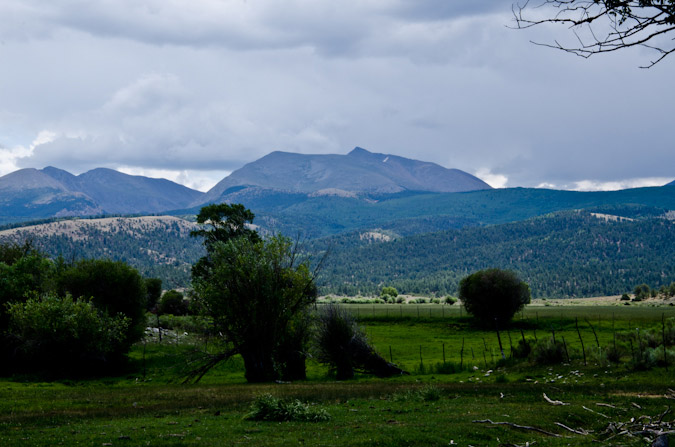
Eventually, Jack Taylor was jailed himself for taking matters into his own hands and had an assassination attempt on his life in 1975. After that, he rarely returned, all the while the land was being poached for hunting, climbing and other uses. Eventually, Jack Taylor died in 1988 and the land was passed on to his son, Zachary Taylor, who continued to log the forest of the land, which caused even greater controversy. Long story short, climbing access to Culebra has been mixed over the years, and it has always been a sore topic for many that are on the quest to complete the 14ers. Personally, I have mixed feelings about the practice of charging money to allow someone to walk on your property. On one hand – it is a piece of entrepreneurial genius. On the other hand – it barely feels right for someone to “own” a mountain. I am sure that I am not the only person to think about this and I am sure I won’t be the last!
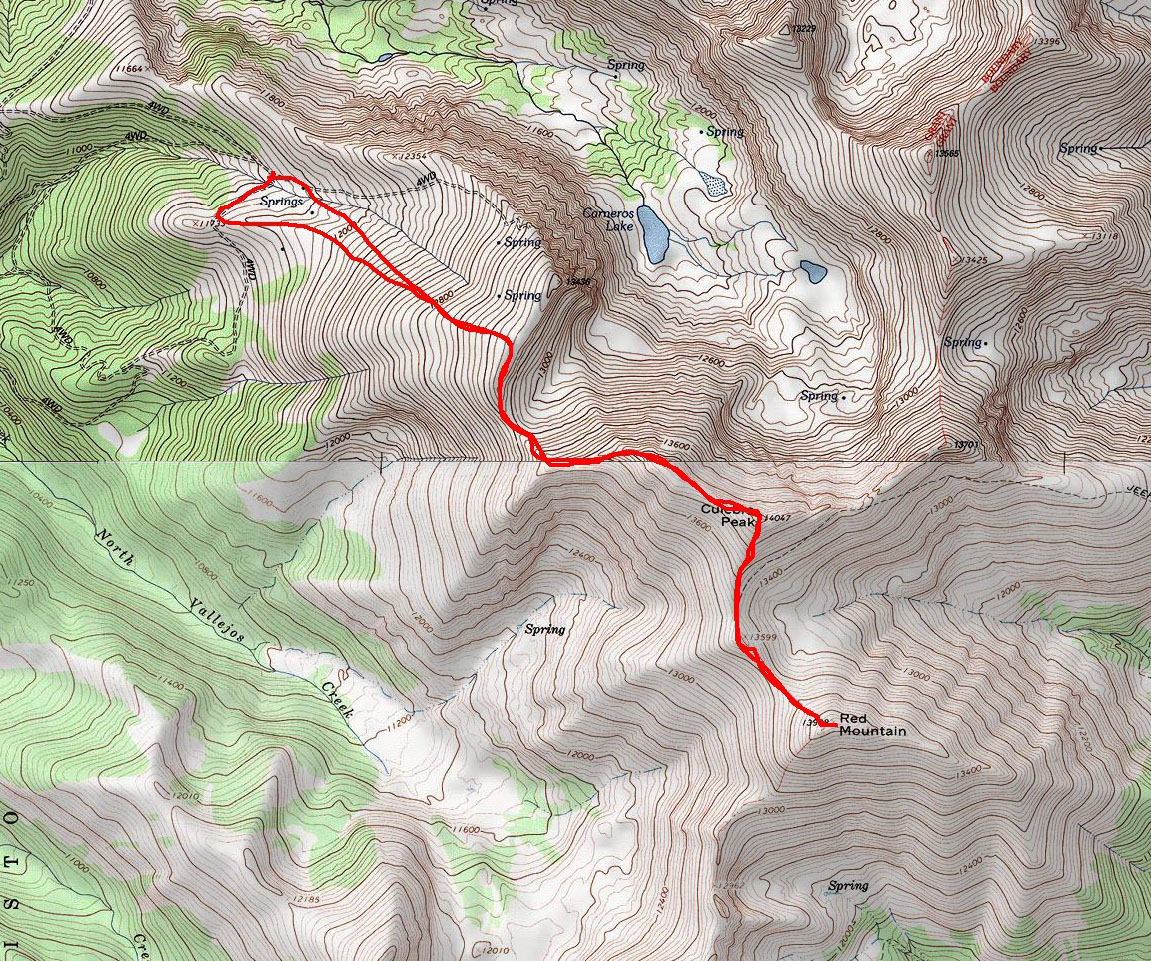

Now that I am done with the brief history lesson – here’s the details if you’re ever interested in climbing Culebra and Red Mountain yourself. Reservations are required if you want to pay to climb - to reserve a space, call the office in Glen Rose, TX at 254-897-7872. They usually start taking reservations in mid-May and spaces go quickly. They are quite friendly – and send you a packet of materials about the mountain and their rules. The only real downside to the arrangement (other than the rather exorbitant cost) is the fact that you are not permitted to start at your own time – you are required to wait at the property gate until 6 AM, at which time they open the gate and escort you to the ranch proper, where you are required to pay and listen to a speech on how to drive up the road to the trailhead. All-in-all the whole experience left me with a foul taste in my mouth. I felt like herded cattle – like a child being told what to do. I suppose this is out of necessity for the ranch owners; however, I cannot help but voice my distaste for the whole affair. To their credit – they are super nice people and seem to run a very clean operation. OK - rant over.
So, Regina and I made reservations back in May for both Culebra and Red Mountain. Since Red Mountain is in the top 100, I felt obliged to add it on. So – Regina and I left for the town of San Luis on Saturday - 7/23/11 to stay the night at the gate of the Cielo Vista Ranch and await for the 6 AM cattle herding to the ranch proper. We arrived rather late on Saturday and set-up our campsite in what seemed to be a desolate desert in the middle of nowhere. I was not going to let that bother me though – I wanted to experiment with some star trails photography and light painting. The results were very appealing.
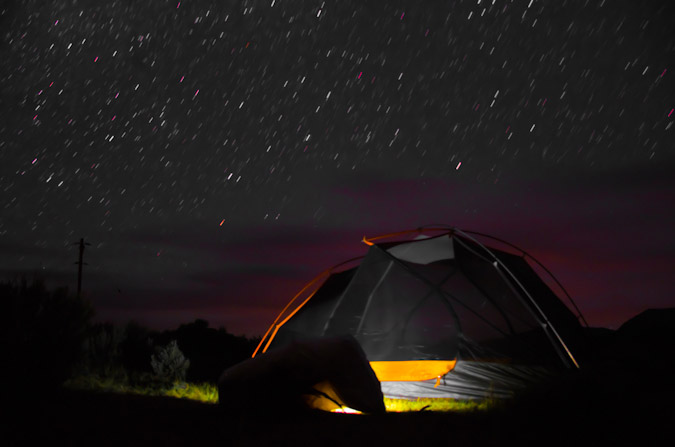
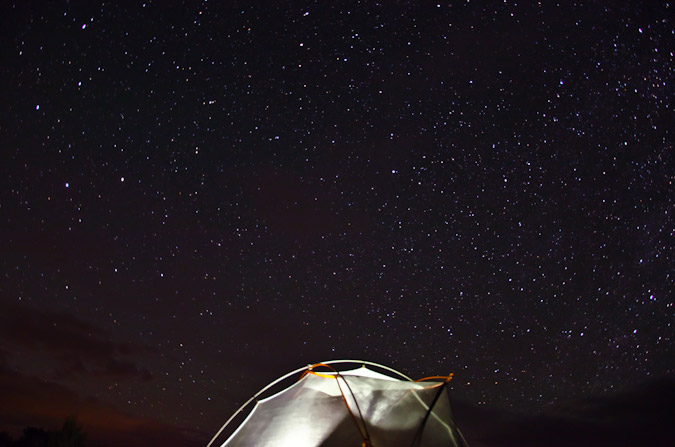
I decided to use the tent as a foreground subject and was able to locate the North Star and centered it above the tent so that the stars rotated around the North Star in a concentric circle pattern.

Additionally, I was able to get some pretty nice photos of the Milky Way and other night sky features.
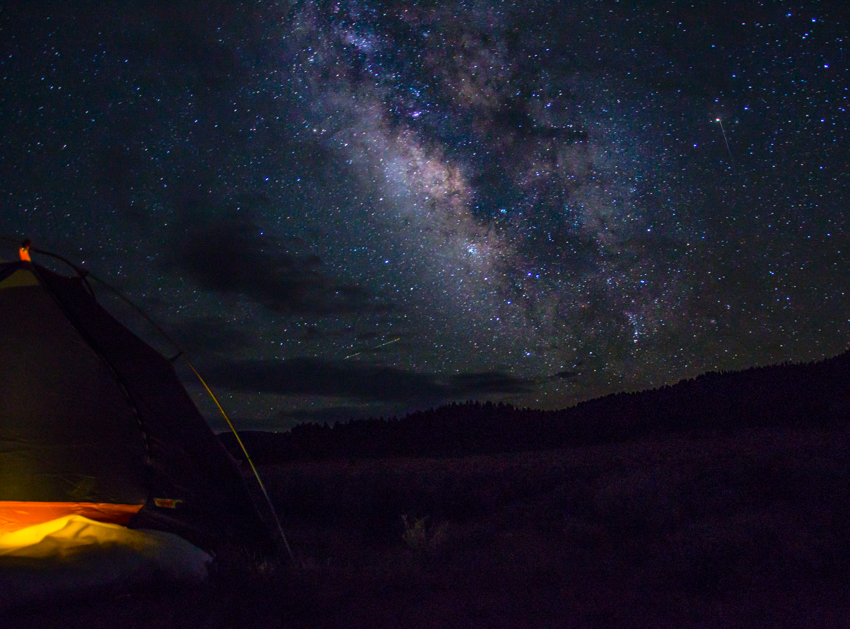
We set our alarm for 5:30 AM and hit the sleeping bags. We got up and followed the herd of cattle at the gate up to the ranch, where we got in line to pay our fees (cash or check only) and to wait for further instructions. Once instructions on how to drive your car in 4-high vs. 4-low were given in great detail, we drove to the upper trailhead, where we found ourselves at the base of the start of Culebra Peak. On the side of the mountain were probably 40-50 elk running up the ridge – quite a sight – but unfortunately too quick for me to get a photo.
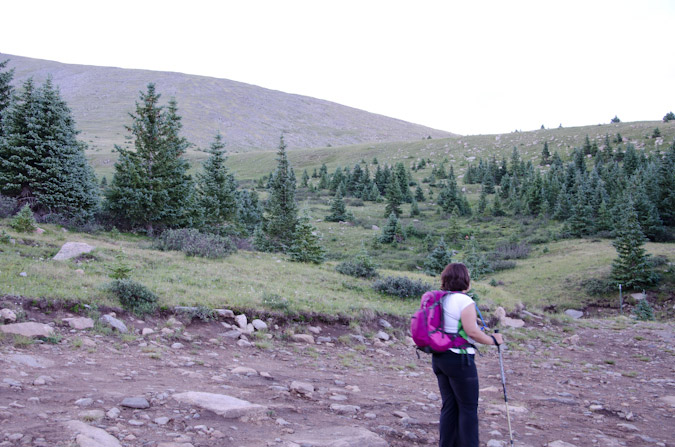
Since the ranch bills this mountain as being the most pristine 14er experience, there are no trails. We set-off up an old road to the west and joined up with the northwest ridge and began our climb, which mostly consisted of hiking on moderately steep grass and rock up the ridge to join another ridge.
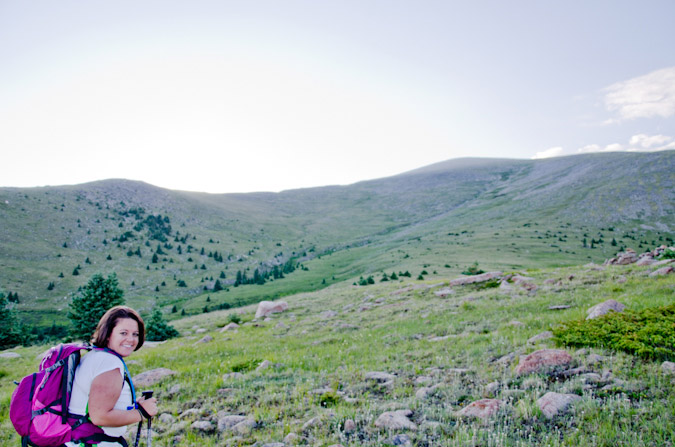
I was feeling really strong, and made it to the ridge in little time, waiting for Regina periodically to catch-up.
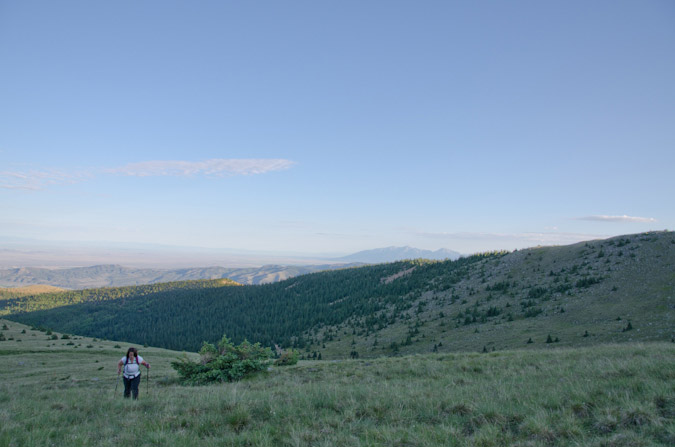
Once the ridge is reached, you find yourself standing before a giant cairn and a lofty view of Culebra Peak.
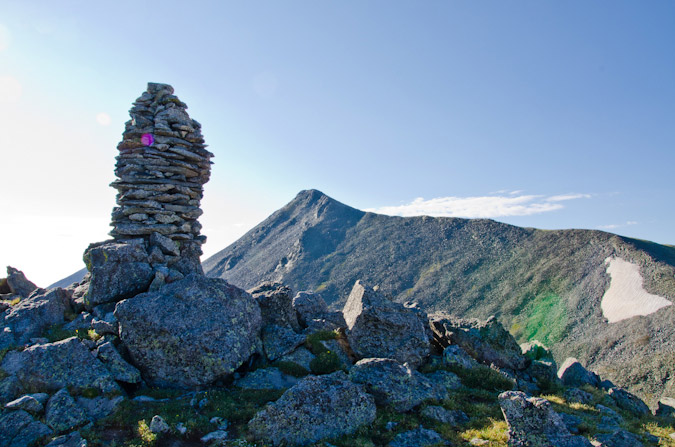
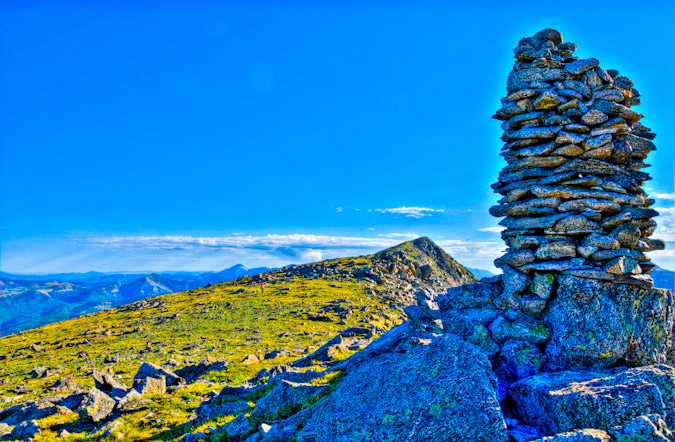
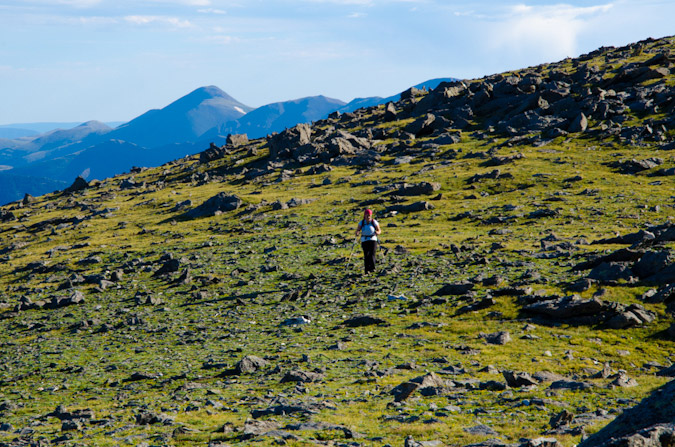
The route from here was quite obvious – follow the ridge to the top, which is just what we did. I found the route somewhat pleasant, with minor scrambling challenges here and there, but mostly the route was class 1 and quite boring, in all honesty.
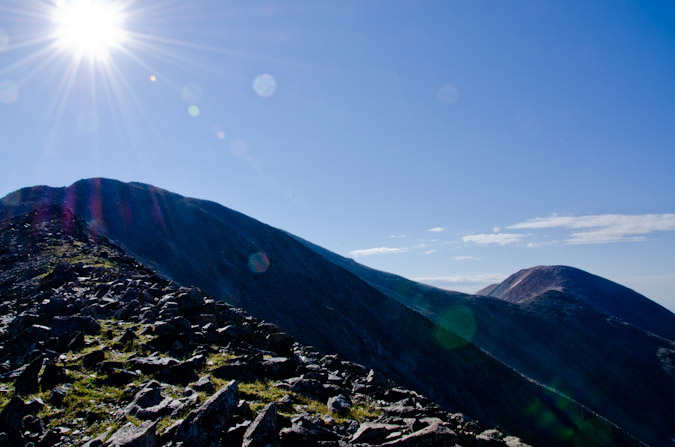
Contributing to the relative boring nature of this hike, Culebra lacks much in terms of scenic opportunity. The only notable mountains in view from Culebra are Blanca, Little Bear, and Lindsey far to the north, with some minor 13ers nearby (Trinchera to the Northeast, Vermejo and Purgatoire Peaks to the South).
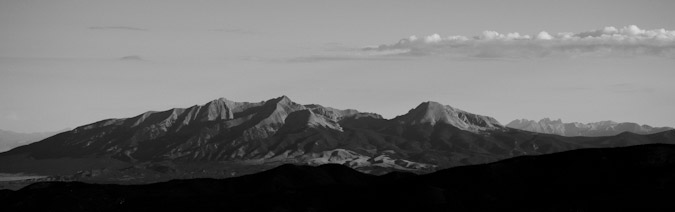
Needless to say, I was not terribly impressed by much of the views from Culebra – which is not to say it was ugly – it just was not spectacular or notable in comparison to many other mountains I’ve climbed. About ¾ of the way up, I decided to take a 360 degree panoramic set, which turned out great.


The rest of the hike up to Culebra’s summit was easy, with one minor false summit to go over and some fairly easy boulders to navigate over.
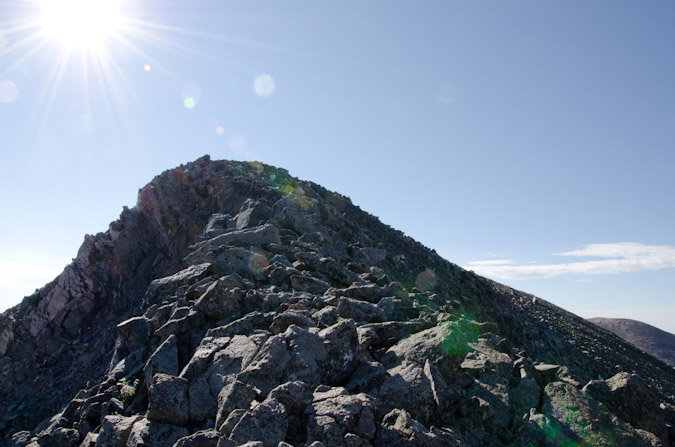
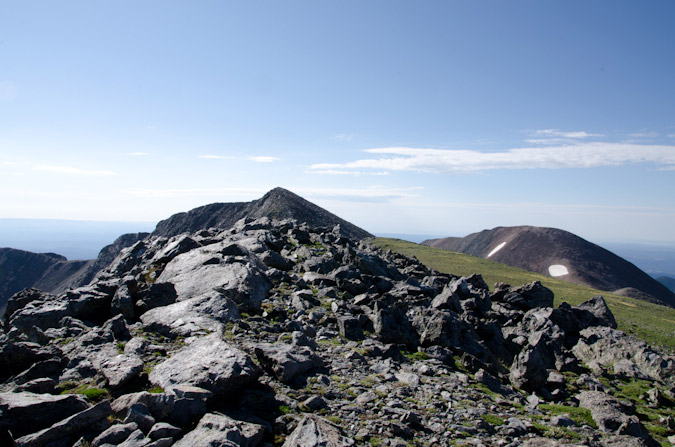
Once on top, I waited for Regina for about 30 minutes and took some photos. The summit was full of quite friendly marmots, which were not afraid to come right up and try to eat my backpack.
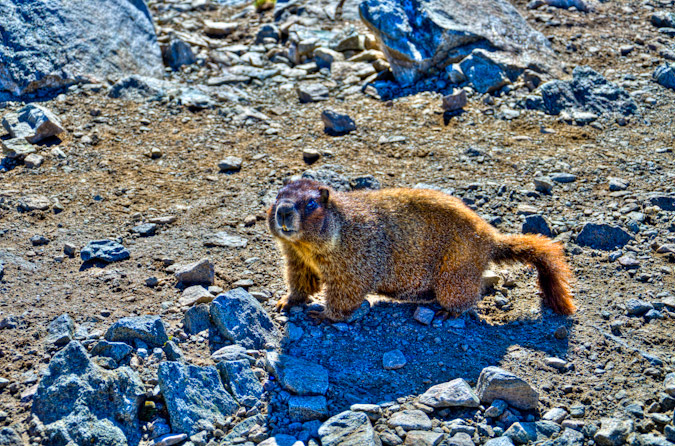
Once Regina arrived, we took a few more photos and then Regina explained that she did not feel well, so she hung out on the summit and told me to go ahead and hit Red Mountain real fast.
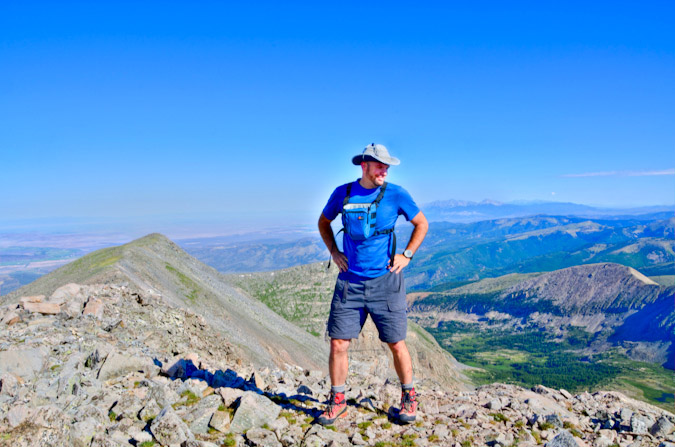

I hustled down the ridge and up to Red Mountain in no time at all – making it over in just under 25 minutes from Culebra. Views from Red Mountain were a little better, so I took a nice 360 panoramic from there, signed the register, and headed back over to Culebra.

With Culebra and Red Mountain complete, I was left with 34 of the highest 100 and the 15 from the Sangre de Cristo Range completed. It felt great. I hustled back over to Culebra in just over 30 minutes and was pleased to see that Regina had already headed back down.
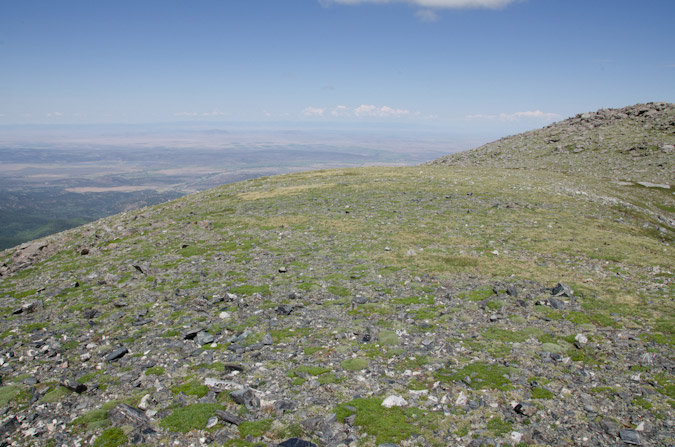
I embarked back down the ridge and was greeted abruptly by yelling from below. Two women were screaming: “There is a bear 40 yards to your left – stay on the ridge!” WHAT!? I’ve never heard of a bear above treeline before, nor have I seen one in the wild, period. That says a lot considering how often I hike. I looked at my altimeter watch and I was at 13,600 ft. Unbelievable! What the hell was the bear doing at 13,600 ft? I did not want to stick around and find out, so I quickly headed for the two women and saw the bear rummaging in the boulders – I presume he was looking for bugs to eat. He was a young bear – maybe 2 years old.
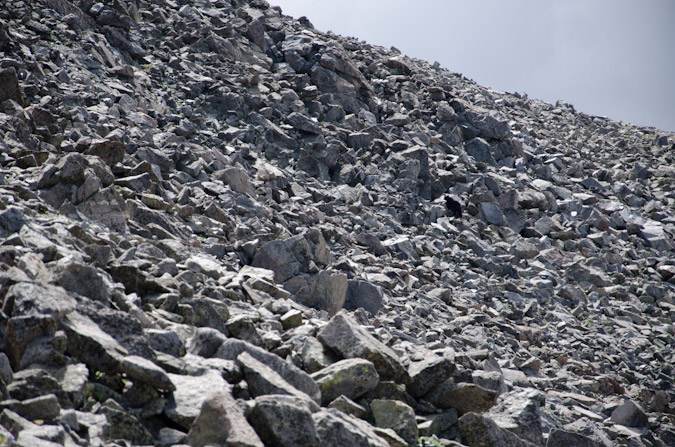
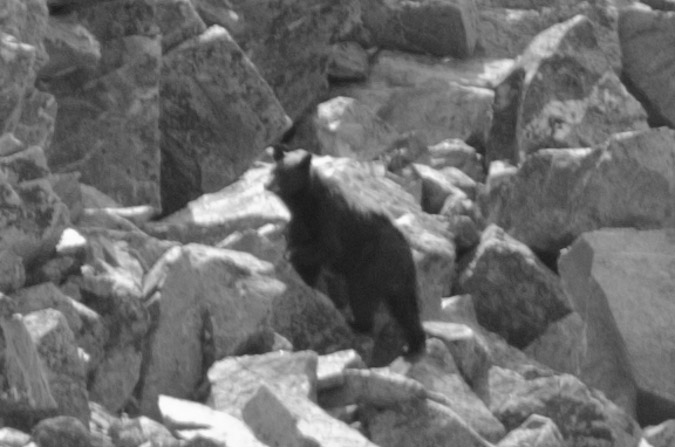
I kept on hiking and eventually rejoined Regina on last section of the down climb from Culebra. We were able to make it back to the car just before hearing the first thunder from a storm that had quickly built above Culebra. We were both thankful to be off the mountain and headed out. We stopped a few times to get photos of Culebra and also of the Blanca massif from the town of San Luis.

Next up – Snowmass Mountain and Hagerman Peak!
Just a reminder - this site costs me time and money to maintain - if you find it useful, please consider supporting the site by remembering to use the affiliate links, especially if you purchase photography related gear from Adorama. Thanks!
{fcomment}