Displaying items by tag: Backpacking
Rio Grande Pyramid - The Lonely Centennial
 Rio Grande Pyramid has long been on my "to-do list" for the Centennials (the highest 100 mountains in Colorado). Isolated by over 10 miles from its neighbors in the San Juan Mountains, Rio Grande Pyramid sticks out like a sore thumb by itself to the east of the Needle and Grenadier subranges. I viewed Rio Grande Pyramid from many angles this year, including a great view from Handies, and another wonderful perspective from Vestal and Arrow Peaks.
 Needless to say, I have been eyeing Rio Grande Pyramid a lot this year, and I have known since January that I would be climbing it with my dad at the end of August. Since Rio Grande Pyramid is very isolated, it requires a fairly lengthy backpacking excursion and some planning. My dad (Old Climber on this site) has wanted Rio Grande Pyramid for many, many years, so he jumped all over the chance to attempt to tackle this beast.
The plan was to leave from Colorado Springs after work around 5 or 6 PM on Friday, set-up a quick camp near Rio Grande Reservior, back-pack to Weminuche Pass on Saturday, set-up camp there, climb Rio Grande Pyramid on Sunday, and backpack out on Monday. With the weather forecast for the area being up to 70% chance of precipitation for pretty much the whole weekend, Ray and I were prepared for a wet trip, but hopeful that the weather would cooperate for a summit attempt. Just in case, I packed a book, The Things They Carried by Tim O'Brien, per the recommendation of my wife.
To start off, here are some meaningful statistics for this adventure:
Peak summited:
Rio Grande Pyramid: 13,821 ft. (ranked 97th in Colorado)
Total elevation gain: 4,674 ft.
Total distance hiked: 19.26 miles
Total time hiking: Approx. 14 hours
Total photos taken: 350
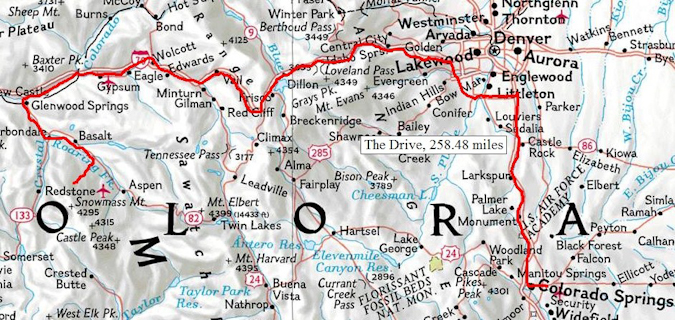
Total distance driven: 540 miles
Trip duration: 3 days
The drive to Rio Grande Reservior was uneventful, and finding a place to camp was surprisingly easy. We were aiming for the Thirtymile National Forest Campground, but we balked at the $16 fee, so instead we decided to camp 400 yards away, for free, in a large field by the Rio Grande River. This proved to be a great campsite. We woke up around 7:30 AM, packed up, ate breakfast, and drove to the campground, where the parking lot for the Weminuche Trail is at. At about 8:30 AM, Ray and I were packed and ready to hike, and began our 3-day journey into the remote Weminuche Wilderness Area.

A topographical map of our trip, click to enlarge.
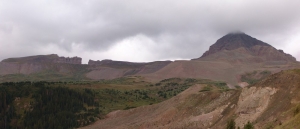
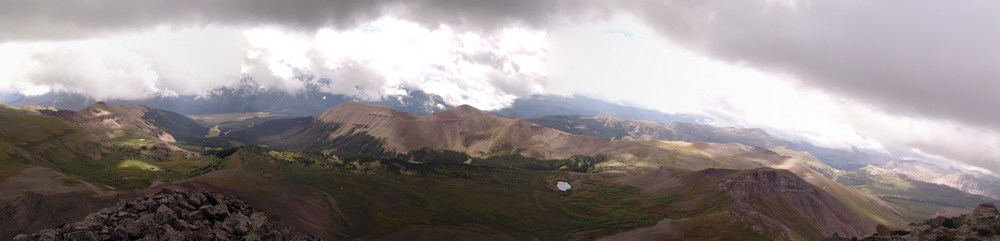
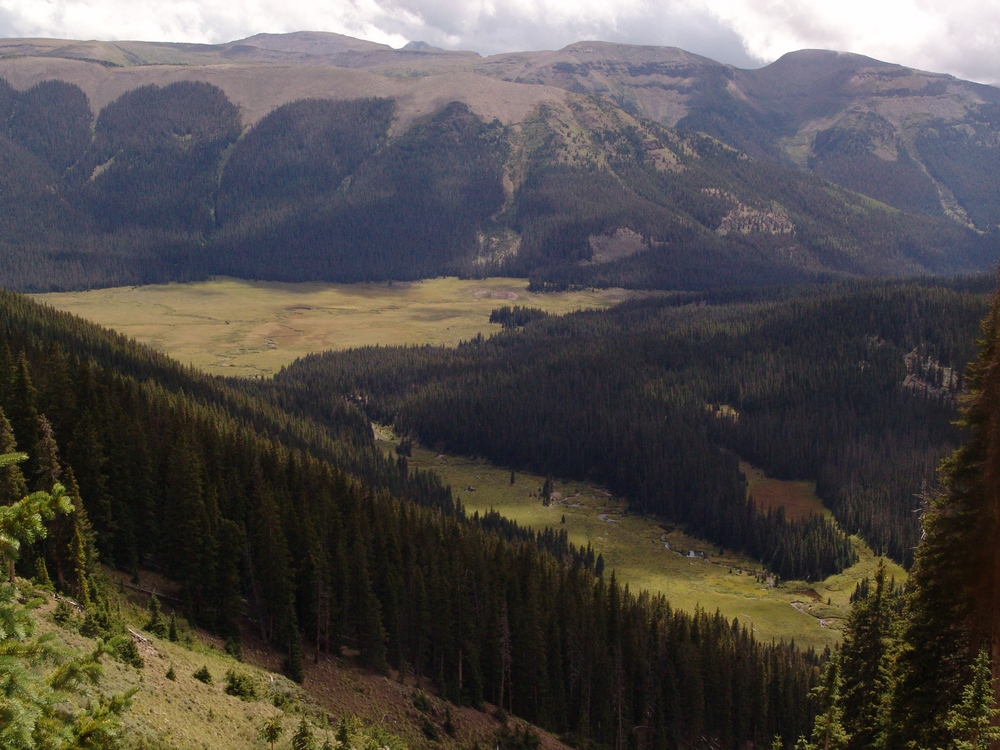
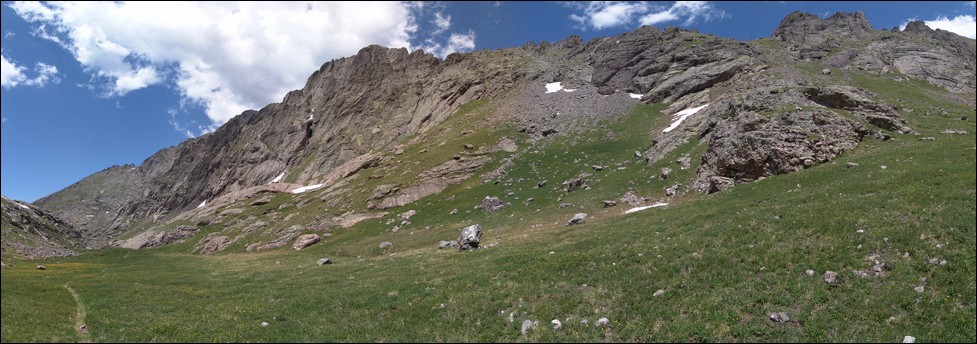
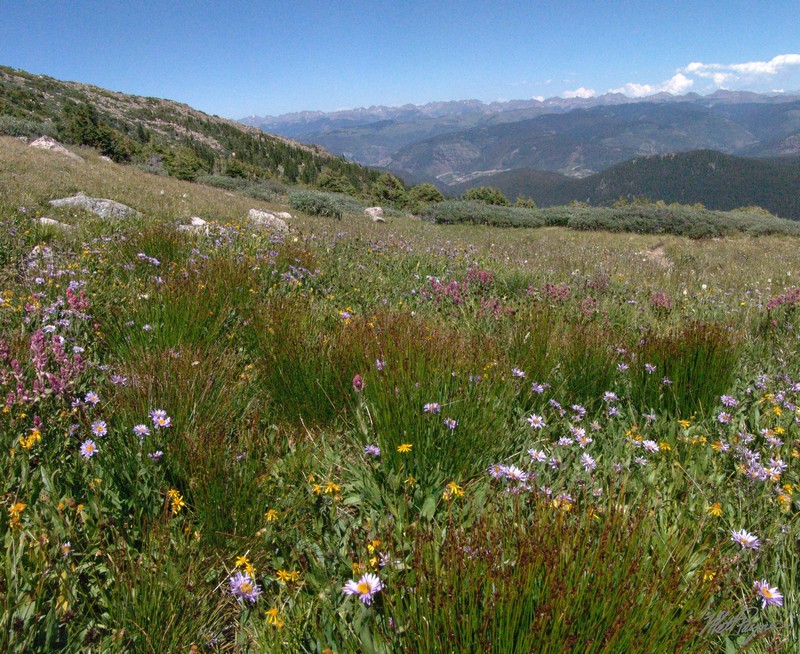
The hike in is a relatively easy backpack, with the exception of mile number 2. The first mile is spent traveling along Rio Grande Reservior along a gentle trail, and then the trail picks up elevation quickly in mile 2 as it climbs and rounds the corner to the south west. After the 2nd mile, the rest of the hike in is very mild, with excellent views of the wide-open and very photogenic Weminuche Creek basin.

The Weminuche Creek.
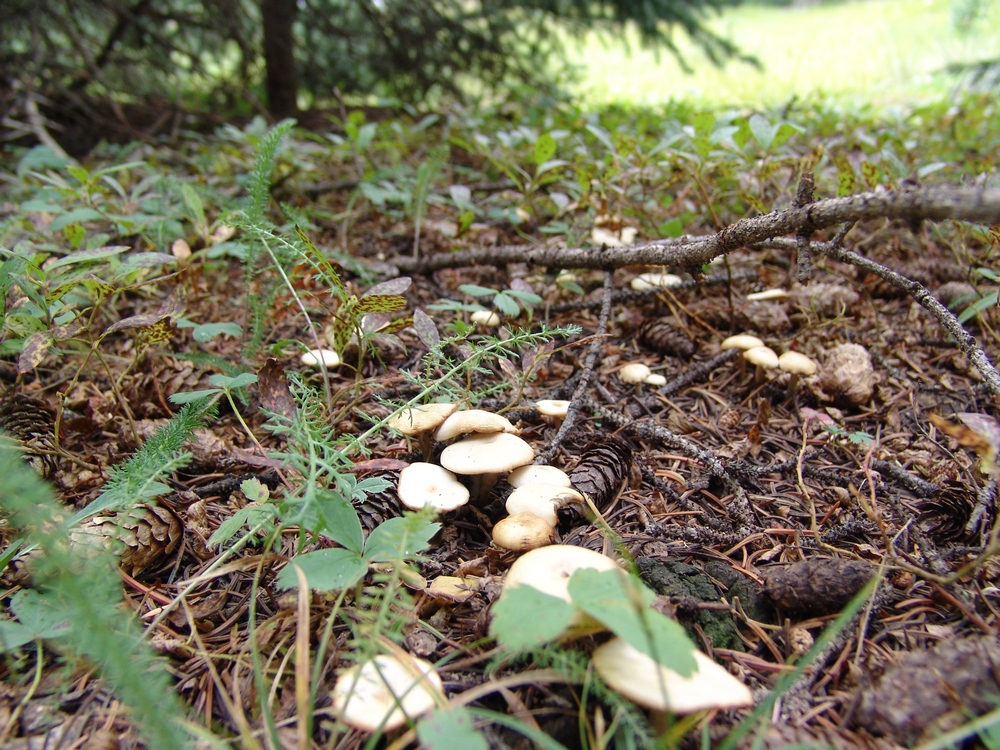
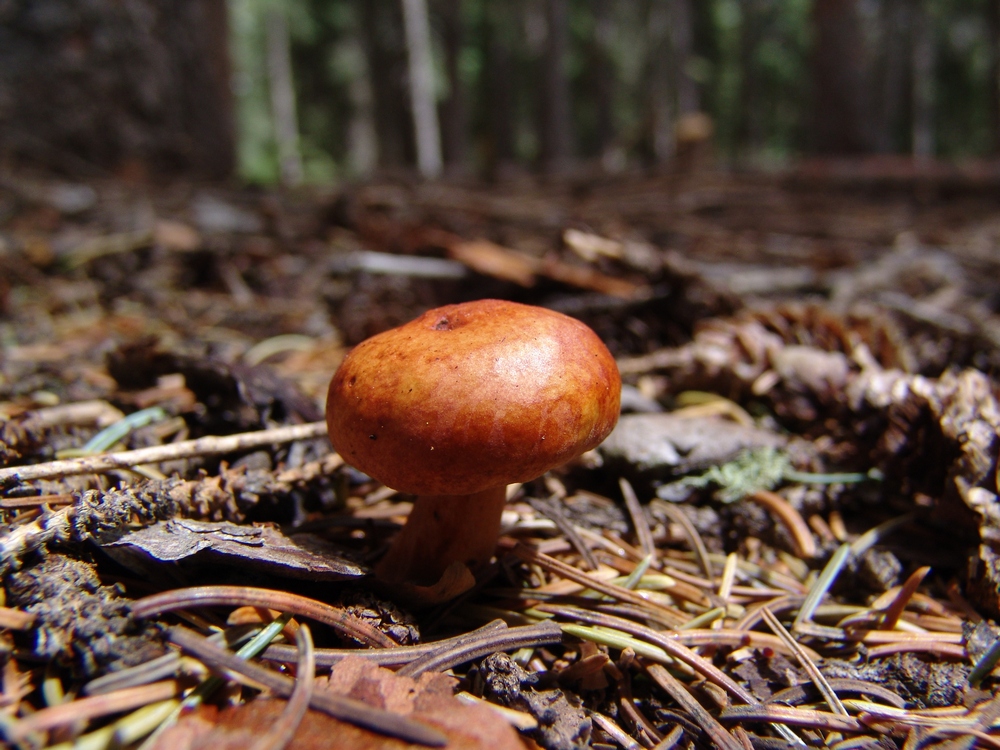
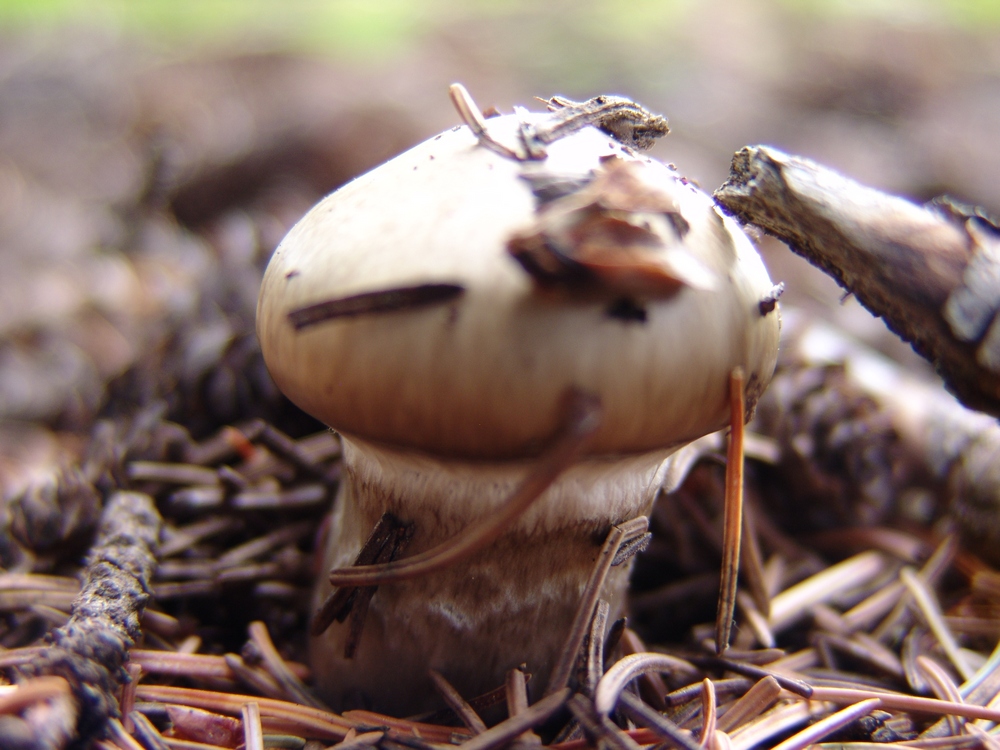
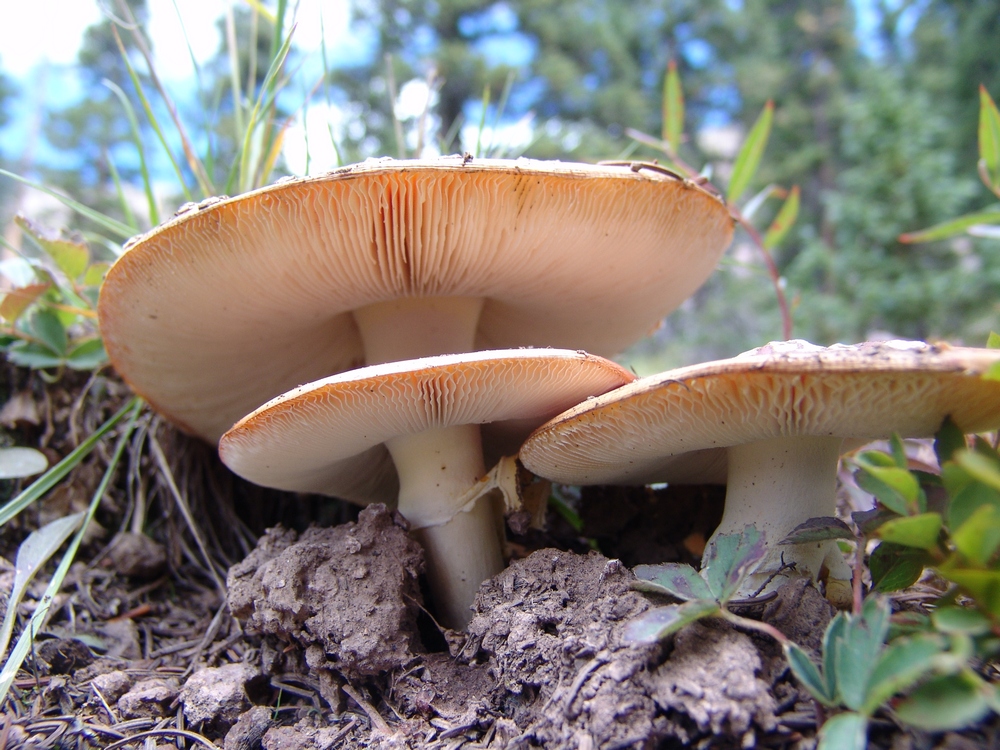
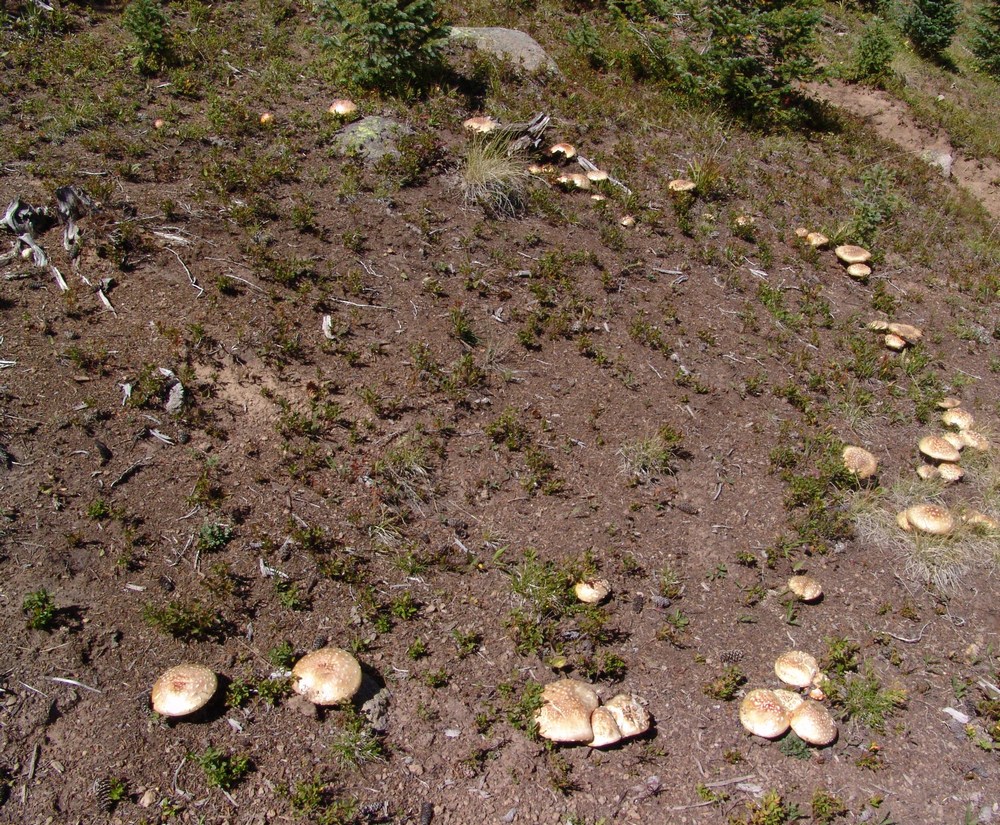
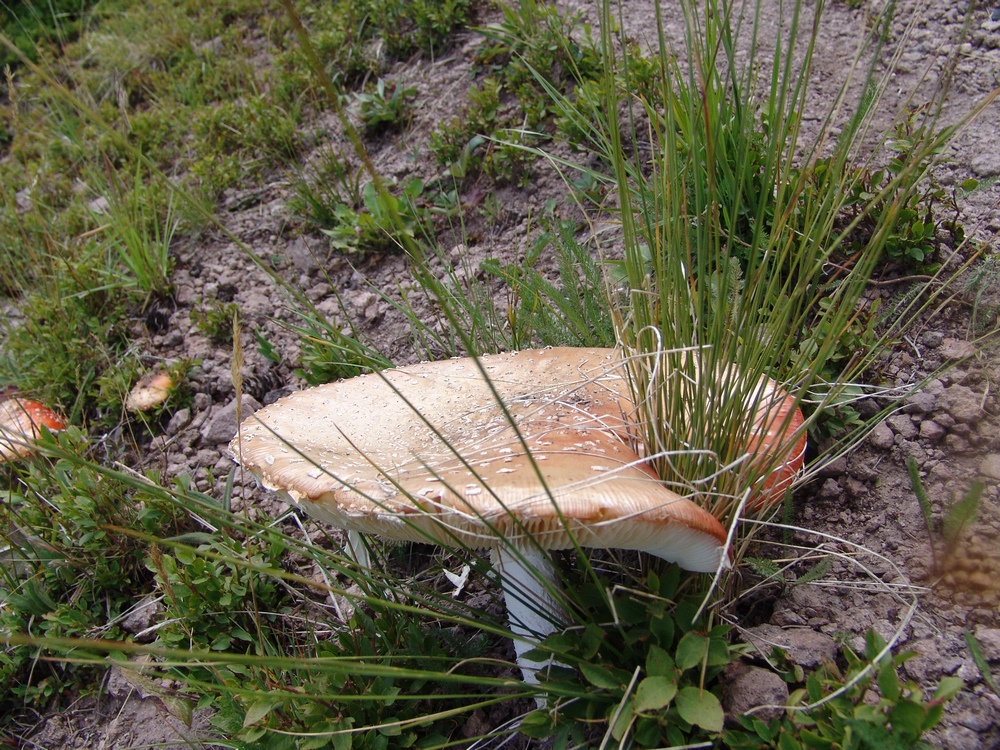
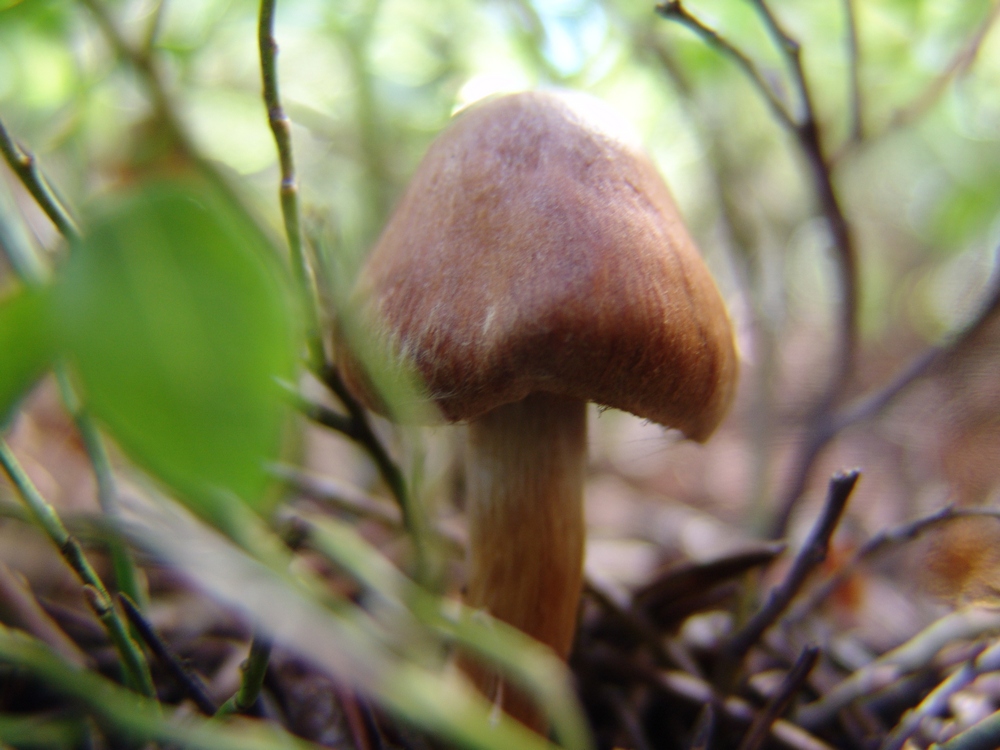
For our campsite, we were aiming for an area near Weminuche Pass. On the way up, both Ray and I were marvelled by the variety of mushroom that were growing along the trail, certainly evidence that this was been a very wet summer. Little did we know, the mushrooms would be one of the highlights of our trip (for those wondering, we did not ingest any of them).
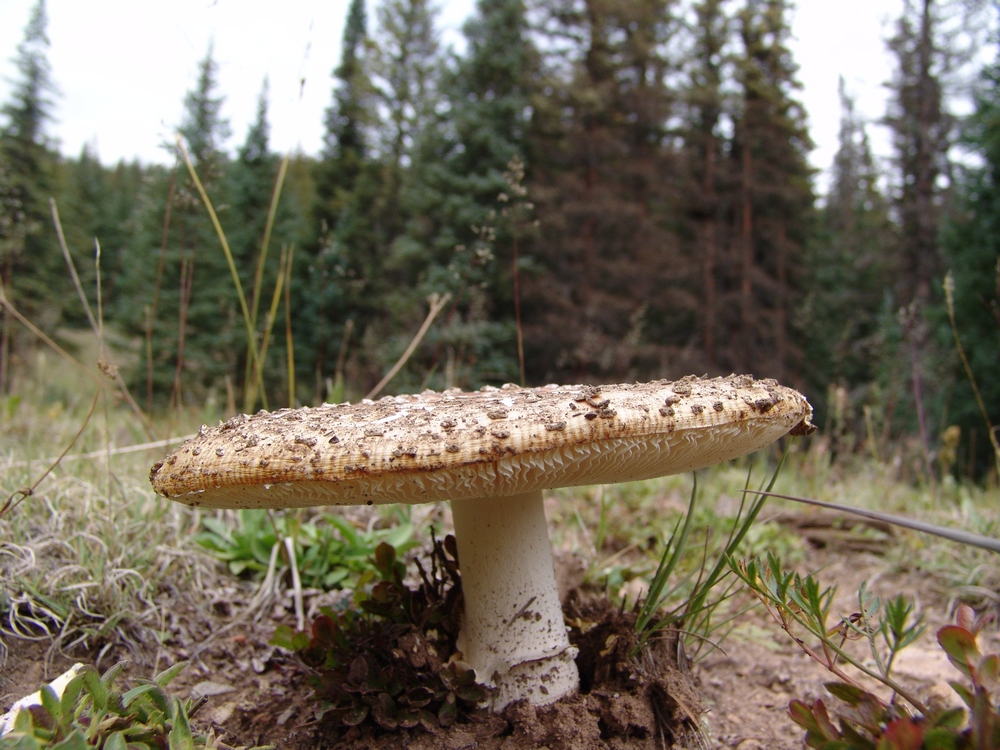
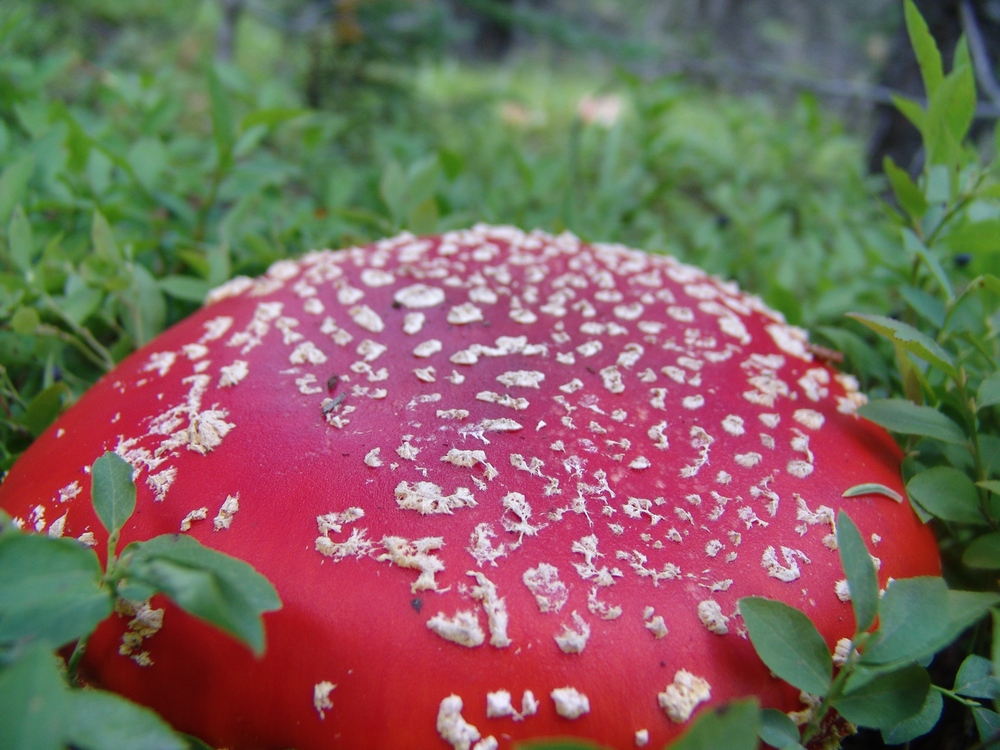
A Fly Agaric mushroom along the trail leading towards Weminuche Pass.
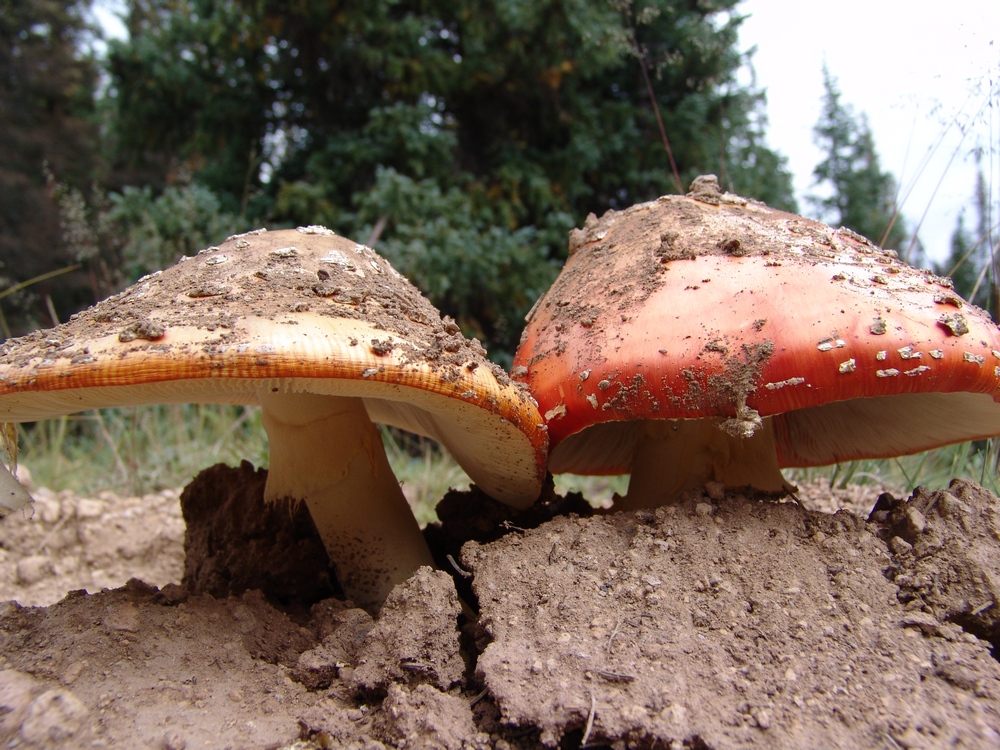
Two Fly Agarics emerge from the hard soil.
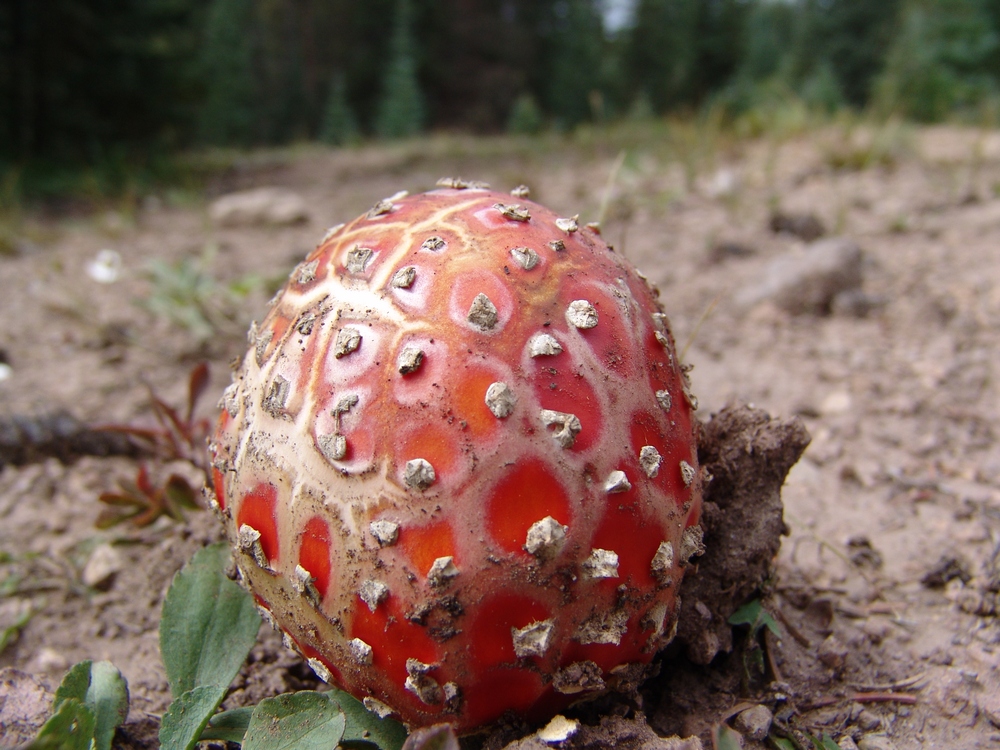
A Fly Agaric poking through the dirt.
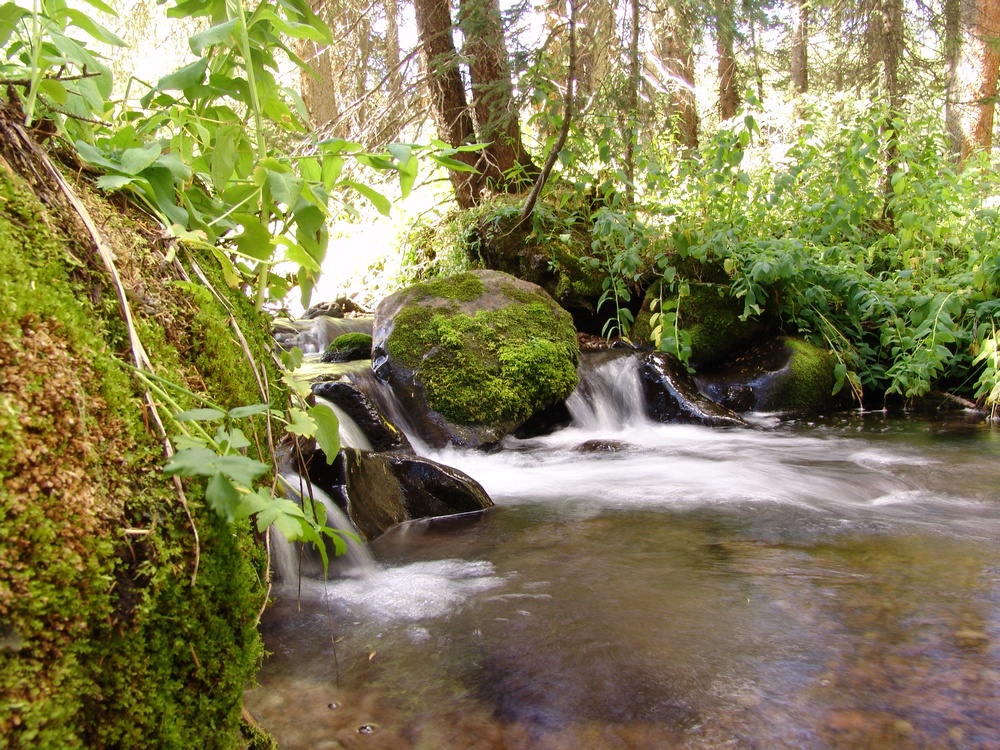
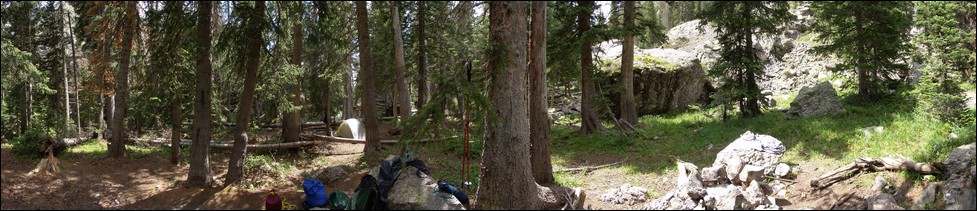
We finally found Weminuche Pass, which was easy to spot by the two almost useless signs sticking up out of some cairns on each side of the trail. Heed my warning now, the sign on the right is for "Sky Line Trail," which is the route to Rio Grande Pyramid. The sign is poorly marked and at the time pointed in the wrong direction. We've since fixed the sign, so hopefully you'll see it better than we did. We camped directly east (left) of these signs along a small but gorgeous creek that flowed down from the Continental Divide. The area was a very large and impacted campsite, with plenty of great spots for a tent a a nice fire-ring.

The creek near our campsite.
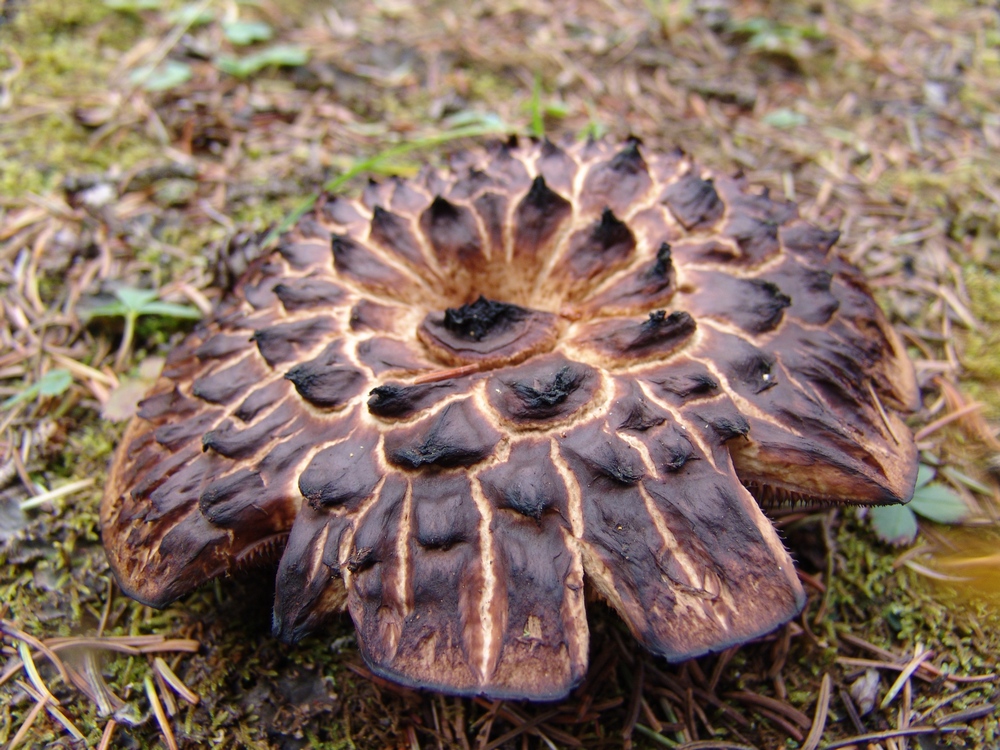
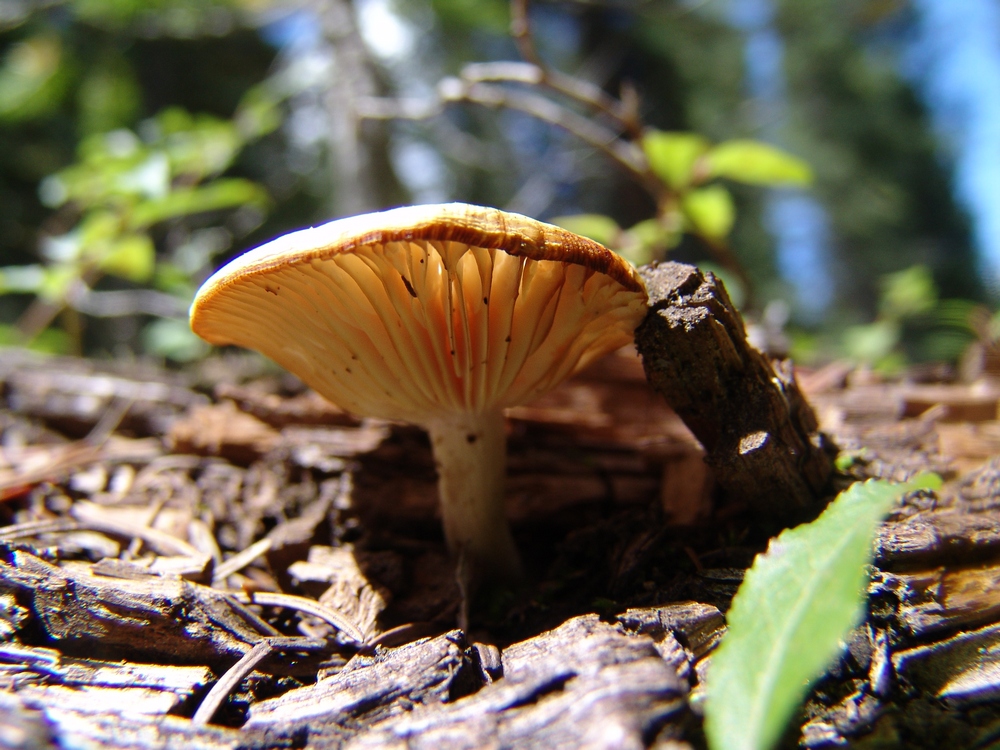
After setting up camp, I decided to go for a walk around the area, and see what kind of mushrooms I could find. Since I know almost nothing about mushroom identification, this was more of an opportunity for me to practice taking macro shots with my camera. I do think that mushrooms make for excellent subjects for photography, and I suspect/hope that some mushroom lovers out there may appreciate this trip report. I've submitted these photos to MushroomExpert.com (which is a very cool site) and hope to find out soon if we can name any of them. If you don't care for photos of mushrooms, you can skip that section by clicking here.
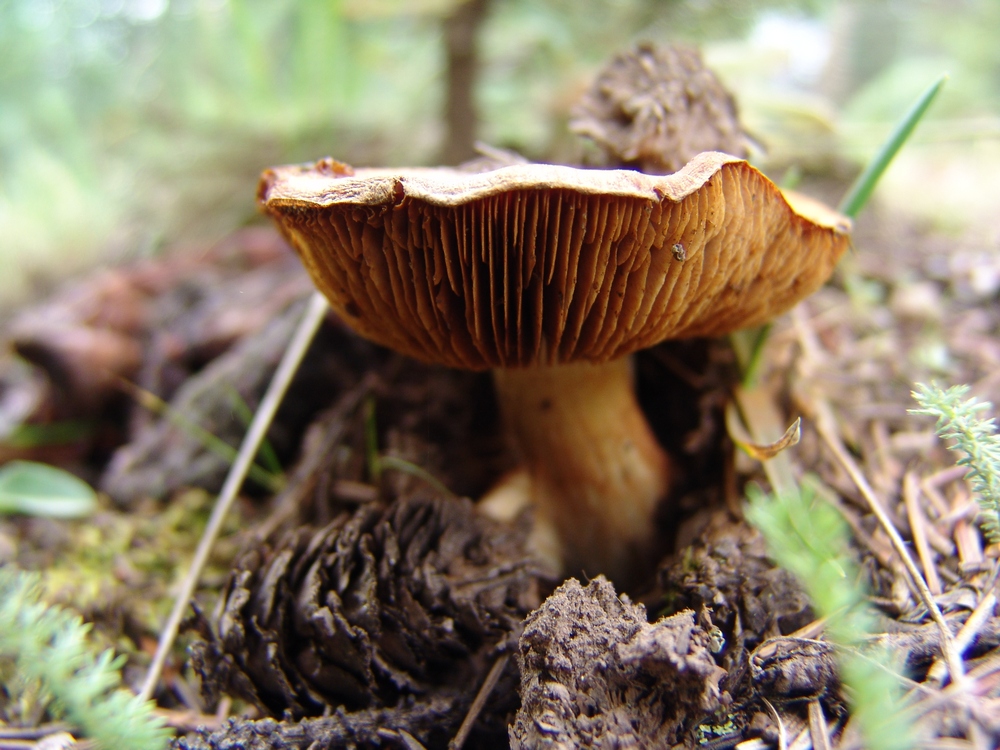
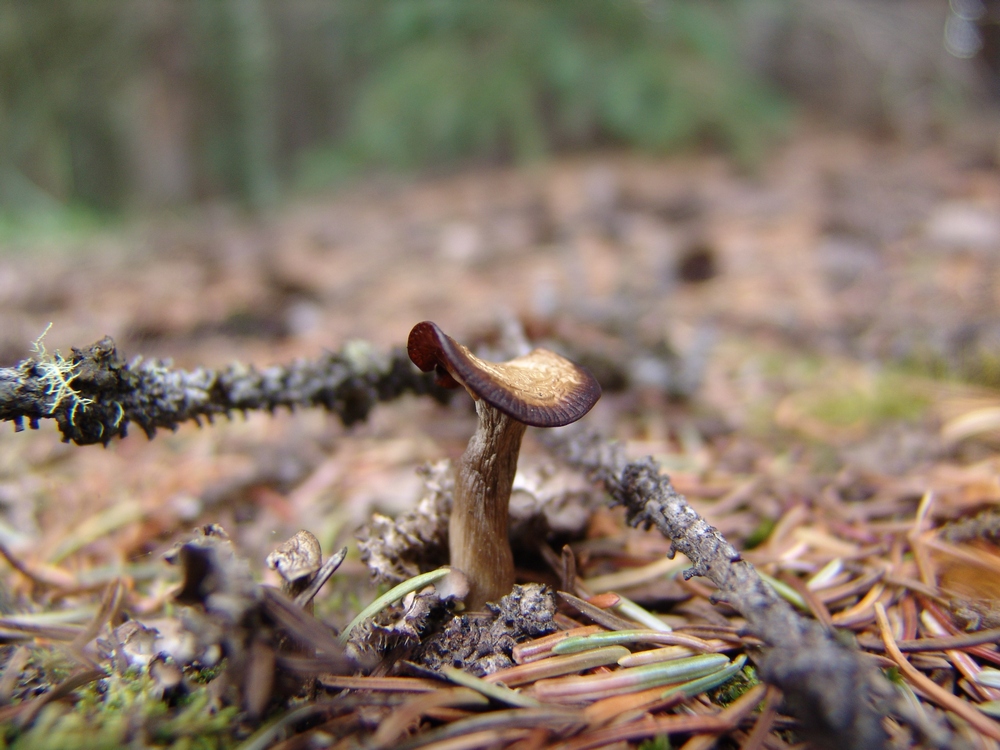
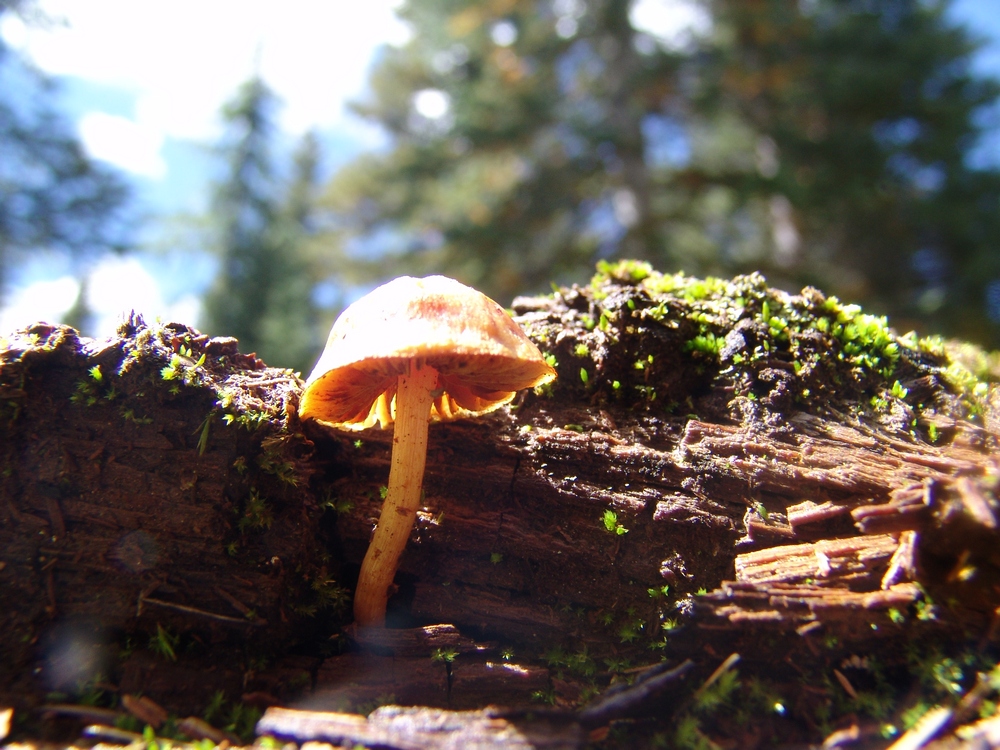
A little brown mushroom (or LBM for short, as Ray would say).
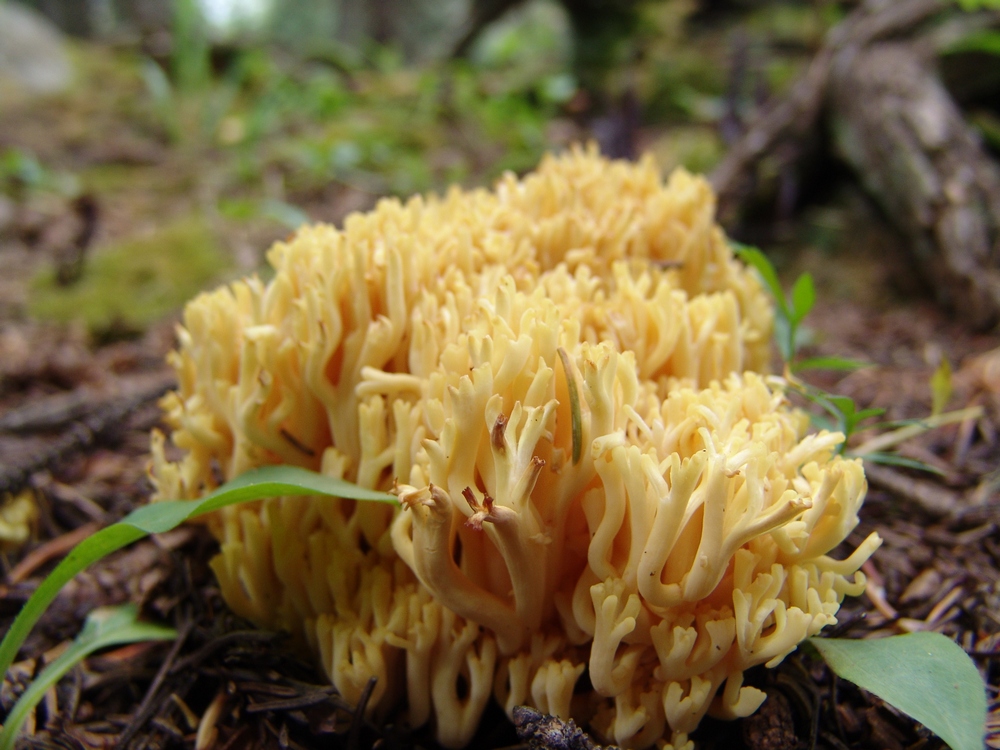
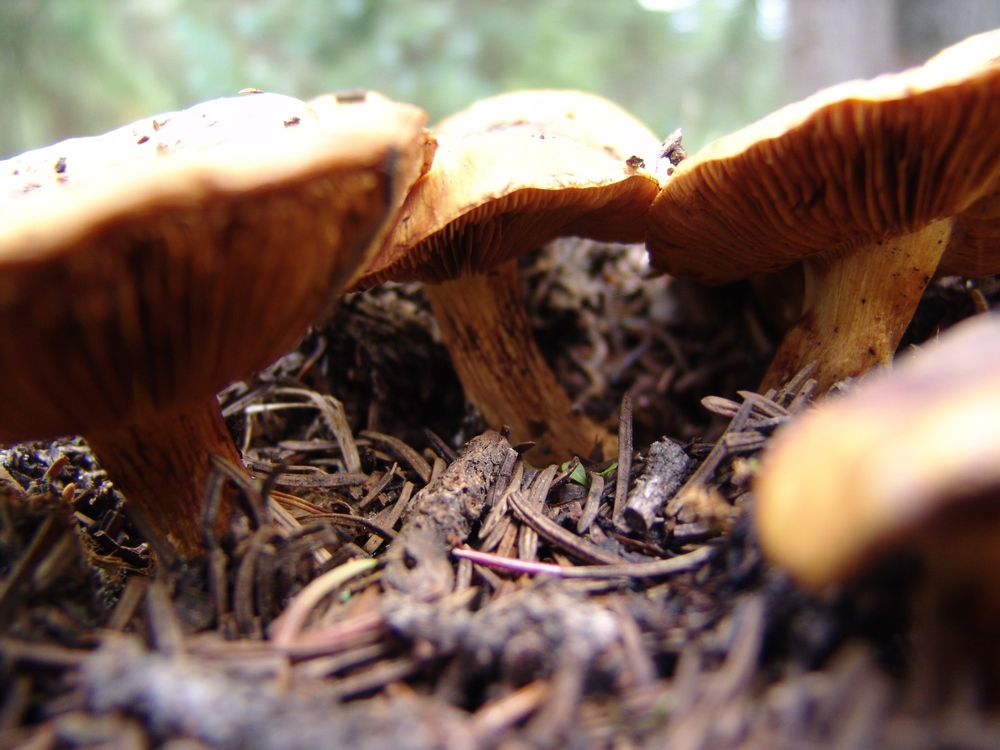
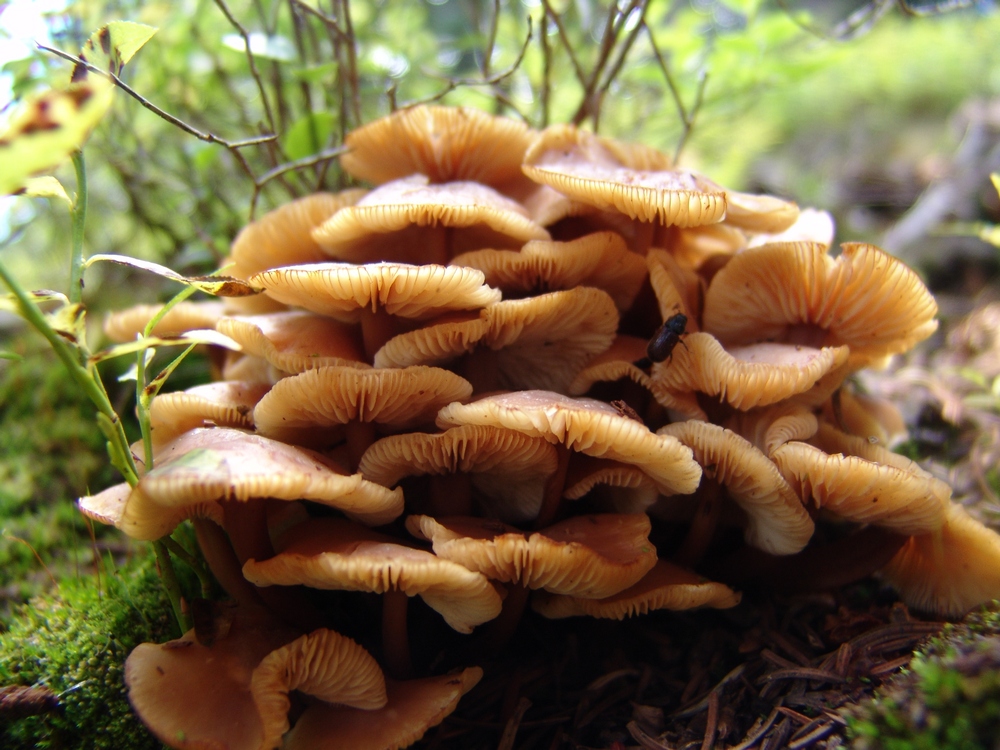
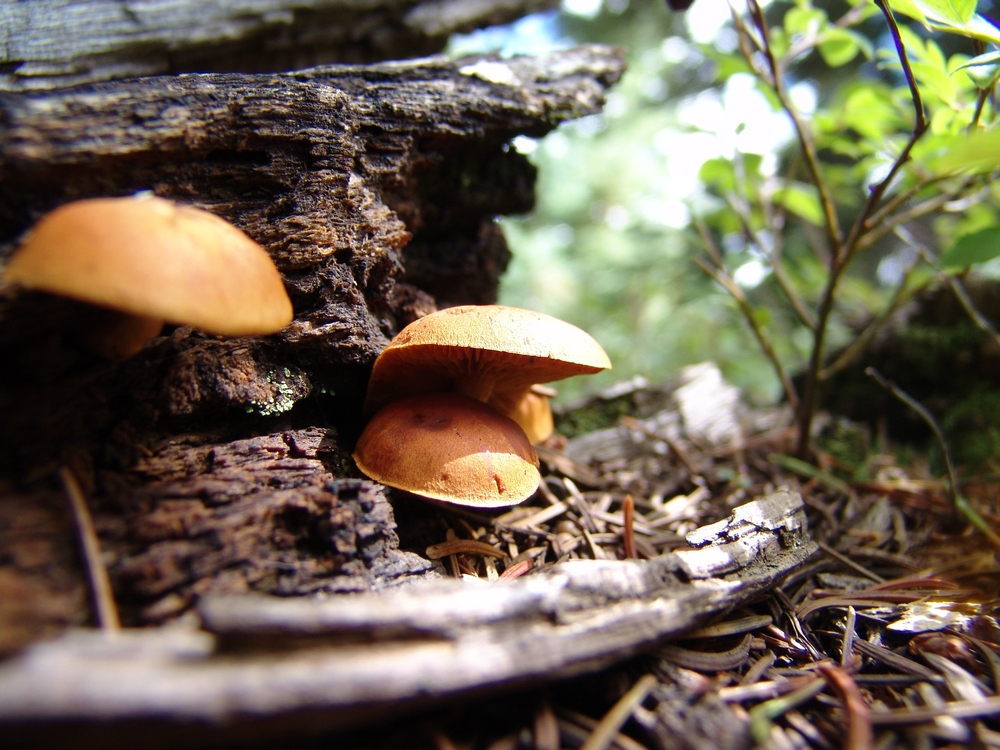
Some funky yellow mushrooms - we saw a lot of these under the pine trees.
Another "LBM."
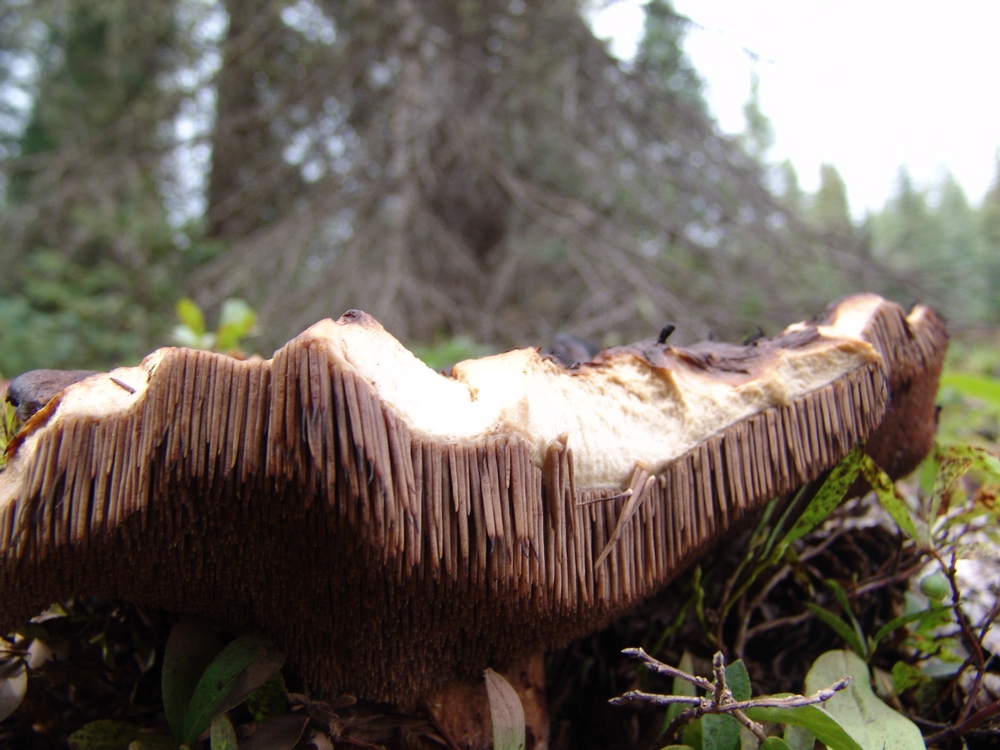
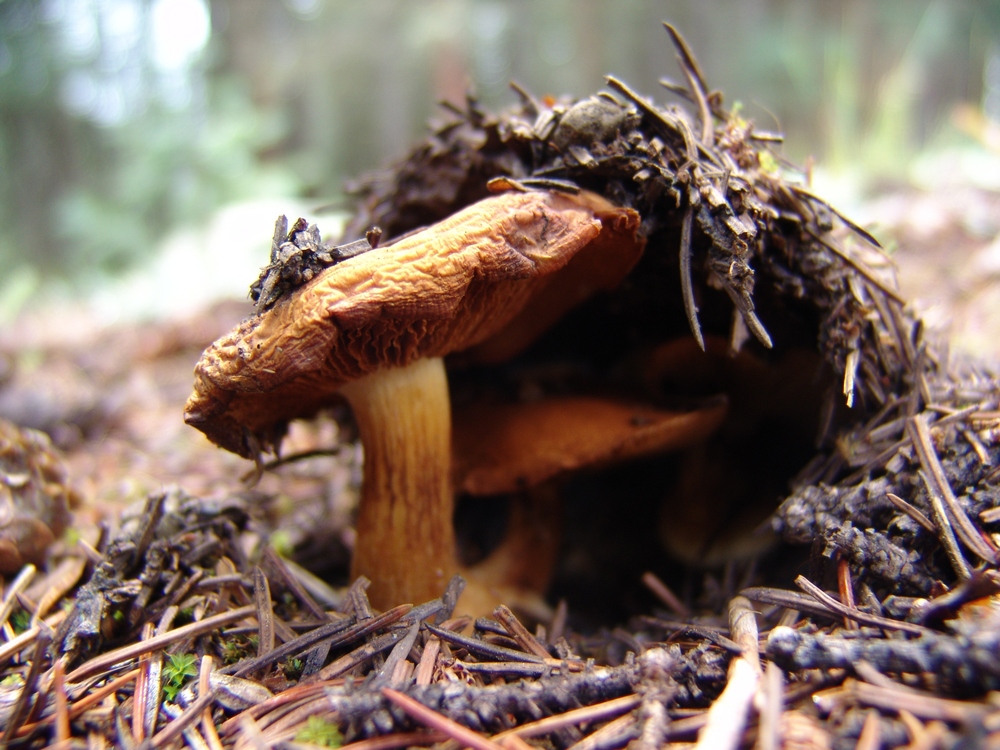
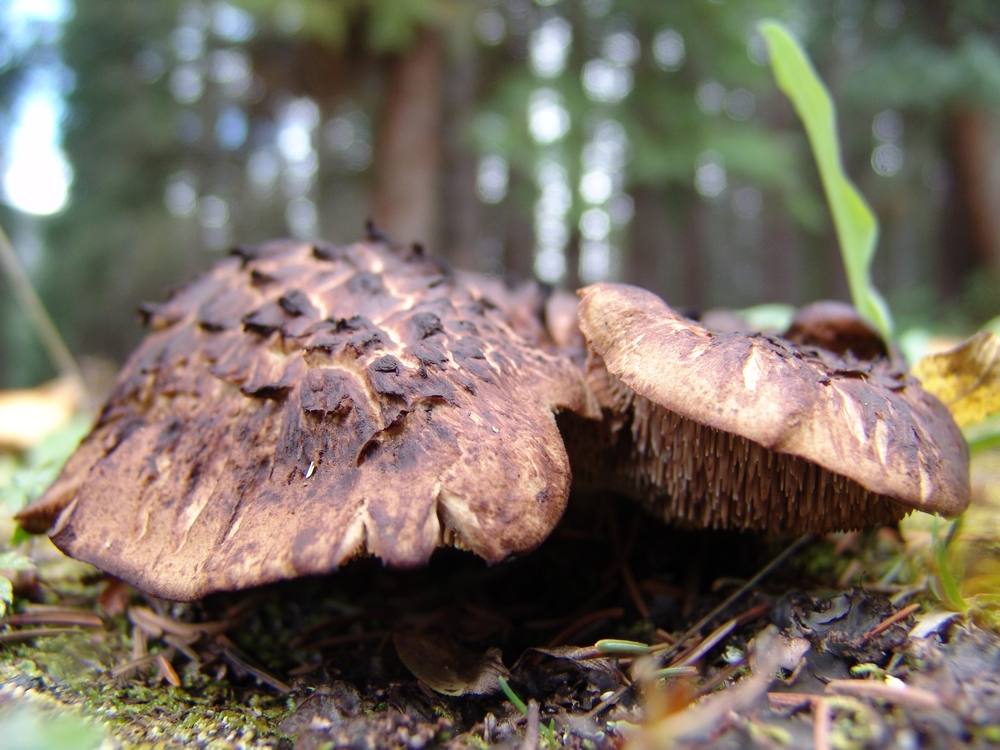
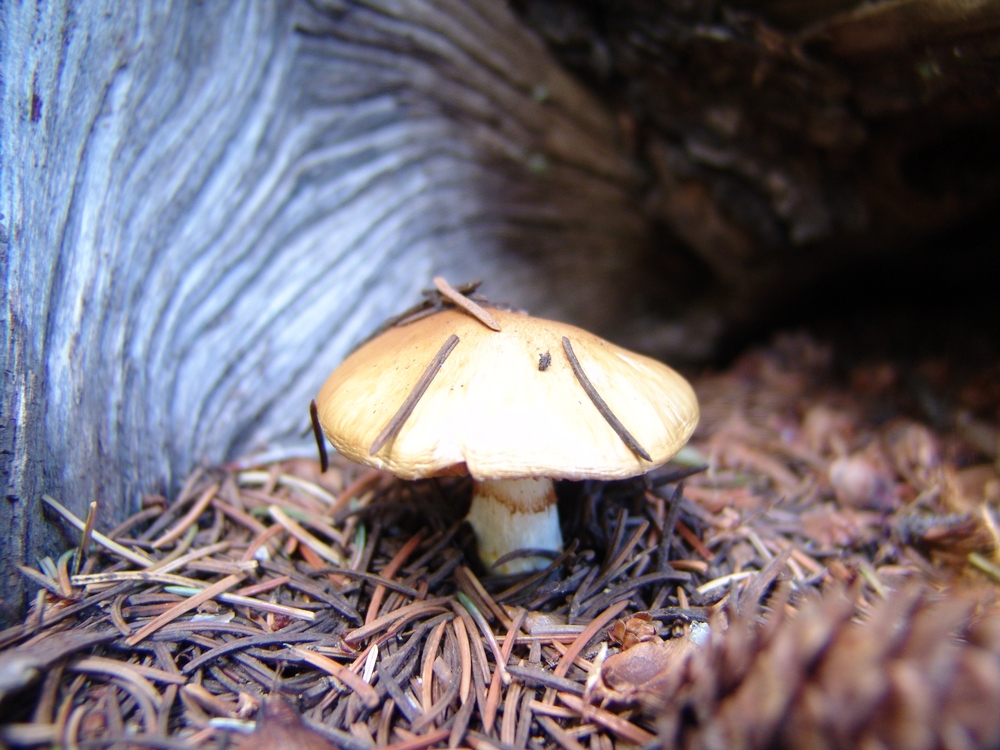
A nasty looking 'shroom - I think it has seen better days...
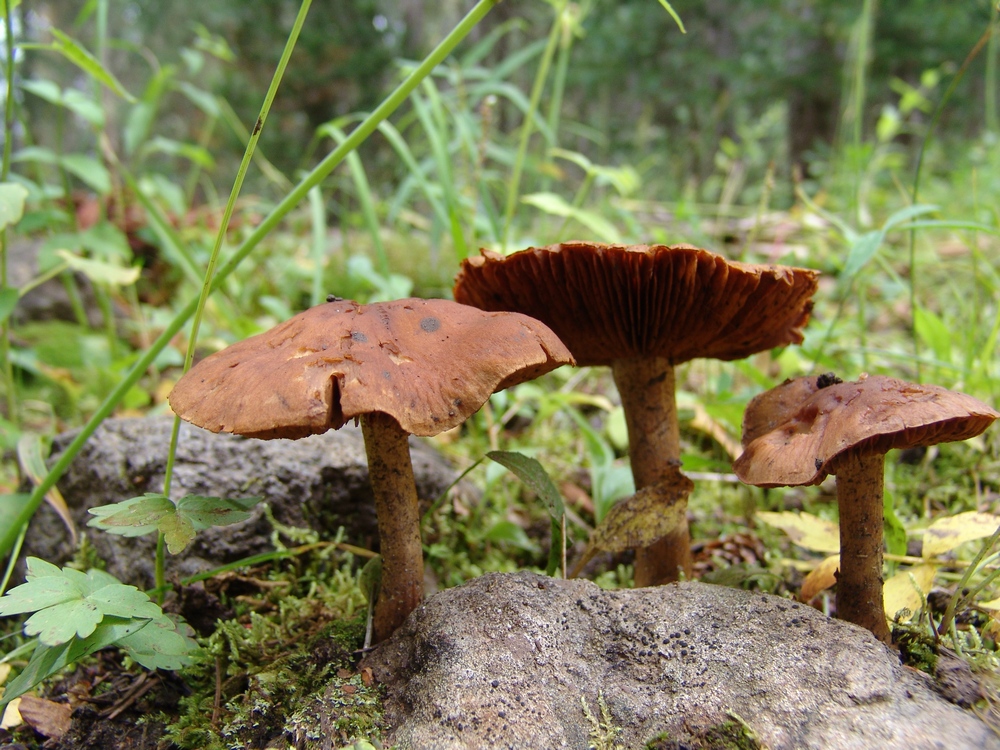
Three "LBM's" emerge from the mossy ground floor of the forest.
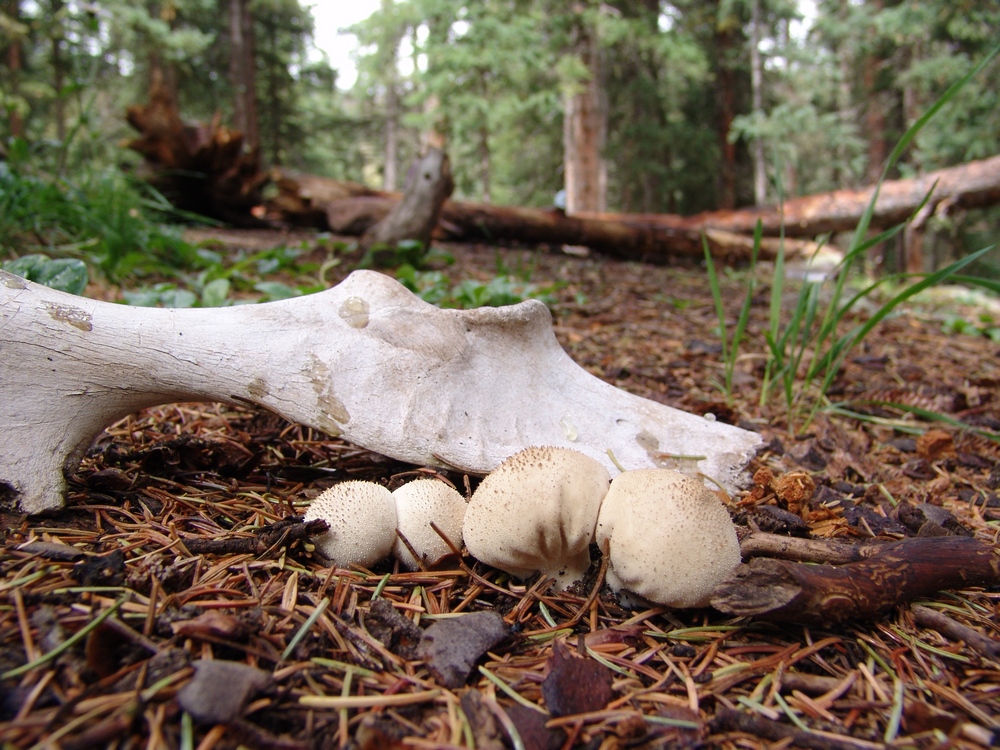
I wonder... did these mushrooms seal the fate of this poor animal?

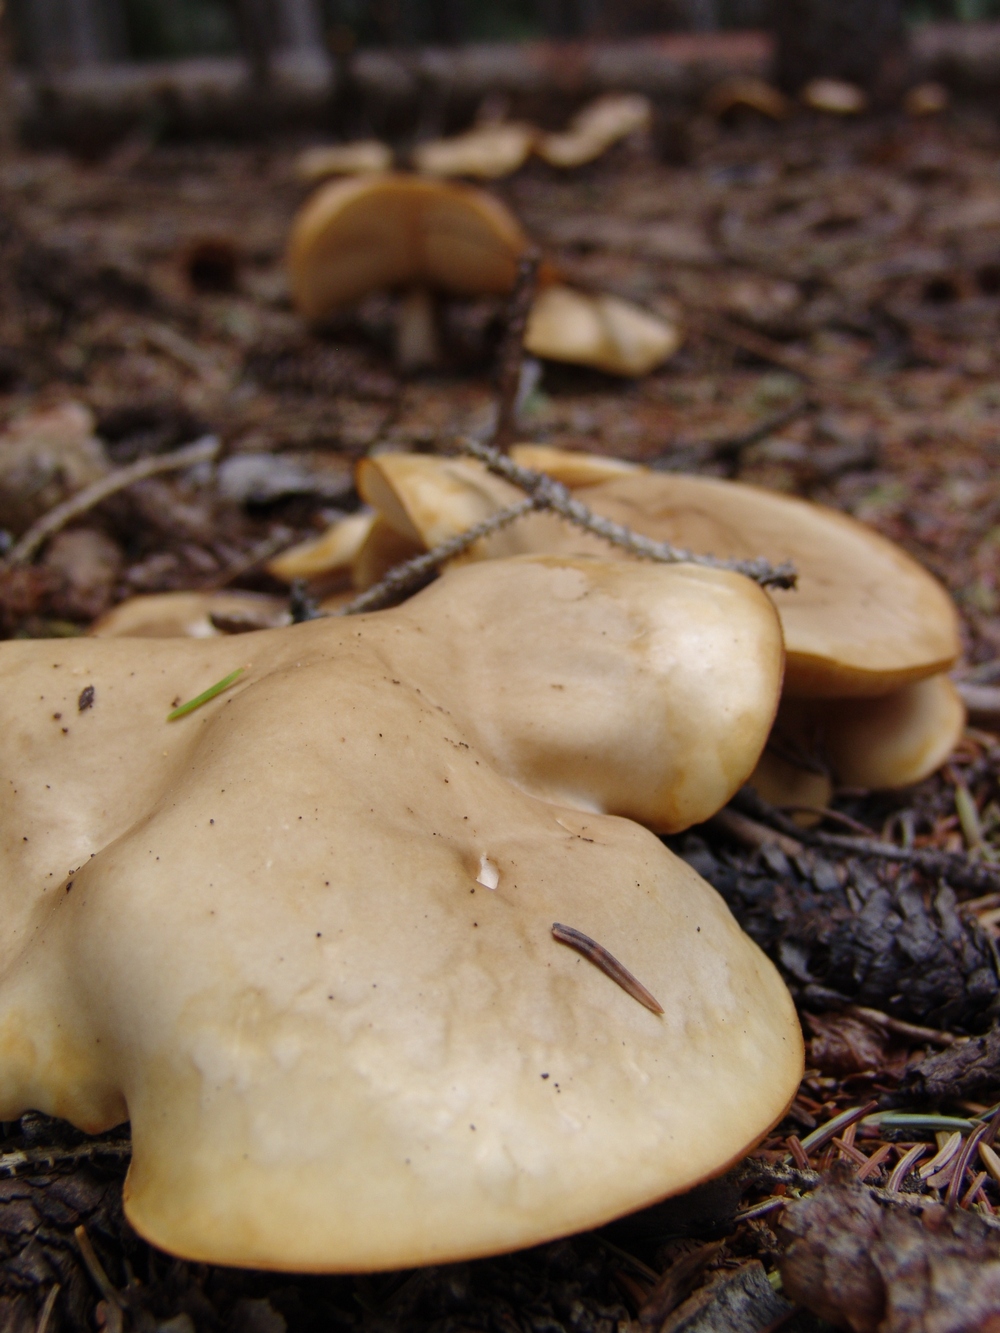
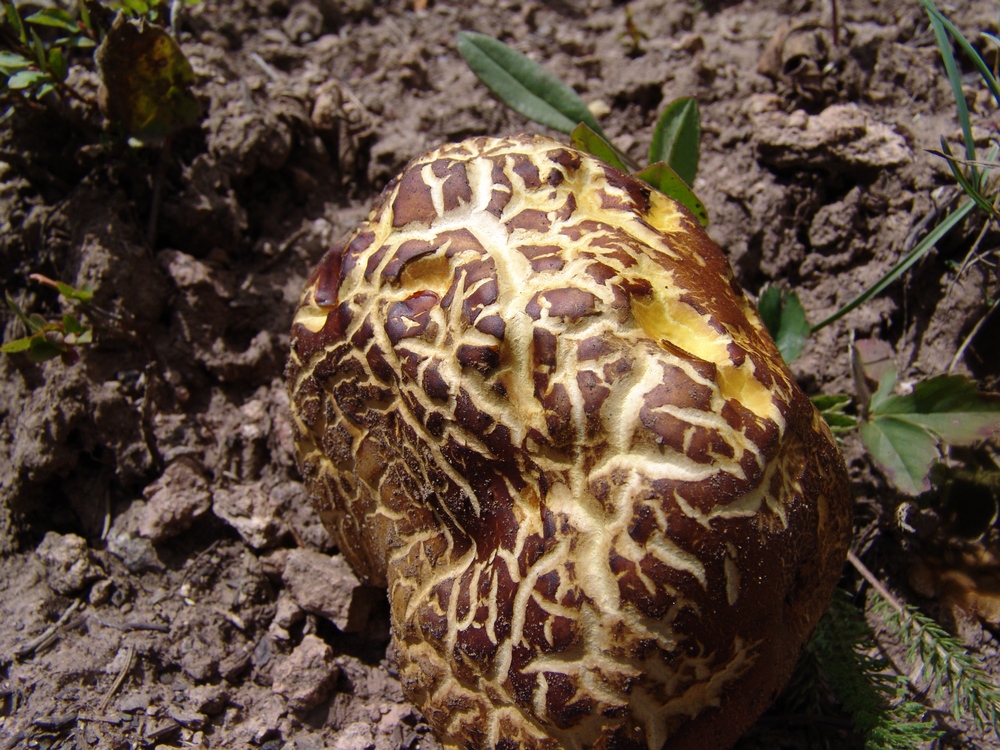
A King Bolete mushroom near our campsite. It turns out that these are quite edible.

Another view of the King Bolete.

A ring of mushrooms near our campsite.
More LBM's.
A LBM emerges from the pine needle floor.
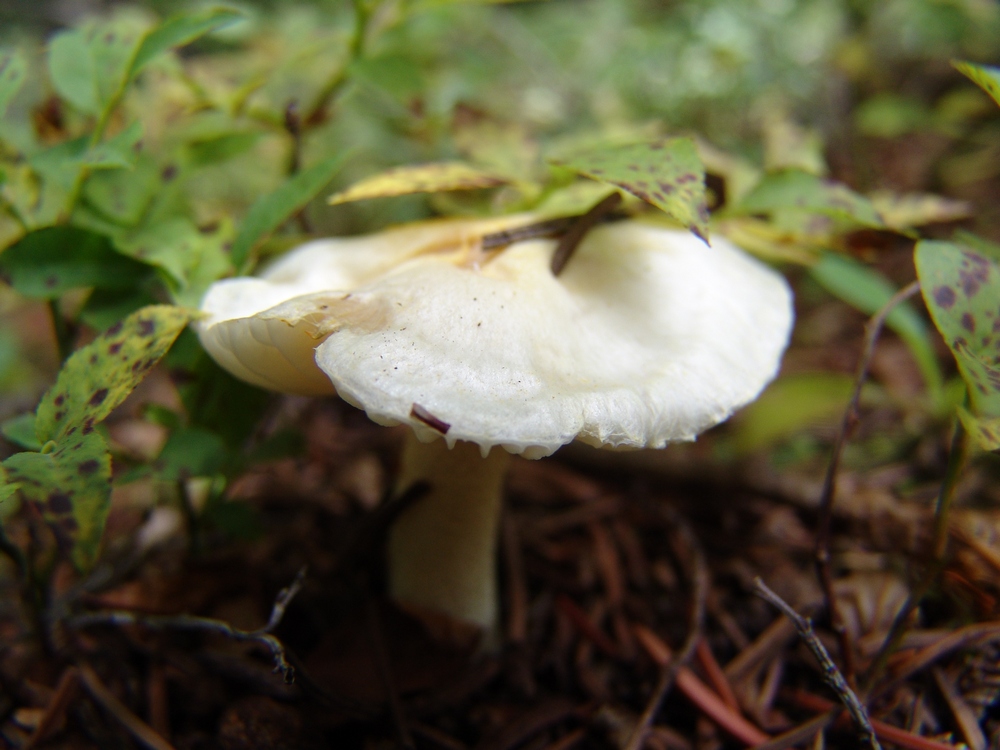
Little white mushrooms were everywhere...
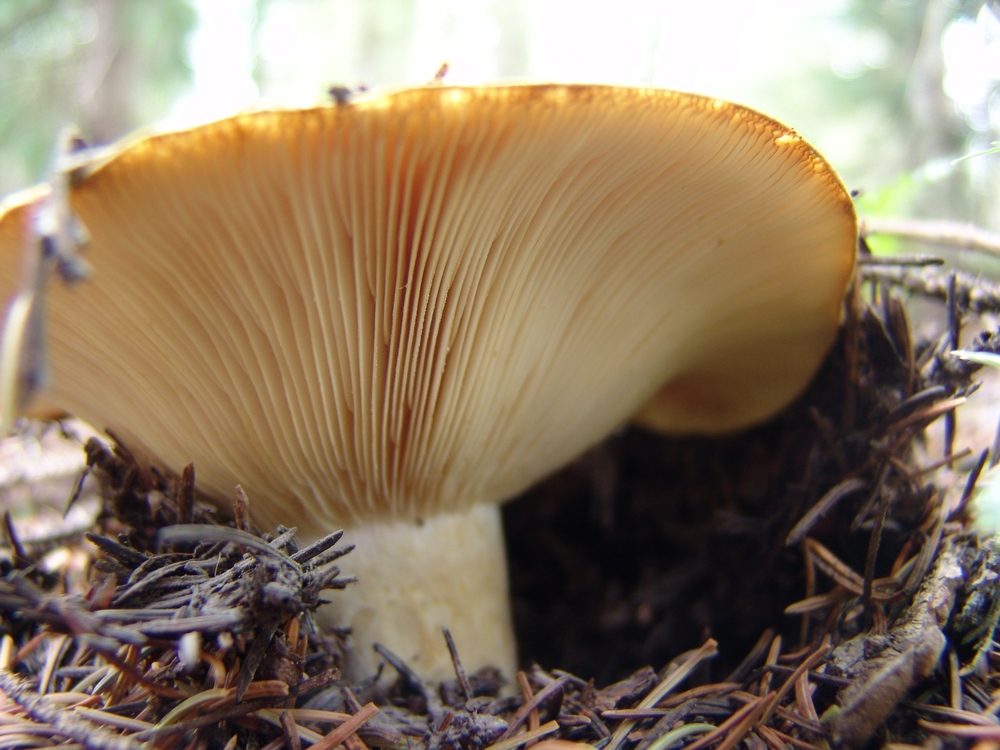
The "gills" of this mushroom made for an interesting subject for a macro shot.
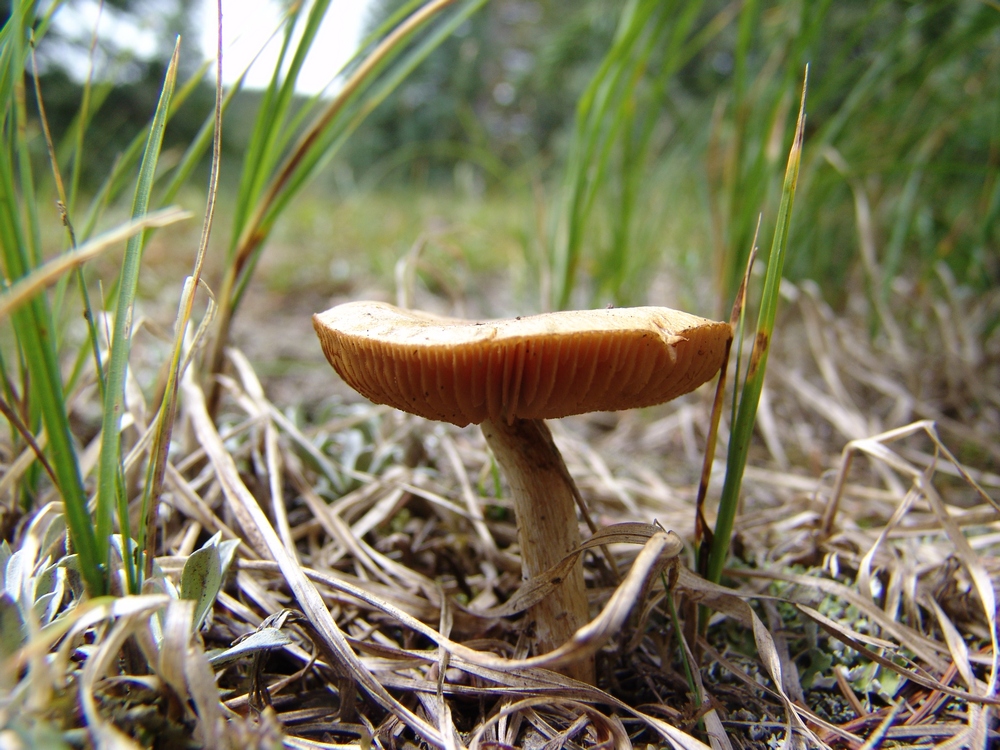
Another LBM rises from the grass.
These mushrooms looked like blobs slithering across the forest floor.
Yet another LBM!
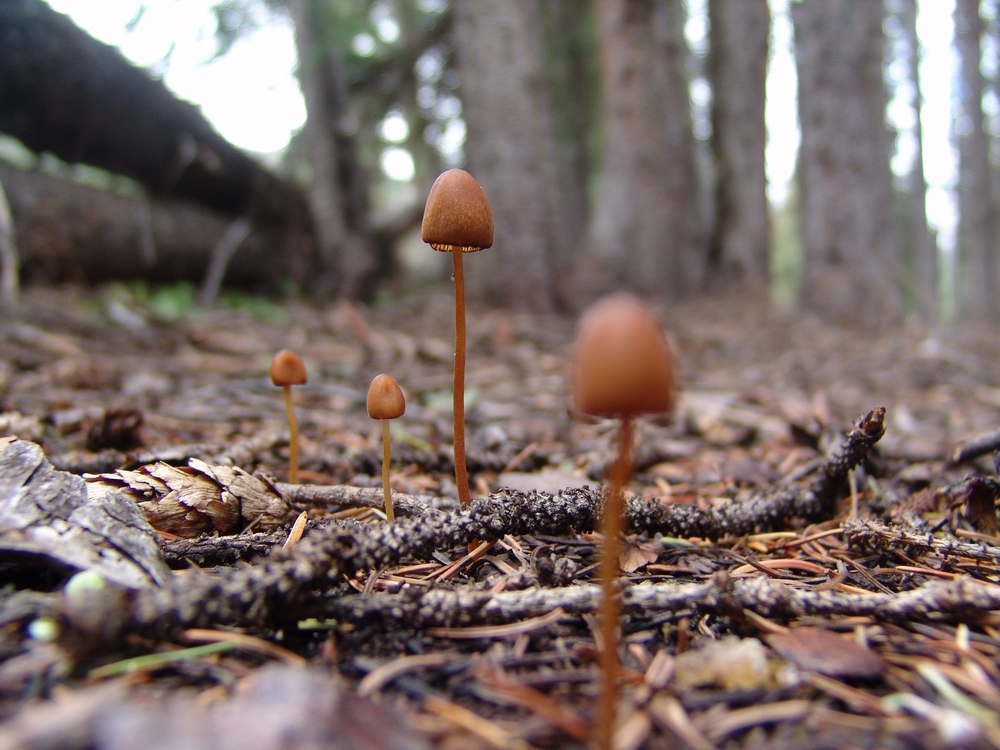
These tiny mushrooms were growing in a very obscure location. I don't have a clue how I spotted them. Pure luck. They were about an inch tall.
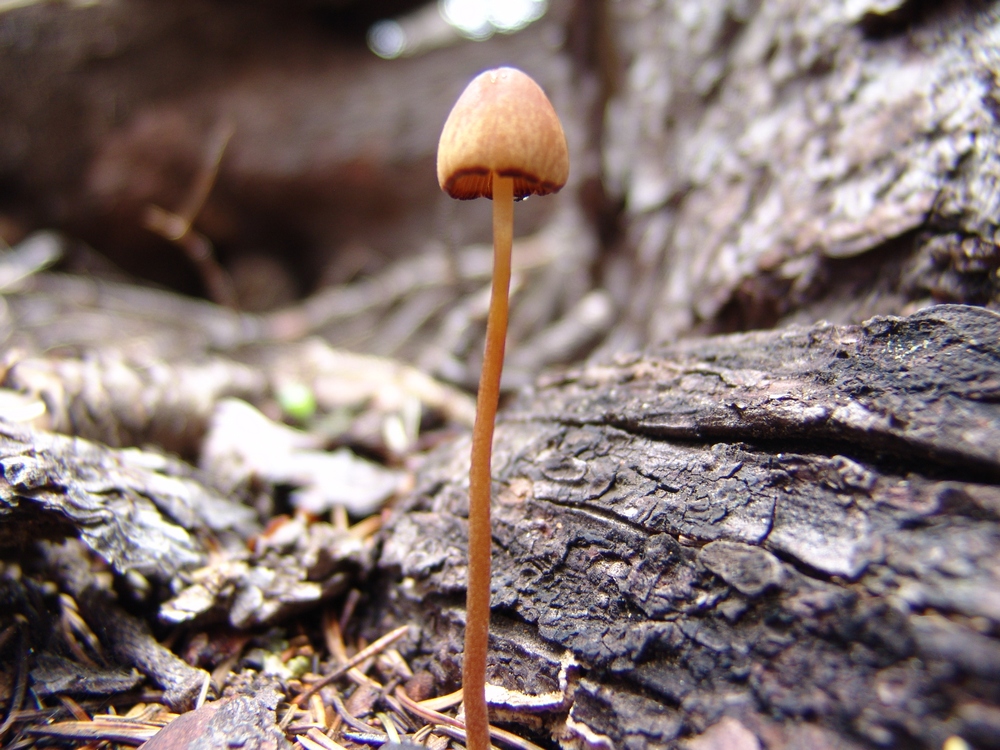
Another tiny little mushroom.

A perfect Fly Agaris specimin near our campiste. Doesn't it look like something out of Super Mario Brothers?

Mario emerges!
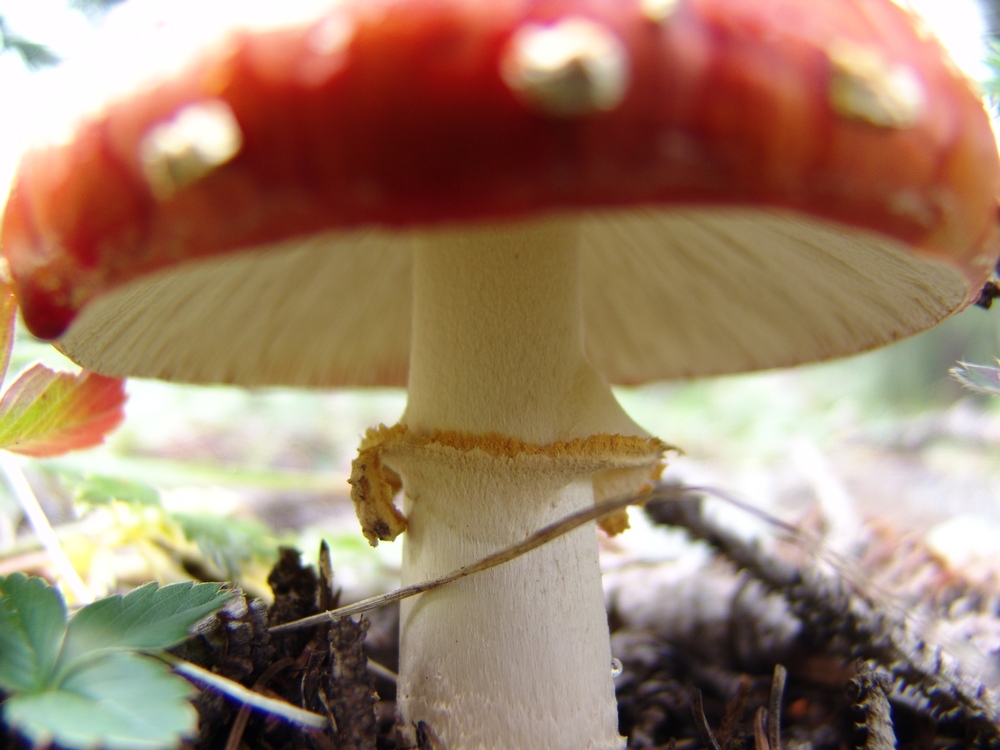
A view of the underside of the Fly Agaric.
This mushroom looks like it maybe got a little too much sun. Sunscreen is important in the mountains.
More crispy 'shrooms.
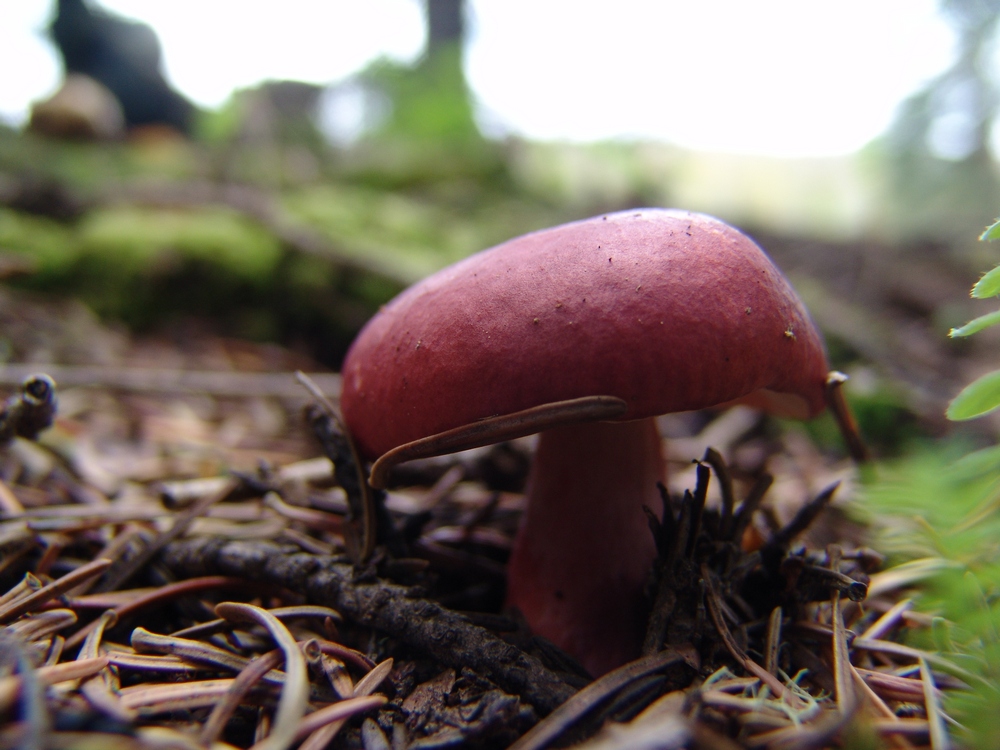
This little mushroom looks like she put on a little too much lipstick...
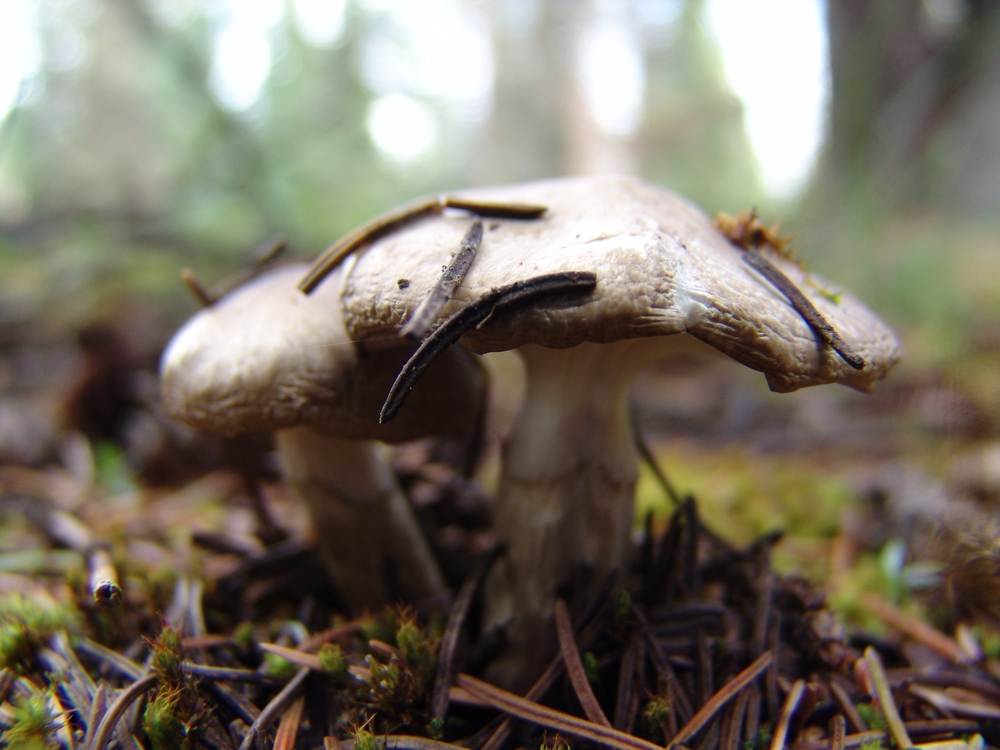
A white mushroom.
A small button cap mushroom.
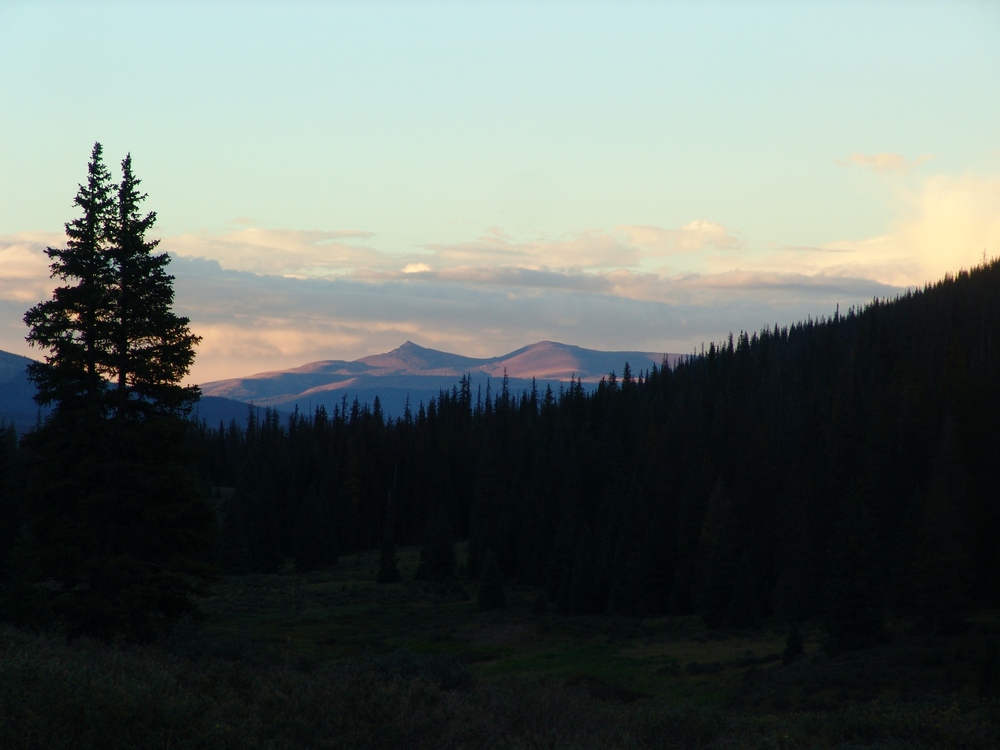
After photographing the mushrooms, I took a nap. Sleeping next to the creek was great, and I recuperated from my exhausting search for the perfect mushroom. Ray and I cooked up some mashed potatoes and gravy with StoveTop dressing and chicken breast (we know how to cook when we backpack), and then after dinner I decided to go on another adventure up the valley to see if I could watch the sunset.

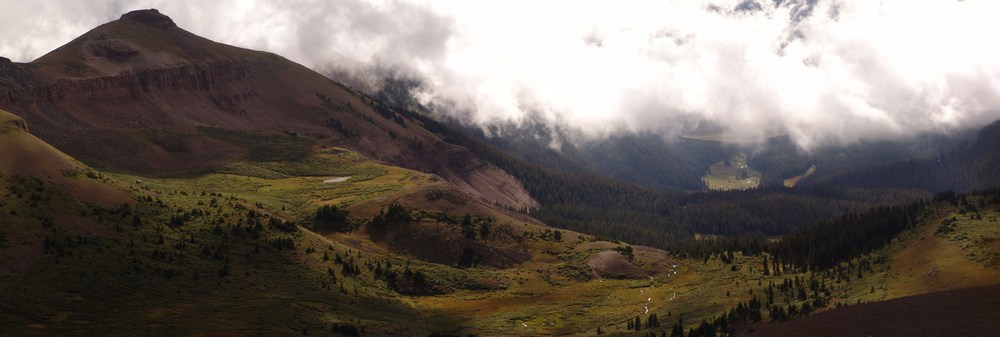
A view of the upper Weminuche Creek basin, just past Weminuche Pass.
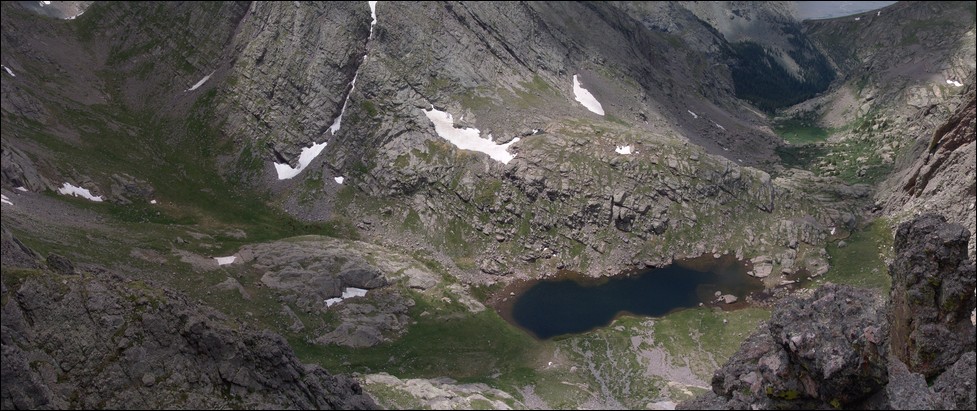
To the east (left), I saw a small meadow at the base of the hillside pictured above. In that meadow, I saw a deer grazing, so I decided to see if I could stalk the deer and get a good photo of it. I think the deer was aware of my presense for pretty much my entire walk, which about 400 yards total across the basin. As I got closer to the meadow, I found myself looking down upon an awesome series of pristine beaver ponds.
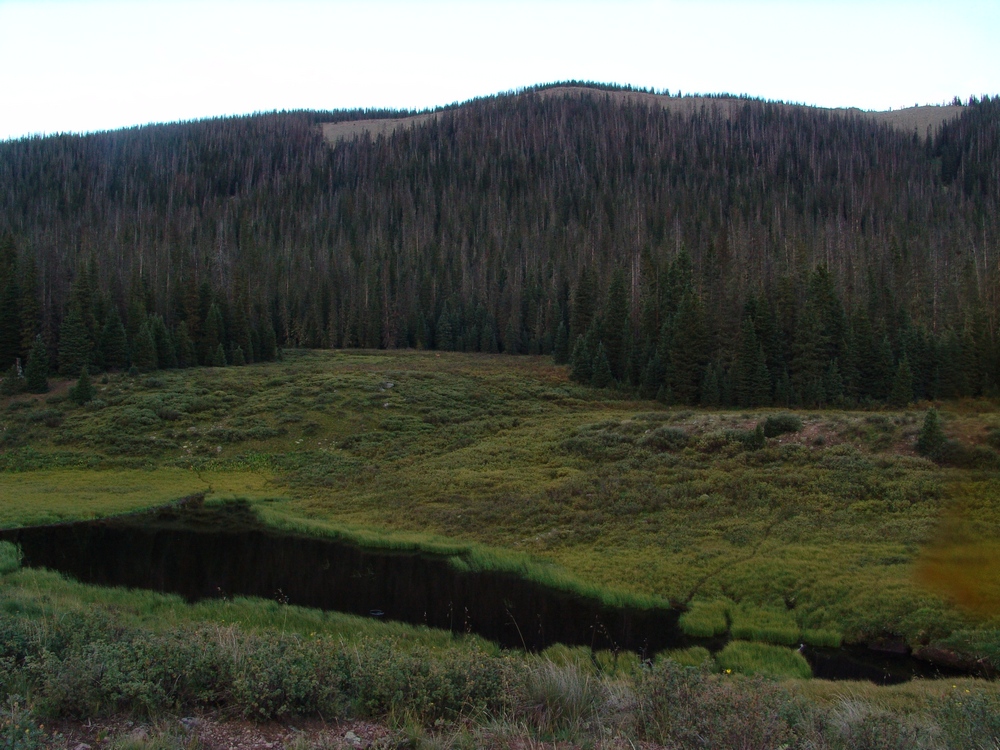
A hidden beaver pond and meadow. The deer can barely be seen in the upper meadow.

Another beaver pond.
The beaver ponds were full of duck and fish, and it was fun watching the ducks swim around with their little families of chicks.
I even took some video of the ducks. If you listen really closely you can hear coyotes howling in the woods nearby.
In the distance I could make out what I believed to be Pole Creek Mountain in the late sun's light.
Pole Creek Mountain.
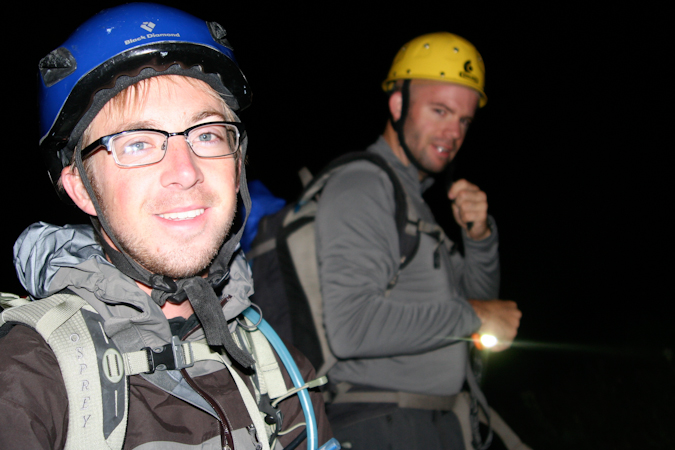
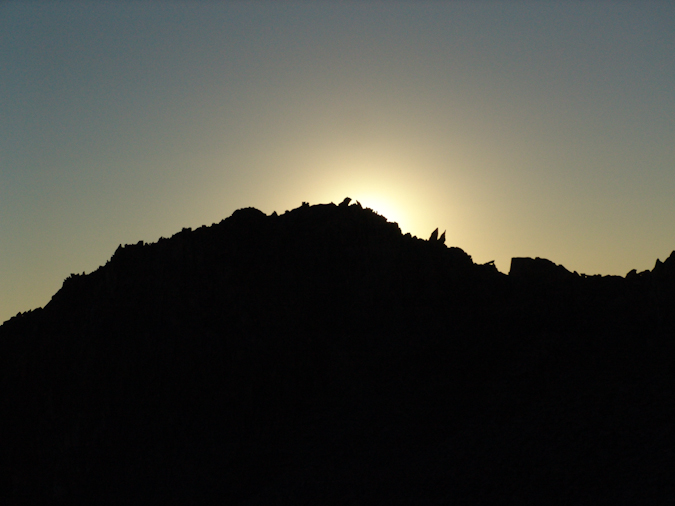
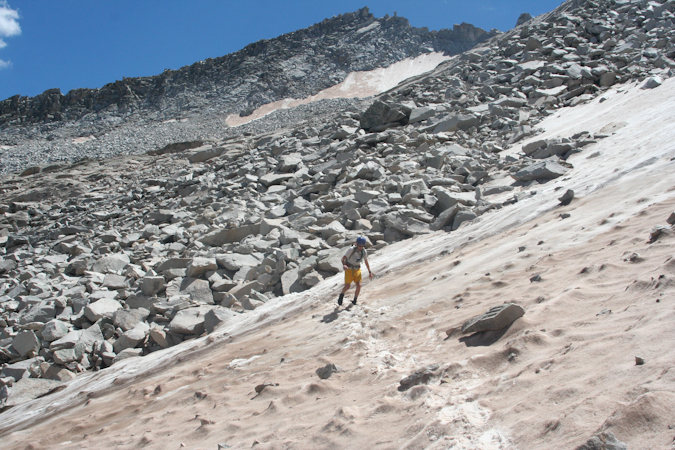
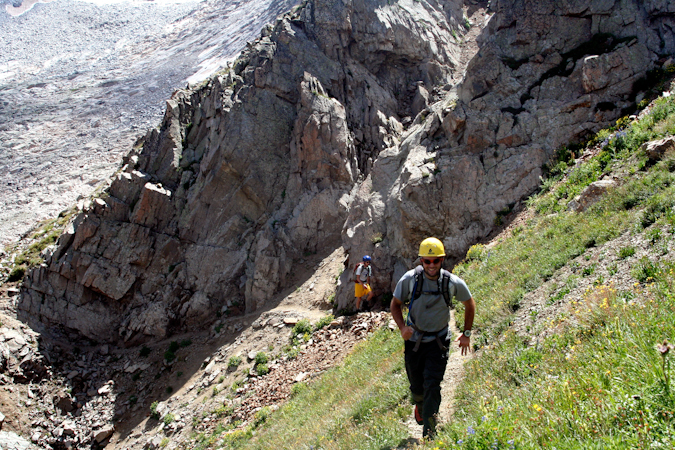
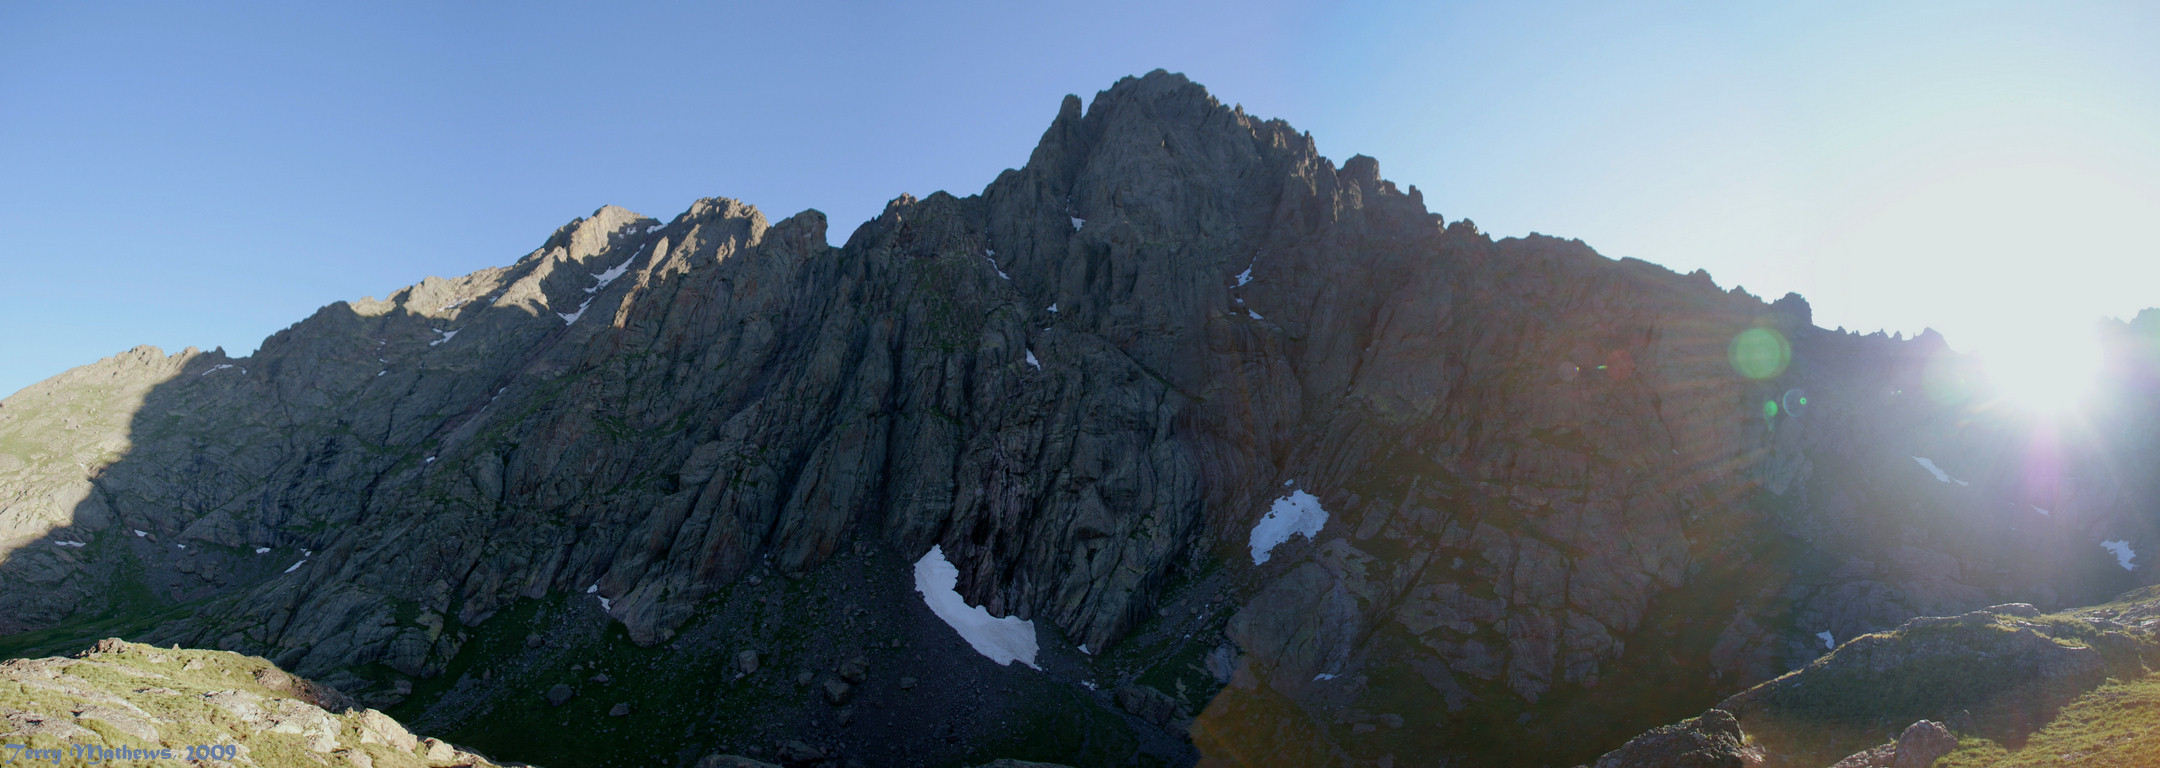
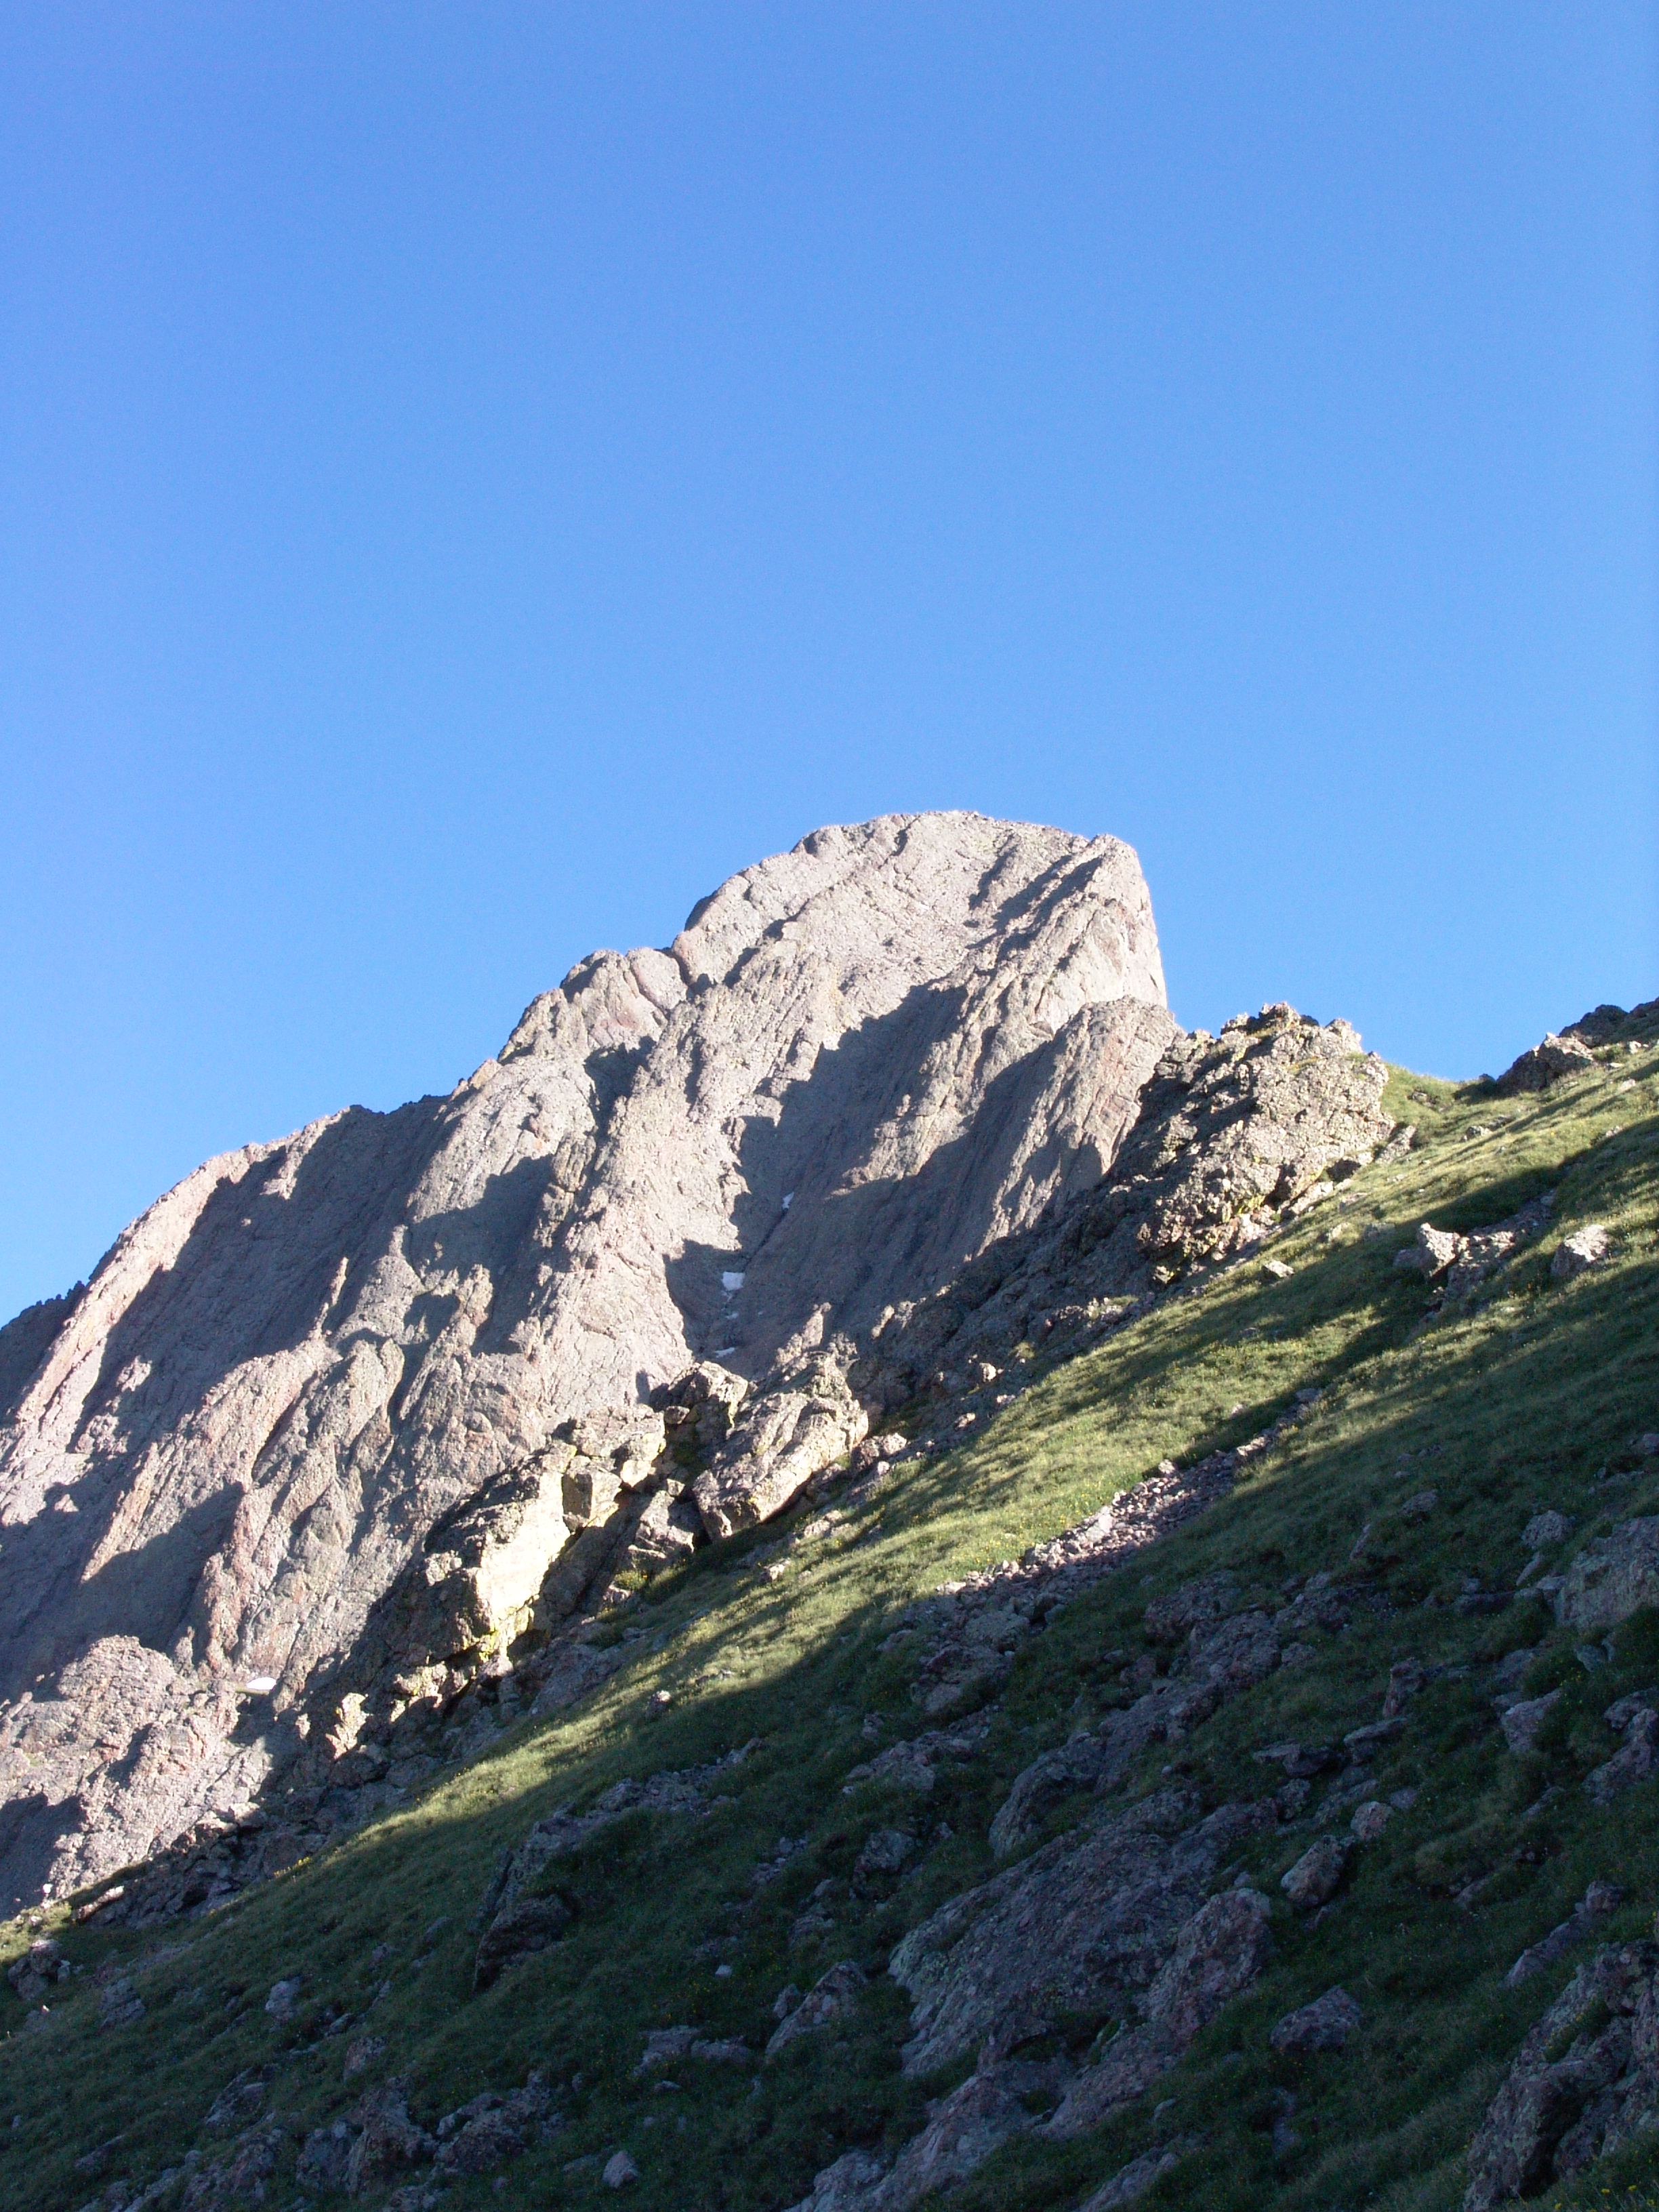
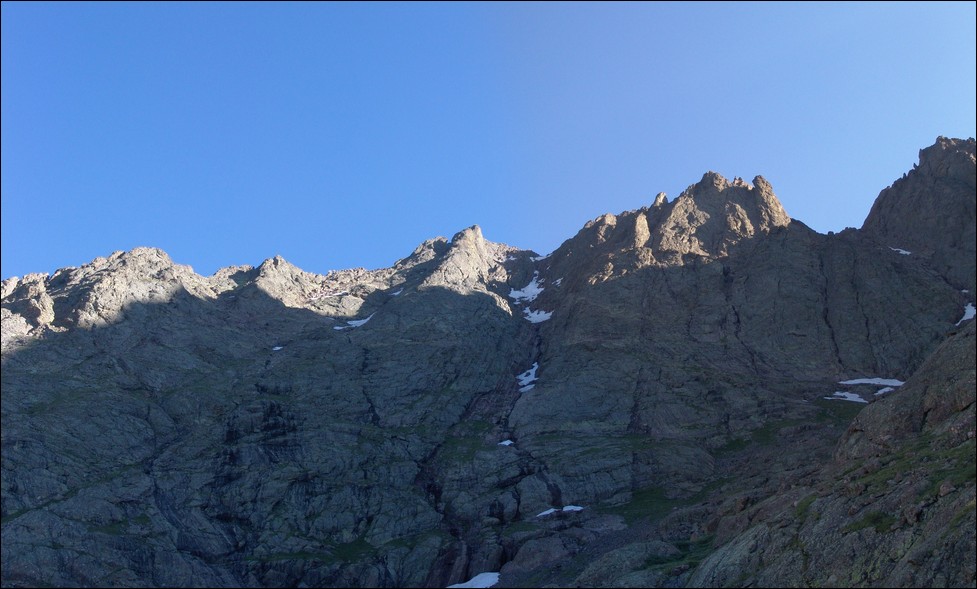
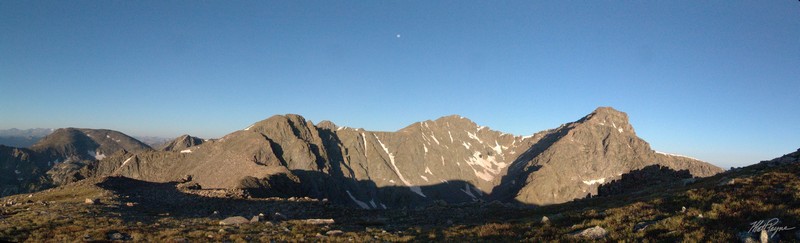
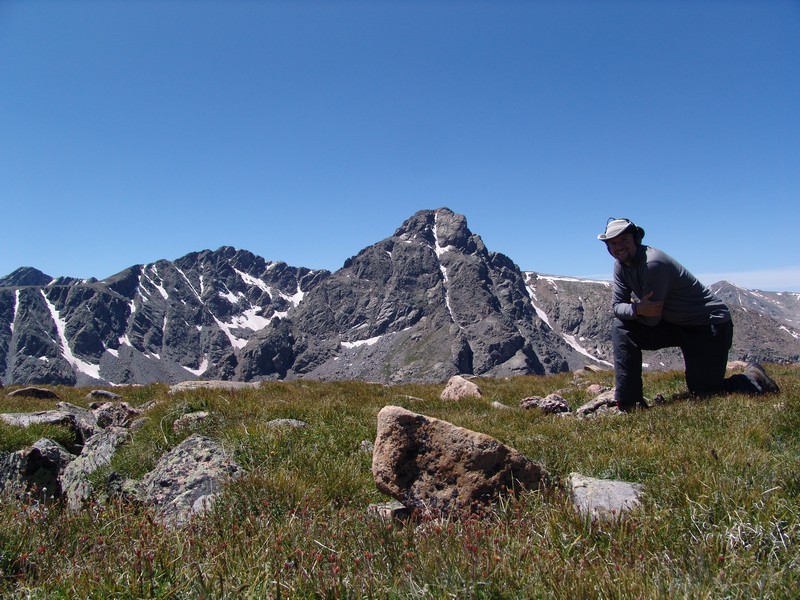
After being spooked at the beaver ponds by continuous coyote howling, I decided to return to camp. We crashed fairly early and set our alarm for 5 AM. The alarm went off and it was really cold outside. We got ready quickly and were on the trail by 6 AM. This is where we made our first mistake. Instead of following the "Sky Line Trail," we followed the Weminuche Trail further south until I realized we were doing something wrong. We backtracked to the Sky Line Trail (which does NOT follow where it shows on the USGS topo map, as seen by my TOPO map of our route) and began the steep upclimb along the Continental Divide. This trail is well established and somewhat steep. The weather was very foggy and winter-like for us, but there was no precipitation, so we continued up. The trail splits at one point, trying to avoid some deadfall; however, we found the best thing to do is to stay on the trail and go over the dead trees. This prevents you from losing a lot of elevation. Eventually, the trail brings you around the bend and Rio Grande Pyramid and The Window come into view.

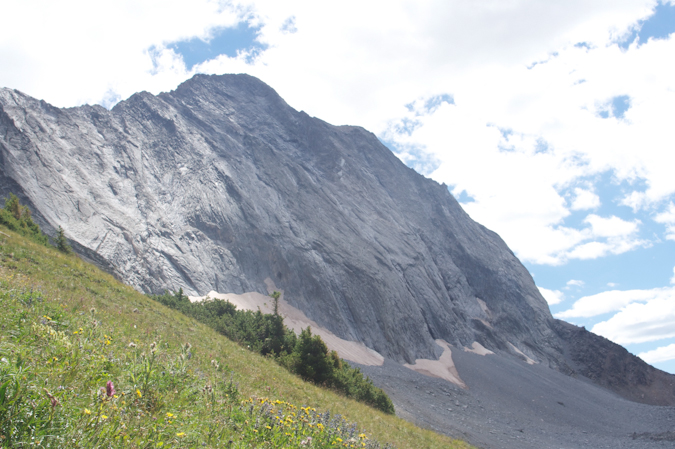
The Window and Rio Grande Pyramid.
The Window is a very impressive geologic formation along the south ridge of Rio Grande Pyramid, and it does not disappoint. It was truly striking.
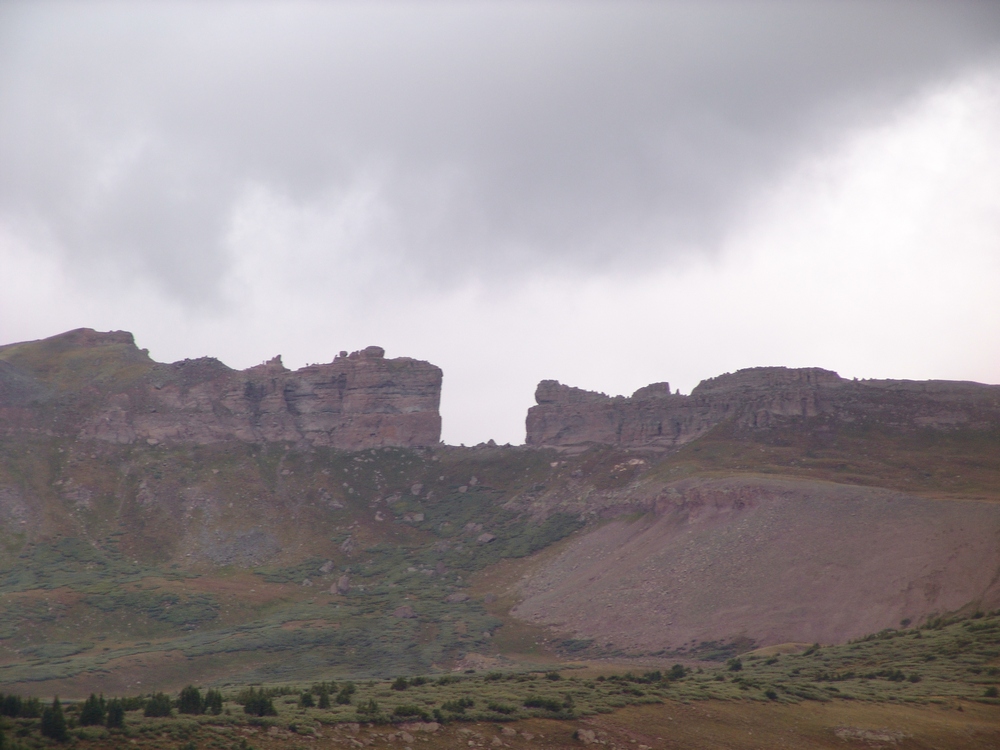
The Window.
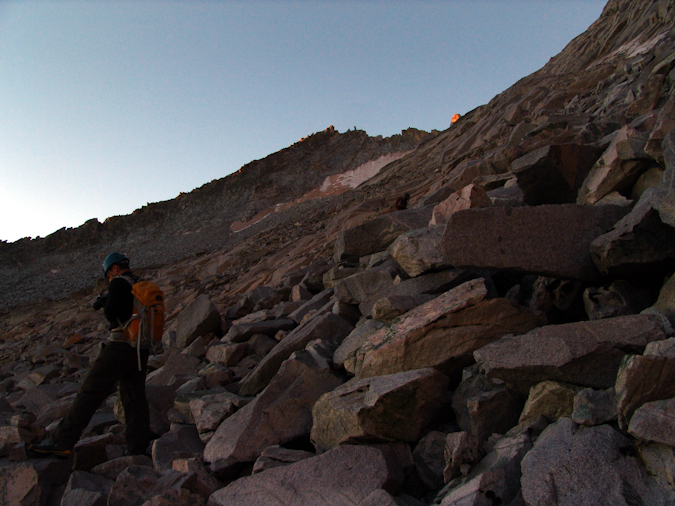
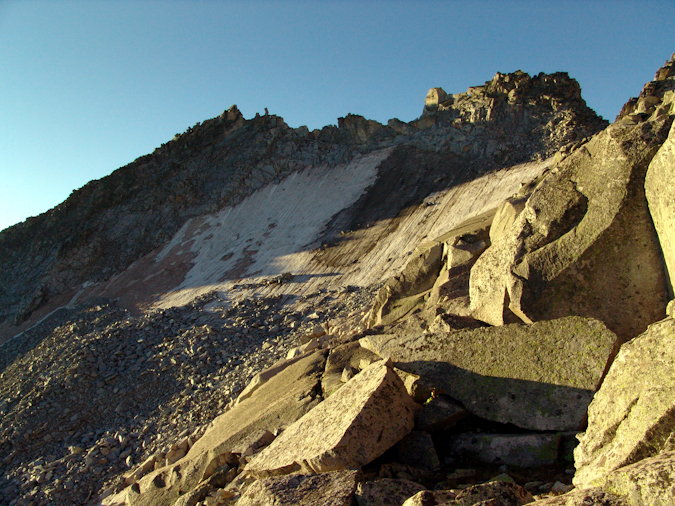
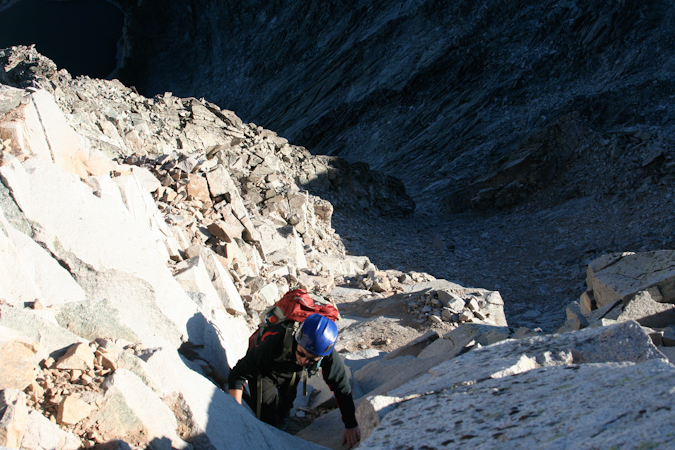
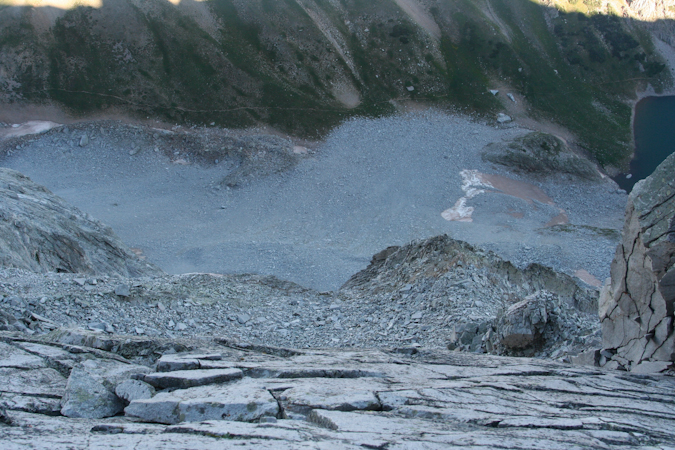
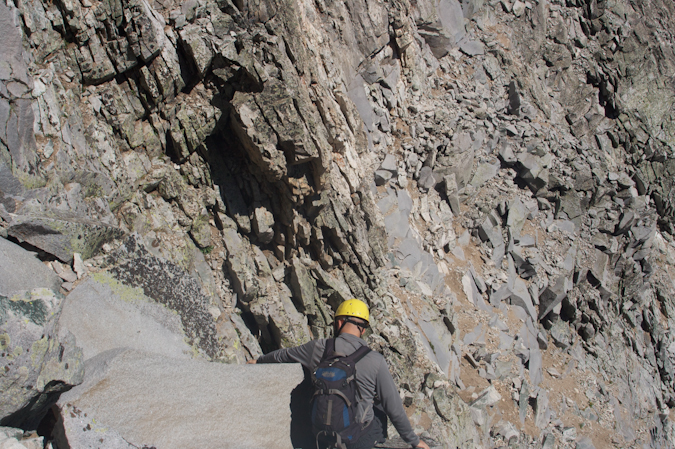
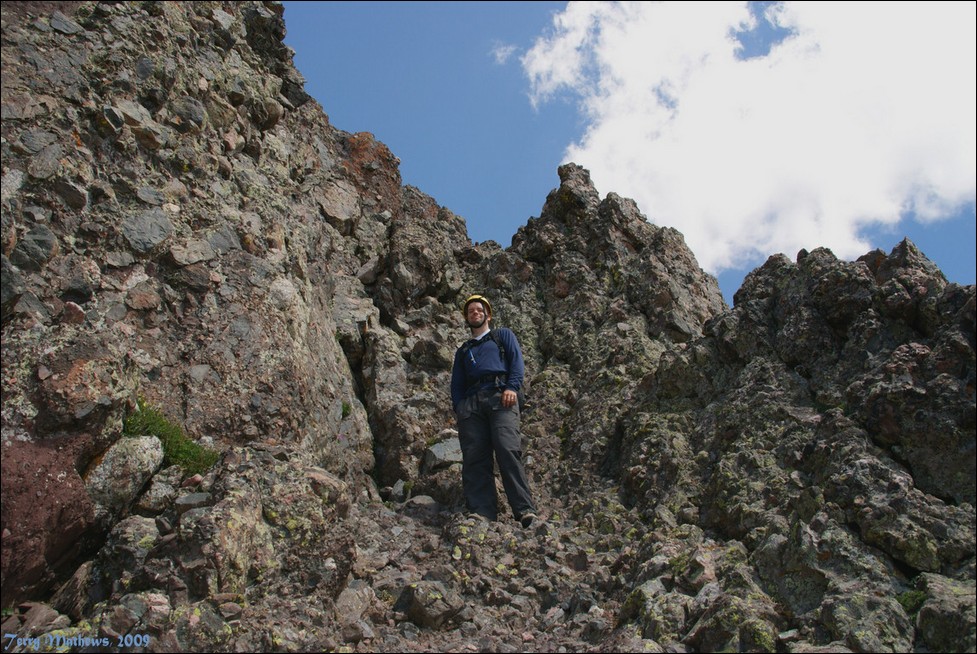
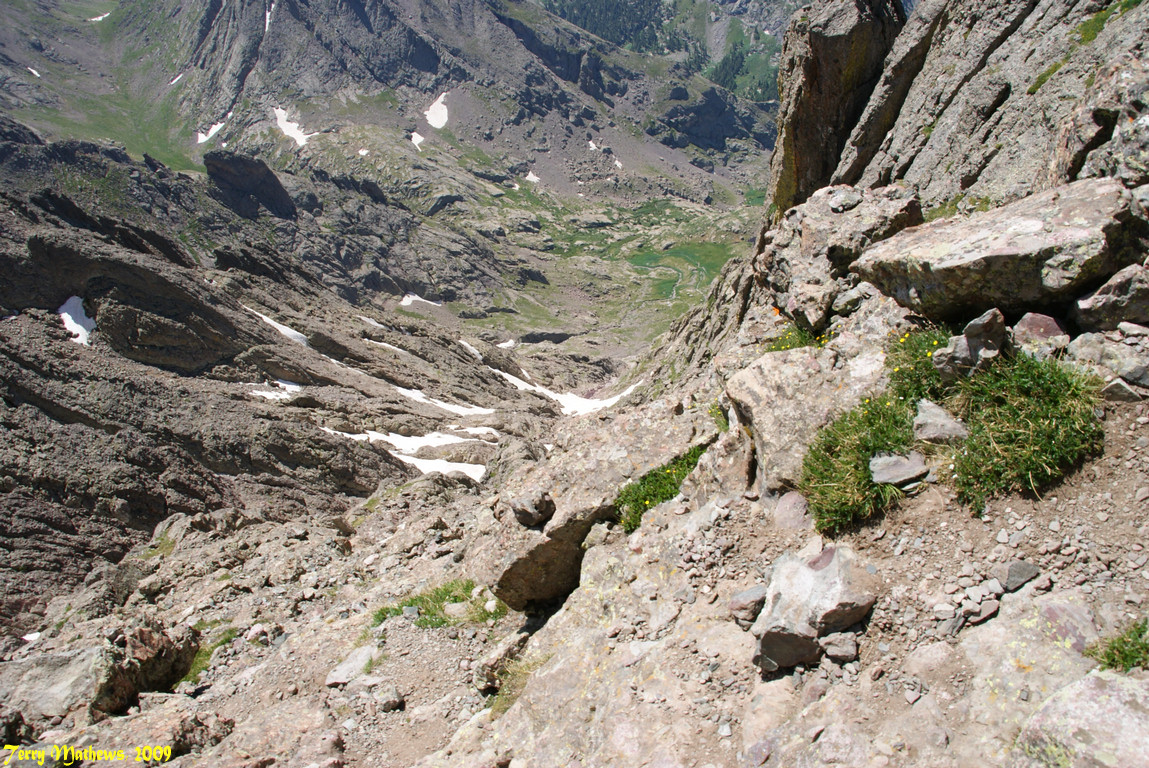
The trail flattens out here in the upper basin and eventually brings you to a junction at the base of Rio Grande Pyramid. We took the junction to the right and climbed up a steep trail to the lower plaform of Rio Grande Pyramid. From here, we chose to follow the platform south and then up the gradual southeast slope.
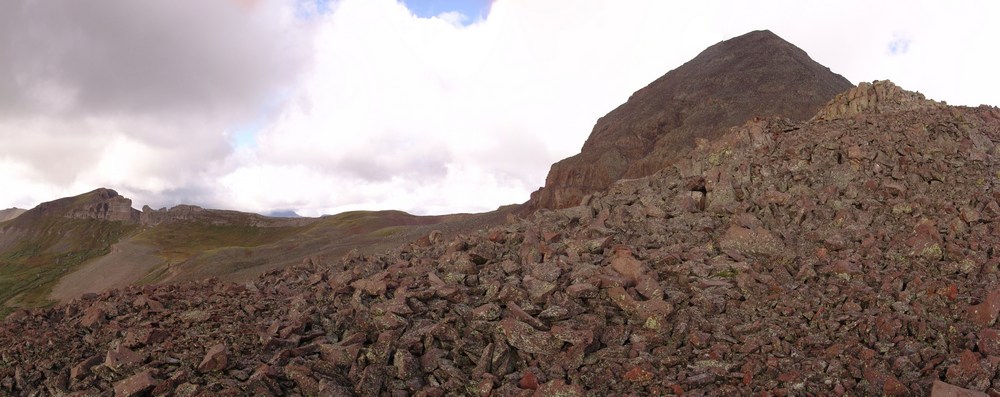
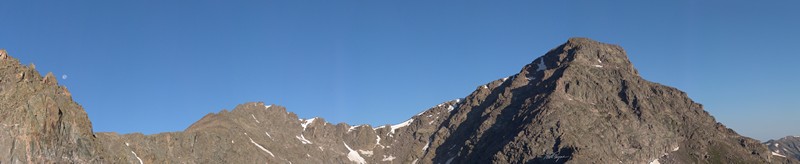
Nearing the summit of Rio Grande Pyramid.
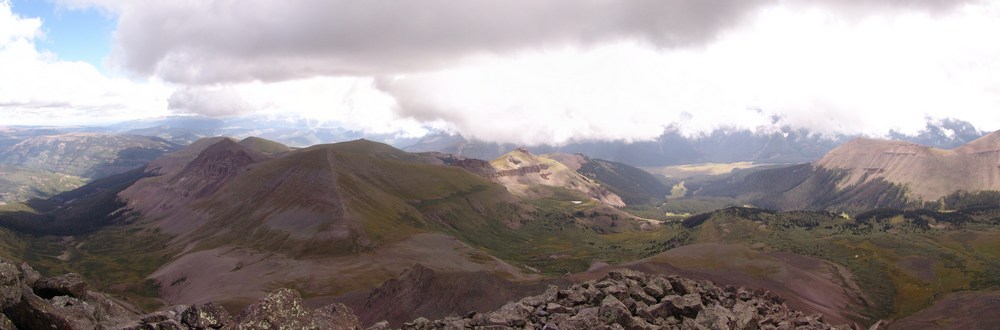
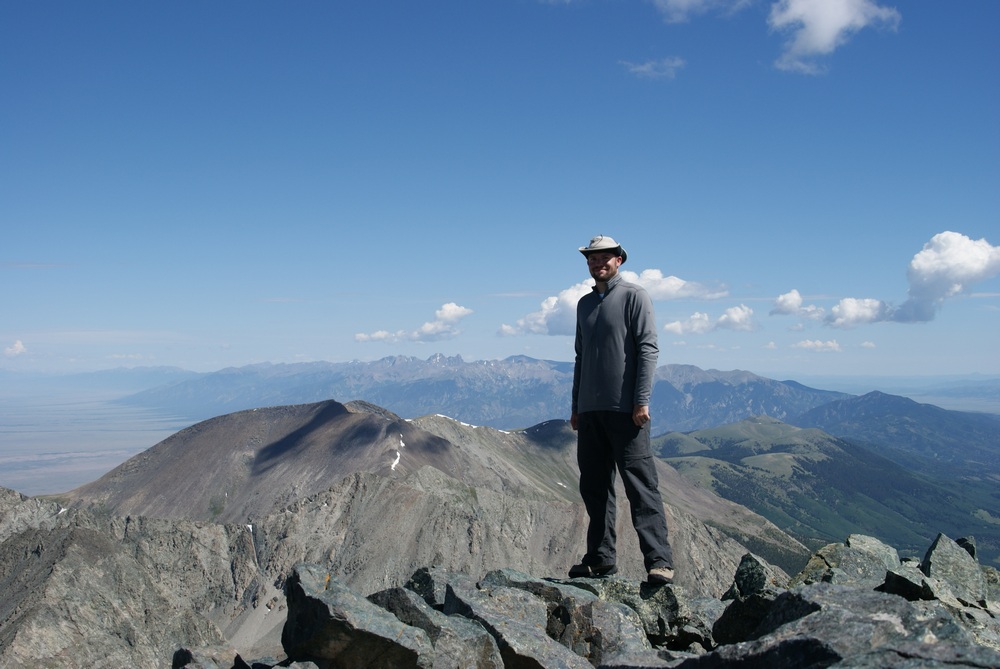
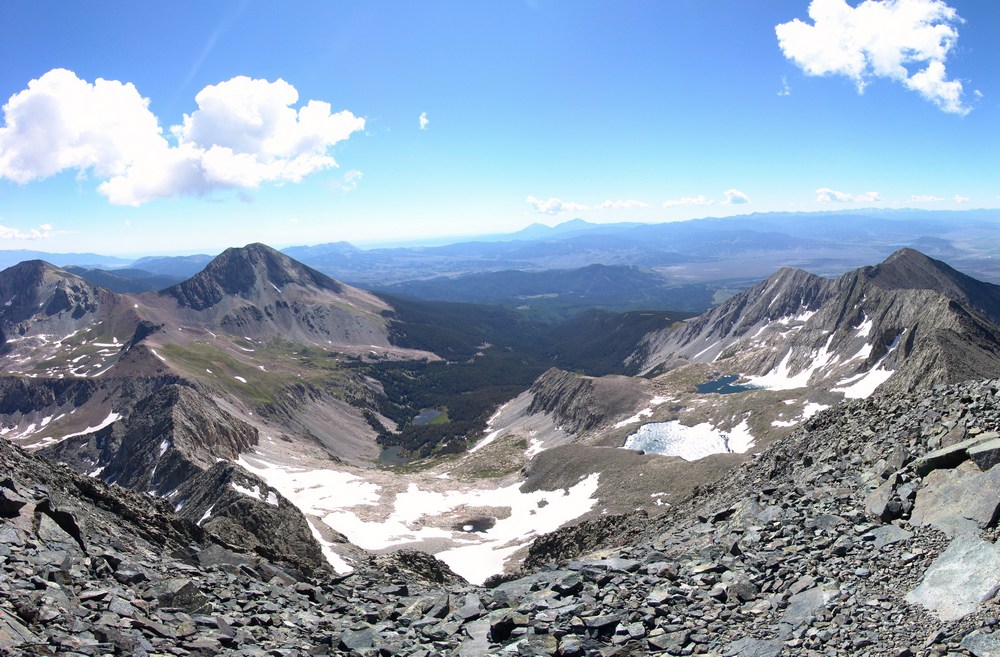
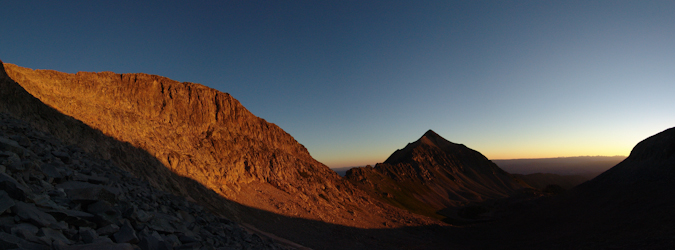
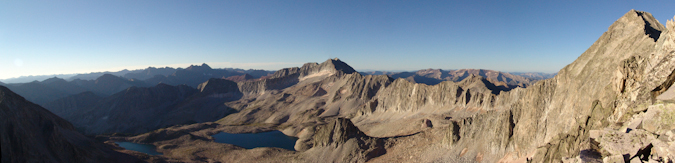
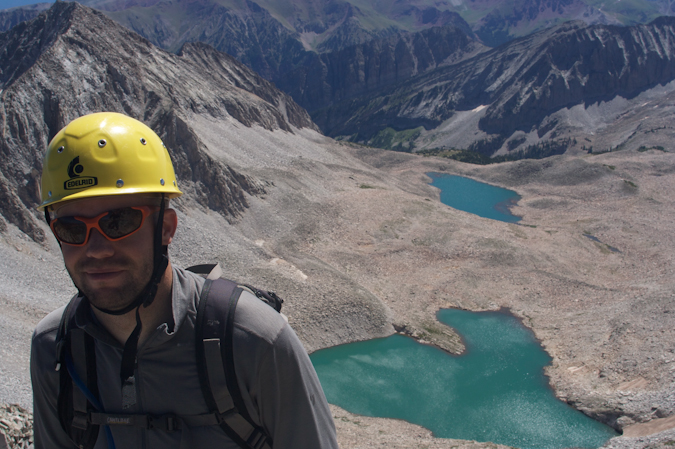
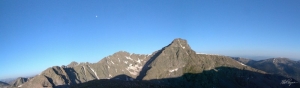
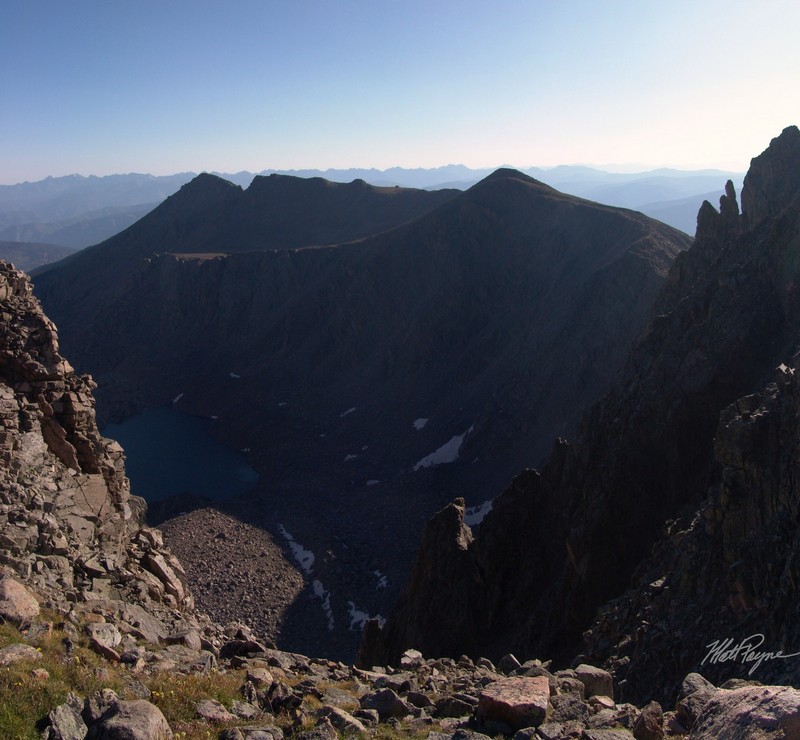
The view back from where we came near UN 12,808 was pretty awesome, with the greens and yellows of the huge basins showing their true colors.
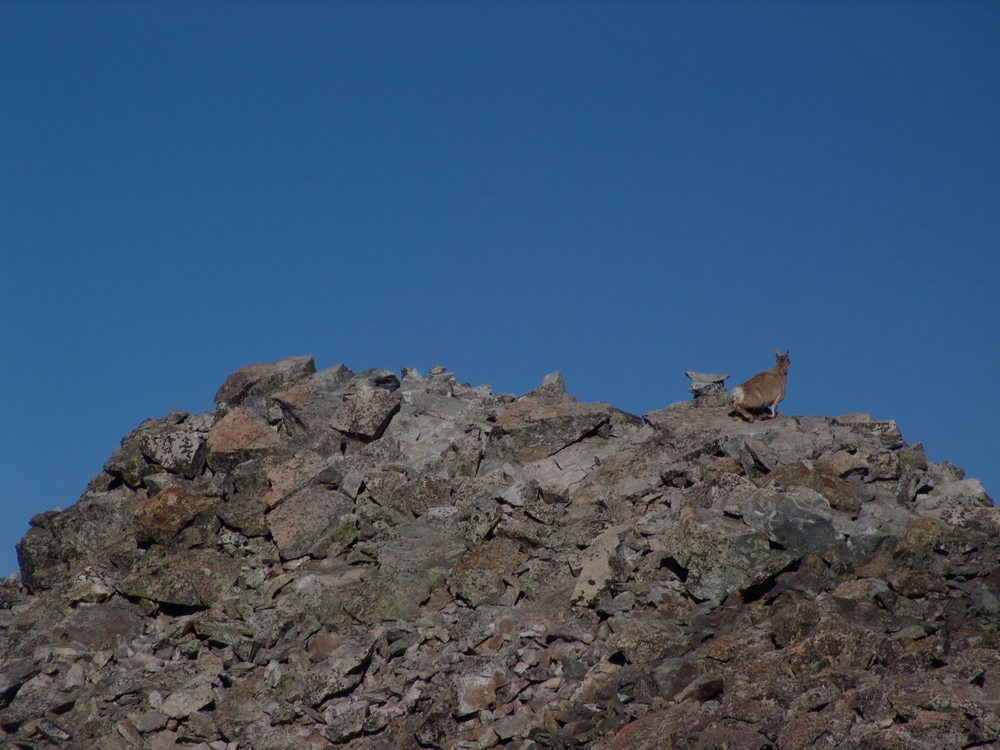
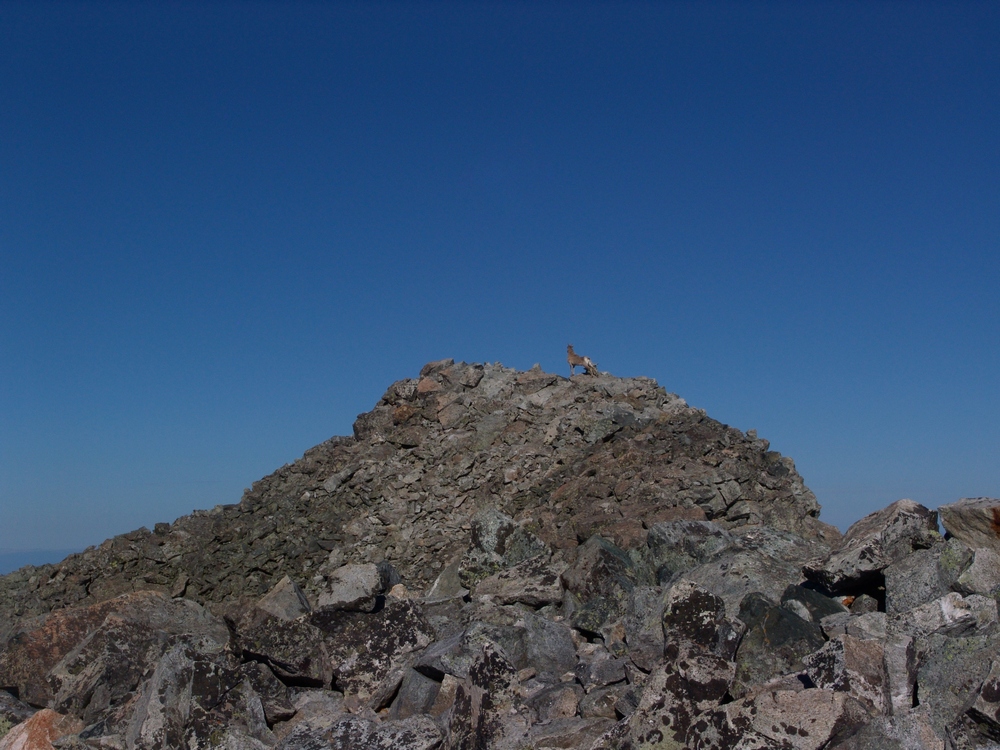
UN 12,808 towers over the valley below.
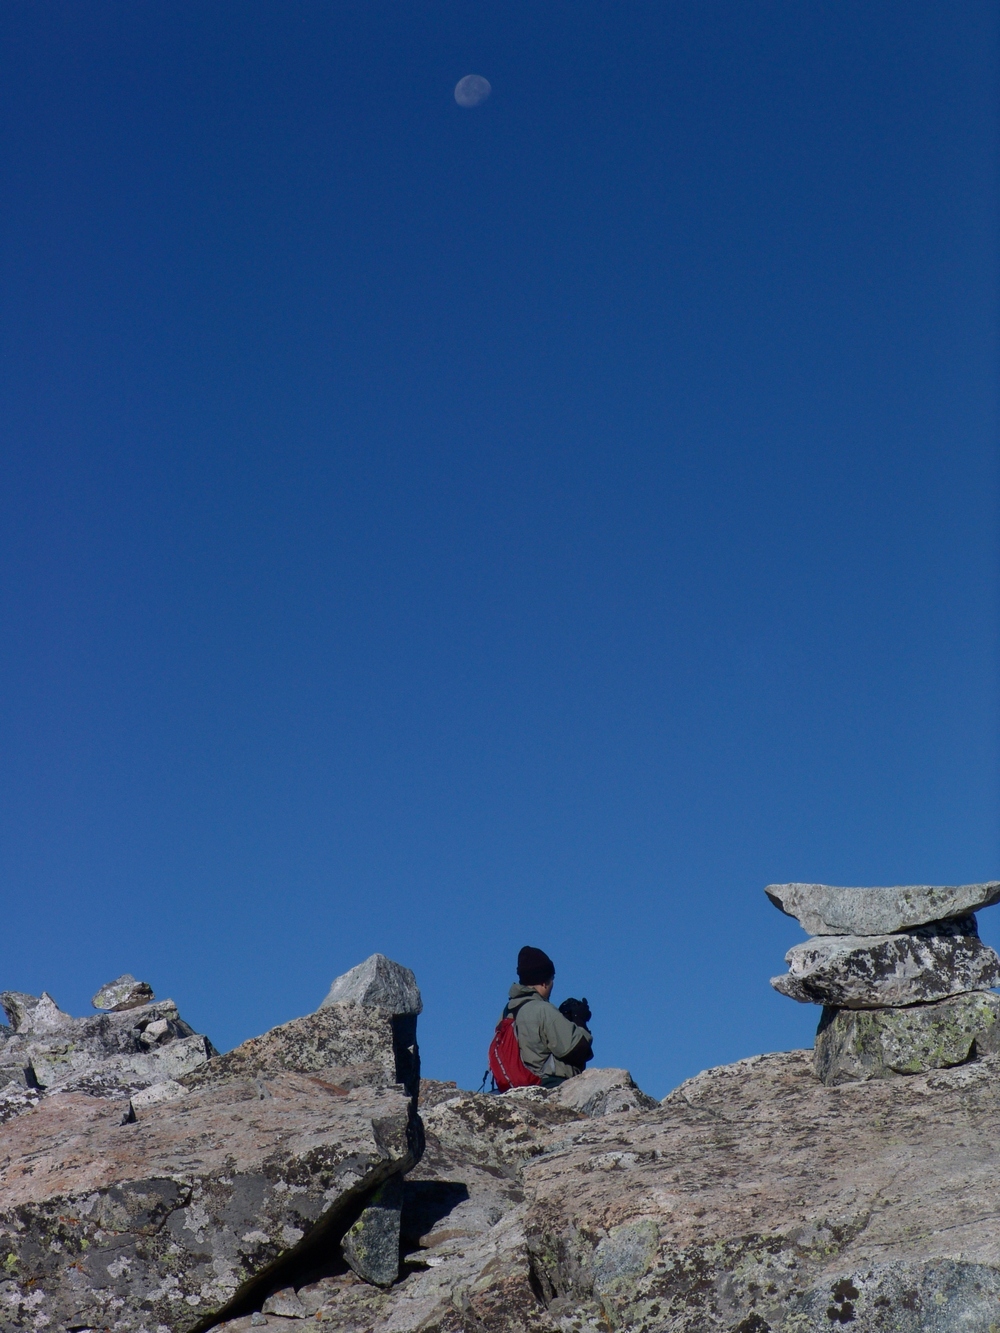
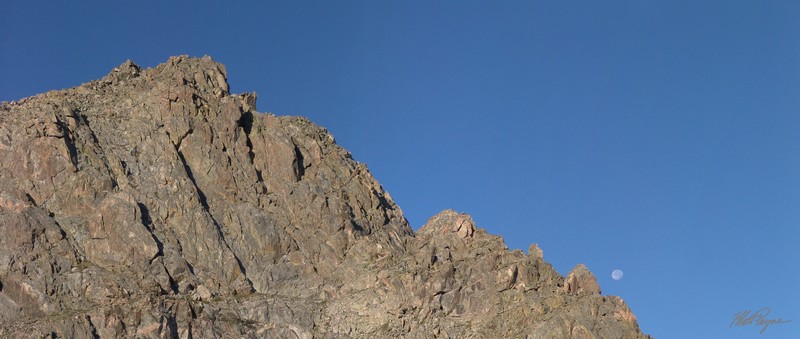
The Moon sets over Rio Grande Pyramid.
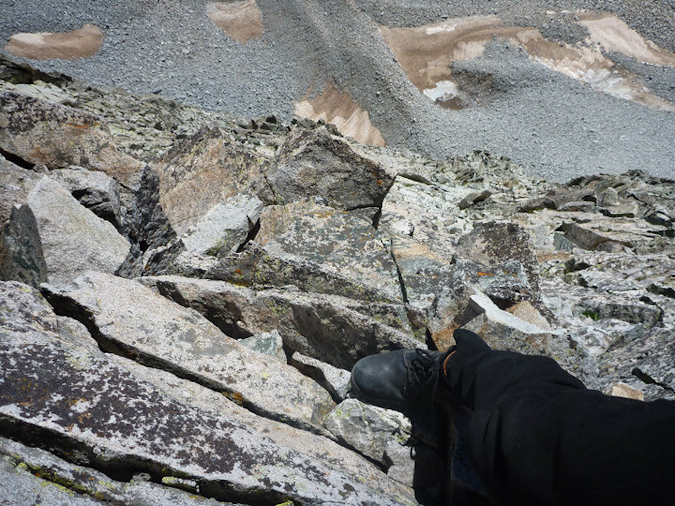
I was very intrigued by the volcanic nature of the rock on Rio Grande Pyramid. It was very much like lava rock in many regards, and made for quite easy travel compared to the "dinner plates" in the Elk Mountains or the famously loose rock found elsewhere in the San Juan Mountains.
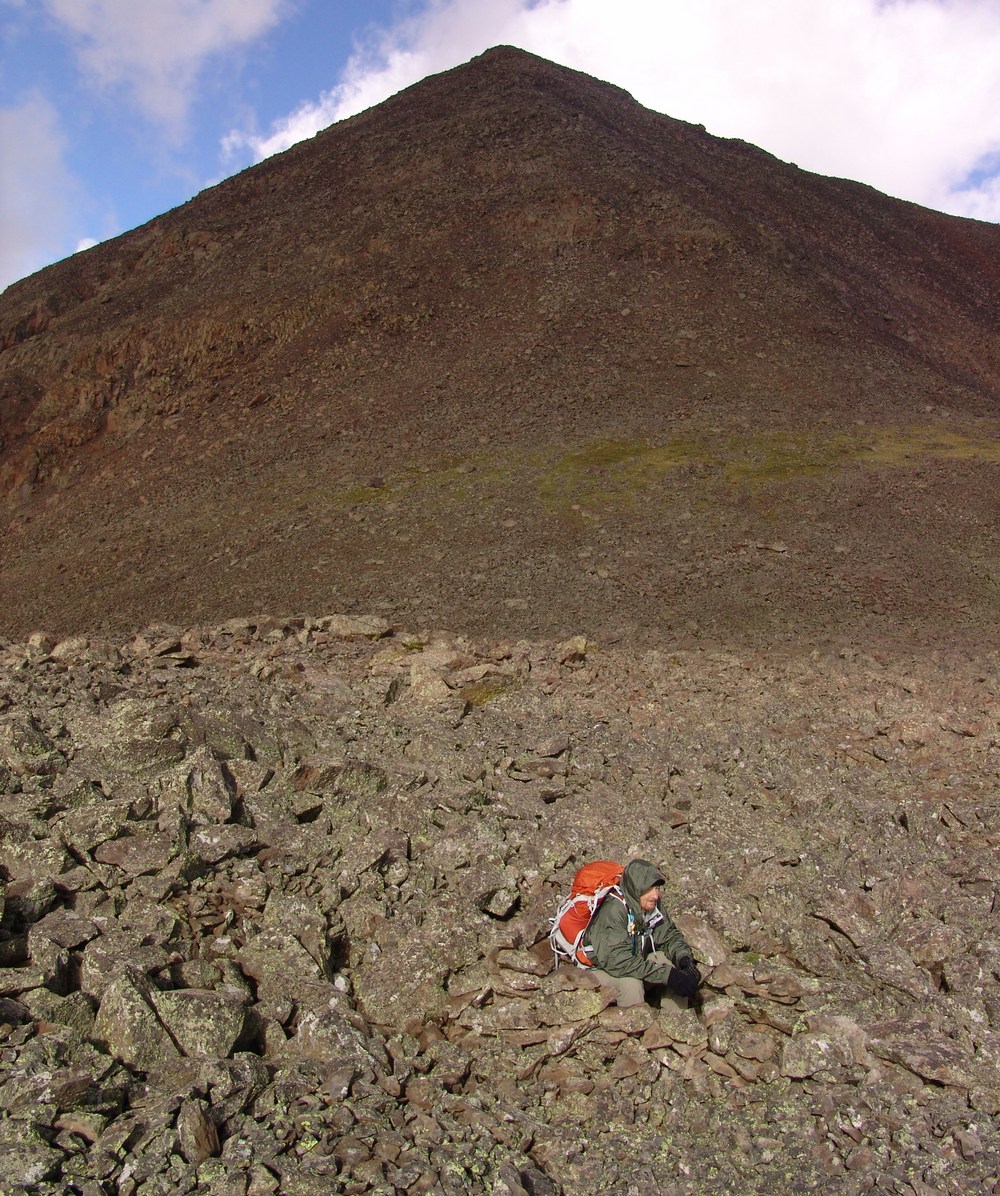
Ray takes shelter in a ring of rocks we found.
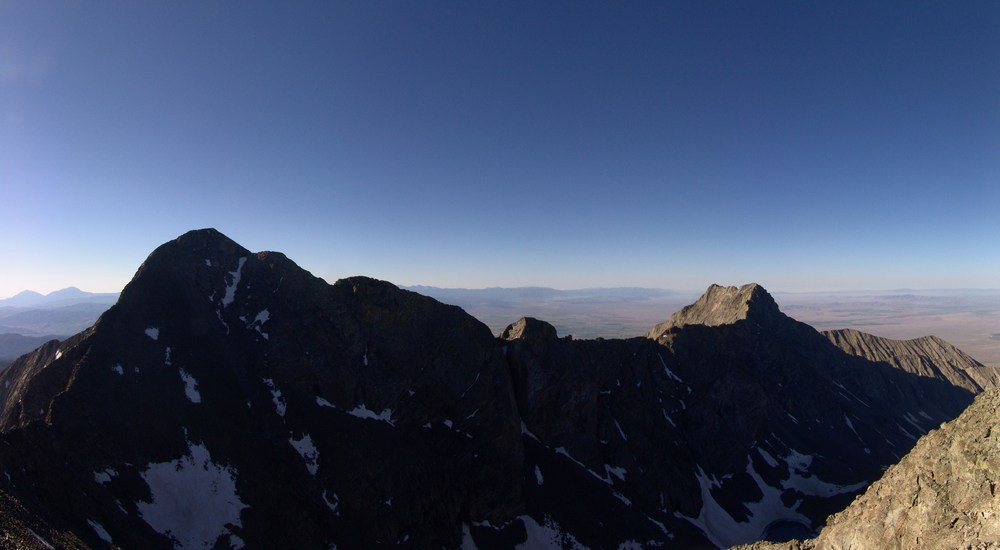
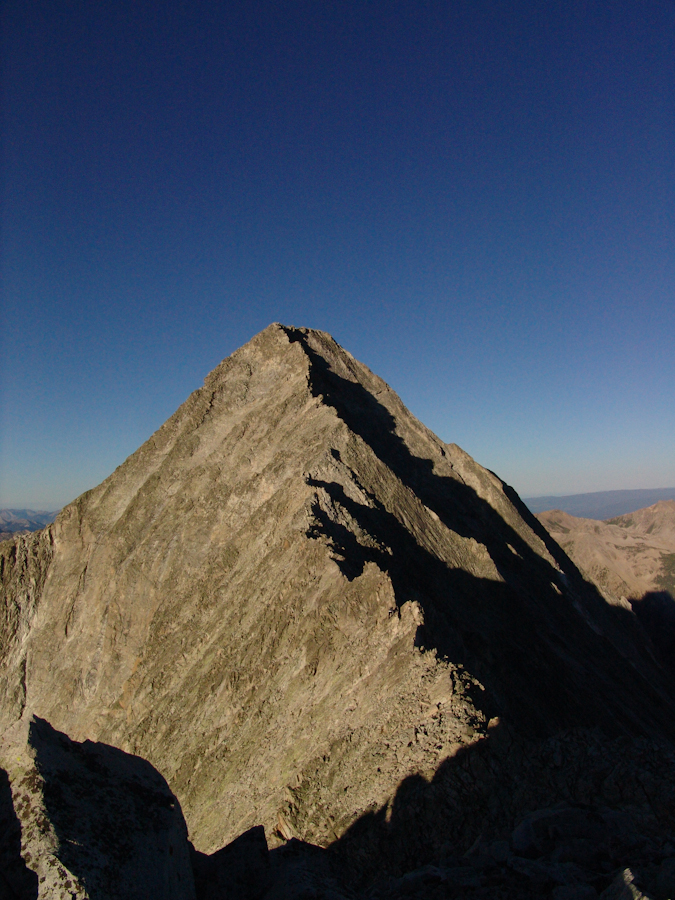
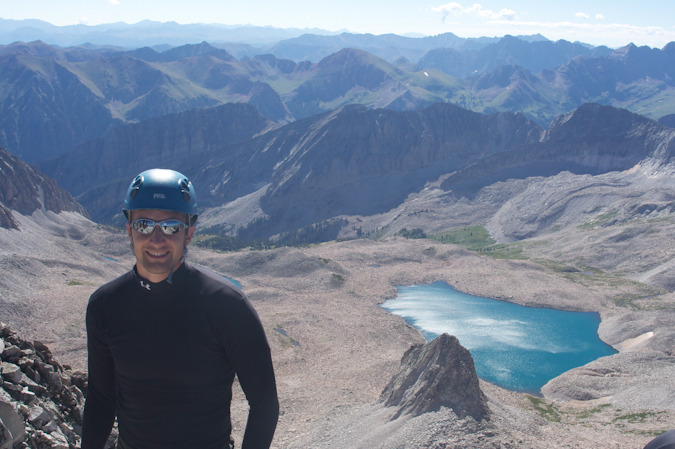
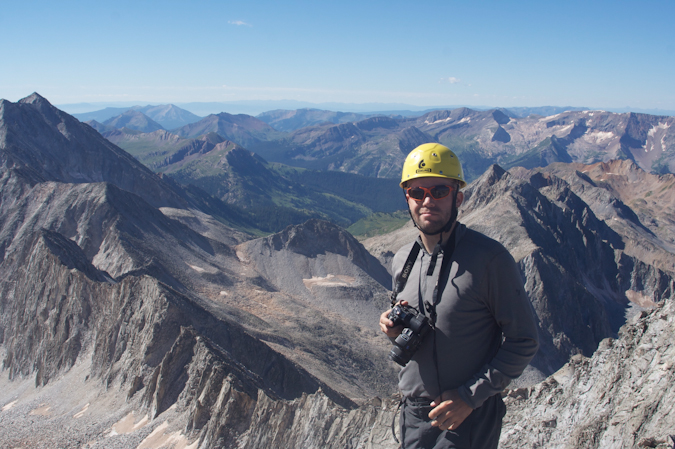
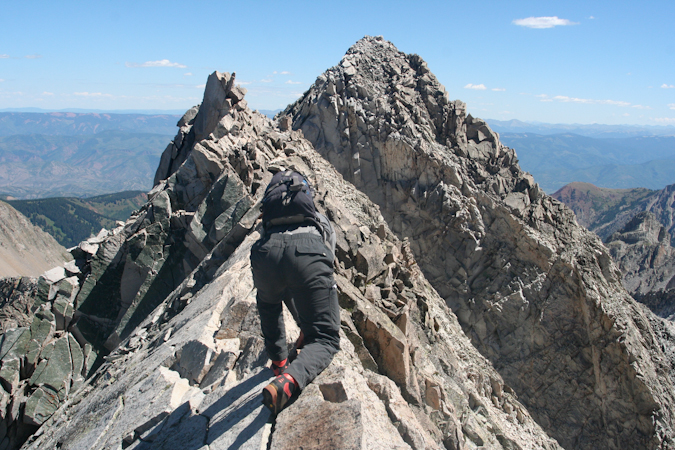
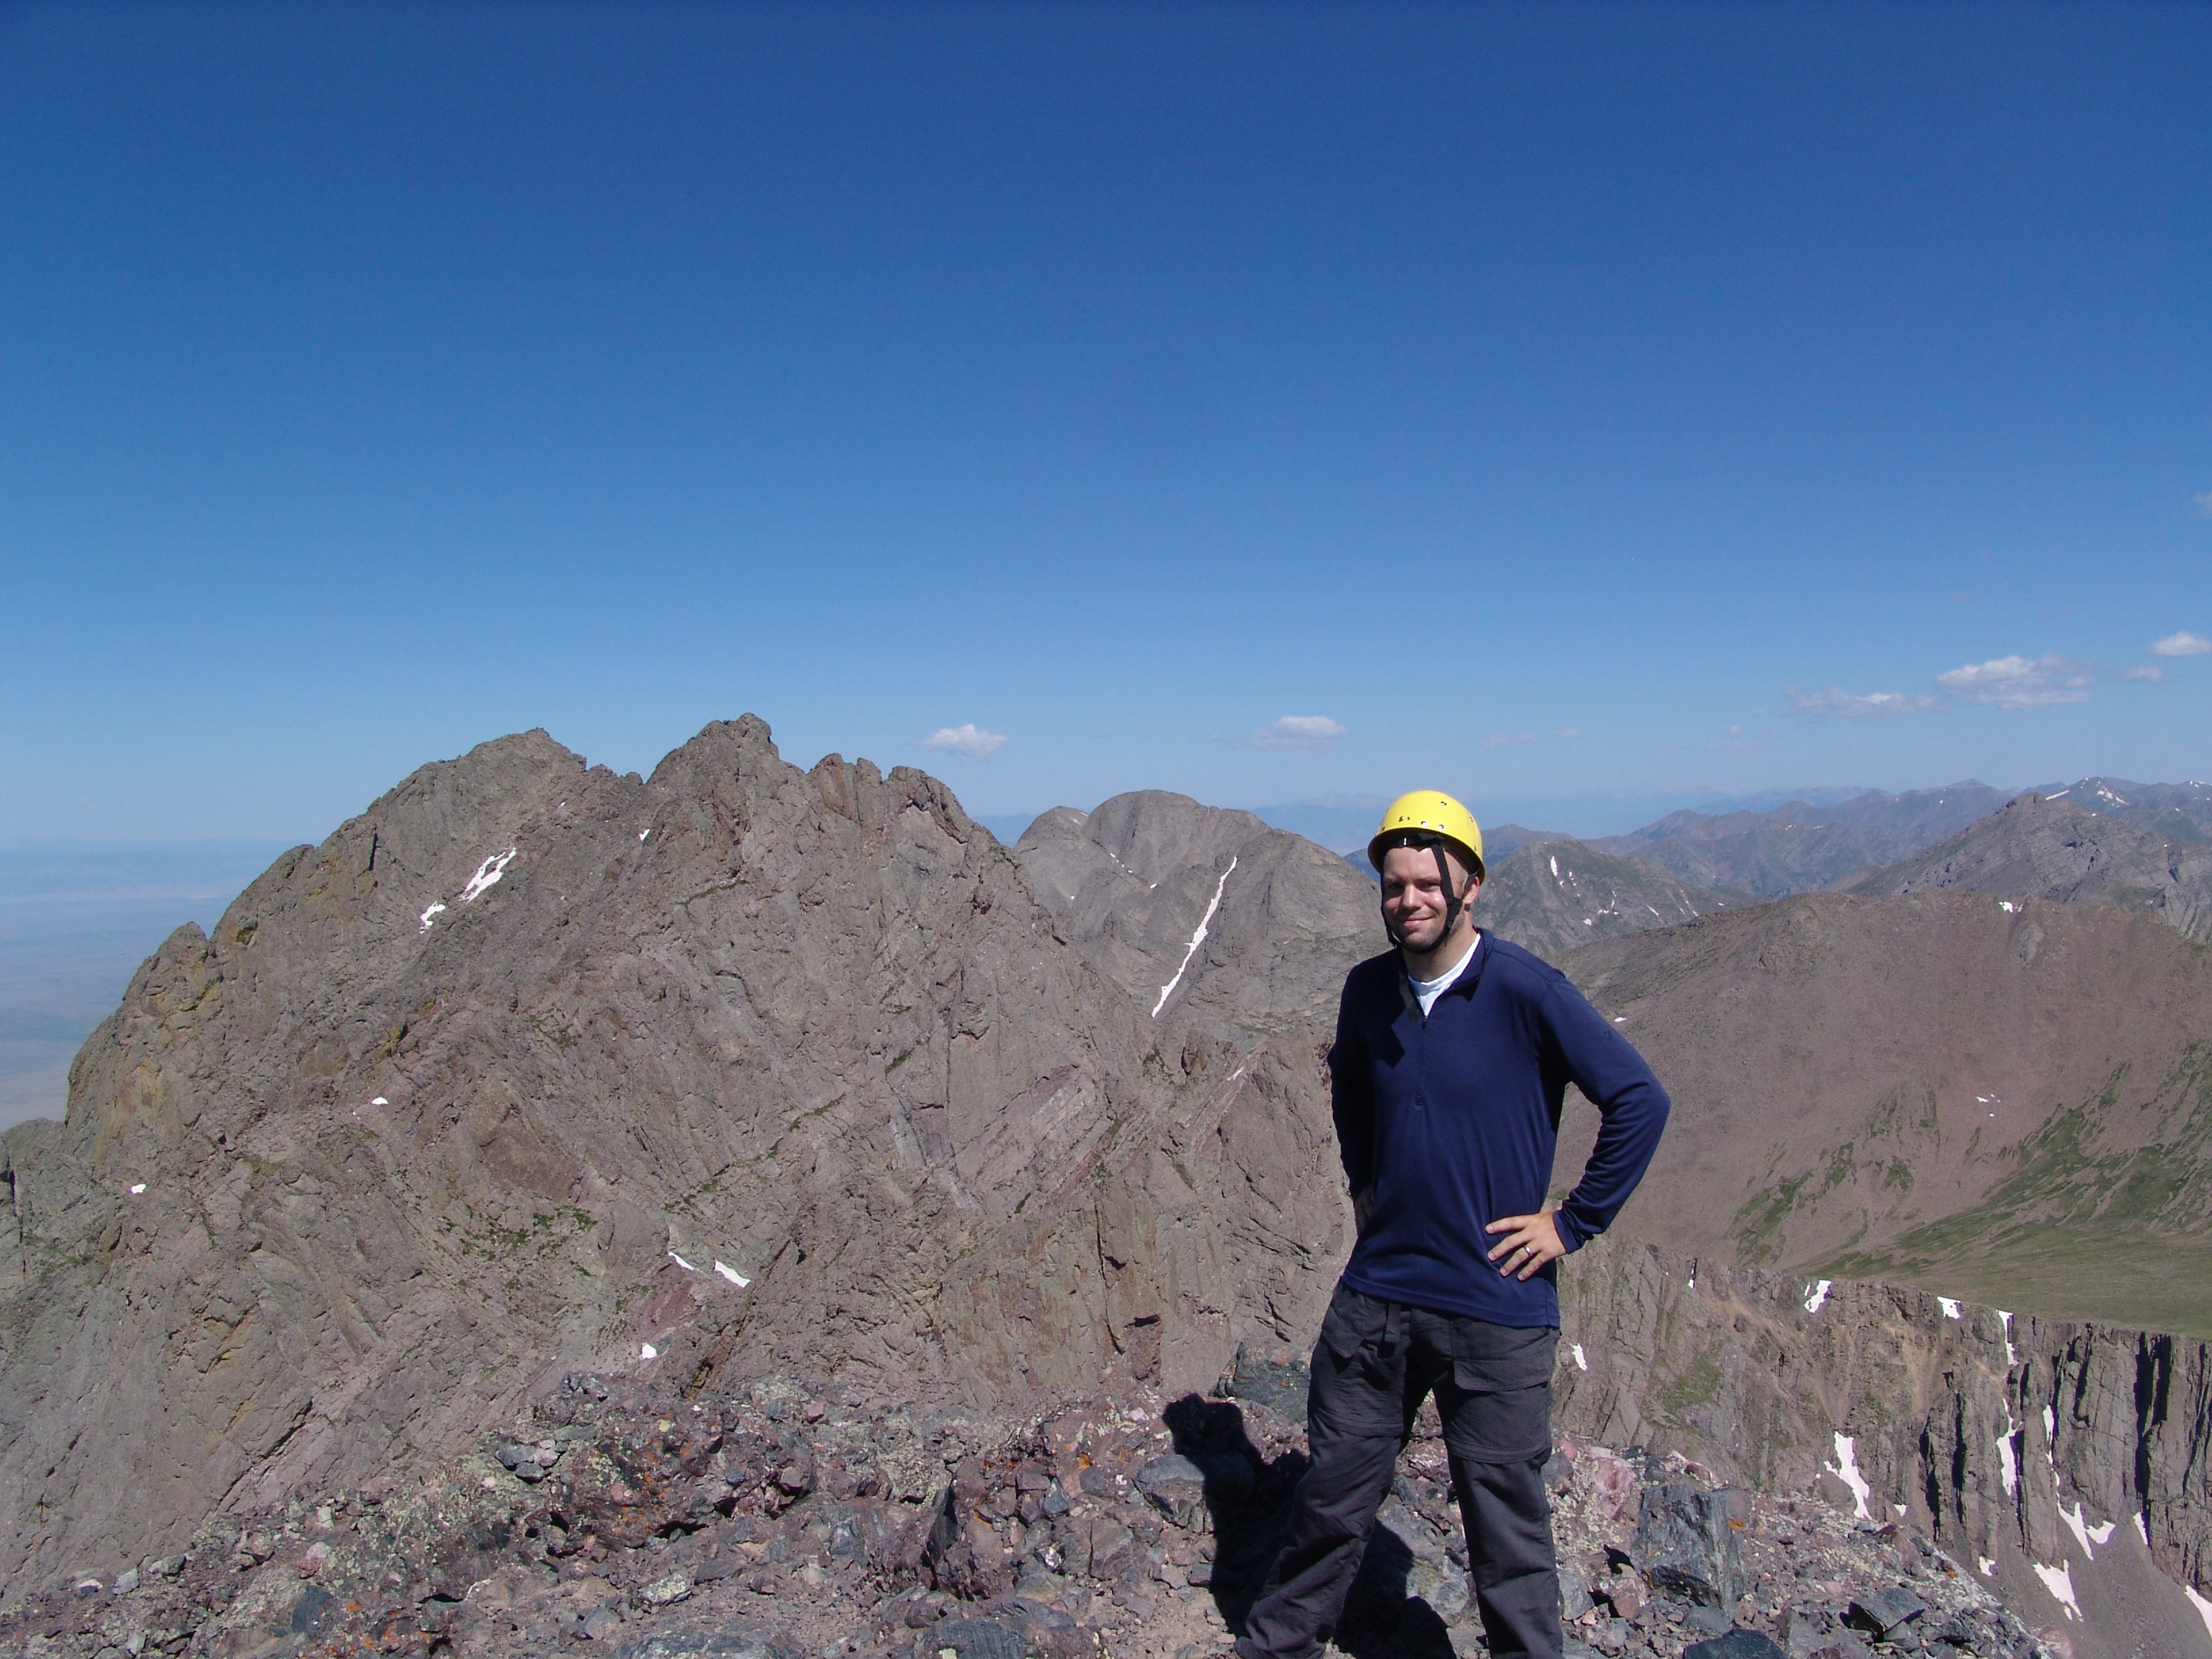
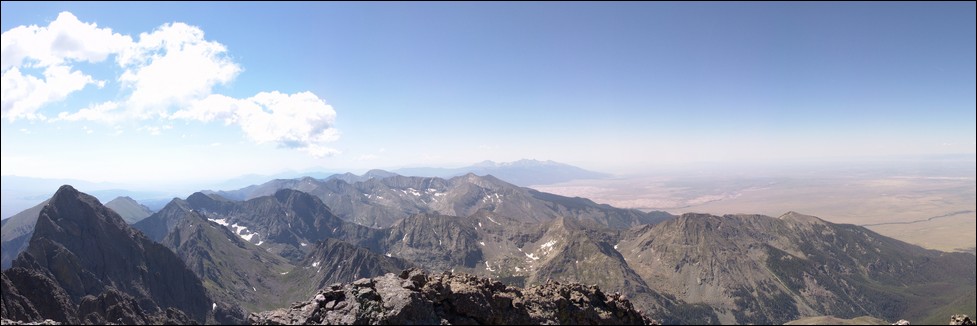
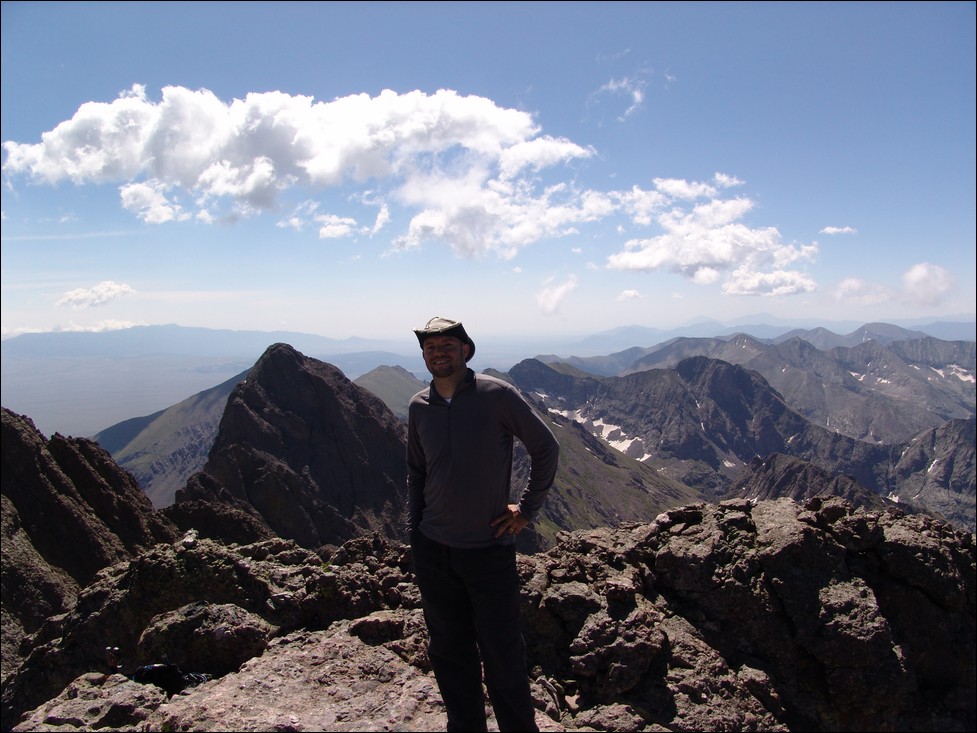
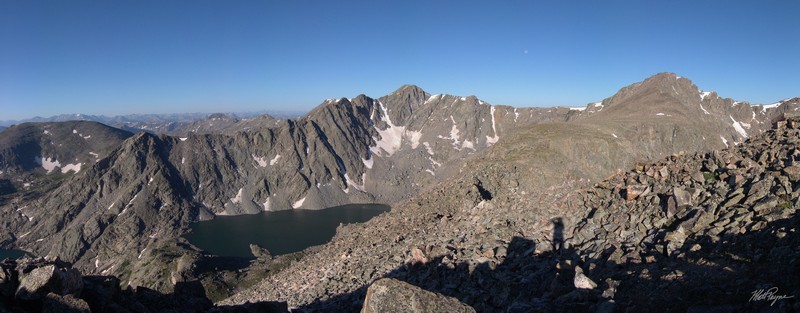
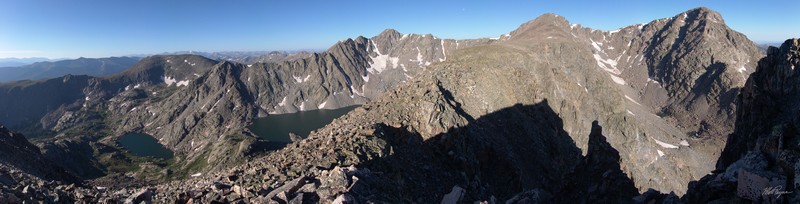
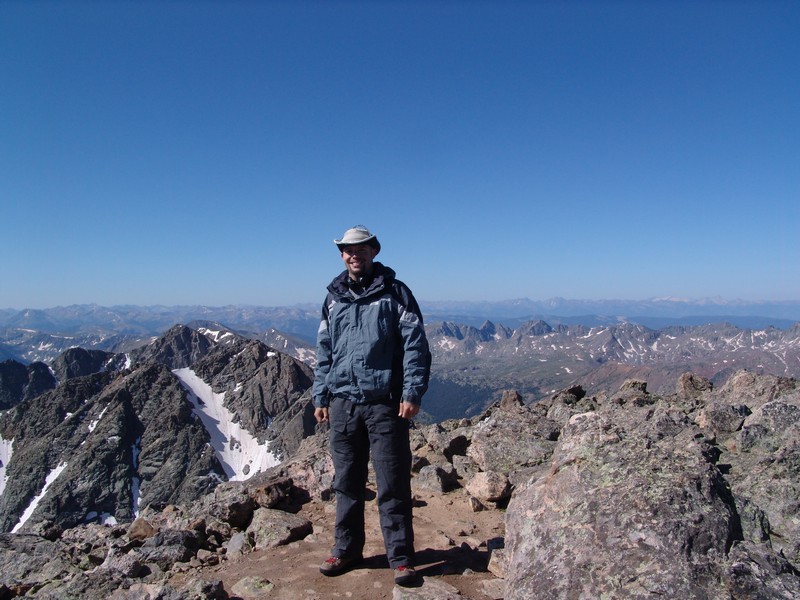
From here, it was smooth sailing to the summit. While steep, Rio Grande's final summit block is nothing to be worried about. It is relatively short, and there are even class 3 variations for those seeking out a more challenging ascent. As I crested the summit, I was worried that there would be complete cloud cover in the area and that my view of Vestal Peak and Arrow Peak would be obscured. When I first viewed those two mountains at the top, I was ecstatic. While the weather did indeed obscure much of my view of the Needle Range, the Grenadiers were in plain view.
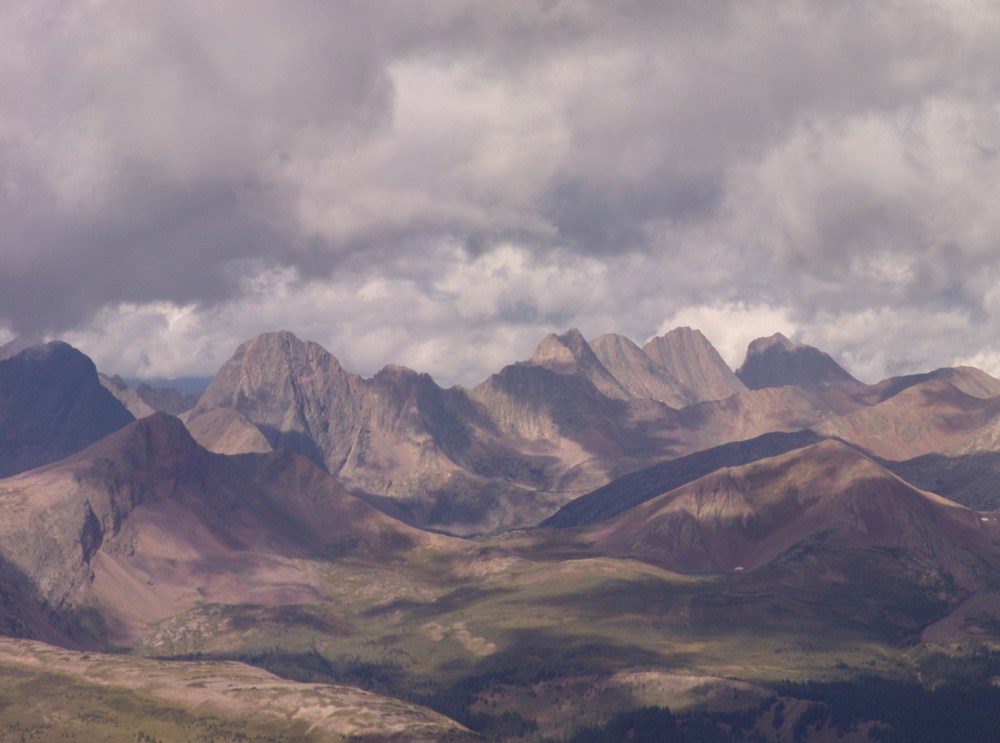
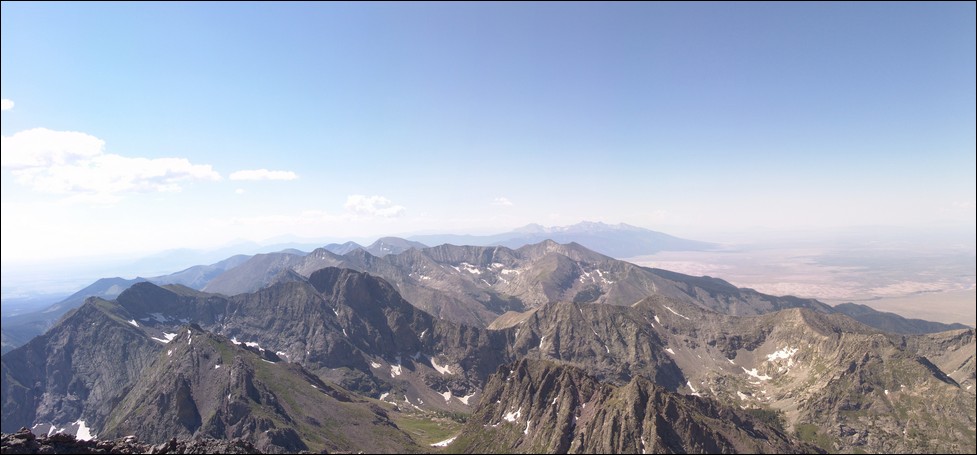
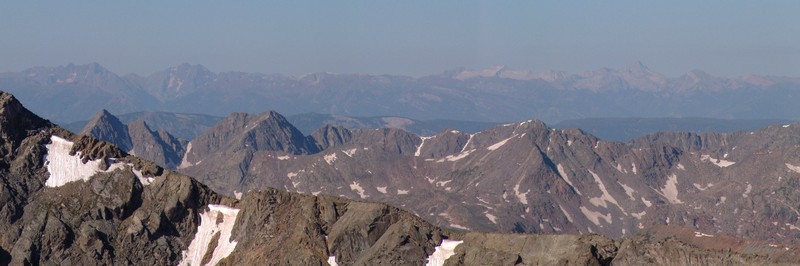
The Grenadier Range.
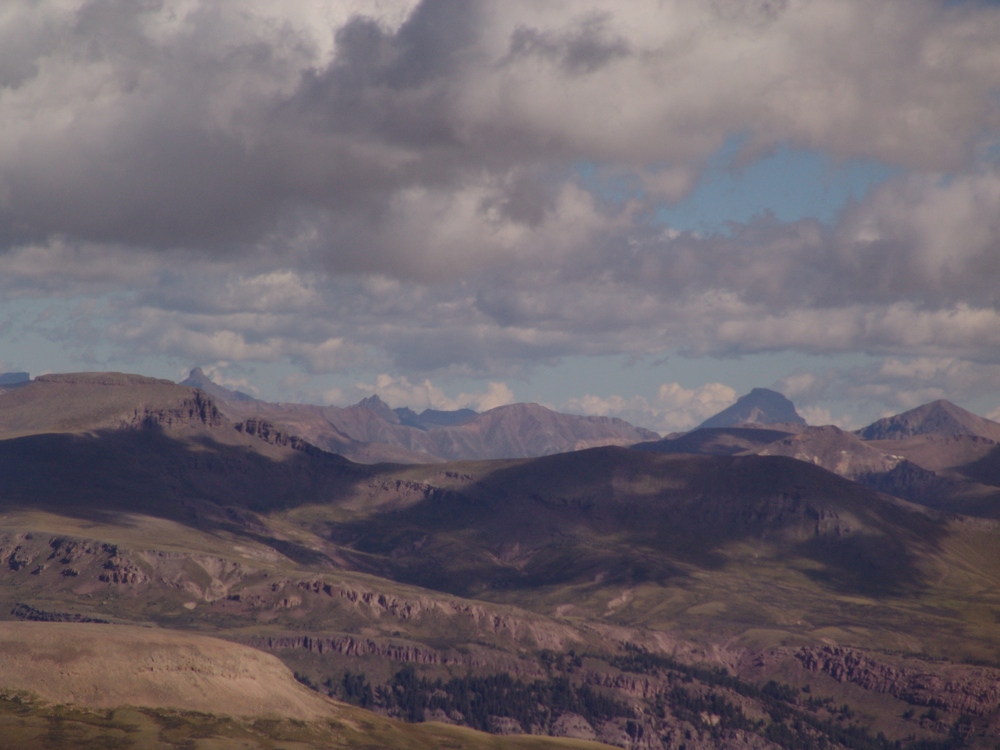
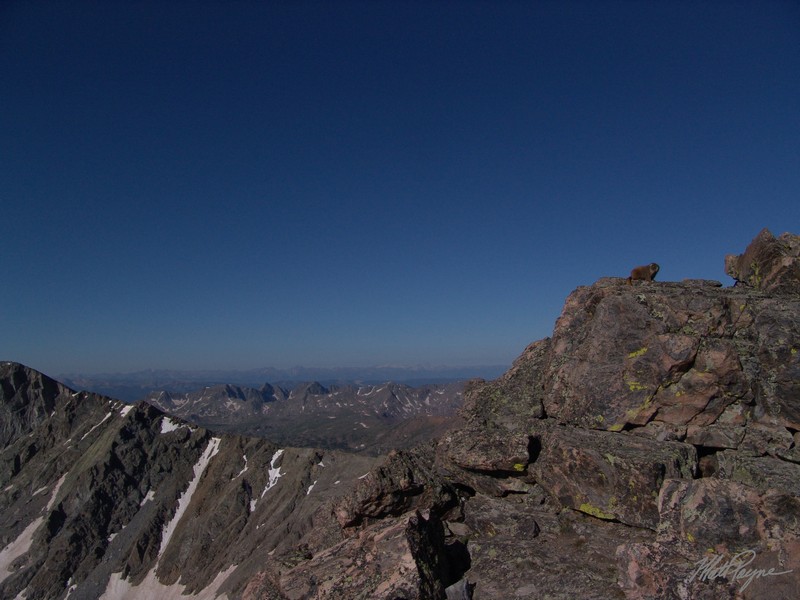
Wetterhorn and Uncompahgre to the north.

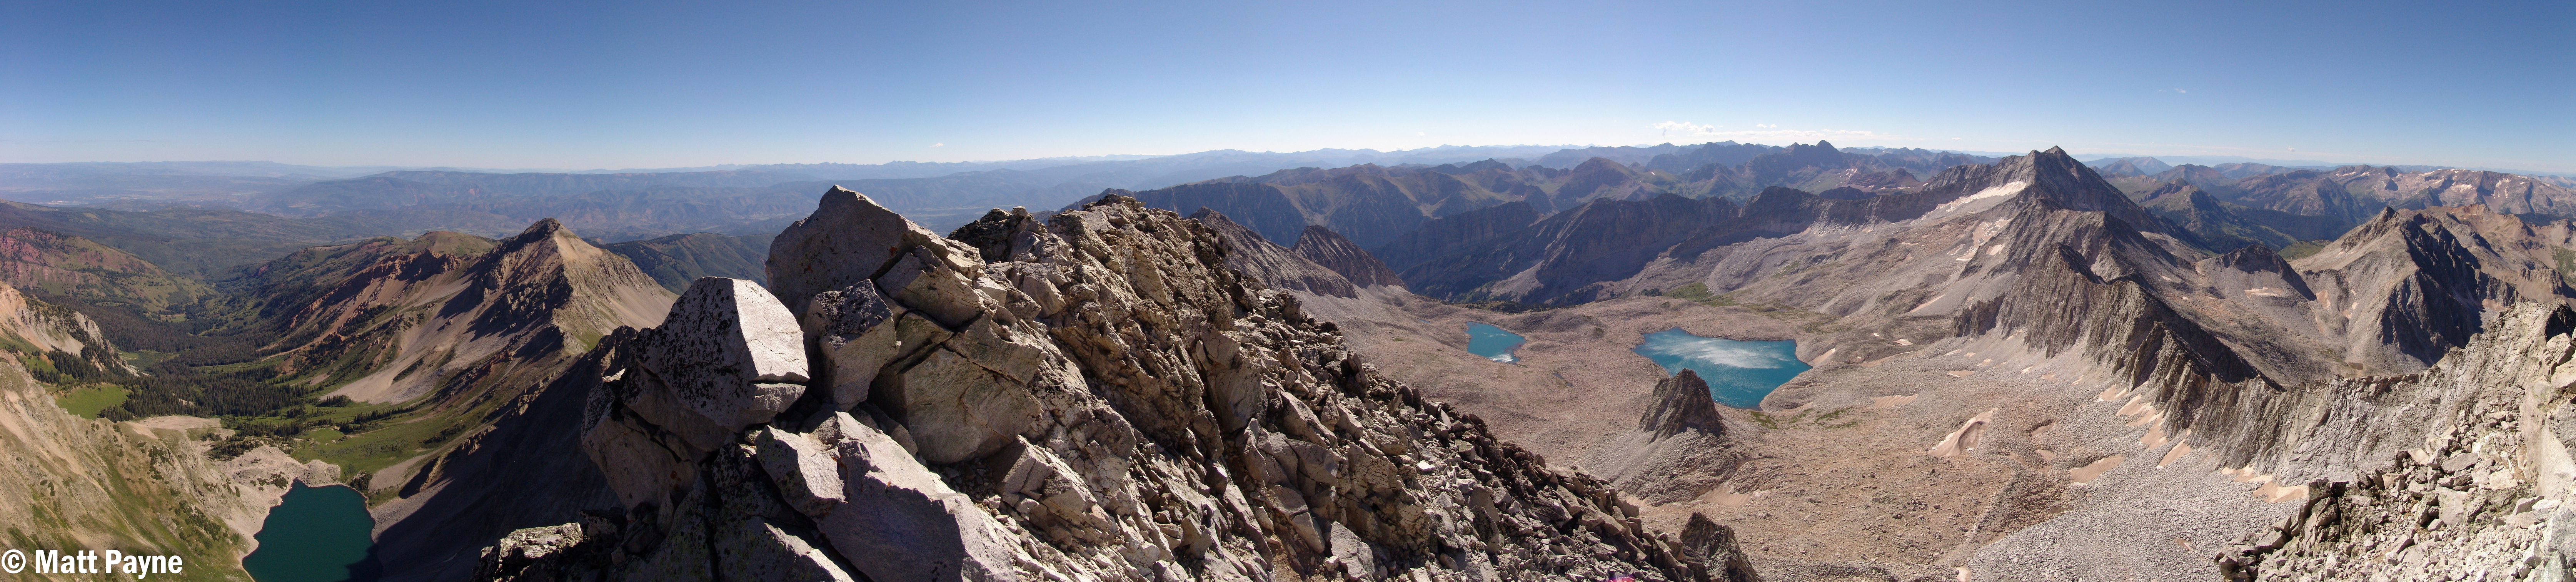
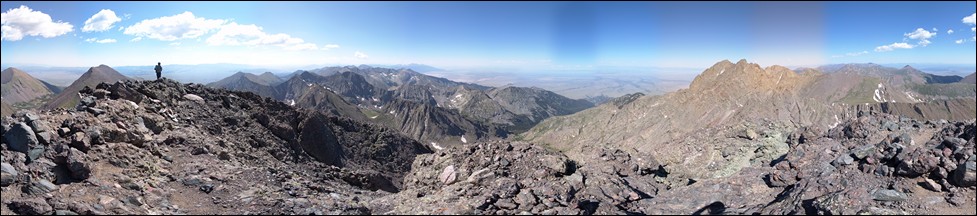
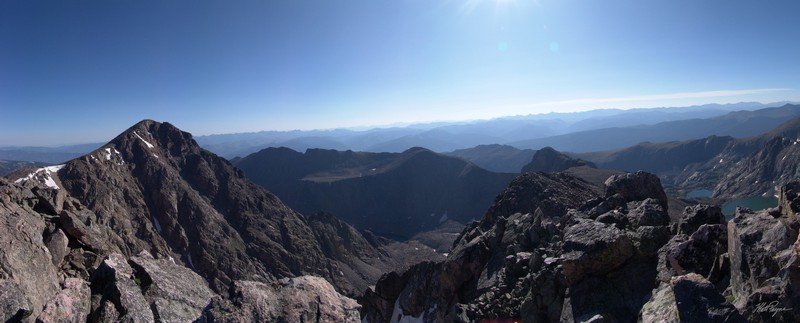
A 2800 pano from the summit of Rio Grande Pyramid.
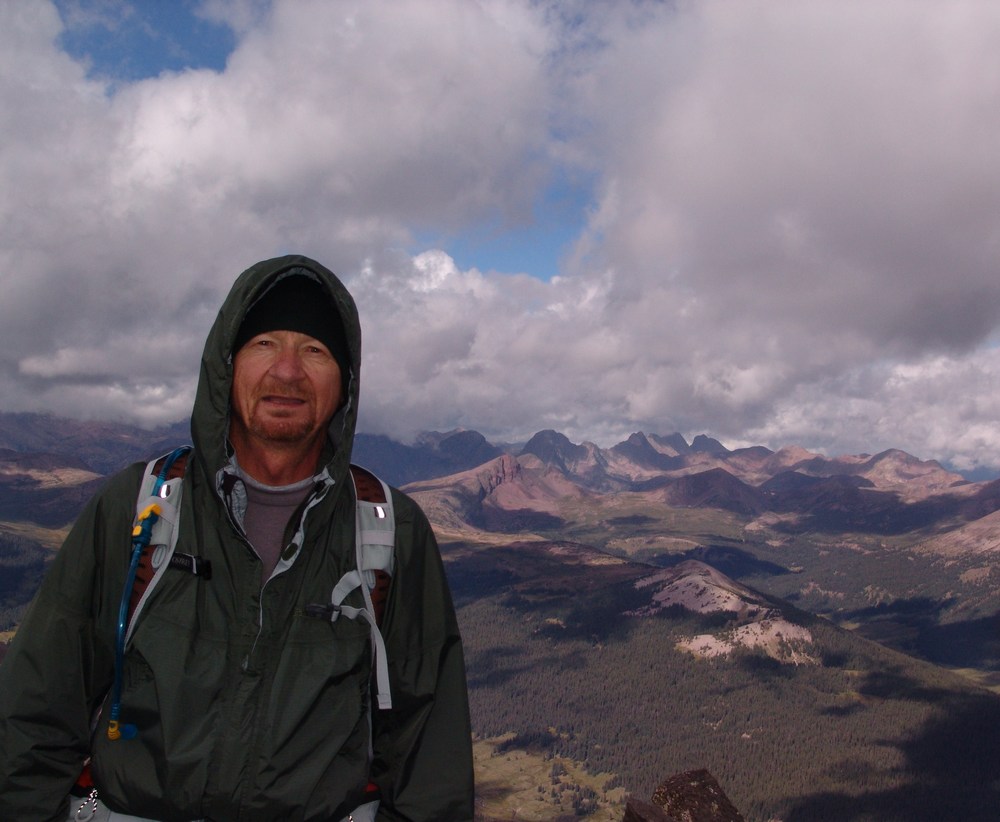
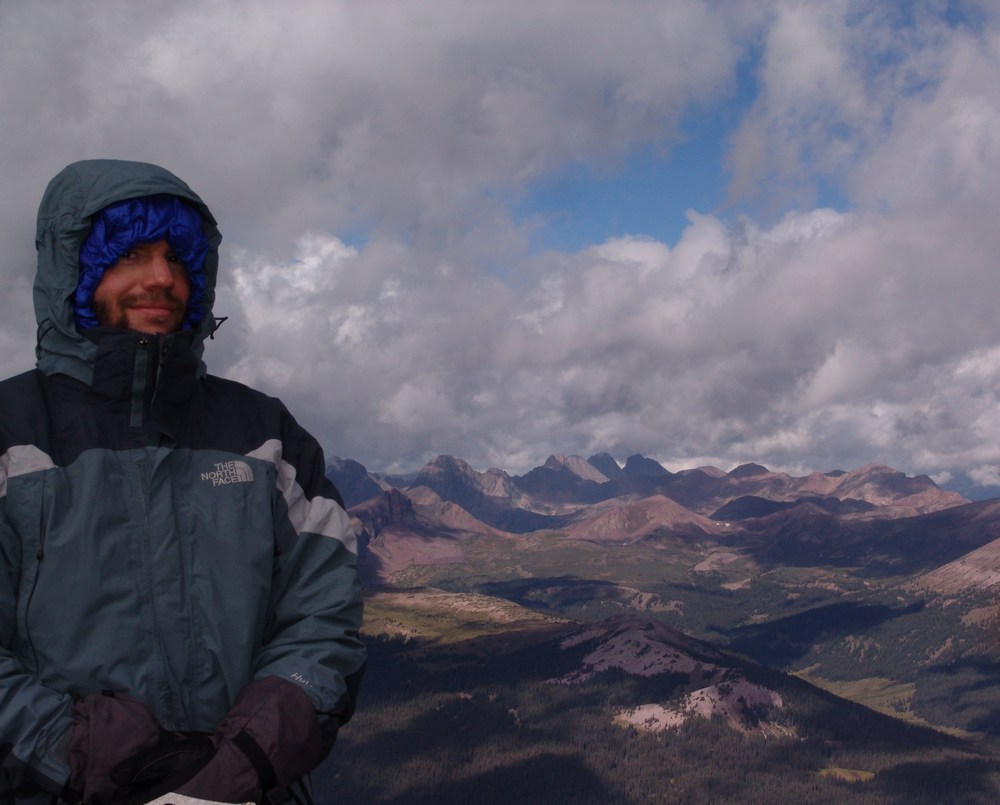
Ray Payne on the summit of Rio Grande Pyramid Matt Payne on the summit of Rio Grande Pyramid
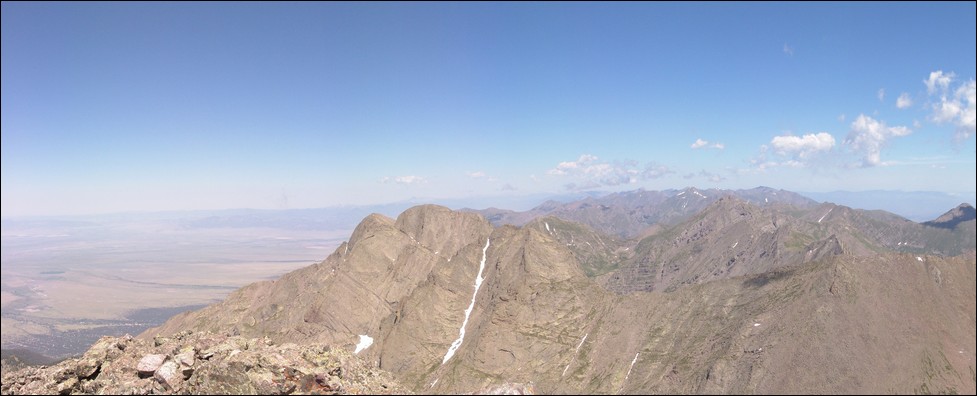
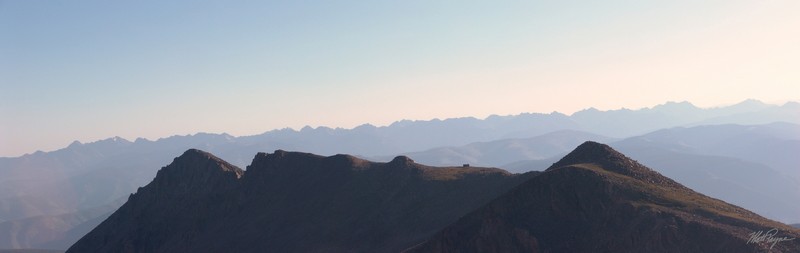
A view east and south. The clouds loomed over us all day long.
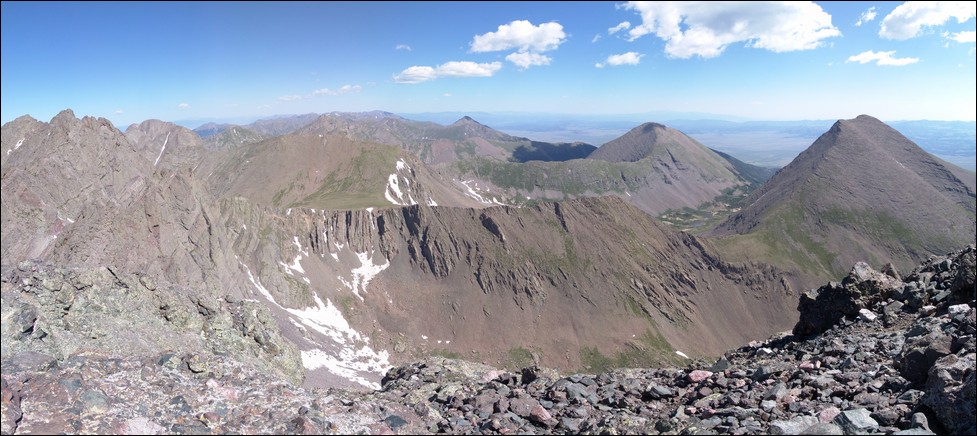
A pano looking east. "Fool's Pyramid" or UN 13,278 left of center.
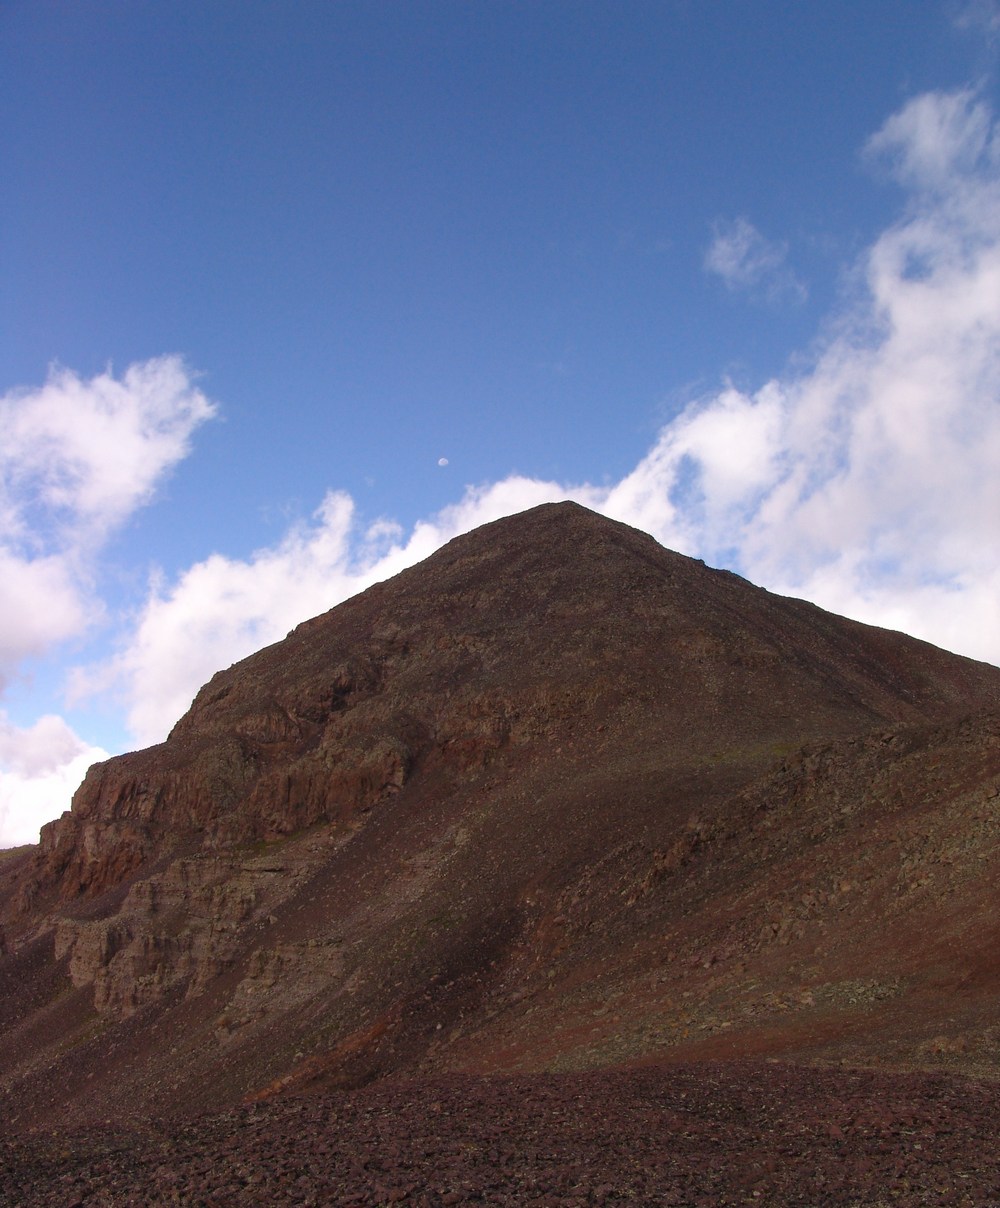
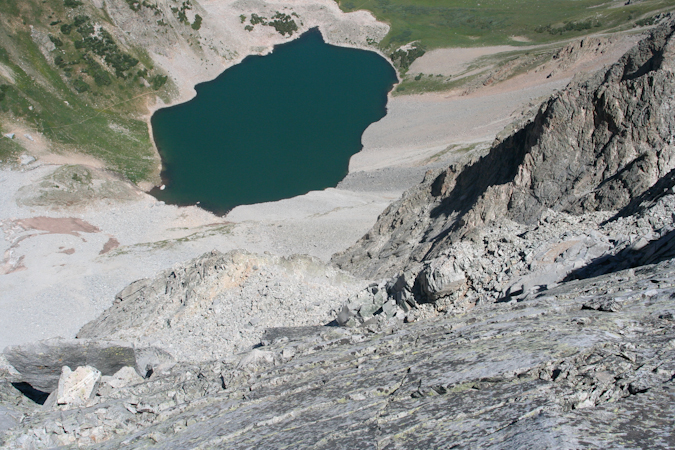
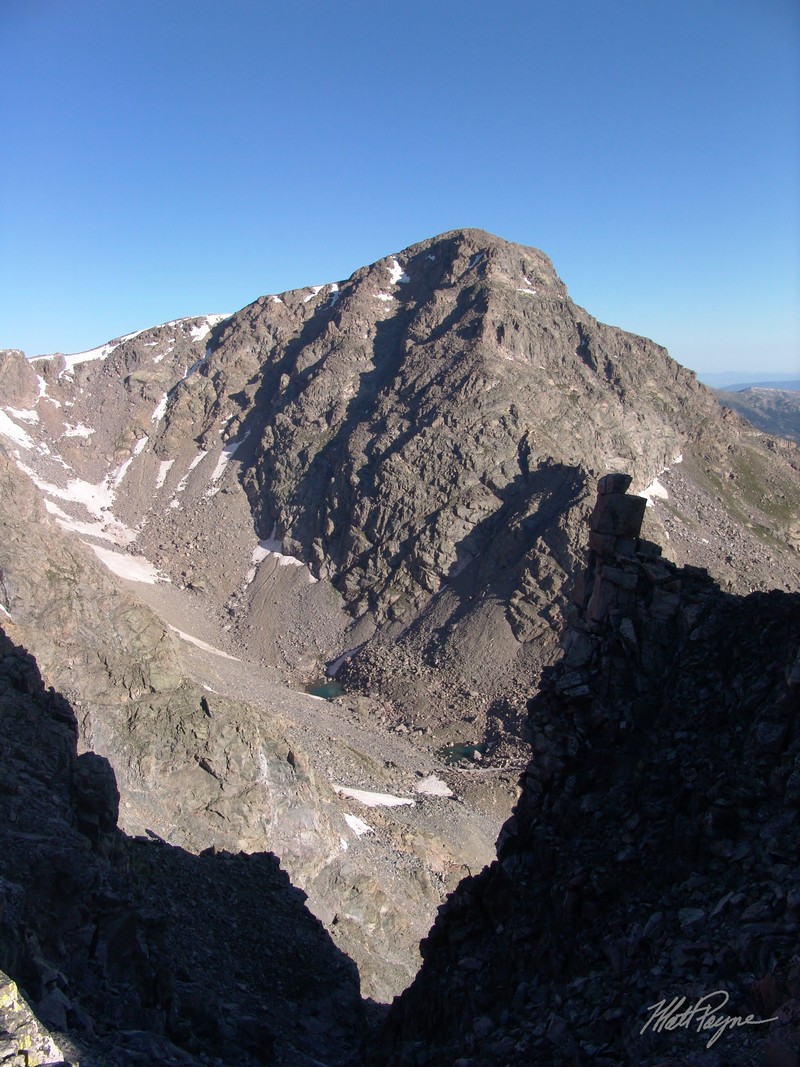
Since it was really windy and cold on the summit, Ray and I opted to head back down a few yards to eat a snack and refuel for the climb back down and hike back to camp. It began to lightly snow, so we headed on down. The weather began to clear for us on our descent, and better views of Rio Grande Pyramid were had from below.

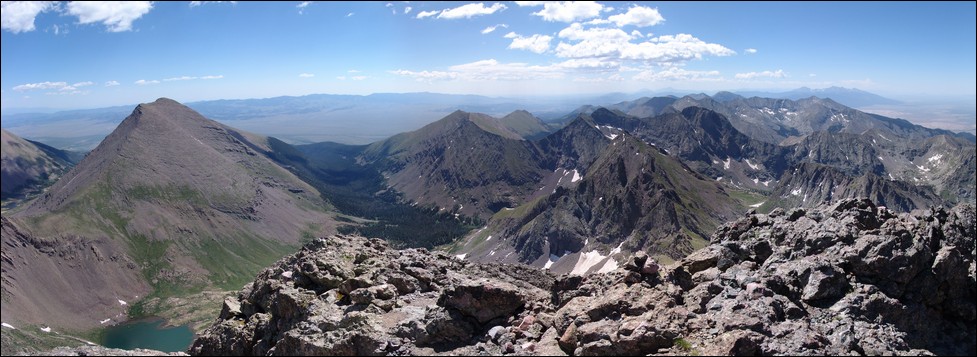
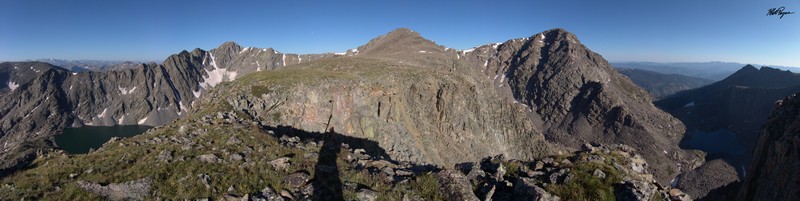
A super-high resolution pano of Rio Grande Pyramid.

Ray rests on the trail in this wide view pano of Rio Grande Pyramid and the surrounding ridges and valley.
As we hiked down, I was constantly drawn to the deep green and yellow colors of the meadows below.
On the way back down, Ray and I took our time looking for mushroom, and we found plenty to take photos of. The mushrooms were honestly one of the highlights of this trip, because both Ray and I are fascinated by mushrooms.
A trio of Fly Agarics.
A circle of Agarics.
A tiny white mushroom.
An odd cluster of gooey looking mushrooms.


This one looks like a UFO.
This one grew around the grass...
This one had it's own wooden house.
Covered in moss. Or - the Dagobah Mushroom.
This one caught our eye...
Once back at camp, I decided to get a few more shots of our close-by creek. I think these came out quite well!
Ray and I cooked up dinner - a fitting meal of tortellini, salmon, alfredo sauce, and 4 kinds of dried mushrooms. A meal fit for kings.
Blanca Peak and Ellingwood Point - Introduction to the Sangres
Blanca Peak has always mystified me. It is one of the most prominent mountains in Colorado - it towers over the San Luis Valley and the Great Sand Dunes National Park. It is easily one of the most impressive looking mountains in the State, from almost any angle. With that being said, it was quite exciting to finally get to climb it along with its neighbor, Ellingwood Point.
Here are some meaningful statistics from this adventure:
Blanca Peak - 14,345 ft. (ranked 4th highest in Colorado)
Ellingwood Point - 14,042 ft. (ranked 42nd highest in Colorado)
Total mileage: Approximately 10 miles
Elevation gain: 4,600 ft.
My friend Terry and I started our epic July climbs with a bang by heading down to the Sangres to tackle some of the most impressive mountains in the State. To accomplish this - we would need to backpack up a fairly long road to reach some high mountain lakes.
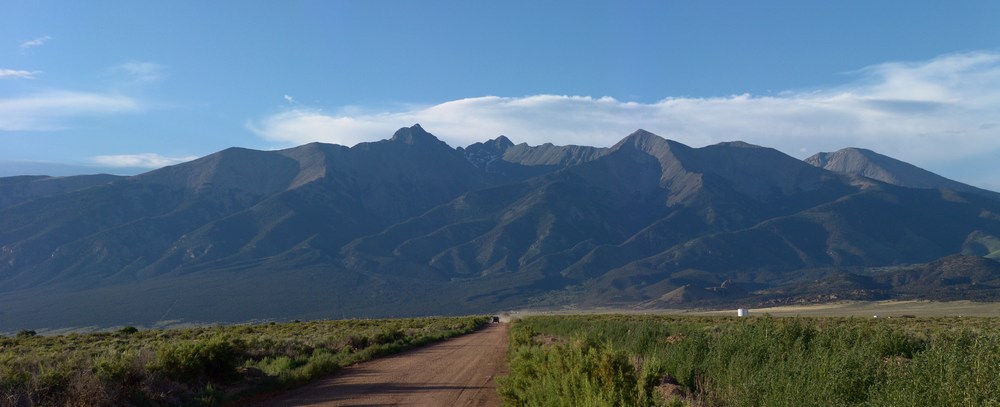
Terry picked me up at my house on Friday morning at about 7AM and we started the drive down to Walsenburg. Once we reached Walsenburg, we headed west over La Veta Pass and then through the towns of Fort Garland and Blanca. From Blanca, some pretty awesome views of the Blanca massif can be seen. Blanca is the highest one in the middle towards the back and Little Bear is the pointy one on the left.
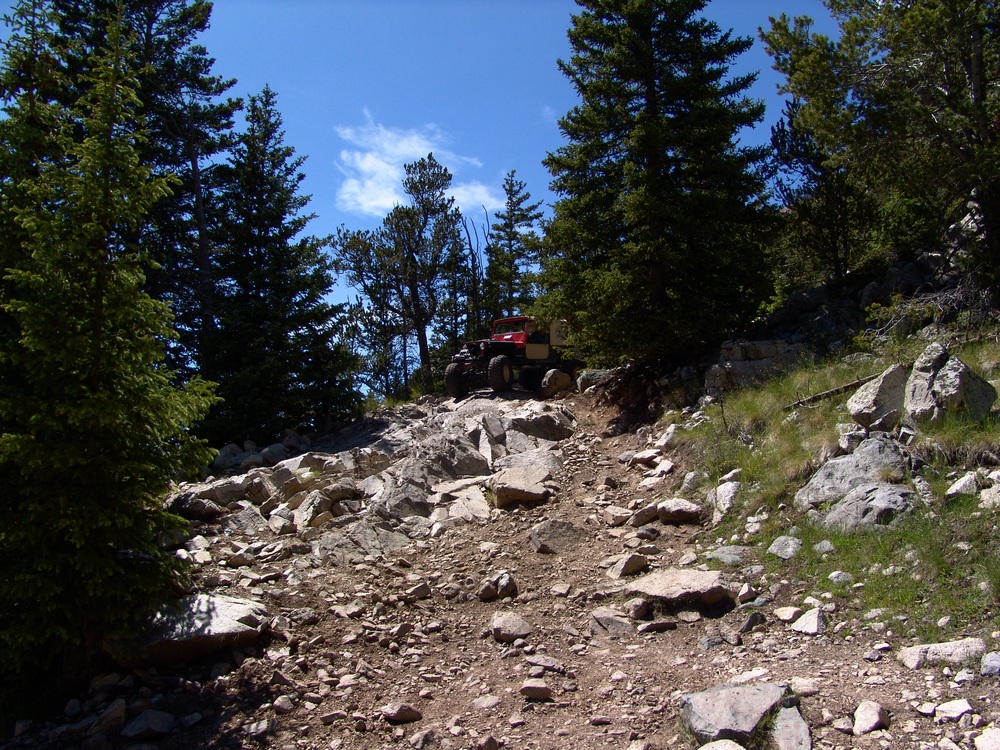
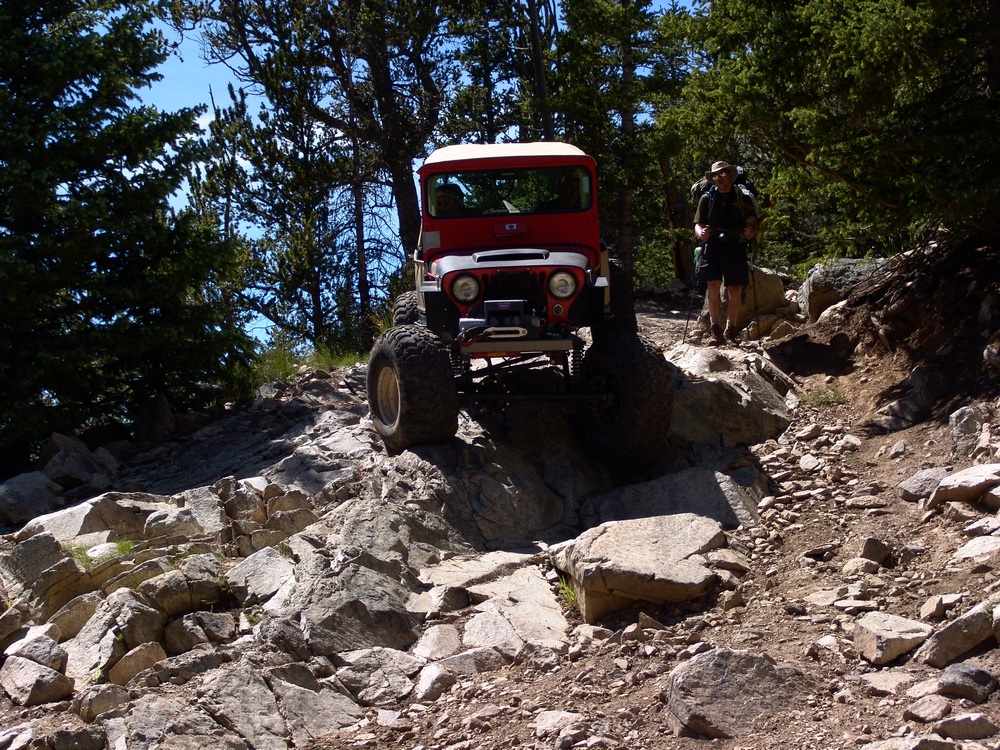
Next we headed north towards the Great Sand Dunes and turned up towards Lake Como. The Lake Como road is one of the premier 4-wheeling roads in the State, as evidenced by the three Rubicons at the start of the road. We started up the road in Terry's Blazer and encountered what I believe to be some of the most intense off-roading I've ever seen. Terry was a total champ! He was able to maneuver up the crazy road over some impressive and daunting obstacles and got us to a large camping area at about 10,000 ft. Turns out Terry damaged his engine mounts in the process. Here is a nice article on the road we were driving on.
In 2010, I went up the same road with my friend David, and there are more photos of that adventure in my Little Bear report.
The road is full of obstacles called "Jaws" which we stopped just short of. We got out of the vehicle and started our backpacking adventure. My pack weighed in at 55 lbs and Terry's weighed 40 lbs. I guess I carried heavier food!?
Here is the overall route we took up the valley and eventually up to the top of the peaks:
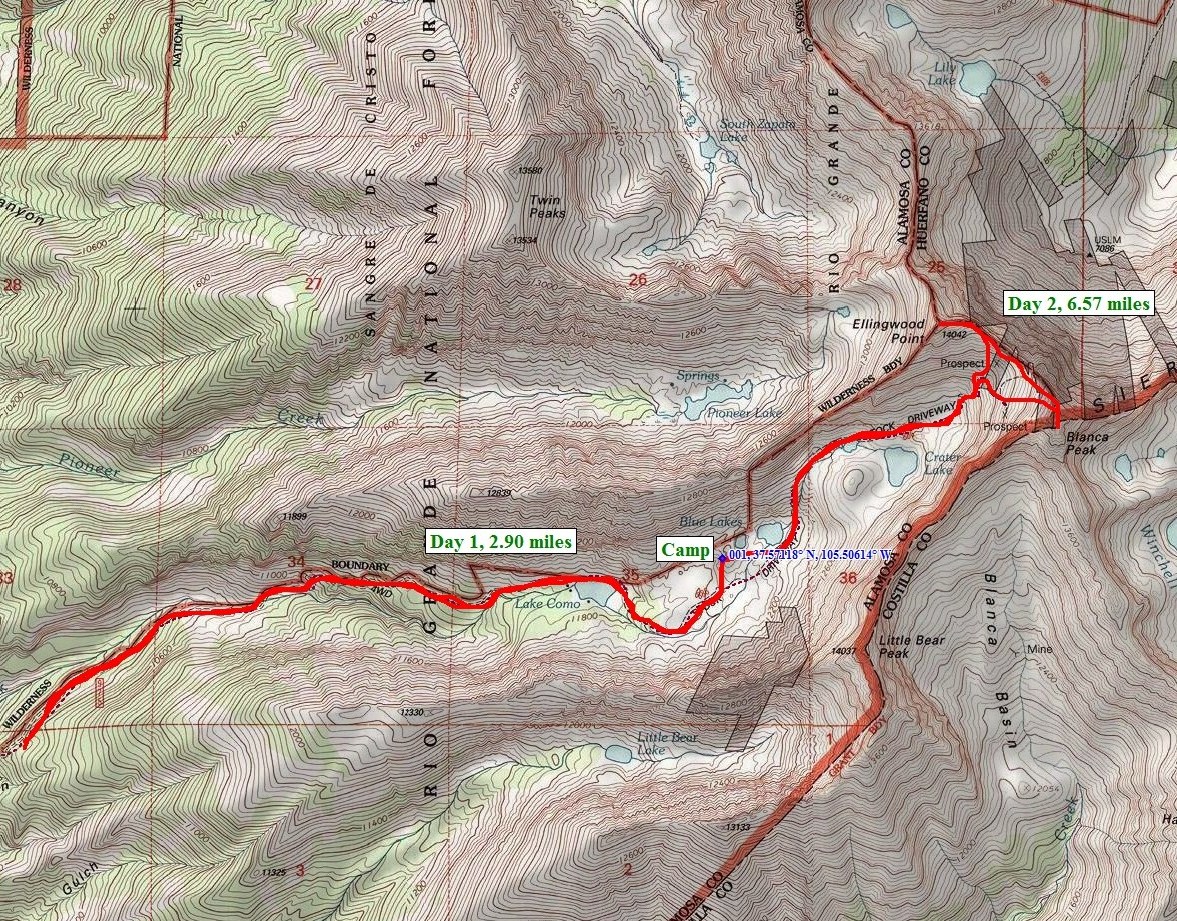
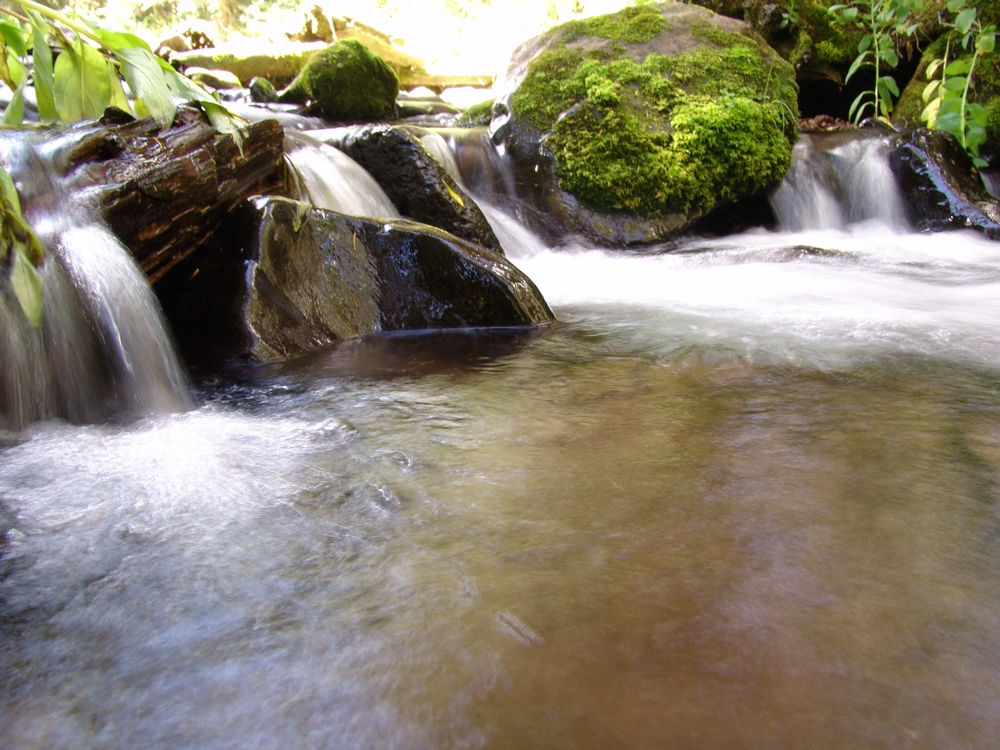
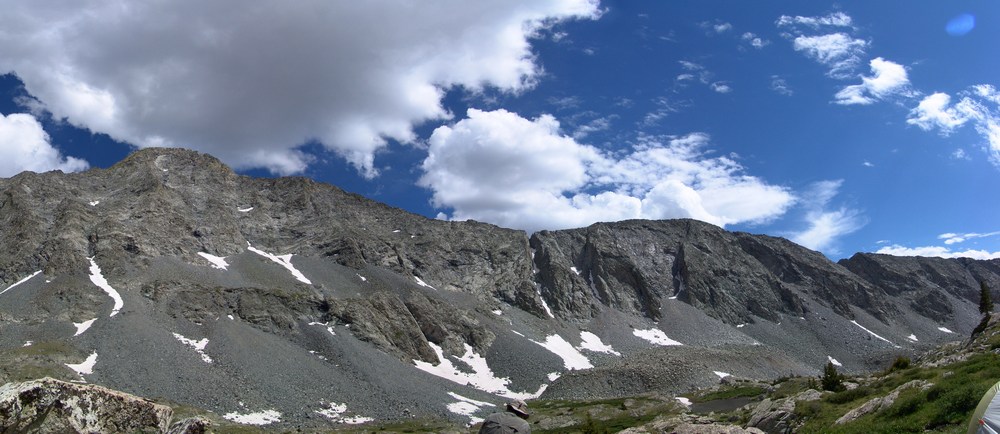
The hike took us up past the infamous "Jaws" obstacles and eventually we landed at Lake Como. We passed Lake Como and continued up the valley towards Little Bear Peak, Ellingwood Point, and Blanca Peak. We finally stopped above tree-line at 12,200 feet to set-up our camp-site. Here is a nice panoramic photo of the view from our campsite:
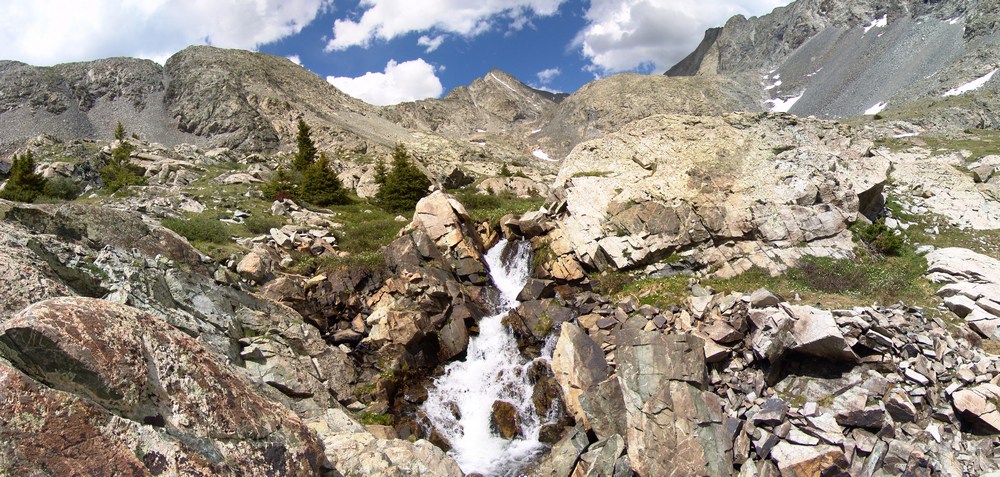
We were camped right next to a mini-waterfall that looked right up at Ellingwood Point. After we unpacked and got settled in, we decided to take a short hike further up the trail to one of the Blue Lakes. On the way there, I saw a small bird scurry past me. My first thought was, that bird can't fly! Then my second thought was, that's a baby bird! Sure enough, there were several small baby birds right in the area that were standing very still.
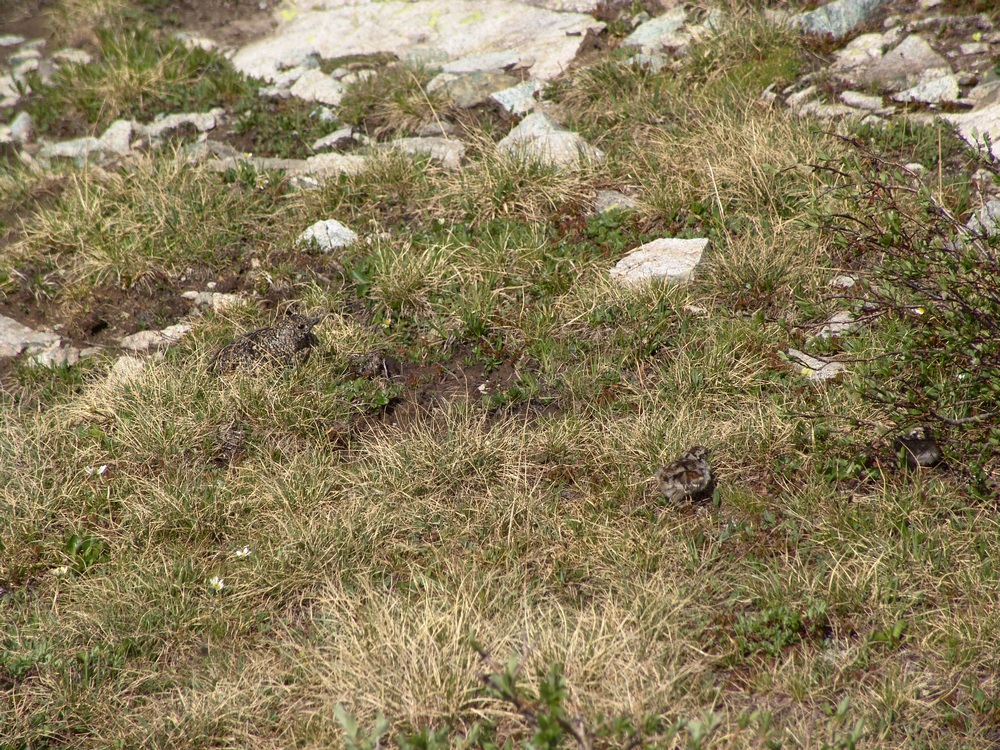
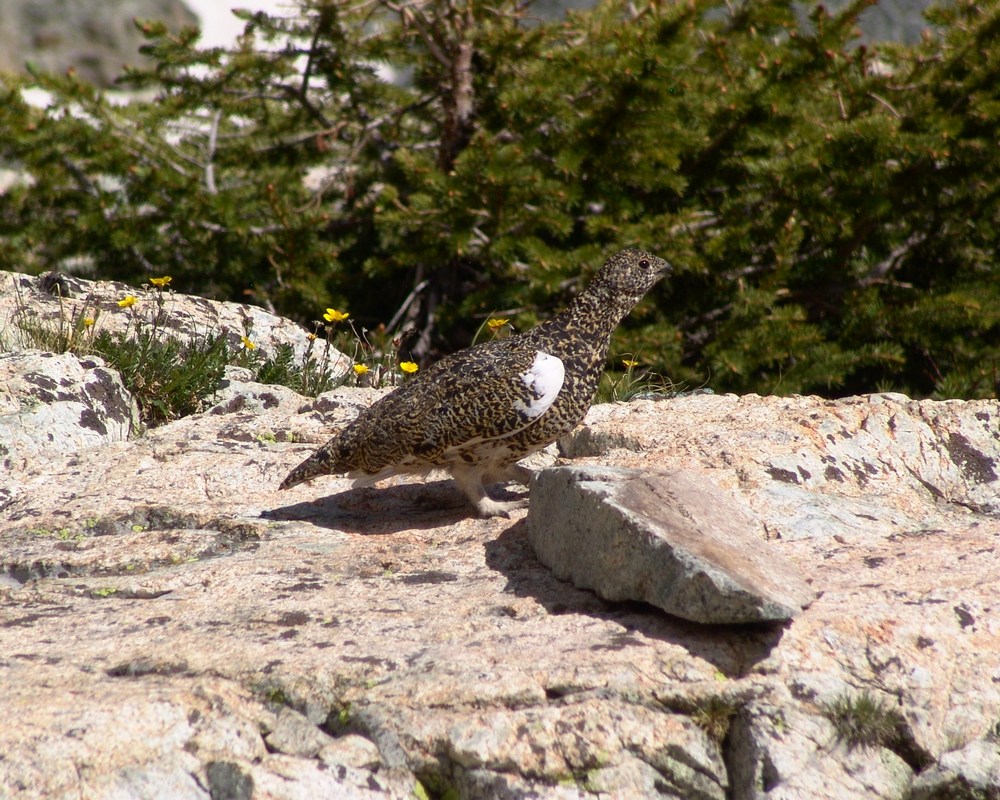
Then I spotted the mama bird - a full-grown Ptarmagin hiding in the brush:
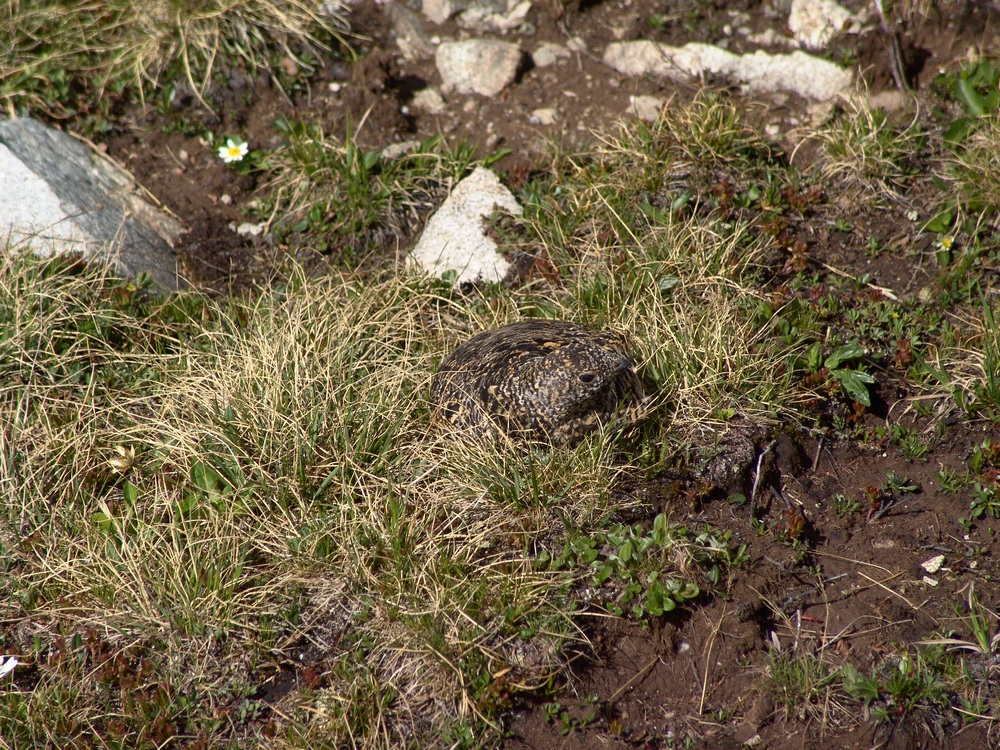
She got up and started running around me like a crazy lady (can't blame her - I was invading her space and she was protecting her chicks) and I took one more picture of her and continued up to the lake.
At the lake, we were able to get more awesome views of Ellingwood Point (left of center) and the waterfall at the base of the headwall for the Blanca / Ellingwood Point saddle.
From the lake you could see all the way up and down the valley, including nice views of Little Bear.
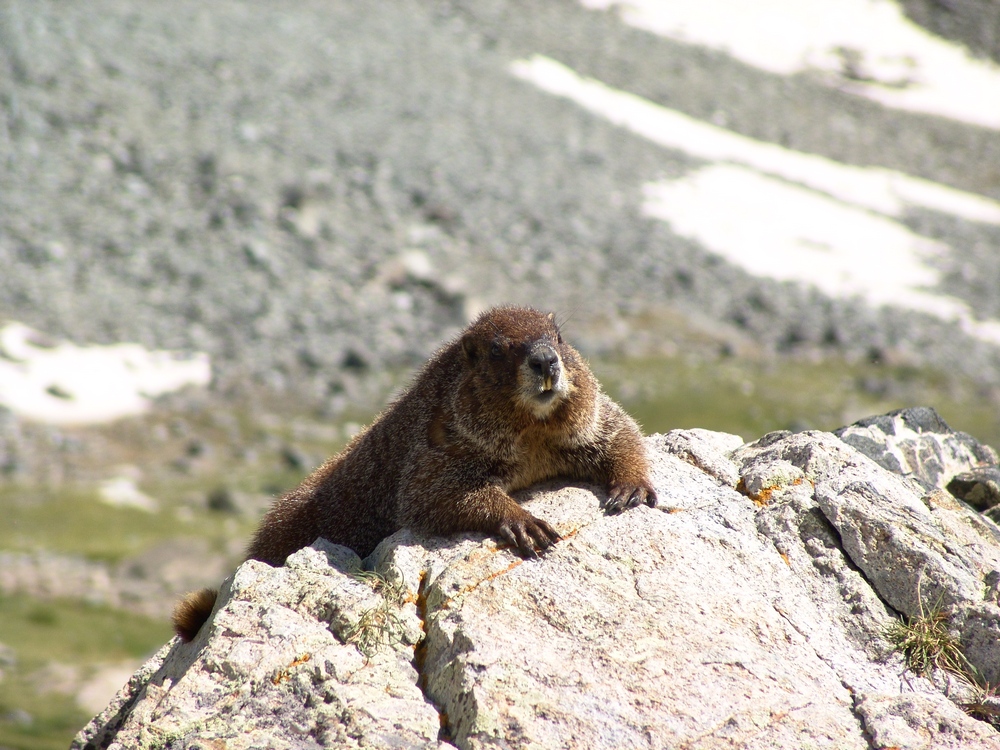
On the way back to our camp-site, we encountered a very friendly Marmot hanging out on a rock. This whole area was full of marmots and we were very careful to hang our food bags in a tree to prevent Marmots from eating our food.
When we returned to camp, we both set-off to prepare dinner. Terry boiled some water for his freeze-dried meal and I opened up a can of tomatoes, chicken, and green chilies. I got out my pre-chopped onion and sauteed everything together and made some yummy burritos. My pack may have weighed a lot, but I got to eat well, so it was worth it.
We saw that rain was on the way so we prepared our area for rain and got into Terry's tent. The rain was fairly heavy and lightning was off-and-on the rest of the evening. I was particularly uncomfortable being so high during a lightning storm, but we survived... We set the alarm for 4:30 AM and went to sleep.
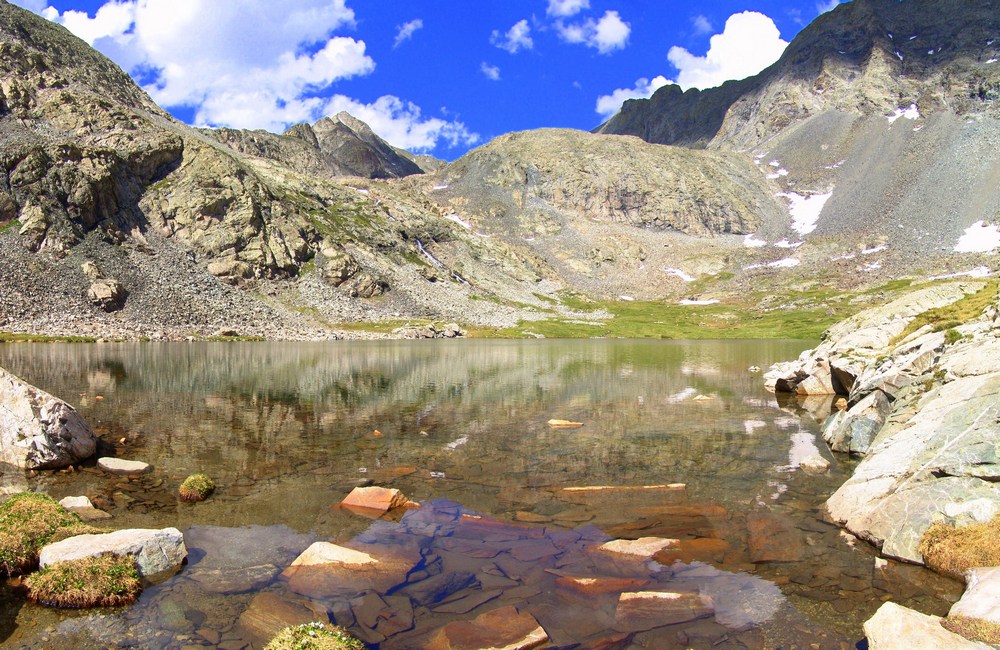
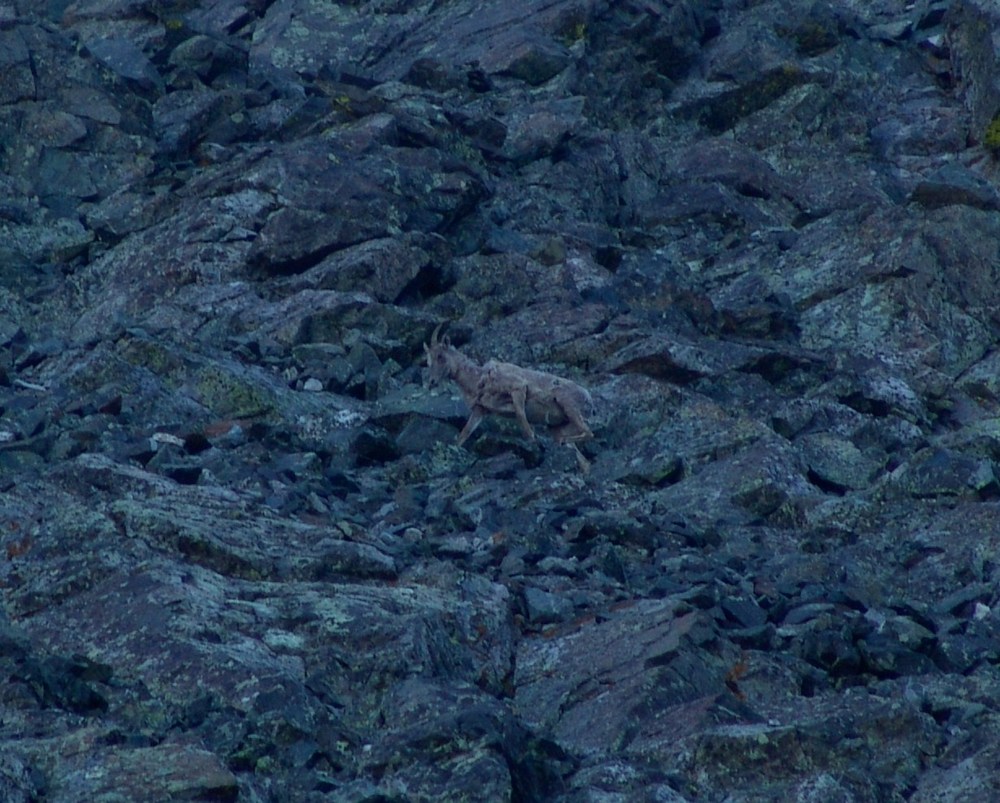
At about 1AM I woke up to the loud sound of rocks falling. I think a goat knocked down some rocks in the valley, which sounded like fireworks in the middle of the night. At 4:30 we both got up and prepared for the climb. I ate some breakfast bars and Terry boiled more water for another freeze-dried meal. In the process he melted some plastic on his stove on accident. Fortunately, it appeared that his stove was still functional. We started up the trail around 5:30 AM as the sun was just beginning to light up the valley. Shortly after we began, we reached one of the upper lakes. The lake was pretty cool because it was reflecting the light that had just started to shine on Little Bear - right of center.
The lakes were really calm and provided some nice views.

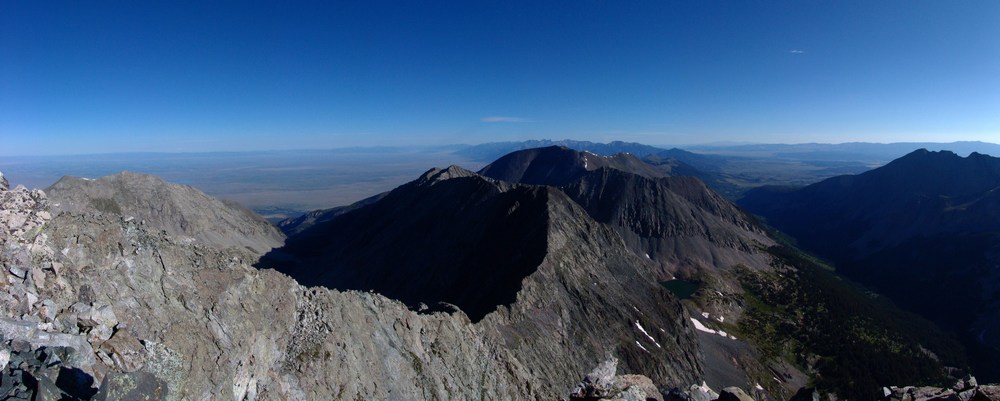
We continued up the trail and began the steel climb up snow fields and boulders. We followed cairns towards the saddle between Ellingwood Point and Blanca and heard the sound of rocks falling above us. A pair of Mountain Goats were doing the traverse from Blanca to Ellingwood above us!
Terry finally reached the trail connecting Blanca and Ellingwood just below the saddle and he led us up towards Ellingwood.
Finally we reached the saddle between Blanca and Ellingwood and were afforded the first very impressive views of the morning. We could begin to make out Crestone Needle (the pointy mountain peaking through left of center).
I also took a 300 degree pano from here, which turned out really nicely. On the right you can see the Lake Como valley from where we came from, and on the left you can see the Huerfano River valley and Mount Lindsey, which I climbed last weekend.
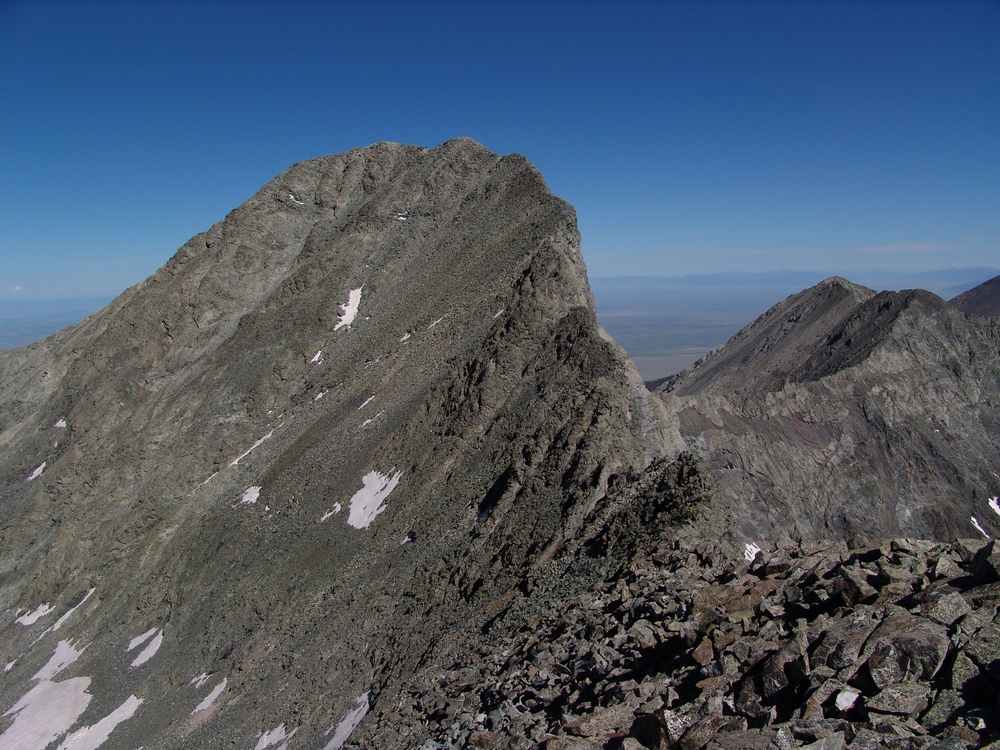
We continued up Ellingwood Point and kept looking back behind us in awe of the sheer size of Blanca Peak. It really is impressive. Here's some panos of Blanca and Little Bear, across the valley from us:
While I was taken by all of the views and therefore occupied by photo-taking, Terry was making great progress towards the top of Ellingwood. He couldn't see it, but unfortunately he was not the first to summit Ellingwood today. The goats were!
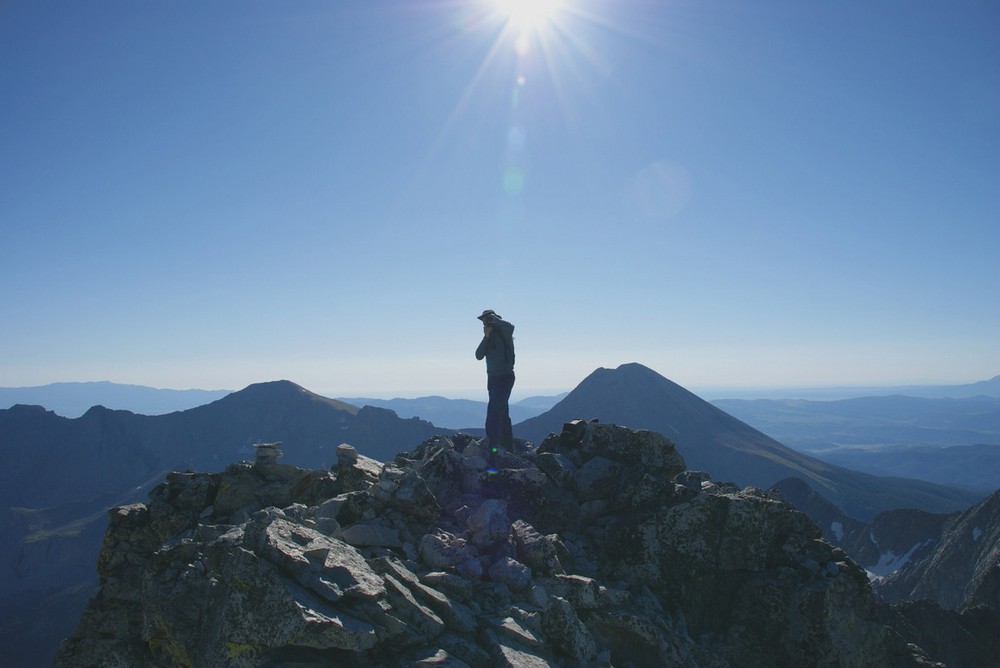
As Terry approached the summit, the goats left and Terry was afforded solitude once more on Ellingwood. Here's Terry with the moon above him as he took in the views from atop Ellingwood:
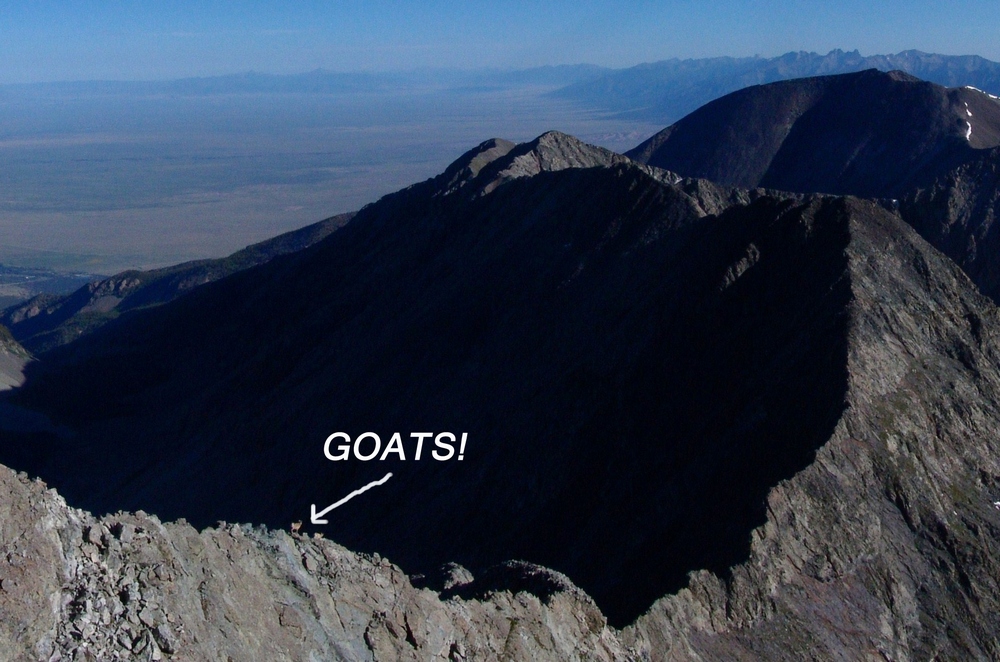
As I reached the false summit of Ellingwood, I looked to my right (north) and saw an impressive ridge connecting Ellingwood to California Peak. If you look closely at this pano, you can see something really cool...
... goats!
Here's a zoomed in view of the Goats! They were doing the traverse down the spiny ridge. It was really amazing seeing wildlife this high.
I finally reached the summit and Terry was already taking pictures. He took this one of me as I was also taking photos:
Here's a 360 pano from Ellingwood. Under the sun is Lindsey, and left of Terry is Little Bear and finally Blanca:

Terry and I stayed on top for about 20 minutes, watching groups of people summit Blanca and Little Bear across the valley. We refueled and began the traverse over to Blanca. This was a fairly sketchy route, perhaps because we stayed pretty high on the airy ridge. To our east was a sheer drop-off of at least 1,000 feet. The route required some careful footholds, ledge-walking, and even an icy couloir. Terry went down the icy couloir first, acting like Spiderman on the edge. I decided to around the ice and then right through it, using my hand to pick up ice and snow and throwing it out of my way. We started up Blanca and passed one gentleman coming over from Blanca. Looking back at Ellingwood, you can see the route we took, basically right down the ridge and up again towards Blanca.
The scramble up Blanca was fairly straightforward class 2+ climbing and I eventually reached the summit. Terry summited about 10 minutes later and we both began to take pictures like crazy. The weather was absolutely perfect - no wind. Terry took my summit shots, and then we both started walking around the summit block in search of great photos.
I took my normal 360 pano...

...and then took some higher detail panos of Lindsey Peak and the Winchell lakes to our Southeast.
Here's a zoomed in view of one of the Winchell lakes: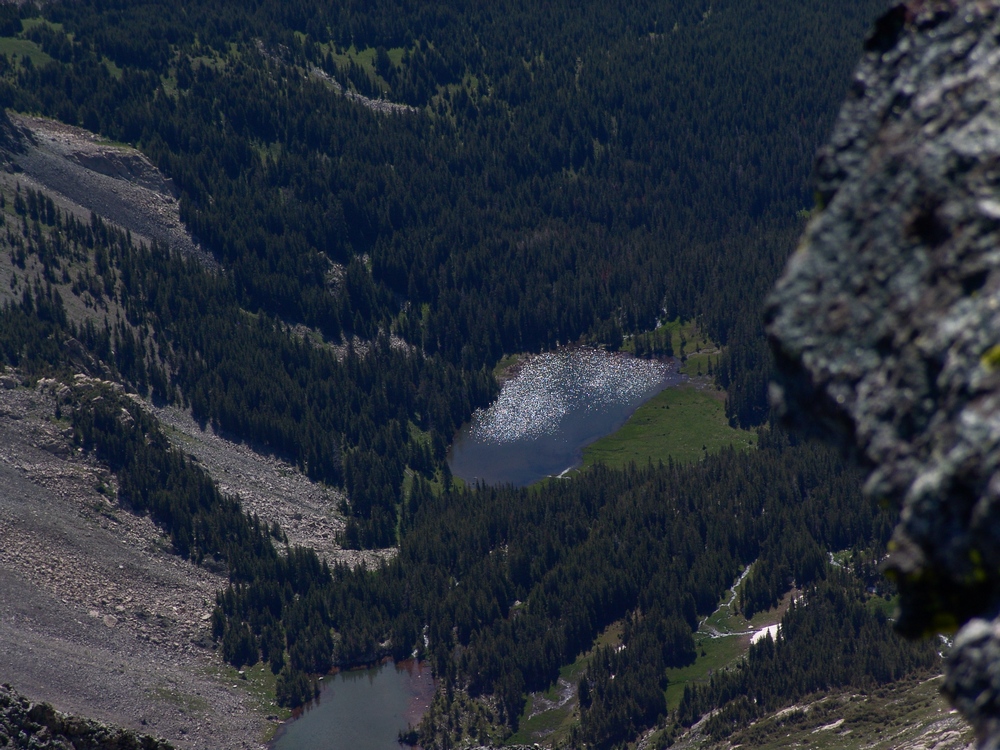
Then I took a very detailed set of photos of Little Bear and the traverse from Little Bear to Blanca - one of the hardest traverses in the State. You can also see Lake Como in the valley to the right of Little Bear.

After hanging out on the summit for awhile, we decided to head back down, which turned out to be fairly uneventful except for the awesome views. We eventually got back down to the waterfall, which I had to take a picture of!
When we got back to camp, we both decided it would make sense to just pack-out today, so we packed up our camp and headed back down towards Terry's vehicle. At Como Lake, we encounted a large group of 4-wheelers, one of which we followed down most of the trail to watch him go over the Jaws obstacles. His Willy's Jeep made the Jaws look more like baby teeth:
The hike back down to the car was fairly uneventful after seeing the Willys.
We then drove into Blanca to have some good food to prepare us for the drive home.
Capitol Peak: On The 'Edge'
Capitol Peak carries a mystique among hikers and climbers in Colorado. First climbed in 1909 by Percy Hagerman and Harold Clark, Capitol Peak is often revered as the most difficult 14er in Colorado. Capitol Peak towers above treeline in the Elk Mountains of Colorado, a crumbling mass of granite, shaped into a rugged pyramid with spiny ridges. While I have a great respect for Capitol Peak, I felt that I had personally prepared myself for the climb through graduation along the difficulty continuum of climbs in Colorado. Having summited several of Colorado's harder Centennials (highest 100 mountains), including Crestone Needle, Crestone Peak, Vestal Peak and Little Bear Peak, I felt that I had the skills and mental toughness to complete Capitol. Capitol is well-known for its "Knife Edge," a 150 ft. narrow and jagged section found on the main route of Capitol Peak. The Knife Edge is very exposed on both sides, making it a mental challenge for many climbers. Many personal friends and family members as well as reports on the internet had built up Capitol's Knife Edge's difficulty in my mind; infact, YouTube is full of videos of people climbing the Knife Edge, some recklessly crossing it like a tightrope. I was hopeful that it was more hype than people it made it out to be...
Here are some meaningful metrics from this amazing trip:
Peaks summited:
Capitol Peak: 14,130 ft. (ranked 29th in Colorado)
"K2": 13,664 ft. (unranked)
Total elevation gain: 5,300 ft.
Total distance hiked: 17 miles
Total time hiking: Approx. 14 hours
Total photos taken: 356
Total distance driven: 520 miles
Trip duration: 1 day, 19 hours

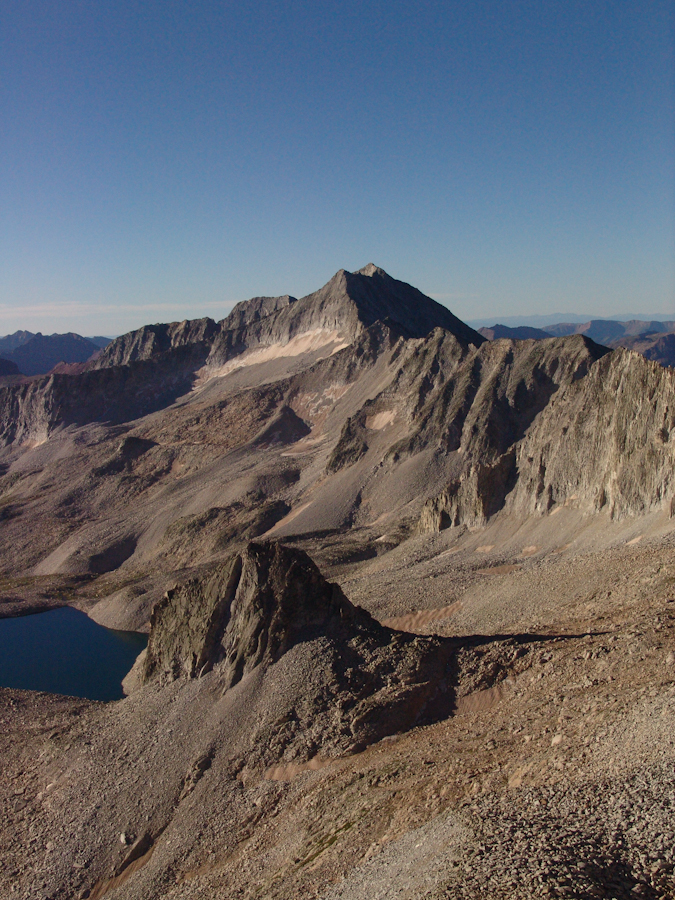
K2 (far left) and Capitol Peak (far right) seen in this dramatic panoramic. Click for high resolution version (15 mb).
That being said, Capitol Peak was not without other dangers. Many climbers have perished on Capitol over the years, oddly enough, very few of the deaths have occurred on the Knife Edge. In 2009, James Flowers, the United States Paraolympic Swim Coach, perished on the Northeast side of "K2," a sub-peak of Capitol Peak, as reported by the Aspen Times. Needless to say, great caution, respect, and preparation would be required if I were to successfully climb Capitol. First on my list for preparation was to find capable partners. This is often difficult in the mountaineering community, since many climbers inflate their abilities or do not disclose their limitations to potential partners.
Earlier this summer, I climbed Huron Peak with Mike Vetter, a Sioux Falls, South Dakota resident and an up-and-coming star in the IT realm and CEO of DataSync. Mike and I made plans to climb again this year and we set our sights on Capitol Peak. Mike invited his friend, Travis Arment, an avid marathon runner. Neither Mike nor Travis had extensive experience climbing class 4 peaks; however, having hiked with Mike in the past, and knowing that Mike was a comfortable and avid rock climber, I knew I could trust him to make solid decisions and that they would both be personally responsible enough to turn-around if the climb became too difficult. We all exchanged plans via Facebook, ensured we all had the proper gear and knowledge, and established ground rules for the climb in case something unexpected happened. Travis and Mike flew in to Denver on Friday, August 13th. I picked them both up from Castle Rock, where Travis' aunt lives, on Saturday morning and we departed for Capitol. The total drive from Colorado Springs was approximately 260 miles and took roughly 5 hours.
We arrived at the trailhead for Capitol at about 10:00 AM and were hiking by 10:30 AM. As usual, my pack was the heaviest and largest, weighing in at just over 50 lbs.
Mike's pack was medium-sized and Travis literally backpacked with a daypack. We made sure to give Travis a hard time for having the smallest pack, and Mike was quick to point out that he was carrying half of Travis' stuff. Travis was a great sport about it and agreed to share his tasty snacks on the hike up.
There are two trails for Capitol Peak - the standard trail and the "ditch trail." We chose the ditch trail due to its lack of elevation loss and gain at the start of the hike. The ditch trail is aptly named, following an irrigation ditch along the side of a ridge line which wraps around towards Capitol Peak. The irrigation ditch is used to provide water for cattle, which are known to graze this part of the Elk Mountains in large numbers.

The topo map of our route. Want to make your own maps like this? Check out the TOPO! program from National Geographic!

Capitol Peak seen from the trailhead.

Matt Payne and Travis Arment on the Capitol Peak Ditch Trail - photo by Mike Vetter
After about a mile and a half of hiking on the trail, it leaves the ditch and heads uphill, gaining half of the ridge to the west. Before we knew it, the trail meandered into a great opening, revealing Capitol Peak. Capitol Peak remained in view for much of the remainder of the hike up to Capitol Lake.
Matt Payne on the trail
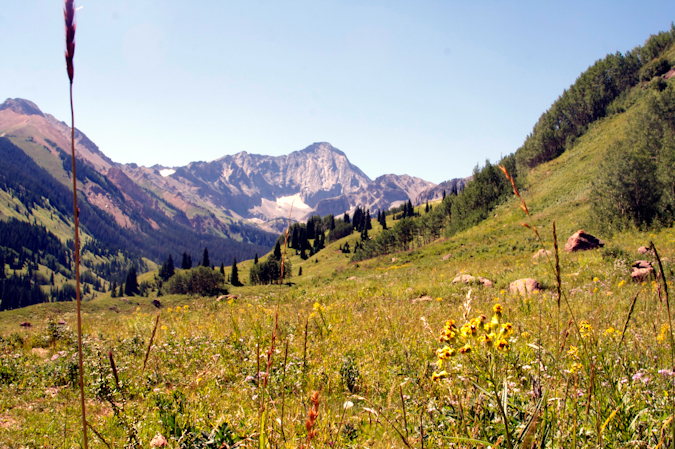
Capitol Peak, about 1/3 of the way up to Capitol Lake from the trailhead.
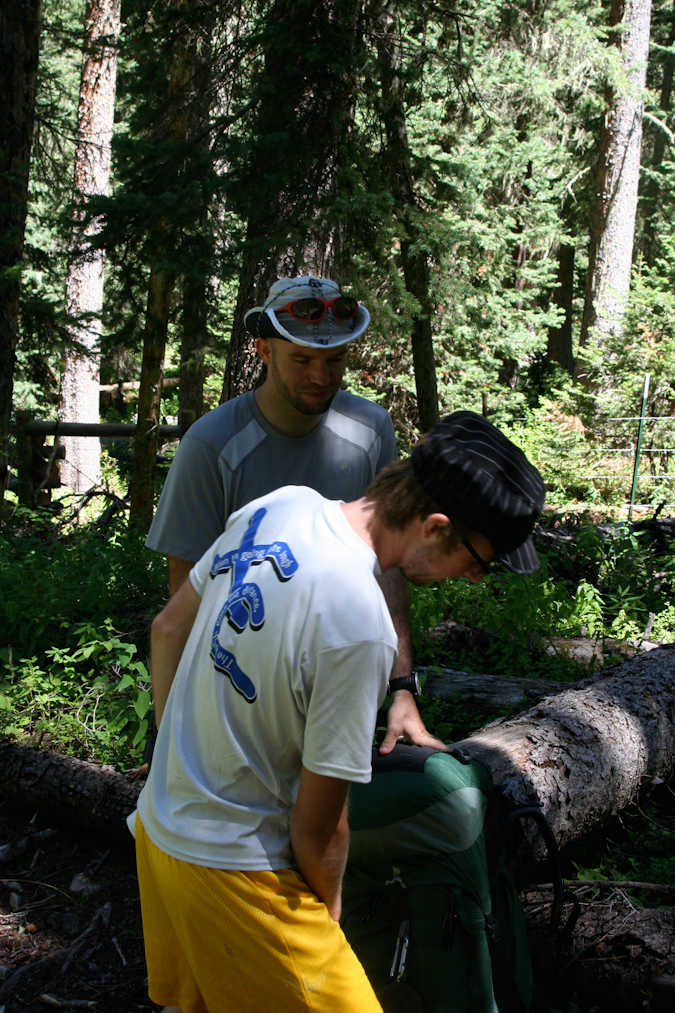
On the way up the trail, we passed many raspberry plants, sometimes stopping to grab a snack to help fuel our ascent.
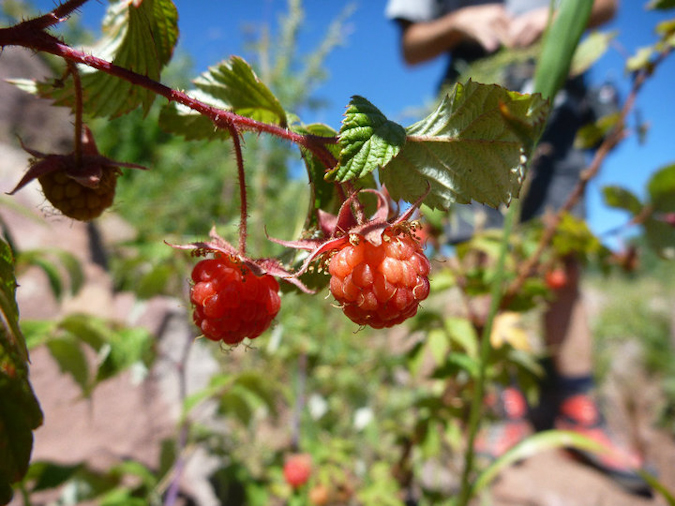
Wild Raspberries - photo by Travis Arment
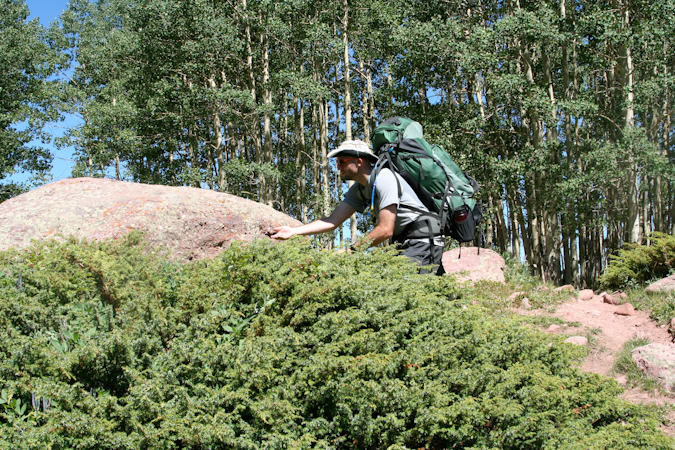
Matt Payne braves the spiky bush to score some berries.
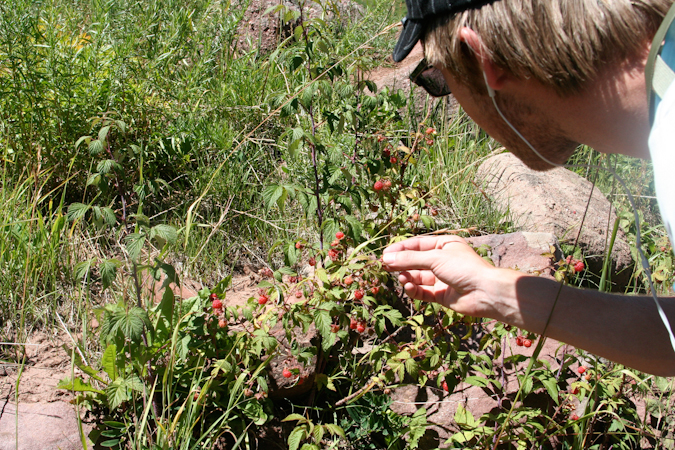
Travis Arment reaches in to score some berries.
Eventually, the trail reaches the Capitol Lake basin and intersects two side trails leading to two campsite areas, each split into four campsites (#1 through #4 and #5 through #9). We found ourselves camped at site #6, a quaint spot in the trees up on a hill.
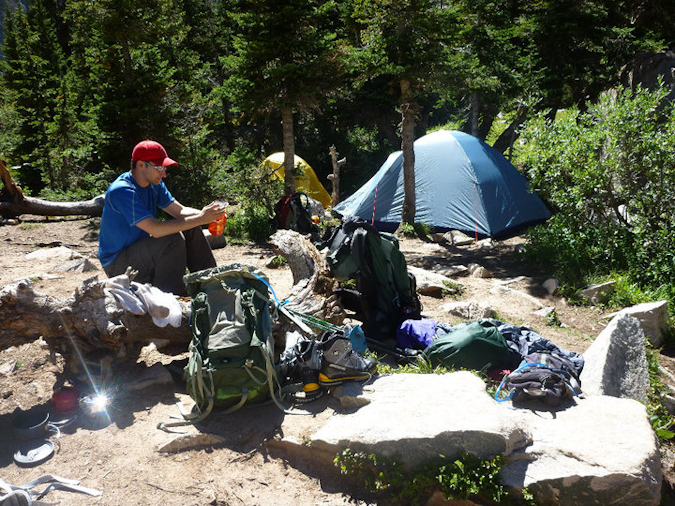
Mike Vetter unpacks at our campsite.
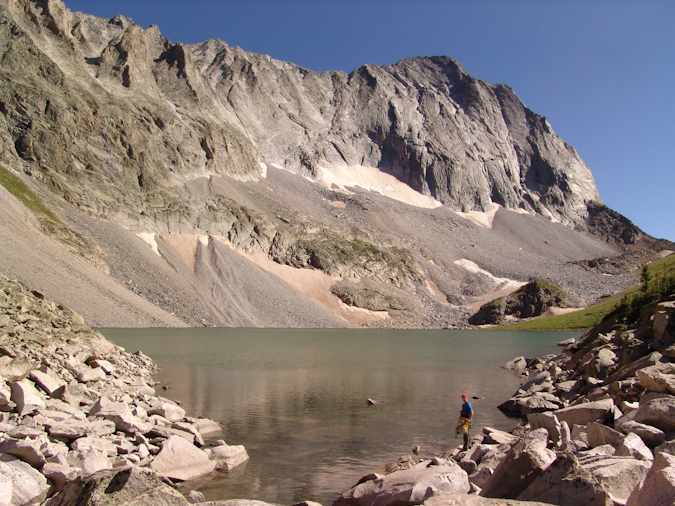
After we got situated at our campsite, we took a small nap. The hike up to Capitol Lake was pretty exhausting for all of us. After our short nap, we took a walk down to the lake with our cameras and took pictures. The lake rests right below Capitol itself and was a great area to relax and take in the afternoon sun.

Capitol Lake sits beneath Capitol Peak in this 1800 panoramic photo taken above the shore.
Mike went down to the lake to fill up his water bottles, using his steri-pen to sterilize the water. Unfortunately, the steri-pen bested Mike's weary intellect and he gave up on the endeavour, conceding that my Ketadyn Hiker Pro filter would later suffice. Mike and I went down to the stream near our campsite before cooking dinner and refilled all of our water. The area surrounding Capitol Lake is really quite gorgeous, with Capitol looming over the whole area like some kind of ancient protector of its treasure.
Mike Vetter filling his water up at Capitol Lake.
I pulled out my food for the night - a custom-made soup with dehydrated vegetables and pasta with chicken. Mike and Travis were somewhat jealous of this fancy treat at first; however, the meal was about the saltiest thing I've ever ate. Mike and Travis cleaned up on their Knorr Pasta side meals and we all hit the sack at around 8 PM, with the alarm set for 4 AM.
4 AM came all too soon, despite the long night of sleep we all enjoyed. I scarfed down some homemade zuchinni bread that my wife made for me and we all grabbed our backpacks and headed for Capitol. The trail for Capitol happened to be the same trail used by our campsite, which perpendicularly intersects the Capitol Lake trail just below Capitol Lake. We made our way up the switchbacks in quick order, passing several groups. Being that it was quite early in the morning, we could see all the other hikers in the area ascending beneath us and above us. We counted about 15 to 20 other headlamps heading up.
Travis Arment (left) and Matt Payne (right) excited to be on the trail to Capitol Peak.
We reached the Mount Daly - Capitol Peak saddle about 30 minutes into the hike and enjoyed some pretty awe-inspiring sunrise views from there, which Mike documented on video:
Sunrise
Sunrise... again
Clouds rest in the light of sunrise to the east.

We continued up and over the ridge and descended a well traveled gully to reach the beginning of a very long stretch of boulders to the north and east of K2. The trail here mostly consisted of cairns and boulders, making for fun travel in the early light.
Mike Vetter hikes up the immense boulder field.
Out of nowhere, as if we were not expecting it, the sun blasted alpenglow onto the mountains surrounding us.

Mount Daly basked in alpenglow in the early morning.
Mount Daly in Alpenglow.
The trail eventually lead us to a snowfield, which was mostly ice. I had been warned by the snowfield by a fellow hiker, Terry Mathews. We tested our footing on the snow and ice and decided to cross it, cautiously. There were great footsteps already kicked into the snow, and the relief was not terribly steep at this point. We all made it across quite easily and continued up the boulders. We saw a large snowfield at the top of the basin on the K2 - Clark Peak saddle's face and knew that we needed to turn right before then to reach K2. We decided to head up a very solid class 4 section.
A snow and ice field adorns the face of the saddle between K2 and Clark Peak.
Travis up-climbing the solid Class 4 terrain leading to the base of K2.
 Once reaching the top of the ridge between K2 and Clark Peak, we realized that we still had quite a ways to go before reaching K2. The terrain became much flatter and we were able to get to the top of K2 in short order. Many parties opt to skip K2, arguing that the approach is more difficult; however, we did not want to miss out on the views from K2's summit.
To reach the top of K2, we broke off from the main trail just after it winds itself to the right of K2 and climbed a steep but solid dihedral to the summit. Capitol Peak looked ominous from K2, dwarfing it's surroundings.
Capitol Peak, Snowmass Mountain, and the Maroon Bells come into view from the summit of K2.
The down-climb from K2 was trickier than expected, and it forced us to backtrack a little bit to meet back up with the proper trail which winds around the side of K2. The terrain here is steep, loose, and slightly exposed.
Matt Payne downclimbing from K2.
Downclimbing K2 to reach the K2 - Capitol saddle.
I had read some reports of people dying near K2 in the past, and had always wondered how this was possible. Undoubtedly, there did not seem to be any obvious threats to one's life until we reach the backside of K2 and saw the impressive cliffs surrounding K2 and Capitol Peak. One false move and a climber could find themselves in a world of hurt.
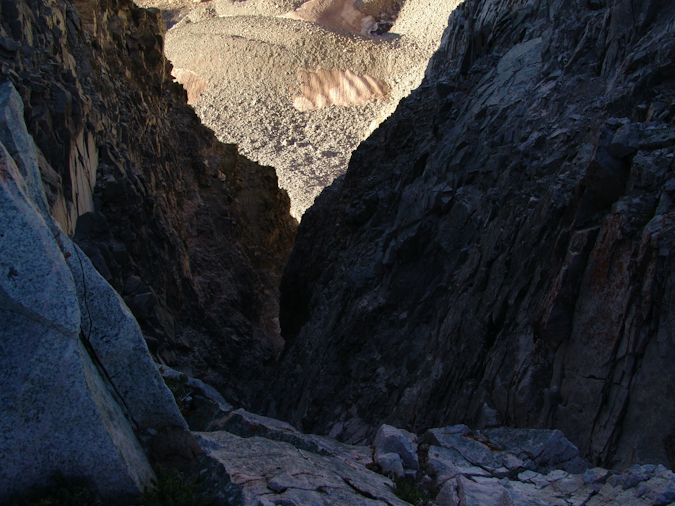
A huge cliff greets climbers reaching the base of K2. Don't slip here...
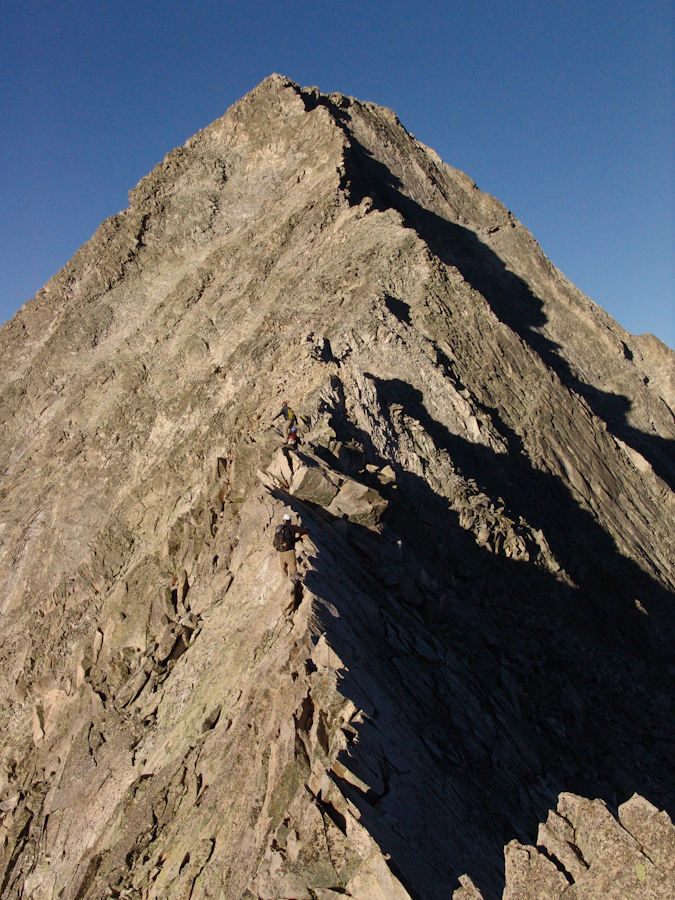
The remainder of the climb was amazing. Capitol's ridge is a spine of crumbling boulders and jagged knives, a real tribute to the harsh and remote wilderness that the Elk Mountains call home.
Mike with K2 in background.
At this point we knew we were quickly approaching the fabled Knife Edge. The North Face of Capitol Peak shot up like an angry beast from the pits of hell. Ok - maybe not that freakish, but it was sincerely one of the more impressive rock faces I've seen. Either side of Capitol presented thousands of feet of exposure and immediately reminded you of the need for caution and careful routefinding. A fall anywhere from here on would almost certainly be fatal.
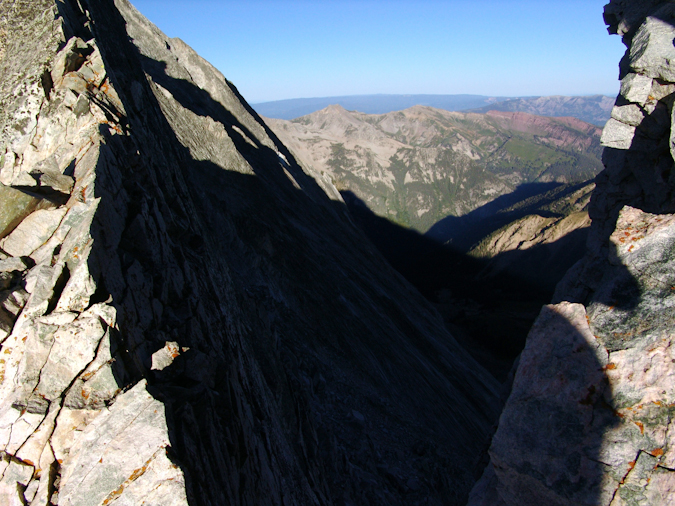
Capitol Peak's North Face - not a good place to fall.
Fortunately, the views from this part of the climb were unreal. The sun slowly rose above, providing light for the most incredible vistas of the Elk Mountains.
Snowmass Mountain, Capitol Peak's closest 14er neighbor.
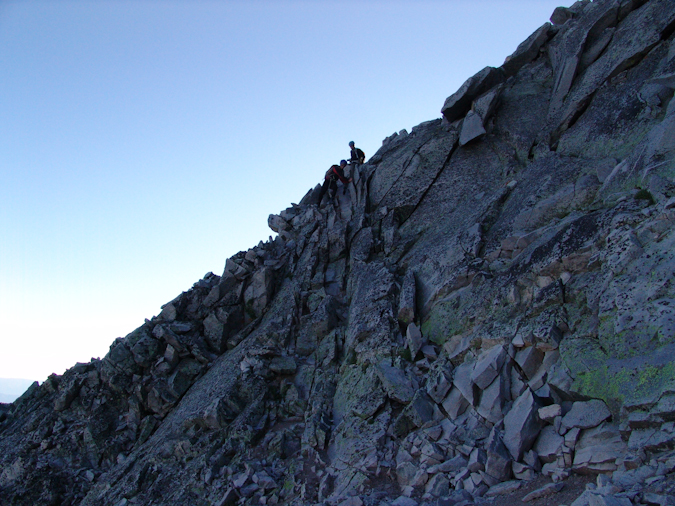
We traversed across small ledges and quirky chimneys and found ourselves with what must have been the Knife Edge. K2's previously daunting surroundings now felt much easier.
Nearing Capitol Peak's Knife Edge
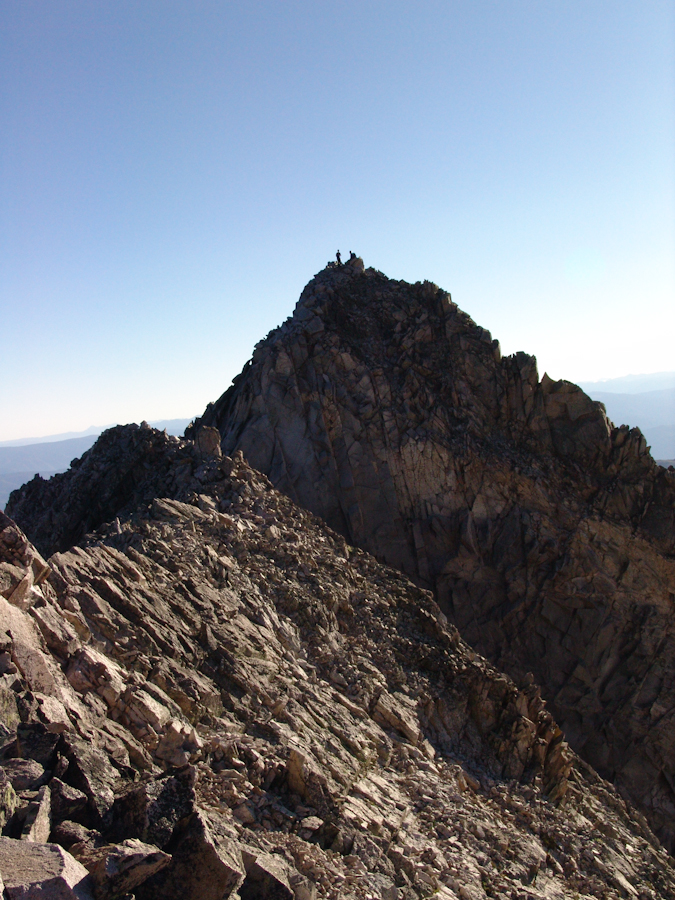
Looking behind: K2 and climbers reaching it's summit.
We finally reached the Knife Edge, gathered our wits about us, and gave it a go. The plan was for Mike to go first, and then to take video with his camera of us crossing. We watched the group before us, and they mostly employed a mix between the 'scoot on your ass' method and the 'hang from one side like monkey bars' method for crossing. We figured to follow suit, as both strategies seemed to appeal in their own ways.

Mike Vetter ready to cross the Knife Edge.
Mike made it across without a hitch and took this revealing photo while crossing, looking down one of the sides. It goes to show how freaky and exposed it really was.
I crossed second, making sure I had perfectly solid holds on the rock as I crossed. I employed a mix between scooting and hanging from a side and made it across fairly quickly. The technical nature of the crossing is not terribly difficult or physically demanding; however, the mental requirement to cross was great, knowing that one mistake meant death. Needless to say, don't get yourself too hyped up for the Knife Edge. It is dangerous but the risk is quite manageable with caution, careful movements and mental toughness. I did find myself breathing heavily at the end, mostly from the excitement of the whole thing.
Matt Payne starts the Knife Edge - photo by Mike Vetter.
Mike compiled some video of our crossings of the Knife Edge and placed them on YouTube:
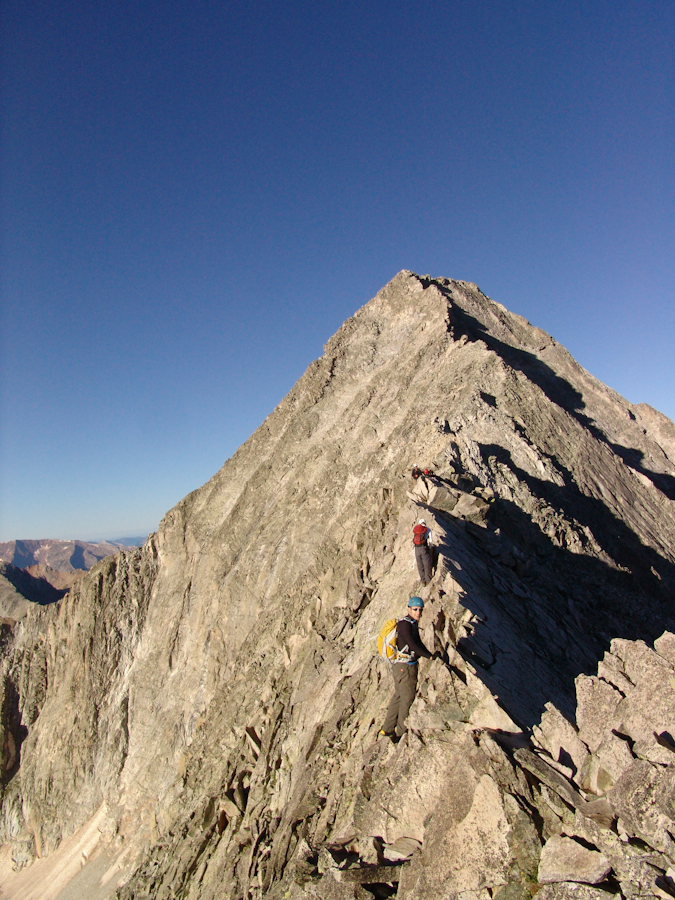
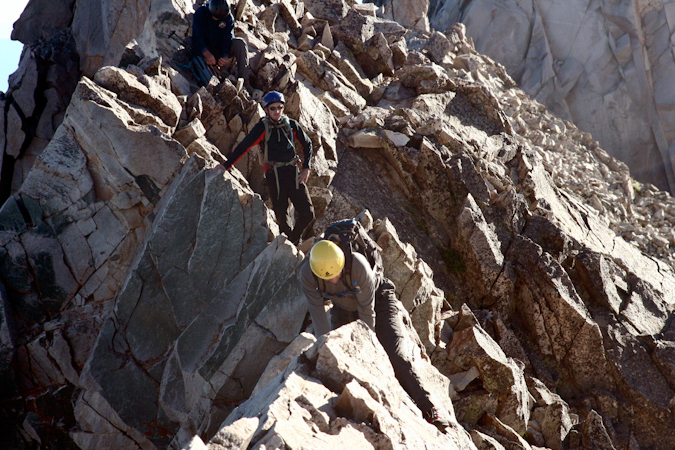
After the Knife Edge, the going got much easier, mostly a Class 3 / 4 scramble across a fun boulder ridge. We reached somewhat of an impasse about 3/4 to the summit, having to choose to either continue straight ahead and around the left side of Capitol per the standard route's description, or to head straight up to the ridge, ascending Class 5.2 / 5.3 terrain. Being the adventurers we are, we chose the latter and went straight up. The route was solid, challenging, and enjoyable, with minimal exposure and many places to rest. All in all, I would recommend taking the upper ridge route if you feel comfortable with light Class 5 climbing and steeper terrain. Never did any of us feel unsafe on this section; although, Travis did mention later that it was somewhat spooky for him. Fortunately, Travis is an excellent athlete and managed to power himself up the steep section without any problems. We were very cognizant of the rockfall potential, taking special caution not to pull rocks down on people below us.
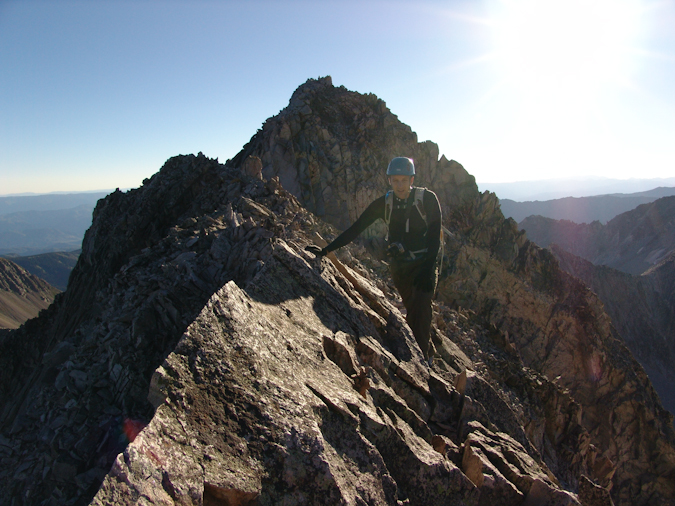
Once reaching the ridge again, we stopped to rest and recoup our strength for the final summit push.
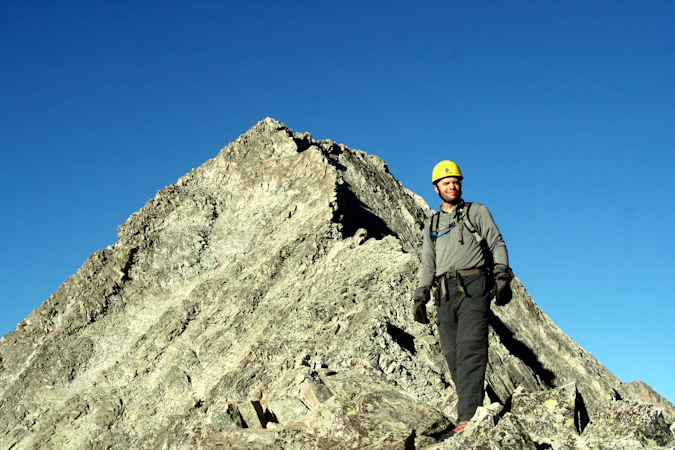
Matt Payne with Capitol's summit block. Almost there.
From here, the summit push was quite fun, with Class 4 and low Class 5 moves required. We were quite pleased with our choice to go the high route, enjoying both the challenge and the solidness of the route. We watched several climbers take the lower route, a looser, chossier, and less enjoyable section of the mountain.
Mike and I took some video footage of this section:
We reached the summit at 10:15 AM as one of the first groups up. The views were outstanding and the company was superb. A group from Ft. Collins joined us on the summit, and conversation quickly went to skiing Capitol Peak. Being probably the hardest 14er to ski, theorized on the possible ski routes and I swapped stories and names of climbers we both knew of that had either skied it or attempted to, referencing Brian Kalet and Jordan White of 14ers.com fame.
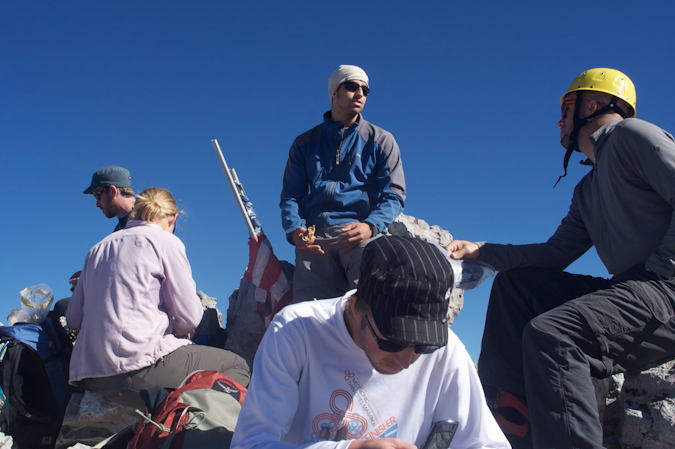
The summit party. Travis tinkers with his cell phone while Matt converses with fellow climbers.
After refueling with Resees Peanut Butter Cups and Raisins, I went on a photo frenzy.

A 3600 view from the summit of Capitol Peak. Click for high resolution view.
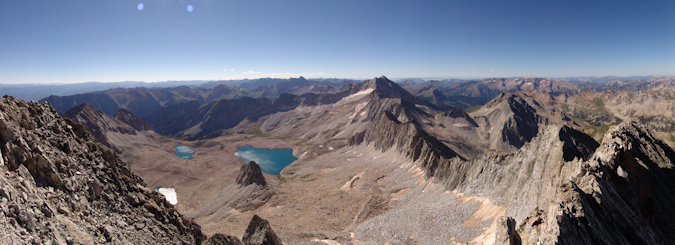
A panormaic view of the Pierre Lakes, Snowmass Mountain, and the rest of the awesome Elk Mountains.
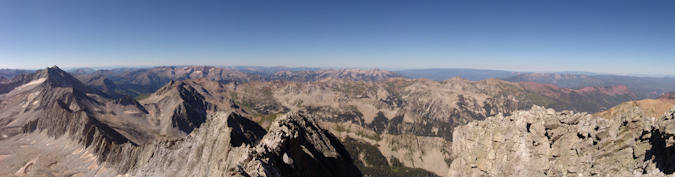
A panoramic photo looking north and west from Capitol Peak. The Snowmass - Capitol ridge strikes me as being quite impressive.
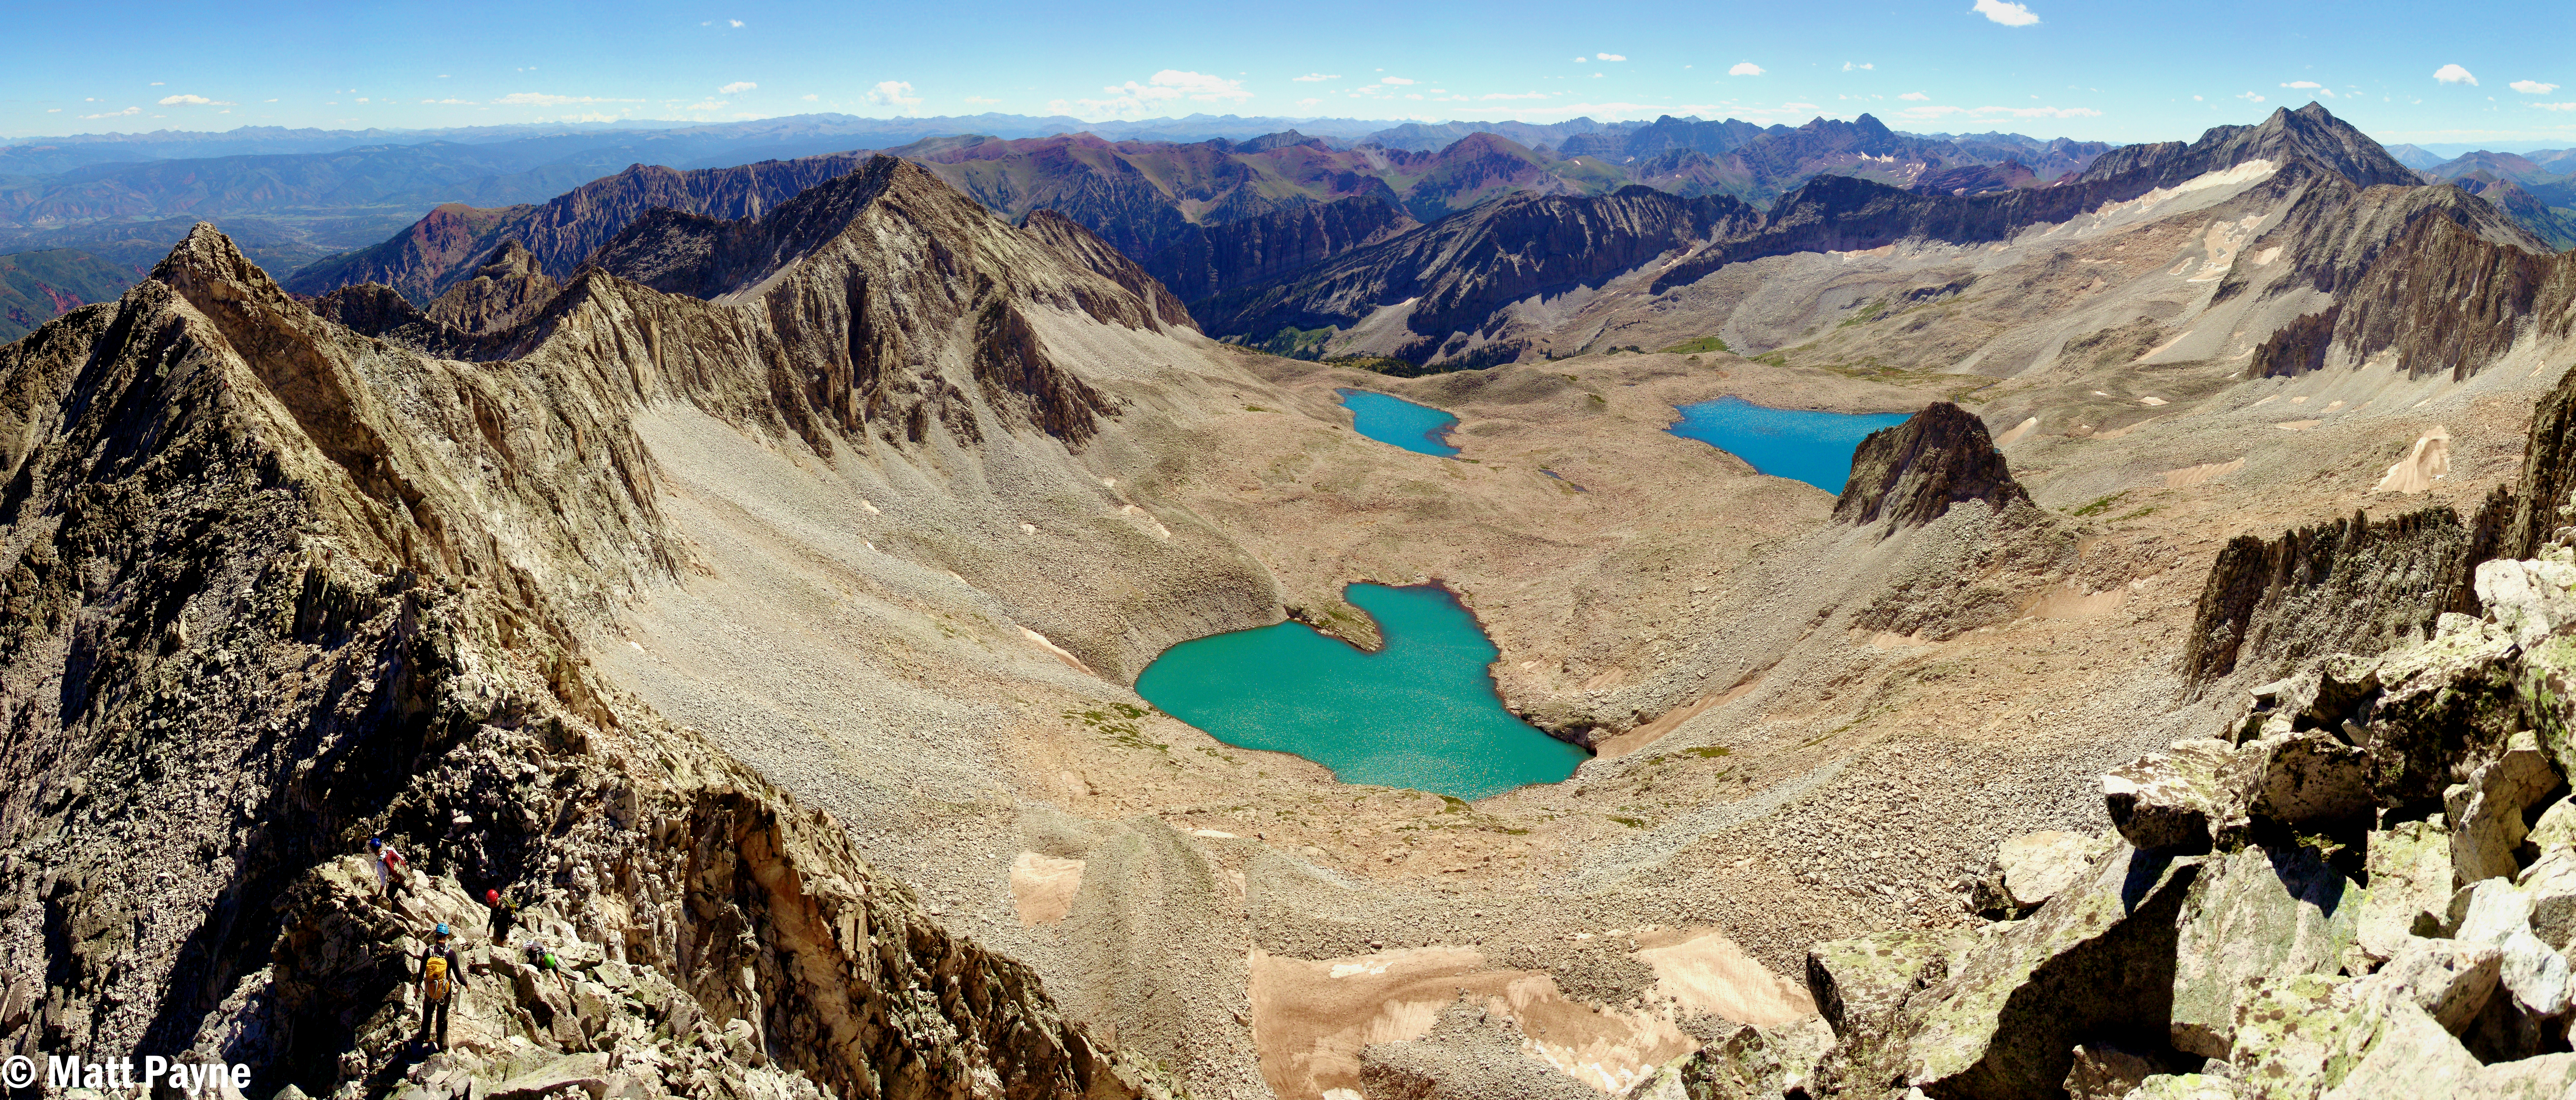
A massive panoramic photo of the Snowmass Basin, K2, Maroon Bells, and Snowmass Mountain. Click for high resolution version (26 meg file). How many climbers can you count?

A zoomed in panoramic photo of the Maroon Bells and Pyramid Peak. Click for full resolution version.

A super zoomed in view of the Maroon Bells.
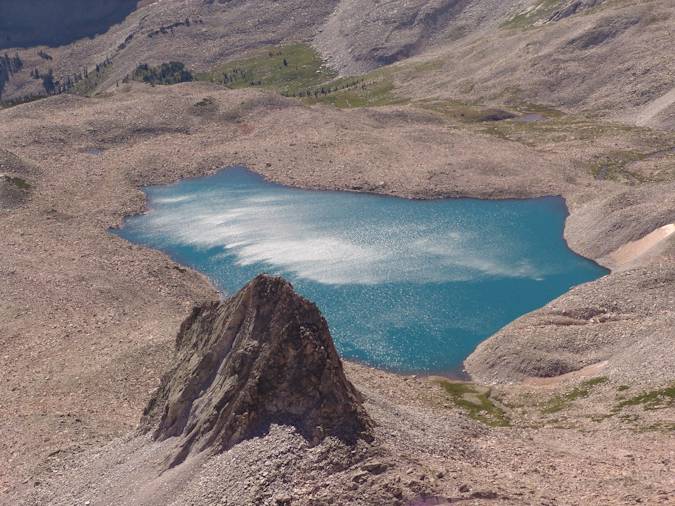
A zoomed in view of one of the Pierre Lakes.
Mike Vetter on the summit of Capitol Peak.
Matt Payne on the summit of Capitol Peak.
A panoramic view looking down at Capitol Lake, Mount Daly, and across Capitol's ridge to the Pierre Lakes and the rest of the Elk Mountains. Click for high resolution version.
Mike was able to capture some video from the summit as well:
With no threat of weather in any direction, we decided to hang out on the summit for about an hour, enjoying the views. We eventually headed down and chose to follow the standard route. The rock was nasty through this section of down-climbing, and required good concentration, footing tests (make sure the rock does not fall when you step on it), and patience. Most accidents occur on the way down, so we were vigilant and cautious. Travis was able to capture this perspective of the rock and exposure beneath us on the down-climb.
Travis plants his foot firmly on a ledge during the down-climb from the summit of Capitol Peak.
Matt Payne carefully down-climbs from Capitol Peak.
Matt Payne with one of the Pierre Lakes in background.
About halfway back to the Knife Edge, a group of climbers were coming up Capitol below us, without helmets. They asked us if this was the way to go and we responded that it was one of the ways up. It surprised me to see how oblivious they were that we were climbing above them on loose rock. I ordered my group to stop moving until they were in a safe location below us. It really is no wonder that more people do not perish on these mountains. Ironically and sadly enough, we later learned that a 20-year-old hiker died the day before on Maroon Peak from rockfall that had come from above him. Even though he was wearing a helmet, the rock that struck him had enough force to knock him loose from the mountain and caused him to fall to his death. I strongly believe that if people took more caution and paid attention to their surroundings and used some common sense, there would be less deaths. If you need a good climbing helmet, check out this one.
We reached the Knife Edge at approximately 12 PM and crossed it in much the same fashion as before, except this time, I went first. I generously used the 'scoot on your butt' maneuver to get across.
Matt Payne crosses back over the Knife Edge on Capitol Peak, heading towards K2.
Mike captured yet another great shot from the Knife Edge, looking down at Capitol Lake:
The climb back down from K2 was fairly straight-forward but tiring. We were ready for some pizza at Beau Jo's Pizza, no doubt. We finally reached the snowfield again, and it was much softer this time, with rivers of slush flowing down it. It was somewhat scary, but I tested the footing and it felt great, so we crossed again.
Travis Arment crosses the snowfield beneath K2. Photo by Mike Vetter.
We made great time back to the Daly - Capitol saddle and I sprinted the last stretch to the saddle, anticipating the victorious beer that would be consumed once back to civilization.
Matt Payne runs the final section on the back side of the ridge between Capitol and Daly. Photo by Mike Vetter.
On the way down the hillside, Mike stopped to take some great shots of the wildflowers found on Capitol's northeast shoulder:
We made it back to camp at 2:15 PM and packed up. We refilled our water and headed out. Travis and I were motivated solely by the prospect of cold beer and fresh pizza.
I hope you enjoyed this trip report. We surely enjoyed the trip and I personally can't wait to join Mike and Travis for our next adventure.
Crestone Needle and Peak via Cottonwood Creek
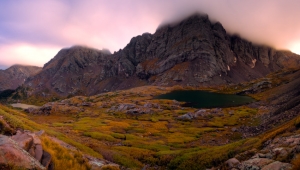
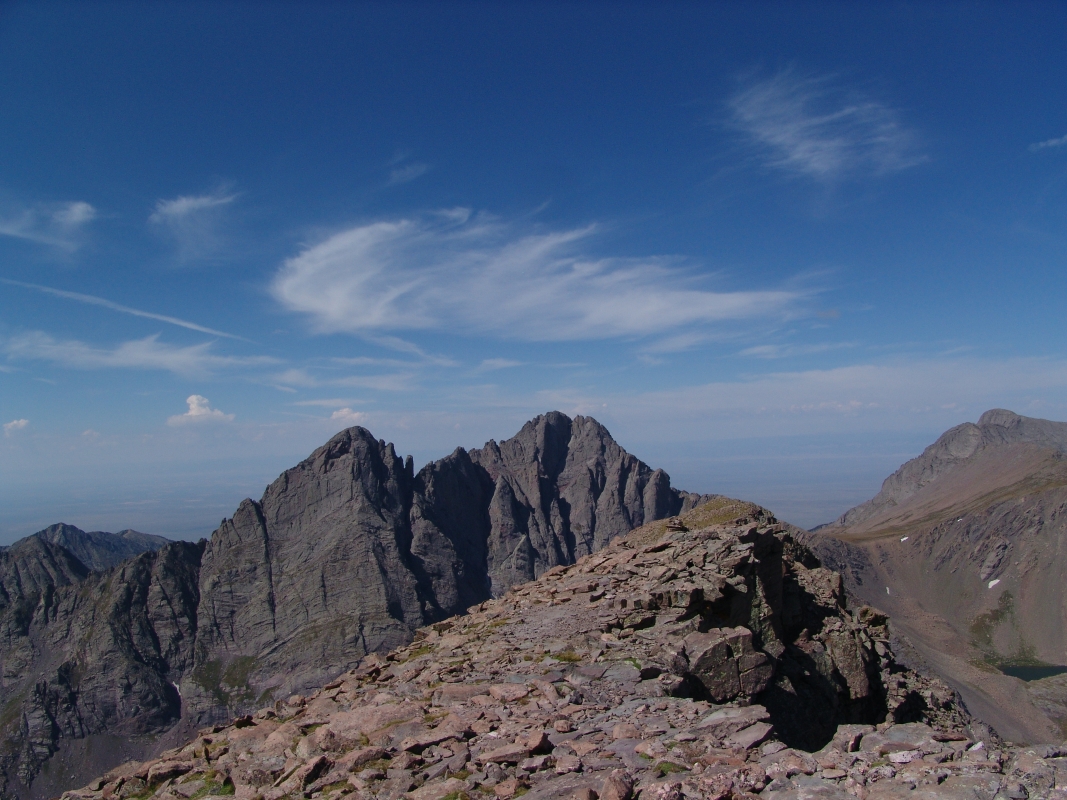
What an adventure! Never in my dreams did I think I would ever conquer the mighty Crestone Needle and Crestone Peak. After seeing them from two years ago, I figured I’d never have the testicular fortitude to attempt them. Here is Crestone Needle and Crestone Peak (right of Crestone Needle) as seen from the summit of Humboldt.
Alas – when I read my friend's itinerary for his mountain climbs back in April 2009, I saw the Crestones and decided it would be the best chance I’d get to give them a shot…
My friend Terry picked me up from my house at 5 AM on Thursday morning. We headed out for the long journey towards Buena Vista and eventually the small town of Crestone. The route Terry chose for these climbs was a rarely traveled backpacking trail from the west side of the mountains, up the Cottonwood Creek drainage.
The trailhead is on private property owned by the Manitou Foundation, a religious organization set-up to provide property easements for the purpose of religious worship and pilgrimage. Earlier this month, Terry was able to obtain written permission from the Manitou Foundation to park on their property and begin up the trail towards Crestone Needle and Crestone Peak. Below is a map of the route we ended up taking on our adventures.
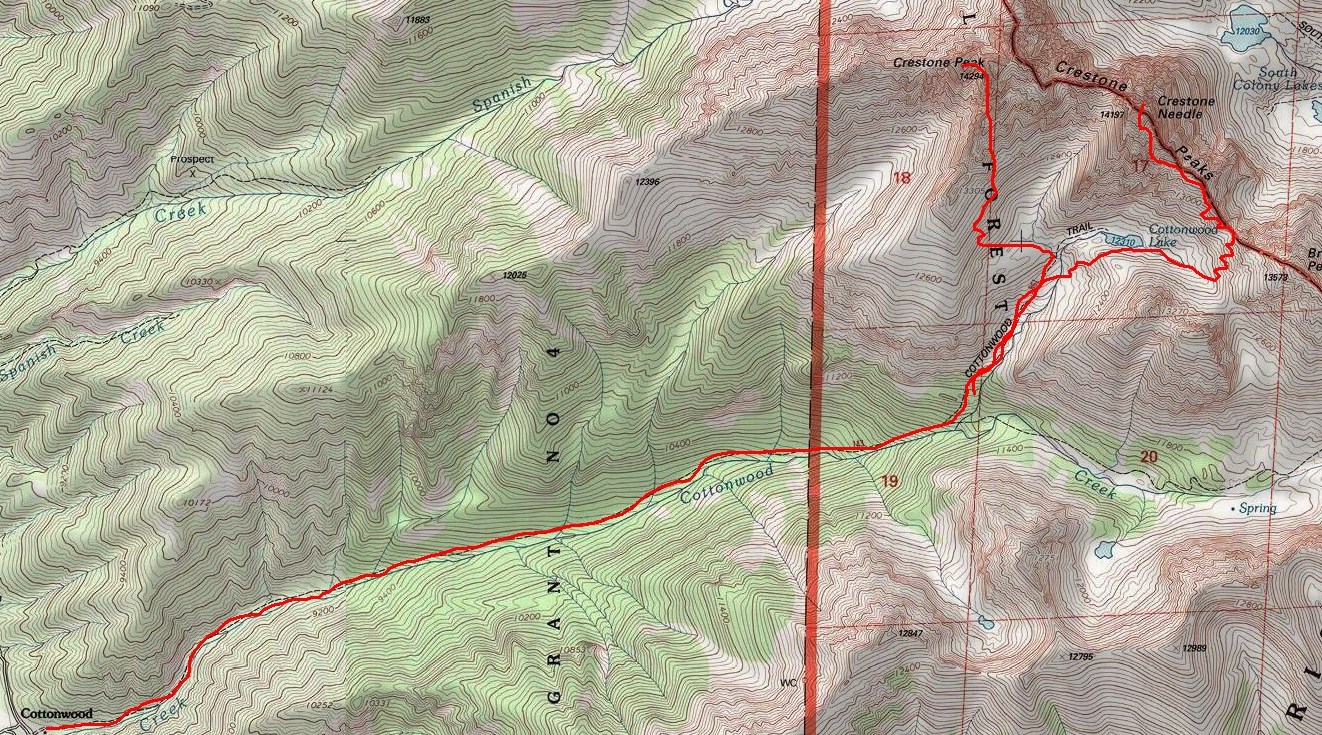
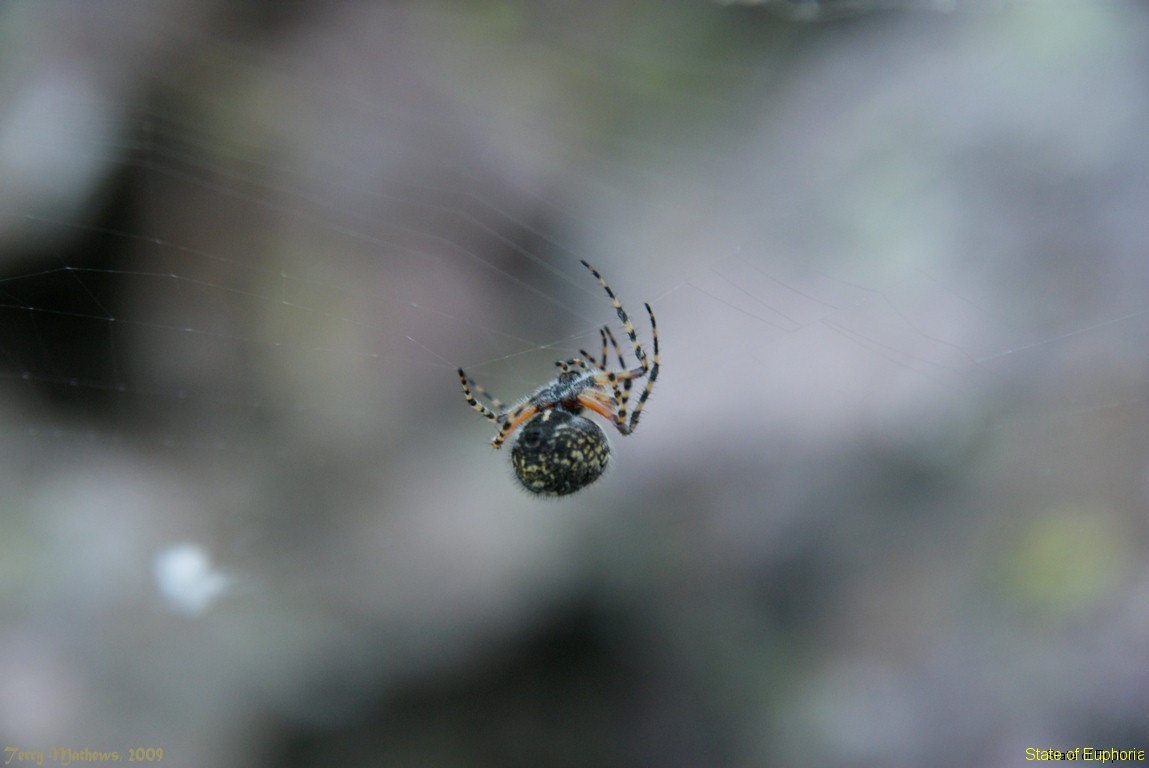
We arrived at the trailhead around 10 AM after driving around the area looking for the proper place to begin our hike. Due to the fact that this trail is off-limits to the general public, trail maintenance has not occurred on the trail for many years. The trail was very primitive and at many points in our day we lost the trail due to having to hike around heavy deadfall (basically a ton of dead trees blocking the trail). In addition to the trail being very faint, the trees in this forest were covered in heavy moss and spider webs. The spider webs were getting all over us and getting in our face, making the hike up quite the annoying yet adventurous journey.
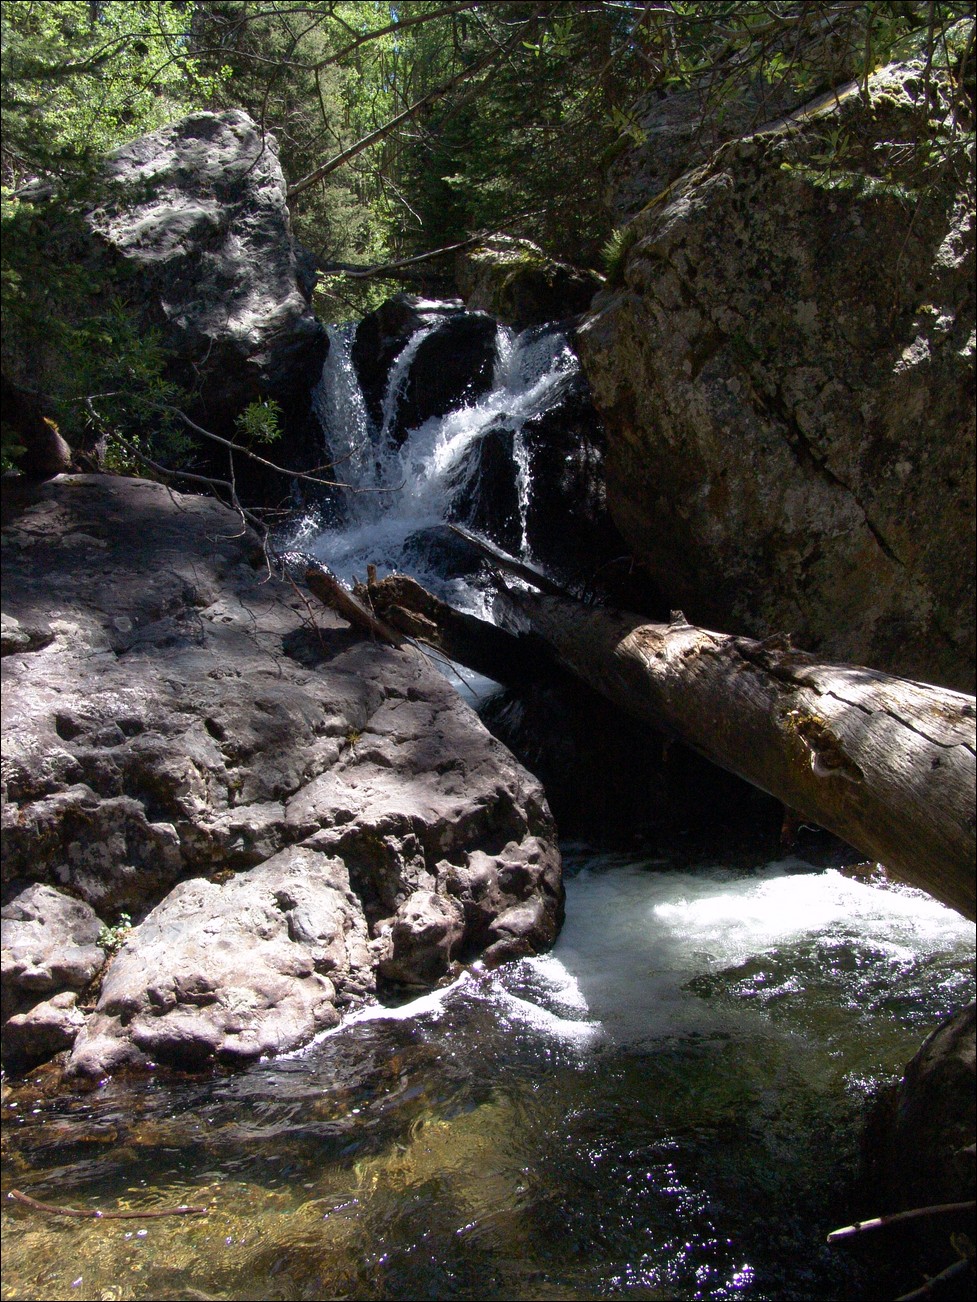
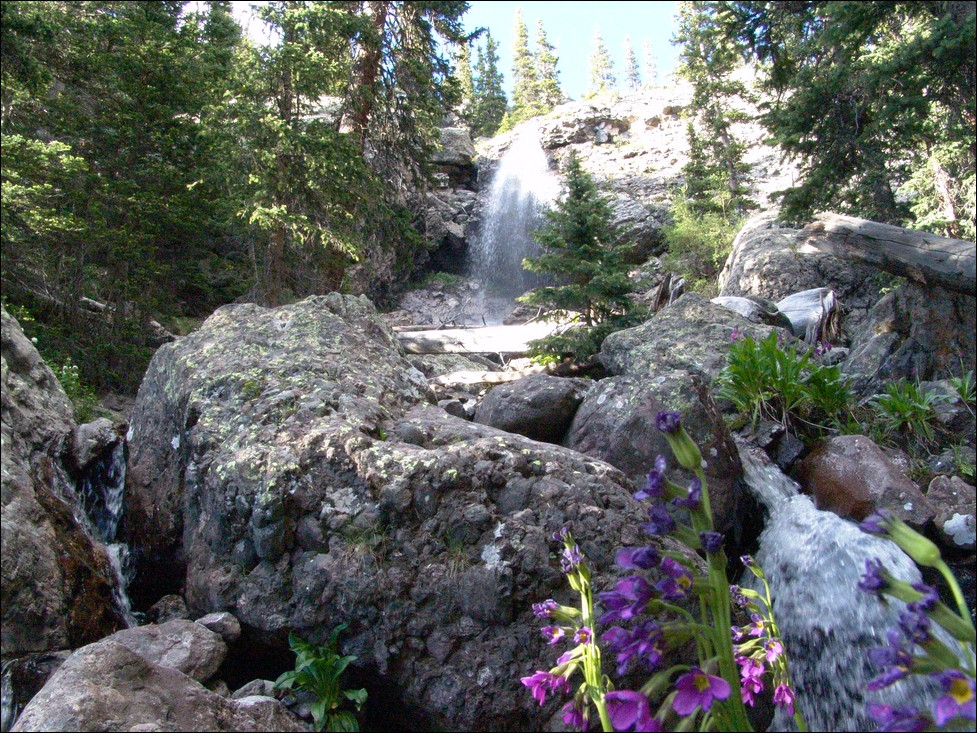
This was quite possibly the most intesnse bushwhacking, insane trail I've been on with a heavy backpack. At many times, the route was not visible at all, and the trail is lost easily. Take caution! The trail led us to a very pristine waterfall, one of many.
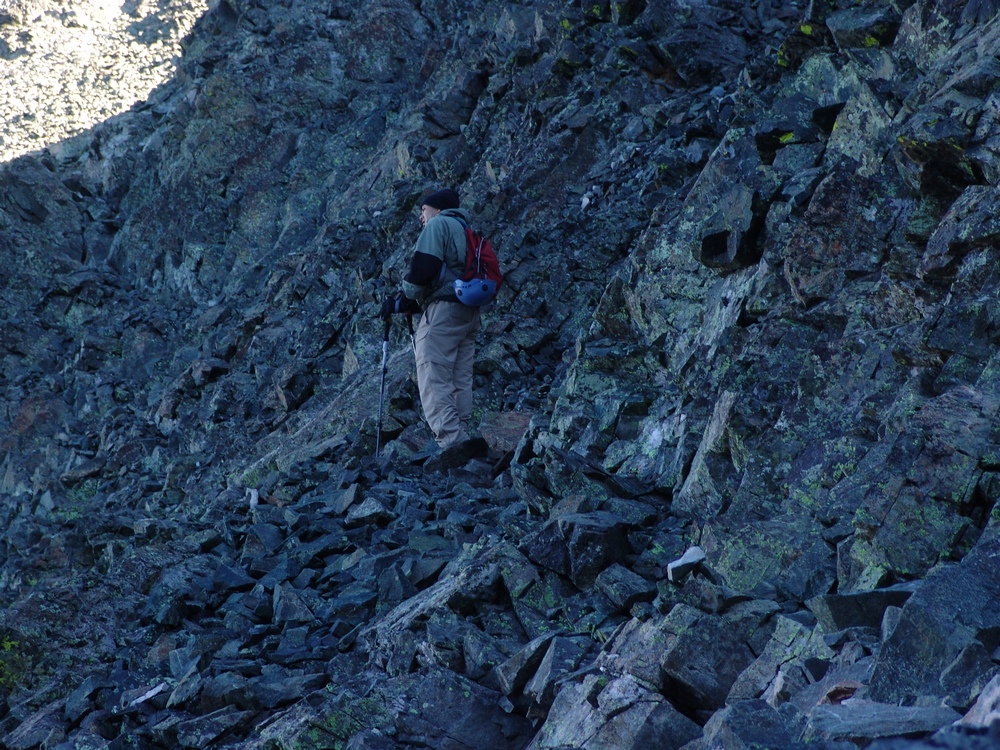
We scanned the area constantly for cairns in order to find our way. Unfortunately, a set of cairns led us up a very steep and rocky section that lasted for at least thirty minutes, but allowed for us to avoid some wet slab-like rocks that would have presented their own unique challenge. The rocky section was quite difficult given the fact that I had a 60 pound backpack on.
During our trek up the trail, I kept a close eye on my GPS, which has the TOPO! maps from National Geographic synced up with it. I monitored our position to ensure we were heading the right direction. As we approached a split in the trail that was critical to our route, I became nervous as the GPS showed our direction
heading up the wrong trail on several occasions. This resulted in Terry and I doing some bushwhacking through some heavily wooded areas and up a very steep gully towards our proper destination. Finally, our bushwhacking paid off when we found the proper trail leading up towards Cottonwood Lake
(where we had tentatively planned on making camp). Terry noticed that the trail we had found was the very trail we had left to do the bushwhacking, so it would seem that the trail splitting to the southeast was never revealed to us. After a very short time, we came to a very ideal campsite underneath a waterfall at the base of a large boulder field. At this point we had been hiking for 5 hours and decided we would camp here.
Here’s a nice 360 view of our campsite.
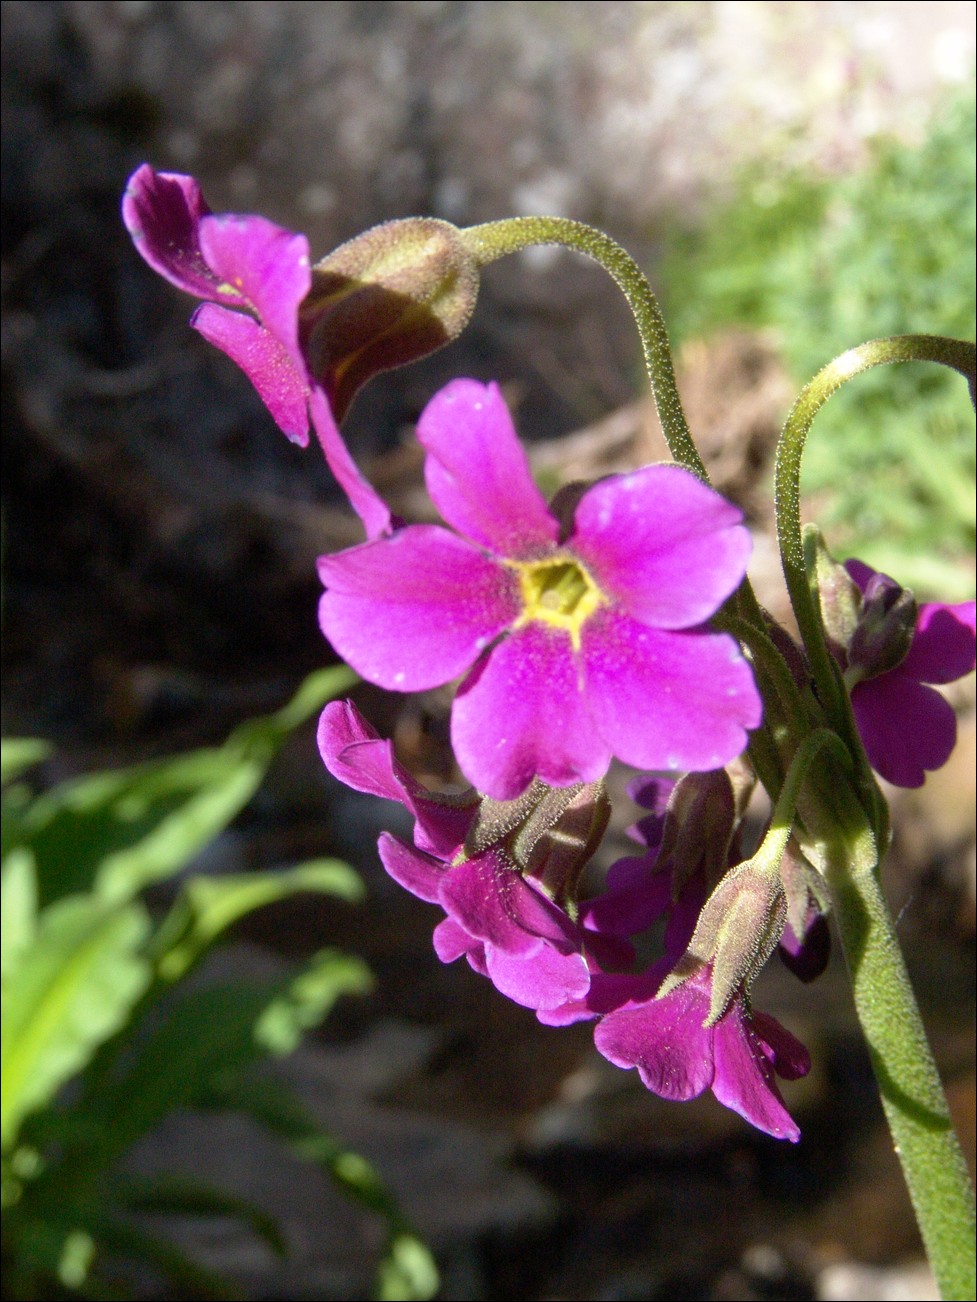
After setting-up camp, eating, and taking in some pretty sweet views of the waterfall right next to our camp (pictured below), I decided to take a quick hike up to see if I could get a sneak peek at Crestone Needle. (pictured below the flower). Seeing Crestone Needle brought some anxiety mixed with excitement to me, and I began thinking about the difficult climb we were about to attempt.
Terry set his alarm for 5 AM, which came way to soon given the level of exhaustion we had reached during our backpack up that crazy trail. We quickly ate breakfast and started up the steep trail above our campsite towards Cottonwood Lake. The trail was once again poorly maintained and poorly marked. We followed some cairns here and there up a large basin full of willows, spiders and steep waterfalls. Terry got a cool photo of one of ths high-altitude spiders we saw:
We decided to head east once we were quite high in the basin below Crestone Peak and Crestone Needle. About 3/4 of the way up the basin my daypack decided it would break, so I was forced to jerry-rig it so that it would still work. The shoulder strap ripped from the hip area, so I tied it to another strap coming up from the hip belt. Whatever works! We reached the top of the basin and realized we were quite high above the lake and that we would need to down climb to the trail leading up to Broken Hand Pass. Unfortunately the photos I took from this vantage point did not come out as intended; however, Terry got a great shot of the vantage we had of Crestone Needle and Crestone Peak:
Once we down climbed to the trail leading up Broken Hand Pass, we were able to get to the far east area of the basin and head up towards Broken Hand Pass. Terry and I felt sorry for the climbers that chose to climb these two mountains from the other side of the pass, as they would be required to climb up it twice for each mountain – ouch!
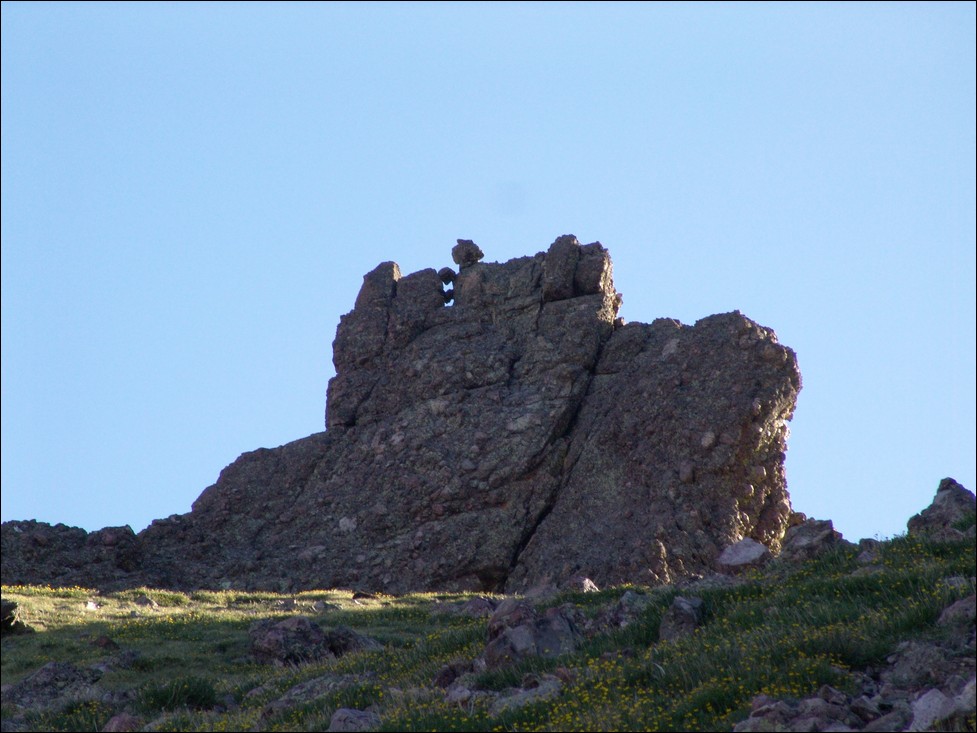
Climbing up Broken Hand Pass, one does not have to stretch their imagination too far to see why it is called Broken Hand Pass, as you can see a view of some rock that looks exactly like a closed fist that is next to what appears to be a second arm that has the hand broken off of it.
At the top of the pass, a large pulley system is set-up, with ropes and an intricate system of PVC pipes. Terry and I did not have much of a clue as to what this was for, but we later found out that day that the Rocky Mountain Field Institute uses the device to hoist large rocks from the top of the pass down the north side of the pass to fix the trail to prevent erosion.
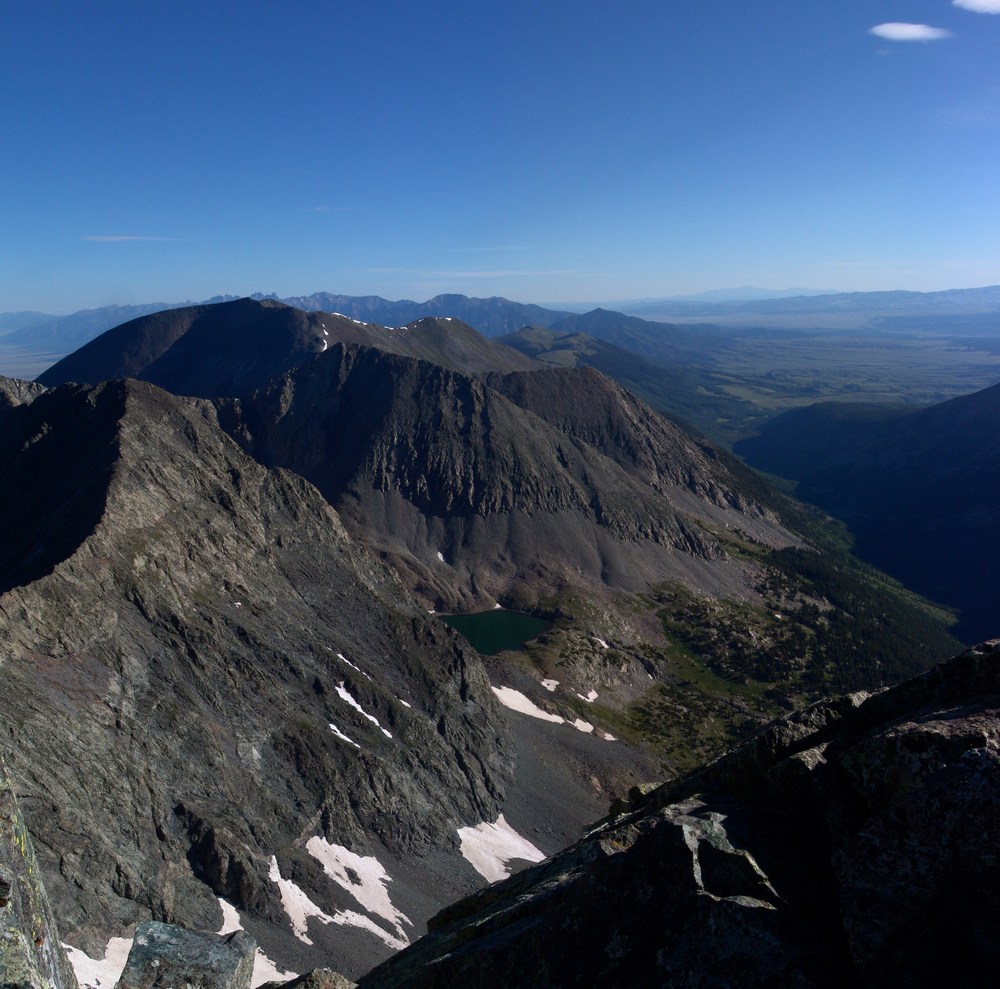
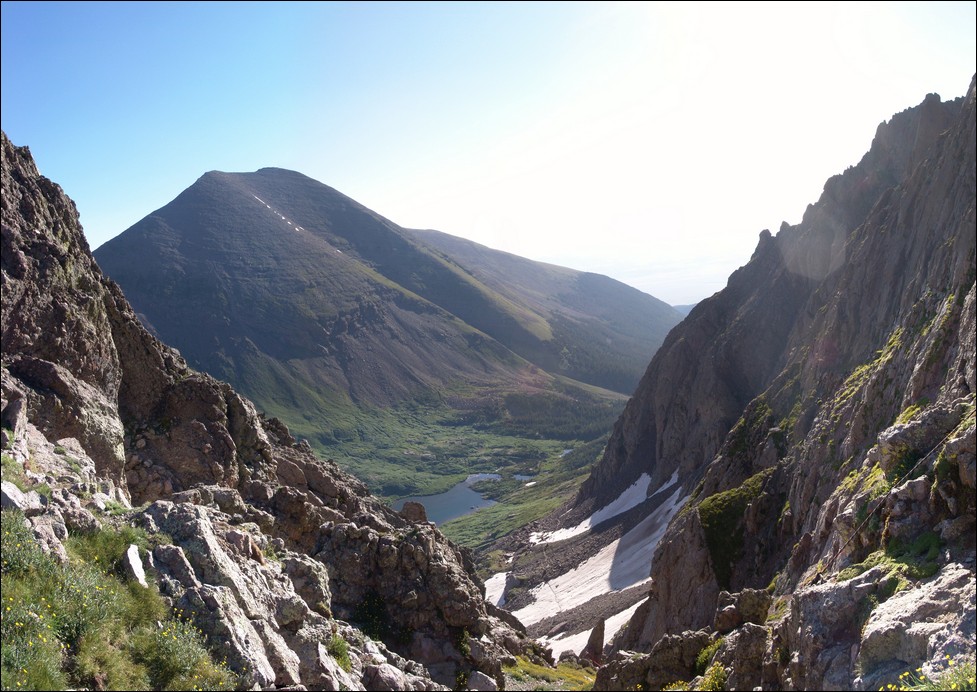
From the top of Broken Hand Pass, we were able to check out the lower South Colony Lake and Humboldt across the way. Here’s a nice panoramic photo of that view:
At this point, Terry and I decided it was a good time to don our climbing helmets, a first for me in all of my mountain climbing adventures. From here we could see Crestone Needle looming above us, taunting us with its intimidating rock formations that we would be forced to carefully scale.
You can see two distinct gullies, one directly facing us, and another to its left, obscured by a rib running the length of the Needle. The standard route up the Needle takes you half-way up the east gully and then over the rib to the west gully and up to the summit. It sounds a lot more simple than it really is.
We followed the well-established trail over to the base of the east gully and started up. The rock on Crestone Needle is most impressive, a climber’s dream.
The entire mountain is made up of a mixed conglomerate of granite, quartz, and other rock. The rock had numerous large rocks cemented together making it quite easy to locate hand-holds and foot-holds for climbing. Here is a view up the east gully.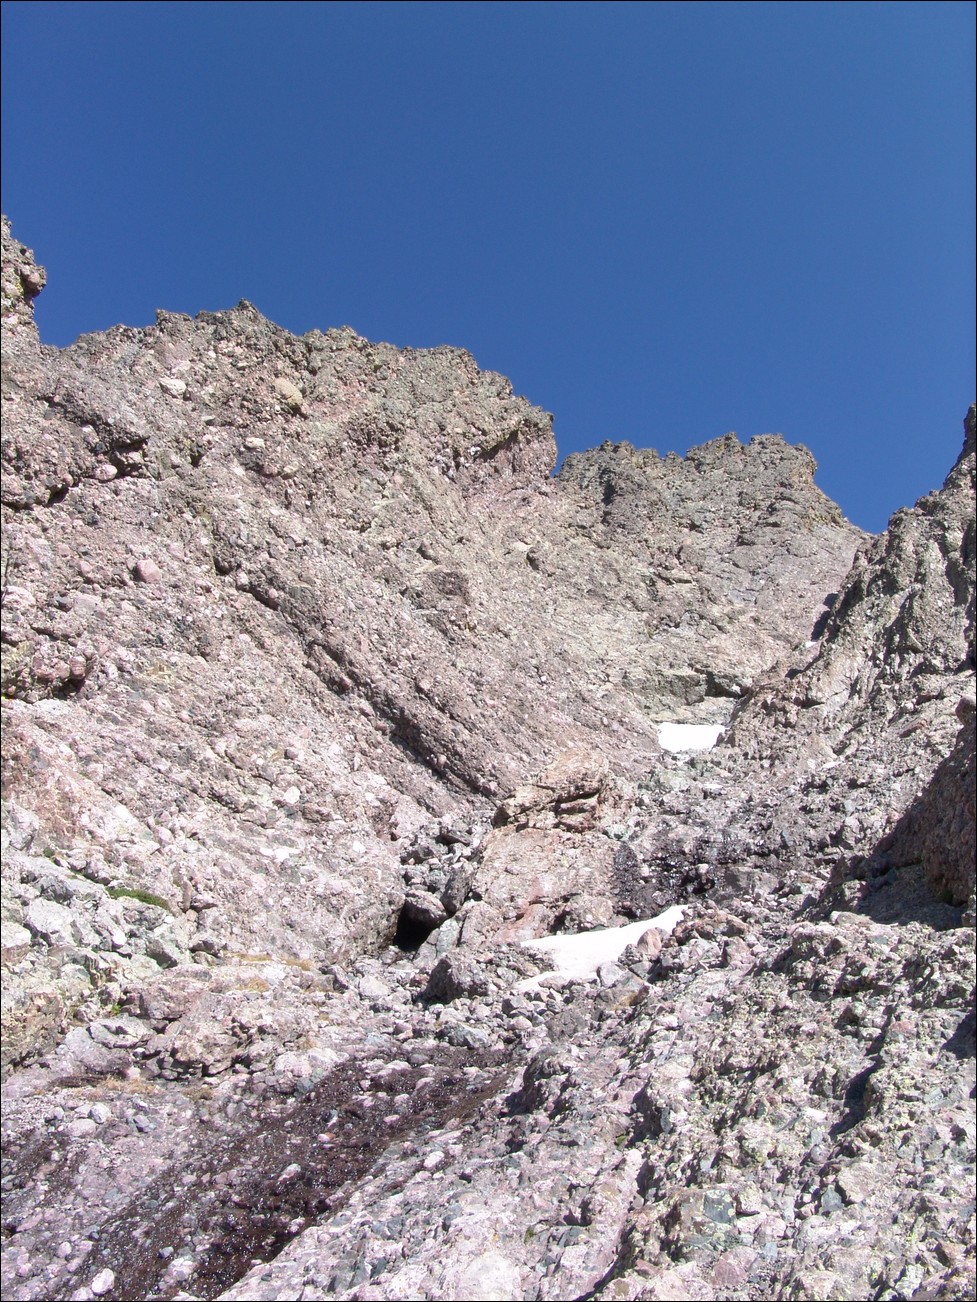
Terry and I were quite pleased with how solid the rock was and how stable the route seemed to be.
The hard part of climb was finally upon us – the transfer from the east gully to the west gully. The east gully takes you to a large dihedral with a large amount of snow at its base. We were forced to cross right at this snow over to the other side of the gully. This required a very unstable move by which we were forced to smear ourselves to the side of the wall, reach up, and push off and up at an angle to the more stable ledge just above the end of the dihedral.
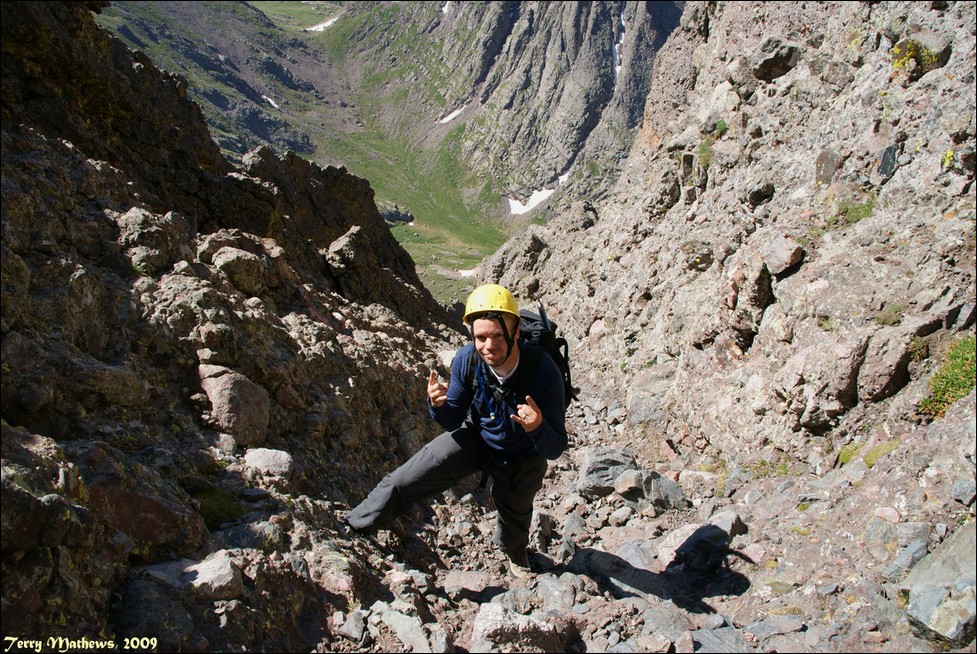
We scrambled up the side of the gully up to a notch leading over to the west gully. Here is a shot of me climbing up the west gully courtesy of Terry. You can tell that this was not a good place to be for someone that is afraid of heights.
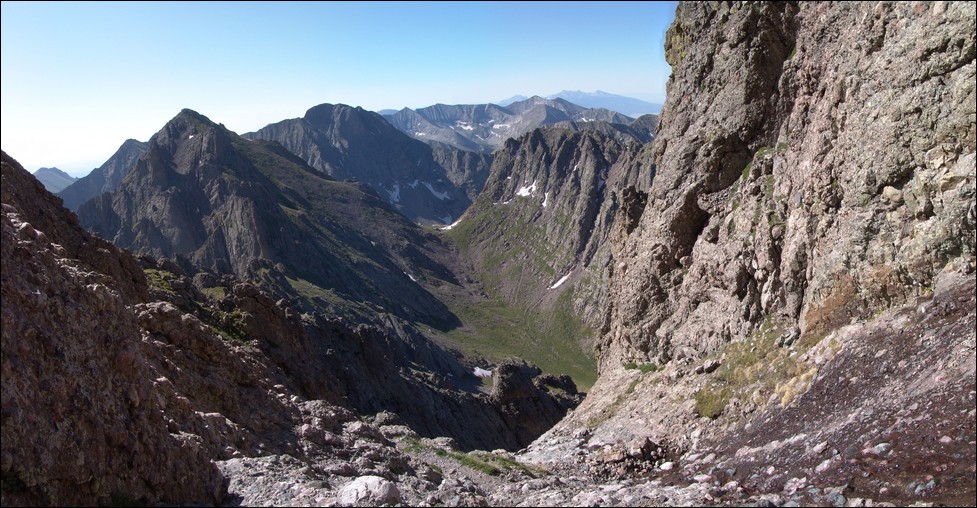
I was able to take some nice shots combined into pano of the gully looking down towards the basin we came from to give you a good idea of the steepness of the climb.
After climbing up the west gully for about 600 feet, we reached the summit block of Crestone Needle! I was very eager to gain the summit, so I passed
Terry and celebrated on top.
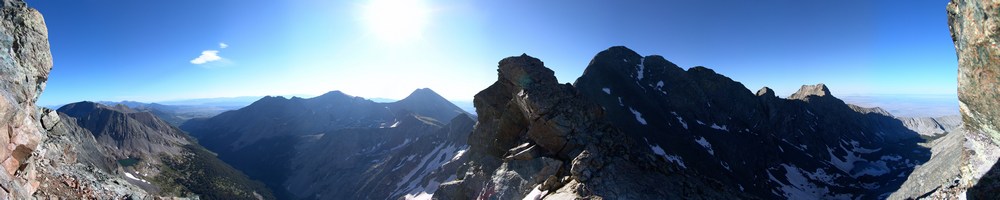
This was probably one of the most invigorating climbs of my life. Here’s a 360 degree panoramic photo from the summit. Apologize for some image quality issues...
I have since figured out how to use my camera... Colony Baldy and Humboldt can be seen on the left to the left of Terry. The southern Sangres can be seen in the distance including Blanca, Little Bear, and Ellingwood Point and of course the Sand Dunes National Park. At right are Crestone Peak with Kit Carson, Challenger Point, and Kat Carson to its right. Finally, Mt. Adams can be viewed at far right.
Here’s another pano to the north and northeast showing Crestone Peak, Kit Carson, Challenger Point, Mount Adams, Colony Baldy, and Humboldt.
And another view north and northwest of Broken Hand Mountain, Milwaukee Peak, Pico Aislado and of course the Southern Sangres.
And yet another view of the upper South Colony Lake beneath Humboldt and with the Sangres to our south.
Terry was nice enough to take a shot of me on the top, with Crestone Peak behind me.
After spending about 30 minutes on top, we decided to head down. It was pretty cool having the summit of a 14er to ourselves. On the way down,
Terry snapped this shot of me looking up the west gully.
We were able to reach the bottom of the gullies without incident. The rock was super stable and I really can’t say enough good things about how fun this climb is.
From the start of the gully section, I went over to a spot where I was able to look down upon Cottonwood Lake and the basin we climbed up from.
We climbed up from the basin on the right.
We got back down to Broken Hand Pass, chatted with the Rocky Mountain Field Institute for a bit, and headed down towards the lake. We passed a few people that had been on Crestone Peak and learned that we would indeed need our ice axes for Crestone Peak. Due to how tired we were, we decided that we would have to do Crestone Peak on day 3. We got near the lake and I decided to take some shots for this pano of our surroundings.
On the way back down the basin towards our camp, I decided to build some cairns to ensure we would be able to find the best possible route up the trail again in the morning. We made it back down to our campsite, ate, and went to sleep. We were both really tired and decided to get up an hour later the next day so that the sun would have more time to soften up the snow on Crestone Peak for our ascent.
Day 3 – Crestone Peak. We woke up at 6 AM and headed back up the basin towards Crestone Peak.
We followed my cairns and made great time, reaching the base of Crestone Peak at about 7:30 AM. There was a couple of groups ahead of us in the “red gully,” the standard route up the peak. Due to this, we knew that we would have to be cautious of rock-fall from above during our climb up.
At the base of Crestone Peak, I took some photos for this pano. You can see the red gully running right up the middle of the mountain with snow lining much of the route.
We started up the red gully, which was a tiring and difficult task. Right before we reached the main snowfield near the top, the group above us kicked down a very large boulder and screamed “ROCK!” It spun rapidly towards us down the gully. It passed about 20 feet away from us and Terry yelled below to warn those behind us coming up the gully.
The rocks falling down from above were fairly common, so we were forced to remain very vigilant going up.
We were able to avoid the first two snowfields but the third and largest we decided to go right straight up. We got out our ice axes and began our ascent,
with a group on our heels. Terry kick-stepped up the mountain slowing, driving his axe into the snow in between each step. It was an arduous but very fun process.
I was just totally excited to be using my dad’s ice axe for the first time. At the top of the snowfield, we were about 200 feet from the top of the gully. We made it to the top, avoiding the looser rock in this area in order to prevent us from killing those below us.
The pucker factor was not as high as I thought it would be despite the steepness and exposure, as seen by this shot Terry took:
Once at the saddle at the top, it was a quick scramble to our left to the summit. From the summit, you gain pretty sweet views of Crestone Needle pictured at left of this pano.
You also get some nice views of Kit Carson and Challenger, which would be our goals for next weekend.
And of course the obligatory summit pose:
We spent almost an hour on top, most of which was in the company of several other climbers. We decided to head down as the clouds began to build near us.
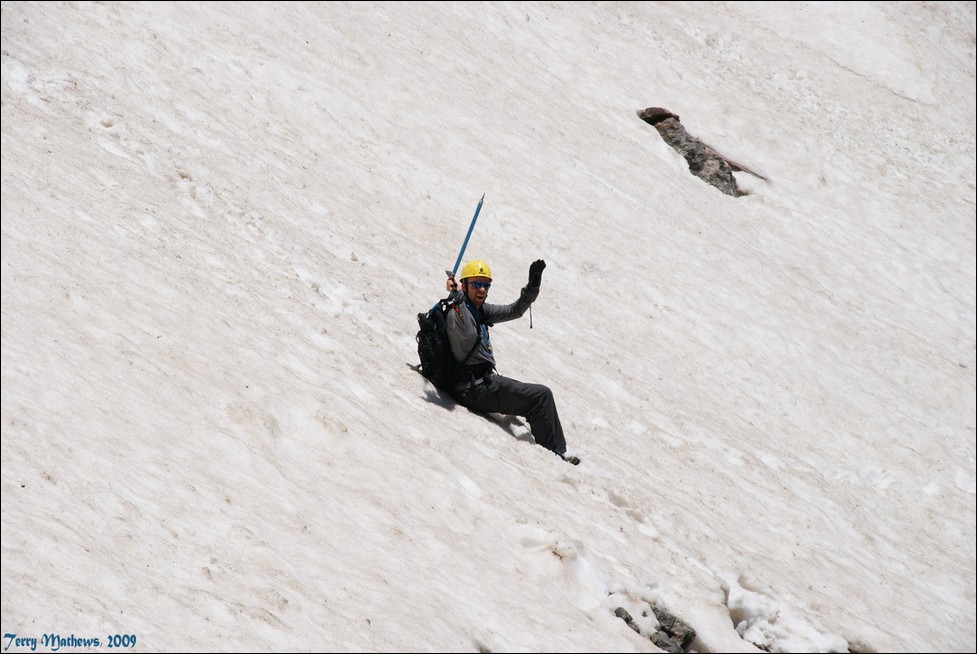
We decided to decent the snow, and I wanted to go all the way down the snow, while Terry departed the snow as soon as he was able. I really felt like the snow as soft and that there
was no risk of falling. I felt pretty comfortable about going down the snow, especially with my new best friend – the ice axe. Here’s a picture Terry took of me having a blast going down the snow.
We passed several groups going up and then stopped at the bottom of the red gully and beyond to take a photo of the basin, the peak, and the red gully above.
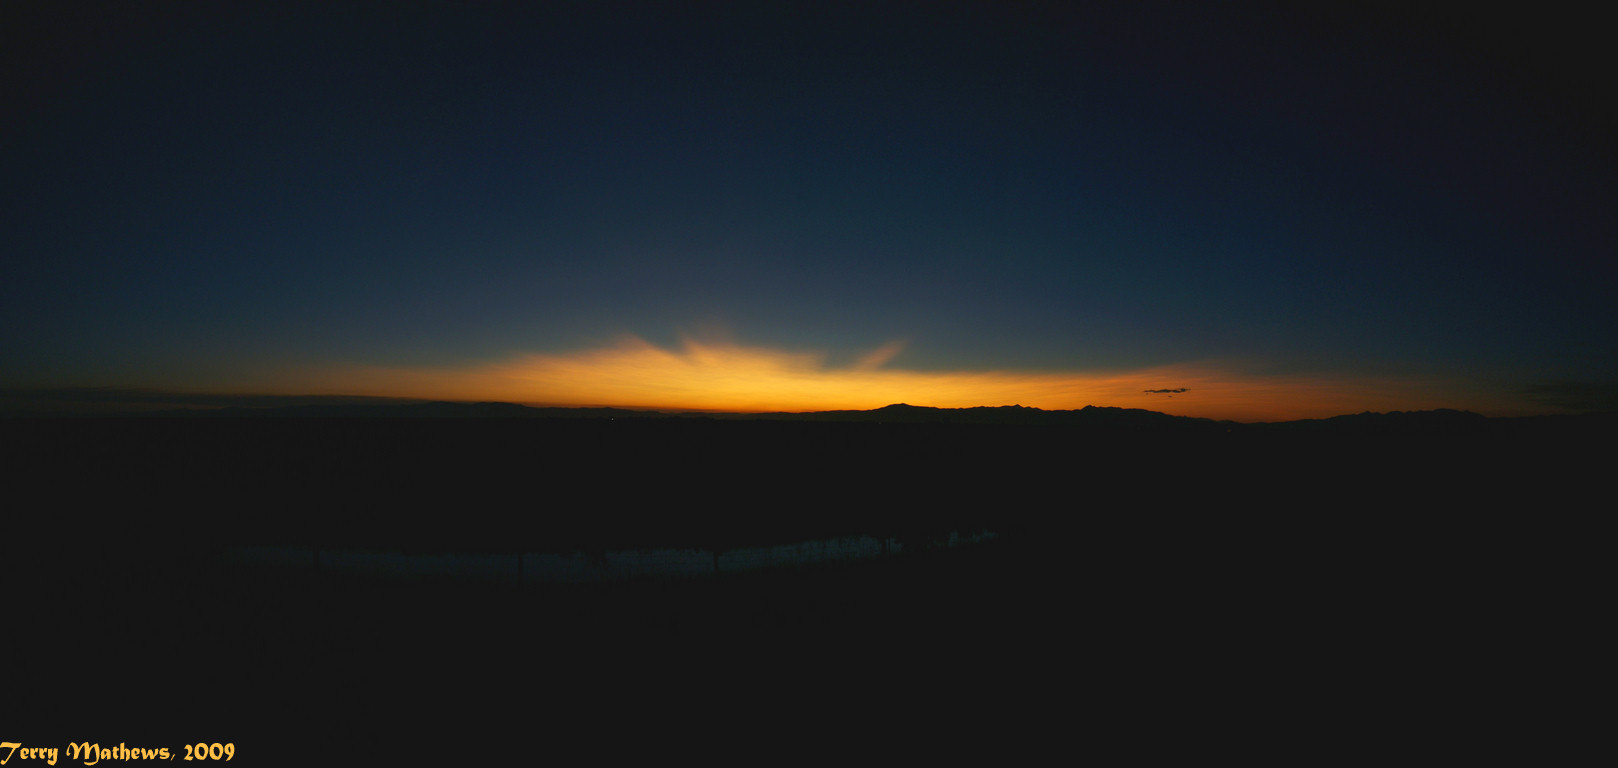
We slogged back down to our campsite and decided to pack-up and head back down the 3.5 miles back to Terry’s truck. It took us 3 hours to reach his vehicle at 8 PM and we left for Colorado Springs. Terry got some awesome shots of the sun setting to our west as we drove off into the sunset.
What a great trip, one I will remember for the rest of my life!
Mount of the Holy Cross at Sunrise
Short story: One of the most scenic and enjoyable hikes I’ve ever had the pleasure of doing.
Long story: On Friday evening I drove via I-25, C-470, and I-70 past Vail to the Tigwon Rd. near Minturn, CO. The total drive time was 3.5 hours.
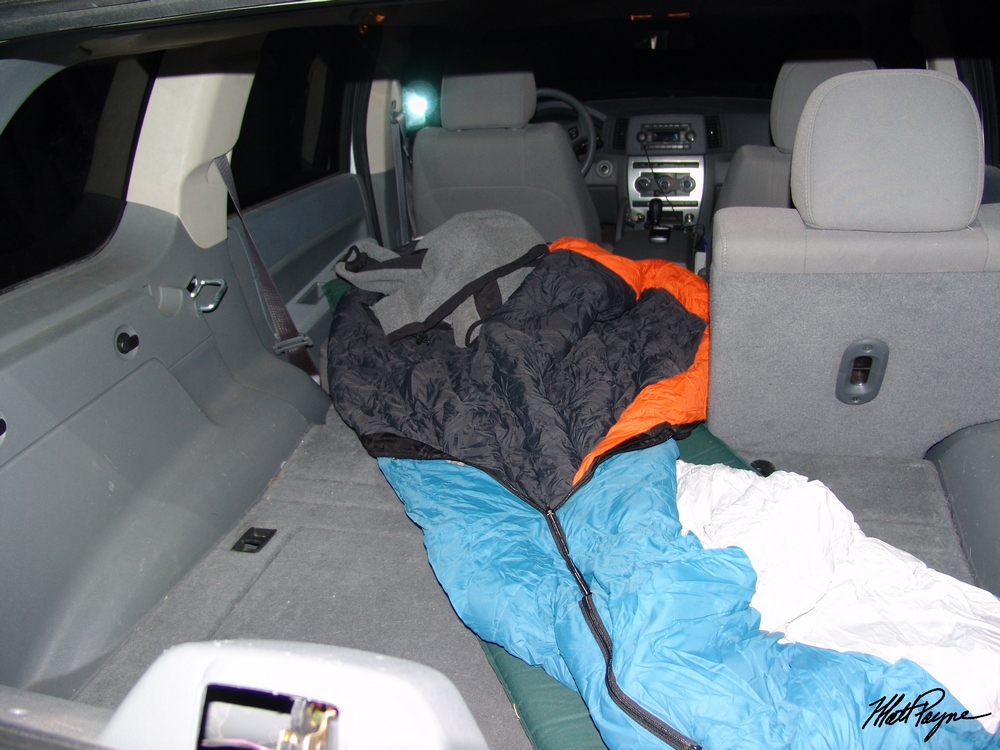
I think I arrived at the trailhead at about 9 PM and prepared my luxurious accommodations:
I’ve been wanting to do Holy Cross for a long time. The famous views of the Cross Couloir are something I’ve been wanting to see since I was a little kid.
Not that I’m religious, but the mountain is probably one of the most recognizable peaks around due to the snow couloir shaped like a cross.
Apparently many people used to do pilgrimages to the Notch Mountain Shelter which was built in 1924 in order to see the famous peak. I chose the Notch Mountain trail and Halo Ridge route for this very reason – it brings you up to 13,000+ feet and keeps you there for 4-5 hours of hiking… sweet! Some more history about Holy Cross:
In the mid nineteenth century, as the high country of Colorado was being explored, reports of a peak with a cross on its side began to circulate. A while later, it became clear that there was a high mountain with a large cross on its side formed out of snow. Finally in the August of 1873, a survey party led by Dr. Ferdinand Hayden, and including the photographer William H. Jackson, ventured into the wilderness above the Eagle River and located Mount of the Holy Cross. On August 24, two parties set off in different directions, the first to attempt to climb Mount of the Holy Cross, and the second, which included Jackson, to climb Notch Mountain and hopefully photograph the cross. Both parties were successful that day; one making the first known ascent of Mount of the Holy Cross, and the other reaching the top of Notch Mountain.
In the decades that followed, the area became a popular destination for religious pilgrimages. In the mid-1920’s a stone cabin was erected on top of the southern ridge of Notch Mountain to accommodate visitors. Due to the popularity of the area, in 1929, the area was declared a national monument by Congress. In 1950, the national monument status was rescinded. – Photo and history credited to summitpost.org and Aaron Johnson.
This weekend promised to be one of the best weekends for climbing – the weather was projected to be totally clear and there was a near-full moon on the calendar. Due to these factors, I wanted to get up super early and try to catch the sunrise from 13,000+ feet – something I’ve not done in over 10 years. So I set my alarm for 3 AM and hit the sack. I woke up at 3 AM and got ready, groggily. It was kind of strange being all by myself in the dark, but I was excited to begin my adventure. Hiking solo was a perk because it meant I could set my clock for whatever time, spend as little or as much time as I needed to get to my destination, and not rely on others for anything. I could also listen to my I-pod, which was kind of fun. The only drawback was that I was doing a lesser-used route by myself and so I would need to be very careful not to get injured. I started at the Fall Creek Trailhead at 3:30 AM and hastily made my way up the side of Notch Mountain.
I counted over 40 switchbacks to the top of the ridge.
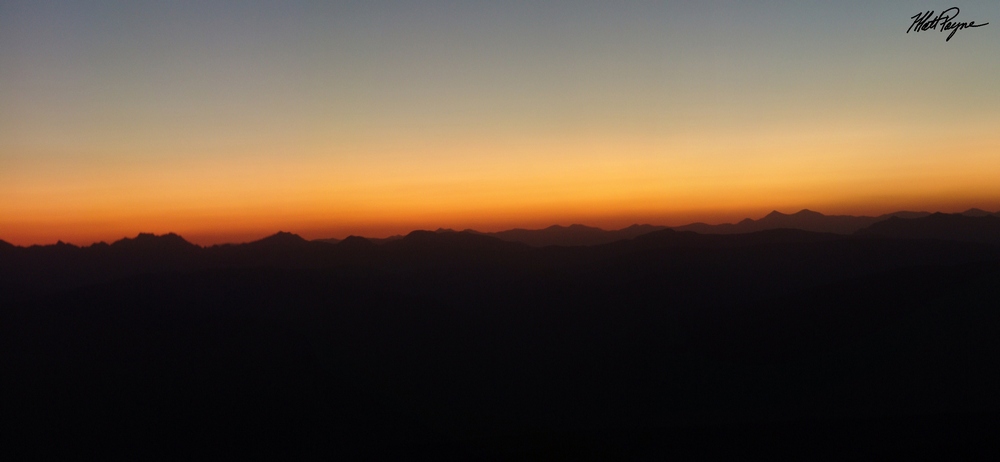
As I neared the top of the Notch Mountain ridge, I could not help but look back behind me to see the light change as the sun started to light up the horizon:
From the trailhead to the shelter was 5.1 miles, and I was able to get to the shelter at 5 AM, which means I made super-good time – 3.4 miles/hr.
with 2,673 ft. of elevation gain. The wind was really cold at 13,077 ft. (elevation of the shelter) so my hands were pretty much frozen – taking pictures
was pretty challenging… The good news was that my legs felt ridiculously strong and I was jamming out to some Solas – which totally reminded me of my friend Rob, who introduced me to that music a very long time ago. Jamming out to Irish music while watching the sunrise was pretty darn awesome. Anyways, here’s the shelter.
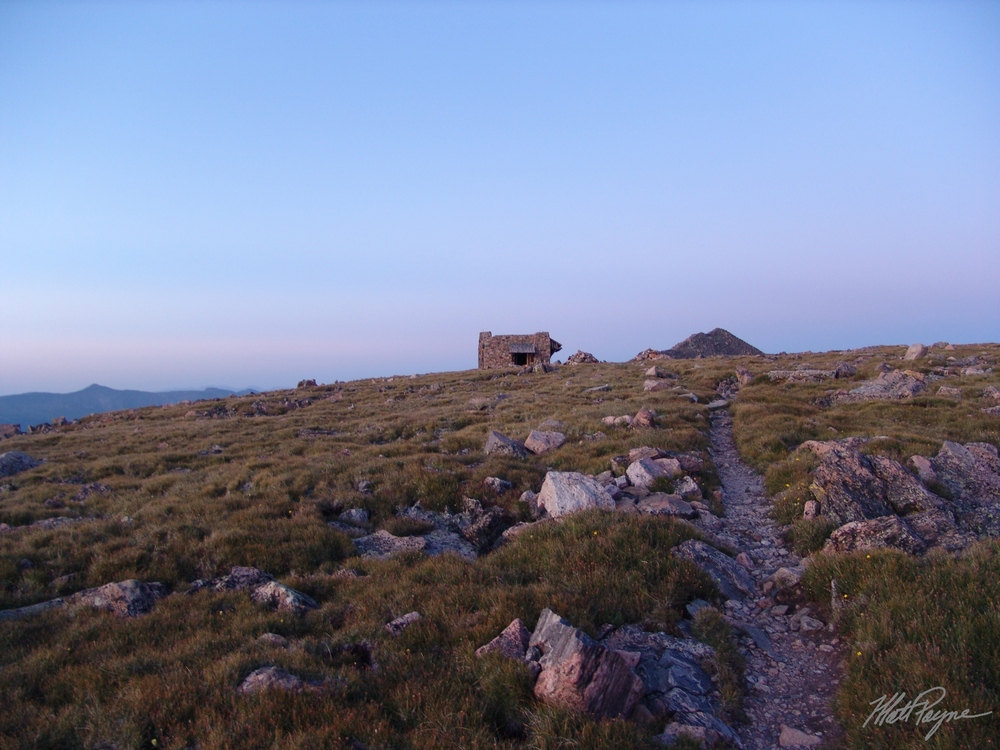
That little bump of a mountain at the end of the trail would be my first challenge of the day – UN 13,248. So the shelter was pretty awesome – it had steel cable attached to it at numerous locations leading to the ground, which acted as lightning protection.
I was pretty impressed with how sturdy it was, given it was built in 1924. Another neat feature of the shelter was that it had windows – windows that were clear enough to see a reflection in. I could not help but take my first photo of the famous Holy Cross:
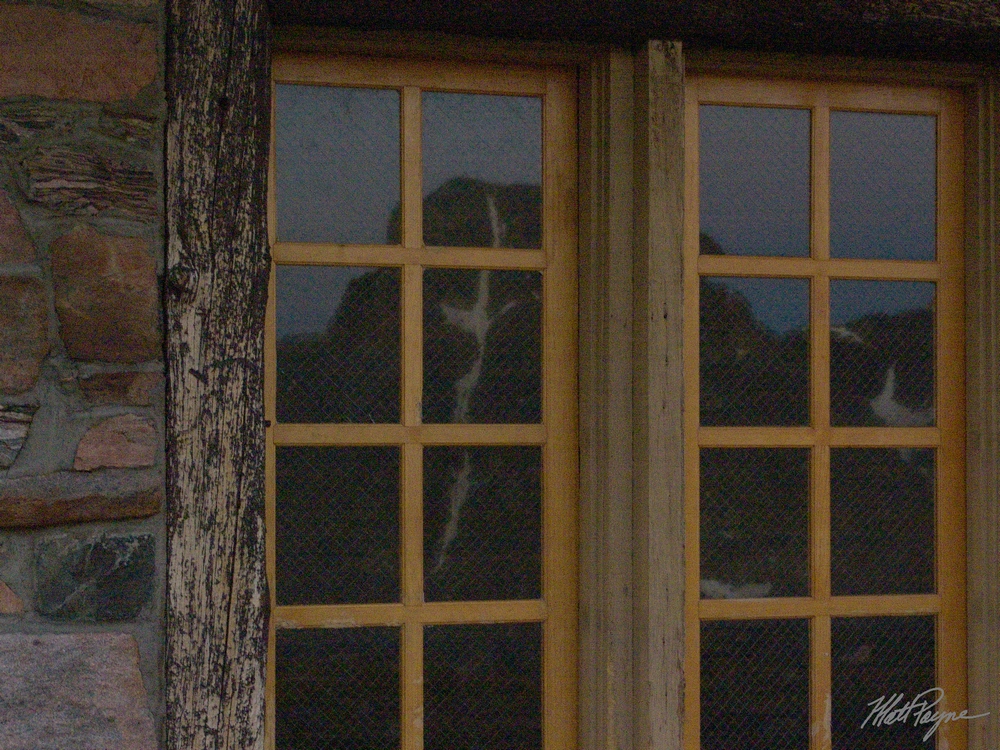
The sun still had not crested the horizon, but the light was still amazing. I decided to get a nice panoramic photo of the shelter and Holy Cross – you can also see the reflection in this one:

And just before sunrise… with the moon above.
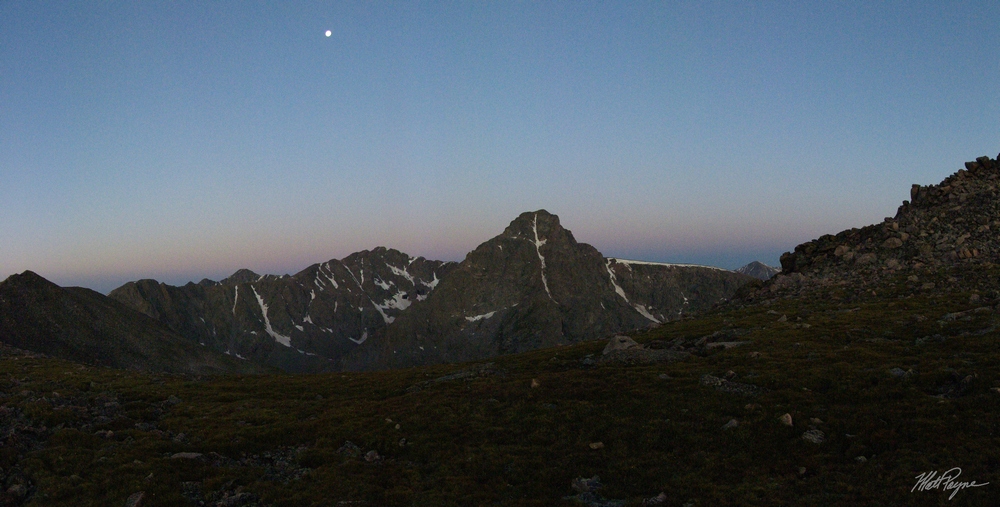
I’ve got to tell you – watching the sunrise over the Gore and Tenmile Ranges was pretty spectacular.
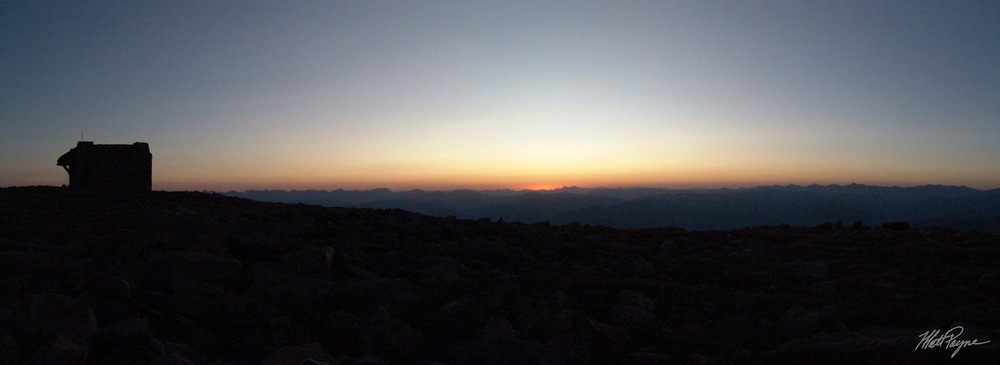
360 degrees of sunrise awesomeness:

Wait for it… wait for it… Woohoo! The sun rises! Amazing stuff.
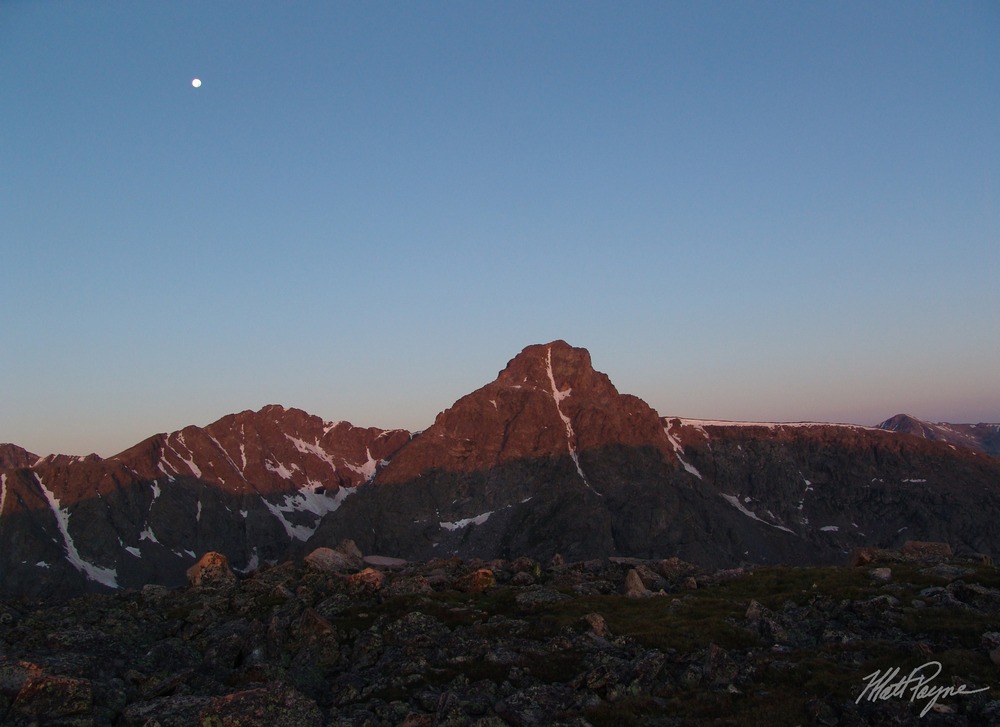
I decided to start hiking towards my first destination but I kept stopping like every few feet taking photos – I was addicted to the insane light I had all around me despite the fact that my hands were frozen. My route would take me all the way up the peak to the left and up and around the ridges to the right of there and finally to the top of Holy Cross. The summit was a good 2 miles away and the route would never drop me below 13,000 feet for the rest of the day.  The lighting on Holy Cross was very impressive – I really liked the red hue the sun was producing.I slowly made my way over towards PT 13,248. I finally made it to the top of PT 13,248 after about an hour of slow scrambling and photography, and took more pictures of my view – my favorite part about this hike was that my perspective was constantly but slowly changing.

Just on the other side of PT 13,248, I was able to see the rest of my route for the day – the ridge looked very straight-forward but LONG. And long it was…
My next objective was to conquer PT 13,373. The trek over to the base of PT 13,373 was very easy, but the route description states that reaching the top of PT 13,373 is the crux of this route. It was a very steep and rocky boulder-filled summit, with loose rocks and spider-webs everywhere.
The moon was in sharp contrast with the rock here…
Here’s a closer zoomed in view of the moon and cliff:
After some fun class 2+ climbing up, I reached the top of PT 13,373 and took some time to get a full view of my surroundings – 360 degrees worth:

You can really see how far I have climbed now – the shelter is just a small dot in the distance. This shot shows the route pretty nicely – with where I came from to the right and where I was heading to the left:

Check out how far away the shelter looked, zoomed in:
Well, time to head on over to the next goal – a ranked centennial – Holy Cross Ridge. Apparently my dad climbed Holy Cross via Holy Cross Ridge, and he did it via Tuhare lake, seen in this pano of Holy Cross Ridge (far right):
And here… with Holy Cross in view at far right and lower Tuhare lake at far left:
On the way over to the Holy Cross Ridge, I was able to get some really cool views of both Lake Tuhare on my left (south) and the Bowl of Tears to my right (north). This is one my favorite shots because you can see my shadow and I look super crazy, plus you can see both valleys (Holy Cross Ridge right down the middle):
And just because the view from here was so awesome, here’s another shot… :-)
And a look back at the Bowl of Tears and the Notch Mountain Shelter above it:
After making it across the long boulder field leading to Holy Cross Ridge (which would later prove to be the hardest part of the climb due to numerous false summits), I took one last set of shots of the Tuhare lakes and, much to my excitement, the Maroon Bells, Snowmass Mountain, and Capitol Peak in the far distance.
Man, the Maroon Bells are some of the coolest mountains I’ve ever laid eyes on, and Snowmass and Capitol are just ridiculous looking. Here’s a zoomed in view of them. The ‘Bells’ are left of center, and Snowmass is right of center with Capitol at right of Snowmass looking like a sore thumb sticking up. Truly – seeing the Elk Range pretty much made my summer. As I approached the very top of Holy Cross Ridge, I saw the first living being since the night before: a marmot guarding the boulders:
Once I reached the top to Holy Cross Ridge, I basked in the insane view. The valley on the other side (west) of Holy Cross and Holy Cross Ridge was really cool – full of lakes and waterfalls. Here’s a 360 view from the top of the 91st highest mountain in Colorado:

The really cool part of being on the Holy Cross Ridge for me was seeing where I had came from and being so close to my final destination. This pano shows the route, starting at the shelter and ending at Holy Cross:
From Holy Cross Ridge, Mount of the Holy Cross was just one hour away, a quick boulder scramble down and then up. I started down, following the crest of the ridge (no trails) and up Holy Cross. I finally saw people… seeing other people motivated me to move even faster, because I thought they were the first people to hit the summit block for the day, and I wanted to beat them :-)~
I did end up beating them, but there were already others on top – oh well. Most people climb Holy Cross via the Halfmoon Pass trailhead, which is totally beyond me because going that way completely robs you of the spectacular view of the Cross Couloir from the Notch Mountain shelter. I hit the summit at 10:30 AM, which means it took me 7 hours from the trailhead. Anyways, I had a nice young lady take a few shots of me on top and then it was off to take some pano shots!Look at all the people!

From the top of Holy Cross, there is a small point jutting to the east. I took a quick walk over there in order to get some photos of the entire route I was on for the day. Here it is! The 2nd photo shows the actual route I took.

And the route outlined in black:

That photo really shows the length of the day and was a rather proud moment for me. It felt great to be able to accomplish that, thinking back to May for my 1st climb this year, Shavano, and how tired I was just after a few miles. Ha-ha – looking back I realize now how much better I am now at using my camera too! Apparently the more you use it, the better… imagine that! After spending some time on top, I made the decision to return back the way I came. Apparently this route down is 1.5 miles further than the standard route but less overall elevation gain (remember, I had to go back over all three of the 13’ers again to get down).
After a beautiful day of hiking back over the 13’ers, I made it to the shelter at about 2 PM. Here’s a self-timer shot of me from there.
I rested and refueled at the shelter and had a short but pleasant conversation with a family that was also from Colorado Springs who were on a day-hike to the shelter. I started back down the trail (it was nice to be back on a trail after 8 hours of no-trail hiking) towards the trailhead.
After reaching the trailhead at 4 PM, I headed to Buena Vista and stopped in at Panchos for a burrito before the long drive back to Colorado Springs.
Rocky Mountain National Park
Rocky Mountain National Park lies within the Front Range and is home of one of the most popular 14'ers - Longs Peak. Several lesser known 13'ers and 12'ers are scattered throughout Rocky Mountain National Park, making it one of the most popular hiking destinations in Colorado. A hiker could spend months in Rocky Mountain National Park and not complete all 359 miles of trails. Two smaller sub-ranges are with in Rocky Mountain National Park, including parts of the Mummy Range and the Never Summer Mountains. Special considerations must be made before planning a trip to this area. A breakdown of the rules and regulations for Rocky Mountain National Park can be found here.