Displaying items by tag: Elk Mountains
Completing the Centennials - ending a decade-long goal on Thunder Pyramid
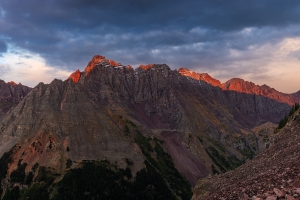
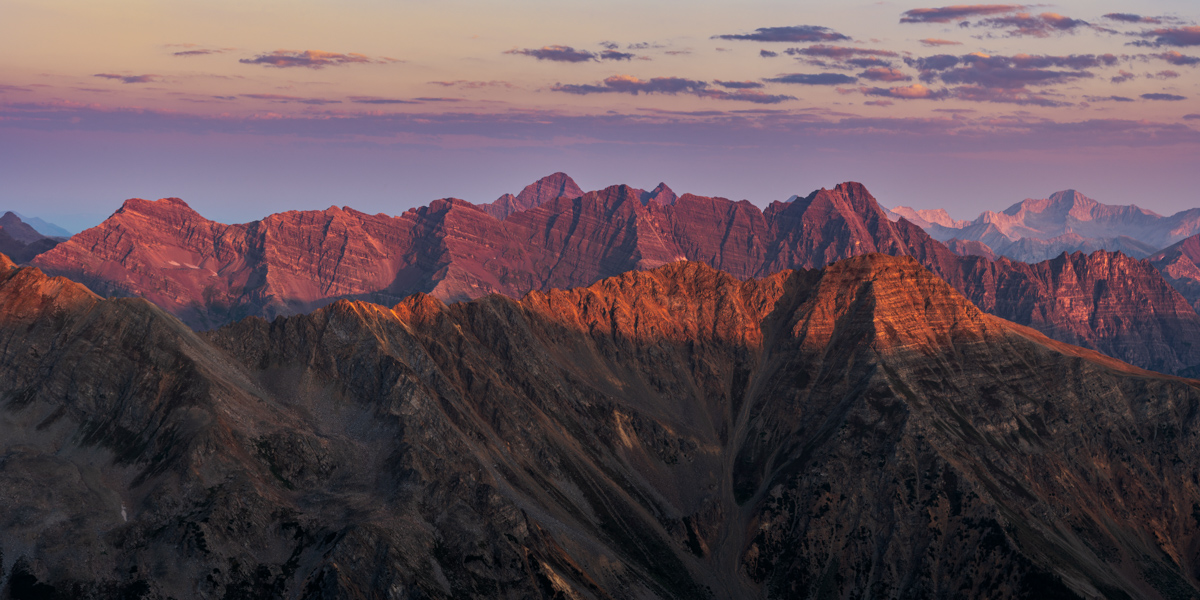
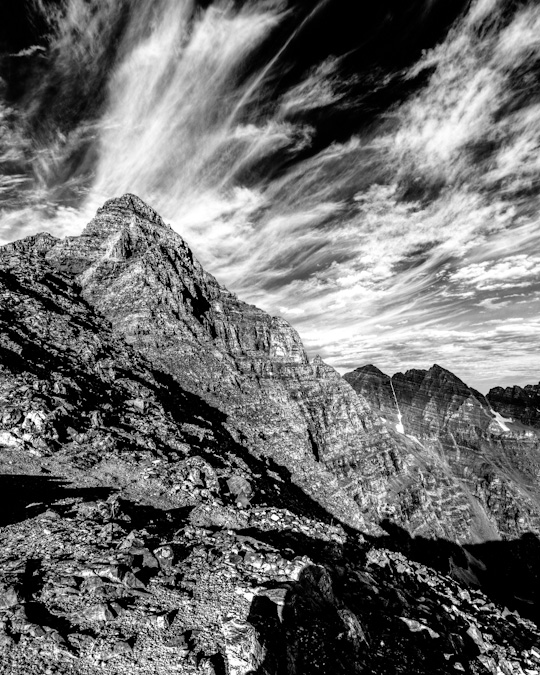
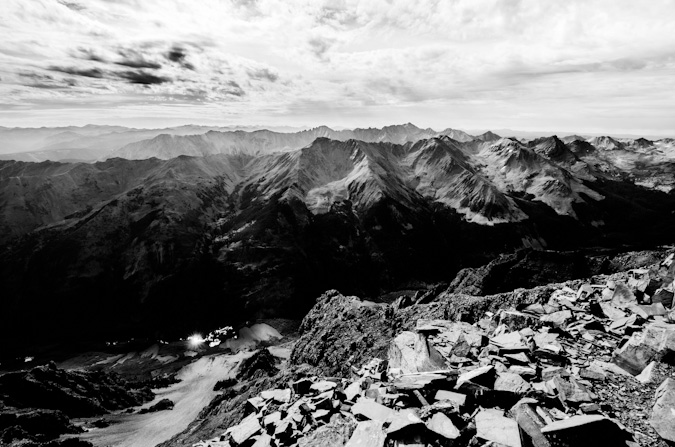
 Pyramid Peak and Thunder Pyramid as seen from Maroon Peak in 2012
At the start of 2018, I told myself that this would be the year that I would complete the Centennials (the highest 100 mountains in Colorado). For no great reason, I wanted to finish my goal before I turned 40 (I'm 39). It was a somewhat lofty goal considering I had lost my job in January, started a new job in February, and was not in the best physical shape of my life. I started this goal officially in 2009 and game out of the gates in a hurry. I had a headstart, having started climbing peaks when I was 4-years-old (1982). I had completed 22 / 100 by the end of 1998 when I was in college, but took a very long hiatus after that. I only completed 5 more peaks from 1998 to 2008. That means that between 2009 and the end of 2018, I completed 73 of the highest 100 mountains. That feels substantial. In January 2009, I built this website and began documenting my journey. This trip report may be boring in some ways so bear with me. It is my way of reflecting back on this journey and reminiscing on a goal completed. The following summaries don't include repeat peaks or other peaks not in the highest 100 that were climbed those years.
- In 2009, I completed 20 summits on the list.
- In 2010, I completed 12 summits on the list.
- In 2011, I completed 14 summits on the list.
- In 2012, I completed 5 summits on the list and finished the 14ers.
- In 2013, I completed 5 more summits and then moved to Oregon.
- In 2014, I completed 1 more summit (how sad).
- In 2015, I completed 2 more summits (still very sad), but moved back to Colorado at the end of the year.
- In 2016, I completed 3 more summits.
- In 2017, I completed 3 more summits.
- Finally, in 2018, I completed 8 more summits and my goal. My average per year that I was actively seeking the goal was 7.3 - not bad!
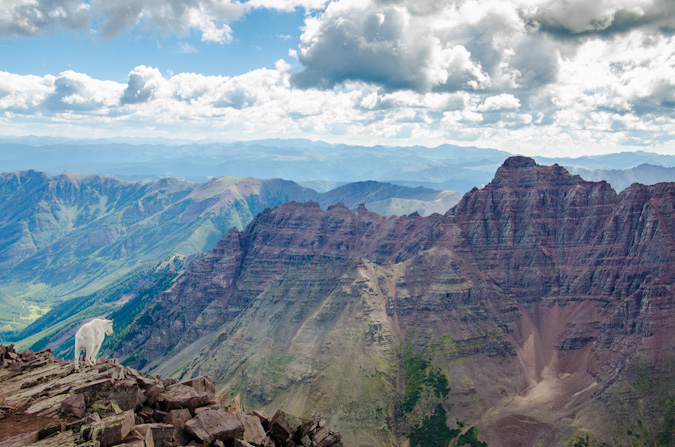
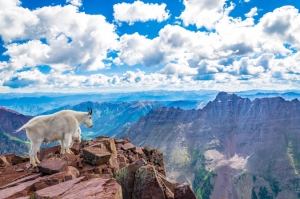
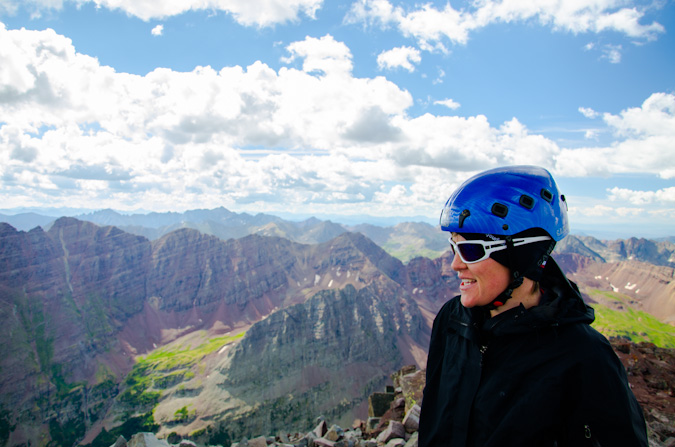
A mountain goat gazes upon Pyramid and Thunder Pyramid from the summit of Maroon Peak
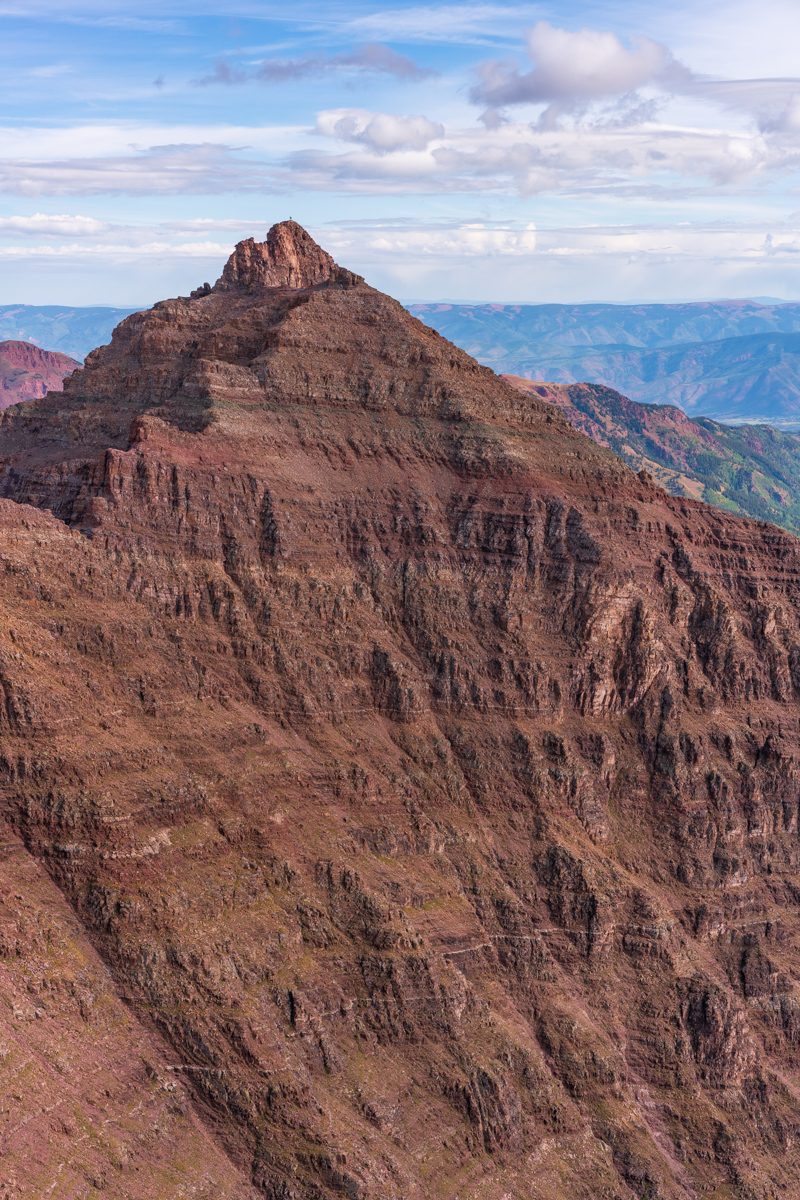
Regarding the subject at hand: I have been dreading Thunder Pyramid ever since gazing upon it in 2012 from the summit of Maroon Peak. The vantage from that position makes Thunder Pyramid unclimbable, the White Gully leading to the summit a straight-up nightmare. I had heard horror stories (all greatly exaggerated) of the looseness of the rock on Thunder Pyramid and many very exceptional climbers, including David Morano and Steve Gladbach, have perished on her slopes. The mountain was ultra-hyped in my mind and I was completely prepared for anything I found due to that hype. Anxiety is a powerful driver for some of us and I'm no exception.
As always, you can see and download my full route and GPS tracks over on the incredible app, Gaia GPS, which I use on my iPhone to plan, track, and follow my routes on these trips. It is absolutely invaluable and worth every cent. I personally love that you have full access to all USGS topo maps and National Geographic Trails Illustrated maps as well. You can use the app while in airplane mode and even save maps for offline use. To get a nice discount on the application, follow this link and you'll also support my efforts to keep this site running.
For this trip, I decided to pack quite a lot of camera gear (by the way, these are affiliate links and using them helps me pay for this site and to bring you better content):
- Sony A7R2 Camera
- Laowa 15mm f/2 lensaowa 15mm f/2 lens
- Zeiss Loxia 21mm f/2.8 lens
- Sony 55mm f/1.8 lens
- Sony 70-300 FE telephoto lens
- Feisol Tournament 3442 tripod
As usual, I used the beta from Gerry Roach's High Thirteener Guidebook. I was still using the 1st edition of the book; however, his new edition is available on Amazon after many years of waiting - rejoice! Also, huge shout-out to my good friend Kane Englebert who called me to give me some excellent tips on climbing this peak safely - thanks man!

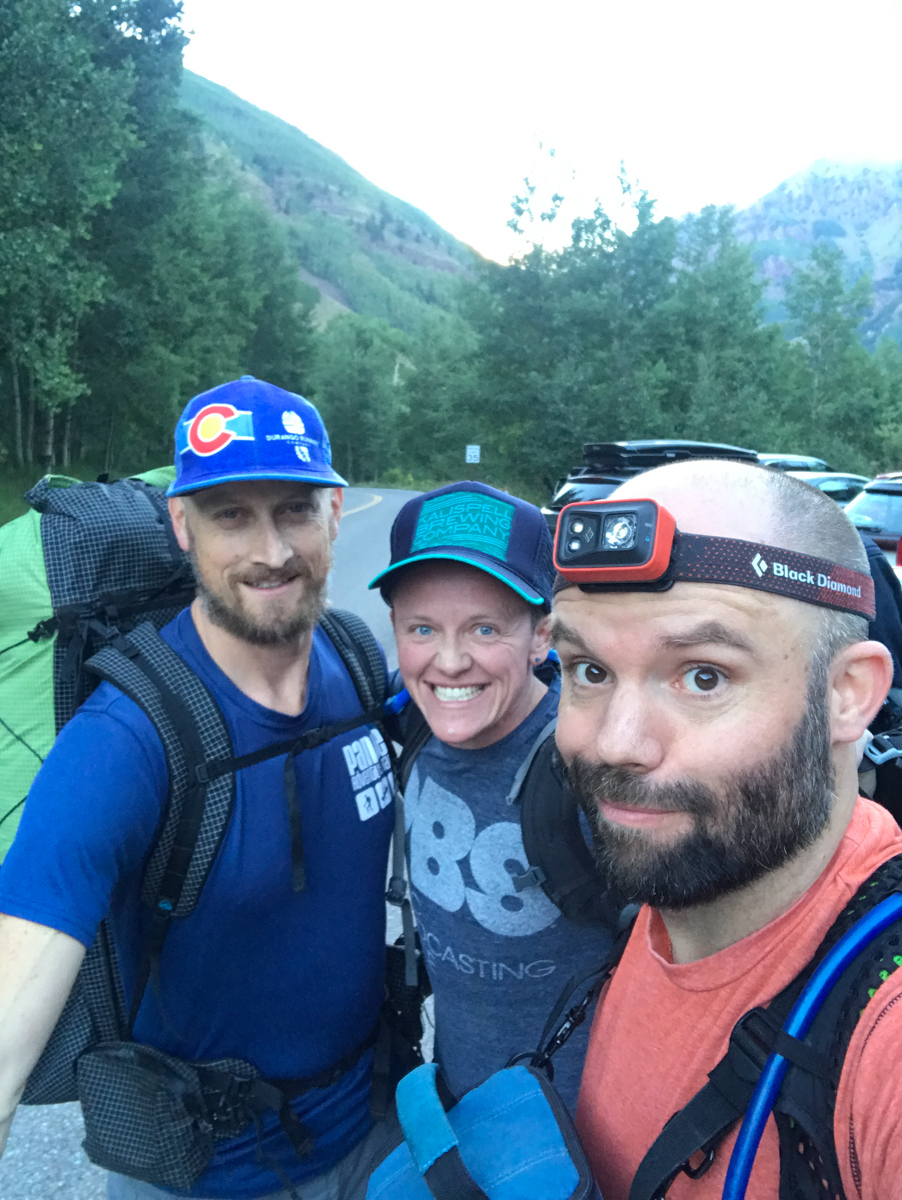
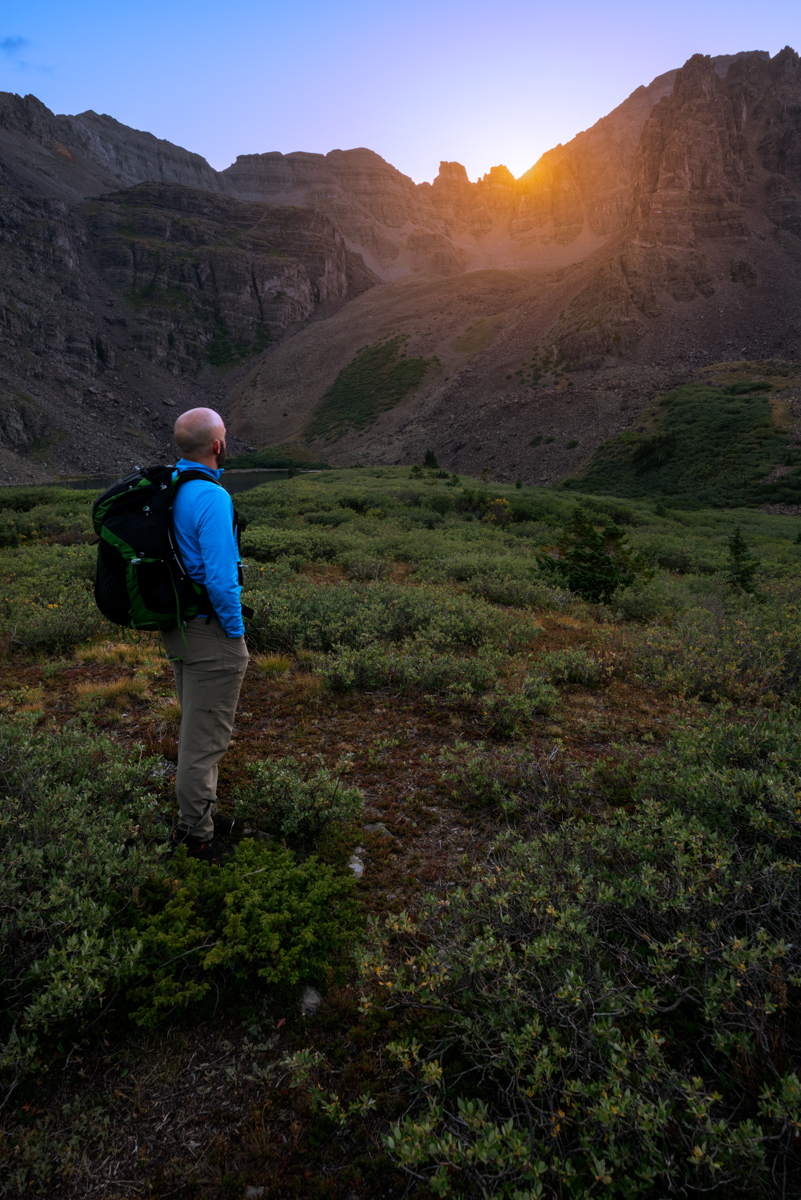
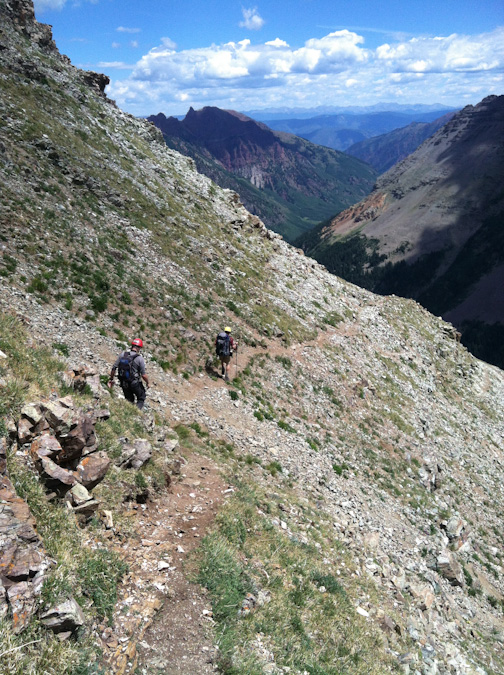
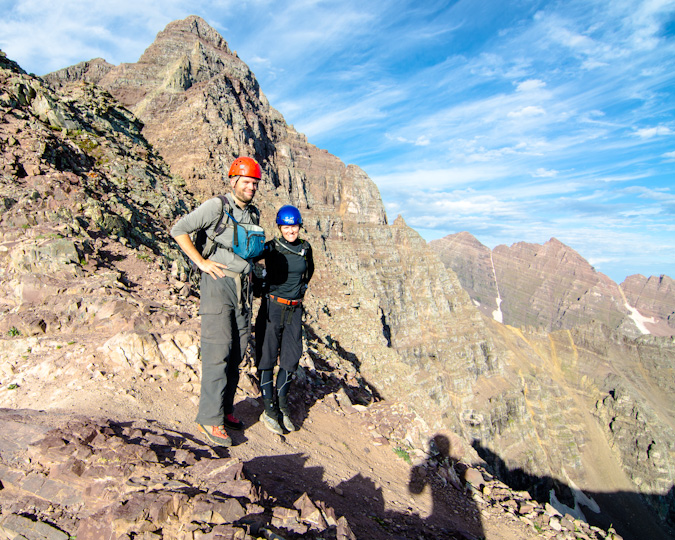
I decided to invite my two best friends for this final climb: Silas Musick, who has joined me on 16 of the highest 100 peaks; and, my friend Todd Myers. Since Todd was training for the Imogene Mountain Run in a week, he opted to just join us for the backpacking and stay in camp during the climb. The plan was for Todd and I to meet Silas in Aspen and then drive to the Maroon Bells parking lot together. Todd and I left Durango at noon on Friday. We met Silas at 6 PM in Aspen and we were all at the trailhead and ready to hike at 7:30 PM. We were planning to backpack to Crater Lake, set-up camp, and then get up really early for our attempt on Thunder Pyramid. Silas also had North Maroon on his radar and so we knew we would be in the area for a few days. The three amigos began our trip up from the lake in high spirits.
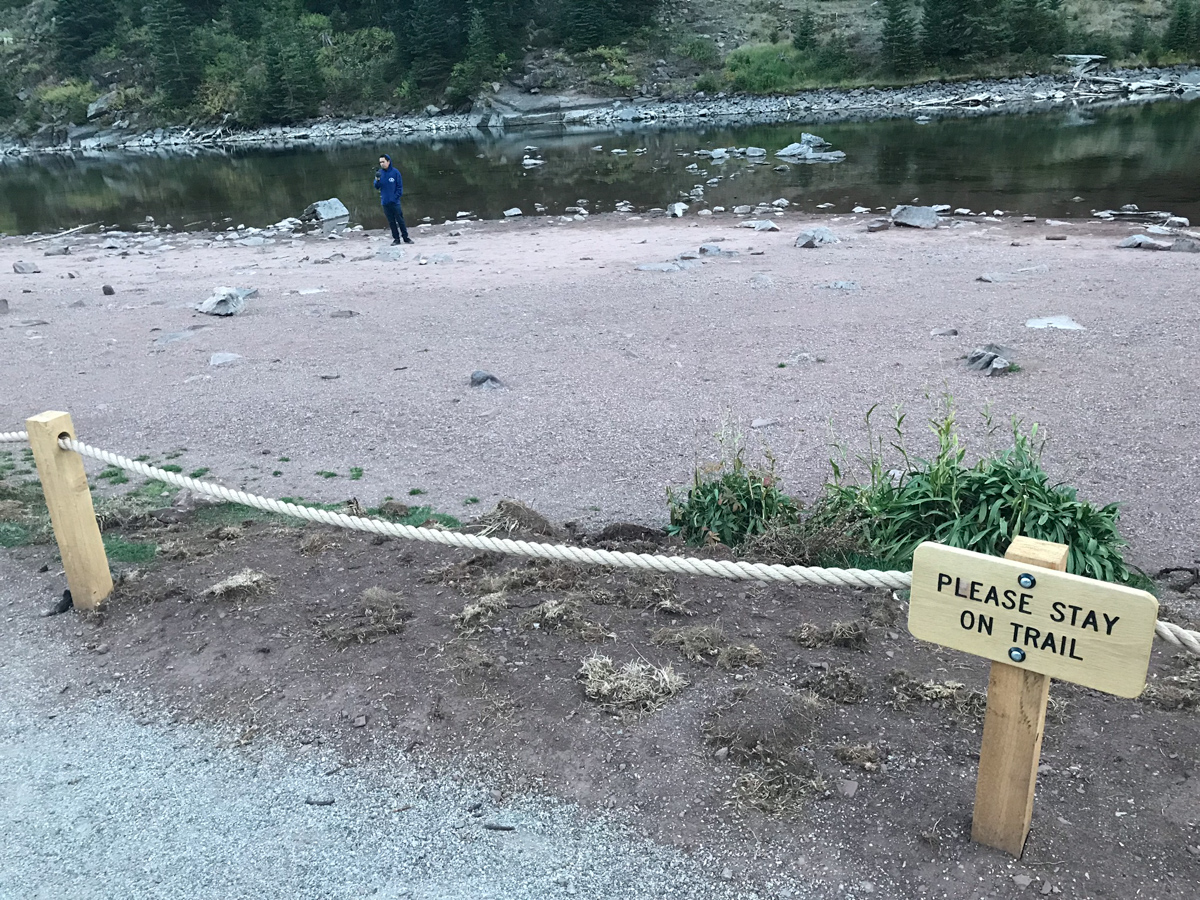
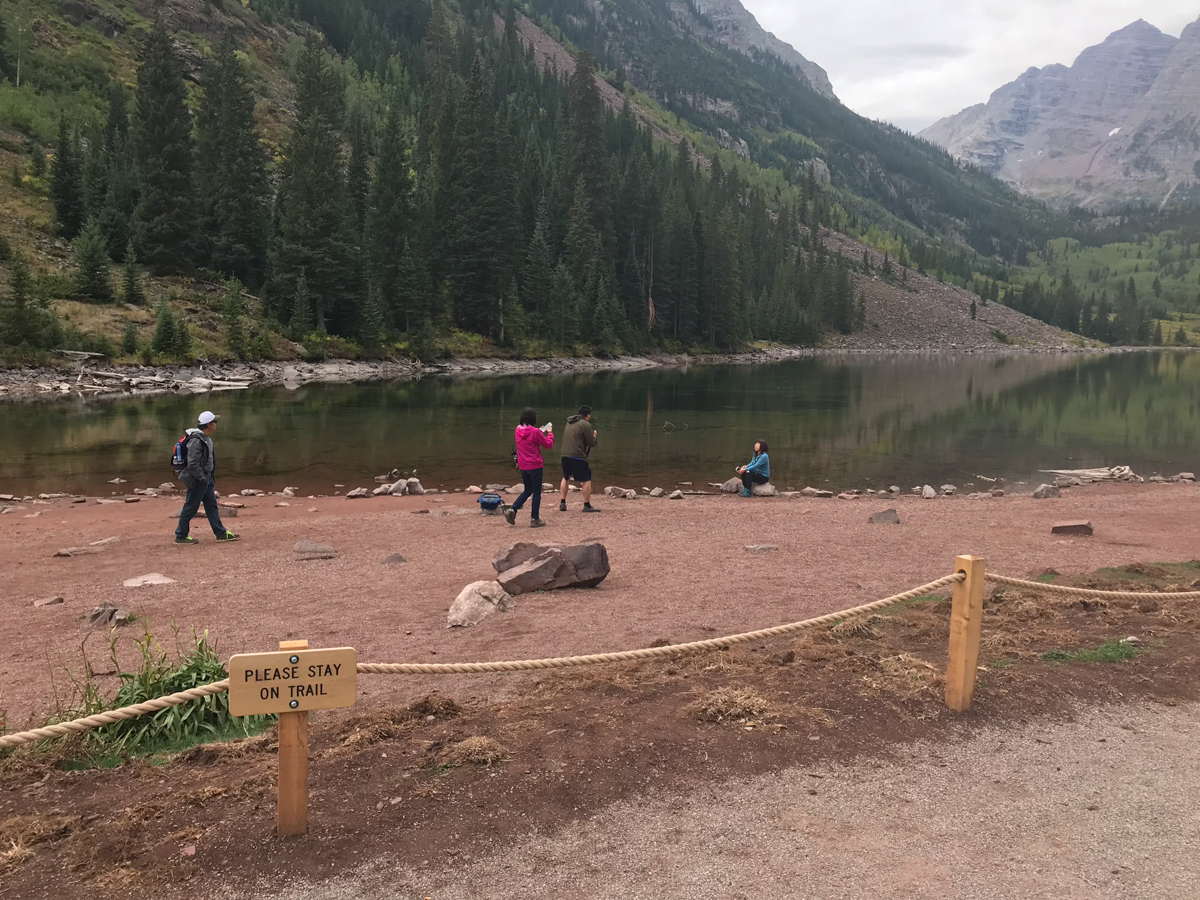
I was surprised to find that Maroon Lake had a rope surrounding it - which will not bode well for those looking to photograph it during autumn colors. Already, we found lots of people that simply disregarded the signage to stay on the trail, despite a sign being visible on the rope every 20 feet or so. Seriously, how hard is it for us as humans to simply obey rules? Do folks feel like they are above them? Anything for Instagram? What's going on here? You may not agree with the rope, but if you're going to enjoy public lands, you need to follow the rules. While they may sometimes be poorly implemented, we should still follow them. For more on the Forest Service's decision to rope it off, see this link.
We arrived pretty late at our campsite and set-up in the dark. There was an abandoned tent at our site - one of those cheap Walmart tents. I sure don't envy the job of the Forest Service to keep these places looking halfway decent. The total disregard of Leave No Trace principles is quite astounding. OK, off my soap box! Silas and I set our alarms for 3:45 AM and hit the sack.
We woke up at 3:45 and left camp at 4:00 AM. The forecast for the day was not great; however, it was also looking like the best weather window for the weekend. We anticipated early storms and lots of clouds in our future and wanted as early of a start as possible. While this meant hiking up the first section of Thunder in the dark, we felt it was a good choice.
After hiking about 10 minutes, a young man by the name of Austin stopped us on his way down from above asking if we had cell phone reception. We of course did not and explained that you would have to go all the way into town to get cell reception. He explained that his father, Brad, had altitude sickness and asked him to go down to get help. We explained that the most important thing was for his dad to get down and for someone to help him do that. We urged him to go back up and get him. He reluctantly agreed and hiked with us to the Thunder Pyramid turn off. We wished him luck, made sure he had food and water, and went our separate ways. More on that story later!
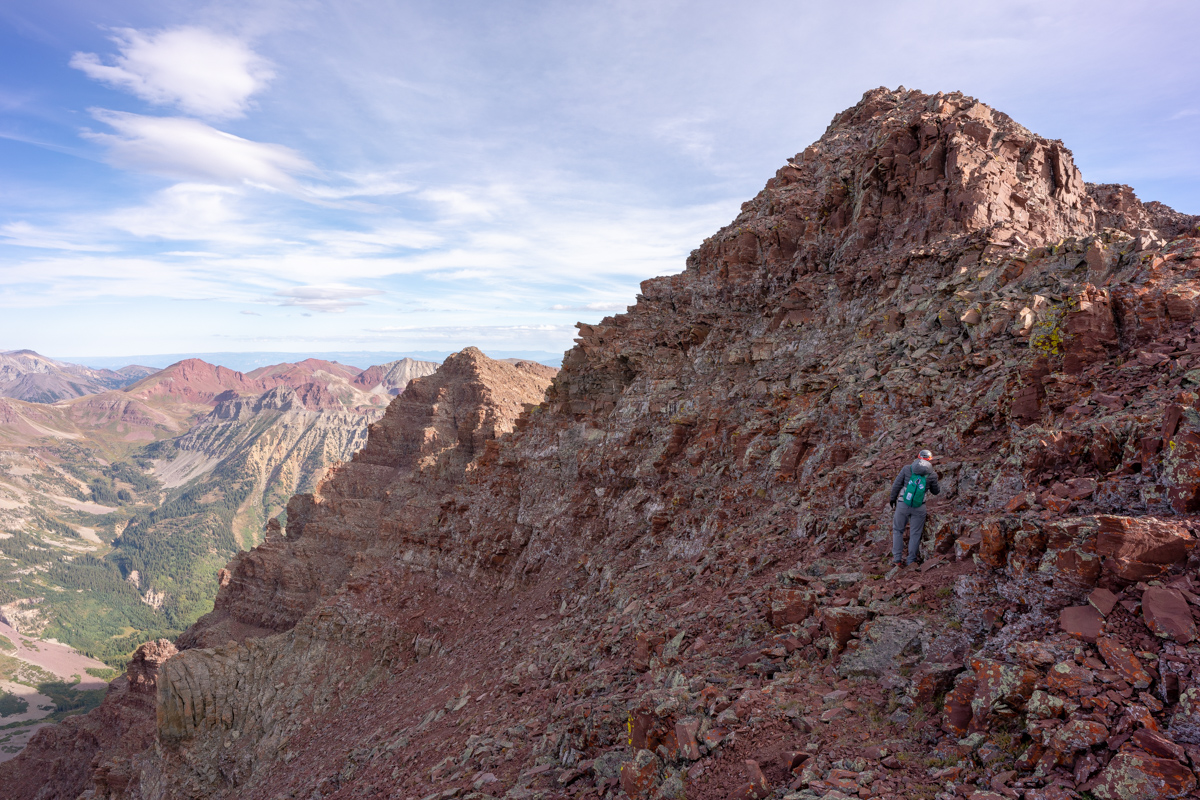
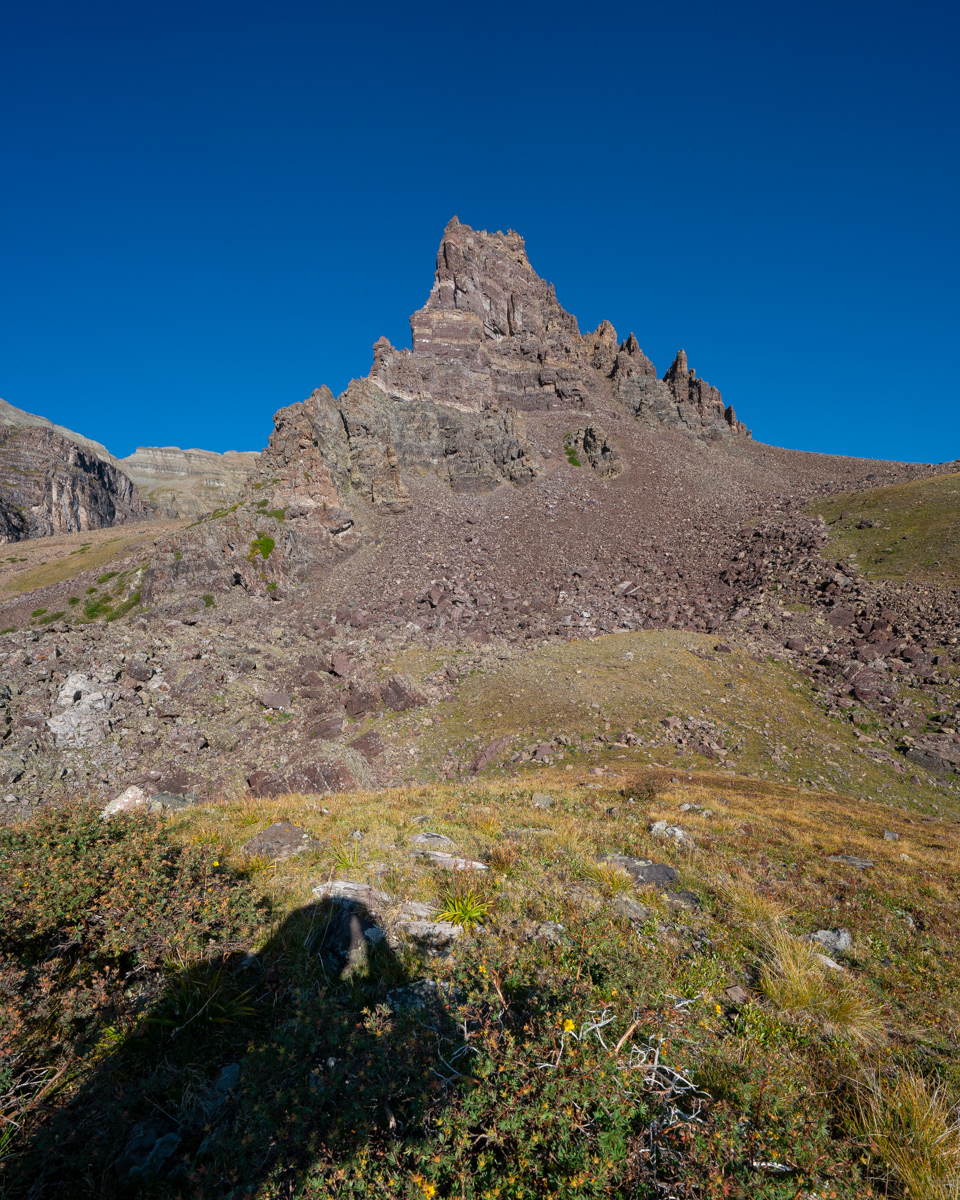
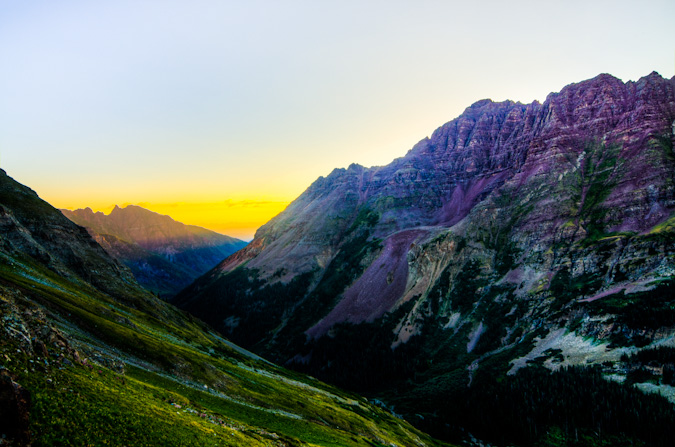
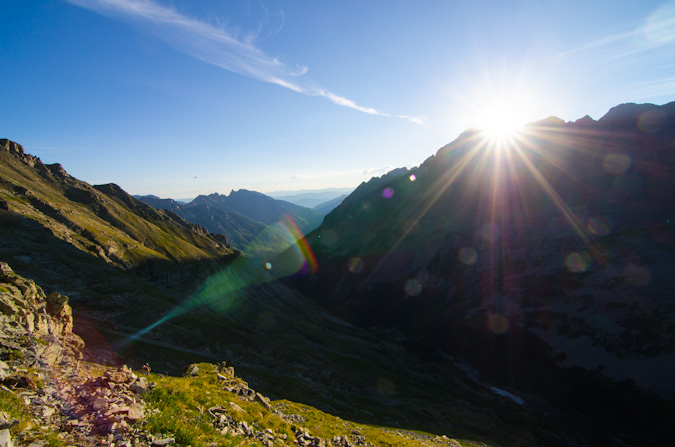
We had a tough time finding / following the trail from the cairned turn-off for Thunder Pyramid. We ended up bushwhacking up steep forested garbage until we reached the first cliff band. We followed that cliff band to our left to a weakness and followed that weakness up to another cliff band. This pattern continued until we found ourselves above treeline looking back on the Maroon Bells before sunrise.
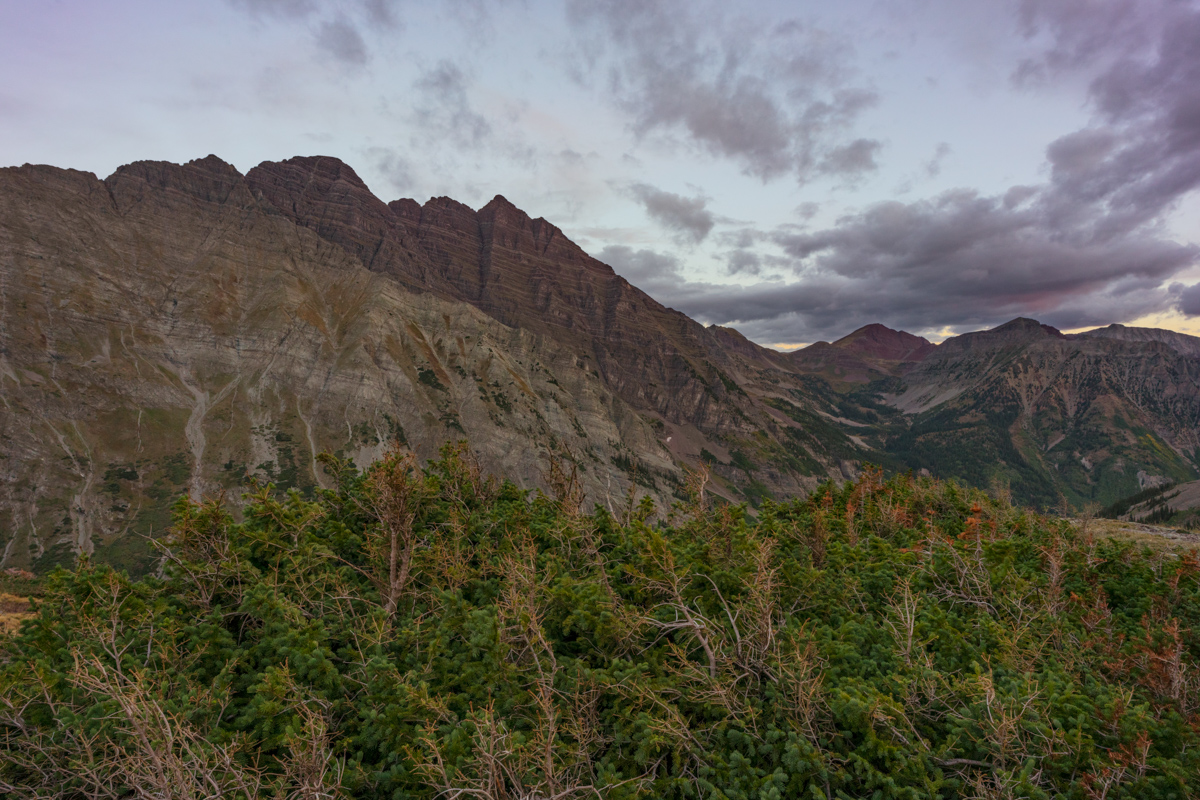
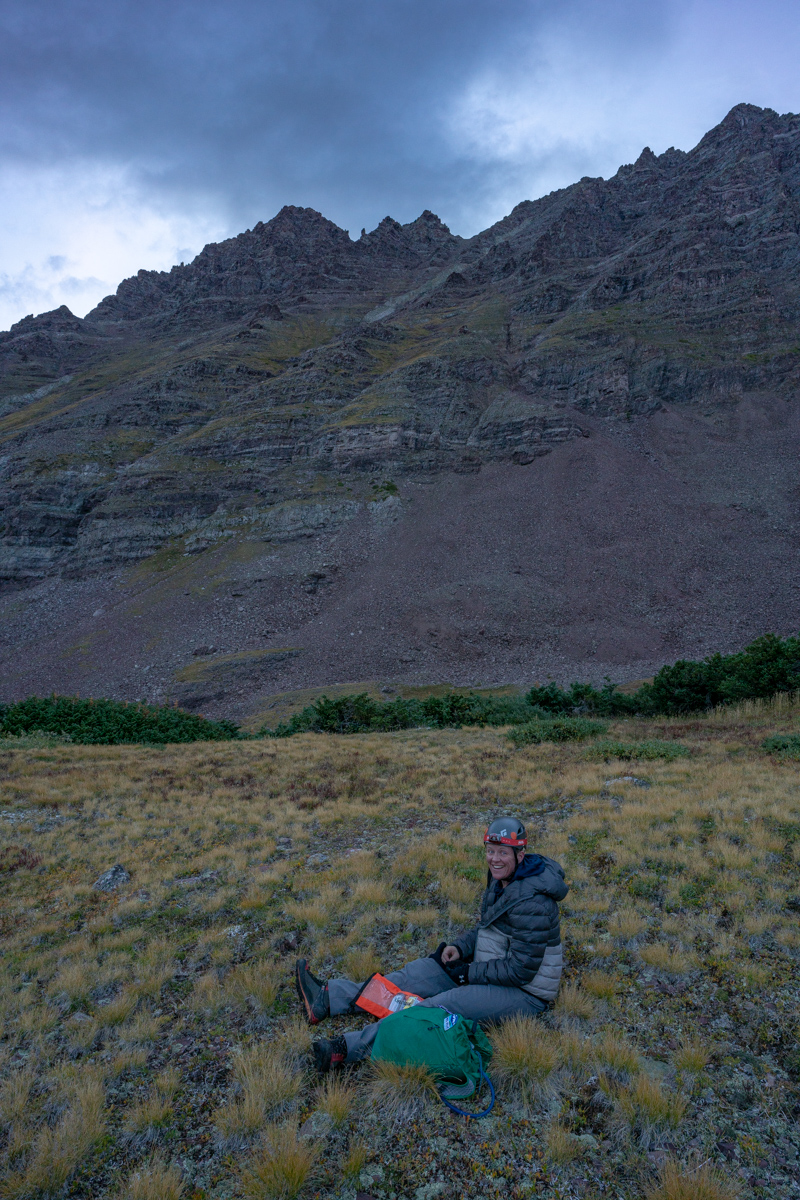
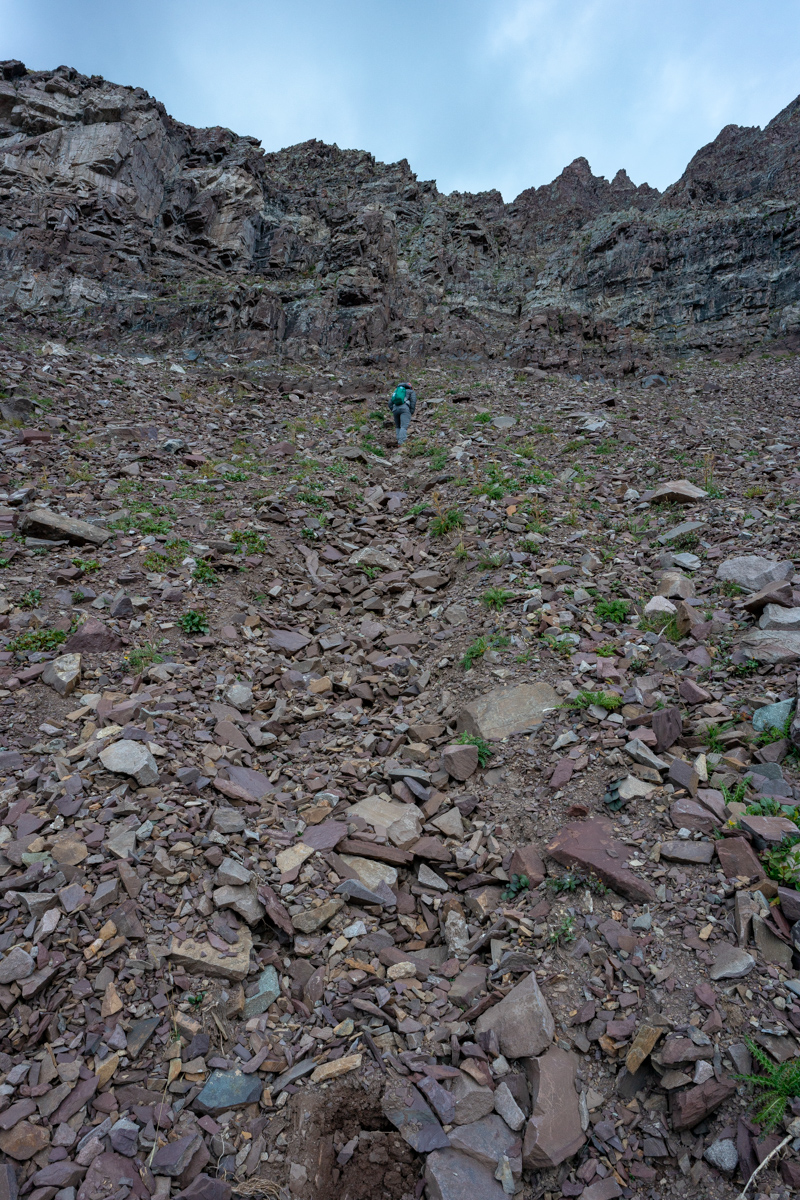
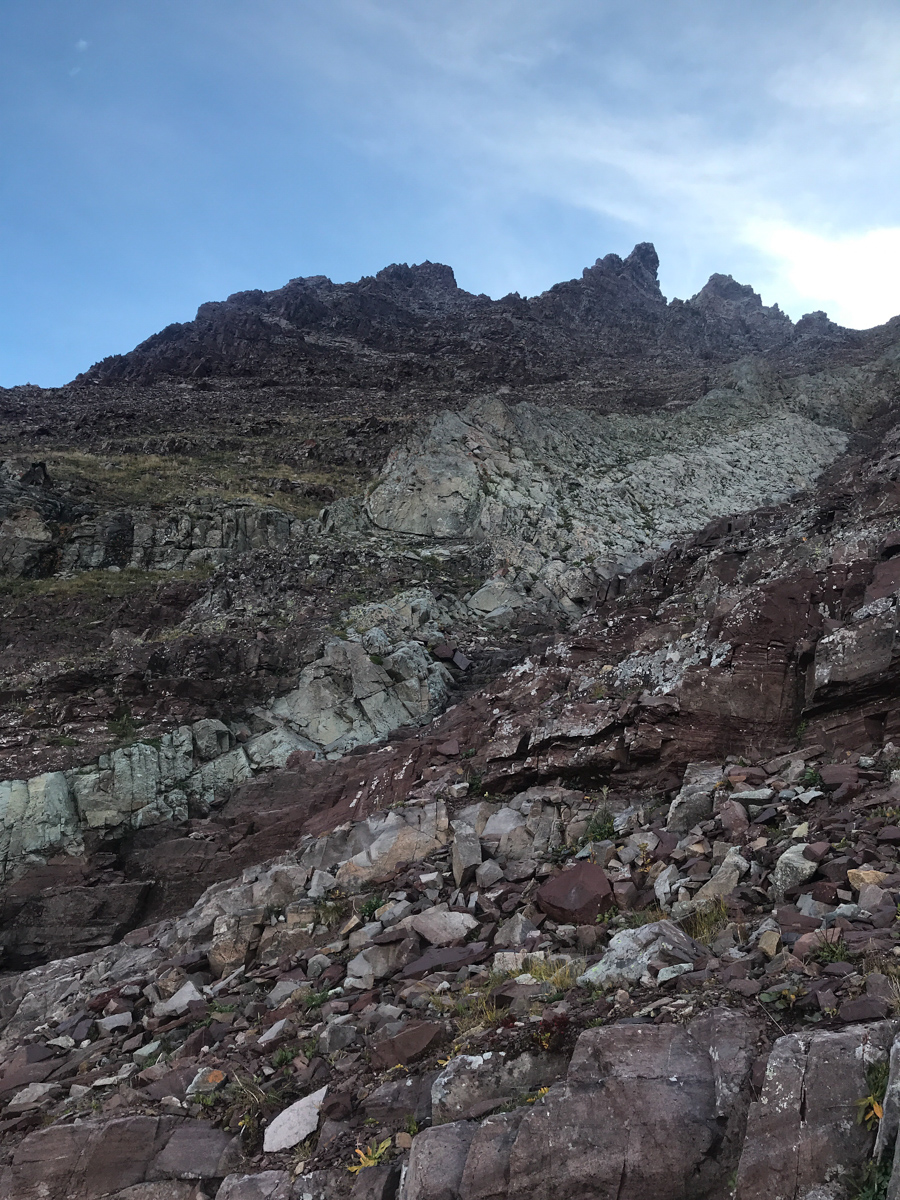
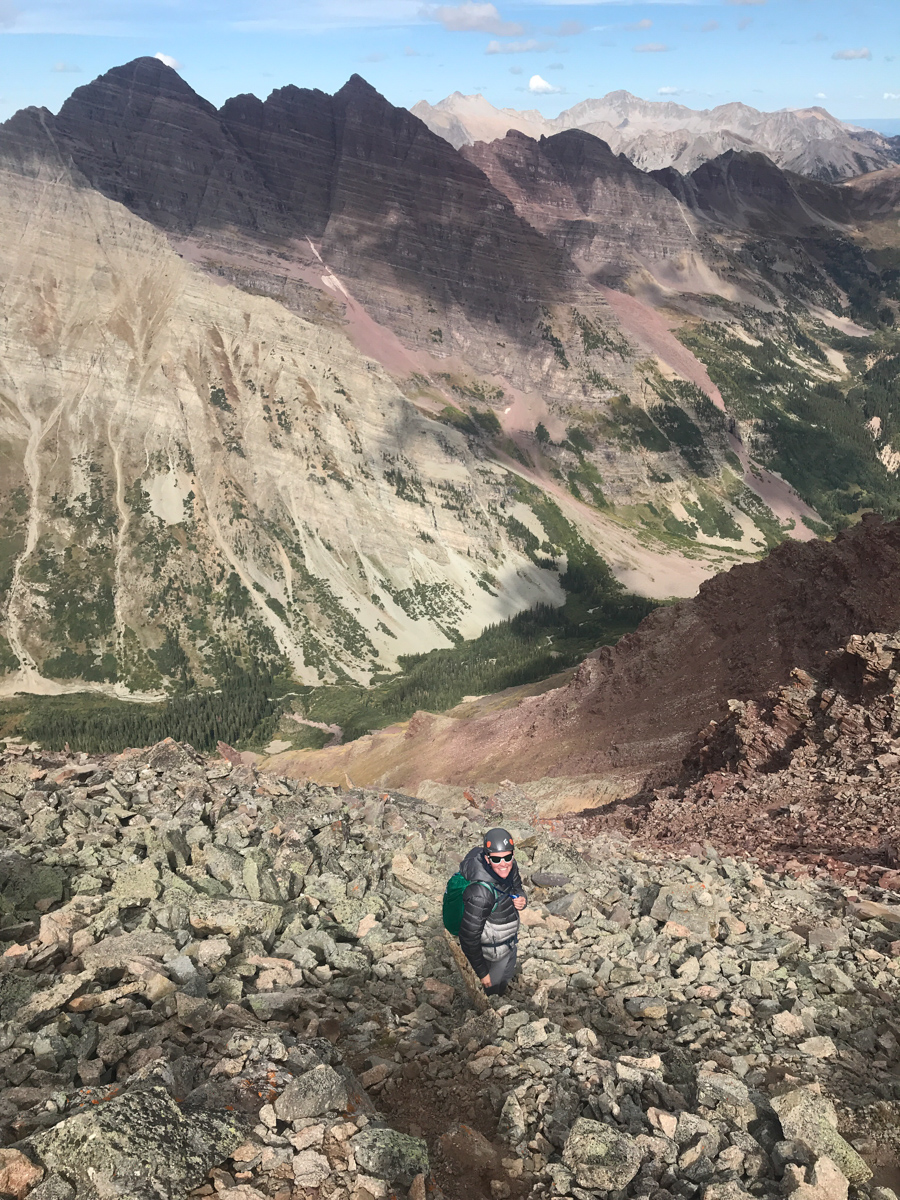
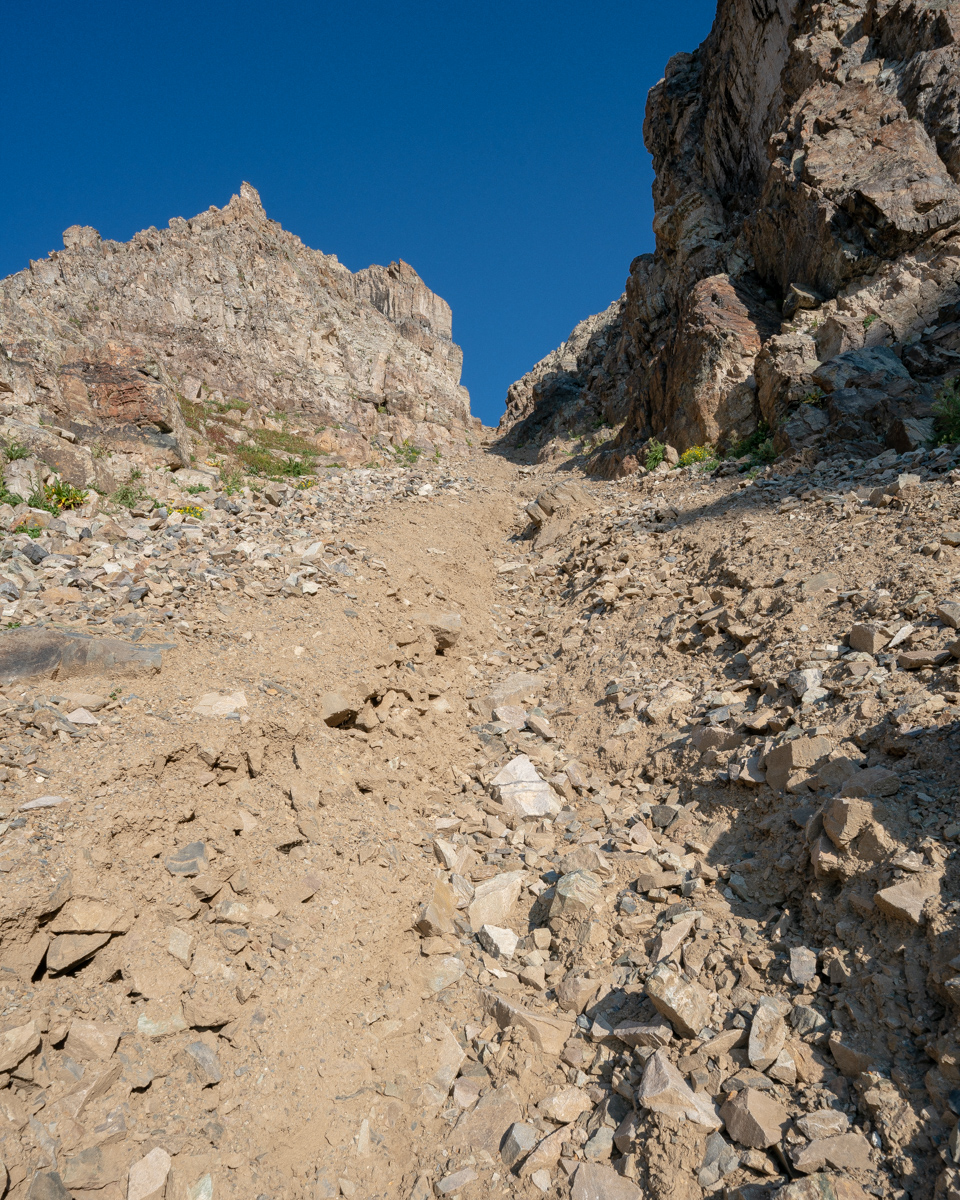
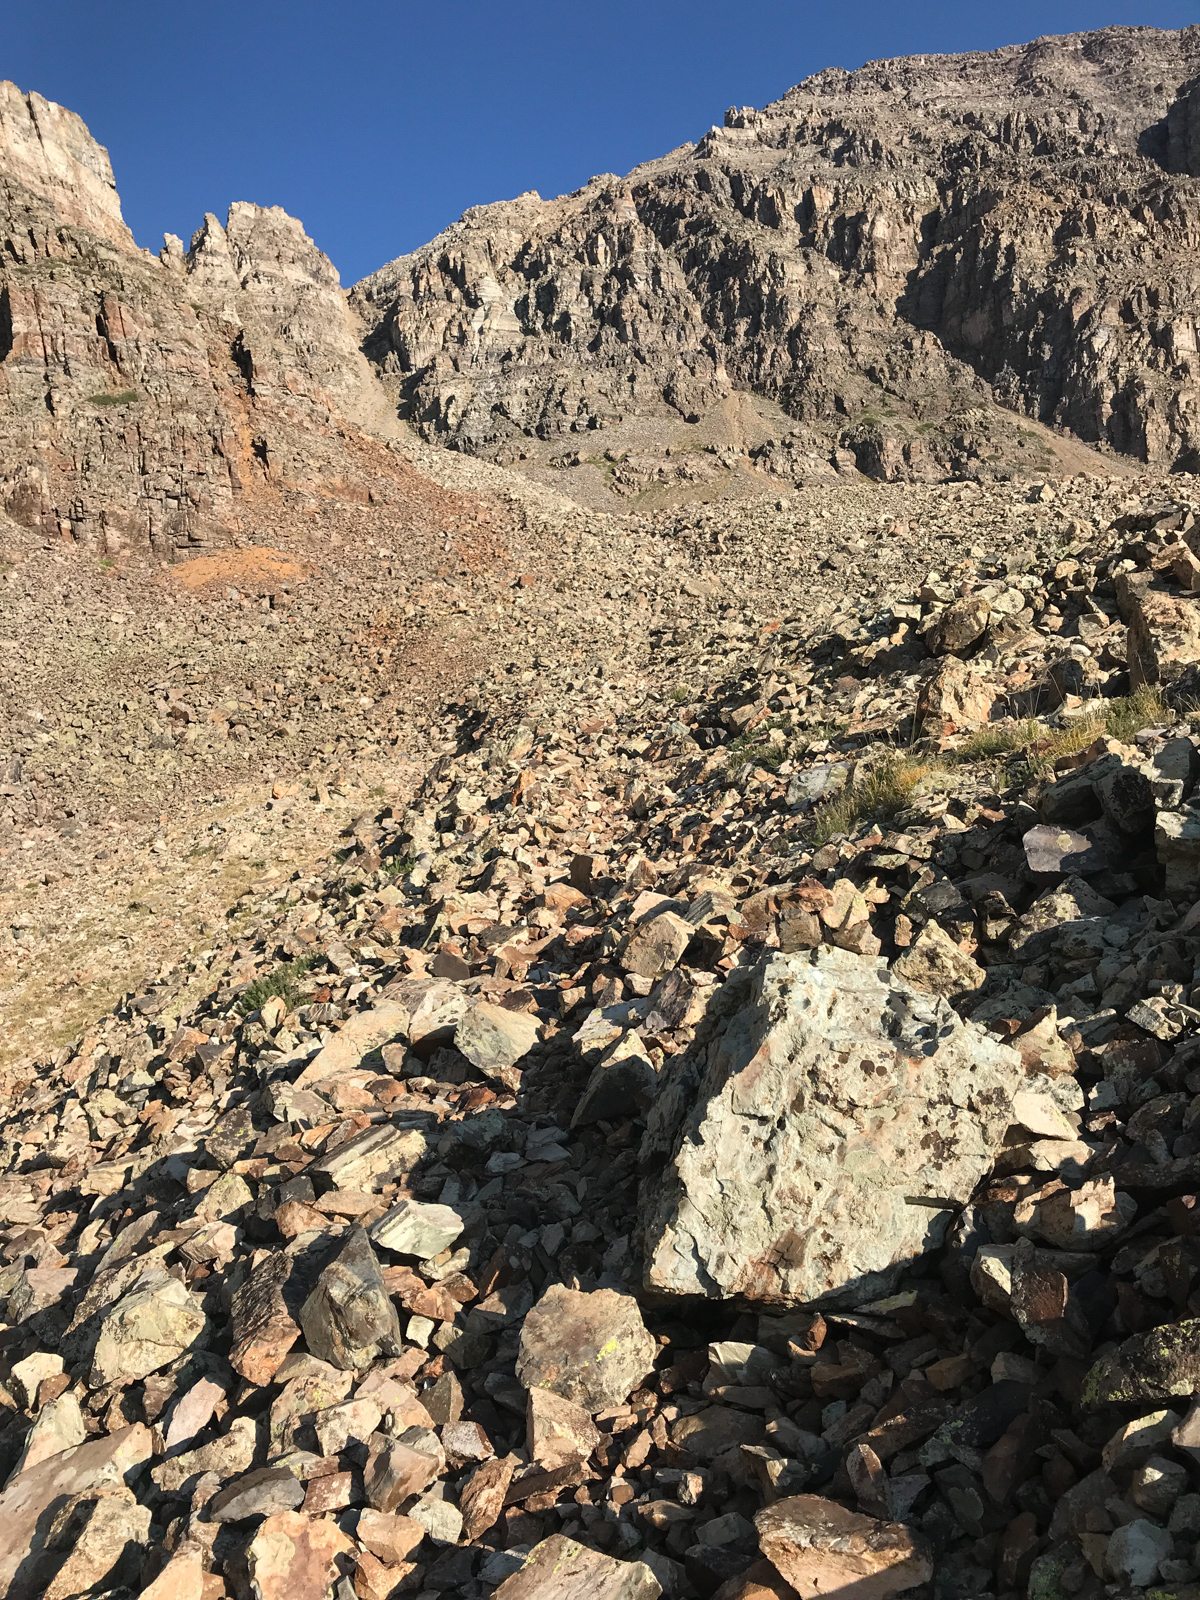
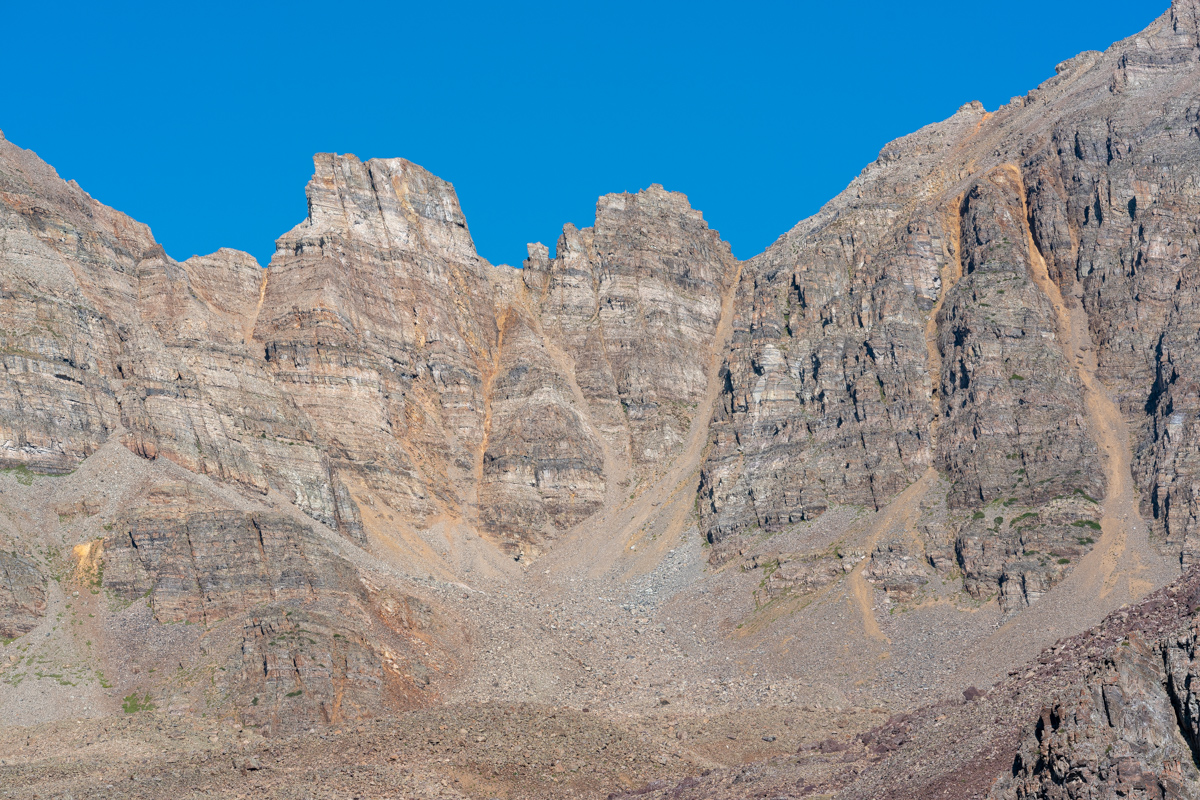
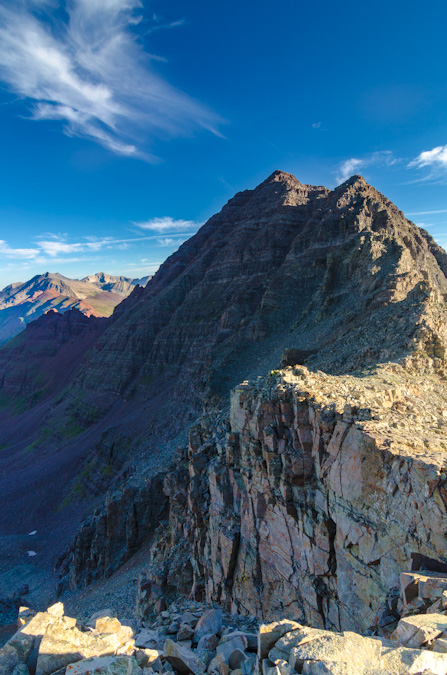
The sight of Thunder Pyramid above us was certainly sobering. Clouds were already forming to the north and we felt like the hardest parts were still yet to come. We knew the next step was to identify a steep gully of talus and follow it more or less to the base of the famous white gully. We decided on the gully to the left of the really large one filled with junky talus.
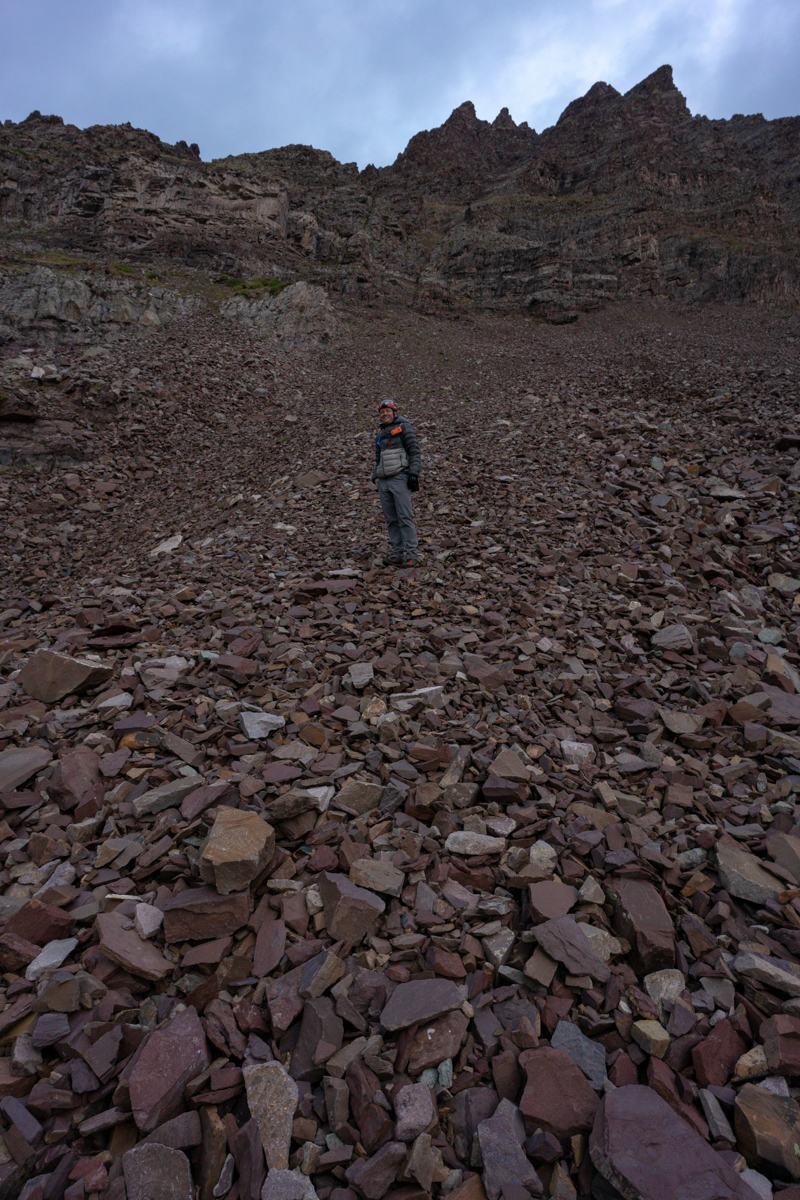
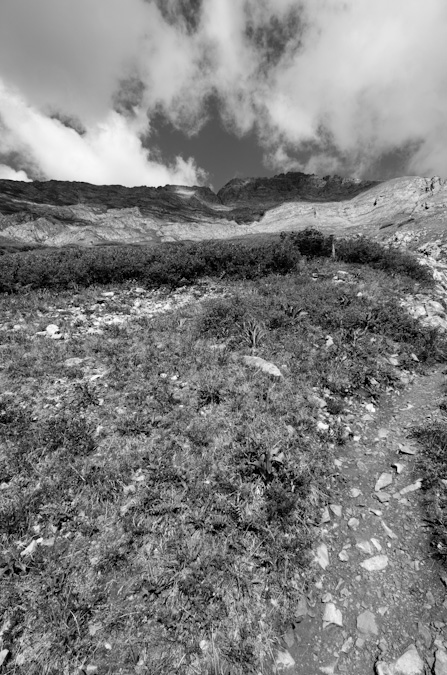
The talus was not too terrible or awful, but it was certainly made of the same garbage Elk Mountains stuff we had grown distateful of on Maroon and Pyramid in previous climbs. I personally found it quite inviting compared to my experience on Cathedral Peak!
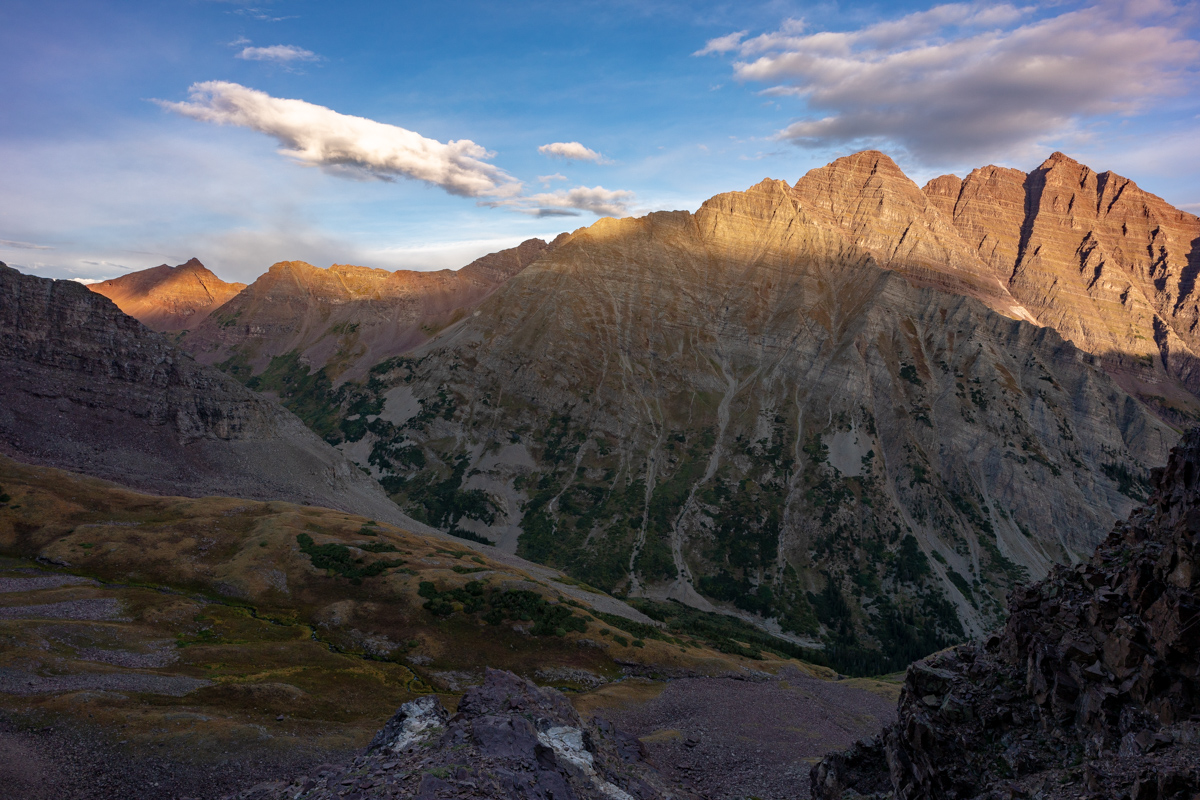
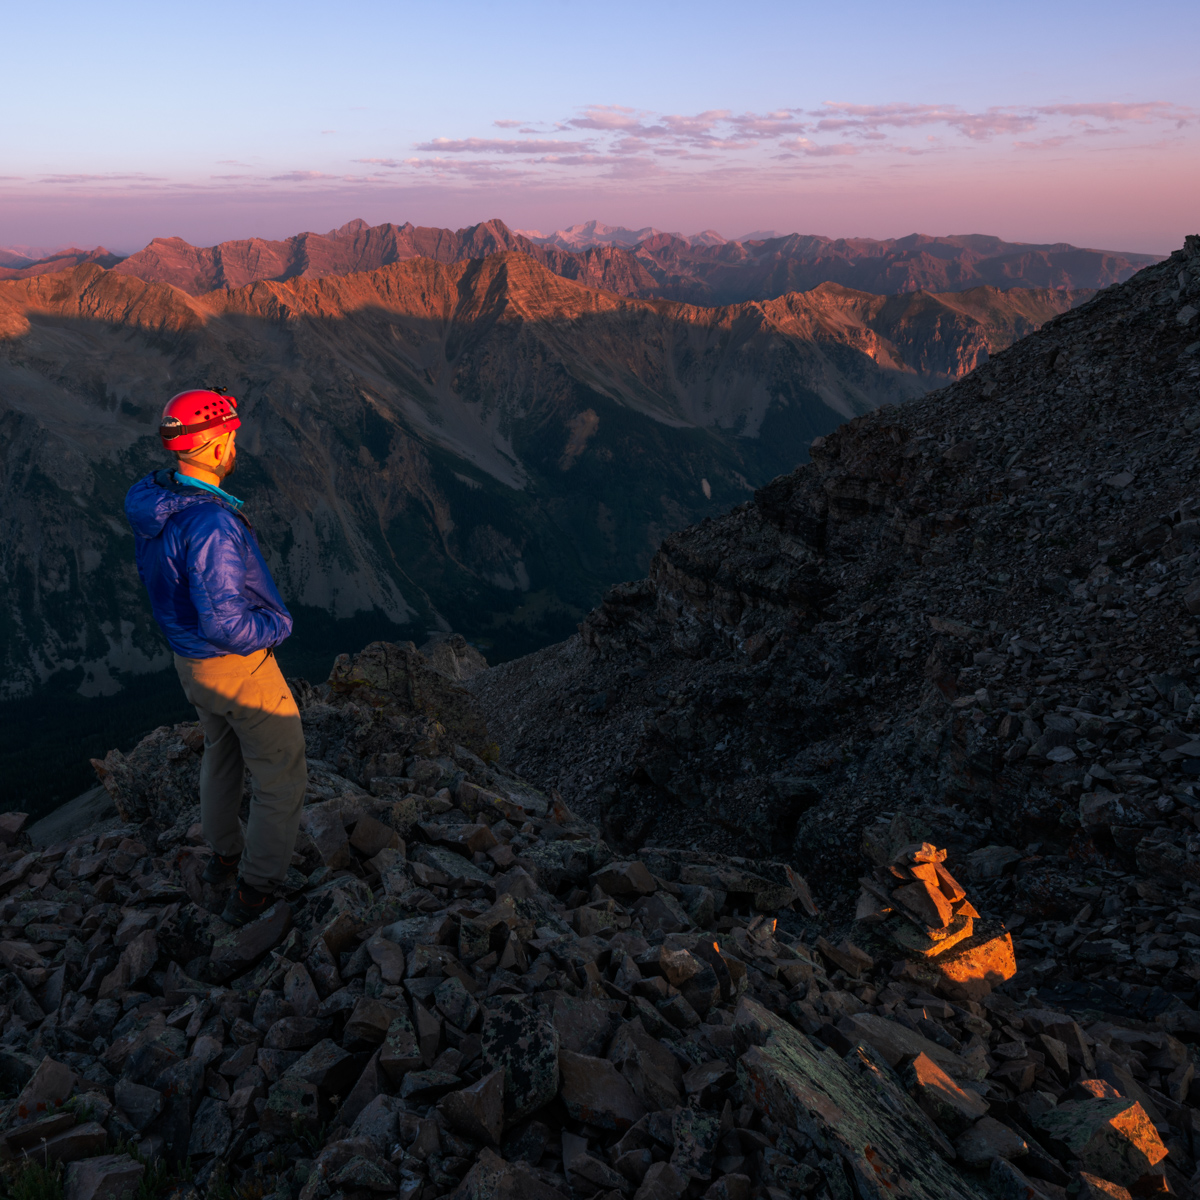
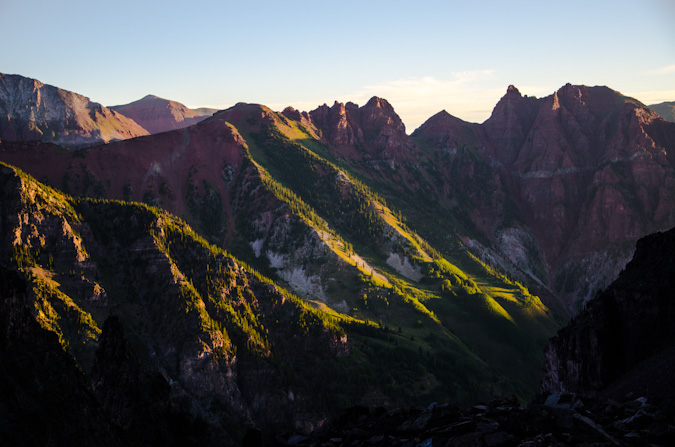
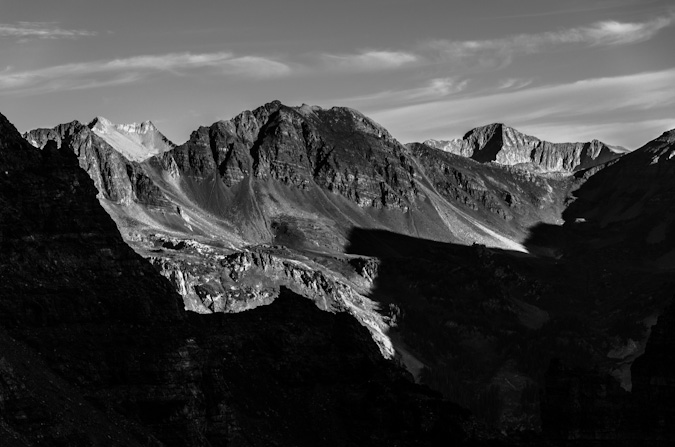
As we ascended the gully, the light over on Buckskin Benchmark to the northwest was looking quite fine!
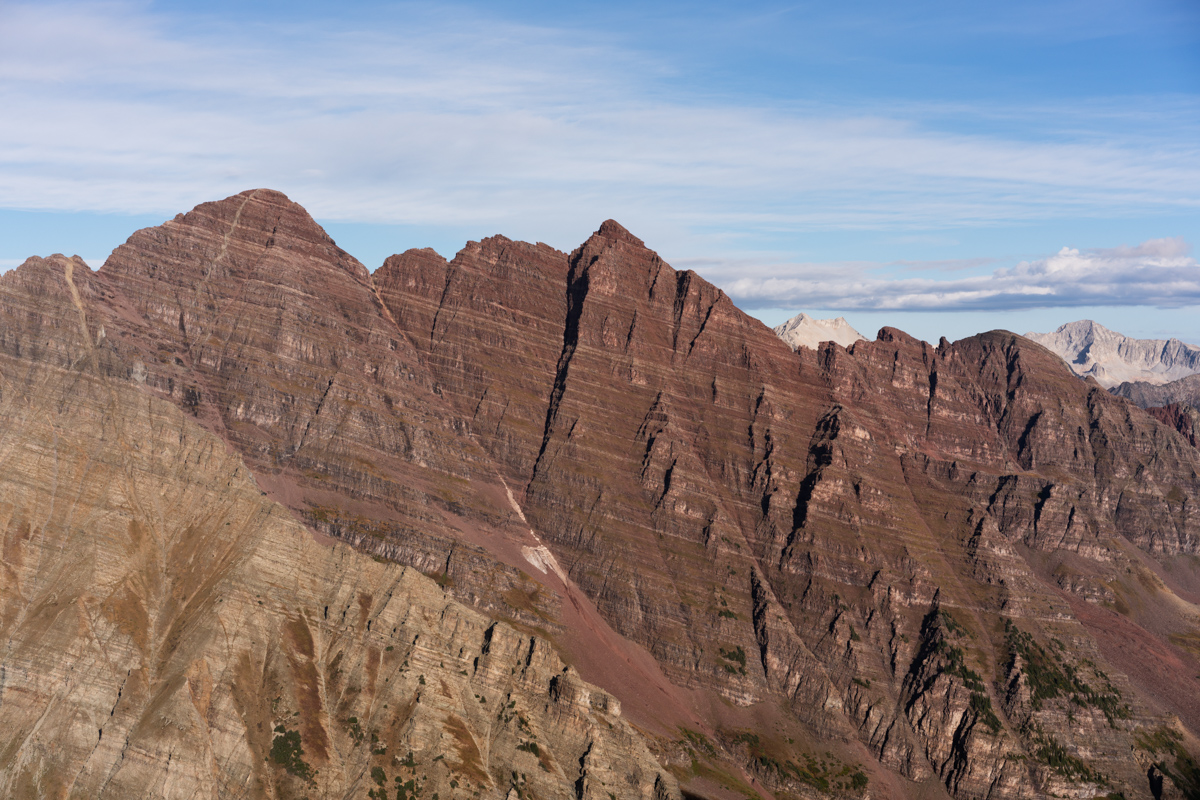
And naturally my gaze was constantly drawn by the Maroon Bells. What a magnificent pair of peaks to be able to stare at throughout the day.
Silas was armed with cell phone and Spot GPS, and I was armed with my Sony A7R2 and my cell phone equipped with Gaia GPS. Technology has really come a long way in a short amount of time since I started documenting these climbs!
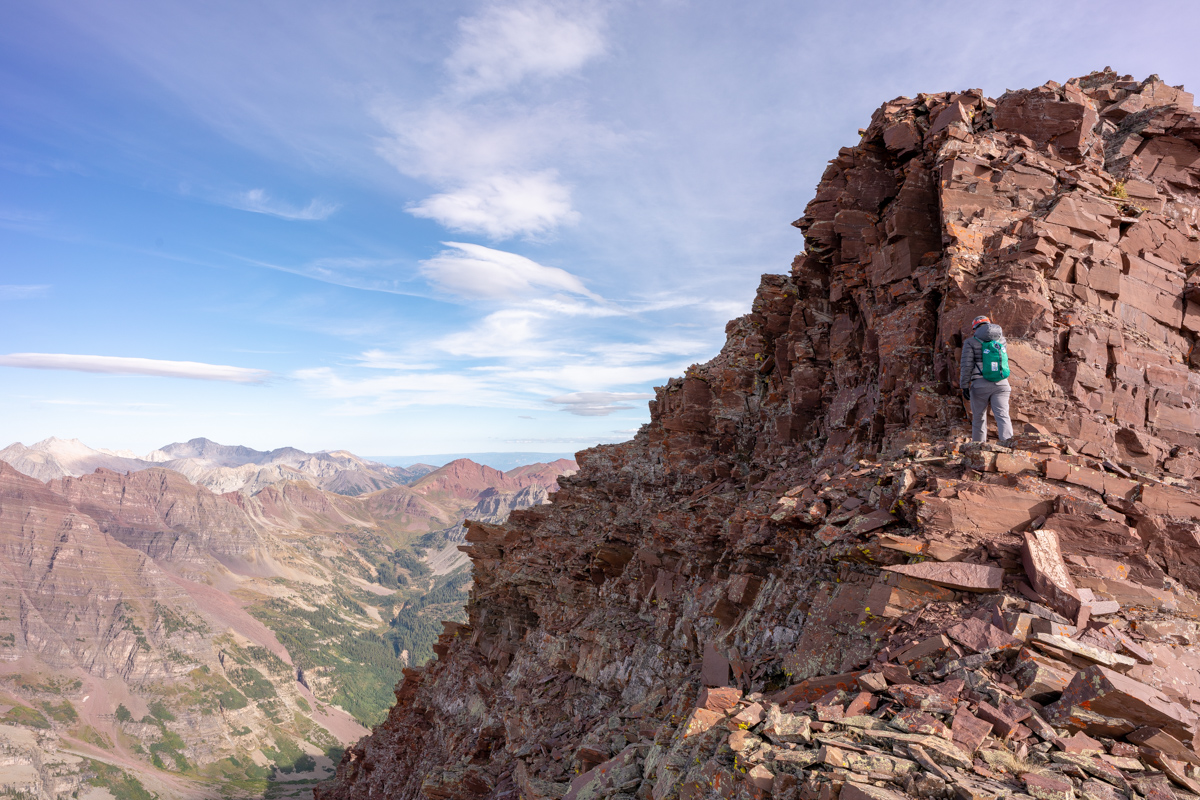
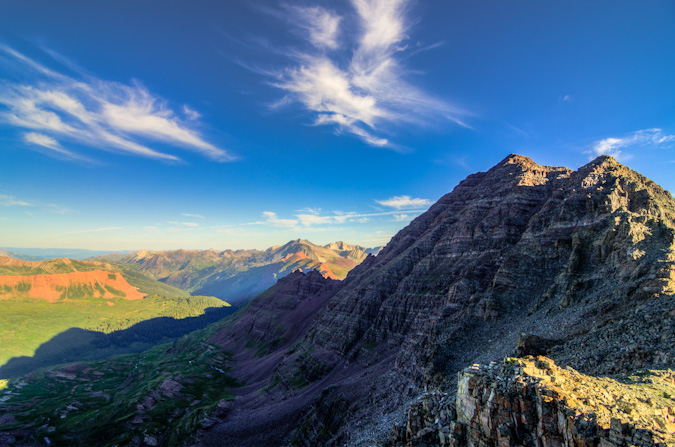
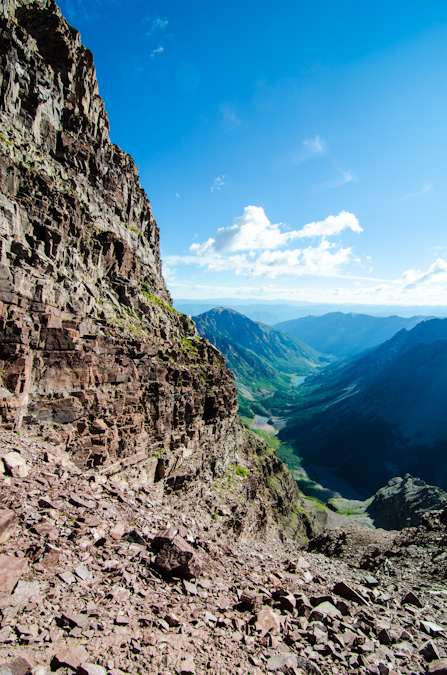
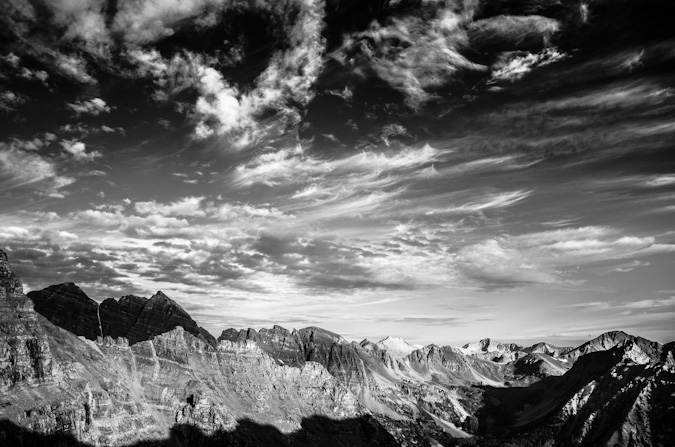
As we climbed up into the gully, the views above Len Shoemaker Ridge were getting really nice. I don't love climbing on the rocks in the Elks, but damn they make for great scenery!
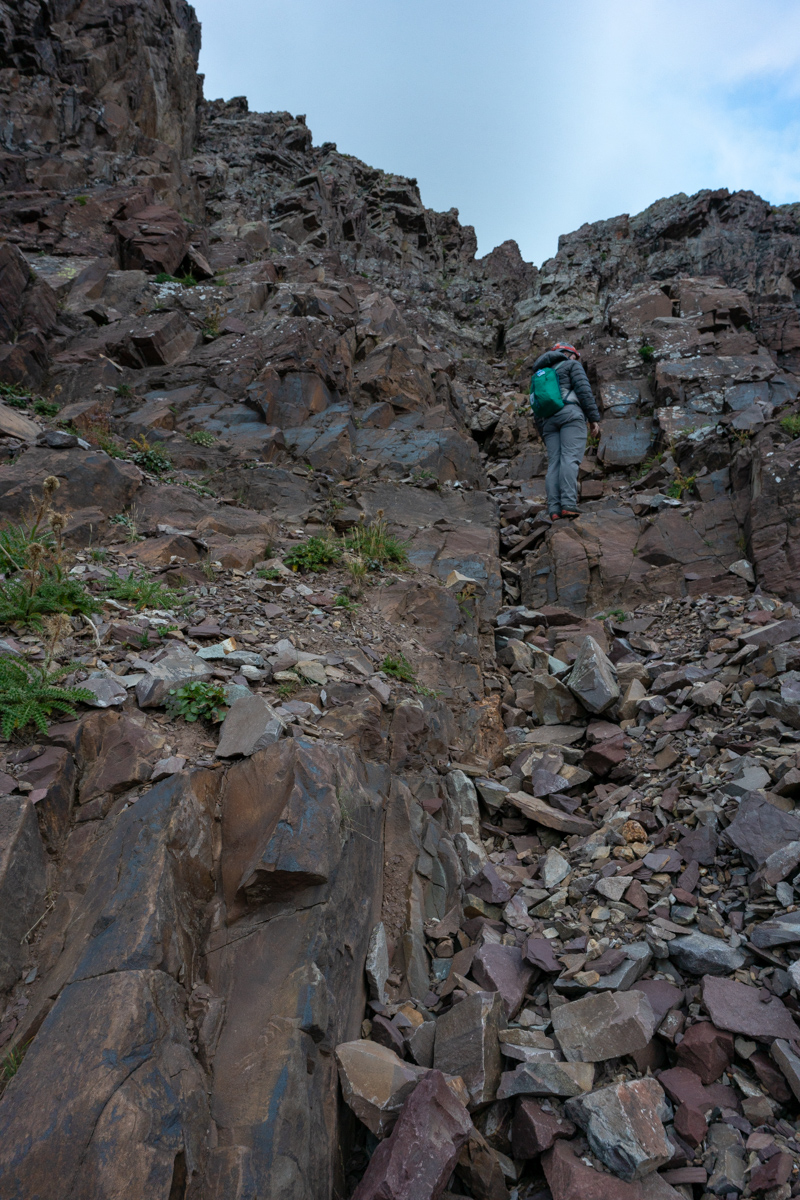
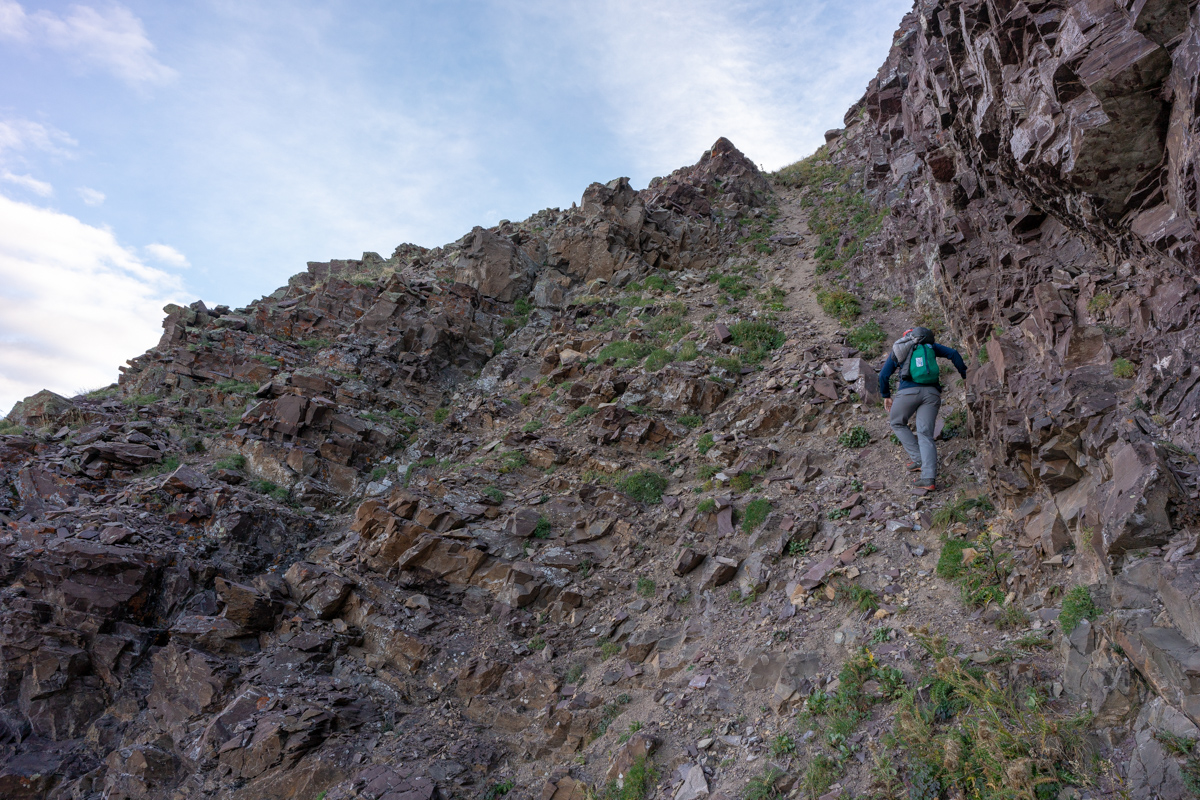
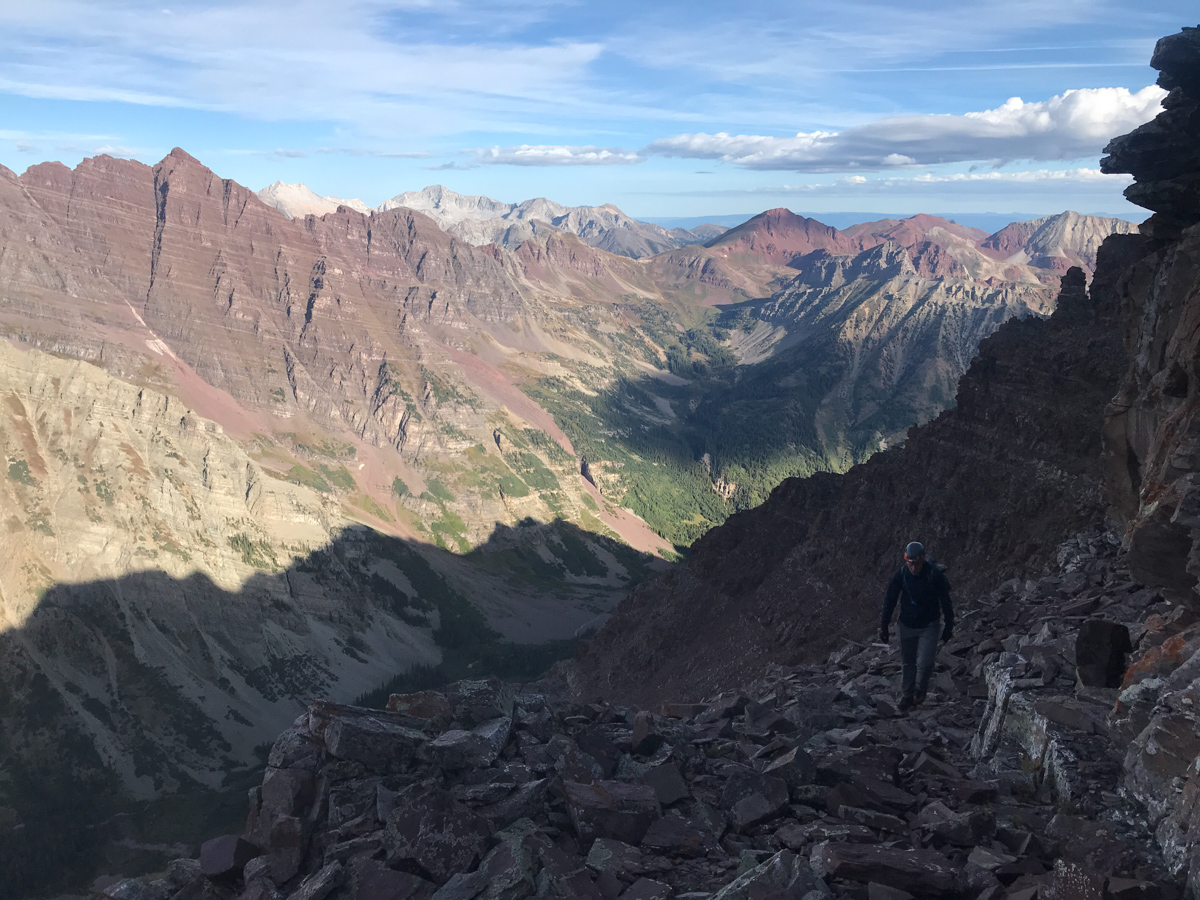
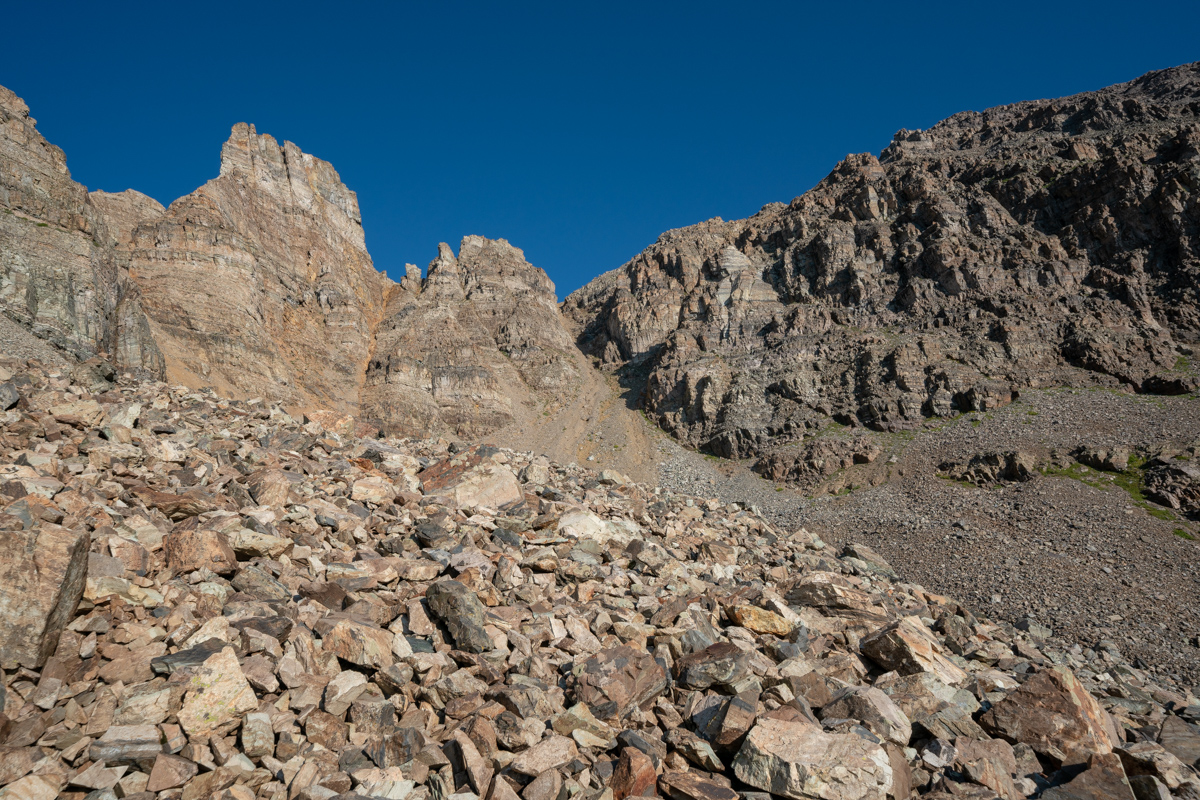
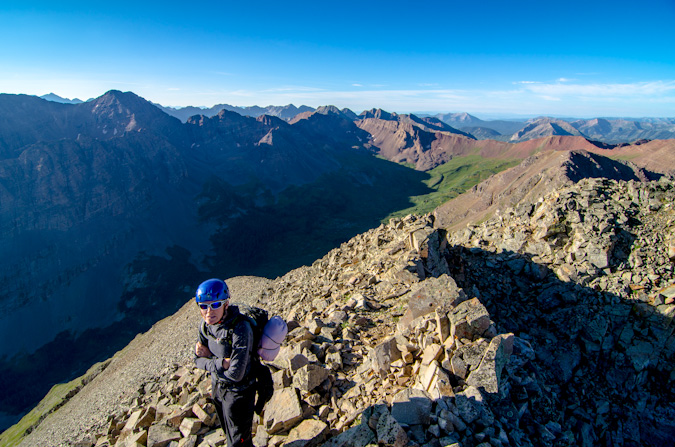
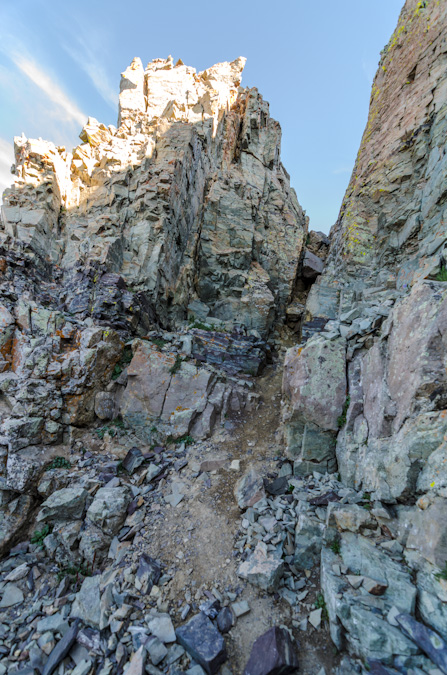
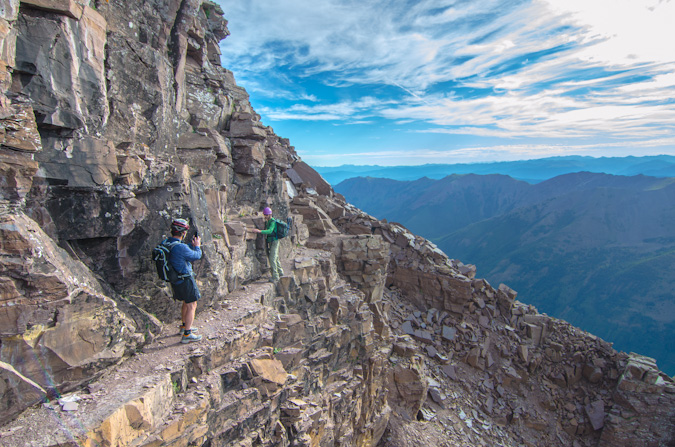
Below you can see another good view of the gully we chose to climb up, which I felt was very solid class 3 climbing all the way up until we turned off to the left.
More views of the class three climbing...
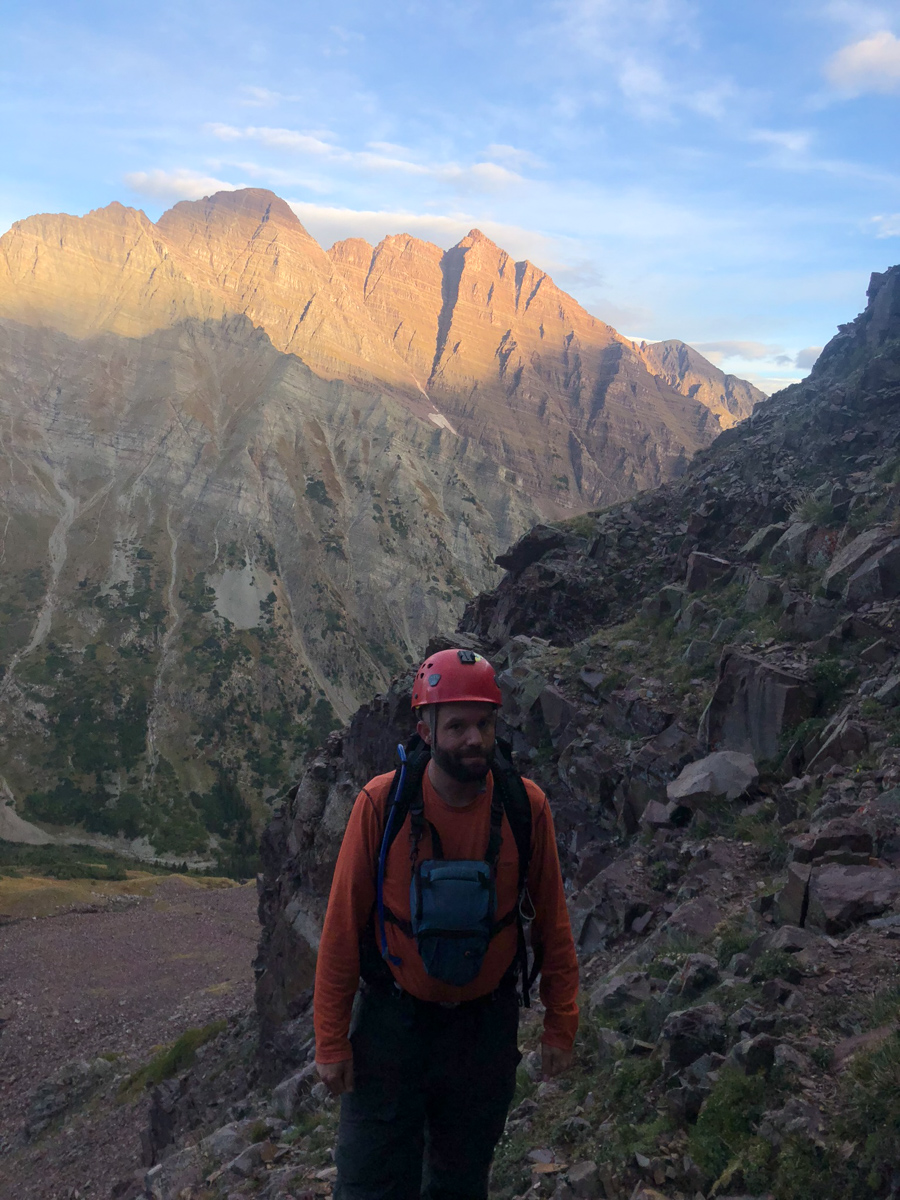
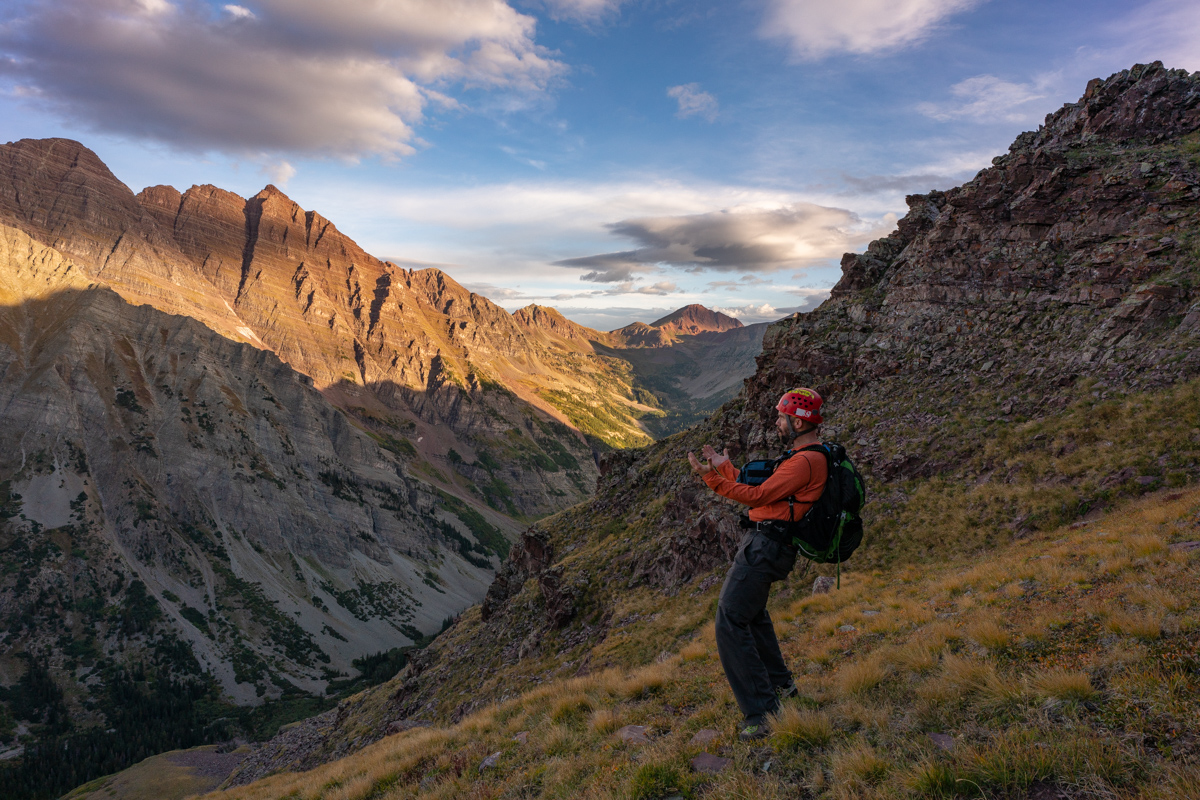
And finally the sun hits the Bells and makes me a happy dude.
I took advantage of the great views of the Bells to showcase the terrain down below us in the gully. I think this photo does a good job of showing you the complexity of the rock in this section.
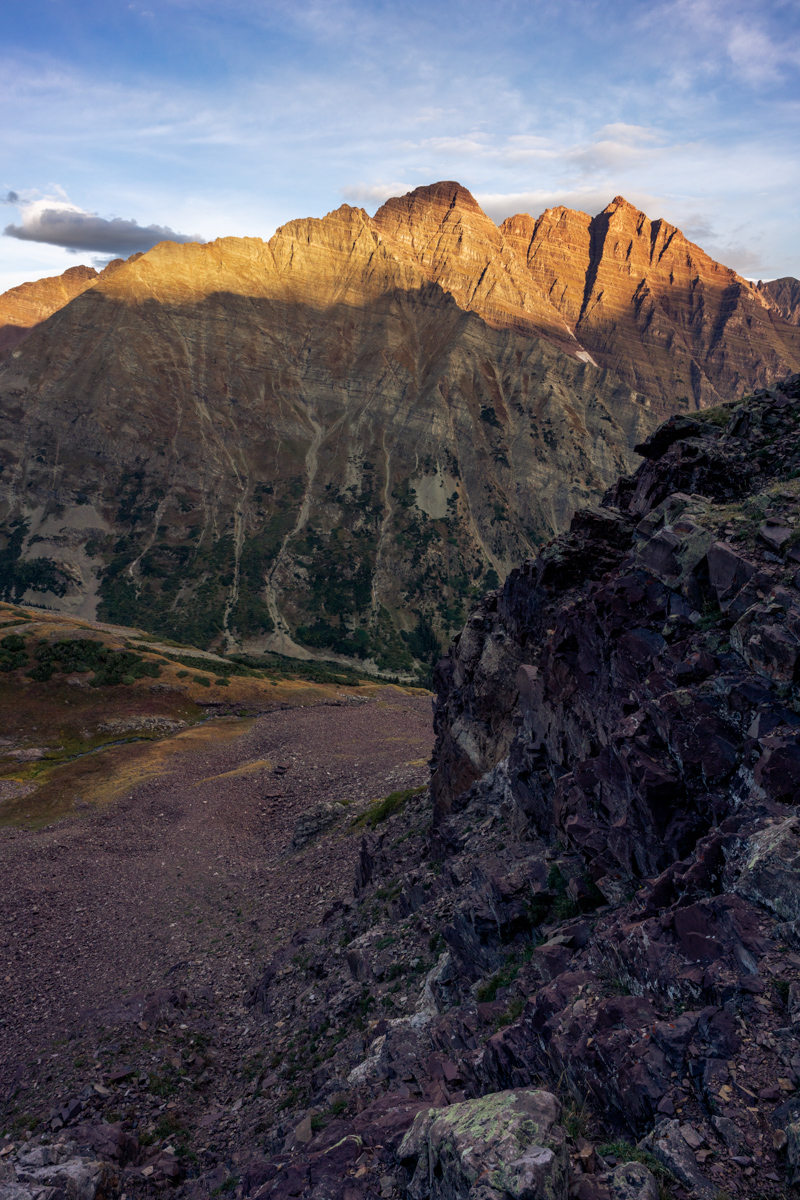
I also found myself quite enamored by Bellview Mountain, which is seen left (south) of the Bells in the photo below. I really would like to climb that one someday. I bet its an incredible vantage of the Bells; aptly named indeed.
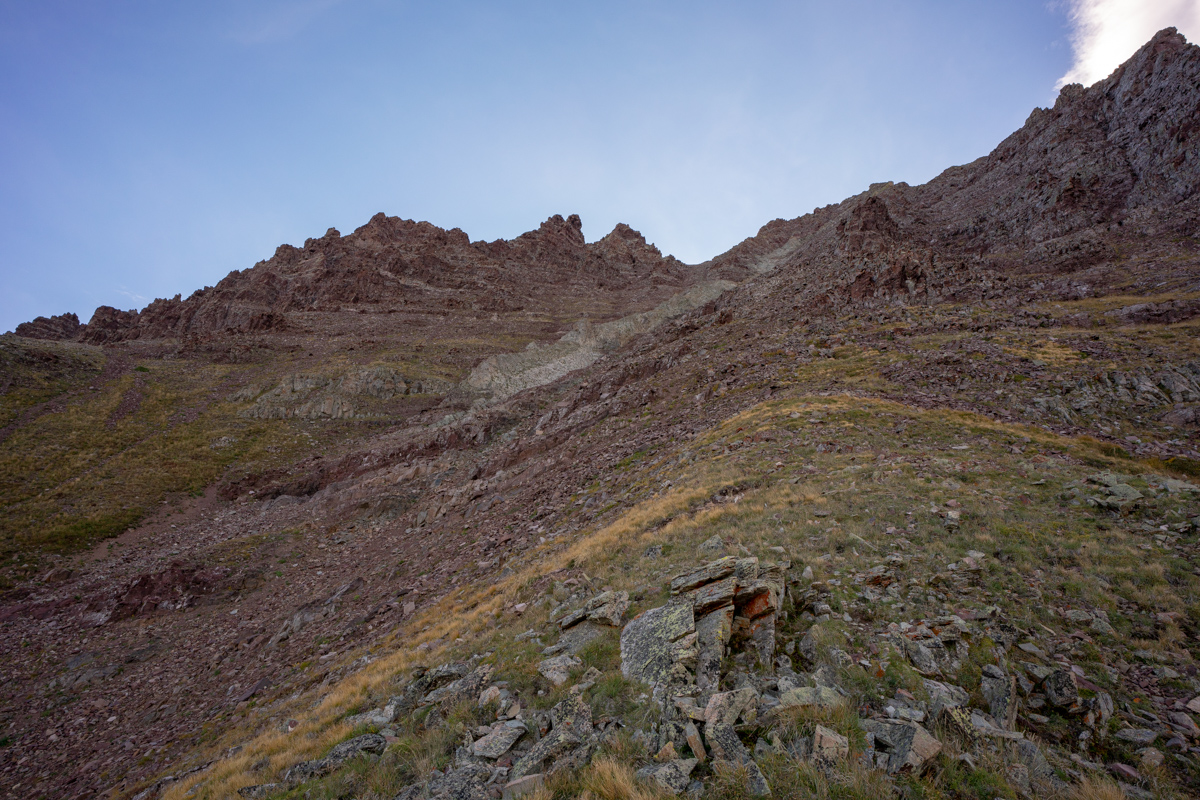
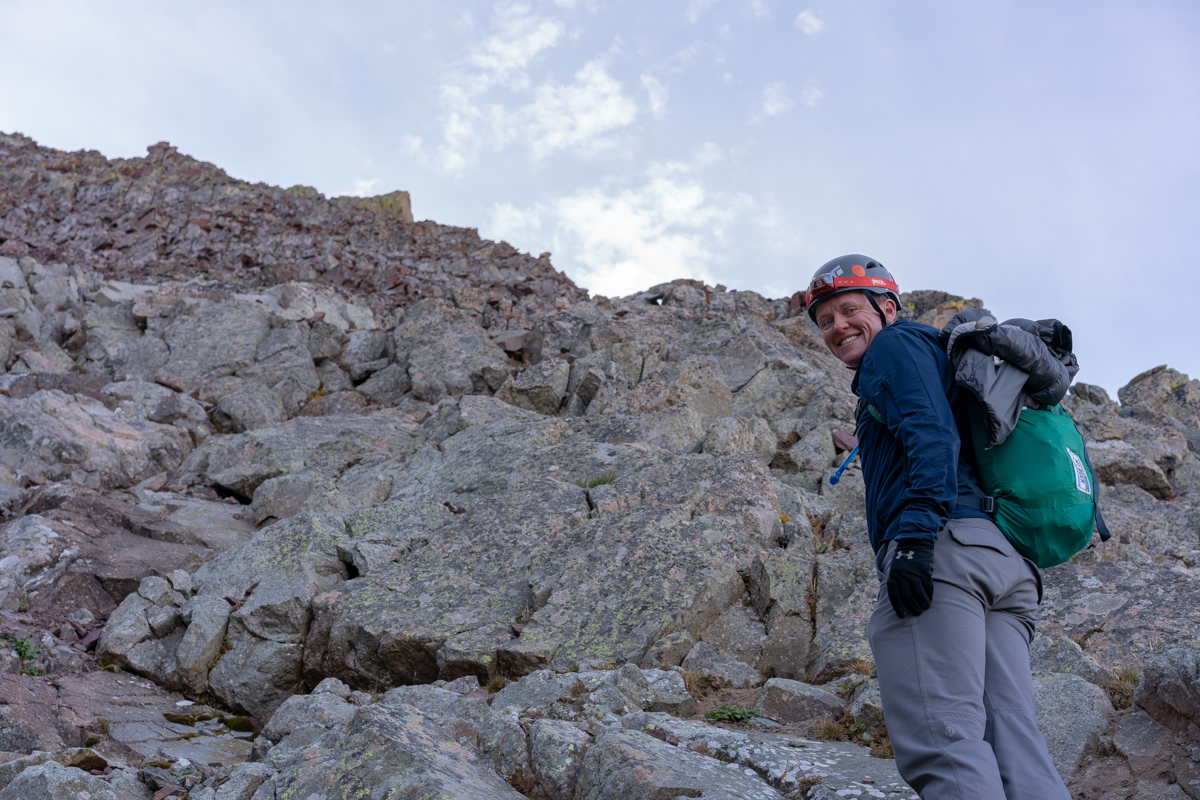
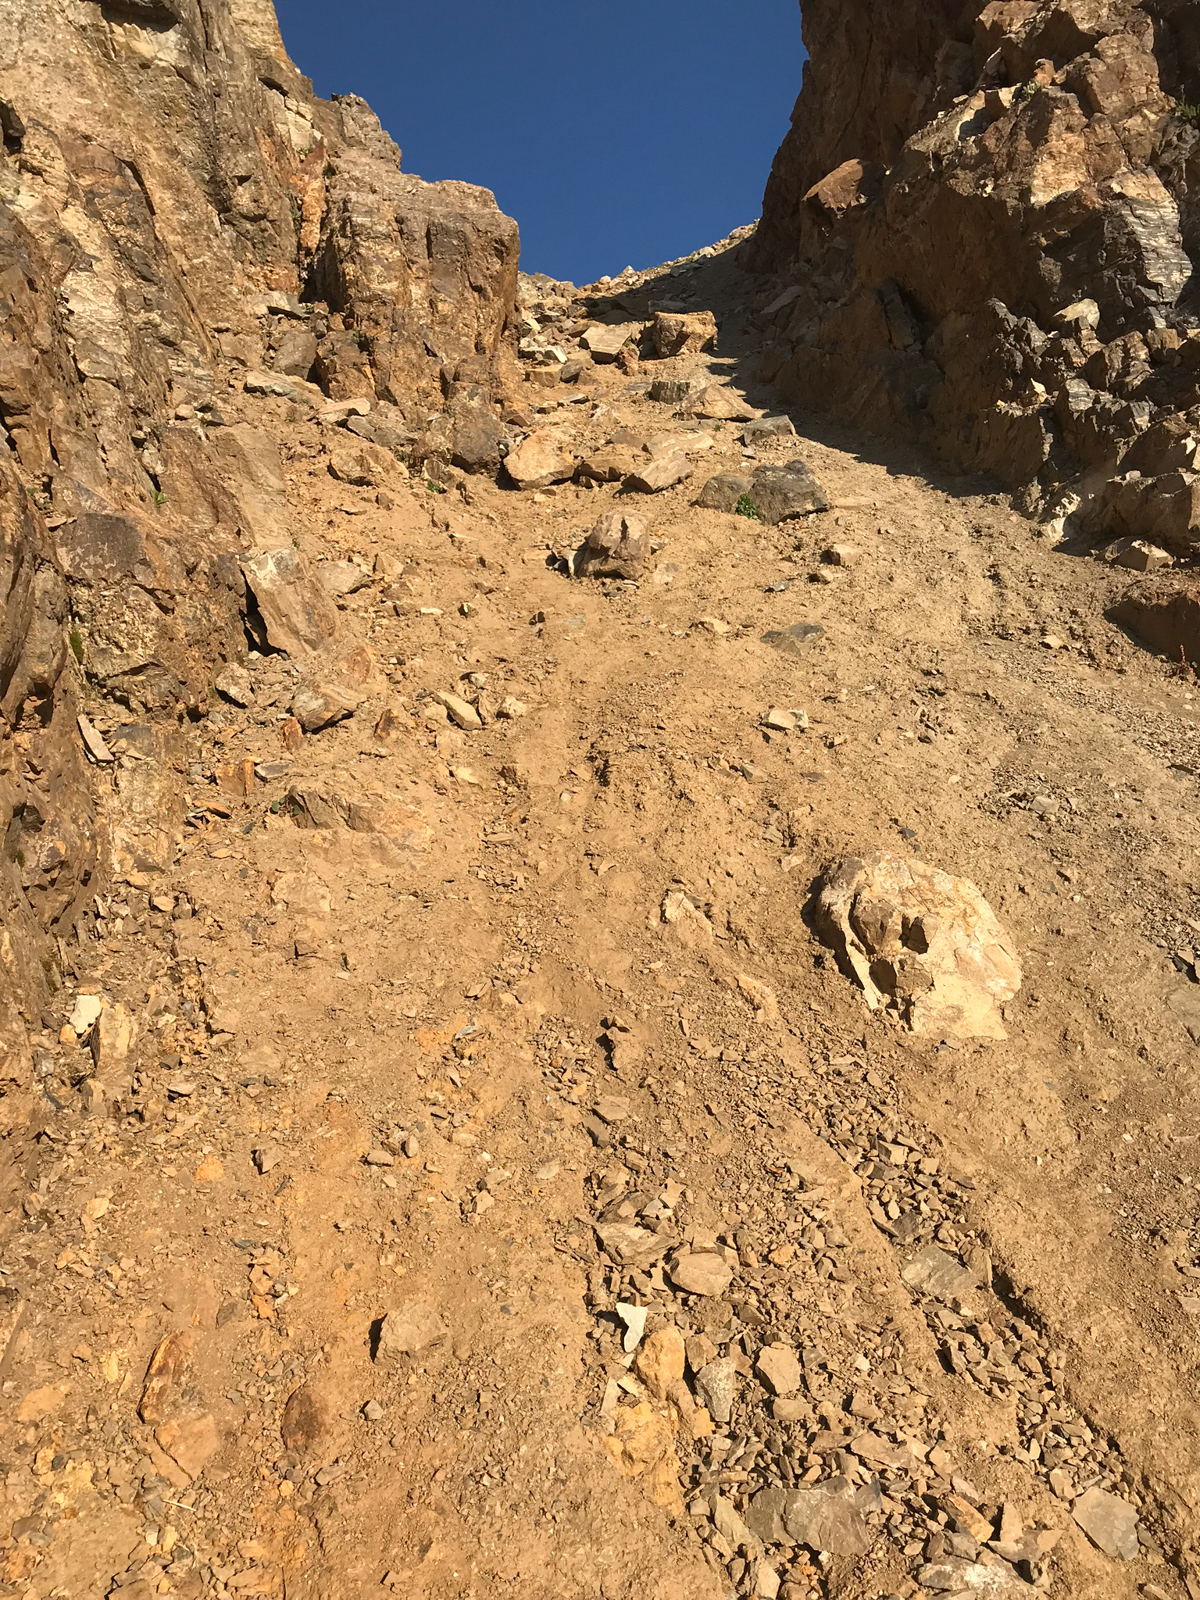
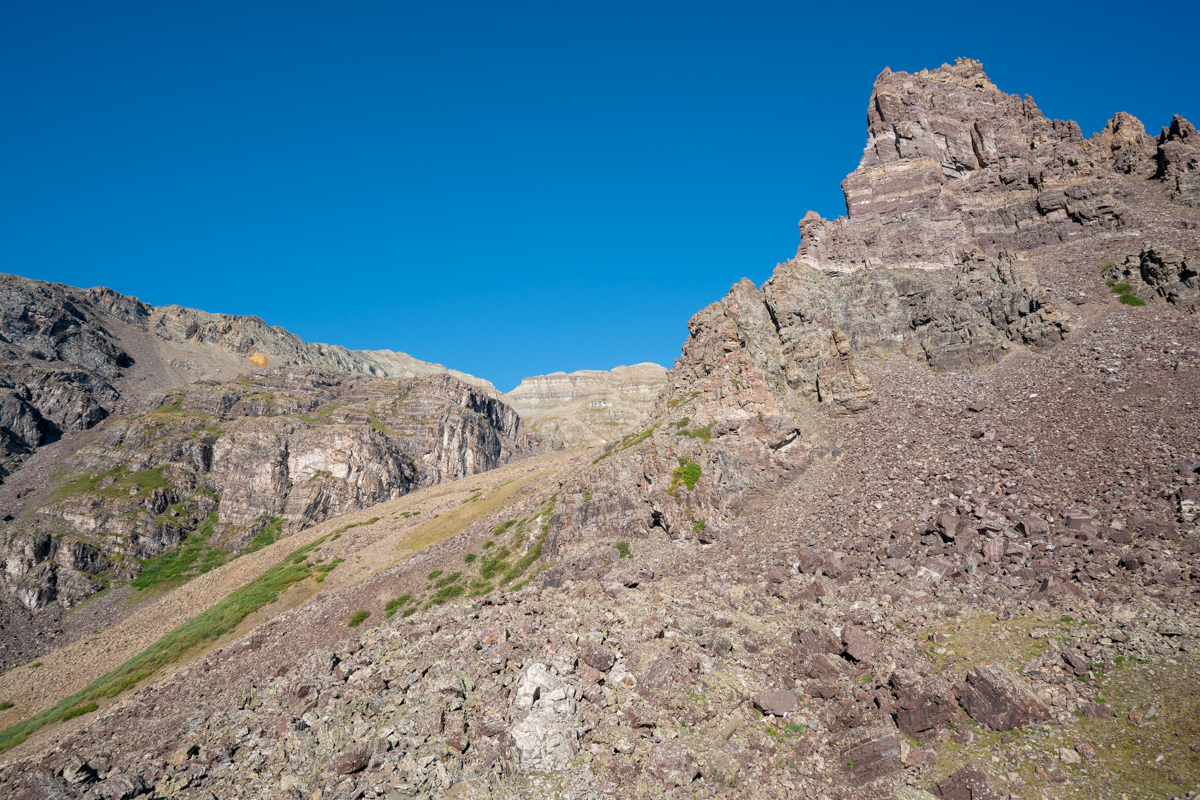
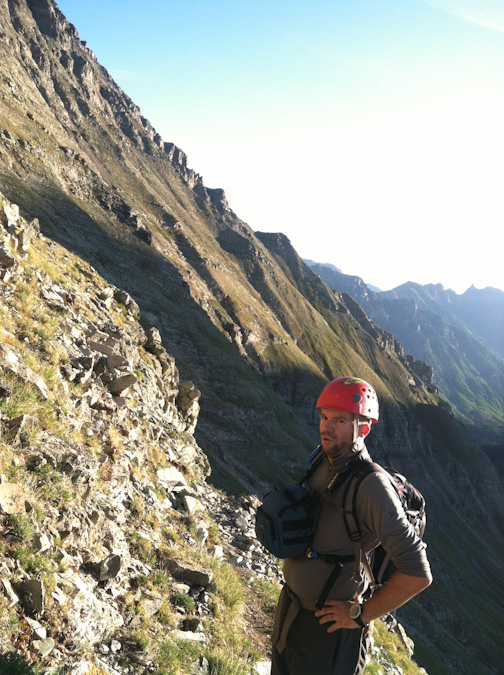
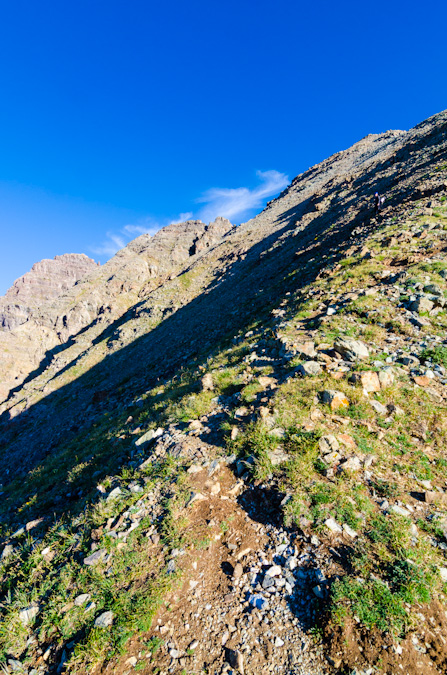
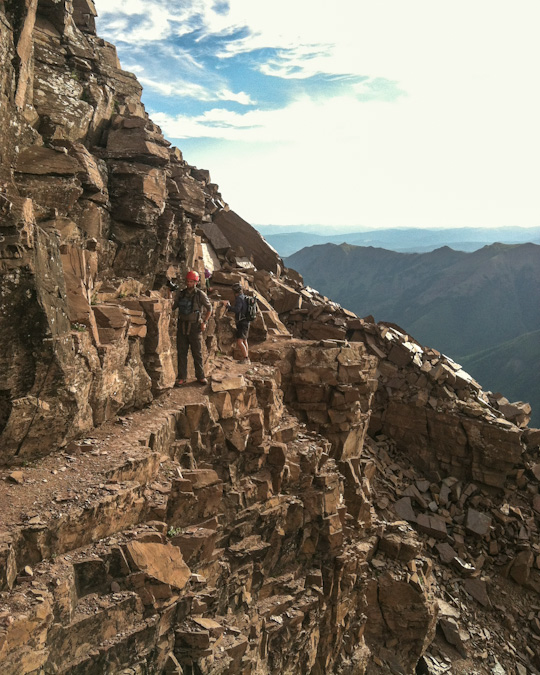
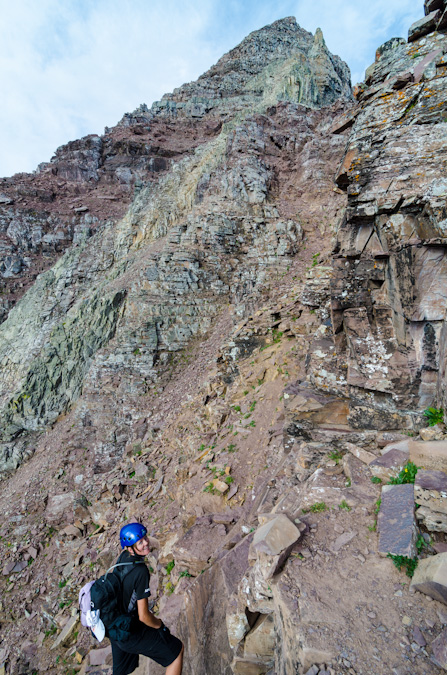
Once we reached the top of this gully, we saw a noticable trail heading left up a very steep dirt and rock slope below the next cliff band. We decided to take it. I knew it would probably lead to the base of the white gully. The trail is what I describe as a "climber's trail," aka - not very solid, very loose, and very steep!
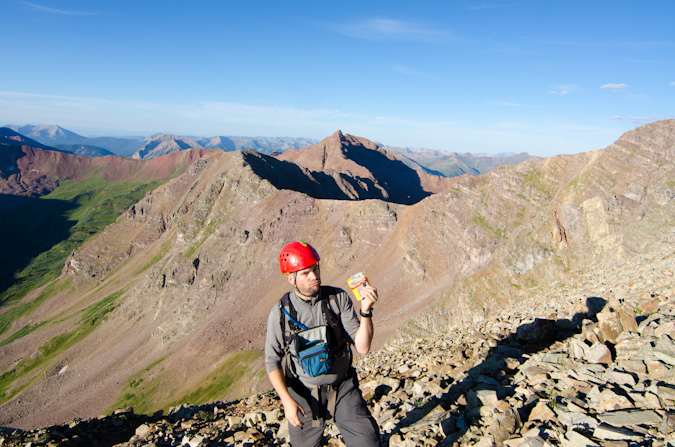
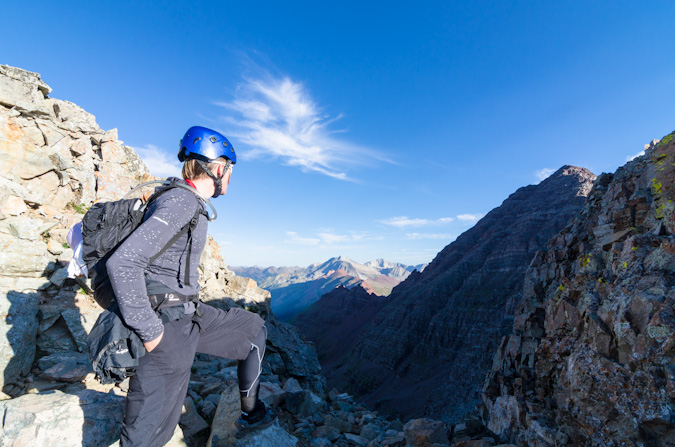
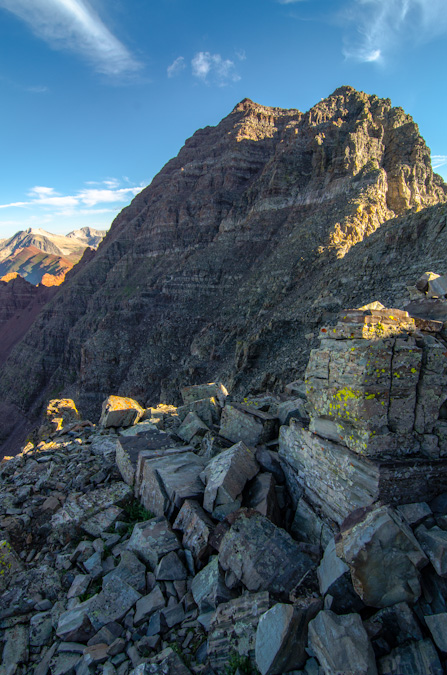
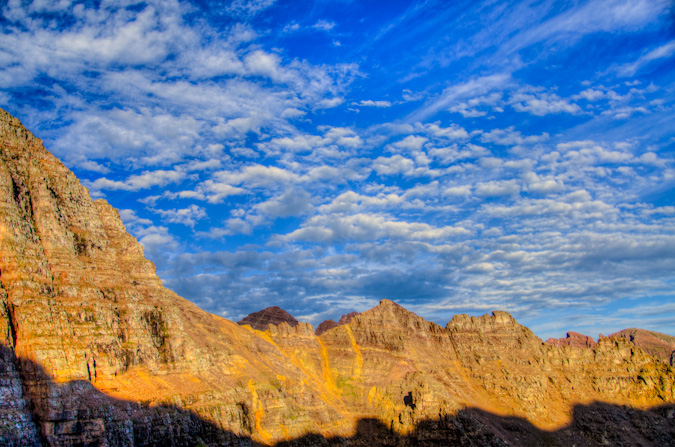
After reaching the top of this section, our view of the Bells really opened up and I could not have been more happy with it.
Indeed, the famous white gully came into full view and revealed our future. I was excited to reach this section finally. There was a decent trail all the way up to the base of the gully from here.
As predicted, the white gully was much less daunting up close than from afar. Many of climbers warned me of the loose nature of the rock in the white gully and I was prepared for anything.
It was at this point that I decided to film the rest of the journey to the top with my GoPro Hero 4. I created a 30 minute video which is in hyperlapse format with pauses at key moments. I'm not a professional video editor nor do I have the time to edit this to give it full justice, but I figure it serves as a nice beta for folks wanting to know more about the white gully, the final segment, etc. Also, its fun for me to look back on later in life.
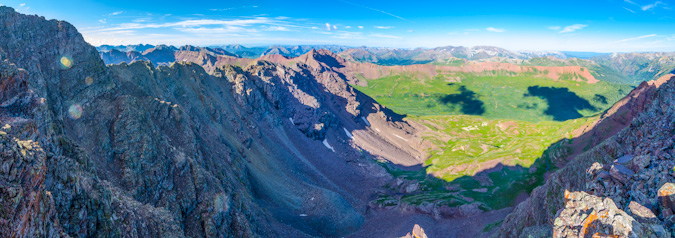
About halfway up the white gully, we began to get great views of all the 14ers in the area. The below shot really intrigued me. It includes Maroon, North Maroon, Snowmass, and Capitol all in one frame. Nice! By the way, I did not find the white gully to be loose at all! We chose to stay high on the left side in the white stuff and it was very solid. Once exiting the gully to the right, things get much dicier.
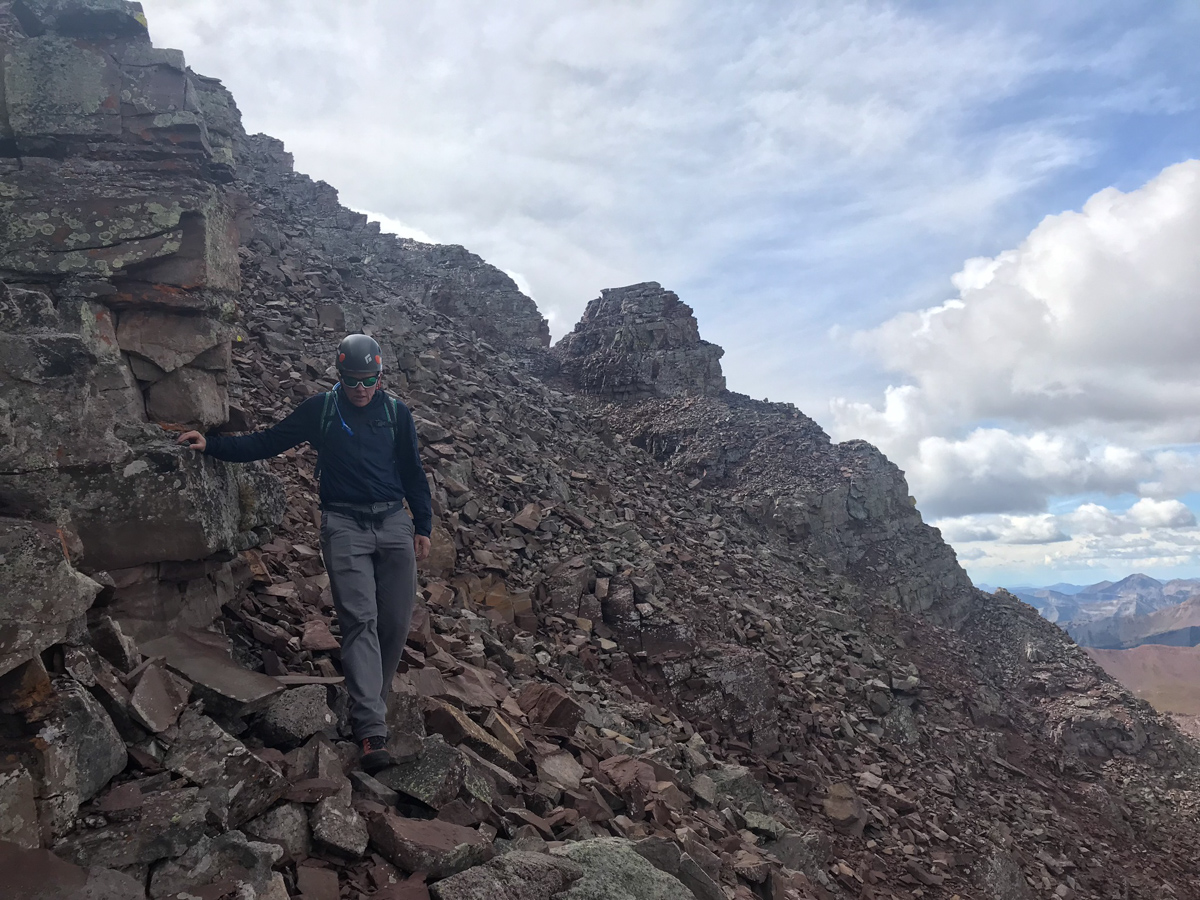
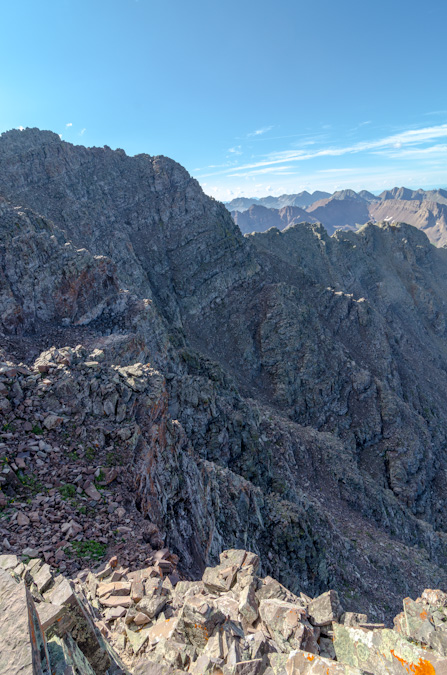
We exited at 13,400 ft. just as Roach suggests. There's a pretty obvious spot to exit below some cliff bands. We had to pick our way through some very nasty rock and maybe strayed a bit too far right into the next gully when we should have stayed high on the "ridge" here, but nothing was obvious at this point. We just went a couple feet at a time, making sure to stay close to each other and stay very mindful about potential rockfall above and below. It is more a mental exercise than a physical one from this point forward.
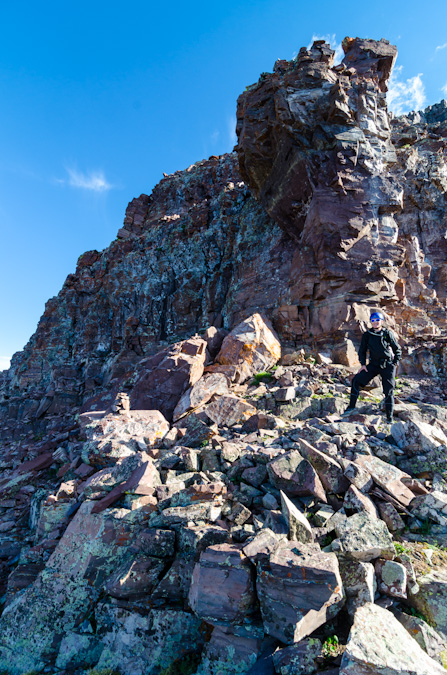
Just below the saddle between Thunder Pyramid and Lightning Pyramid, we found it best to cut under more cliff bands and stay high on lighter colored rock as pictured above.
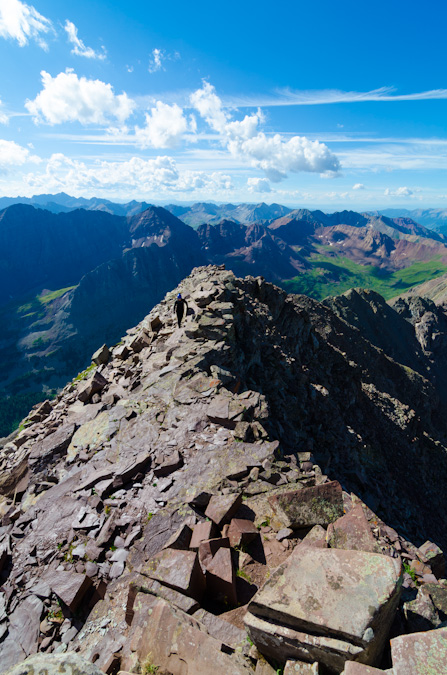
Once we reached the saddle, it was very clear where to go next and we were feeling very excited to be so close to the top!
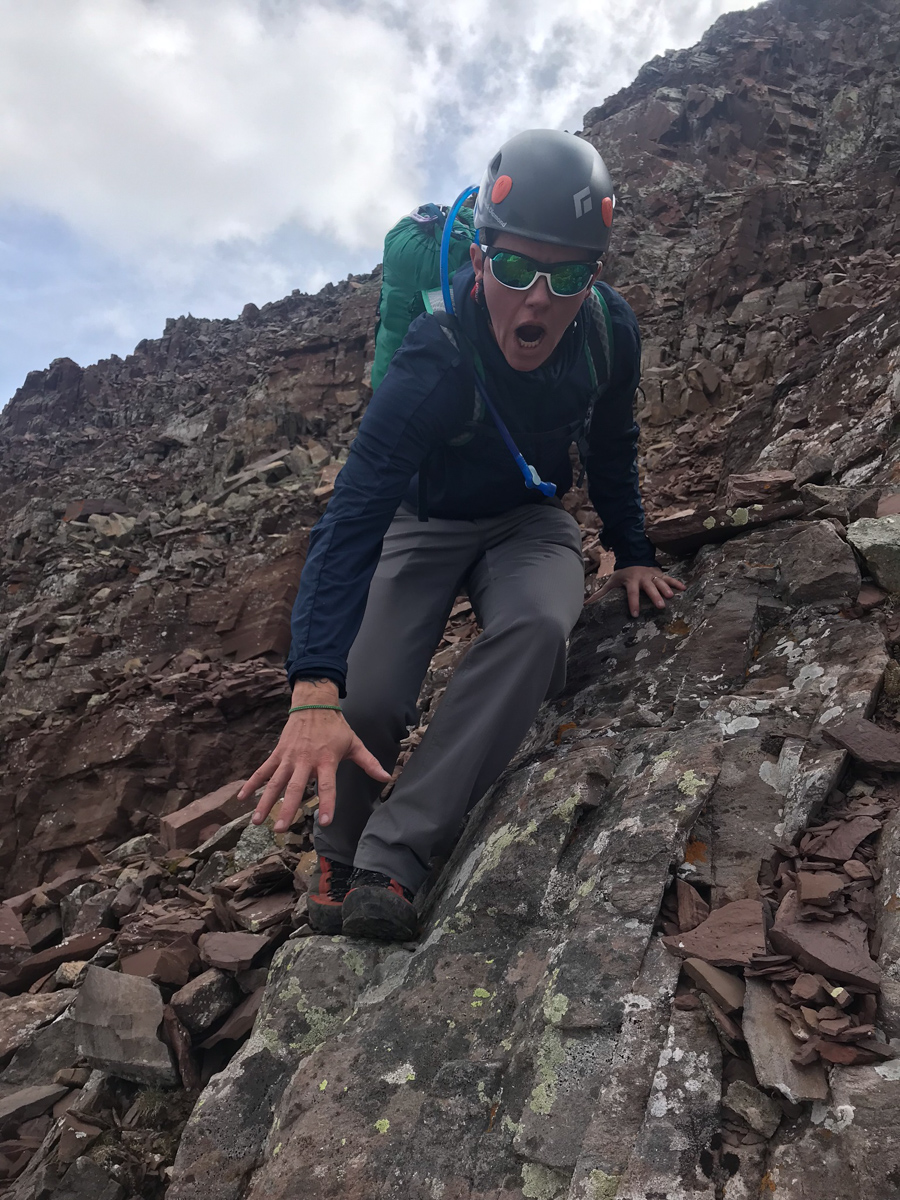
I let Silas go first as I wanted him to film me ascending the final section.
They very last section, which you can see on the earlier YouTube video, was pretty simple to find the solution too, but it did require some easy class 3 chimney climbing. A real joy, to be honest. We just had to be ultra careful about the loose rock above the chimney, as it was ubiquitous and precarious. Below is Silas' film of me arriving at the summit. What a crazy feeling it was.
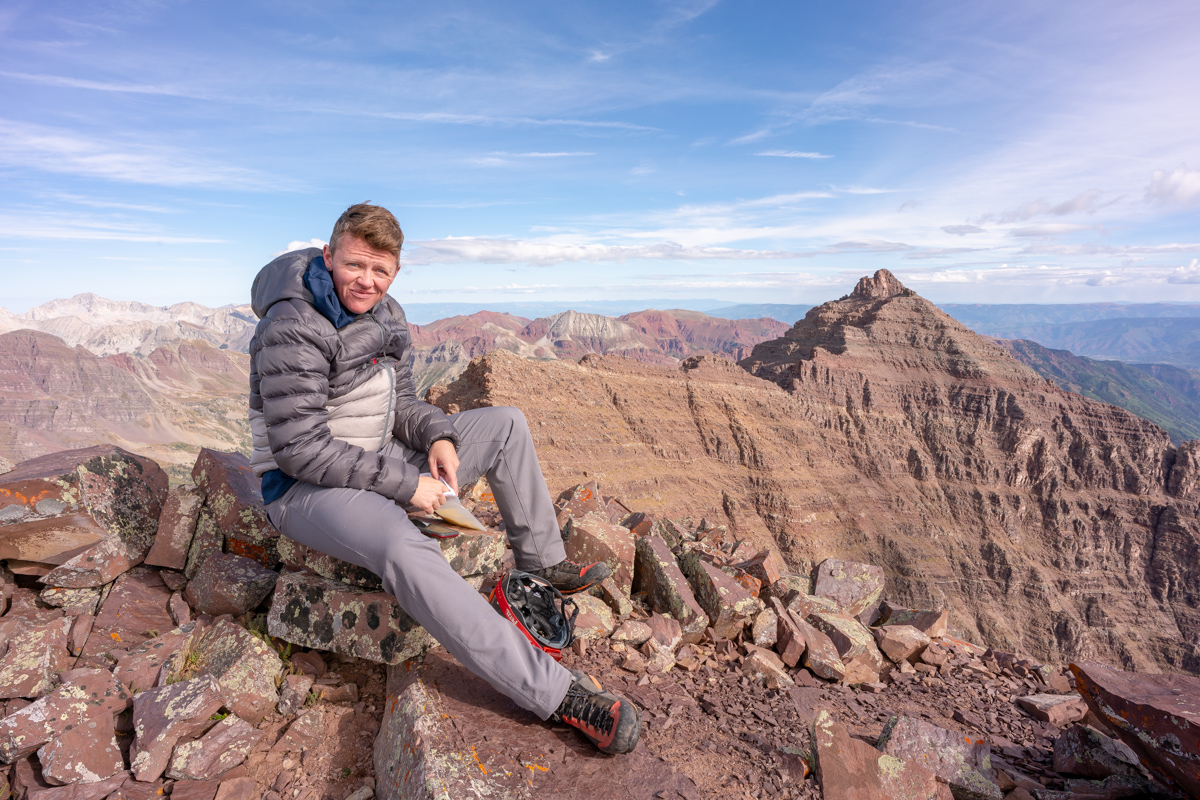
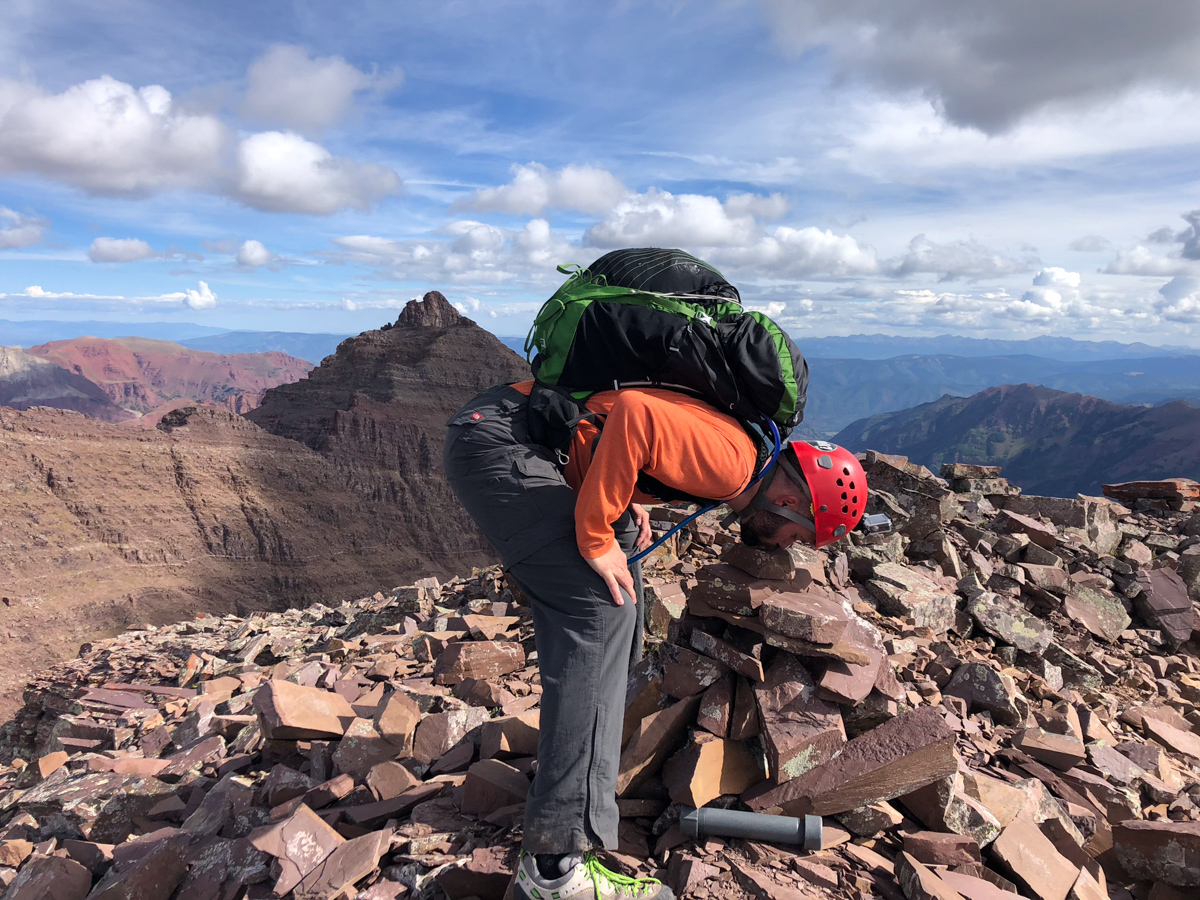
Nerd move! Number 100!
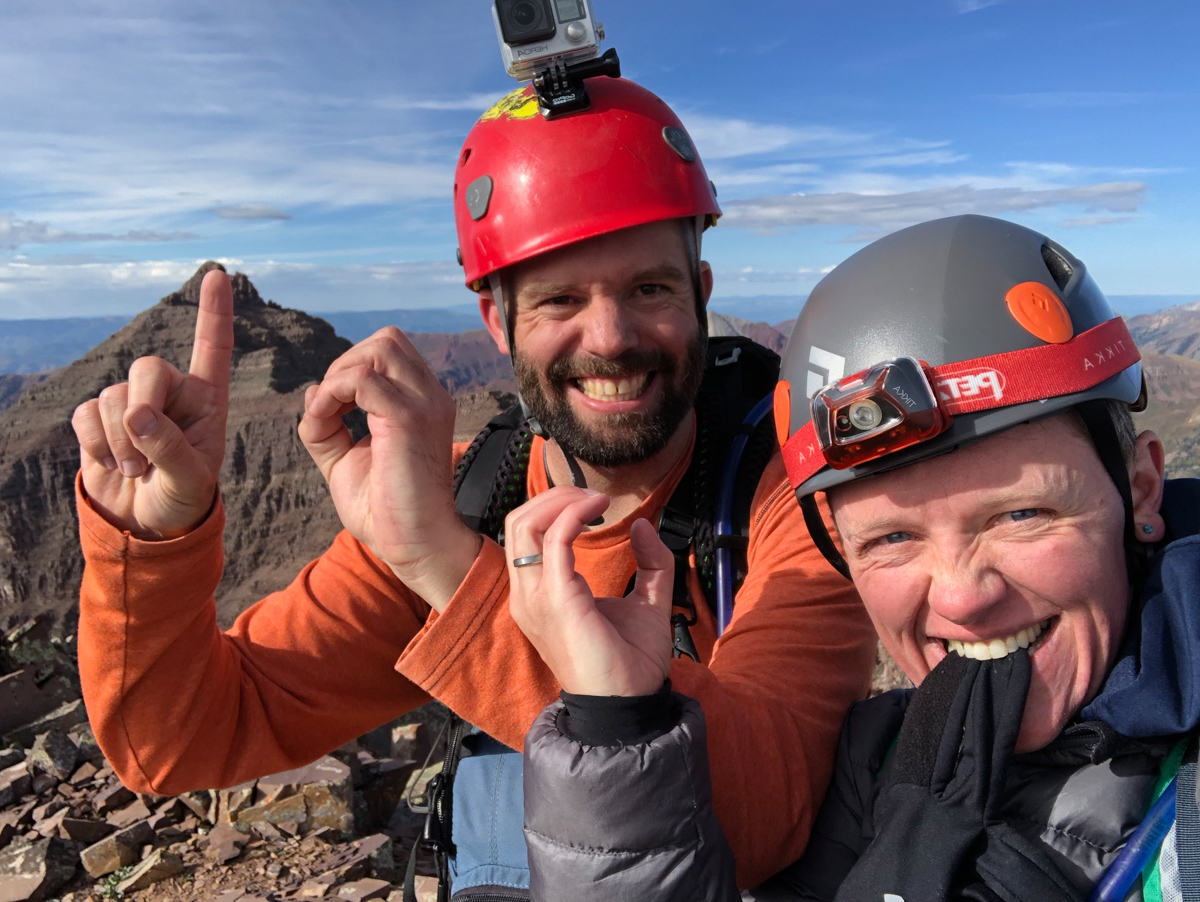
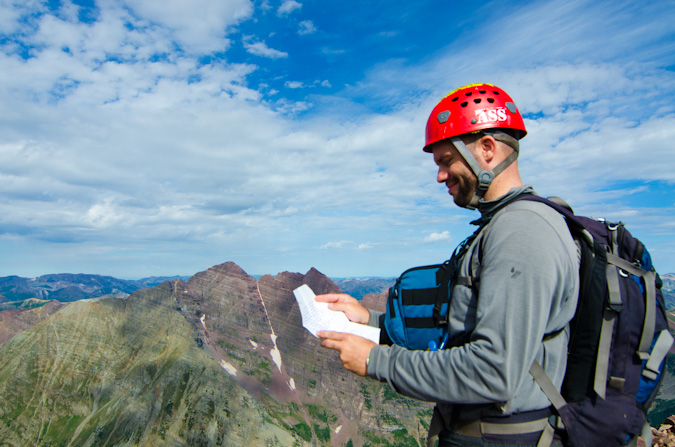
Upon arrival, the first order of business was for Silas to surprise me with a letter written by my mom and dad for Silas to read upon us reaching the summit. It was so incredibly heart-felt and I teared up big time. The video of me reading it is below. Thanks mom and dad!
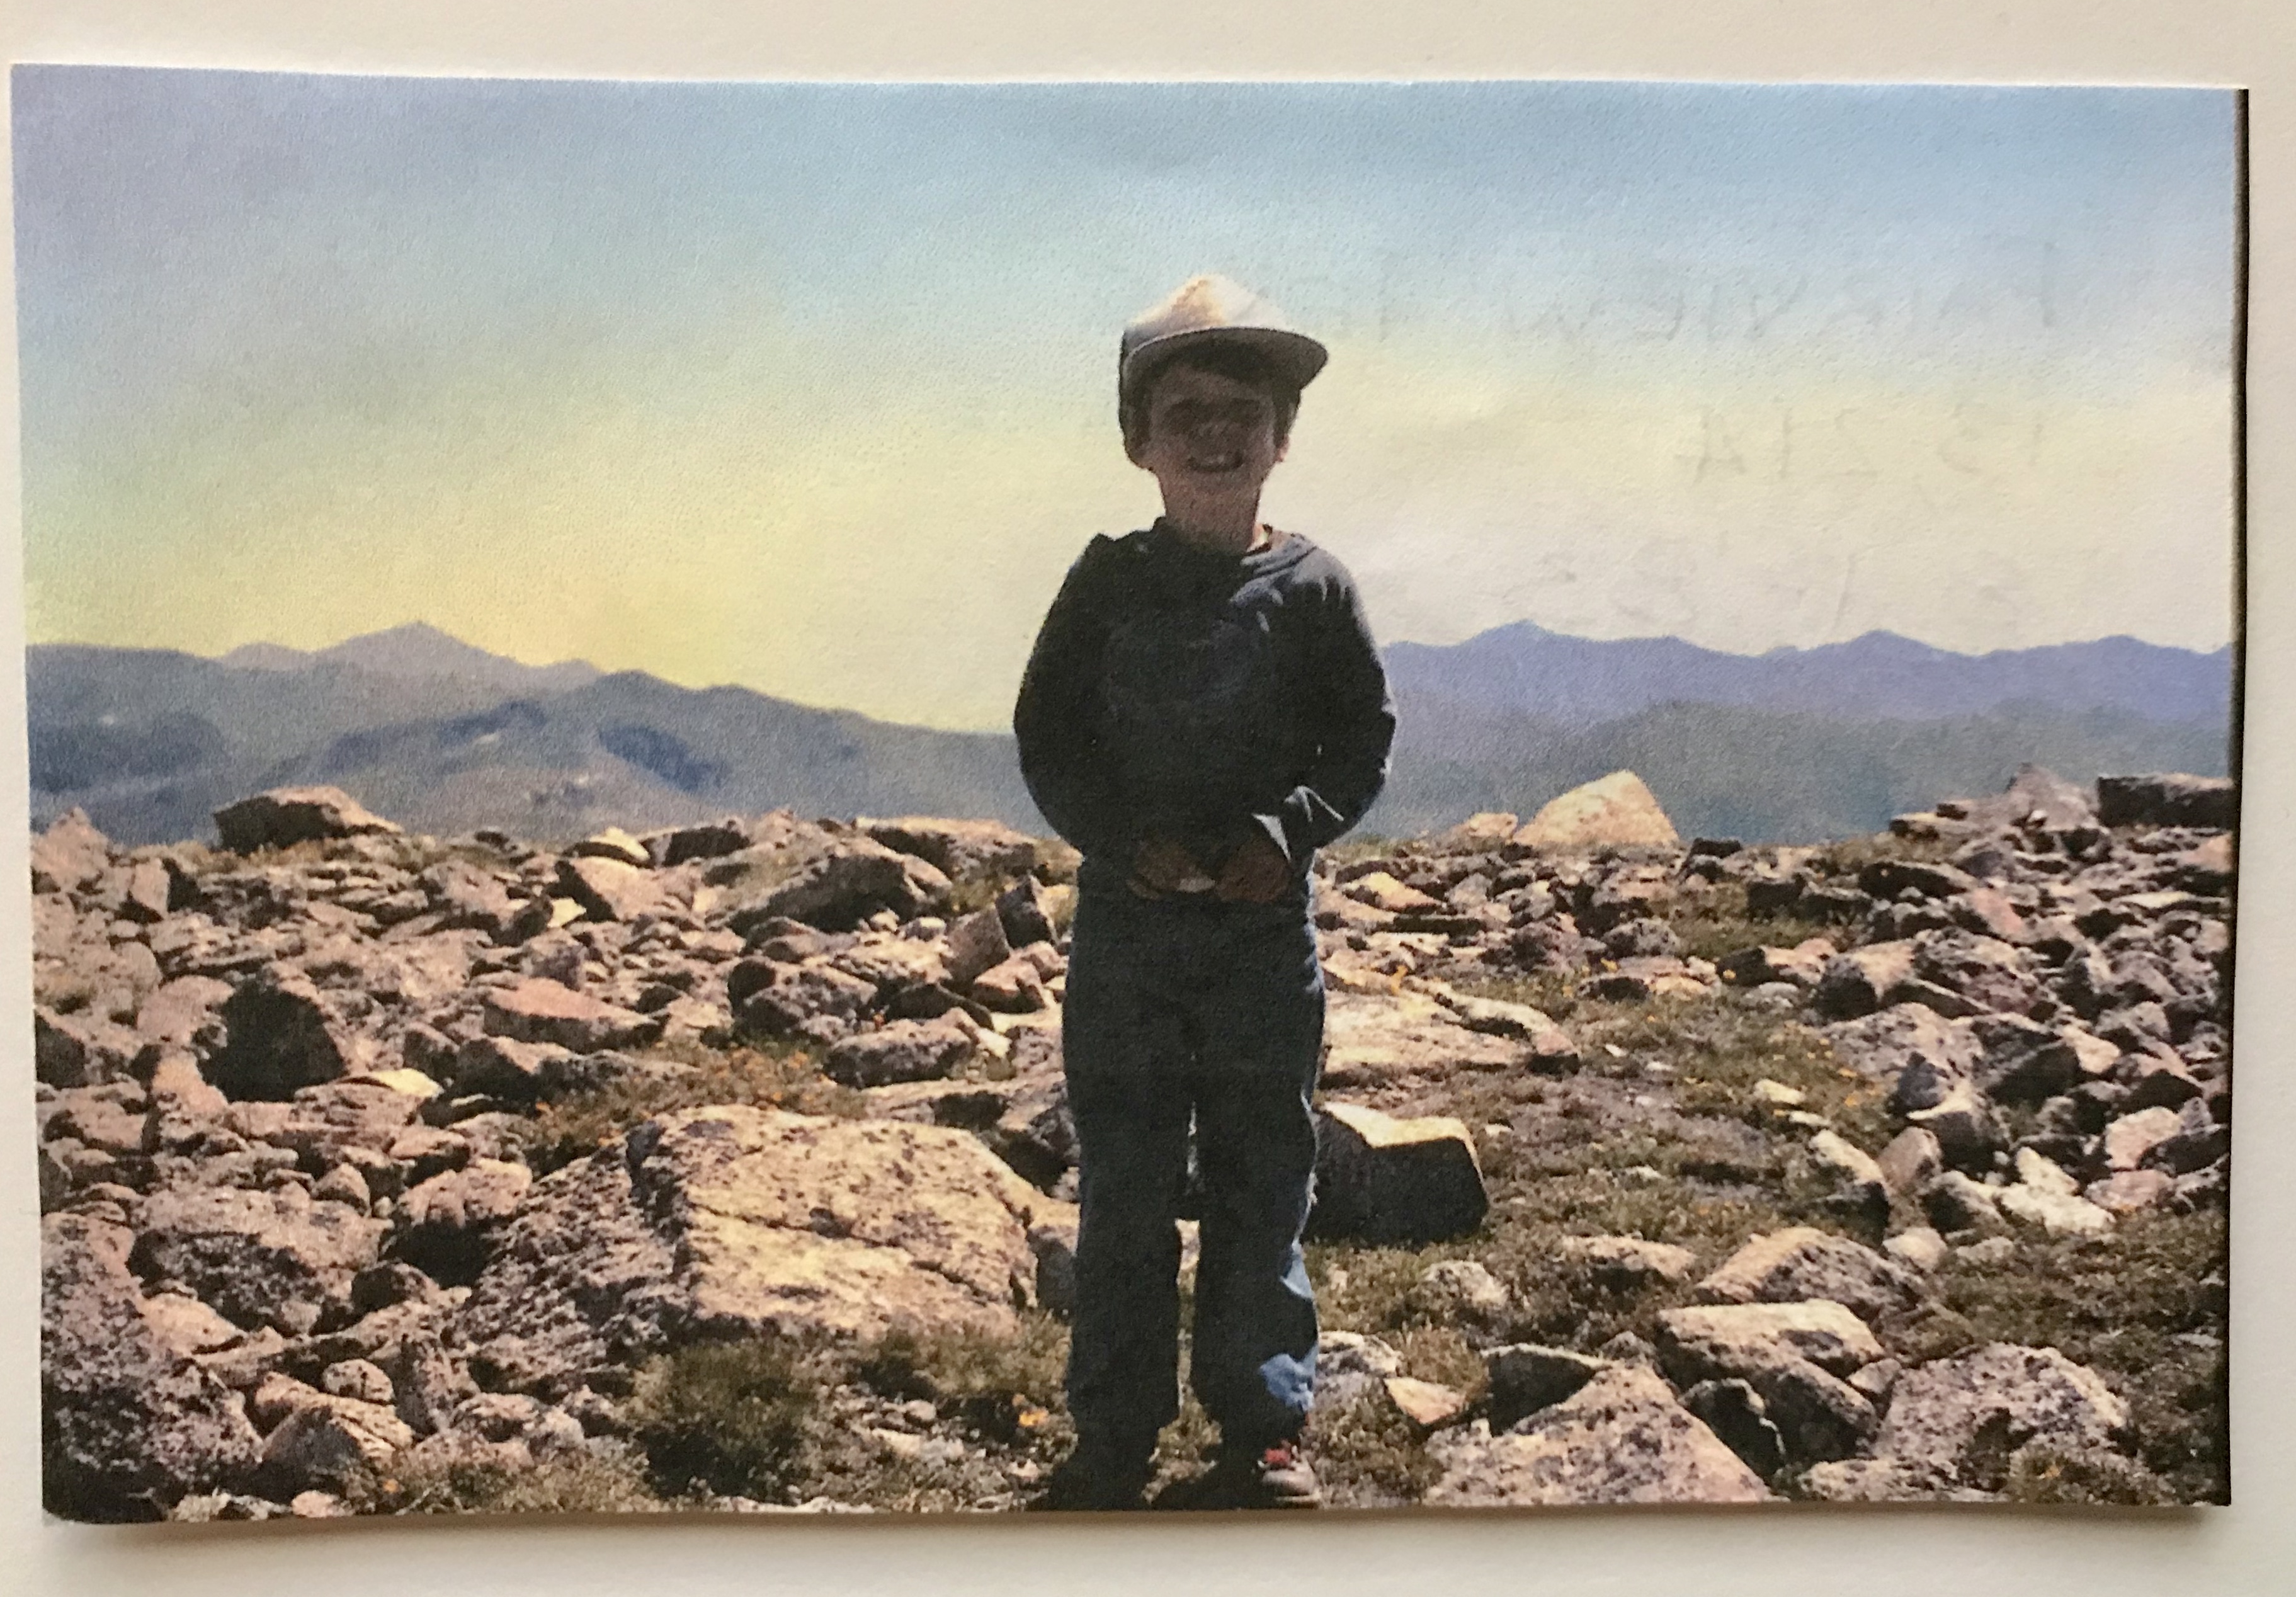
And of course, here's the photo they sent with it - me standing on my first 13er - Fairview Peak at age 4. Good stuff!
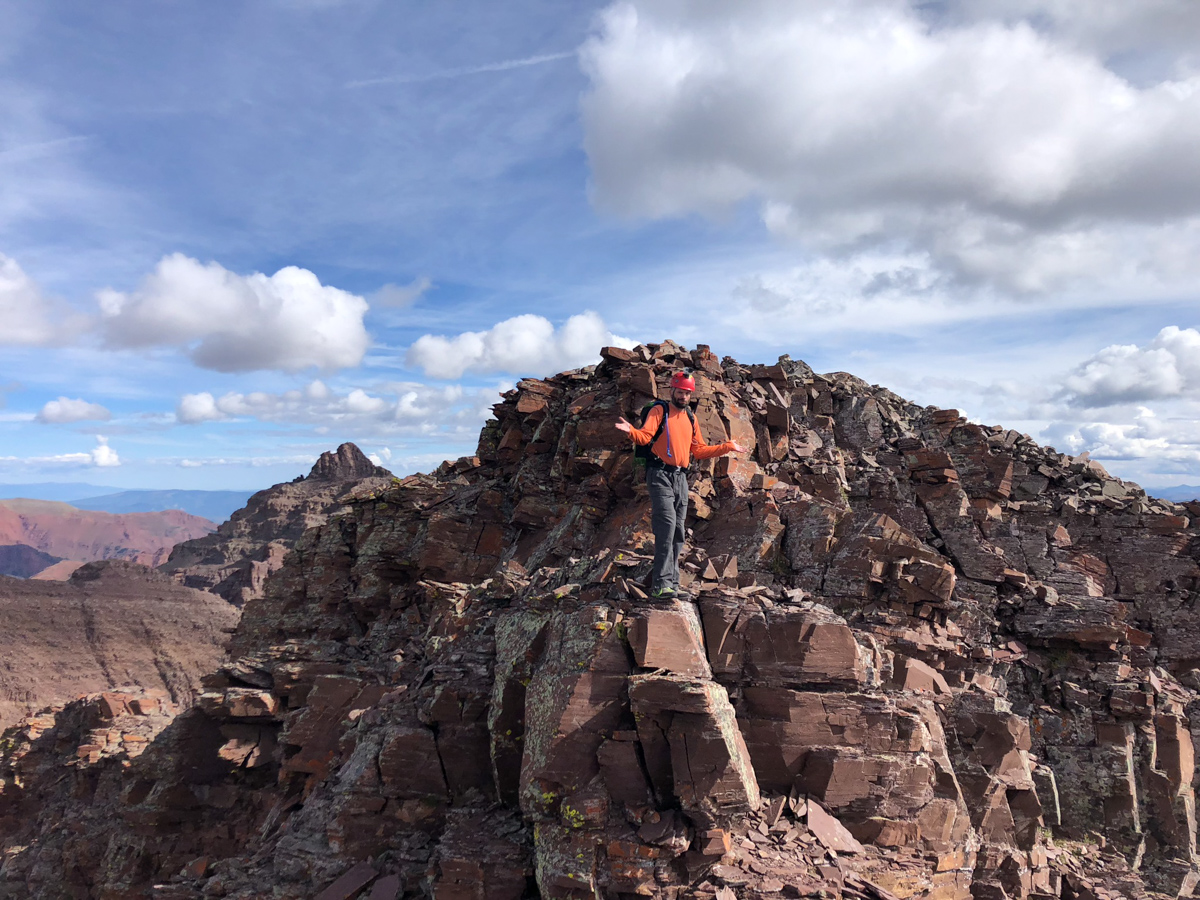
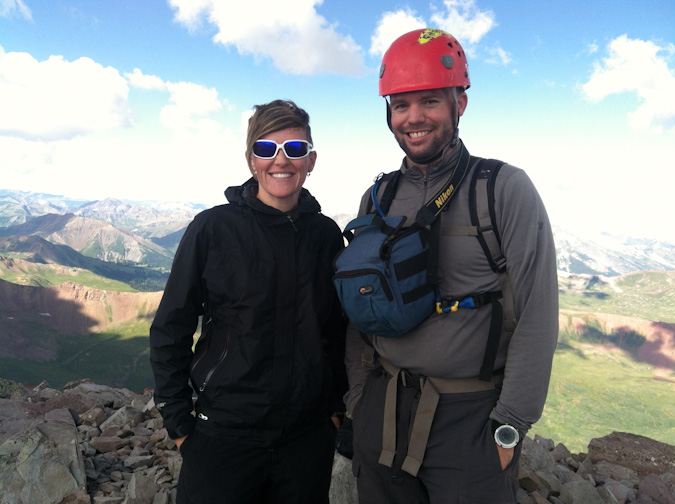
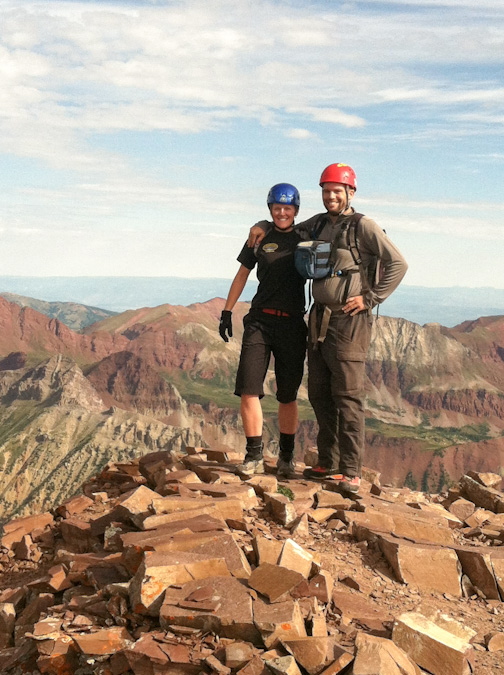
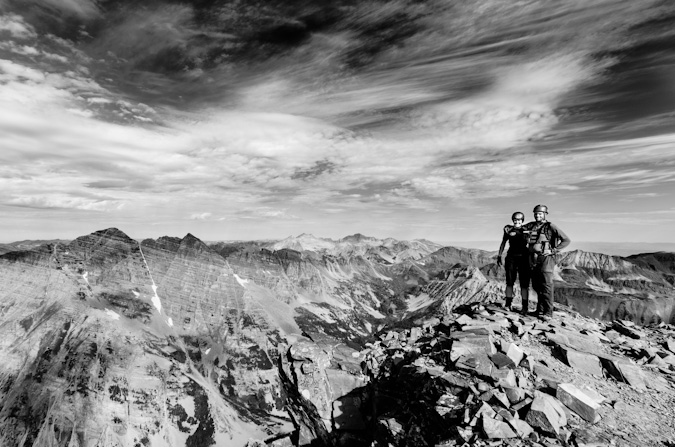
It was so great celebrating this one on top with Silas, who I think was more elated than me!
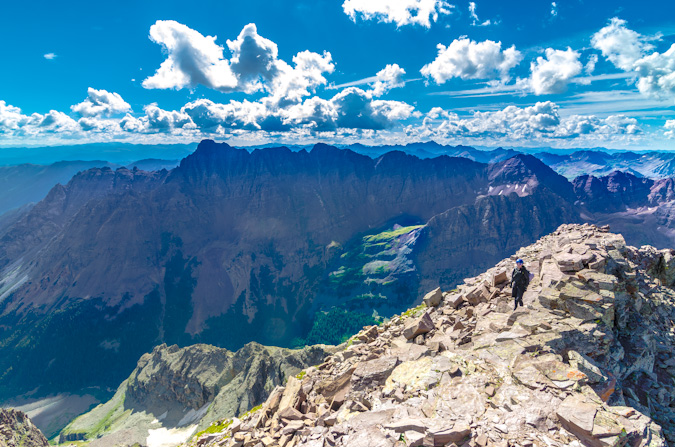
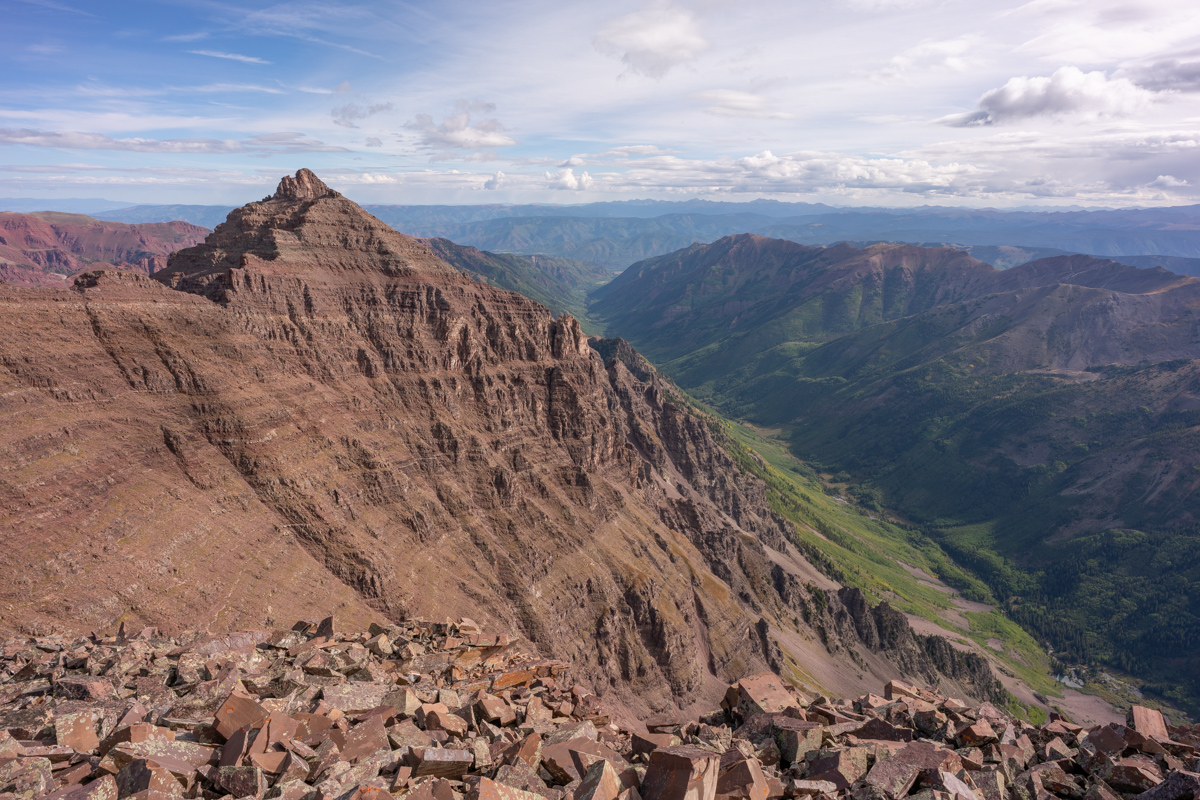
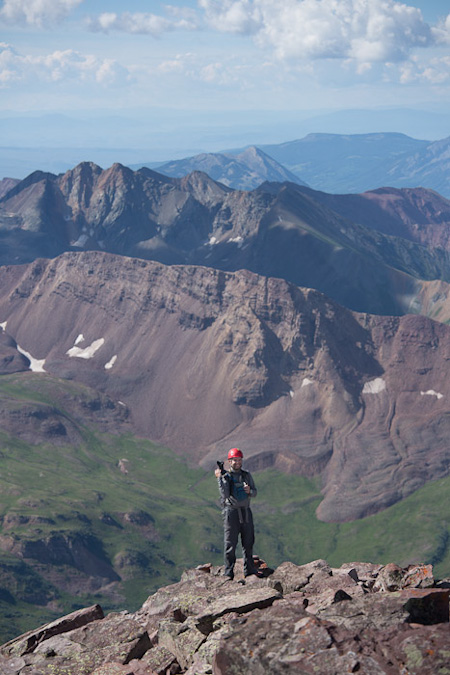
It was also really cool to have a view of Pyramid from here, which I finished the 14ers on in 2012.
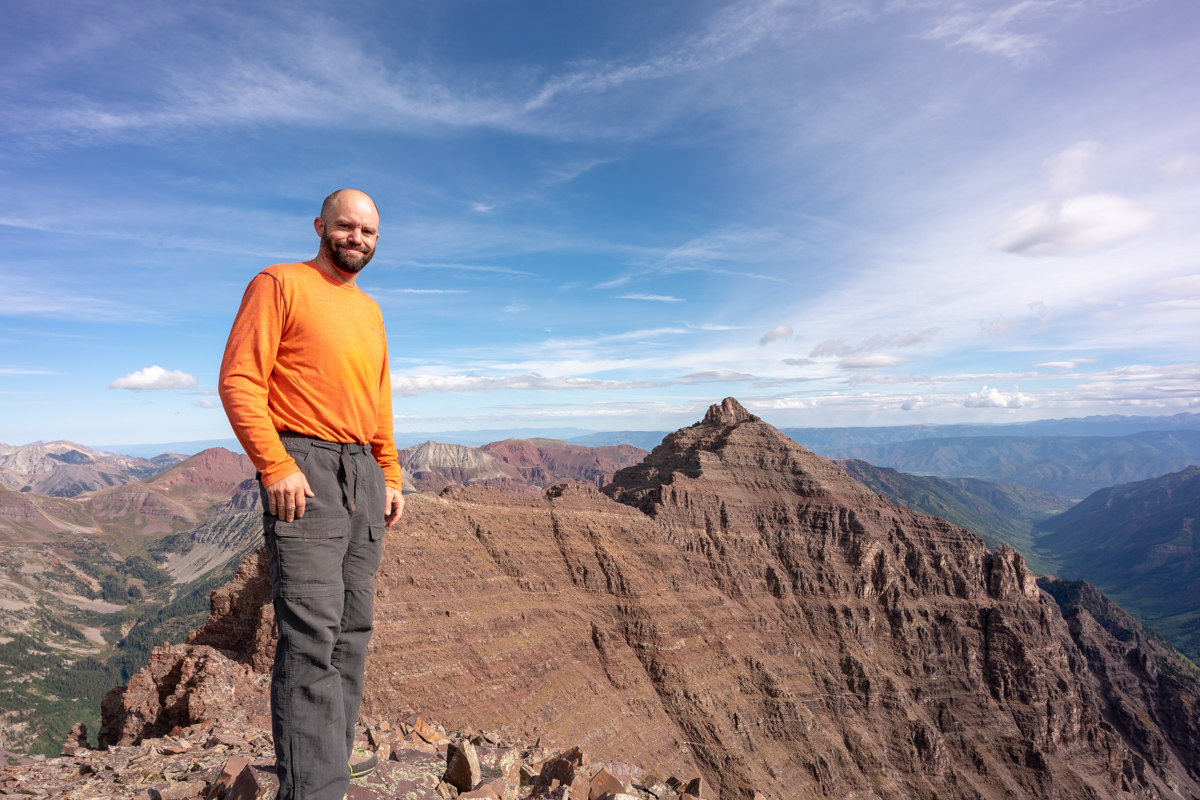
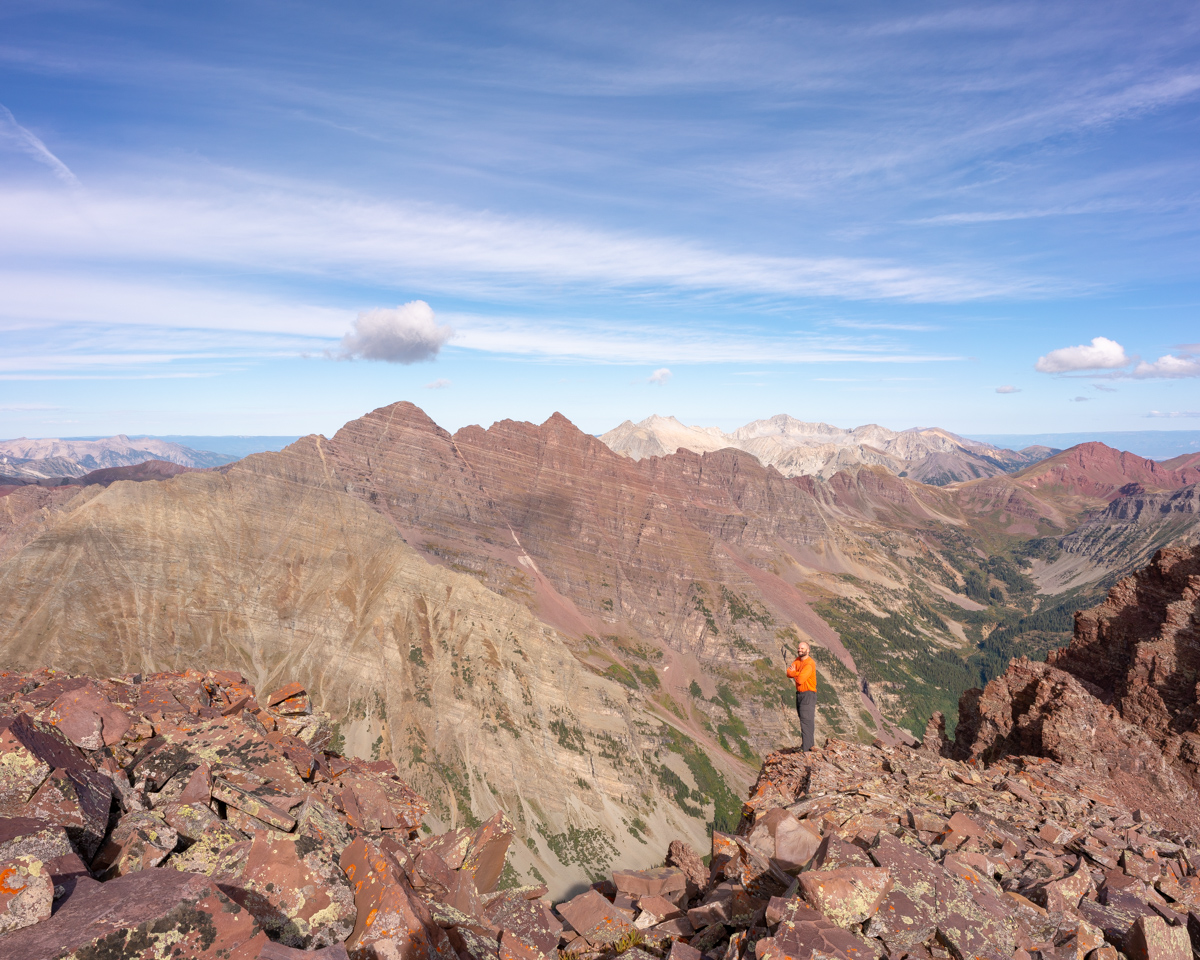
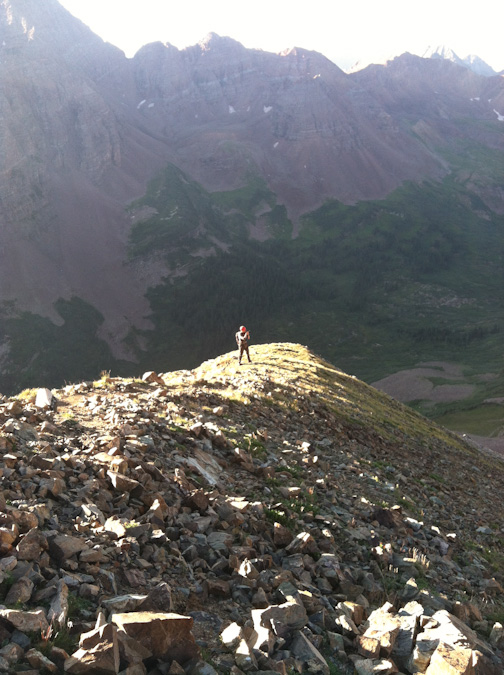
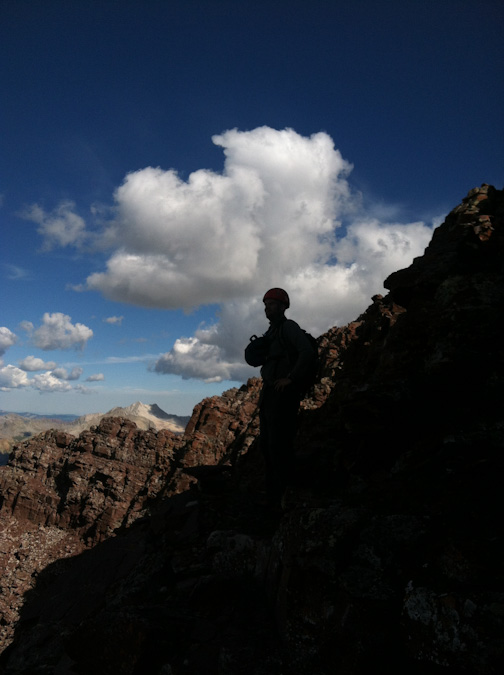
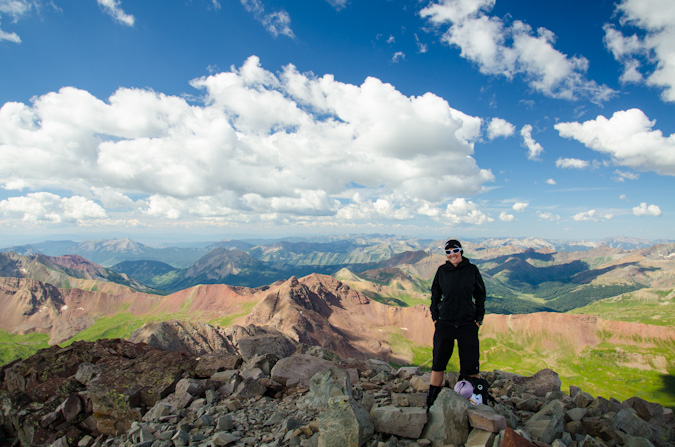
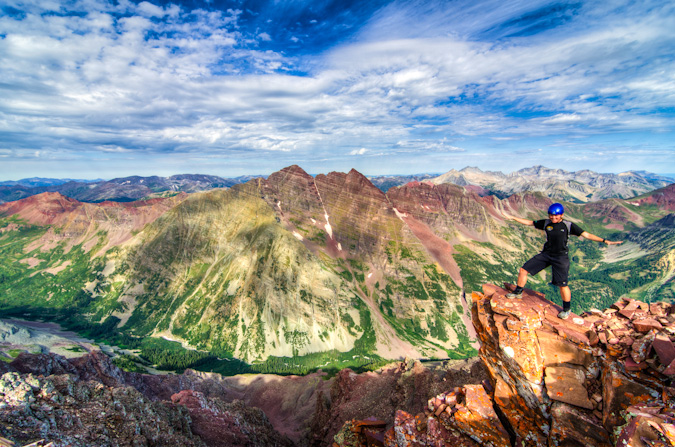
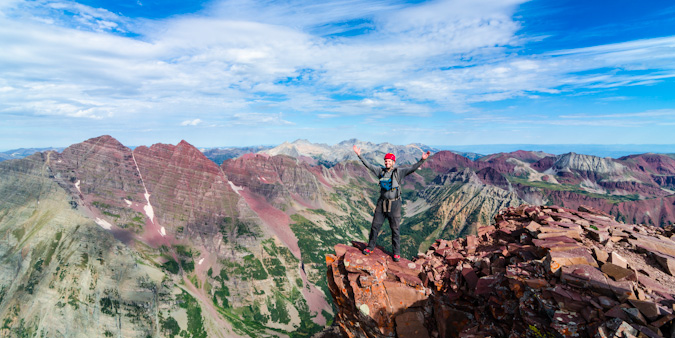
The scale of these mountains is so hard to describe in photos; however, I think adding me to the frame helps.
I had a special surprise for Silas too. I brough my 100summits.com T-shirt with me and a sharpee so he could check off the last box for Thunder Pyramid. What a great feeling!
I wonder why they call these the Pyramids?
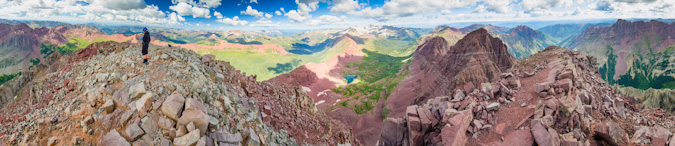
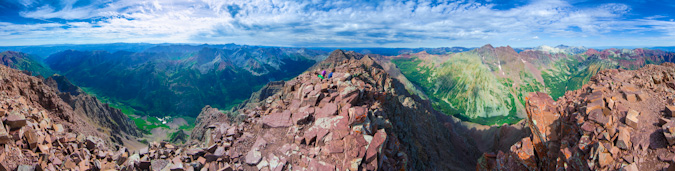
Silas caught me in the act of composing a photo while there. I really wanted something to show off the gnarly rocks in the foreground while including all of the great peaks of the area, so I had to get really low!
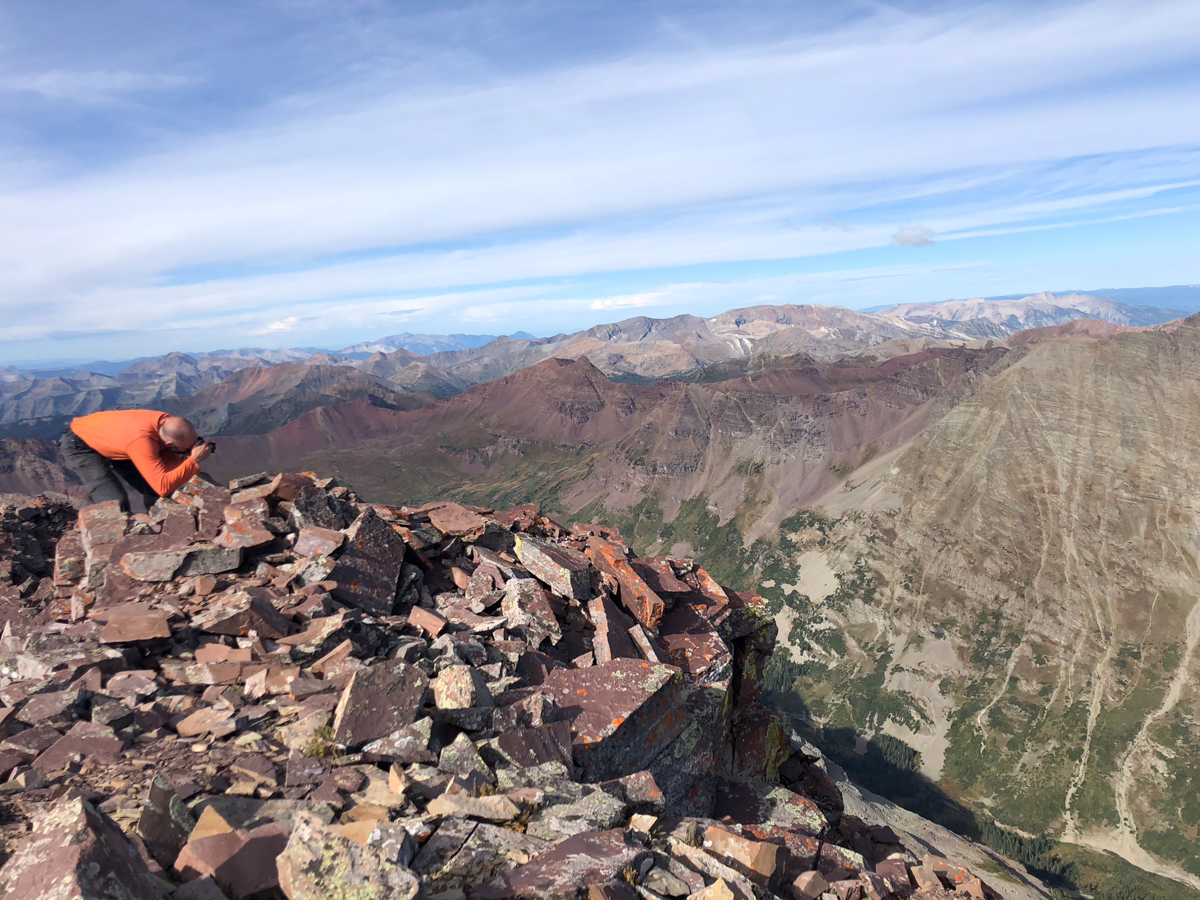
And the result:
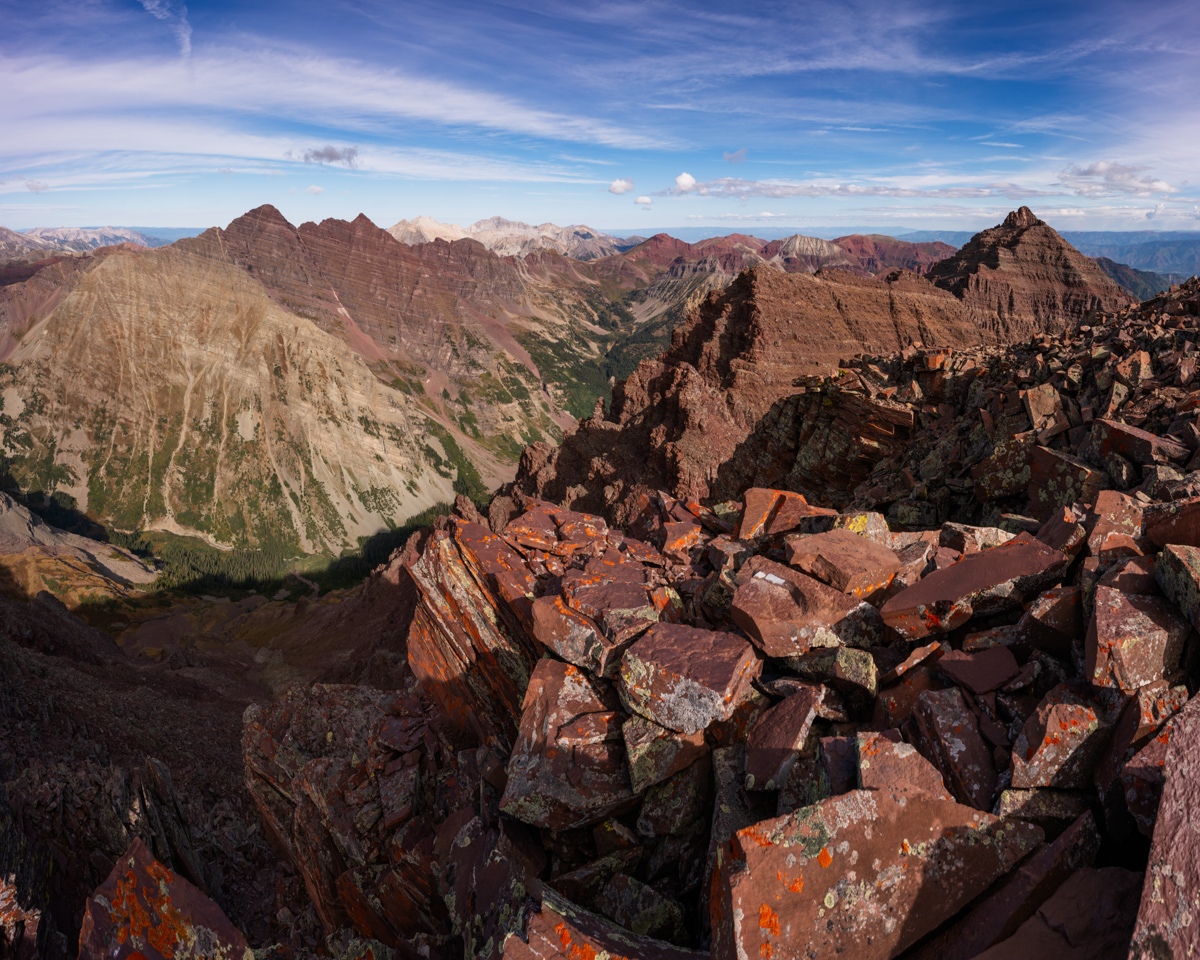
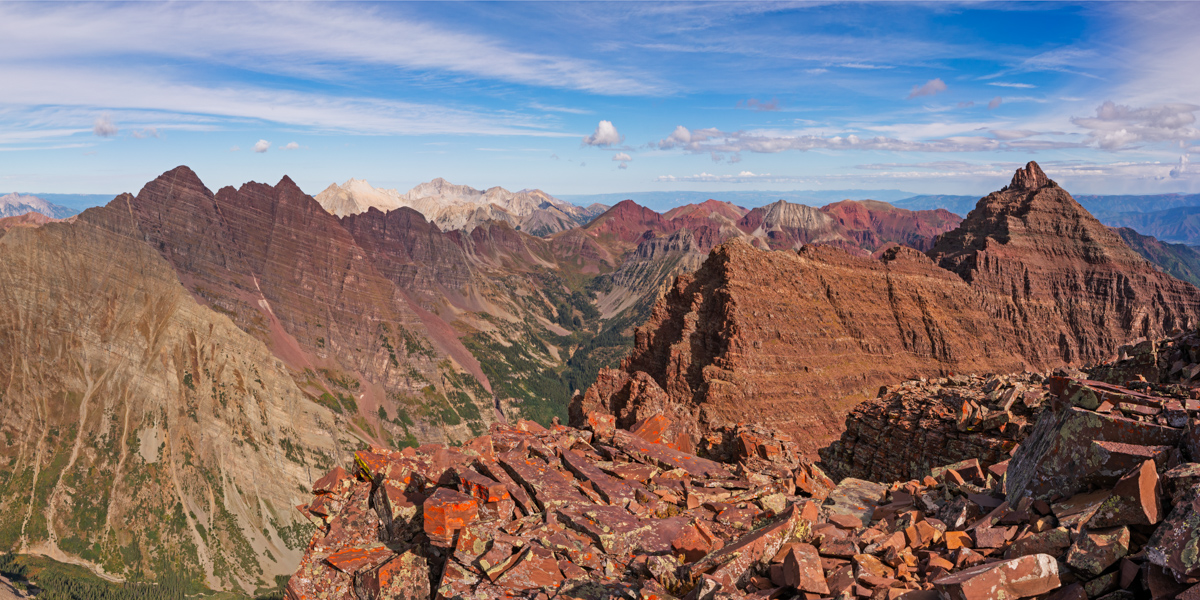
Another angle:
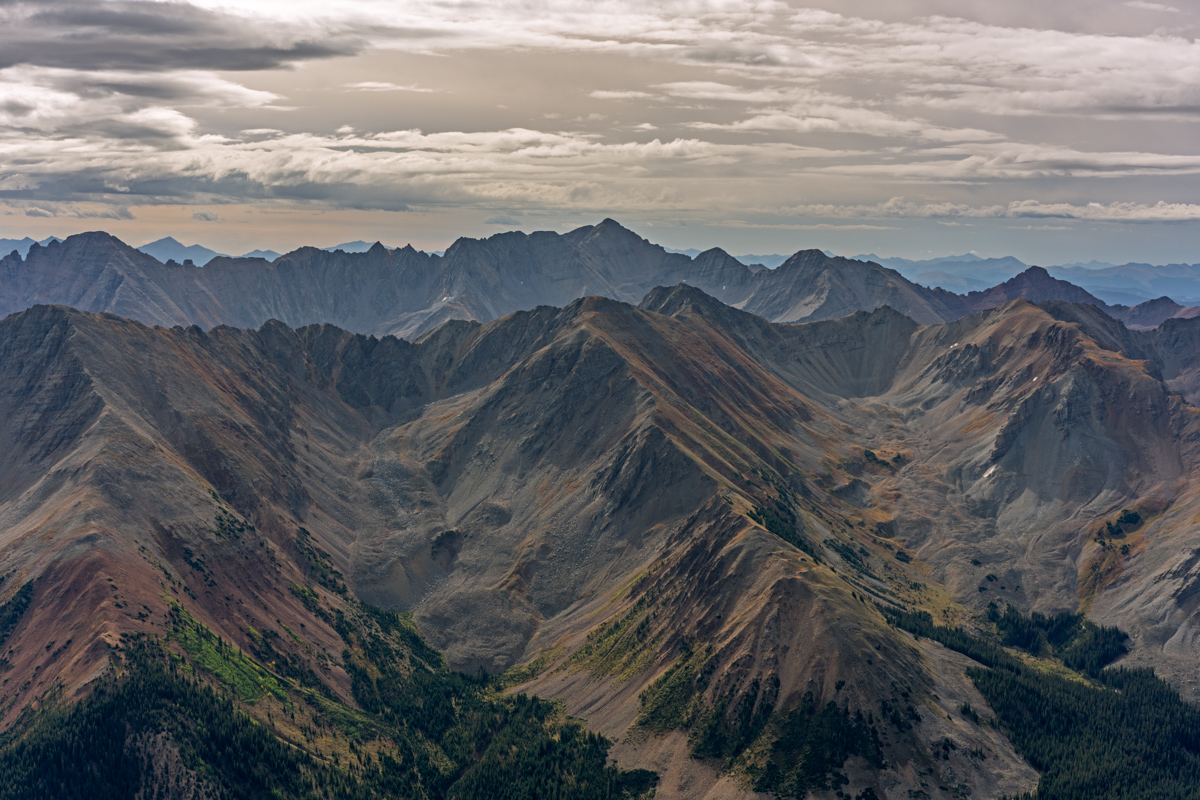
I felt like I needed a shot of Castle and Condundrum too, even though the light to the east was quite harsh. I think they still look quite formidable from here though. It was crazy to think just a couple weeks ago I was on Cathedral at sunrise looking this direction.
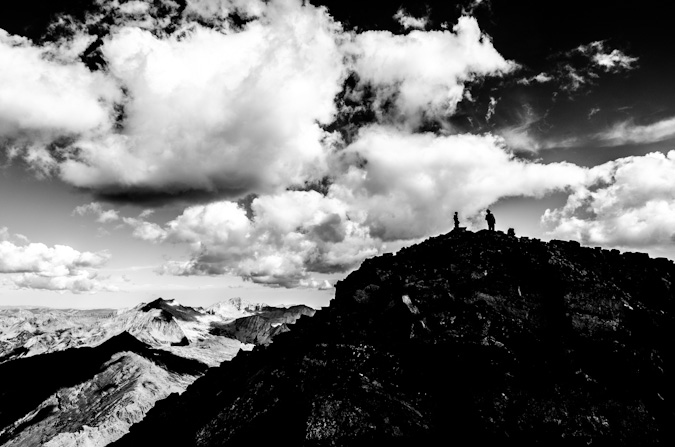
We also noticed a pair of hikers on top of Pyramid. This photo really shows off the scale of that peak well.
I decided to sign the summit register and have Silas video it for posterity.
I also felt compelled to kiss the top of the mountian for some reason before departing. It was fun Thunder Pyramid - thanks for the ride!
The journey down began and I was still on cloud 9 but knew we needed to be extra safe on the descent. There were sections near the summit that had decent exposure and made Silas quesy to look back at me on the edges. I was like, "what's the big deal?" :-)
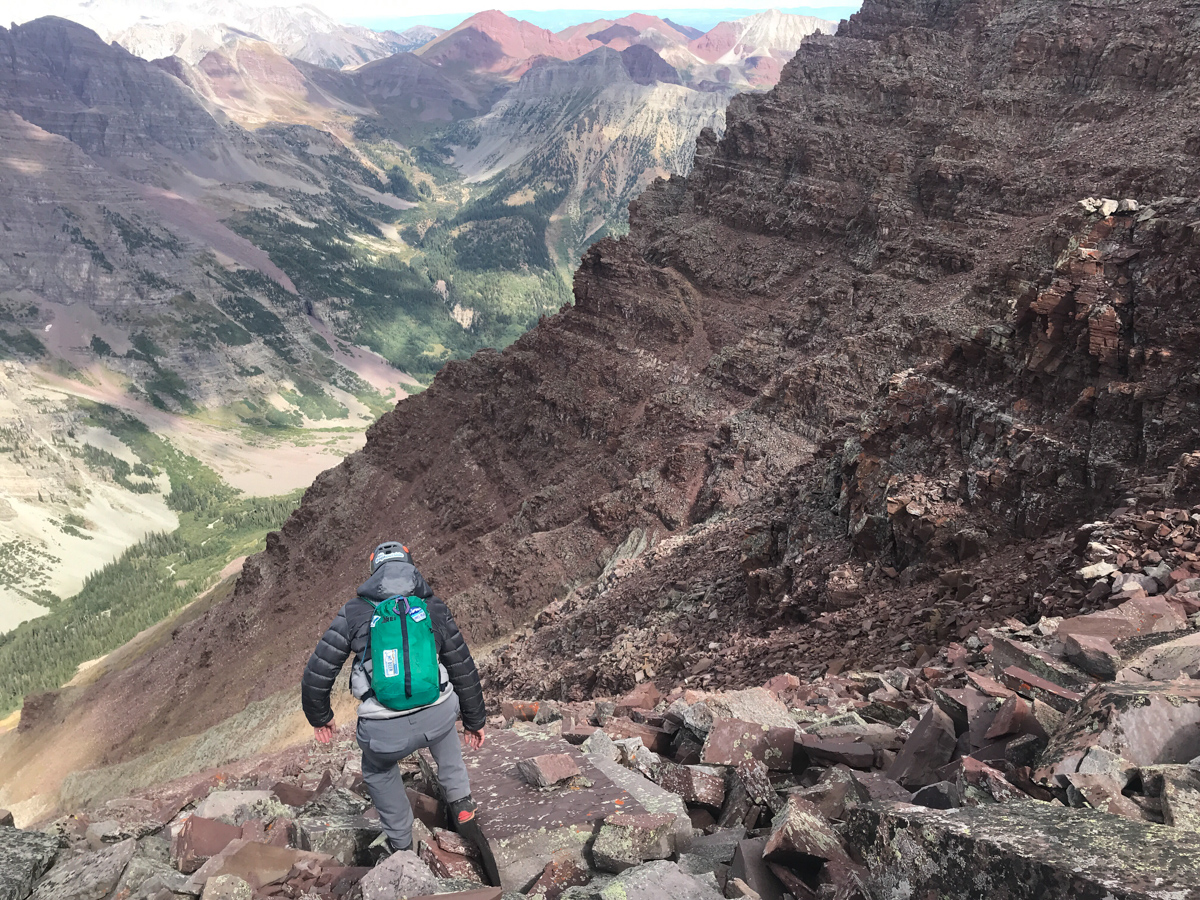
Upon reaching the saddle the view down was sobering. It looked incredibly nasty. Fun.
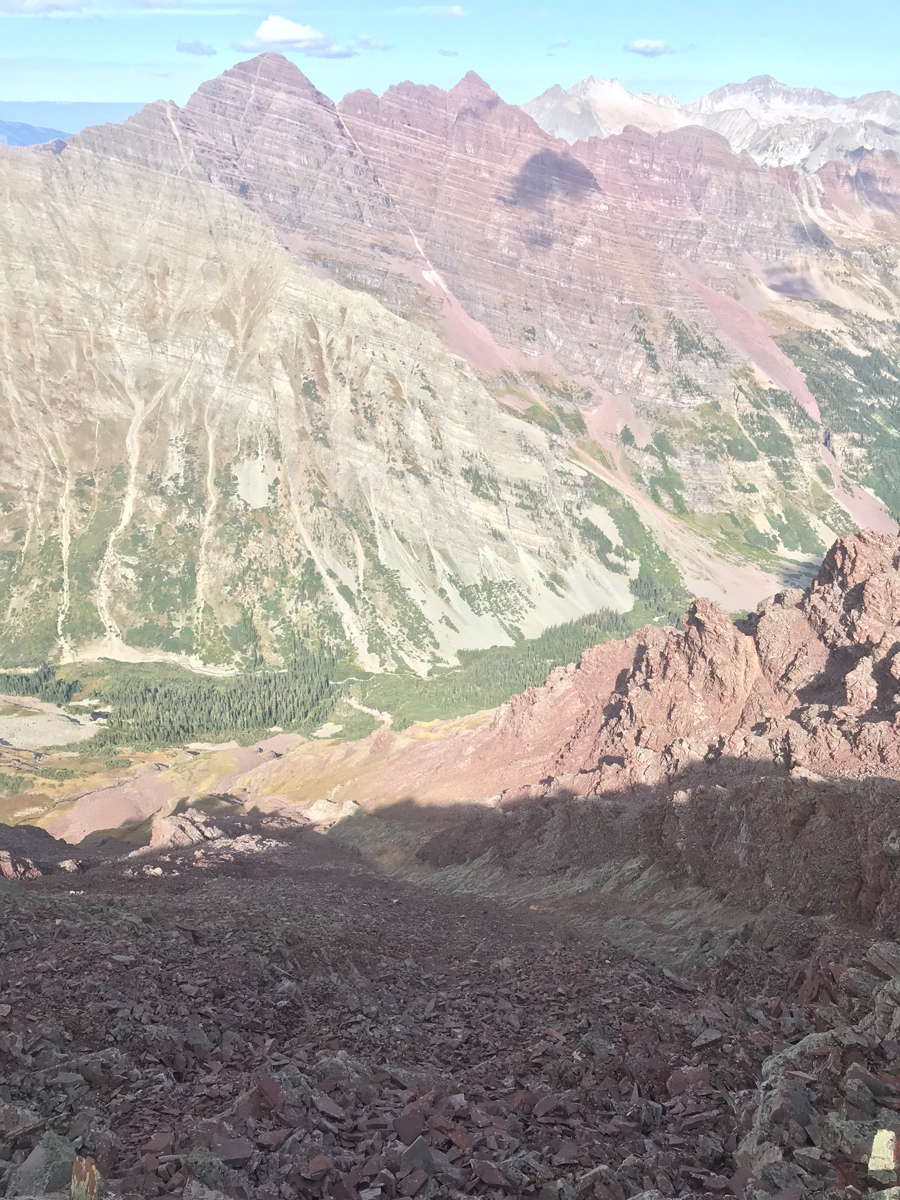
We made our way down carefully, picking mostly the same route as before, except we stayed a bit higher towards the top of the ridge instead of going south into the gully.
The rock here is especially loose and nasty. Great care should be taken to navigate down. I got some fun action shots of Silas in the act.
Don't fall!
Here is a good view of the spot we chose to turn off from the White Gully, only in reverse.
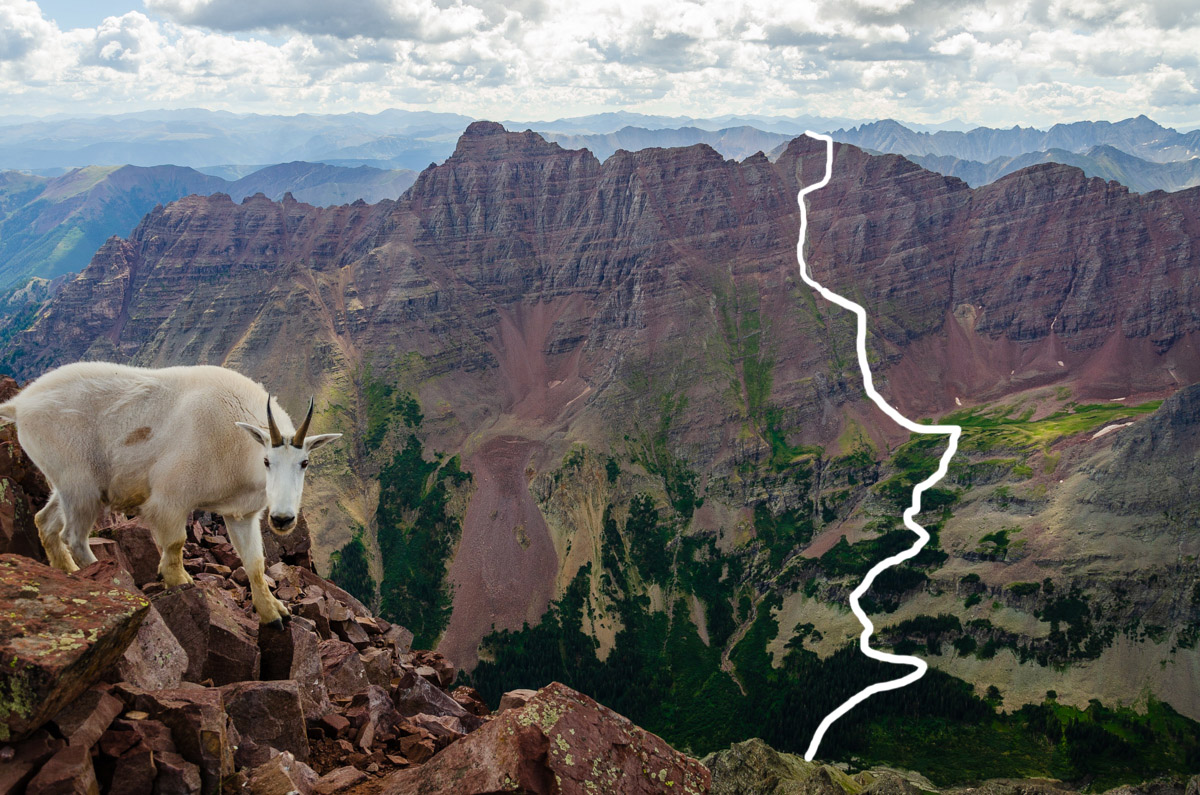
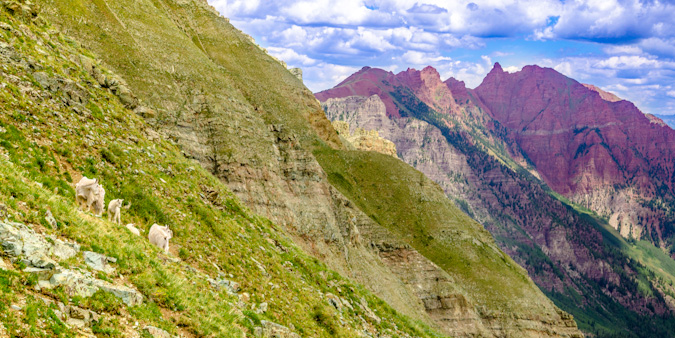
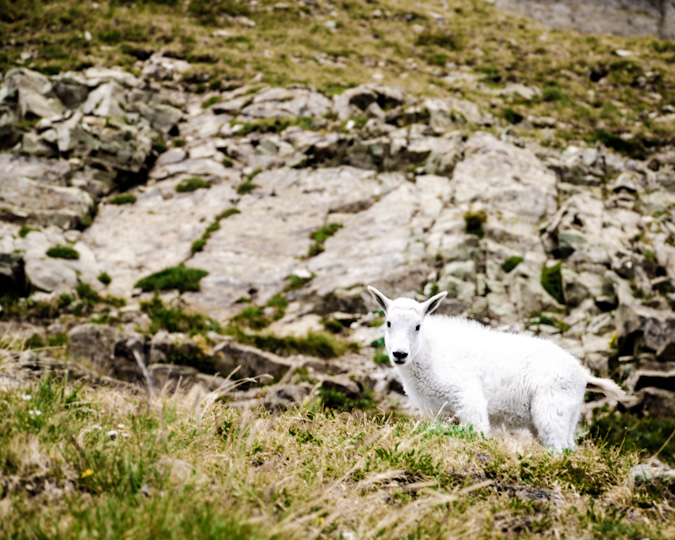
Upon reaching the white gully, we were equally excited and dismayed by the appearance of a mountain goat below us. Despite our efforts, he kept climbing right up the gully towards us and eventually above us. We now not only had to contend with our own rock fall, but also the rock fall from the goat. Fortunately, he did not knock any rocks down on us!
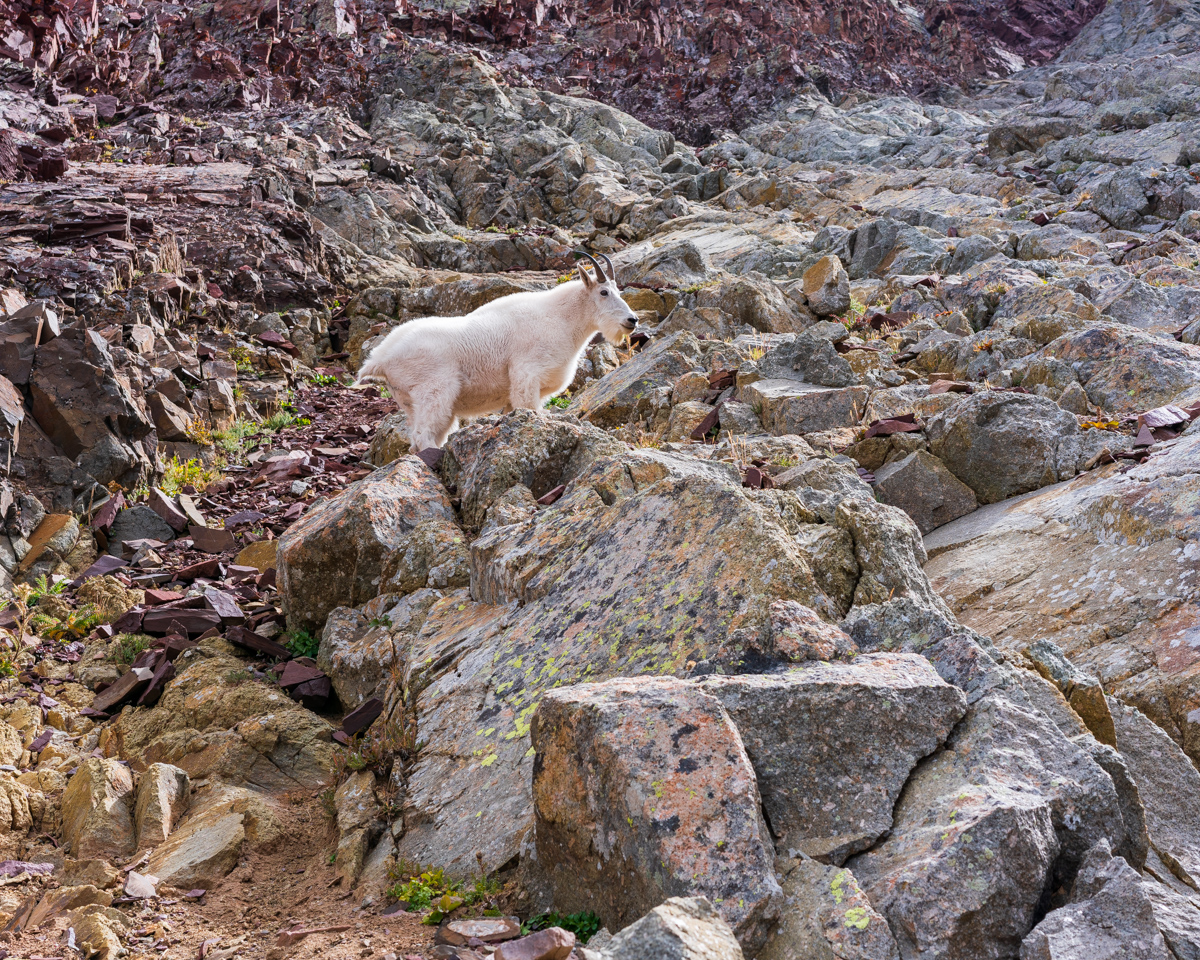
Reaching the bottom of the white gully was a relief, and, we were pleasantly surprised at how well the weather had held up!

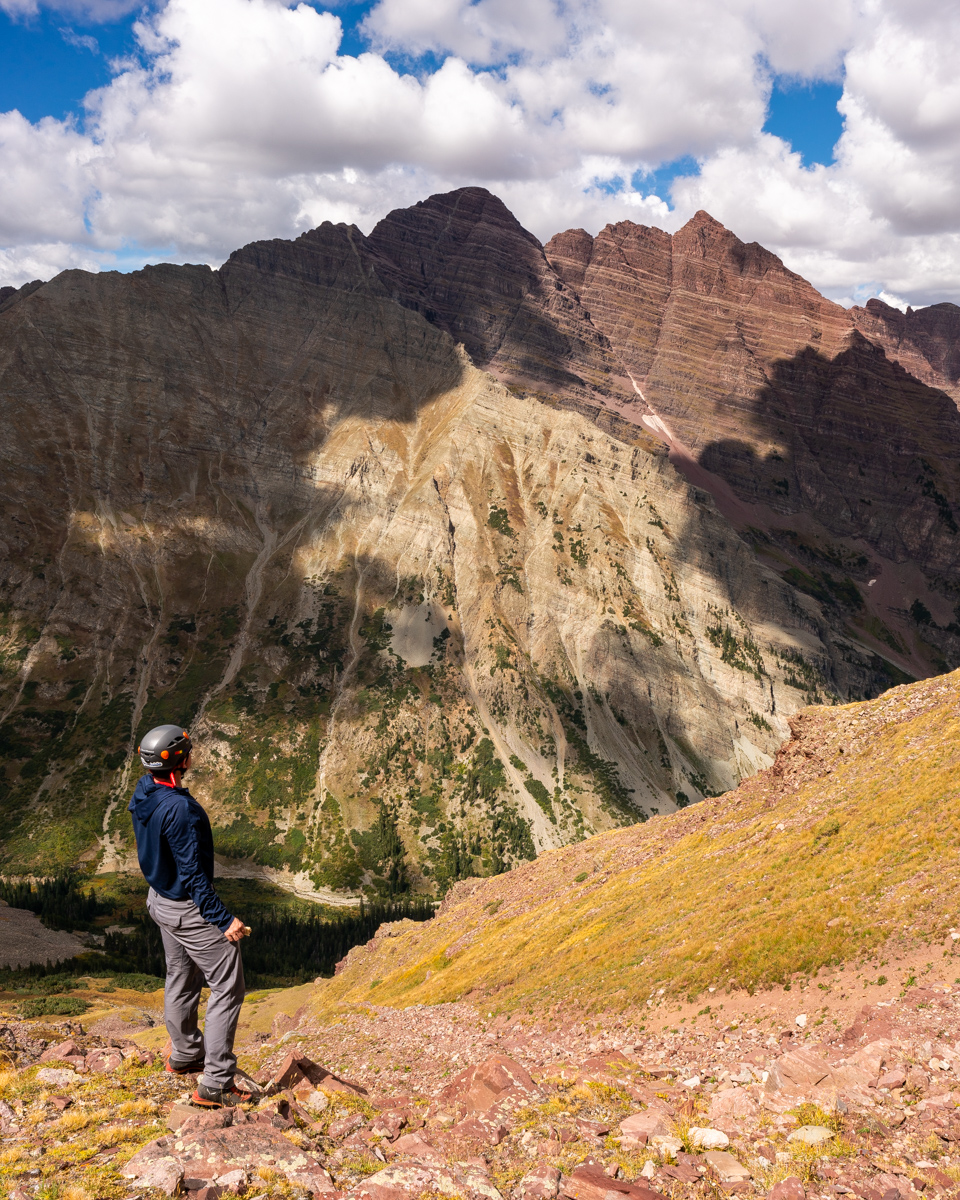
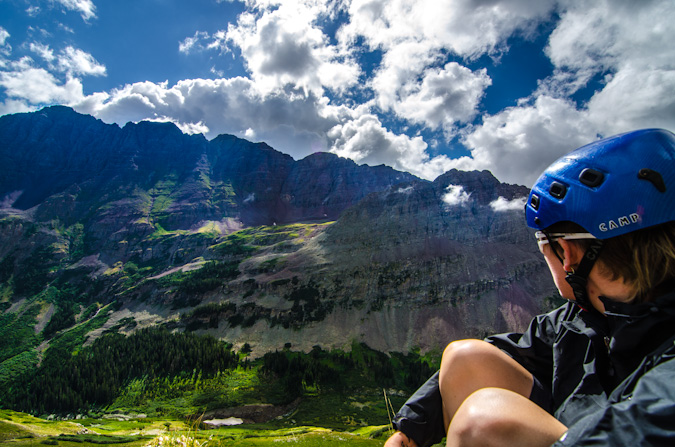
I absolutely love the next shot of Silas gazing at North Maroon (which he climbed the following day).
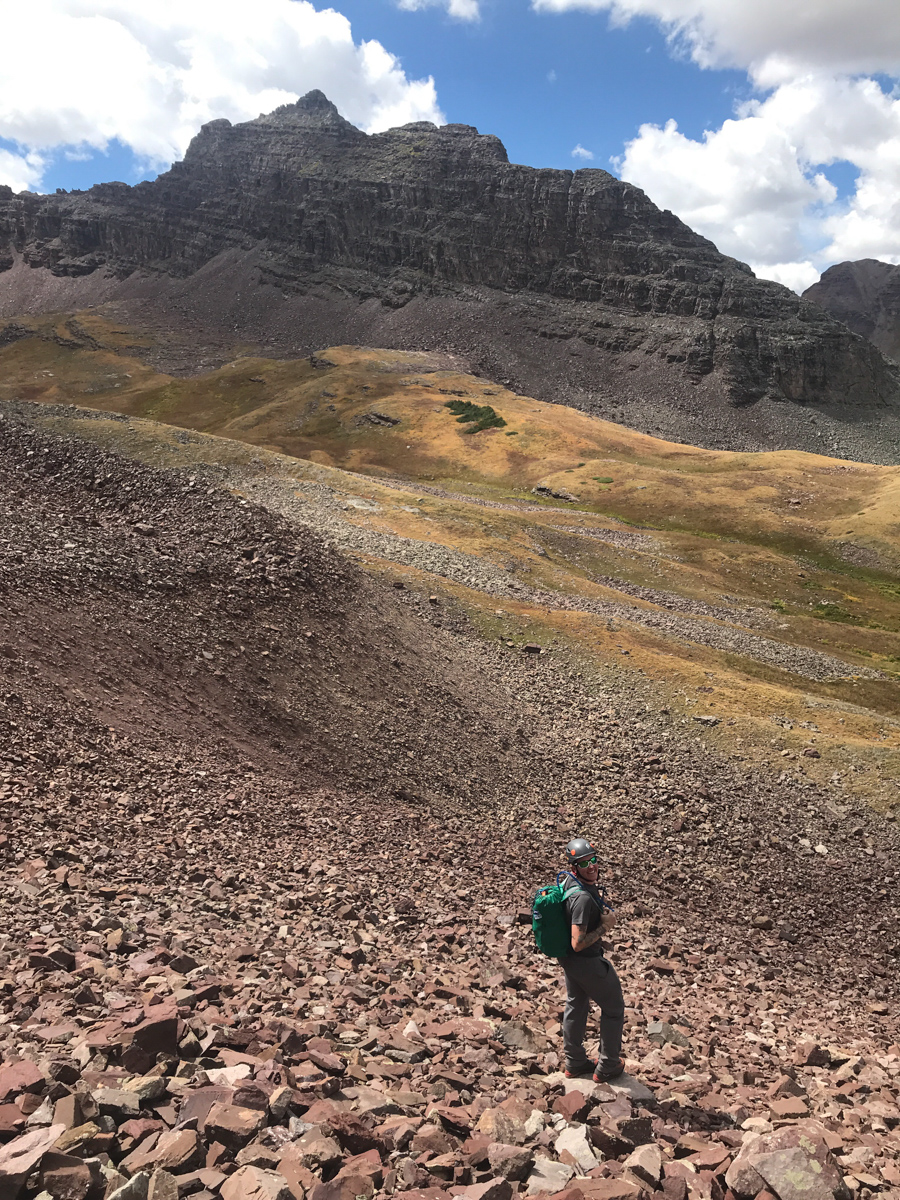
We made it to the turn off for the very first gully and found that dirt/rock section to really suck - here's a good view of Silas entering that section. It was super steep and very unpleasant.

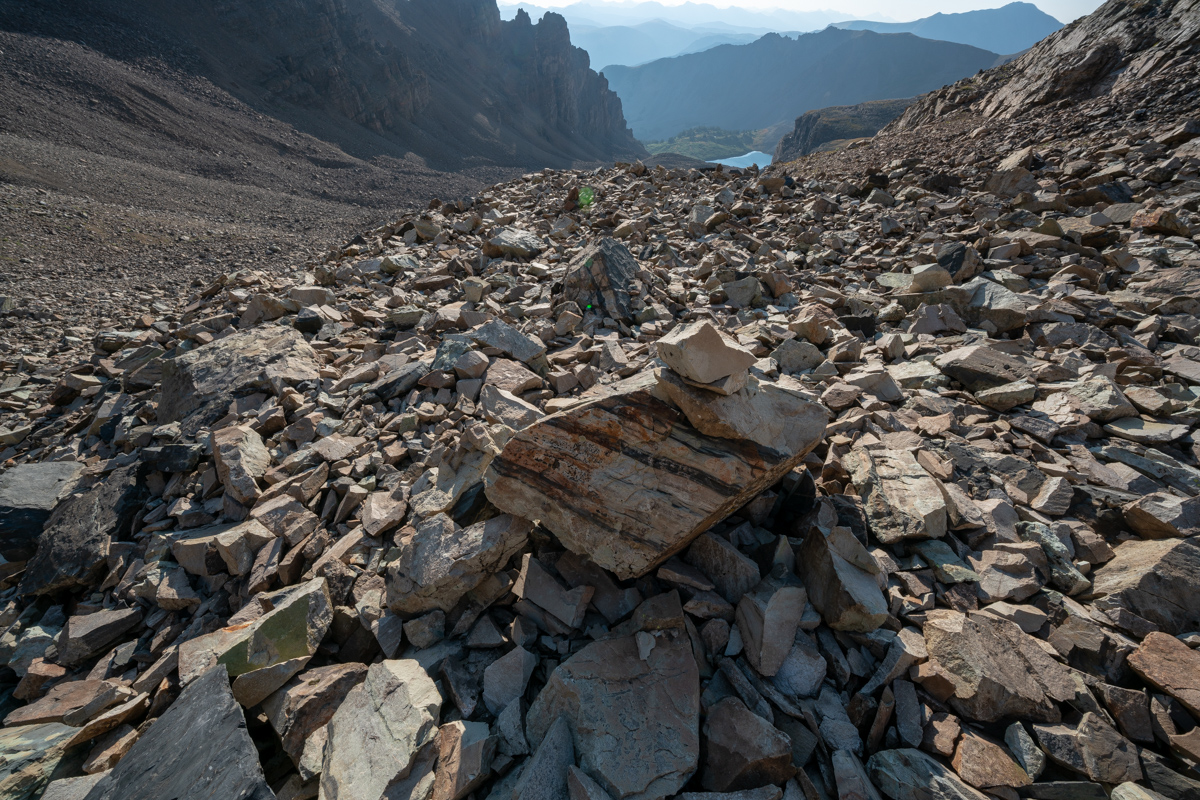
We opted to follow the far left gully to exit, which was much less steep but much more loose and filled with nasty talus. At least the view of Len Shoemaker ridge was good.
Every step in this gully was dangerous. It was a real ankle destroyer.
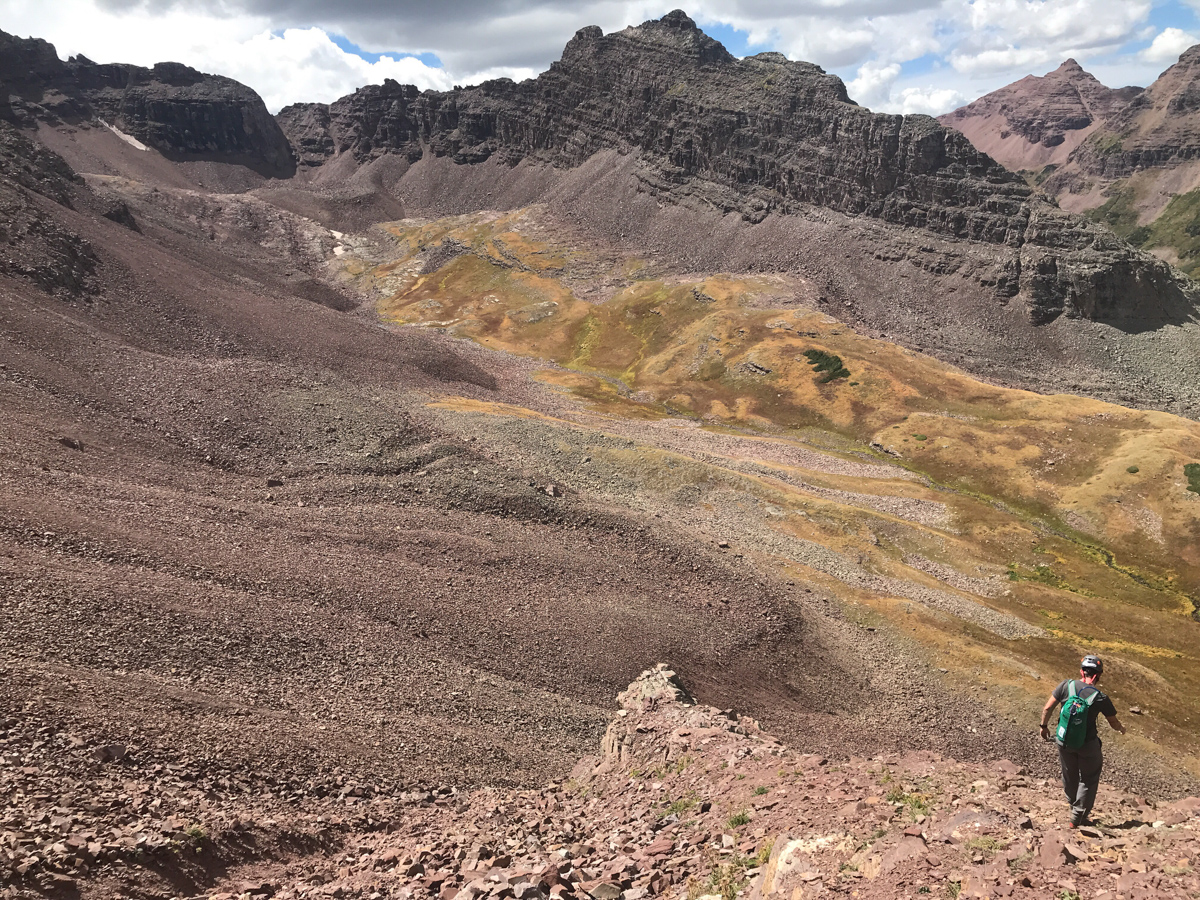
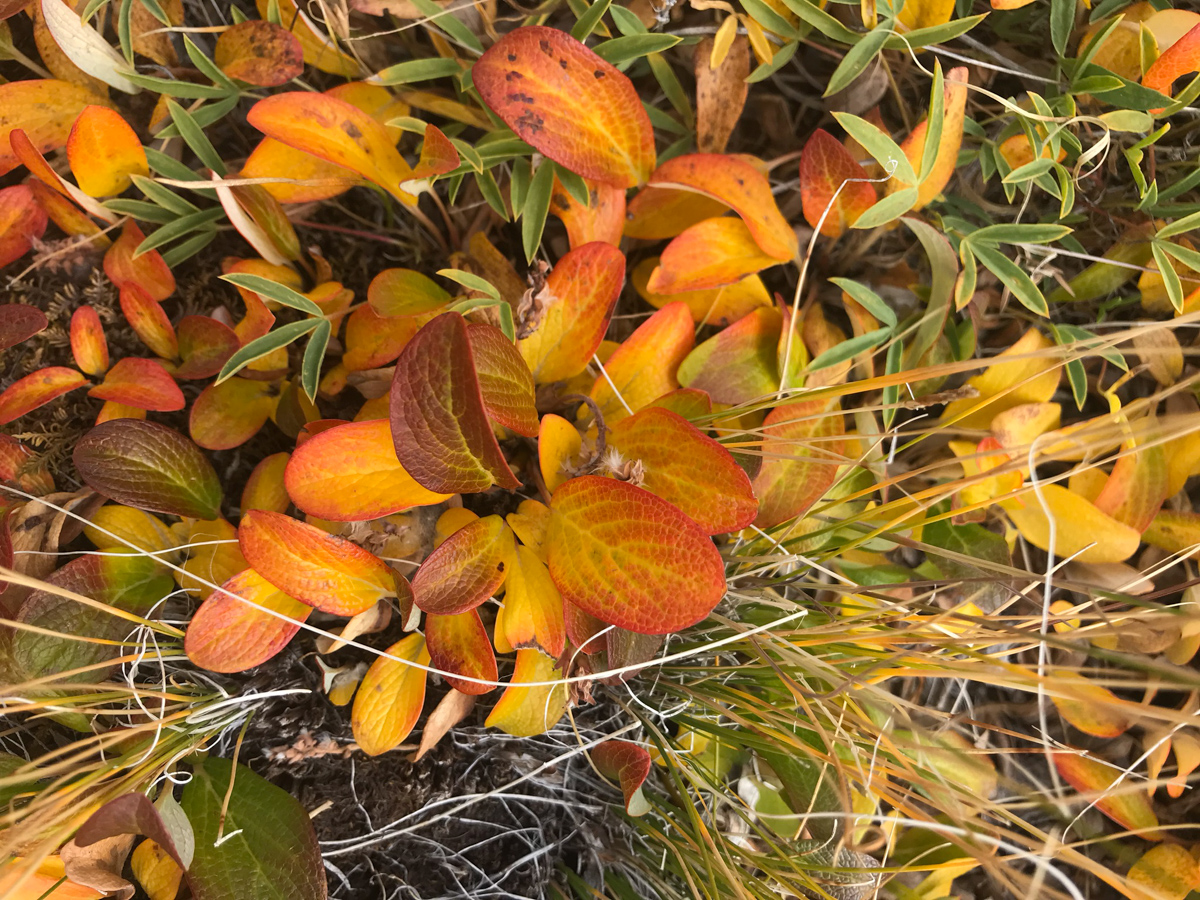
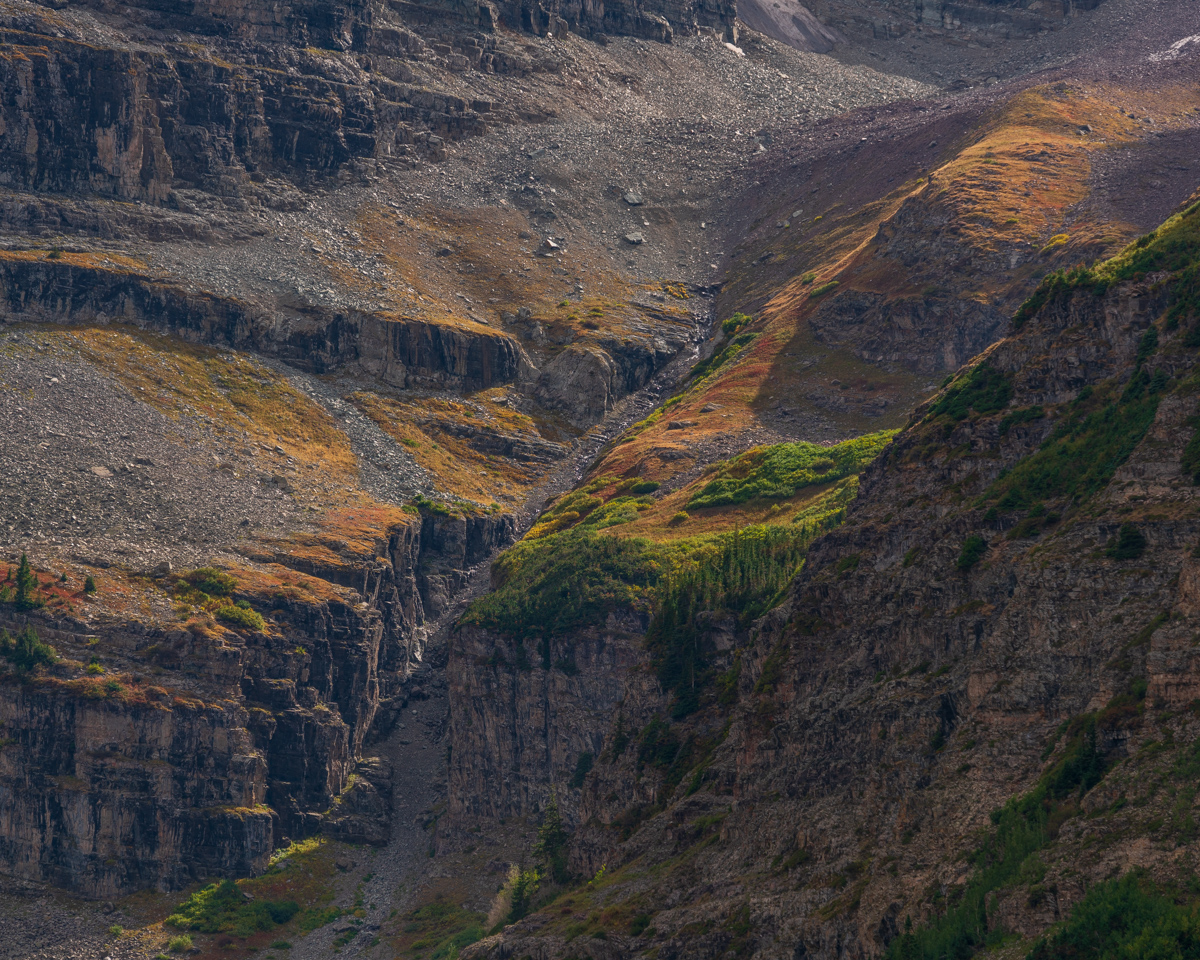
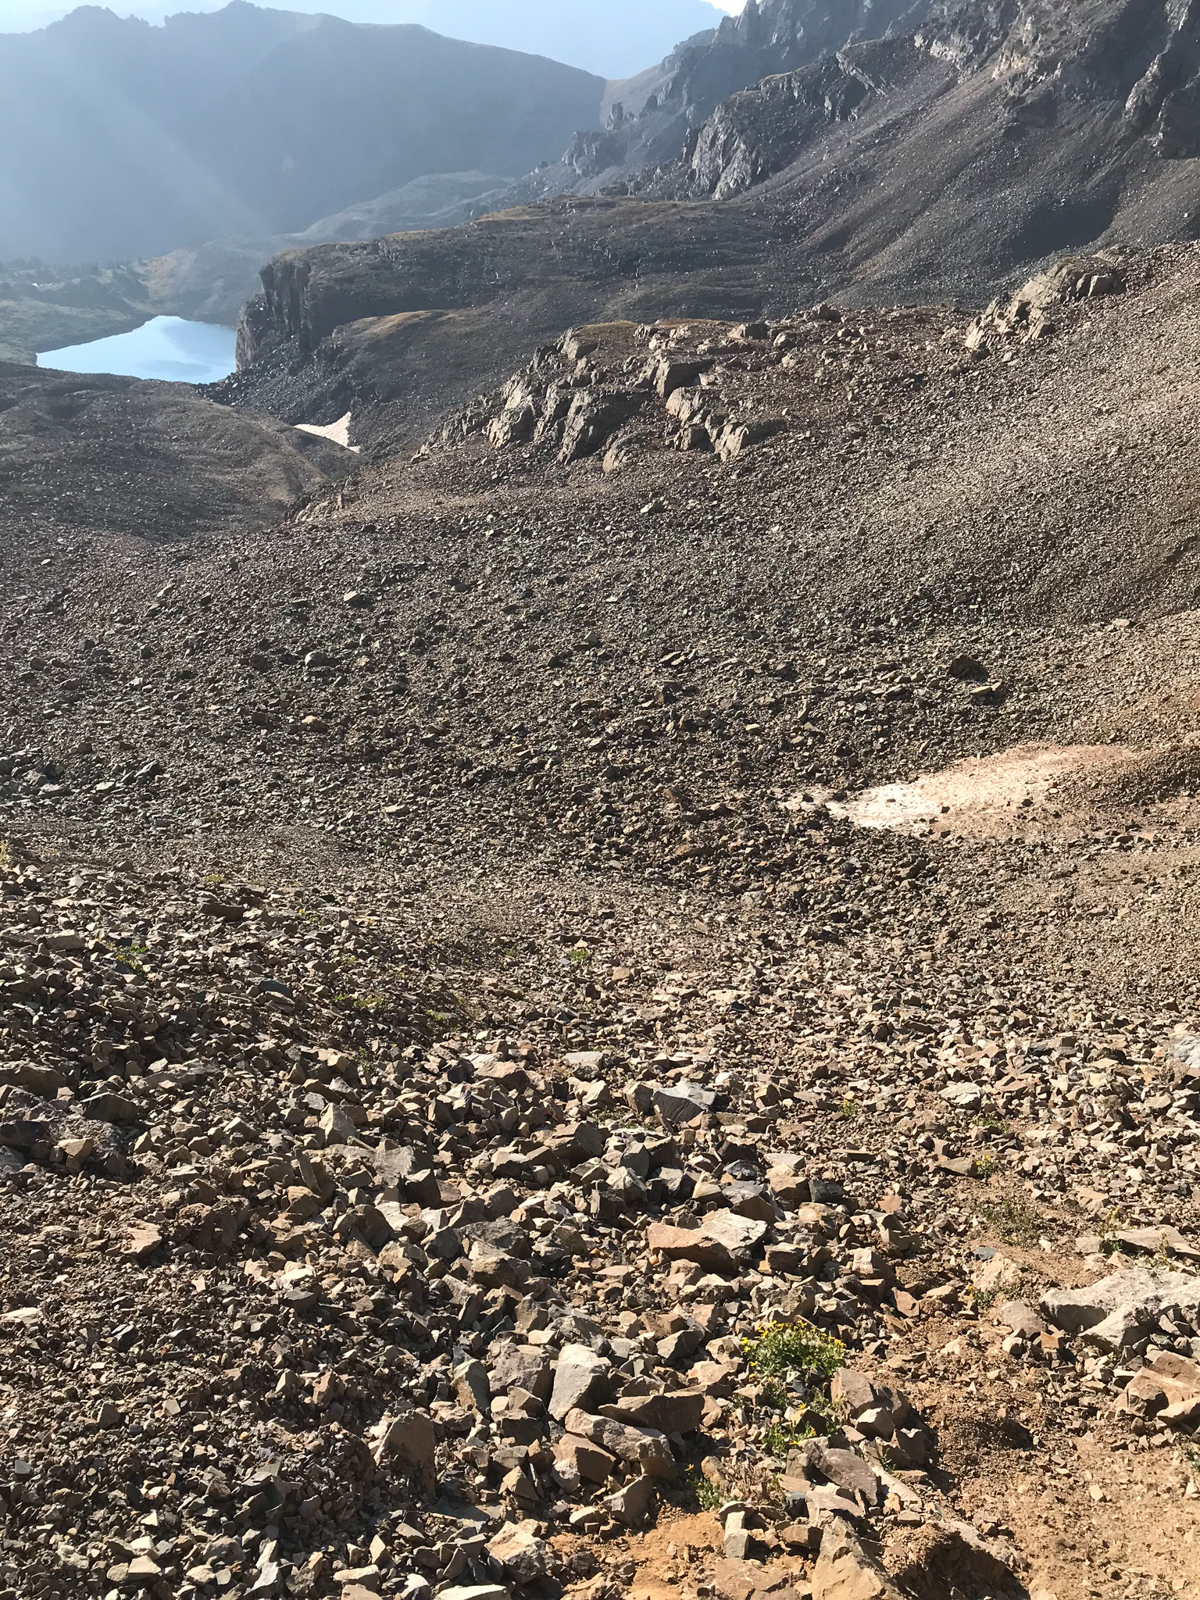
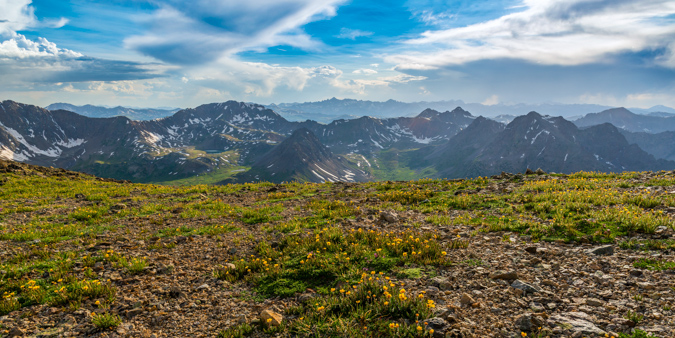
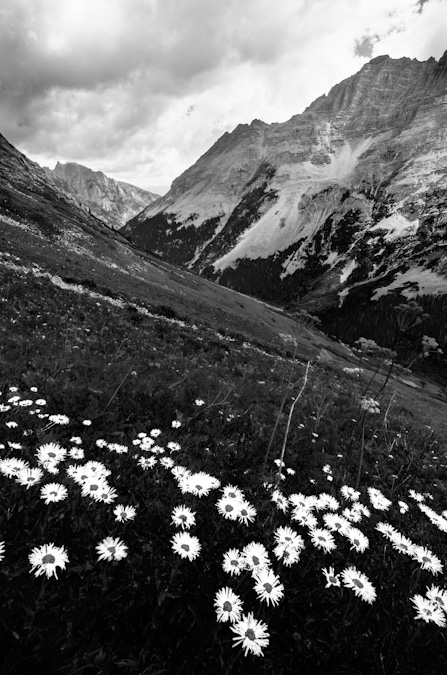
Upon reaching the flat surface below the talus field, we stopped to admire the foliage - the tundra had turned yellow and orange, reminding us that fall had arrived.
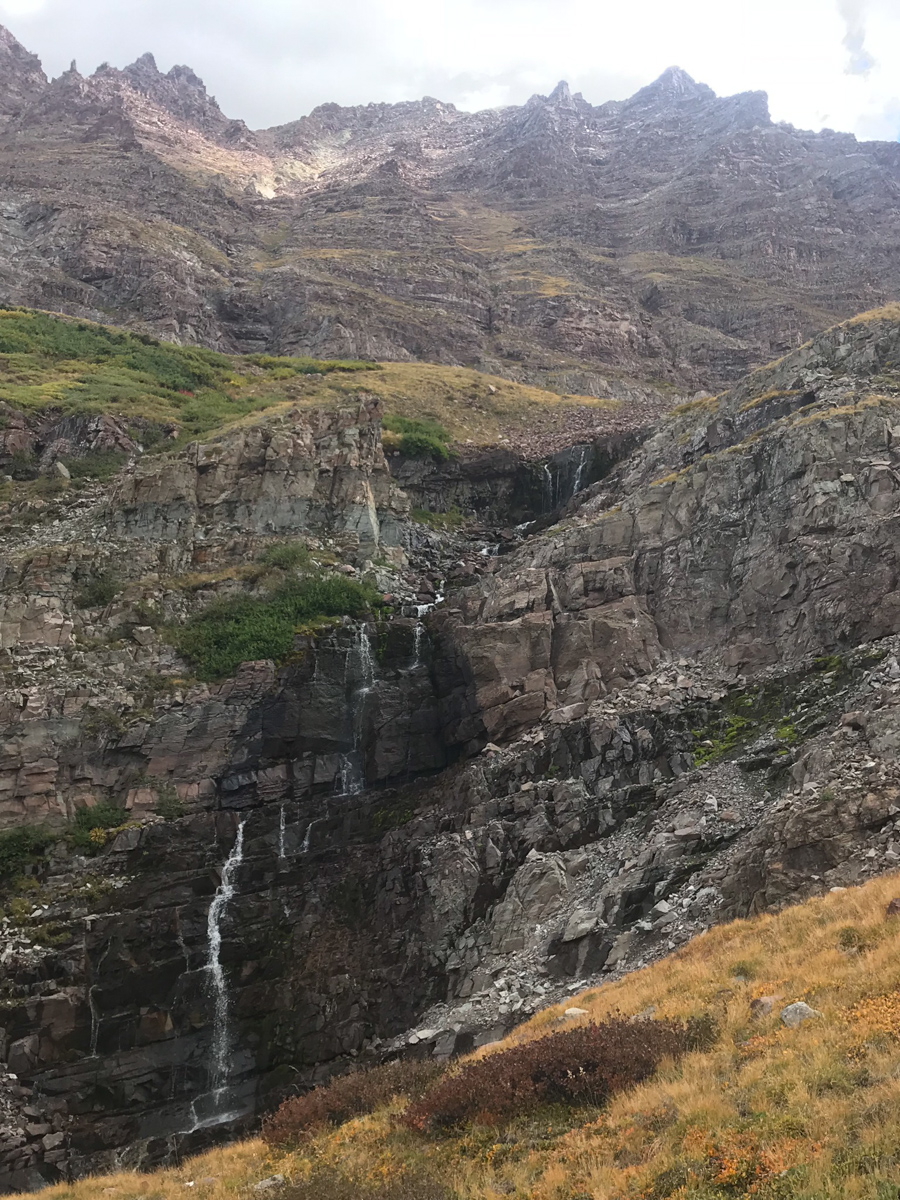
A look back up Thunder Pyramid below some waterfalls we found - a glorious sight indeed.
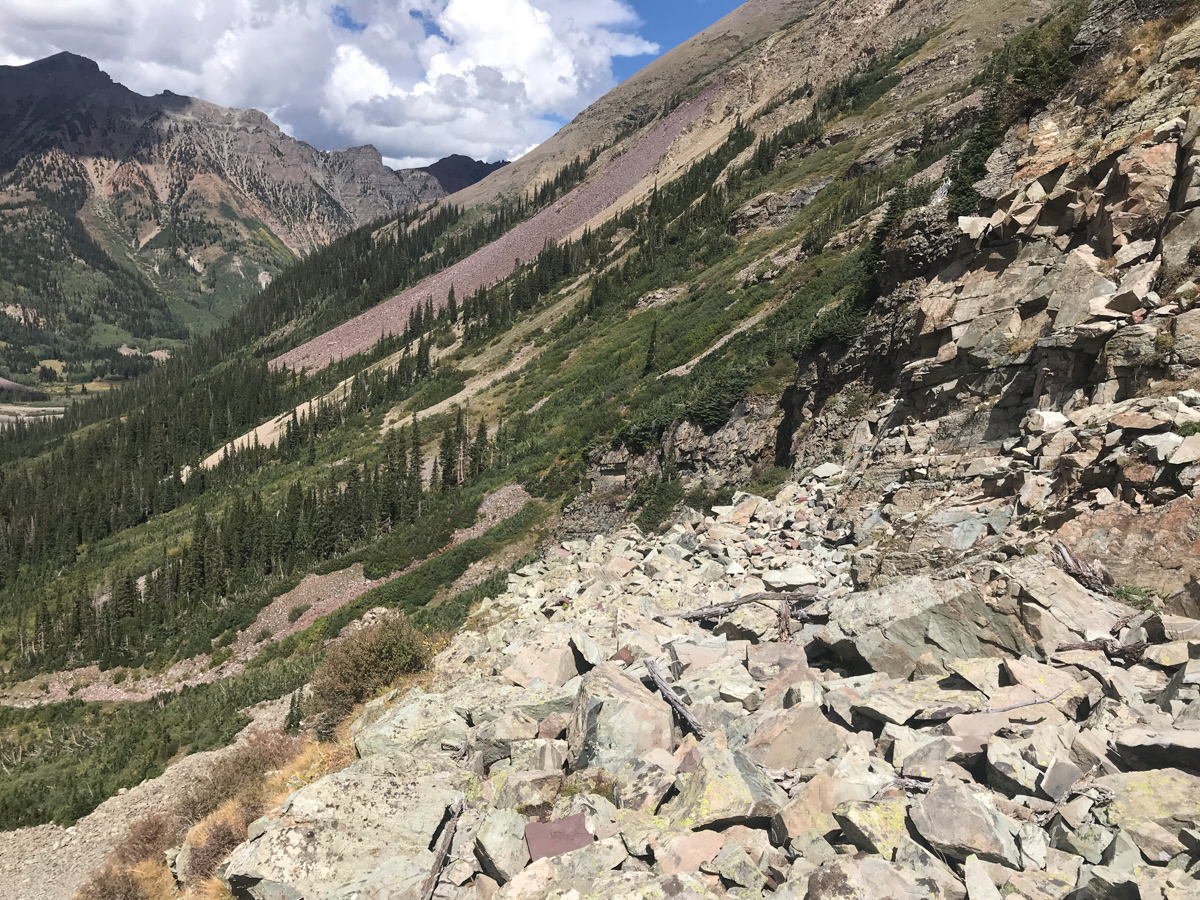
We picked our way down pretty much following our ascent route - here you can see one of the sections where we navigated below and above two cliff bands by following a nice rocky section.
At treeline we found some very large plastic peices that we think were from a downed helicopter. They appeared to be part of the cockpit and were about 2' by 2' in size. Silas carried them out. We reached the base of the peak without incident! Success! Upon reaching our campsite, we found a Ranger talking to an older gentleman who seemed a bit out of breath. I confirmed it was the father we had told the son to go back to get earlier in the morning. It had apparently taken them this long to get him down to our campite near Crater Lake. He thanked us for helping his son Austin, saying when Austin came back for him, he had fallen asleep. They eventually airlifed them both out from the lake, which quite the specticle to witness. I got some photos and video of the event.
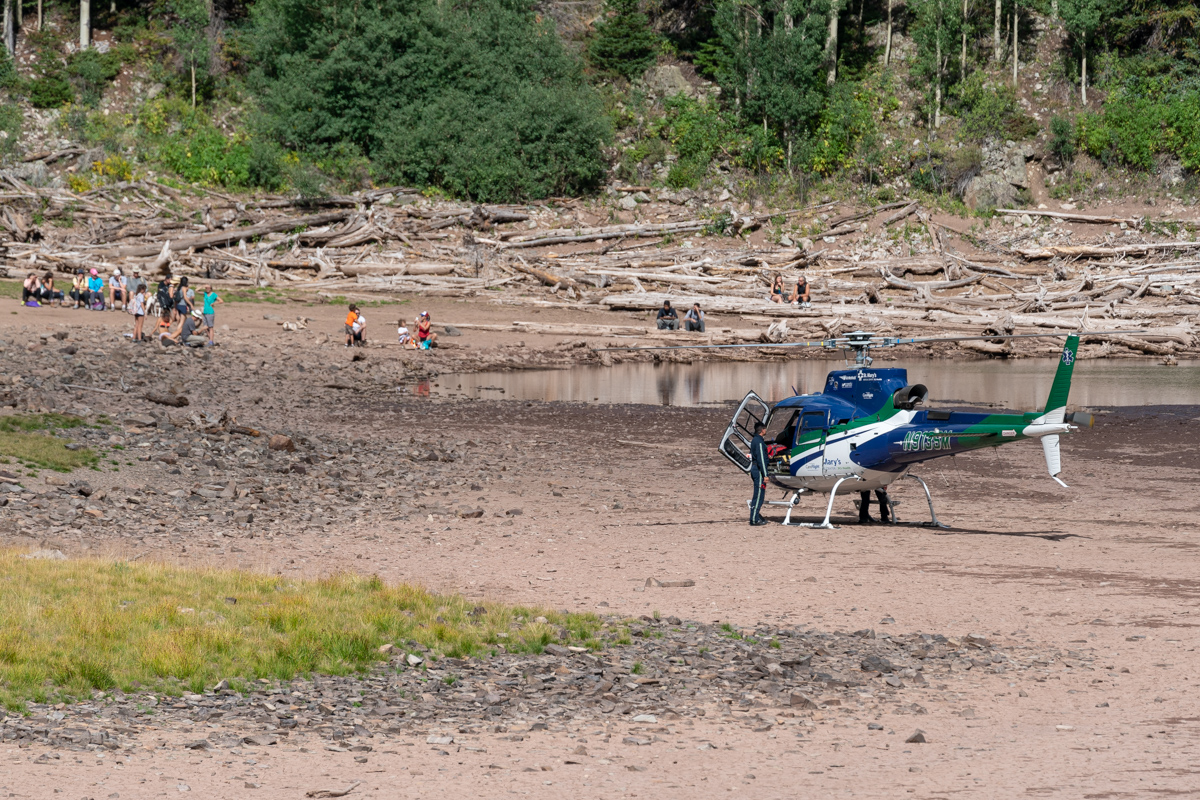
It was impressive seeing the pilots navigate the lake with the helicopter.
Once the drama stopped, I stopped to get some photos of the surrounding area with my telephoto lens. The light in the steep gullies below North Maroon was particularly mesmerizing.
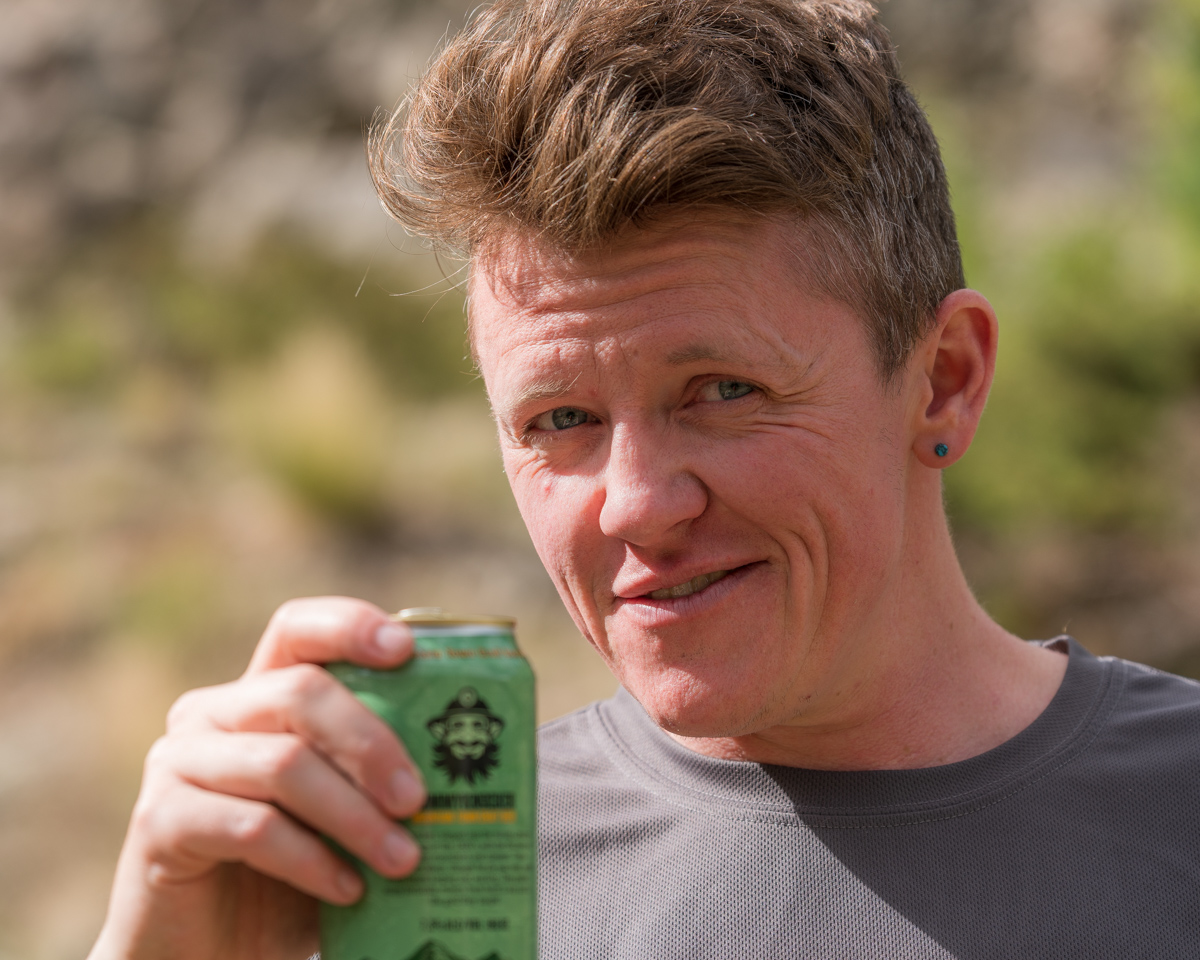
And of course we celebrated with camp beer!
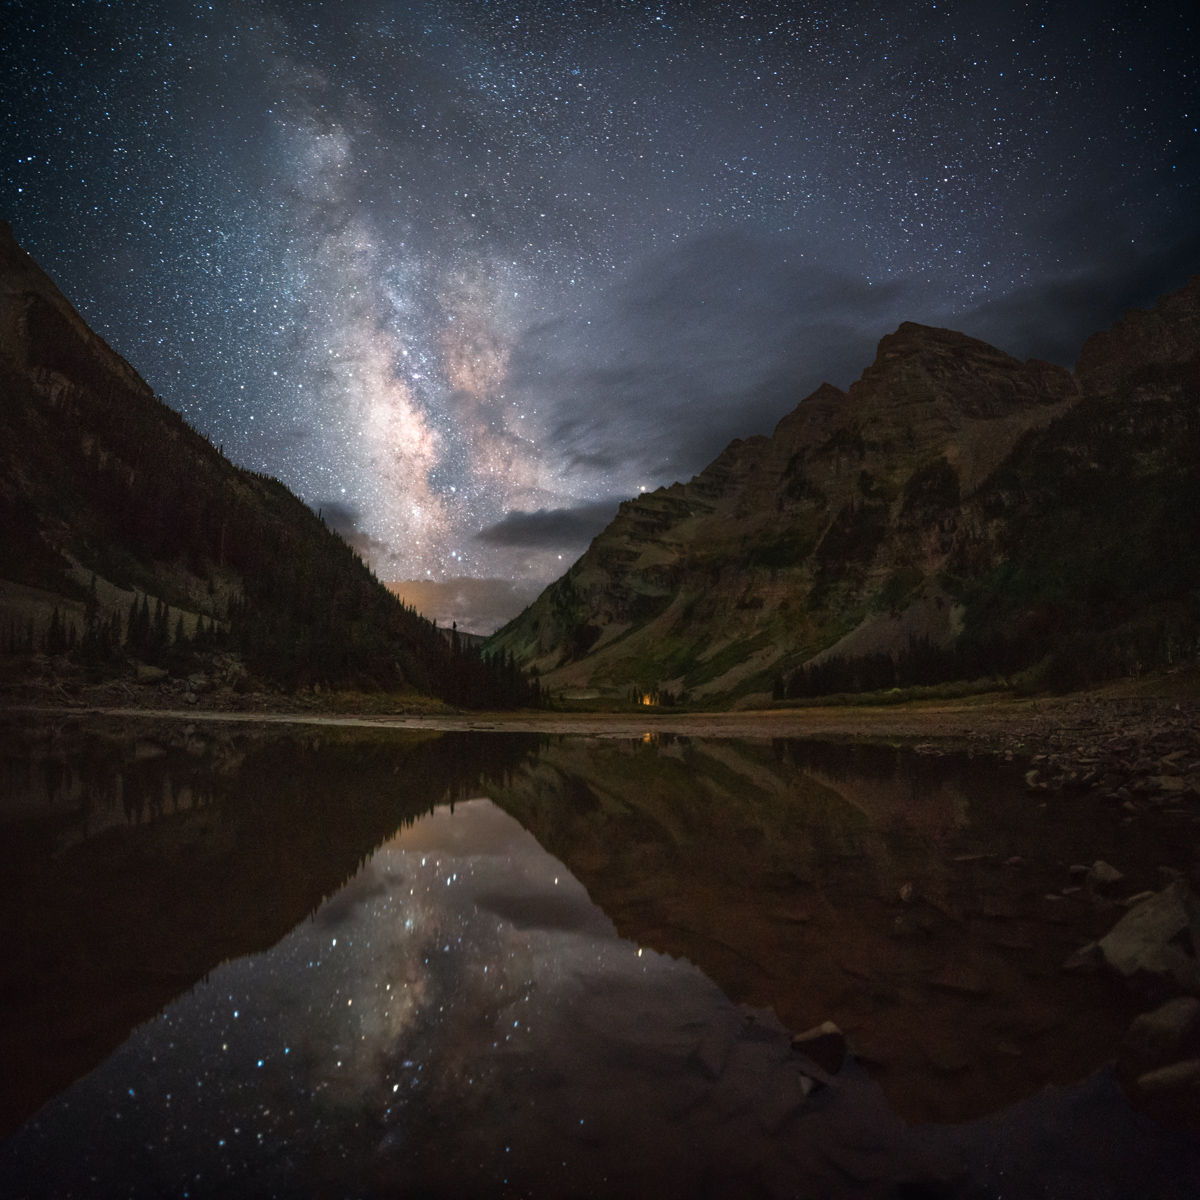
After telling Todd about the climb and settling in for the night at a new campsite, I decided to head down to Crater Lake for some night photos. Using my new 15mm wide angle lens, I was able to get the whole lake, both Bells, and the Sleeping Sexton in one photo. Nice.

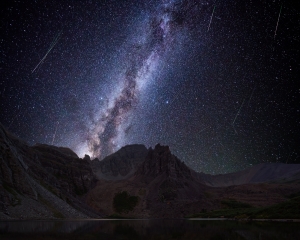
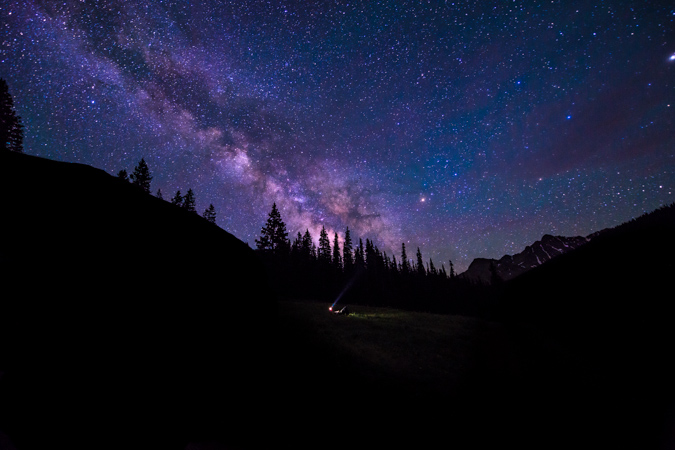
I was particularly excited to re-create a photo I shot here several years ago with inferious camera equipment - the Milky Way in the valley gap between the Maroon Bells and Pyramid Peak. I think it was quite the success.
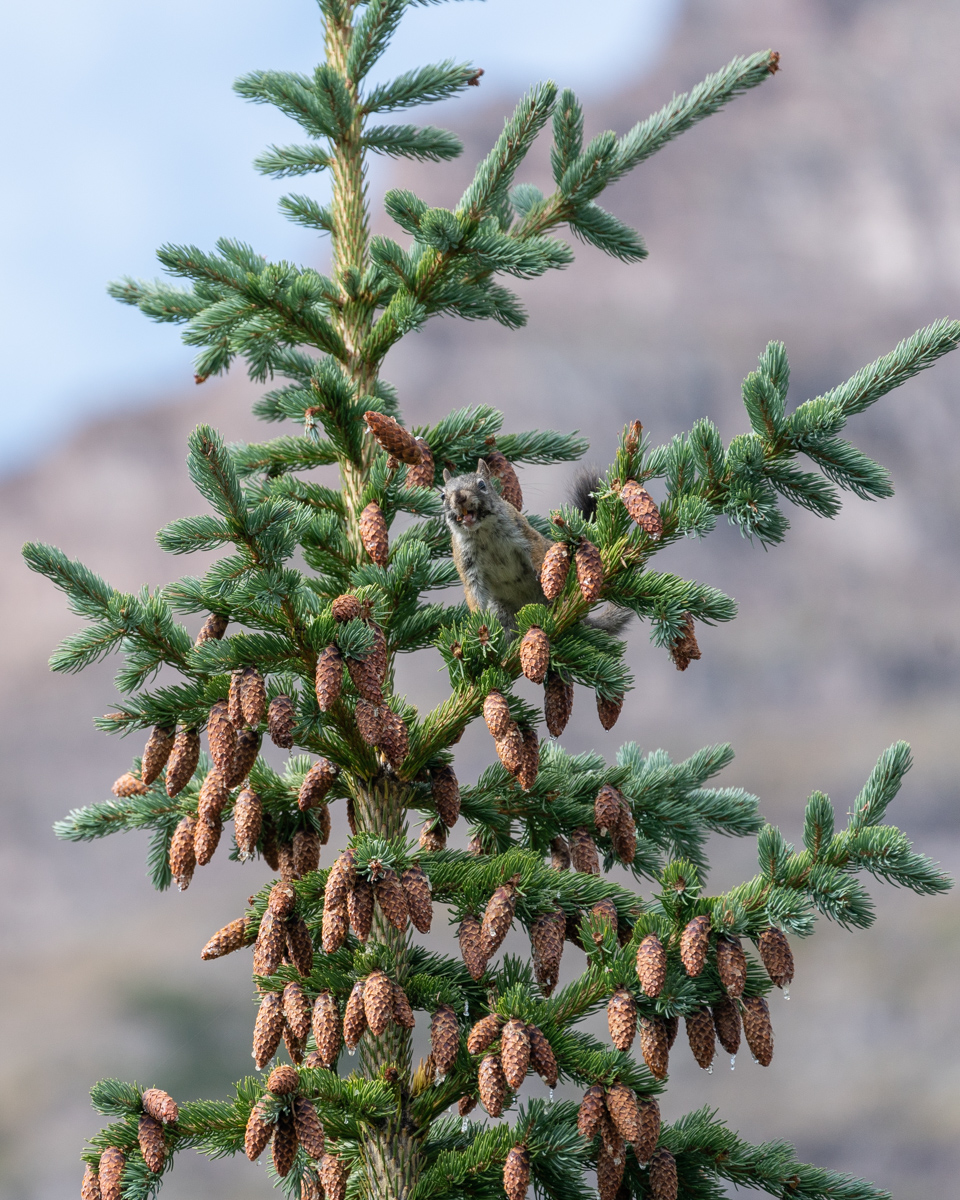
Day 3 - a rest day for me and a climb of North Maroon for Silas. I spent a great deal of the day putzing around with my camera and talking with my friend Todd. We were confronted by a Forest Service Ranger for camping in the wrong location. Apparently the correct site 6 was further back away from the trail than we realized. The sign we camped near said site 6 and was heavily impacted. He forced us to pack up and move to another spot. We were happy to comply. Note - the signage is pretty spotty and not very useful in general. Many camp sites have huge signs saying "restoration in progress, no camping," and others have no signage at all. It is wildly inconsistent and the marked sites are, well, not very well-marked. Noted. Since Silas was away on North Maroon, we had to figure out how to coordinate the move. We packed all of Silas' gear up into his pack and moved to site 8 (which was WAY better, by the way). We came back to site 6 and Silas had just arrived back from North Maroon. Perfect timing! I decided to get some photos of a squirrel that was throwing pine cones on the ground (which is hilarious to watch).
I also decided to get some abstract shots of a rock covered in moss... boring for some, probably, but interesting to me.
And of course, the setting moon was fun to photograph over the Sleeping Sexton.

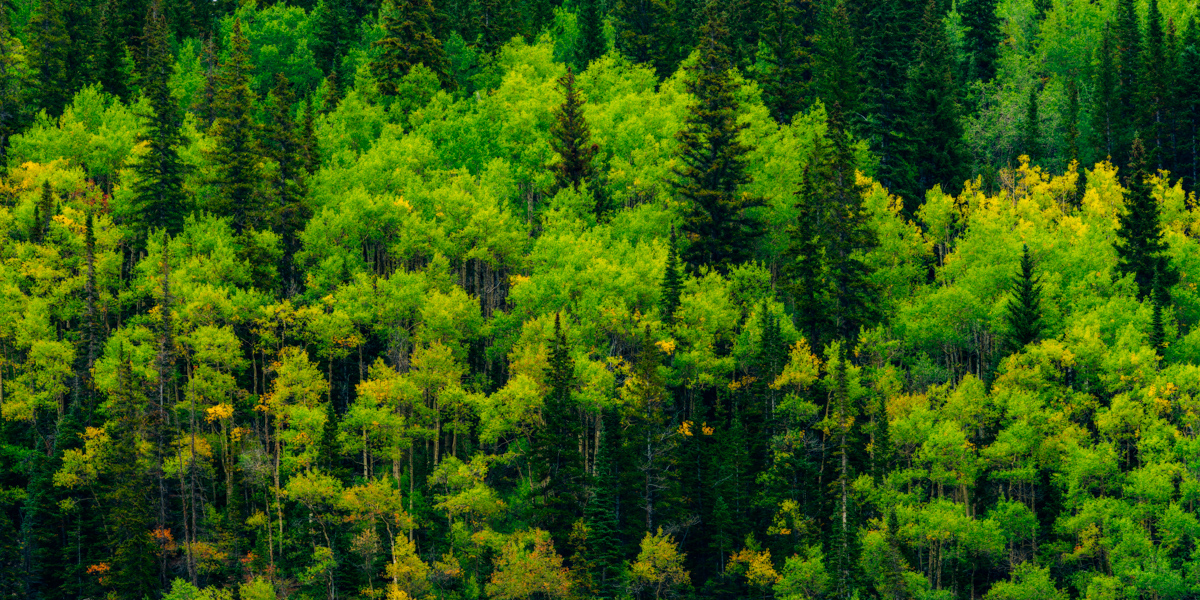
After we all napped in the rain at site 8, I set-off to photograph the area with my telephoto lens. The foliage was just starting to change color and I really enjoyed phtographing the area.
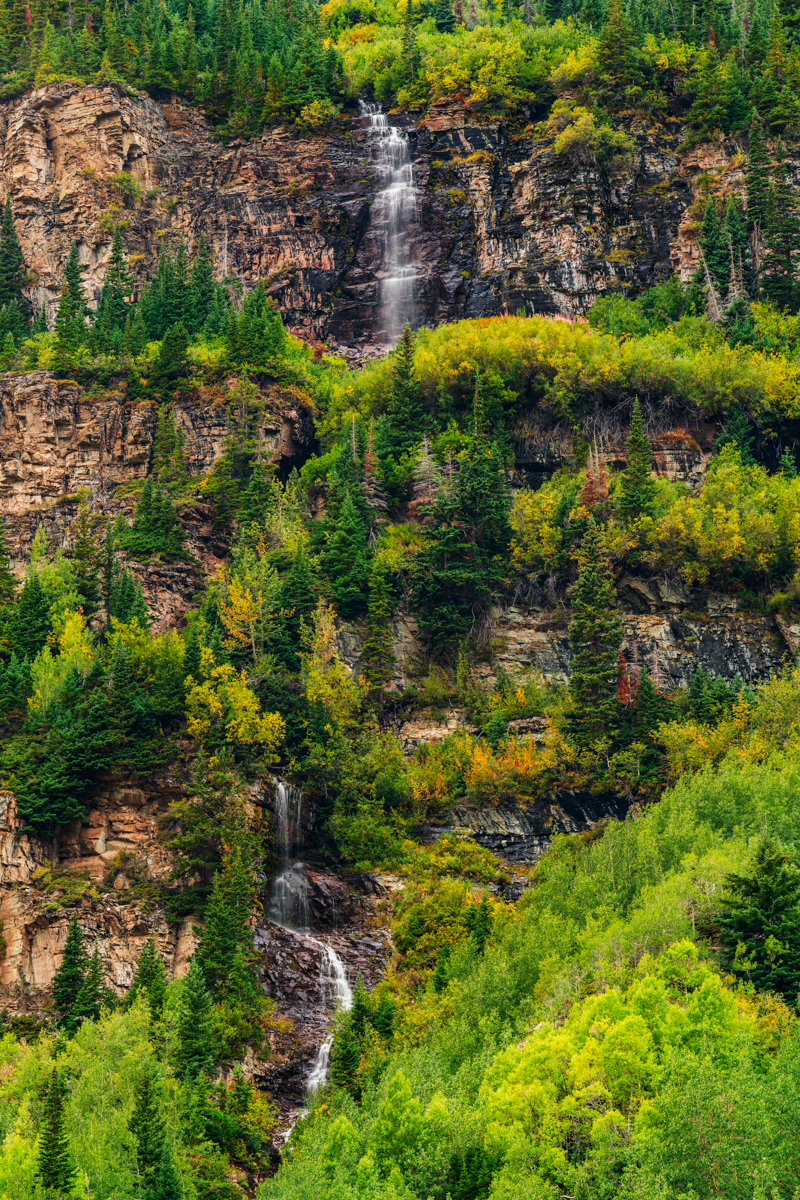
After the rain, there was a significant waterfall that appeared above us below North Maroon, and it was also fun to photograph.
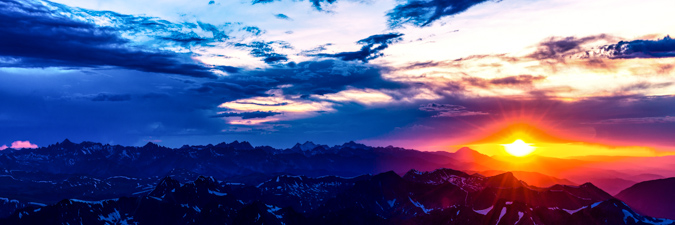
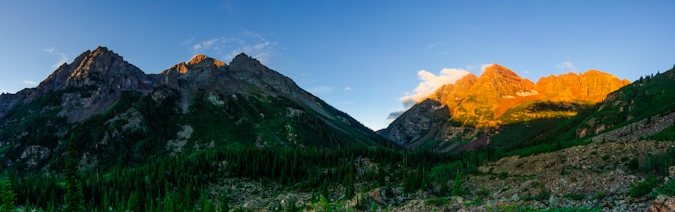
A very large weather system moved into the area around 4 PM and we were glad we were not climbing. I had a vision in my mind of snow being dropped onto Pyramid and Thunder Pyramid during the storm and thought there could be a possibility that the storm would break at sunset and produce some amazing results. I really wanted to commemorate the trip and experience with one last photograph of Pyramid and Thunder Pyramid in these conditions, so I sold Silas on the idea of hiking all the way back up North Maroon's slopes to get a good view of these two peaks at sunset. We hiked in the rain for a couple of hours up the trail for North Maroon, which was pretty miserable. Honestly, who does this?
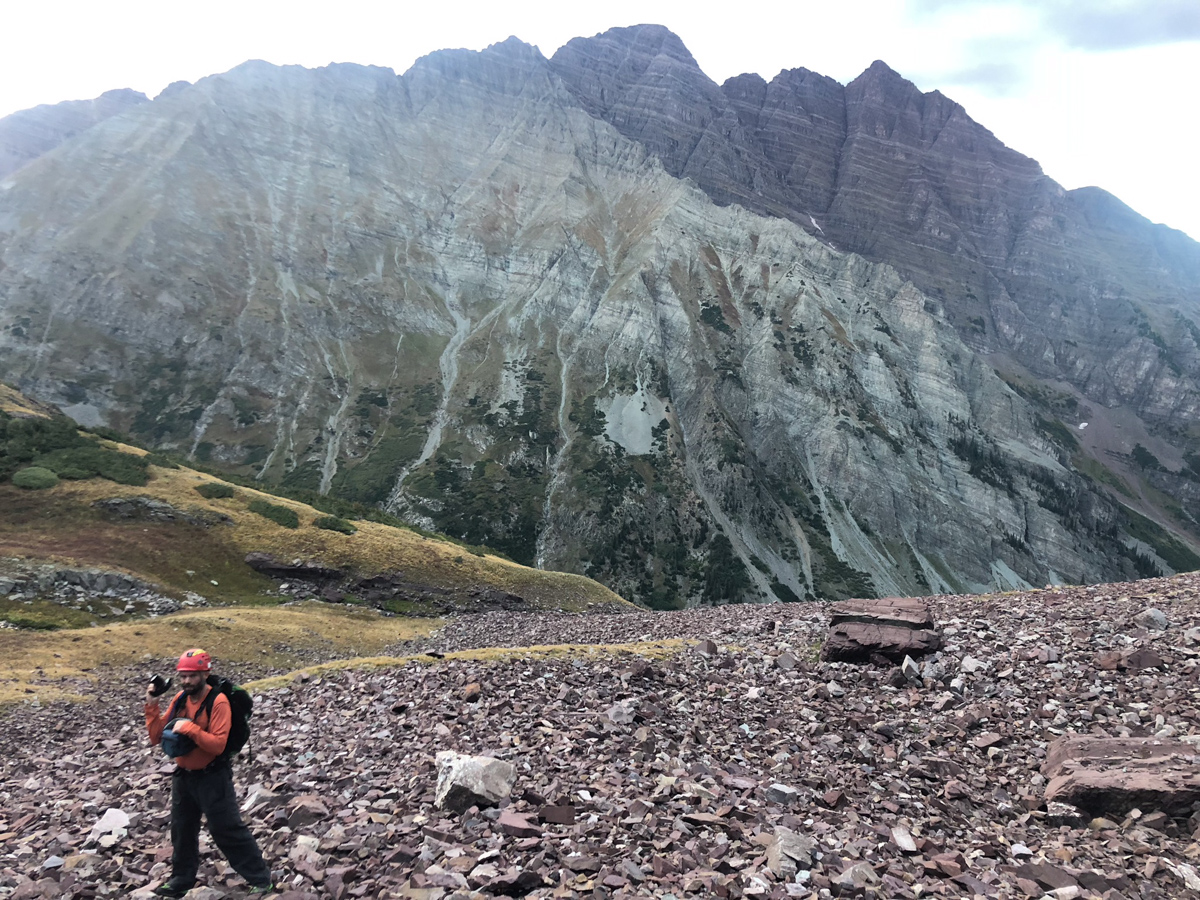
When we arrived, I stopped at the very long boulder field below North Maroon, which was very wet and slippery. I noticed a climber at the other end of the boulder field who was moving incredibly slowly back down the mountain. He was maybe moving one rock per minute. He was obviously in pain. I later learned his name was Scott and he was from Woodland Park, CO. I yelled out to him.
Matt: "Hey man, are you OK!"
Scott: "Yep, just hurt my ankle and can't put any pressure on it."
Matt: "Do you need any water or Ibuprofen?"
Scott: "I'm good man."
Matt: "Well, I'll wait for you up here to make sure you get down OK."
Scott: "Thanks man, appreciate it."
Silas and I waited below the boulder field for another hour and he still had not come down. I decided to climb back up to the boulder field and found that he was really high above the trail. I went to him and helped him get down to safety, one step at a time. He was badly hurt. We gave him some ibuprofen and wrapped his ankle in an ace bandage and he went on his way down the mountain.
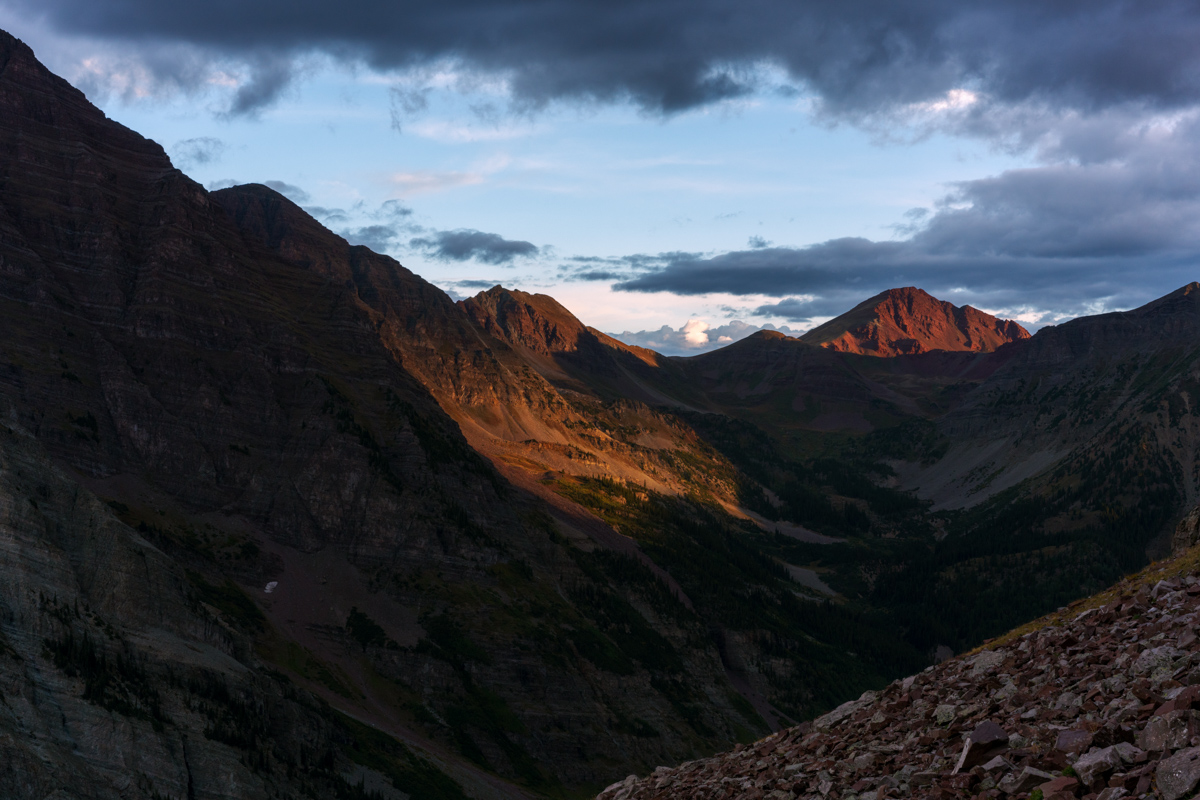
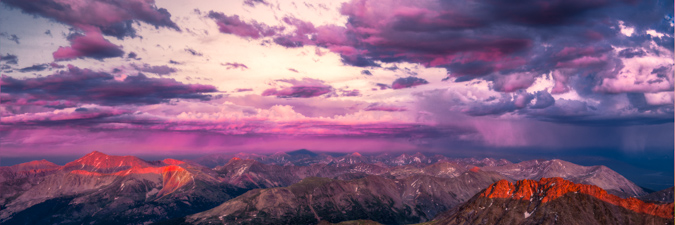
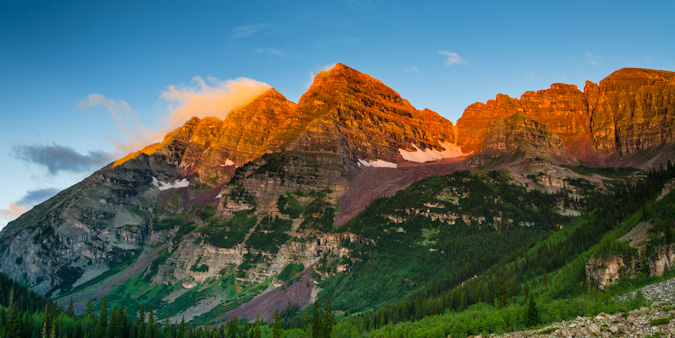
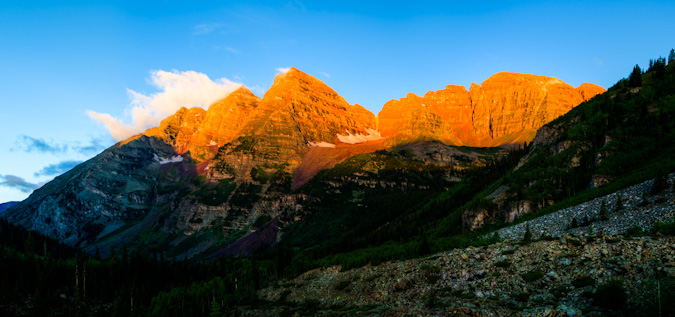
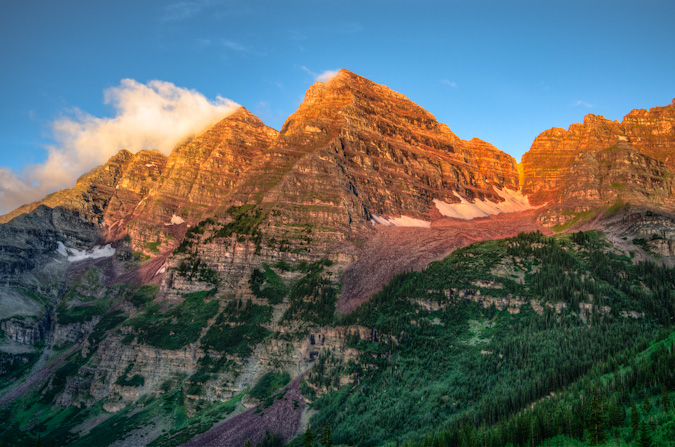
The clouds and light were quite dramatic and I was really holding out hope that the clouds would break for just a minute to light up the peaks with alpenglow.
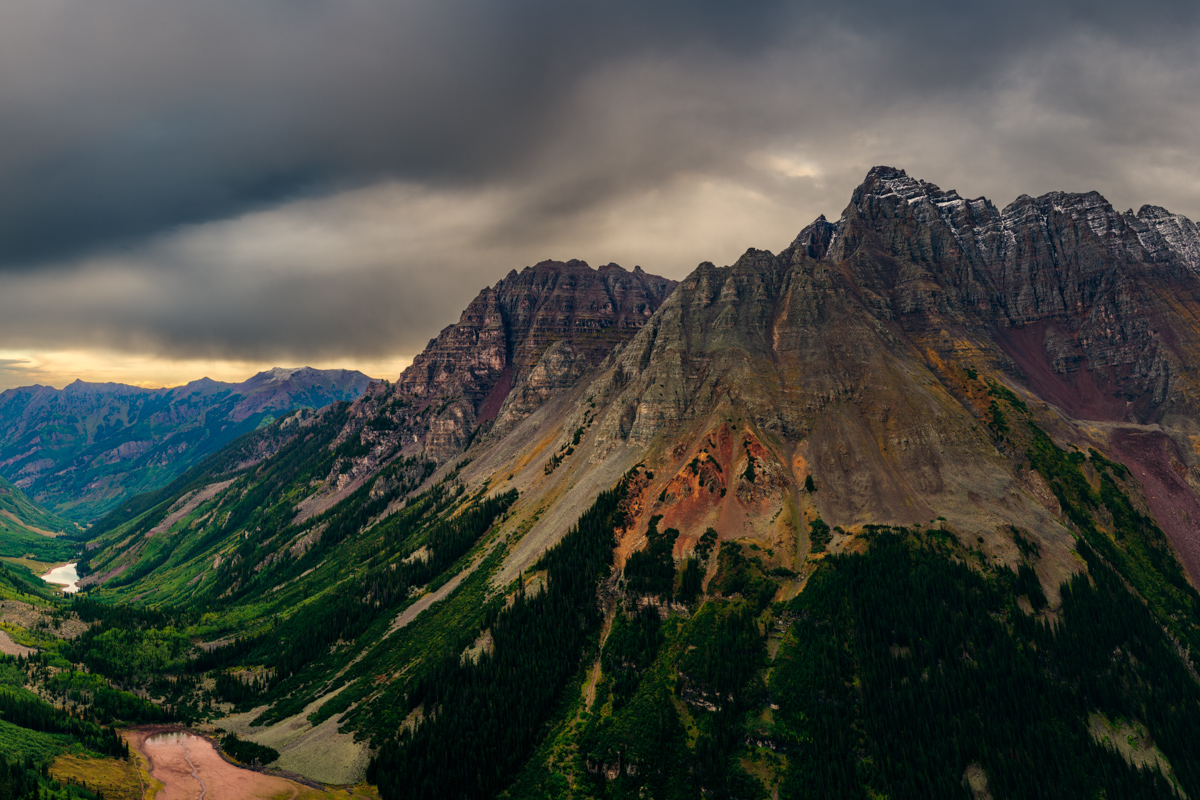
Alas, my wish was granted! I was so elated! Silas caught the whole thing on video.
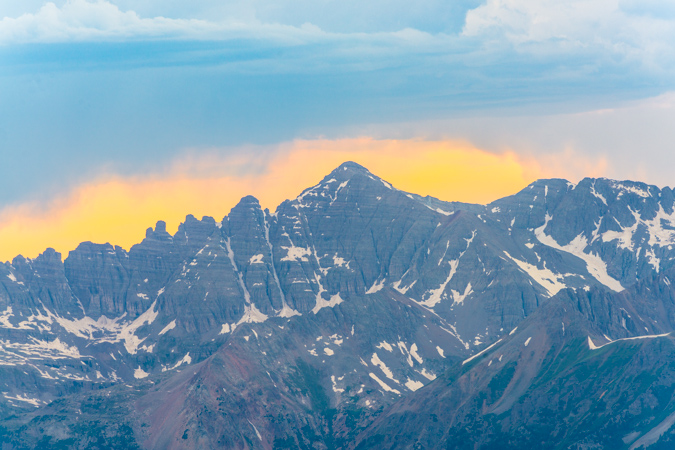
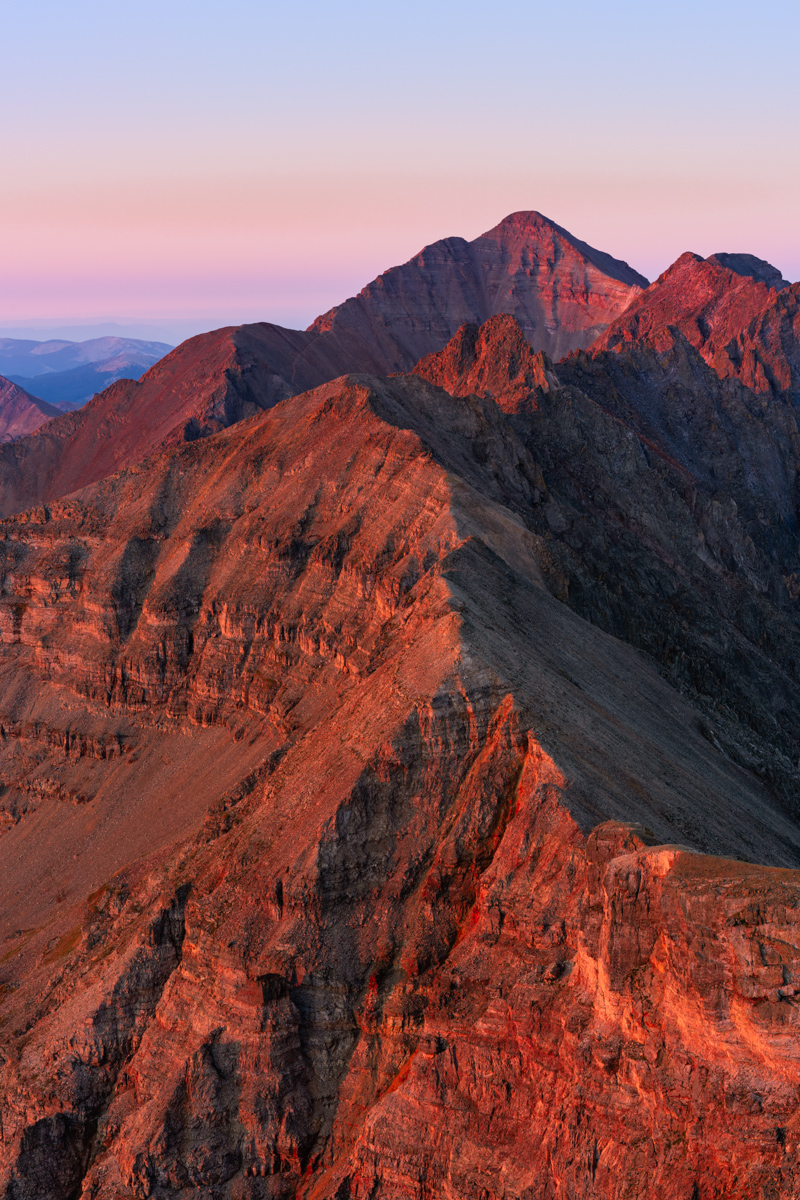
I really loved this scene. Not the best, compositionally, but damn, the light! Pyramid and Thunder Pyramid covered in snow with alpenglow, just as I had envisioned. Yes!
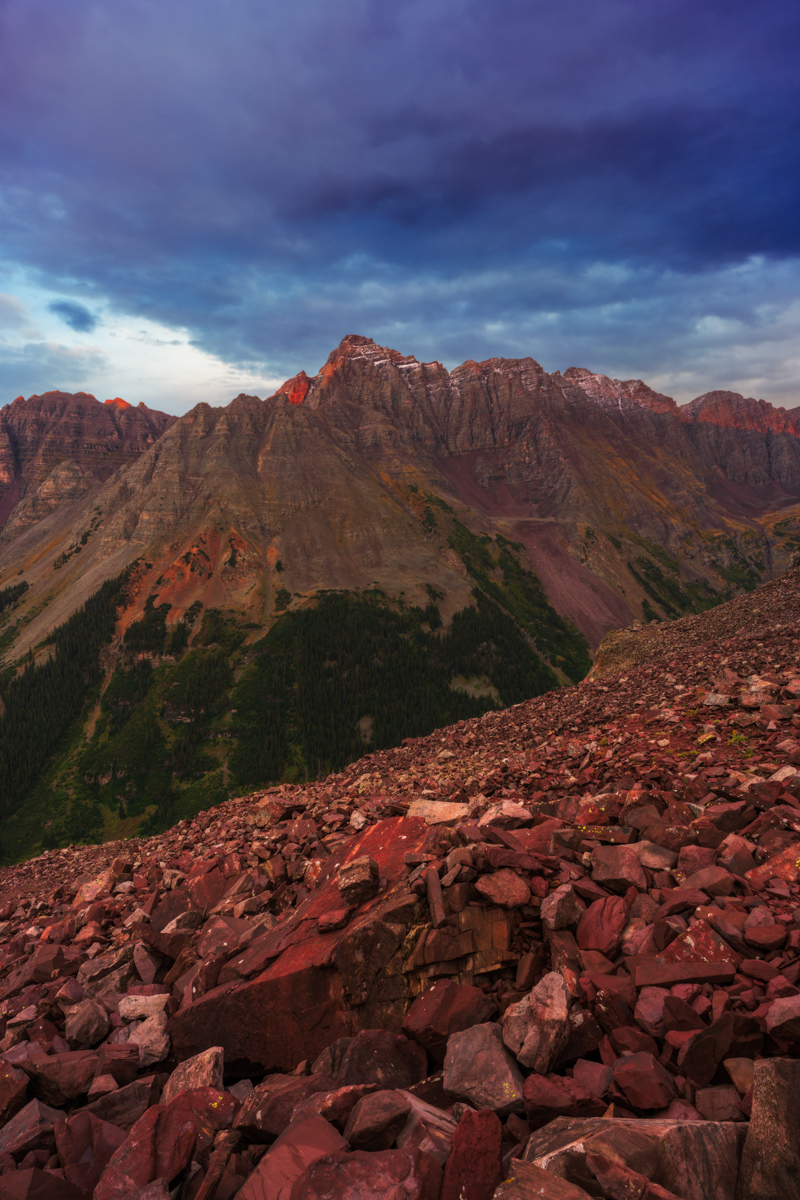
I am really proud of this image. I had the vision. I had the perseverence to try to get it. I was prepared. Execution was good too. Hallelujuah, this is what its all about for landscape photographers!

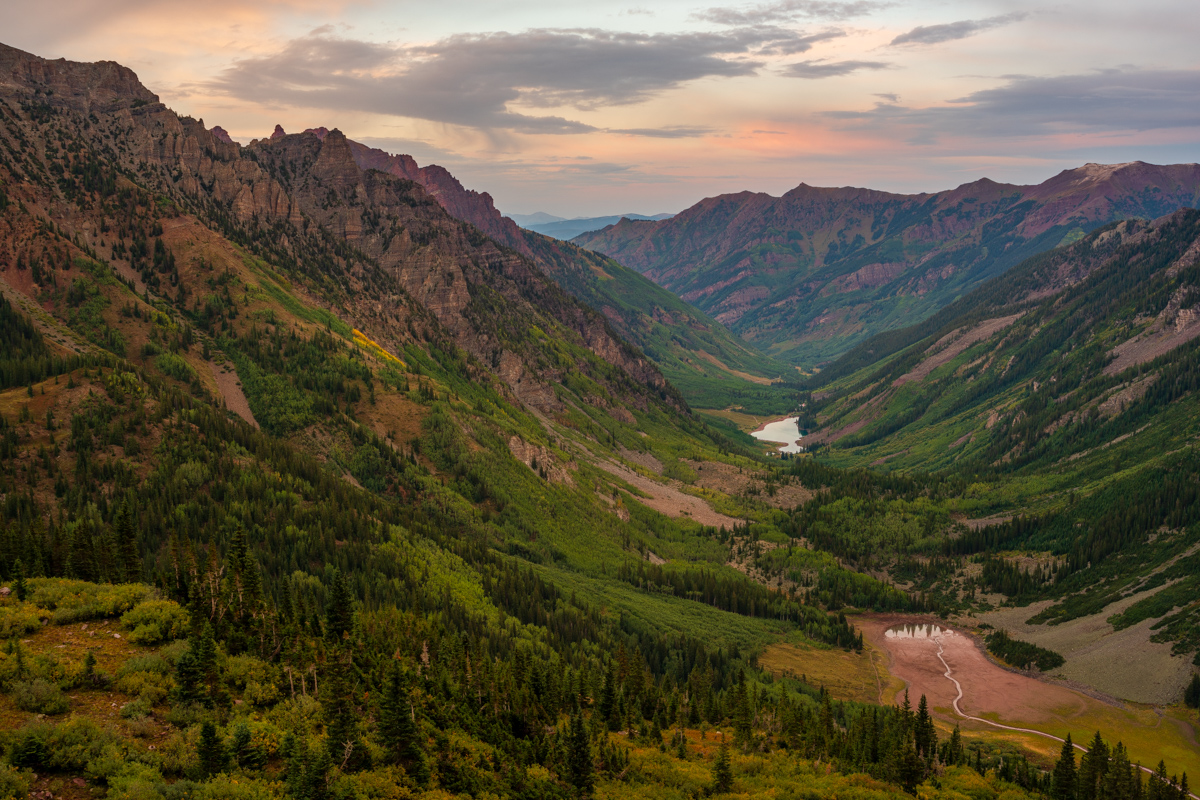
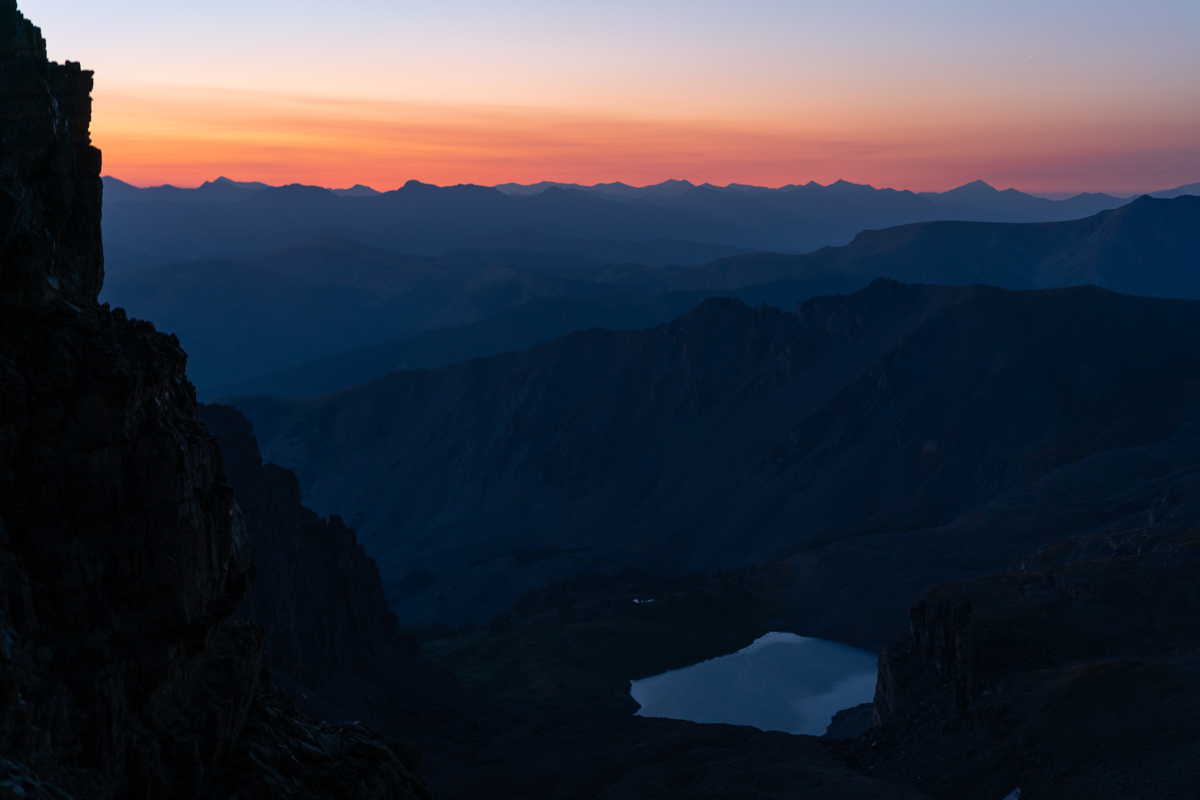
The light to the north was pretty great too! Looking down on Crater Lake and Maroon Lake was quite a treat.
After sunset, we left. On the way down, we ran into three hunters, a father and two sons who were hunting Mountain goats. They said they saw our injured hiker earlier and he was doing OK. Good! We returned to camp very late and ate a very late dinner and had beers. What a great trip! The next morning, we packed up and head out at 10 AM. Naturally, upon arriving at Maroon Lake, the shit-show of tourists not obeying the Forest Service signs was even worse. I loudly but politely asked several parties to not cross the rope and that they should read the sign. I bet the forest service hates this new system. I can't imagine policing it 24/7.
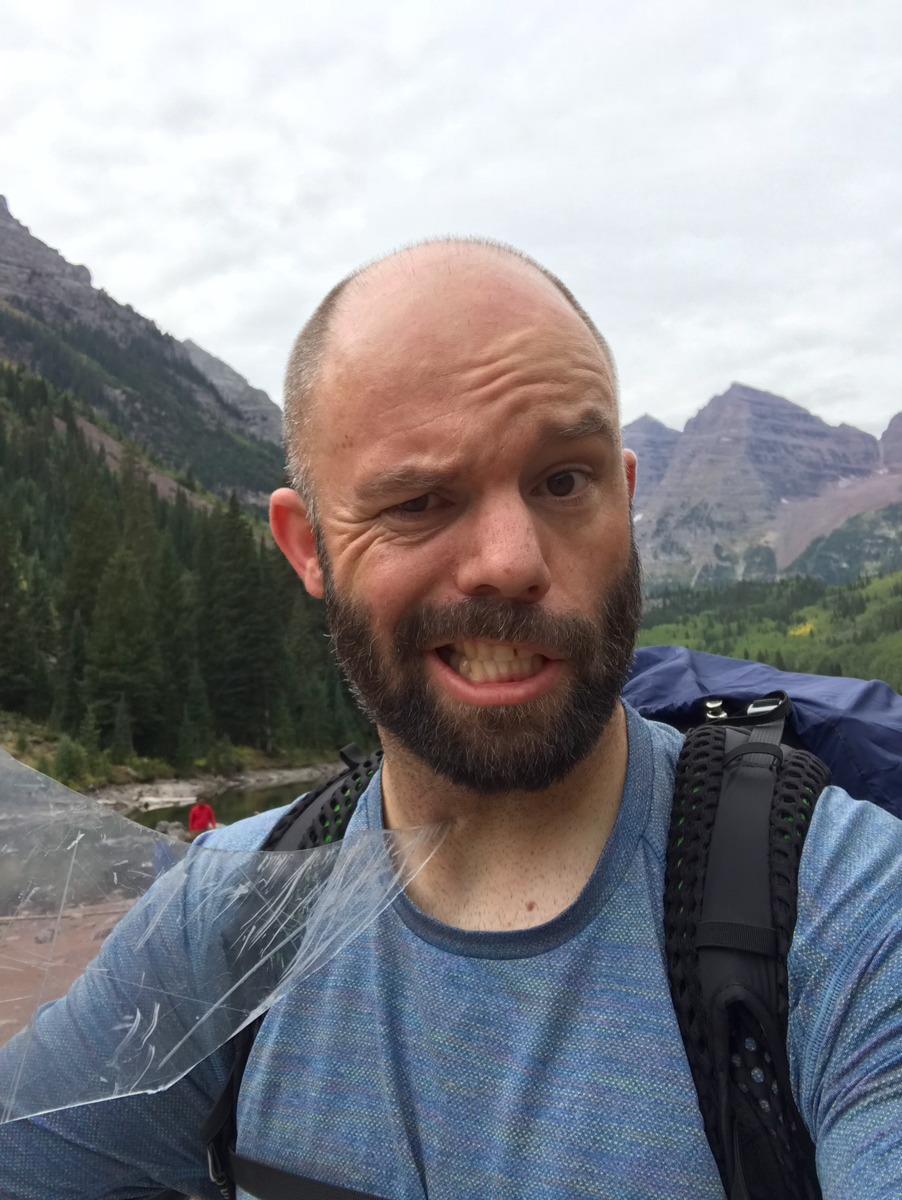
I think I looked pretty menacing with the plastic helicopter cockpit part we found...
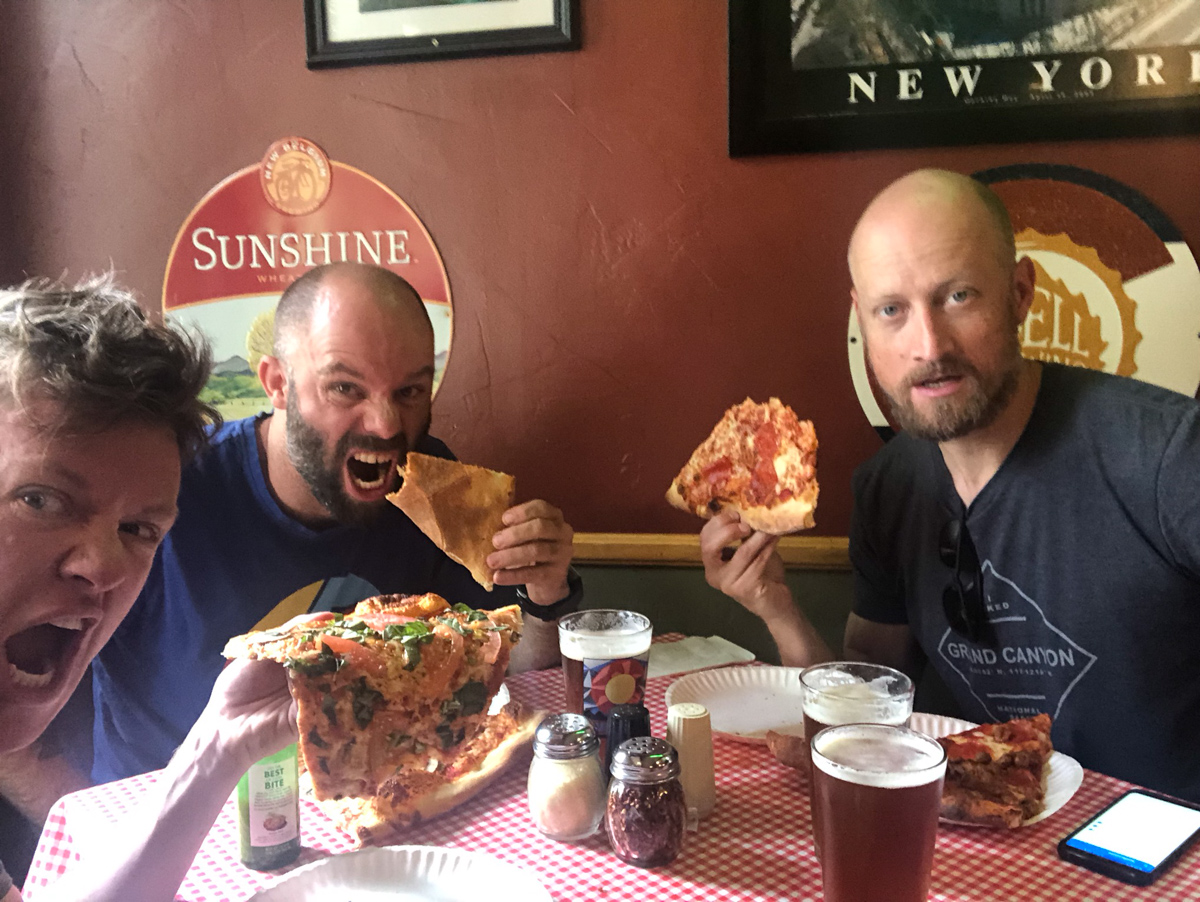
A successful trip deserves a trip for beer and pizza. We stopped at NY Pizza in Aspen for our celebration meal.
Wow, that concludes this report. My final Centennial!
A few thanks are in order -
Thanks to Silas Musick for being such an amazing climbing partner. We celebrated on 14 of those 100 summits together and I consider you my best friend - all because of our mutual passion for mountains and the outdoors. You're a beautiful human.
Thanks to Natalie Moran for taking me up Jagged, Dallas, and Teakettle. You're a fabulous climber and a great person.
Thanks to Terry Matthews (RIP) for accompanying me on my first class 3 climbs in 2008 when I got back into this pursuit. You are missed.
Thanks to Ethan Beute - our climbs on obscure 13ers kept me going - miss you man!
Thanks to Regina Primavera - you're a great friend and it has been fun catching summits with you since 2011.
And lastly, thanks to my parents for getting me going on this crazy journey 35 years ago. The photo Silas posted was actually my first 13er - Fairview Peak - I was 4 yrs old.
I created my little website in 2009 mostly to teach myself how to build one but also to document and share my journey with my friends and family. I know my dad regrets not having something similar to look back on. Hope it’s at least been somewhat useful to others as well.
Next up? I have no idea. I don't think it’s the bi-centennials.
I have some photography projects I want to tackle, including a book of photos of the Centennials...
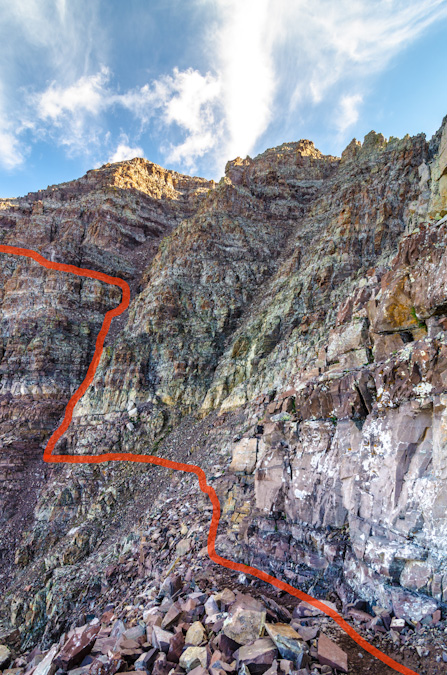
Here is a photo that might help folks see the general route we took:
And a link to the Gaia GPS track:
Cathedral Peak in August - Photographing the Perseid Meteor Shower and Sunrise from the Summit
 Cathedral Peak as seen from Grizzly Peak in 2013
2018 is the year! I WILL complete the quest to climb the highest 100 mountains in Colorado! Cathedral Peak marked #99 and was only one of two peaks standing between me and my dreams. I set off for Aspen at noon on a Saturday. My plan was relatively simple yet ambitious: Backpack to Cathedral Lake, set-up camp, photograph sunset, find a composition for the Perseid Meteor Shower, photograph the Perseid Meteor Shower, sleep (maybe), climb Cathedral Peak in the dark, photograph sunrise from the summit. Seems doable, right? I have made it somewhat of a tradition to photograph the Perseid Meteor Shower whenever I can. Last year's was a total dud due to the moon being full, so I chose not to photograph it; however, the year before I photographed it from the saddle between Pigeon and Turret, which was also ambitious (and quite rewarding). I was hopeful for a similar outcome at Cathedral Lake.
I have been dreading the climb of Cathedral for several years. Most people climb it in early summer when there is ample snow in the incredibly steep couloir leading to the summit saddle. I personally dislike snow climbing, but also did not have high hopes for climbing up that gully when it was all hard dirt and rock; however, I needed this peak and so it was on!
As always, you can see and download my full route and GPS tracks over on the incredible app, Gaia GPS, which I use on my iPhone to plan, track, and follow my routes on these trips. It is absolutely invaluable and worth every cent. I personally love that you have full access to all USGS topo maps and National Geographic Trails Illustrated maps as well. You can use the app while in airplane mode and even save maps for offline use. To get a nice discount on the application, follow this link and you'll also support my efforts to keep this site running.
My full stats for this particular climb, which included summiting Cathedral Peak (13,943 ft.):
- Peaks climbed: 1
- Miles hiked: 8.5
- Time: 5 hours, 23 minutes
- 3,987 ft. elevation gain
For this trip, I decided to pack quite a lot of camera gear (by the way, these are affiliate links and using them helps me pay for this site and to bring you better content):
- Sony A7R2 Camera
- Sony 12-24 f/4 lens
- Zeiss Loxia 21mm f/2.8 lens
- Sony 55mm f/1.8 lens
- Sony 70-300 FE telephoto lens
- Feisol Tournament 3442 tripod
As usual, I used the beta from Gerry Roach's High Thirteener Guidebook. I was still using the 1st edition of the book; however, his new edition is available on Amazon after many years of waiting - rejoice!
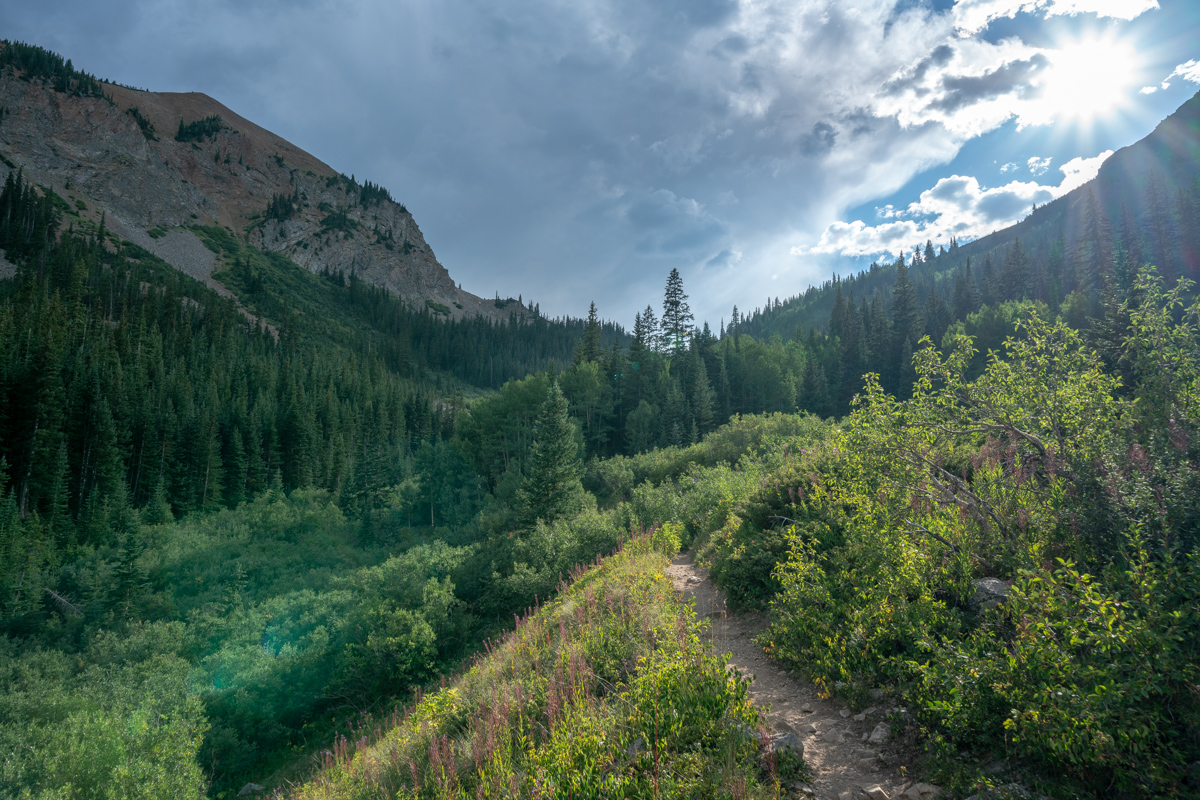
I reached the Cathedral Lake Trailhead at 5 PM. It was not very full and that made me smile. I embarked up the steep trail which Roach describes as unrelenting and pretty much did not stop until I reached the lake. The hike is steep but the trail is great and the scenery is wonderful as well.
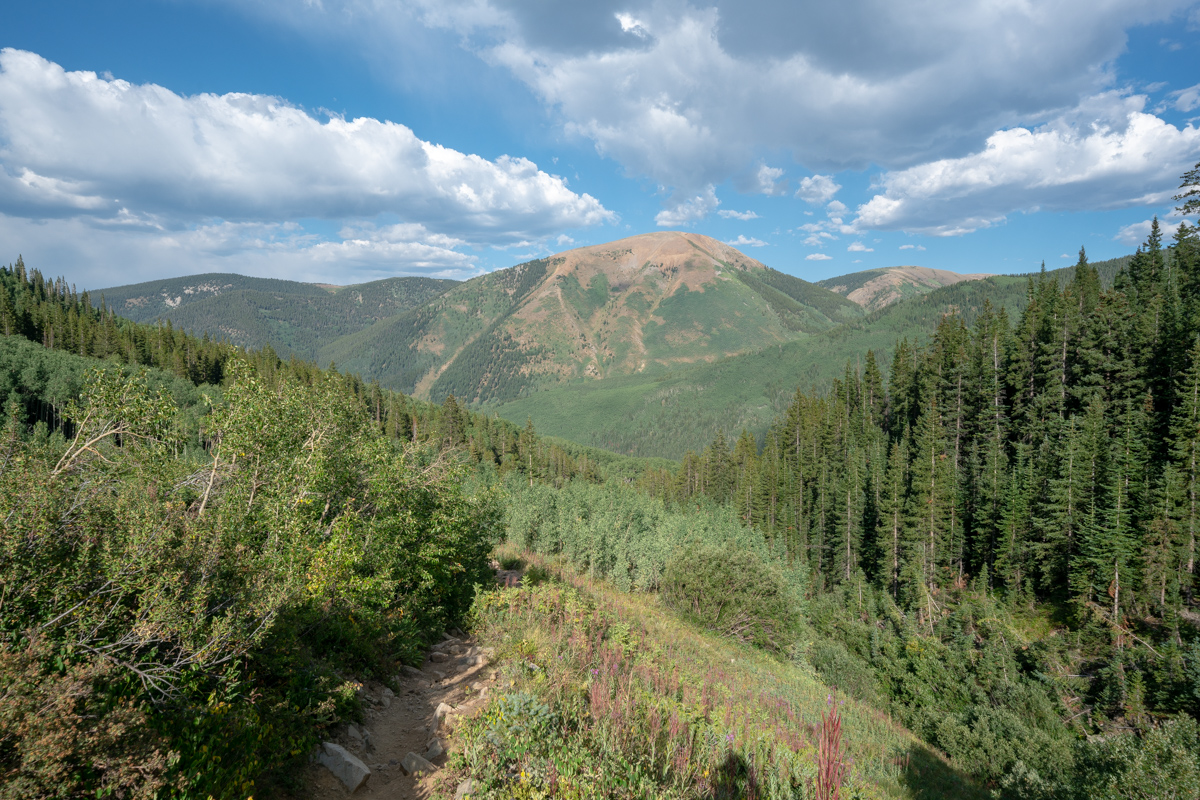
As you climb the trail, the view opens up quite a bit across Castle Creek to reveal Ashcroft Mountain.
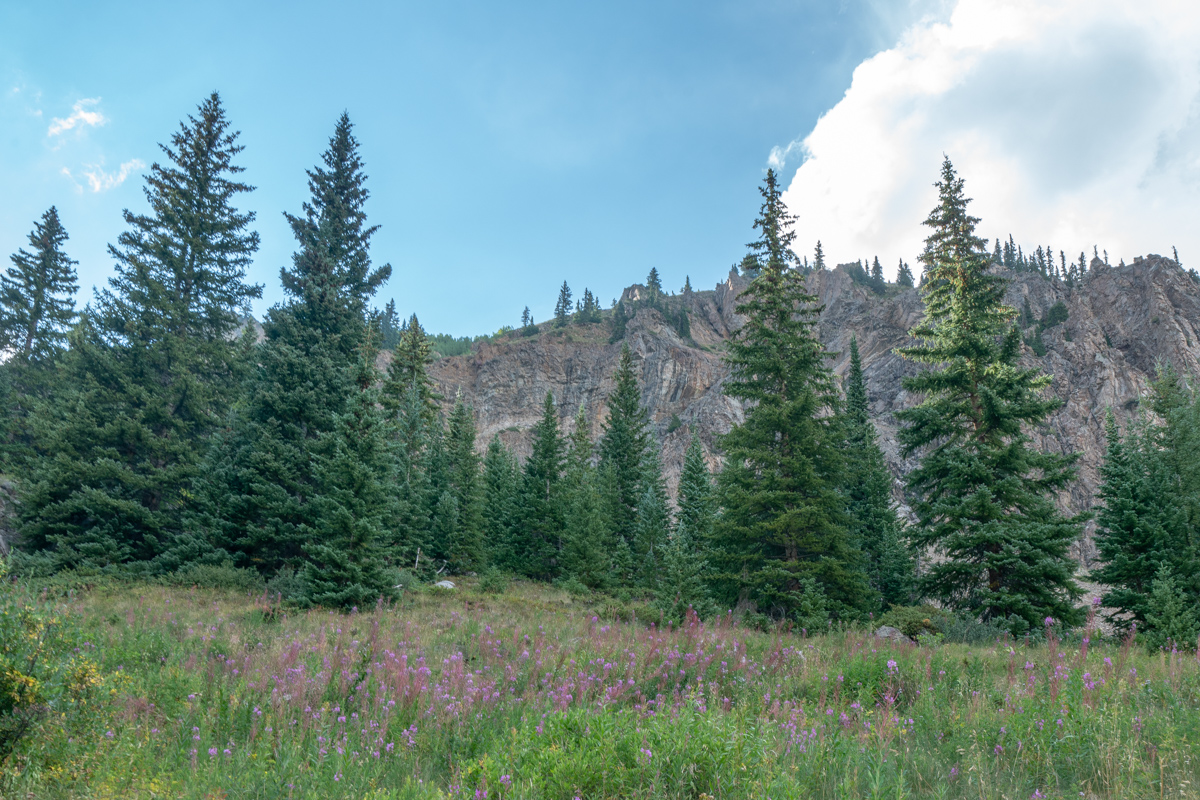
The fireweed had all grown super tall and looked really eerie.
As I continued up, the eastern flanks of Malamute Peak began to reveal themselves.
The area just before the lake has ample camping and some great sites near the stream. I opted to find a spot a little higher up near some small trees with a wonderful view of Cathedral Peak (center) and Leahy Peak (right).
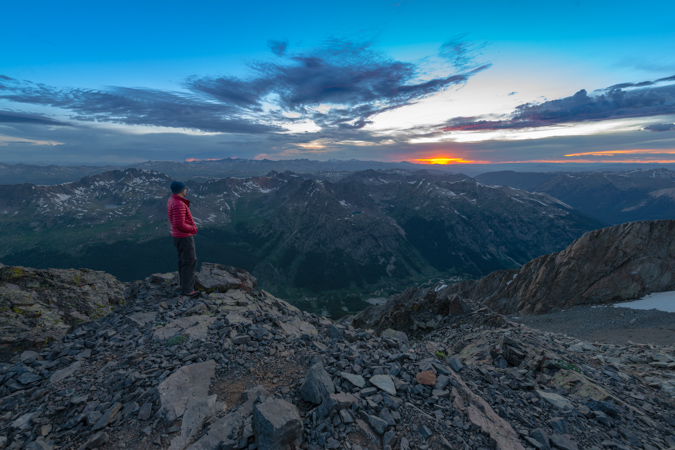
I set-up my campsite at 6:30 PM and began hydrating my dinner. Knowing I would need a good hour for it to hydrate, I hiked to the lake and found some spots to photograph the sunset from. It was really pretty and I was the only person up there except for a fisherman, who left shortly after I arrived. Being the only soul around at a high mountain lake is equal parts scary and serene.
The sunset looked like it would open up over Cathedral Peak, so I repositioned myself on the eastern shore for some great shots of Cathedral Peak.
The light was bright, intense, and really colorful.
I decided it was time to go back and get ready for bed. I enjoyed one last gaze at the parting light before bed.
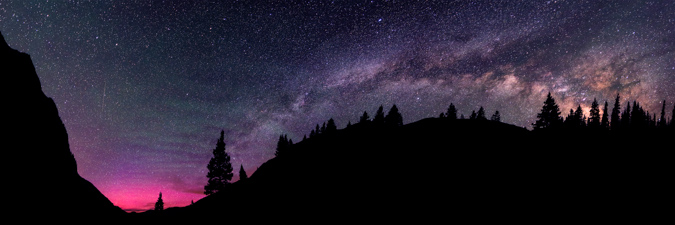
I set my alarm for 1:30 AM so I could photograph the Perseid Meteor Shower. I ended up waking up at 11:30 PM to some strange sounds (maybe just wind). I decided to get up and set-up my camera for the Meteor Shower. The Milky Way was ablaze to the south and I was loving it.

I found a nice compositon including Cathedral Lake and the Milky Way and set-up my camera to shoot on a time-lapse automatically every 31 seconds. I lay on my back and watched the meteors for about an hour or so - it was one of the best displays of the Perseids I could remember. Huge streaks across the sky. It was pitch black - no light from cities, no moon. I decided to leave my camera there all night and get some sleep. I wanted to shoot sunrise from the summit of Cathedral.

I got up at 3:45 AM, found my camera again, packed it up, and began my journey in the dark up Cathedral, following the description in Roach's book. I was not able to find the "mining trail" he describes until about 500 feet of elevation gain above the lake. I bushwhacked up a steep grassy slope and encountered the great trail heading west. I followed cairns all the way to the base of the infamous gully, where I watched the beginnings of sunrise. The gully itself was atrocious. It was some of the nastiest terrain I can ever recally climbing up. Class 3 loose dirt and rock. Maybe snow climbing would have been fine after-all! Oh well, I suffered up the steep gully and made great time.
The terrain between the saddle and the summit was pretty interesting. It reminded me of Vermillion Peak or Hagerman Peak. It was loose in spots but relatively easy to find good solid holds. Some care was needed to ensure a good route up, but all-in-all I did not find it overly difficult to ascend. I reached the top just in time for sunrise, which was glorious to say the least!
I was so focused on the Elk Mountain 14ers to my west, including the Maroon Bells, Pyramid Peak, and Capitol Peak that I had forgotten about Castle Peak to my south. I caught it in the corner of my eye and my jaw dropped. Castle never looked so good in the early light. So much red!
Of course the Elk Mountain 14ers looked amazing as well.
This telephoto rendition showcases all the great peaks, including, from left to right, Maroon Peak, Thunder Pyramid (my last Centennial), North Maroon Peak, Pyramid Peak, and Capitol Peak.
It was a magical display of light and might.
It was maybe not the most incredible display of color that I remember, but it was a damn good sunrise, and I was proud to have photographed another sunrise from the top of a Centennial.
The clouds and haze from the California wildfires added some interesting dynamics as well.
#99 was in the bag! Next up - Thunder Pyramid!
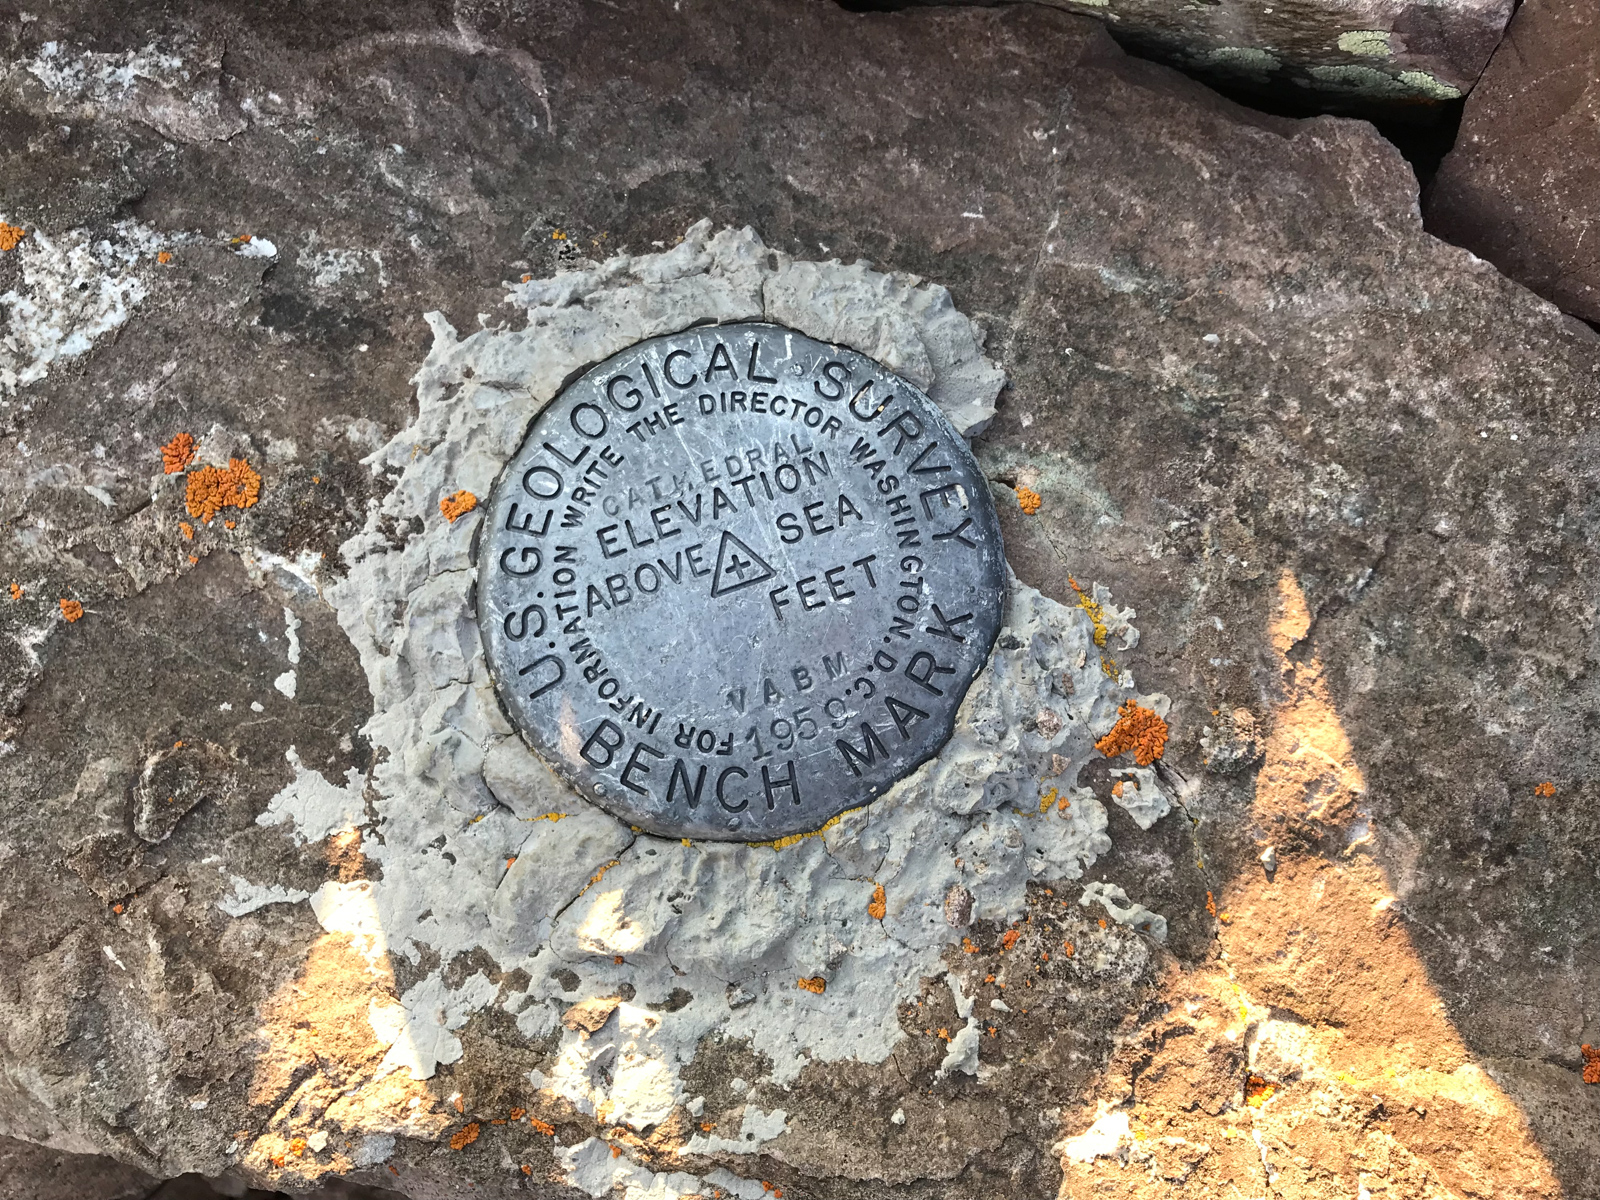
The Cathedral summit marker, looking great after 59 years.
I did not spend a ton of time on the top. I let my friends and family know I had made it to the top and then I made my way down. I reached the gully again in no time and prepared myself for hell.
This next photo is looking back up the gully from just a little ways down. It was so steep, loose, and nasty.
More from the nasty gully, to give you a good sense of what it is like when dry.
I finally reached the bottom of the gully and my feet were sore. What a nasty spot. I don't recommend it.
The next photo shows the highest cairn I was able to locate before the gully, in case anyone needs a good marker for their climb. Going down from here was pretty easy on a well-marked trail on precarious but mostly solid rock and boulder.
Here is a look back towards the start of the gully.
And another view of the gully from a little lower.
I loved the castle-like rock formations here, they were really cool to look at.
The eastern wing of Cathedral was especially impressive, towering over the whole area like some sort of watchman.
I made it back to my campsite at about 9 AM. I felt great about my time and my legs and feet were feeling strong still. The next photo shows a zoomed in view of the gully (right of middle) and shows just how crazy steep it is.
I took one more parting panorama of the area from camp to remember the day.
I could not help but get a telephoto black and white shot of the pinnacles east of Cathedral - so impressive!

Farewell Cathedral! Your eastern friend Leahy Peak looks way more inviting! =)
Thanks for reading. I hope you enjoyed my photos and description. One more to go!
Scaling Colorado's Highest 13er - Grizzly Peak at Sunset
Climbing mountains in solo-mode is therapy for me. While I have often espoused a deep belief that climbing mountains solo is a safety concern, there are times when the benefits outweigh the risks. I'm not sure that this particlar climb qualifies; however, I must admit, this was a truly wonderful experience that I will never regret. I decided somewhat at the last minute to take Friday off of work and climb a 13er. Having only 20 or so Centennials left to complete my quest of the highest 100 in Colorado, I have been getting more motivated to tackle the mountains left.
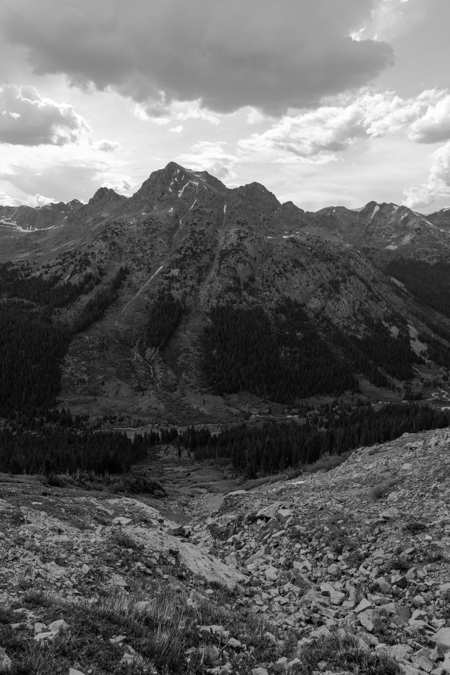
Grizzly Peak had always intrigued me. It is one of the few Centennials not visible from a paved road (I am fairly confident of this) and has a very remote status. Grizzly Peak is nestled deep in a valley just west of the summit of Independence Pass between Leadville and Aspen and is the most western Centennial in the Sawatch Range. There are tremendous views of the Elk Mountains from Grizzly Peak, including Pyramid Peak, the Maroon Bells, Snowmass Mountain and Capitol Peak. Grizzly Peak also carries with it the distinction of being the highest of 7 mountains in Colorado named Grizzly and the highest ranked 13er at 13,988 ft. (Sunlight Spire is higher, but is not ranked - for more on this issue see this article).

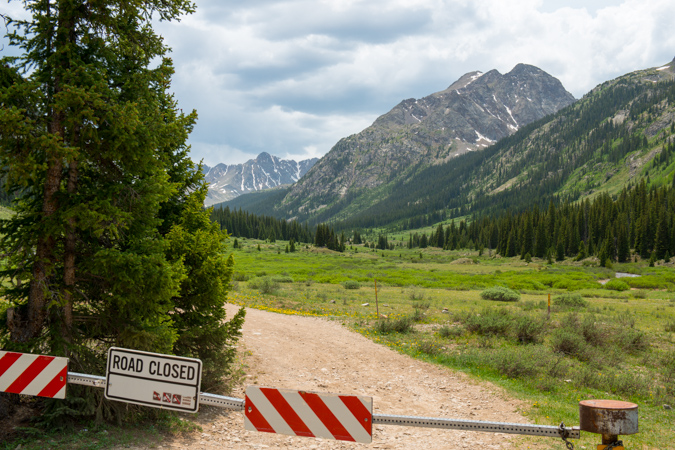
Since I would be climbing by myself, I knew I would have as much time as I needed to take photos and do some crazy photography projects from or near the summit. I chose the west route of Grizzly due to the very short length of the climb, which was very appealing for weather purposes. The plan was to drive the road to the base of the mountain Friday morning, climb the mountain, take photos of sunset from the top, and stay on the top as long as possible for a shot of the Milky Way and to do some star trails photography. According to Roach's 13er guidebook, the road is open all the way to the very base of the mountain, leaving only about 2 miles of hiking to the summit. When I reached Grizzly Reservoir, the road was closed at this point, which meant I had to add another 2 miles both ways to my hike. This was not a huge deal, but it certainly made me re-think my plan.
Being that I had nutty plans to do some extensive photography work from the summit, I packed quite heavily. I was carrying the following photography gear with me:
| Item | Weight (lbs) |
| Gitzo Carbon Fiber Tripod w/ Arca Swiss Ballhead | 6.4 |
| Nikon D800 DSLR w/ Arca Swiss Plate | 2.8 |
| Nikon 14-24 f/2.8 Lens | 2.0 |
| Nikon 24-70 f/2.8 Lens | 2.0 |
| Nikon 50mm f/1.4 D Lens | 0.5 |
| Nikon 300mm f/4 D Lens | 3.0 |
| 1.4x Teleconverter | 0.5 |
| Total | 17.2 |
I'm not especially proud of carrying all of this weight up a steep mountain, but I certainly don't regret doing it.
After I parked my Jeep near the Grizzly Reservoir campground, I head out with a pack full of camera gear and fresh legs at about 1 PM. This is not a very typical start time for me, and probably not highly recommended due to weather concerns, but I figured I would play it safe and keep an eye above for the hike in. For any photographers reading this, I decided to stick with the 24-70 f/2.8 as my walk-about lens, which worked out fairly well. The round-trip stats for this hike are 8 miles w/ 3,500 ft. of elevation gain.
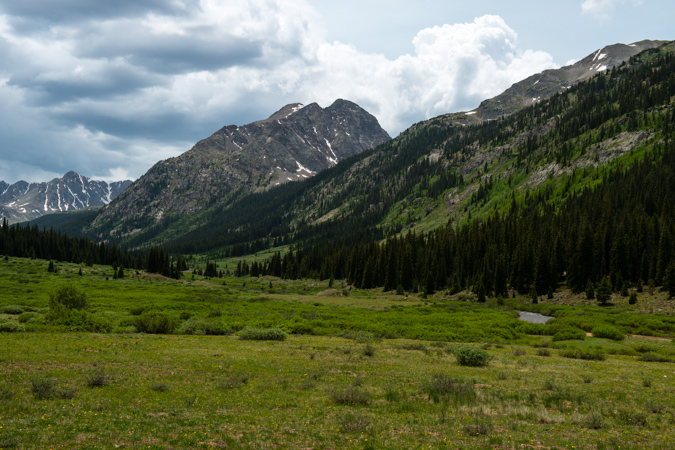
The view from the road was fantastic. Lower, but very rugged 13ers adorned the valley and made for quite a nice sight on the hike in.
I certainly enjoyed the view but was keeping an eye on developing thunderstorms above.
I'm usually not a fan of hiking on a road, but I could not really complain with the view I had, plus I had the Nerdist podcast to keep me entertained.
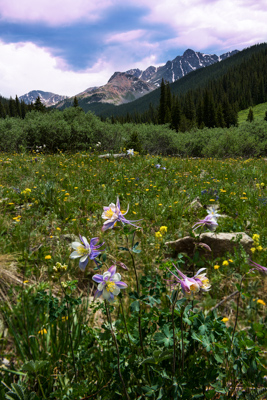
On the hike in, I was able to find some Columbine flowers growing in a small open field, making for a fun photography experiment. One thing I have been wanting to try to do is a technique called focus stacking, which allows a photographer to capture a very sharp photograph that is really the combination of multiple photographs taken at various focal points. I tried that out on these columbine flowers, which worked pretty well considering the wind was blowing (which makes focus stacking almost impossible).
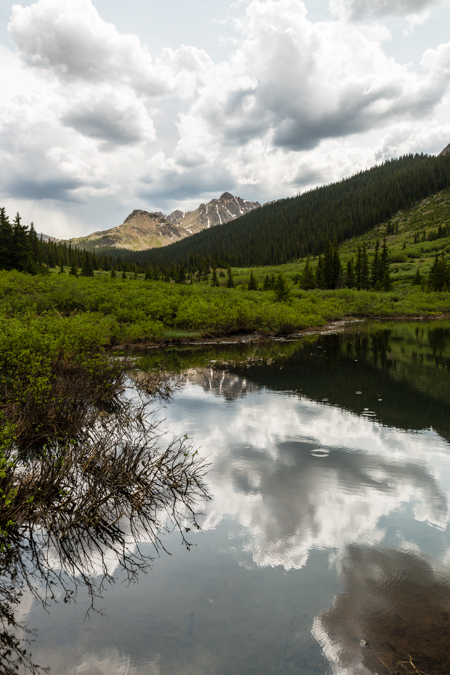
I was looking for a gully cut into the side of the mountain to my left (east), which would be my entrance point for the Grizzly Peak ascent. The mountain has no trail and is basically a steep slog up a very pretty, wild, but generally straight forward gully going up, up, up. Before reaching the gully, the rain started to come down a little, so I stopped to get a photo at this beaver pond before putting my camera away and heading up the gully.
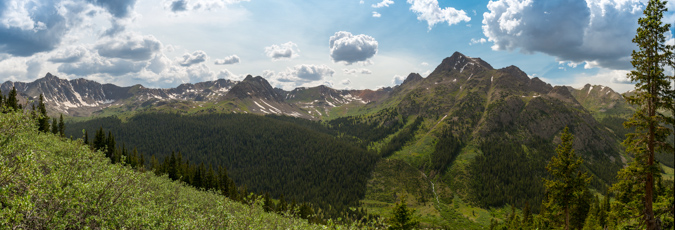
While small rain was coming down, I decided to keep my camera bag packed in my main pack to make it easier and to give me some peace of mind. As such, I was unable to take any photographs with my camera until the rain totally left and I was about a quarter of the way up Grizzly via the gully. I stopped to snap a set of photos to be later stitched into a panorama, looking west across the valley towards Truro and several un-named 13ers.
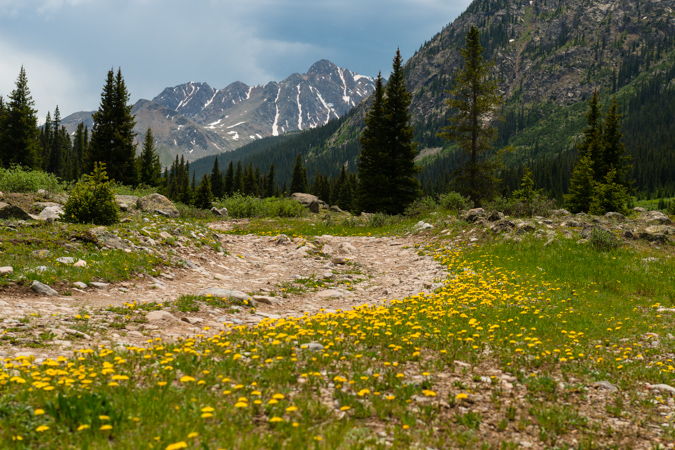
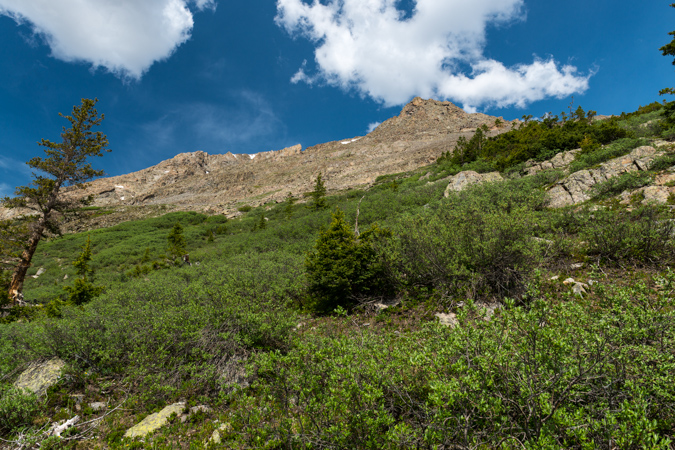
A look up at the terrain revealed just the sloggy mess I was climbing up. It was quite steep and somewhat difficult to navigate through all of the small pine trees, willow trees and rocks. I just had to pick my way up and take frequent rest breaks (I was carrying a lot of weight, haha). The Nerdist podcast of Rick Moranis made the slog a lot less painful, although my laughter probably drove wildlife away.
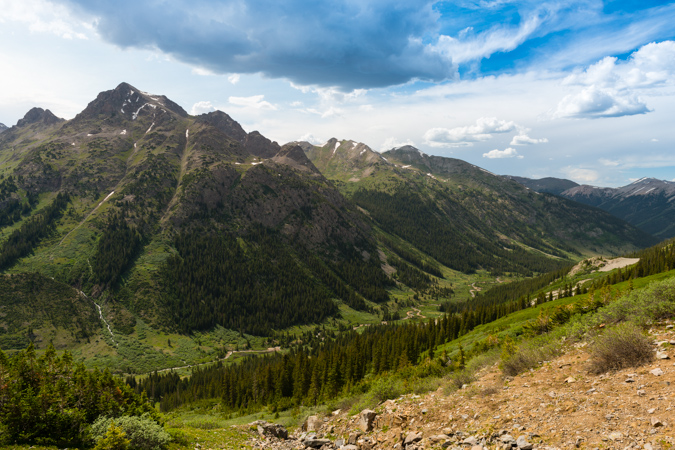
As I continued up Grizzly, the storms seemed to subside, and I was feeling a lot more comfortable about the hike up and eventual stay on the summit. A look back down the gully showed the way up and I could now see the road I hiked up from the North (right).
Once above treeline, the gully was pretty obvious in terms of where to go. It was mostly rock and dirt with wildflowers and boulders strewn about.
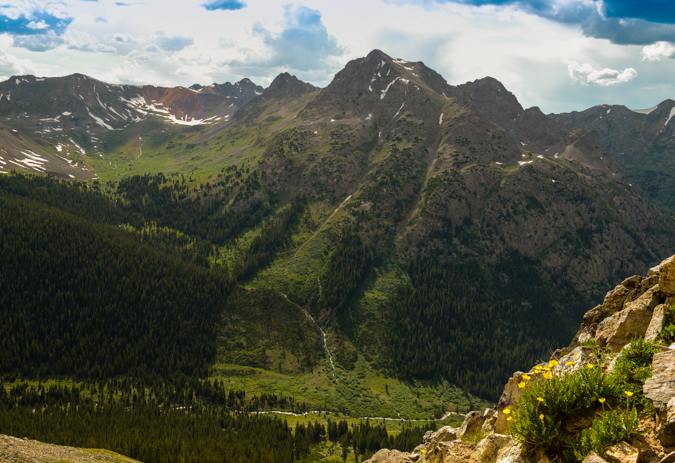
The views were pretty enjoyable in all directions. Despite some wind, I really could not complain.
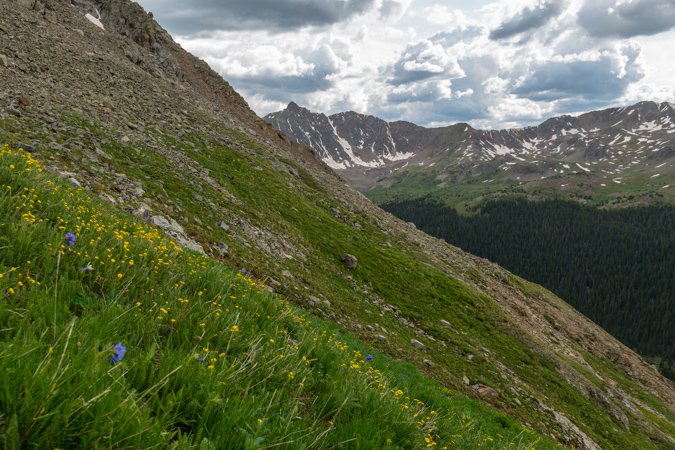
The 13ers to the west kept me looking back quite often, and the wildflowers were just too cool. They were all over the place, even above treeline, which is always awesome. I probably could have made it up the mountain in a lot less time, but I took the time to take some quality photos. This is another focus-stacked image making it so the very close flower in the foreground could be in focus as well as the distant peaks.
As I continued up, views of the Elk Mountains (specifically, Castle Peak) began to materialize above the horizon to the west beneath some virga coming from some small storm clouds.
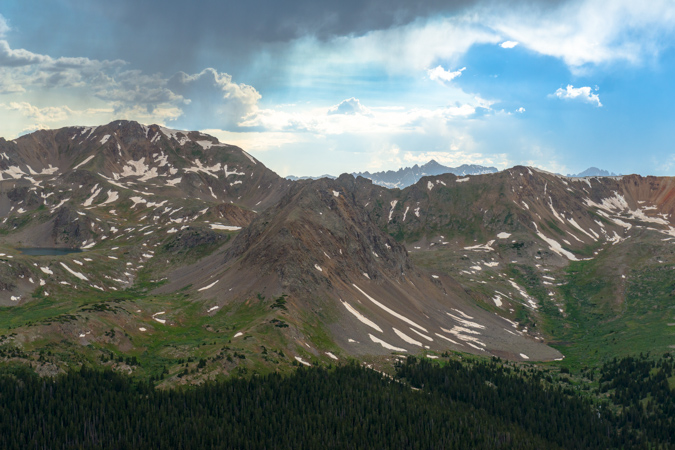
I was not worried about the weather yet - the clouds were pretty small and my new expansive views to the west indicated I should be in the clear for the remainder of the day. At this point, the climb became progressively more difficult for my weary legs. The weight of the photography equipment was really kicking my rear end and I had to take more and more breaks. The terrain was also much more difficult - not technically, but physically demanding. There were more boulder fields to contend with and the dreaded scree that takes you downhill one step for every two you take. As such, I decided to pack away my camera again so I could focus on the hike and make sure I did not fall. I finally was able to reach the saddle between Grizzly Peak and Garfield Peak as the light from the impending sunset was starting to generate some magic on the valleys below to the west and east. Seriously, if you've never done a sunset climb before, you need to - it is simply one of the most amazing experiences you can have in the high country.
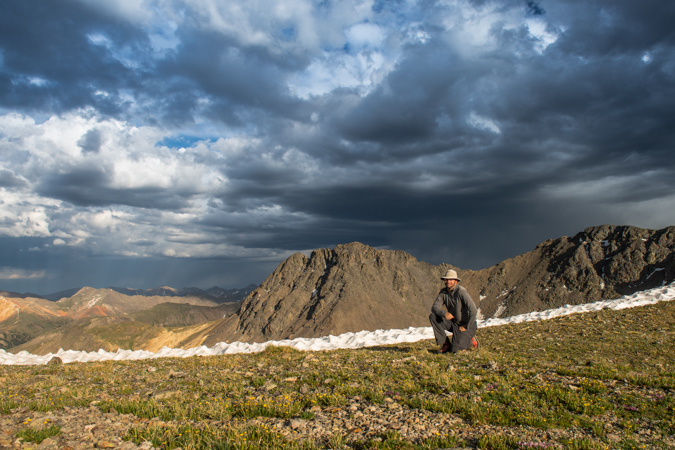
While the weather to the west was looking fabulous, the weather to the south and east was starting to look kind of nasty. I was not too concerned yet, but was keeping watch. One benefit of carrying a 5 lb tripod up a mountain is that you can do self-portraits. Here's one looking south and east towards Garfield Peak and Taylor Park (not visible).
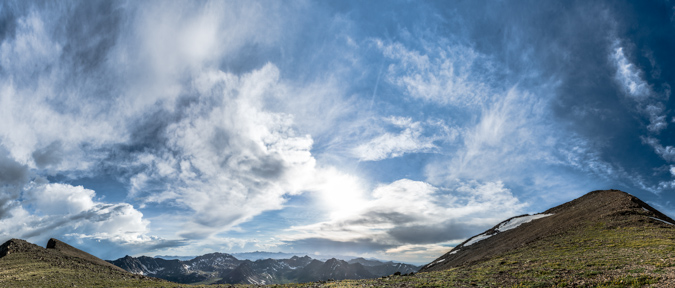
I also decided it might be fun to do a very large vertical panoramic showcasing the sky from the saddle, looking South-West-North. To the north (right) would be the summit of Grizzly Peak itself.
After about 20 more minutes of climbing, I was able to reach the summit of Grizzly Peak. I was greeted by an incredible view to the east and south, which included the Three Apostles and an amazing rainbow just shy of Taylor Park, where a huge thunderstorm was brewing.
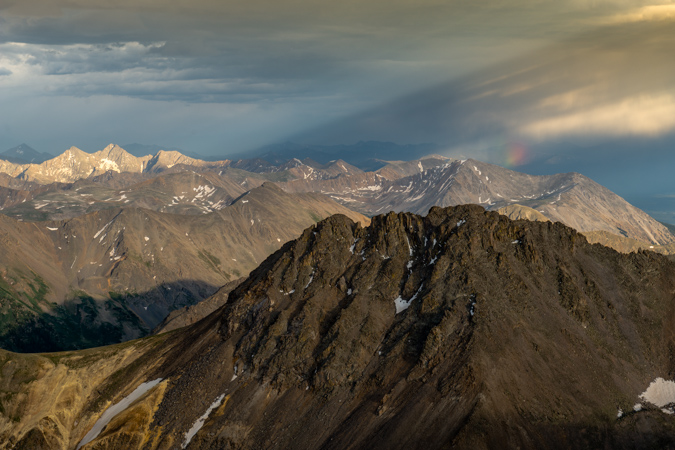
It was pretty awesome to be on top of the Continental Divide before sunset. The views were great, and that sweet rainbow stuck around for quite a long time to the northeast. The light from the sun was hitting the clouds over Taylor Park and causing some interesting streaks to appear. I signed the summit register, which was last signed by a guy I had read a trip report of from the day before. He had made a tribute to Steve Gladbach, a very accomplished and famous Colorado mountaineer who had just perished on Thunder Pyramid. I decided to also sign the book as "For Steve." I think Steve's passing weighed on every mountaineer's mind heavily, including mine. I never did get a chance to meet Steve, but we exchanged several cordial and thought-provoking messages over on 14ers.com regarding my morbid articles I write about the mountaineering deaths each year. Steve wrote a very eloquent and thoughtful post about death over there a few years ago and it always stuck in my mind. I even remember responding to his post saying that "heaven forbid you die in the mountains..." and yet - he eventually did. Steve had conquered the goals I have set for myself and I had always looked up to him, not only as an accomplished mountaineer but as a very amazing person. There are countless stories of his selfless acts and I felt a solo climb a nice tribute to his life.
As I enjoyed the last few minutes of sunlight, I had to take advantage of my somewhat foolish decision to haul up my 300mm lens, which weighs 3 pounds on its own. I wanted to get some zoomed in shots of Ice Mountain, Pyramid Peak, the Maroon Bells and Snowmass Mountain using the 300 and a 1.4 Teleconverter, which gave me an effective focal length of 420mm.

Castle and Conundrum were looking freaking awesome, with some crazy sunset light surrounding it. Thanks to Michael Colson for the correction!
Snowmass Mountain was also looking wicked with the sunset light, giving the photo a very layered feel in black and white.
As the light continued to approach the magical photographic Golden Hour, I had some fun playing with different photos.
I also stitched together a massive 360 summit pano centered on the sun. This photo, being taken with the Nikon D800, is a massive file. If printed at native resolution (no loss of quality), it would span 30 feet wide. I'd love to see that. If I have time later, I'll work on an interactive 360 file so you can see this thing at a bigger resolution and zoom in.

The sun went behind some clouds but then created some nice god beams coming down near Mt. Sopris.
Then the sun reappeared and allowed me to snap off this photo which I think looks kind of like a Colorado flag.
A look back to the east revealed some magic also. The light was very soft and colorful, showcasing the grand scale of La Plata Peak (left), Colorado's 5th highest mountain.

Sunset from the Continental Divide - an awesome experience. I took some artistic liberties on this next photo...
As the sun dipped below the horizon, and stood and watched the magic fade.
At this point, I had to make a decision. Watching the clouds to my east and south, I was getting a little nervous about the prospect of staying on top of the mountain to photograph the night sky. I was really motivated to do so, but I did not feel like it was a risk worth taking. While climbing down the mountain in the dark did not appeal to me, getting struck by lightning was even less appealing. I decided to pack up the gear and head down. The hike down was an adventure to say the least. It became quite dark very quickly, as there was no moon. I found myself in some sketchy spots where I had no recollection of that route from the hike in. I took my time and was very deliberate about each step. I was able to ride down a scree field a ways using some scree-skiing techniques and from there it was pretty much a boulder/snowfield/cliff/willow dodging fest. Downclimbing in the dark without a trail - not recommended - AT ALL. Hahahaha! It was certainly not the safest mountain climbing experience...
After reaching the road at 11 PM, I was rewarded with some insane views of the Milky Way. I set-up for some shots of the Milky Way and to my huge surprise, was able to also capture the Northern Lights! This next shot is a panoramic looking north-east-south. I just can't believe I got the Northern Lights - so awesome.
My final shot is me laying in the grass with my head-lamp, gazing into the night sky.
I slept under the stars at my Jeep back at the Reservoir after a long but enjoyable hike out in the dark and drove home to Colorado Springs early the next morning. What a great trip!
If you enjoyed my photos, please consider purchasing a print for your home or office. You can visit my gallery for a full showcase of my photography - if there are any photos from this trip you are specifically interested in, please do contact me.
Maroon Peak and Pyramid Peak - finishing a goal 27 years in the making
Two amazing summits; 11,060 ft. elevation gain, 21.5 miles... and a whole lotta' fun.
Introduction
Last year, I had plans to complete my long quest to climb all of Colorado’s 14ers. I had the calendar all lined up, trips planned, gear ready and my legs were in great shape. If all went to plan, I was to finish on Windom Peak after a long summer of knocking out some of Colorado’s toughest peaks. Unfortunately, as is so common in this sport of mountaineering and peak-bagging, those plans were interrupted. An unsuccessful attempt on Snowmass Mountain in June left me with one less weekend available. A complete re-arrangement of the calendar ensued and for the third straight year, my plans of climbing Maroon Peak and Pyramid Peak were delayed. However, this worked out to my advantage – as I had always dreamed of completing the 14ers on Maroon Peak and then on Pyramid Peak, which purportedly is one of the most difficult mountains as well as one of the most rewarding summits. Finally, my time had come to complete this incredible journey that started when I was six-years-old – the completion of the 14ers. Lots of hard work over the past 3 years have culminated in this moment.
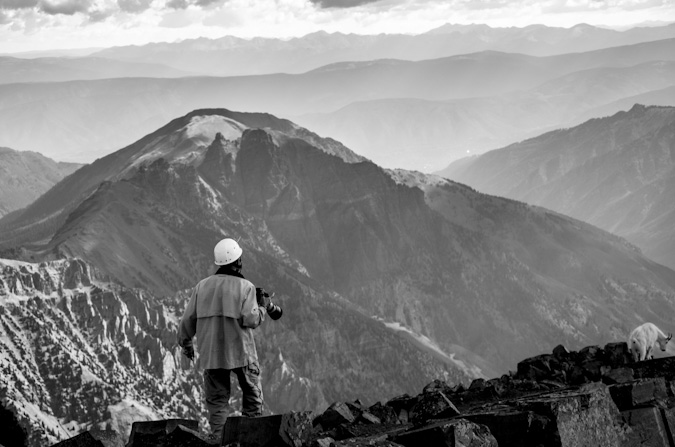
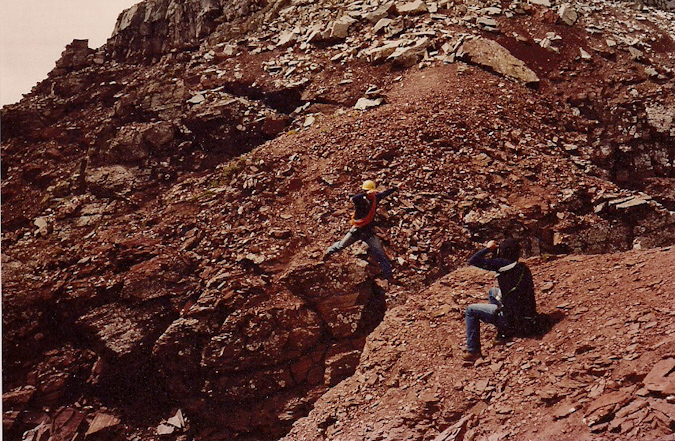
Ever since I was a child, I recall being mesmerized by the Maroon Bells, for both their scenic wonder and beauty and their dangerous mystique. My dad, Ray Payne, climbed the Bells back in August 1987 and returned home regaling his conquest with stories of incredible mountaineering feats (it must have sounded insane to my then 9-year-old ears) and near-death encounters with “The Deadly Bells.” Here's an old-school shot of my dad (yellow helmet) asending Pyramid Peak, rope in tow.
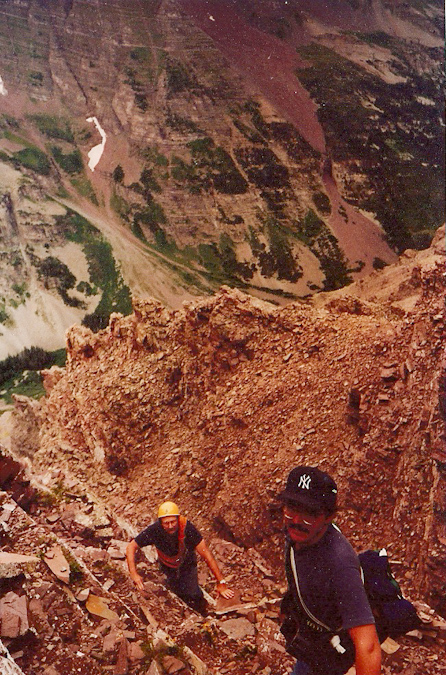
Per Wikipedia (and per my own witness of the sign), the term “Deadly Bells” refers to a U.S. Forest Service sign on the Maroon Lake access trail which calls the mountains "The Deadly Bells" and warns would-be climbers of "downsloping, loose, rotten and unstable" rock that "kills without warning". Sounds like my kind of mountain! Unlike other mountains in Colorado, the Maroon Bells are composed of metamorphic sedimentary mudstone that has hardened into rock over millions of years. This mudstone is weak and fractures readily, giving rise to dangerously loose rock along almost any route. This same mudstone is responsible for the Bells' famous and distinctive maroon color. The Bells got their "deadly" name in 1965 when eight people died in five separate accidents. Since then, many climbers have perished while attempting these dangerous peaks, including Spencer James Nelson in 2010.
In fact, just before leaving for this trip, I had learned that there was a missing hiker on the Maroon Bells. This news had cast a shadow on the trip and I had hoped he was found safely. The hiker was a New York City Paramedic named Lenny and had not reported to work. It later turned out that he took a fall and perished on North Maroon and was found the very same day we arrived.
Given the danger factor and overall awesome factor surrounding the fact that I was planning to complete the 14ers on these deadly mountains, I was quite nervous the week leading up to this trip. I think I had started packing four or five days before the trip, which is uncommon for even me and my neurotic trip planning. To make matters even worse, the trip had quite a few loose ends on the logistics side of things – originally I had planned to head-out Tuesday night with my climbing partner, Sarah, we’d climb some mountains, and then our other climbing partner, Ethan, would join us at Crater Lake on either Saturday or Sunday. Then a few wrenches got thrown into the mix – Sarah found out she had to work a cycling event on Sunday, and Ethan would be unable to join us on Friday. To make matters even more interesting, my Jeep Wrangler came up with some mechanical issues the day before we were supposed to leave. It was not looking good for team Payne. I called Sarah and we finally worked out all the details. Ethan would not be joining us after-all, and Sarah could drive. Crisis averted.
I decided to backpack using my Osprey Talon 44 instead of my regular backpacking pack – the huge and insane discontinued Dana Design Terraplane - a monstrous 95 Liter pack. Instead, I opted for the smaller 44 Liter pack so that I would force myself to take less gear and food and hopefully save some damage to my knees, which were still recovering from the massive 45 mile trip Sarah and I took last year to the Chicago Basin. To round things out, I opted to also purchase a knee brace, in hopes of preventing pain and further damage on this trip.
Choosing camera equipment for a trip such as this was a challenge, especially given the fact that I wanted to keep my over-all weight low without sacrificing my ability to take great photos. So, I opted to bring my Gitzo carbon-fiber tripod (which is quite solid and somewhat heavy despite being crafted out of carbon-fiber), Nikon D7000, a few filters, a shutter release cable (for long exposures), and two lenses – the Tokina 11-16 f/2.8 and the Nikkor 18-105 VR f/3.5-5.6. This would give me the ability to shoot very wide shots and some versatility with a zoom in the 18-105.
Day 1: The drive in
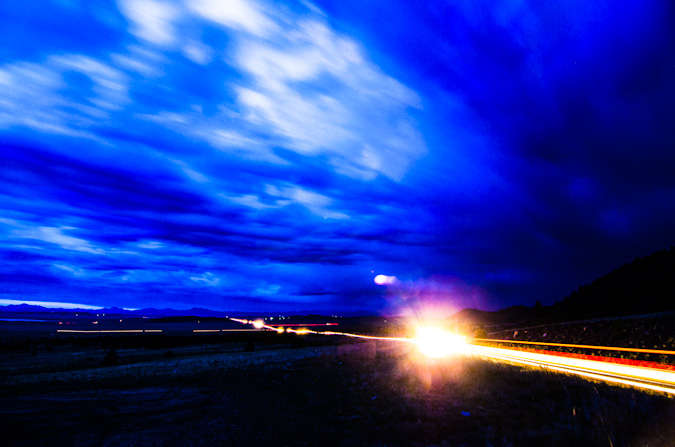
Loaded-up and ready to rock – Sarah picked me up from my house in Colorado Springs at 7 PM. We departed for our speedy adventure up Highway 24, which afforded us some pretty gruesome views of the damage caused by the Waldo Canyon Fire just the month prior. We stopped at the top of Wilkerson Pass to check-out the remnants of a thunderstorm there, hoping to capture some of that footage on film; however, all I was able to get was a long exposure of the cars driving through South Park below.
Thanks to some recon data provided by 14ers.com member Bill Wood, I knew our goal was to find the over-night parking lot just below the Maroon Lake trailhead. We found that lot at around midnight and prepared for what would become a very short 4-hour nap in the back of Sarah’s skinny pick-up truck.
Day 2: The backpack in to Crater Lake and an attempt on Maroon Peak
We were rudely awoken at around 3:45 AM by some guys next to us prepping for their hike, who were loud and even making jokes about how we were probably not too happy about how loud they were. Such is life at popular 14er trailheads, even on a Wednesday morning. We debated the night before about our intents and goals for this first day in the area, and decided to wake-up at a reasonable time (4:30 AM) to begin backpacking up into the basin to find a campsite, with the option to attempt Maroon Peak (weather dependent). We rose groggily from the truck and prepared our backpacks, which for me is always an interesting challenge with a large tripod attached. We began the hike in the dark and were passed quickly by a solo hiker looking to tackle Pyramid Peak by himself. Best of luck to that guy. The hike up towards Crater Lake was quite uneventful, and after a quick 1.5 miles, we stopped shortly before sunrise so I could quickly bushwhack up a hillside to photograph the Maroon Bells while the light was good. I did several versions at various focal lengths and lighting.
During this photo shoot, I made a nearly dire mistake when I switched lenses. I put my Tokina in my camera bag, which was attached to my chest. I forgot to zip it up, so when I leaned over, the lens rolled out onto the rocks. Fortunately, absolutely no damage was done. Close call!
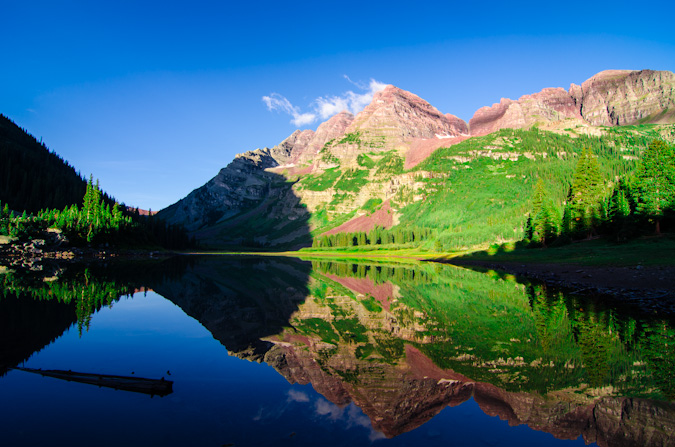
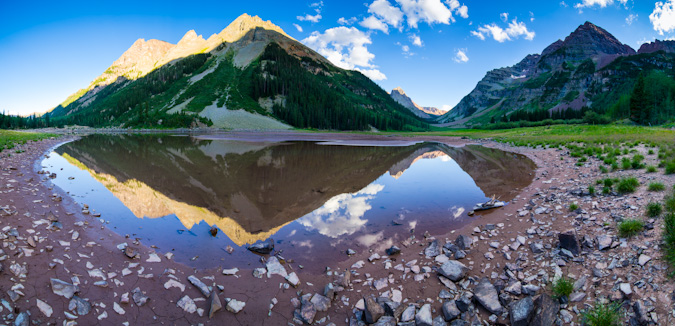
After shooting sunrise at the Maroon Bells, we made our way up the rest of the way to Crater Lake, where we would try to locate a campsite. Upon first arrival at the lake, the reflections of the Maroon Bells in the very still water and post-sunrise light were absolutely fantastic.
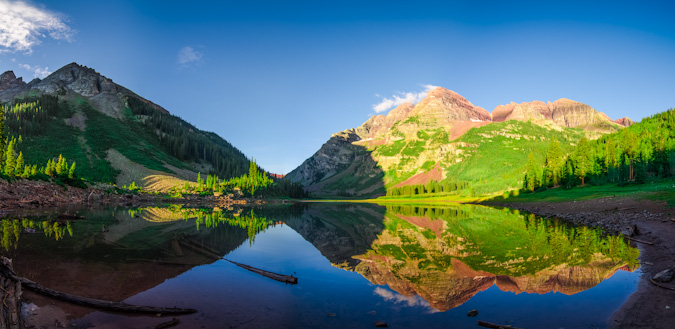
A wider view, including the Pyramid Peak massif:
The search for a campsite was on, and I had been given some good tips from Bill Wood that we should shoot for campsites 6-11. We finally landed on campsite 9, slightly south and west of Crater Lake on a large hillside. Sarah later joked it was no wonder the campsite was open, because you have to hike up a hill away from the water to reach it.
We quickly made camp, setting-up the tent and all of our stuff, and finally had summit packs ready by 8 AM. Not exactly the best start time for a 14er of Maroon’s caliber, but we thought we’d give it a shot either way, so off we went. We followed the trail quite a long ways up the valley to the south and reached the oh-so recognizable warped tree described by the 14ers.com guide.
After the tree, the real work was before us, and the Maroon Peak southeast slopes trail lay before us in all of its steep glory. The trail started quite steeply, much like the Manitou Incline.
We reached well above tree-line before my stomach started to really give me issues. I could not figure out why I was not feeling well, so we stopped at around 12,400 ft. This turned out to work out just fine, because weather was starting to build above, the clouds that were hanging low all morning had never really left. I later figured out that the culprit to my stomach issue was the Cliff Bar Builder’s Bar I had ate.
Sarah and I sat around for a bit, contemplating our options.
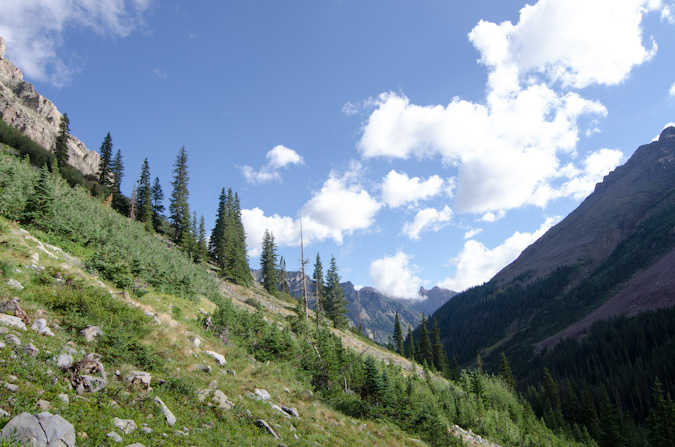
We had picked a pretty great place to stop. The views in all directions were great. We did not feel rushed at all.
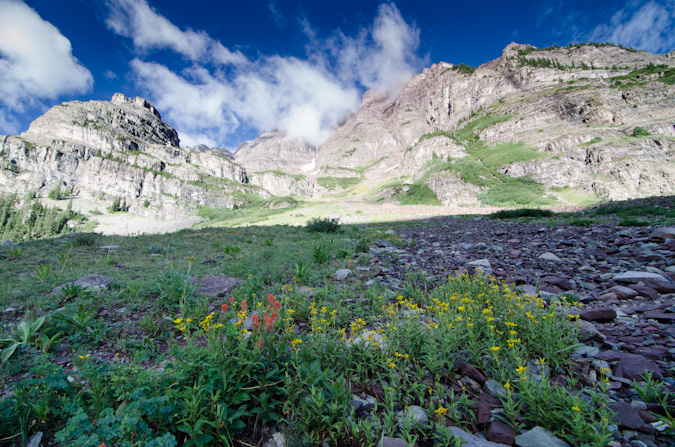
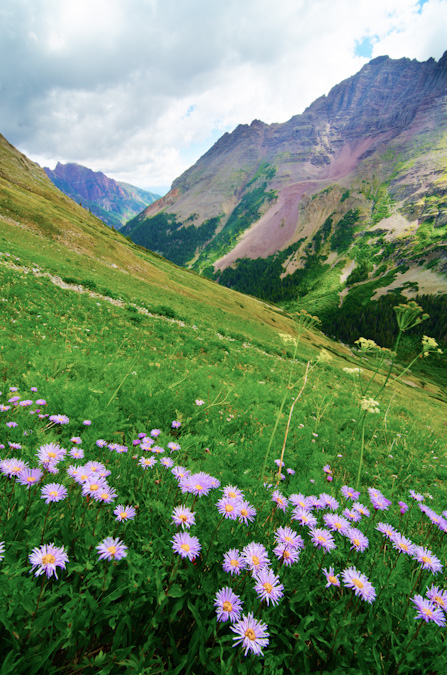
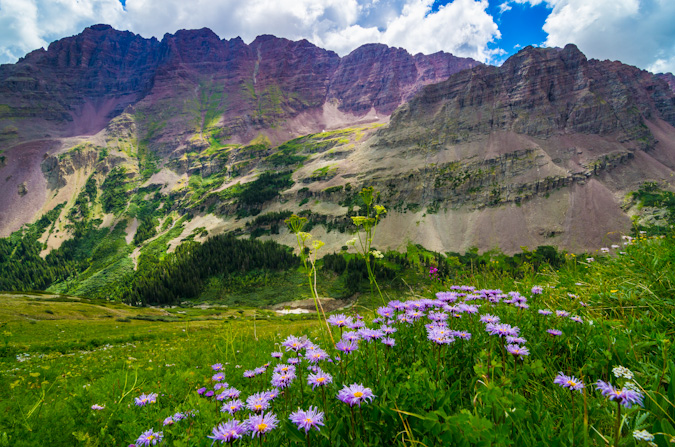
Even though my stomach was in pain, we found ourselves near a large meadow of wildflowers, which made for some fun photography.
It was a really cool spot, and since it seemed were not going to do any more climbing, I took the liberty of taking a ton of shots.
We headed on down and later ran into a group of three guys coming down as well. They were attempting Maroon as well and were turned back due to the weather just short of the ridge. These three guys were very cool, and we had a nice conversation about the area and climbing the Centennials. We all headed on down to the main trail, where we intersected two more hikers coming up to investigate the location of the Maroon Peak trail turn-off. This would not be our last encounter with these two guys, as we would later run into them twice more the following day.
Sarah and I hiked back to camp and took naps. After our short naps, we cooked up some food and I prepared my camera equipment for a walk down to Crater Lake for sunset shots and later night photography.
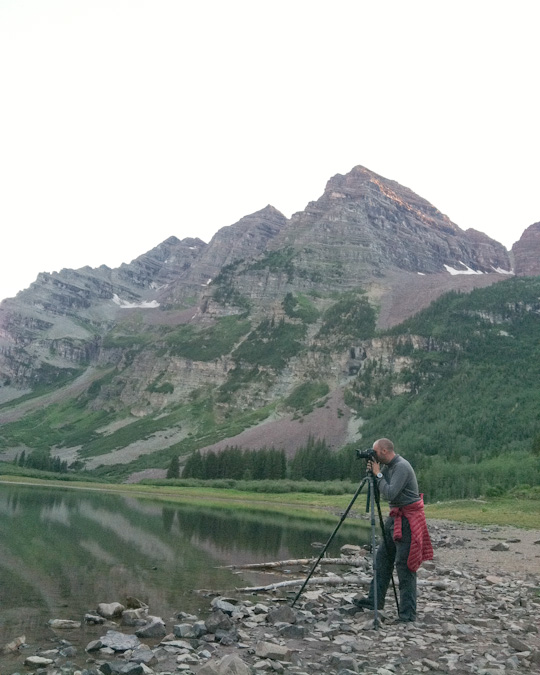
Upon arriving at the lake, I was immediately in my happy place, having many quite interesting landscape shots to attempt. I waited for the sun to set and the magic started to happen, lighting up the tips of the surrounding mountains to our East, which were part of the Pyramid Peak massif. I also tried out my ND filter and did some longer exposures of the clouds and Maroon Peak.
Sarah was able to sneak a shot of me geeking out on my camera.
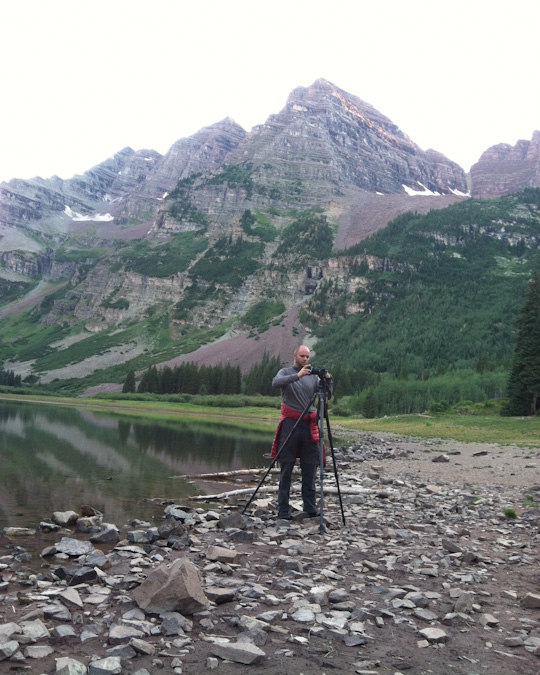
Composing the shot...
The sun was setting and the light started doing its thing.
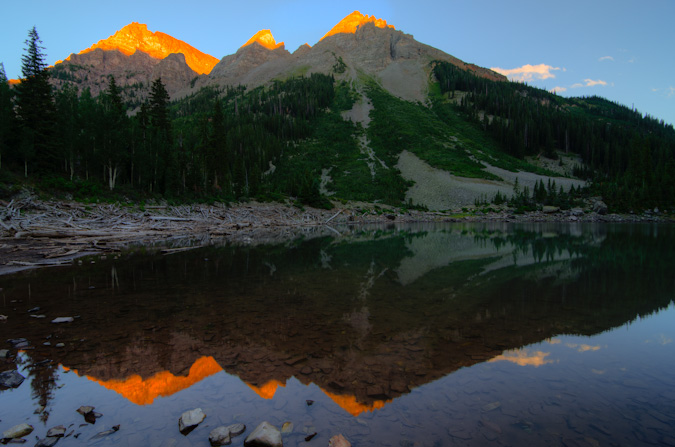
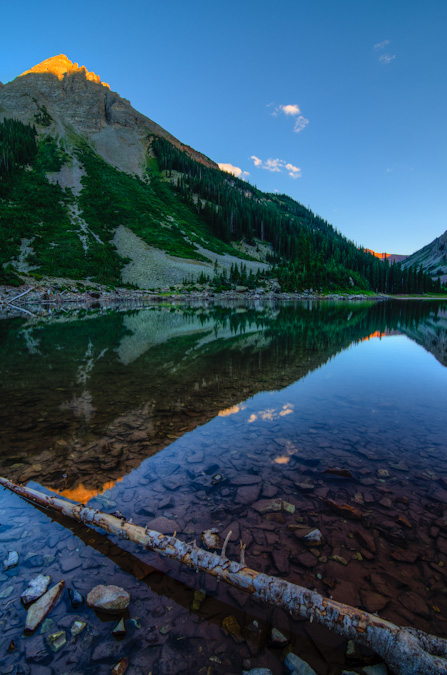
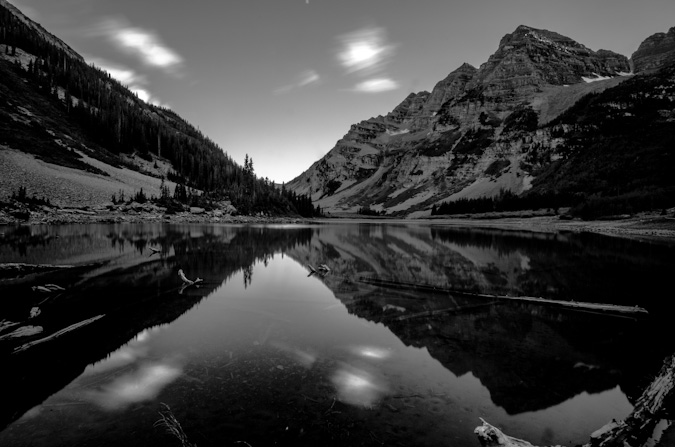
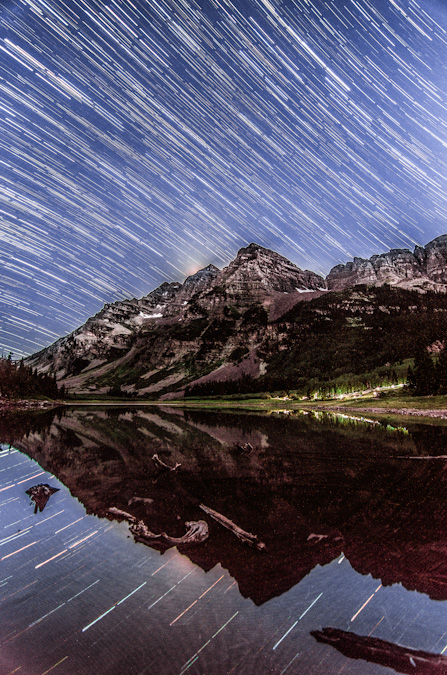
After the sun went down, Sarah went back to the tent to get some sleep. I stayed out and set-up for something I had been planning for a long time - star trails over the Maroon Bells, reflected in Crater Lake. This worked out pretty nicely, there was a group hiking in the dark up the trail and so my long exposures got their head lamps in the shot too, which I opted to keep in. The "break" in the trails is from my intervalometer stopping unexpectedly on me and me having to restart the sequence. Bummer! Still turned out great though, I think. You can see where the moon had just set over Maroon Peak's upper left cliff bands.
While photographing the star trails using the intervalometer on my camera, two sets of eyes appeared near me at the lake. I rose and walked closer to find two deer, one a quite large buck. I was both relieved and amazed. I’m not really sure how well I could defend myself against a mountain lion.
After shooting star trails above the Maroon Bells, I took advantage of the scene and clear night and took some fantastic shots of the Milky Way. My two favorite was this single shot of the Milky Way reflected in the lake, and the next one, which is a 9-shot panoramic of the Milky Way above the Pyramid Peak massif. Click on the single shot if you'd like to learn more or purchase it.
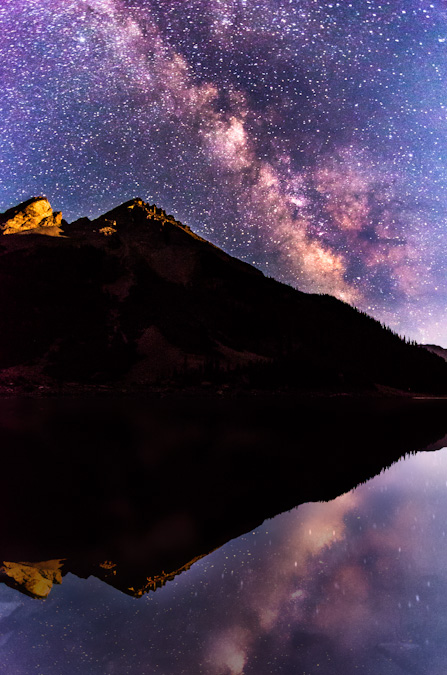
I just could not get over how clear the sky was!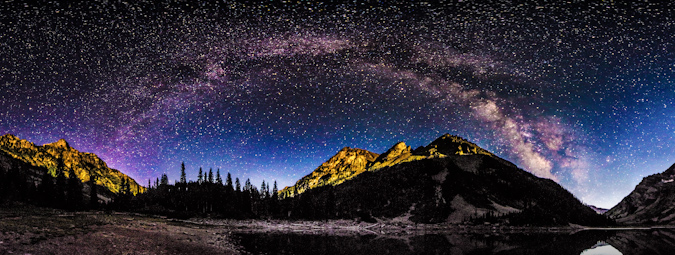
After capturing what I felt at the time were some great photos, I decided it was time to hit the sack, since our departure time for Maroon Peak was looming just a few hours away. I came back to the tent, where I found Sarah wide awake still. Apparently a field mouse had managed to find our tent and was crawling over the top of it, which kept freaking Sarah out. In fact, about 30 minutes later, the mouse bumped past the side of the tent next to Sarah’s face, which caused her to freak out and elbow me like she was trying to win a Karate match. It was awesome.
Day 3: Early start and successful summit of Maroon Peak - 14,156 ft.
Sarah’s iPhone alarm sounded off and sounded just like a self-destruct sequence, in fact, it was just like this YouTube video.
Mixed with my dream that President Obama had confiscated the valley we were in for national security reasons, and my head was all kinds of whacked out – too much, too early.
Nonetheless, we rose like zombies and hit the trail at a brisk pace at a quarter past 4 AM and head back up the valley to the Maroon Peak turn-off, in the dark. By the time we were working our way up the steep trail, the sun had begun to illuminate the mountainside and we were moving at a very steady pace.
Two of the three climbers from the prior day passed us quickly, having a deadline to meet – they were extremely fast – good on them! We kept our pace going at a good rate and eventually caught up with the two gentleman from the day before that were looking for the trail.
They were moving very slowly and had mentioned that there was only two others ahead of them other than the two we knew about – a photographer and their friend.
A photographer you say? This piqued my interest instantly. Who was ahead of me? Did I know them or of them?
The trail was one of the steepest I could remember. Exhausting, but a wonderful workout all the same.
Before long at all, Sarah and I crested the ridge after 2,800 feet of grueling non-stop high angle grinding. As Bill Middlebrook describes on the 14ers.com route description, “Conquering the East Slope is a major achievement, but now the more technical terrain remains.” Indeed. Time to refuel.
Sarah had maintained an excellent pace up Maroon Peak so far and was kicking my butt. Did I mention that while I'm at home editing photos, she's out racing single speed mountain bikes? Yeah. Wonder who's in better shape?
The remaining section of the ridge was more of the same; however, we had much better views of the surrounding area.
Once we reached the ridge, it was only a short section of maybe 400 feet to tackle before reaching the hard part.
The ridge section was still fairly steep, but the excitement of seeing the rest of Maroon Peak's impressive face kept us moving quickly.
Reaching the crest of the final ridge was exhilarating as always, made especially sweet by the awesome visage of Maroon Peak, which loomed in front of us like a giant sentinel.
Sarah and I followed the rest of the route religiously, having had a bad experience off-route last year on Snowmass. We took a break for food, and I ate another Honey Stinger Waffle which was delicious – these things are the real deal. The fun begins.

From the ridge crest, the route went very easily, much to my surprise and partial disappointment. I was expecting an epic class 3 adventure; however, Maroon Peak is more like class 2 with a sprinkle of class 3 in some lame locations. It looked intimidating as hell though.
The trail is very obvious most of the route and there are actually only a few spots you need to actually make a decision and “climb.” That being said, the terrain was still quite dangerous and we were vigilant. The views... oh man. So amazing. Intense.
Shortly after entering the more dangerous terrain, we ran into the other companion of the two guys we had passed earlier. He wanted to know how far behind they were. He was not very thrilled to learn about their slow pace, but the weather seemed to be holding so I felt like they still had a shot.
For the most part, the first section after the ridge involves following the trail up and over a bunch of small gendarmes near the ridgetop. As predicted, we found ourselves having to climb a small gully into a small and secluded alcove, which offered great views to the west.
Just at the top of this gully rested our next problem - a small gully with great hand and foot holds heading up.
On the other side of this gully, parts of Maroon Peak were back in view. The route certainly did not look obvious from here, but it worked out.
The most dangerous section was probably the set of gullies you can choose to ascend about 2/3 of the way through the route as pictured here.
We chose to climb the second gully and then follow a ledge system to the left. I feel that under the right circumstances and a lot of climbers, this section could be quite dangerous due to rockfall. Most of the rest of the route seemed quite safe with the occasional ledge area that was exposed. It looks worse than it is, trust me. Here's a view from the top of the gully, looking back across where we had come from.
At this point it felt like a great time to stop and soak in the views. It does not get much better than this.
The rock features on Maroon Peak were quite remarkable and made for a wonderful hiking experience. There were many times where I kept saying to myself, "I'm really here, this is one awesome place!"
Looking up or down made you feel so small. The sheer ruggedness and steepness of these peaks is easy to appreciate.
The final stretch of the climb includes a large boring dirt and rock section that reminded me of Columbia Peak, meaning, it was fairly awful – the kind of stuff that goes two steps up and you slide one step down.
Once at the top of this area, you climb a really short but interesting ledge system onto the flank of the peak and follow a long series of quite solid and fun-to-explore ledges before reaching the final summit ridge.
Pyramid Peak dwarfed Sarah.
Sarah, while only equipped with an iPhone, took some awesome shots on this trip as well. One of my favorites was this one she took of my near the summit.
Upon reaching the final summit ridge, I saw a man with a yellow helmet on the summit, in fact, the same yellow Edelrid helmet my dad handed down to me and seen in the photos of him in this report. He yelled down at me that it “was a great photo” and to “stay put if I didn’t mind.” This must be the photographer we learned about. While I waited for the light to get right for him to take my shot, I took a high contrast shot of him and Sarah on the summit.
He then snapped off this cool shot of me climbing the final section to the summit.
We got up to join him and he pulled out his business card. It was none other than the legendary Glenn Randall. Readers may recall Glenn’s name from an article I wrote earlier this year where I shared my thoughts on the twenty best Colorado landscape photographers. In fact, Glenn’s revered in the mountaineering-photography community as a pioneer, for, as he later explained to me, he has photographed sunrise from thirty-eight 14ers. This is a most impressive feat. Glenn explained that he was just on a recon mission today, because he was going to be doing Maroon Peak tomorrow as well to photograph sunrise from there. He was setting waypoints and familiarizing himself with the route. He had just done sunrise at Pyramid Peak the day before. Glenn’s dedication to this sub-set of photography is most impressive – in order to achieve sunrise on a peak like Maroon Peak – he would need to begin hiking at midnight and carry over 20 pounds of photography equipment with him to the summit. I was humbled to have met such a great photographer that I had modeled a great deal of my own personal work after.
Glenn gladly took our photo with Sarah's phone.
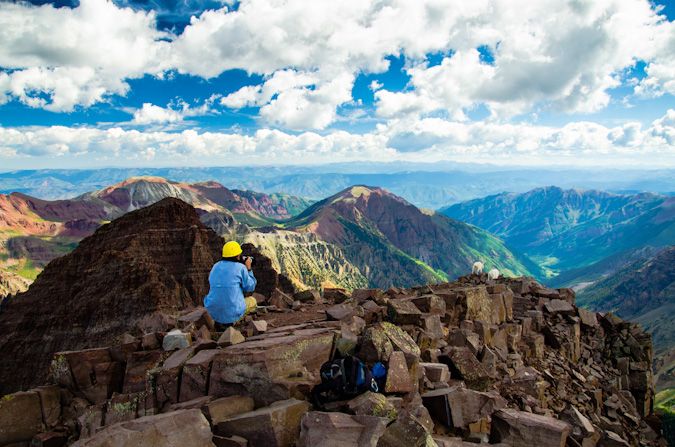
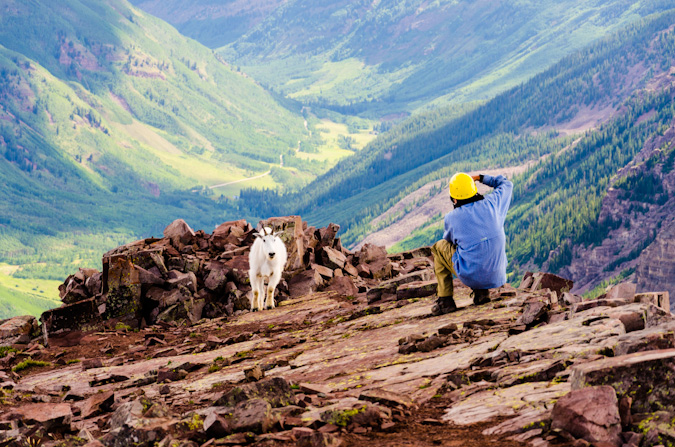
Glenn and I talked shop for quite awhile and he decided to head down. Shortly after though, two mountain goats came strolling up the side of the mountain from the descending route area with none other than Glenn behind them.
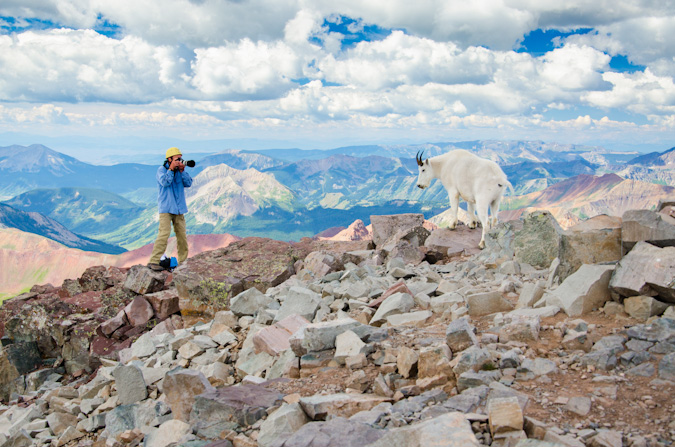
It was such a fun day on the summit, sharing the photographic experience with a true pro. I had fun composing images of the goats and of Glenn. I might be geeking-out a little, but it really was an incredible experience.
Sarah was able to get some incredible shots of all of the action too. Some of my favorites.
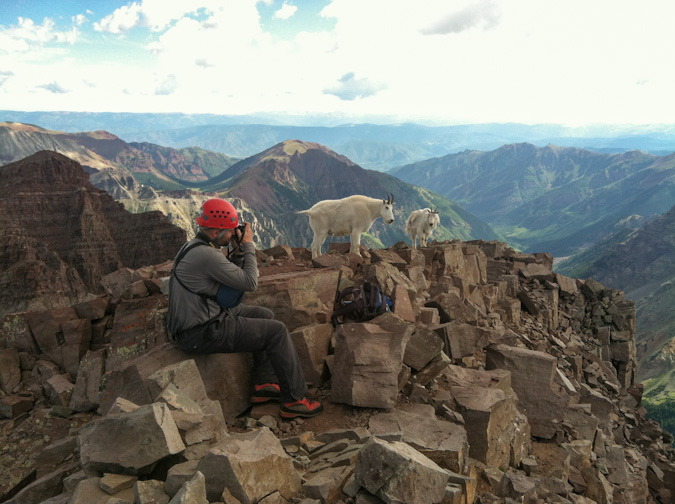
These were quite friendly goats, often coming within feet of me.
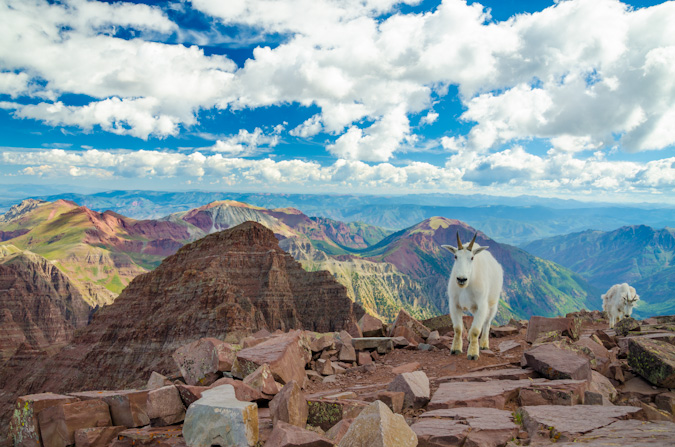
Pyramid Peak made for a killer backdrop for the goat.

I bet Glenn got some really great shots of the goats... he was sporting a quite nice Canon Fx camera and a 70-200 lens.
I took so many fun shots of the goats, and I hesitated to post so many here, but they turned out so great, I had to share.
My favorite shot of the mix was this shot of this goat peering out towards Pyramid Peak, foreshadowing the day to come, where I would complete the 14ers.
Through all the excitement, I had to stop and take some shots of Sarah and a couple panoramics.
The traverse over to N. Maroon looked like a lot of fun, but it was not on the agenda.

The obligatory 360 panoramic... which demonstrated how large of a summit Maroon Peak really had... and how amazing the views around us were.
The white coilour for Thunder Pyramid stuck out like a sore thumb above Len Shoemaker ridge.
The weather began to look a little shaky after a long time spent at the summit, so we all decided to head down together. On the way down, Glenn was a really great mountaineer, concerned with safety and route selection in many of the same ways Sarah and I were. It was such an honor to spend the afternoon chatting about photography methods, gear and stories while down-climbing. I felt kind of bad for Sarah but she rolled with it and contributed a great deal to the conversation, having many stories of our mountaineering adventures to convey.
On the way down, at the earlier described gullies, we opted to go with Glenn down a different gully. I think the original gully we took on the up-climb was sturdier (the second of the two when coming up, the first of the two when coming down). Other than this small section, we sailed down the mountain’s route, eventually running into the lone guy we had encountered earlier that was waiting for his friends. Indeed, he was again waiting for his friends and explained that they were very slow and he was concerned because he said they were very set on doing the traverse between Maroon Peak and North Maroon Peak, which is very dangerous and requires a great deal of time. He asked that we try to convince his partners not to attempt the traverse based on the weather and their slow speed.
Shortly after this, we ran into the ambiguously odd duo again as Glenn tried to convey the seriousness of the traverse given their speed and the weather. They did not seem convinced this was problem for them and so I hoped that I would not be reading about them on 14ers.com in the Memoriam section (if you guys are reading, I hope you got down safely). We continued on and eventually reached the ridge safely without any issues.
The hike down was relaxing. No threat of weather to worry about.
From here, we casually followed the steep trail back down from the summit, stopping occasionally to take photos of flowers and a small group of mountain goats, which consisted of two adults and two tiny baby goats (so adorable). This prompted me to wonder about the breeding habits of mountain goats and the herd consistency, so I made a mental note to read about that when I got home. I did learn that it was likely that we saw two females (nannies) with their two kids (babies) – as I learned from this almighty Wikipedia article.
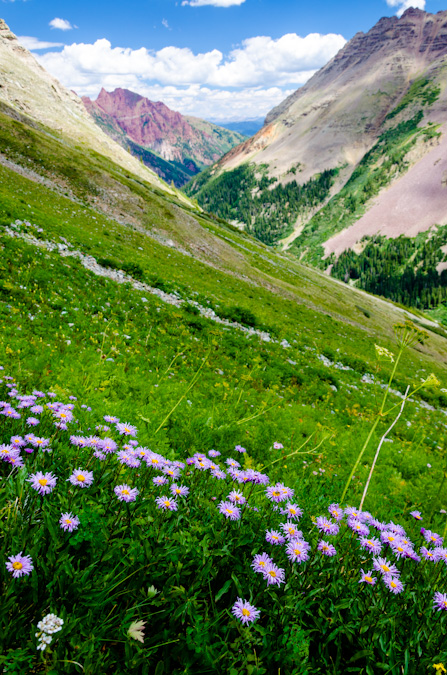
The wildflowers were so fantastic on this hike, it reminded me a little bit of the wildflowers we saw the prior year on our hike up into Lead King Basin.
Glenn left us about halfway down to move a little faster so that he could get some rest before his epic sunrise hike. Sarah and I continued down at a decent pace and found ourselves back at camp at approximately 1:45 PM. The weather was holding quite well for the Elk Mountains, and we were starving. We cooked some food and took naps that lasted well into the late evening and eventually the night. We were certainly well rested for the next climb.
Day 4: Early start and successful summit of Pyramid Peak - 14,018 ft.
The alarm went off and we climbed out of the tent and started hiking at 4:15 for Pyramid Peak. The hike down to the lake and to the trail split off in the darkness was a fun experience as always. Once we found the turn off for Pyramid Peak, we were greeted by a couple that was heading up to do Pyramid as well. They were moving quite quickly and left us in their dust in no time at all. We were both thankful to have a really well-constructed trail to start the day on - the Colorado Fourteeners Initiative built an absolutely bomber trail up the first section of Pyramid in 2006 and it does not disappoint. The trail climbs steeply out of the valley over large boulders and is very well-maintained. Before we knew it, we were starting to get the first sunlight of the day at pre-dawn.
After switching back and forth up the steep slopes, the trail deposited us at the base of a giant boulder field, nick-named the "Ampitheater" due to the fact that it has three of its four sides surrounded by steep sections of Pyramid Peak.
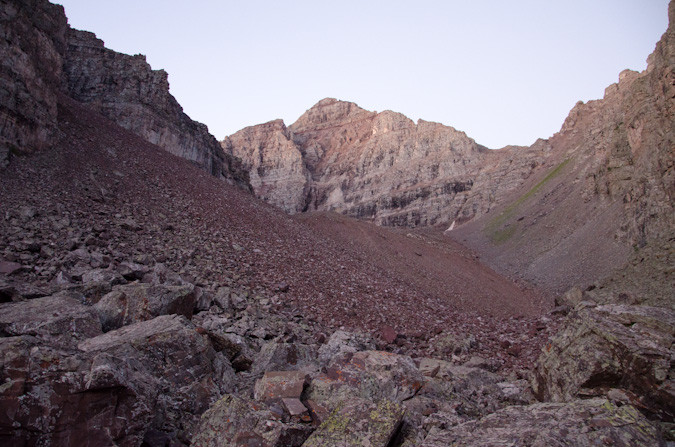
As we rose up the Ampitheater, the views to the north became better and better, with the soft light of sunrise illuminating the surrounding peaks.
Eventually, we reached the top of the Ampitheater and were greeted with our next task, climbing up a very steep scree and dirt gully to the ridge. We were both overcome with glee over the prospect of such fun hiking (just kidding). Fortunately, the views behind us were starting to get good, with Snowmass Mountain and Capitol Peak poking above the ridgeline in the Ampitheater.
In addition to this, the clouds above were looking phenomenal, and the Maroon Bells were beginning to poke up above the ridge too.
The hike up this section was gruelling to say the least. It was steep, loose and unrelenting. The occasional break to look back was worth the climb though.
At last, we reached the top of this devilish section of climbing and our day's objective finally came into view for the first time. Pyramid Peak erupted above us like some freakish volcano. Here's a groovy photo with all of the mighty Elk 14ers in view - Pyramid, Maroon, North Maroon, Snowmass and Capitol. 
Sarah and I stopped for a bit at the top of this section to rest, eat and study up on the route. Sarah enjoyed what had become her signature staple food of the trip - PB&J on a hot dog bun. Yep. 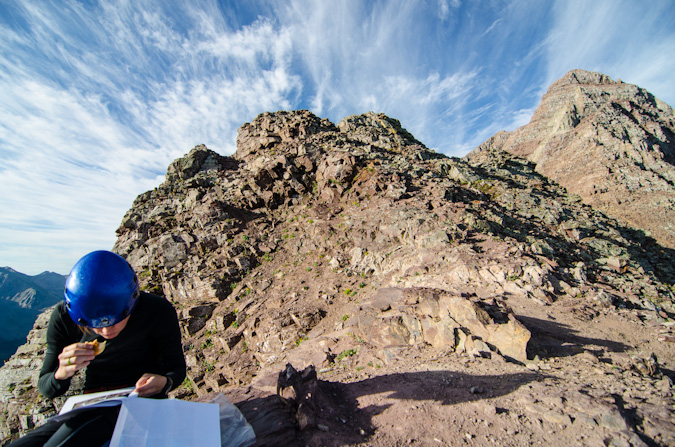
The clouds continued to provide a very dramatic feel for the whole morning.
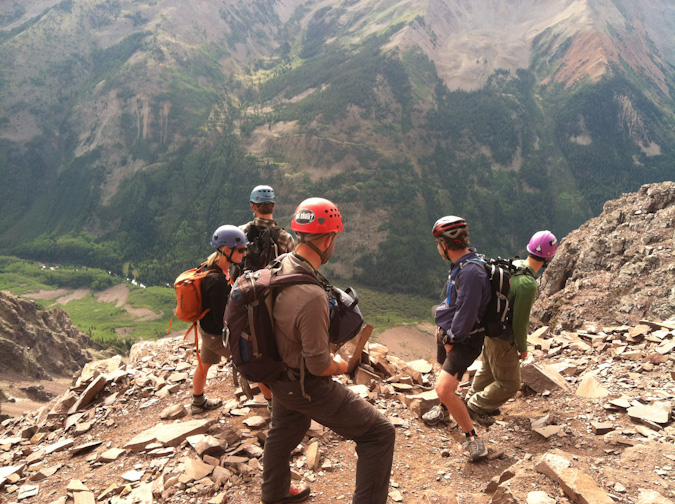
After a short rest, two climbers joined us on the saddle - they were named Doug and Martin and asked to join us for the rest of the climb so that we would not kick rocks down on each other. This seemed like a great plan to us; although at first glance, Sarah and I were both a little taken back by Doug's bicycle helmet. Fortunately, it turned out he would be one of the safest climbers I've been with.
Doug snapped off a group photo for Sarah and I and we departed for the difficult section of the climb.
The route was quite obvious for most of the remaining part of the climb, with several cairns and a clear trail in many sections. At one point, we found ourselves at a section that was a huge crevasse in the trail, which totally reminded me a photo I remembered seeing of my dad when he climbed Pyramid Peak. Indeed, the crevasse was jumped by me both up and down. Here's a photo from the 1980s of my dad jumping a similar crevasse.
We reached the infamous "ledge" which proved to be a challenge with my camera bag affixed to my chest. Sarah captured this photo of me being quite relaxed while crossing, with camera in hand.
I had the camera out for a reason though, as I wanted to get a closer shot of Doug and Martin crossing this awesome section.
At last, we reached the infamous green gully, which turned to be the most enjoyable section to upclimb. It was quite solid and easy going, with little to no loose rocks to contend with. It was very steep though, and a miscalculation would prove fatal. Climbing to the top of this section was quite a lot of fun.
We then reached what many consider to be the crux of this route up Pyramid Peak, a section where you can choose between a very exposed class 3 section or an unexposed but more dangerous class 5 section. Coming down from this area were the two climbers we met earlier in the morning near the lake - they had already summited and were coming down, so we waited for them before continuing. As a group, we had a nice discussion about the route and the other two climbers departed.
The crux move was spicy but nothing too hard. I thought the summit block on Mt. Wilson was harder and more exposed for sure. The rest of the climb was as simple as weaving our way up cairned sections of ledges. Before we knew it, we were on the summit. Sarah was up first and captured a photo of me summiting my last 14er.
As I reached the top, I took one last look back behind me at the east Elks - they looked so good.
The feeling was surreal, exciting, sad, happy and relieving, all at the same time. It was a flood of feelings for sure, but they were all welcome feelings. I felt like I had accomplished something quite remarkable (even though thousands have done it before me). Perhaps it had something to do with the length of the time it took to finish, or the length of the time I had had the goal. Either way - it was pretty darn awesome! Sarah gave me a big hug and then dropped a huge surprise on me. She prefaced the surprise with the something like the following words, "Angela wanted me to give this to you when you got to the top... I ensured it was not a divorce letter or anything like that, but don't shoot the messenger!"
She then handed me a white folded envelope with my name on it. Inside was the most thoughtful, humorous and loving message I could ever ask for from my wife. Sarah said, "she said you might cry." Which of course, I did a little.
Sarah and I celebrated the amazing day and basked in all of the glory that I knew would come from the views from Pyramid Peak. It was the perfect mountain to finish on. The views of the Maroon Bells, Len Shoemaker ridge, Snowmass Mountain, Capitol, Castle, Conundrum, Cathedral and the rest of the killer Elk Mountains were absolutely surreal and wonderful.
The famous Pyramid Peak diving board was a very inviting spot for photos, and Sarah decided to go surfing. I did an HDR and a non-HDR of this, for fun. You can mouse-over or click to see the non-HDR version.
...and my celebratory pose!
It felt like a small little party up there, spirits were high, weather was looking good, and the views were to die for.
After some food, I fired off a 360 degree panoramic from the summit. One of my favorites to date.
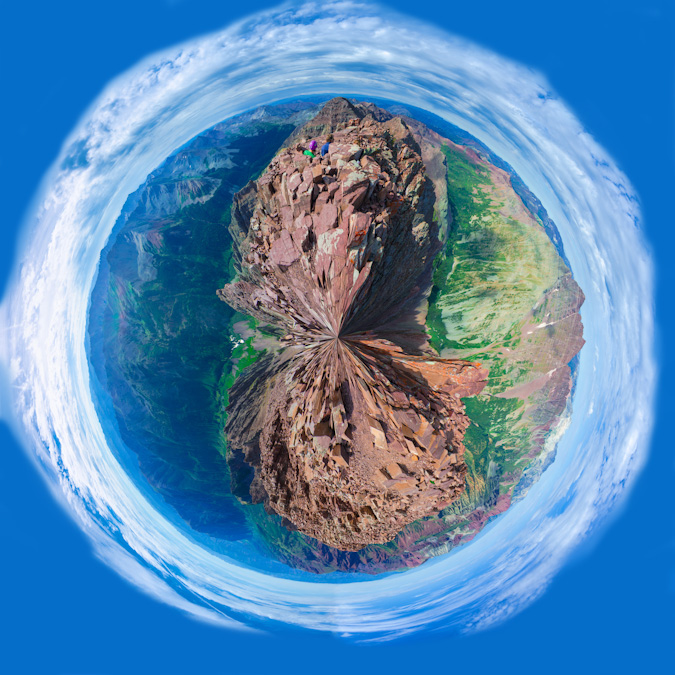
The same 360 degree pano made for a wonderful planet too... for more on those see this article...
One of Sarah's more awesome traditions is that every Friday she wears a tie and takes a photo of it. This Friday would be no exception!
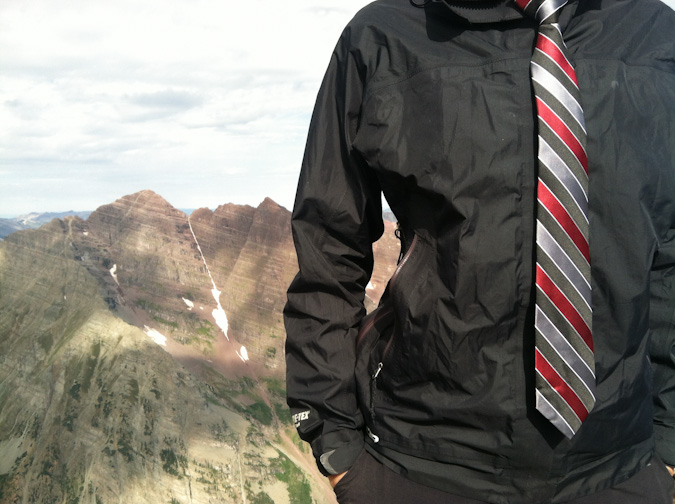
Weather was starting to build to the west, so we decided to start to pack up our stuff. I still was in awe of the sheer nature of the valley below - how steep the walls were, how amazing the features of the rock were. I'm not religious at all, but this is as close as you can get to a religious experience.
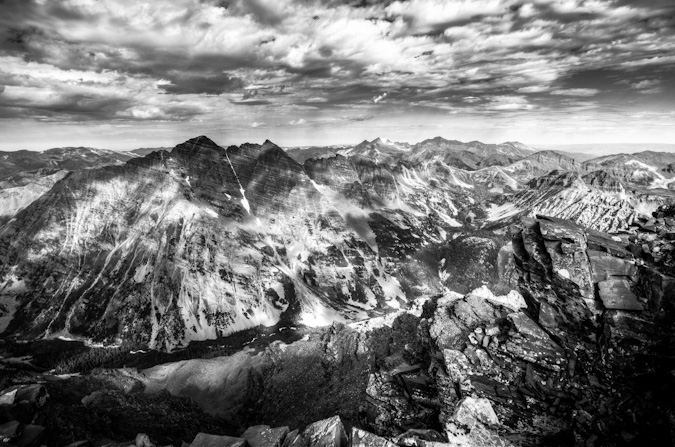
Before we left, I wanted one more parting shot from Pyramid with the USGS marker.
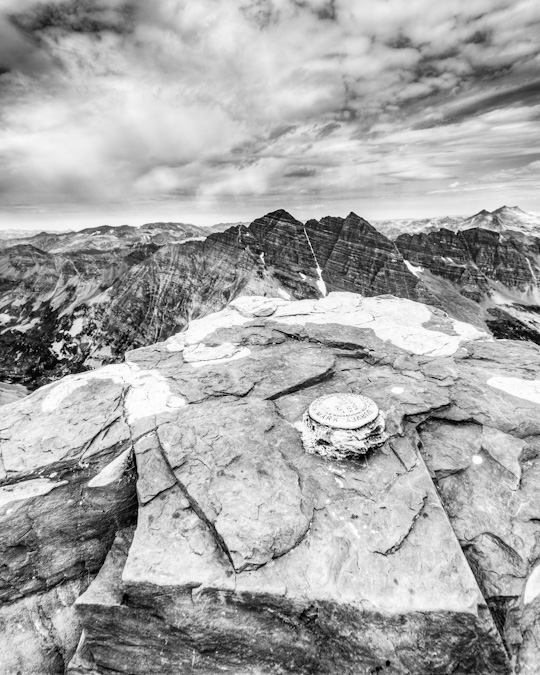
Downclimbing Pyramid Peak was slow going. It always feels much more awkward to downclimb the steeper terrain and Pyramid was no exception. Our group took special care not to dislodge any rocks onto each other and we staggered our decents and ensured we were each clear of a run-out section before the next person started. It was pretty fun climbing though.
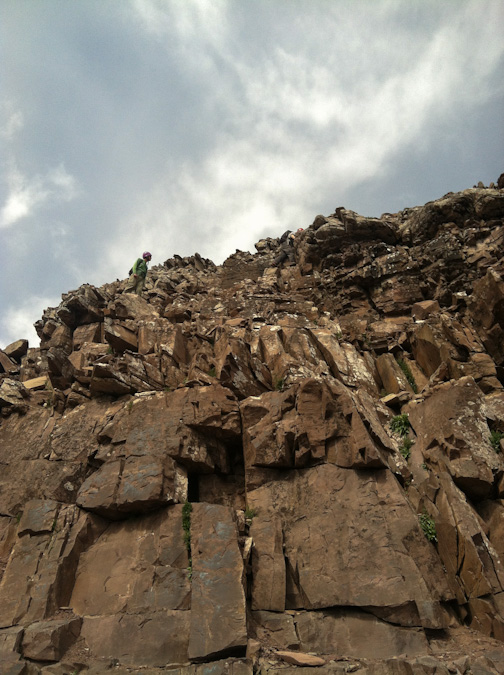
Pyramid was one steep mountain, with lots of loose rock to beware of.
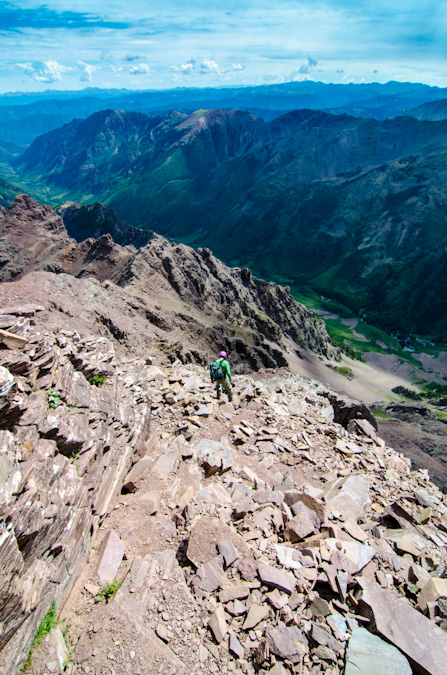
I was still amazed at how rugged the terrain was on Pyramid - it looks so unclimbable from all directions, and even when you're up there it feels quite surreal.
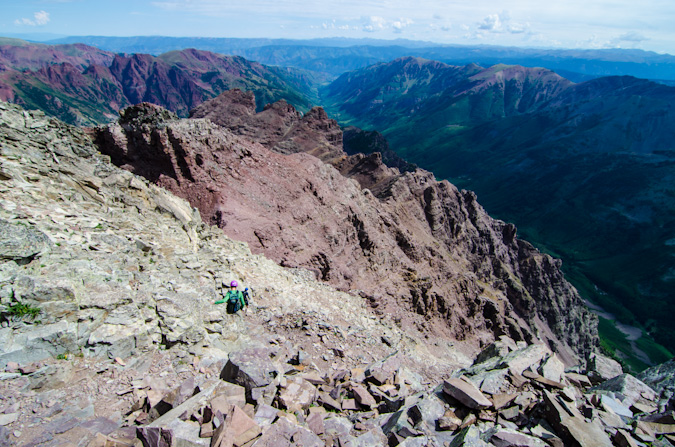
The slowest and most challenging part of the downclimb was the green gully. We took turns decending into sections and just as we reached the bottom of it, small rain drops started to slowly fall. We had made it through the hard sections just in time.
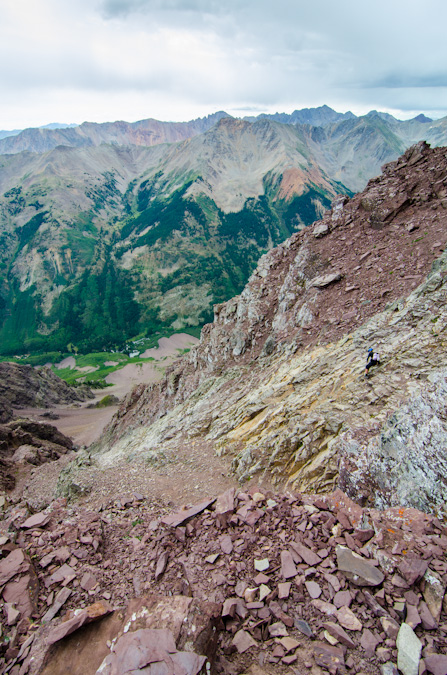
Luckily for us, the rain lasted only a short time and we were able to reach the saddle quickly and safely. Upon arrival, we were greeted by a lone mountain goat, who was probably licking up the urine others had deposited there earlier in the day...
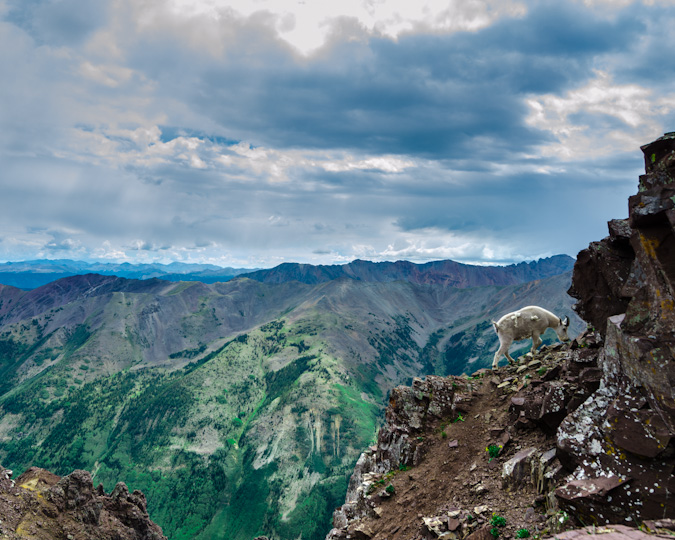
This mountain goat was quite photogenic and decided to pose just for me on the rocks above.
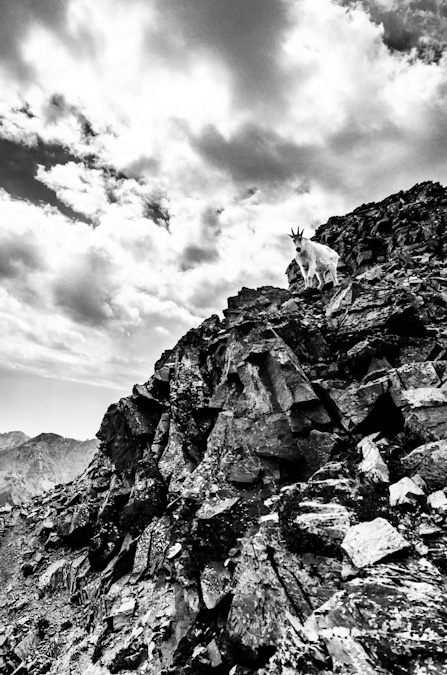
After enjoying the company of the goat, we decided to head on down the most wonderfully exciting and enjoyable dirt and scree fest that was the descent off of the ridge back into the Ampitheater. We both ran out of water at this point and decided to hoof it down as fast as we could, with plans of heading on out of the valley that evening. The thought of a celebratory meal in Aspen was too much to pass up. Once out of the ampitheater, the CFI trail down was quite solid. I could not really imagine how awful this trail would be before this work was done. I took one final parting shot of the Maroon Bells on the way down Pyramid.
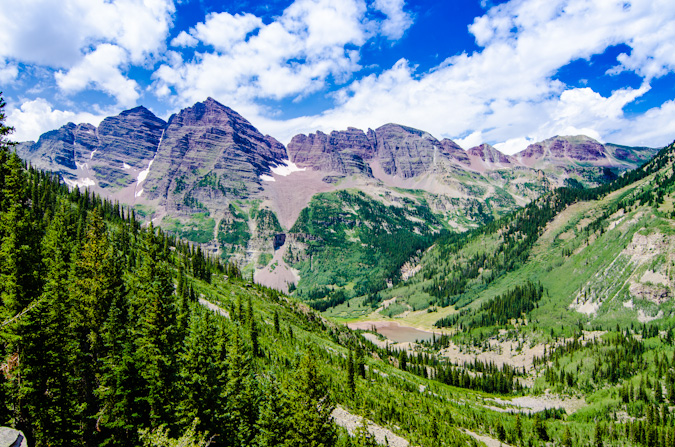
Sarah snapped off one last shot of me hiking back to camp. This is one happy dude.
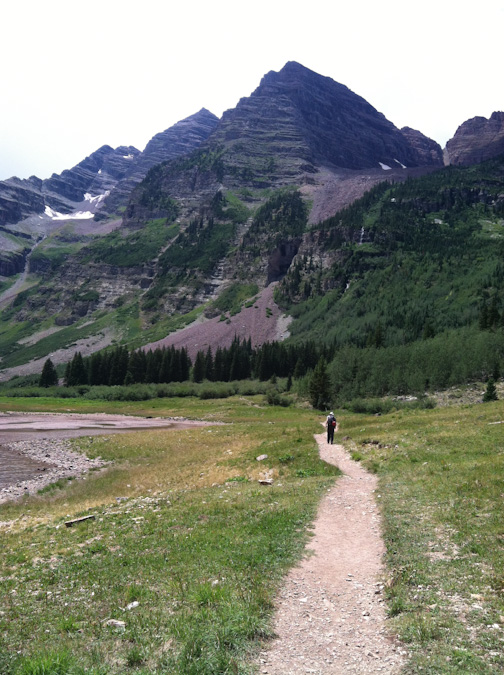
We got back to our campsite and packed up after refilling our water. Our legs were tired. Our souls were refreshed. It was time for beer and pizza. We headed out and I took one final "classic" shot of the Maroon Bells from Maroon Lake with the "Deadly Bells" sign. "DO NOT ATTEMPT IF NOT QUALIFIED."
I'm not sure if I was qualified or not, but I felt greatly accomplished and quite humbled to have experienced them either way.

A final look at the route map. Click on it for a larger version.
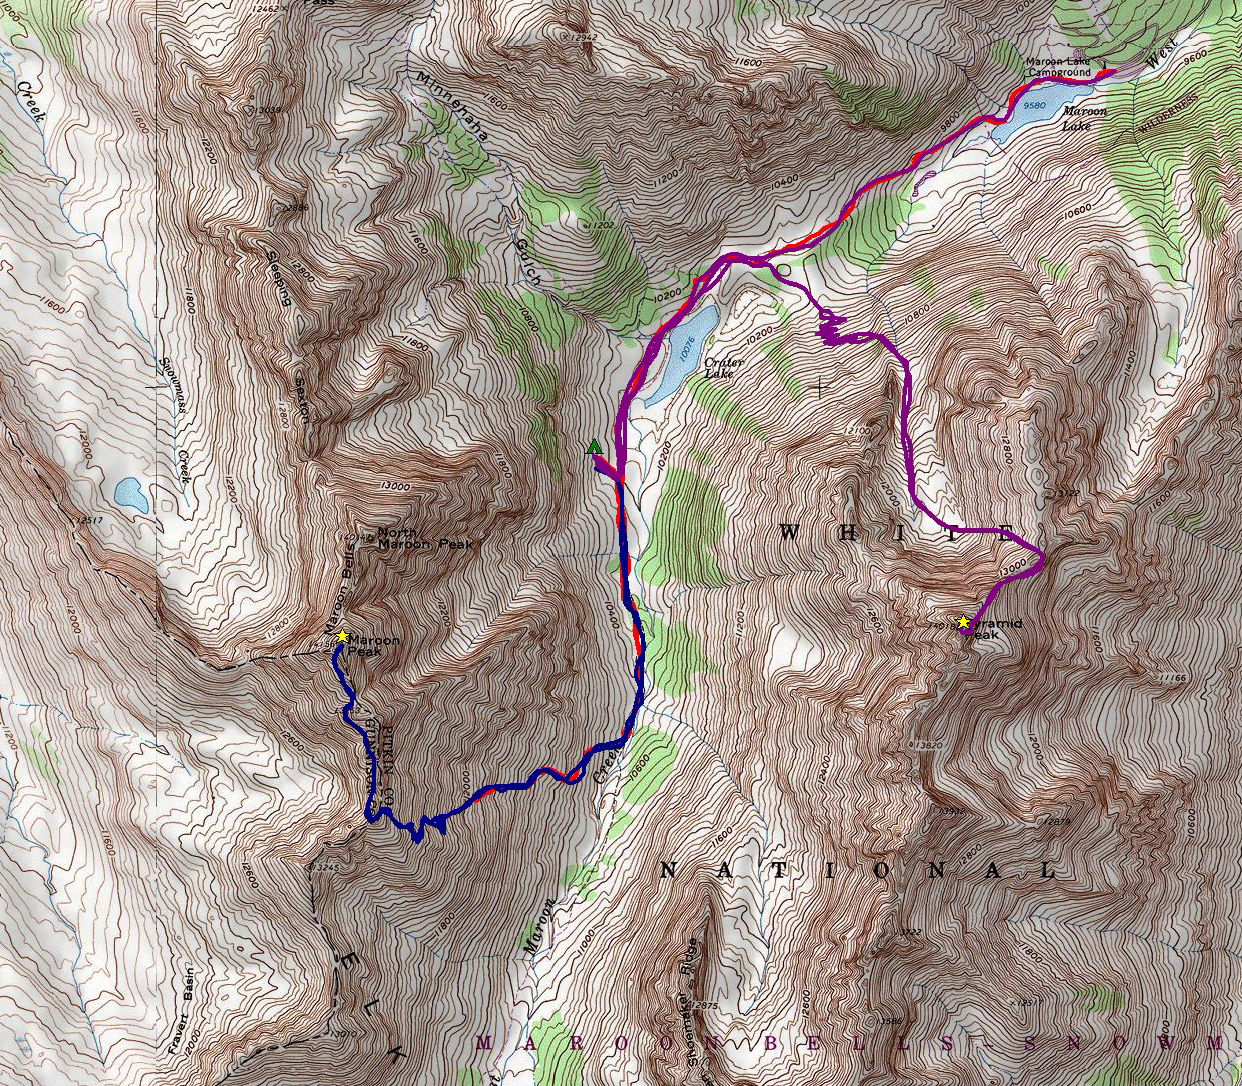
We decided on a restaraunt called Mezzaluna in Aspen for our celebration dinner. I had a vegetarian pizza (did I mention I'm a vegetarian) with truffle oil and Sarah had a sausage pizza. Two margaritas were served and congratulations were in order.
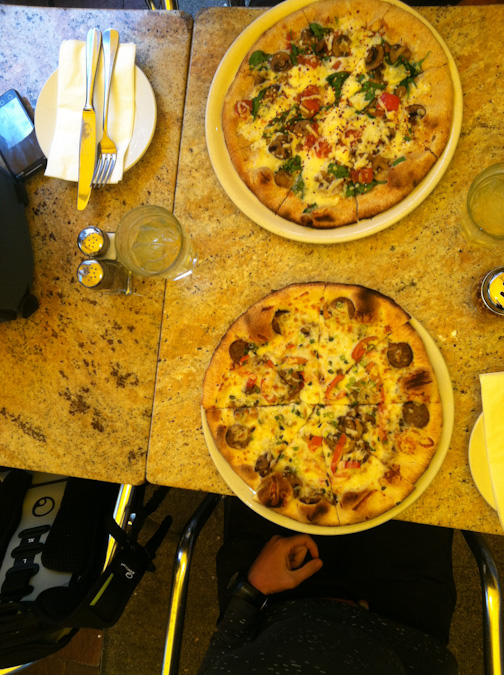
After leaving Aspen and dropping off of Independence Pass towards Buena Vista, we were greeted with a rare double rainbow, which capped off our most excellent trip in fine order. I could not have asked for a better trip, partner, or experience to finish the 14ers.
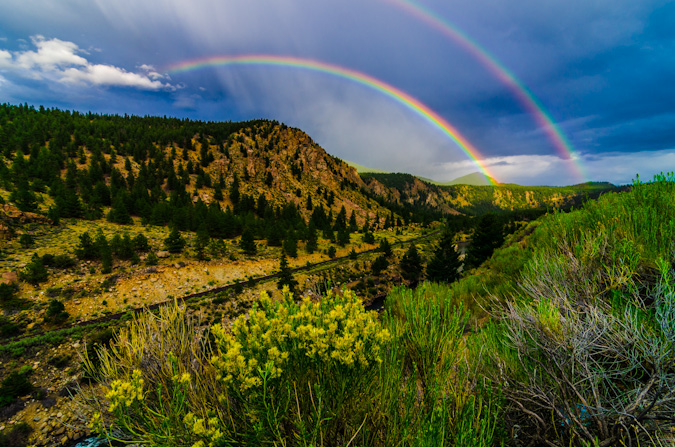
Conclusion and acknowledgements
A goal that takes 27 years to complete is one worthy of relishing, reflection and sincere acknowledgements to those that helped make it possible.
After fracturing my L5 vertabrae in 1995, I was not sure if I would ever be able to realize some of my goals. Fortunately, through hard work and incredible support from my family, I fully recovered from that and learned a great deal about work ethic. This quest for the mountains has tought me so many valuable lessons about life, about people, about myself...
Most importantly, it has taught me that despite people having severe differences of opinion on matters such as religion, politics or otherwise, something like the great mountains of Colorado can bring those people together to share in life-changing experiences that bind people unlike any other force. I hope to build on those lessons and continue to better myself as a person - my friends and family know there is plenty of room for growth.
To Sarah Musick: Thank you so much Sarah! It was such an honor to share those last two summits with you - you have been a true inspiration to me and my quest to finish. Your support over this past year has been fantastic. You are truly an amazing human being.
Of course, an achievment like this is never possible without the support of others, who are for sure some of the finest people I've had the pleasure to meet.
1. 1st - to my wife, Angela Payne (one fine Vegan chef with a killer sense of humor) - who has given me more support than I ever could have asked for - allowing me to chase my dreams is the best gift a person can give!
2. To my parents, they have been an inspiration for this life-long goal and I would have never have started without them introducing me to the mountains of Colorado at such a young age. My dad's goal to complete the highest 100 began in the 1970's and it quickly became my own goal as well.
3. To my family’s close friend – Dave LeShane – who also was on the quest for the highest 100 when I was a child – and inspired me to dream for the stars while climbing various 13ers with me as a child. Your wisdom, guidance and support over the years was like having a super-awesome uncle with bad-ass climbing stories.
4. To my regular climbing partners - Sarah Musick, Ethan Beute, Jeremy Park, and Regina Primavera (Yalegirl09) - you guys have been absolutely awesome to climb with! Your support, humor, talks, patience, insight and overall awesomeness has grounded me and reaffirmed my faith in mankind's future.
Sarah - you are one of the most amazing people I've ever met - our short but fantastic friendship has been such a blessing for me.
Ethan - our talks and hikes are always some of my most enjoyable days and most memorable experiences - I hope we can continue what I believe to be an incredible friendship!
Jeremy – while we have not done any 14ers together, we’ve known each other since high school and have been amazing friends ever since. Our epic adventure on Vestal’s Wham ridge will always be one of my fondest moments in my life!
Regina - you are one crazy, amazing and true friend! Our hikes are always a great time and I have enjoyed our talks!
5. To my other climbing partners, mostly from 14ers.com –
Terry Mathews (tmathews) - it was so great getting back into climbing with you back in 2009. Our adventures and introductions to class 3 on Crestone Needle, Crestone Peak, Blanca, Ellingwood, Kit Carson and Challenger were fantastic.
Micah (mountainmicah83)- dude – our epic day on Harvard and Columbia will never be forgotten - while I had hoped we could get out more – it was still awesome to learn rope/climbing skills from you and Matt!
Mike Vetter and Travis Arment - what can I say Mike - anyone who would drive all the way from South Dakota to climb Huron Peak with me is one awesome dude. Our adventure up Capitol Peak with the accomplished Travis Arment was unforgettable. You guys are fantastic people.
Barry Johnson (Johnson) – our climb of Shavano in 2009 was my re-introduction to the 14ers after a long hiatus – thank you for joining me on that fantastic day!
Mike (fiemus) and Bob Hay – our hike up Yale was great – learning about all of Mike's SAR stories was one of my favorite days in the hills.
Kara Bauman, Will (WillV), Alli Kolega and Tom Shaar – our climb of Mt. Wilson was absolutely wonderful! Thank you for allowing me to join you guys on such a fabulous adventure!
6. To Bill Middlebrook for creating and maintaining 14ers.com – it has been very helpful for me in this crazy pursuit.
7. All the other awesome mountaineers, climbers and hikers in this community - we need to continue to focus on our common goals and dreams.
Thank you for all for the inspiration to write these, and thank you for reading...
{fcomment}
Snowmass Mountain and Hagerman Peak - Magic in the Elk Mountains

Day 1: Drive to Lead King Basin and Backpack to Geneva Lake ~ 1,400 ft. elevation gain ~ 3 miles
Day 2: Snowmass Mountain via the West Ridge Route ~3,000 ft. elevation gain ~ 6 miles
Day 3: Hagerman Peak via the standard route (south ridge) ~3,000 ft. elevation gain ~ 6 miles
Snowmass Mountain and Hagerman Peak have sustained my attention for quite a few years. Ever since I first recall setting eyes on Snowmass Mountain from the summit of La Plata in 2005, I was in awe. The massive snow field that sits in the bowl that is Snowmass Mountain is simply breathtaking and totally recognizable from the summit of many mountains in Colorado. Here are a few examples of how easy Snowmass Mountain is to recognize, from various shots I’ve taken over the past few years of Snowmass Mountain from various summits:
From Huron Peak - June 2010:
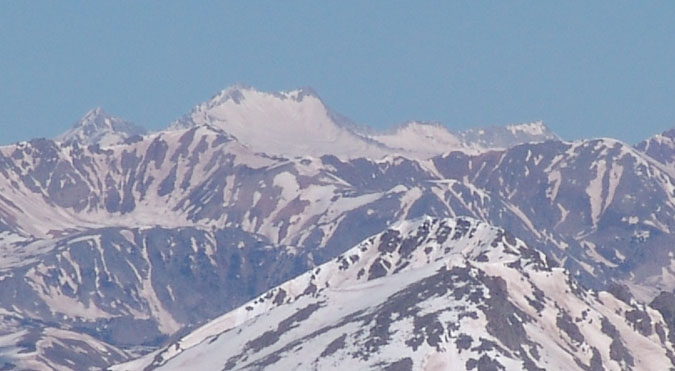
From La Plata Peak - July 2005:
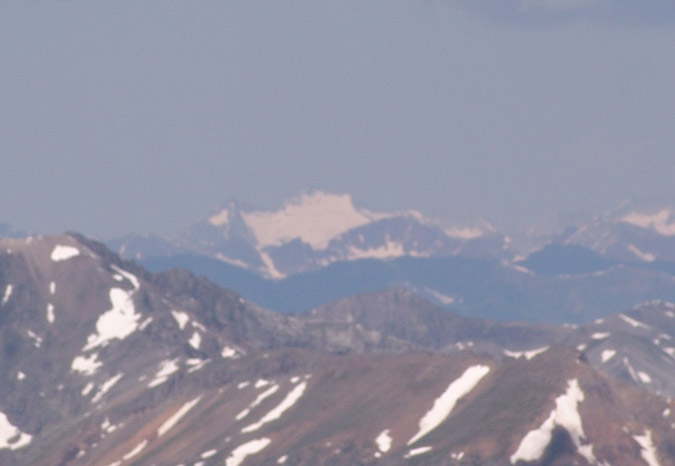
From Mount Massive - October 2009:
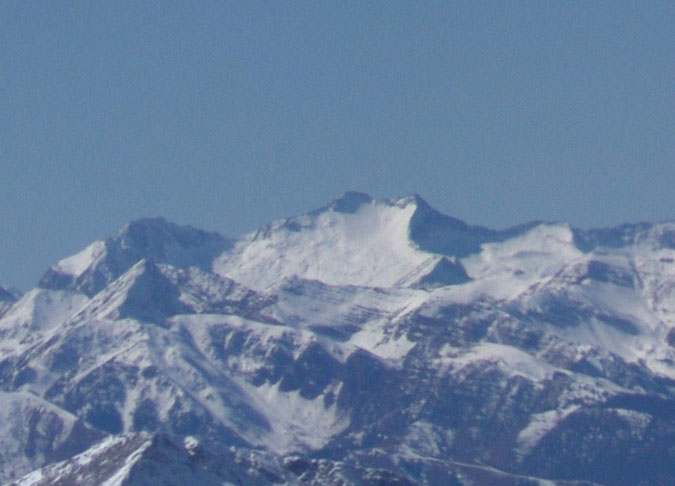
From Mount Elbert - August 2009:
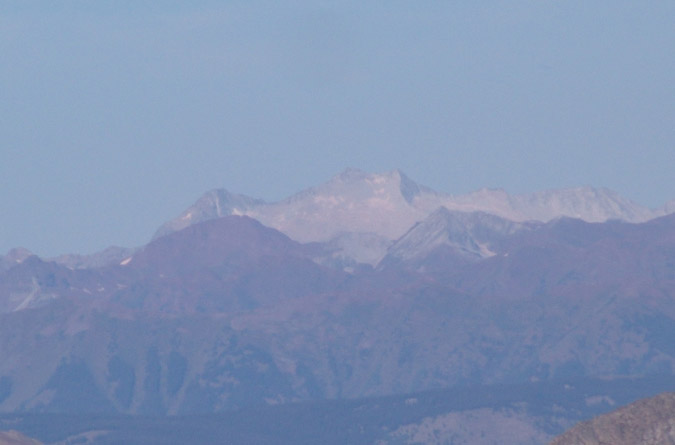
Snowmass Mountain and Hagerman Peak have a very storied history and are deserving of a few paragraphs to paint those details:
Snowmass is the 31st highest mountain in Colorado and rises to 14,092 ft. and is the 4th highest in the Elk Mountains. Snowmass was named originally by the Hayden Survey of 1873 and was simply called “Snow Mass” because of the huge snow field beneath the summit. The Ute Indians called it “Cold Woman” because it was often believed to be the source of bad weather. Some pioneers called it White House Peak, but that name did not stick. 1 Interestingly enough, there is a restaurant in Carbondale that we ate at on the way home called White House Pizza – which was delicious by the way - I wonder if it is named after this historical fact.
Hagerman Peak is the 88th highest mountain in Colorado and rises to 13,841 ft. and is the 8th highest in the Elk Mountains. Hagerman Peak is named after the legendary Aspen, Colorado businessman and mountaineer Percy Hagerman, who was the first person to climb Maroon Peak in 1908 and the first person to climb Hagerman Peak as well. From Hagerman’s Book, “Notes on Mountaineering in the Elk Mountains of Colorado, 1908-1910,” Hagerman describes the area around Snowmass Mountain and Hagerman Peak: “These peaks are among the finest in the Rockies for a number of reasons. They have big streams and fine large lakes; they are rugged, steep and forbidding in appearance; some of them are richly colored; and finally, the upper stretches have not been scarred with mining claims.”2
Hagerman Peak is rarely climbed due to its remote location and difficulty (and because it is not a 14er). In fact, we saw only a handful of names on the summit register dating back to 2009 – many of which I did recognize (props to Ryan Kowalski for picking Hagerman as his 99th Centennial to climb – he eventually finished on Pikes Peak of all mountains).
Enough with the history – let’s get on with the trip report, starting with a TOPO map of our journey (click for a larger version):
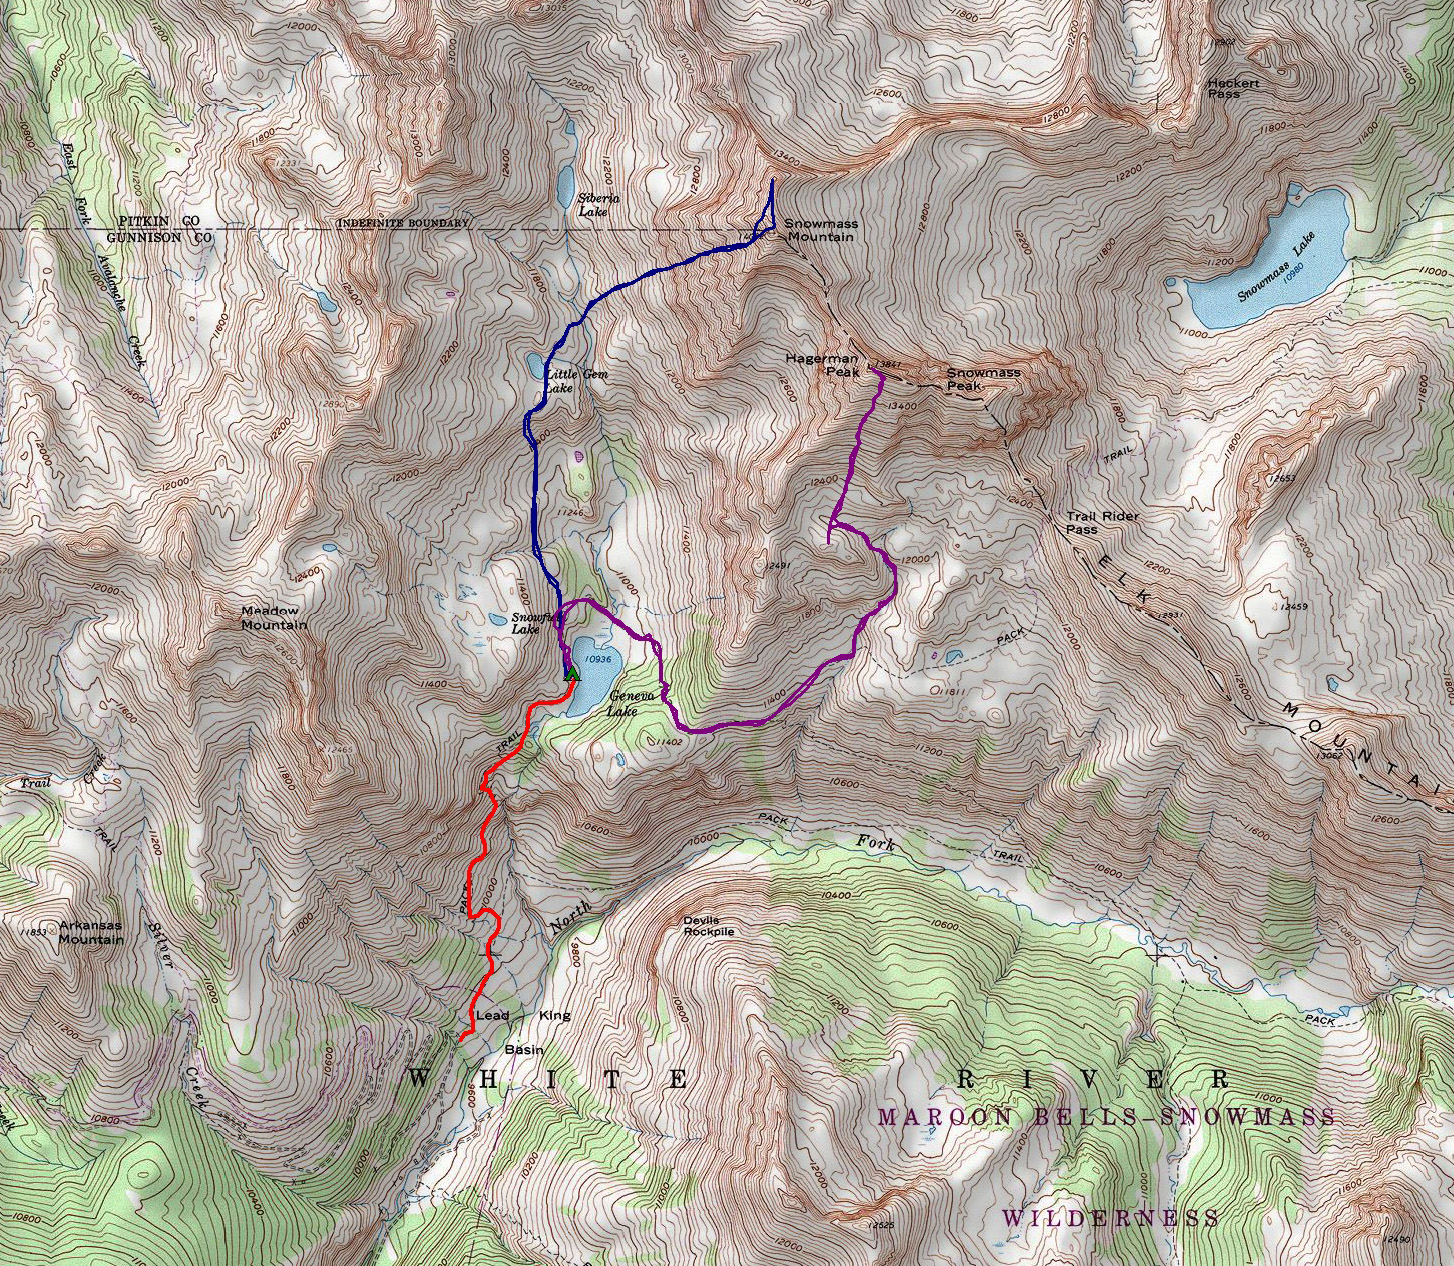
Day 1: Drive to Lead King Basin and Backpack up to Geneva Lake
I was desperate. Desperate for the mountains, desperate for a climb, desperate for a climbing partner. After my miserable failure on Snowmass in June, I really wanted to get vengeance. If I were to finish the 14ers this year, that meant knocking out either Snowmass Mountain or Wilson and El Diente. Due to the insane rain that the Telluride area has received as of late, and thanks to a stern warning from a friend from 14ers.com, Jim (dancesatmoonrise) about the nasty conditions of the Wilsons after a lot of rain, I opted not to head down to the Wilsons. Instead, I contacted another friend, Ryan (monster5) to see how the conditions on Snowmass’ west ridge route were. Ryan was involved in a rescue attempt the prior weekend on Snowmass for 25-year-old Sean Wylam, another 14ers.com member. Sean eventually succumbed to his injuries and died, which was a real blow to the 14er climbing community. The thought of Sean’s death on Snowmass did damper my enthusiasm to climb it; however, I was determined not to let that stop me. Additionally, I chose another, more technically challenging route, but one that did not involve the use of crampons or snow. Lastly, I knew that this route would also give me good access to Hagerman Peak, which is another mountain in the highest 100. Bonus! I searched all week long for a partner. I knew that one of my regular partners, Regina, would not be up for the challenge (too technical), and I knew my other go-to partner, Ethan, would not be able to do a multi-day trip. Another friend, Micah (mountainmicah83) was already occupied for the weekend as well.
Enter Sarah Musick, friend, musician (no joke - that is really her last name – check her out on YouTube), ball-smasher (ask me later about that one) and last-minute climbing partner hero of the year! Here's Sarah on YouTube:
Sarah was able to get the green light at the final hour to join me on my trip to Snowmass – and I was totally excited! I really was not sure if I would be able to go without a partner because my wife might have just taken my car keys away if I didn’t have a partner lined up. After watching Sarah perform at Stargazers Theatre on Thursday night, I was able to pack for the trip. I had Friday off of work and was ready to rock. I picked Sarah up at her house at 10 AM and we departed for Carbondale. We stopped in at a burger joint in Carbondale and headed for Marble. The drive up from Marble was interesting. I was definitely glad that I had my lifted Jeep Grand Cherokee. I would rate the road a 6/10 on the difficulty scale for off-roading, as it did provide some rocky sections and a pretty formidable creek crossing. I think most stock SUVs could handle the road with caution. We found what we thought was the trailhead, but were not sure since it said “Silver Creek Trail.” We confirmed that it was not the right trail and kept going up the road another 2 miles up. All-in-all, the road into Lead King Basin is a good 15 miles of off-road adventure. I have never seen an area so full of wildflowers in my entire life! Wildflowers were everywhere, and the Lead King Basin offered spectacular views in almost every direction, all filled with flowers. Especially amazing were the views of Snowmass Mountain and Hagerman Peak. A huge waterfall crashes down from the Geneva Lake Basin into the Lead King Basin beneath the mountains.
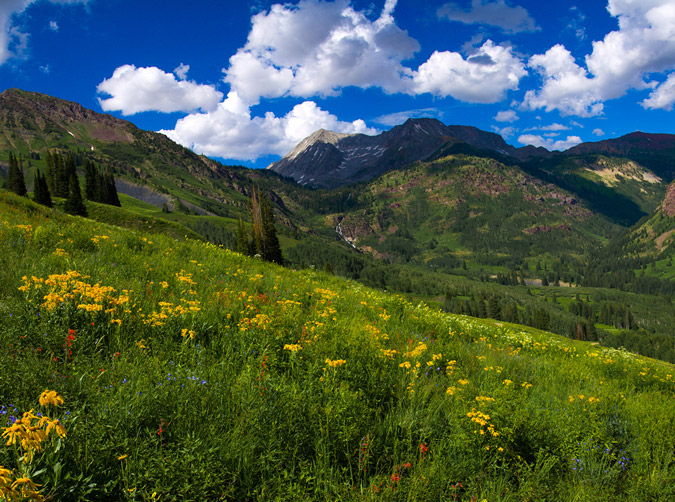
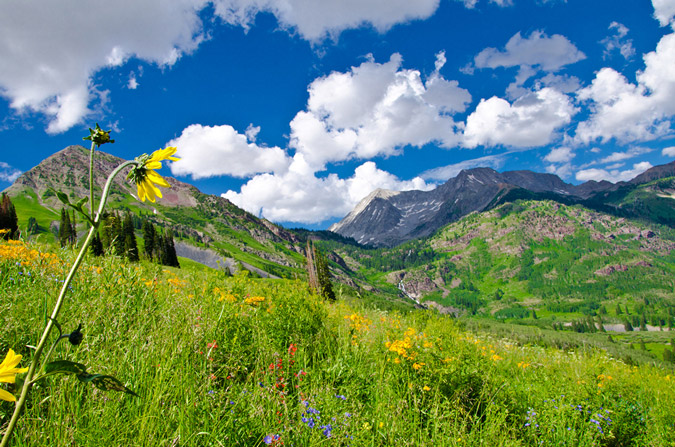
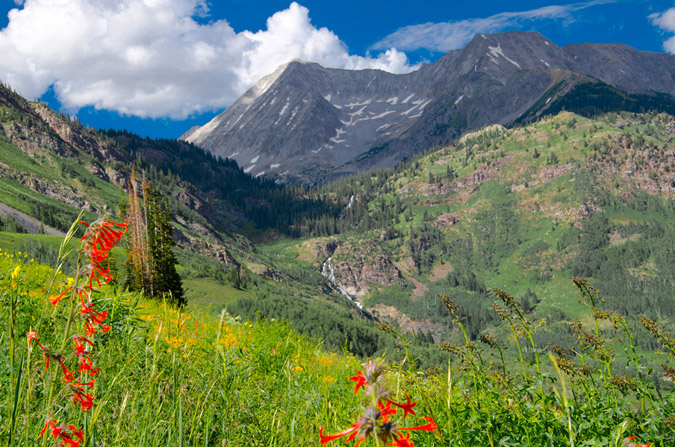
Wildflowers galore in Lead King Basin with Snowmass Mountain (left) and Hagerman Peak (right) in the background. Our route for Snowmass Mountain would take us right up that steep left side.
My Jeep’s temp gauges were all going into the red and I was perplexed. Well, it turned out that I had burned / leaked all of my coolant. No big deal, I had extra in the back. We parked at the real trailhead, which was totally obvious and labeled as the Geneva Lake trail. We headed up the trail at about 5 PM.
Some of the wildflowers that we saw on the trail were actually taller than me! The Wilderness Designation for this area is completely appropriate, that was obvious.
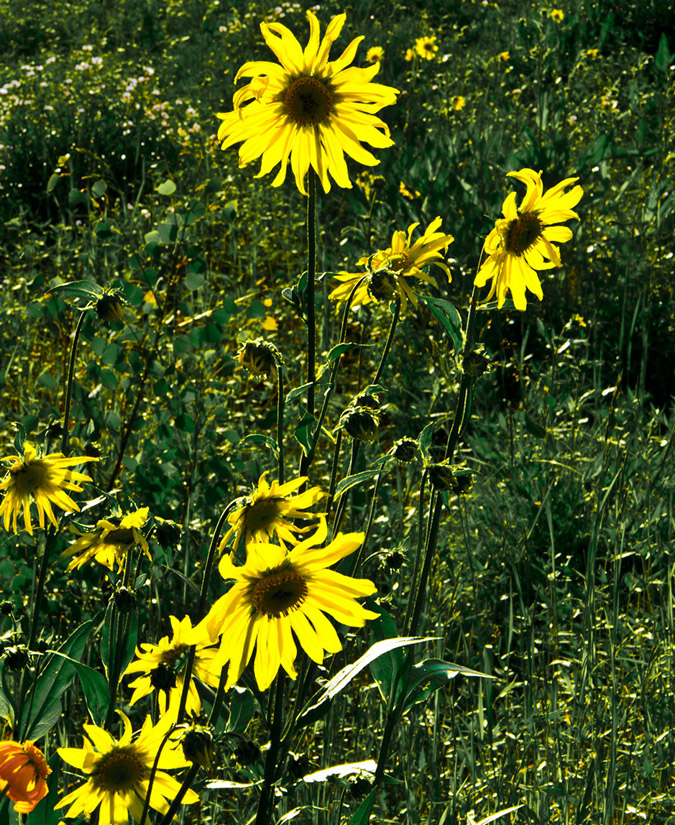
Along the way, there was an incredible opportunity to take photos of the wildflowers. We found ourselves standing smack dab in the middle of a field the size of three football fields, all filled with huge wildflowers. It was incredible. I was thankful that I had packed in my tripod (thanks for the advice Kane Englebert).
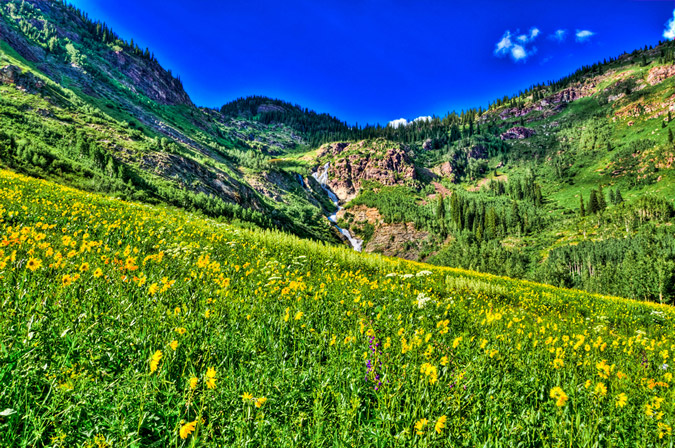
I brought the tripod for a couple of reasons. The first reason was that HDR photos are much better with a tripod since the tripod reduces and prevents movement of the camera, making the HDR photos easier to combine. The second reason is to do better panoramic photos.
The use of the tripod for this field of wildflowers proved great and I put together an HDR version and a non-HDR version for you to see the difference. By mousing over the photo, you can see the HDR version. You can really see how the HDR processing allows for a richer texture and you can see how the dynamic range of the darks and shadows are brought forward.
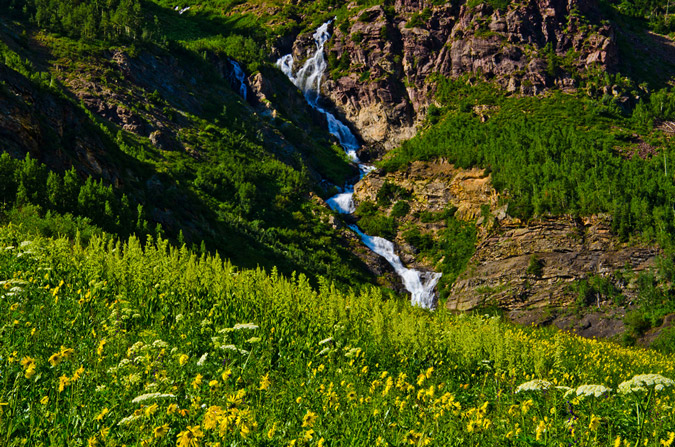
What was even more exciting was that the Maroon Bells peak through on the way up the trail to Geneva Lake as well. Thanks to the rift caused by the Fravert Basin, views of Maroon Peak were spectacular from the trail.
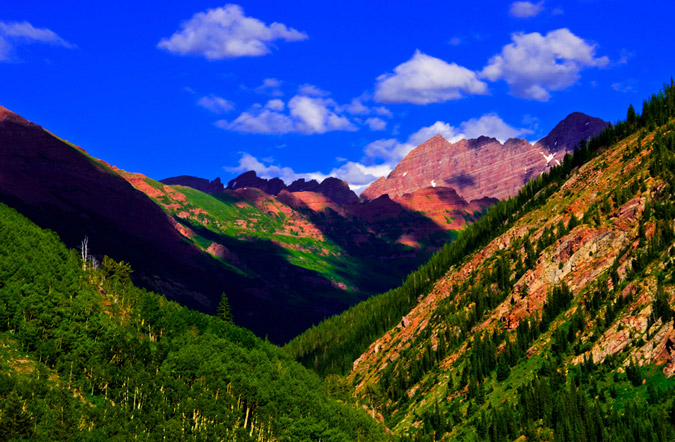
The wildflowers continued as we climbed up towards Geneva Lake. It was madness, truly.
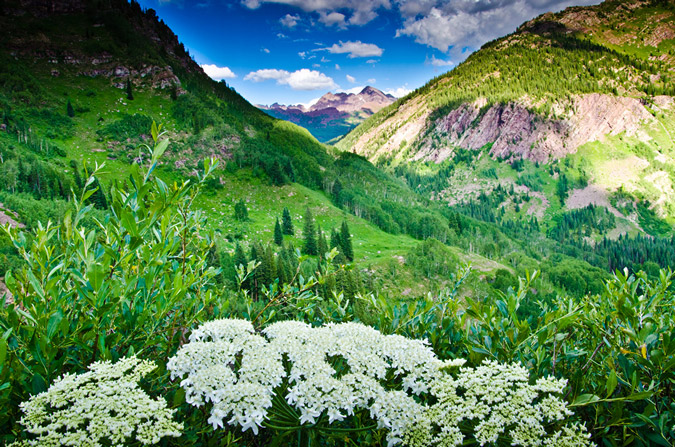
This was the first time I had seen the Maroon Bells this close up with a decent camera and I was not going to let the opportunity go to waste!
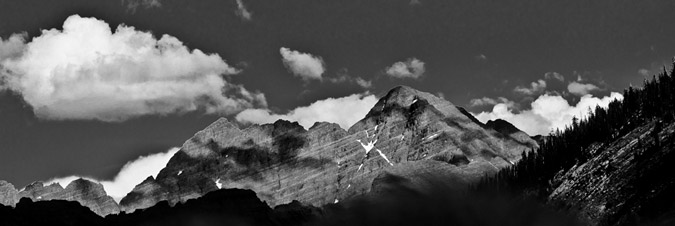
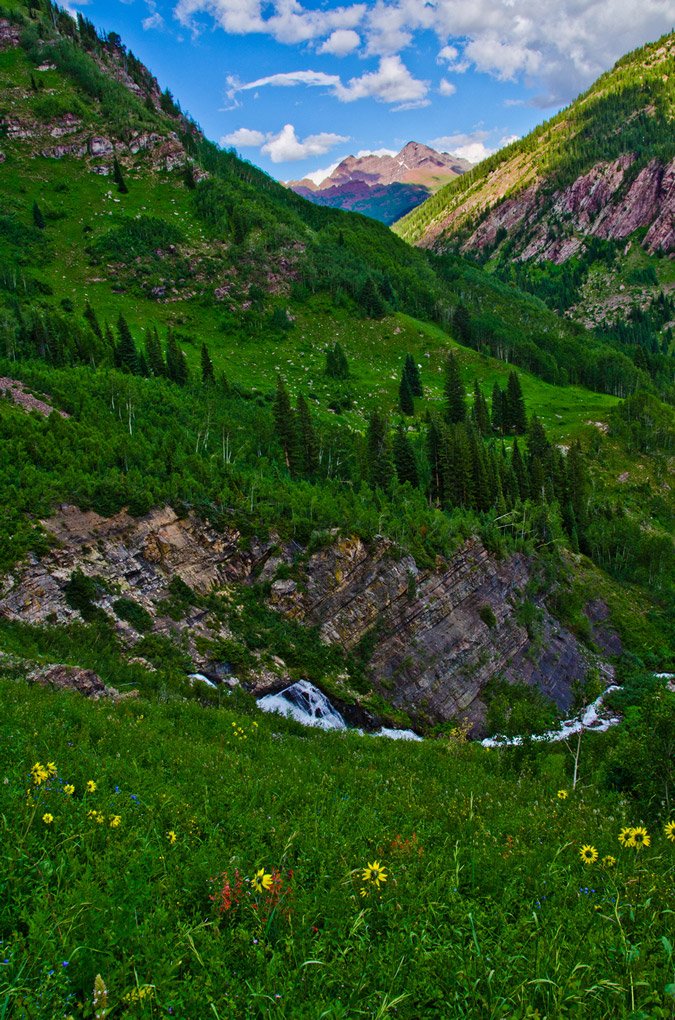
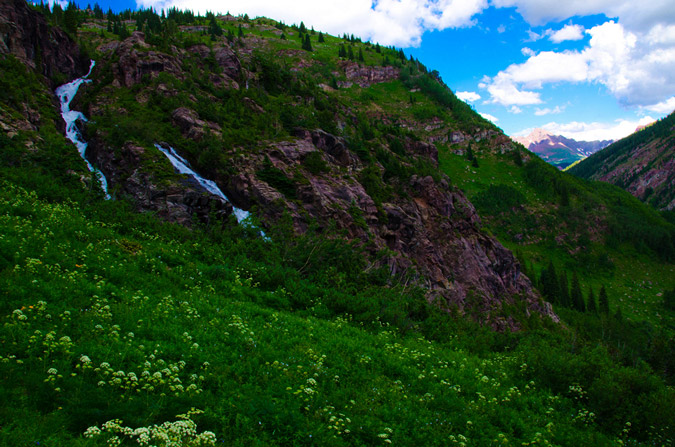
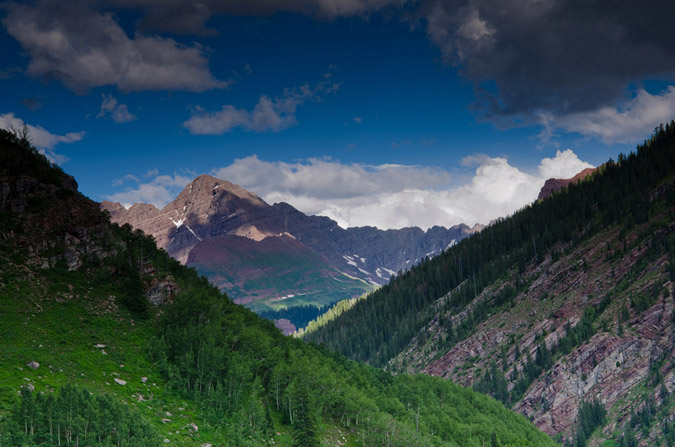
We reached Geneva Lake in quick order (about 2 hours) and found one of the six designated campsites near the lake. We opted to camp in site #2 even though we later found site #4 and #5 to be the superior sites. Site #2 sat on a large hill above the lake’s western shores and was right off of the trail. It was highly impacted, and offered several trails down to the lake for water fetching purposes. We found it to be quite a nice site. Camping at sites that are not designated for camping is prohibited at the lake; however, we noticed that it really did not deter others throughout the weekend from making sites of their own. Tisk Tisk!
After we got all set-up, I decided to go check out the lake and stumbled upon a huge waterfall near the mouth of the lake’s south shores. The waterfall was really rushing quickly and difficult to get down to, but I managed to get my tripod and camera into place for some fun shots of the water.
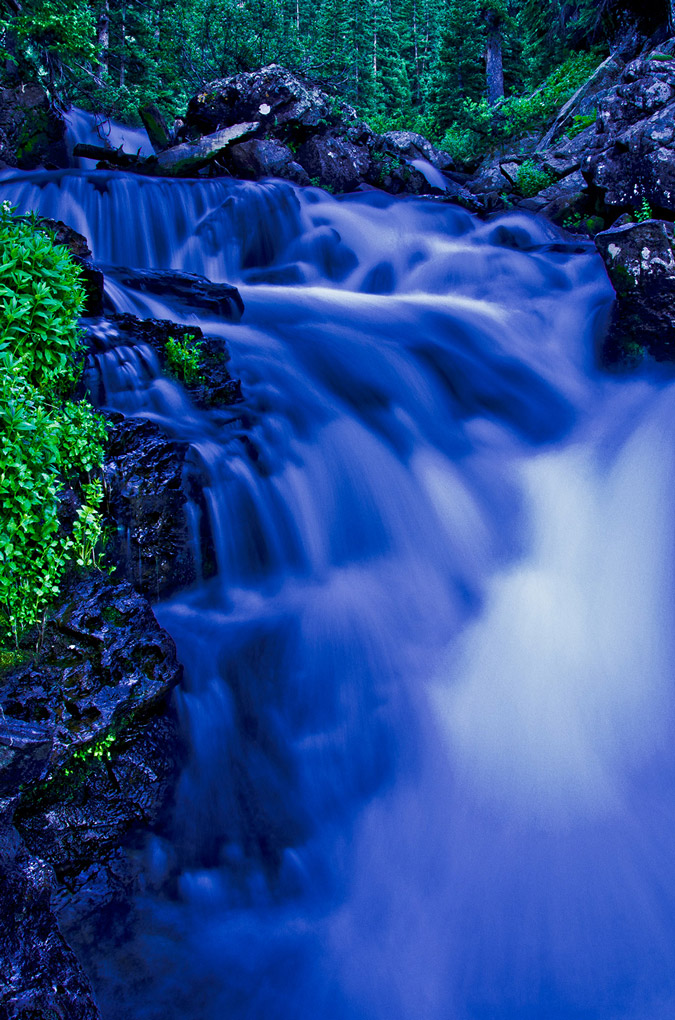
Next, my attention was on getting set-up for the sunset and for star trails photography, which I was pretty excited for. I set-up my tripod on the shores of the Geneva Lake and went to work.
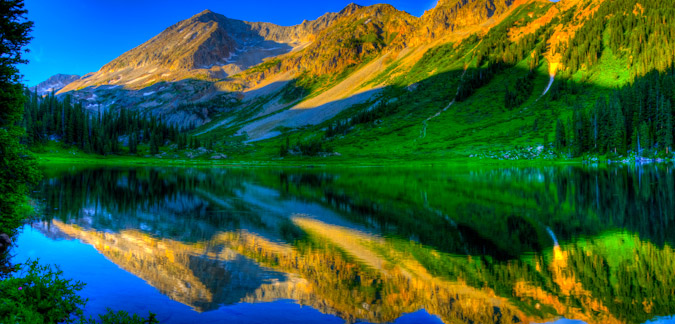
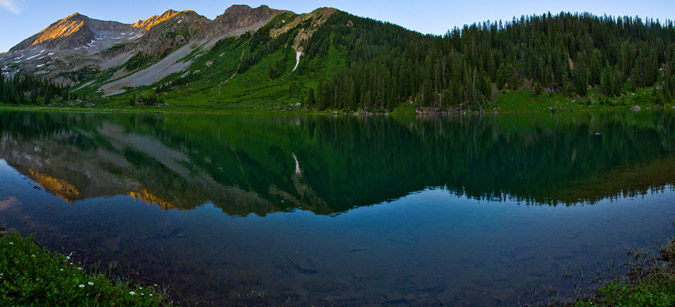
I was so busy checking out the lake that I almost missed an opportunity to catch the last of the sun's light on some clouds over the lake. I think if I were to take this shot 3 minutes earlier, the clouds would have been even more vibrant. Oh well!
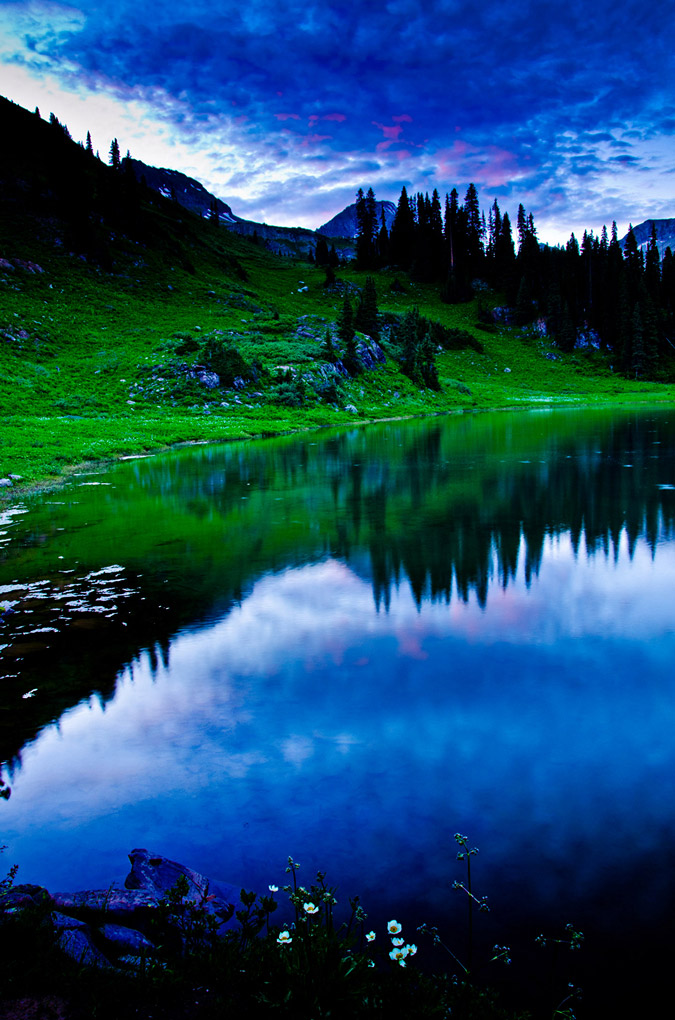
For this trip's star trails photo, I decided to do something a little different based on some techniques I've been reading about. Instead of just doing the night sky, I wanted the scene to be a bit more interesting this time. I decided to start the process earlier and take it deeper into the night, so I set-up before the sunlight had totally faded and started - ending after an hour and a half of photos. I opted for an f-stop of 5.6 instead of 3.5 (to allow for a slightly better depth of field) and I stuck with 30 second exposures. All-in-all, this photo is a compilation of 115 photos. The North Star is just out of frame on the top-left.
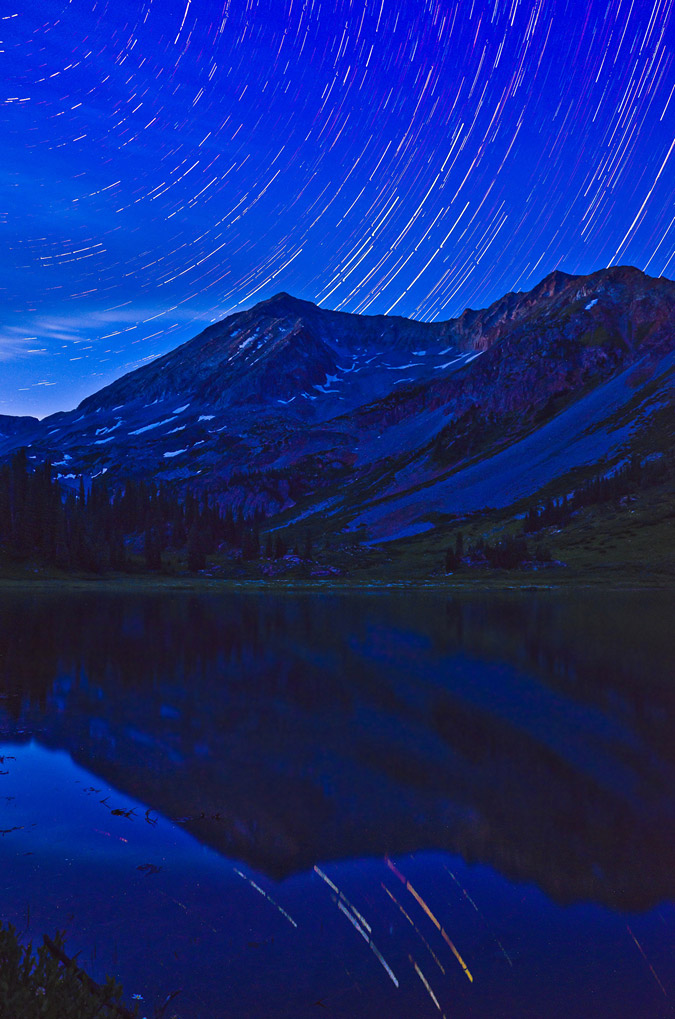
I really loved how the stars reflected in the lake too!
After nearly falling asleep while sitting next to my tripod in the dark, I decided it was time to hit the sack. Knowing that we were entering dangerous and unknown territory to ascend Snowmass Mountain's west ridge, we opted for a slightly later start, but not too late so we could be down before storms. Before our 3:30 AM and 4:00 start came, we were both awakened by a really pissed off coyote across the lake from us. That guy was howling and barking for a good 30 minutes and would have startled anyone, I don't care what you say!
Day 2: Snowmass Mountain via the West Ridge Route
Hiking in the dark is always interesting, especially when you don't know where you're going. We had the description from 14ers.com in print and on my Android phone 14ers.com app (thanks Bill), and headlamps with fresh batteries. We were able to find our way pretty easily though, and before we knew it we were heading up the insanely steep slopes of Snowmass' west ridge. The trail to this point had been very easy to follow except for a few spots and the route finding had begun since there was no trail after we crossed over creek that feeds Geneva Lake coming down from Siberia Lake. It was all scree, boulders and dirt from here on out. I made a quip to Sarah: "Welcome to the next three hours of your life!" We both laughed and continued up to a flatter section that was clearly perfect for a tripod. Since the sunlight was getting a bit better, I decided it was prime time to set-up for some HDR panoramic photography. The clouds and sky were an orange-pink-purple color to the south and west over the Raggeds Wilderness Area and Treasure Mountain. Additionally, Little Gem Lake was barely in view, which we had passed on the way up. Lastly, "Siberia Peak," a quite prominent and impressive mountain connected via a ridge with Capitol Peak was in the right 1/3 of the frame. Hauling a tripod up the side of a mountain is a pain in the butt, no question about it; however, the rewards are well worth it. Click on the photo for a much larger version.
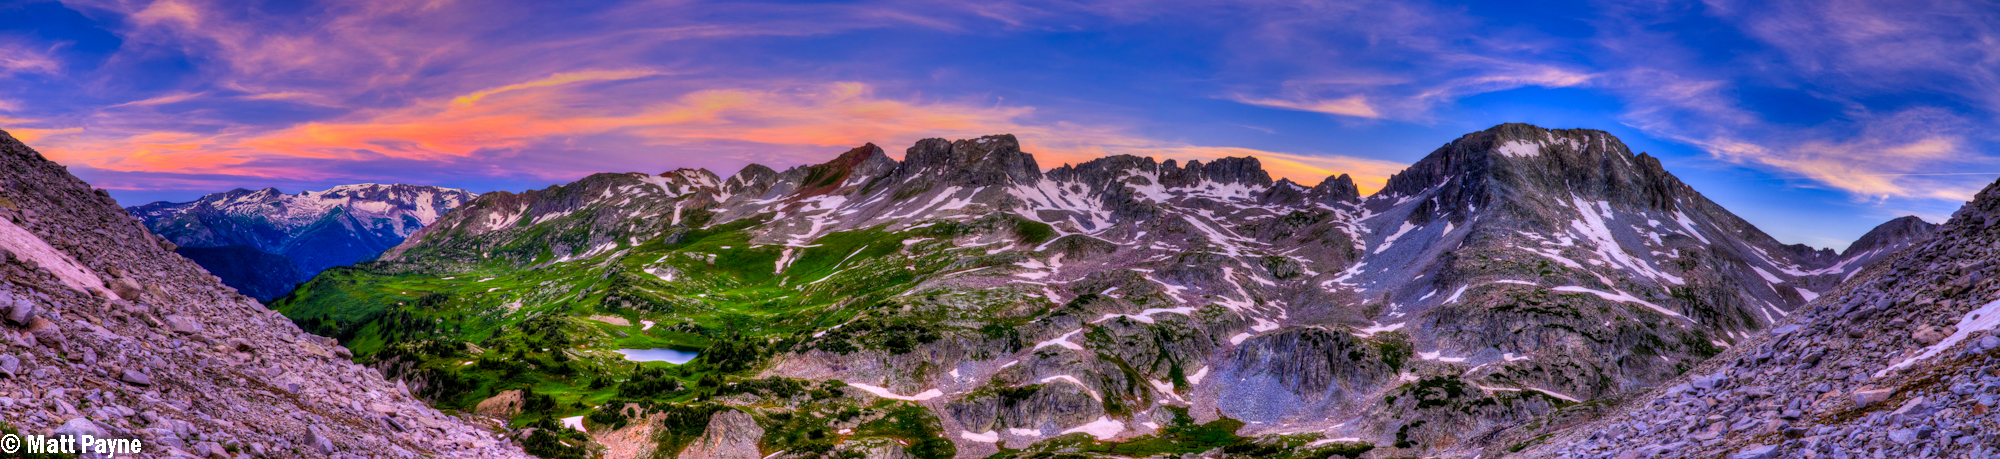
We hung out in the cold for a bit longer, allowing the sun to just paint the tops of "Siberia Peak." You can really see the difference between HDR and non-HDR in the below photo (non-HDR) and the above photo (HDR).

I packed away my tripod and woke Sarah up and defrosted her (just kidding on both accounts). We headed up the side of Snowmass and located the obviously correct gully that was full of vegetation at its base. The climbing from here on out was quite enjoyable, despite what I had read about the route. You could choose between loose dirt and scree (great for coming down, not so much going up) or huge boulders and class 3/4 scrambling. We opted for the fun scrambling and it was one of the most fun routes I've been on. Sarah was loving the terrain too, which was a relief since you never know if a new climbing partner will like this sort of climbing or not. It takes a different breed to enjoy scrambling on steep boulders.
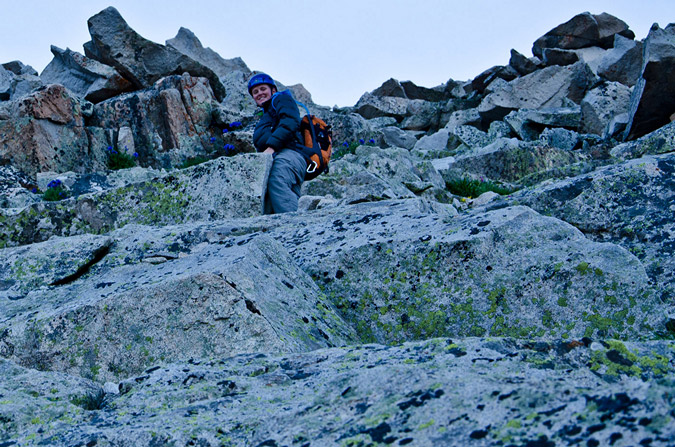
Sarah and I also have another thing in common - we both love taking pictures of wildflowers. She recently just gave her partner one of the coolest birthday presents there is - a bunch of framed photos of wildflowers that her partner had taken on 14er hikes.
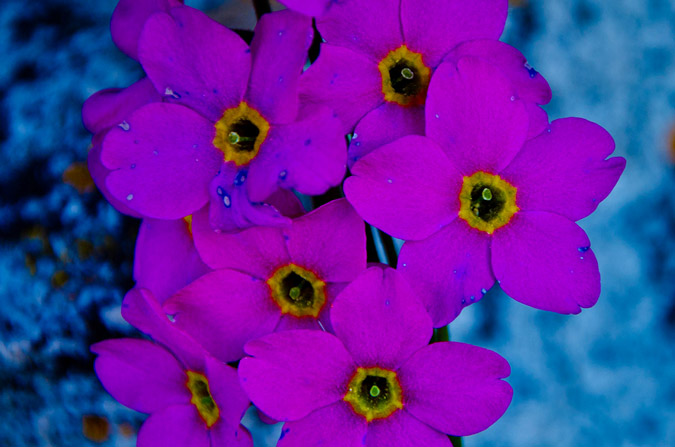
As we climbed, the views became progressively better. Finally, Geneva Lake came into view for the first time and Sarah and I stopped to admire it, as seen in the below panoramic which includes Geneva Lake, Little Gem Lake and Sarah. Sarah (and anyone else) - click to see a much bigger version!
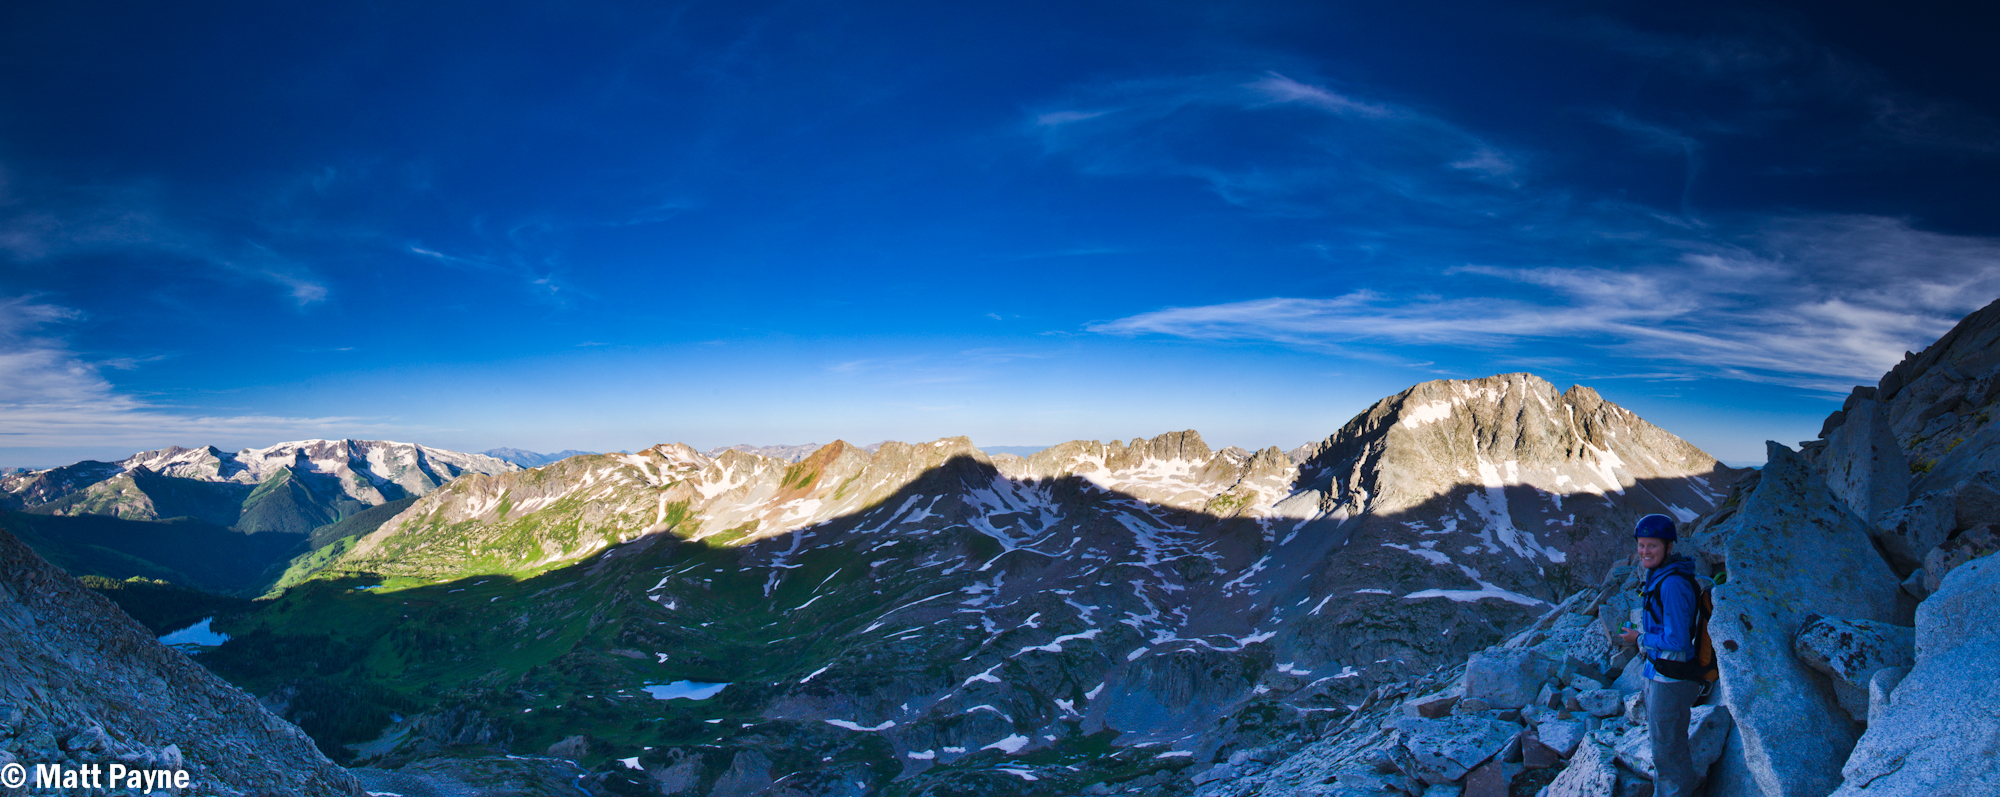
We were both just loving the scrambling!
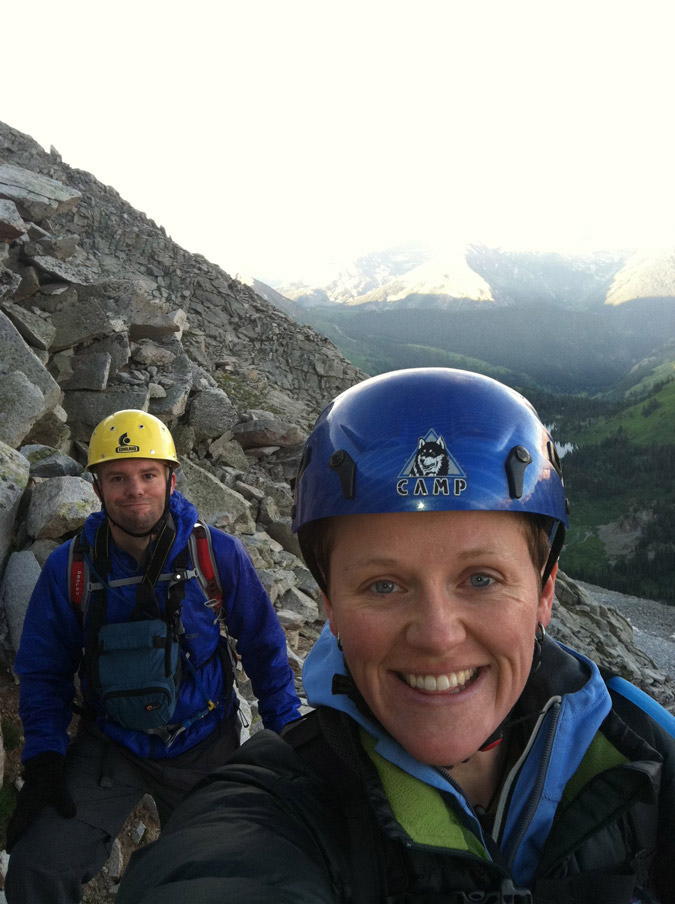
We kept climbing up, opting to stay close to the tops of the higher ridge that was on the left side of the gully. Sarah was able to document my climb up.
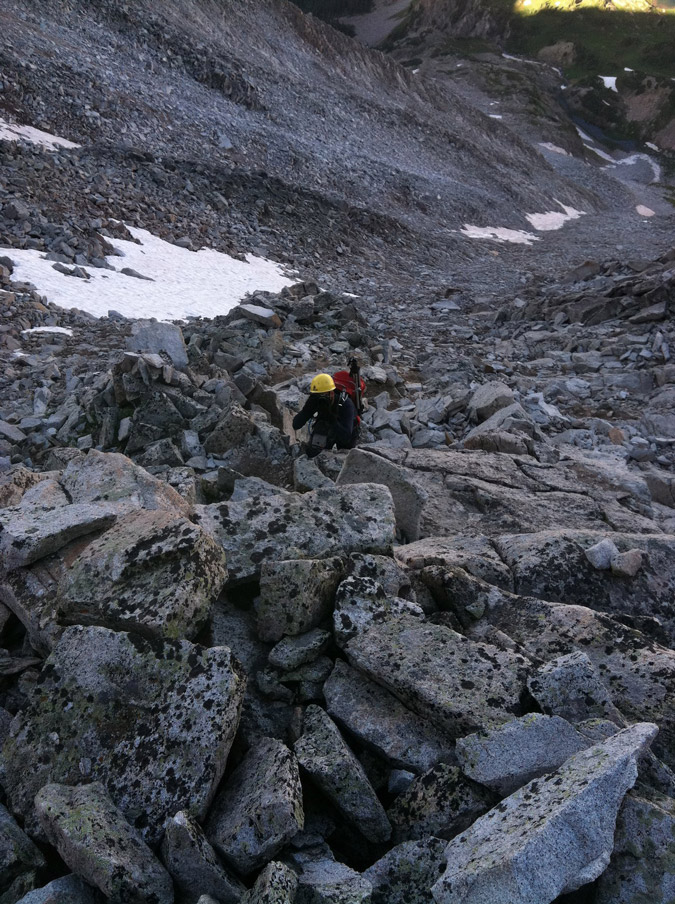 |
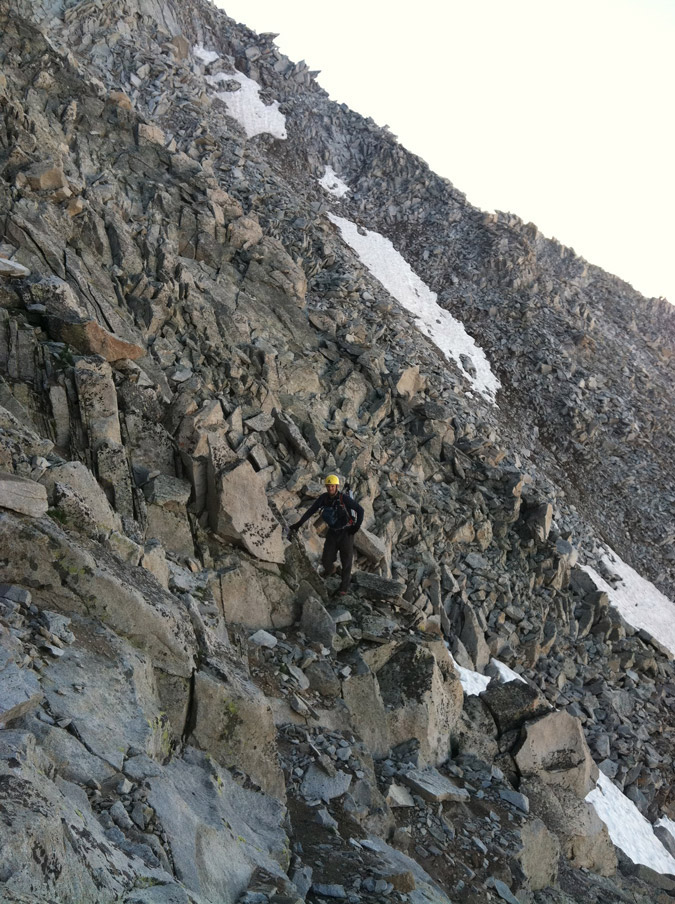 |
And of course, I was able to photograph her photographing me - man we are nerds!
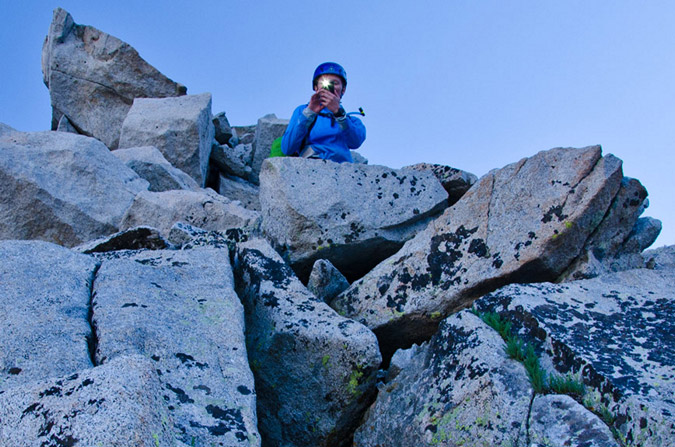
The rock was more solid than advertised, but we were very careful to test every hold and every step. Every once in awhile we were surprised by a loose rock or two, but so far, nothing had really warranted the dangerous warnings that I had read about on numerous sites and trip reports.
Staying near the ridge's top proved to be a great strategy because it offered us some really early views of the magnificent Capitol Peak, which I climbed last year and subsequently won a copy of Gerry Roach's 14ers guidebook through contest put on by his publisher for the efforts I put into my trip report. Not to digress, but I am really glad that people read, enjoy and use these reports, considering the fact that a report such as this one takes me roughly 16 hours of work between photo editing and writing.
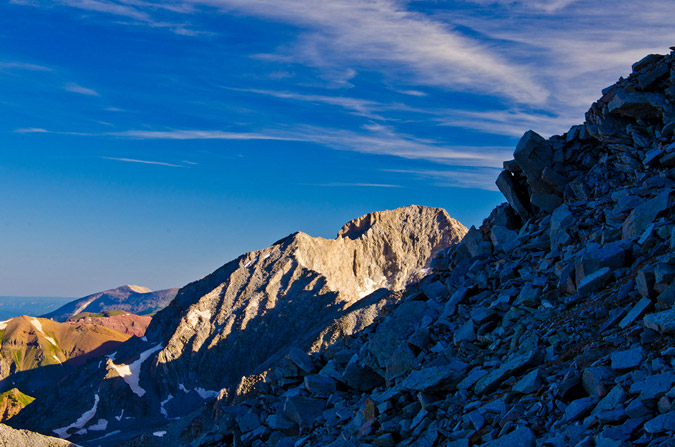
Both Sarah and I were excited to see Capitol Peak... maybe me more than her - what do you think?
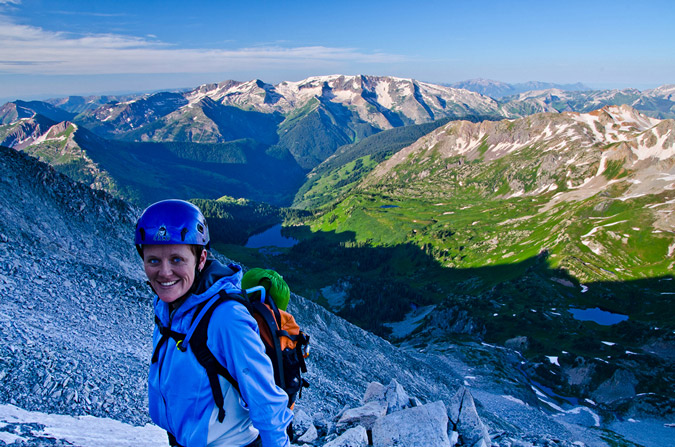
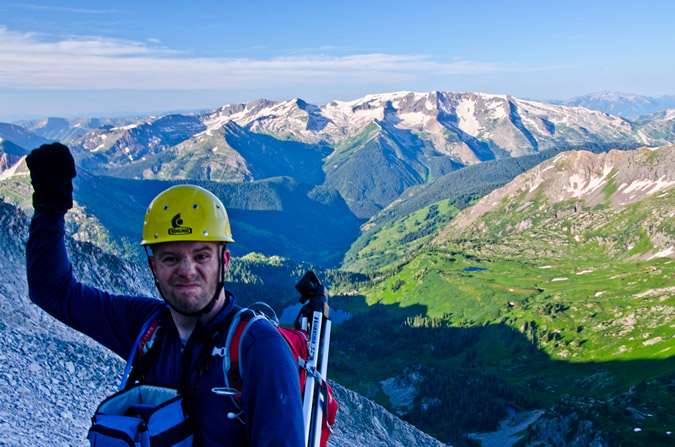
Pierre Lakes came into view as well, sitting below Capitol Peak.
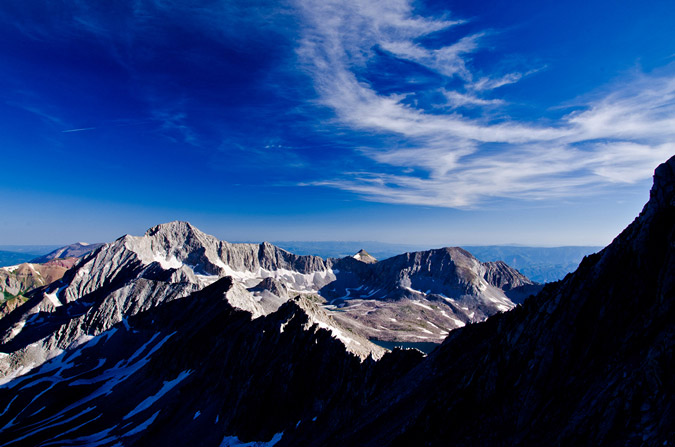
Sarah caught me gazing at Capitol:
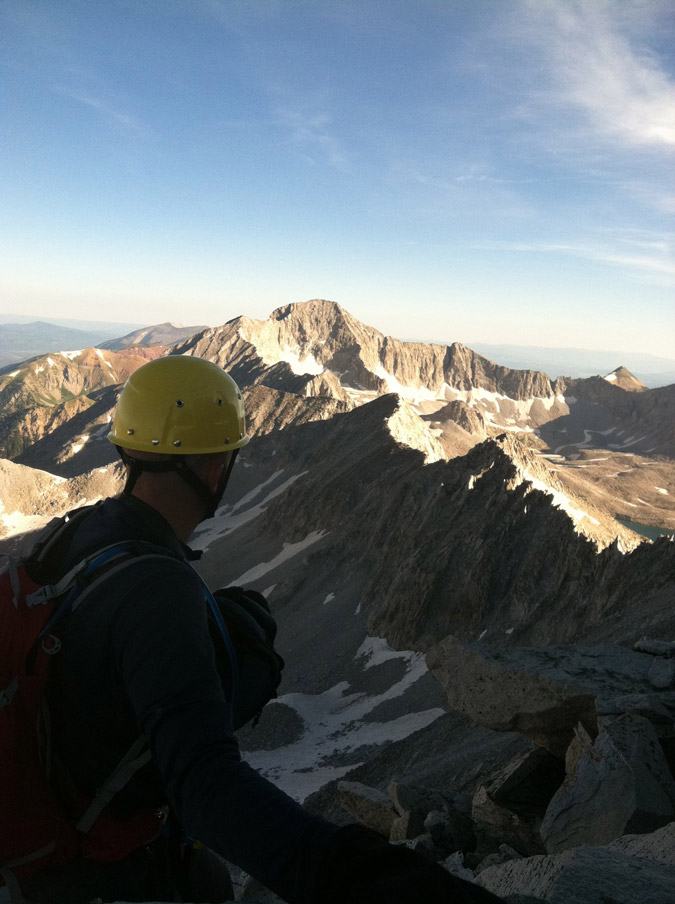
I felt this was also a great time to stop for a minute to get a really awesome panoramic. The basin below had really opened up quite a bit and the contrast from the low sun had made for some nice photo conditions. Click on the photo for a much larger version!
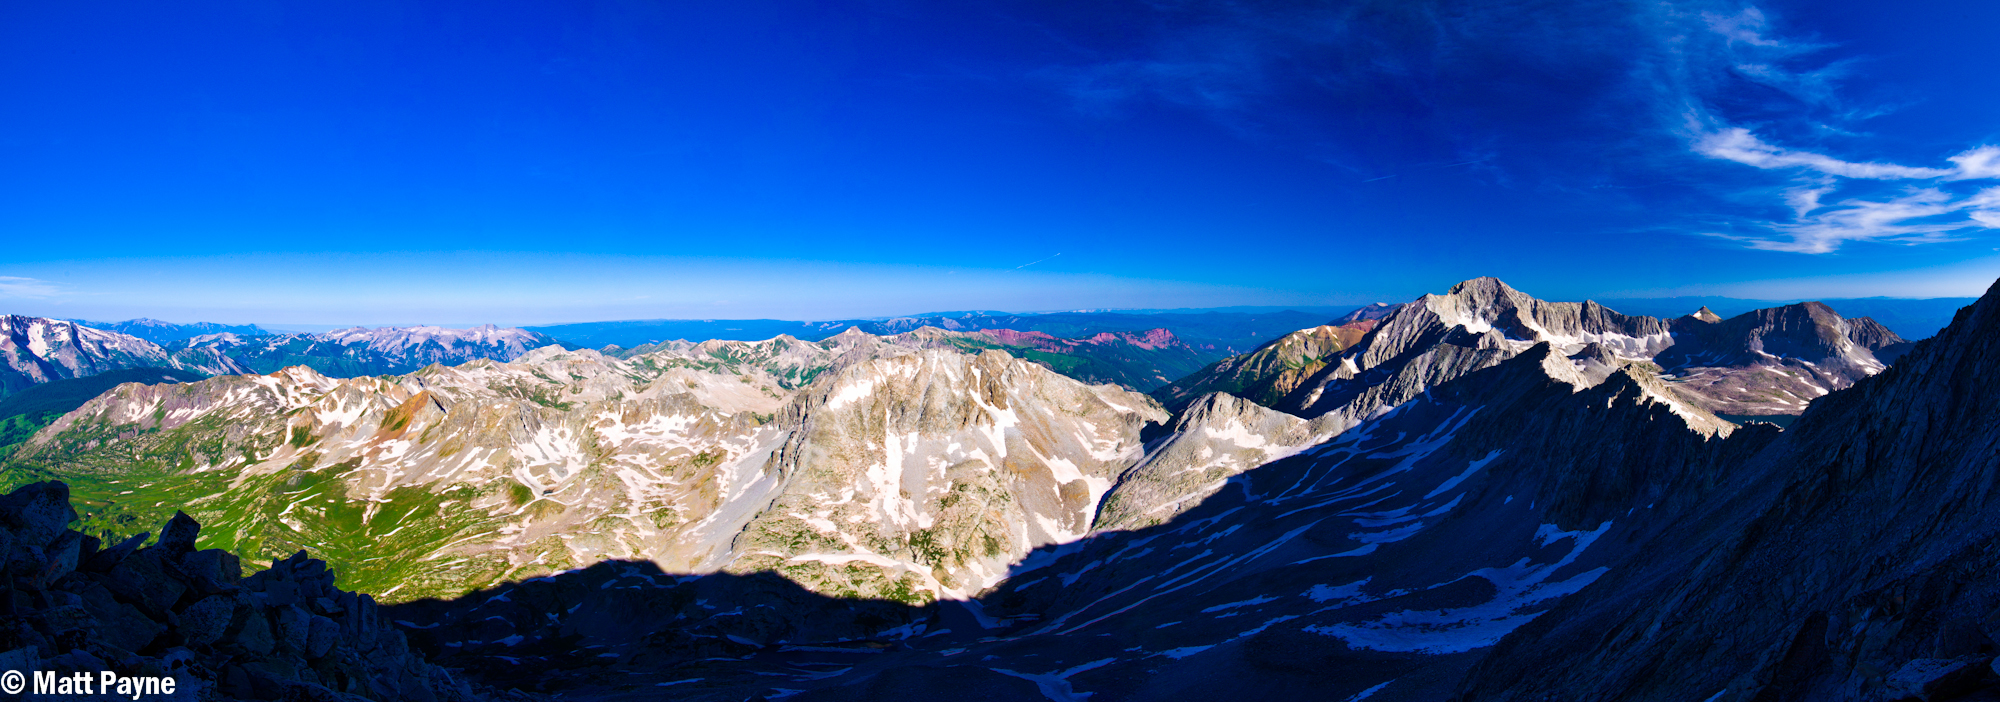
Continuing up the ridge line felt like the best way to go, despite the fact that we often ran into some obstacles that were challenging. Someone else must have agreed since we found a really groovy cairn up there too.
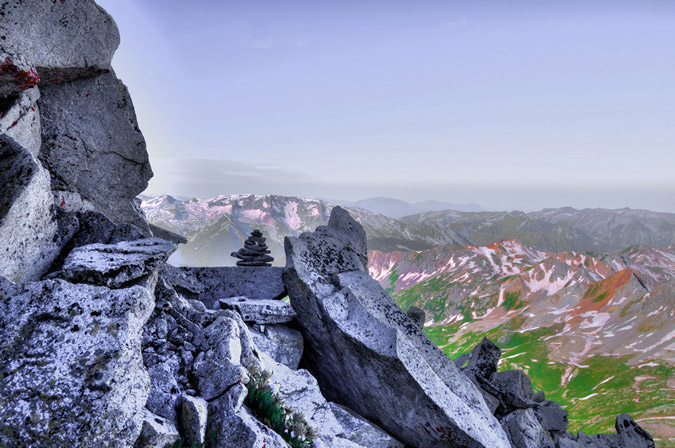
We finally crested the ridge and the first views of North Snowmass came into view. North Snowmass is one of two points that makes up Snowmass Mountain and is not ranked, but is 20 ft. above 14,000 ft. and has a whopping 40 ft. of prominence.
Sarah and I decided that on our way back we would for sure venture over to it, but for now we would concentrate on getting to the real summit of Snowmass Mountain. Here's a view of North Snowmass from the top of the ridge with Capitol Peak rising in a quite intimidating fashion to the north of the connecting ridge between North Snowmass and Capitol Peak.
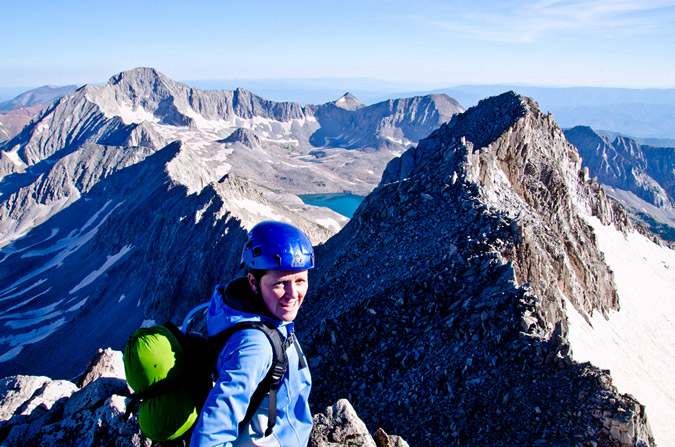
From here, we opted to stay high on the ridge, which I affectionately nicknamed "Exposure-Palooza" after the famous rock band tour of the same namesake. The exposure from this ridge was fabulous. I was totally loving it despite Sarah telling me I was out of my mind. It was perfect exposure - totally manageable on one side (west) and totally freakishly nuts on the other (east). Sarah was a trooper though and kept up with me through the exposure-filled ridge scramble.
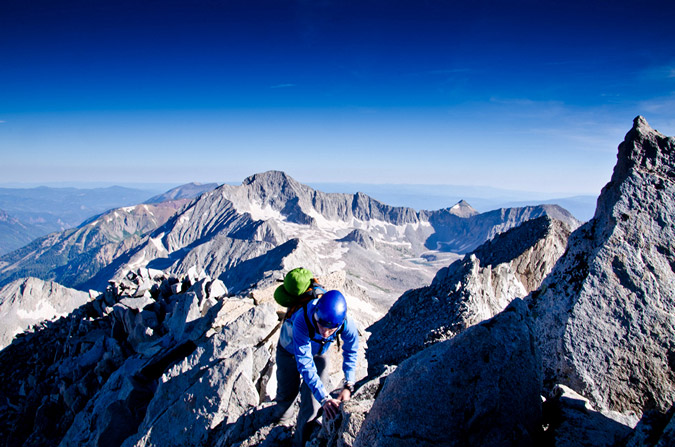
I think the exposure had grown on Sarah too, and before long I caught her flirting with it.
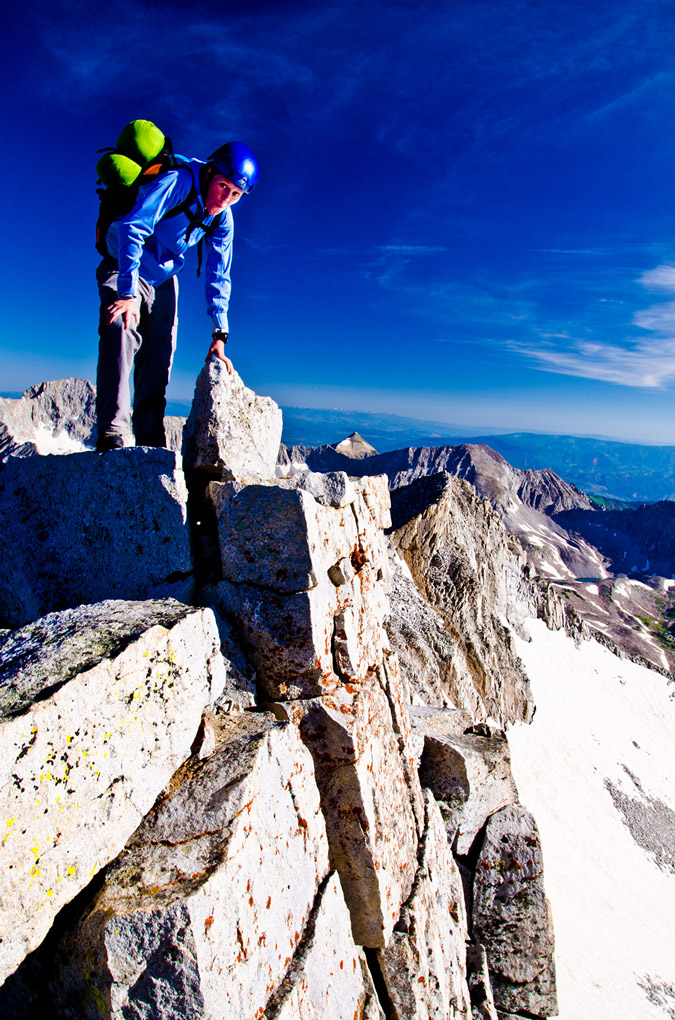
We reached the summit just shy of 9 AM, which meant we had made excellent time. There was still no sign of storms and we had the summit to ourselves. We could see some people below starting to make their way up, so I knew my time was limited to get a panoramic photo with my tripod. I set the tripod up right on the summit block, with one of the legs about 6 inches away from the greatly exposed face. This made for some adventurous maneuvering around the tripod as I shot. Sarah thought for sure I would step off the side and die. I'll admit, it was a bit surreal operating a tripod on the summit of Snowmass!
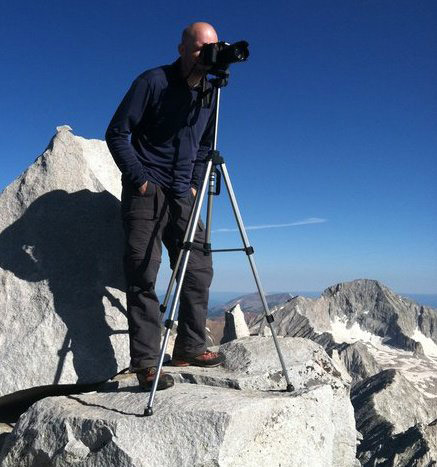
I tried to do some HDR work, but I don't think the lighting was best for it, so I opted to post-process a non-HDR version and an HDR version.

260 Degree Panoramic from Snowmass Mountain - at left - Capitol Peak - center - Snowmass Lake - right - Hagerman Peak
 360 Degree HDR Panoramic from Snowmass Mountain
This was Sarah's 15th 14er and she was pretty excited. As for me - it was #48. Another advantage of having a tripod on the summit - it makes for great summit portrait shots! Hooray for self-timers and tripods!
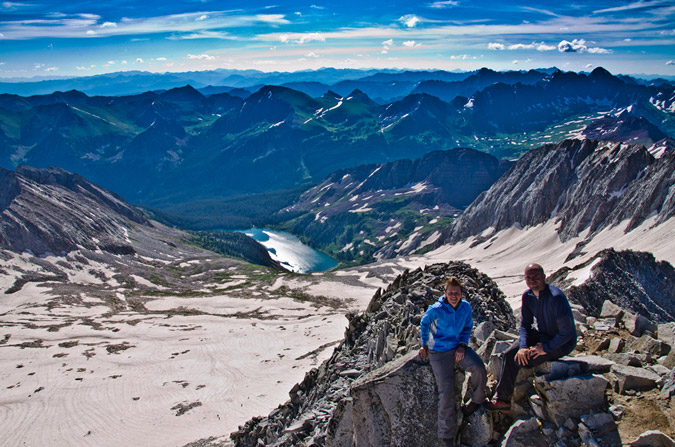
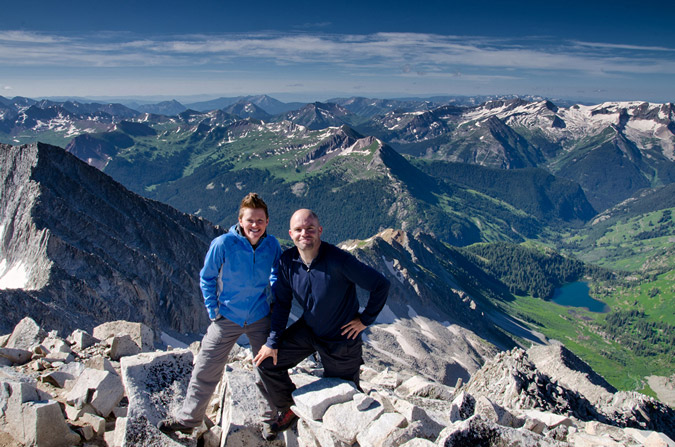
Eventually another climber (a 14ers.com member but I can't recall his user name) joined us on the summit from the standard route and took notice of the crazy guy behind the camera on a tripod. It was a pretty funny conversation:
Me: "How's it going!?"
Him: "Great man, you?"
Me: "Could not be better!"
Him: "What's your name?"
Me: "Matt."
Him: "Matt Payne?"
Me: "Yep!"
Him: "Oh cool - I love your pictures!"
Me: "Awesome - thanks man!"
He must have figured that I was the only person crazy enough to take a tripod up Snowmass Mountain. Haha. Either way, it was quite flattering and I really thought it was awesome that he knew who I was.
He reported to us that he wore only microspikes up the huge snowfield and that it was a challenge but doable. He had wished he had crampons but it seems they are not necessary at this time. Good to know for other climbers doing the standard route. He departed after only a few minutes and Sarah and I watched as another climber came up the snowfield, except this time, this climber went all the way up the basin and ascended North Snowmass via a very steep and sketchy rock face.
My attention was kept by the powerful Maroon Bells to the east of us, and so I decided to try my hand at a zoomed-in panoramic at 105mm. You can also click on the photo to view a larger version of it on Flickr in a new window - feel free to comment!
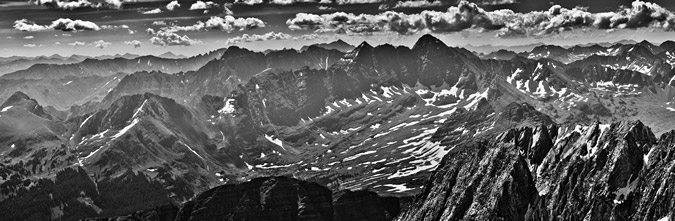
Sarah and I figured we had spent enough time on top - so I took some shots of the USGS marker. The second one has some split toning applied to it in Adobe Lightroom.
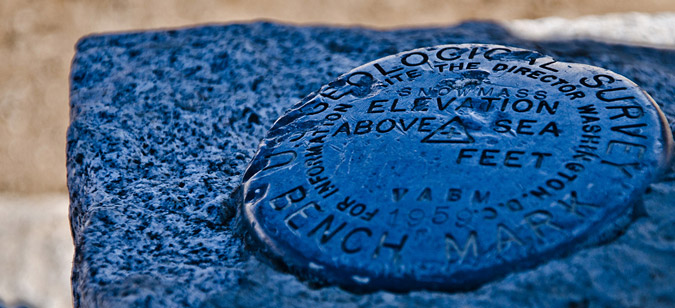
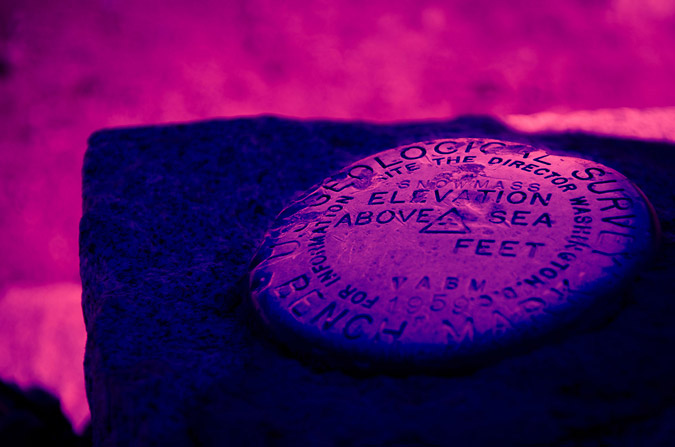
Sarah packed up and re-attached her helmet to her dome. She asked me one last time if we should do the traverse to Hagerman Peak from here. I explained that I had read several reports of that traverse and that it did not sound like something we would want to do. Take a look for yourself, or read lordhelmut's trip report.
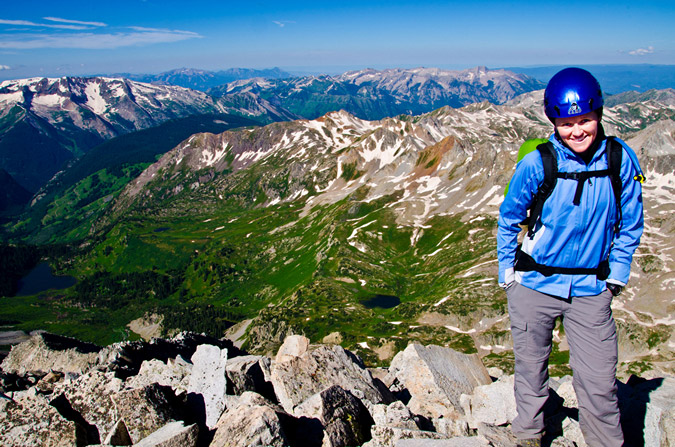
I thought that the exposure was just as fun on the way down as it was on the way up. Sarah agreed.
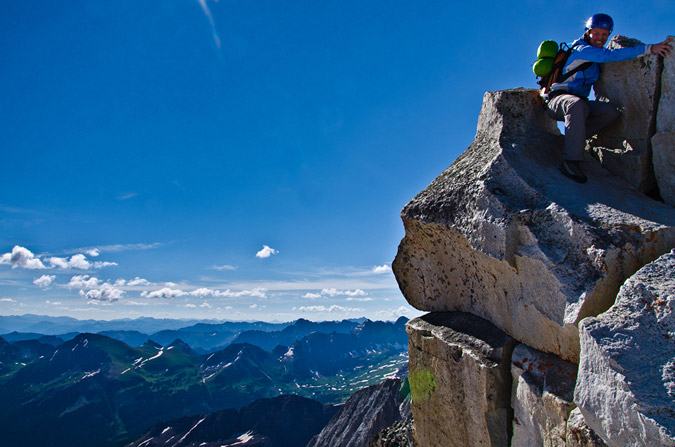
Sarah and I reached the joining saddle between the down-climb back to camp and the traverse over to North Snowmass. The terrain below looked loose and nasty. We took our time and staggered it so that I would go down 20 feet and then step to a side, let her know she could come down while I stayed put, and then repeat until down to the saddle. The reason for this strategy is to prevent rockfall injury. It worked wonderfully.
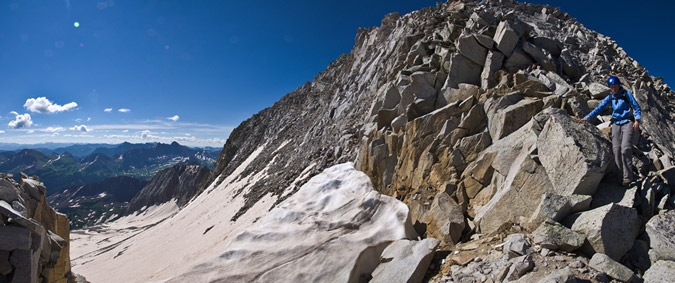
On the way over to North Snowmass I had to perform some last minute heroics to prevent the mountain from falling down. Good thing I drank some gatorade!
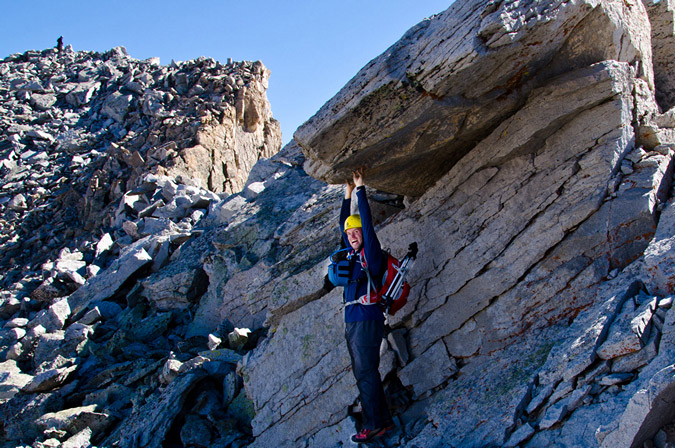
We were able to join the solo hiker that had gone up to North Snowmass via the standard route just as another climber hit the summit of Snowmass Mountain.
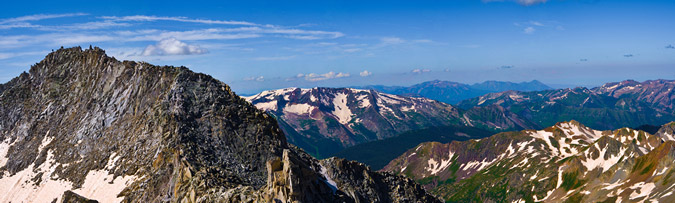
Let me know if that is you on top of Snowmass and I can show you a larger version!
The reason I wanted to head over to North Snowmass was because I knew the views of Capitol Peak and the Pierre Lakes basin would be great - and I was totally right about that concept, no question!
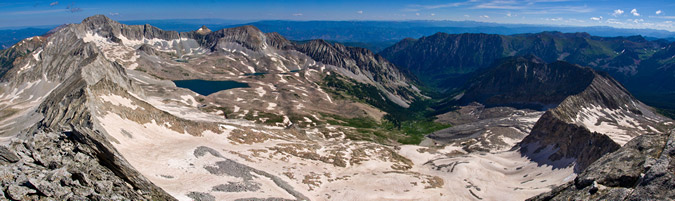
Sarah was really in love with this place and commented that it was easily the most gorgeous 14er she'd been on to date. The connecting ridge between Snowmass and Capitol was quite intimidating. I know of only a handful of people that have successfully completed that traverse, and I am certain that each of them is either certifiably insane or... as Samuel Jackson would say, "One Bad Mutha $%^&*#."

Even without the tripod set-up, I was able to get a decent panoramic from North Snowmass, which included both Snowmass Mountain and Capitol Peak.

The last order of affairs was to get a really good glimpse of the valleys below, which Sarah caught me in the act of doing.
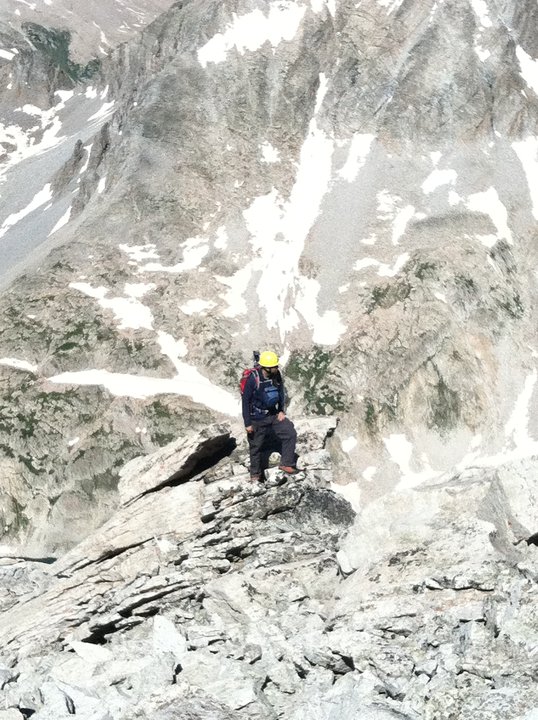
We decided to head back to the ridge for our downclimb. Now - this is where I made a critical error in judgement and should be critisized repeatedly, especially given my propensity to evaluate mountaineering accidents. Let me be clear - I was an idiot. A moron. A completely foolish jack-ass. There, I said it. Now you don't need to. If I had not made it out alive, I would fully expect someone to write an entire article about how stupid I was and how ironic the death was given my mountaineering safety articles. It really goes to show that even the most experienced people can make errors and find themselves in a bad place. There's no question in my mind that no one is immune to it. When Sarah and I head back towards the saddle between North Snowmass and Snowmass, I decided it would be a fine and dandy idea to take a short-cut to re-join the ridge for our descent. Instead of going back up the ridge we came down, I thought we could get away with going around the side and to the ridge. I figured that if we encountered anything too crazy that we could turn around and go back the way we came. From my vantage point, it looked totally doable to just skirt around the side. If you look at the photo below you can see what I saw - the ridge where we needed to head down from and the ledgy system that connected us to it.
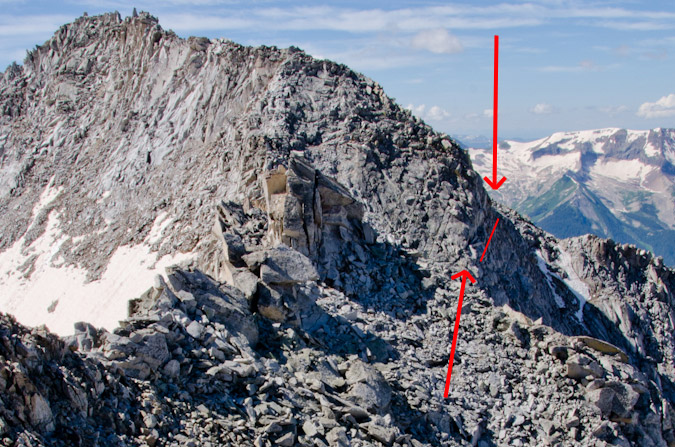
What we found was something totally inviting yet progressively challenging. It was kind of like each time you passed an obstacle it got easier for a moment and then you found another slightly harder obstacle until you were up against an almost impossible one that was slightly more psychologically reasonable than turning around. I am not sure if that makes sense or not, but it did to me at the time. What we found ourselves in was a mess - a real pickle. The rock was loose. Insanely loose. Dangerously loose. And it was exposed with class 5 sections. Each foothold and handhold was tested by both of us with great diligence - which is probably what saved our lives. Eventually, I found myself perched on a ledge with nothing but veritcal rock above and below me, with a huge boulder between me and the next part of the ledge. The only reasonable foothold was a large protruding boulder below me that looked to be held in place by air and spiderwebs. I knew it would not hold, but I also knew I had no where else to go. So I asked Sarah what it looked like from her point of view. "It looks like it is going to go at any second." Crap. I triple tested all of my holds again and put a small amount of weight on it with my right foot. Sure enough - the huge rock went crashing down the mountain. I still get chills even thinking about it. I could feel the mountain shake each time it bounced below me. Not a good feeling. Too late to turn back. In what felt like a move out of a Spiderman movie, I crouched backwards while holding solid holds with my hands and found myself on the other side of the boulder obstacle in a move that must have looked like a circus act to Sarah. My heart racing, I stopped to take it all in and relax for a bit. What the hell were we doing? Why was I risking my life for a short-cut? So stupid. I kept saying it out loud too. "Sorry Sarah. I'm stupid. Sorry. Ahhhhh why am I so dumb!?" I think Sarah was regretting this climb now. I didn't blame her. The terrain we found ourselves in was rugged and surreal, sure - but wow - death defiance was not what I signed up for this week. Sarah smartly resigned to down-climbing below my spot and up a gully nearby, where she rejoined me at another crux. A small triangular rock was wedged vertically into the ledge, held in by only a half inch of rock. It was the only handhold between me and death. Footholds were scarce too - a small patch of dirt and rock about half a foot in diameter terminating in air. After this move, the route was clear to the ridge. I tested everything over and over again like Howard Hughes washing his hands. When your life is at risk a little OCD goes a long way. I nailed the move and breathed deep sigh of relief. Sarah watched me and gave it a go. Before she could even get to the crux, she stepped on some rocks and sent about 20 large rocks crashing down - with quite real psychological demoralizing impact. Sarah was freaked out. I talked her through getting to a safe place. Fortunately, her OCD rock-testing was on par with mine. She decided (smartly) again to down-climb for a safer area and eventually we were able to re-join each other on the ridge. Some short-cut. Lesson learned. Short-cuts are stupid, especially in the Elk Mountains! Here's some views of what we found ourselves in.
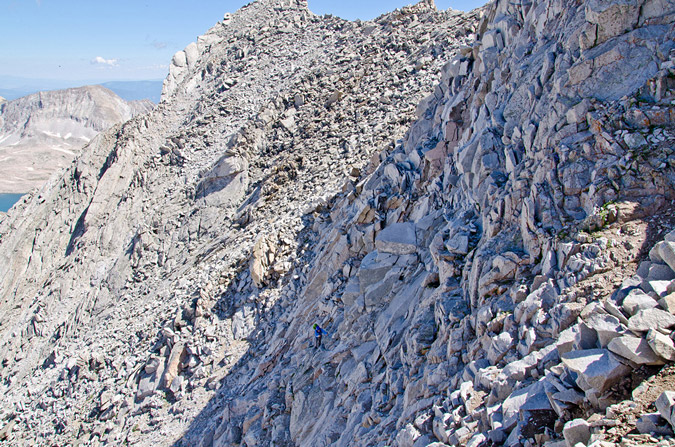
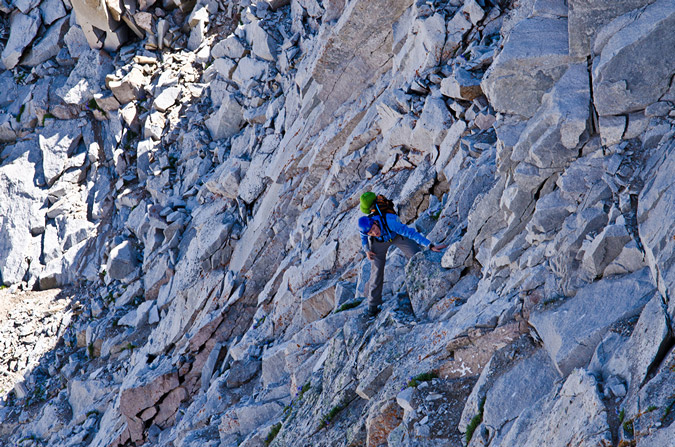
It was really irresponsible of me to put Sarah's life into this sort of danger and for that I will always feel bad.
After we rejoined on the ridge, we talked about the adventure we just had and how stupid it was. We were both pretty shaken. We were overly careful after this point and it slowed our descent a bit, but that was OK by both of us. Finally, we were able to reach the vegetation at the bottom of the 2000 ft. gully and enjoy more solid ground.
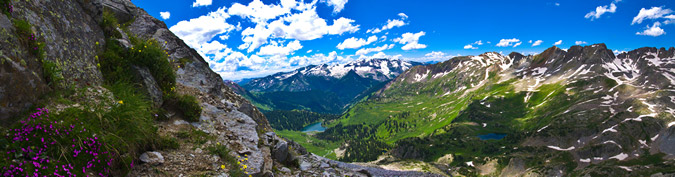
The wonderfully gorgeous flowers almost calmed my nerves, almost.

It was an impressive mountain to downclimb. Looking back, you really gained a sense of accomplishment at how far we had gone and how steep the mountain really was.
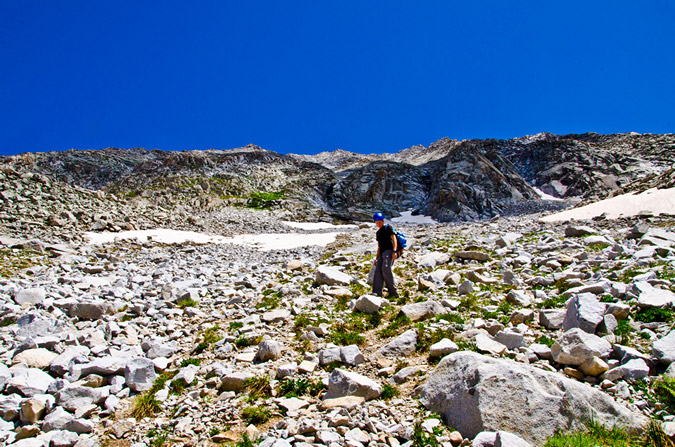
We ran into one other guy heading up as we were coming down. I was not quite sure what he was going to accomplish since storm clouds had already began to form in the area, but he seemed quite determined and I felt I had no place preaching to him about safety after the complete debacle I had just escaped (turns out he came walking by our campsite a few hours later stating he was turned around by weather - I was glad he made it down safely).
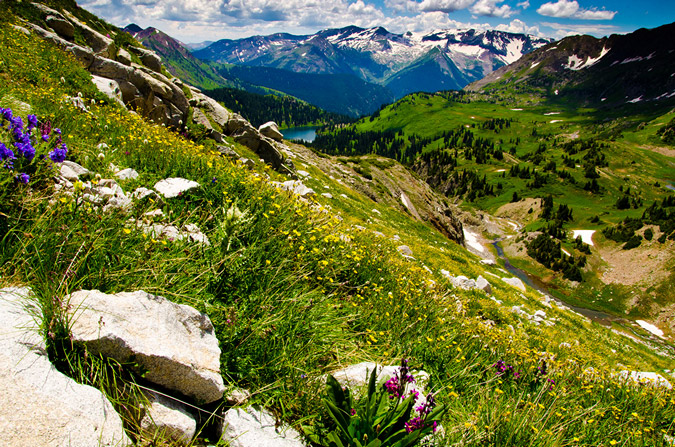
At this point I was just happy to be alive and enjoying the multitude of incredible wildflowers.
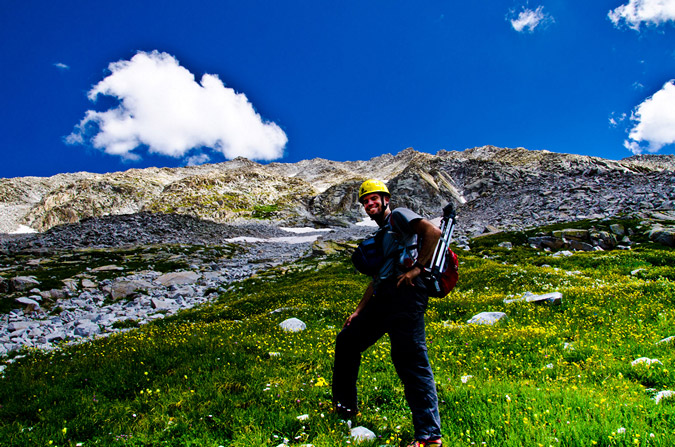

Speaking of wildflowers - I had never seen so many Columbine flowers. They were everywhere!
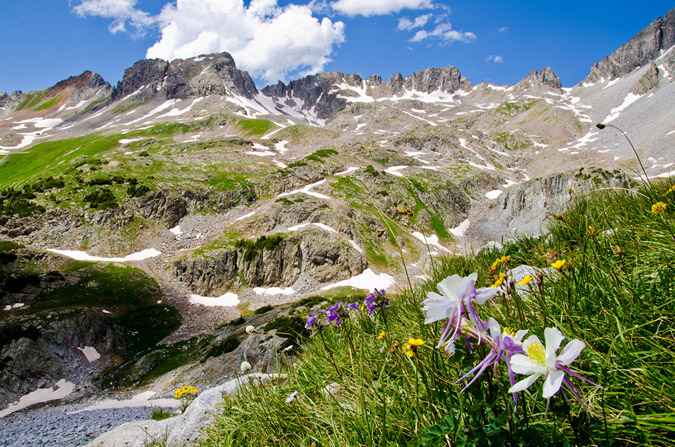
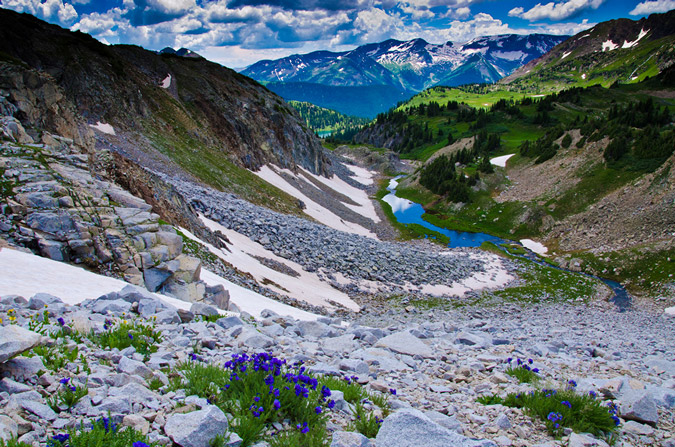
I stopped for one last look back up Snowmass Mountain. The gully with all of the green at the base was the one we went up.
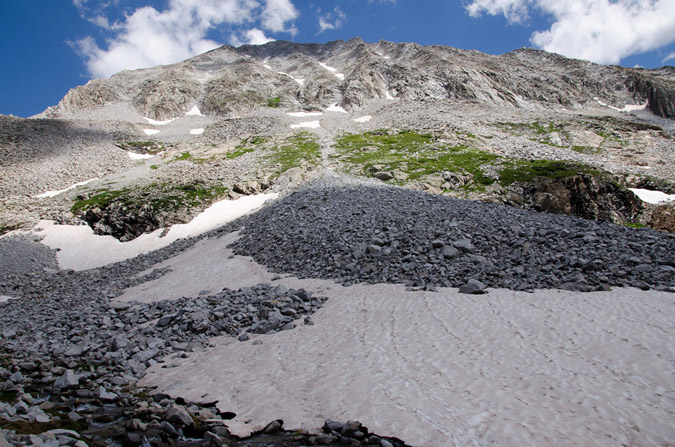
We reached Little Gem Lake in no time at all and enjoyed the views from there.

Below Little Gem Lake was a really nice mountain creek draining out - it was surrounded by flowers, making for a really nice scene!
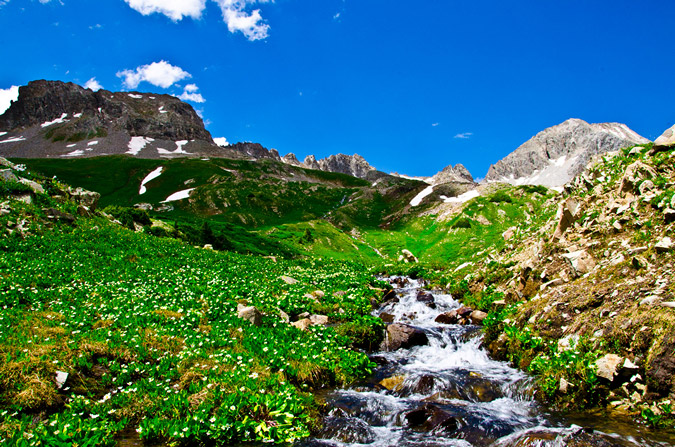
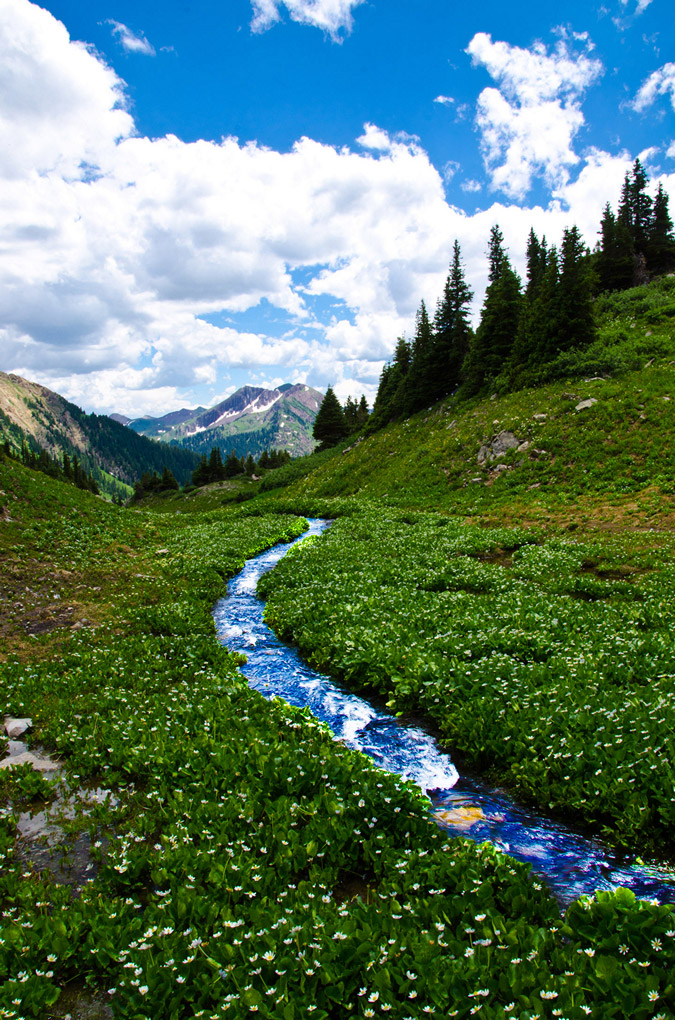
I could not help myself from stopping several times on the way back to Geneva Lake to take photos of the wildflowers and waterfalls that were everywhere. What a magical place!
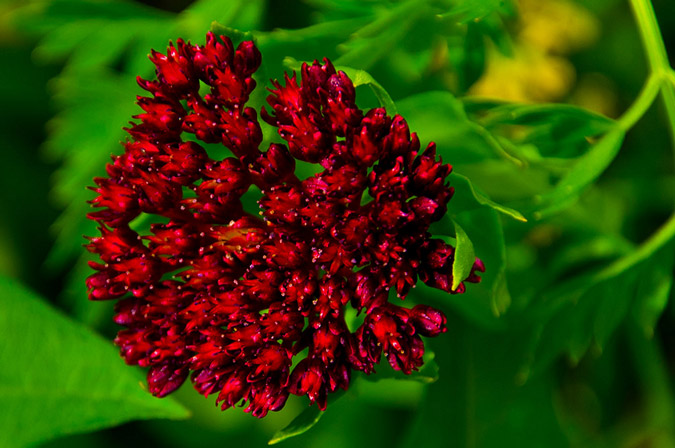
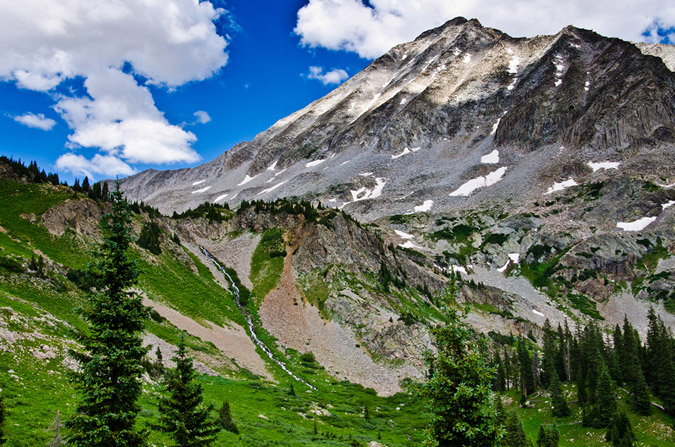
The ubiquitous columbine flowers made for great backgrounds and bokeh subjects for other flowers in the area, which I accentuated in this desaturated photo. A lot of people ask me what bokeh is. According to Wikipedia, bokeh is is the blur, or the aesthetic quality of the blur, in out-of-focus areas of an image, or "the way the lens renders out-of-focus points of light." Differences in lens aberrations and aperture shape cause some lens designs to blur the image in a way that is pleasing to the eye (or not pleasing to the eye). Further research on the origin of this word took me to this article, where the author goes on to explain that, "it is a Japanese word meaning, roughly, "fuzzy," and it is used to describe old people with cobwebs in their heads among several other things — including the out-of-focus areas of photographs, which, I'm told, might more specifically be referred to as "boke-aji." So, long story short, the correct pronounciation is: BOW (as in bows and arrows) KUH (like Cuss). They even did a YouTube Video on it...
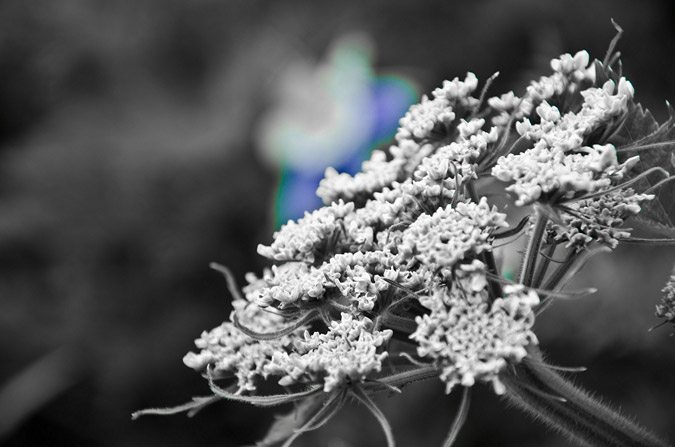
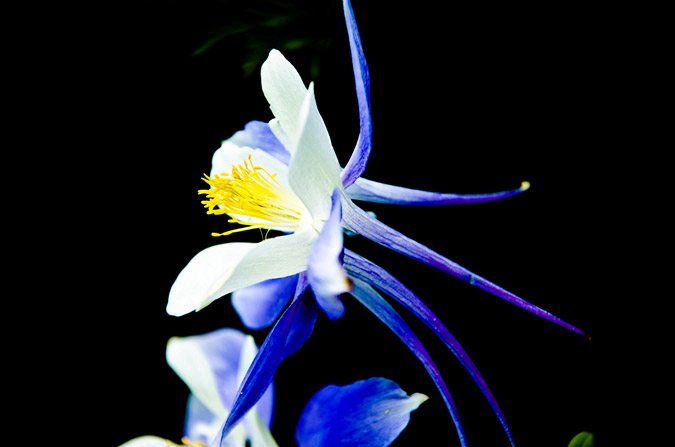
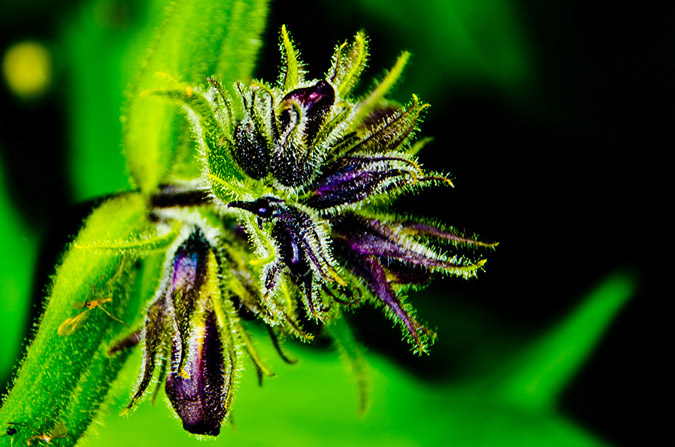

We finally reached our campsite at about 2:30 PM and cooked some delicious food. By now, other groups had made their way into the basin and a family of four had made camp just above us in a site out of view from our campsite. Sarah and I were pretty tired, so we took a nap while a thunderstorm rolled through the area. I've always loved sleeping in a tent during the rain.
Here's an elevation profile of our long day up Snowmass Mountain. Feel free to click on it for a larger version.

For day three, we decided it would be best for a 2:30 wake-up and a 3:00 start in hopes of catching the sunrise at some point for photography purposes.
Day 3: Hagerman Peak via the standard route (south ridge)
2:30 AM came pretty quickly and when it did, I asked Sarah if she wanted me to hit snooze. Hilarious half-awake banter ensued:
Me: "Want me to hit snooze?"
Sarah: "I don't want to ruin your sunrise."
Me: "That sounds like a tragic country song."
Sarah: (laughter)
Me: (singing voice and fluctuating notes) "Don't wanna ruin your sunrise."
Sarah: "It could be a song about a one-night-stand - leaving before the other person wakes up."
Both: (heavy laughter)
We opted not to hit snooze and embarked on another darkness-filled adventure. I had copied the notes from Gerry Roach's Colorado Thirteeeners guidebook as a reference, which proved quite handy despite the fact that we were in complete darkness all the way to the base of Hagerman. Despite our success in reaching the base of Hagerman, it did not come without some really tough route finding. For starters, the route was quite confusing and after the turn-off from the Trail Rider Pass trail, there was no trail. We found the creek drainage Roach describes in the route easily but were somewhat astounded and questioned the route when we found ourselves walking IN the creek since it was quite a narrow drainage (photos of the route during the daytime can be found later in this report). Additionally, the route went straight up the side of a hill through steep willow trees. Trails are for the weak, I suppose. Fortunately the willow trees were sturdy and we could use them to aid our climbing. Next, we found ourselves on top of a small 12,000 ft. mountain thinking it was the ridge after following the directions in the route description, only to realize it was opposite our current location. All was well though. We found what we thought was a gully Roach describes in the route, which turned out to be a much harder gully to the west of the actual gully. According to Roach, the gully was supposed to lead us to a "commodious grassy bench" but we had no idea what the hell a commodious grassy bench looked like, so that was not much help. Turns out, by the way - that commodious means spacious. Who knew!? We found ourselves on the south ridge pretty quickly. Unfortunately, because of the poor quality of the route and our misdirection, we did not reach the top in time for sunrise; however, we were able to make it to about 12,500 ft. and in view of the Maroon Bells and Pyramid Peak. There were some clouds hovering around Maroon Peak and it made for a very dramatic morning at first.
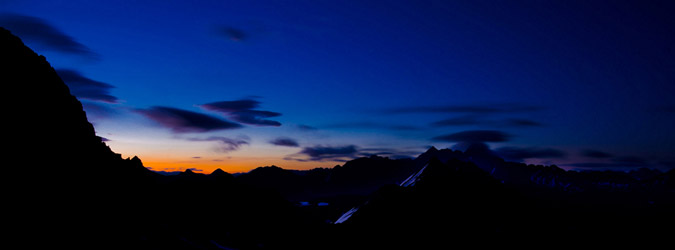
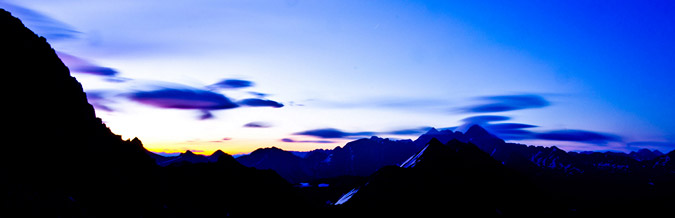
We were in pretty good position for sunrise and it was decent lighting for an HDR panoramic attempt. I feel like it turned out pretty well. The HDR process brings out all of the dynamic range of each bracketed photo, and in this case, it made for a graduated sunrise effect, ranging from pink to orange to purple. Quite stunning. Click on the photo to see a larger version.

Once the photo session was over, Sarah and I packed up and headed up Hagerman's south ridge, which we found to be pretty straight-forward and enjoyable. It was quite similar to Snowmass the day before - offering a choice between dirt and scree or boulders. We once again opted to up-climb the boulders and later down-climb the dirt and scree.
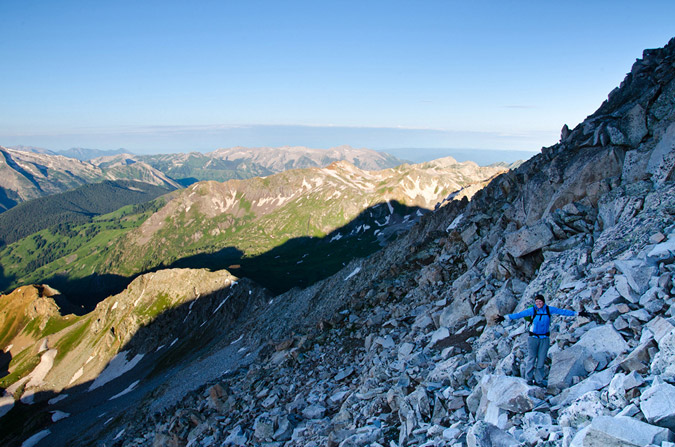
We reached the saddle between Hagerman Peak and Snowmass Peak (not to be confused with Snowmass Mountain - Snowmass Peak is an un-ranked 13er to the southwest of Hagerman, named only due to its dramatic view from Snowmass Lake) and enjoyed the amazing views below, as seen in the below panoramic from the saddle (click on the photo to see a larger version).

We stopped short of the summit for a bit to take it all in. What an amazing weekend we had had.
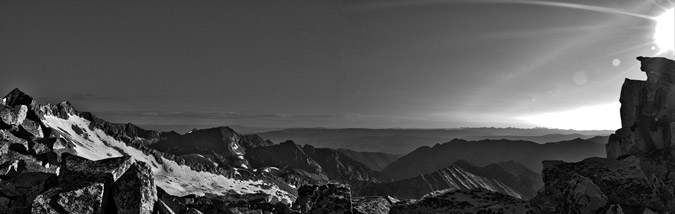
We reached the summit of Hagerman in no time at all from here after scrambling over a very small false summit. We could see a group of climbers below, heading up Snowmass Mountain from Snowmass Lake. I was pretty sure that this was the group that had talked to me earlier in the week about joining them, including Kara Bauman.
Sarah was pretty excited to reach the summit of her first 13er!
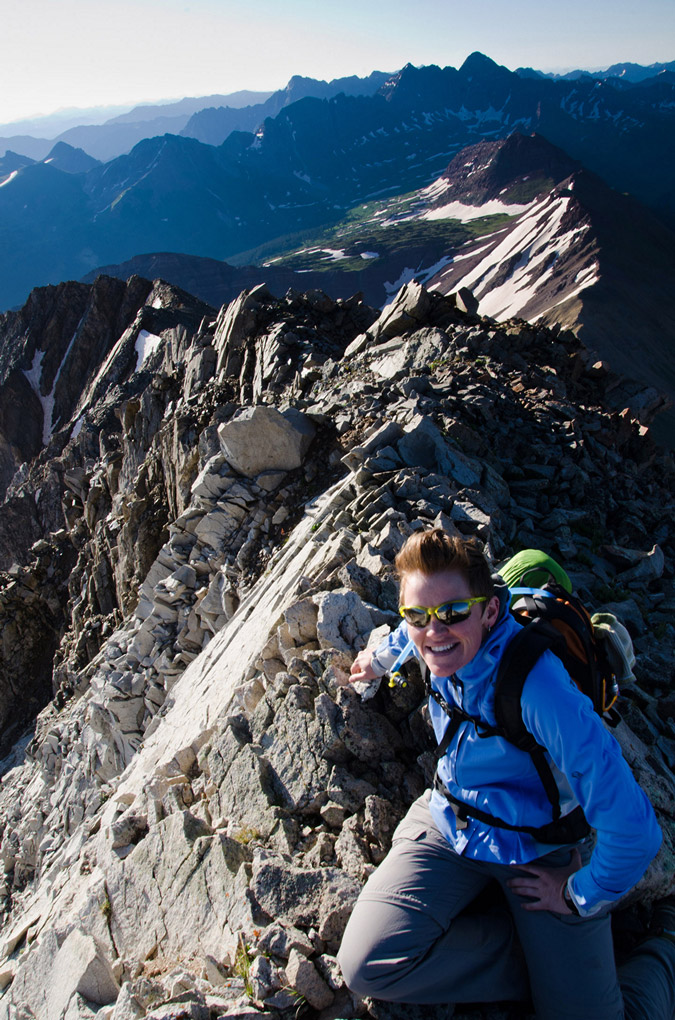
Once again, I was blessed with the powers of the tripod to ease my summit panoramic photography. Click on the photo to see a larger version.

If you'd like to see a very large version of this photo in flash with the ability to zoom in and out and move around, check out this page, but be warned - it is 22 megs!
We set-up for a summit portrait with Snowmass Mountain behind us.

After a few more minutes on the summit, we decided to head down the same way we came up.
The downclimb was quite a bit easier due to the slightly wet dirt and scree, which made for quite an enjoyable boot ski down.
During the downclimb we finally properly identified the commodious bench, which quickly became the subject of many jokes. The "commode" as it was referred as from now on served its purpose well.
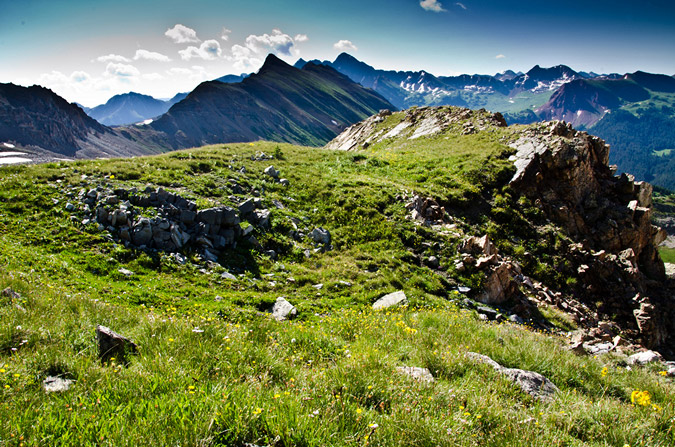
The commodious grassy bench offered one other benefit as being a great place for photography of the Maroon Bells.
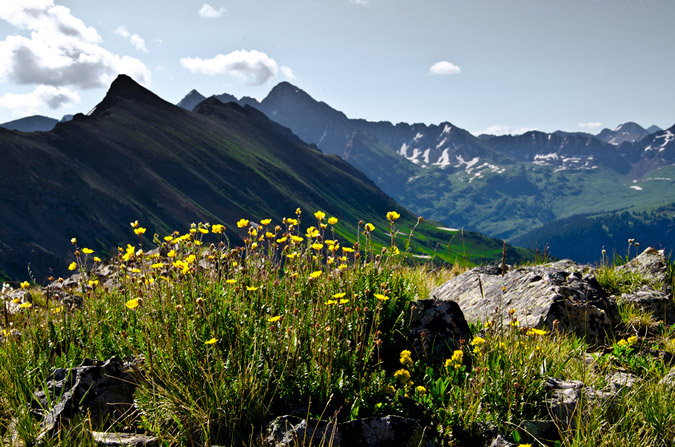
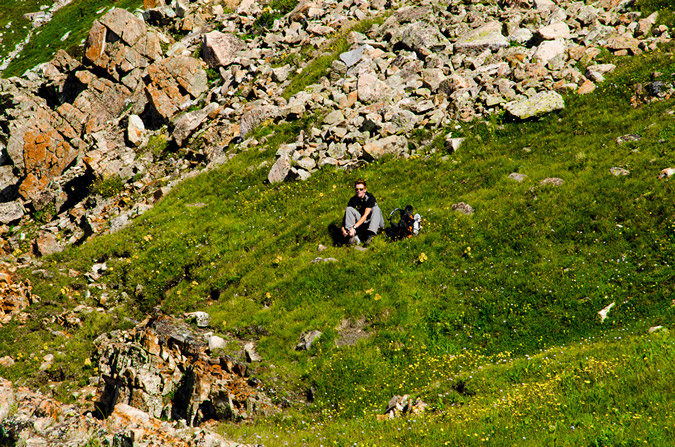
Directly next to the grassy bench was the gully we were supposed to take up earlier in the dark. Here's what the gully looks like if you are wanting to know.
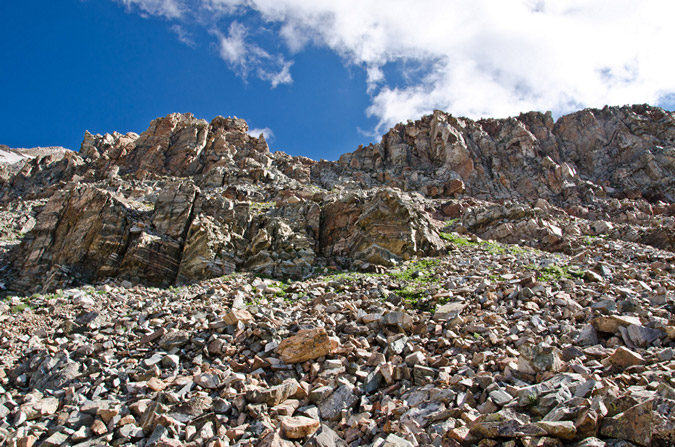
We followed some rocky ledges (as described in Roach's book down and the rest of the route was fairly easy to follow back down the drainage.
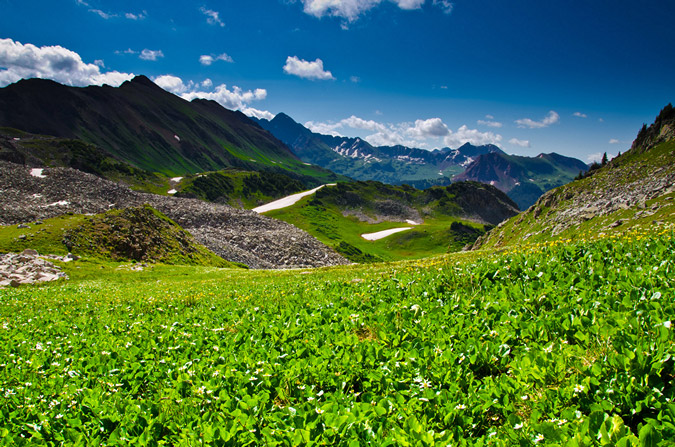
Here are some photos showing the route down, obviously in reverse order if you were coming up. Hopefully these can serve as a better guide to you than Roach's book did for us.
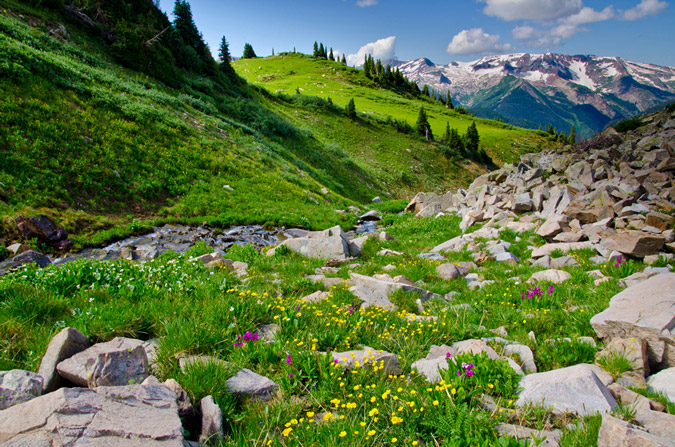
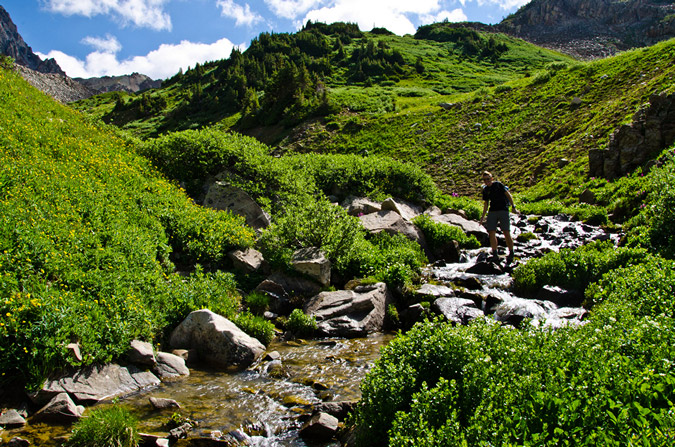
The "trail" for Hagerman going up a "narrow drainage."
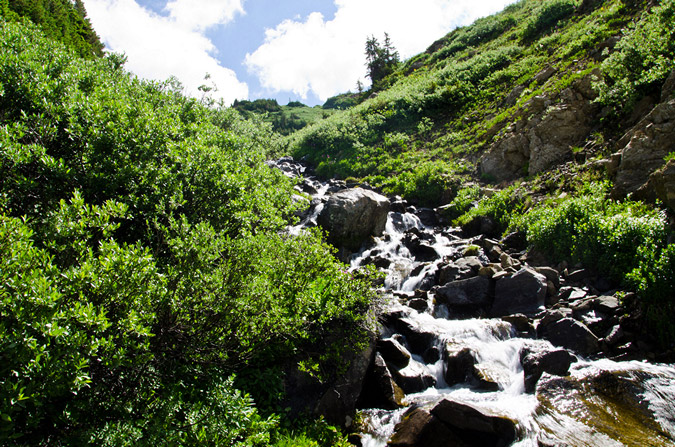
The willows you must upclimb for the standard route of Hagerman Peak.
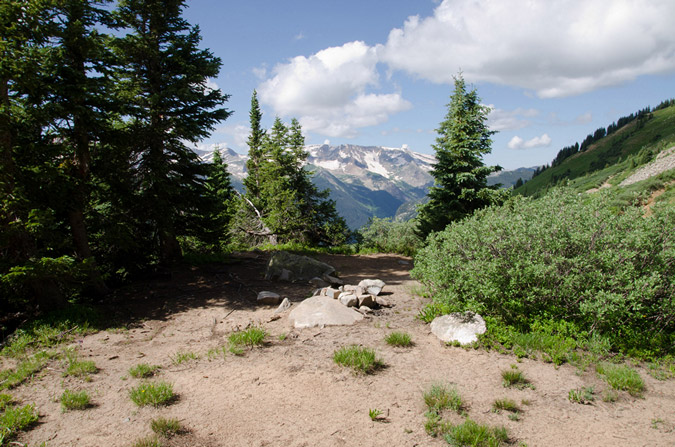
The "excellent campsite" on Hagerman's standard route
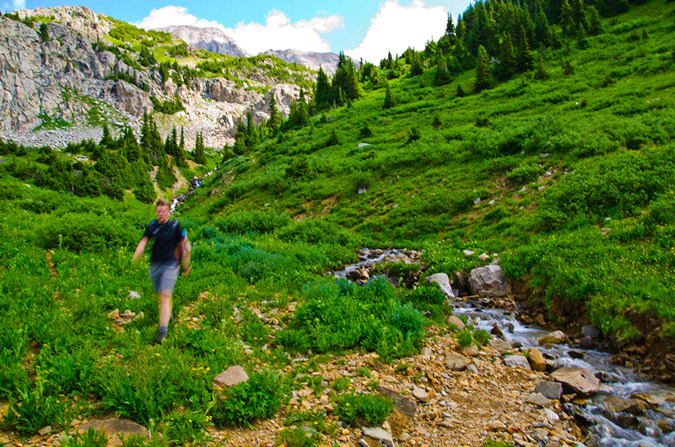
This is where you turn off to go up the creek and faint trail for Hagerman's standard route.
The hike back to Geneva Lake was pleasant and the views along the way were great. Here's another vantage of the Fravert Basin.
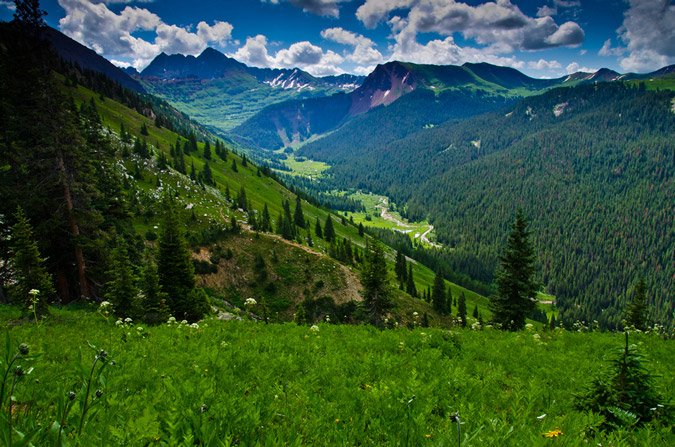
And a sweet view of Siberia Peak from a clearing on the trail.
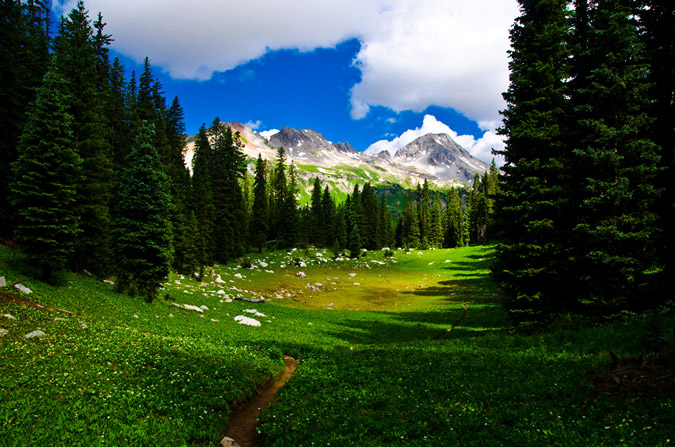
And back at Geneva Lake!
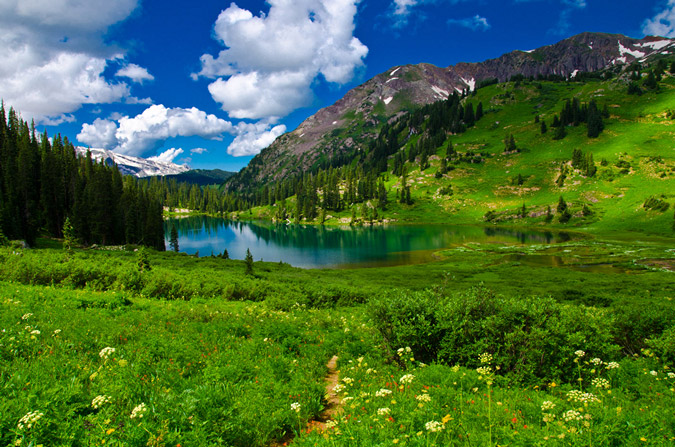
After reaching our campsite, we quickly tore down camp and packed out, making it back to the car just shy of noon - making for a great weekend of climbing!
These two mountains will forever hold a special place in my memory and my heart - if you've never been to Geneva Lake and the Lead King Basin - you really should! It is a magical place.
Here is an elevation profile of Hagerman Peak and then one of the entire trip - feel free to click on each to see a larger version.


Thanks for reading! Just a reminder - this site costs me time and money to maintain - if you find it useful, please consider supporting the site by remembering to use the affiliate links, especially if you purchase photography related gear from Adorama. Thanks!
References:
- http://www.tosv.com/uploads/FileUpload/mtnnames.pdf - Snowmass and its peaks: the name game. Catherine Lutz.
- Notes on Mountaineering in the Elk Mountains of Colorado, 1908-1910. Percy Hagerman.
{fcomment}
Backpacking to Snowmass Lake - A Photographic Gem
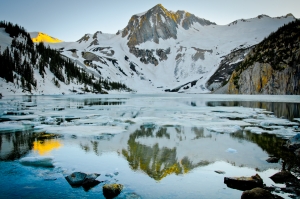
When Regina and I embarked from Colorado Springs, the plan was to backpack up to Snowmass Lake and climb Snowmass Mountain, putting me within 10 climbs of completing all of the 14ers in Colorado. Unfortunately, some unforeseen circumstances prevented us from reaching the summit of Snowmass Mountain, which I will go into detail about later on. Fortunately, there was ample opportunity for photography, and that opportunity was not passed on.
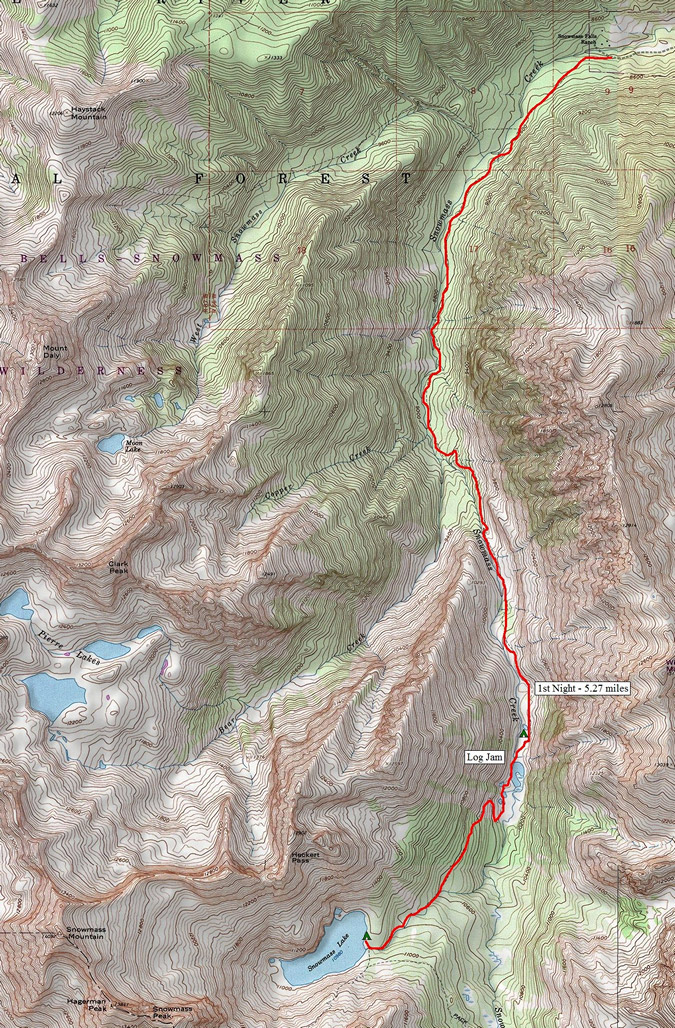
For those that follow my trip reports, Regina is a friend of mine that I met through 14ers.com and our relationship could best be described as one of two siblings. My wife is 100% cool with me hiking with another woman, and if another person asks me about it, I may just roll my eyes. Now that we have that out of the way, let's move on with the report! Regina and I departed Colorado Springs on Friday June 24th and reached the Snowmass Lake trailhead at around 8 PM. We were both very psyched about our first backpacking trip of the year, and had prepared for the many possible scenarios we were anticipating, including deep snow, an ice/snow climb, and wet weather. With that being said, we both packed our snowshoes, crampons and ice axes. I was also very excited to finally test out my brand new Lowepro Toploader Zoom 50 AW camera bag, as pictured below. The idea behind the bag is that it is held to your chest by this harness and makes your DSLR easily accesible. Time would tell!
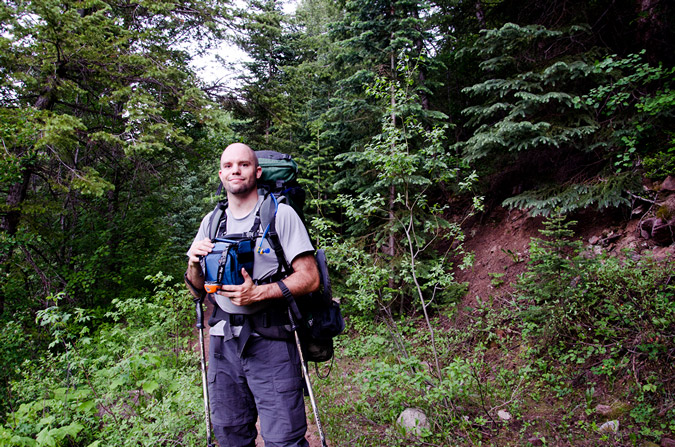
The hike up the Snowmass Lake trail (I believe it is actually referred to as the Snowmass Creek trail). takes you right into the Maroon Bells - Snowmass Wilderness Area and did not disappoint in terms of aesthetic beauty.

One of the things that Regina and I were concerned about was the infamous logjam crossing, where you must cross a huge stream via randomly scattered logs. This was not something we were looking forward to, given the fact that the snowmelt was particularly high this year and because we were carrying a lot of weight on our backs. About a mile into the hike, our fears of Snowmass Creek having a lot of water in it were confirmed...
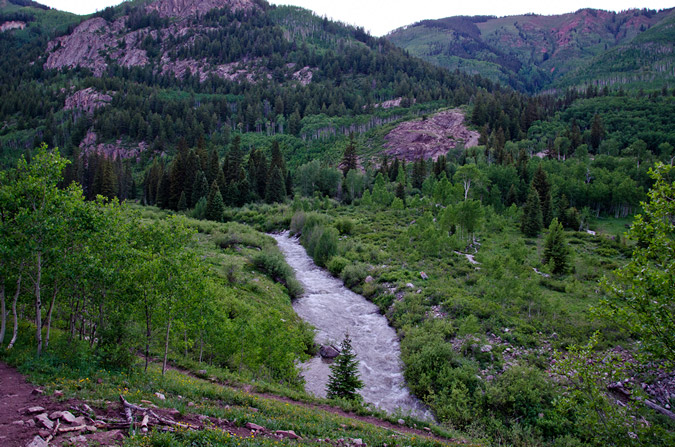
Would we be able to safely cross the logjam in the dark? The idea was quickly losing favor among the two of us; however, we kept our quick pace, which was aided by the great views of the surrounding peaks and forest.
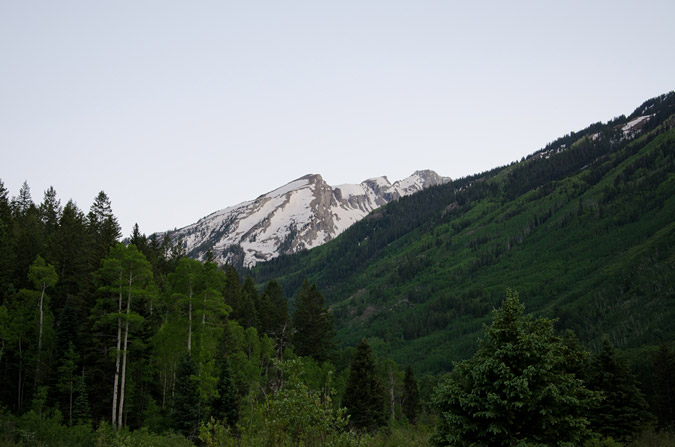
As we hiked up the trail in our heavy packs, the daylight faded quickly, and soon we were forced to employ the use of our headlamps to guide our hike.
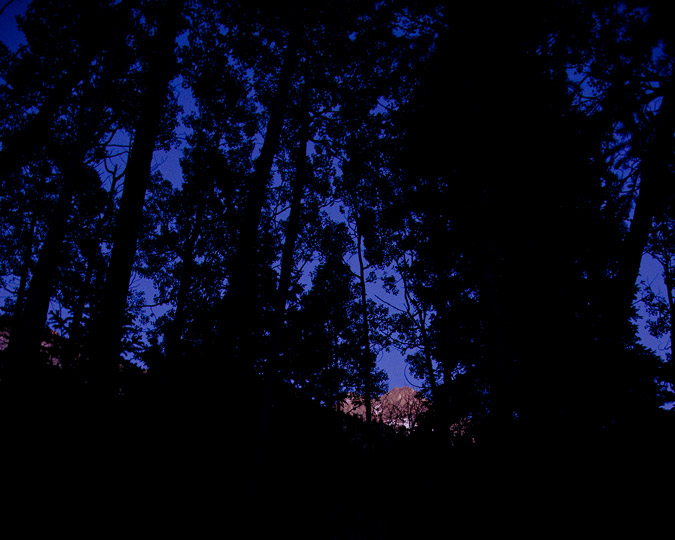
The plan was to get as far as we could in the dark before setting up camp for the night and making a go out of Snowmass Mountain the following day. From the trailhead, the lake was a good 8 miles up, which meant a good portion of our hike would be in the dark. Shortly after the sunset and the trail became dark (but before we turned on our headlamps), a dark object walked across the trail in front of Regina, which frightened us both. I quickly turned on my headlamp and discovered that it was a porcupine. We let him pass on through and continued on up the trail in the dark. Periodically, our headlamps would catch the eyes of various wildlife in the dark shadows of the night. For the most part, we identified them as deer, but given we were in the wild and it was dark, our imaginations were going in a much different direction!
After a short while, Regina began to get sick and threw up all over the trail (sorry about that to the folks that came up the next morning). Surely this would not be a portent for things to come? Regina said she felt much better, so we kept on heading up the trail in the dark. As midnight approached, we decided to stop and see where we were at. I pulled out my GPS and discovered that we were about 1/8 of a mile from the logjam - a perfect stopping spot for the night. We decided to set-up camp in one of the better campsites I've seen on any backpacking trip, right next to Snowmass Creek. Since this was her first backpacking trip, I showed Regina how to hang our food bags by nylon rope and how to setup camp.
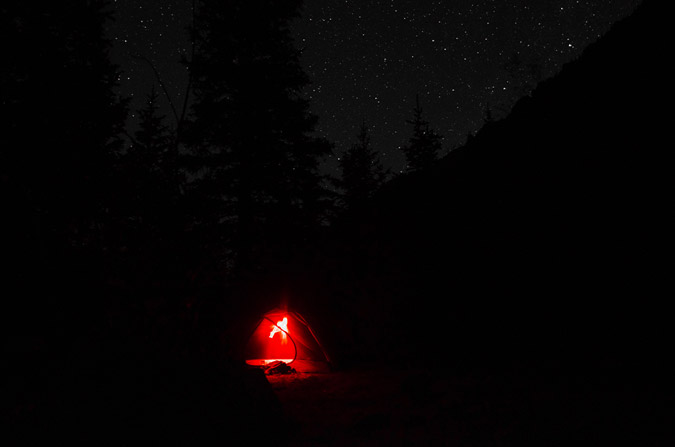
Since it was so late and because Snowmass would require crampons on hard snow, we decided the best plan would be to get plenty of rest, pack the rest of the way up to Snowmass Lake the next day, take it easy, and go to bed early for a super-early ascent of Snowmass Mountain on Sunday. We woke up the next morning at around 9 AM, listening to a group that had just came down from Snowmass Mountain talk about the logjam. They were making jokes about how the logs would sink and that people were almost falling in, etc. Was the logjam really that bad?
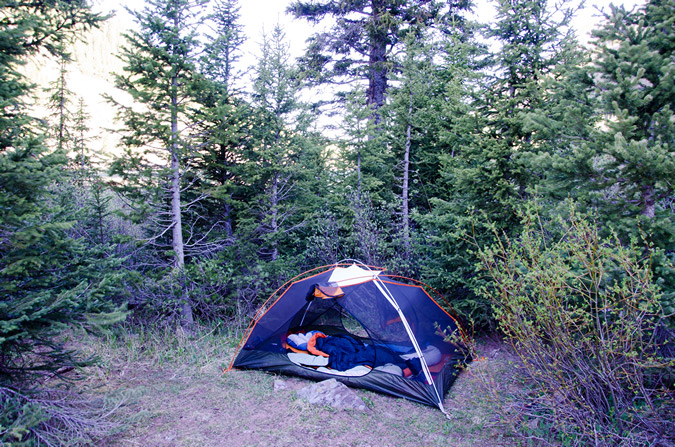
We quickly packed up and headed towards the logjam. At first sight - the logjam confirmed our worst fears - it looked incredibly daunting.
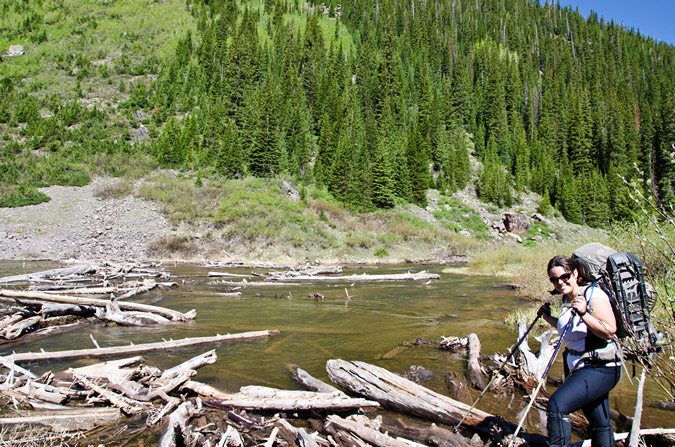
The water was about 3 or 4 feet deep in spots, and was rushing quite quickly under the logs. If the views were not so incredible, the logjam would have been a real bummer!
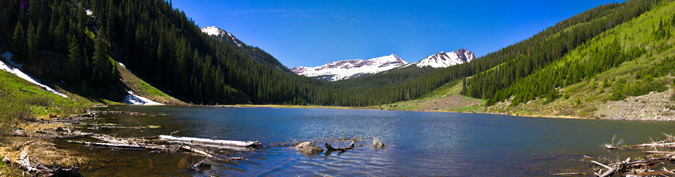
There was little to no consistency in the reliability of each log, and each log required a good test before we used it. Trekking poles were quite useful, but at times they gave me a false sense of security because I would put some of my weight on them when they were not secure on a log, causing me to get off balance. Care must be taken to successfully cross the logjam as it is a good 100 ft to the other side! I stopped halfway across to take a 180 degree panoramic photo to show the length of the crossing.
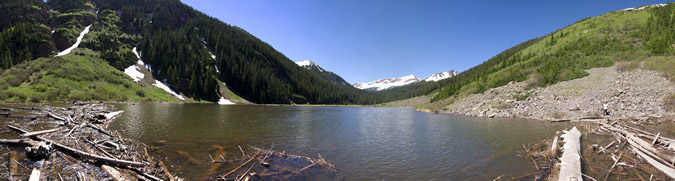
After successfully crossing the logjam, we quickly made our way up the trail, which followed the now wide and pristine Snowmass Creek. The whole area was like a giant beaver pond, with lakes and creeks intertwining with the beauty of the Elk Mountains at the head of the valley. The trail quickly begins to work uphill again and soon views of the pristine valley below can be made.
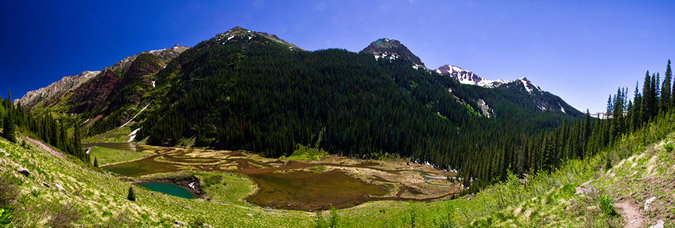
The rock in the mountainside was quite red, a clear indication that the Maroon Bells were closeby.
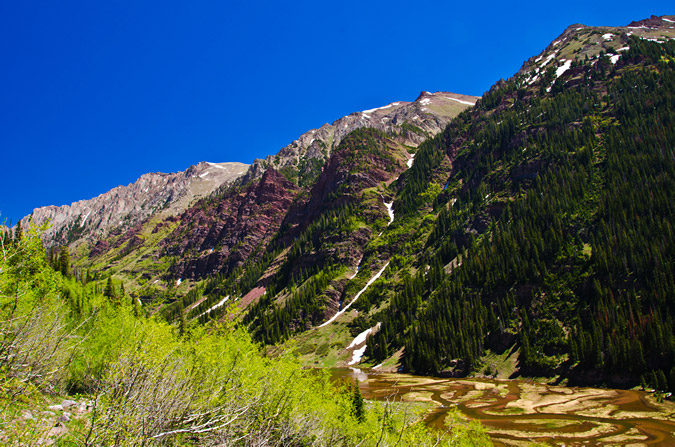
The trail quickly weaved into the trees towards Snowmass Lake above and to the east, and we were quickly reminded that there was a ton of snow in this area still. Would we finally get to use our snowshoes? Not so much - the snow as hard enough and sporadic enough that snowshoes were not required. Another trip where I packed my snowshoes for no reason! Oh well.

This was the hardest section of the hike, with the snow banks rising and falling throughout the trail, making travel slow and laborious with heavy packs on. Nonetheless, we arrived at the trail junction for Snowmass Lake and headed on up, following Snowmass Creek, which was quite full of water.
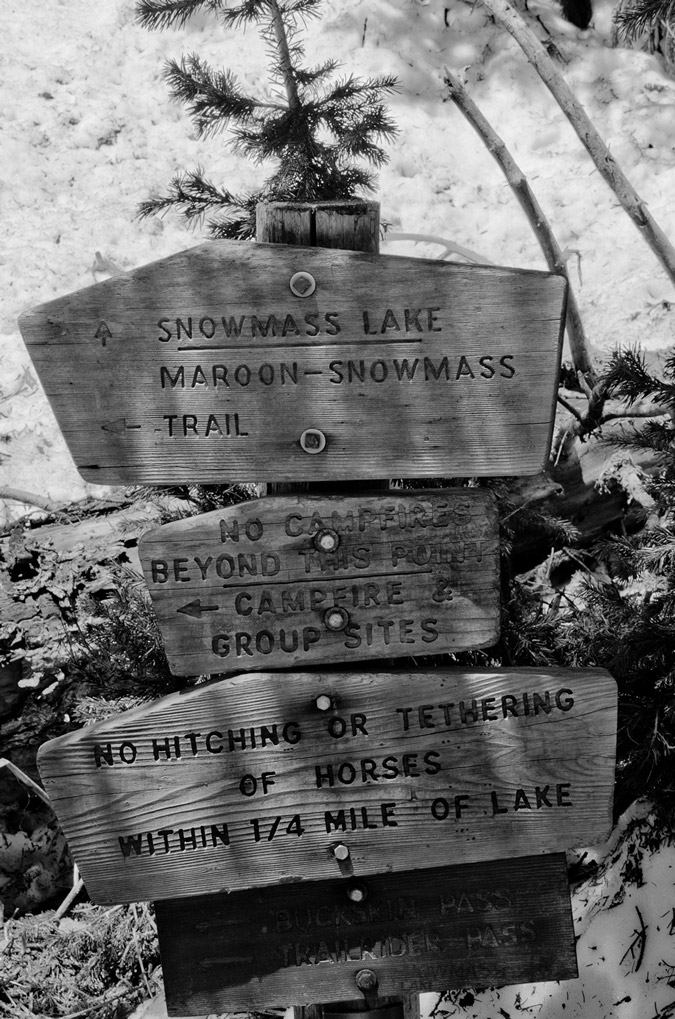

Soon, we reached a huge waterfall next to the trail, with a giant log in front of it. I decided to take a break, take my pack off, and cross onto the log to get some HDR shots of the waterfall from the middle of the log. Getting onto the log proved quite tricky, with the area around the creek full of snow and ice and dirt; however, I managed to make it onto the log without drowning or falling in. Yay for me.
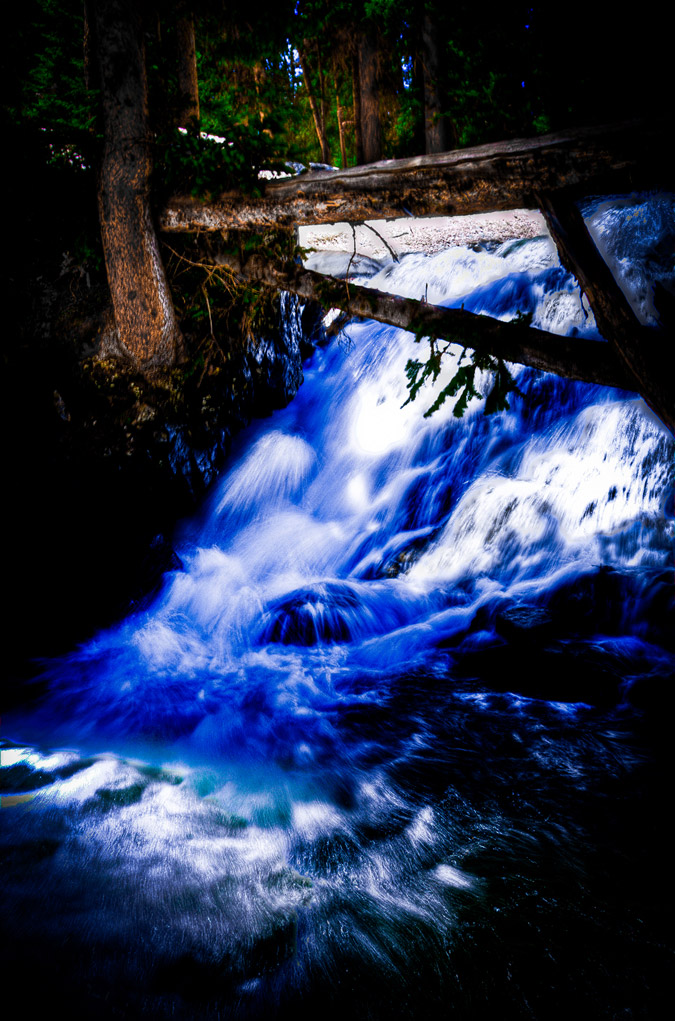
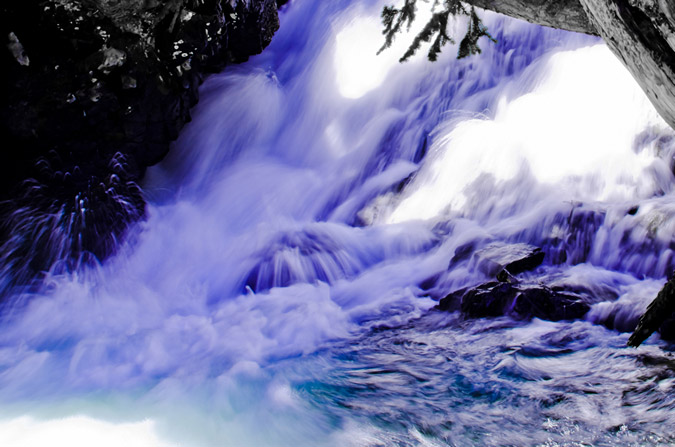
About 200 feet past this waterfall, we finally reached the head of Snowmass Creek and the first views of Snowmass Peak with Snowmass Lake in the foreground. How exciting!
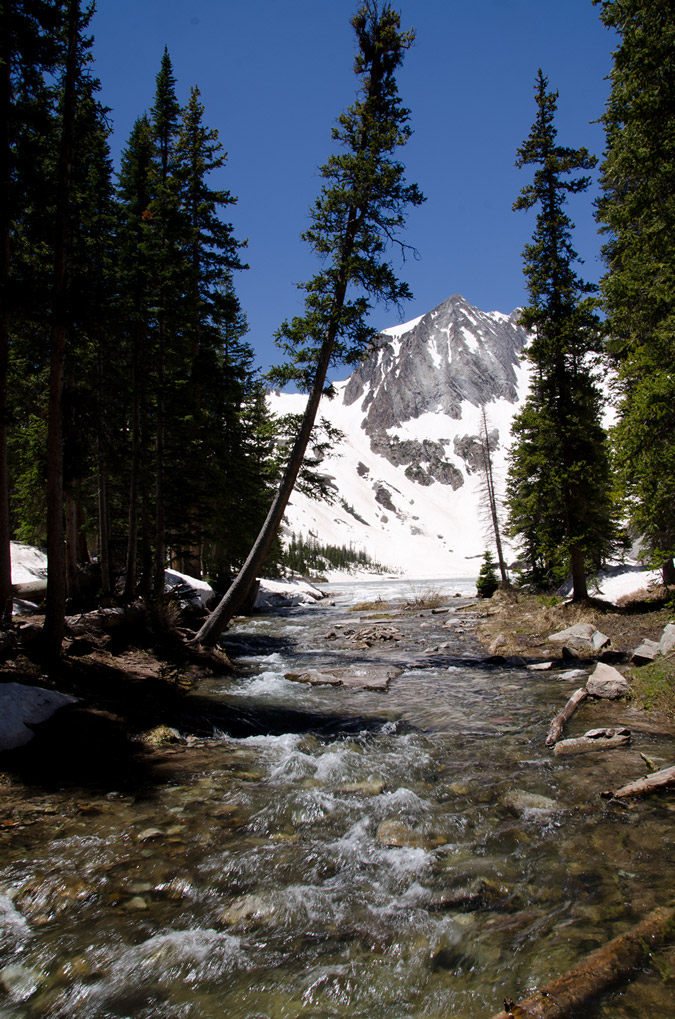
The first order of affairs was to locate a suitable campsite. Most of the area was full of deep snow, so options were quite limited. Sticking to the "100 ft away from lakes" rule proved nearly impossible due to the snow and marshy conditions. Nevertheless, we found a great spot near the lake and creek and set up for the day. It was pretty great to finally get a glimpse of Snowmass Mountain as well, which was tucked away to the right of Snowmass Peak, the lower 13er at the head of Snowmass Lake. Even better, the moon was passing just above Snowmass Mountain, making for some fun photography.
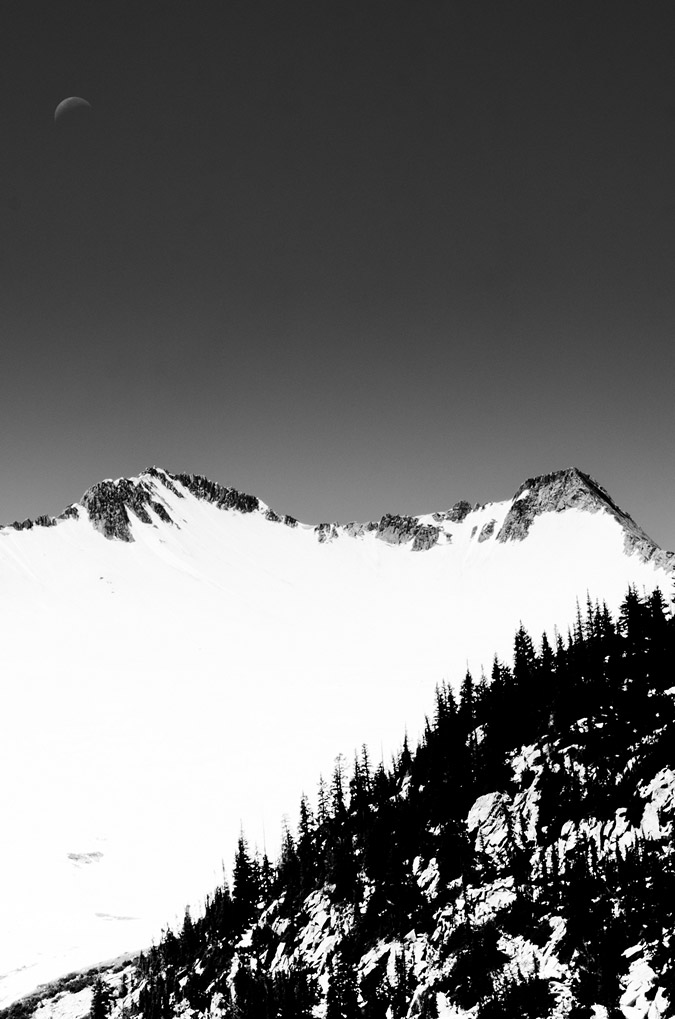
Throughout the day, the lighting shifted and the winds died down, making for better or worse photography conditions, depending on the combination of the two. For the most part, the Golden Hour proved to be the best time to shoot, which did not surprise me in the least.
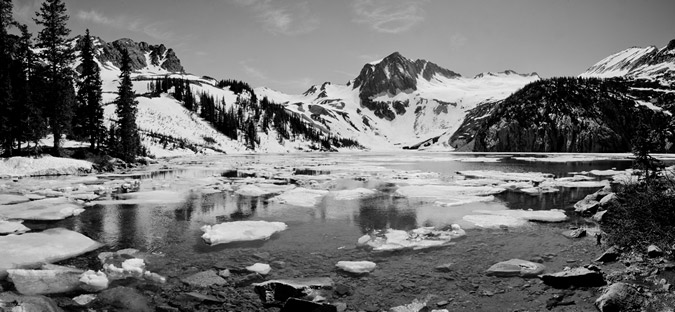
For the most part, Regina and I just kicked it at the lake for the day, watching the wildlife and the insane beauty of the lake. This also gave me the opportunity to play around with my camera and try to get some decent shots.
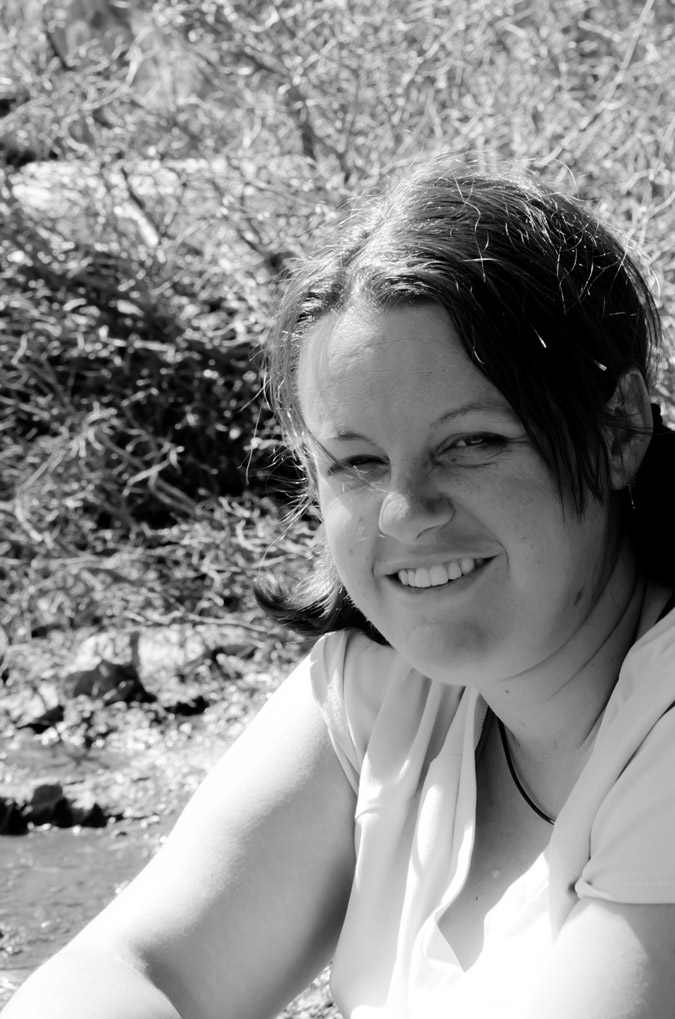
About an hour or two after we arrived at the lake, another group of gentlemen came to the lake, sporting a pistol and a Canon EOS Digital Rebel attached to a fully extended tripod. They were nice enough guys, hailing from Elizabeth, but I could not help but wonder how fun that tripod was to carry up to the lake and if they would be using the pistol for fun or for protection. I was hoping for the latter, based on my horrible experience at Huerfano Valley a couple of years ago. The two confirmed they were just hikers, not climbers, and were just there for the night.
Another hour later, two more guys came up the trail and were looking to camp nearby. One looked familiar, so I asked him if his name was Corey. He said it was - and sure enough, it was one of my Facebook friends! Corey was up at the lake with his friend Robbie as they were planning on climbing Snowmass on Sunday, the same as us. They were planning for a 4 AM start and we were planning for a 2 AM start. Regina and I talked for awhile off and on with both Corey and Robbie throughout the afternoon, getting to know each other. It is always remarkable to me how quickly people that climb 14ers can get to know each other and how, generally speaking, everyone is so friendly. It was a real pleasure sharing a campsite with them. Regina got to spend some quality time getting to know Corey:
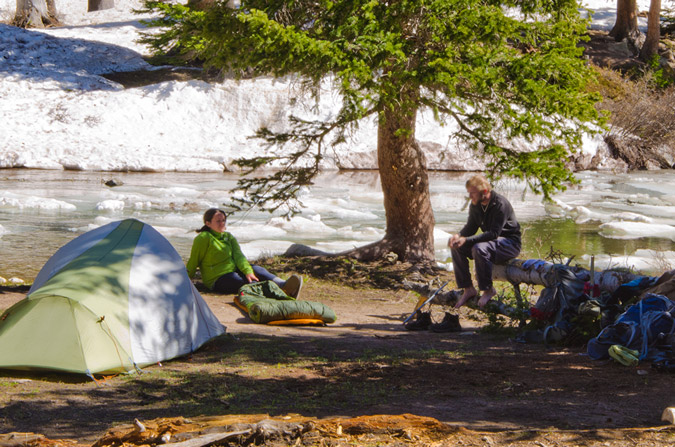
The lake was thawing out throughout the day, which was actually really fun to watch. Chunks of ice and snow would calve off of the icy glacier that was now Snowmass Lake and flow down into Snowmass Creek and out to sea. It was really fun to watch, and quite peaceful too. Soon, the sun began to get lower and lower on the horizon, which piqued my photographic instinct quickly. I was off to get as many quality shots as possible of the lake, hoping to get both HDR and standard photos. HDR has quickly become one of my more favorite photographic mediums. Its almost like opening a present at Christmas when you begin working with the files at home - you never quite know what you're going to get!
First up - the HDR version:
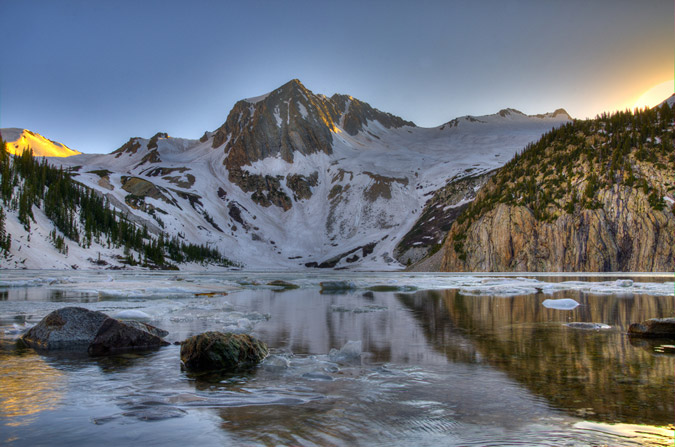
And the standard version, which won me my second Flickr Explore Award, which was quite exciting! Explore is Flickr’s Daily Artist Showcase. Every day Flickr admins choose 500 of the most interesting images determined by “interestingness”. I have placed that photo in my portfolio and for sale section if you are interested in purchasing a print.
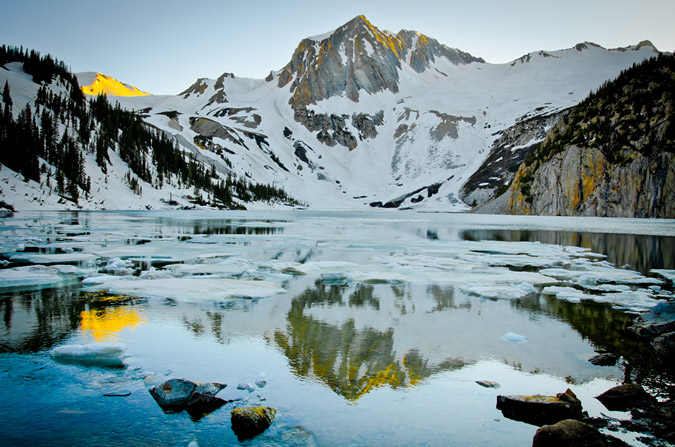
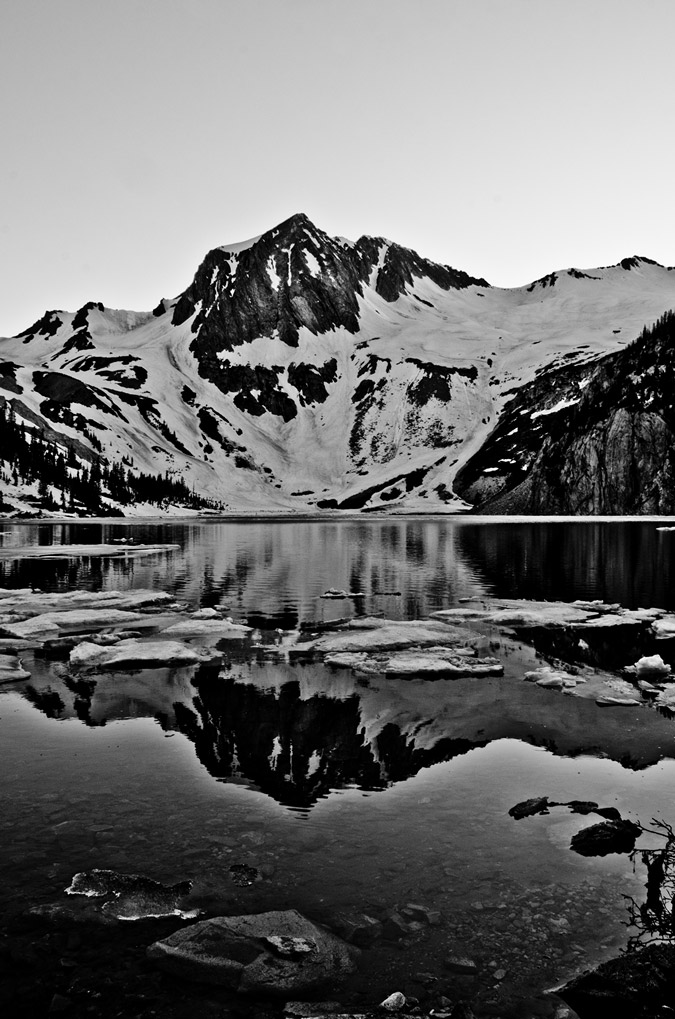 The views from the shores of the lake were outstanding. Quite possibly ranking in the top 10 views of all time for me personally. The impressive features of Snowmass Peak, paired with the crazy cliff walls below Snowmass Mountain made for quite a great spot to sit and soak it all in. To make things even more fun, close to dusk, a huge, feral, rugged looking porcupine decided he would come and hang out with us. This guy was seriously oblivious to our presence, and it was actually somewhat challenging getting him to go away without putting myself in a dangerous place.
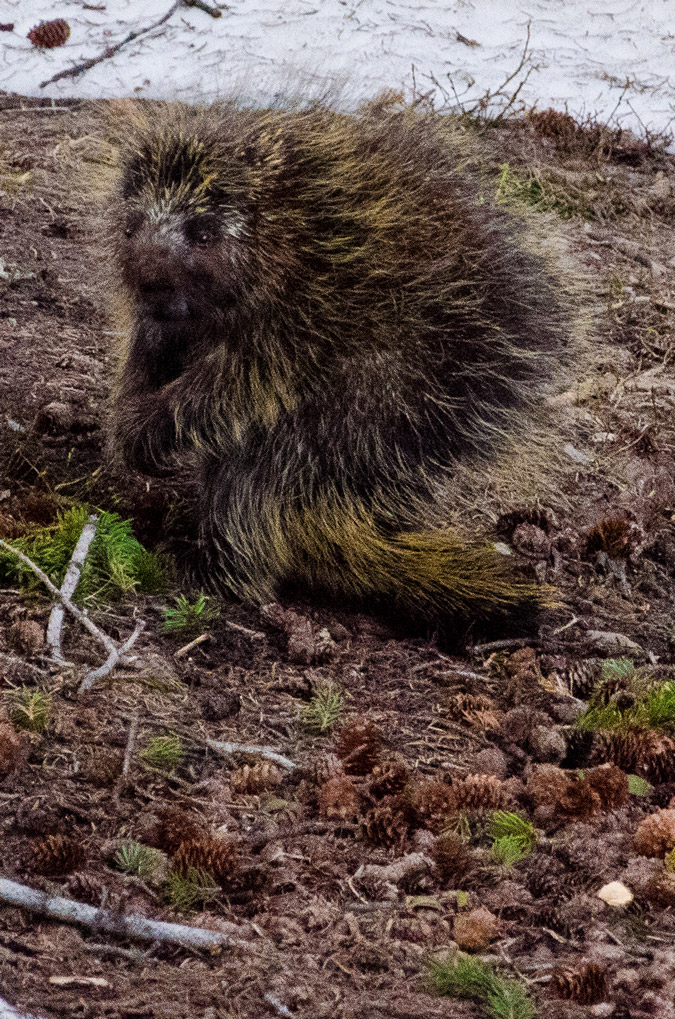
With all of the excitement over the porcupine and the heavenly sunset, I decided it was time to hit the sack. We had set our alarms for 1:45 AM, anticipating a 2 AM start. It was sadistic, I know, but we felt it was necessary given the conditions. The alarm went off and I got up fast, because I wanted to take advantage of a quick photographic opportunity to capture the Milky Way, or at least attempt it. Additionally, I was hoping that I could get some photos of the stars reflected in the lake as well. Both concepts challenged my photographic mind, and away I went to try to get some good shots. The challenge with shooting in low light, as in pitch dark, is always figuring out the best combination of aperture, ISO and shutter speed. Of course, I guess this can be said about any other form of photography, but the concepts are of particular sensitivity in low light conditions. I opted to set the camera at a slightly higher ISO (400) to increase the sensitivity of my cameras sensor. Additionally, I went for a 20 second exposure instead of a 30 second exposure since I did not want the stars to blur / move across the frame at all. Lastly, I opted to set my camera at the lowest aperture the lens would handle (f/3.5) to allow the maximum amount of light into the lens. These combinations produced fairly good results.
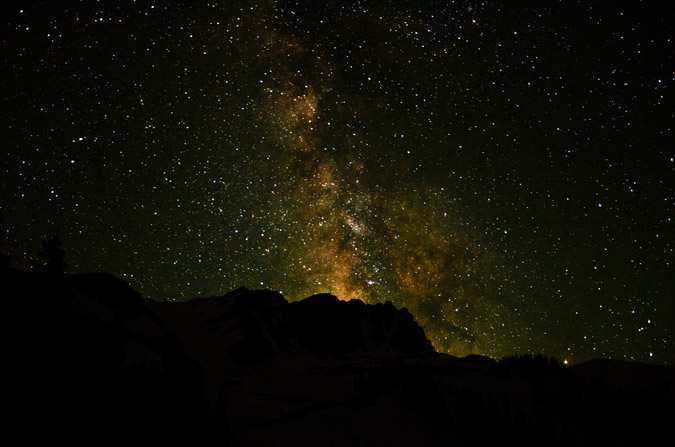
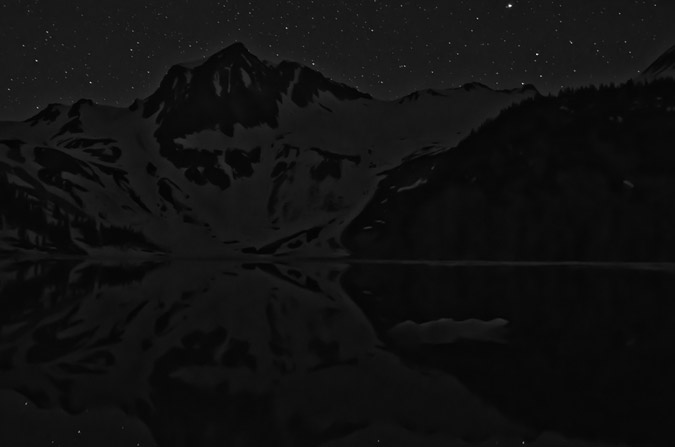
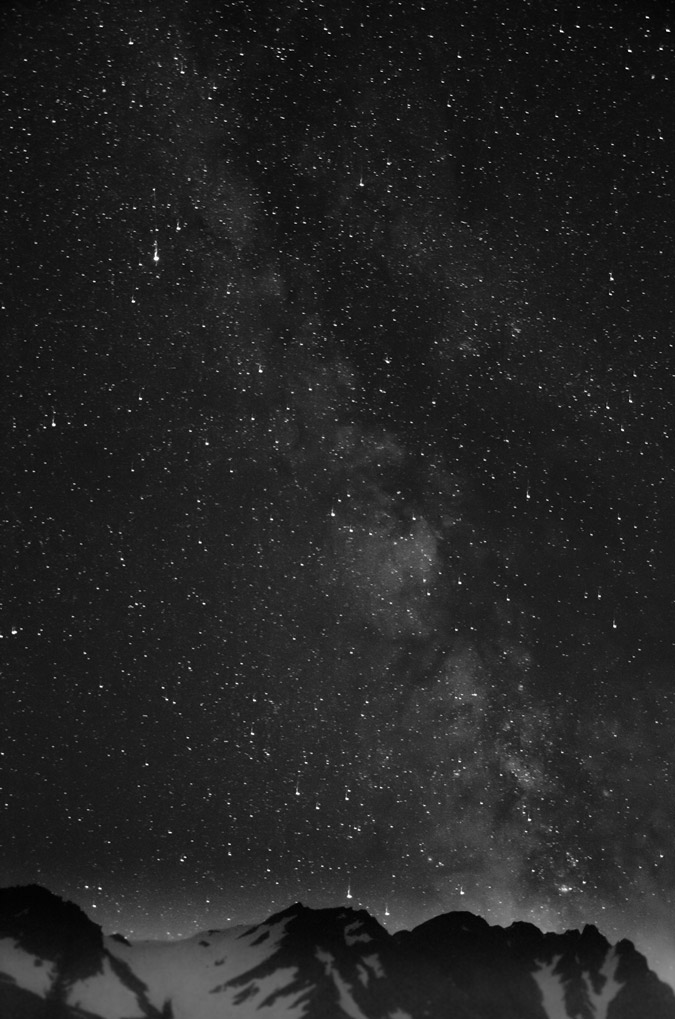 Unfortunately for me, the photographic success would not lead into climbing success. This is quite an embarrasing story for me, since I pride myself on preparation. As Regina and I wrapped around the steep snow banks to the left of Snowmass Lake, heading for Snowmass Mountain, we quickly realized that crampons would be required. No problem right!? Wrong. Shortly after putting the crampons on and continuing, my crampons would come right off my boot, necessitating frequent and long stops to get them back on. Finally, Regina and I decided that there was something wrong with my crampons and that no matter how we tried to get them to stay on my boots, they just would not stay. We decided to abort the mission at about 3:45 AM and headed back to camp. I was quite furious with myself, since I had personally tested the crampons at home, putting my boots into them, strapping them down, and making sure they fit. Apparently that effort was not as good as it could have been. It turns out, after inspection at home, that my crampons were adjusted in such a way that they were too big for my boots. Most modern crampons self-adjust their size; however, the crampons I own are hand-me-downs from my dad. Surprisingly, the same model is still manufactured by Seattle Manufacturing Corporation. Anyways - lesson learned! USE your equipment before you trust it with your life. We went back to camp, slept for a bit longer, and then packed up and headed back down to the trailhead. I was not in a great mood because this was one of the only mountains I've ever been turned back from, and it was completely my own fault. If it were weather or altitude sickness or some other uncontrollable event, that would be one thing, but to have the mountain turn us back because I was too stupid to test my crampons - not cool. It was not a total loss though, the photos turned out great, and I was able to get some fun and creative shots of wildflowers on the way out. If any of you know the names of these flowers, please, by all means let me know!
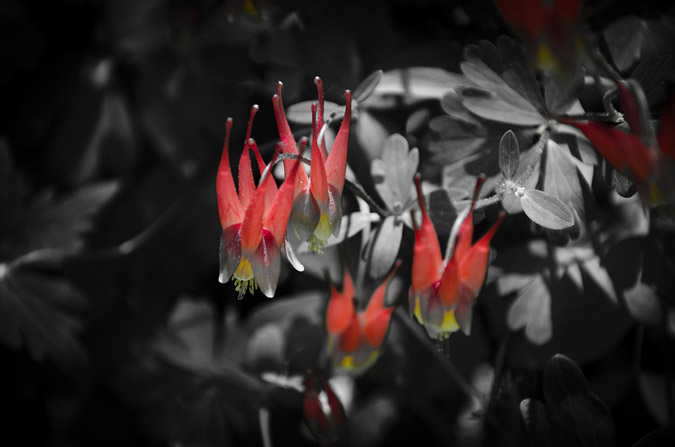
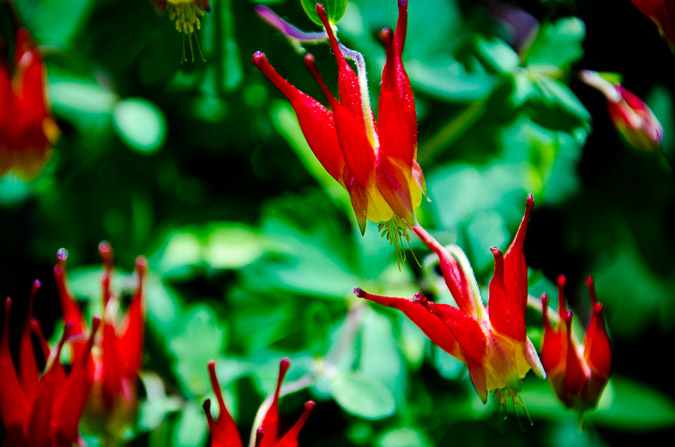
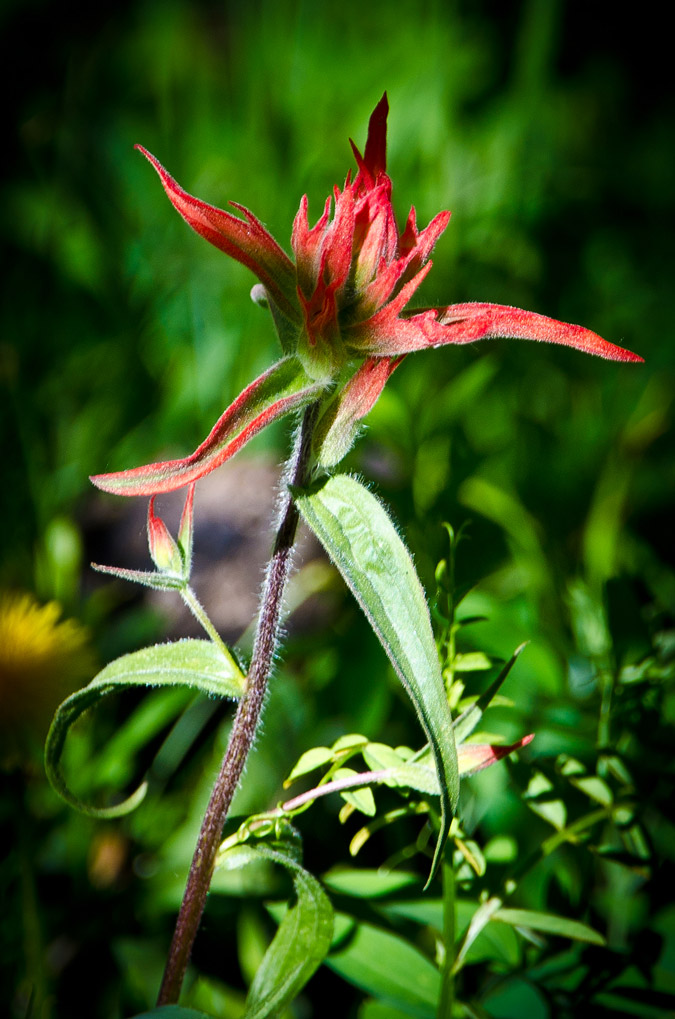
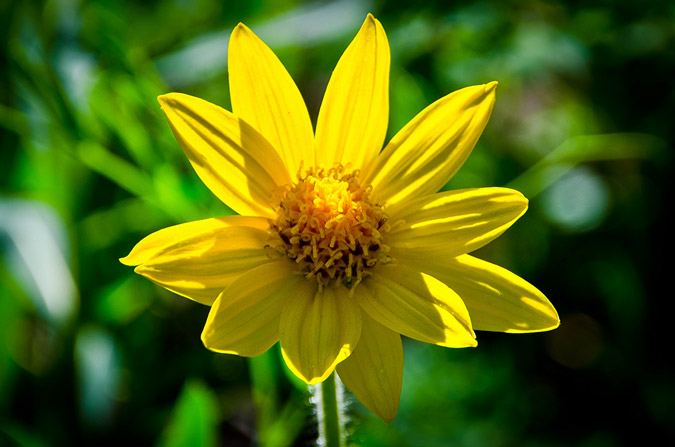
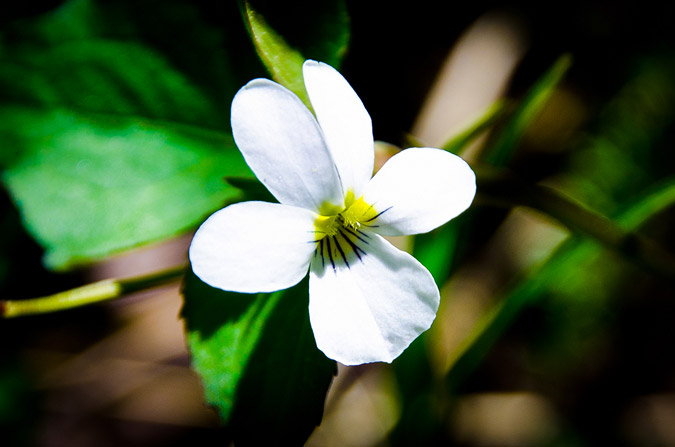
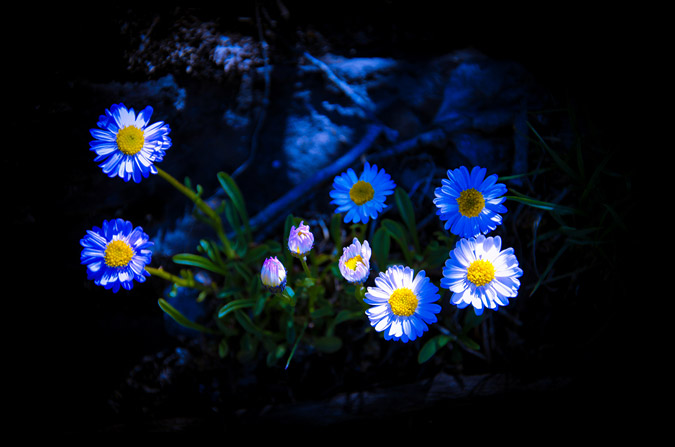

The most memorable part of the trip was yet to come though - and it certainly made up for the rest. On our way out, Regina took a nasty fall on the logjam! At first it was quite a scary experience. I was right behind her, and had to talk her through getting herself back up out of the water. She had managed to completely submerge one of her legs and was drenched. Fortunately, Regina is a good sport, and within a matter of minutes we were both laughing about it.
Lastly, we were able to get some great views of the backside of Snowmass that we did not get to see on the way up, which were quite stunning!
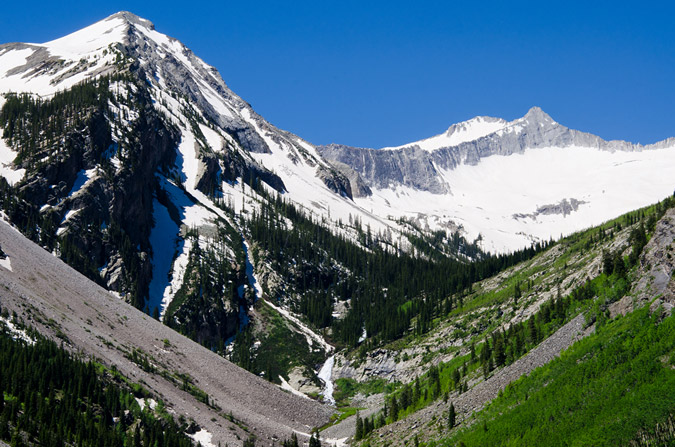
All-in-all, I would rate this hike quite highly on my list of hikes that I have done. The views from Snowmass Lake are worth it by themselves, and the logjam provides an excellent adventure.
And in case you were wondering - the new camera bag totally lived up to my expectations - I will end up writing a full-blown review of that product for sure!
Until next time Snowmass Mountain... I'll be back!
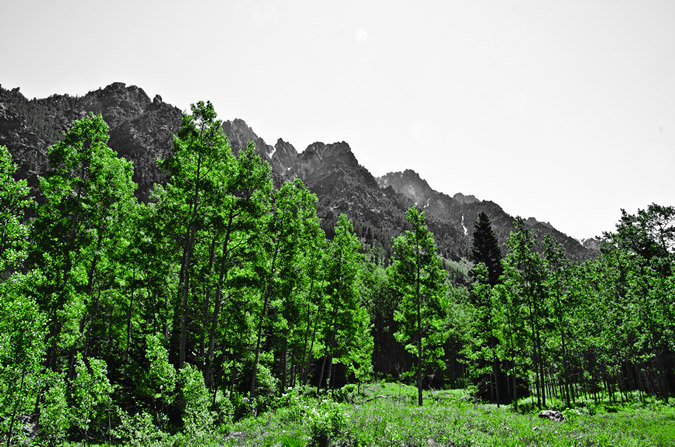
Top 5 Stunning Colorado Locations
Colorado is easily one of the most scenic places in the whole world, so creating this set of lists was not an easy task by any stretch of the imagination. Having lived in Colorado my whole life and having visited nearly every mountain range the State has to offer, I wanted to reflect on my absolute favorite locations as well as highlight the places I’ve not yet visited. If you’ve not yet had the opportunity to visit some of these places, I would highly recommend that you do so immediately! Without further ado, here is my list of the top five stunning locations in Colorado that I have visited:
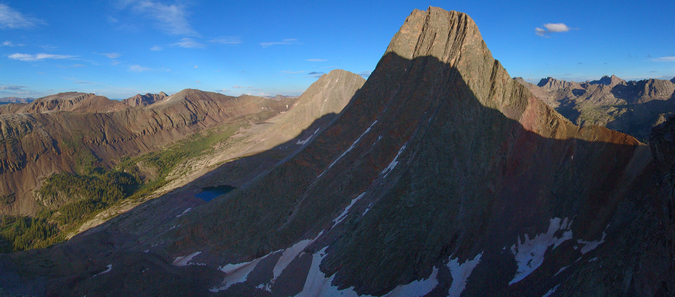
- Vestal Basin. Vestal Basin is a very remote valley located deep within the Weminuche Wilderness Area 32 miles northeast of Durango, Colorado. The surrounding mountains are members of the Grenadier Range, which is a sub-range of the San Juan Mountains. Vestal Basin is home to one of the most aesthetically inspiring mountains in Colorado, Vestal Peak. Vestal Peak towers above the basin in a upwards sloping fashion and contains one of the most classic climbs in all of Colorado up what is known as Wham Ridge. Vestal Peak is easily recognized from all directions by the dramatic and awe-inspiring Wham Ridge. Next door to Vestal Peak lies the also impressive Arrow Peak, which also has similar traits, in that it rises to the sky in a very dramatic fashion. A trip up these two incredible peaks should be on any serious Colorado mountaineer’s bucket list.
- Capitol Lake / Elk Mountains. Capitol Lake sits at the base of Capitol Peak, located deep within the Elk Mountains 13 miles west of Aspen, Colorado. Access to some of Colorado’s most stunning peaks is granted from this location, including the challenging task of summiting Capitol Peak via its famous Knife Edge. Once above tree-line, views of other famous peaks, such as The Maroon Bells and Pyramid Peak are seen to the southeast. The Elk Mountains are a truly magical place to behold.
- Mount Sneffels Wilderness Area. This pristine wilderness area is located 10 miles south of the town of Ridgway, Colorado in the San Juan Mountains. The area is home to the famous Yankee Boy Basin and several incredible mountains within the highest 100 of Colorado, including Mount Sneffels, Teakettle Mountain and Dallas Peak. Dallas Peak is arguably the most difficult mountain to climb out of the highest 100 in Colorado. The rugged terrain and incredible foliage located in this area are something every visitor to Colorado should take time to see. Especially beautiful in the fall, the wilderness area’s aspen trees change to a magical display of deep gold, red and yellow, all with the dramatic and spectacular Mount Sneffels in the background. This area is a must-see for natives and out-of-state visitors alike.
- Colony Lakes / Cottonwood Creek. These two magical lakes rest at the eastern base of Crestone Needle, Crestone Peak and Humboldt Peak in the Sangre de Cristo Range, 13 miles southwest of the town of Westcliffe, Colorado. Cottonwood Creek runs on the western side of Crestone Peak and Crestone Needle and provides remote access to one of the densest, most pristine wilderness Colorado has to offer. Unfortunately, access to Cottonwood Creek is currently problematic due some private property complications at the trailhead near Crestone, Colorado. Hopefully this area will be opened back up someday so that others can fully appreciate the natural wonder and beauty this area has to offer. Access to the Colony Lakes is still available by way of a four-wheel drive road that recently was re-developed by the Forest Service. There is plenty of controversy surrounding this access point as well, due to damage to the ecosystem at the lakes above.
- Highland Mary Lakes. Highland Mary Lakes are some of the most remote lakes in Colorado located quite deep within the Weminuche Wilderness Area in the San Juan Mountains, southeast of Silverton, Colorado. The lakes are located on the Colorado Trail on a stretch of earth that is completely above tree-line for several miles in each direction. It is truly insane to be on such an elevated plateau with some of Colorado most splendid mountain vistas surrounding you. This location is a favorite attraction of mountain goats as well. An amazing 3-5 day backpacking trip can be made by traveling from north to south or south to north from the silverton-side trailhead of these lakes all the way to Vallecito Reservior or vice-versa. The trek is truly magnificent. Be sure to coordinate a car shuttle ahead of time!
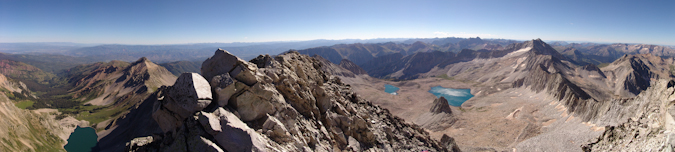
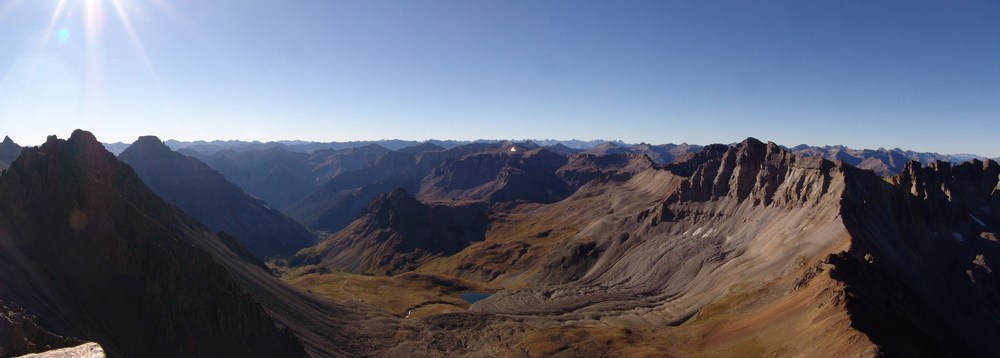
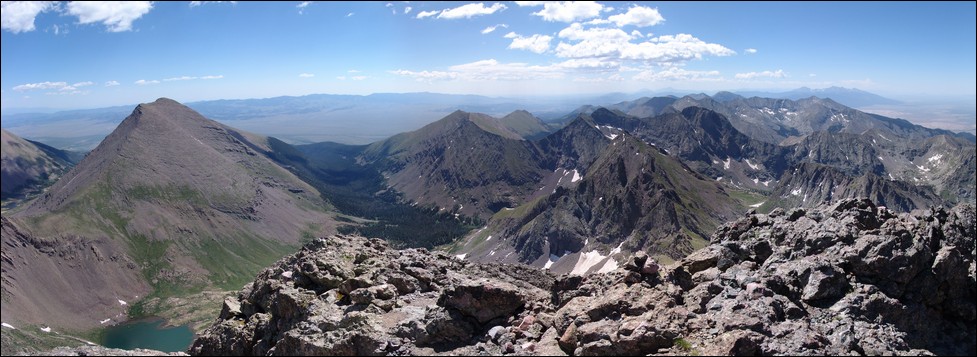
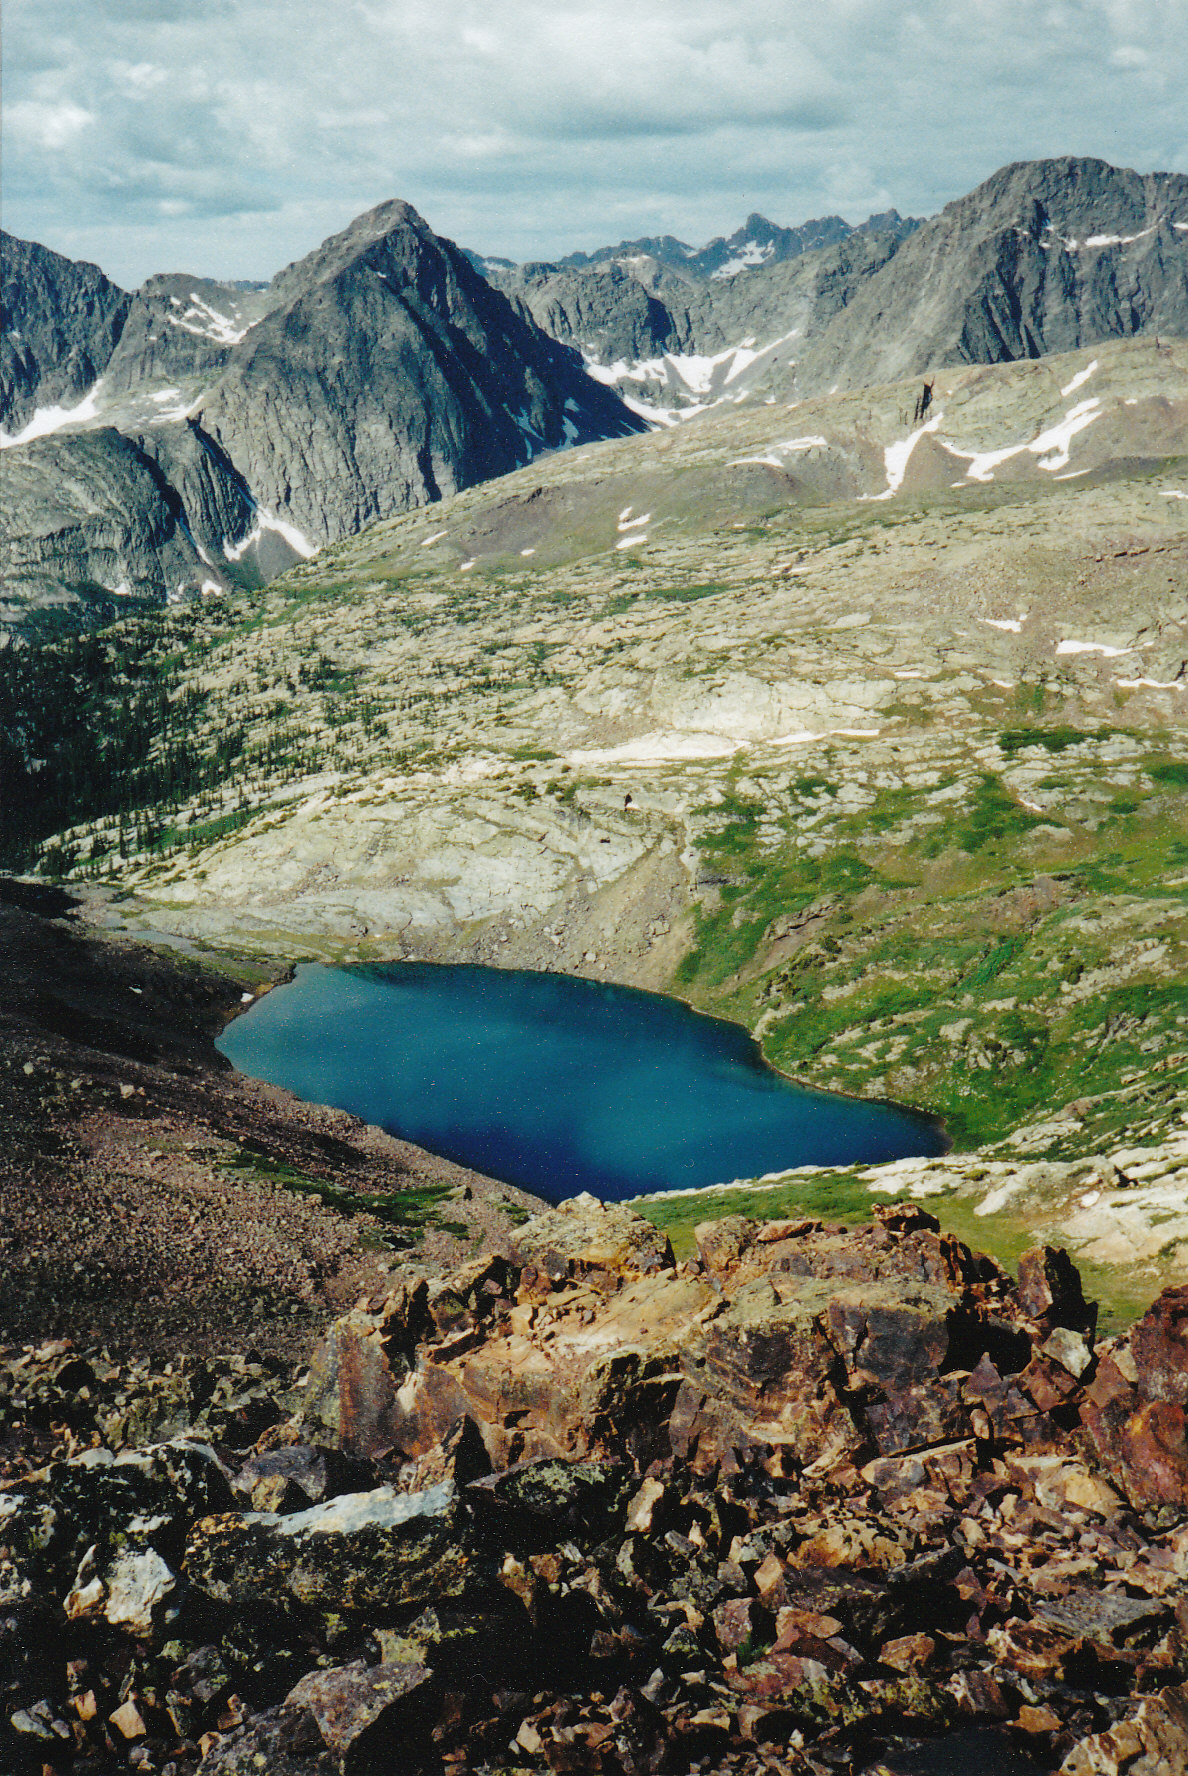
-
The top 5 places in Colorado that I’d like to visit but not had a chance to yet:
- Ice Lake Basin. Ice Lake Basin is a remote area west of Silverton, Colorado. From what I understand, this is one of the most incredible places in Colorado and I cannot wait to see it myself. The basin provides access to some of Colorado’s greatest peaks, including U.S. Grant Peak, Pilot Knob, Vermillion Peak and Fuller Peak.
- Chicago Basin. Chicago Basin is home to three of Colorado’s 14ers, Sunlight Peak, Windom Peak and Eolus Peak. Located deep within the San Juan Mountains’ Needle sub-range, these mountains are quite possibly some of the most photogenic and rugged looking out of any set in the State. While travel to the area is popular due to the access provided for the area’s 14ers, it is still tops on my list of places to visit.
- Indian Peaks Wilderness Area. Indian Peaks Wilderness Area is located northwest of Denver, Colorado, just south of Rocky Mountain National Park. While this area boasts no 14ers and only one peak over 13,500 ft, it is apparently a very pristine mountain range full of incredible hikes and challenging climbs.
- Gore Range. The Gore Range is a relatively unknown area north of Vail, Colorado and obtains some of Colorado’s most glaciated and rugged looking peaks. Many mountains in this range have never been named, mostly because of the remoteness of the area.
- West Elk Wilderness Area. This swath of wilderness is located north of Crested Butte, Colorado is home to some of the most insane images of autumn colors ever imaginable.
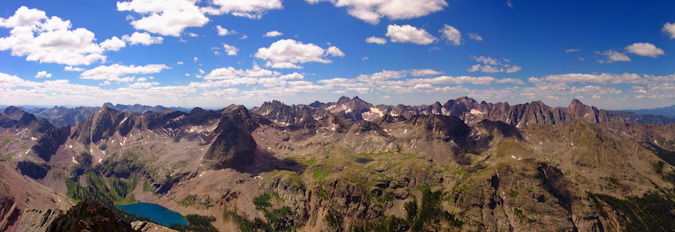
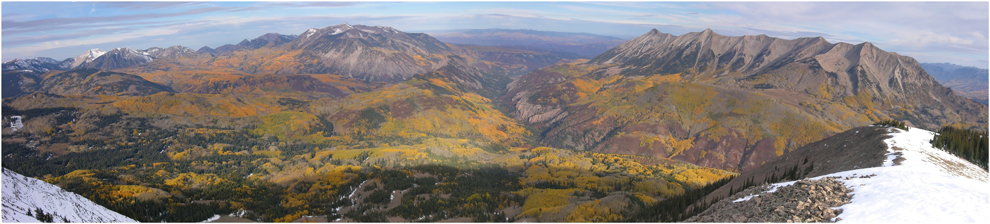
Photo by KAE Photography
What areas not covered have you been to that you’d like to share? Have any places you have yet to visit that you want to? I’d love to hear about your thoughts.
{fcomment}
Mount Massive - A Frozen Wonderland
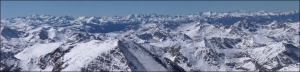
Some fun information about this great hike:
Mt. Massive - 14,421 ft. - 2nd highest in Colorado; third highest mountain in the contiguous U.S.
8 miles round-trip via Southwest slopes route
3,950 ft. elevation gain
More snow than I expected...
I thought that my climbing season had ended after being snowed on in mid-September on Grays and Torreys; however, I got the itch to climb again this weekend. Serendipitously, a fellow climber from Colorado Springs, Rob, posted on 14'ers.com that he was going to Mt. Massive on Saturday and that anyone from Colorado Springs was welcome to join him. I jumped all over the opportunity and we made plans to meet at 4:15 AM on the west-side of town to car pool. Rob had his friend Brad with him and we departed for Mt. Massive at around 4:30 AM.

Our route took us directly up the snowy south face of Massive.
On the way over we had good conversation, shared stories about our climbs and got to know each other. We arrived at the turn-off for Mt. Massive at 6:45 and met up with two other climbers from Denver. We reached the trail-head and began hiking at 7:40 AM. Right at the trail-head lies a memorial to the soldiers that died in a helicopter crash earlier this year on Mt. Massive. Here are some photos of the Memorial, notice a section of the helicopter is seen as well:

A memorial cross for the victims of the Blackhawk Helicopter crash on Mount Massive, 2009.

The forecast for the day was clear skies and a high of 60, and wow the weatherman did not disappoint! We swiftly hiked up the valley and reached the turn-off for Mt. Massive. Our view back down the valley was stunning:

The trail was covered in snow, making for a quite interesting hike. As we gained elevation, the trail became less and less apparent and eventually we just started hiking straight up towards Massive.
Looking back towards Elbert, you can see our footprints through the snow...

None of really expected to see so much snow, but it made for a very challenging hike. The snow was up to 3 ft. in depth in some spots, and it was quite slippery due to the 30-40 degree slopes were climbing on. We stopped several times to rest on the way up, and about halfway up I was able to take some shots, combined here into a smaller panoramic photo:

After approximately three hours, we were able to reach the saddle, which joined us with the standard route. By now I was pretty tired, partially due to the extra effort required by the snow, and partly due to the fact that I had not had much to eat. I made sure at this point to eat some snacks, and we headed back up. We found ourselves climbing up some pretty deep snow, as evidenced by this shot, looking up the ridge towards the summit, taken on our way back down:

After trudging through the snow, we were able to reach the summit at 12:40 PM, a full 5 hours after we started. The snow really took a lot out of us! I was just really glad I brought my gators and had tons of warm clothing... Here is my obligatory summit pose, with the Elk range behind me:
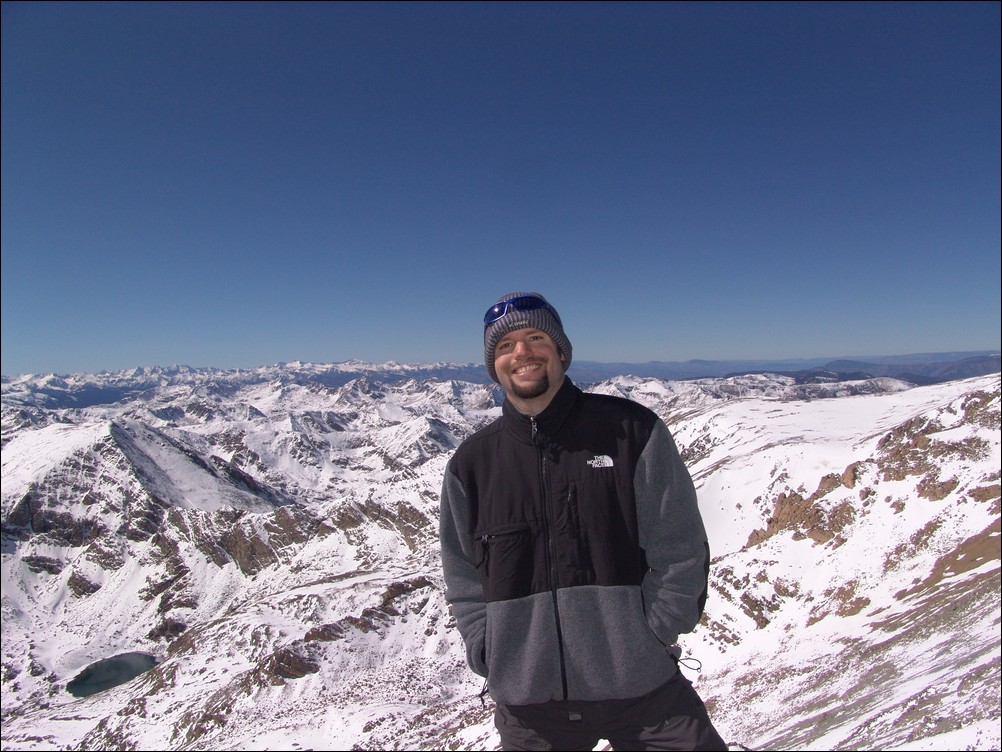
And of course my traditional 360 degree pano:

Before we left from the summit, I took some zoomed in shots of the Elk range, including the Maroon Bells. This stitched pano is one of my favorites from this 2009's shots:

We headed back down and had a good time rumbling down the snowy slopes. I took one last set of the valley, combined into a pano here:
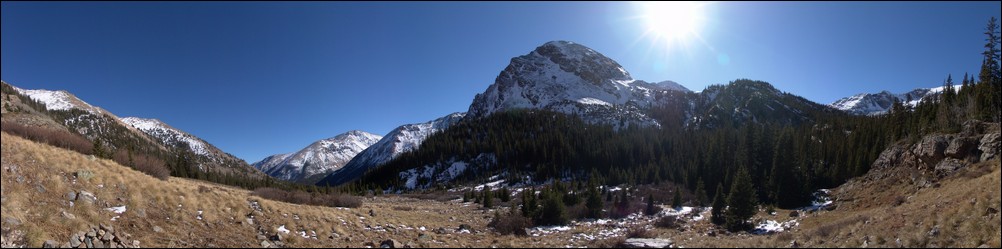
All in all, I would highly recommend this route for Mount Massive. Even in October, the route is solid, and I could see this being feasible even through November or later.
Capitol Peak: On The 'Edge'
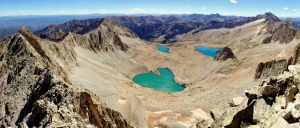
Capitol Peak carries a mystique among hikers and climbers in Colorado. First climbed in 1909 by Percy Hagerman and Harold Clark, Capitol Peak is often revered as the most difficult 14er in Colorado. Capitol Peak towers above treeline in the Elk Mountains of Colorado, a crumbling mass of granite, shaped into a rugged pyramid with spiny ridges. While I have a great respect for Capitol Peak, I felt that I had personally prepared myself for the climb through graduation along the difficulty continuum of climbs in Colorado. Having summited several of Colorado's harder Centennials (highest 100 mountains), including Crestone Needle, Crestone Peak, Vestal Peak and Little Bear Peak, I felt that I had the skills and mental toughness to complete Capitol. Capitol is well-known for its "Knife Edge," a 150 ft. narrow and jagged section found on the main route of Capitol Peak. The Knife Edge is very exposed on both sides, making it a mental challenge for many climbers. Many personal friends and family members as well as reports on the internet had built up Capitol's Knife Edge's difficulty in my mind; infact, YouTube is full of videos of people climbing the Knife Edge, some recklessly crossing it like a tightrope. I was hopeful that it was more hype than people it made it out to be...
Here are some meaningful metrics from this amazing trip:
Peaks summited:
Capitol Peak: 14,130 ft. (ranked 29th in Colorado)
"K2": 13,664 ft. (unranked)
Total elevation gain: 5,300 ft.
Total distance hiked: 17 miles
Total time hiking: Approx. 14 hours
Total photos taken: 356
Total distance driven: 520 miles
Trip duration: 1 day, 19 hours

K2 (far left) and Capitol Peak (far right) seen in this dramatic panoramic. Click for high resolution version (15 mb).
That being said, Capitol Peak was not without other dangers. Many climbers have perished on Capitol over the years, oddly enough, very few of the deaths have occurred on the Knife Edge. In 2009, James Flowers, the United States Paraolympic Swim Coach, perished on the Northeast side of "K2," a sub-peak of Capitol Peak, as reported by the Aspen Times. Needless to say, great caution, respect, and preparation would be required if I were to successfully climb Capitol. First on my list for preparation was to find capable partners. This is often difficult in the mountaineering community, since many climbers inflate their abilities or do not disclose their limitations to potential partners.
Earlier this summer, I climbed Huron Peak with Mike Vetter, a Sioux Falls, South Dakota resident and an up-and-coming star in the IT realm and CEO of DataSync. Mike and I made plans to climb again this year and we set our sights on Capitol Peak. Mike invited his friend, Travis Arment, an avid marathon runner. Neither Mike nor Travis had extensive experience climbing class 4 peaks; however, having hiked with Mike in the past, and knowing that Mike was a comfortable and avid rock climber, I knew I could trust him to make solid decisions and that they would both be personally responsible enough to turn-around if the climb became too difficult. We all exchanged plans via Facebook, ensured we all had the proper gear and knowledge, and established ground rules for the climb in case something unexpected happened. Travis and Mike flew in to Denver on Friday, August 13th. I picked them both up from Castle Rock, where Travis' aunt lives, on Saturday morning and we departed for Capitol. The total drive from Colorado Springs was approximately 260 miles and took roughly 5 hours.
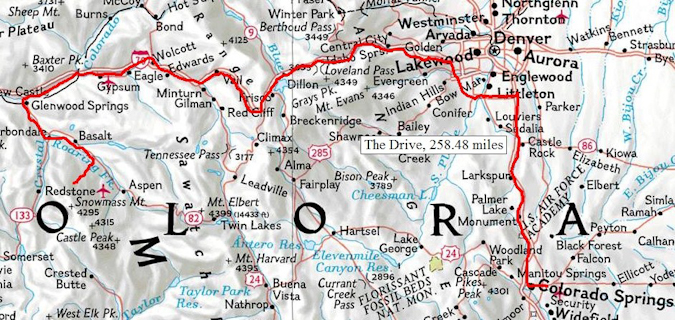
We arrived at the trailhead for Capitol at about 10:00 AM and were hiking by 10:30 AM. As usual, my pack was the heaviest and largest, weighing in at just over 50 lbs.
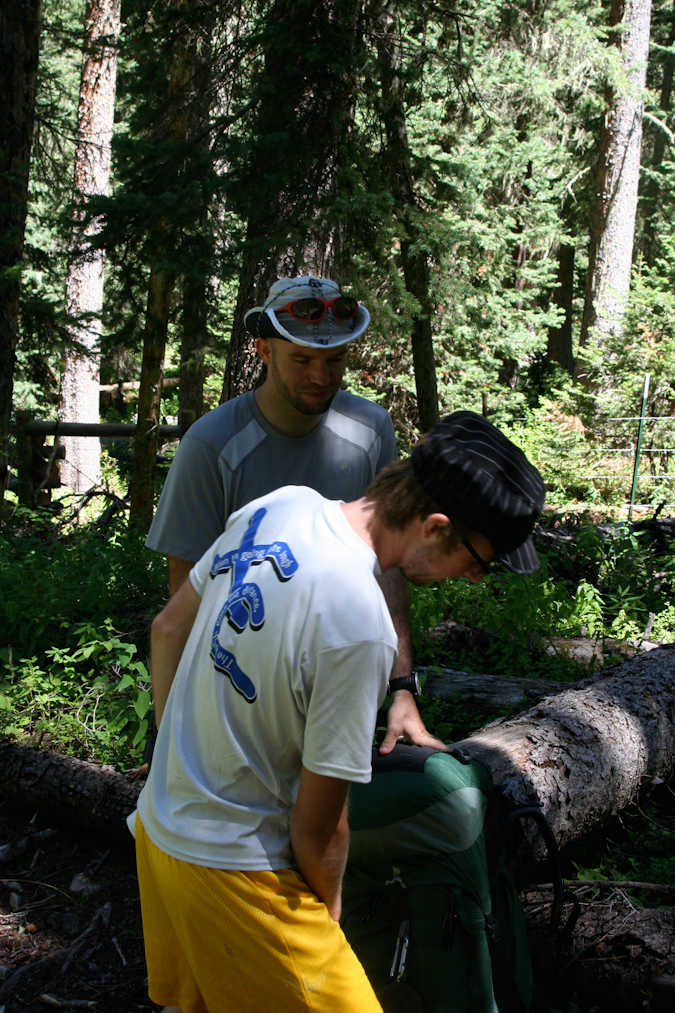
Mike's pack was medium-sized and Travis literally backpacked with a daypack. We made sure to give Travis a hard time for having the smallest pack, and Mike was quick to point out that he was carrying half of Travis' stuff. Travis was a great sport about it and agreed to share his tasty snacks on the hike up.
There are two trails for Capitol Peak - the standard trail and the "ditch trail." We chose the ditch trail due to its lack of elevation loss and gain at the start of the hike. The ditch trail is aptly named, following an irrigation ditch along the side of a ridge line which wraps around towards Capitol Peak. The irrigation ditch is used to provide water for cattle, which are known to graze this part of the Elk Mountains in large numbers.

The topo map of our route. Want to make your own maps like this? Check out the TOPO! program from National Geographic!

Capitol Peak seen from the trailhead.

Matt Payne and Travis Arment on the Capitol Peak Ditch Trail - photo by Mike Vetter
After about a mile and a half of hiking on the trail, it leaves the ditch and heads uphill, gaining half of the ridge to the west. Before we knew it, the trail meandered into a great opening, revealing Capitol Peak. Capitol Peak remained in view for much of the remainder of the hike up to Capitol Lake.
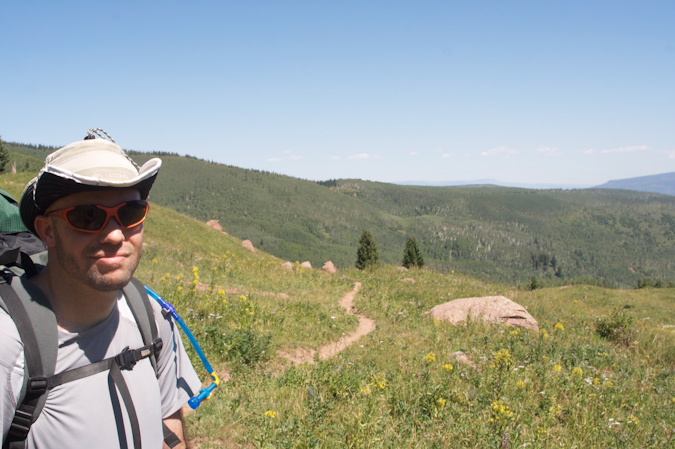
Matt Payne on the trail
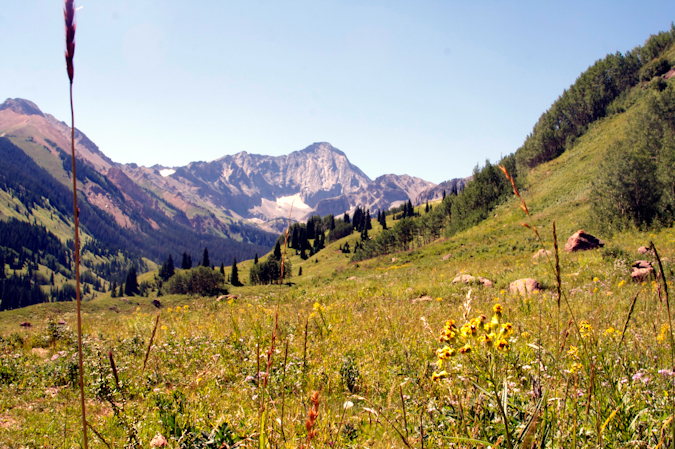
Capitol Peak, about 1/3 of the way up to Capitol Lake from the trailhead.
On the way up the trail, we passed many raspberry plants, sometimes stopping to grab a snack to help fuel our ascent.
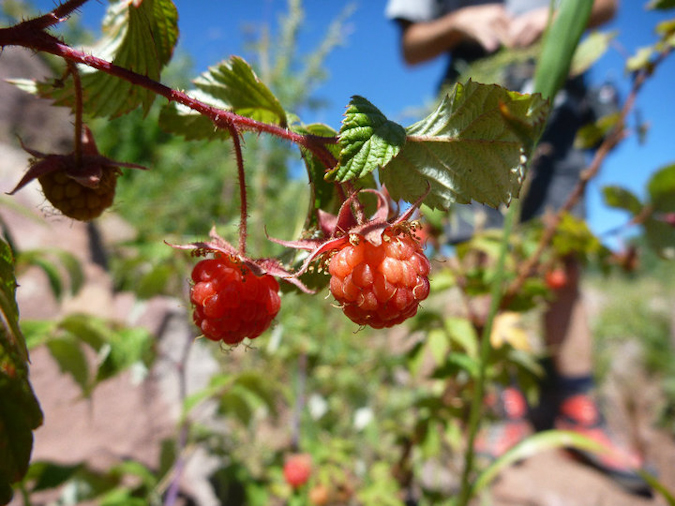
Wild Raspberries - photo by Travis Arment
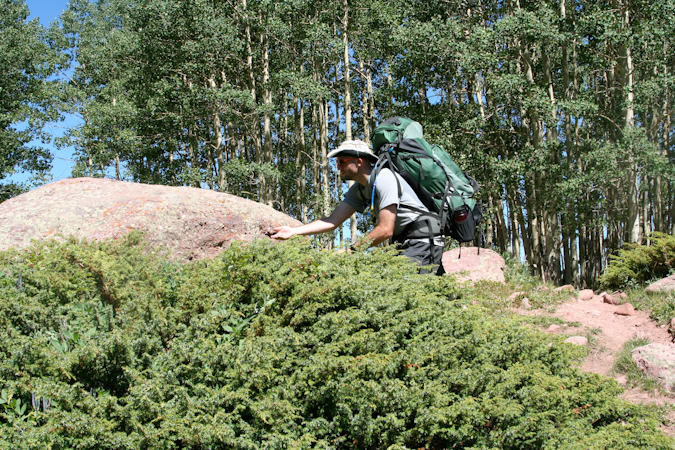
Matt Payne braves the spiky bush to score some berries.
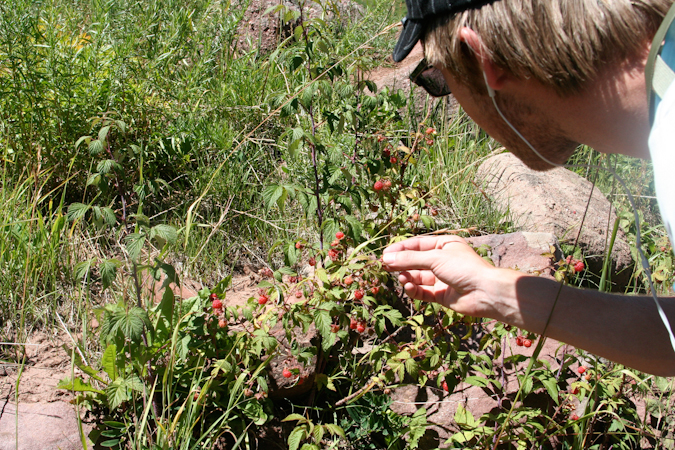
Travis Arment reaches in to score some berries.
Eventually, the trail reaches the Capitol Lake basin and intersects two side trails leading to two campsite areas, each split into four campsites (#1 through #4 and #5 through #9). We found ourselves camped at site #6, a quaint spot in the trees up on a hill.
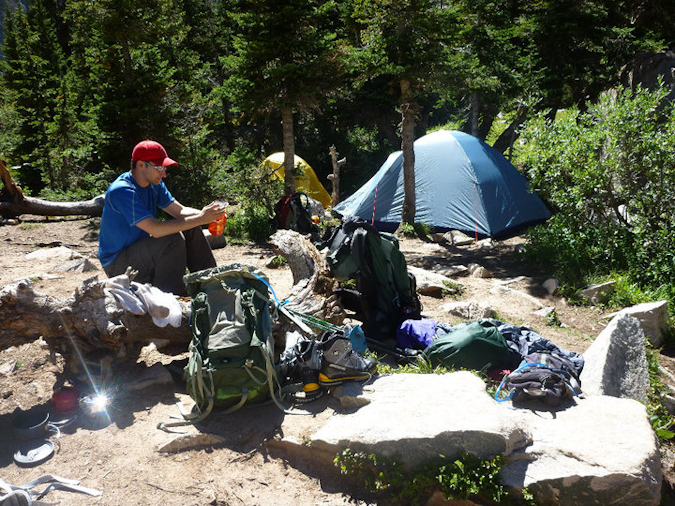
Mike Vetter unpacks at our campsite.
After we got situated at our campsite, we took a small nap. The hike up to Capitol Lake was pretty exhausting for all of us. After our short nap, we took a walk down to the lake with our cameras and took pictures. The lake rests right below Capitol itself and was a great area to relax and take in the afternoon sun.

Capitol Lake sits beneath Capitol Peak in this 1800 panoramic photo taken above the shore.
Mike went down to the lake to fill up his water bottles, using his steri-pen to sterilize the water. Unfortunately, the steri-pen bested Mike's weary intellect and he gave up on the endeavour, conceding that my Ketadyn Hiker Pro filter would later suffice. Mike and I went down to the stream near our campsite before cooking dinner and refilled all of our water. The area surrounding Capitol Lake is really quite gorgeous, with Capitol looming over the whole area like some kind of ancient protector of its treasure.
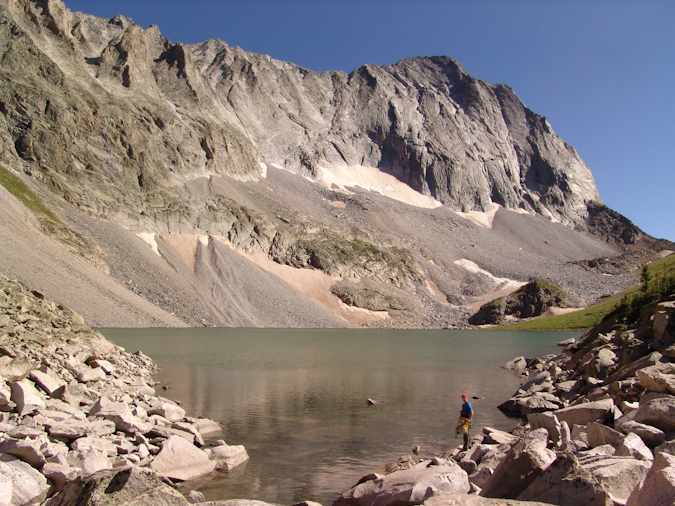
Mike Vetter filling his water up at Capitol Lake.
I pulled out my food for the night - a custom-made soup with dehydrated vegetables and pasta with chicken. Mike and Travis were somewhat jealous of this fancy treat at first; however, the meal was about the saltiest thing I've ever ate. Mike and Travis cleaned up on their Knorr Pasta side meals and we all hit the sack at around 8 PM, with the alarm set for 4 AM.
4 AM came all too soon, despite the long night of sleep we all enjoyed. I scarfed down some homemade zuchinni bread that my wife made for me and we all grabbed our backpacks and headed for Capitol. The trail for Capitol happened to be the same trail used by our campsite, which perpendicularly intersects the Capitol Lake trail just below Capitol Lake. We made our way up the switchbacks in quick order, passing several groups. Being that it was quite early in the morning, we could see all the other hikers in the area ascending beneath us and above us. We counted about 15 to 20 other headlamps heading up.
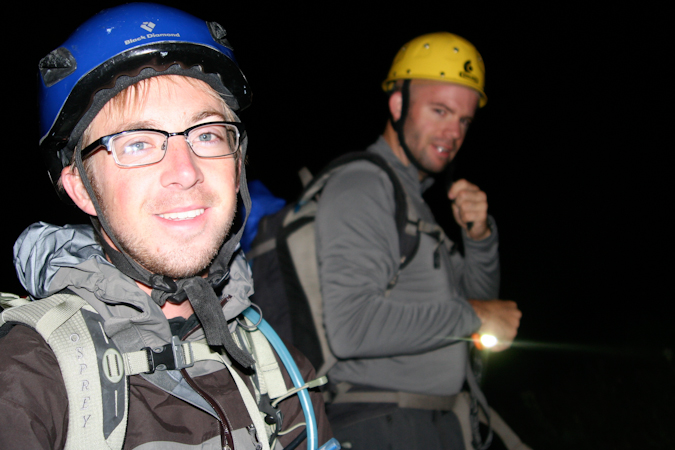
Travis Arment (left) and Matt Payne (right) excited to be on the trail to Capitol Peak.
We reached the Mount Daly - Capitol Peak saddle about 30 minutes into the hike and enjoyed some pretty awe-inspiring sunrise views from there, which Mike documented on video:
Sunrise
Sunrise... again
Clouds rest in the light of sunrise to the east.
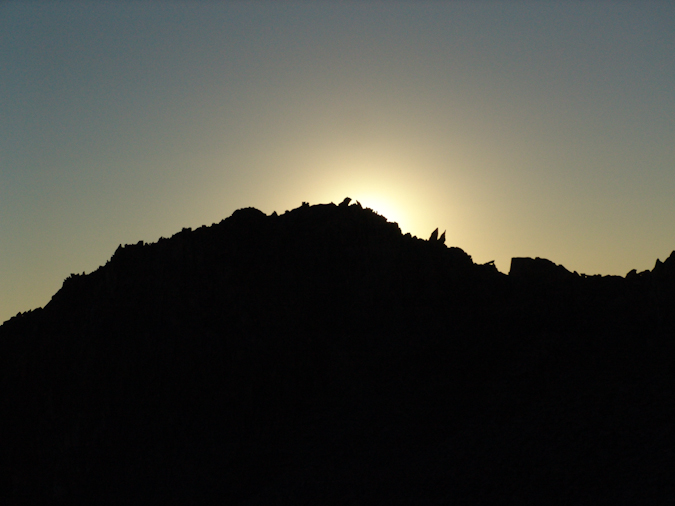

We continued up and over the ridge and descended a well traveled gully to reach the beginning of a very long stretch of boulders to the north and east of K2. The trail here mostly consisted of cairns and boulders, making for fun travel in the early light.
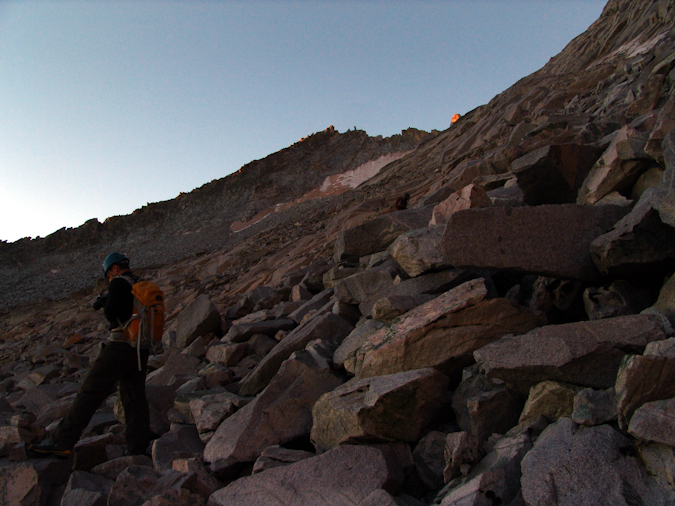
Mike Vetter hikes up the immense boulder field.
Out of nowhere, as if we were not expecting it, the sun blasted alpenglow onto the mountains surrounding us.

Mount Daly basked in alpenglow in the early morning.
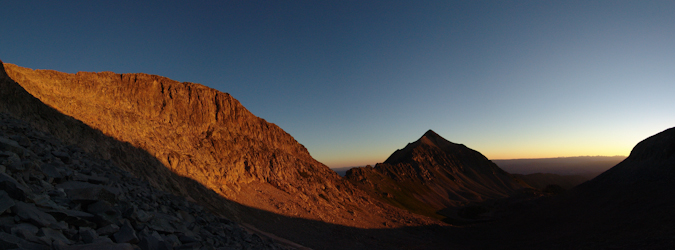
Mount Daly in Alpenglow.
The trail eventually lead us to a snowfield, which was mostly ice. I had been warned by the snowfield by a fellow hiker, Terry Mathews. We tested our footing on the snow and ice and decided to cross it, cautiously. There were great footsteps already kicked into the snow, and the relief was not terribly steep at this point. We all made it across quite easily and continued up the boulders. We saw a large snowfield at the top of the basin on the K2 - Clark Peak saddle's face and knew that we needed to turn right before then to reach K2. We decided to head up a very solid class 4 section.
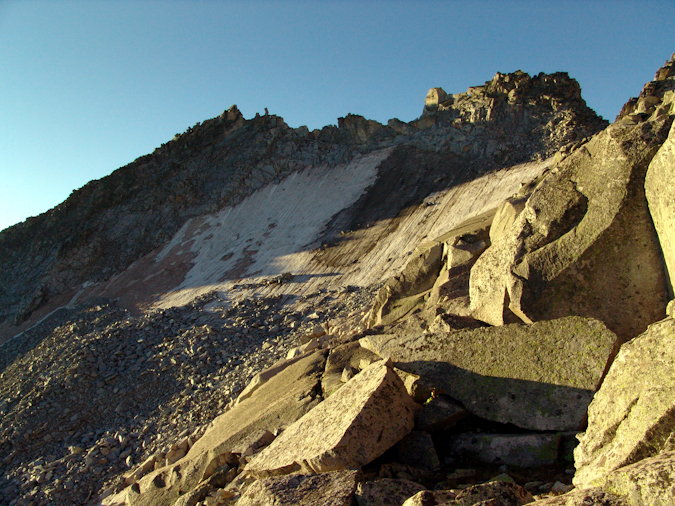
A snow and ice field adorns the face of the saddle between K2 and Clark Peak.
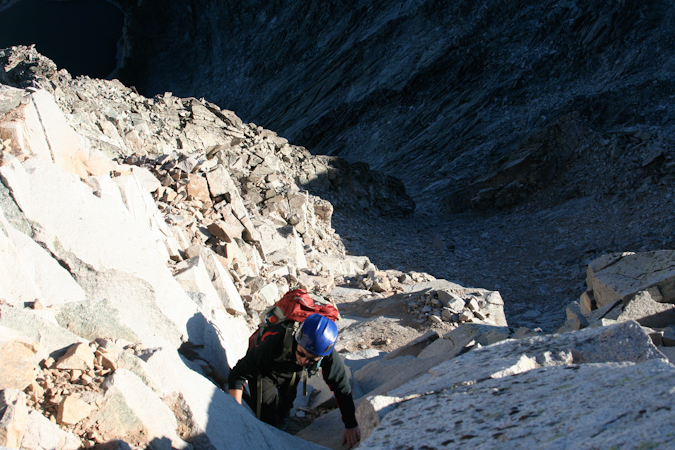
Travis up-climbing the solid Class 4 terrain leading to the base of K2.
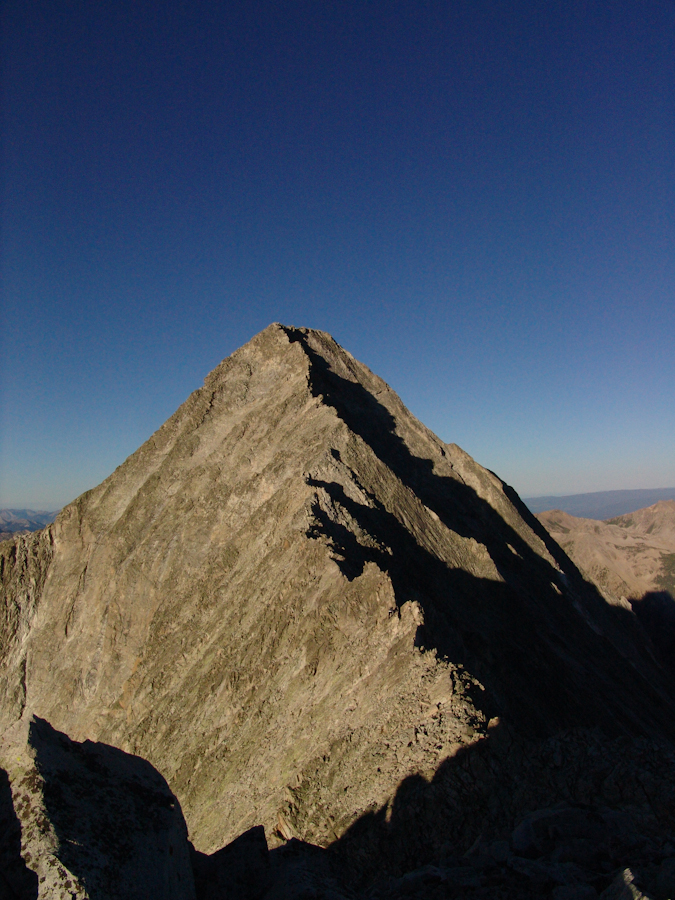 Once reaching the top of the ridge between K2 and Clark Peak, we realized that we still had quite a ways to go before reaching K2. The terrain became much flatter and we were able to get to the top of K2 in short order. Many parties opt to skip K2, arguing that the approach is more difficult; however, we did not want to miss out on the views from K2's summit.
To reach the top of K2, we broke off from the main trail just after it winds itself to the right of K2 and climbed a steep but solid dihedral to the summit. Capitol Peak looked ominous from K2, dwarfing it's surroundings.
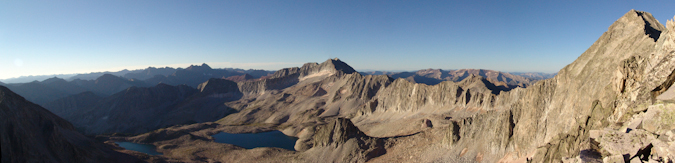
Capitol Peak, Snowmass Mountain, and the Maroon Bells come into view from the summit of K2.
The down-climb from K2 was trickier than expected, and it forced us to backtrack a little bit to meet back up with the proper trail which winds around the side of K2. The terrain here is steep, loose, and slightly exposed.
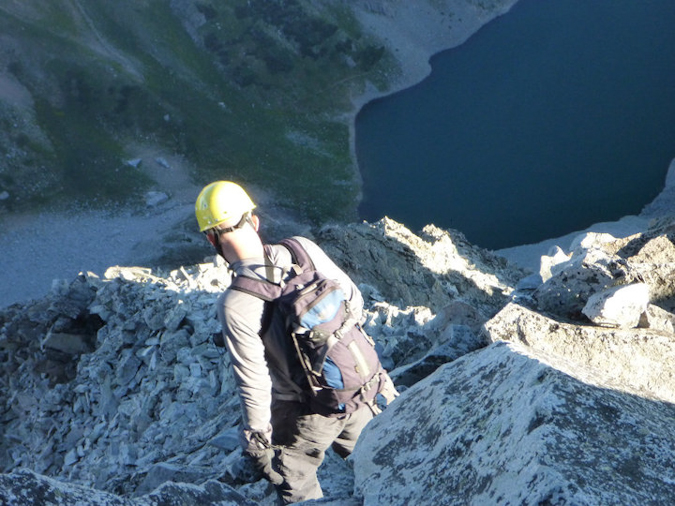
Matt Payne downclimbing from K2.
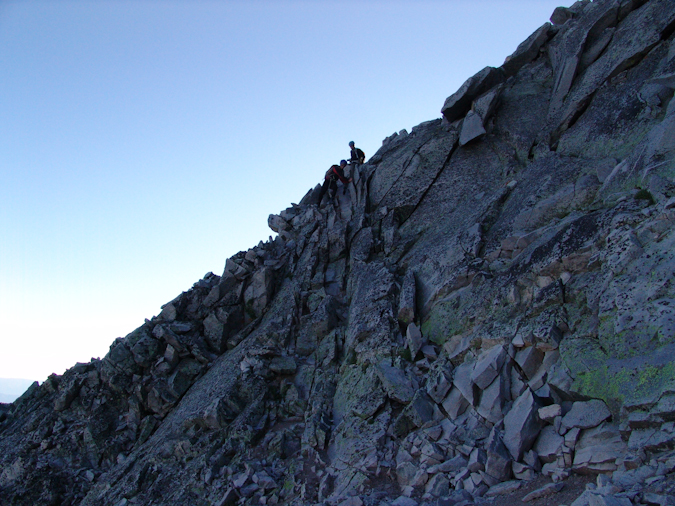
Downclimbing K2 to reach the K2 - Capitol saddle.
I had read some reports of people dying near K2 in the past, and had always wondered how this was possible. Undoubtedly, there did not seem to be any obvious threats to one's life until we reach the backside of K2 and saw the impressive cliffs surrounding K2 and Capitol Peak. One false move and a climber could find themselves in a world of hurt.
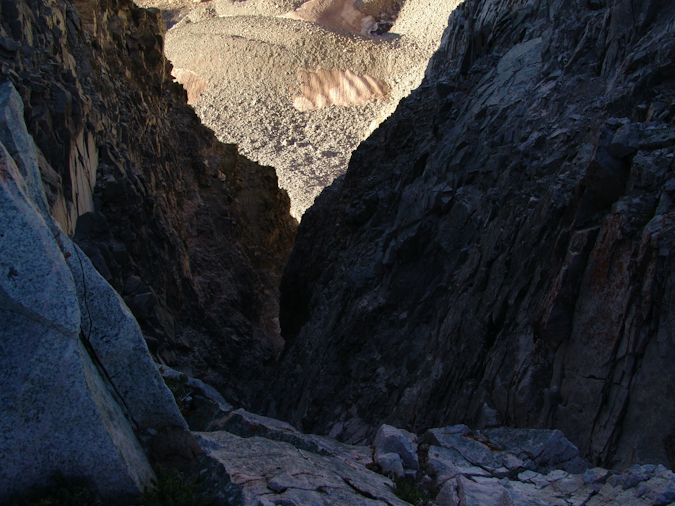
A huge cliff greets climbers reaching the base of K2. Don't slip here...
The remainder of the climb was amazing. Capitol's ridge is a spine of crumbling boulders and jagged knives, a real tribute to the harsh and remote wilderness that the Elk Mountains call home.
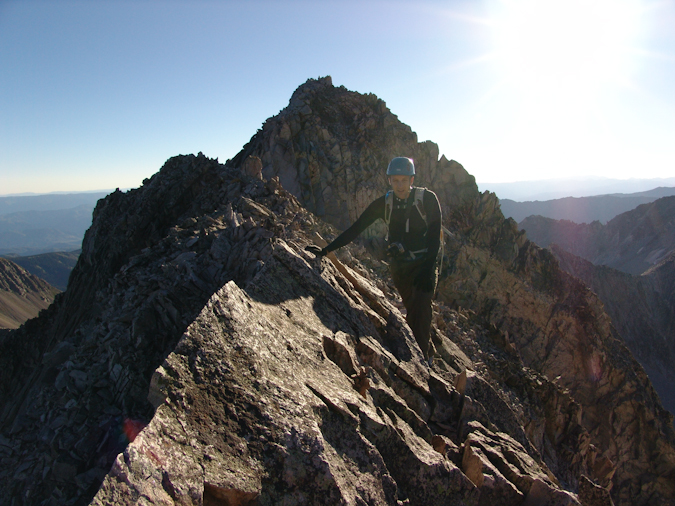
Mike with K2 in background.
At this point we knew we were quickly approaching the fabled Knife Edge. The North Face of Capitol Peak shot up like an angry beast from the pits of hell. Ok - maybe not that freakish, but it was sincerely one of the more impressive rock faces I've seen. Either side of Capitol presented thousands of feet of exposure and immediately reminded you of the need for caution and careful routefinding. A fall anywhere from here on would almost certainly be fatal.
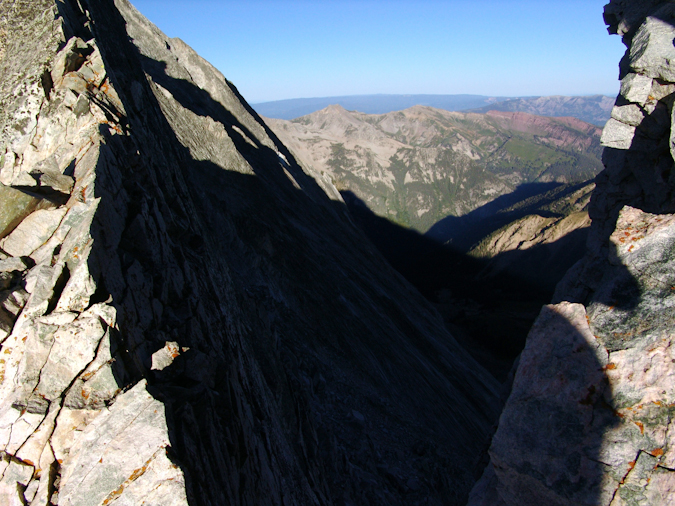
Capitol Peak's North Face - not a good place to fall.
Fortunately, the views from this part of the climb were unreal. The sun slowly rose above, providing light for the most incredible vistas of the Elk Mountains.
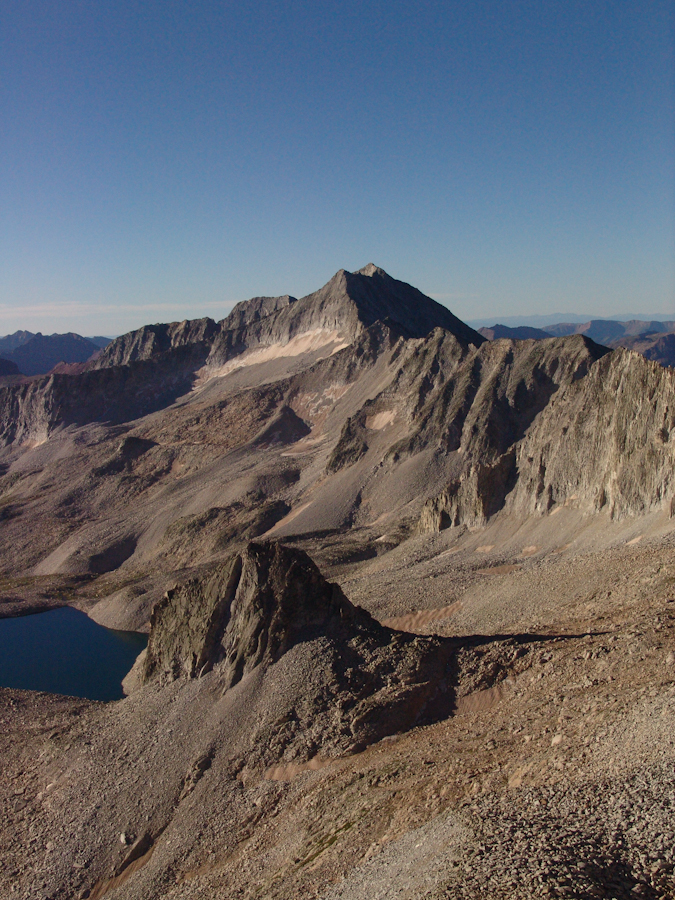
Snowmass Mountain, Capitol Peak's closest 14er neighbor.
We traversed across small ledges and quirky chimneys and found ourselves with what must have been the Knife Edge. K2's previously daunting surroundings now felt much easier.
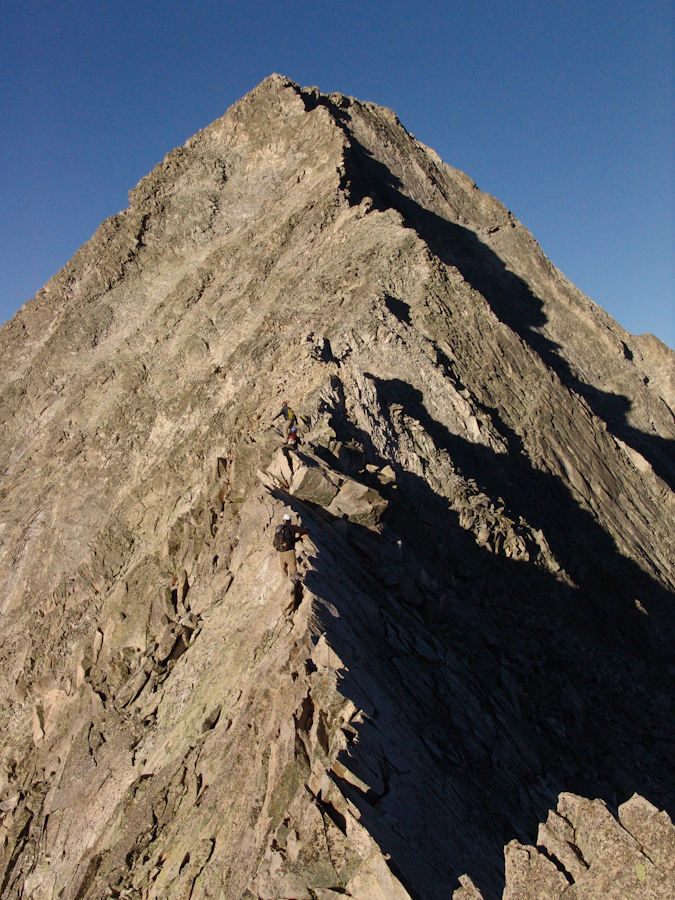
Nearing Capitol Peak's Knife Edge
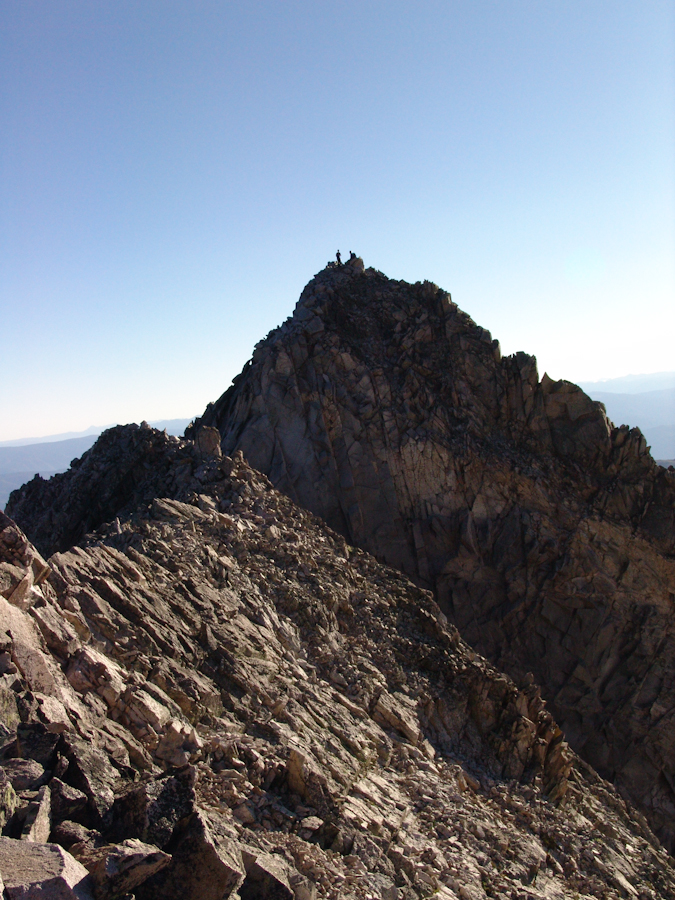
Looking behind: K2 and climbers reaching it's summit.
We finally reached the Knife Edge, gathered our wits about us, and gave it a go. The plan was for Mike to go first, and then to take video with his camera of us crossing. We watched the group before us, and they mostly employed a mix between the 'scoot on your ass' method and the 'hang from one side like monkey bars' method for crossing. We figured to follow suit, as both strategies seemed to appeal in their own ways.

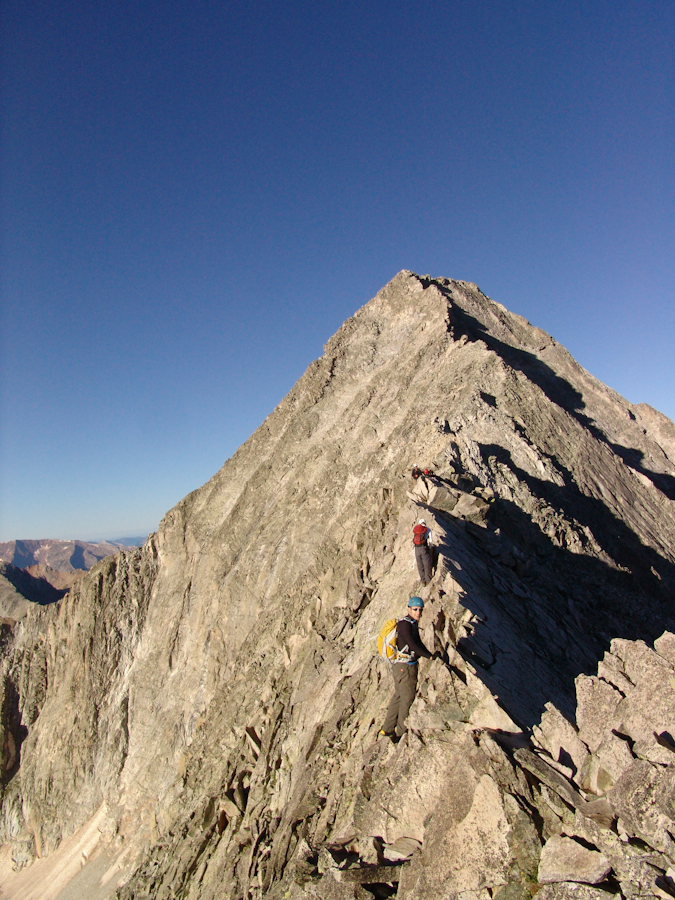
Mike Vetter ready to cross the Knife Edge.
Mike made it across without a hitch and took this revealing photo while crossing, looking down one of the sides. It goes to show how freaky and exposed it really was.
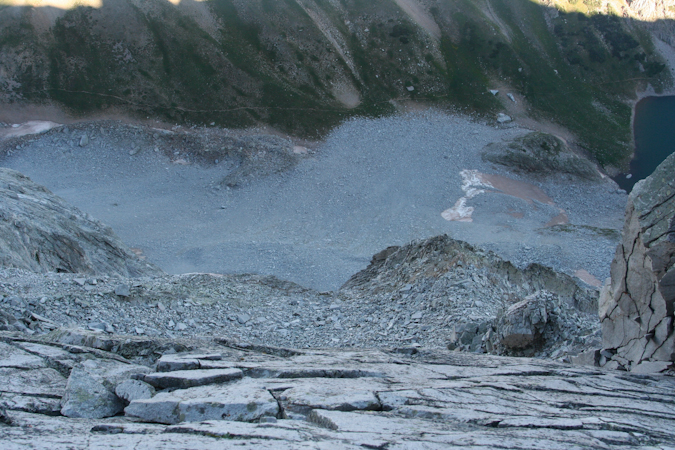
I crossed second, making sure I had perfectly solid holds on the rock as I crossed. I employed a mix between scooting and hanging from a side and made it across fairly quickly. The technical nature of the crossing is not terribly difficult or physically demanding; however, the mental requirement to cross was great, knowing that one mistake meant death. Needless to say, don't get yourself too hyped up for the Knife Edge. It is dangerous but the risk is quite manageable with caution, careful movements and mental toughness. I did find myself breathing heavily at the end, mostly from the excitement of the whole thing.
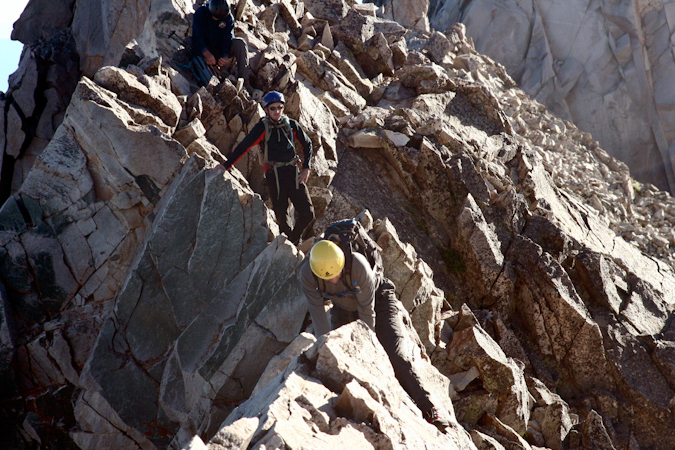
Matt Payne starts the Knife Edge - photo by Mike Vetter.
Mike compiled some video of our crossings of the Knife Edge and placed them on YouTube:
After the Knife Edge, the going got much easier, mostly a Class 3 / 4 scramble across a fun boulder ridge. We reached somewhat of an impasse about 3/4 to the summit, having to choose to either continue straight ahead and around the left side of Capitol per the standard route's description, or to head straight up to the ridge, ascending Class 5.2 / 5.3 terrain. Being the adventurers we are, we chose the latter and went straight up. The route was solid, challenging, and enjoyable, with minimal exposure and many places to rest. All in all, I would recommend taking the upper ridge route if you feel comfortable with light Class 5 climbing and steeper terrain. Never did any of us feel unsafe on this section; although, Travis did mention later that it was somewhat spooky for him. Fortunately, Travis is an excellent athlete and managed to power himself up the steep section without any problems. We were very cognizant of the rockfall potential, taking special caution not to pull rocks down on people below us.
Once reaching the ridge again, we stopped to rest and recoup our strength for the final summit push.
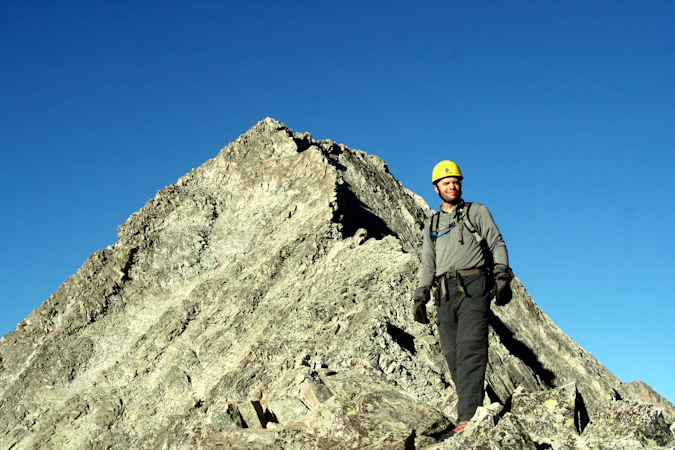
Matt Payne with Capitol's summit block. Almost there.
From here, the summit push was quite fun, with Class 4 and low Class 5 moves required. We were quite pleased with our choice to go the high route, enjoying both the challenge and the solidness of the route. We watched several climbers take the lower route, a looser, chossier, and less enjoyable section of the mountain.
Mike and I took some video footage of this section:
We reached the summit at 10:15 AM as one of the first groups up. The views were outstanding and the company was superb. A group from Ft. Collins joined us on the summit, and conversation quickly went to skiing Capitol Peak. Being probably the hardest 14er to ski, theorized on the possible ski routes and I swapped stories and names of climbers we both knew of that had either skied it or attempted to, referencing Brian Kalet and Jordan White of 14ers.com fame.
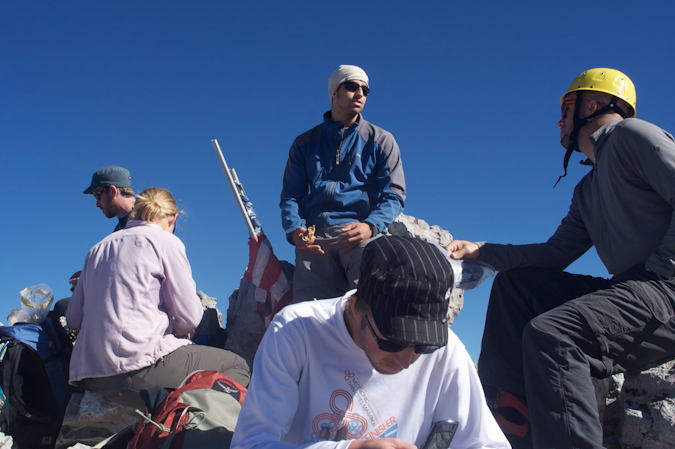
The summit party. Travis tinkers with his cell phone while Matt converses with fellow climbers.
After refueling with Resees Peanut Butter Cups and Raisins, I went on a photo frenzy.

A 3600 view from the summit of Capitol Peak. Click for high resolution view.
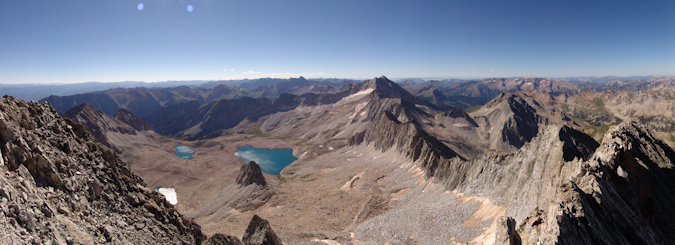
A panormaic view of the Pierre Lakes, Snowmass Mountain, and the rest of the awesome Elk Mountains.
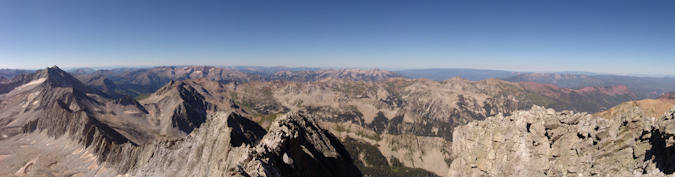
A panoramic photo looking north and west from Capitol Peak. The Snowmass - Capitol ridge strikes me as being quite impressive.
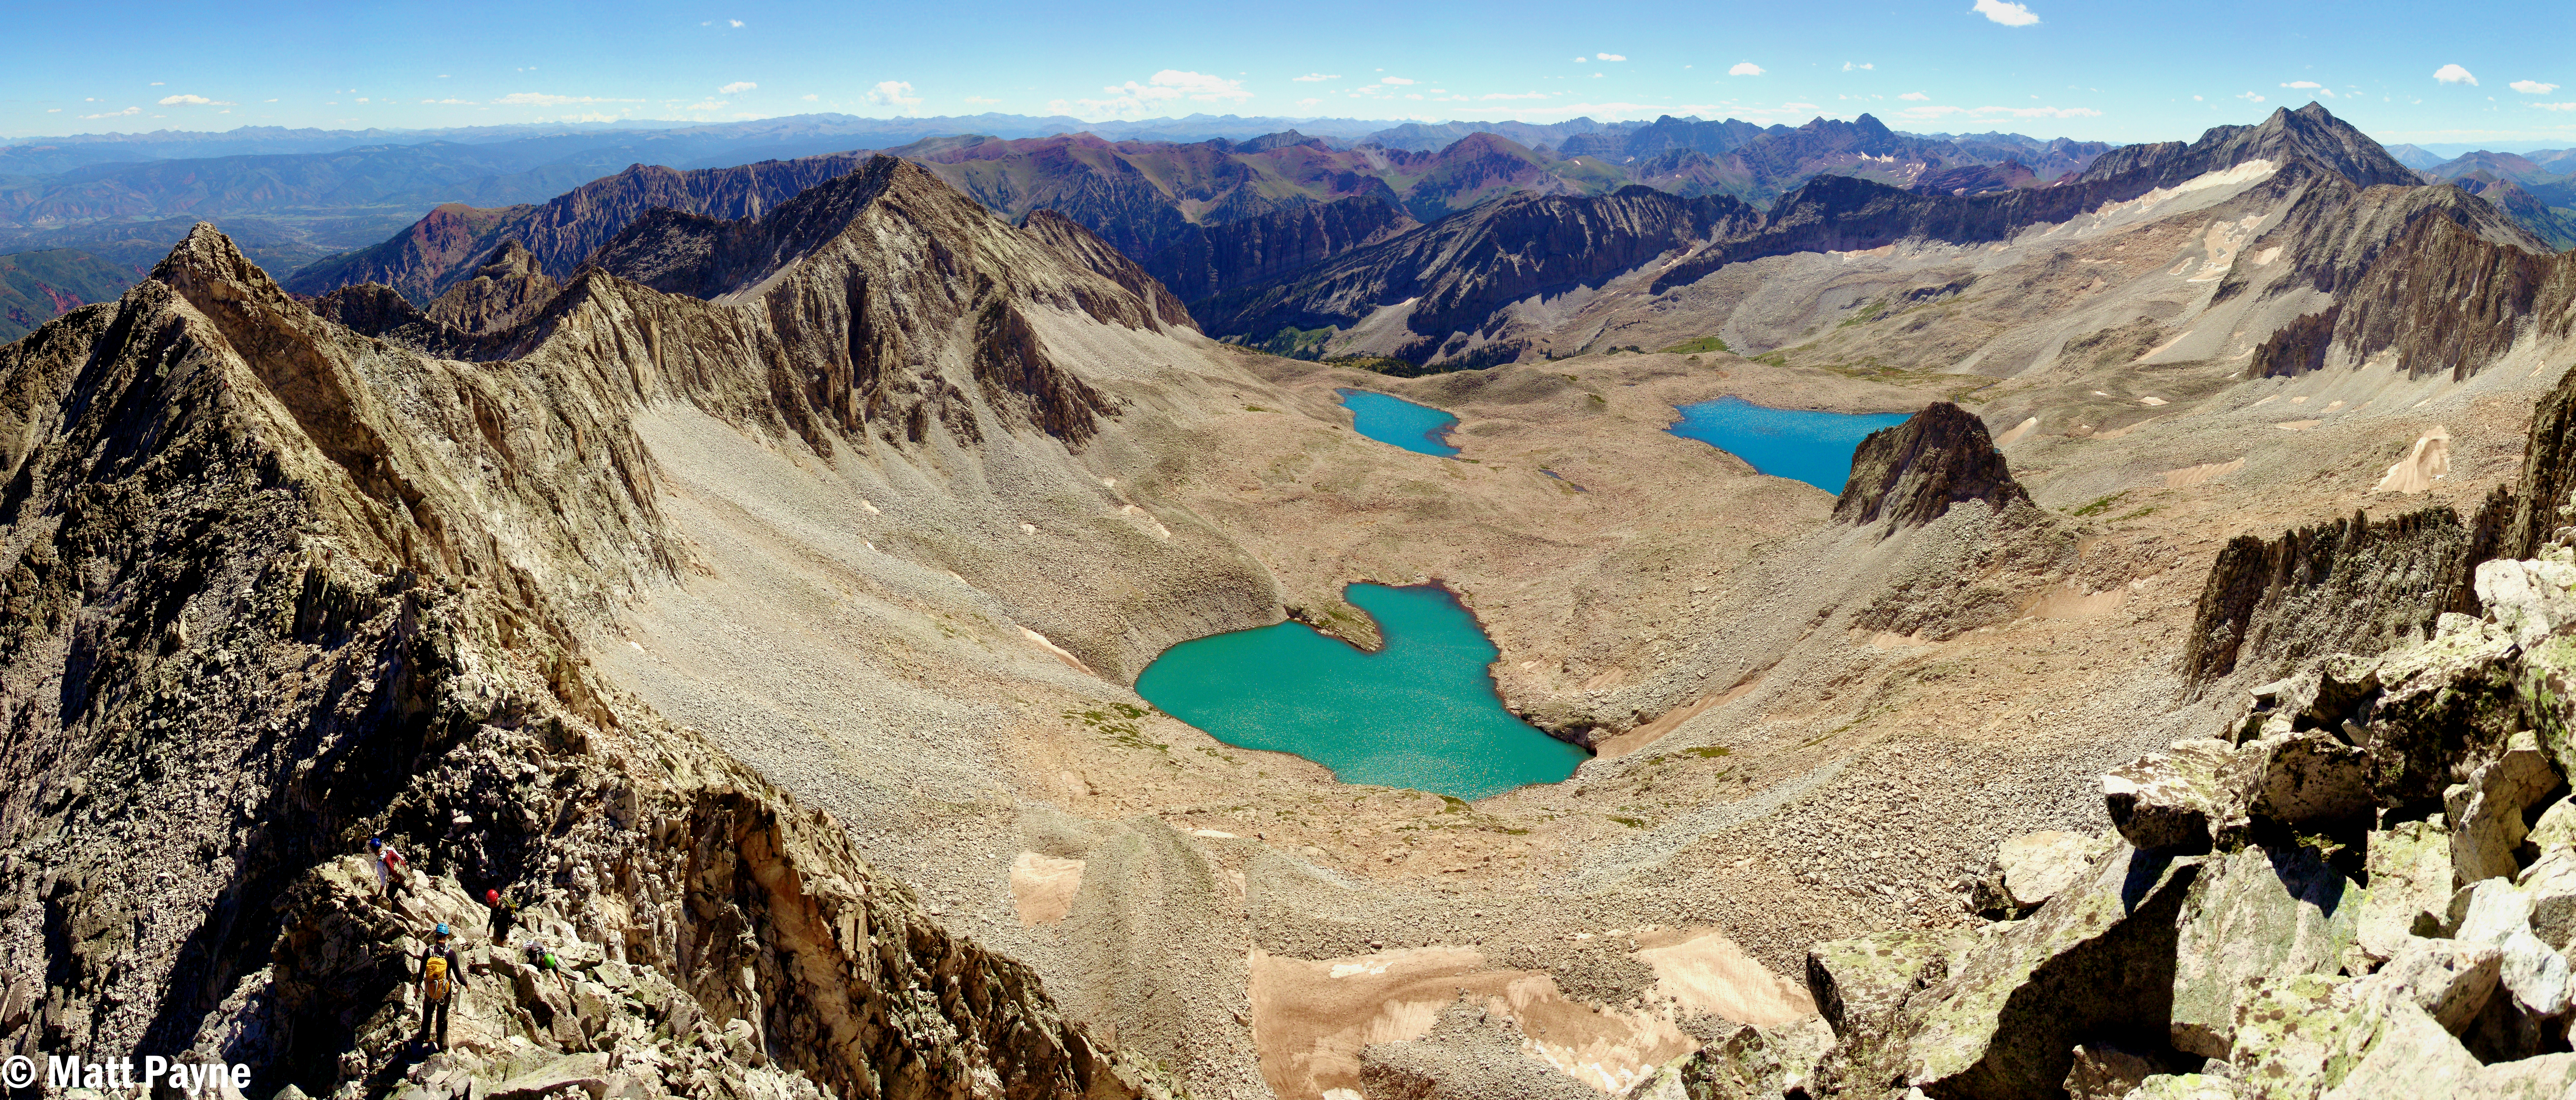
A massive panoramic photo of the Snowmass Basin, K2, Maroon Bells, and Snowmass Mountain. Click for high resolution version (26 meg file). How many climbers can you count?

A zoomed in panoramic photo of the Maroon Bells and Pyramid Peak. Click for full resolution version.

A super zoomed in view of the Maroon Bells.
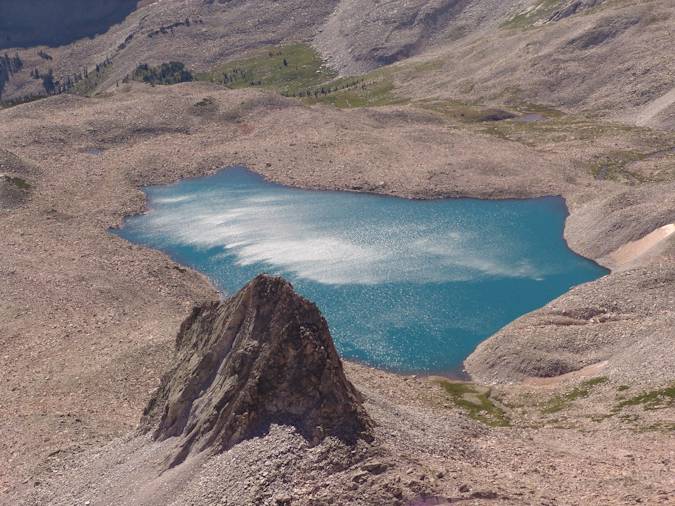
A zoomed in view of one of the Pierre Lakes.
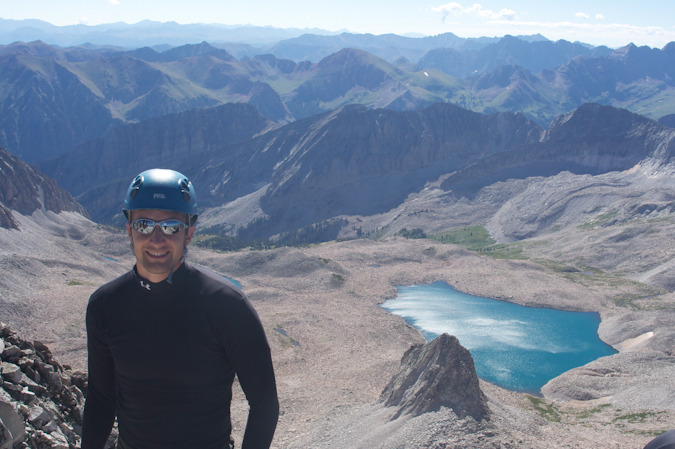
Mike Vetter on the summit of Capitol Peak.
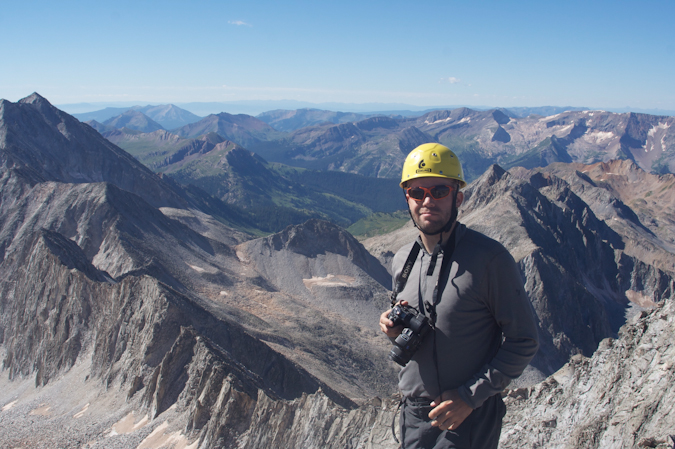
Matt Payne on the summit of Capitol Peak.
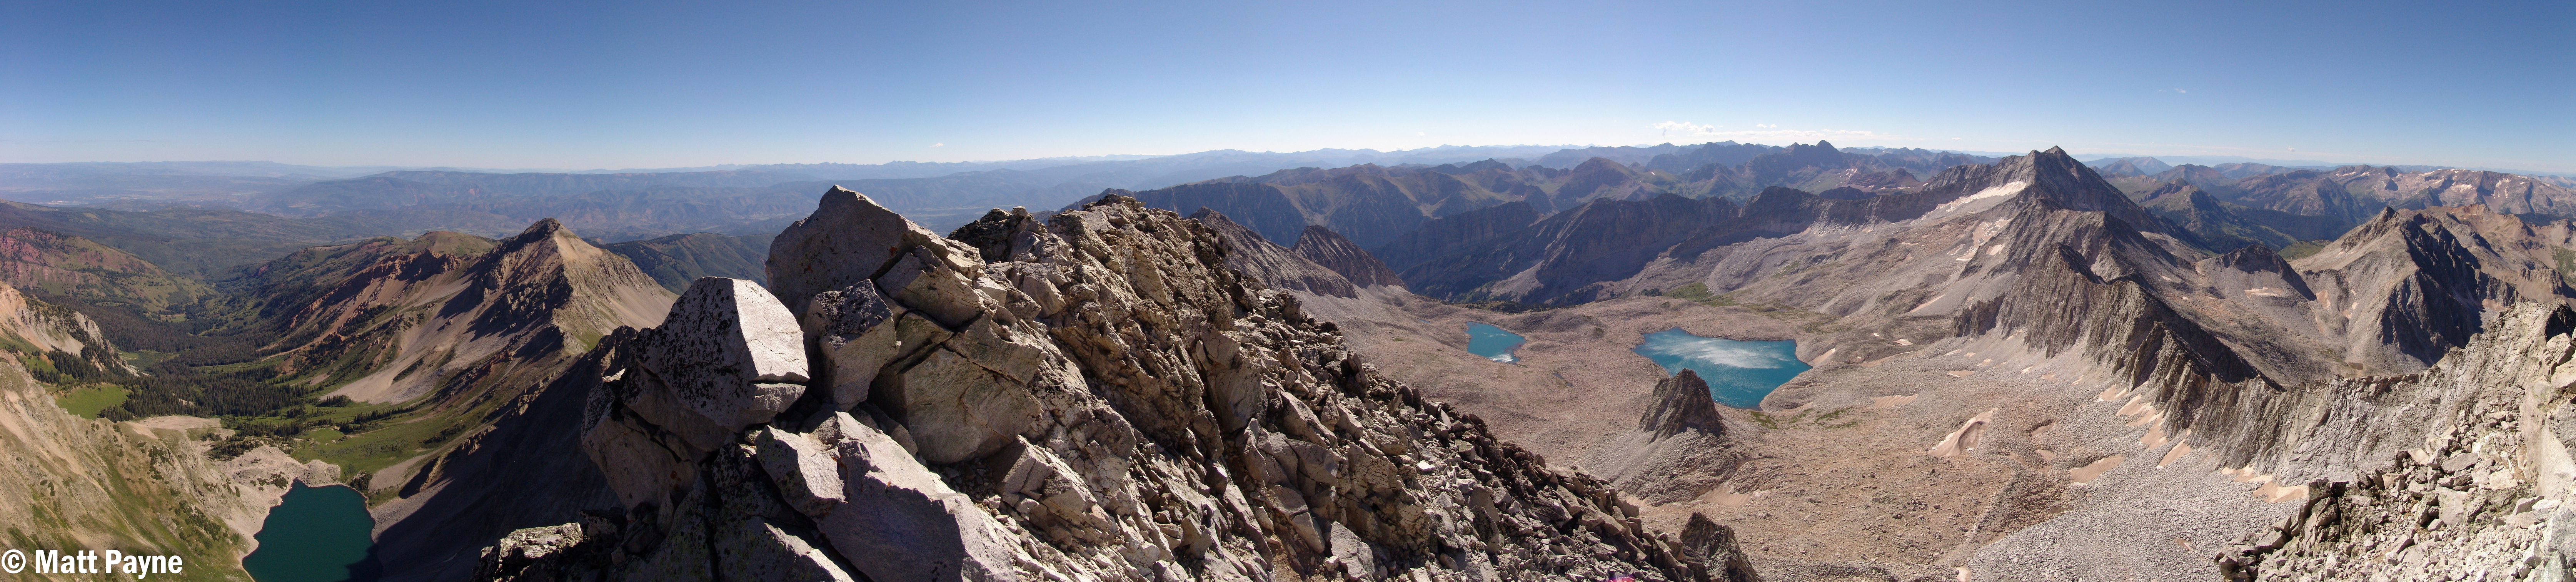
A panoramic view looking down at Capitol Lake, Mount Daly, and across Capitol's ridge to the Pierre Lakes and the rest of the Elk Mountains. Click for high resolution version.
Mike was able to capture some video from the summit as well:
With no threat of weather in any direction, we decided to hang out on the summit for about an hour, enjoying the views. We eventually headed down and chose to follow the standard route. The rock was nasty through this section of down-climbing, and required good concentration, footing tests (make sure the rock does not fall when you step on it), and patience. Most accidents occur on the way down, so we were vigilant and cautious. Travis was able to capture this perspective of the rock and exposure beneath us on the down-climb.
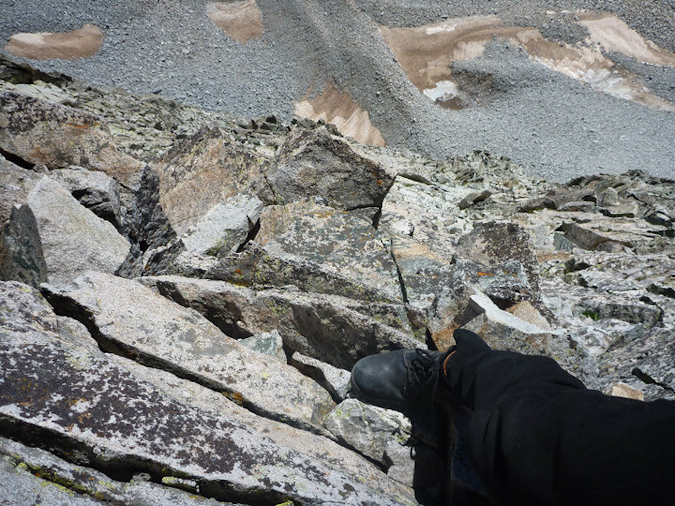
Travis plants his foot firmly on a ledge during the down-climb from the summit of Capitol Peak.
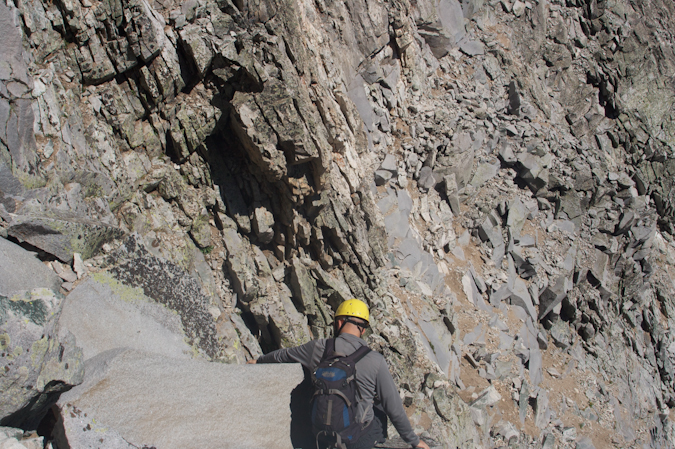
Matt Payne carefully down-climbs from Capitol Peak.
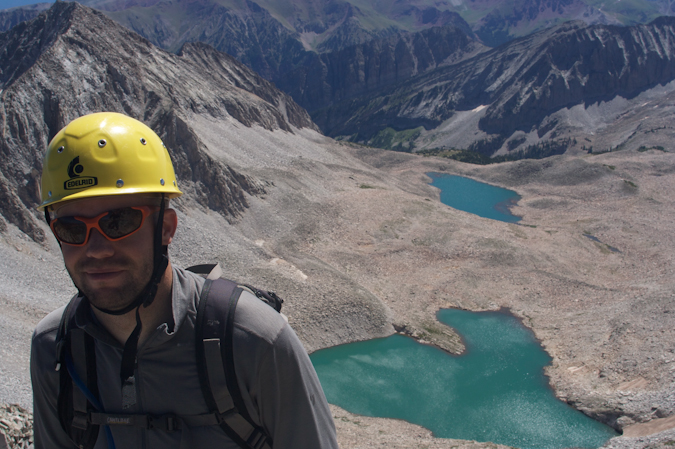
Matt Payne with one of the Pierre Lakes in background.
About halfway back to the Knife Edge, a group of climbers were coming up Capitol below us, without helmets. They asked us if this was the way to go and we responded that it was one of the ways up. It surprised me to see how oblivious they were that we were climbing above them on loose rock. I ordered my group to stop moving until they were in a safe location below us. It really is no wonder that more people do not perish on these mountains. Ironically and sadly enough, we later learned that a 20-year-old hiker died the day before on Maroon Peak from rockfall that had come from above him. Even though he was wearing a helmet, the rock that struck him had enough force to knock him loose from the mountain and caused him to fall to his death. I strongly believe that if people took more caution and paid attention to their surroundings and used some common sense, there would be less deaths. If you need a good climbing helmet, check out this one.
We reached the Knife Edge at approximately 12 PM and crossed it in much the same fashion as before, except this time, I went first. I generously used the 'scoot on your butt' maneuver to get across.
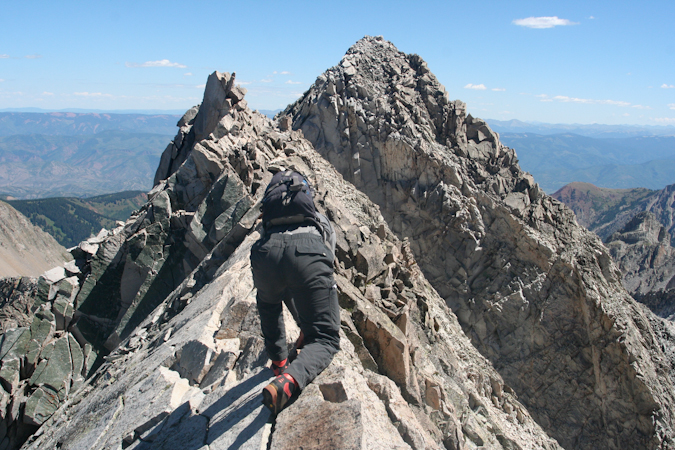
Matt Payne crosses back over the Knife Edge on Capitol Peak, heading towards K2.
Mike captured yet another great shot from the Knife Edge, looking down at Capitol Lake:
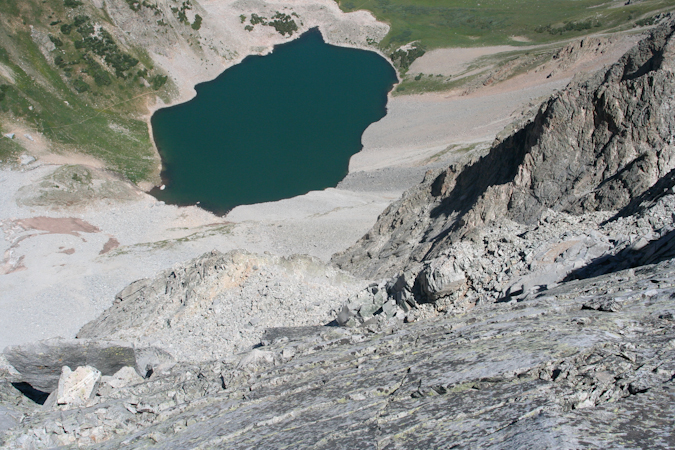
The climb back down from K2 was fairly straight-forward but tiring. We were ready for some pizza at Beau Jo's Pizza, no doubt. We finally reached the snowfield again, and it was much softer this time, with rivers of slush flowing down it. It was somewhat scary, but I tested the footing and it felt great, so we crossed again.
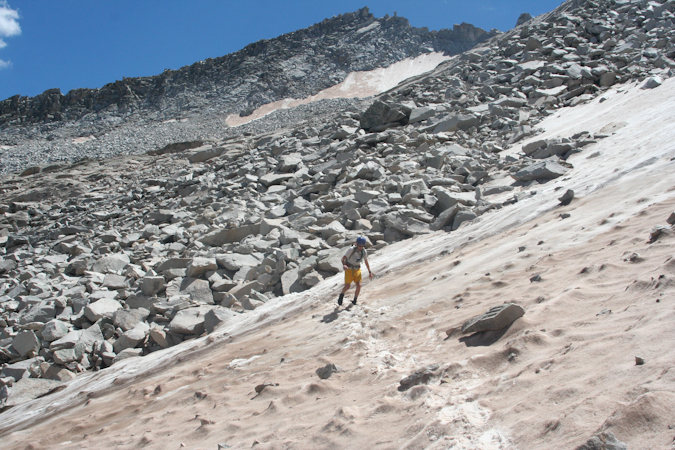
Travis Arment crosses the snowfield beneath K2. Photo by Mike Vetter.
We made great time back to the Daly - Capitol saddle and I sprinted the last stretch to the saddle, anticipating the victorious beer that would be consumed once back to civilization.
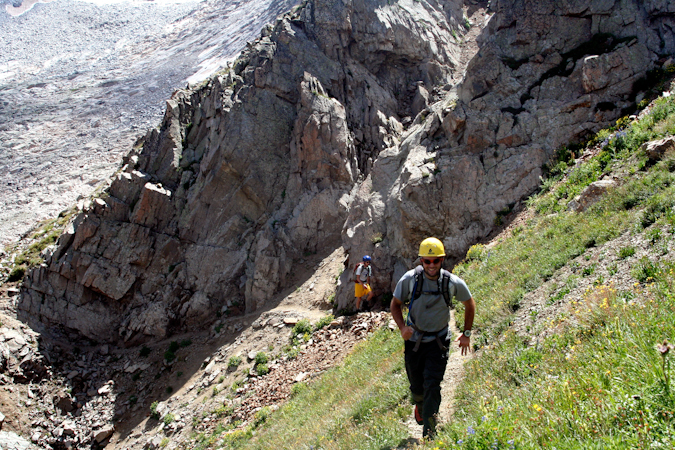
Matt Payne runs the final section on the back side of the ridge between Capitol and Daly. Photo by Mike Vetter.
On the way down the hillside, Mike stopped to take some great shots of the wildflowers found on Capitol's northeast shoulder:
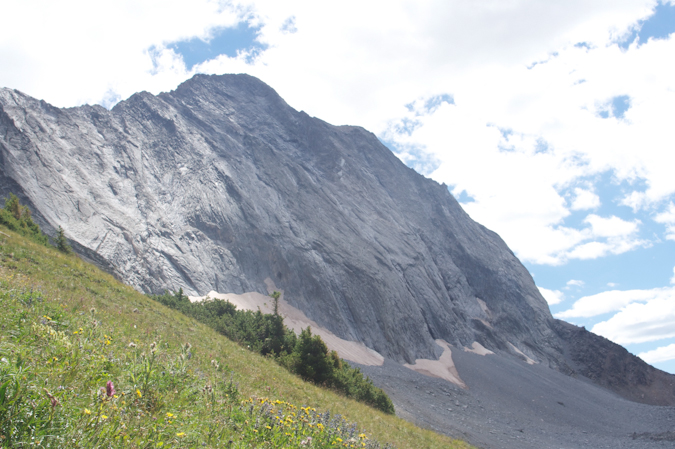
We made it back to camp at 2:15 PM and packed up. We refilled our water and headed out. Travis and I were motivated solely by the prospect of cold beer and fresh pizza.
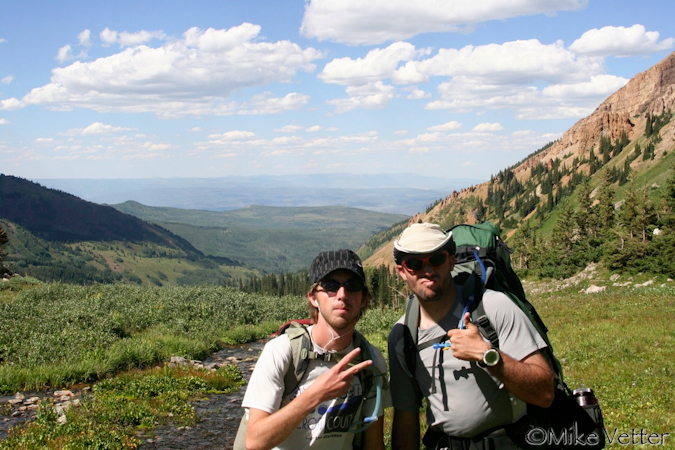
I hope you enjoyed this trip report. We surely enjoyed the trip and I personally can't wait to join Mike and Travis for our next adventure.