Displaying items by tag: San Juan Mountains
Wilson Peak - An 'Airy' Scramble Above Navajo Lake

Fourth of July weekend always provides a tremendous opportunity for mountaineering, and this year was no different for me. Early in the year (January), I was eagerly planning my summer's climbs and saw this weekend and knew it would be both tremendous and controversial. You see, my wife's birthday is July 3rd. I begged her to allow me to climb on this weekend, knowing that it would probably be the only way I would be able to successfully complete the 14ers this year, which was my goal. My wife was really cool about it and said I could go. With that being said, I knew that the perfect match for this date range would be the Wilsons (Wilson Peak, El Diente and Mount Wilson). I set aside a total of 5 days for the trip and hoped I would not need all 5 days, but knew that weather could necessitate the use of all 5 days. My climbing partner, Regina and I roughly sketched what we thought would work best earlier in the year and when June 30th finally arrived, we were both excited to get out of town and up into the mountains! The plan was to drive to the Navajo Lake trailhead on June 30th and camp there, backpack up to Navajo Lake on July 1, establish camp, climb Wilson Peak and go to bed. After this, on July 2, we would do El Diente via the North Slopes route in the snow and then traverse over to Mount Wilson. This would leave July 3 for completing Gladstone Peak (a centennial 13er) and for the hike out. It even factored in one extra day for weather or for kicking it in Telluride for a bit.
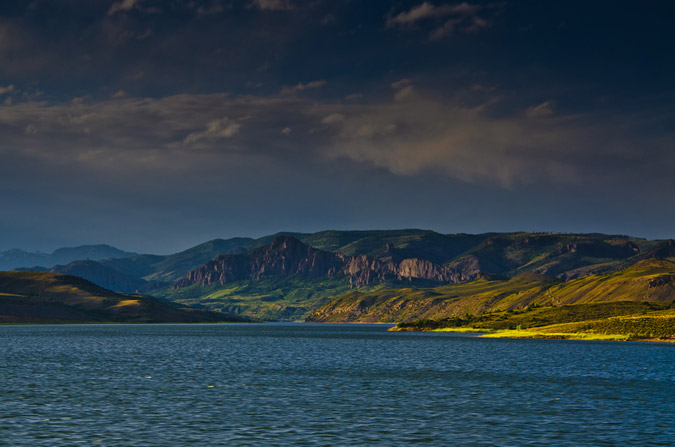
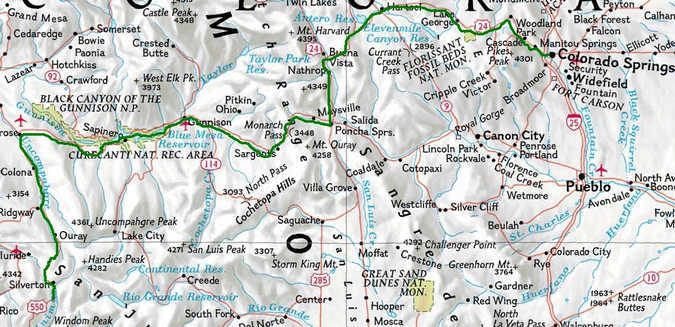
So, with all that being said, Regina and I embarked for the Telluride area, a good 300 miles away. We drove through the Blue Mesa Reservoir area during dusk, and I was able to get one decent photo from the car while Regina was driving. I have always really enjoyed that part of the drive and someday I'll time it just right to get a gorgeous sunset photo there. Until then...
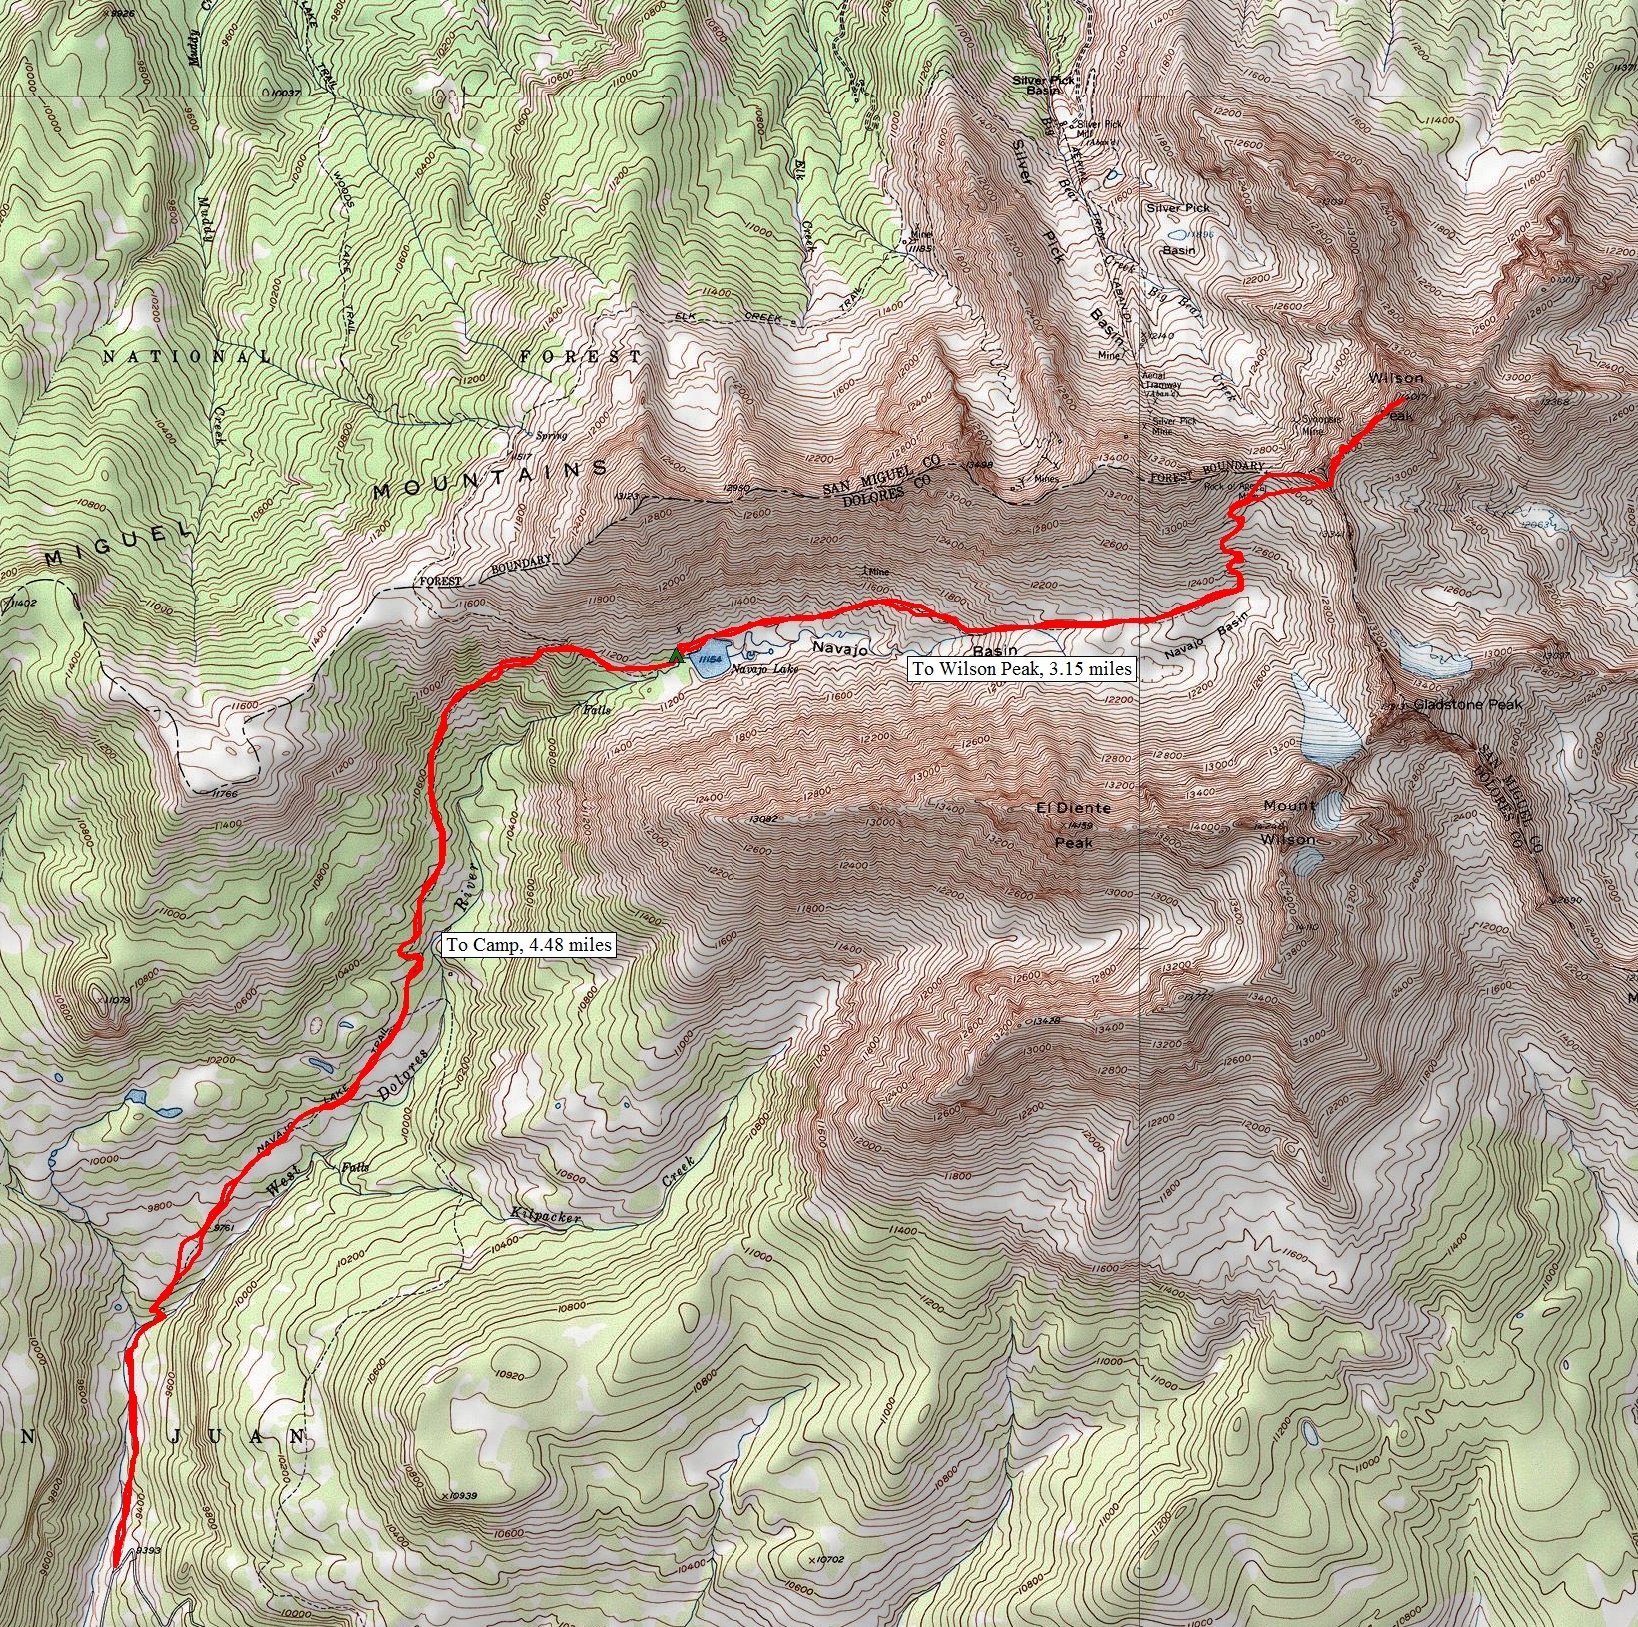
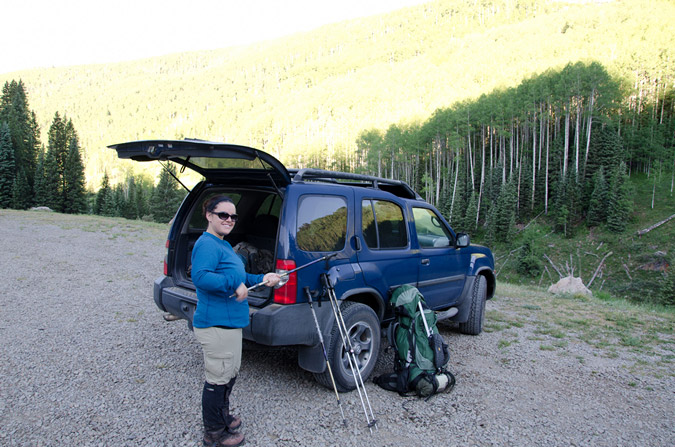
The plan unfolded perfectly and before we knew it we had arrived at the trailhead for Navajo Lake at around midnight. We set-up camp away from the trailhead and set the alarm for 7 AM since we were looking at a good 4.5 miles or so to the lake and an additional 8 miles to Wilson Peak and back to the lake for our itinerary. The alarm went off and we sprang out of the tent and packed up quickly, eager to hit the trail. The weather was absolutely fantastic. This week, I decided to try something I've never done before and pack my tripod with me. While this added some additional weight, it would allow me to get some great photos at Navajo Lake and even try my hand at some more star trails photography.
The Navajo Lake trail was really quite fantastic - it weaves in and out of huge groves of corn lilies (Veratrum Californicum), but I like to refer to them as Indian Toilet Paper since back when I taught Leave No Trace we would always use them for, ahem, wiping.
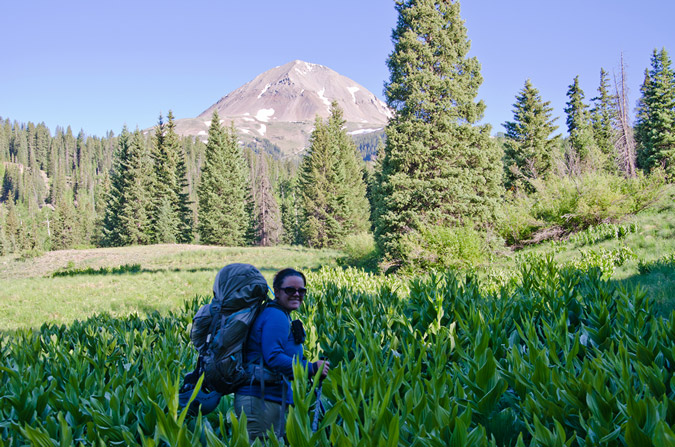
Pretty quickly, the trail leads you up the long meadows and into view of El Diente, which by the way was one of the most deadly mountains last year.
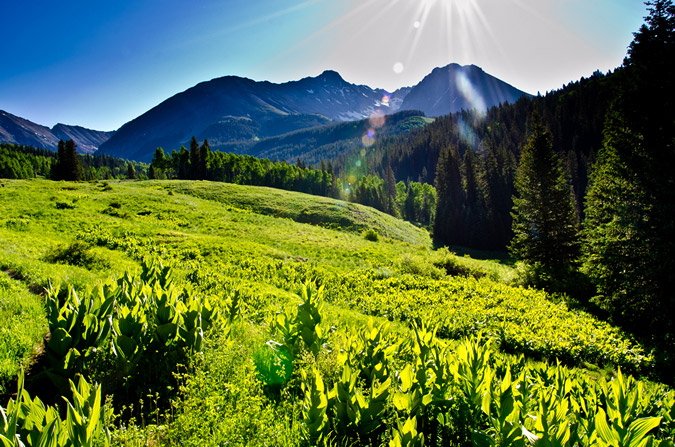
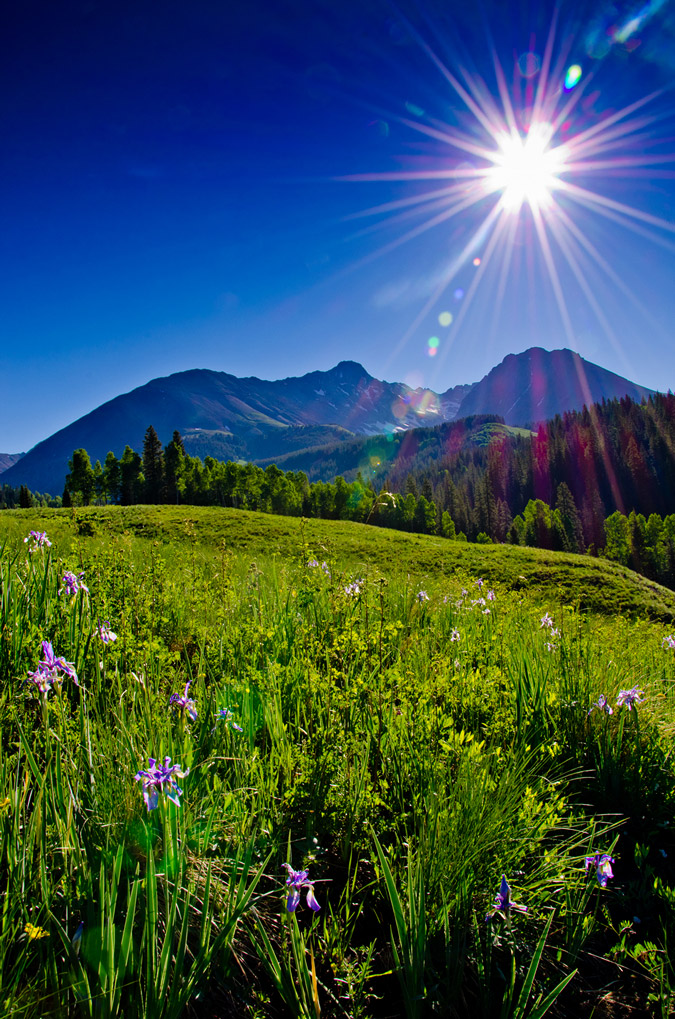
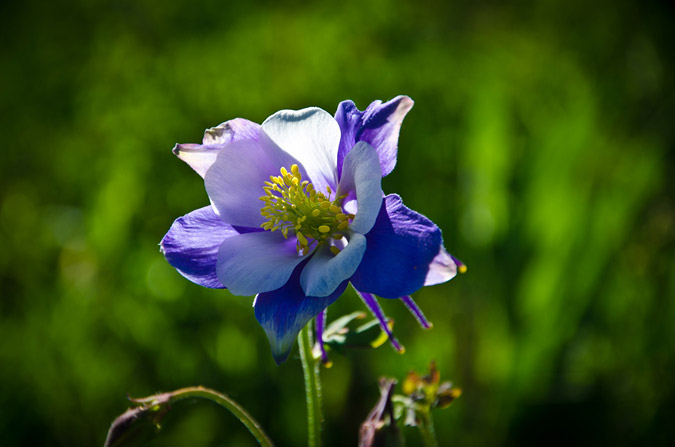
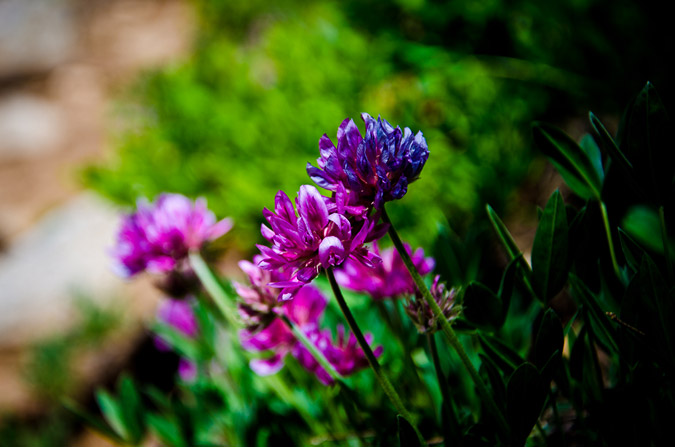
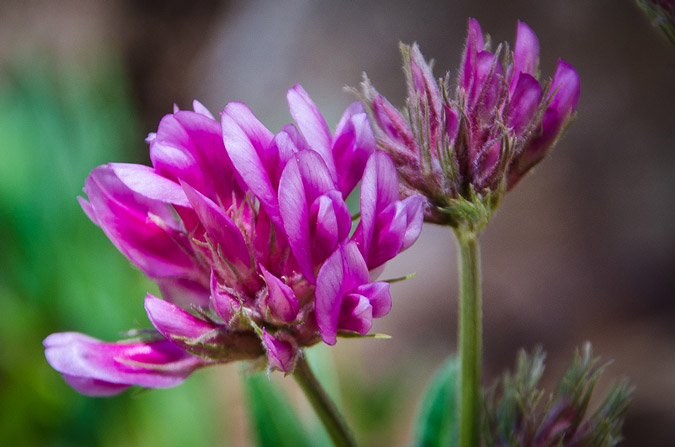
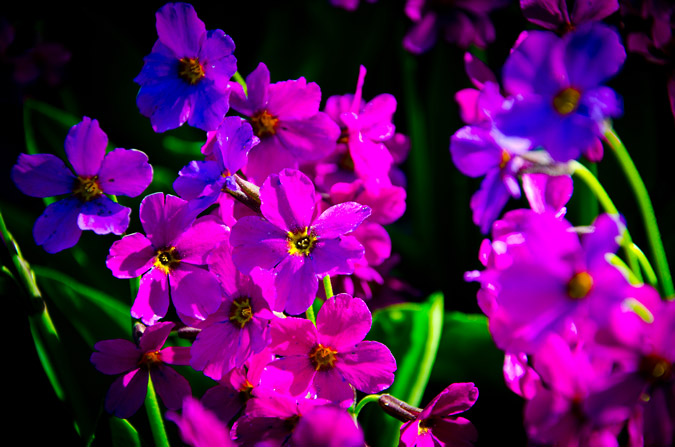
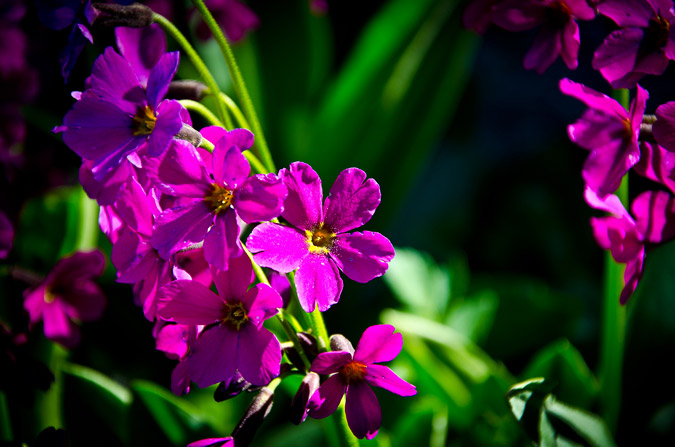
The whole area was covered in those corn lilies and wildflowers, which slowed me down a bit due to me wanting to take a ton of photos. I think I have a serious photography problem or something... what do you think?
 |
 |
 |
 |
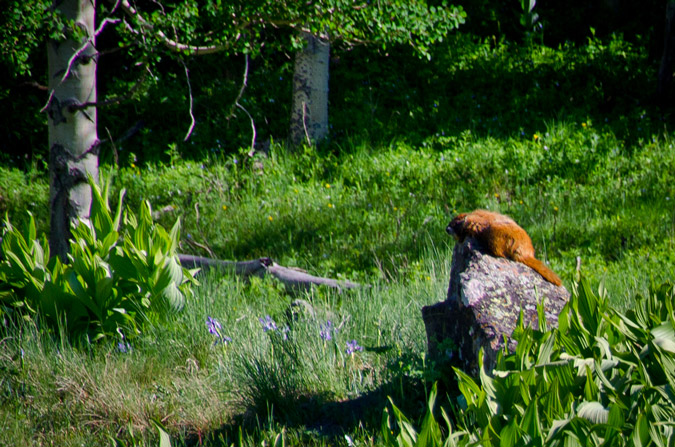
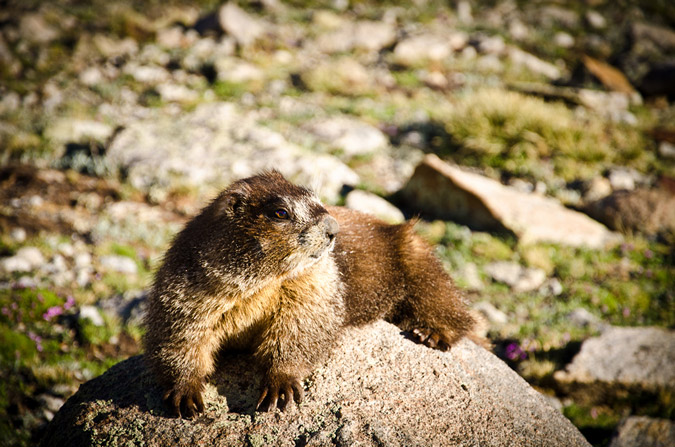
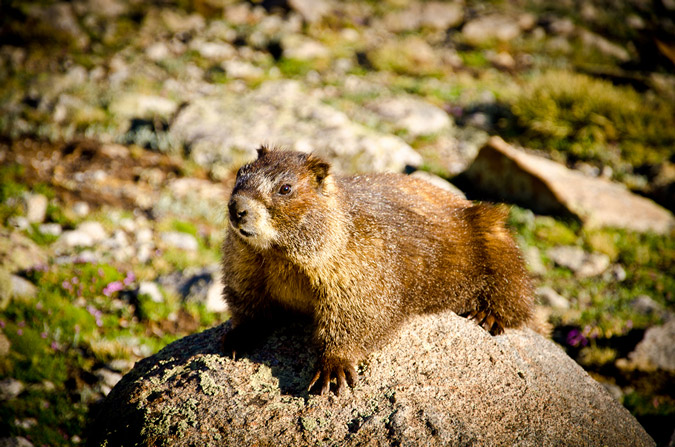
Naturally, a hike in the San Juans and the Lizard Head Wilderness Area are not complete without a sunbathing marmot!
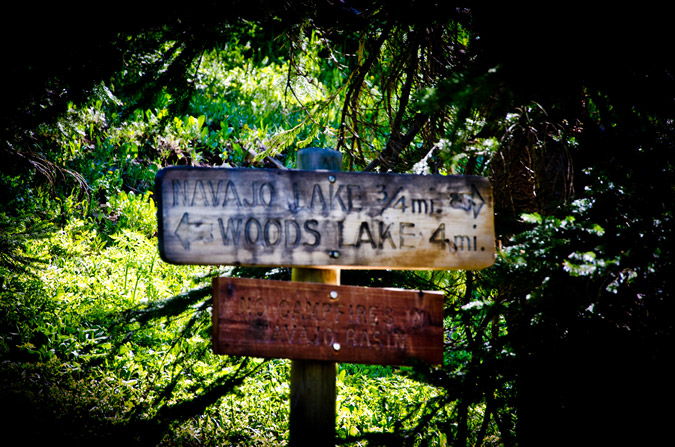
The trail kept winding up towards Navajo Lake and eventually we reached the trail junction for Woods Lake.
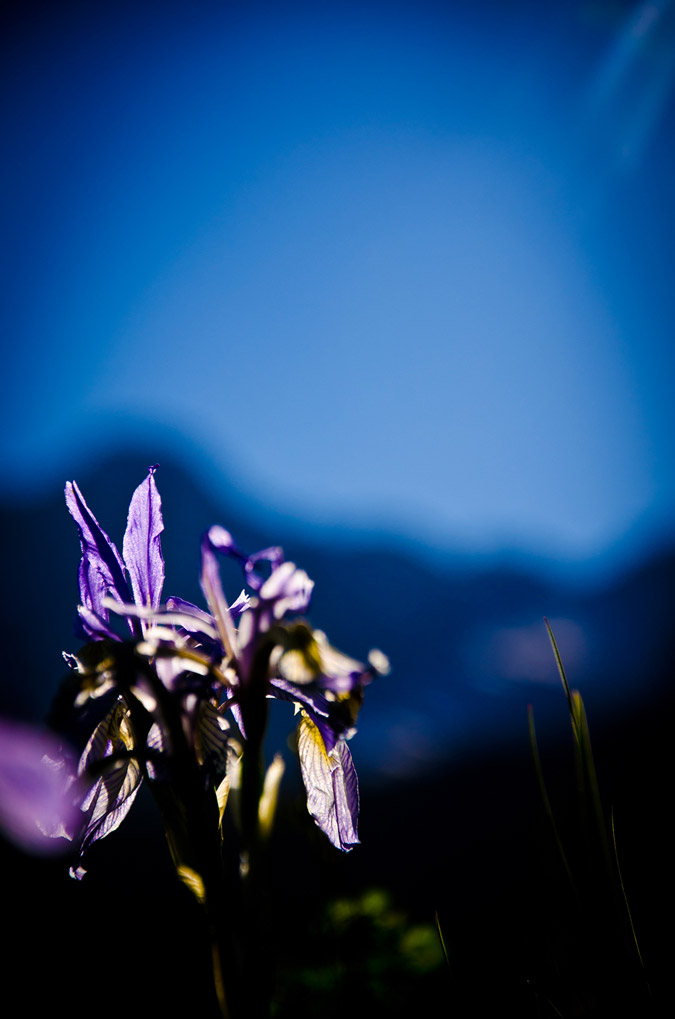
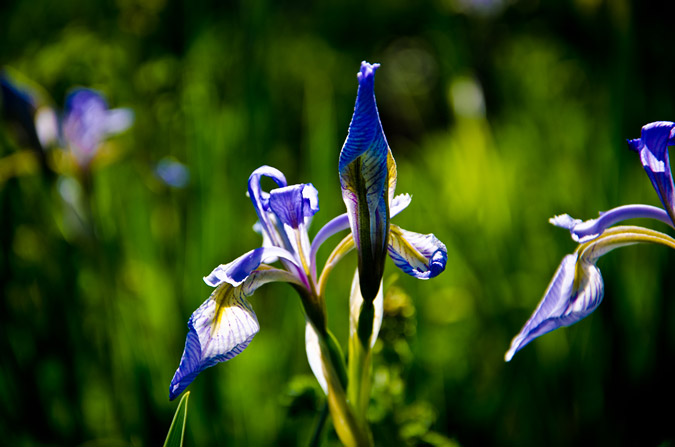
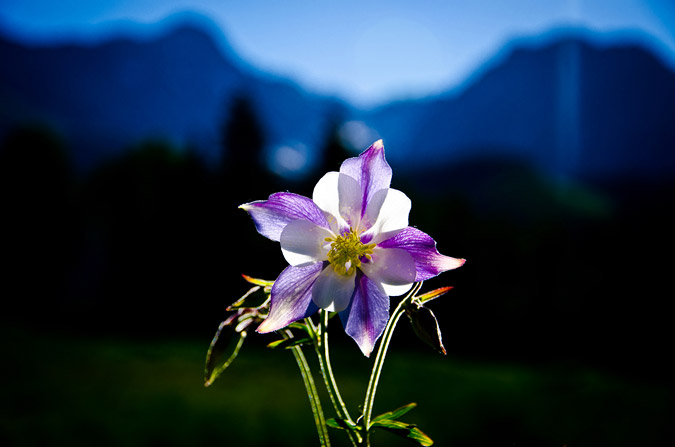
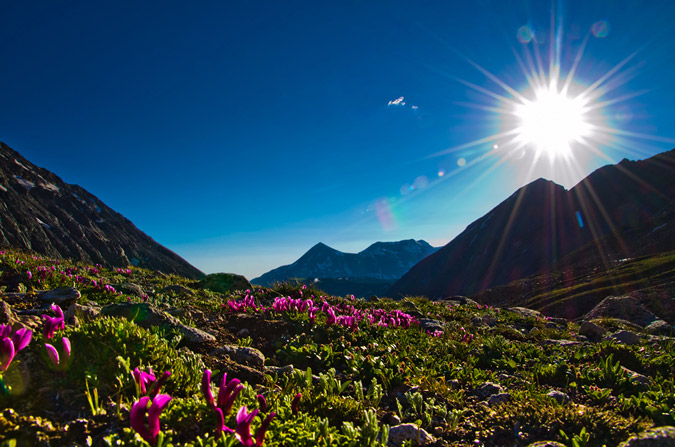
The closer we got to the lake, the more vibrant and ubiquitous the wildflowers became and I could not help but take more photos. What can I say, I'm a sucker.
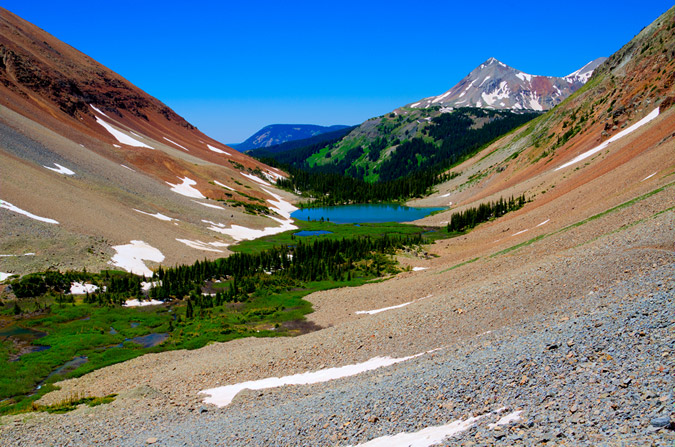
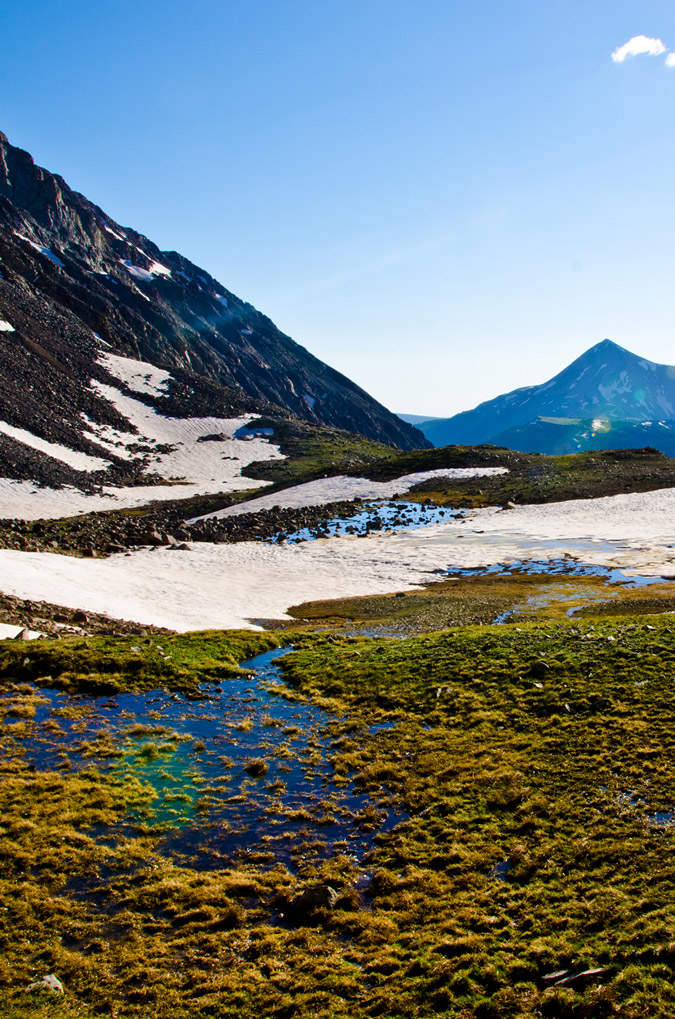
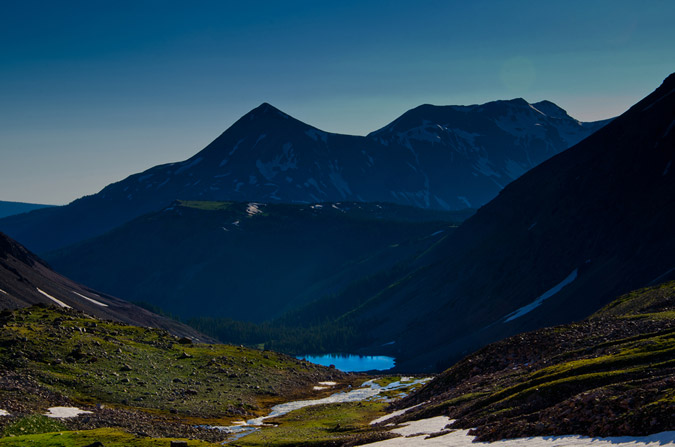
A mere 3 hours later we finally arrived at Navajo Lake. The view of the lake and Gladstone Peak was absolutely stunning.
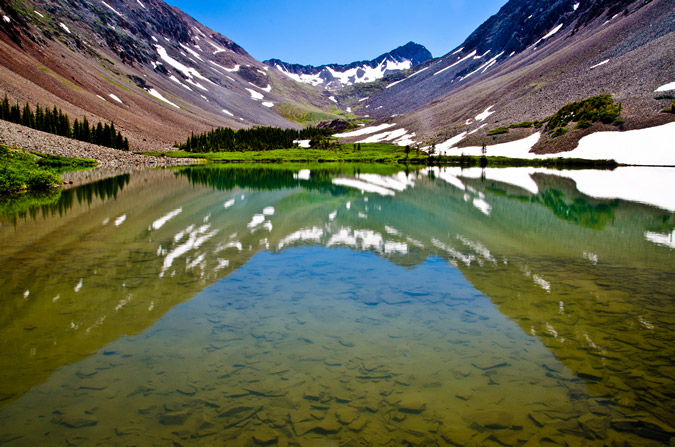
We were able to establish camp about 300 feet away from the lake up on a small plateau - it was an absolute gem of a campsite. After setting up our tent and getting everything else situated, we packed up our daypacks and headed on up the trail with the objective of Wilson Peak in mind. Our departure time was 12 PM. Normally, I would not attempt to climb a mountain so late in the day, but the weather was superb and I knew the forecast was totally clear, so we opted to give it a shot. Worst case scenario, we could always head back down to the lake if the weather turned on us.
Now, Wilson Peak has never held much status in my mind, purportedly being the easiest of the group's 14ers, so I never did much research on the route. Sure, I read the route description and printed off a few photos and paragraphs, but I felt pretty confident that it would be a fairly easy climb. Boy - I was really pleasantly surprised and wrong about that assumption, as you'll read later on.
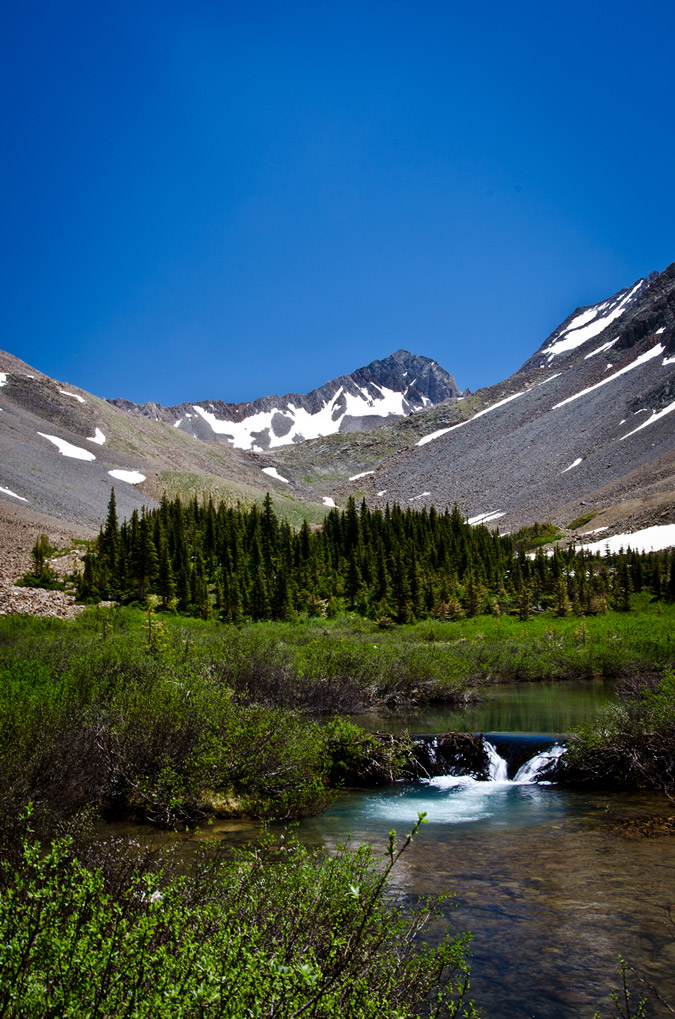
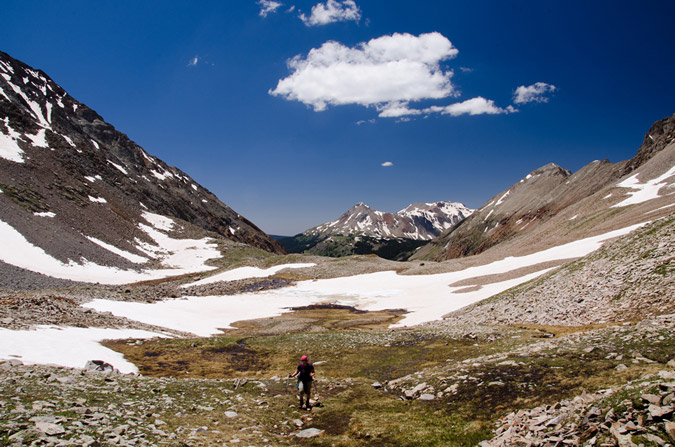
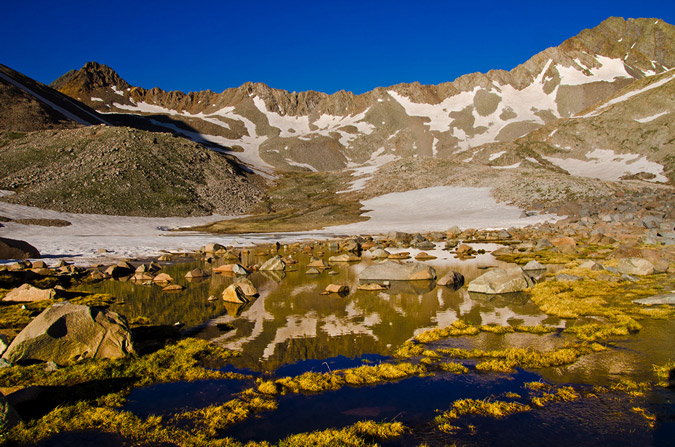
The hike up into Navajo Basin was really enjoyable from the lake.
 |
 |
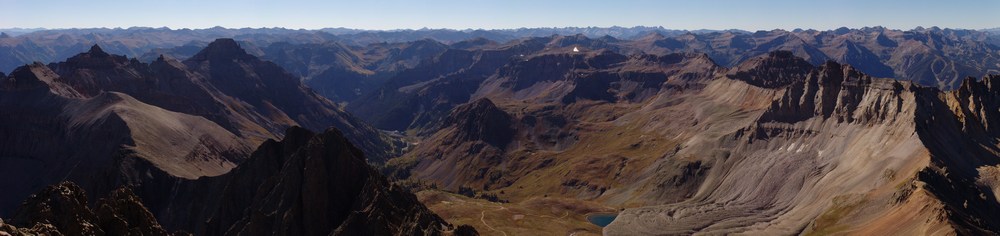
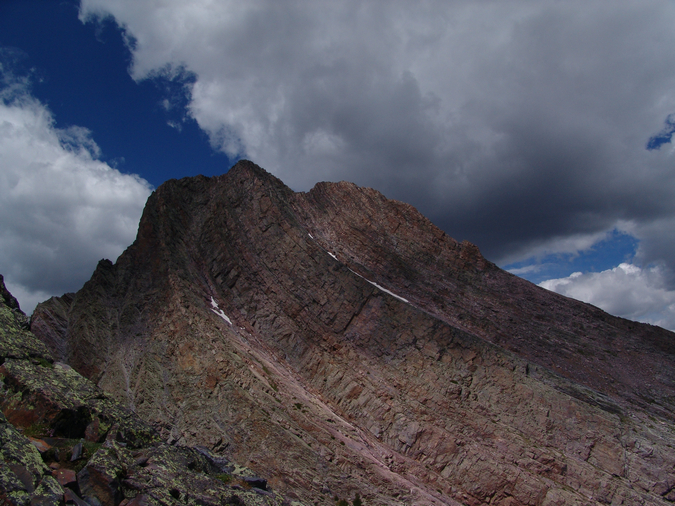
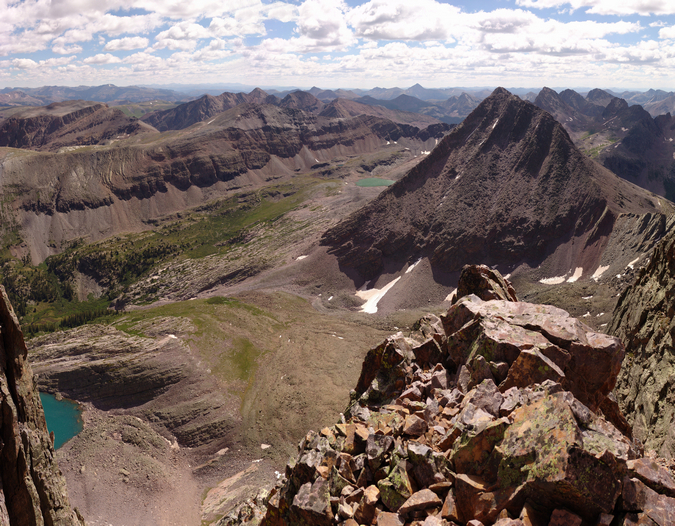
After awhile, the trail finally brought us even with El Diente to our right, the view of the North Slopes route came into view nicely. Mount Wilson sits at the top of the basin, right of Gladstone Peak, and is connected to El Diente by a massive, spiny ridge, as seen in the below pano.
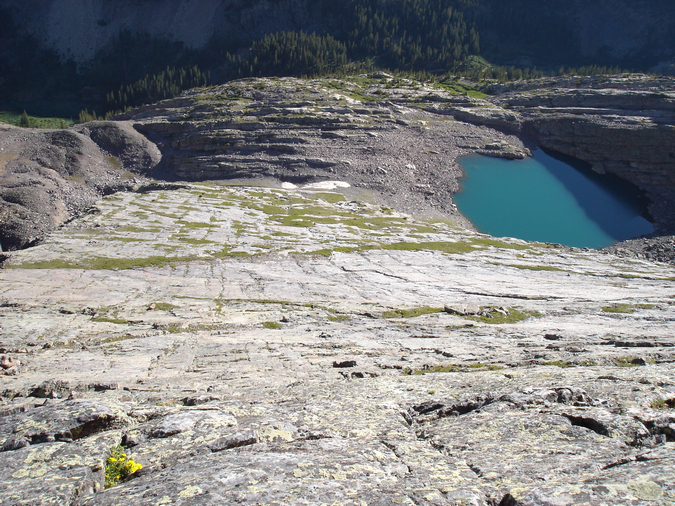
Additionally, the blue hues of Navajo Lake kept me looking back, enjoying the vistas of the valley.
The trail was not terribly steep but it did weave in and out of large snowfields, making it a bit more interesting but nothing too dicey, so far.
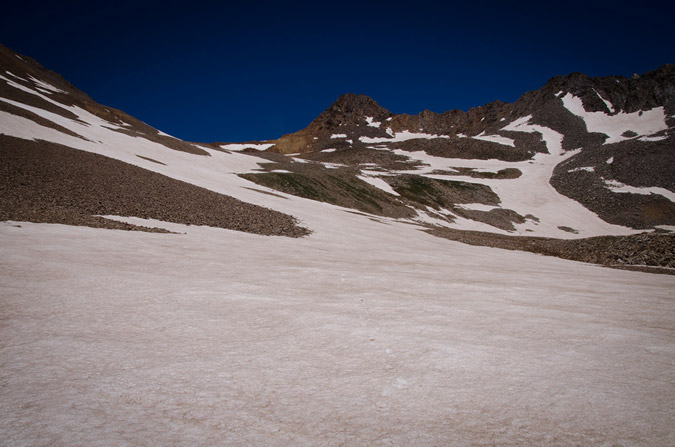
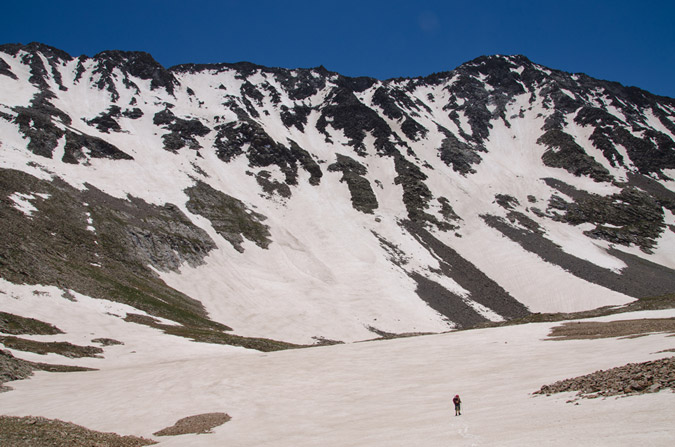
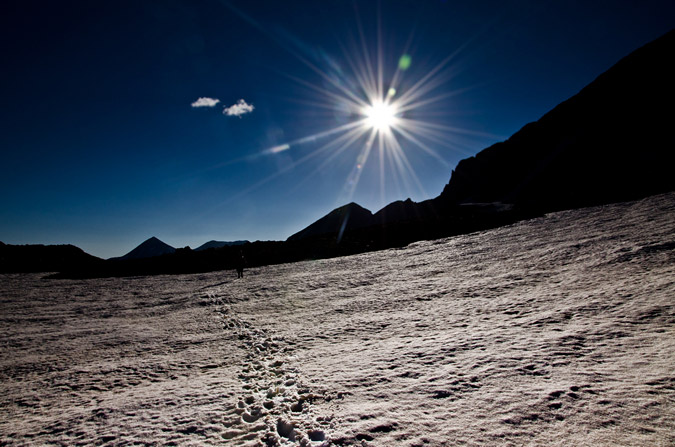
Finally, we reached the headwall that leads to the Wilson Peak - Gladstone Peak saddle beneath the Rock of Ages Mine, which required us to head up a giant snowfield. The snow was quite firm and easy to hike through.
I was feeling really good and had gained a bit of distance between Regina and I, so I periodically stopped to let her catch up.
The snow in the North Slopes Couliour for El Diente looked superb and I was a bit excited to see how that would work out on the following day.
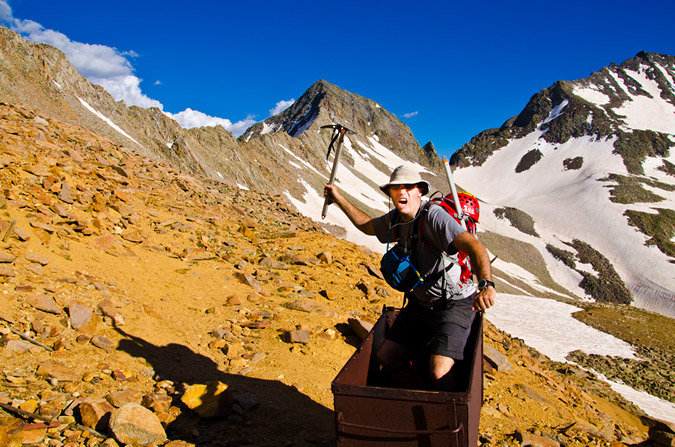
At 2:30 PM, we both reached the Rock of Ages mine, which felt quite like something out of the 1800's. An old wooden mine shack still sits on the mountainside along with a small wooden bench, a mining cart and some other odds and ends.

We rested at the mine, ate some food and discussed the next steps. The trail continued on up towards the Rock of Ages saddle to our left, but I knew from reading the route description that the trail winds back across the mountain just above the mine itself, so I figured it would be a good opportunity for some off-route exploring up through some easy class 2 boulders above us to the Wilson Peak - Gladstone Peak saddle.
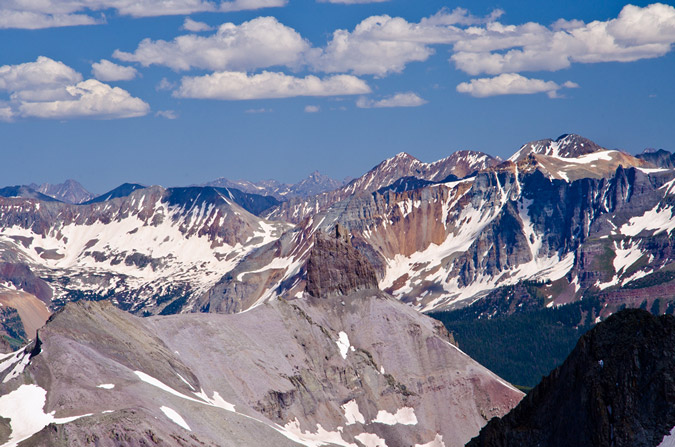
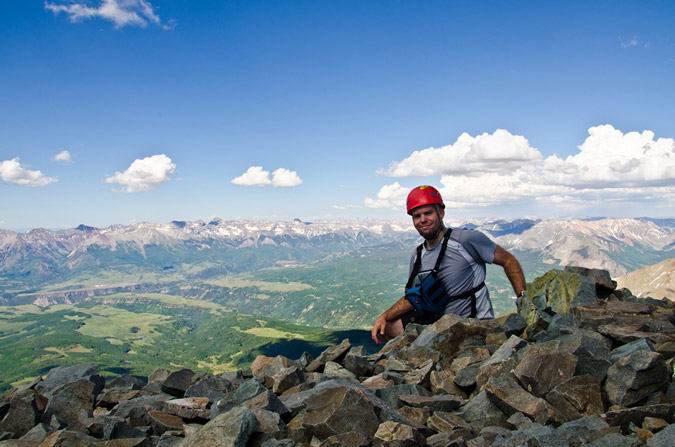
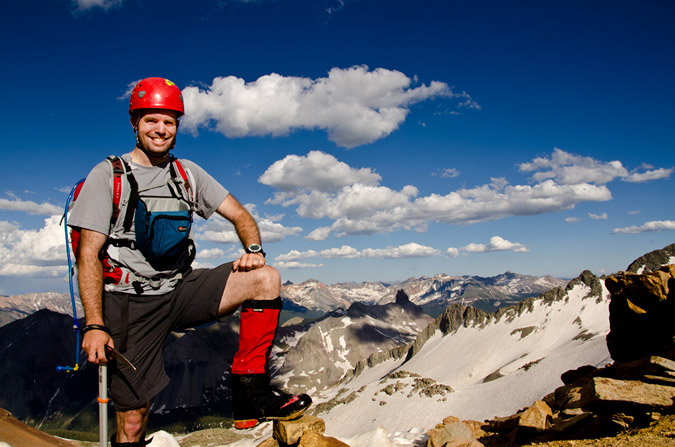
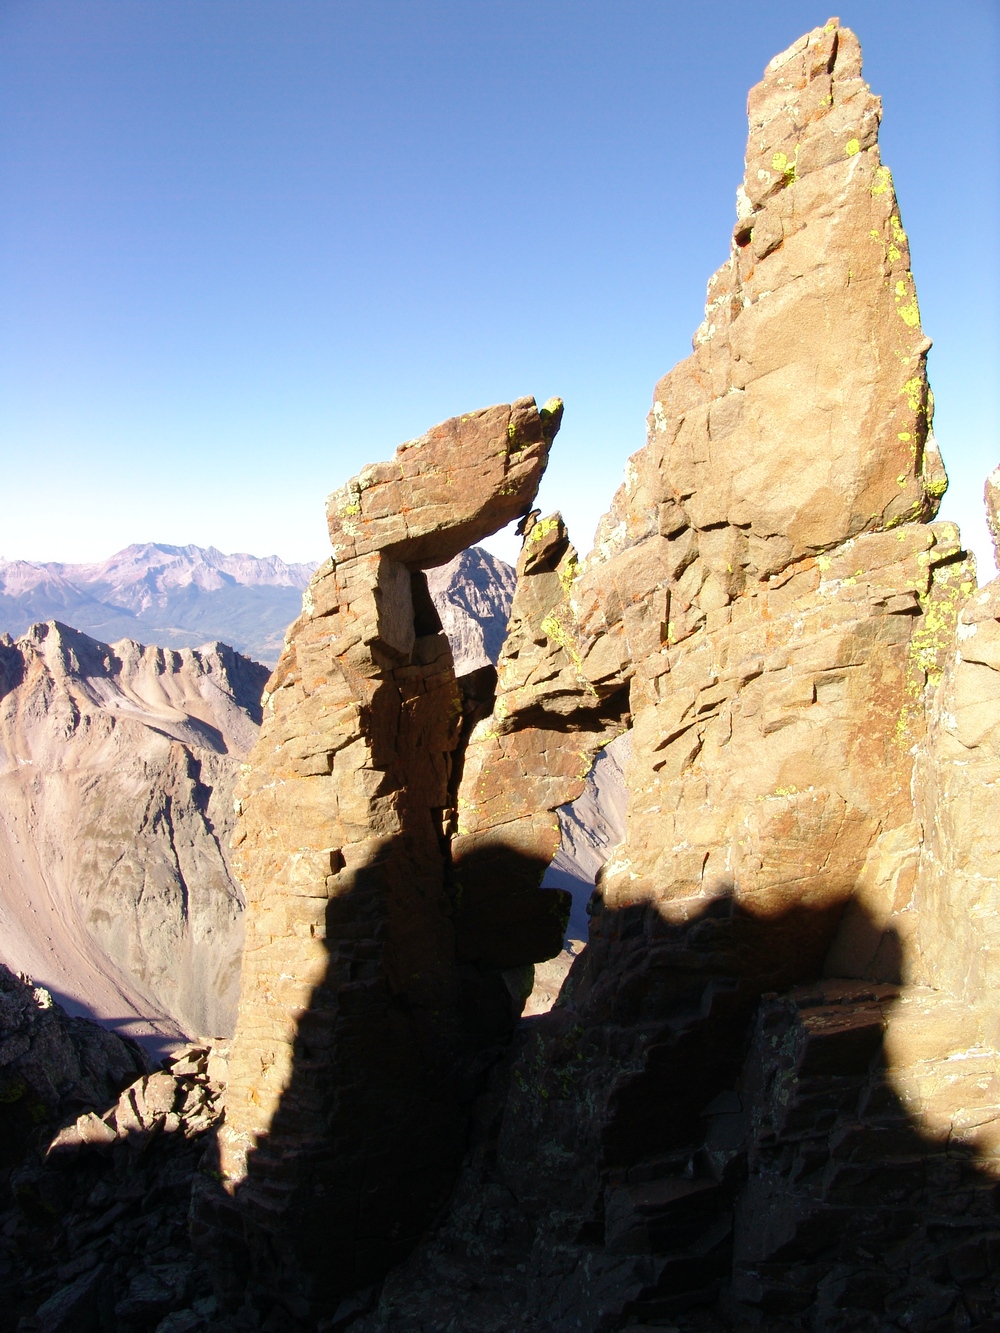
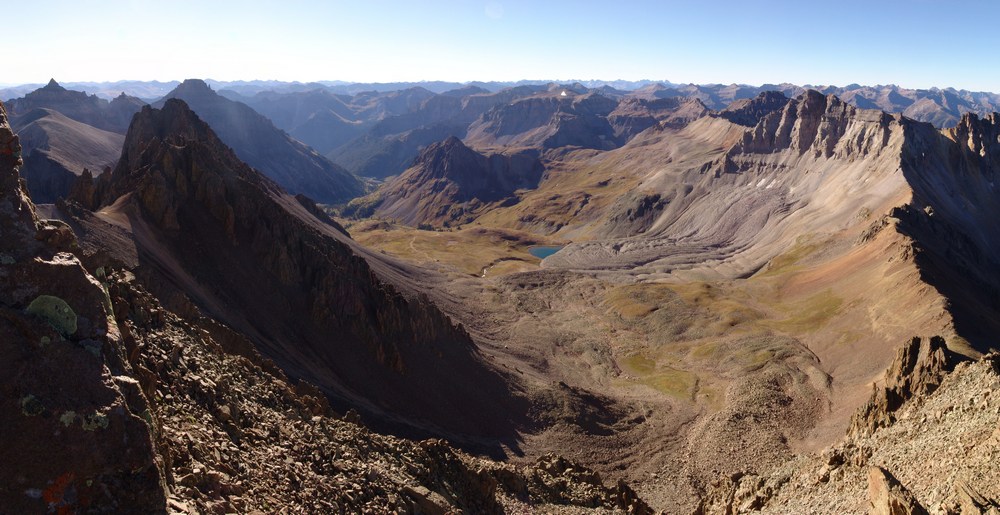
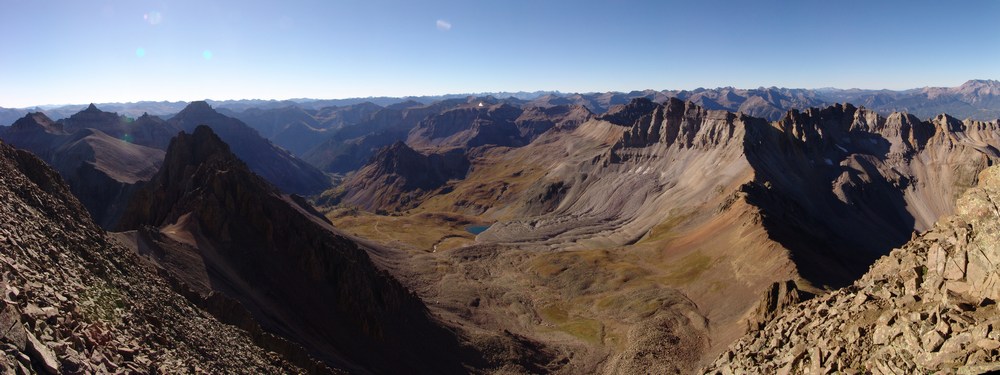
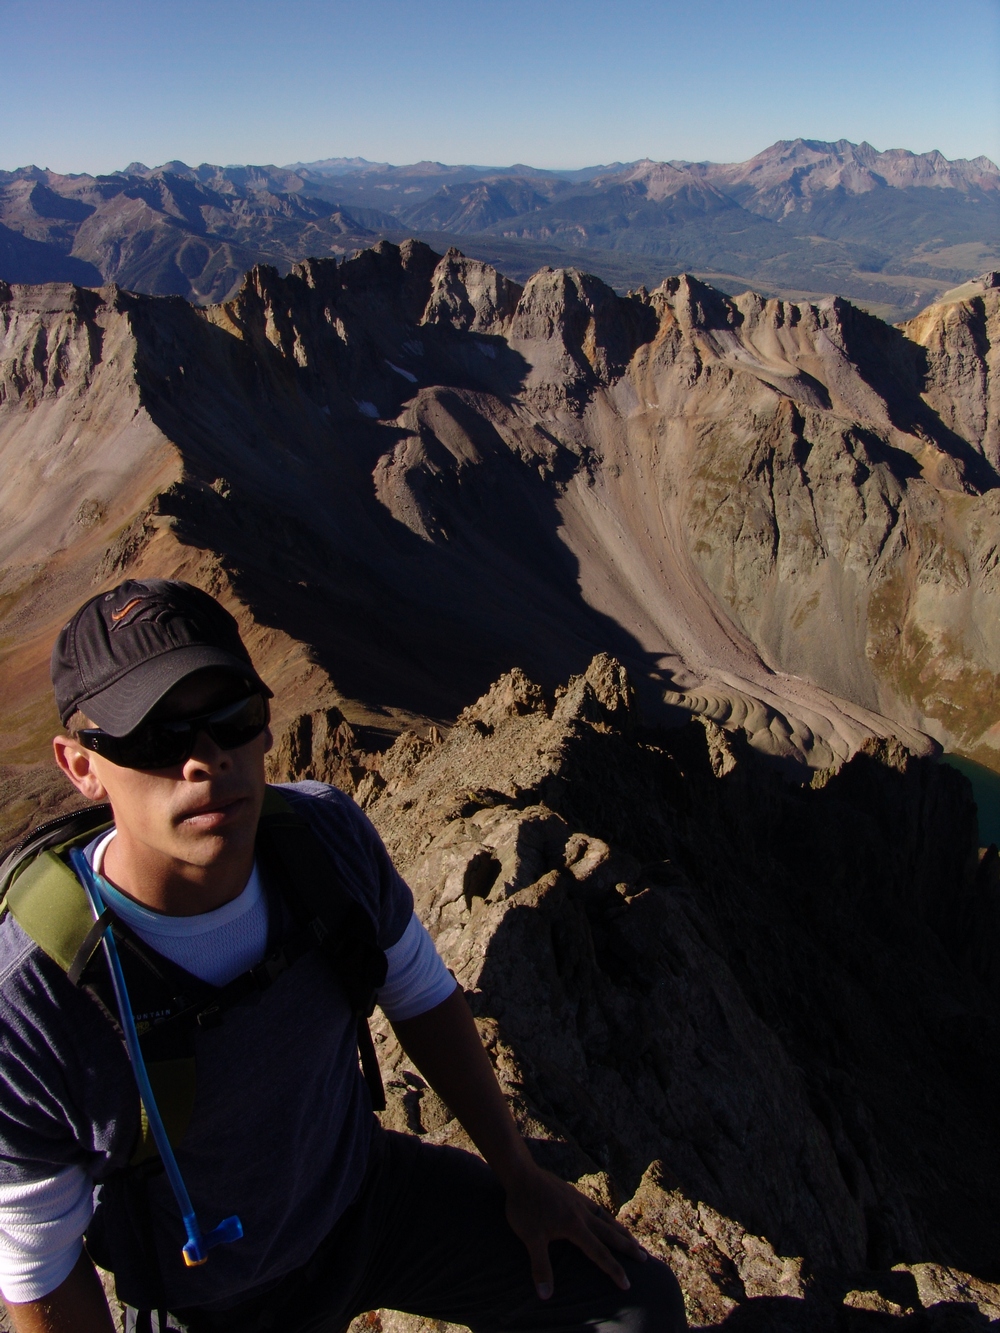
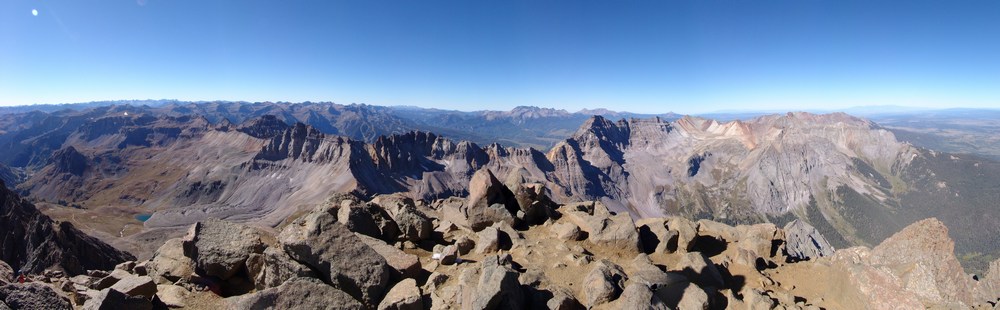
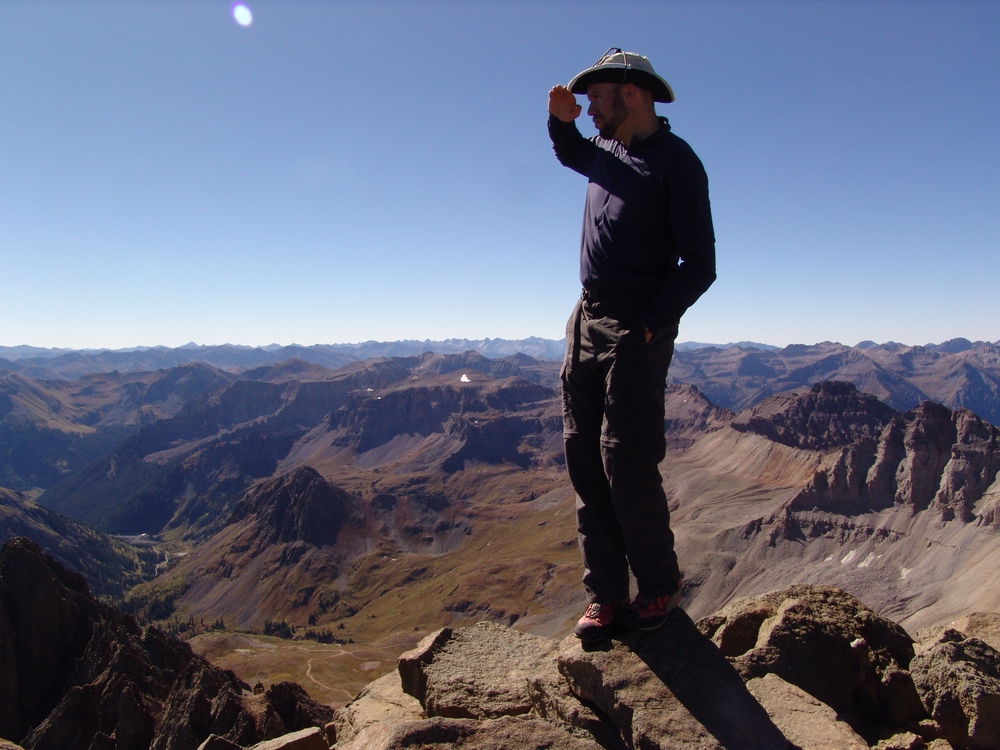
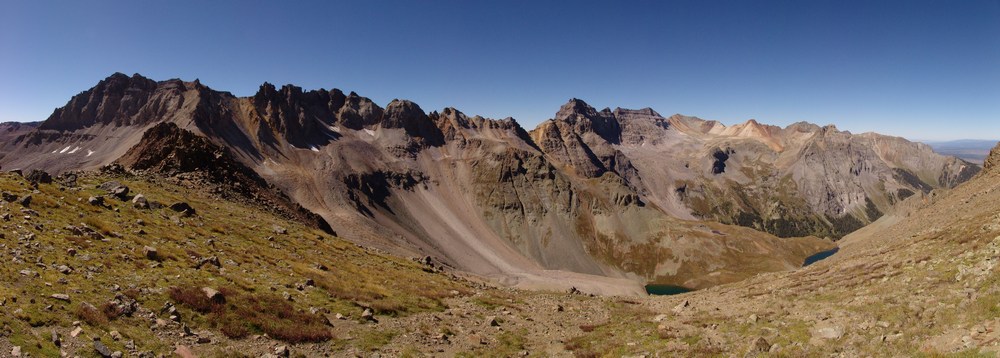
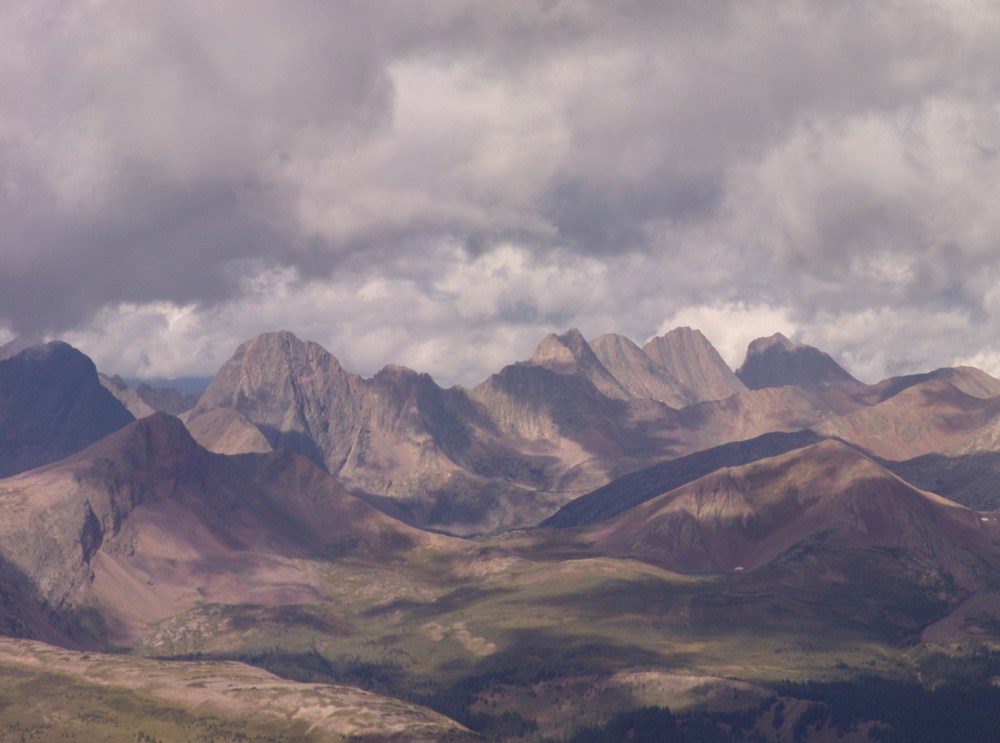
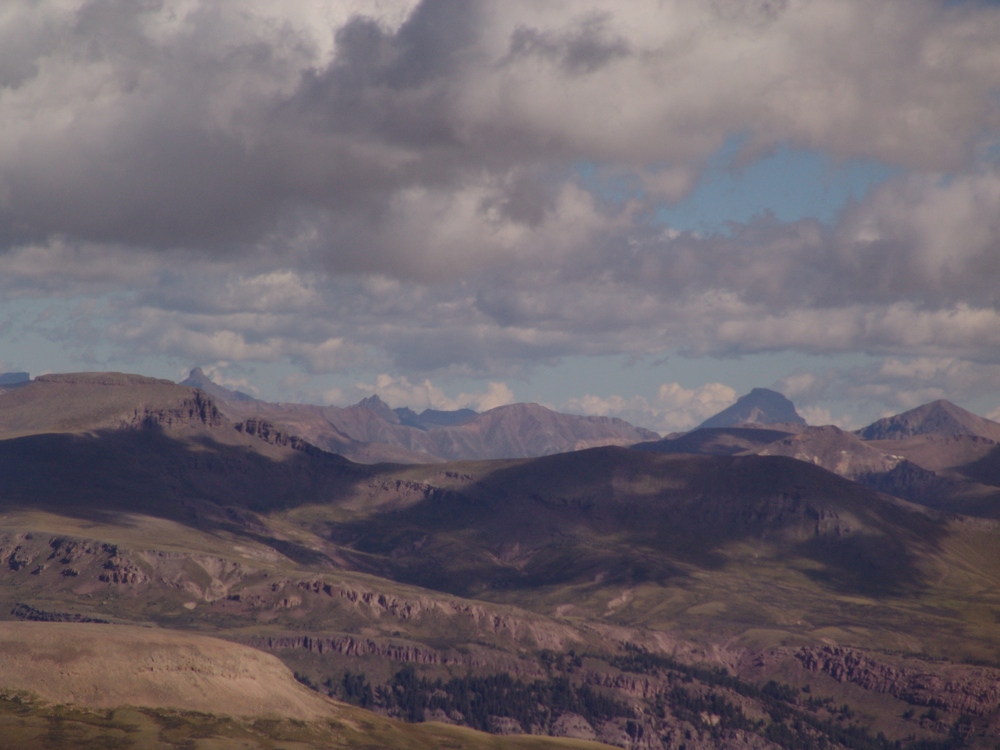
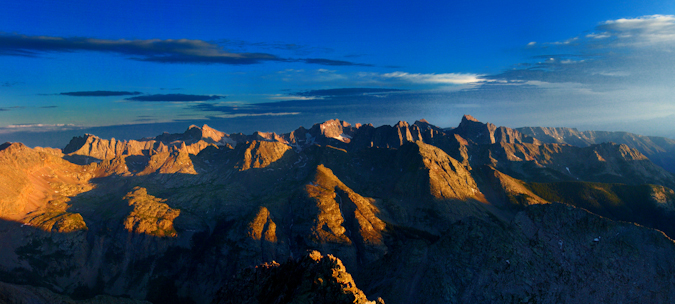
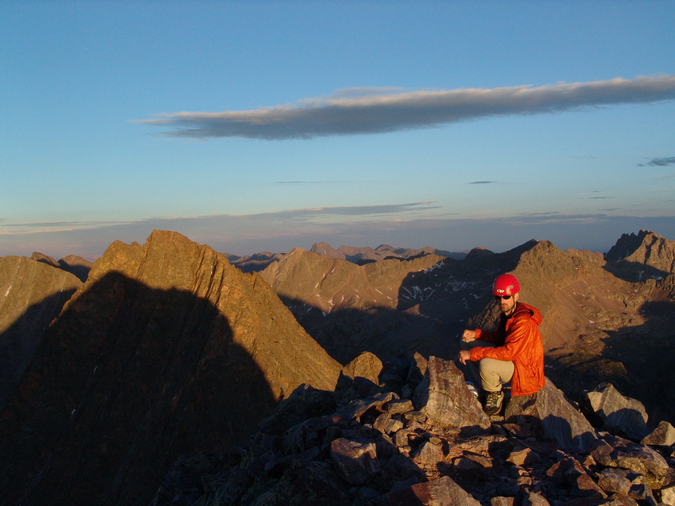
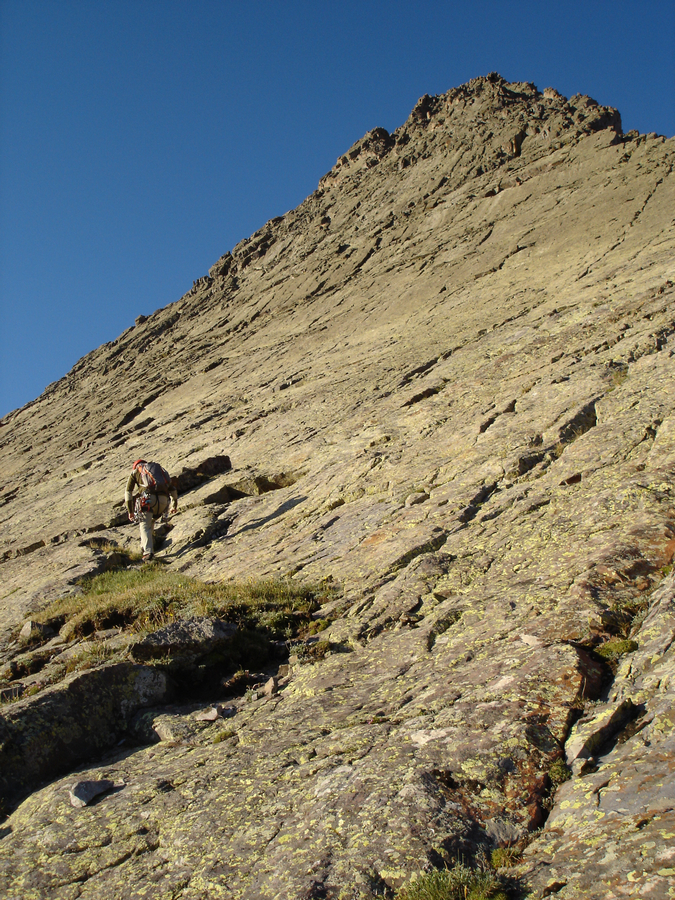
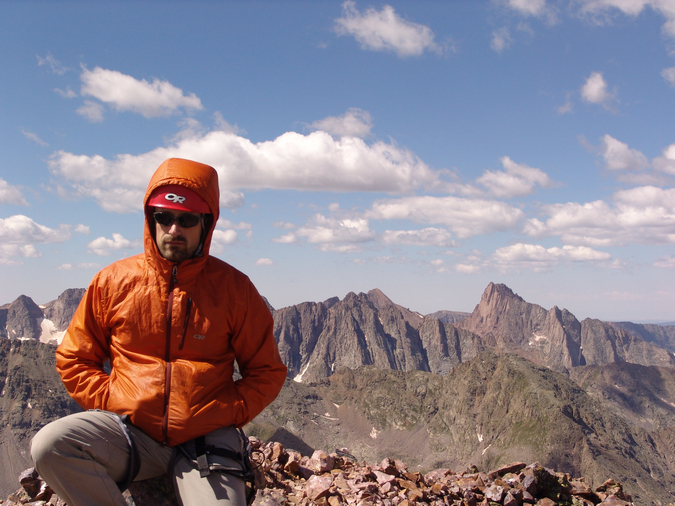
Personally, this terrain is a playground for me - the rock was somewhat loose but not too crazy, and it was fairly obvious which rocks were stable and where you needed to go. Regina on the other hand, not having grown up climbing off-route like me, felt a little less comfortable on the boulder field and was starting to have some doubts about the rest of the climb. I assured her that she would be fine and that she needed to treat the rocks with respect, expect that they will move, and be nimble about her movements. Eventually we made it up to the saddle without incident and were greeted by the first insane views of the day to our east. A cornicopia of San Juan mountains laid before our eyes and I was excited to finally get views of Lizard Head Peak, Fuller Peak, Vermillion Peak, Golden Horn, Pilot Knob, U.S. Grant Peak and South Lookout Peak, which all rest at the head of Ice Lake Basin - one of the most gorgeous locations in Colorado. Can you identify them all?
Here, let me help you!


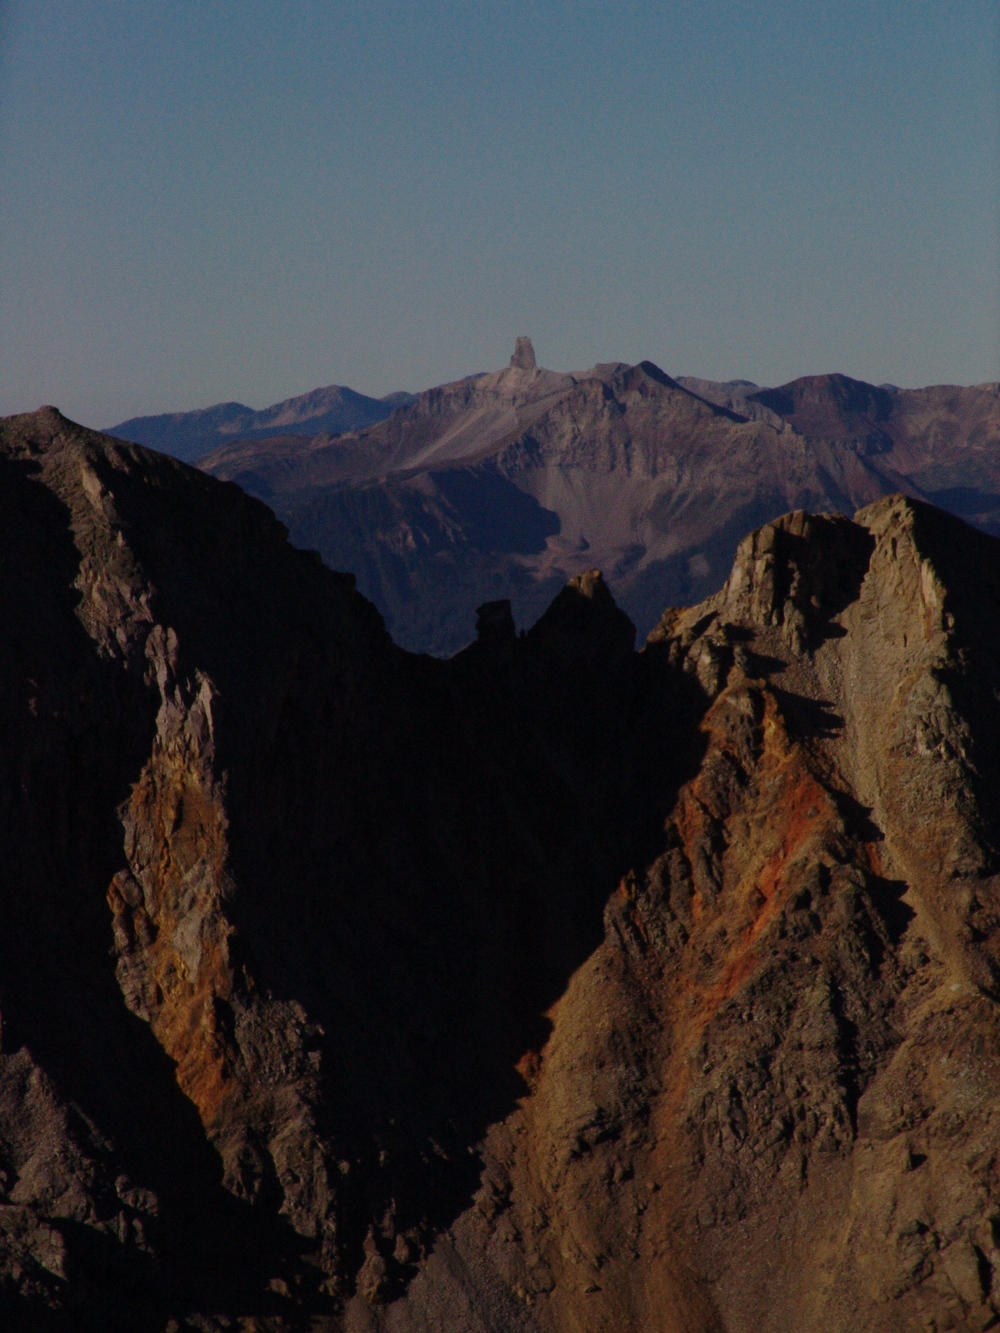
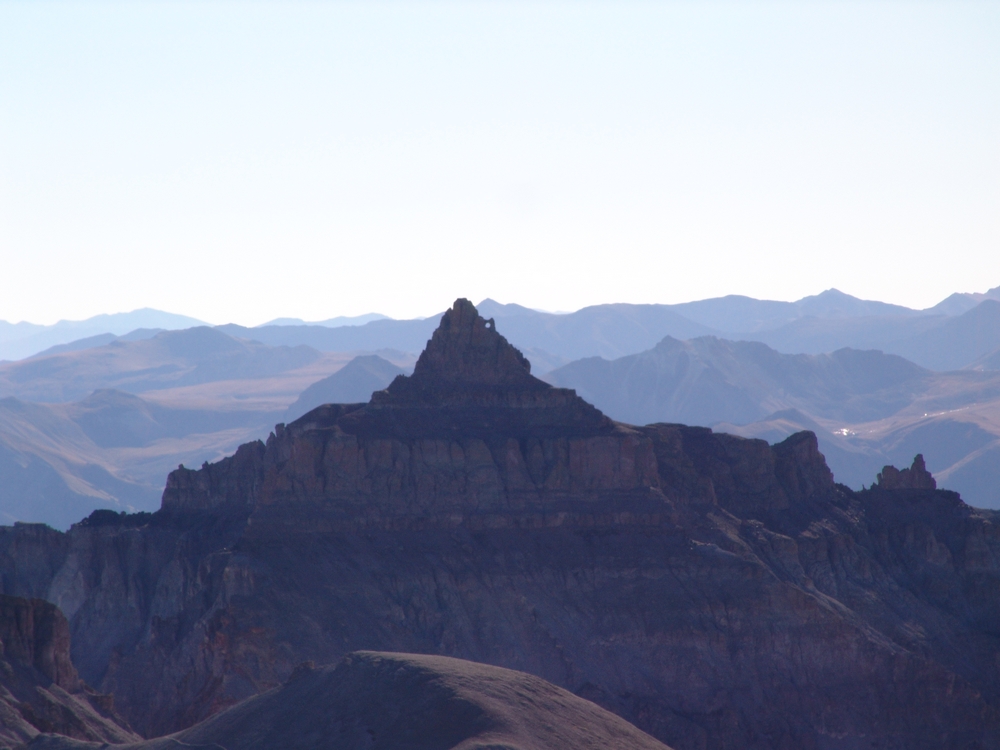
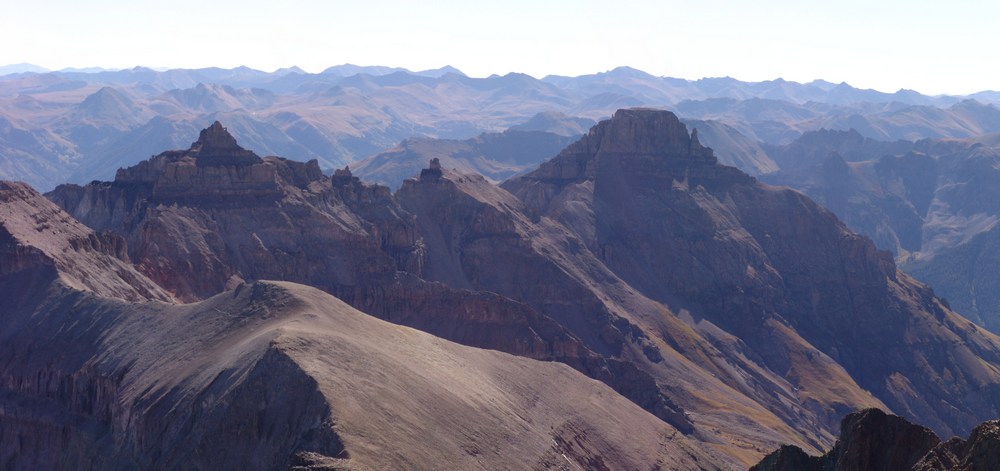
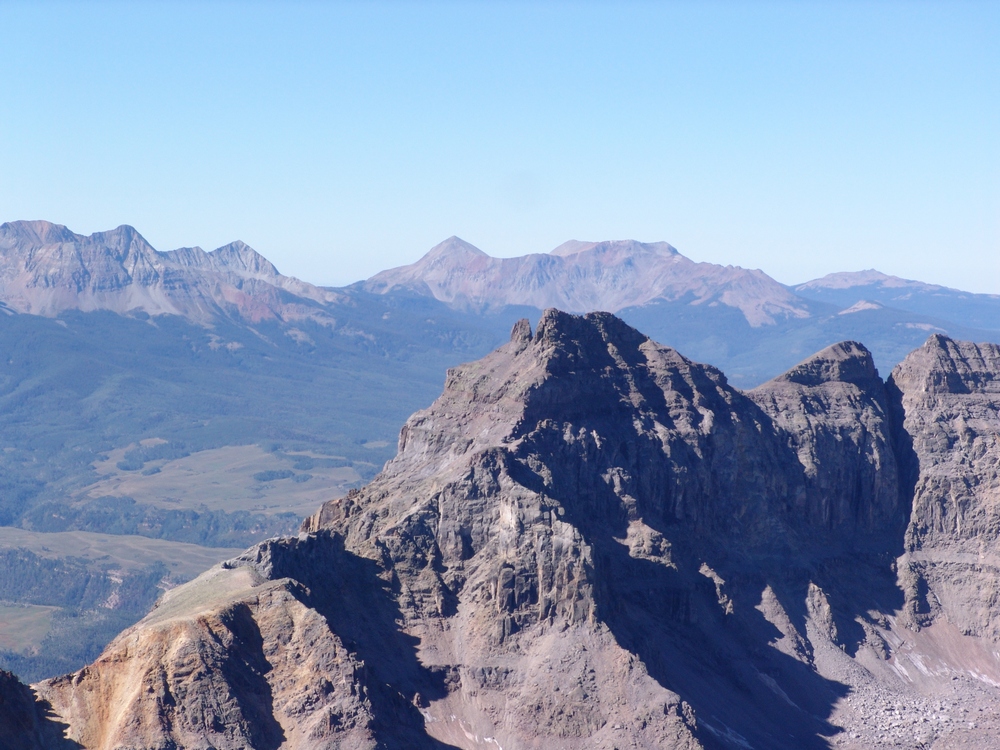
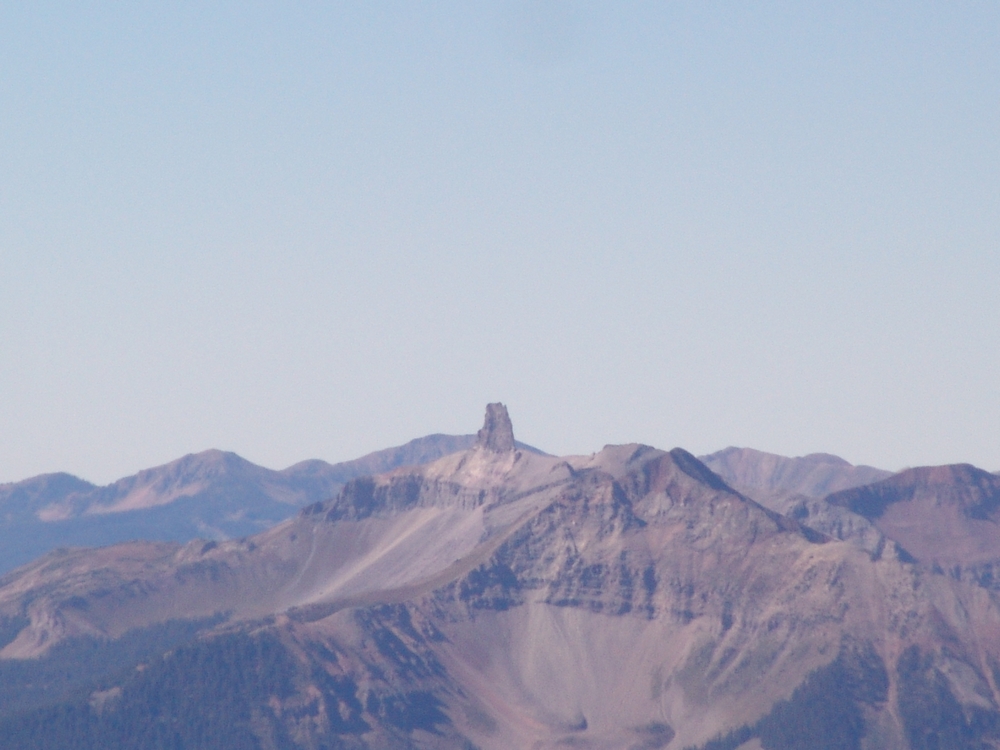
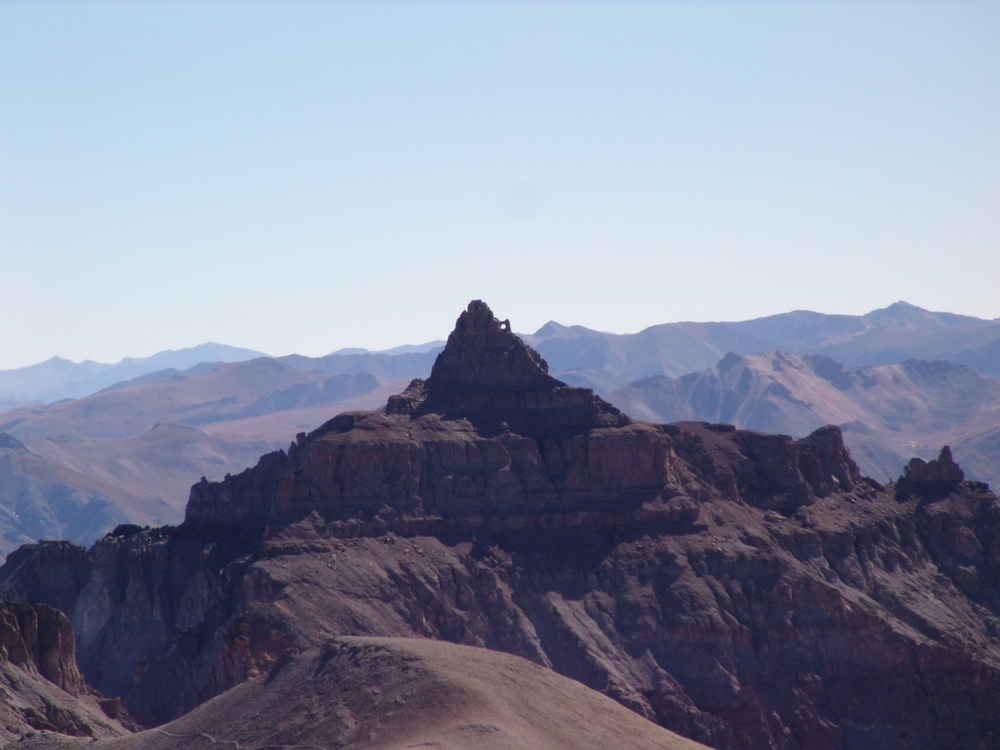
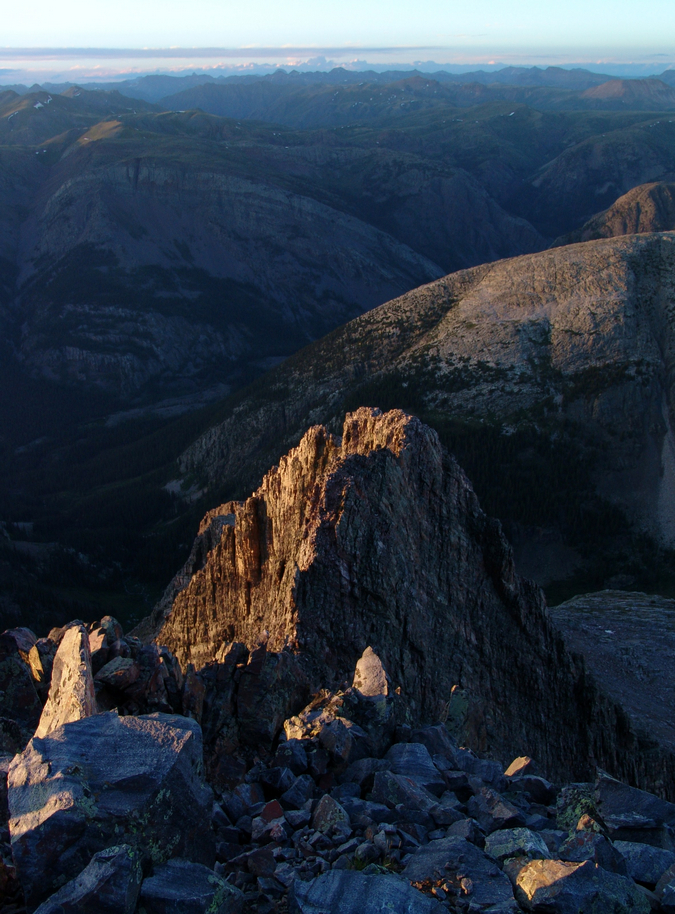
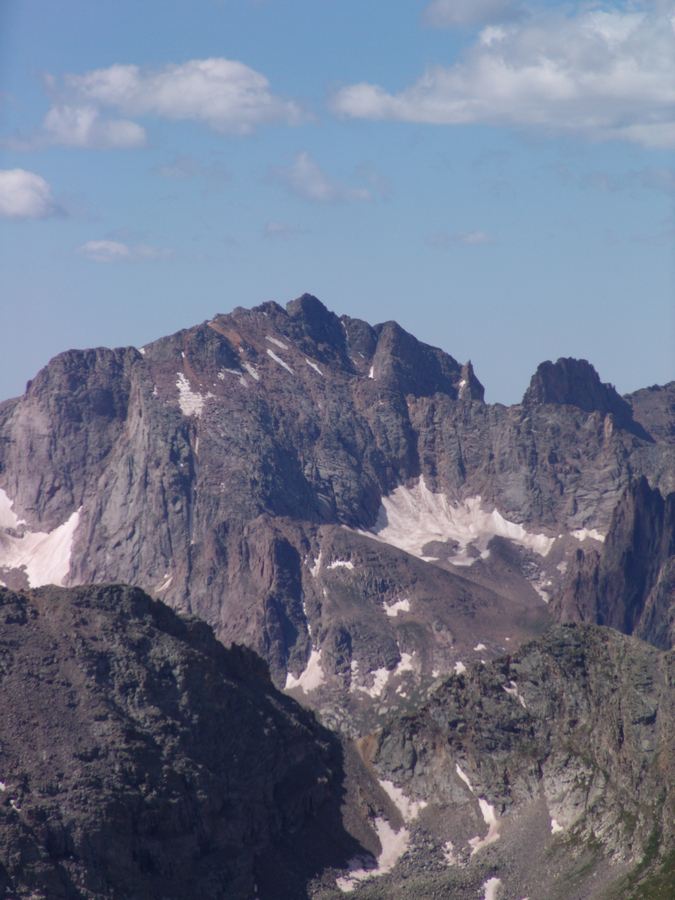
Of particular awesomeness was the view of Lizard Head Peak, which will likely forever rest on my unclimbed list!
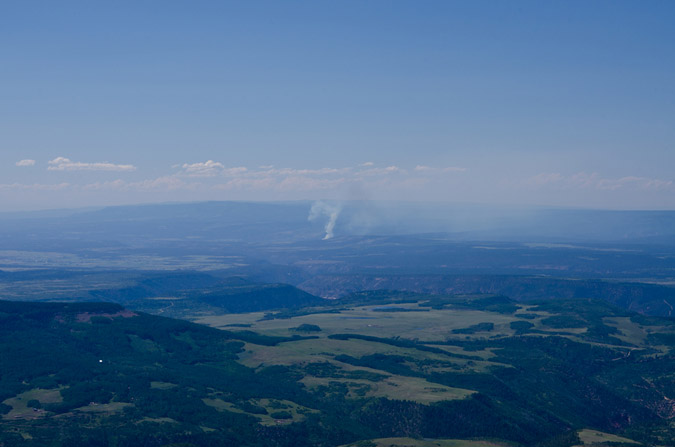
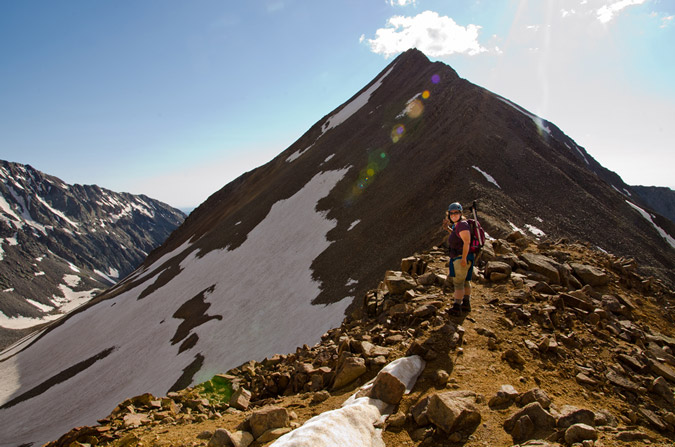
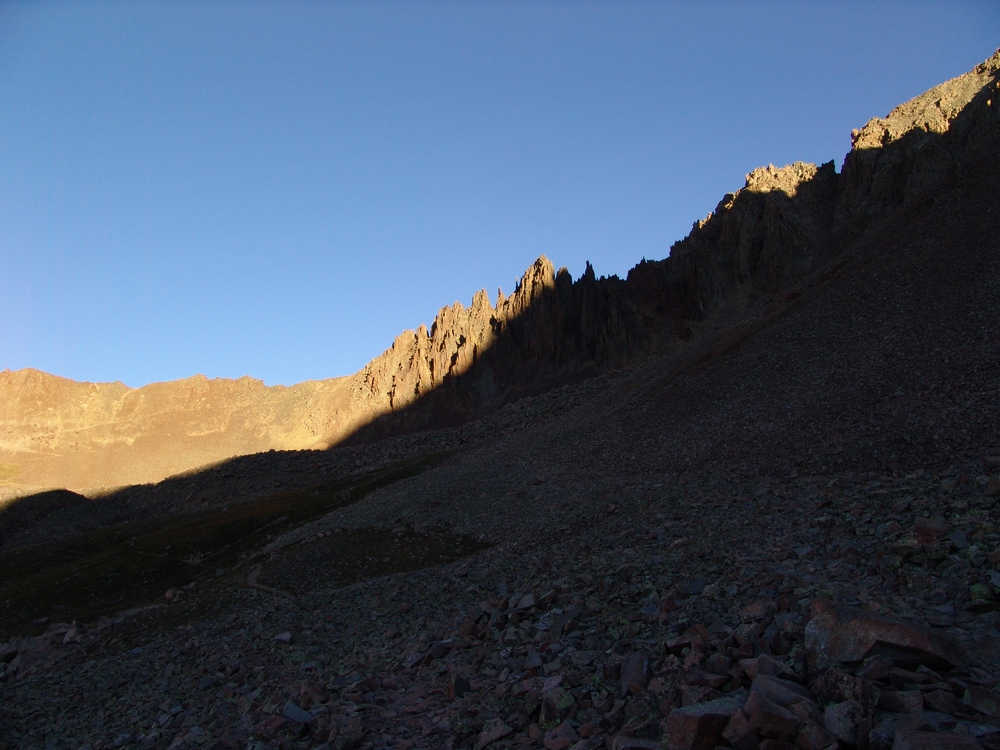
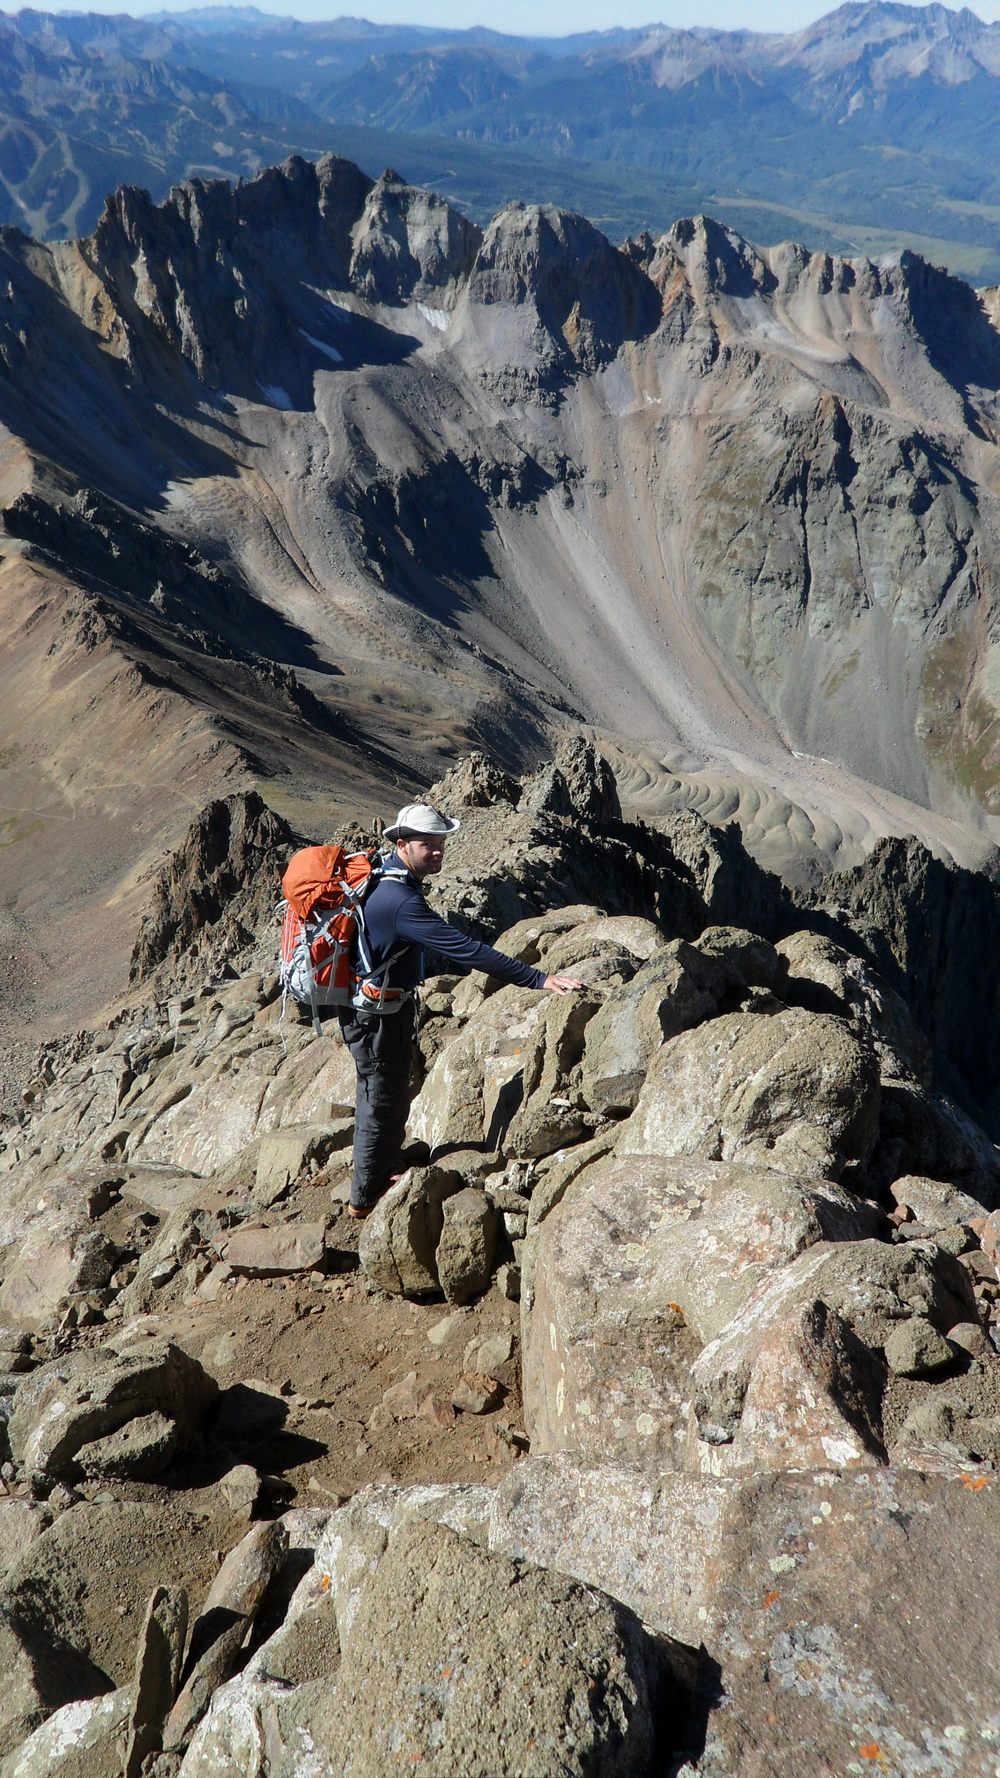
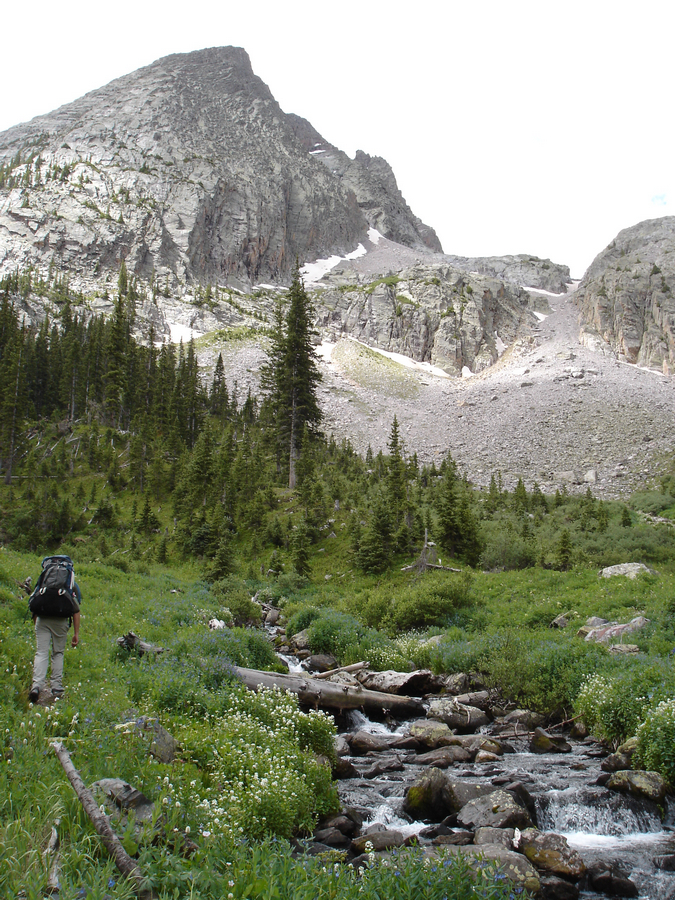
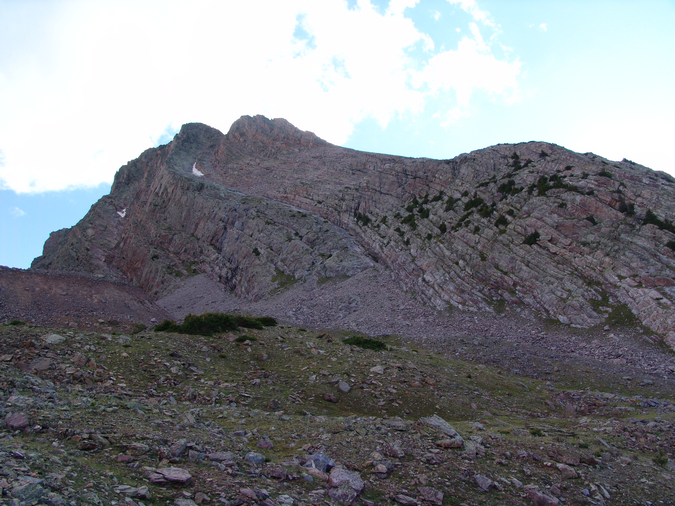
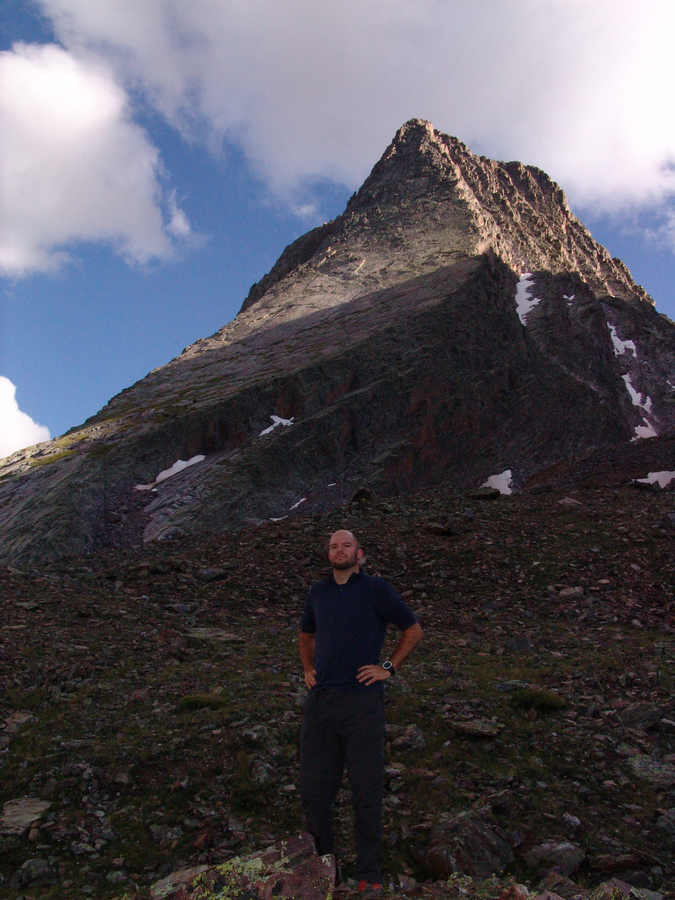
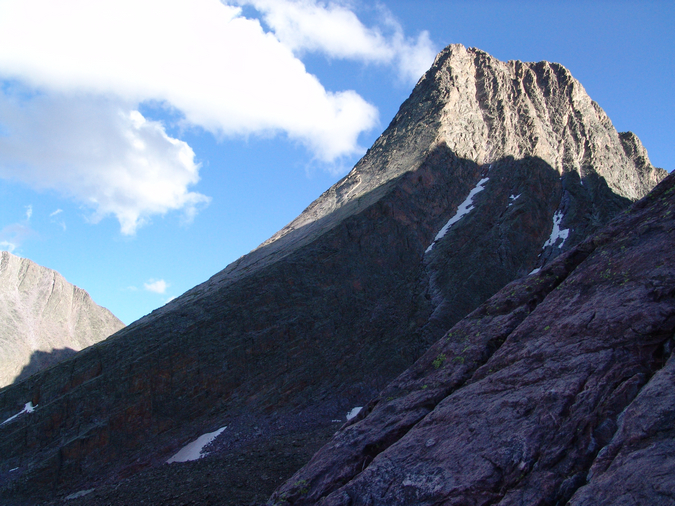
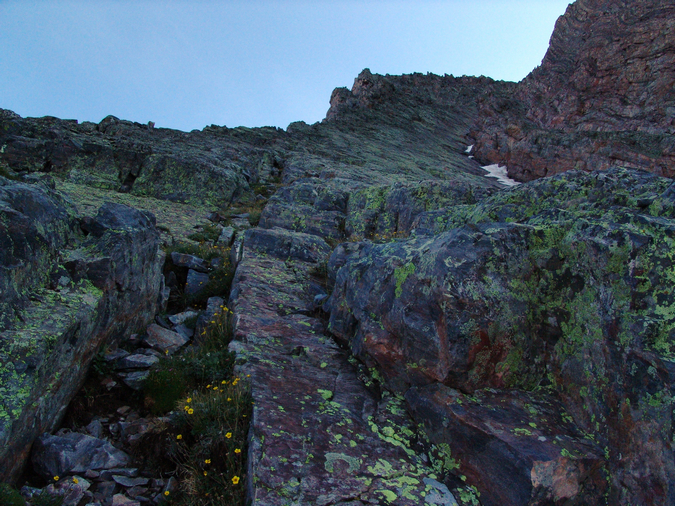
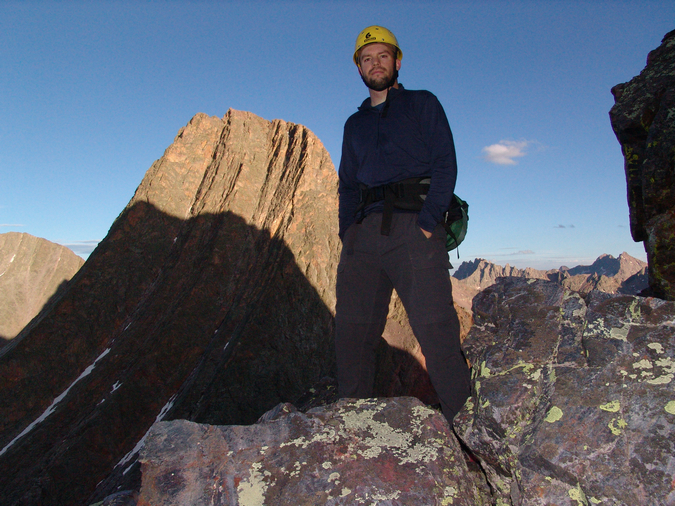
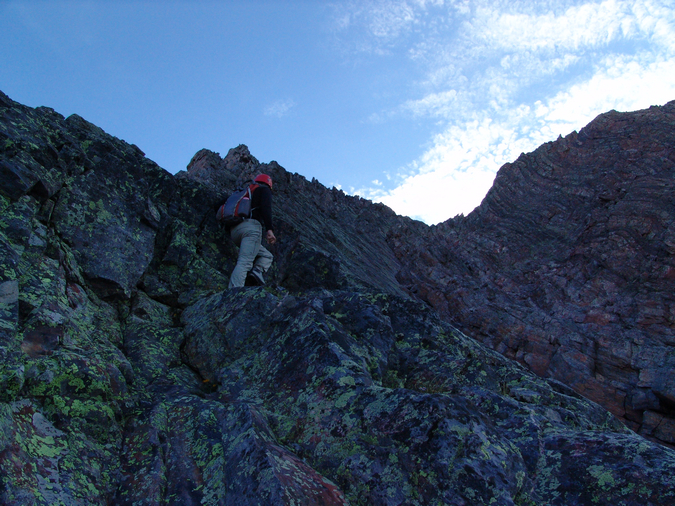
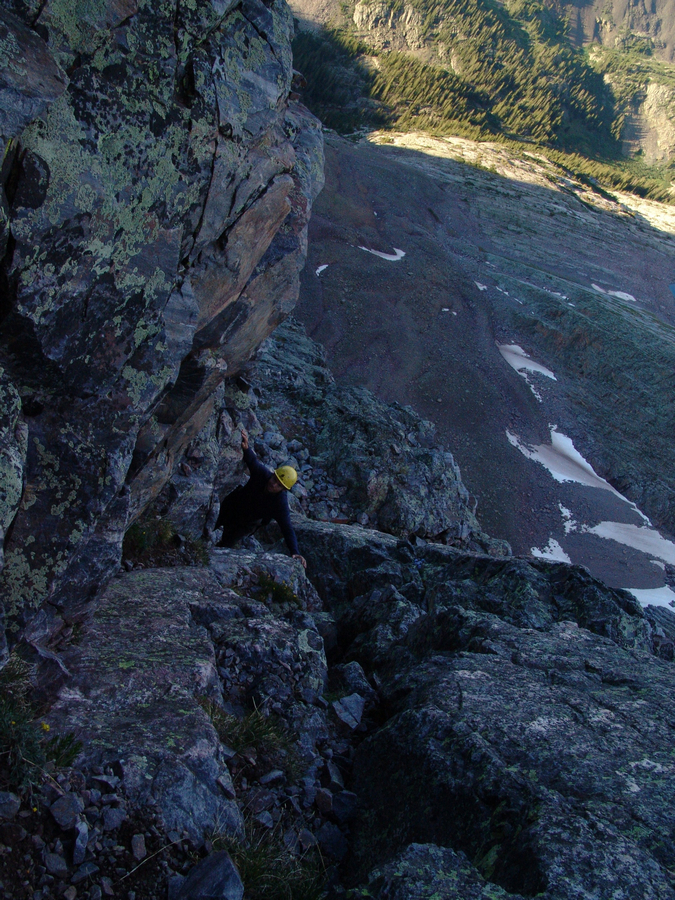
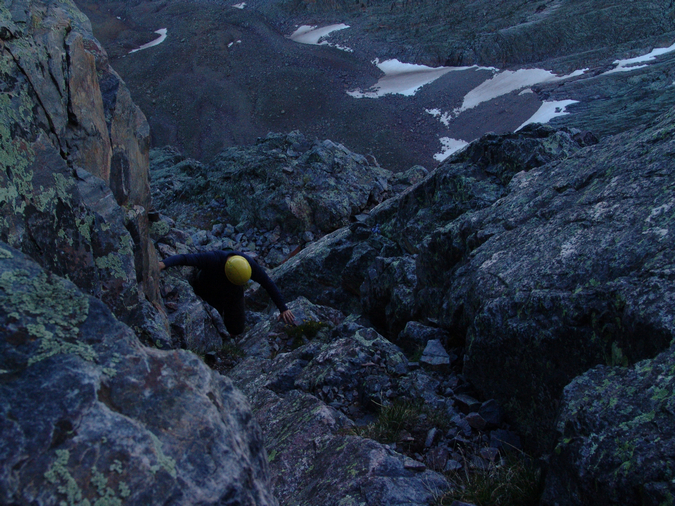
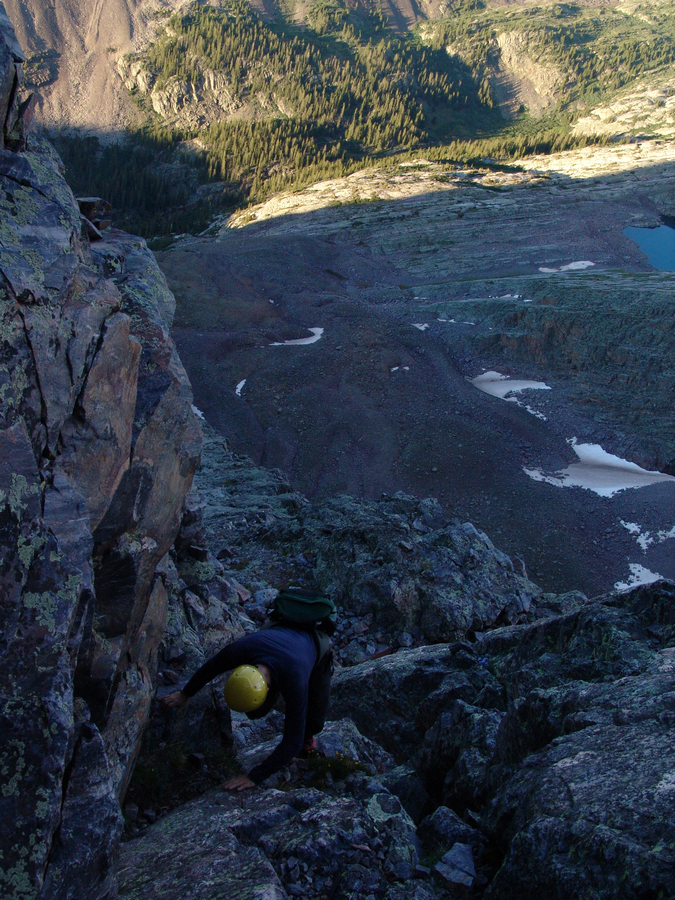
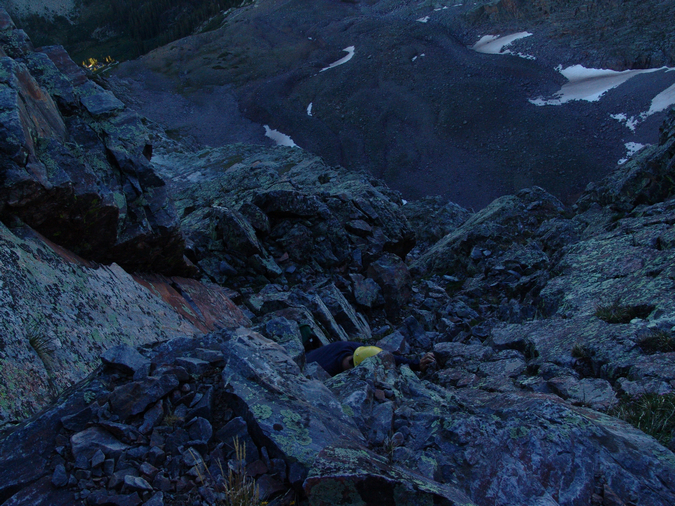
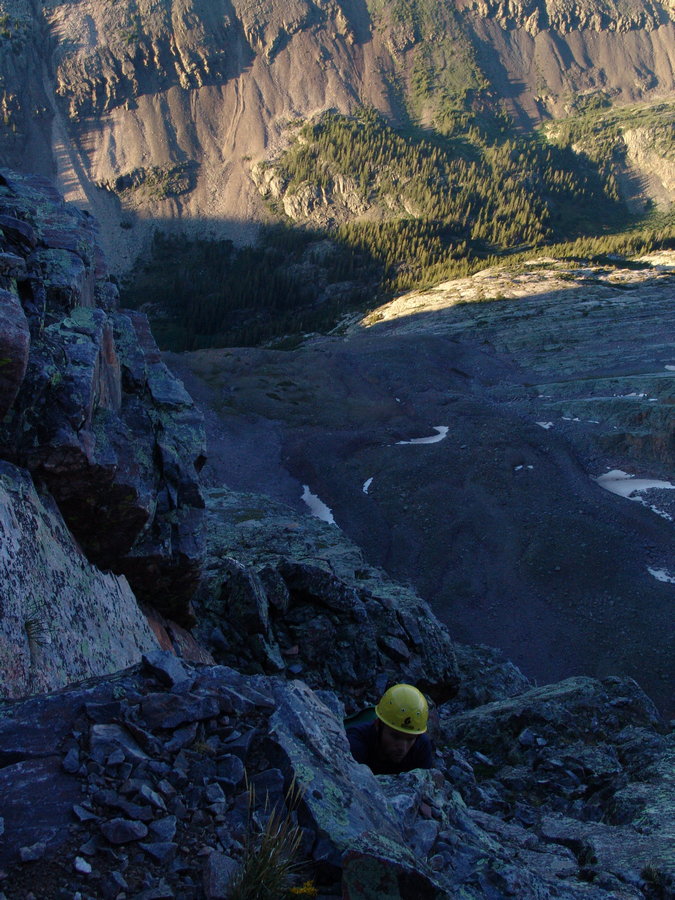
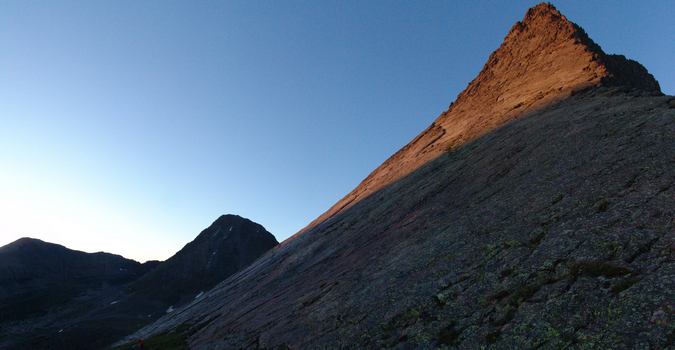
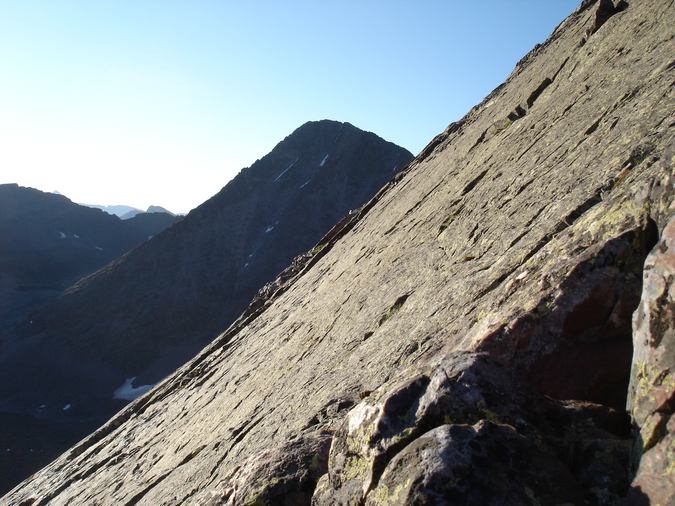
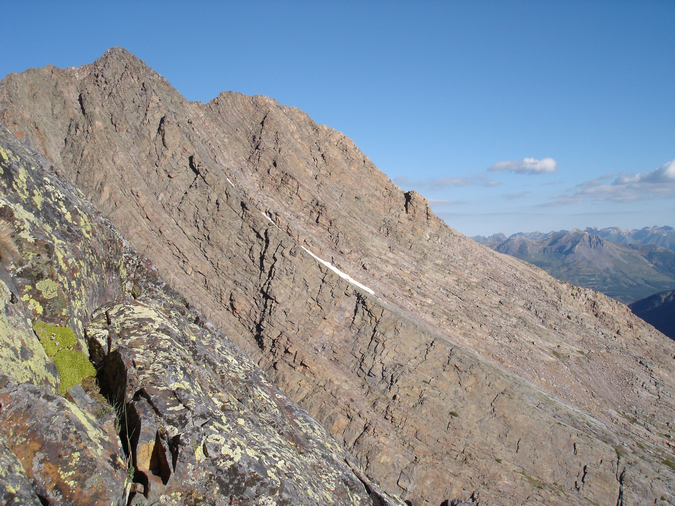
At this point, Regina and I had to make a decision. The weather was great. Barely any clouds in any direction. But - Wilson Peak was still a long ways off and it was already 3:30 PM. I still felt strong but Regina was fairly demoralized by how far away Wilson Peak looked still. From the saddle Wilson Peak was still a half mile away and a good 600 feet up across insane snowfields and rotten rock. I encouraged Regina to give it a shot with me, so we did. Right off the bat, we were greeted by a pretty intense snow field at the base of a cliff that was quite run-out, meaning, if you fell down, you were going to travel a long way down and probably die. We deployed our ice axes and secured our helmets and crossed, using extreme caution. Soon, a second and then a third snow field of equal danger were presented to us as well as crumbling rock and difficult trail-finding. Regina became really sketched out by the whole thing and decided that it was as far as she would travel and told me to keep going and that she would wait there. I was fine with that idea, so I continued on. I'm not going to lie - I was not mentally prepared for this climb. I thought Wilson Peak would be a walk in the park. Having much of the route obscured by steep and dangerous snow that had softened considerably throughout the day, my mountaineering skills were certainly challenged. The route before the false summit was chossy at best, with huge loose boulders cascading above and below me on a regular basis. Oddly enough, I was calm in this environment. I have an odd knack for loose rock and when my footholds and handholds gave way, I went with it, almost like walking onto an escalator. I chose my route carefully enough so that I could avoid the larger messes, but a few rocks did manage to take huge chunks of flesh out of my finger and hand. No worries though, the bleeding stopped quickly and I didn't even stop to apply a bandage. All in a days work. I was finally able to reach the ridgeline that connects to the false summit, and was able to catch views of a small wildfire that had broken out to the north-west of me.
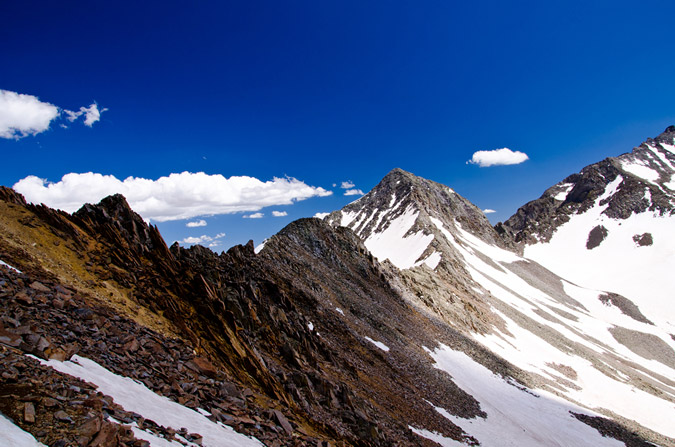
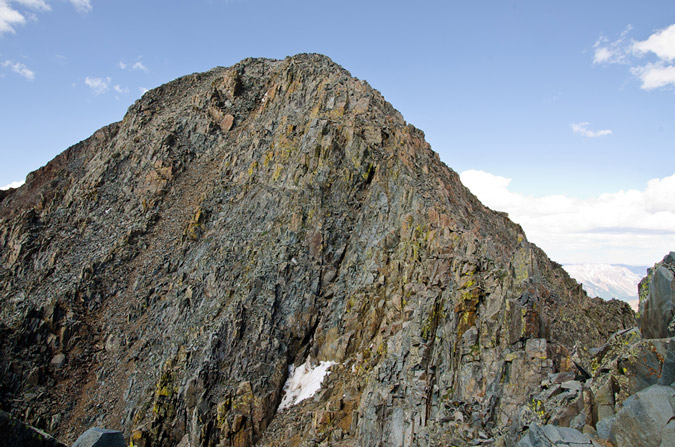
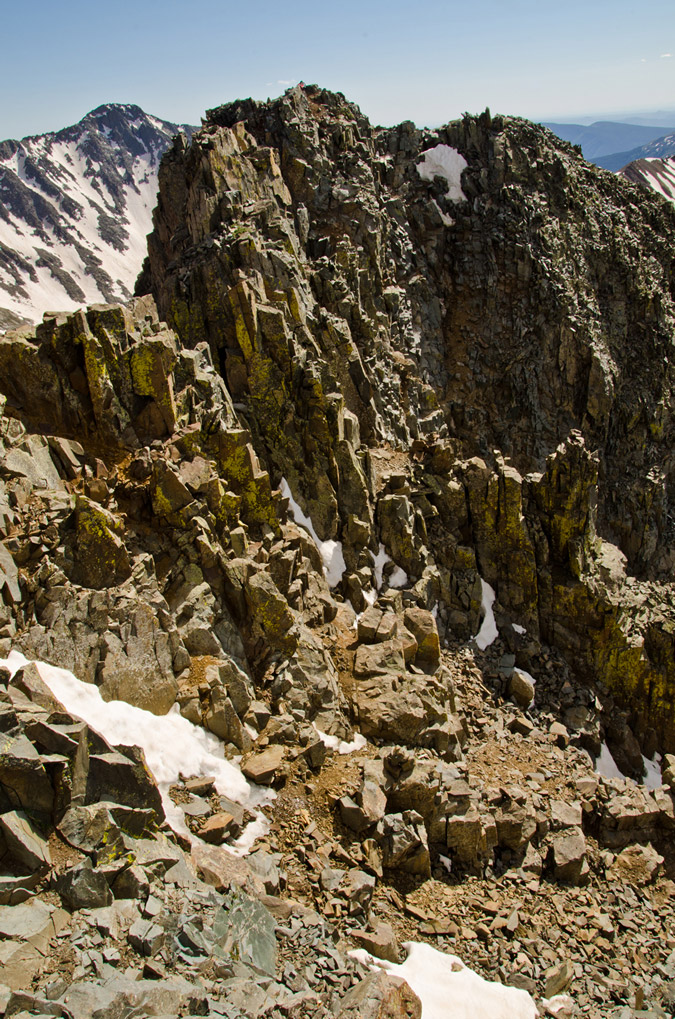
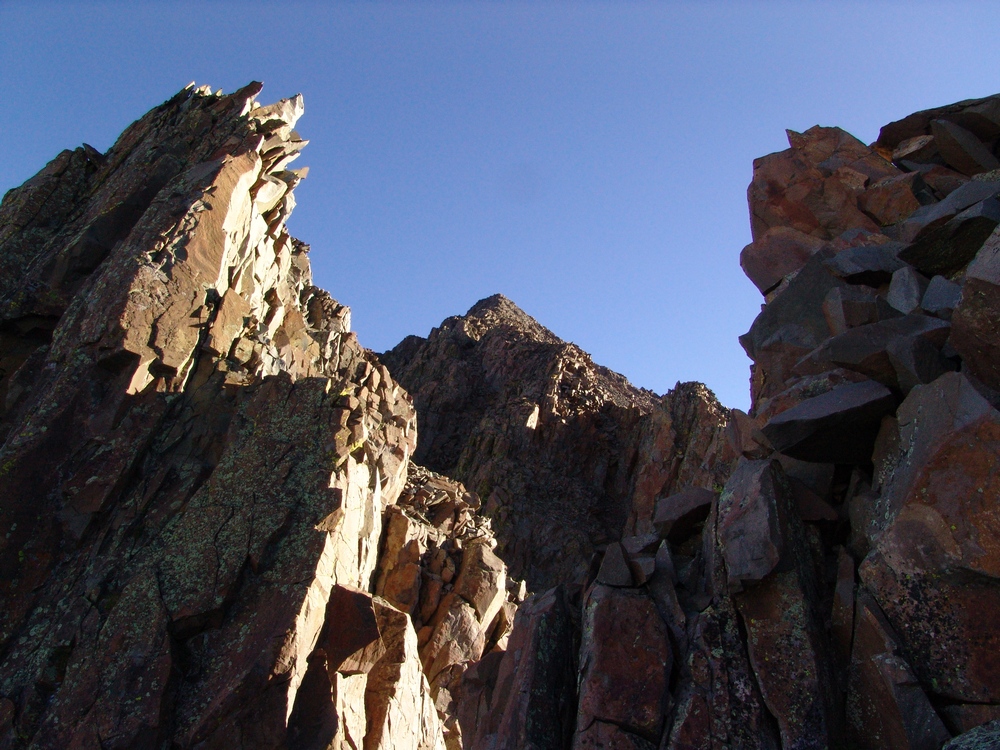
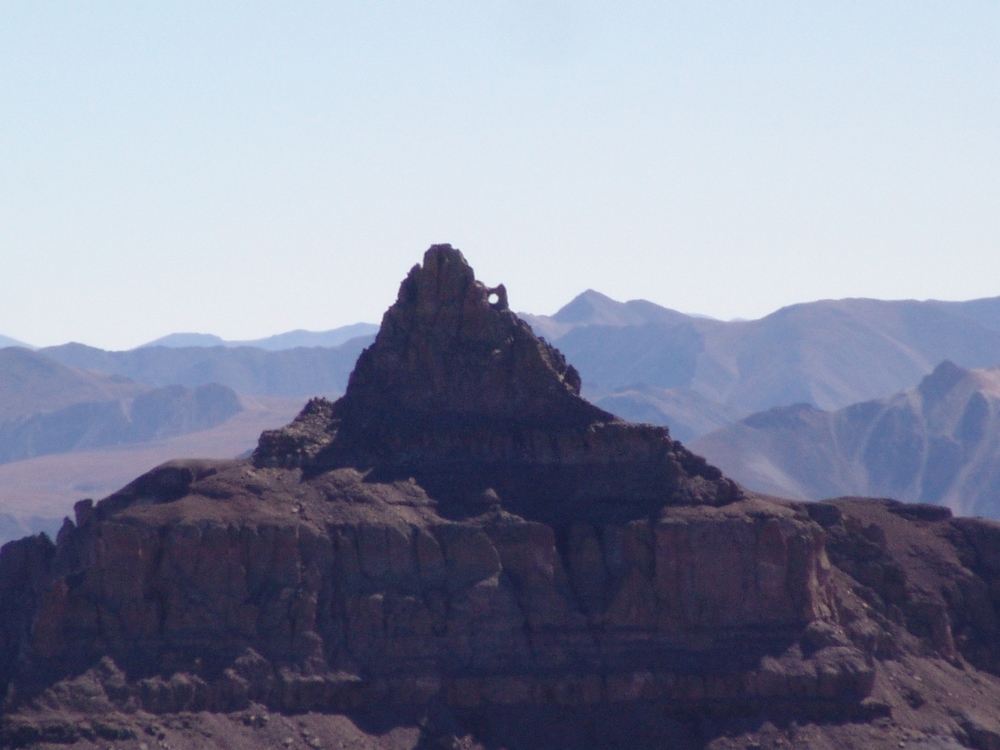
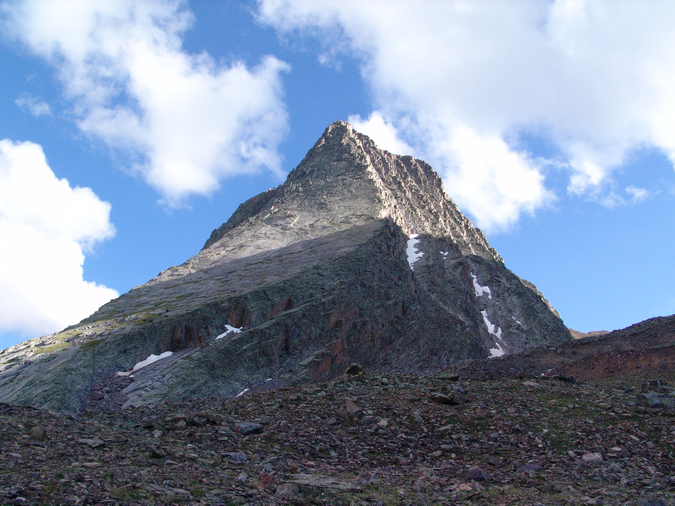
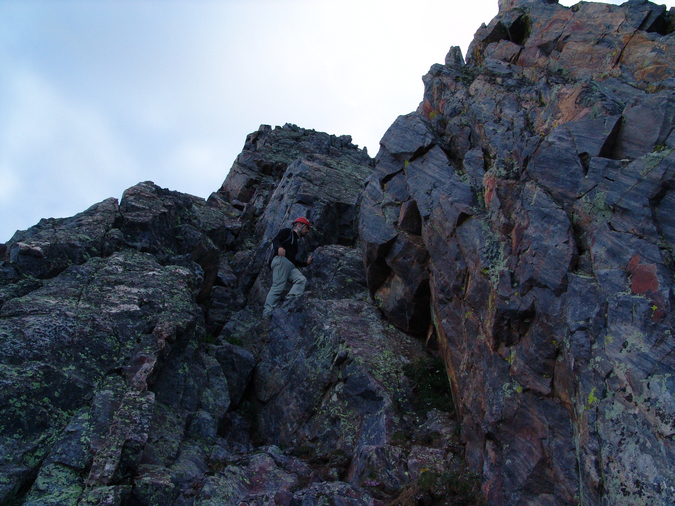
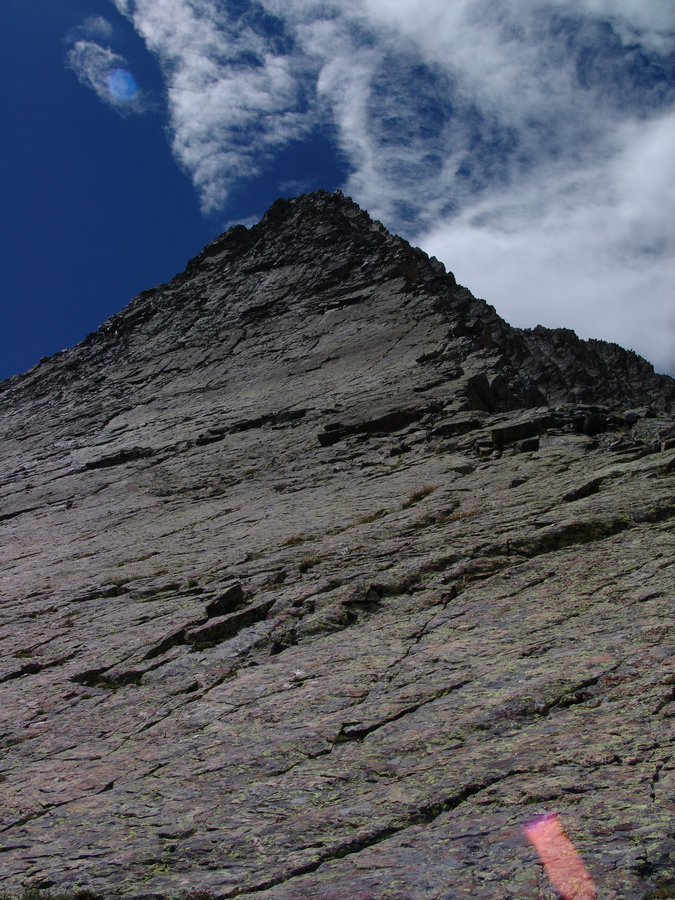
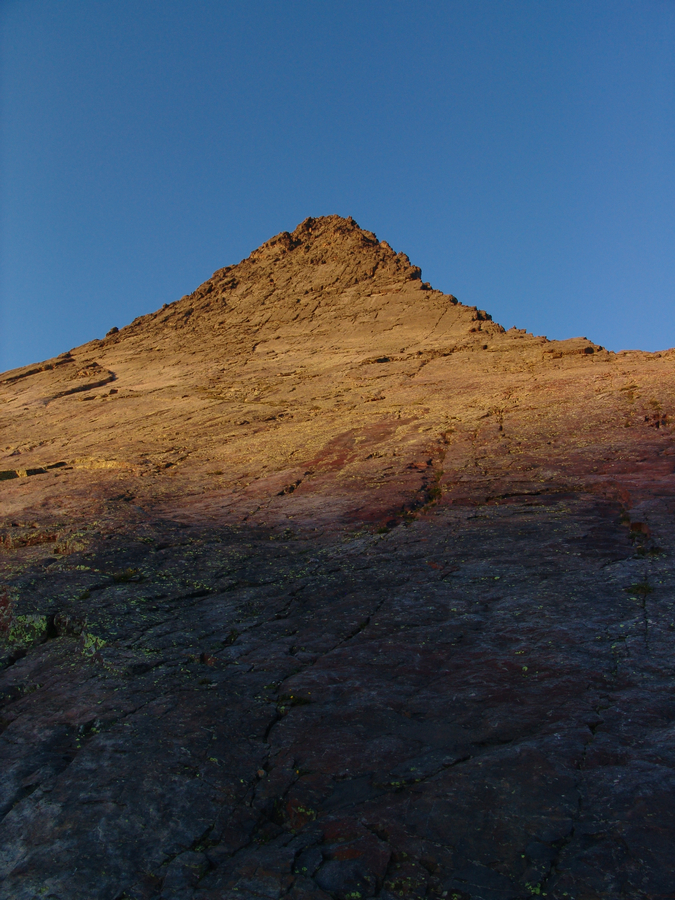
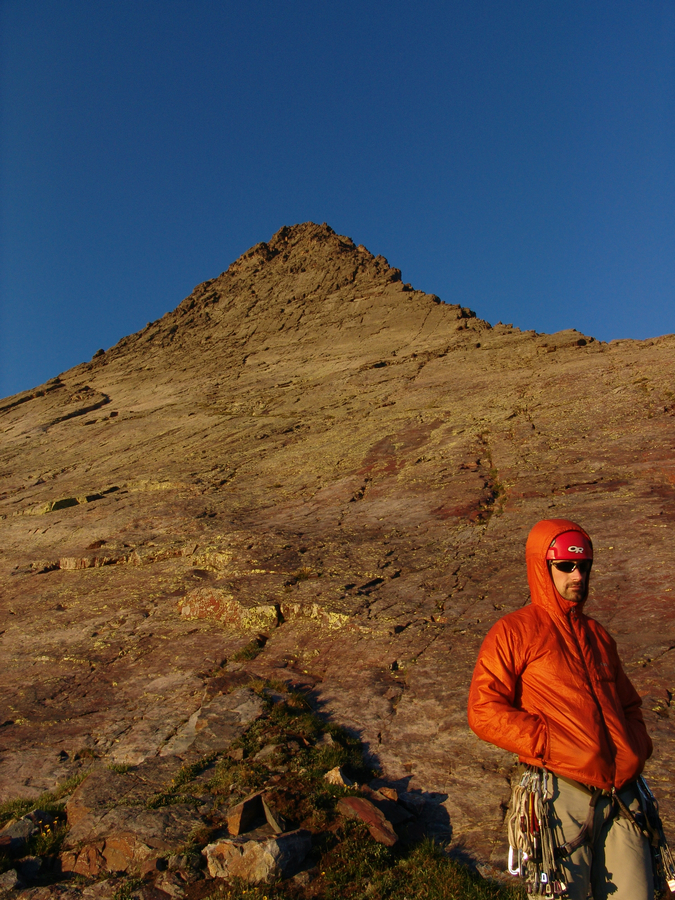
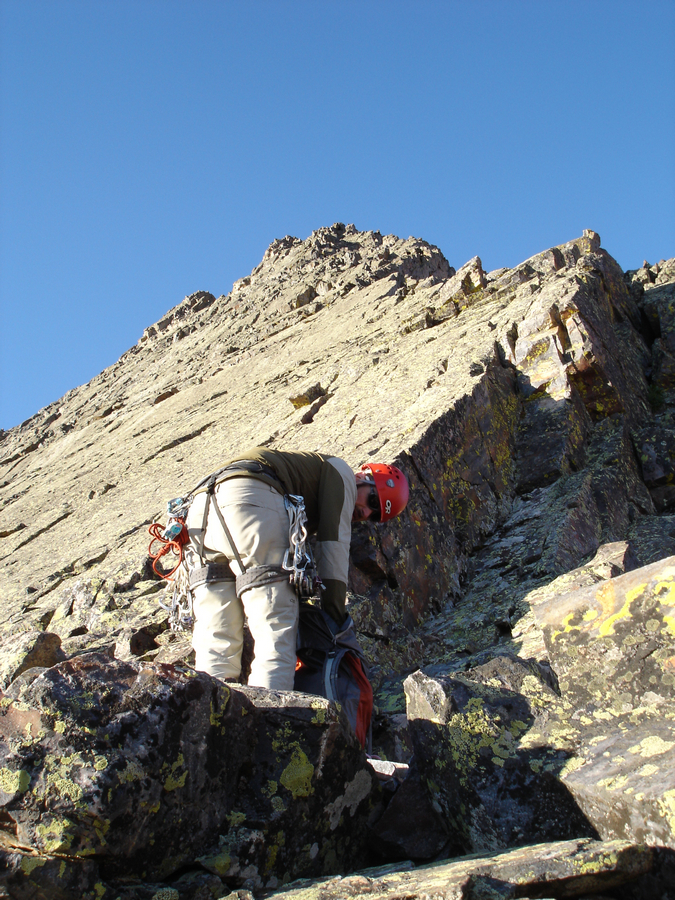
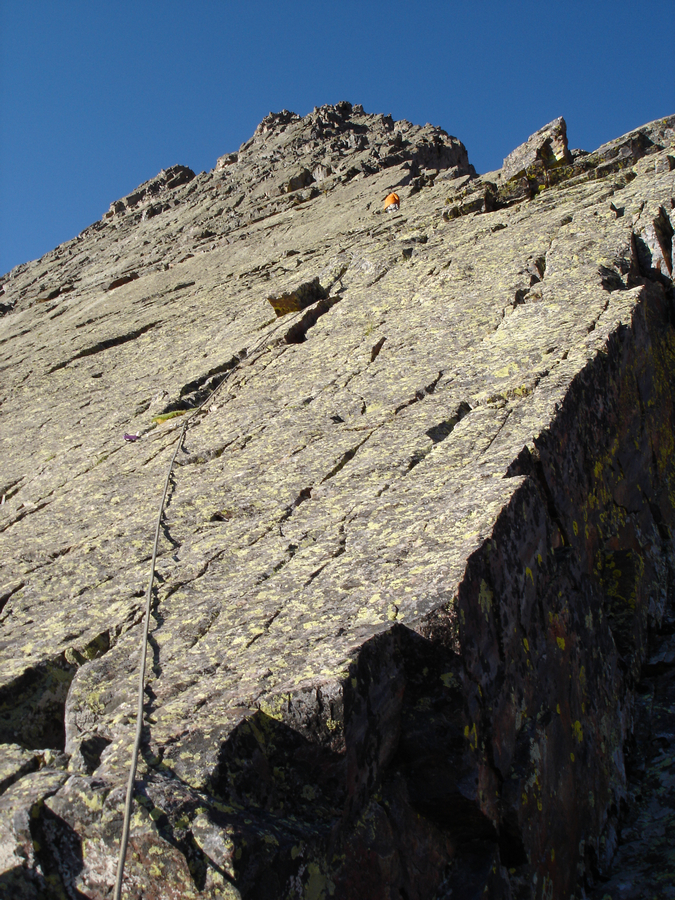
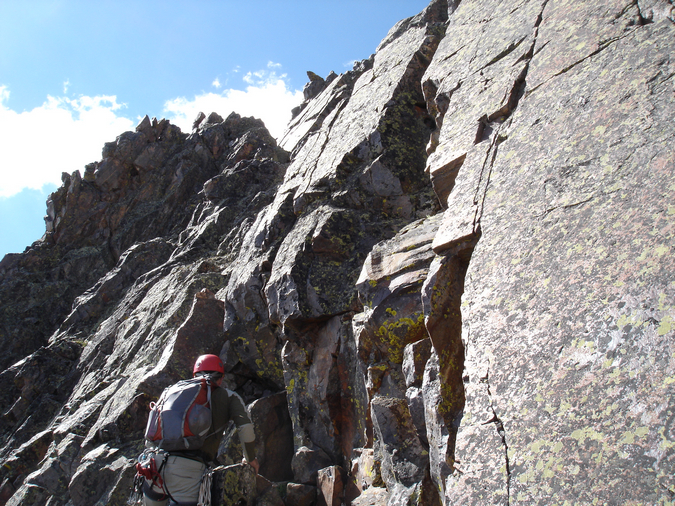
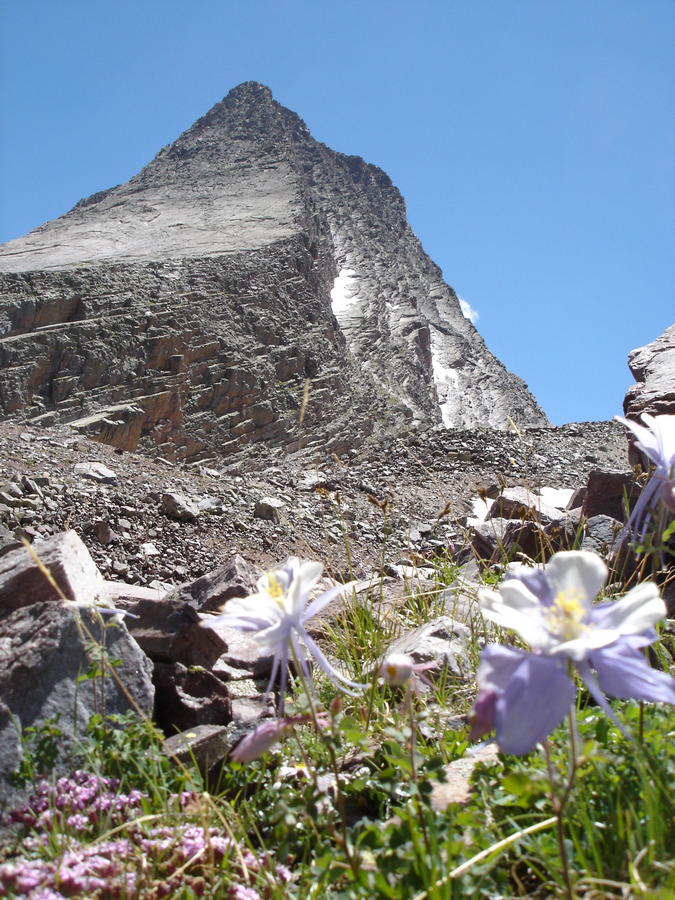
Of even more interest at the time, Wilson Peak's daunting summit block stood before me like some ancient pyramid. Again I found myself thinking - wow - really? I never expected this much awesomeness from this mountain. I was excited. Was this going to turn into a class 4 scramble? I sure hoped it did! The exposure looked inviting, but the rock was crumby and resembling of tiny pinnacles. I knew that I needed to choose my route carefully. The route description from 14ers.com stated that there was two ways to skin this cat - go left and downclimb to some safer class 3 sections, or continue on the ridge and challenge yourself with some nuts class 4 stuff. I chose the class 4 stuff and it did not disappoint me in the least.
In the interest of weight and balance, I decided to take a huge drink of gatorade and leave my pack on the false summit, bringing along my camera, which was attached to my chest by my new Lowepro Toploader bag. Yes, I realize that I broke one of the key tenets of mountaineering by leaving my pack behind, but I still feel it was the best decision.
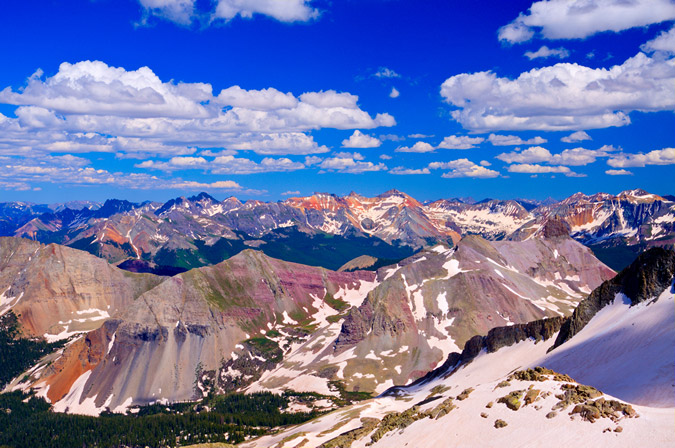
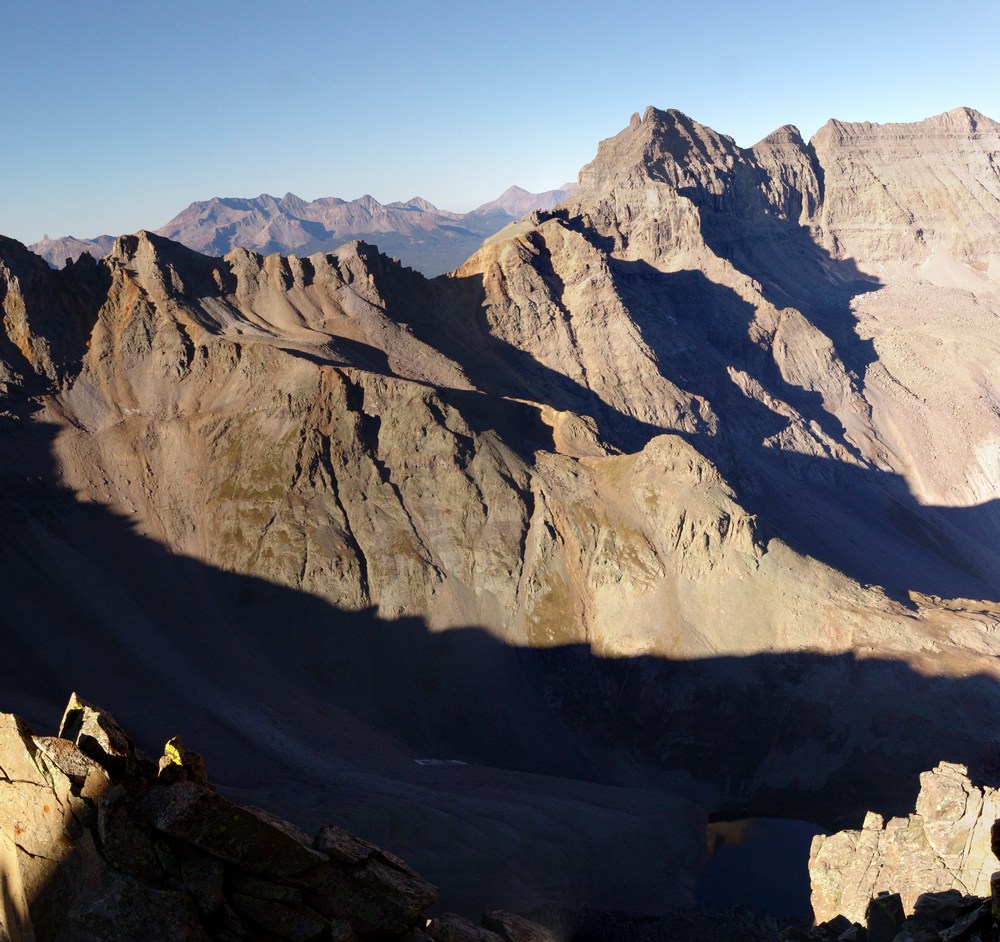
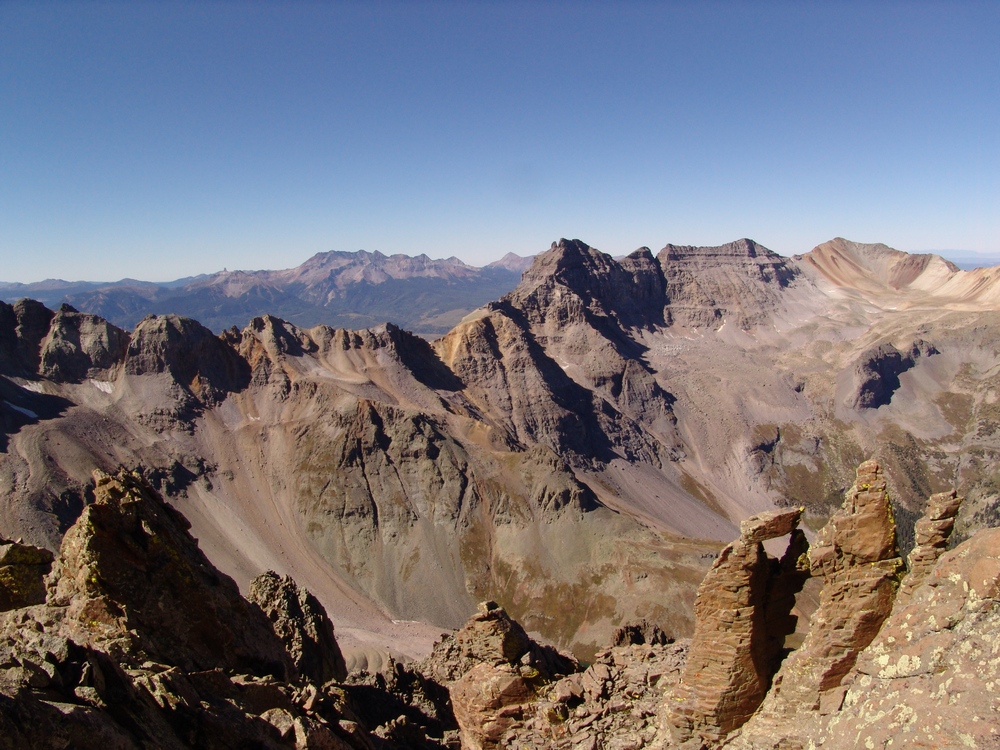
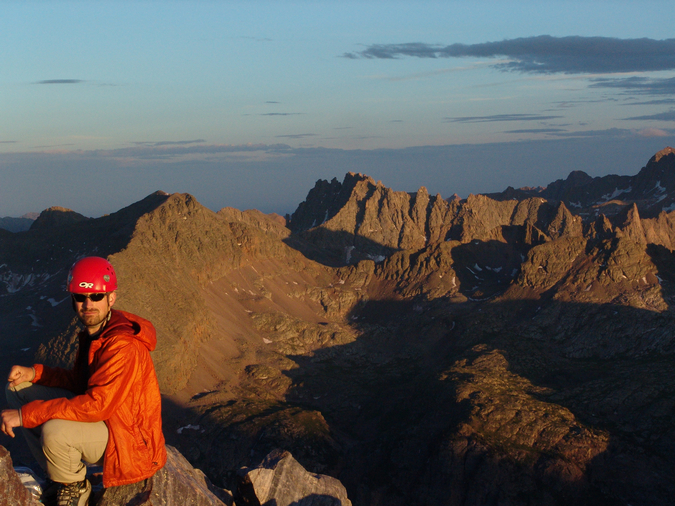
After carefully finding my way down and through the class 4 section, I reached the summit at 4:50 PM. I was still feeling great. Naturally, the views were absurd and rediculous - in a good way of course! Sneffles towered to the north-east alongside all of her insanely shaped neighbors. All-in-all I would rate the Wilson Peak views as a 8 or 8.5. Pretty amazing.
Sneffles and her friends:

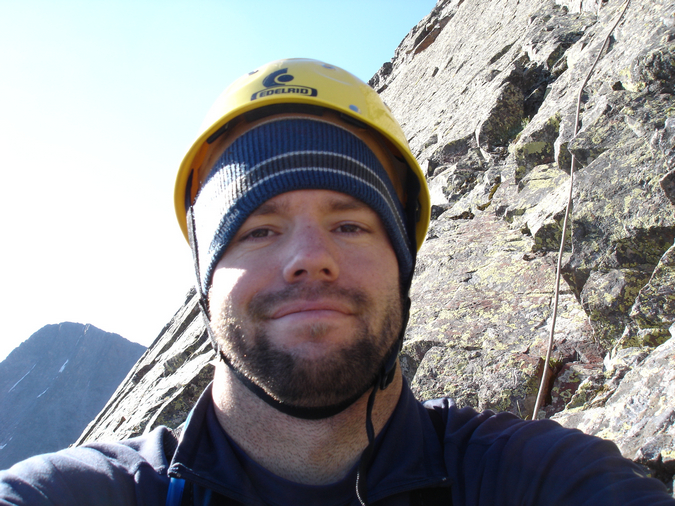
I was able to set my camera up to take a quick self-timer too - how fun.
I figured with Regina waiting below, I should get off the summit pretty quickly, and so I did, leaving at 5:03 PM. In the distance, I spotted my pack and I thought it was neat to see the nastiness of the downclimb I did earlier as well as my pack for a dose of perspective. I basically went straight down from where my pack was at.
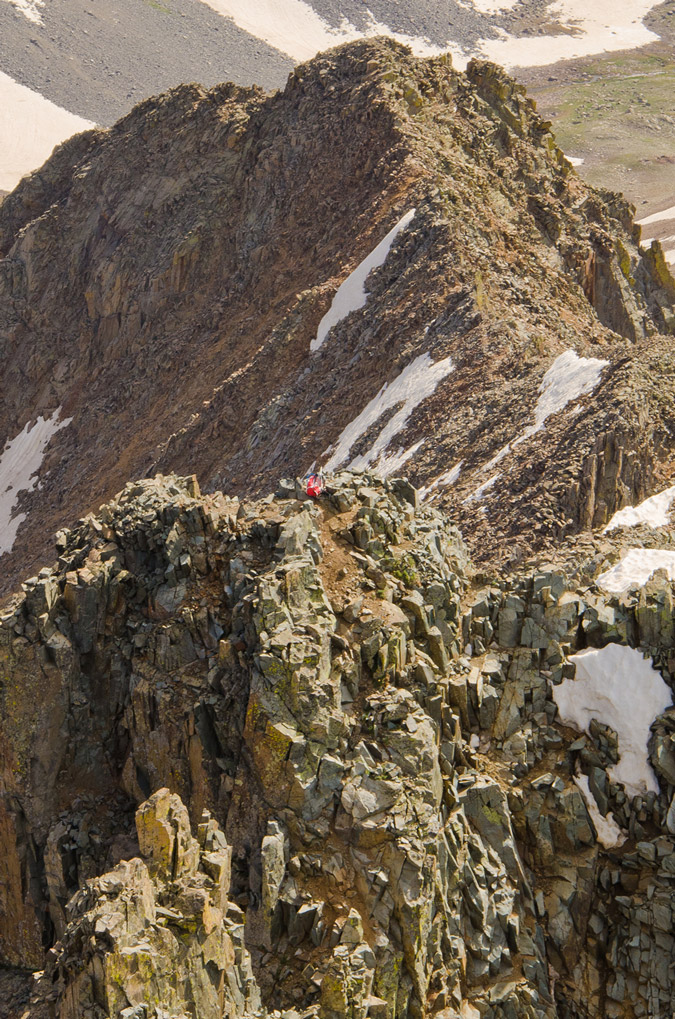
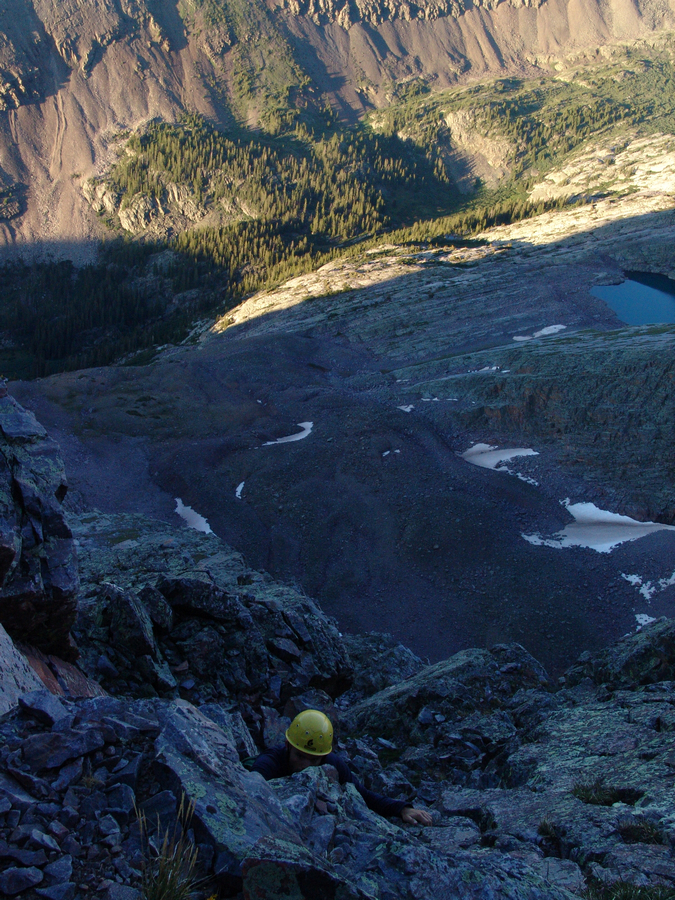
Zoomed out, you can see that the saddle where Regina was waiting for me was a long ways off. I believe she was waiting for me just where the snow was starting to end.
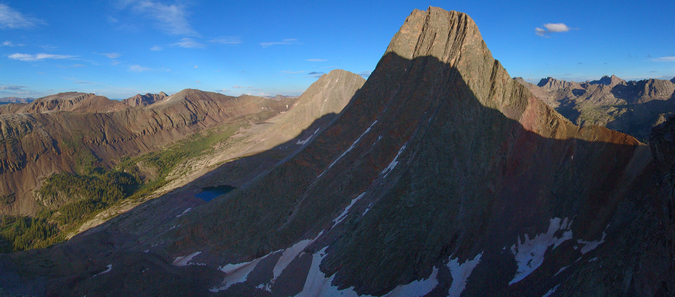
Another view of the climb back up to the false summit from Wilson Peak with my backpack at the top:
The downclimb back to Regina went much faster and I was able to reach her in just 30 minutes from the summit. She had safely crossed back to the saddle and had waited for me there. She also took a shot of me on the Gladstone Peak - Wilson Peak saddle:
We opted to head back down the standard way to the Rock of Ages Saddle and had a long conversation on the way down. I knew that Regina was probably feeling pretty bummed about not getting to the top of Wilson Peak, especially after the absolute disaster that was our Snowmass Mountain attempt the week prior. I was pretty proud of the way Regina handled this situation. We talked about how this type of climbing just was not fun for her and that if she was feeling uncomfortable on the rock that it was not worth getting killed just to check off a box on a list. I knew that Regina had a strong goal to finish the 14ers this year, but I think she has a much richer appreciation for mountaineering and all of its challenges. I think that in time she will grow more and more comfortable on class 3 and class 4 climbs, and will complete the 14ers; however, there's no sense in getting killed because you don't feel comfortable! Kudos to Regina for having a clear mind about this issue. All too many climbers lose sight of this important perspective in their quest for glory.
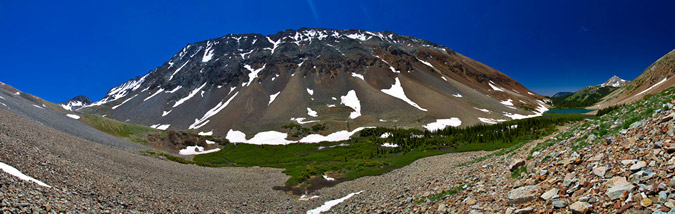
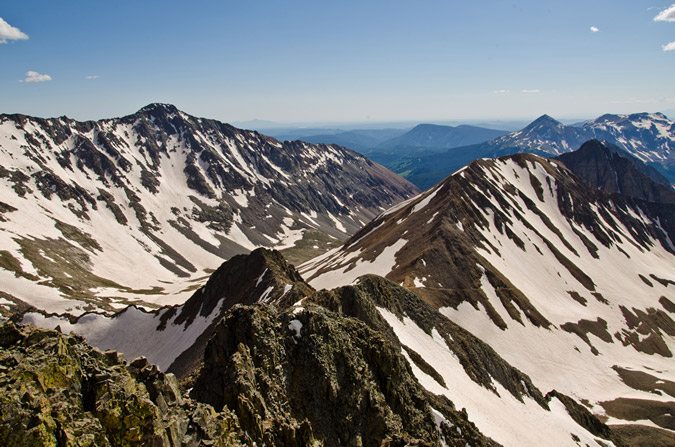
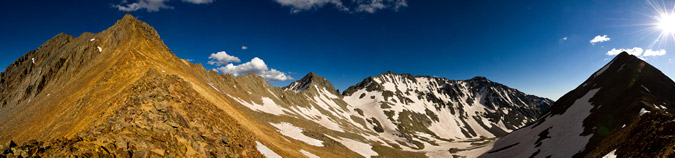
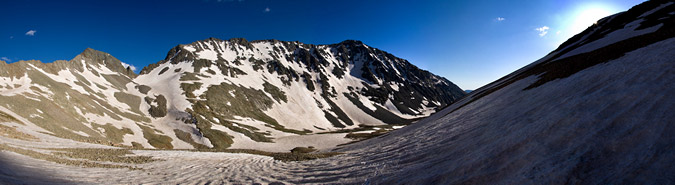
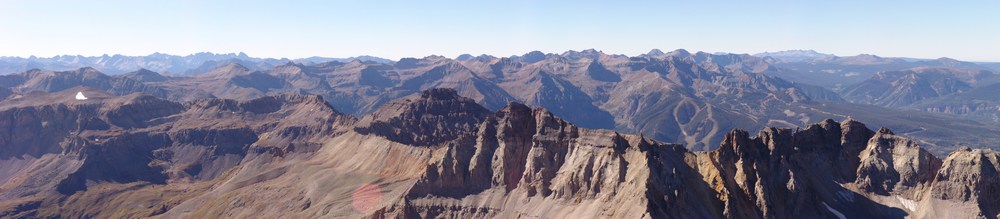
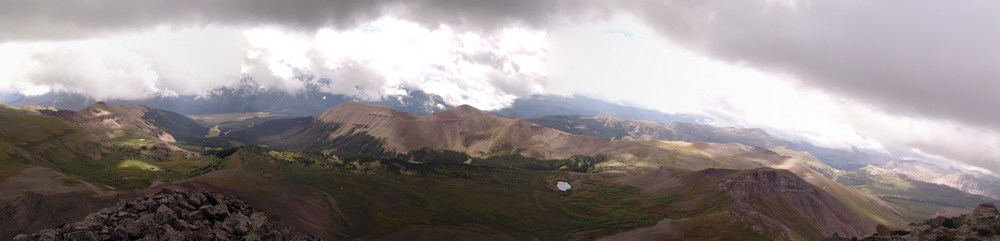
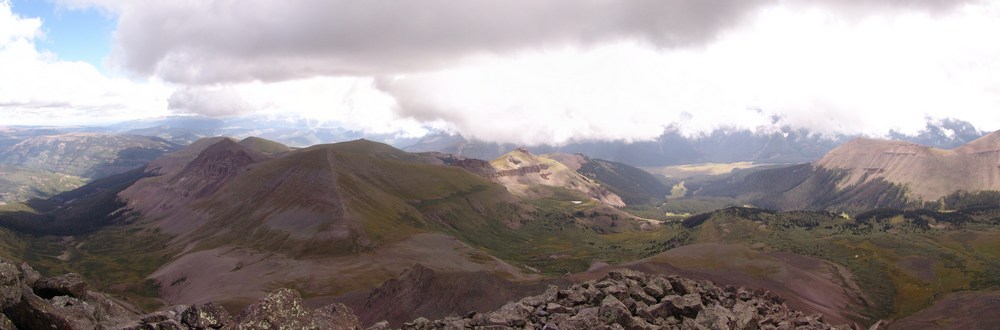
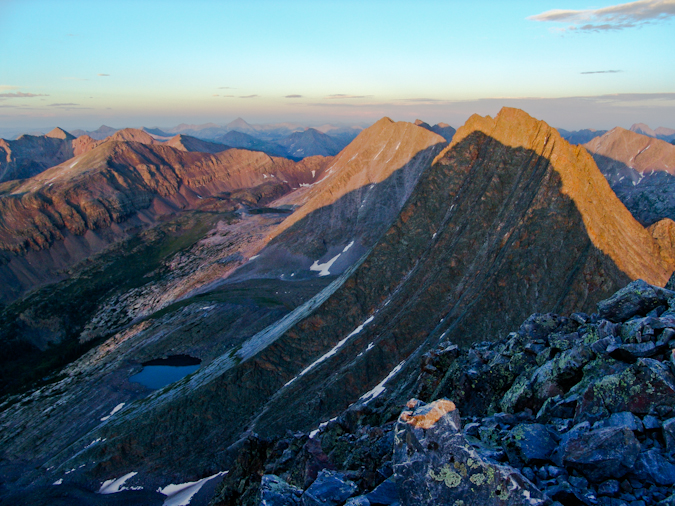
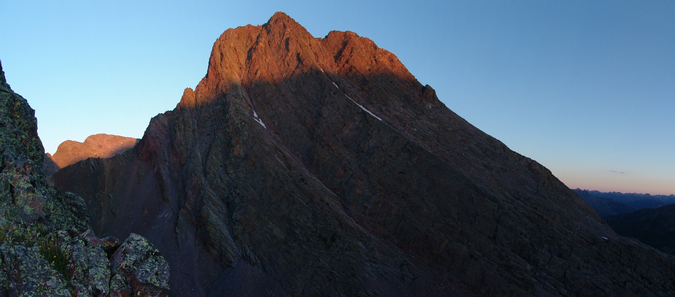
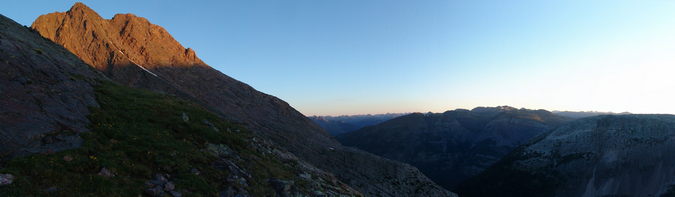
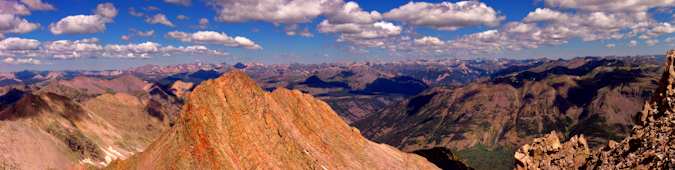
The Rock of Ages Saddle proved to be a nice location to capture a nice panoramic of the Navajo Basin, with Gladstone Peak (center) at the head and continuing on down the ridge to El Diente.
We took pause back at the Rock of Ages Mine for some good 'ol fashioned mining fun. Regina took a more conservative approach to her mining pose:
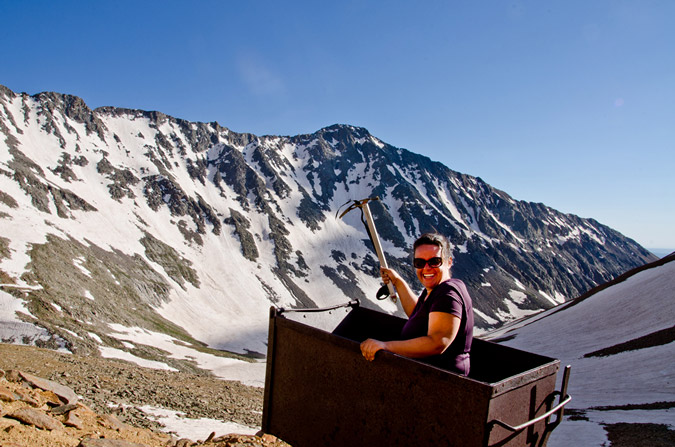
But... I was still pumped from doing Wilson Peak, plus I wanted to give my best Miner-49-er impression! I think the result was more of a hybrid between pirate and crazy guy...
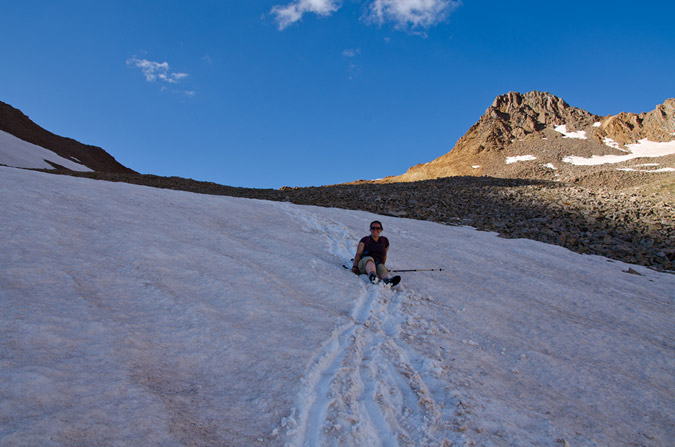
Cruising back down the Navajo Basin was quite fun since the snow had softened up just enough for some glissading and boot skiing.
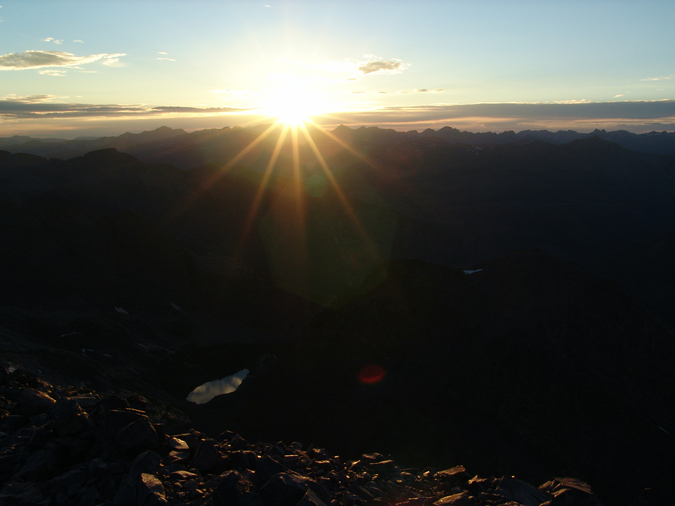
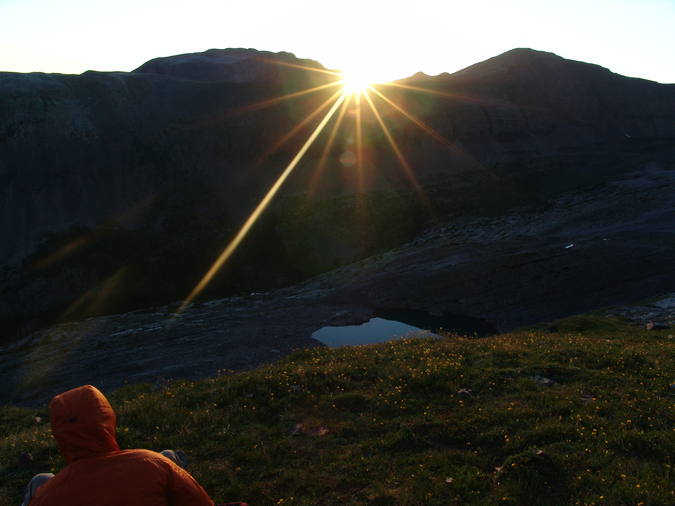
However, the sun was beginning to set, and my photographic funny bone started to shake. I knew that the Golden Hour was approaching and that there would be some amazing opportunities for some killer shots soon.
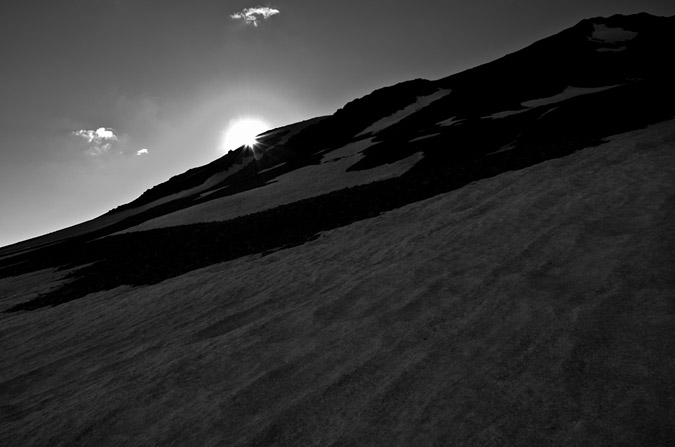
 As we worked our way down the snow fields, I was getting more and more anxious for the photography opportunities. I kept looking down at my altimeter watch to see what time the sun was setting. According to my watch, the sun would set at 8:45 PM. I was really pushing myself to get down to Navajo Lake before then so that I could take advantage of my tripod and the sunset.
Unfortunately, there were just too many awesome things to take pictures of on the way down!
I even found a model marmot to pose for me - how kind of him!
I thought he was pretty funny! He even gave me his best "oh crap" look! Haha.
As the sun set further and further, I kept pushing myself to hike faster and faster. Would I make it?
The photographic opportunities were endless...
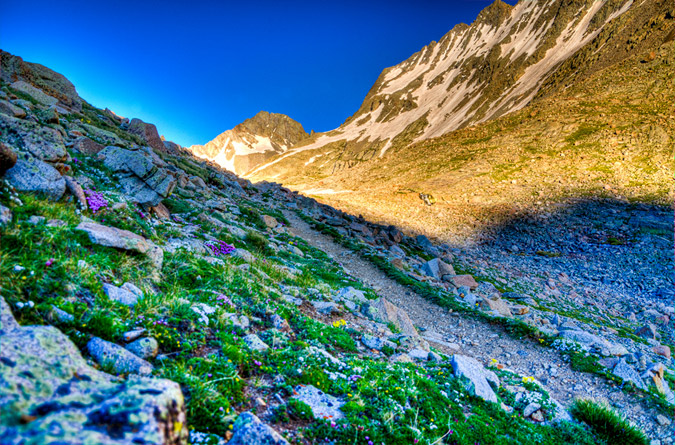
I was even able to get a quick HDR from the trail, although the results were not terribly great.
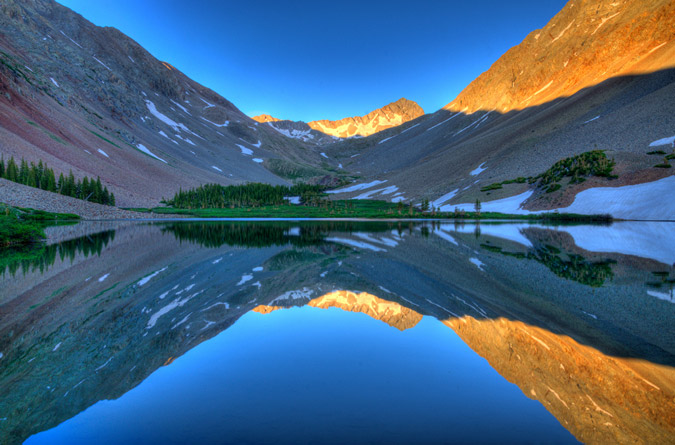
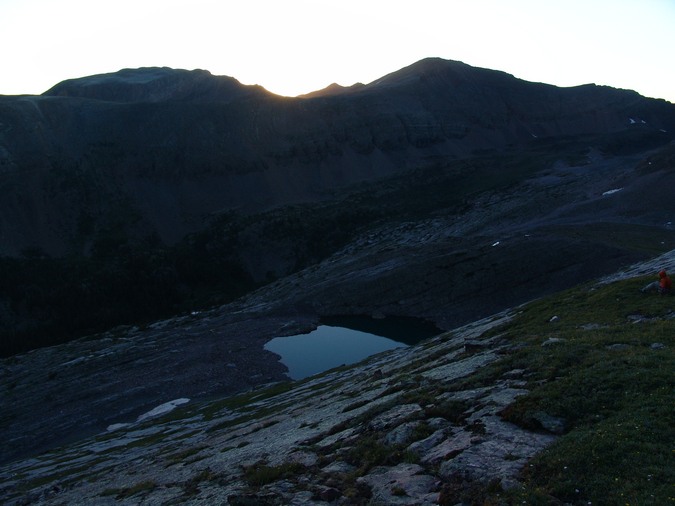
I finally passed Regina and she pretty much knew what I was up to - I needed to get back to that lake! Alas - I did reach the lake right on time at 8:00 exactly, 8 hours after we had left camp. Navajo Lake submitted her glory to me quite beautifully...
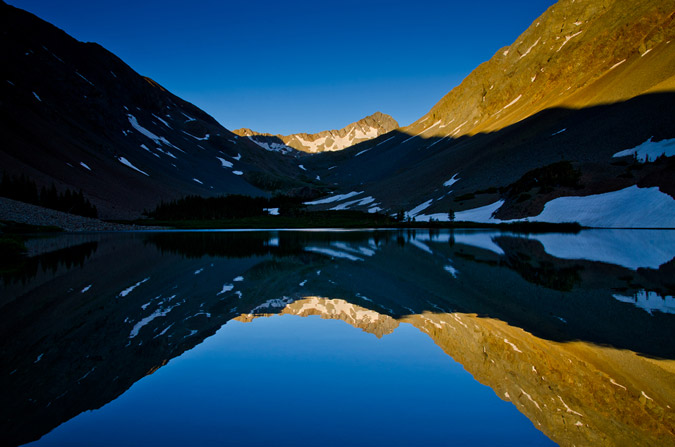
And I even did a pretty decent HDR too:
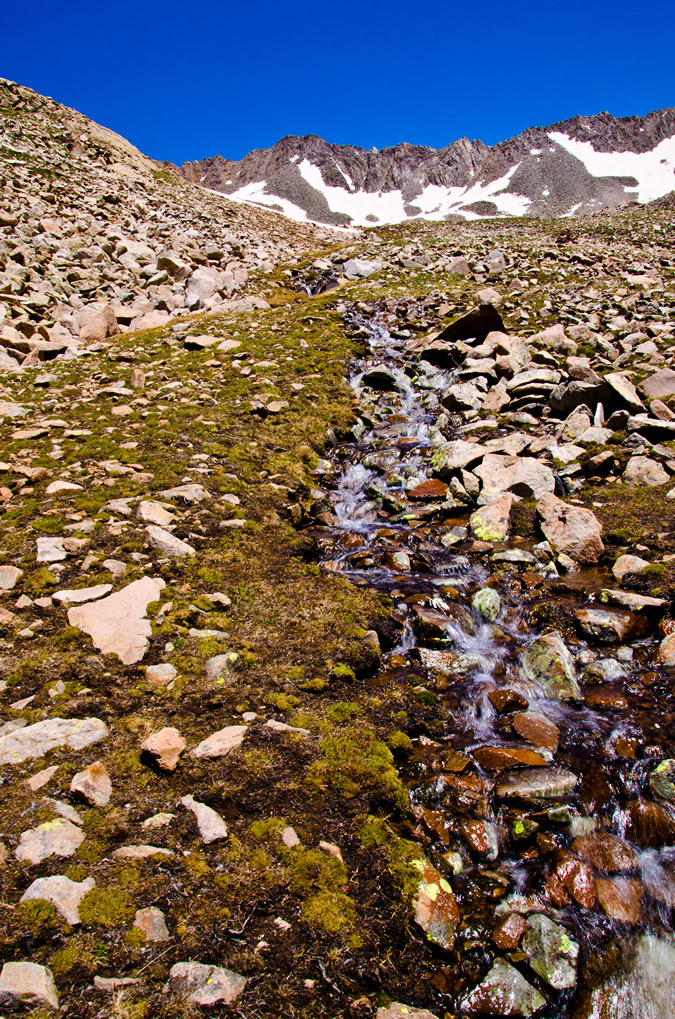
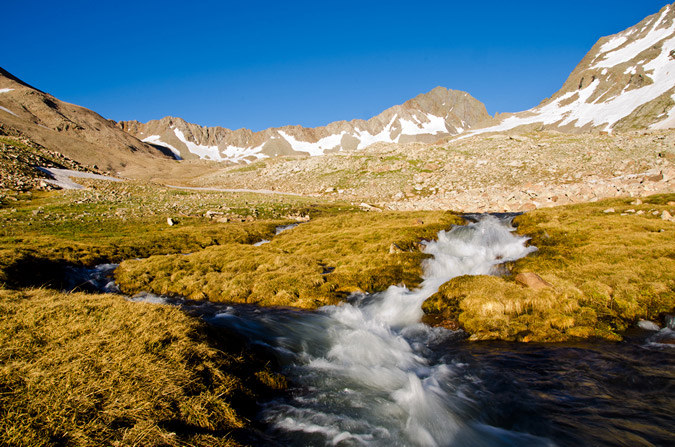
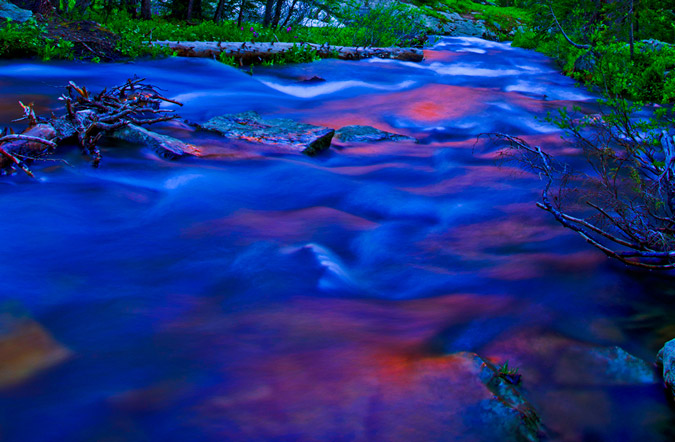
Regina and I convened at camp and decided to cook some Mountain House meals ASAP to refuel. While I gathered some water at the creek, I could not help but notice that the red rocks of El Diente were reflected off of the creek...
Regina and I talked about our plans for the remainder of the weekend. We tossed around a few ideas. Maybe I could climb Mount Wilson and El Diente with another group at the lake? Maybe we would just head out and call it good? We decided on the latter. I did not want Regina sitting around all day while I climbed some more, and since the mountains are not going anywhere, I figured it would be totally cool.
Regina and I threw down on our meals like two starving children. Regina was pretty tired and went to bed, but I knew that my adventure had just begun. With tripod at hand and camera at the ready, I set-up for a night of star trails photography, which is quickly becoming one of my favorite things to do.
Navajo Lake would provide the perfect setting for star trails, and I knew that I would get a few keepers out of my efforts.
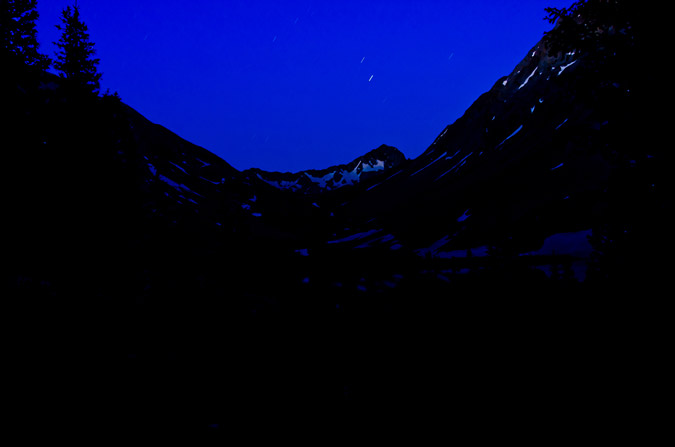
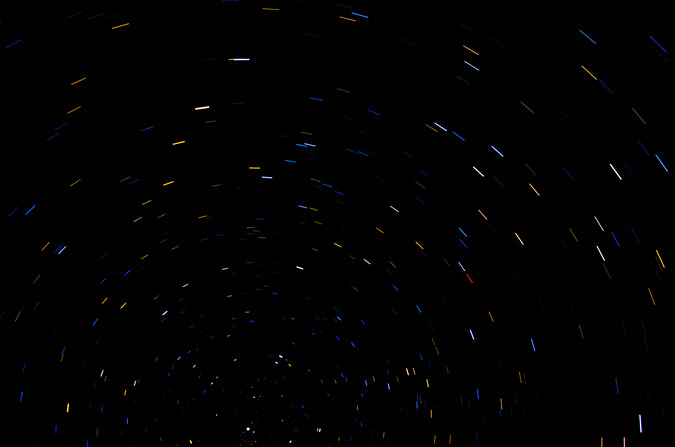
As I waited for the perfect amount of star light, I embarked on a slight experiment. I knew that in a lot of star trails photos, the goal is to center the photo on the North Star, since that star does not move across the sky. The result is a center star that does not move with the rest of the stars rotating around it like a carousel. Unfortunately, I totally forgot how to identify where the North Star is in the sky, but knew that it had something to do with the Big Dipper. I realized that the Big Dipper's cup pointed at the North Star, so I centered my camera on that star and tested it out. Sure enough, I had successfully located the North Star.
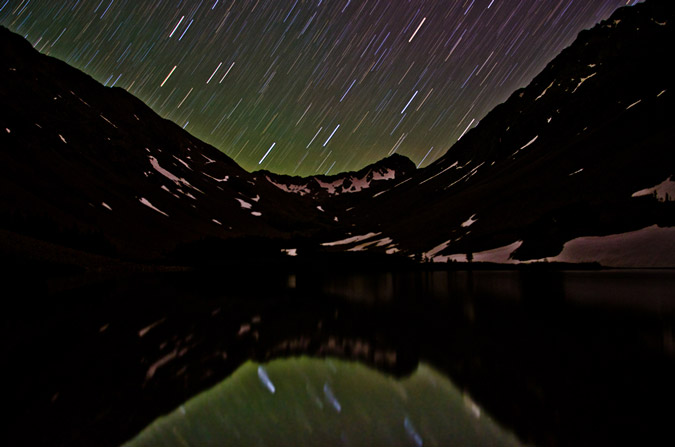
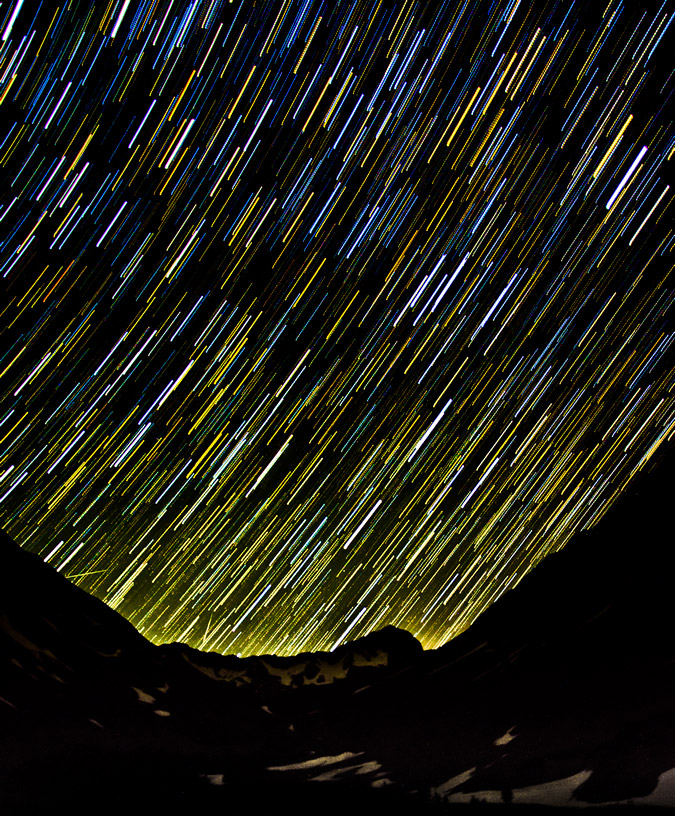
Finally, the moment was right and I opted to do the one exposure method of shooting star trails, where combining photos is not required, but precision is. I think it went pretty well, although I really wanted to do it for longer, but literally fell asleep on the shores of the lake while the camera took the shot...
I also decided to compile a set of exposures @30 seconds each to see which method produced the best results. I certainly feel torn!
I finally went to bed, knowing that I had captured something magical in the reflection of the lake. In all, I ascended 5,280 ft. and hiked over 15 miles. Click the elevation profile for a larger version if you'd like.

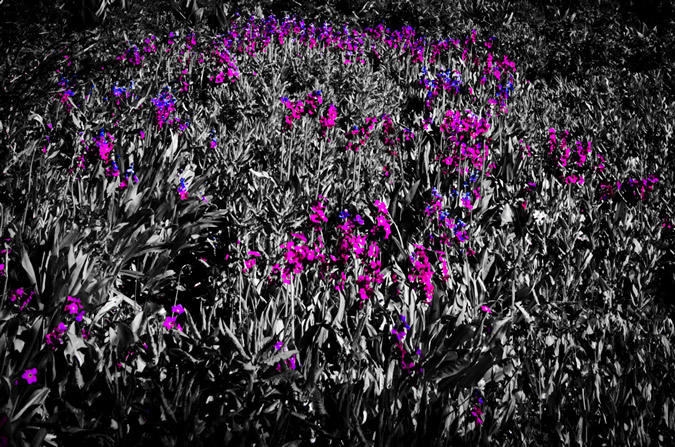
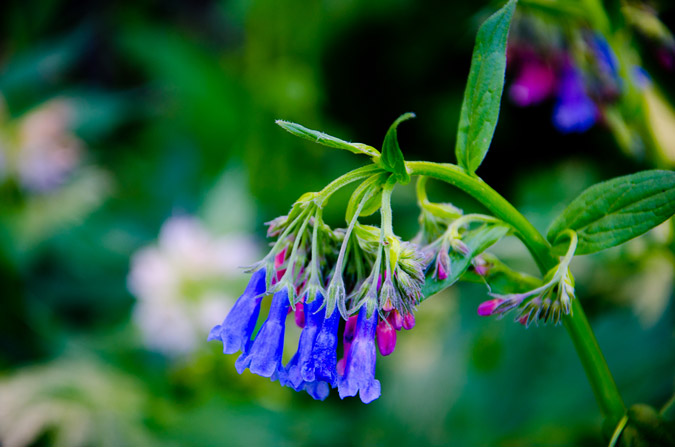
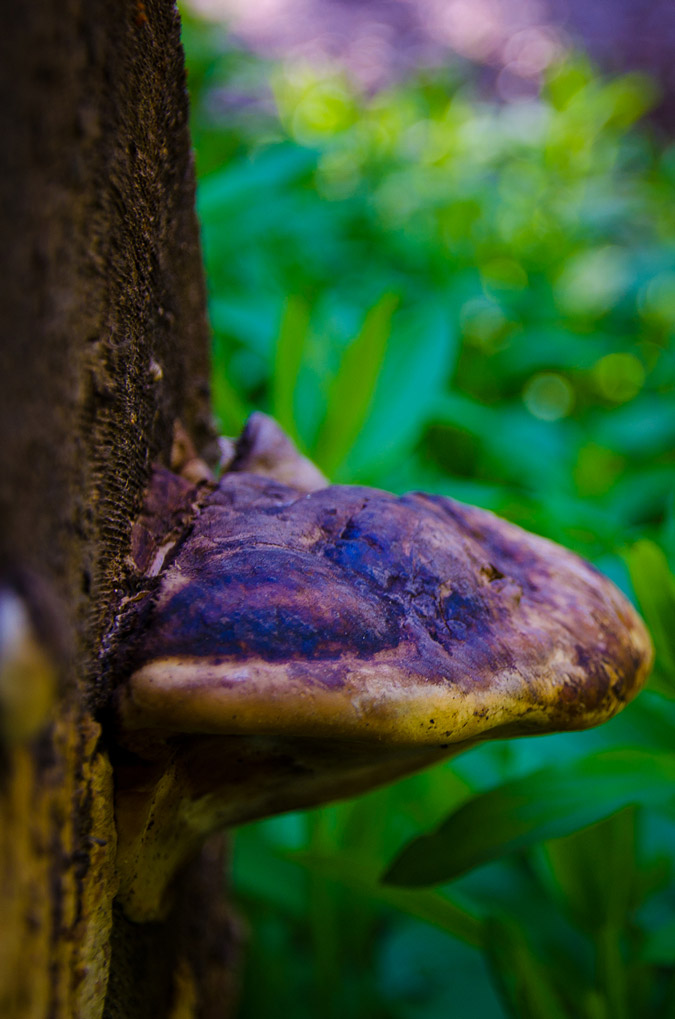
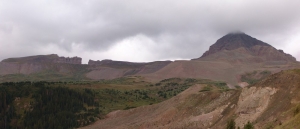
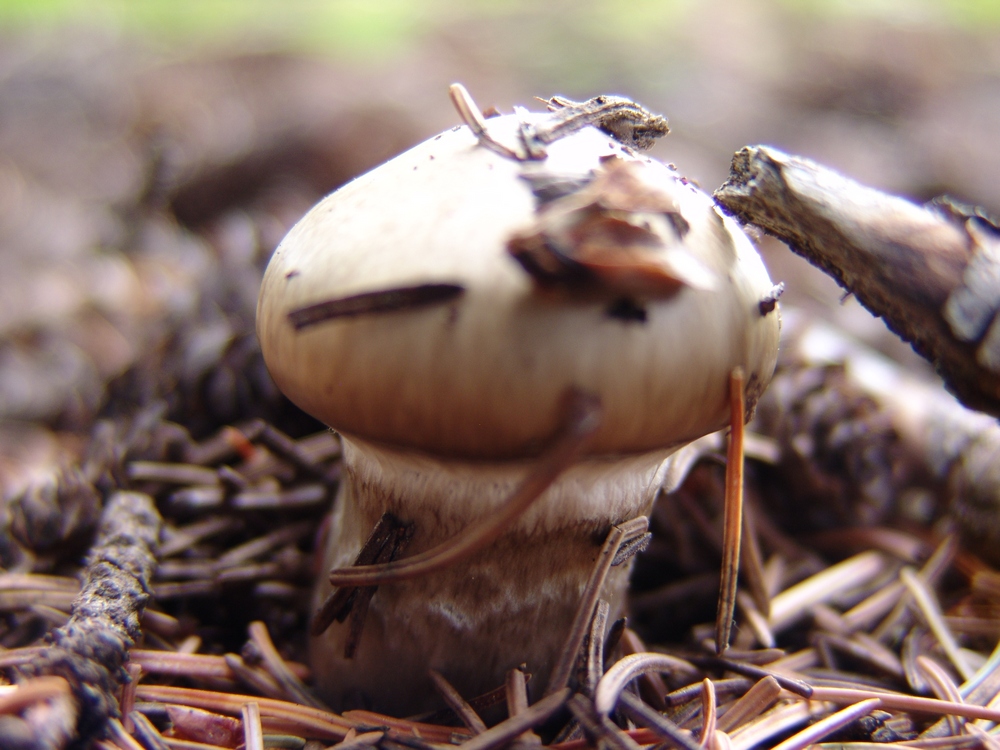
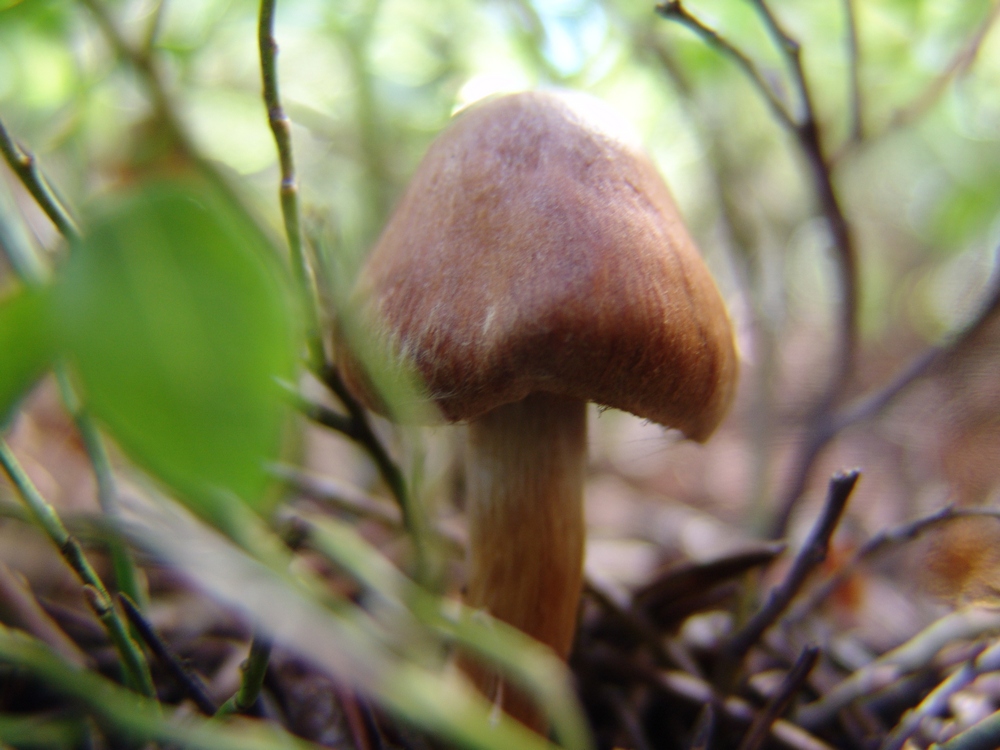
The next day, we packed our packs and headed out, but not without some obligatory shots of more wildflowers and one whacky mushroom!
 We departed the valley thinking that our adventure had ended. We left knowing that we had gleaned some positives from the trip and that even though our plans did not pan out the way we intended, that it was still a great time. Little did we know then that our adventure had just begun...
Mount Sneffels - A taste of the Southwest Ridge

I've had my eye on Mount Sneffels for quite some time. This gem of a mountain located near Ouray, CO, is one of the most splendid-looking mountains in all of Colorado. Sneffels first caught my attention back in February, when I snowshowed on Miller Mesa, to the North of Sneffels.

Mount Sneffels as seen in February, 2010.
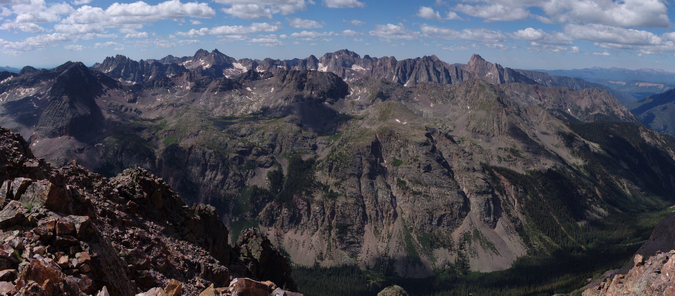
Additionally, I was able to get great views of Sneffels and the surrounding rugged peaks back in June from the summit of Handies, and in July from the summits of Arrow and Vestal.

Sneffels and Teakettle as seen from Handies. Sneffels' pinnacles can barely be seen at the base of the Southwest ridge.

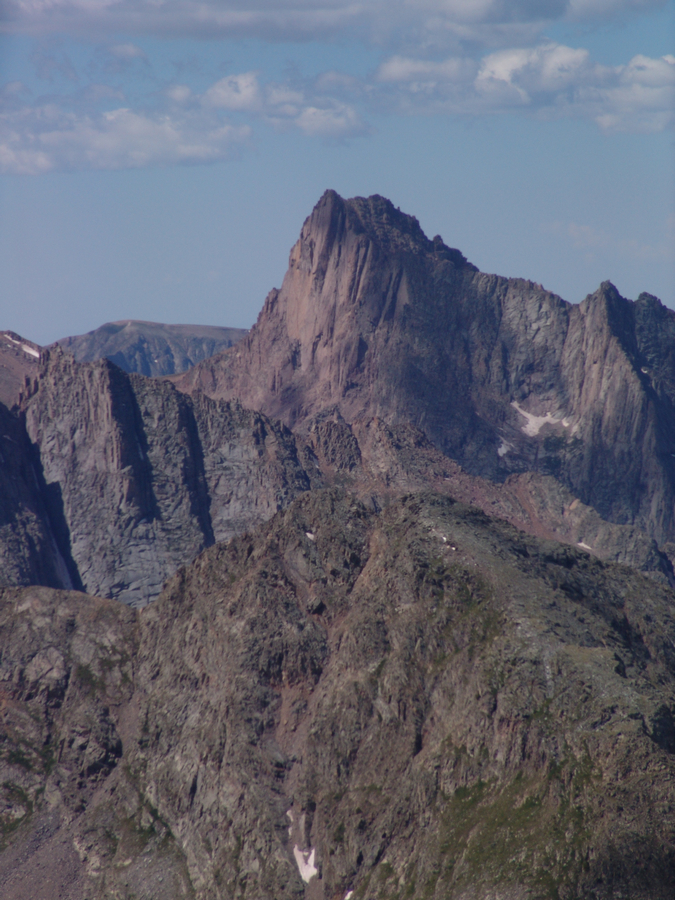
The Sneffels group as seen from Vestal.
The surrounding mountains are all very rugged, and access to the peak is accentuated by the well-traveled and world-famous Yankee Boy Basin.

The Sneffels "sub-range" (seen above) is probably the second most rugged group of mountains in all of Colorado, next to the Grenadier-Needle range. Sneffels is generally climbed via Yankee Boy Basin from the upper trailhead at 11,600 ft and up what is known as the Southeast Couloir route; however, for this trip, I'd had my mind set on the Southwest Ridge route of Sneffels, which follows the same basic start path of the standard route, but instead of going up the couloir, you gain the top of "Blue Lakes Pass" and then continue up the ridge to the top. In fact, the first recorded ascent of Sneffels, on September 10, 1874 (almost exactly 136 years before) was made by the Hayden Survey via the Southwest Ridge. The Hayden Survey had to "climb with care" because this route is "quite steep in some places."1
From Yankee Boy Basin, the Southwest Ridge looks to be unclimbable because of the jagged pinnacles, known as "The Hand." However, these are avoided by going up the back side of the pinnacles and up a series of steep gullies to gain the ridge, and eventually the top of Sneffels.
Here are some meaningful statistics from this adventure:
Peak summited:
Mount Sneffels: 14,150 ft. (ranked 27th in Colorado)
Total elevation gain: 2,550 ft.
Total distance hiked: 3.86 miles
Total time hiking: 5.5 hours
Total photos taken: 330
Total distance driven: 620 miles
14er # 41 for me.
Joining me on this ascent of Sneffels was my wife's best friend's husband - Arron Shaver. Arron is not an experienced mountaineer by any stretch of the imagination; however, he is a very athletic and fit individual with a love for the outdoors. Arron and I made plans earlier in the summer to tackle Sneffels together in September, and when the week we had planned to climb it rolled around, I received a very prompt call from Arron and we finalized our plans. We left Colorado Springs on Friday night and arrived at Yankee Boy Basin at around 10:30 PM. The drive was made more interesting because the power steering of my Jeep had begun to fail on the way over. Fortunately, this did not prove to be a huge problem and we were able to make camp near where the road has a sign that indicates that "short wheel-base 4WD vehicles only past this point." Although my Jeep is very capable, I did not know what to expect up the road, and did not want to test my vehicle in the dark. We set the alarm for 5 AM and crashed very quickly.
When the alarm went off we were both amazed by the huge drop in temperature from the night before. I am guessing that we woke up to 25-30 degree temps in the morning. After a quick breakfast of oatmeal, we were off to the races. We continued up the road another mile to the end of the road and the start of the trailhead. I was not overly impressed with the difficulty of the road and in retrospect, I would have driven much further had I known it was not a very difficult road. Once at the trailhead, Arron and I were greeted there by a few other hikers, about 5 in total. We started up the trail and quickly reached the fork in the trail for the two different routes available from this trailhead: the Southwest Ridge route (Blue Lakes Pass) and the standard Southeast couiloir route (Mt. Sneffels trail). We broke to the left towards Blue Lakes Pass and watched as the rest of the hikers headed up the standard route. From this point until the summit, Arron and I did not see another person the rest of the ascent.

Our route up Mount Sneffels.
Views of the surrounding peaks were outstanding, right from the start. Teakettle Mountain, Gilpin Peak, and Potosi Peak were impressive. Having seen them all at a distance from many vantage points this summer, it was great seeing them up close and personal!

Gilpin Peak in alpenglow.

Gilpin Peak at sunrise.
Sneffels' pinnacles.

Arron Shaver - trusty hiking partner.

Potosi Peak.

Gilpin Peak in the early sun.

Matt Payne nearing the top of Blue Lakes Pass. The ruggedness of the pinnacles can be seen.
The hike up to Blue Lakes Pass was quick and painless, and before we knew it, we were enjoying intense views of Dallas Peak, West Dallas Peak and "T 0" after crossing into the Mount Sneffels Wilderness Area.

Blue Lakes Pass provided awesome views of Dallas Peak.

Matt Payne at the top of Blue Lakes Pass.
From the top of Blue Lakes Pass, the route heads directly behind the pinnacles and up a somewhat steep boulder field.

The backside of the pinnacles of Sneffels.
The trail here was fairly easy to find and the route seemed fairly self-explanatory - up! As the sun continued to rise, we could see the awesome Blue Lakes basin below Dallas Peak.

As we continued to climb up the gullies, Lizard Head finally came into view for the first time. Lizard Head is a tall spire near the Wilson group to the Southwest of Sneffels and is only climbed by experienced rock climbers, as the route up it is 5.8 on the YDS. For a great read on the Lizard Head approach and climb, see Sarah Thompson's site, 13ergirl.com.
Lizard Head is barely seen at far left, with the Wilson group rising above the ridge between Dallas Peak and Gilpin Peak.
Lizard Head - zoomed-in.
As we continued to climb up the first gully on the Southwest ridge, we finally reached the top of the gully and were forced to down-climb to a ledge, which led us to the base of some class 4 sections just before the obviously last ridge section.
The terrain on the Southwest ridge was crumbly and jagged.

Matt Payne starting the Southwest Ridge of Sneffels.

Arron Shaver on the Southwest Ridge of Sneffels.
The climbing up the ridge was quite enjoyable. The rock was quite solid, with ample hand-holds and foot-holds during the class 4 sections. Finally, Teakettle and Potosi came back into view, and they did not disappoint. Teakettle is one of the most appropriatly named mountains in Colorado. Shaped like an actual teakettle, sporting a spout and a handle - Teakettle is both a geologist's and a photographer's dream.

Teakettle Mountain is seen at far left, with it's handle represented as a large hole in the rock. Potosi Peak seen at far right.
I remember being very impressed by Teakettle, even as a child. My dad climbed Teakettle in the 1980's and this photo was taken of him inside the handle of the teakettle:


Teakettle Mountain, zoomed-in.
At this point, our views of Yankee Boy Basin below was quite impressive as well, with the golds, browns, yellows and greens of fall accentuating the pristine basin.

Yankee Boy Basin.
Looking in any direction, we could see some amazing peaks. Teakettle, Potosi, Gilpin, and Dallas made for quite the fall back-drop.

On the way up the ridge, we were able to find the Kissing Camels rock outcropping that is often described on route descriptions for Sneffels. The landmark is almost impossible to miss.

Dallas Peak can be seen through the Kissing Camels rock outcropping. Arron caught me in the act of taking that photo...
Yankee Boy Basin far below.
The climb from the Kissing Camels was very straight-forward - we continued up the steep ridge, appreciating the added difficulty and greater views of the Southwest Ridge route over the standard route.
Teakettle Mountain was difficult to keep from staring at. It truly is one of the more remarkable mountains I've seen. So remarkable, that I had to get a super-zoomed in view of it!
Arron was also excited about the route - being that Sneffels was his first 14er of his life - I think I may have spoiled him with one of the more fun routes of any 14er.

Arron with the ridge behind him. "Cake Batter" spills down the ridge between Dallas and Gilpin. (Zoomed in at right)
I suspect that the "cake batter" looking stuff is probably caused by mud slides during the monsoon seasons that often plague the San Juan Mountains.
We finally reached the summit just as the other group was reaching the top as well. The weather was perfect. No clouds. No wind. Warm. We could not have picked a better day to climb.
As usual, I took several photos from the summit and celebrated with the other climbers.


Arron's summit shot.
Matt and Arron on the summit of Mount Sneffels.
Views of the Grenadier Range (Vestal, Arrow, etc), and the Needle Range (Eolus, Windom, Sunlight, Pigeon, etc) were great as well as views of Uncompahgre and Wetterhorn. What I was most impressed by was the views of the Grand Mesa and the land between Sneffels and the mesa. The town of Ridgway, Ridgway State Park, and Ridgway Reservoir could all be seen easily as well. What was also impressive were the views of the Telluride Ski Area, the Wilson group (Mount Wilson, Wilson Peak, El Diente, and Gladstone Peak), and the La Plata Mountains.

Mount Sneffels East to West Summit Pano.
Gilpin Peak and Telluride Ski Resort. The Grenadier and Needle ranges seen in the far distance to the left.
Teakettle Mountain and Potosi Peak zoomed in.
Teakettle, Potosi, Yankee Boy Basin, Gilpin, and Telluride.


360 Degree Summit Pano from Sneffels.

Sneffels summit pano - north and east

Uncompahgre seen in the distance...
Sneffels Summit - looking south
Dallas Peak, Zoomed-in.
The Grenadier Range - Zoomed-in - including Vestal Peak and Arrow Peak. See that trip report here.
Lizard Head Zoomed-In
And of course, a summit photo is no fun unless I'm posing in a silly way...

Matt Payne taking photos on the summit of Sneffels.
After quite some time on the top, Arron and I decided to descent the same way we ascended. The down-climb was challenging but solid. There were some tricky sections that required some in-facing down-climbing, and a few spots where we needed to wait for each other to ensure neither of us were hurt by rock-fall from above.
Down the Southwest Ridge!
Teakettle Mountain
Teakettle with digital zoom.
We reached the camels again in no time and I took one last shot of the Wilson group.
The trickiest part was when we came across some class 4 rock that we had to negotiate. It was a fun challenge for sure.

The class 4 section provided some entertainment.
We headed back down to the Blue Lakes Pass ridge without any problems.
Blue Lakes Pass. I wonder why it is called Blue Lakes Pass?

The Blue Lakes Pass trail and Mount Sneffels.
We hiked down the Pass back towards Yankee Boy Basin and decided to take a side trail that led us to a small lake at the base of Gilpin Peak.
Gilpin Peak and Mount Sneffels.
As we hiked down, we were blessed with one last great view of Yankee Boy Basin.
Yankee Boy Basin
We reached my Jeep at 12:00 PM and drove out. The road was quite enjoyable in 4WD without power steering...

If you've never been up the road, it is worth it to drive up it. There is a really awesome overhang about halfway up the road that is quite impressive.
We drove into Ouray and ate lunch at the Ouray Brewery, which proved to be a great decision because they have a patio on their roof that made for excellent fall weather dining.
I hope you found this trip report useful and / or enjoyable! Thanks for reading!
References:
1 Rhoda, Franklin, Summits to Reach, An Annotated Edition of Franklin Rhoda's "Report on the Topography of the San Juan Country," edited and with preface by Mike Foster, Boulder, Pruett Publishing (1984).
2 Rosebrough, Robert F., The San Juan Mountains: A Climbing and Hiking Guide, Evergreen, Cordillera Press (1986).
Rio Grande Pyramid - The Lonely Centennial
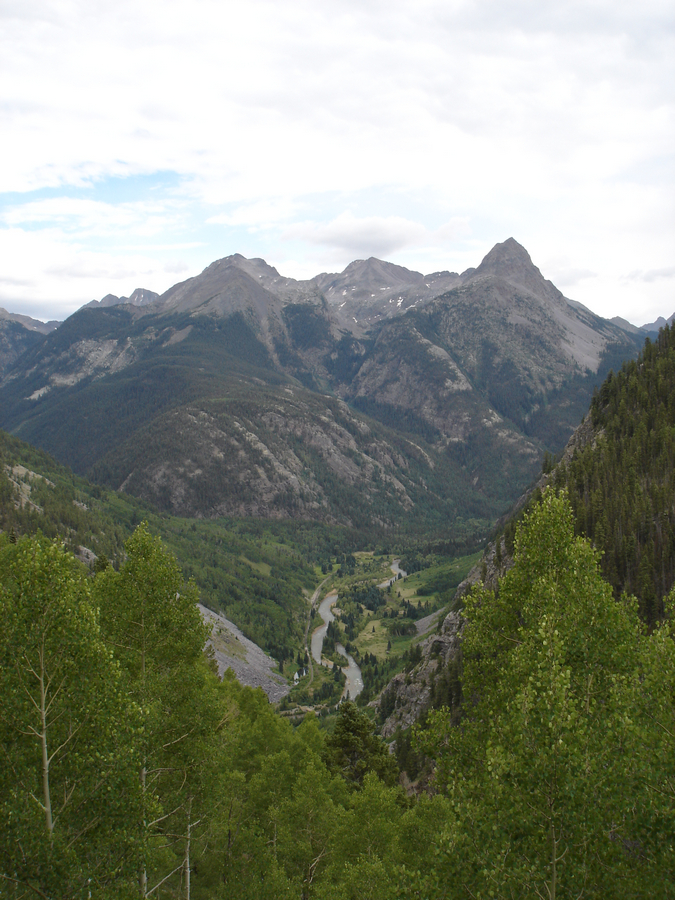
 Rio Grande Pyramid has long been on my "to-do list" for the Centennials (the highest 100 mountains in Colorado). Isolated by over 10 miles from its neighbors in the San Juan Mountains, Rio Grande Pyramid sticks out like a sore thumb by itself to the east of the Needle and Grenadier subranges. I viewed Rio Grande Pyramid from many angles this year, including a great view from Handies, and another wonderful perspective from Vestal and Arrow Peaks.
 Needless to say, I have been eyeing Rio Grande Pyramid a lot this year, and I have known since January that I would be climbing it with my dad at the end of August. Since Rio Grande Pyramid is very isolated, it requires a fairly lengthy backpacking excursion and some planning. My dad (Old Climber on this site) has wanted Rio Grande Pyramid for many, many years, so he jumped all over the chance to attempt to tackle this beast.
The plan was to leave from Colorado Springs after work around 5 or 6 PM on Friday, set-up a quick camp near Rio Grande Reservior, back-pack to Weminuche Pass on Saturday, set-up camp there, climb Rio Grande Pyramid on Sunday, and backpack out on Monday. With the weather forecast for the area being up to 70% chance of precipitation for pretty much the whole weekend, Ray and I were prepared for a wet trip, but hopeful that the weather would cooperate for a summit attempt. Just in case, I packed a book, The Things They Carried by Tim O'Brien, per the recommendation of my wife.
To start off, here are some meaningful statistics for this adventure:
Peak summited:
Rio Grande Pyramid: 13,821 ft. (ranked 97th in Colorado)
Total elevation gain: 4,674 ft.
Total distance hiked: 19.26 miles
Total time hiking: Approx. 14 hours
Total photos taken: 350
Total distance driven: 540 miles
Trip duration: 3 days
The drive to Rio Grande Reservior was uneventful, and finding a place to camp was surprisingly easy. We were aiming for the Thirtymile National Forest Campground, but we balked at the $16 fee, so instead we decided to camp 400 yards away, for free, in a large field by the Rio Grande River. This proved to be a great campsite. We woke up around 7:30 AM, packed up, ate breakfast, and drove to the campground, where the parking lot for the Weminuche Trail is at. At about 8:30 AM, Ray and I were packed and ready to hike, and began our 3-day journey into the remote Weminuche Wilderness Area.

A topographical map of our trip, click to enlarge.
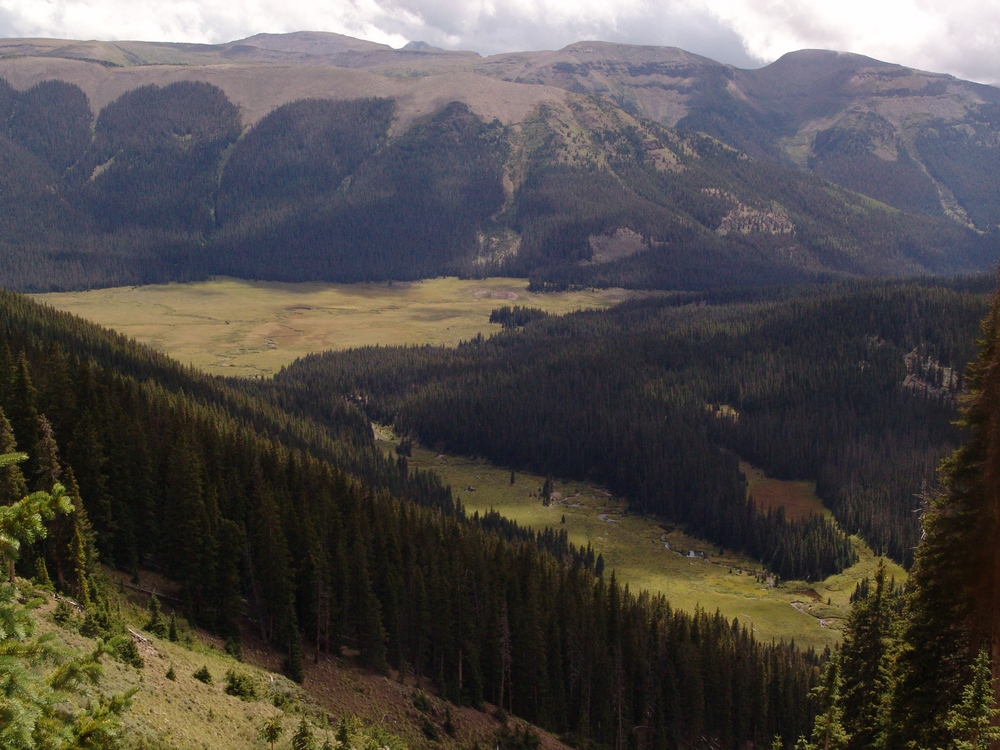
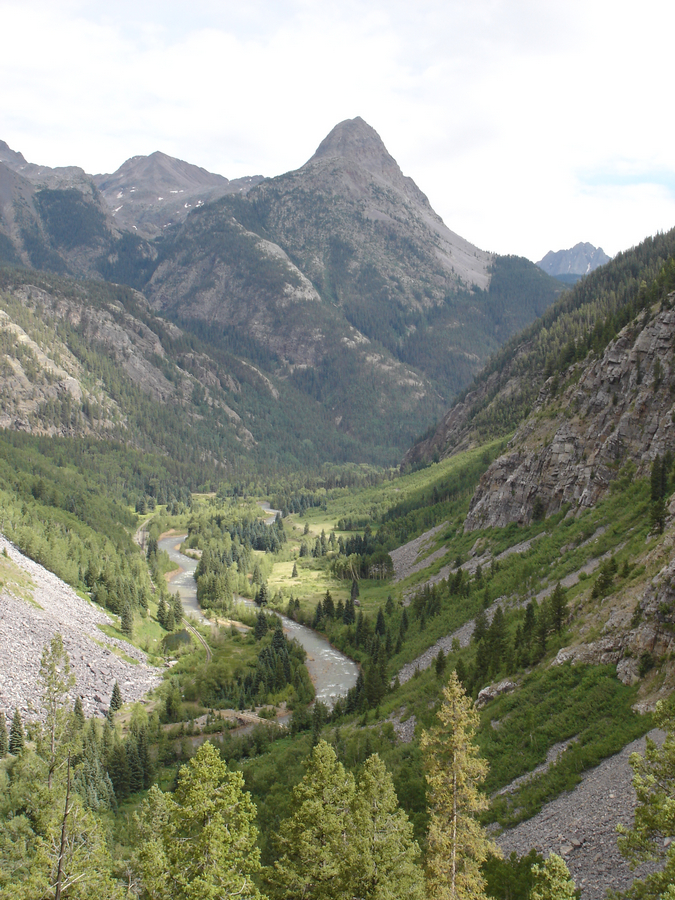
The hike in is a relatively easy backpack, with the exception of mile number 2. The first mile is spent traveling along Rio Grande Reservior along a gentle trail, and then the trail picks up elevation quickly in mile 2 as it climbs and rounds the corner to the south west. After the 2nd mile, the rest of the hike in is very mild, with excellent views of the wide-open and very photogenic Weminuche Creek basin.

The Weminuche Creek.
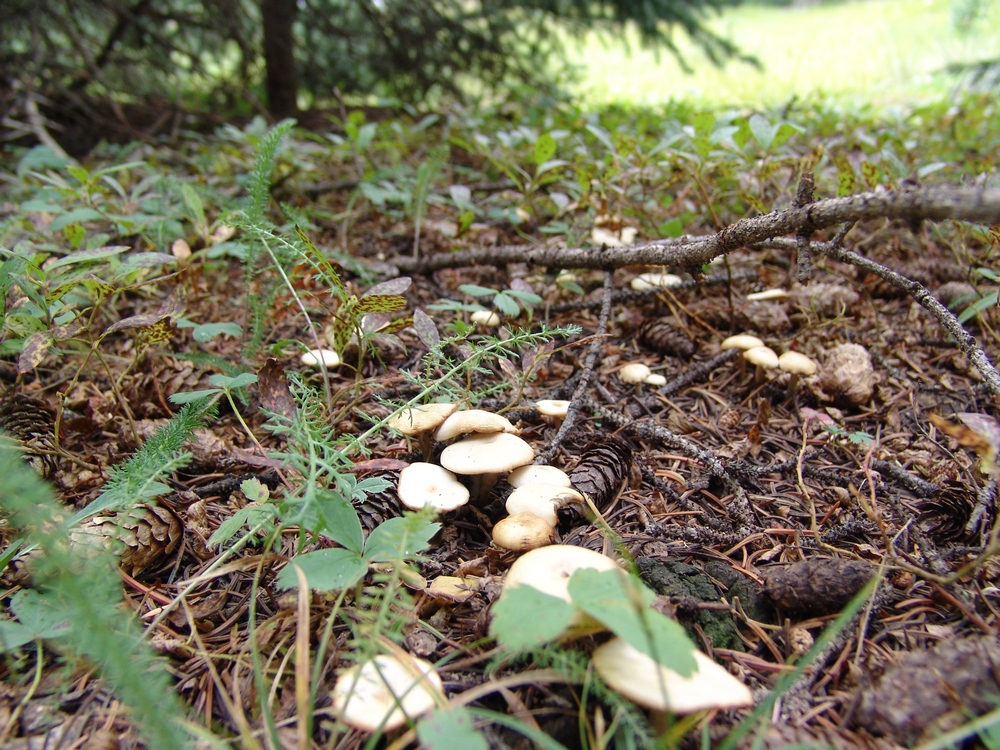
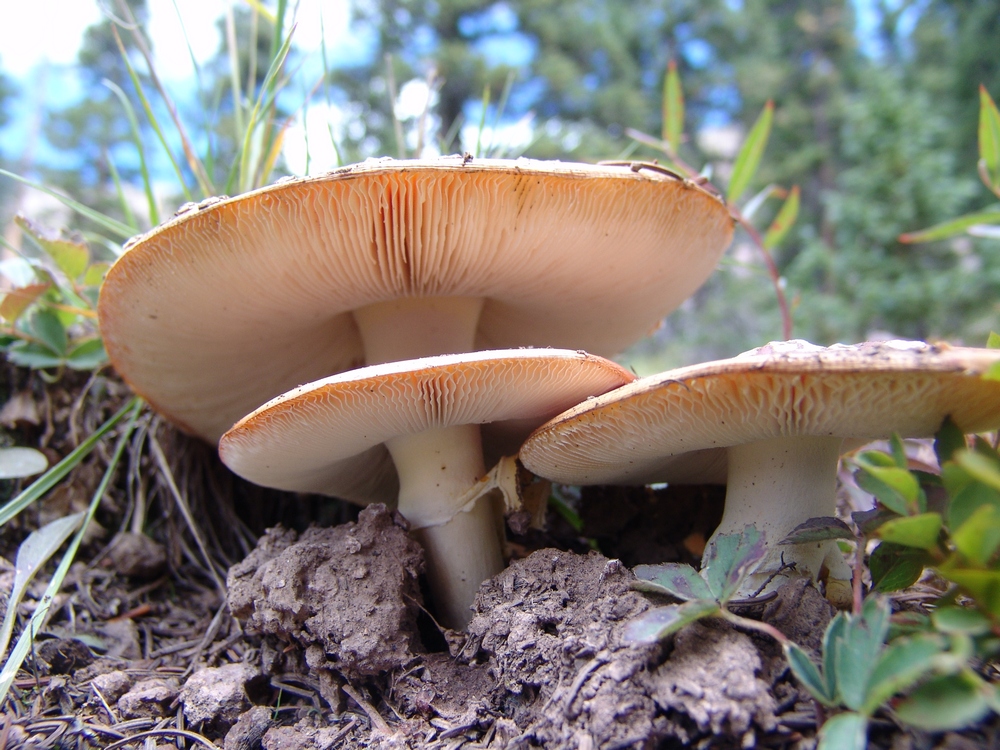
For our campsite, we were aiming for an area near Weminuche Pass. On the way up, both Ray and I were marvelled by the variety of mushroom that were growing along the trail, certainly evidence that this was been a very wet summer. Little did we know, the mushrooms would be one of the highlights of our trip (for those wondering, we did not ingest any of them).
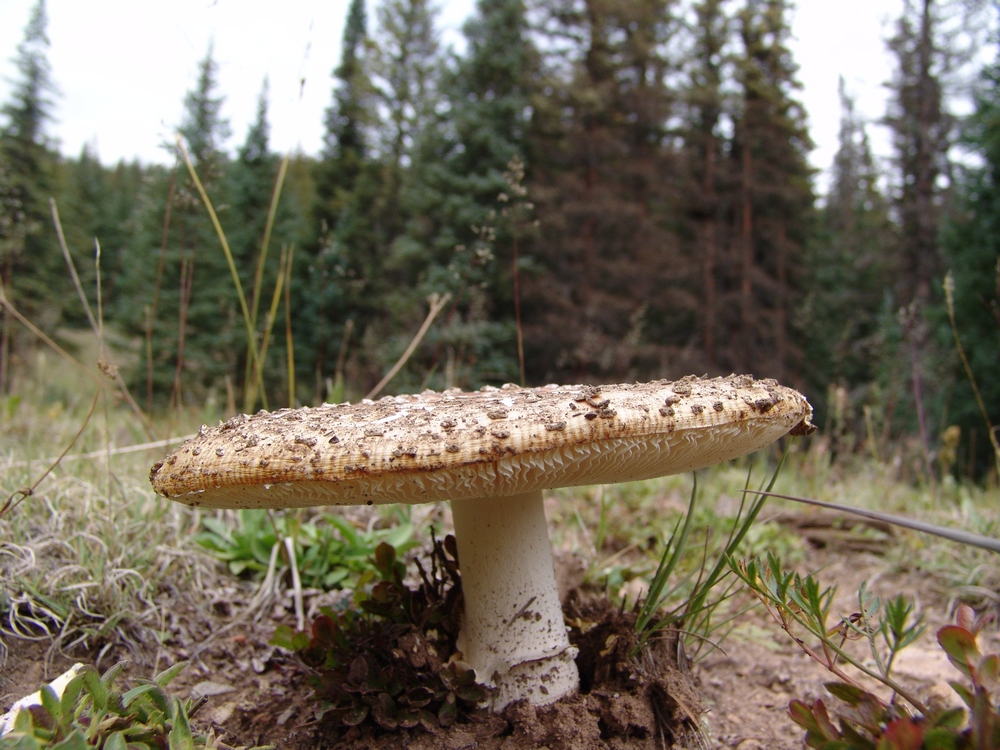
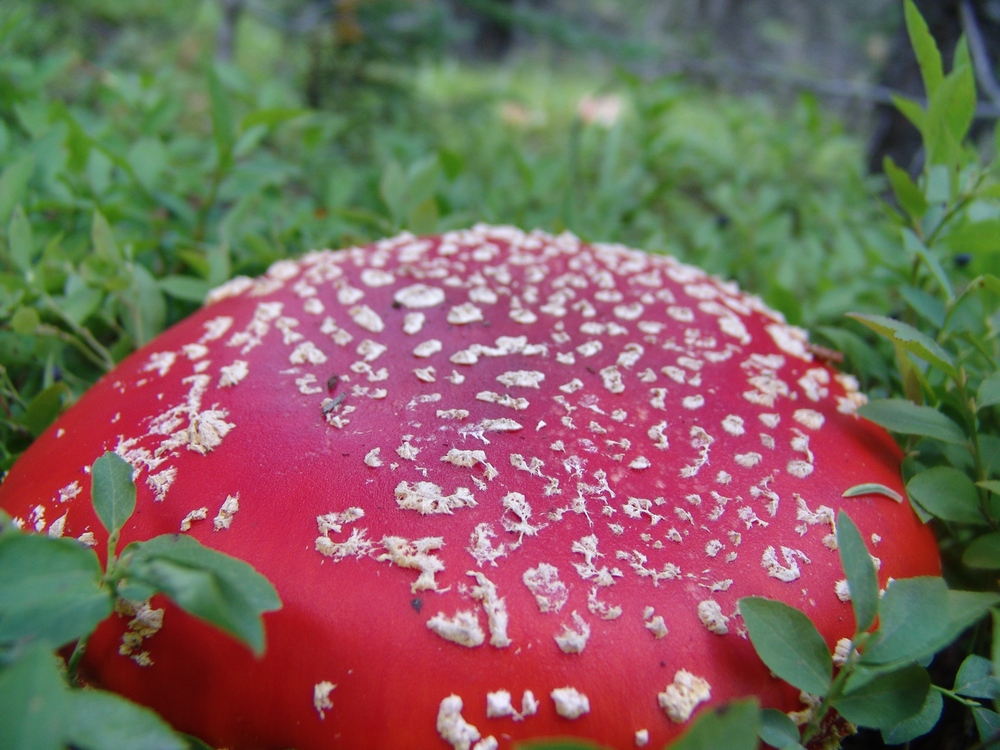
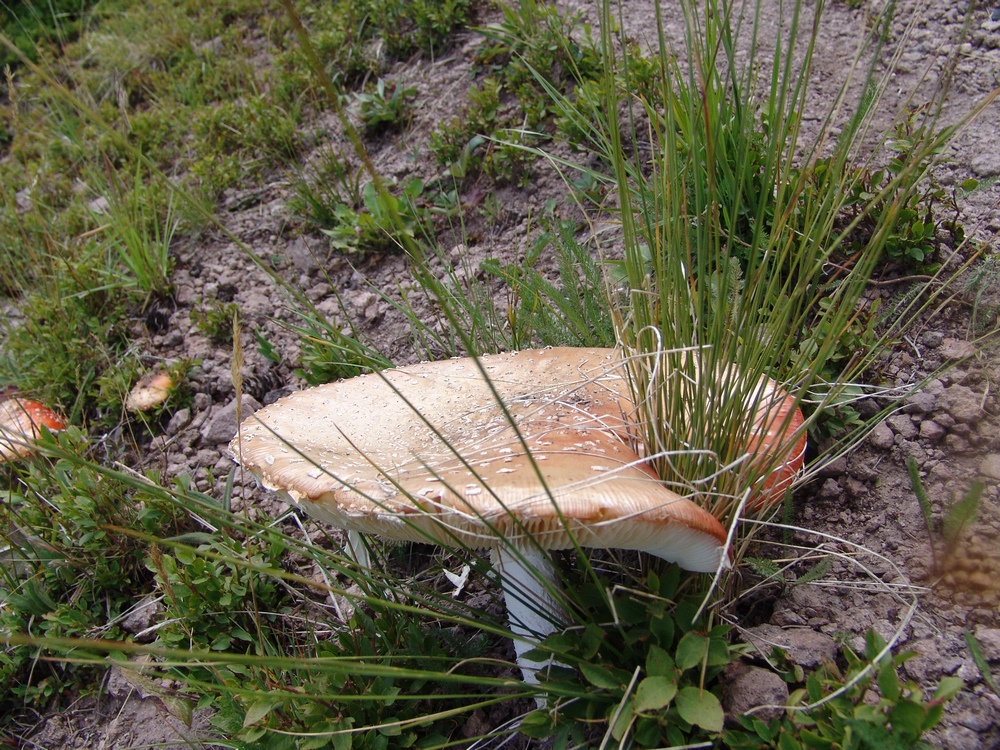
A Fly Agaric mushroom along the trail leading towards Weminuche Pass.
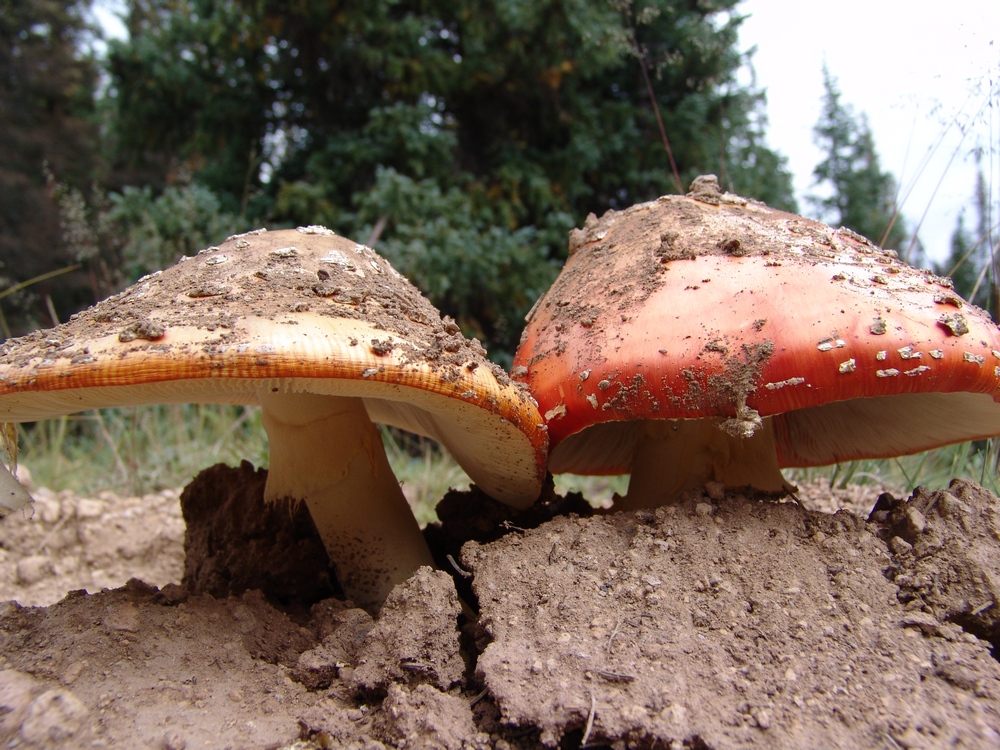
Two Fly Agarics emerge from the hard soil.
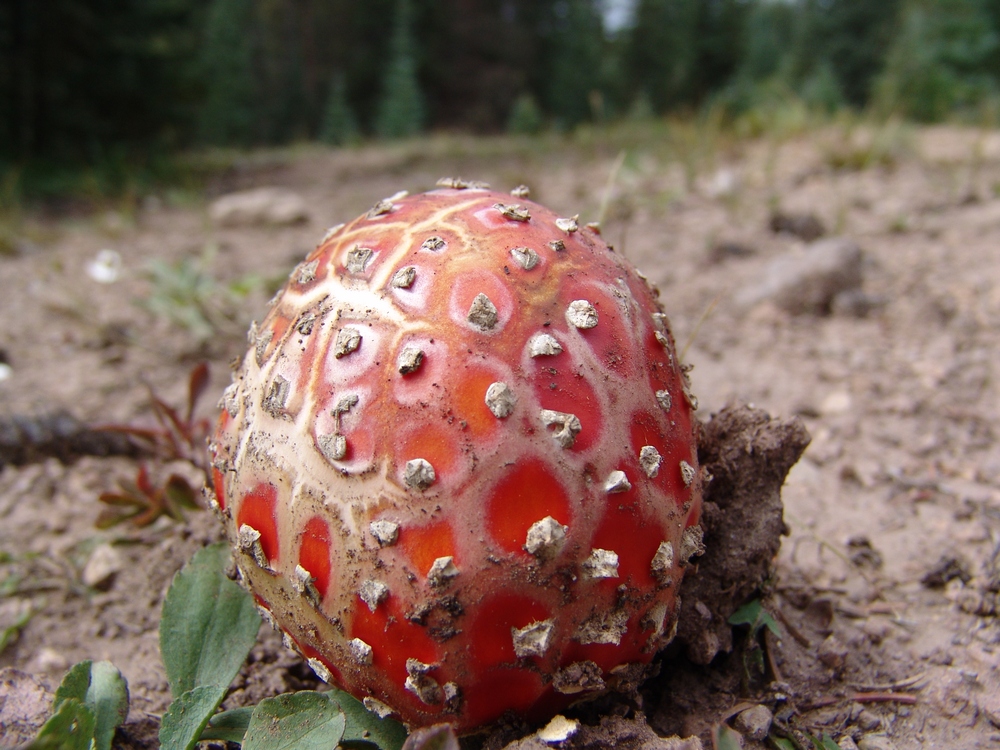
A Fly Agaric poking through the dirt.
We finally found Weminuche Pass, which was easy to spot by the two almost useless signs sticking up out of some cairns on each side of the trail. Heed my warning now, the sign on the right is for "Sky Line Trail," which is the route to Rio Grande Pyramid. The sign is poorly marked and at the time pointed in the wrong direction. We've since fixed the sign, so hopefully you'll see it better than we did. We camped directly east (left) of these signs along a small but gorgeous creek that flowed down from the Continental Divide. The area was a very large and impacted campsite, with plenty of great spots for a tent a a nice fire-ring.

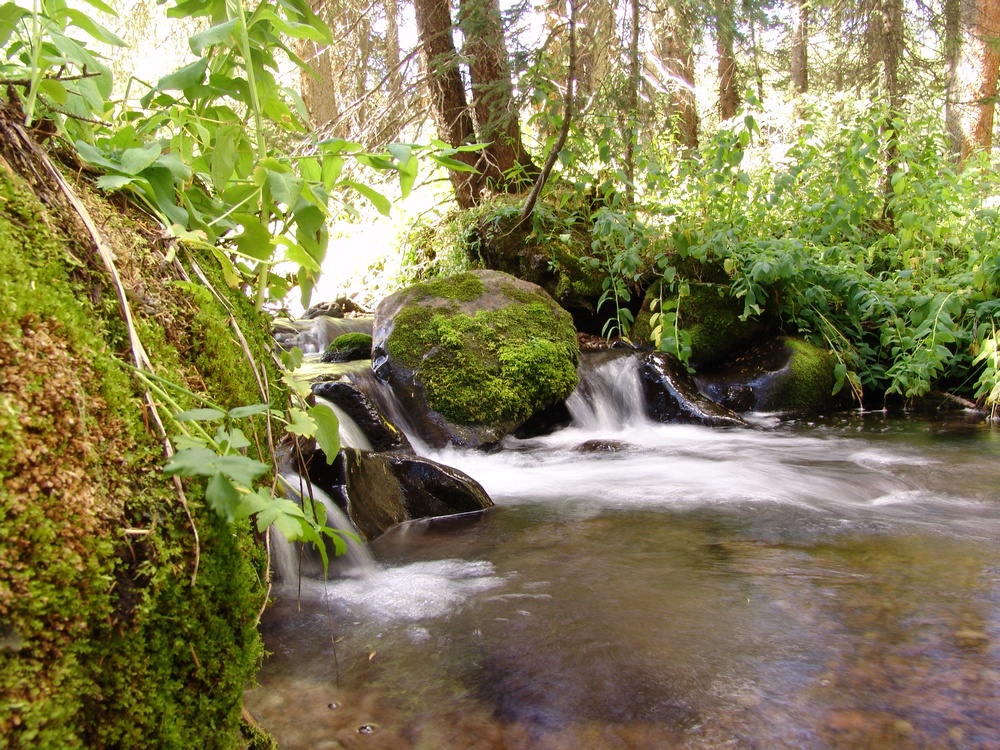
The creek near our campsite.
After setting up camp, I decided to go for a walk around the area, and see what kind of mushrooms I could find. Since I know almost nothing about mushroom identification, this was more of an opportunity for me to practice taking macro shots with my camera. I do think that mushrooms make for excellent subjects for photography, and I suspect/hope that some mushroom lovers out there may appreciate this trip report. I've submitted these photos to MushroomExpert.com (which is a very cool site) and hope to find out soon if we can name any of them. If you don't care for photos of mushrooms, you can skip that section by clicking here.
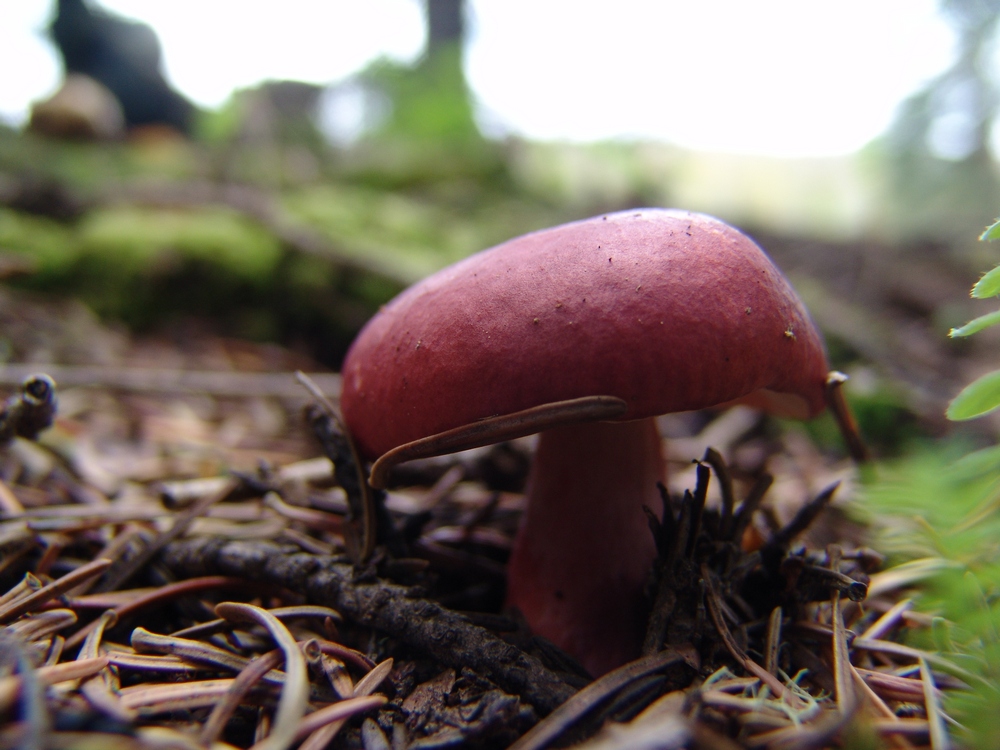
A little brown mushroom (or LBM for short, as Ray would say).
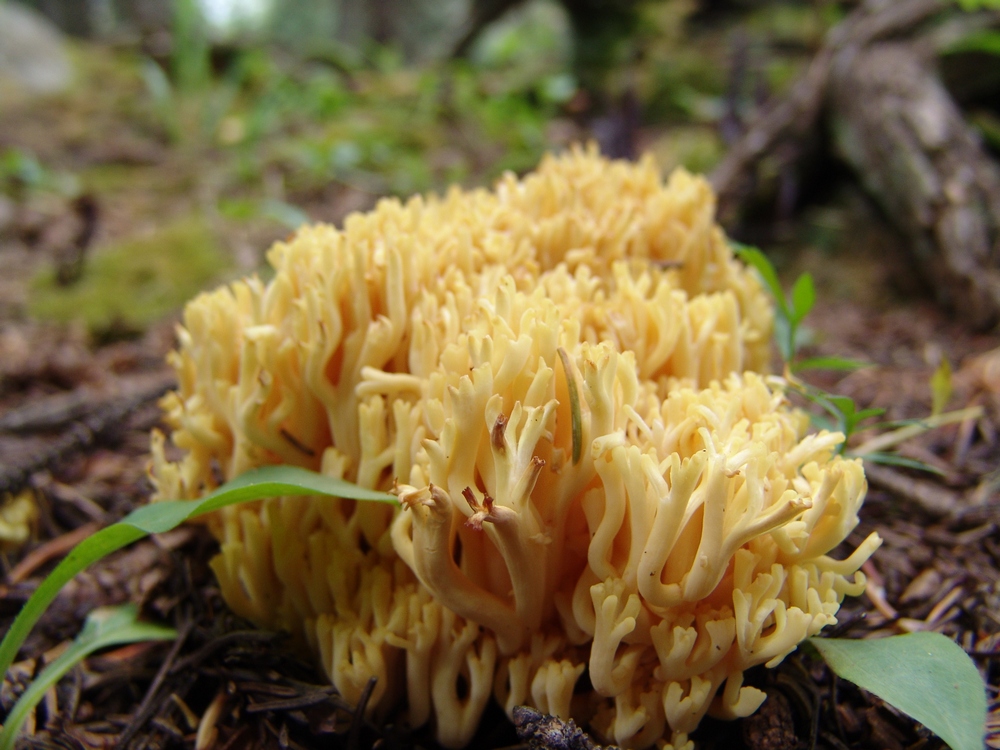
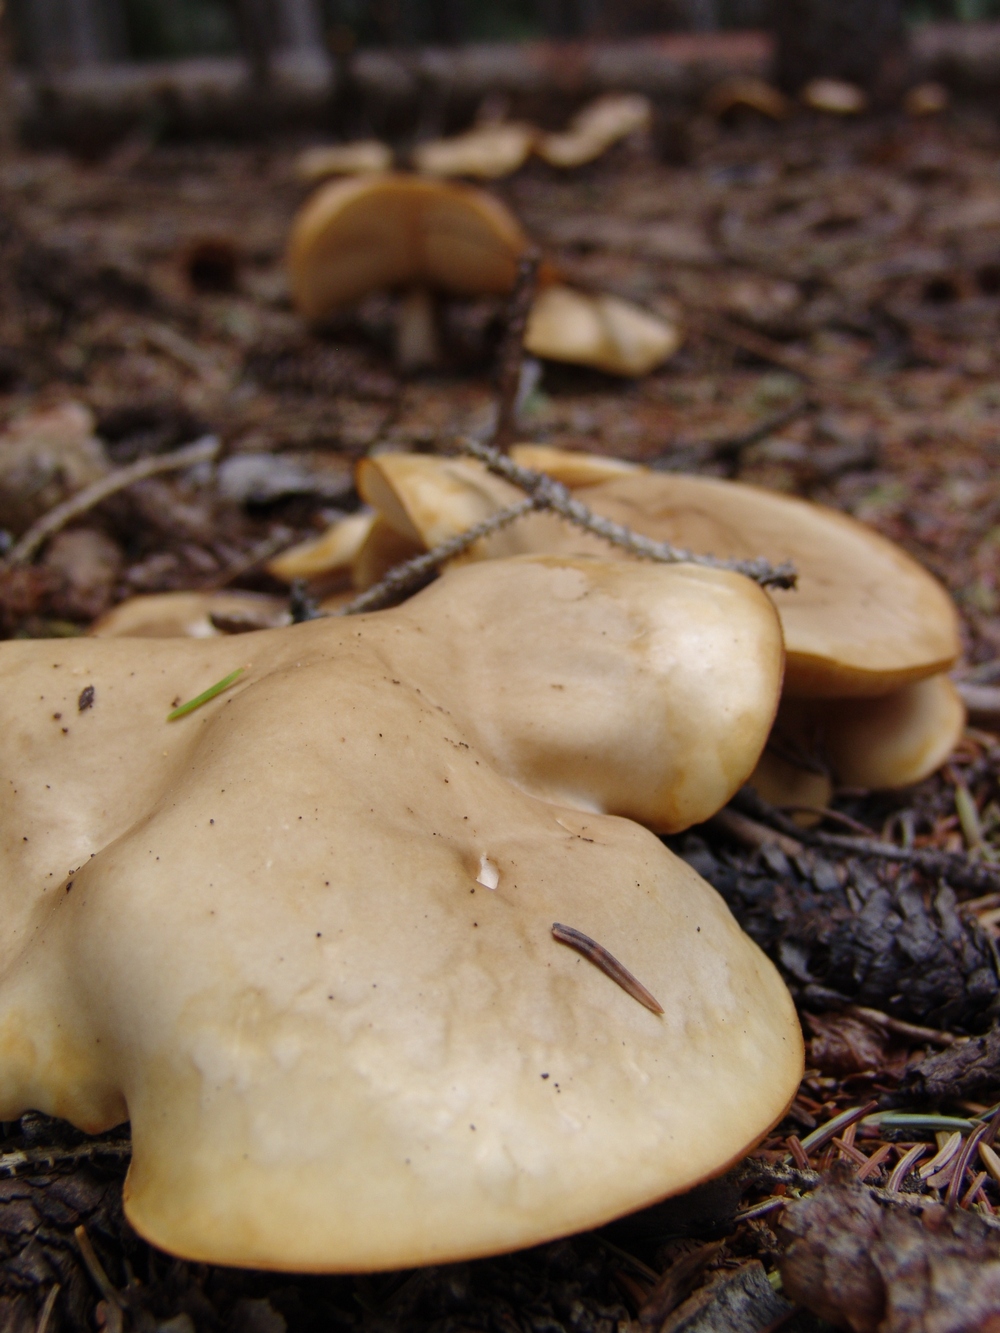
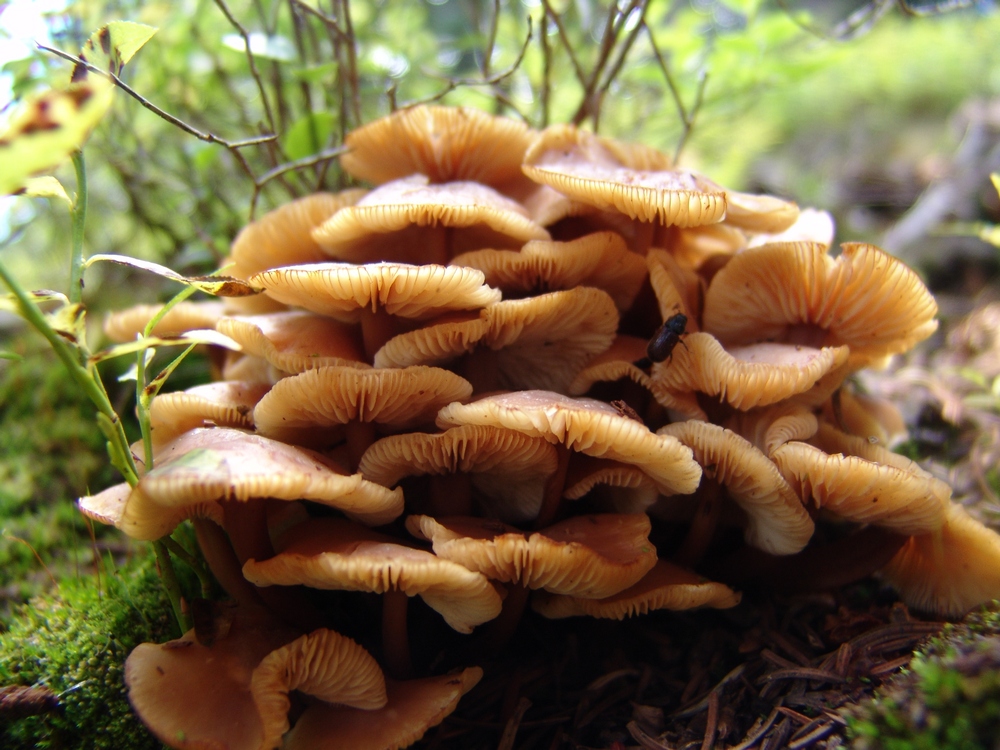
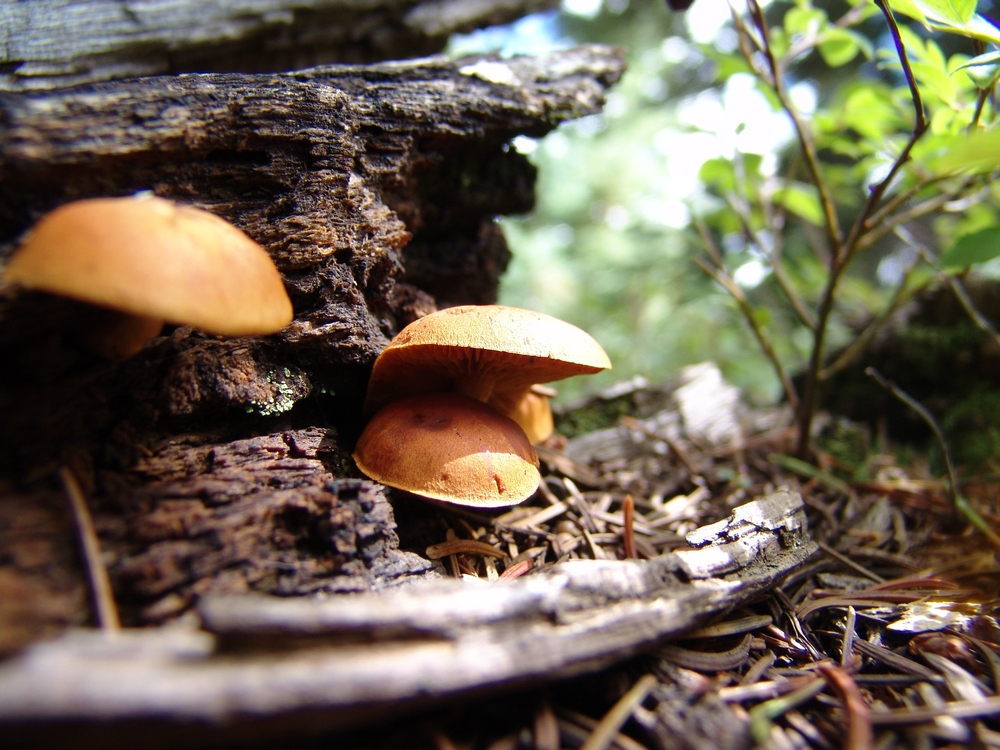
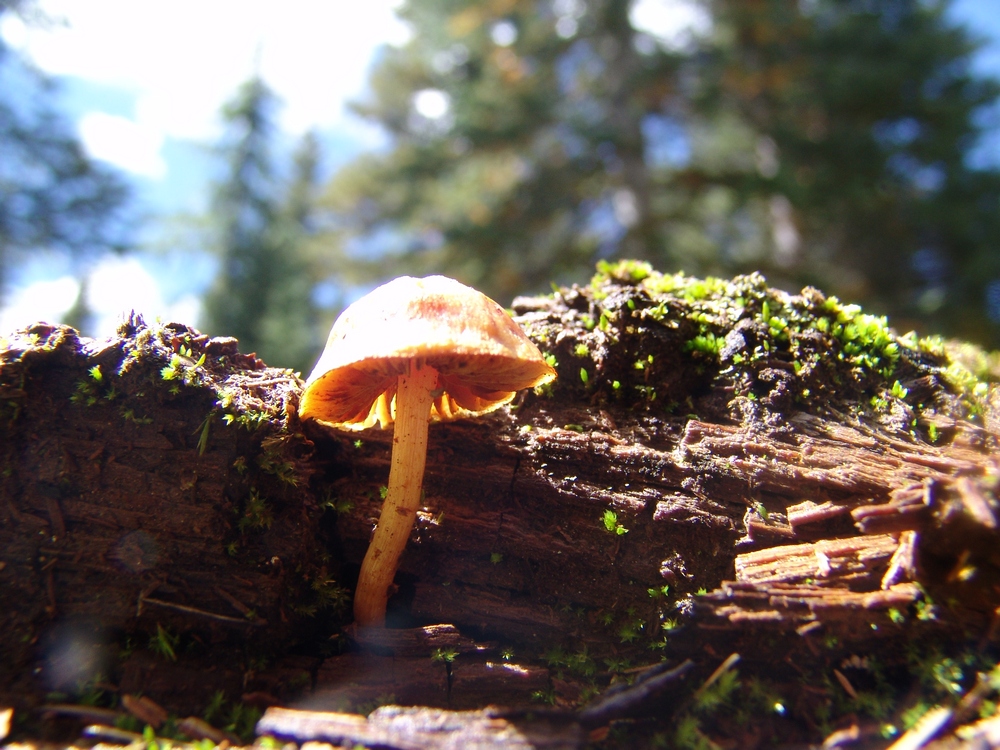
Some funky yellow mushrooms - we saw a lot of these under the pine trees.
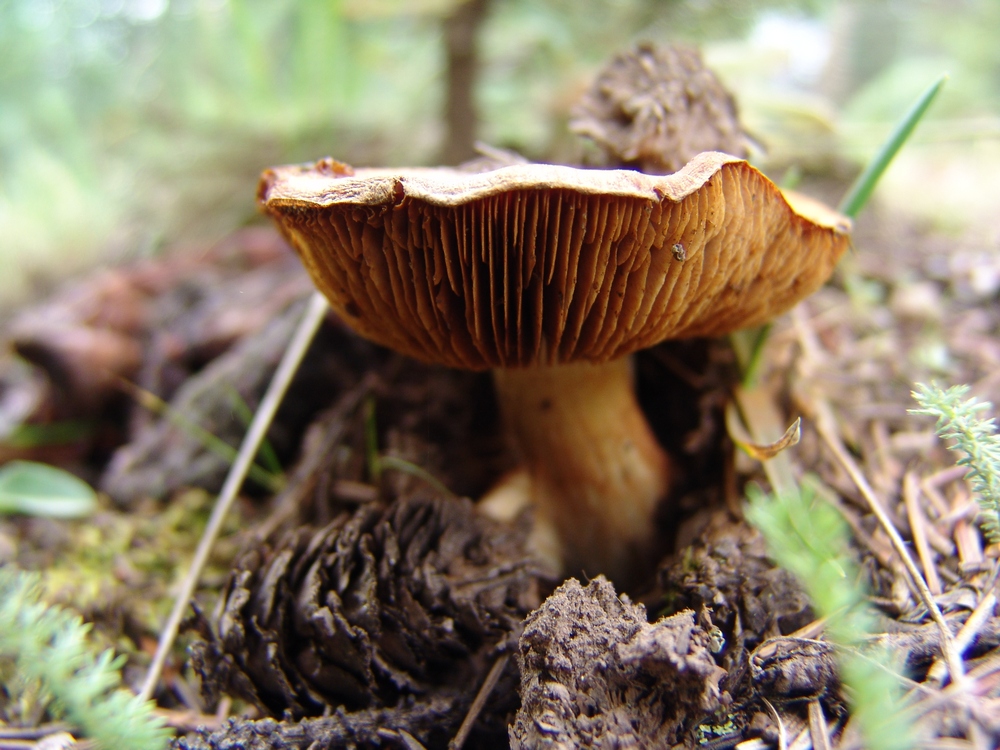
Another "LBM."
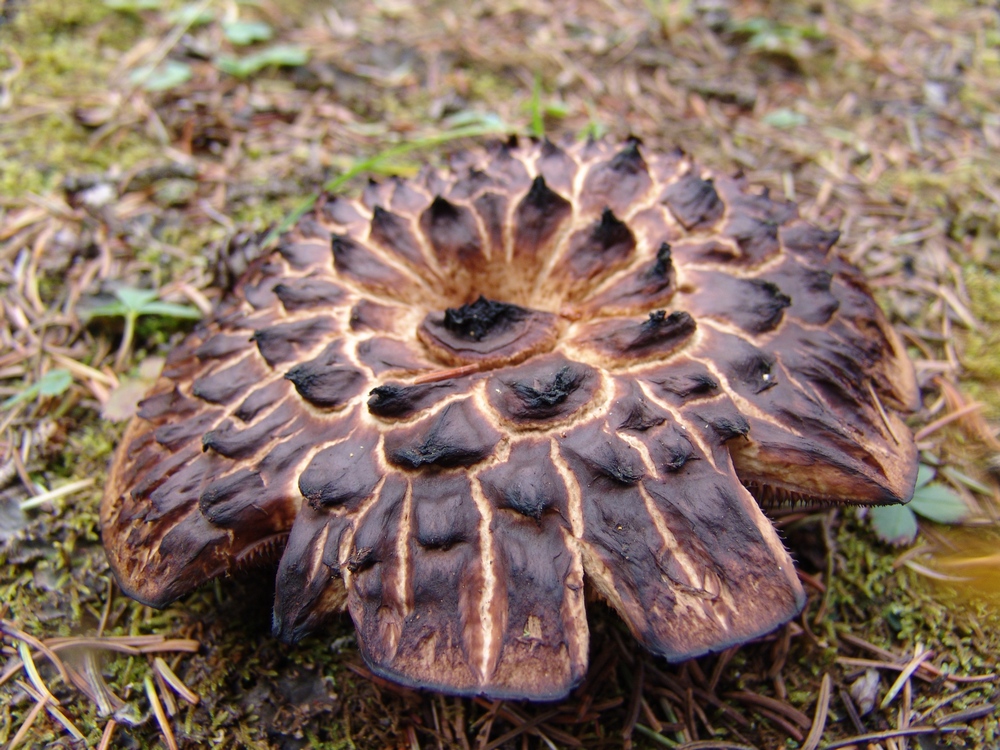
A nasty looking 'shroom - I think it has seen better days...
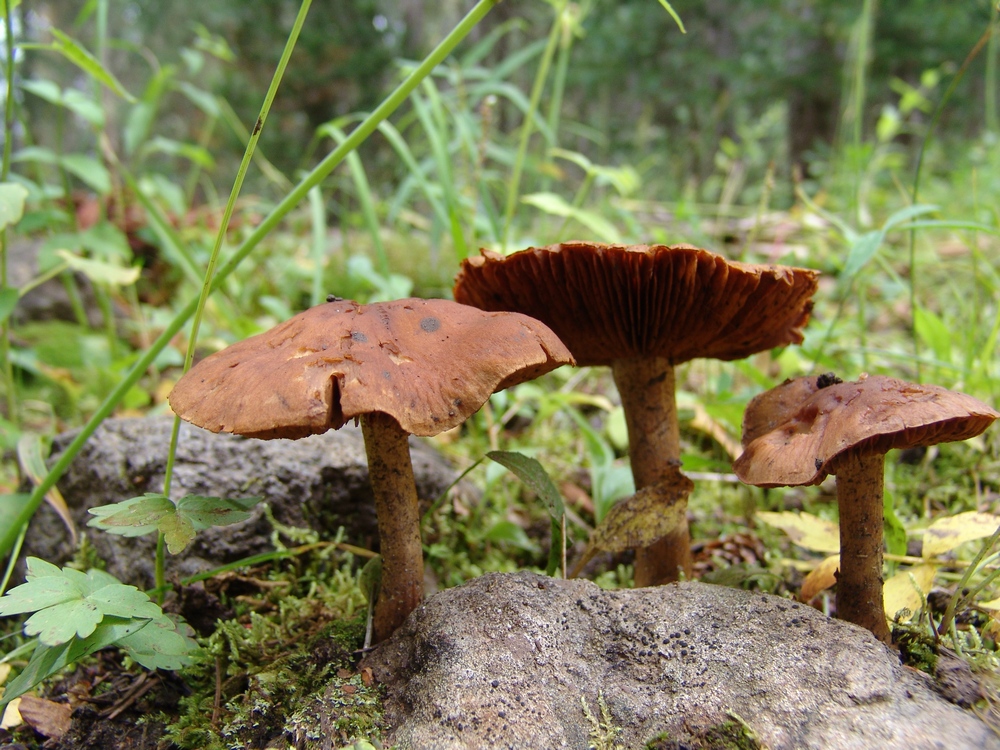
Three "LBM's" emerge from the mossy ground floor of the forest.
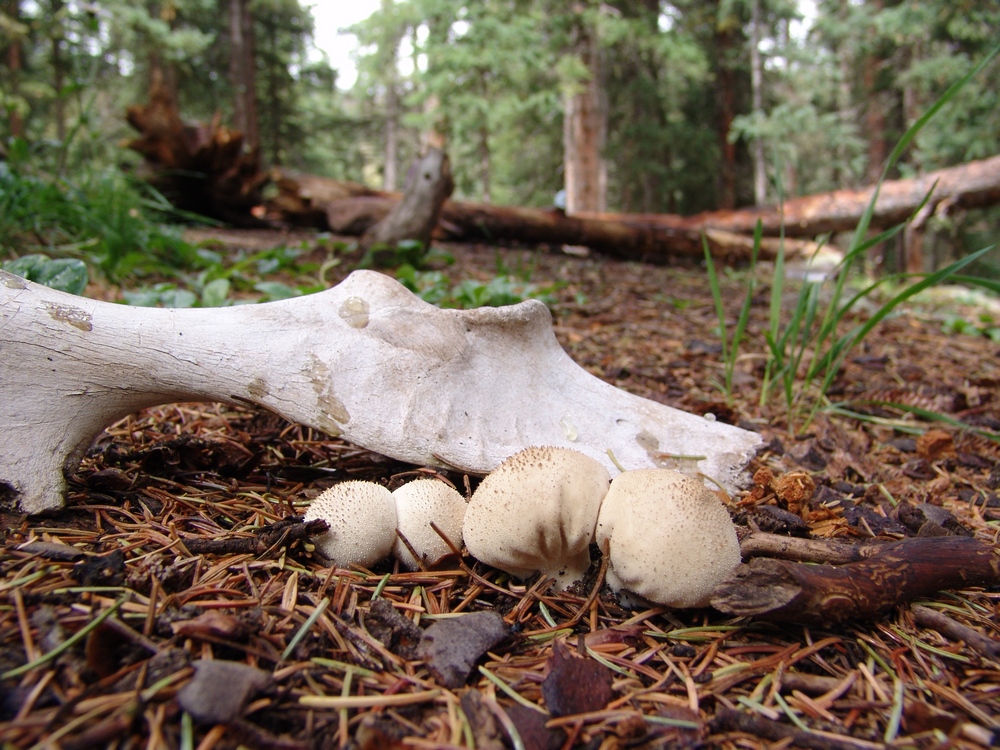
I wonder... did these mushrooms seal the fate of this poor animal?

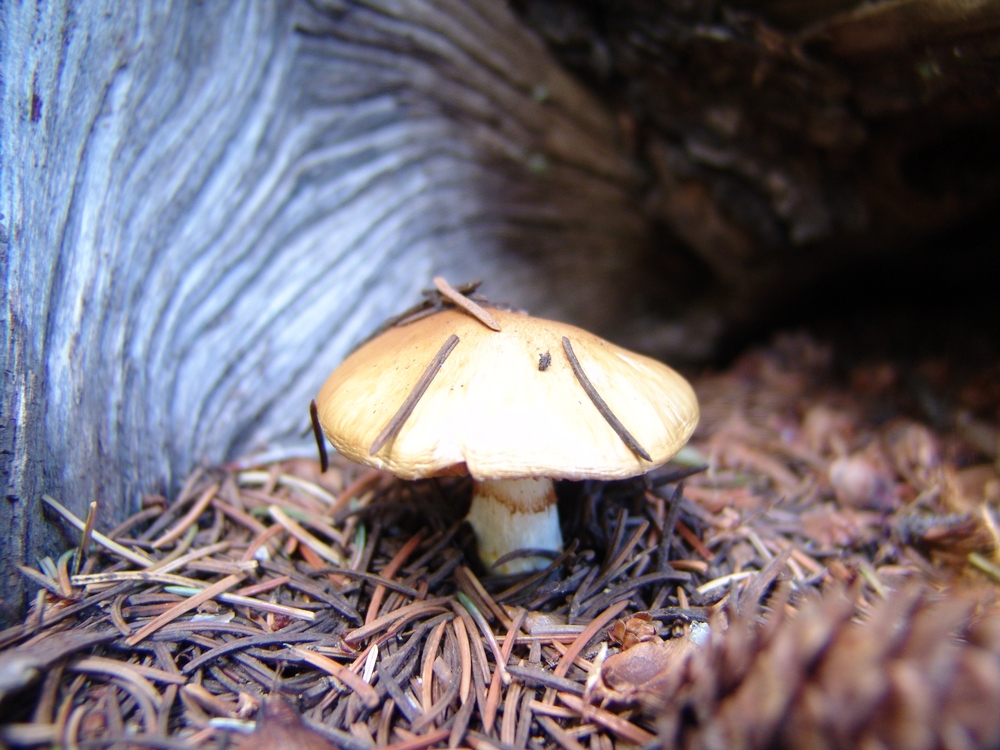
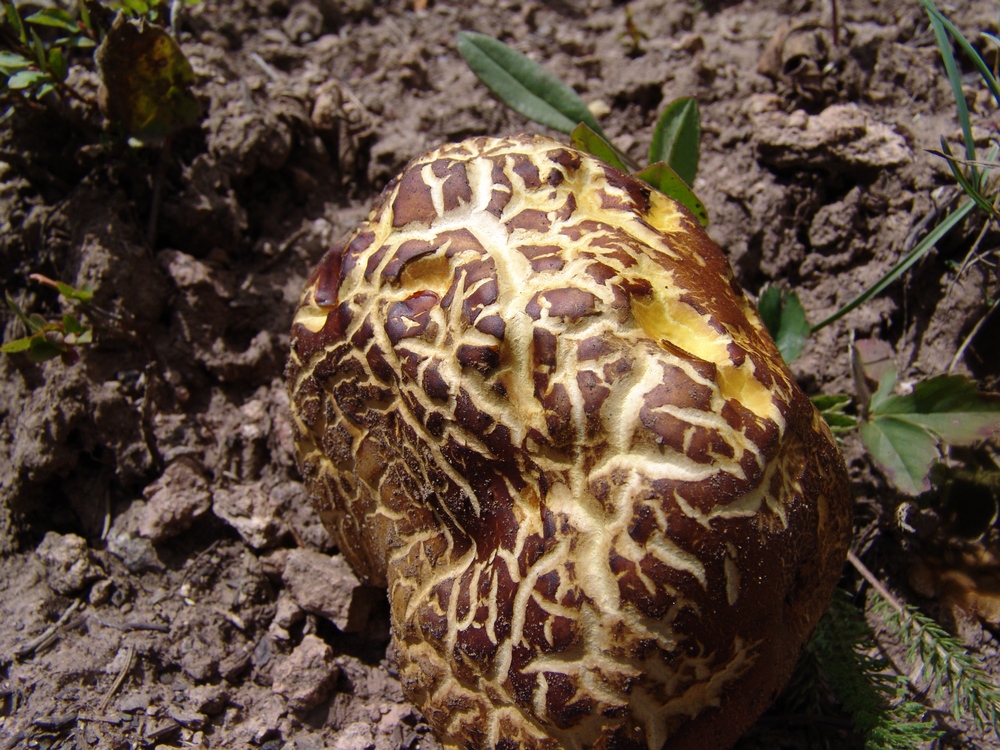
A King Bolete mushroom near our campsite. It turns out that these are quite edible.

Another view of the King Bolete.

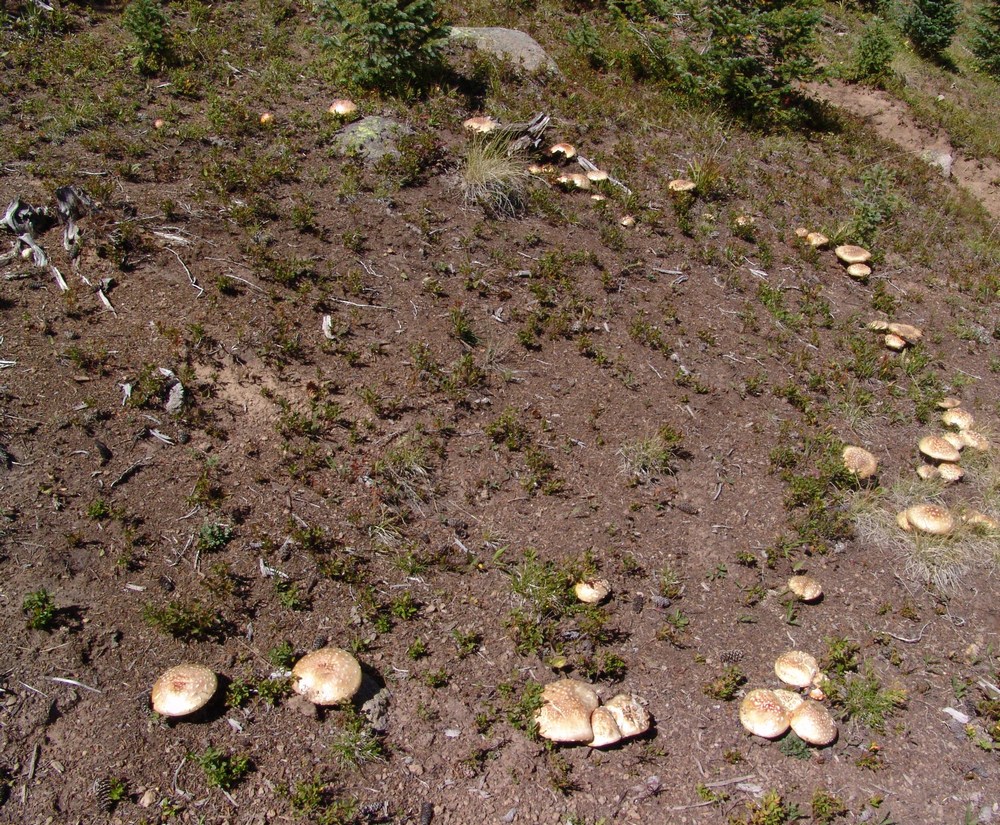
A ring of mushrooms near our campsite.
More LBM's.
A LBM emerges from the pine needle floor.
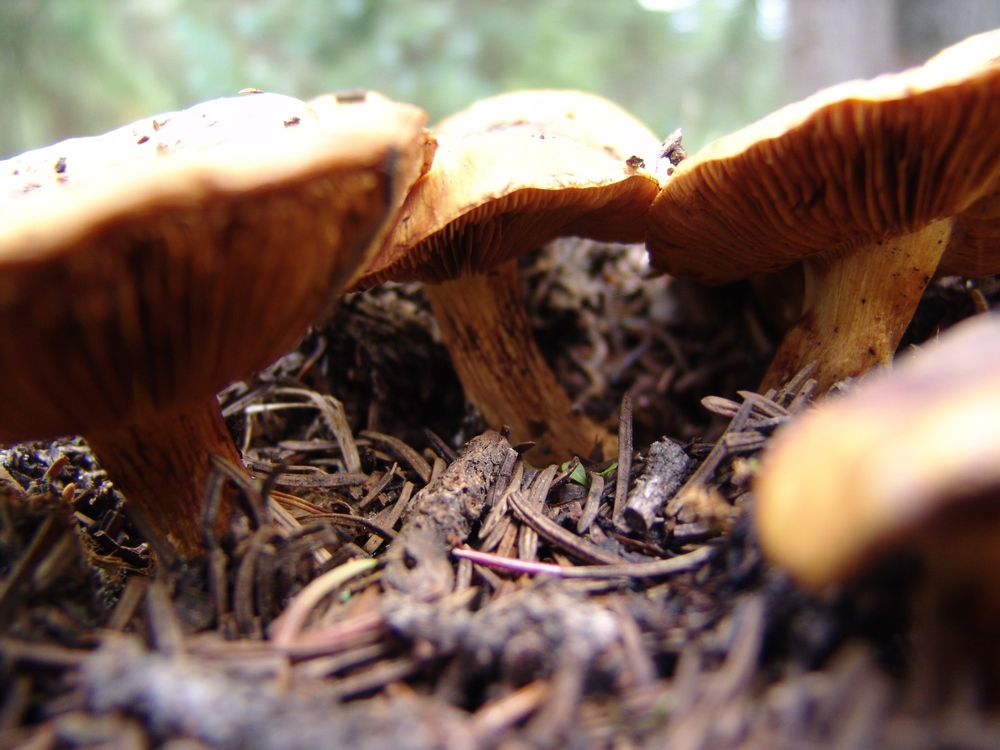
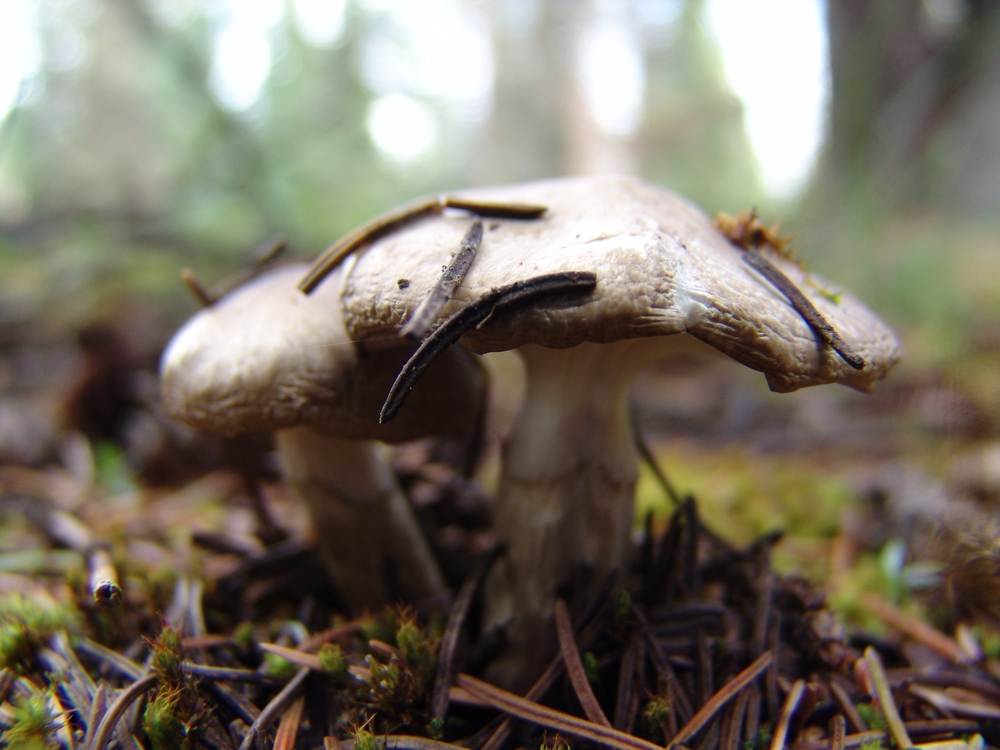
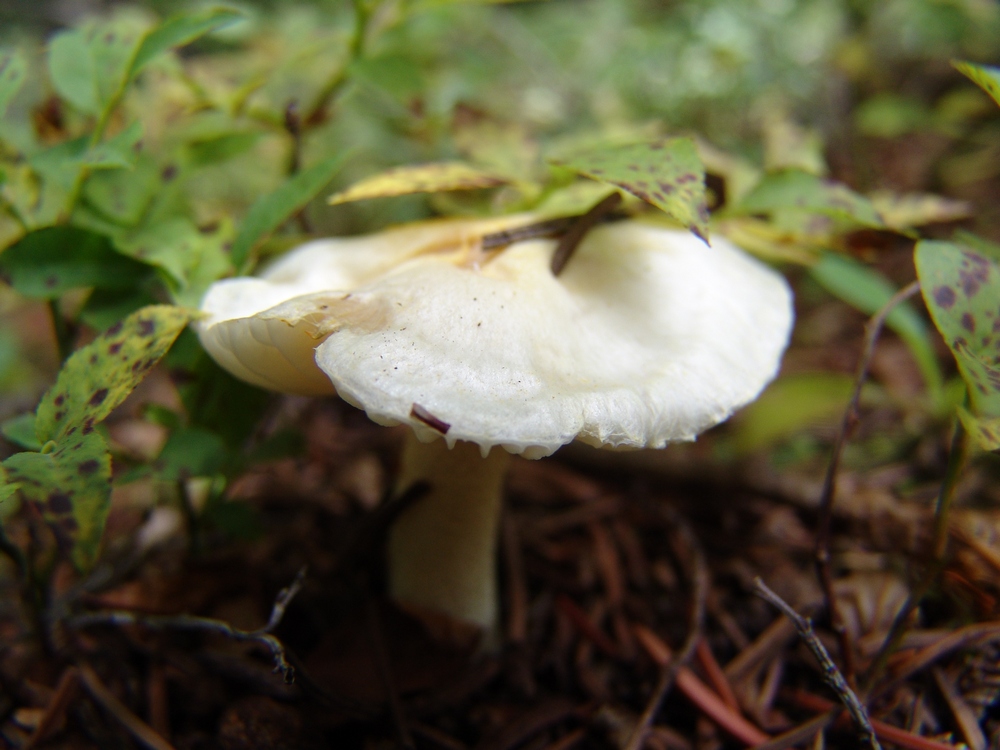
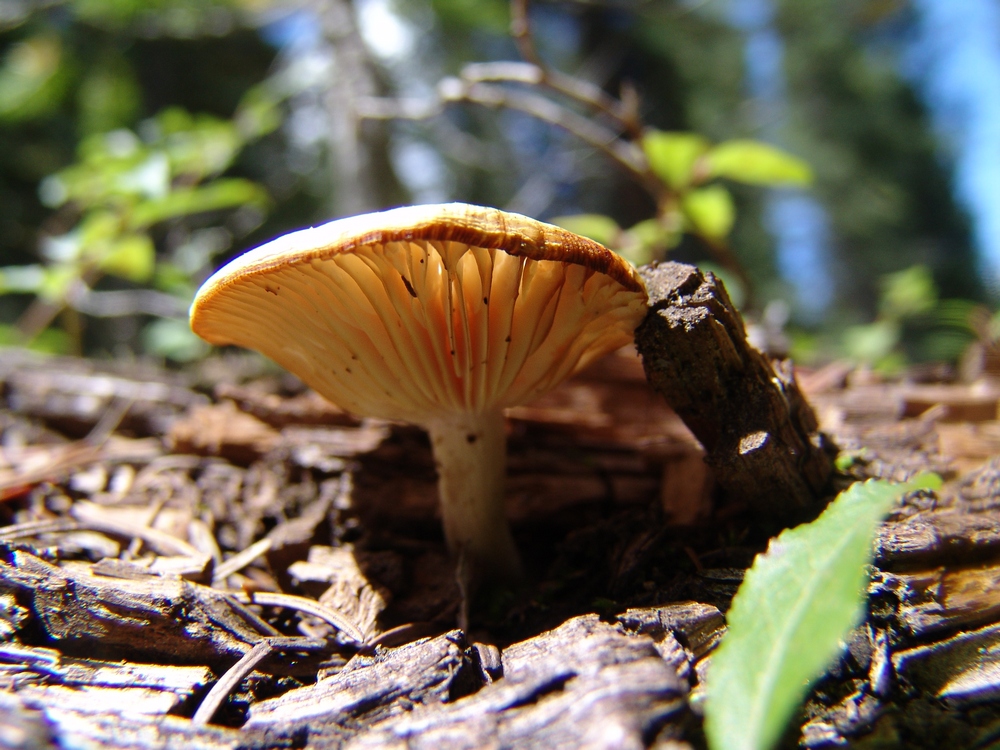
Little white mushrooms were everywhere...
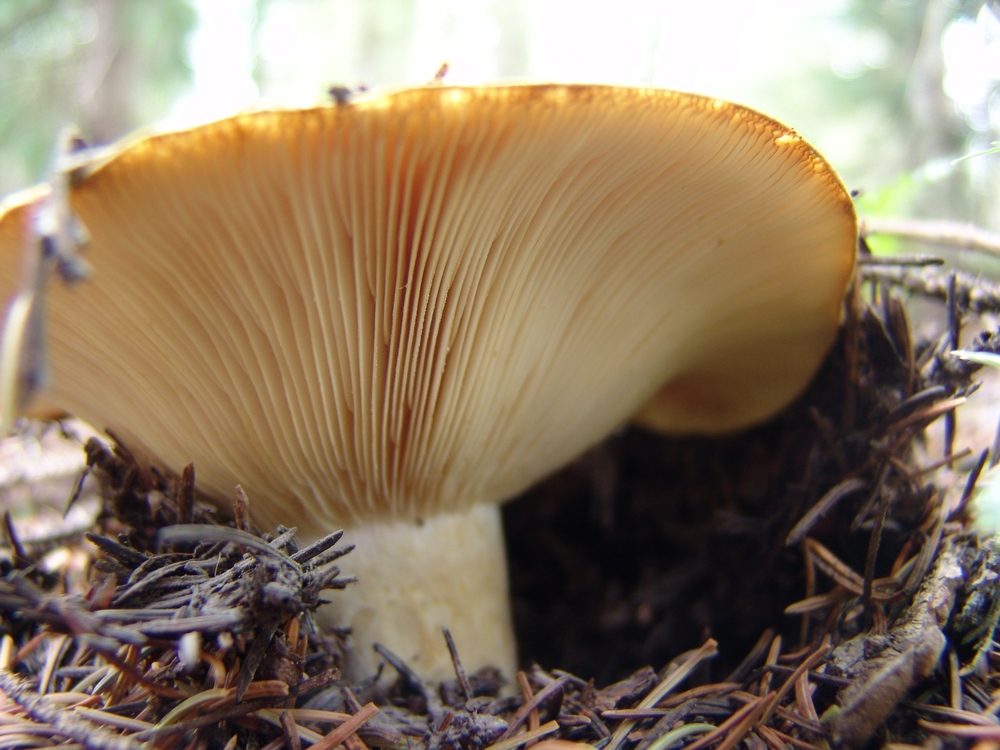
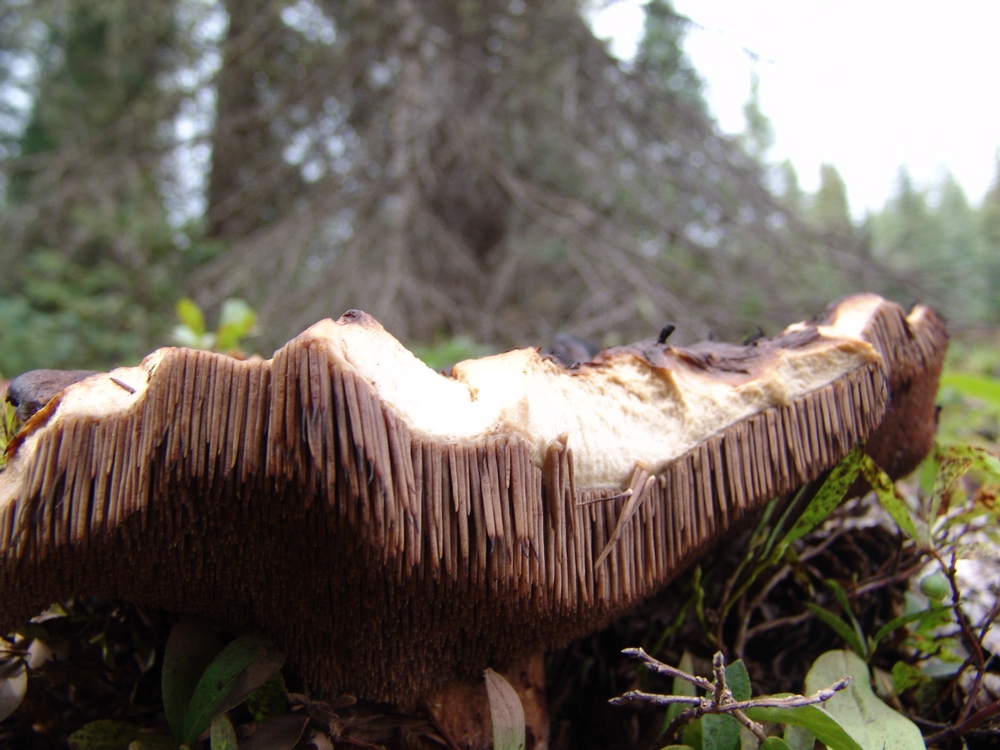
The "gills" of this mushroom made for an interesting subject for a macro shot.
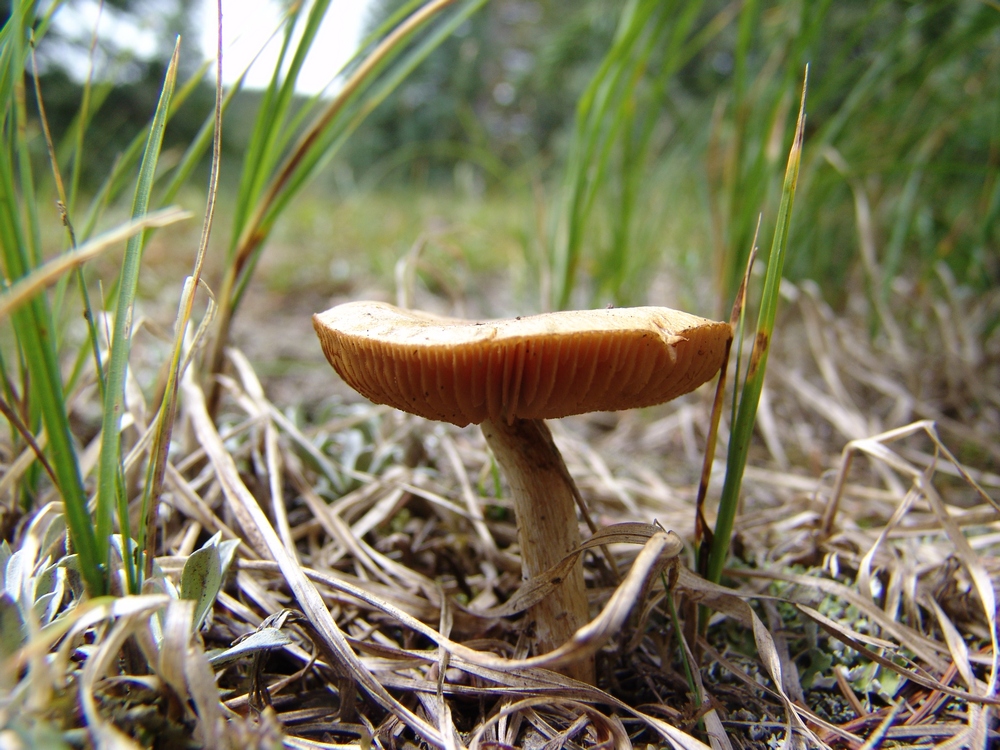
Another LBM rises from the grass.
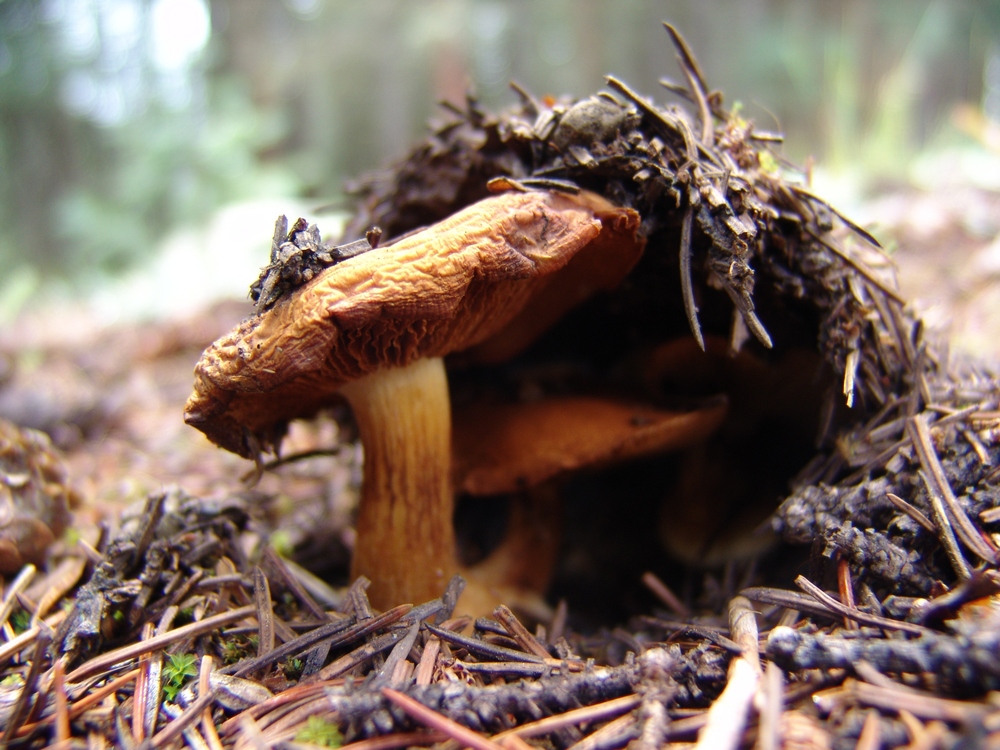
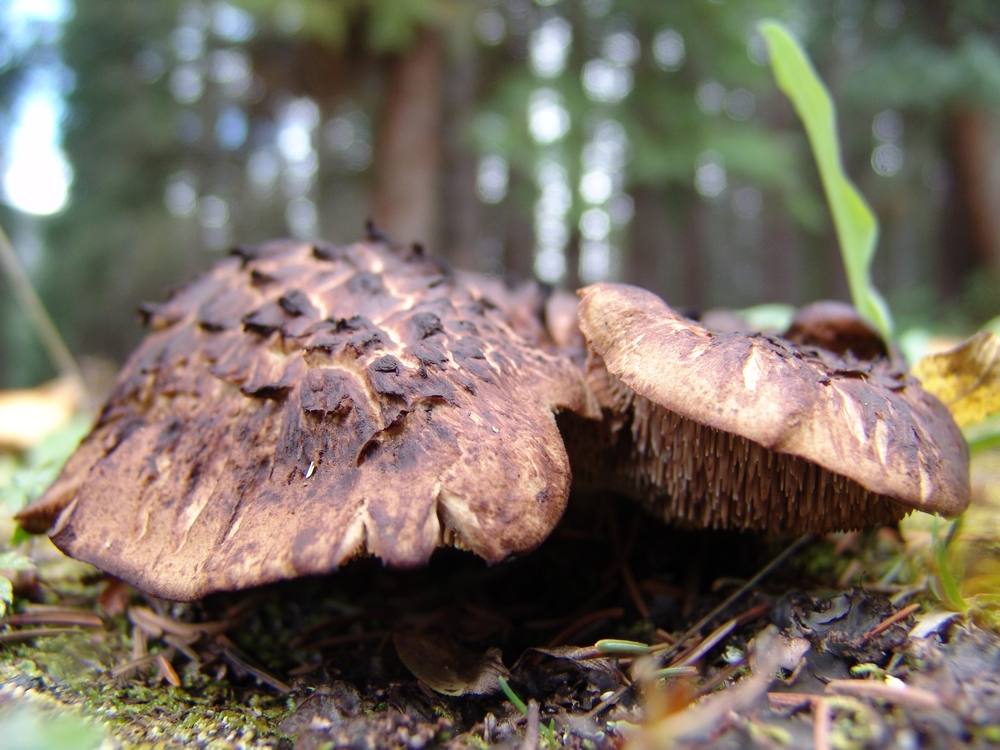
These mushrooms looked like blobs slithering across the forest floor.
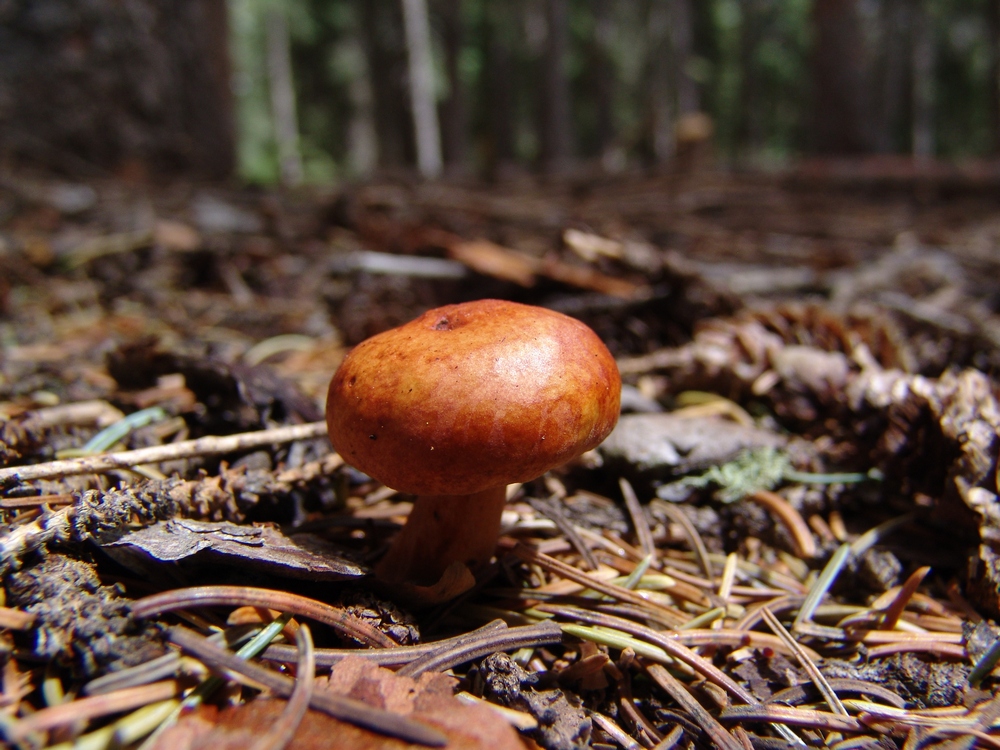
Yet another LBM!
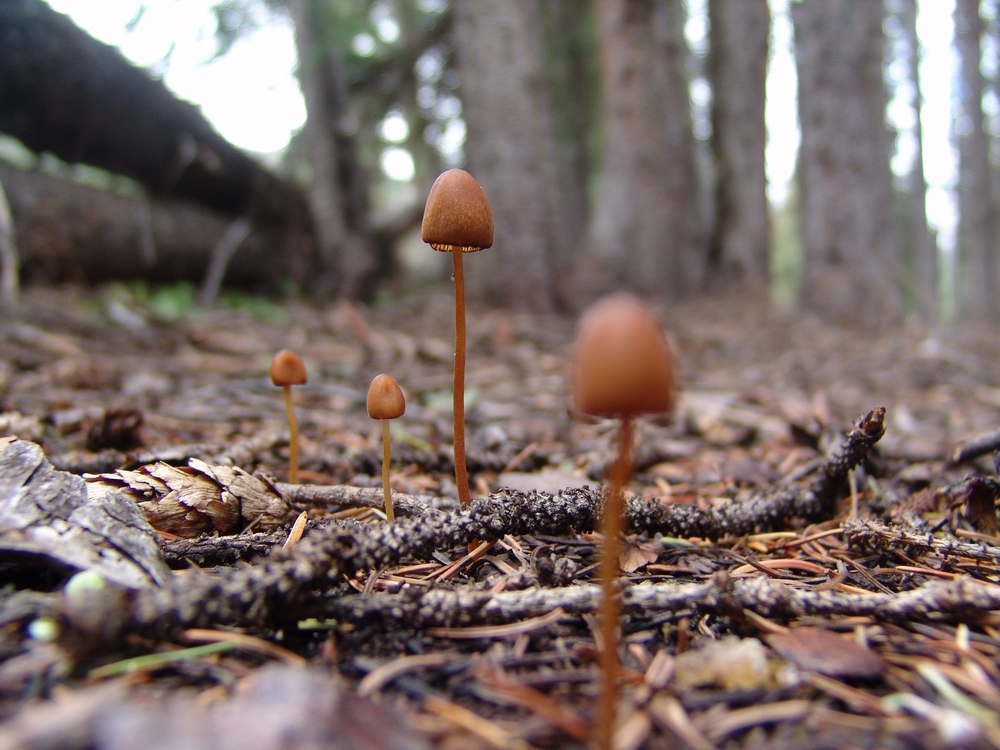
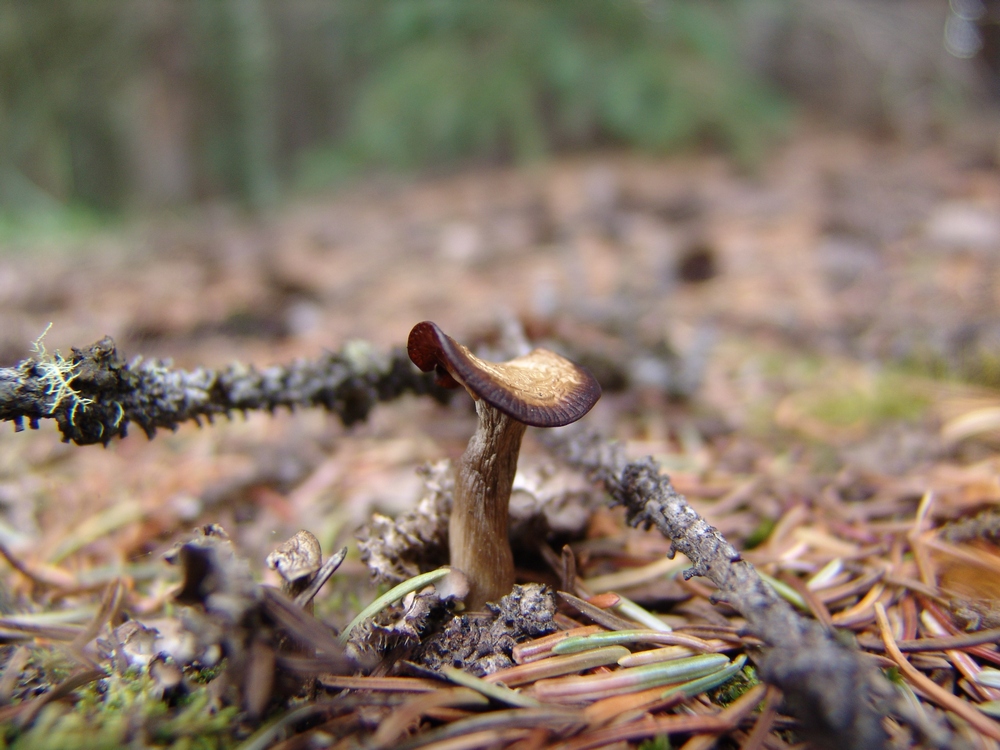
These tiny mushrooms were growing in a very obscure location. I don't have a clue how I spotted them. Pure luck. They were about an inch tall.
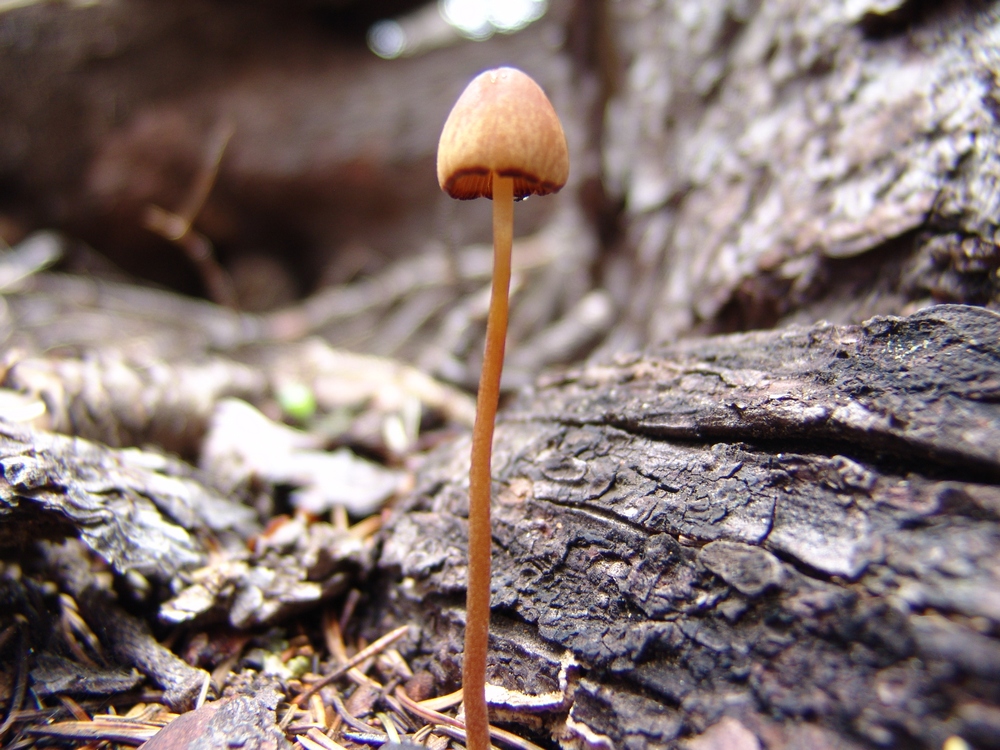
Another tiny little mushroom.

A perfect Fly Agaris specimin near our campiste. Doesn't it look like something out of Super Mario Brothers?

Mario emerges!
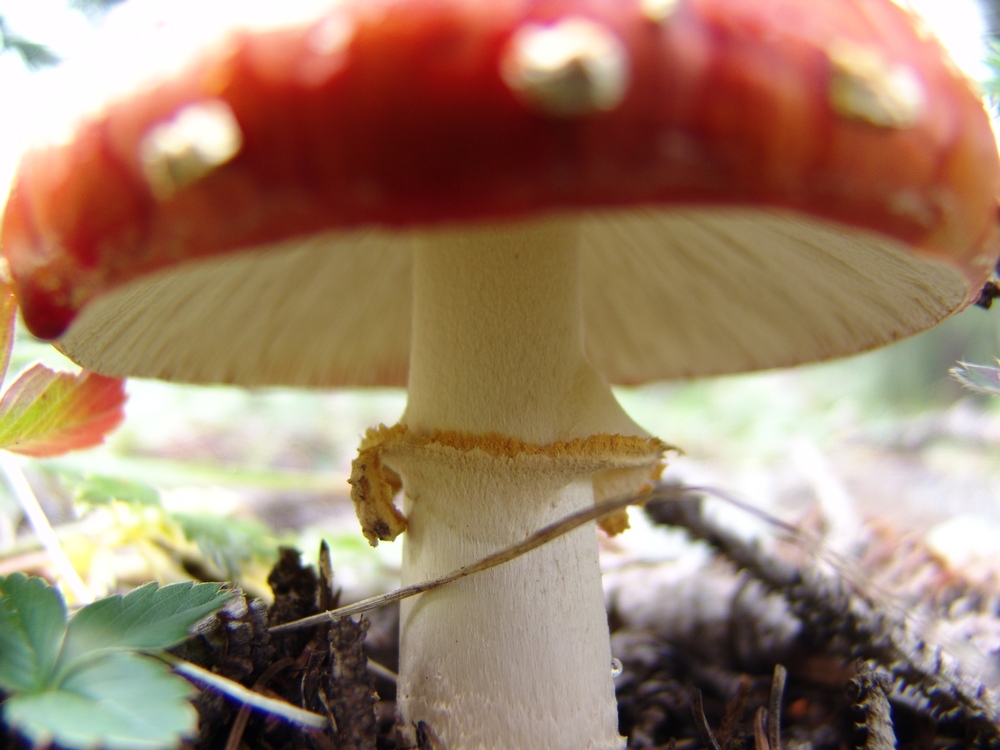
A view of the underside of the Fly Agaric.
This mushroom looks like it maybe got a little too much sun. Sunscreen is important in the mountains.
More crispy 'shrooms.
This little mushroom looks like she put on a little too much lipstick...
A white mushroom.
A small button cap mushroom.
After photographing the mushrooms, I took a nap. Sleeping next to the creek was great, and I recuperated from my exhausting search for the perfect mushroom. Ray and I cooked up some mashed potatoes and gravy with StoveTop dressing and chicken breast (we know how to cook when we backpack), and then after dinner I decided to go on another adventure up the valley to see if I could watch the sunset.

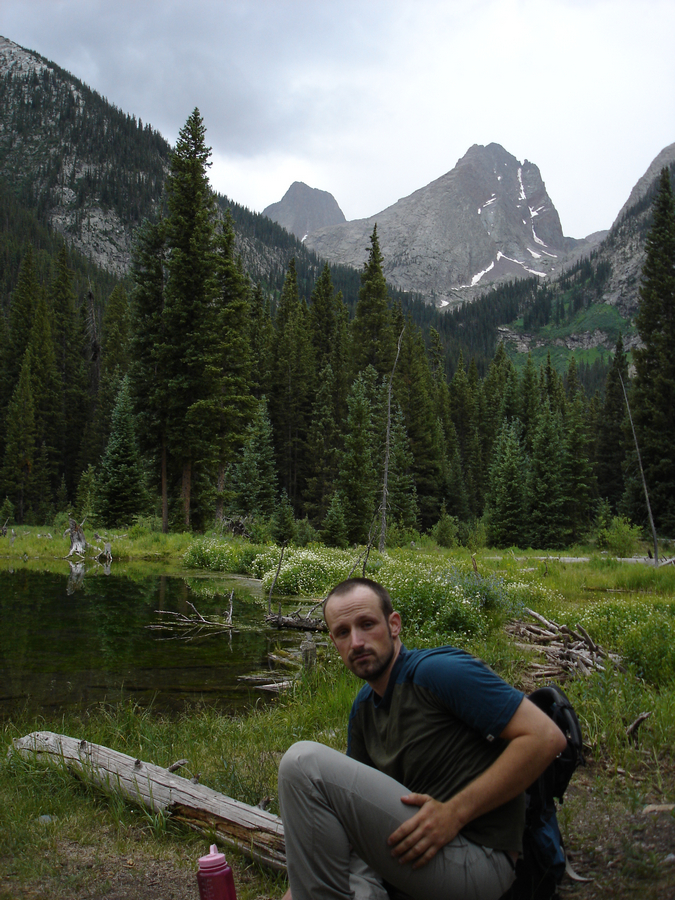
A view of the upper Weminuche Creek basin, just past Weminuche Pass.
To the east (left), I saw a small meadow at the base of the hillside pictured above. In that meadow, I saw a deer grazing, so I decided to see if I could stalk the deer and get a good photo of it. I think the deer was aware of my presense for pretty much my entire walk, which about 400 yards total across the basin. As I got closer to the meadow, I found myself looking down upon an awesome series of pristine beaver ponds.
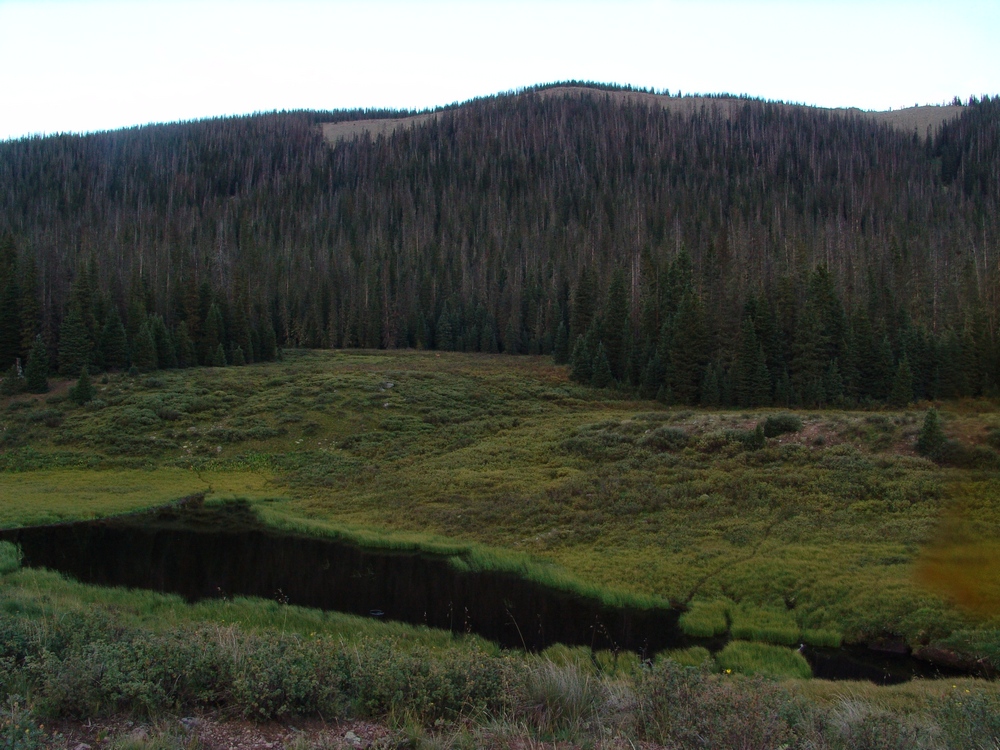
A hidden beaver pond and meadow. The deer can barely be seen in the upper meadow.

Another beaver pond.
The beaver ponds were full of duck and fish, and it was fun watching the ducks swim around with their little families of chicks.
I even took some video of the ducks. If you listen really closely you can hear coyotes howling in the woods nearby.
In the distance I could make out what I believed to be Pole Creek Mountain in the late sun's light.
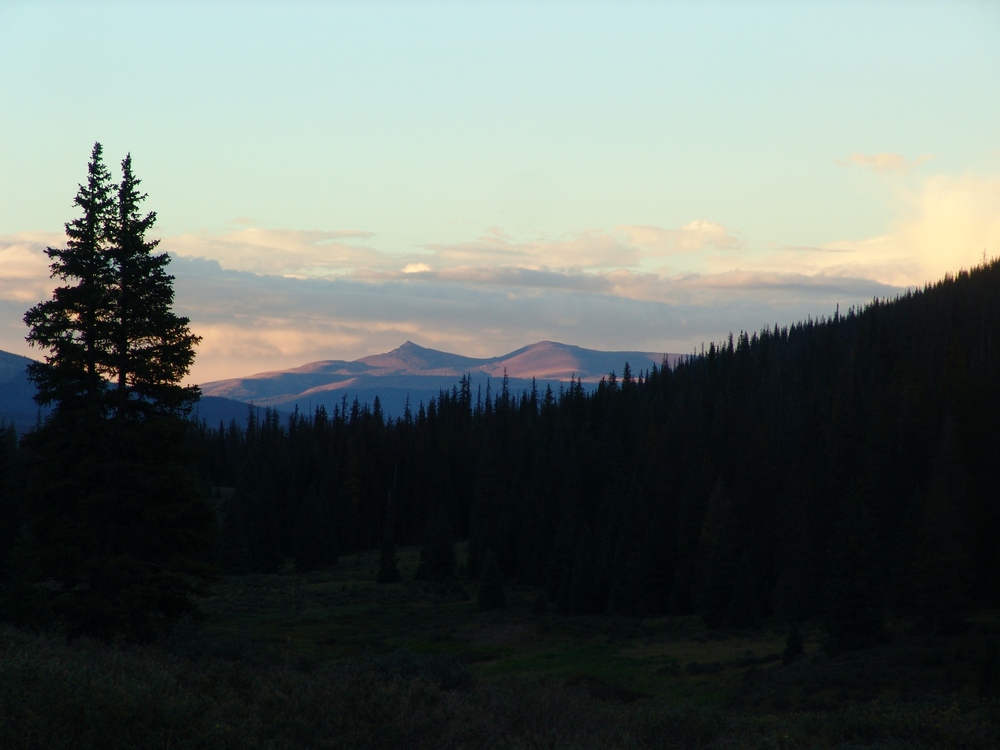
Pole Creek Mountain.
After being spooked at the beaver ponds by continuous coyote howling, I decided to return to camp. We crashed fairly early and set our alarm for 5 AM. The alarm went off and it was really cold outside. We got ready quickly and were on the trail by 6 AM. This is where we made our first mistake. Instead of following the "Sky Line Trail," we followed the Weminuche Trail further south until I realized we were doing something wrong. We backtracked to the Sky Line Trail (which does NOT follow where it shows on the USGS topo map, as seen by my TOPO map of our route) and began the steep upclimb along the Continental Divide. This trail is well established and somewhat steep. The weather was very foggy and winter-like for us, but there was no precipitation, so we continued up. The trail splits at one point, trying to avoid some deadfall; however, we found the best thing to do is to stay on the trail and go over the dead trees. This prevents you from losing a lot of elevation. Eventually, the trail brings you around the bend and Rio Grande Pyramid and The Window come into view.

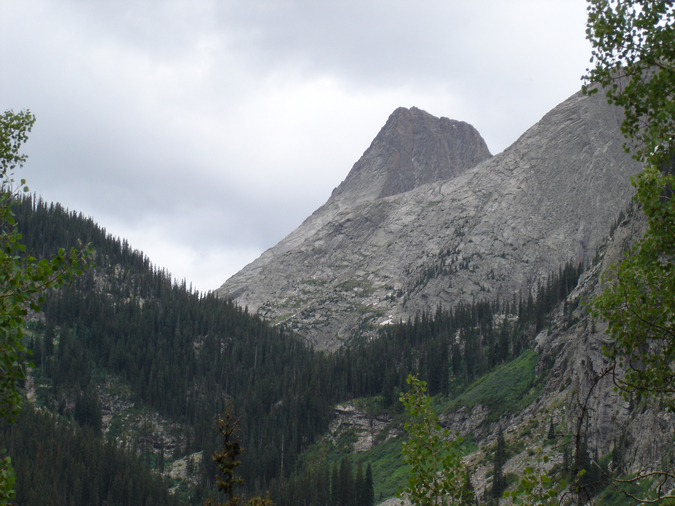
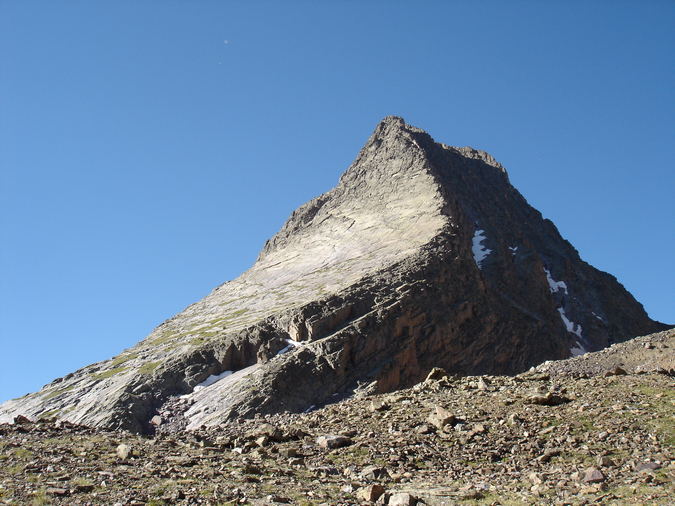
The Window and Rio Grande Pyramid.
The Window is a very impressive geologic formation along the south ridge of Rio Grande Pyramid, and it does not disappoint. It was truly striking.
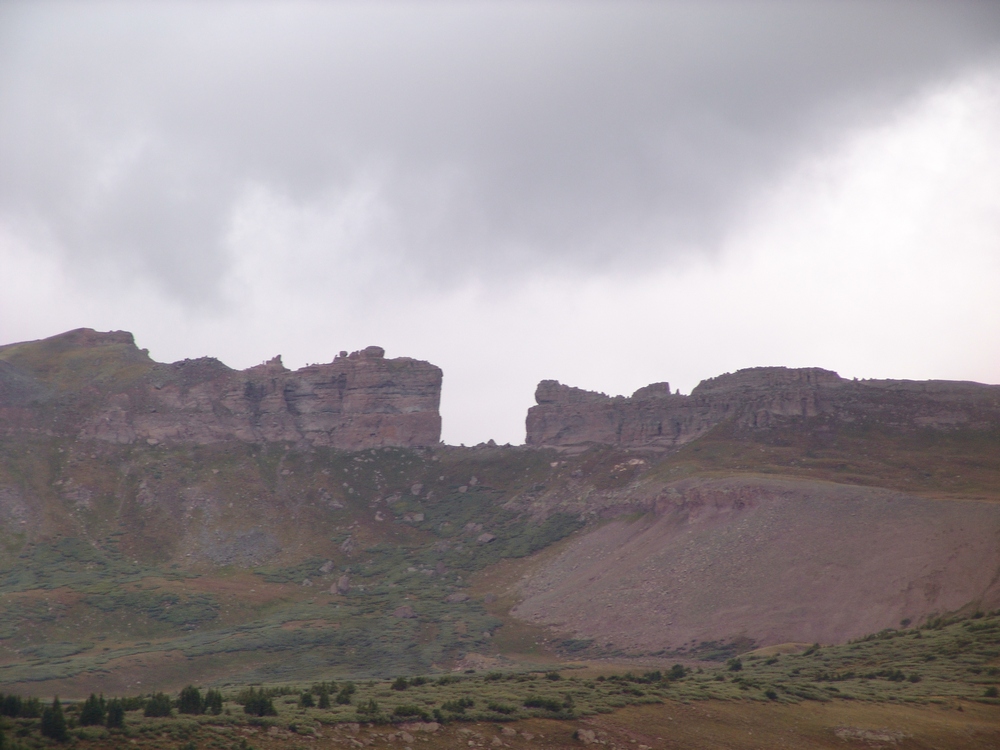
The Window.
The trail flattens out here in the upper basin and eventually brings you to a junction at the base of Rio Grande Pyramid. We took the junction to the right and climbed up a steep trail to the lower plaform of Rio Grande Pyramid. From here, we chose to follow the platform south and then up the gradual southeast slope.
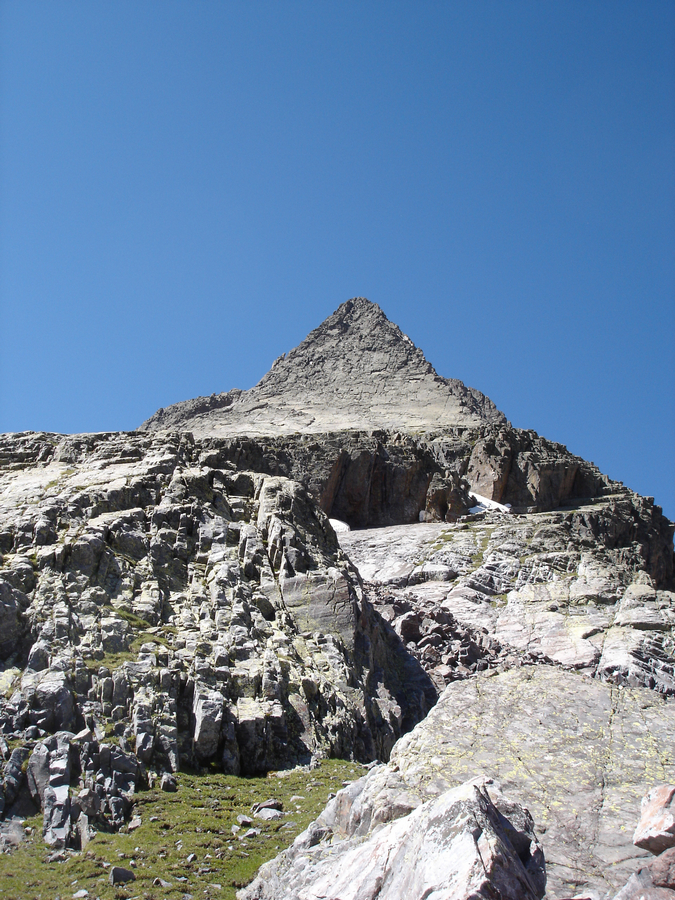
Nearing the summit of Rio Grande Pyramid.
The view back from where we came near UN 12,808 was pretty awesome, with the greens and yellows of the huge basins showing their true colors.
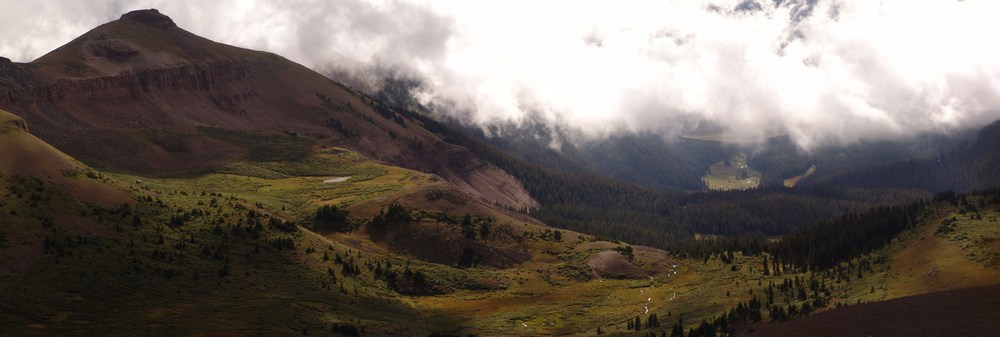
UN 12,808 towers over the valley below.
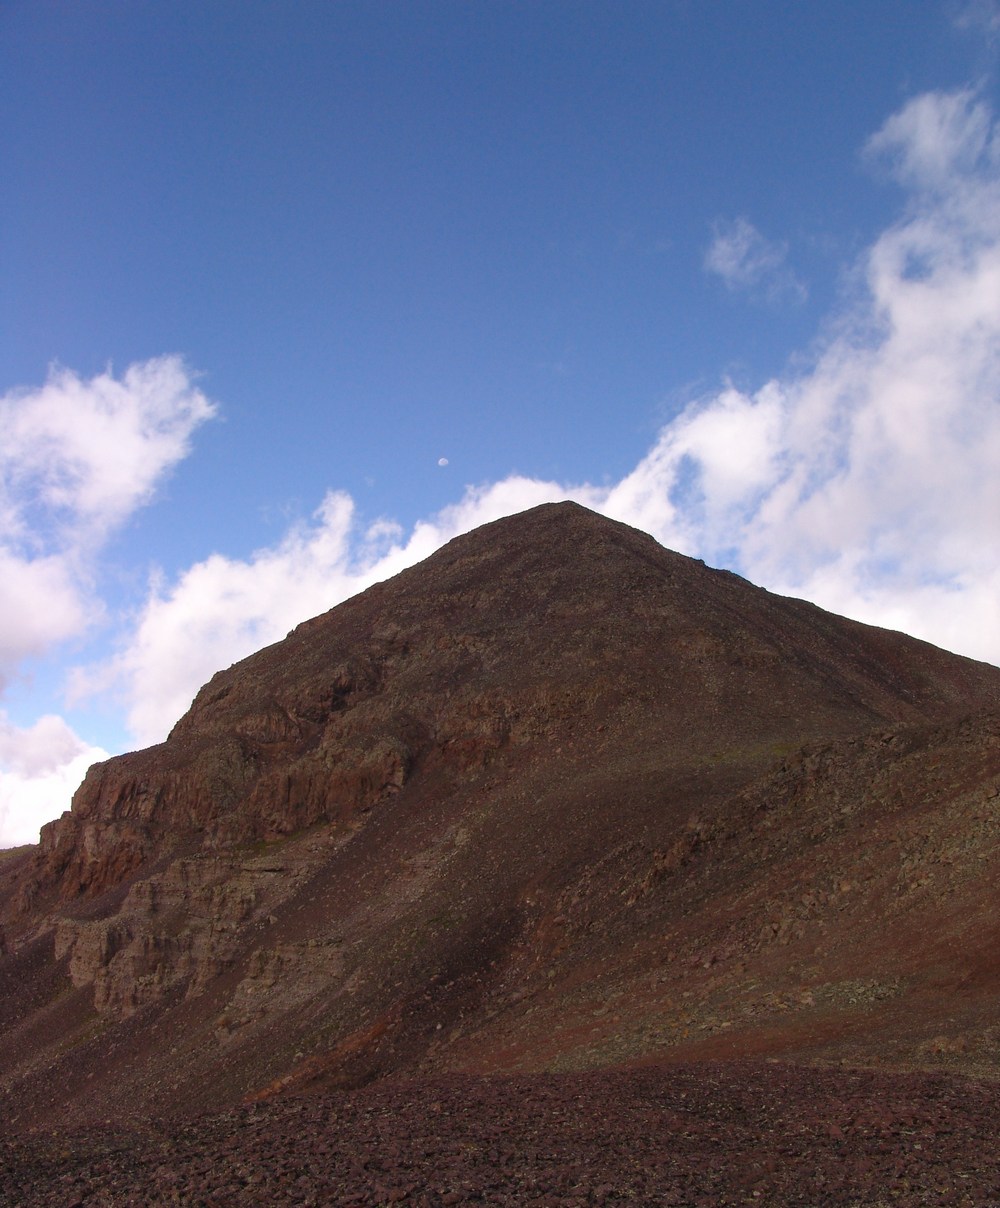
The Moon sets over Rio Grande Pyramid.
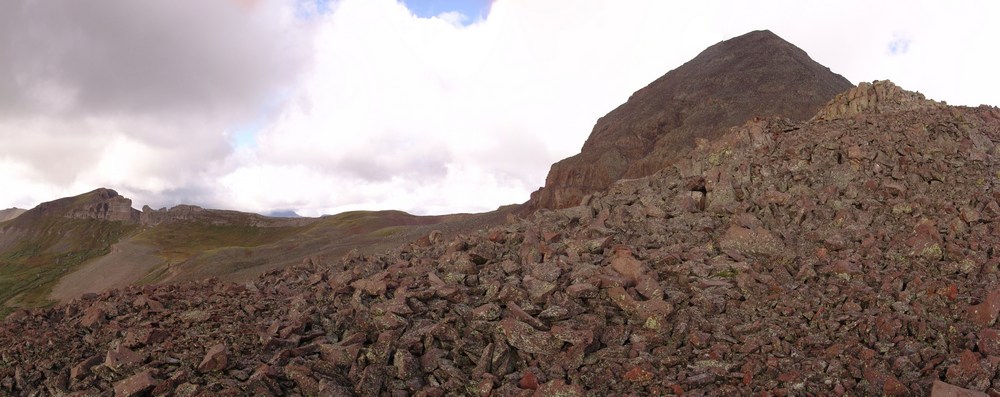
I was very intrigued by the volcanic nature of the rock on Rio Grande Pyramid. It was very much like lava rock in many regards, and made for quite easy travel compared to the "dinner plates" in the Elk Mountains or the famously loose rock found elsewhere in the San Juan Mountains.
Ray takes shelter in a ring of rocks we found.
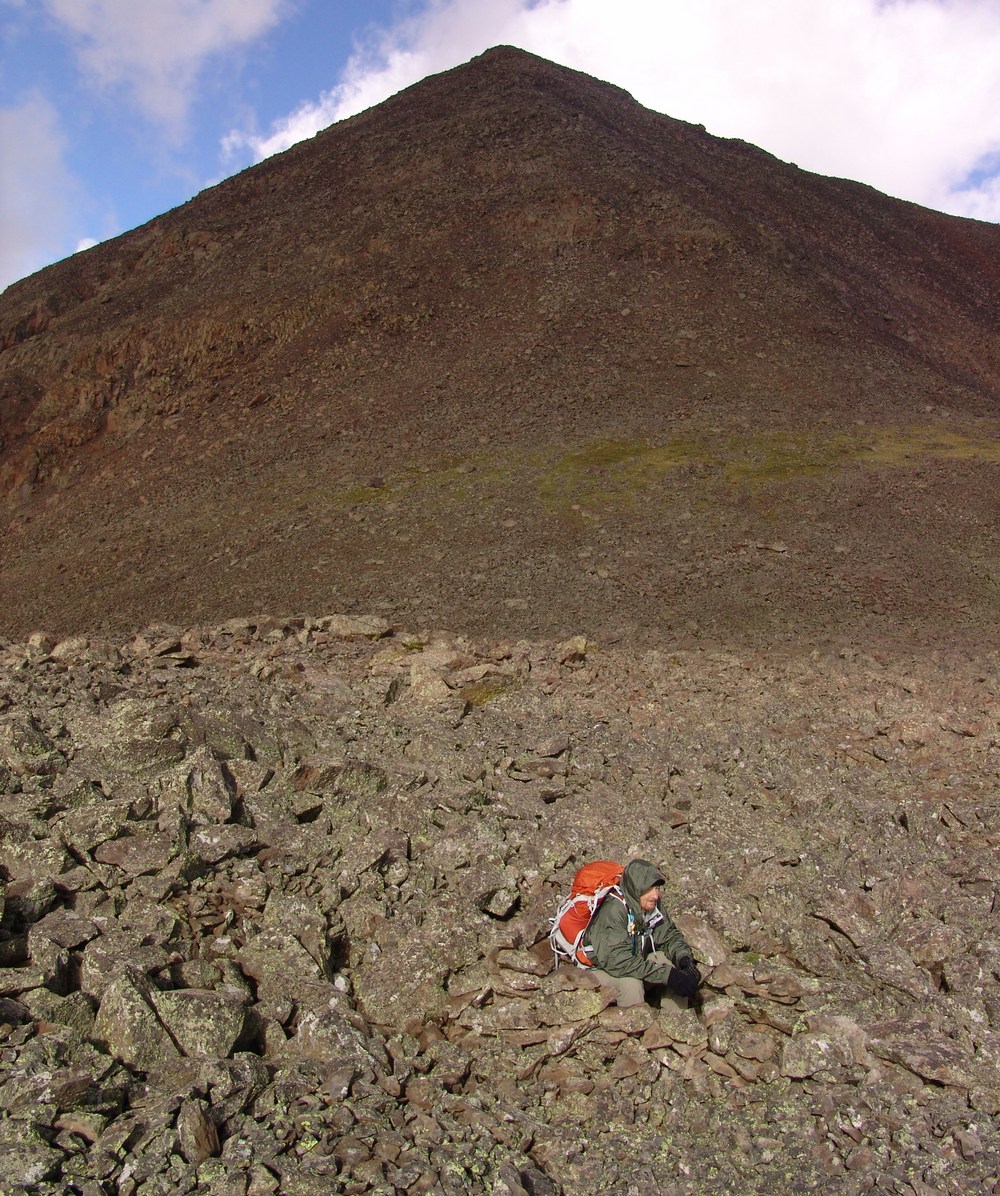
From here, it was smooth sailing to the summit. While steep, Rio Grande's final summit block is nothing to be worried about. It is relatively short, and there are even class 3 variations for those seeking out a more challenging ascent. As I crested the summit, I was worried that there would be complete cloud cover in the area and that my view of Vestal Peak and Arrow Peak would be obscured. When I first viewed those two mountains at the top, I was ecstatic. While the weather did indeed obscure much of my view of the Needle Range, the Grenadiers were in plain view.
The Grenadier Range.
Wetterhorn and Uncompahgre to the north.

A 2800 pano from the summit of Rio Grande Pyramid.
Ray Payne on the summit of Rio Grande Pyramid Matt Payne on the summit of Rio Grande Pyramid
A view east and south. The clouds loomed over us all day long.
A pano looking east. "Fool's Pyramid" or UN 13,278 left of center.
Since it was really windy and cold on the summit, Ray and I opted to head back down a few yards to eat a snack and refuel for the climb back down and hike back to camp. It began to lightly snow, so we headed on down. The weather began to clear for us on our descent, and better views of Rio Grande Pyramid were had from below.

A super-high resolution pano of Rio Grande Pyramid.

Ray rests on the trail in this wide view pano of Rio Grande Pyramid and the surrounding ridges and valley.
As we hiked down, I was constantly drawn to the deep green and yellow colors of the meadows below.
On the way back down, Ray and I took our time looking for mushroom, and we found plenty to take photos of. The mushrooms were honestly one of the highlights of this trip, because both Ray and I are fascinated by mushrooms.
A trio of Fly Agarics.
A circle of Agarics.
A tiny white mushroom.
An odd cluster of gooey looking mushrooms.


This one looks like a UFO.
This one grew around the grass...
This one had it's own wooden house.
Covered in moss. Or - the Dagobah Mushroom.
This one caught our eye...
Once back at camp, I decided to get a few more shots of our close-by creek. I think these came out quite well!
Ray and I cooked up dinner - a fitting meal of tortellini, salmon, alfredo sauce, and 4 kinds of dried mushrooms. A meal fit for kings.
Vestal Peak and Arrow Peak - the Grenadier Range's Finest

There really is only one word that can aptly describe the Grenadier Range: incredible. This sub-range of Colorado's San Juan Mountains rests deep within the Weminuche Wilderness Area and sweeps up from the valley below in a gravity-defying statement of beauty, ruggedness and splendor. Sitting approximately 9 miles south-southeast of Silverton, Colorado, and 32 miles northeast of Durango, Colorado, the Grenadier Range cannot be missed. In fact, I would go as far as to say that this group of mountains should be among the places one should see before they die. Made mostly of quartzite, these mountains are the spine of the San Juan Mountains, and arguably, some of Colorado's most difficult to climb. In fact, Arrow Peak was once considered the hardest major mountain in Colorado to climb until a class 3 route was established on its northeast rib1. Vestal Peak's "Wham Ridge," impressively seen from many vantage points in the San Juan Mountains, is considered by most to be a classic climb in Colorado. Lt. George Marshall of the U.S.G.S. 1876 Wheeler Survey reported on the Grenadier Range:
No where in Colorado can be found such steep slopes, such shapeless crags, such rocky and impassable ravines, such generally detestable characteristics and features as are here seen. The hard metamorphic rocks are shivered along their cleavage planes for hundreds of feet, leaving their odd pinnacles, there the likeness of the shattered outspread wings of some gigantic bird, and again of the grim grinning teeth of death.2
Additionally, from the summit of Mount Sneffels, Rhoda of the U.S.G.S. 1871 Hayden Survey reported:
The group of quartize peaks stood out as boldly as ever about thirty miles to the southeast. In fact, I may state here that we have never yet seen a group from any station (and we have viewed it from all sides) without feeling both deep respect and awe for their terrible ruggedness. The fact already stated, that the storm clouds seem to hover about them before starting on their meandering ways, only served to add to our other feelings of uneasiness.3
Given the incredible fanfare this group of mountains has received over the years by many visitors, I made sure to include it on my summer's climbing itinerary. Scheduling the trip would prove somewhat difficult since I was relying on the 5th class climbing expertise of one of my best friends, Jeremy Park. Jeremy was able to clear his calendar and join me from Seattle, Washington for this amazing backpacking adventure. Jeremy is a highly qualified trad climber who has spent many years climbing difficult routes in the rugged Cascade Mountains of Washington. For more on his adventures, see his profile on CascadeClimbers.com.
To start off, here is a break-down of relevant numbers from the trip:
Peaks summited:
Vestal Peak: 13,864 ft. (ranked 77th in Colorado)
Arrow Peak: 13,803 ft. (ranked 104th in Colorado)
Total elevation gain: 8,782 ft.
Total distance hiked: 25.12 miles
Total time hiking: Approx. 22 hours
Total photos taken: 582
Total wildlife sightings: 2 (marmots, mountain goats)
Total distance driven: 610 miles
Trip duration: 4 days, 16 hours
Day 1:
The rough plan was to leave Colorado Springs on Friday, July 9th, 2010 and return on Wednesday, July 14th, 2010. These plans were altered somewhat; however we did end up leaving at 8 AM from Colorado Springs on Friday and arrived at the Molas Pass trailhead at approximately 3 PM.
The long drive from Colorado Springs to Molas Pass
After arriving at Molas Pass, I became quite excited to see the Grenadiers for the first time. The range lived up to its name, striking both excitement and awe into me immediately.

The Grenadier Range as seen from Molas Lake.
One of the Grenadiers, Mount Garfield, really rises quite steeply from the valley below, and is rated 33rd on my list of "most impressive summits."
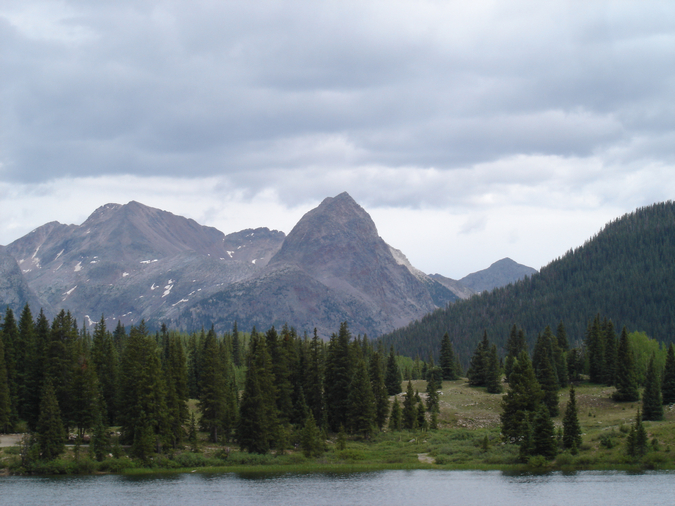
Mount Garfield rises high above (right of center)
Jeremy and I loaded our heavy packs (mine was 65 pounds) onto our backs and began hiking. We started down the Colorado Trail, which leads down 1,700 ft over 2.5 miles and several switchbacks (37 to be exact) to the Animas River and to the Durango & Silverton Railroad. Generally, most people take the train to this point to avoid the downclimb (and later upclimb); however, Jeremy and I chose to hike from Molas Pass to save money and to avoid being tied to the train schedule.

The full route map for the trip. Click to see a larger version.
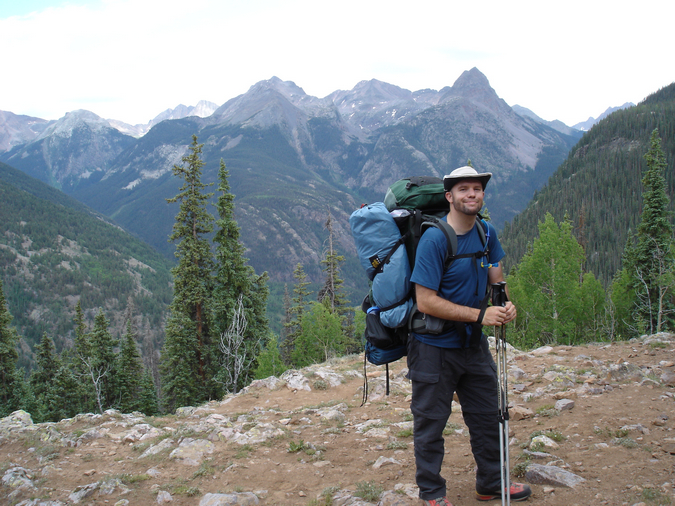
Matt Payne heading down the Colorado Trail.
Before long, the river and railroad tracks became visible. Our route would eventually take us to the bottom, over the river, and up the valley to the left towards the steep looking mountains (the Grenadiers) that are nearly hidden left of center.
Looking down at the Animas River from the Colorado Trail
Once lower into the valley, Mount Garfield became more and more impressive, towering over the river like a midevil castle's guard.
Mount Garfield
Once we crossed the river over a very well-maintained bridge and over the railroad tracks, the trail leading up Elk Creek appeared and started us up into the Elk Park valley. This trail is very well-maintained, and there was even quite a bit of evidence that trail crews had been working on it this summer to fix some washed out sections. The trail is quite steep, but very manageable with a heavy pack. We followed this trail for nearly 2.9 miles until we reached a set of beaver ponds at 10,000 ft., our pre-determined trigger to head up into the Vestal Basin.
Vestal Peak towers above the Elk Creek valley and Vestal Basin.
Jeremy looking tired at the beaver ponds with Vestal Basin in the background.
After 3 hours of backpacking, we were determined to make Vestal Basin before nightfall. We headed south up Vestal Basin's trail - an unmaintained, but easy to follow trail which climbs quite steeply up towards Vestal and Arrow Peaks. Did I mention that this trail is steep? The trail gained 600 feet in 3/4 of a mile with large amounts of fallen trees and boulders to navigate around. In several other trip reports I've read, people have mentioned that the trail was difficult to find or follow; however, we did not find this to be the case at all.
After hiking another two hours into the basin for a total of 8.7 miles, our legs finally gave out at 10,620 ft shortly after nightfall. We found a cozy campsite near a small tributary of Vestal Creek and made our first meal of the trip - two packets of Zatarain's ready to serve rice and chicken. This was surprisingly good and filled with sodium (a nice thing to take in after a full day of backpacking). We decided to set the alarm for 4 AM and hit the sack around 11 PM. It was at this point that I realized that my Thermarest pad had somehow sprung a leak from the hike up and that I would be sleeping on hard ground. Yay!
Day 2:
4 AM came and went, and we finally crawled out of the tent around 8 AM. Both us were thankful for the extra rest and tore down camp and hit the trail at about 10 AM, heading for the upper sections of Vestal Basin.
Jeremy hikes up into Vestal Basin along Vestal Creek.
Great views of both Electric Peak and Arrow Peak were had while hiking up into the basin.
Electric Peak
Arrow Peak's steep northeast face, seen from the Vestal Basin trail.
After hiking a little over a mile and gaining 893 ft., we found an ideal campsite at the foot of Vestal and Arrow, at the end of a long clearning and in some trees next to Vestal Creek. Vestal Peak itself could be seen directly from camp, with it's "Wham Ridge" rising above us.

Vestal Peak's Wham Ridge
Since we were planning on climbing Wham Ridge, it was particularly exciting to see it close-up.
Vestal's Wham Ridge zoomed in from our campsite.
After setting up camp, I repaired my Thermarest using a repair kit that I always carry with my on backpacking trips. For once the extra weight paid off! We set-up camp just in time. Clouds had been forming since we had woken up and as typically happens in the San Juan Mountains, a thunderstorm decided to develop quickly above us around 12 PM. We crawled into our tents and napped through the storm, which subsided around 4 PM. We woke up, ate a few snacks, and finished setting up our campsite. At around 5 PM, after the clouds had completely cleared out, I somewhat jokingly told Jeremy that we should climb Arrow that evening. Jeremy said, "why not," and before we knew it, we were packing our day-packs for an ad hoc summit of one of Colorado's finest summits. We departed camp at 6:15 PM, headlamps and helmets equipped, and headed up a climber's trail right next to our campsite, which went straight up the head-wall of the lower area beneath Vestal and Arrow. This trail was also easy to follow, but ridiculously steep, rising 645 ft. in just .45 miles until it reached a plateau in between Arrow and Vestal. Arrow's classic ramp was easy to spot, and Vestal's Wham Ridge continued to blow my mind.
Arrow Peak
Vestal Peak
Vestal and Arrow Peaks as seen from the top of the headwall above our campsite.
Additionally, the Trinities were quite prominent just to the left of Vestal.The Trinities are the middle three mountains of the Grenadier Range, composed of West Trinity, Middle Trinity, and East Trinity.
The Trinities as seen from the base of Arrow and Vestal Peaks.
Matt Payne posing with Vestal Peak behind.
We headed up to the base of Arrow and began the climb up Arrow's prominent ramp. The ramp itself was nearly free of snow and consisted of easy class 3 climbing.

The base of Arrow Peak and the start of our route.
As we climbed, I could not help but constantly look left at the impressive nature of Vestal's Wham Ridge, which swept up as if it were carved out with a fine instrument.
The impressive profile of Vestal Peak's Wham Ridge.
The higher we were able to climb on Arrow, the more and more impressive Vestal became. I simply could not stop myself from gazing over at its sheer beauty, and eventually, Vestal Lake came into view as well.
A panoramic photo of Vestal's Wham Ridge.
Jeremy and I reached a junction in our route and made a decision to stay left and continue up a class 4 variation of Arrow. This decision was one of our best of the trip, as Arrow's upper ramp provides some of the most fun, yet least exposed, class 4 climbing I've done to date. For those that do not know, exposure is defined as "the condition of being on high vertical rock with full consciousness that nothing exists between you and the distant ground but thin air4."
The start of Arrow Peak's class 4 terrain
Following the higher ridge to the left also provided some great views of the Needle Range to the south, and Jagged Mountain, Windom Peak and Sunlight Peak came into view for the first time, Jagged's pinnacles rising up like upside-down stalagtites.

Jagged Mountain (left of center), Windom Peak and Sunlight Peak
Matt Payne with Vestal's insane Wham Ridge behind him.
A high resolution panoramic photo of Vestal's Wham Ridge.
Jeremy Park on Arrow Peak's class 4 ridge, just east of the traditional class 3 route
Jeremy Park navigating the class 4 terrain on Arrow
Jeremy took my camera and was able to take some photos of me negotiating some of the class 4 terrain. The climbing was fun, challenging, and quite rewarding. Exposure was minimal, and various holds were quite ubiquitous.

The sun was setting quickly, which was both exciting and troublesome, as we did not look forward to down-climbing Arrow in the dark, but I was really excited to see the sun set from 13,803 ft.

The sun setting on Vestal Basin.
After an exhilirating climb, Jeremy and I topped out on Arrow's summit at 8:15 PM, and enjoyed the sunset from the top. This was one of the most majestic and spiritually fulfilling moments of my life.

A 3600 view from the summit of Arrow Peak, with the sun setting over the San Juan Mountains.
The Needle Mountains across the Tenmile Creek and Noname Creek drainages from us were impressive, each living up to their namesake.
The Needle Mountains - from left to right: Jagged Mountain, Windom Peak, Sunlight Peak, Mount Eolus, Animas Mountain, Turret Peak and Pigeon Peak
Pigeon Peak was quite possibly one of the most impressive mountains I've ever seen, with its east face dropping off like the edge of table.

Pigeon Peak
Jeremy with Jagged Mountain directly behind him to the right
Jeremy with Vestal in Arrow's shadow to the left

A self-timer captures Matt and Jeremy on the summit of Arrow Peak
Rio Grande Pyramid and The Window were looking pretty awesome in the late evening sun as well. Rio Grande Pyramid has really piqued my interest lately since I am going to climb it in August, 2010 with my dad (update - completed - see the Trip Report). It should be pretty amazing to look back towards Arrow and Vestal.

Rio Grande Pyramid and "Window Peak" as seen from Arrow's summit. The Window is the notch on the ridge just right of Rio Grande Pyramid.
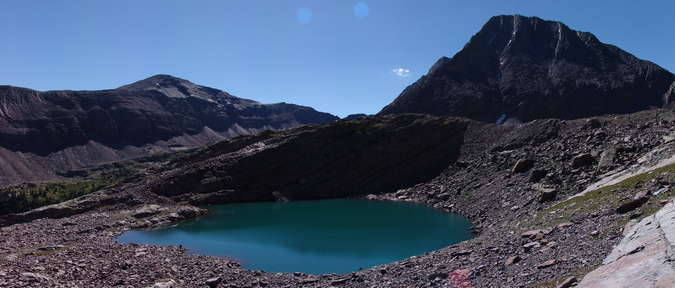
The sun sets behind the San Juan Mountains. Check out that lake below!
Arrow Peak's north face and an airy fin connecting it with the true summit
Vestal Peak's Wham Ridge during sunset.
After spending just 20 minutes on the summit to enjoy the sunset, Jeremy and I departed Arrow's amazing summit via the standard class 3 trail, which was marked by several cairns heading down the steep face of Arrow. Before long, we adorned our headlamps and were in complete darkness, but not before we had successfully navigated below the more treacherous sections. The down-climb in the dark provided quite an interesting challenge. The ramp on Arrow was quite solid and easy to climb down, rarely requiring either of us to sit down on steeper sections. We could see other campers much higher in the basin above our camp with their headlamps on, watching us. I thought the climbing down would be difficult in the dark; however, the route on Arrow is so straightforward that I think it could even be up-climbed in near darkness if one were experienced and comfortable. We reached our campsite at approximately 9:15, just 3 hours after we had set-out to climb Arrow.
We cooked our dinner in the dark again, this time creating an amazing medley of re-hydrated black beans, jalapenos, green chilis, velveeta cheese, and tortillas. We planned to climb Vestal's Wham Ridge the next day, so we set the alarm for 5 AM again, and hit the sack at 12 AM, snoozing the night away.
Day 3:
We awoke on day 3 and quickly prepared for what we hoped to be an amazing climb. Having read about Wham Ridge over and over again the past several years, I had mentally hyped up the climb to be an epic adventure. A small group of three climbers headed up the trail shortly before us, which was somewhat concerning to both Jeremy and I as we did not want any rocks to fall down onto us during our ascent. We decided not to deviate from our plans since Jeremy felt confident that if we bumped into the other group we could find a route around them. We left camp and headed up the steep climber's trail again to Vestal's base. I carried the 60 meter rope, a nut key for taking out nuts from the rock, as well as my personal gear, and Jeremy carried the climbing rack (a full compliment of anchors, quickdraws, webbing, camalots, and nuts). The Columbine flowers on the climber's trail were outstanding.
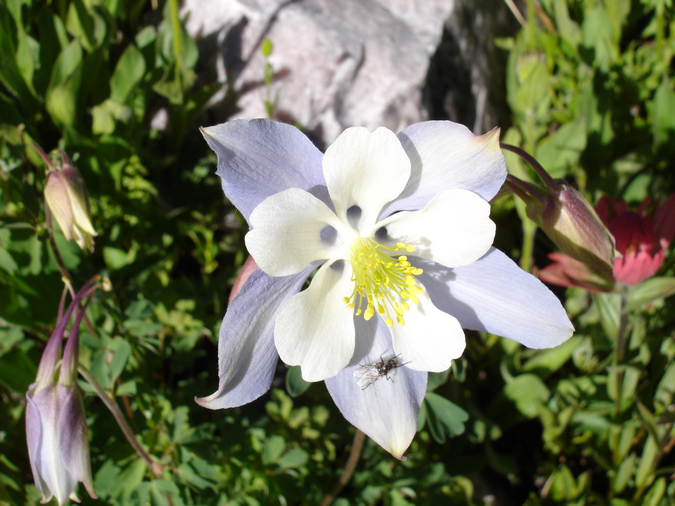
A Columbine flower
We reached the base of Vestal and Arrow again and headed towards the start of Wham Ridge.
Vestal Peak in the morning sunlight
We stopped at the base of Wham Ridge and put on our climbing harnesses and climbing shoes. We decided that we would stash the rest of our gear under a large rock at this point. Jeremy went to take out the climbing gear from his backpack and opened to find... all of his food. Yes, that's right - his food bag and climbing bag are identical and he mistakenly grabbed his food bag instead of his climbing bag when we left camp. So, Jeremy needed to hike back to camp and then back up to the start of Wham Ridge before we could begin climbing. While we were both upset, I assured Jeremy that it would be fine and that I was not mad at him. He left for camp and I headed over to Vestal Lake to take some photographs.This turned out to be a good mishap as I was able to capture some of the most stunning photos of the trip.
Vestal Lake and West Trinity

Vestal Peak reflected in Vestal Lake
There was a small group of 4 men fishing quite successfully at the lake, and I stopped to talk to one of them. He was from Memphis Tennesee and explained that he had climbed Wham Ridge the day before without rope, and that he had only climbed one mountain prior to this. While this seemed rather dangerous to me, it did instill some confidence in my ability to complete the climb. He also said he saw us downclimbing Arrow the night before and that he was praying for us to make it down safely. Not being a religious person, I thanked him for the warm thoughts and headed off to take more photos.
Vestal Peak's Wham Ridge
I headed back to the rendezvous point and waited for Jeremy to return. It was not until 10:30 AM that Jeremy reappeared and reconvened with me. At this point, clouds had already formed and we were questioning if we should continue or not. We decided to keep going and keep an eye on the clouds. With a full compliment of climbing gear, we headed up Wham Ridge in our climbing shoes. I reached the last grassy ramp of Vestal and re-evaluated the weather. Jeremy asked me what I thought and I told him that my gut told me we should bail. We both agreed that heading back would be the best choice - safer to start earlier the next day than to get struck by lightning. I took some parting photos of both Vestal and Arrow and headed back down the steep slopes of Wham Ridge, which proved to be a quite painful experience in climbing shoes.
A view of Vestal from the turn-around point
Arrow Peak with stormy weather forming above
The somewhat loose fitting climbing shoes were quite painful on the downclimb, and caused some very painful blisters to appear on 5 of my 10 toes. This did not bode well for my chances of using climbing shoes on the actual climb. Jeremy and I changed back into our mountaineering boots, and stashed all of our climbing gear at the same large rock at the base of Vestal in a waterproof bag for the next day.
Jeremy stashes our climbing gear under this huge boulder beneath Vestal Peak
We went back down to camp and decided to take a nap. The decision to bail on Vestal proved to be a very good one, as the whole basin was riddled with rain and lightning for three hours. Fortunately, the group ahead of us had safely made it down from Vestal before the storms hit.
We got out up and cooked dinner - this time a carbohydrate-filled meal consisting of re-constituted mashed potatoes, country gravy, Spam, and cheddar cheese. While this sounds horrible - it was amazing! Go Spam! We set our alarms for 3:30 AM and crashed at a much more respectable time of 9 PM.
Day 4:
We woke up and made our way up to the base of Vestal to watch the sunrise from the final grassy ledge before the beginning of the more difficult climbing. Since my feet were completely mangled from the prior day's adventure, I decided to wear my La Sportiva Trango Evo Sport mountaineering boots for the ascent. With heavy socks on, I could barely feel my blisters. Watching the sunrise from the base of Wham Ridge was pretty awesome. The sun lit up the surrounding mountains and made for quite a peaceful start to an incredible climb.
Arrow Peak in alpenglow from the start of Vestal's Wham Ridge.
Vestal's Wham Ridge in alpenglow, with Jeremy resting at the base.
Jeremy watches the sunrise
I even took a short video of the sunrise:
Arrow Peak at sunrise.
A closer view of Wham Ridge - looks like fun!
Jeremy watches the sunrise over Vestal Lake
Jeremy warms up
Matt looking cold
Jeremy poses in front of Wham Ridge
Matt looks ready to begin Wham Ridge
We finally started up Wham Ridge, making our way quickly up the small ledges and cracks. The going was pretty easy and unexposed for awhile, with plenty of great hand and foot holds to be found.
Jeremy heads up the ledges
We continued up into some 4th class sections, with exposure and steepness increasing gradually as we climbed.
Jeremy climbs the lower Class 4 section of Vestal Peak
Before long, Rio Grande Pyramid and the Window appeared, looking really cool in the early light.
Our first view of the day of Rio Grande Pyramid and The Window
Wham Ridge continued to become more and more steep, decreasing my comfort level of being unroped.
Wham Ridge's profile
We reached a great stopping point with plenty of room at our feet for belaying, and prepped the rope and our gear for 5th class climbing. Let the fun begin! While I did the route in my La Sportiva EVO Mountaineering Boots, Jeremy did Wham Ridge in his Evolv Bandits. According to Jeremy, they were quite comfortable shoes and he felt like he probably could have gone without a rope (being that he is very experienced and the shoes made for great traction).
Jeremy prepares for our 1st pitch of Wham Ridge
Jeremy led the first pitch as I belayed from below, only placing two pieces of gear for protection on the way up - a camalot and a nut. Once Jeremy arrived safely at the next obvious stopping point above at about 55 meters up from me, he created an anchor and signaled me to begin climbing.
The first pitch
I easily ascended the first pitch, removing Jeremy's protection as I climbed. I reached the anchor and Jeremy prepped for the 2nd pitch. Meanwhile, I decided to take a few photos from this vantage, looking down.
Looking down Wham Ridge
Arrow Peak's profile from about 3/4 up on Vestal's Wham Ridge
We cruised up the 2nd pitch in quick order and set-up for one last pitch, which proved to be quite difficult in one section. I found myself at a point where there were no foot-holds and only one hand-hold - a large inset section holding a rusted cam. Having on mountaineering boots and not climbing shoes made the climb much more difficult than it needed to be, but I welcomed the challenge. The move required me to do a one-armed push-up with my right arm in the inset section and to reach up with my left arm to a hand-hold. Once in this position, I pulled myself up and placed my feet where my right hand was previously at. This was probably the crux of the entire route. It felt much harder than 5.4, but I suspect that was because I was wearing boots.
Matt on Wham Ridge
At this point, Jeremy and I both felt comfortable being unroped and headed up the class 4 / low class 5 remainder of the route. There was only one other section that was greatly exposed, which required us to do a really crazy move with about 1,000 ft. of exposure below us. The move was on a completely solid rock, so I felt comfortable enough to make a go at it without rope. This proved to be OK, as the move was totally solid, and fun to say the least.
The last section of Wham Ridge proved to be a very fun class 4 and 5 playground.
We finished up to the top of Vestal, and I celebrated. Since I had been dreaming of doing Wham Ridge for quite some time, this moment was especially exciting for me. I thanked Jeremy for leading the climb and began to go crazy with my camera. 
As expected, the views from Vestal were outstanding. The Needle Range and the remainder of the Grenadier Range to the east were quite the sight!
A view of the Needle Range to the south of Vestal Peak.
A zoomed in view of Pigeon Peak
A zoomed in view of Jagged Mountain
A zoomed in view of Windom, Sunlight, and Sunlight Spire
A zoomed in view of Mount Eolus

A zoomed in panoramic of the Needle Range.
The La Plata Mountains seen in the distance to the southwest, including Hesperus Mountain
A panoramic photo looking west to north from Vestal Peak.
A fully zoomed in panoramic view looking down and east from Vestal Peak, with Vestal Lake below. Seen at far right are the Trinities, Storm King Peak, Mount Silex, and The Guardian.
Jeremy sits on the summit of Vestal Peak with Pigeon Peak behind him.
Matt and Jeremy are captured in this self-timer from the summit of Vestal Peak.
Matt looking proud on the summit of Vestal Peak.
I think I see my house from up here!
A panoramic photo of the Needle Range

A panoramic photo from Vestal Peak, looking north to south - with Basalm Lake between the Grenadiers and the Needle Mountains.
With more sky this time...
After a great time on the summit, we decided to descent via the "class 3" route of Vestal on the south side of the mountain. I put class 3 in quotations marks because this was the worst, chossiest, nastiest, most unpleasant class 3 climbing I've done in my life. The route was unmarked, with no trail, and no cairns until the bottom. We weaved in and out of gullies, unsuccessfully finding one dead-end after another. Finally, as we were nearing desperation, Jeremy found a narrow but climbable gully leading down to a large cairn below. The climbing on the backside of Vestal reminded me of Crestone Needle, except steeper and looser. Not a good combination! We finally reached the saddle between Arrow Peak and Vestal Peak and descended via the "Dues Collector Couloir." I've often wondered why it was called this, and realized it was because it was loose talus and dirt, not the most enjoyable stuff to climb up or down.
Jeremy in the "Dues Collector Coulior"
We reached the end of the coulior and headed towards the end of the base of the mountains where we would down climb back to our campsite.
A view of Vestal's Wham Ridge on the way down
Vestal Peak and some Columbine flowers
We reached our campsite about six hours after we had begun, still high from the amazing climb. We prepped our dinner - this time a hearty meal consisting of tortellini and pasta sauce with chicken. Yum.
A view of Vestal Peak from Vestal Creek near our campsite. It should be noted that the steep section between us and Vestal (right of center) was the trail up from our campsite.
The flowers were incredible in the afternoon sun, so I took some time to photograph them after dinner.
A purple flower in front of Vestal Peak
Lower Vestal Basin, where we were camped
We hit the sack around 10 PM, and set the alarm for 5 AM, tentatively planning to do the Trinity Traverse the next morning.
Day 5
We awoke around 6 AM, seeing that the clouds had already formed in the basin. We opted to cancel the Trinity Traverse and head back to the car. We packed up and left camp around 11 AM, making our way back down the steep trail and to the beaver ponds. The view from the beaver pond was incredible as ever.
Vestal Peak and Arrow Peak are reflected in a beaver pond
We cruised back down the Colorado Trail, meeting up with the train around 2:30 PM.
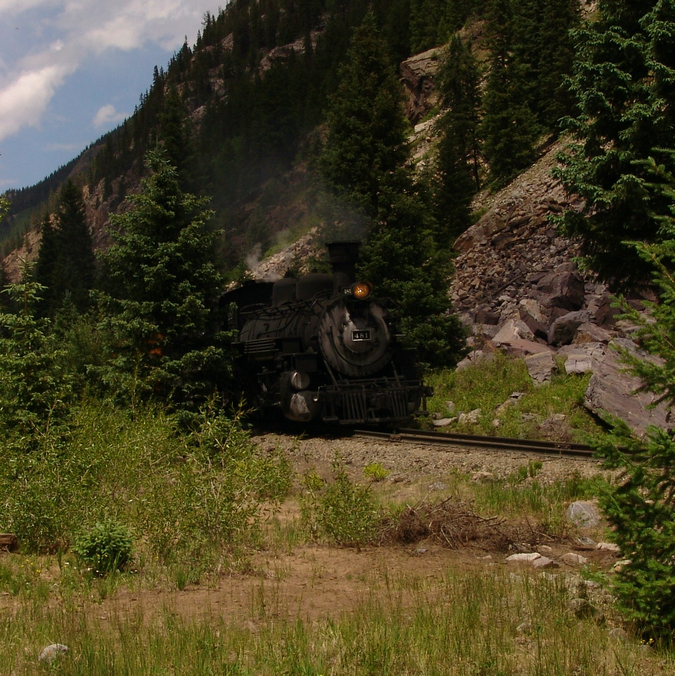
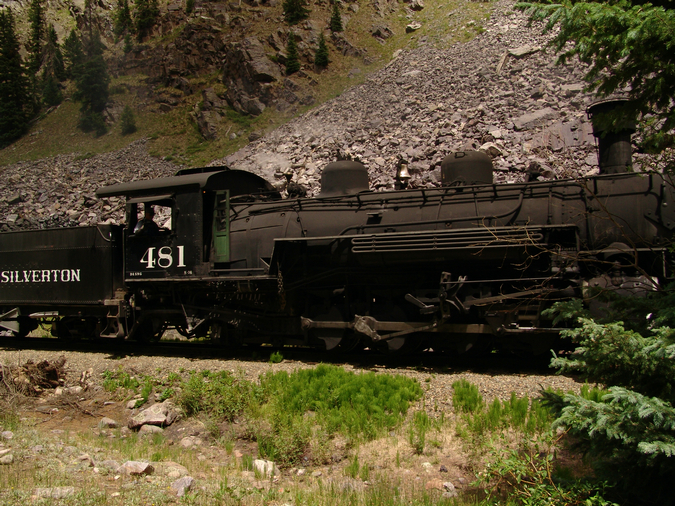
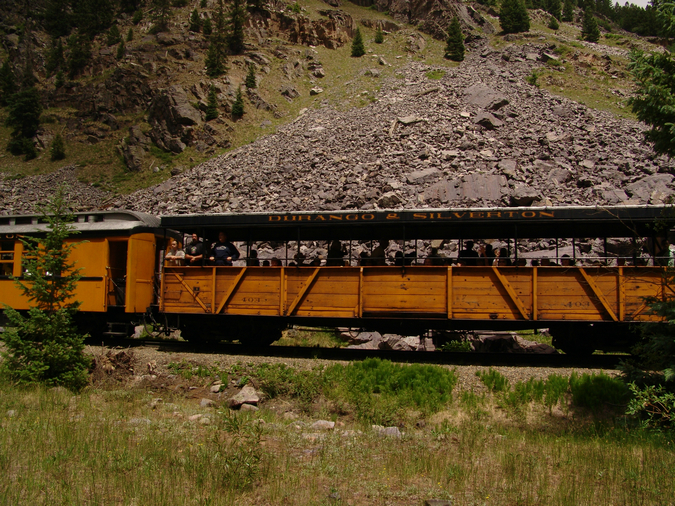
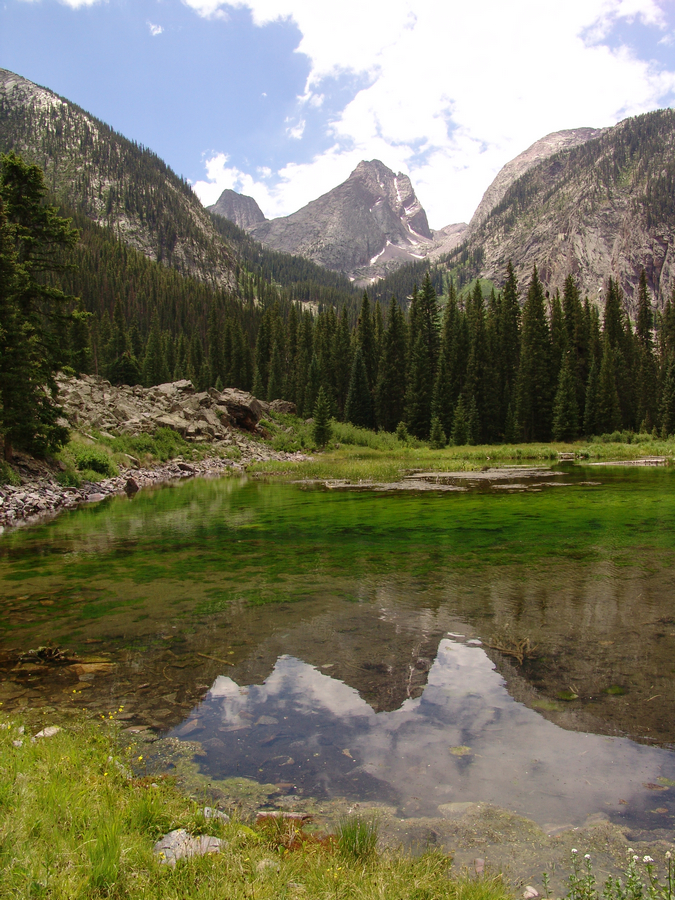
The Durango & Silverton Narrowgauge Railroad
We reluctantly trudged back up the 1,700 feet to our car in a matter of 2 hours and drove into Silverton, where we dined on Elk Burgers and French fries. The drive home was uneventul yet completely satisfying.
Vestal marked the 60th mountain of the highest 100 in Colorado for me. 40 to go!
References:
1. The San Juan Mountains - A Climbing and Hiking Guide. Robert F. Rosebrough
2. Wheeler, Annual Report of the Chief Engineers for 1876, Appendix JJ, p. 101
3. Rhoda, Summits to Reach, p. 75
Handies Peak and Whitecross Mountain - a sweet San Juan saunter

Hiking in the San Juan Mountains was quite possibly the best gift a dad could get. Make that two dads.
My dad is who introduced me to climbing mountains at the young age of six, and it was fitting that we spend Father's day climbing a mountain that we had both had our eyes on for quite a few years. While my dad had originally planned in the 1980's to save Handies Peak as his last 14er, he decided to give up that idea. The last time my dad climbed a 14er was Uncompahgre Peak in 2001 - another father-son outing in the San Juan Mountains, nearly 10 years ago. Having prepared for the past two months through rigorous training and exercise, my dad, now 60 years old, believed he was ready again for climbing. Since all I talk about anymore is climbing mountains, it was no surprise that his interest in climbing is renewed and I was very pleased that he asked to join me on my attempt of Handies Peak. My dad (Old Climber on this site) and I debarked from Colorado Springs at roughly 5:00 PM on Friday, June 18th 2010, heading straight for the rugged San Juan Mountains in southwestern Colorado. We drove south down State Highway 115 and connected with Highway 50 heading west. We stopped for a bite to eat in Salida and drove to Gunnison and south towards Lake City. The drive up towards Cinnamon Pass from Lake City was a somewhat confusing one in the dark - there are a couple points where you can make a wrong turn - neither intersection having been mentioned on the route description at 14ers.com. To top things off, the road was pretty rough, but my Jeep handled it like a champion. We managed to find our way to the American Basin near Handies Peak and began setting up camp with our headlamps on at around 11:30 PM.
Here are some interesting statistics from this amazing adventure:
Total elevation gain: 3,629 ft.
Total distance hiked: 8.22 miles
Total time hiking: 8 hours, 15 minutes
Total photos taken: 346
Total wildlife sightings: 3
Total distance driven: 480 miles
Trip duration: 28 hours

A map of our driving route to our campsite in the American Basin from Colorado Springs
As we began setting up camp, I turned back towards my vehicle to see two glowing eyes about 20 feet away. These were no ordinary glowing eyes - these were quite large and clearly fit a very large animal. I whispered to my dad, "Ray - look - there is an animal over there!" Ray got out his flashlight and revealed a giant moose! We were both in shock, as neither of us had seen a moose in the wild in Colorado before. The moose walked around our campsite for much of the remainder of the night and at one point got within 5 feet of the tent before walking away. I decided to name the moose "Tim" since I thought it would be funnier and more convenient to refer to the moose by name instead of "it" or "moose."
The moon was about half-full and lit the basin up quite well. We could make out the ridge line of Handies Peak and the American Basin crags (American Peak, ranked 102nd highest in Colorado).
We enjoyed the views of the basin in the moonlight and set the alarm on my Suunto Core watch for 5 AM. The tent was sitting on a lot of wierd bumps, so sleeping was not the easiest of tasks. I think I did get a few hours of pretty spotty sleep before the alarm went off. We woke up and broke down our camp pretty quickly while eating some oatmeal. "Tim" was still hanging around, eating some willow trees 50 or so yards away from our campsite. We prepared our packs and debarked up the road towards the trailhead, but not before taking a photo of the basin around our campsite.

Handies Peak seen at left of center with American Peak at dead center and UN 13,512 at far right. The American Basin is a very peaceful locale.
The plan for the day was to ascend Handies Peak (14,048 ft. and ranked 40th in Colorado) via the standard trail and then to traverse over to Whitecross Mountain (ranked 222) to the northeast of Handies. Starting the hike pretty early and at a respectable elevation, I believed that the itinerary would be quite manageable.

A topo map with my route shown in red. We began the hike near the word "Fork" on the map.
Ray and I quickly began the hike up the trail at 6:15 AM and within minutes, the sun began to light up the surrounding peaks, including American Peak.

American Peak gets a healthy dose of sunlight.
The basin itself was quite serene, with waterfalls everywhere and green slopes and orange mountain tops surrounding us in all directions.
Ray Payne with an awesome waterfall in the background
We probably could have made better time, but I was taking tons of photos the whole way up!

Matt Payne with American Peak in the background.
The trail was mostly snow-free, with a few sections of snow obscuring the trail. We were able to quickly follow the trail up the side of Handies Peak, weaving our way up towards Sloan Lake.

Ray Payne gazes up the side of the relatively steep trail leading up Handies.
Shortly before reaching the turn-off for Sloan Lake, I stumbled across a beautiful ptarmagin, still in the process of changing out of its winter coat and into its summer colors.

A ptarmigan rests on rocks near the trail leading up Handies Peak.

The ptarmigan peers back at me, wondering if it is on the menu for dinner.
The ptarmigan made a loud squak and flew down the trail and away from our threatening gaze. What a pleasure it was to see wildlife!
Shortly after heading away from Sloan Lake, the trail turns back towards Handies and down through a small snowfield. The snow was steep but easy to navigate.

Ray navigates through a steep snow field.
The trail quickly zig-zags up Handies and before we knew it, we gained some incredible views back down into the American Basin.

Sloan Lake sits in front of American Peak, with the Handies standard route trail below. The first view of distant San Juan Mountains is revealed.
We rested in the shadows for a bit and resumed the hike up towards the saddle between Handies Peak and American Peak. Once gaining the saddle, views east into the next valley over were presented with the morning sun welcoming us.

A 360o view from the Handies - American Peak saddle. As a reminder - many images can be clicked on to view the full resolution versions!
We continued up towards the summit of Handies and were wildly surprised with a view of Rio Grande Pyramid, one of the top 100 summits in Colorado (ranked 97).

Rio Grande Pyramid sits prominently in the far distance to the south of Handies Peak.
This was a particularly exciting discovery for Ray and I since we are planning to climb Rio Grande Pyramid at the end of August of this year. Getting a first-hand view of this magnificent mountain was quite awesome.
We also could not help but notice the other quite prominent mountain sitting in front of Rio Grande Pyramid Peak on the near side of Pole Creek Mountain (ranked 138th in Colorado) - Half Peak (ranked 86th in Colorado).

Half Peak (left of center) sits left (northeast) of Pole Creek Mountain, and Rio Grande Pyramid.
Additionally, views of Mount Sneffles (ranked 27th in Colorado) and the surrounding mountains came into view.

Ray Payne gazes towards Mount Sneffels to the northwest.
Ray snapped a shot of me before I continued up the trail.

Having gained the amazing views of the San Juans, I was re-energized to hike faster, so I quickly made my way up towards the summit of Handies. I peered back to catch the first glimpse of the Grenadiers and Needle Mountains near Silverton. I have always been completely awe-struck by these mountains, so seeing them from here was quite exciting for me. Views of Pigeon Peak (ranked 57), Vestal Peak (ranked 77), and Arrow Peak (ranked 104) were impressive. Due to the fact that I am climbing Vestal's Wham Ridge and Arrow Peak in three weeks, this view was especially awesome.

Ray Payne ascends Handies with the Grenadier range and Needle Mountains showing themselves above American Peak. Pigeon Peak seen just above American Peak, with Arrow and Vestal Peaks to its left.
I was able to complete the climb of Handies at 9 AM, a brisk 2 hours and 45 minutes after we started, and was greeted at the top by Ray within minutes. Handies was the 48th 14er for Ray and the 36th 14er for me.

Matt and Ray Payne celebrate on top of Handies with the Grendiers and Needle Mountains in the background.
The wind on top was fairly chilly, so Ray and I found shelter on the eastern side of the summit. Ray got out his topographical maps and I began to take my ritual photos for the 360 degree panoramic photo from the summit. The views from Handies were much more impressive than I could have ever imagined.

A 360o view from the top of Handies Peak. The views of the mighty San Juan Mountains were astounding. Click on the image for the full resolution version (very large).

A 180o view looking northeast to west from Handies Peak.
I continued to marvel at the sheer impressiveness of the Grenadiers. The thought of climbing them in a few weeks seemed very surreal. Vestal's Wham Ridge looked impossible.

The Grenadiers and Needle Mountains zoomed in.
Views of other areas of the San Juans also did not disappoint. The Ice Lake Basin and Wilson group were quite impressive as well.

Looking west from the summit of Handies Peak
In my office at work, I have a framed topographical map composed of many different 7.5 minute maps of the Grenadiers and Needle Mountains. I had always wanted to capture a comprehensive photo of that area, showing the various summits of the region. I had a great time using the 100summits.com Google Earth plugin tool to attempt to correctly identify all of the mountains in the following giant panoramic photo. I would greatly welcome and appreciate any feedback or corrections to the labels, as the viewpoint from Handies made for a distorting and confusing process for peak identification. Be sure to click on the images to see the full resolution versions and the labeled photo (2nd photo).

A large zoomed-in panoramic photo of the San Juan Mountains.

Many mountains are labeled in this version. Send corrections to This email address is being protected from spambots. You need JavaScript enabled to view it.
For a more natural way of viewing this photo, check out THIS PAGE.
Views of both Wetterhorn Peak and Uncompahgre to the north were also outstanding.

Wetterhorn Peak

Wetterhorn Peak (left of center) and Uncompahgre Peak (right of center) rise up impressively to the north of Handies
Looking further west, were able to identify Mount Sneffels and Teakettle Mountain (ranked 98th).

Mount Sneffels (largest at center) and Teakettle Mountain (right of Sneffels)
Due west of our position on Handies, were caught view of the Ice Lake Basin. We originally thought this was the Sneffels group; however, upon further investigation, we believe we have correctly identified the mountains west of Handies as U.S. Grant Peak (ranked 119) et.al.

The Ice Lake Basin - send corrections to Matt at This email address is being protected from spambots. You need JavaScript enabled to view it.
After the whirlwind of photo taking, I decided to sit-down and eat some food. Ray ate his hard-boiled egg (apparently a long-standing tradition for him), while I chowed down on a Clif Bar and some cashews.
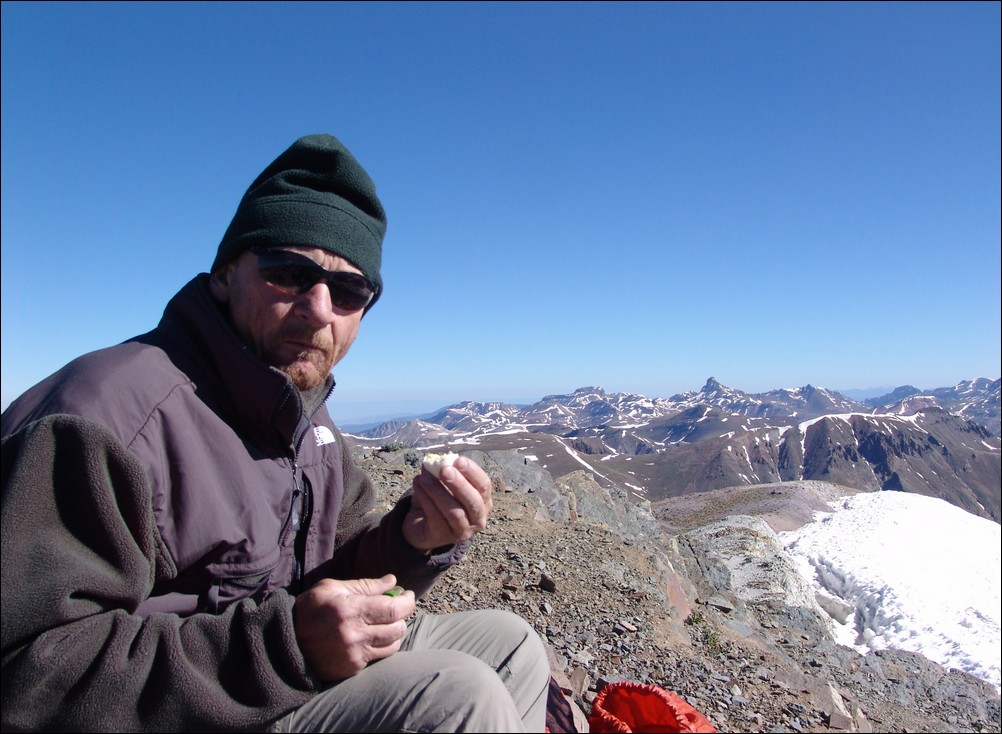
Ray chows down on a hard-boiled egg with Wetterhorn Peak behind him.
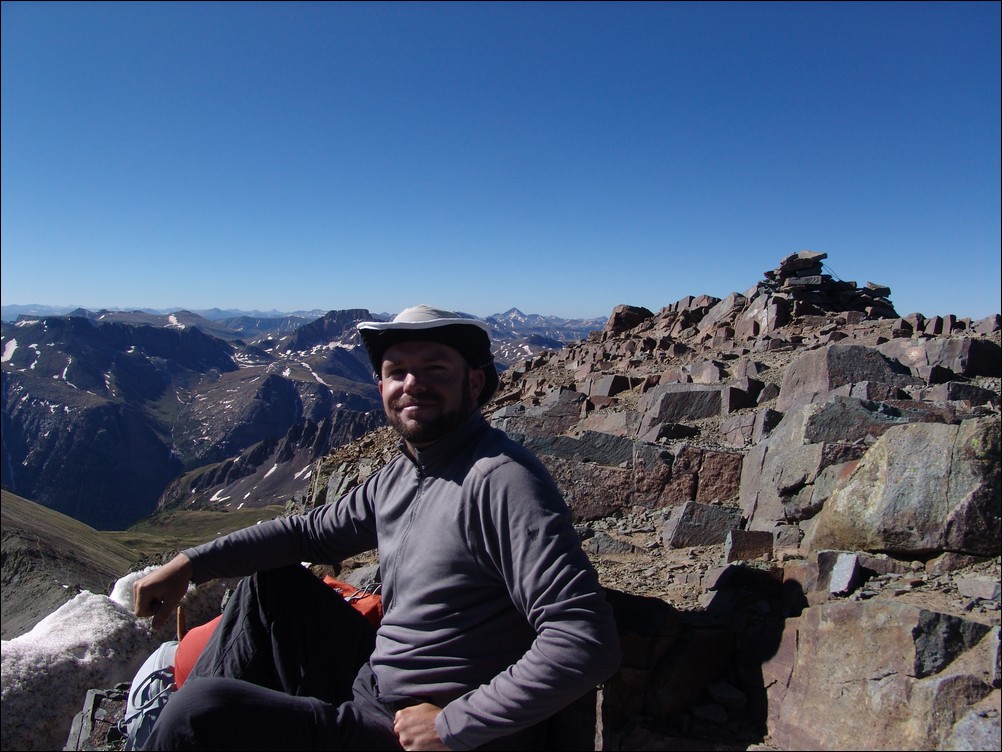
Matt Payne relaxes on the summit of Handies.
Sitting on the east side of Handies to eat, we were able to get a great view of Grizzly Gulch, Sunshine Peak and Redcloud Peak (ranked 53 and 46 respectively).

Redcloud and Sunshine Peaks rest just east of Handies.
Additionally, I was able to get a good glimpse of my second objective for the day - Whitecross Mountain. Whitecross looked further away than I thought it would, but with the insanely great weather we had and with my legs feeling superb, I was not concerned.

Whitecross Mountain and the traverse to it (partially obscured by snow).
We were joined on the summit by Ben Smith of 14erPlatinumTeam.com. Ben was with his friend Don, and they were quite friendly. We chatted for a bit about our climbing adventures and plans and exchanged website information.
I took more photos of the surrounding peaks.
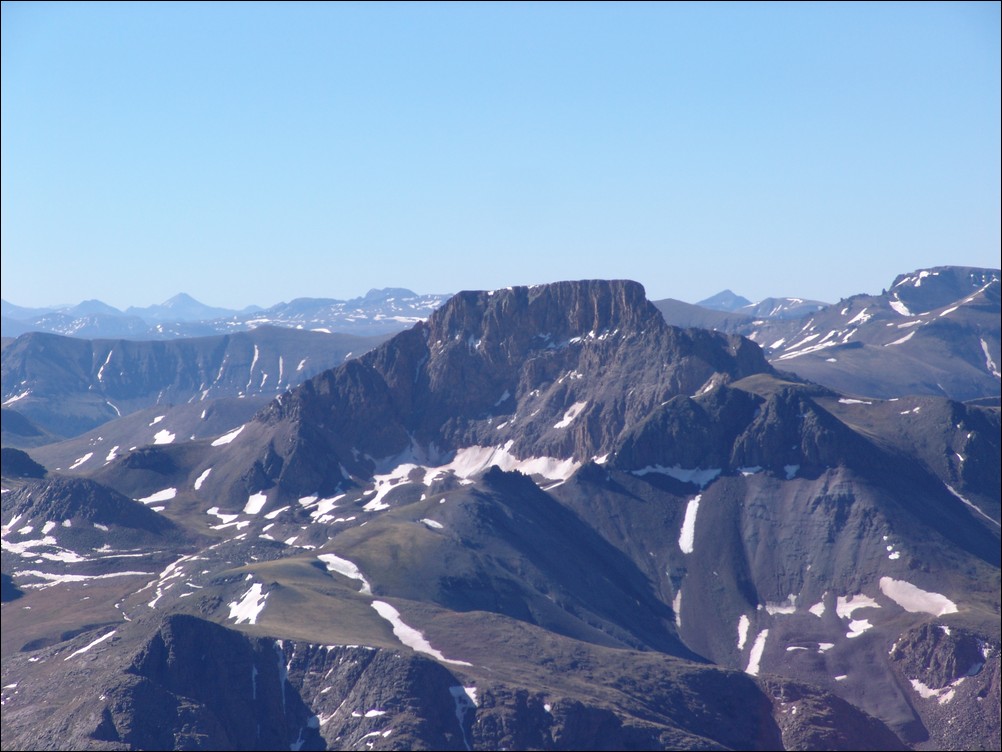
Half Peak
Rio Grande Pyramid
I had Don snap one more photo of my on top and Ben volunteered to take some photos with his camera as well. He was kind enough to email me the photo he took of Ray and I on top.
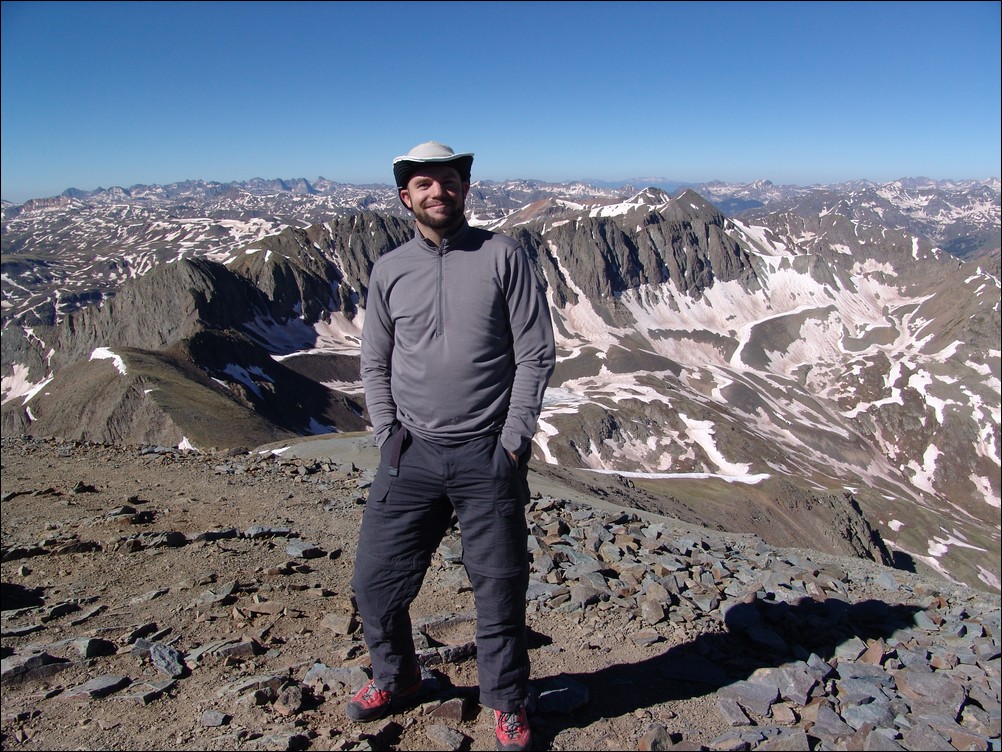
Matt Payne on top of Handies Peak
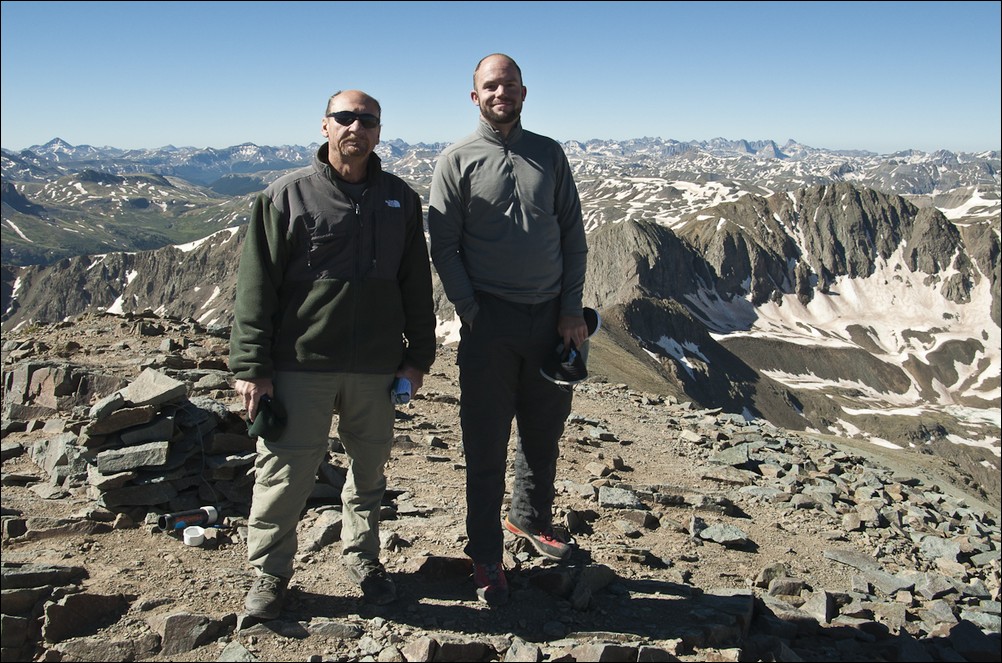
Matt and Ray Payne atop Handies Peak - photo courtesy of Ben Smith.
Ray and I packed up and got ready for our traverse over to Whitecross Mountain. Ray informed me that he would probably not go to Whitecross but would wait for me at the saddle between Handies and Whitecross. This sounded like a good plan and we began to head north after bidding adieu to Ben and Don.
Shortly after making our way down towards the Handies - Whitecross saddle, we gained an excellent view down to the west into the valley we started in. Lo-and-behold we could see my Jeep way down below.

Matt Payne's Jeep far below in the American Basin.
After making it down the steepest section from Handies' summit, we gained excellent views of the Whitecross traverse and the terrain we ultimately needed to navigate across.

Whitecross Mountain's traverse terrain
By this point, we could look back at Handies and get a really nice profile of it from the north side.
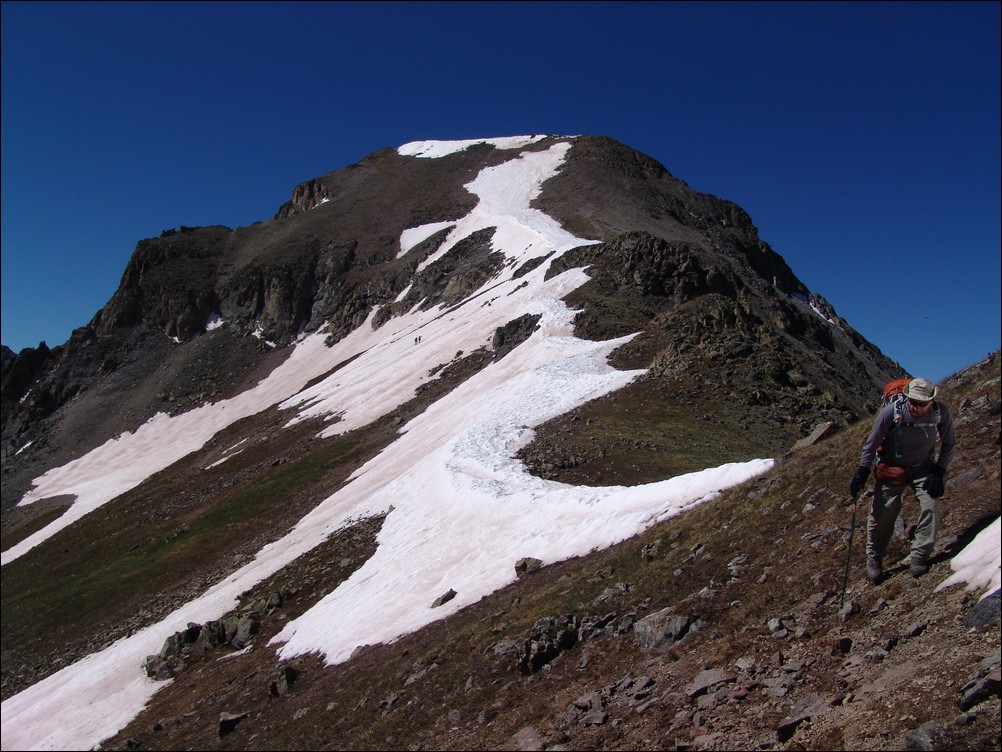
Ray Payne traversing towards Whitecross Mountain away from Handies Peak
Being mid-June still, we encountered some difficult snow on the traverse and at one point I fell up to my hips into a snow bank. This was rather uncomfortable, being on a quite steep section with about 100 feet of run-out below me. I decided to pause to gather my wits and to get out my ice axe. I used the ice axe as a safety device as I faced into the mountain and slow kicked steps into the snow while heading down at an angle towards the saddle. Ray followed in my footsteps and we both decided that it would have been smart to just stay high above on the ridge proper instead of angling around the side of the saddle near PT 13,577.
After successfully making it past the snowy sections, I once again stumbled upon a ptarmigan. This time, it let me get very close to it before I even noticed.
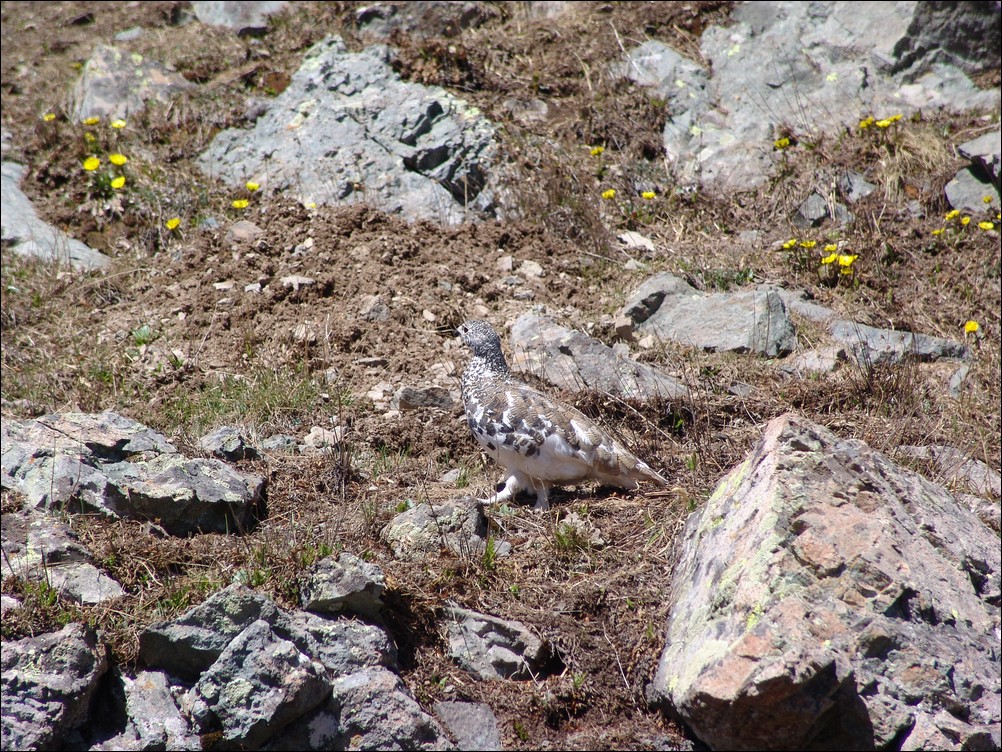
A Ptarmigan feeds upon the tundra near the saddle between Handies and Whitecross
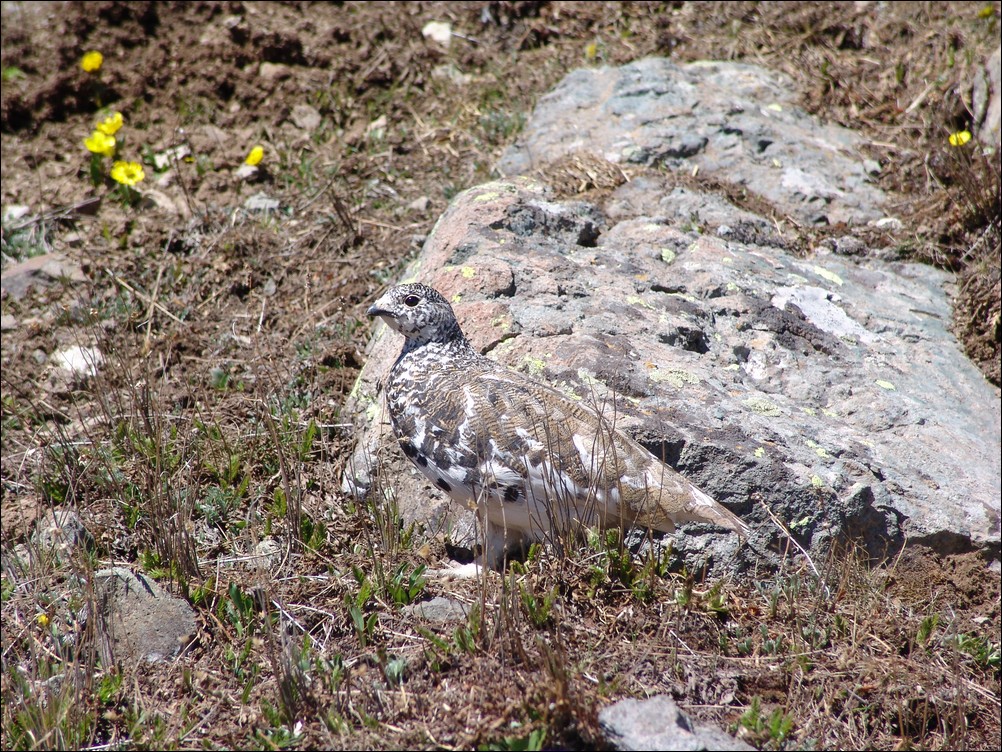
The views down into Grizzly Gulch were great during the traverse and I paused several times to get photos of the area.
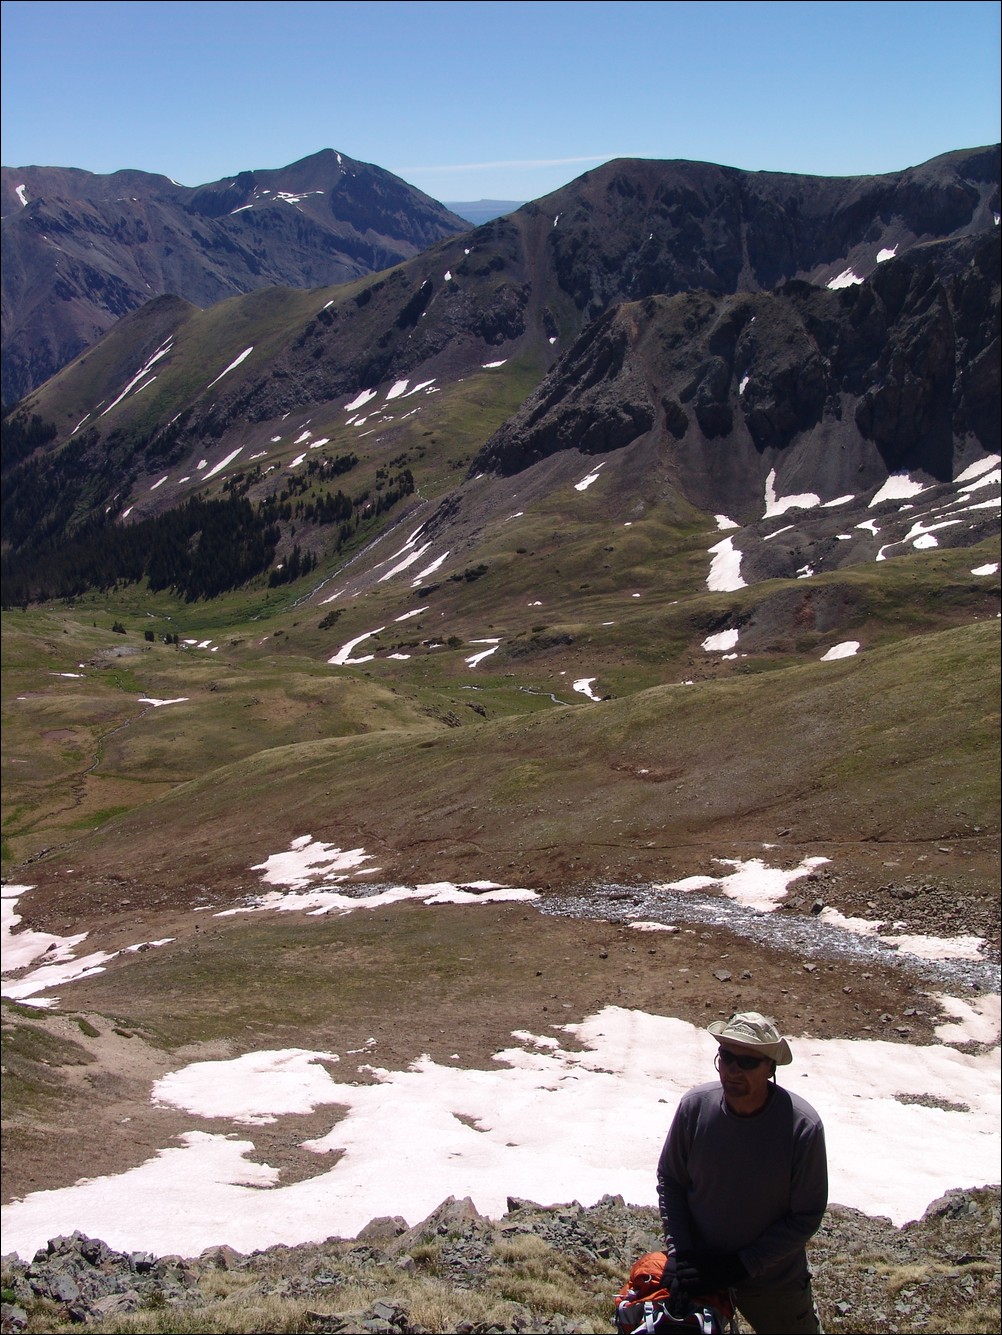
Ray Payne, traversing towards Whitecross Mountain, with Redcloud Peak left of center.
Most of the way to the saddle between Whitecross and Handies, we encountered some nasty scree below the ridge that we were forced to cross. The rock was the kind that when you stepped on it, huge sections of rock would slide above and below your feet. While this terrain is rather fun when down-climbing, it was not so fun while going across it.

Scree with a red hue made for an interesting traverse to Whitecross Mountain.
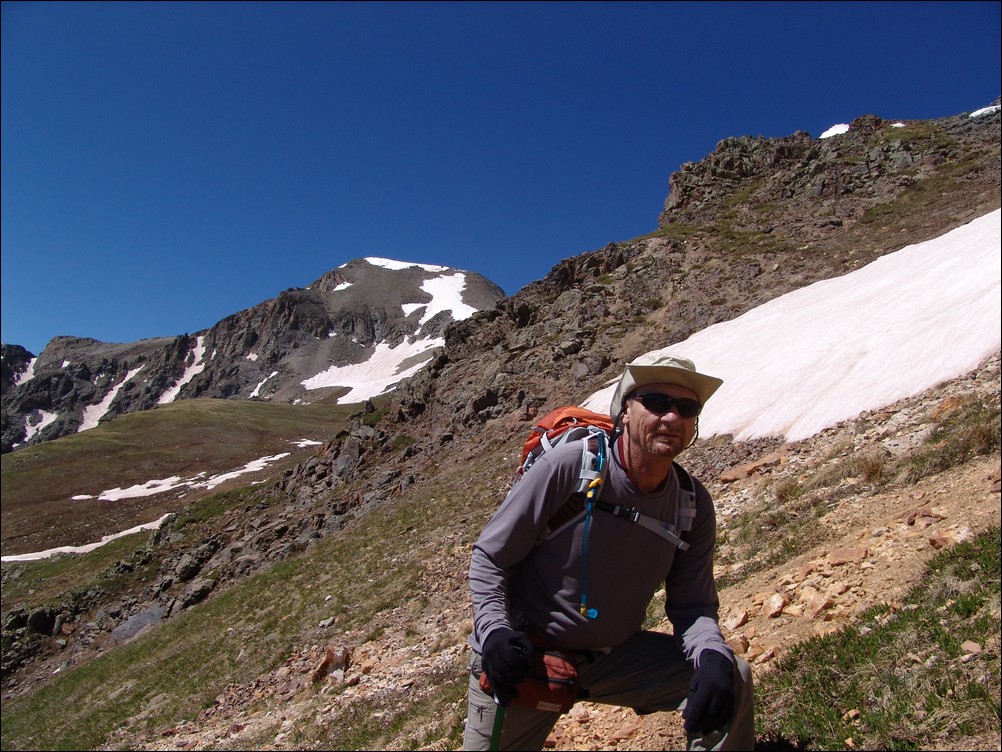
Looking back towards Handies Peak - Ray Payne welcomes the break in crossing the awkward terrain.
Ray and I reached the saddle near some fun rock outcroppings and discussed my plans for heading to Whitecross. I told Ray to "send the cavalry if I'm not back by midnight." I took off most of my gear and left it with Ray so that I could increase my speed for the traverse.
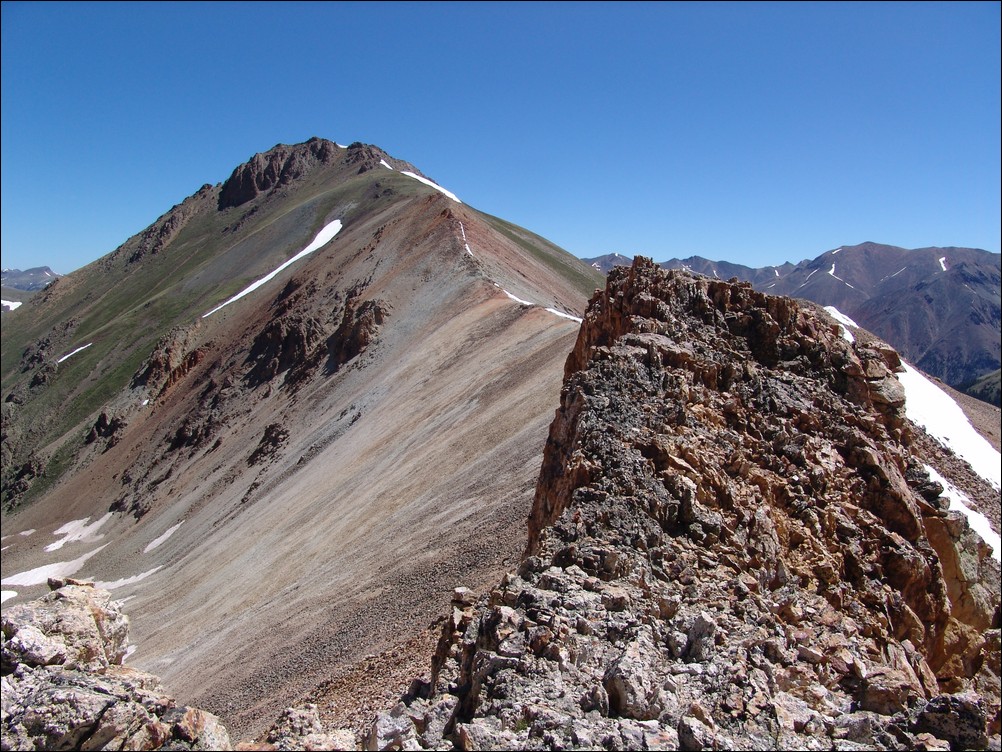
Whitecross Mountain sits above interesting terrain
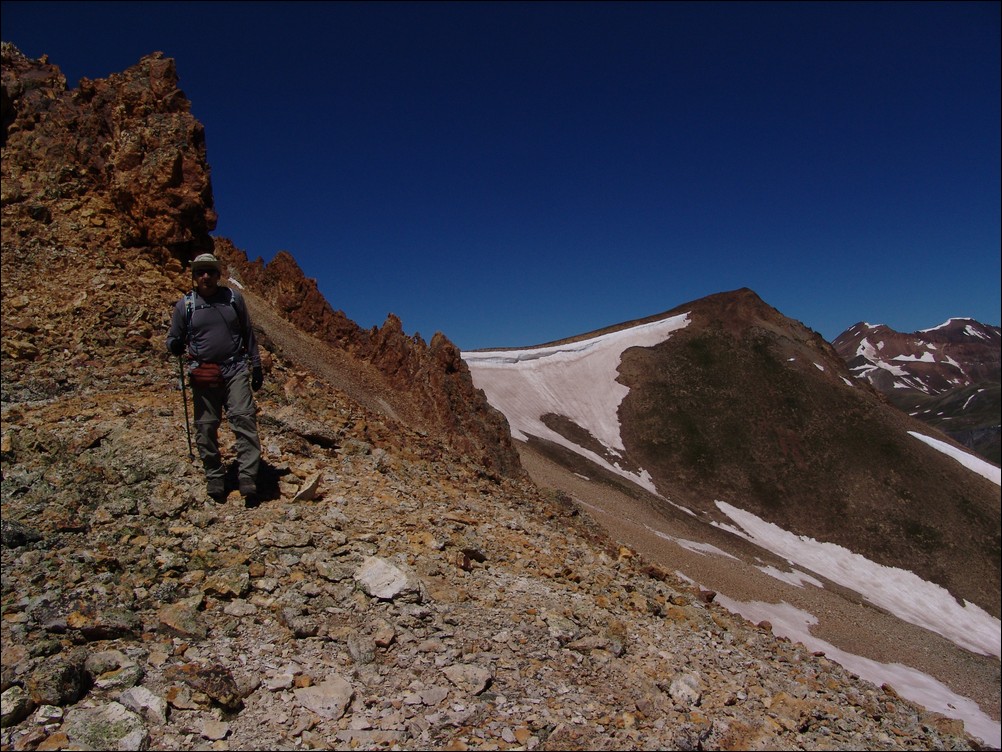
Ray Payne nears our meeting place
I started my traverse over to Whitecross at 11 AM. There were no threatening clouds and I felt solid.

Matt Payne poses on top of a rock formaton on the way up Whitecross Mountain
About halfway up Whitecross, I was able to get a better view of the cornice across the way and Golden Horn (ranked 116) behind it in the distance.

Cornice with Golden Horn behind it.
I made my way up Whitecross quite steadily and quickly. I made great time to the tundra field below it and could see the route up the summit block.

Whitecross Mountain's summit block
I also could see some amazing views of the western ridge of Handies and a couple lakes below it.
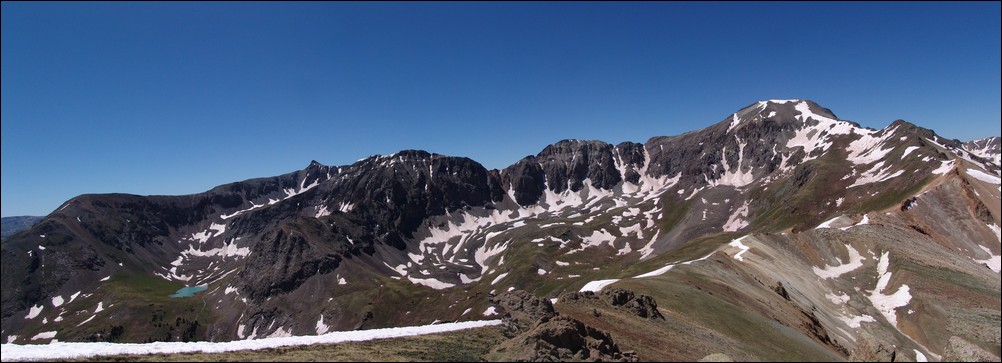
A small lake rests in the basin below the western ridge of Handies Peak.
I made my way up towards the top of Whitecross rather quickly and was greeted with views of another neat cornice sitting in front of Uncompahgre Peak and Whitecross (to its left).

A cornice sits below the summit of Whitecross with Uncompahgre and Wetterhorn in the distance.
I finished up the climb up Whitecross and enjoyed views of Handies and the valley below Whitecross which was obscured before. The traverse from the saddle took 30 minutes on the mark.

Handies as seen from the summit of Whitecross
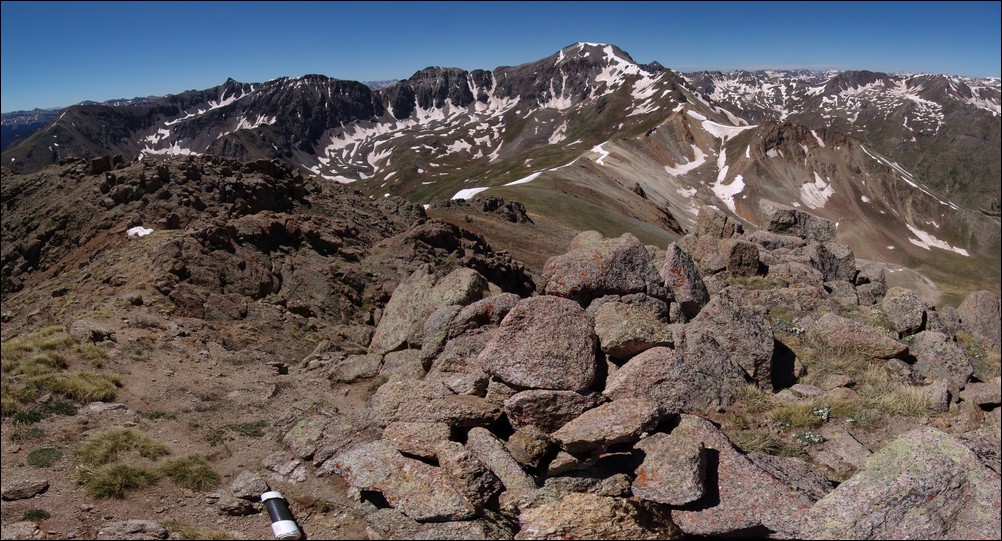
The summit register lays out on the summit of Whitecross.
I signed the summit register (first to do so in 2010), and gathered a few more photos for a panoramic photo and a self-timer summit photo.

Redcloud and Sunshine are seen in better detail from Whitecross Mountain.

A view north, east, and south from Whitecross Mountain.
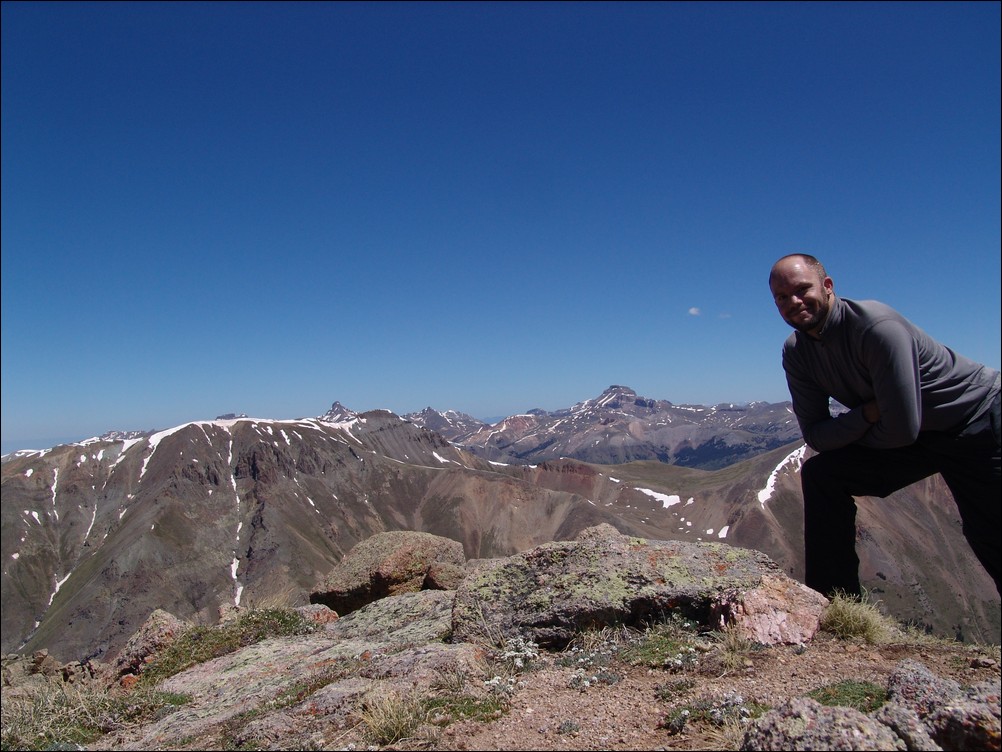
A self-timer summit shot on top of Whitecross Mountain.
After spending a few minutes on top, I headed back down the ridge towards Ray, stopping once on the way to capture a shot of some wildflowers on the ridge.
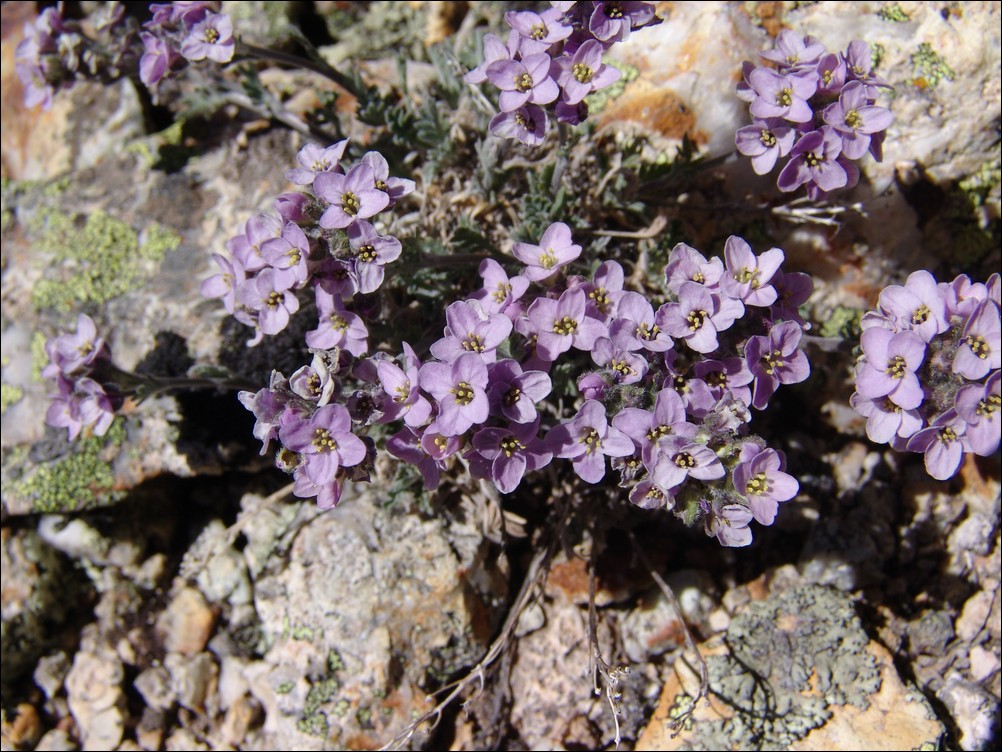
A macro shot of some purple flowers on the ridge between Whitecross and Handies.
After 20 minutes of down-climbing, I reached Ray again, having spent a total of 50 minutes on the traverse from the saddle and traveling a distance of 1.11 miles with 558 ft. of elevation gain. Ray and I packed our belongings and headed down the steep scree to the north of the saddle. We had studied our maps and determined that this route would get us back to the road eventually and that it was the safest descent route. The only downside was that we would be required to hike back up the road to my car. A small price to pay for a great traverse.
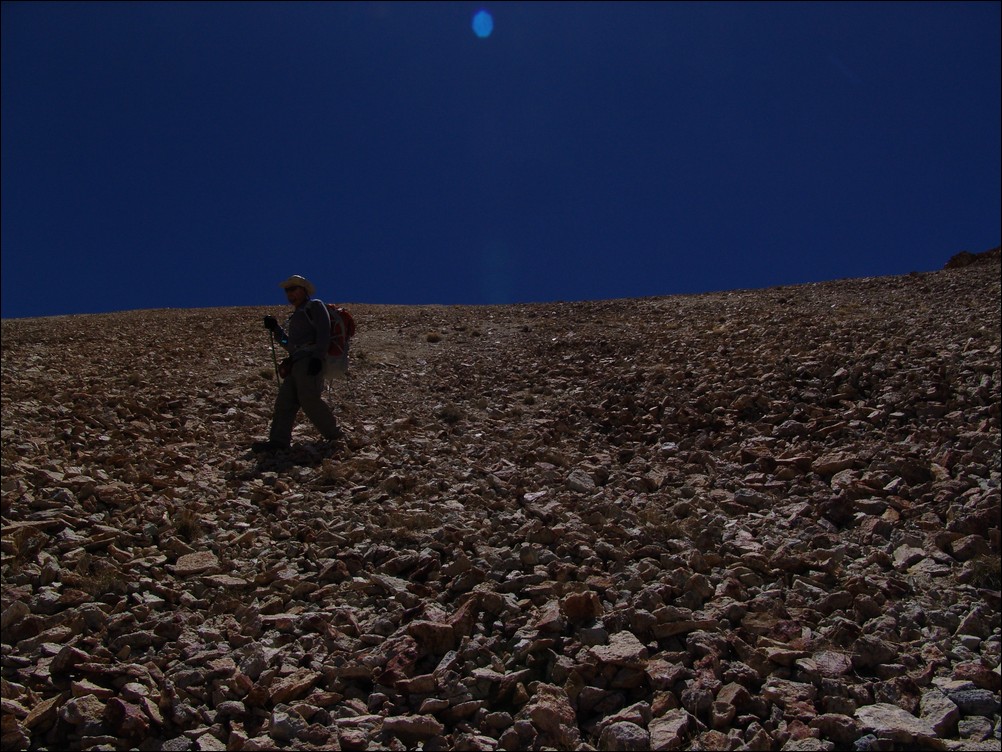
Ray descends the steep and loose scree below the Handies-Whitecross saddle.
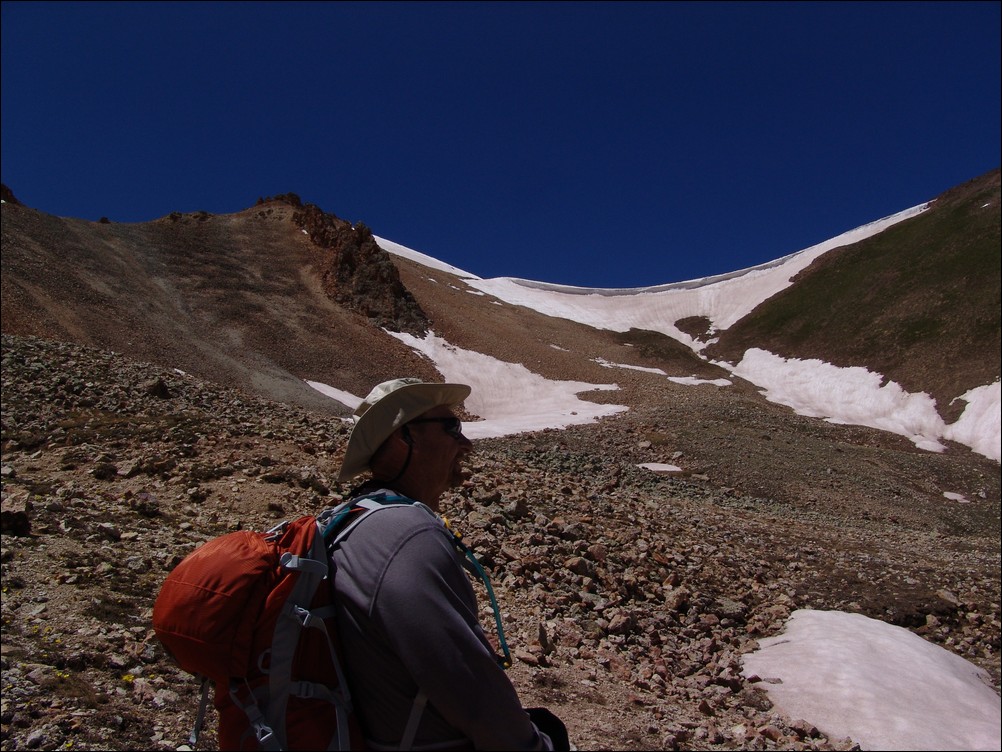
Ray Payne with the Whitecross-Handies saddle above
On the way down, we captured one last view of Uncompahgre.
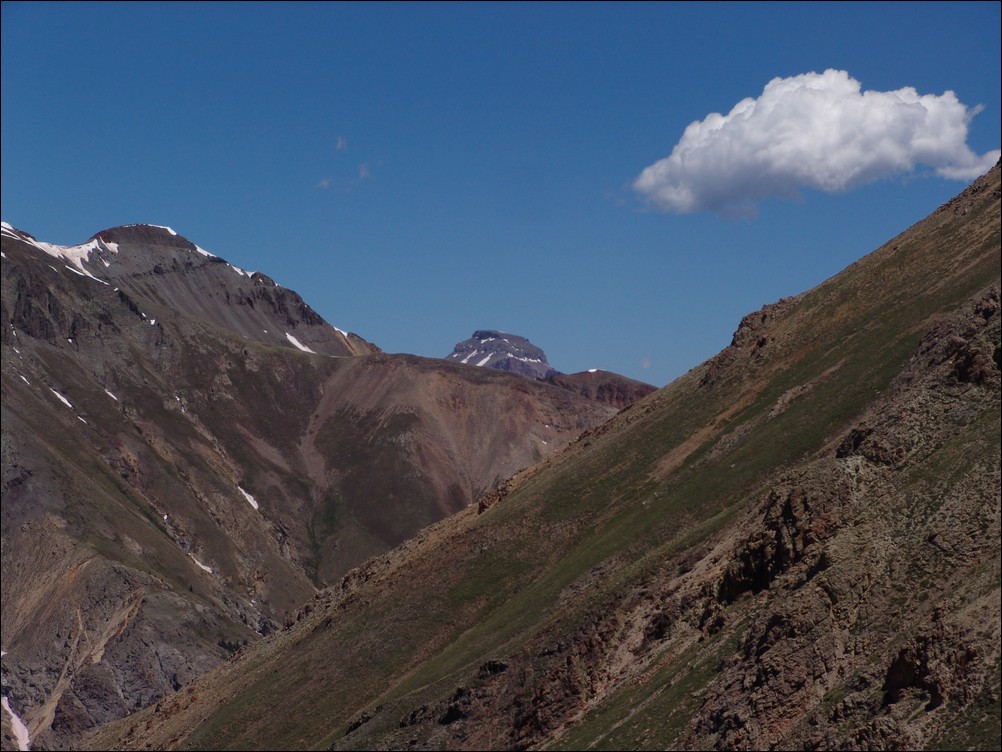
Uncompahgre Peak pokes above the surrounding ridges.
The route down towards the road was straight-forward and enjoyable. We made awesome time down towards tree-line.
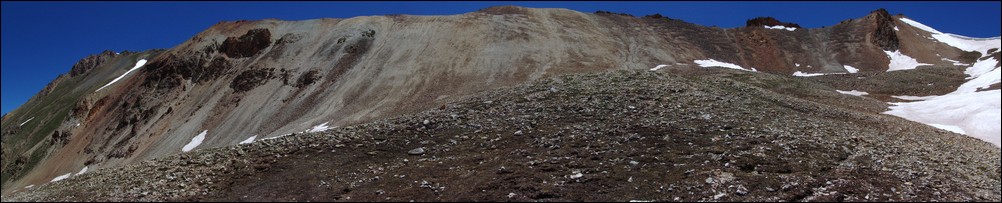
A look back towards the Whitecross-Handies saddle and the steep terrain negotiated on the way down from Whitecross.
We made quick time to tree-line, and after less than an hour, we were entering the trees and much steeper terrain.
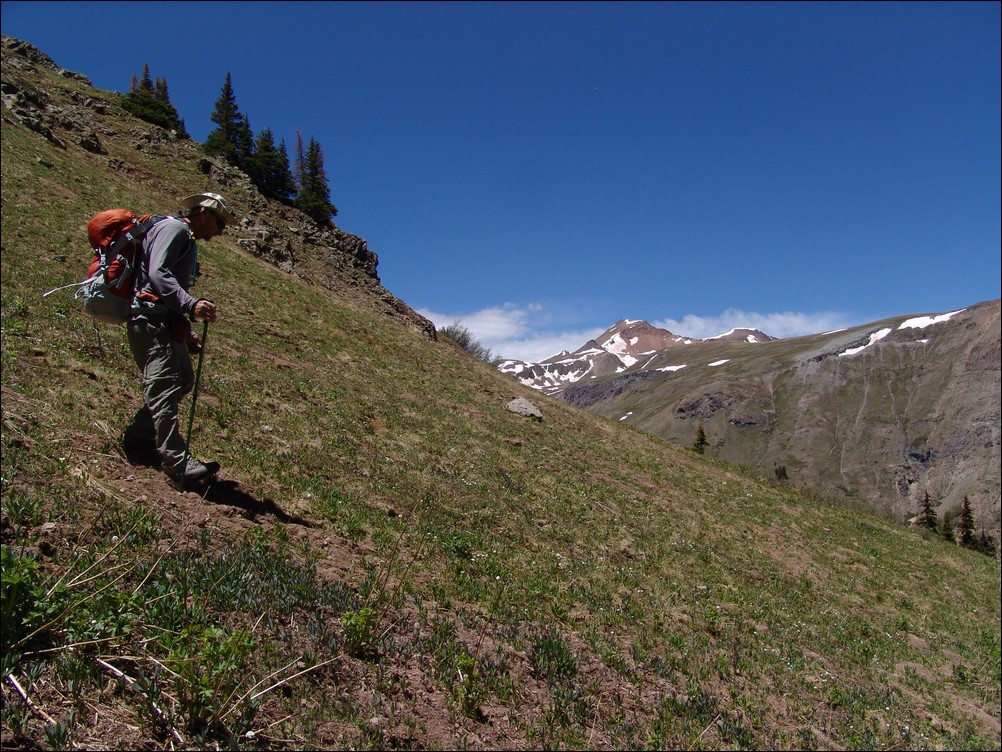
Ray Payne down-climbs from the Whitecross-Handies saddle.
The wildflowers on the fridge of the forest were amazing -yellow flowers were blooming everywhere on the mountainside.
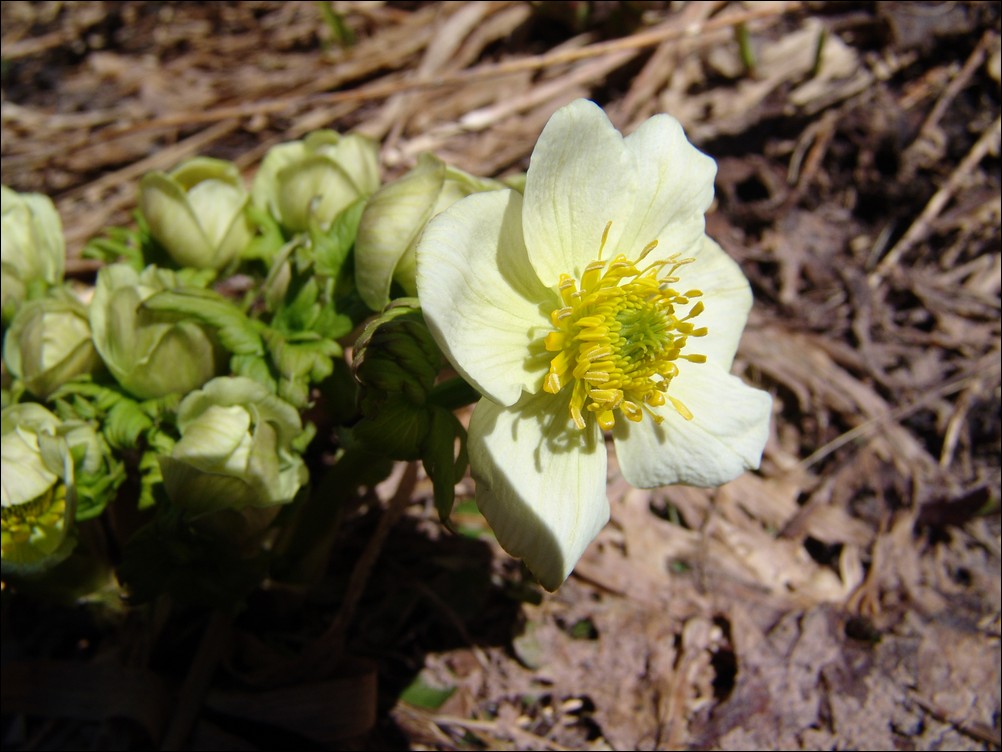
A yellow flower blooms in this macro shot near tree-line.
Soon after entering the trees, the terrain became much steeper and was littered with huge deadfall and other fun obstacles. We negotiated through the deadfall for about 20 minutes until reaching somewhat of a clearing.
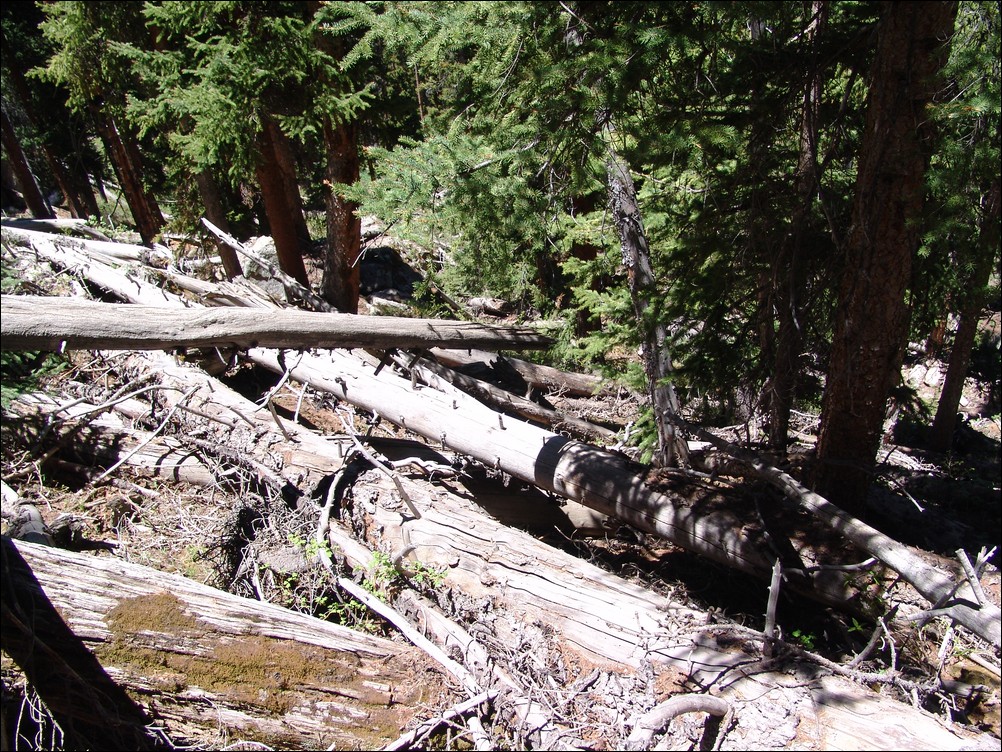
Deadfall on the descent of Whitecross and Handies.
From this clearing, we were able to find a small service road on the mountain side. We aimed for this road, hoping we were not trespassing on private property, and followed it down. We were grateful for finding the road, as it had a bridge across the Lake Fork Gunnison River where it connects with the main American Basin road.
We also saw a large mine shaft with railroad tracks leading into it - evidence of that at one time this region was heavily mined.
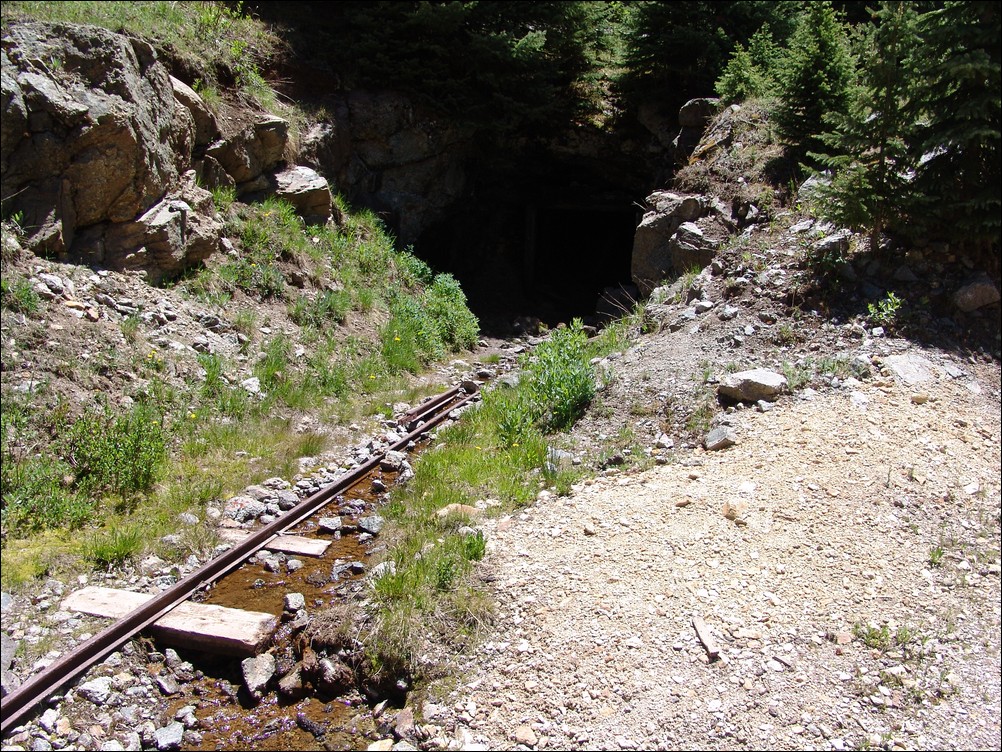
Railroad tracks lead into the darkness of an abandoned mine shaft.
Once back on the main road, we were able to get a good view of the valley and mountainside we had come down.
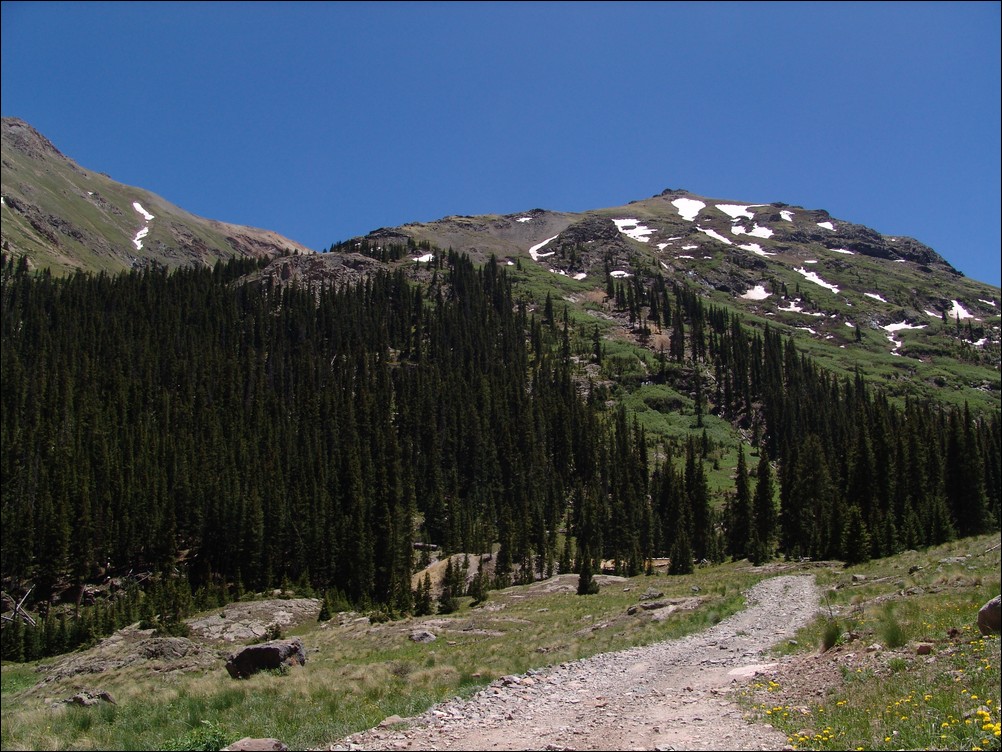
Ray and I hiked back up the road towards my Jeep. The road was pretty long and we needed to hike about a mile or so. American Basin was looking impressive in full sunlight.
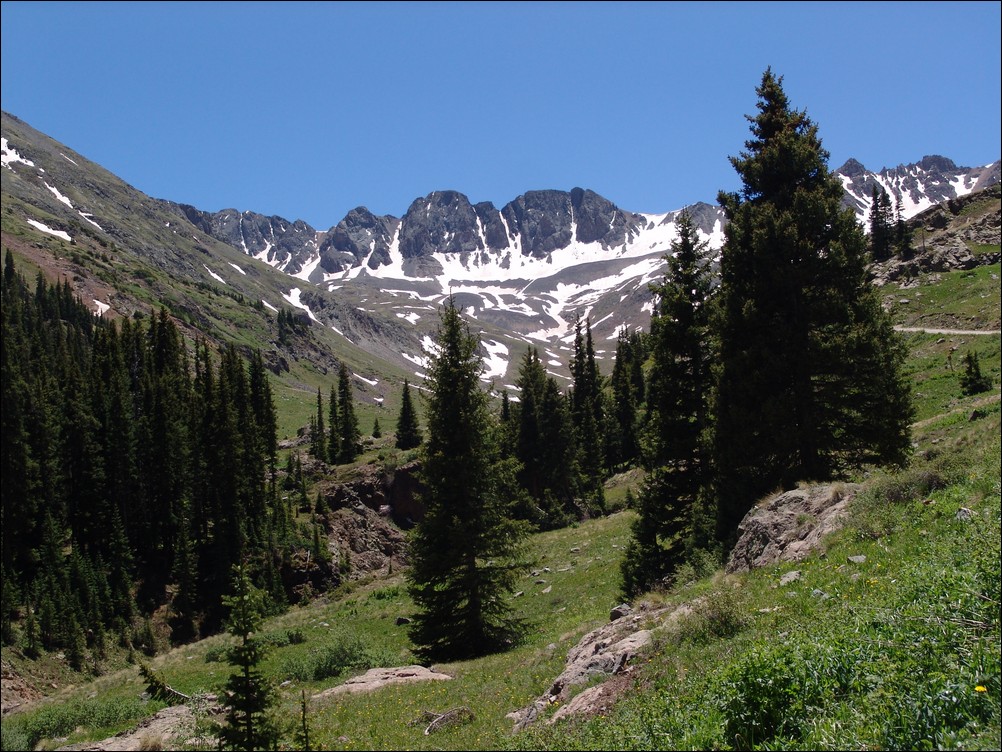
American Basin
We crossed the head of the river near a large snowbank we had noticed on the way up the night before.
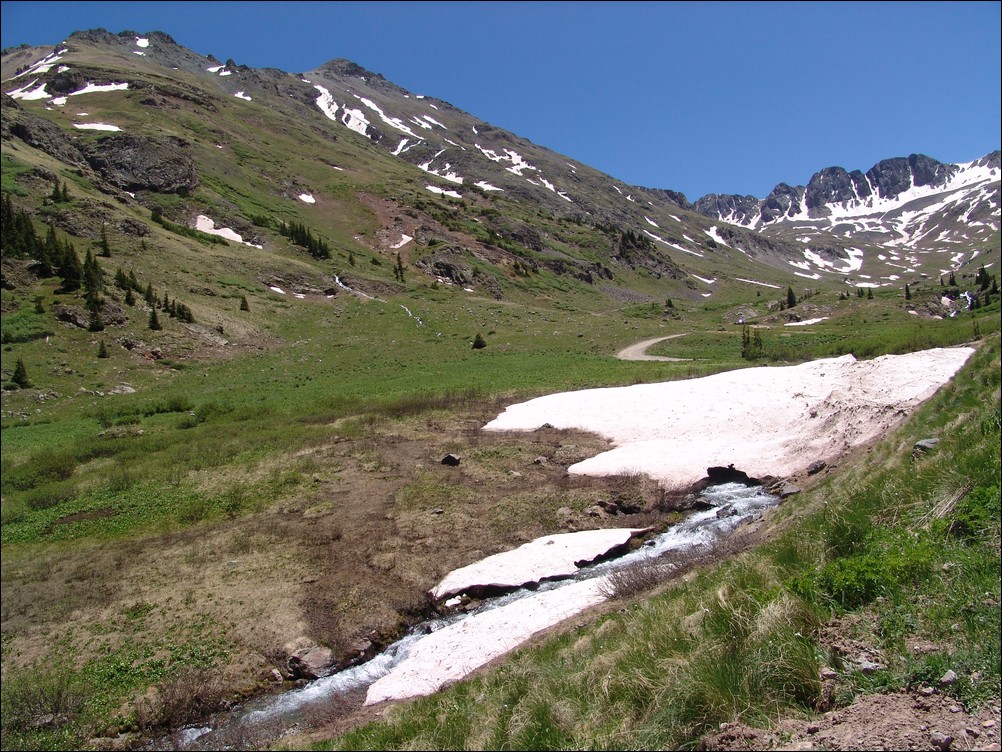
I took one more photo of the American Basin on the way back up to my Jeep. The waterfalls and surrounding terrain were very aesthetically pleasing after the long day of hiking.
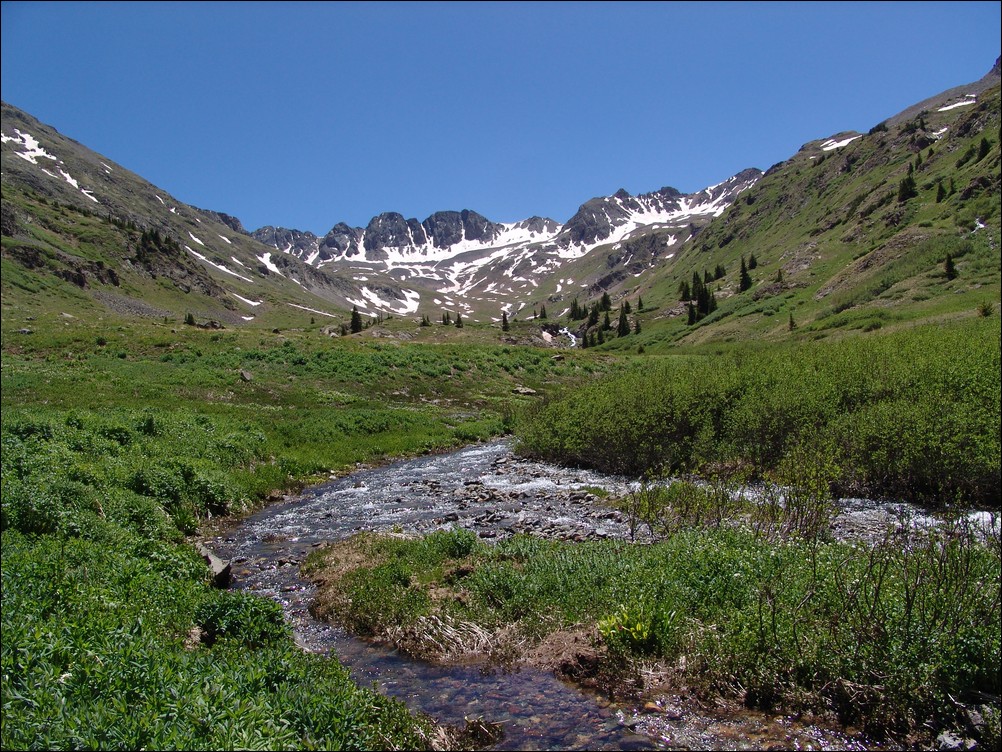
We finally made it back to the Jeep at 2:30 PM and I took one final set of photos to illustrate the daytime views from where we camped.
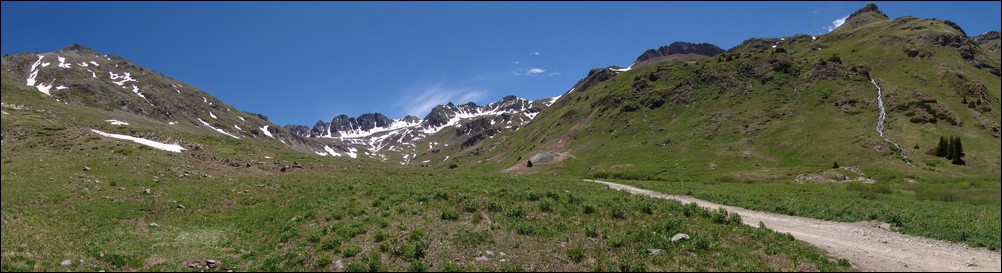
We packed up our gear after eating some snacks and headed back down the road in my Jeep. This is one of the best hikes up a relatively easy 14er with highly rated views. Given the ease of climb and the rewarding views, I would say that Handies Peak should be on all beginner and serious hikers' to-do lists.
I hope you enjoyed this trip report for Handies Peak and Whitecross Mountain. Next weekend: Missouri Mountain, Iowa Peak and Emerald Peak with my friend, Ethan Buete.