Displaying items by tag: photography
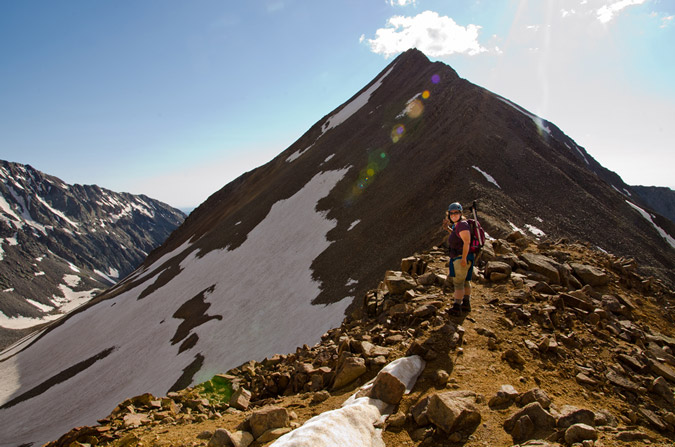
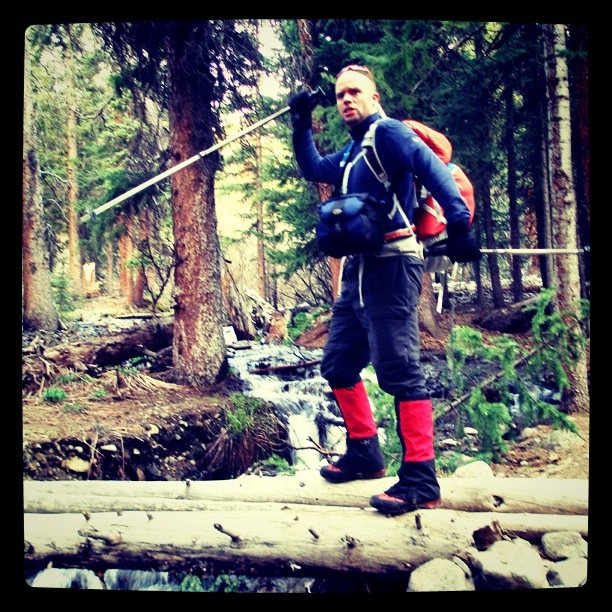
A Mad Scramble in the Sangres - Mount Adams and UN 13,580
Mount Adams is one of the last mountains in the top 100 in the Sangre de Cristo Range that I've yet to climb. It has always drawn my attention on other hikes in the area, and I had hopes of climbing it this spring. Instead, I opted to climb California Peak with Ethan, which was a great hike. Originally, I had planned to climb Pyramid Peak this weekend; however, none of my climbing partners had crampons, so we decided to hit Mount Adams instead. I had always read great things about climbing Mount Adams, and Gerry Roach has the west ridge route marked as a classic climb. Since I have more or less always agreed with Roach's ratings for "classic climbs," I figured that it would be the best way to climb it. So, Ethan and I agreed to take the west ridge route instead of the standard route. Feel free to read more about Roach's 13'er guidebook HERE.
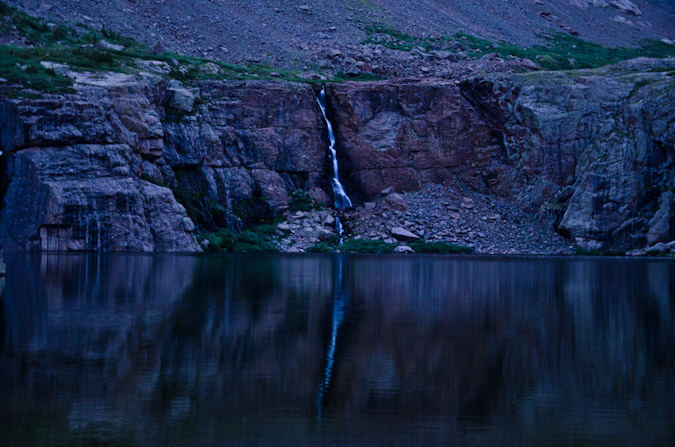
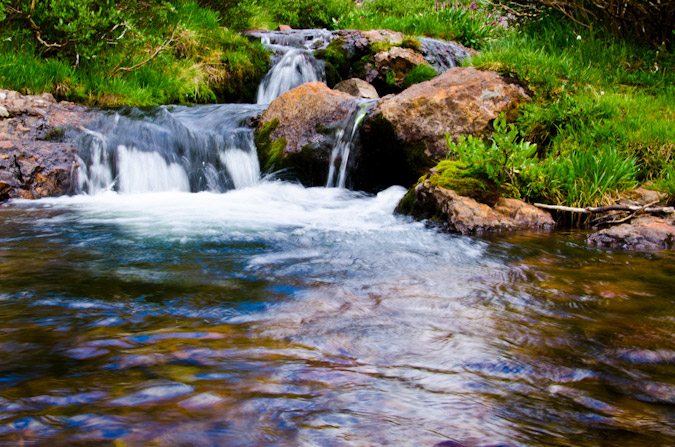
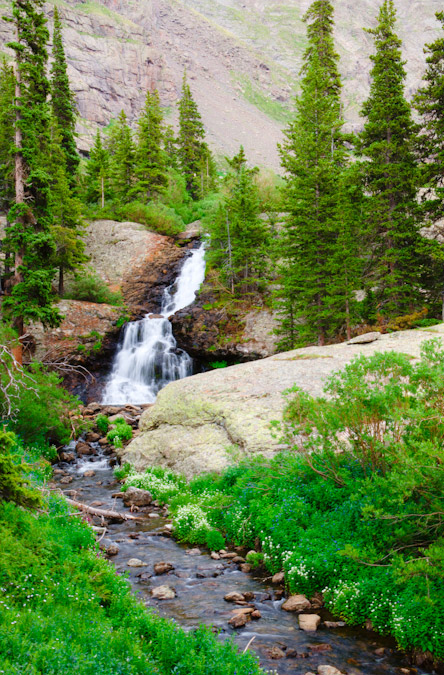
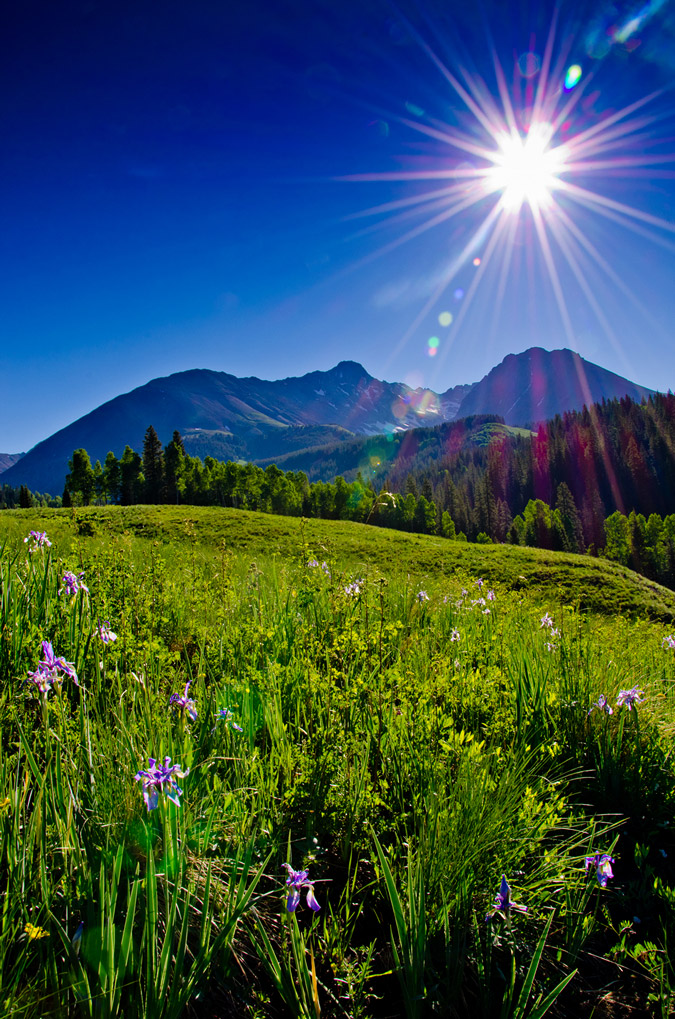
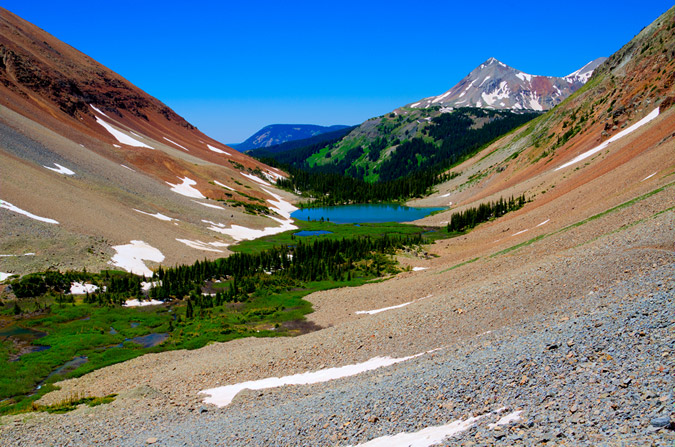
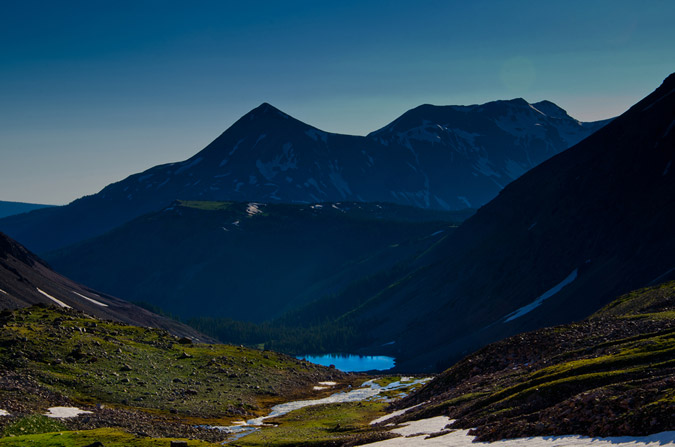
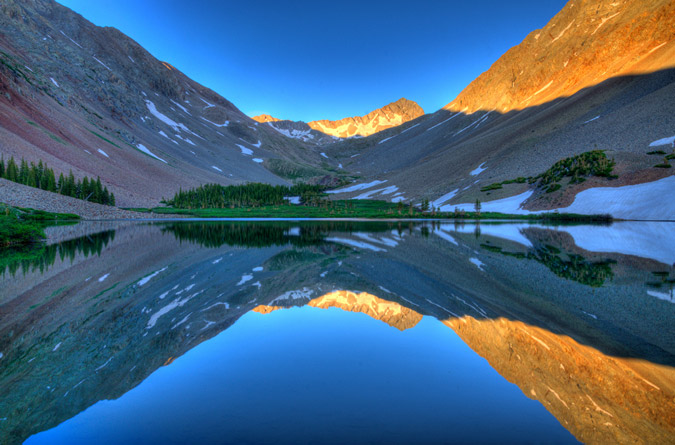
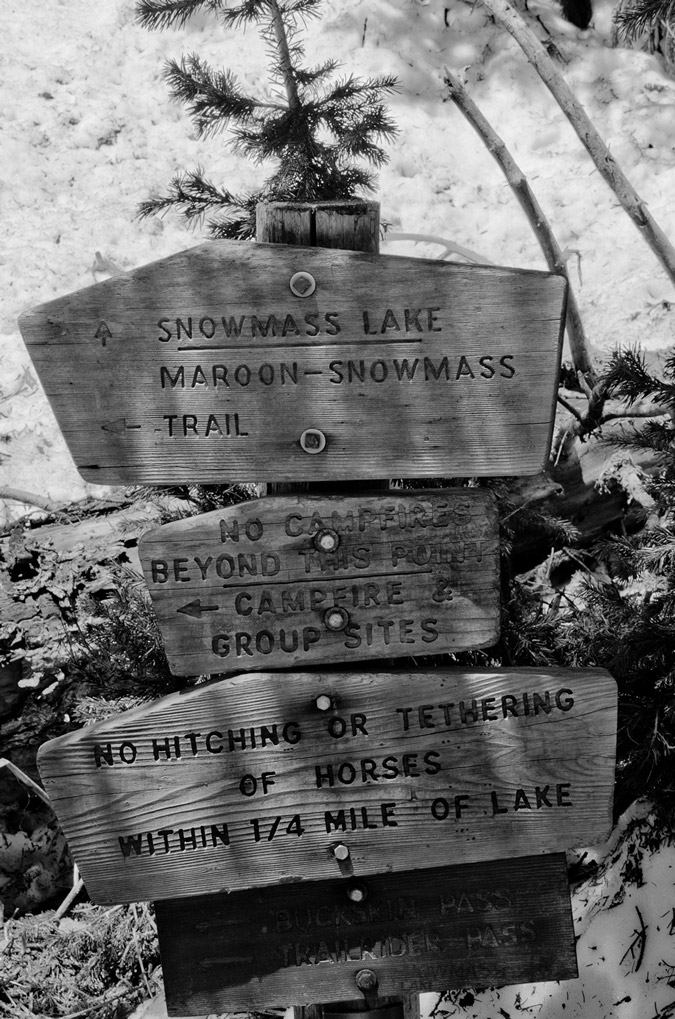
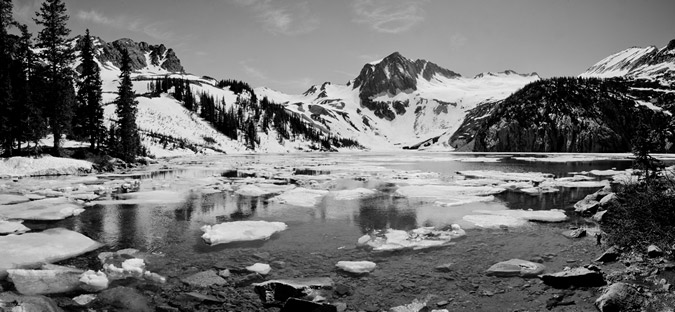
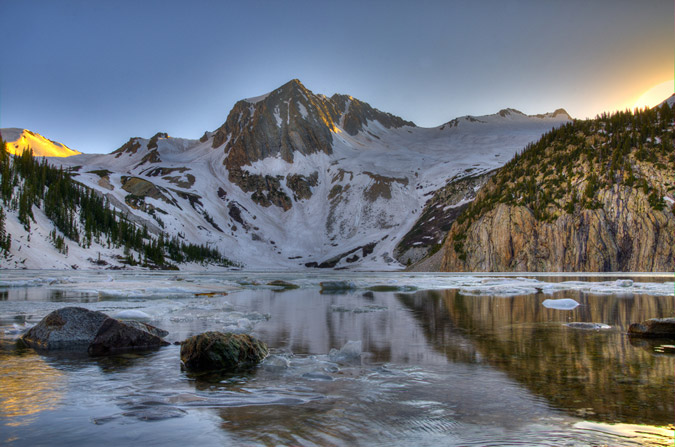
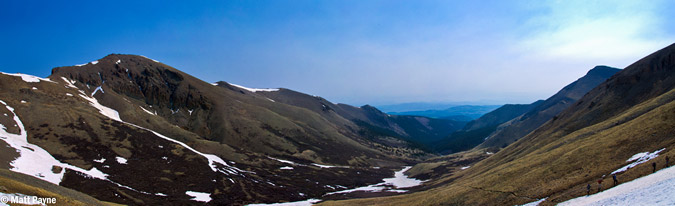
This was particularly exciting since I have wanted to go back to Willow Lake for awhile now. Willow Lake is truly a magical place, and should be designated as a wilderness area, in all honesty. The lake is pristine, with a giant waterfall at its head. Additionally, it is surrounded by some of the most rugged and aesthetically remarkable mountains in Colorado, including Kit Carson Peak, Challenger Point, Columbia Point, Crestone Peak and Crestone Needle, not to mention Mount Adams!
Mount Adams is the 66th highest ranked summit in Colorado, sitting at 13,931 ft. 69 more feet and it would be climbed much more frequently, not that Ethan and I are complaining that we didn't see another soul on the summit...
Looking at the maps while driving over, Ethan and I also thought it might be fun to tack on another peak or two while we were out, so we decided that once we reached the summit of Adams, we would evaluate the conditions and how we felt and then decide on the next steps.
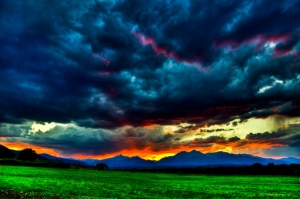
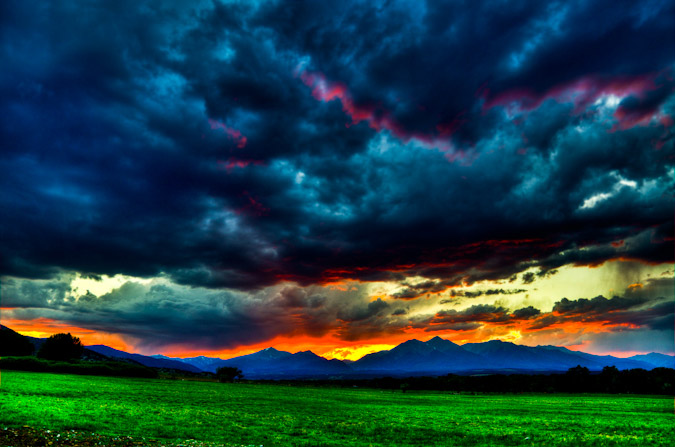
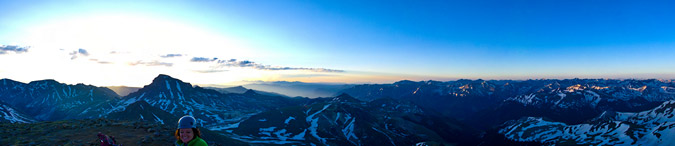
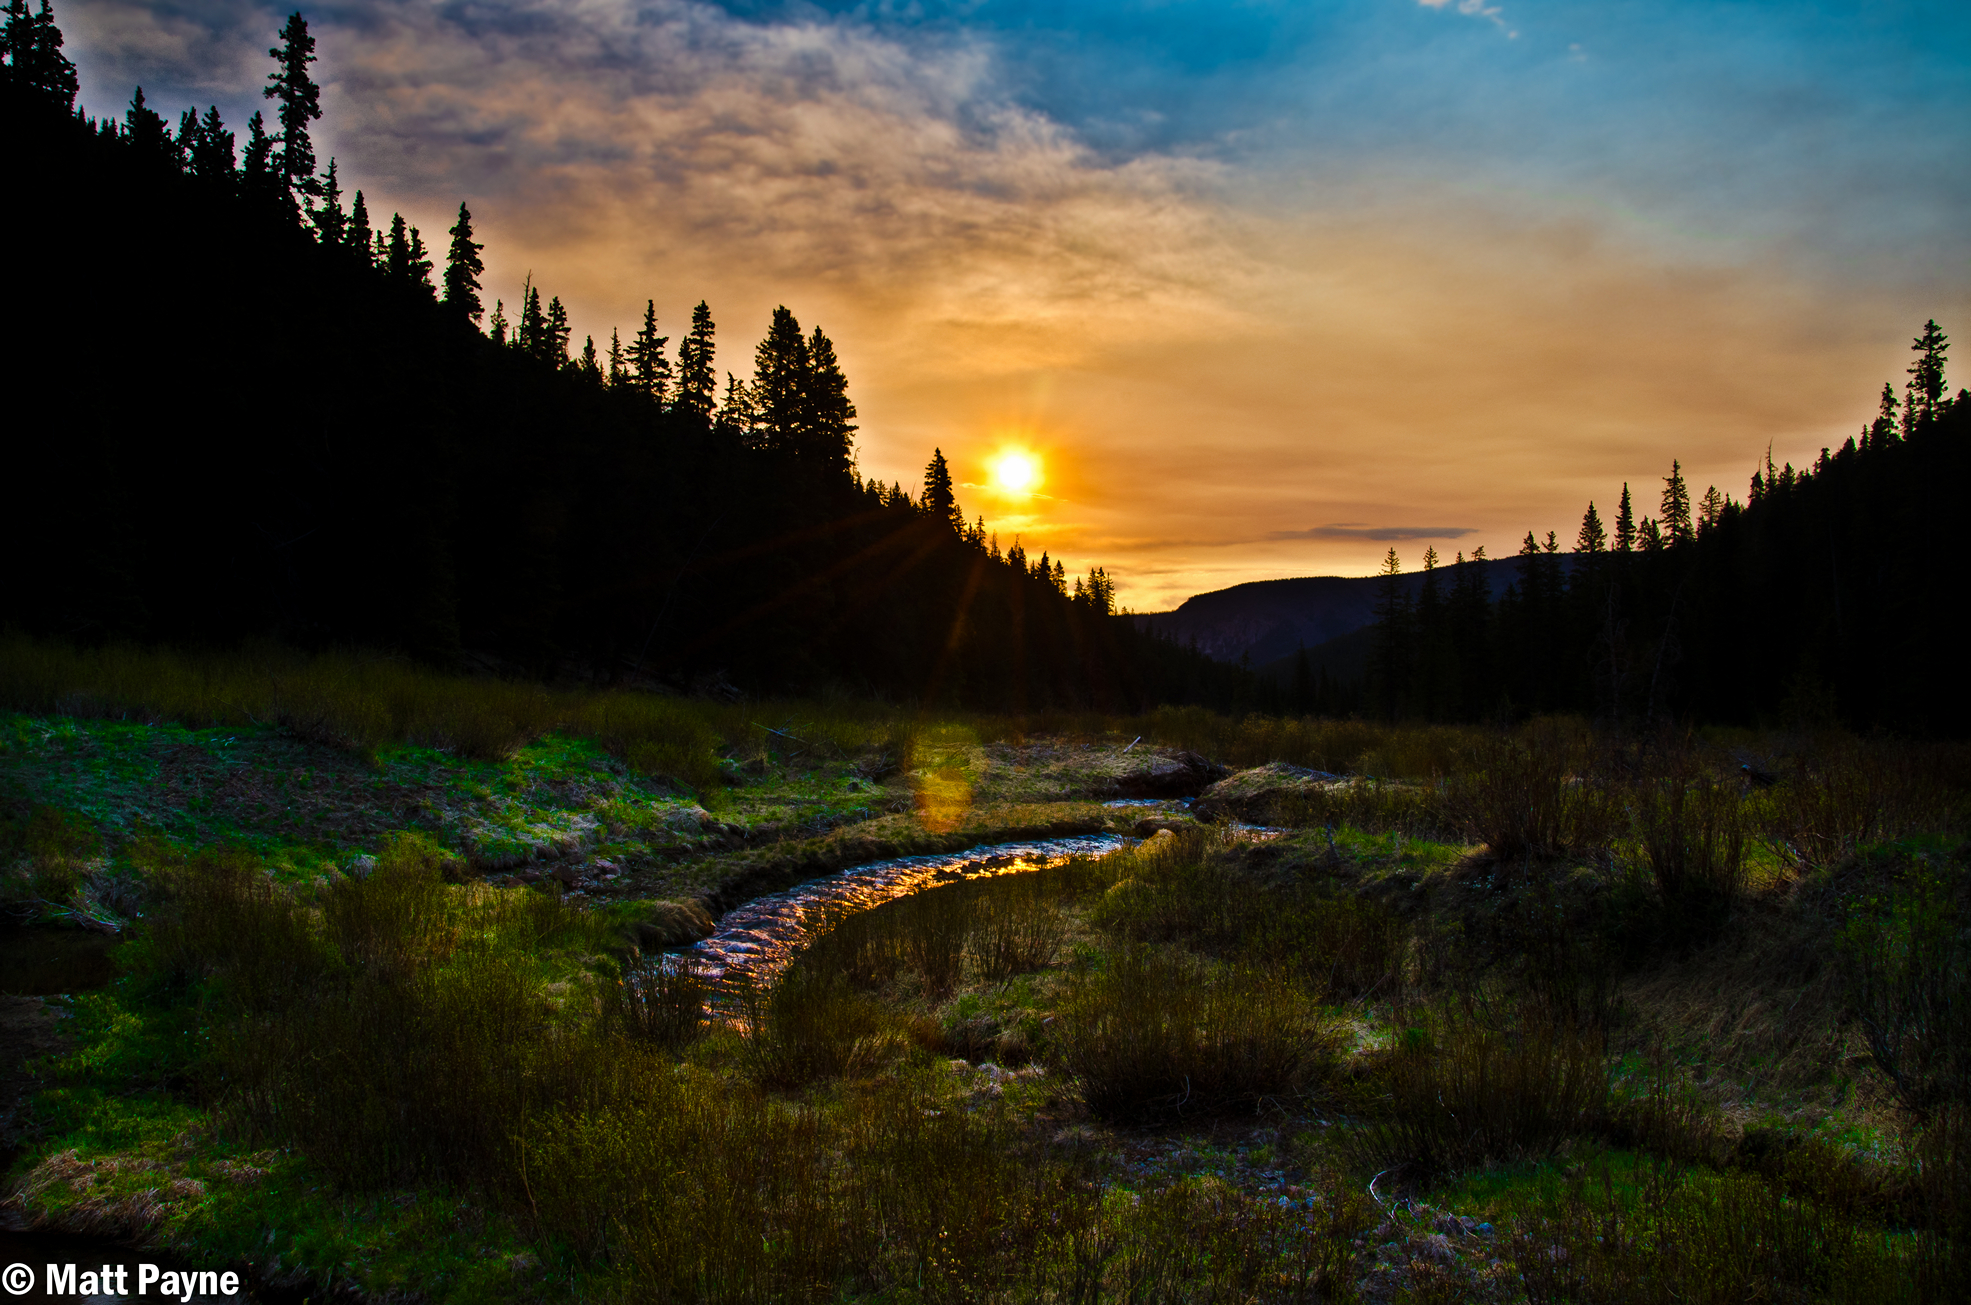
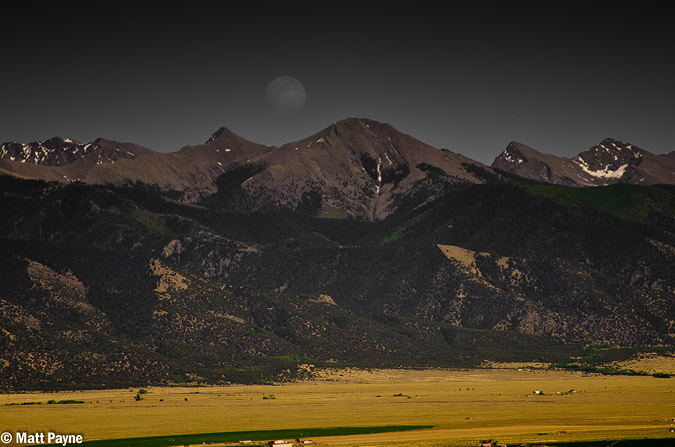
The drive over to the town of Crestone was remarkably unremarkable except for two incredible details. First, the pizza at Amicas in Salida was incredible, as usual. Second, the sunset as we were leaving Salida was insane. We drove out of town, heading west into Poncha Springs, and decided we HAD to pull over and take photos of this rediculous sunset. For my photos, I opted to do a minor HDR treatment since the foreground was quite interesting -we had stopped just in front of a huge grassy area used for cattle to pasture on. The results were stunning, with the sunsetting directly behind Mount Shavano.
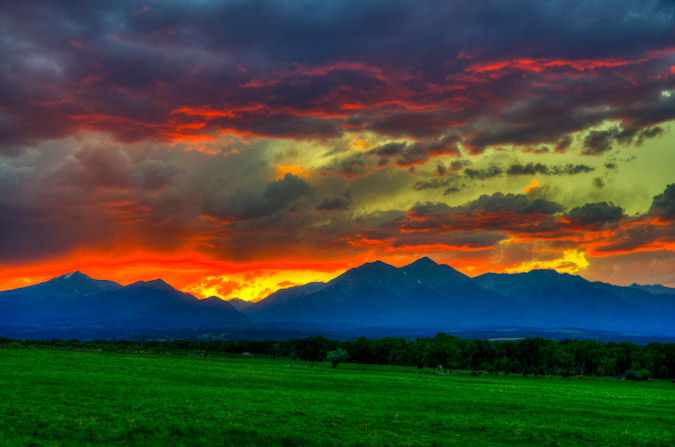
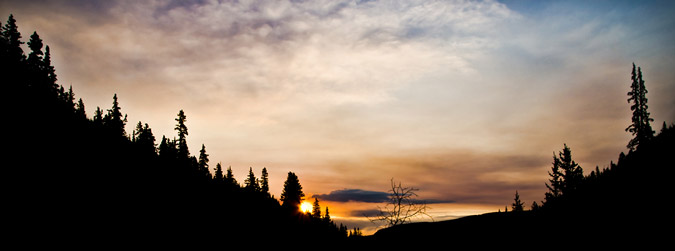
Here's a zoomed-out version of the same scene, which I personally prefer.
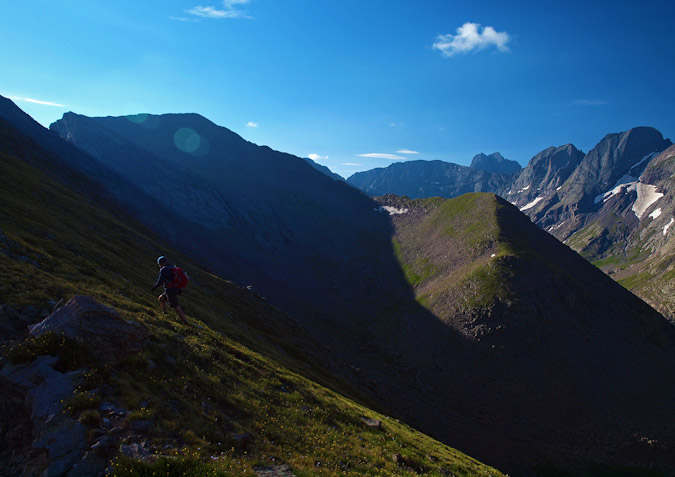
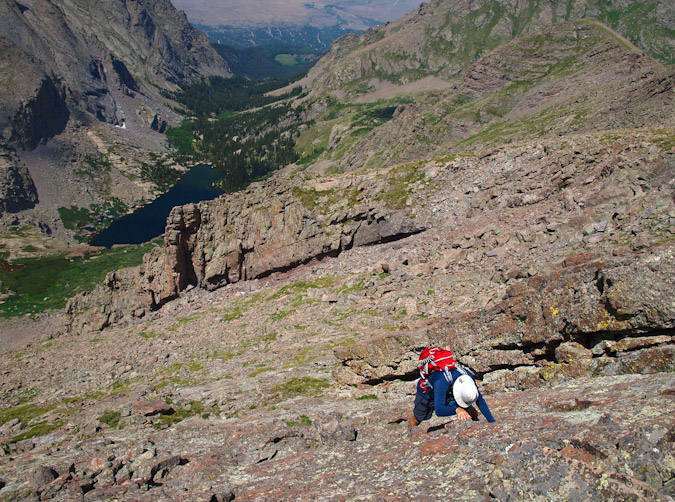
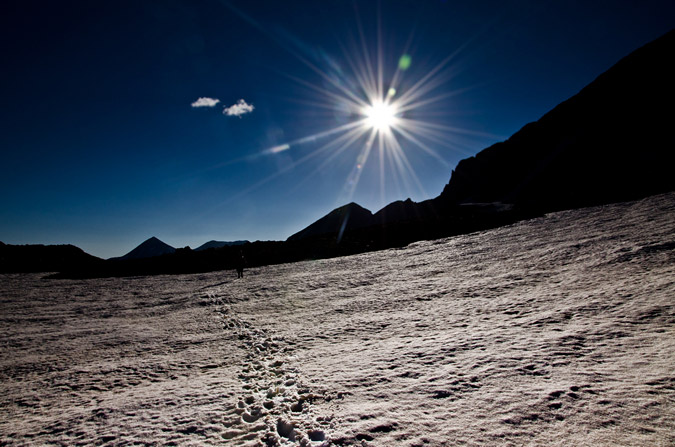
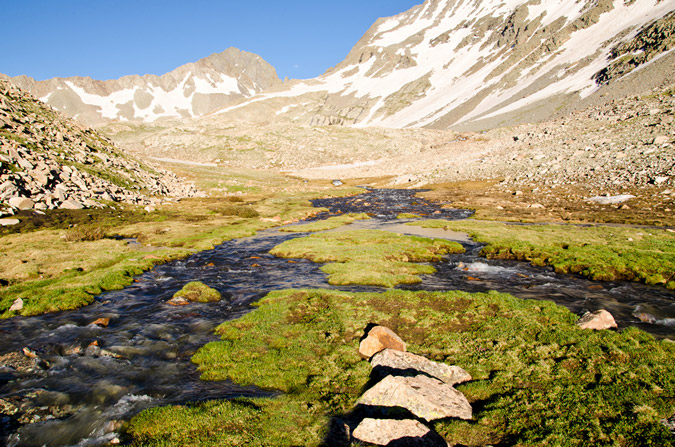
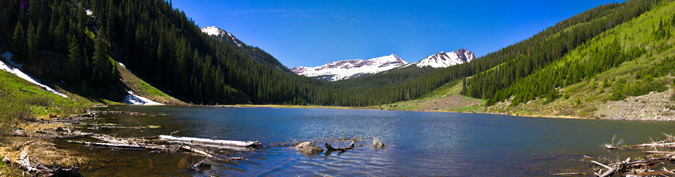
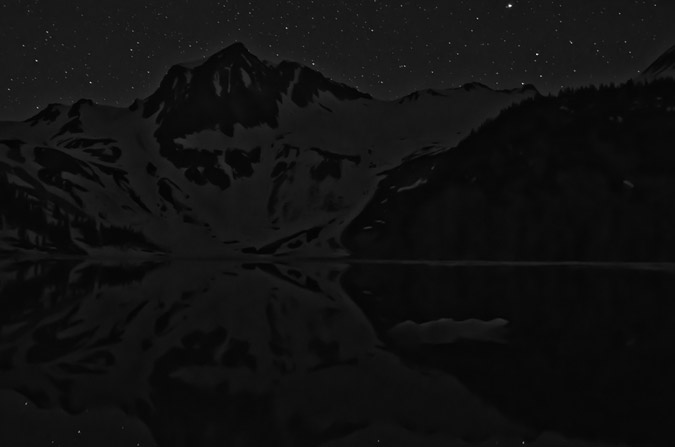
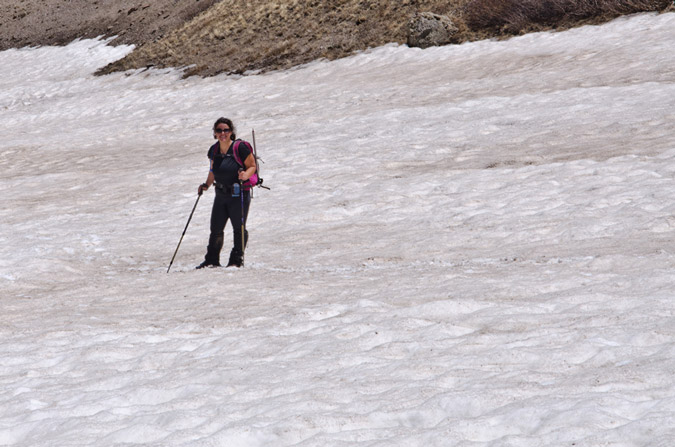
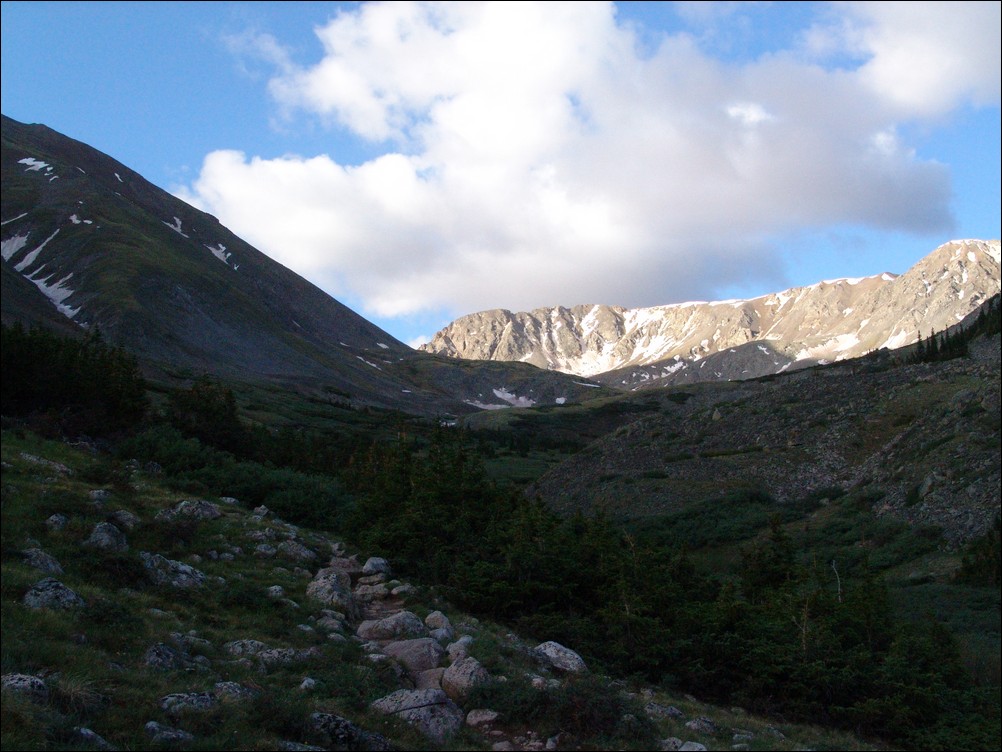
We arrived at the Willow Lake trailhead around 10 PM, set-up Ethan's tent, and hit the sack, with our alarm set for 2 AM. We wanted to ensure that we had enough time to reach the summit of Adams before the weather hit. As soon as the alarm went off, we packed up quickly and hit the trail. The hike was an interesting one since there was a full moon and because we did not get a ton of sleep. Nevertheless, we hiked quickly and reached the base of Willow Lake within 2.5 hours.
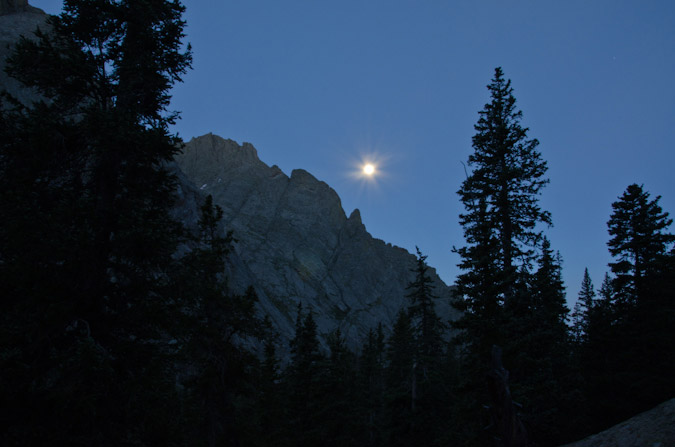
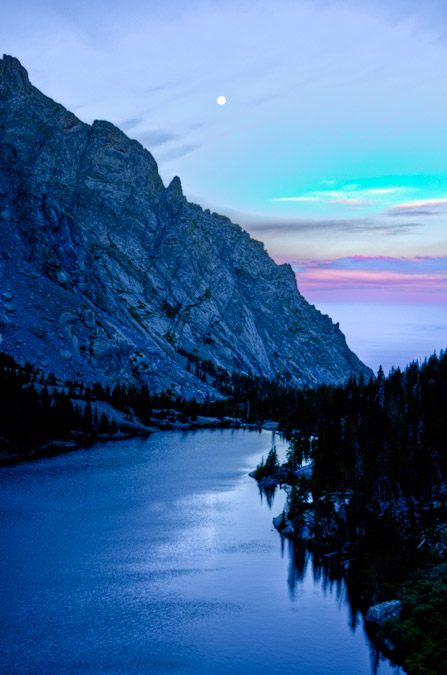
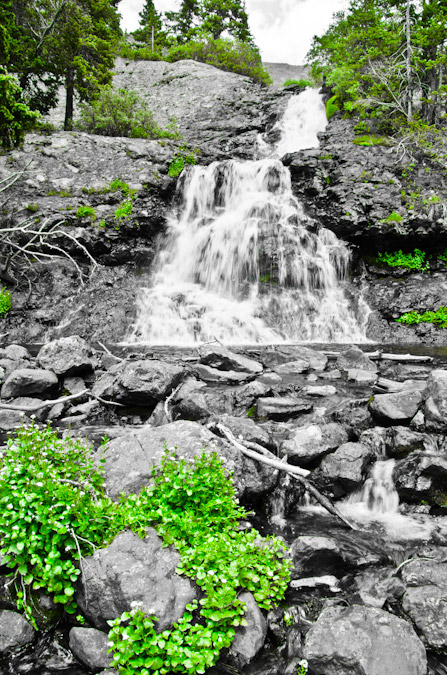
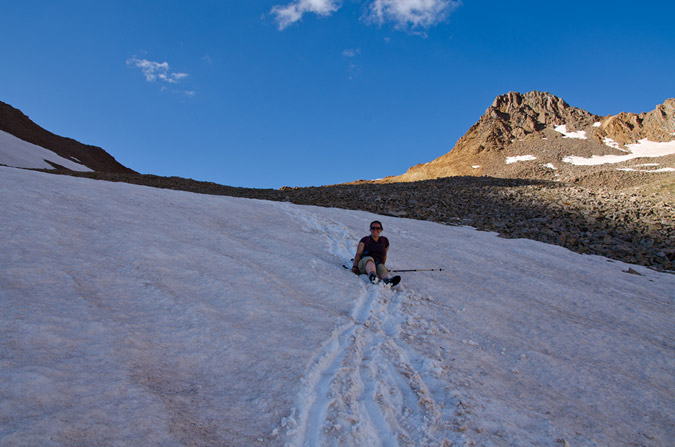
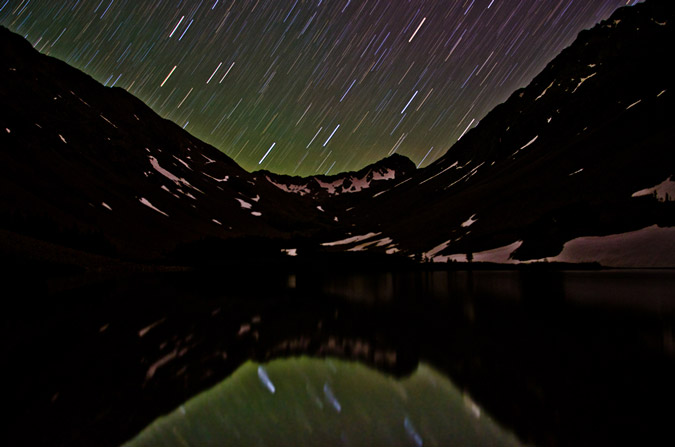
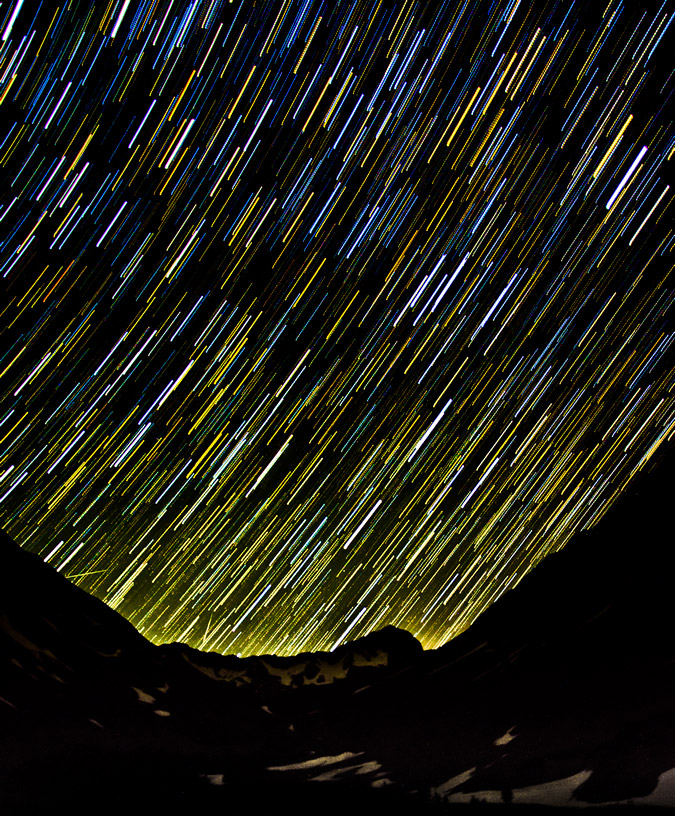
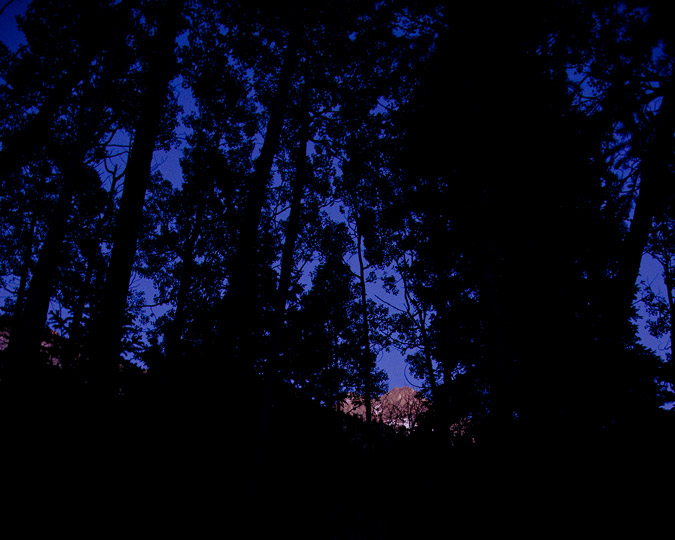
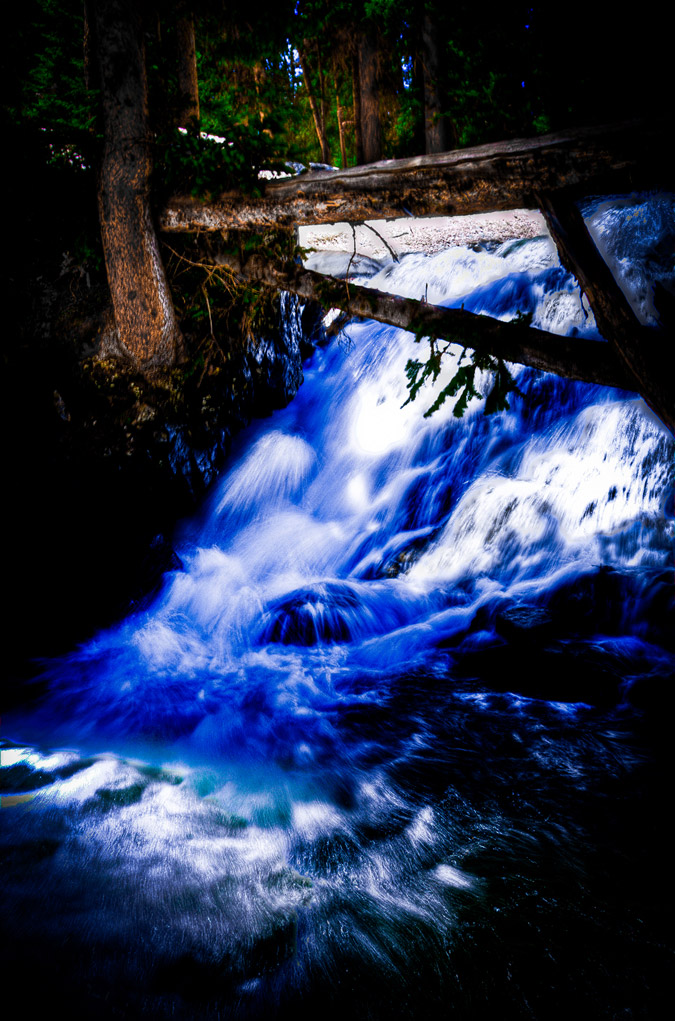
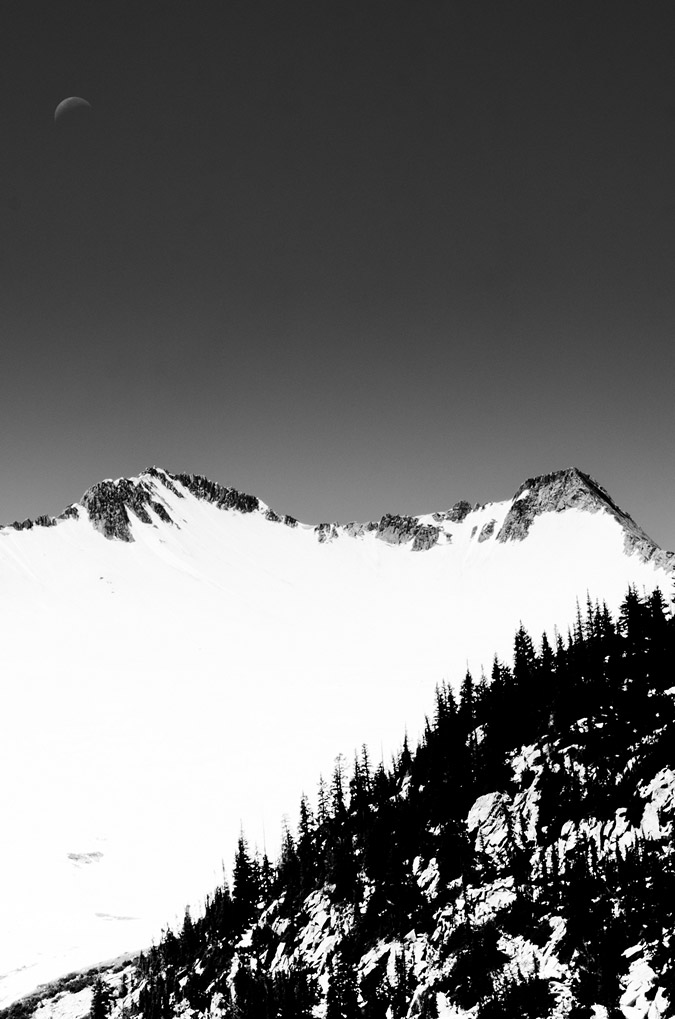
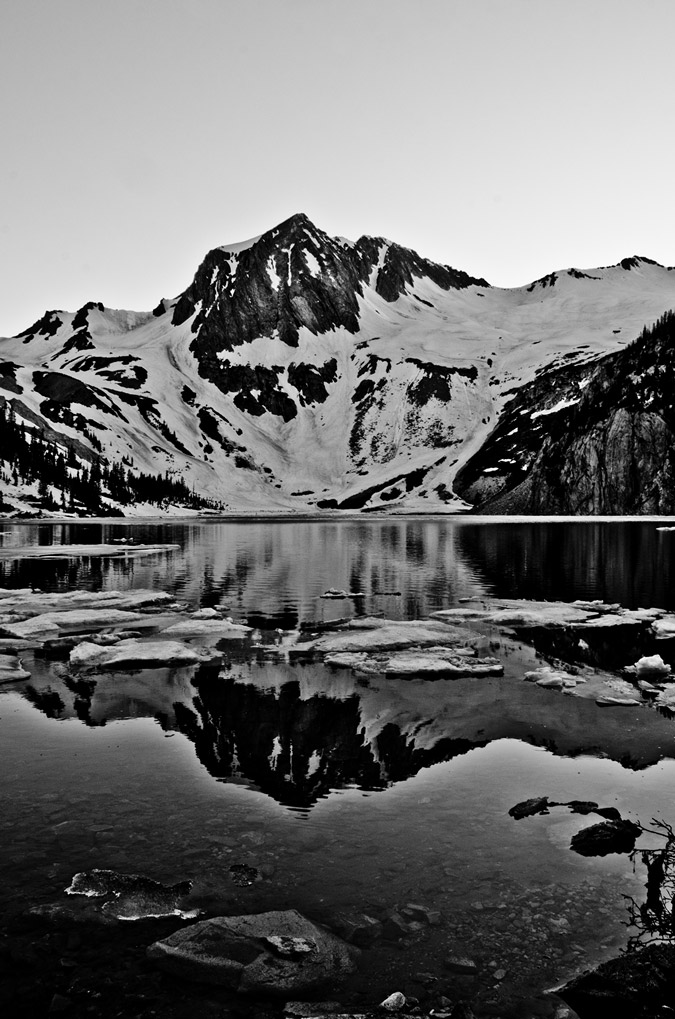
The full moon made for some pretty fun photography opportunities, although photographing the moon is always a big challenge unless you have a really nice zoom lens. Most photos you will see of the moon and of a scene are two images layered as one, since it is literally impossible to photograph the moon and your foreground without either overexposing the moon (like above) or underexposing your foreground. Anyways, seeing Willow Lake again was great. We rested there for a good 30 minutes and took some photos. The waterfall was just as awesome as I had remembered it to be.
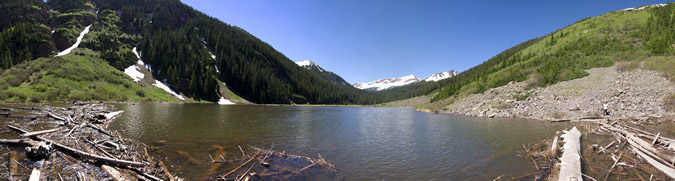
We saw lots of tents on the way up, probably 15 total. Lots of people were up here to climb the 14ers. We were the only group doing Mount Adams though. We gained the trail to the left of the lake and began to ascend above the lake in quick order, stopping every once in awhile to get some photos.
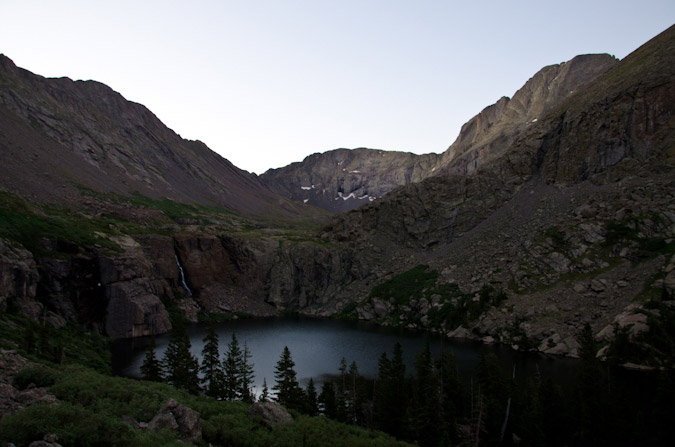
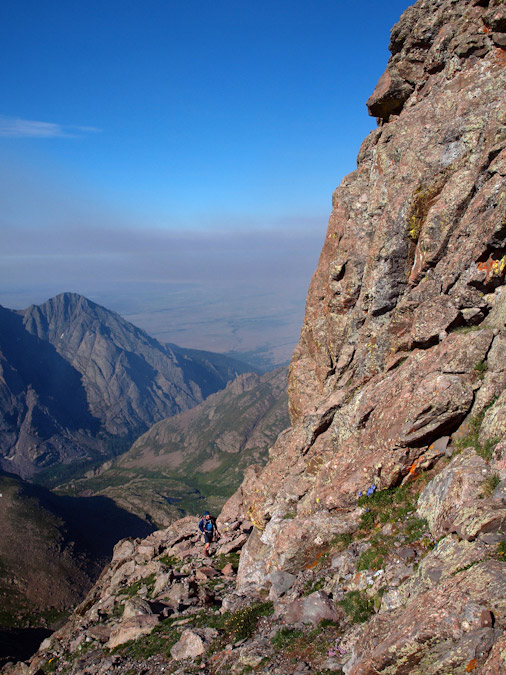
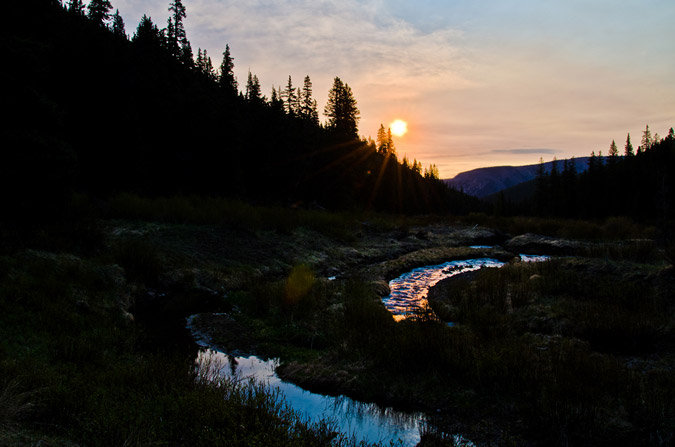
Before we knew it, we had gone too far and were nearly at the head of the lake near the waterfall. While we knew we were somewhat off-route, we decided to get into a good position to get photos of the sunrise and the full moon over Willow Lake.
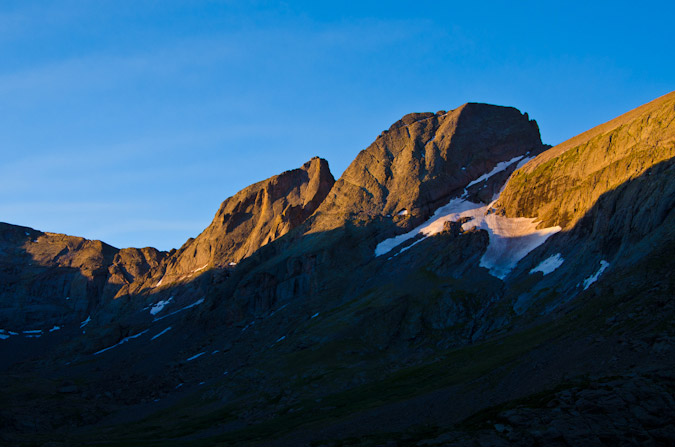
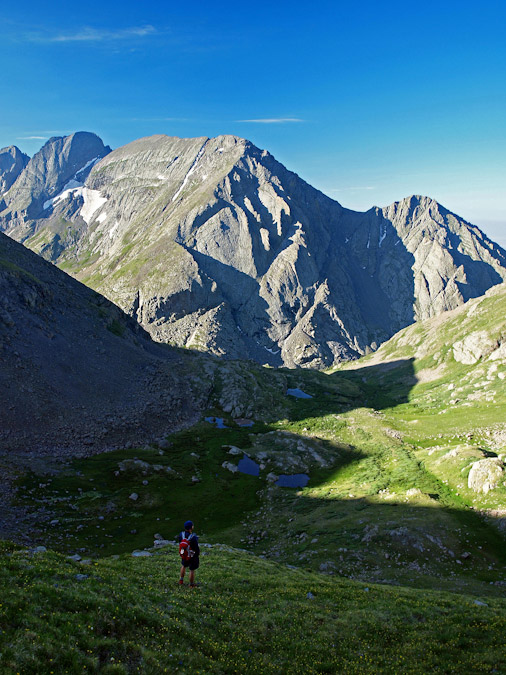
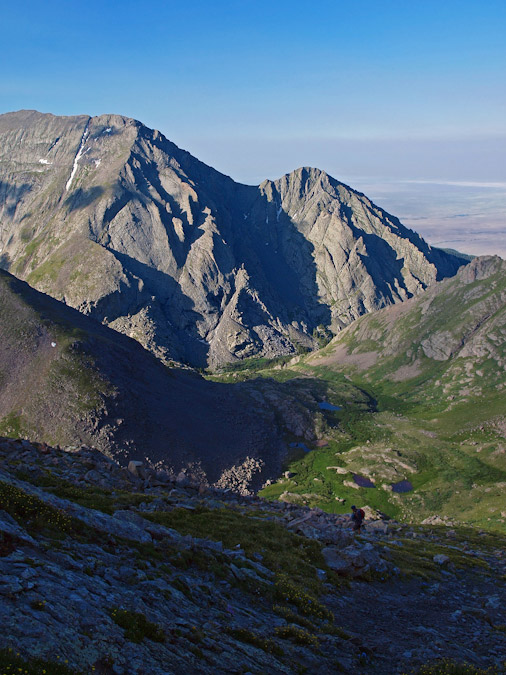
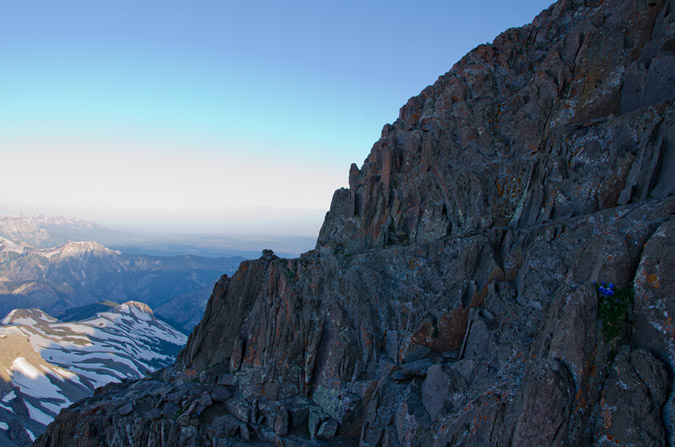
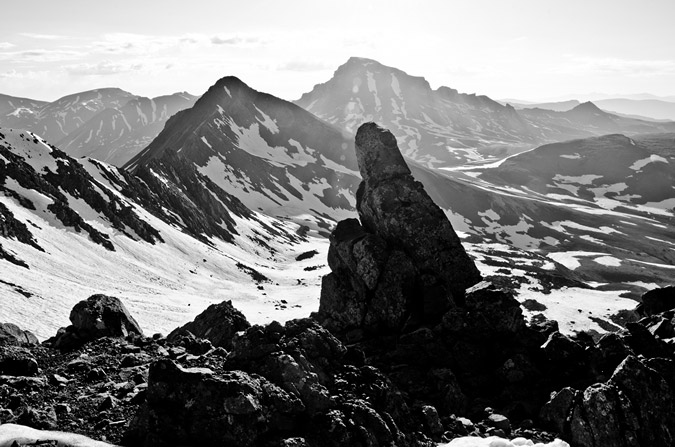
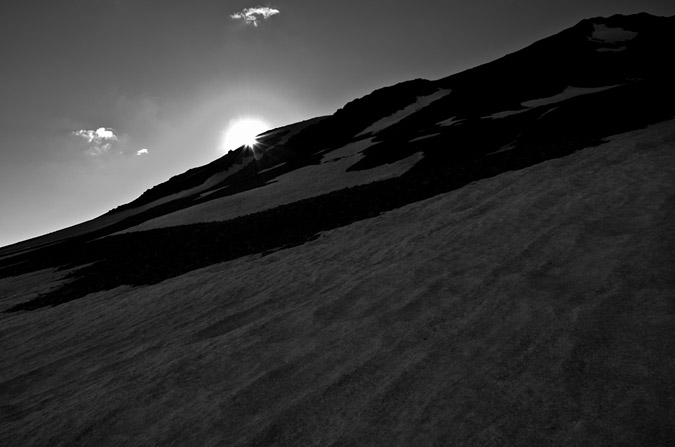
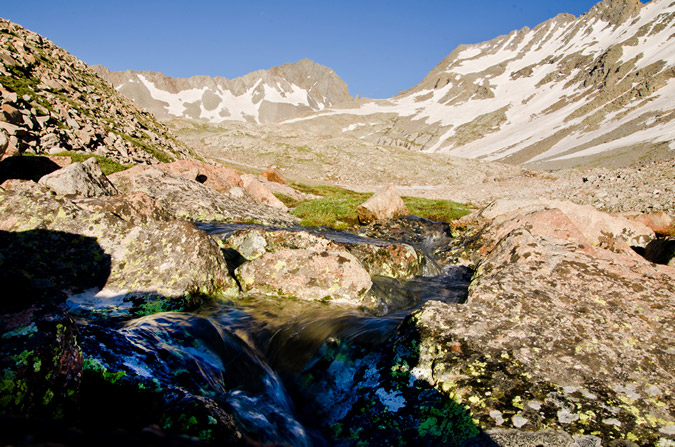
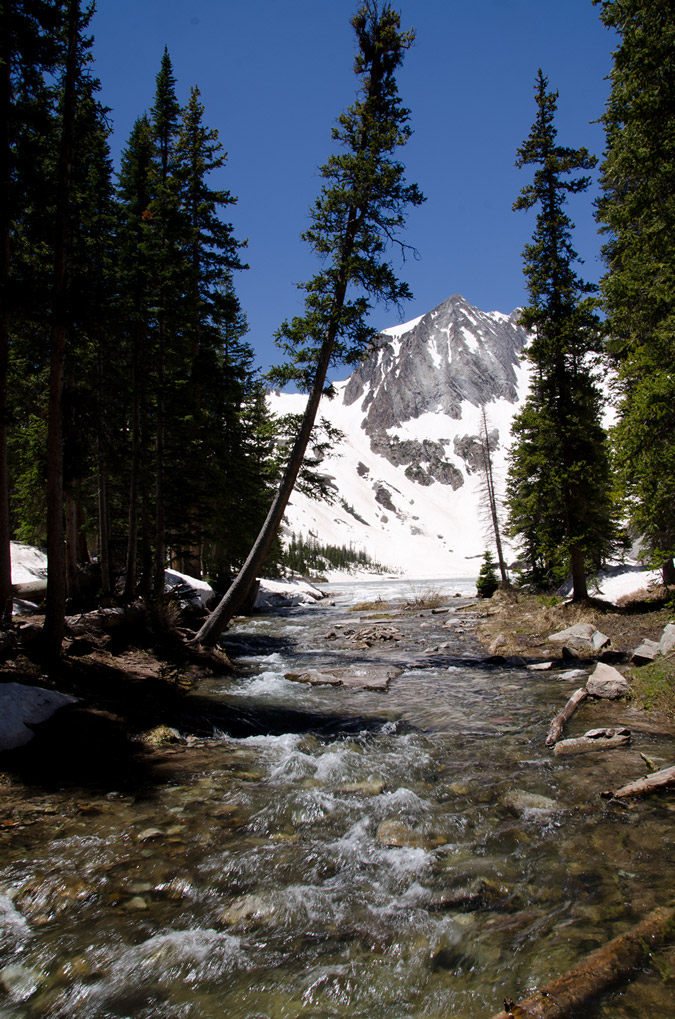
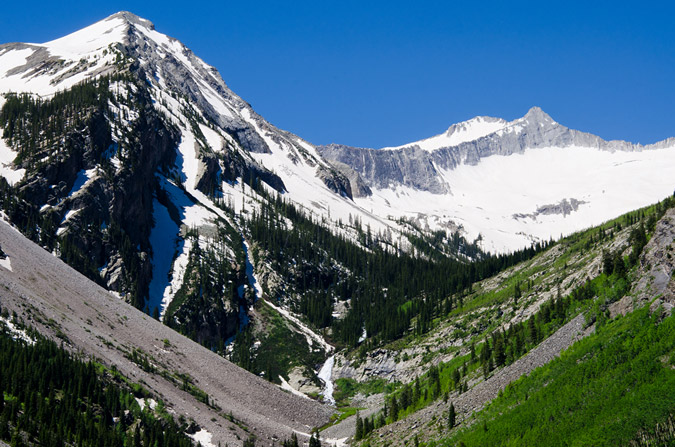
We then turned sharply south to gain elevation into the small basin beneath Mount Adams. Since there is no trail up there, we just followed beneath the termination of a large cliff wall that led into the area, looking back from time to time to catch the sunlight on Kit Carson Peak.
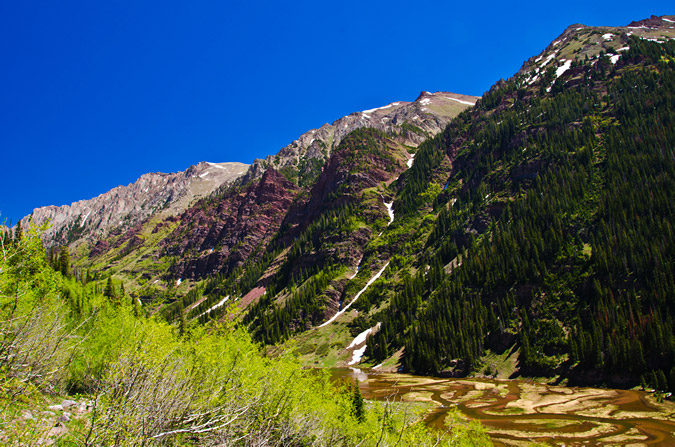
I've always like the geology of this area, which is comprised of clastic sedimentary rocks, which appear as large pebbles that are cemented together. These rocks sometimes erode, to leave behind some really interesting features. For more information on Crestone Conglomerate, check out this interesting website.
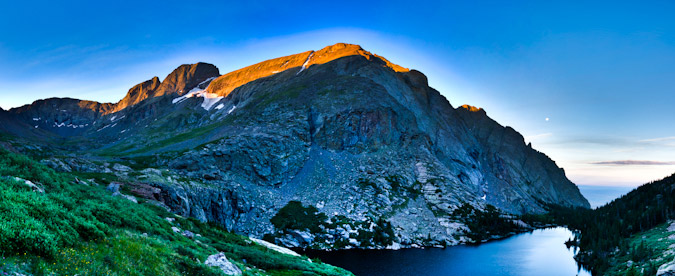
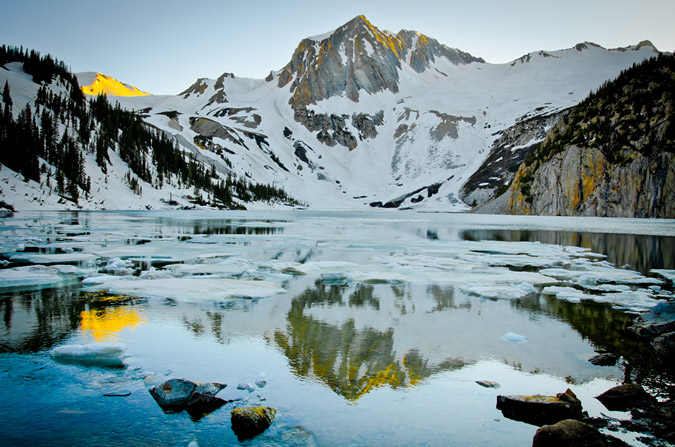
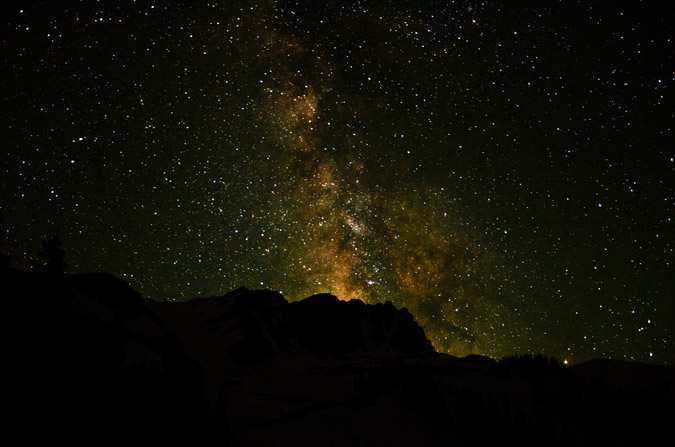
As we gained the basin, we could not help but notice the amazing hues cast onto Willow Lake by the sun hitting the southern aspects of Challenger Point.
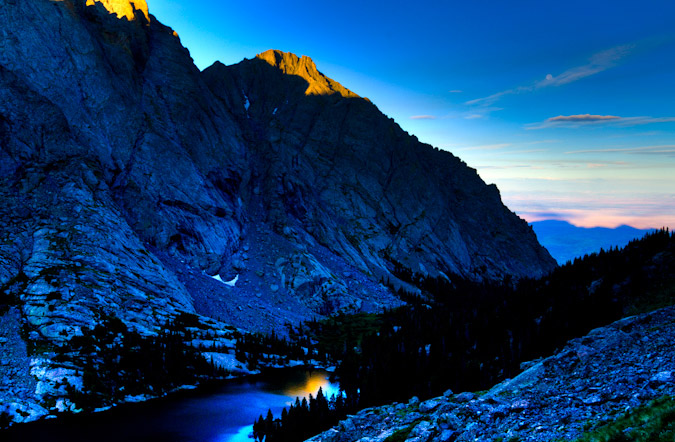
Indeed, the alpenglow on KIt Carson Peak and Challenger Point were quite impressive, and coupled with the moon and the lake it made for a perfect scene to hone my HDR skills. If you've ever wondered how to do HDR, you can do like I did, and read about it a ton, or watch this perfectly succinct tutorial from Trey Ratcliff.
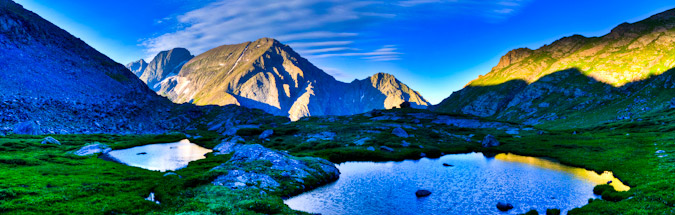
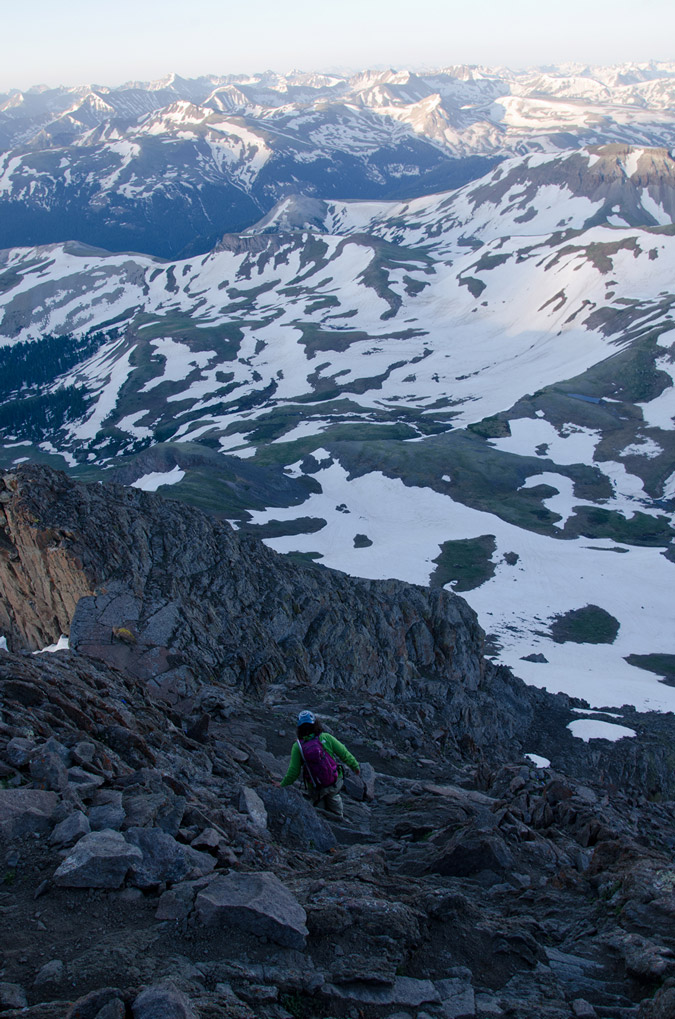
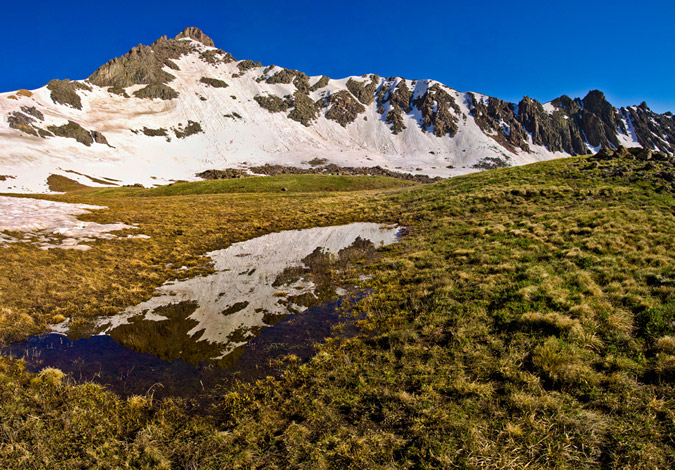
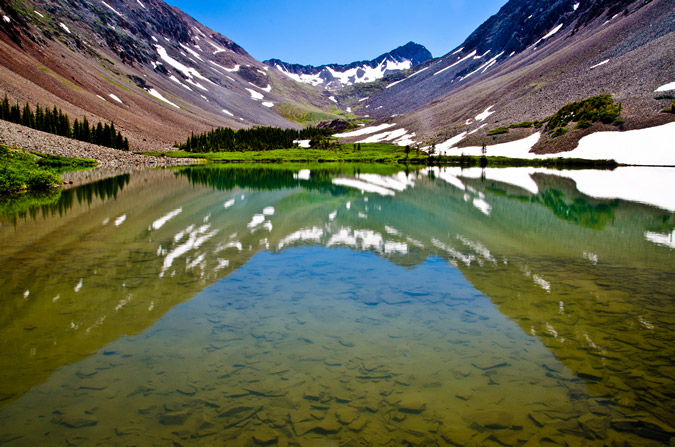
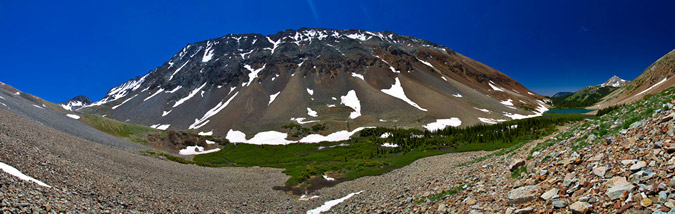
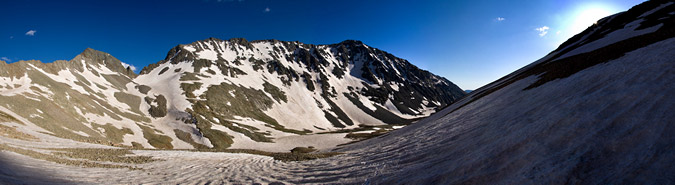
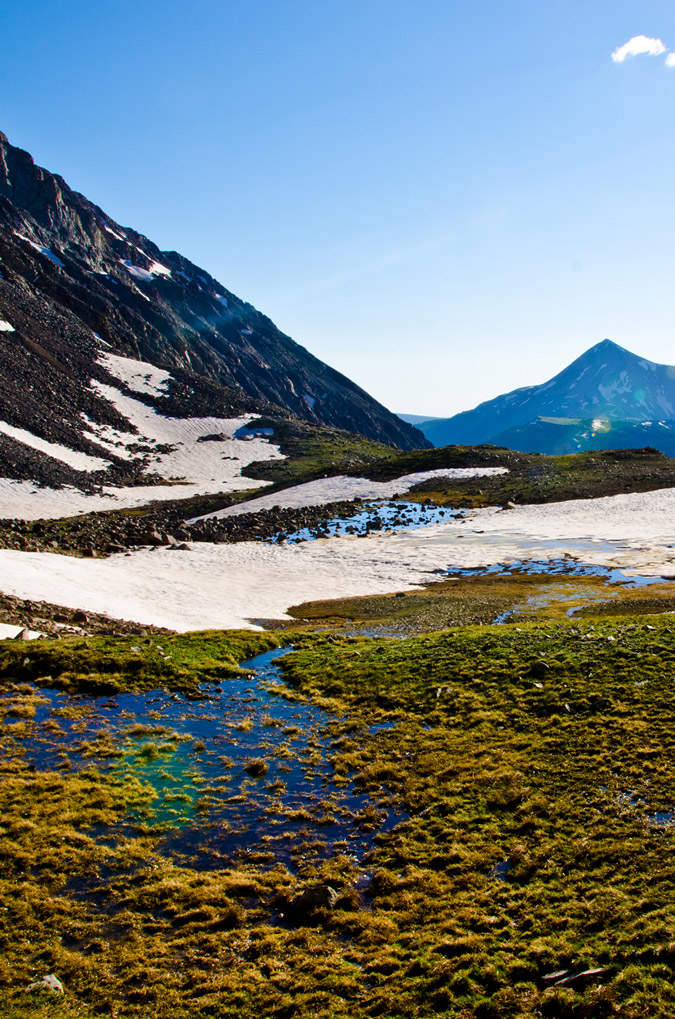
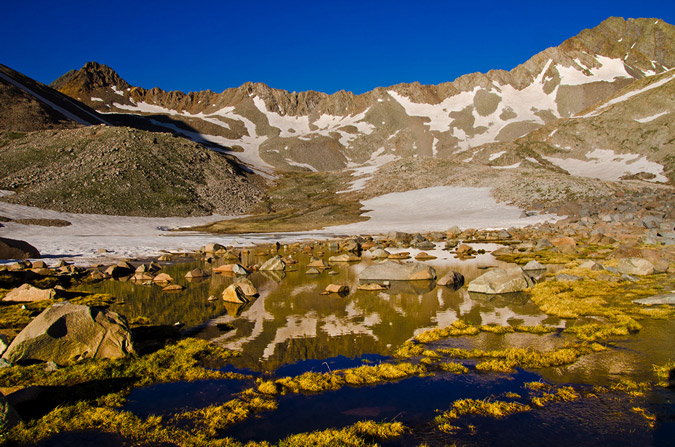
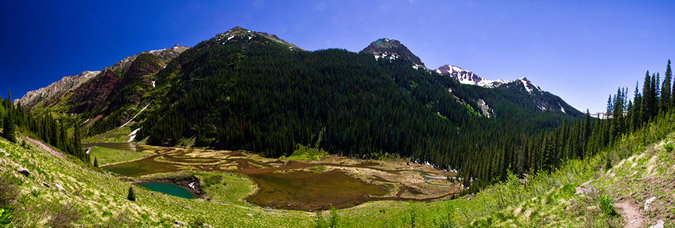
We kept on hiking up into the basin towards Mount Adams and stumbled upon a pair of really nice looking ponds. The ponds were surrounding by wildflowers and separated by a huge jutting rock feature, which made for quite a lovely subject for an HDR panoramic. Additionally, the clouds were insane, and continued to be all day long.
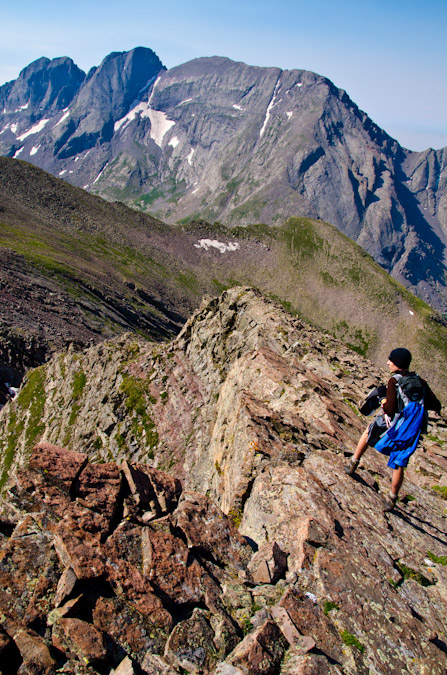
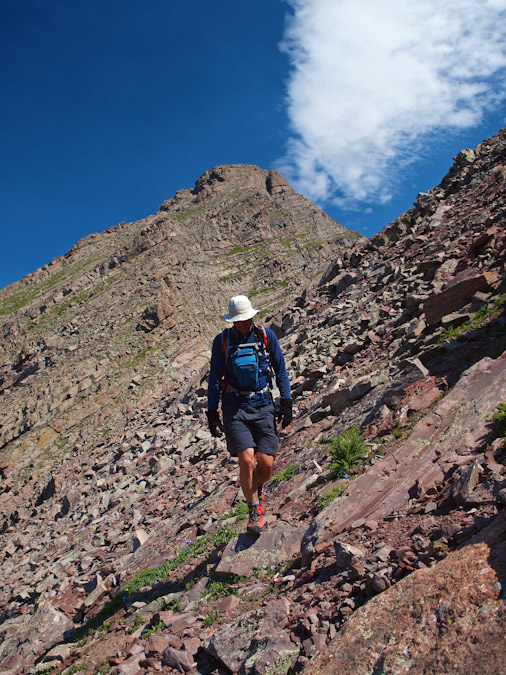
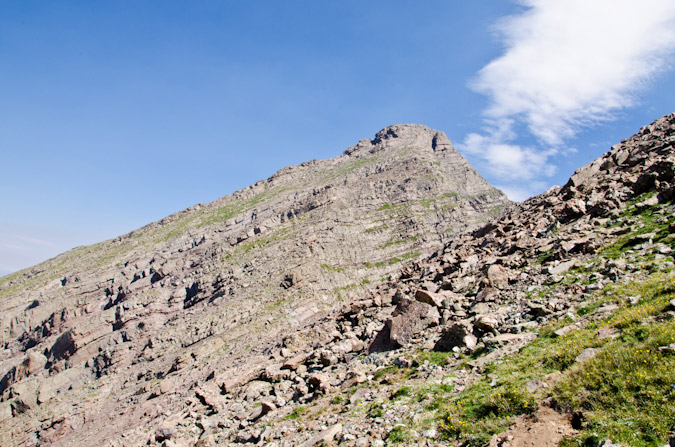
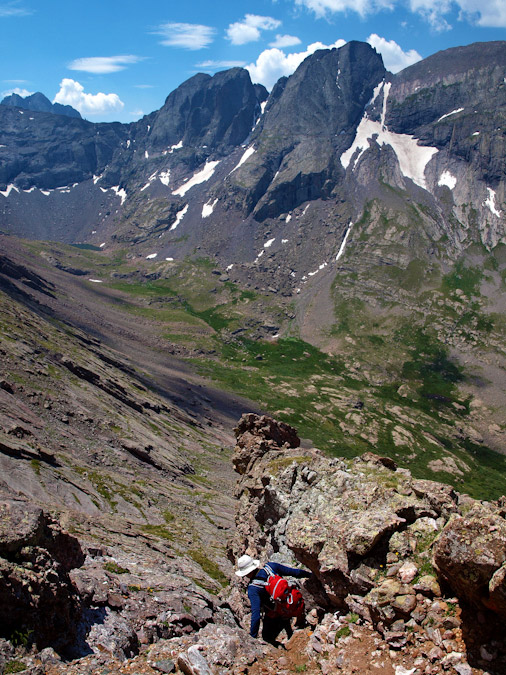
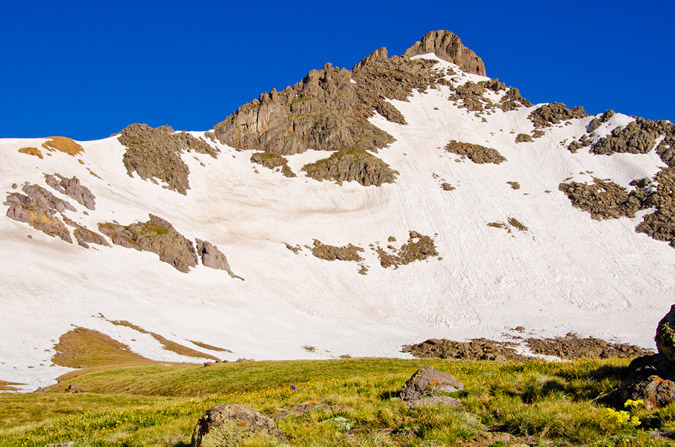
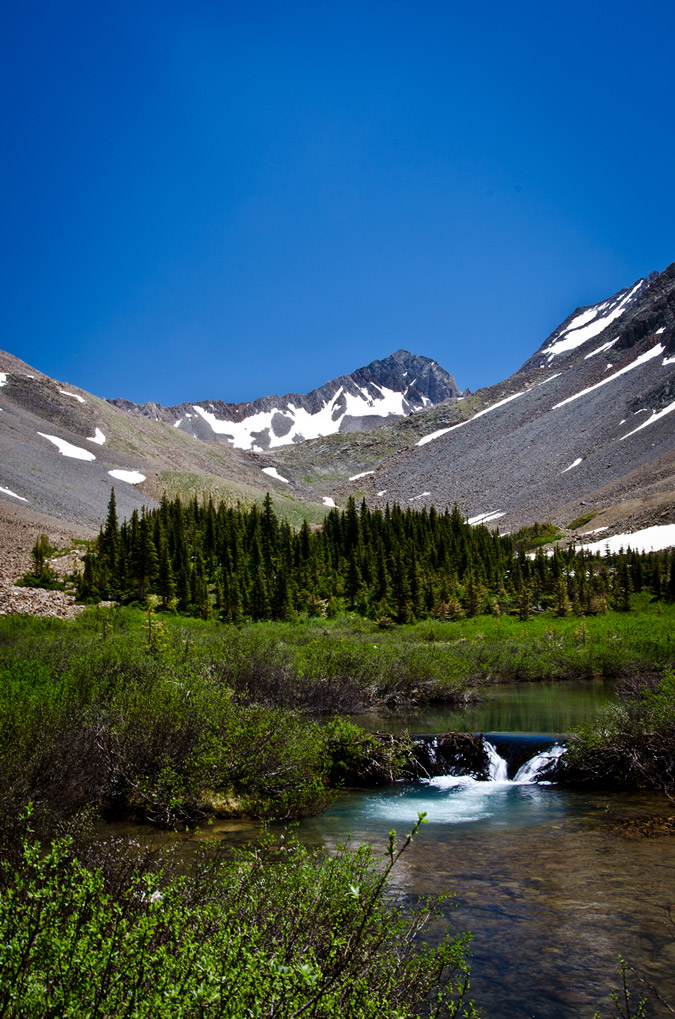
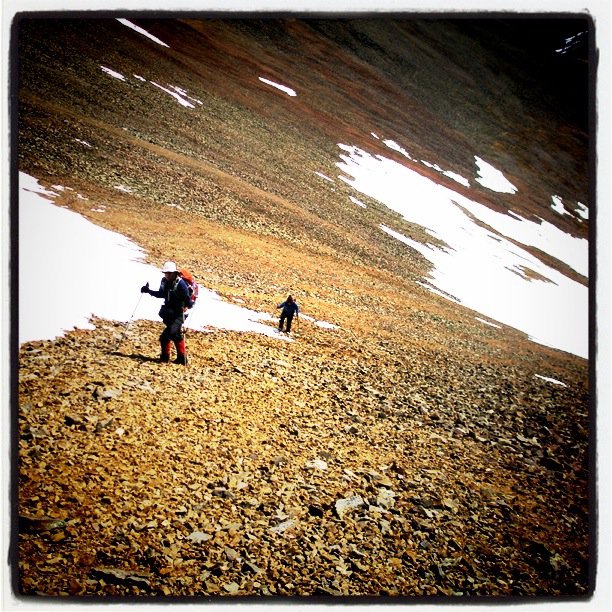
After a few more minutes, Mount Adams finally came into view for the first time.
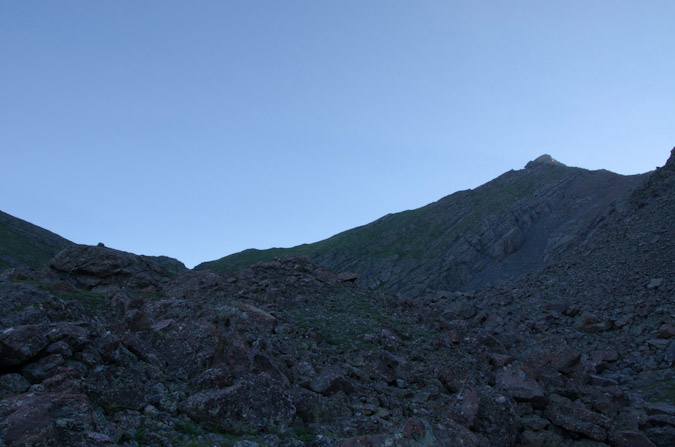
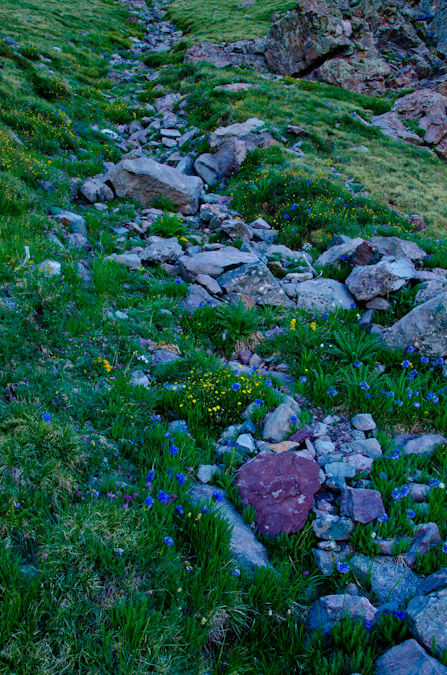
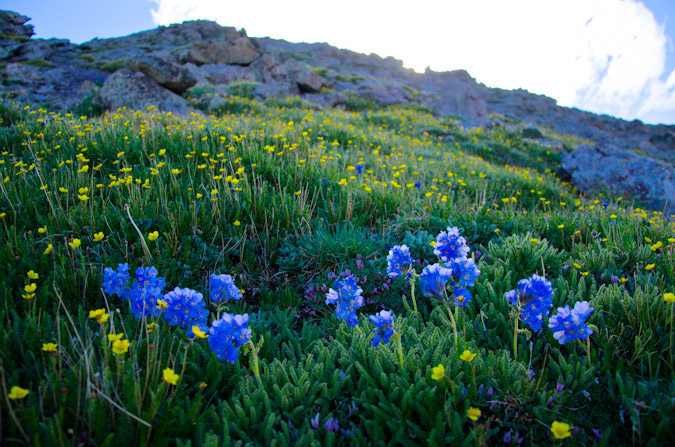
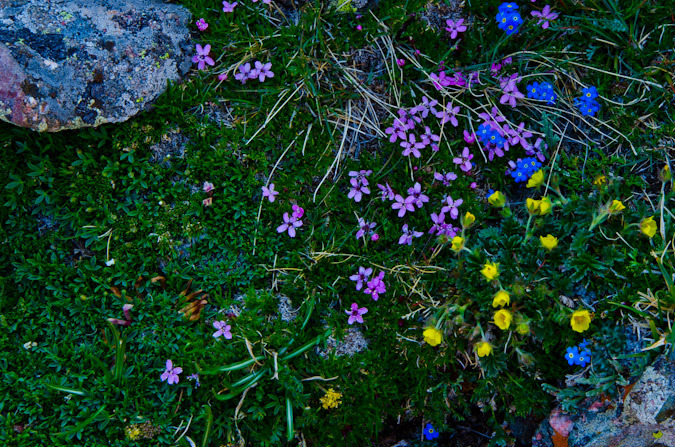
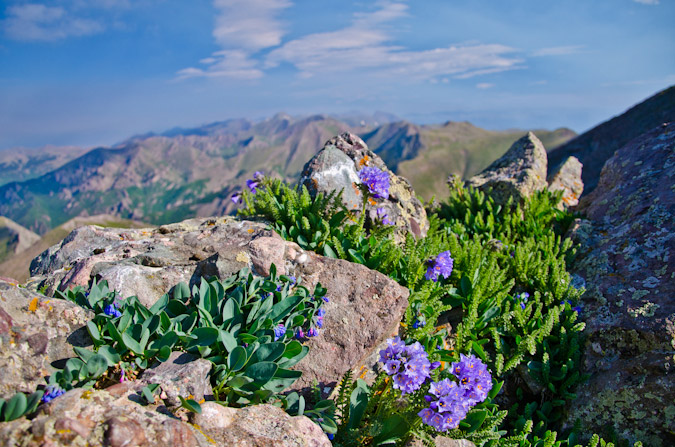
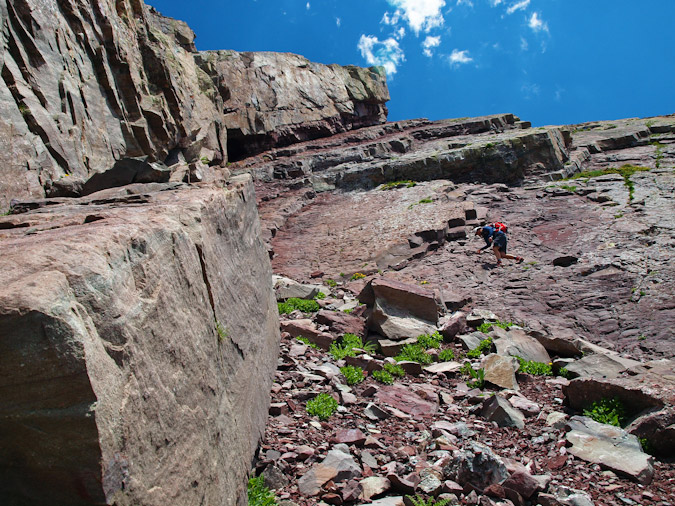
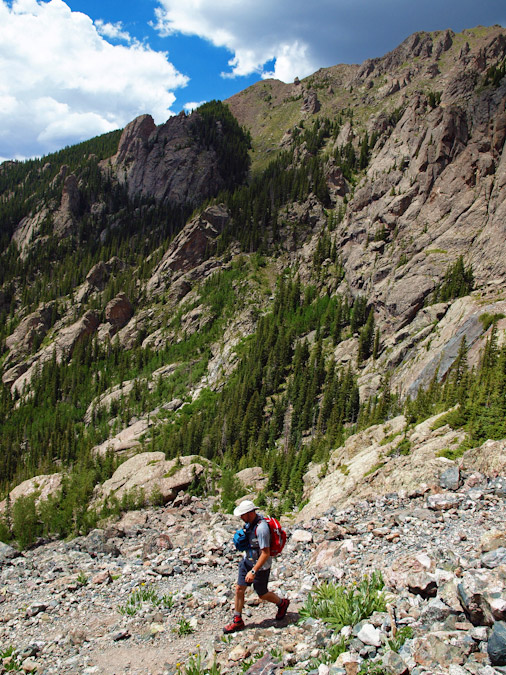
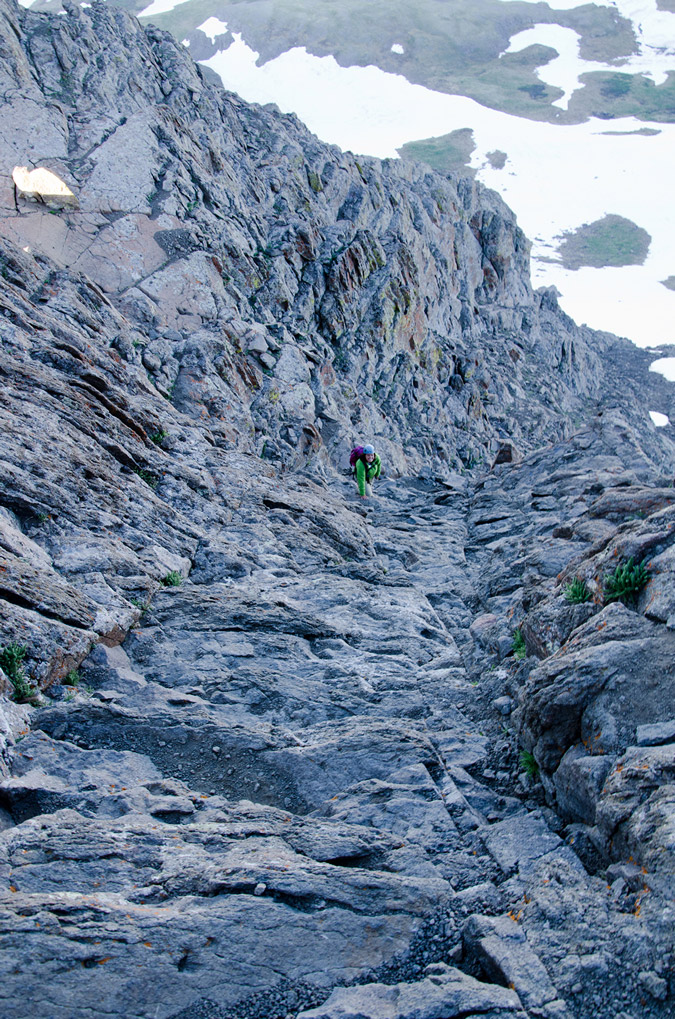
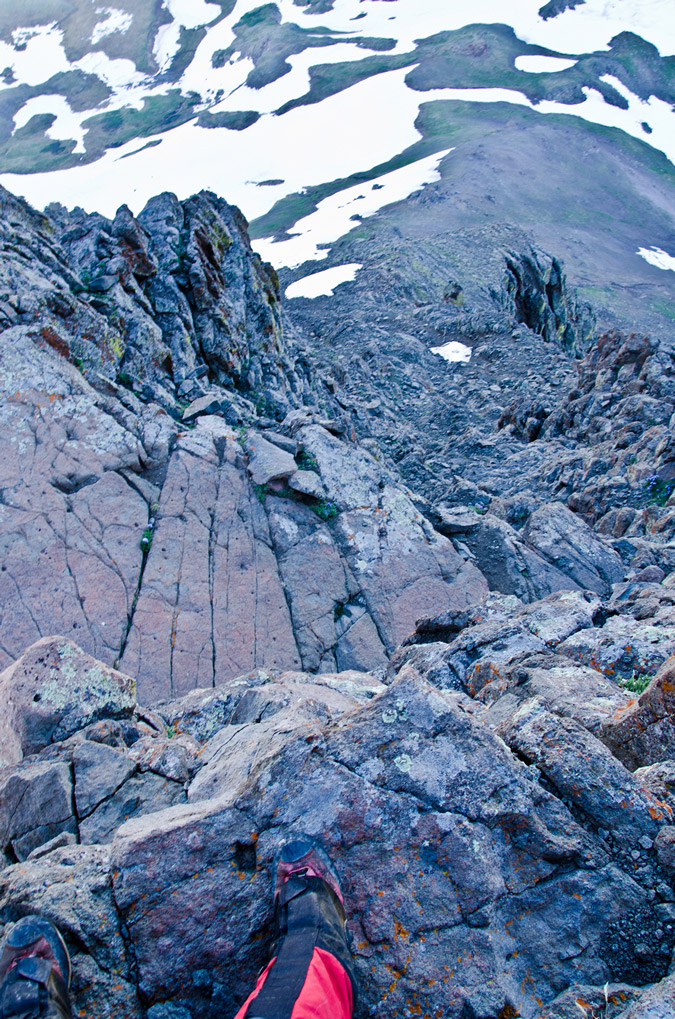
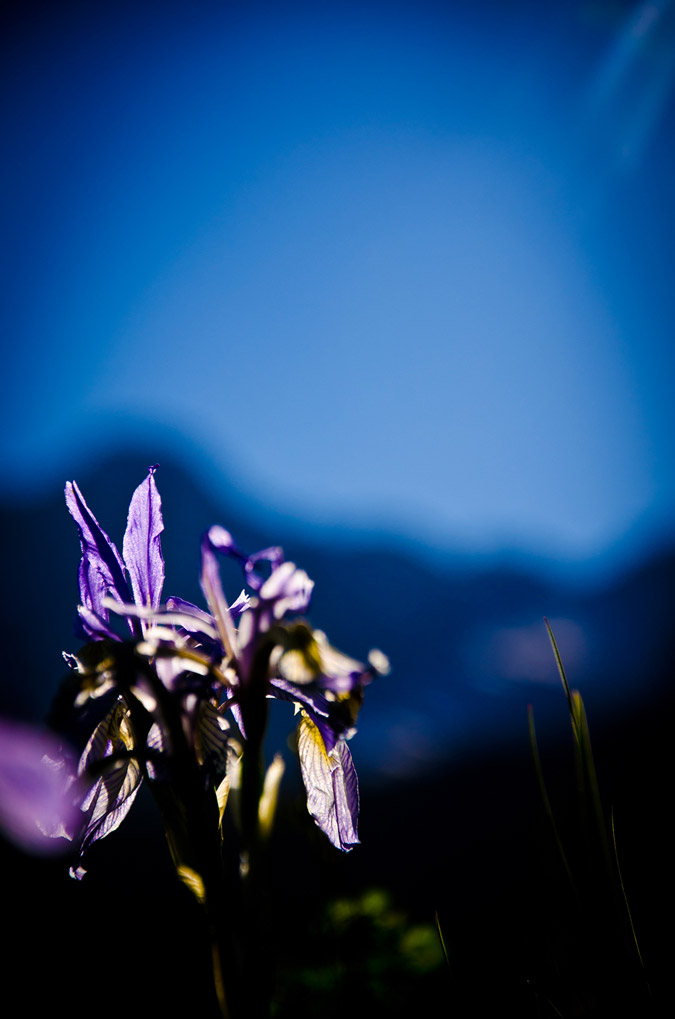
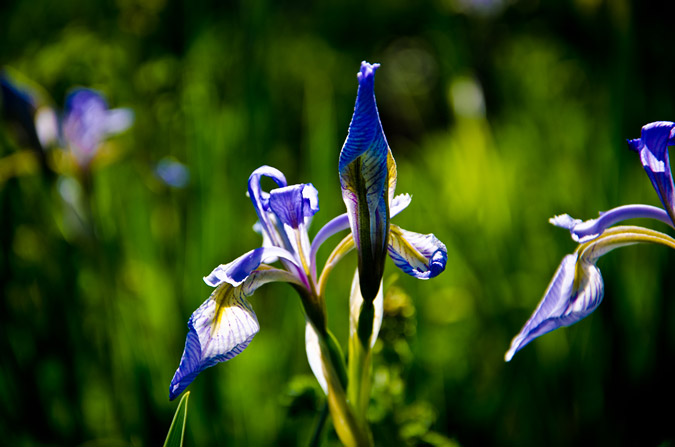
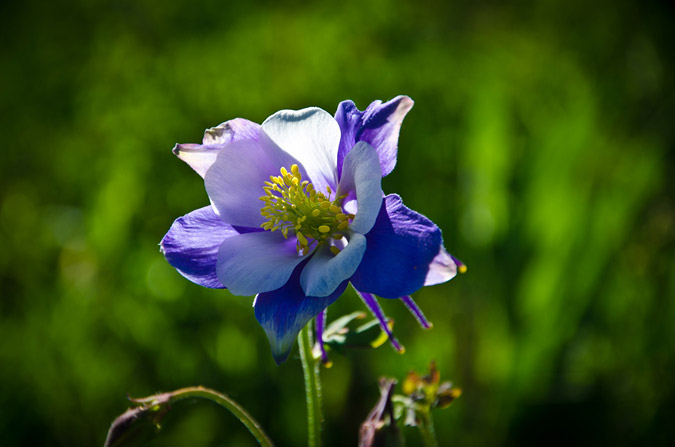
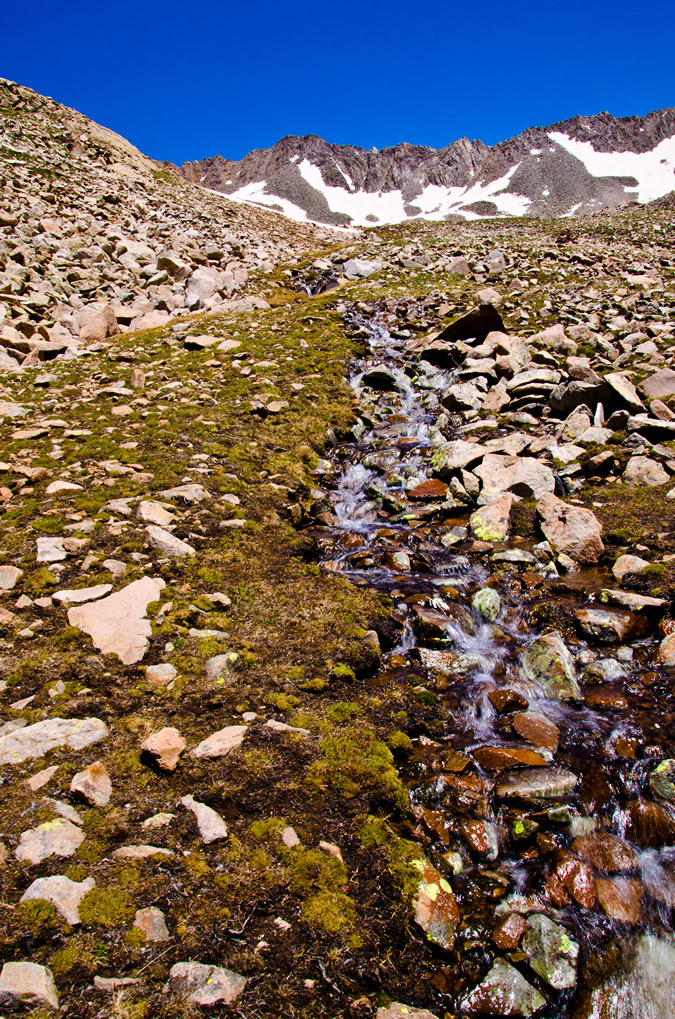
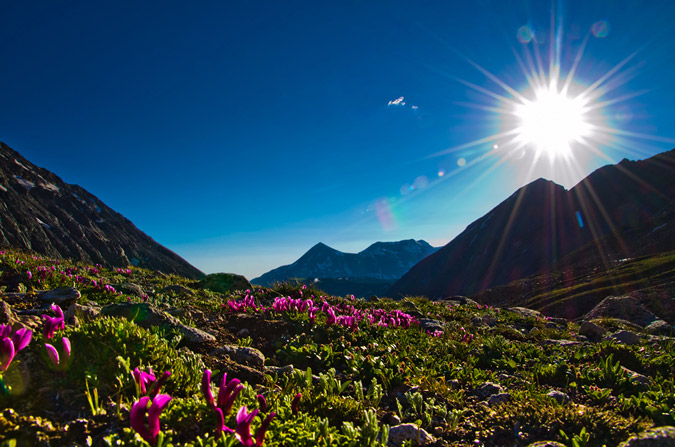
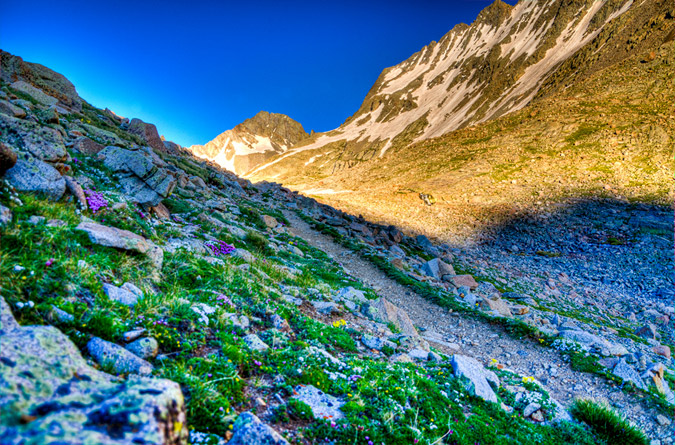
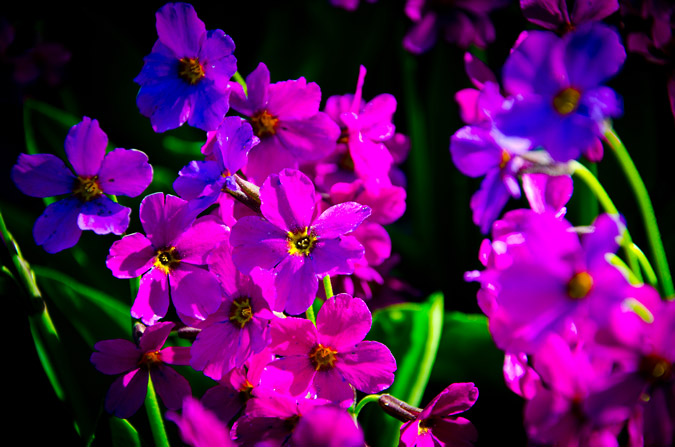
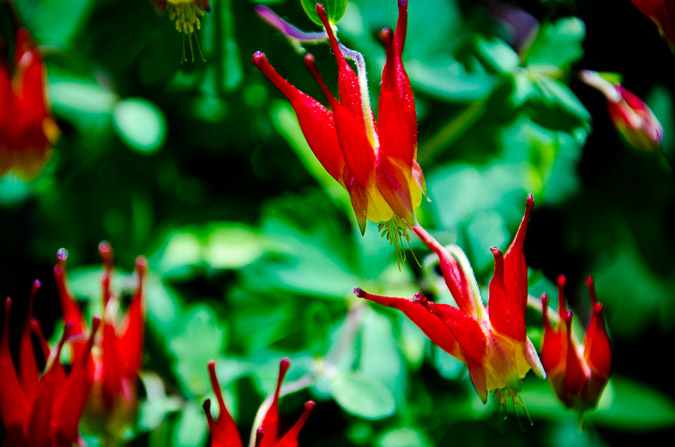
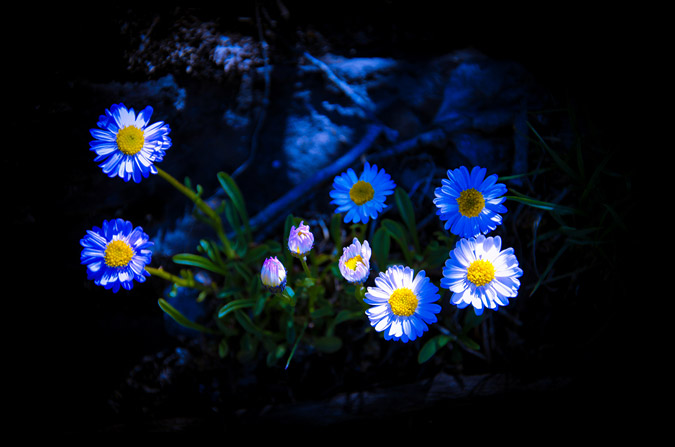
The route seemed quite straight-forward to us, so we opted to just follow a rock gully up towards the ridge, which was strewn with all sorts of wildflowers.
|
|
|

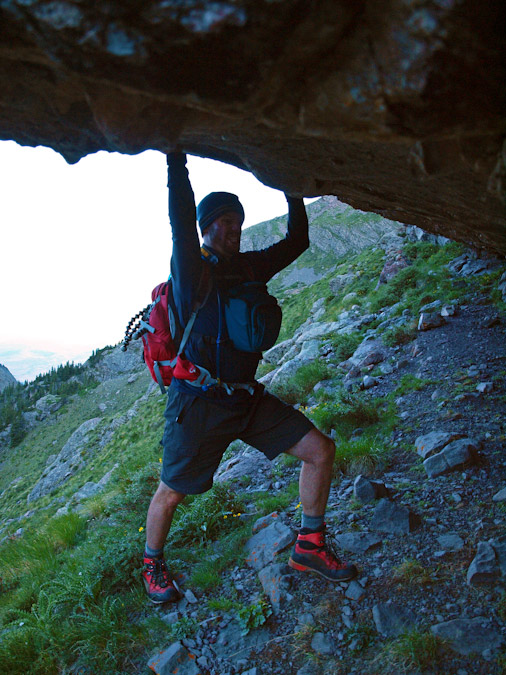
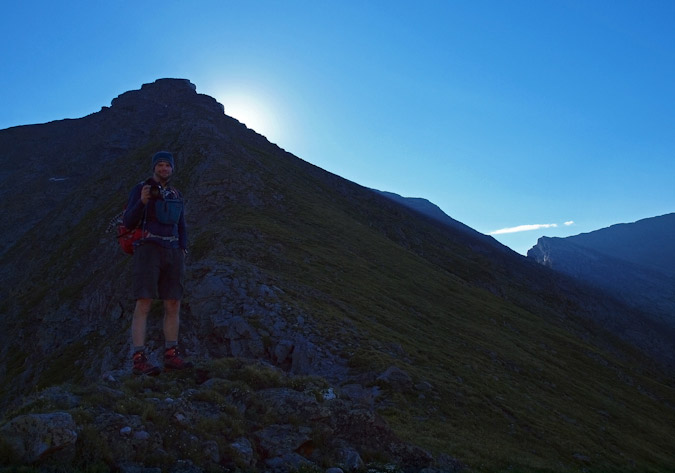
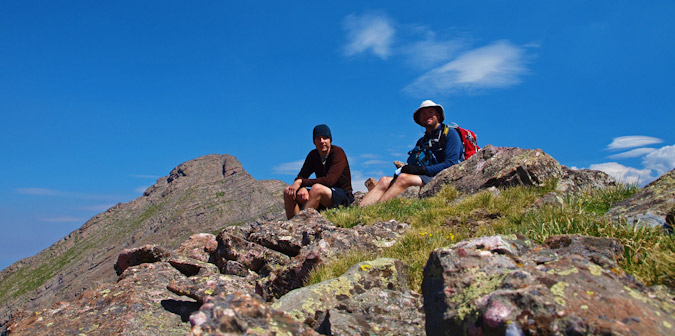
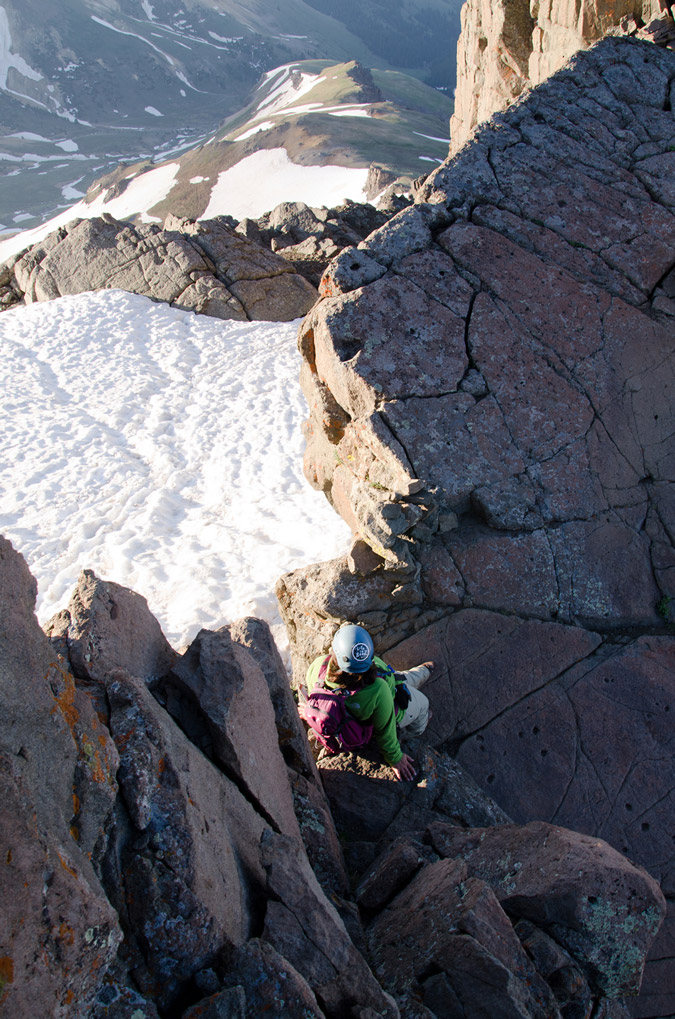
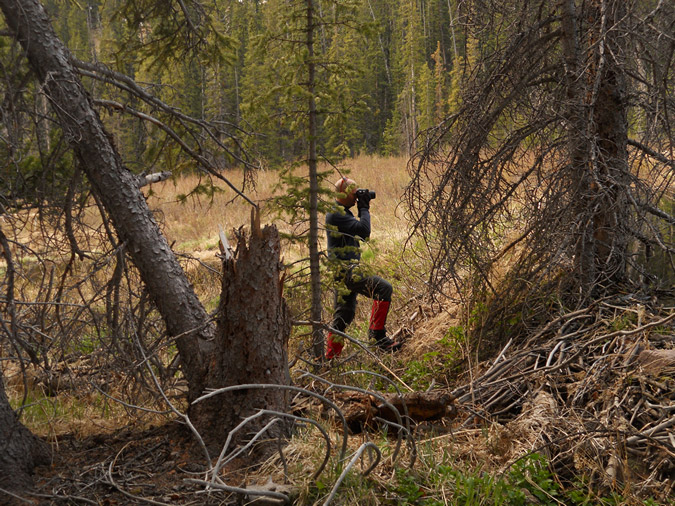
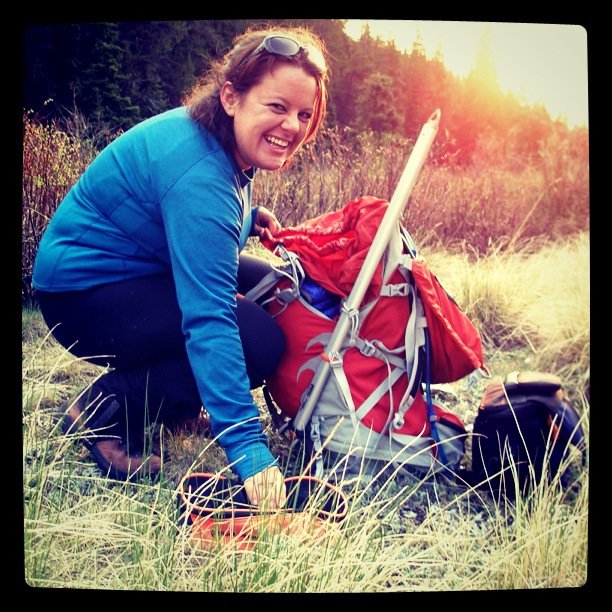
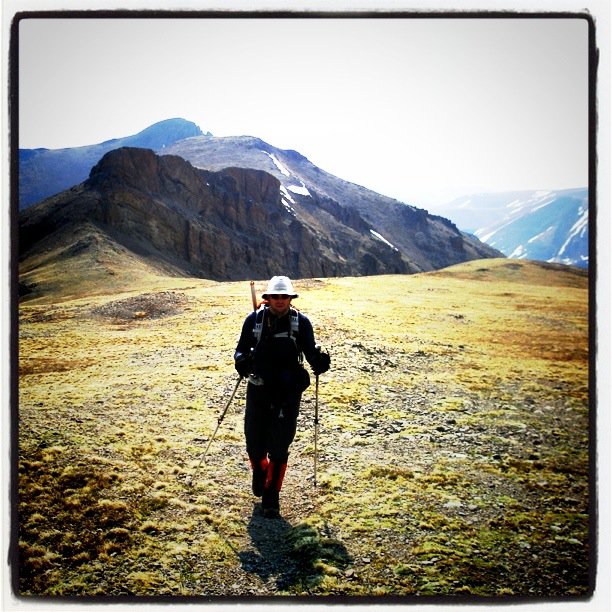
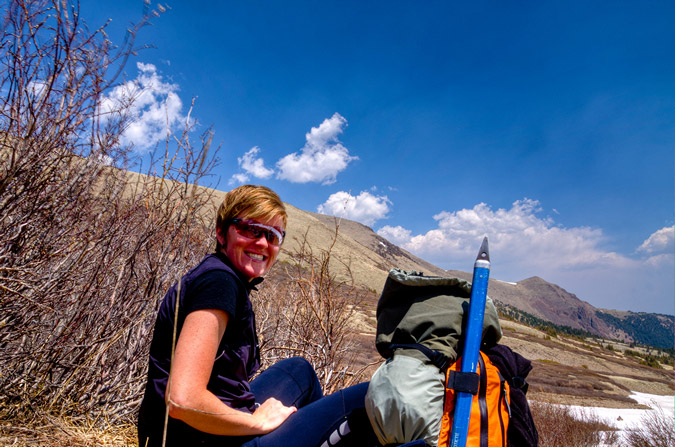
Ethan was a superb photography this day - he captured many many photos of me throughout the journey, all of which I really enjoyed his perspective and composition on.
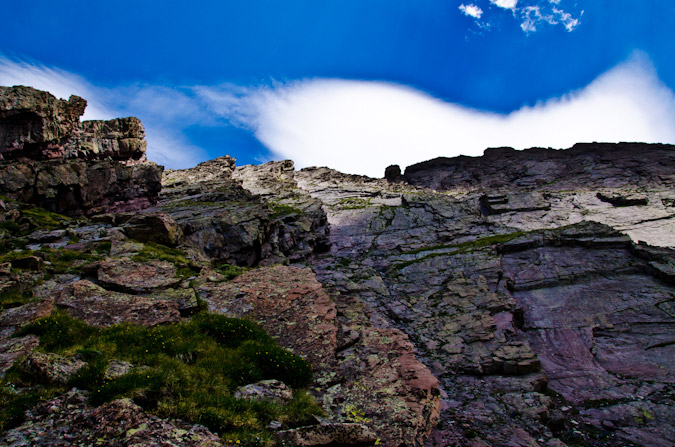
We finally gained the ridge!
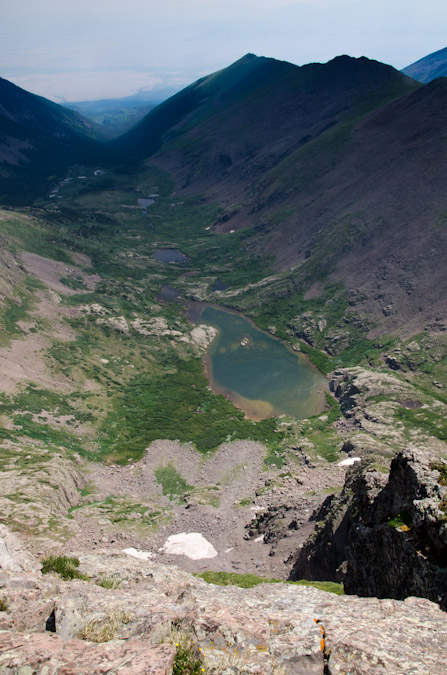
We were able to look down at South Crestone Lake and some 'miniture' Crestone Needle looking mountains.
As we continued up, Crestone Peak came into view, and eventually Crestone Needle as well.

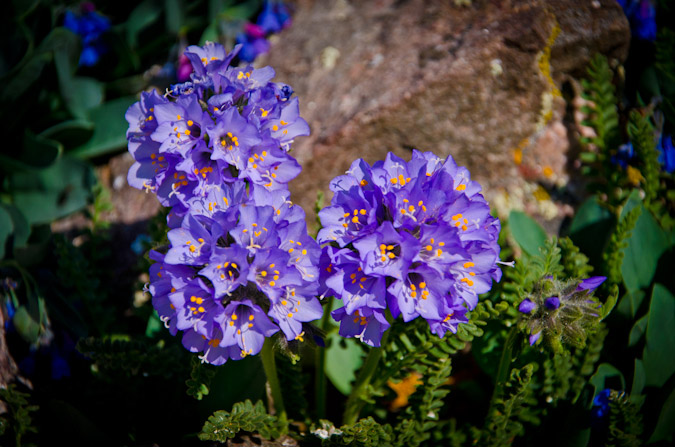
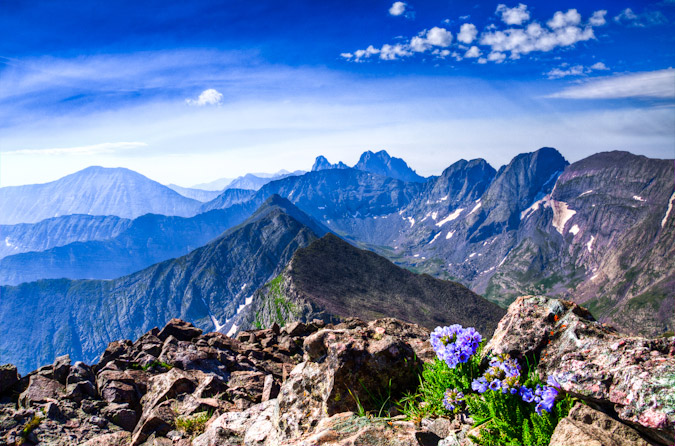
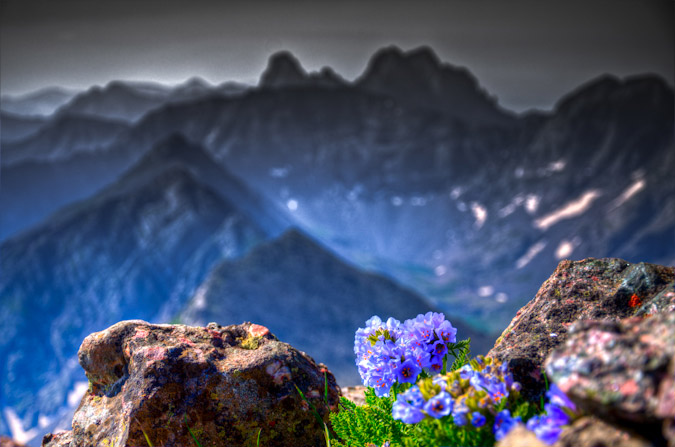
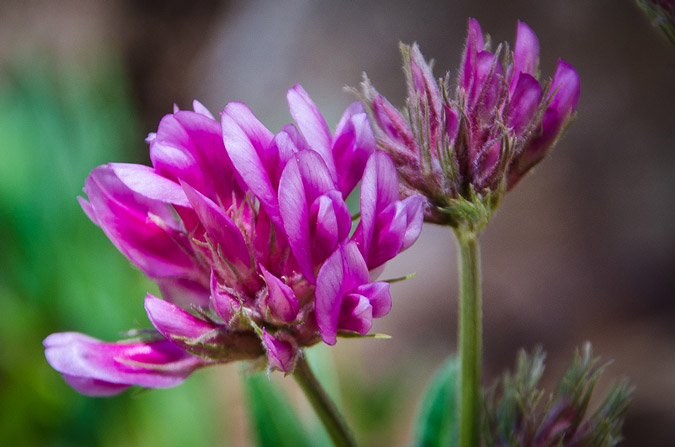
The wildflowers on Mount Adams were amazing.
|
|
|
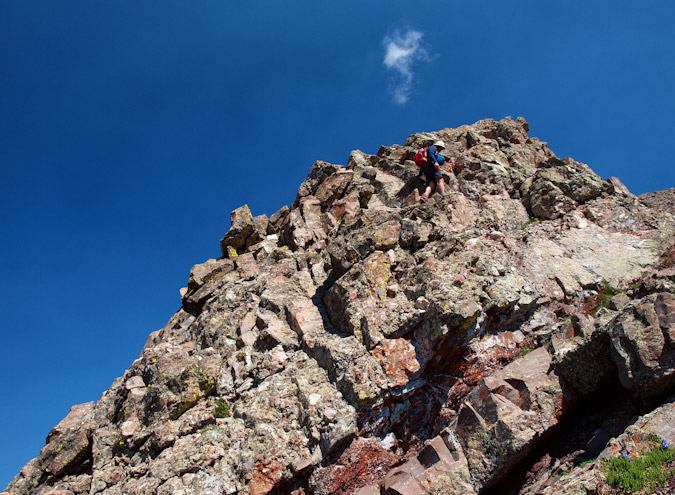
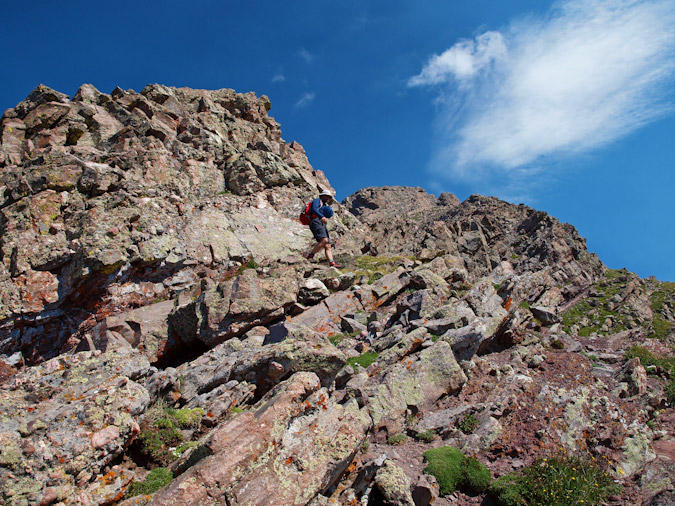
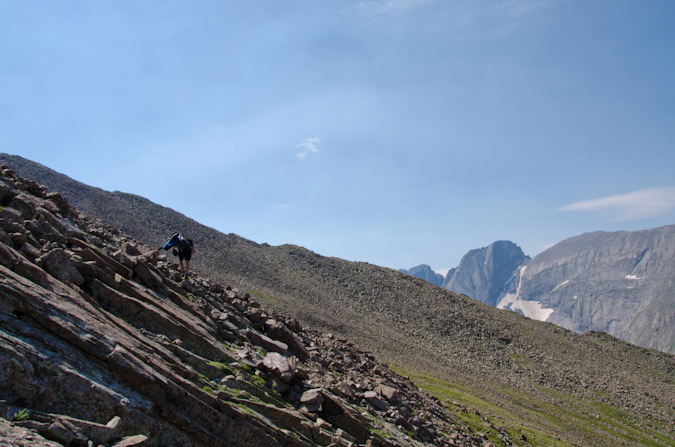
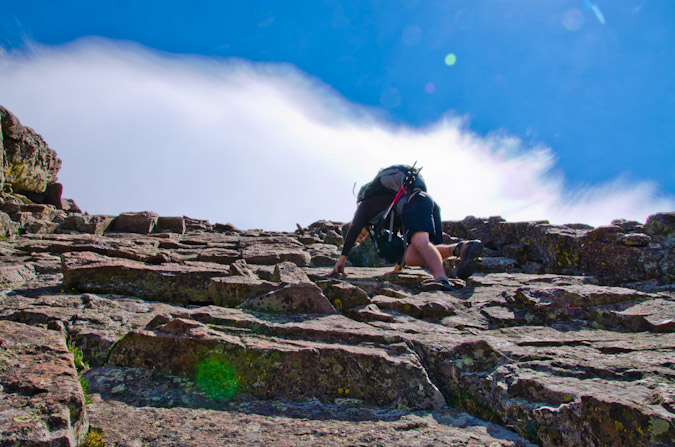
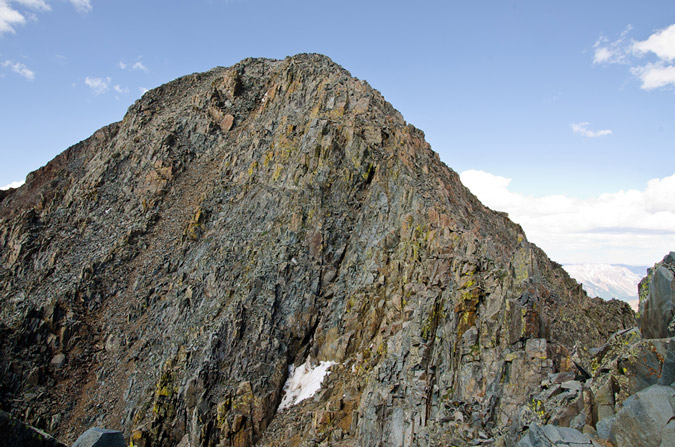
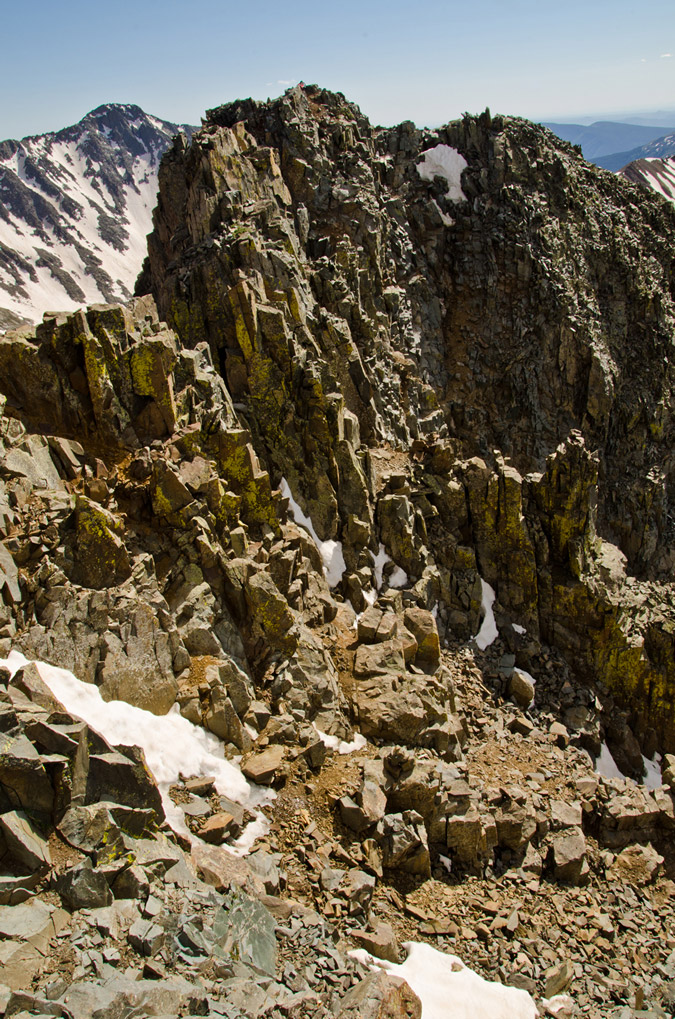
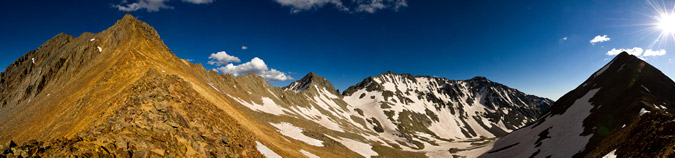
And the route up the west ridge was fabulous. In some sections, it really reminded me of Crestone Needle, just not as steep. The same type of rocks made for some enjoyable route-finding. I shall hereby dub Mount Adams, "Baby Crestone Needle." The similarities in the rock were remarkable.
The clouds continued to look awesome, and so I was able to get this photo of Ethan gaining the ridge higher up.
I was also able to get a really nice panoramic photo of Ethan gaining the ridge with the nutty clouds behind him. Click to see a larger version.

Check out this cloud - it looks like its going to eat my soul - thanks Ethan!
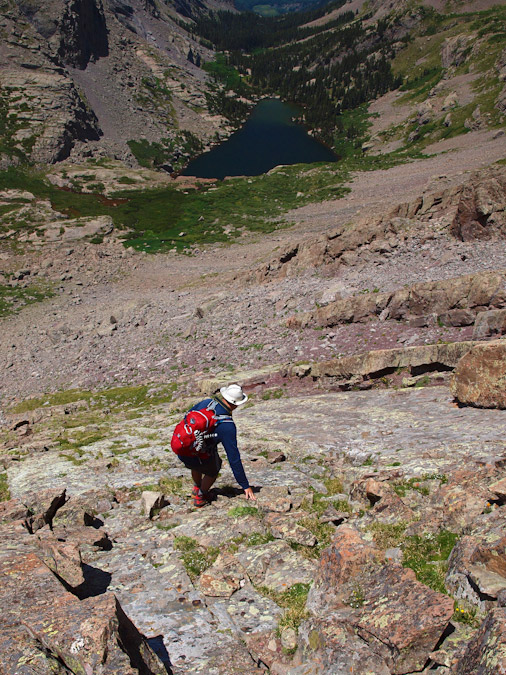
We stopped frequently to shoot photos. This is an all too familiar scene - me shooting photos of flowers. Thanks for catching me in the act, Ethan!
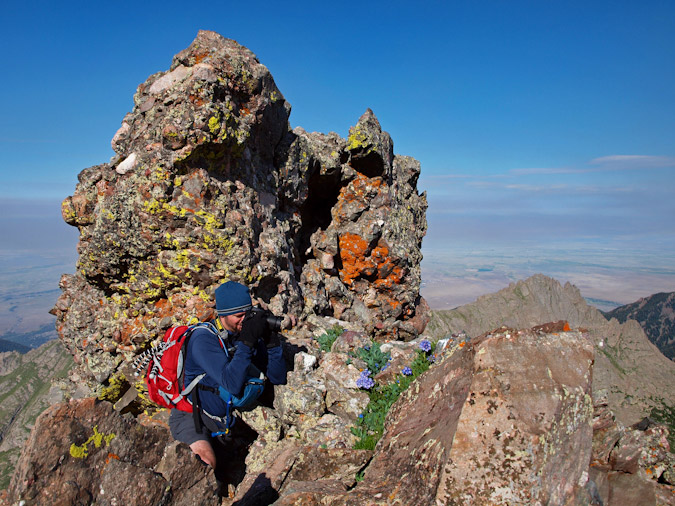
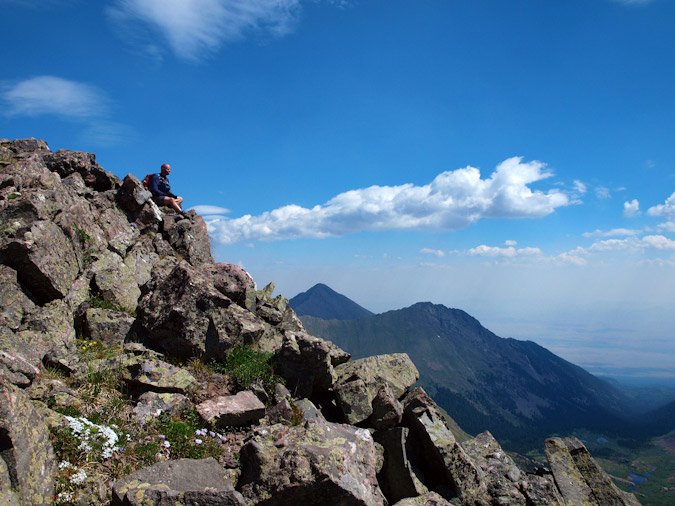
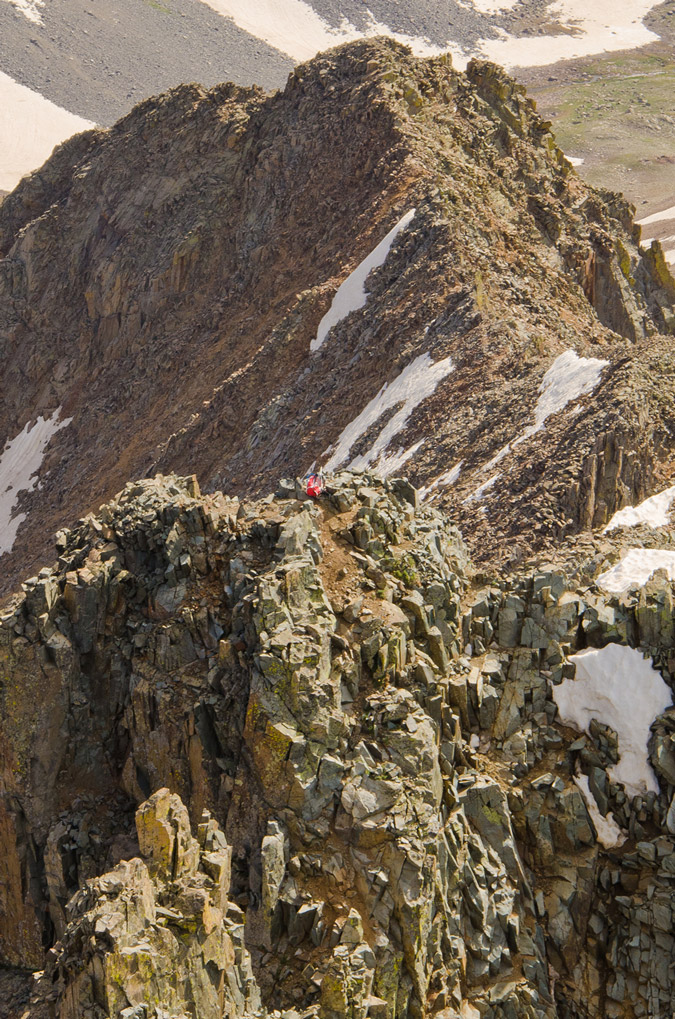
We kept on truckin' up to the summit block, which proved to have some enjoyable class 3 options if one so chose, so we did.
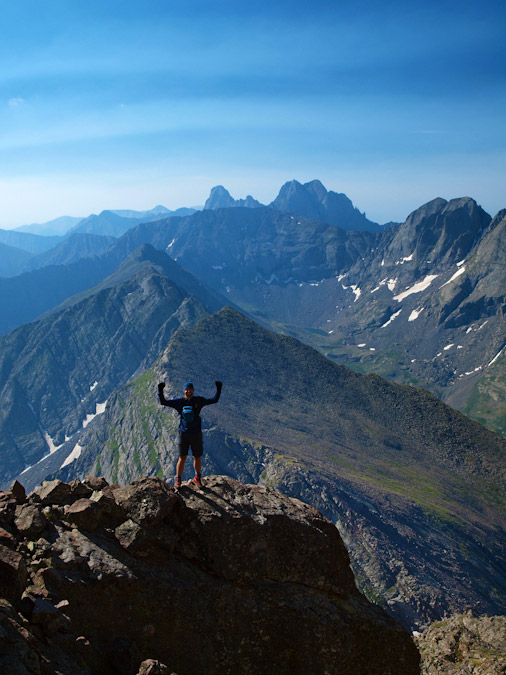
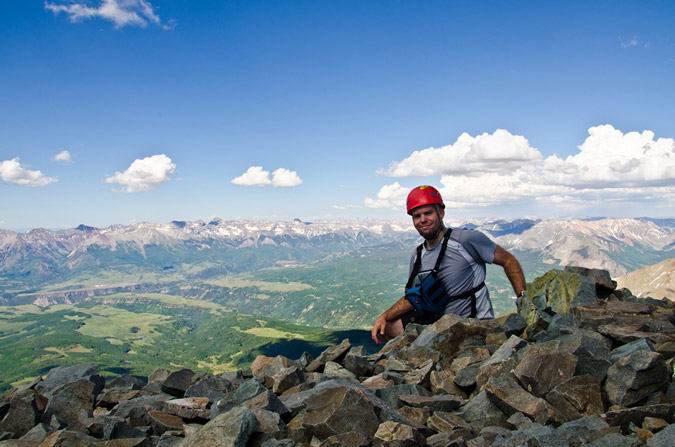
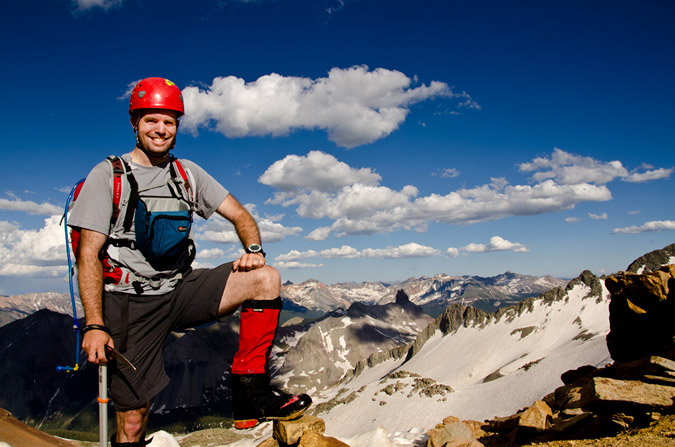
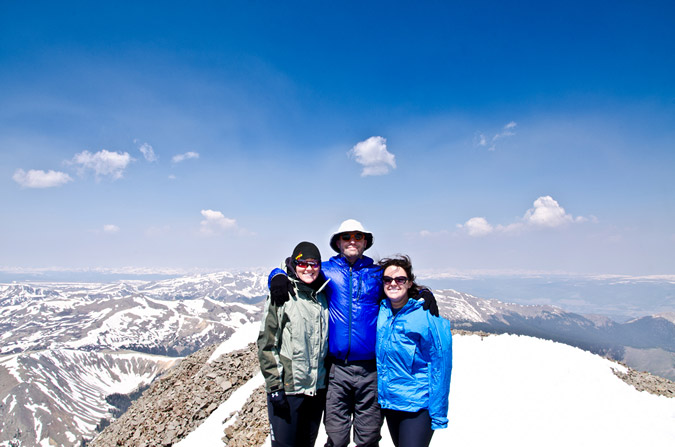
Finally, we reached the summit and took a congratulatory summit shot using Ethan's camera on self-timer.
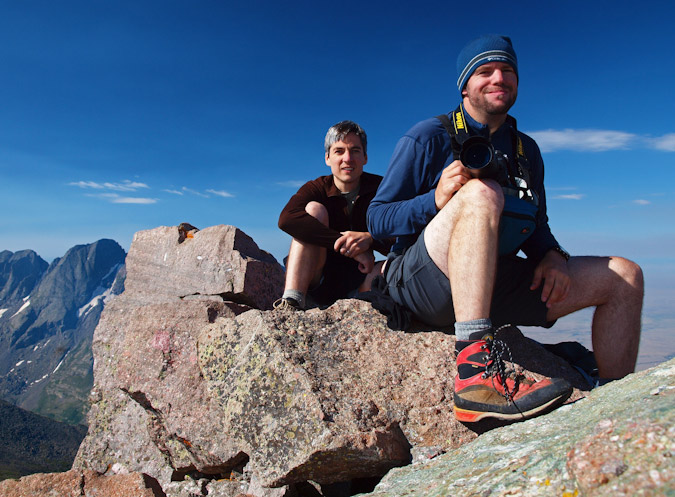
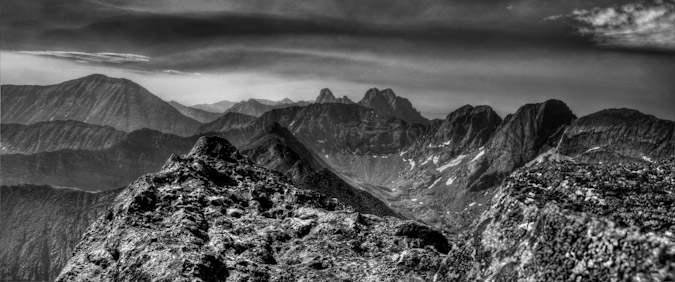
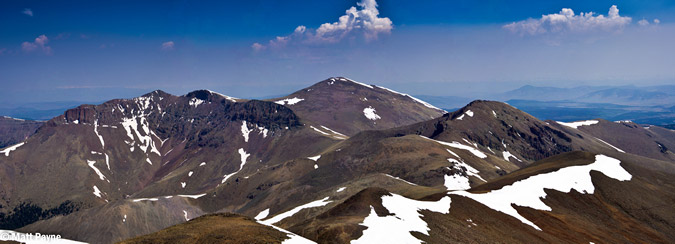
Mount Adams was a great climb, for sure. The summit was superb, with excellent views in all directions.
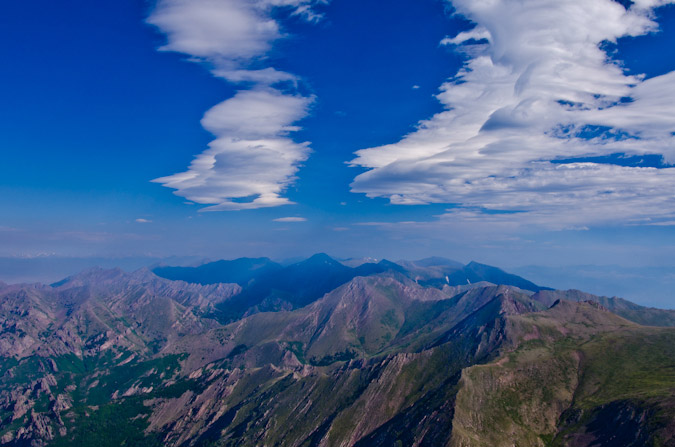
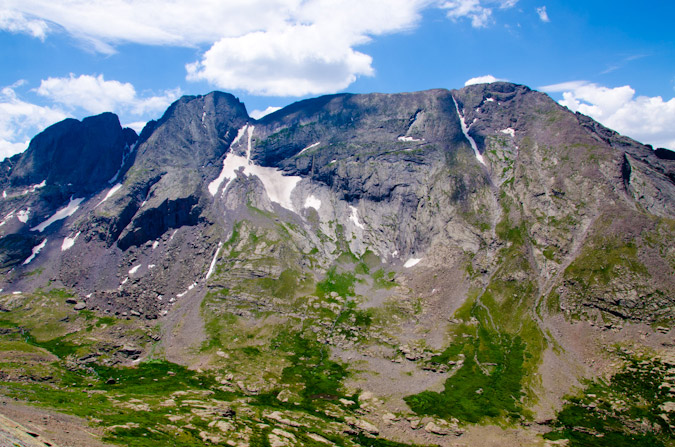
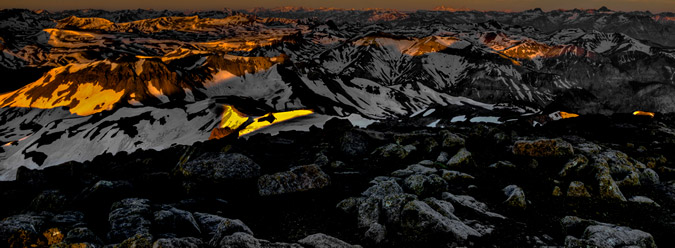
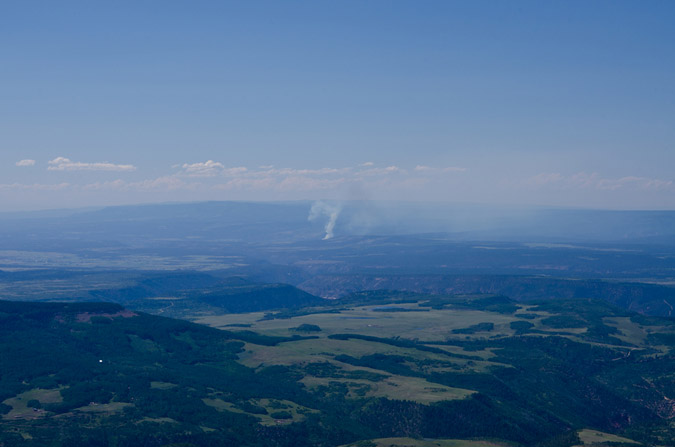
We also had some insane smoke appear out of nowhere in the valleys around us, and before we knew it, the smoke was gone. It was truly odd. It was almost as if the valley below was on fire and then put out before we knew it. A look to the north revealed some crazy looking clouds over Rito Alto, Venable and Comanche.
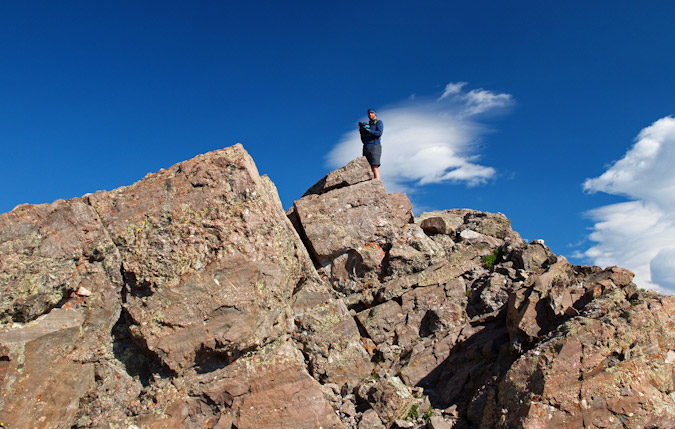
We also found an awesome spot with a great vantage point for a celebration pose. We took advantage and marvelled at the sheer depth below us from where we stood.
|
|
|

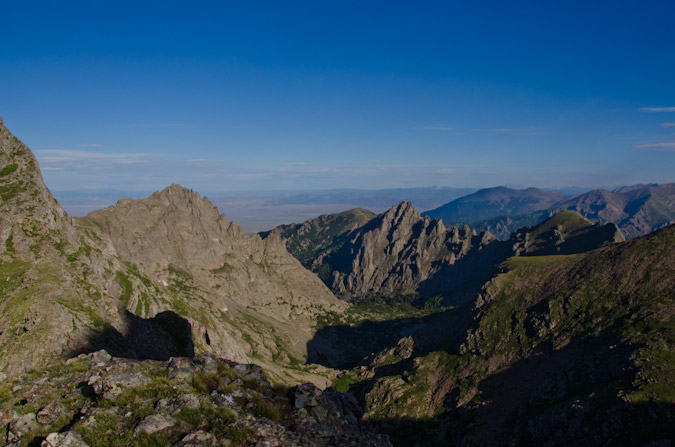
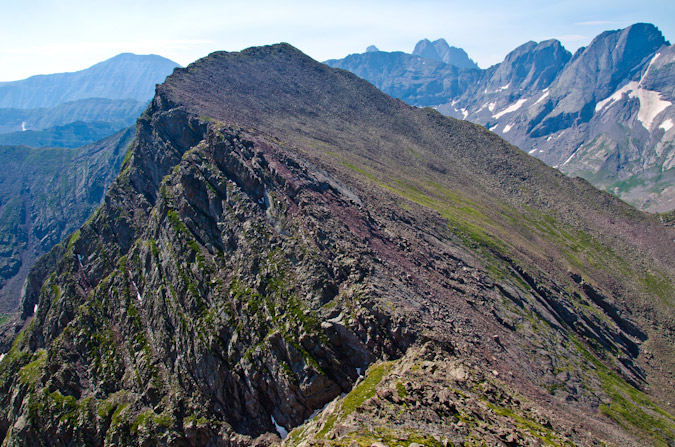
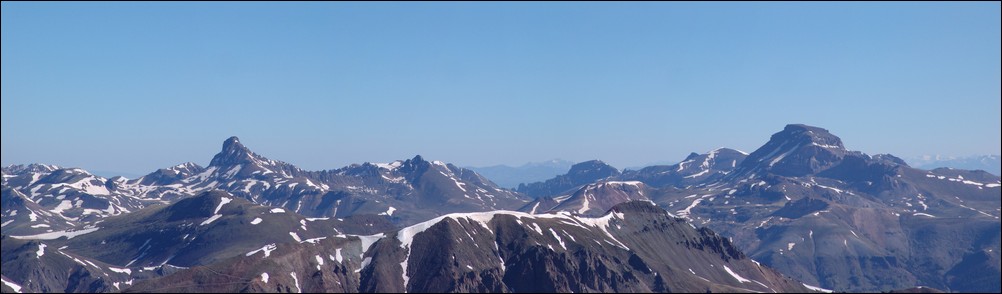
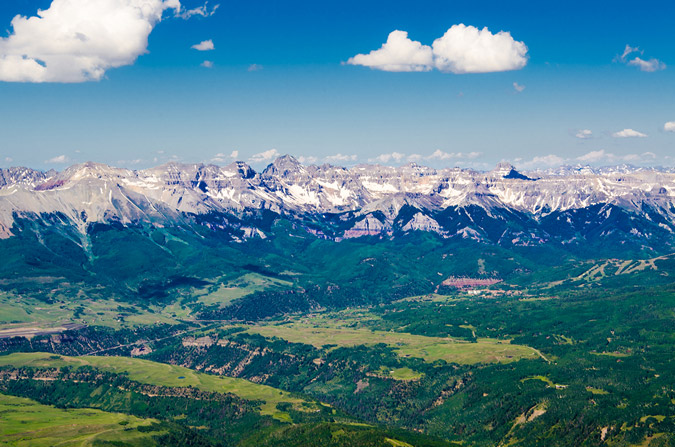
Naturally, my focus was on Crestone Needle and Crestone Peak, two of my favorite mountains in Colorado. They are so distinguishable and quite honestly some of the freakishly looking peaks there are in Colorado. In fact, Crestone Needle ranks just 4th on the "Most Impressive" list (for ranked peaks) that is based on the work of David Metzler and the ORS/RORS scales.
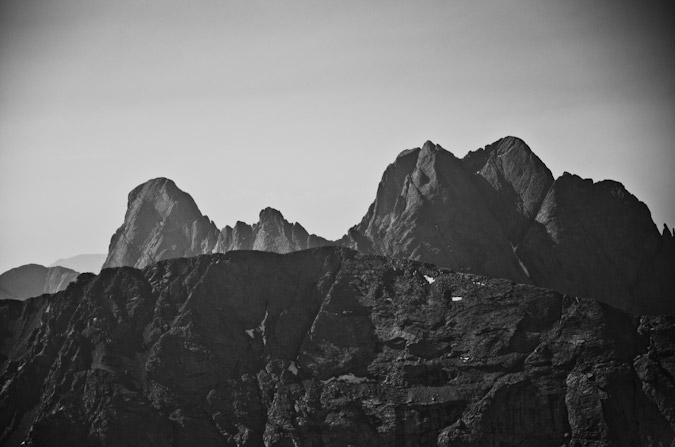
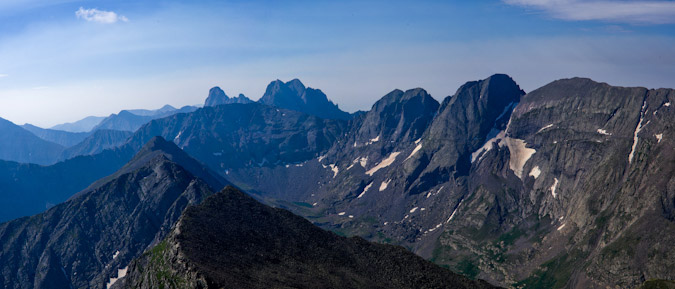
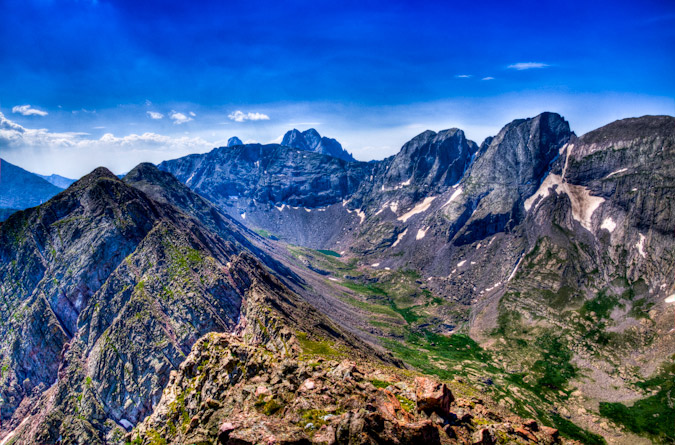
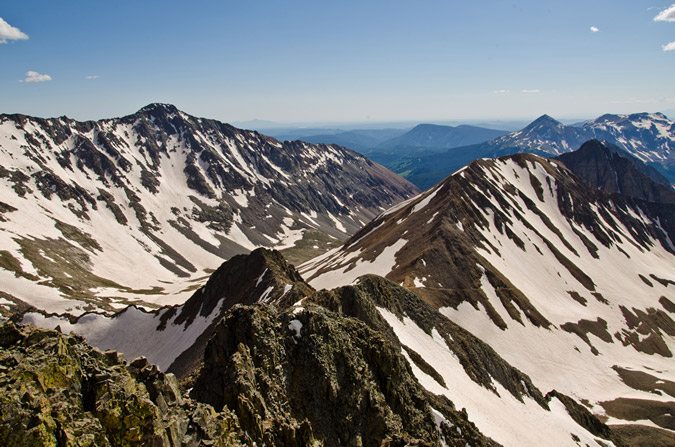
A view to the east revealed Fluted Peak (far left), Horn Peak (left, in distance) and the Horn Lakes below. UN 13,580 (ranked 201) was directly south, with UN 13,541 and Obstruction Peak and Humboldt behind. Additionally, Crestone Needle and Crestone Peak stood out like sore thumbs with Columbia Point, Kit Carson Peak and Challenger Point all towering over the basin below.

A closer look at the 14ers of the area. Left to right - Crestone Needle, Crestone Peak, Columbia Point (13er, ranked 56th), Kit Carson Peak and Challenger Point.
Ethan was loving the views and the clouds.
And so was I...
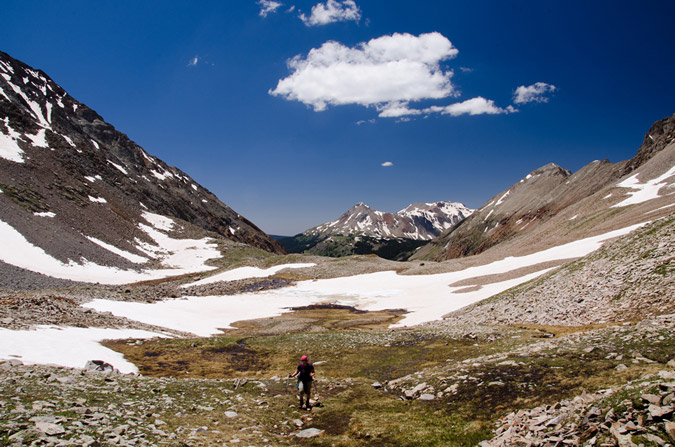
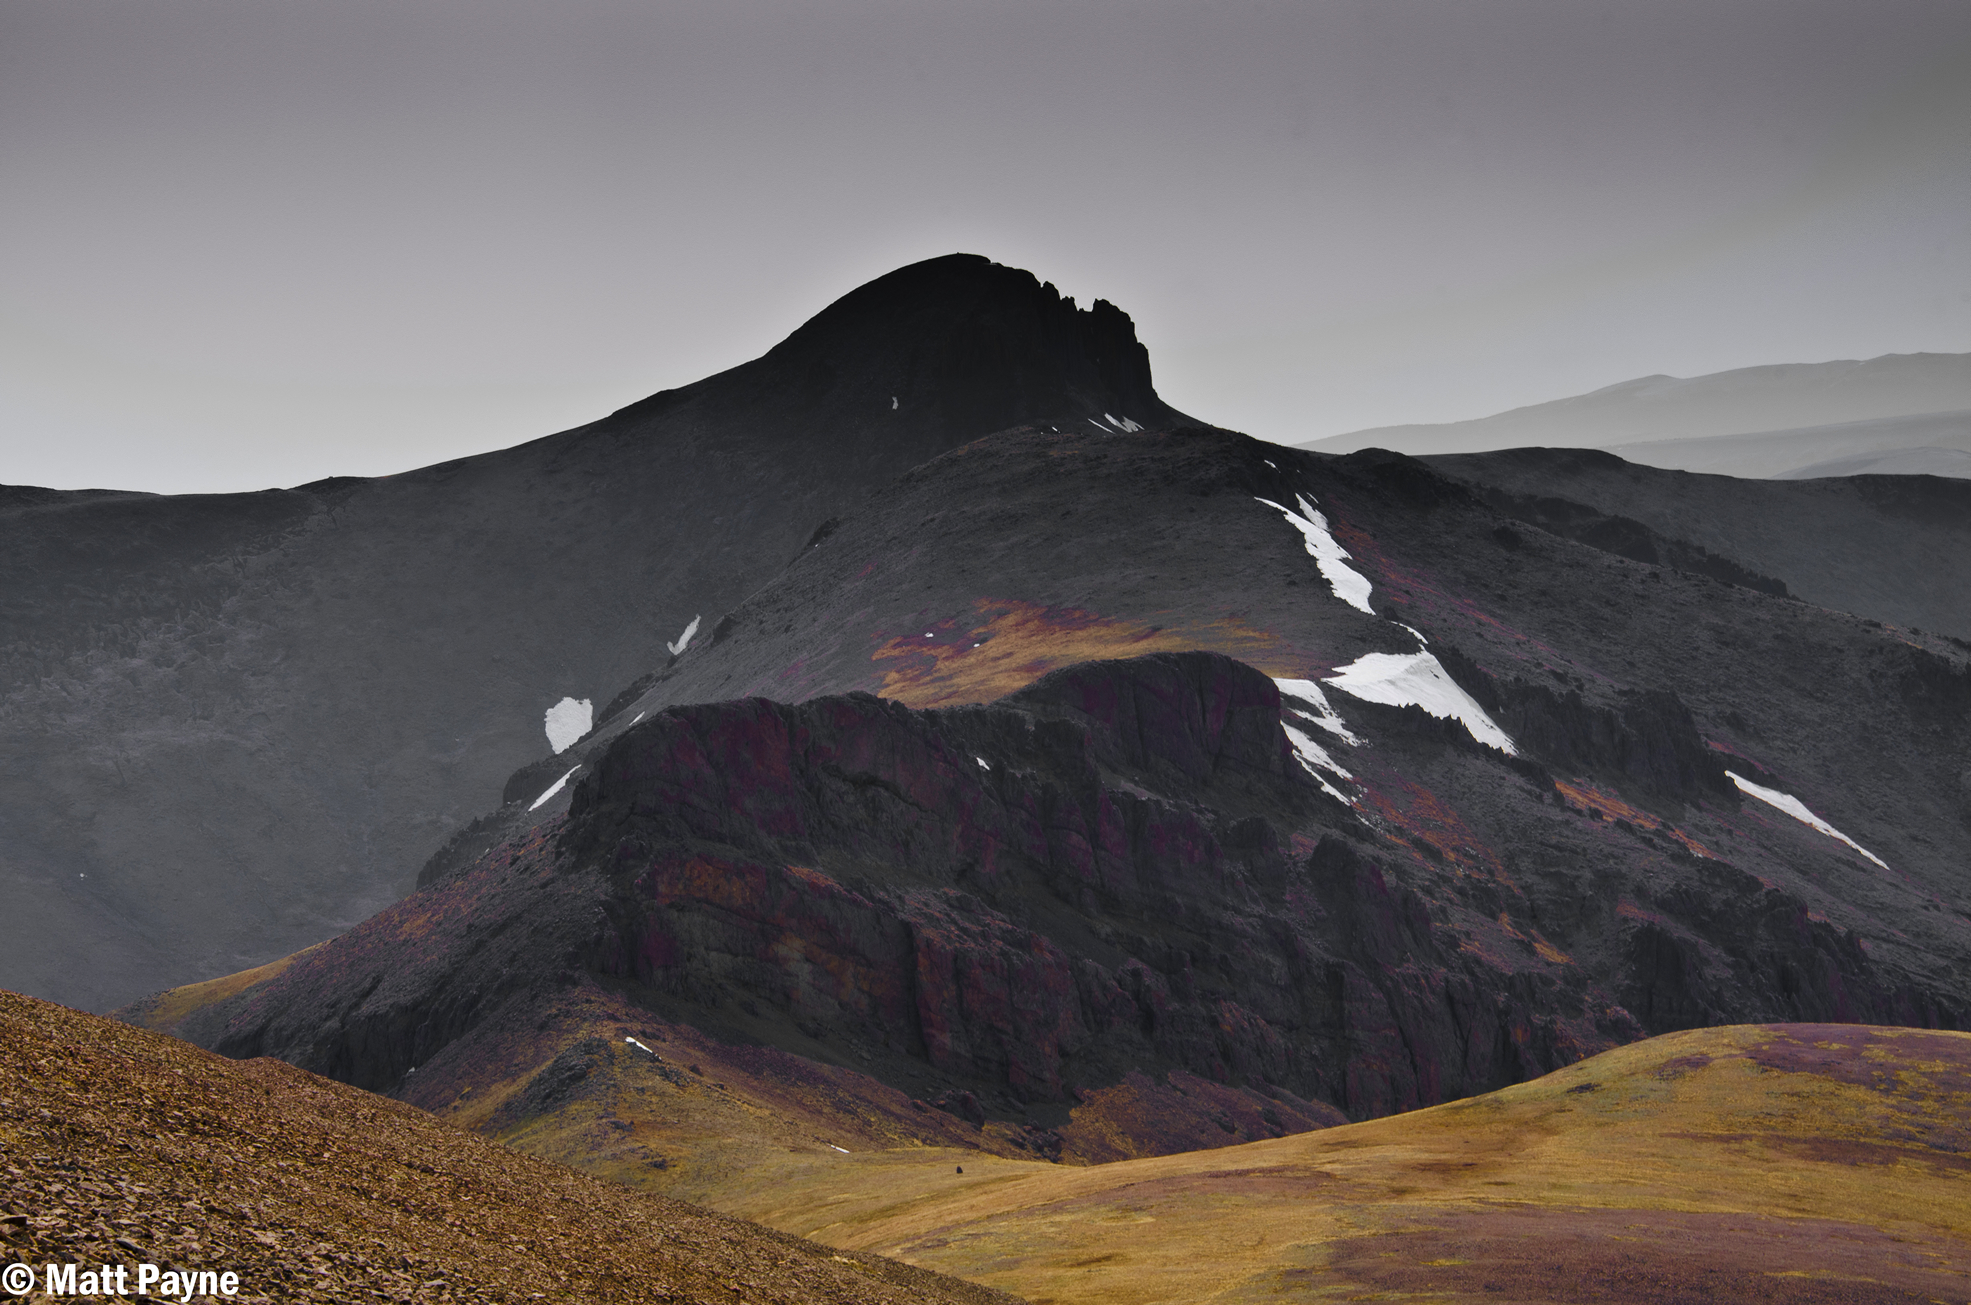
Alas - a perfect summit does not last forever, so we decided to head south towards UN 13,580 and beyond to see what we could accomplish. The dramatic nature of the cliffs to our left kept us on our toes and in amazement for quite a long distance.
|
|
|
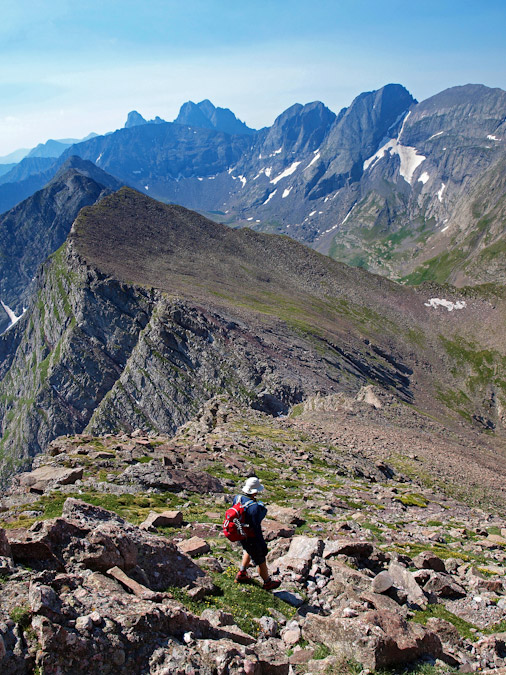
Also, the traverse over to 13,580 proved to offer some really fun challenges, including this class 3 manuever above a hugely exposed section.
But it also offered some fun boulder scrambling on very solid rock.
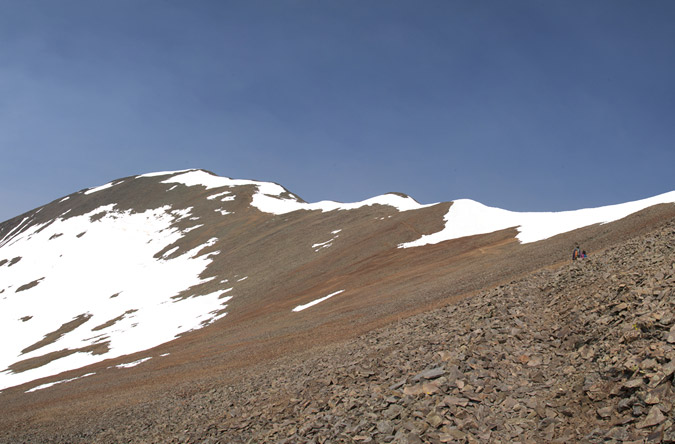
UN 13,580 was not too far from us, and the views kept us from moving too quickly.
The rock was all totally solid, but in places it was awkward walking on slanted slopes of what felt like giant fissures in the earth.
|
|
|

A look back at Mount Adams...
We finally reached the summit of UN 13,580 and enjoyed as what Gerry Roach describes on page 155 as "a startling view of Horn Lake." I don't disagree with Roach one bit on this detail, but what I do disagree with him on is that he describes UN 13,580 as a bi-centennial, meaning it is in the top 200 in Colorado ranked by elevation. According to my list, it is ranked 201 and just shy of that mark. When I built my database, I ranked mountains in the following order:
- By elevation
- By prominence
- By isolation
- By name
So, if two mountains had the same elevation and prominence, the mountain with more isolation is ranked higher. This seemed like the most fair way to rank mountains that had very similar characteristics. I am not sure how Roach or any others rank them.
Subsequently, according to my database, which is based almost entirely off of data compiled by John Kirk of Listsofjohn.com, Clark Peak, a 13er in the Elk Range, is also sitting at 13,580 ft. Additionally, it has the exact same prominence as UN 13,580, making them tied in most regards. The mountain with more isolation (Clark Peak) gets ranked higher.
Sorry to get on that soap-box... here's a self-timer of Ethan and I on UN 13,580.
And Ethan with the Crestones in the background...

With me enjoying the "startling views."
It was really cool signing the summit register for this rarely climbed peak. At the top of the register was Gerry and Jennifer Roach, followed later by John Kirk (of ListsofJohn fame), Susan Joy Paul (a regular on 14ers.com and a Facebook friend), and Doug Hatfield, another regular 14ers.com contributor who quoted on the summit register, "100/100 in Custer County," meaning, this was the last ranked peak in this county that he needed to finish. Quite an accomplishment!
Naturally, the Crestones just kept my gaze for much of our time resting on UN 13,580, so I decided to get some more HDR shots, as well as a non-HDR shot.

We decided to keep going along the ridge to see where it would take us. Much to our surprise, a lone goat crested the ridge to greet us below to the south.
"We're gonna climb that one now?"

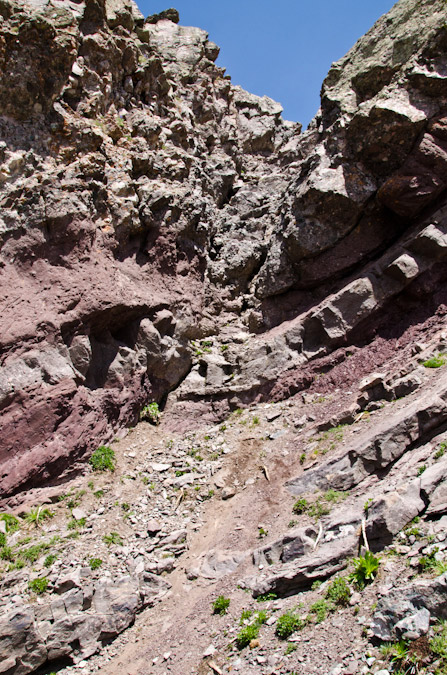
Unfortunately, the storm clouds starting building to the west, so we opted to bail at the first opportunity. Since there's no trails in this terrain, we had to do some heavy route-finding. This ended up being quite enjoyable and challenging, and afforded us with plenty of class 4 down-climbing opportunities.
We found a crazy gully just below the first set of slabs we had down-climbed, and decided that the terrain on the other side of this mini-ridge below the gully looked much better as an exit. Unfortunately, the gully was loose and chossy, with eroded garbage and hardened mud. It was a real nightmare to downclimb. I went first, and faced-in for many sections. I kicked down tons of loose debris and tested every hold. It was quite a mess. Once I was down, I yelled up to Ethan that I was clear. Ethan had a bit more trouble, mostly because he was schlepping his trekking poles on his pack still (I opted to not bring any), and his camera bag was not of the LowePro Toploader variety that I have grown to love. His bag got into his way and he had to stop and re-pack the whole thing into his main pack. Almost down, Ethan had a few more moves left. He faced in and placed all of his weight on his feet, which were being held by what appeared to be a very solid and large boulder. Ethan shifted his weight to another rock, and as he did, the rock he was just standing on crumbled and disintegrated, causing huge blocks to go down the rest of the gully and down the mountain. Ethan was quite lucky. Here's some views of the nasty gully:
|
|
|
After the lame gully, we were greeted by a series of steep ledges that had interesting holds, probably rated at class 3 or 4.
A look back up the ledges:
And over to Kit Carson and Challenger...
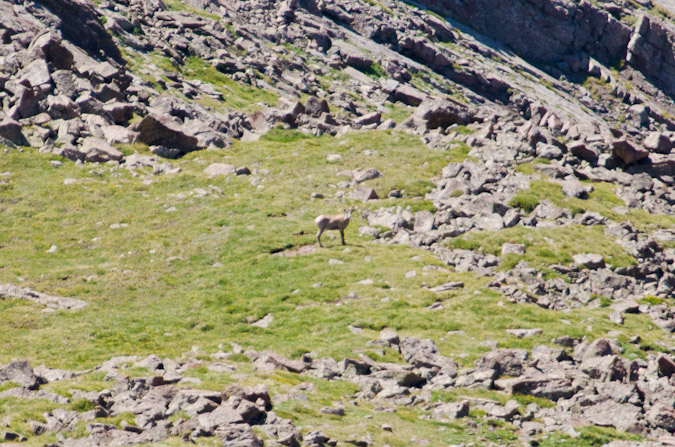
We descended this section pretty quickly, having to shift directions a few times due to the bands of ledges terminating a few times. I rested a few minutes at the base of the boulder field we came down and found a new friend.
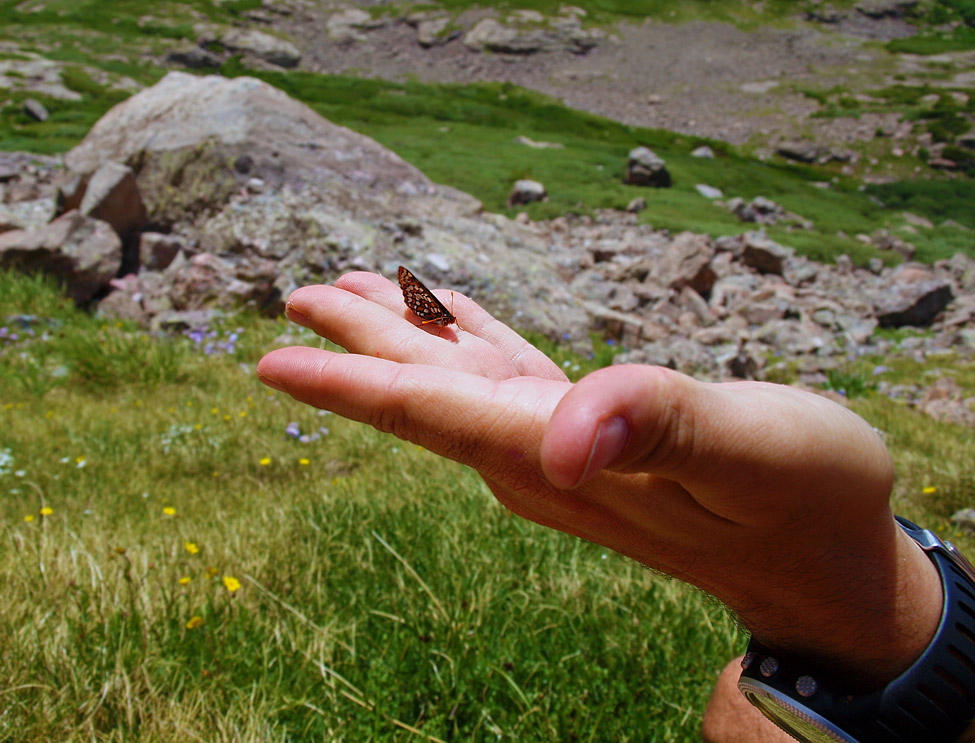
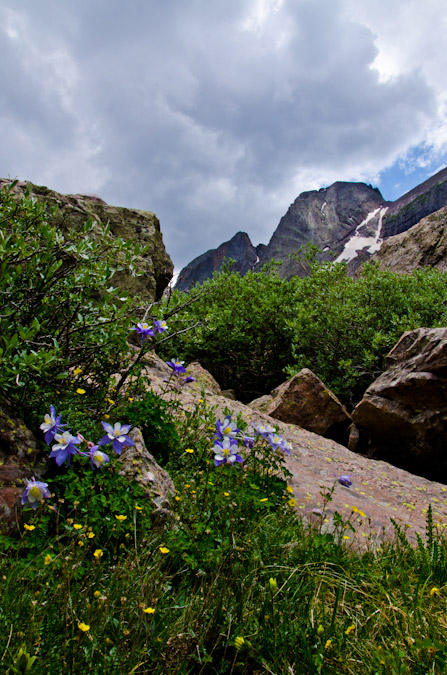
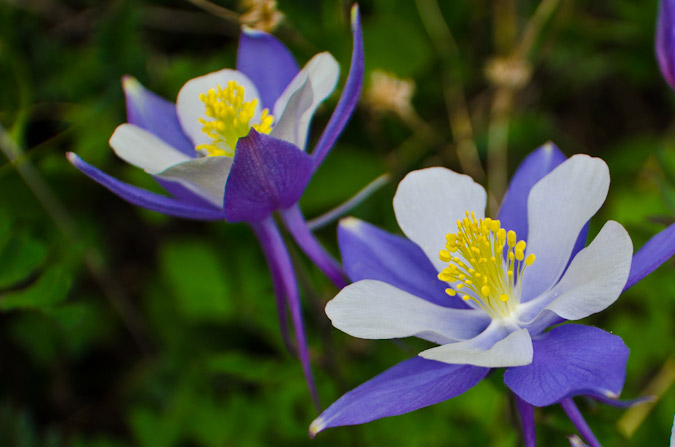
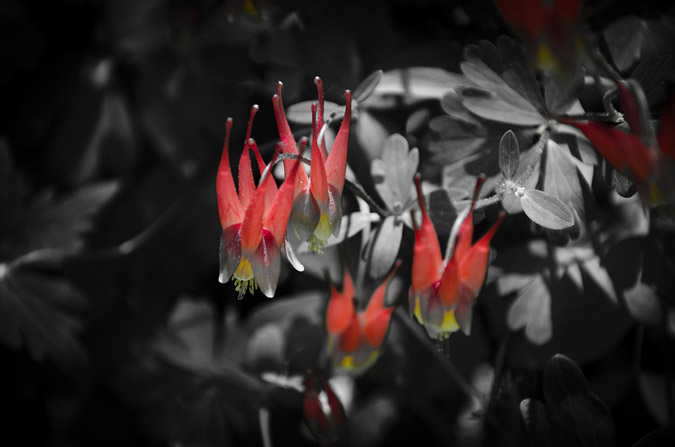
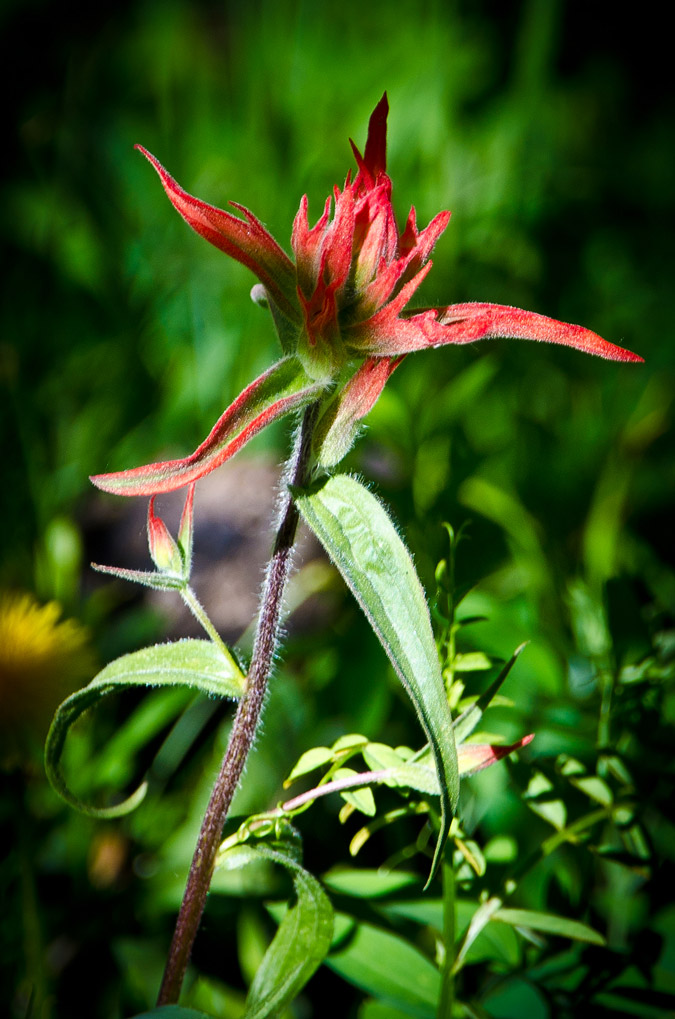
The columbine flowers were really nice too!
Another look back up the insanity we down-climbed...
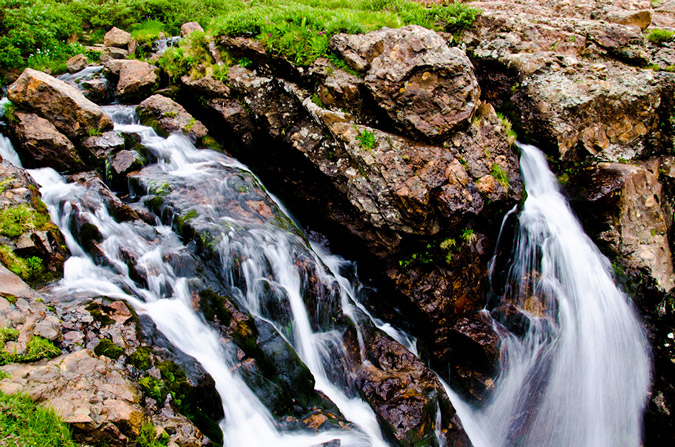
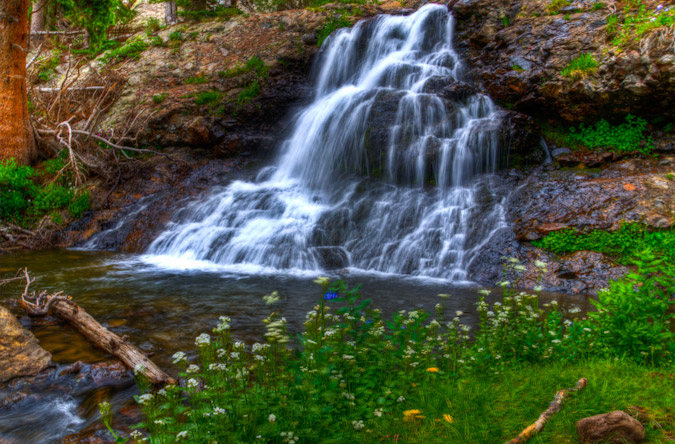
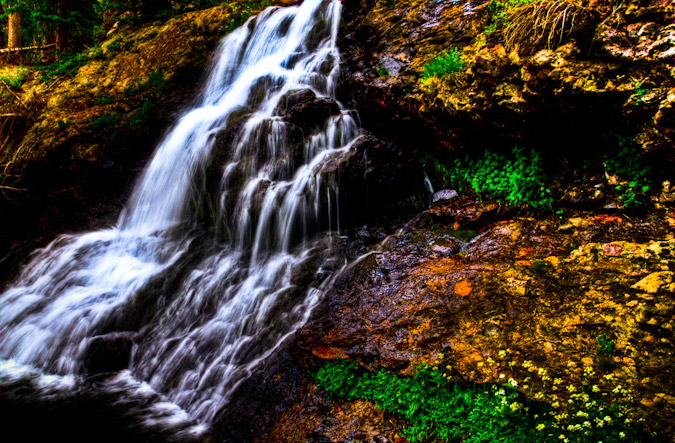
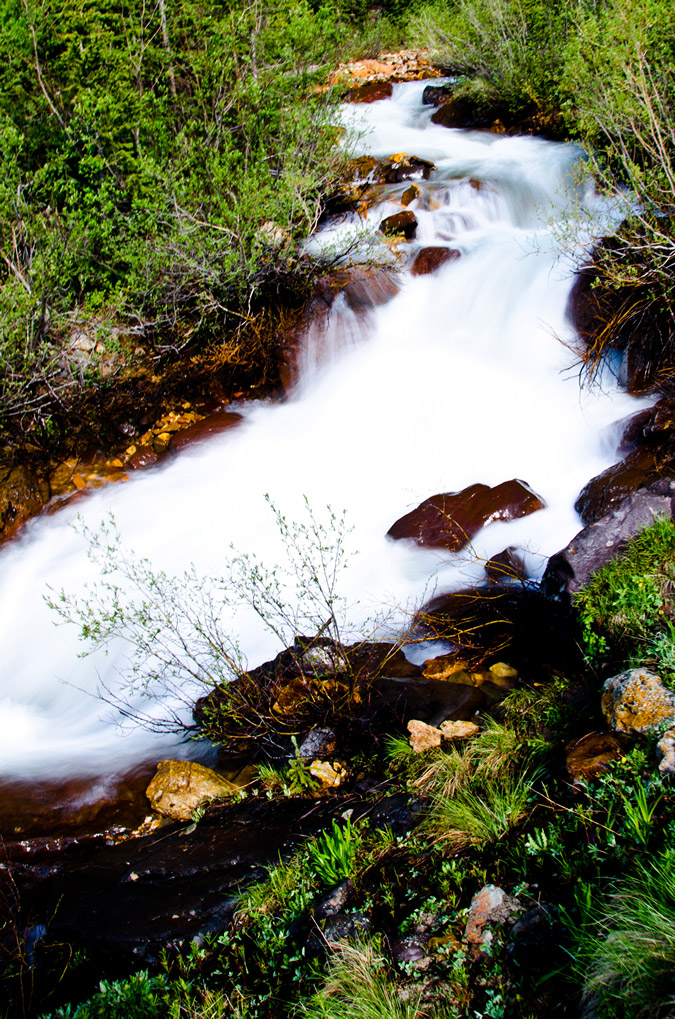
We re-joined the trail that leads up to Challenger Point and headed towards the waterfalls above Willow Lake.
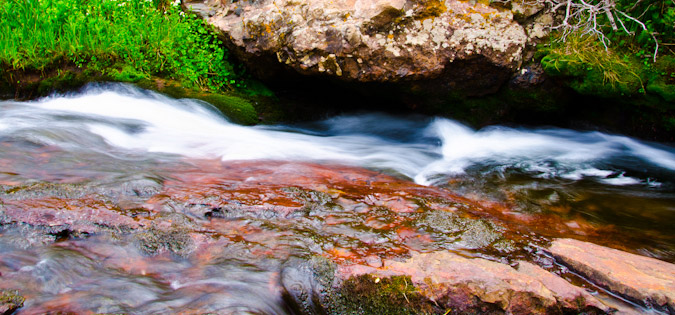
Which were quite amazing!

Finally, we made it back around and to the lake in short order.

When I was here in 2009, I took a panoramic photo series from the lake, which included the waterfall and a really interesting rock in the lake. I always regretted that photo because it cut the top off of Challenger Point. Not this time!
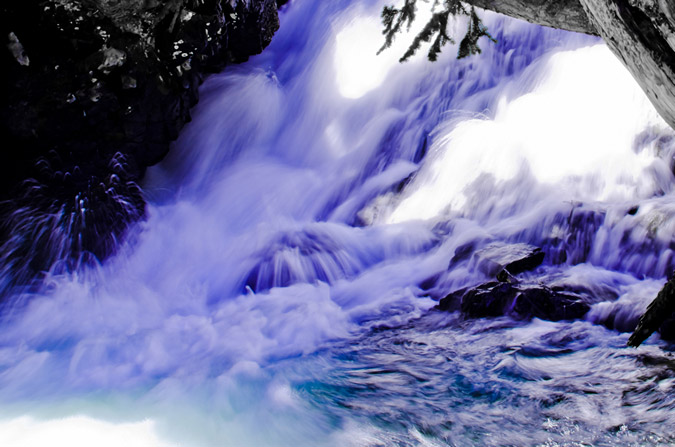
Also, we stopped below the lake to get some amazing shots of the lower waterfall near the trail.
The hike out was pretty uneventful after the waterfalls, except of course for the insane amount of switchbacks on the lower trail. We made it back to the car at 4 PM on the nose, just 14 hours after we started...
|
|
|
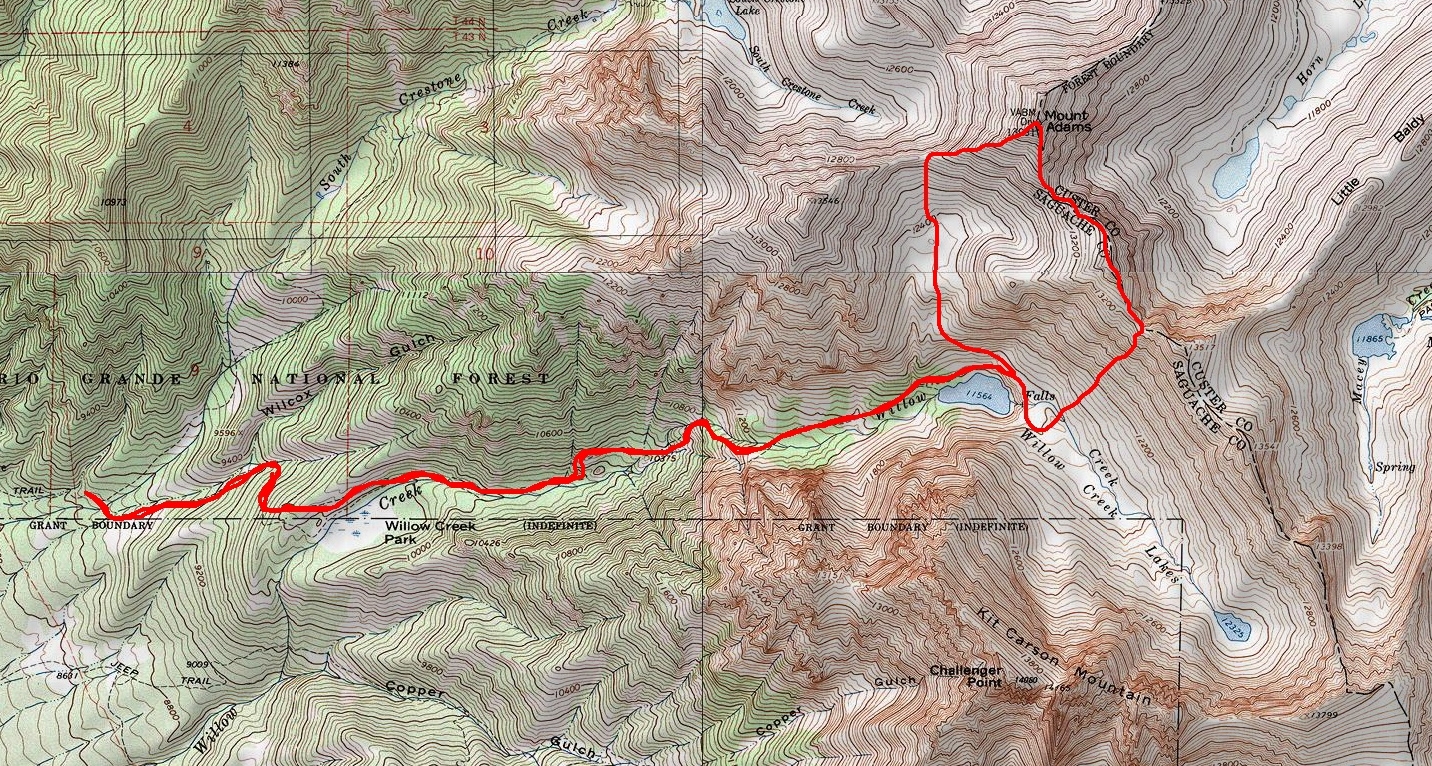
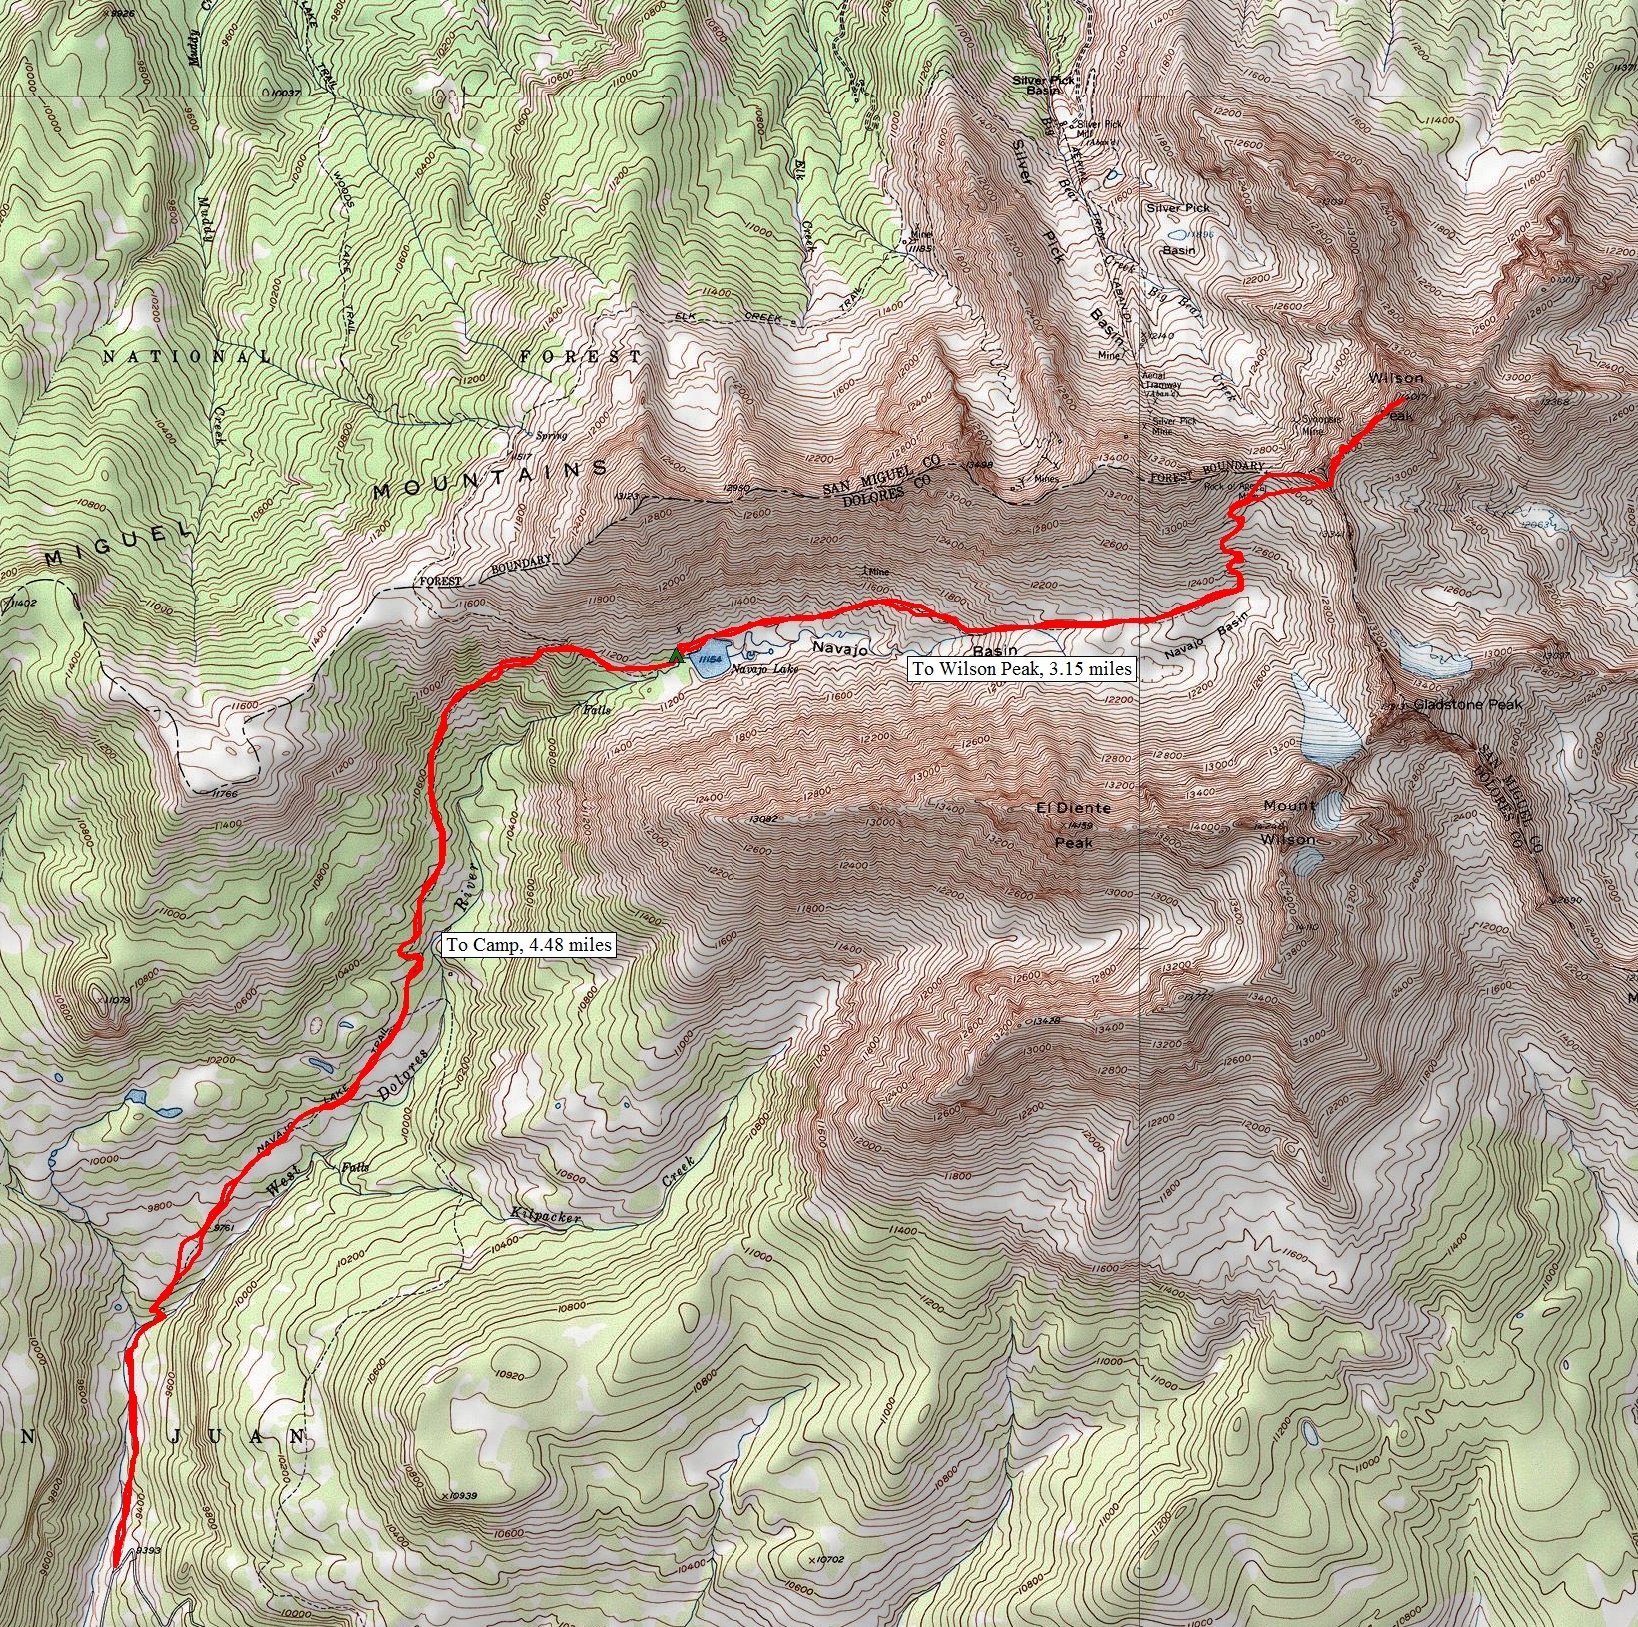
Here's a look at the map, showing our route and elevation profile. Feel free to click on each to see larger versions.

As always, if you liked this report, please feel free to follow 100summits on Twitter or Facebook! Also, if you're planning on doing any online shopping and if you enjoyed the content, please help keep the site going by using the links on this page to help fund the site. And last but not least, if you are interested in purchasing photography from me, please take a moment to read this page for more details. Thanks for stopping by!
Sunrise from 14,015 feet: Wetterhorn Peak
The adventure of my July 4th weekend for 2011 just wouldn't end on its own. After spending the morning in Telluride sulking about our partial defeat in Navajo Basin, Regina and I decided to drive back to Colorado Springs and lick our wounds. As we drove closer and closer to Blue Mesa Reservoir, I got a wild idea in my brain. Since both Regina and I still had three days off for climbing, I figured that it would be a total shame to waste that time off and gas money on only one climb up Wilson Peak. Even though we opted to not do El Diente and Mount Wilson, I still felt that we had more gas left in the tank, so to speak, so... I suggested to Regina that we head to Lake City and climb Wetterhorn Peak instead of driving home. At first Regina was more focused on a warm shower and a soft pillow, but it did not take long for the idea to set in and Regina enthusiastically agreed. Perhaps my tactic was not fair, since I knew that Wetterhorn Peak was Regina's favorite mountain of all time. Once Regina agreed, my mood increased dramatically and we set-off for Lake City and the Wetterhorn Peak Trailhead.
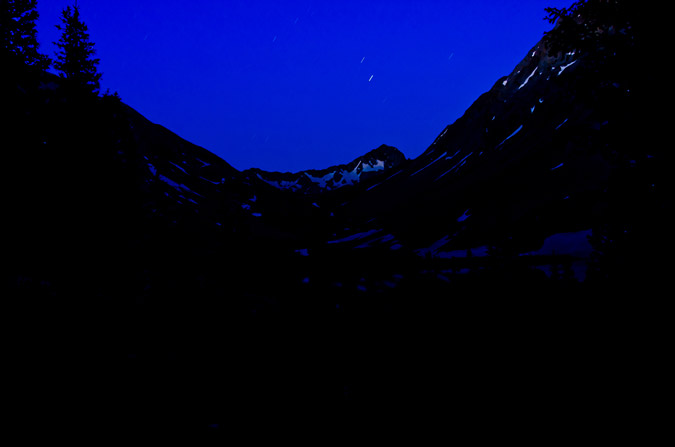
To make matters even more epic, I convinced Regina that we should start from camp at 2 AM so we could watch the sunrise from the summit. Climbing up the class 3 summit block of Wetterhorn in the dark sounded pretty fun too... We arrived at the trailhead and found a perfect campsite next to Matterhorn Creek. All night long, I had visions of a most epic sunrise over Uncompahgre Peak that looked something like this:
We quickly went over the game plan and Regina explained the route to me. Regina had been up this trail 3 times last year, so she knew all about it. The first time she went, she was pushed off before reaching the summit because of exhaustion. The second time, she was scared off the trail by actual mountain lions (true story), and the third time, she finally succeeded in reaching the top. She has never shut up about Wetterhorn in all of our trips together, so I figured that either she was exaggerating or that Wetterhorn was truly one of the best climbs in Colorado. 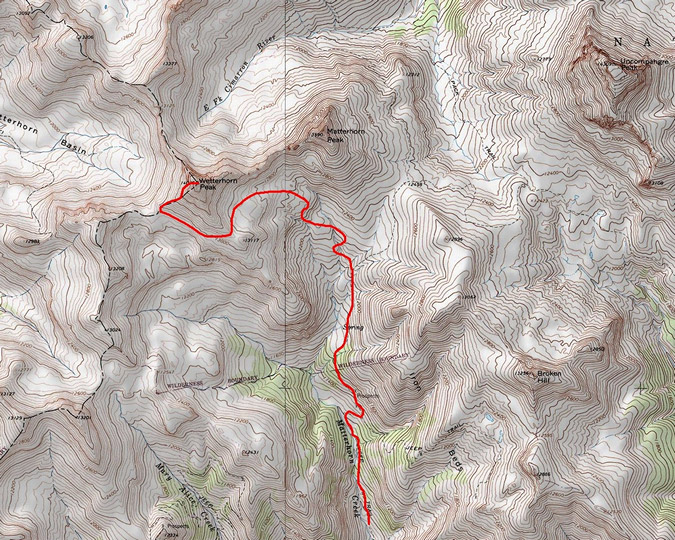
Our campsite was pretty awesome, and we were both thankful for our Mountain House meals that we had packed with us for Navajo Basin. 
We went to bed, set the alarm for 2 AM, which arrived pretty quickly. I felt totally rested though, so we equipped our packs and opted to not pack up our tent so that we could hopefully reach the summit by sunrise. The trail was really easy to follow in the dark, but I could not help but think about the mountain lions that Regina encountered last year. Would they totally thwart our efforts? I really hoped not, and focused on the task at hand. We finally reached the area where Regina had encoutered the mountain lions last year, and wouldn't you know it, we looked down the hill to catch the gaze of three sets of eyes illuminated by our headlamps. Crap! Fortunately, we were able to realize pretty quickly that they were just deer, so we continued on up past treeline. It was not until we reached the final ridge of Wetterhorn that there as any light whatsoever in any direction, save the star light.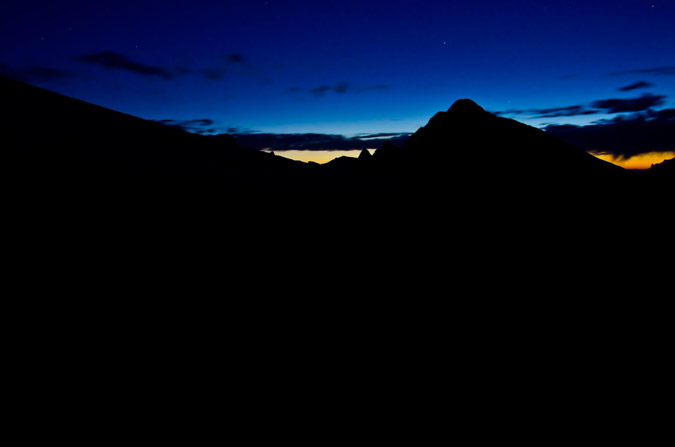
We continued on up Wetterhorn's ridge, enjoying the progressive light show that was starting to erupt to the east.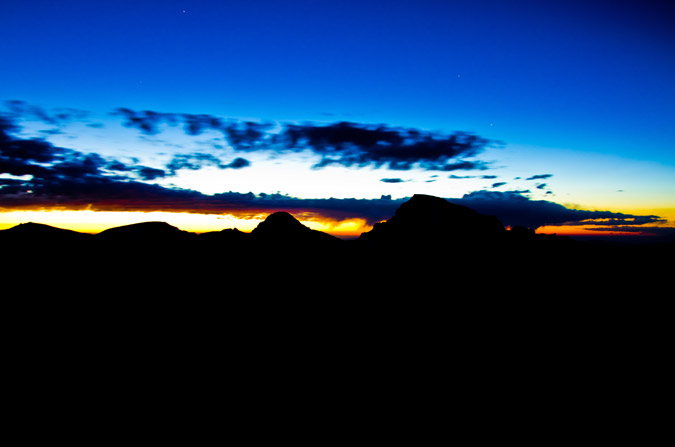
Just before we reached Wetterhorn's final section, the sun began to get closer and closer to emerging... would we make it to the top before the sunrise? I was getting nervous in anticipation.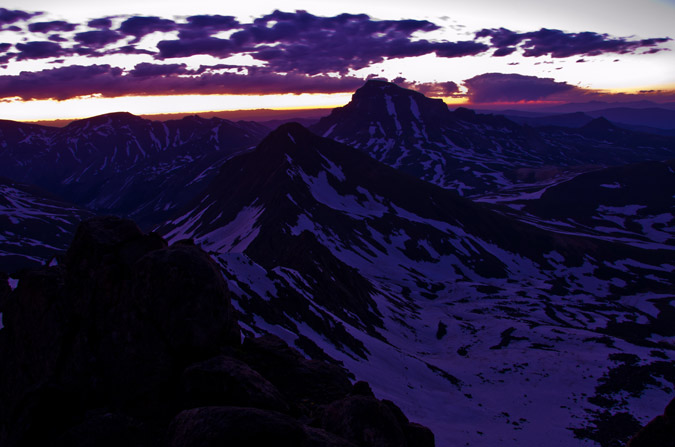
I was really having fun with my camera, firing off several bracketed shots for HDR, using rocks as a tripod and the self-timer to prevent camera shake. 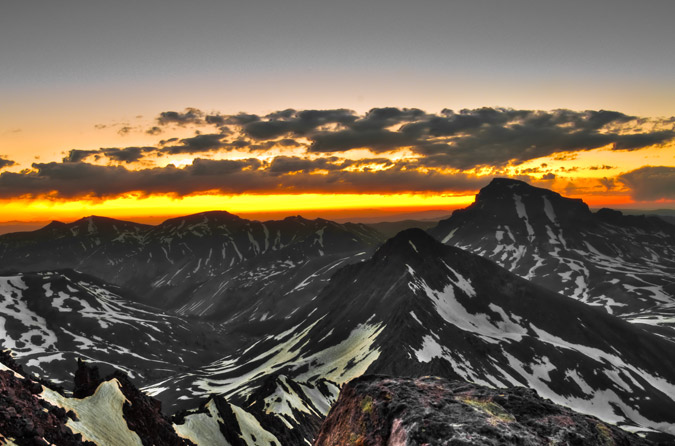
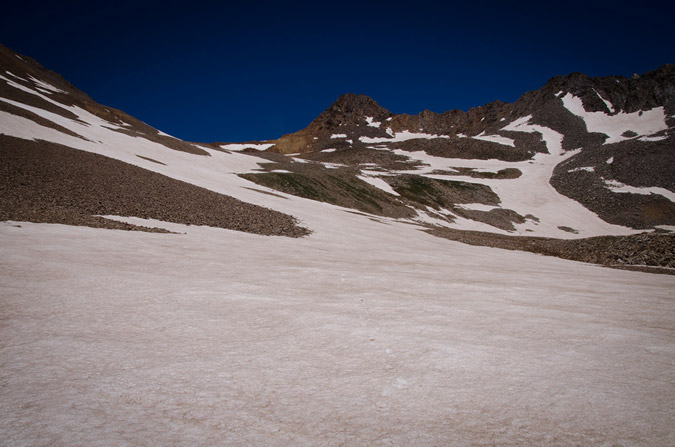
We finally reached a small snowfield that was in a small flat area before the top. The snowfield was at the base of the huge cliff walls of Wetterhorn and lead us to a notch that was a portal to the super fun Class 3 section of Wetterhorn.
At last, we reached the final summit pitch and Regina went first. Her enthusiasm for Wetterhorn was impressive and nothing like her lack of enthusiasm two days prior on Wilson Peak.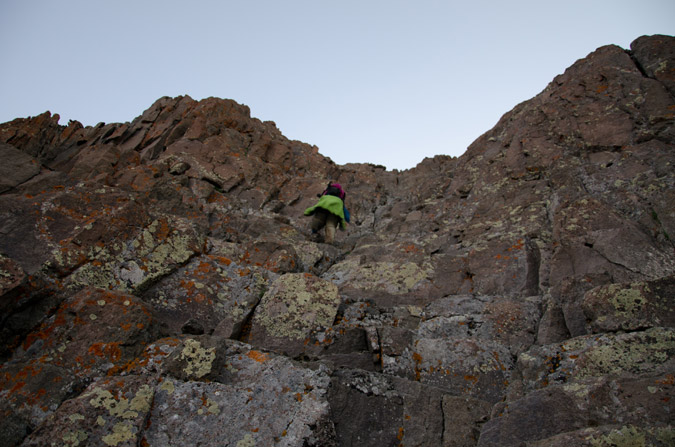
I was even able to take some video of Regina climbing up this section.
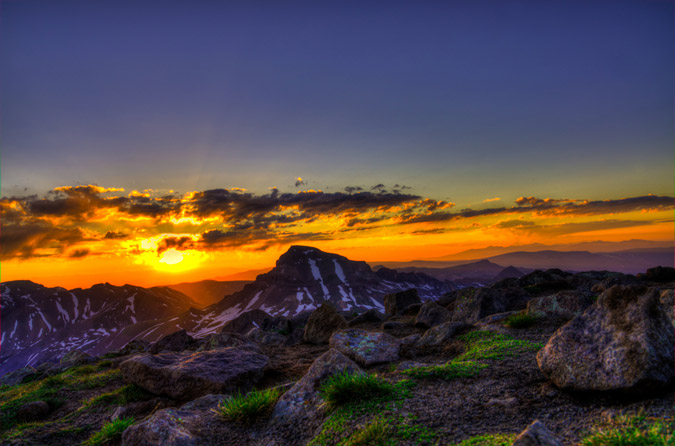
I followed Regina after she had secured herself above, and quickly made it up within a few seconds of fun climbing. We were literally about 20 seconds from the top and I told Regina that the sun would be rising in any second. I crested the summit and it was quite possibly one of the most amazing thing I've ever witnessed. The sun literally crested the horizon THE EXACT MOMENT that I crested the summit. The timing was insane. I ran as fast as I could to the other side, built a rock tripod, and began shooting. I knew that this was gold.
These two are HDR and almost the same except for some slightly different processing techniques.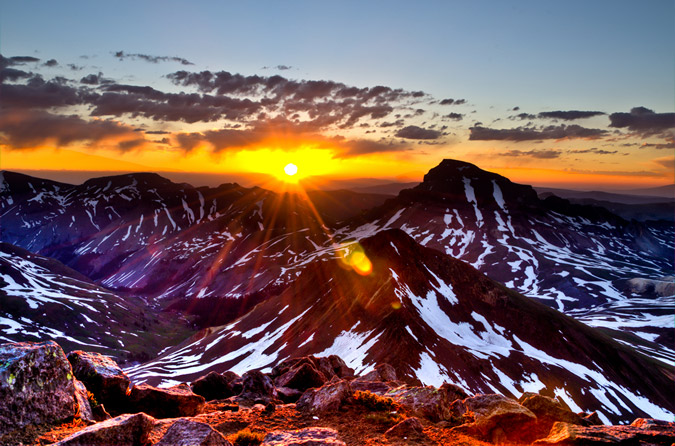
I was like a little kid on Christmas. I had no words to describe it. I didn't even realize it, but it was pretty cold up there. I think it took me a good 20 minutes to even feel it.
Regina was pretty excited too, being that it was the first time she had seen the sunrise from the top of the mountain.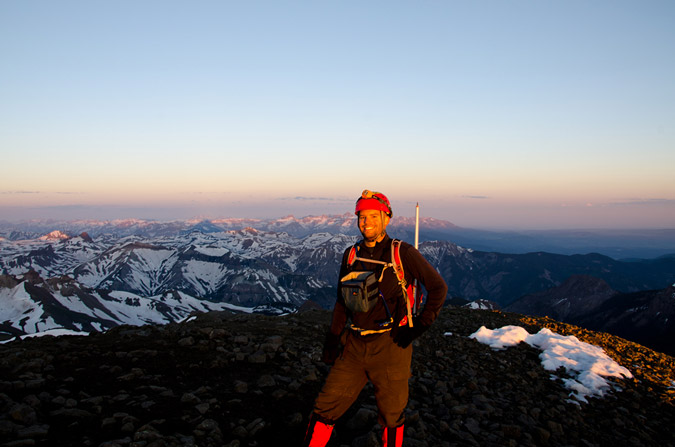
The views were simply incredible... including this 360 degree panoramic.
The lighting was perfect for High Dynamic Range (HDR). I knew that this would be the best chance I'd get in a long time to put together an HDR pano, so I gave it a shot. The results were mind-blowing. I can't wait to get one printed for my house.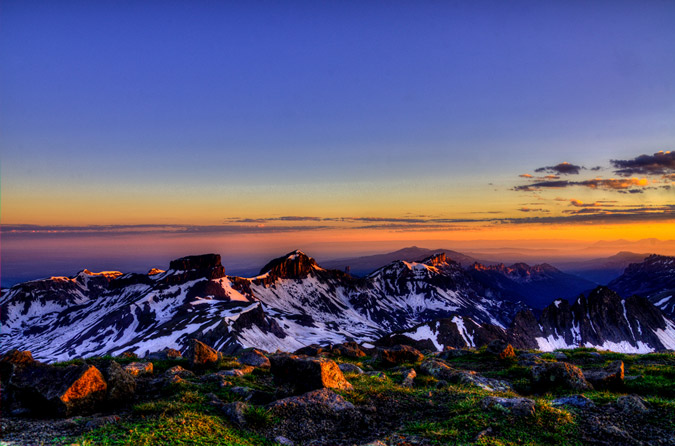
The views of Coxcomb and Redcliff were crazy!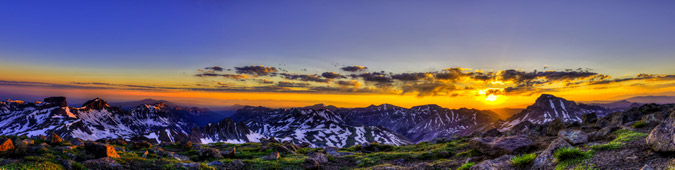
Hey, the summit shelter even makes a good tripod in a pinch! I decided to take a few HDR shots of Sneffels and the rest of the rugged San Juan Mountains to the west.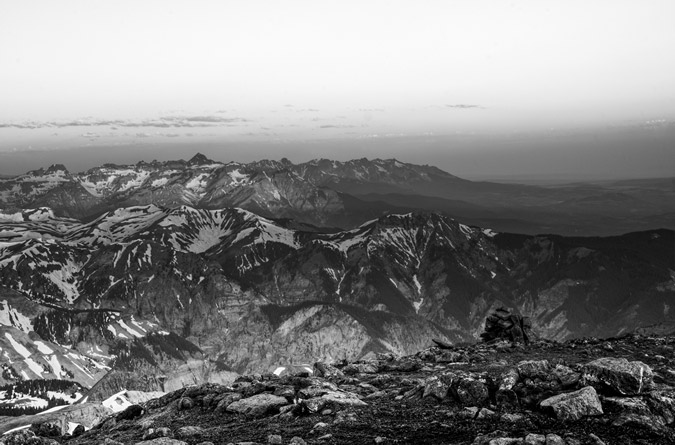
Uncompahgre Peak was truly an amazing feature to photograph from Wetterhorn.
I had always admired both Uncompahgre and Wetterhorn as a pair, especially last year from Handies Peak (Wetterhorn on the left, Uncompahgre on the right):
Is there really such a thing as too many sunrise photos?
Or panoramics for that matter?

The craggy features of Redcliff to the North were quite impressive as well!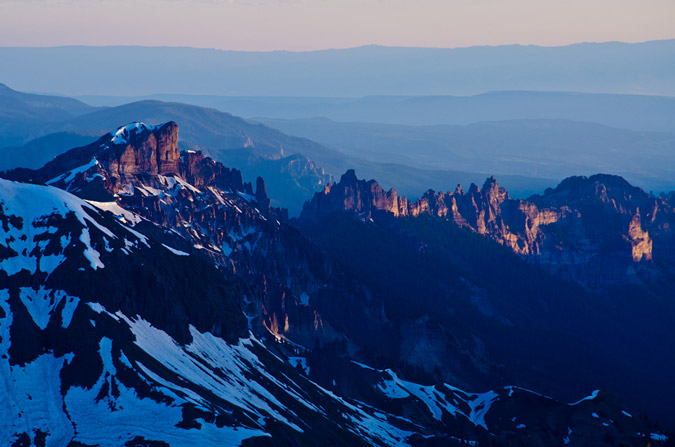
All this photography and I had almost forgotten that Regina was with me, obviously a bit chilled!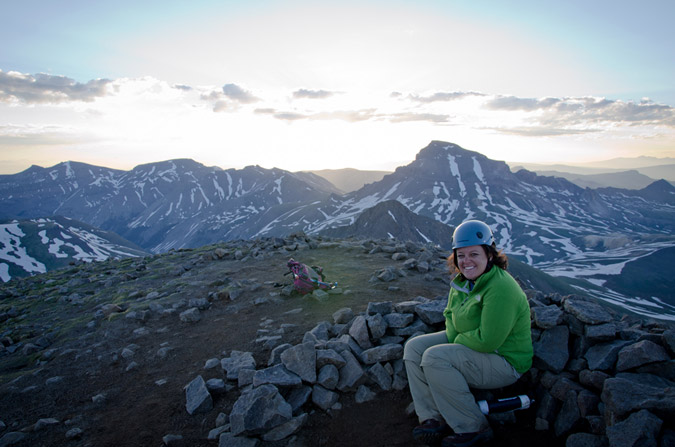
So, we decided we had enough amazing views for one morning and then departed the summit.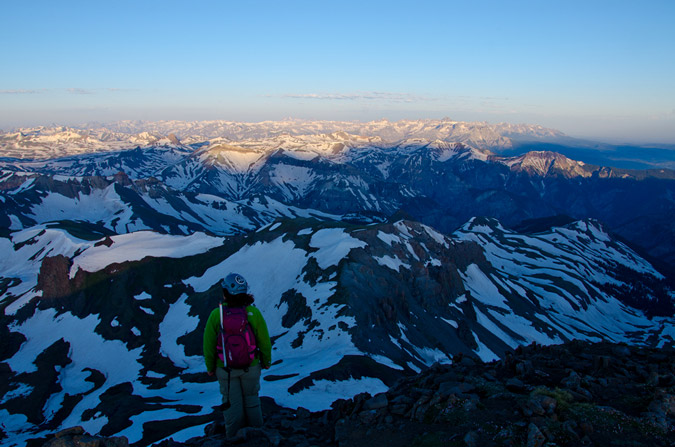
The downclimb was a little more tricky than the upclimb, but nothing worth worrying too much about. As long as you take your time and stagger your group, it is very safe.
 |
 |
 |
 |
It never fails to amaze me what will grow on the side of a mountain...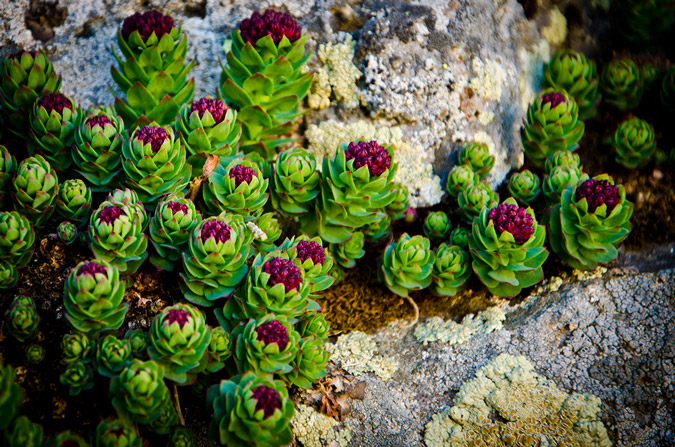
Naturally, Uncompahgre kept me in a state of wonder...
As did Sneffels...
Wetterhorn was pretty awesome looking for below, which was awesome since it was completely dark when we headed up.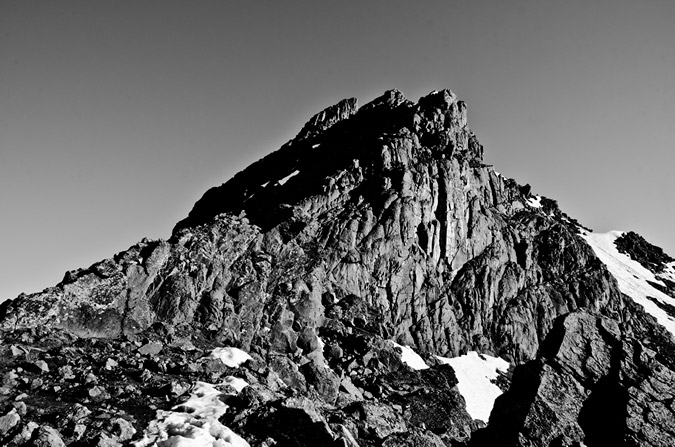
Also, a set of lower peaks kept my attention to the west, near Ouray. They were so impressive and gnarly looking! I was convinced that it could only be Bighorn Ridge, just east of Ouray. I believe I have confirmed this by looking on the Impressiveness List on my website.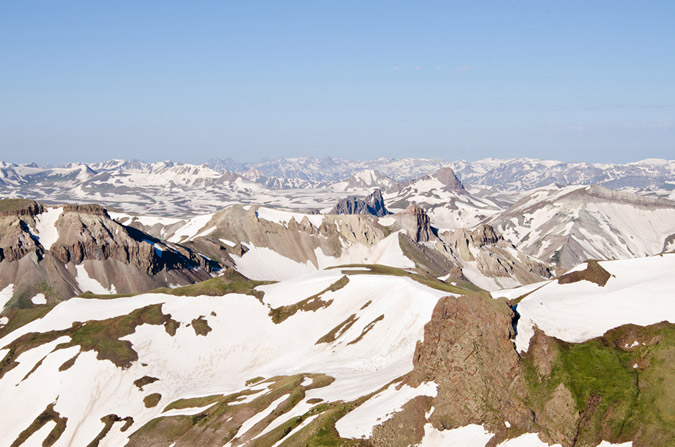
All this photography set me back from Regina quite a ways, and before I knew it, Regina had reached the Golden Saddle.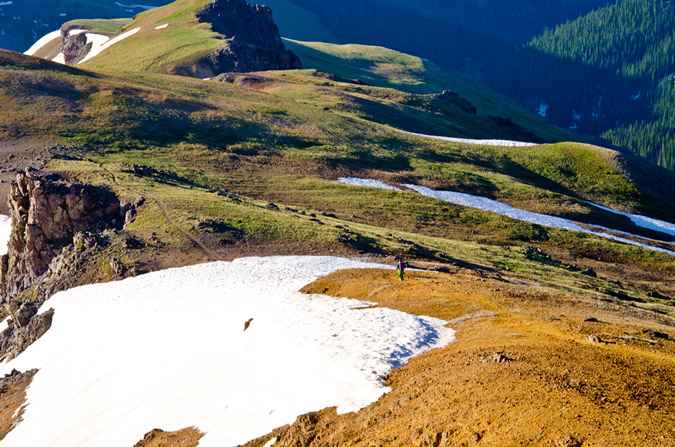

We finally ran into some early hikers just after the ridge, who turned out to be none other than "Kitten" from 14ers.com. 
Regina and I both spotted this awesome little pool below and I knew it would make for an interesting shot...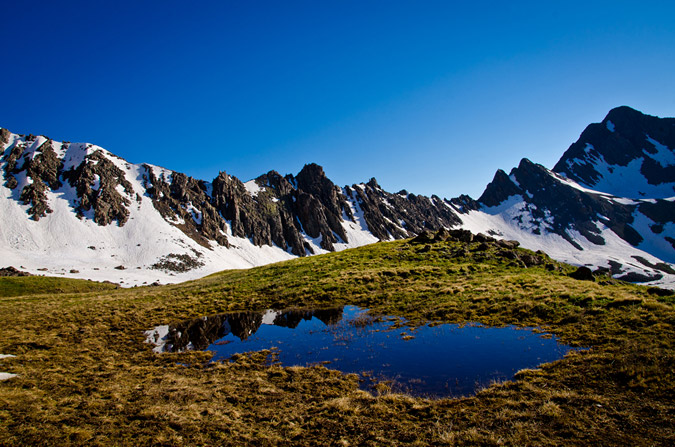
Funny thing - unknown to me at the time, "Kitten" shot a photo of me taking that photo, as I discovered it in her trip report.
I even got a picture of Regina, and Wetterhorn, plus the pool.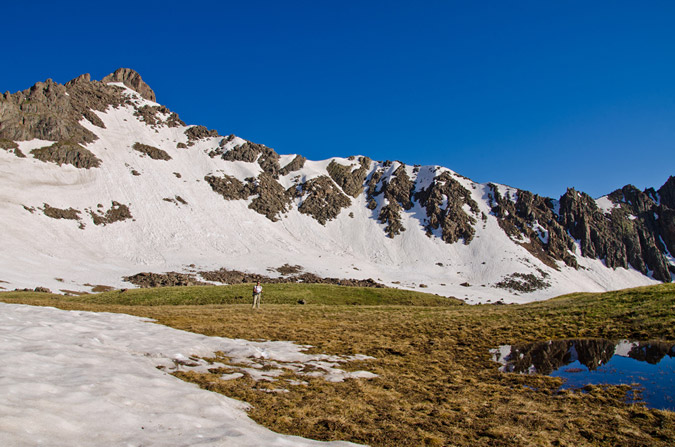
I spotted some interesting flowers off-trail and figured they might make for a cool shot with Uncompahgre behind them...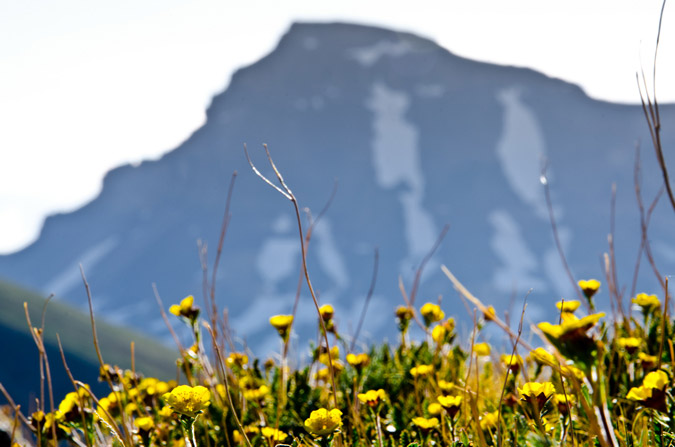
And, out of nowhere, a plane went zooming by over Wetterhorn...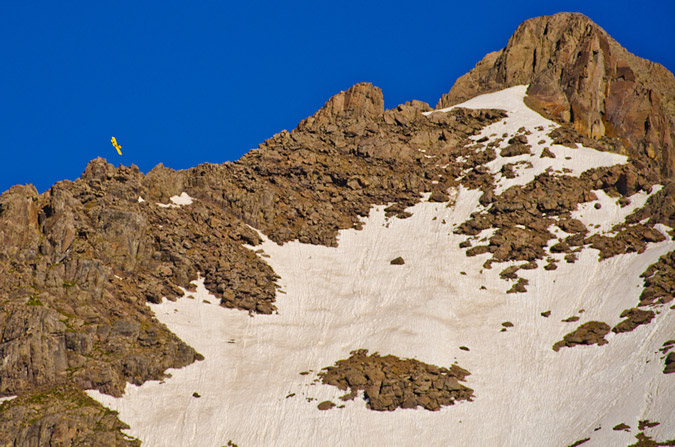
The hike out was pristine. The views never got old. Wetterhorn and Matterhorn painted such an incredible vista.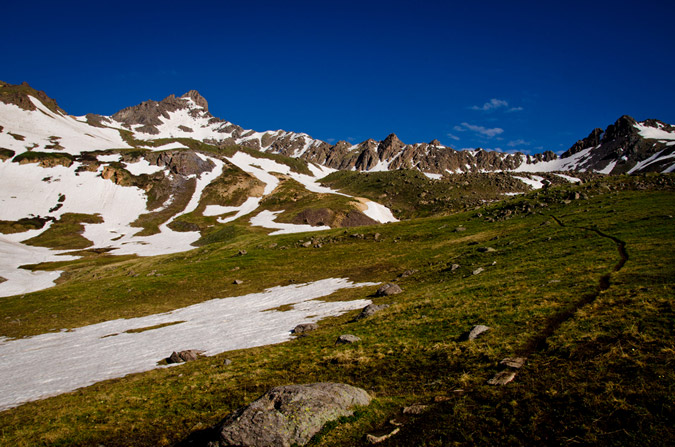
Wetterhorn looked pretty awesome from the valley below...
And of course, the weather started to move-in as we were heading out. The clouds were really intense, so I figured it might be fun to take some HDR shots of them.
In case you were wondering, at the first trail junction, seen below... you go right. I barely noticed this one on the way up since Regina has this mountain memorized.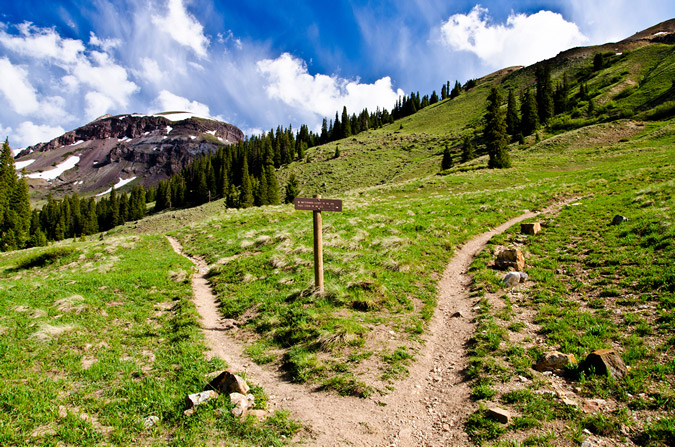
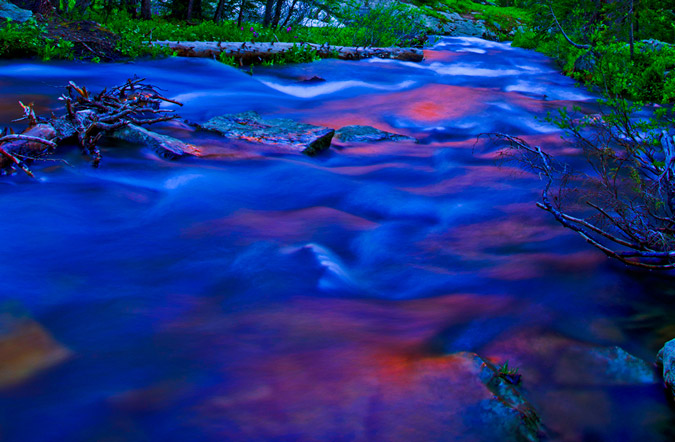
Matterhorn Creek provided some amazing opportunities for photos as well, having a ton of water in it.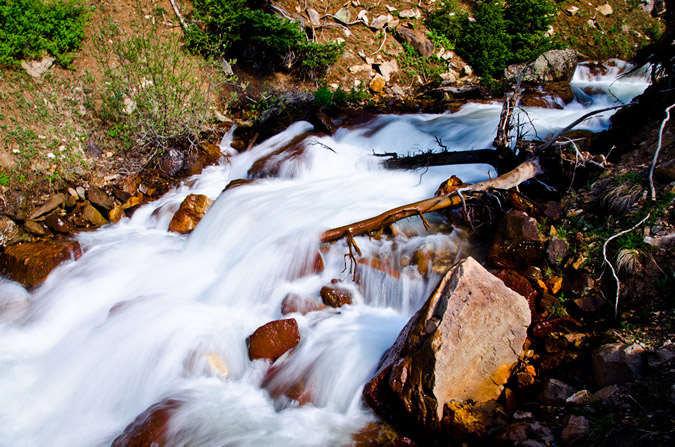
What else can be said about Wetterhorn? It is probably the perfect mountain. Here's why:
- The approach is short and easy, accesible to even the most novice of hikers.
- The route is solid - it is a terrific introduction to Class 3.
- The views are INSANE.
The only bad thing about Wetterhorn is that it is not closer to my house! I would rate it a 10/10.
I hope you enjoyed the photos! Please contact me if you would like to purchase any. See this page for more details.
{fcomment}
Wilson Peak - An 'Airy' Scramble Above Navajo Lake

Fourth of July weekend always provides a tremendous opportunity for mountaineering, and this year was no different for me. Early in the year (January), I was eagerly planning my summer's climbs and saw this weekend and knew it would be both tremendous and controversial. You see, my wife's birthday is July 3rd. I begged her to allow me to climb on this weekend, knowing that it would probably be the only way I would be able to successfully complete the 14ers this year, which was my goal. My wife was really cool about it and said I could go. With that being said, I knew that the perfect match for this date range would be the Wilsons (Wilson Peak, El Diente and Mount Wilson). I set aside a total of 5 days for the trip and hoped I would not need all 5 days, but knew that weather could necessitate the use of all 5 days. My climbing partner, Regina and I roughly sketched what we thought would work best earlier in the year and when June 30th finally arrived, we were both excited to get out of town and up into the mountains! The plan was to drive to the Navajo Lake trailhead on June 30th and camp there, backpack up to Navajo Lake on July 1, establish camp, climb Wilson Peak and go to bed. After this, on July 2, we would do El Diente via the North Slopes route in the snow and then traverse over to Mount Wilson. This would leave July 3 for completing Gladstone Peak (a centennial 13er) and for the hike out. It even factored in one extra day for weather or for kicking it in Telluride for a bit.
So, with all that being said, Regina and I embarked for the Telluride area, a good 300 miles away. We drove through the Blue Mesa Reservoir area during dusk, and I was able to get one decent photo from the car while Regina was driving. I have always really enjoyed that part of the drive and someday I'll time it just right to get a gorgeous sunset photo there. Until then...
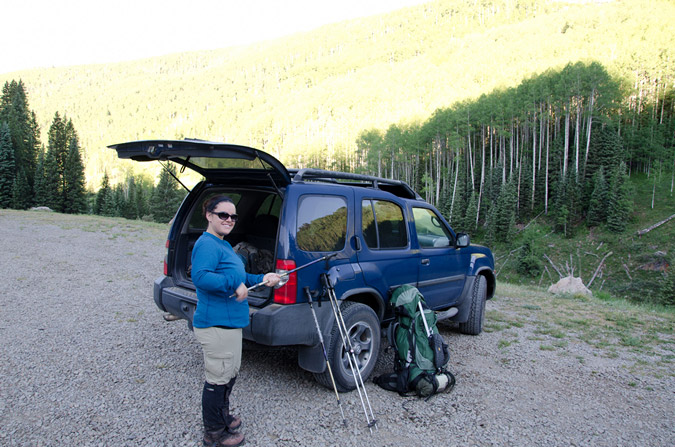
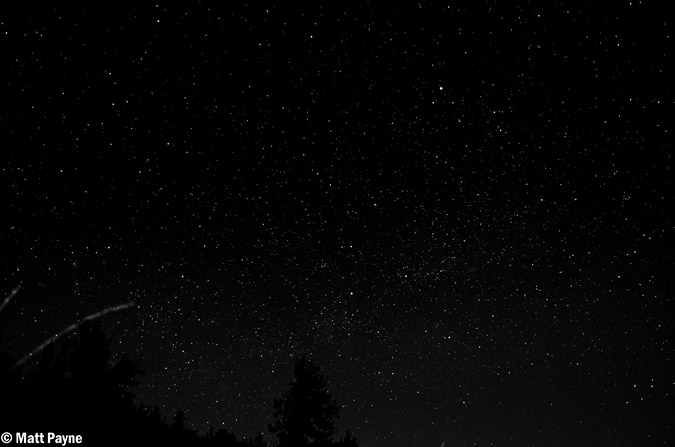
The plan unfolded perfectly and before we knew it we had arrived at the trailhead for Navajo Lake at around midnight. We set-up camp away from the trailhead and set the alarm for 7 AM since we were looking at a good 4.5 miles or so to the lake and an additional 8 miles to Wilson Peak and back to the lake for our itinerary. The alarm went off and we sprang out of the tent and packed up quickly, eager to hit the trail. The weather was absolutely fantastic. This week, I decided to try something I've never done before and pack my tripod with me. While this added some additional weight, it would allow me to get some great photos at Navajo Lake and even try my hand at some more star trails photography.
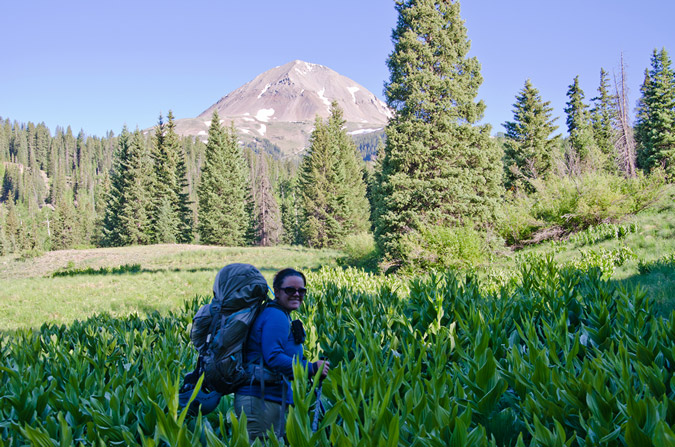
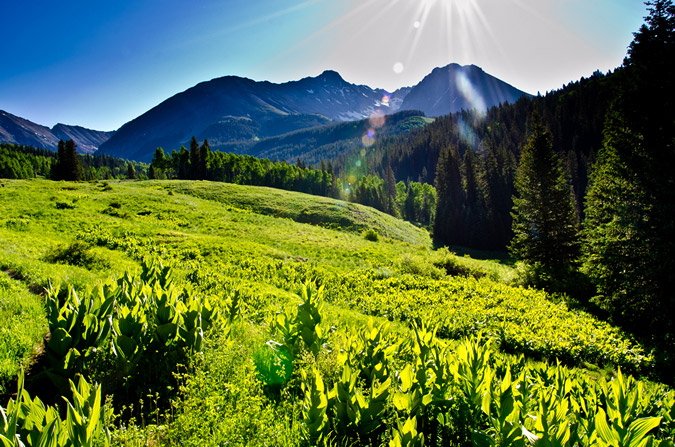
The Navajo Lake trail was really quite fantastic - it weaves in and out of huge groves of corn lilies (Veratrum Californicum), but I like to refer to them as Indian Toilet Paper since back when I taught Leave No Trace we would always use them for, ahem, wiping.
Pretty quickly, the trail leads you up the long meadows and into view of El Diente, which by the way was one of the most deadly mountains last year.
The whole area was covered in those corn lilies and wildflowers, which slowed me down a bit due to me wanting to take a ton of photos. I think I have a serious photography problem or something... what do you think?
 |
 |
 |
 |
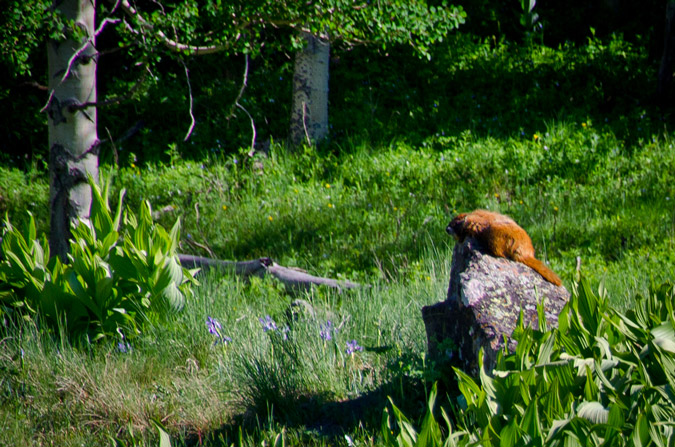
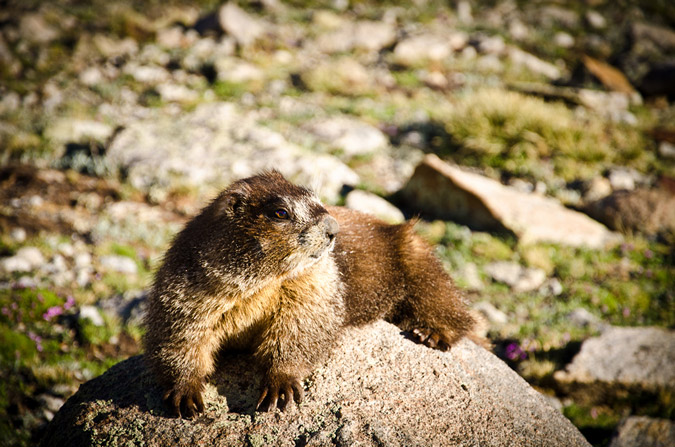
Naturally, a hike in the San Juans and the Lizard Head Wilderness Area are not complete without a sunbathing marmot!
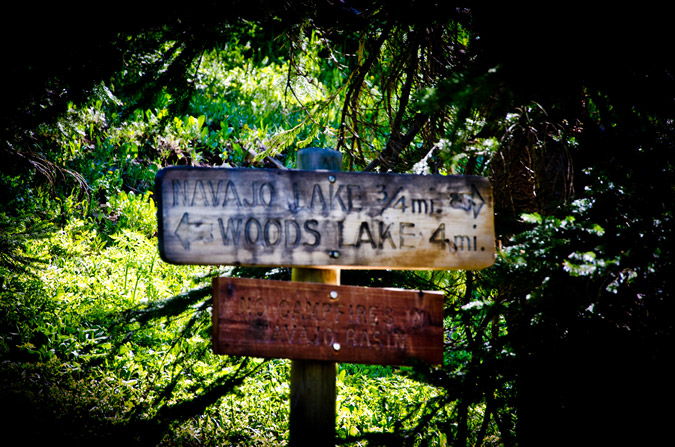
The trail kept winding up towards Navajo Lake and eventually we reached the trail junction for Woods Lake.
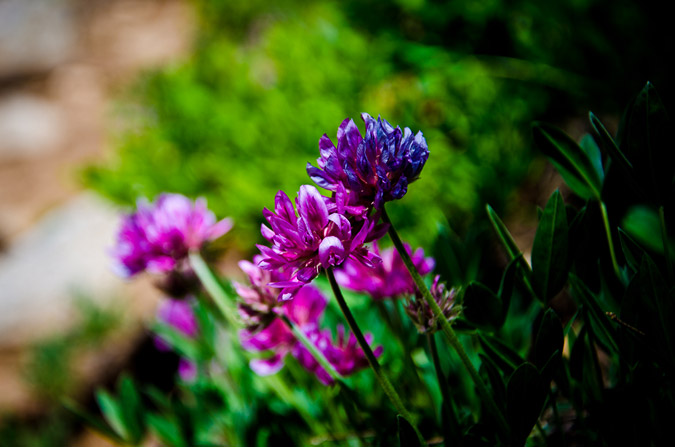
The closer we got to the lake, the more vibrant and ubiquitous the wildflowers became and I could not help but take more photos. What can I say, I'm a sucker.
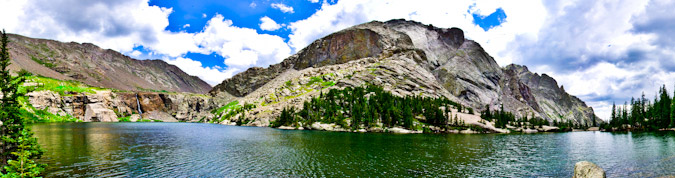
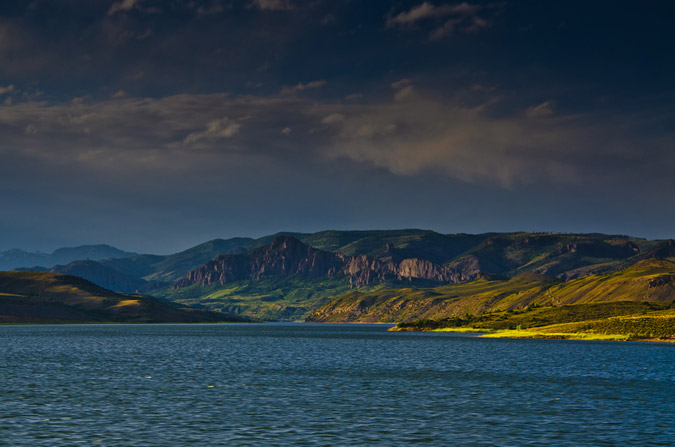
A mere 3 hours later we finally arrived at Navajo Lake. The view of the lake and Gladstone Peak was absolutely stunning.
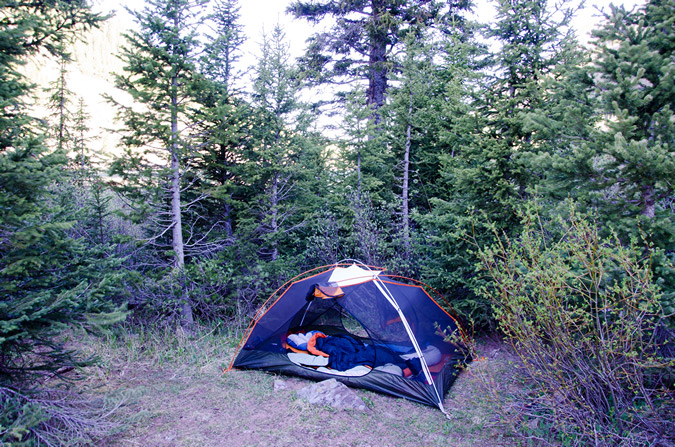
We were able to establish camp about 300 feet away from the lake up on a small plateau - it was an absolute gem of a campsite. After setting up our tent and getting everything else situated, we packed up our daypacks and headed on up the trail with the objective of Wilson Peak in mind. Our departure time was 12 PM. Normally, I would not attempt to climb a mountain so late in the day, but the weather was superb and I knew the forecast was totally clear, so we opted to give it a shot. Worst case scenario, we could always head back down to the lake if the weather turned on us.
Now, Wilson Peak has never held much status in my mind, purportedly being the easiest of the group's 14ers, so I never did much research on the route. Sure, I read the route description and printed off a few photos and paragraphs, but I felt pretty confident that it would be a fairly easy climb. Boy - I was really pleasantly surprised and wrong about that assumption, as you'll read later on.
The hike up into Navajo Basin was really enjoyable from the lake.
 |
 |
After awhile, the trail finally brought us even with El Diente to our right, the view of the North Slopes route came into view nicely. Mount Wilson sits at the top of the basin, right of Gladstone Peak, and is connected to El Diente by a massive, spiny ridge, as seen in the below pano.
Additionally, the blue hues of Navajo Lake kept me looking back, enjoying the vistas of the valley.
The trail was not terribly steep but it did weave in and out of large snowfields, making it a bit more interesting but nothing too dicey, so far.
Finally, we reached the headwall that leads to the Wilson Peak - Gladstone Peak saddle beneath the Rock of Ages Mine, which required us to head up a giant snowfield. The snow was quite firm and easy to hike through.
I was feeling really good and had gained a bit of distance between Regina and I, so I periodically stopped to let her catch up.
The snow in the North Slopes Couliour for El Diente looked superb and I was a bit excited to see how that would work out on the following day.
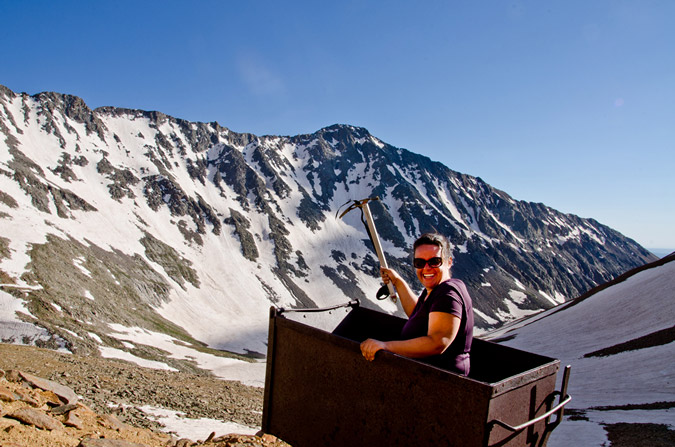
At 2:30 PM, we both reached the Rock of Ages mine, which felt quite like something out of the 1800's. An old wooden mine shack still sits on the mountainside along with a small wooden bench, a mining cart and some other odds and ends.

We rested at the mine, ate some food and discussed the next steps. The trail continued on up towards the Rock of Ages saddle to our left, but I knew from reading the route description that the trail winds back across the mountain just above the mine itself, so I figured it would be a good opportunity for some off-route exploring up through some easy class 2 boulders above us to the Wilson Peak - Gladstone Peak saddle.
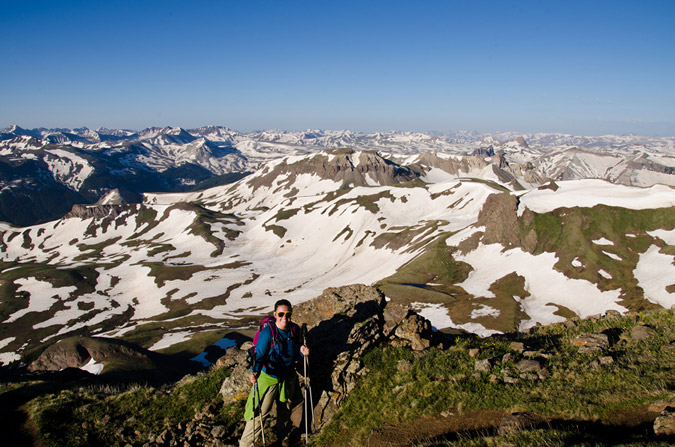
Personally, this terrain is a playground for me - the rock was somewhat loose but not too crazy, and it was fairly obvious which rocks were stable and where you needed to go. Regina on the other hand, not having grown up climbing off-route like me, felt a little less comfortable on the boulder field and was starting to have some doubts about the rest of the climb. I assured her that she would be fine and that she needed to treat the rocks with respect, expect that they will move, and be nimble about her movements. Eventually we made it up to the saddle without incident and were greeted by the first insane views of the day to our east. A cornicopia of San Juan mountains laid before our eyes and I was excited to finally get views of Lizard Head Peak, Fuller Peak, Vermillion Peak, Golden Horn, Pilot Knob, U.S. Grant Peak and South Lookout Peak, which all rest at the head of Ice Lake Basin - one of the most gorgeous locations in Colorado. Can you identify them all?
Here, let me help you!


Of particular awesomeness was the view of Lizard Head Peak, which will likely forever rest on my unclimbed list!
At this point, Regina and I had to make a decision. The weather was great. Barely any clouds in any direction. But - Wilson Peak was still a long ways off and it was already 3:30 PM. I still felt strong but Regina was fairly demoralized by how far away Wilson Peak looked still. From the saddle Wilson Peak was still a half mile away and a good 600 feet up across insane snowfields and rotten rock. I encouraged Regina to give it a shot with me, so we did. Right off the bat, we were greeted by a pretty intense snow field at the base of a cliff that was quite run-out, meaning, if you fell down, you were going to travel a long way down and probably die. We deployed our ice axes and secured our helmets and crossed, using extreme caution. Soon, a second and then a third snow field of equal danger were presented to us as well as crumbling rock and difficult trail-finding. Regina became really sketched out by the whole thing and decided that it was as far as she would travel and told me to keep going and that she would wait there. I was fine with that idea, so I continued on. I'm not going to lie - I was not mentally prepared for this climb. I thought Wilson Peak would be a walk in the park. Having much of the route obscured by steep and dangerous snow that had softened considerably throughout the day, my mountaineering skills were certainly challenged. The route before the false summit was chossy at best, with huge loose boulders cascading above and below me on a regular basis. Oddly enough, I was calm in this environment. I have an odd knack for loose rock and when my footholds and handholds gave way, I went with it, almost like walking onto an escalator. I chose my route carefully enough so that I could avoid the larger messes, but a few rocks did manage to take huge chunks of flesh out of my finger and hand. No worries though, the bleeding stopped quickly and I didn't even stop to apply a bandage. All in a days work. I was finally able to reach the ridgeline that connects to the false summit, and was able to catch views of a small wildfire that had broken out to the north-west of me.
Of even more interest at the time, Wilson Peak's daunting summit block stood before me like some ancient pyramid. Again I found myself thinking - wow - really? I never expected this much awesomeness from this mountain. I was excited. Was this going to turn into a class 4 scramble? I sure hoped it did! The exposure looked inviting, but the rock was crumby and resembling of tiny pinnacles. I knew that I needed to choose my route carefully. The route description from 14ers.com stated that there was two ways to skin this cat - go left and downclimb to some safer class 3 sections, or continue on the ridge and challenge yourself with some nuts class 4 stuff. I chose the class 4 stuff and it did not disappoint me in the least.
In the interest of weight and balance, I decided to take a huge drink of gatorade and leave my pack on the false summit, bringing along my camera, which was attached to my chest by my new Lowepro Toploader bag. Yes, I realize that I broke one of the key tenets of mountaineering by leaving my pack behind, but I still feel it was the best decision.
After carefully finding my way down and through the class 4 section, I reached the summit at 4:50 PM. I was still feeling great. Naturally, the views were absurd and rediculous - in a good way of course! Sneffles towered to the north-east alongside all of her insanely shaped neighbors. All-in-all I would rate the Wilson Peak views as a 8 or 8.5. Pretty amazing.
Sneffles and her friends:

I was able to set my camera up to take a quick self-timer too - how fun.
I figured with Regina waiting below, I should get off the summit pretty quickly, and so I did, leaving at 5:03 PM. In the distance, I spotted my pack and I thought it was neat to see the nastiness of the downclimb I did earlier as well as my pack for a dose of perspective. I basically went straight down from where my pack was at.
Zoomed out, you can see that the saddle where Regina was waiting for me was a long ways off. I believe she was waiting for me just where the snow was starting to end.
Another view of the climb back up to the false summit from Wilson Peak with my backpack at the top:
The downclimb back to Regina went much faster and I was able to reach her in just 30 minutes from the summit. She had safely crossed back to the saddle and had waited for me there. She also took a shot of me on the Gladstone Peak - Wilson Peak saddle:
We opted to head back down the standard way to the Rock of Ages Saddle and had a long conversation on the way down. I knew that Regina was probably feeling pretty bummed about not getting to the top of Wilson Peak, especially after the absolute disaster that was our Snowmass Mountain attempt the week prior. I was pretty proud of the way Regina handled this situation. We talked about how this type of climbing just was not fun for her and that if she was feeling uncomfortable on the rock that it was not worth getting killed just to check off a box on a list. I knew that Regina had a strong goal to finish the 14ers this year, but I think she has a much richer appreciation for mountaineering and all of its challenges. I think that in time she will grow more and more comfortable on class 3 and class 4 climbs, and will complete the 14ers; however, there's no sense in getting killed because you don't feel comfortable! Kudos to Regina for having a clear mind about this issue. All too many climbers lose sight of this important perspective in their quest for glory.
The Rock of Ages Saddle proved to be a nice location to capture a nice panoramic of the Navajo Basin, with Gladstone Peak (center) at the head and continuing on down the ridge to El Diente.
We took pause back at the Rock of Ages Mine for some good 'ol fashioned mining fun. Regina took a more conservative approach to her mining pose:
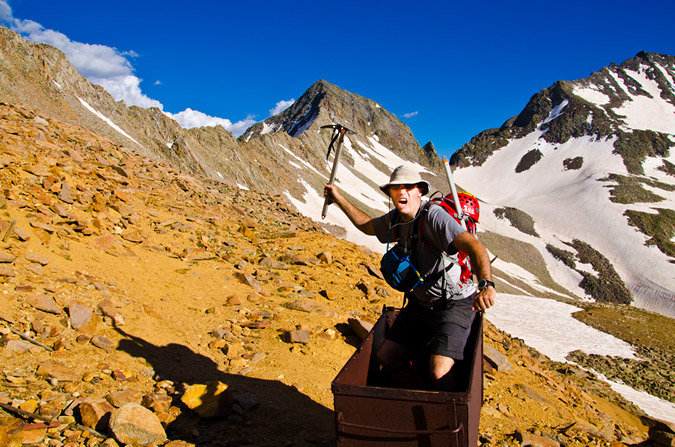
But... I was still pumped from doing Wilson Peak, plus I wanted to give my best Miner-49-er impression! I think the result was more of a hybrid between pirate and crazy guy...
Cruising back down the Navajo Basin was quite fun since the snow had softened up just enough for some glissading and boot skiing.
However, the sun was beginning to set, and my photographic funny bone started to shake. I knew that the Golden Hour was approaching and that there would be some amazing opportunities for some killer shots soon.
 As we worked our way down the snow fields, I was getting more and more anxious for the photography opportunities. I kept looking down at my altimeter watch to see what time the sun was setting. According to my watch, the sun would set at 8:45 PM. I was really pushing myself to get down to Navajo Lake before then so that I could take advantage of my tripod and the sunset.
Unfortunately, there were just too many awesome things to take pictures of on the way down!
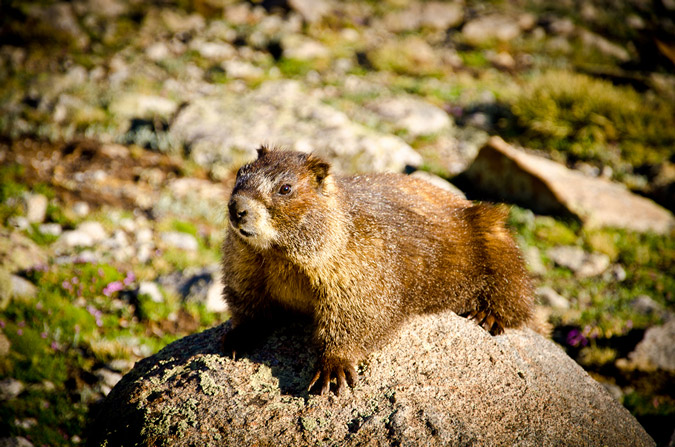
I even found a model marmot to pose for me - how kind of him!
I thought he was pretty funny! He even gave me his best "oh crap" look! Haha.
As the sun set further and further, I kept pushing myself to hike faster and faster. Would I make it?
The photographic opportunities were endless...
I was even able to get a quick HDR from the trail, although the results were not terribly great.
I finally passed Regina and she pretty much knew what I was up to - I needed to get back to that lake! Alas - I did reach the lake right on time at 8:00 exactly, 8 hours after we had left camp. Navajo Lake submitted her glory to me quite beautifully...
And I even did a pretty decent HDR too:
Regina and I convened at camp and decided to cook some Mountain House meals ASAP to refuel. While I gathered some water at the creek, I could not help but notice that the red rocks of El Diente were reflected off of the creek...
Regina and I talked about our plans for the remainder of the weekend. We tossed around a few ideas. Maybe I could climb Mount Wilson and El Diente with another group at the lake? Maybe we would just head out and call it good? We decided on the latter. I did not want Regina sitting around all day while I climbed some more, and since the mountains are not going anywhere, I figured it would be totally cool.
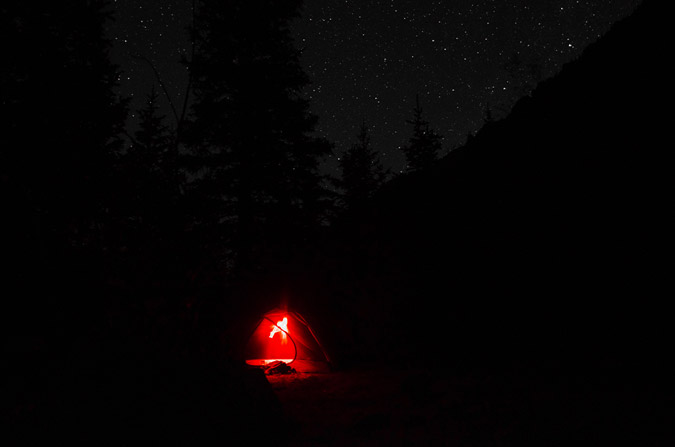
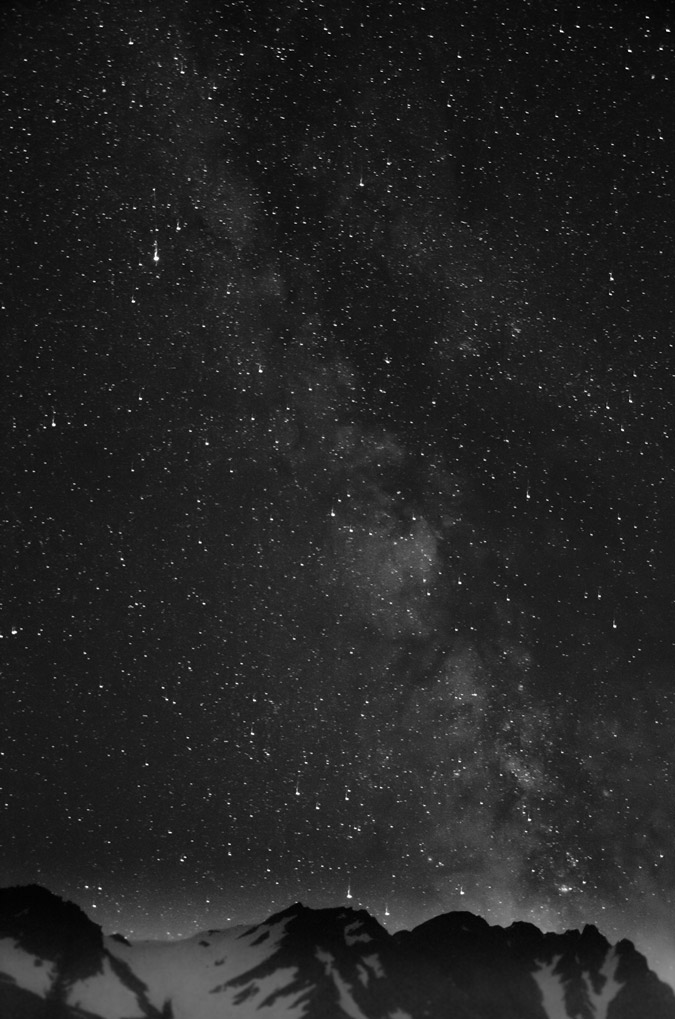
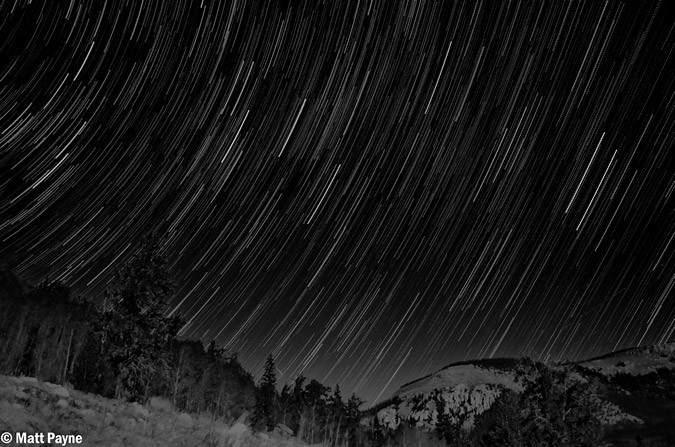
Regina and I threw down on our meals like two starving children. Regina was pretty tired and went to bed, but I knew that my adventure had just begun. With tripod at hand and camera at the ready, I set-up for a night of star trails photography, which is quickly becoming one of my favorite things to do.
Navajo Lake would provide the perfect setting for star trails, and I knew that I would get a few keepers out of my efforts.
As I waited for the perfect amount of star light, I embarked on a slight experiment. I knew that in a lot of star trails photos, the goal is to center the photo on the North Star, since that star does not move across the sky. The result is a center star that does not move with the rest of the stars rotating around it like a carousel. Unfortunately, I totally forgot how to identify where the North Star is in the sky, but knew that it had something to do with the Big Dipper. I realized that the Big Dipper's cup pointed at the North Star, so I centered my camera on that star and tested it out. Sure enough, I had successfully located the North Star.
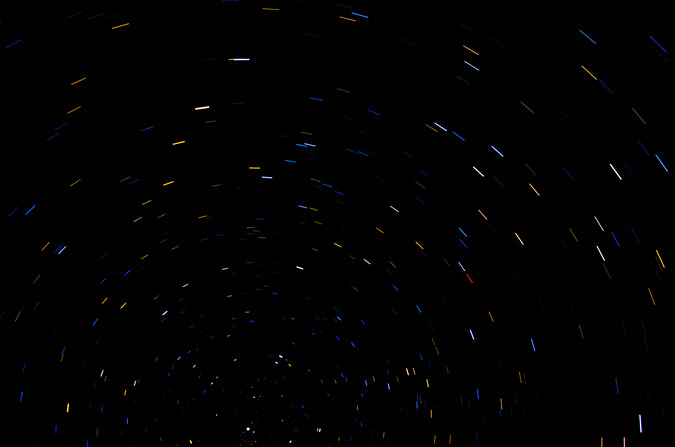
Finally, the moment was right and I opted to do the one exposure method of shooting star trails, where combining photos is not required, but precision is. I think it went pretty well, although I really wanted to do it for longer, but literally fell asleep on the shores of the lake while the camera took the shot...
I also decided to compile a set of exposures @30 seconds each to see which method produced the best results. I certainly feel torn!
I finally went to bed, knowing that I had captured something magical in the reflection of the lake. In all, I ascended 5,280 ft. and hiked over 15 miles. Click the elevation profile for a larger version if you'd like.

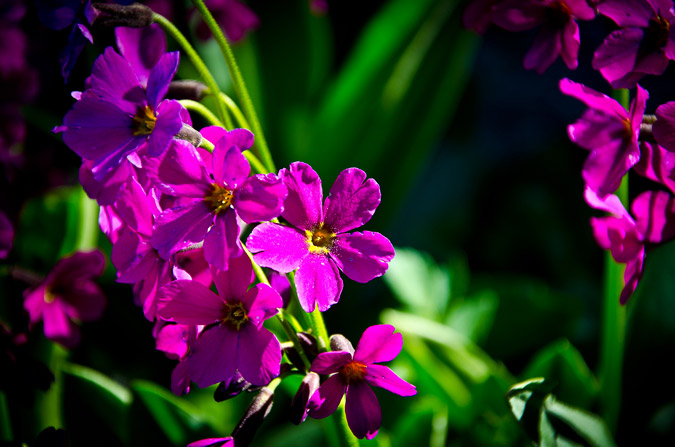
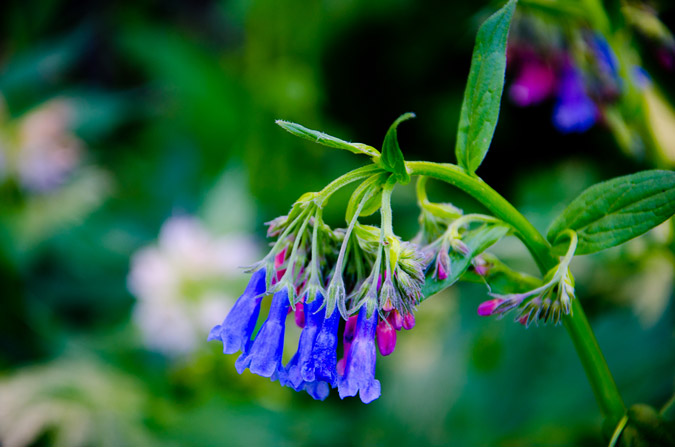
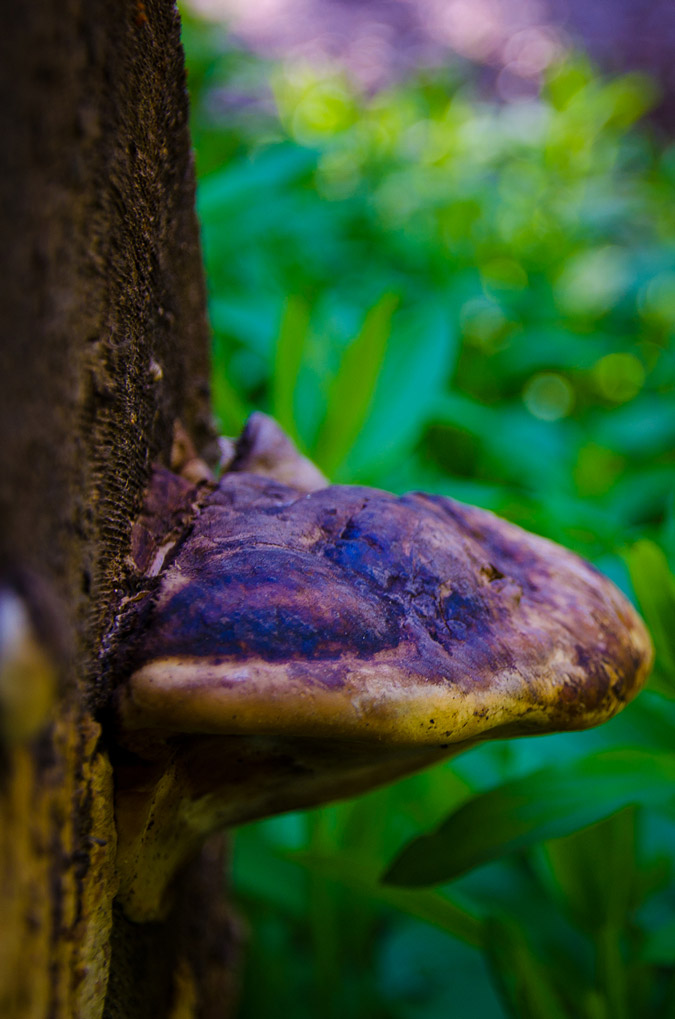
The next day, we packed our packs and headed out, but not without some obligatory shots of more wildflowers and one whacky mushroom!
 We departed the valley thinking that our adventure had ended. We left knowing that we had gleaned some positives from the trip and that even though our plans did not pan out the way we intended, that it was still a great time. Little did we know then that our adventure had just begun...
Backpacking to Snowmass Lake - A Photographic Gem
When Regina and I embarked from Colorado Springs, the plan was to backpack up to Snowmass Lake and climb Snowmass Mountain, putting me within 10 climbs of completing all of the 14ers in Colorado. Unfortunately, some unforeseen circumstances prevented us from reaching the summit of Snowmass Mountain, which I will go into detail about later on. Fortunately, there was ample opportunity for photography, and that opportunity was not passed on.
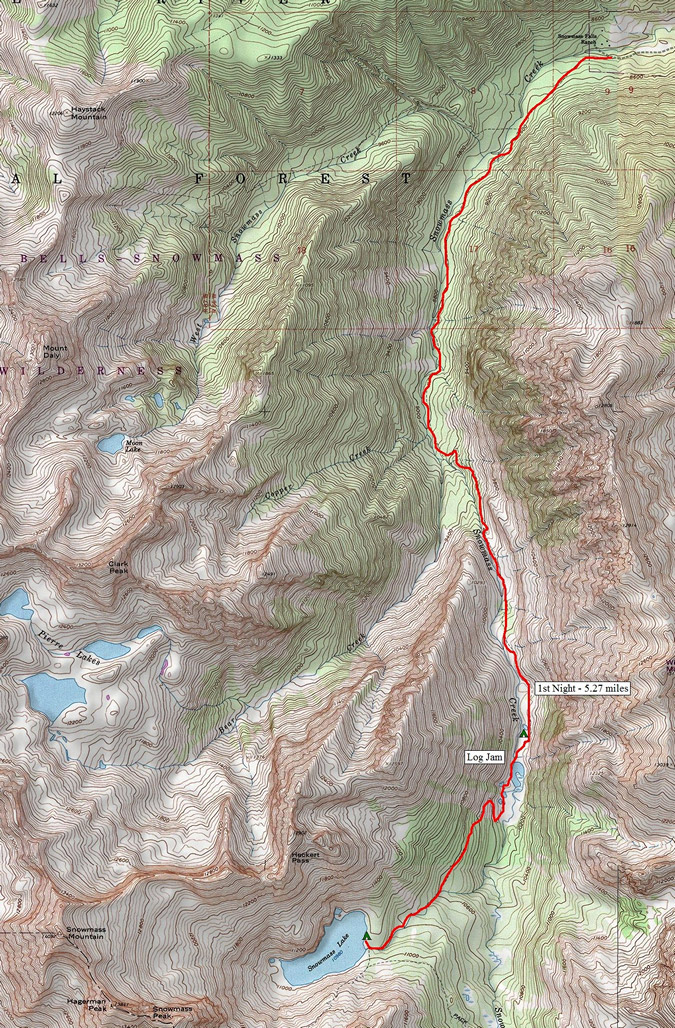
For those that follow my trip reports, Regina is a friend of mine that I met through 14ers.com and our relationship could best be described as one of two siblings. My wife is 100% cool with me hiking with another woman, and if another person asks me about it, I may just roll my eyes. Now that we have that out of the way, let's move on with the report! Regina and I departed Colorado Springs on Friday June 24th and reached the Snowmass Lake trailhead at around 8 PM. We were both very psyched about our first backpacking trip of the year, and had prepared for the many possible scenarios we were anticipating, including deep snow, an ice/snow climb, and wet weather. With that being said, we both packed our snowshoes, crampons and ice axes. I was also very excited to finally test out my brand new Lowepro Toploader Zoom 50 AW camera bag, as pictured below. The idea behind the bag is that it is held to your chest by this harness and makes your DSLR easily accesible. Time would tell!
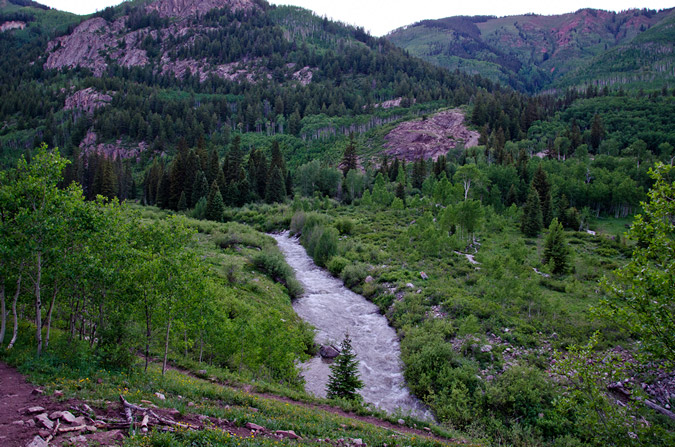
The hike up the Snowmass Lake trail (I believe it is actually referred to as the Snowmass Creek trail). takes you right into the Maroon Bells - Snowmass Wilderness Area and did not disappoint in terms of aesthetic beauty.

One of the things that Regina and I were concerned about was the infamous logjam crossing, where you must cross a huge stream via randomly scattered logs. This was not something we were looking forward to, given the fact that the snowmelt was particularly high this year and because we were carrying a lot of weight on our backs. About a mile into the hike, our fears of Snowmass Creek having a lot of water in it were confirmed...
Would we be able to safely cross the logjam in the dark? The idea was quickly losing favor among the two of us; however, we kept our quick pace, which was aided by the great views of the surrounding peaks and forest.
As we hiked up the trail in our heavy packs, the daylight faded quickly, and soon we were forced to employ the use of our headlamps to guide our hike.
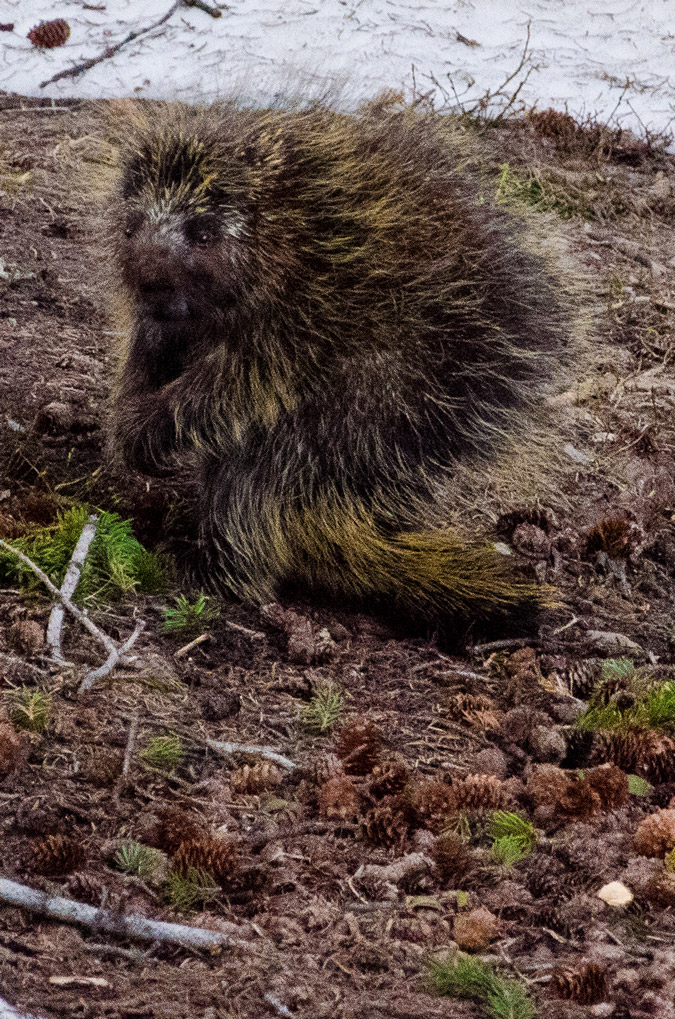
The plan was to get as far as we could in the dark before setting up camp for the night and making a go out of Snowmass Mountain the following day. From the trailhead, the lake was a good 8 miles up, which meant a good portion of our hike would be in the dark. Shortly after the sunset and the trail became dark (but before we turned on our headlamps), a dark object walked across the trail in front of Regina, which frightened us both. I quickly turned on my headlamp and discovered that it was a porcupine. We let him pass on through and continued on up the trail in the dark. Periodically, our headlamps would catch the eyes of various wildlife in the dark shadows of the night. For the most part, we identified them as deer, but given we were in the wild and it was dark, our imaginations were going in a much different direction!
After a short while, Regina began to get sick and threw up all over the trail (sorry about that to the folks that came up the next morning). Surely this would not be a portent for things to come? Regina said she felt much better, so we kept on heading up the trail in the dark. As midnight approached, we decided to stop and see where we were at. I pulled out my GPS and discovered that we were about 1/8 of a mile from the logjam - a perfect stopping spot for the night. We decided to set-up camp in one of the better campsites I've seen on any backpacking trip, right next to Snowmass Creek. Since this was her first backpacking trip, I showed Regina how to hang our food bags by nylon rope and how to setup camp.
Since it was so late and because Snowmass would require crampons on hard snow, we decided the best plan would be to get plenty of rest, pack the rest of the way up to Snowmass Lake the next day, take it easy, and go to bed early for a super-early ascent of Snowmass Mountain on Sunday. We woke up the next morning at around 9 AM, listening to a group that had just came down from Snowmass Mountain talk about the logjam. They were making jokes about how the logs would sink and that people were almost falling in, etc. Was the logjam really that bad?
We quickly packed up and headed towards the logjam. At first sight - the logjam confirmed our worst fears - it looked incredibly daunting.
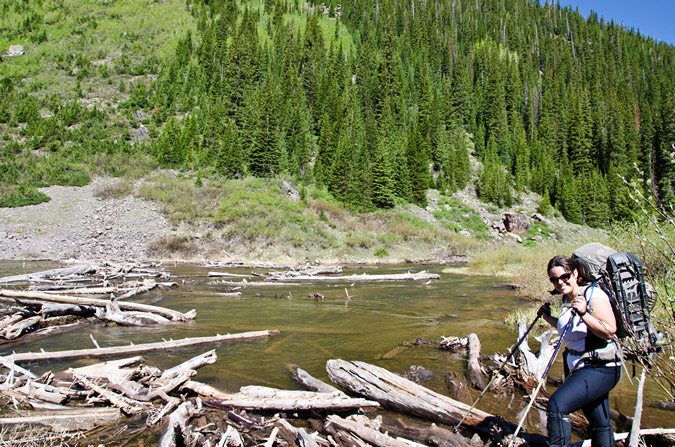
The water was about 3 or 4 feet deep in spots, and was rushing quite quickly under the logs. If the views were not so incredible, the logjam would have been a real bummer!
There was little to no consistency in the reliability of each log, and each log required a good test before we used it. Trekking poles were quite useful, but at times they gave me a false sense of security because I would put some of my weight on them when they were not secure on a log, causing me to get off balance. Care must be taken to successfully cross the logjam as it is a good 100 ft to the other side! I stopped halfway across to take a 180 degree panoramic photo to show the length of the crossing.
After successfully crossing the logjam, we quickly made our way up the trail, which followed the now wide and pristine Snowmass Creek. The whole area was like a giant beaver pond, with lakes and creeks intertwining with the beauty of the Elk Mountains at the head of the valley. The trail quickly begins to work uphill again and soon views of the pristine valley below can be made.
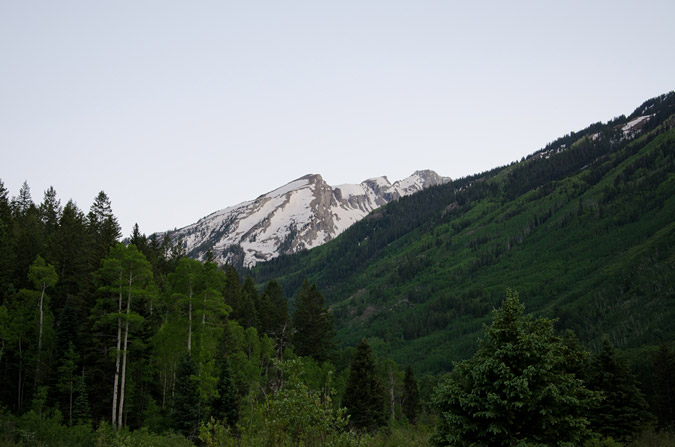
The rock in the mountainside was quite red, a clear indication that the Maroon Bells were closeby.
The trail quickly weaved into the trees towards Snowmass Lake above and to the east, and we were quickly reminded that there was a ton of snow in this area still. Would we finally get to use our snowshoes? Not so much - the snow as hard enough and sporadic enough that snowshoes were not required. Another trip where I packed my snowshoes for no reason! Oh well.

This was the hardest section of the hike, with the snow banks rising and falling throughout the trail, making travel slow and laborious with heavy packs on. Nonetheless, we arrived at the trail junction for Snowmass Lake and headed on up, following Snowmass Creek, which was quite full of water.

Soon, we reached a huge waterfall next to the trail, with a giant log in front of it. I decided to take a break, take my pack off, and cross onto the log to get some HDR shots of the waterfall from the middle of the log. Getting onto the log proved quite tricky, with the area around the creek full of snow and ice and dirt; however, I managed to make it onto the log without drowning or falling in. Yay for me.
About 200 feet past this waterfall, we finally reached the head of Snowmass Creek and the first views of Snowmass Peak with Snowmass Lake in the foreground. How exciting!
The first order of affairs was to locate a suitable campsite. Most of the area was full of deep snow, so options were quite limited. Sticking to the "100 ft away from lakes" rule proved nearly impossible due to the snow and marshy conditions. Nevertheless, we found a great spot near the lake and creek and set up for the day. It was pretty great to finally get a glimpse of Snowmass Mountain as well, which was tucked away to the right of Snowmass Peak, the lower 13er at the head of Snowmass Lake. Even better, the moon was passing just above Snowmass Mountain, making for some fun photography.
Throughout the day, the lighting shifted and the winds died down, making for better or worse photography conditions, depending on the combination of the two. For the most part, the Golden Hour proved to be the best time to shoot, which did not surprise me in the least.
For the most part, Regina and I just kicked it at the lake for the day, watching the wildlife and the insane beauty of the lake. This also gave me the opportunity to play around with my camera and try to get some decent shots.
About an hour or two after we arrived at the lake, another group of gentlemen came to the lake, sporting a pistol and a Canon EOS Digital Rebel attached to a fully extended tripod. They were nice enough guys, hailing from Elizabeth, but I could not help but wonder how fun that tripod was to carry up to the lake and if they would be using the pistol for fun or for protection. I was hoping for the latter, based on my horrible experience at Huerfano Valley a couple of years ago. The two confirmed they were just hikers, not climbers, and were just there for the night.
Another hour later, two more guys came up the trail and were looking to camp nearby. One looked familiar, so I asked him if his name was Corey. He said it was - and sure enough, it was one of my Facebook friends! Corey was up at the lake with his friend Robbie as they were planning on climbing Snowmass on Sunday, the same as us. They were planning for a 4 AM start and we were planning for a 2 AM start. Regina and I talked for awhile off and on with both Corey and Robbie throughout the afternoon, getting to know each other. It is always remarkable to me how quickly people that climb 14ers can get to know each other and how, generally speaking, everyone is so friendly. It was a real pleasure sharing a campsite with them. Regina got to spend some quality time getting to know Corey:
The lake was thawing out throughout the day, which was actually really fun to watch. Chunks of ice and snow would calve off of the icy glacier that was now Snowmass Lake and flow down into Snowmass Creek and out to sea. It was really fun to watch, and quite peaceful too. Soon, the sun began to get lower and lower on the horizon, which piqued my photographic instinct quickly. I was off to get as many quality shots as possible of the lake, hoping to get both HDR and standard photos. HDR has quickly become one of my more favorite photographic mediums. Its almost like opening a present at Christmas when you begin working with the files at home - you never quite know what you're going to get!
First up - the HDR version:
And the standard version, which won me my second Flickr Explore Award, which was quite exciting! Explore is Flickr’s Daily Artist Showcase. Every day Flickr admins choose 500 of the most interesting images determined by “interestingness”. I have placed that photo in my portfolio and for sale section if you are interested in purchasing a print.
 The views from the shores of the lake were outstanding. Quite possibly ranking in the top 10 views of all time for me personally. The impressive features of Snowmass Peak, paired with the crazy cliff walls below Snowmass Mountain made for quite a great spot to sit and soak it all in. To make things even more fun, close to dusk, a huge, feral, rugged looking porcupine decided he would come and hang out with us. This guy was seriously oblivious to our presence, and it was actually somewhat challenging getting him to go away without putting myself in a dangerous place.
With all of the excitement over the porcupine and the heavenly sunset, I decided it was time to hit the sack. We had set our alarms for 1:45 AM, anticipating a 2 AM start. It was sadistic, I know, but we felt it was necessary given the conditions. The alarm went off and I got up fast, because I wanted to take advantage of a quick photographic opportunity to capture the Milky Way, or at least attempt it. Additionally, I was hoping that I could get some photos of the stars reflected in the lake as well. Both concepts challenged my photographic mind, and away I went to try to get some good shots. The challenge with shooting in low light, as in pitch dark, is always figuring out the best combination of aperture, ISO and shutter speed. Of course, I guess this can be said about any other form of photography, but the concepts are of particular sensitivity in low light conditions. I opted to set the camera at a slightly higher ISO (400) to increase the sensitivity of my cameras sensor. Additionally, I went for a 20 second exposure instead of a 30 second exposure since I did not want the stars to blur / move across the frame at all. Lastly, I opted to set my camera at the lowest aperture the lens would handle (f/3.5) to allow the maximum amount of light into the lens. These combinations produced fairly good results.
 Unfortunately for me, the photographic success would not lead into climbing success. This is quite an embarrasing story for me, since I pride myself on preparation. As Regina and I wrapped around the steep snow banks to the left of Snowmass Lake, heading for Snowmass Mountain, we quickly realized that crampons would be required. No problem right!? Wrong. Shortly after putting the crampons on and continuing, my crampons would come right off my boot, necessitating frequent and long stops to get them back on. Finally, Regina and I decided that there was something wrong with my crampons and that no matter how we tried to get them to stay on my boots, they just would not stay. We decided to abort the mission at about 3:45 AM and headed back to camp. I was quite furious with myself, since I had personally tested the crampons at home, putting my boots into them, strapping them down, and making sure they fit. Apparently that effort was not as good as it could have been. It turns out, after inspection at home, that my crampons were adjusted in such a way that they were too big for my boots. Most modern crampons self-adjust their size; however, the crampons I own are hand-me-downs from my dad. Surprisingly, the same model is still manufactured by Seattle Manufacturing Corporation. Anyways - lesson learned! USE your equipment before you trust it with your life. We went back to camp, slept for a bit longer, and then packed up and headed back down to the trailhead. I was not in a great mood because this was one of the only mountains I've ever been turned back from, and it was completely my own fault. If it were weather or altitude sickness or some other uncontrollable event, that would be one thing, but to have the mountain turn us back because I was too stupid to test my crampons - not cool. It was not a total loss though, the photos turned out great, and I was able to get some fun and creative shots of wildflowers on the way out. If any of you know the names of these flowers, please, by all means let me know!

The most memorable part of the trip was yet to come though - and it certainly made up for the rest. On our way out, Regina took a nasty fall on the logjam! At first it was quite a scary experience. I was right behind her, and had to talk her through getting herself back up out of the water. She had managed to completely submerge one of her legs and was drenched. Fortunately, Regina is a good sport, and within a matter of minutes we were both laughing about it.
Lastly, we were able to get some great views of the backside of Snowmass that we did not get to see on the way up, which were quite stunning!
All-in-all, I would rate this hike quite highly on my list of hikes that I have done. The views from Snowmass Lake are worth it by themselves, and the logjam provides an excellent adventure.
And in case you were wondering - the new camera bag totally lived up to my expectations - I will end up writing a full-blown review of that product for sure!
Until next time Snowmass Mountain... I'll be back!
San Luis Peak - an adventure in photography and friendship
San Luis Peak is a gentle giant, rising to 14,014 feet in the middle of the La Garita Wilderness Area, which means "The Lookout" in Spanish, according to Wilderness.net. The 50th highest ranked peak in Colorado, San Luis Peak is named after the valley it towers over, the San Luis Valley. According to Hayden's 1877 Atlas of Colorado, the valley itself was named by an early unknown Spanish explorer, the patron saint of whose village was San Luis.
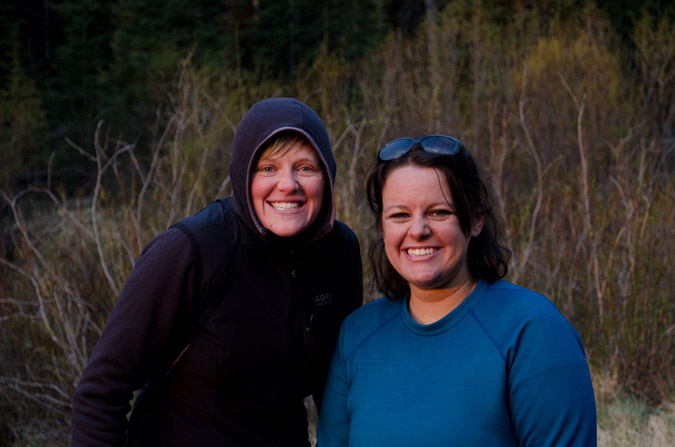
I've been wanting to climb San Luis for awhile now. Not a technical climb nor arduous hike, San Luis is generally considered one of the easier 14ers; however, due to its remote location, it is not climbed nearly as frequently as other 14ers. Indeed, the trail-head is located nearly 50 miles from any recognizable form of civilization. For this reason, I am quite thankful that I was able to get a ride with Regina Primavera (Yalegirl09 on 14ers.com), my friend and hiking partner. Regina and I planned out many of our hikes quite early this year and San Luis was to be the first mountain for us to tackle together. Additionally, another awesome person, Sarah Musick, found me through my website and a mutual friend, and asked if she could join us.
Regina and I picked up Sarah and departed for the San Luis trailhead on Friday evening, June 10th, 2011. Excellent conversation ensued and we were all quite acquainted with each other before we reached Salida, Colorado for dinner. We made a stop at Amica's Pizza and Microbrewery, which reminded us all of Il Vicino in Colorado Springs (and for good reason too, apparently Amica's used to be a Il Vicino and was later converted by the new owner). The food and beer were all quite fantastic. With spirits high, we continued on to the town of Saguache, Colorado (pronounced Saw-watch), refueled, and drove the beautiful yet never-ending road to the San Luis trail-head. A note about the road - it was somewhat confusing for us coming from the San Luis Valley. If you are coming from the San Luis Valley area, drive north on Colorado 114 to Dome Lakes, then turn left onto the "15-GG" road. Our mistake was that we did not drive all the way to the 15-GG road, but instead headed up the NN-14 road before reaching Dome Lakes. It still gets you there by going the way we did, but it is MUCH longer! For our trip, we opted to take the Stewart Creek trail.

Upon reaching the trail-head parking lot, we set-up our camp site quickly with the aid of headlamps. The stars were pretty incredible since we were in the middle of nowhere, and I decided it would be a great time to try out some star trails photography.
The stars were looking good... hopefully the star trails version would be just as good!
There are a couple techniques one can use to accomplish star trails in a photo. The basic method is to take one long exposure (over an hour), which captures the movement of all of the stars as trails across the photo. The drawback from this technique is that you have no room for error because of the long single exposure and, due to noise caused by heat and other factors in the camera, you need to turn on noise reduction in camera, which basically takes an equally long exposure with the shutter closed at the end of the shot and then reduces noise based on the comparison of the open and closed shutter shots. The second method, which I employed, is to take multiple shorter exposure shots (30 seconds to 4 minutes each) over a period of time, with little time between shots to ensure that no gaps exist in your trails (unless that is what you want), and then combine them later in a program like photoshop or startrails.exe. In order to get the below photo, I set-up my camera, a Nikon D7000, to take a photo every 45 seconds. The camera was set on manual focus, with the stars in focus, at aperture of 5.6; the shutter speed was set for 30 seconds because I forgot to bring my shutter release cable, otherwise I would have probably set my shutter speed at 2 minutes or so. I then imported the photos into Adobe Lightroom and adjusted the exposure and cleaned up any unwanted artifacts that streaked through the exposures (airplanes, satellites, etc). I copied the development settings of the photo I did the work on and applied it to the other 47 images for consistency purposes. Finally, I loaded all of the images into startrails.exe, which is a free program. Startrails combines all of the photos together into the one you see below. All-in-all, I was very pleased with the results.
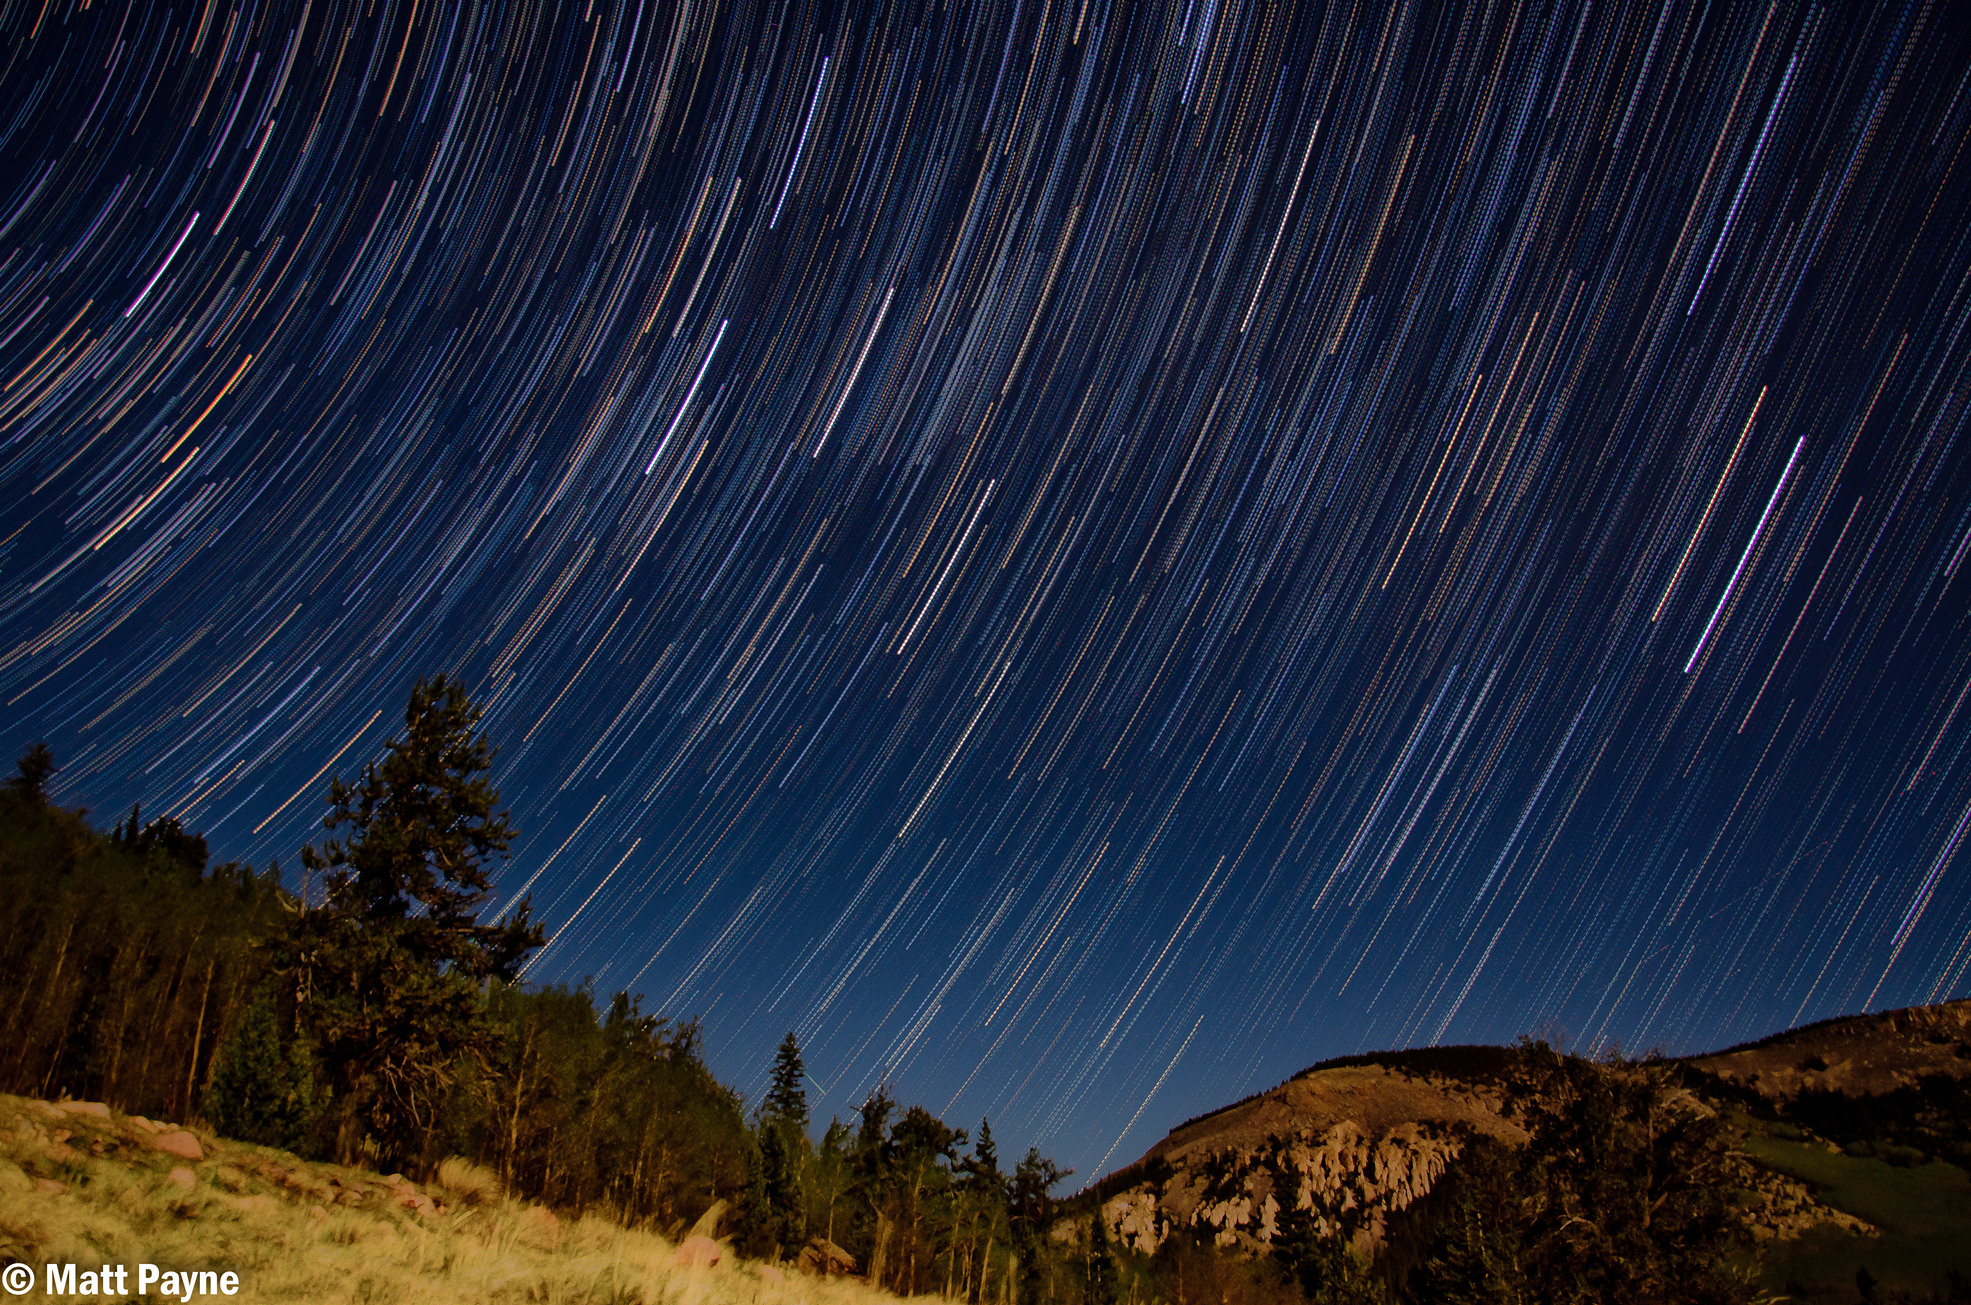
Additionally, I decided to add the photos together into a time-lapse video, showing the change in star position across the 35 minute time-span, as seen in this YouTube video:
After waiting in the cold for an hour with Regina while the camera captured the photos, we set our alarm for 4 AM and crashed in the tent. 4 AM came sooner than I liked, but I felt much more rested than I did on my last adventure up Princeton.
We packed up our tent and sleeping amenities, ate some quick trail food, and departed. Since none of us were really sure about the conditions of the mountain due to a real dearth of trip reports online for San Luis recently, Regina and I opted to pack our crampons, and we all had ice axes. Regina and Sarah were looking quite excited to begin the hike at 5 AM, despite Regina stating she felt sick.
Naturally, I had to look as excited as possible, despite the fact that I am not a morning person!
The trail heading up the Stewart Creek valley was gentle and steady. One thing that was remarkable was the beaver ponds, which were quite ubiquitous. We were even lucky enough to be greeted in the early morning by a couple of beavers, whom used their tails to loudly splash water, as if to say, "this is our house!" As we continued up the trail, we shortly glimpsed a very young moose that was grazing near one of the beaver ponds. Before we could capture any photos of it, it ran into the woods. Oh well!
Before long, the sun began to rise and the inner nerd photographer in me began to get excited. The Golden Hour is easily one of the best times to take photos, and I quickly searched for some beaver ponds or other water features to balance out my compositions.
 |
 |
We stopped near a small pond and a crook in the stream and I set-up my camera.
If you are not familiar with The Golden Hour, it is well defined by Wikipedia: "In photography, the golden hour is the first and last hour of sunlight during the day, when a specific photographic effect is achieved due to the quality of the light." Today was no exception. Due to the fires on the Colorado-New Mexico border and in Arizona, the sky and the clouds had a brownish-red hue to them, making for some interesting light effects.
I think I may have frustrated Regina and Sarah with the amount of time I spent shooting photos at this point, but I think the time was well worth it, personally. I have been trying to focus a little more on composition in my photographs lately, including thinking about the rule of thirds and incorporating lines into the photo in order to draw the viewer into the photo. I've also been using Lightroom to do most of my editing. Let me know what you think about my efforts!
While I was playing in the woods with my camera, Regina decided it would be fun to take a picture of me, taking pictures.
Something about me being rich and famous someday (yeah right)! Additionally, Regina and Sarah teamed-up and came up with the brilliant plan of putting Regina's crampons in my pack as punishment for the long wait I had caused (and more importantly, because Regina did not feel well).
On we continued up the trail, with Sarah playing videographer to our adventures.
Sarah and Regina made for great companions, it was amazing how well we all got along and how closely aligned our political, religious and philosophical views were.

We rested for a little bit to eat and drink, and Sarah shared some amazing little snacks her friend made. Apparently, her friend is beta-testing these snacks to be sold to cyclists, hikers, climbers, triathalets, etc. I must say, they were delicious! They were little balls of goodness!
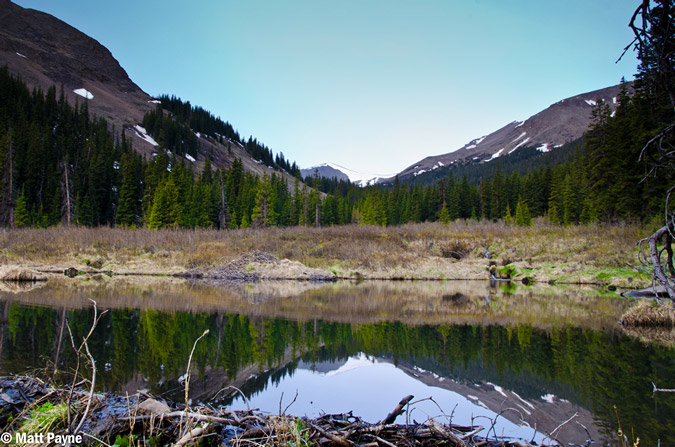
We spent a little time at a huge set of beaver ponds, admiring the clear water and great morning air.

Before we knew it, we were at treeline after a few simple creek crossings.
Once we hit treeline, the trail ran right into a huge snowfield that presumably went over where Stewart Creek is supposed to be.
From here, the goal was to gain the saddle between Organ Mountain and San Luis. The trail was hit or miss through the snow, but never felt difficult. The snow was not a problem at all, and I think Regina was a little bummed that she didn't get to use her crampons.
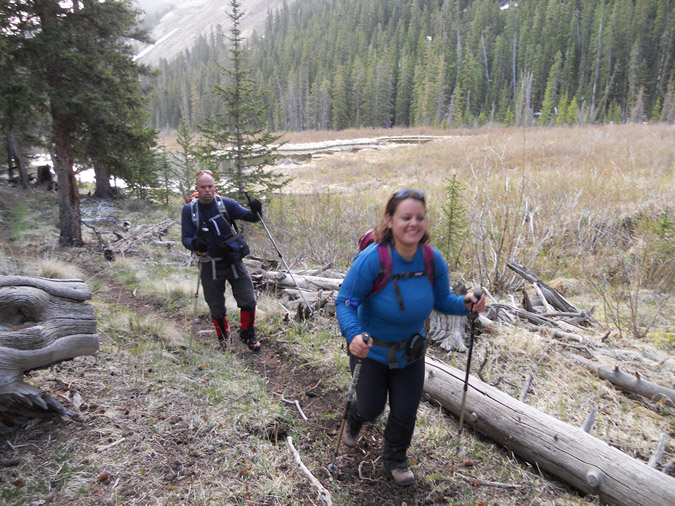
There was a group of 5 guys that were behind us pretty much the whole way up. In total we counted 15 people including ourselves the whole day. I was able to get a large pano from most of the way up to the saddle, which included the guys behind us.
We quickly gained the saddle and enjoyed views of both Organ Mountain and San Luis, which was pretty close!
Organ Mountain behind Matt.
After the saddle, the trail leads you up towards a bump that Regina kept saying was Baldy Alto, but is in fact just a bump on the way up San Luis. The trail bypasses this bump to the left and then heads right up below San Luis' ridge.

A 360 view from the ridge between Organ and San Luis. Click for a higher resolution version.
Organ Mountain was impressive. I had originally thought we might have time and energy to hit it as well, but with Regina not feeling well, I decided to just do San Luis Peak. Anyways, I really liked the imposing feel that Organ Mountain imparted upon me here, so I had fun editing this photo to really convey that feeling.
We opted to follow the trail and stay low instead of going up to the top of the ridge.
Subsequently, the trail led us into some nasty snowfields, which we had to downclimb to go around. We later lost the trail due to the snow and ended up going straight up some relatively unpleasant scree to the ridge.
We reached the summit at 10:45 AM, a modest 6 hours since we left the car. Surely if Regina wasn't sick and if I didn't own a camera we could have shaved a good 2 hours off the time!
The smoke was very evident from the top, by sight and smell. It really degraded the view and photography. Regardless, I was able to get some good shots from the top, including this near-360 view (click for higher resolution).

I was also contemplating knocking out Stewart Peak (center) and Baldy Alto (right of center), as seen below, but opted not to due to Regina not feeling well. I did not want to split the group up if someone was not feeling good.
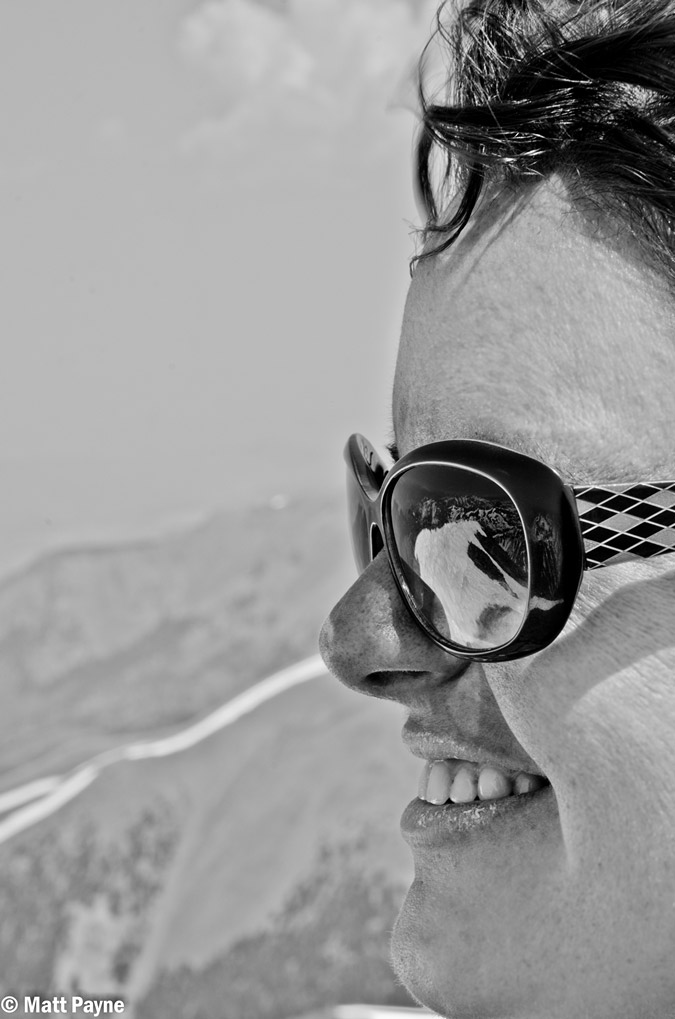 I had fun shooting this photo of Regina - the mountains to the west were reflected nicely in her sunglasses, plus she was quite a cooperative model! All in all, it felt great to climb my first mountain with both Regina and Sarah, and I think everyone was quite proud of their accomplishment!
After enjoying some cliff bars on top, we all decided to head back down. The hike down was quite easy, and before we knew it, we were all back at the first snowfield we had encountered before. Regina cracked some jokes about falling into the snow, which was hard enough to prevent post-holing, thankfully.
On the way back down, I caught something moving out of the corner of my eye. Much to my surprise, a huge moose was moving slowly through the beaver ponds below. That was probably the highlight of the trip!

The Stewart Creek valley is a very beautiful place. I am glad I need to return to do other climbs nearby!

We finally reached the trailhead again, and I took some fun bracketed photos to run through Photomatix. If only I had a tripod...
The total hike was 11 miles round-trip, including 3,500 feet in elevation gain. I would rate this hike as moderate to easy in comparison to other 14ers I've climbed.
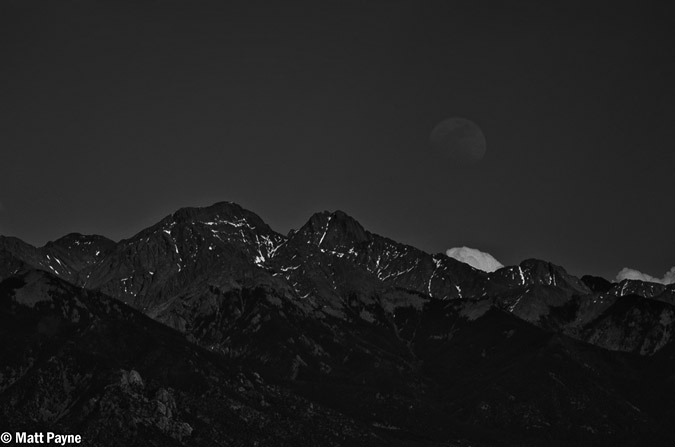
The drive home was fairly uneventful until I was able to discover the moon rising above the Sangre de Cristo Mountains, including Crestone Peak (right) and Kit Carson Mountain (center).
As soon as I returned home, I made sure to check-off another box on my 100summits t-shirt. Thirty-eight of the highest 100 to go and ten 14ers to go!
I look forward to more exciting hikes with Regina and hopefully Sarah too!
If you would like to stay up-to-date on all of my articles, photography musings, trip reports and other mountaineering related news, please feel free to follow 100summits on Twitter or Facebook! Also, if you're planning on doing any online shopping and if you enjoyed the content, please help keep the site going by using the links on this page to help fund the site.
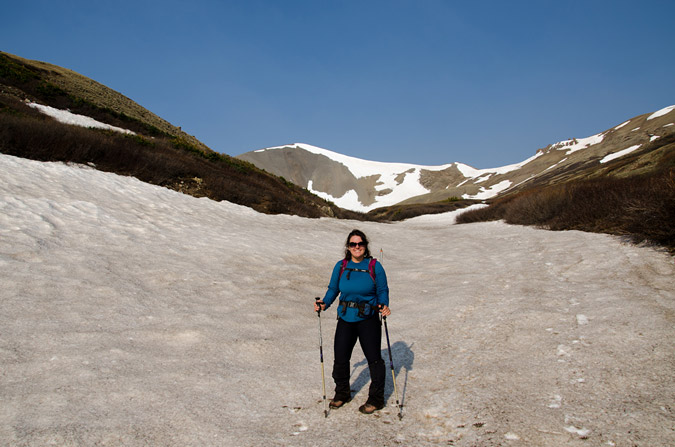
Missouri Mountain, Iowa Peak and Emerald Peak: The Sawatch Triple-Crown
The Sawatch Range of Colorado is known for its long, gentle giants such as Mount Elbert, Mount Massive, etc. It would also seem that most visitors to this area of the state are solely interested in climbing only the 14ers, due to the popular sport it has become to summit all of the 14ers in Colorado. I must admit that I have been caught up in this craze myself; however, one of my favorite climbing past-times is to spend time tackling some of the lesser-known 13ers, and that is just what Ethan Buete and I did this past weekend.
To start off, here is a break-down of relevant numbers from the trip:
Missouri Mountain: 14,067 ft (ranked 36th in Colorado)
Iowa Peak: 13,831 ft (soft-ranked)
Emerald Peak: 13,904 ft (ranked 71st in Colorado)
Total elevation gain: 5,612 ft.
Total distance hiked: 13.44 miles
Total time hiking: 10 hours, 10 minutes
Total photos taken: 554
Total wildlife sightings: 2 (marmot and beaver)
Total distance driven: 124 miles
Trip duration: 27 hours
Ethan and left his house at 5:30 PM on Friday evening and stopped in Buena Vista at the Eddyline Brewery for dinner. The selection of food was superb - Eddyline supports local agriculture and the green movement - a definite bonus. I ordered the "Mount Princeton Calzone," which seemed quite fitting. After chowing down at the brewery, Ethan and I departed for Chafee County Road 390, just a few minutes North of Buena Vista, and headed up past Clear Creek Reservoir to find a camp-site next to a beaver pond along-side the road. Upon arrival, we were greeted by a friendly and noisy beaver as we began un-packing. We quickly set-up camp, set our alarm for 4 AM, and drifted into the always welcome pre-summit slumber.
We woke up at 4 AM and made some quick oatmeal and broke-down our campsite. Shortly afterwards, we departed for the Missouri Gulch trailhead and began hiking at 5:15 AM.
This particular trailhead provides access for several fourteen-thousand foot mountains, including Mount Belford, Mount Oxford and Missouri Mountain. We were hopeful that most other hikers would be aiming for the ever-popular Belford-Oxford combo and that we would be provided with some solitutude. Our goal was to climb the standard route of Missouri and then follow the ridge over to Iowa Peak and then Emerald Peak. We were not sure on our route quite yet, but figured we would have it solidified upon getting a full view of the area from each peak. Our eventual route took us up Missouri, over to Iowa, up Emerald, down into the Missouri Basin, and finally over Elkhead Pass back to the trailead.

A topographical map with our route shown in purple. We began and ended near Vicksburg at the Missouri Gulch trailhead.
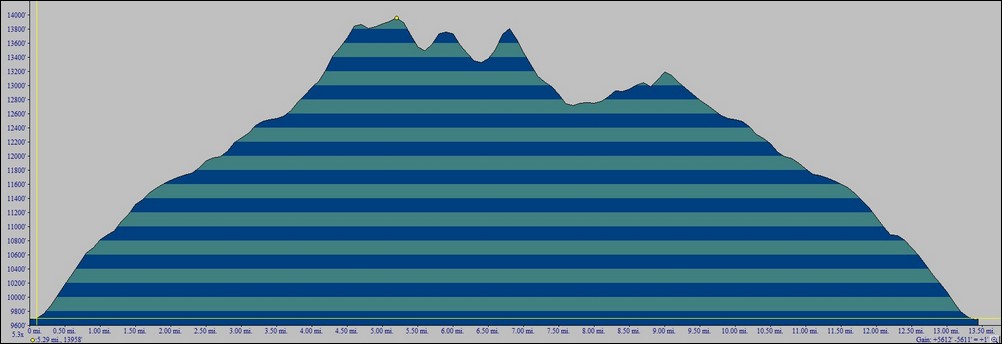
A vertical profile of our chosen route up Missouri, Iowa and Emerald.
The trail going up Missouri Gulch starts out very steep and does not relent until after treeline. Ethan and I made excellent progress up the trail and only stopped a few times before reaching treeline shortly before the sun began to rise.
The sun rises below over the Clear Creek valley.

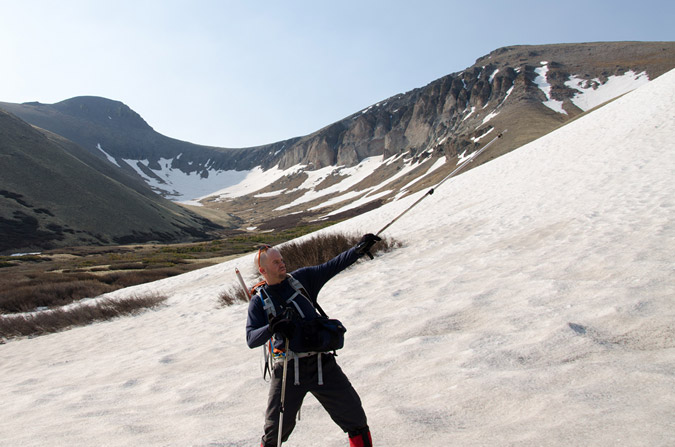
Matt Payne hikes quickly up Missouri Gulch
Shortly after reaching treeline, some favorable campsites appear near some old mining cabins alongside the Missouri Gulch drainage. It is at this point that you can begin to see Mount Belford above and to the east. Ethan and I both stopped to take some pictures of Mount Belford and the surrounding area.

Matt Payne stops to take a few photos of the Missouri Gulch and Mount Belford.

Mount Belford is illuminated by sunlight near Missouri Gulch
After hiking a short was further up into the basin, our first views of our first objective for the day, Missouri Mountain, became available.
Missouri Mountain appears before us, basked in early sunlight.
At this point, we were closer to Mount Belford. Ethan explained to me that when he climbed it, he climbed up Elkhead Pass, where most other hikers chose to go straight up a muddy slope on the northwest slopes, making for a terrible climb. It appeared that others were attempting to do just that on this day as well.

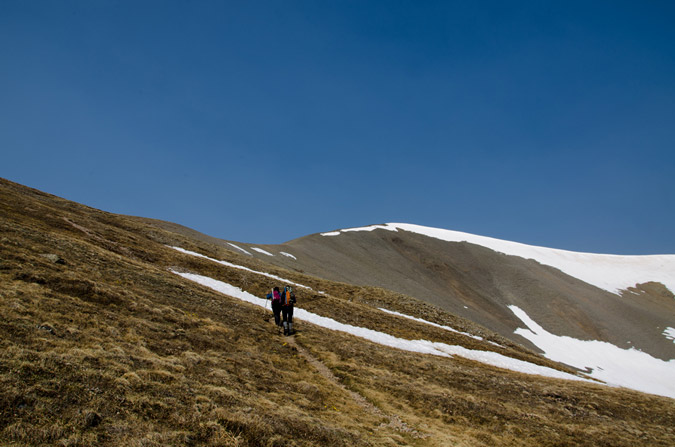
Mount Belford with hikers on the northeast slope.

Climbers are seen going up the gentle northeast slope of Mount Belford.
As we climbed higher, Missouri became more and more impressive. The light also afforded somewhat better views of the mountain, and afforded us with some photo opportunities.
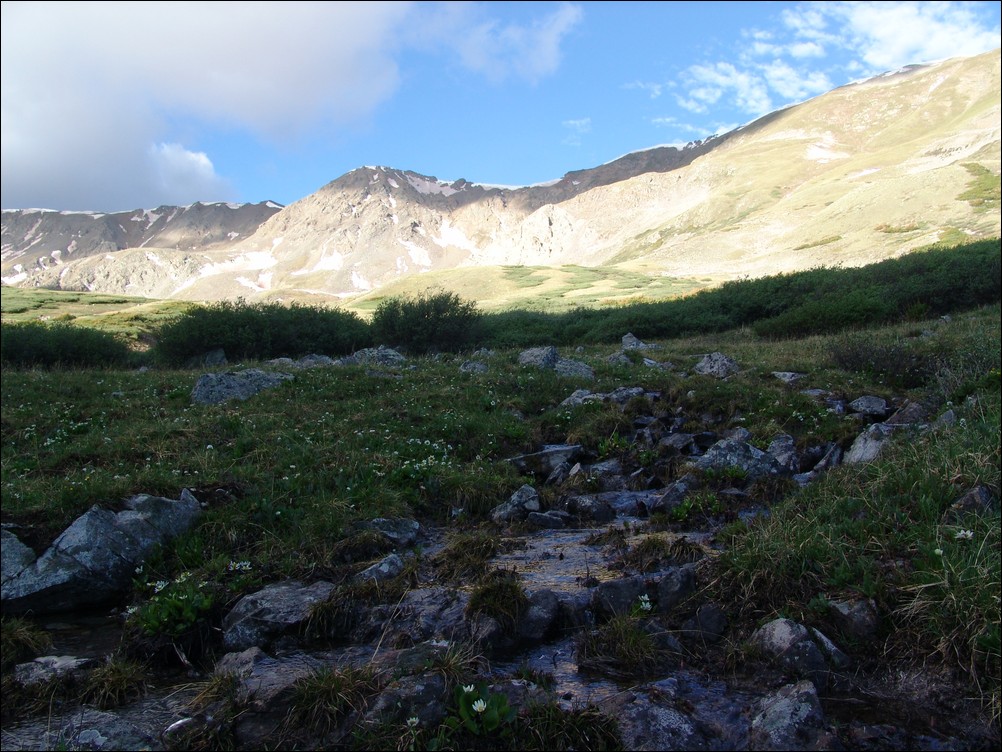
Missouri Mountain with a small water flow with alpine flowers
At this point, were were passed by a group of 4 hikers heading up Missouri. I hate to judge people that I don't know, but I could not help but wonder about this group. It was a friendly but fairly odd group, all wearing cotton sweat-shirts (cotton is often considered a very poor choice for any article of clothing worn during high-altitude hikes due to its inability to quickly dry). One gentleman was wearing flip-flops and playing music out of a small radio in his backpack. I was both perplexed and annoyed - I really don't want to hear your music when I'm hiking, and I won't feel pity if Search and Rescue are called because you obtained frostbite on your toes. We later learned it was his first 14er and he had switched into ascent shoes, which made me feel a little better.
Ethan and I continued up the trail and kept our eye on Missouri, hoping to catch a view of the trial heading up to the ridge.
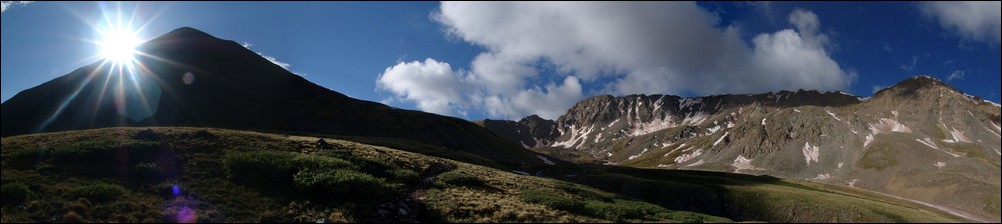
The sun rises over Mount Belford with Missouri to its immediate right.
The extra light from the sun also revealed to us that there were many types of wildflowers in bloom, much to our surprise. The basin was covered in whites, purples, yellows, and blues.
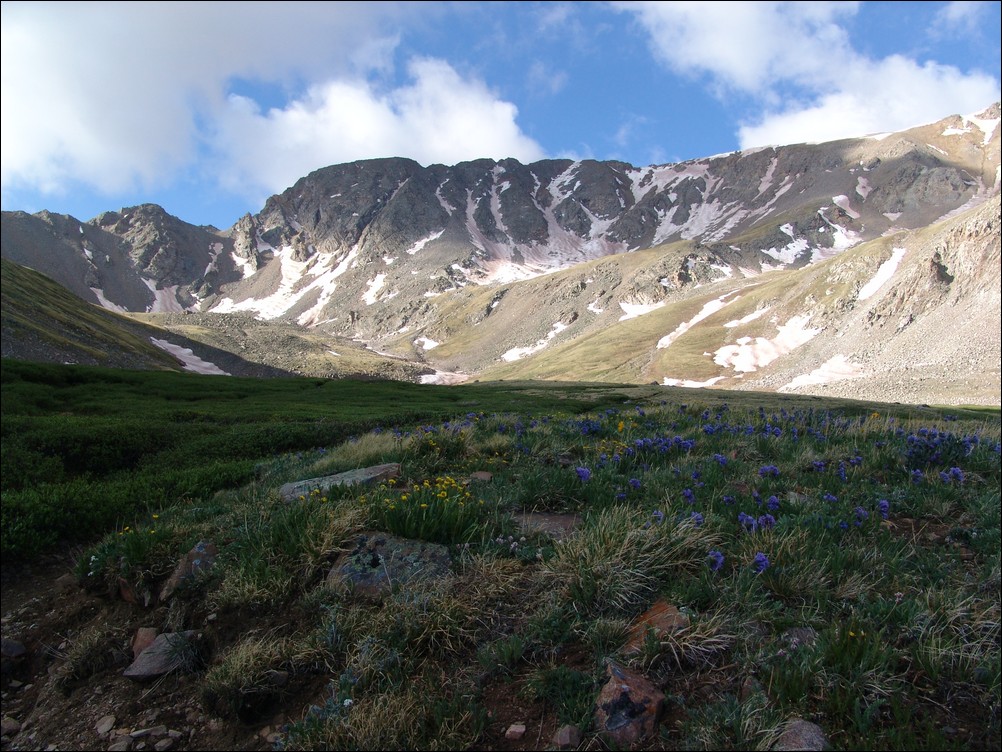
Wildflowers cover the Missouri Gulch basin in late June.
The trail heading up towards Missouri was in great condition, often weaving through thick tundra grasses and around willow bushes.
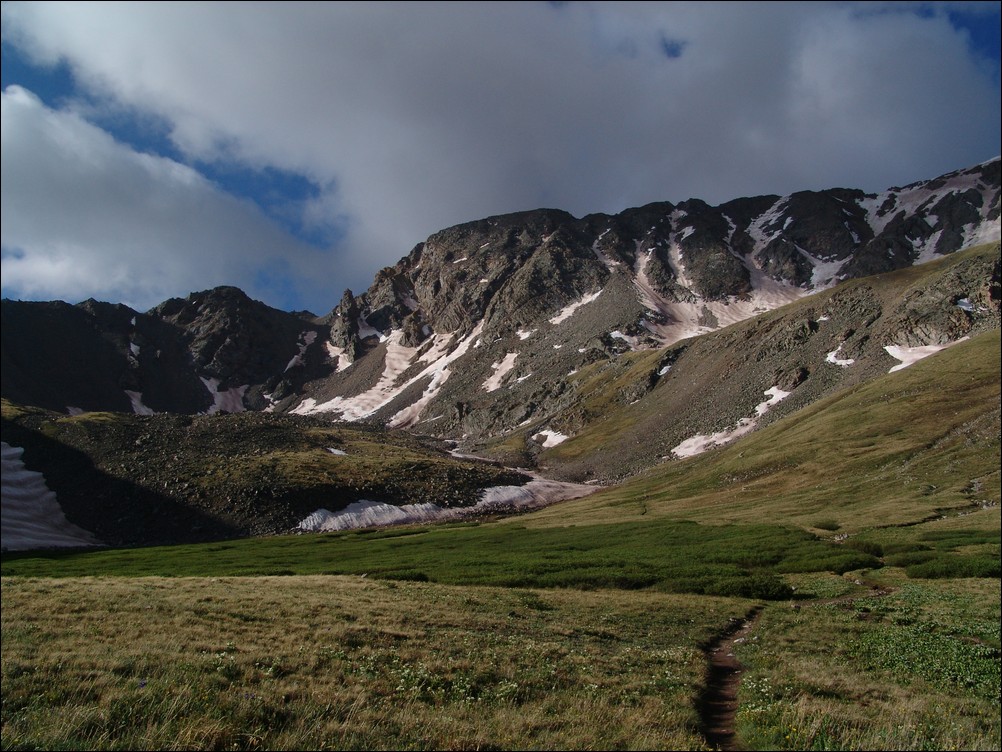
Shortly before reaching the base of Missouri Mountain, the trail hits an intersection. Heading left takes you up Elkhead Pass and heading right takes you up the standard trail for Missouri Mountain. Ethan and I refueled with nuts/fruit/powerbars and began our ascent up the relatively steep trail for Missouri.
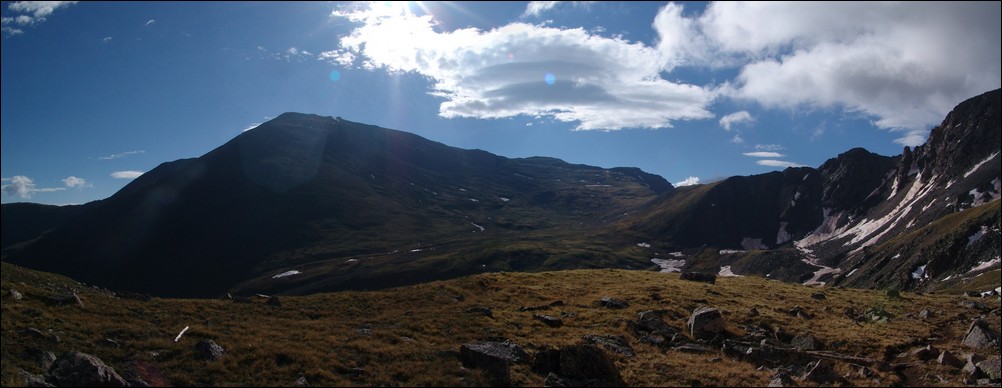
Elkhead Pass can be seen to the right of Mount Belford (left of center).
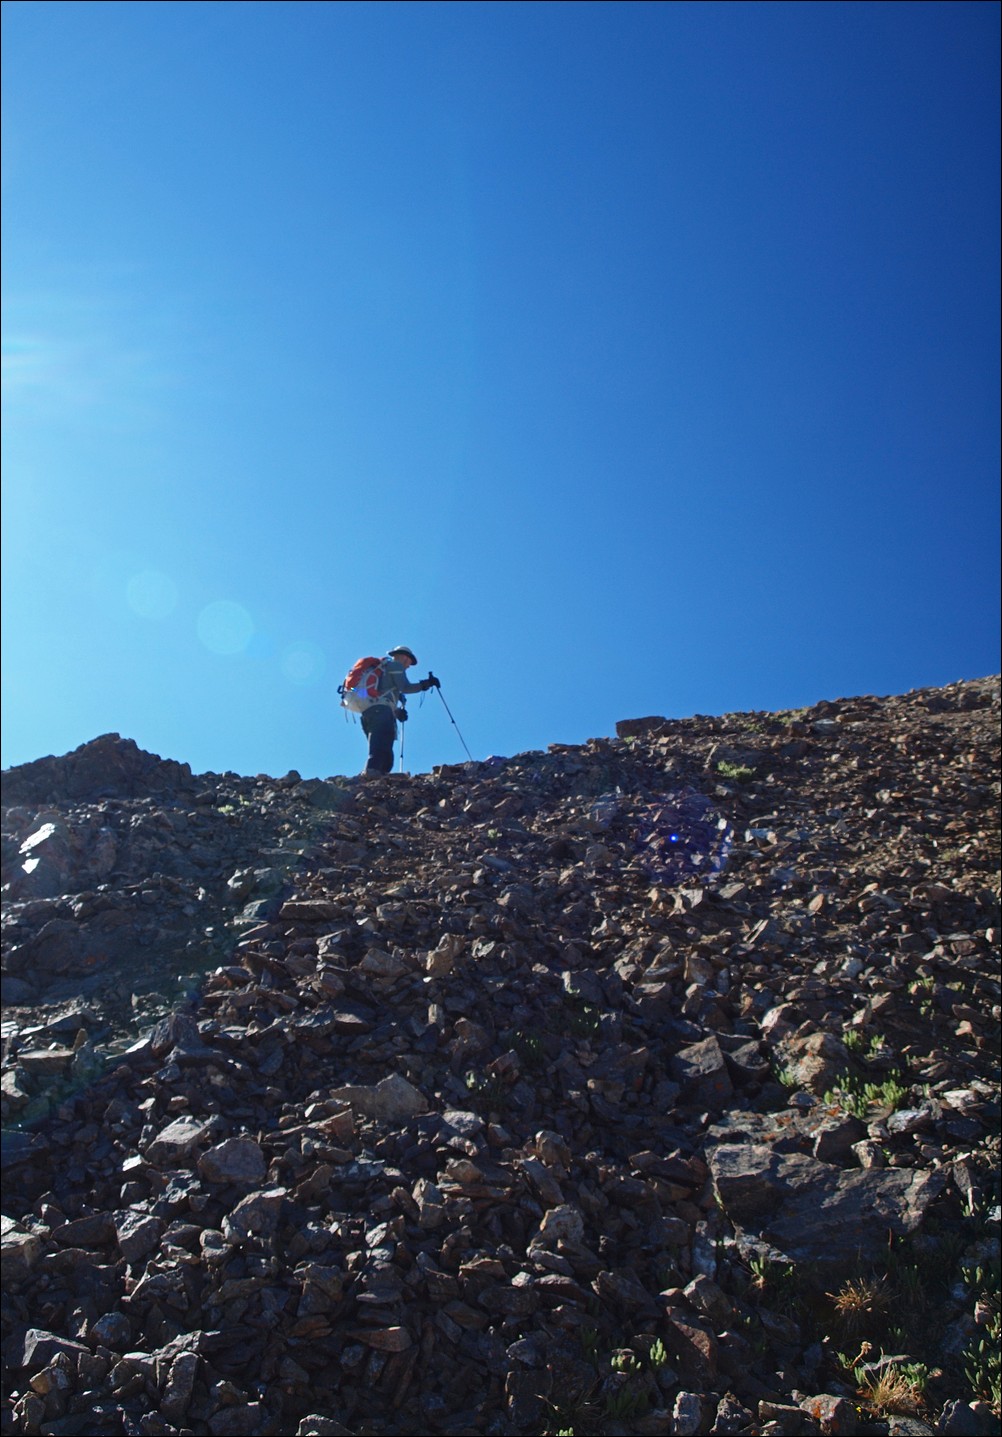
At this point, Ethan and I kicked it into high gear, heading up the rocky, but well-maintained trail up Missouri's long sweeping north ridge. The trail takes you up very quickly, and before we knew it, we were cresting the ridge.
After reaching the ridge, awesome views of Huron Peak, La Plata Peak, and the Three Apostles, including Ice Mountain and North Apostle were revealed.
This was particularly exicting for me since I had just been on top of Huron Peak just a few short weeks previous to this trip.
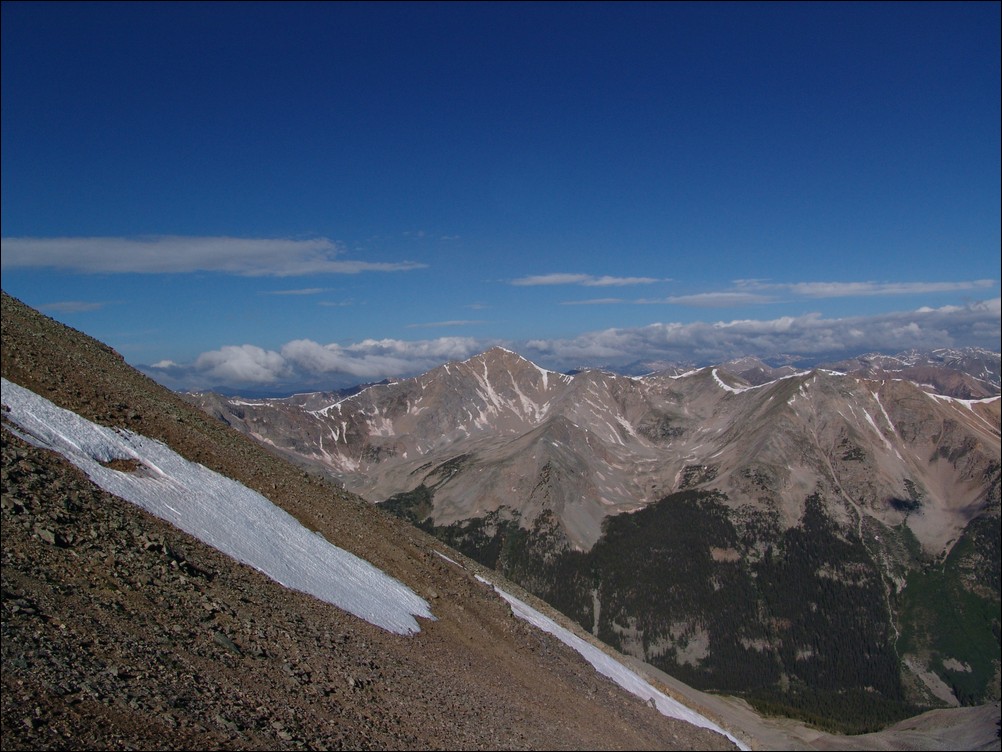
Huron Peak comes into view upon gaining the north ridge of Missouri Mountain.

Huron Peak - zoomed in

Ethan Buete looks over towards La Plata Peak (ranked 5th highest in Colorado).

Missouri's Ridge is revealed.
After taking a lot of photos, Ethan and I headed up and along the long ridge towards Missouri. The second and third objectives for the day finally appeared as well, with Emerald peaking over the top of Iowa.

Iowa Peak mostly obscures the view of Emerald Peak to the south of Missouri Mountain.

From the ridge of Missouri, views of Emerald Peak, Iowa Peak, the Three Apostles, Huron Peak, and La Plata Peak (among many others) can be seen in great detail (click to see the full resolution version).
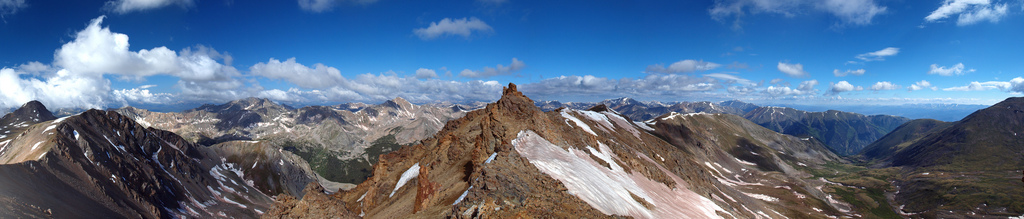
Ethan's photo of Missouri's Ridge with Emerald and Iowa in view (left) and Missouri's Ridge behind us (right)
The ridge to Missouri was nothing harder than class 2 the whole way, and was quite simple to navigate. I've read reports of people calling the ridge class 3, and I can assure you, it is not even close to class 3 unless you stay high at the jagged rocks (seen above). Those rocks are easily navigated around though...
After 3 hours of hiking, we reached the summit of Missouri Mountain at 9:15 AM. Naturally, the flip-flop guy had his music playing on top and he was enjoying a beer. Ethan and I exchanged summit photos, took some 360o panoramic shots, ate some food, and quickly departed, knowing our day had really just begun. Later in the day, I was able to capture a nice view of the route we took up Missouri from the Missouri Gulch.

The route up Missouri Mountain.
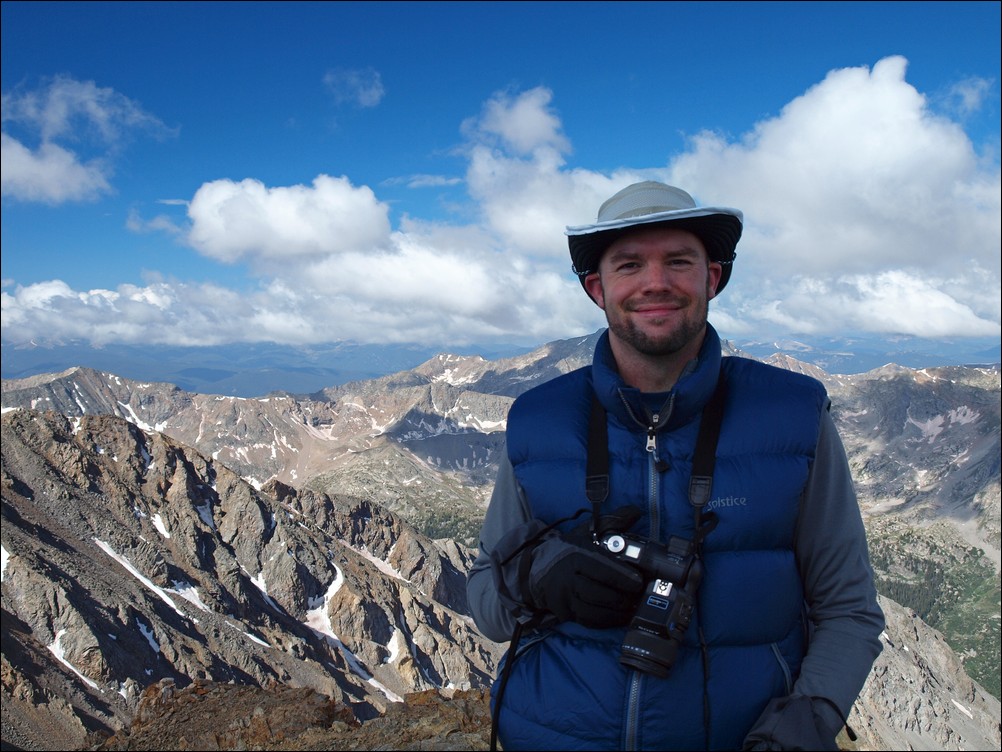
Matt Payne on the summit of Missouri Mountain, his 38th 14er climb (37 total 14ers).
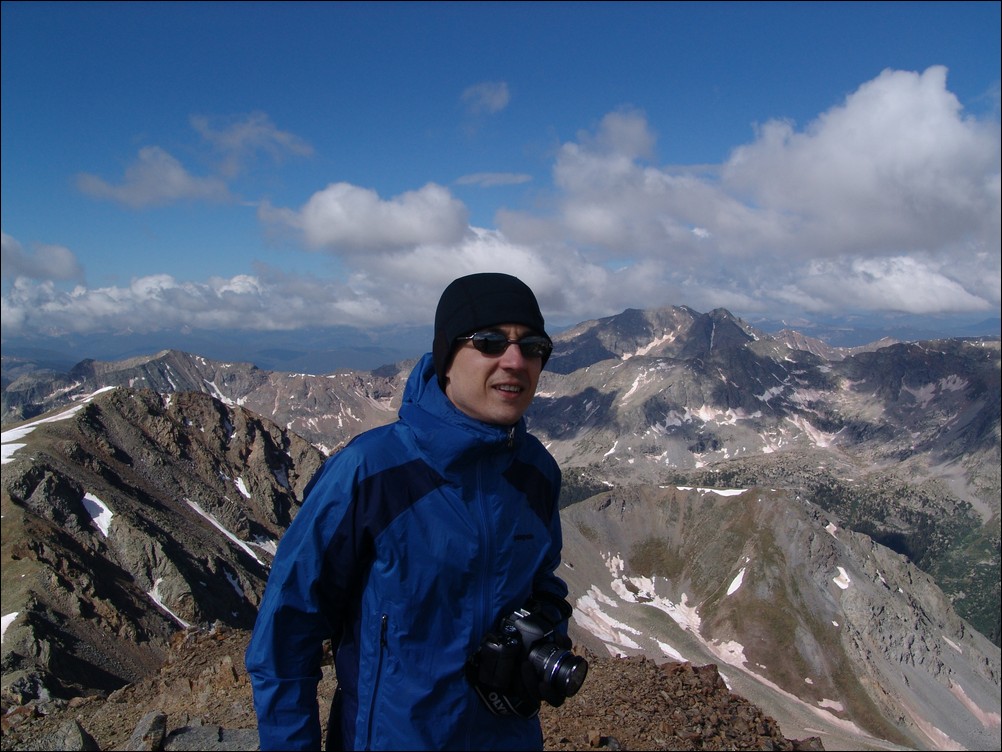
Ethan Beute on the summit of Missouri Mountain. Ethan was unsure of how many 14ers he has climbed, as he is not keeping track. 
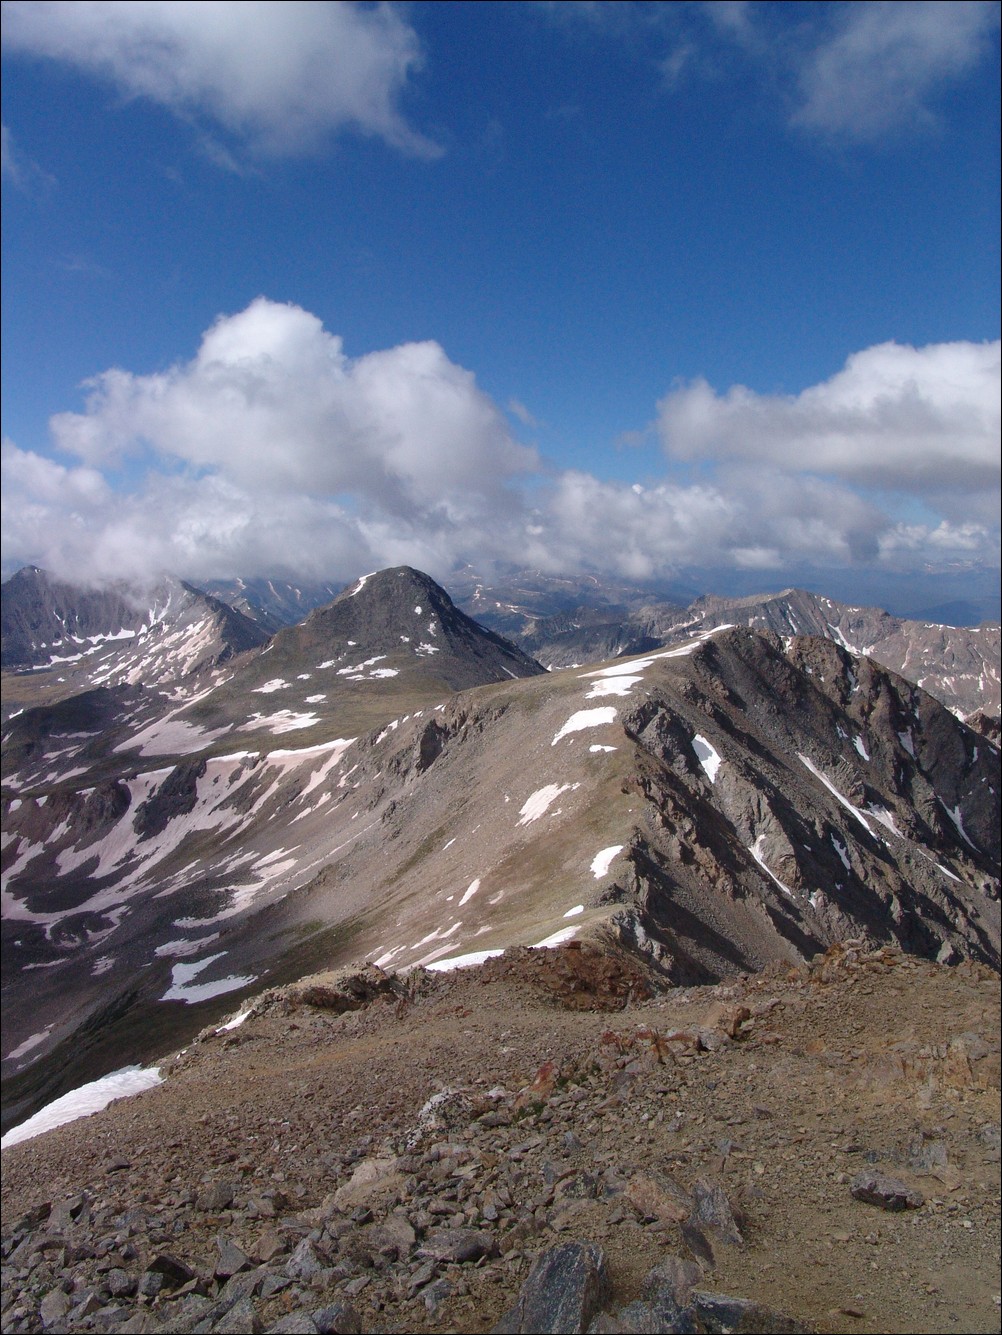
Iowa Peak (closest) and Emerald Peak (left and behind Iowa) drew our gaze.

Mount Harvard (left) rises high above the Missouri Basin (middle), with Emerald Peak and Iowa Peak sitting above pristine alpine lakes.

A zoomed in view of Emerald Peak from Missouri Mountain
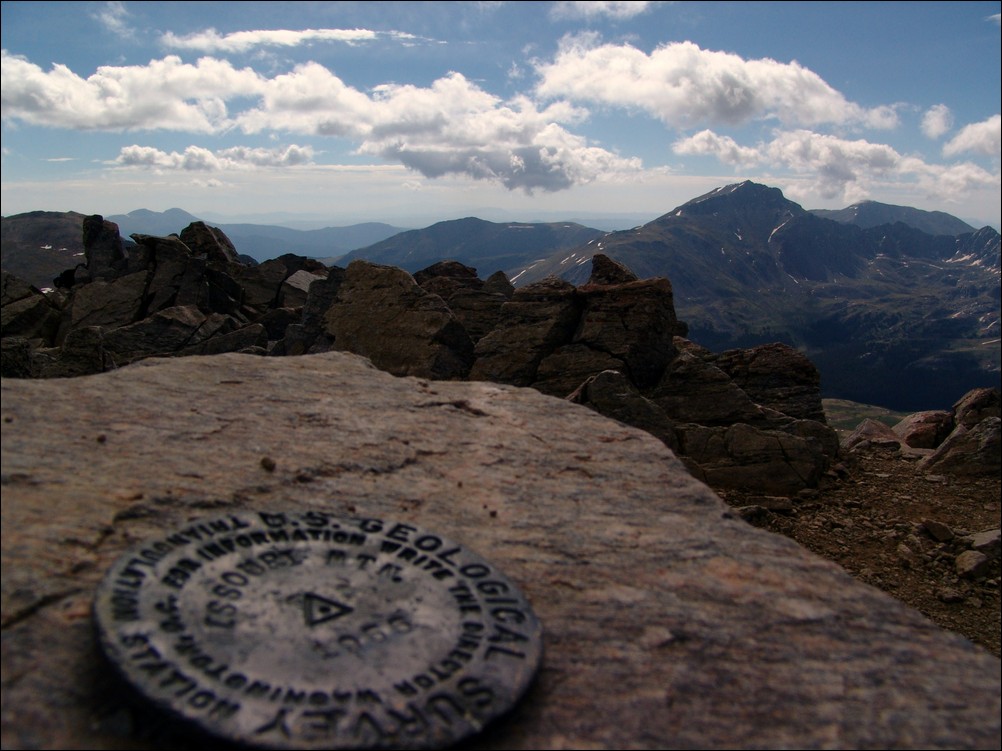
The USGS marker for Missouri Mountain with Mount Harvard in the background.
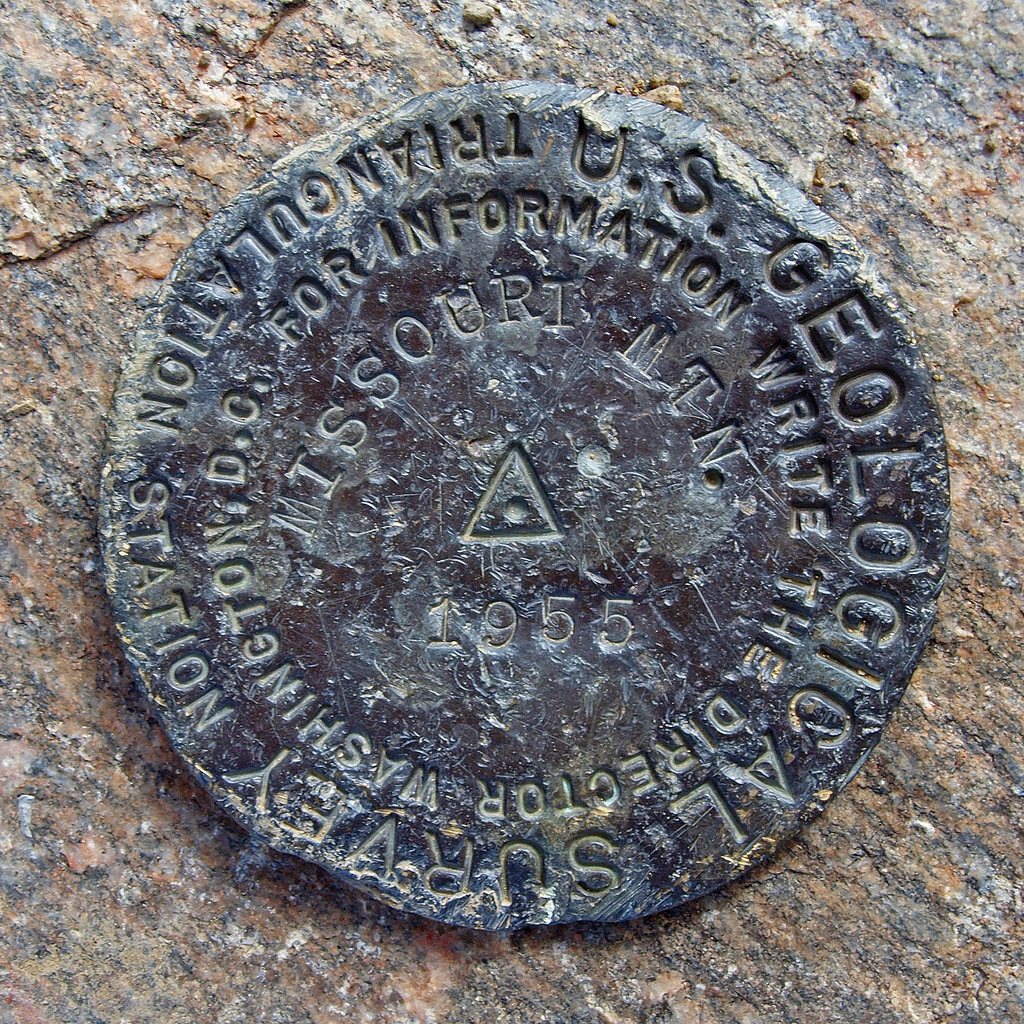
Ethan Buete captured this great macro shot of the Missouri Mountain USGS marker.
Ethan and I decided to pack up and head on over to Iowa Peak, leaving the summit of Missouri Mountain.

Matt Payne descends towards Iowa Peak - photo by Ethan Buete
The climb down to the ridge and up Iowa was fairly straight forward on a primitive trail.
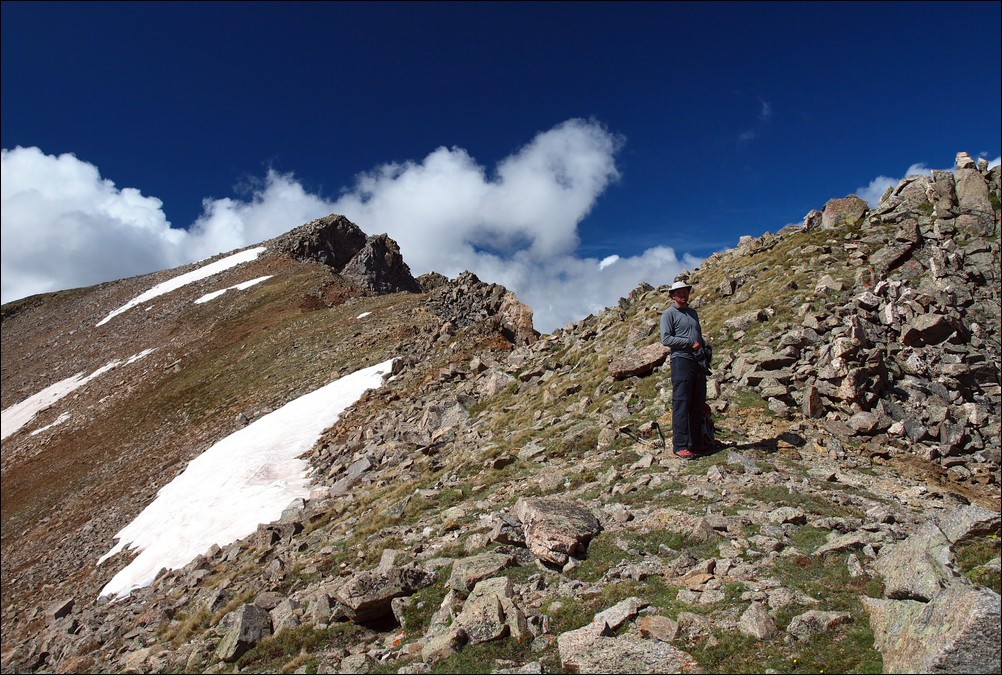
Matt Payne halfway up Iowa Peak.

A look back at Missouri Mountain from near the top of Iowa Peak.
It took us about 30 minutes to reach the top of Iowa Peak, where we stopped to take more photos and re-hydrate.
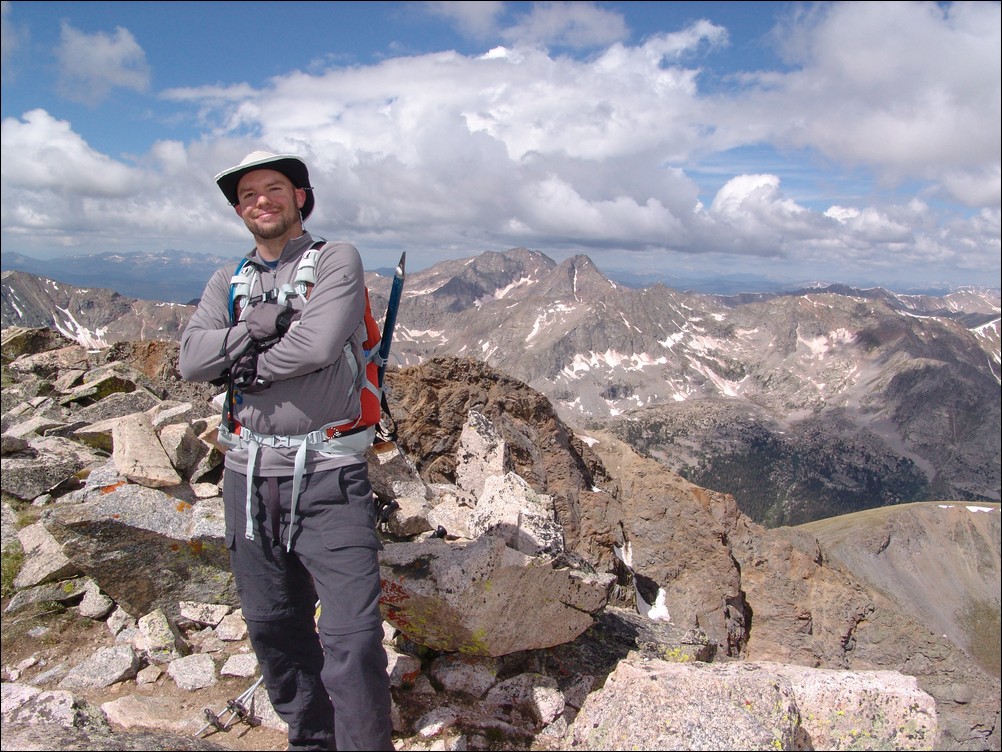
Matt Payne on top of Iowa Peak.

Ice Mountain and North Apostle sit above the valley just below Iowa Peak.

180o view from the summit of Iowa Peak. Looking left to right - Missouri Mountain, Buffalo Peaks (in far distance), Mount Harvard (center), Mount Yale, Emerald Peak (above near snow).

Huron Peak rises high above Clohesy Lake as seen from the summit of Iowa Peak.
After a few minutes on top of Iowa Peak, we made an assessment on the weather. The cloud patterns had not changed since leaving Missouri Mountain and we were fairly confident that the weather would hold long enough to summit Emerald and make it down. So, we headed on down to the saddle between Iowa and Emerald.

Emerald Peak and its grassy slopes.

Ethan made it down to the saddle first, and promptly began photographing the area. He was able to capture some amazing photos, including the next one - one of my favorites from the trip. I love the images Ethan produced from this trip. The colors are astounding. I believe that Ethan uses the Olympus E-30 DSLR with a circular polarizer. I wrote a quick follow-up article about the use of circular polarizers here.
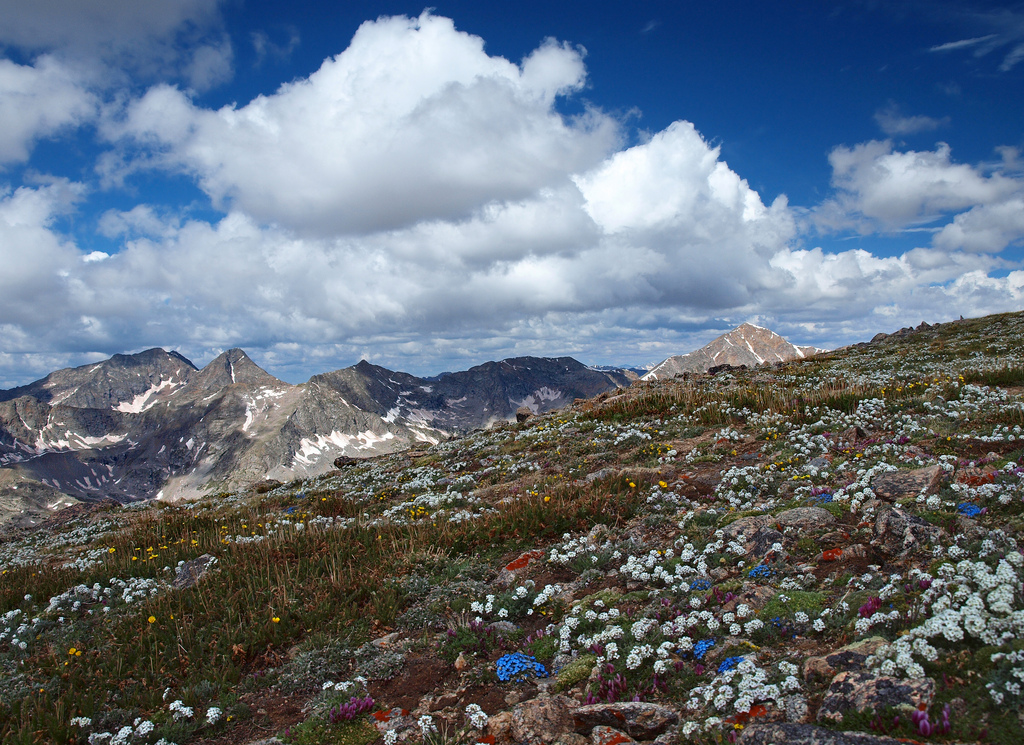
Wildflowers in bloom - photo by Ethan Buete.
After reaching the saddle, we began hiking up Emerald's steep face. It was a fairly straight-forward climb requiring a few breaks on the way up.
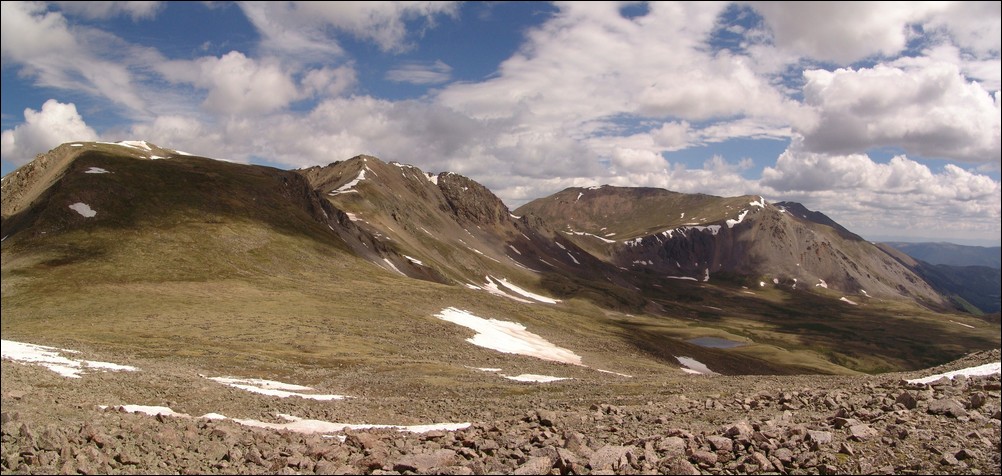
A look back at Iowa Peak and Missouri Peak from the base of Emerald Peak.
After reaching the summit of Emerald Peak at 10:30 AM, Ethan and I both agreed that the views from Emerald were the best of all three summits. Unabated views of Yale and Harvard and the surrounding basins made for a great resting spot. We probably spent about an hour on top, enjoying the views and taking photos while eating. I chowed down on some Reeses Peanut Butter Cups, which made for an even better experience 
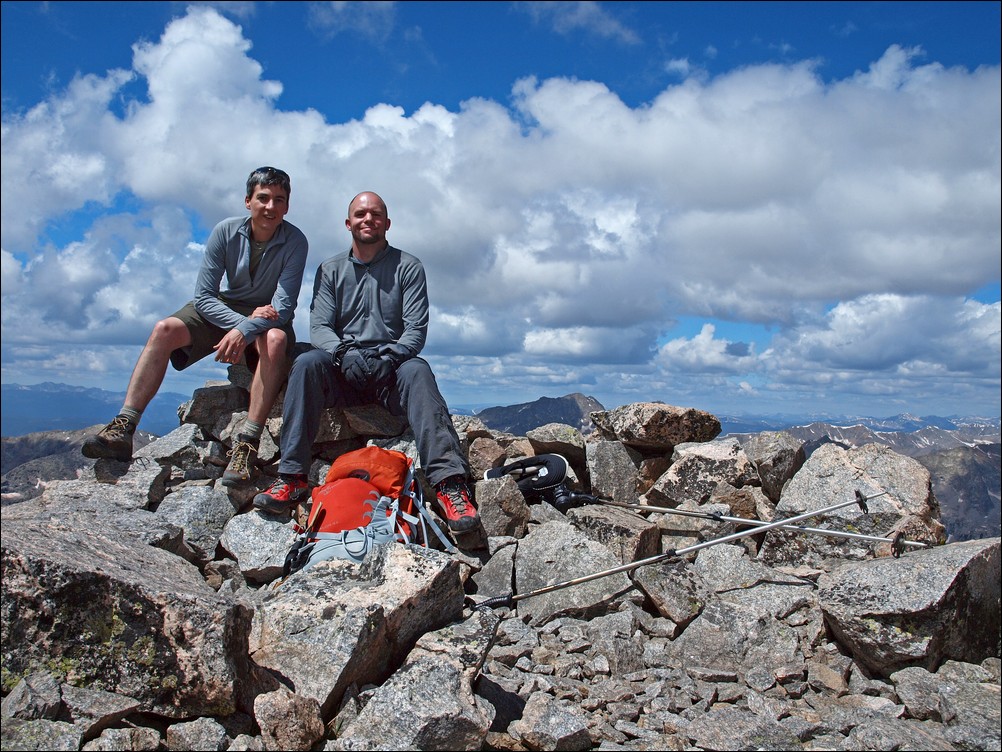
Matt and Ethan enjoy the views from Emerald Peak.
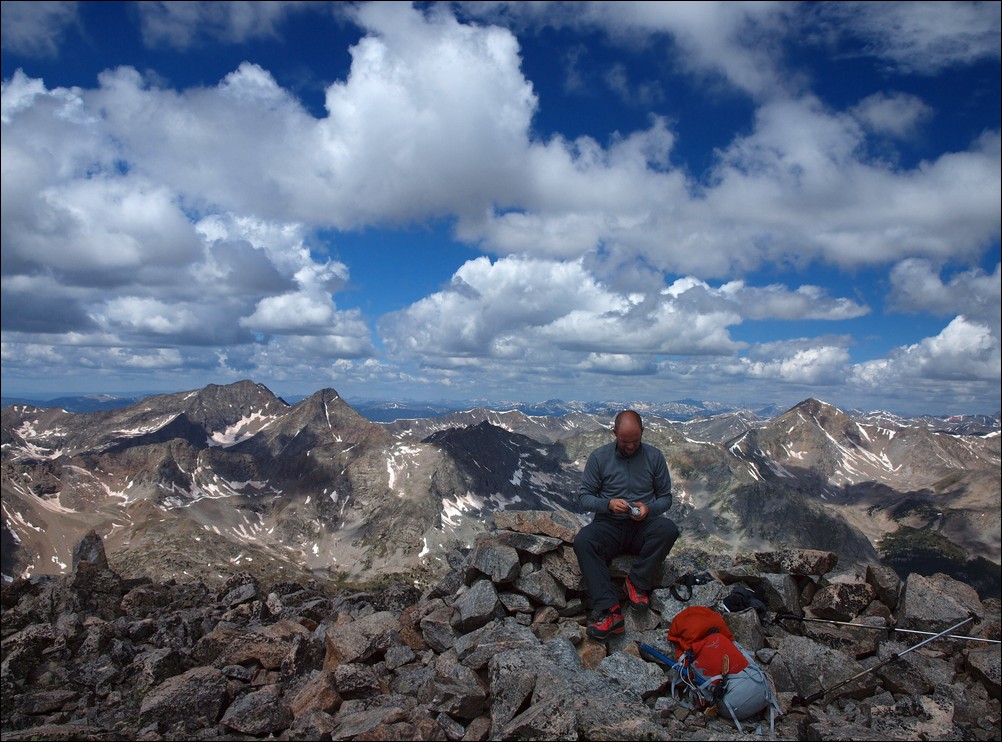
Matt Payne signs the summit register of Emerald Peak, one of the 100 highest mountains in Colorado.
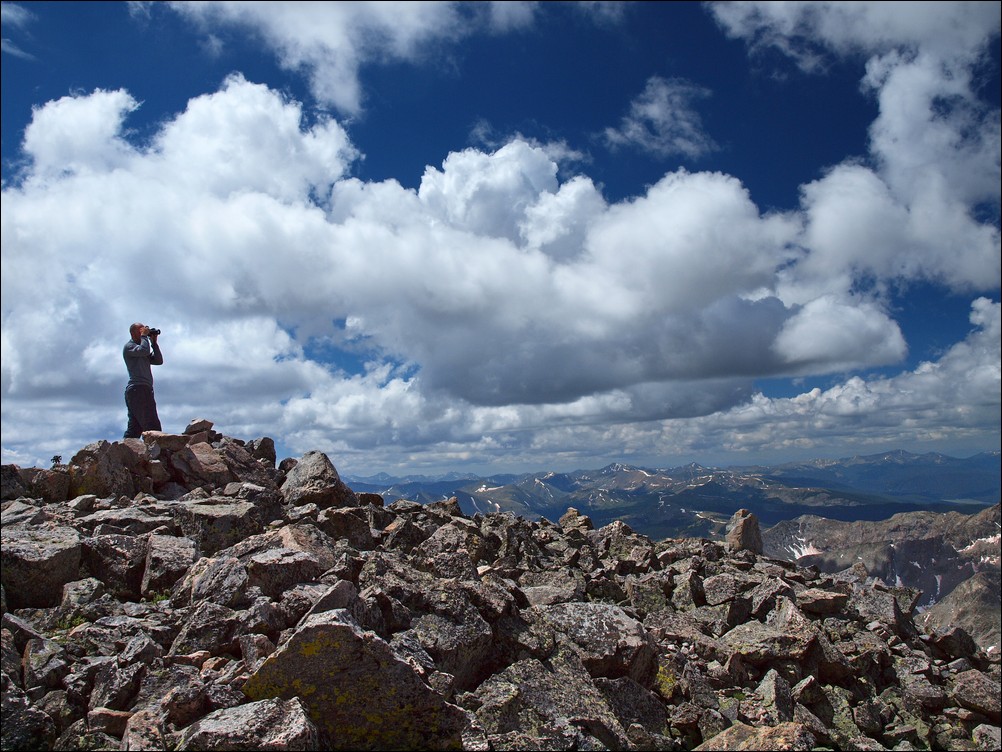
Matt Payne scouts for more Reeses Peanut Butter Cups.

Views from Emerald Peak, west-to-east (left to right).

Ethan Buete gazes west from the summit of Emerald Peak, with La Plata Peak behind him.
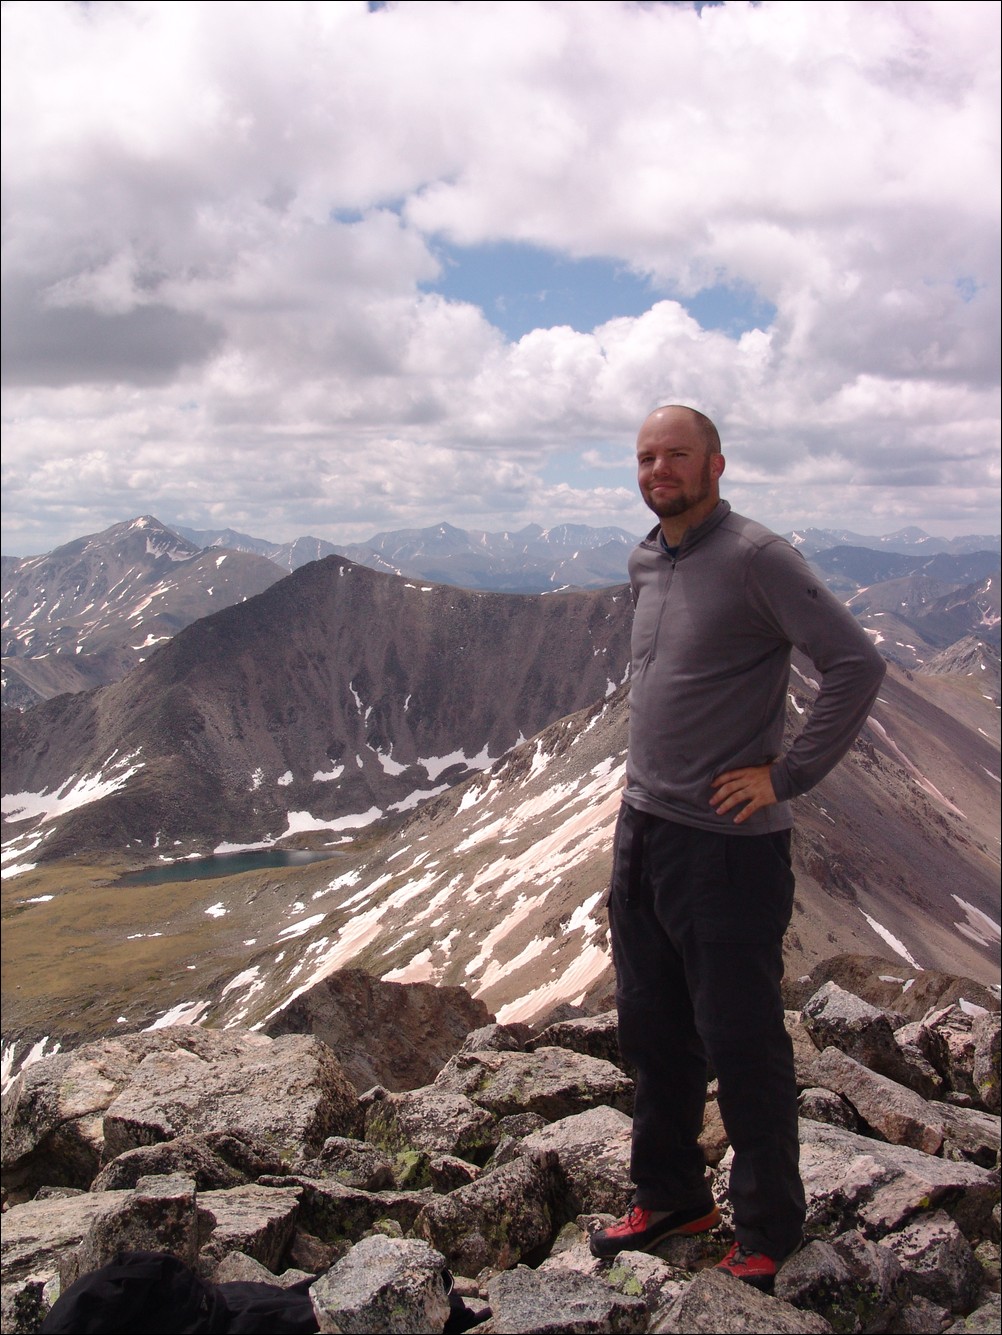
Matt Payne on the summit of Emerald Peak, with Mount Yale in the distance (far left).
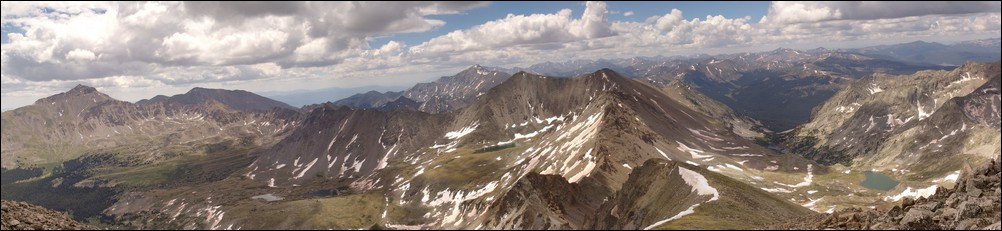
Views from Emerald Peak, looking east-to-north (left to right).
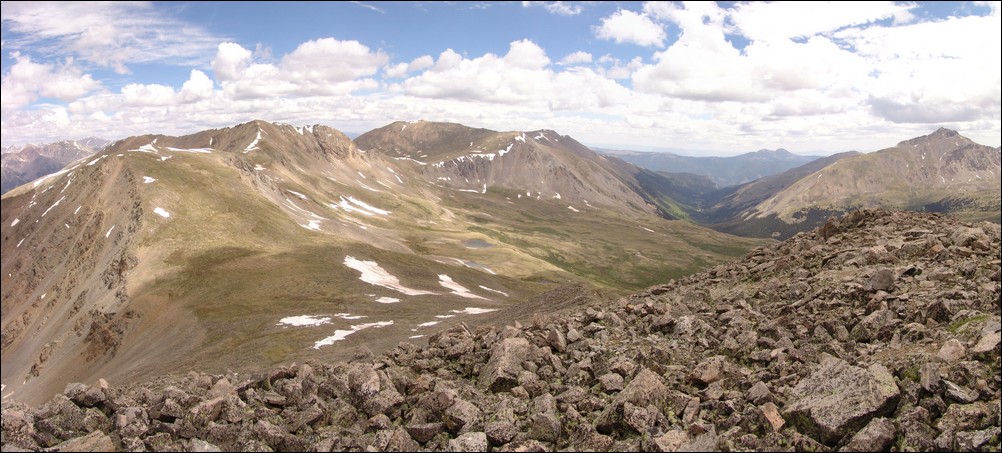
A view back at Iowa Peak and Missouri Mountain, with Mount Belford to it's right. Mount Harvard to the far right.
Ethan and I planned our route back to the trailhead from the summit. We decided that we would drop off of the east face of Emerald Peak and to the lakes below us. From there, we would aim for Elkhead Pass and head back down Missouri Gulch.
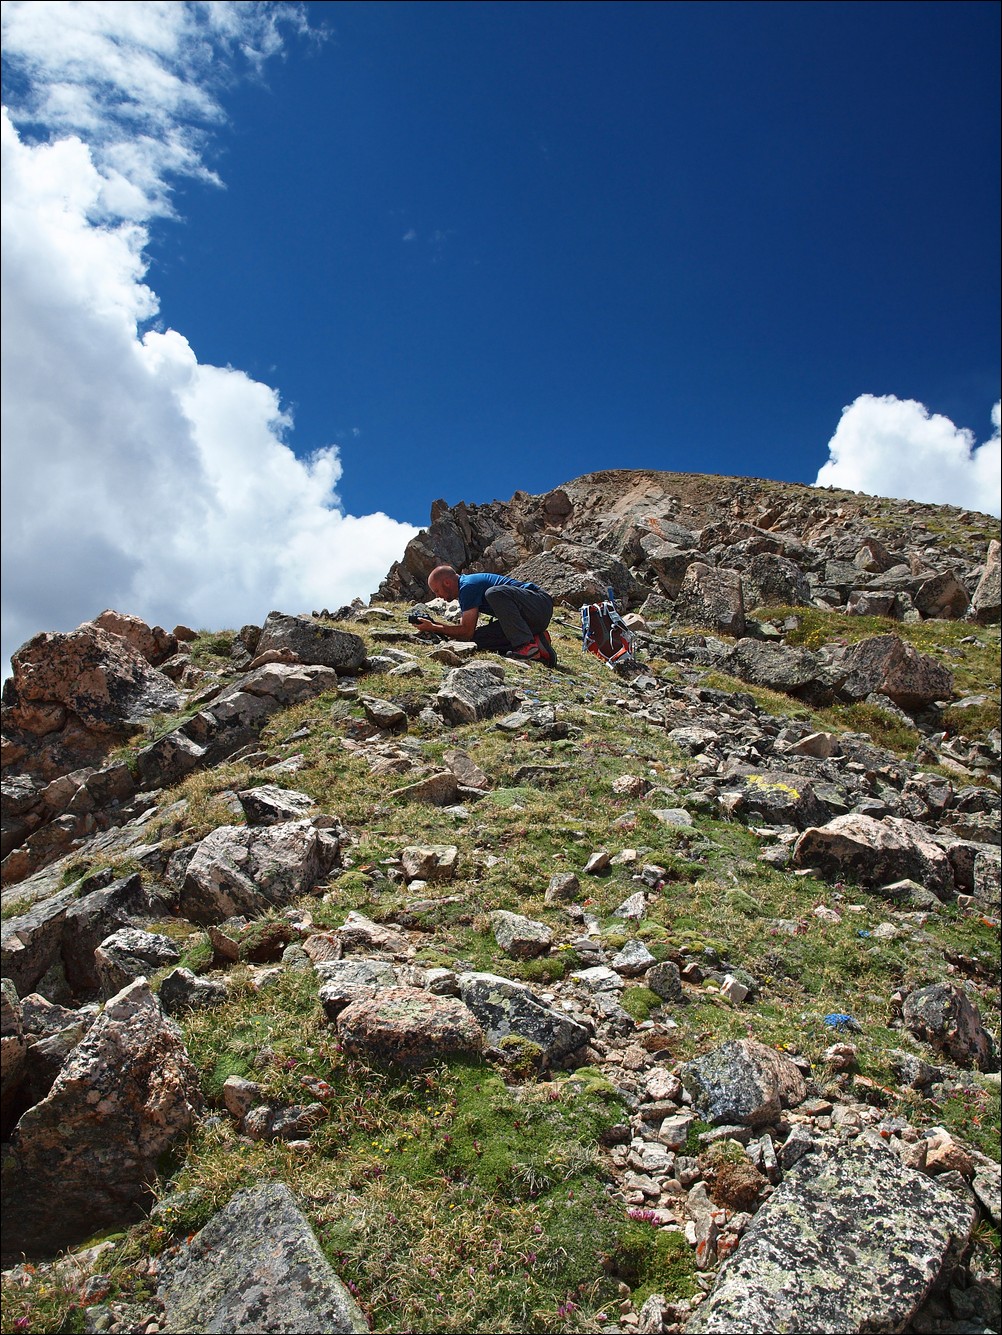
Matt Payne shooting some photos of flowers on Emerald Peak's east ridge.
And here is what I was photographing...
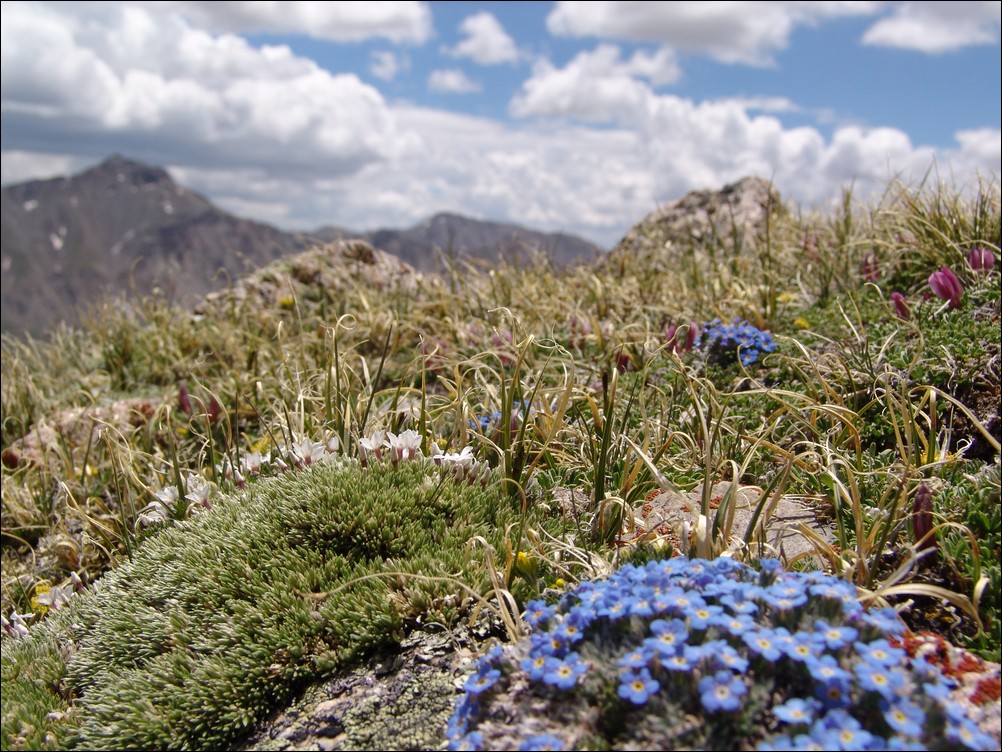
Wildflowers growing on Emerald Peak with Mount Harvard blurry in the distance.
We continued down the ridge from Emerald and through a small snow field. The snow was solid and we were able to walk right on the top of it. No need for the ice axe after-all!
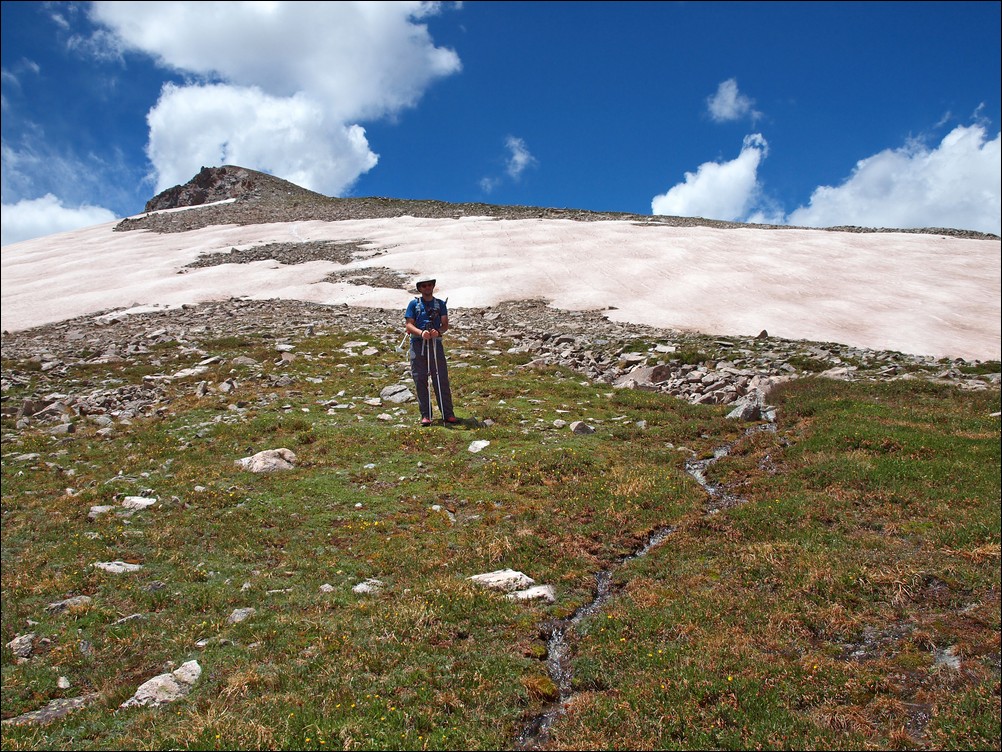
Still plenty of snow melt on Emerald Peak's east ridge in June.
At this point, the hike became incredible. The lower lakes came into better view, and the alpine surroundings continued to amaze both of us. One of the lakes in particular had an island of snow still sitting in it, making for a very bright blue hue around it. It was fascinating and gorgeous.
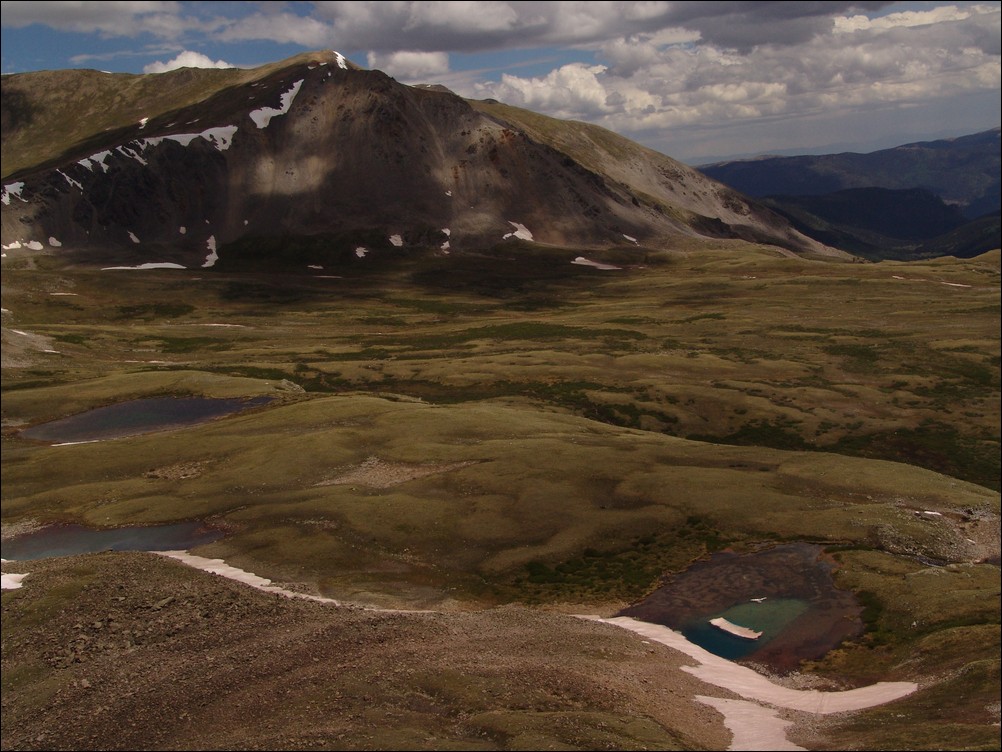
Lakes sit at the base of Emerald Peak.
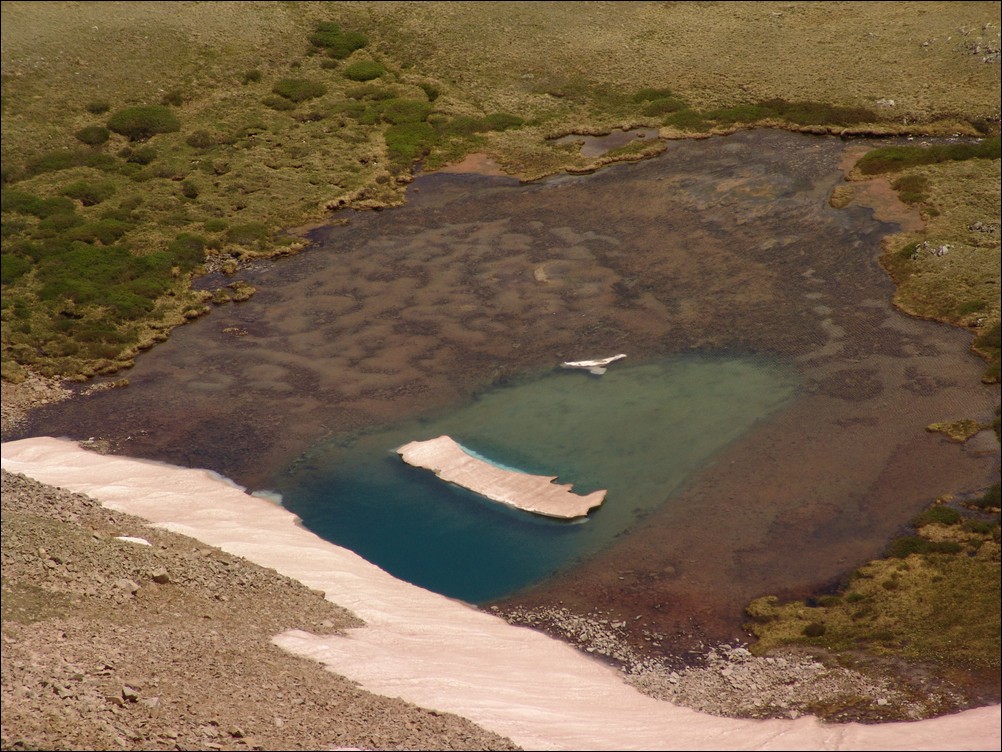
A zoomed in view of the odd and gorgeous blue lake.
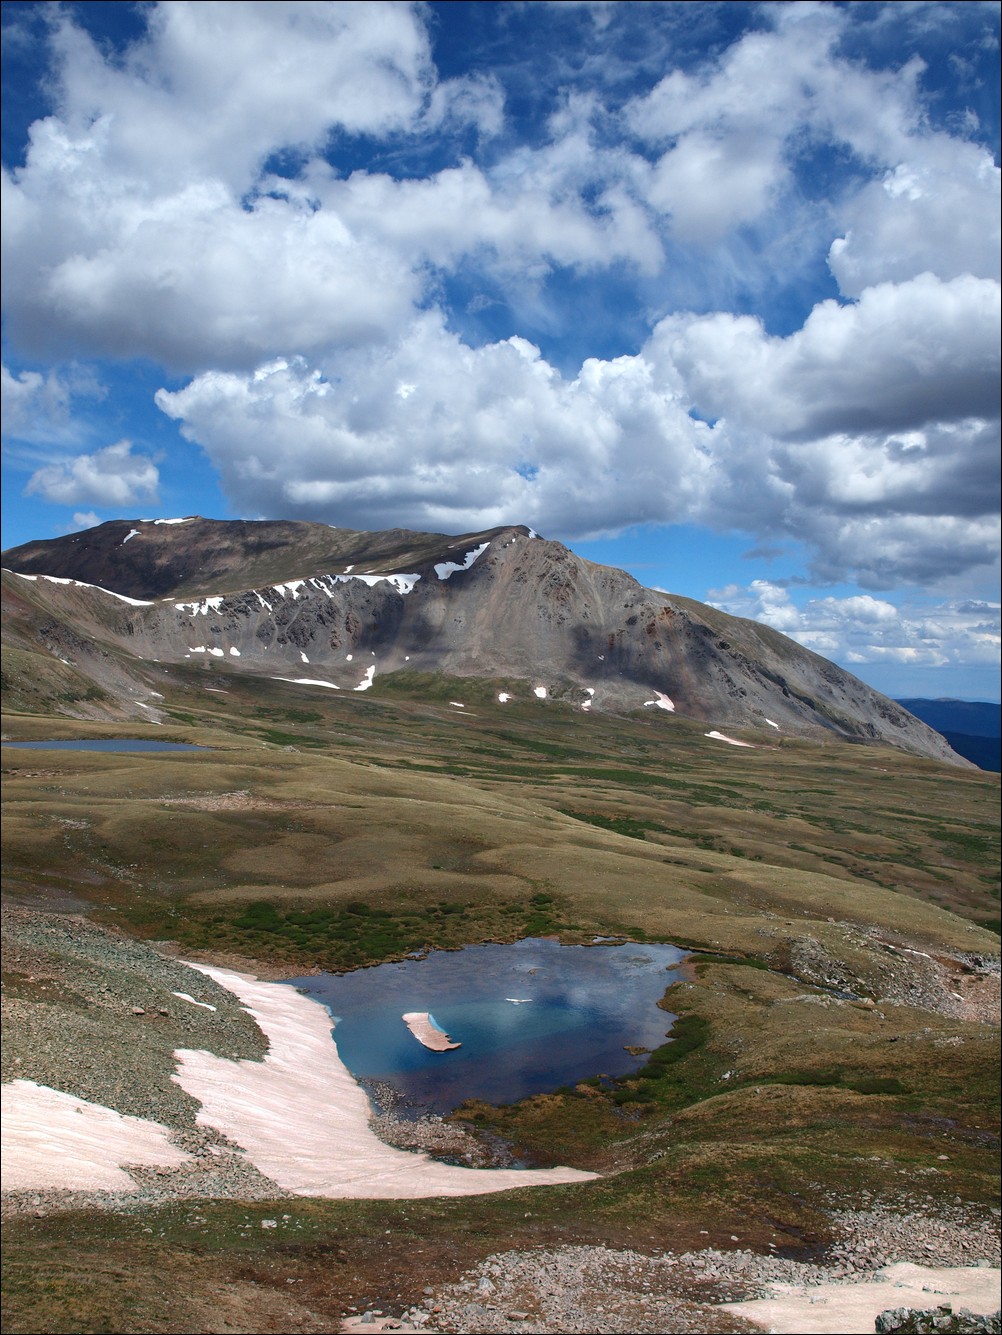
Ethan captures the blue slight better than I through the use of a circular polarizer.

Ethan Buete captured this great photo of some small lakes.
We were able to connect with an old game trail and head down to the lakes.
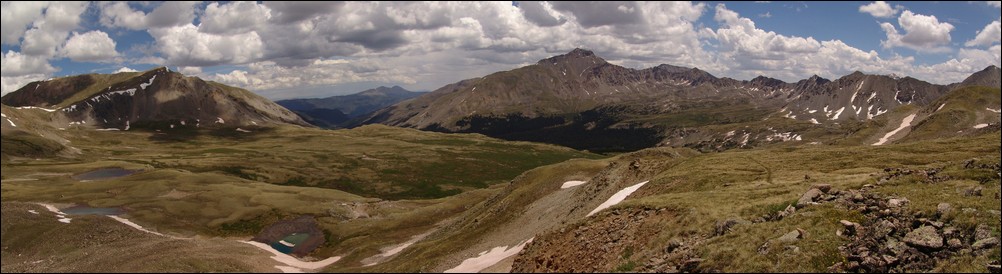
The Missouri Basin.
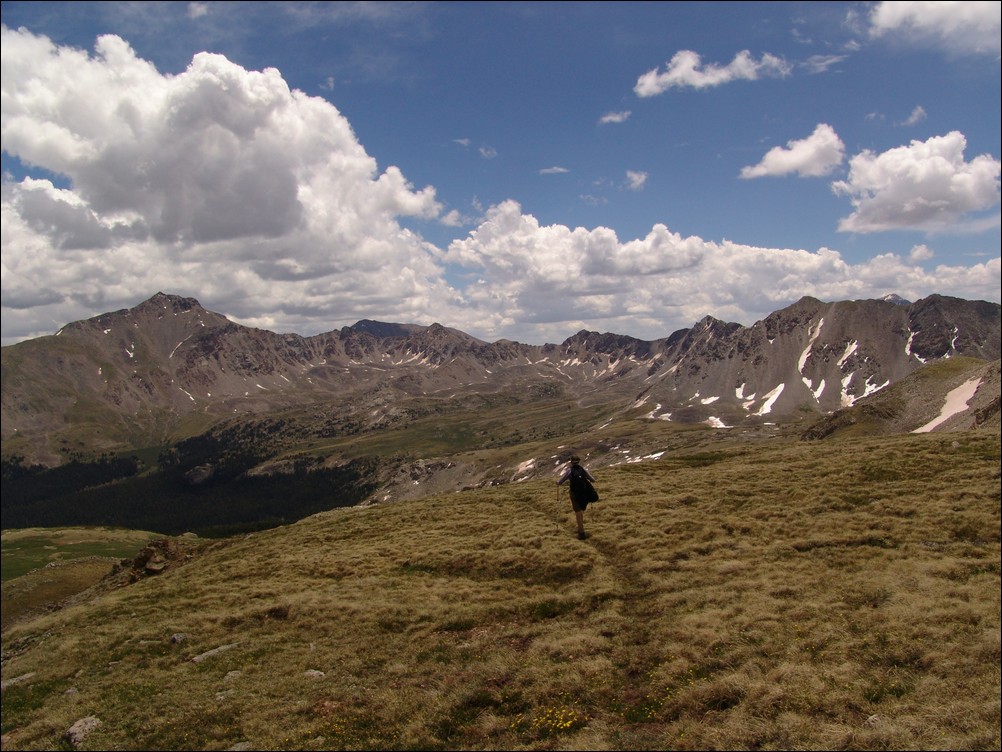
Ethan hikes towards Mount Harvard.
Ethan and I were continually impressed with the views of Mount Harvard from this area - a much more impressive view than you get when you actually climb it.
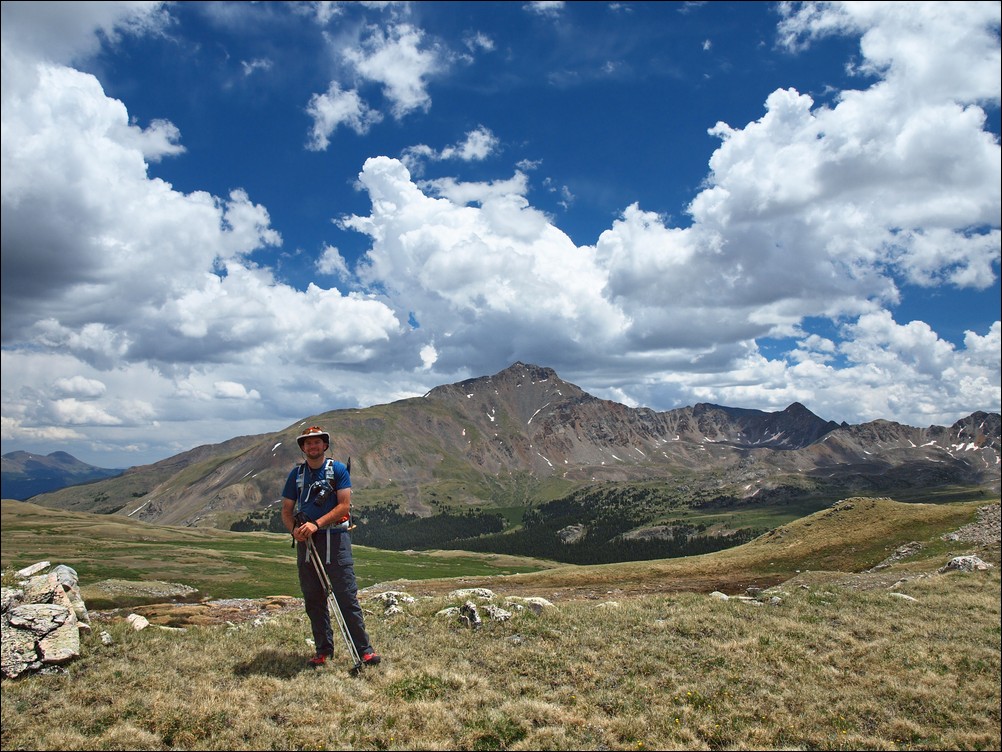
Mount Harvard towers above Matt Payne
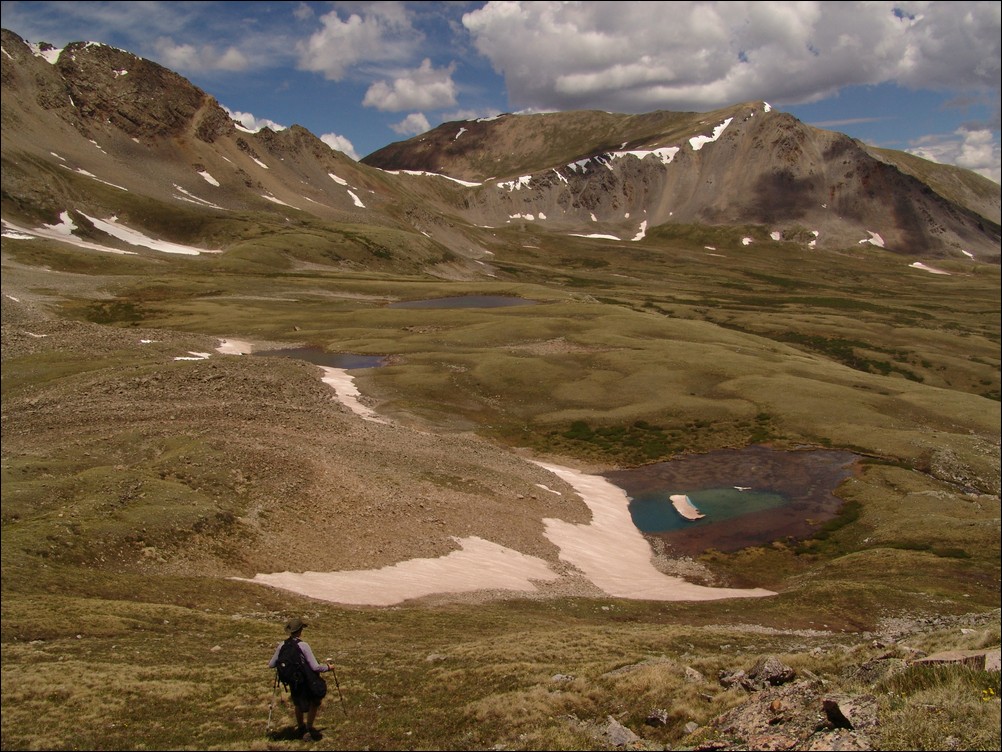
Ethan descends down into the basin towards the awesome blue lake.
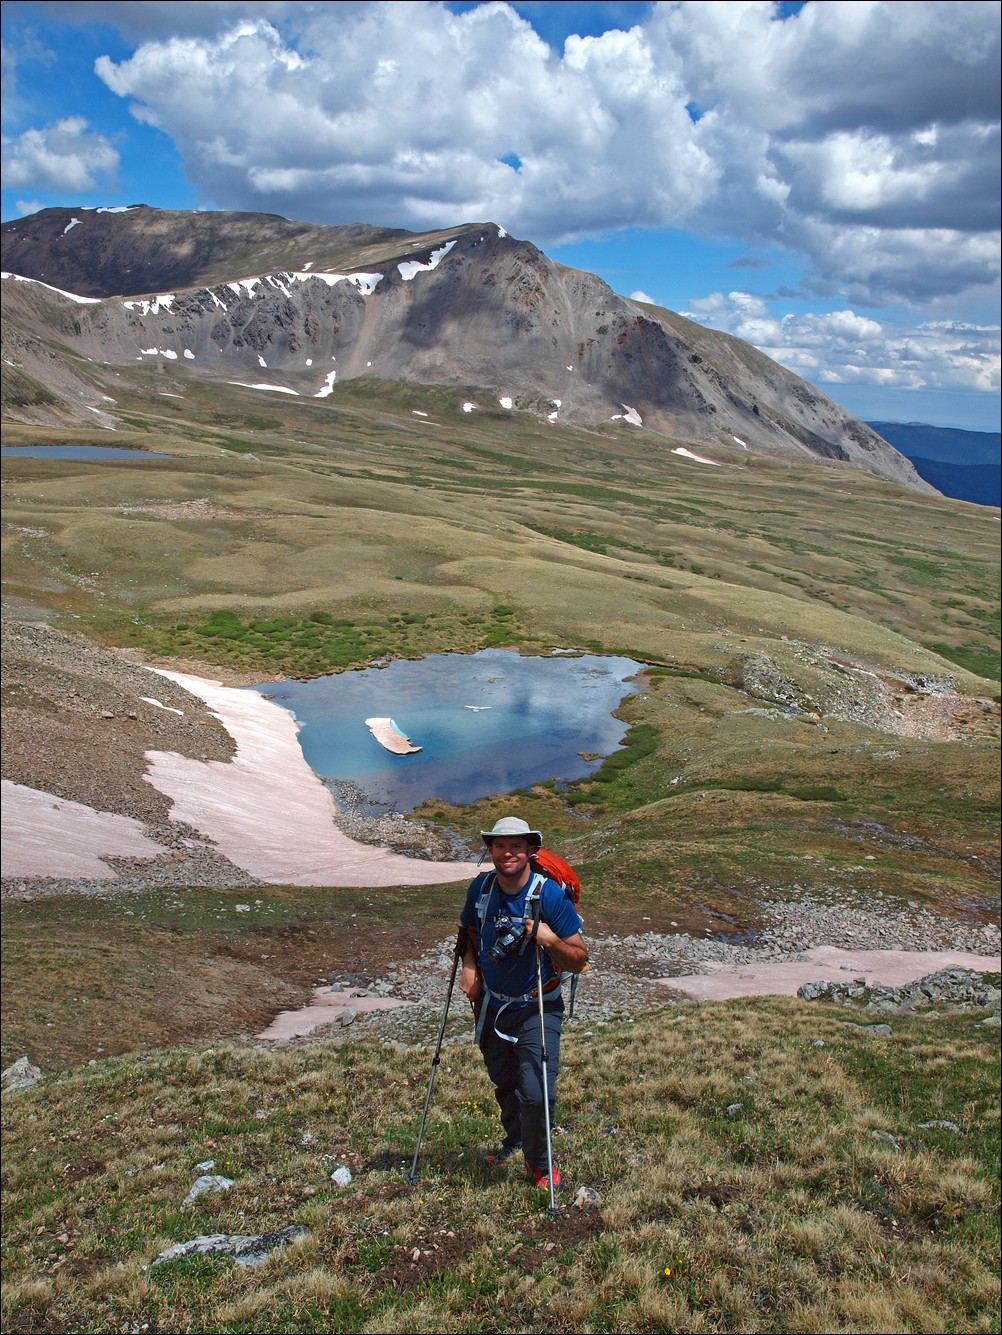
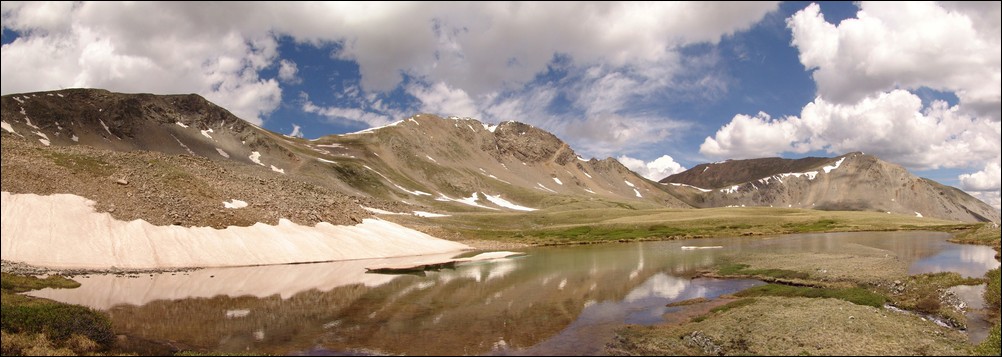
A panoramic photo of the first of three lakes found in the Missouri Basin, with Missouri Mountain at center.
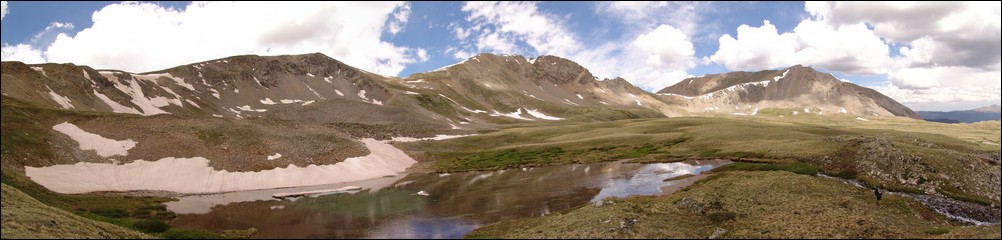
Ethan Buete checks out the snow melt coming out of the 1st of three lakes at the base of Emerald Peak.
We made our way across the long basin and found the 2nd of three lakes. This lake had some snow that had begun calving from the rock face, much like a glacier would.
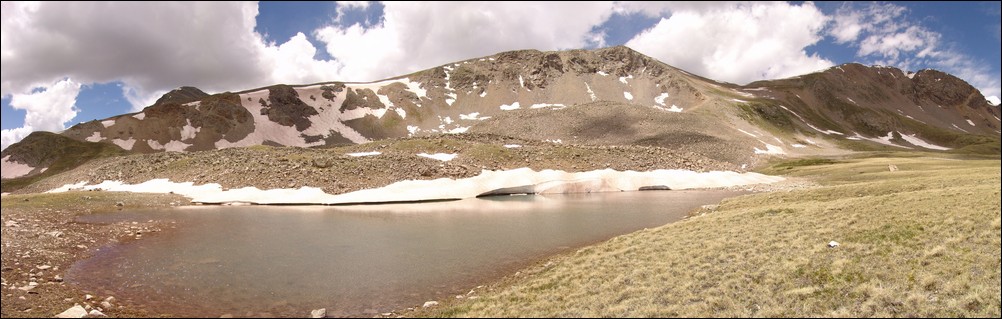
A glacier-like calving on the 2nd of 3 lakes below Emerald and Iowa Peaks.

The water was quite still for this panoramic shot of a small lake below Missouri Mountain, Iowa Peak and Emerald Peak (right to left).
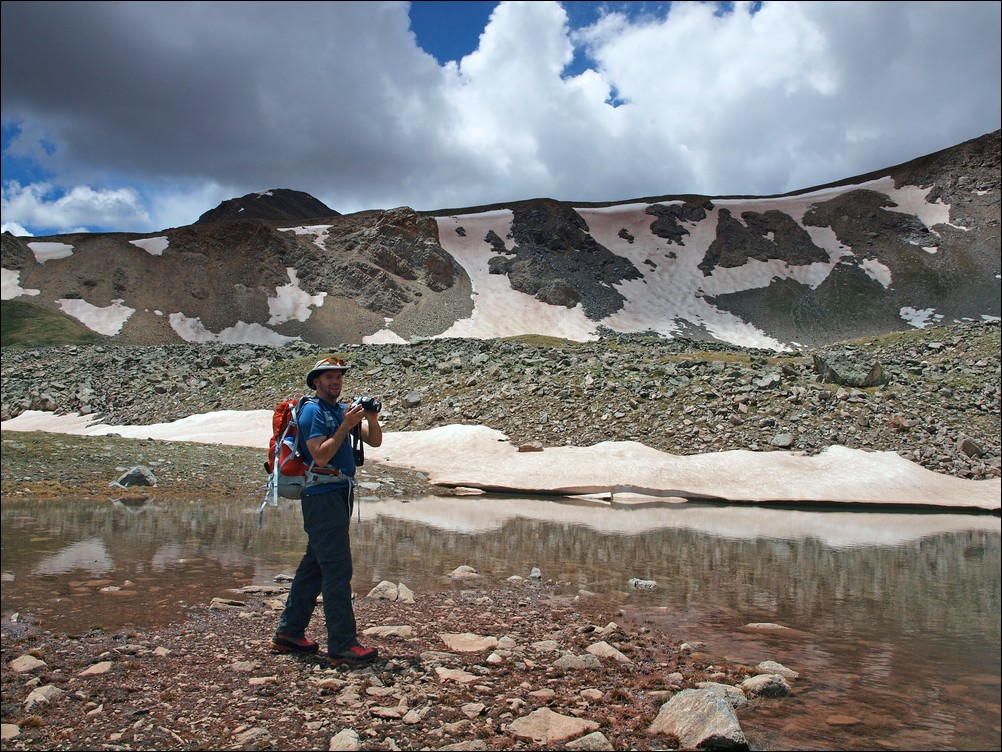
Ethan catches me in action at the 2nd of 3 lakes.
We headed on over to the 3rd lake, finding it to be the best of three due to its larger size and excellent views below Mount Harvard.
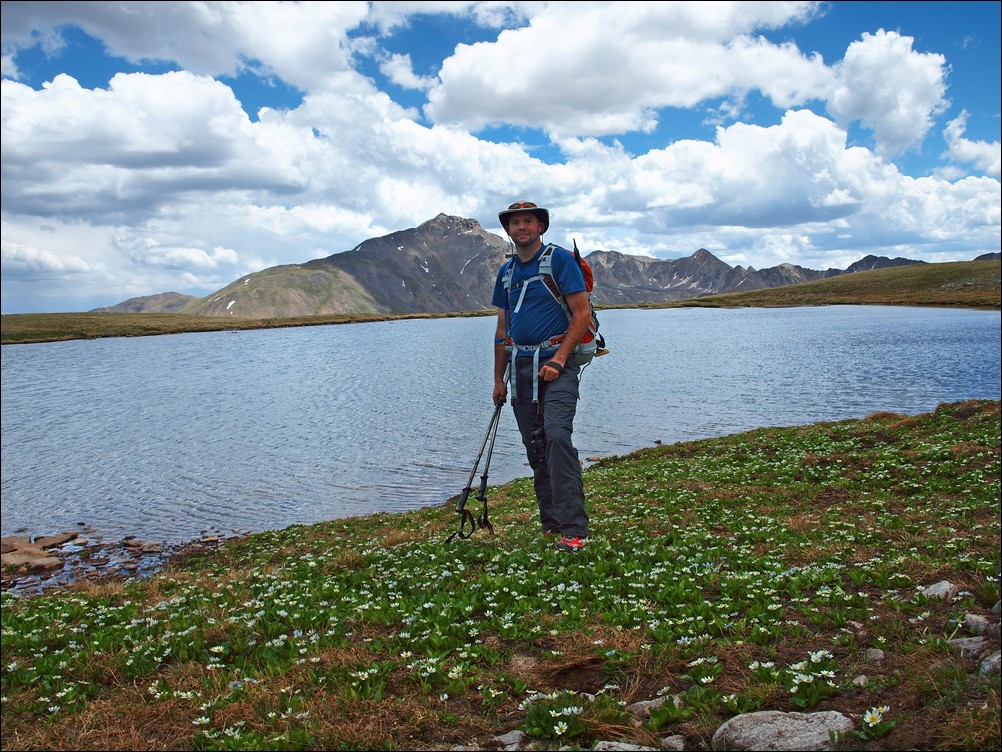
Matt Payne in front of a large apline lake and Mount Harvard.
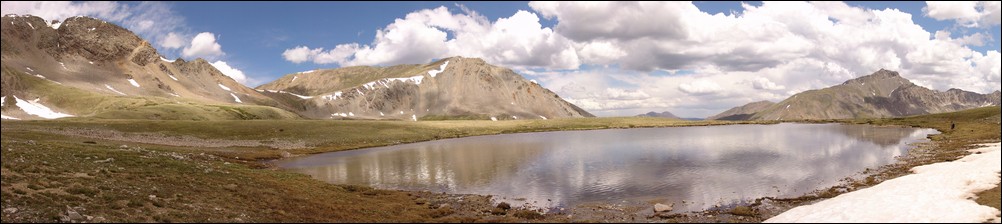
Ethan Buete next to a large lake with Mount Harvard in the background.
The sheer size of the Missouri Basin makes it a wonderful place to hike. With alpine vistas in every direction, it was tough for Ethan and I to leave. However, with weather looming on the horizon, we decided to head towards Elkhead Pass. Once reaching the end of the basin, looking back at Emerald left a great feeling in us. We had traveled a great distance today, and it was hard to believe just how far away Emerald looked already.

Matt Payne boogies on out of the Missouri Basin
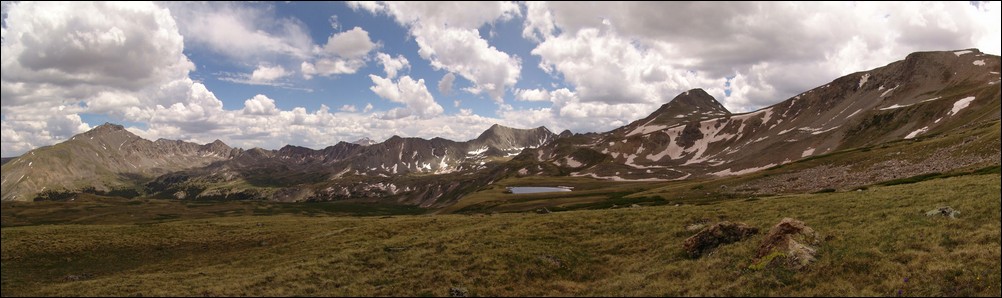
A look back across the Missouri Basin. Mount Harvard sits as the basin's monarch to the far left with Emerald Peak and Iowa Peak resting at the far right.
After hiking more or less straight across the back-side of Missouri Mountain, we were able to connect back up with the trail leading up Elkhead Pass.
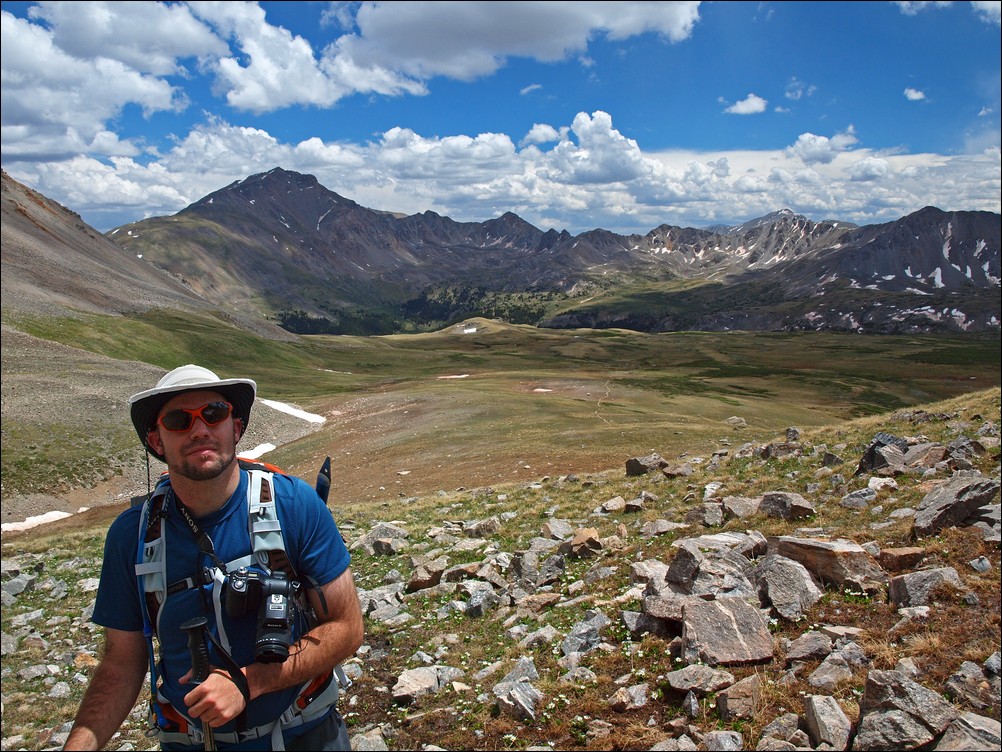
Matt Payne with Mount Harvard behind him.
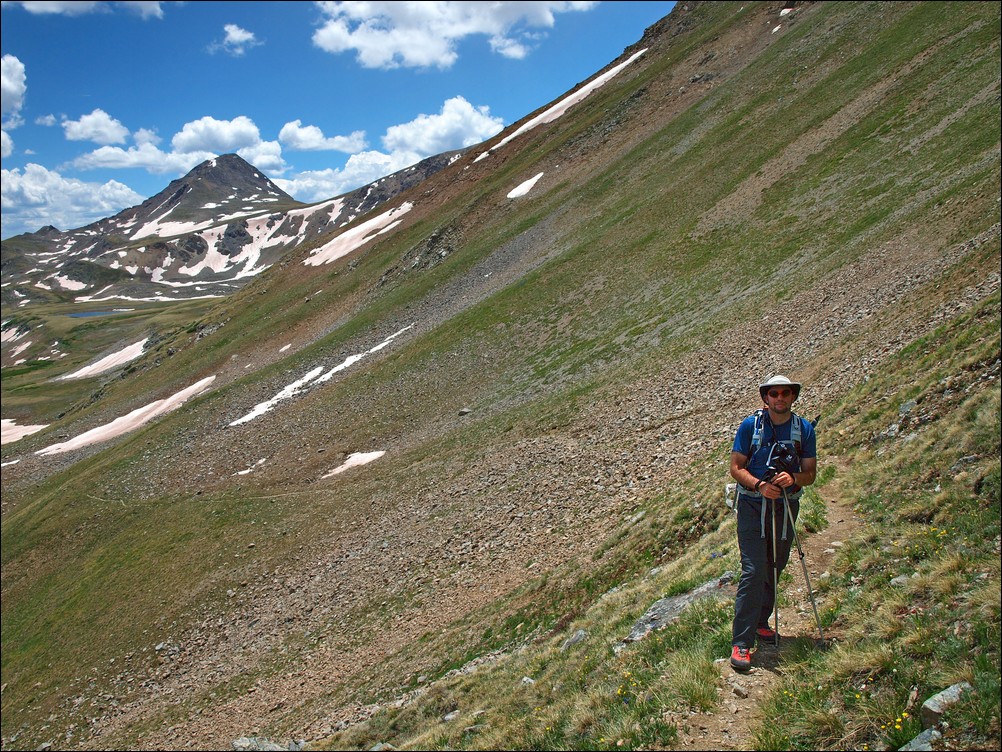
Matt Payne on the Elkhead Pass trail with Emerald Peak at far left.
Near the top of Elkhead Pass, I noticed a giant waterfall below Emerald Peak, so I took several fully zoomed in photos of the basin and waterfall and composed them into one giant zoomed in view of the basin.
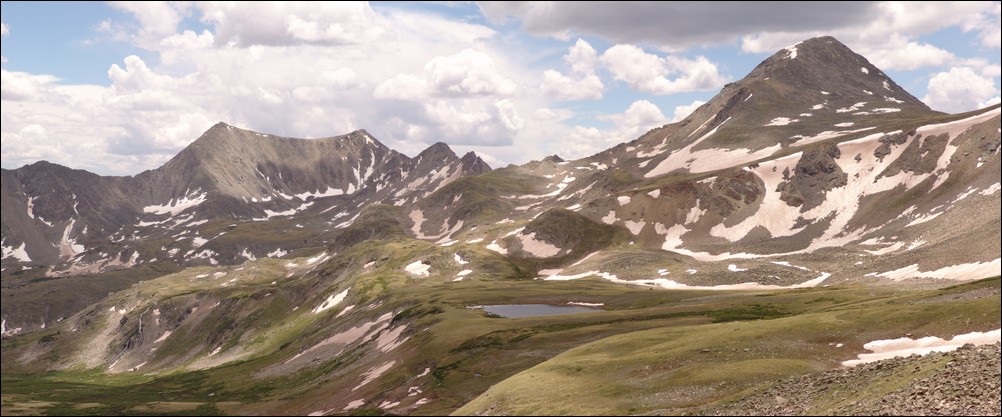
A super-zoomed in view of the Missouri Basin, with a giant waterfall flowing at far left. Emerald Peak sits above the basin at far right.Click on the photo to see the full resolution version.
A short while later, Ethan and I managed to reach the top of Elkhead Pass and see down into Missouri Gulch where the whole day began.
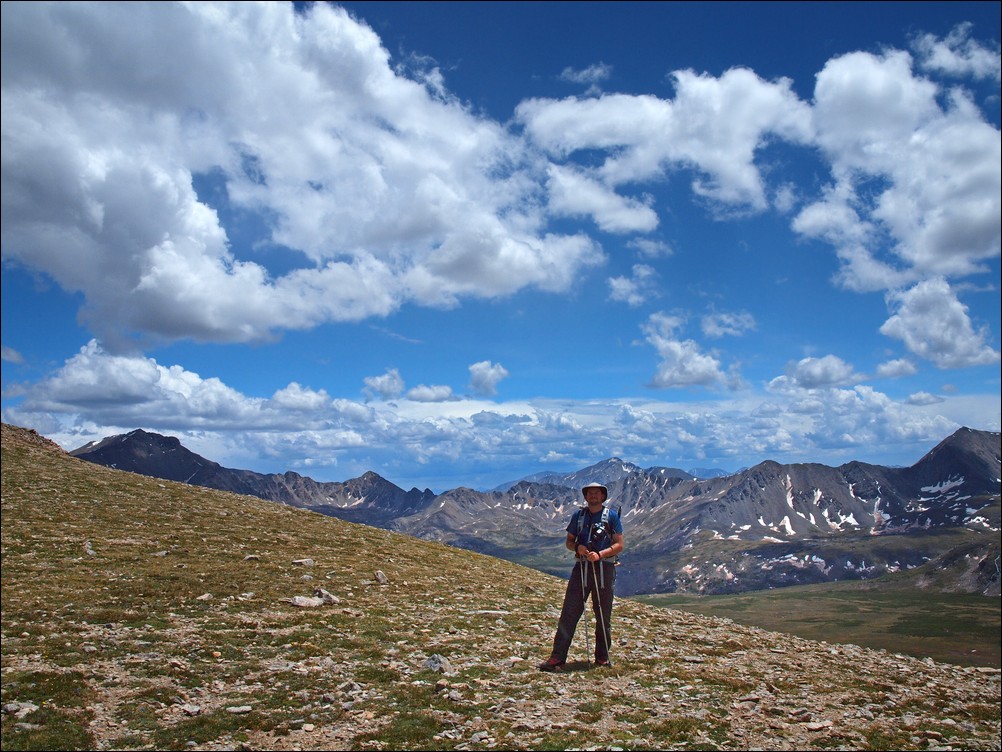
Matt Payne at the summit of Elkhead Pass.
It was nice to hike downhill again and see the valley in the middle of the day with more light. We were also lucky to see the entire route up Missouri from slightly below the pass, as well as views of Missouri's class 4 northeast face.

Missouri Mountain's class 4 northeast face (far left).

A zoomed in view of Missouri Mountain's class 4 northeast face.
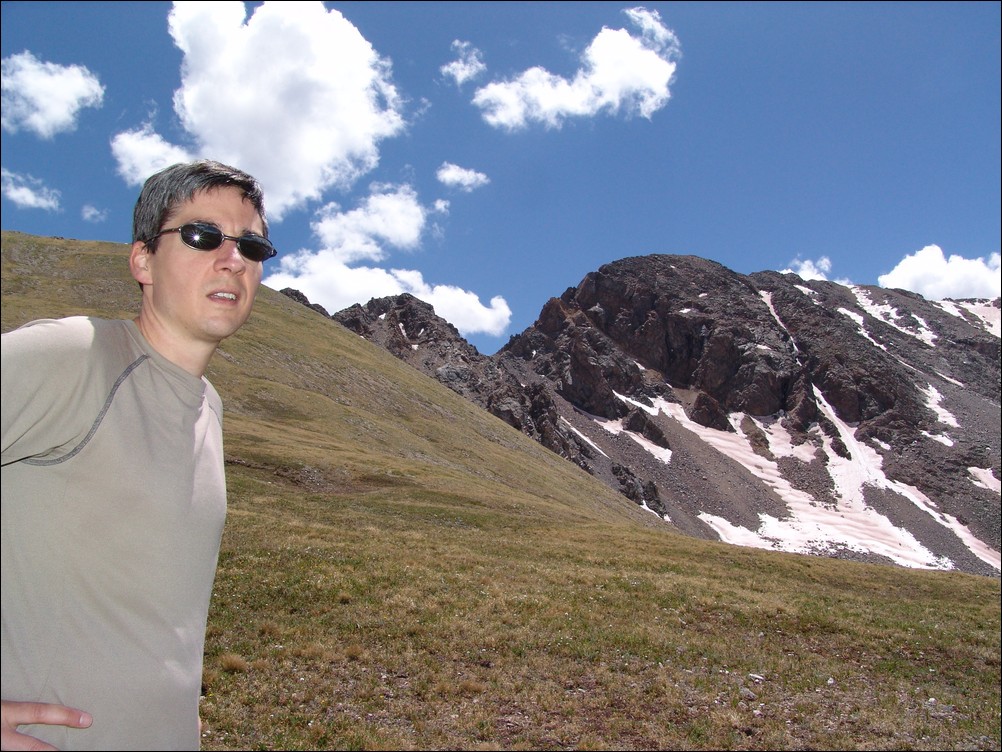
Ethan poses in front of Missouri Mountain.
We headed on down the pass and noticed a large waterfall coming down Missouri as well.
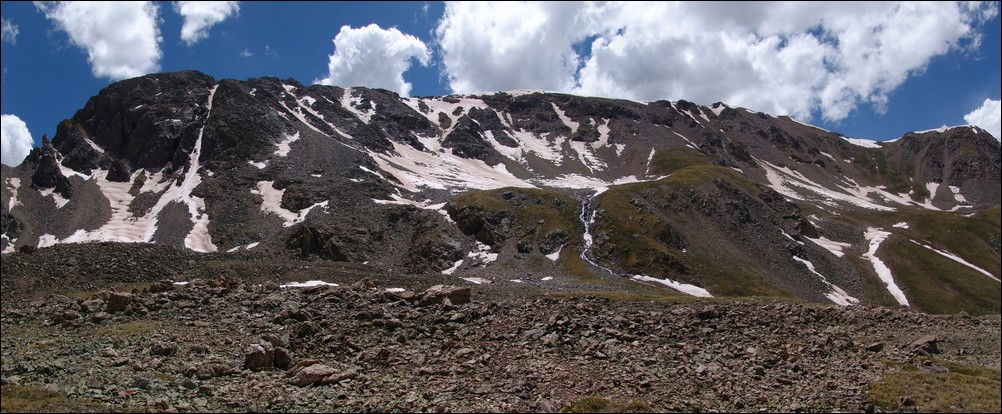
A large watefall flows down the face of Missouri Mountain's ridge.
After a short time, we reached the trail turn-off for going back up Missouri Mountain. We had made a full circle at 1:30 PM, a full six hours after we first encountered this split in the trail.

The trail forks - heading back up Missouri Mountain or down to the start of Missouri Gulch.
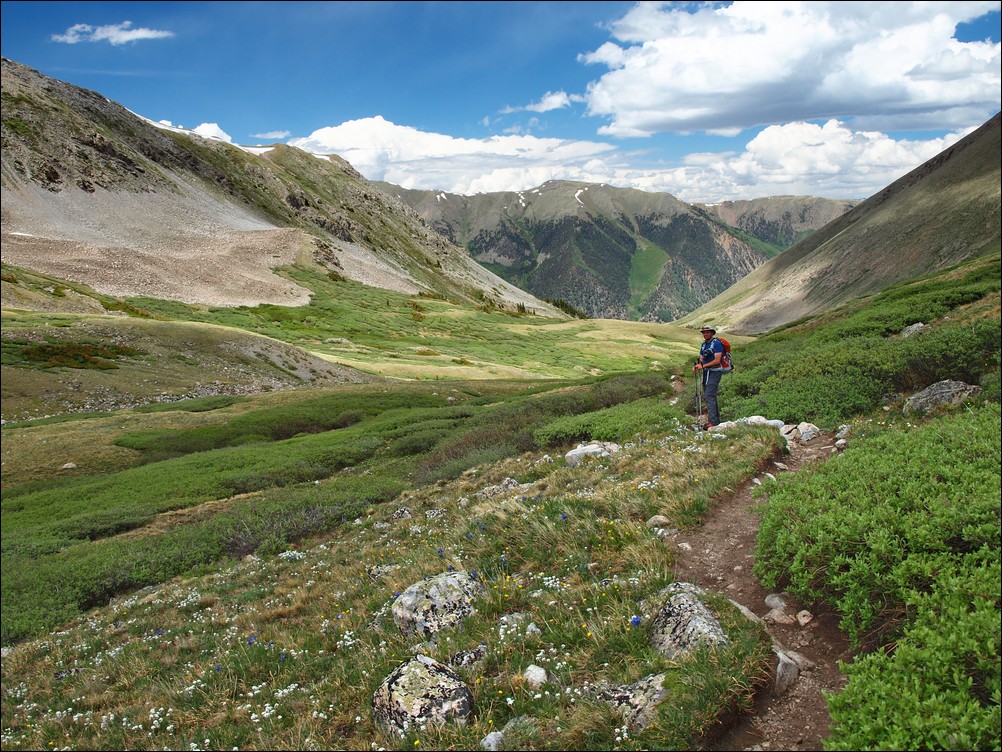
Matt Payne hikes down the Missouri Gulch trail.
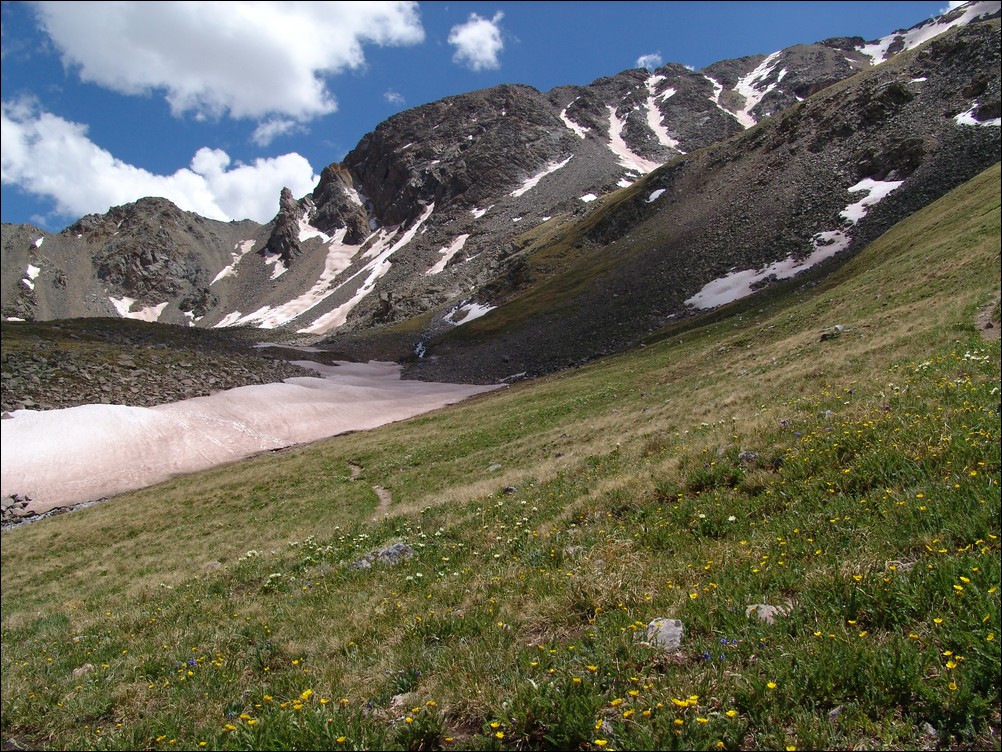
A look back at Missouri Mountain and the Elkhead Pass trail.
Ethan and I made excellent progress down the trail and made it back to a large stream crossing. Ethan took this time to train me on photographing water flows.

Water flows down Missouri Gulch.
Ethan and I made excellent time back down the trail and to the trailhead. We made a quick stop at a small gravesite in the Vicksburg cemetary. The grave marker reads: "Vicksburg Cemetary. William Huffman, Born 1884. Died of Pnemonia. One Month Old.Father was a miner and mother ran a boarding house in Vicksburg."

We crossed Clear Creek over the bridge and made it to Ethan's car. All in all a very successful and aesthetically pleasing trip.
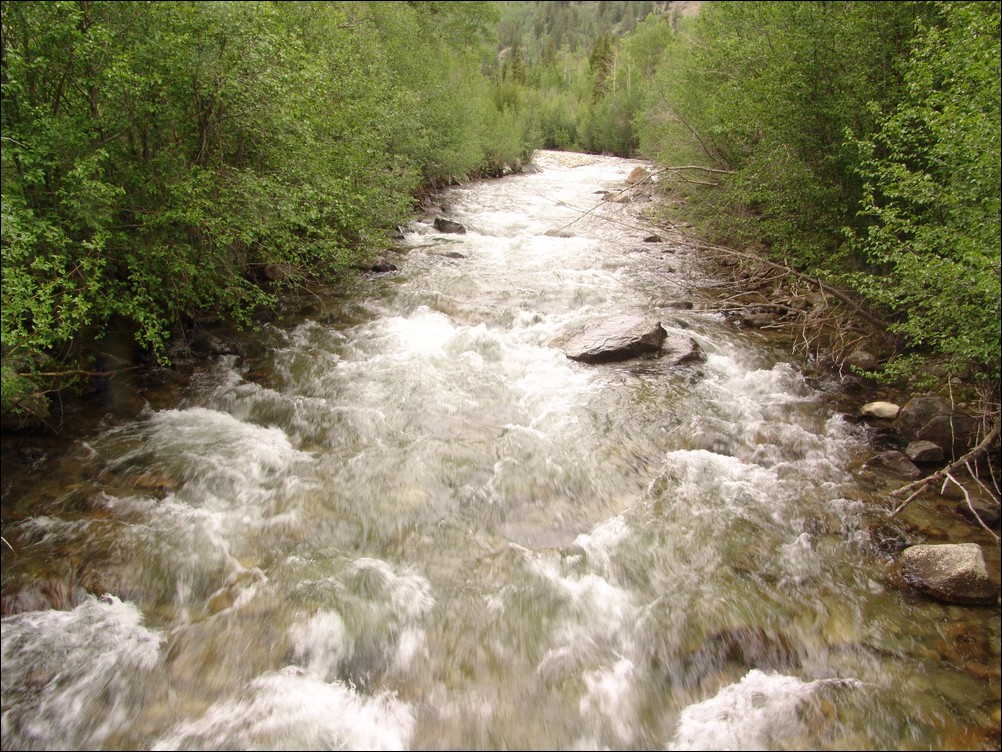
Clear Creek was still running fast near the end of June.
I hope you enjoyed this trip report. If you are interested in any of the photos, please contact me. If one of the photos belongs to Ethan Beute, I will forward your message to him.
Stay safe!