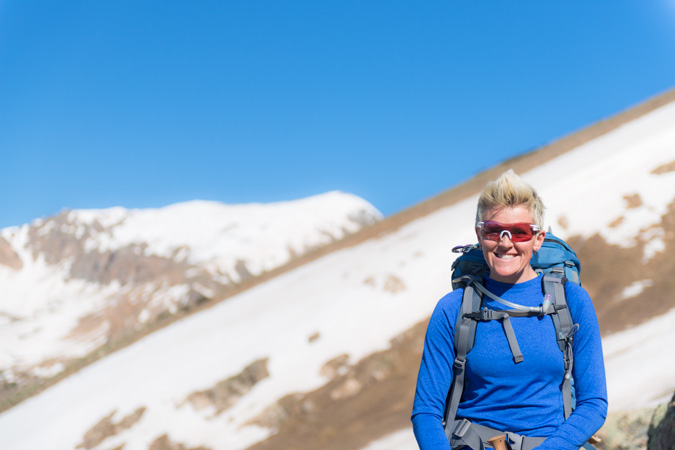
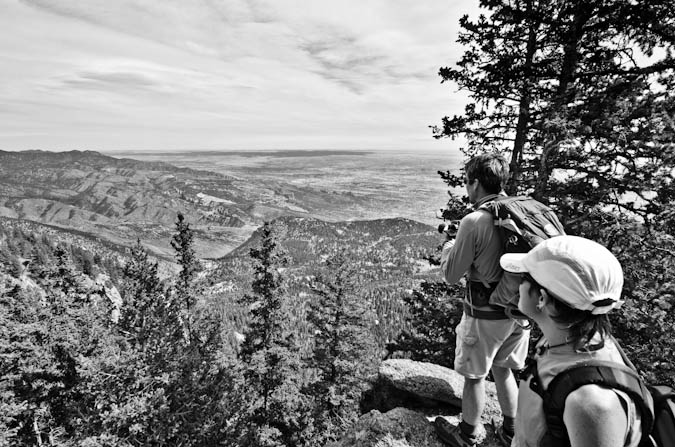
I had fully intended to climb the Centennial French Mountain this weekend, but plans change. My climbing partner Sarah and I left Colorado Springs at around 3:45 AM and reached the North Halfmoon Creek Trailhead at 6:15 or so. A pretty late start for this guy! In order to climb French Mountain, we would need to cross North Halfmoon Creek and head south. When we reached the creek, it was easily up to our waist and I had no intention of driving my Jeep through that deep of a creek crossing. A decision was quickly made to abandon our attempt on French Mountain and head up the scenic and steep Southwest Slopes route for Mount Massive. Since I had done this route back in October of 2009 (trip report here), I knew the way and was fine with repeating it, especially since my partner still needed to climb Massive. We parked the Jeep and packed up and readied ourselves for our first climb of the year. I was hopeful that I would make it to the top (you might think I'm joking) because the last mountain I had ascended was Pyramid Peak, which was my 14er finisher last year. I was also quite eager to test drive my new photography equipment, since I had not really had a chance to take it on a real climb yet. For this hike, I wielded my Nikon D800 and my Nikkor 24-70 f/2.8 lens, a heavy combination to be sure. Would the extra weight of a full-frame DSLR and the quite heavy yet amazing 24-70 be worth it? I was hoping so.
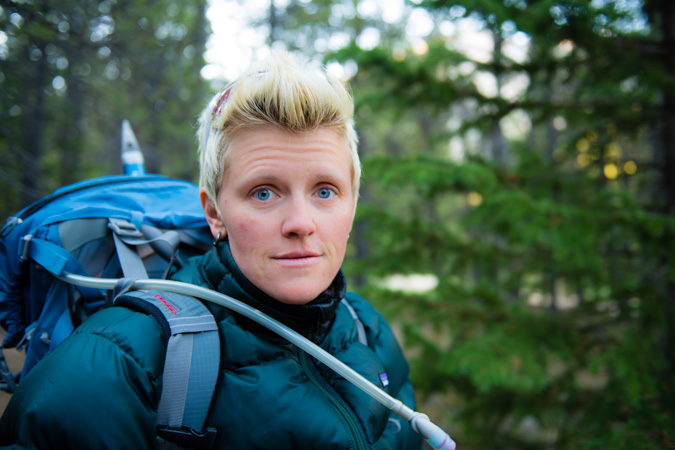
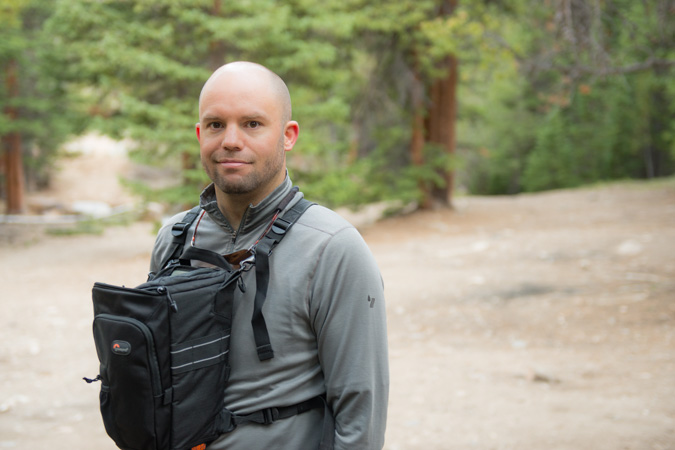
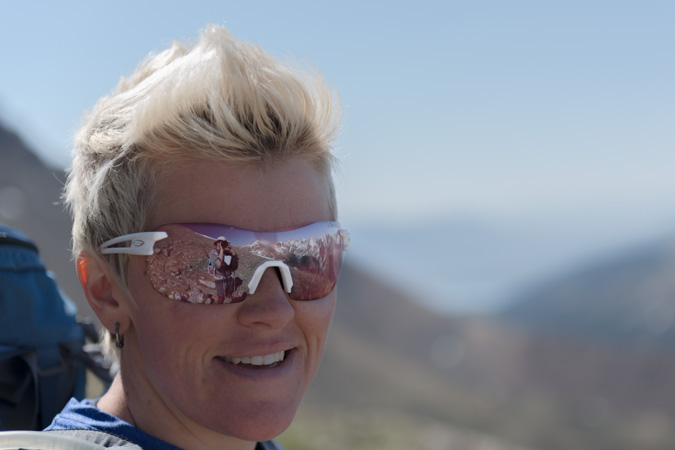
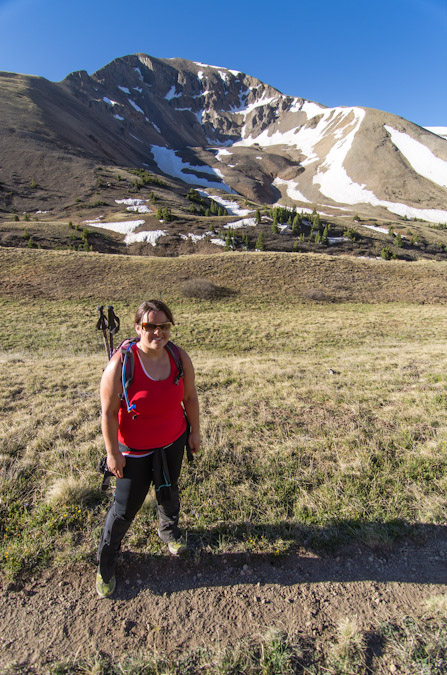
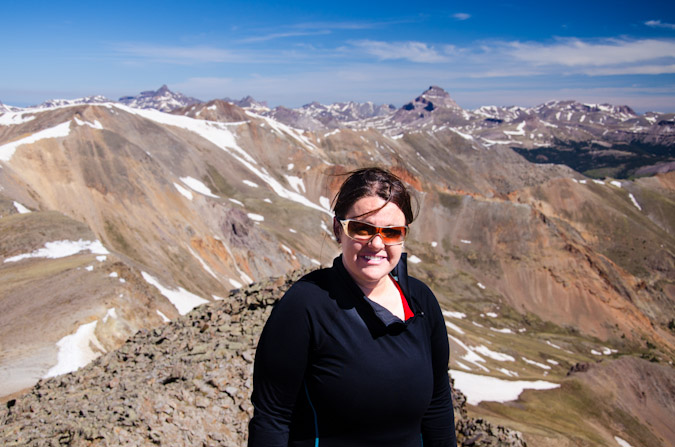
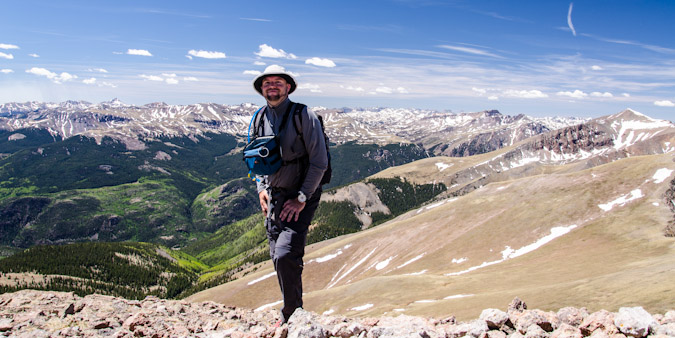
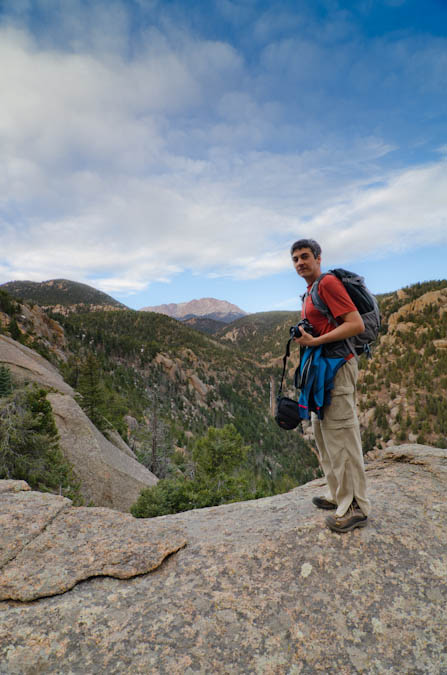
Sarah posed nicely for me so I could document the day's beginning and in turn she took a shot of me, looking weary.
For the sake of ease, I decided to leave my tripod behind. The sucker weighs 5 pounds and I figured it would not be something I could use a whole lot on this hike. Good choice.
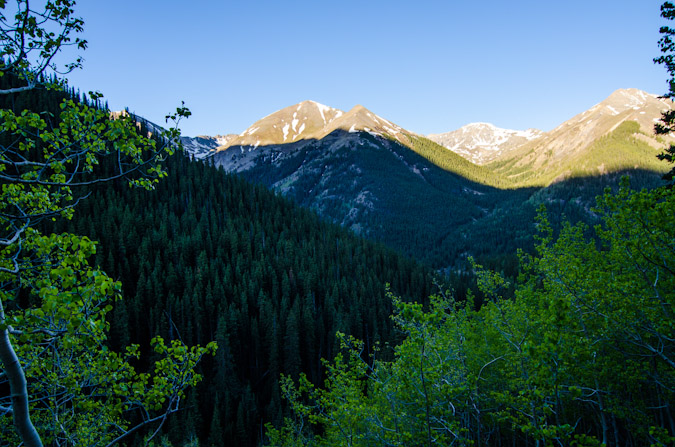
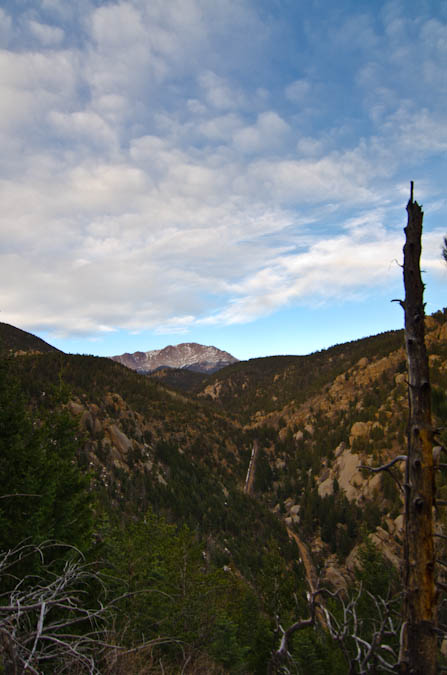
Sarah and I traveled up the basin towards Mount Oklahoma, which I climbed last year. I was beginning to get quite familiar with this area! Mount Oklahoma was looking quite nice and seemed to be holding quite a bit of snow as compared to last year, which was nice to see.
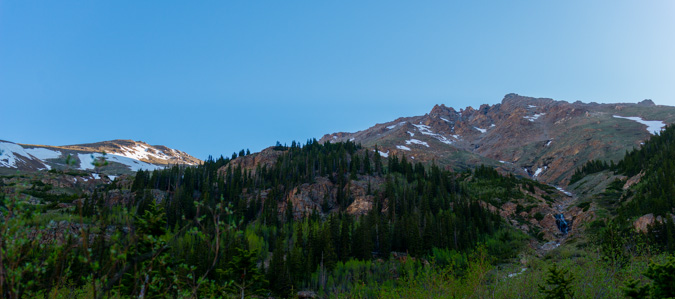
Mount Massive's south slopes are pretty darned steep but also a very pretty backdrop to the Colorado blue skies that we have been sorely missing due to all of the wildfires this year.
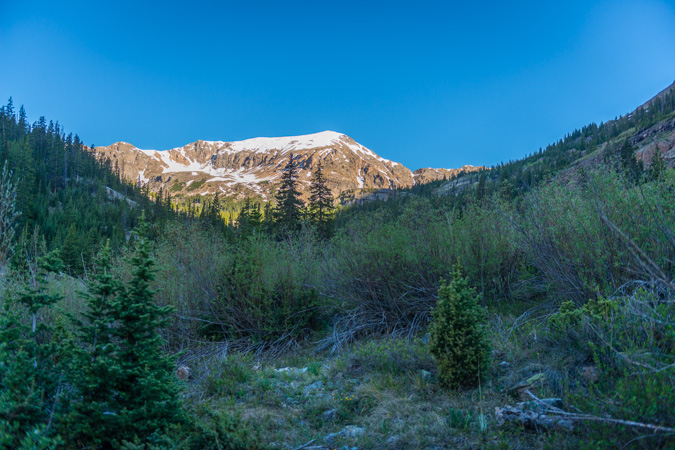
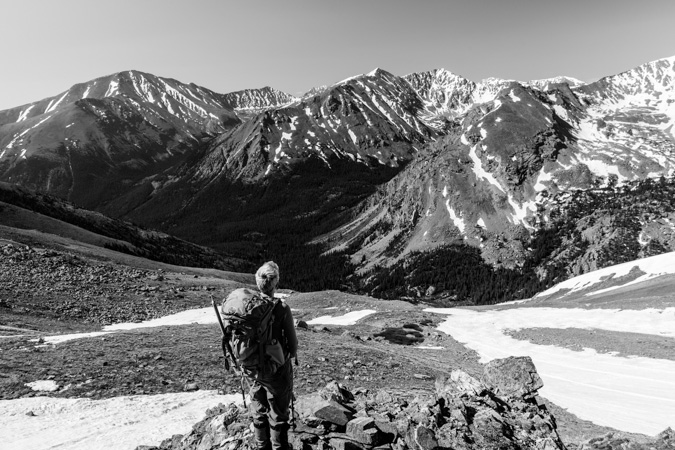
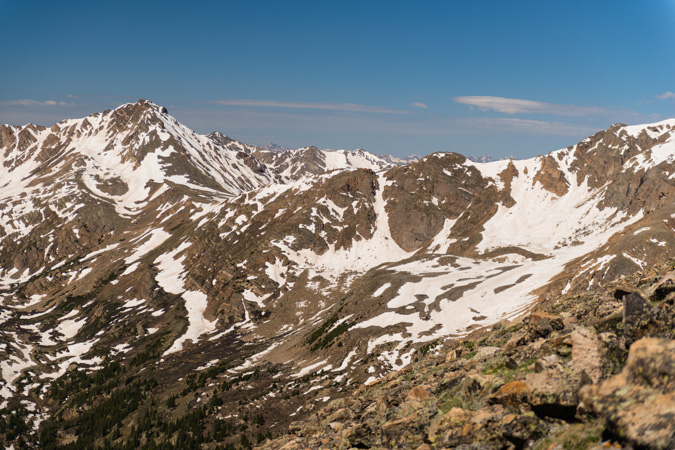
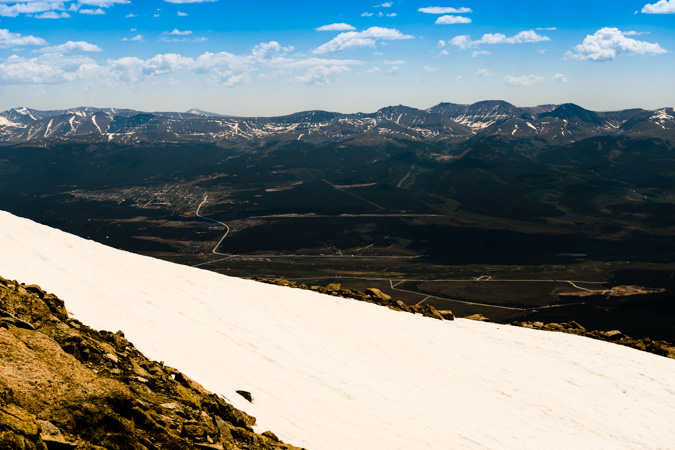
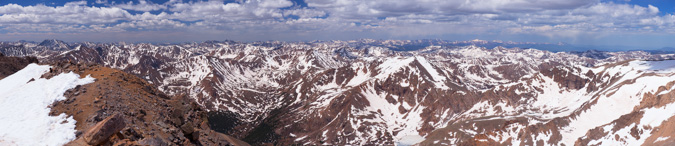
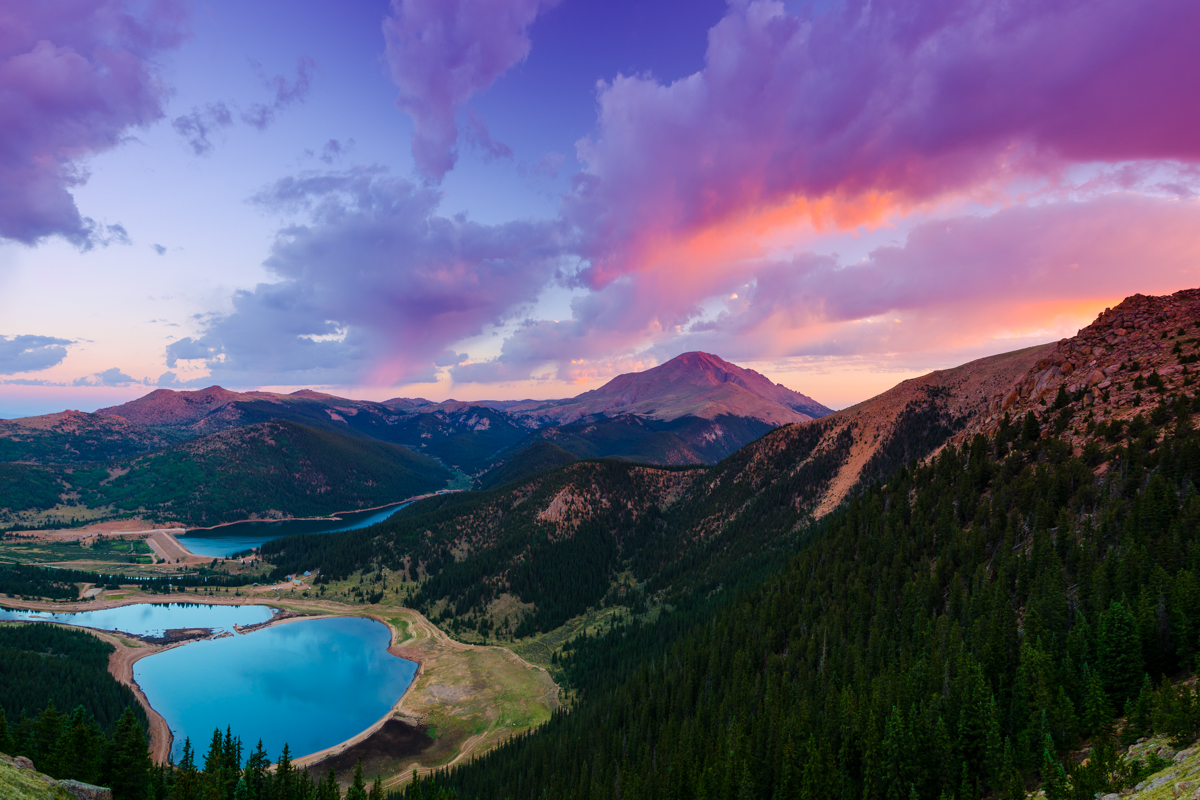
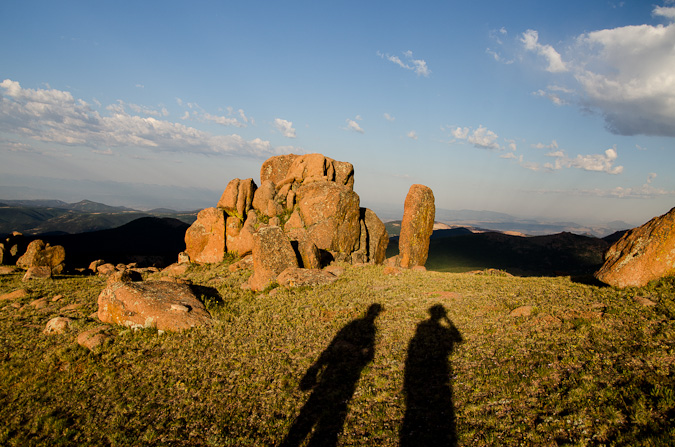
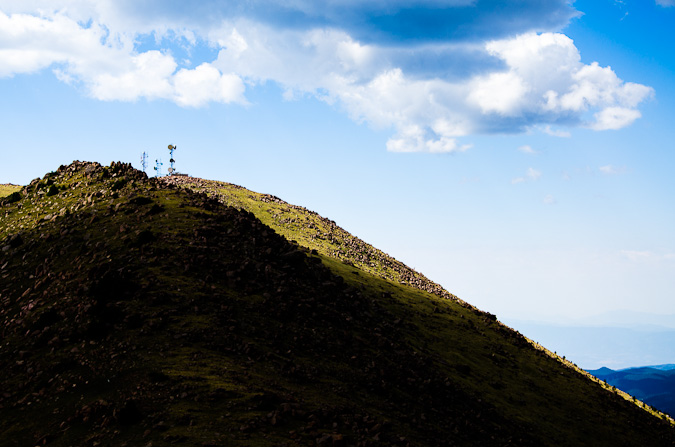
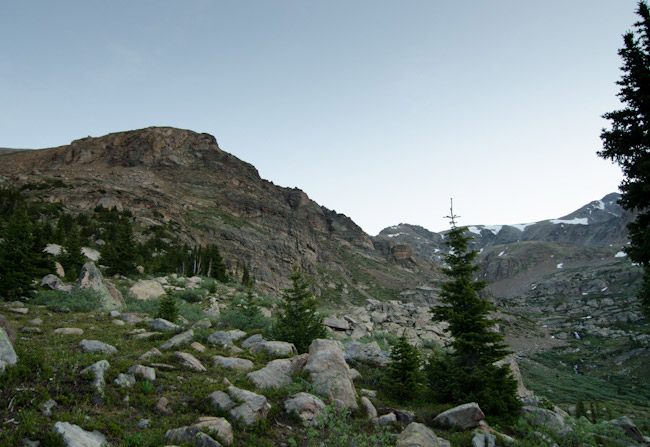
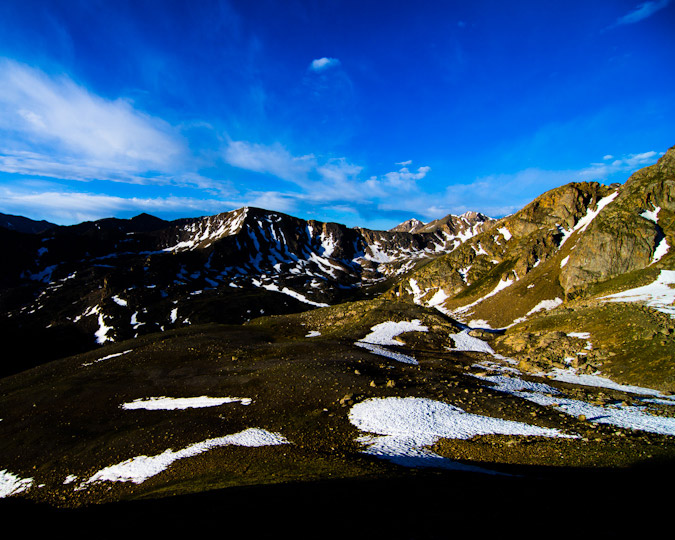
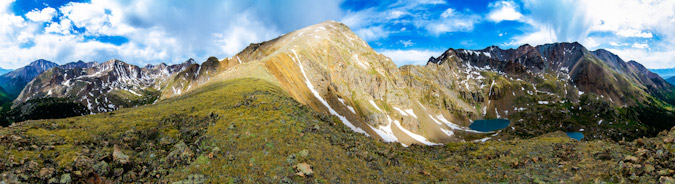
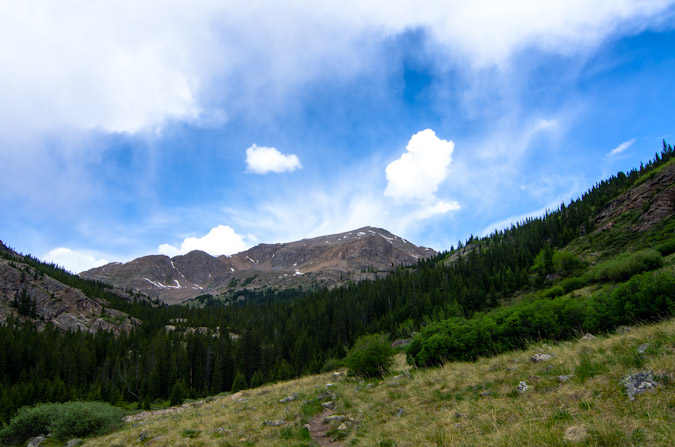
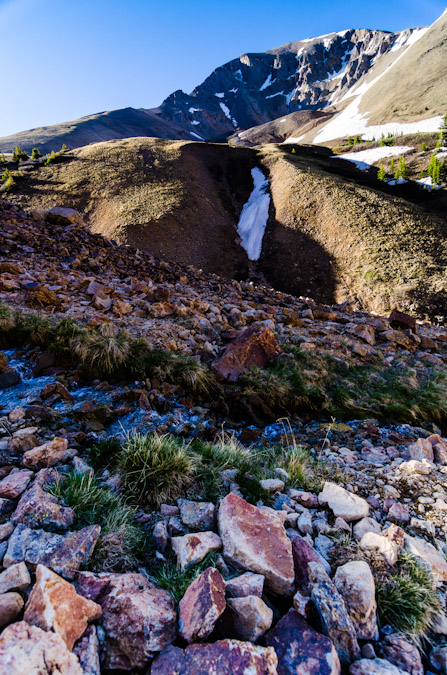
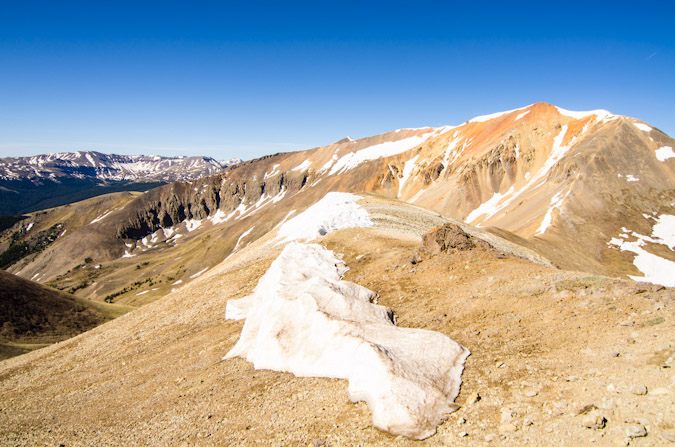
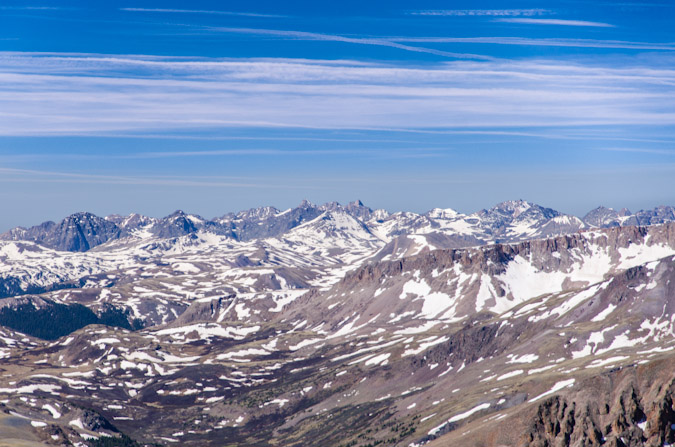
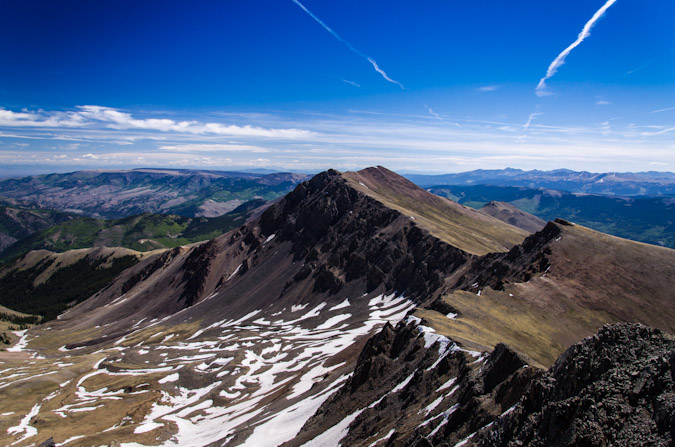
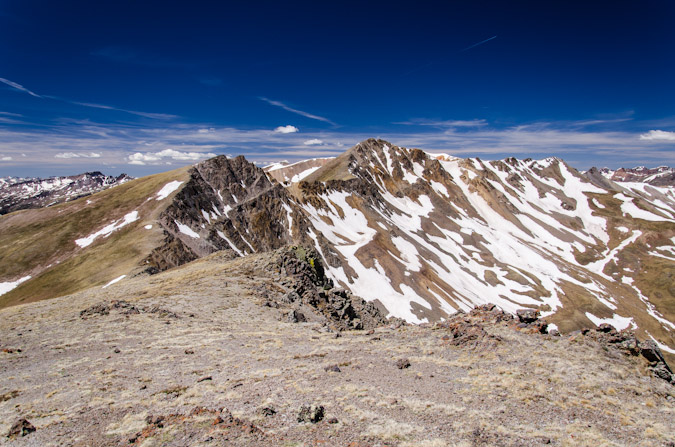
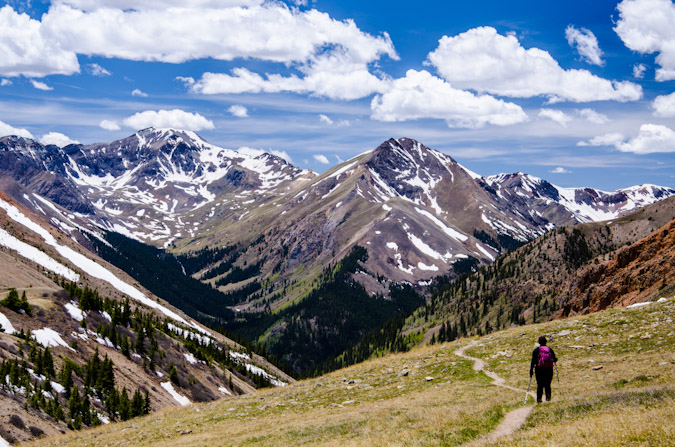
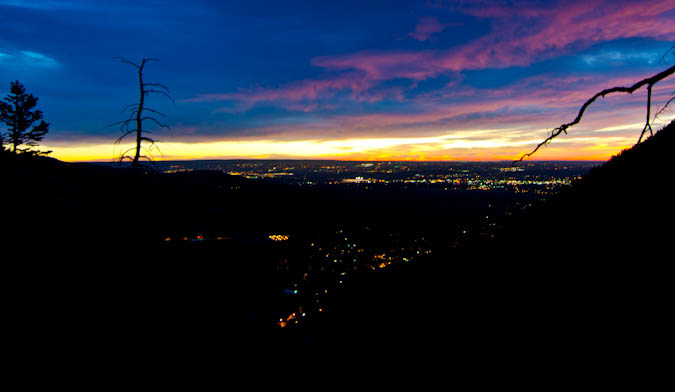
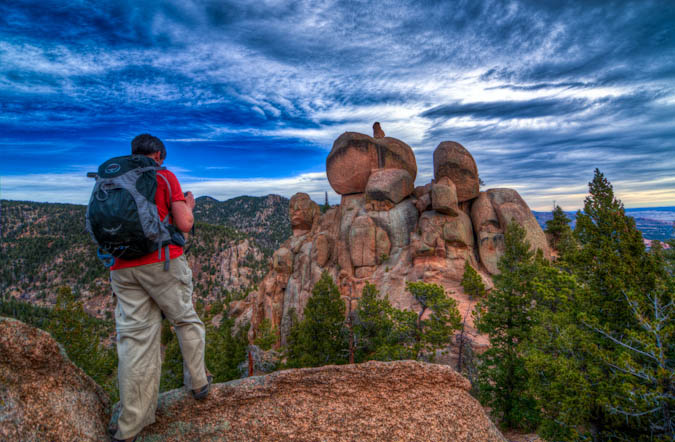
As we continued up the basin, we stopped periodically to look back up the basin that we would have gone up to climb French Mountain, pictured here.
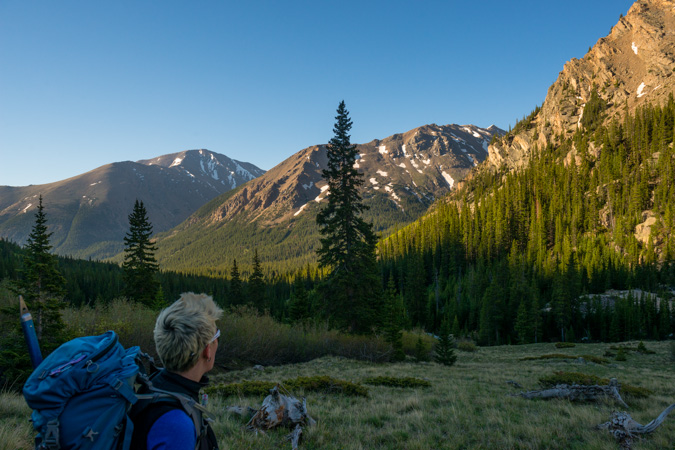
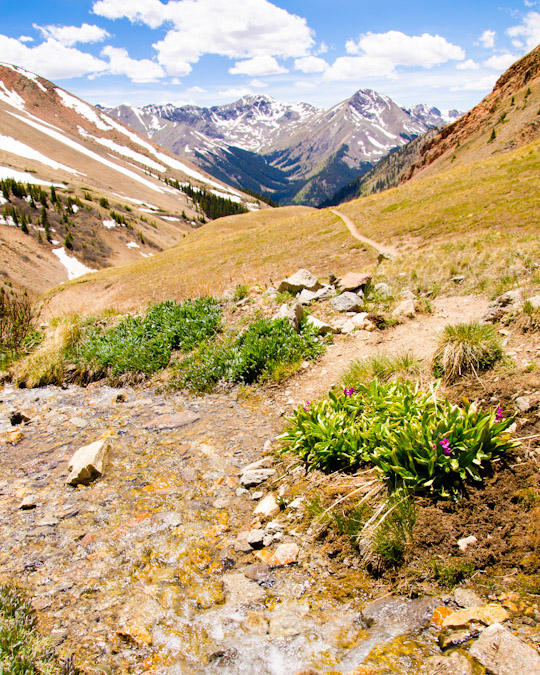
The trail going up towards Oklahoma and the turn-off for Mount Massive is very straight-forward and well- maintained. For a season starter, it was a nice change of pace.
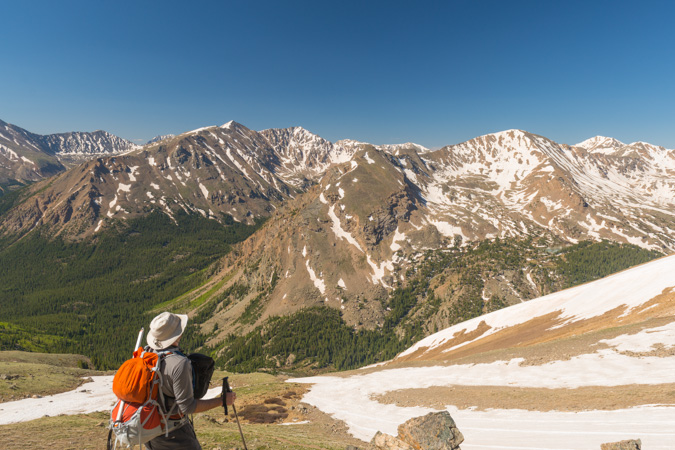
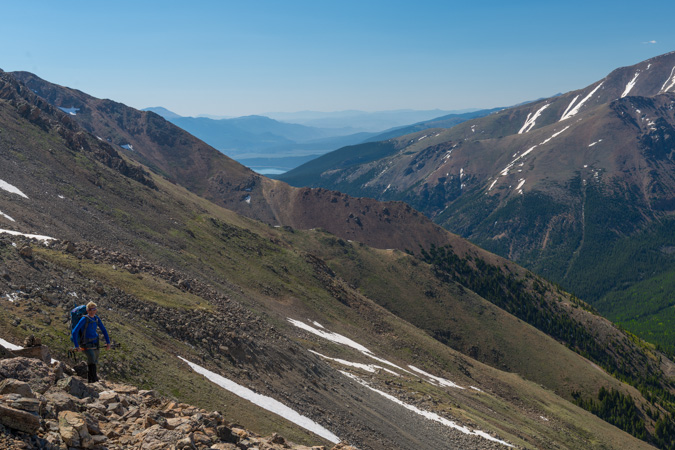
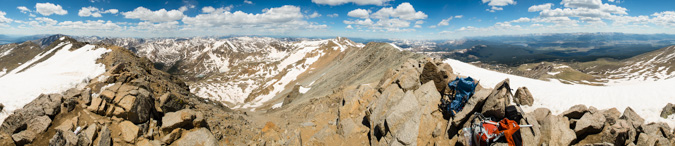
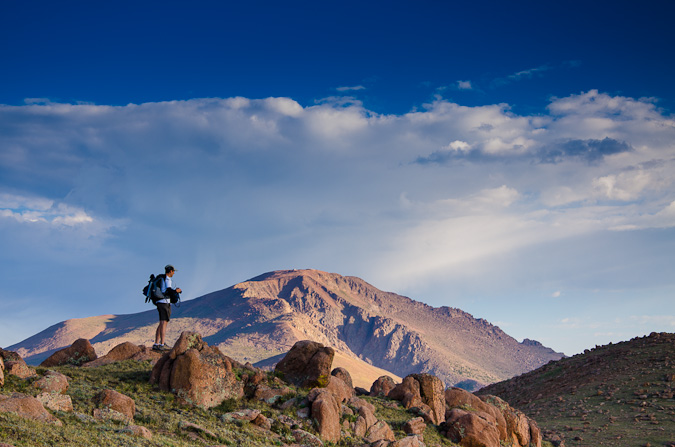
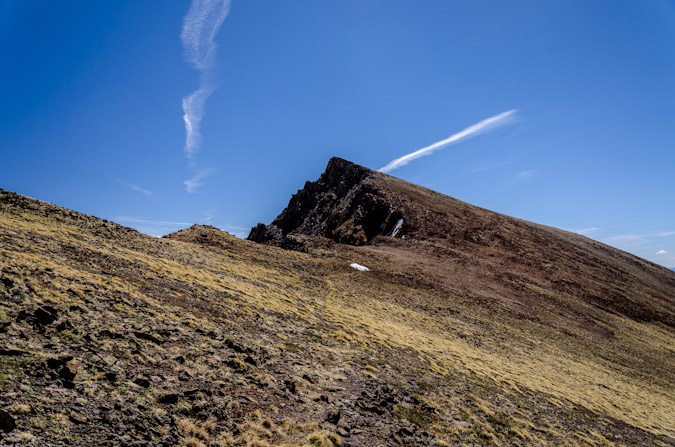
We finally reached the turn-off for Mount Massive, pictured here where Sarah is pointing up.
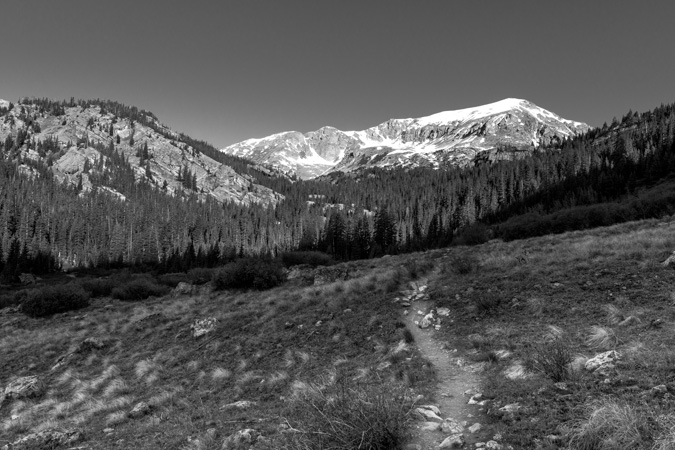
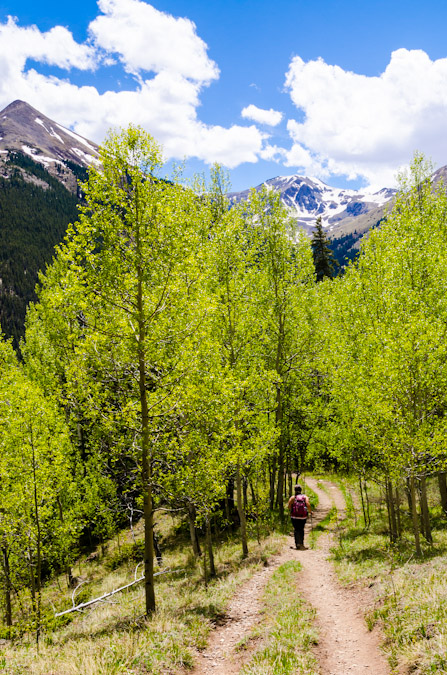
This trail gets you up Massive in a hurry, no doubt about it. It is fairly steep, but in very good condition almost the whole way up. I think that Colorado 14ers Initiative did some work on this trail some time back, and it certainly shows. The trail switches back up the side of Mount Massive several times and affords awesome views of the valley below and the awesome peaks across the way, including Colorado's highest, Mount Elbert.
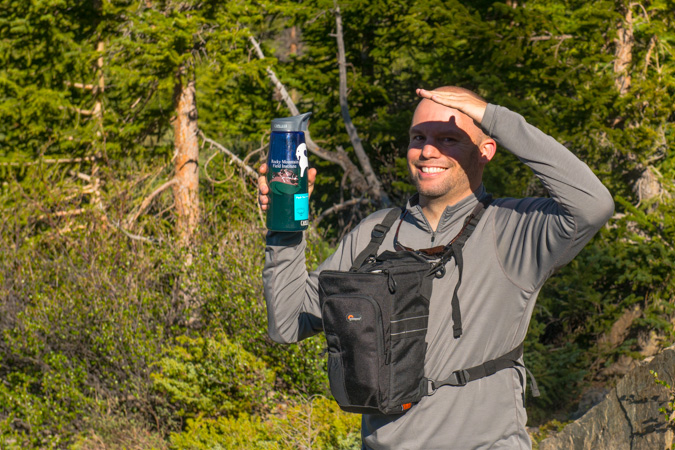
As we approached tree-line, we decided to stop for a snack and water break.

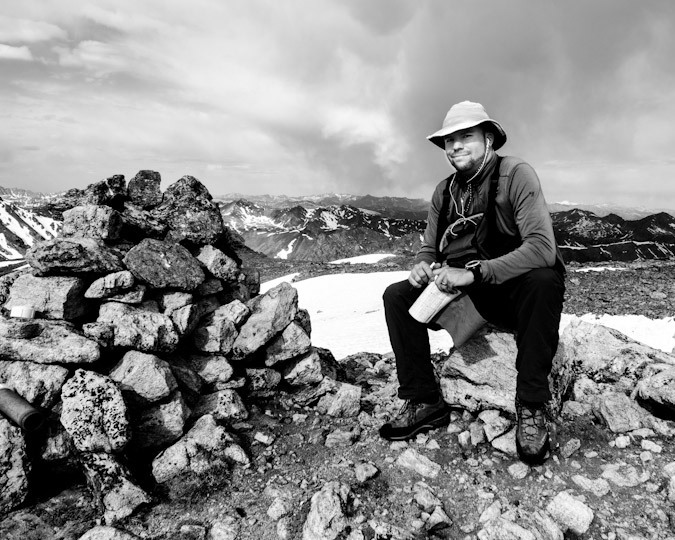
I have Sarah take a photo of me posing with my Rocky Mountain Field Institute (RMFI) water bottle. I'm a very proud member of the board of directors for RMFI. If you're not familiar with RMFI, you need to check them out! If you've ever climbed Humboldt, Crestone Peak or Crestone Needle, then you're familiar with the work they have done in the backcountry.
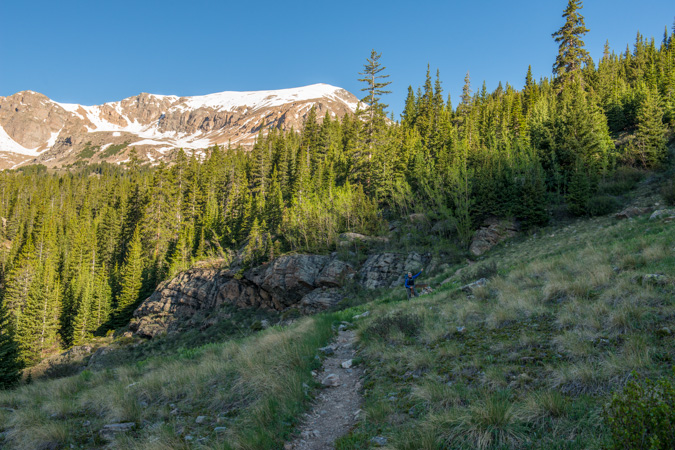
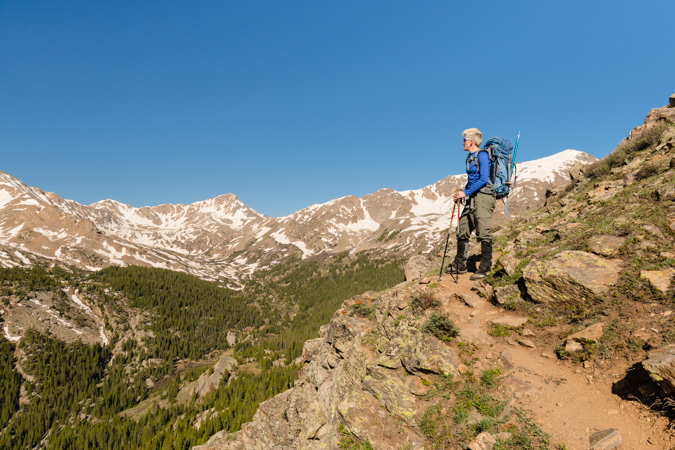
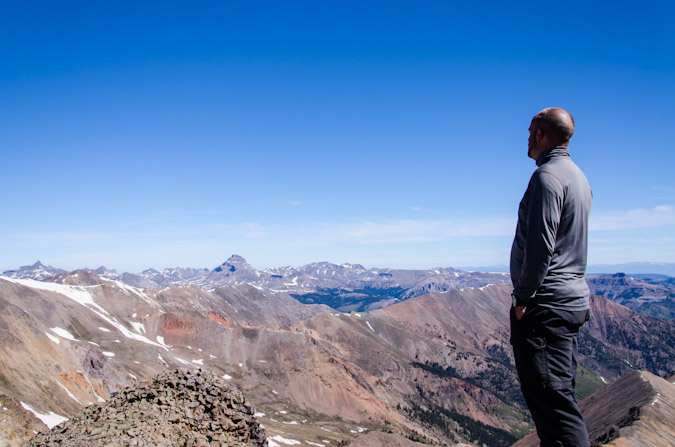
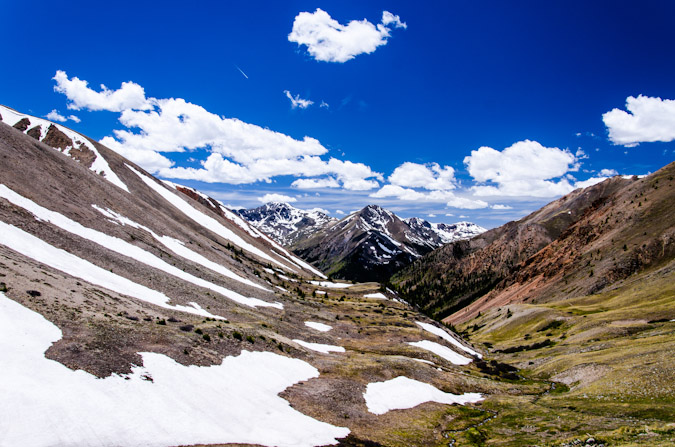
After re-fueling, we decide to keep on trucking. The trail winds steeply up the slopes and kept on delivering us with awesome views to our south of Deer Mountain and Mount Champion.
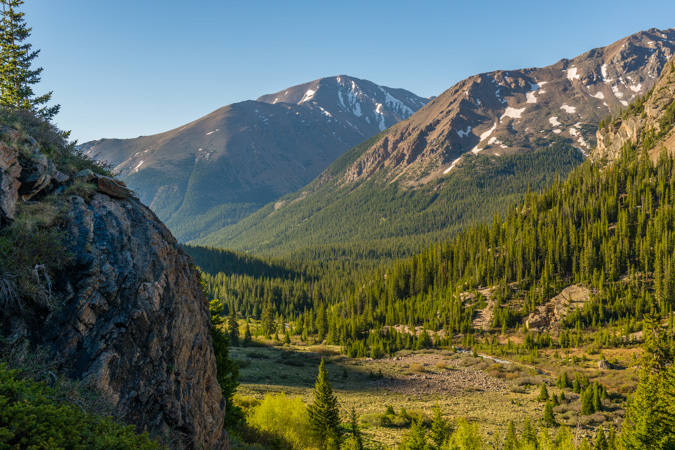
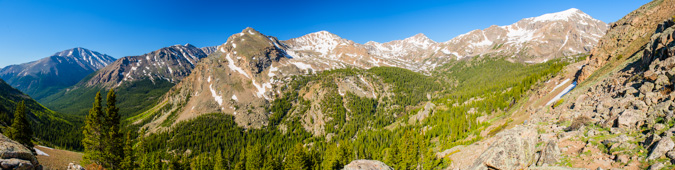
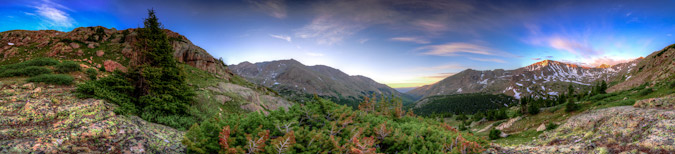
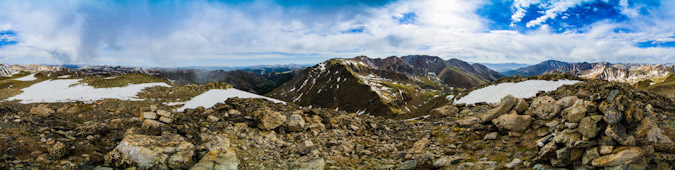
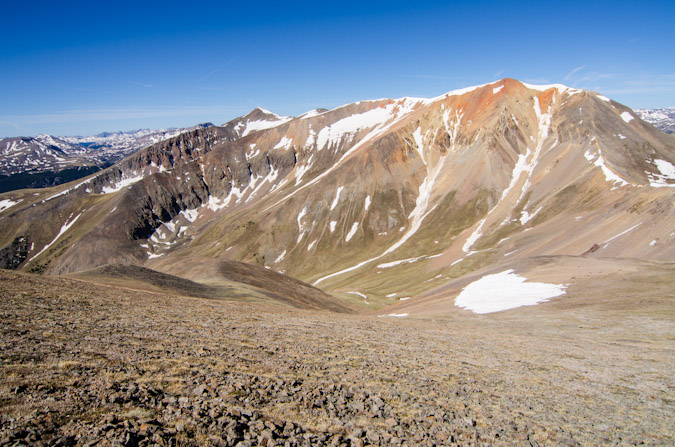
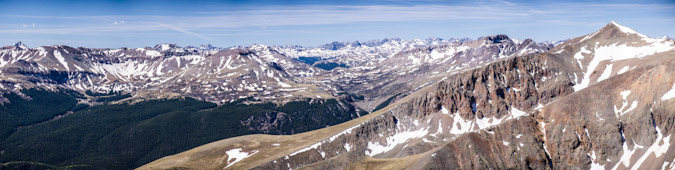
The whole valley below made for a very nice panoramic. From left to right - Mount Elbert, French Mountain, Unnammed pointy peak (but Sarah and I later dubbed this a very foul and childish name to keep up entertained), Mount Champion, Deer Mountain and Mount Oklahoma.
We took our time going up, being the first climb of the season. We enjoyed the views, the company, the conversation, the wilderness.
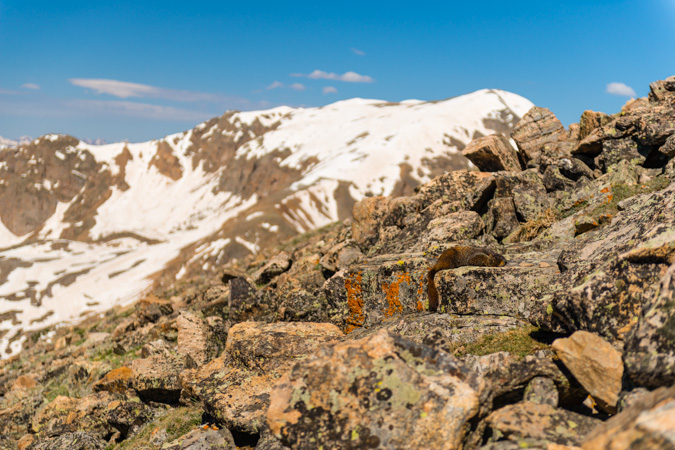
We were even able to locate some wildlife, albeit your normal fanfare of chipmunks and marmots.

Getting a day to spend with Sarah was awesome. She's one of the most dynamic and fun people I've ever met. Our personalities go together quite nicely. It is also great to see her in high spirits when we're hiking.
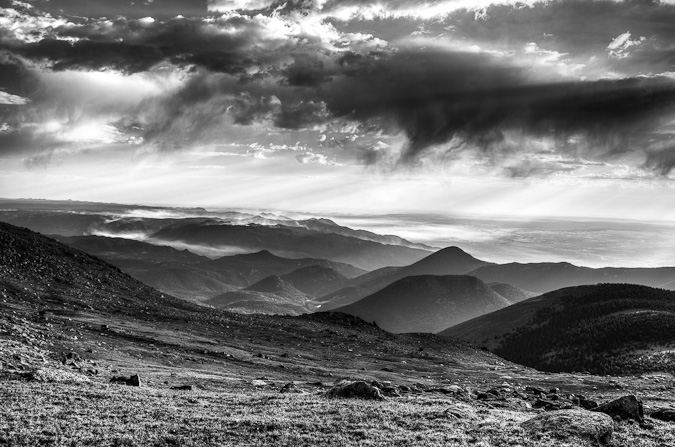
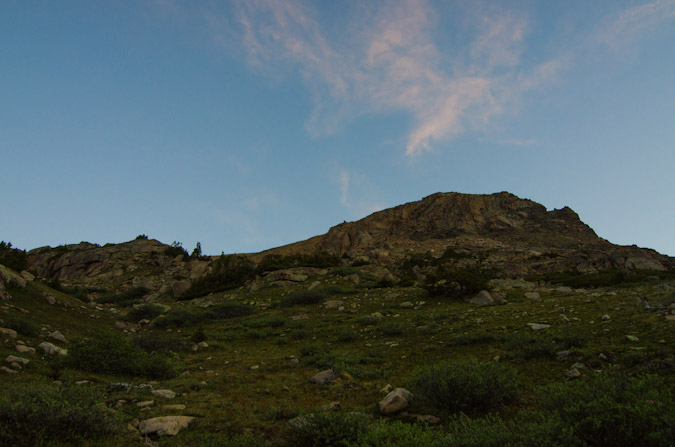
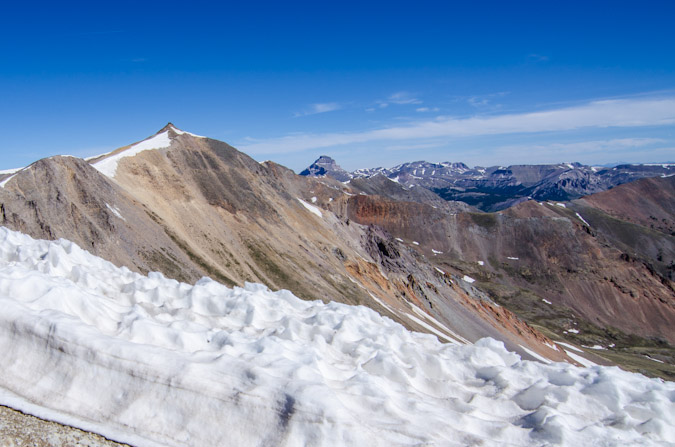
We took a lot of stops to soak in the Sawatch Range glory, and the weather was holding quite nicely.
Here's that stealth marmot. I think he thought if he layed down I would not see him. Nice try pal.
Finally the tips of the distant Elk Mountains were coming into view. They seemed like they were holding a lot of snow as well.
And looking back, Twin Lakes was starting to come into view.
This is always my favorite part of hiking. Above tree-line, no wind, sunny day. What more could you ask for than a day like that on the side of a 14er? Sarah seemed to be enjoying the views as much as me.
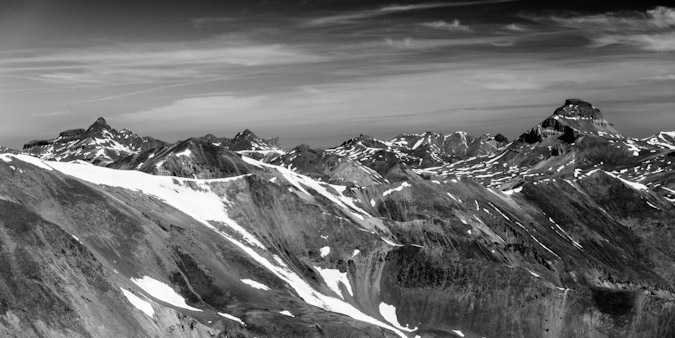
We stopped for a bit to enjoy the killer views of the Elk Mountains, which are some of my favorites. The tips of the Maroon Bells, Snowmass and Capital were poking above the top of Mount Oklahoma to the west.
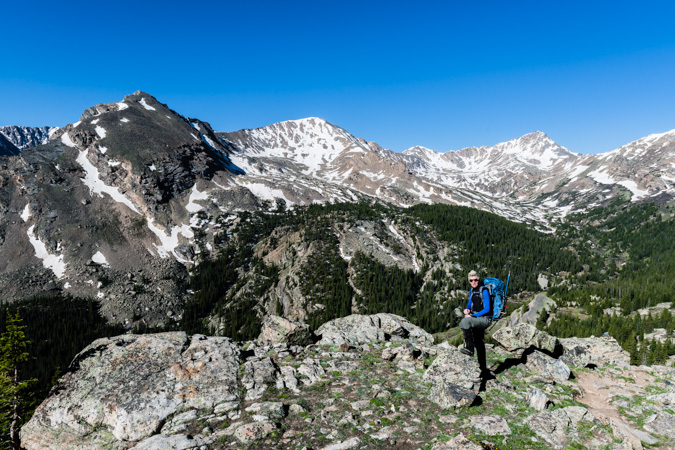
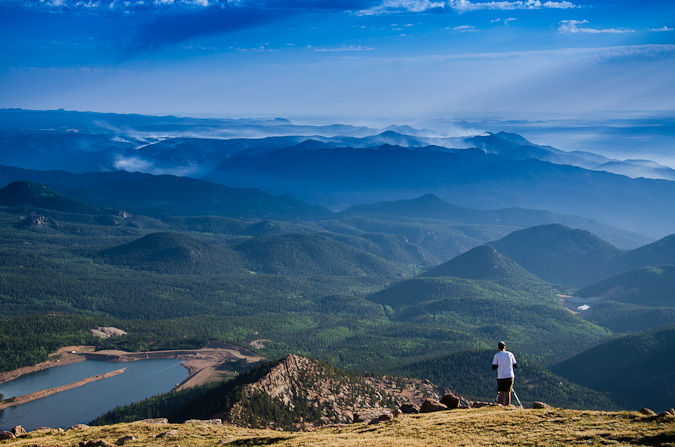
From here, the trail continues up the southwest slopes and crosses east at the ridge. The town of Leadville comes into view to the east.
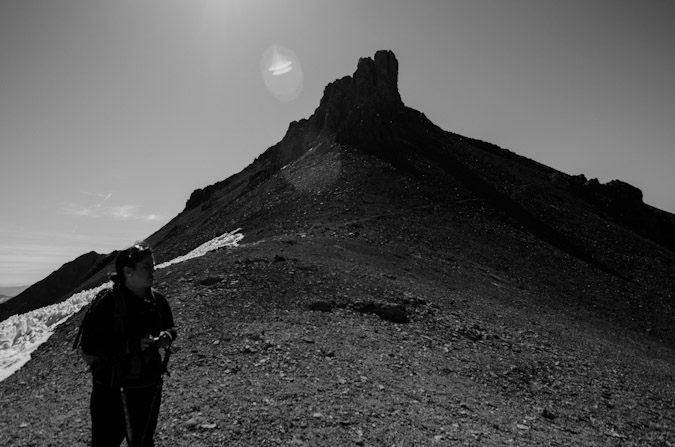
And of course the summit of Mount Massive to the north, with a lot of people coming down.

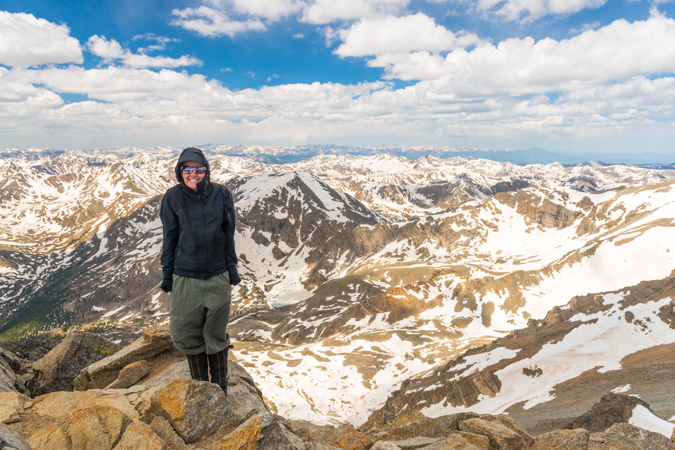
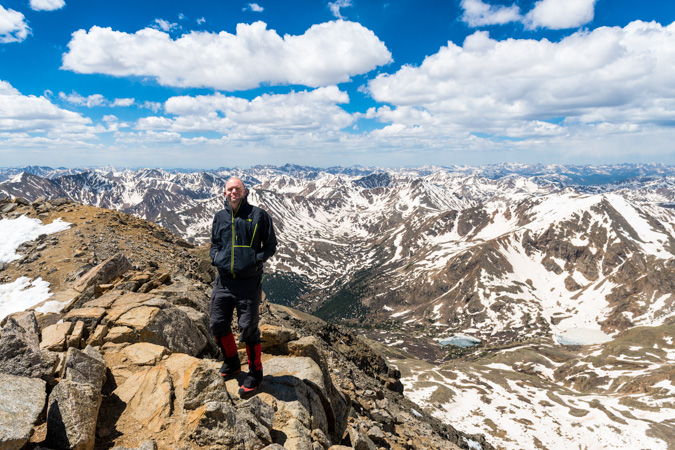
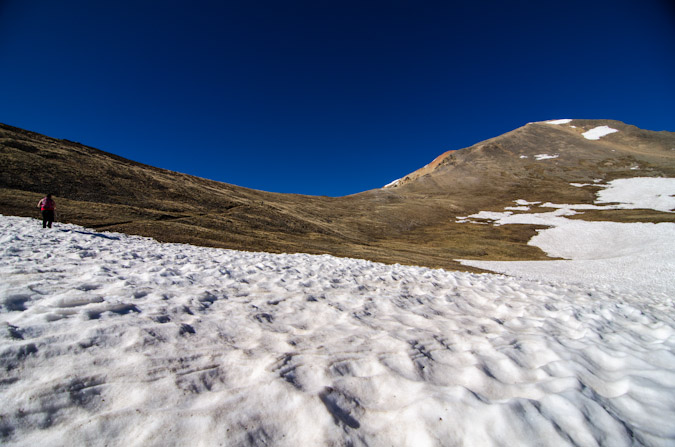
After a quick stroll over to the summit, victory was ours. We were able to almost completely avoid snow for the entirety of the hike up, minus a few snowfields below and some minor snow at ths summit. This was Sarah's 24th 14er and my 60th I think. It was awesome sharing the summit with Sarah again.
On the top, we ran into a group of gear testers from Osprey packs. We were immediately filled with envy that their job was to test the comfort of packs while hiking 14ers.
From the summit, I decided to try out some long exposure photos using a 9-stop ND filter, specifically, the Hoya ND400 77mm filter. Esentially, an ND filter is a black peice of glass that goes over you lens, which allows your shutter to stay open for a long exposure in daylight conditions. This allows you to capture photos of the clouds moving, and other awesome effects. Since I was shooting for a 30-second exposure, I would need my camera to be sturdy. To acheive this, I fashioned a flat suface out of rocks to rest my camera on.
I was also able to perform a hand-held panorama at 70mm looking west at the Elks.
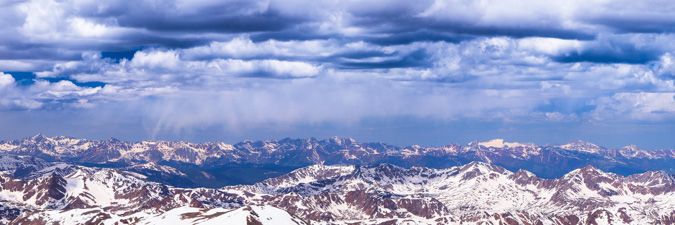
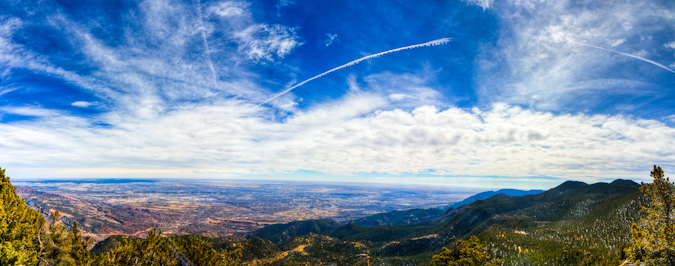
And here's a larger version looking south to north at 70mm:
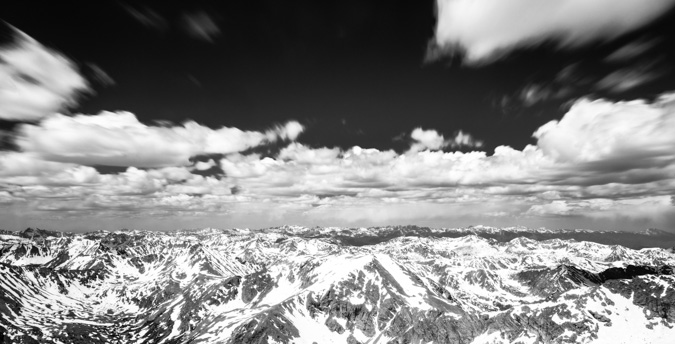
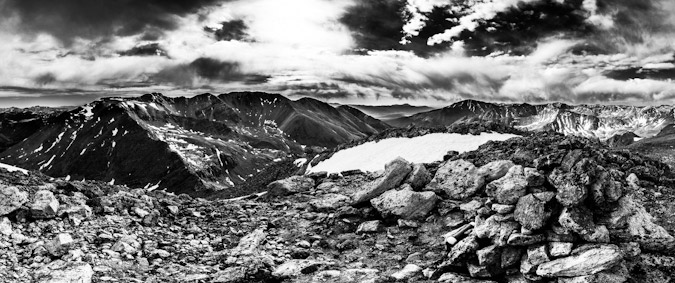
And lastly, the 360 panoramic taken at 24mm:
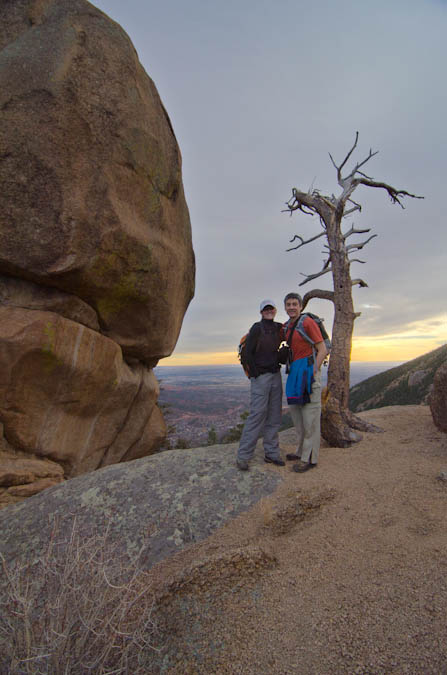
I had Sarah snap off a few shots of me before we head back down.
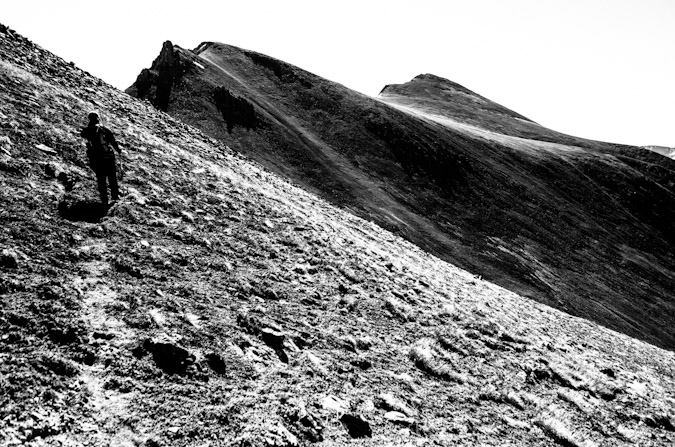
A solo gentleman joined us for the descent, mostly because he was looking for the trail, which he had lost on the way up the same route we came up. I could have sworn this guy was Taylor Lautner from the Twilight movies. A few notes about my camera and lens selection. I felt like the pairing did well. While they were heavy, it was easily mitigated by the front-loading Lowe Pro pack I used and the quality of the photos was superb. The Nikon 24-70 afforded just the right amount of flexibility in range, I rarely felt myself wishing for a longer lens. Had I saw some true wildlife, I would have loved to have my 300mm f/4 lens with me, but it would have added weight to an already heavy set-up.
After taking summit photos, we head back down pretty quickly. I wanted to travel quickly, so I put my camera bag in my main pack and did not take it back out for the rest of the hike down. Once back at the trailhead, we saw a Toyota FJ cross the stream. Go figure.
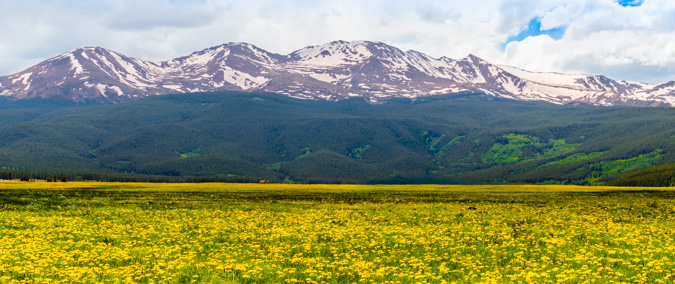
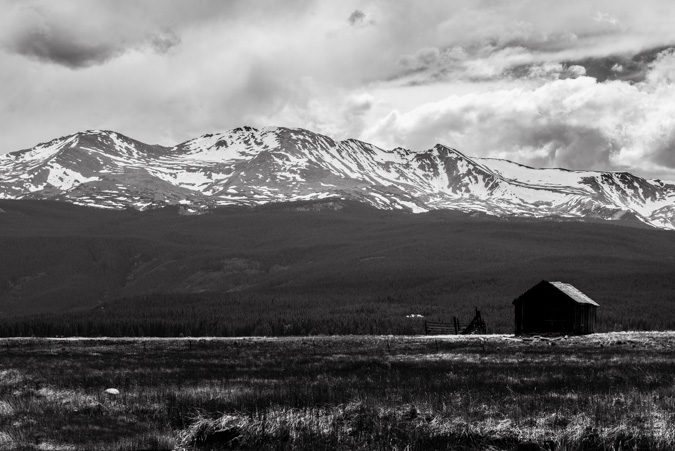
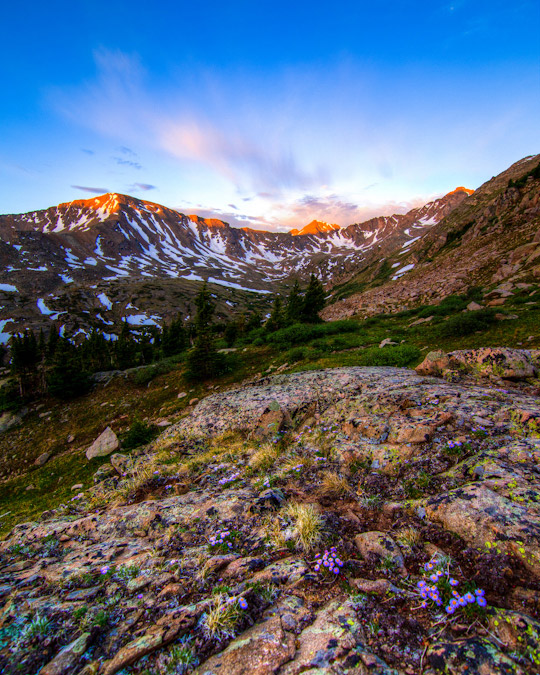
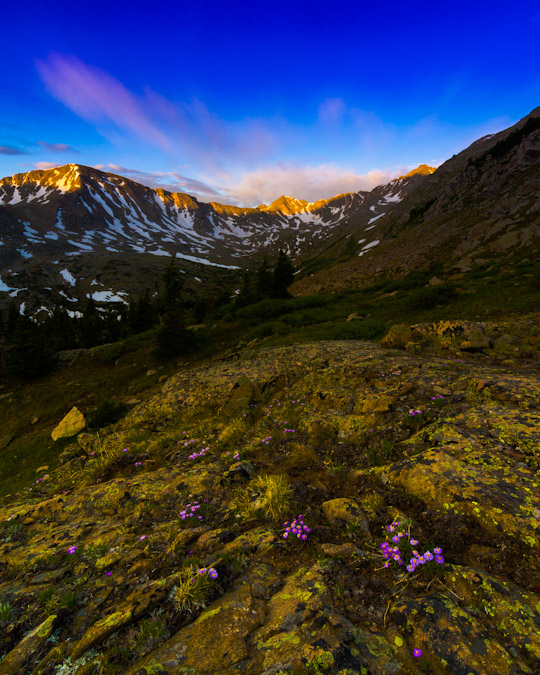
We drove back out towards Leadville and stopped to take a few photos of an amazing flower field in front of Mount Massive and an idyllic abandoned cabin. I hope you enjoy my parting shots:
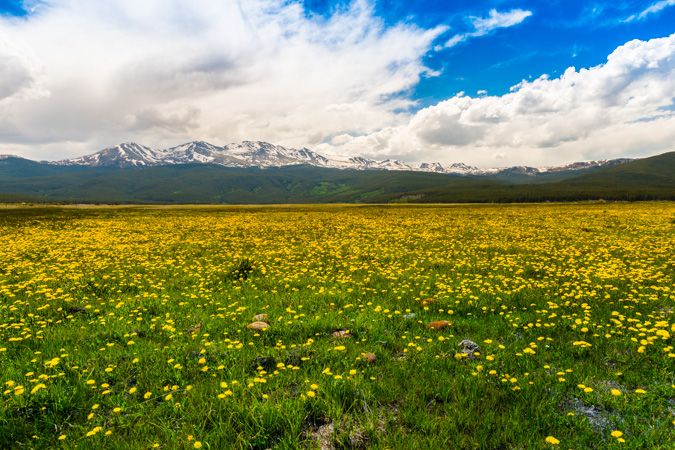
Panoramic version...
Abandoned cabin...
This concludes the first trip report of 2013. I apologize for the lack of updates lately. I have been quite busy working on my photography business, where I sell prints of my work. You can check it out by visiting www.mattpaynephotography.com
Originally, my friend Ethan and I had made plans to climb the Three Apostles - three great 13ers over near Leadville; however, the Waldo Canyon Fire started the weekend prior and by Tuesday had burned out of control - 346 homes were burned to the ground in Mountain Shadows and Highway 24 was closed. The main access to the mountains was Highway 24, so we were pretty much stuck on the Front Range. Additionally, the whole week had been an emotional rollercoaster for everyone - my parents evacuated their house and stayed with us for a couple of nights. Ethan covered the fire quite a bit with video and social media throughout the week (by the way, if you have a chance, you really should check out his incredible blog post about social media, traditional media and the Waldo Canyon Fire - a fabulous read). The Waldo Canyon Fire had presented Ethan and I another opportunity - to hike a closer-to-home peak with the hopes of getting a birds-eye-view of the fire's extent.
So - we set off early on Sunday morning to do just that - I picked Ethan up at 3:30 AM from his house and we head up Gold Camp Road to tackle Almagre Mountain - a 12,367 ft. gently-sloped peak just South of Pikes Peak. Indeed, most Colorado Springs residents will recognize Almagre as a very plain looking set of mountains above tree-line to the left (south) of Pikes Peak. I'd always wanted to climb Almagre, and Ethan had already done it twice, so it seemed a great fit for our objectives.
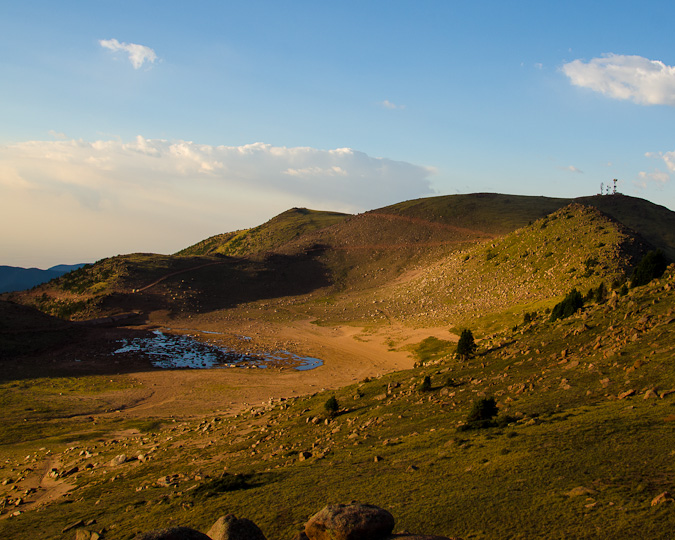
We opted for the western approach from near the gate that Colorado Springs Utilities (CSU) has erected to keep people out of the city's water supply, which seemed to us to be quite low. To reach this spot, we drove quite a ways up Gold Camp Road, about 2/3 of the way to Cripple Creek, and turned right on Forest Road 376 to the CSU dead-end.
We arrived at the gate at approximately 4:15 AM and began in a wild rush up the steep 4WD road by foot towards McReynolds Reservoir. The air was quite cold this early and this high up, a stark contrast to the record-setting 100+ degree heat we had been experiencing in the scorched and dry urban setting of Colorado Springs. Eventually, the road leveled off and opened up into a large meadow, giving us a clue to begin to head west on a very faint trail, which crossed the CSU fence-line and connected to a more solid trail leading up towards Almagre Mountain. After a couple of miles of fairly steep climbing, we reached a great stopping point, giving us a wonderful vantage of Pikes Peak and the various reservoirs below - Mason Reservoir and McReynolds Reservoir - also known as the Seven Lakes area.
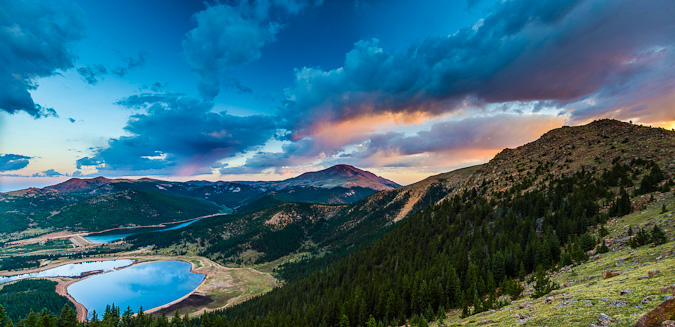
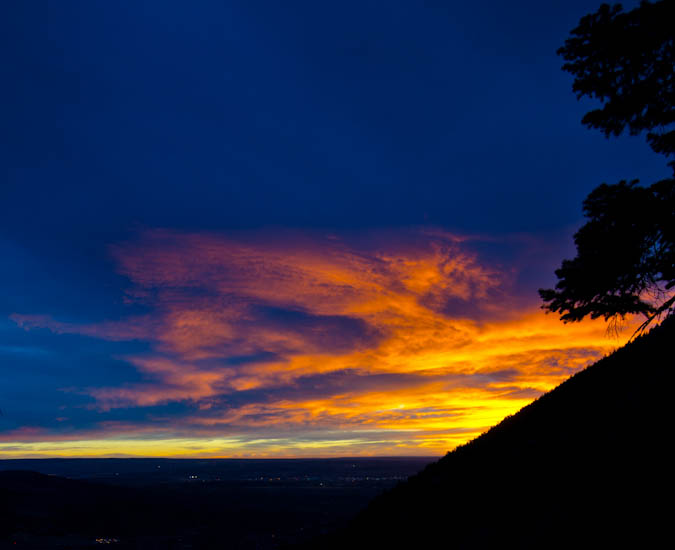
We stopped here to take in the great light hitting Pikes Peak, and I took advantage to take many photos from here as the sun continued to change the colors of the clouds and Pikes Peak.
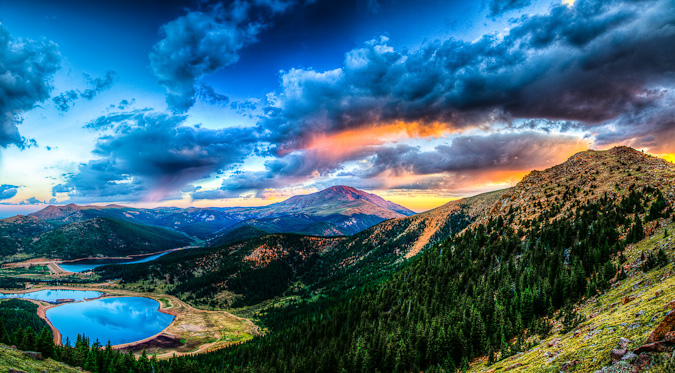
The lighting was fantastic, and it was such a rare view of Pikes Peak, I really loved it. This particular shot is also available on my photography website for sale.
Eventually, Ethan and I packed up our tripods and continued up to the ridge for Almagre Mountain. Once on the ridge, we could see Stratton Reservoir, which looked more like Stratton pond. Additonally, we made lots of jokes about the "Weather Control Satellite" on top of Almagre Mountain South (which is really a microwave repeater). This was based on a very funny press conference earlier that week about the Waldo Canyon Fire where someone in the crowd actually seriously suggested that the government just use its weather control satellites to create rain to put out the fire. For more on the weather control satellite joke, check out this hilarious post.
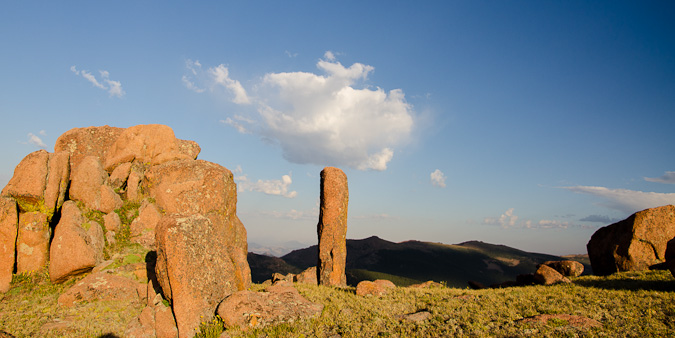
The terrain on the ridge was classic Pikes Peak granite - much of the same material found in the Lost Creek Wilderness Area.
There were funky rock outcroppings all over the place. Nature sure does have a great sense of humor!
Ethan and I were both really loving the light and the color - somewhat tainted by the smoke from the huge fire that raged on to the north of us.
Ethan and I made several stops on the way up to take shots of the lakes and of Pikes Peak.
Before long, we had reached the summit without any problems. We had a great viewpoint of the fire burn area and the current burning zone. The smoke had settled into the valleys below us and made for quite the fantastic scene.
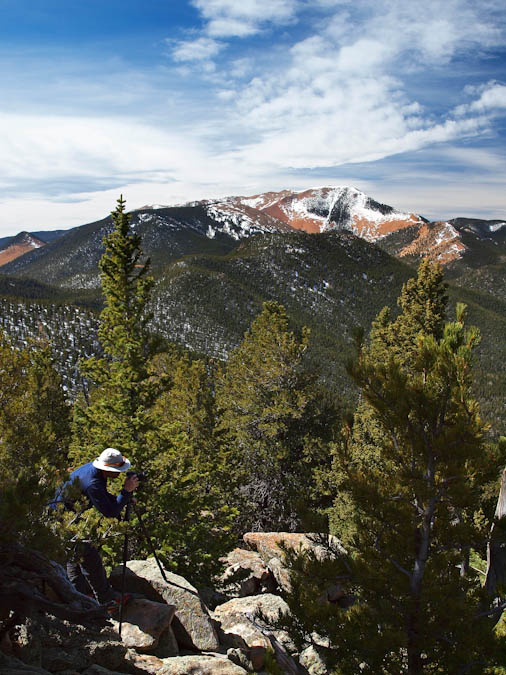
We both set-up tripods to take some time-lapse photos and video.
I was able to put together a 300 shot time-lapse video out of still images over a two-hour period from the summit. While it was pretty borning up there, I could not complain about the view.
I was able to get some pretty great zoomed-in shots of Rampart Range Reservoir about Highway 24, where the fire was most active at this point. A zoomed in view shows quite a bit of destruction in that area, but as bad Ias I had thought would / could happen.
The 360 degree view was fantastic as well - with Pikes Peak anchoring the center of this peice.

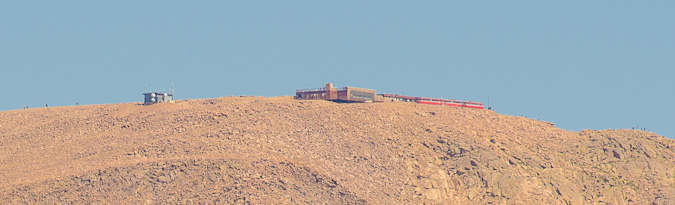
I was even able to get a super zoomed in view of the Pikea Peak summit, where I could make out people and the Cog Railway.
We both decided that after spending two hours on the summit that it was time to head-out. So we did just that. Right beforehand I was able to get a sweet shot of Ethan way up on the summit taking shots.
On the way back, I was able to get a better shot of Stratton Reservoir (with Mount Rosa in the background), now reduced to almost nothing.
And of course, our down-climb would not be complete without another shot of the Weather Control Satellite...
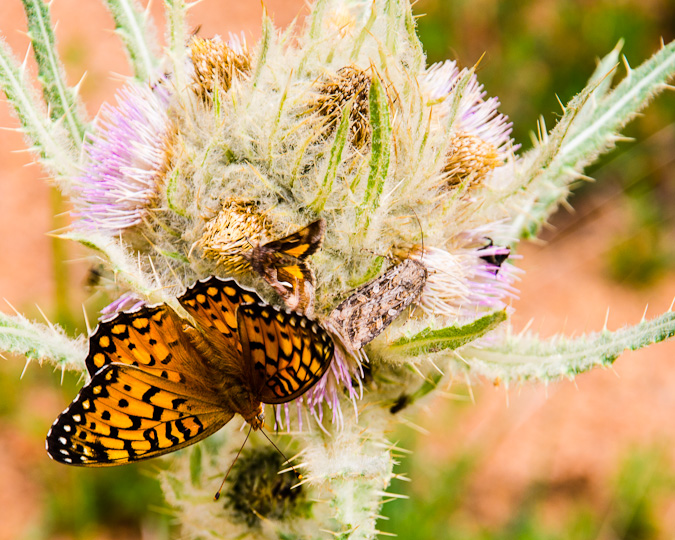
The hike back down to the car was quite uneventful. We noticed there were a lot of butterflys out and so we were able to follow one to this huge thistle plant, where countless other insects were hanging out, drinking nector from these hearty flowers.
All in all, I would rate Almagre Mountain as very easy - a mountain for all ages and skill levels. The rare views of Pikes Peak alone were worth the drive and hike for me.
{fcomment}
Mount Oklahoma is often forgotten by many, including myself, for a variety of reasons. There's nothing very remarkable about the look or feel of Oklahoma or the route to climb it. As Gerry Roach explains in his guidebook for 13ers, Mount Oklahoma is dwarfed by its neighbor to the east, Mount Massive, which is the 2nd highest mountain in Colorado. Despite this fact, Mount Oklahoma is more than OK - it offers solitude, unique views of mountains in all directions, and a fresh perspective on the art of "peakbagging."
Mount Oklahoma is not a mighty mountain, nor is it meek - rather, it is fairly average in stature for the Northern Sawatch Range - rising 13,845 ft. in a valley full of giants. Indeed, Mt. Elbert (14,433 ft.), Colorado's highest mountain, towers over Oklahoma to the south and east. Other higher Centennial peaks also adorn the skies nearby, including French Mountain (13,940 ft.), Casco Peak (13,908 ft.) and of course the Mount Massive massif (14,421 ft.) right next door.
Knowing that Mount Oklahoma is a fairly straight-forward and relatively safe climb, lacking anything harder than class 2 and with one of the easier levels of access for a 13er, I opted to head-out to climb it solo. While this is something I generally discourage, I felt the risk was manageable, plus my wife knew where I was going to be. Indeed, it did turn out that I did not run into a single other soul during the whole hike until well on the way back to the Jeep on the Mount Massive leg of the trail. So there it was, I left my house in Colorado Springs at about 6:30 PM on Friday evening and found myself at the North Halfmoon Creek Trailhead at 9:15 PM. There was an abundance of people up in the valley camping. Despite campsites being quite ubiquitous in the valley, I was left with no other option but to park at the trailhead and find a flat and comfy campsite within the trees. I set-up my sleeping pad and sleeping bag only and went to sleep right away.
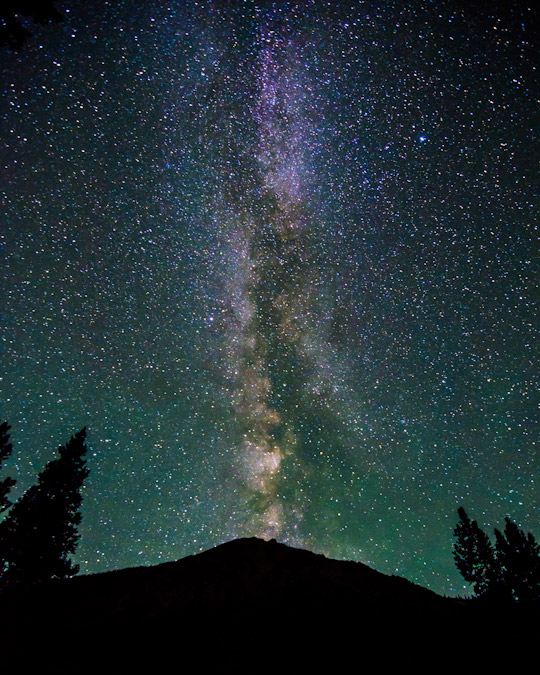
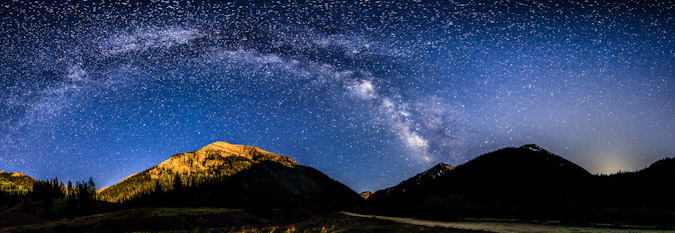
The alarm sounded promptly at 3:30 AM and I rose quickly to get a start for the day, as I knew my wife wanted me home relatively early so that we could go to my parent's house for a father's day dinner that night. The first thing I did was take a shot of the Milky Way above the trees and above the 13,221 ft. northern sub-peak of Mount Elbert.
Click on the photo to see a larger version or to purchase a print.
I had been on this trail once before in 2009, having been here in the cold month of October to climb Mount Massive. What I remembered of this trail was that it was very straight and easy to follow below tree-line before the turn-off for Mount Massive, so I was very confident that I could make my way in the darkness with the aid of a headlamp. Adorned with my Ipod and my favorite Celtic tunes, including Solas and Altan, I began my journey in the dark.
I also decided to bring my Gitzo tripod - which is basically an older, heavier version of THIS one, with an Arca Swiss monoball affixed so that I could get some sweet sunrise shots and summit shots along the way. While this adds a great deal of weight to my pack, the effort is worthwhile and increases the types of shots I can get significantly. I've fallen in love with this tripod and monoball combination since acquiring them both on the cheap a few months ago on Craigslist. They are hands-down the highest quality photography gear in the business. I highly recommend both for anyone looking to upgrade.
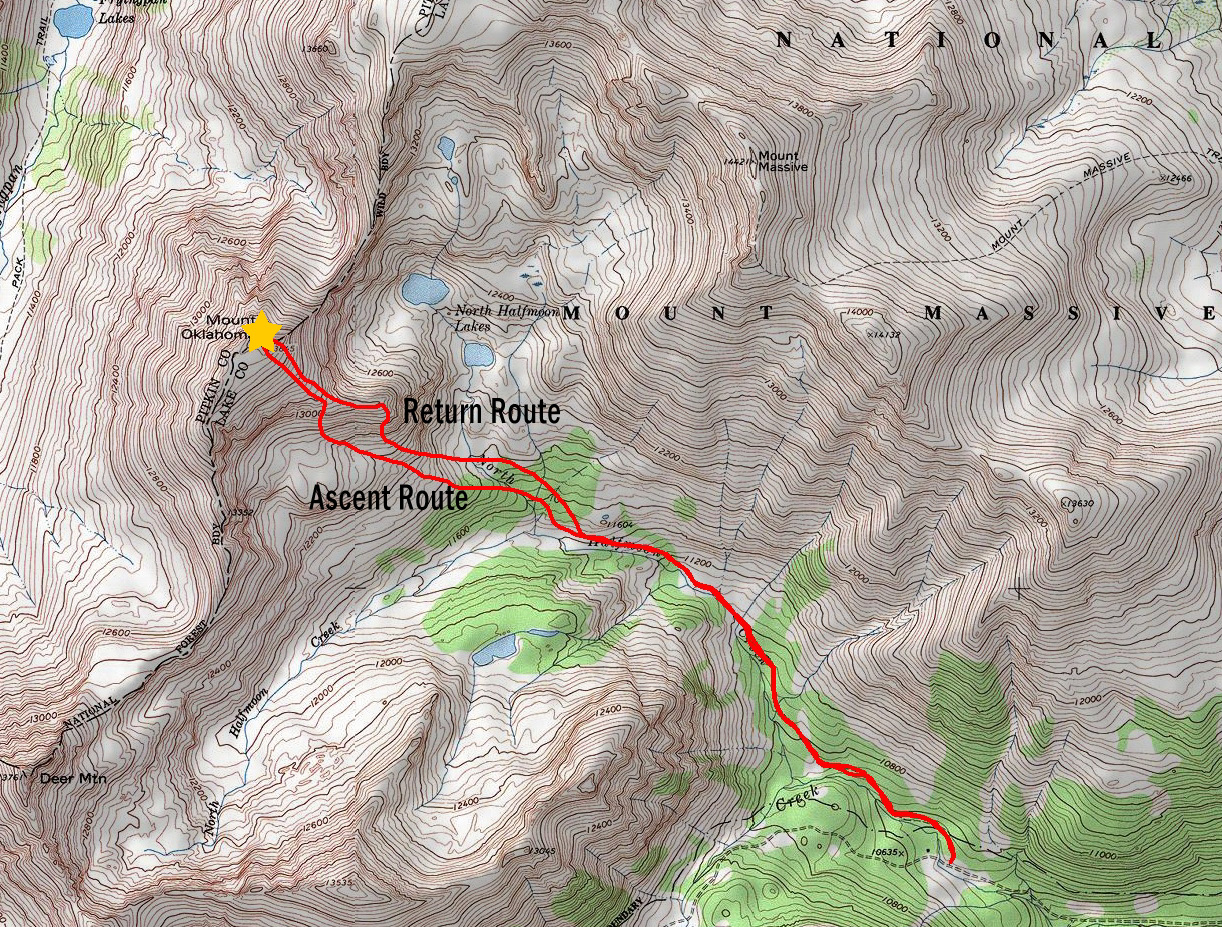
The plan was to follow the route as described by Roach, which is close to what actually happened - here is the map of my route - click on it to see a larger version.
I found the trail very easy to follow, even in the darkness, minus one section where the trail meets up with a very large rock formation and crosses it. I just kept my eye out for the trail and ensured I was on track at all times. The route description for Mount Oklahoma is pretty straight-forward according to Roach. After passing the Mount Massive trail junction, continue west-northwest until the trail begins to gain elevation and head north, at which point you are to leave the trail and continue west. That's just what I did, but it was somewhat sketchy in the dark - bushwhacking through trees and logs is a great time. I quickly reached the two large stream crossings described by Roach - they were quite fast streams on a steep incline - I was very careful to cross, finding dry-ish rocks in narrow passage-ways. At this point - I began up a steep hillside per Roach's description for going up a tree-filled ridge to the northwest. Before I knew it, I had reached treeline and could make out my surroundings.
I encountered a deer at this point, which quickly ran off into the trees below. I could also make out a series of waterfalls in the Halfmoon Lakes basin below Mount Massive to my right - this was quite impressive and I made a mental note to return to those lakes someday - they seem to hold quite a bit of promise. I also was revelling in the fact that I was hiking solo in the Mount Massive Wilderness Area, off-route, while listening to great tunes and taking pictures of fantastic vistas. I really do love Colorado! Mount Oklahoma was clear as day above me, and the route seemed quite obvious from this point - go up.
Before long, I found myself high above most of the trees just in time to witness the first light kiss the tops of Deer Mountain and UN 13,535 to the south and west. Moments like this made hauling the tripod up worth the effort.

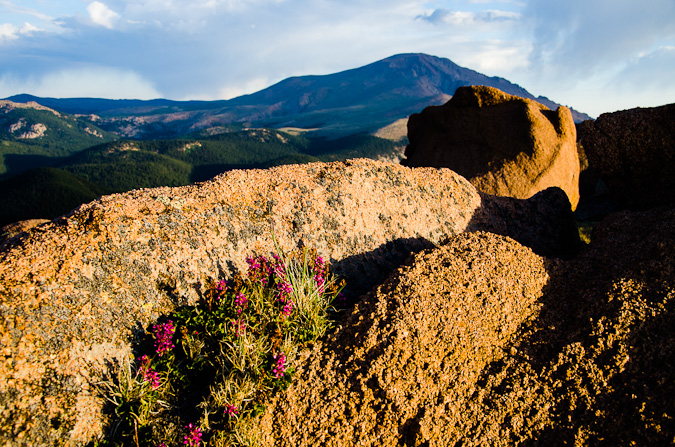
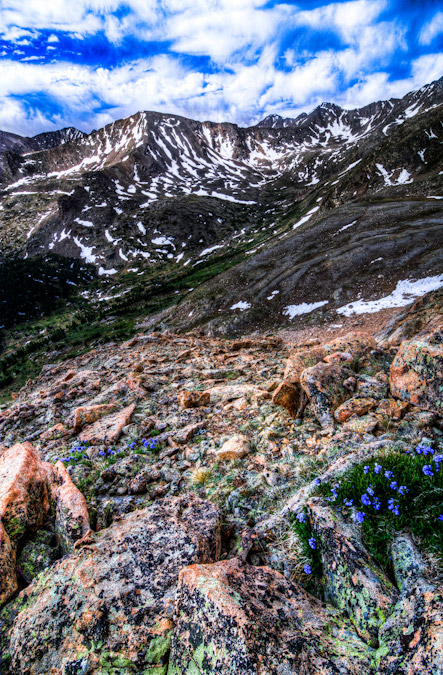
I left my pack and wandered up a little way and found an area covered with really cool looking flowers. Turns out the flowers are known as Alpine Primrose - a really quite lovely looking purple and pink flower. I took quite a few shots from this spot and processed each a little differently.
Another version from the same vantage point...
I was even able to put together an 360 degree HDR panorama, which I've not tried in a few months. I was not overly impressed with the results of this one, but I'll share it anyways.
Having filled my soul with a dose of alpine sunrise, I was ready to continue on up the mountain. I followed what seemed to be a slight trail or drainage up the mountain and was aiming for an area to upclimb a grassy screefield.
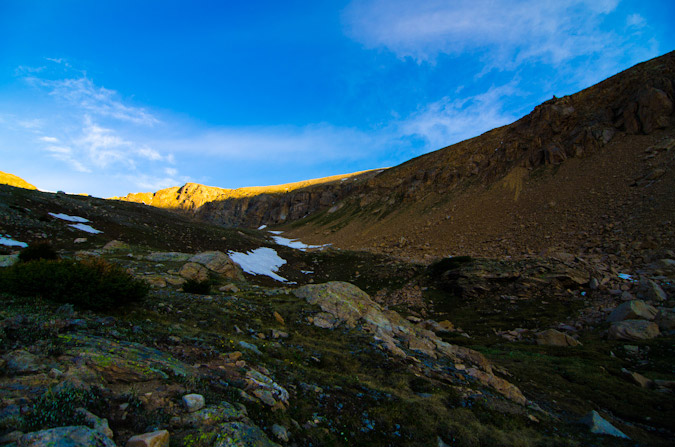
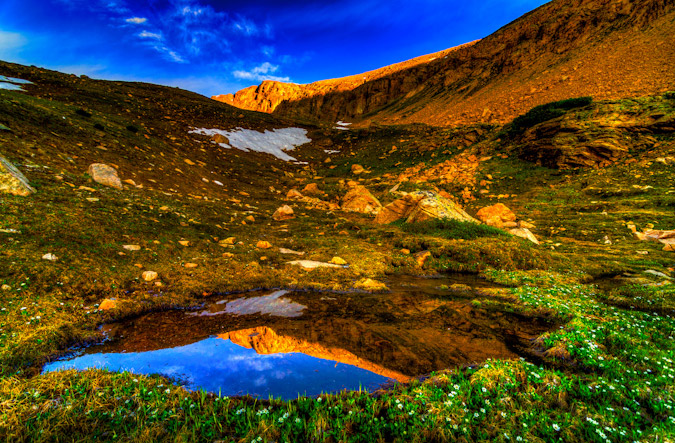
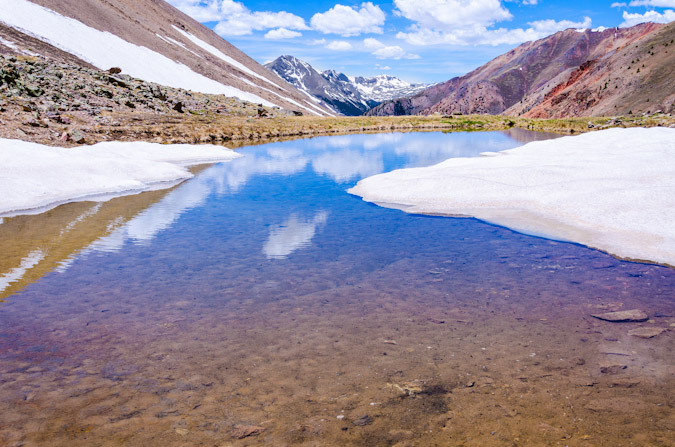
At this point I stumbled upon a small pond at the base of a small snowfield below Mount Oklahoma. It made for a very interesting reflection in the water with the sun just hitting the tops of the southern ridge of Oklahoma.
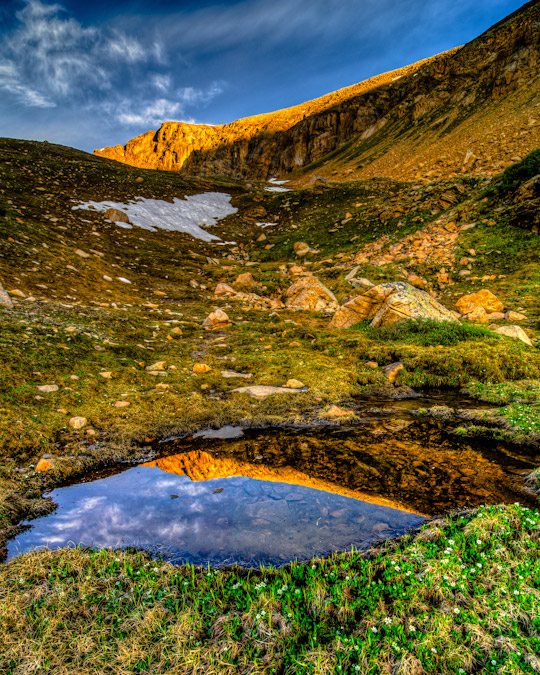
I played with a few versions of this shot, and I think I liked the HDR horizontal version the best. I know HDR is a technique with many detractors; however, I like to play with it - it keeps me entertained and thinking.
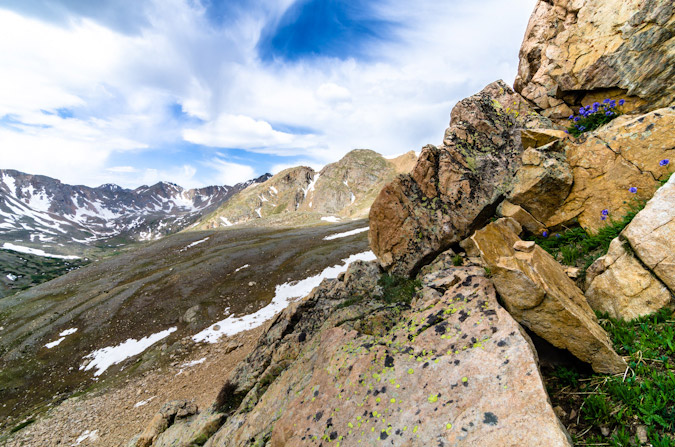
At this point, I found the grassy screefield, and it was mighty steep. I was not sure if this was the right way to go, but it looked like the easiest way up to the ridge. I plowed ahead slowly, reaching the ridge after several long minutes of gruelling climbing up this nasty section. Once up, the views were splendid.
I continued to plow ahead slowly on the obvious route up Oklahoma to the north and west. As I climbed, the views improved dramatically.
It was at this point that I began to feel sick to my stomach just like I did back in 2009 when I climbed Harvard and Columbia. I was beginning to wonder if my lack of food intake or the water I was drinking were to blame. Perhaps I did not clean out my camelbak adequately? Perhaps I was eating too dense a food (Larabars) for my stomach to handle? Or, perhaps I was just suffering from a mild case of Acute Mountain Sickness? Who knows? All I knew was that I was moving far slower than I wanted to and making progress quite sluggishly. I worked my way slowly up the boulderfield until my eye was caught by some blooming flowers which happened to be quite near the summit. I took off my pack and prepared my tripod for some photos of some flowers. Also, I could finally make out the Elk Mountains to the west, including Snowmass, Maroon Bells, Cathedral and Castle - they were all quite impressive to be sure. I fixated on small field containing a variety of colorful wildflowers and took some shots.
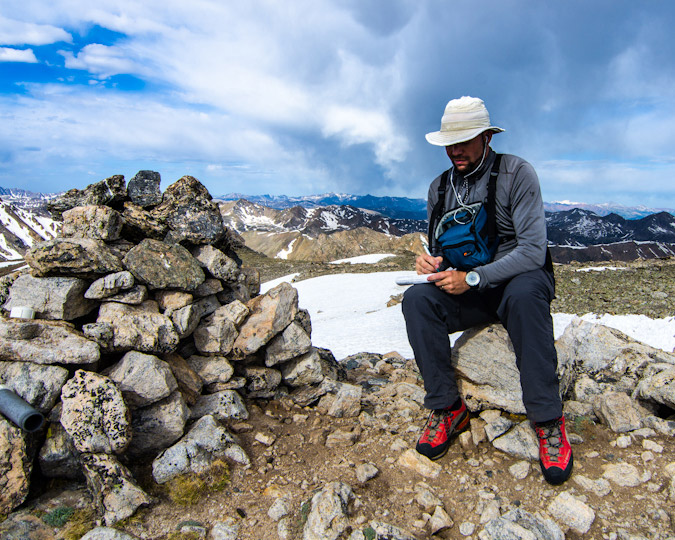
After taking my fair share of photos in this patch of flowers, I decided to move upwards. It took about 4 more minutes from here to reach the summit, which was a relief given my stomach issues, which had actually subsided significantly since I stopped to photograph the flowers. On the summit, I noticed that clouds were hitting the Elks with some light showers and that those clouds were headed this way. I had no intention of getting stuck in a storm, so my lofty goal to traverse to North Massive was out of the question. I set-up my tripod and set the timer so I could get a few shots of myself signing the summit register for Centennial #76 - only 24 more mountains to go!
The register was quite intact and filled with many familiar names. I was happy to add mine to the list.
At this point I used the tripod to take some photos to later be used in my 360 degree summit panorama.
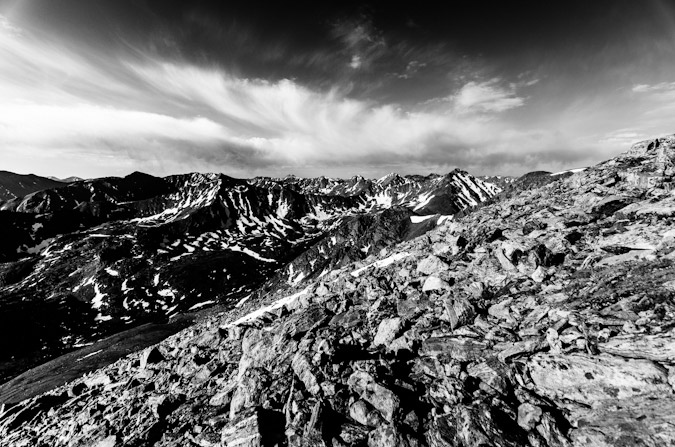
I also toyed with a black and white shot from here, framing Mount Massive on the left part of the shot.
After a quick phone call to the wife to let her know I made it safely, I took an assessment of the weather. The storms rolling in over the Elk Mountains to the west did not give me a good feeling, so I decided to pack-up and head down. I decided this time to see about the small ridge that rolls down to the east of Oklahoma. Instead of going back down the grassy talus, I went down the long ridge.
Once down, I found a great spot at the end of the ridge to take a sweet pano from - Mount Oklahoma at center with Mount Massive at right with a small storm over it.
At this point, I saw a ton of cairns leading down the mountain towards the cliffs Roach warned to avoid in his guidebook. I decided to take the challenge and see where the breadcrumbs could lead me. Sure enough, they led me down the mountain's steep slopes, but it was not a terrible route, albeit harder than my ascent route (loose rock, etc).
Small storms were hitting the areas peaks, and it started snowing a little bit, but nothing too scary.
On the way down the steep terrain, I ran into some really nice flowers in a very strange spot amongst the rocks. Nature never ceases to surprise me...
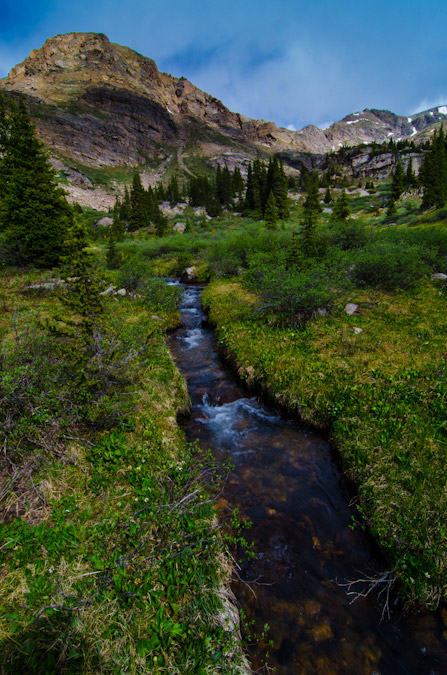
Once down the nasty part, I was back on the grassy ledges near treeline. I decided to angle my decent more northeasterly so I could hit the trail coming down from Halfmoon Lakes sooner. This turned into a pleasant bushwhack into the forest, where I stumbled upon a small stream leading down from the lakes.
I found the trail again with no issues and found myself flying down the trail at a rapid pace. I reached the turn-off for Mount Massive in short order and took one last look back at Mount Oklahoma.
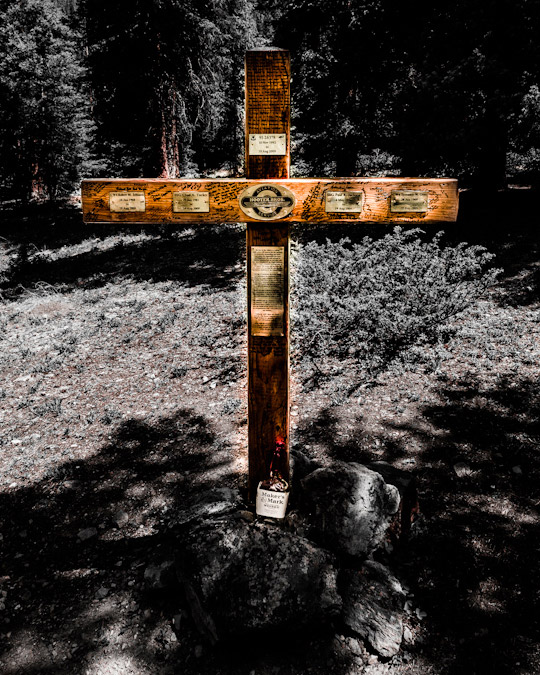
I was also pleased to see the large monument cross at the trailhead that was placed after the Blackhawk Helicopter crash in 2009 on Mount Massive.
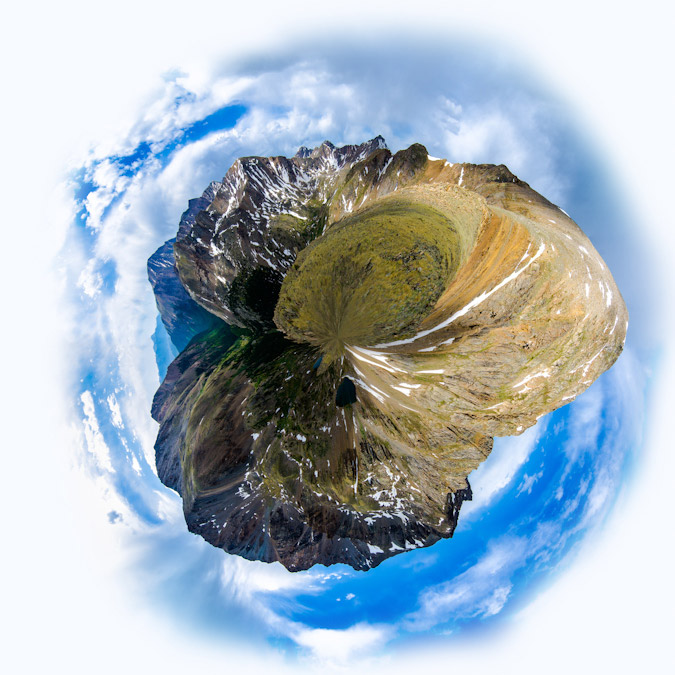
In closing, I highly recommend Mount Oklahoma as a hike that gets you away from the crowds on 14ers and still allows for wonderful views and a decent work-out. I am certainly not usually a fan of the Sawatch Range; however, the northern Sawatch Range really separates itself vis-a-vis grand views of the Elk Mountains and a seemingly more rugged feeling than the Southern Sawatch Range. I'll leave this trip report with a creative rendition of my 360 pano from the ridge - Planet Oklahoma. I wrote a tutorial on how to make these if anyone is interested.
{fcomment}
UN 13,832 and UN 13,811 (UN = Unnamed) have been on my radar for quite a few years now. My dad and I were hoping to tackle them both back in 2009 but weather steered us elsewhere. I've also eyed them as a potentially fantastic winter climb from the Williams Creek TH, but have not had the ability to string together the time to pull that off either. So, when I figured I had the opportunity to take a vacation day and do some climbing, I quickly picked out these two gems. I coached my son's first t-ball game and then afterwards drove to Lake City for an estimated 1 AM arrival at the trailhead. I planned to meet my friend Regina there (she was coming down from Denver via Highway 285) and get a few hours of sleep before we set off to climb early Friday, June 1st.
Interestingly enough, UN 13,832 and UN 13,811 are the only two mountains of the highest hundred peaks in Colorado (Centennials) with neither an official nor unofficial name. These two fantastic thirteeners (ranked #90 & #99 respectively) are located just east of the 14ers Redcloud and Sunshine near Lake City, Colorado. If you're like me, you are wondering why these two mountains in the highest 100 are unnamed. These unnamed mountains are located within a large section of BLM (Bureau of Land Management) land, specifically, BLM's Redcloud Wilderness Study Area. According to Summitpost, "in 2004, these two mountains were "protected" from being named when the USGS turned down a proposal to christen them after two of Colorado's mountaineering pioneers, Carl Blaurock and Bill Ervin. Apparently the policy is to not approve new names of mountains within wilderness or wilderness study lands, and a competing Blaurock/Ervin naming proposal was selected for a pair of peaks in the central Sawatch Range."
With all that being said, I needed something to do to keep me awake on my drive down to Lake City... so I focused on trying to think of clever names for these two mountains. With the close proximity to Sunshine and Redcloud, I figured it might be fitting to name UN 13,832 something to do with the moon. The sun shines, then it sets... the clouds get red (Redcloud), then the moon rises. How about "Moonrise" for UN 13,832 and "Not Last" for UN 13,811 (since it's ranked #99 / 100)? Let's see if they stick anywhere.
Speaking of the moon, on the way down to Lake City, I decided that it would be pretty awesome to stop near Lake San Cristobal and get a shot of the stars and moon, so that's just what I did. I stopped right off the road heading towards the trailhead and took a 5-shot vertical pano (my camera was vertically orientated vs. horizontally oriented) of the Milky Way, moon, and Lake San Cristobal. I think it worked fabulously! Please click to see a larger version or to purchase on my photography website.
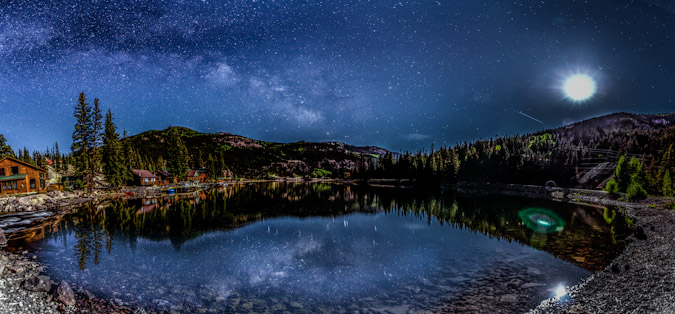
With the shot I had envisioned complete, I continued on up the road towards the trailhead. I finally reached my destination at around 12:45 AM and decided it was suitable to sleep under the stars in my sleeping bag, so I set out to do just that. Shorly after I settled in, Regina arrived and set-up her gear to do the same. I took the time to take one last set of photos (why not). This one turned out even more magical, I think. It is 7 veritical shots as a panoramic of the Milky Way over "Sundog," the 13,432 ft. mountain connected to Sunshine Peak's north ridge. The moon had just set and allowed for a great scene. I was actually inspired by another photographer's (David Kingham) photo from last month and wanted to give this a shot. Click on it to see a larger version on my photography website.
We crashed at 1:45 AM and decided to set the alarm for 5:45 AM, which came all-too quickly. There was one other hiker at the TH that started before us (and did wake me a few times by starting his car), so solitude was looking to be guaranteed. I promptly threw down some coffee soymilk (which was surprisingly good and filling) and we departed! I knew from the get-go that I wanted to do what Roach calls "Point Fever," which is to say, combining UN 13,832, UN 13,632 and UN 13,811. The route is a long but easy 12.8 miles and gains 4,727 ft. in elevation. A nice leg burner. [Colorado's Thirteeners - Roach & Roach, pg. 222]
Here is a map of the route we took from the Silver Creek TH (click for larger version):

So, that's just what we set-out to accomplish. The semi-early start granted us a nice view of Handies Peak and Whitecross Mountain across the valley. It was really great seeing them from this side since my climb of them with my dad in 2010 on Father's Day.
As we climbed on the trail, we stumbled upon an open area with boulders. I was immediately struck with a rush of nostalgia, remembering vividly coming through that part of the trail and seeing a marmot during my climb of Redcloud and Sunshine in 1987 at the age of 9. Crazy!
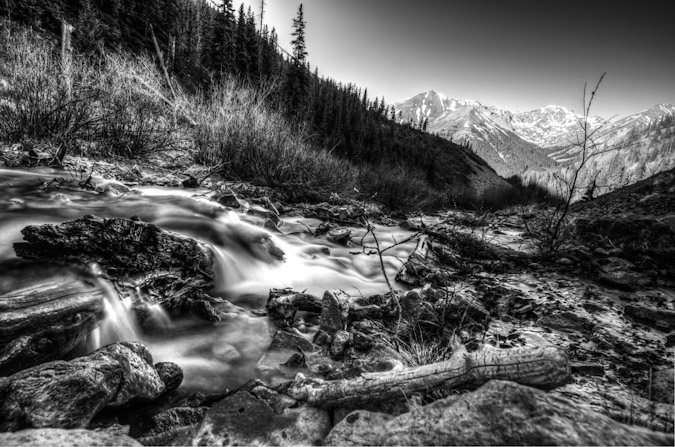
Before long, we were gaining altitude and came across a nice stream. It seemed the perfect spot to test out my 9-stop ND filter, so I put it on my Tokina 11-16 lens and did a very long exposure. I liked how it turned out.
As we gained elevation, parts of Redcloud came into view to our right. It was immediately taken aback by how little snow was left. It was truly remarkable. Indeed, Colorado's state-wide snowpack levels are at 2% of normal. Very dry.
Regina was setting a nice pace for us and the weather was holding up quite nicely. I had no worries about my chances of summiting both 13ers.
Before we knew it, we found ourselves gaining the ridge between UN 13,832 and Redcloud. We had also caught up from the guy that left before us that morning.
Gaining the saddle was no problem, and the views were great from there. As expected, the other hiker turned up to climb Redcloud. Solitude was guaranteed at this point. Here's a 360 degree view from the saddle, with Redcloud at far right and UN 13,832 just under the sun.

The hike from here was just long and gentle - easy class 1 / 2 stuff. Here's a view of UN 13,832 as we approached from the ridge.
Looking back at Redcloud, with Sunshine barely peaking up over the ridge.
And finally, Uncompahgre Peak came into view for us!
Heading up towards the next saddle made for easy and fun trail / ridge walking.
I was impressed by how far apart Sunshine was from Redcloud - much further than I remember.
We finally topped out on UN 13,832 at around 10:30 AM. Regina was loving the view of Wetterhorn and Uncompahgre, no doubt.
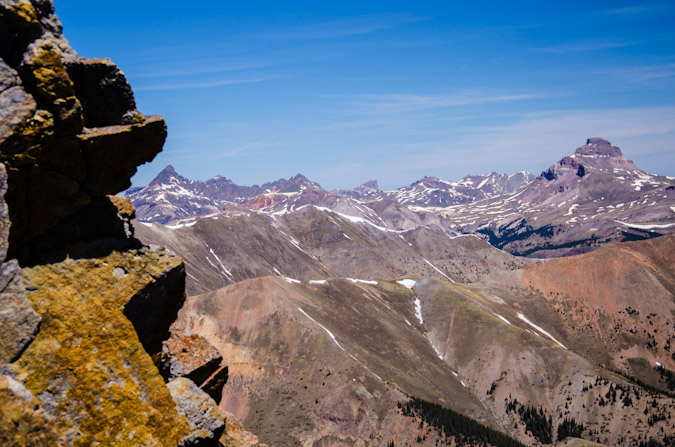
Also awesome was the view of the Grenadiers and the Needles. Eolus, Sunlight, Windom, Silex, Guardian and others all stuck out quite prominantly. This perspective really shows you how far part Eolus is from Sunlight. Pretty amazing.
I also did not mind the great view of Wetterhorn from here. Such a cool looking mountain!
Regina decided she was not going to continue over to UN 13,811, so I fired off a few more shots, including the below panoramas, and headed off for UN 13,811. Regina was going to wait for me below the saddle of Redcloud and UN 13,832.

The San Juans are truly great.
UN 13,811 was still quite a ways off, as seen from this next shot.
I began my hike over and was constantly drawn to the view of Wetterhorn and Uncompahgre. I just loved those two mountains.
UN 13,632 was one obstacle in the path to UN 13,811, so I needed to go up and over it as well.
All while still enjoying my view...
Within about an hour, I finally made it over to UN 13,811 to complete my 75th Centennial. Pretty impressive and almost there!
I snapped off a few shots for a panorama from 13,811 also , still in shock over how little snow was truly left.

The view back over to 13,832 was sobering to say the least. I was starting to feel a little tired in the legs, so I was not really looking forward to the hike back. I did however, really enjoy the surprising view of 13,832 from here.
I headed back over to UN 13,832, which was quite the demoralizing slog. I reached the saddle of Redcloud and UN 13,832 in quick order and met up with Regina at a small tarn below Redcloud Peak. THe view of Whitecross was very cool from there.
And of course Handies and Whitecross were our guides for the duration.
Regina led the way while I snapped off this super great shot of her hiking out. I think this was one of my favorites from the hike.
We crossed over a small stream that had some wildflowers growing at it. I thought it was a nice looking scene to stop and enjoy.
Before long, we had reached treeline again and Handies was all that we could make out above the trees.
The remainder of the hike went without incident. I will say that these two mountains are pretty fun. The hike is very long, but affords welcoming views of very recognizable 14ers and 13ers in the area. Solitude is almost a given, since most people in the area are there to tackle the more famous 14ers Redcloud and Sunshine. I think you will also enjoy the hike if you choose to take it.
We stopped in Gunnison on our way home for some much needed sustanance at our favorite Mexican food place on Main St. Until next time... I hope you enjoyed this trip report!
{fcomment}
Introduction:
I've longed to obtain a good portrait lens for awhile now, and after months of research and testing, I settled on the Nikkor 85mm f/1.4 AF-D. The Nikkor 85mm f1.4 AF-D lens has long been regarded as one of Nikon's best lenses for many reasons. The lens produces incredibly creamy bokeh (the aesthetic quality of the blur in out-of-focus objects in a photograph) and separates the subject with extreme clarity and definition. This is partially because the lens sports a rounded diaphragm with 9 blades. This lens is an absolute champion for portraiture and creative photography as well as landscape photography. This lens offers an incredibly fast 1.4 aperture, which provides great low light capability. It is sharp at every aperture, except, perhaps in the corners at f/1.4.

Technical Specifications:
The technical details of this lens are impressive - extremely fast maximum f/1.4 aperture with stops at every aperture (smallest aperture is f/16); 77mm filter size (great news since most professional lenses take this filter size); a minimum focal distance of 2.8 feet (.85 meters). For an FX body, the horizontal angle of view is 24°, for a DX body, 16°. While this is an autofocus lens, it is not an AF-S lens, meaning that it won't autofocus on the low-end DSLR bodies. Nikon lenses with integrated autofocus-motor are designated AF-S (this lens is AF-D). They are needed for new cameras with lack of an autofocus motor. Today these are the Nikon D40, D40X, D60, D3000, D3100, D5000, D5100 and the Nikon 1 series with FT1 adapter. Fortunately for me, the autofocus works wonderfully on the Nikon D7000, which is arguably the best non-FX camera body made by any camera company. For those of you with one of the above Nikon bodies, do not fret - Nikon has recently updated this lens, enhancing the autofocus by adding a silent wave motor, and modernized the look and feel. The newer version is titled, “85mm f/1.4G AF-S”. Unfortunately, that lens costs nearly twice as much.
Build and Feel:
The build of this lens is quite impressive as well. You may notice that newer Nikon lenses feel plastic-like and cheap. Not this lens, which entered the market in 1995 and had its final production run in 2010. The lens is very solid and feels great.
My Experience on a DX Camera Body:

Many reviews suggest that DX users should not bother with this lens due to the crop-factor of an FX sensor. While I won't disagree that it seems to be a good idea to go with the 50mm f/1.4 lens instead, I opted for the 85mm f/1.4 because I had used it before and because it is often regarded as one of the best lenses you can purchase. I also want to think about the future of my photography; therefore, lenses are an investment. You could spend $500 on glass that you won't be able to use on your next camera body, or you can invest $1000 on glass that you can. The choice is yours. Personally, I find the lens to be a perfect fit for my Nikon D7000, albeit, a tad long. Certainly, the lens has forced me to re-think the way I shoot, and that is enough for me (also - good luck getting similar bokeh results on a 50mm f/1.4).
Performance:
This lens performs wonderfully at almost every f-stop. Even at f 1.4 images are crisp and sharp, with minor loss in sharpness in the corners. By f2.8, images are perfectly sharp, even at the corners. In fact, this lens peforms even better than the newer G lens in this regard. I've uploaded a few sample shots I've taken with the lens, so you too can see the results:


Depth of Field:
The depth of field results from this lens are pretty remarkable. In order to understand depth of field, one needs to understand how f-stops and aperture work. It is somewhat counter-intuitive, so let me explain:
The main purpose of a camera lens is to collect light (crazy, I know). The aperture of a lens is the diameter of the lens opening and is usually controlled by an iris, or, in photography, a diaphragm. The larger the diameter of the aperture, the more light reaches the image sensor.Aperture is expressed as f-stop, e.g. f2.8 or f/2.8.
- The lower the number (f-stop), the bigger the opening of the lens (aperture)
- The higher the number, the smaller the opening of the lens
- Larger opening = more light = shallower depth of field
- Smaller opening = less light = larger depth of field
- Less light = need for a longer exposure (shutter speed)
- More light = need for a smaller exposure
To demonstrate the Nikkor 85mm f1.4 AF-D's capabilities at various f-stops, and to better demonstrate and explain depth of field, I took sample images using a tripod at every f-stop. My camera was set in aperture-priority mode, meaning, I chose the aperture (opening) and the camera adjusted the shutter speed to get the same exposure for each photo. I set-up two demonstrations, the first with a colored pencil as the focal point, and the second as the lens box as the focal point. Please feel free to click on each image inside the box sample to see a larger version of the shot.
Here is the sample set with the yellow colored pencil as the object in focus:

And here is the sample set with the box in focus:

As you can see, this lens performs quite well at all f-stops. I also hope that this demonstration was useful for anyone looking to purchase the lens or understand how f-stops and aperture translates into various depths of field.
Conclusion:
This is an absolutely dreamy lens that produces amazing results for portrait photography. This lens produces incredble bokeh and offers wonderful control for focus in both manual and auto-focus modes given the proper body pairing. The lens is quickly becoming one of my go-to lenses for most day-to-day applications. My only concern with this lens on an DX body would be focal distance. Indeed, I am hopeful that sometime within the next few years I will be able to purchase an FX body to take full advantage of this incredible lens.
If you are in the market for a new copy of this lens or any other photography equipment, please consider supporting this site by using this link to the lens on Adorama. Thanks for reading!
{fcomment}
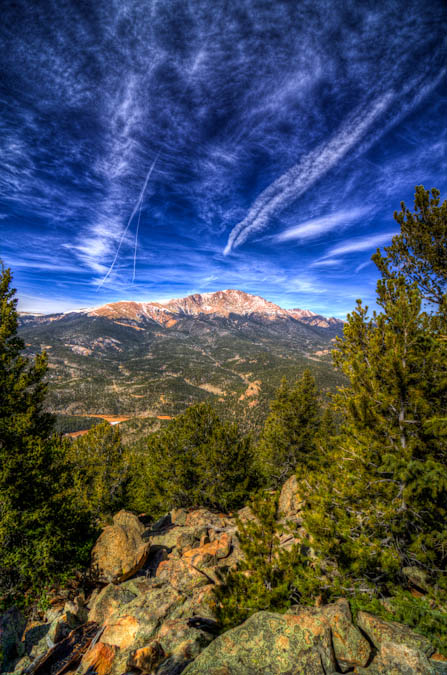
This Spring has been quite dry and I've been feeling the itch to get out and get up a summit. I mulled the idea of heading up to do Lackawanna (a high 13er near Independence Pass); however, I knew my time was limited and that I would need to stay closer to home. So, I put out a feeler to my climbing partner Ethan Beute to see if he would be interested in doing something easy close to home. We both settled on Cameron Cone, the easily recognized point often seen in front of Pikes Peak in many photos of Pikes from Colorado Springs. I'd had my radar on Cameron Cone forever it had seemed, so it was a great choice in that regard. At the last minute, I also invited one of my other hiking partners, Sarah Musick, and plans were in motion to meet at Ethan's at 5 AM and hit the Cone. Since both Ethan and I are avid photographers, we opted for the early start in the hopes of getting some decent shots of sunrise from the trail somewhere.
Cameron Cone is named after a famous soldier and newspaper publisher, Robert Alexander Cameron. When originally dedicated, the summit was called Cameron's Cone. The Cone towers 10,707 feet above the city of Colorado Springs and is the fourth highest ranked summit in El Paso County and 1,935th highest in the State of Colorado. For a whole listing of summits in El Paso County, check out this link.
There are several routes to reach the summit of Cameron Cone; however, we chose one of the more rigorous routes to gain the summit. Instead of driving to Crystal Park, as some would suggest, we opted for the long route from Barr Trail. Here is a map of our route, feel free to click on it to see a slightly larger version. All in all the hike was 7.0 miles and 4,175 ft. of elevation gain - a nice work out for sure!

We decided to park on Ruxton Ave. in Manitou Springs and walk the road to where it ends. We then chose to cut left just after the chain link fence to the left of the Barr Trail and then walk the Cog Railway about a hundred feet. From there, we went straight up the hillside to the south until we reached the Englemann Trail. We found this guide to be very useful for the trip, as you can see from this photo of Ethan and I taken by Sarah.
We found the route to be fairly straight-forward once on the trail; however, we did lose the trail in one spot lower in the Englemann canyon. A simple up-climb and we were able to re-locate the trail. I would mention that I did bring my GPS with me and I had entered the coordinates from the Summitpost route description into my GPS as waypoints which proved useful.
Before we knew it, the sun had begun to rise and we found a suitable place to stop. I set-up my new Gitzo carbon-fiber tripod and took a ton of shots with my Tokina 11-16 lens. I love this tripod! It was somewhat heavy, but well worth the haul. I was not terribly impressed with my sunrise photos, mostly because I think we were too low and some of the view was obscured by Eagle Mountain to the south and east. Nonetheless, here's a few of my shots.
The city lights made for a very cool view.
I also had a little bit of fun doing a very short time-lapse video of sunrise using my intervalometer on my Nikon D7000.
After stopping to take some shots of the sunrise, we continued on up the trail. The trail was fairly steep and kept our heart-rates going. Soon, the trail went around this huge rock feature and then dumped us out with a huge view of Pikes Peak and the Cog Railroad, which was pretty impressive.
The rock near the trail was very classic Pikes Peak Granite, with features very similar to those of outcroppings found in Lost Creek Wilderness Area. A truly fun playground, as Sarah was able to demonstrate.
Ethan and I both enjoyed the view of Pikes Peak from this location.
The terrain was like a playground of sorts, with all kind of really cool features.
We took a few more pictures and then we were on our way up to the next section of the trail.
Soon, the trail opened-up again and dumped us out onto a very flat area which was the middle section of the hike. From here, we could see Cameron Cone finally - it seemed a lot futher away than I think we were anticipating. We could also see the Magog Ridge and Magog Rock. For the rest of the hike we all jokingly coined the phrase "Oh-my-Gog."
We went around the huge Magog Rock, which was one of the cooler features I'd seen. It had this smaller rock perched above it which made us all wonder how the heck something like that could even happen.
Ethan took many opportunities to take photos of it as well.
We followed a small road for a ways and then found the trail leading up to Cameron Cone, as advertised. Indeed, the trail was faint and sometimes hard to follow. We did find that there were small ribbons tied to trees at various intervals to help mark the way. We lost the trail a couple of times and found ourselves bushwacking through some steep and nasty terrain. Finally, we reached the ridge to the south of Cameron Cone and then ascended to the summit. It was pretty steep and I could understand if people turned back on this climb. It is much harder than it looks, for sure. Once we reached the top, we all enjoyed the view of Colorado Springs to the east and the unique view of Pikes Peak to the west. I busted out my tripod and set it up for some HDR work. Ethan caught me in the act, with Almagre in the background.
The sky was pretty cool for photography and some jet contrails added to the interest level.
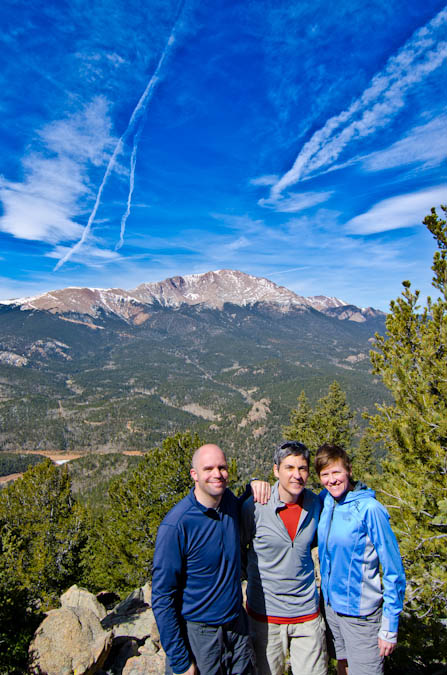
One other nice advantage to bringing a tripod is that it makes for easy group photos.
On the other side of the summit, the views of Colorado Springs, Waldo Canyon, Williams Canyon, Garden of the Gods and Colorado Springs were pretty impressive.
From here, I took a quick panoramic photo of the Colorado Springs area, looking northeast, east and southeast.
We spent about an hour on the summit and then head back down. The rest of the trip was pretty uneventful, albeit full of great conversation with some really great friends. I left with one parting shot of Pikes Peak.
Overall, Cameron Cone is a great hike! It is tougher than it looks and demands some respect when climbed from Barr Trail. Also, good route-finding skills are also required.
The views of Pikes Peak on this trip are totally worth the hike and are quite unique. You won't be disappointed if you choose this mountain that is off the beaten path.
{fcomment}
This tutorial will teach you how to create "planets" out of your 360 degree panoramic photos and requires Photoshop.
It is no secret that one of my favorite things to do is to create panoramic photos from very high and unique vantage points in crazy situations like sunrise, sunset, etc. One way that I have made this practice even more artistic is to create "planets" out of those panoramics. This process is actually easier than it sounds, as long as your panoramics are done well. The first step, of course, is to create a 360 panoramic out of your images. I have written a tutorial on how to do that HERE. Once you have your panoramic created, open it in Photoshop. For this tutorial, I have chosen a 360 degree panoramic that I took 2 months ago from the summit of Windom Peak, one of Colorado's more remote and rugged 14,000 ft. mountains. You don't have to use 360 degree panoramics for these planets, but it makes the editing process much easier.
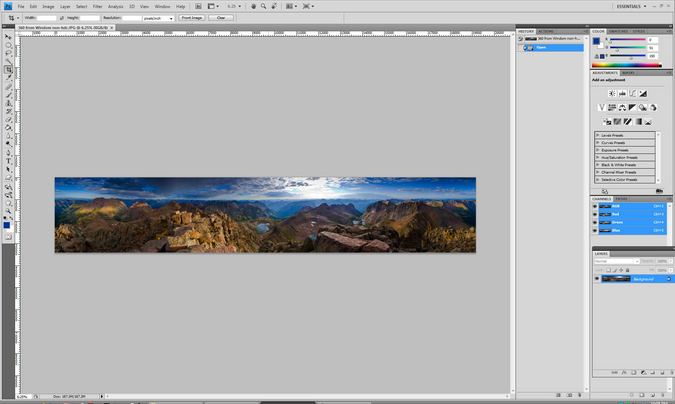
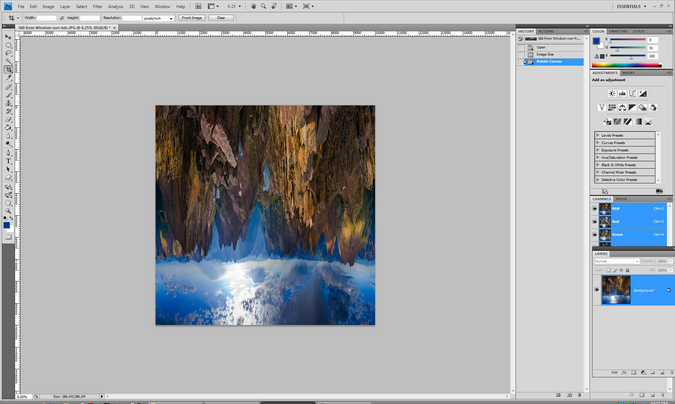
Now that you have your panoramic loaded up into Photoshop, you will need to change the size of the photo itself so that the length and width are equal. To do this, you need to click on the "Image" menu and select "Image Size." Uncheck "Constrain Proportions" and "Scale Sizes." Lastly, make the width and height the same value. I like to just use an approximation roughly equal to half the value of the width for this.

Hit "OK" and you will see the image warp into a squished looking image. Click again on the "Image" menu and rotate the image 180 degrees. It will turn the image up-side-down.
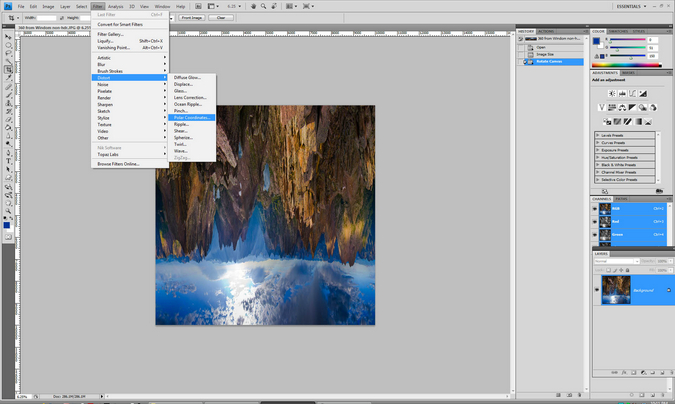
The next step is to turn it into a sphere around a polar coordinate. To do this, click on "Filter" and then on "Distort" and then "Polar Coordinates."
The result is a square image with your scene distorted to look like a planet. Crop it to your desired size. The last step is sometimes not necessary, depending on how clean your panoramic photo is and which software you used to create it. You may need to go into the seam where Photoshop joined the two ends and do some clone stamping and/or healing brush work to get it to look good. In this case, the pano fits together perfectly and is ready to publish! Here are the final results:
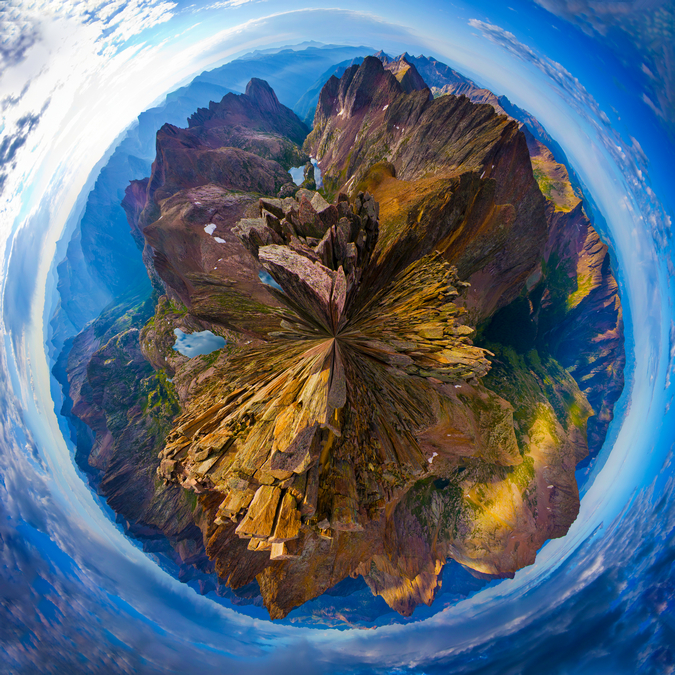
The very last thing that I sometimes will do with these is to clean up the corners, as you may notice some interesting lines shooting out from them. I usually just use the healing brush and paint in the corners. I hope that this tutorial was helpful! Please feel free to share your results with me in the comments below.
{fcomment}